Underground Blossom Chapter 2 | Child Lane
Hello everyone and welcome to the second chapter of our walkthrough for the “Underground Blossom” a puzzle-solving game developed by Rusty Lake – one of the most famous game developers in puzzle puzzle-solving genre. In this game, we follow Laura’s life, and the story in this chapter continues at “Child Lane” station. At this point in time, Laura was a small child.
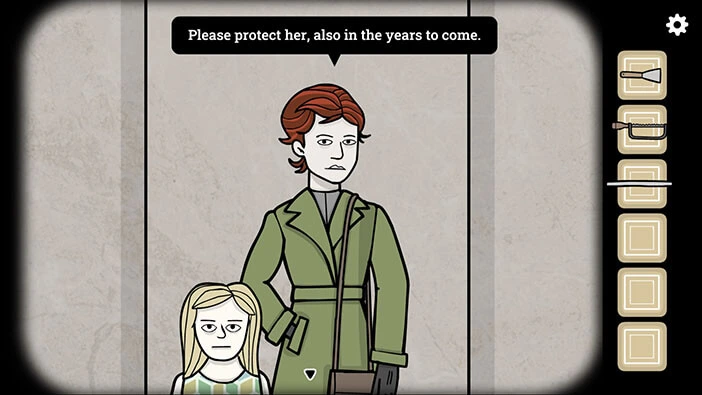
Tap on the train door to open it, then tap on Laura’s mother to approach her, and tap several times to talk to her.
She will inform you that she has to leave her daughter, even though she doesn’t want to do that. She didn’t explain why. Laura’s mother will also ask you to look after her daughter.
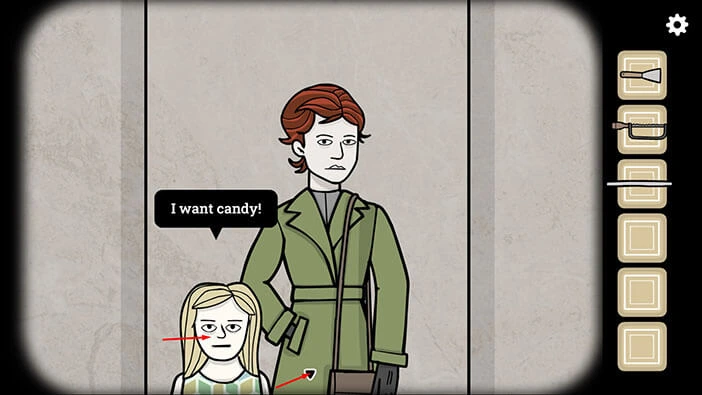
Next, tap on Laura to start the interaction. She will tell you that she wants candy. Well, let’s look for candy. Tap on the arrow at the bottom of the screen to go back.
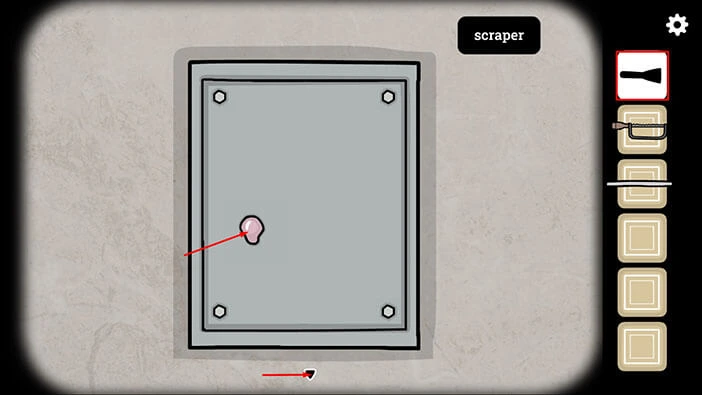
Tap on the panel on the wall on the left to take a closer look at it.
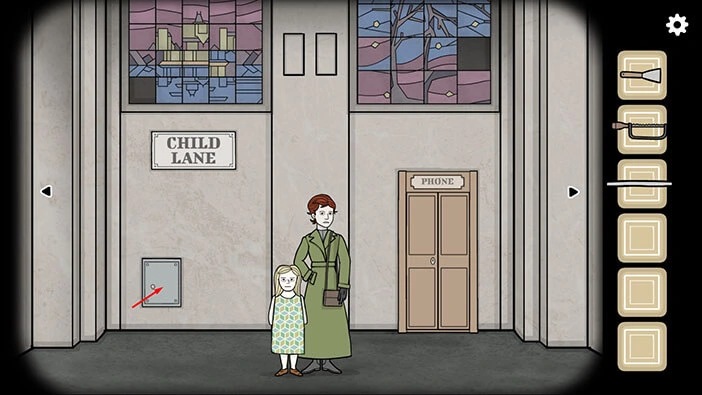
Here, we can see a bubble gum. Select the “Scrapper” from the inventory and use it to remove the bubble gum. “Old gum” will be added to your inventory.
After that, tap on the arrow at the bottom of the screen to go back.
Next, tap on Laura to approach her. Select the “Old gum” from the inventory and give it to Laura. Tap on Laura’s mouth, several times, and she will chew the gum, and a few moments later she will blow a bubble. Tap on the bubble to burst it.
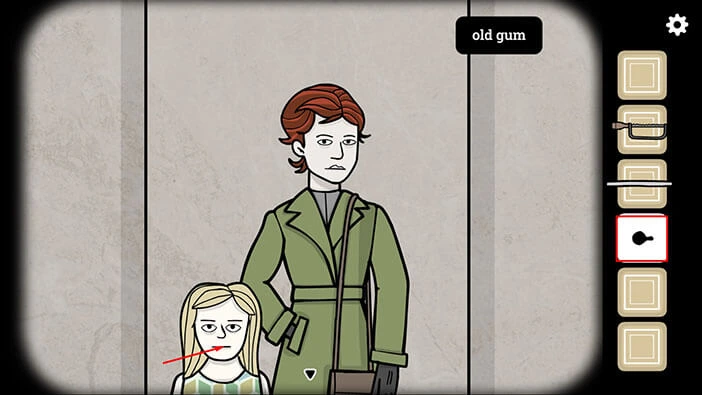
Tap on the “Chewed gum” to pick it up. After that, tap on the arrow at the bottom of the screen to go back.
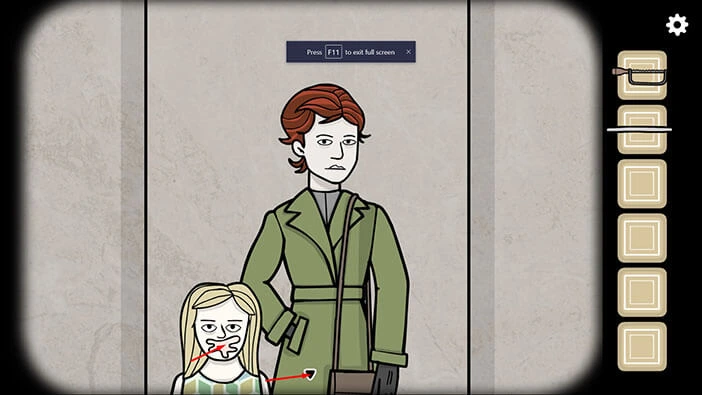
In the next scene, you will notice that Laura is gone. Our next task is to play hide and seek with young Laura. So, let’s find her.
Tap on the arrow on the left to go to the next room.
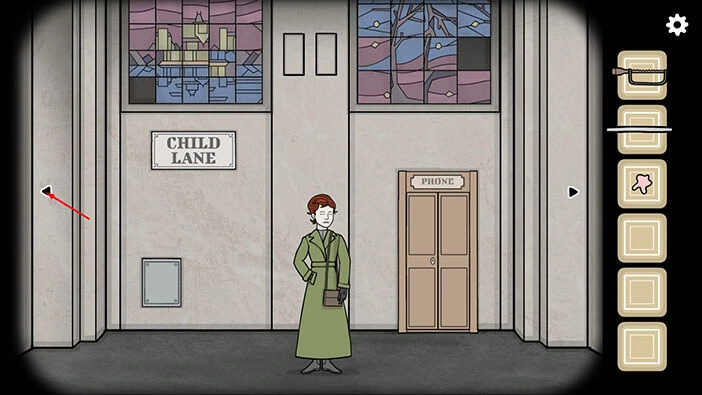
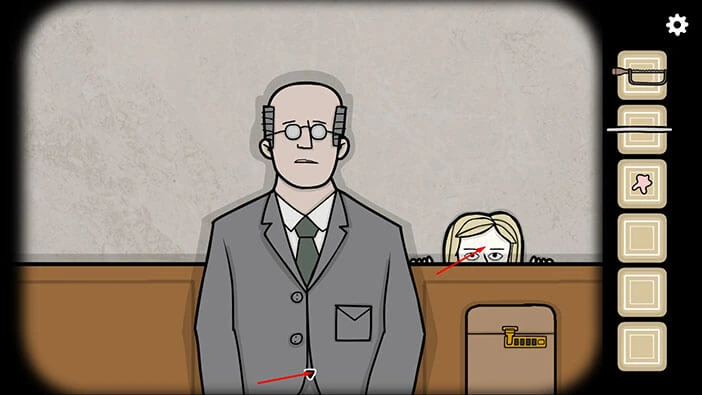
We can see a man with glasses sitting on a bench in front of us. You will also notice Laura, hiding behind the bench. Tap on Laura to approach her, and once you get closer, tap on Laura. She will run away to the next hiding place.
Once you’re done, tap on the arrow at the bottom of the screen to go back.
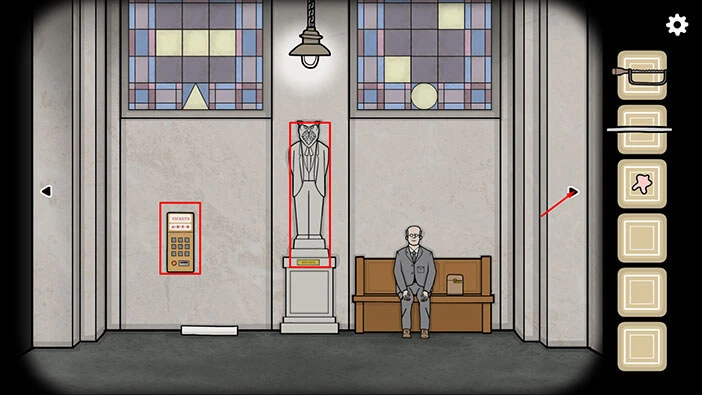
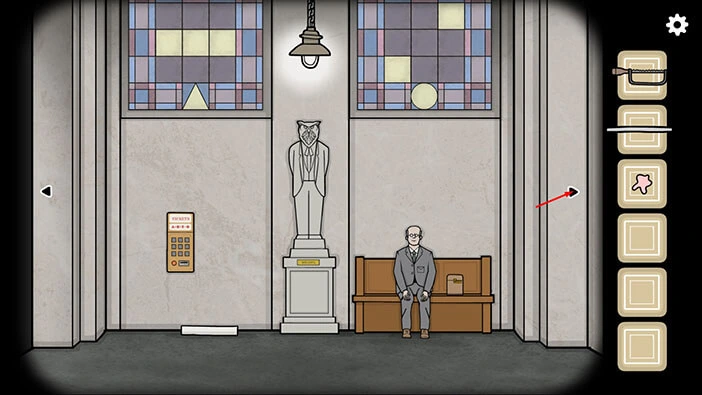
In this room, we can also see a “Mr. Owl statue” and the “Tickets machine”. We will come back to them a bit later in the walkthrough.
For now, let’s tap twice on the arrow on the right to go to the next room, and look for Laura.
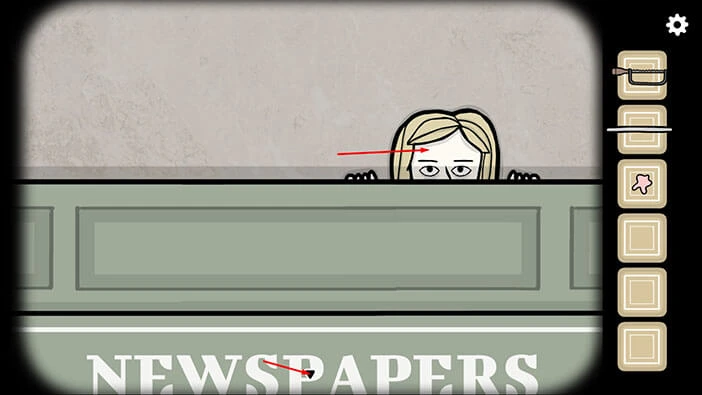
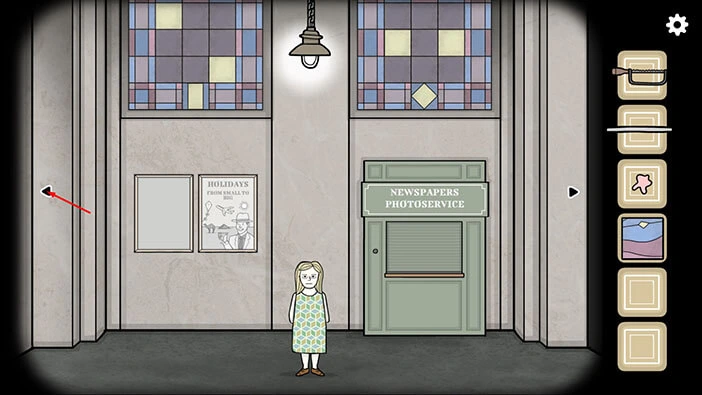
Here, you will notice Laura peeking behind a newspaper’s photo service. Tap on Laura to approach her, and tap again to interact with her. She will run away to the next hiding place.
Once you’re done, tap on the arrow at the bottom of the screen to go back.
Let’s look for Laura, again. Tap twice on the arrow on the right to go back to the room with the Mr. Owl statue.
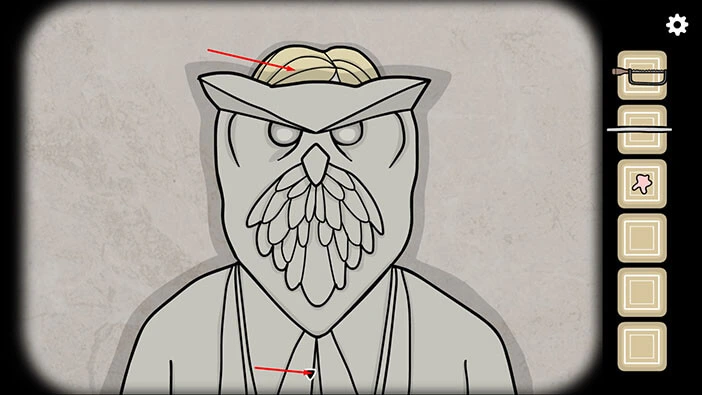
If you pay really close attention to Mr. Owl’s head, you will notice Laura’s blonde hair sticking out above it.
Tap on Mr. Owl’s head to take a closer look at it and you will see Laura’s head. Tap on Laura to interact with her. She will run away to the next hiding place.
Once you’re done, tap on the arrow at the bottom of the screen to go back.
Tap twice on the arrow on the right to go back to the room newspaper’s photo service.
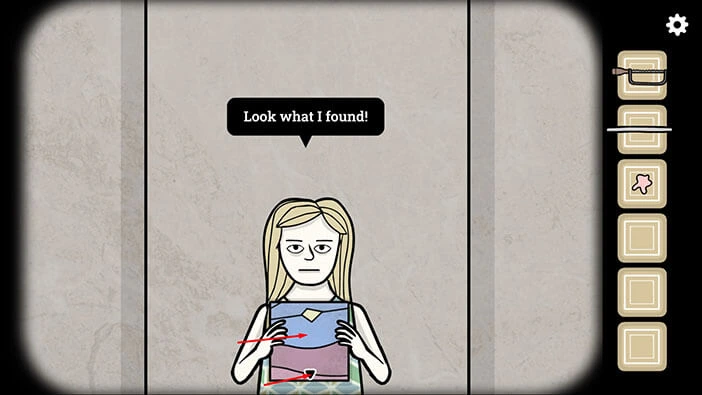
Now, you will see Laura standing in the middle of the room and holding something in her hands. Tap on her to take a closer look.
Tap on Laura to talk to her, and she will excitingly say that she found something interesting. Tap on the item in her hands to pick it up, and “Glass panel” will be added to your inventory.
Once you’re done, tap on the arrow at the bottom of the screen to go back.
We can use the “Glass Panel” panel to solve the next puzzle. This puzzle is located in the room in which we saw Laura’s mom, so let’s go there. Tap on the arrow on the left.
Tap on the window on the right to take a closer look at it. You will notice that one puzzle piece is missing, so select the “Glass Panel” from the inventory and insert it into the empty slot.
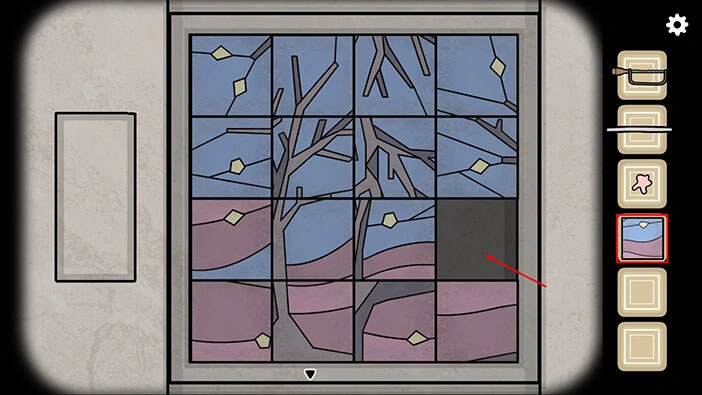
Ok, we should now assemble the puzzle by rotating different puzzle pieces. We will do this in several steps. Let’s begin.
Step 1
Swipe in left to right direction on the second puzzle piece (left to right) in the third row to rotate it.
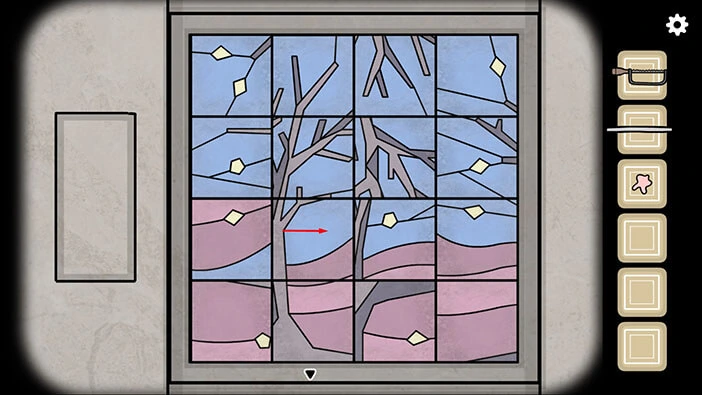
Step 2
Swipe in left to right direction on the second puzzle piece in the second row to rotate it.
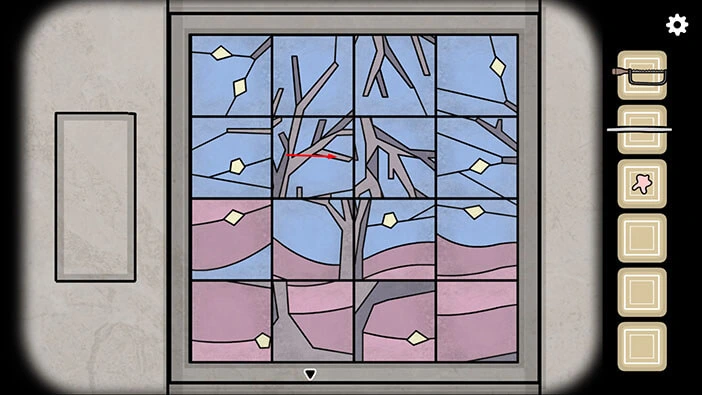
Step 3
Swipe in left to right direction on the second puzzle piece in the first row to rotate it.
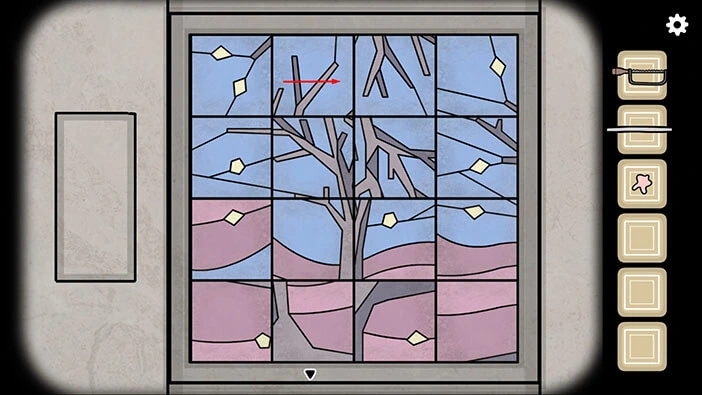
Step 4
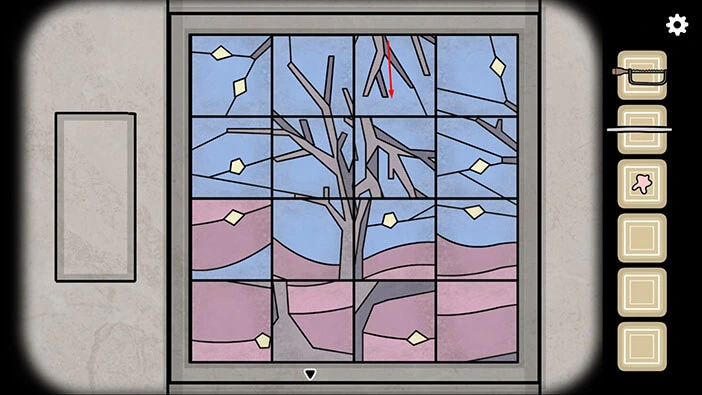
Swipe in top to bottom direction on the third puzzle piece in the first row to rotate it.
Step 5
Swipe in left to right direction on the third puzzle piece in the first row to rotate it.

Step 6
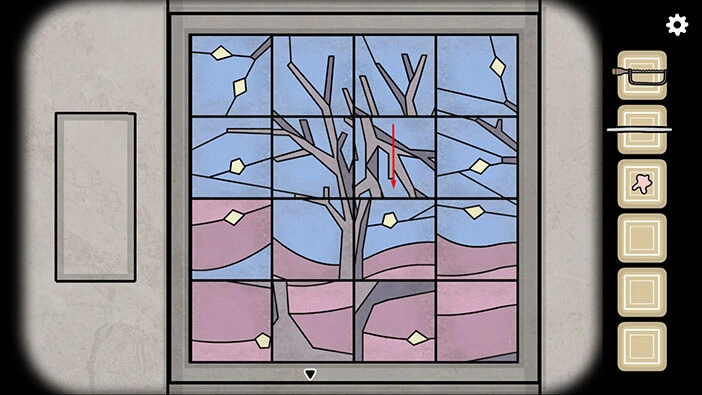
Swipe in top to bottom direction on the third puzzle piece in the second row to rotate it.
Step 7
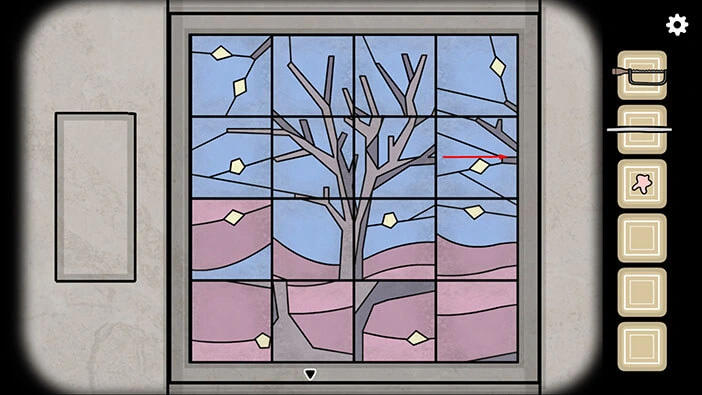
Swipe in left to right direction on the fourth puzzle piece in the second row to rotate it.
Step 8
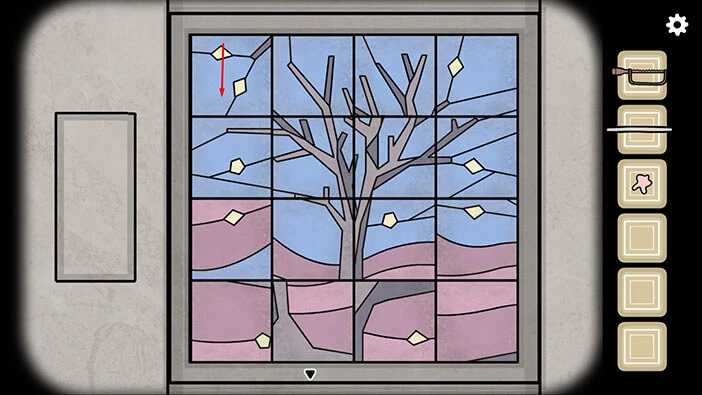
Swipe in top to bottom direction on the first puzzle piece in the first row to rotate it.
Step 9
Swipe in top to bottom direction on the first puzzle piece in the third row to rotate it.
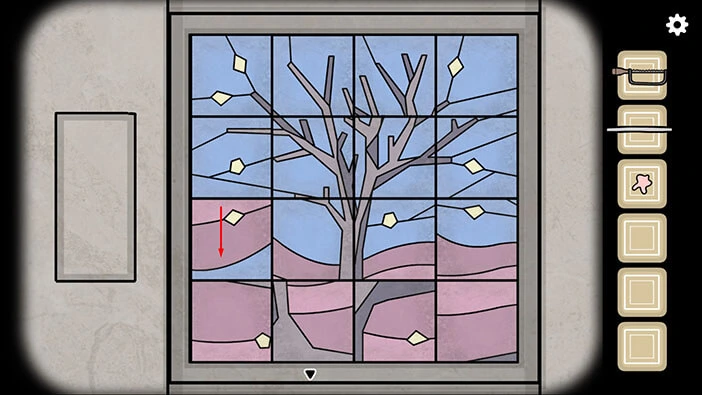
Step 10
Swipe in left to right direction on the fourth puzzle piece in the third row to rotate it.
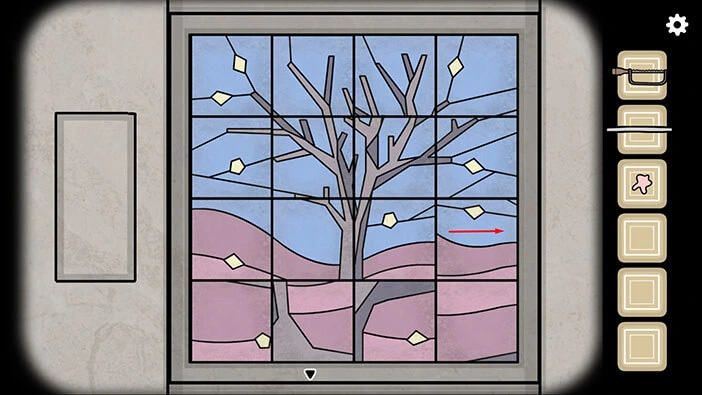
Step 11
Swipe in left to right direction on the fourth puzzle piece in the fourth row to rotate it.
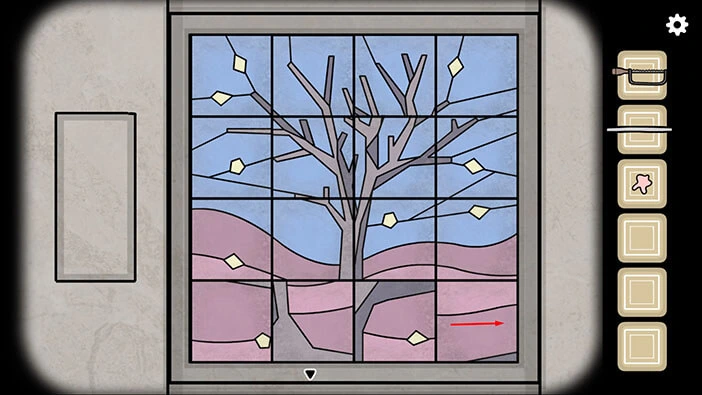
Step 12
Swipe in top to bottom direction on the third puzzle piece in the fourth row to rotate it.
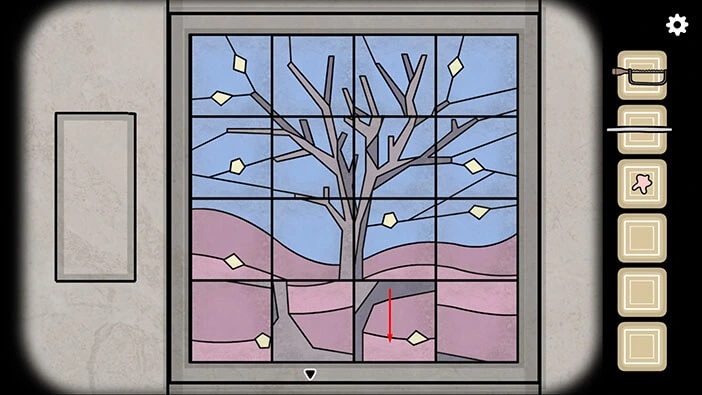
Step 13
Swipe in left to right direction on the second puzzle piece in the fourth row to rotate it.
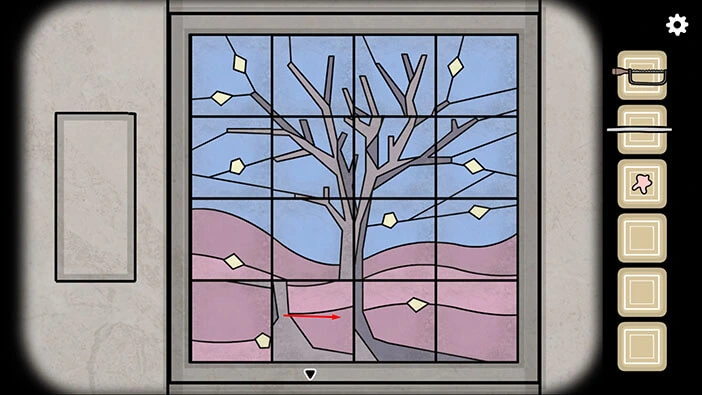
Step 14
Swipe in top to bottom direction on the first puzzle piece in the fourth row to rotate it.
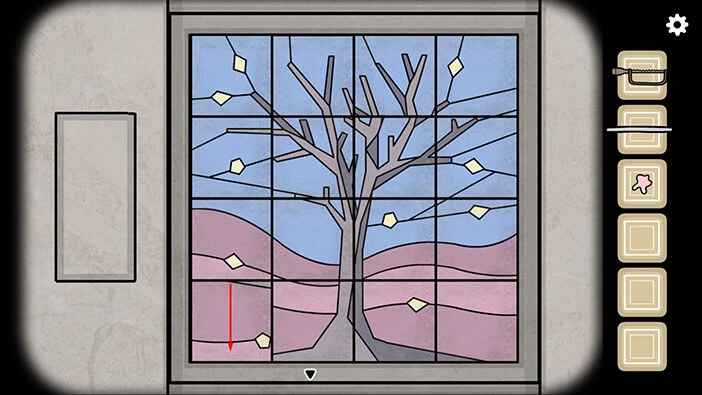
Step 15
Lastly, swipe in left to right direction on the third puzzle piece in the first row to rotate it.
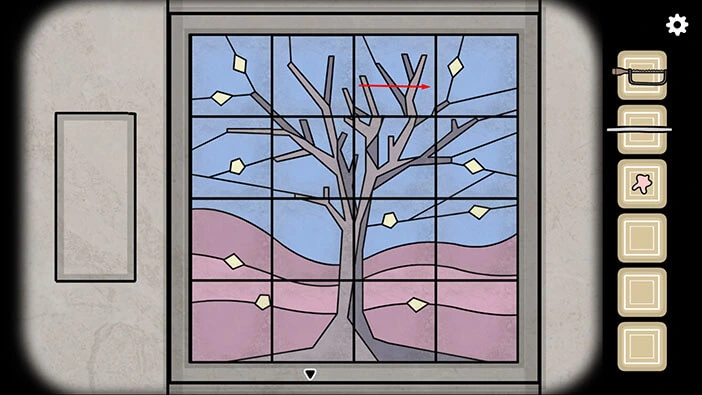
With the last step done, you will complete the puzzle and the compartment on the left will open. In the compartment you will find a “Crank” so tap on it to pick it up.
After that, tap on the arrow at the bottom of the screen to go back.
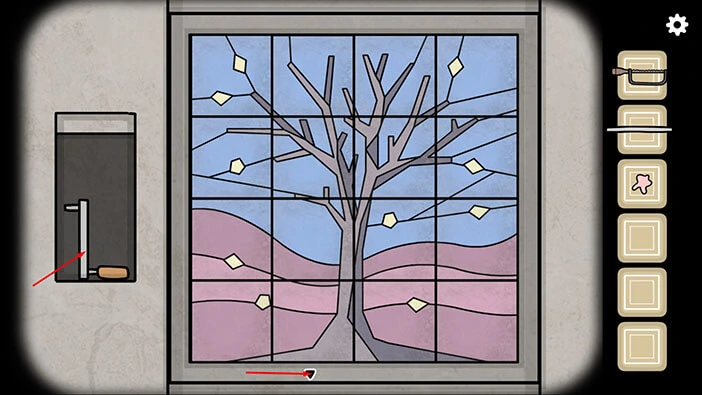
Let’s go back to the room with Laura. Tap on the arrow on the right.
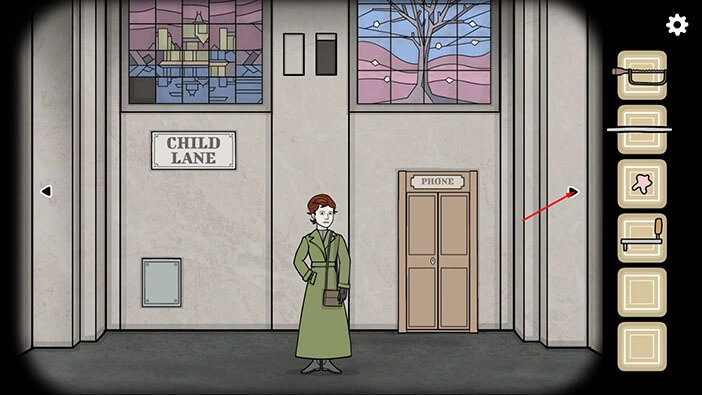
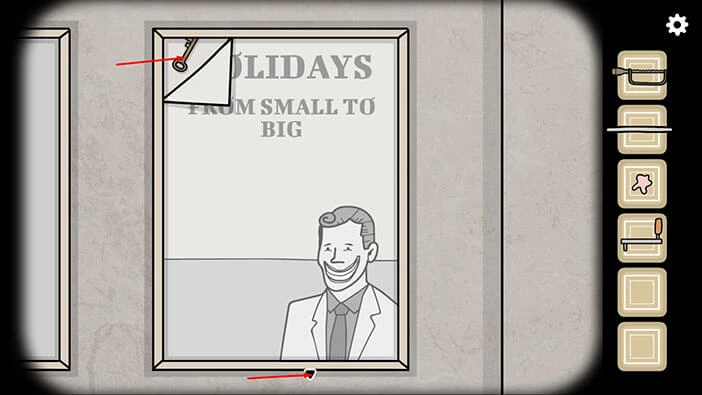
Tap on the poster located on the wall behind Laura to take a closer look at it. At the top of the poster, we can see the slogan “Holidays from small to big”. Here, our task is to tap on the items on the poster starting with the smallest and progressing towards the biggest items. However, we should think about the real-life size of the items and not their size in the picture.
We will do this puzzle in several steps. Let’s begin.
Step 1
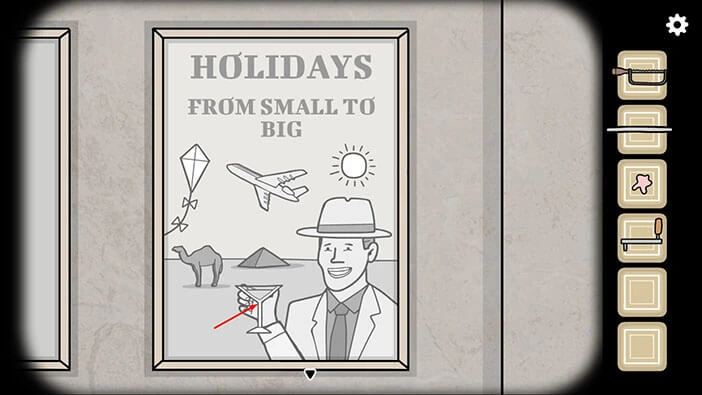
Tap on the glass (the smallest item) and the character in the portrait will lower his hand.
Step 2
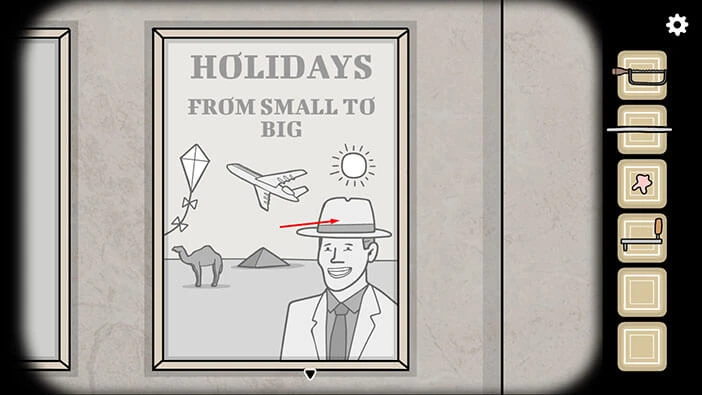
Next, tap on the hat and the wind will blow it off.
Step 3
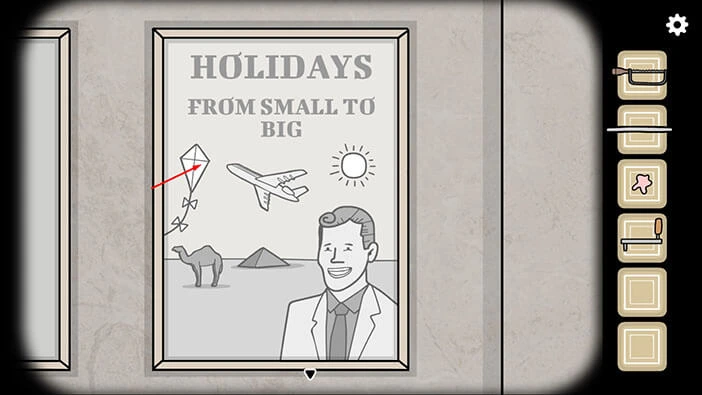
Next, tap on the kite located on the left side, and it will be blown away by the wind.
Step 4
Next, tap on a camel and it will move to the right.
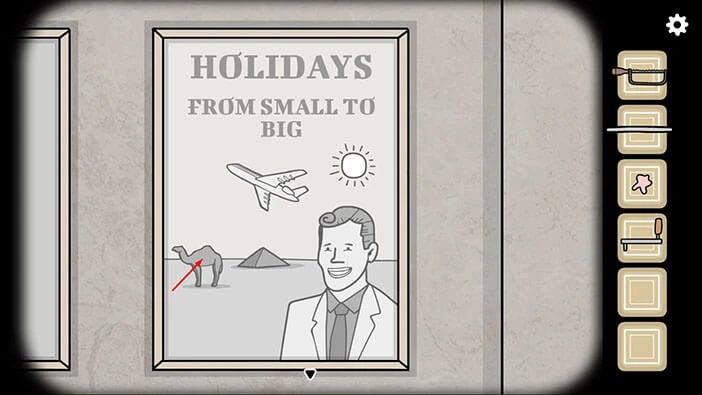
Step 5
Next, tap on the airplane and it will fly away.
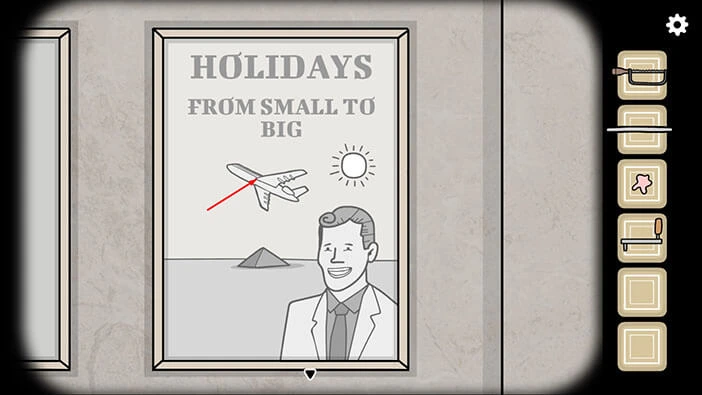
Step 6
Next, tap on the pyramid and it will crumble.
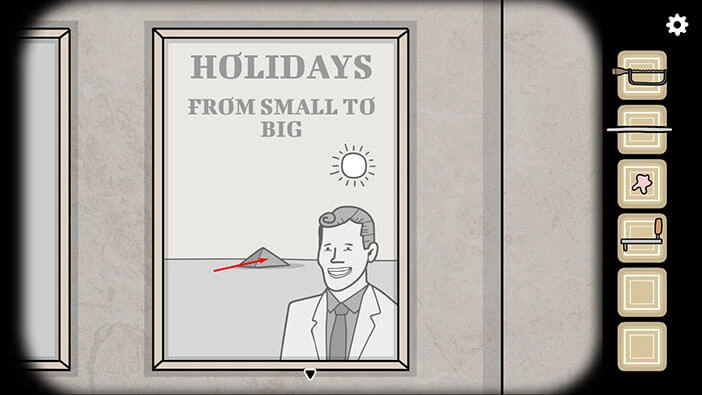
Step 7
Lastly, tap on the Sun (the largest item) and it will fall down.
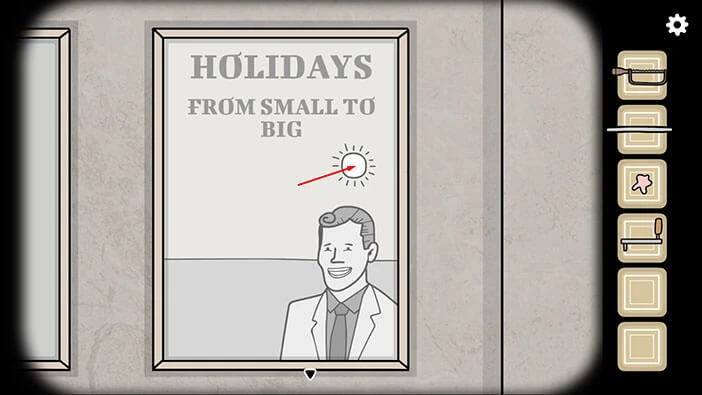
As soon as you tap on all items in the correct order, a character in the portrait will smile, and the top right corner of the portrait will fold, revealing a key that was hidden below it.
Tap on the “Key” to pick it up. After that, tap on the arrow at the bottom of the screen to go back.
Next, let’s go back to the room with the “Mr. Owl” statue. Tap twice on the arrow on the right.
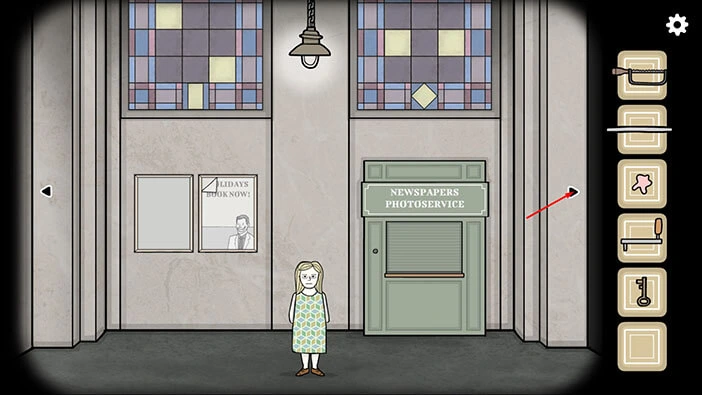
On the floor, just to left of the Mr. Owl, you will notice some rolled-up paper. Tap on it to pick it up, and “Poster” will be added to your inventory.
After that, tap twice on the arrow on the left to go back to the room in which Laura is located.
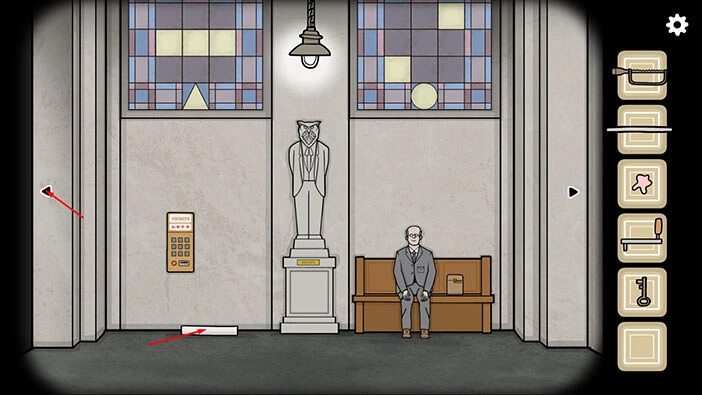
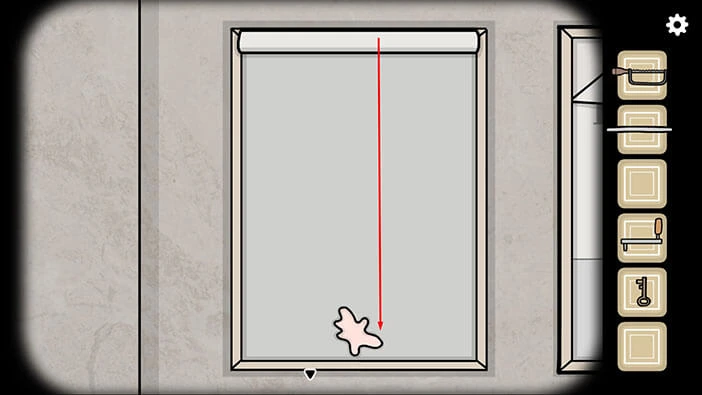
The space to the left of the poster is empty. Tap on this spot to take a closer look at it.
Select the “Poster” from the inventory and attach it to the top of the panel.

Now, we should find something that can hold the poster in place. So, select “Chewed gum” from the inventory and stick it to the bottom of the panel.
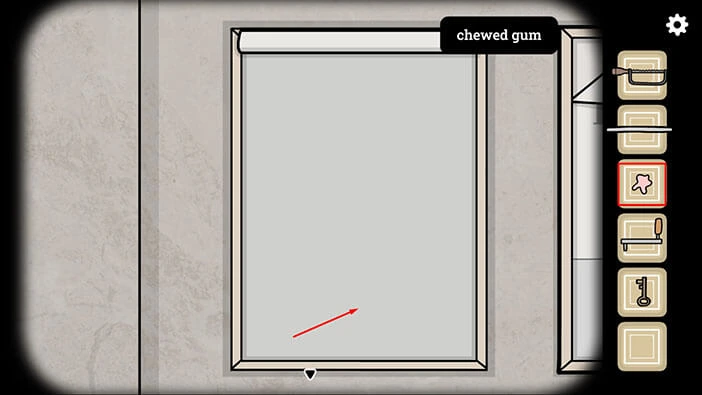
Roll down the poster and the chewed gum will hold it in place.
In the poster, we can see a woman holding a box. At the top of the poster, you will notice the word “Smile”. So, let’s tap on the woman’s mouth. The woman will have a wider smile.

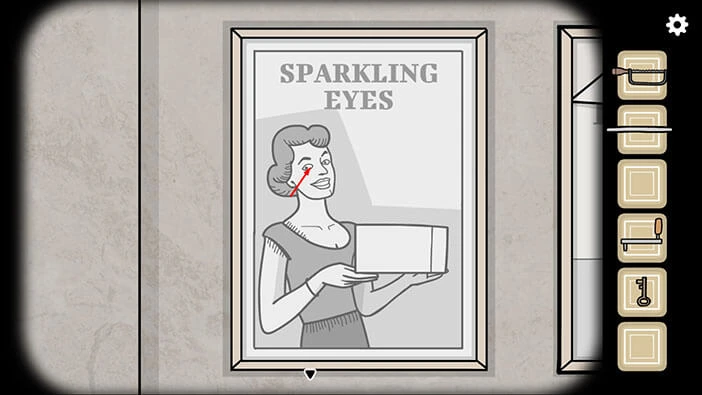
Next, we can see the phrase “Sparkling eyes”. So, tap on the woman’s eyes.
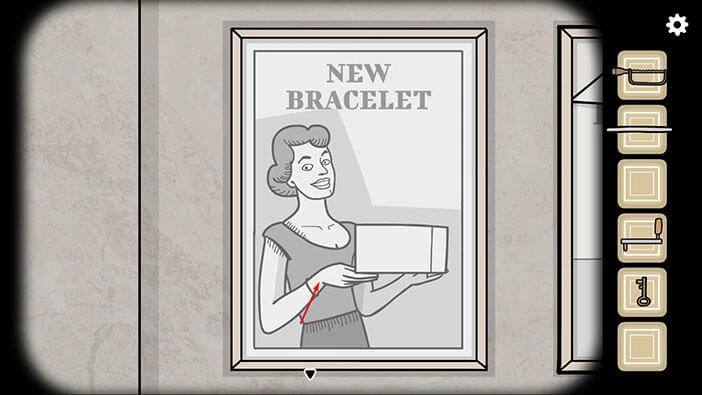
Next, we can see the phrase “New bracelet”. So, let’s tap on the woman’s wrist, and the bracelet will appear.
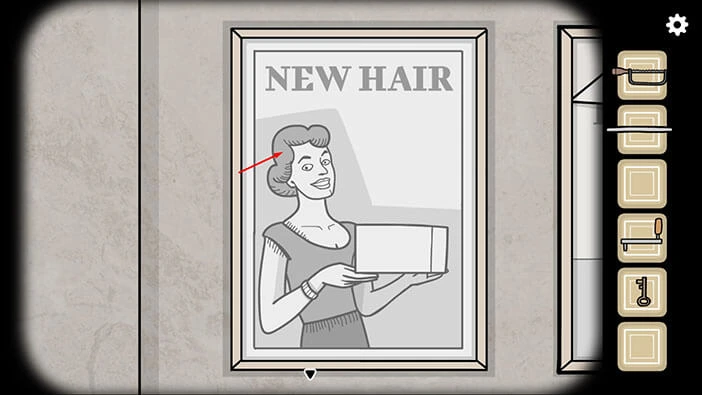
Next, we can see the phrase “New hair”. So, let’s tap on the woman’s hair. Her hairstyle will change.
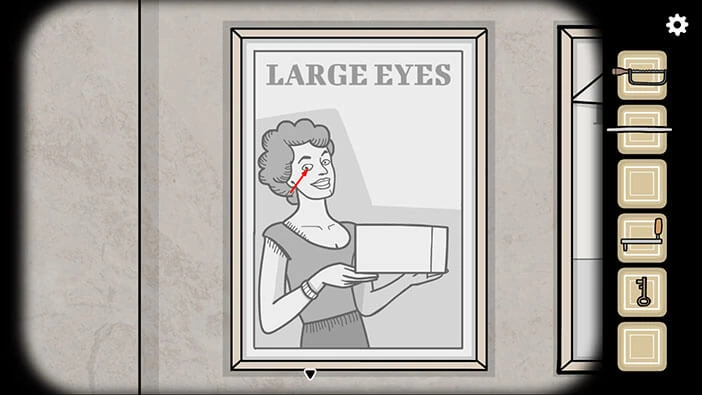
Next, we can see the phrase “Large eyes”. So, let’s tap on the woman’s eyes to enlarge them.
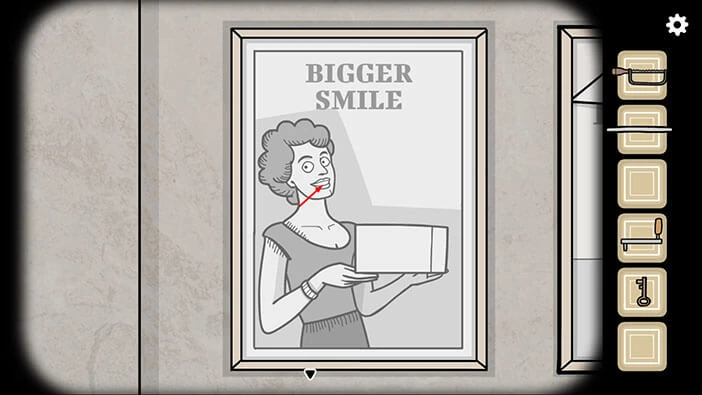
Next, we can see the phrase “Bigger smile”. So, let’s tap on the woman’s mouth.
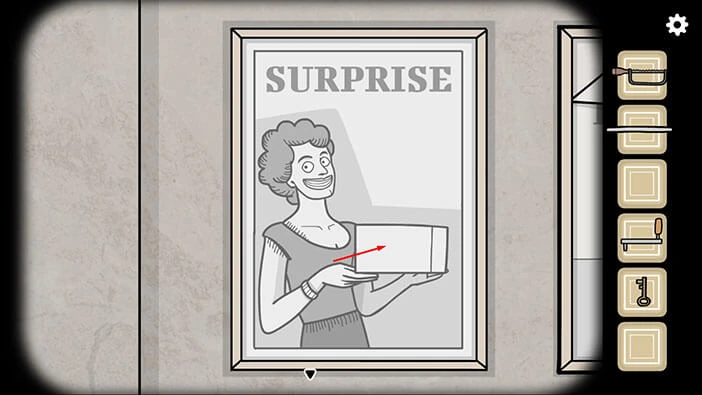
Lastly, you will see the word “Surprise”. Let’s tap on the box. A hand holding a knife will appear from the box and it will attack the woman in the poster.
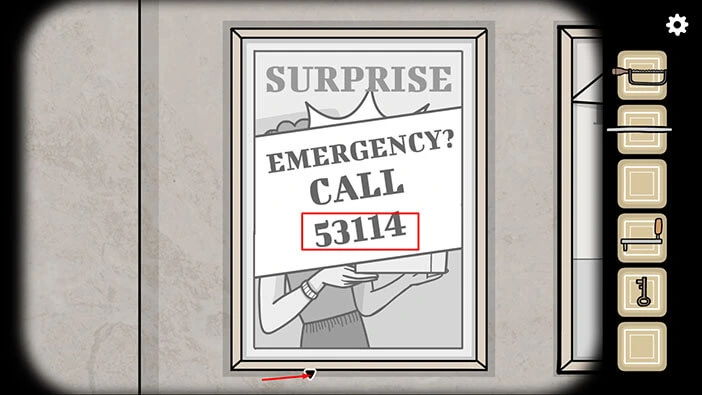
Now, you will see the phrase “Emergency CALL” and the number “53114”. Memorize/write down this number because we will need it for the next puzzle.
Once you’re done, tap on the arrow at the bottom of the screen to go back.
Previously, we found a crank, so let’s use it to open the newspaper’s photo service. So, tap on it to take a closer look.
On the left, you will notice a slot for the crank. So, select the “Crank” from the inventory and insert it into the empty slot.
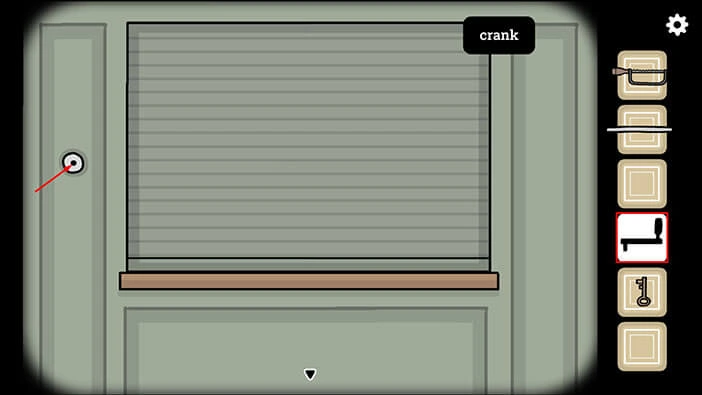
Next, tap and hold on the crank to roll up the window blinds.
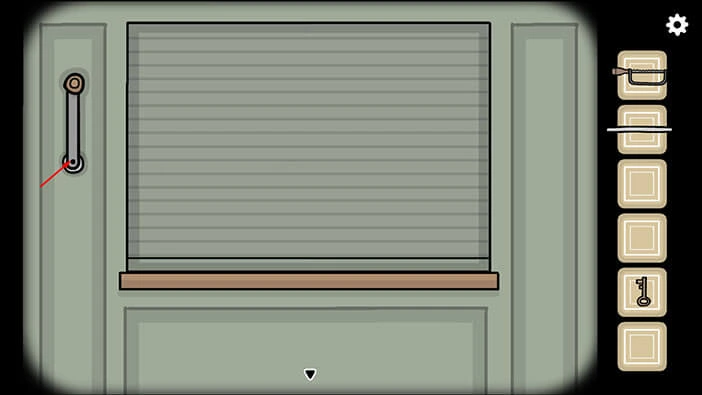
On the left, you will see a “Newspaper” so tap on it to pick it up. After that, tap on the arrow at the bottom of the screen to go back.
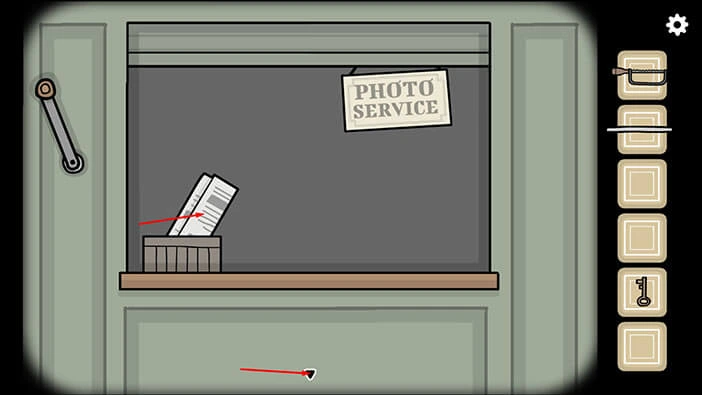
Let’s go back to the room in which Mr. Owl is located. Tap twice on the arrow on the right.
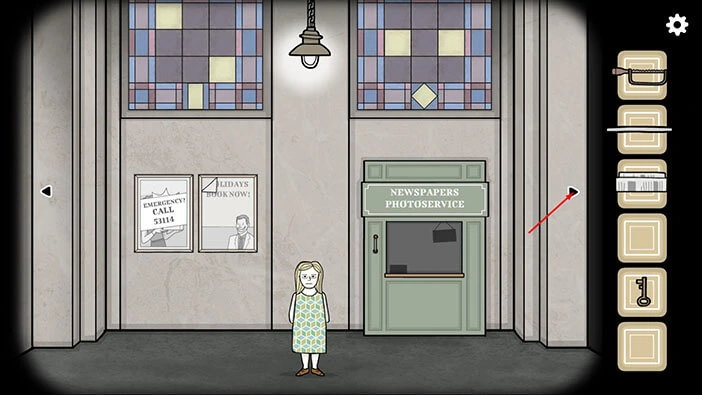
Let’s take a closer look at the man sitting on the bench. Select the “Newspaper” from the inventory and give it to the man with glasses.
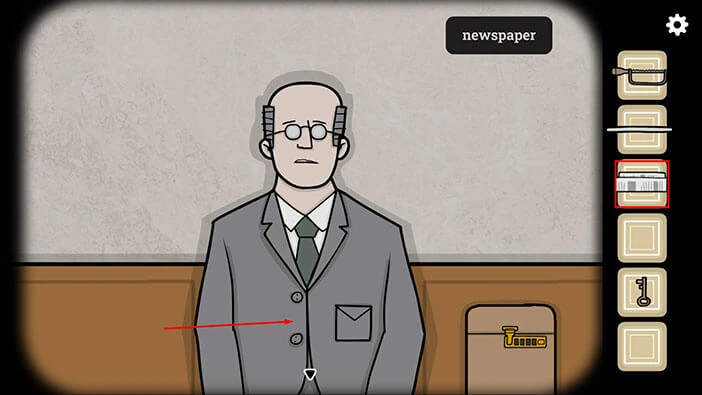
The man is now reading a newspaper, so let’s tap on the newspaper to examine it.
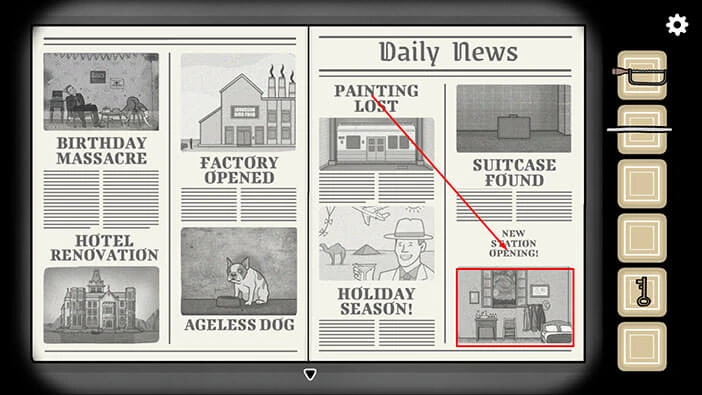
Here, we can see eight titles and an image above each title. However, you will probably notice that the titles do not match the image above them. So, our next task is to rearrange the titles and assign them to the correct image.
We will do this in several steps. Let’s begin.
Step 1
In the top left section of the right page, we can see the title “Factory opened” and in the top right section of the left page, we can see an image of the factory. So, select the “Factory opened” title and drag it below the image of a factory (instead of the “Hotel renovation” title).
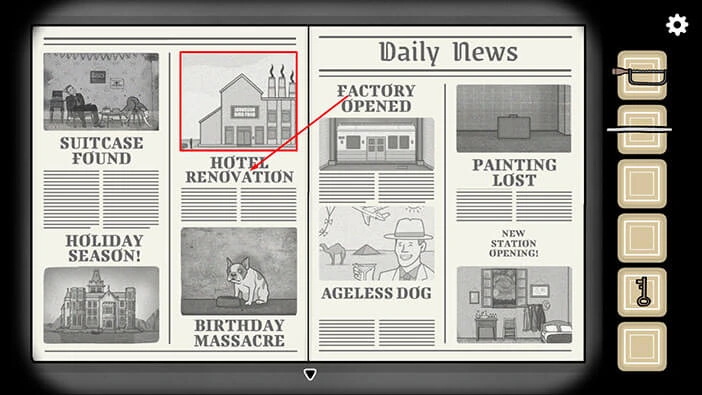
Step 2
In the top left section of the right page, we can see the title “Hotel renovation” and in the bottom left section of the left page, we can see an image of a hotel. So, select the “Hotel renovation” title and drag it above the image of a hotel (instead of the “Holiday season!” title).
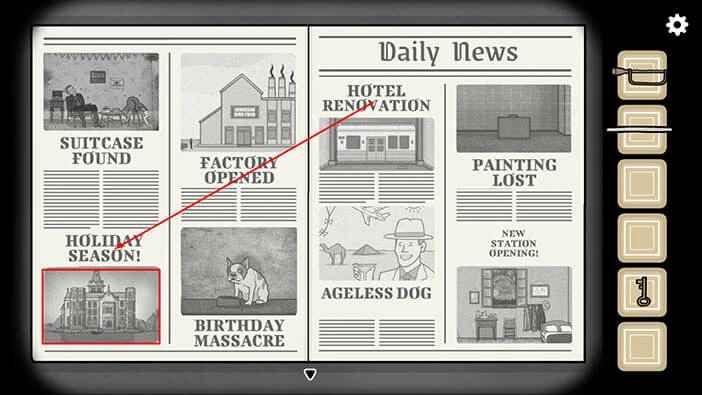
Step 3
In the top left section of the right page, we can now see the title “Holiday season!” and in the poster, we already saw an image that should be associated with this title. This image is located in the bottom left section of the right page. So, select the “Holiday season!” title and drag it above the image of a man with a hat (instead of the “Ageless dog” title).
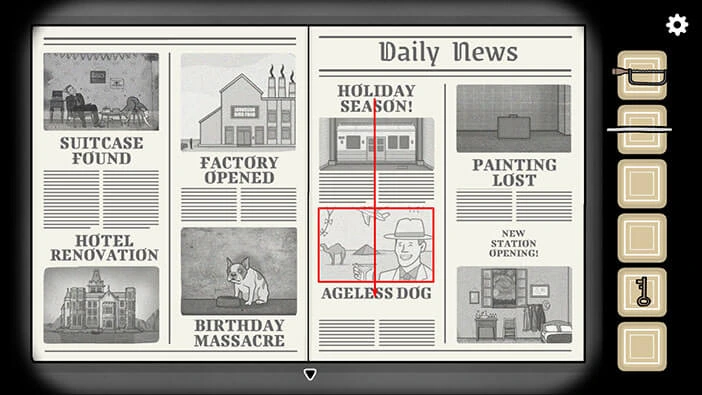
Step 4
In the top left section of the right page, we can now see the title “Ageless dog” and in the bottom right section of the left page, we can see an image of a dog. So, select the “Ageless Dog” title and drag it below the image of a dog (instead of the “Birthday Massacre” title).
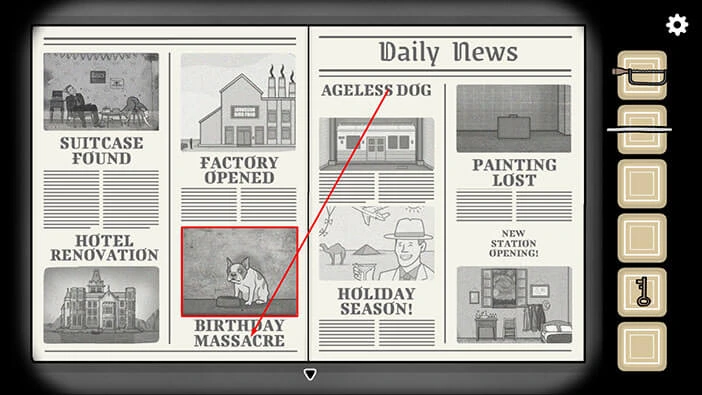
Step 5
In the top left section of the right page, we can now see the title “Birthday Massacre” and in the top left section of the left page, we can see the image of a massacre. So, select the “Birthday Massacre” title and drag it below the image of a massacre (instead of the “Suitcase Found” title).
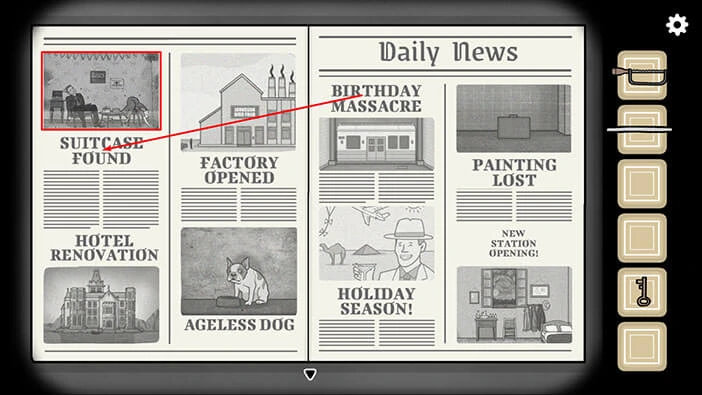
Step 6
In the top left section of the right page, we can now see the title “Suitcase Found” and in the top right section of the right page, we can see the image of a suitcase. So, select the “Suitcase Found” title and drag it below the image of a suitcase (instead of the “Painting lost” title).

Step 7
In the top left section of the right page, we can now see the title “Painting lost” and in the bottom right section of the right page, we can see the image of a painting. So, select the “Painting lost” title and drag it above the image of a painting (instead of the “New Station Opening!” title).
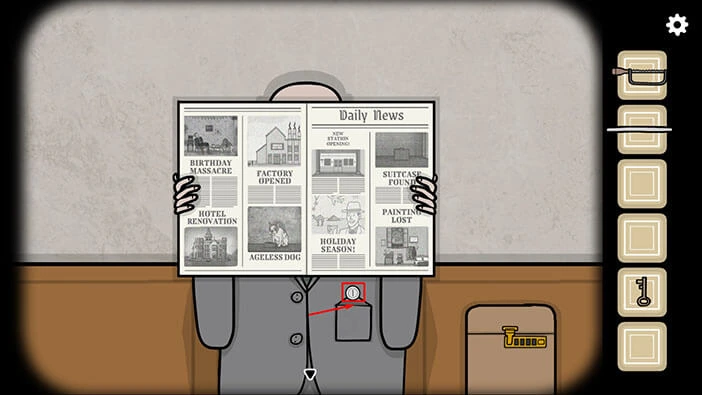
With this last step, you will match the titles with the images that they describe.
The man will bring up the newspaper to the eye level, and we can now see the front pocket of his jacket.
Tap on the pocket to open it, and tap again to pickpocket the man. You will gain a “Coin”. After that, tap on the arrow at the bottom of the screen to go back.
We can use the coin to make a call in the phone booth, and it is located in the first room to the right, so let’s go there. Tap on the arrow on the right.
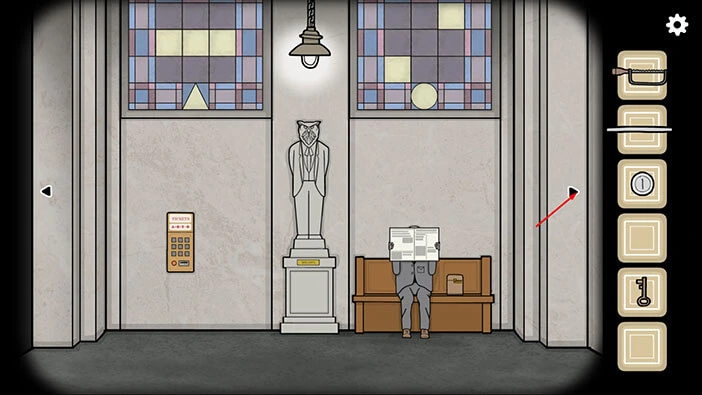
Tap on the phone booth on the right to take a closer look at it and our character will focus on the keyhole.
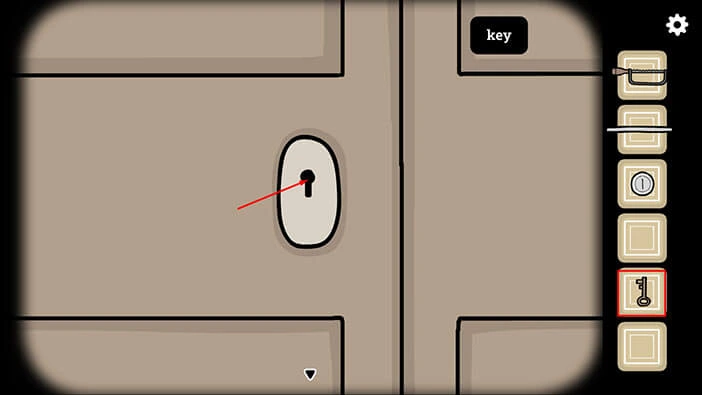
Select the “Key” from the inventory and insert it into the keyhole. After that, tap on the key to turn it, and our character will unlock the phone booth door.
Tap on the phone to take a closer look at it. Next, we must insert the coin in order to make a phone call so let’s do that. Select the “Coin” from the inventory and insert it into the slot (above the dialer).
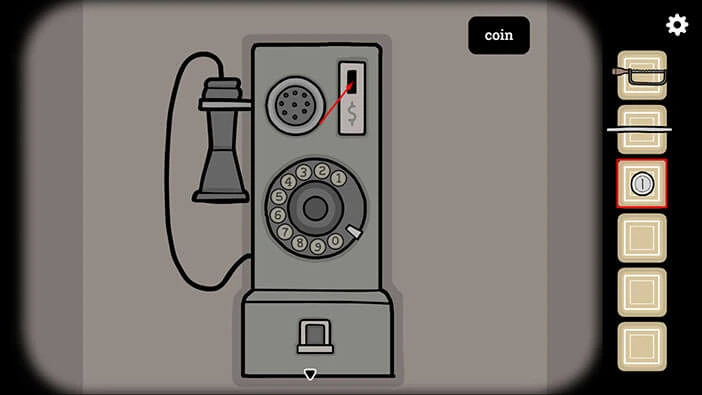
Next, tap on the dialer to start the interaction.
We should now dial the number “53114” that we discovered on the poster. To dial the number, hold and drag to the right.
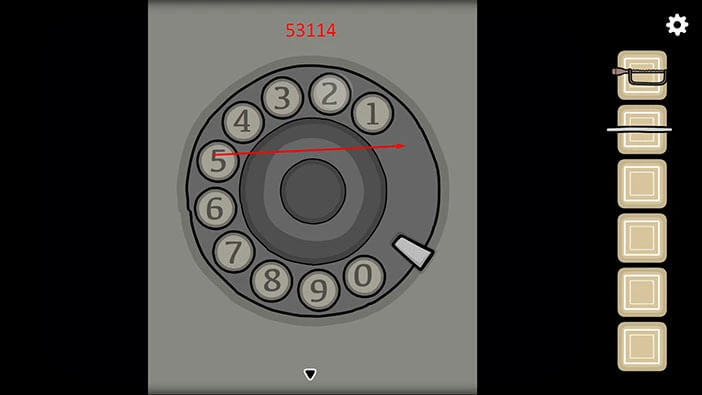
Once you dial the correct number, you will again see a phone booth. Tap on the handset, several times, to speak with the unknown person.
This person will tell you that he will come and get the mother and that she knows this. He will also tell you to “Look into the eyes of the bird”. This is a hint for the next puzzle, and we should go back to the Mr. Owl statue.
Once you’re done, tap on the arrow at the bottom of the screen to go back.
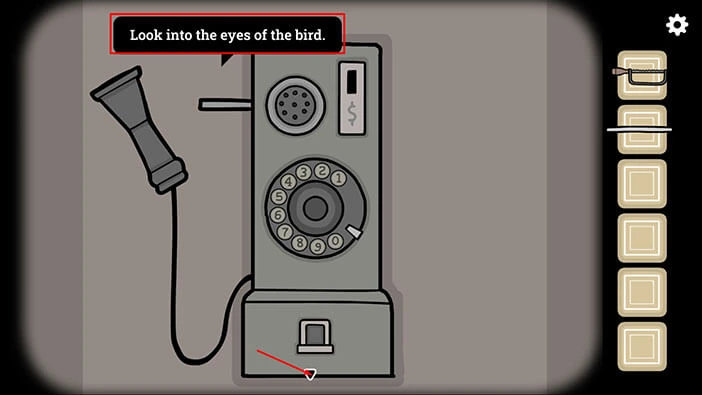
So, let’s go back to the room in which we saw Mr. Owl. Tap on the arrow on the left.
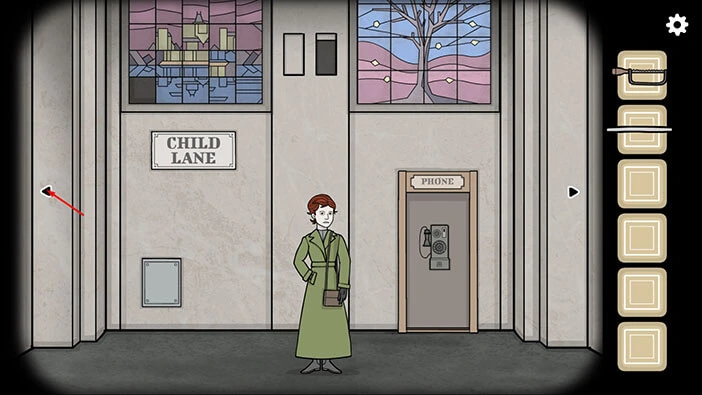
Tap on the Mr. Owl’s head to take a closer look at it. After that, tap on its eyes (Mr. Owl is a bird and the voice said “Look into the eyes of the bird”) and they will change color from grey to white. Once you “activate” both eyes, you will hear a loud bump and there will be a screen shake, indicating that we opened something.
Once you’re done, tap on the arrow at the bottom of the screen to go back.
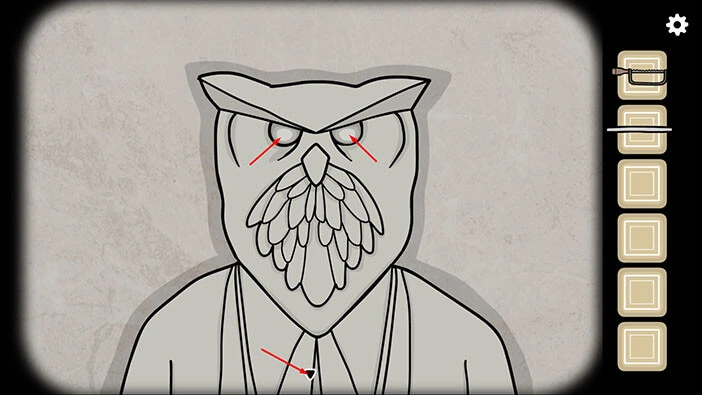
You will notice that the stone door below the Mr. Owl statue opened up a bit. Tap on the door to take a closer look.
Our character still can’t open the door with his bare hands, so let’s solve this problem. Select the “Rod” from the inventory and jam it into the opening.
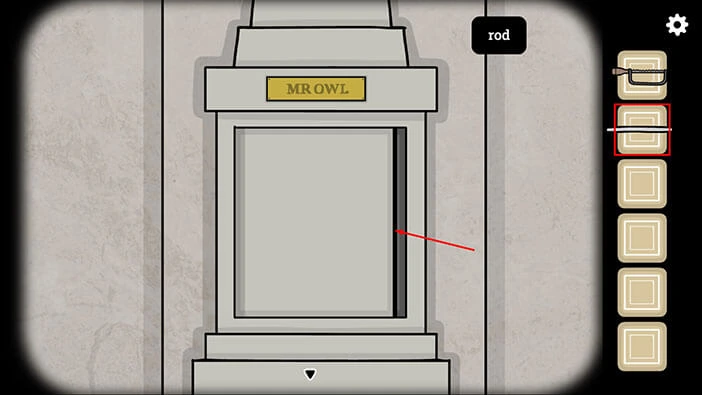
Next, tap and hold on the rod to use it as leverage, and you will open the door.
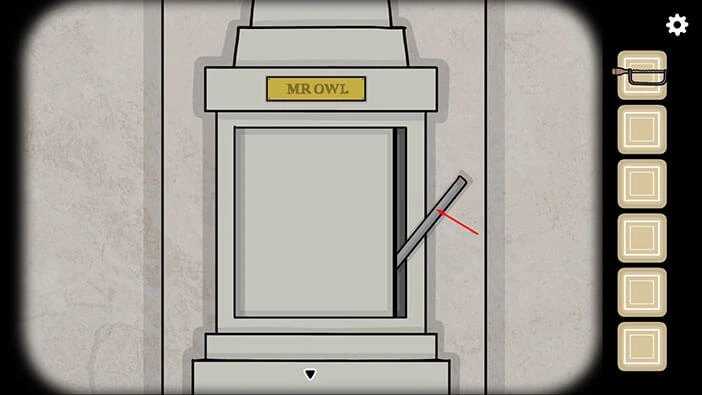
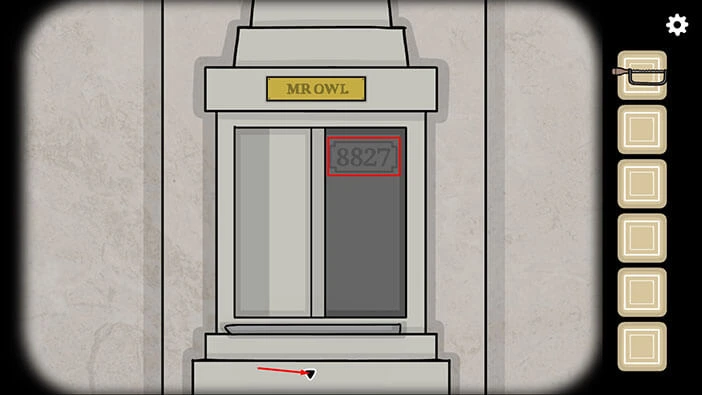
Once you open the door, you will see the number “8827”. Memorize/write down this number because we will need it for the next puzzle.
Once you’re done, tap on the arrow at the bottom of the screen to go back.
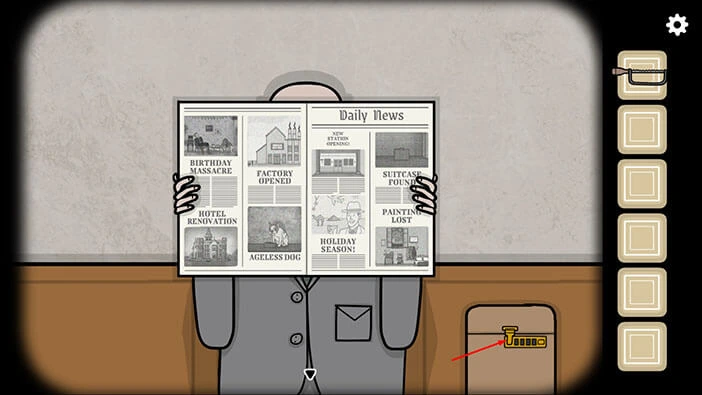
Next, tap on the man on the bench to take a closer look, then tap on the suitcase to start the interaction.
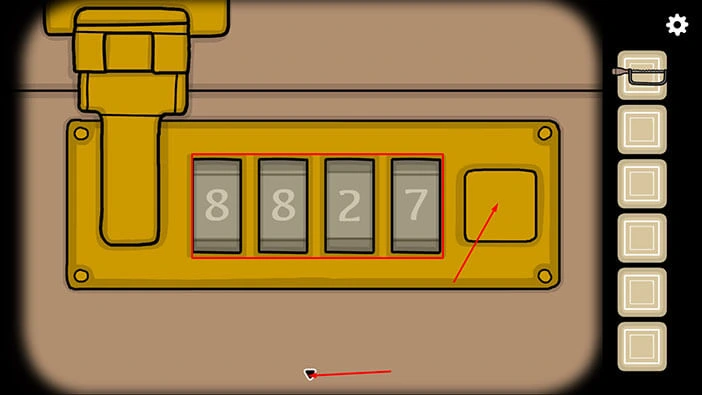
Enter the code “8827”. After that, tap on the button on the right and you will unlock the suitcase.
Once you’re done, tap on the arrow at the bottom of the screen to go back.
Tap on the suitcase to open it, and tap again to pick up the “Camera”. After that, tap on the arrow at the bottom of the screen to go back.
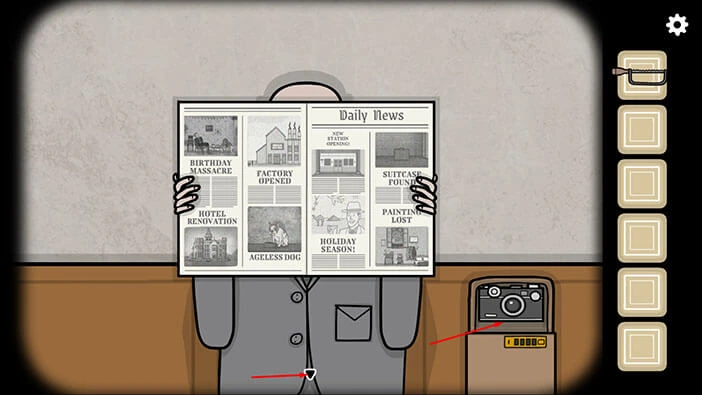
Let’s go back to the room in which Laura is located. Tap twice on the arrow on the right.
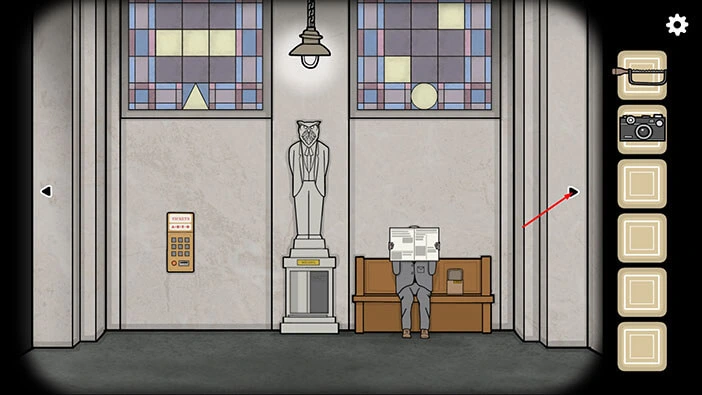
Tap on Laura to take a closer look at her and tap again to start the interaction. She will ask to take your photo. So, select the “Camera” from the inventory and give it to Laura.
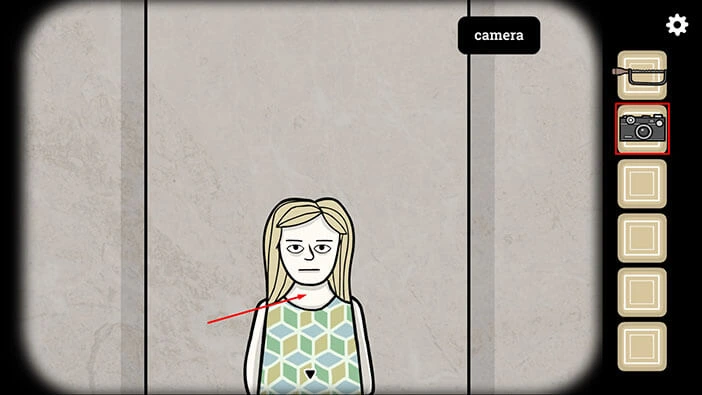
Tap on Laura’s face, several times. She will take two photos, but, after that, looks like the power will be turned off, and all the rooms will grow dark.
Once that happens, tap on the arrow at the bottom of the screen to go back.
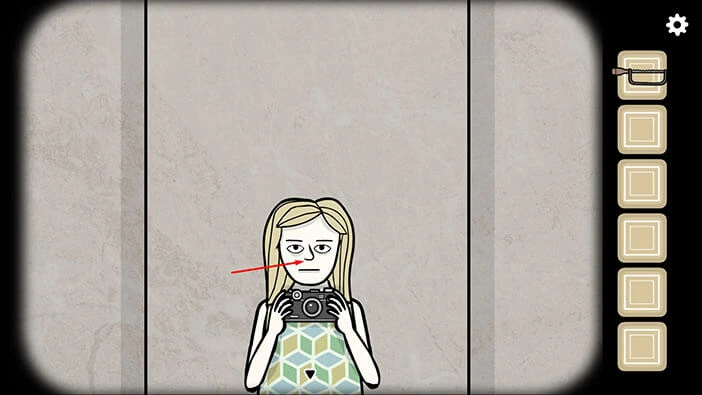
Let’s go back to the room in which we saw Laura’s mom. Tap on the arrow on the left to go back.
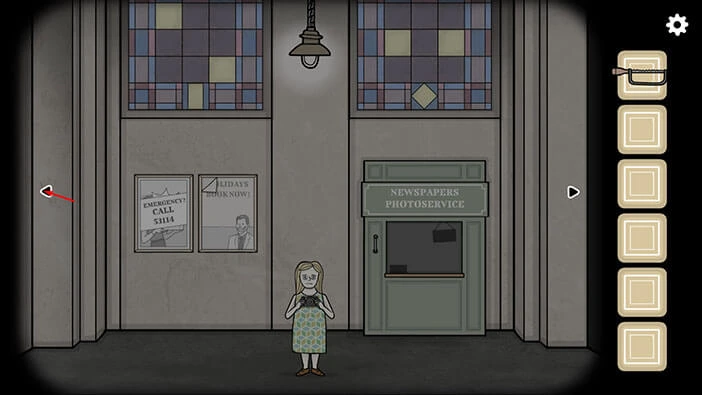
You will see a demonic creature with antlers, standing behind Laura’s mom. Tap on her to approach her. After that, tap on the creature several times to interact with it.
The creature will say “She has to come with me”. “The girl is on her own”. Tap on the arrow at the bottom of the screen to go back.

It seems that Laura’s mom and the creature are gone. Tap twice on the arrow on the right to go to the next room.
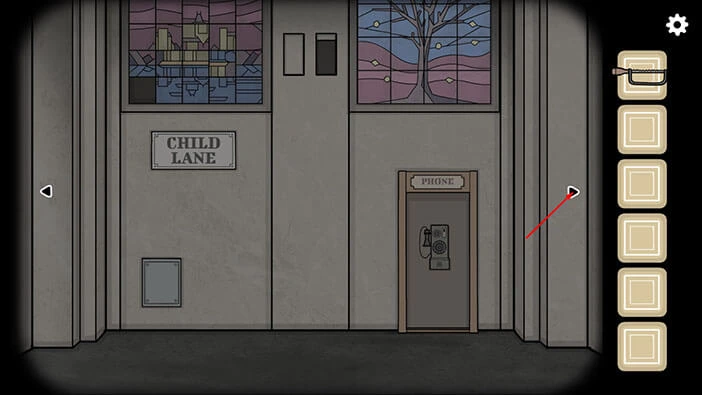
When you enter this room, you will see a creature and Laura’s mom entering the train, and they will leave soon after that. This means that we will now have to take care of Laura. However, Laura’s mom left her purse on the ground, so let’s take a closer look at it.
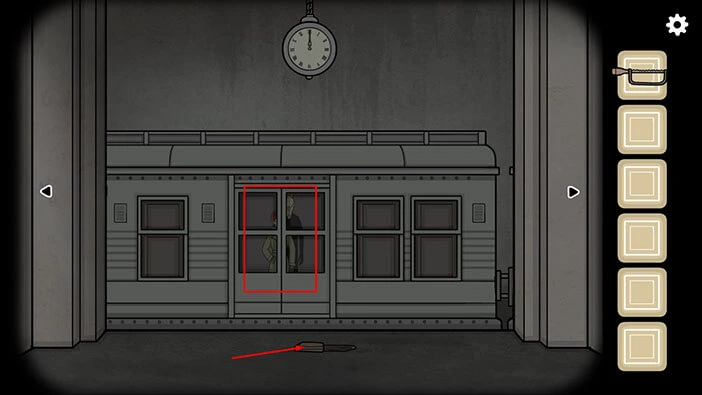
Tap on the purse to open it, and three items will fall out of it. Tap on the “Golden timepiece” and the “Nut driver” to pick them up.
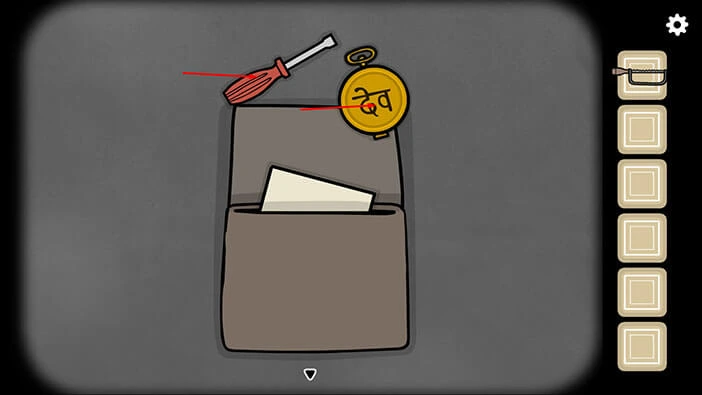
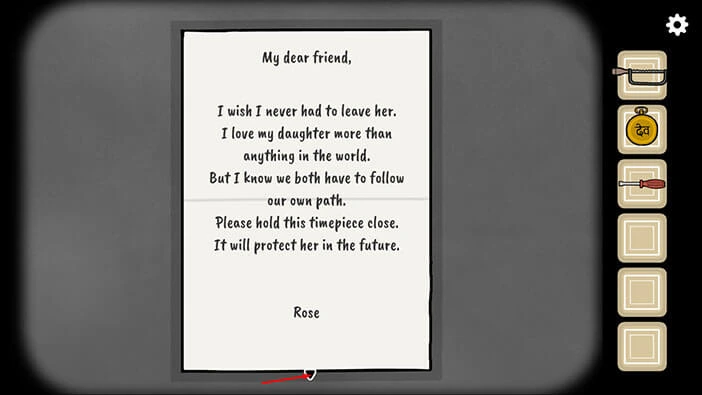
Next, tap on the note to pull it out of the purse, and tap again to read it.
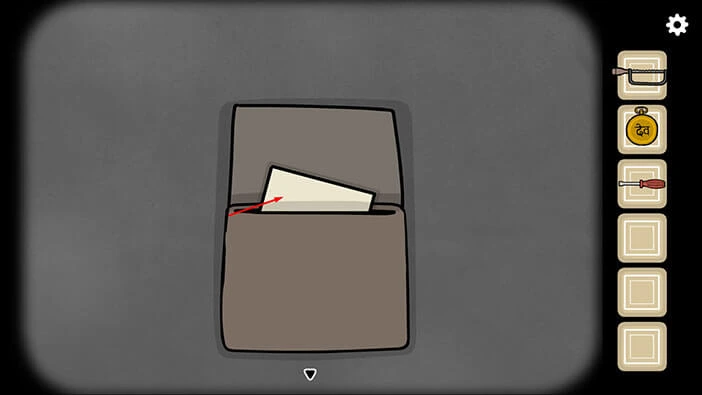
In the note, Laura’s mom explained that she loves her daughter, but she has to leave her. She will also ask you to take the “Timepiece” and keep it safe because it will protect Laura in the future.
Tap on the arrow at the bottom of the screen to go back.
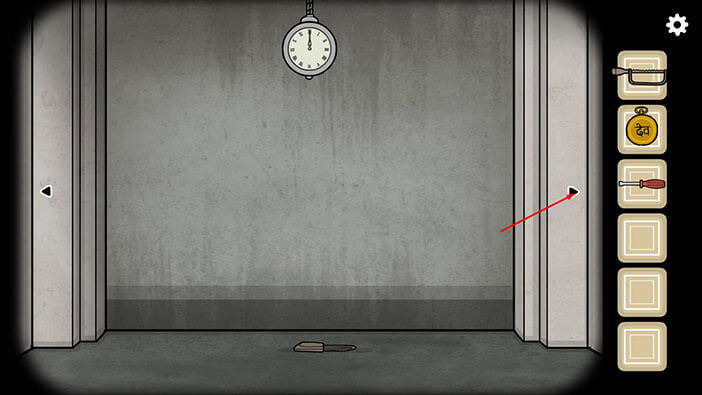
Let’s go back to the room with the phone booth. Tap twice on the arrow on the right.
Here, you will notice a small panel door, located in the lower right corner of the wall. Tap on the pane door to take a closer look at it.
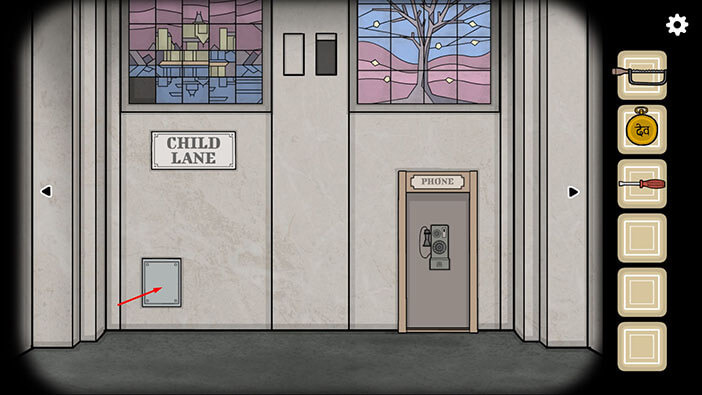
Select the “Nut driver” from the inventory and use it to remove the four screws that are holding the panel door in place.
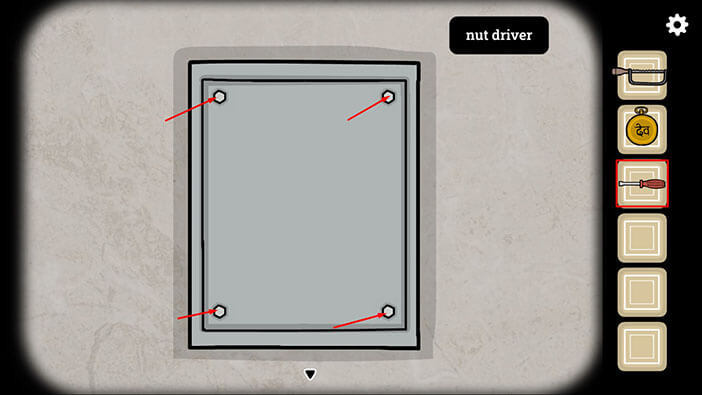
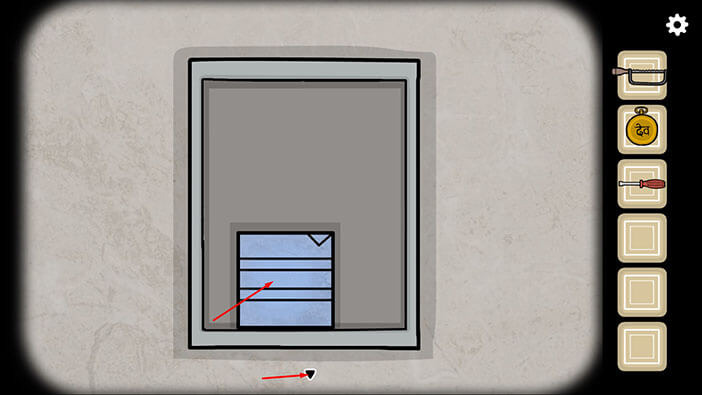
In the small compartment you will find another “Glass panel”. Tap on it to pick it up.
After that, tap on the arrow at the bottom of the screen to go back.
Let’s go back to the room with the Mr. Owl statue. Tap on the arrow on the left.
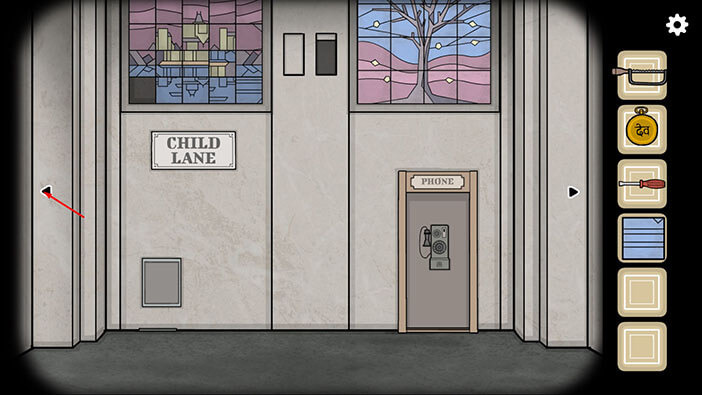
Now, you will see Laura hiding inside the compartment below Mr. Owl’s statue. Tap on Laura to take a closer look at her. Tap on Laura again to start the interaction.
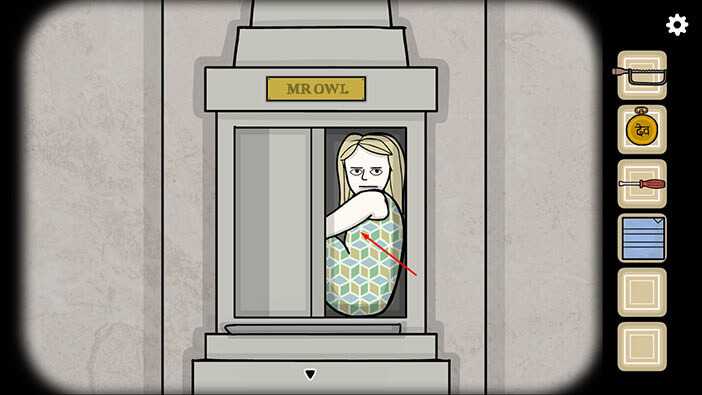
Laura is angry and she will slam the door because she doesn’t want to talk to you. However, she dropped the “Roll of Film” when she slammed the door, so let’s tap on it to pick it up.
After that, tap on the arrow at the bottom of the screen to go back.
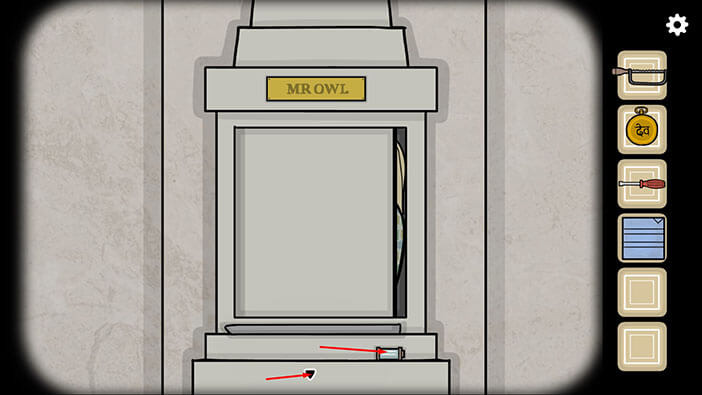
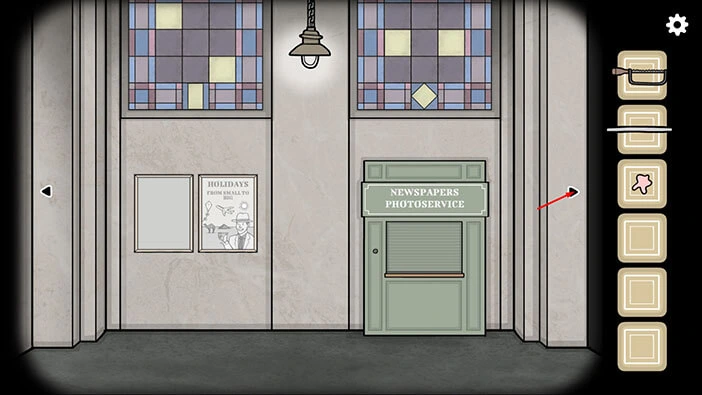
Well, we can use the newspaper’s photo service to develop the photos on the film. So, let’s go to the room with the newspaper’s photo service. Tap twice on the arrow on the right.
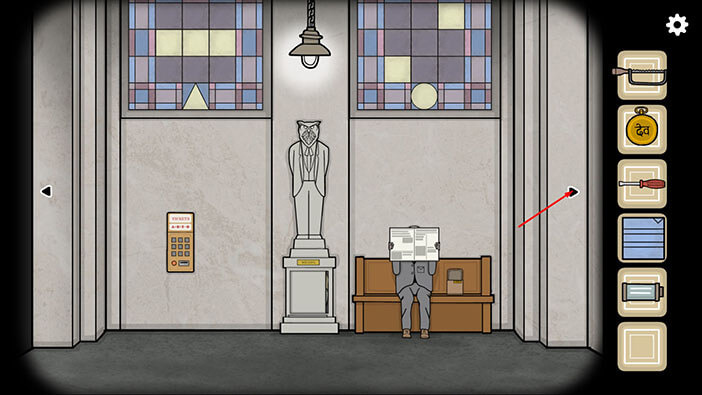
Tap on the newspaper’s photo service to take a closer look at it. Select the “Roll of film” from the inventory and drop it into the box on the left.
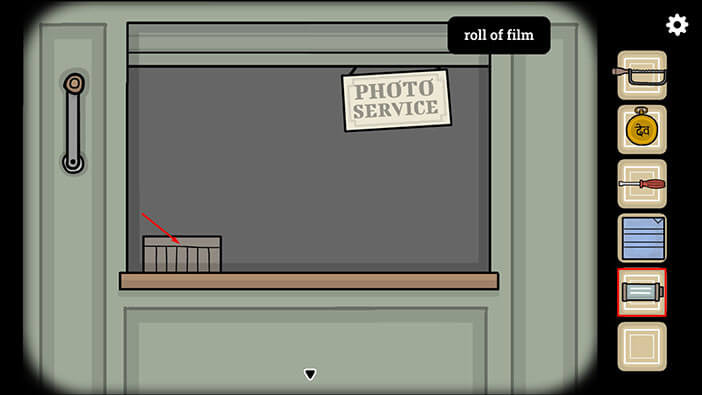
Next, tap on the “Photo Service” sign in the top right corner, and you will see the message “Come back in 20 minutes”. So, let’s do that.
Tap on the arrow at the bottom of the screen to go back.
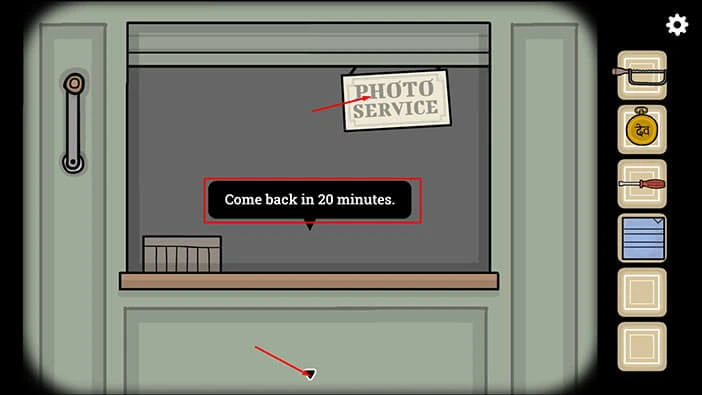
Let’s go back to the room with the large clock and set the time. Tap on the arrow on the right.
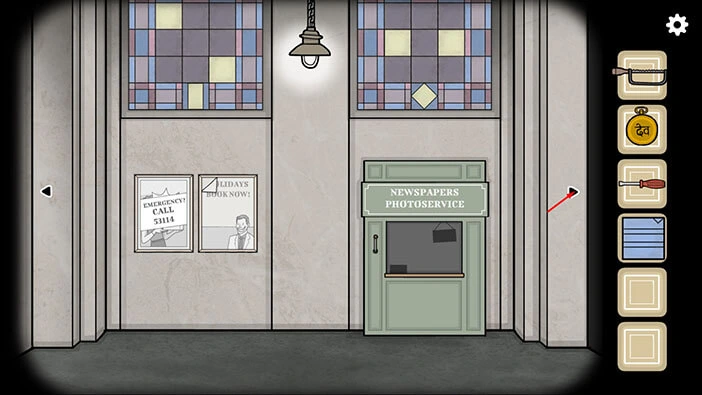
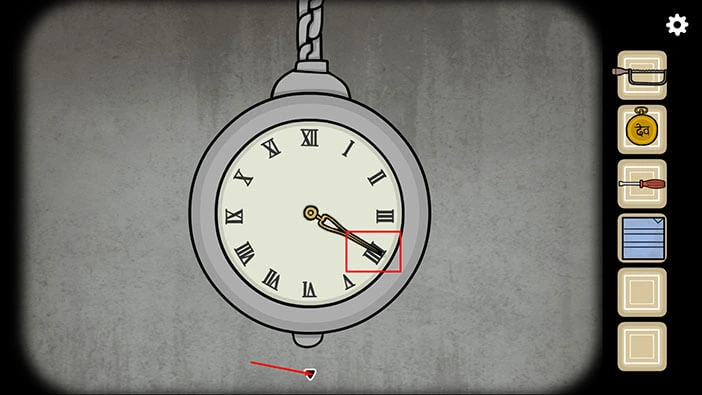
Tap on the clock to take a closer look at it. We can see that the minute hand is pointing at 12 o’clock so let’s set it to point at 4 o’clock (+20 minutes).
Once you’re done, tap on the arrow at the bottom of the screen to go back.
Let’s go back to the newspaper’s photo service and pick up the photos. Tap on the arrow on the left.
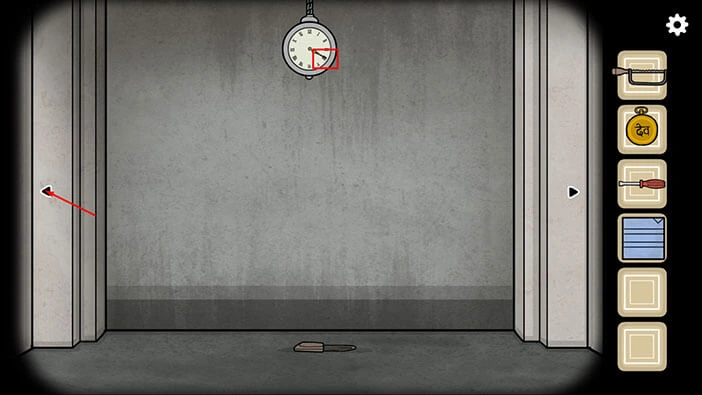
Tap on the newspaper’s photo service to take a closer look at it. After that, tap on the photos in the box on the left to examine them.
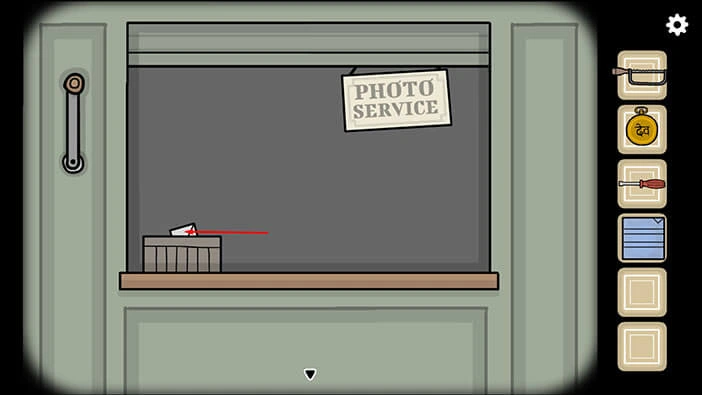
Inside you will find an envelope with photos. Tap on the envelope to take a look at the photos.
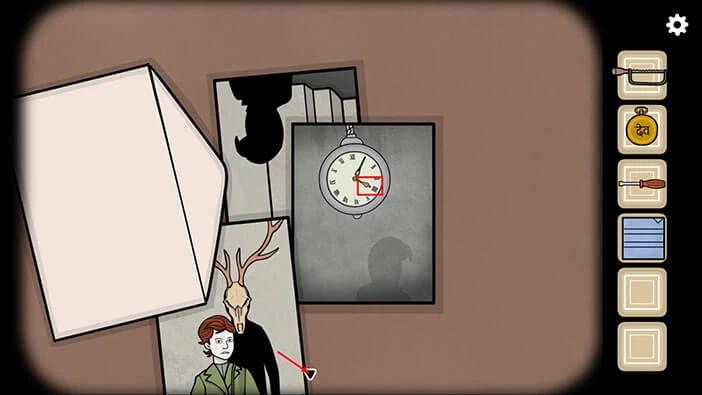
In the first photo, we can see Laura’s mom and the demonic creature. Let’s move down this photo so that we can take a look at the photo below it.
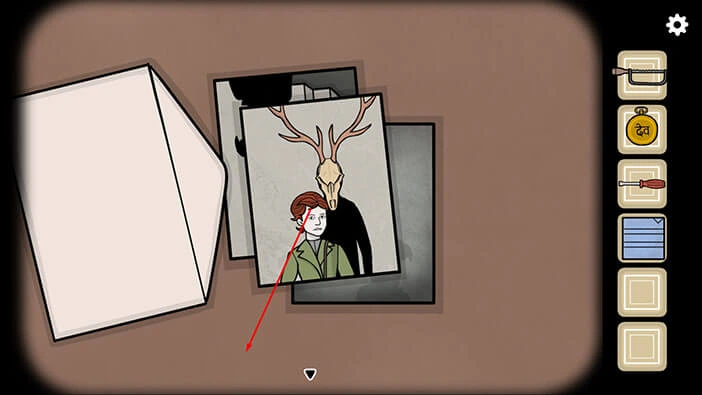
If you take a look at the clock in the photo, you will notice that the time is “04:05”. Memorize/write down this information because we will need it a bit later (once we find an hour hand).
Once you’re done, tap on the arrow at the bottom of the screen to go back.
Previously, we found a “Glass panel” so let’s use it to solve another puzzle. Tap on the arrow on the left to proceed to the room with the phone booth.
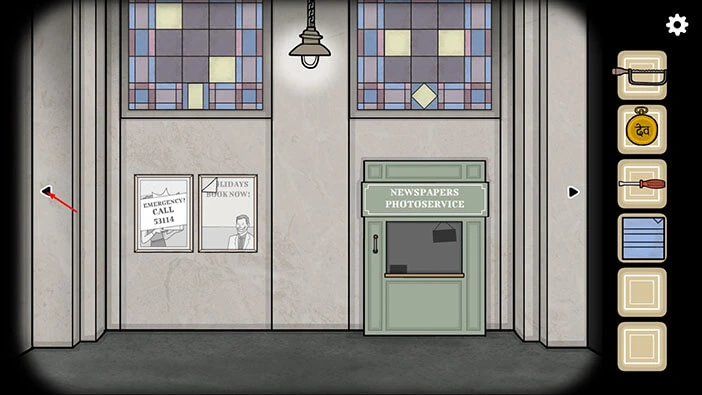
In this room, we solved the puzzle on the right, and we should now also solve the puzzle on the left. So, tap on the puzzle on the left to take a closer look at it.
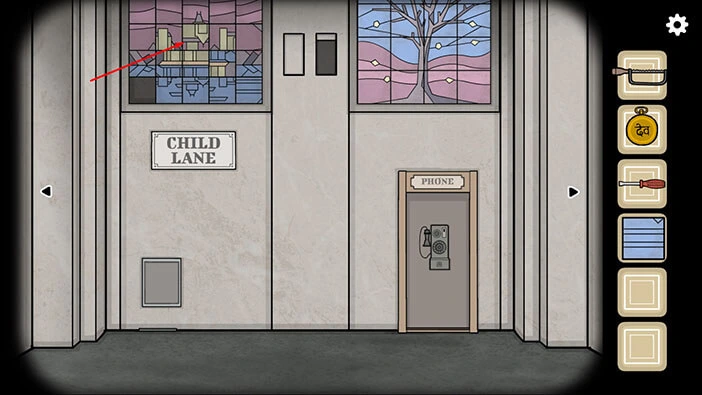
You will notice that one of the puzzle pieces is missing. So, select the “Glass panel” from the inventory and insert it into the empty slot.
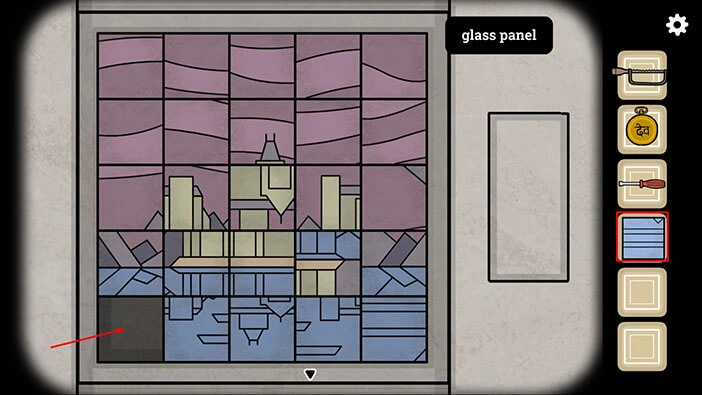
Ok, just like before, we should now assemble the puzzle by rotating different puzzle pieces. We will do this in several steps. Let’s begin.
Step 1
Swipe in left to right direction on the fifth puzzle piece (left to right) in the third row to rotate it.
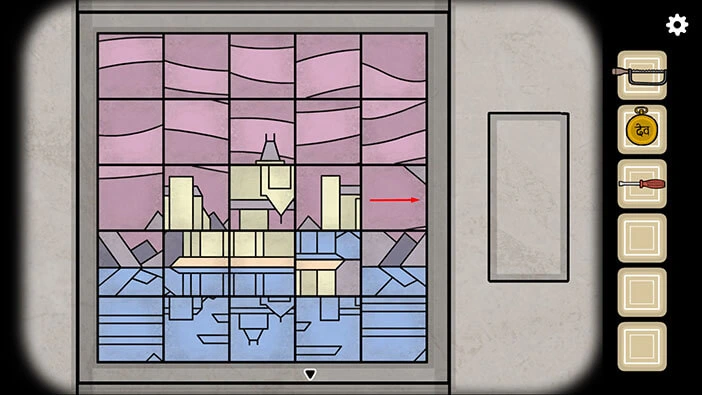
Step 2
Swipe in top to bottom direction on the fifth puzzle piece (same piece) in the third row to rotate it.
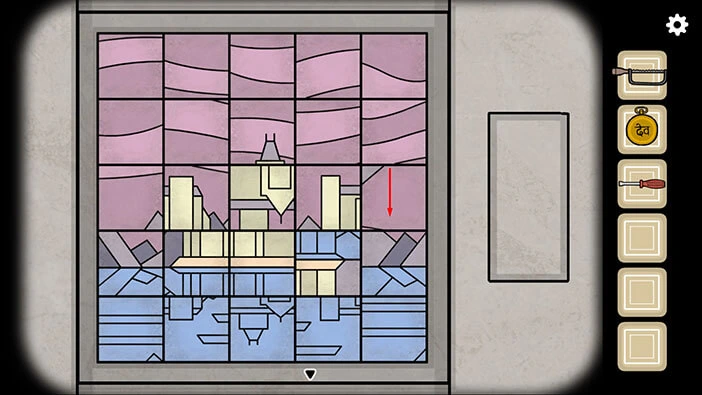
Step 3
Swipe in left to right direction on the first puzzle piece in the fourth row to rotate it.

Step 4
Swipe in left to right direction on the second puzzle piece in the fifth row to rotate it.
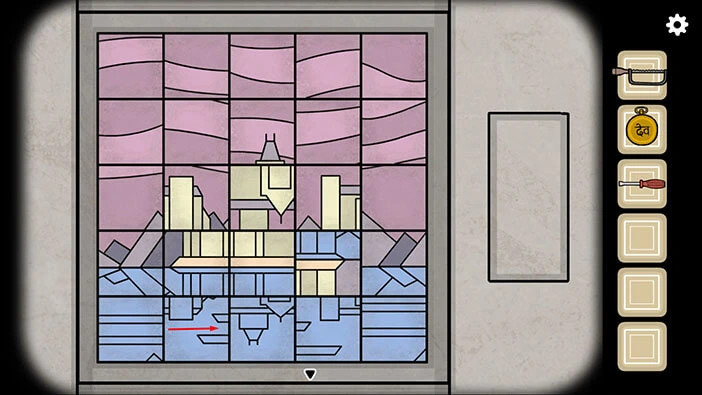
Step 5
Swipe in the top-to-bottom direction on the first puzzle piece in the fifth row to rotate it.
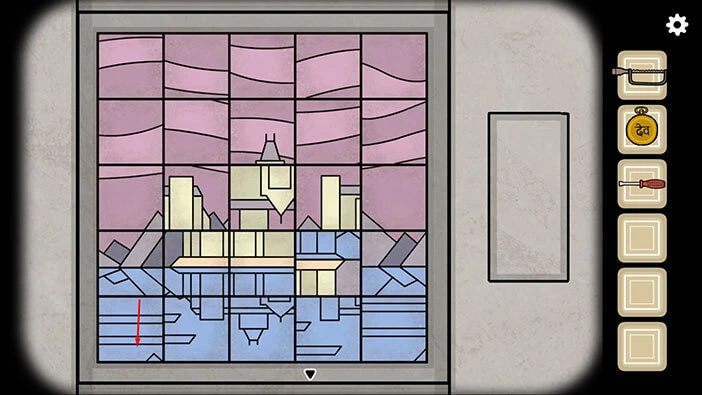
Step 6
Swipe in the top-to-bottom direction on the fifth puzzle piece in the fifth row to rotate it.
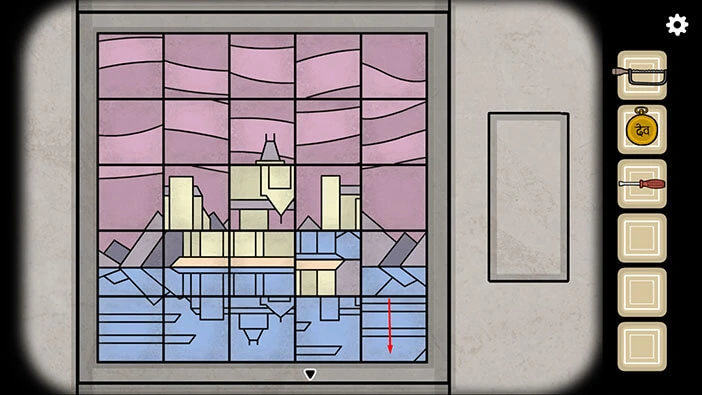
Step 7
Swipe in left to right direction on the fifth puzzle piece in the fifth row to rotate it.
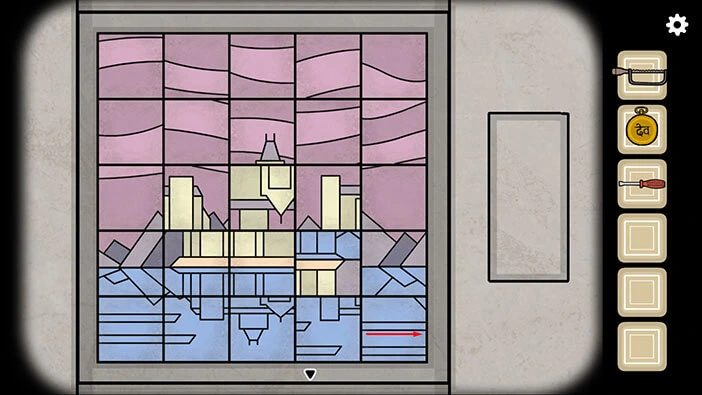
Step 8
Swipe in left to right direction on the fourth puzzle piece in the fifth row to rotate it.
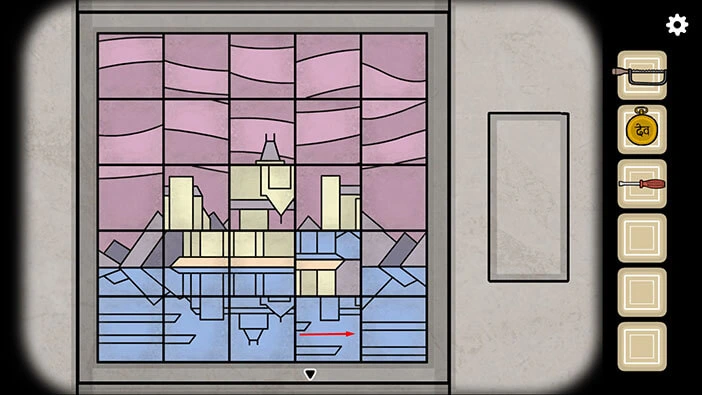
Step 9
Swipe in the top-to-bottom direction on the fourth puzzle piece in the fourth row to rotate it.
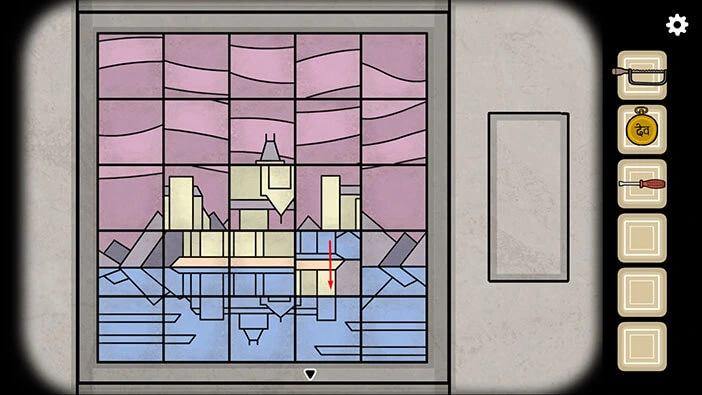
Step 10
Swipe in left to right direction on the fourth puzzle piece in the third row to rotate it.
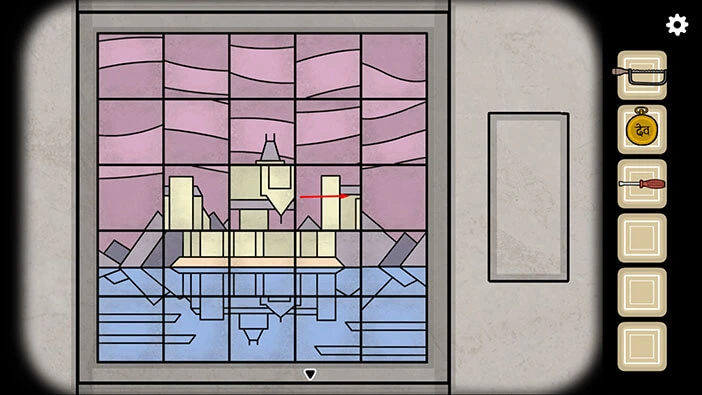
Step 11
Swipe in left to right direction on the fifth puzzle piece in the third row to rotate it.
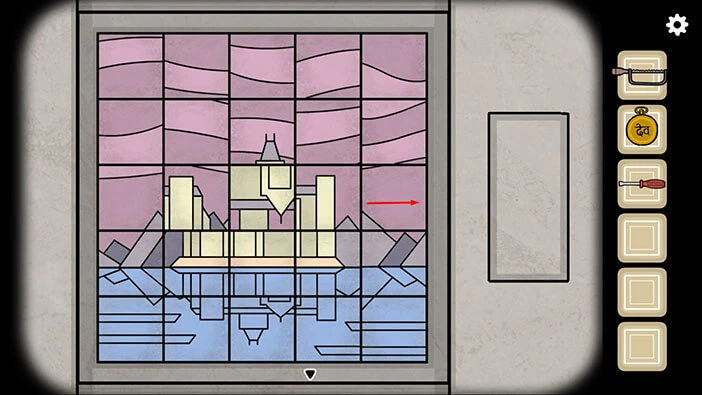
Step 12
Swipe in left to right direction on the fifth puzzle piece in the fourth row to rotate it.
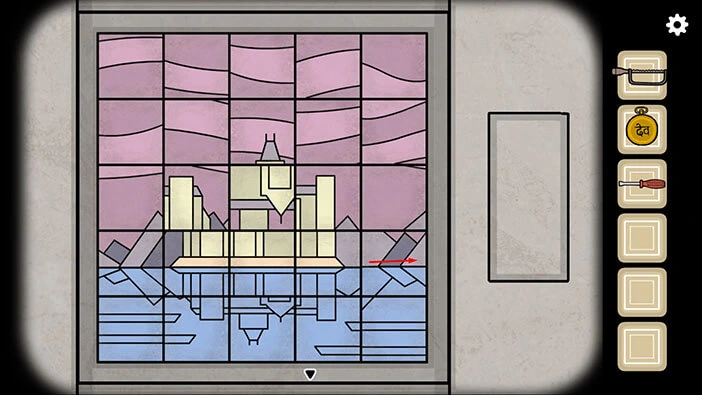
Step 13
Swipe in left to right direction on the second puzzle piece in the third row to rotate it.
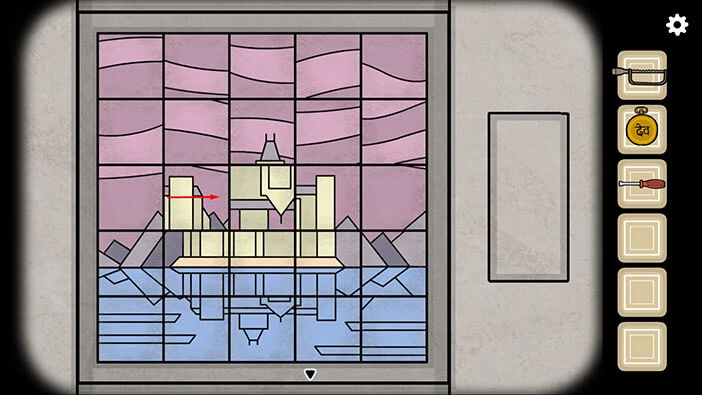
Step 14
Swipe in the top-to-bottom direction on the second puzzle piece in the second row to rotate it.
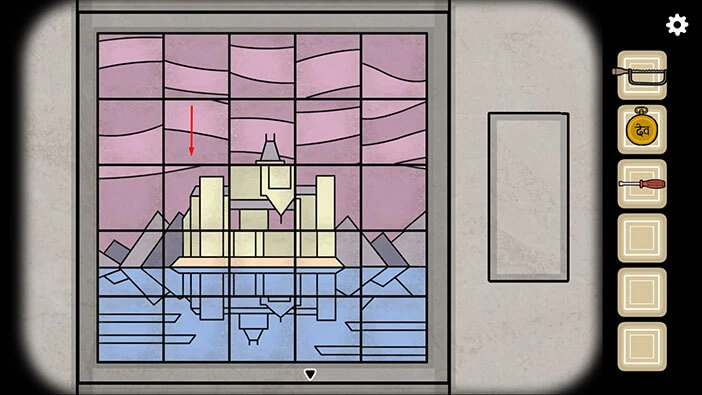
Step 15
Swipe in left to right direction on the third puzzle piece in the third row to rotate it.
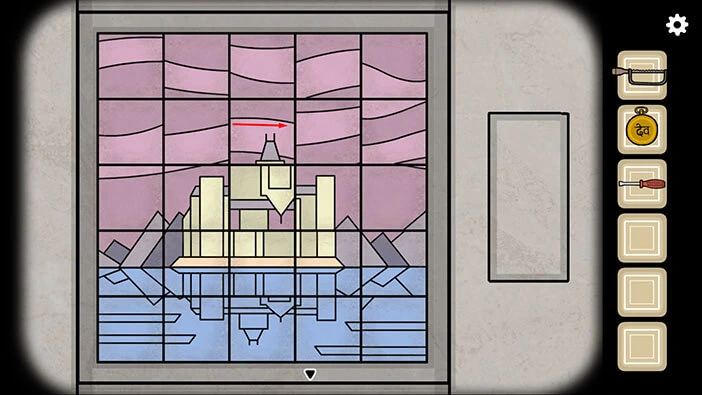
Step 16
Swipe in the top-to-bottom direction on the third puzzle piece in the third row to rotate it.
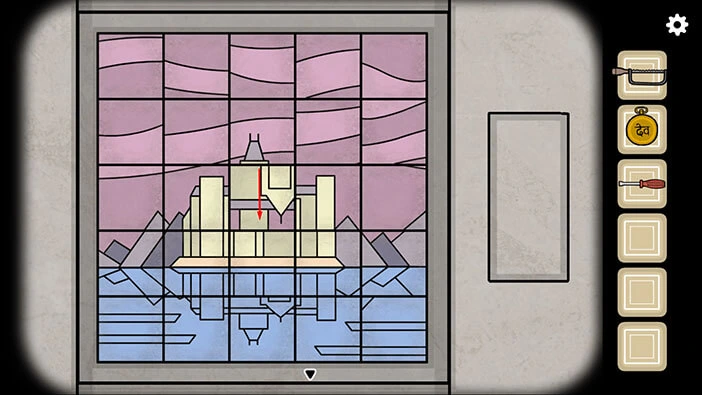
Step 17
Swipe in the top-to-bottom direction on the fourth puzzle piece in the second row to rotate it.
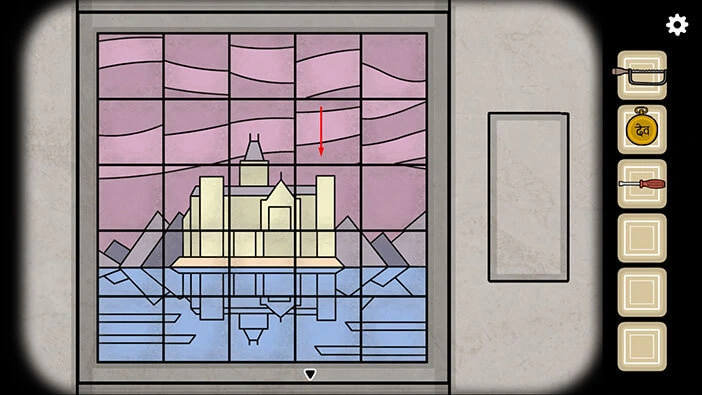
Step 18
Swipe in left to right direction on the fifth puzzle piece in the second row to rotate it.
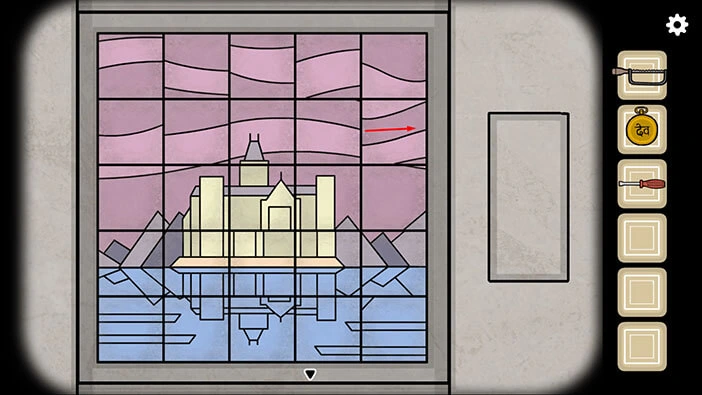
Step 19
Swipe in left to right direction on the fourth puzzle piece in the first row to rotate it.
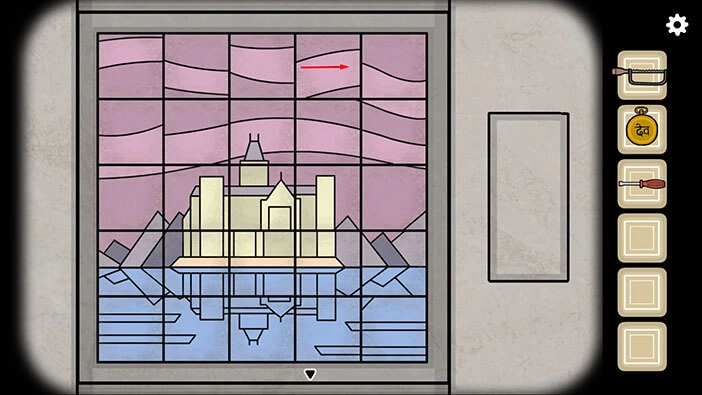
Step 20
Swipe in the top-to-bottom direction on the third puzzle piece in the first row to rotate it.
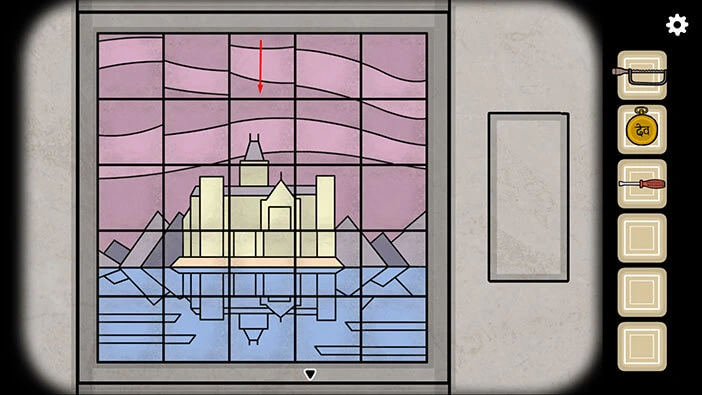
Step 21
Swipe in left to right direction on the second puzzle piece in the first row to rotate it.
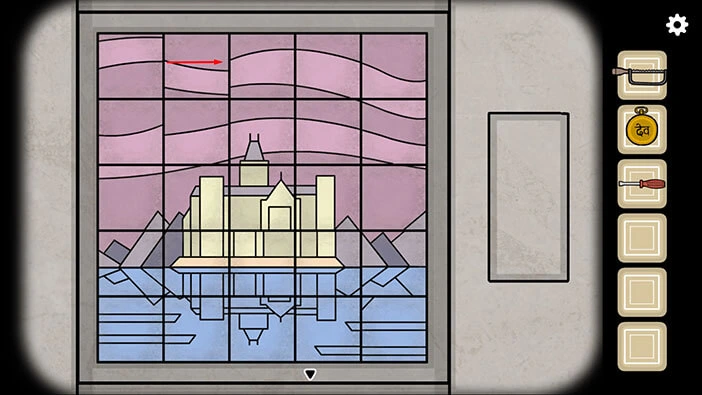
Step 22
Swipe in the top-to-bottom direction on the first puzzle piece in the first row to rotate it.
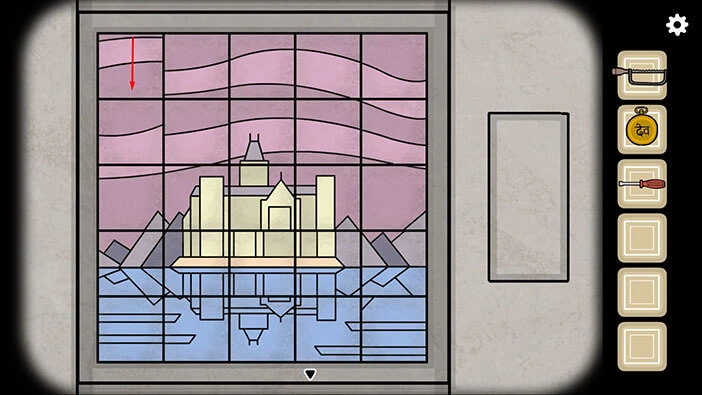
Step 23
Swipe in left to right direction on the first puzzle piece in the second row to rotate it.
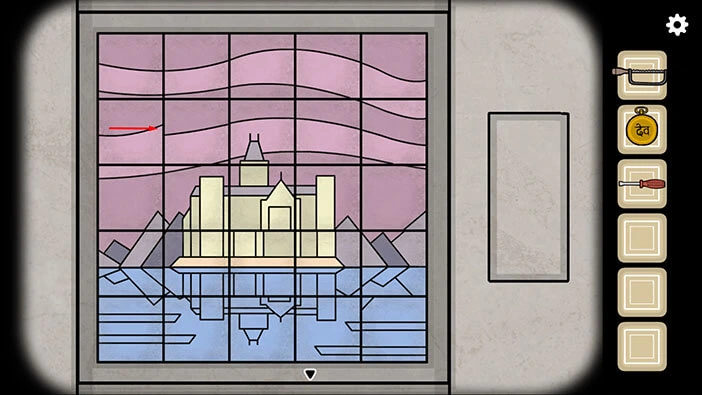
Step 24
Swipe in left to right direction on the third puzzle piece in the fifth row to rotate it.
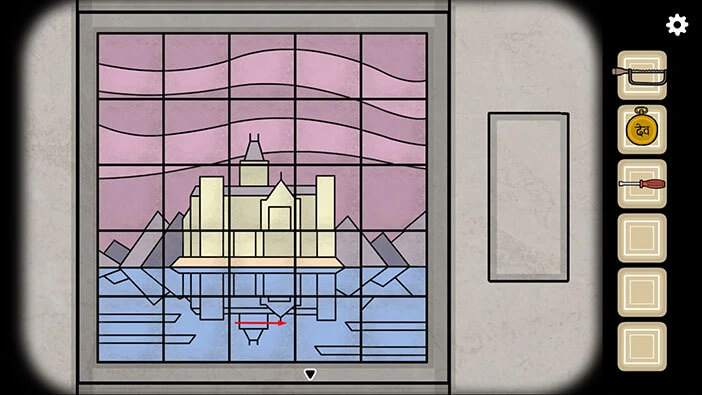
Step 25
Swipe in left to right direction on the third puzzle piece in the fourth row to rotate it.
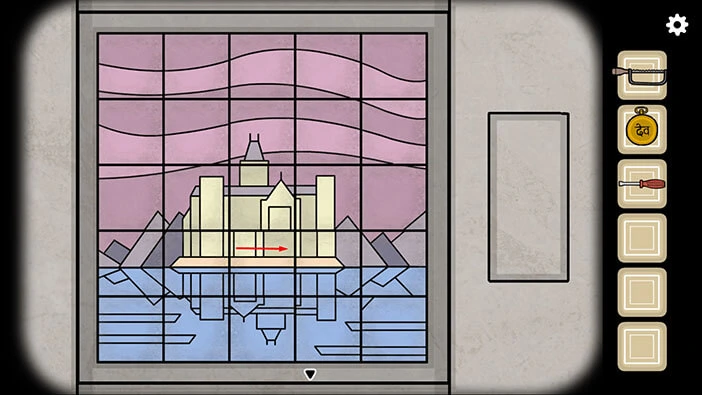
Step 26
Swipe in left to right direction on the third puzzle piece in the fifth row to rotate it.
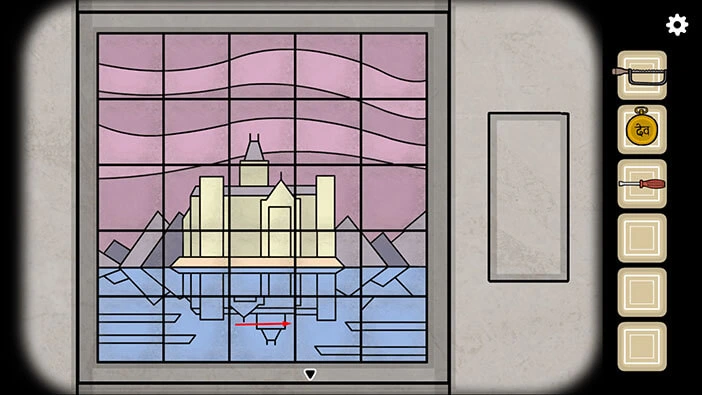
Step 27
Lastly, swipe in left to right direction on the fifth puzzle piece in the fifth row to rotate it, and you will solve this puzzle.
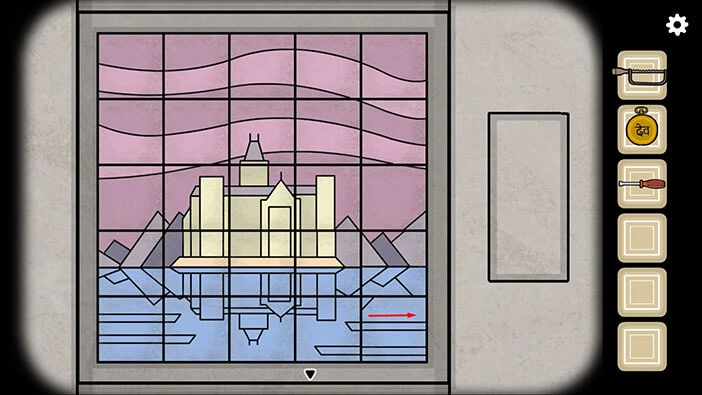
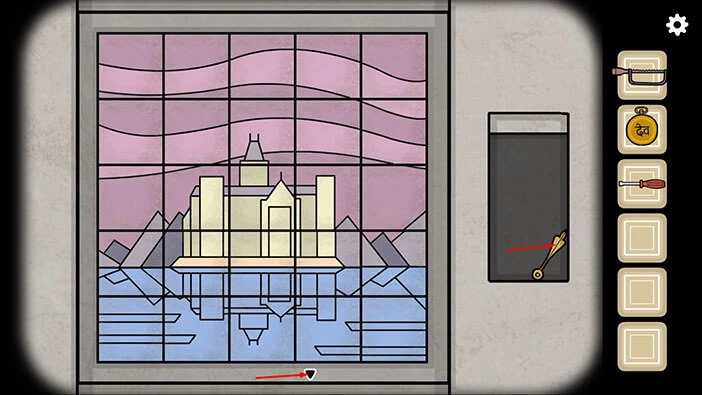
As soon as you solve the puzzle, the compartment on the right will open and inside you will find a “Clock hand”. Tap on it to pick it up.
After that, tap on the arrow at the bottom of the screen to go back.
Let’s go back to the room with the clock. Tap twice on the arrow on the right.
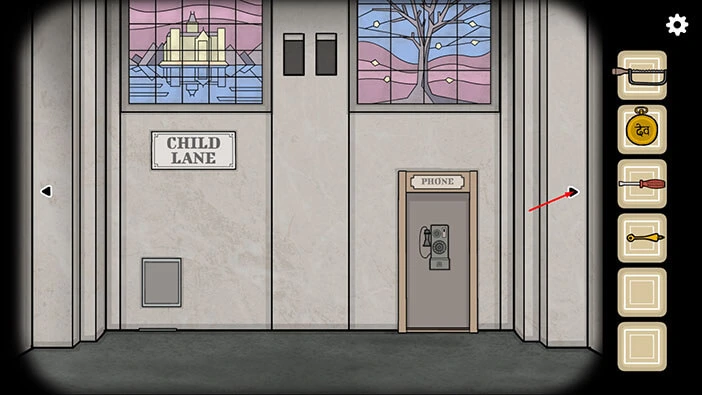
Tap on the clock to take a closer look at it. Select the “Clock hand” from the inventory and attach it to the clock.
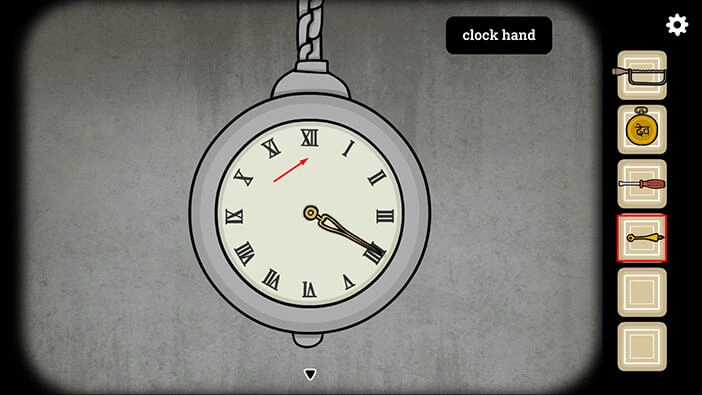
Our next task is to set the time to 04:05. As a reminder, we previously saw this time on the clock in the photo.
So, rotate the minute hand, and set the time to 04:05.
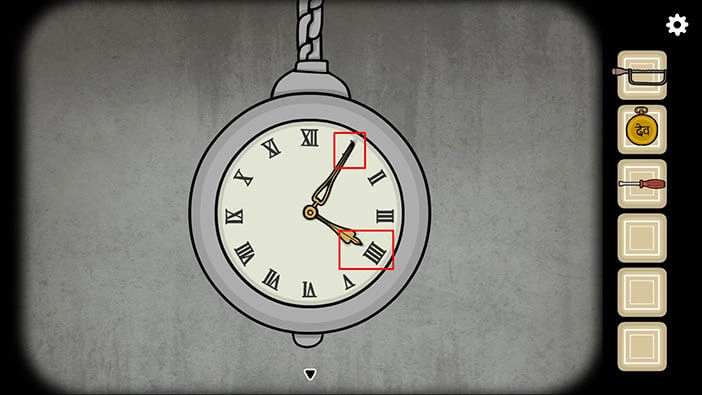
The train will arrive as soon as you set the correct time. However, in order to board the train we will need a ticket. So, let’s go back to the room with Mr. Owl and look for the ticket. Tap once on the arrow on the right.
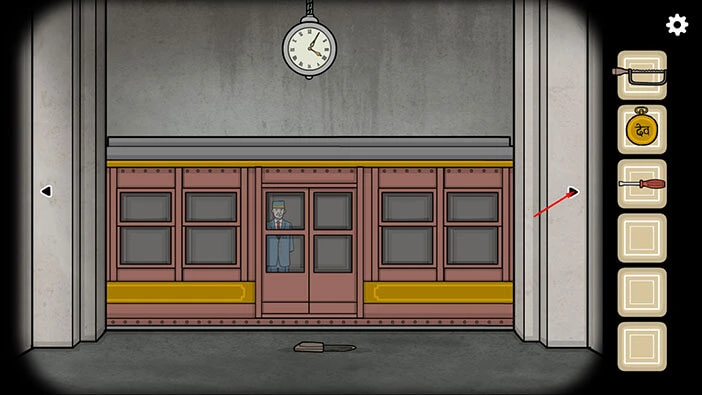
On the right side of the wall, you will see the panel labeled “Tickets”. Let’s tap on it to take a closer look.
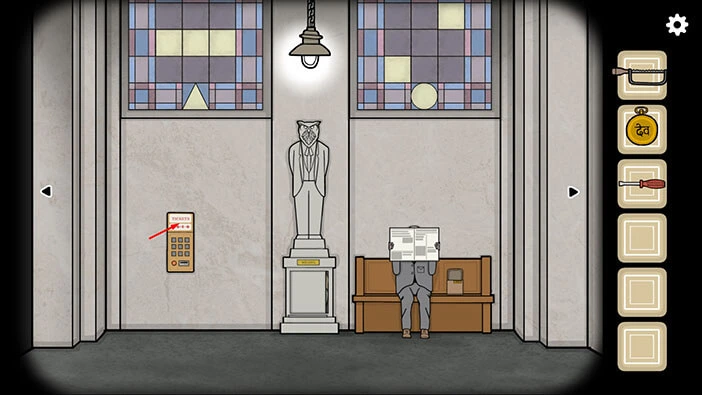
Below the label “Ticket”, you will see triangle + circle + rectangle – rhombus. You don’t have to memorize this information, because we will use it later, on this same panel.
If we look at the middle of the panel, we will see a 3×3 grid. Just take note of this information.
Once you’re done, tap on the arrow at the bottom of the screen to go back.
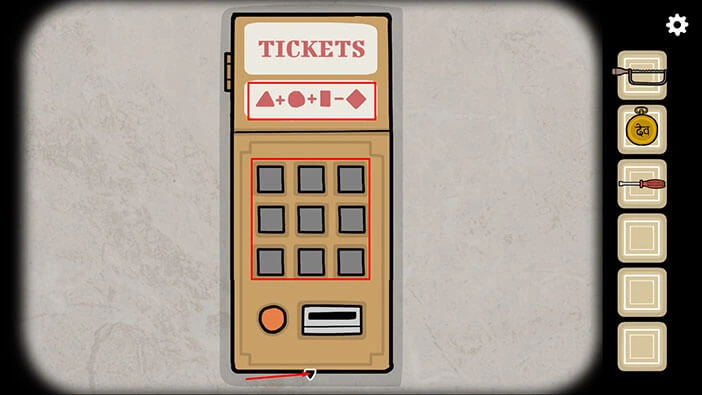
If you take a look at the two windows in this room, you will notice a “Triangle” on the window in the top left corner, and a “Circle” on the window in the top right corner.
So, let’s first take a closer look at the window in the top left.
Here, we can see a “Triangle” at the bottom of the window. In the middle of the window, we can see three by three grid (the same as the grid that we saw on the tickets panel). You will notice that the three squares on this grid are highlighted. Let’s memorize/write down this information.
Triangle = first square in the second row, second square in the second row, and third square in the second row.
Next, let’s take a look at the window in the top right.
Here, we can see a “Circle” at the bottom of the window. In the middle of the window, we can see three by three grid. You will notice that the two squares on this grid are highlighted. Let’s memorize/write down this information.
Circle = third square in the first row, first square in the third row.
We now have the information for the first two windows (Triangle and Circle), so let’s take a look at the two remaining windows. Tap twice on the arrow on the right to go to the room with the newspaper’s photo service.
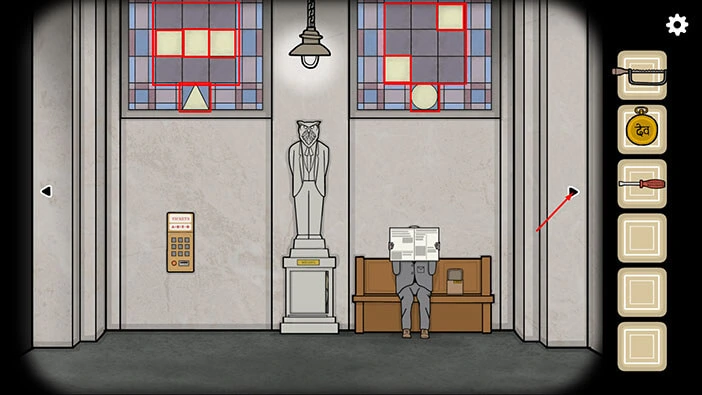
Here, we can also see two windows. Let’s examine them.
Let’s take a closer look at the window in the top left.
Here, we can see a “Rectangle” at the bottom of the window. In the middle of the window, we can see three by three grid (the same as the grid that we saw on the tickets panel). You will notice that the two squares on this grid are highlighted. Let’s memorize/write down this information.
Rectangle = first square in the first row, third square in the third row.
Next, let’s take a look at the window in the top right.
Here, we can see a “Rhombus” at the bottom of the window. In the middle of the window, we can see three by three grid. You will notice that the two squares on this grid are highlighted. Let’s memorize/write down this information.
Rhombus = first square in the second row, third square in the second row.
Ok, we now have all the information that we need to solve the “Ticket” puzzle, so let’s go back to the room with Mr. Owl. Tap twice on the arrow on the left.
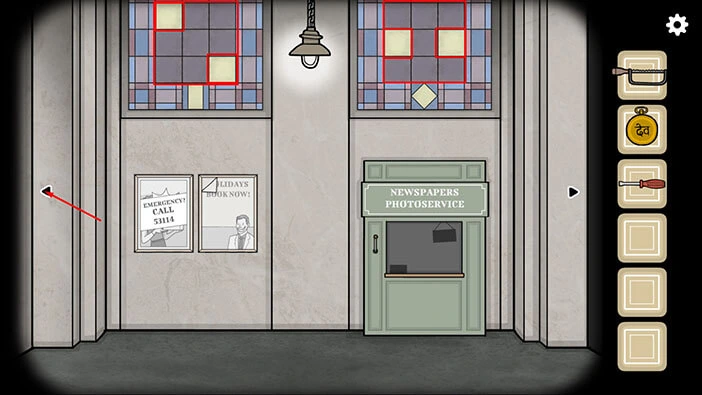
Tap on the “Tickets” panel to start the interaction.
The first symbol is the Triangle, so let’s tap on the highlighted squares on the window marked with this symbol.
So, tap on all squares in the second row (first square in the second row, second square in the second row, and third square in the second row) to activate them.
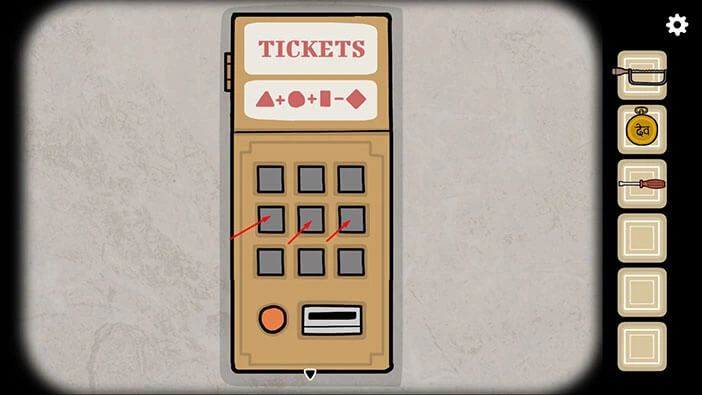
Next, we can see Triangle + Circle, so let’s tap on the highlighted squares on the window marked with Circle.
So, tap on the third square in the first row and, the first square in the third row.
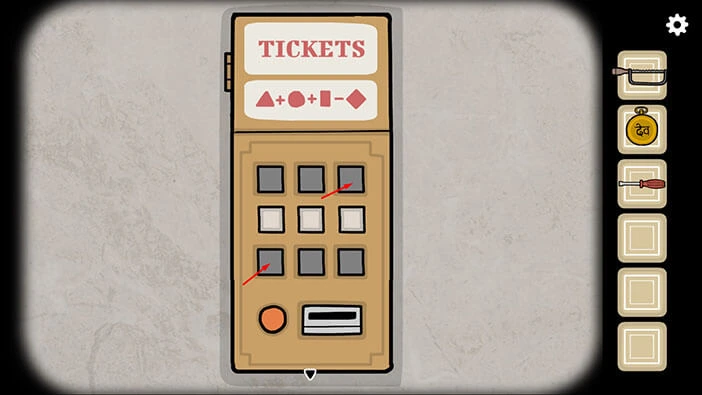
Next, we can see Triangle + Circle + Rectangle, so let’s tap on the highlighted squares on the window marked with Rectangle.
So, tap on the first square in the first row and, the third square in the third row.
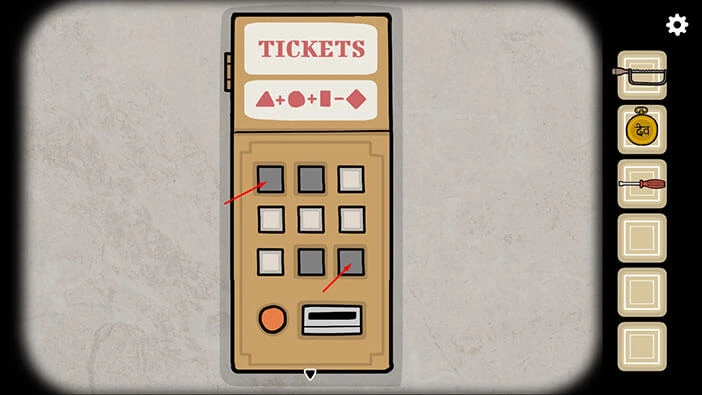
Next, we can see Triangle + Circle + Rectangle – Rhombus, so let’s tap on the highlighted squares on the window marked with Rhombus.
So, tap on the first square in the second row, and the third square in the second row. You will deactivate these two squares.
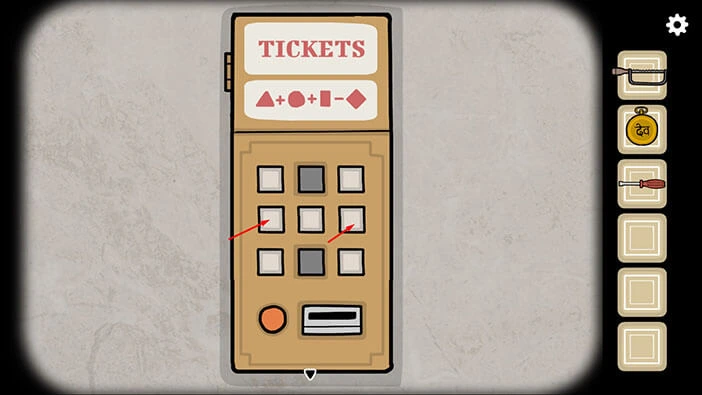
Ok, we completed the instructions, so let’s tap on the “Red button” located in the lower-left corner of the panel to activate the ticket machine.
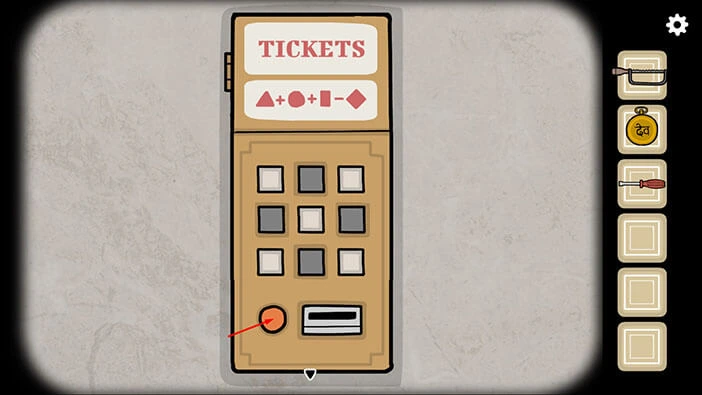
Yup, we entered the correct combination, and the ticket rolled out from the slot. Tap on the “Metro ticket” to pick it up.
After that, tap on the arrow at the bottom of the screen to go back.
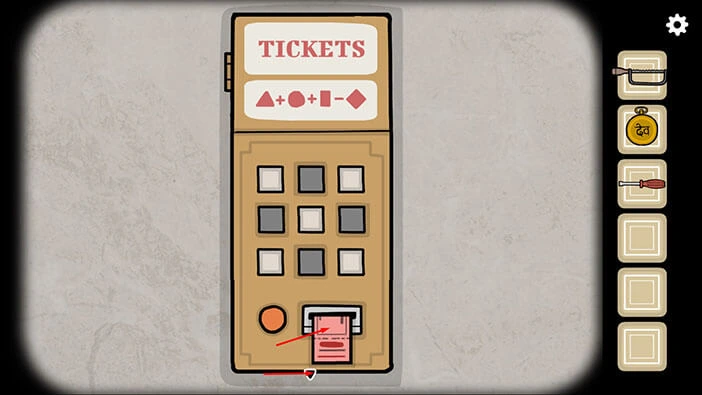
Let’s board the train and proceed to the next station. Tap once on the arrow on the left.
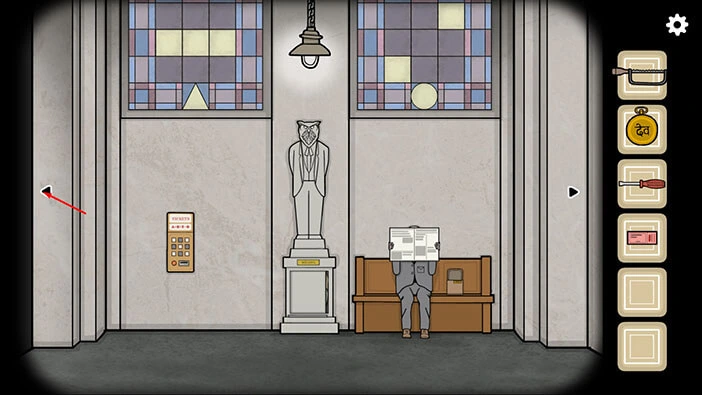
Tap on the train door to open it, then tap on the ticket collector to start the interaction. He will tell you that you need a ticket in order to board the train.
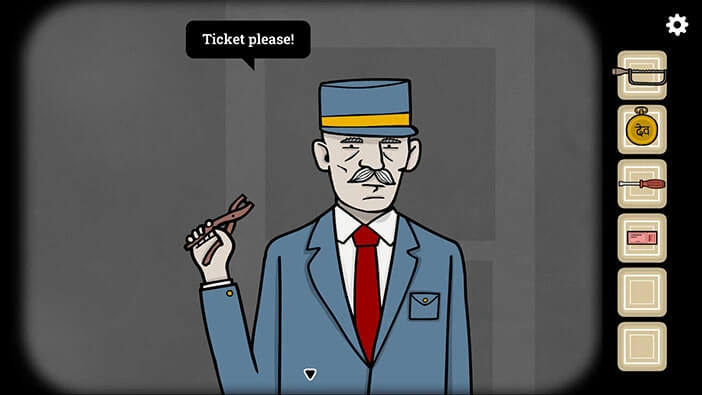
So, select the “Metro ticket” from the inventory and give it to the ticket collector.

Tap on the ticket punch to open it, then drag the ticket below it.
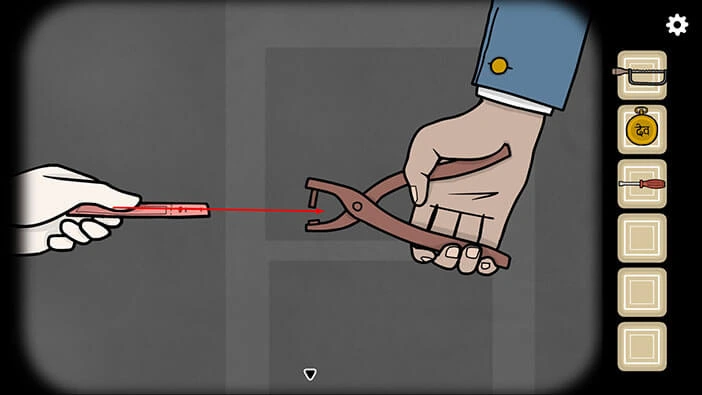
Tap on the ticket punch to complete the interaction.

Tap on the ticket collector to complete the conversation, then tap on the train door to board the train.
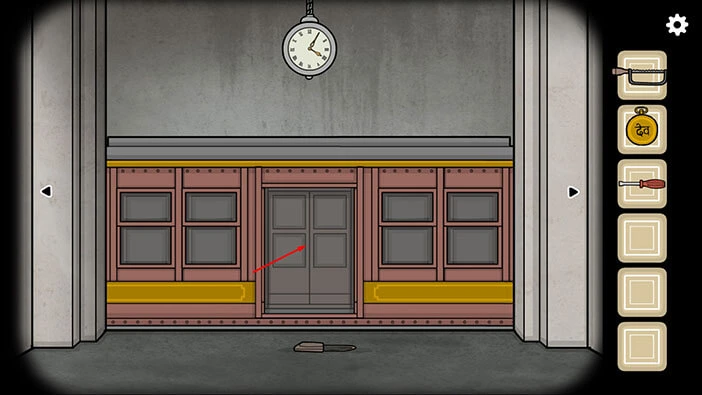
We reached the end of the second chapter of the walkthrough. You can check out the walkthrough for the third chapter, the “School Street” station, by tapping on the “Next Part” button.
Thank you for reading.