The Echo Bay Murders – Chapter VI
Hello everyone, and welcome to our walkthrough for Chapter 6 of “The Echo Bay Murders” another game in the series of AE mysteries, developed and published by Haiku Games.
In the previous chapter, Kate woke up in a jail cell, but fortunately, Darius arrived and confirmed her identity. Nicholas, the police officer, released her after checking in with his superiors. Next, Nick brought her luggage, and after she cleaned up and changed her clothes, they decided to work together on the case (still unofficially). Kate’s first task was to chronologically arrange Darius’s clues.
After some time she discovered that there was a search warrant for the suspect’s company. Well, all of them agreed that getting the approval for this warrant would be the fastest way to find and arrest the suspect. Nick mentioned that he has the DNA sample found inside the car of the previous victim, Ellie. Kate got an idea. She could match this DNA sample with the suspect’s blood which the police officers gathered after the shootout on the bridge. So, if they get a match, Commissioner will probably approve the warrant without further delays, and they will be able to look for Benjamin Lee at “Lepat Fishing Company”. Well, that’s exactly what happened, and our story continues at the “Lepat Fishing Company”.
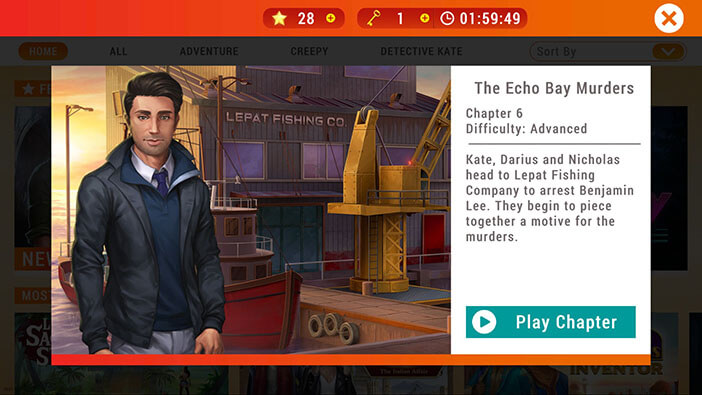
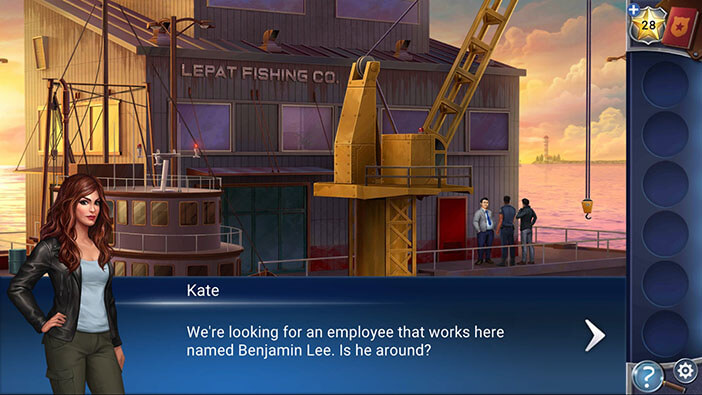
Kate approaches a man in front of the office of “Lepat Fishing Company” and informs him that she’s looking for Benjamin Lee. Darius is furious, and he almost punches the man, but Kate stops him, explaining that the man in front of them isn’t their suspect.
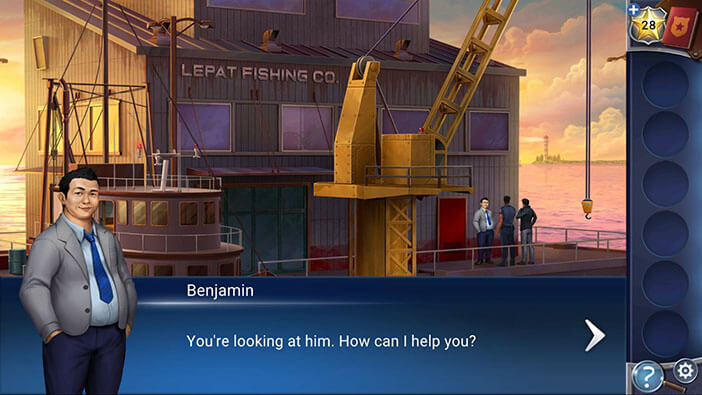
The man wants to know if they are inquiring about him because his company is under investigation. Benjamin explains that he received a notice a few days informing him that “Human remains were found in the harbor along the delivery route of his company”. He tries to dispel their suspicion, explaining that his company existed for 60 years, and they never had trouble with authorities.
However, Nick informs him that a man, who was driving a vehicle registered under Benjamin’s name, shot at detective Kate. Needless to say, the police officer demands an explanation.
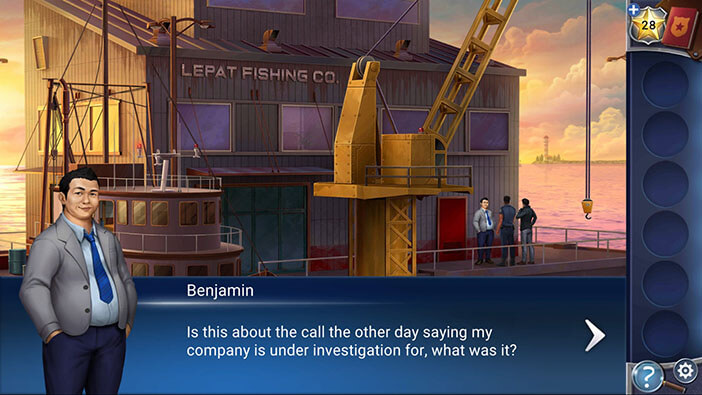
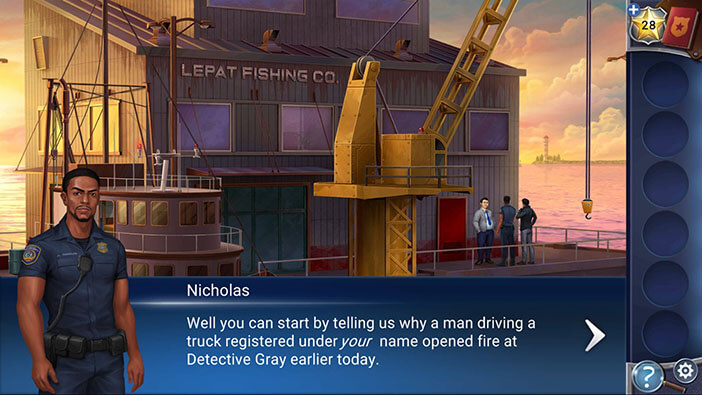
Benjamin explains that he has a business partner. All the trucks are registered under Benjamin’s name, while boats are registered under his partner’s name, which is Luca Patel.

Darius wants to know more about Luca, more specifically, he wants to know if Benjamin noticed something suspicious about his partner’s behavior. However, looks like this will be a dead end because Benjamin informs them that Luca always kept to himself. He further explains that both he and Luca inherited the business from their fathers, who were very good friends. On the contrary, Benjamin and Luca had only very limited contact. So, this guy probably won’t be of much help with the investigation.
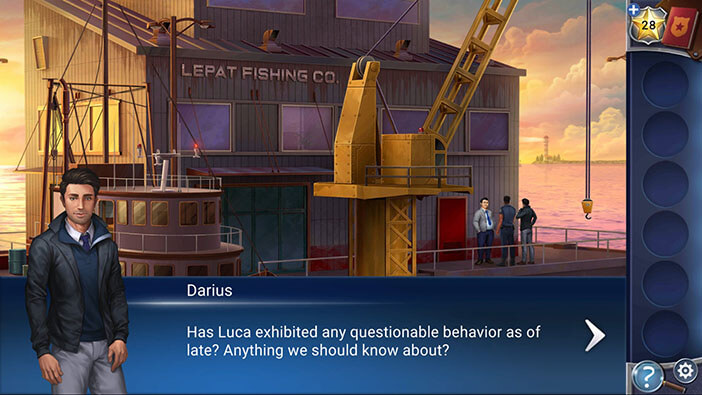
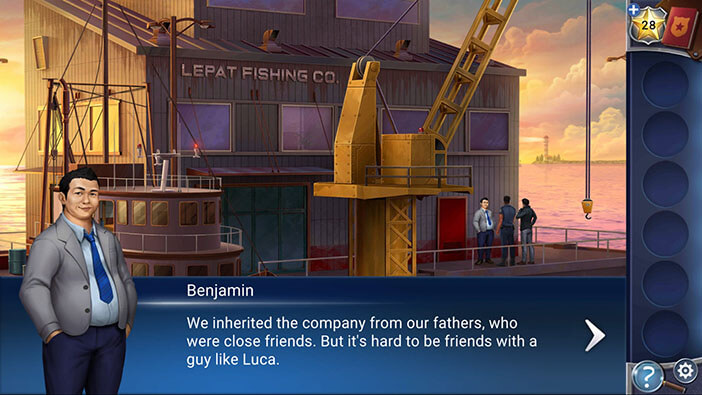
Well, since the boats are registered under Luca’s name, Kate would like to take a look around. In the meantime, Nick and Darius will ask him some questions concerning Luca. Benjamin agrees, and with that, he, Darius, and Luca go into the office.
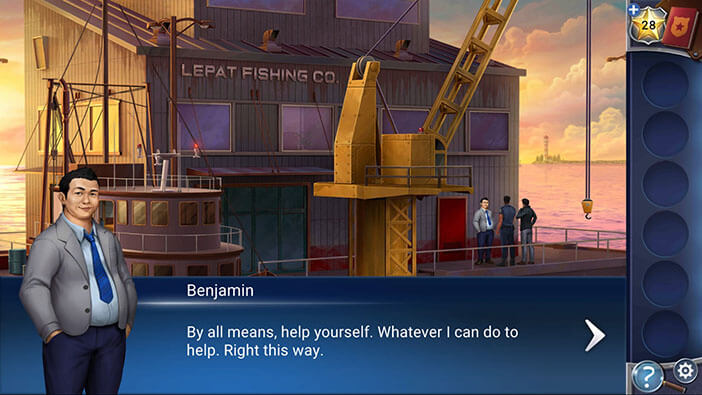
If you look to the right, you will notice a piece of paper. Tap on it to pick it up and a “Torn note” will be added to your inventory.

Next, tap on the boat to proceed inside.
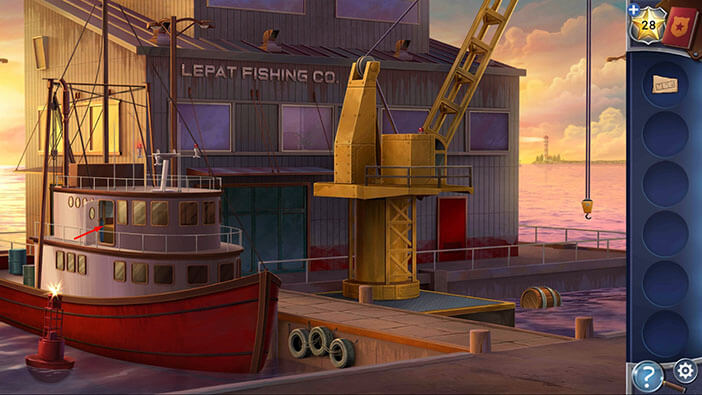
First, tap on the top drawer to open it, and inside you will find another “Torn note”. Tap on it to pick it up.

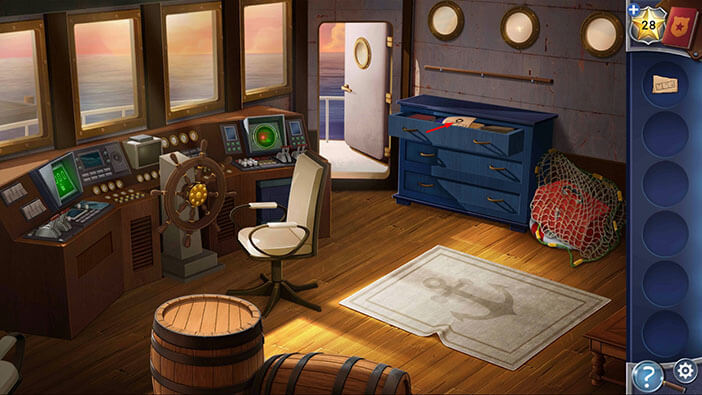
Next, tap on the middle drawer to open it and you will find “Binoculars”. Pick them up.


Lastly, tap on the bottom drawer to open it, and inside you will find a “Knife”. Tap on it to pick it up.
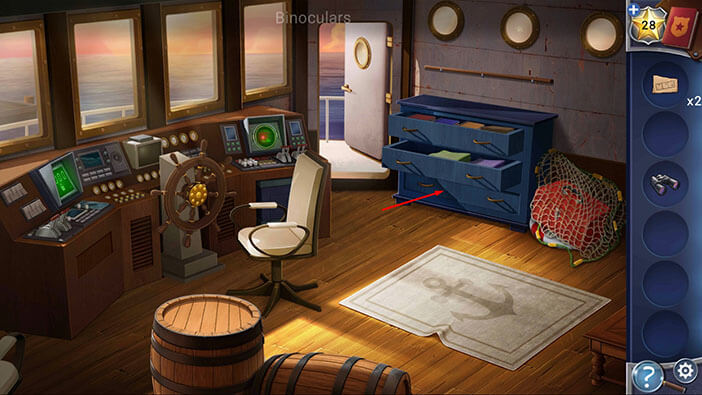
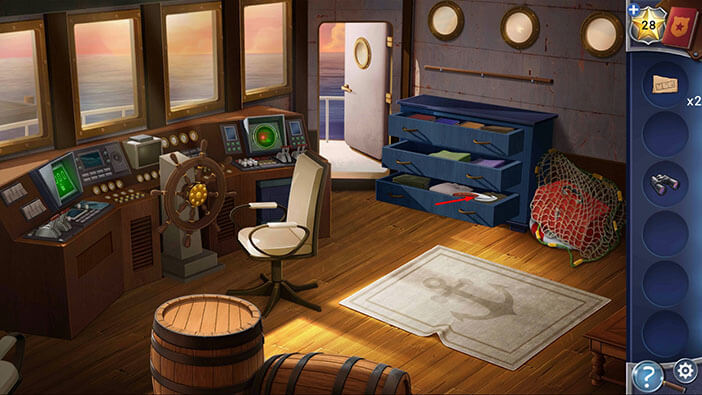
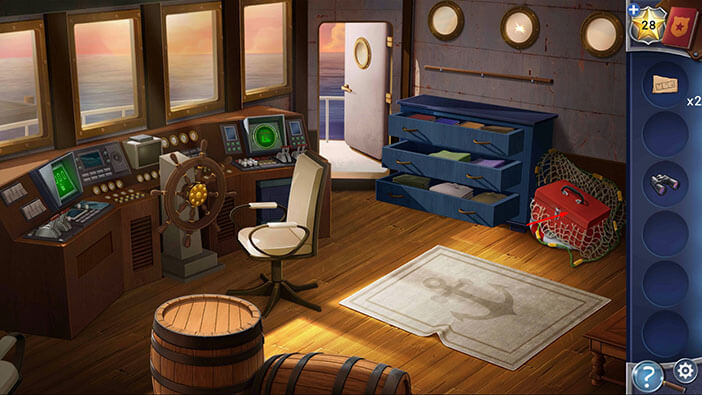
Next, select the “Knife” from the inventory and use it to cut open the fishing net, located in the right corner of the cabin.
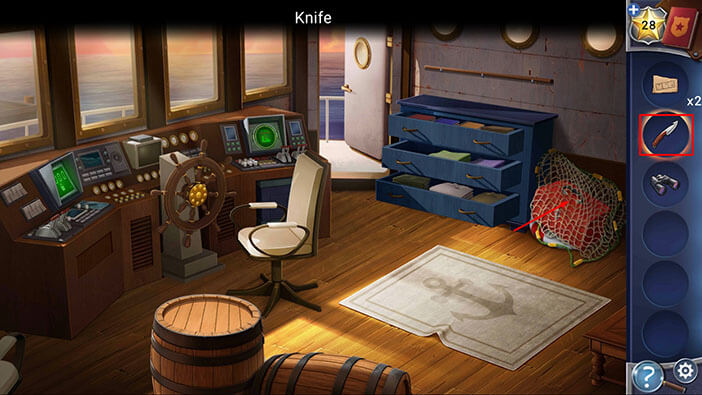
Tap on the red box to open it, then tap on the “Hammer and Chisel” to pick them up.
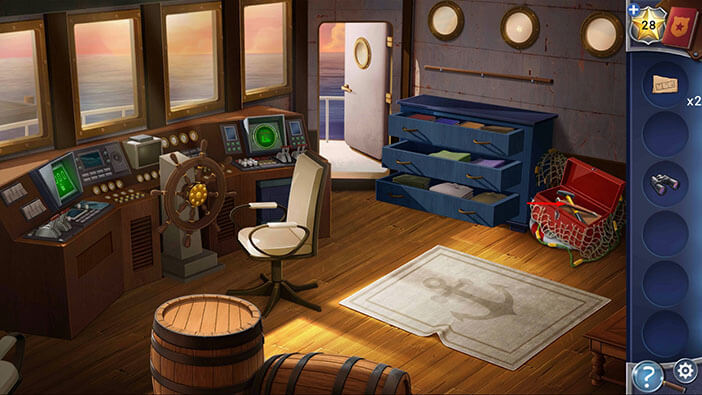
Ok, now, select the “Hammer and Chisel” from the inventory and use them to open the barrel on the left.
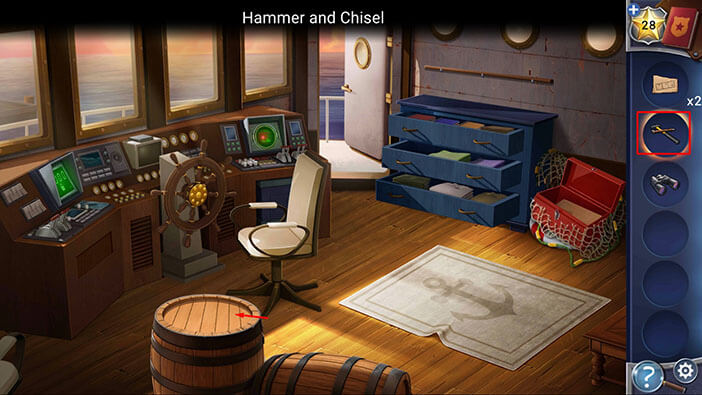
Inside the barrel, you will find a “Key”. Tap on it to pick it up.

Next, tap on the rug to move it aside, and you will find a hidden trapdoor.
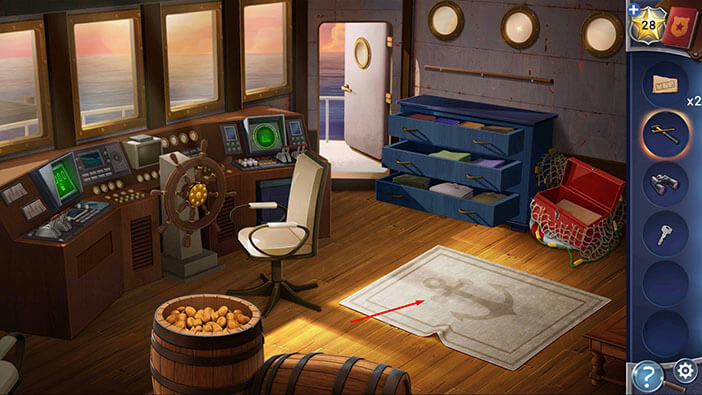
Select the “Key” from the inventory and use it to unlock the padlock.
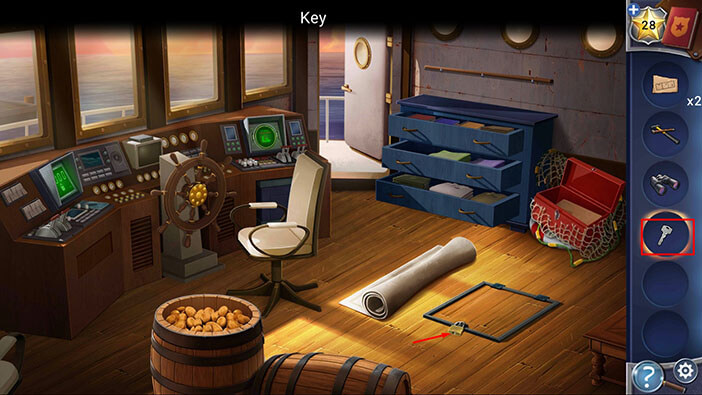
Tap on yet another “Torn note” to pick it up.
After that, tap on the “Hook” to pick it up.

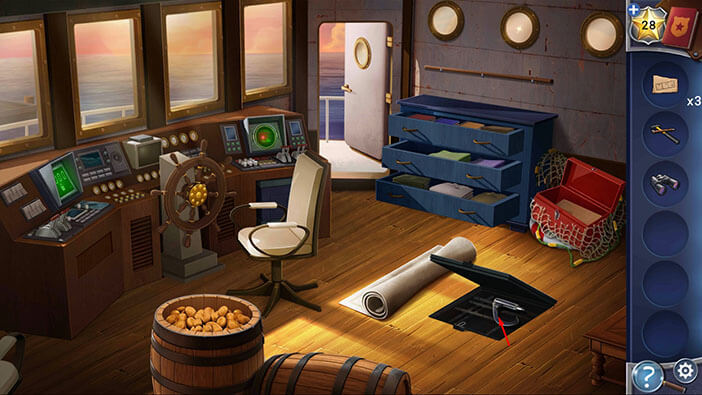
Ok, now, select the “Hook” from the inventory and attach it to the wooden pole on the right. “Logging Hook” will be added to your inventory.
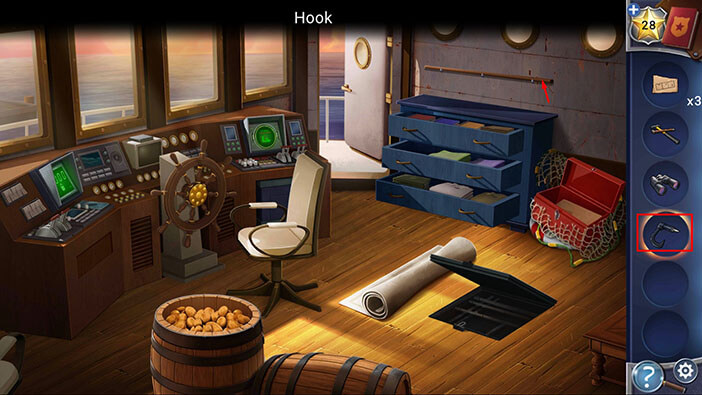
Well, we’re done here, at least for now. So, tap on the front door to go back outside.

Select the “Logging Hook” from the inventory and use it to “fish out” the wooden barrel from the water.
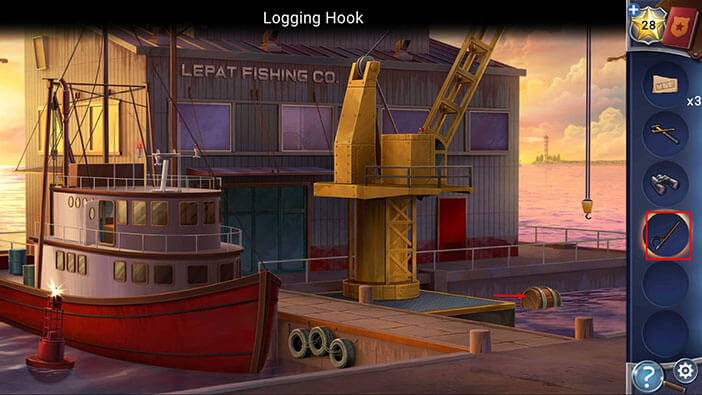
Ok, we should select the “Hammer and Chisel” from the inventory and use them to open another barrel.
Well, so far, Kate has been doing some very hard labor at the docks, so she might gain some serious muscles.
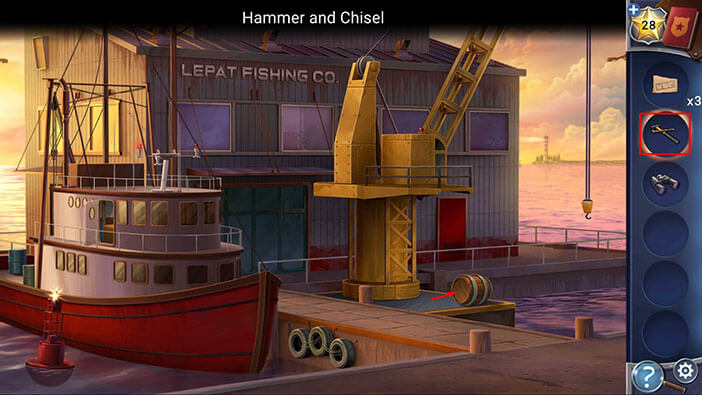
Inside the barrel, you will find yet another “Torn Note”. Tap on it to pick it up.
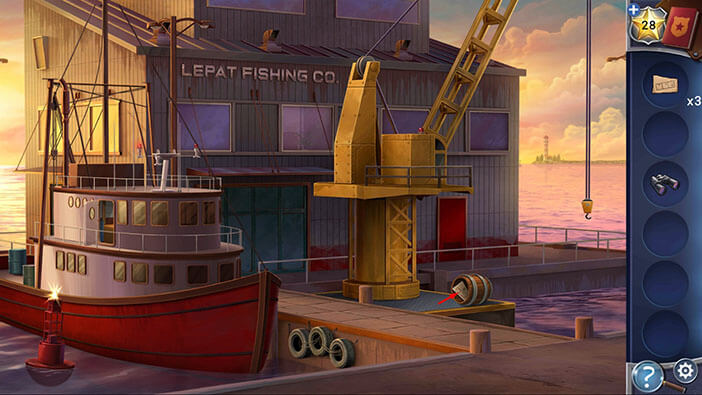
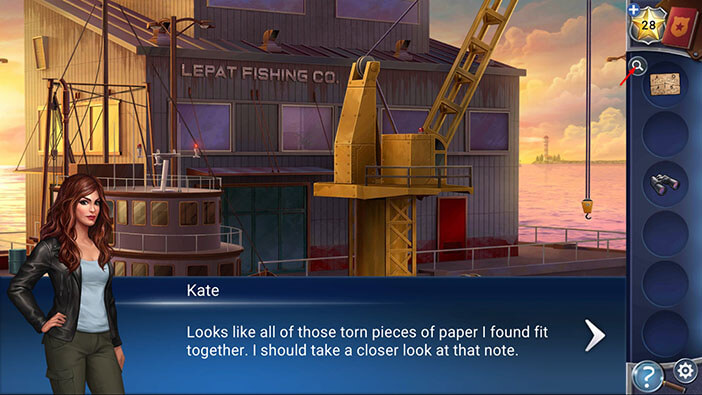
Well, looks like this was the last piece, and Kate was able to assemble the note. Let’s take a closer look at it.
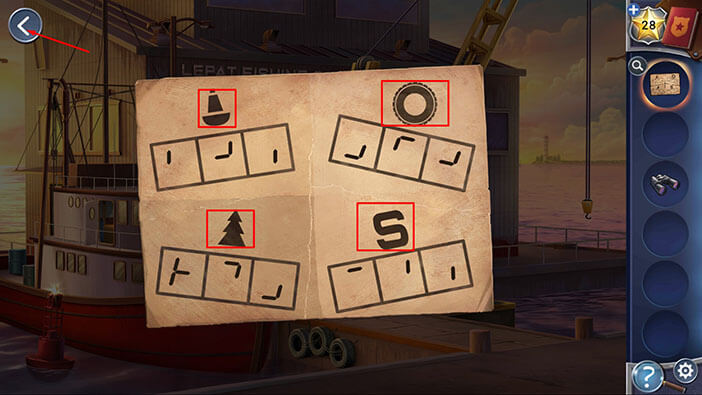
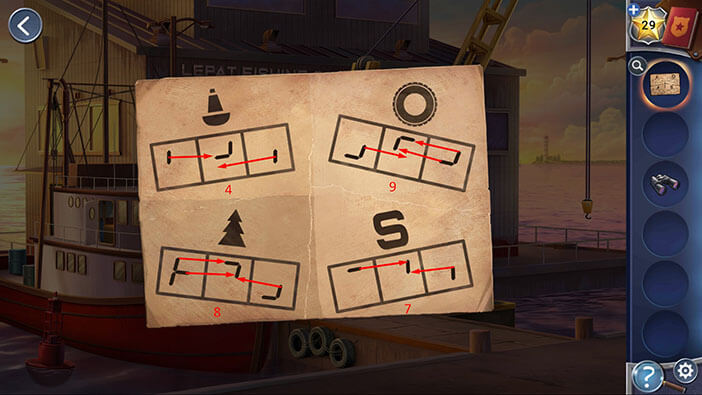
Ok, here we can see four symbols, a buoy, a tire, a tree, and the letter “S”.
Below each symbol, there are also three fields, and inside each field, we can see some lines. We will come back to that.
For now, memorize/ write down the four symbols, then tap on the arrow in the upper left corner to go back.
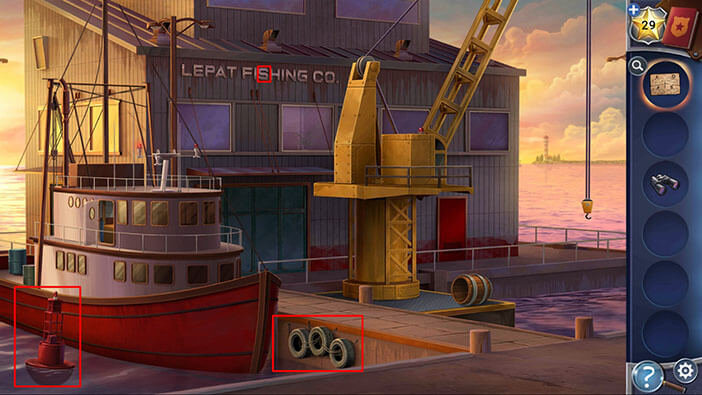
Ok, let’s look for symbols.
On the building in front of us, we can see the “Lepat Fishing CO” sign. So, here we have a single letter “S”.
If you look to the right of the bow of the boat, you will see three tires.
To the left of the boat, we can see a single buoy.
Memorize or write this information. So,
“S” = 1
Tires = 3
Buoy = 1
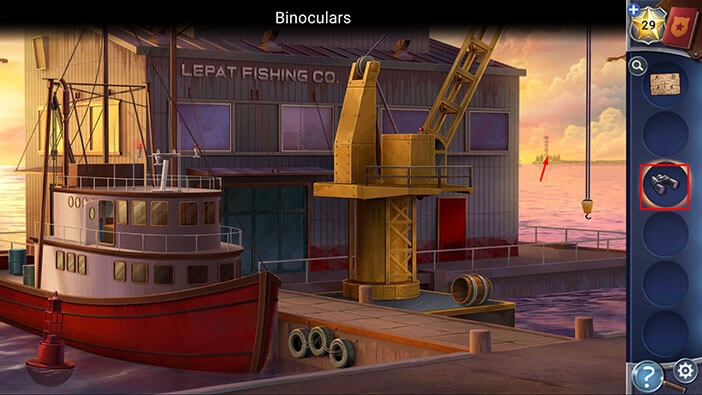
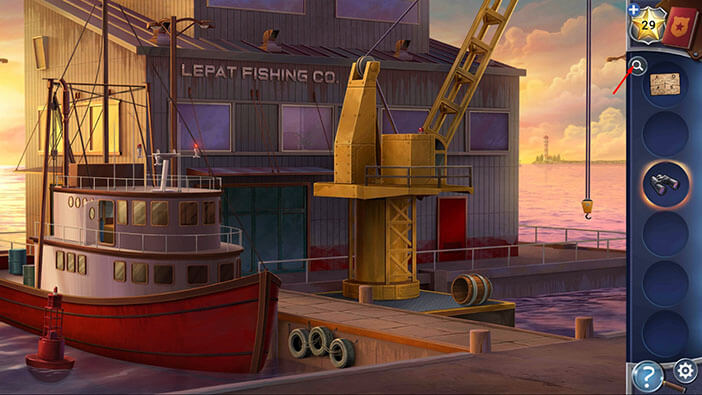
Next, select the binoculars from the inventory and take a look at the lighthouse which is some distance away (on the right).
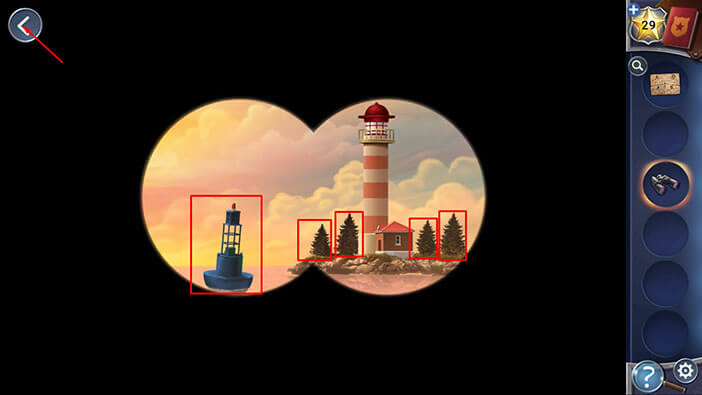
Here, we can see four trees and another buoy.
When we added it all together, we will get,
“S” = 1
Tires = 3
Buoy = 2
Trees = 4
You probably already guessed that the quantity of a certain item represents the chronological order of the symbols (1, 2, 3, and 4). Memorize/ write it down.
As a side note, that lighthouse reminds me of something naughty…
Once you’re done, tap on the arrow in the upper left corner to go back.
Ok, let’s take a look at the note, again.
If you closely examine the lines in the fields below the symbols, you might notice that by merging the three lines you could probably form some shape.
When you start playing around with this idea, you will realize that lines in the three fields below the symbols will actually form a certain number.
So, let’s check this out.
The lines below the buoy will form number 4.
The lines below the tire will form number 9.
The lines below the tree will form number 8.
The lines below the letter “S” will form number 7.
Ok, we have the numbers, and we already determined the chronological order of the symbols (but counting the number of symbols on the screen), so let’s arrange them.
The first symbol is the letter “S” (because we only found one letter “S”) and the number below the letter “S” is 7. So, the first number is 7.
The second symbol is the letter buoy and the number below the buoy is 4. So, the second number is 4.
The third symbol is the tire and the number below the tire is 9. So, the third number is 9.
The fourth symbol is the tree and the number below the tire is 8. So, the fourth number is 8.
When we put it all together, we will get the code “7498”. Memorize/write down this code, then tap on the arrow in the upper left corner to go back.
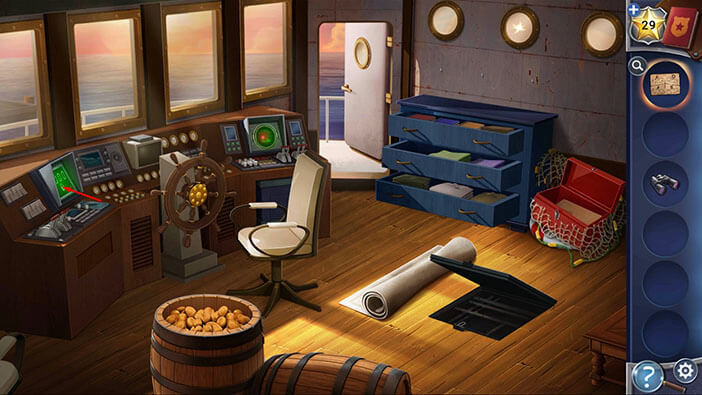
Let’s go back into the boat cabin.

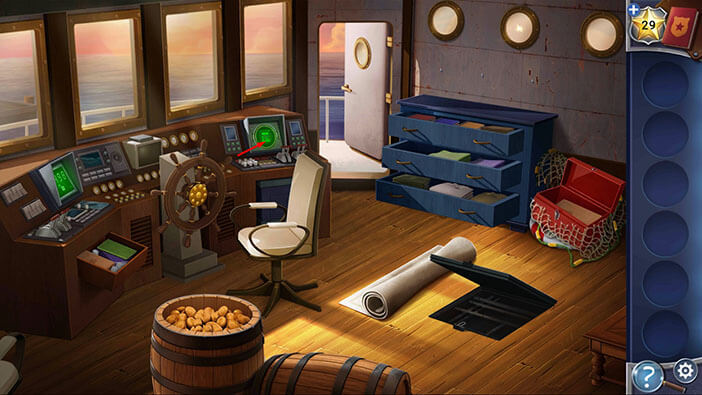
Tap on the green screen on the left to start the interaction.
Here, we will need a four-digit code in order to unlock the controls. Luckily, we already discovered the four-digit code by solving the “Note puzzle”.
So, enter the code “7498”.
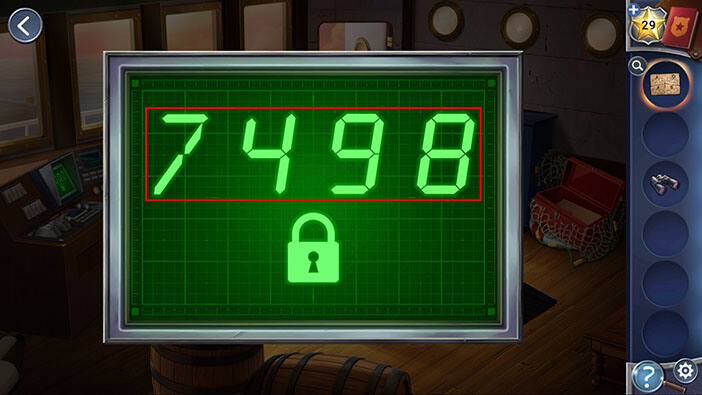
By entering the correct code, you will unlock the drawer below the screen, and inside you will find the “Garage Remote”. Tap on it to pick it up.

Let’s go back outside.
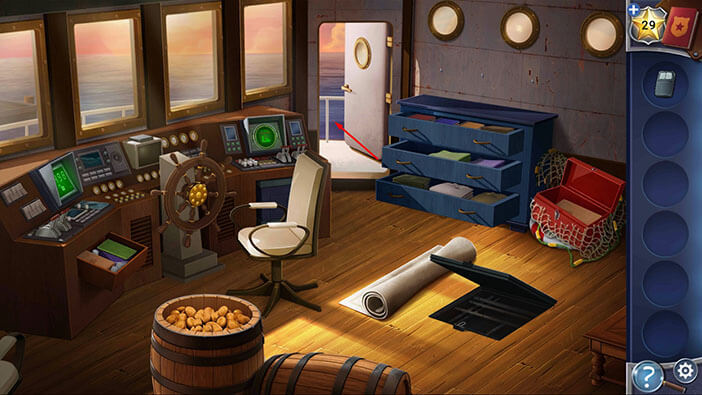
Select the “Garage Remote” from the inventory and use it to open the garage door (just to the right of the boat).

Tap on the “Satellite” to pick it up.
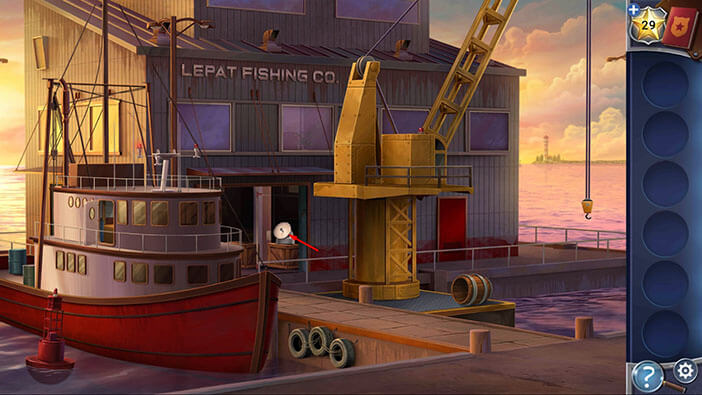
Select the “Satellite” from the inventory and install it on the top of the boat.
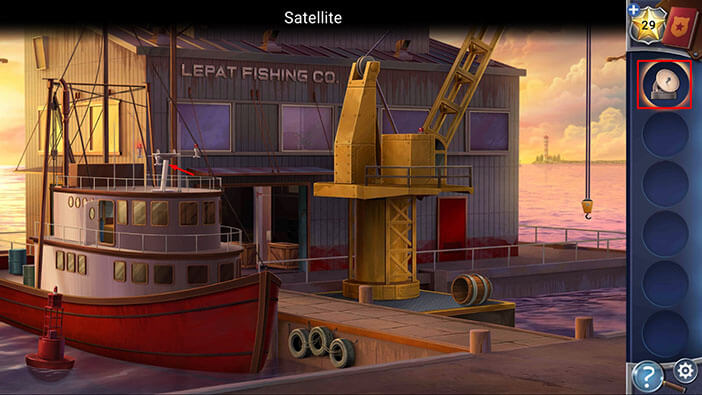
Ok, it seems that we managed to activate the boat’s radar. Let’s go back into the cabin to check it out.

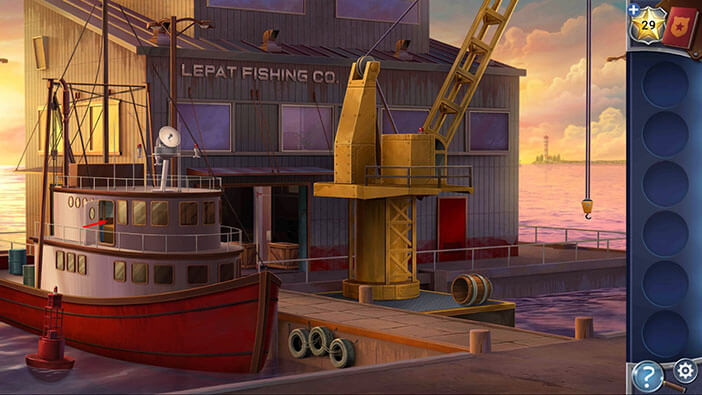
Tap on the screen on the right to take a closer look at it. After that, tap on the “Scan” button.
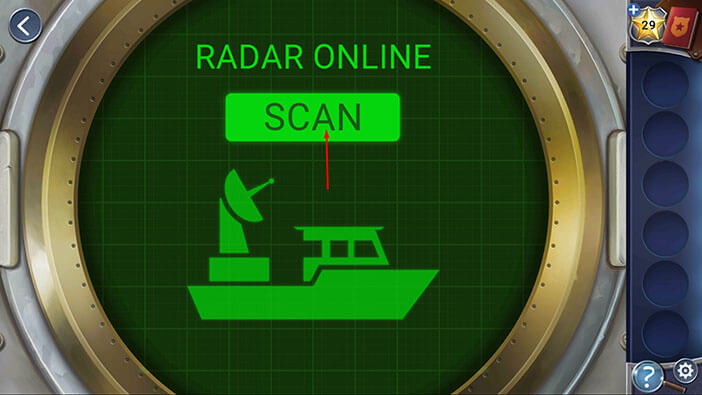
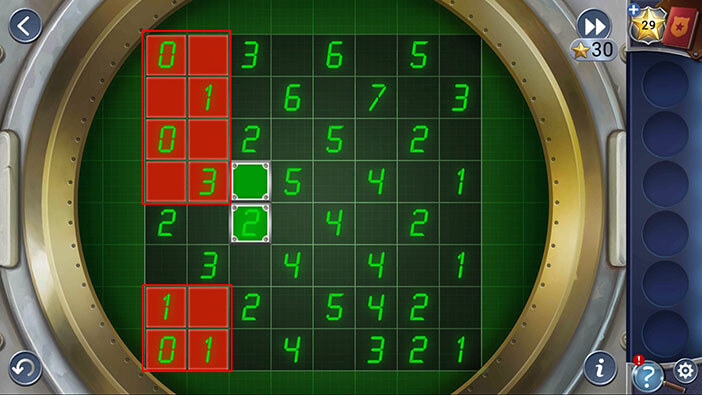
Here we have another minigame, which is very similar to minesweeper. The numbers on the grid indicate the amount of nearby green tiles, including all the neighboring tiles, plus the tile of the number itself. So, there could be at most 9 tiles associated with any single number.
Also, we already have two locked green tiles.
Our task is to determine which tiles should be green and change their color by tapping on them once. We also have to determine which tiles should be red, and we can change their color by tapping on them twice. Let’s begin.
Step 1
We will start with the number 0. The number 0 tile, and all tiles around it should be red because 0 indicates that there are no green tiles associated with it.
We have three numbers 0, in the first tiles of the first, third, and eighth row. Let’s change the color of these tiles to red by tapping on them twice.
Step 2
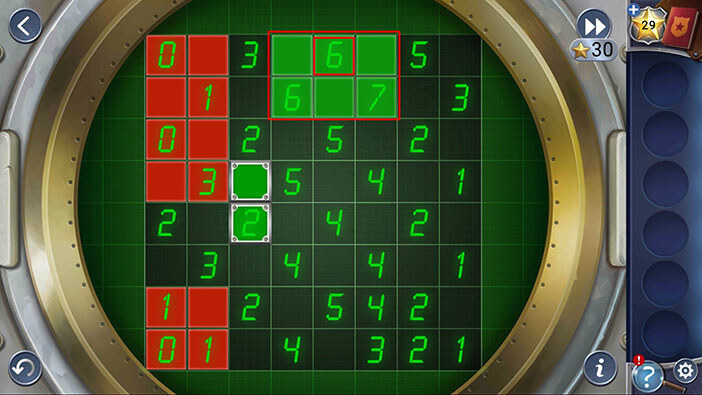
In the fifth tile in the first row, you will see the number 6. This tile can only be associated with 6 tiles. So, this tile with the number 6 and all tiles around it have to be green. Let’s change their color.
Step 3
The third tile in the fifth row is green number 2 and it’s “locked” (we can’t change its color). Right above it is another locked green tile. Well, since the number 2 in this tile already has 2 green tiles associated with it (both of them locked), all other tiles around it have to be red. Let’s change their color.
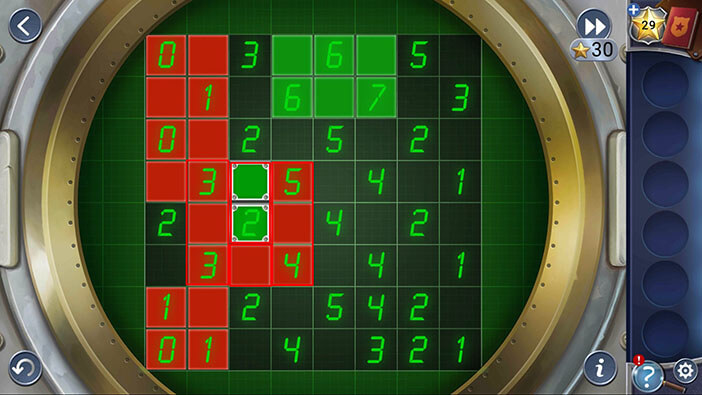
Step 4
Next, let’s take a look at the first tile in the fifth row with the number 2 inside. All tiles around it are red, except for the two tiles. So, these 2 tiles have to be green.
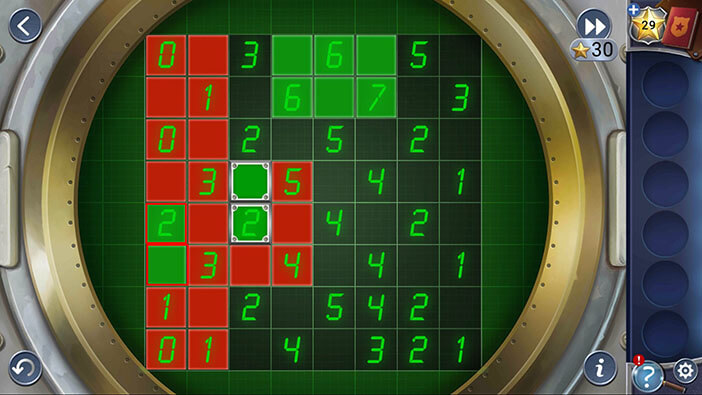
Step 5
Next, let’s take a look at the second tile in the sixth row with the number 3 inside. We can see that it is surrounded by 3 green, 5 red, and one empty tile. So, this empty tile has to be red.
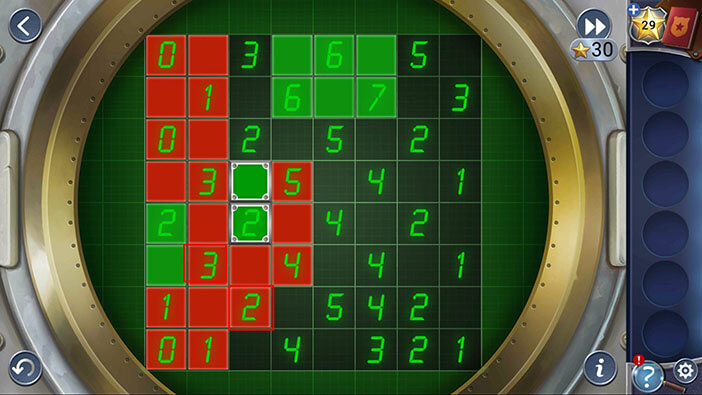
Step 6
Next, let’s take a look at the third tile in the third row with the number 2 inside. This tile is surrounded by 4 red tiles, 2 green tiles, and 3 empty tiles. So, these empty tiles have to be red (because we already have 2 green tiles).
Also, in the third tile in the first row, we have number 3, which has 2 green tiles associated with it, and only one empty tile left. So, the tile with the number 3 has to be green.
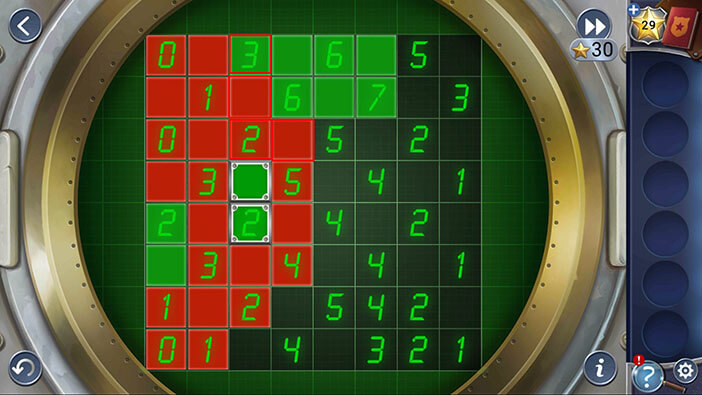
Step 7
Next, let’s take a look at the fourth tile in the fourth row with the number 5 inside. This tile is surrounded by 2 green tiles, 4 red tiles, and 3 empty tiles. So, these three empty tiles have to be green.
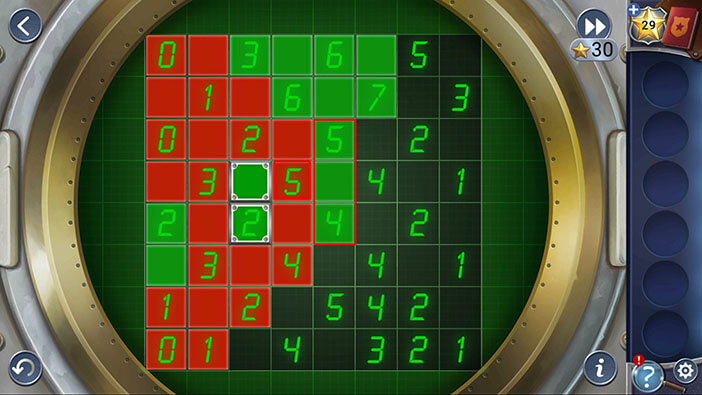
Step 8
Next, let’s take a look at the fifth tile in the third row with the number 5 inside. This tile is surrounded by 2 red tiles, 5 green tiles, and 2 empty tiles. So, 2 empty tiles have to be red.
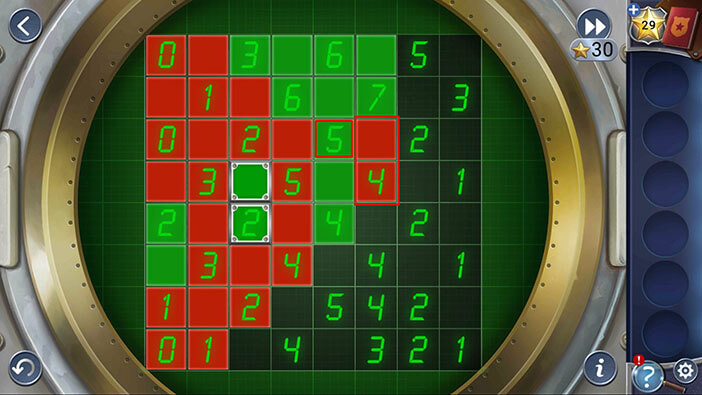
Step 9
Next, let’s take a look at the second tile in the eighth row with the number 1 inside. This tile is surrounded by 5 red tiles, and only one empty tile. So, the empty tile has to be green.
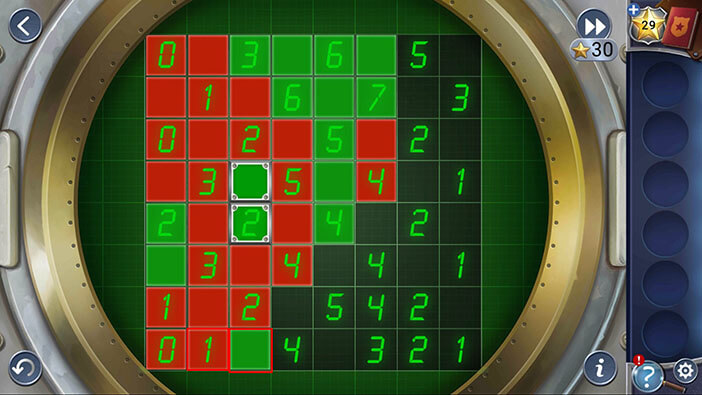
Step 10
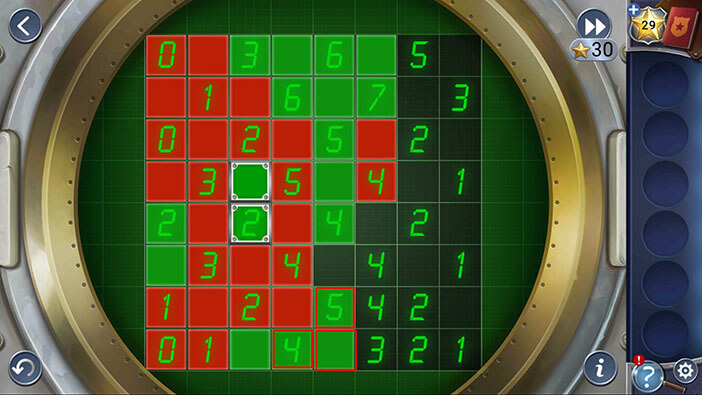
Well, now we are somewhat stuck. So, let’s take a look at the third tile in the seventh row with the number 2 inside. This tile is surrounded by 6 red tiles, 1 green tile, and 2 empty tiles. Well, one of the empty tiles has to be green and the other one red. Since we’re stuck, let’s try our luck and presume that the fourth tile in the seventh row is red and the fourth tile in the eighth row green.
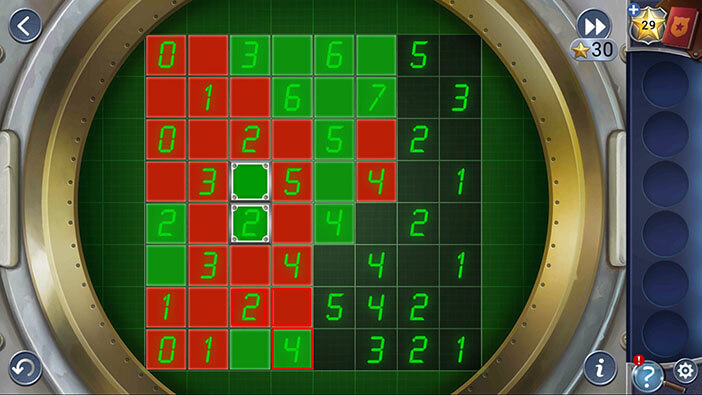
Step 11
Next, let’s take a look at the fourth tile in the fourth row with the number 4 inside. This tile is surrounded by 2 red tiles, 2 green tiles, and 2 empty tiles. So, 2 empty tiles have to be green.
Step 12
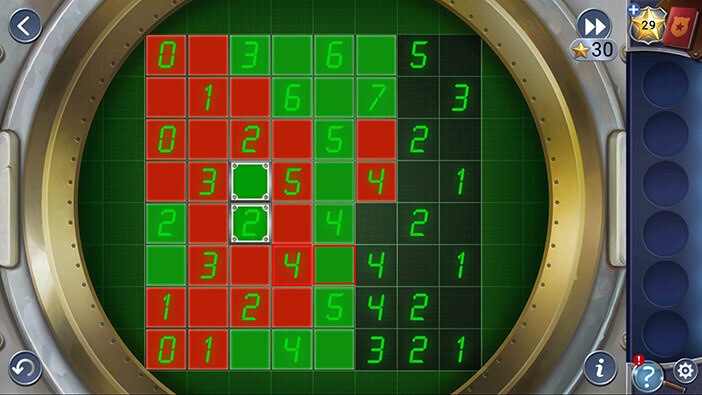
Next, let’s take a look at the fourth tile in the sixth row with the number 4 inside. This tile is surrounded by 5 red tiles, 3 green tiles, and 1 empty tile. So, the empty tile has to be green.
Step 13
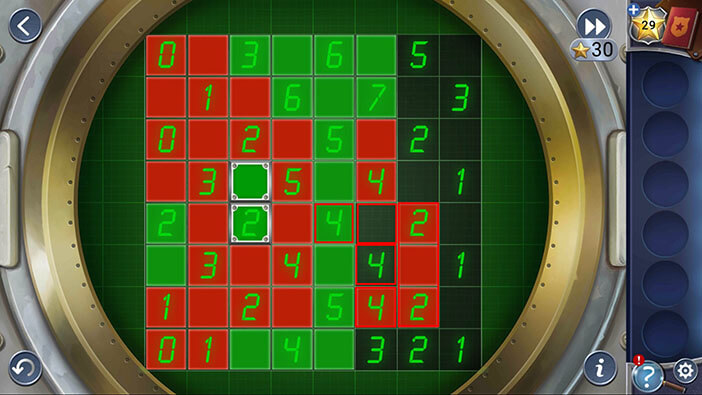
Well, here comes the truly complicated part. Let’s take a look at the fifth tile in the fifth row with the number 4 inside. This tile is surrounded by 4 red tiles, 3 green tiles, and 2 empty tiles. Well, one of the empty tiles has to be green and the other one red. So, either the sixth tile in the fifth row has to be green, or the sixth tile in the sixth has to be green. Whichever of these two we turn green, will affect the seventh tile in the sixth row with number 4 inside. Why? Well, if either of the aforementioned tiles is green, this tile (seventh in the sixth row, number 4) will be connected to 4 green tiles. So, the other 4 tiles that it’s bordering will have to be red.
Step 14
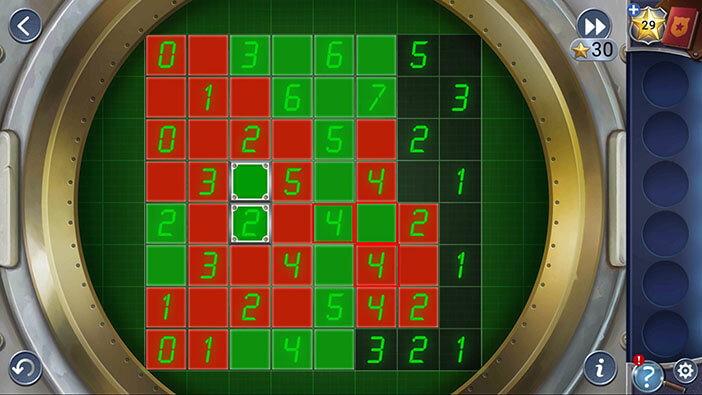
Well, despite my best efforts, it seems that we’re stuck, once more. So, let’s take another look at the fifth tile in the fifth row with the number 4 inside. We took a look at this tile in the previous step, and we already know that it is surrounded by 4 red tiles, 3 green tiles, and 2 empty tiles. Also, we know that one of the empty tiles has to be green and the other one red. So, let’s presume that the sixth tile in the fifth row is green, then the sixth tile in the sixth has to be red.
Step 15
Next, let’s take a look at the sixth tile in the fourth row with the number 4 inside. This tile is surrounded by 3 red, 4 green, and 3 empty tiles. Well, since it’s already connected with 4 green tiles, the empty tiles have to be red.
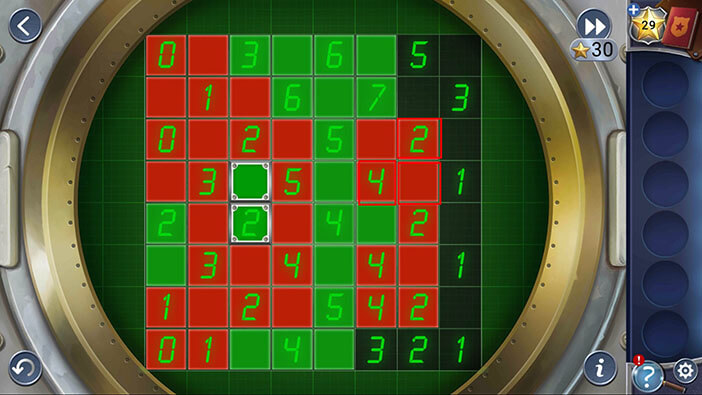
Step 16
Next, let’s take a look at the sixth tile in the second row with the number 7 inside. This tile is surrounded by 2 red, 5 green, and 2 empty tiles. So, the empty tiles have to be green.
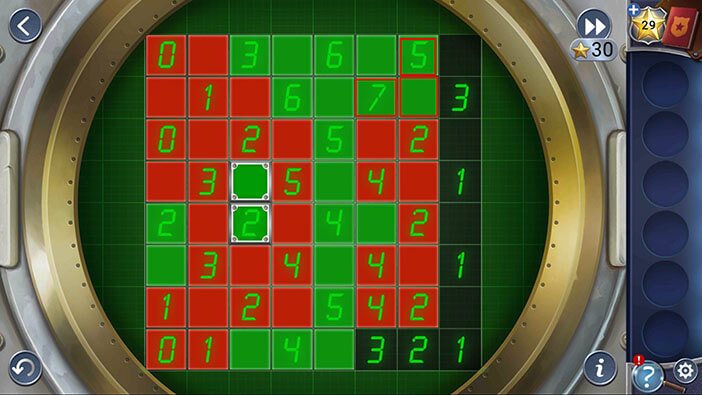
Step 17
Next, let’s take a look at the seventh tile in the third row with the number 2 inside. This tile is surrounded by 4 red, 2 green, and 3 empty tiles. So, since it’s already connected to the 2 green tiles, 3 empty tiles have to be red.
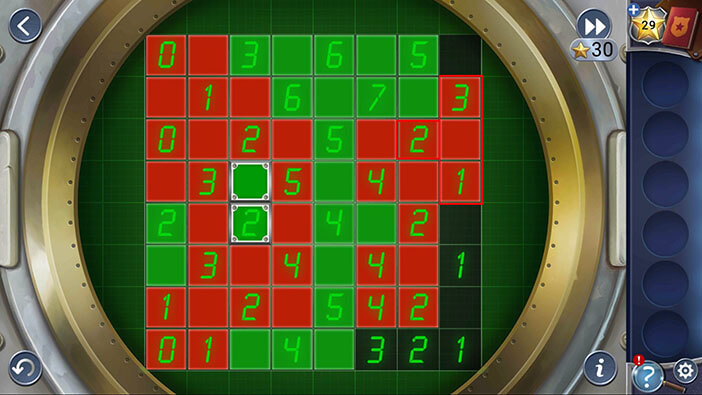
Step 18
Next, let’s take a look at the seventh tile in the first row with the number 5 inside. This tile is surrounded by 1 red, 4 green, and 1 empty tile. So, the empty tile has to be green.
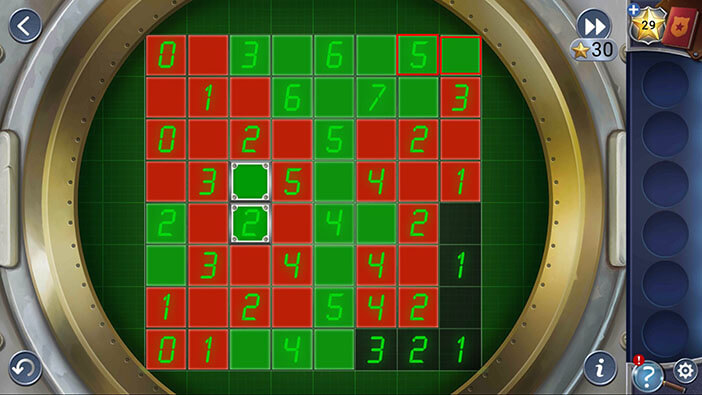
Step 19
Next, let’s take a look at the eighth tile in the fourth row with the number 1 inside. This tile is surrounded by 5 red and 1 empty tile. So, the empty tile has to be green.
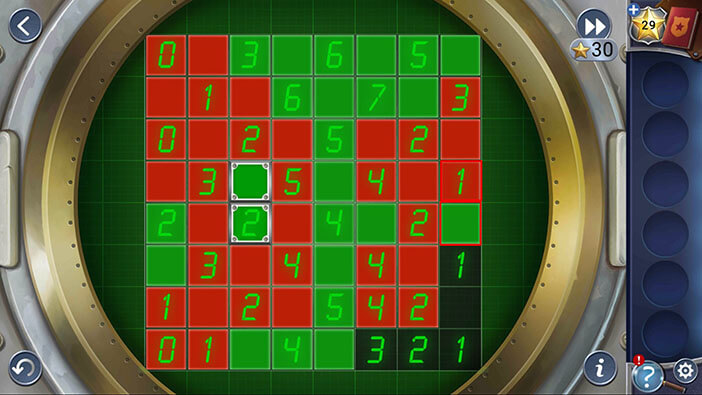
Step 20
Next, let’s take a look at the seventh tile in the fifth row with the number 2 inside. This tile is surrounded by 6 red, 2 green, and 1 empty tile. So, the empty tile has to be red.
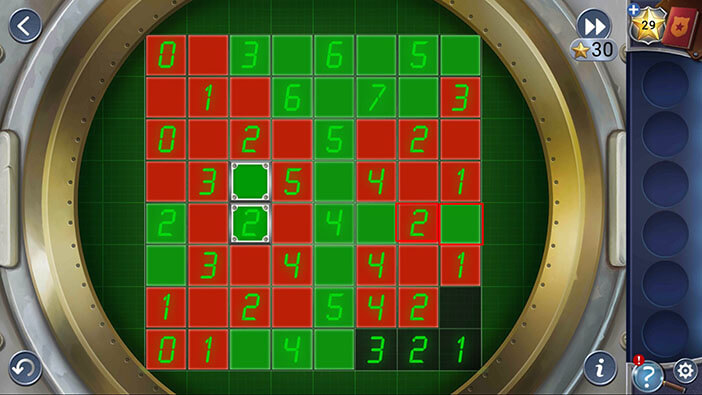
Step 21
Next, let’s take a look at the eighth tile in the sixth row with the number 1 inside. This tile is surrounded by 4 red, 1 green, and 1 empty tile. So, the empty tile has to be red.
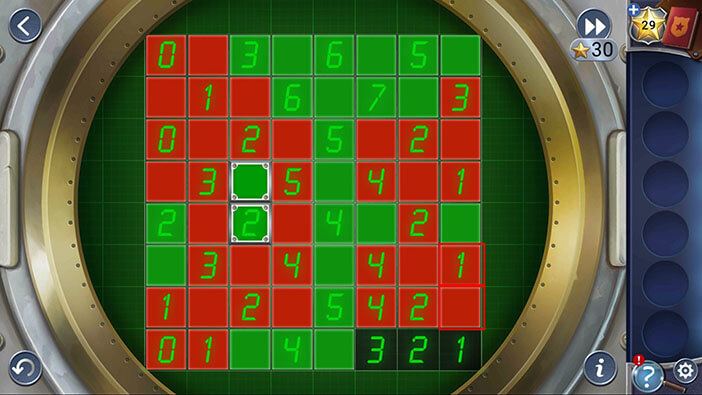
Step 22
Ok, we have reached the last three tiles. The tile with number 1 needs a green tile. So, let’s say that tile number 1 is green, tile number 2 is red, and tile number 3 is green.
With that, we finally solved this puzzle. I have to admit that this puzzle was extremely difficult. Probably the hardest one so far.
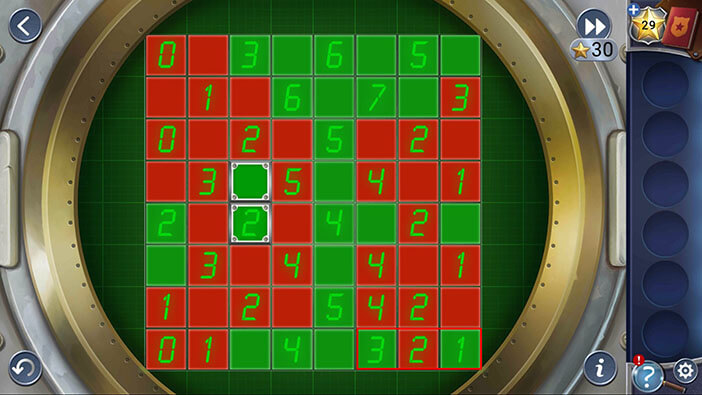
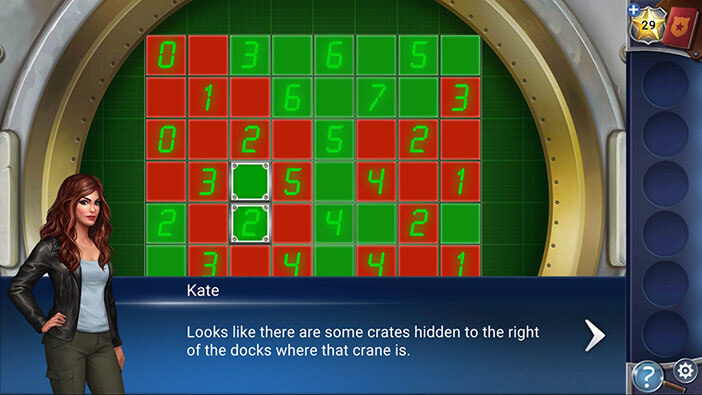
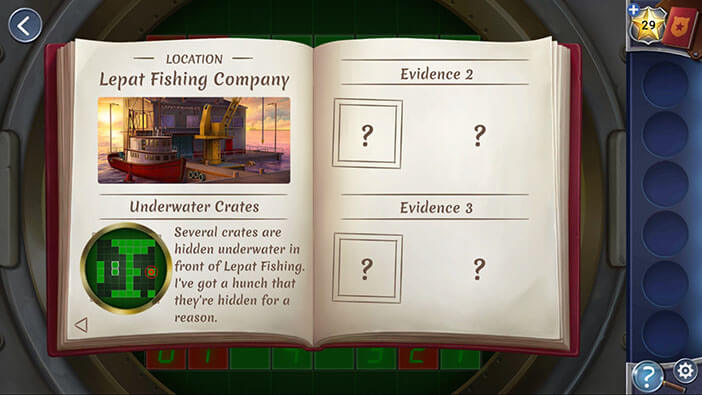
By solving the previous puzzle, you will activate the radar. Kate will immediately notice that there are some crates hidden underwater, on the right side of the docks. The detective will write down this information in her notebook, and our next task will be to find a way to pull out the crates from the water and search them.
Ok, let’s go back outside.

When you get out of the boat cabin, Nick, Darius, and Benjamin will step out of the office to meet you. Darius wants to know was Kate’s investigation successful. The detective explains that she discovered some crates, hidden underwater, and she suspects that these crates weren’t just accidentally dropped. She thinks that Luca hid something in one of those crates. With that, said she wants to use the crane to “fish out” the hidden crate. Conveniently enough, the crates are right under the crane. However, Benjamin informs her that he doesn’t know how to operate the crane, but he will try to reach one of his crane operators.


Next, Kate would like to know did they search Luca’s office. However, Nick explains that the office is locked, and he wasn’t able to break down the sturdy door. He informs Kate that he could call in the specialized crew to break it open, but the detective wants to take a more subtle approach. She thinks that she should be able to find another way into the office. Because of that, she instructs Nick to wait a bit, before calling in a demolition crew.
Lastly, Benjamin asks for permission to take away the boat, because he has to refuel and resupply it for the next journey. He gets Kate’s approval and takes away the boat.

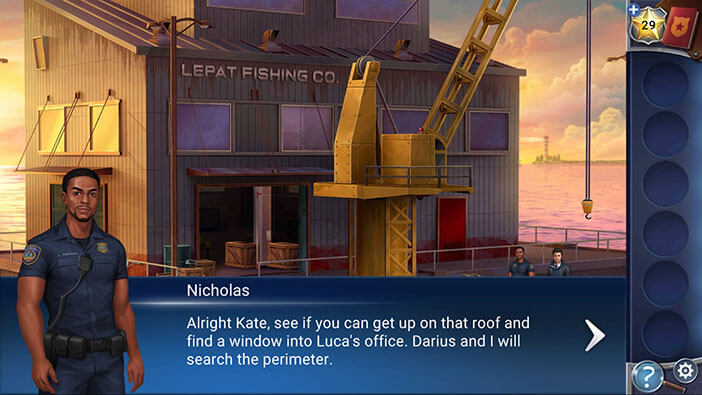
So, our task is to find a way into the office, while Darius and Nick search the perimeter.
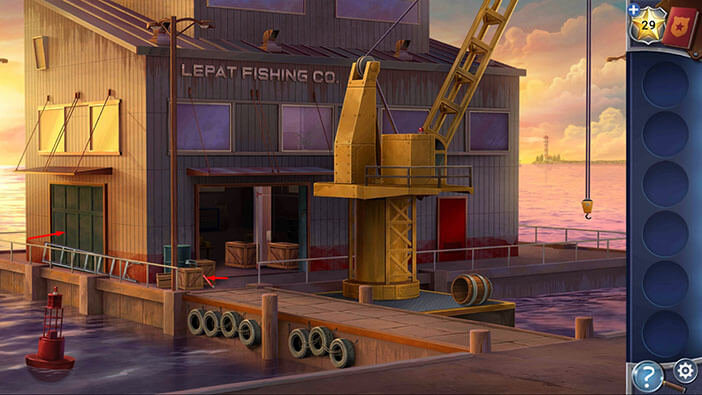
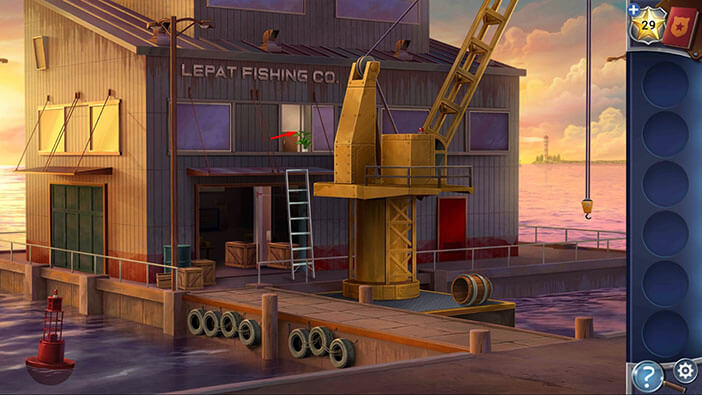
Next, to the left of the garage entrance, next to the boxes, you will see a crowbar. Tap on it to pick it up.
Tap on the “Ladder”, located next to the other garage door, to pick it up.
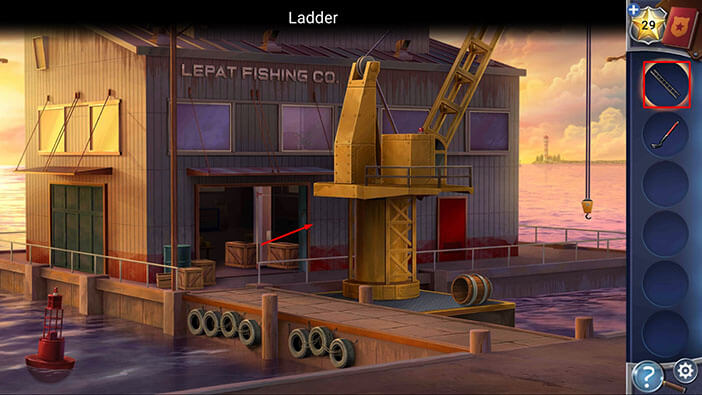
Select the “Ladder” from the inventory and place it below the second window from the left.
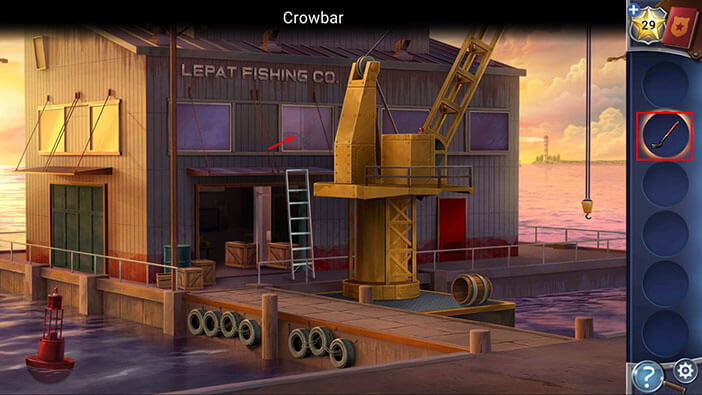
Next, select the “Crowbar” from the inventory and use it to “open” the window. After that, tap on the window to get into Luca’s office.
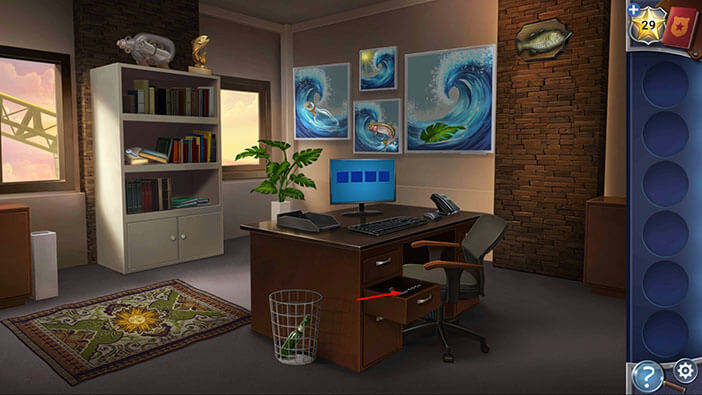
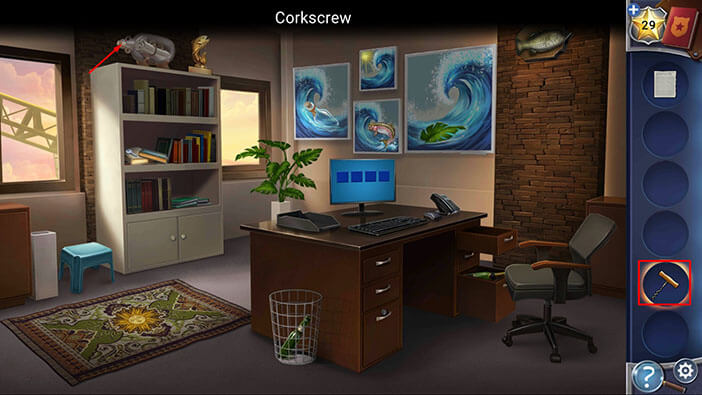
Tap on the middle drawer on the left to open it, then tap on the “Corkscrew” to pick it up. After that, tap on the drawer again to close it.

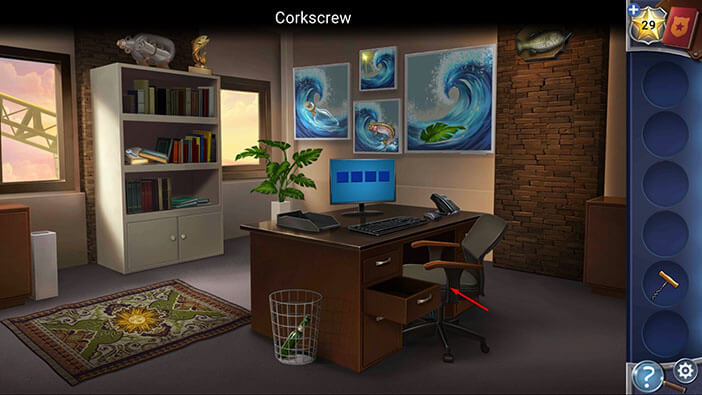
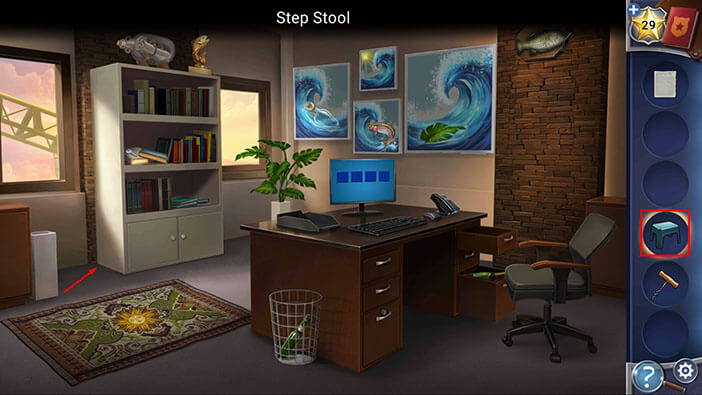
Next, tap on the chair to move it aside, and you will find a “Step Stool”. Tap on it to pick it up.

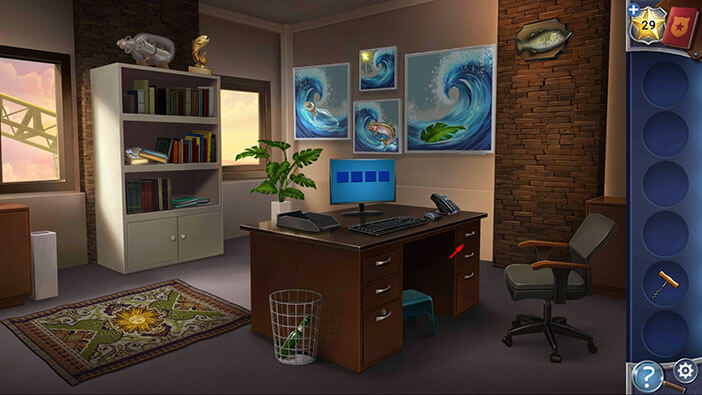
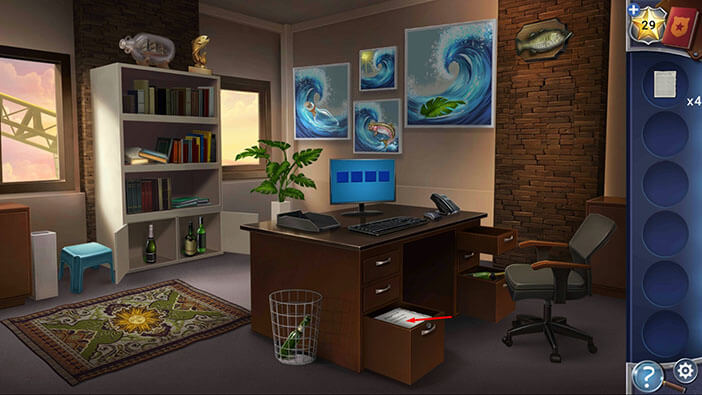
Next, tap on the top drawer on the right to open it, and inside you will find a “Journal Page”. Tap on it to pick it up.
Also, open the bottom drawer on the right, because we will need it, a bit later.

Ok, now, select the “Step Stool” from the inventory and place it on the left side of the shelf.
We can now reach the ship on the bottle on top of the shelf, so select the “Corkscrew” from the inventory and use it to open the bottle. After that, tap on the note that is sticking out from the bottle to pick it up, and another “Journal Page” will be added to your inventory.

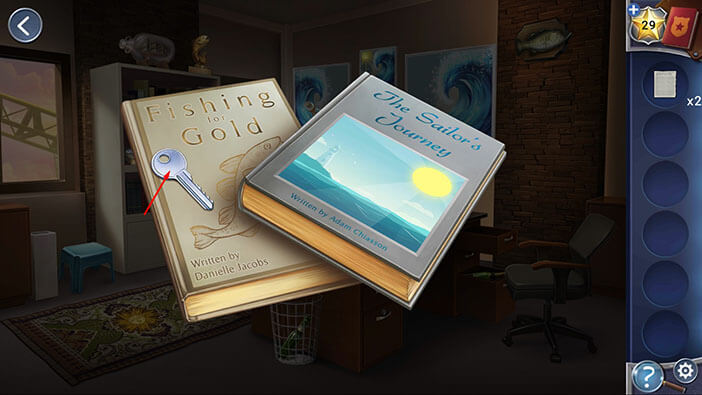
Next, tap on the books, located on the left side of the middle shelf to take a closer look at them, and you will notice a “Small Key”. Tap on it to pick it up.
Also, take note of these books because we will need them for one of the following puzzles.
After that, tap on the arrow in the upper left corner to go back.
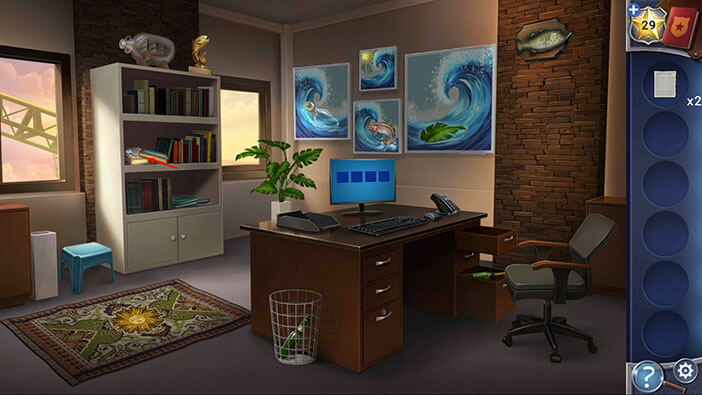
Tap on the cabinet doors at the bottom of the shelf to open them. In the left compartment, you will see a paper ball. Tap on it to pick it up, and another “Journal Page” will be added to your inventory.
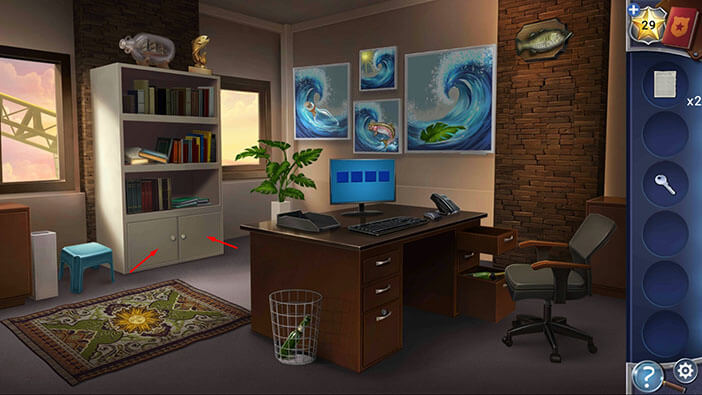
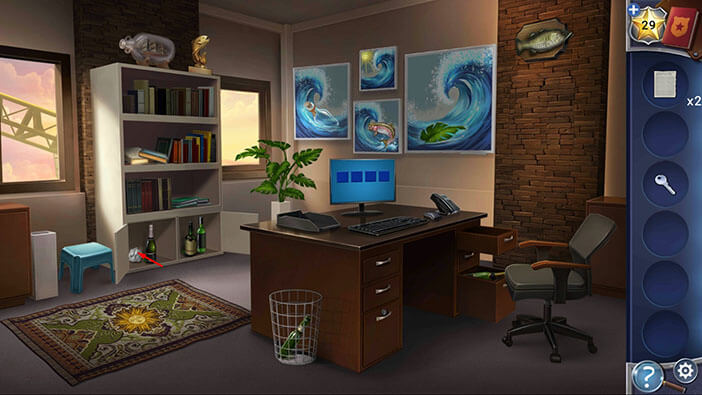
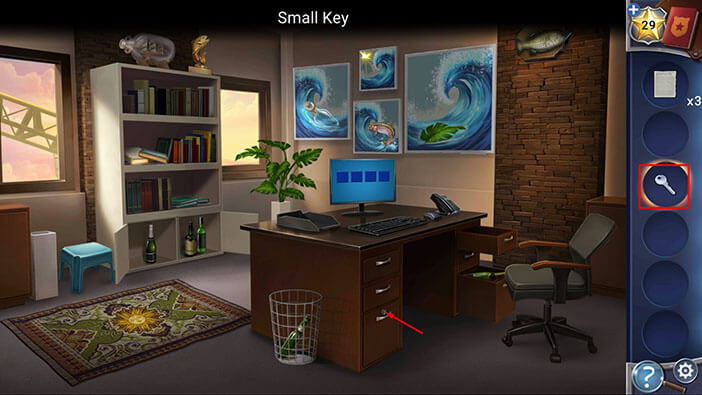
Select the “Small Key” from the inventory and use it to unlock the bottom drawer on the left.
Inside the bottom left drawer is Luca’s journal. However, we still need one journal page in order to fully assemble the journal, so we will get back to it once we’ve found the last page.
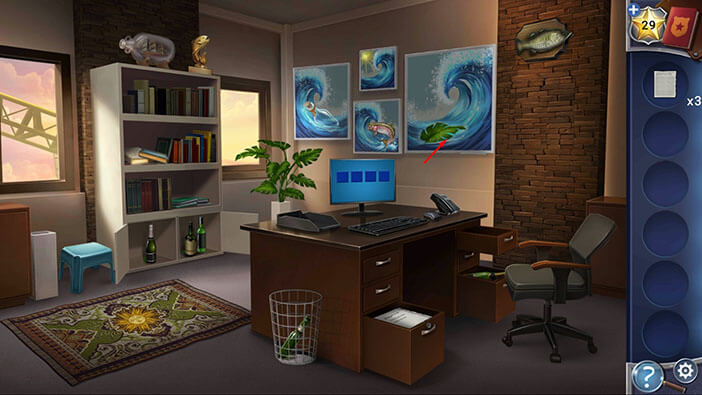
Tap on the largest picture on the right (the one with a wave and a leaf) to slide it up, and below it, you will find the last “Journal Page”. Tap on it to pick it up.

Ok, now we have all 4 journal pages, so let’s tap on Luca’s journal (bottom left drawer) to examine it.
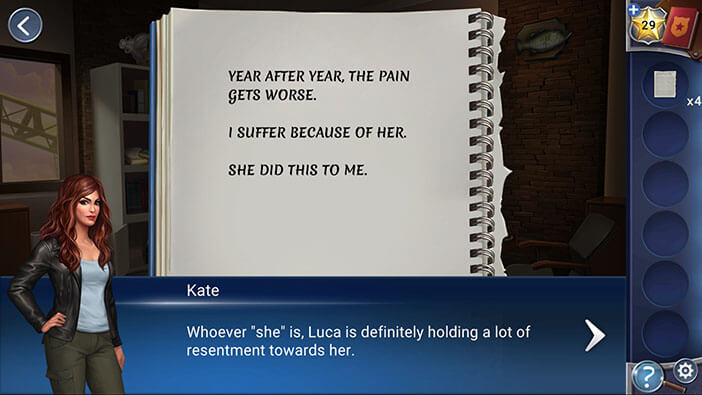
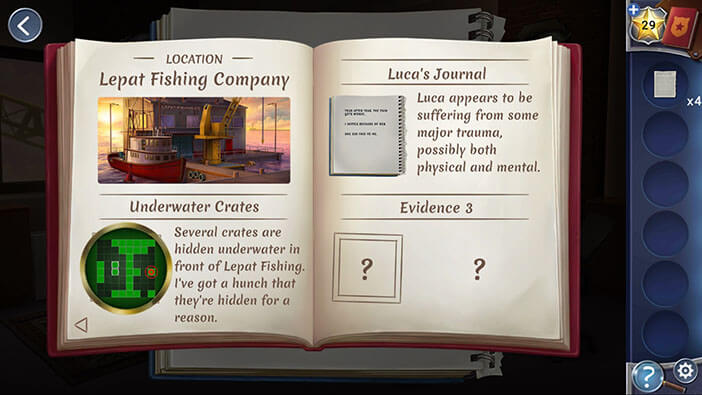
Well, by looking at the front page, Kate concluded that Luca was deeply hurt by a woman (possibly both physically and mentally). It seems that he’s suffering from severe trauma. We can only guess who this woman was. Most likely, it was one of his ex-lovers, but she could also be someone from his family. Whatever the case, it seems that Luca is extremely mad at her.
The detective will write down this information in her evidence notebook.
Ok, select the four “Journal Pages” from the inventory and add them to Luca’s journal.
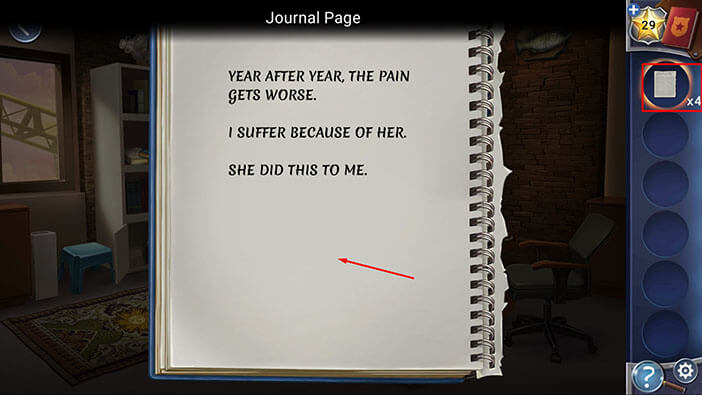
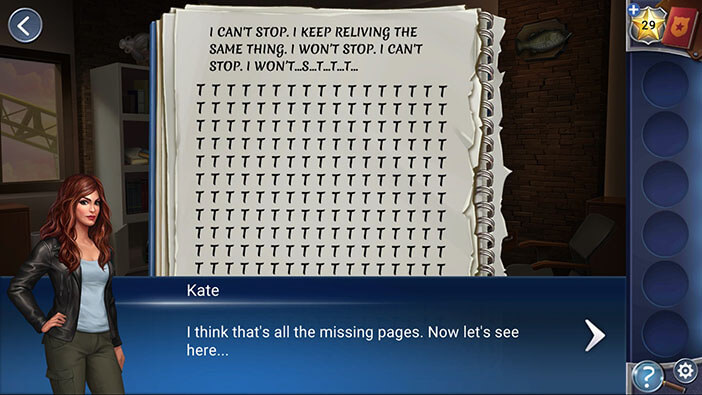
Ok, tap on the pages to turn them until you find page number 1.
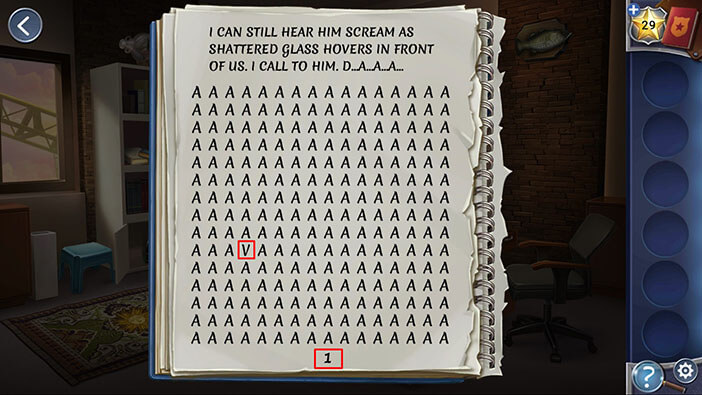
Let’s take a look at this page.
By looking at the text, I would guess that Luca was in some kind of an accident. Probably with his dad, while he was still a child because at the end of the text we can see him screaming “D…A…A”.
Now, let’s take a look at the letters “A” which cover most of the page. Hidden among the letters A, you will find a single letter “V” (tenth row, fourth letter).
So, on the first page, we have one letter “V” so this will be the first letter of the password that we will need a bit later. Let’s memorize/write down this information.
First letter = V
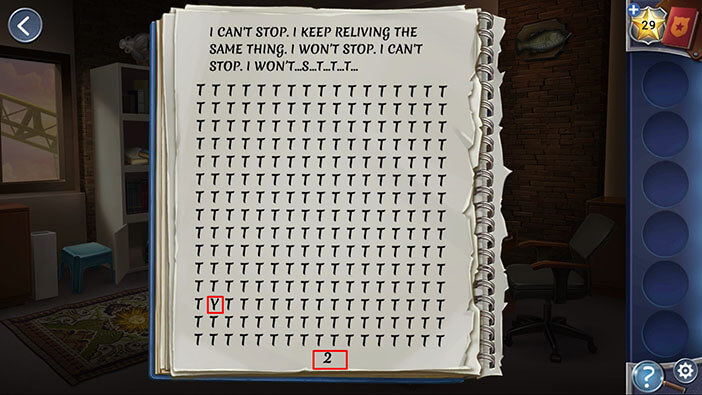
Tap on the pages to turn them until you find page number 2.
By looking at the text, it seems that Luca is relieving some kind of traumatic experience, over and over again. If our interpretation of the text on the first page is correct, then he is probably reliving his father’s death (or severe injury). However, that doesn’t explain “I won’t stop. I can’t stop” sentences. So, maybe he was calling out to a woman whose name starts with “DA”? We shall see.
Let’s take a look at the letters “T” which cover most of the page. Hidden among the letters T, you will find a single letter “Y” (thirteenth row, second letter).
Let’s memorize/write down this information.
Second letter = Y
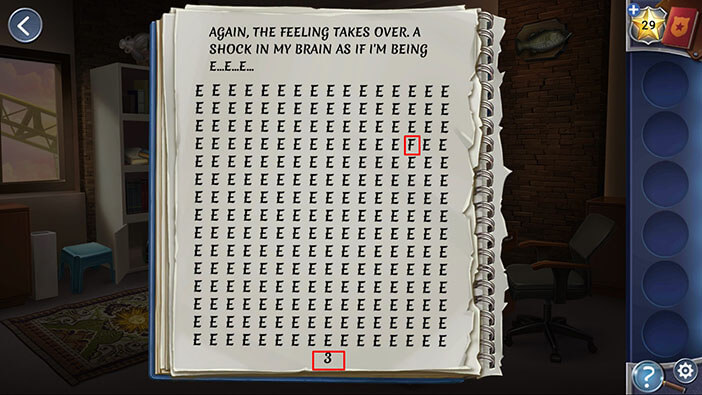
Tap on the pages to turn them until you find page number 3.
By looking at the text, I can only conclude that Luca has trouble calling controlling himself, once something triggers his traumatic feelings/experience.
Let’s take a look at the letters “E” which cover most of the page. Hidden among the letters E, you will find a single letter “F” (fourth row, fifteenth letter).
Let’s memorize/write down this information.
Third letter = F
Tap on the pages to turn them until you find page number 4.
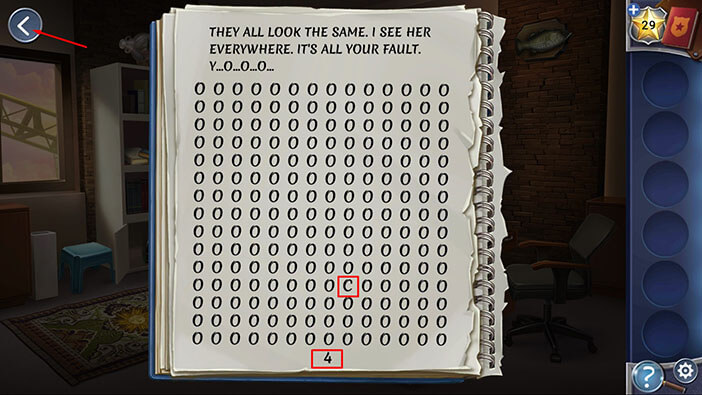
By looking at the text, I would presume that Luca is kidnapping and murdering his victims because they look like someone from his past. Most likely, they look like the person that caused his trauma, and once he sees them, he can’t stop his murderous urges.
Let’s take a look at the letters “O” which cover most of the page. Hidden among the letters O, you will find a single letter “C” (twelfth row, ninth letter).
Fourth letter = C
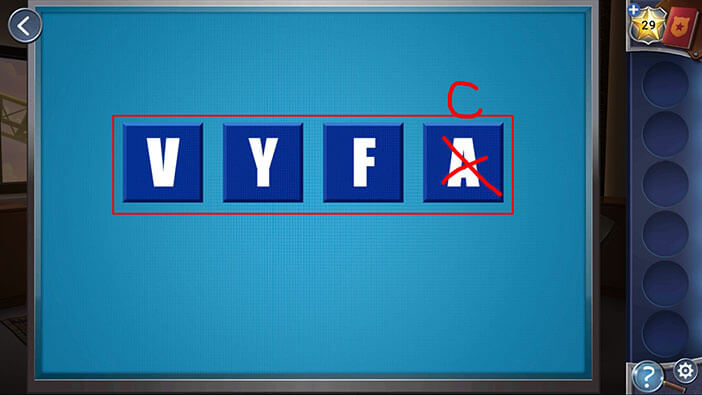
When we put together the letters from the 4 pages, we will get the password “VYFC”. Memorize/write down this password, then tap on the arrow in the upper left corner to go back.
Tap on the computer screen to start the interaction.
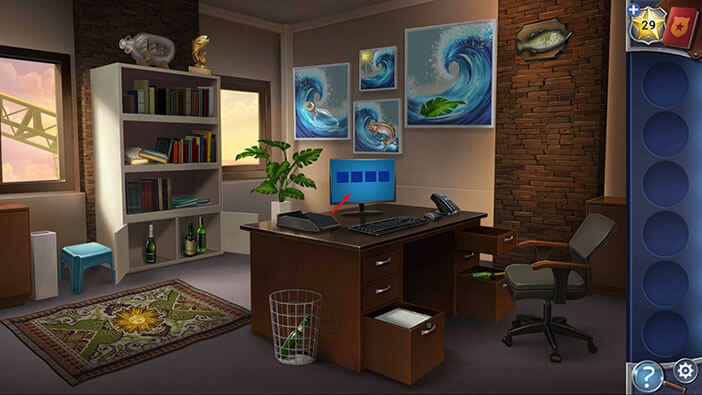
Enter the code “VYFC” to unlock the computer.
Next, let’s take a look at the emails.
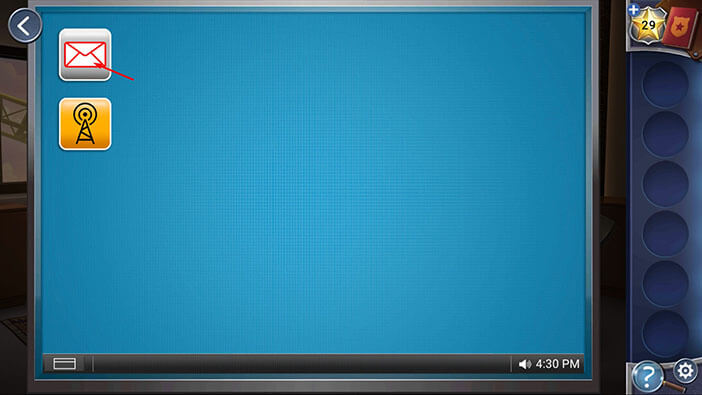
Well, after reading the first email, we found out that Luca is going through a divorce. Kate thinks that Luca’s soon-to-be ex-wife, Chelsey Patel, might provide some useful information about her husband, so she intends to pay her a visit as soon as possible. On the downside, Kate suspects that Luca might have already killed his wife…
Also, it seems that a divorce settlement has been reached, so Luca just has to sign some documents and he will be officially divorced.
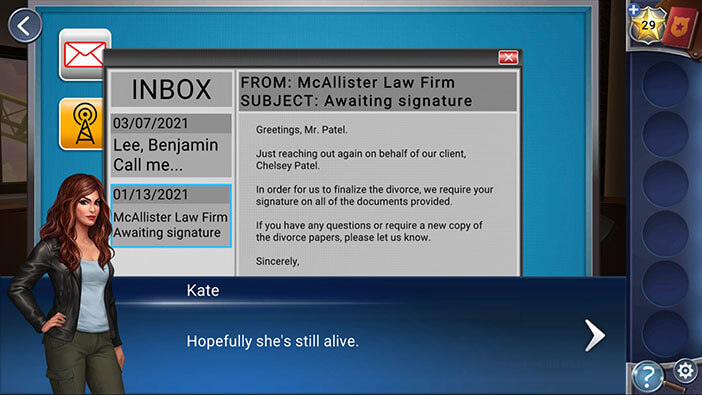
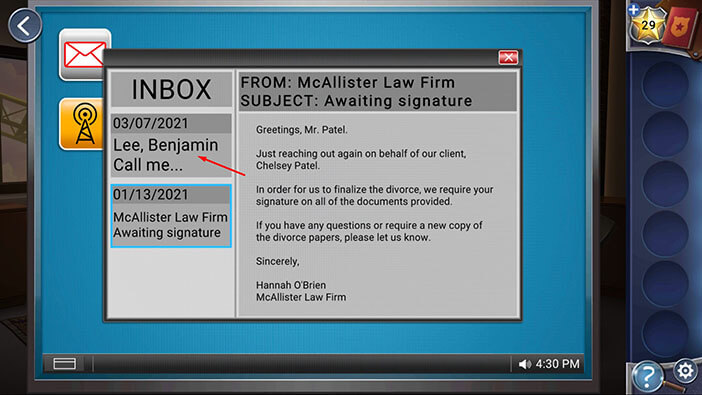
If you tap on the top email, you will find out that Benjamin immediately informed Luca about the investigation notice. But, Luca never returned his calls.
So, it seems that Benjamin was telling truth and that he really didn’t know anything about his partner’s dark side.
Once you read the email, tap on the “X” to close the window.
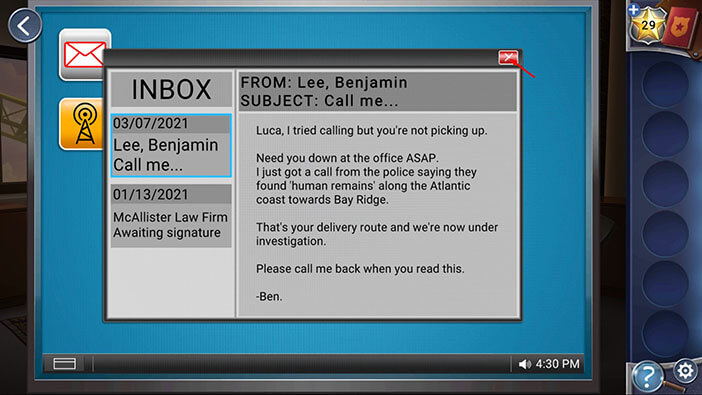
Tap on the “radio tower” icon to start the interaction. After that, tap on the “Open” button.

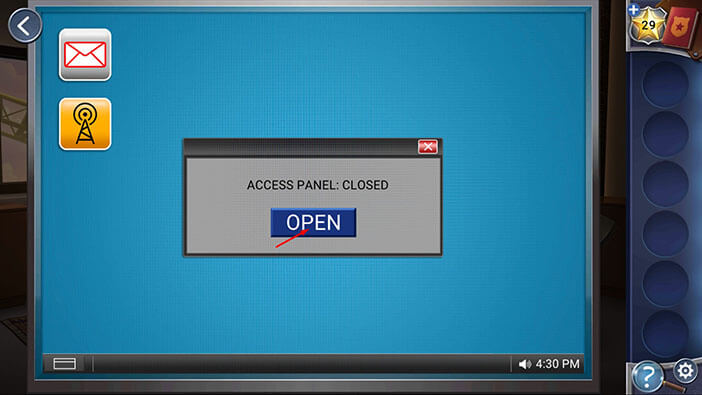
Well, we just found a hidden wall safe. Now we will have to figure out a way to open it. Tap on the safe to take a closer look at it.

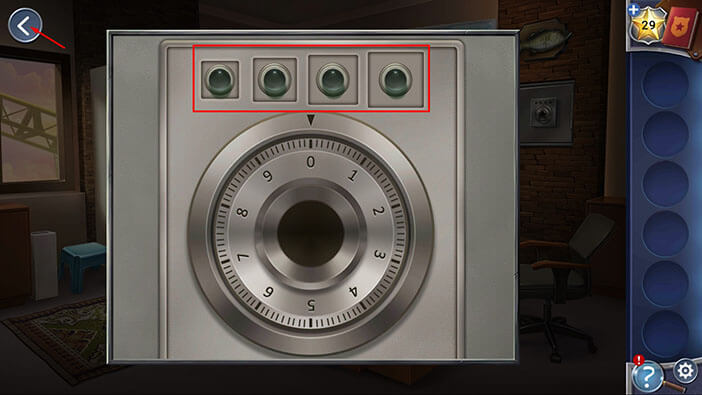
The safe has a dial with numbers 0 to 9. Above the dial, we can see four light bulbs, and each of them is planted into a small square.
If you take a look at the squares, you will notice that the squares are arranged by size, with the smallest square on the left, and the largest square on the right.
Memorize the order of the squares (by size) then tap on the arrow in the upper left corner to go back.
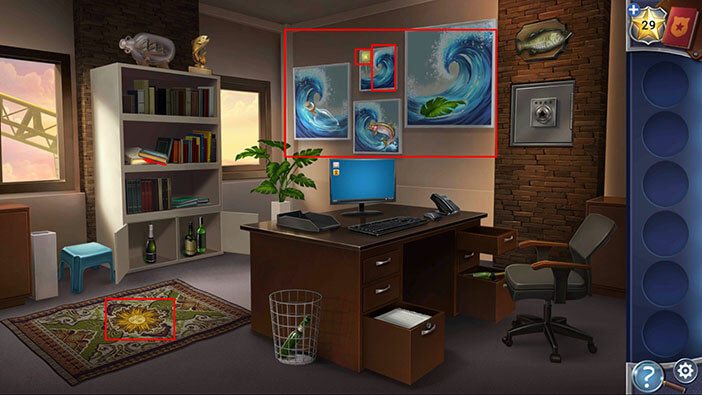
Ok, now, if we take a look at the wall to the left of the safe, we will notice four pictures. These pictures are in four different sizes, just like the squares on the wall safe.
Each picture has a wave, and the direction of the wave represents the direction in which we should turn the dial.
Also, you will notice that besides the wave, each picture has one object unique to it. The amount of these objects represents the number on the dial, and we should count these objects by looking around the room.
I know that this might sound confusing at first, but everything will clear up once we start to solve this puzzle. So, let’s begin.
Step 1
The first picture that we should look at is the smallest one, and that is the picture with the sun.
The wave in this picture is going right to left, so that means that we should turn the first dial counterclockwise (in the same direction as the wave on the painting).
Next, let’s look around the room and see how many suns we can find.
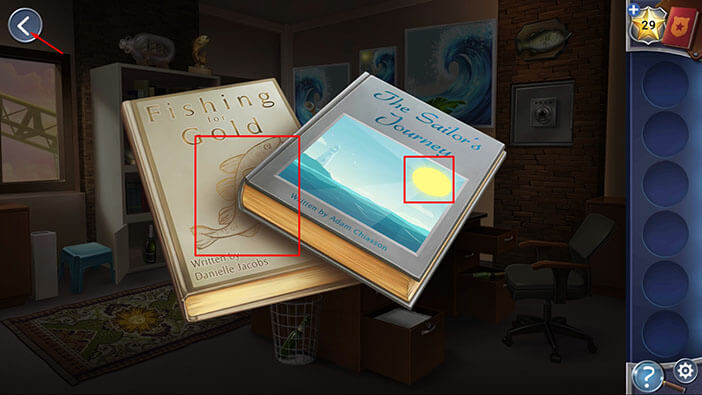
Well, at first glance, it seems that there is only one sun in this room, and that is the one on the rug. But do you remember the books that we saw earlier (left side of the middle shelf)? Let’s take another look at them.
On the cover of the book on the right, we can see a sun. So, there are two suns in the room.
With that said, STEP 1 is,
Turn the dial counterclockwise (because that’s the direction of the wave on the smallest painting) to the number 2 (because there are 2 suns in this room). Memorize or write down this information.
Before we go back, take a look at the cover of the book on the left, and you will see a fish. Memorize this, because there’s fish on one of the other paintings, so we will need this information once we start counting the fish in the room.
Once you’re done, tap on the arrow in the upper left corner to go back.
Step 2
The second picture that we should look at is the second smallest one, and that is the picture with the fish.
The wave on this picture is going left to right, so that means that we should turn the second dial clockwise.
Next, let’s look around the room and see how many fish we can find.
There is one fish above the safe.
There is also a fish trophy on top of the shelf.
Finally, we also saw a fish on the cover of one of the books that we looked at in the previous step.
So, there are 3 fish in total.
With that said, STEP 2 is,
Turn the dial clockwise to the number 3. Memorize or write down this information.

Step 3
The third picture that we should look at is the second largest one, and that is the picture with the bottle.
The wave on this picture is going left to right, so that means that we should turn the third dial clockwise.
Next, let’s look around the room and see how many bottles we can find.
There is one bottle in the bottom right drawer (that’s why we left it open).
There is one more bottle in the trash can (next to the desk).
There are 3 more bottles at the bottom of the shelf.
Lastly, there is one large bottle on top of the shelf.
So, there are 6 bottles in this room.
With that said, STEP 3 is,
Turn the dial clockwise to the number 6. Memorize or write down this information.

Step 4
The third picture that we should look at is the largest one, and that is the picture with the leaf.
The wave on this picture is going right to left, so that means that we should turn the fourth dial counterclockwise.
Next, let’s look around the room and see how many leaves we can find.
Well, the only leaves in the room are the ones on the plant (in the left corner) and there are seven of them.
With that said, STEP 4 is,
Turn the dial counterclockwise to the number 7. Memorize or write down this information.

Let’s go back to the safe.
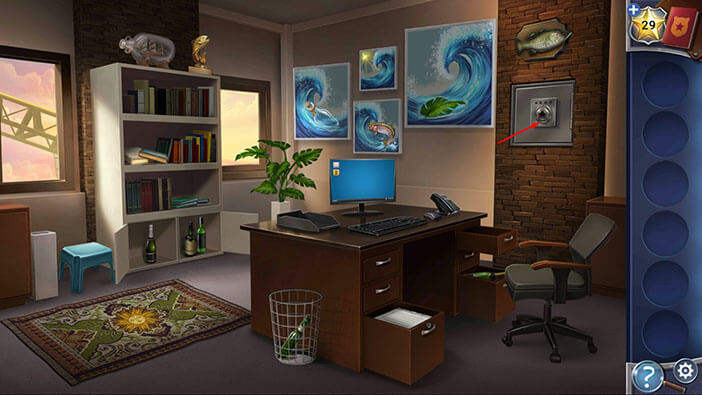
Ok, now let’s follow the steps that we discovered, and finally, open this safe.
STEP 1
Turn the dial counterclockwise to the number 2 (the arrow should be pointing at number 2).
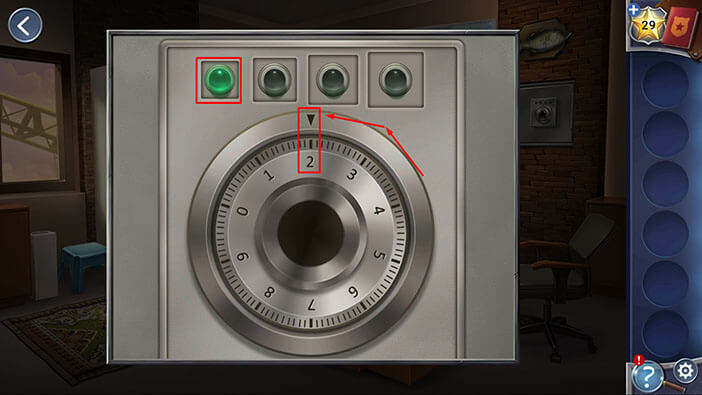
STEP 2
Turn the dial clockwise to the number 3.
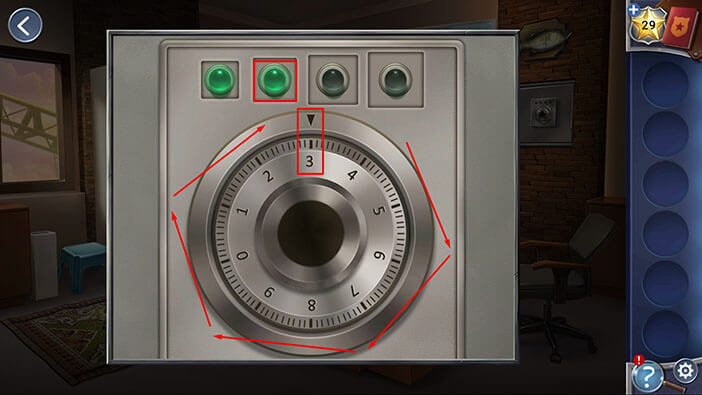
STEP 3
Turn the dial clockwise to the number 6.
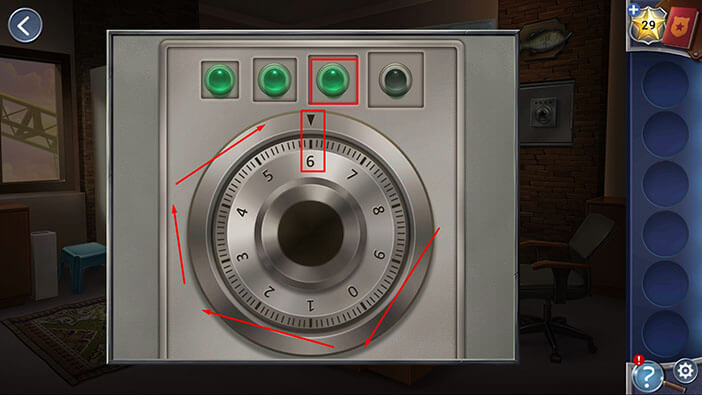
STEP 4
Turn the dial counterclockwise to the number 7, and you will open the safe.
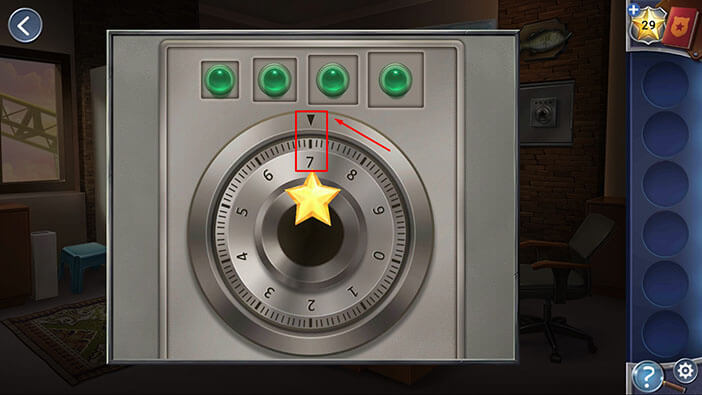
Inside the safe, you will find the “Crane Key”. Tap on it to pick it up.
Well, Kate thinks that keeping the crane keys locked inside the wall safe, with a very complicated password, is very suspicious. She’s sure that whatever Luca is hiding in the underwater crates, must be very important.

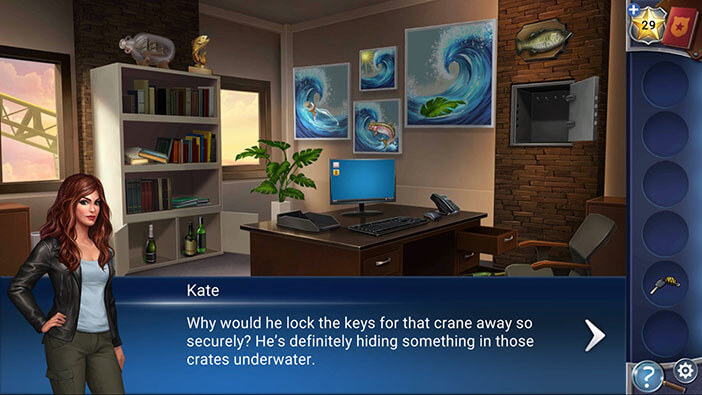
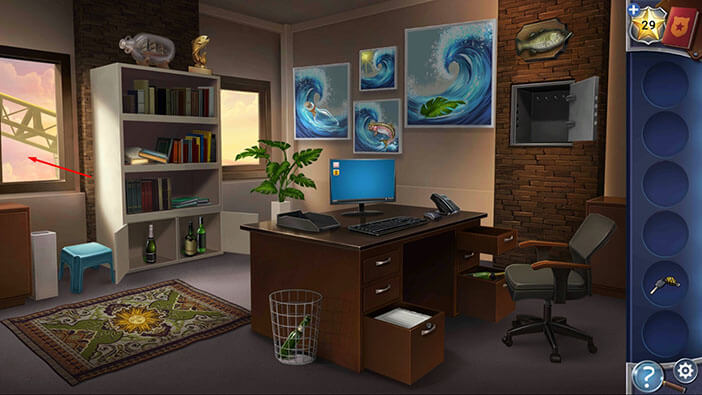
Ok, let’s tap on the window to go back outside.
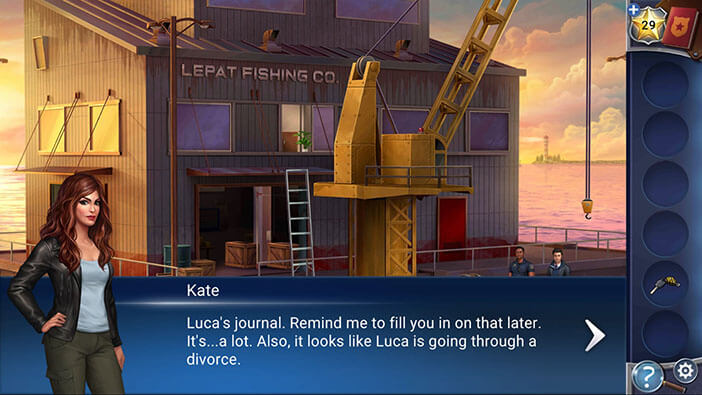
When you get out, Darius and Nick will say that they checked the perimeter, but didn’t find anything suspicious. Kate will inform them that she found Luca’s journal inside the office and that it contains a lot of interesting and disturbing information. She also discovered that Luca is going through a divorce. Well, Darius will immediately try to get in touch with Chelsey Patel (Luca’s wife), because she could definitely provide them with a lot of information about Luca, possibly even with the motive for his dark behavior.
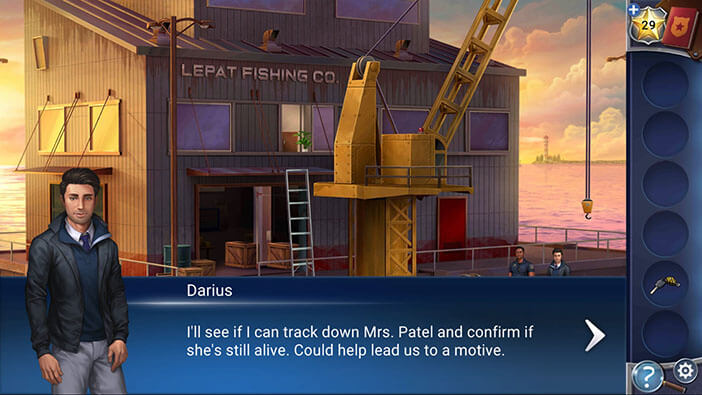
At this moment, Benjamin will come back. Kate wants to know if he has any information about Luca’s wife. Benjamin will reply that he thinks that Luca and his wife are separated (as we already know), but more importantly, he thinks that he has her contact information somewhere in the office. So, he and Nick will go to the office to look for the contact information, while Kate tries to pull out the crate from the bottom sea.

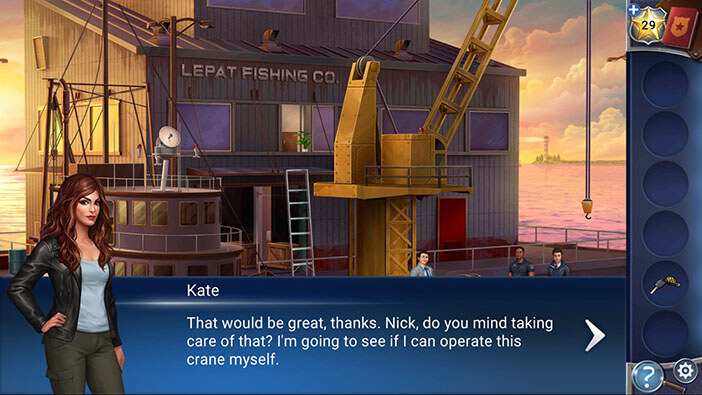
Ok, select the “Crane Key” from the inventory and use it to start the crane.
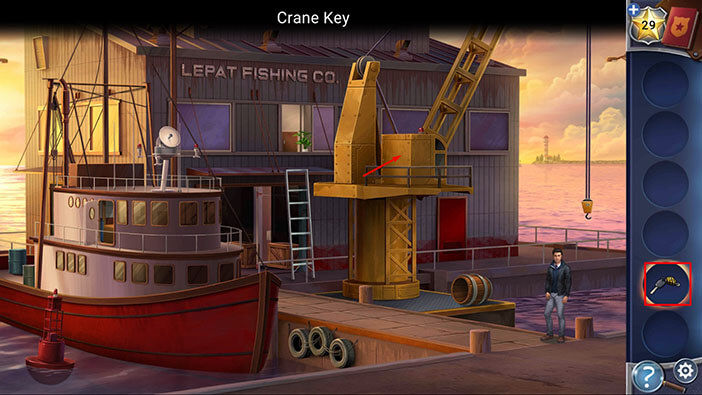
Here, we have another minigame. Our task is to pull the green crate out of the water. Inconveniently enough, it’s buried under the other crates.
You can move the crane hook by using four directional arrows. To attach/detach the crate, press the middle button.
We will do this in several steps. Let’s begin.
First, drag the red box on the top, into the upper right corner.
Next, drag the small yellow box from the left and drop it onto the red box at the bottom.
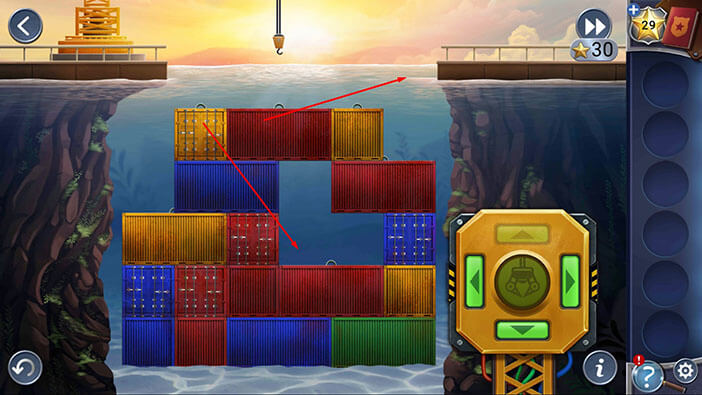
Step 2
Drag the large blue box all the way to the left.
Next, drag the large red box from the top and drop it on top of the large blue box.
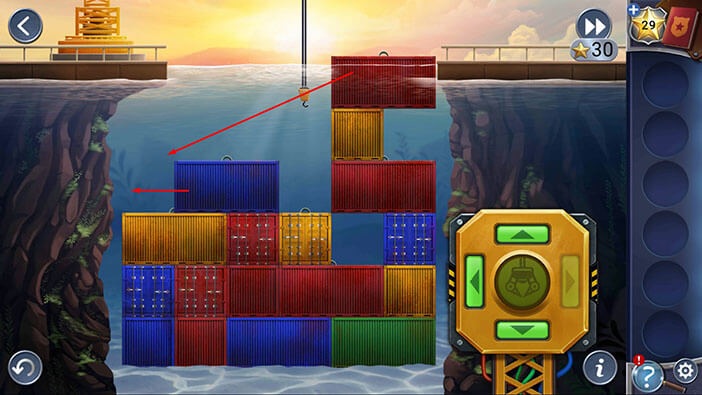
Step 3
Drag the small yellow box from the top right, and drop it onto the small red box on the left.
Next, drag the other yellow box and put it on top of the box that we just moved.
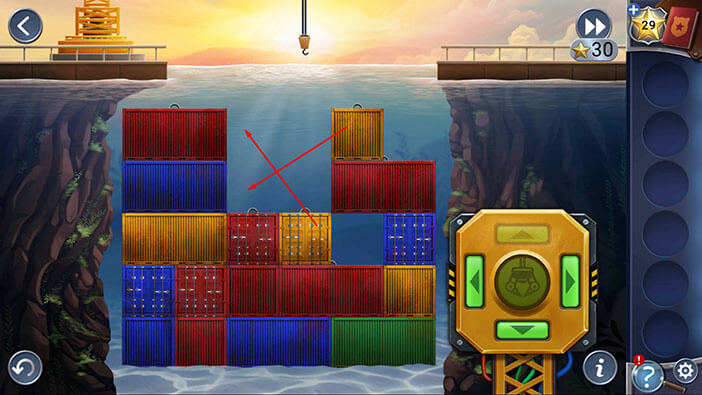
Step 4
Drag the large red box from the bottom right, and put it on top of the boxes on the left.
Next, drag the other large red box from the bottom and put it on top of the small blue box on the right.
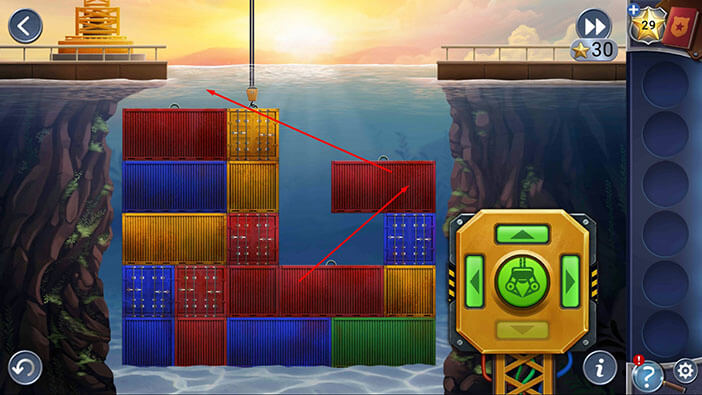
Step 5
Drag the large red box from the top left, and drop it on the large red box on the right.
Next, drag the small yellow box from the top left, and drop it on the blue box at the bottom.
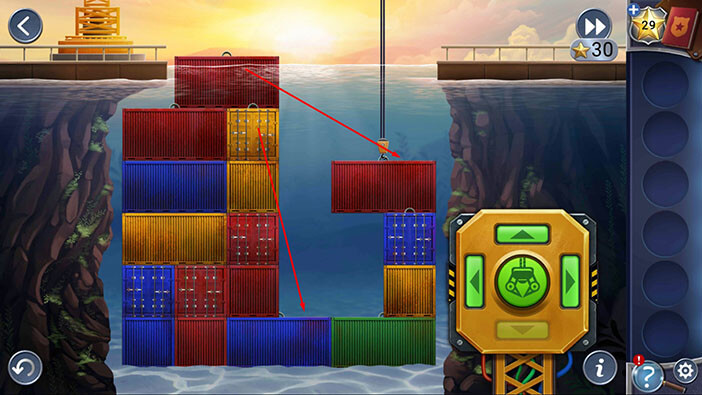
Step 6
Drag the small yellow box from the top left, and drop it next to the small red box.
Next, drag the large red box from the top right, and drop it on the small boxes on the left.
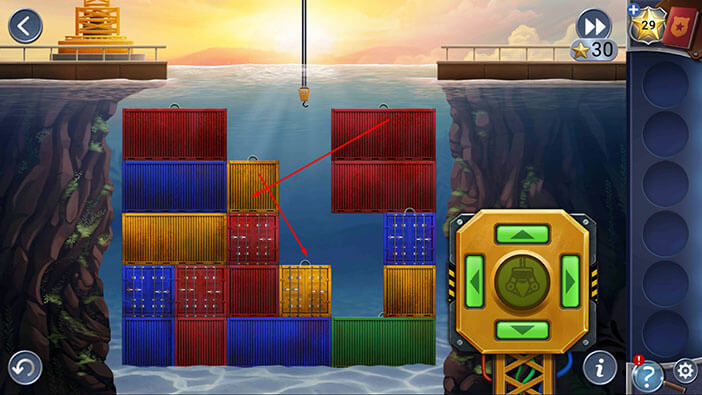
Step 7
Lift the large red box from the right and drop it on the red box next to it.
Next, drag the small blue box and put it into the upper left corner.
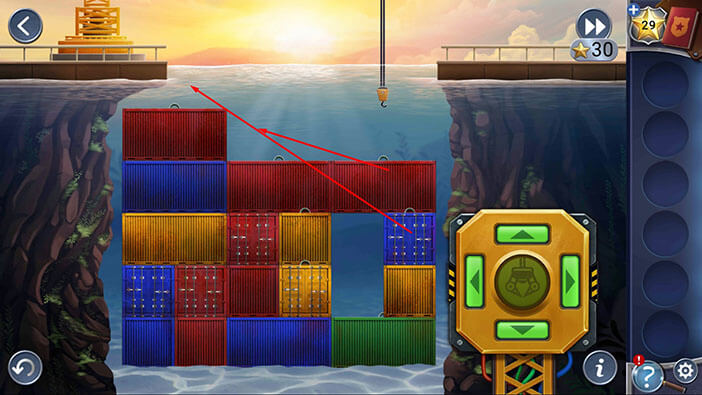
Step 8
Drag the small yellow box from the bottom right and place it in the upper left corner.
Finally, you can pull out the green container.
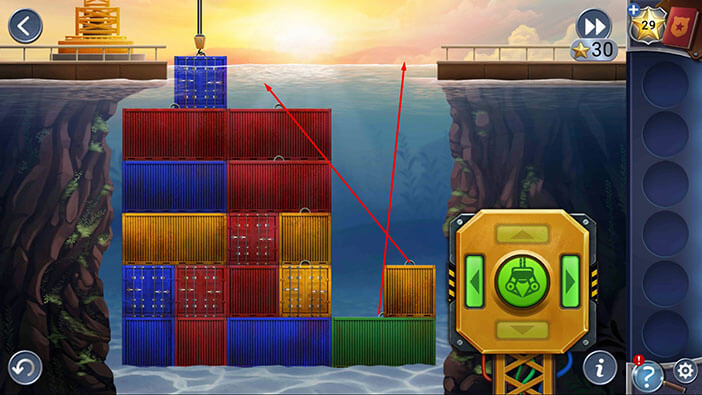
Well, let’s open the container and see what’s inside.
Tap on the container to open it.
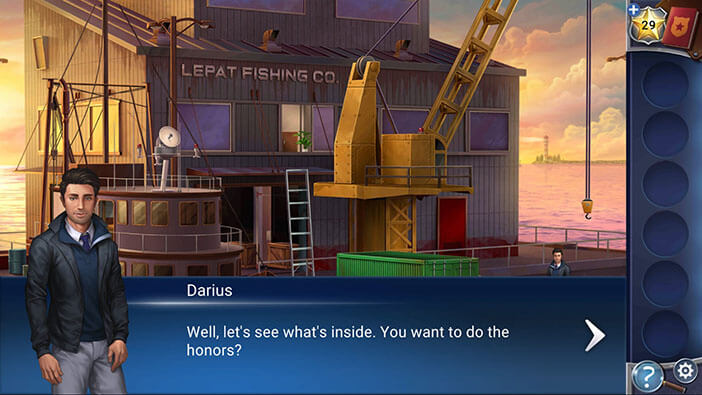
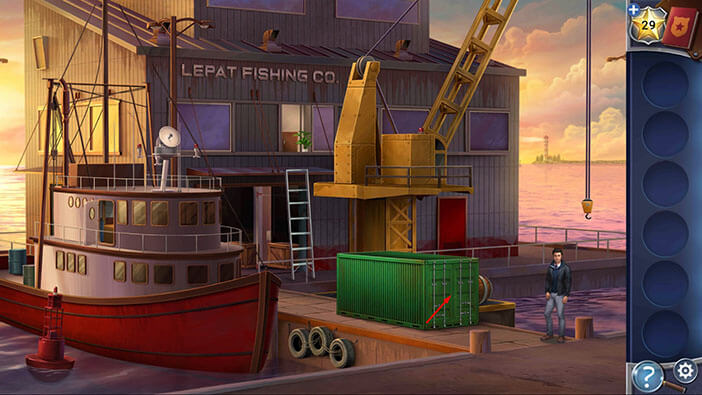
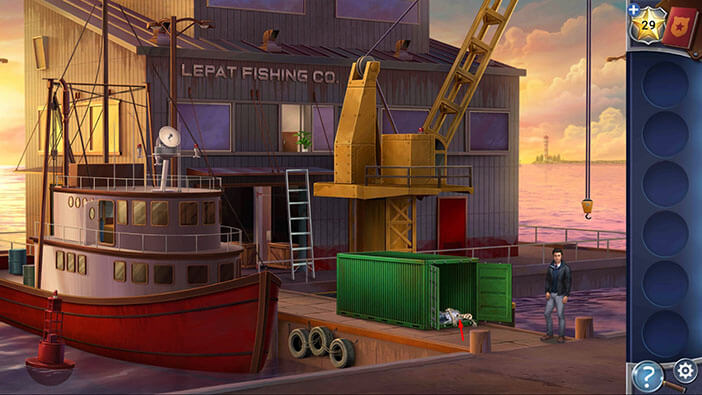
An almost completely decomposed body fell out of the container as soon we opened it, and Kate and Darius were instantly overwhelmed with the stench.
However, Kate decided to hold her breath and try to approach the body, to determine if it was possible to identify it.
Tap on the body to take a closer look, and Kate will add another entry into her evidence book.
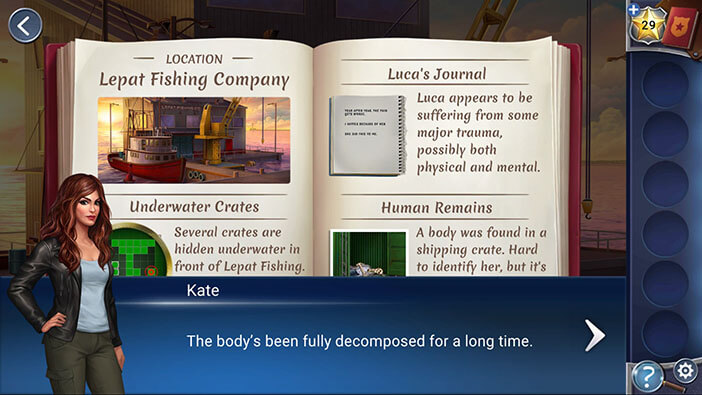
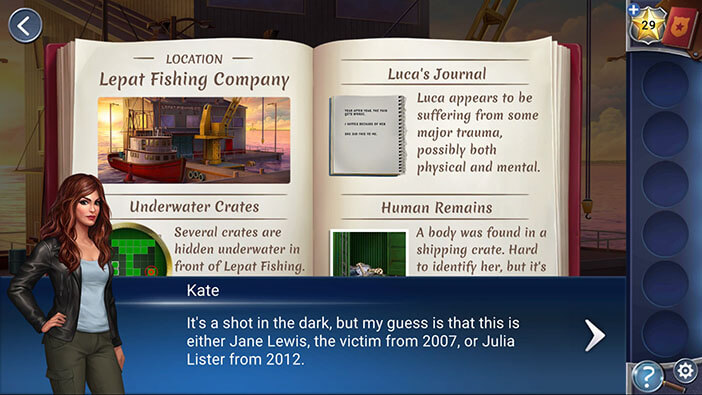
Kate thinks that the body inside the container is either Jane Lewis (2007.) or Julia Lister (2012.). Hmm, I think that this body might also be the woman that caused Luca’s initial trauma, hence his first victim. We shall see.
Darius thinks that they might be able to identify the body by comparing the dental records. At this moment, Nick and Benjamin will also arrive, and they will immediately sense the strong stench of a decomposing body. On the bright side, they found the contact info that they’ve been looking for. Nick already contacted Chelsey Patel and informed her that the police officers will come to question her about her husband. Also, Nick already sent us Chelsey’s contact information.
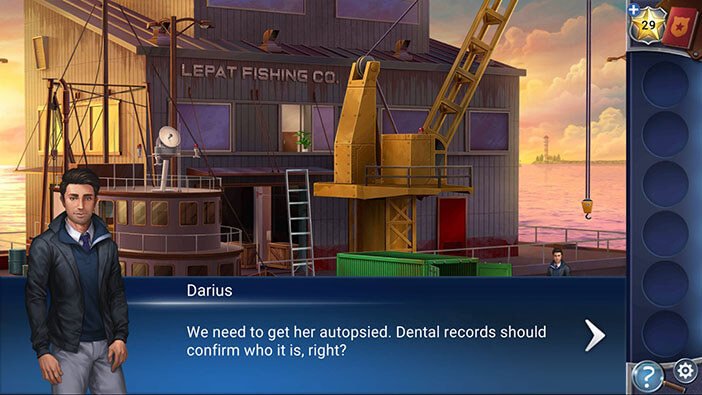
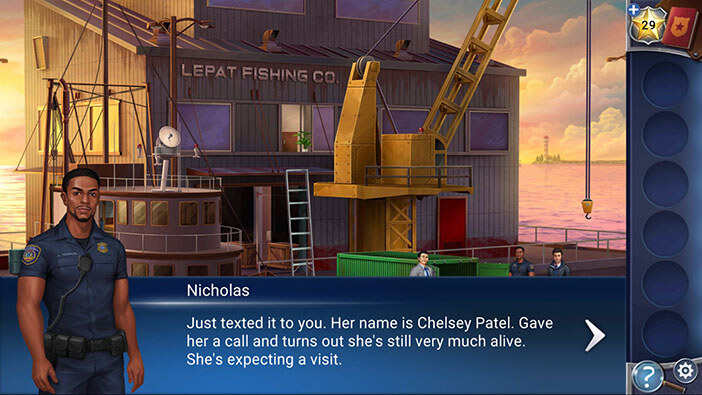
Well, Kate and Darius will go to Chelsey immediately, but Nick will have to stay behind until the team arrives to collect the body. Also, Benjamin will have to go to the station and answer some questions. He isn’t a suspect in this case, but I guess he could provide some useful information about Luca.
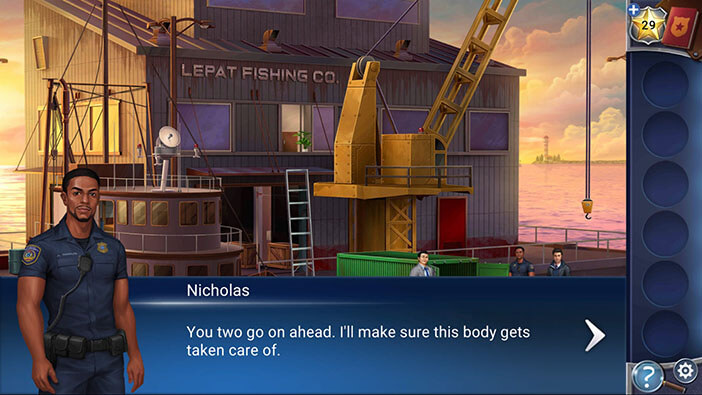
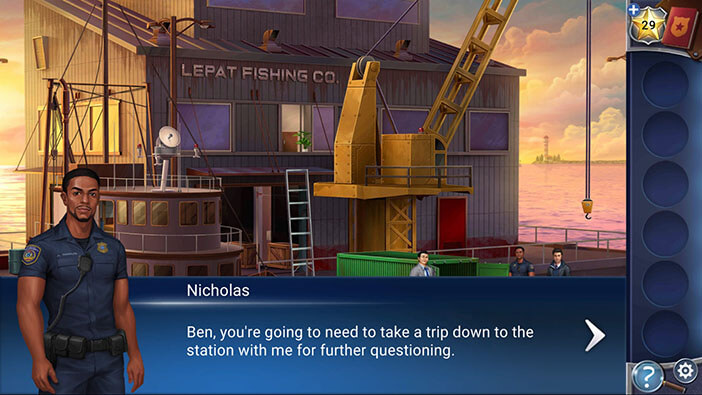
Well, that’s the end of the sixth chapter. In this chapter, we made some groundbreaking discoveries. I am still wondering about the identity of the body that we found in the container. I don’t know why, but I have a hunch that the body might be Luca’s first victim, the woman that caused him the initial trauma. Hmm, maybe his wife will be able to shed some light on this mystery. Well, I guess we will find out in the next chapter.
You can check out the seventh chapter by tapping on the “Chapter VII” button.
Thank you for reading.