The Echo Bay Murders – Chapter III
Hello everyone, and welcome to our walkthrough for Chapter 3 of “The Echo Bay Murders” another game in the series of AE mysteries, developed and published by Haiku Games.
In the previous chapter, Kate managed to escape from the hunting cabin in which she was captured. However, before she escaped she searched the house and found out several things about her captor. It appears that this guy is a very skilled hunter and fisherman, but Kate wasn’t able to discover his identity. Also, he has a very large collection of firearms, but, unfortunately for Kate, she didn’t find any ammo, so she decided to leave the firearms behind. Besides that, the suspect was also married, and Kate thinks that his wife was his first victim.
While she was searching the attic, the suspect returned, so she made an improvised zip line and escaped into the forest.
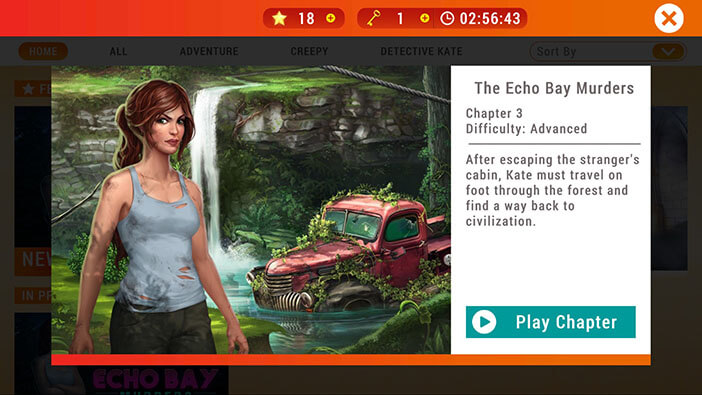
Well, it seems that Kate managed to go down the zip line without suffering any major injuries. However, she’s certain that her captor will track her down if she stays in one place. She concludes that following the stream seems like a good idea because it will probably lead her to a town or village.
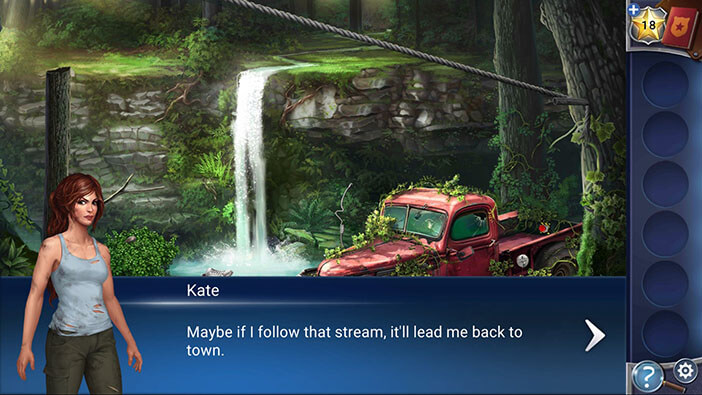
Ok, we will start by gathering a few items. First, tap on the “Weight” in the lower right corner of the screen to pick it up.

Next, tap on the brush on the riverbank to move it aside, and you will find another “Weight”. Tap on it to pick it up.


Next, tap on the “Antenna” to pick it up.

Lastly, tap on the shoe in the water to pick it up.
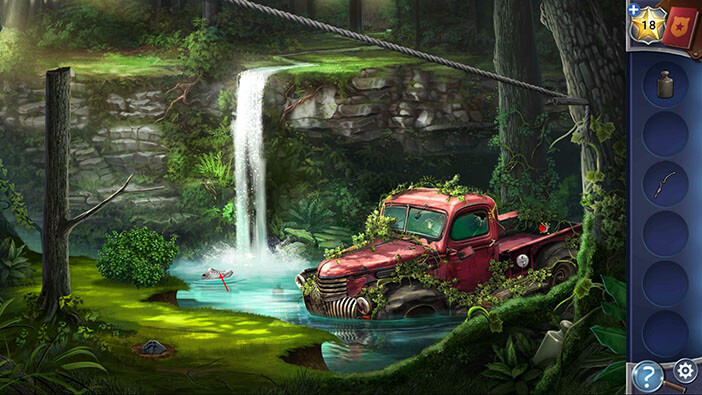
After you pick up the shoe, Kate will add another entry in her Notebook, “Women’s Shoe”. Kate thinks that the shoe probably belonged to Ava (the woman that entered the bathroom at the gas station and wasn’t seen since then).
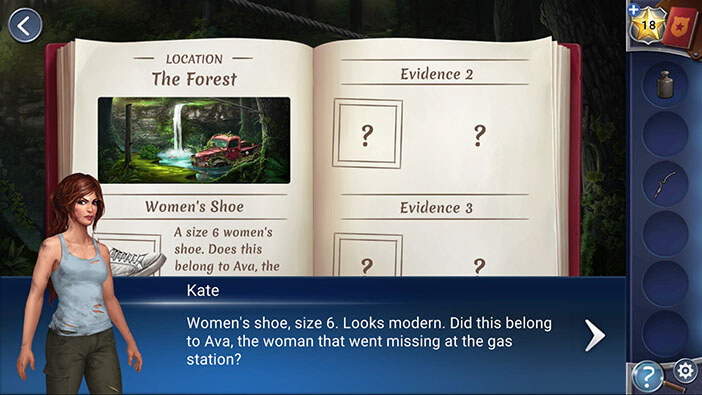
Ok, let’s try to open this old truck. Select the “Antenna” from the inventory and use it open the truck door. After that, tap on the door to search the truck.
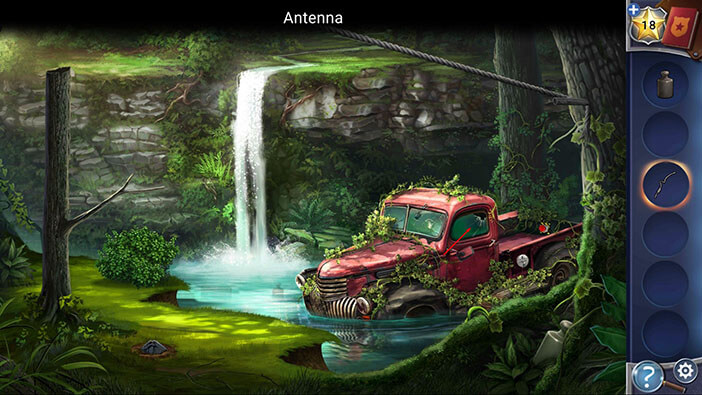
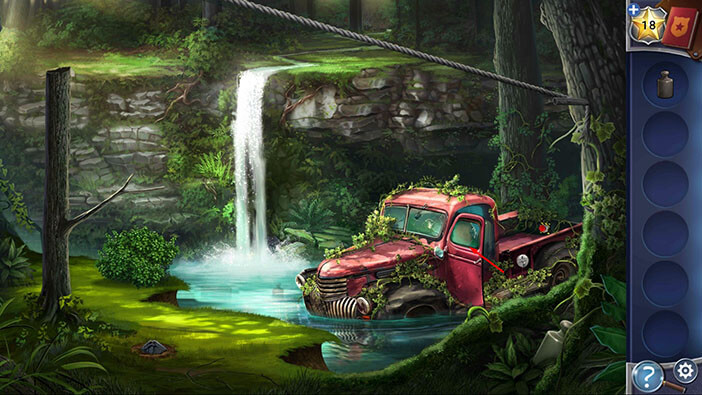
Tap on the “Knife” to pick it up.

In the upper left corner of the screen, you will see some leaves. Tap on the leaves to moves them aside and under them, you will find an “Electrical Tape”. Tap on it to pick it up.
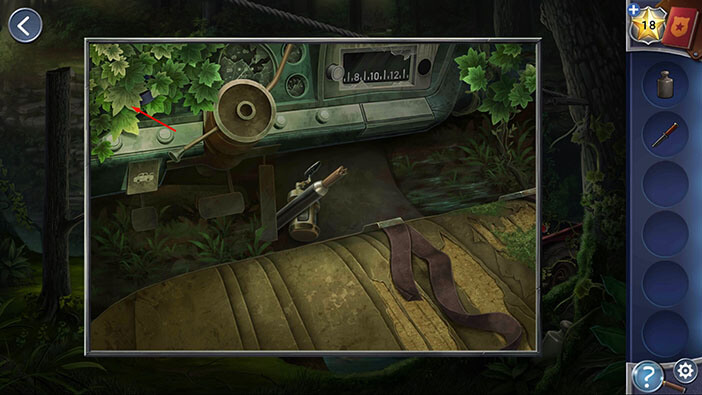

Next, tap on the button below the leaves to open the hood.
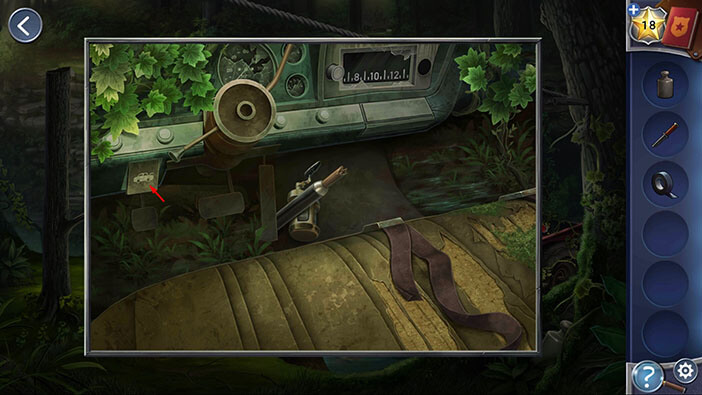
There’s also a broken fishing rod in the truck, which we might be able to fix with the correct supplies.
Tap on the arrow in the upper left corner to go back.
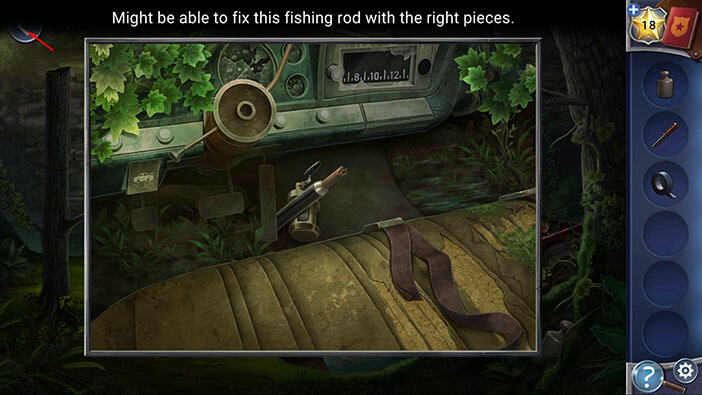
Under the hood, we can see a “Hook”. Tap on it to pick it up.
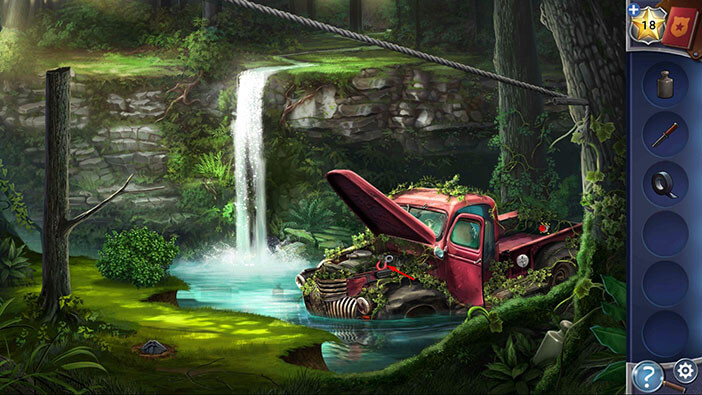
Next, select the “Knife” from the inventory and use it to cut the zip line. “Steel Cable” will be added to your inventory.

Lastly, with the “Knife” selected, tap on the branch on the left to cut it, and “Tree Branch” will be added to your inventory.
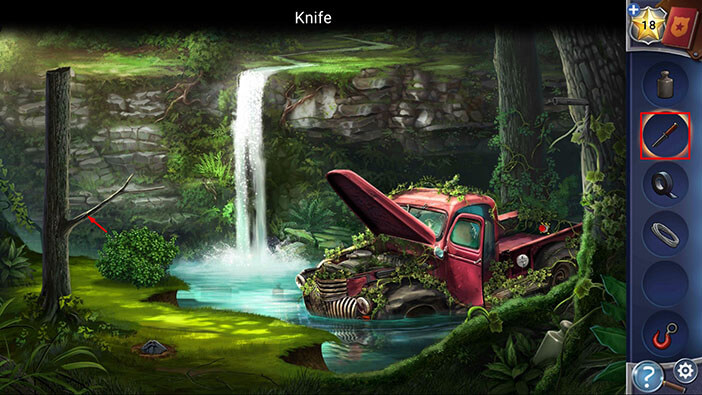
We should now have everything that’s necessary to assemble the fishing rod, so let’s go back into the truck.
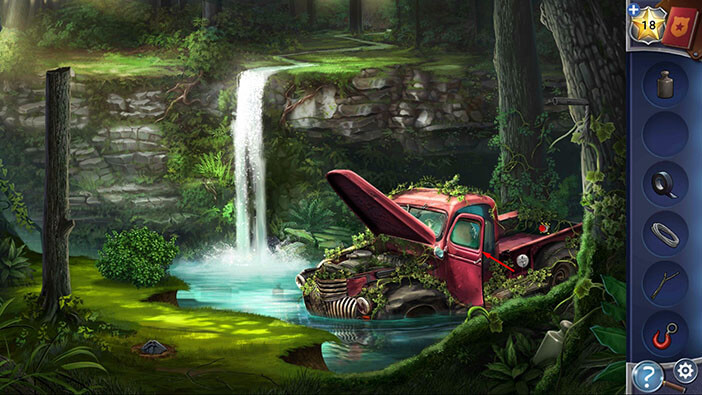
First, select the “Tree Branch” from the inventory and attach it to the broken fishing rod.
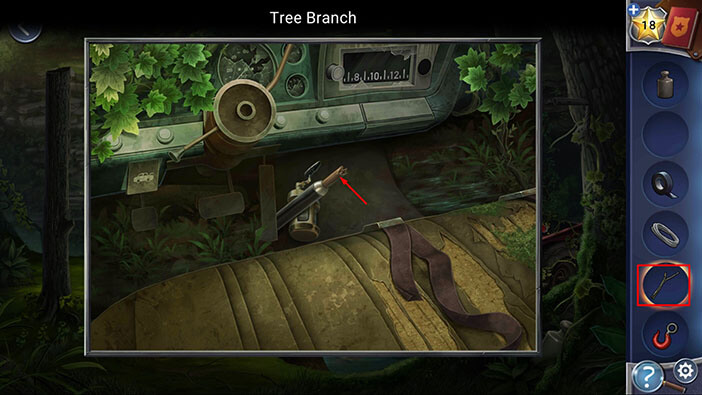
Next, select the “Electrical Tape” from the inventory and use it to bind the tree branch to the broken fishing rod.
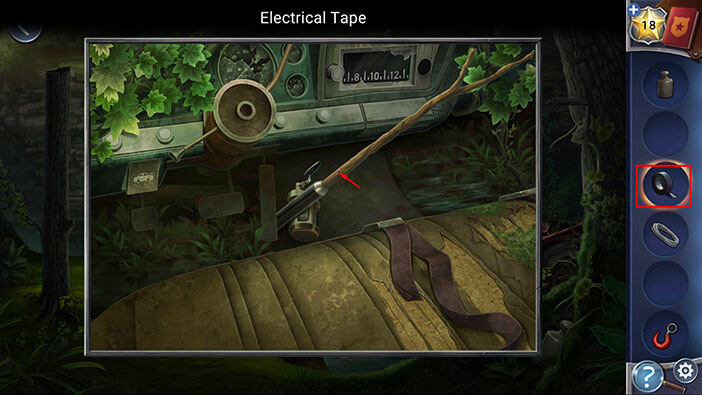
Next, select the “Steel Cable” and attach it to our fishing rod.
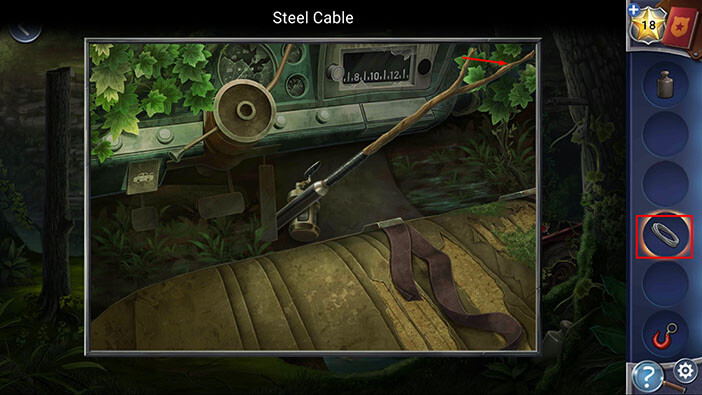
Lastly, select the “Hook” from the inventory and attach it to the other end of the steel cable. With this step, you will assemble the “Fishing Rod” and it will be automatically added to your inventory.
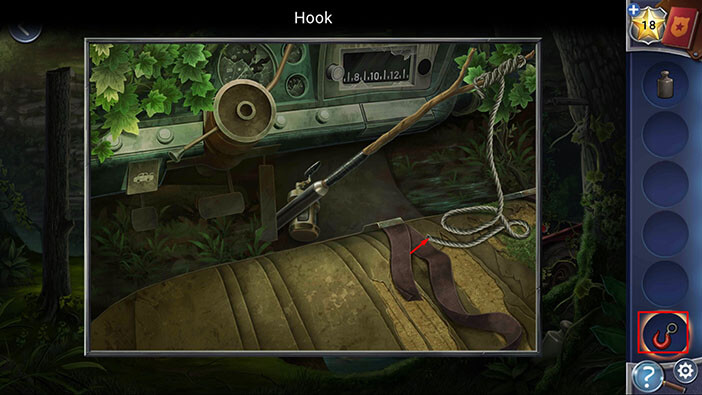
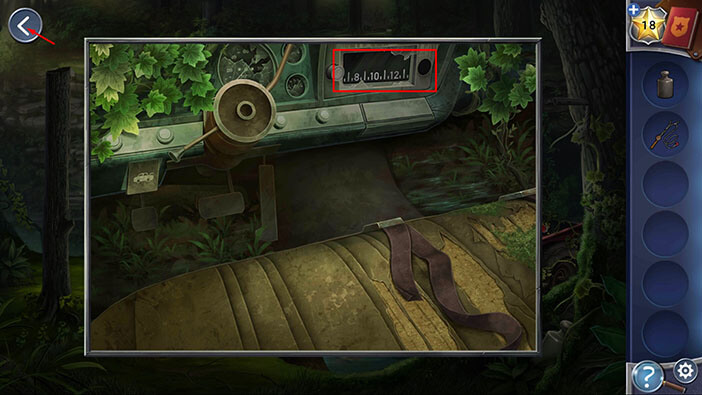
There’s also a radio in front of the passenger’s seat, and we will use it later to solve one of the puzzles. For now, just take note of it. Tap on the arrow in the upper left corner to go back.
If you take a closer look at the water, you will notice two items, below the surface. So, let’s select the “Fishing Rod” from the inventory and use it to get them out. Another “Weight” will be added to your inventory, and Kate will fish out the wooden chest.

Tap on the wooden chest to take a closer look at it.
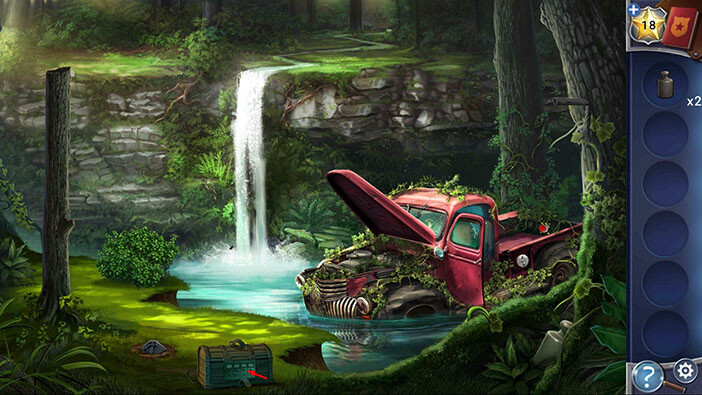
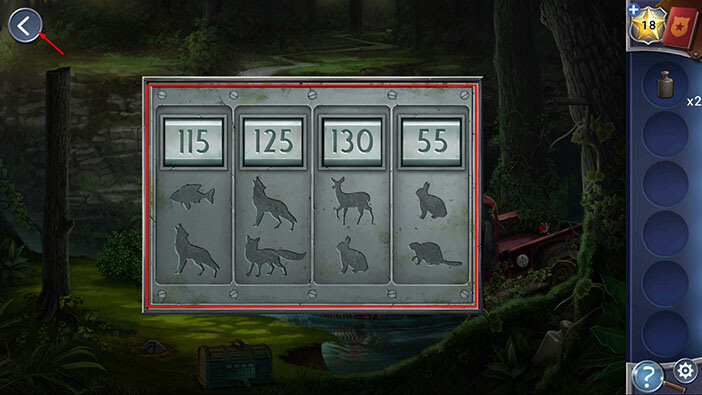
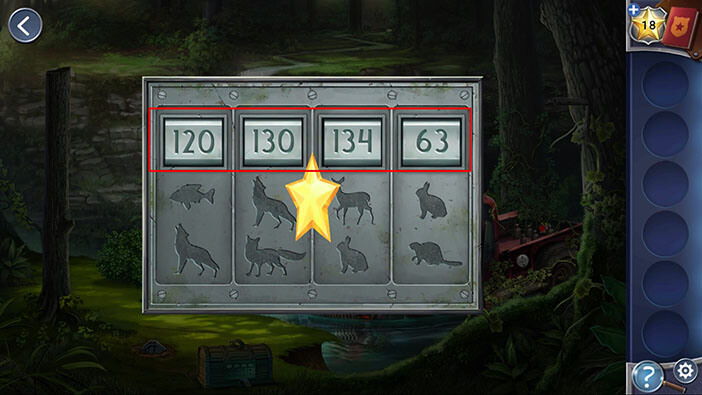
Here, we can see silhouettes of several animals (fish, wolf, fox, deer, rabbit, and beaver). Below each number we can see the silhouettes of two animals, so, it seems that each type of animal has a certain numerical value, and once we discover these values, we will be able to unlock the box.
Tap on the arrow in the upper left corner to go back.
Let’s take a closer look at the back of the truck.

Well, it seems that this truck has a built-in weight scale.
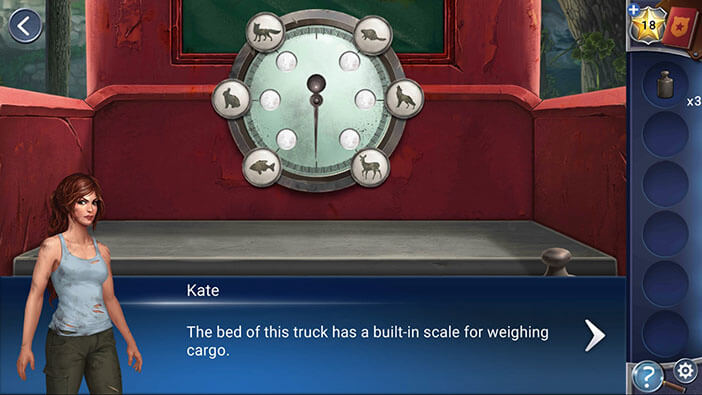
We can tell that some of the weights are missing, so select the “Weights” from the inventory and place them in the weights in the back of the truck.
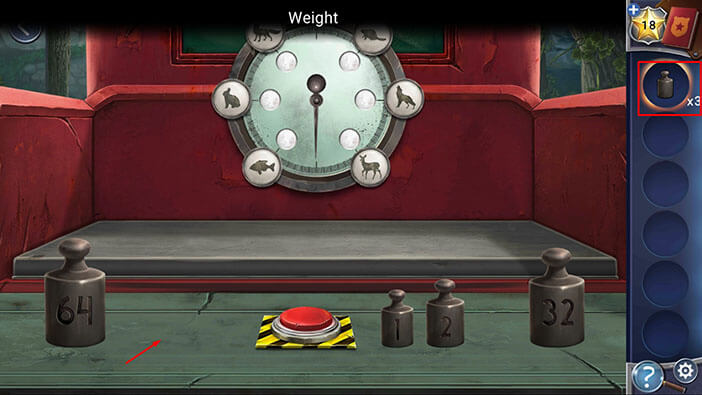
Ok, if we take a look at the scale, we will see pictures of the six animals, the same animals that we saw on the wooden box.
Our objective is to add the weights to the scale and determine the weight of each type of animal. Once we discover the weight of each animal, we will be able to open the wooden chest.
We will solve this puzzle in several steps. Let’s begin.
Step 1
Drag the weights 4 and 1 on the scale. After that, tap on the Red Button to confirm.
You will discover that the weight of a fish is 5.
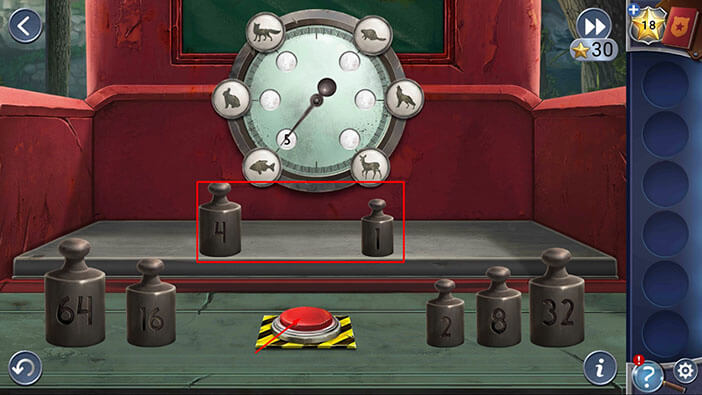
Step 2
Remove the weights 4 and 1.
Drag the weights 8 and 2 on the scale. After that, tap on the Red Button to confirm.
You will discover that the weight of a rabbit is 10.
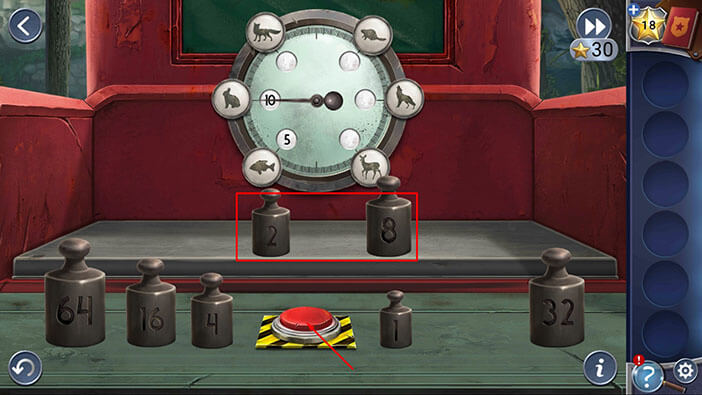
Step 3
Drag the weights 4 and 1 on the scale. After that, tap on the Red Button to confirm.
You will discover that the weight of a fox is 15.
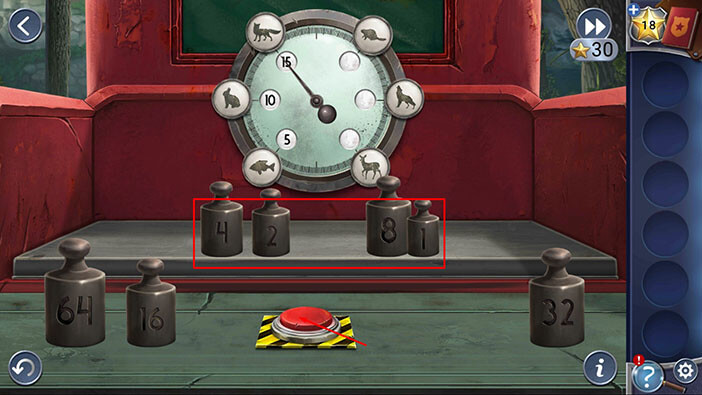
Step 4
Remove the weights 8 and 2.
Drag the weights 32 and 16 on the scale. After that, tap on the Red Button to confirm.
You will discover that the weight of a beaver is 53.
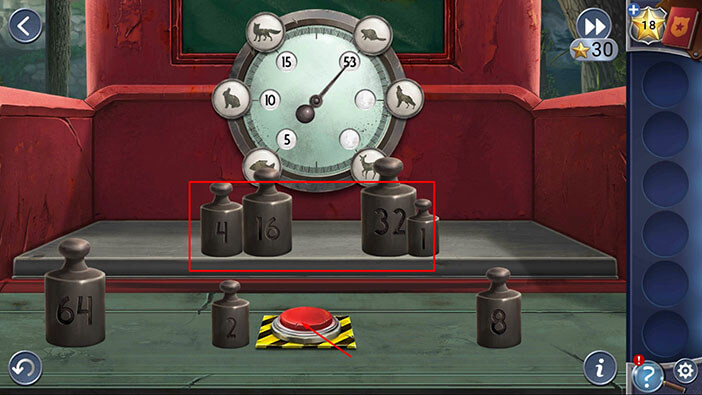
Step 5
Remove the weight 4.
Drag the weights 64 and 2 on the scale. After that, tap on the Red Button to confirm.
You will discover that the weight of a wolf is 115.
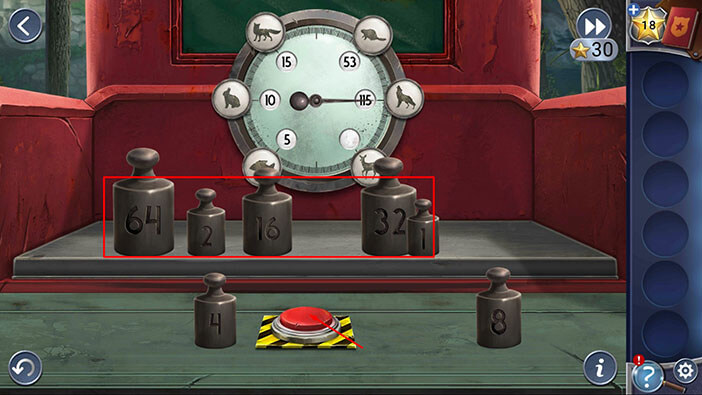
Step 6
Remove the weights 2 and 1.
Drag the weights 8 and 4 on the scale. After that, tap on the Red Button to confirm.
You will discover that the weight of a deer is 124.
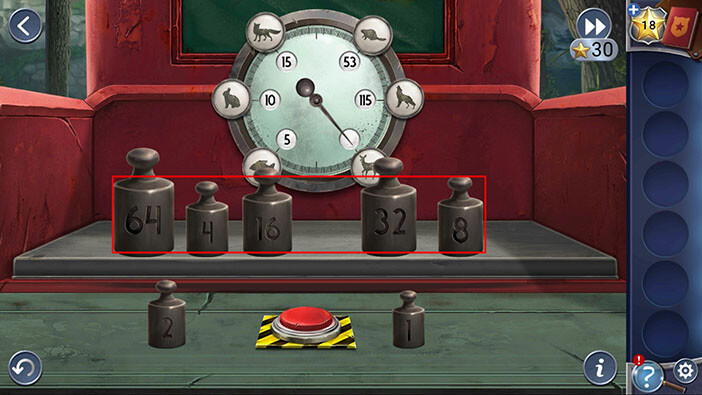
Well, Kate now knows the average weight of the animals. More importantly, we know the numerical value that animal each animal represents, so let’s write it down because we will need this information to unlock the wooden chest.
Fish = 5
Rabbit = 10
Fox = 15
Beaver = 53
Wolf = 115
Deer = 124
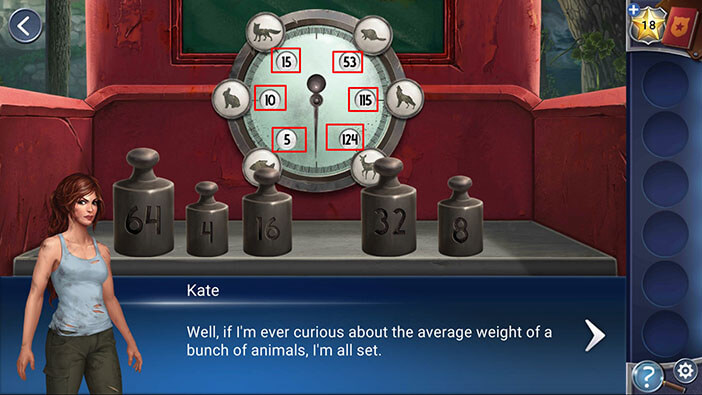
Tap on the wooden chest, again, to start the interaction.

Ok, let’s calculate the value for each slot.
Below the first slot, we have a fish and a wolf.
First slot = 5 + 115 = 120
Below the second slot, we have a wolf and a fox.
Second slot = 115 + 15 = 130
Below the third slot, we have a deer and a rabbit.
Third slot = 124 + 10 = 134
Below the fourth slot, we have a rabbit and a beaver.
Fourth slot = 10 + 53 = 63
Enter these values and you will unlock the chest.
In the chest, you will find a “Climbing Gear”. Tap on it to pick it up.

Select the “Climbing Gear” from the inventory and use it to climb on the ledge on the right.
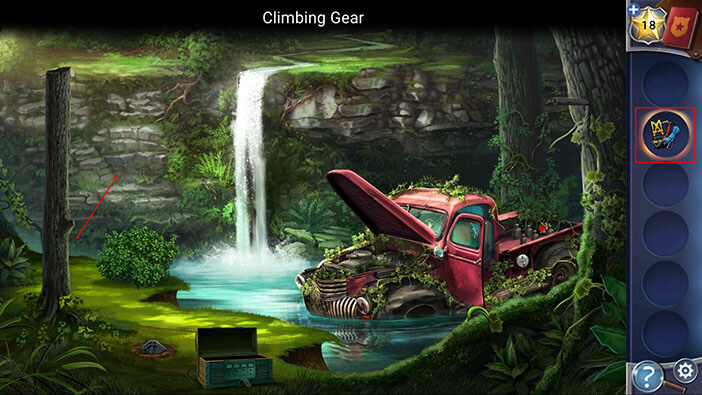
Ok, we just unlocked a new area. Tap on the “Axe” to pick it up.
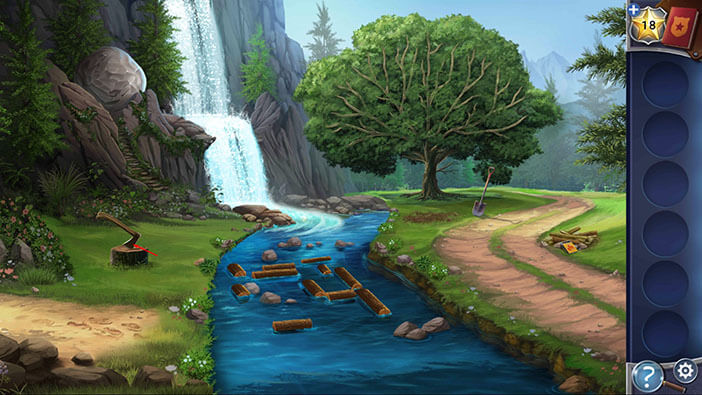
After that, tap on the path dirt path on the left to go back to the previous area.
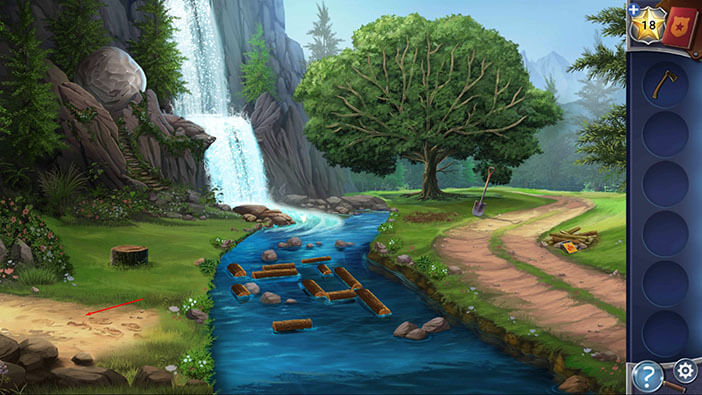
Select the “Axe” from the inventory and use it to cut down the tree on the left.
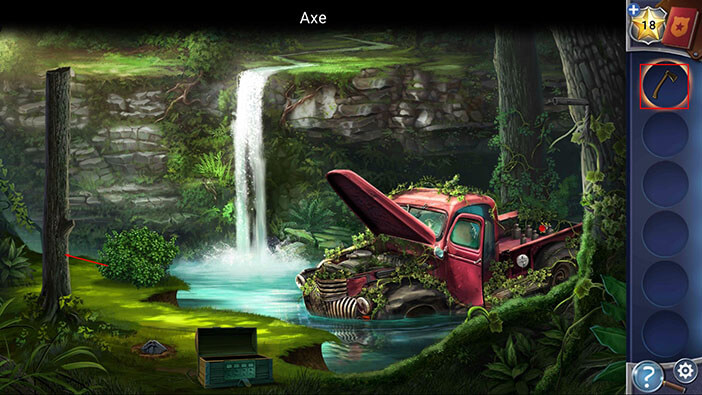
With the “Axe” selected, tap on the tree two more times to cut it into the three smaller logs.
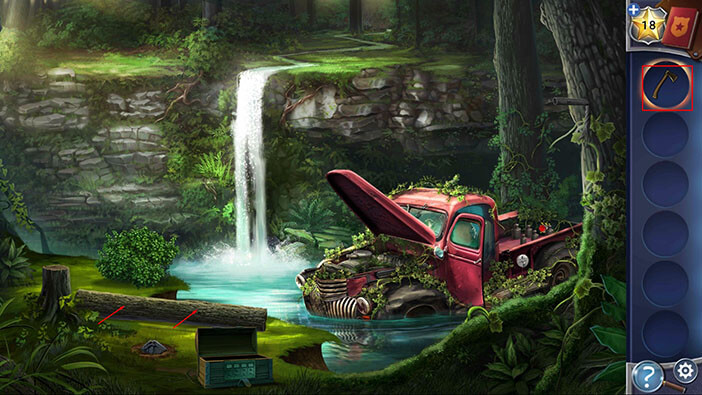
Tap on the “Logs” to pick them up. After that, tap on the ledge to go to the next area.
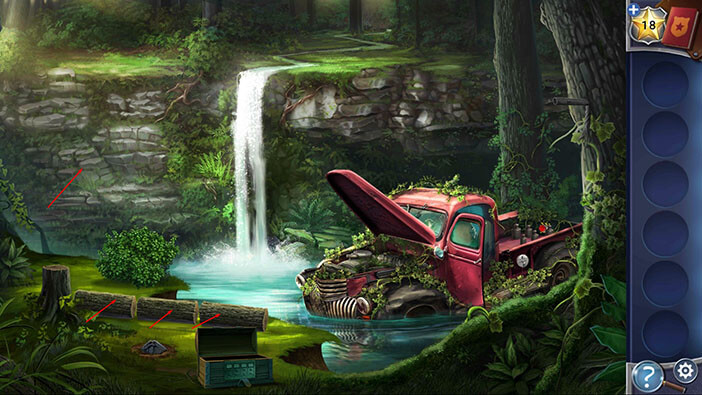
Tap on the logs in the water to take a closer look.

Kate thinks that she should be able to find the way to the other side of the river if she had a few more logs. Luckily, we already gathered the logs, so select the “Logs” (you should have 3) from the inventory and put them into the water.
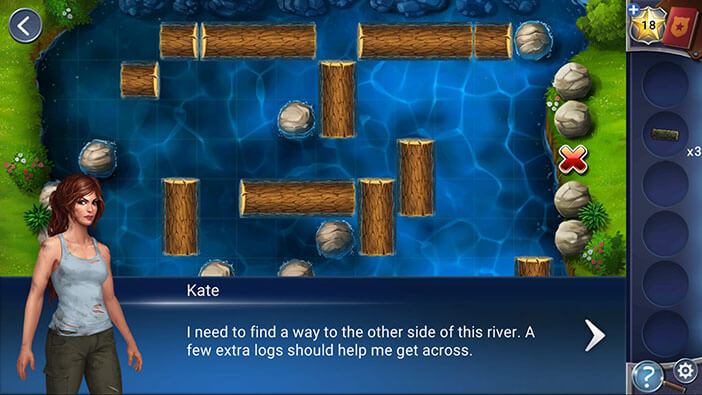
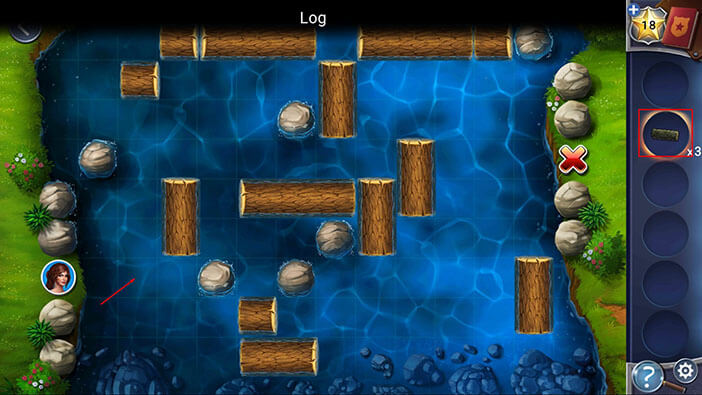
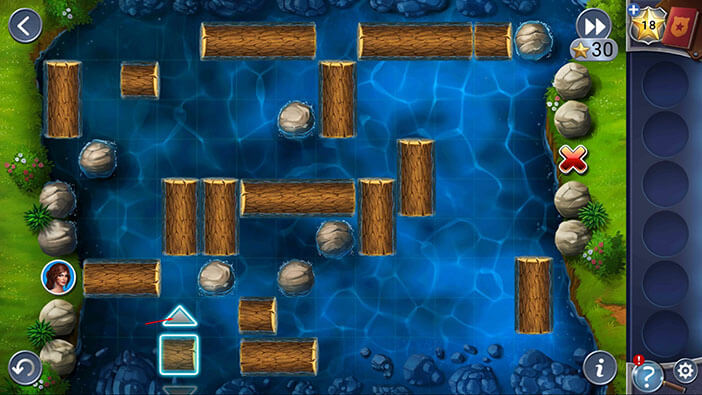
Ok, our next task is to make a continuous path of logs from our side of the shore (Kate’s icon is the starting point) to the “X” on the other side. We can rearrange the logs by rolling them.
We will do this puzzle in several steps. Let’s begin.
Step 1
Select the log in the lower-left corner, then tap on the “Up” arrow to roll it.
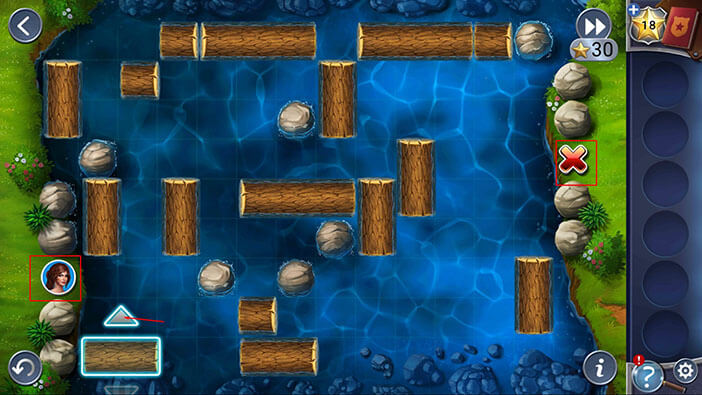
Step 2
Close to Kate’s portrait, you will see two vertical logs. Select the second one, then tap on the “Right” arrow to roll it.
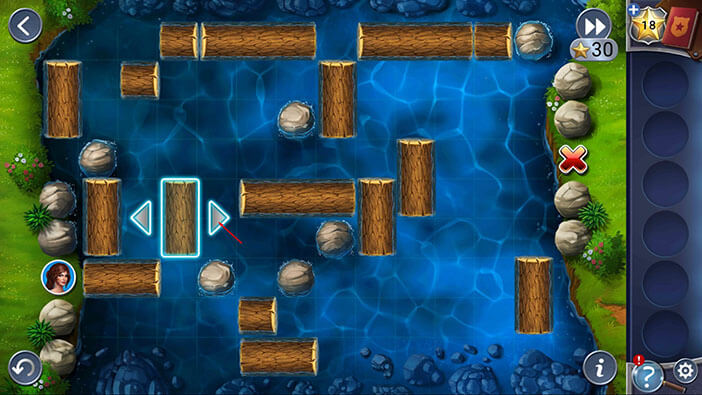
Step 3
By moving the previous log, we have cleared the path for one of the smaller logs in the upper left corner, and we can now roll it all the way down. So, select this log then tap on the “Down” arrow to roll it.
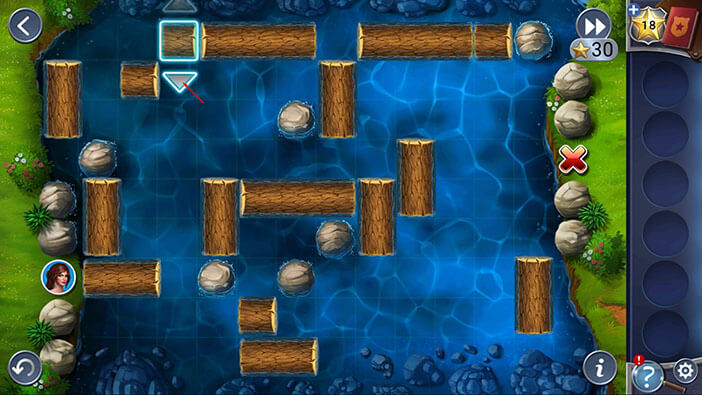
Step 4
Select the first vertical log (the one next to Kate) and tap on the “Right” arrow to roll it.

Step 5
Select the small log that we previously rolled all the way down, then tap on the “Up” arrow to roll it. This small log will jam between larger vertical and horizontal logs, completing the first part of our bridge.
Step 6
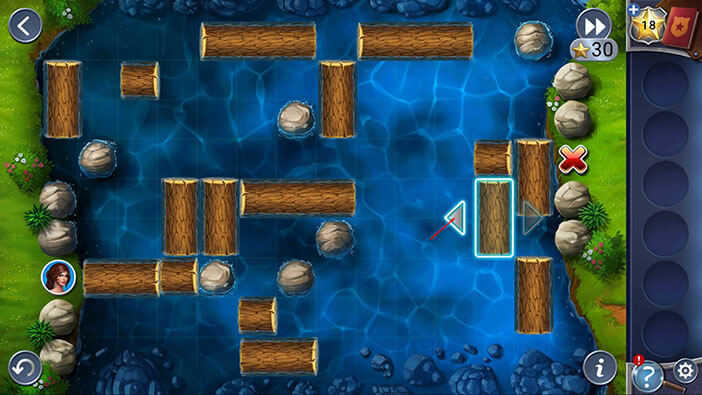
In the middle of the river, just to the right of the large horizontal log, there are two vertical logs. Select them both, one by one, and roll them to the right.


Step 7
Select the small log in the upper right corner of the screen and tap on the “Down” arrow to roll it. The small log will be jammed between the two vertical logs, just where we want it.

Step 8
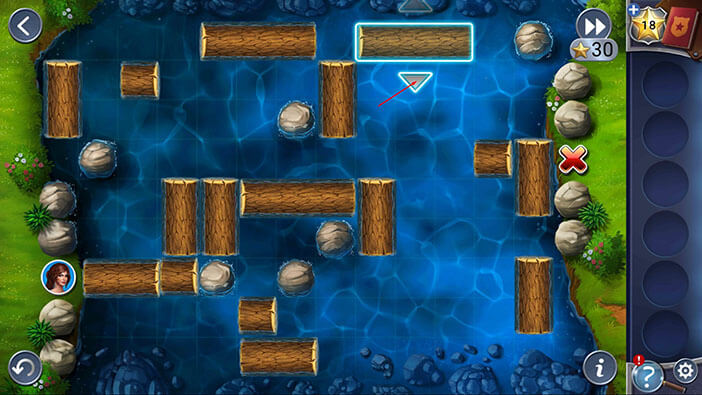
The bridge is almost assembled. We just have to roll down the large horizontal log located on the top-right side. However, if we did that now, it would roll all the way to the bottom, and we don’t want that. So, let’s select the vertical log that we previously moved to the left, and now move it to the right. We will use this log to jam the larger log.
Step 9
Select the large horizontal log in the upper right area, and tap on the “Down” arrow to roll it. With that, you will assemble the bridge, and Kate will cross to the other side of the river.
Here, we can pick up two items.
First, tap on the “Shovel” on the left side of the road to pick it up.
After that, tap on the “Matches” on the right side of the road to pick them up.
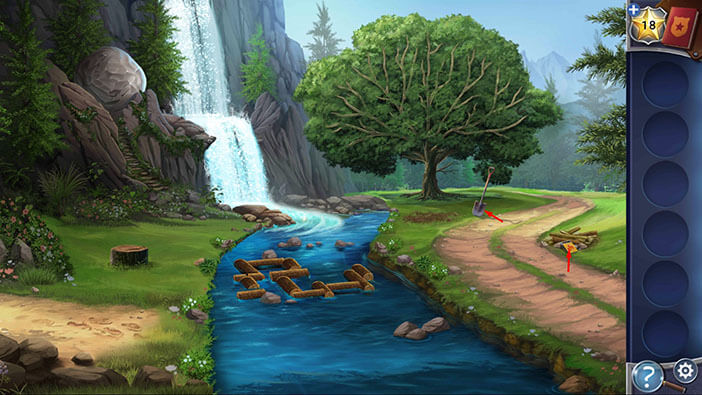
We can see that the ground beneath the shovel was freshly dug, so select the “Shovel” from the inventory and use it to dig at this spot.
After you dig the hole, tap on it to look inside.


Well, as we suspected, Ava is dead, most likely murdered by the same man that kidnapped Kate. Kate is terrified because right now she realized that she would probably end up in the same grave as Ava. Luckily, she managed to escape. However, instead of succumbing to fear, Kate vows that she will bring Ava’s murderer to justice.
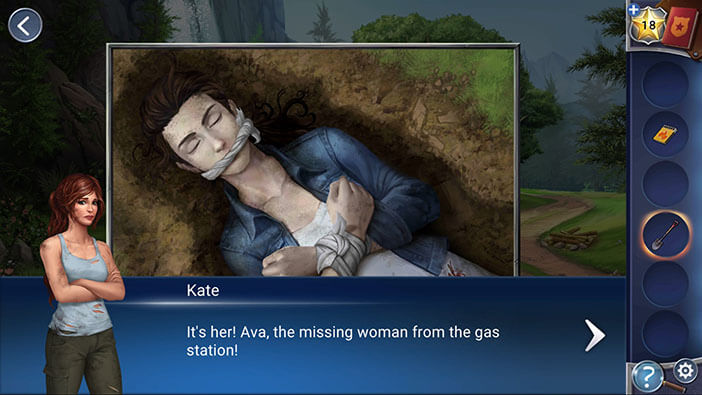
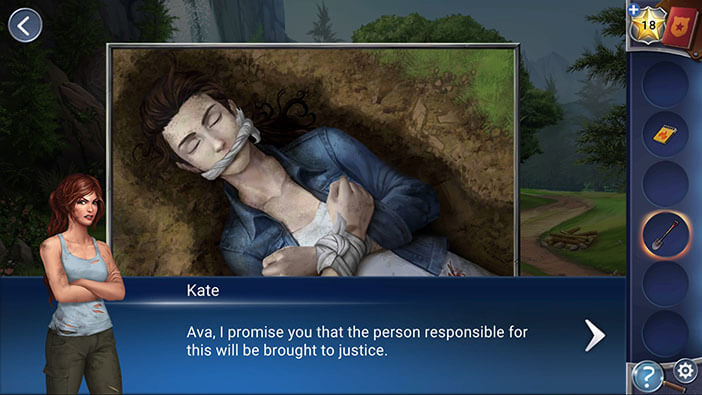
A new entry will be added to your Notebook, “Dead Body”. Kate also concludes that she will have to send someone to recover Ava’s body, once she makes it back to the civilization, of course.
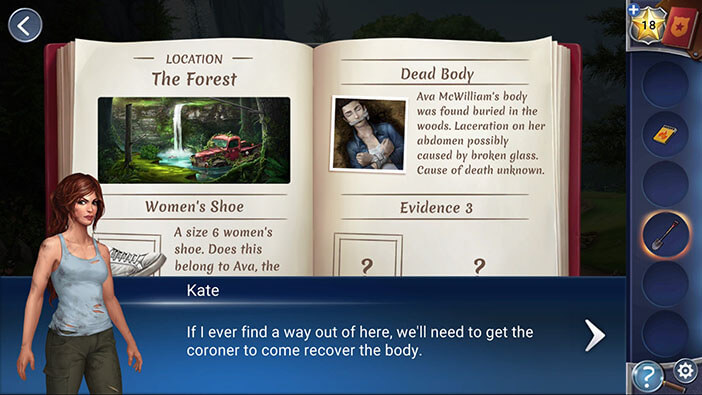
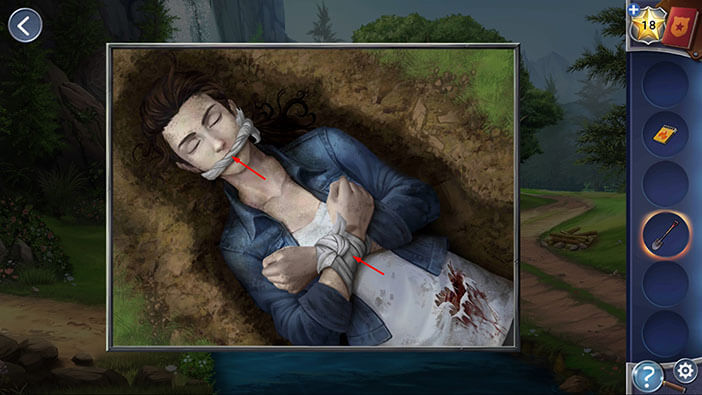
Tap on the “Cloth” on Ava’s hands and mouth to pick it up.
Ok, we should now get back to the truck (the first area). To get there, tap on the dirt path on the left.
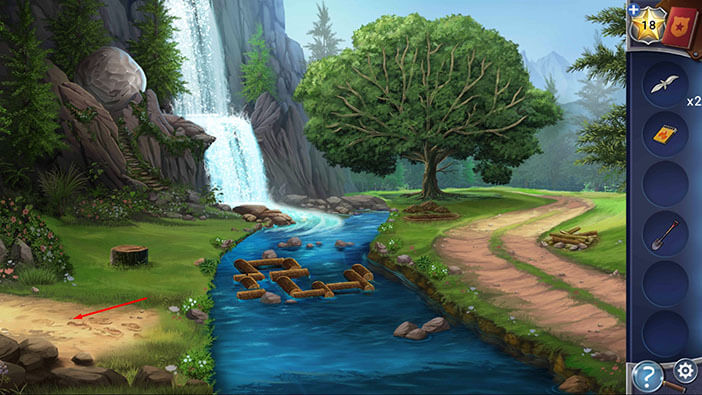
Select the shovel from the inventory and tap on the partially buried suitcase to dig it up.
After that, tap on the chest to take a closer look at it.
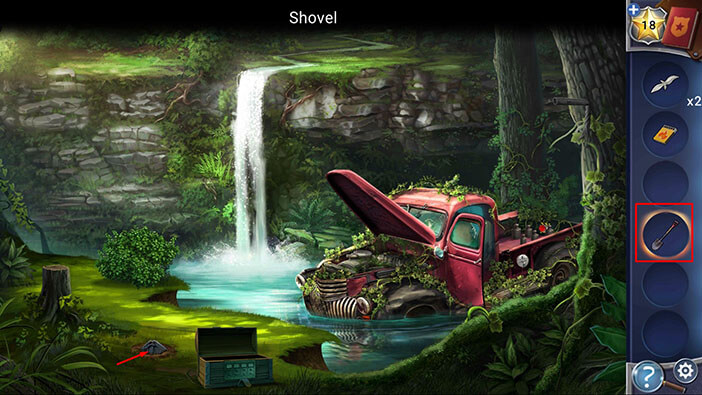

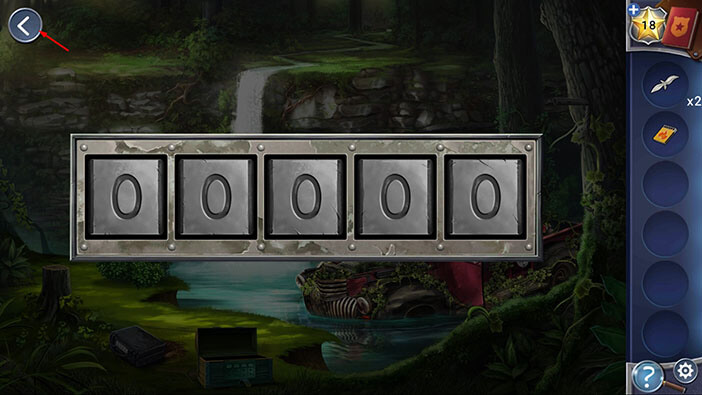
Ok, we can see that the suitcase is locked and we will need to find a five-digit code to open it. Tap on the arrow in the upper left corner to go back.
Remember that radio that we saw in the truck at the beginning of this stage? Well, it’s time to get back to it. Tap on the truck door to enter.
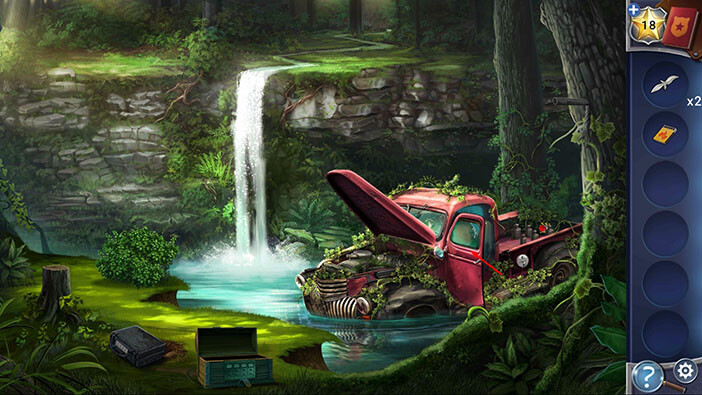
Tap on the button on the left side of the radio, and you will see a red line above number 8. Write down this number, and repeat this process three more times. You will end up with the number “81379” (8, 13, 7, and 9).
Memorize/write down this number because it’s a code for the suitcase.
Once you’re done tap on the arrow in the upper left corner to go back.

Tap on the suitcase to start the interaction.

Enter the code “81379” and you will unlock the suitcase.
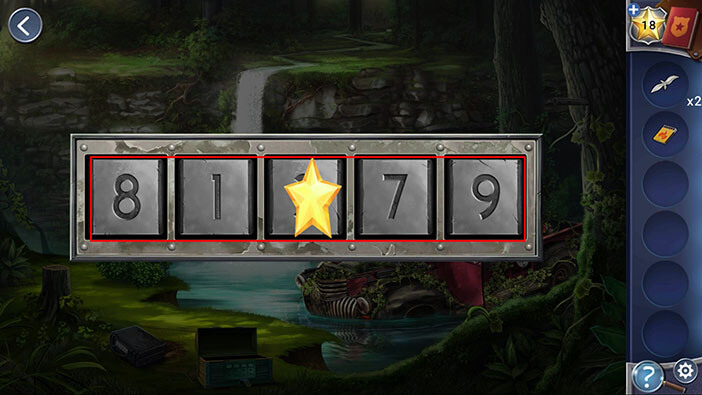
In the suitcase, you will find “Butane Canister”. Tap on it to pick it up.

Next, tap on the lid on the truck’s fuel tank to open it.
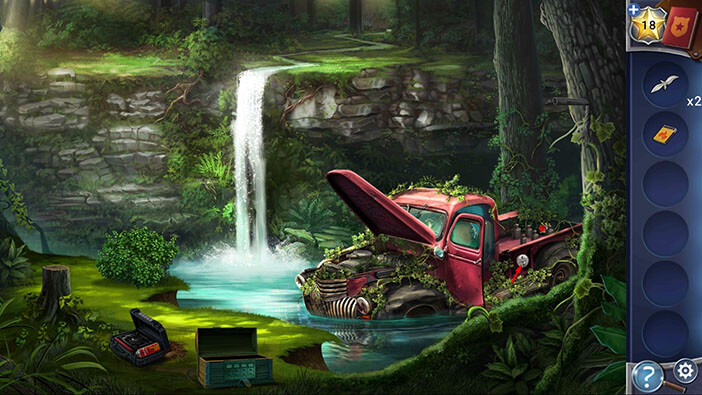
After that, select the “Cloth” from the inventory and dip it into the fuel. “Gas-soaked Cloth” will be added to your inventory.
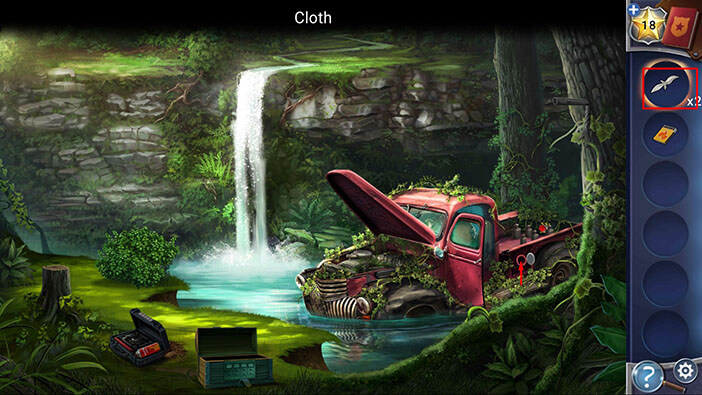
Ok, let’s get back to the river (tap on the ledge).

If you take a look at the left side, you will notice a very large stone formation. It seems that there are stairs carved into the stone, but the rest of the path is blocked by the huge rock. So, let’s blow it up.
First, select the “Butane Canister” from the inventory and place it at the base of the rock.

Next, select the “Gas-soaked Cloth” from the inventory and attach it to the canister (we will use the cloth as an improvised fuse).

Finally, select the “Matches” from the inventory and use them to light the fuse.
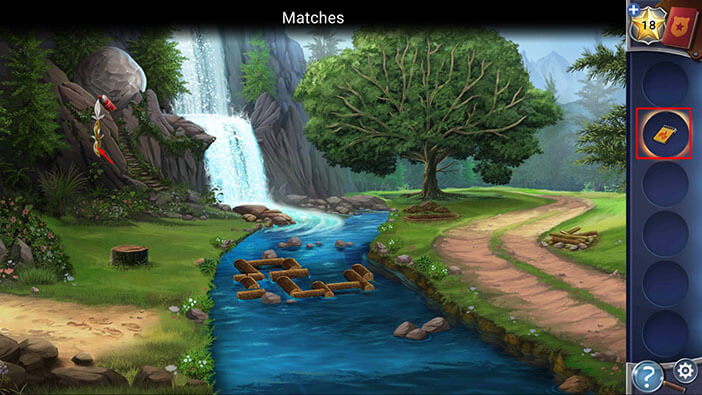
The explosion will throw the rock to the right, and it will block the flow of water from the waterfall, revealing a cave entrance. Interestingly, the first time I played I expected to see a cave entrance (or access to the next area via stone stairs) behind the rock.
Tap on the cave entrance to proceed inside.

Kate will jokingly say that she found a “man cave”. Most men built them in their basement, but it seems that this guy took this expression literally.
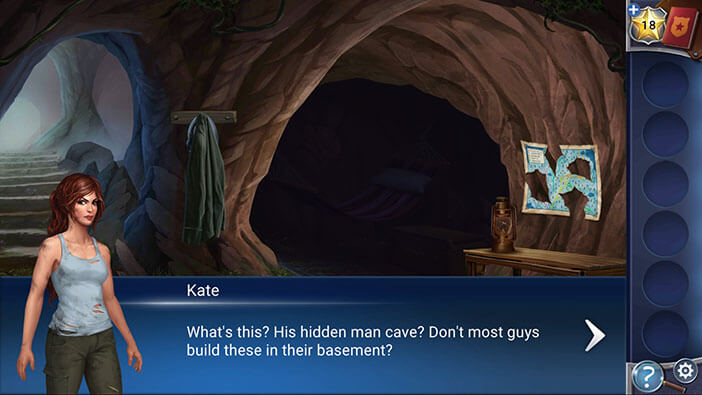
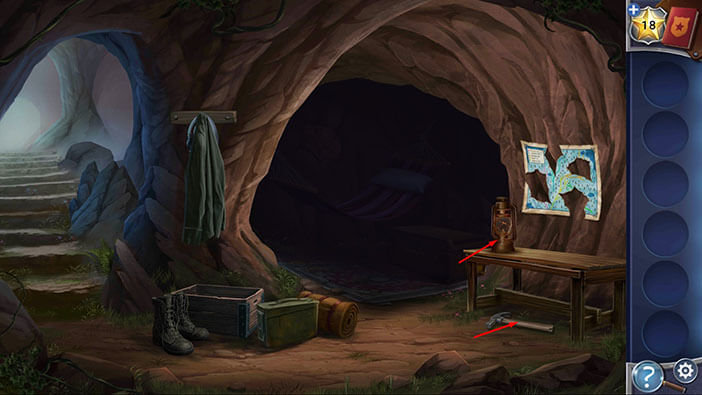
Ok, let’s search the “man cave”. We will start by picking up two items.
First, tap on the “Empty Lantern” on the small table on the right to pick it up.
Below this table, you will see a “Hammer”. Tap on it to pick it up.
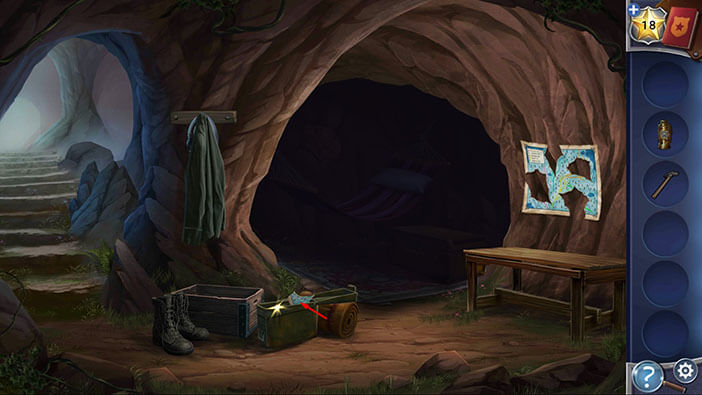
Next, tap on the green (ammo) box next to the cave entrance to open it. After that, tap on the “Map Piece” to pick it up.
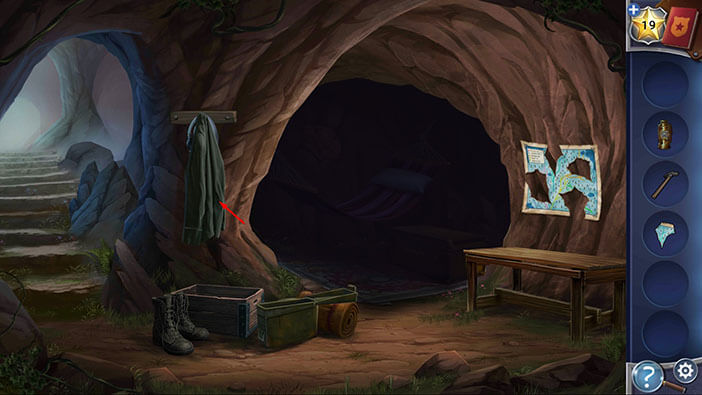
Next, tap on the coat to move it aside, and you will find a “Fuel Siphon”. Tap on it to pick it up.
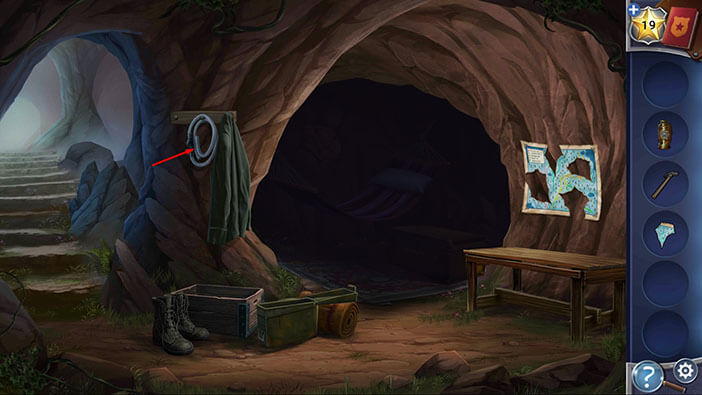
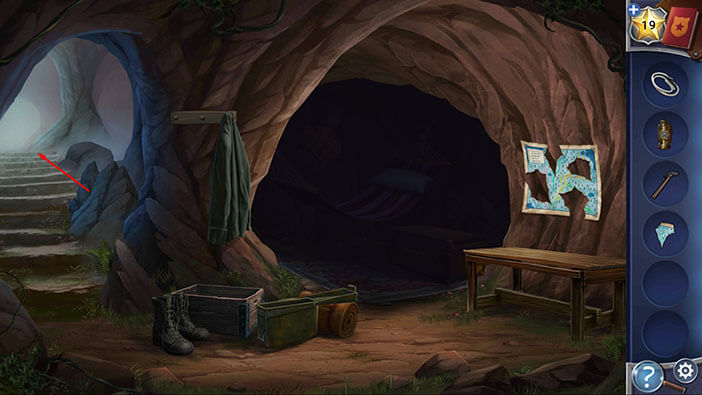
Ok, we should now go back to the truck, and use the gasoline to fill up the “Empty Lantern”.
To get to the truck, tap on the cave entrance on the left to go back to the previous area.
After that, tap on the dirt path on the left and you will reach the truck.
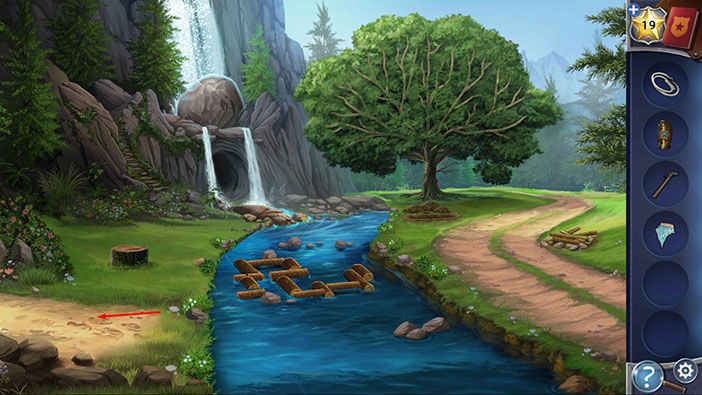
Select the “Fuel Siphon” from the inventory and insert it into the fuel tank.
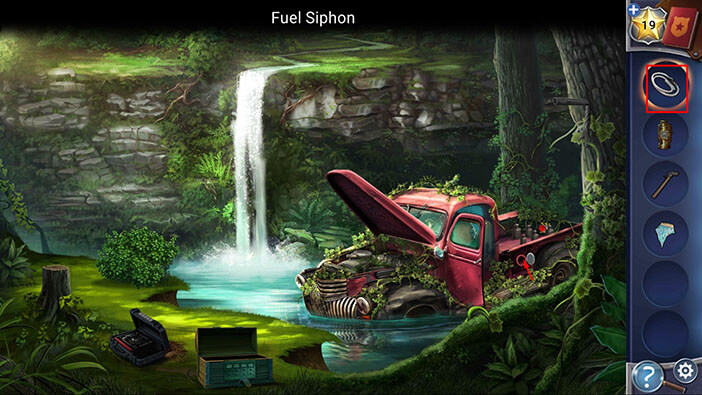
Next, select the “Empty Lantern” and tap on the fuel siphon. Kate will fill up the lantern, and “Gas Lantern” will be added to your inventory.

Ok, let’s go back to the cave.
Tap on the ledge to go to the next area. After that, tap on the cave entrance.
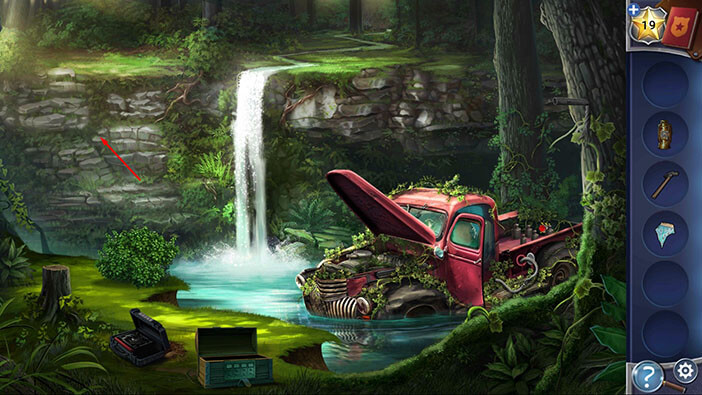

We can now use the lantern to illuminate the dark portion of the cave. To do that, select the “Gas Lantern” from the inventory and tap on the dark part. Kate will automatically light the lantern (somehow, because she no longer has the matches) and place it on the table on the right.
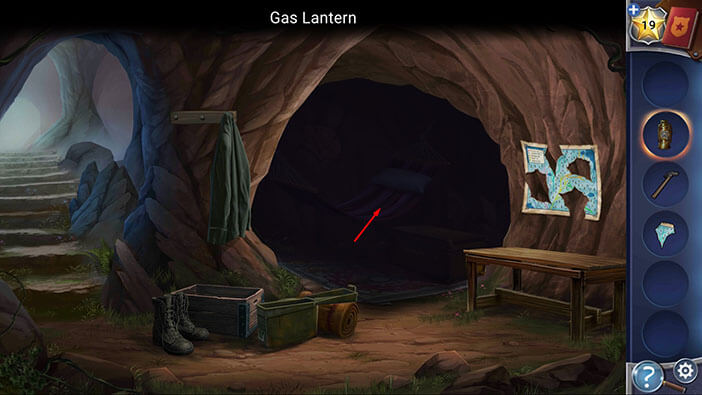
Tap on the left side of the rug to move it aside and you will discover another “Map Piece” below it. Tap on it to pick it up.

Tap on the pillow on the hammock to move it aside and you will find another “Map Piece”. Tap on it to pick it up.

Next, select the hammer from the inventory and use it to break the stones above the hammock.
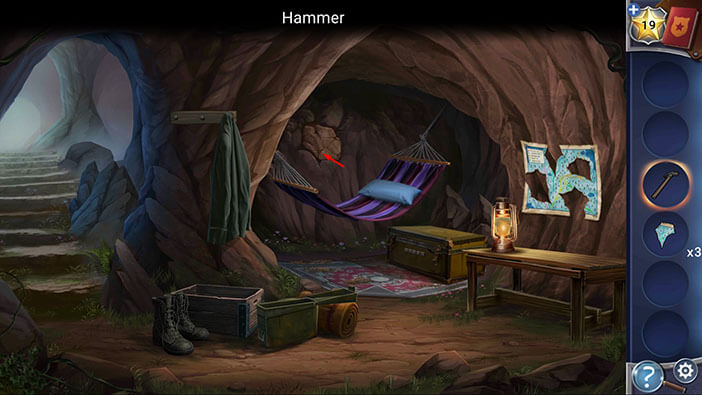
Tap on the “Map Piece” in the hole to pick it up. At this point, you should have four “Map Pieces”.

Next, let’s take a look at the chest next to the hammock.
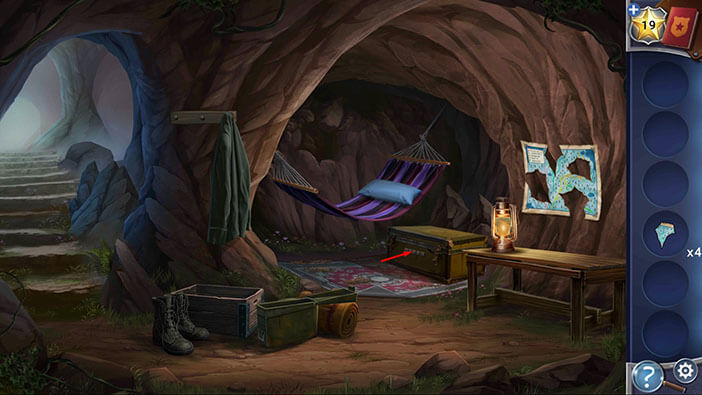
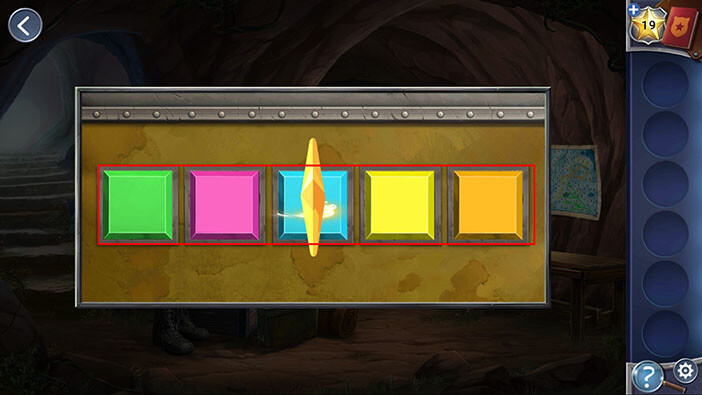
This chest is locked by a combination of five colors (the buttons will change color if you tap on them). For now, just take note of this information. Tap on the arrow in the upper left corner to go back.
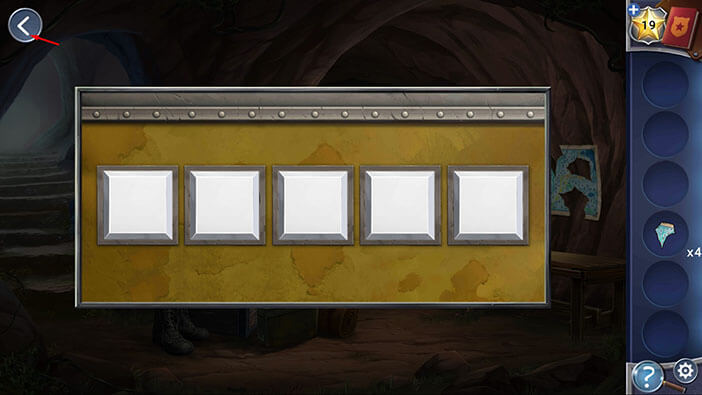
Finally, let’s take a look at the map on the wall on the right.

Select the “Map Pieces” from the inventory and use them to assemble the map.
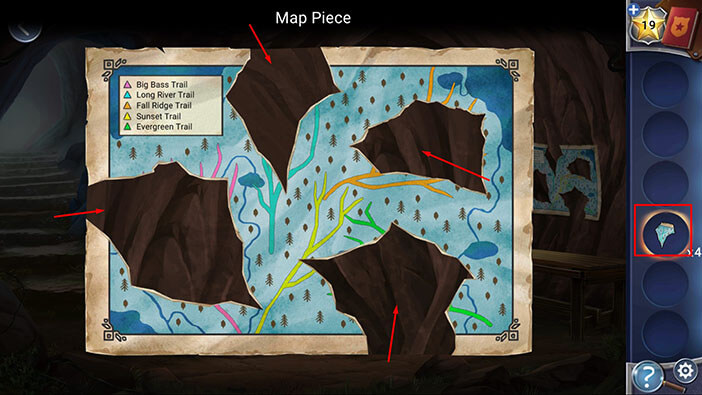
After assembling the map, we can see four trails, pink, blue, orange, yellow, and green. Try to memorize (or draw) the shape of these trails (and color), because we will need this information for the next puzzle.
Also, you’ll probably notice that the shape of the trails looks like branches of a tree.
Once you’re done, tap on the arrow in the upper left corner to go back.
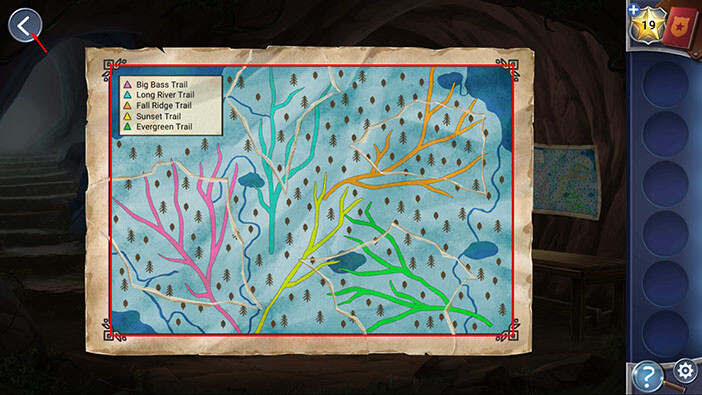
Ok, let’s go back outside.
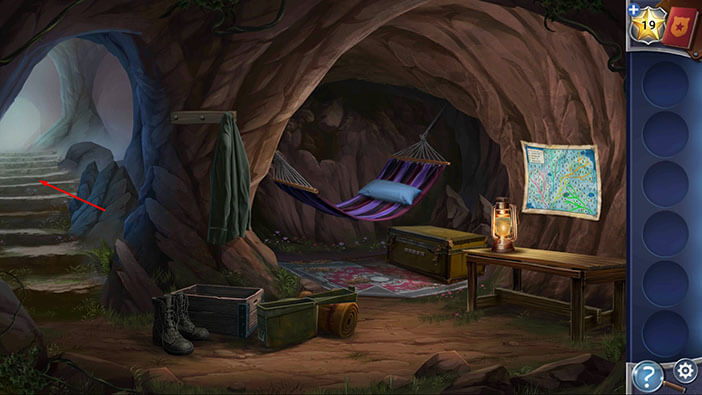
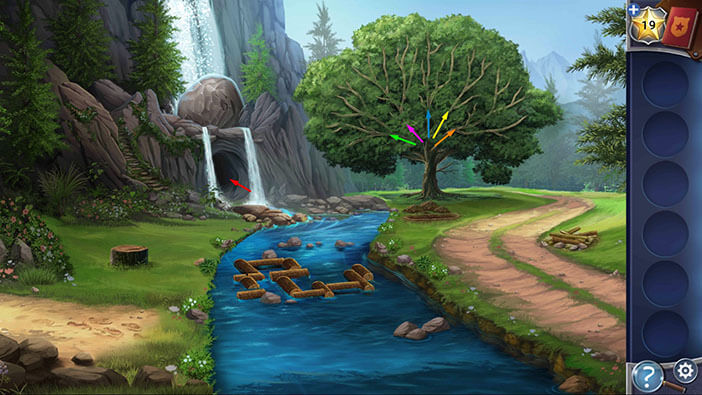
Pay attention to the large tree on the right side of the river. If you take a closer look at its branches, you will notice that they form a similar pattern as the trails on the map.
Well, our task is to find the branch patterns that match the trails on the map.
Starting from the left side of the tree, we will see that,
Green, Pink, Blue, Yellow, and Orange trails match the patterns of the branches.
Memorize/write down the order of colors, then tap on the cave entrance to go back inside.
Tap on the chest to start the interaction.

Enter the colors in the correct order, Green, Pink, Blue, Yellow, Orange, and you will unlock the chest.
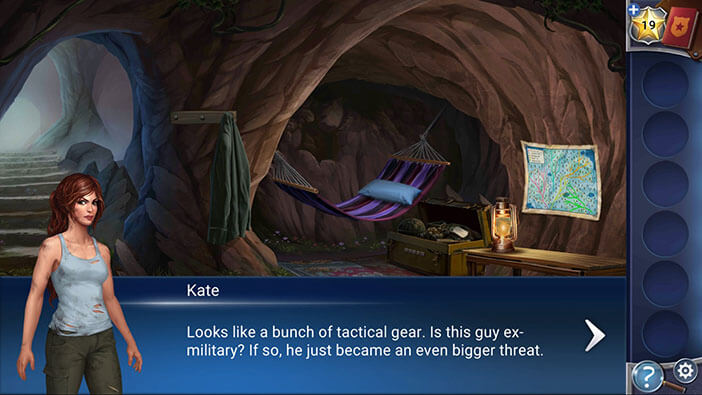
Inside the chest, Kate will find a lot of tactical gear, which indicates that the murderer might have been part of the military.
Tap on the “Dog Tags” in the chest to examine them, and Kate will add another entry to her Notebook, “Dog Tags”. Although the name on the tags is scratched beyond recognition, she believes that she still might be able to identify this mysterious killer by the number on the tags.
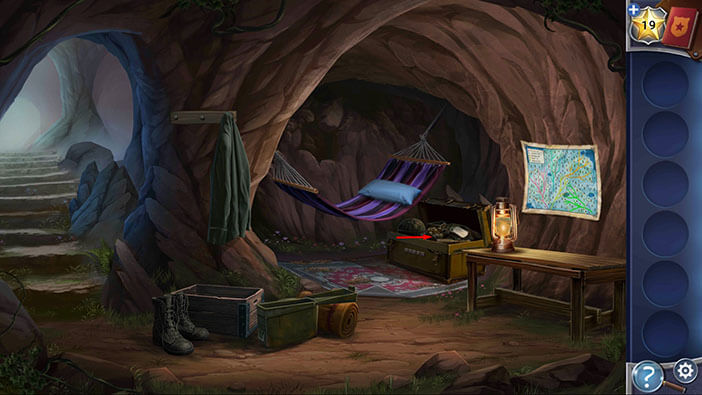
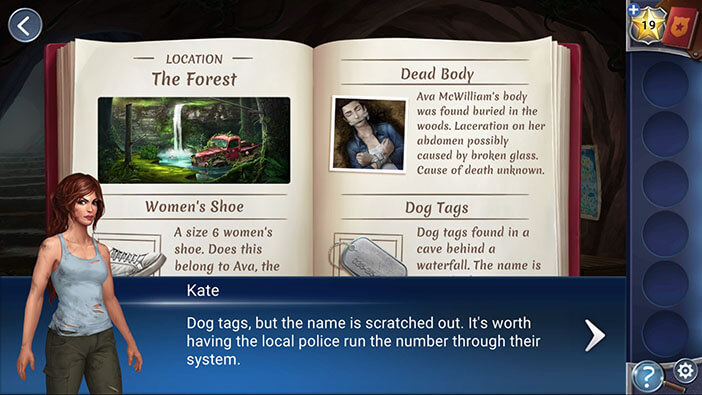
Unfortunately, at this moment, Kate will hear a truck stopping in front of the cave entrance. She hopes that the driver is some random camper and not the serial killer that has been after her. She knows that there is only one entrance from the cave, so there’s no way for her to escape. The last sound that she heard was cocking of a gun…
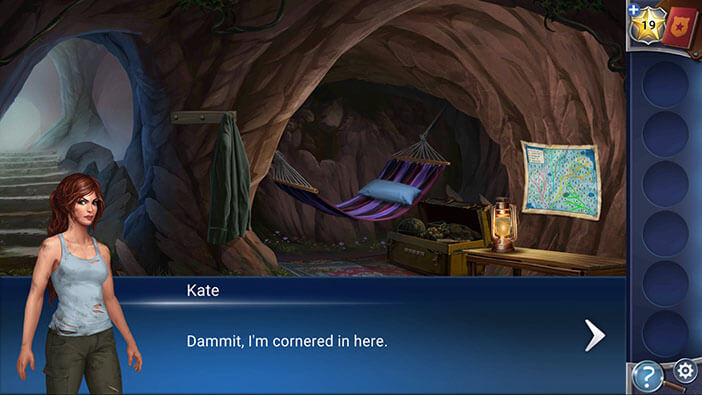
The third chapter ended on a real cliff-hanger. I don’t see how Kate could get out of this situation, and, as we expected, the killer was able to track her down. On the other hand, there’s a slim chance that someone else stopped in front of the cave entrance. Maybe a search party? Well, I guess we will find out in the next chapter.
You can check out the fourth chapter by tapping on the “Chapter IV” button.
Thank you for reading.