The Echo Bay Murders – Chapter II
Hello everyone, and welcome to our walkthrough for Chapter 2 of “The Echo Bay Murders” another game in the series of AE mysteries, developed and published by Haiku Games.
In the previous chapter, we investigated the disappearance of another woman. After examining the crime scene, we discovered the victim’s identity (Ava McWilliam). Also, after reviewing the footage from the security cameras, we saw the suspect, but the video had very low resolution, so it was impossible to determine his identity. The only thing that Kate knew for sure was that the suspect is an athletically built male.
After she finished investigating the crime scene, detective Kate decided to go to the hotel room and get some rest. However, while she was driving, the mysterious man blinded her with headlights on his car and fired a shot through her windshield. Kate lost control over her car and crashed. The last thing she saw before blacking out was a man holding a gun pointed at her, and this man was dressed in the same way and looked exactly the same as the suspect from the security footage. As she was losing her consciousness, Kate realized that she was about to be taken…
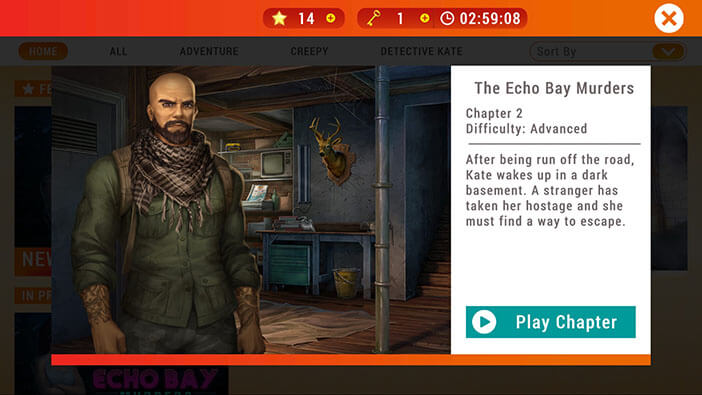
When Kate woke up, she was sitting in a chair, her hands were tied, and the man from the gas station was standing in front of her. He knew that Kate wasn’t a local, because he saw her license. After a short monologue, the man got to the point and asked Kate what she was doing at the gas station.
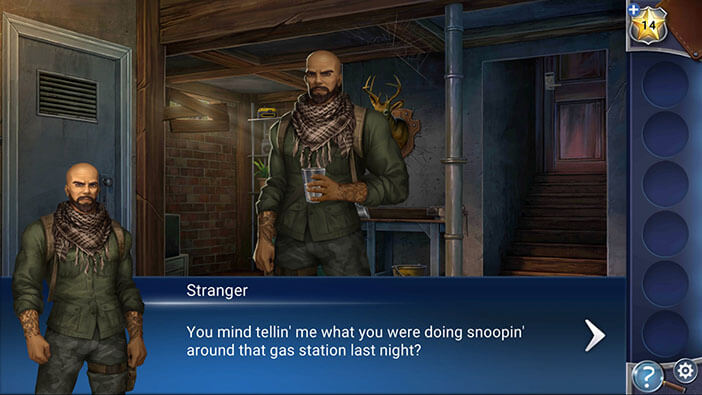
Before answering his question, Kate complained that her throat is completely dry. The man offered her a glass of water, but after that Kate will have to tell him everything she knows.
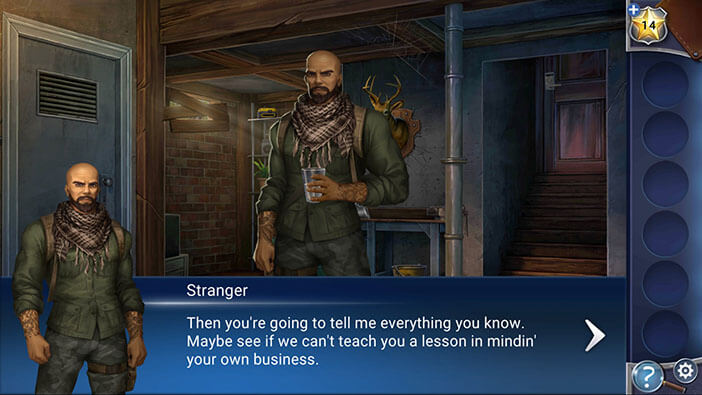
With that, he extended his arm, offering Kate a glass of water. Tap on the glass to pick it up.
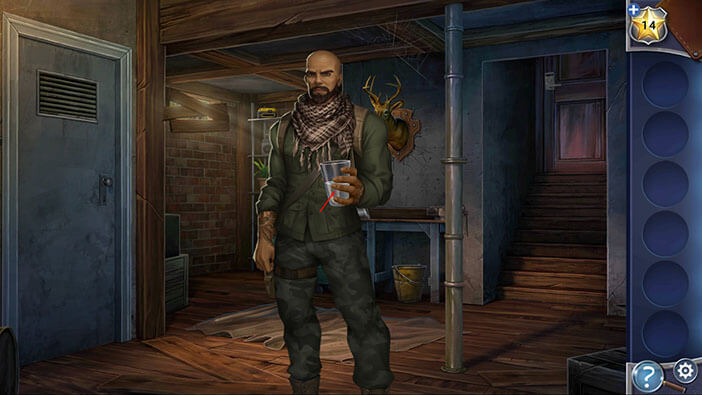
At this moment, his phone started ringing. The man turned around to leave, saying that he has to take the call. However, before he left, he threatened Kate, by saying that she must tell him everything she knows when he comes back, or else she will face serious consequences.
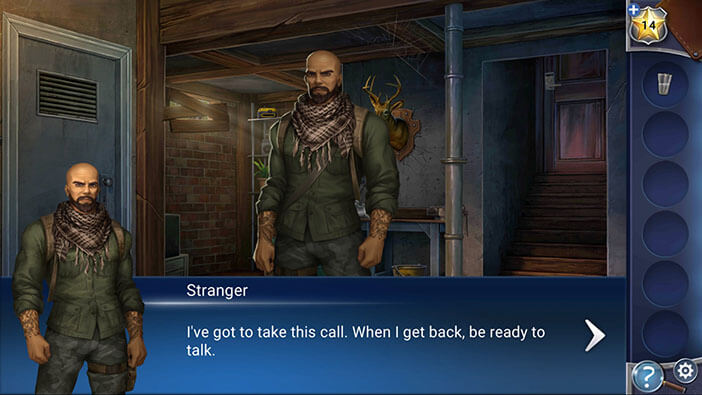
But Kate wasn’t intimidated. As soon as her captor left, she started looking for a way to free her hands. After that, she plans to escape from this place.
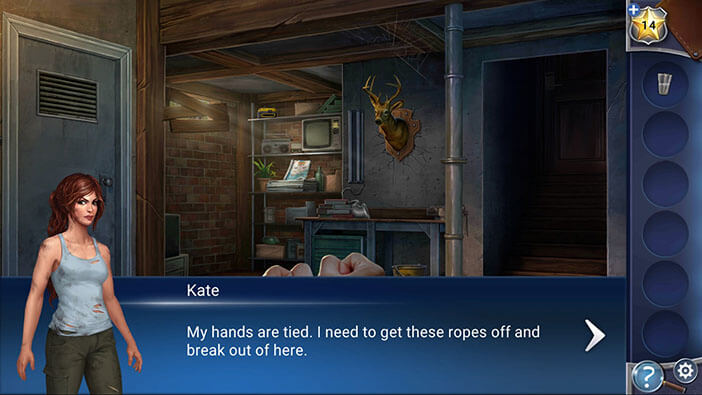
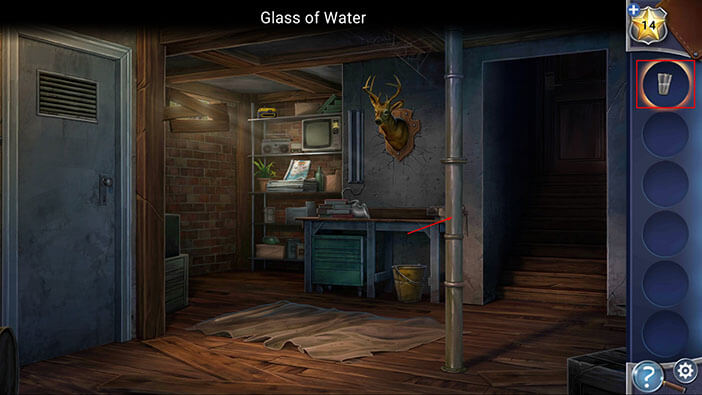
Select the “Glass of Water” from the inventory. Kate won’t drink the water because she suspects that it might contain drugs/poison. So, tap on the pipe in front of you, to throw the glass.
The glass will break and Kate will automatically pick up one of the shards.
Next, select the broken glass from the inventory and use it to cut the rope.
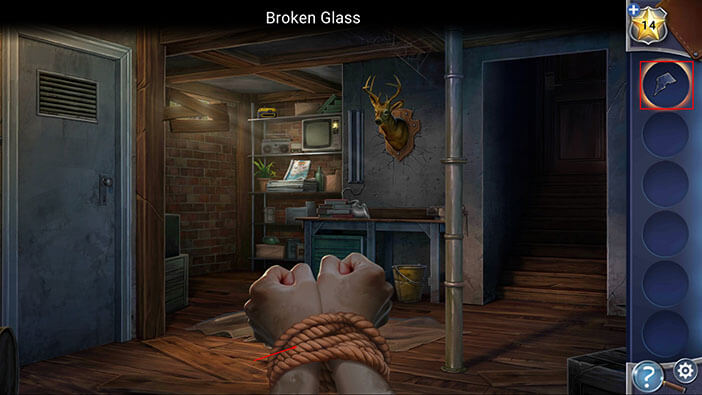
Well, after completing the first stage of the plan by freeing her hands, Kate concluded that she must act quickly and find a way to escape, before her captor returns.
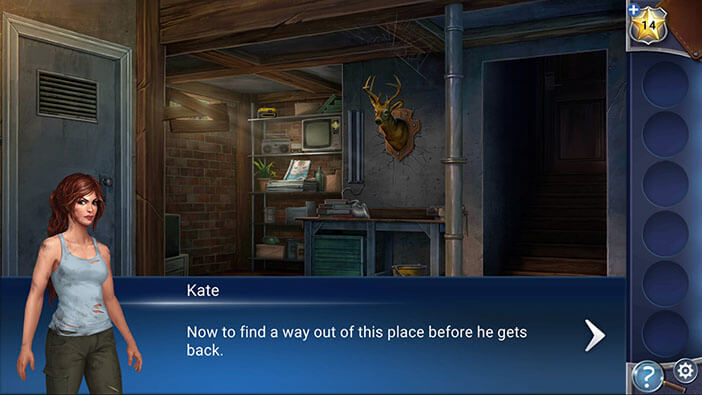
Ok, we will start by picking up two items.
First, tap on the “Bucket”, below the desk, to pick it up.
Second, tap on the “Pipe” on the table to pick it up.
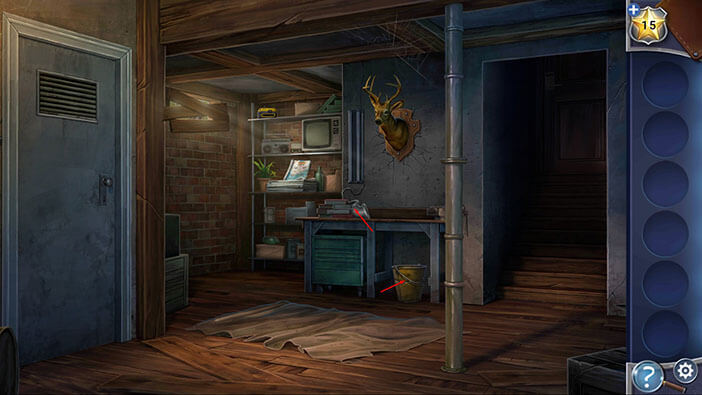
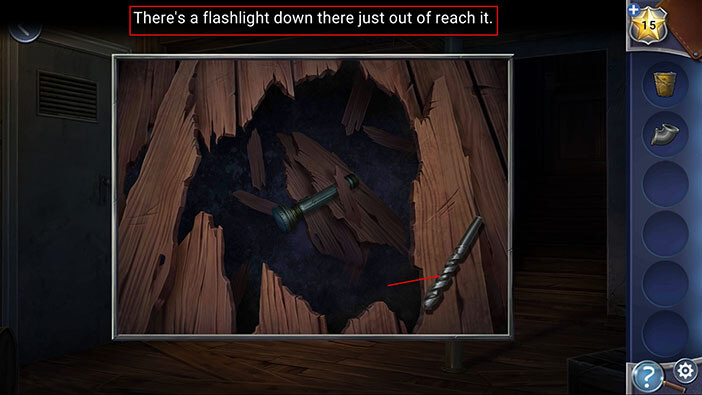
On the floor, in the middle of the room, you will see a sheet. Tap on it to move it aside and you will uncover a hole in the floor. Tap on the floor to take a look inside.
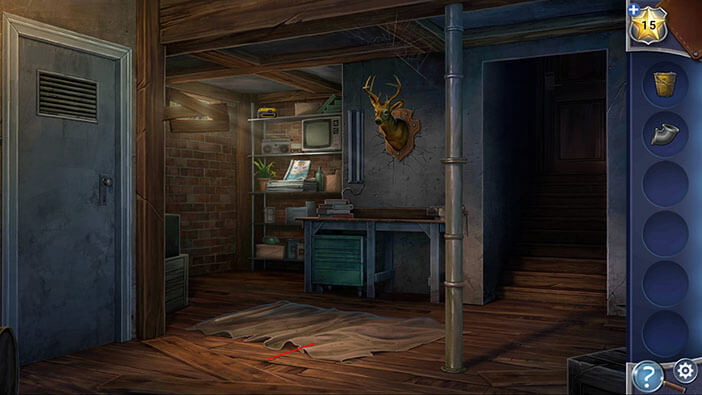
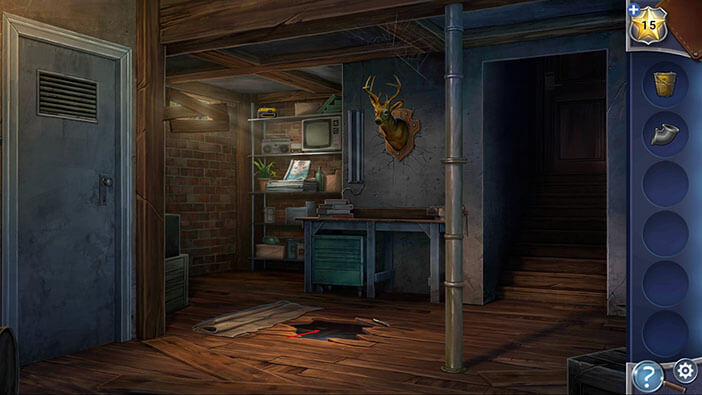
There are two items inside.
Inside the hole, you will see a flashlight, but Kate can’t reach it. So tap on the “Drill bit” on the right to pick it up. I guess we’ll find a way to reach the flashlight, a bit later.
For now, tap on the arrow in the upper left corner to go back.
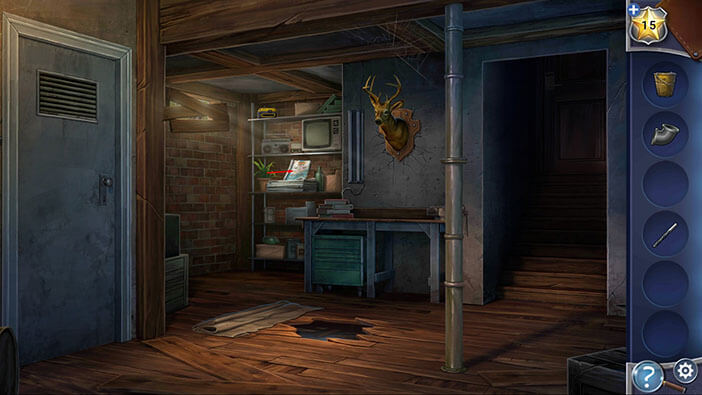
Next, tap on the magazine on the third shelf (in the left corner of the room) to take a closer look at it.
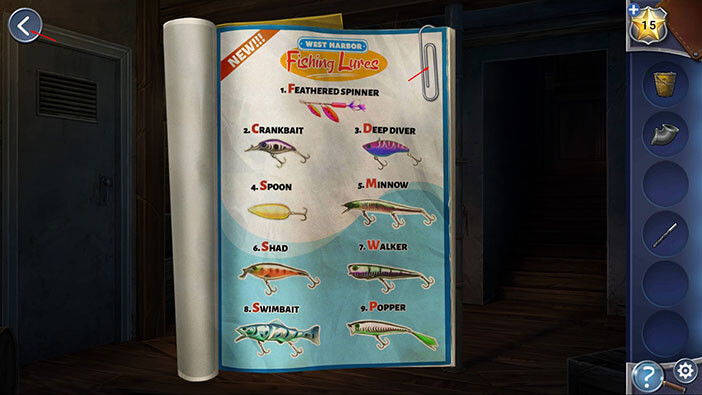
In the upper right corner of the magazine, you will notice a paperclip. Tap on it to pick it up.
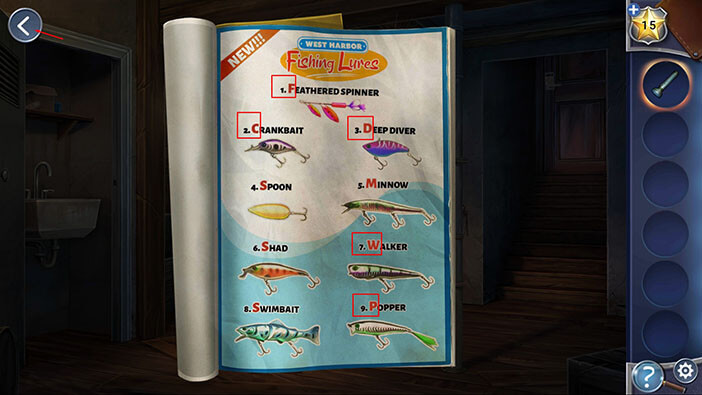
Also, the fishing lures in this magazine will be important for one of the following puzzles, but we will get back to them, a bit later.
For now, tap on the button in the upper left corner to go back.
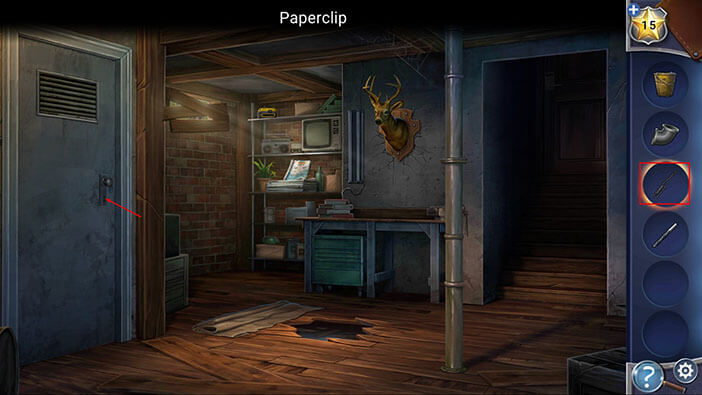
Select the “Paperclip” from the inventory and use it to lockpick the door on the left.
Here, we can pick up two items.
First, tap on the “Pipe” on the top shelf to pick it up.
After that, tap on the “Folding Chair” below the sink to pick it up.
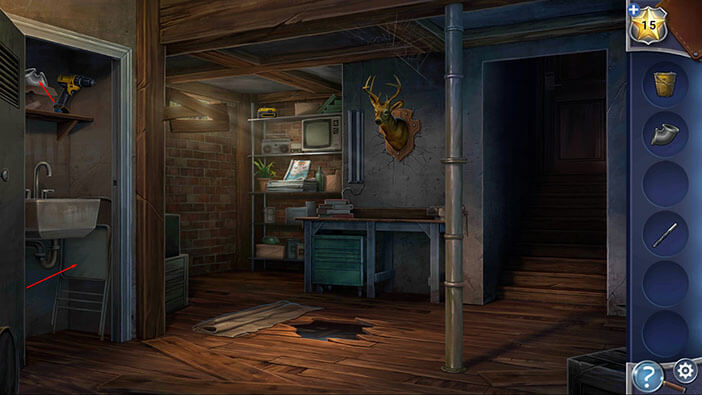
Next, let’s select the “Folding Chair” from the inventory and place it in the left corner of the room – below the shelf.
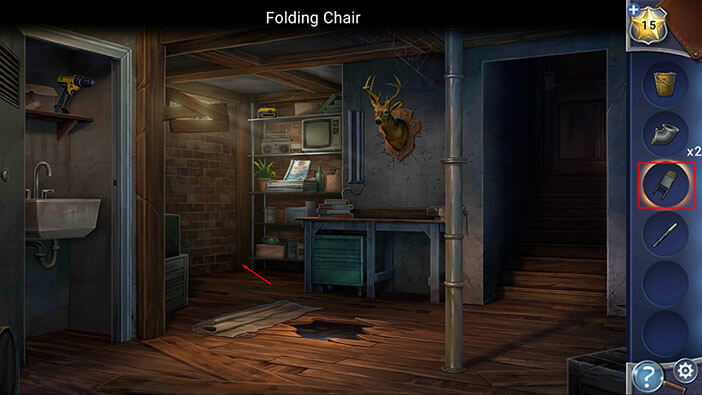
Kate can now climb on the chair and reach the top shelf, so tap on the yellow box, and “Drill Battery” will be added to your inventory.
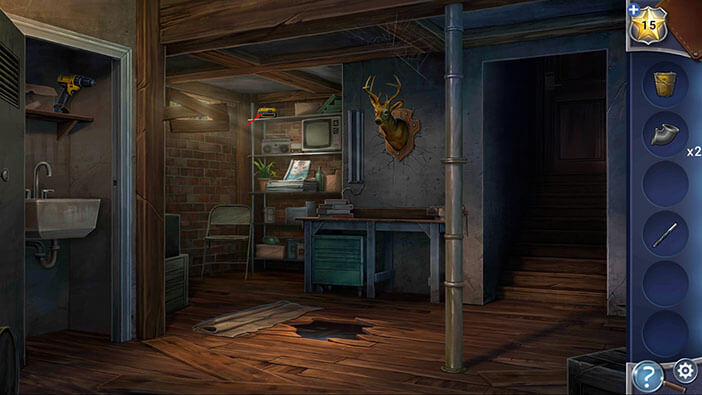
Ok, we now have all the items needed to assemble a functioning power drill, so let’s do that.
First, select the “Drill Battery” from the inventory, then tap on the power drill to insert it.
After that, select the “Drill Bit” from the inventory and install it on the drill.
“Drill” will be automatically added to your inventory.
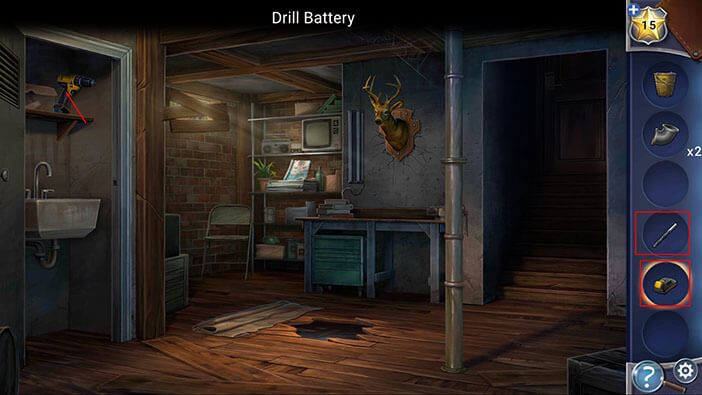
Next, select the “Drill” from the inventory, then tap on the boarded window on the left to remove the planks.
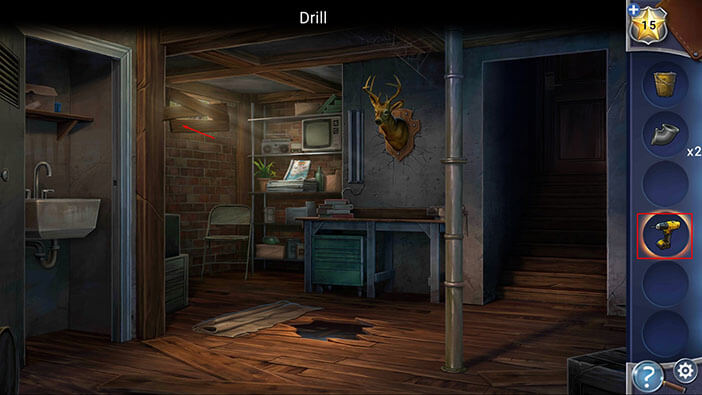
Tap on the window to take a closer look at it.
After that, tap on the “Pipe” to pick it up.
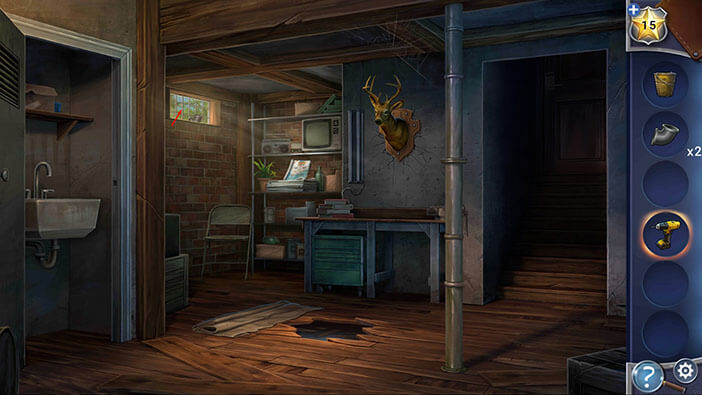
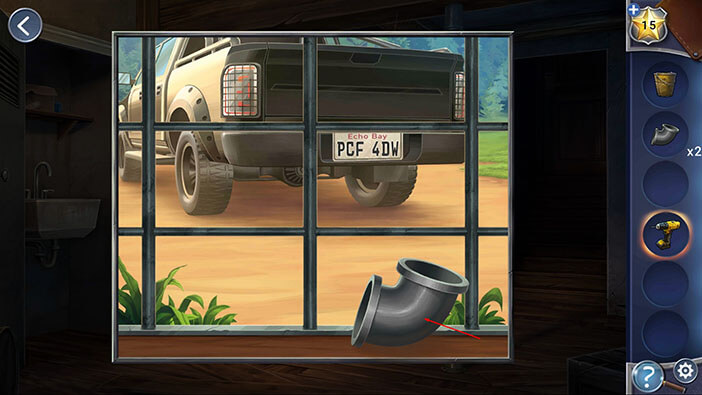
The window is also barred, so we will have to find another escape route.
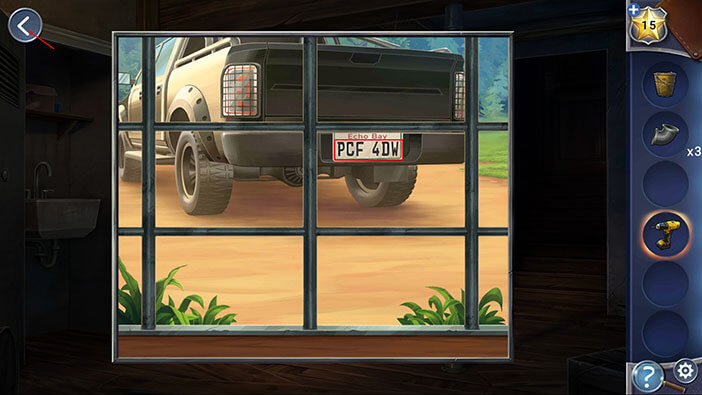
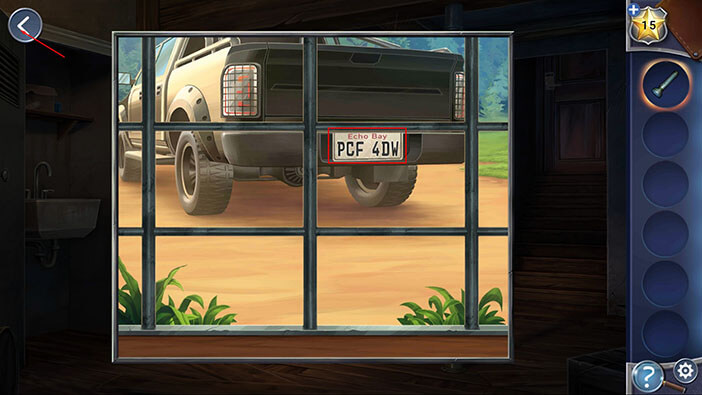
However, if you look outside a window, you will see a pickup truck. If you take a closer look at the license plate, you will notice that this vehicle is registered in Echo Bay, which means that our suspect is a local.
Also, let’s memorize/write down the license plate (“PCF 4DW”) because we will need this information in order to solve one of the following puzzles.
When you’re done, tap on the arrow in the upper left corner to go back.
Ok, now let’s select the “Drill” from the inventory and use it to remove the deer head trophy from the wall.
After that, tap on the hole to take a look inside.
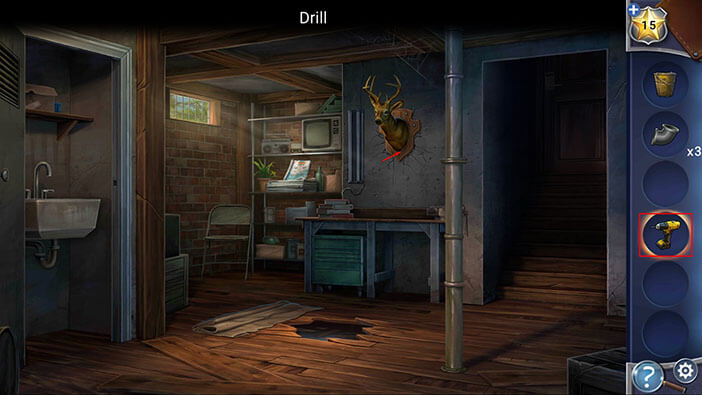
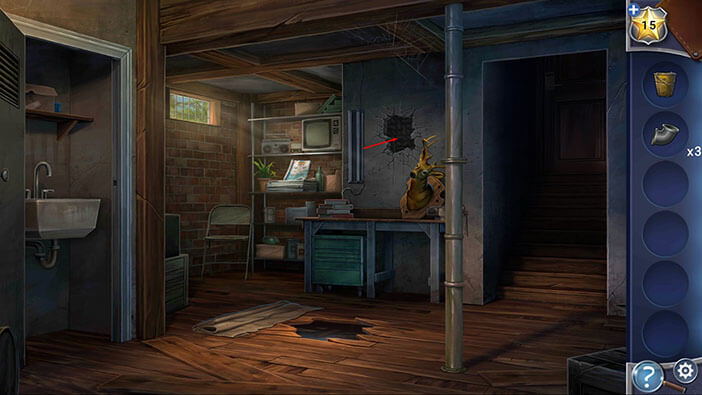
Next, select the three “Pipes” from the inventory and insert them into the three empty slots.
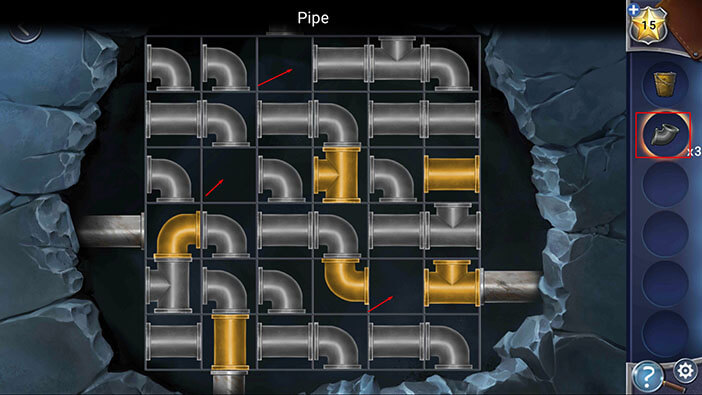
Ok, our goal here is to connect the pipes inside the grid to the four exit pipes. We can rotate the grey pipes by tapping on them. We can also switch the positions of the yellow pipes. We will do this puzzle in multiple steps. Let’s begin.
Step 1
First, let’s set the yellow pipes, by changing their positions.
Select the horizontal pipe on the right (sixth in the third row) then tap on the yellow on the left (first in the fourth row) to switch their positions.
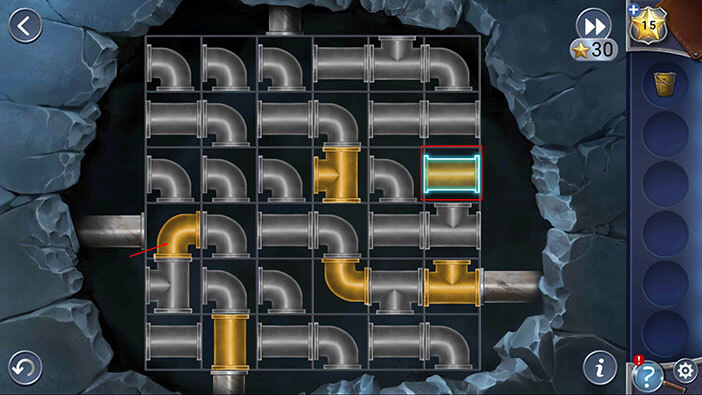
Step 2
Select the vertical yellow pipe (second in the sixth row) then tap on the yellow pipe on the right (sixth in the third row) to switch their positions.
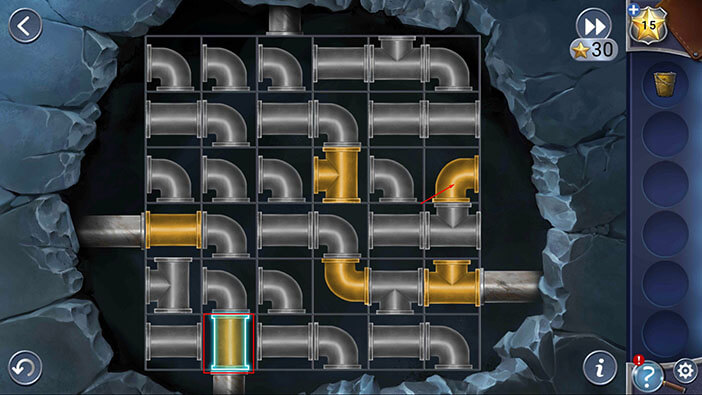
Step 3
Next, select the yellow pipe which has three exits (sixth in the fifth row) then tap on the other three-exits pipe (fourth in the third row) to change their positions.
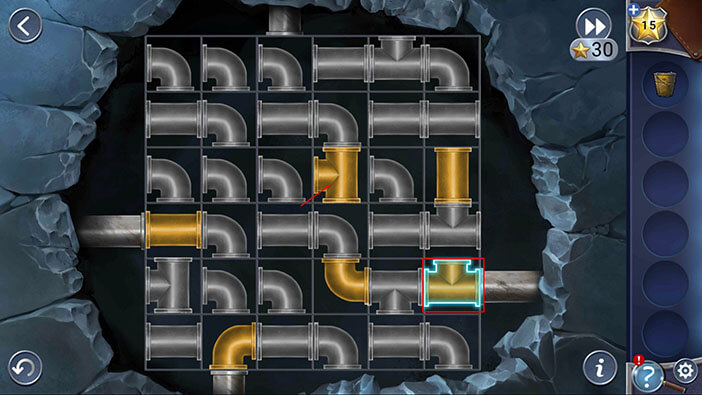
Step 4
Next, select the yellow three-exits pipe on the right (sixth in the fifth row) then tap on the yellow pipe in the middle (fourth in the fifth row) to change their positions.
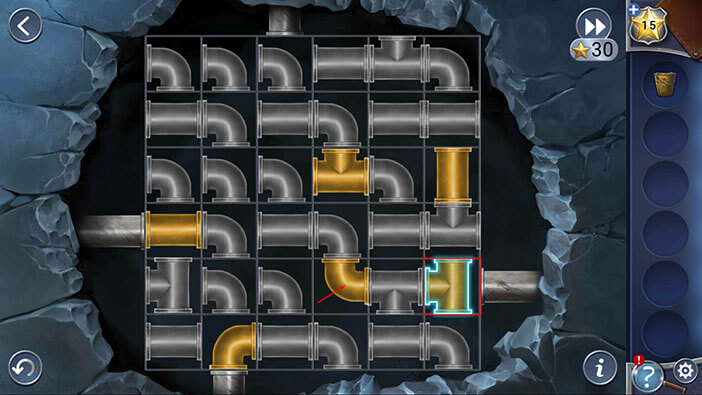
Step 5
Ok, we’re finished with the yellow pipes, so now we will start rotating the grey pipes, and connecting them with the exit pipes.
Let’s start from the top. Tap twice on the third pipe in the first row to rotate it, and you will connect it with the exit pipe on the top.
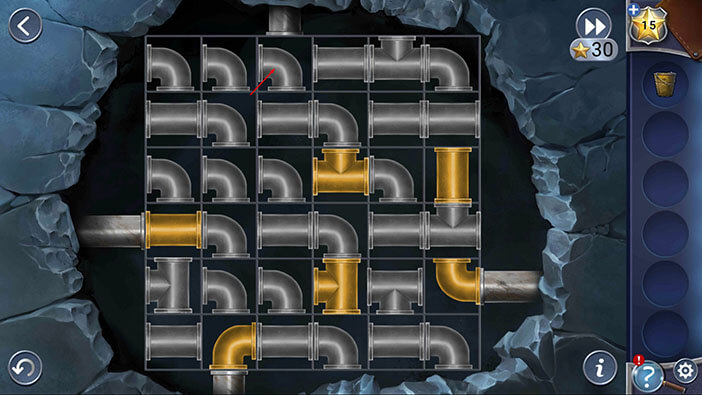
Step 6
Tap twice on the fifth pipe in the first row to rotate it.
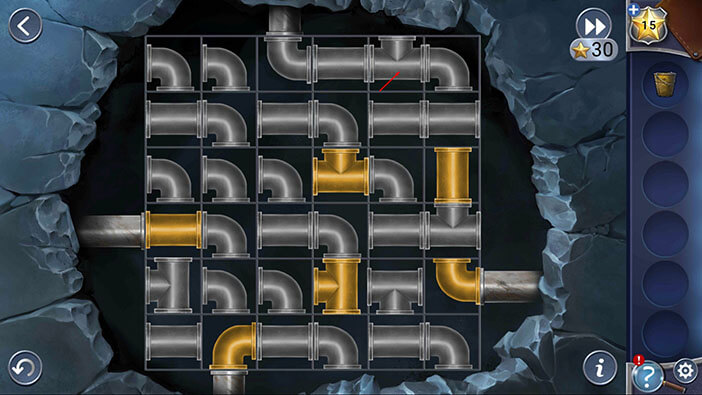
Step 7
Tap once on the fifth pipe in the second row to rotate it.
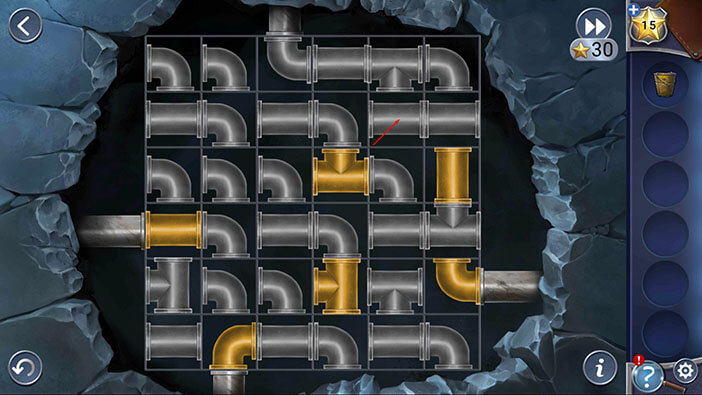
Step 8
Tap once on the sixth pipe in the second row to rotate it.
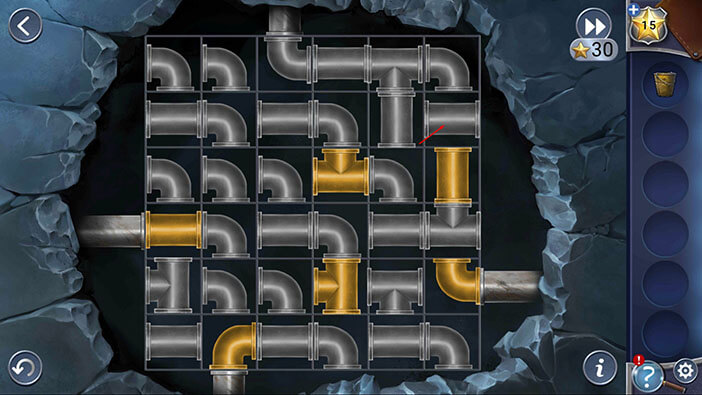
Step 9
Tap three times on the sixth pipe in the fourth row to rotate it, and you will connect the pipes to the second exit.
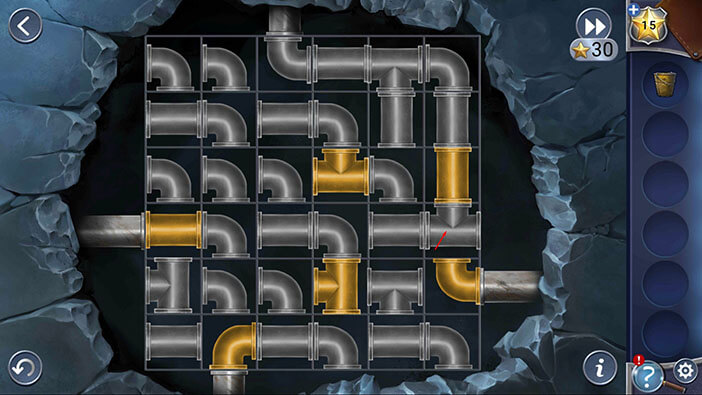
Step 10
Tap three times on the fourth pipe in the fourth row to rotate it.
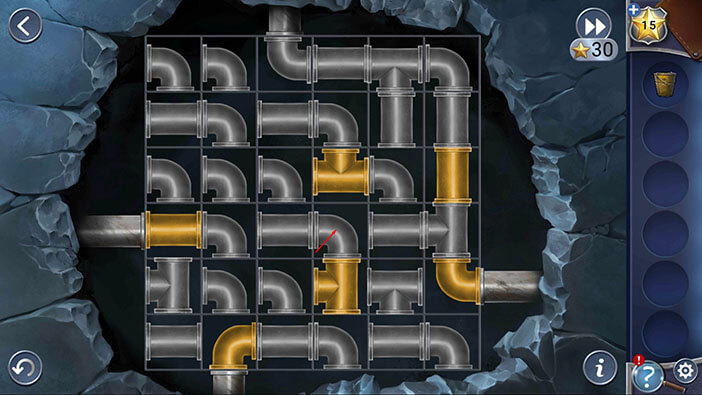
Step 11
Tap once on the fourth pipe in the sixth row to rotate it, and you will connect the pipes to the second exit.
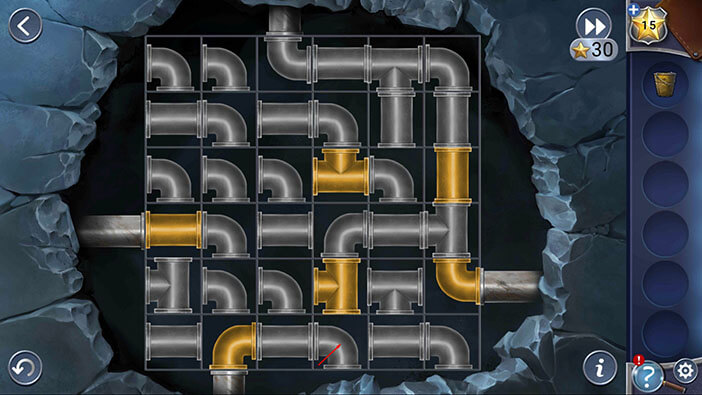
Step 12
Tap twice on the third pipe in the fifth row to rotate it.
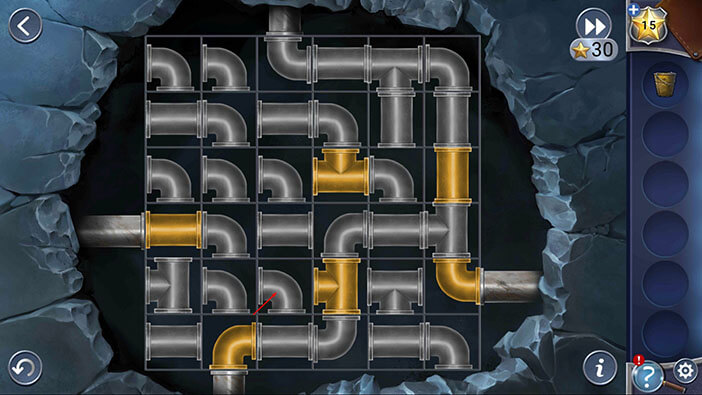
Step 13
Tap once on the third pipe in the fourth row to rotate it.
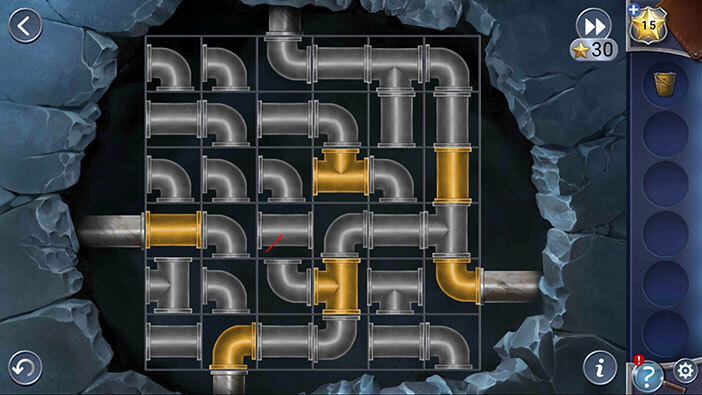
Step 14
Tap three times on the third pipe in the third row to rotate it.
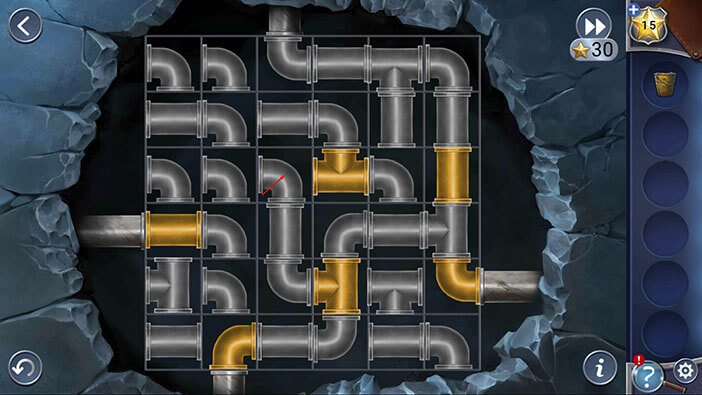
Step 15
Tap once on the fifth pipe in the third row to rotate it.
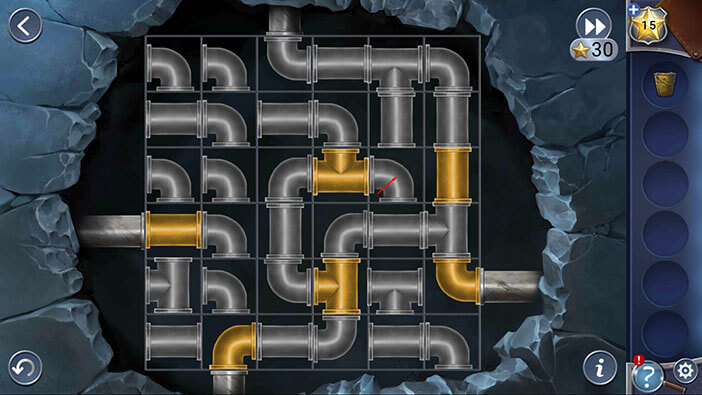
Step 16
Tap twice on the second pipe in the second row to rotate it.
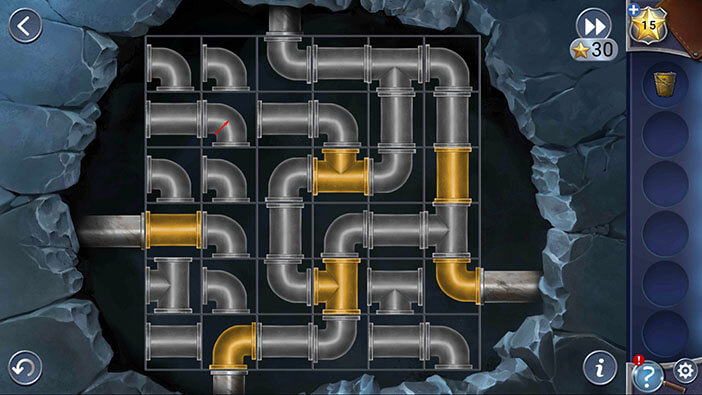
Step 17
Tap three times on the first pipe in the first row to rotate it.
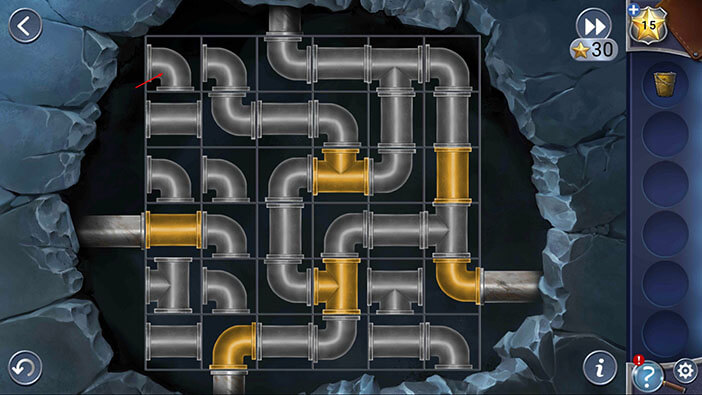
Step 18
Tap once on the first pipe in the second row to rotate it.
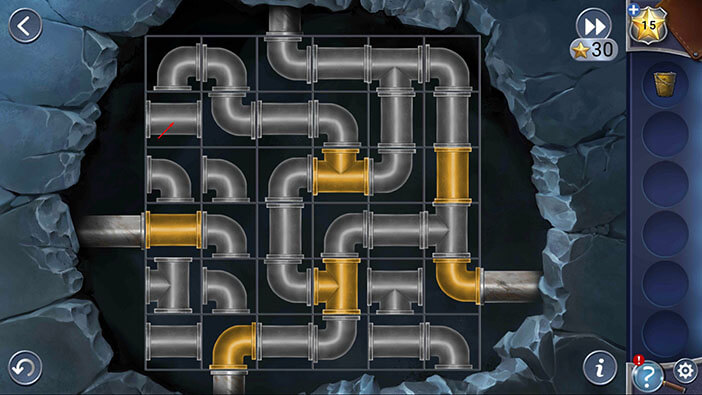
Step 19
Tap twice on the first pipe in the third row to rotate it.
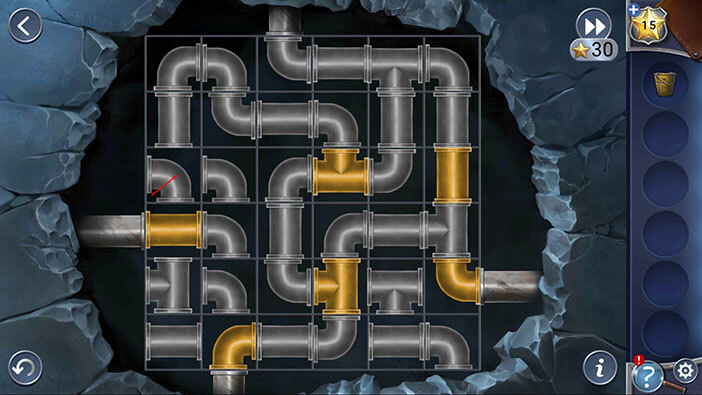
Step 20
Finally, tap once on the second pipe in the fourth row, and you will solve this puzzle.
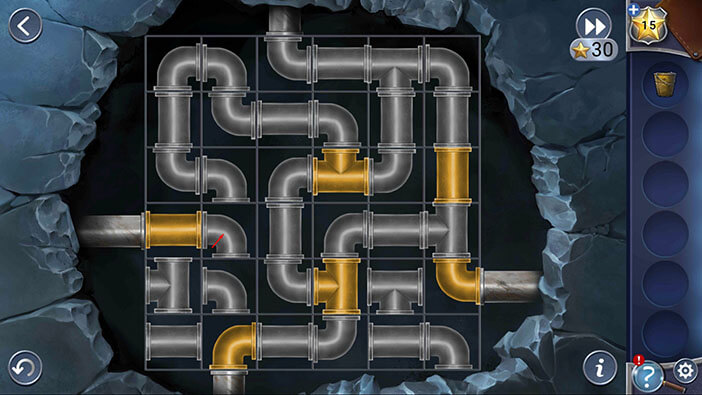
By connecting the pipes, you will fix the sink on the left. Select the “Bucket” from the inventory, then tap on the sink to fill it with water. “Bucket of Water” will be added to your inventory.
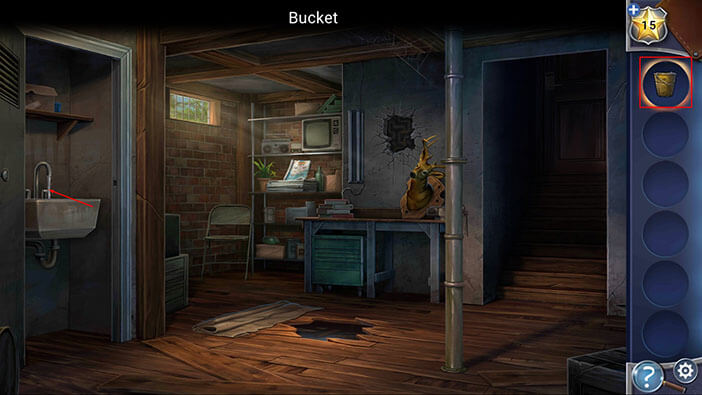
Now, let’s take another look at the hole in the floor.
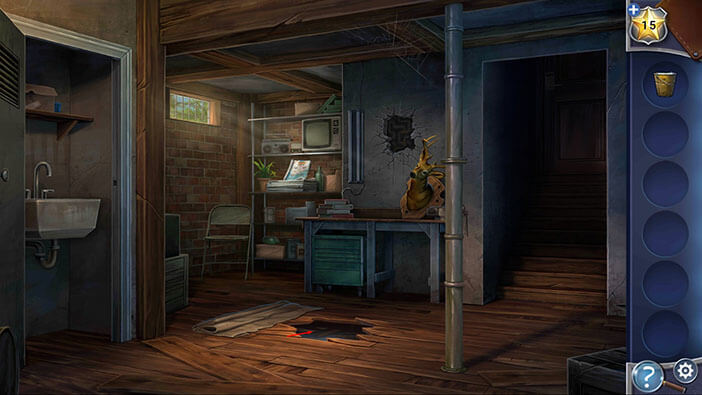
Select the “Bucket of Water” from the inventory and tap on the hole to use it. Our character will fill the hole with water, and the flashlight will float up.
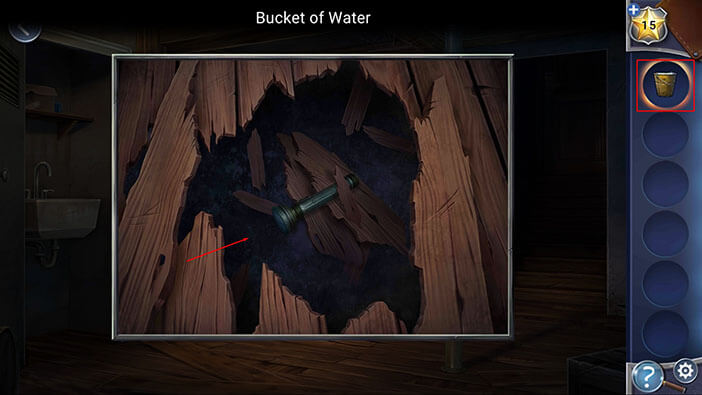
The “Flashlight” is now within our reach, so tap on it to pick it up.
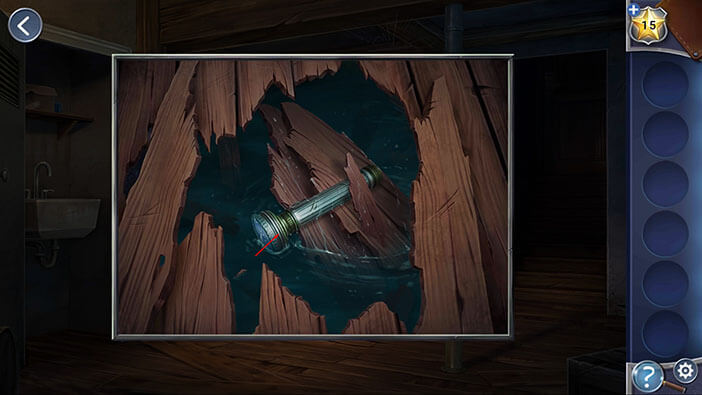
Next, let’s select the “Flashlight” from the inventory and use it to illuminate the dark stairs on the right side of the room.
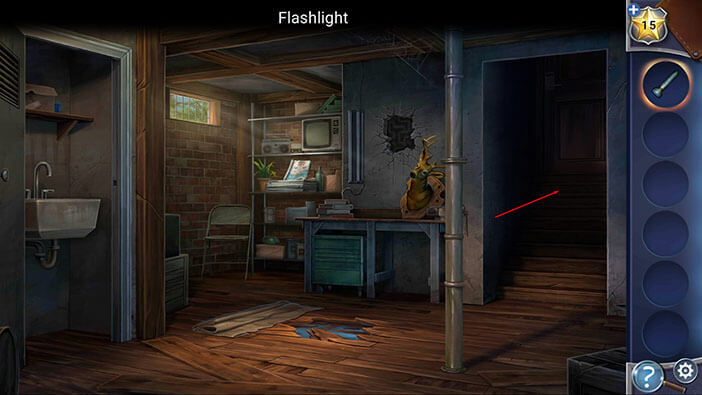
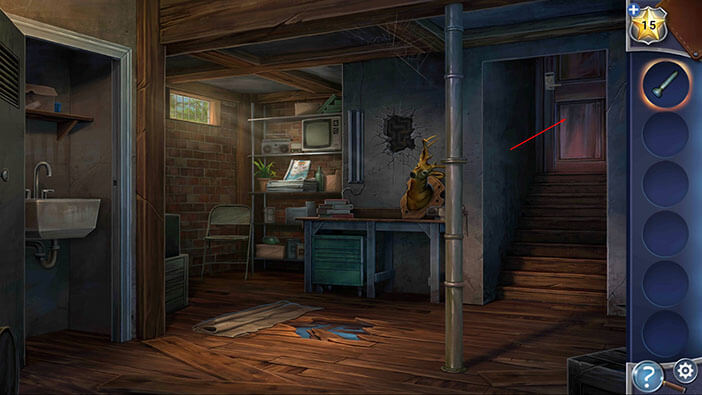
Tap on the door, on top of the stairs, to take a closer look at it.
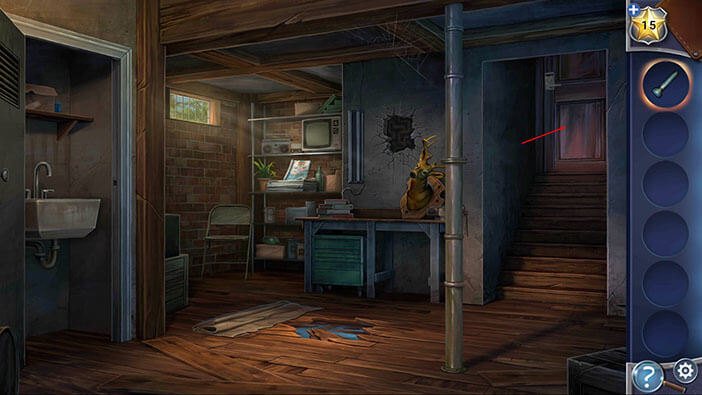
Well, looks like this door is the only way out of the basement, so we will have to find the code for the lock, in order to escape. Finding the code for the look requires several steps. First, let’s take another look at the license plate, in case you forgot it.
Tap on the barred window on the left.
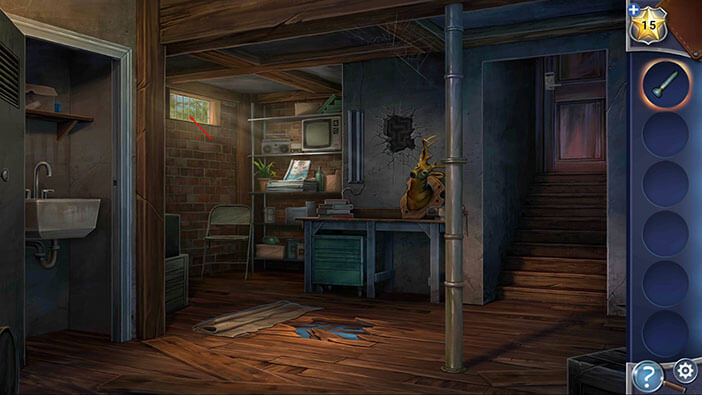
The license plate is “PCF 4DW”. Memorize/write down this information, then tap on the arrow in the upper left corner of the screen to go back.
Ok, now, let’s take another look at the fishing magazine, located on the middle shelf, in the left corner of the room.
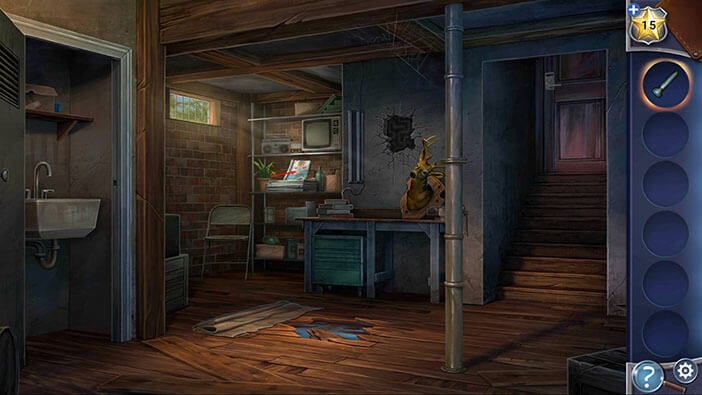
Here, we can see 9 fishing lures, and the first letter of each lure is red. To crack the code, we should match the letters from the license plate with the starting letter of the fishing lure. After that, we should write down the number of the lure. Sounds simple enough, so let’s begin.
The license plate was “PCF 4DW”. So,
The first letter is the letter “P”. The fish lure number 9 is called “Popper” (red letter “P”). So, our first number is number 9.
The second letter is the letter “C”. The fish lure number 2 is called “Crankbait” (red letter “C”). So, our second number is number 2.
The third letter is the letter “F”. The fish lure number 1 is called “Feathered spinner” (red letter “F”). So, our third number is number 1.
The fourth number is number 4.
The fifth letter is the letter “D”. The fish lure number 3 is called “Deep diver” (red letter “D”). So, our fifth number is number 3.
The sixth letter is the letter “W”. The fish lure number 7 is called “Walker” (red letter “W”). So, our sixth number is number 7.
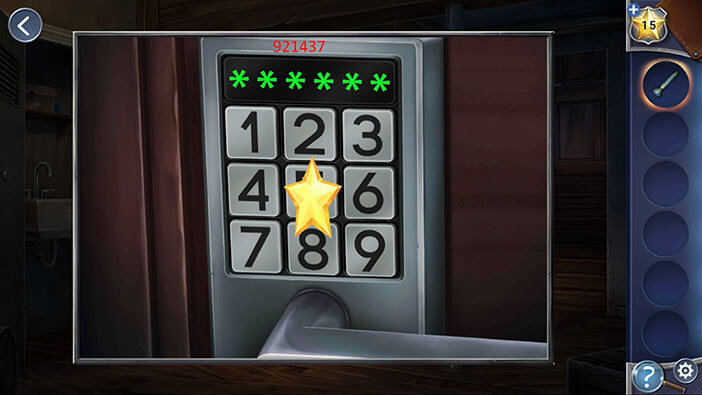
When we put these numbers together, we will get the code “921437”. Memorize/write down this code, then tap on the arrow in the upper left corner to go back.
Let’s go back to the door.
Enter the code “921437” and you will unlock the door.
Tap on the door to proceed into the next room.
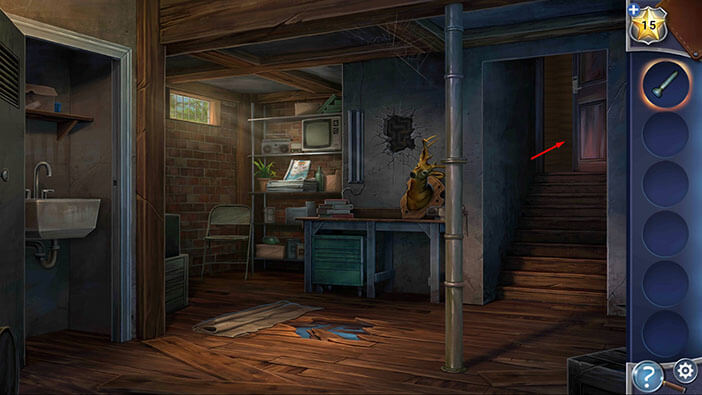
Well, we managed to escape from the basement and looks like our captor has left, so let’s use this opportunity to search the room.
First, tap on the “Charger” located on the chest in the middle of the room to pick it up.
After that, tap on the “Fish trophy” located on the shelf on the left to pick it up.
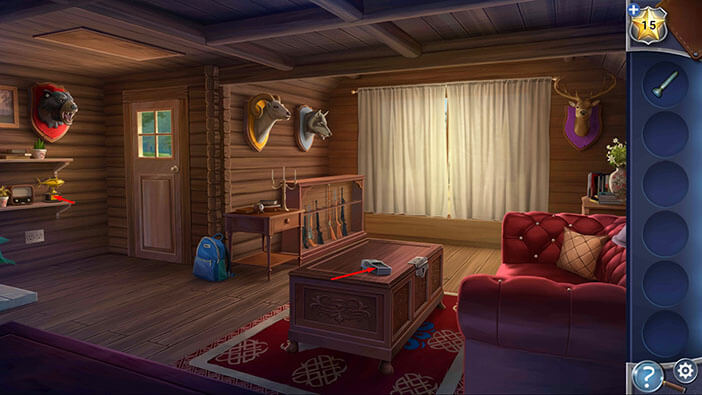
Next, tap on the bag on the left (next to the front door) to open it.
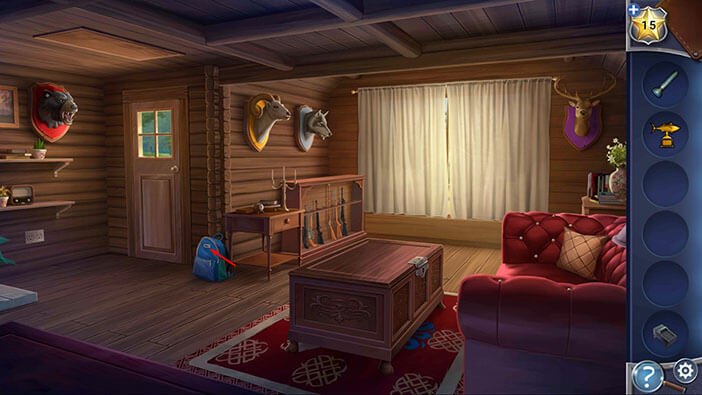
Inside the bag, you will find Kate’s notebook. Tap on it to pick it up.
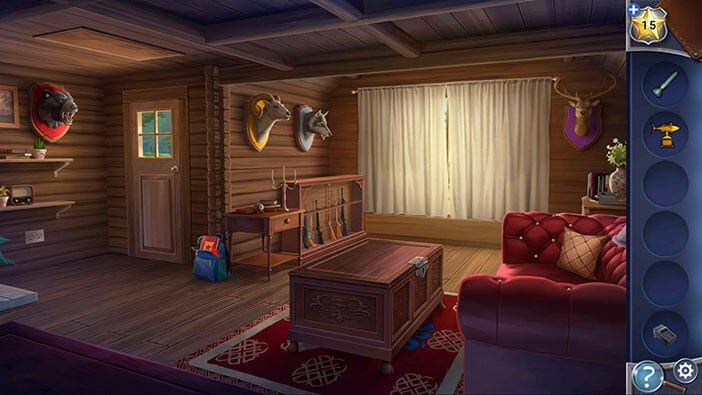
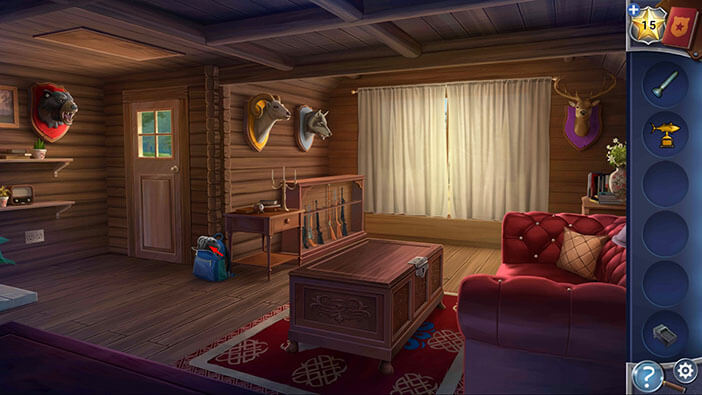
Well, Kate thinks that she should search the house, while the man is away, and gather evidence against him.
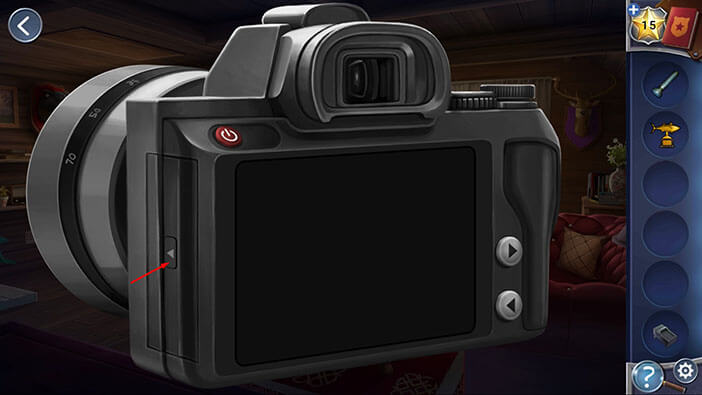
After picking the notebook, you will notice that camera is also sticking out of the backpack. Tap on the camera to start the interaction.
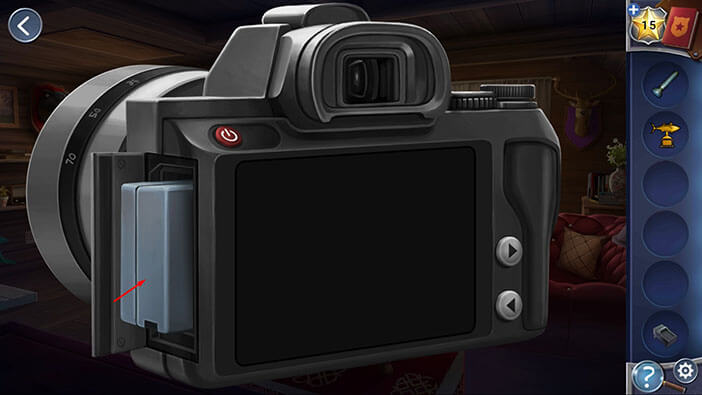
Tap on the arrow on the left side of the camera to open the battery compartment, then tap on the battery to pick it up. “Camera Battery” will be added to your inventory.
On the wall on the left, you will see an electrical outlet. Select the “Charger” from the inventory, then tap on the outlet to plug it in.
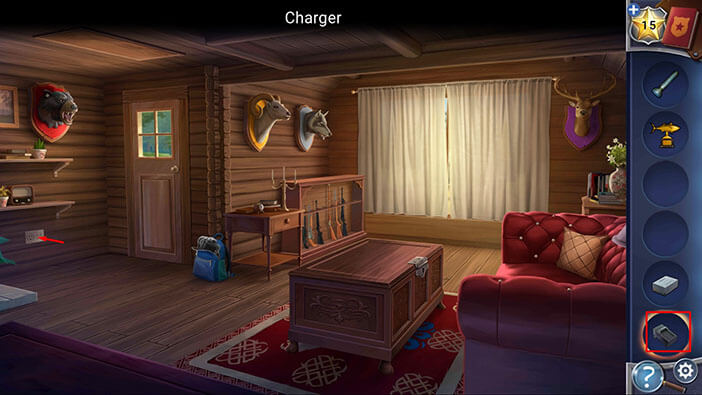
After plugging in the charger, select the “Camera Battery” from the inventory and insert it into the charger.
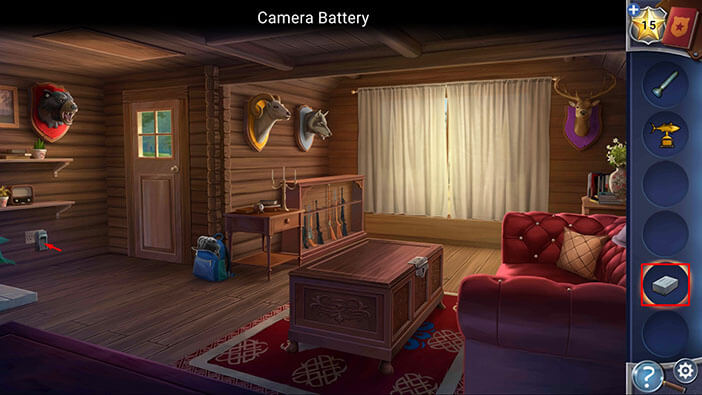
Wait a few moments, for a battery to charge, and “Charged Battery” will be automatically added to your inventory.
We will use the “Charged Battery” to take a look at the photos on the camera, but before we do that, let’s tap on the pillow on the couch on the right to move it aside.
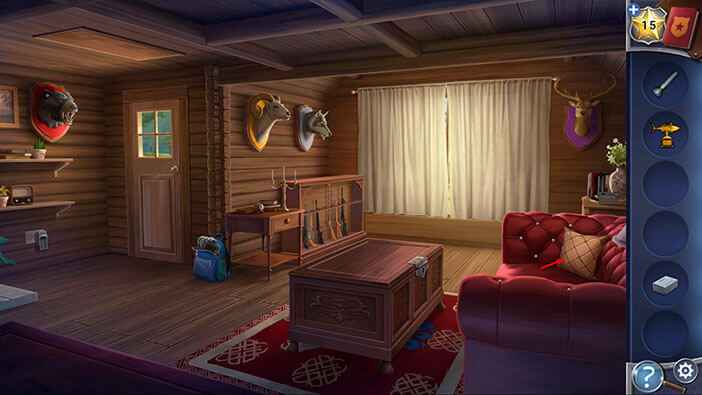
Behind the pillow, you will discover a “Map Piece”. Tap on it to pick it up.
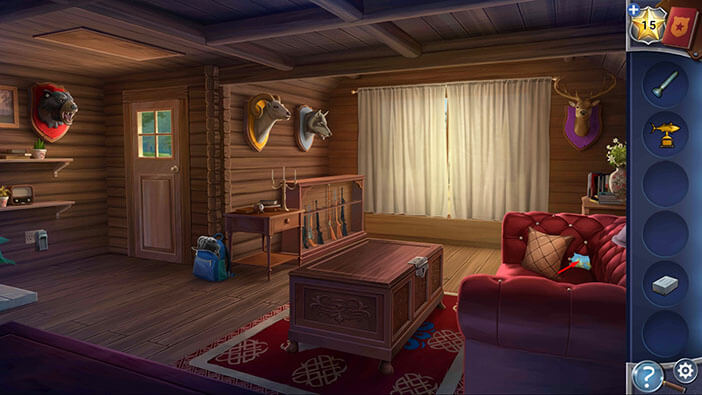
Ok, now let’s go back to the camera.
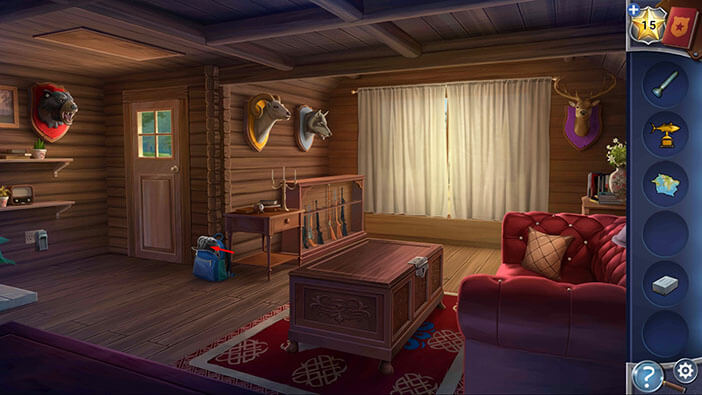
Select the “Charged Battery” from the inventory and insert it into the camera.
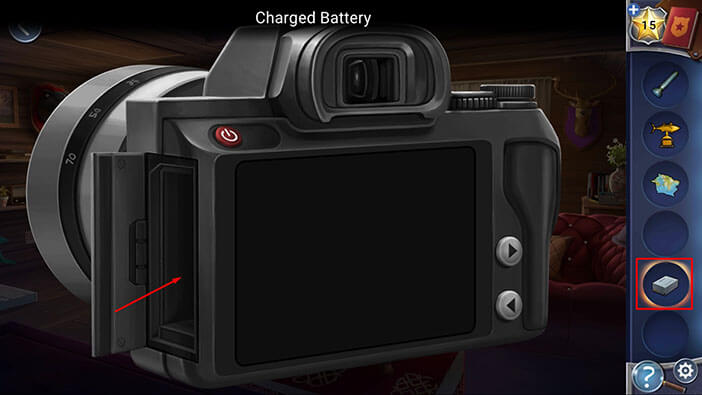
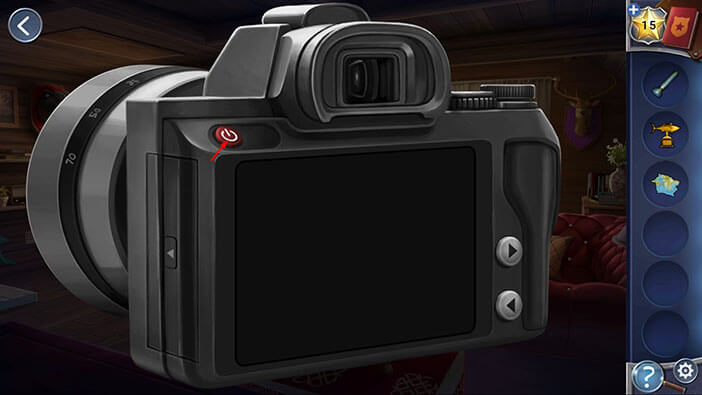
After that, tap on the “power” button to turn on the camera.
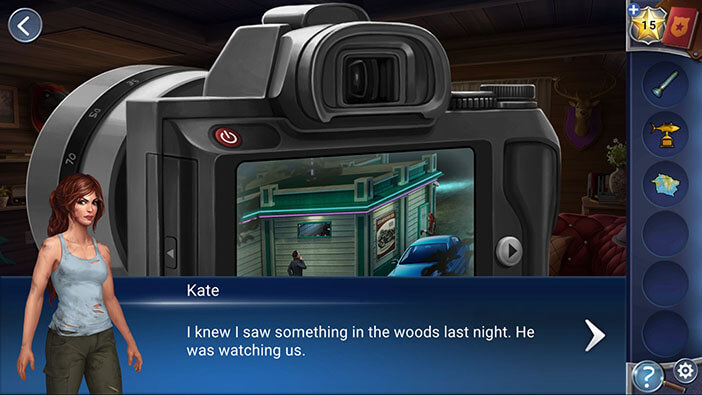
In the first photo, we can see Kate and Darius at the gas station. So, Kate was right when she said that she saw a flash from the camera. The kidnapper was observing and photographing them from the forest. He probably hid or ran away when Darius went to check the perimeter.
Let’s take a look at the next photo.
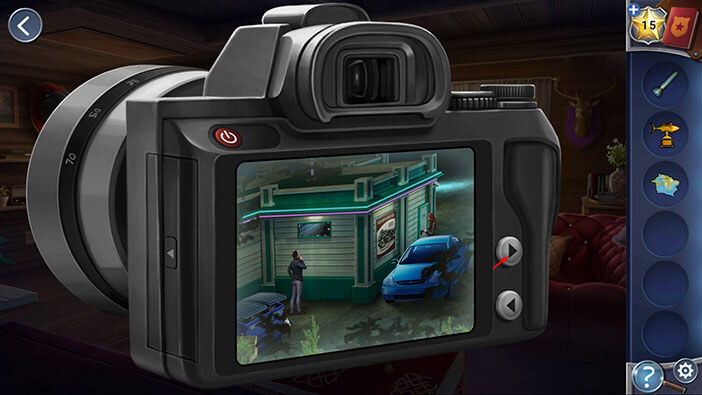
In the next photo, we can see Ava, the girl that went missing after she entered the gas station bathroom. So, this attack wasn’t random. Our suspect was observing Ava, probably for days, before he decided to strike.
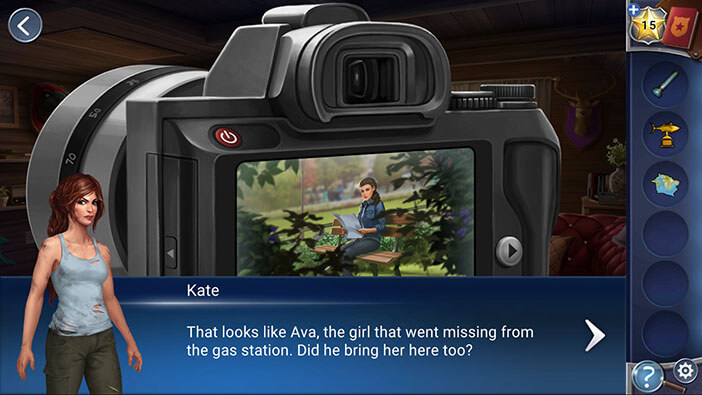
Let’s take a look at the next photo.
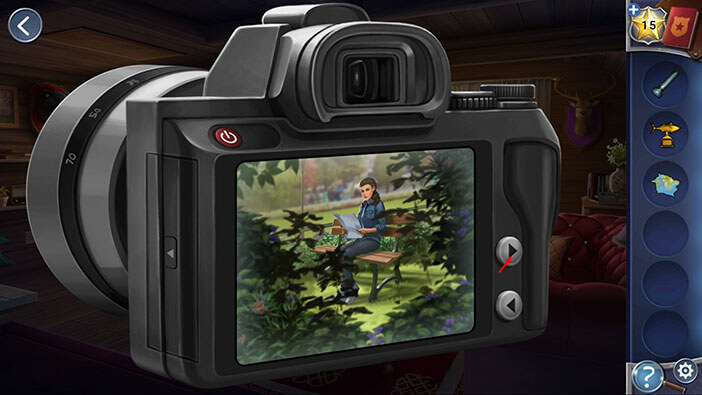
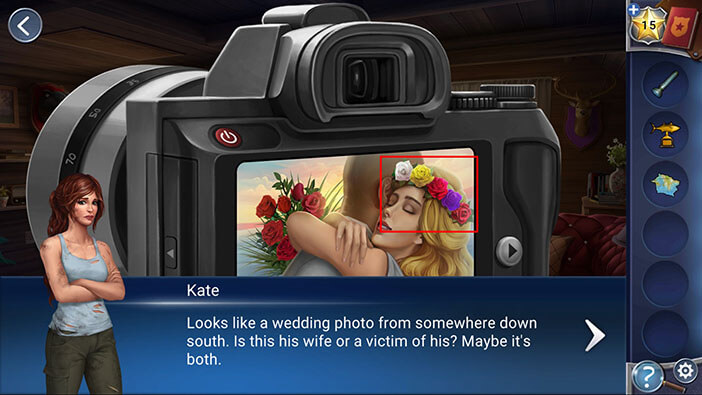
In the next photo, we can see a man that looks like our suspect, and this photo was taken during his wedding. Kate suspects that his wife might also be his first victim.
Let’s pay attention to the circlet of flowers on the woman’s head. Looking from left to right, we have white, yellow, red, purple, and red (again) flowers. Memorize/ write down the order of flowers because we will need it to solve the next puzzle.
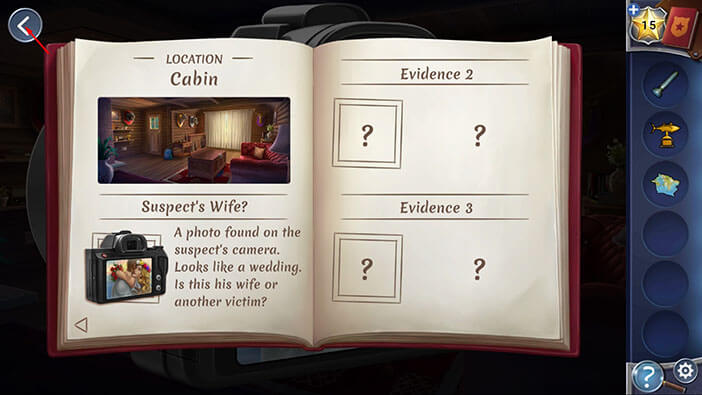
Under the entry “Suspect’s wife” the photo from the camera will be added to your Notebook. Tap on the arrow in the upper left corner to proceed.
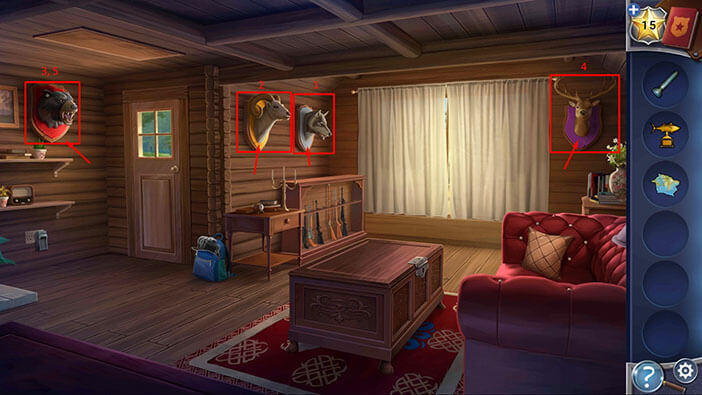
If you take a look around the room, you will notice four animal trophies on the cabin walls, and each trophy stand has a different color. Also, the colors of the trophy stand match the colors that we saw on the flower circlet (on the bride’s head).
So, let’s tap on the trophies in the order that matches the color of the flowers.
First, we had a white flower, and the wolf trophy stand is also white. So, let’s tap on it.
Second, we had a yellow flower, and the mountain goat trophy stand is also yellow. So, let’s tap on it.
Third, we had a red flower, and the bear trophy stand is also red. So, let’s tap on it.
Fourth, we had a purple flower, and the buck trophy stand is also purple. So, let’s tap on it.
Finally, we had a red flower again, so let’s tap once more on the bear trophy.
By tapping on the trophies in the correct order you will lower the attic ladder. Tap on the ladder to extend it, and tap on it again to proceed to the attic.
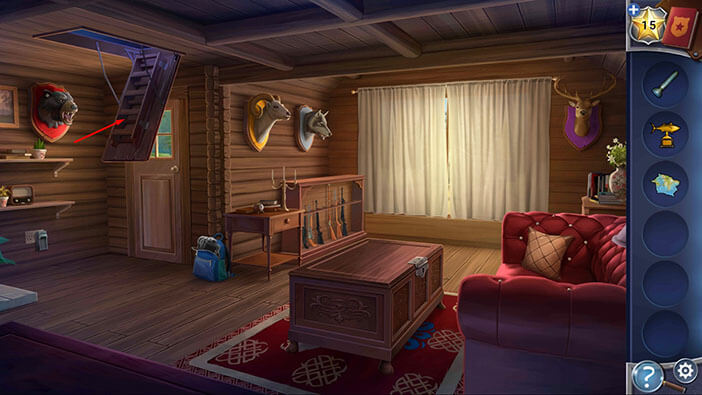
It’s very dark in here, so select the flashlight from the inventory and use it.
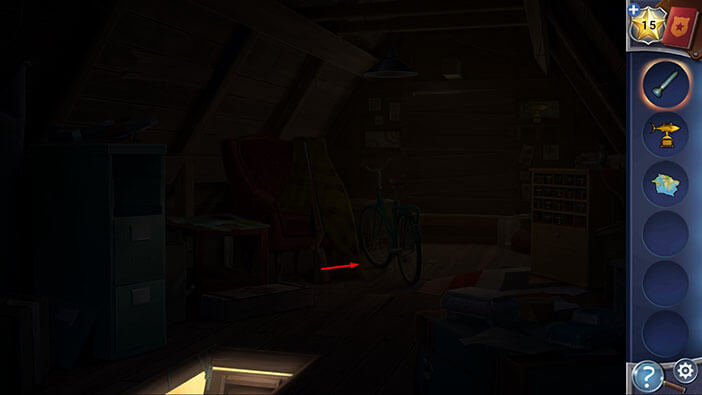
Let’s take a look around the attic. Drag the light to the small chest in the bottom right corner of the room to illuminate it.
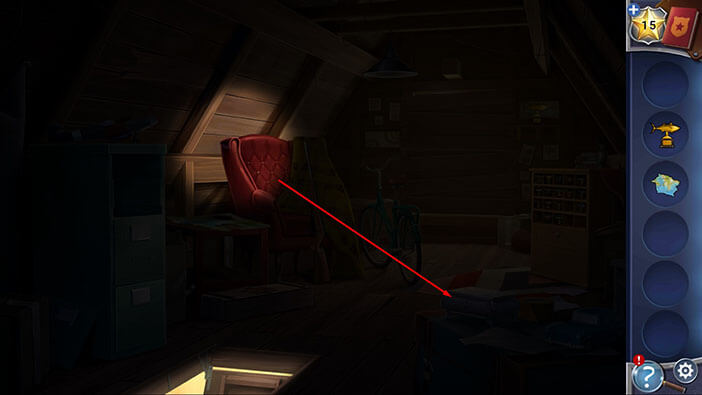
Tap on the chest to open it, then tap on the “Key” to pick it up.
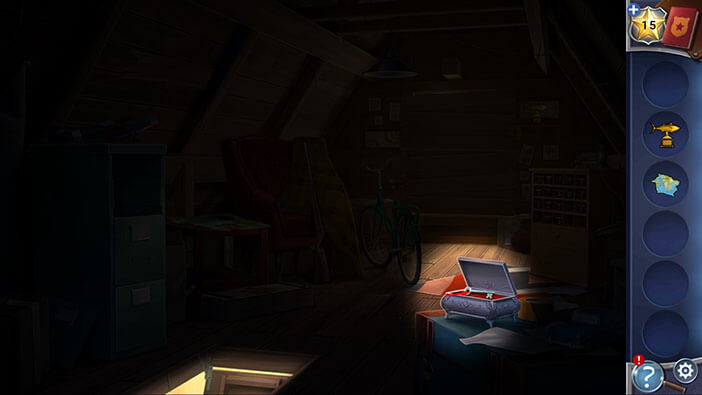
Next, let’s illuminate the upper left corner of the room.
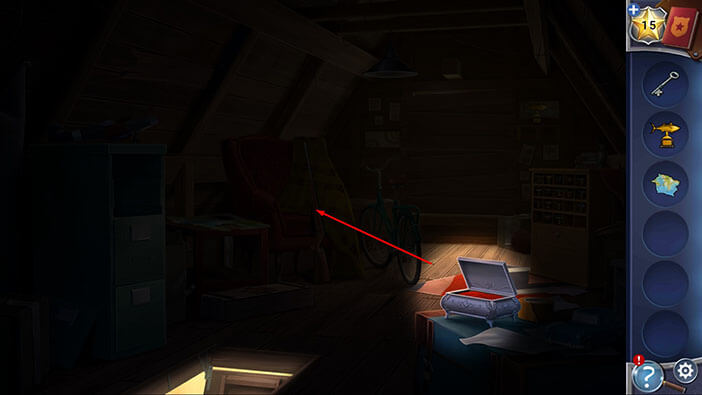
In this corner, you will find a “Gun”. Tap on it to pick it up.
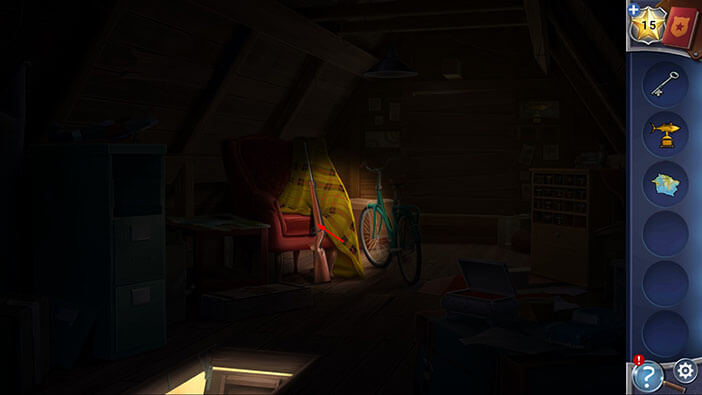
Ok, that’s it for the attic. Let’s go back downstairs.
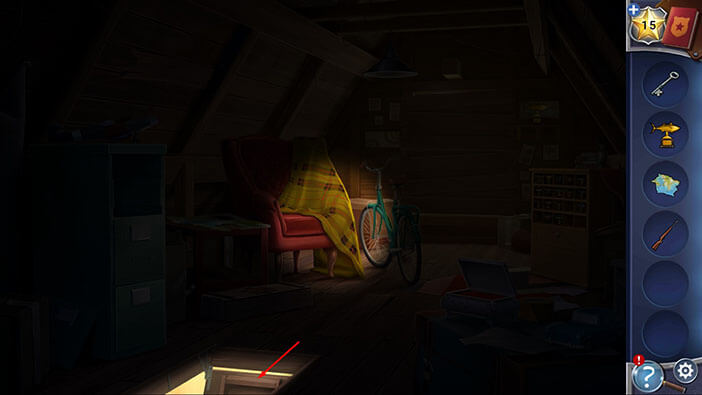
Select the “Key” from the inventory and use it to open the larger chest in the middle of the room.
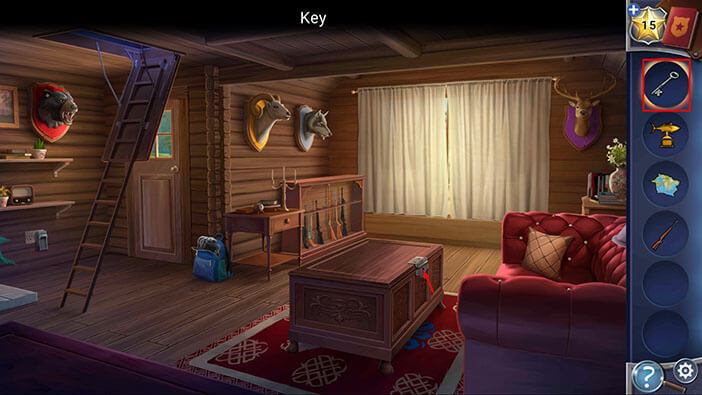
Inside the chest, you will find another “Gun” and a “Magnet”. Tap on them to pick them up.
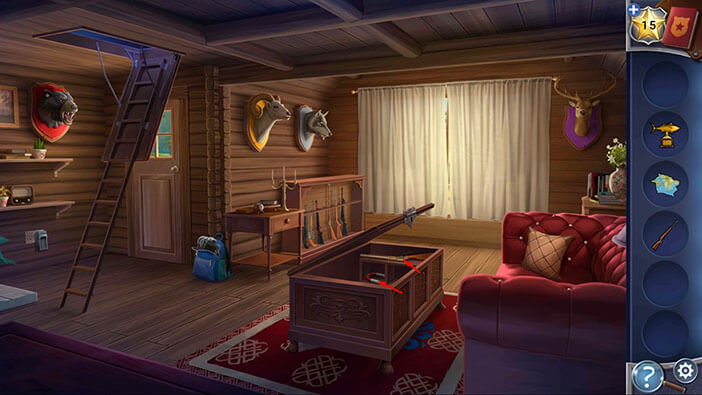
After picking up the gun, Kate will hear the truck engine starting, and soon after that the suspect will leave, so we have some time to explore and gather the evidence before he comes back.
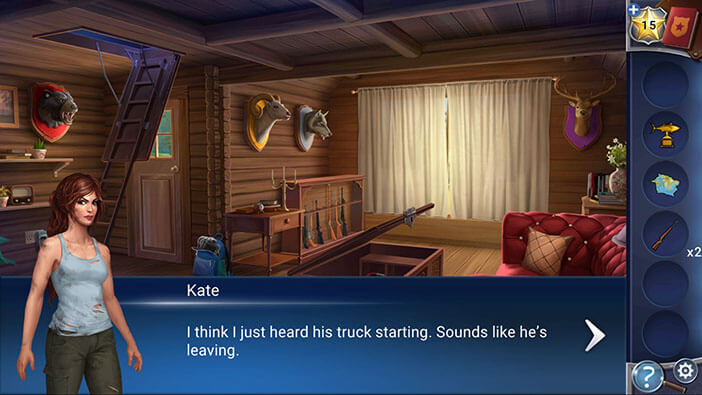
Next, tap on the curtains to open them, and you will see that the truck is leaving.
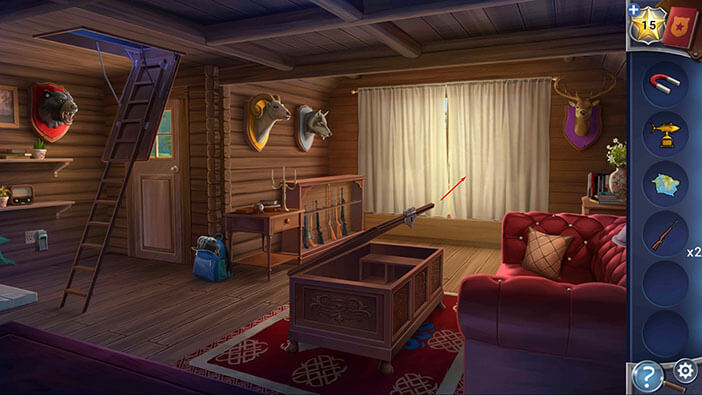
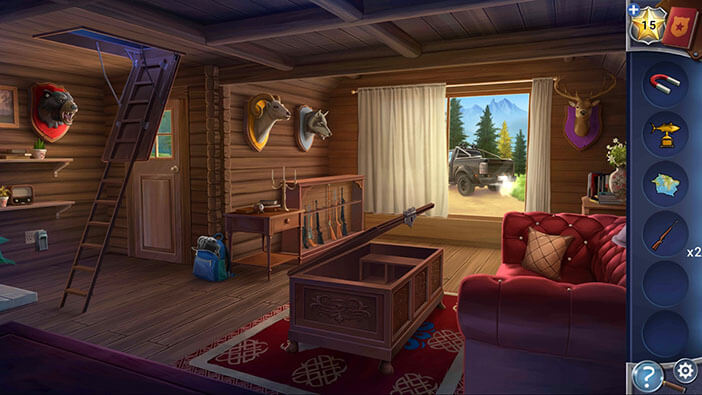
When you open up the curtain on the left, Kate will realize that she’s somewhere deep in the forest (mountains) and that she will have to find a way to get back to the nearest town. Traveling on foot probably isn’t an option as it would take too long.
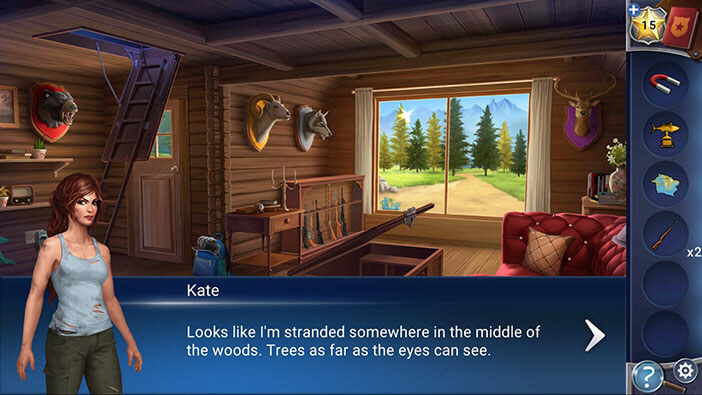
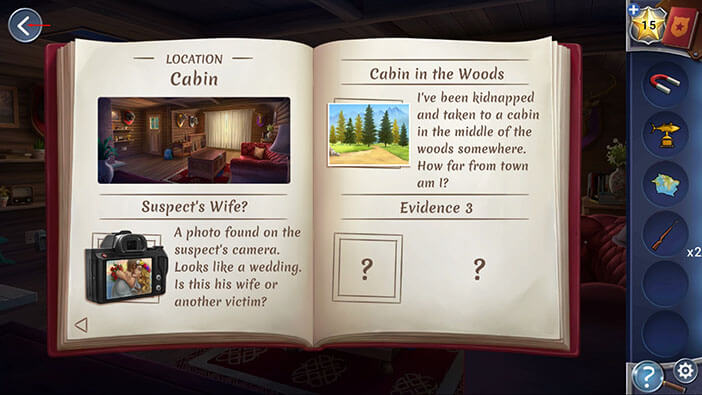
Another entry will be automatically added to your Notebook, “Cabin in the Woods”. Tap on the arrow in the upper left corner to go back.
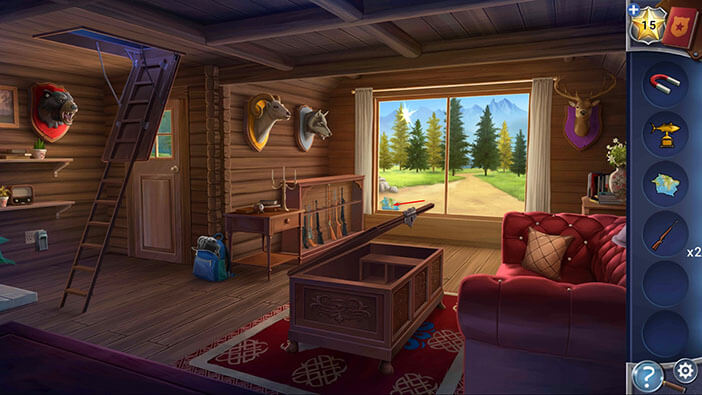
In the lower-left corner of the window, you will find another “Map Piece”. Tap on it to pick it up.
Next, tap on the gun cabinet on the left to take a closer look at it.
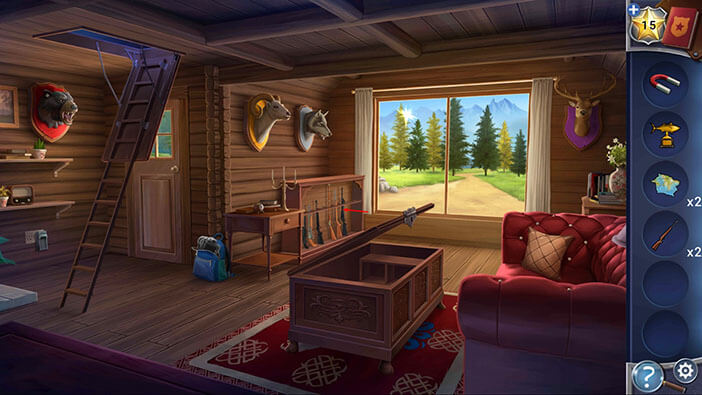
Apparently, the guns in the cabinet aren’t in very good condition. Besides that, Kate can’t see any ammo, so picking up an empty gun would be pointless.
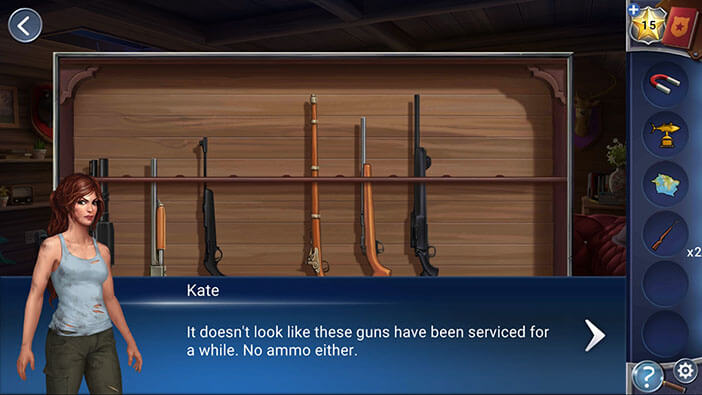
Select the “Guns” from the inventory and place them into the empty slots.
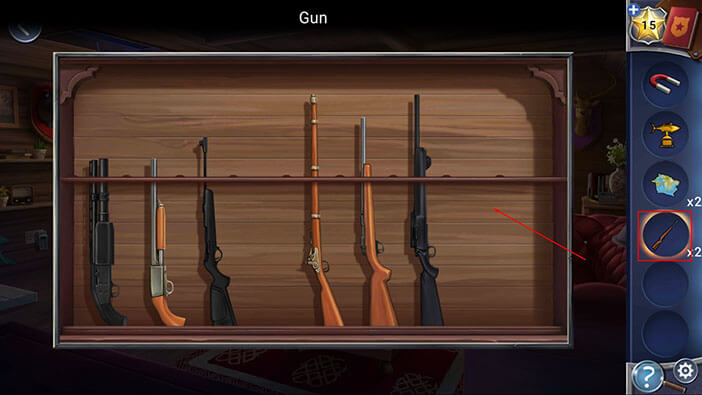
After placing the guns in the cabinet, you will get a hint that you can rearrange the order of the guns. Let’s not do that right now.
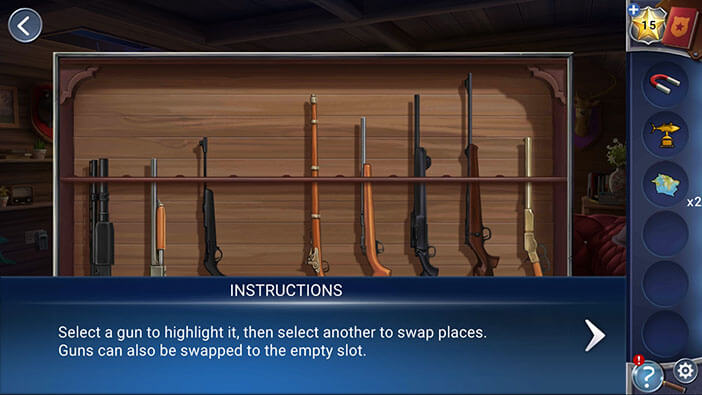
If you take a closer look at the guns, you will notice that some of them (four) are of lighter color (brown), while the other four are much darker (black). Also, some of the guns are shorter, and we also have some very large (tall) rifles. This information will be important a bit later. For now, just take a note of it, and tap on the button in the upper left corner to go back.
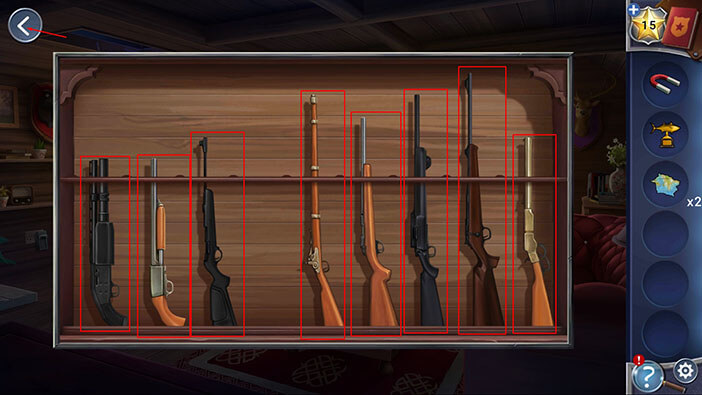
If you take a look at the window, you will notice eight trees outside, four dark green, and four light green. In the cabinet, we saw four brown (light), and four dark (black, dark brown) guns. For the purpose of the next puzzle, let’s say that brown guns represent light green trees, while dark guns represent dark green trees. Also, some of the trees are taller, and some are shorter, just like the guns in the gun cabinet.
With all that said, we should now write down the order of the trees, and their two attributes, height, and color (we will use this information to arrange the guns in the cabinet in the same order).
Considering the height, we will mark the trees with a number from 1 to 4, with the number 1 tree being the tallest. Let’s begin. Looking from left to right, we have,
- First tree: color = light green, height = 4 (shortest)
- Second tree: color = light green, height = 1 (tallest)
- Third tree: color = dark green, height = 3 (middle-short)
- Fourth tree: color = light green, height = 2 (middle-tall)
- Fifth tree: color = dark green, height = 1 (tallest)
- Sixth: notice an empty space between the fifth tree and the next one. This empty space represents an empty slot in the gun cabinet. In other words, the sixth slot in the gun cabinet should be empty.
- Sixth tree (seventh slot): color = dark green, height = 2 (middle-tall)
- Seventh tree (eighth slot): color = light green, height = 3 (middle-short)
- Eighth tree (ninth slot): color = dark green, height = 4 (shortest)
Write down this information, then tap on the gun cabinet to start the interaction.
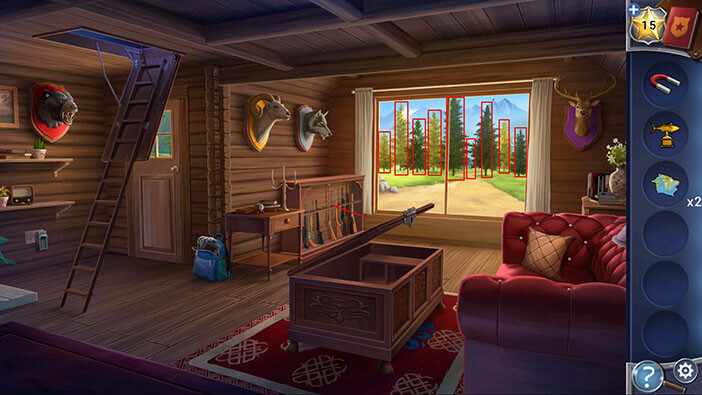
Ok, now let’s rearrange the guns to match the order of the trees. We will do this in several steps. Let’s begin.
Step 1
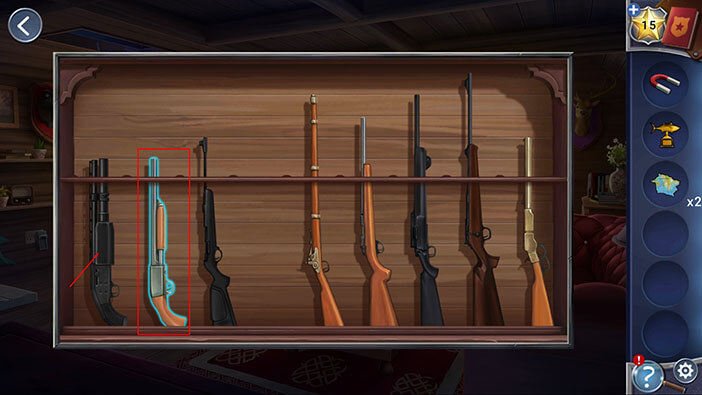
The first tree (looking from left to right) was light green, and it was the shortest one. The shortest light (brown) gun is a pump-action shotgun (currently in the second slot) so select it and place it into the first slot.
Step 2
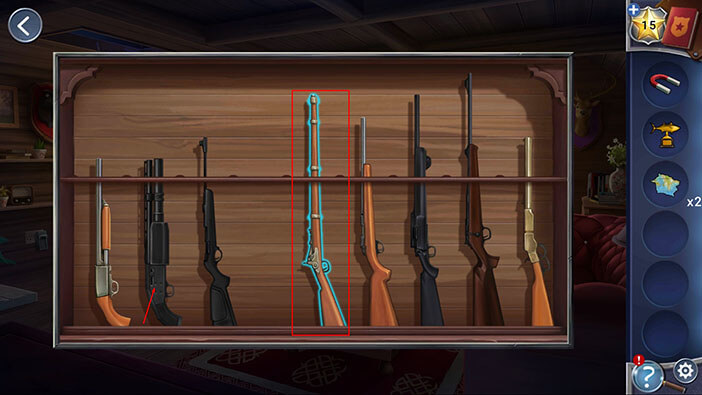
The second tree was light green, and it was the tallest one. The longest light (brown) gun is a musket (currently in the fifth slot) so select it and place it into the second slot.
Step 3
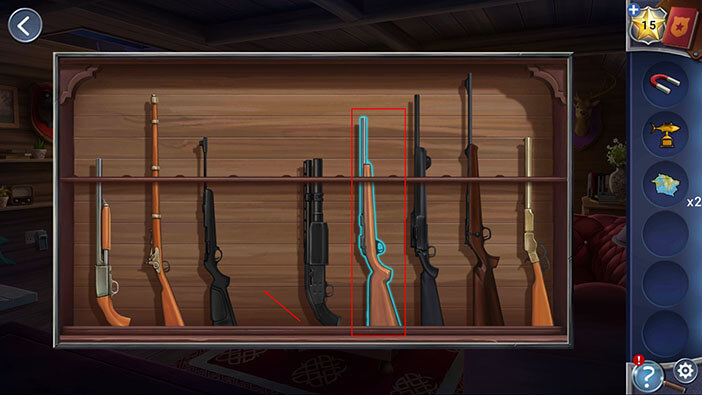
The third tree was dark green, and it was the middle-short. The middle-short dark (black) gun is a rifle (currently in the third slot) so it’s already in the correct position.
The fourth tree was light green, and it was the middle tall. The middle-long light (brown) gun is a bolt action rifle (currently in the sixth slot) so select it and place it into the fourth slot.
Step 4
The fifth tree was dark green, and it was the tallest one. The longest dark (dark-brown) gun is a bolt action rifle (currently in the eighth slot) so select it and place it into the fifth slot.
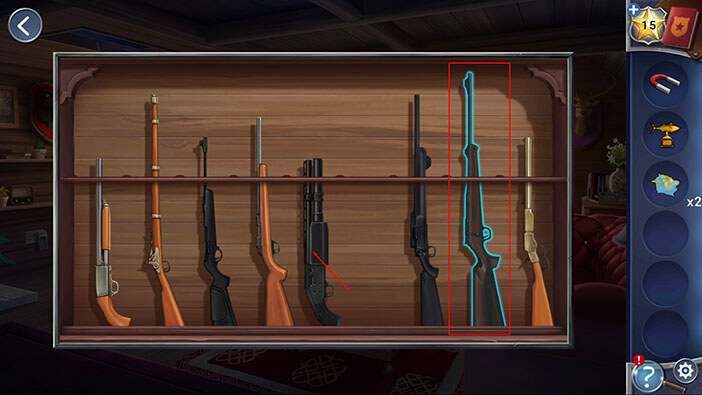
Step 5
The sixth slot should be empty, so let’s move on.
The sixth tree (seventh slot) was dark green, and it was the middle-long one. The middle-tall dark (black) gun is a bolt action rifle (currently in the seventh slot) so it’s also in the correct place.
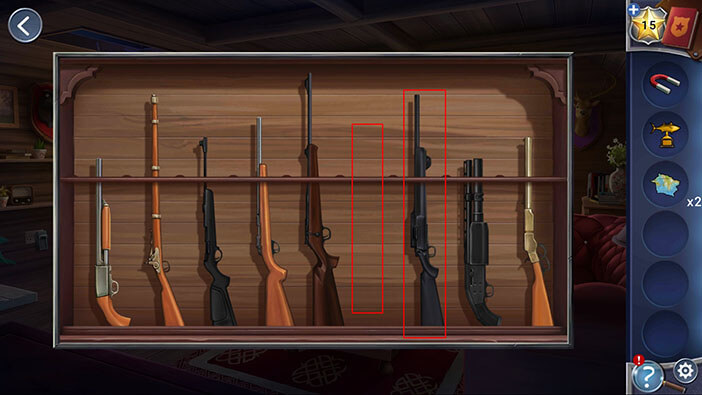
Step 6
The seventh tree (eighth slot) was light green, and it was the middle-short. The middle-short light (brown) gun is a lever-action rifle (currently in the eighth slot) so select it and place it into the eighth slot. When you switch positions of the brown lever-action rifle and black pump-action shotgun you will correctly arrange the guns in the cabinet (they will match the order of the trees that we saw outside).
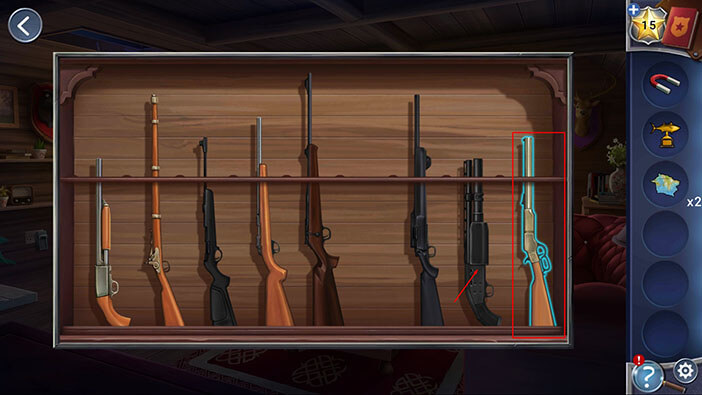
As soon as you place the guns in the correct order, the drawer on the left will open and in it, you will find a “Light Bulb”. Tap on it to pick it up.
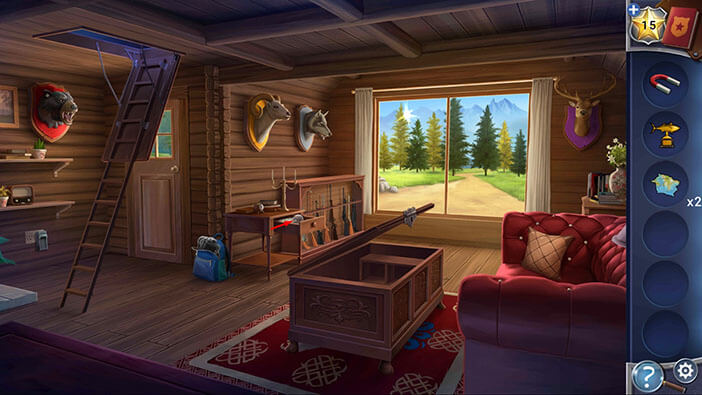
Ok, let’s go back to the attic.
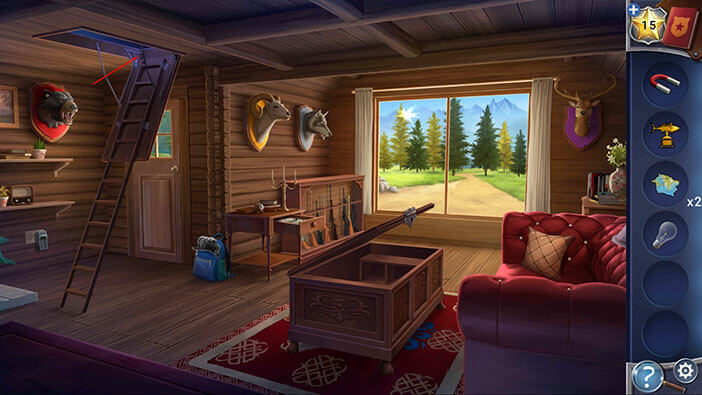
Kate will automatically turn on the flashlight, so use it to illuminate the ceiling lamp.
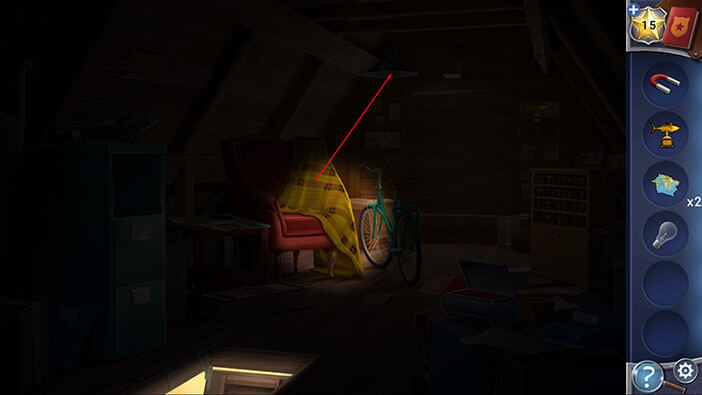
Select the “Light Bulb” from the inventory and attach it to the lamp.
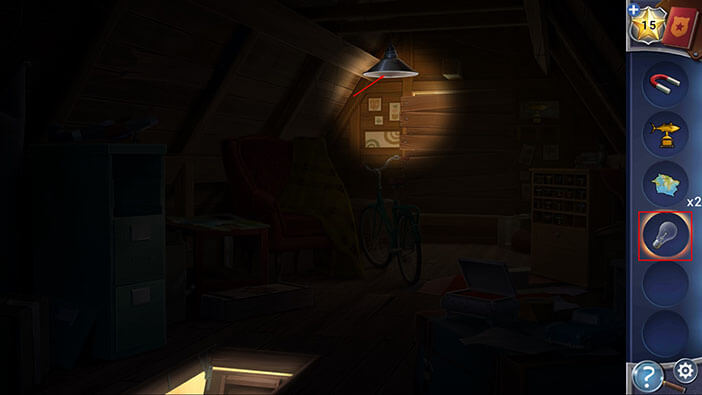
Ok, we have now restored a light in the attic, so let’s take a look around. In the upper right corner of the room, we can see a “Fish Trophy”. Tap on it to pick it up.
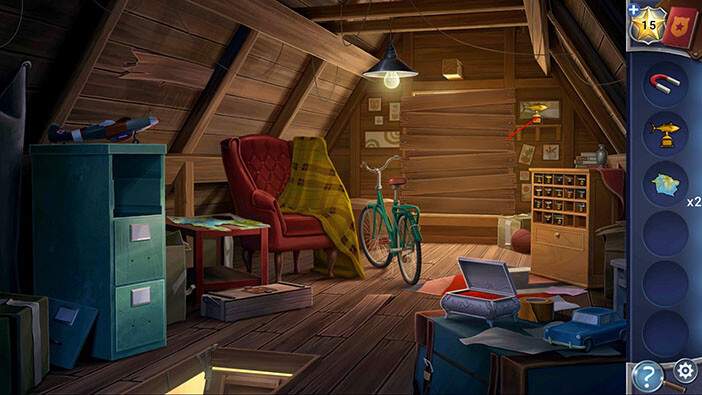
On your left, you will notice a red chair and a blanket. Tap on the blanket to move it aside and below it, you will find another “Fish Trophy”. Tap on the “Fish Trophy” to pick it up.
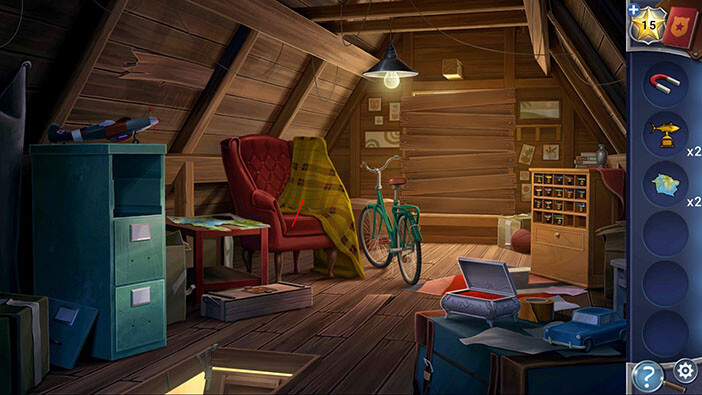
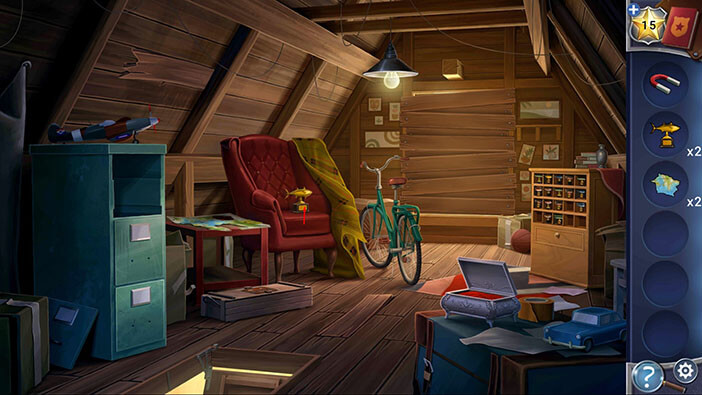
Next, select the “Magnet” from the inventory and attach it to the bottom drawer on the cabinet on the left. After that, tap on the “Magnet” again to open the drawer.
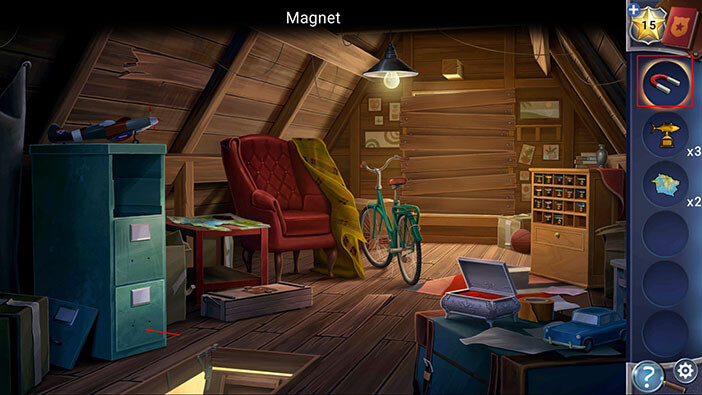
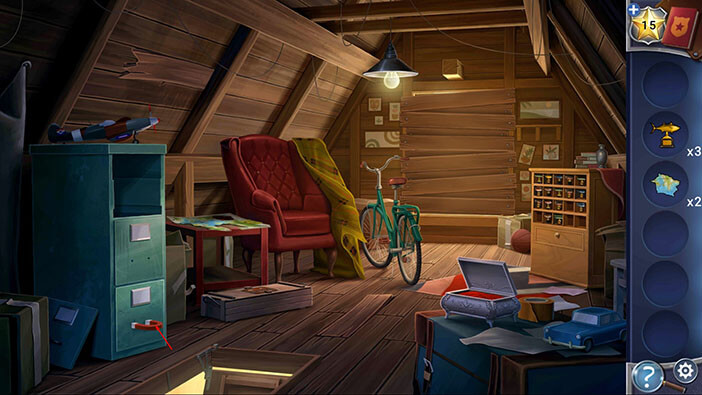
Inside the drawer, you will find a “Crowbar”. Tap on it to pick it up.
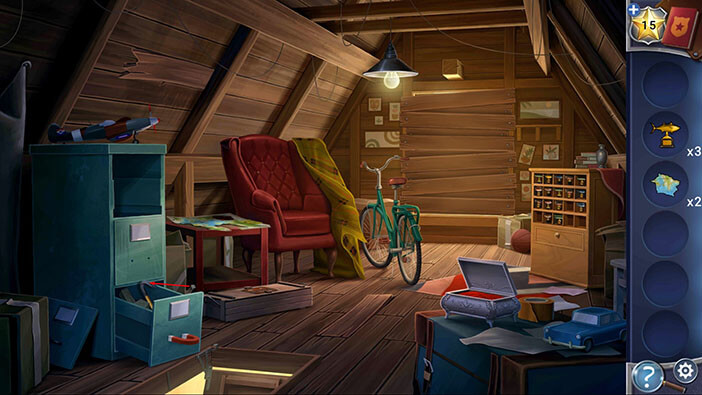
Well, we can use this crowbar to remove several planks, so let’s begin. Select the “Crowbar” from the inventory and tap on the wooden boards on the opposite wall (behind the bike) to remove them. You will unblock the boarded window.
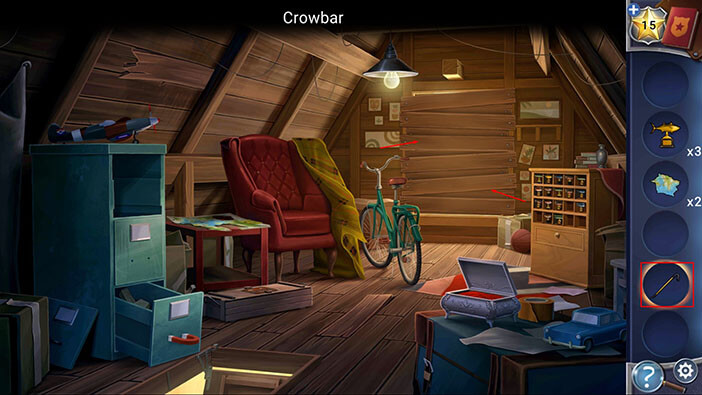
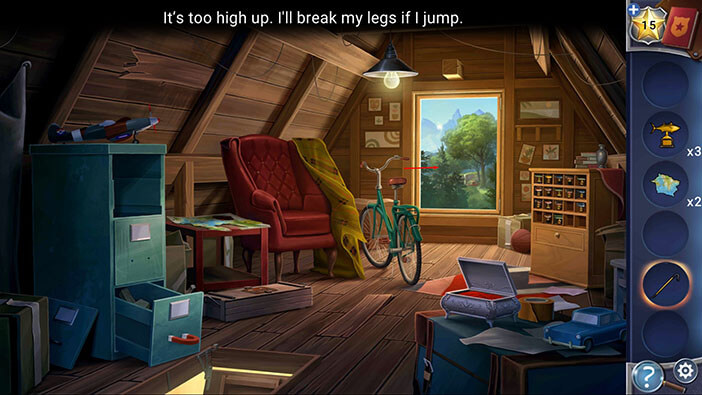
The window is too high above the ground to be a viable escape route, and Kate will say this if you tap on the window.
With the “Crowbar” selected, tap on the loose floorboard to remove it.
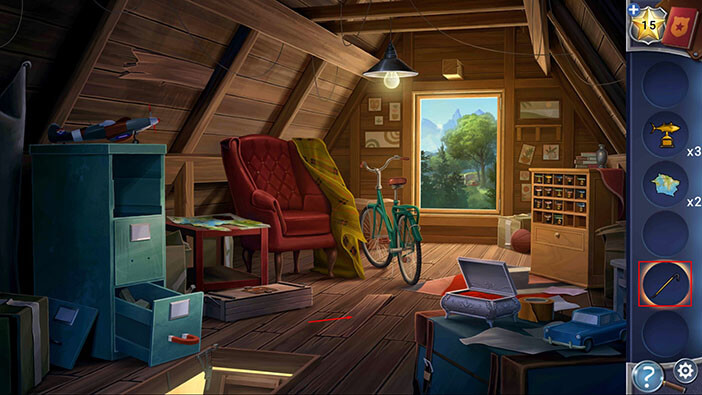
Inside the hole in the floor, you will find a “Wrench”. Tap on it to pick it up.
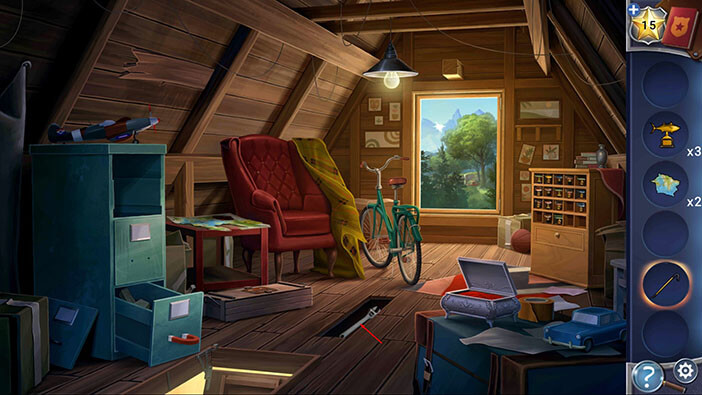
Lastly, if you take a look at the inner side of the roof (on the left) and you will see another loose board. So, with the “Crowbar” still selected, tap on the board to remove it.
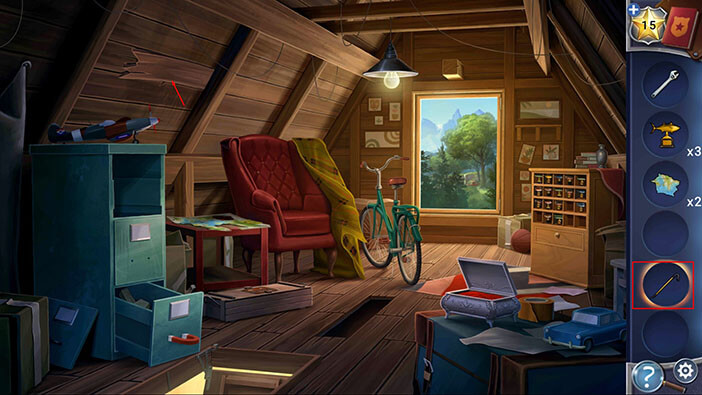
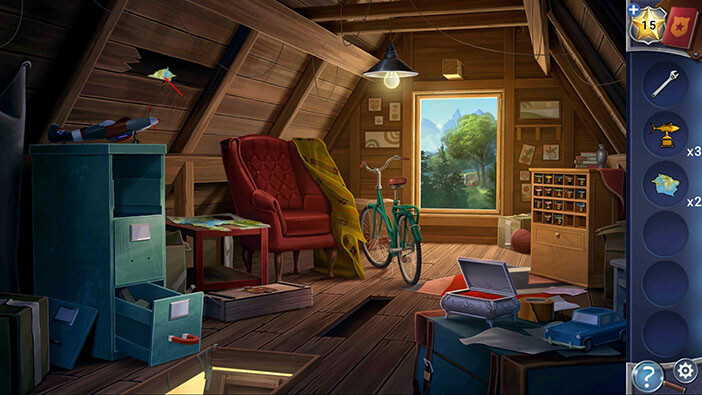
Inside the hole, you will find another “Map Piece”. Tap on it to pick it up.
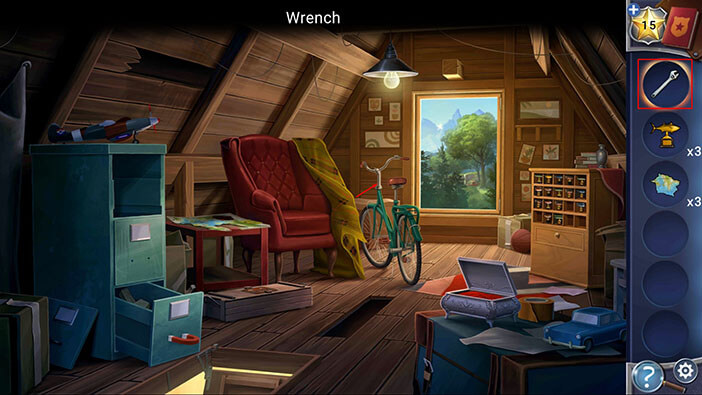
Next, select the “Wrench” from the inventory and use it to remove the “Handlebars” from the bike.
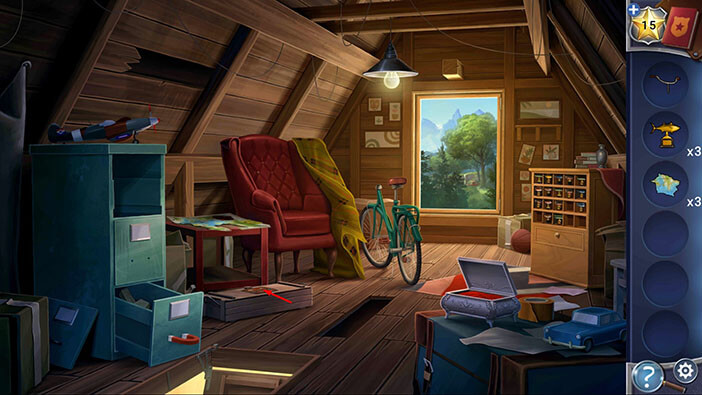
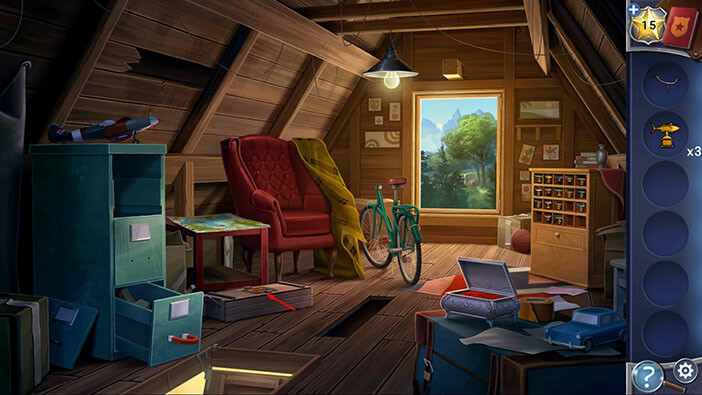
Next, let’s tap on the wooden box, located on the floor between the cabinet and the chair, to take a closer look at it.
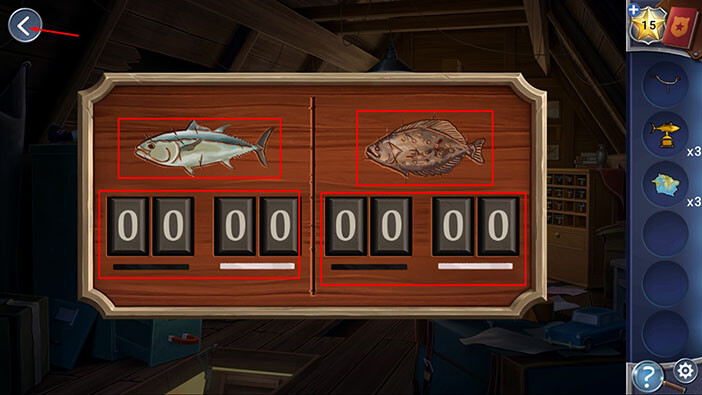
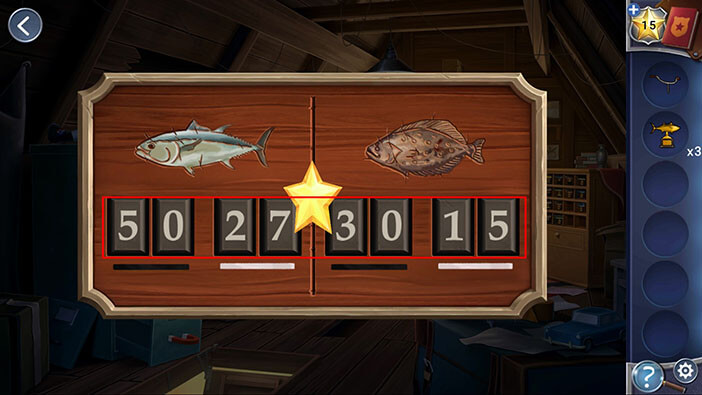
We can see that the box is locked by an eight-digit code. The first four digits (two “pairs”) are located below the fish on the left, and the other two digits (also, two “pairs”) are located below the fish on the right.
Also, the first pair of digits on each side has a white line below them, while the second pair has a black line.
We should now pay close attention to the fish.
The fish on the left has a navy blue top half and grey bottom half.
The fish on the right is brown and somewhat wide.
Try to memorize/ write down the appearance of these fish, because we will need this information for the next puzzle.
Once you’re done, tap on the arrow in the upper left corner to go back.
Ok, now let’s take a closer look at the map (it’s located on the small desk, just above the wooden box).
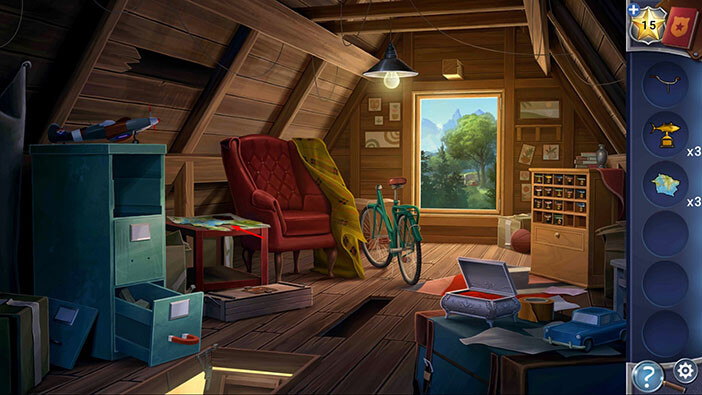
Well, it is obvious that some parts of the map have been torn away so, select the “Map Pieces” from the inventory (by this point you should have 3 of those) and tap on the map to assemble it.
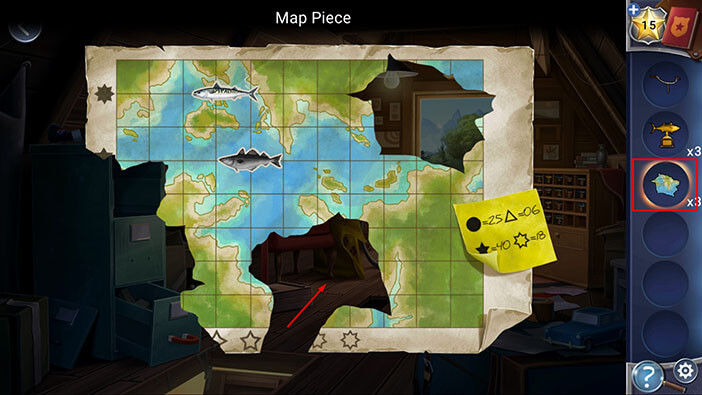
Ok, we will have to decipher several things on this map. First of all, we can see four fish on the map, so let’s start by identifying the two fish that we saw on the lock for the wooden box.
The first fish had a navy blue top half, and a grey bottom half. This fish is in the upper left corner of the map.
The second fish was brown and somewhat wide, and we can see this fish at the bottom of the map.
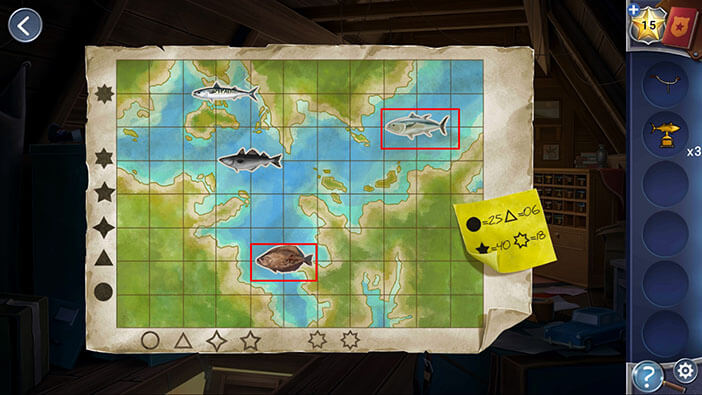
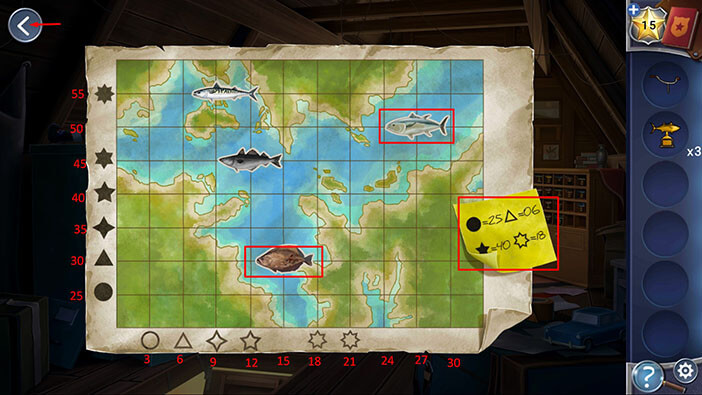
After identifying the fish, we will have to find their coordinates on the map, because their coordinates represent the code for the wooden box.
To decipher the coordinates, we will first have to examine the note on the lower-left corner of the map. Here, we can see four symbols, two white, and two black, and each symbol has a certain value assigned to it.
Let’s start by deciphering the values for the black symbol that are drawn on the left side of the map.
On the note we can see:
Black Circle = 25
Black five-pronged Star = 40
The black circle is the starting point. There are three lines (increments) from the black circle to the black five-pronged star, which means that each line represent the increment of 5 (40 – 25 = 15. 15 / 3 = 5)
With this information, we can determine the value for each line on the vertical (Y) axis.
Y-axis has a starting value of 25 and each line represents 5 “points” increment.
Next, let’s decipher the values for the white symbols.
On the note we can see:
White Triangle = 06
White seven-pronged Star = 18
There are four lines (increments) from the white triangle to the white seven-pronged star, which means that each line represent the increment of 3 (18 – 6 = 12. 12 / 4 = 3)
With this information, we can determine the value for each line on the horizontal (X) axis.
The starting line on the X-axis has a value of 3 (one line before the white circle) and each line represents 3 “points” increment.
With this knowledge, we can easily determine the coordinates of the two fish. So,
First Fish coordinates = 50, 27
Second Fish coordinates = 30, 15
Note: The white lines below the numbers on the box represent the white symbols (X-axis) and the black lines represent the black symbols (Y-axis).
Memorize/write down the coordinates of the two fish, then tap on the arrow in the upper left corner to go back.
Tap on the wooden box again to start the interaction.
Enter the code that we discovered. 50 27 (first fish) 30 15 (second fish) and you will unlock the box.
In the box, you will find another “Fish Trophy”. Tap on it to pick it up.
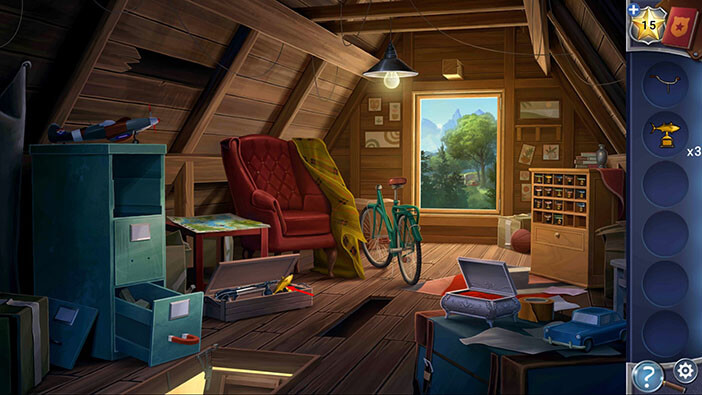
If you tap on the other item in the wooden box, you will discover that it is a “Harpoon Gun” but it is missing a harpoon.
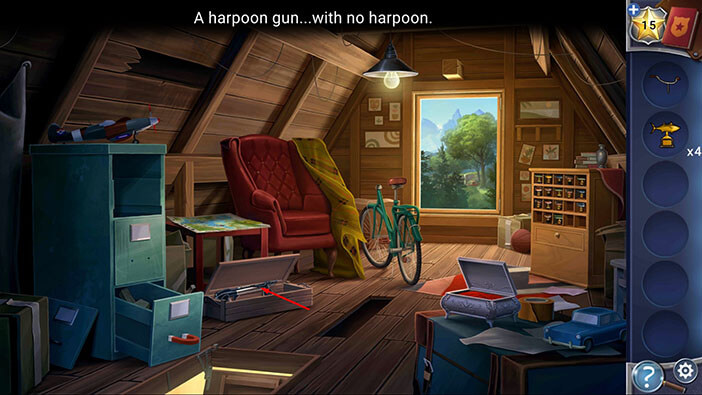
Ok, now let’s tap on the fish trophy cabinet, located in the upper left corner of the room, to take a closer look at it.
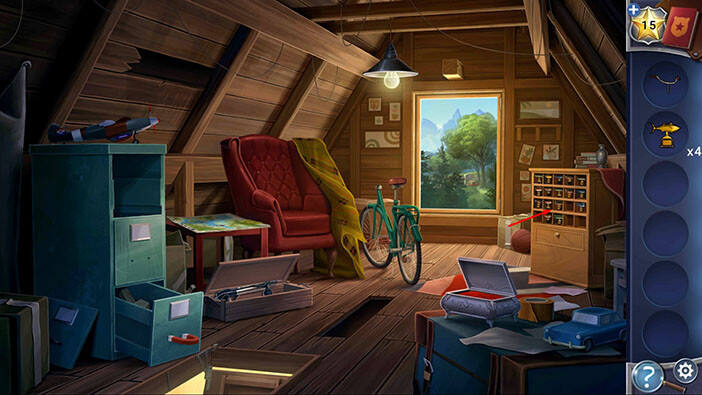
After seeing, all the trophies in this cabinet, Kate concludes that her captor must be a very good fisherman and that he won a lot of competitions, so she decided to make note of it.
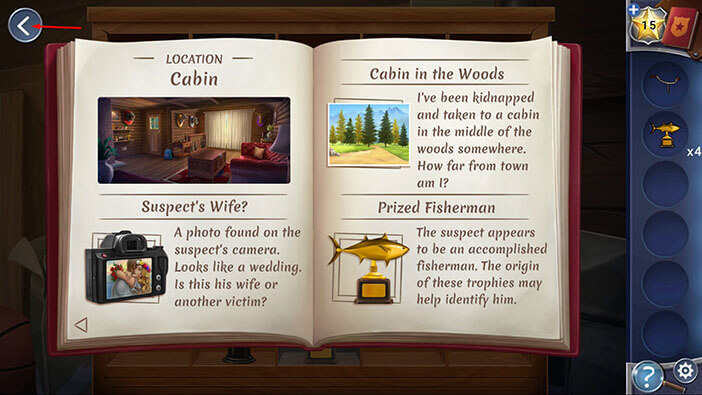
Another entry, “Prized Fisherman” will be added to your inventory. Kate thinks that she might be able to determine the identity of the suspect if she can determine the origin of the trophies (somebody probably keeps records with names of fishing tournament champions).
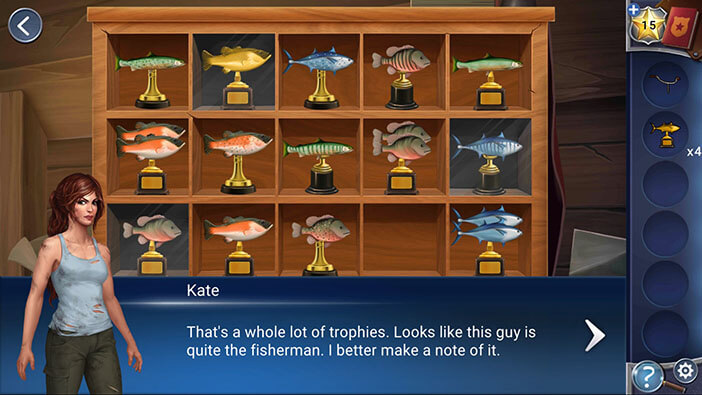
Well, we can see that four trophies are missing from the shelf, so select the “Fish Trophies” from the inventory (you have four of them, at this point) and add them to the collection.
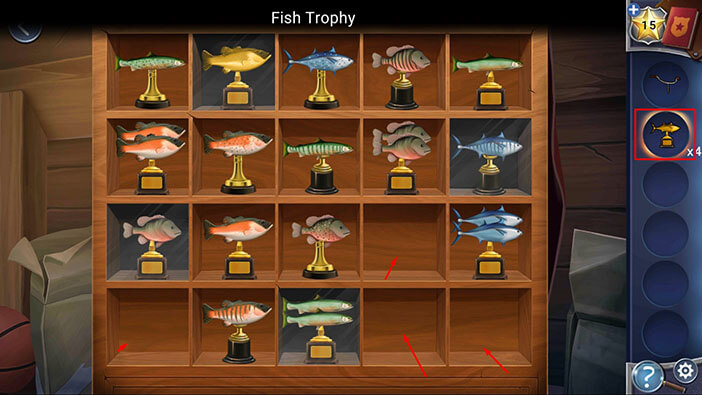
Ok, our next task is to properly rearrange the trophies. The four trophies with the grey background are protected by glass, and they can’t be moved.
Every trophy has two attributes, color, and shape, and our goal is to arrange the trophies by these attributes. Since the grey trophies can’t be moved, we can use them to identify
Color (or the amount of fish) of the trophies that should be placed in their column.
The shape of the trophies that should be placed in their row.
We will start with the Gold Fish Trophy (grey background). This trophy is in the second column (left to right) and first row (top to bottom). So, all fish trophies in the second column should be gold. Also, all fish in the first row should be of the same shape as this trophy (orange fish with the black top).
Next, we have the Double Green Fish Trophy (grey background). This trophy is in the third column and fourth row. So, all fish trophies in the third column should have double fish. Also, all fish trophies in the fourth row should be of the same shape as this trophy (thin and long).
Next, we have the Blue Fish with Stripes Trophy (grey background). This trophy is in the fifth column and second row. So, all fish trophies in the fifth column should have stripes. Also, all fish trophies in the second row should be of the same shape as this trophy (medium size, long fins).
Lastly, we will go back to the fish in the first column, because it doesn’t have any particular markings. This fish is plain, so in the first column, all fish should be plain (no markings like stripes, dots, etc.). This fish trophy has a very unique shape, so all fish in this row should have the same shape.
Finally, there are no fish trophies with grey background in the fourth column, but trophies in this column will be determined by the four rows.
This was a very long explanation, but you can SEE THE SOLUTION IN THE IMAGE BELOW.
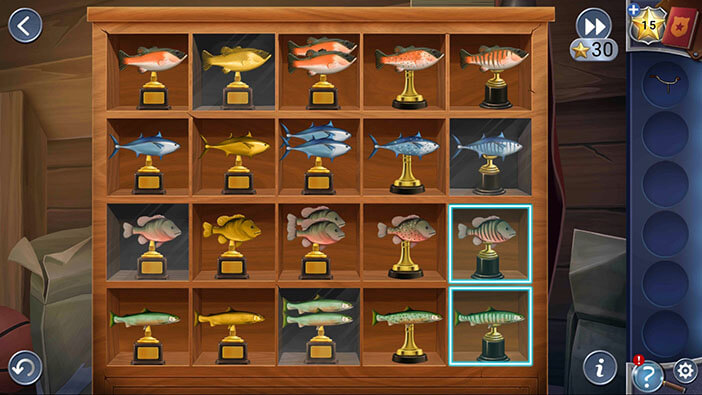
By arranging the fish trophies, you will unlock and open the drawer on the trophy cabinet. Inside the drawer, you will find a “Harpoon”. Tap on it to pick it up.
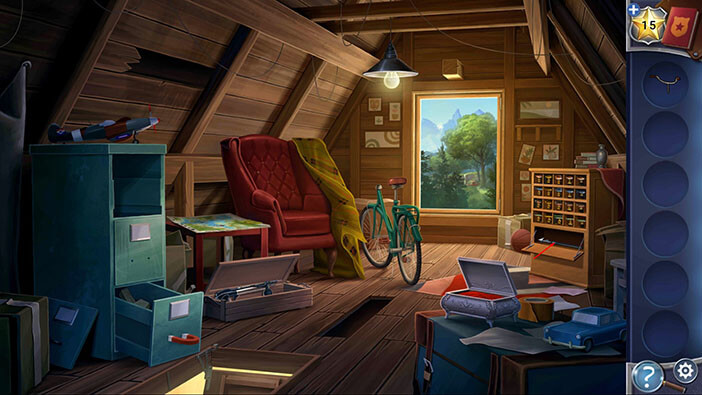
At this moment, Kate will hear the truck stopping in the front yard, and that means that her captor came back. She has to find a way to escape, and quick. But first, she will close the trapdoor and block his only access point to the attic.
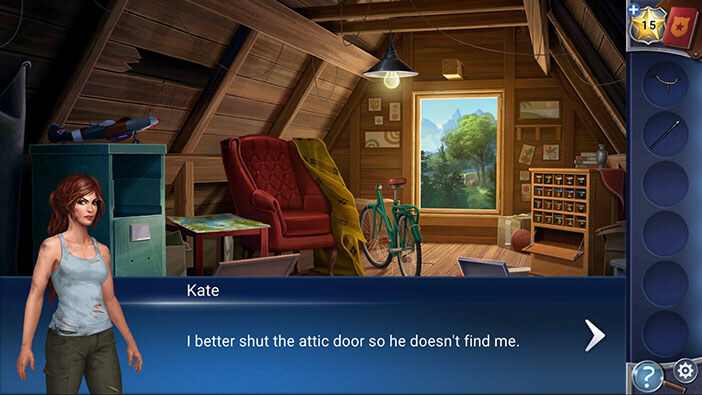
Select the “Harpoon” from the inventory and load it into the “Harpoon gun” which will be automatically added to your inventory.
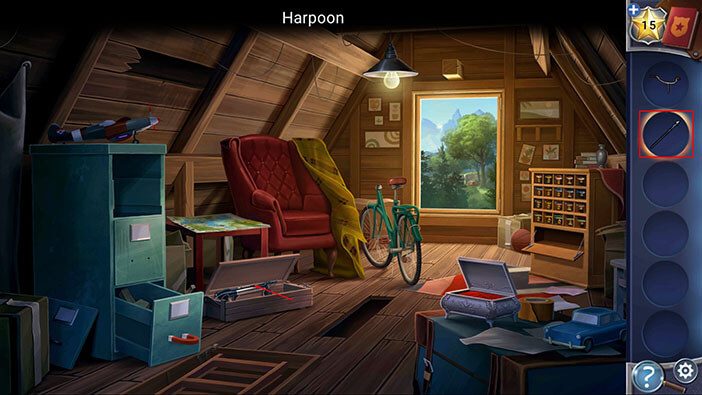
At this moment, Kate’s captor will enter the house, and she realized that her only escape route is through the attic window.
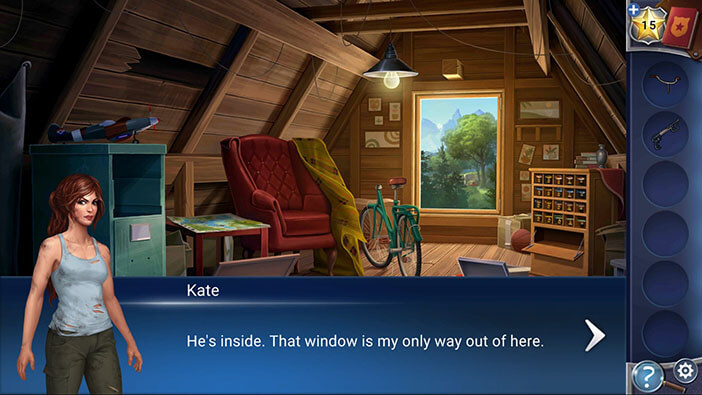
Select the “Harpoon Gun” from the inventory and fire it through the window.
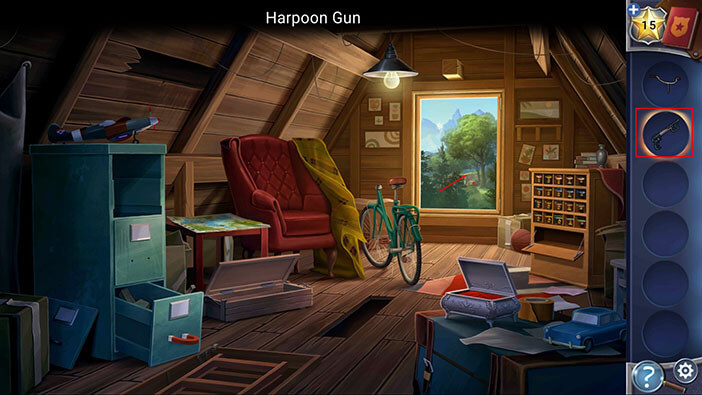
Next, select the “Handlebars” from the inventory and Kate will use them to create an improvised zip line.
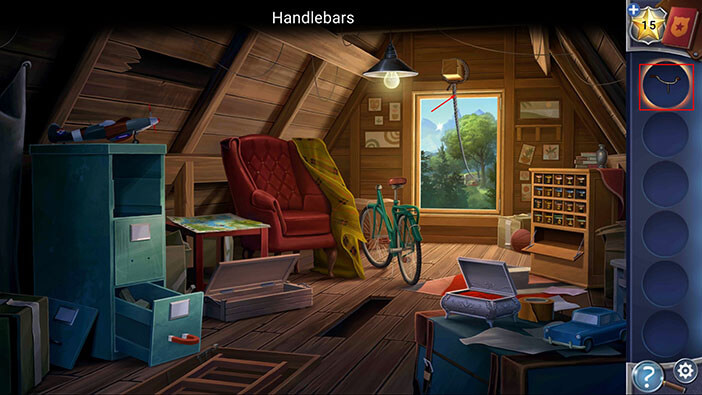
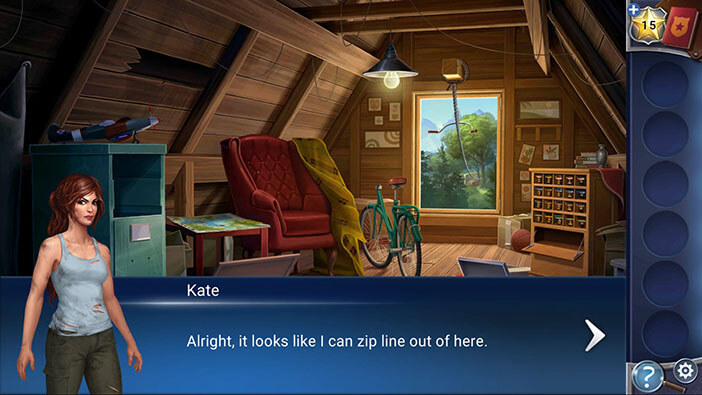
Even though descending down this improvised zip line is very risky, Kate has no other choice, because the risk of zip line breaking and suffering some injuries is still a better option than certain capture. With that, she grabs the handlebars and slides down the zip line, toward the forest, toward freedom…
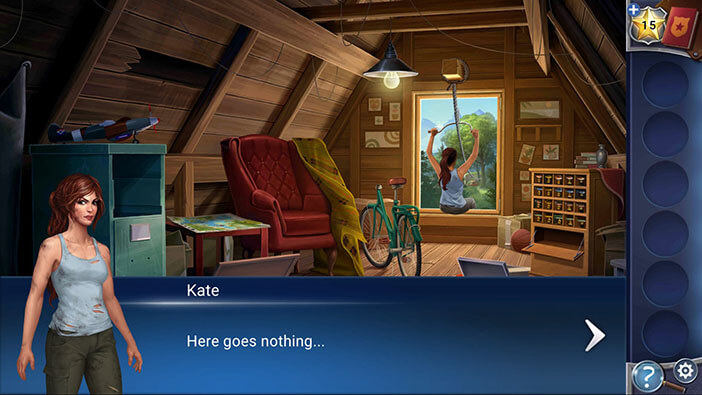
Well, that’s the end of the second chapter. Will Kate manage to evade her captor in the forest? It seems that her captor is a proficient hunter, and probably a tracker, so she will have a very difficult task ahead of her. Well, I guess we will find out in the next chapter.
You can check out the third chapter by tapping on the “Chapter III” button.
Thank you for reading.