Strange Case: The Alchemist, Chapter 2
Hello everyone and welcome to the walkthrough for Chapter 2 of ” Strange Case: The Alchemist”. During the first chapter, our character acquired a new ability called “Ghost Vision” which enables him to see and interact with objects in the other dimension. After a short investigation, which couldn’t be completed without the aforementioned ability, we unlocked the door which leads to the new area and brings us one step closer to the alchemist. Our character feels that he is right on the heels of the mysterious alchemist, and he is certain that he’ll soon catch up to this notorious criminal. However, the detective is also a bit concerned, because he has the feeling that someone is watching him every step of the way.
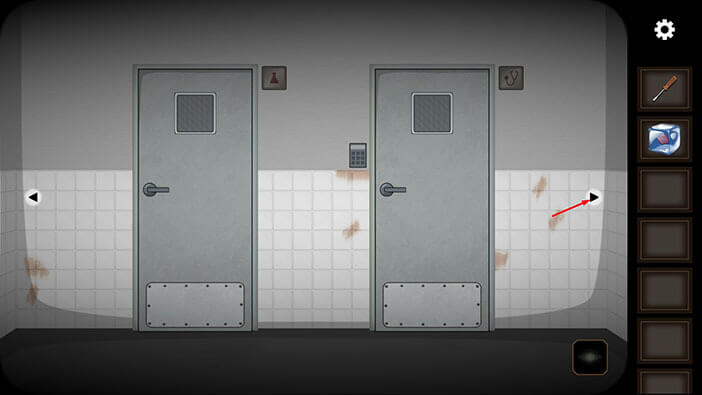
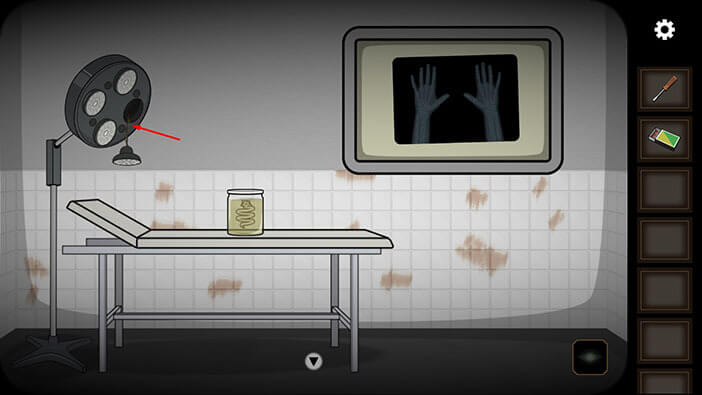
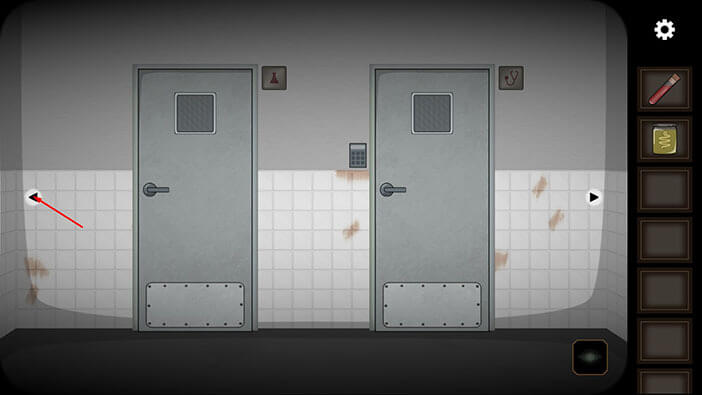
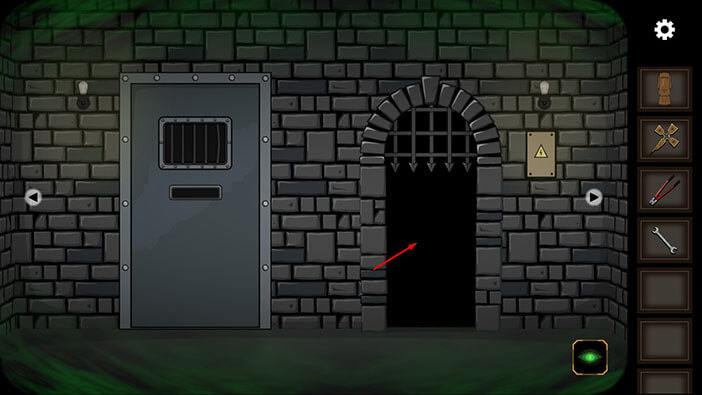
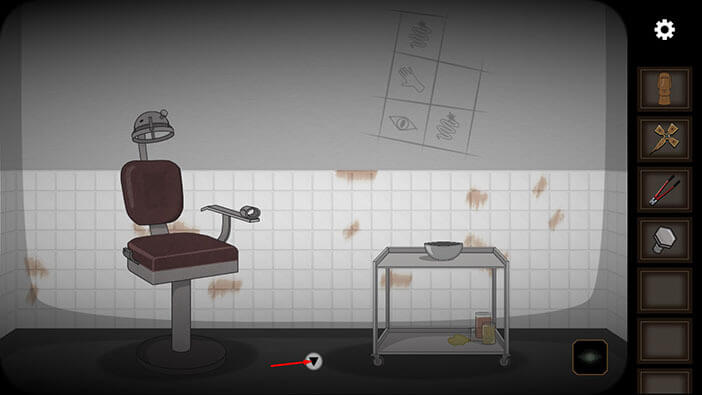
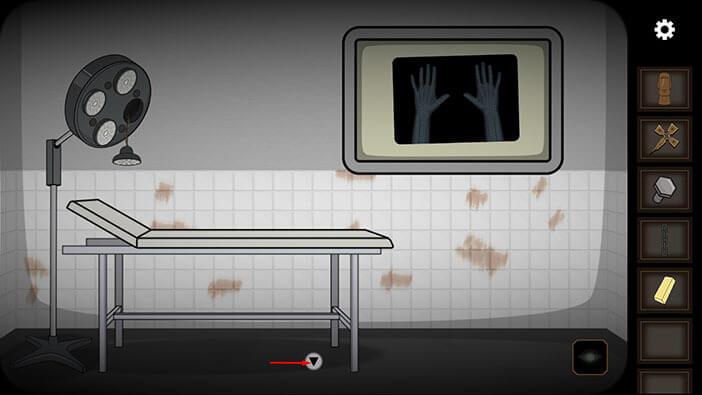
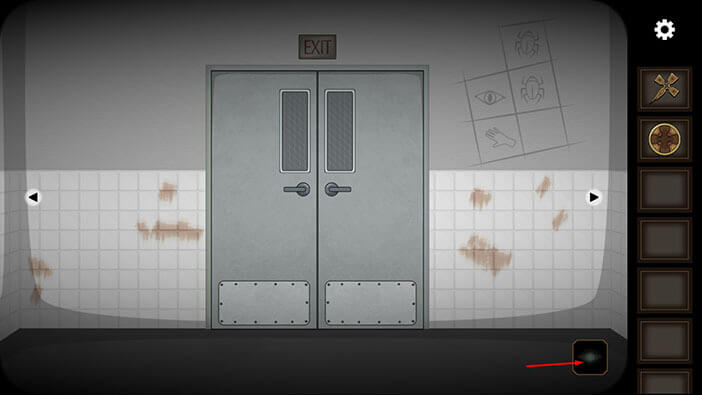
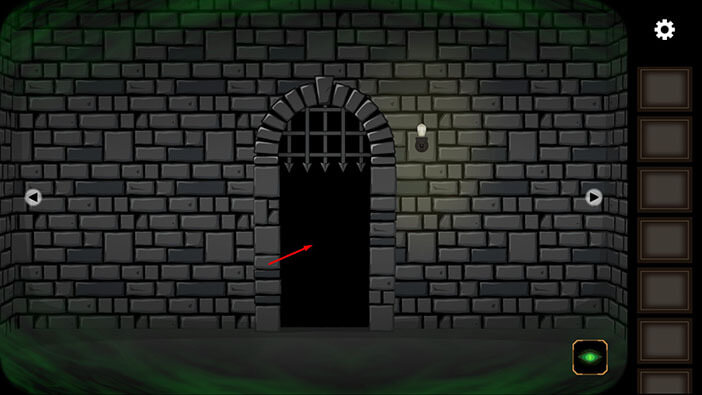
Ok, let’s continue the investigation. Go to the second room on the right.
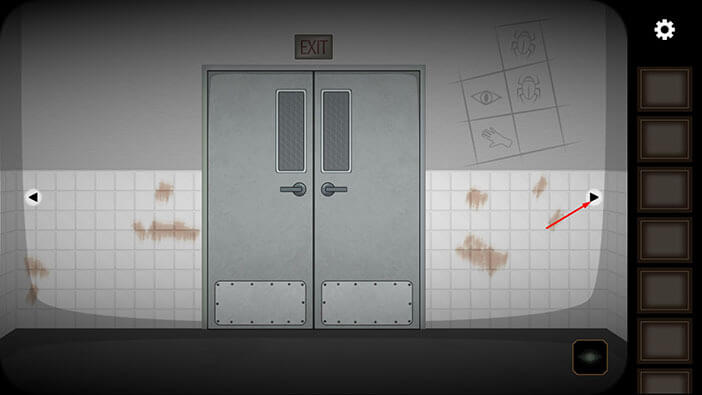
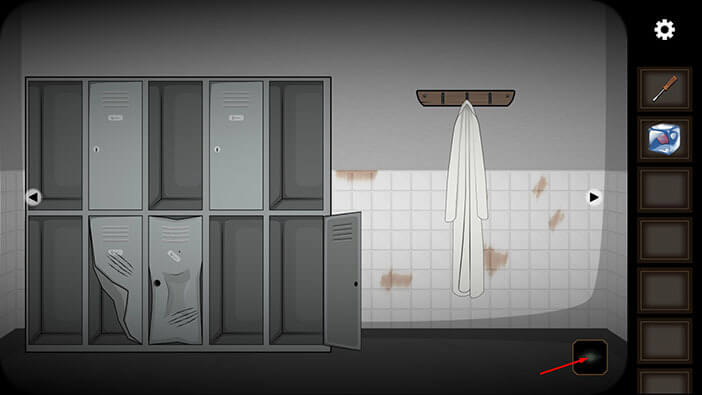
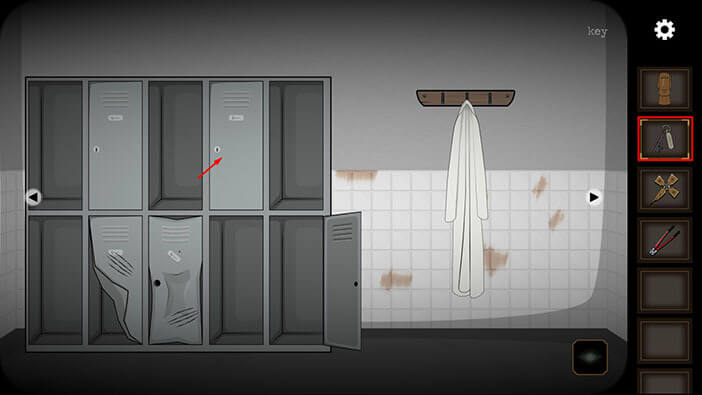
Tap on the lab coat to check the pockets, and a key will drop to the ground.
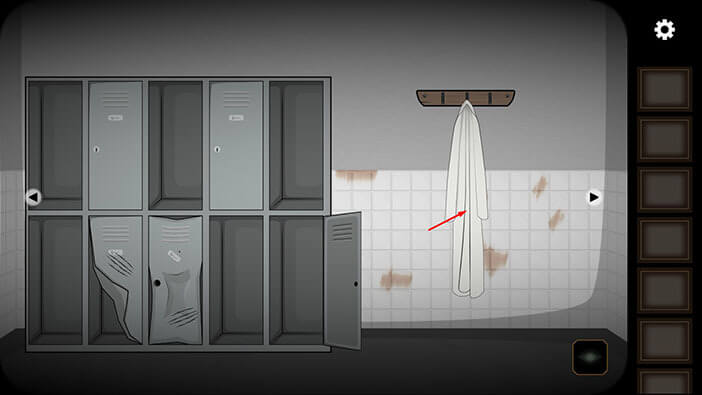
Tap on the “Key” to pick it up.
After that, tap on the arrow on the left to go to the previous room.

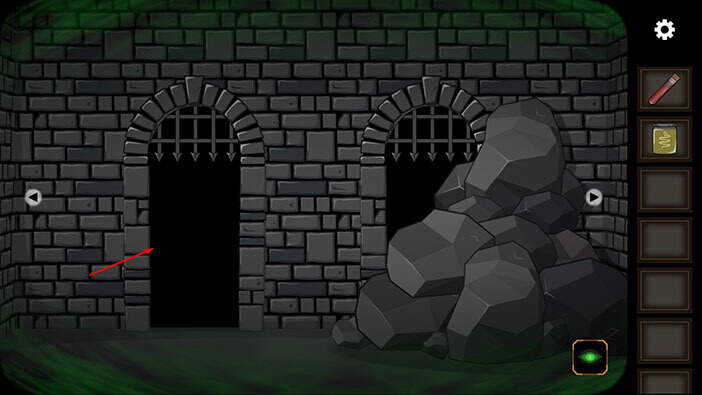
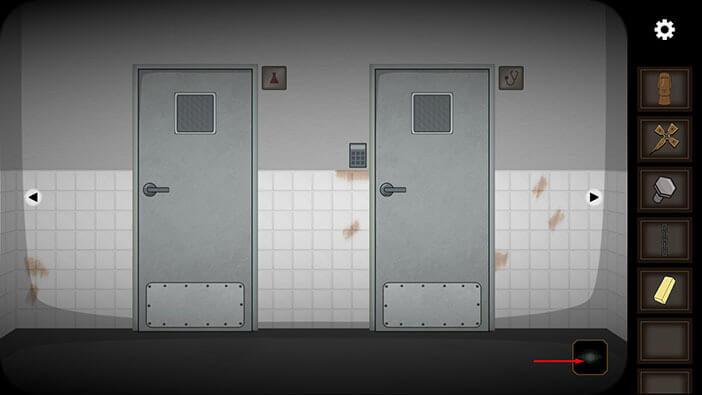
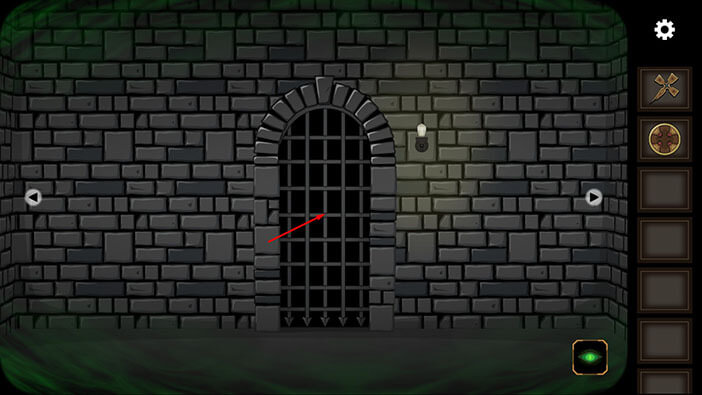
Tap on the “Ghost vision” icon in the lower right corner of the screen to activate this ability.
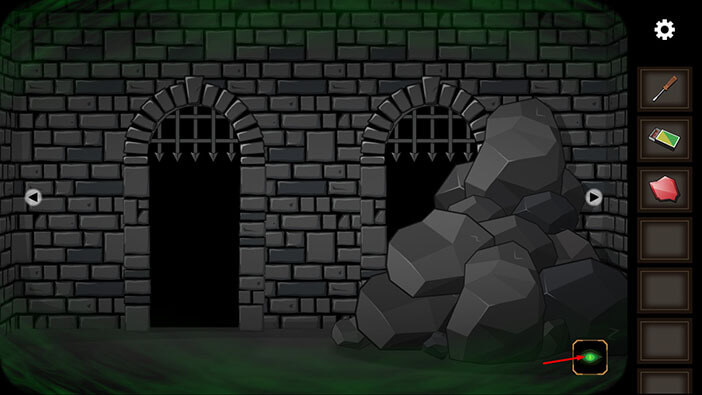
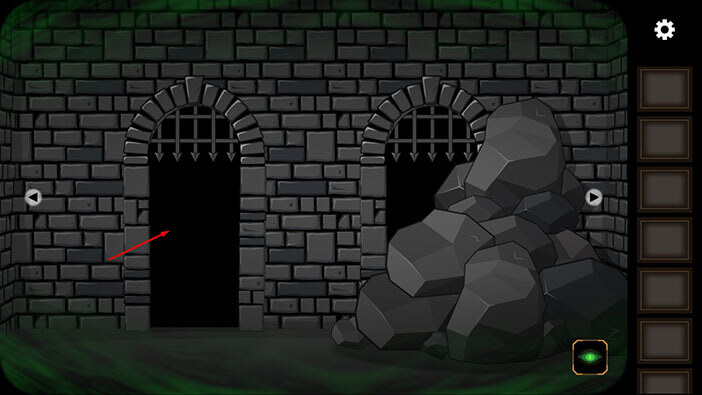
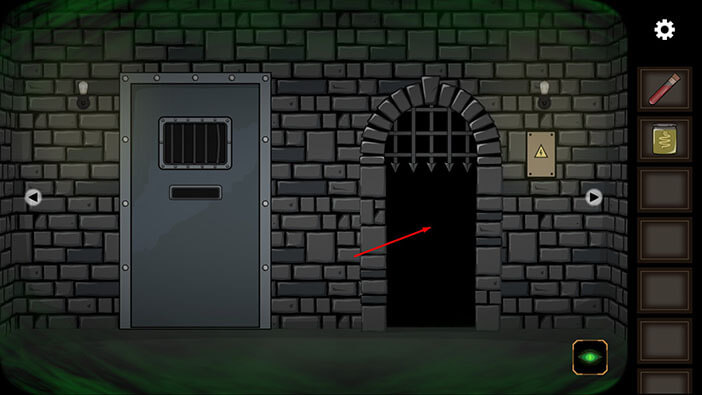
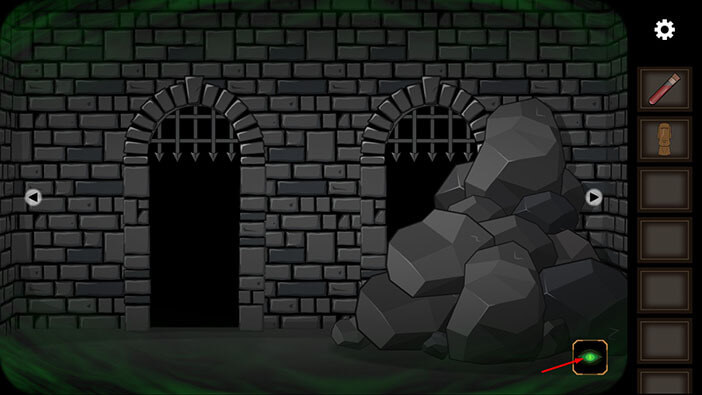
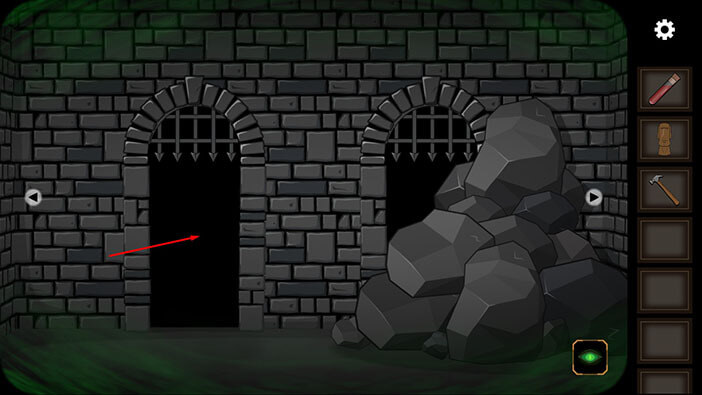
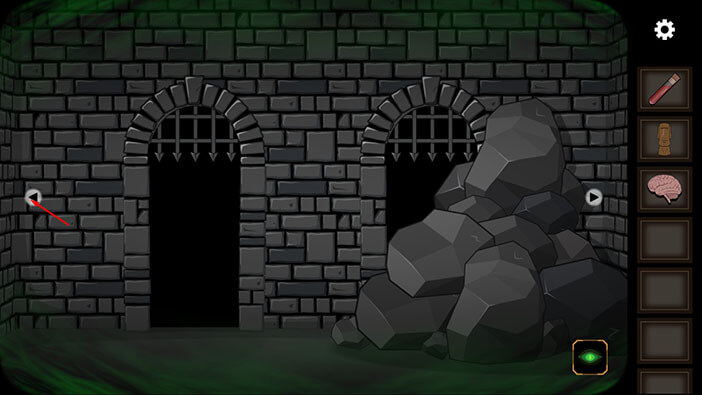
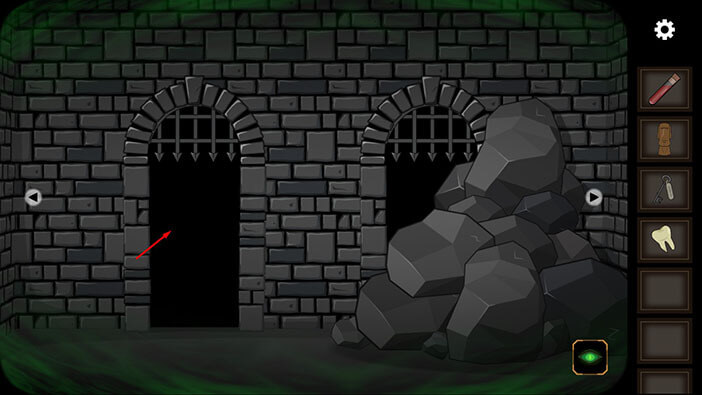
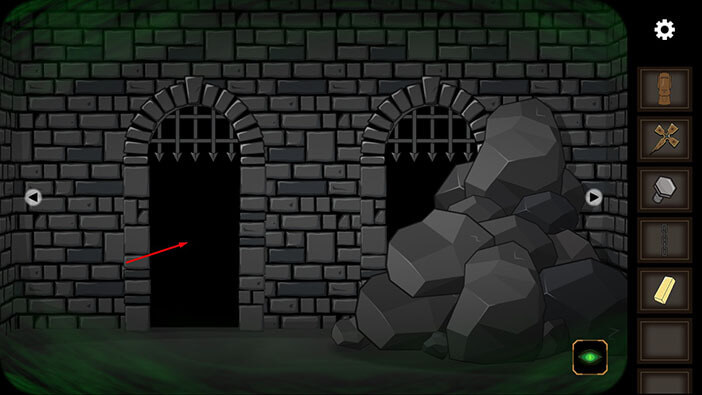
Instead of two metal doors, we can now see two iron gates. The gate on the right is blocked by a stone pile, and the gate on the left is raised. So, let’s go through the gate on the left and explore the next area.
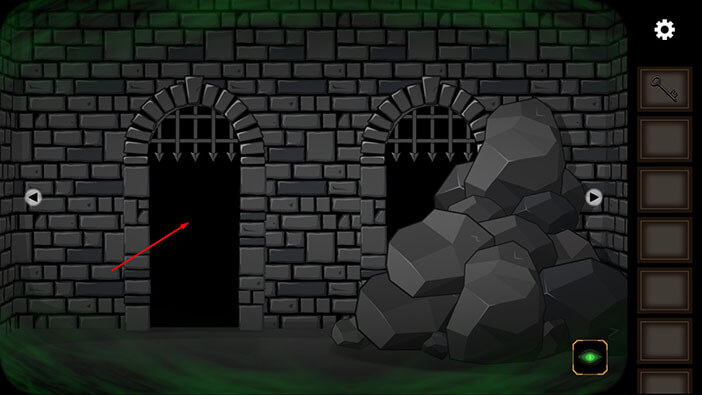
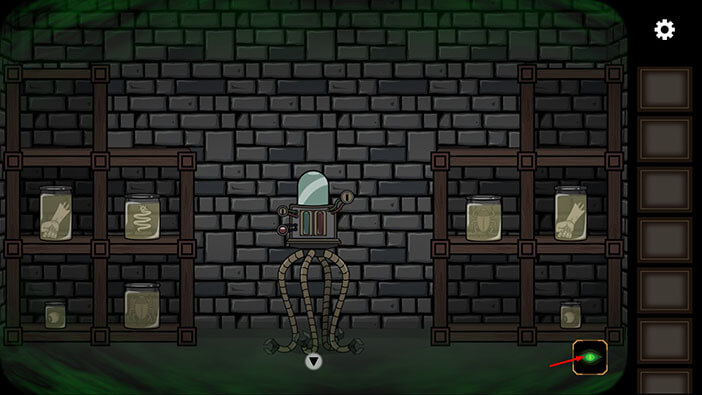
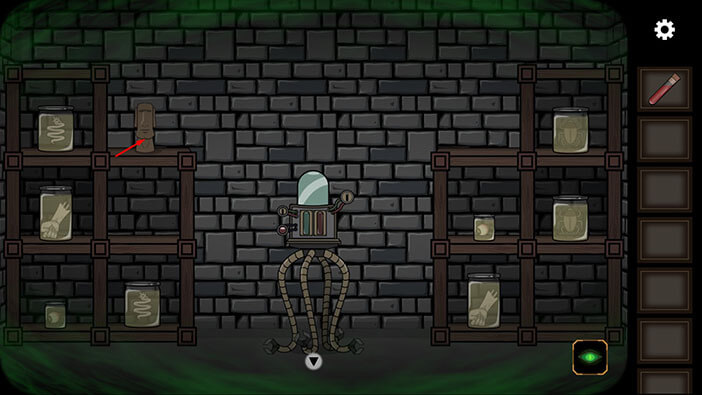
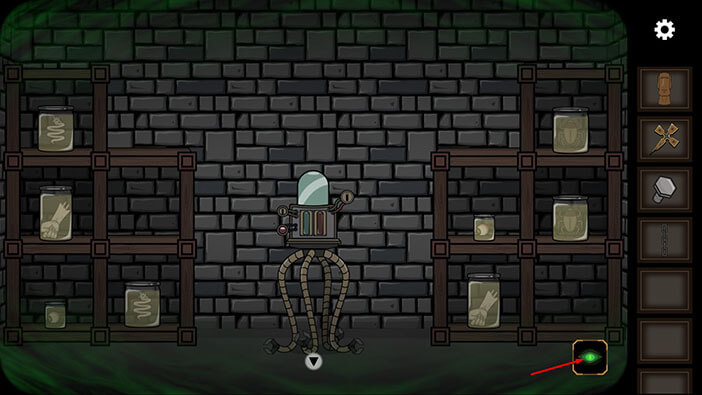
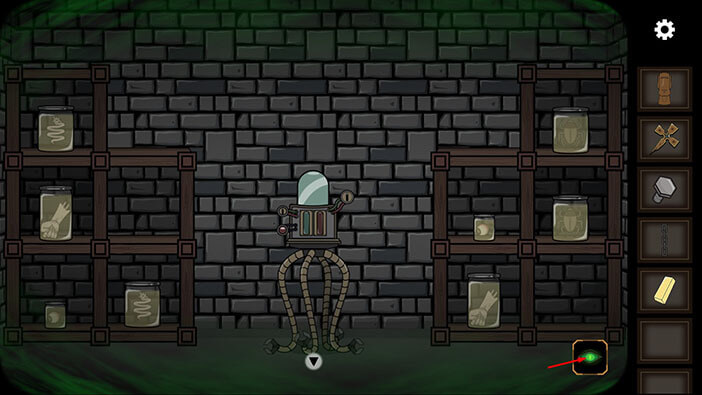
Here, we can see seven large jars, which contain body parts, bugs, and other nasty stuff. Let’s turn off the “Ghost Vision” by tapping on the eye icon in the lower right corner of the screen.
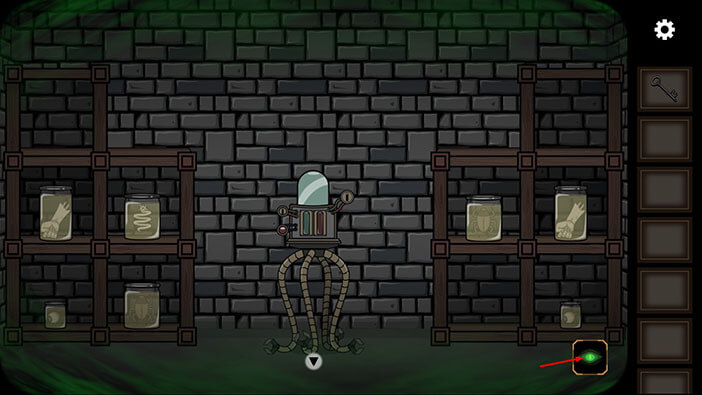
And just like that, we are back in the “normal” world. So, this is one very cheeky way to go through locked doors. In the “normal” world, the door was locked, so we switched to the “Ghost Vision”. In the other world, the gate which represents the door was open, so we went through it. We then turned off ghost vision, and just like that, we are in a room that normally wouldn’t be accessible. This is a very interesting mechanic.
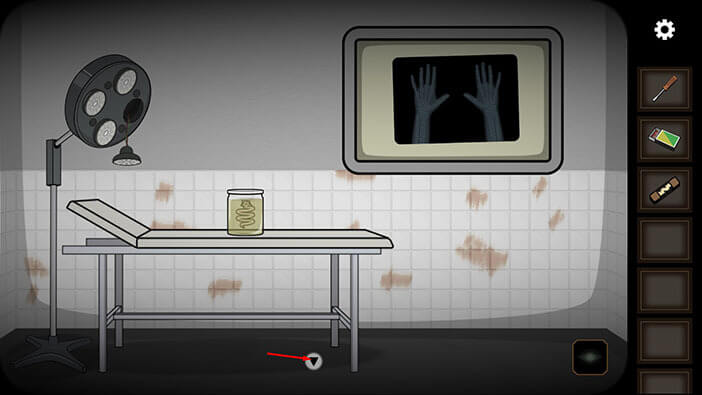
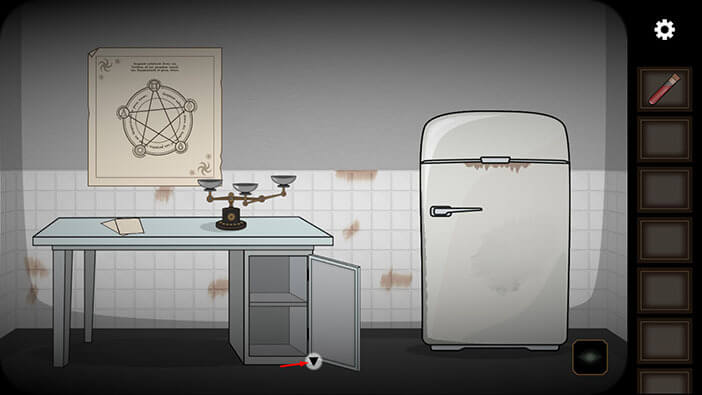
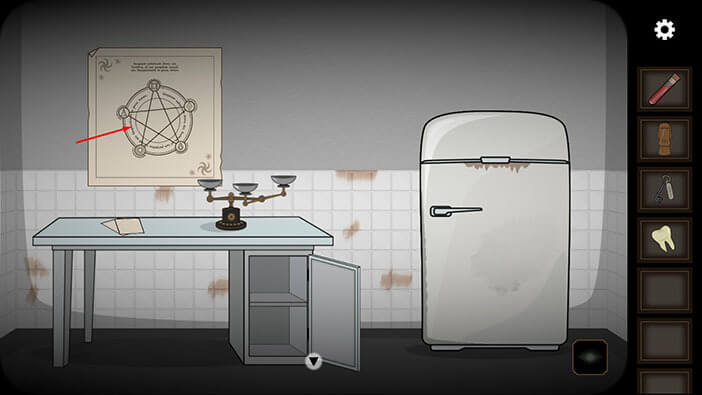
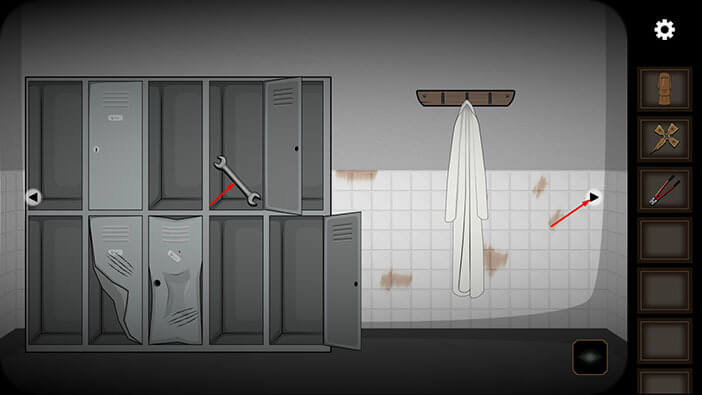
Let’s explore. Select the “Key” from the inventory and use it to unlock the small cabinet, located under the table.
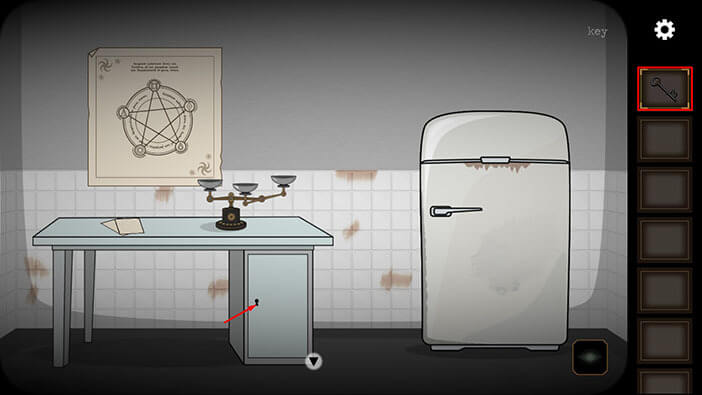
Tap on the item in the cabinet to pick it up and a “Screwdriver” will be added to your inventory.

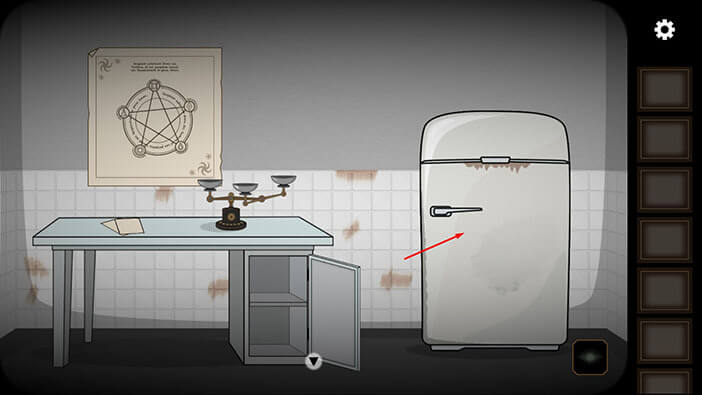
Tap on the fridge on the right to look inside it.
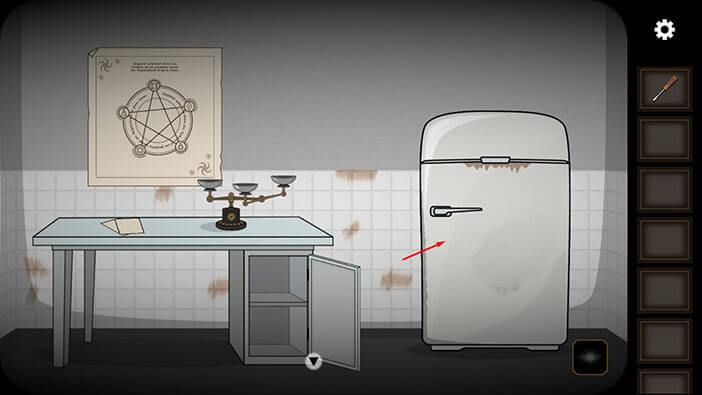
Tap on the large “Ice cube” to pick it up. After that, tap on the arrow at the bottom of the screen to go back.
We should now head back to the room with the lab coat. Let’s do that. Tap on the arrow at the bottom of the screen to go back.

Tap on the arrow on the right to go to the next room.
Tap on the eye icon in the lower right corner to turn on the “Ghost Vision”.
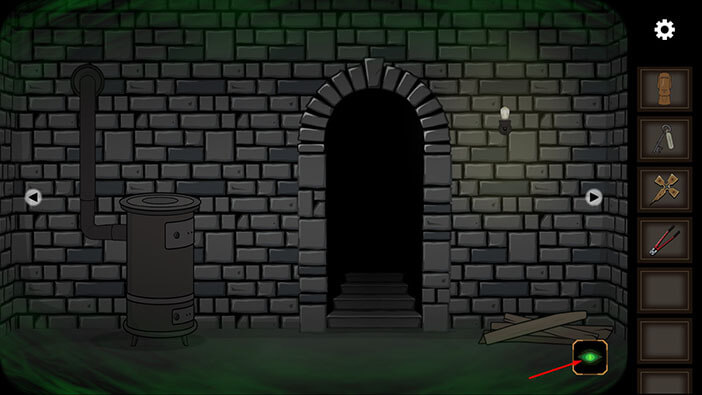
Tap on the planks on the right to pick them up. “Wood” will be added to your inventory.
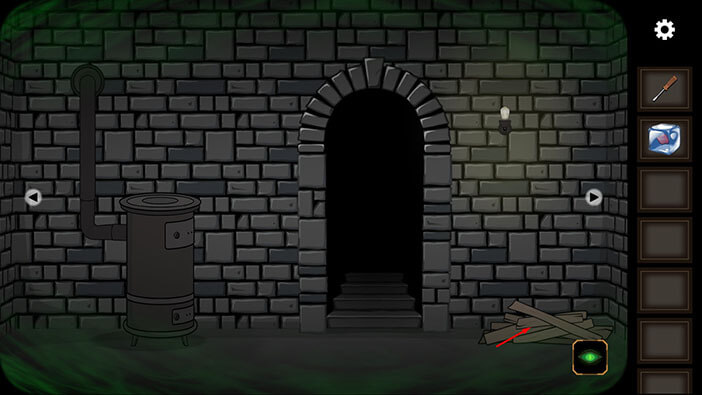
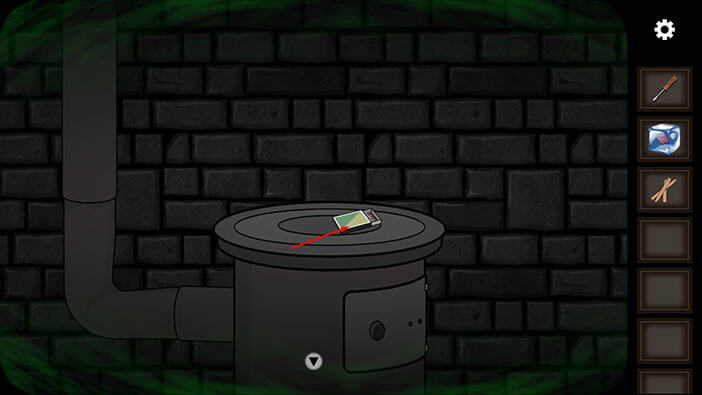
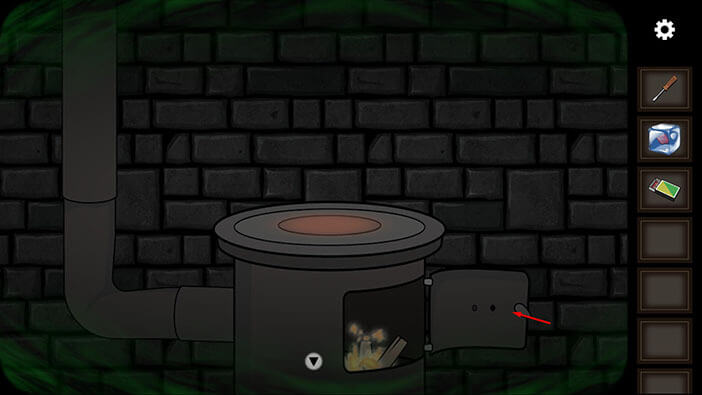
Next, tap on the stove to take a closer look at it.
Next, tap on the “Matches” to pick them up.
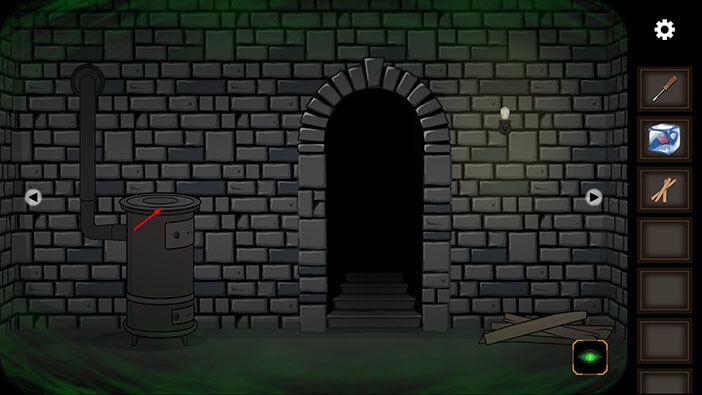
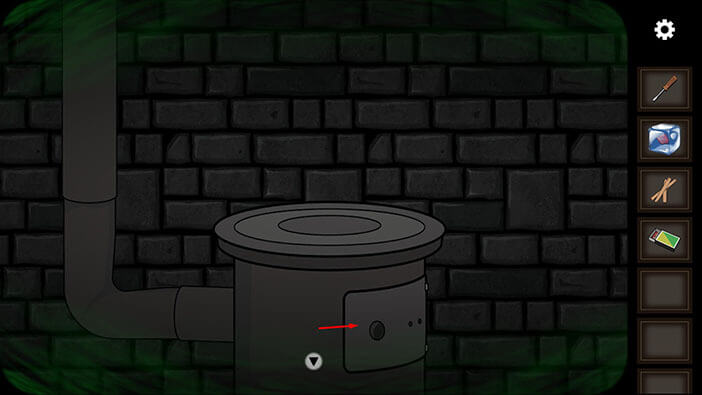
Next, tap on the stove door to open it.
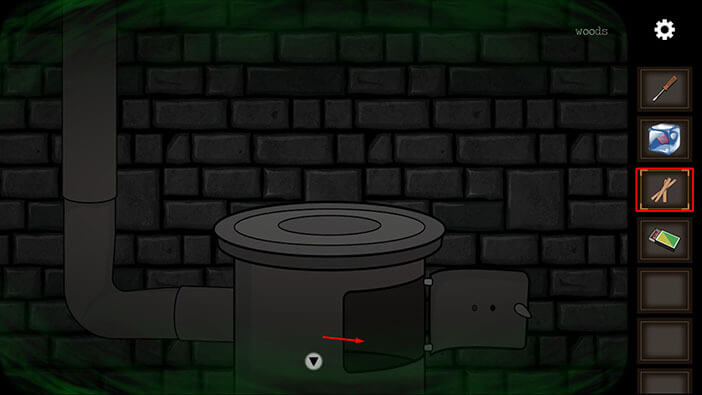
Select the “Wood” from the inventory and place it into the stove.
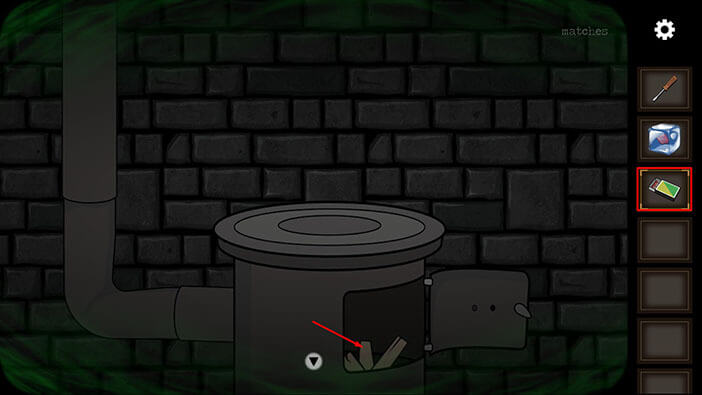
After that, select “Matches” from the inventory and use them to start a fire.
Tap on the stove door to close it.
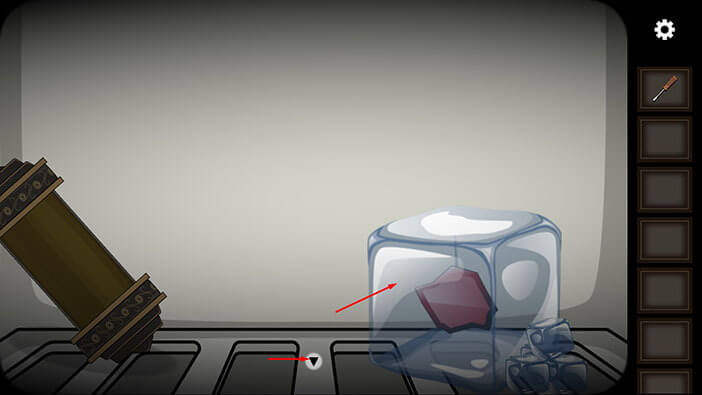
Select the “Ice cube” from the inventory and put it on the heated stove.
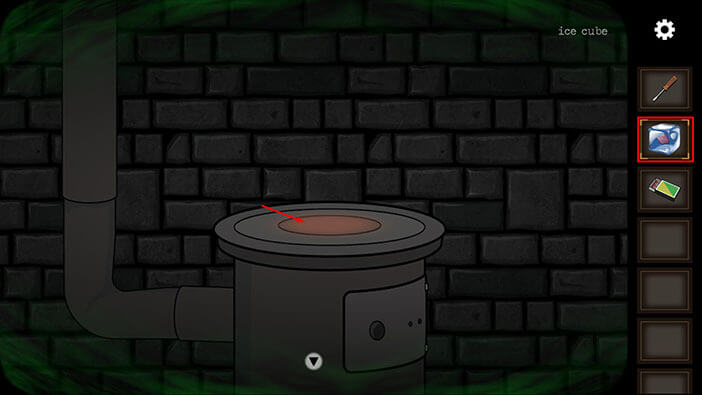
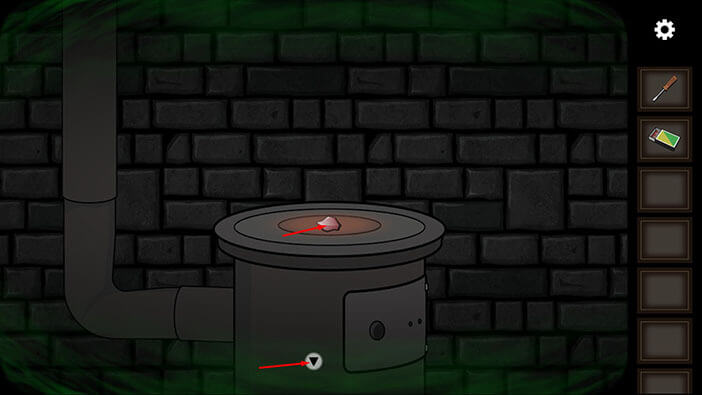
The ice will melt away almost instantly, revealing a small red item that was trapped inside the cube. Tap on this item to pick it up and a “Piece of red glass” will be added to your inventory.
After that, tap on the arrow at the bottom of the screen to go back.
Ok, let’s go back to the previous room. Tap on the arrow on the left.
Tap on the eye icon in the lower right corner to disable the “Ghost Vision”.
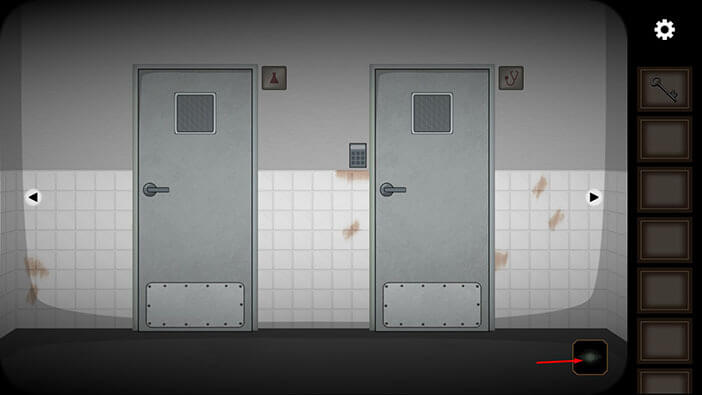
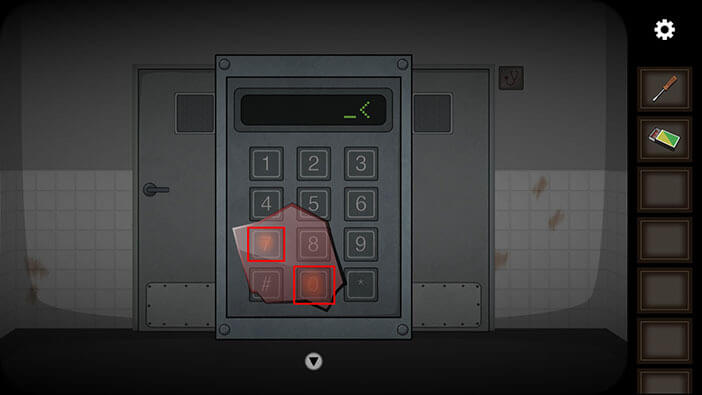
Tap on the numpad next to the door on the right to take a closer look at it.
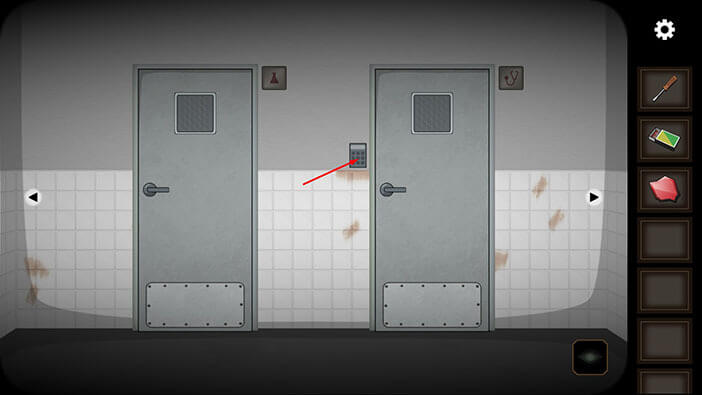
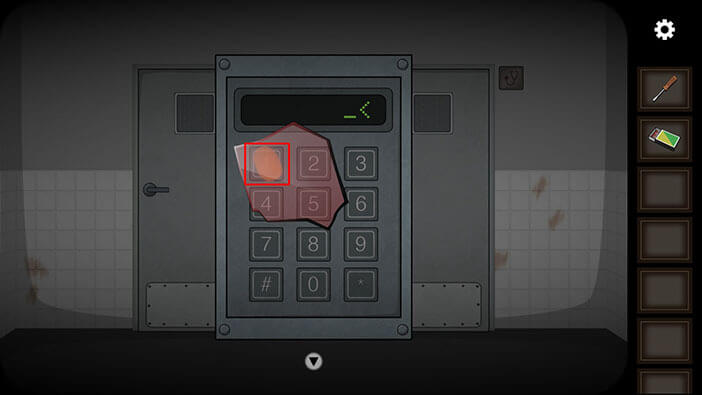
Select the “Piece of red glass” from the inventory and tap on the Numpad.

You will notice the red fingerprint on the number 6. We will use the red glass to solve this puzzle because it can reveal the fingerprints on the buttons that were pressed to open the door. The most visible fingerprint will be on the first button, and the least visible fingerprint will be on the last button. So, the visibility/intensity of the fingerprint will help us determine the correct order of the numbers.
The fingerprint on the number 6 has medium visibility/intensity. Memorize/write down this information because we will need it in order to find the correct code.
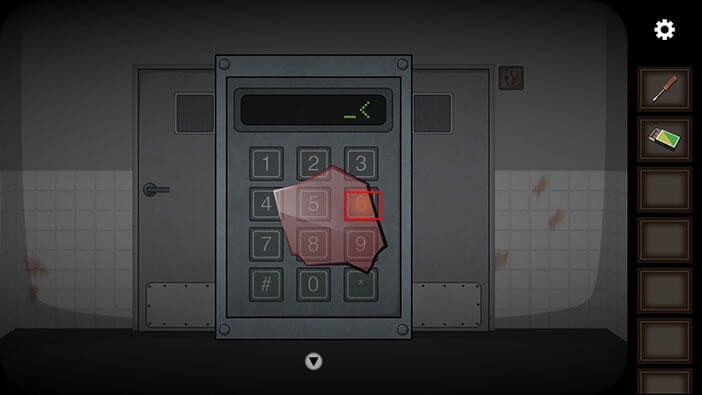
Next, drag the red glass over the number 1 and 2. You will notice that the fingerprint on the number 1 is very visible, so number 1 is our first number.
Next, drag the red glass over numbers 0 and 7. The fingerprint on the number 0 is less visible than the fingerprint on the number 6. So, number 6 is the second number, and number 0 is the third number.
The fingerprint on number 7 is barely visible, so this is our fourth number. When we put it all together, we will get the code “1607”.
Well, figured out a code, so move the red glass away from the numpad, and enter the code “1607”.
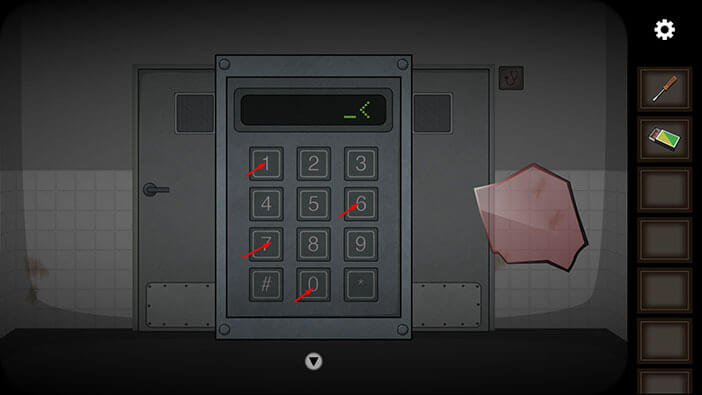
As soon as you enter the correct code, you will see the message “Open” on the display. Tap on the arrow at the bottom of the screen to go back.
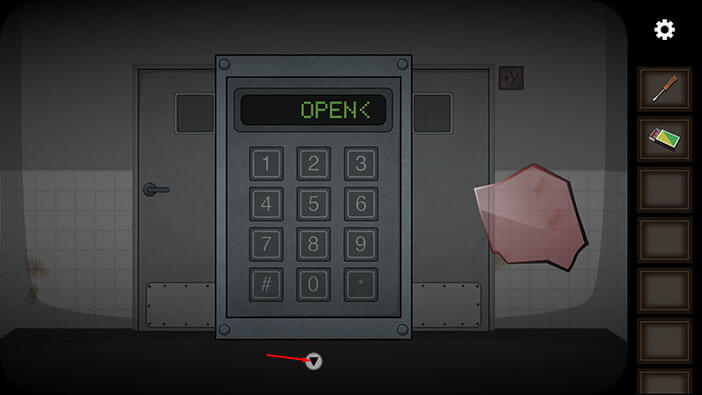
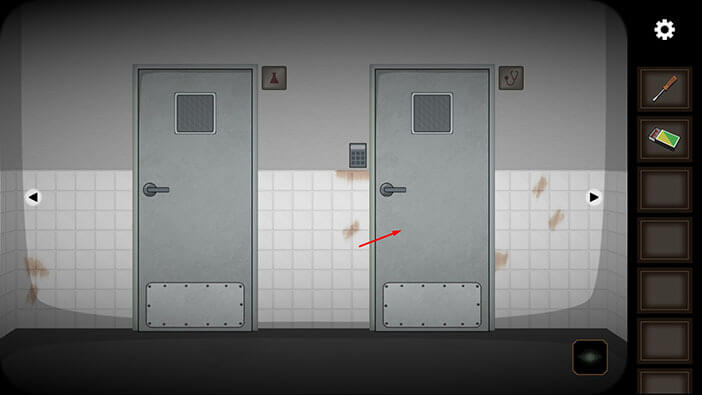
Tap on the door on the right to proceed into the next room.
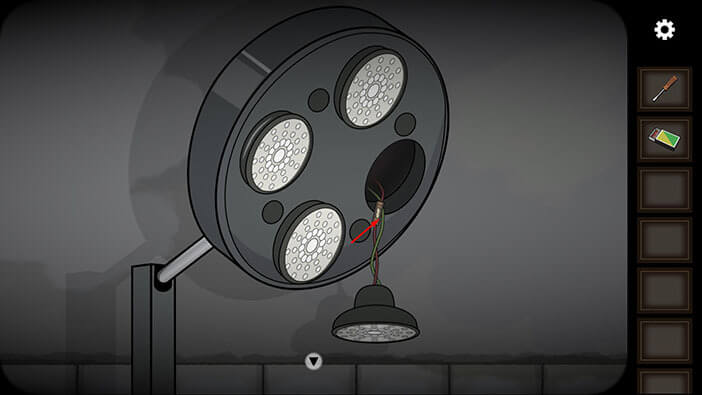
Tap on the spotlight to take a closer look at it.
You will some exposed wires. Tap on them and a “Fuse” will be added to your inventory.
After that, tap on the arrow at the bottom of the screen to go back.
For now, we are done with this room. Tap on the arrow at the bottom of the screen to go back.
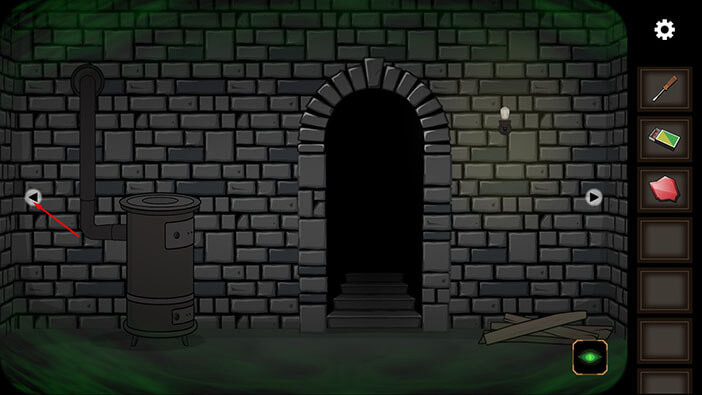
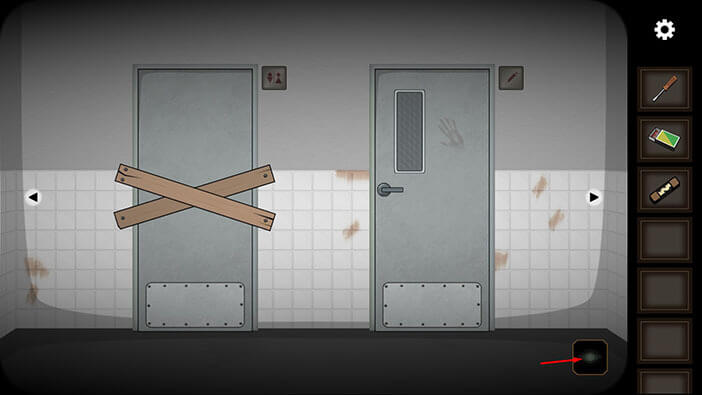
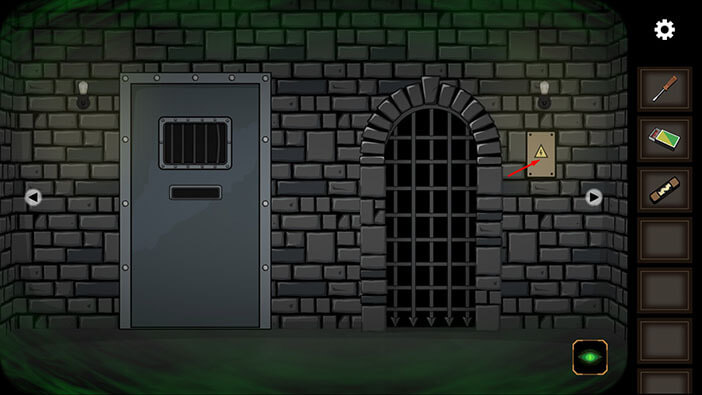
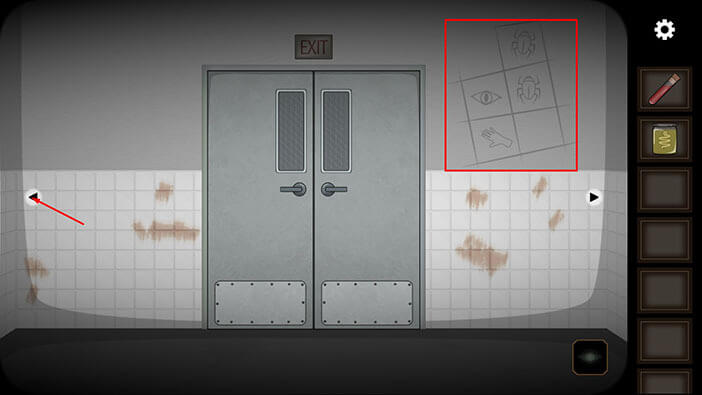
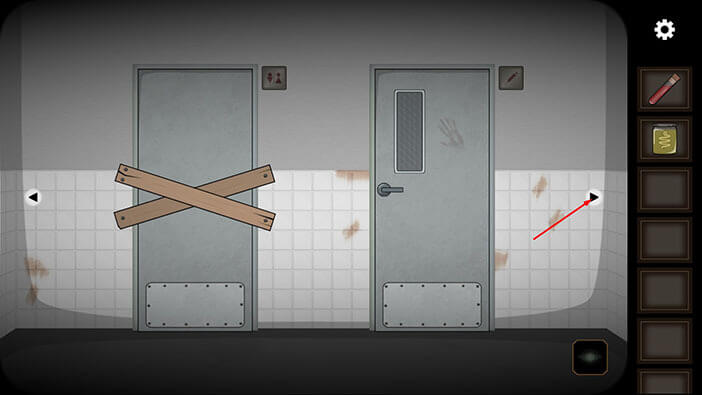
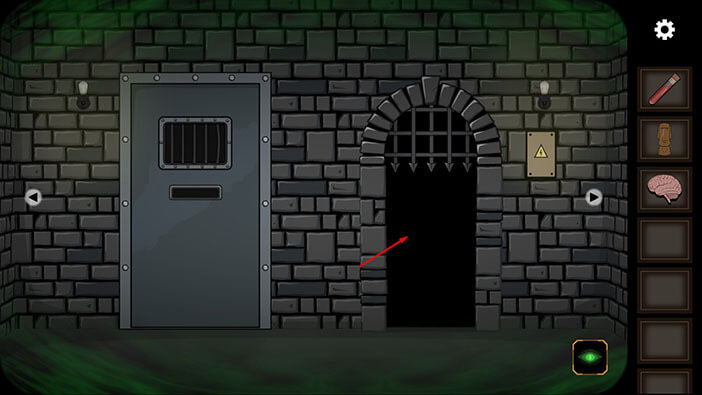
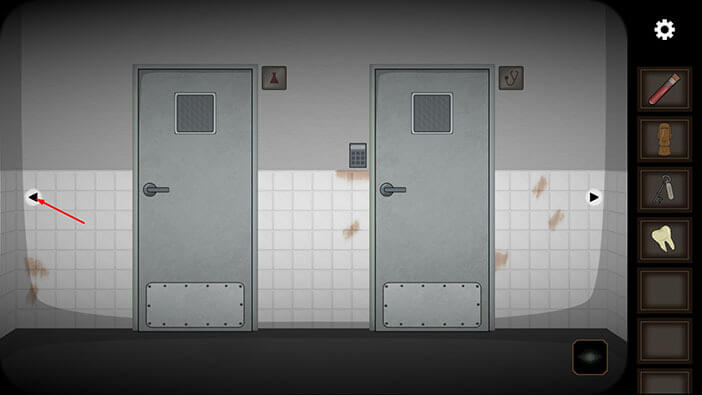
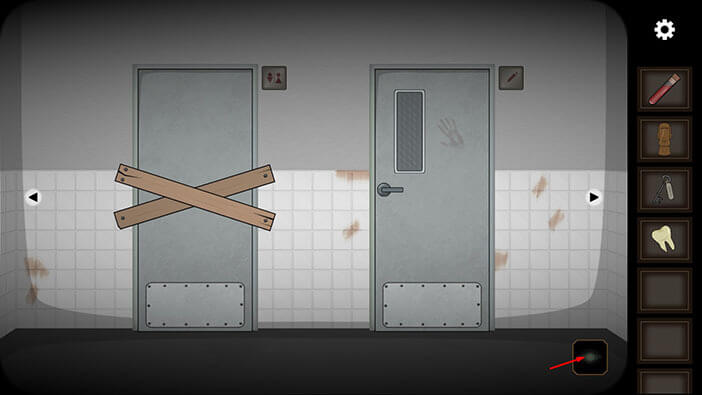
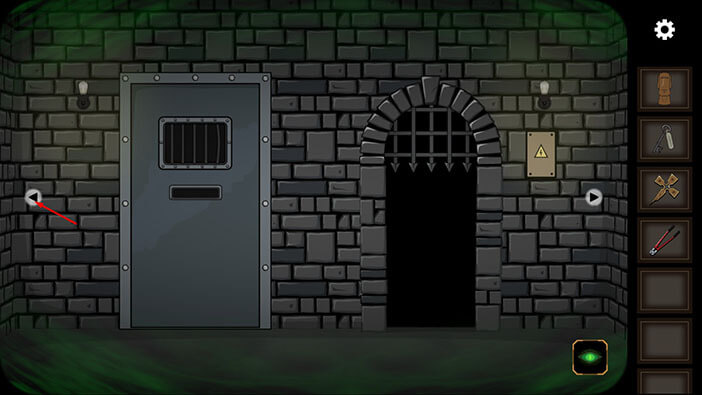
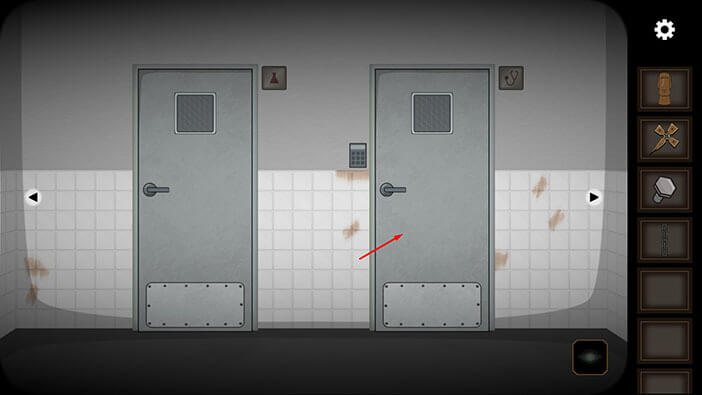
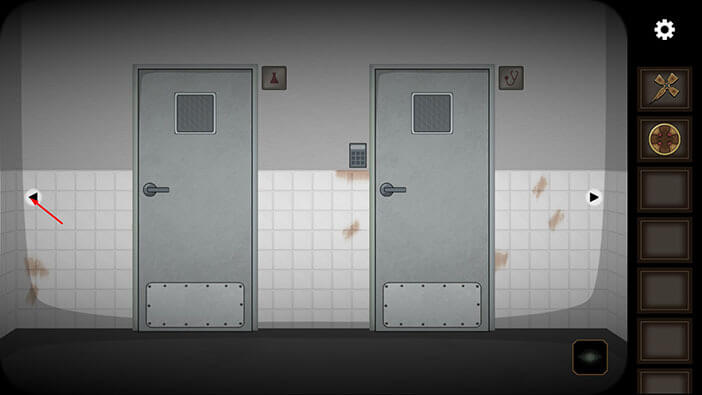
Next, let’s go to the second room on the right. We are going to visit this room for the first time.

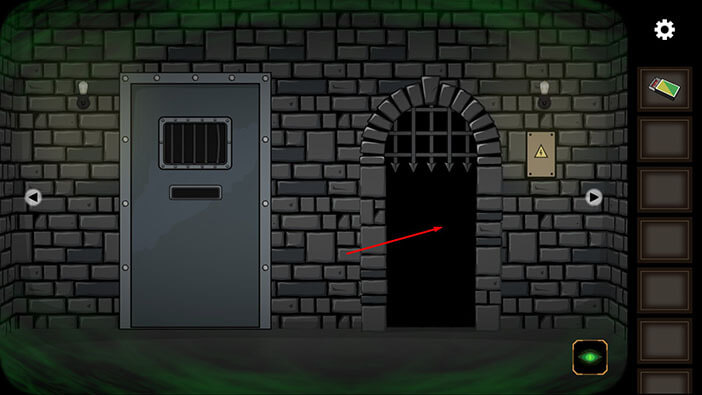
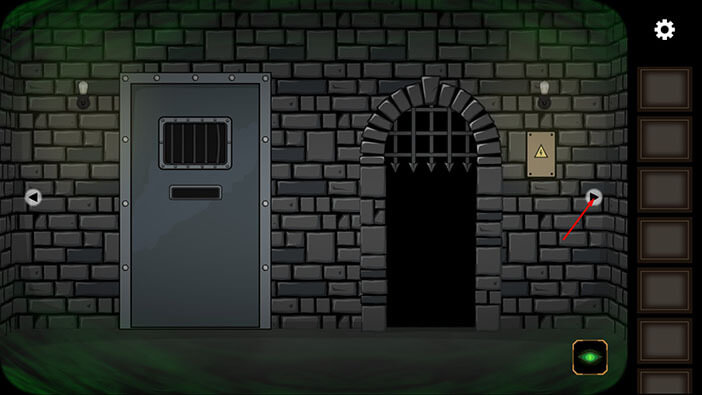
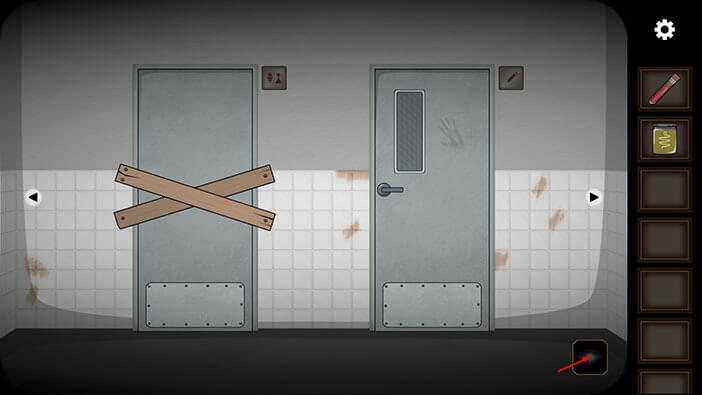
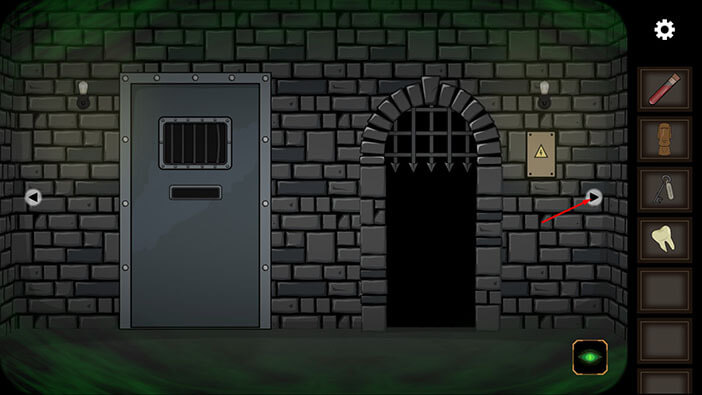
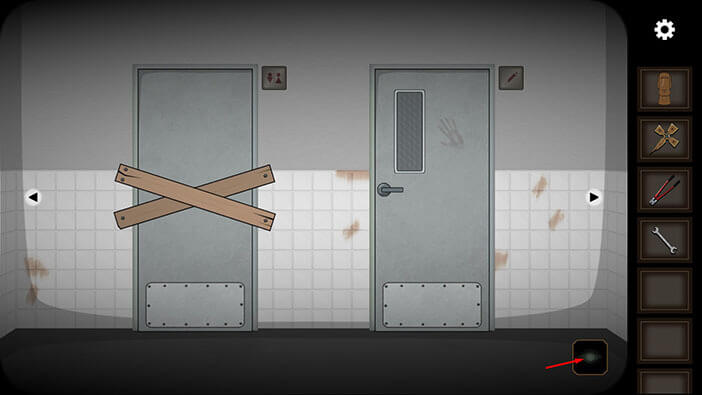
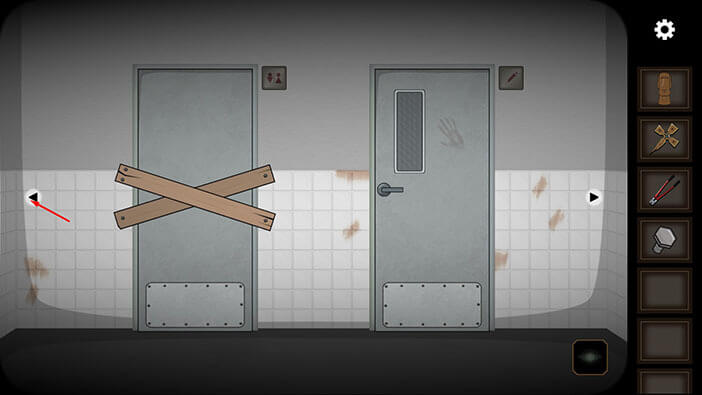
Here we can see a boarded door on the left and a locked metal door on the right. So, let’s try using the same trick which we used before to bypass the locked doors. Tap on the eye icon in the lower right corner to turn on the ghost vision.
Now, we can see a metal door on the left and an iron gate on the right. The circuit board on the right controls the iron gate, so let’s take a closer look at it.
Select the “Screwdriver” from the inventory and use it to remove the screws, and open the box.
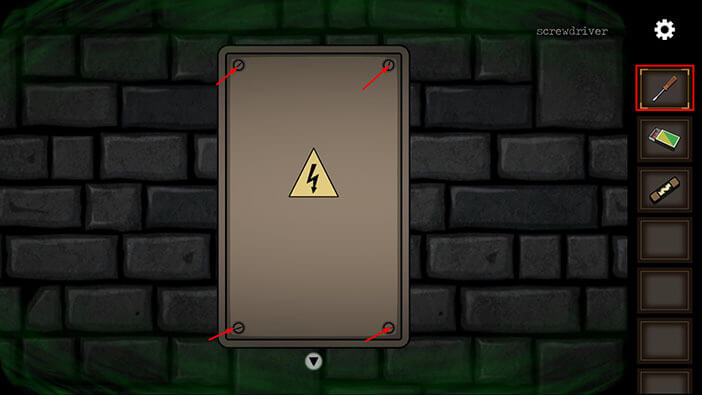
The system is currently off, so we will have to do several things to turn it back on. For starters, the fuse is missing. So, select the “Fuse” from the inventory and insert it into the empty slot in the upper left corner.
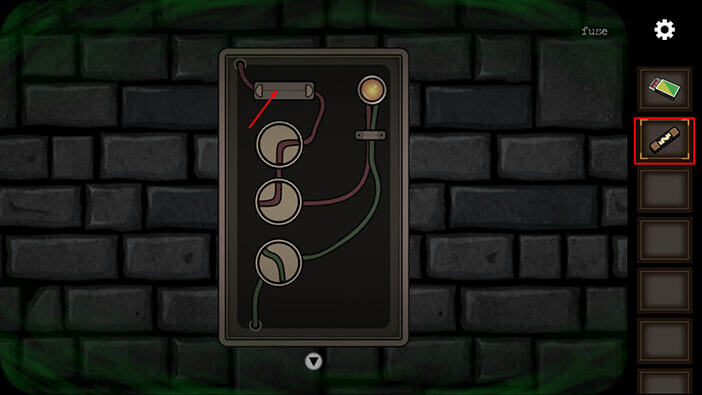
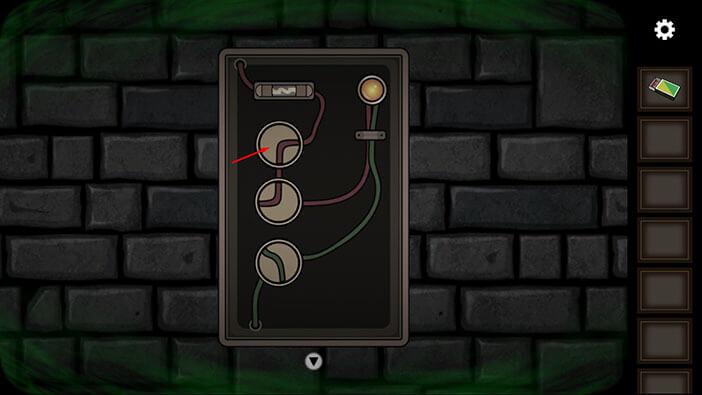
Our next task is to reconnect the wires. In order to do that, we can rotate the three circular slots. The red wire should be connected with the orange light and the fuse, and the green wire should be connected with the orange light and the wire exit in the lower right corner. We will do this puzzle in several steps. Let’s begin.
Step 1
Tap once on the top slot and you will rotate the top slot and the bottom slot.
Step 2
Tap once on the middle slot and you will rotate all 3 slots.
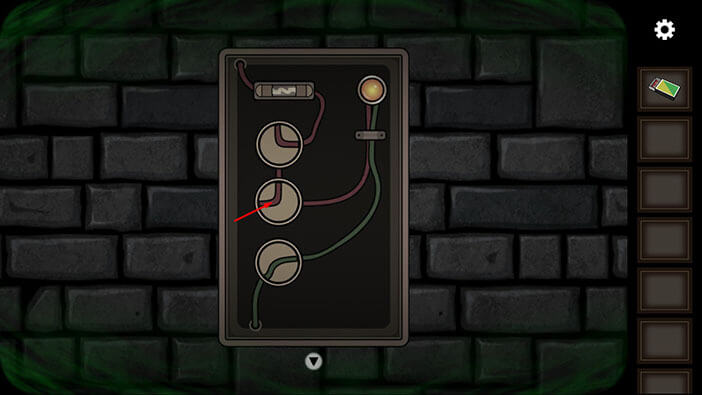
Step 3
Tap once on the bottom slot, and you will rotate the bottom and the middle slots.
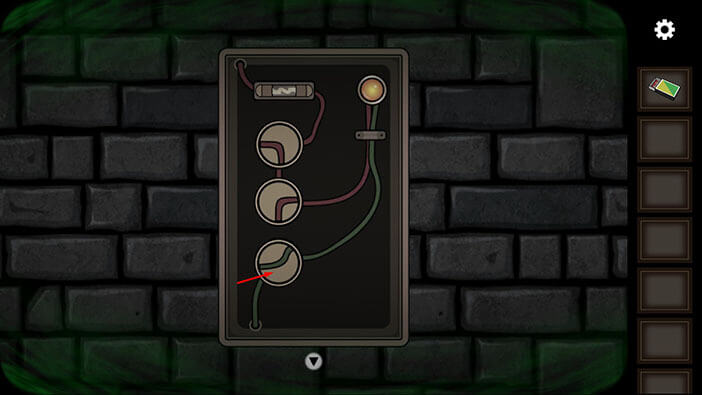
Step 4
Tap once on the top slot and you will reconnect the wires.
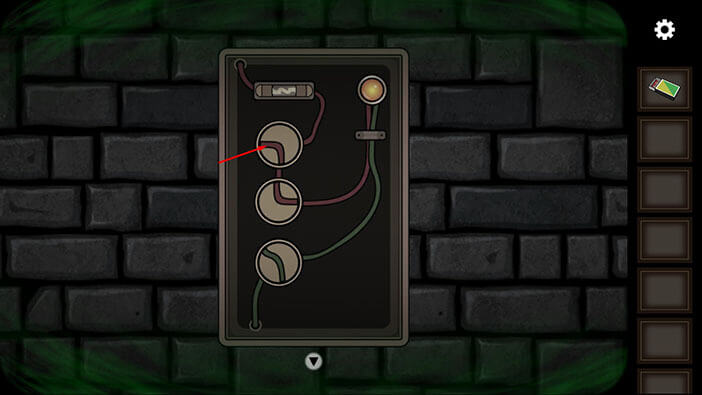
By reconnecting the wires and inserting the new fuse, you will reactivate the mechanism, and raise the iron gate. Tap on the gate to proceed into the next room.
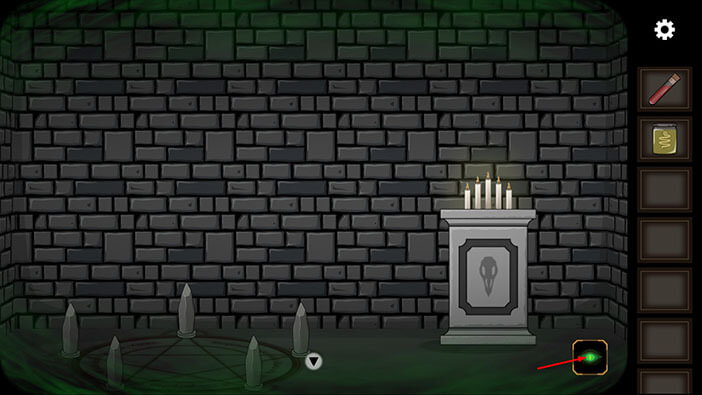
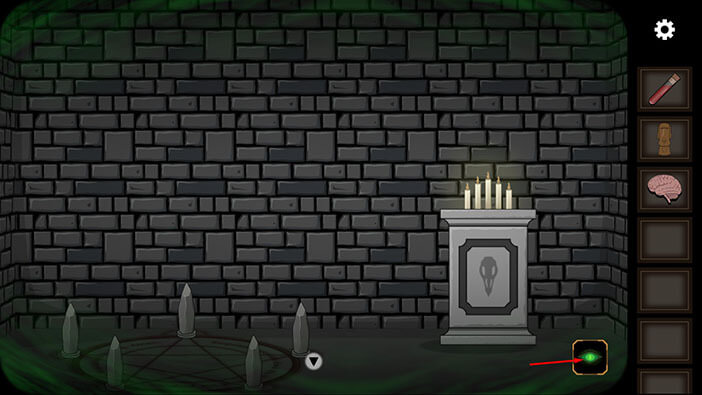
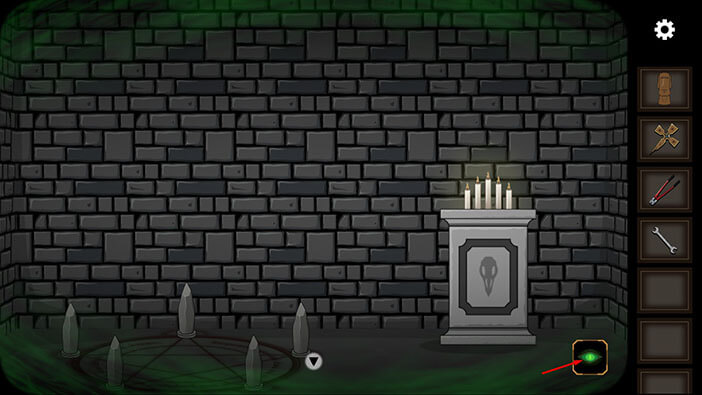
Tap on the candles to take a closer look at them.
Select the “Matches” from the inventory and use them to light the candles.
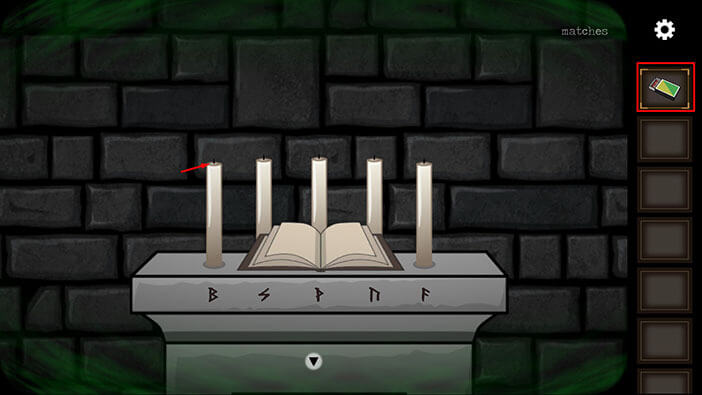
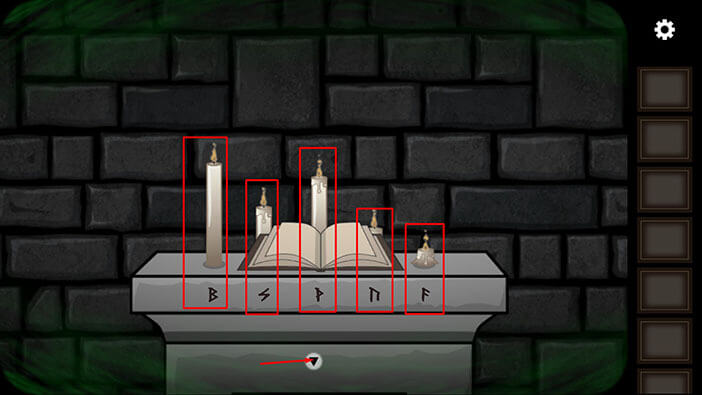
You will notice that some candles have burned down more than others. Most likely, you will also notice that each candle has a letter that is associated with it, and this letter is inscribed below the candle. So, our task is to memorize/write down the height of the candles and the letters below each candle, because this information will help us in solving the next puzzle. So, starting from the highest we have
First candle = letter “B”
Second candle = letter “P”
Third candle = letter “Z”
Fourth candle = small letter “n”
Fifth candle = letter “F”
Once you’re done, tap on the arrow at the bottom of the screen to go back.
Ok, previously, we saw a fridge in one of the rooms, and inside the fridge, there was some weird tubular device. The information that we gathered by examining the candles will help us solve the mystery behind this device. So, let’s head to the room with the fridge. Tap on the arrow at the bottom of the screen to go back.
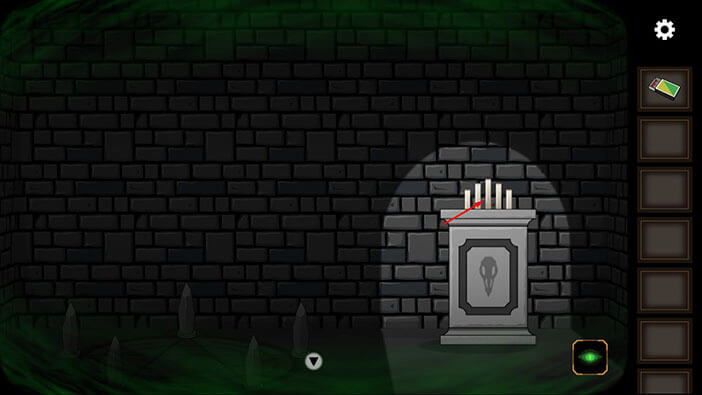
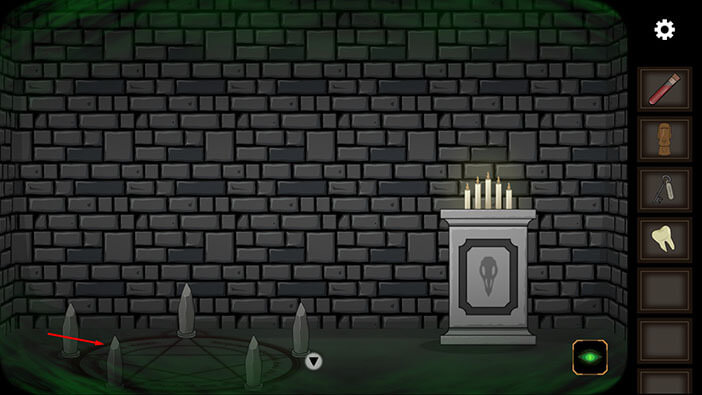
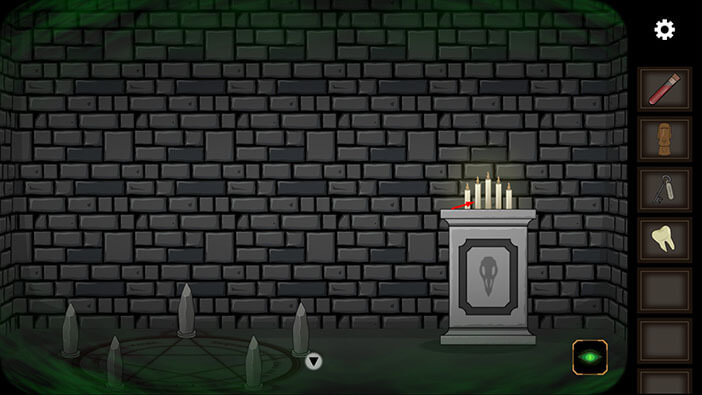
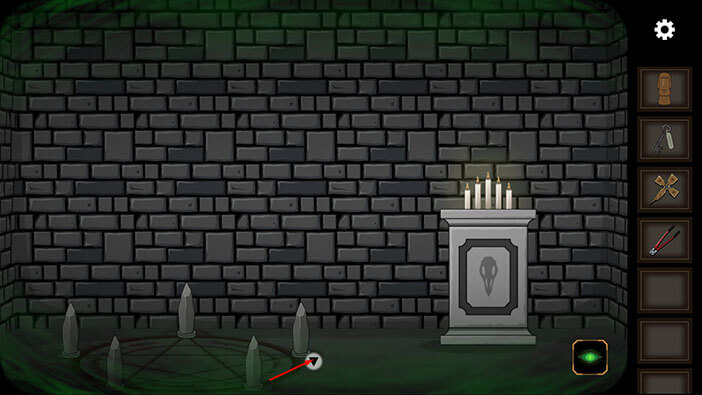
As a side note, the altar on the left side of this room is very important and we will come back to it in the final stage of this walkthrough.

Tap twice on the arrow on the right to go to the second room on the right.
Tap on the door on the left to proceed into the next room.
We are now in the correct room, even though it might not seem like it at first. Tap on the eye icon in the lower right corner to turn off the “Ghost Vision”.
There we go, we reached the correct spot. Tap on the fridge to look inside.
Tap on the tubular device on the left to start the interaction.
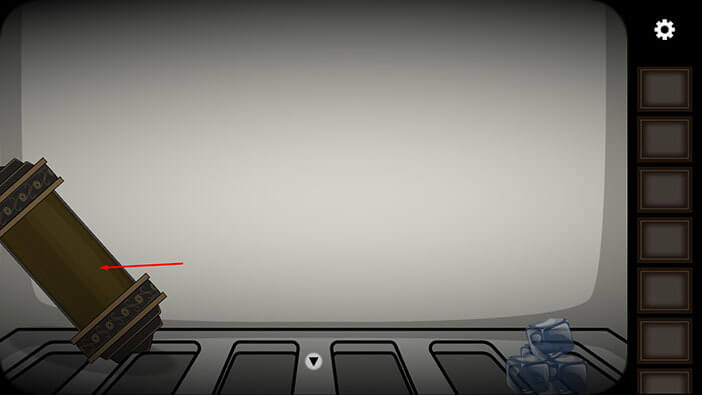
Here, we can see the letters and five sliders. Our task is to set the sliders to the correct position, and this position should match the height of the candle. Let’s begin.
The candle with the letter “B” was the highest, so set this slider at the first position (looking from left to right).
The candle with the letter “P” was the second highest, so set this slider at the second position.
The candle with the letter “Z” was the third highest, so set this slider at the third position.
The candle with the small letter “n” was the fourth highest, so set this slider at the fourth position.
Lastly, the smallest candle was the one with the letter “F” so set this slider to the fifth position.
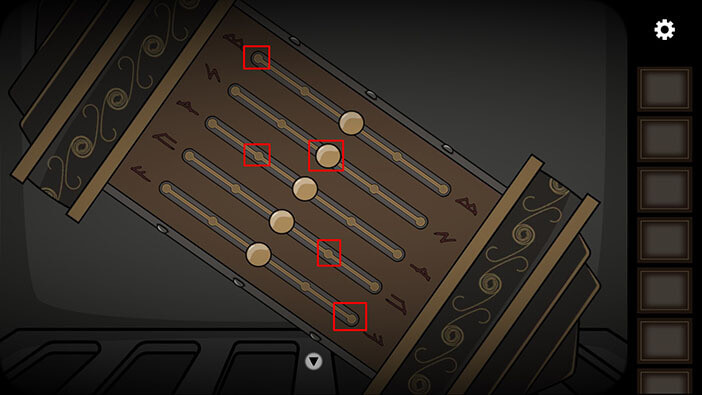
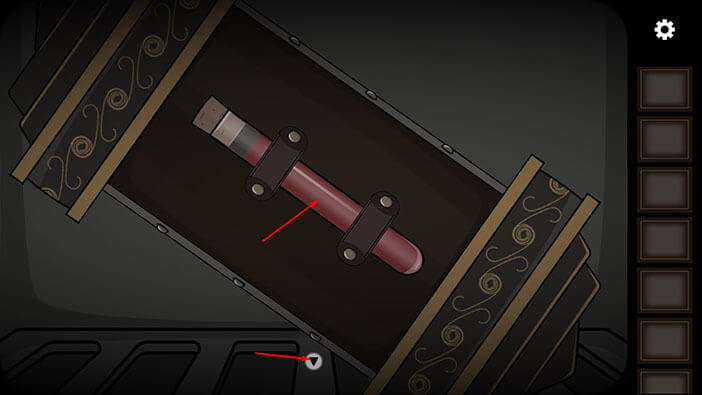
As soon as you correctly set the sliders, the tubular device will open and inside you will see a vial with the red liquid. Tap on the vial to pick it up and “Flask with blood” will be added to your inventory.
After that, tap twice on the arrow at the bottom of the screen to go back.
Tap on the arrow at the bottom of the screen to go back.
Tap on the door on the right to proceed into the next room.

Tap on the large jar to pick it up and “Jar with nasty” will be added to your inventory.
After that, tap on the arrow at the bottom of the screen to go back.
Tap on the arrow on the left to go to the next room.
Here, let’s examine the drawing on the wall on the right. Here, we have,
A bug in the right slot of the top row
An eye in the left slot of the middle row,
Another bug in the right slot of the middle row,
A Hand in the left slot of the bottom row,
The right slot in the bottom row is empty.
Memorize/write down this information because we will need it for the next puzzle. To clarify, to solve the next puzzle we will have to rearrange the large jars with body parts and other stuff, and the jars are located on the two shelves, which we saw in one of the previous rooms. So, the drawing on the wall represents the correct position of the jars on one of these two shelves.
Once you’re done, tap on the arrow on the left to go to the next room.
Next, we should go to the room on the right. However, to do that, we first have to turn on the “Ghost Vision”. So, tap on the eye icon in the lower right corner.
Tap on the door on the right to proceed into the next room.
Let’s turn off the “Ghost Vision”. Tap on the eye icon in the lower right corner.
On the right side of the wall, we can see another drawing of the shelf and jars. Let’s memorize/write down this information.
A snake in the left slot of the top row
A hand in the left slot of the middle row,
The right slot of the middle row is empty,
An Eye in the left slot of the bottom row,
A Snake in the right slot of the bottom row.
Once you’re done, tap on the arrow at the bottom of the screen to go back.
Ok, we should now go to the room with two shelves, and large jars. Tap twice on the arrow on the right to go to the next room.
Tap on the eye icon in the lower right corner to activate the “Ghost Vision”.
Tap on the door on the left to proceed into the next room.
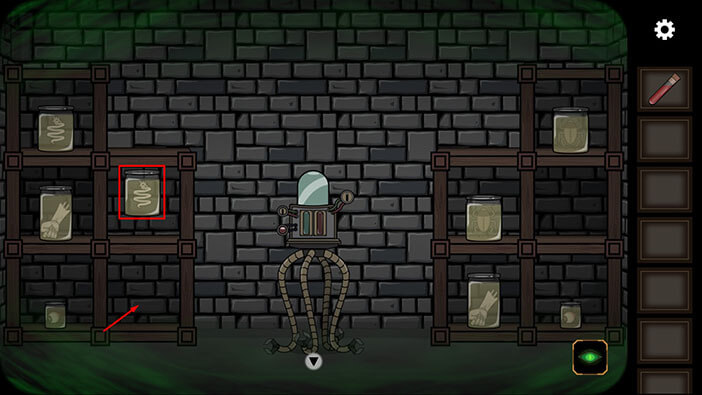
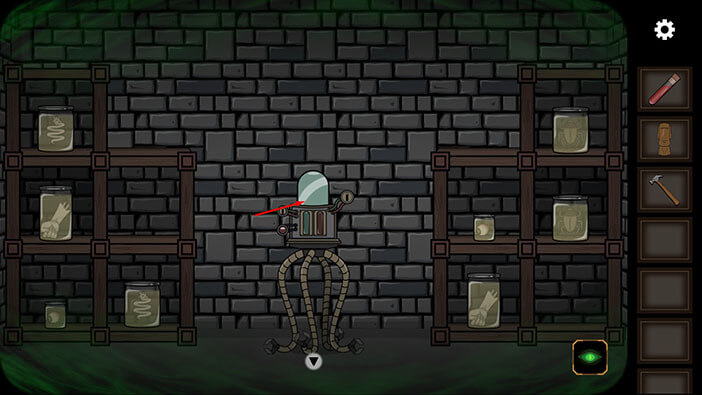
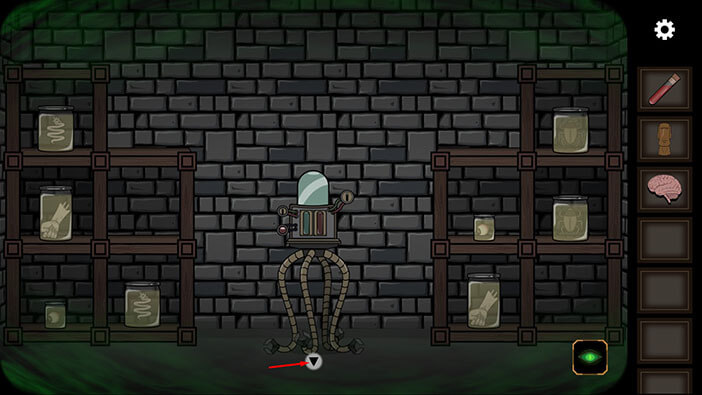
Ok, we reached the correct room. Now, let’s rearrange the jars to match the two drawings which we saw previously. We will do this puzzle in several steps. Let’s begin.
Step 1
Select the “Jar with nasty” from the inventory (it’s obviously a snake) and place it in the top slot of the left shelf.

Step 2
Select the “Jar with Bug” located on the left shelf / bottom row / right slot, and place it on the right shelf / top row/ right slot.

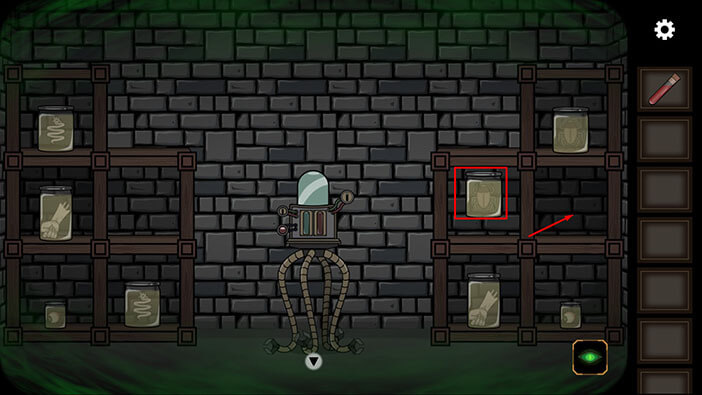
Step 3
Select the “Jar with Hand” located on the right shelf / middle row / right slot, and place it on the right shelf / bottom row/ left slot.

Step 4
Select the “Jar with Snake” located on the left shelf / middle row / right slot, and place it on the right shelf / bottom row/ right slot.
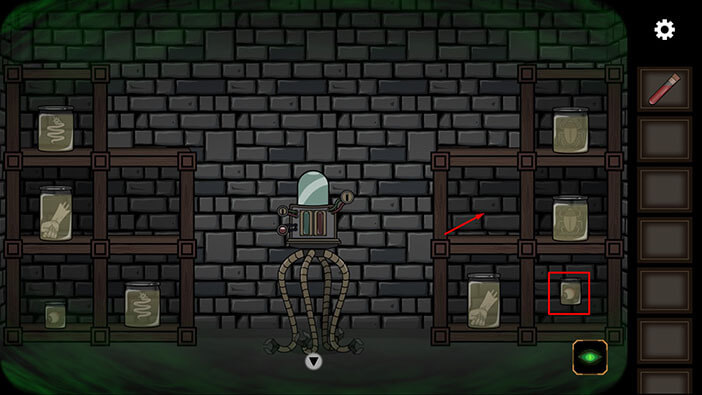
Step 5
Select the “Jar with Bug” located on the right shelf / middle row / left slot, and place it on the right slot.
Step 4
Lastly, select the “Jar with Eye” located on the right shelf / bottom row / right slot, and place it on the right shelf / middle row/ left slot. With this last step completed, you will solve this puzzle.
As soon as you correctly arrange the jars, the small statue will appear on the left shelf. Tap on it to pick it up and “Statuette” will be added to your inventory.
After that, tap on the arrow at the bottom of the screen to go back.
Ok, back to the normal world. Tap on the eye in the lower right corner to turn off the “Ghost Vision”.
Tap on the door on the right to proceed to the next room.

Tap on the eye in the lower right corner to turn on the “Ghost Vision”.
Tap on the “Hammer” to pick it up. After that, tap on the arrow at the bottom of the screen to go back.
Next, tap on the door on the left to proceed to the next room.
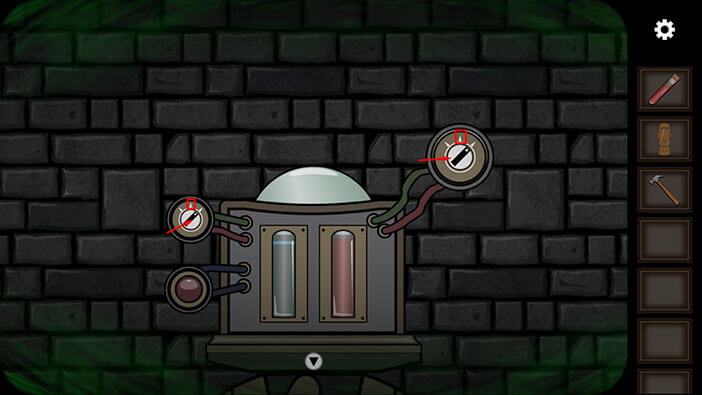
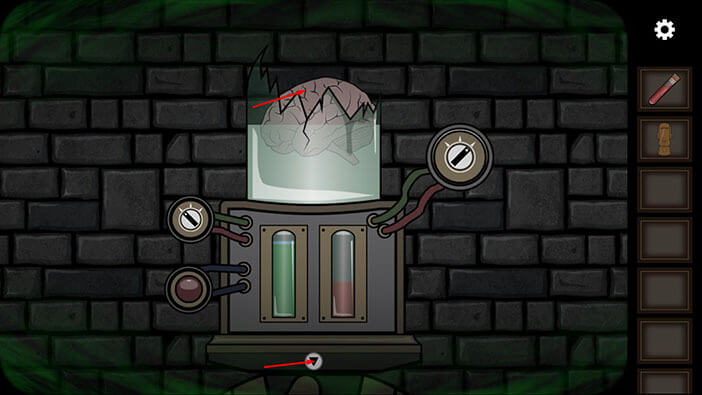
Tap on the strange machine to take a closer look at it.
Tap twice on the left switch to turn it all the way to the right.

After that, tap twice on the right switch to turn it all the way to the right, and you will raise the red liquid in the vial to its max.
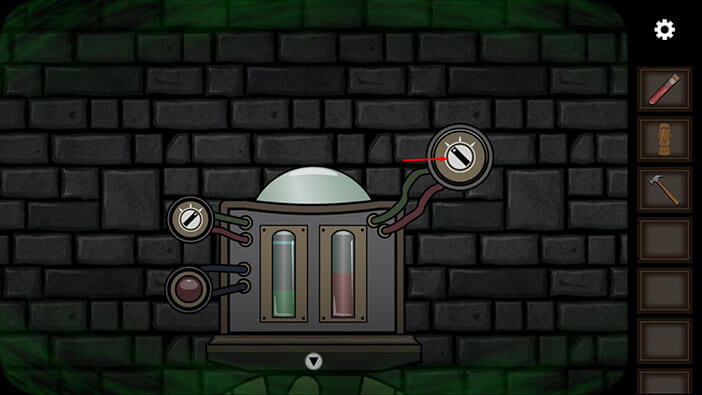
Next, tap on the red button to start the process.
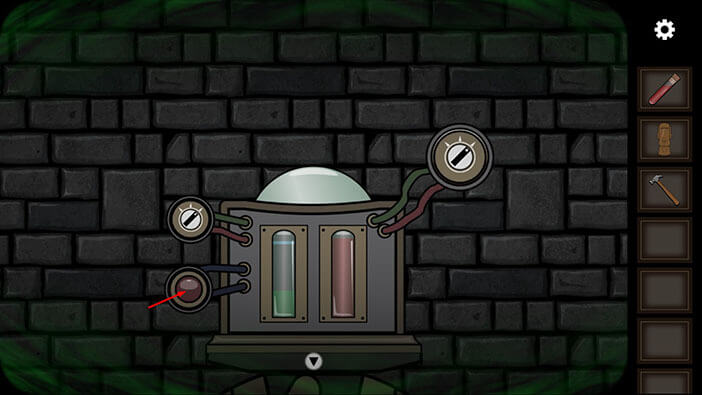
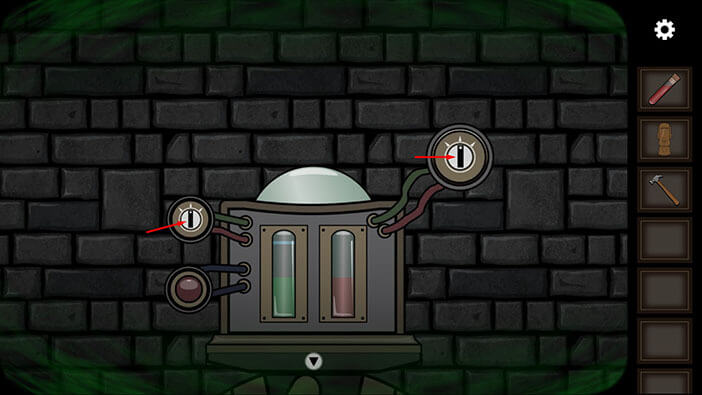
Next, tap twice on the left switch to turn it to the middle value.
After that, tap on twice on the right switch to turn it to the middle value.
Next, tap on the red button again to start the process.

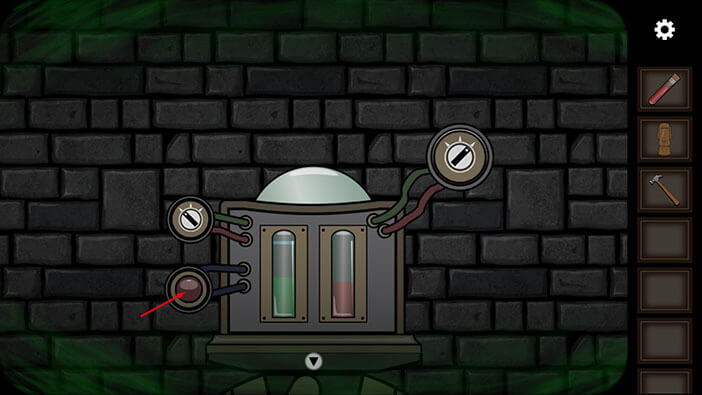
Next, tap twice on the left switch to turn it to the lowest value.
After that, tap once on the right switch to turn it to the highest value.
Next, tap on the red button again to finish the process.
The vial on the left will fill up with the green liquid, and the glass container with the brain will raise up. Select the “Hammer” from the inventory and use it to break the glass.
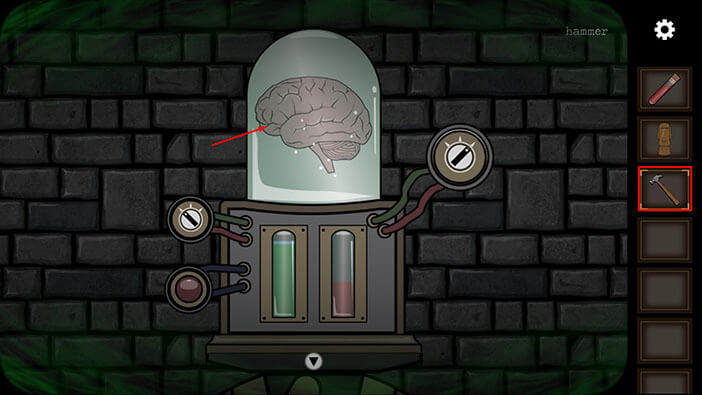
Our character can now reach the “Brain” so tap on it to pick it up.
It’s time to go back to the altar room. Tap on the arrow at the bottom of the screen to go back.
Tap twice on the arrow on the left to go to the next room.
Tap on the door on the right to proceed into the altar room.
Tap on the eye icon in the lower right corner to turn off the “Ghost Vision”.
Tap on the small bowl to take a closer look at it.
Select the “Brain” from the inventory and put it into the bowl.
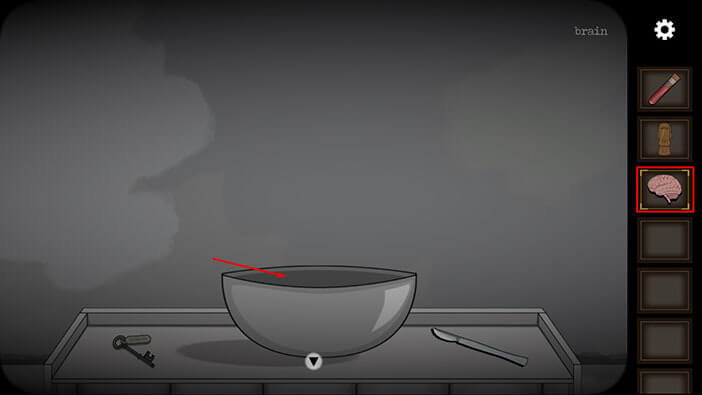
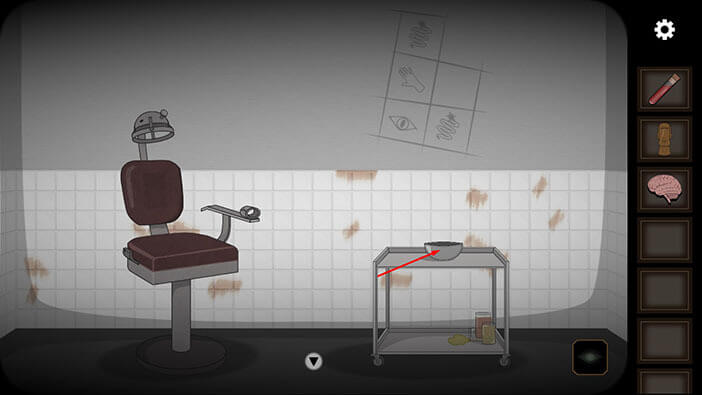
There are two items on the small table. Tap on these items to pick them up and a “Scalpel” and a “Key” to pick them up.
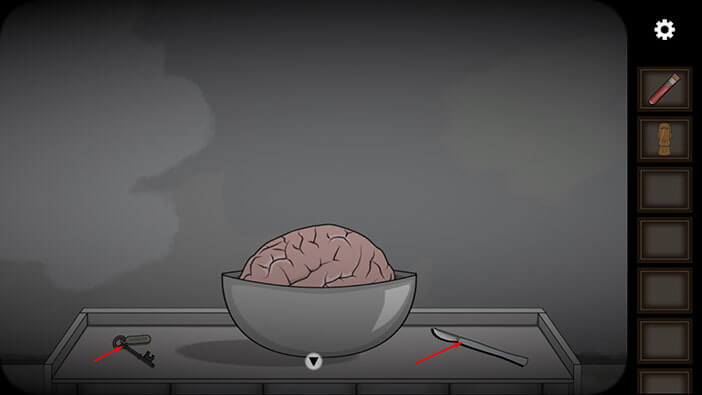
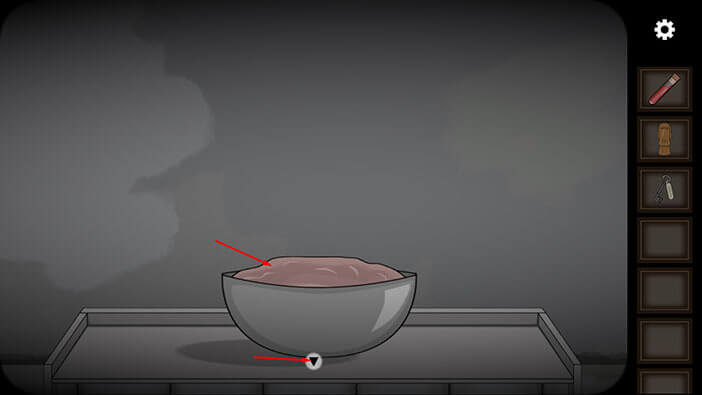
Select the “Scalpel” from the inventory and use it to cut up the brain in the bowl.
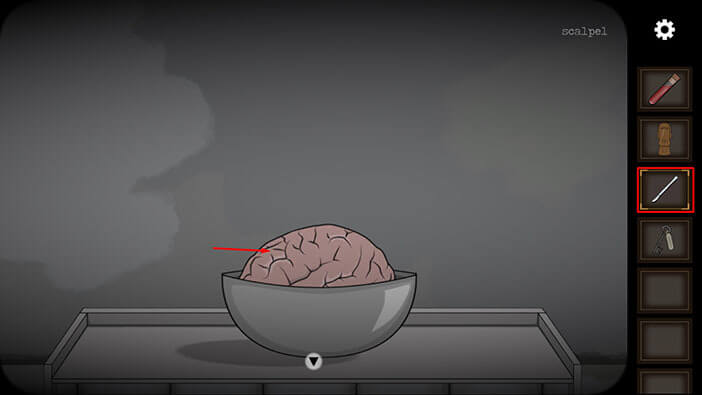
Tap on the bowl to pick it up and “Bowl with a minced brain” will be added to your inventory.
After that, tap on the arrow at the bottom of the screen to go back.
Tap on the arrow at the bottom of the screen to go back to the previous room.
Next, tap on the eye icon in the lower right corner to turn on the “Ghost Vision”.

Tap on the cell door on the left to take a closer look at it.
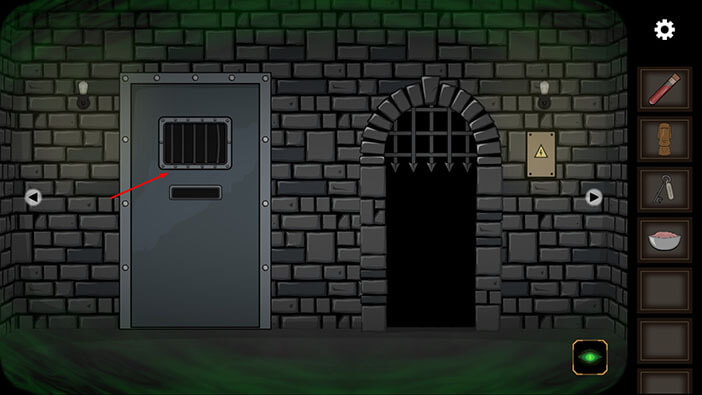
Tap on the small lid on the door to open it.
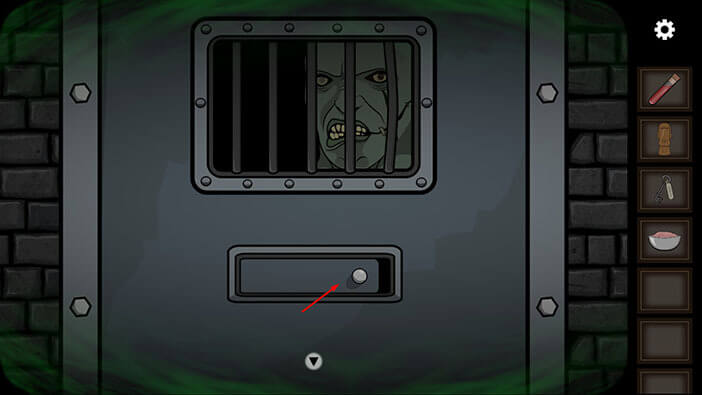
Select the “Bowl with a minced brain” and give it to the zombie through the small slit. Ahem, I don’t get one thing. Why did we have to cut up the brain before giving it to a zombie? It seems that this zombie is very picky.
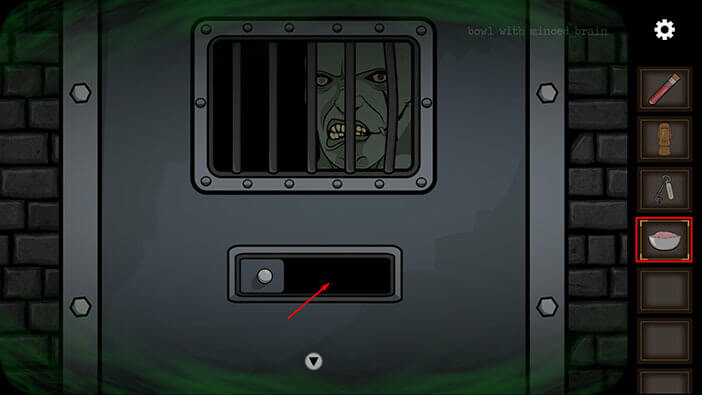
After placing the brain, tap on the lid to close it.
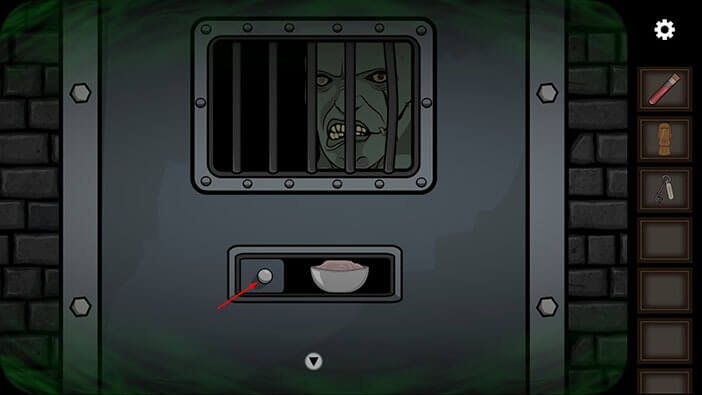
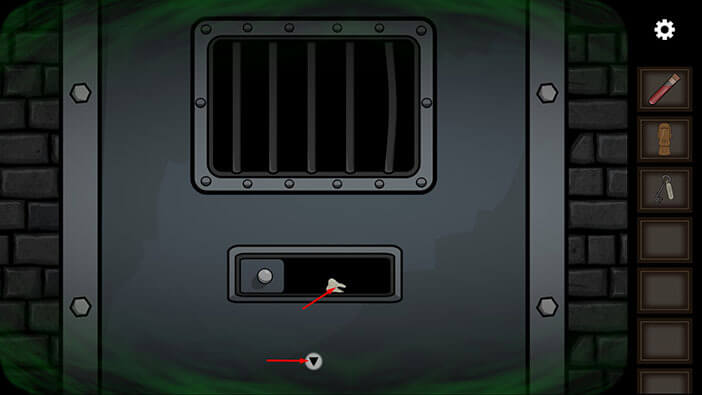
Wait a few moments, and tap on the lid to open it.
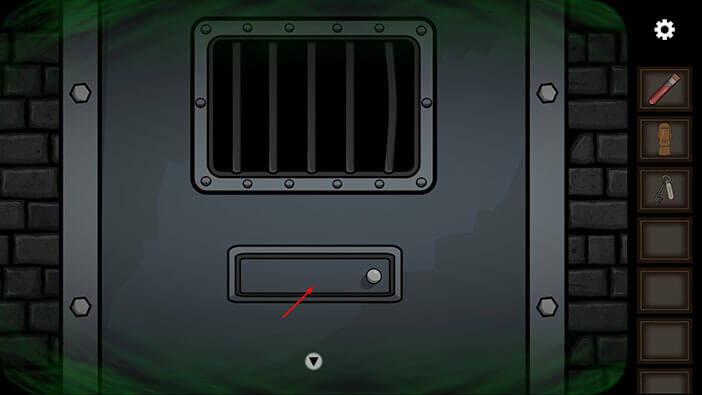
You will see that the zombie has left us one of his teeth. Tap on the “Tooth” to pick it up.
After that, tap on the arrow at the bottom of the screen to go back.
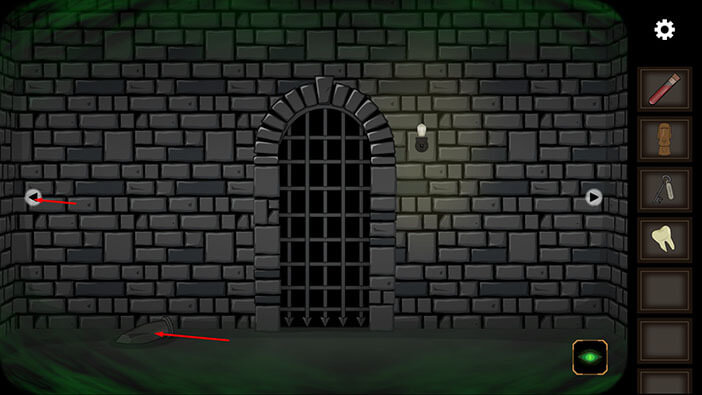
Tap twice on the arrow on the right to go to the next room.
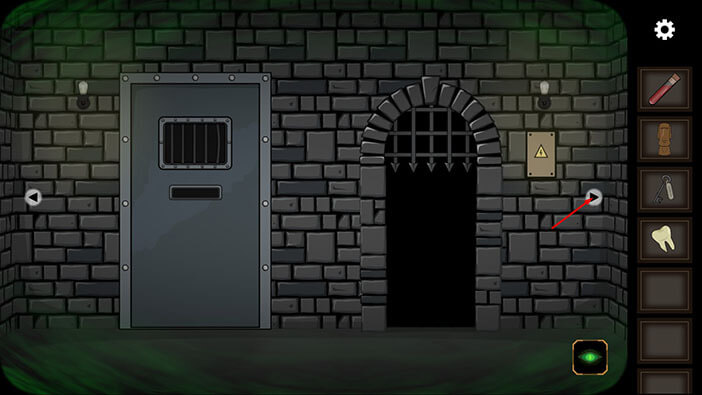
Tap on the item on the ground, located on the left side of the gate, to pick it up. “Stone” will be added to your inventory.
After that, tap on the arrow on the left to go back to the previous room.
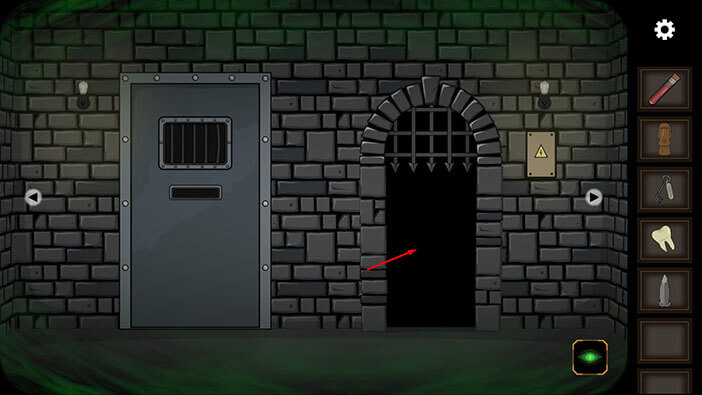
Tap on the door on the right to go back to the altar room.
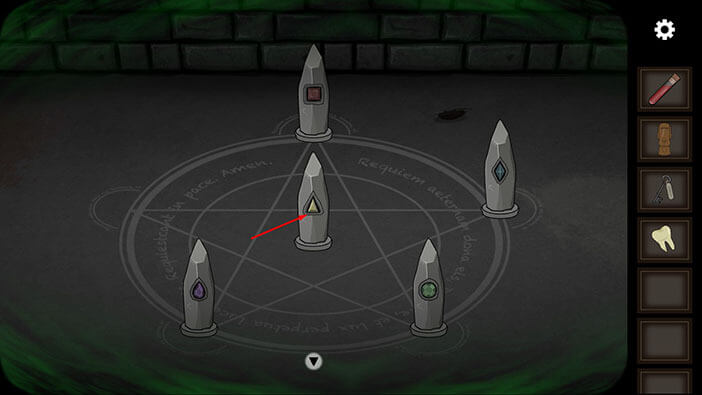
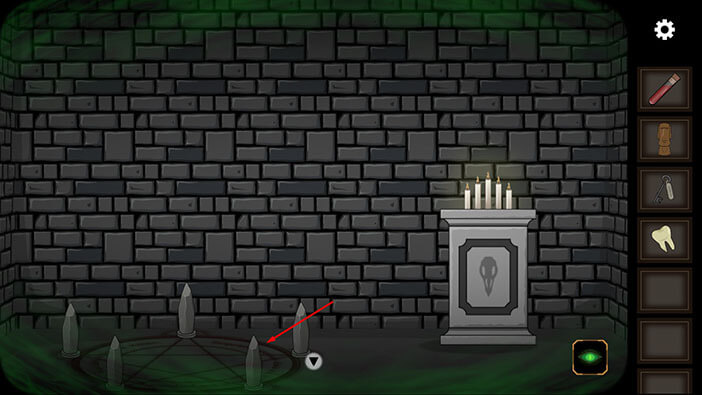
Tap on the stones around the symbol drawn on the ground to take a closer look at them.
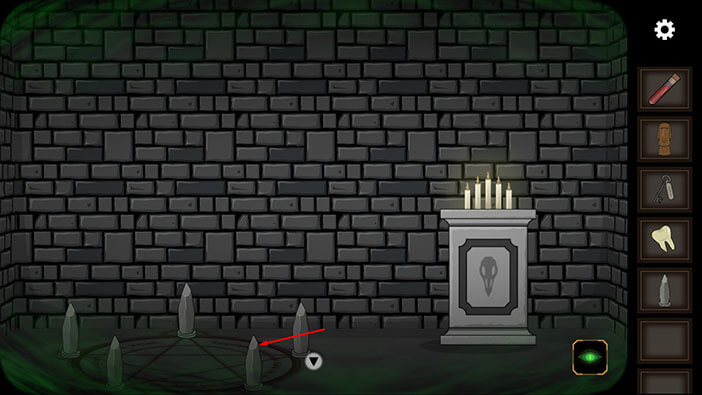
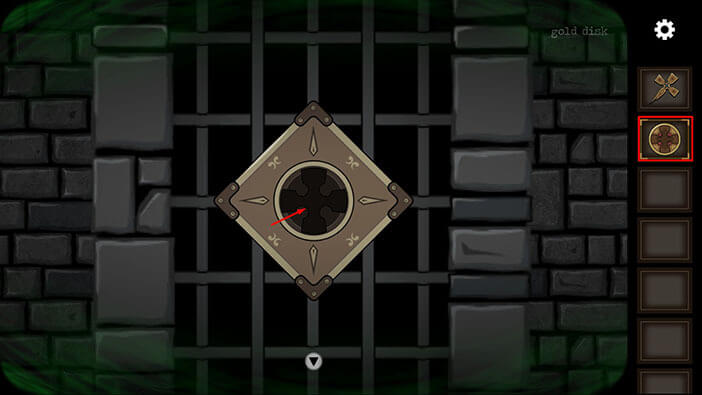
Here, we can see four stones with crystals, arranged in a circle around the drawing. However, there is also a fifth slot, but it is currently empty. So, select the stone from the inventory and place it into the empty slot.
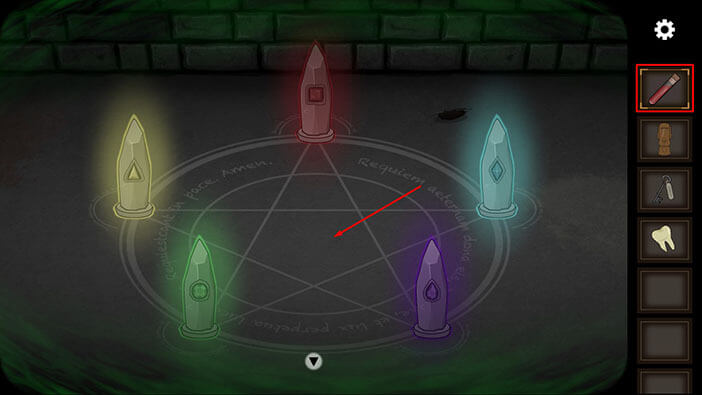
Take a quick look at the crystals in the stones. Here we have blue, yellow, green, purple, and red crystals. Our next task is to discover the correct position for each of the crystals because they have to be arranged in a certain pattern around the drawing.
Tap twice on the arrow at the bottom of the screen to go back to the previous room.
Ok, let’s look for clues regarding the pattern of the stones. Tap twice on the arrow on the right to go to the next room.
Tap on the door on the left to proceed into the next room.
Tap on the eye icon in the lower right corner to turn off the “Ghost Vision”.

Ok, on the wall on the left we can see the same symbol as in the altar room, so let’s take a closer look at it.
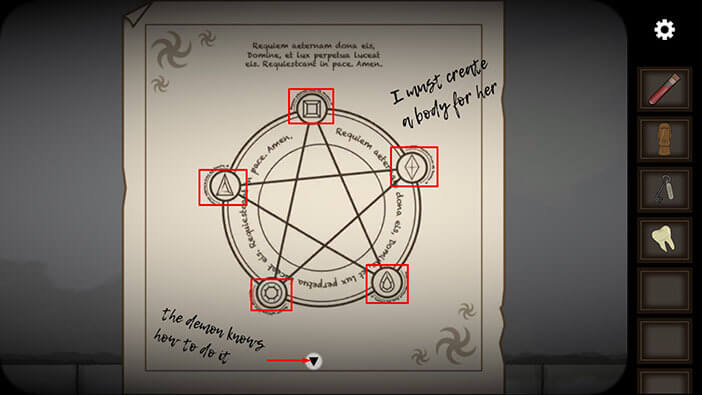
Here, we can see the message “I must create a body for her”. Creepy. Let’s look at the stones.
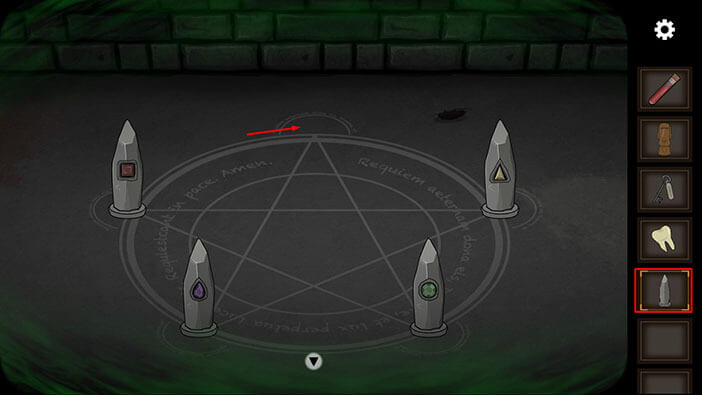
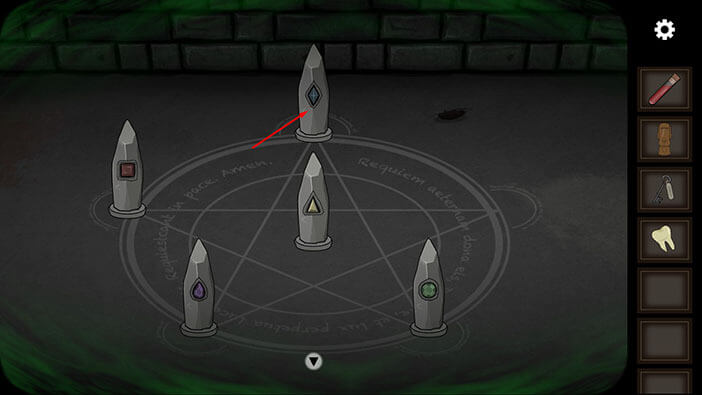
The stone with the square-shaped crystal should be in the top slot.
The stone with the rhombus-shaped crystal should be in the top right slot.
The stone with the tear-shaped crystal should be in the lower right slot.
The stone with the sun-shaped crystal should be in the lower left slot.
The stone with the triangle-shaped symbol should be in the top left slot.
Memorize/write down this information because we will need it in order to arrange the stones in the correct pattern.
Once you’re done, tap twice on the arrow at the bottom of the screen to go back to the previous room.
Ok, let’s go back to the altar room and rearrange the stones. Tap twice on the arrow on the left.
Tap on the eye icon in the lower right corner to turn on the “Ghost Vision”.
Tap on the door on the right to proceed to the altar room.

Tap on the stones to start the interaction.
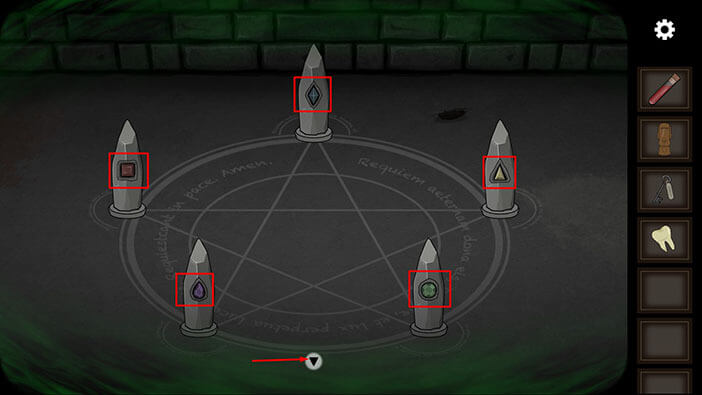
Ok, it’s now time to rearrange the stones. We will do this puzzle in several steps. Let’s begin.
Step 1
Tap on the stone with a triangle crystal (yellow) to place it into the middle of the circle.

Step 2
Tap on the stone with the rhombus crystal (blue) to place it into the top right slot.
Step 3
Tap on the stone with the square crystal (red) to place it into the top slot.
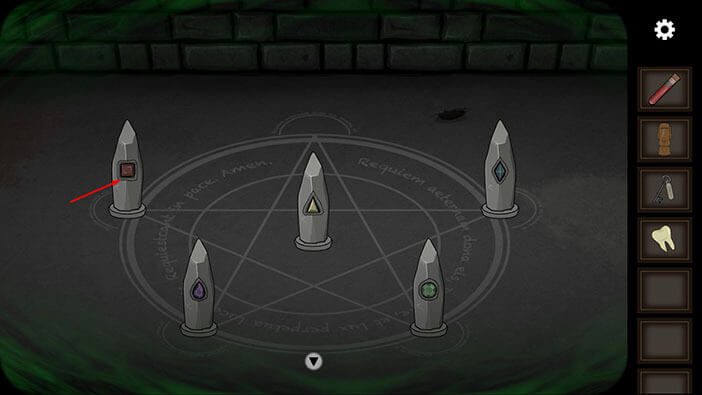
Step 4
Tap on the crystal with the triangle crystal (yellow) to place it into the top right slot.
Step 5
Tap on the stone with the sun crystal (green) to place it into the middle of the circle.
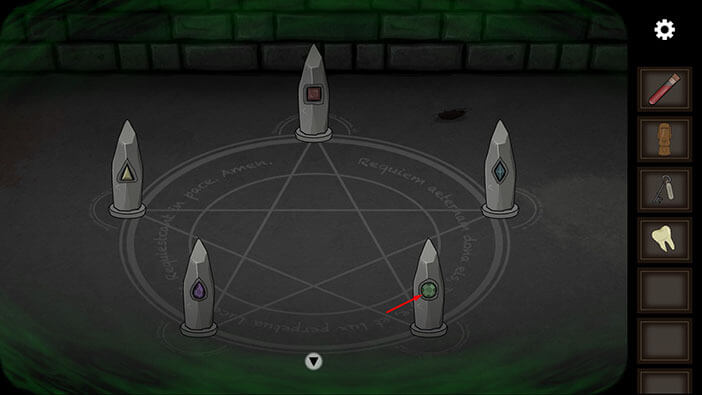
Step 6
Tap on the stone with the tear crystal (purple) to place it into the lower right slot.
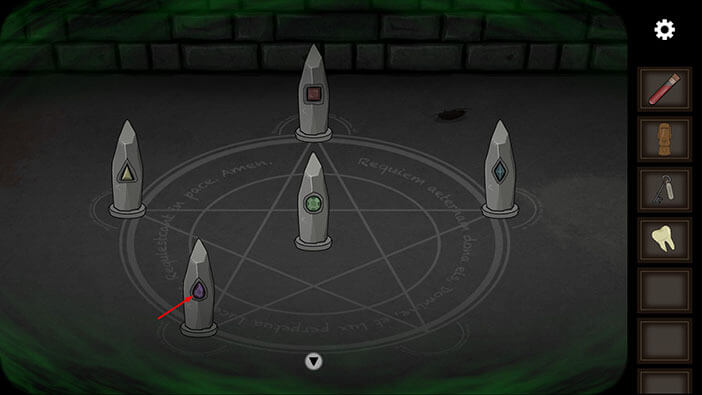
Step 7
Lastly, tap on the stone with the sun crystal (green) to place it into the lower left slot.

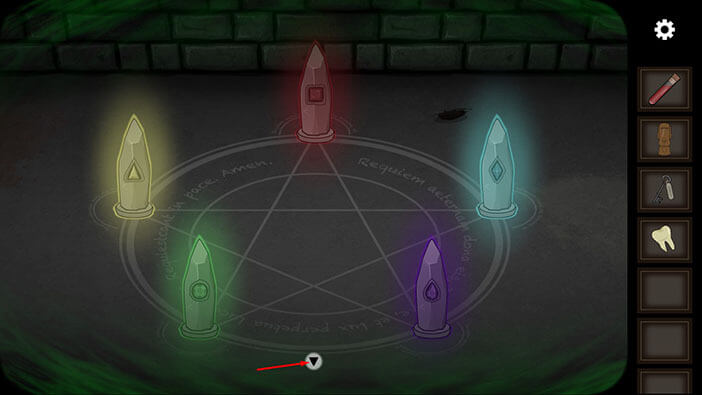
With the last step, the crystals will start glowing, so we definitely arranged the stones in the correct pattern. Tap on the arrow at the bottom of the screen to go back.
Tap on the candles to approach them.
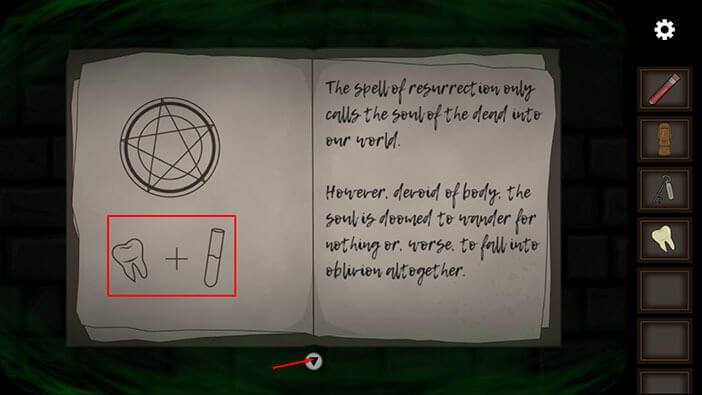
After that, tap on the open book to take a closer look at it.
Here, we can see that two more components are required to complete the resurrection spell. These components are a “Tooth” and a “Flask with blood”. Luckily, we already have both of these items, so let’s go back and finish the ritual.
Tap twice on the arrow at the bottom of the screen to go back.
Tap on the stones to start the interaction.
Select the “Flask with blood” and put it inside the circle.
The stones and the drawing will turn red. Let’s finish the ritual. Select the “Tooth” from the inventory and put it into the circle.
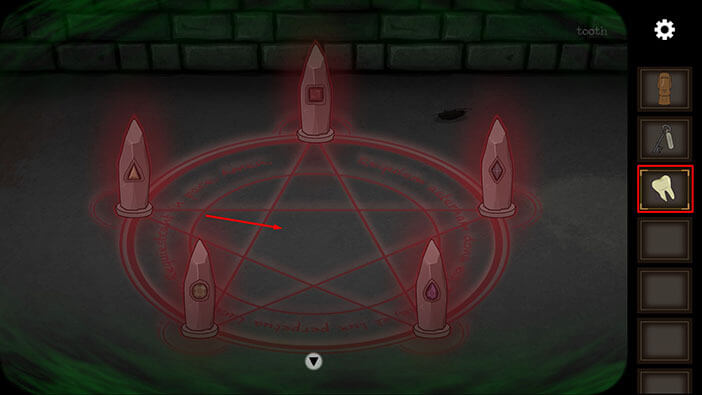
By completing the ritual we summoned the suitcase. Well, that’s a cool name for a spell, “summon suitcase” that is. Especially if you have to prepare for a vacation in a hurry.
Anyway, let’s go back to the investigation. Tap on the suitcase to open it, and tap again to look inside.
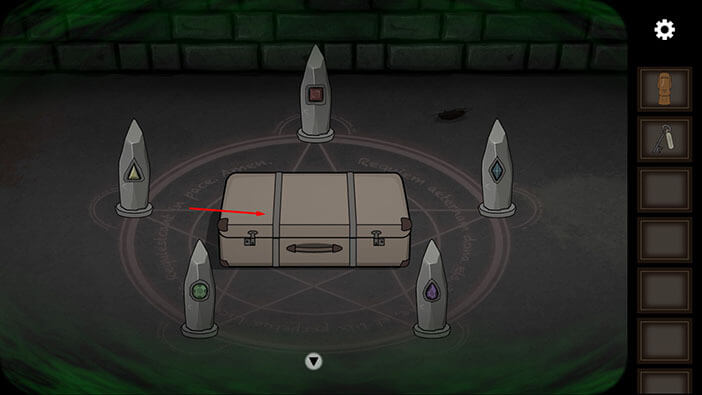
You will see some small, deformed creature in the suitcase. Luckily, it’s dead. Besides that, you will also notice two items so tap on them to pick them up. “Gold cross” and “Boltcutter” will be added to your inventory.
After that, tap twice on the arrow at the bottom of the screen to go back.

Let’s go back to the previous room. Tap on the arrow at the bottom of the screen.
Tap on the arrow on the left to go to the next room.
Let’s turn off the “Ghost Vision” ability. Tap on the eye icon in the lower right corner.
Select the “Key” from the inventory and use it to unlock the top right cabinet.
Inside the cabinet, you will find a “Wrench”. Tap on it to pick it up.
After that, tap on the arrow on the right to proceed to the next room.
Time to turn the “Ghost Vision” back on. Tap on the eye icon in the lower right corner.
Tap on the door on the right to proceed to the next room.
Ok, we are now inside the room, so let’s turn off the “Ghost Vision”. Tap on the eye icon in the lower right corner.
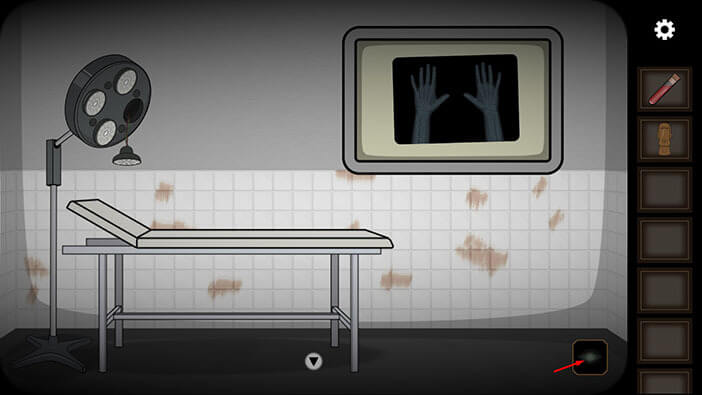
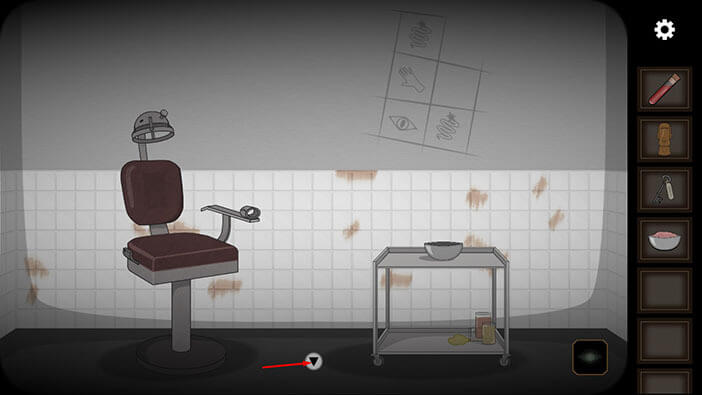
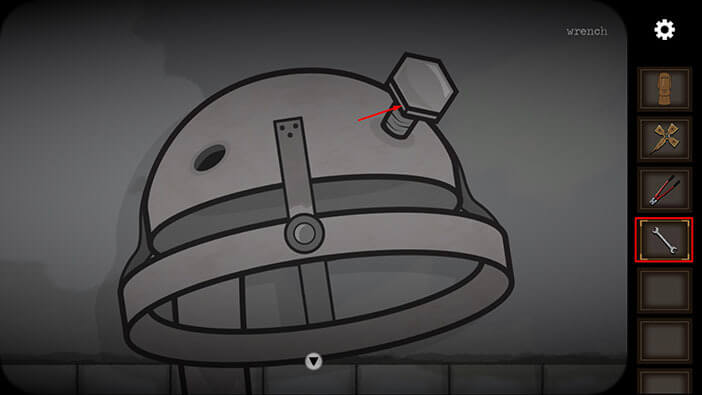
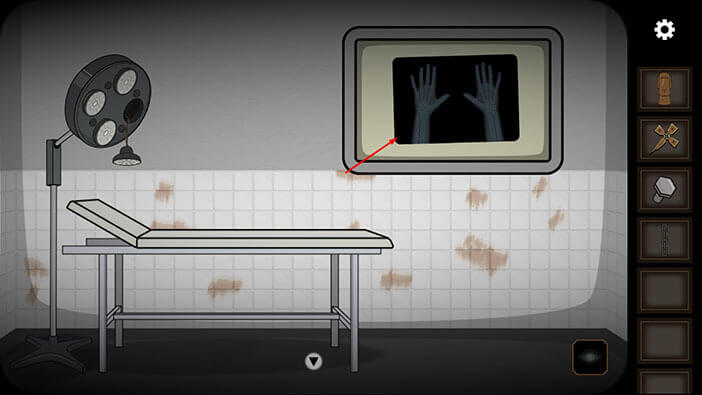
Tap on the metal device above the chair to take a closer look at it.
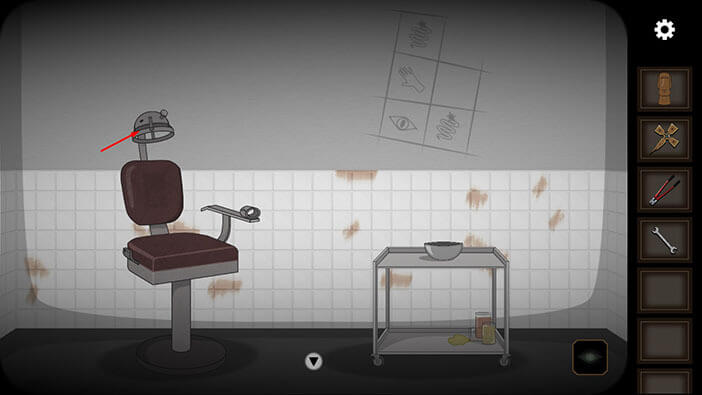
Select the “Wrench” from the inventory and use it to remove the screw. “Screw” will be added to your inventory.
After that, tap on the arrow at bottom of the screen to go back.
Ok, we should now go back to the X-ray room. Tap on the arrow at the bottom of the screen to go back.
Tap twice on the arrow on the left to proceed to the next room.
Tap on the door on the right to go to the X-ray room.

Let’s turn on the “Ghost Vision” again. Tap on the eye icon in the lower right corner.

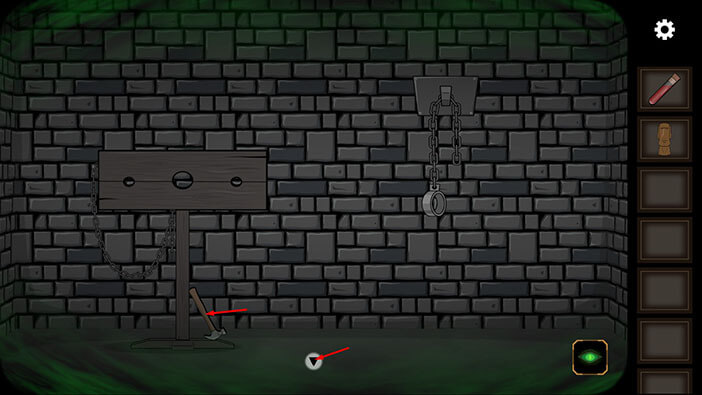
Here, you will see shackles and a chain. Select “Boltcutter” from the inventory and use it to cut the chain. “Chain” will be added to your inventory.

Well, it is time to turn off the “Ghost Vision”. Tap on the eye icon in the lower right corner.

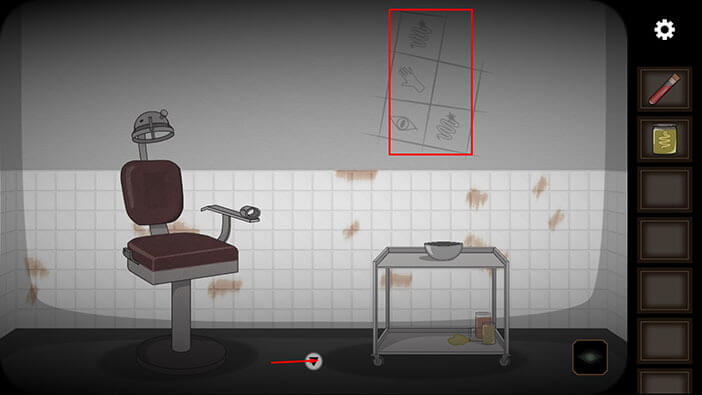
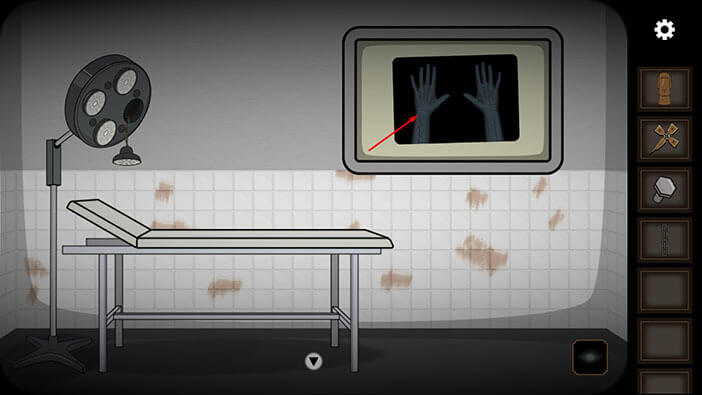
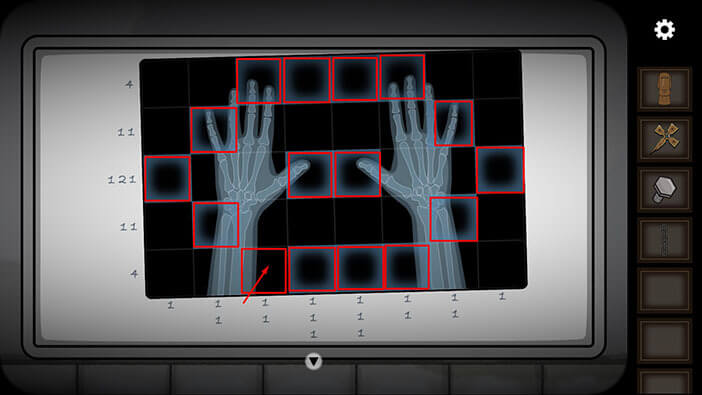
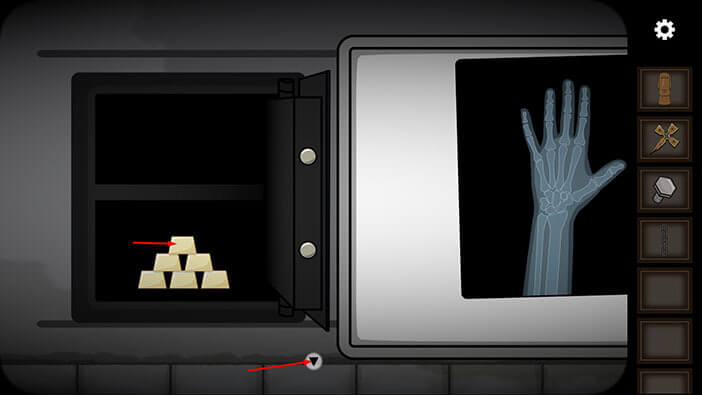
Tap on the X-ray image on the wall to examine it.
Ok, our next task is to find and tap on the correct squares, taking into account the numbers on the left, and below the image. You can see the solution in the image below.
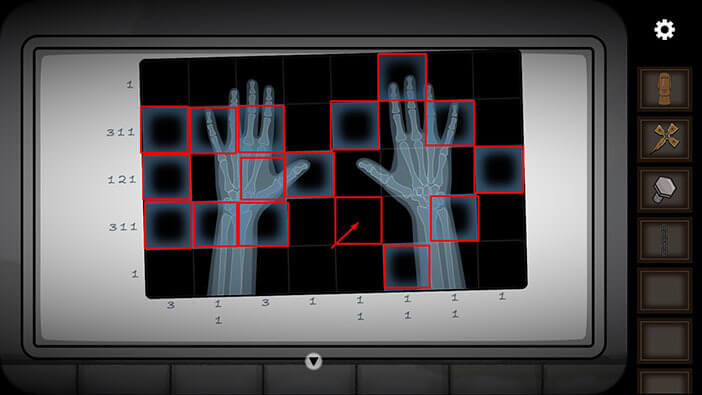
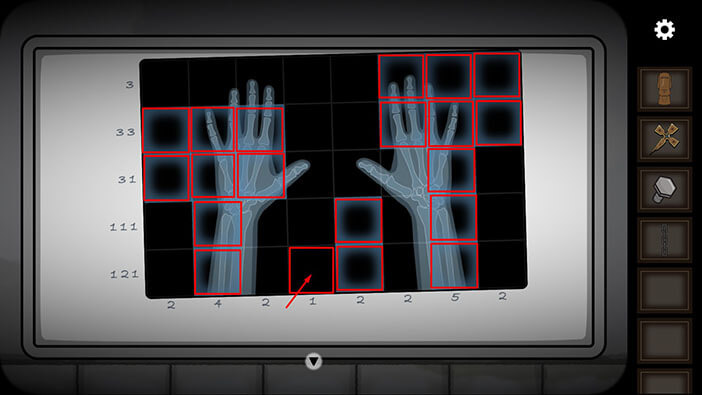
The numbers on the left and below the image will change, so we will have to repeat the process. You can see the solution in the image below.
The numbers on the left and below the image will change once again, so we will have to repeat the process. You can see the solution in the image below.
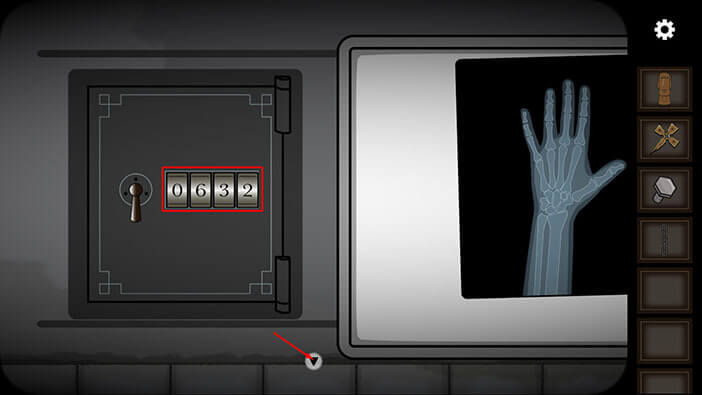
After you solve the puzzle for the third time, the photo will move aside revealing a safe that was hidden behind it. Now, we have to find the code which opens this safe. Tap on the arrow at the bottom of the screen to go back.
We should now go back to the room with the large jars. Tap on the arrow at the bottom of the screen to go back.
Tap on the eye icon in the lower right corner to turn on the “Ghost Vision”.

Tap on the door on the right to go to the room with the large jars.

We’re inside the room, so it’s time to turn off the “Ghost Vision”. Tap on the eye icon in the lower right corner.
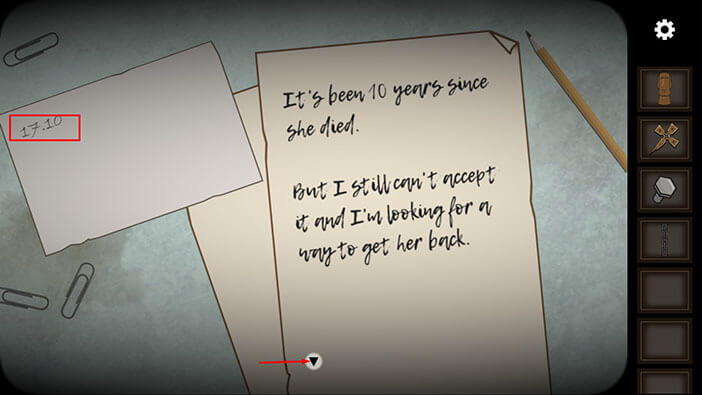
Tap on the notes on the left side of the table to take a closer look at them.
Tap on the photo to look at the backside.
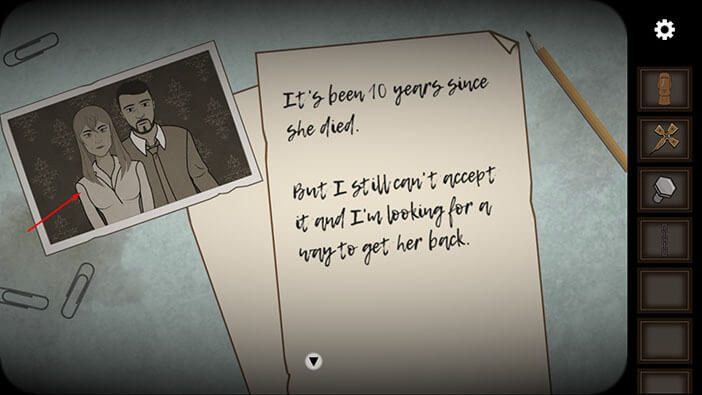
On the backside of the photo, you will see the number “1710” and this is the code that we will use to open the safe, so memorize/write it down.
Tap on the arrow at the bottom of the screen to go back.
Let’s go back to the safe. Tap on the arrow at the bottom of the screen.
Tap on the door on the right to go to the room with the safe.
Tap on the image again, to interact with the safe.
Enter the code that we found on the back of the photo. The code was “1710”.

Wow, looks like we hit a jackpot because it seems that the safe is full of gold bars. Well, if I was in the shoes of our character, I would retire to some tropical island. However, it seems that our character is more interested in chasing the alchemist, so I guess that’s what we will do. Tap on the “Gold bar” to pick it up (unfortunately he will take only one).
After that, tap on the arrow at the bottom of the screen to go back.
Let’s go back to the previous room. Tap on the arrow at the bottom of the screen.
Tap on the eye icon in the lower right corner to turn on the “Ghost Vision”.
Tap on the door on the left to go to the next room.
Let’s turn off the “Ghost Vision”. Tap on the eye icon in the lower right corner.
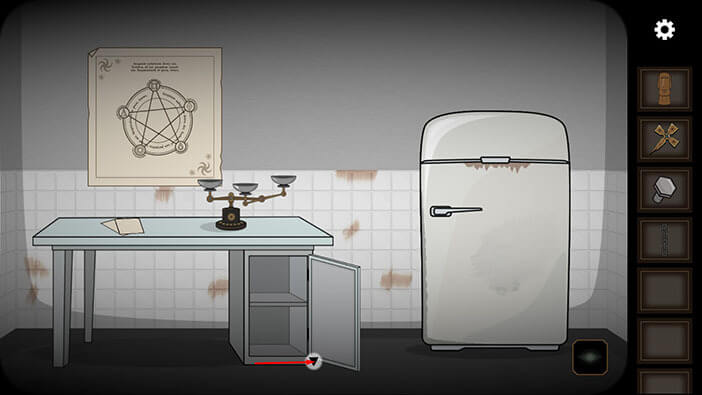
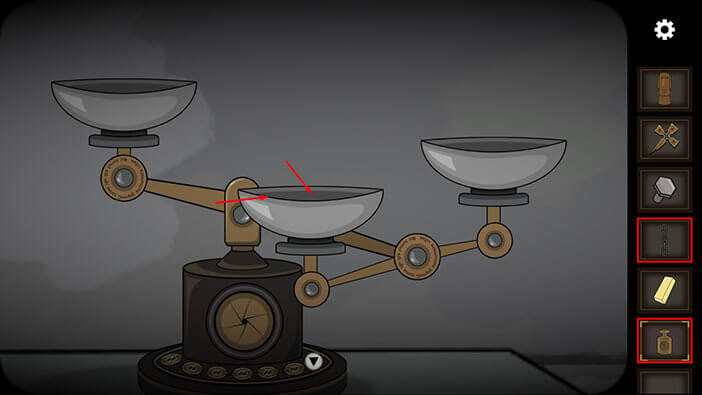
Tap on the measuring scales on the table to take a closer look.

Our next task is to use the items from our inventory to balance the bowls and place them at the same height. We will do this puzzle in several steps. Let’s begin.
Step 1
Tap on the “Plummet” to pick it up.
Select the “Plummet” from the inventory and place it in the middle bowl. After that, select the chain from the inventory and place the chain into the same bowl.
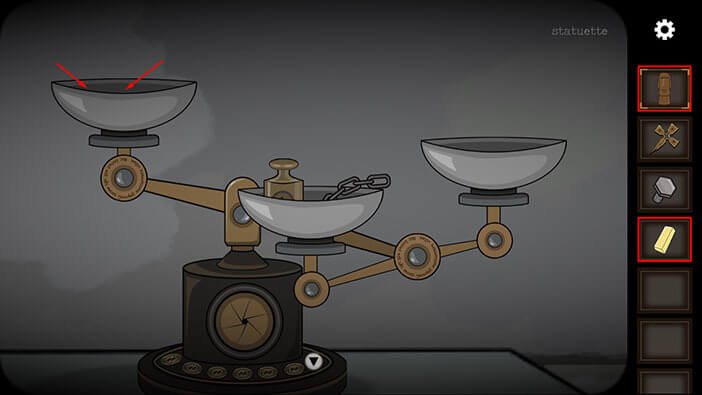
Step 2
Select the “Statuette” and the “Gold bar” from the inventory and place them in the bowl on the left.
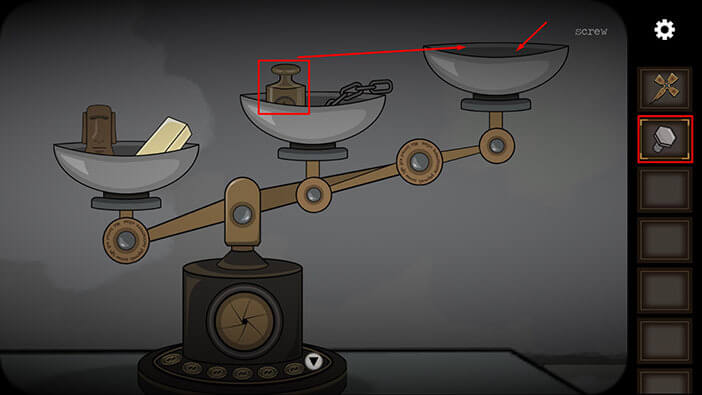
Step 3
Select the “Screw” from the inventory and place it in the bowl on the right. After that, select the “Plummet” from the middle bowl and place it in the bowl on the right.
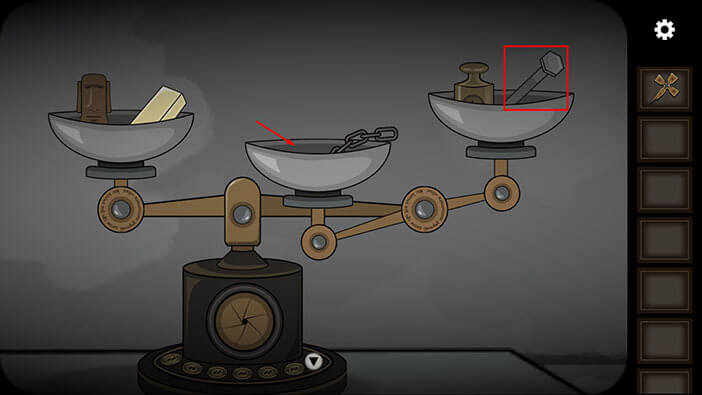
Step 4
Select the “Screw” from the bowl on the right and place it in the middle bowl.
Step 5
Select the “Chain” from the middle bowl and place it in the bowl on the right.

Step 6
Select the “Plummet” from the bowl on the right, and place it in the middle bowl. When you complete this step, you will solve the puzzle.
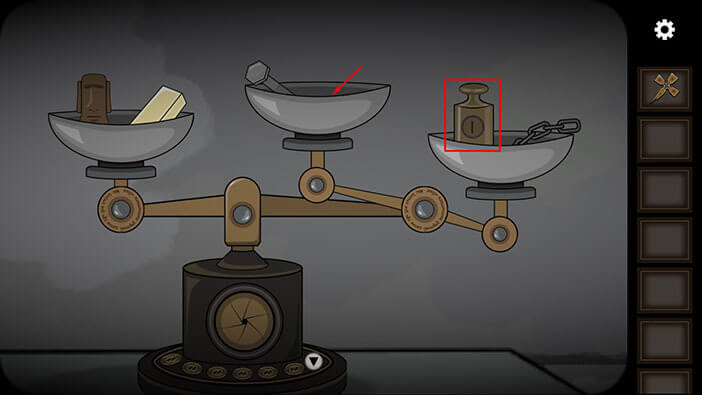
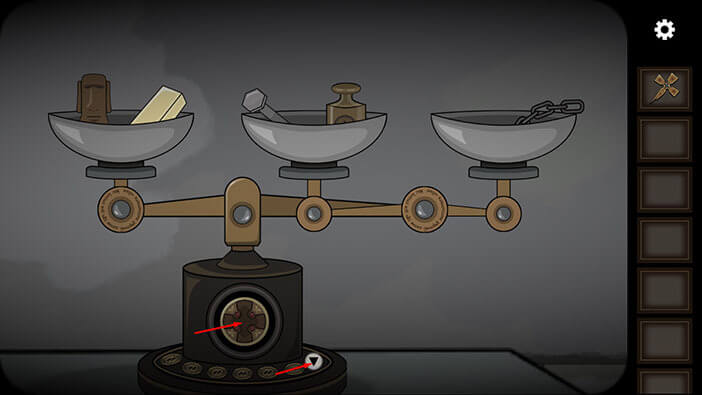
The small compartment will open as soon as you line up the bowls. Tap on the item in the compartment to pick it up, and a “Gold disk” will be added to your inventory.
After that, tap on the arrow at the bottom of the screen to go back.
Let’s go back to the previous room. Tap on the arrow at the bottom to go back.

Tap on the arrow on the left to go to the next room.
Ok, it’s time to turn on the “Ghost Vision”. Tap on the eye icon in the lower right corner.
Tap on the eye icon in the lower right corner to turn on the “Ghost Vision”.
Tap on the gate to take a closer look at it.
Ok, let’s unlock this gate. Select the “Gold disk” from the inventory and plate it into the empty slot.
Next, select the “Gold cross” from the inventory and place it into the “Gold disk”.
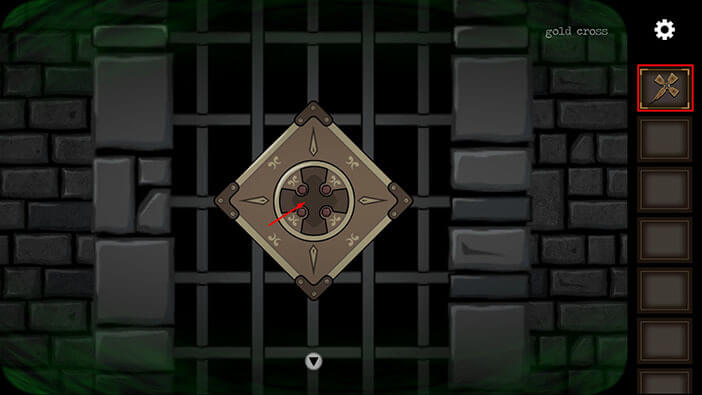
As soon as you insert the “Gold cross” the gate will open. Tap on it to proceed into the next room.
In the cell, you will find the Alchemist’s body.
So, it seems that the Alchemist unintentionally summoned a demon that went on a killing spree. The Alchemist is dead, but the demon is now inside a new body, and we will have to find and neutralize it.
With this, we have come to the end of the second chapter. You can check out the third Chapter by tapping on the “Next Part” button.
Thank you for reading.