Strange Case: The Alchemist, Chapter 1
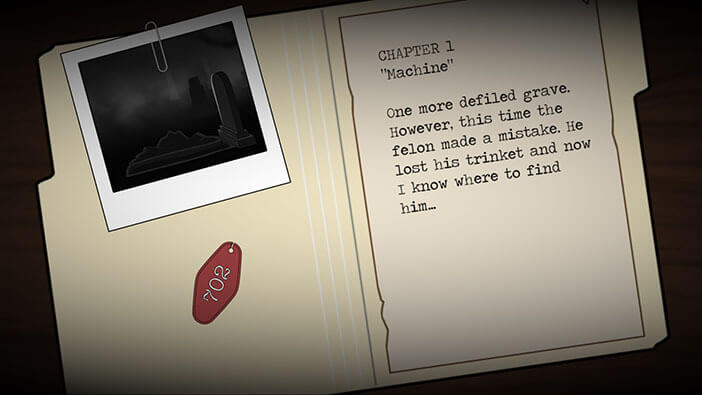
Hello everyone and welcome to the walkthrough for Chapter 1 of ” Strange Case: The Alchemist”. At the start of the game, our character, the detective, will go to the graveyard to investigate the defiled grave. This isn’t an isolated incident, because a lot of graves have been desecrated recently, and the police were desperately trying to find the culprits, but they had no success so far. However, it seems that the criminal (or should we just call him the defiler) made a mistake this time, and dropped the key tag for his hotel room. With this clue in hand, our detective went to the hotel to continue his investigation.
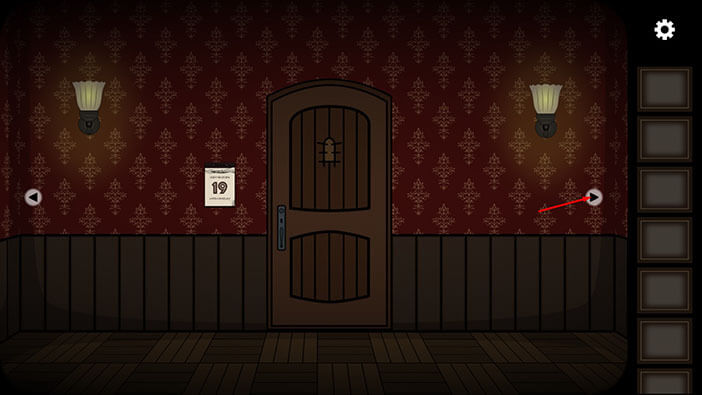
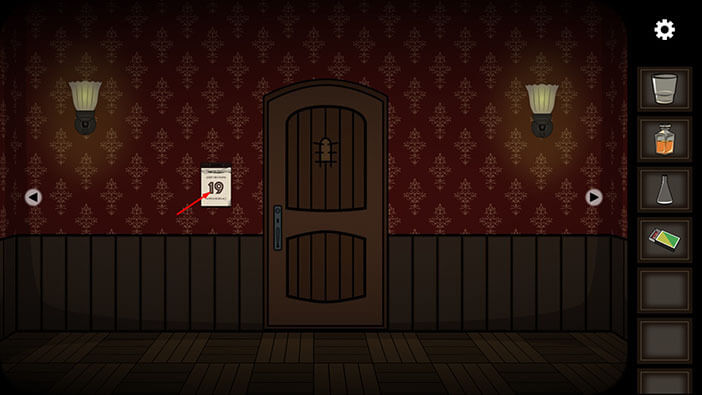
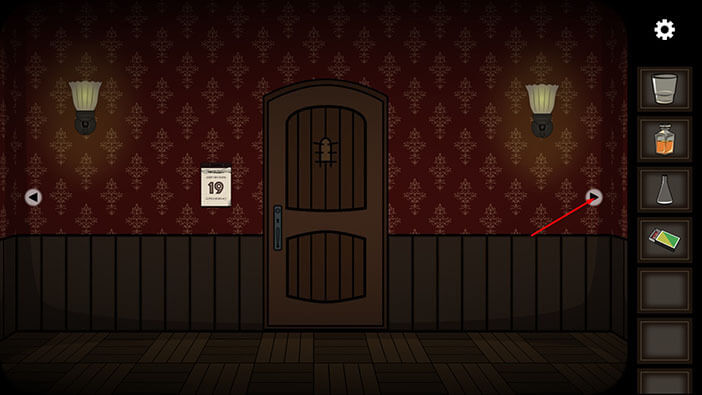
Ok, let’s begin the investigation. Tap on the arrow on the right to proceed to the next room.
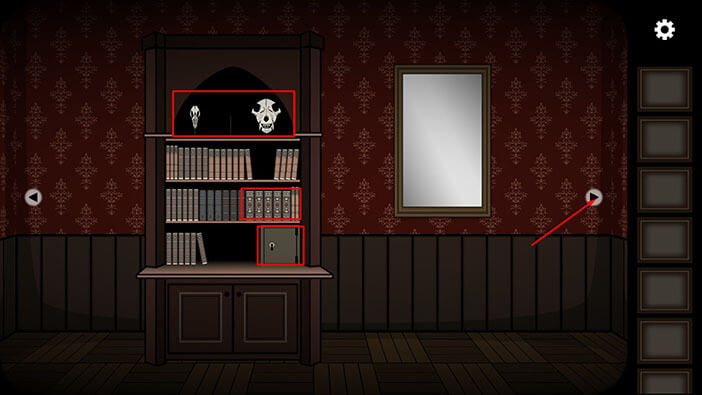
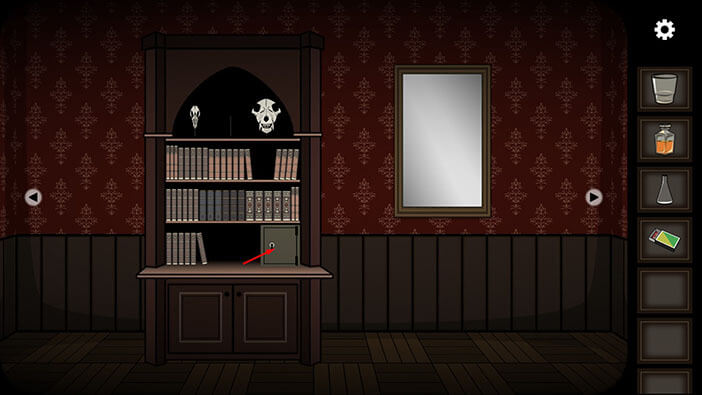
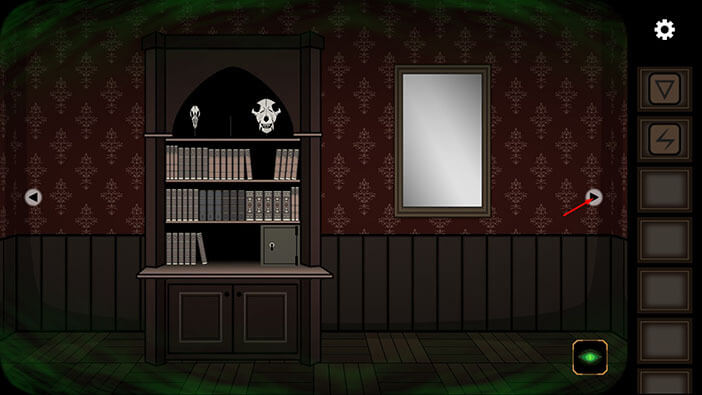
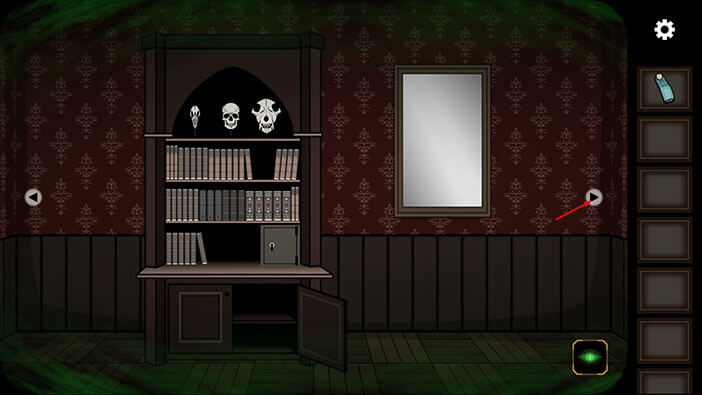
There are several important items on the bookshelf, like the safe, the books on the middle shelf, and the skulls at the top. However, we will come back to this room a bit later. For now, tap on the arrow on the right to continue to the next room.
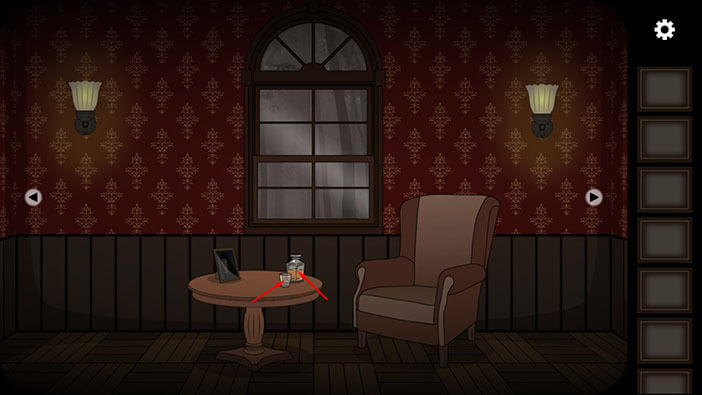
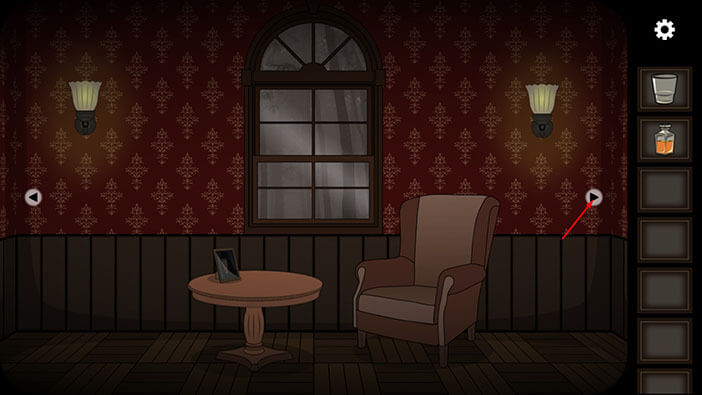
Tap on the empty glass and a bottle, located on the small table, to pick them up. “Glass” and a “Whisky bottle” will be added to your inventory.
Let’s continue. Tap on the arrow on the right to proceed to the next room.
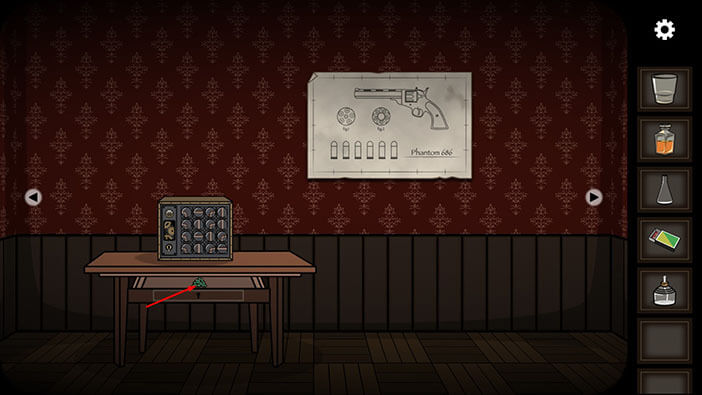
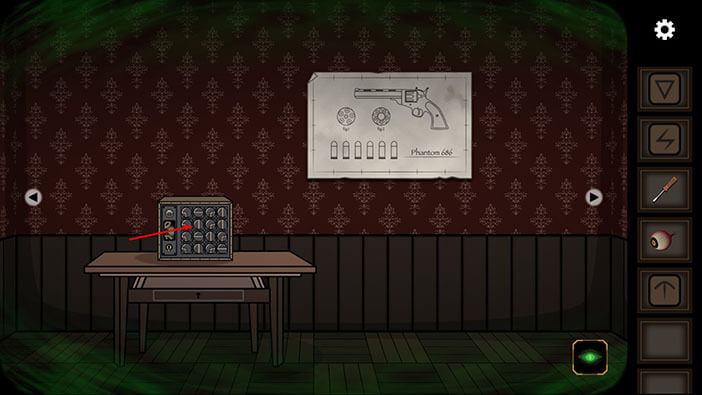
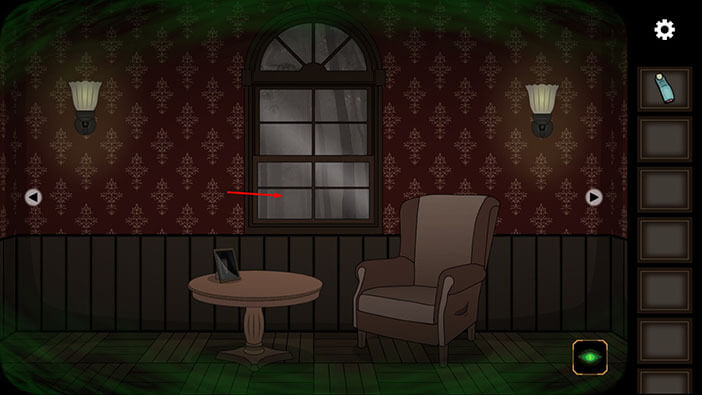
On the table, you will see some strange machine and a glass bottle. We will come back to this strange machine a bit later in the walkthrough. Tap on the glass bottle to pick it up, and a “Flask” will be added to your inventory.
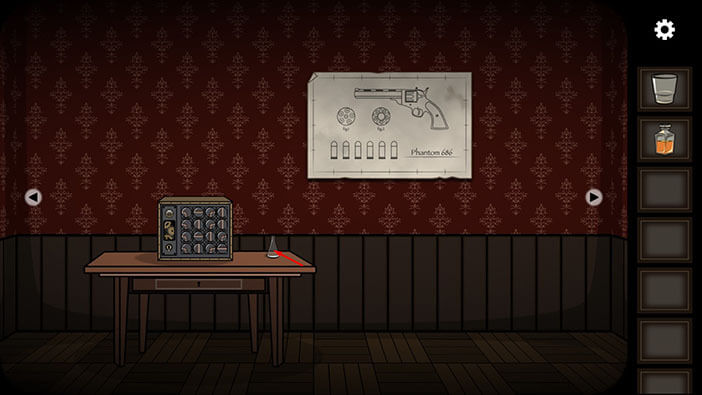
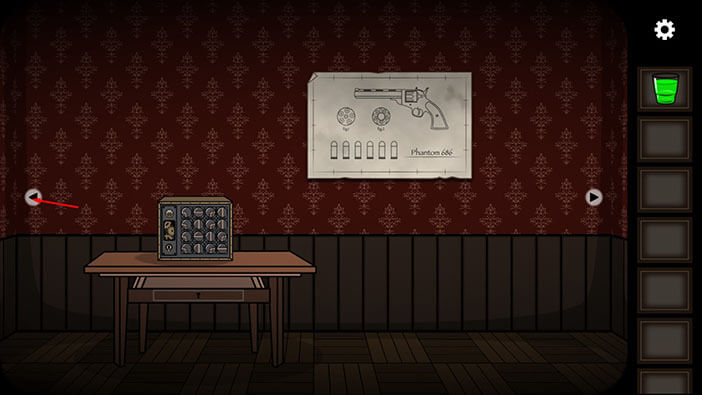
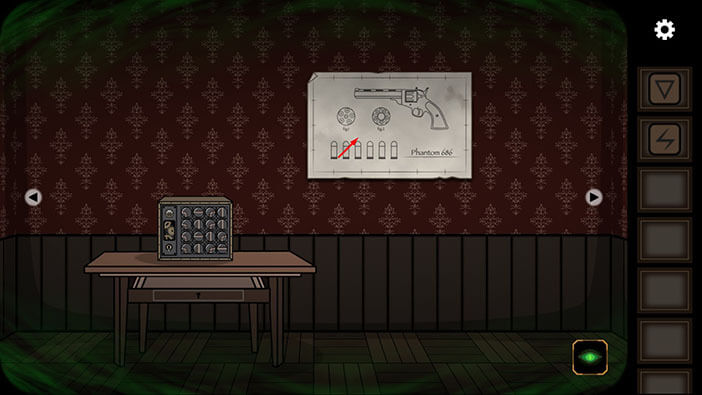
On the wall, we can see a poster with a revolver called “Phantom 686” and six rounds. Tap on the poster to take a closer look at it.

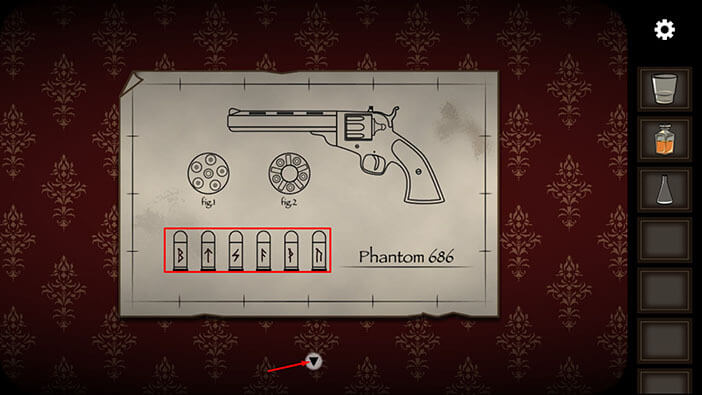
If you closely examine the six rounds, you will notice that each round is marked with a different symbol. Let’s memorize/write down the order of the symbols, starting from left to right because we will need this information in order to solve the next puzzle. So,
First round = Letter “B”
Second round = “Up” arrow
Third round = Lightning
Fourth round = Letter “F”
Fifth round = Letter “P”
Sixth round = small letter “n”
Once you’re done, tap on the arrow at the bottom of the screen to go back.
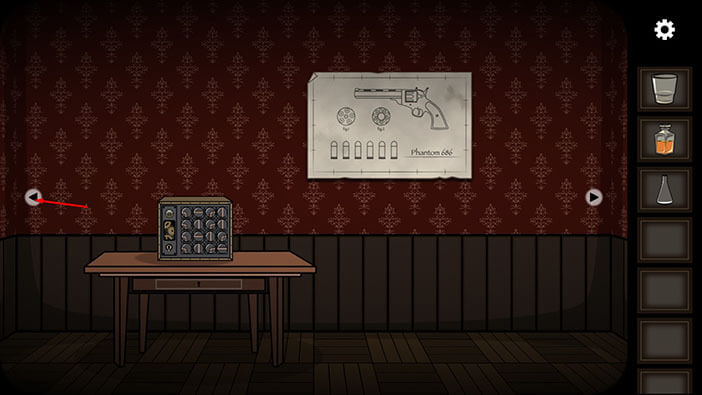
Ok, we should now go back to the room with a large bookshelf, and use the information which we discovered by examining the revolver rounds. To get to this room, tap twice on the left arrow.
Next, tap on the books on the middle shelf to take a closer look at them.

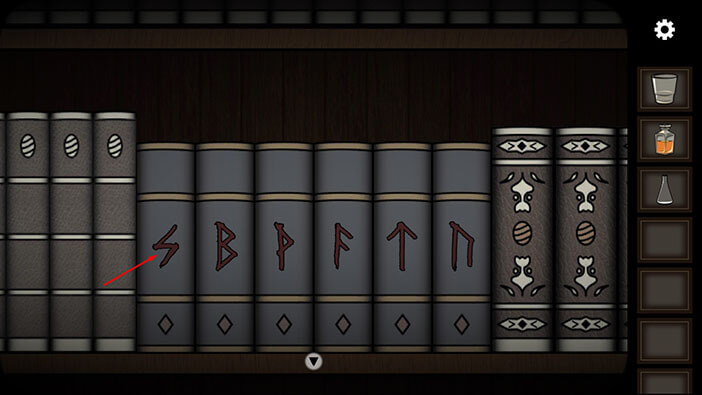
There are six books on the shelf, and they have the same symbols as the revolver rounds that we saw previously. However, the order of the symbols on the books doesn’t match the order of the symbols on the revolver rounds. So, our next task is to rearrange the books, to match the order of the symbols on the revolver rounds. We will do this puzzle in several steps. Let’s begin.
Step 1
Tap on the first book to move the “Letter B” symbol to the left.
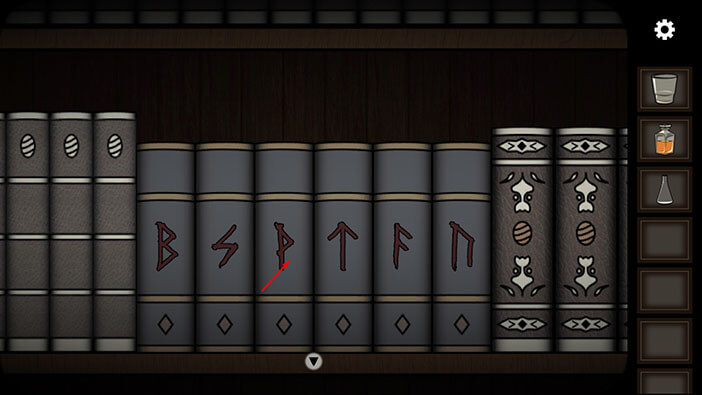
Step 2
Tap on the fourth book to move the “Up arrow” symbol to the left.

Step 3
Tap on the third book to move the “Up arrow” symbol to the left.
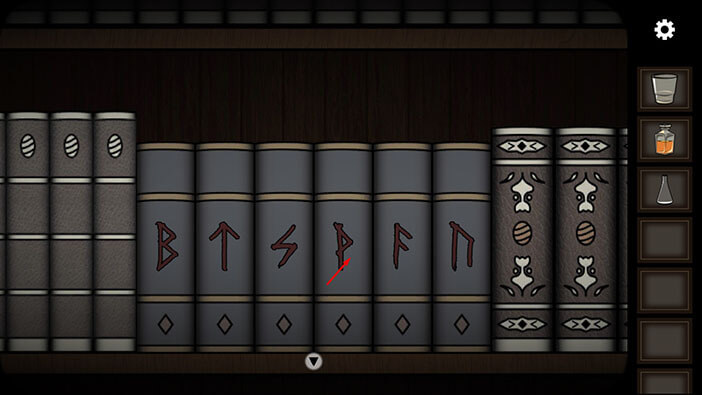
Step 4
Tap on the second book to move the “Up arrow” symbol to the left.

Step 5
Lastly, tap on the fourth book to move the “Letter F” symbol to the left, and the order of the symbols on the books will match the order of the symbols on the revolver rounds.
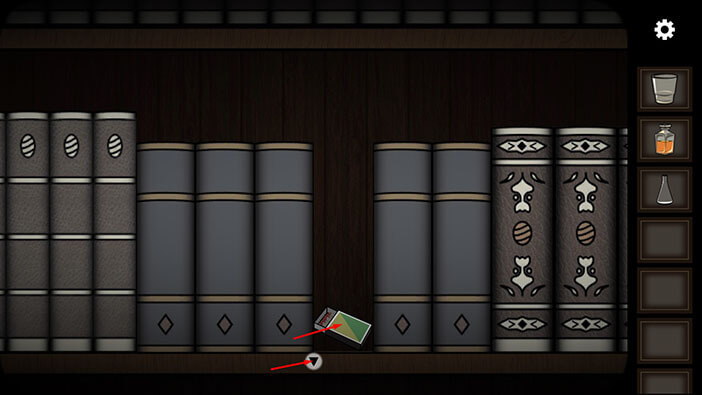
As soon as you arrange the books in the correct order, the fourth book will fall down revealing a box of matches that was hidden behind it. Tap on it to pick it up and “Matches” will be added to your inventory.
After that, tap on the arrow at the bottom of the screen to go back.
Ok, we will come back to this room a bit later. For now, tap on the arrow on the right to go to the next room.

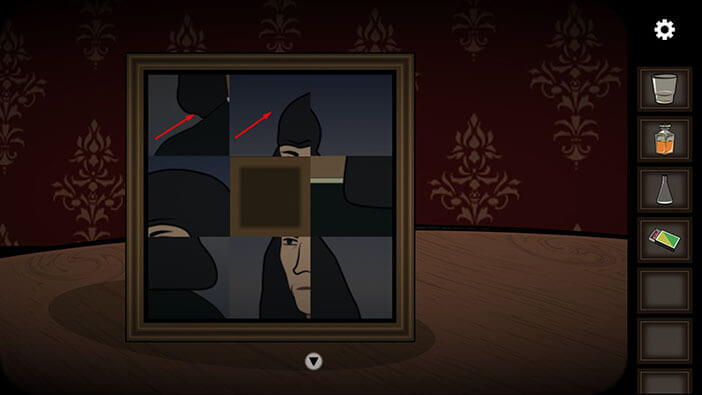
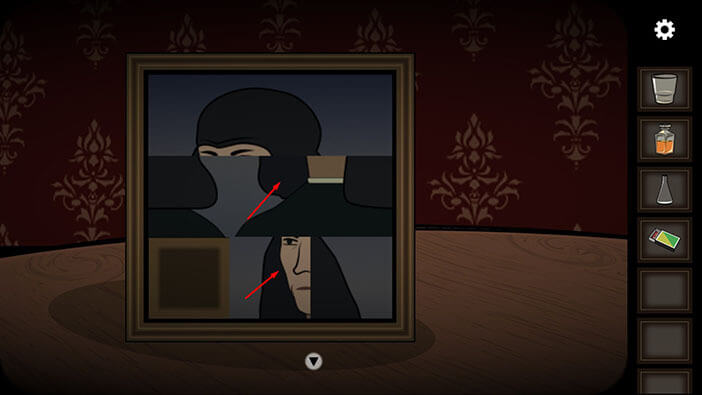
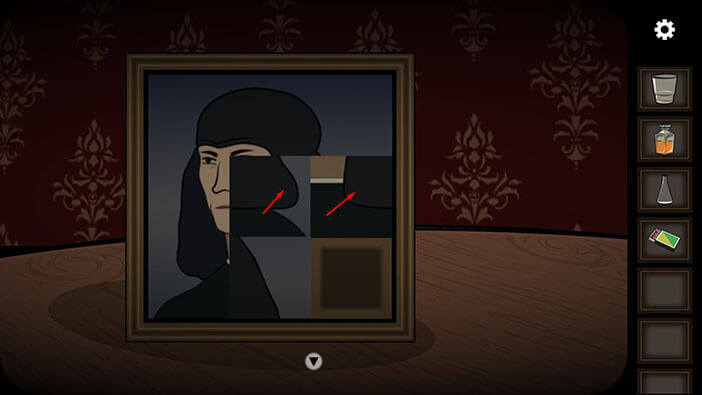
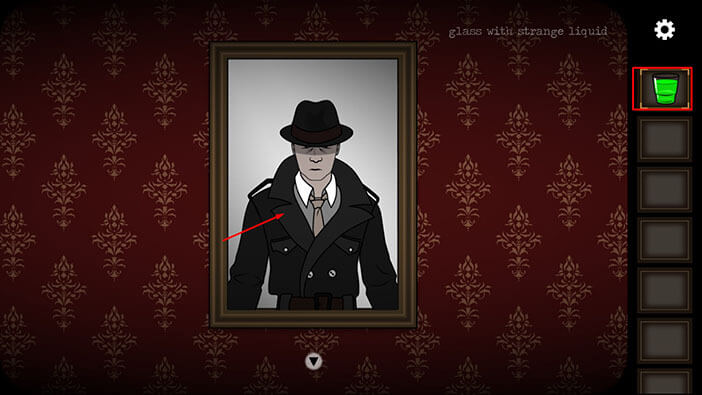
Tap on the photo located on the small table, to take a closer look at it.

Ok, our next task is to solve this puzzle by assembling the photo. We will do this in several steps. Let’s begin.
Step 1
Tap on the second slot (left to right) in the first row (top to bottom).
After that, tap on the first slot in the first row.
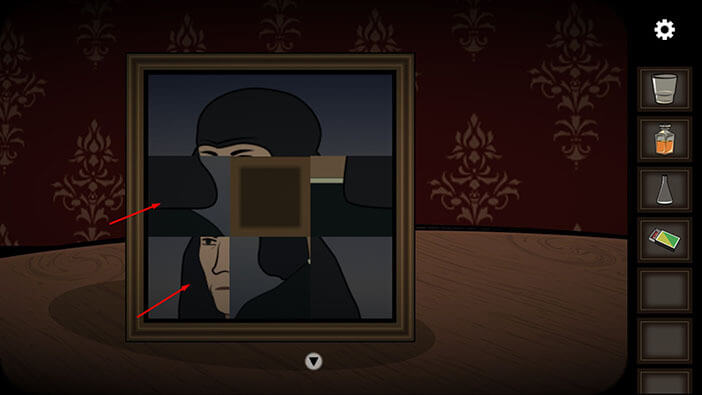
Step 2
Tap on the first slot in the second row.
After that, tap on the second slot in the second row.
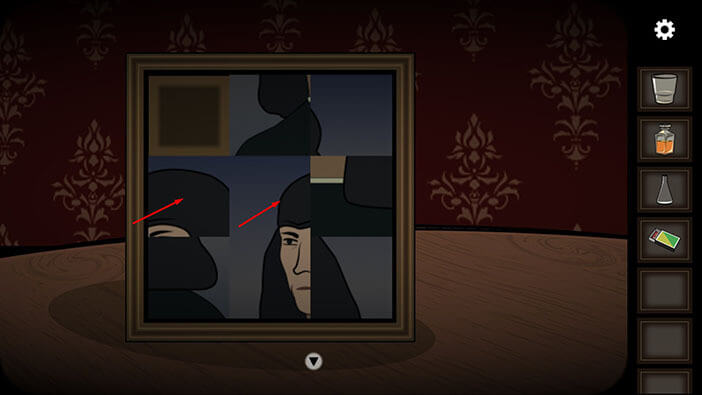
Step 3
Tap on the second slot in the first row.
After that, tap on the first slot in the first row.
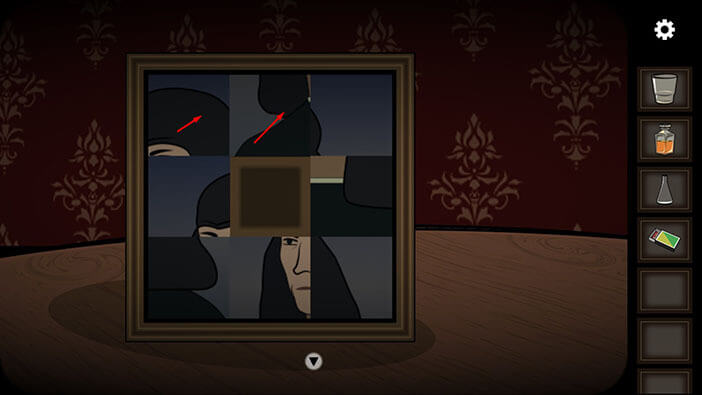
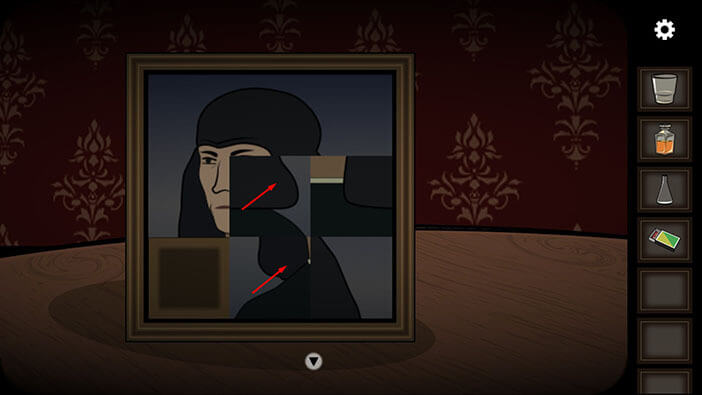
Step 4
Tap on the first slot in the second row.
After that, tap on the first slot in the third row.
Step 5
Tap on the second slot in the third row.
After that, tap on the second slot in the second row.
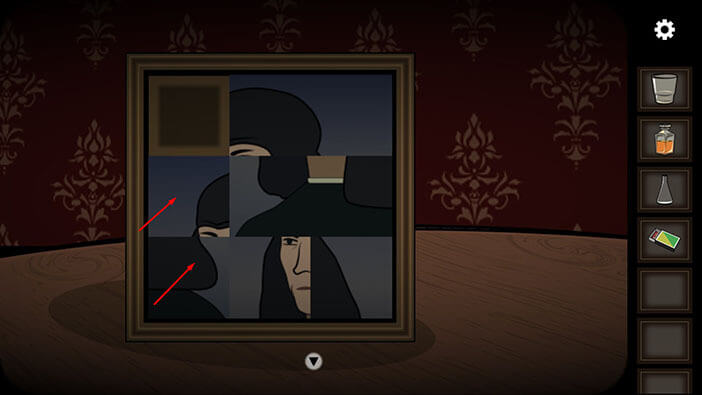
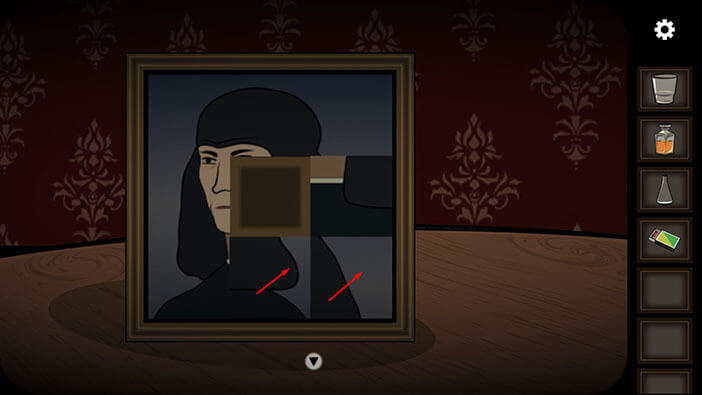
Step 6
Tap on the first slot in the second row.
After that, tap on the first slot in the third row.
Step 7
Tap on the second slot in the third row.
After that, tap on the second slot in the second row.
Step 8
Tap on the second slot in the third row.
After that, tap on the third slot in the third row.
Step 9
Tap on the third slot in the second row.
After that, tap on the second slot in the second row.
Step 10
Tap on the second slot in the third row.
After that, tap on the third slot in the third row.

Step 11
Tap on the third slot in the second row.
Lastly, tap on the second slot in the second row and you will solve this puzzle.
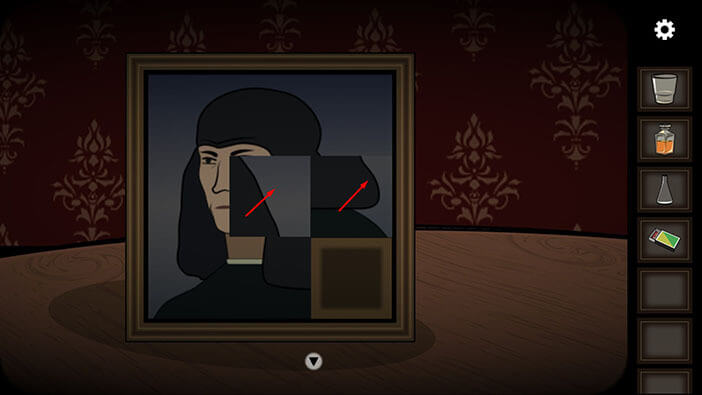
As soon as you assemble the puzzle, the mouth of the man in the photo will open. Tap on the mouth to take a closer look.

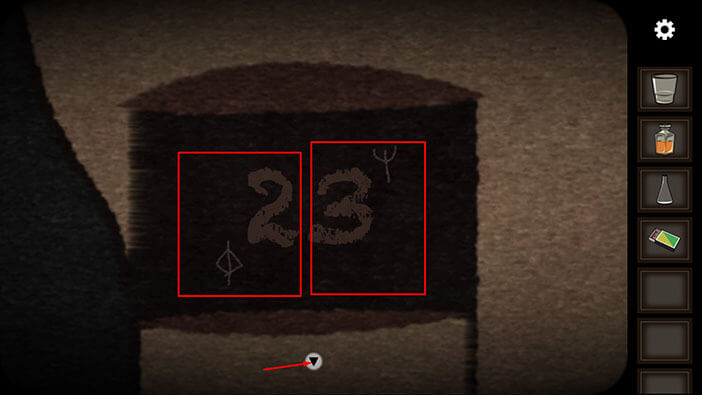
You will see two symbols and the two numbers next to them. Let’s memorize/write down the symbols and the numbers because this information is a part of the solution for the following puzzle.
Rhombus with a vertical line through the center = 2
Trident = 3
Once you’re done, tap twice on the arrow at the bottom of the screen to go back.
We should now go back to the first room. To do that, tap twice on the arrow on the left.
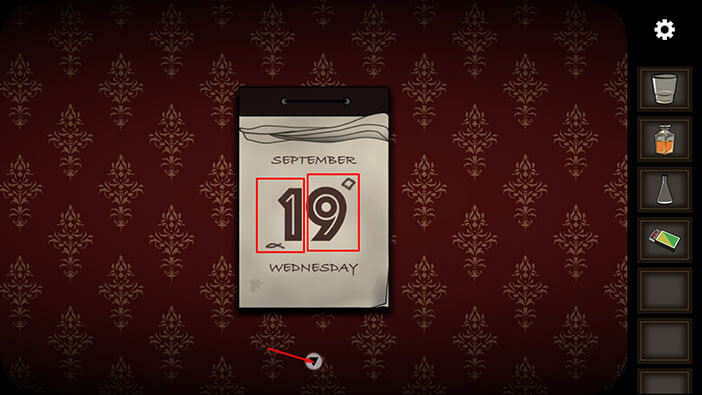
Tap on the calendar, located to the left of the door, to take a closer look at it.
Here, we can see another two symbols and the two numbers next to them. Let’s memorize/write down the symbols and the numbers because this information is the second part of the solution for the following puzzle.
Fish = 1
Rhombus = 9
Once you’re done, tap on the arrow at the bottom of the screen to go back.
Ok, each symbol represents one number, and we can use this information to unlock the safe in the next room. So, tap on the arrow on the right to proceed to the next room.
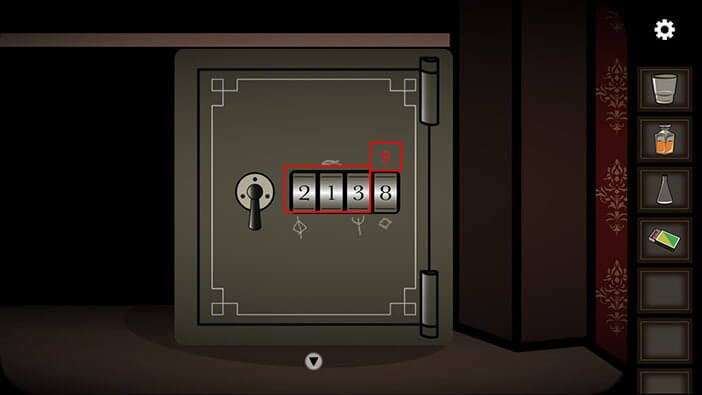
Tap on the safe, located on the right side of the lowest shelf to start the interaction.
Ok, we can see the four symbols next to each slot, so our next task is to enter the number which is represented with a symbol. We had,
Rhombus with a vertical line through the center = 2
Fish = 1
Trident = 3
Rhombus = 9
So, enter the code “2139” and you will unlock the safe.
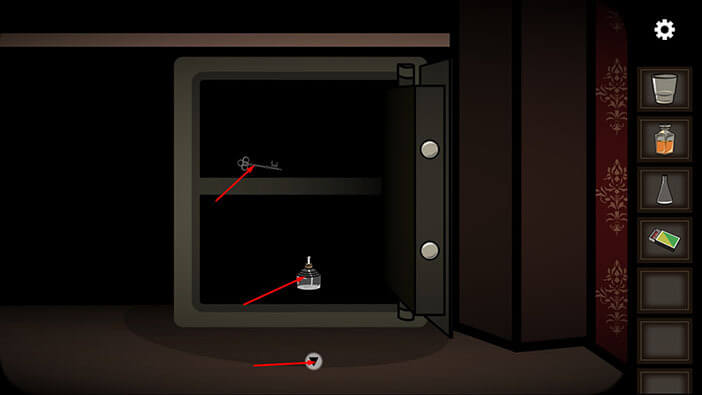
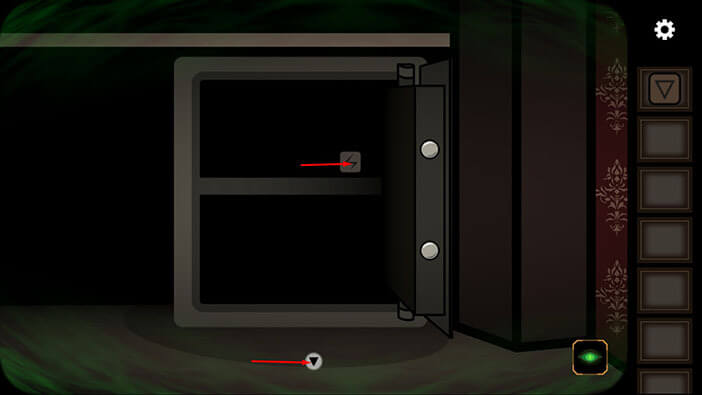
As soon as you enter the correct code, the safe door will open. Tap on the items in the safe to pick them up and “Key” and “Alcohol burner” will be added to your inventory.
After that, tap on the arrow at the bottom of the screen to go back.
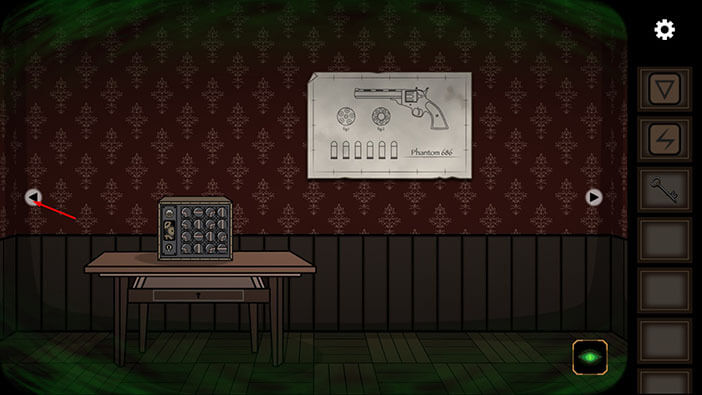
We should now go to the room with the revolver poster. To get there, tap twice on the arrow on the right.
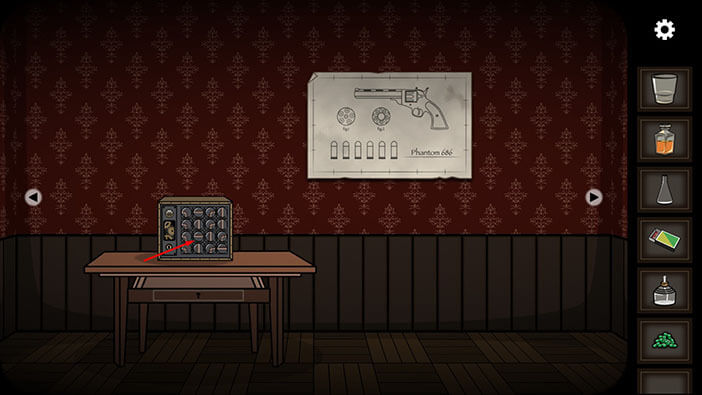
Select the “Key” from the inventory and use it to unlock the drawer.
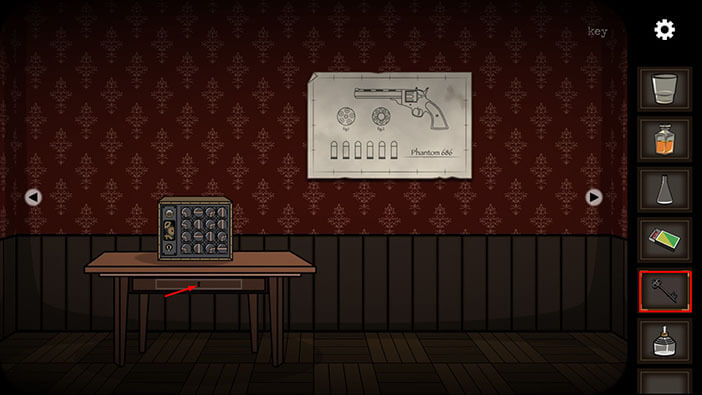
Tap on the green item in the drawer to pick it up and “Pills” will be added to your inventory.
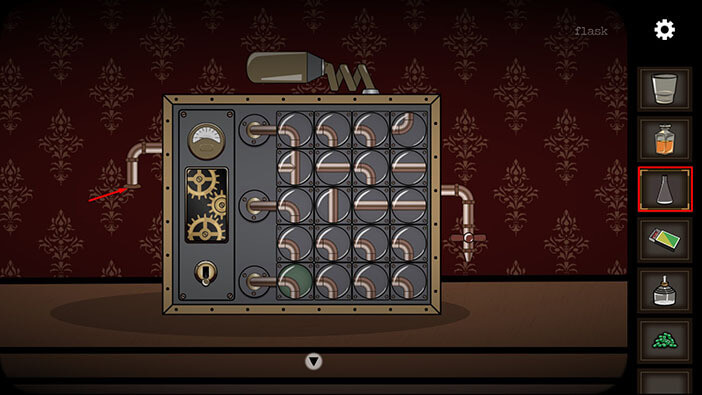
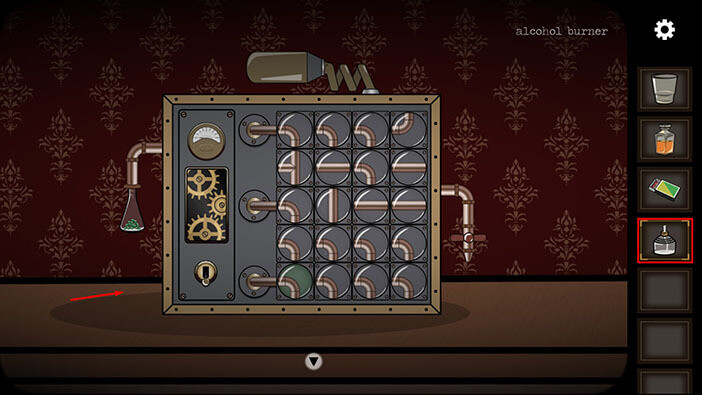
Ok, we have gathered all the necessary items which are required for the next task. Tap on the strange machine on the table to take a closer look at it.
Select the “Flask” from the inventory and attach it to the pipe on the left.
Next, select the “Pills” from the inventory and put them into the flask.
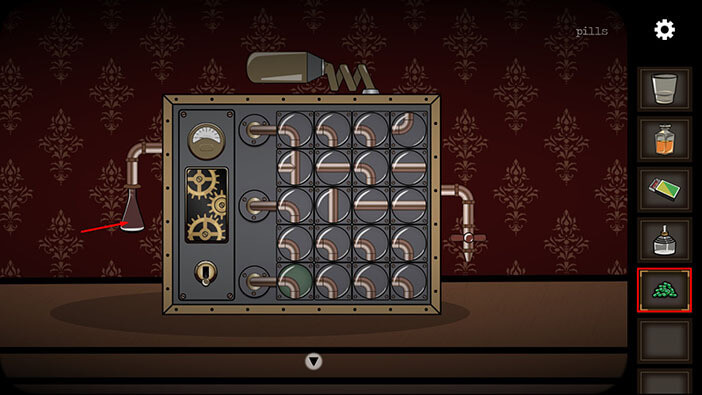
Next, select the “Alcohol burner” and place it below the flask on the left.
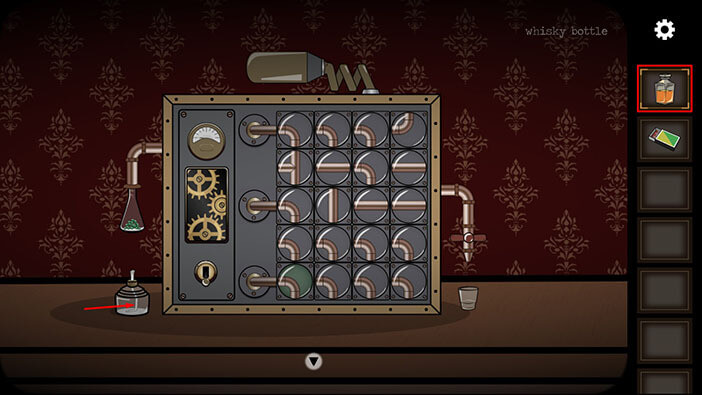
Next, select “Glass” from the inventory and place it below the pipe on the right.

Next, select the “Whisky bottle” from the inventory and use it to fill up the “Alcohol burner”.
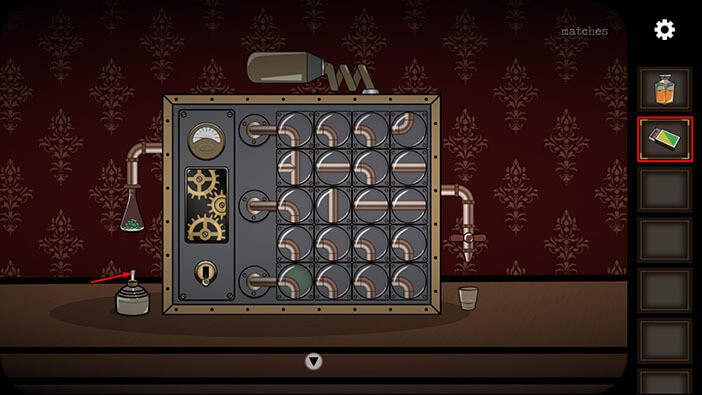
Next, select the “Matches” from the inventory and use them to light up the fuse on the “Alcohol burner”.
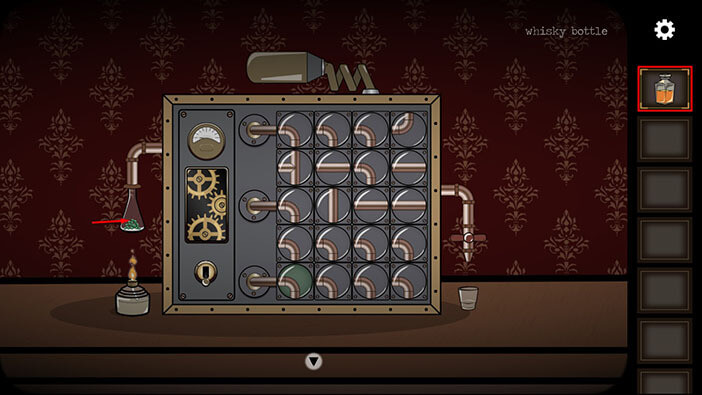
Lastly, select the “Whisky bottle” from the inventory and use it to fill up the flask on the left.
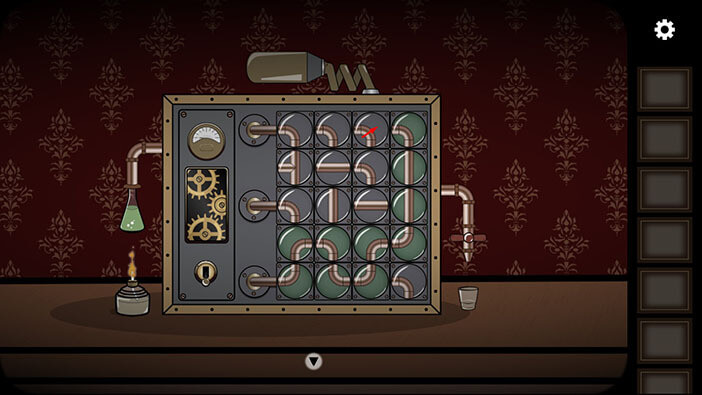
Ok, our next task is to reconnect the three pipes on the left side. We will do this puzzle in several steps. Let’s begin.
Step 1
Tap once on the first slot (left to right) in the fifth row (top to bottom) to rotate it.

Step 2
Tap three times on the first slot in the fourth row to rotate it.

Step 3
Tap two times on the second slot in the fifth row to rotate it.

Step 4
Tap once on the third slot in the fifth row to rotate it.

Step 5
Tap three times on the third slot in the fourth row to rotate it.

Step 6
Tap once on the fourth slot in the fourth row to rotate it.

Step 7
Tap once on the fourth slot in the third row to rotate it.

Step 8
Tap once on the fourth slot in the second row to rotate it.

Step 9
Tap three times on the fourth slot in the first row to rotate it.

Step 10
Tap three times on the third slot in the first row to rotate it.
Step 11
Tap once on the third slot in the second row to rotate it.
Step 12
The pipe in the second slot of the second slot is already in the correct position. We will use the pipe in the first of the second row to connect our pipeline with the top and middle pipeline exits.
Tap twice on the first slot in the second row to rotate it.

Step 13
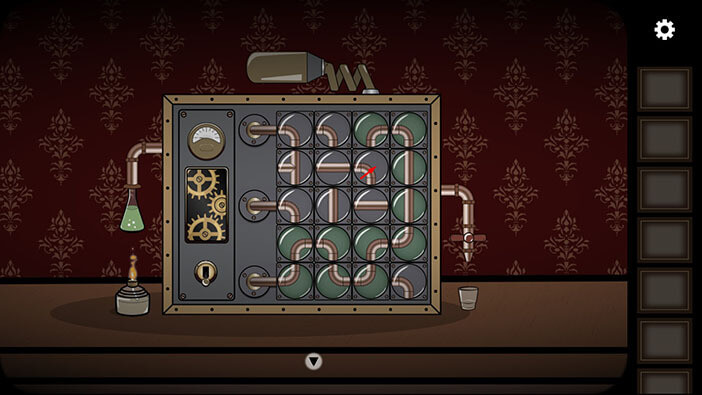
Lastly, tap once on the first slot in the third row to rotate it.

Tap on the switch in the lower left part of the machine to turn it on, and the cogwheels above the switch will start to turn.

Ok, the only thing that we should now do is harvest the liquid which we created during this experiment. Tap on the faucet on the right – above the glass.

The previous action will fill the glass with the green liquid. Tap on it to pick it and “Glass with strange liquid” will be added to your inventory.

We should now go to the room with the large bookshelf and use the liquid which we created in the previous experiment. To get to this room, tap twice on the arrow on the left.
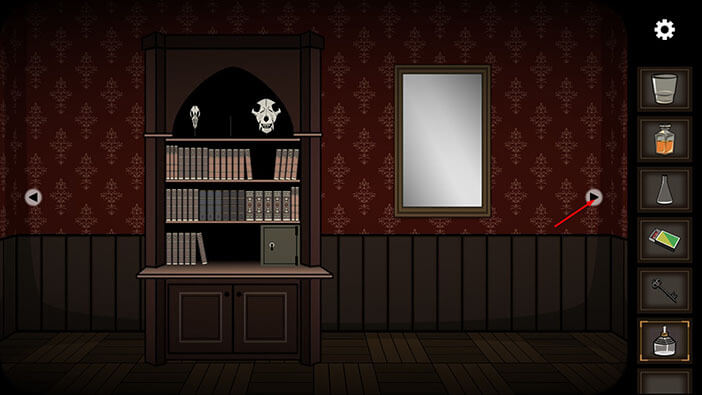
Tap on the large mirror on the right to take a closer look at it.
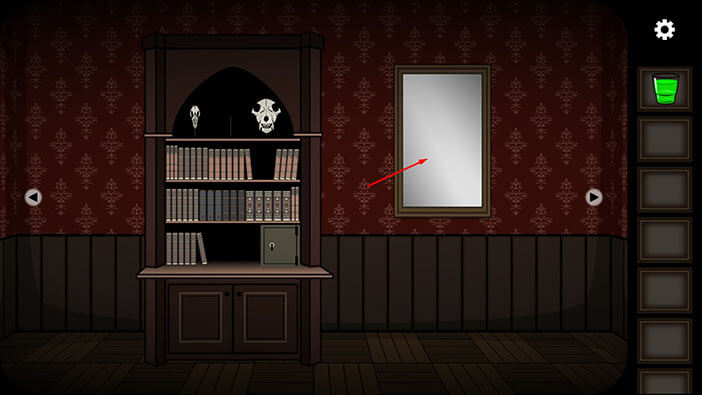
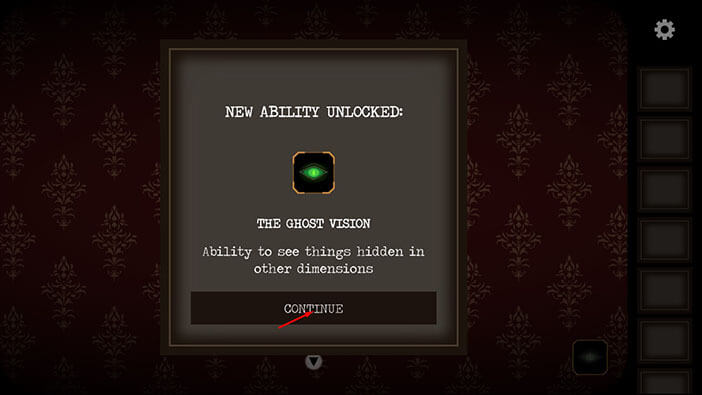
Select the “Glass with strange liquid” from the inventory and tap on the reflection of the character to use it.
This action will unlock a new ability “Ghost Vision”. While this ability is active, our character will be able to see things hidden in the other dimension, and interact with them.
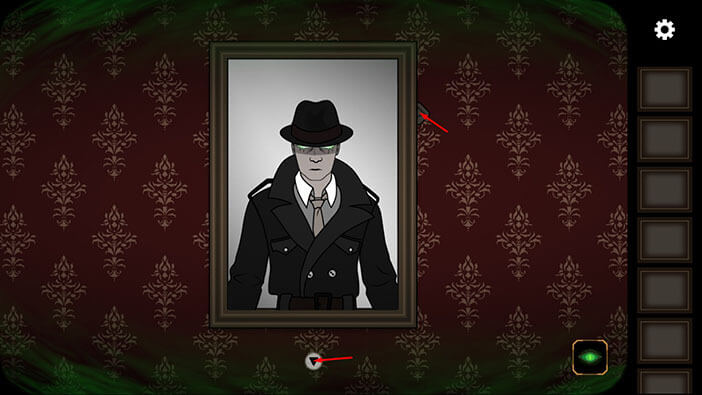
We can already tell that this ability will be extremely useful because we can already see a new item, hidden behind the upper right corner of the mirror. Tap on this item to pick it up and “Rune” will be added to your inventory.
After that, tap on the arrow at the bottom of the screen to go back.
Next, tap on the safe to look inside it.
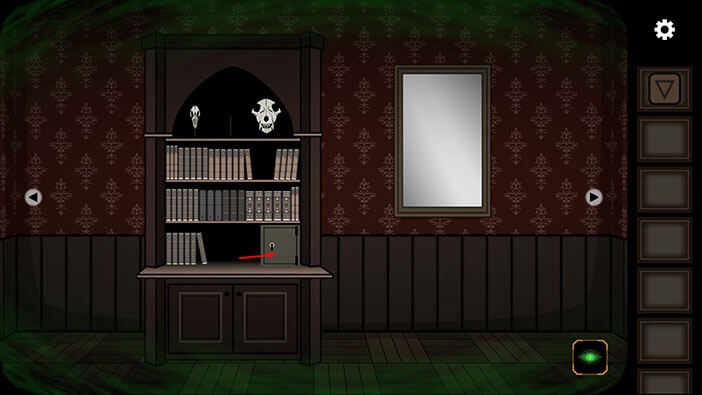
With the “Ghost Vision” ability activated, we can see another item in the safe which was previously invisible. Tap on the item to pick it up and another “Rune” will be added to your inventory.
After that, tap on the arrow at the bottom of the screen to go back.
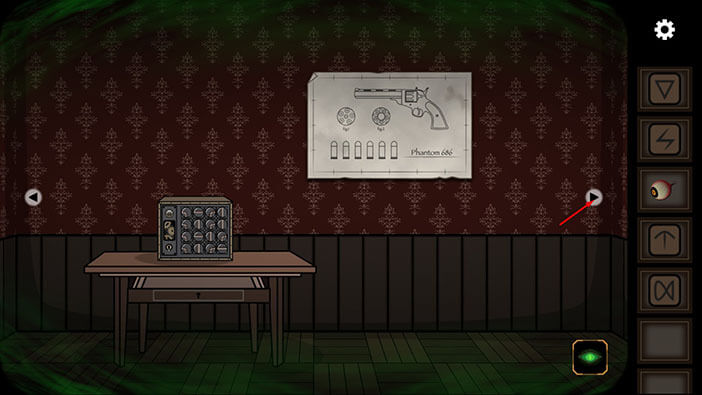
Let’s go to the second room on the right.
Tap on the revolver poster to take a closer look at it.
Tap on the top left corner of the poster to see if there’s something hidden behind it.

You will discover a small key. Tap on it to pick it up and “Key” will be added to your inventory.

Ok, we can use this “Key” to unlock the cabinet located below the large bookshelf. The large bookshelf is located in the second room on the left, so let’s go there.
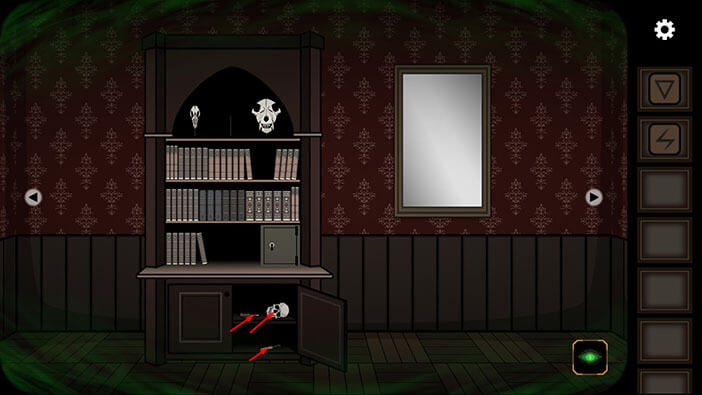
Select the “Key” from the inventory and use it to unlock the cabinet.

There are three items in the cabinet, so tap on all of them to pick them up. A “screwdriver”, a “Skull”, and a “Knife” will be added to your inventory.
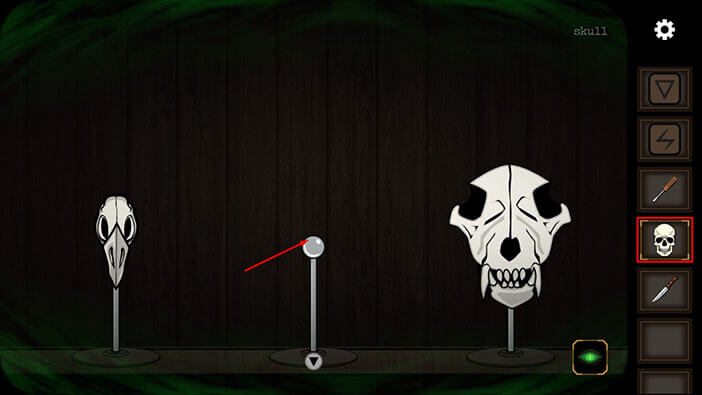
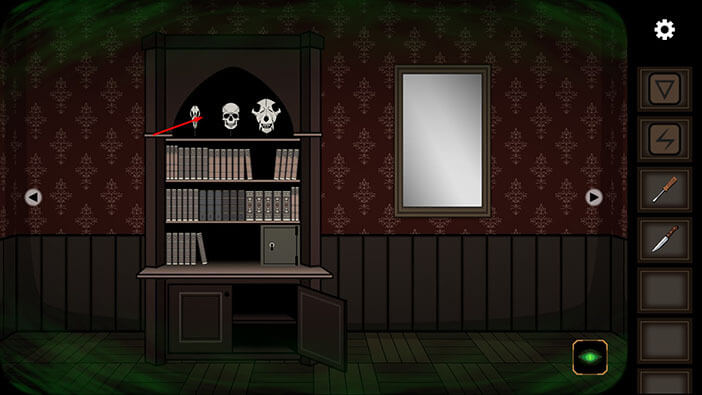
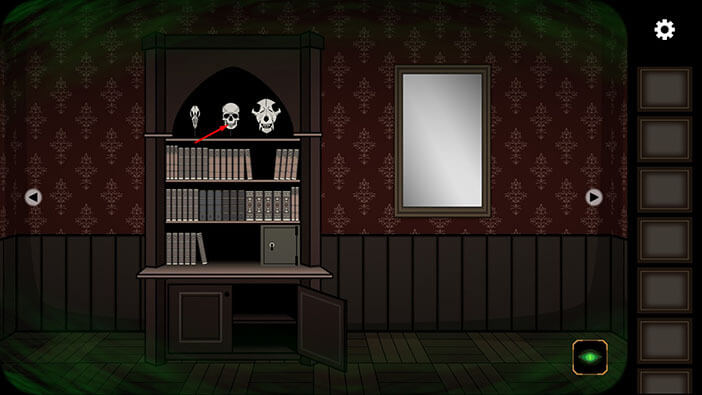
Next, tap on the top section of the bookshelf with the two skulls, to take a closer look at it.

Here, we can see two metal rods with skulls on top of them, but the skull on the middle rod is missing. So, select the “Skull” from the inventory and attach it to the middle rod.
After that, tap on the arrow at the bottom of the screen to go back.
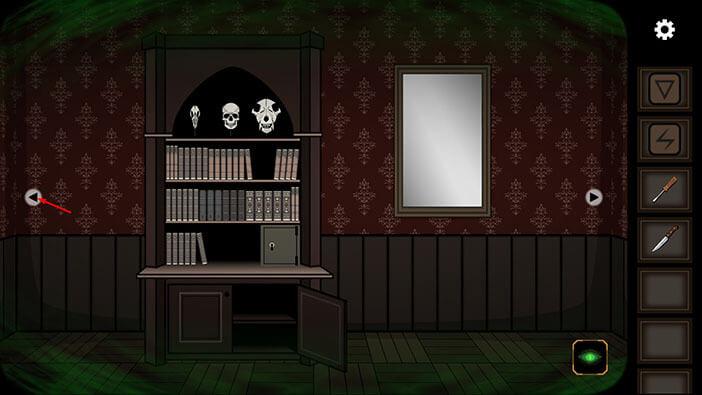
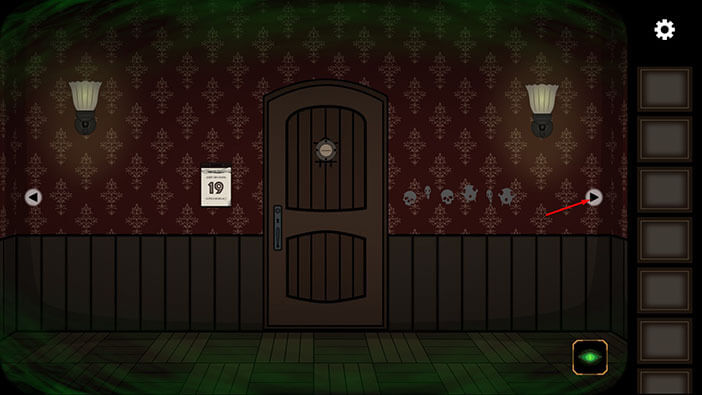
Next, tap on the arrow on the left to go back to the starting room.
Our character is under the effect of the ghost vision, and he will see a scary shadowy creature. But, fortunately, the creature will disappear a few seconds later.
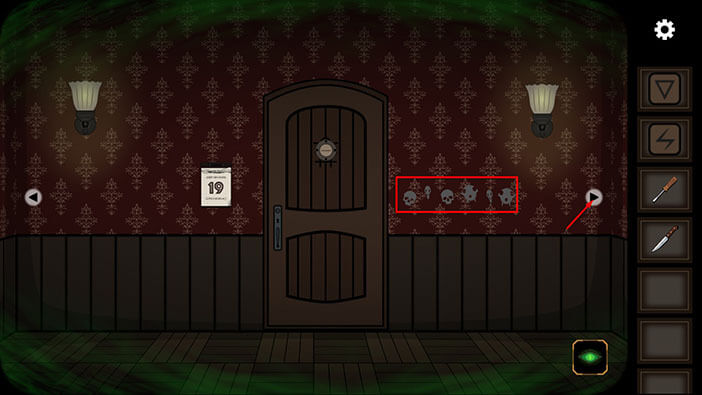
Let’s pay attention to the wallpaper on the right side of the door. Here, we can now see six skulls which weren’t visible until our character unlocked the “Ghost Vision”. Let’s write down/memorize the order and the size of the skulls, starting from left to right, because this information represents the solution for the next puzzle.
First = Medium skull
Second = Small skull
Third = Medium skull
Fourth = Large skull
Fifth = Small skull
Sixth = Large skull
Once you’re done, tap on the arrow on the right to go back to the room with the large bookshelf.
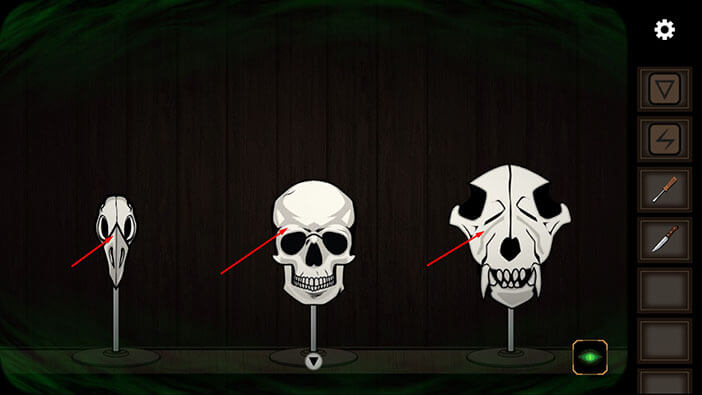
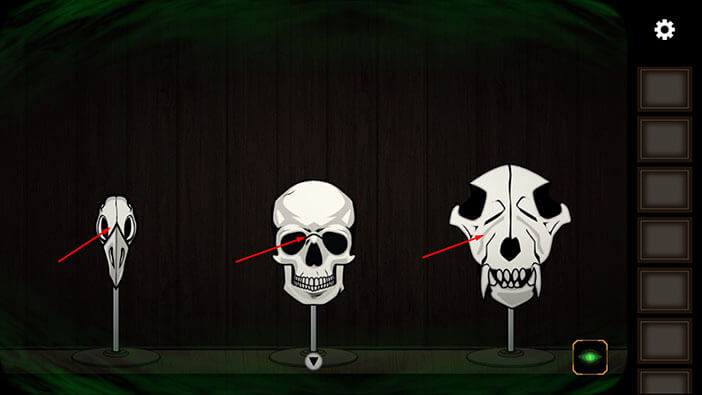
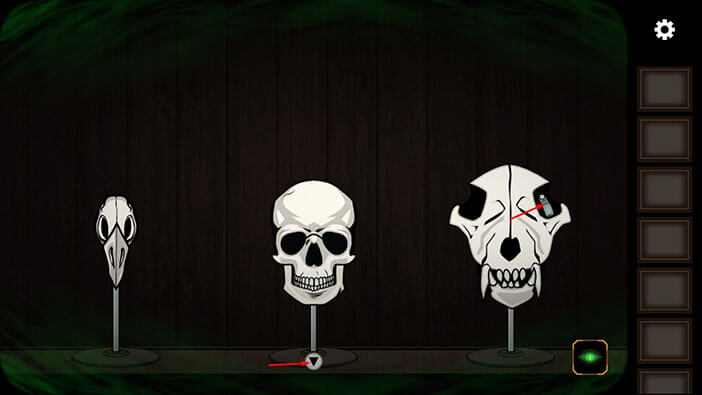
Tap on the three skulls to start the interaction.
Tapping on the skull will produce a certain sound. So, our next task is to play a short tune by tapping on the skulls in the correct order, which is both creepy and funny at the same time.
Tap on the skulls in the order which we saw on the wallpaper in the previous room. The order was,
Medium skull / Small skull / Medium skull / Large skull / Small skull / Large skull
To clarify,
The small skull is the one on the left
The medium skull is the one in the middle
The large skull is the one on the right
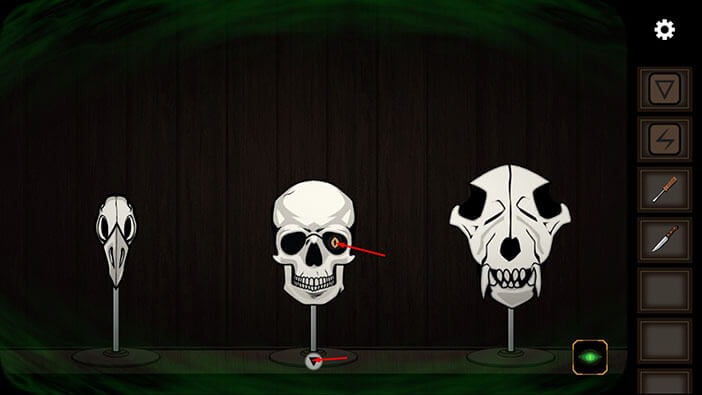
As soon as you play the correct tune, the eye will appear in one of the eye sockets of the middle skull. Tap on the “Eye” to pick it up.
After that, tap on the arrow at the bottom of the screen to go back.
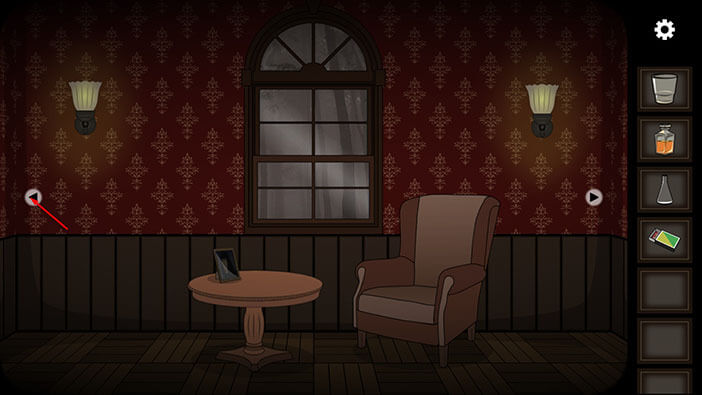
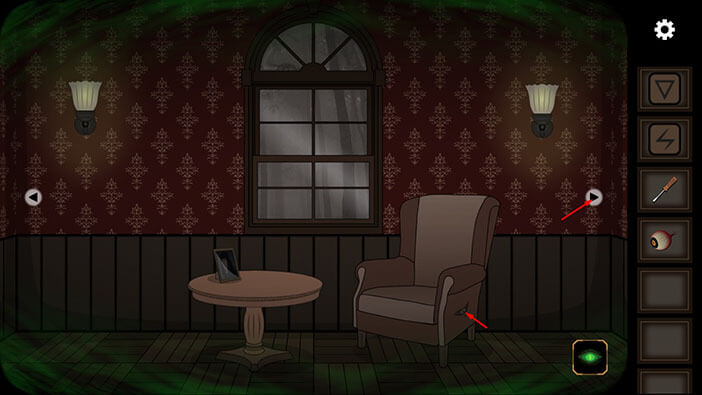
Let’s continue our investigation. Tap on the arrow on the right to go to the next room.

If you pay attention to the armchair, you will notice that it has been stitched up on the right side. So, select the “Knife” from the inventory and use it to cut open the stitched area.
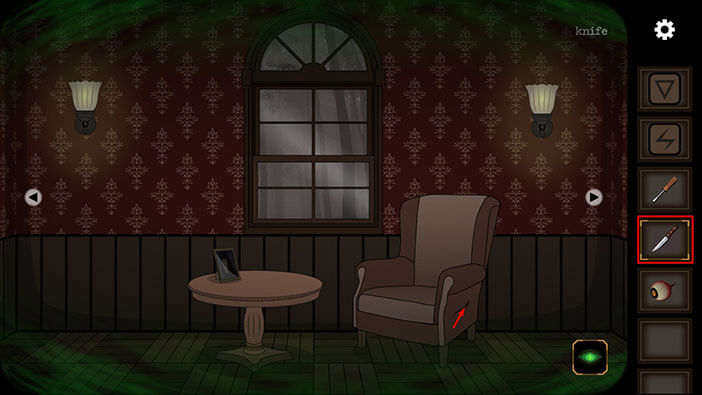
Sure enough, we will discover another hidden item inside the armchair. Tap on this item to pick it up, and another “Rune” will be added to your inventory.
After that, tap on the arrow on the right to go to the next room.
Now we have a “Ghost vision” so let’s take another look at the strange machine on the table.
Select the “Screwdriver” from the inventory and use it to remove the glass part at the top of the machine.
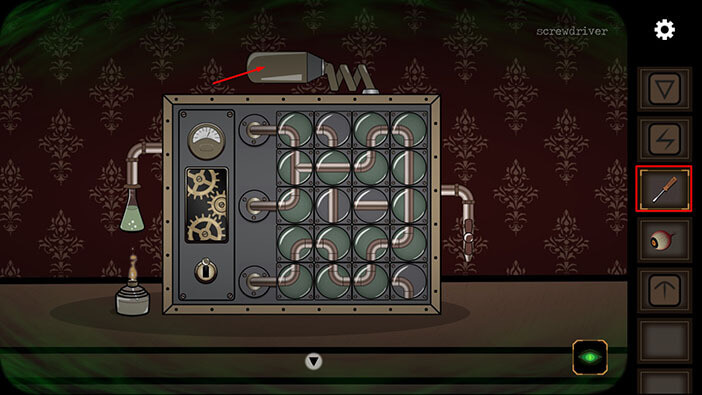
If you closely examine the remaining part, you will notice that the “Rune” is sticking out, so tap on it to pick it up.
After that, tap on the arrow at the bottom of the screen to go back.

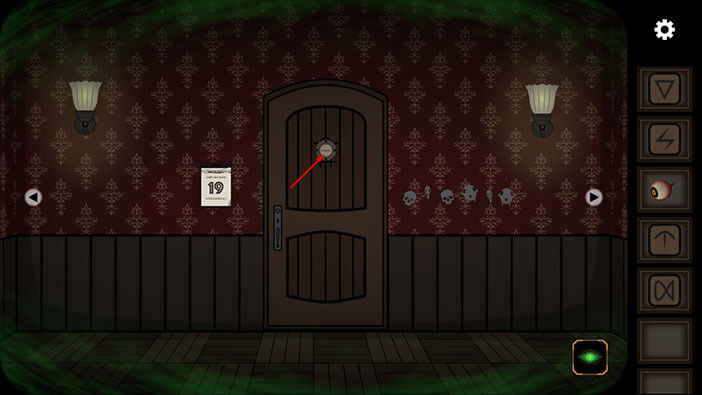
Ok, we should now go back to the starting room. To get there, tap once on the arrow on the right.
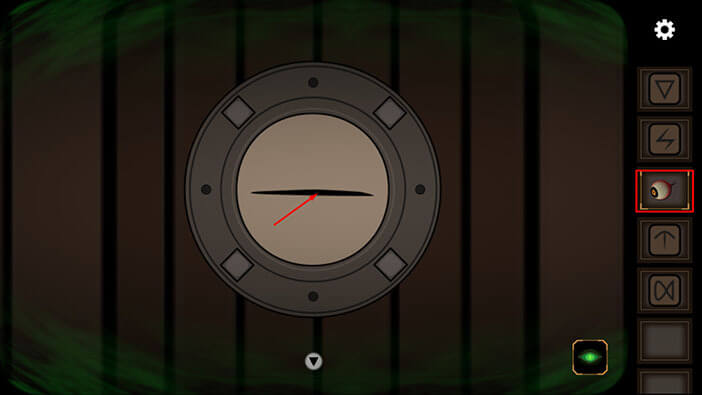
Tap on the circle on the door to take a closer look at it.
Select the “Eye” from the inventory and place it into an empty slot in the middle of the circle.
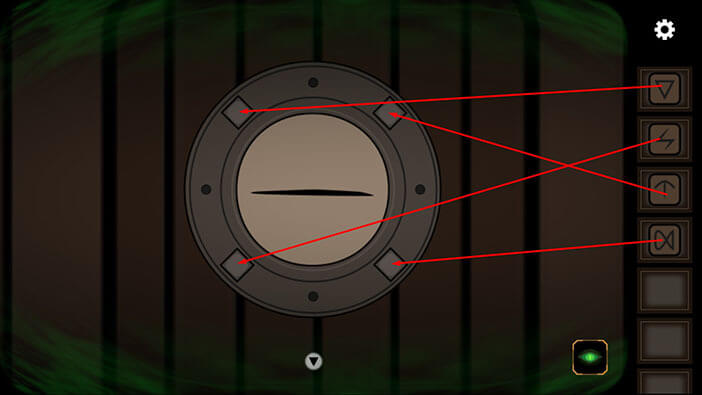
Next, we should take the four runes from the inventory and place them into the four empty, square slots at the edges of the circle. So,
Select the “Up arrow” rune from the inventory and place it into the upper right slot
Select the “Triangle” rune from the inventory and place it into the upper left slot
Select the “Lightning” rune from the inventory and place it into the lower left slot
Select the “Sand clock” rune from the inventory and place it into the lower right slot
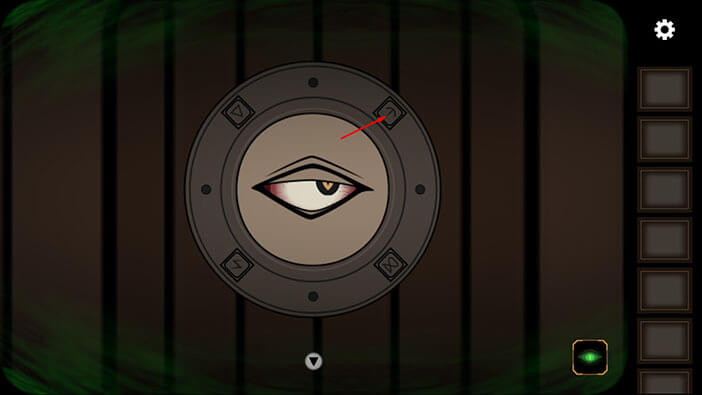
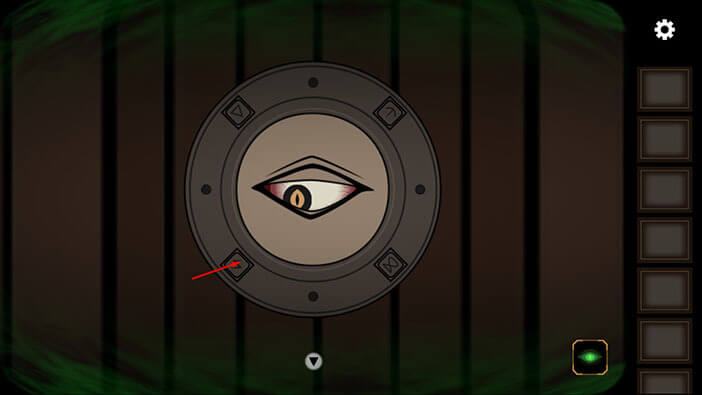
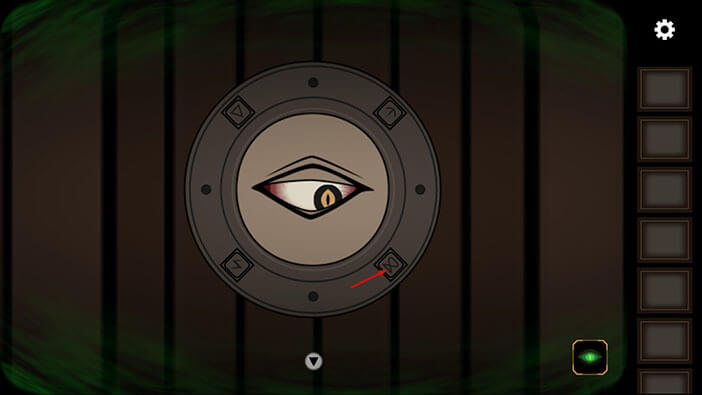
As soon as you arrange the runes, the eye will open and it will look at the rune in the top right slot, so tap on this rune.
Next, the eye will switch its gaze to the rune in the lower left slot, so tap on it.
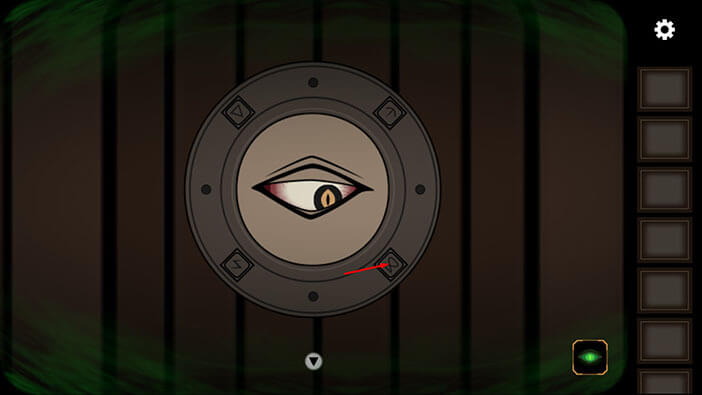
Next, the eye will switch its gaze to the rune in the lower right slot, so tap on it.
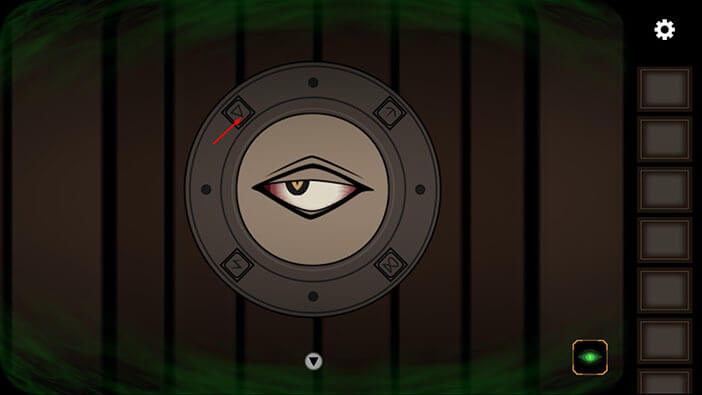
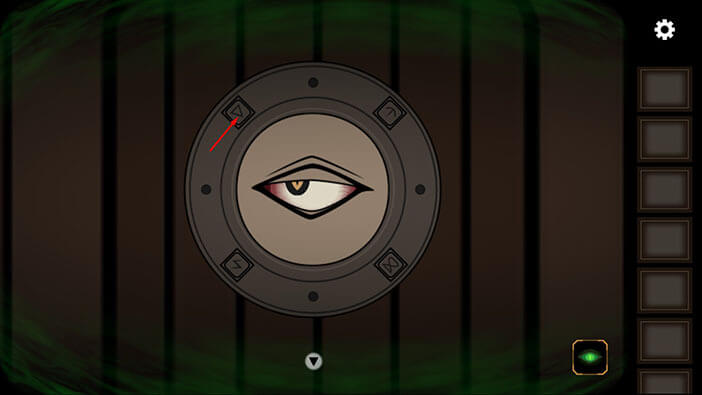
Next, the eye will switch its gaze to the rune in the upper left slot, so tap on it.
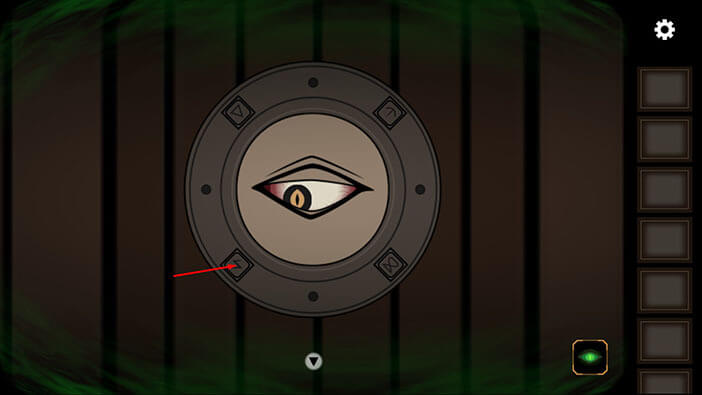
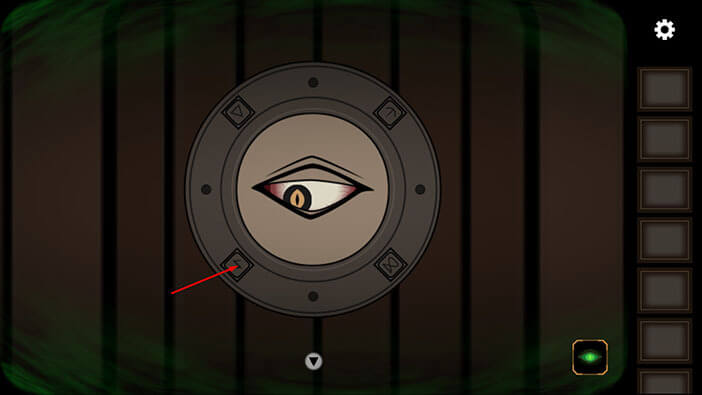
Next, the eye will switch its gaze to the rune in the lower left slot, so tap on it.
Next, the eye will switch its gaze to the rune in the lower right slot, so tap on it.
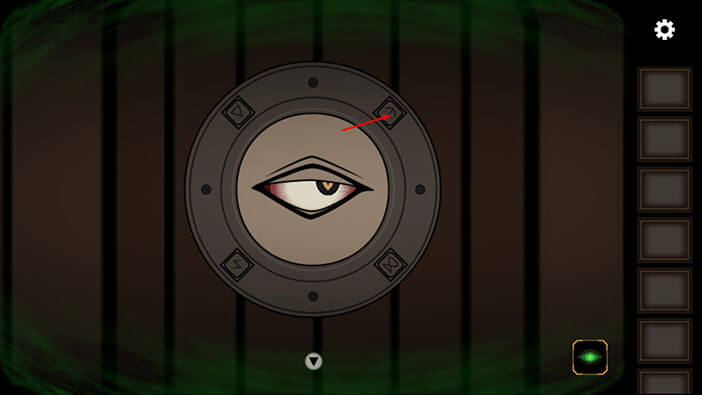
Next, the eye will switch its gaze to the rune in the upper right slot, so tap on it.
Next, the eye will switch its gaze to the rune in the lower left slot, so tap on it.
Next, the eye will switch its gaze to the rune in the upper left slot, so tap on it.
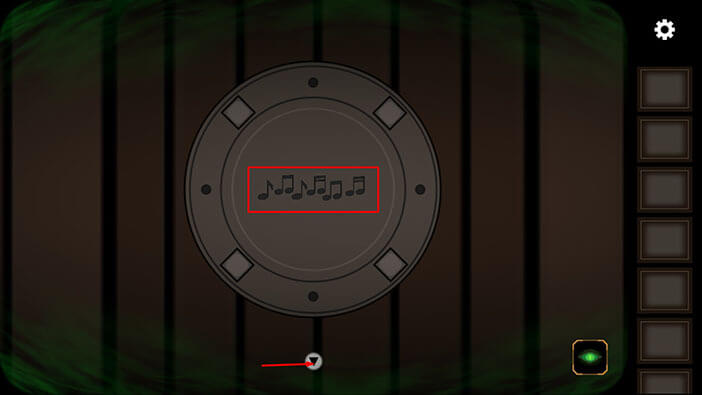
After clicking on the previous slot, the eye will disappear, and six notes will appear instead of it. Similarly to one of the previous puzzles, each note represents the sound that one of the skulls makes when you tap on it. Here is the quick breakdown of the notes, and the heads that,
Small head = single note
Medium head = double note with a single horizontal line
Large head = double note with two horizontal lines
You can easily discover this information by tapping on the skulls.
So, with that out of the way, let’s memorize/write down the order in which we should tap on skulls because we will need this information in order to solve the next puzzle.
Small skull / Medium skull / Small skull / Large skull / Medium skull / Large skull
Once you’re done tap on the arrow at the bottom of the screen to go back.
Let’s go to the room with the large bookshelf and the three skulls. This room is the first one on the right.
Tap on the three skulls to start the interaction.
Tap on the skulls in the correct order to play the tune. The order was
Small skull / Medium skull / Small skull / Large skull / Medium skull / Large skull
As soon as you play the correct tune, the severed finger will appear in the eye socket of the large skull. Tap on it to pick it up and “Finger” will be added to your inventory.
After that, tap on the arrow at the bottom of the screen to go back.
Let’s go to the next room on the right.
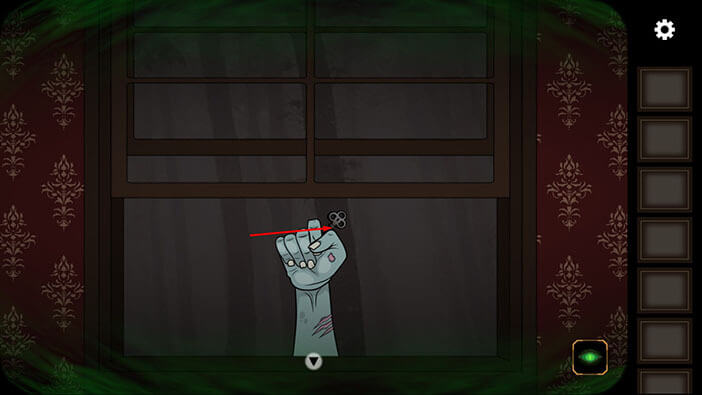
Tap on the window to look outside.
You will see a zombie’s hand, and you will probably notice that the zombie is missing its pinky. So, select the “Finger” from the inventory and give it to the zombie.
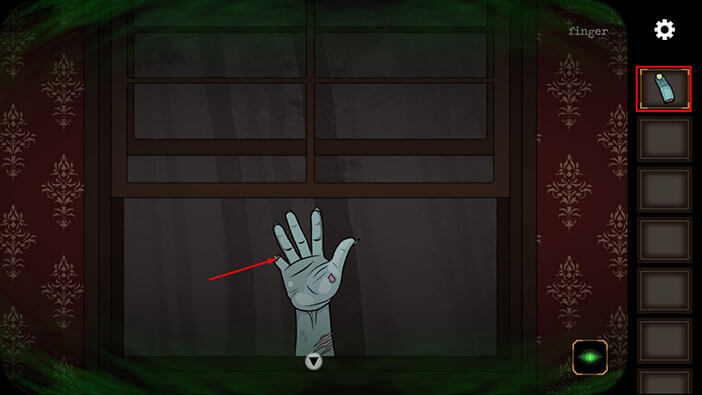
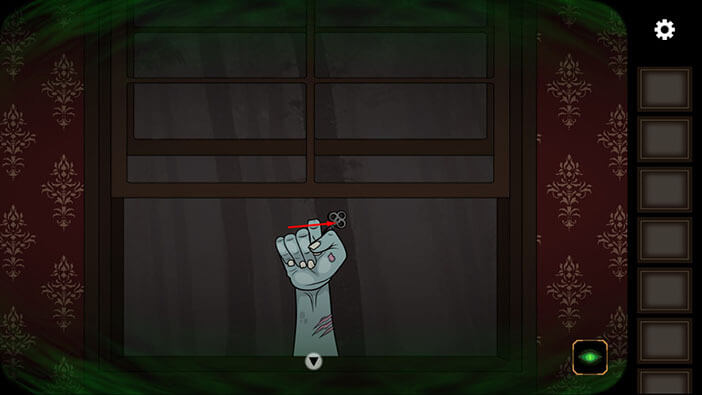
As soon as you do that, the zombie will reattach the pinky to its hand. The hand will then come back, and it will hold the key. Tap on it to pick it up and “Key” will be added to your inventory.
Before going away, the zombie will give you a thumbs up, because you retrieved its pinky. Interesting and hilarious at the same time.
Once you’re done, tap on the arrow at the bottom of the screen to go back.
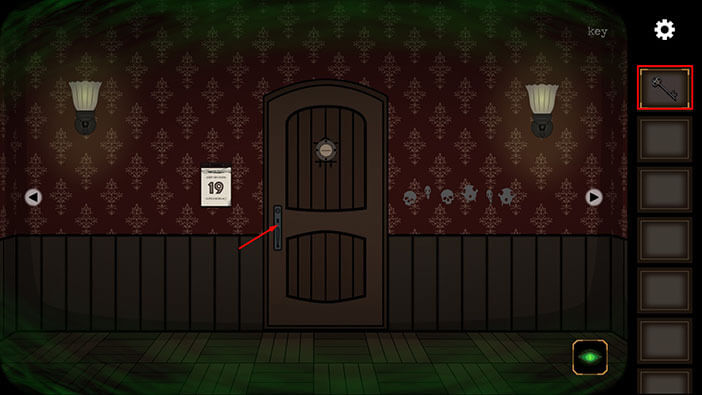
We should now go back to the starting room, and use the “Key” to unlock the door. To get there, tap twice on the arrow on the left.
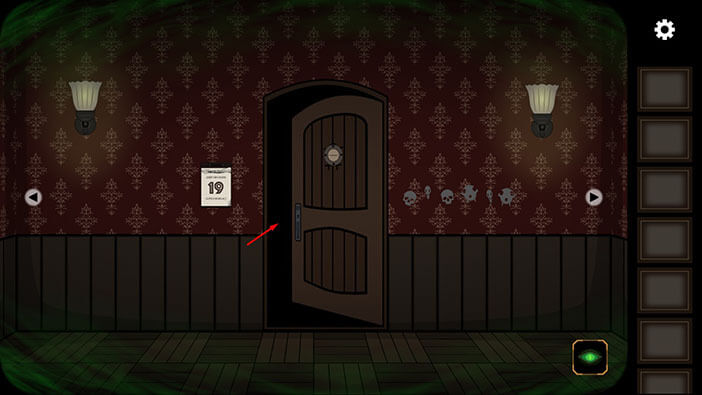
Select the “Key” from the inventory and tap on the door to unlock it. Tap again to open the door.
Tap on the door to proceed, and you will complete the first chapter.
Our character thinks that he is on the right trail, and he has no intention of stopping his pursuit. However, he also feels as if he’s being watched…
With this, we have come to the end of the first chapter. You can check out the second Chapter by tapping on the “Next Part” button.
Thank you for reading.