Scary Horror 2 – Chapter 3, Part 3
Hello everyone and welcome to Part III of our walkthrough for Chapter 3 of the “Scary Horror 2: Escape Games”. At the end of Part II, we unlocked the amusement park gate and gained access to the new area.
NOTE: The third part of the walkthrough follows the story up to the point when you find the sixth coin, and the next step is interacting with the slot machine that requires 6 gold coins in order to unlock its secret.
Let’s go through the gate and explore the next area in the amusement park.
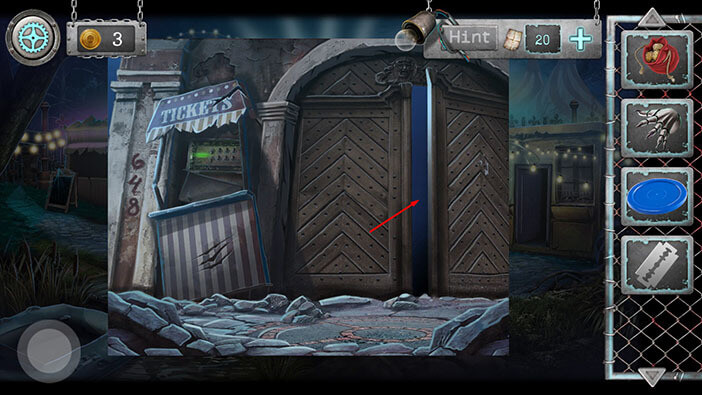
The gate will close behind you as soon as you step through it. Let’s explore. Tap on the stand on the left to take a closer look at it.
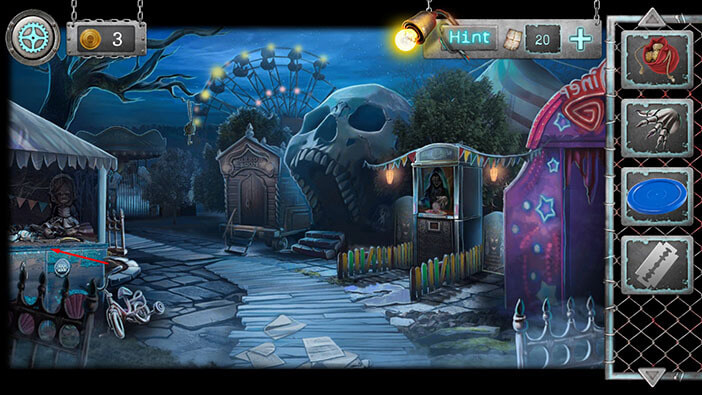
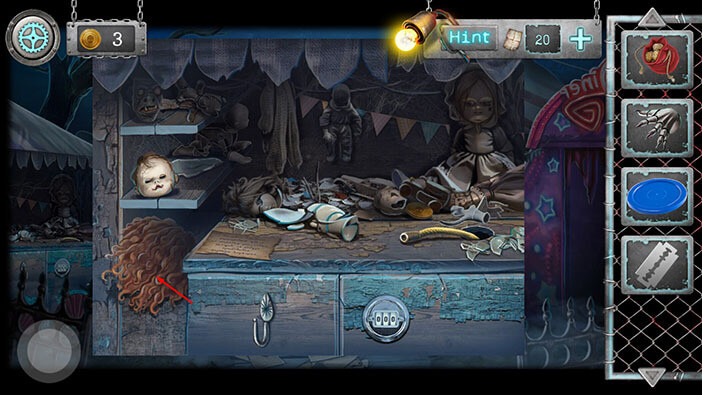
Tap on the wig in the bottom left corner to pick it up. “Ginger wig” will be added to your inventory.
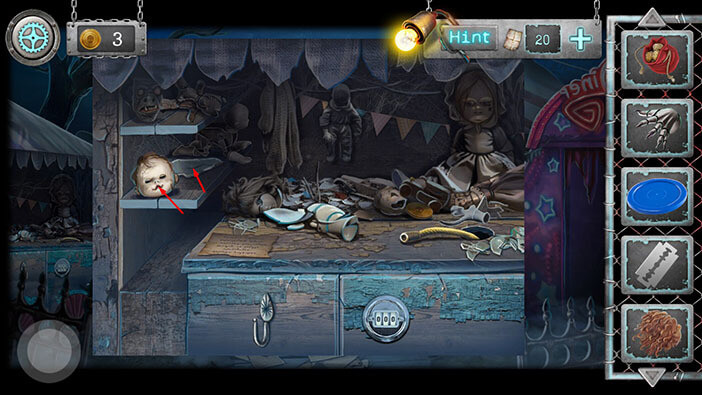
Next, tap on the doll head to move it aside, and then tap on the piece of glass to pick it up. “Mirror shard I” will be added to your inventory.
On the right side of the stand, you will notice another gold coin. Tap on it to pick it up, and you will gain a fourth gold coin.
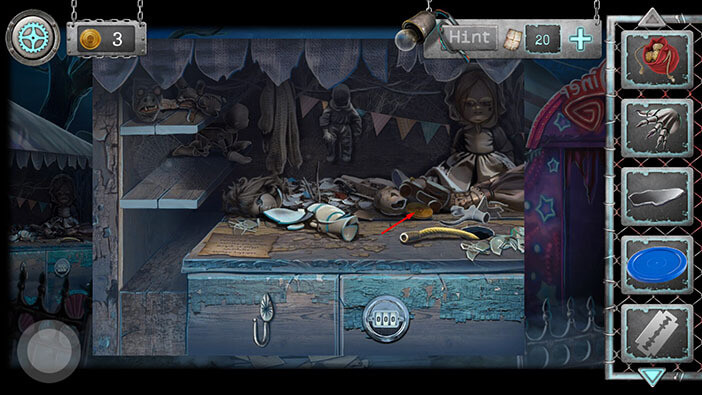
Before we leave, you can also check out the note, located on the left side of the stand. This note isn’t useful right now, but it will be crucial for one of the puzzles that will pop up a bit later in this walkthrough.
Once you’re done, tap on the button in the lower left corner to go back.
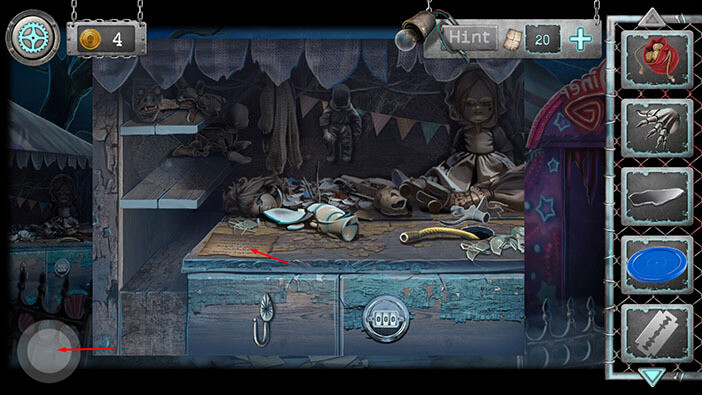
Next, tap on the fortune teller machine on the right to take a closer look at it.
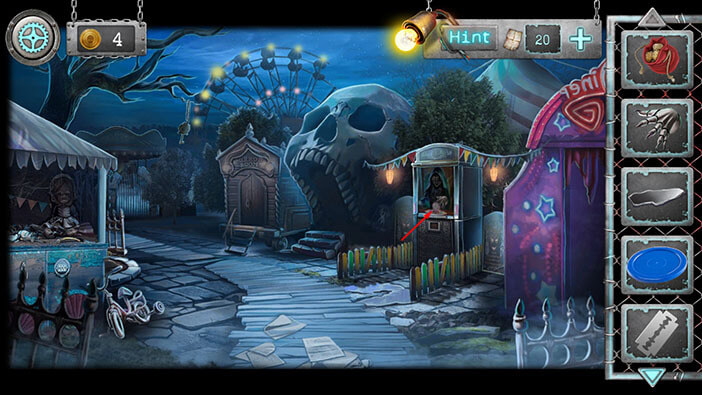
You will notice that the robot doesn’t have the right hand. So, select the “Mechanical hand” from the inventory and insert it into the empty slot.
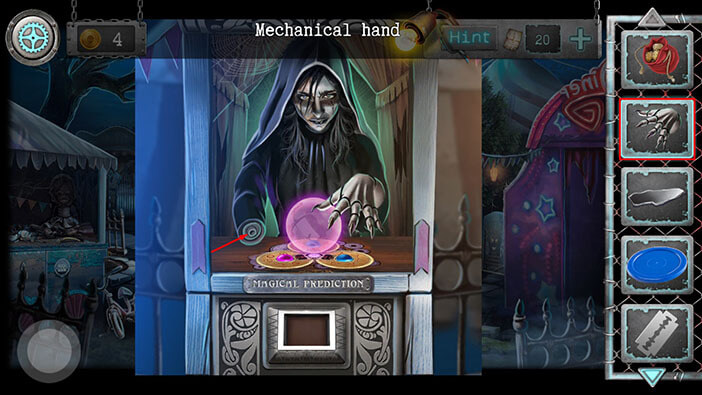
Next, select the “Coin purse” from the inventory and insert the coin into the coin slot. The crystal ball will start glowing, which means that the machine is now active.
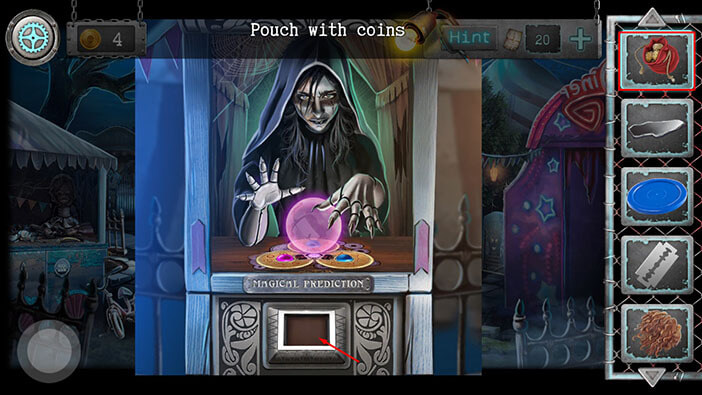
Ok, tap on the crystal ball to start the interaction.
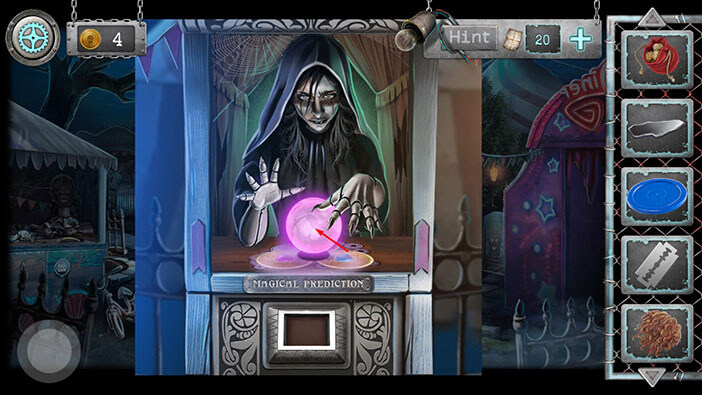
Here, we have another puzzle to solve. The goal is to assemble the symbols that match the symbols on the hands. We can do this by combining the symbols on the three rotating disks.
We will do this puzzle in multiple steps. Let’s begin.
Step 1
We will first assemble the left symbol on the left hand (our left). To do that, tap three times on the blue disk.
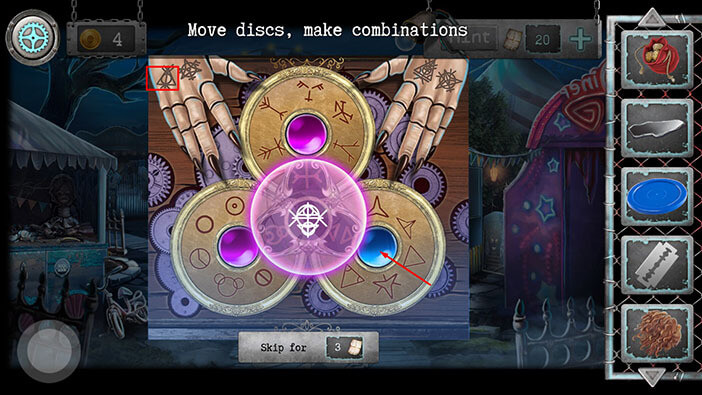
Step 2
Tap twice on the bottom left disk.
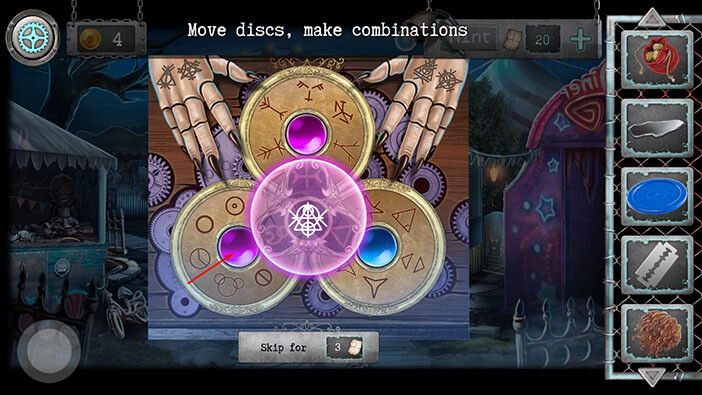
Step 3
Tap four times on the top disk. When you complete this step, the symbol between the disks will match the left symbol on the left hand.
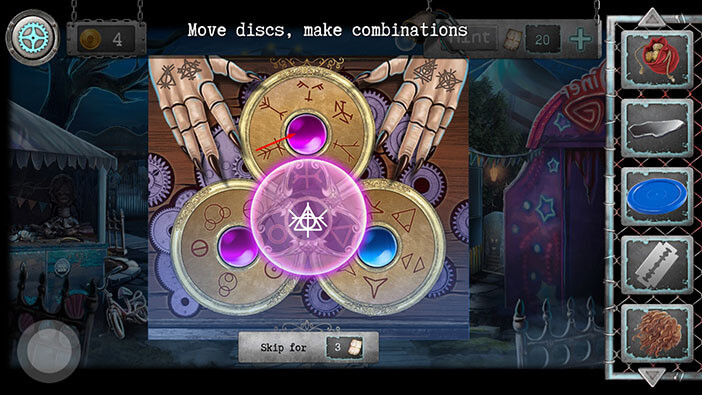
Step 4
We assembled the first symbol, and we will now move on to the right symbol on the left hand. Also, you will notice that the first symbol is now glowing, which means that it is activated.
Let’s start working on the second symbol. Tap twice on the blue disk.
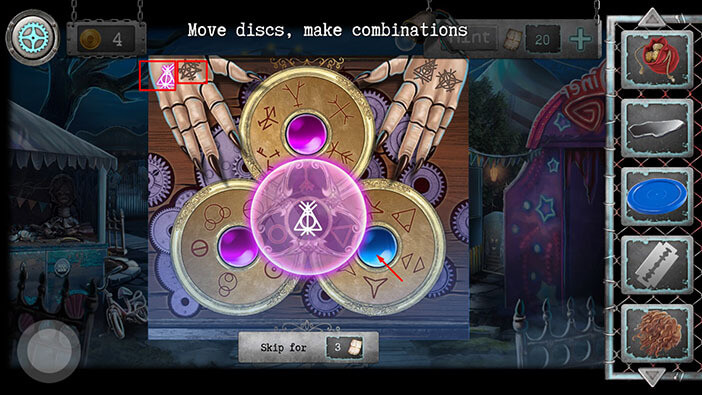
Step 5
Tap five times on the bottom left disk.
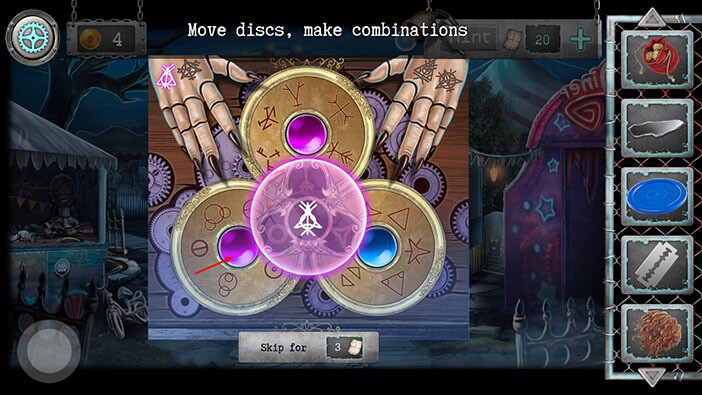
Step 6
Tap five times on the top disk. When you complete this step, the symbol between the disks will match the right symbol on the left hand.
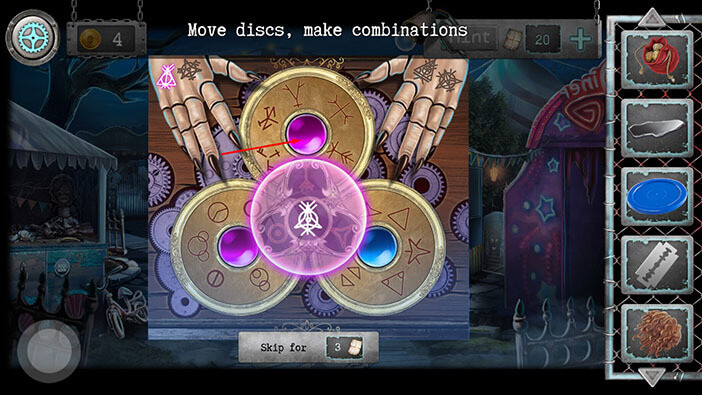
Step 7
We assembled the second symbol, and we will now move on to the left symbol on the right hand. Also, you will notice that the second symbol is now glowing, which means that it is activated.
Let’s start working on the third symbol. Tap twice on the blue disk.
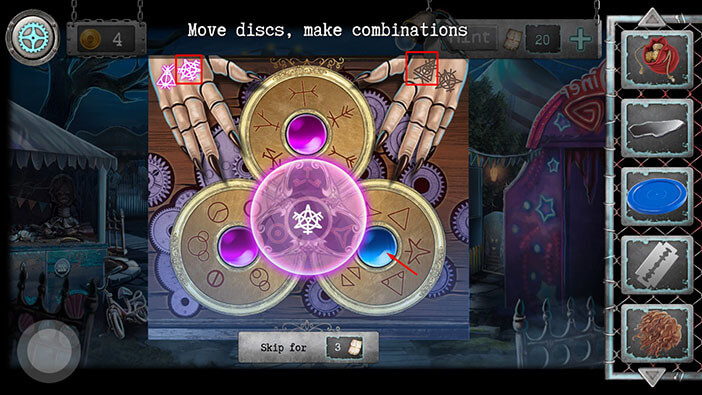
Step 8
Tap four times on the bottom left disk.
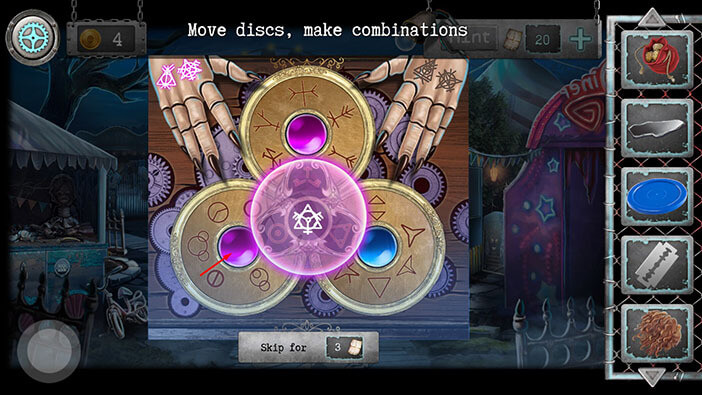
Step 9
Tap two times on the top disk. When you complete this step, the symbol between the disks will match the left symbol on the right hand.
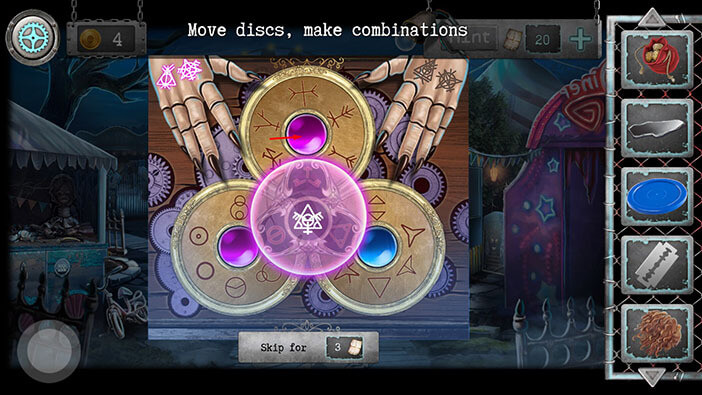
Step 10
We assembled the third symbol, and we will now move on to the right symbol on the right hand. Also, you will notice that the third symbol is now glowing, which means that it is activated.
Let’s start working on the fourth symbol. Tap three times on the blue disk.
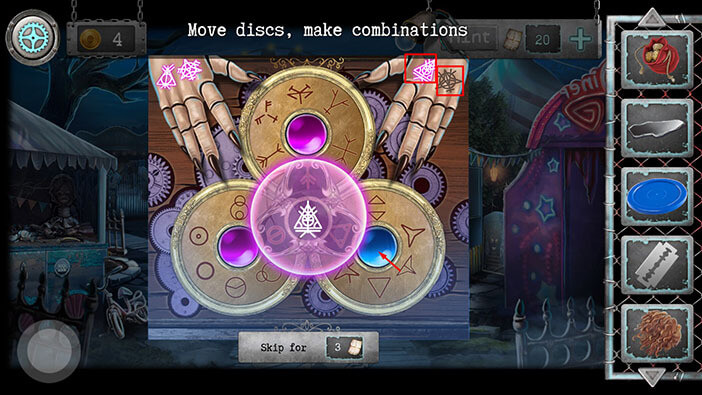
Step 11
Tap four times on the bottom left disk.
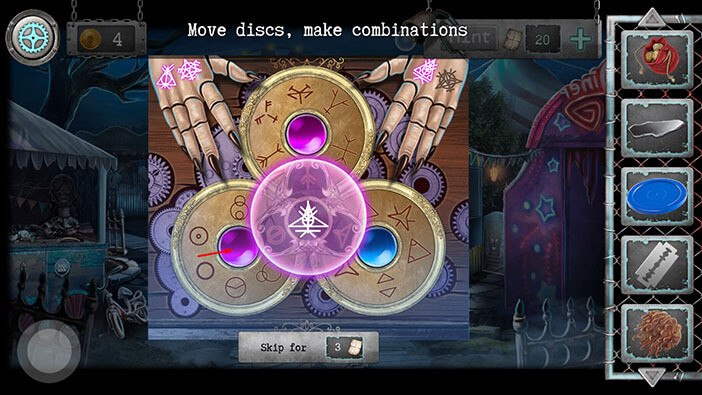
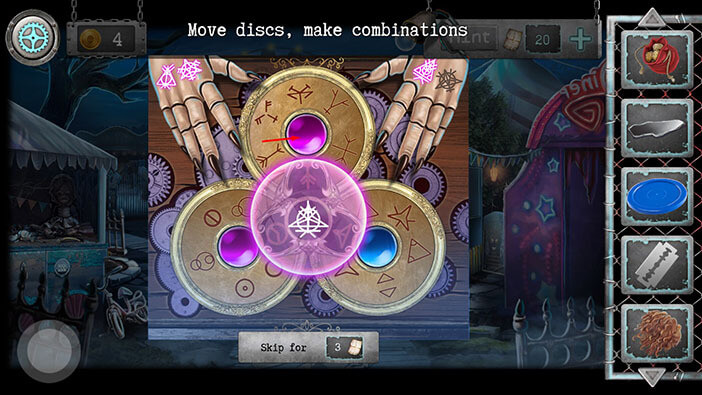
Step 12
Finally, tap two times on the top disk. When you complete this step, you will activate the last symbol, and the entire machine will fall apart.
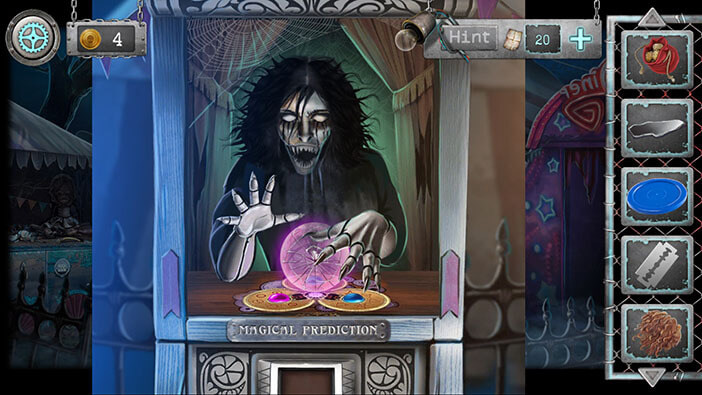
When the dust settles, you will notice some kind of a board in front of you. Tap on it to take a closer look.
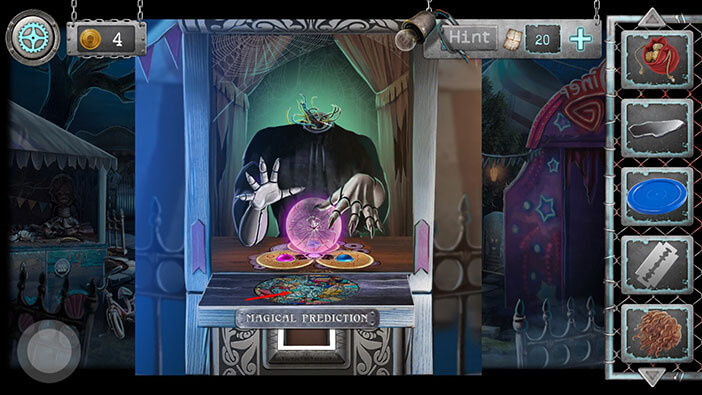
Here, we have another puzzle. The goal is to assemble the image, and we can achieve this by shuffling the pieces of the puzzle. You will also notice that all pieces are located on the two rings (outer and inner rings).
NOTE: It seems that the position of the pieces for this puzzle is randomized each time you start a new game. So, you can take a look at the assembled image below, and find your own solution based on it.
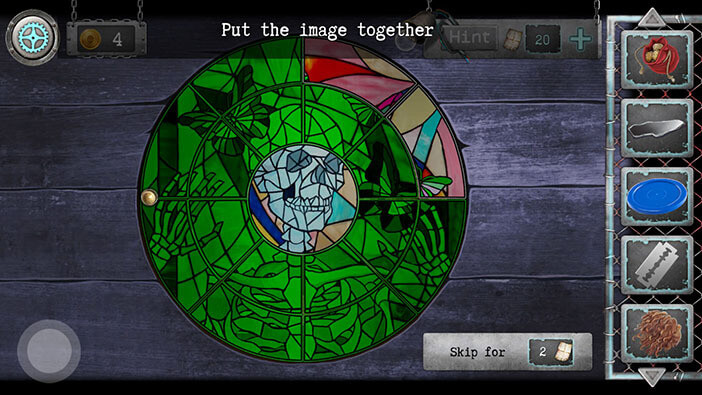
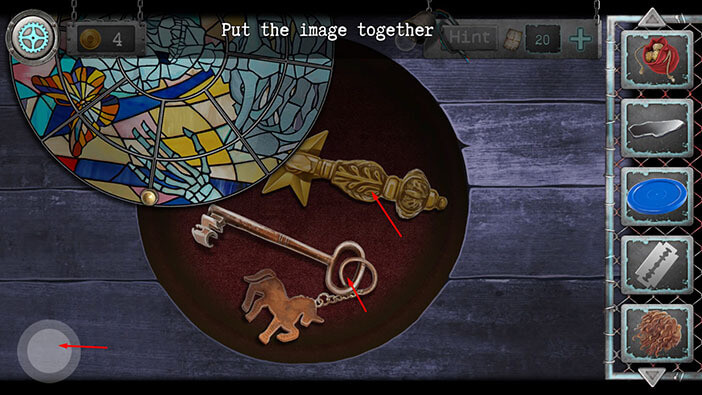
Once you solve the puzzle, the secret compartment will open, and you will see two items. Tap on the items to pick them up. “Door handle” and “Key with a horse” will be added to your inventory.
After picking up the items, tap twice on the button in the lower left corner to go back.
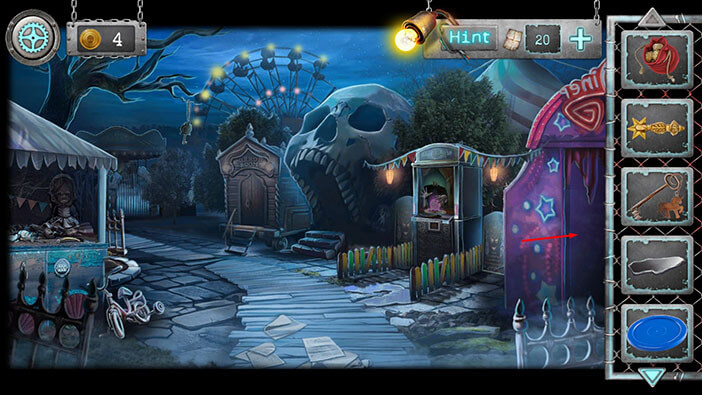
Let’s check out the building on the right.
Tap on the item on the ground (behind the robot) to pick it up. “Balloons” will be added to your inventory.
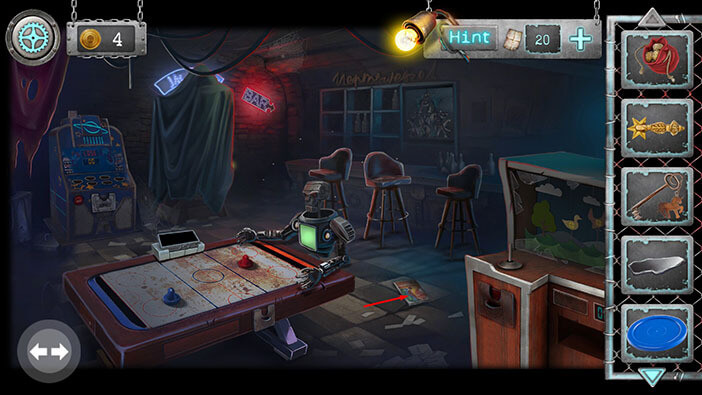
Next, tap on the table to take a closer look at it.
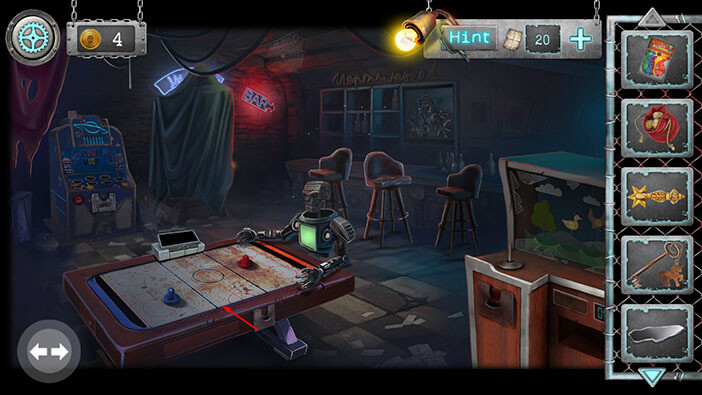
Select the “Pouch with coins” from the inventory and insert the coin into the slot on the table.
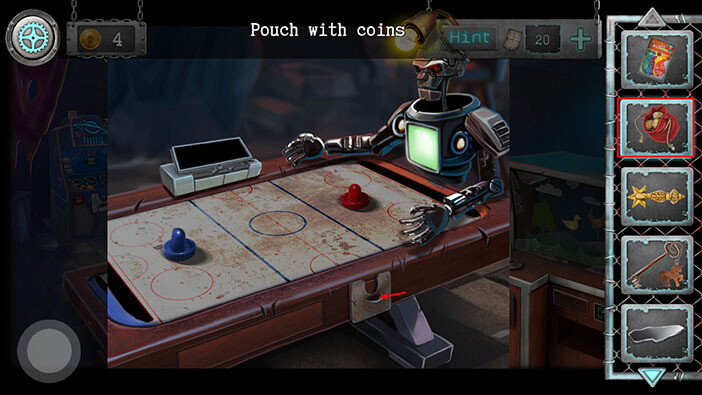
Next, select the “Puck” from the inventory and place it into the blue circle. The “Start” message will appear on the display.
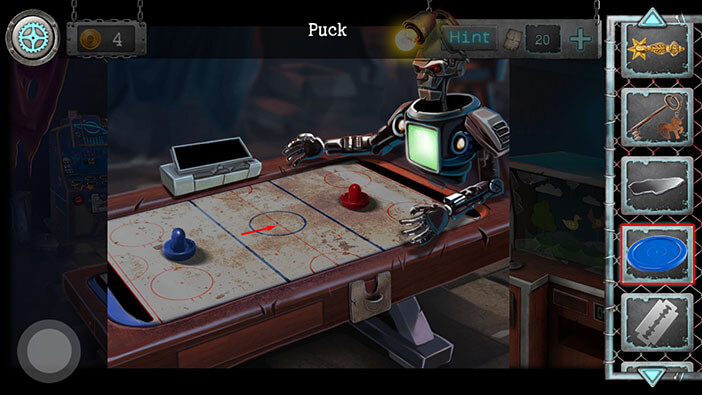
Tap on the table to start the interaction.
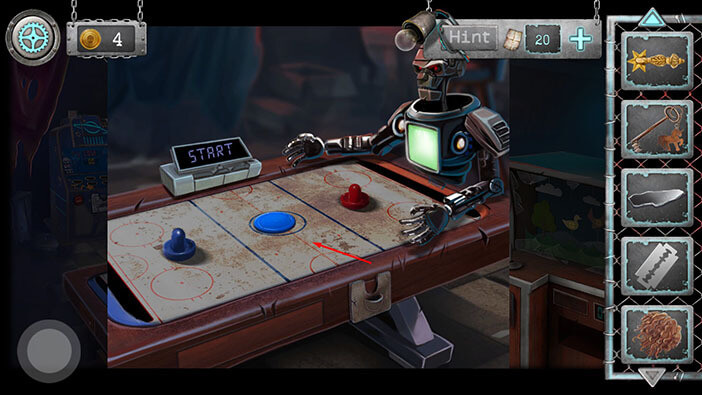
Ok, here we have another minigame. To start the game, simply tap and hold on the blue “goalkeeper”. The goal of this game is to bounce the puck into your opponent’s goal while protecting your own side. It’s a very simple minigame, and you will probably win on the first try. To win, you must score three goals.
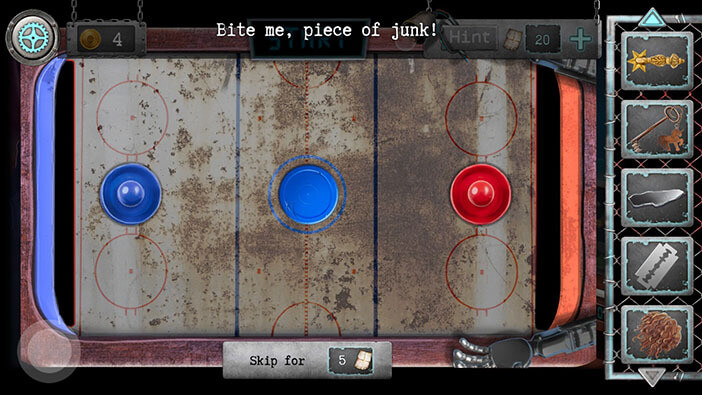
As soon as you beat the AI in the minigame, the drawer on the table will open. Tap on the item inside to pick it up and “Lever” will be added to your inventory.
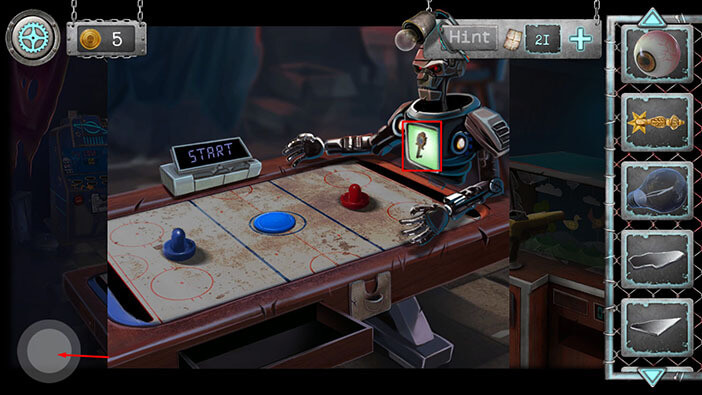
Also, pay attention to the key on the robot’s chest/display screen. It represents the hint for one of the puzzles a bit further down the line. For now, just remember that there is a swinging key on the robot’s chest.
Once you’re done tap on the button in the lower left corner to go back.
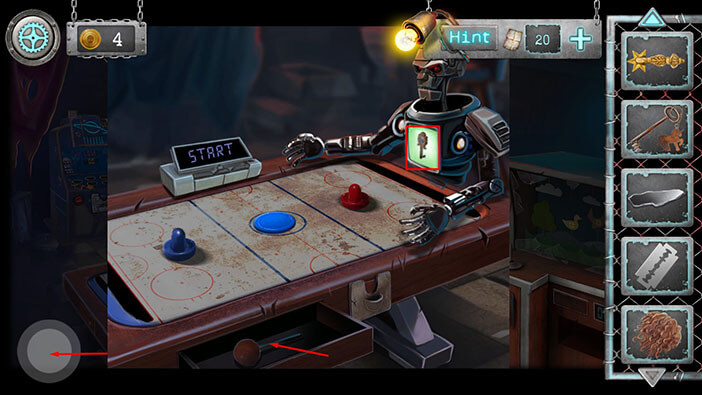
Next, tap on the bar chair in the middle to take a closer look at it.
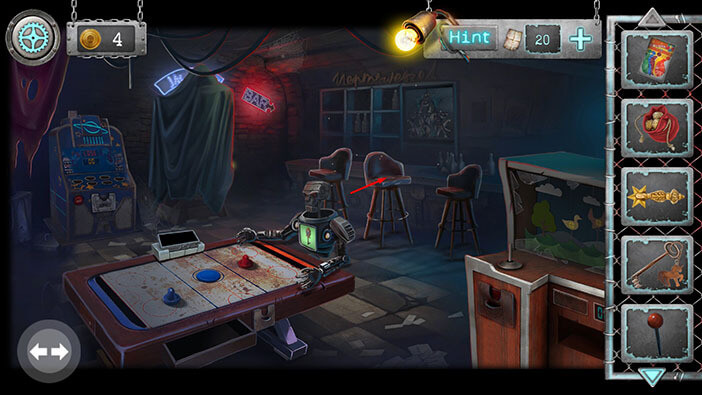
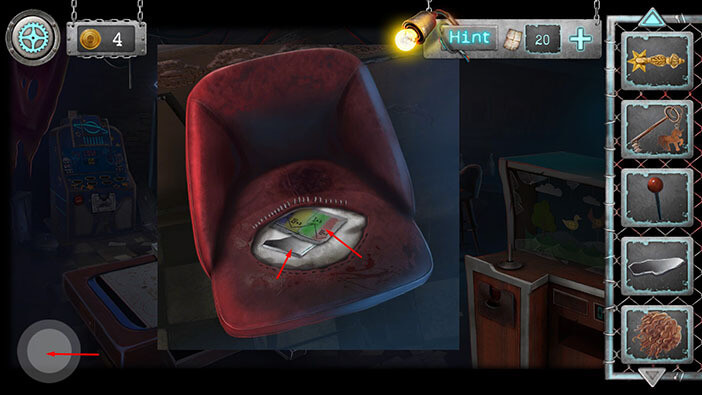
Select the “Razor blade” from the inventory and use it to cut open the chair sit.
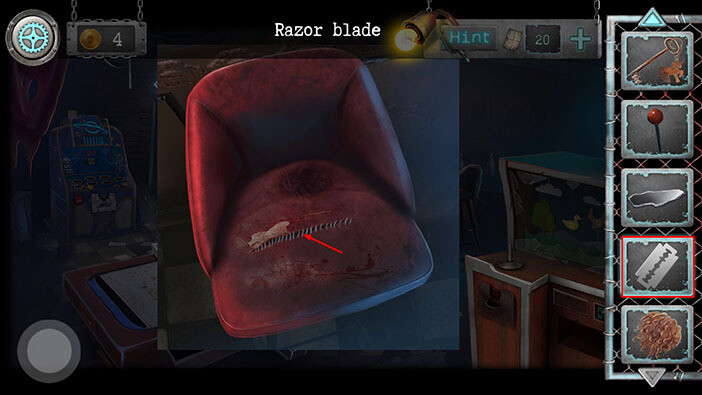
Inside the chair sit you will find two items. Tap on them to pick them up. “Mirror shard 2” and “Start scheme” will be added to your inventory.
Once you’re done, tap on the button in the lower left corner to go back.
If you look at the left side of the room, you will notice that something is covered under the sheet. Tap on the sheet to throw it down.
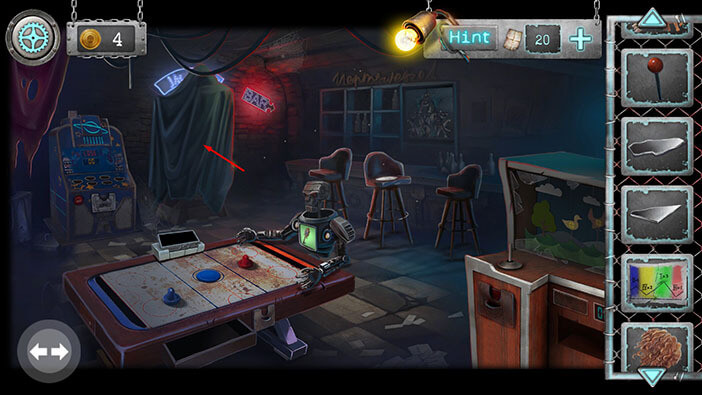
After throwing down the sheet, we discovered some kind of slot machine that was hidden beneath it. Tap on the slot machine to take a closer look at it.
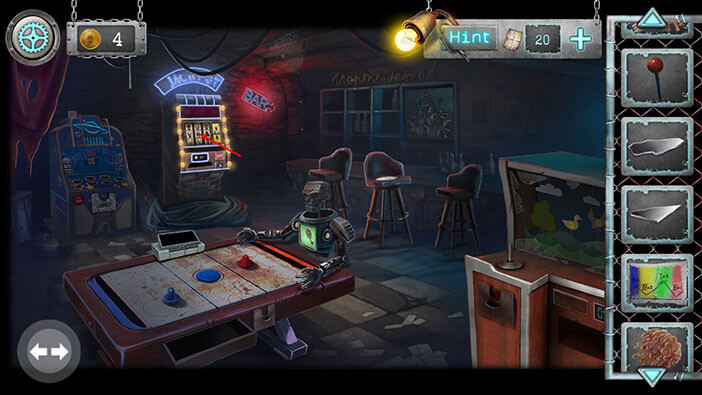
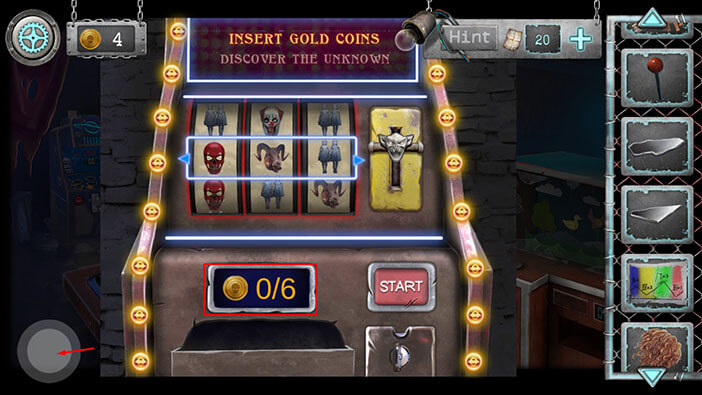
After examining the slot machine, we can see that we will need 6 gold coins, and we only have 4. So, let’s tap on the button in the lower left corner to go back. We will revisit the slot machine a bit later when we gather enough coins.
Next, let’s tap on the puzzle on the back wall to take a closer look at it.

Here we have another puzzle. The goal is to shuffle around the triangle-shaped pieces and assemble the image. We will do this puzzle in multiple steps. Let’s begin.
Step 1
Select the first piece (left to right) in the third row (top to bottom) and swap it with the second piece in the third row.
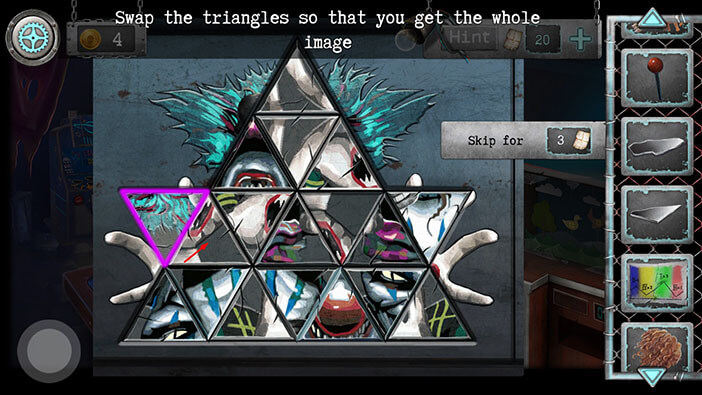
Step 2
Select the second piece in the third row and swap it with the third piece in the third row.
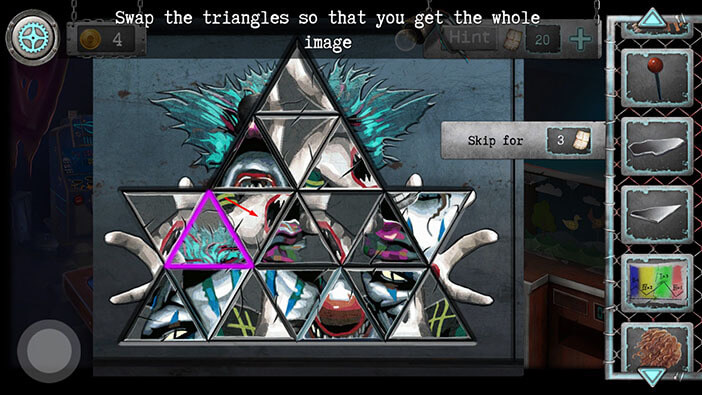
Step 3
Select the third piece in the third row and swap it with the first piece in the second row.
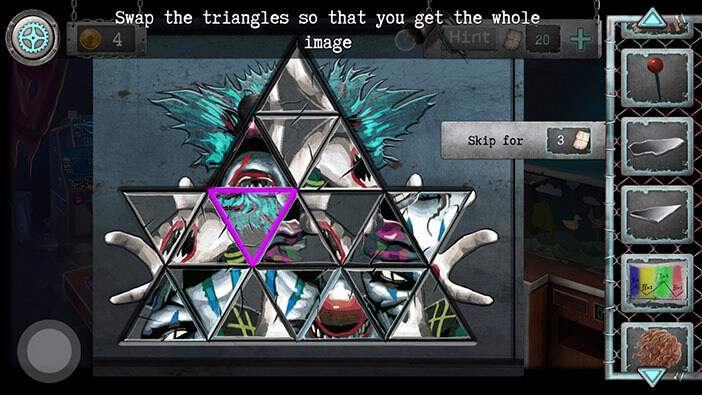
Step 4
Select the first piece in the second row and swap it with the second piece in the second row.
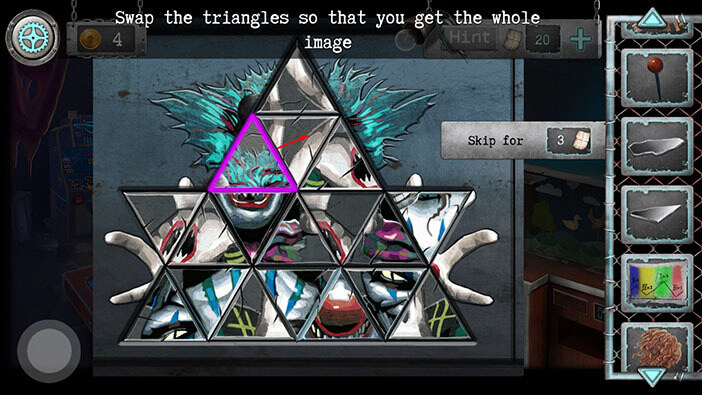
Step 5
Select the second piece in the second row and swap it with the only piece in the first row.
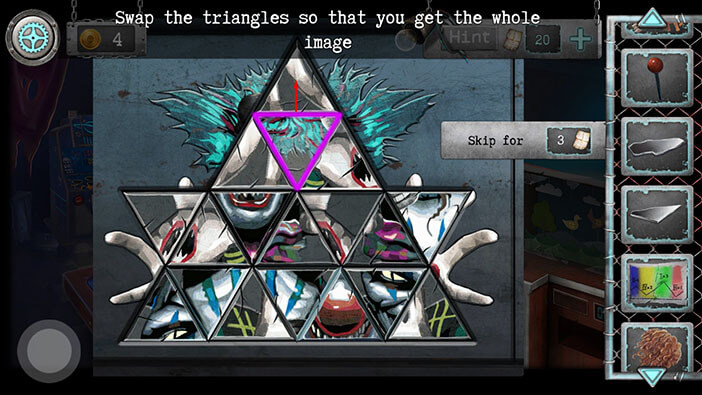
Step 6
Select the seventh piece in the third row and swap it with the sixth piece in the third row.
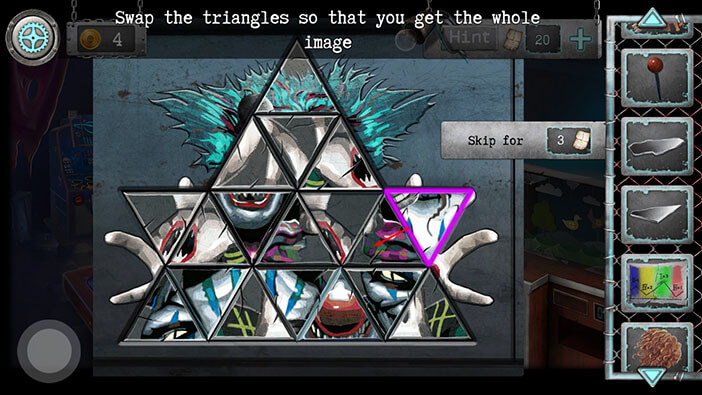
Step 7
Select the sixth piece in the third row and swap it with the fifth piece in the third row.
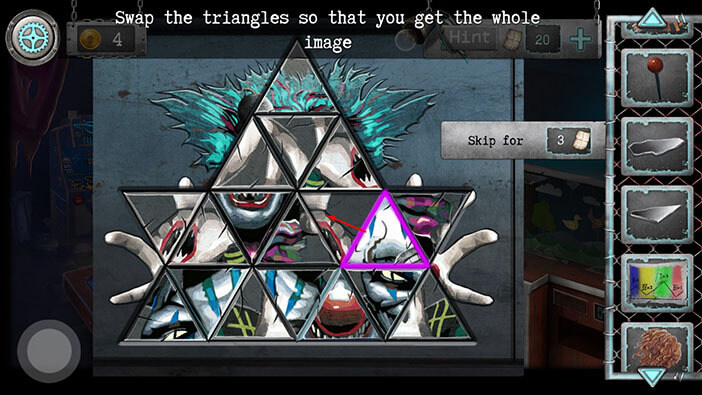
Step 8
Select the fifth piece in the third row and swap it with the third piece in the second row.
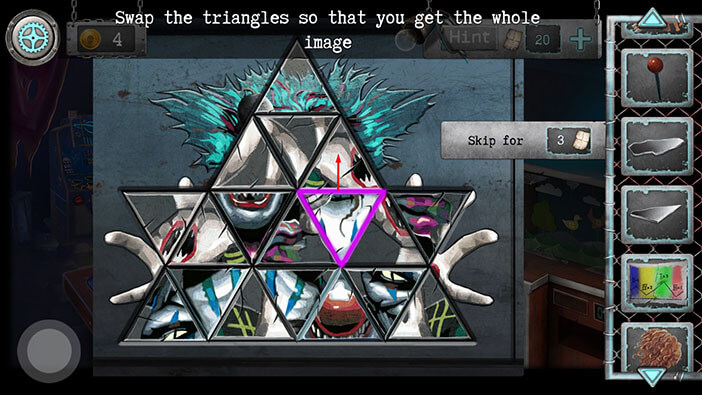
Step 9
Select the third piece in the second row and swap it with the second piece in the second row.
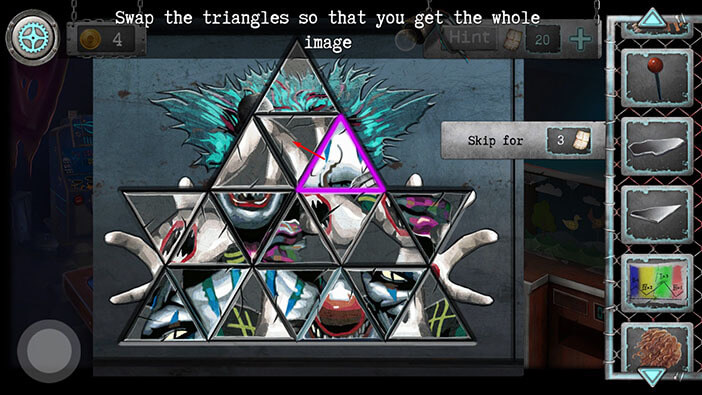
Step 10
Select the fourth piece in the fourth row and swap it with the fourth piece in the third row.
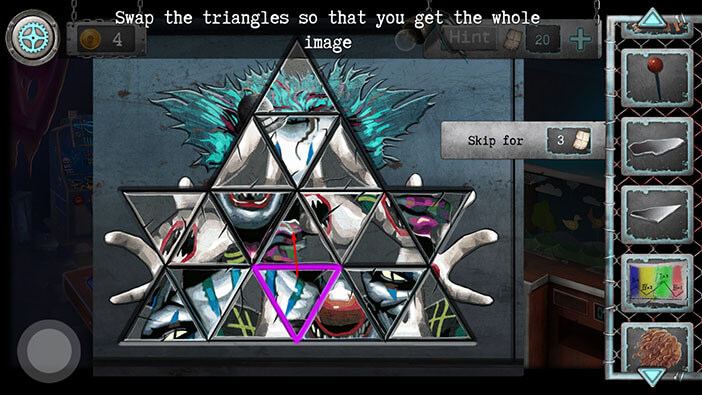
Step 11
Select the fourth piece in the third row and swap it with the third piece in the third row.
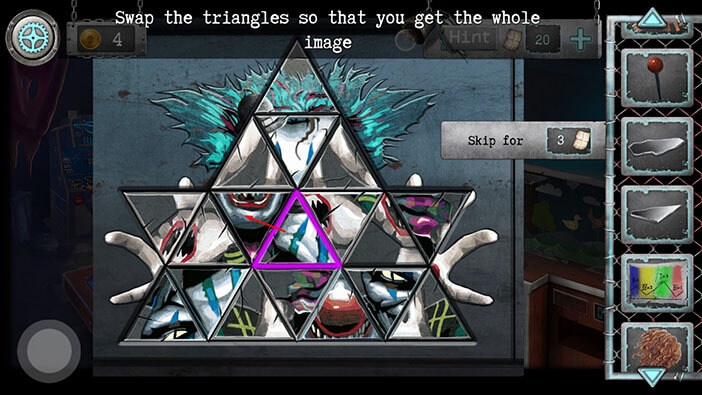
Step 12
Select the third piece in the third row and swap it with the first piece in the second row.
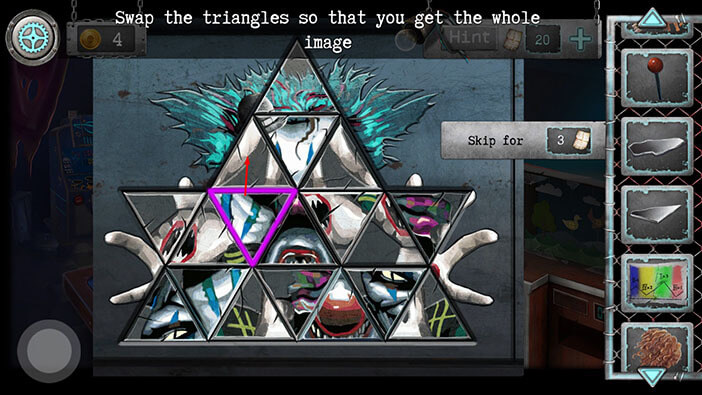
Step 13
Select the third piece in the third row and swap it with the fourth piece in the third row.
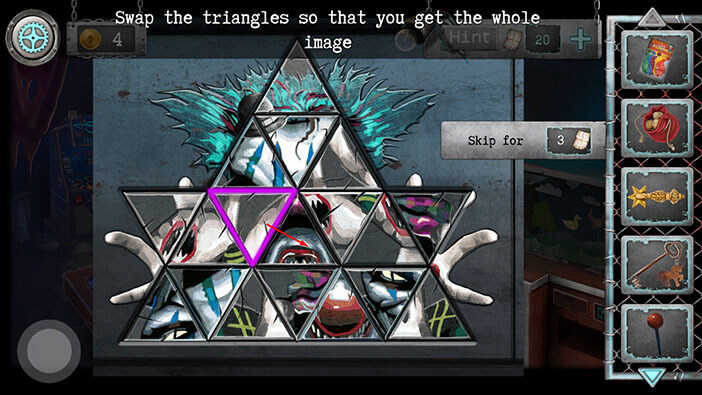
Step 14
Select the fourth piece in the third row and swap it with the fifth piece in the third row.
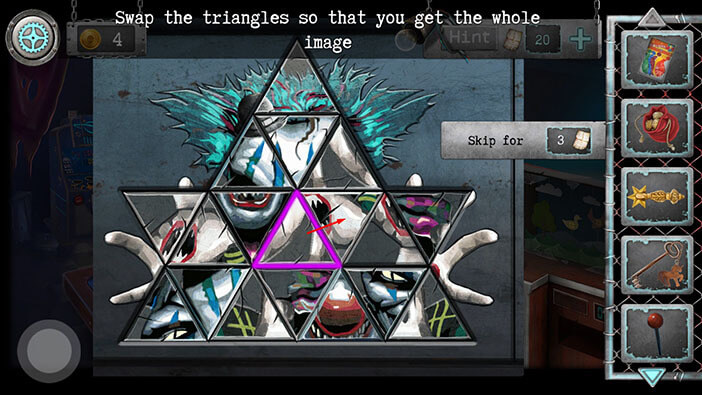
Step 15
Select the fifth piece in the third row and swap it with the sixth piece in the third row.
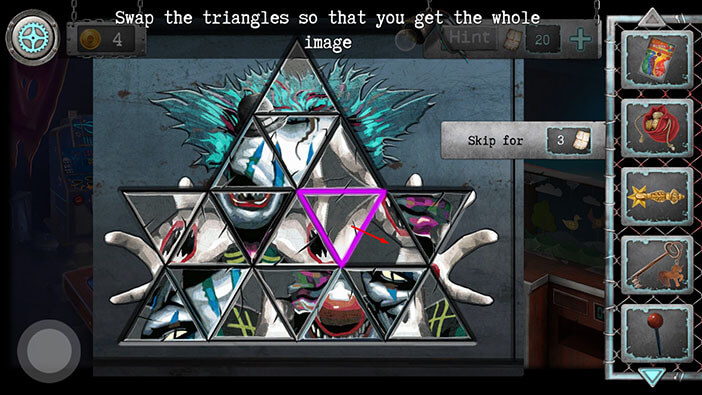
Step 16
Select the sixth piece in the third row and swap it with the seventh piece in the third row.

Step 17
Select the sixth piece in the fourth row and swap it with the sixth piece in the third row.
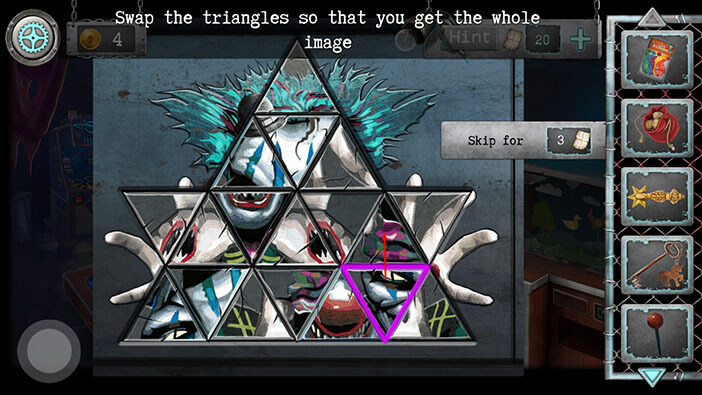
Step 18
Select the sixth piece in the third row and swap it with the fifth piece in the third row.

Step 19
Select the fifth piece in the third row and swap it with the fourth piece in the third row.
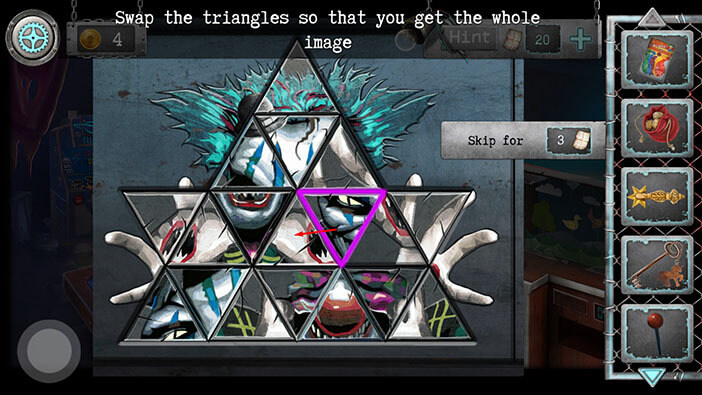
Step 20
Select the second piece in the fourth row and swap it with the second piece in the third row.
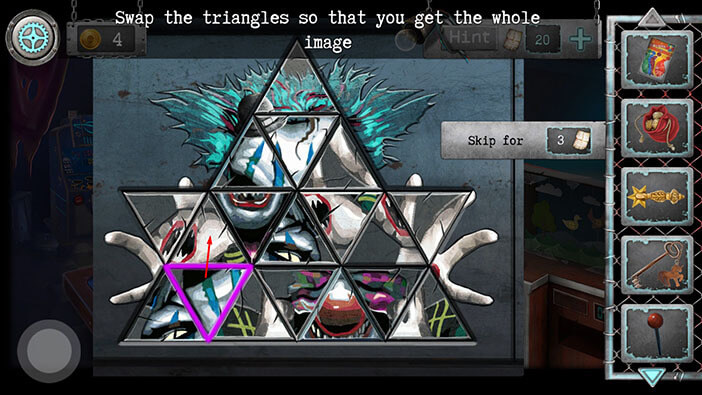
Step 21
Select the second piece in the third row and swap it with the third piece in the third row.
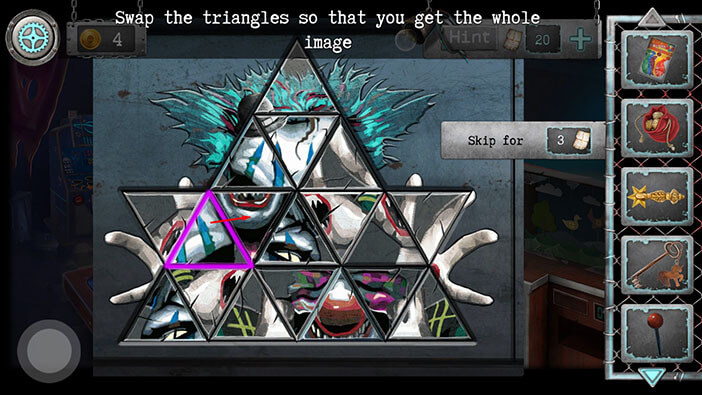
Step 22
Select the third piece in the third row and swap it with the fourth piece in the third row.
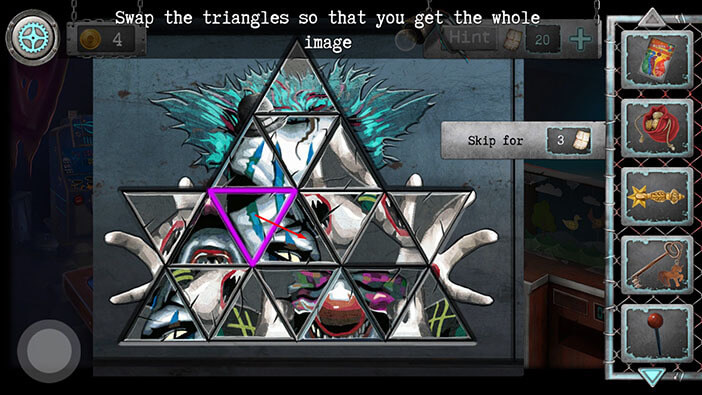
Step 23
Select the fourth piece in the third row and swap it with the fifth piece in the third row.
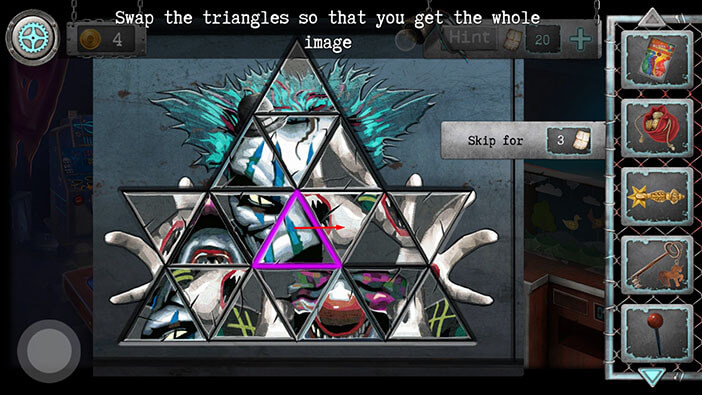
Step 24
Select the fifth piece in the third row and swap it with the second piece in the second row.
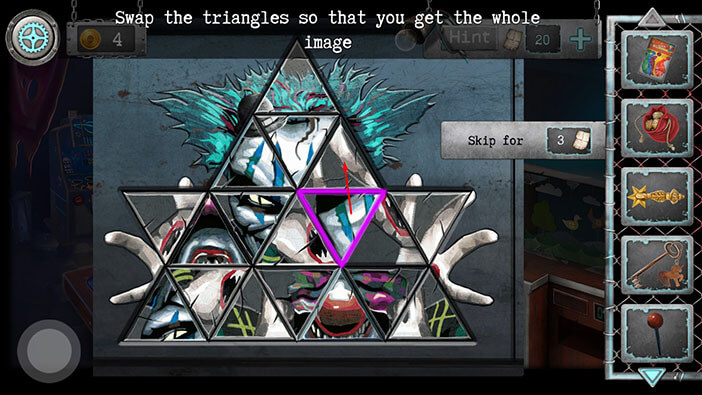
Step 25
Select the seventh piece in the fourth row and swap it with the sixth piece in the fourth row.

Step 26
Select the sixth piece in the fourth row and swap it with the sixth piece in the third row.
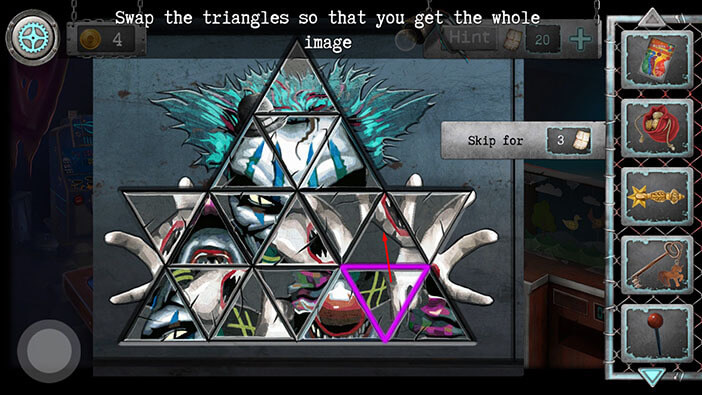
Step 27
Select the fifth piece in the third row and swap it with the fourth piece in the third row.
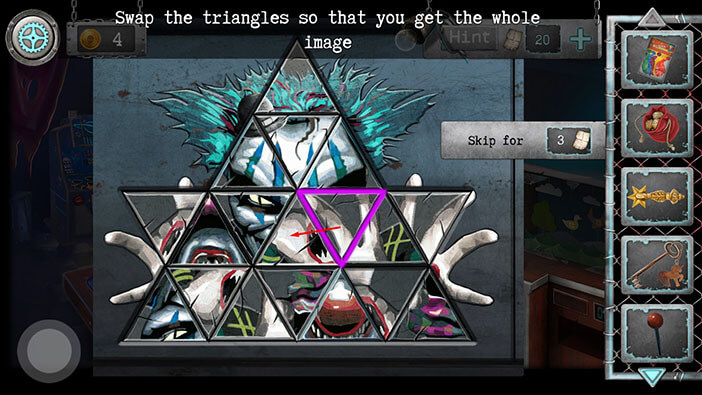
Step 28
Select the fourth piece in the third row and swap it with the third piece in the third row.
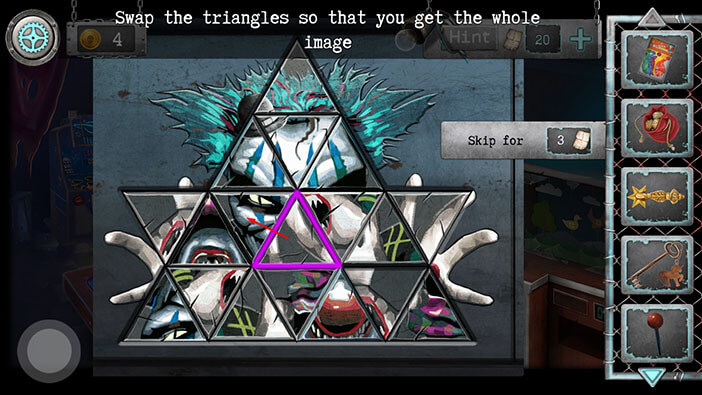
Step 29
Select the third piece in the third row and swap it with the second piece in the third row.
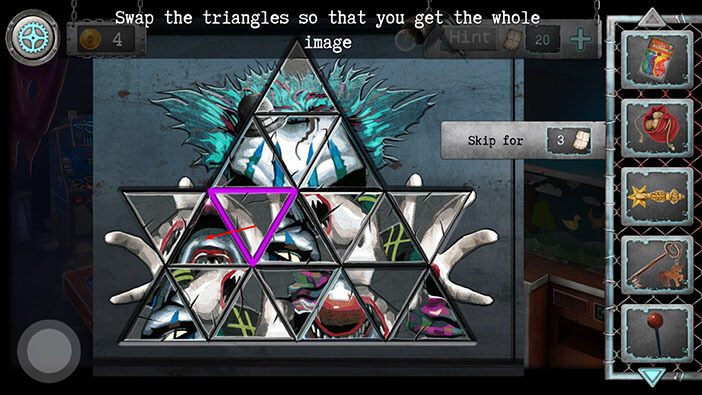
Step 30
Select the second piece in the third row and swap it with the first piece in the third row.
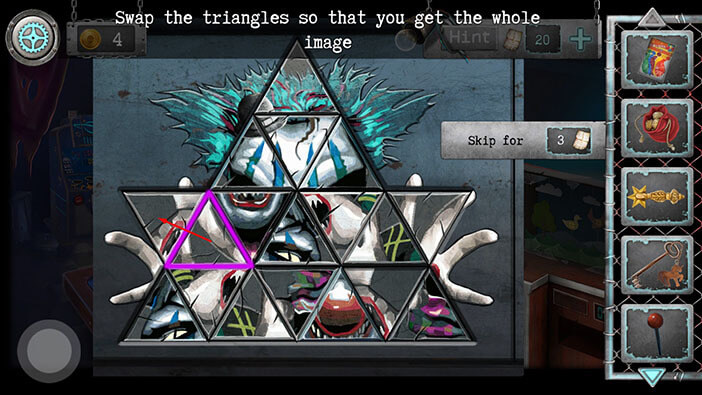
Step 31
Select the first piece in the fourth row and swap it with the second piece in the fourth row.
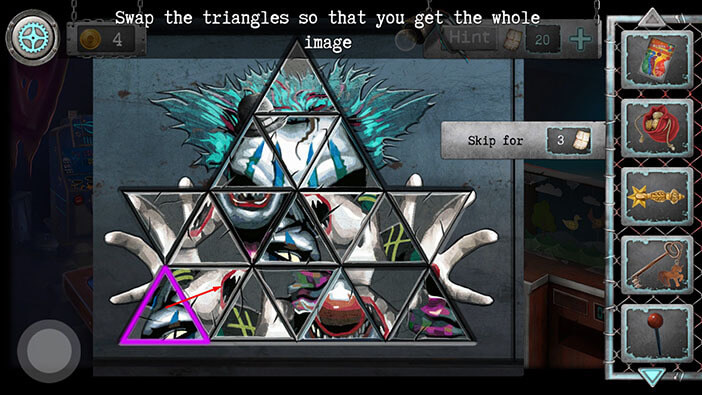
Step 32
Select the second piece in the fourth row and swap it with the second piece in the third row.
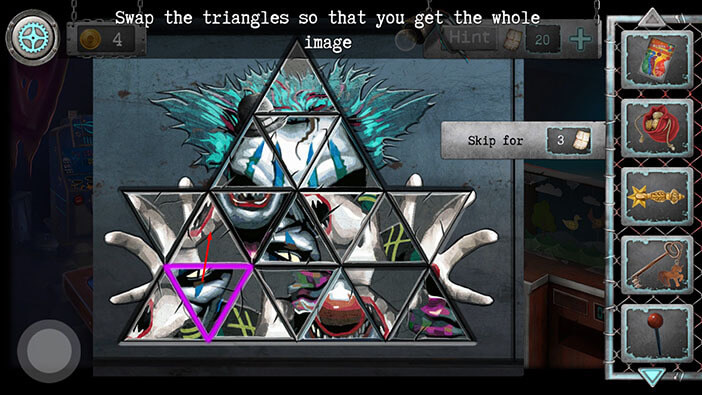
Step 33
Select the second piece in the third row and swap it with the second piece in the fourth row.
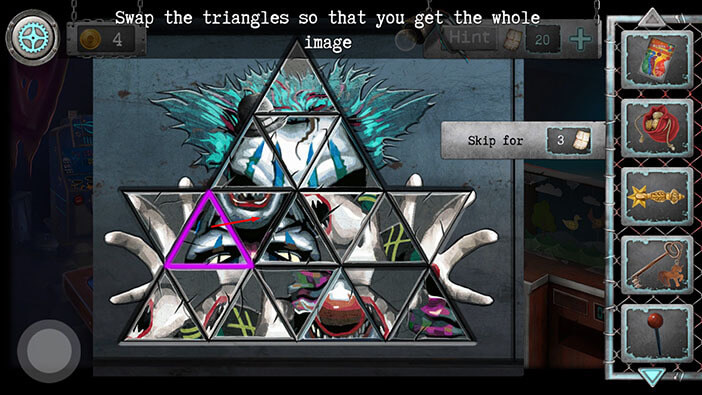
Step 34
Select the third piece in the third row and swap it with the fourth piece in the third row.
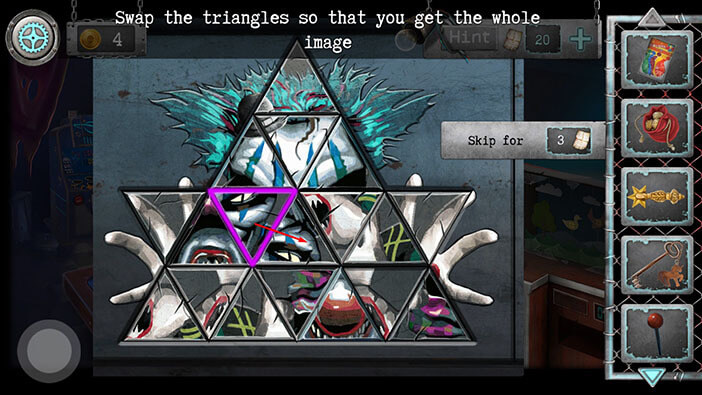
Step 35
Select the fourth piece in the third row and swap it with the fifth piece in the third row.

Step 36
Select the sixth piece in the third row and swap it with the fifth piece in the third row.
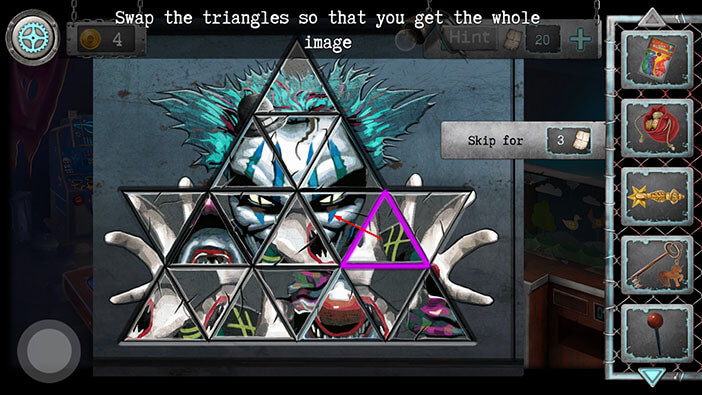
Step 37
Select the fifth piece in the third row and swap it with the fourth piece in the third row.
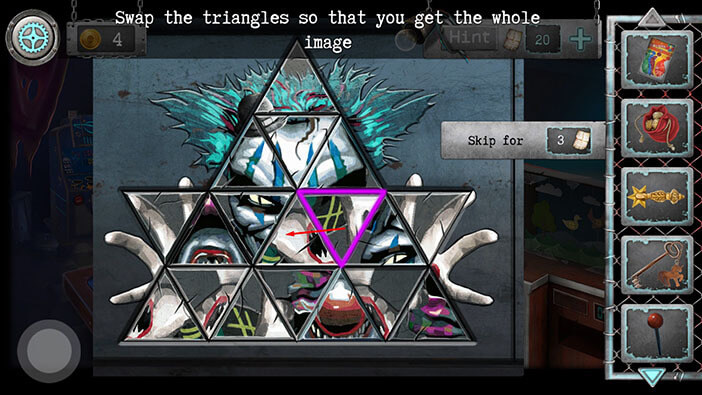
Step 38
Select the fourth piece in the third row and swap it with the third piece in the third row.
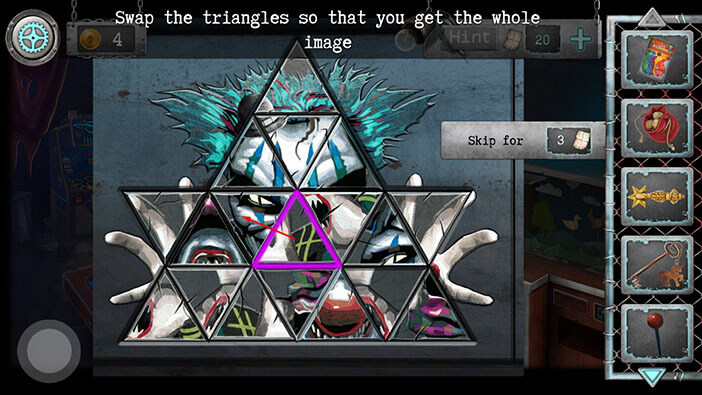
Step 39
Select the third piece in the third row and swap it with the second piece in the third row.
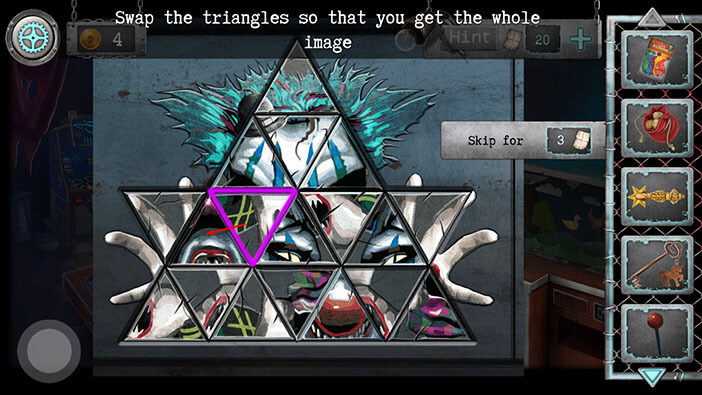
Step 40
Select the first piece in the fourth row and swap it with the second piece in the fourth row.
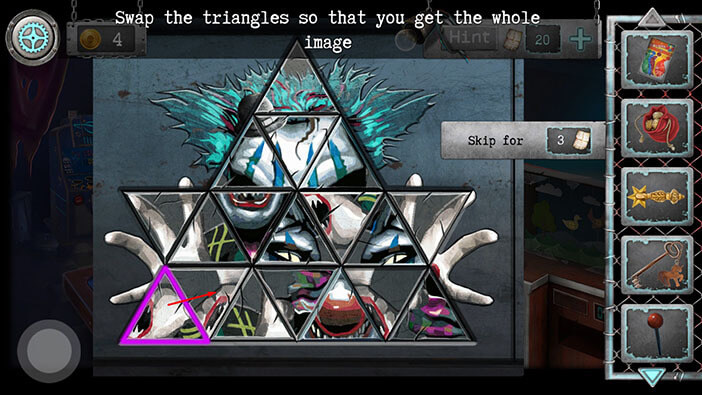
Step 41
Select the fourth piece in the third row and swap it with the third piece in the third row.
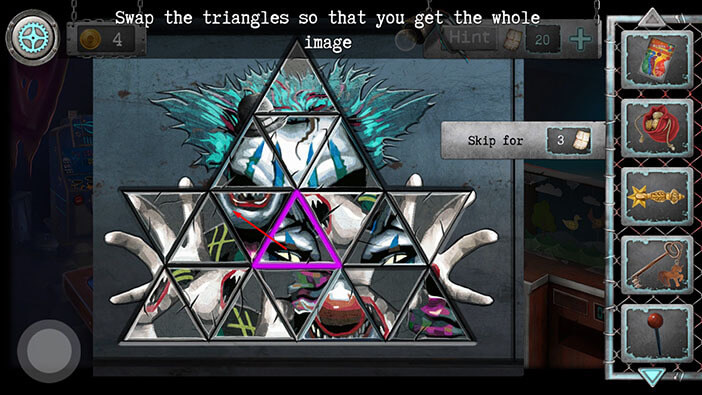
Step 42
Select the fifth piece in the third row and swap it with the fourth piece in the third row.
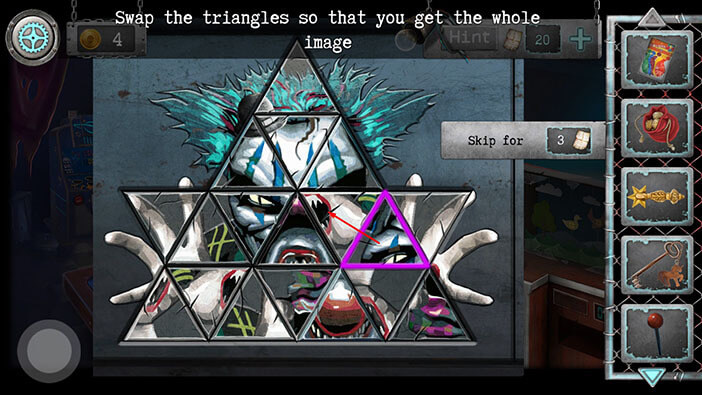
Step 43
Select the third piece in the fourth row and swap it with the fourth piece in the fourth row.
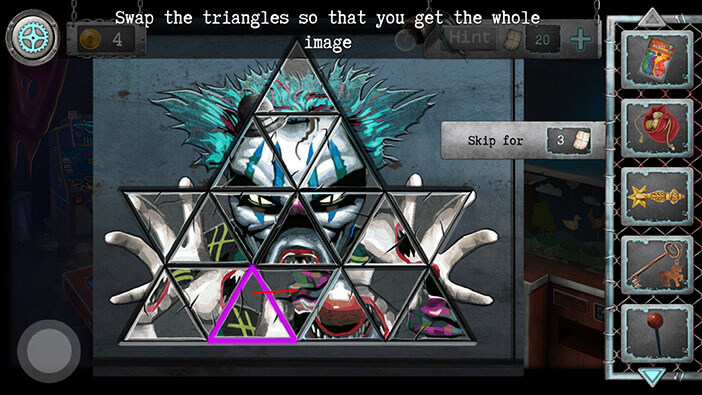
Step 44
Select the fourth piece in the fourth row and swap it with the fifth piece in the fourth row.
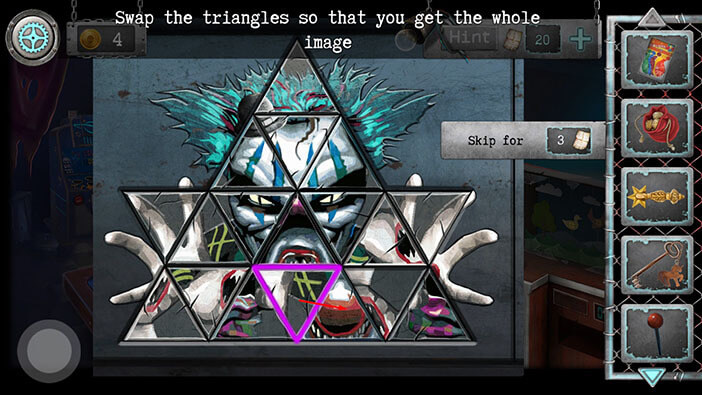
Step 45
Select the fifth piece in the fourth row and swap it with the sixth piece in the fourth row.
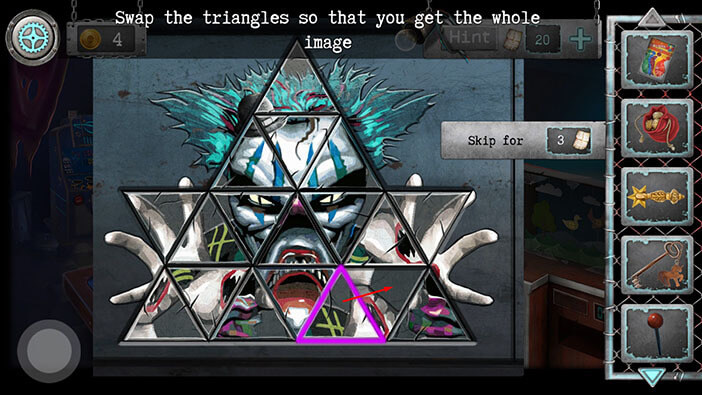
Step 46
Select the sixth piece in the fourth row and swap it with the sixth piece in the third row.
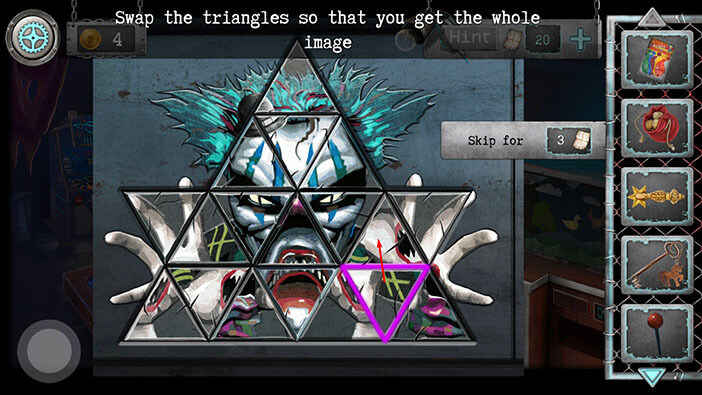
Step 47
Select the fourth piece in the fourth row and swap it with the fourth piece in the third row.
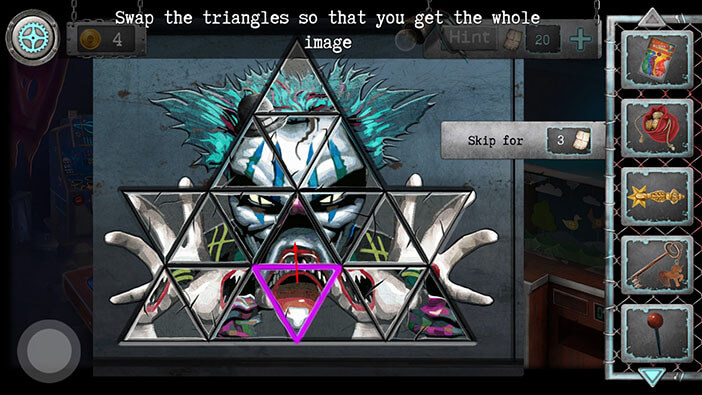
Step 48
Select the fifth piece in the fourth row and swap it with the fourth piece in the fourth row.
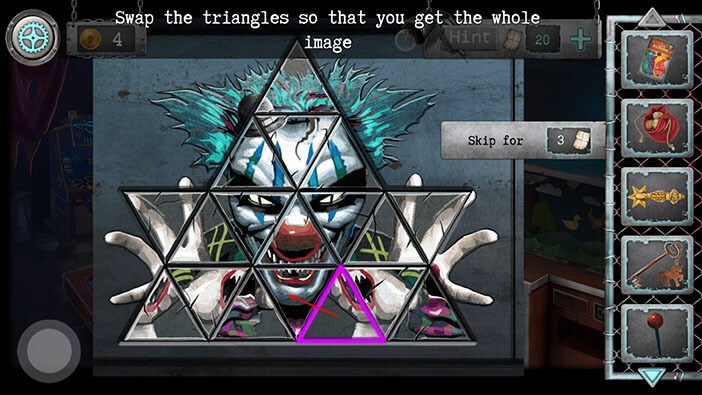
Step 49
Select the fourth piece in the fourth row and swap it with the third piece in the fourth row.
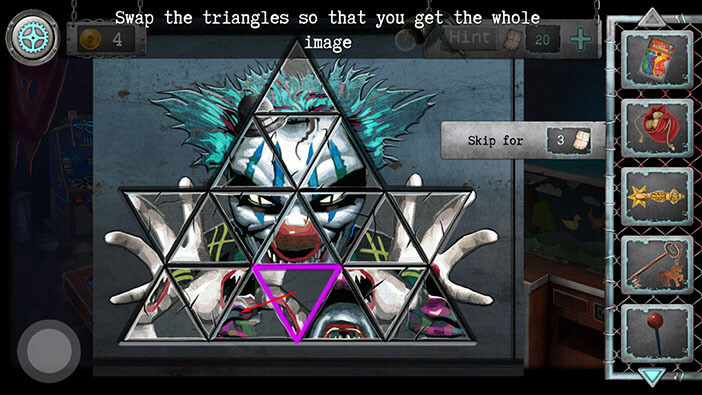
Step 50
Select the third piece in the fourth row and swap it with the second piece in the fourth row.
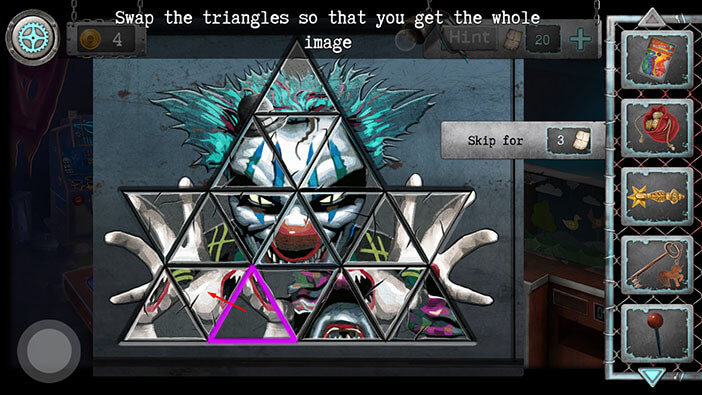
Step 51
Select the second piece in the fourth row and swap it with the first piece in the fourth row.
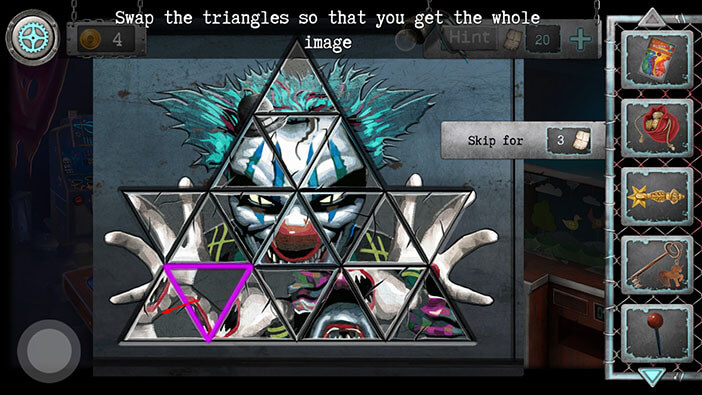
Step 52
Select the sixth piece in the fourth row and swap it with the fifth piece in the fourth row.
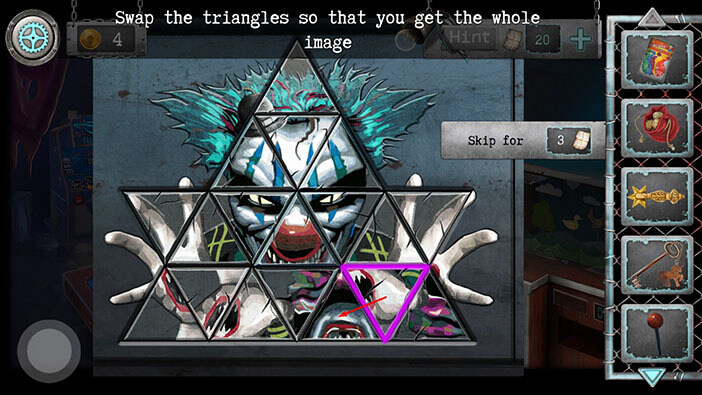
Step 53
Select the fifth piece in the fourth row and swap it with the fourth piece in the fourth row.
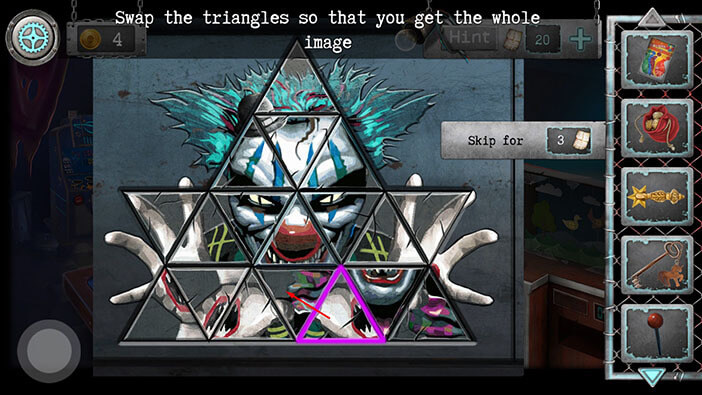
Step 54
Select the fourth piece in the fourth row and swap it with the third piece in the fourth row.
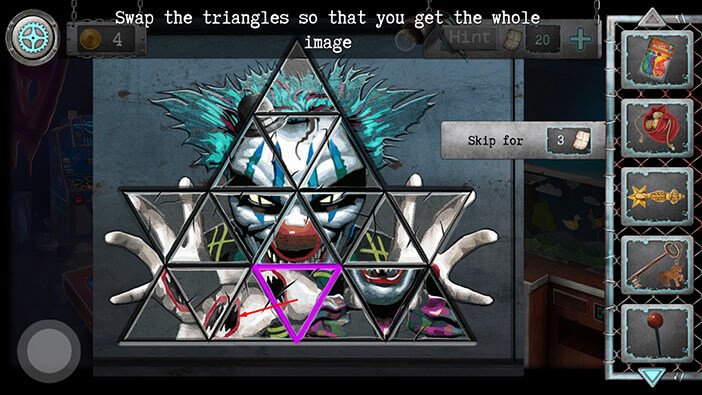
Step 55
Select the third piece in the fourth row and swap it with the second piece in the fourth row.
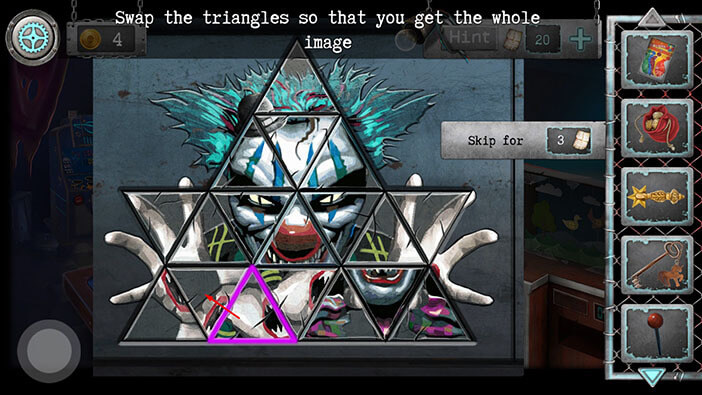
Step 56
Select the third piece in the fourth row and swap it with the fourth piece in the fourth row.
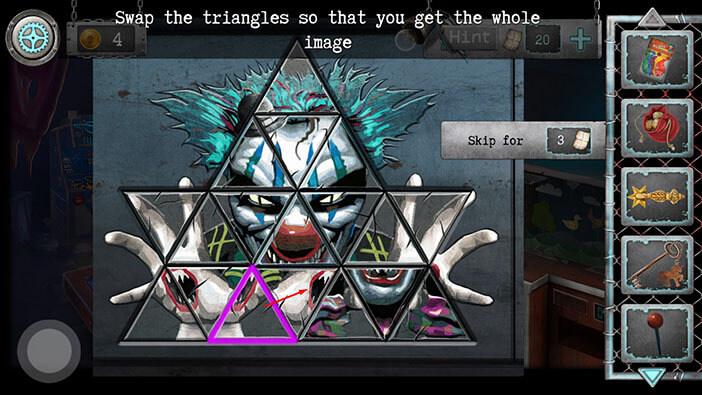
Step 57
Select the fourth piece in the fourth row and swap it with the fifth piece in the fourth row.
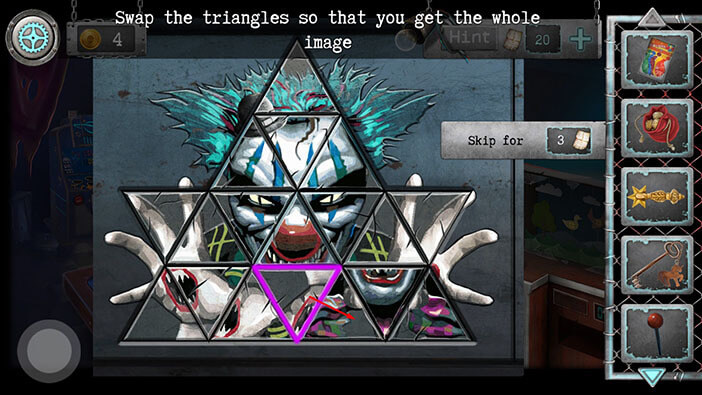
Step 58
Select the fifth piece in the fourth row and swap it with the sixth piece in the fourth row.
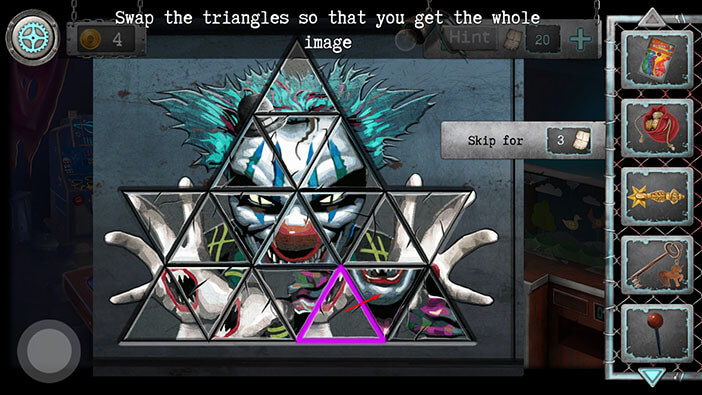
Step 59
Select the sixth piece in the fourth row and swap it with the seventh piece in the fourth row.
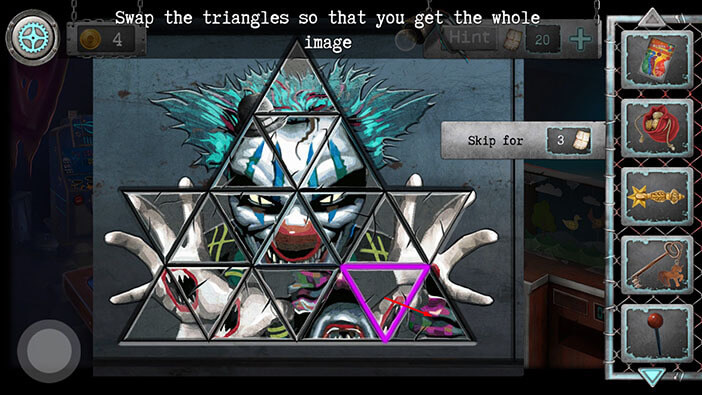
Step 60
Select the third piece in the fourth row and swap it with the fourth piece in the fourth row.
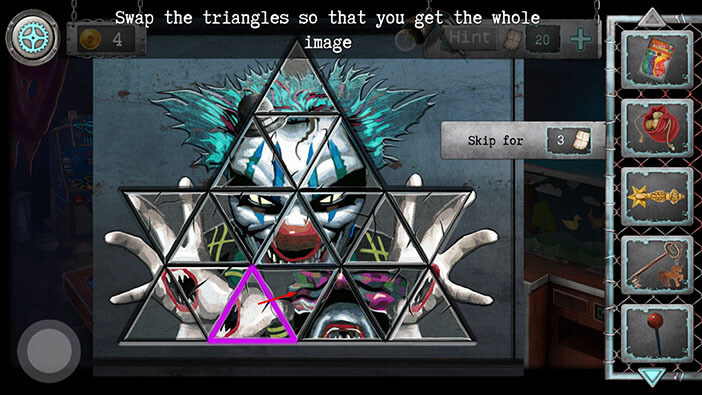
Step 61
Select the fourth piece in the fourth row and swap it with the fifth piece in the fourth row.
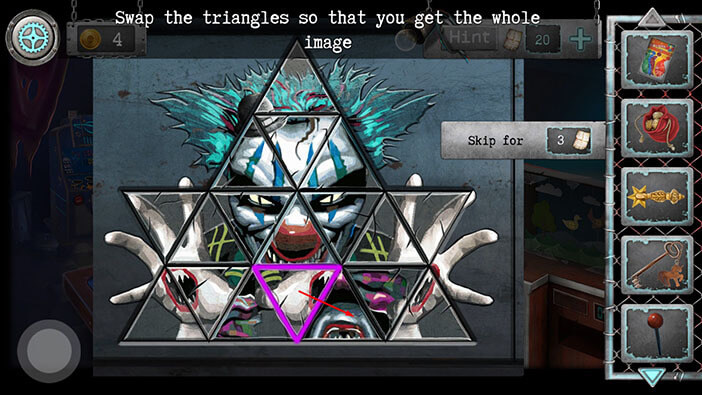
Step 62
Select the fifth piece in the fourth row and swap it with the sixth piece in the fourth row.
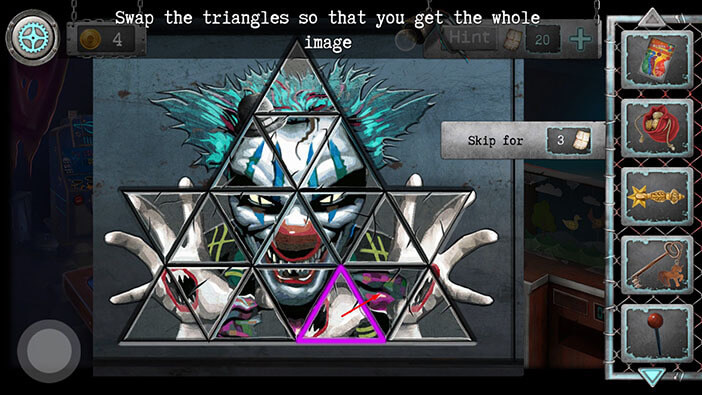
Step 63
Select the fifth piece in the fourth row and swap it with the fourth piece in the fourth row.
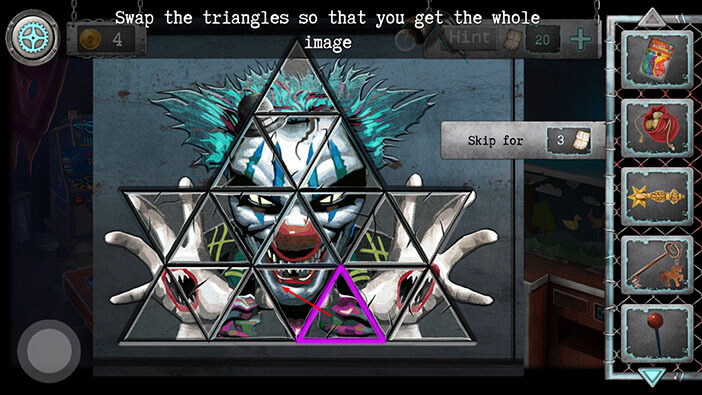
Step 64
Select the third piece in the fourth row and swap it with the fourth piece in the fourth row.
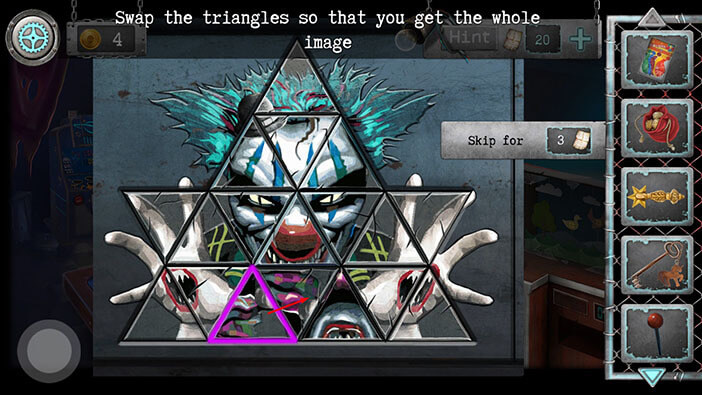
Step 65
Finally, select the fourth piece in the fourth row and swap it with the fifth piece in the fourth row. With this last step, you will solve the puzzle.
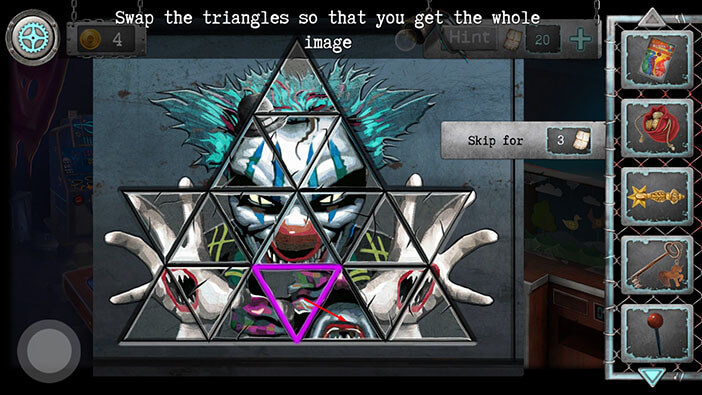
Once you’re done, tap on the clown, and the secret compartment behind the puzzle will open.
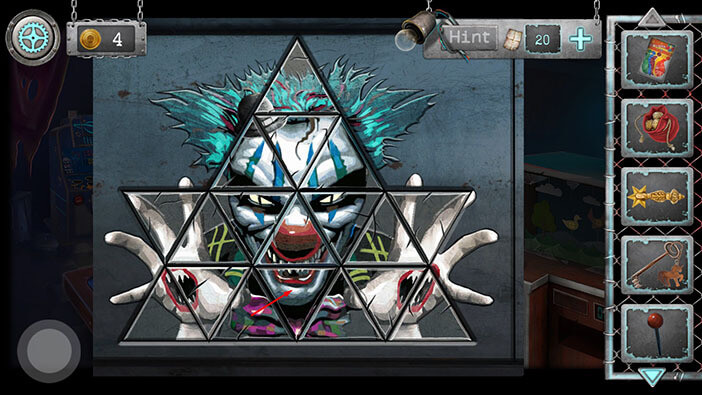
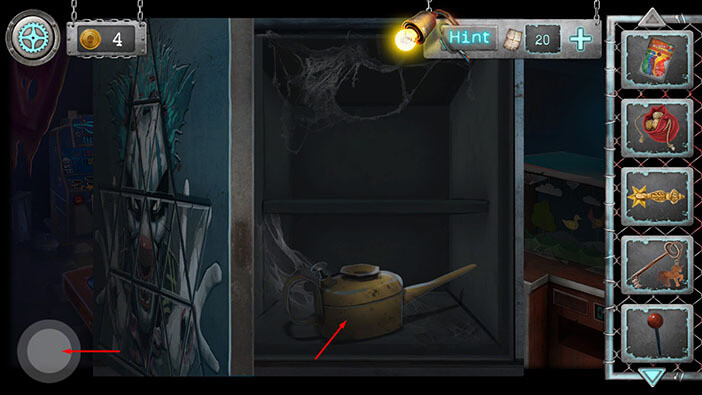
Tap on the gas can to pick it up, and “Oiler” will be added to your inventory.
After that, tap on the button in the lower left corner to go back.
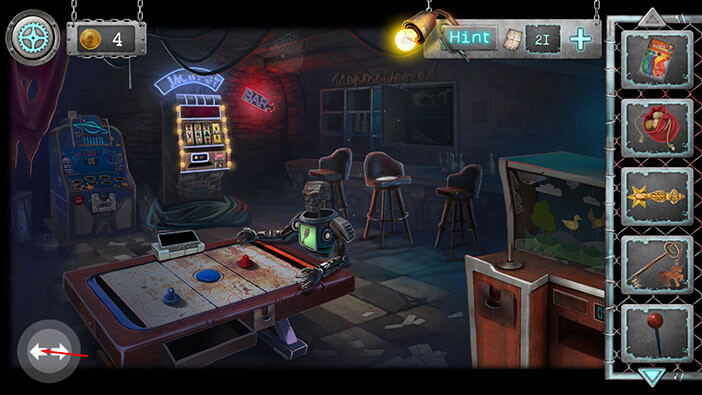
Tap on the arrows in the lower left corner to go outside.
At the end of the path, you will see a gate. Tap on it to proceed to the next area.
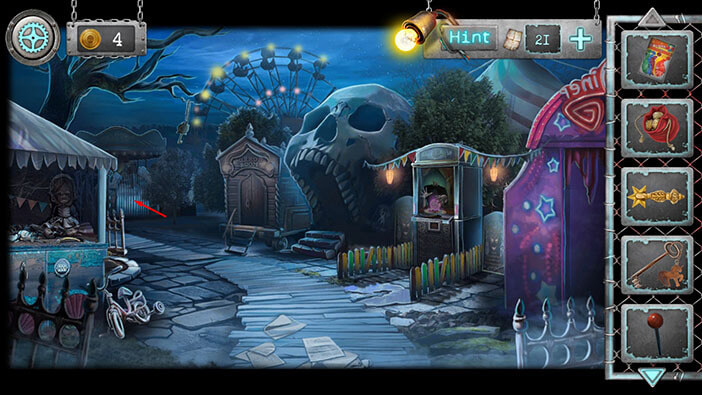
The first thing that you will probably notice upon entering this area is the hanged clown mannequin. Tap on it to bring it down.
The clown will fall down on the bench in the sitting position. Our character will also automatically untie the “Rope”, and it will be added to your inventory.
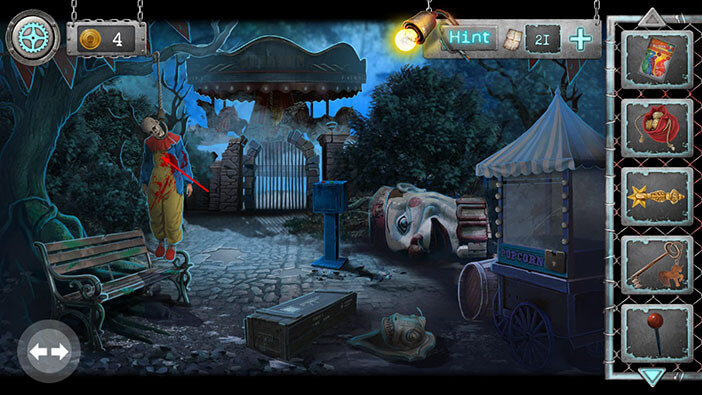
Next, to the right of the green box, you will notice some kind of a statue. Tap on it to pick it up, and the “Monster head trophy” will be added to your inventory.
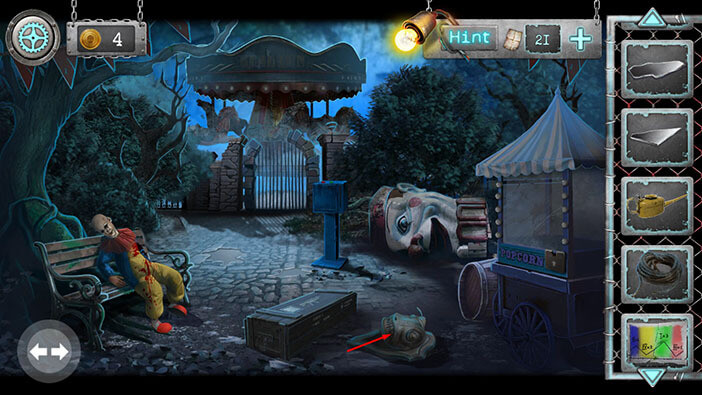
Tap on the popcorn machine on the right to take a closer look at it.
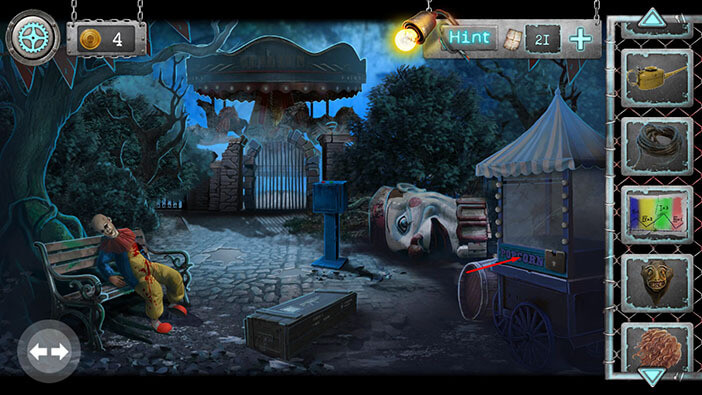
At the bottom of the machine, you will notice a glass shard. Now, we just have to figure out the way to reach it.
Select the “Pouch with coins” from the inventory, and insert the coin into the slot on the popcorn machine.
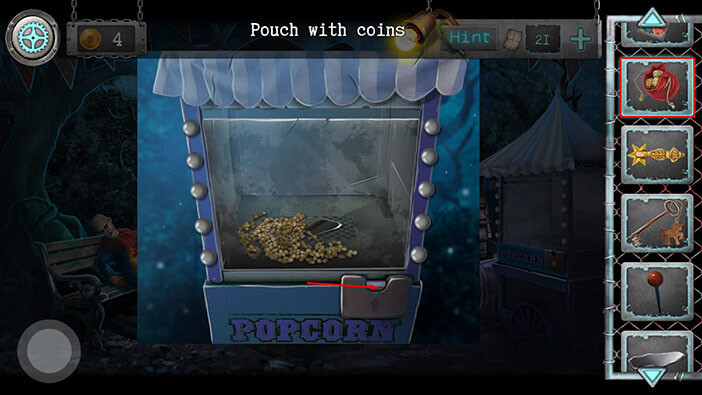
Ok, we made some popcorn and the glass shard is now closer to the top of the machine, and we can reach it. Tap on the glass shard to pick it up and “Mirror shard 3” will be added to your inventory.
After that, tap on the button in the lower left corner to go back.
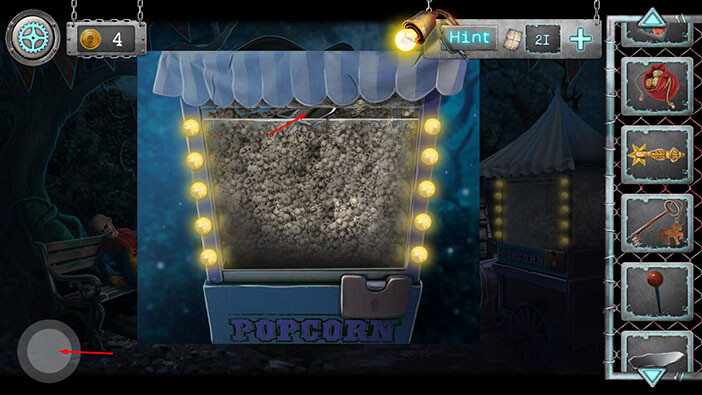
Next, tap on the blur box to take a closer look at it.
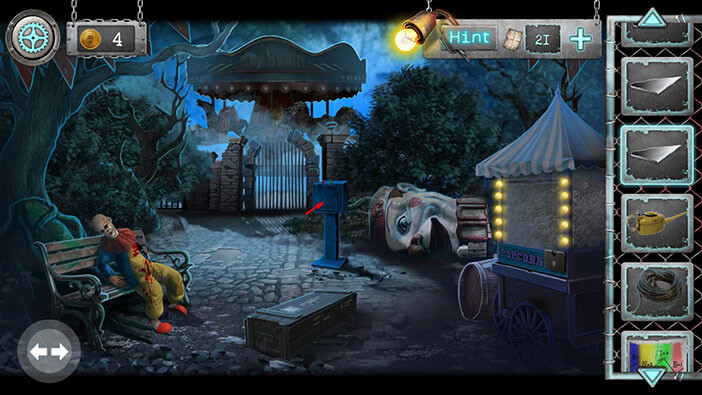
Select the “Key with a horse” from the inventory and use it to unlock the blue box.
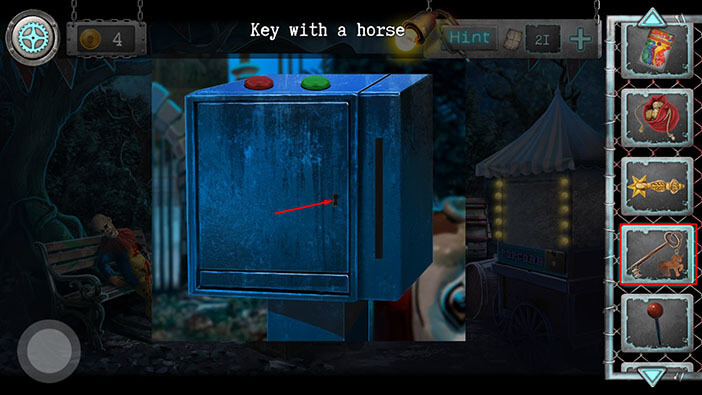
Here, we can see four buttons, red, yellow, green, and blue. Previously we found the note with the same colors. So, select the “Start scheme” from the inventory, and then tap on the above buttons to attach the note.
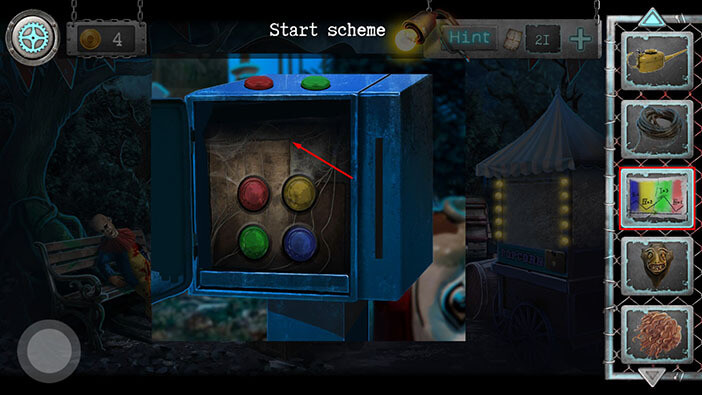
Ok, if we examine the note, we will see a Roman numeral in each column, and we will also the x sign and the Arabic numeral. The Roman numeral represents the order of the buttons, and the x sign and the Arabic numeral tell us how many times we should press each button. So, let’s follow the scheme.
Step 1
Tap on the green button three times (because on the green button we can see the instruction I x 3)

Step 2
Tap once on the blue button (because on the blue button we can see the instruction II x 1)
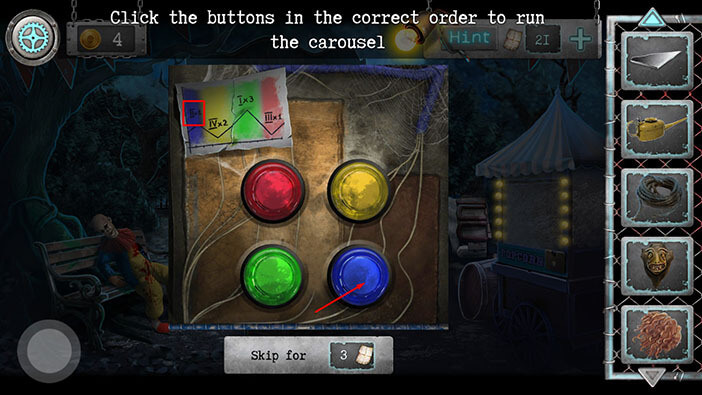
Step 3
Tap once on the red button (because on the red button we can see the instruction III x 1)

Step 4
Tap on the yellow button two times (because on the yellow button we can see the instruction IV x 2)

Select the “Lever” from the inventory and insert it into the empty hole on the right.
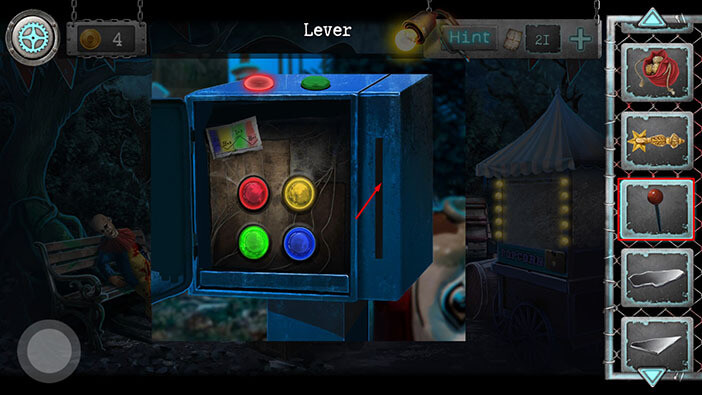
Next, tap on the lever to pull it down.
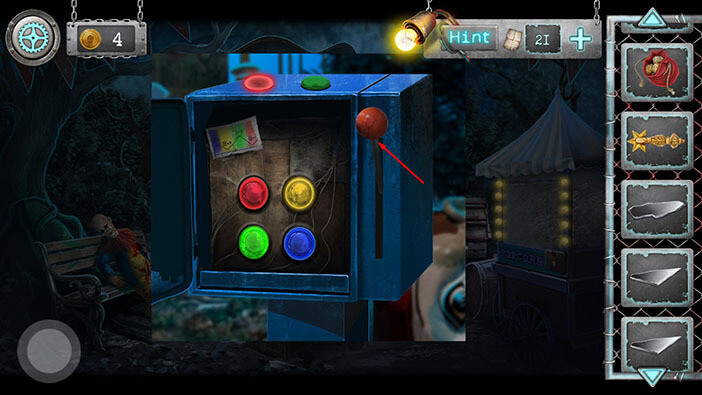
After we pulled the lever the secret compartment opened and the key fell out. Tap on it to pick it up and “Small Key” will be added to your inventory.
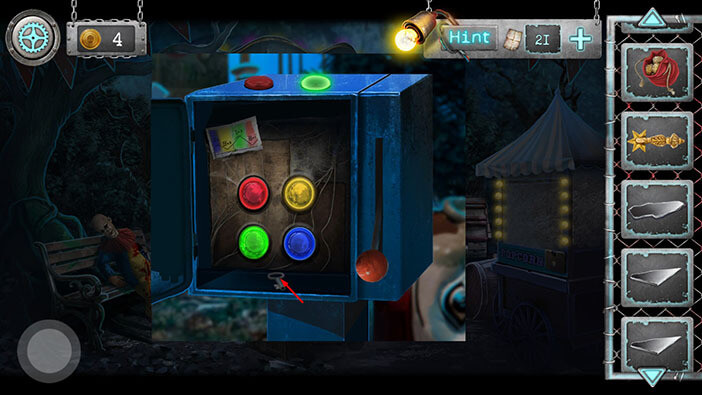
Tap on the button in the lower left corner to go back.
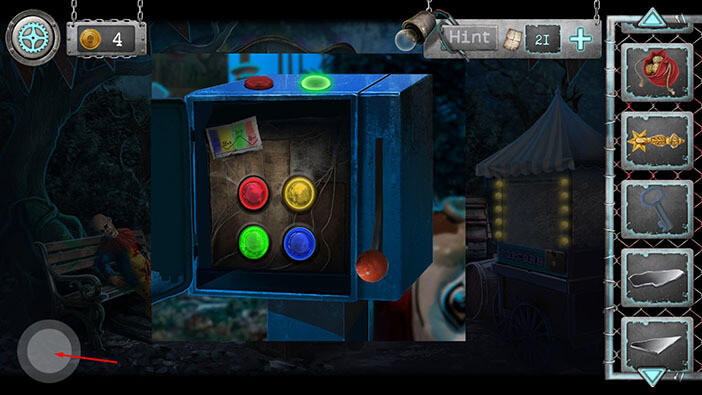
Ok, now let’s take a closer look at the green box.

Select the “Small key” from the inventory and use it to unlock the small panel on the box.
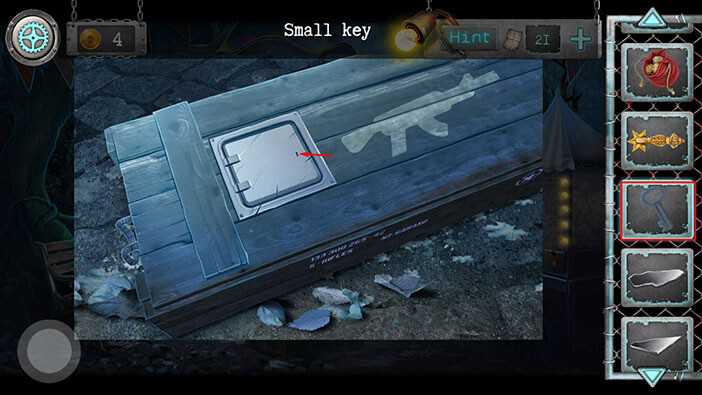
It seems that we will need some kind of password in order to open the box. Let’s go back and look for it.
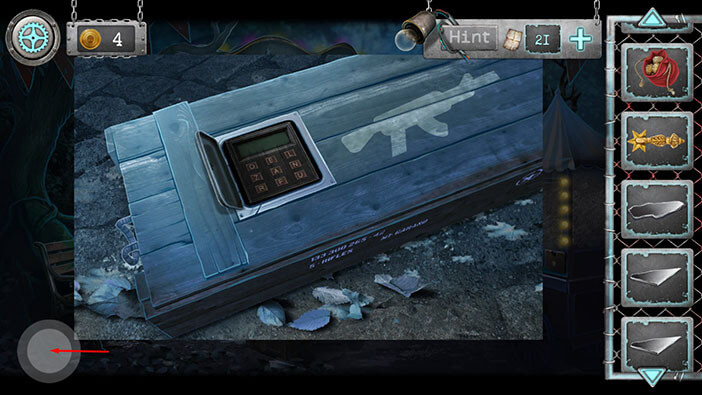
You will probably notice that we activated the carousel. Let’s take a closer look at the sign above the carousel.

If you pay attention to the letters you will notice that they are flashing in some kind of pattern. Let’s write down/ memorize this pattern.
Step 1
The first flashing letter is the letter “F” in the word “FUN”.
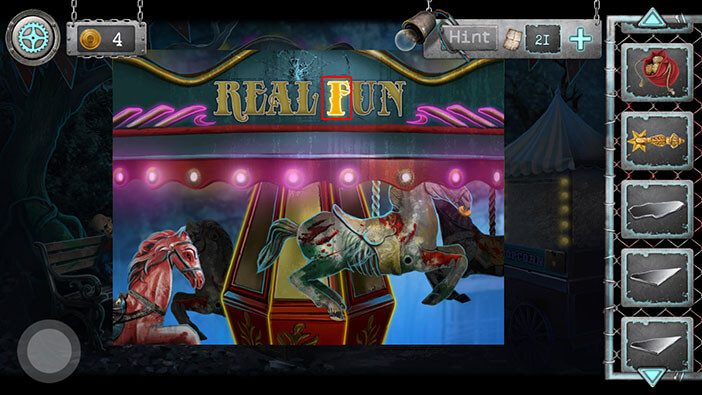
Step 2
The second flashing letter is the letter “U” in the word “FUN”.
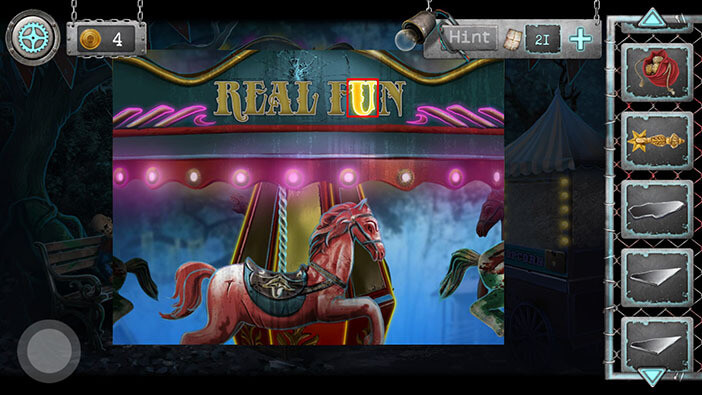
Step 3
The third flashing letter is the letter “N” in the word “FUN”.
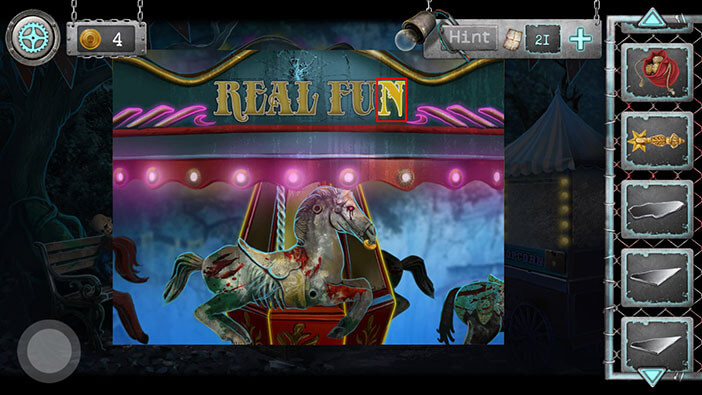
Step 4
The fourth flashing letter is the letter “E” in the word “REAL”.
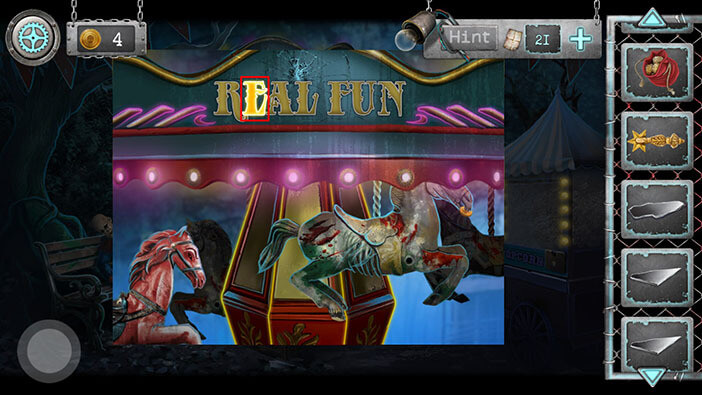
Step 5
The fifth flashing letter is the letter “R” in the word “REAL”.
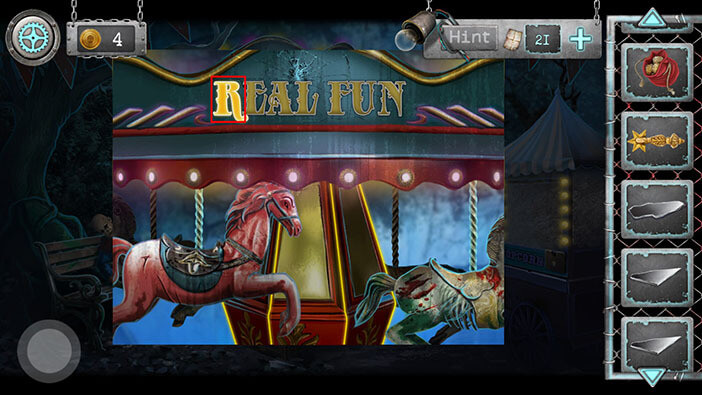
Step 6
The sixth flashing letter is the letter “A” in the word “REAL”.
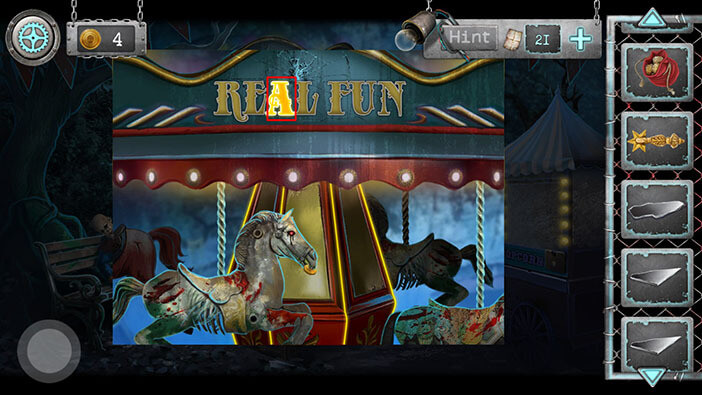
Step 6
The seventh flashing letter is the letter “L” in the word “REAL”.
If we put it all together, we will get the word “FUNERAL”. Memorize/write down this password.
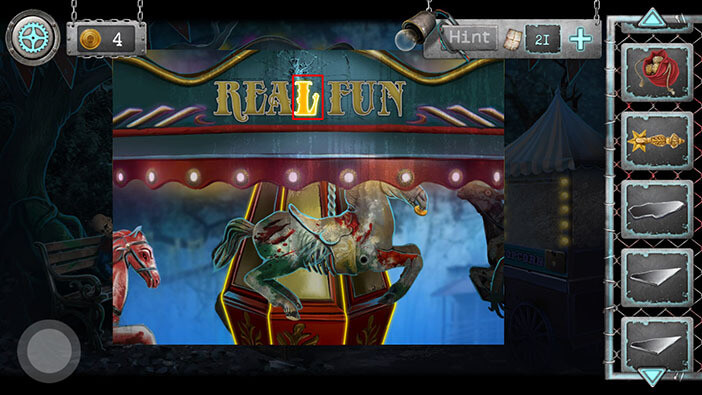
Before we proceed, let’s take a look at the horses on the carousel. If you pay attention, you will notice that one of the horses has a “Gold coin” in its mouth. Tap on the “Gold coin” to pick it up, and you will find the fifth gold coin.
After that, tap on the arrow in the lower left corner to go back.
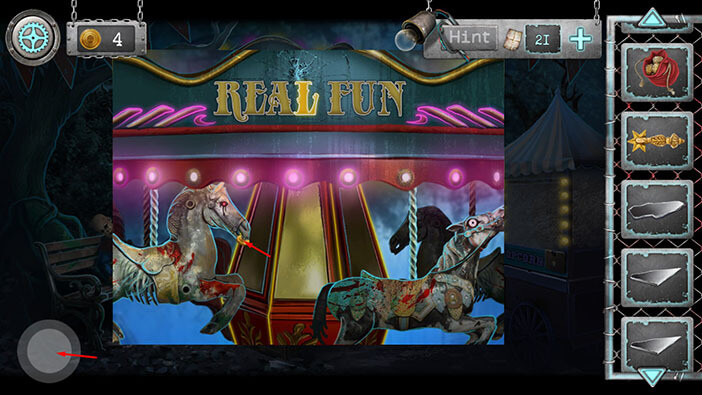
Ok, let’s go back to the green box.
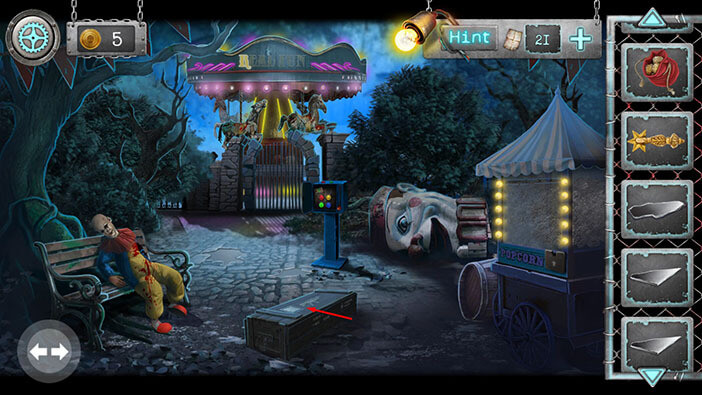
Tap on the display to start the interaction.

Enter the password “FUNERAL” and you will unlock the box.
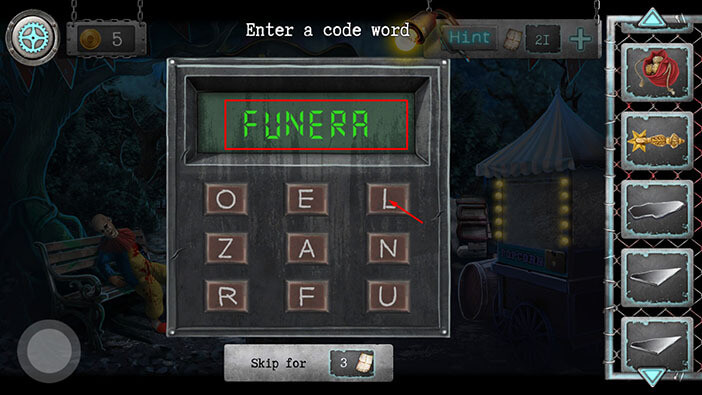
Inside the box you will find a “Toy gun”, and a “Start button”. Tap on both items to pick them up and they will be added to your inventory.
NOTE: The box actually looked like the weapons crate, so our character thought that somebody has a very bad sense of humor because the only weapon that he found in the weapons crate was a toy gun.
Once you’re done, tap on the button in the lower left corner to go back.
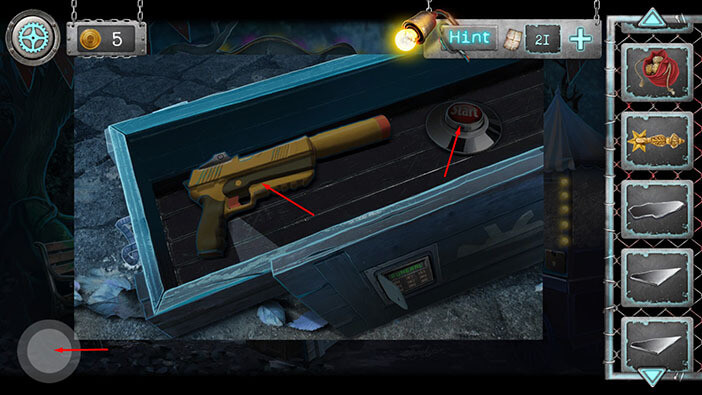
Tap on the arrows in the lower left corner to go back to the previous area.
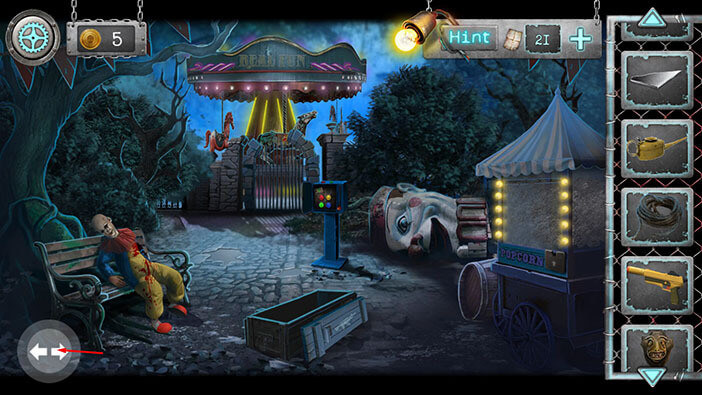
Let’s go back into the purple building with the slot machines on the right.

Tap on the machine on the right to start the interaction.
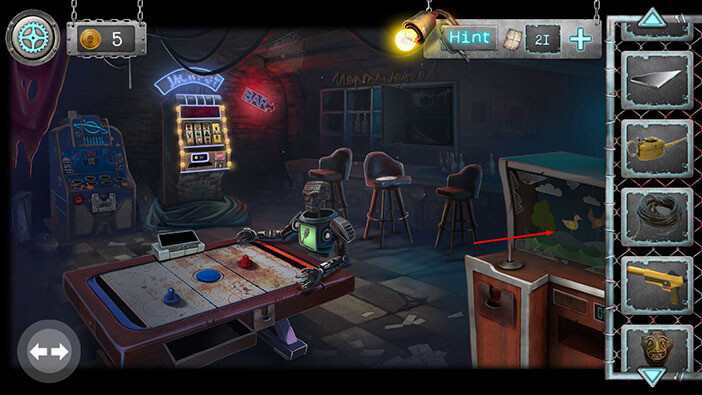
Select the “Toy Gun” from the inventory and attach it to the stand on the left.
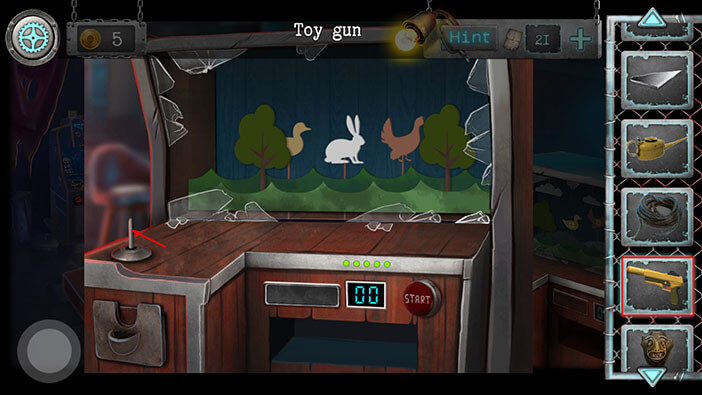
Next, select the “Pouch with coins” from the inventory and insert the coin into the slot on the machine.
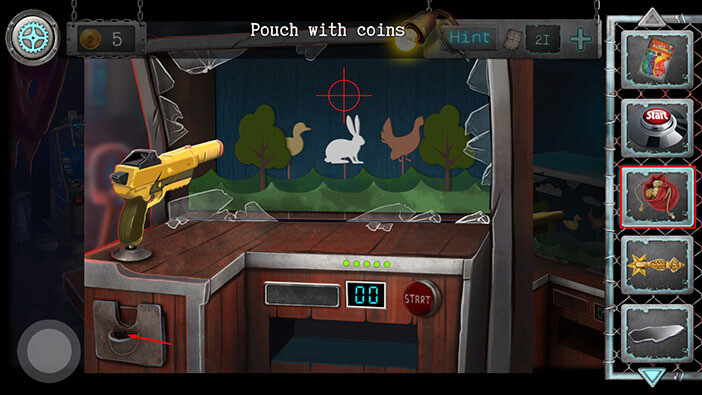
The “Start” button on the right will pop up, so tap on it to start the game.
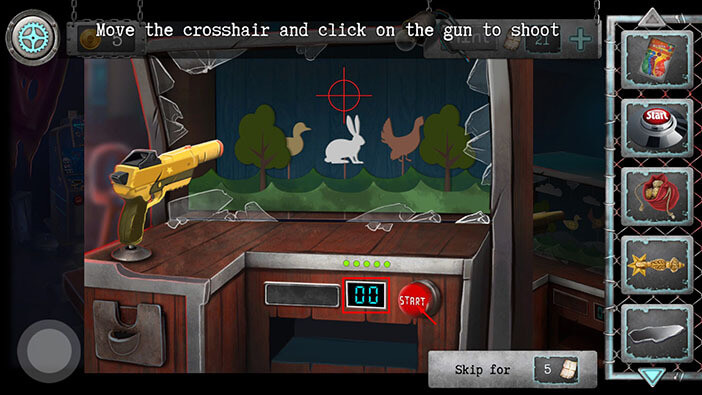
The goal of this game is to shoot all three animals before the time expires. The time is displayed next to the start button. The easiest way to hit the animals is to set the crosshair on their path and tap on the gun to fire once they get near it.
Also, you only have 5 shots, and they are represented by the green dots above the timer.
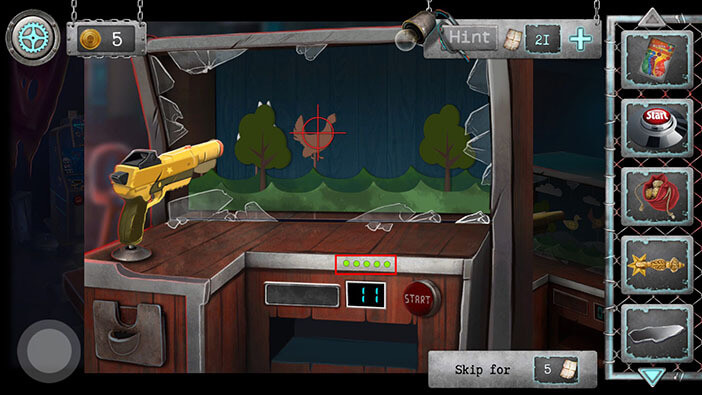
Once you hit all the animals, the numbers will appear on them. The numbers on the animals can be hidden/blocked by other animals, so we will get to these numbers in a moment.
Also, once you win in this minigame, the secret compartment will open. Tap on the item inside to pick it up and “Creepy eye” will be added to your inventory.
After that, tap on the button in the lower left corner to go back.
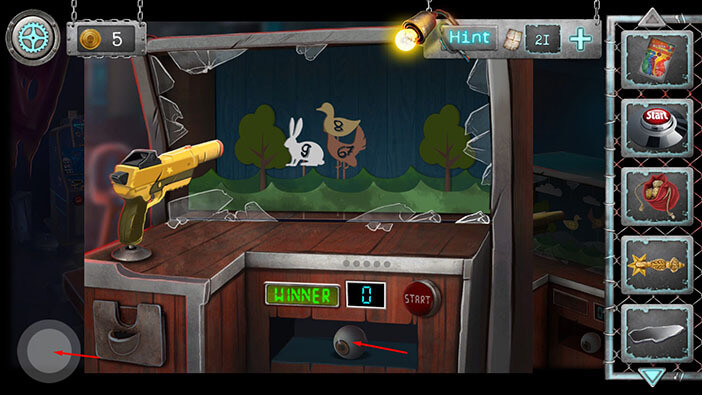
Ok, now let’s take another look at the (shooting minigame) machine on the right.
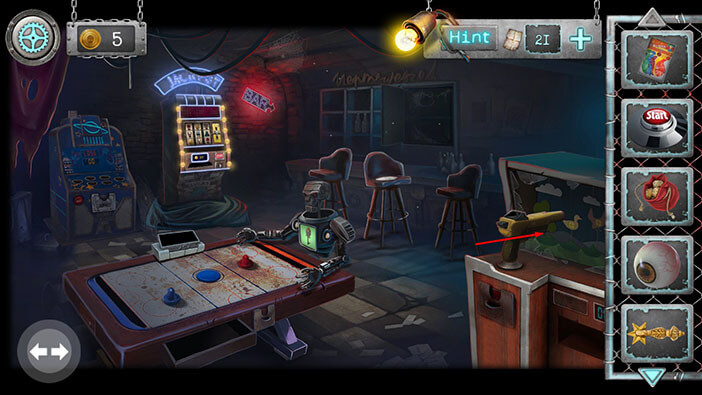
Now, all the animals are ordered correctly, and we can clearly see the numbers on them. Let’s write down these numbers. Here we have:
8 Ducks
9 Rabbits
67 Capercaillies
Once you’re done, tap on the button in the lower left corner to go back.
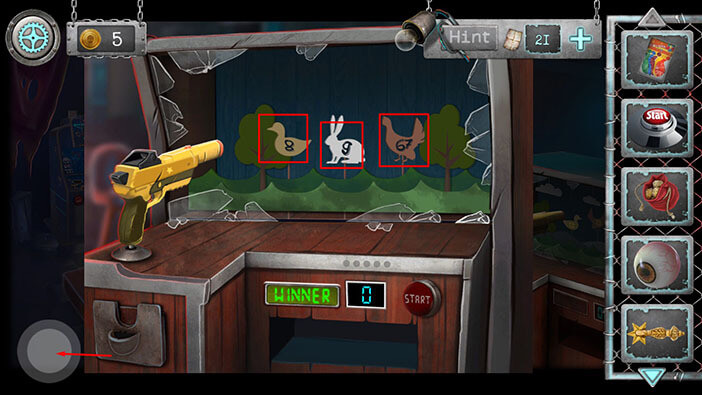
Tap on the arrows in the lower left corner to go back, outside.

Let’s take another look at the stand on the left.
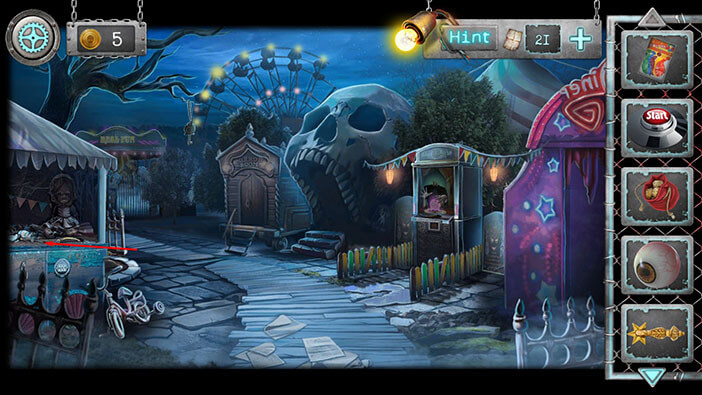
Ok, at the lower right side, we can see some kind of a lock with a three-digit numerical code. Before we interact with it, let’s take a look at the note on the stand.

Here we have a very simple puzzle. We just have to multiply the number of ducks by the number of bunnies and add the number of capercaillies. We already discovered these numbers when we won in the previous minigame, by shooting all three animals. As a reminder, we had:
8 Ducks
9 Rabbits
67 Capercaillies
So,
8 x 9 + 67 = 139
“139” memorize/write down this number, then tap on the button in the lower left corner to put down the note.
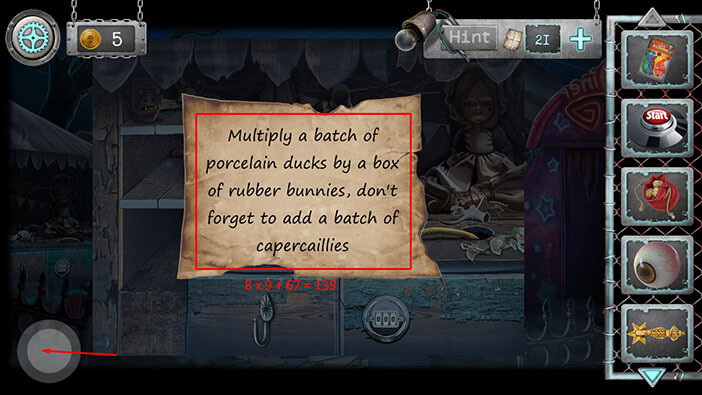
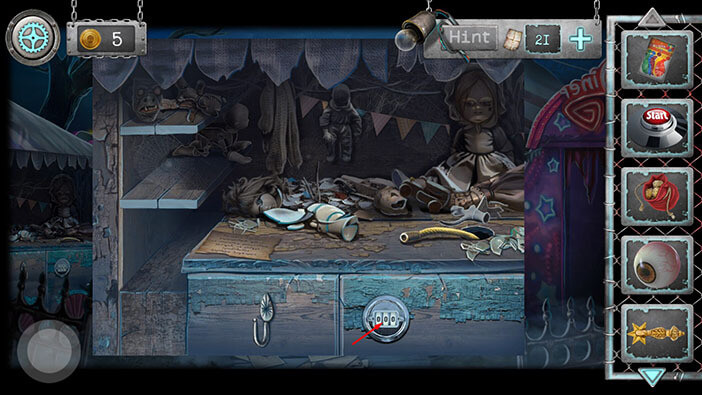
Tap on the lock on the lower right part of the stand to start the interaction.
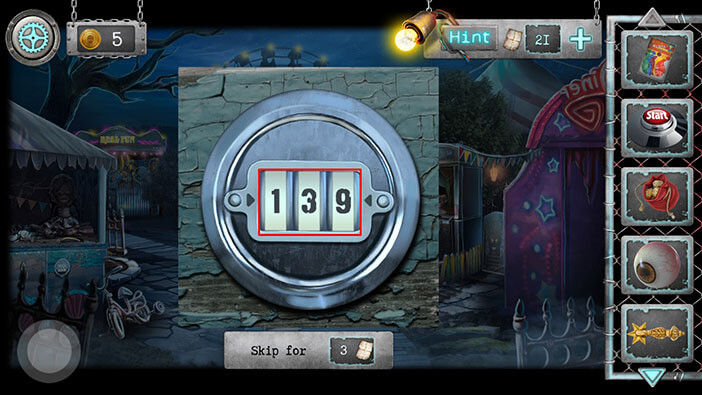
Enter the code “139” and you will unlock the cabinet door.
Tap on the item inside the cabinet (to the left of the helium canister) and the “Bulb I” will be added to your inventory.
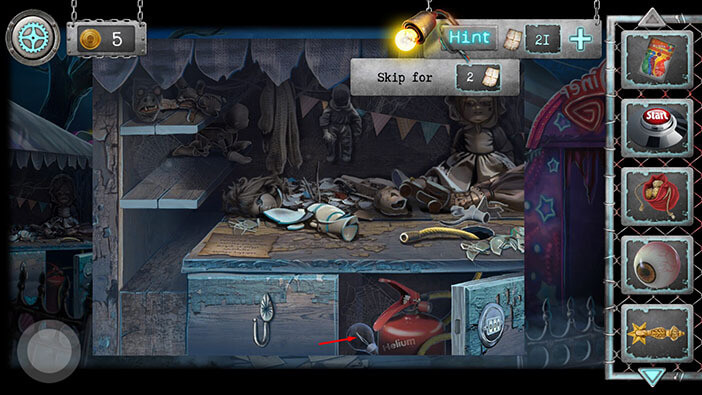
Next, select the “Balloons” from the inventory and tap on the end of the helium hose to attach it.
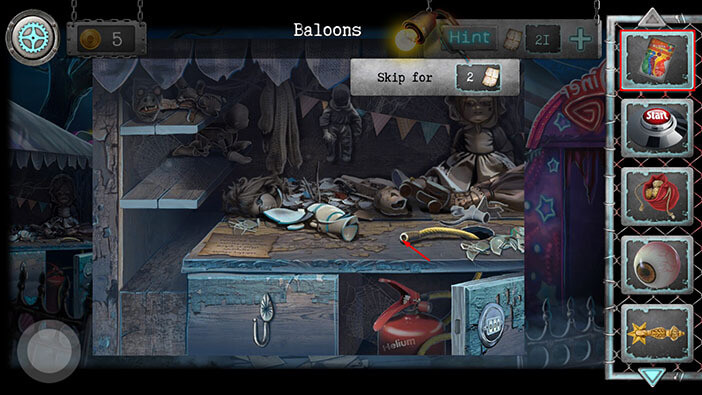
After that, tap and hold on the handle on the helium bottle to inflate the balloon.
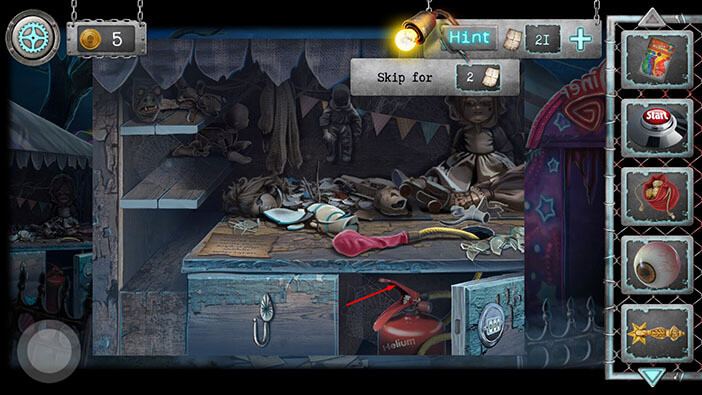
Lastly, select the rope from the inventory to tie up the balloon.
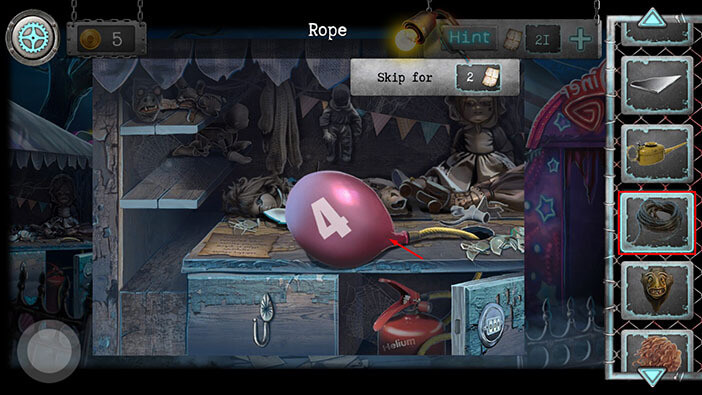
Ok, the red balloon is ready, so let’s repeat this process two more times, and inflate the blue and the green balloons.
Once you’re done tap on the button in the lower left corner to go back.
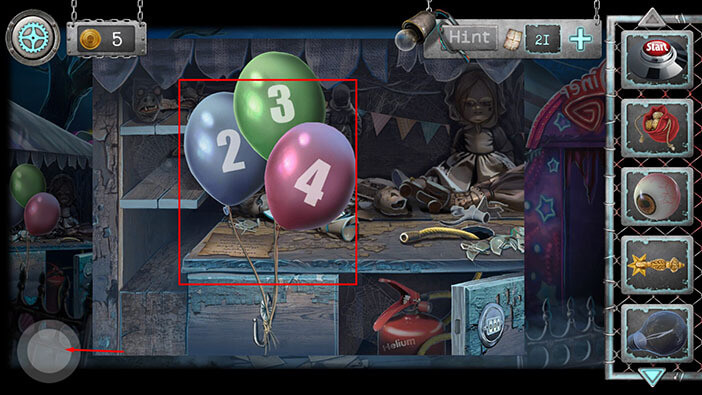
Tap on the balloons to release them. The balloons will fly up and knock down the key which is hanging from the tree.
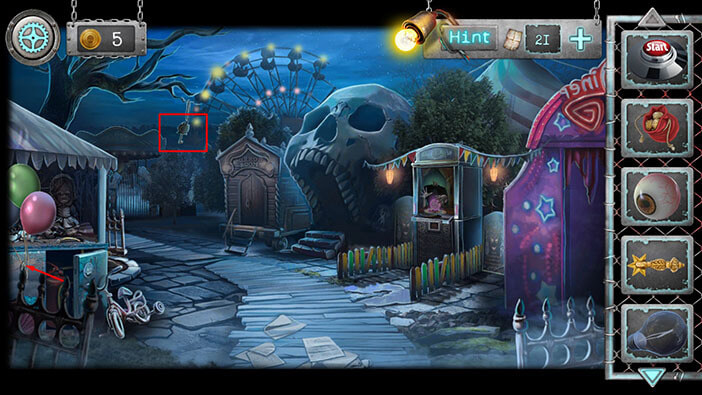
Tap on the key to pick it up and the “Mirror key” will be added to your inventory.
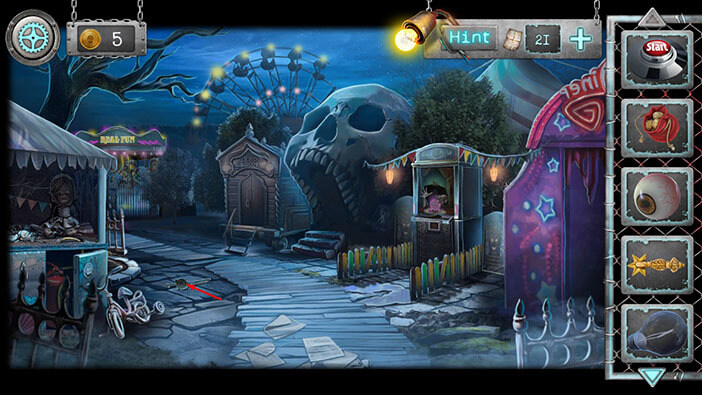
If you pay attention to the right side, you should notice the trailer with the sign “Mirror room” above the door. So, let’s tap on the door to take a closer look.

Select the “Mirror key” from the inventory and insert it into the lock.
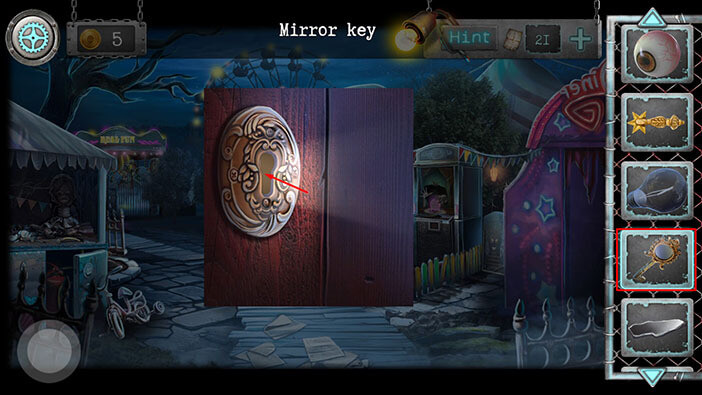
We can now see the left and right arrows below the key. So, we will have to turn the key left and right in a specific sequence in order to unlock the door. So, let’s back and look for the clues.
Tap on the button in the lower left corner.
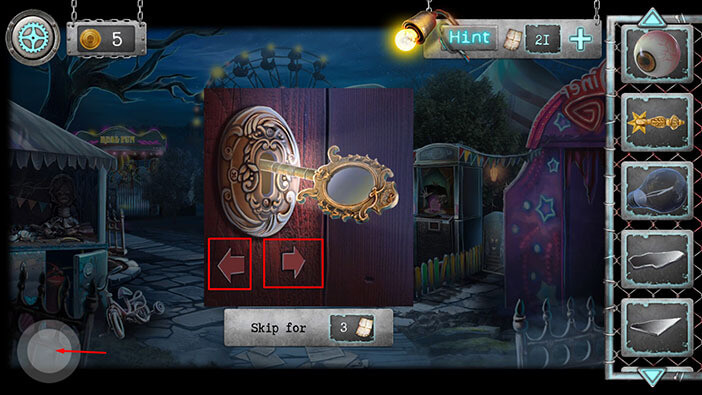
If you recall, we previously saw the key swinging left and right on the display on the robot’s chest. So, let’s go back into the purple building on the right, and take another look at the robot.
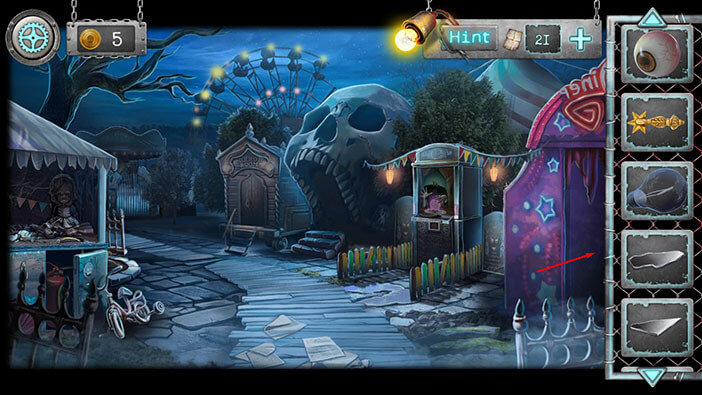
Tap on the table to take a closer look at the display screen on the robot’s chest.

Ok, let’s write down the sequence in which the key is swinging. So, we have
3 swings to the left
2 swings to the right
1 swing to the left
Memorize/ write down this sequence, then tap on the button in the lower left corner to go back.
After that, tap on the arrows in the lower left corner to go back, outside.
Tap on the door of the mirror room, again, to take a closer look.
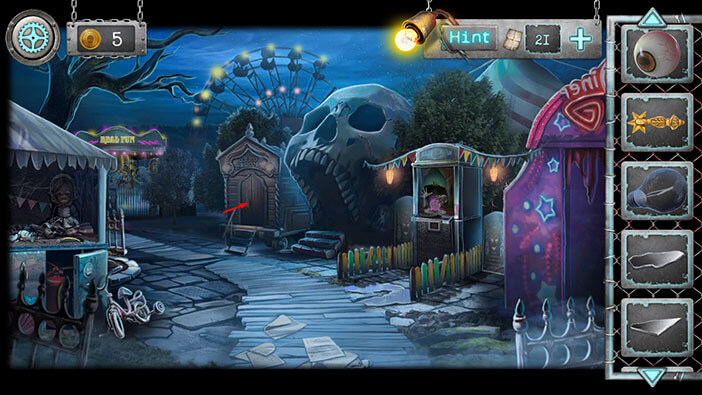
Let’s turn the key in the sequence that matches the swinging of the key on the robot’s chest.
Step 1
Tap 3 times on the left arrow.

Step 2
Tap 2 times on the right arrow.

Step 3
Tap once on the left arrow, and you will unlock the mirror door.
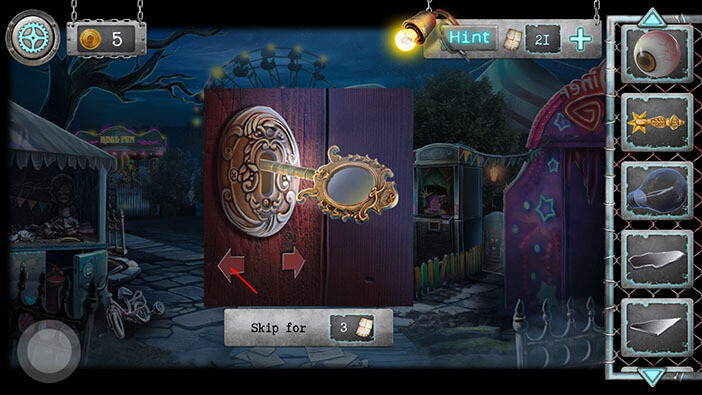
Tap on the mirror door to proceed inside.

It’s very dark in this room, and the only thing that we can see is a toy puppy. So, tap on it to pick it up and “Cute puppy” will be added to your inventory.
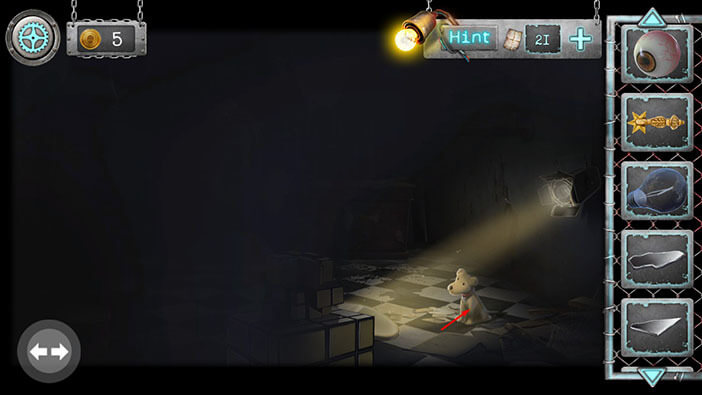
Next, tap on the mirror, located below the boxes, to redirect the light.
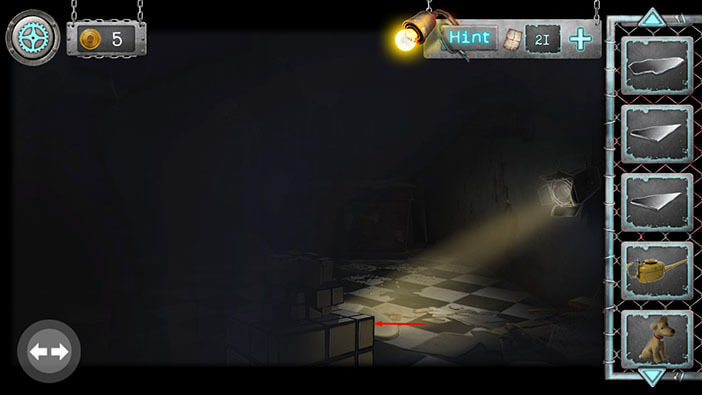
Ok, we can now see the shelf on the wall on the right. Let’s take a closer look at it.
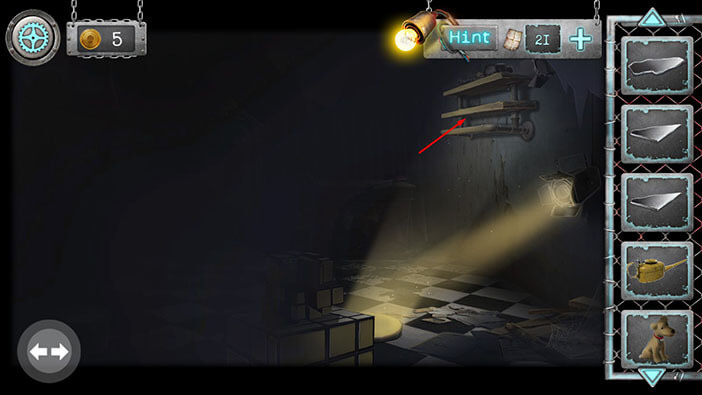
Drag left and right to remove the garbage from the middle shelf.
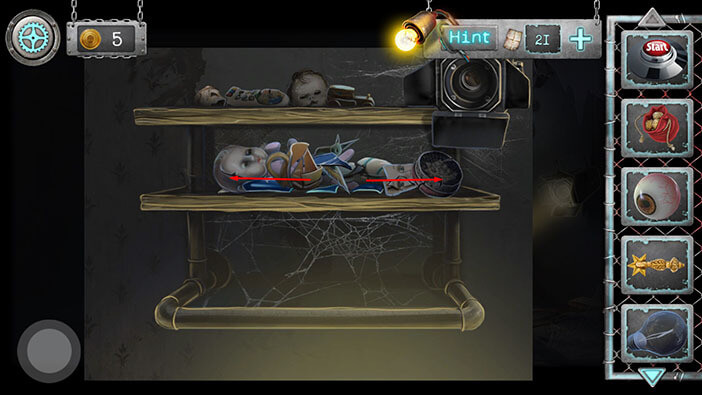
Behind the garbage, you will find a toy. Tap on it to pick it up and “Cute bunny” will be added to your inventory.
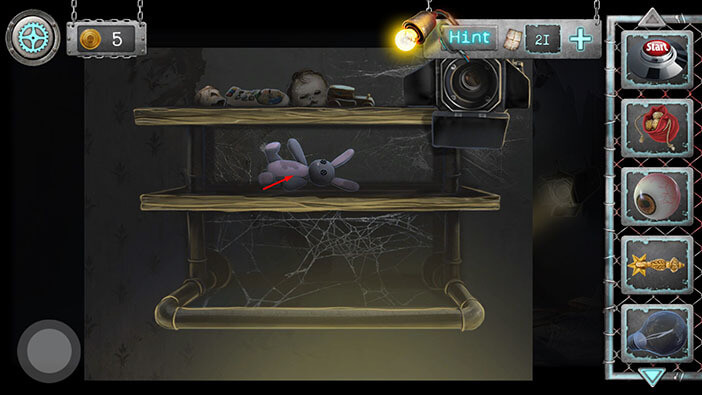
Next, select the “Bulb I” from the inventory and insert it into the spotlight in the top right corner of the shelf.
After that, tap on the button in the lower left corner to go back.
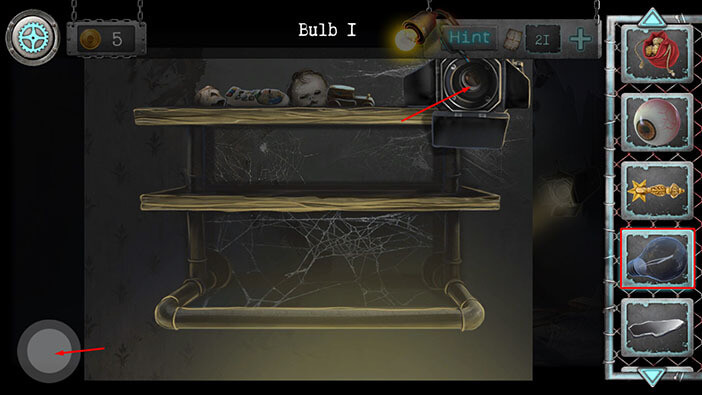
Ok, we illuminated another part of the room and we can now see a chest. Let’s take a closer look at it.
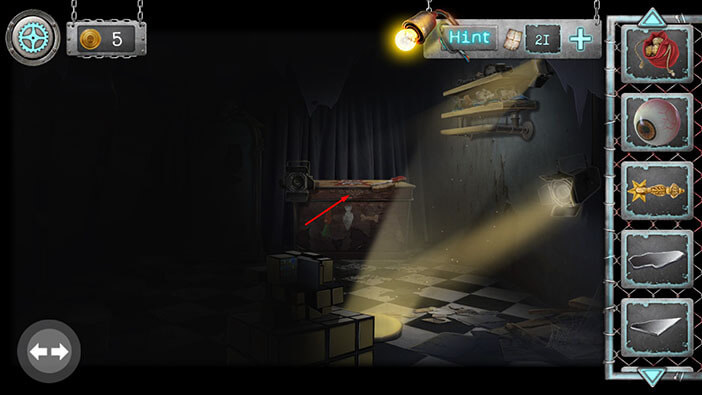
You will notice some kind of brush on top of the chest. Tap on it to pick it up and “Metal brush” will be added to your inventory.
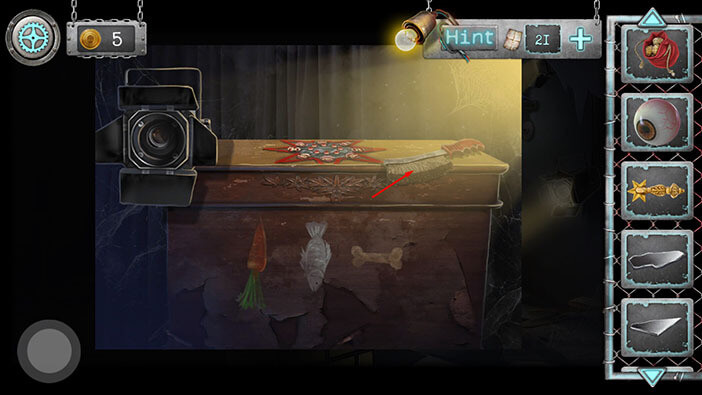
Next, let’s tap on the puzzle on top of the chest to start the interaction.
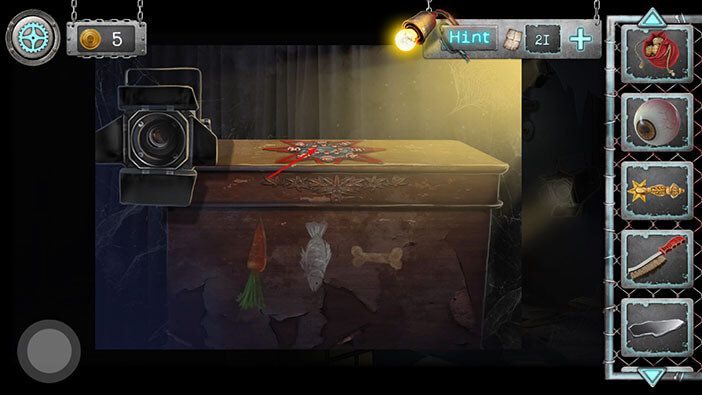
The goal of this puzzle is to place all eight eyes inside the mouth. But, each time you put an eye in the mouth, the whole circle with eyes will rotate one spot to the left.
We will do this puzzle in several steps. Let’s begin.
Step 1
Tap on the mouth in the top right.
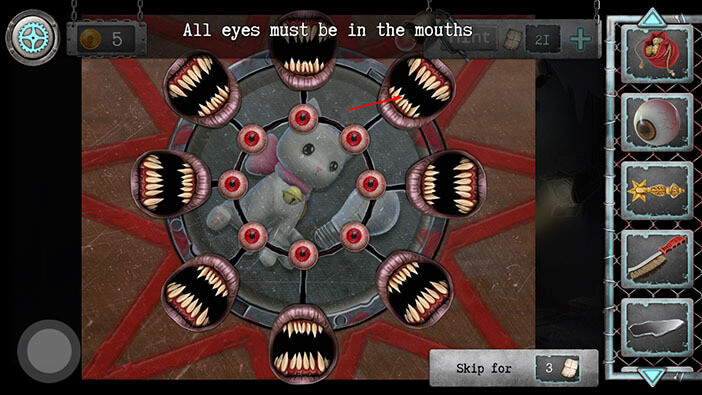
Step 2
Tap on the mouth in the bottom right.
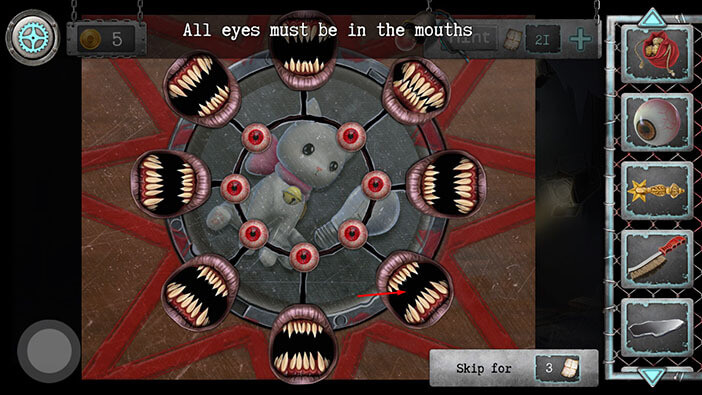
Step 3
Tap on the mouth in the bottom left.
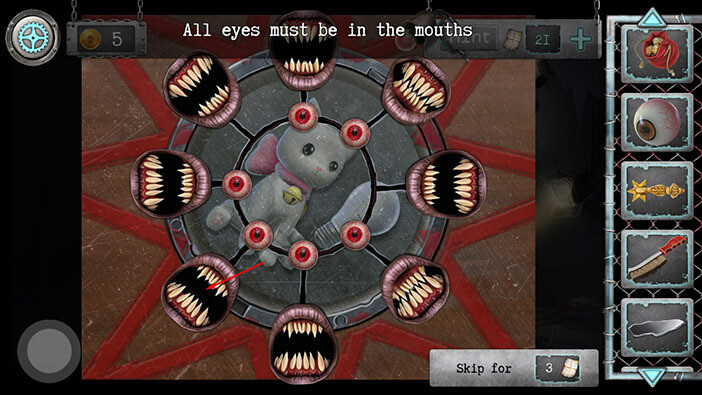
Tap on the mouth in the top left.
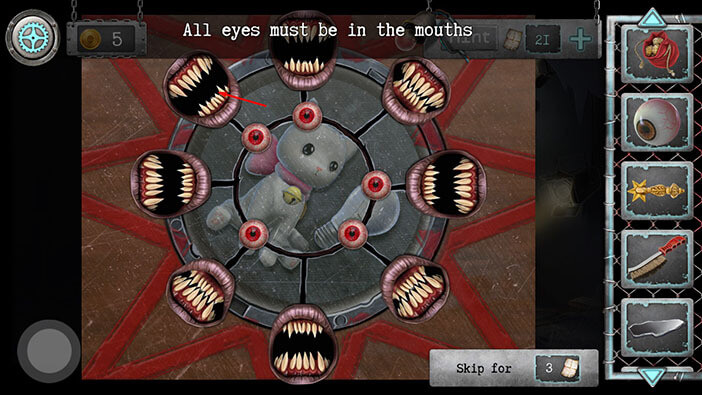
Tap on the bottom mouth.
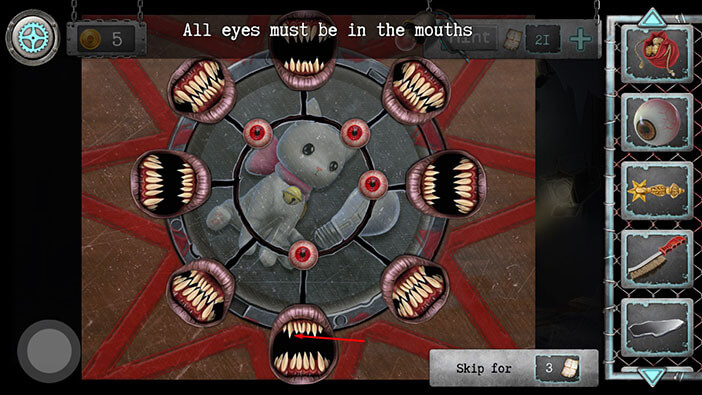
Tap on the mouth on the left.
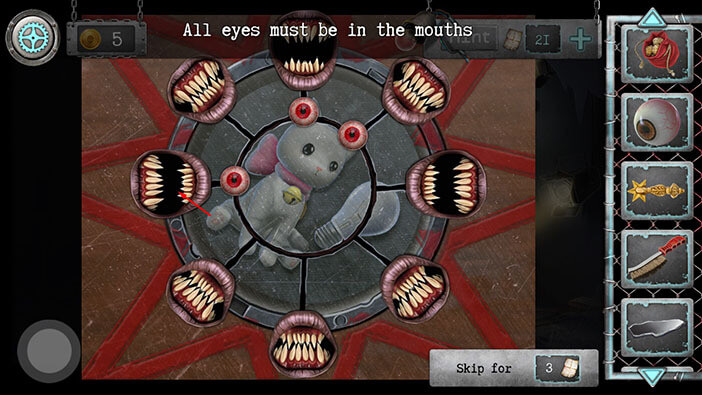
Tap on the mouth at the top.
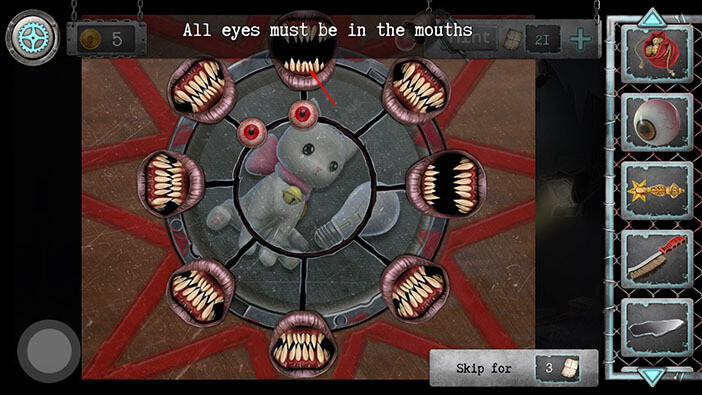
Tap on the mouth in the bottom right to spit out the eyeball.
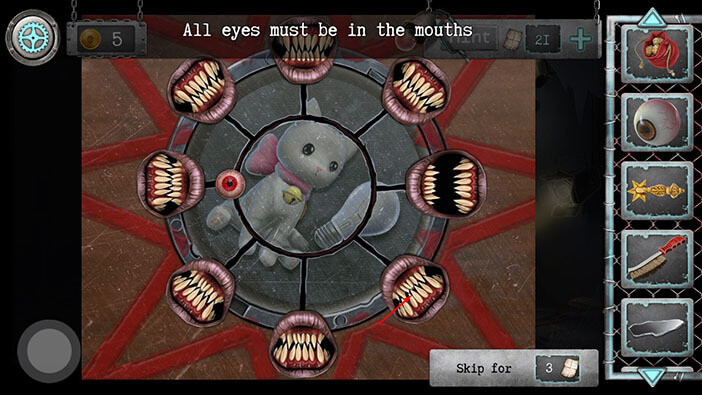
Tap on the mouth on the right.
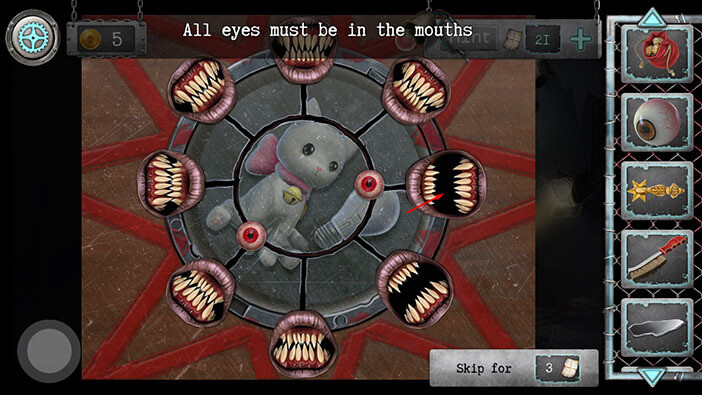
Tap on the mouth in the top left to spit out the eyeball.
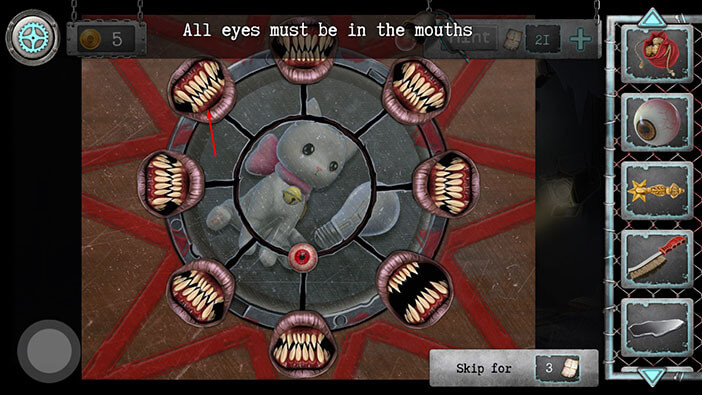
Tap on the mouth in the bottom right.
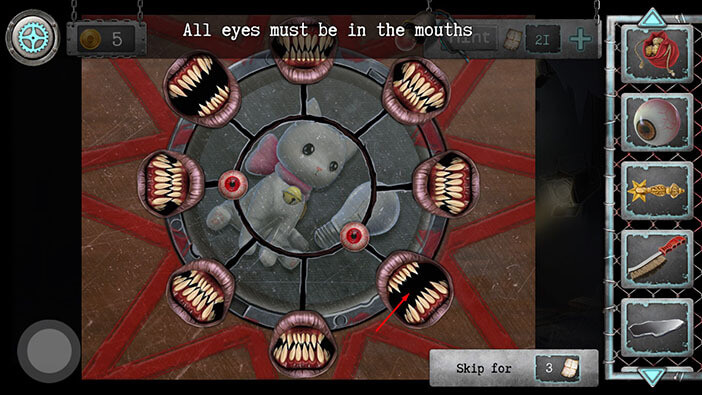
Tap on the mouth at the top to spit out the eyeball.
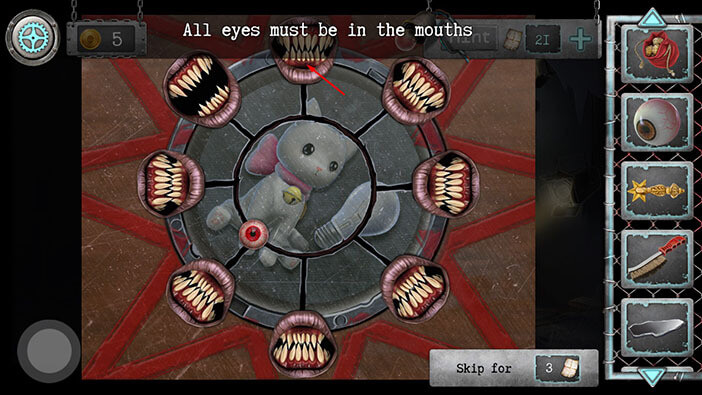
Tap on the mouth in the top left.
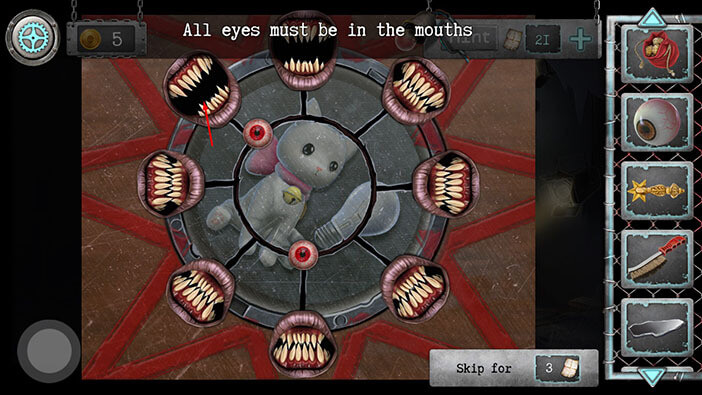
Tap on the mouth in the top right to spit out the eyeball.
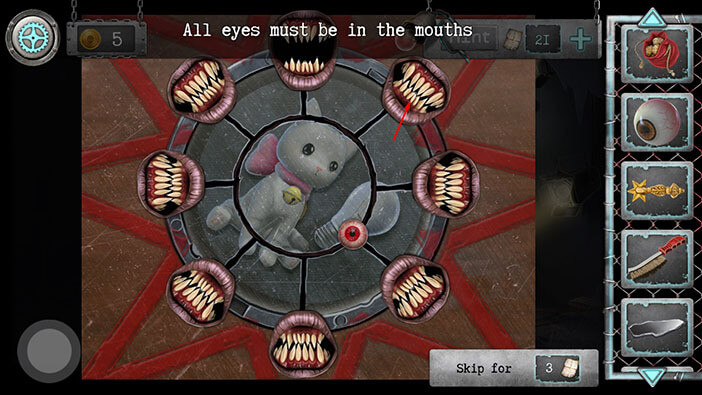
Tap on the mouth at the top to spit out the eyeball.
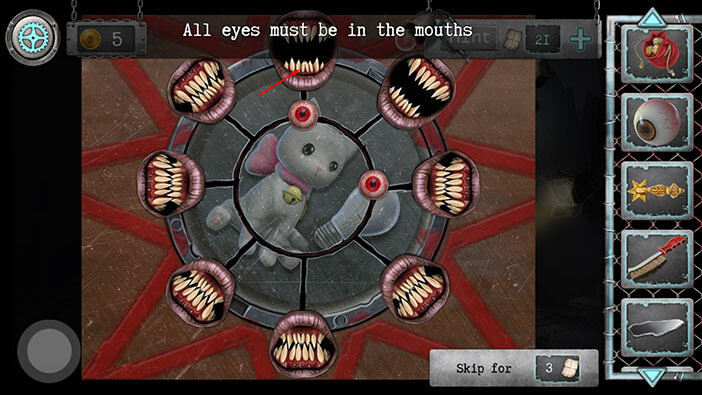
Finally, tap on the mouth in the top right, and you will solve this puzzle.
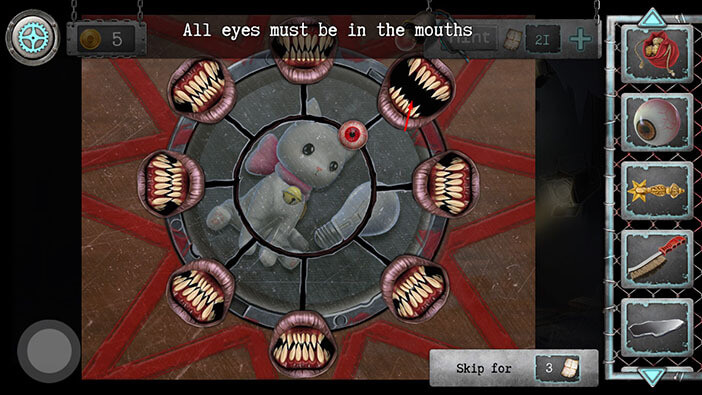
As soon as you solve the puzzle, the small circular door will open, and inside you will see two items. Tap on them to pick them up. “Little kitten” and “Bulb 2” will be added to your inventory.
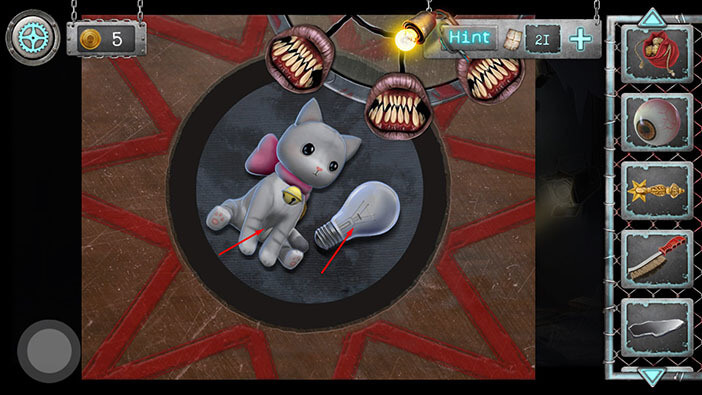
When you pick up the “Little kitten” you will discover a gold coin which was hidden below it. Tap on the “Gold coin” to pick it up.
After that, tap on the button in the lower left corner to go back.
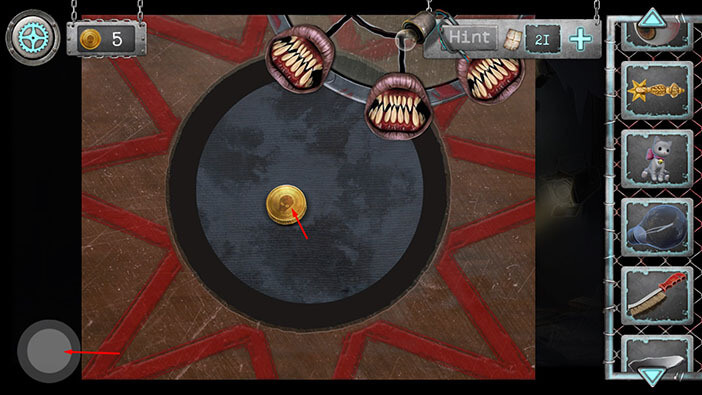
Select the “Bulb 2” from the inventory and place it into the spotlight in the top left.
After that, tap on the button in the lower left corner to go back.
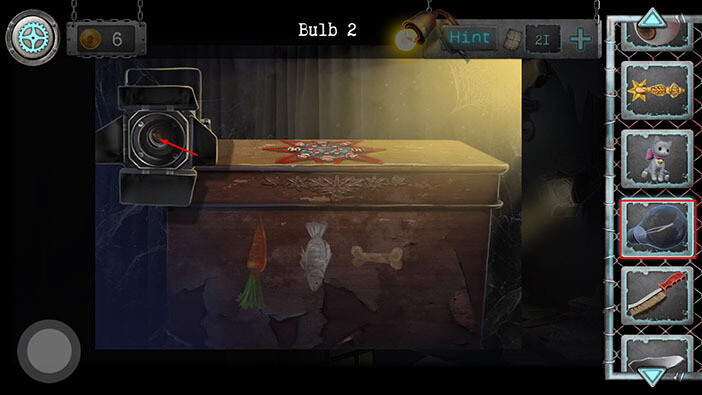
Ok, we illuminated a bit more of the room, so let’s tap on the cube to take a closer look at it.
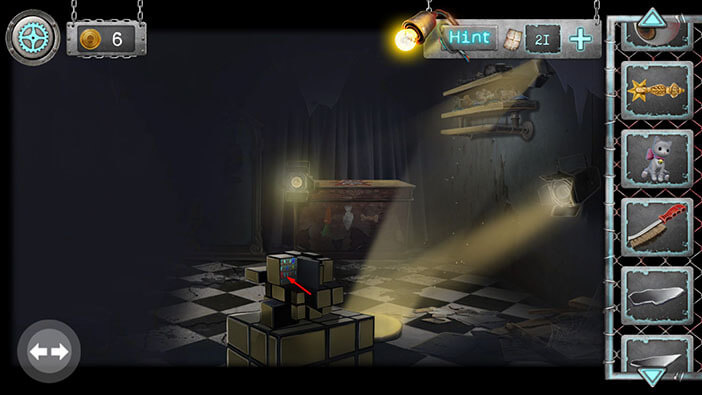
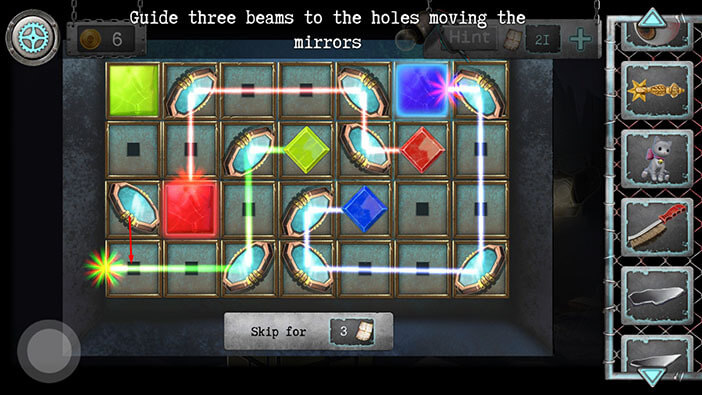
Here we have another puzzle. Our task is to use the small mirrors to redirect the three rays (blue, green, and red) to the cubes of the matching color. We will do this puzzle in several steps. Let’s begin.
Step 1
Take the mirror located in the second slot (left to right) in the first row (top to bottom) and swap it with the mirror in the fourth slot, in the third row.
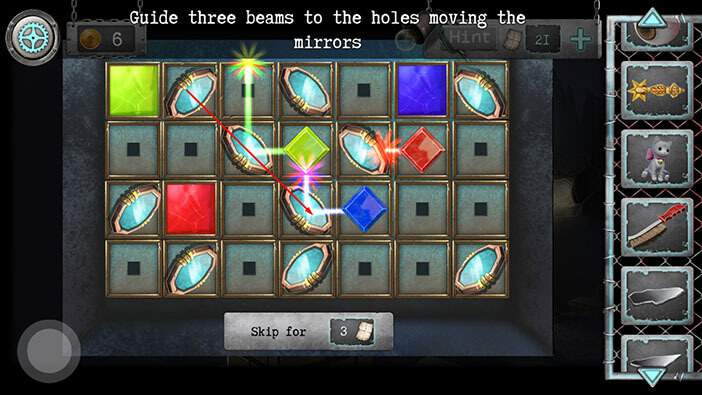
Step 2
Take the mirror located in the third slot in the second row and swap it with the mirror in the fourth slot, in the fourth row.
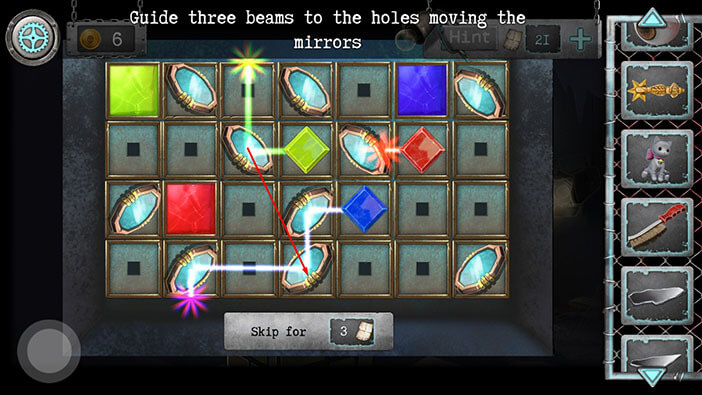
Step 3
Take the mirror located in the fourth slot in the first row and swap it with the mirror in the fifth slot, in the second row.
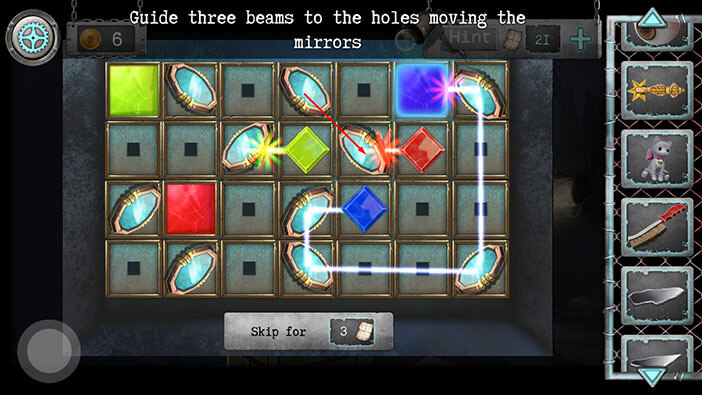
Step 4
Take the mirror located in the fourth slot in the first row and place it into the fifth slot, in the first row (move it one slot to the right).
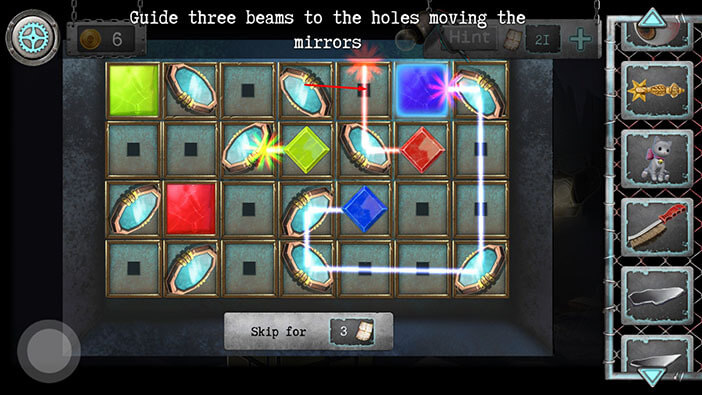
Step 5
Take the mirror located in the first slot in the third row and swap it with the mirror in the second slot, in the first row.
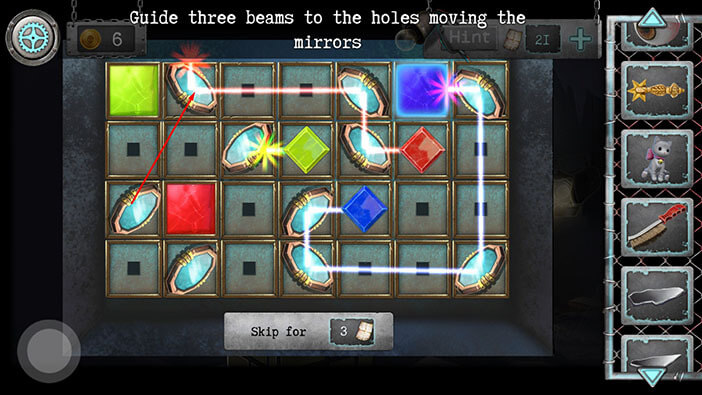
Step 6
Take the mirror located in the second slot in the fourth row and swap it with the mirror in the third slot, in the second row.
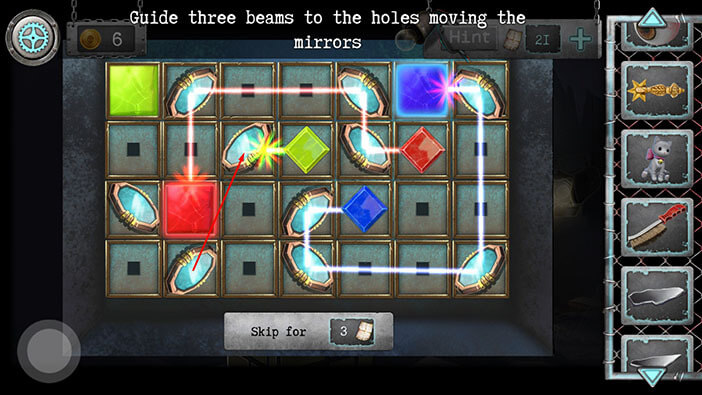
Step 7
Take the mirror located in the second slot in the fourth row and place it into the third slot, in the fourth row (move it one slot to the right).
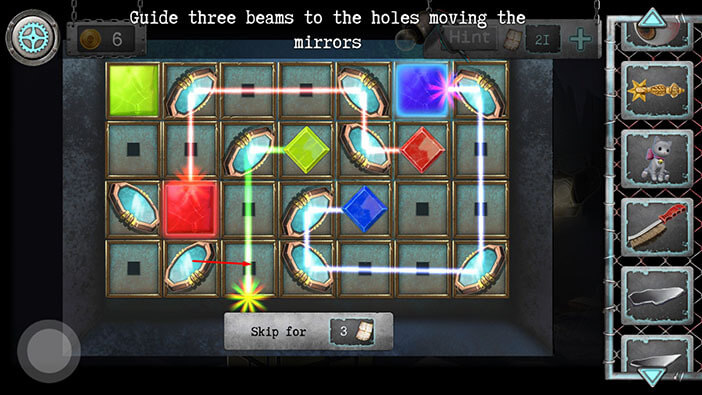
Step 7
Take the mirror located in the first slot in the third row and place it into the first slot, in the fourth row (move it one slot down).
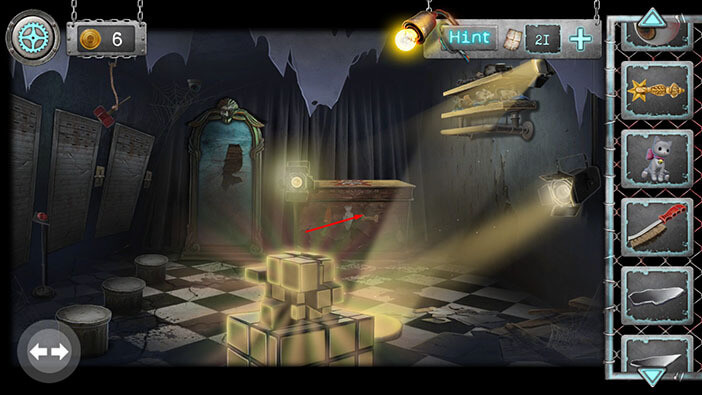
Ok, now let’s take another look at the large chest.
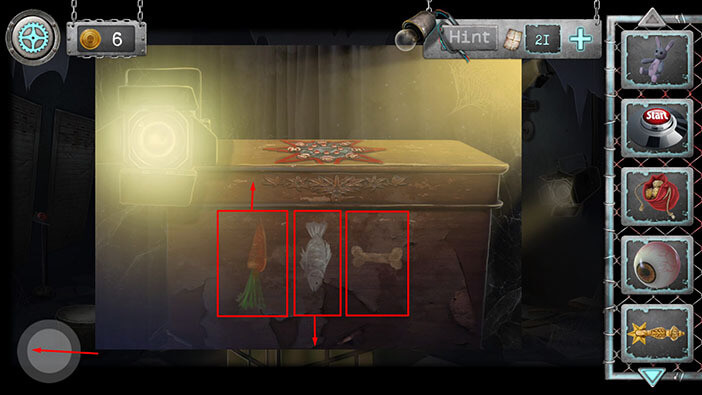
We can see three pictures on the chest, a carrot, a fish, and a bone. If you browse through the inventory you will see that we have three toys, a bunny, a kitten, and a puppy. So, let’s decipher this puzzle.
Carrot = “Cute bunny”. The carrot is the first item, looking from left to right. The carrot is pointing up.
Fish = “Cute kitten”. The fish is the second item, looking from left to right. The fish is pointing down.
Bone = “Cute puppy”. The bone is the third item, looking from left to right. The bone is not pointing in any direction (it just sits in the middle).
Memorize/ write down this information because we will need it to solve the next puzzle. Once you’re done, tap on the button in the lower left corner to go back.
Well, let’s tap on the red button on the left to take a closer look.
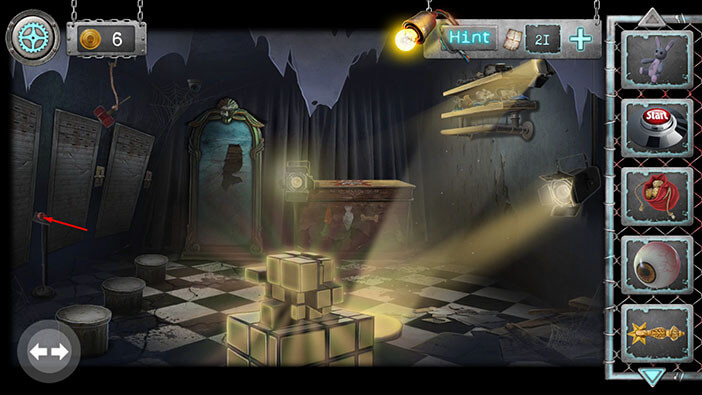
Ok, here we will use the information which we discovered by examining the pictures on the chest. Here, we can see three spots, so let’s arrange the animals in the order which matches the pictures on the chest.
Step 1
Select the “Cute bunny” from the inventory and place it on the first spot (looking from left to right) – because the carrot was on the left side.
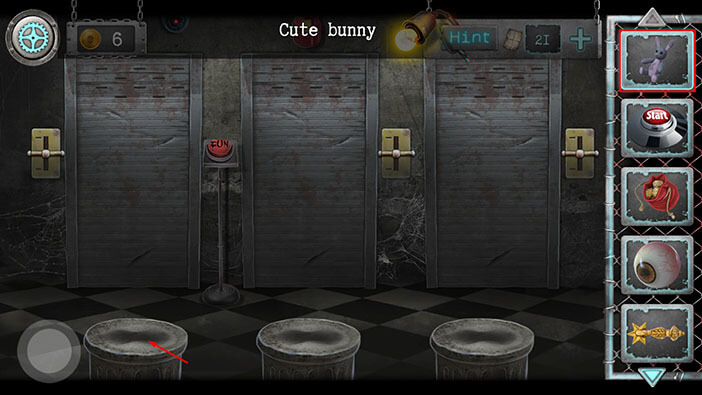
Step 2
Select the “Little kitten” from the inventory and place it in the second spot – because the fish was in the middle.
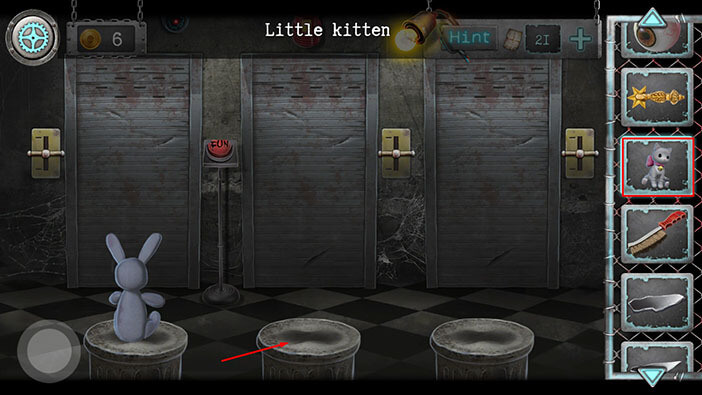
Step 3
Select the “Cute puppy” from the inventory and place it on the third spot – because the bone was on the right side.
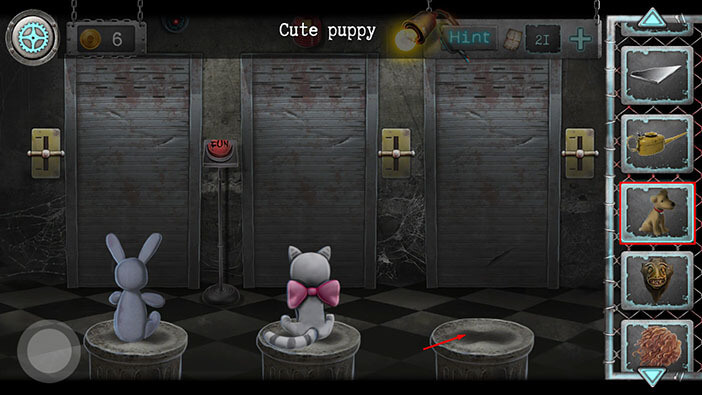
Step 4
Our next task is to set the levers to the position that matches the three images which we saw on the chest.
Tap twice on the lever on the left (bunny) to raise it up – because the carrot was pointing up.
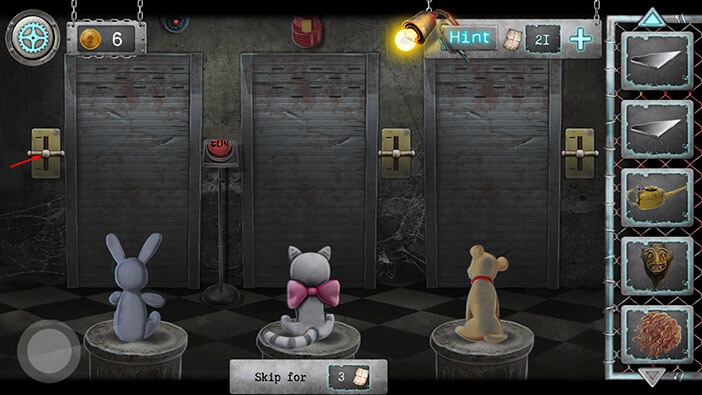
Step 5
Tap once on the lever in the middle (kitten) to lower it down – because the fish was pointing down.
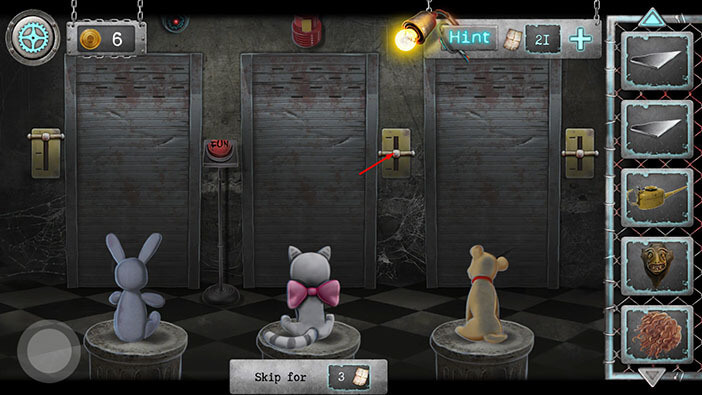
Step 6
The right lever is set to the middle position, so we don’t have to touch it – the bone was in the middle, it wasn’t pointing up or down.
So, let’s tap on the “Fun” button to start the interaction.
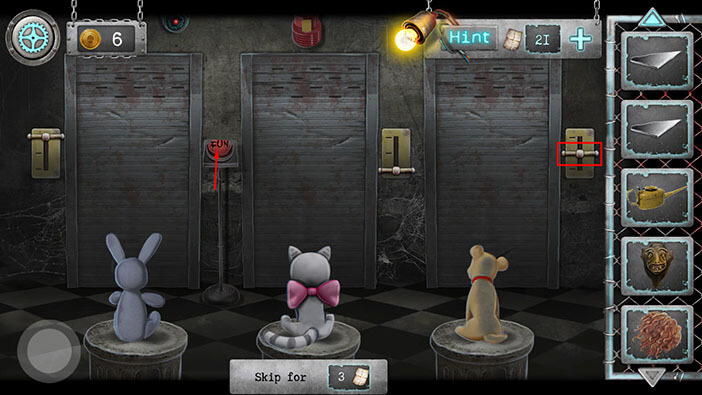
The hanged clown will appear in the middle mirror for a brief moment, and a large hammer will strike the mirror and shatter it.
We can see two items on the ground, so tap on them to pick them up. “Clown nose” and “Hammer” will be added to your inventory.
After that, tap on the button in the lower left corner to go back.
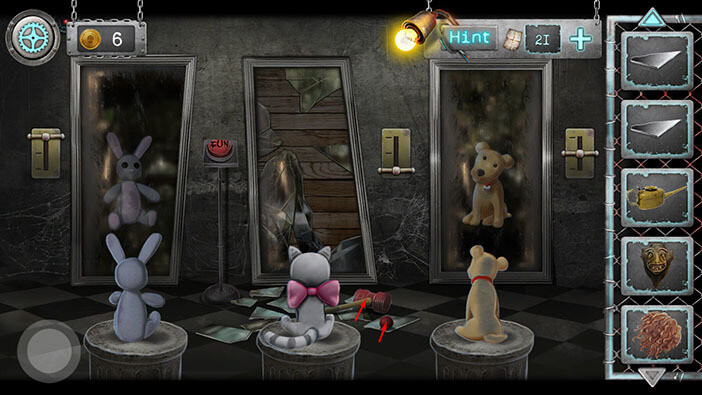
Ok, now we have 6 gold coins, and that should be enough for the slot machine that we saw previously (in the purple building on the right). So, let’s go there.
Tap on the arrows in the lower left corner to go outside.
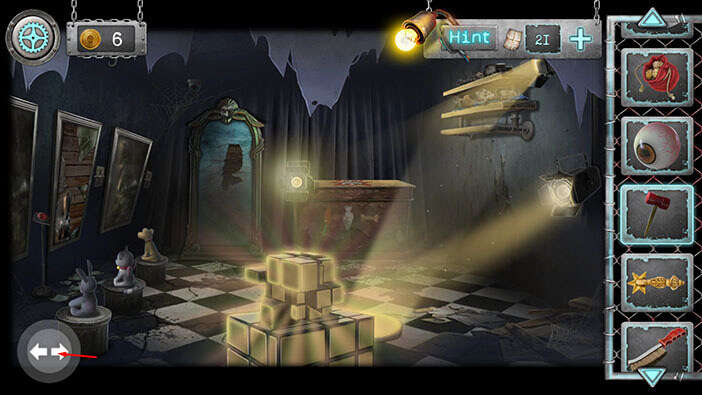
Let’s go into the purple building on the right.
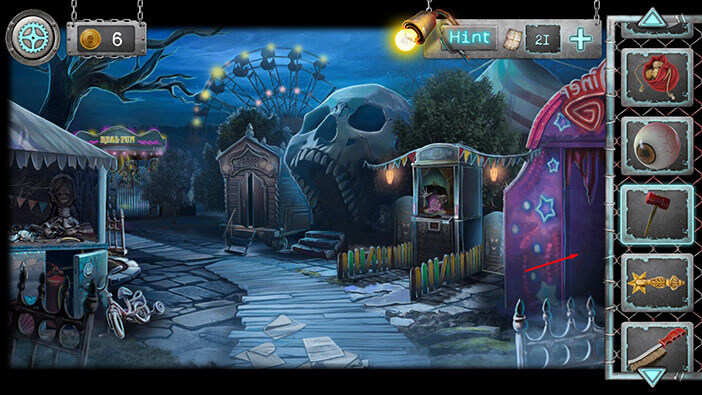
We have enough gold coins for the mysterious slot machine, and we also found the hammer which will allow us to activate another slot machine. However, we will end the third part of the walkthrough at this point and continue the story in the fourth part. You can check out the fourth part by tapping on the “Next Part” button.
Thank you for reading.