Scary Horror 2 – Chapter 3, Part 2
Hello everyone and welcome to Part II of our walkthrough for Chapter 3 of the “Scary Horror 2: Escape Games”. At the end of Part I, we cut down the thorns and gained access to the strange box. However, to open the box, we will have to solve another puzzle (no surprise there).
NOTE: The second part of the walkthrough follows the story up to the point when you unlock the gate in the amusement park, and gain access to the new area.
Ok, let’s solve this puzzle. The goal is to rearrange the balls and match them with symbols of the same color. So,
All yellow balls should be in the first (inner) circle (yellow fish).
All red balls should be in the second circle (red fish).
All black balls should be in the third circle (black fishing hook)
All green balls should be in the fourth (outer) circle (green fish).
There are two empty slots on this machine, and we can use them to move the balls around. We can also rotate the six discs left and right by tapping on the arrows. We will do this puzzle in multiple steps. Let’s begin.
Step 1
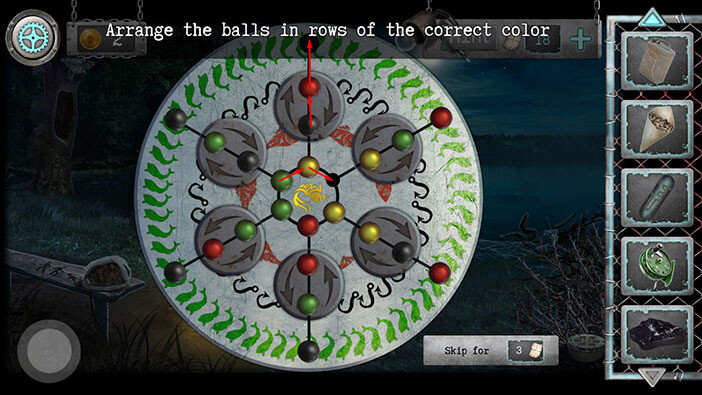
On the top of the inner circle, you will see a yellow ball, tap to move it into the empty slot on the right. After that, tap on the green ball, located in the upper left slot of the inner circle one slot to the right (where the yellow ball was).
Next, on the top disc, move the red ball into the empty slot on the outer circle (above the red ball), and move the black ball to the upper slot (where the red ball was).
Step 2
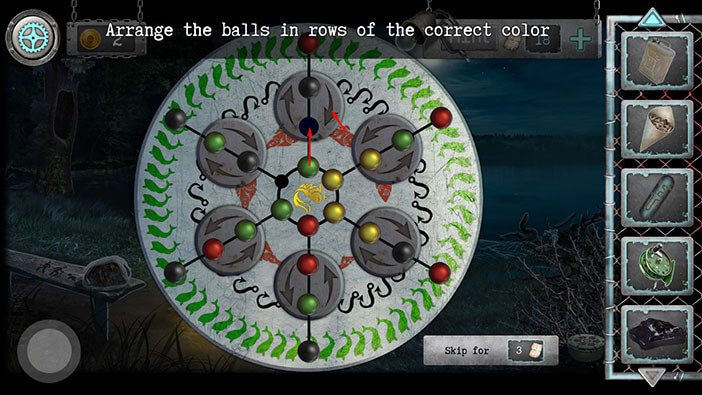
We should move the green ball, located in the top slot of the inner circle, one slot up. After that, tap on the arrow on the top disk to rotate it.
Step 3
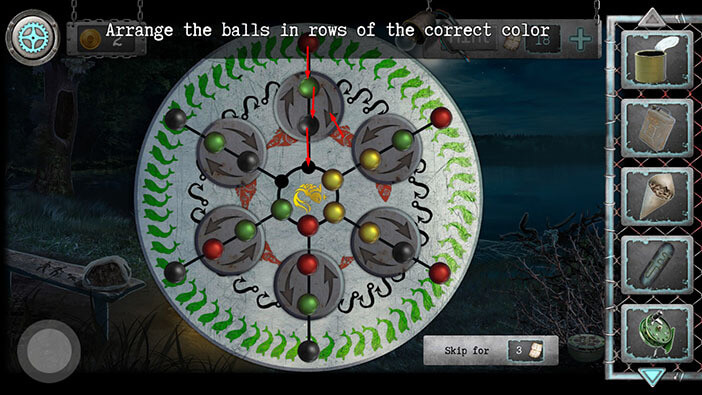
Move both balls (green and black) from the top disk one slot down.
After that move the red ball, located in the top slot of the outer circle, one slot down. Lastly, tap on one of the arrows on the top disk to rotate it.
Step 4
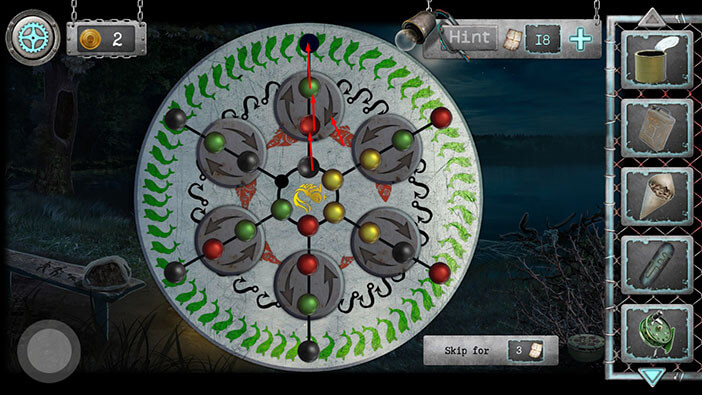
Move the green ball, located in the top slot of the top disk, one slot up (to the outer circle). After that, move the outer two balls that were below the green ball (black and red), one slot up.
After that, tap on one of the arrows on the top disc to rotate it.
Step 5
Ok, now let’s take a look at the balls on the top-left disc. Move the black and green ball located on this disk one slot down and to the right. After that, move the black ball from the outer disk one slot down and to the right.
Lastly, tap on the top-left disc to rotate it.
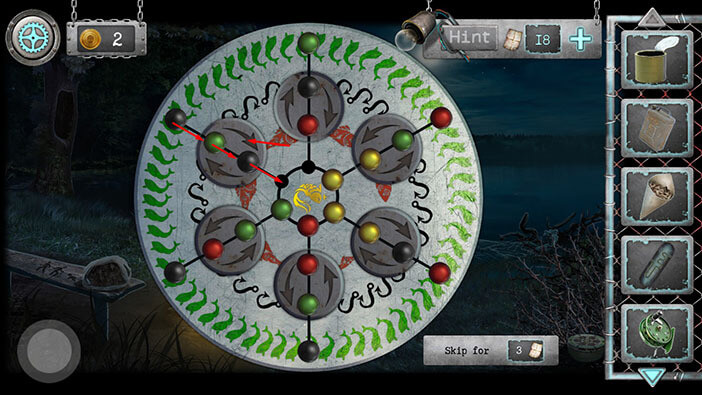
Step 6
Move the green ball and the black ball from the top-left disc by one slot up (and to the left). After that, move the black ball located in the top-left slot of the inner circle, by one slot up and to the left.
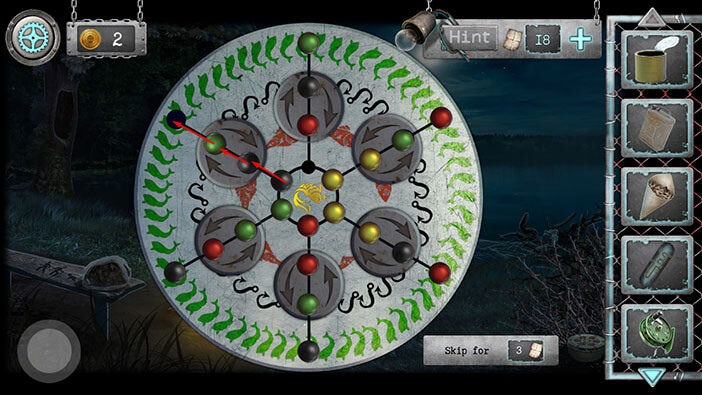
Step 7
Move the green ball located in the bottom left slot of the inner circle, one slot up. After that, tap on one of the arrows on the left disk to rotate it.
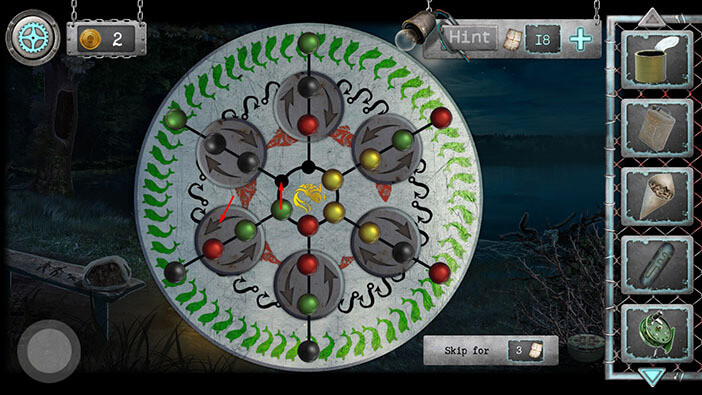
Step 8
Ok, now let’s focus on the bottom left disc. Move both balls (red and green) located on this disc one slot up and to the right. After that, move the black ball located in the bottom left slot of the outer circle, one slot up and to the right.
Lastly, tap on one of the arrows on the bottom left disc to rotate it.
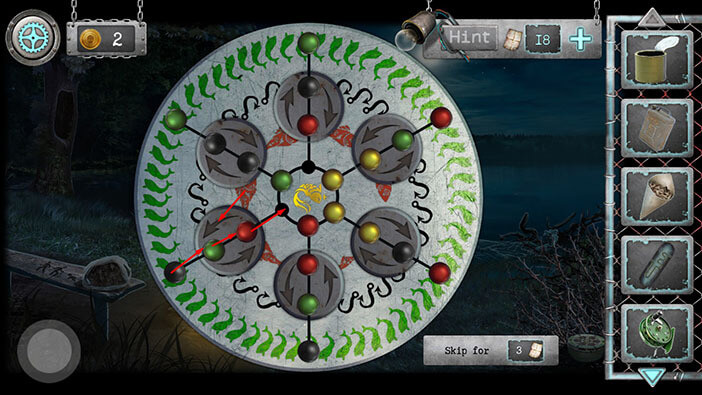
Step 9
Move the green ball from the bottom left disc one slot down and to the right (to the outer disc). After that, move the black ball from the bottom left disc one slot down and to the right.
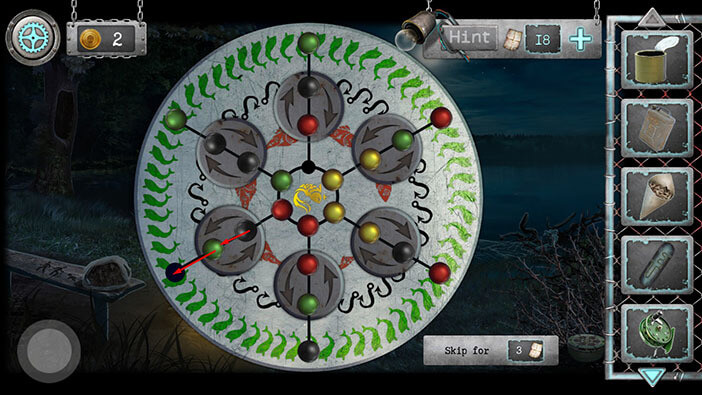
Step 10
Move the red ball located in the bottom left slot of the inner circle, one slot down and to the left. After that, move the yellow ball, located in the top right slot of the inner circle, one slot up and to the left.
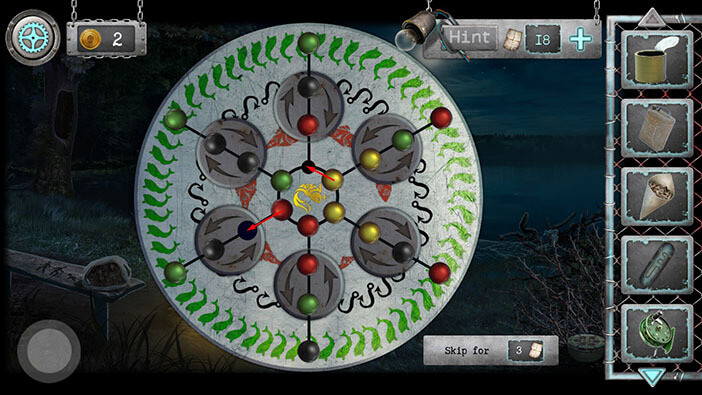
Step 11
Move the red ball, located in the bottom slot of the inner circle, one slot up and to the left. After that, we will focus on the bottom disk. Move both balls from this disc one slot up.
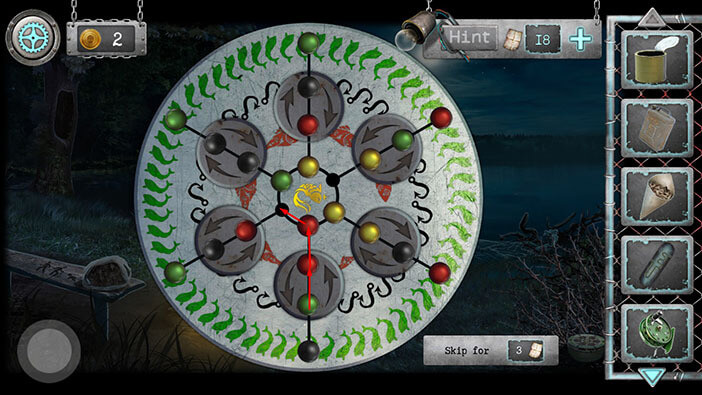
Step 12
Move the black ball located in the bottom slot of the outer circle, one slot up. After that, tap on one of the arrows on the bottom circle to rotate it.
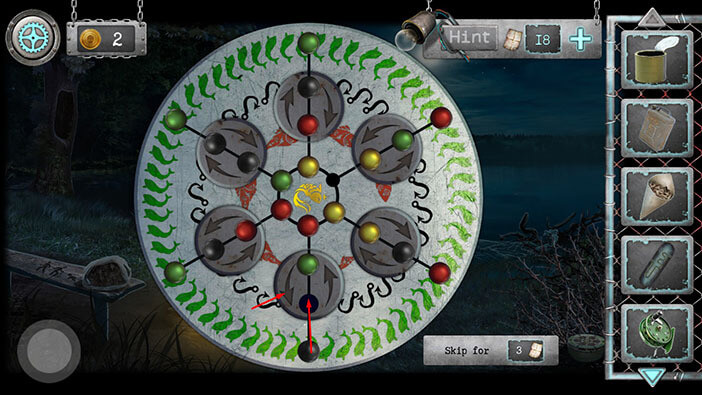
Step 13
Move both balls (green and black) located on the bottom disc one slot down. After that, move the red ball, located in the bottom slot of the inner circle, one slot down (to the bottom disc).
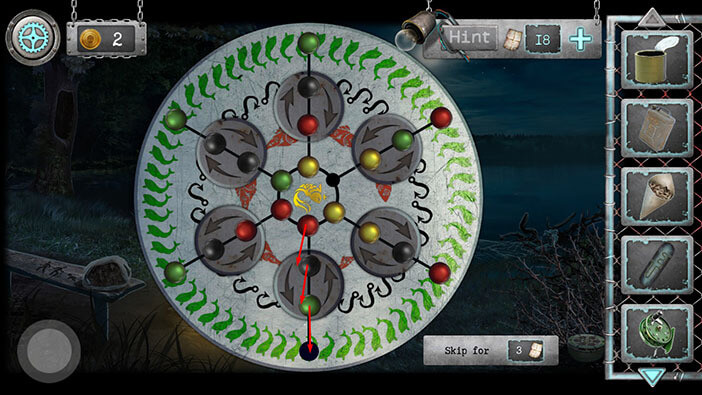
Step 14
M the yellow ball located in the top slot of the inner disc one slot down and to the right.
After that, move the green ball located in the top left spot of the inner disc one spot up and to the right.
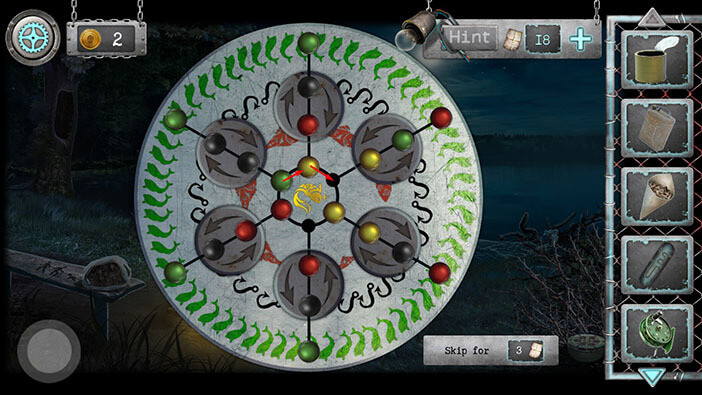
Step 15
Move the black ball located in the top left disc one spot down and to the right (to the inner circle). After that, move the two yellow balls from the inner circle. The yellow ball in the bottom left slot should be moved down and to the left. The yellow ball in the top right slot should be moved down.
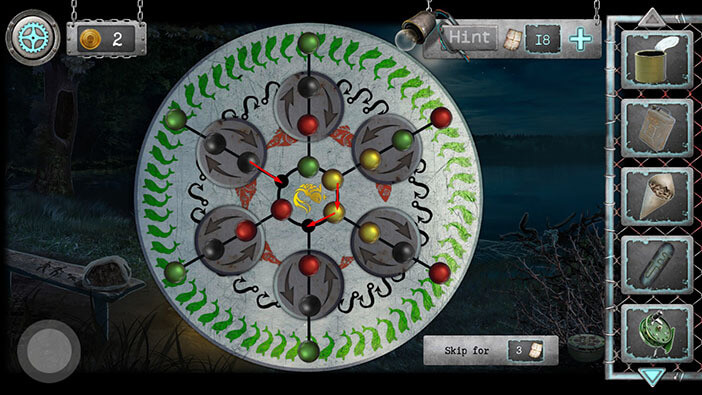
Step 16
Move the green ball located in the top slot of the inner circle one slot down and to the left.
After that, move the black ball located in the top left slot of the inner circle one spot up and to the left.
Lastly, move the red ball located in the bottom left slot of the inner circle one slot up.
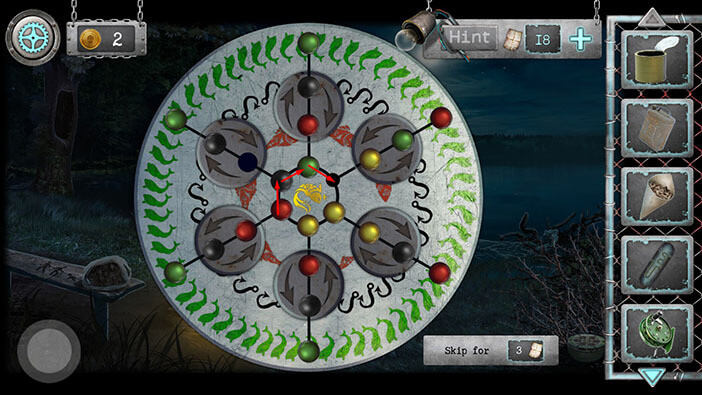
Step 17
Move the red ball located in the top left slot of the inner circle one slot up and to the left (to the top left disc).
After that, move the black ball located in the top slot of the inner circle, one slot down and to the left.
Lastly, move the green ball located in the top left slot of the inner circle one slot up and to the left.
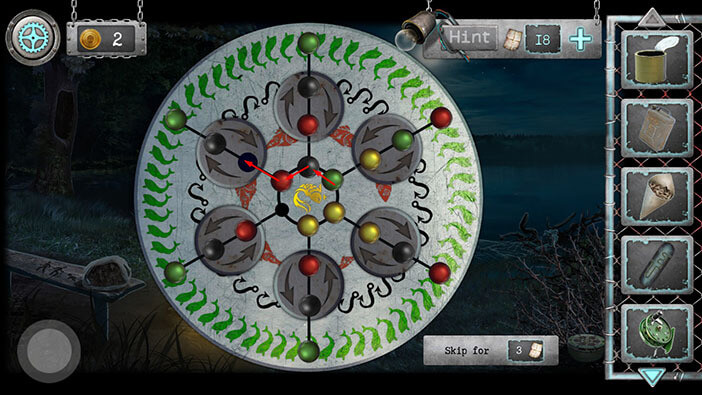
Step 18
Move both balls (yellow and green) located in the top left disc, one slot down and to the left. After that, move the red ball located in the top left slot of the outer circle one slot down and to the left. Lastly, tap on one of the arrows on the top left disc to rotate it.
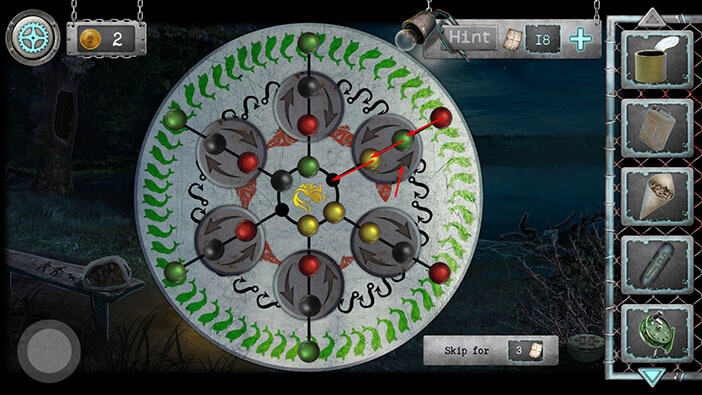
Step 19
Move the green ball located in the top left disc one spot up and to the left (to the outer disc.)
Next, we will move all three yellow balls located in the inner circle.
First, move the yellow ball in the bottom slot, up and to the left.
Second, move the yellow ball in the bottom left slot, down, and to the left.
Third, move the yellow ball in the top left slot, down.
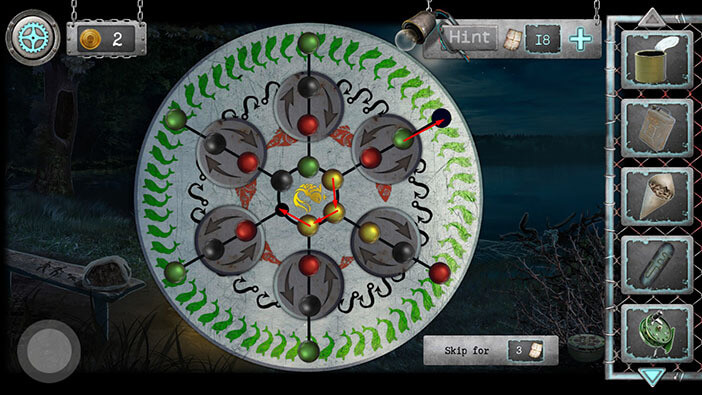
Step 20
Rotate by one slot clockwise (to the right) all balls on the inner circle (three yellow, green, and black).
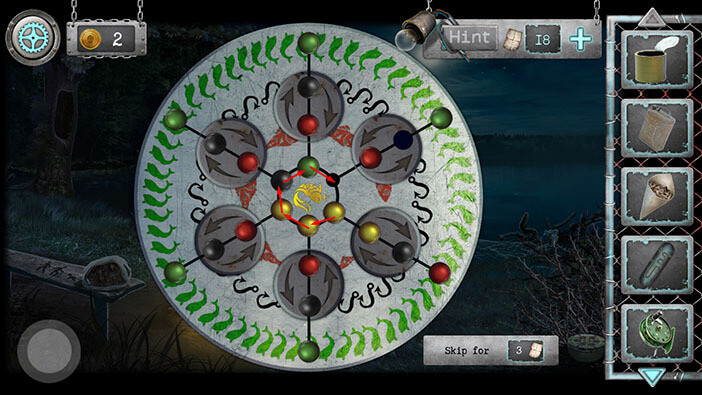
Step 21
Move the green ball located in the top right slot of the inner circle, one slot down.
After that, move the red ball in the top right disc one slot up and to the right.
Lastly, move the black ball locate in the top slot of the inner disc by two slots to the top right disc. So, first down and to the right, and then up and to the right.
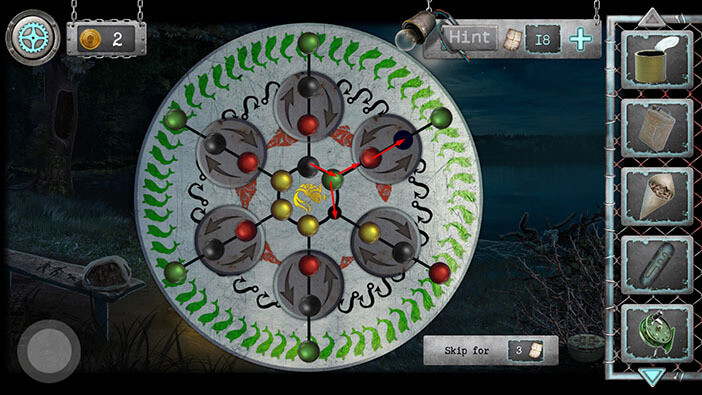
Step 22
Tap on one of the arrows on the top left disc to rotate it.
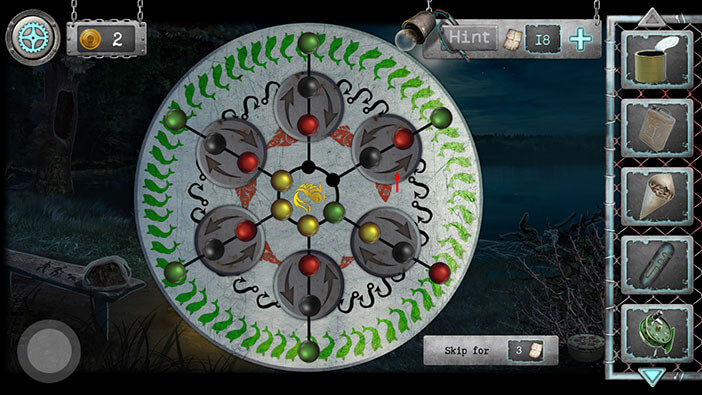
Step 23
Rotate by one slot clockwise (to the right) all yellow balls on the inner circle.
After that, move the green ball located in the bottom right slot of the inner circle one slot up.
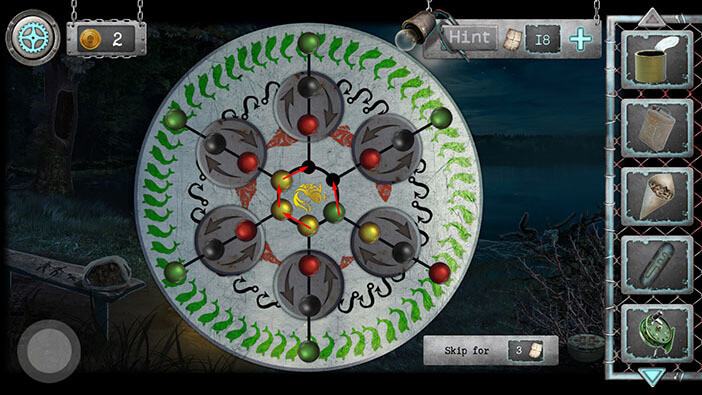
Step 24
Ok, now we will move the yellow ball located in the bottom right disc by two slots, to the bottom slot on the inner circle.
After that, we will move the green ball located in the top right slot of the inner circle, also by two slots to the bottom left disc (where the yellow ball was).
Lastly, tap on one of the arrows on the bottom left disc to rotate it.
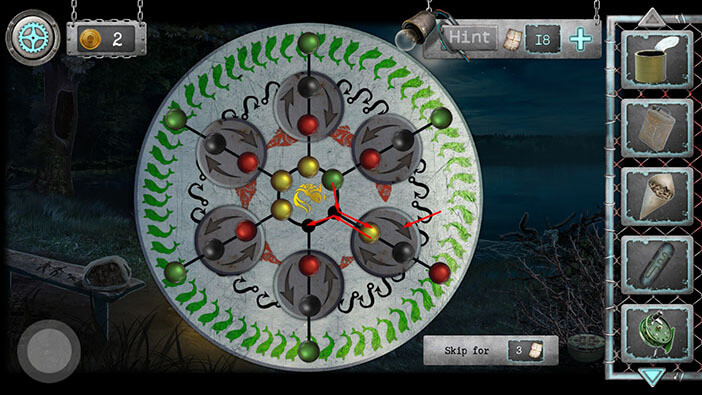
Step 25
Move both balls (green and black) located in the bottom right disc, one slot up and to the left. After that, move the red ball, located in the bottom right slot of the outer circle, one slot up and to the left.
Lastly, tap on one of the arrows on the bottom left disc to rotate it.
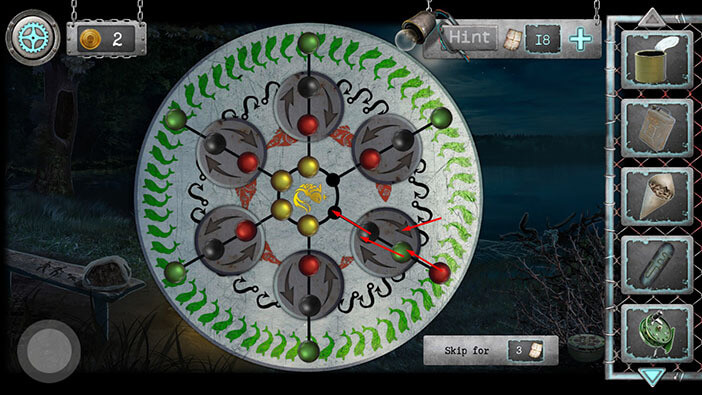
Step 26
Move the green ball, located in the bottom right disc, one slot down and to the right (to the outer circle).
After that, move the red ball located in the bottom right disc one slot down and to the right.
Lastly, move the black ball, located in the bottom right slot of the inner circle one slot down and to the right.
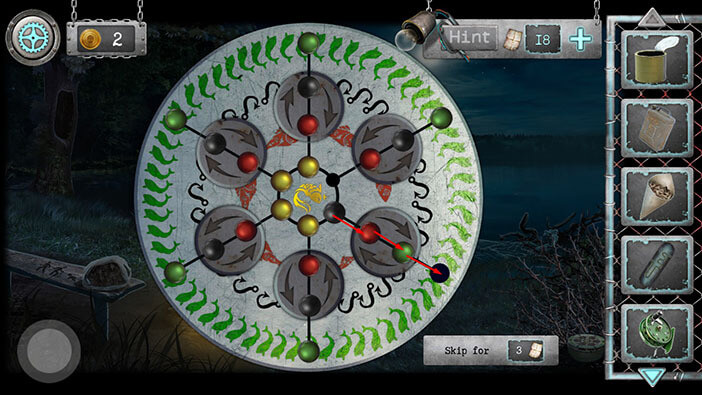
Step 27
Finally, tap on one of the arrows on the bottom right disc to rotate it, and you will solve this puzzle.
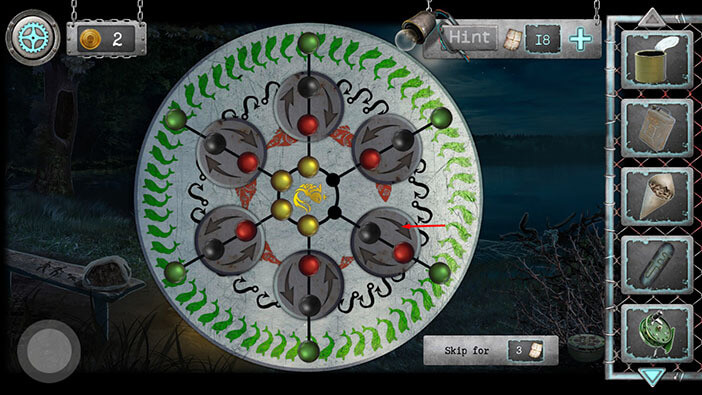
Tap on the item inside the strange box to pick it up and “Hook” will be added to your inventory. After that, tap on the button in the lower left corner to go back.
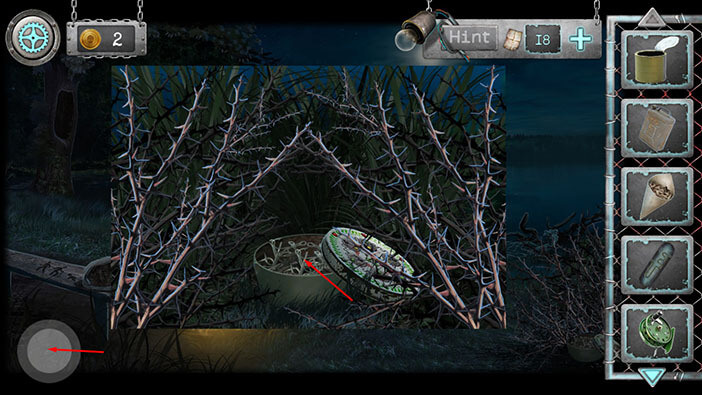
Tap on the fishing pole on the left to take a closer look at it.
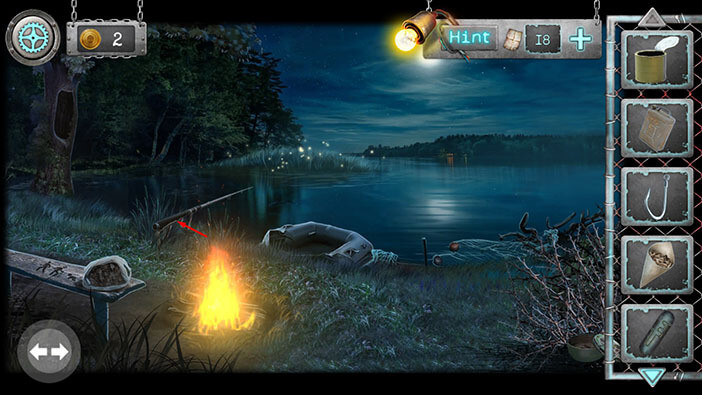
Select the “Reel” from the inventory and attach it to the fishing pole.
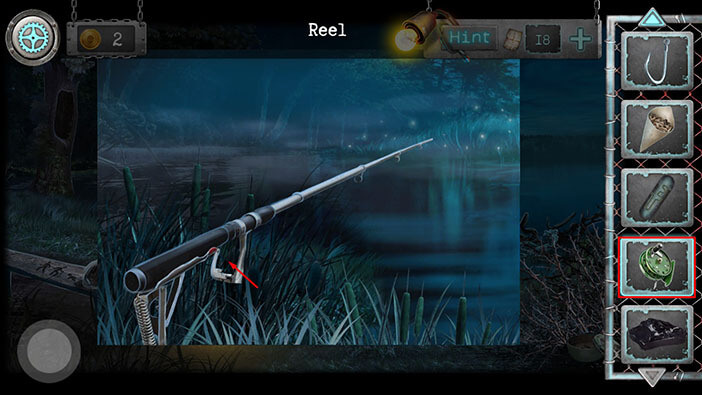
Next, select the “Hook” from the inventory and attach it to the string.
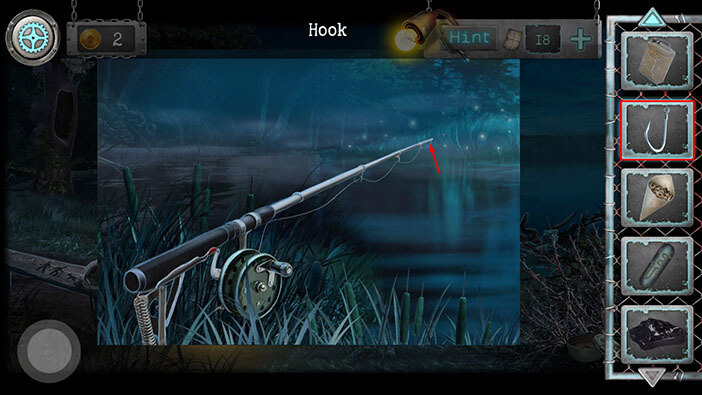
Lastly, select the “Paper cone with maggots” from the inventory, and tap on the hook to set the bait.
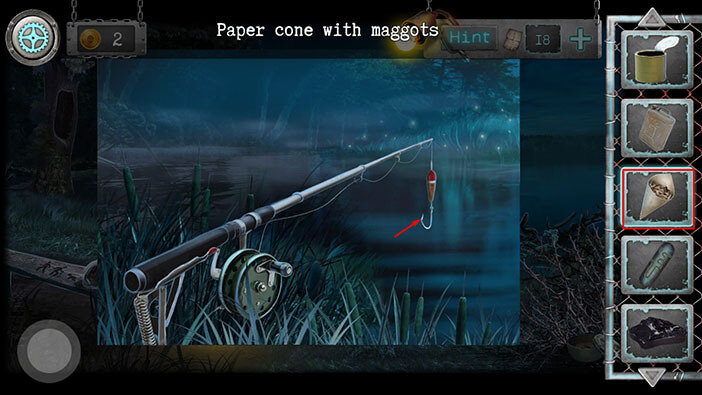
Here we have a small minigame. In order to catch the fish, you should tap on the fish on the bar on the left when it changes color to light green. Stop tapping on the fish as soon as the bar changes to a darker shade of green. You will catch the fish once you reach the top of the bar (and the fish will be added to your inventory).
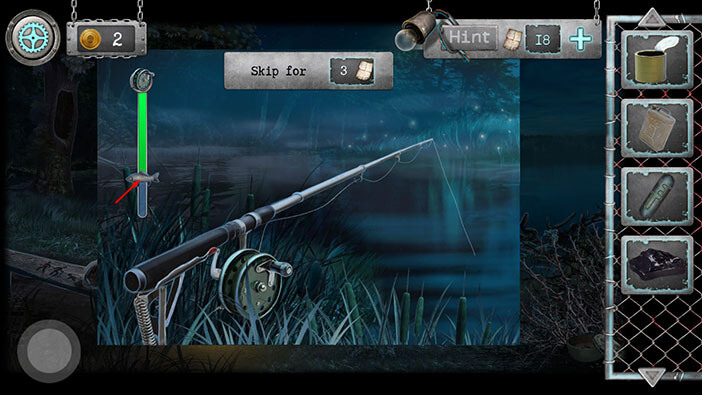
Ok, the plan was to use the fish to distract the dog. But, before we do that, let’s quickly repair the boat. Tap on the campfire to take a closer look at it.
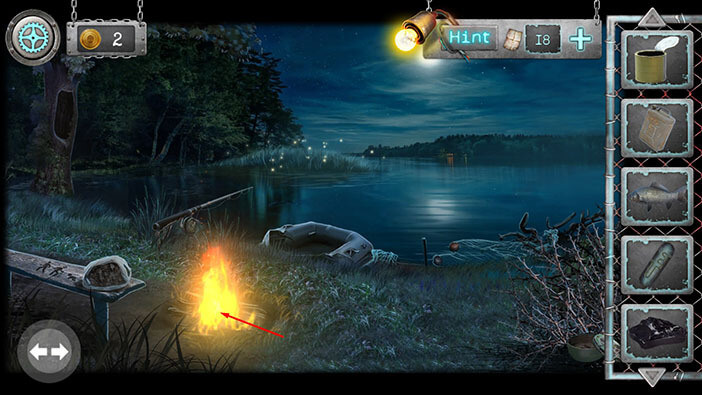
If you take a look at the recipe in the top right corner of the screen, you will see that we need to make a fire, and then hit up the bitumen in order to create the mixture which can be used to repair the boat. We already started the fire, so select the “Can” from the inventory and place it on the improvised fireplace.
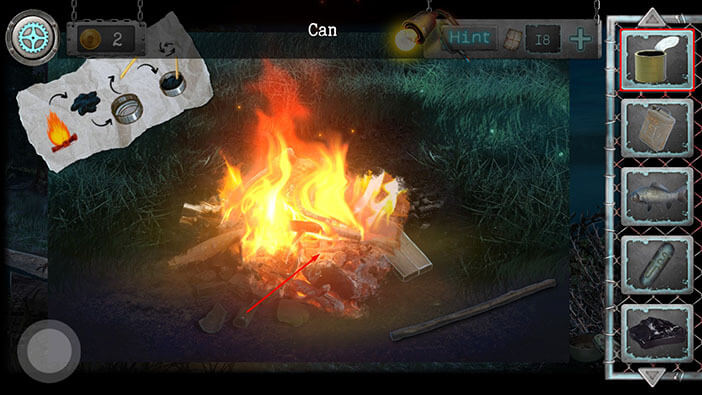
Next, select “Bitumen” from the inventory and place it into the can to melt it down.
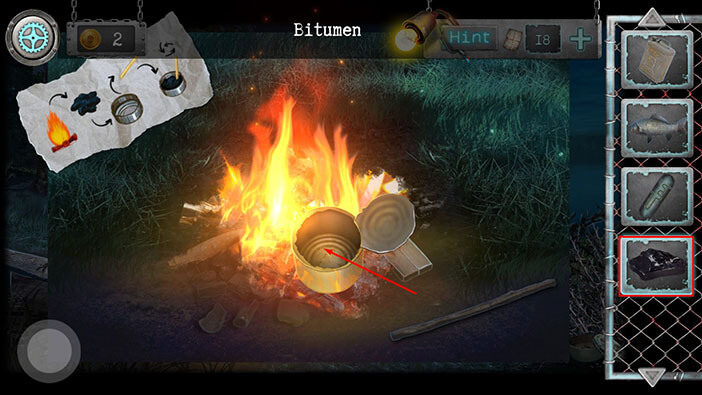
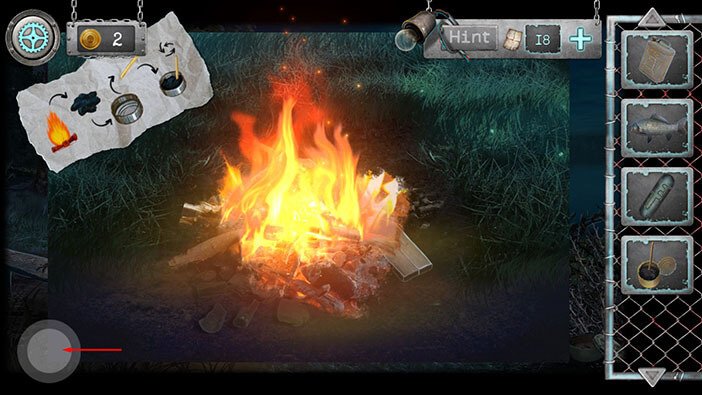
Lastly, tap on the stick in the lower right corner of the screen. Our character will use the stick to steer the melted bitumen and prepare the mixture. “Grout for holes” will be added to your inventory.
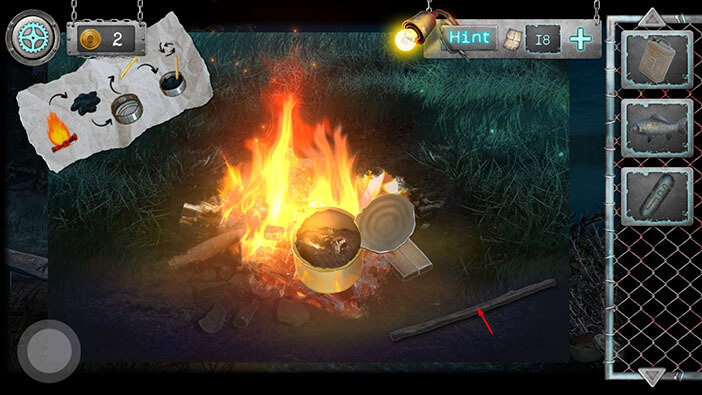
Tap on the button in the lower left corner to go back.
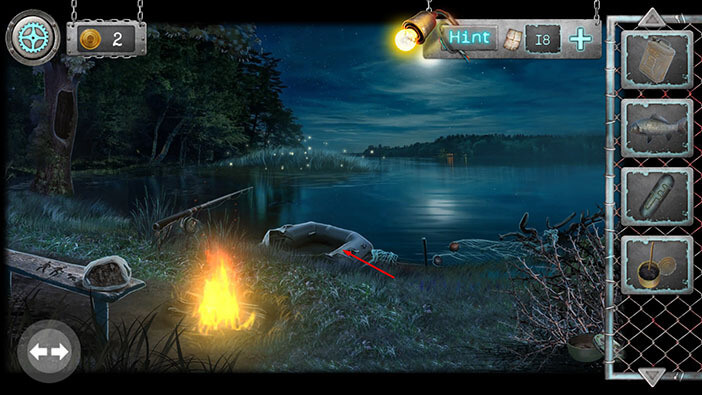
Tap on the boat to take a closer look at it.
Select the “Grout for holes” from the inventory and use it to patch up the boat.
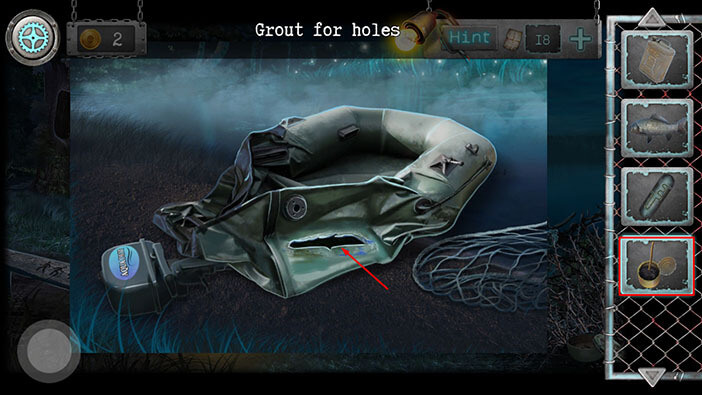
We patched up the boat, but it is still deflated, so our next task is to solve this problem. Tap on the button in the lower left corner to go back.
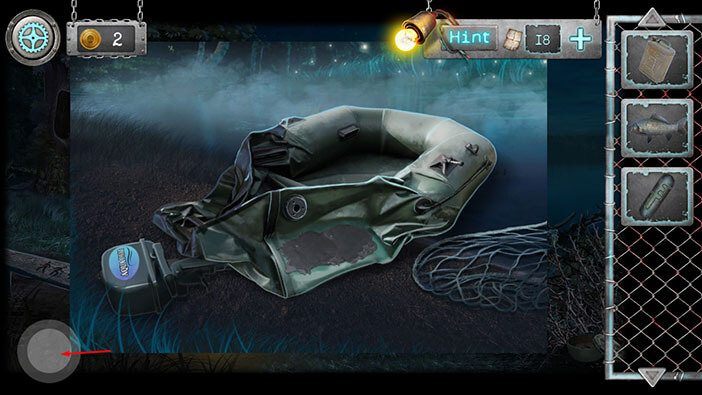
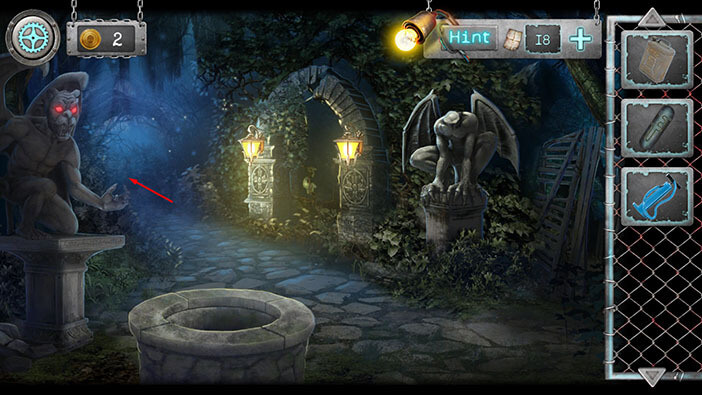
Tap on the arrows in the lower-left corner of the screen to go back to the area with the well and gargoyle statues.
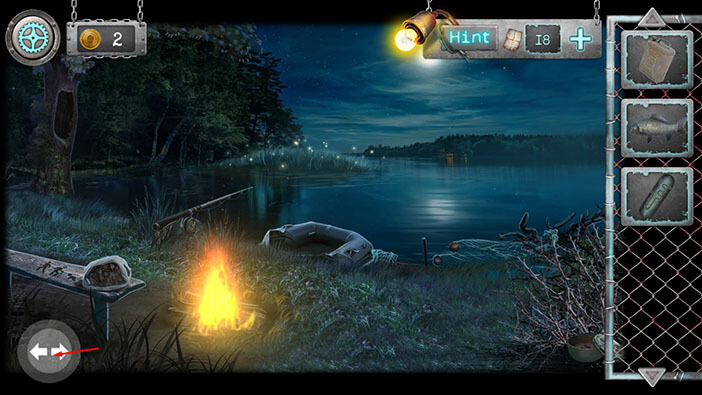
Tap on the fence in the lower right corner of the screen to take a closer look at the dog.
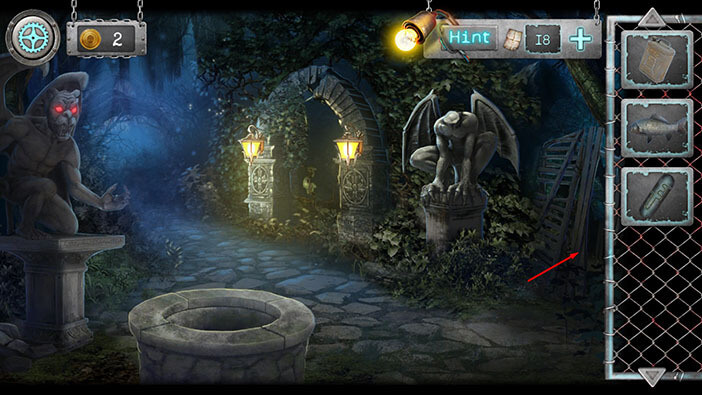
It seems that the dog is now sleeping, and the pump is right next to it. Trying to quickly grab the pump is too risky because the dog could wake up at any moment. So, select the “Fish” from the inventory and use it to distract the dog.
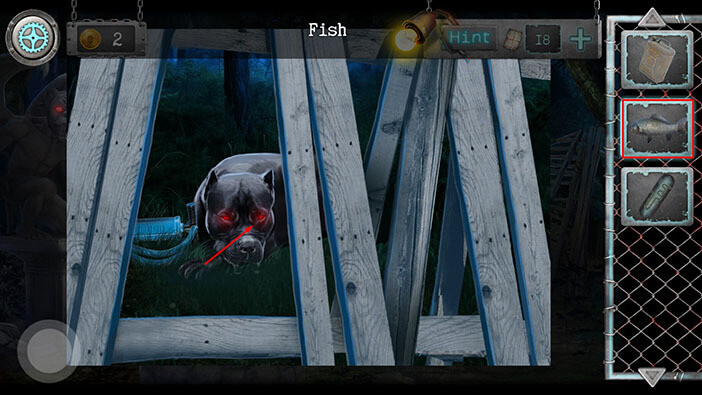
Quickly grab the pump while the dog is distracted. “Pump” will be added to your inventory.
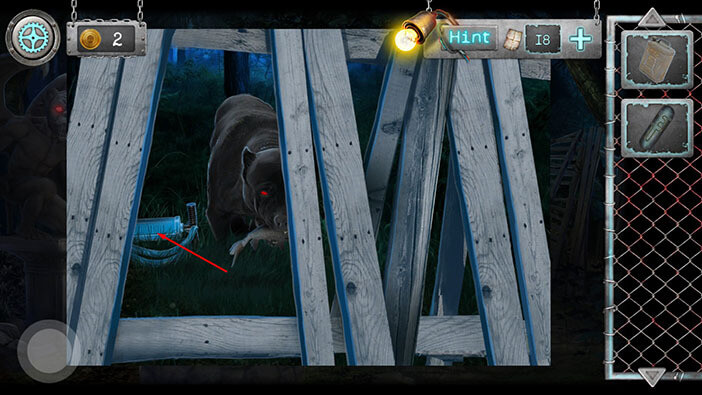
Tap on the button in the lower left corner to go back.
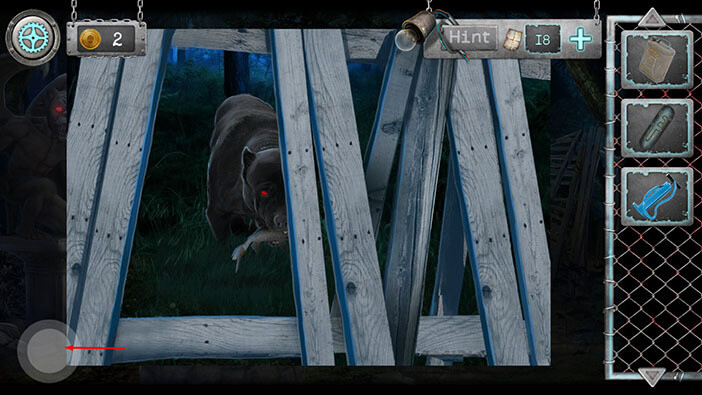
Tap on the end of the stone path to proceed to the lake area.
Tap on the boat to take a closer look at it.
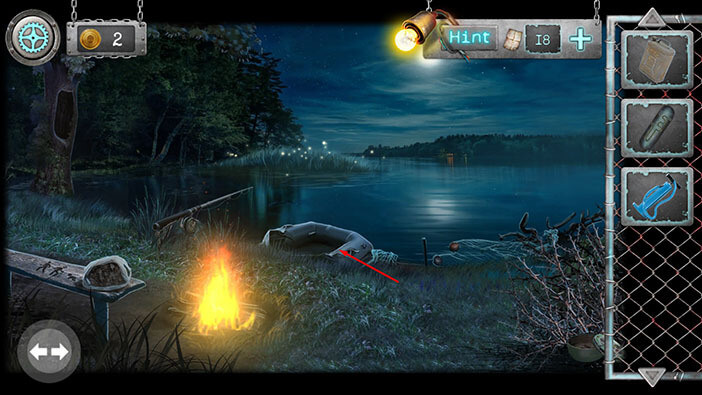
Ok, let’s inflate the boat. To do that, first, select the “Pump” from the inventory and place it next to the boat.
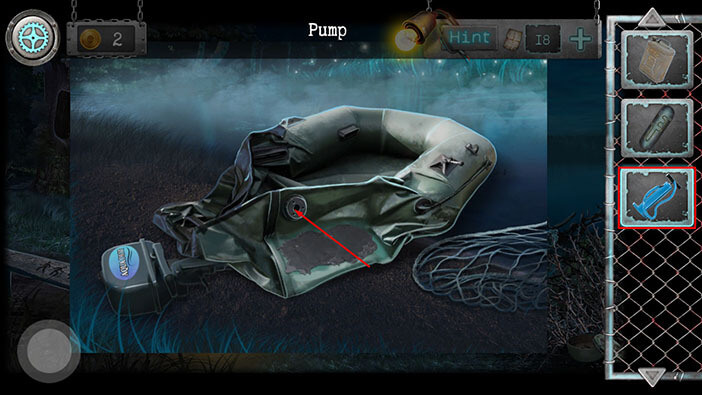
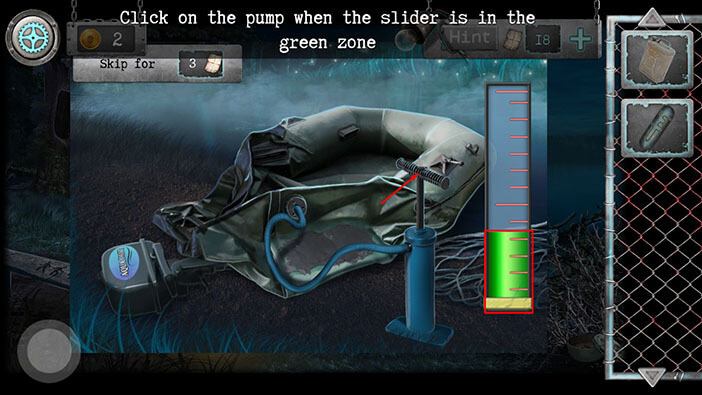
Next, we have a simple minigame. Just tap on the pump handle when the slider on the bar on the right enters the green area. Repeat this process, several times, to fully inflate the boat.
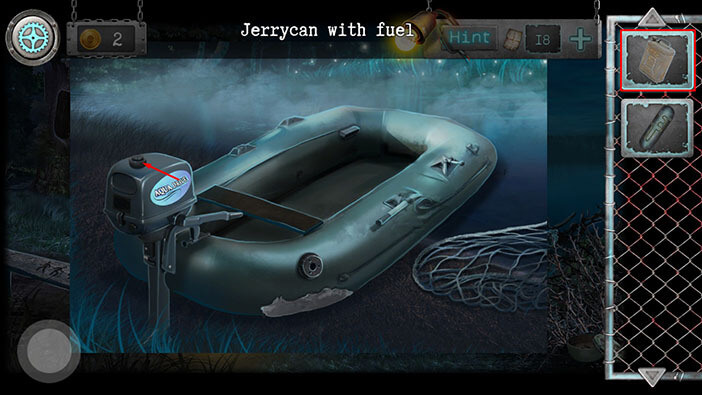
One last step, select the “Jerrycan with fuel” from the inventory and tap on the engine to fill it up with fuel.
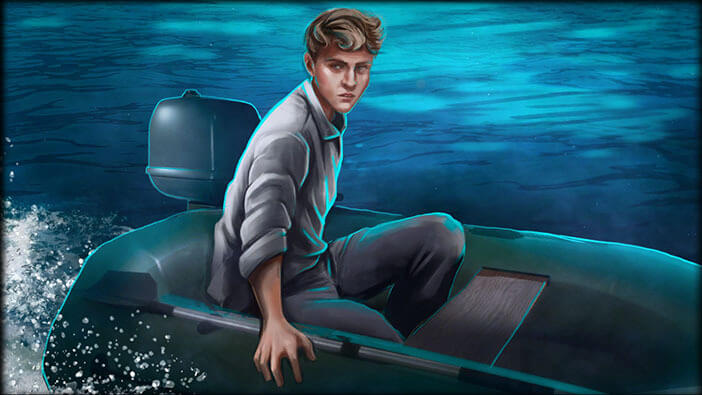
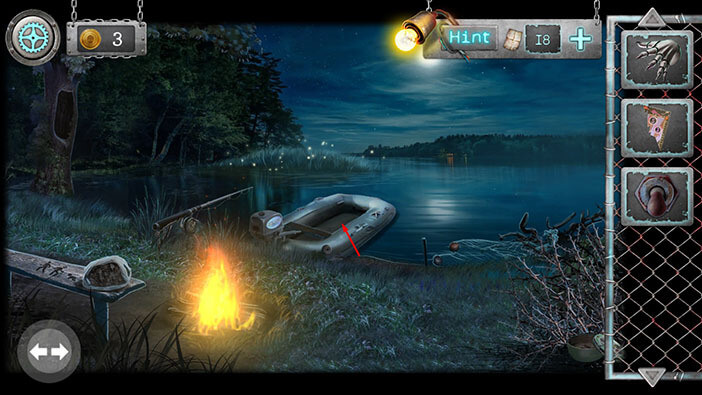
Tap on the boat to travel to the other side of the lake.
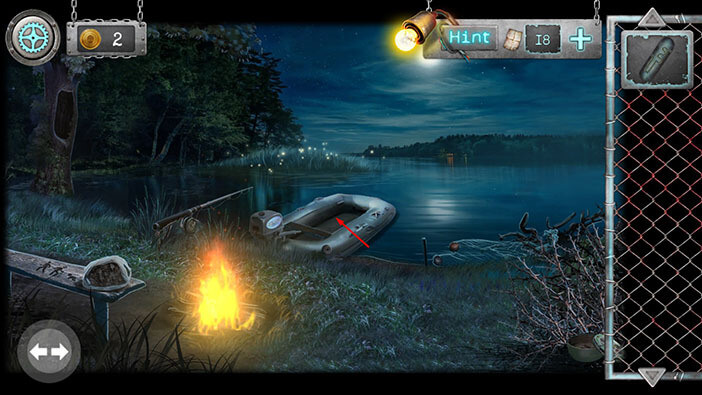
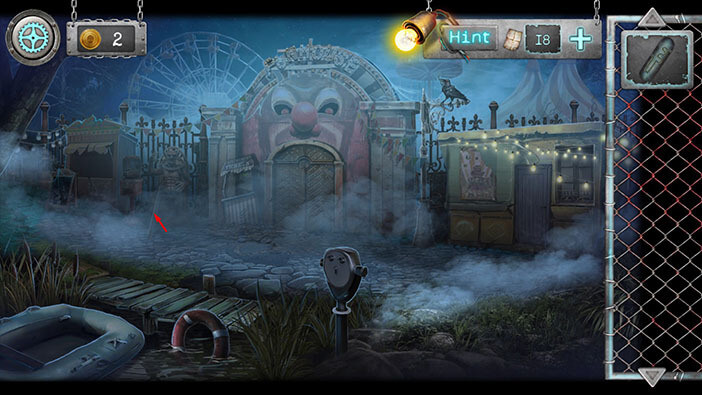
Ok, looks like we found an amusement park. Let’s explore it, and see if we can find something helpful. If you look at the left side of the screen you will notice some kind of a stick leaning against the statue. Tap on it to pick it up and “Long Cane” will be added to your inventory.
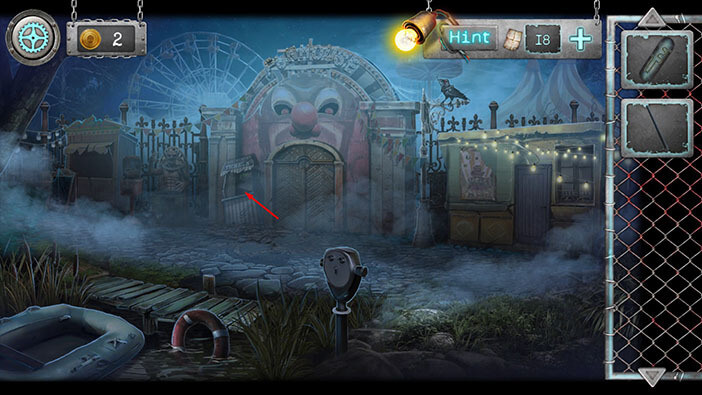
Next, tap on the broken stand located to the left of the gate to take a closer look at it.
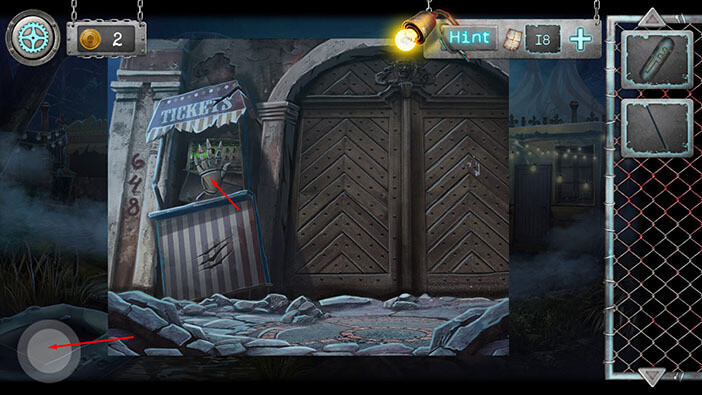
Tap on the large claw to pick it up and the “Mechanical Hand” will be added to your inventory. After that, tap on the button in the lower left corner to go back.
You will notice a large metal pole just to the right of the gate, and a mechanical raven on top of this pole. Tap on the raven to take a closer look at it.
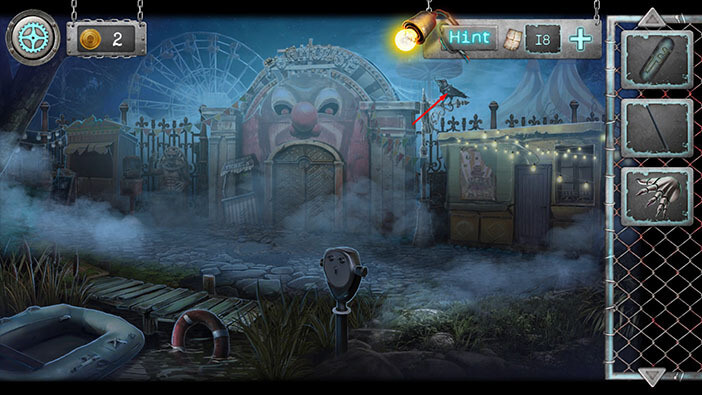
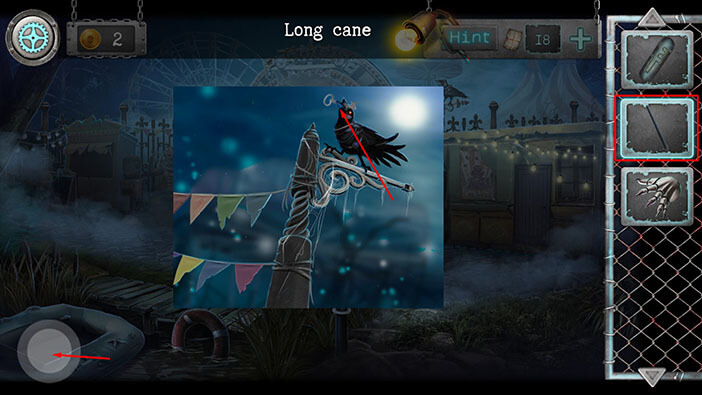
Looks like the raven is holding a key in its beak, so we will have to find a way to reach it. Select the “Long Cane” from the inventory and tap on the mechanical raven. Our character will use the cane to decapitate the mechanical raven, and “Raven’s Key” will be added to your inventory.
Once you have the key tap on the button in the lower left corner to go back.
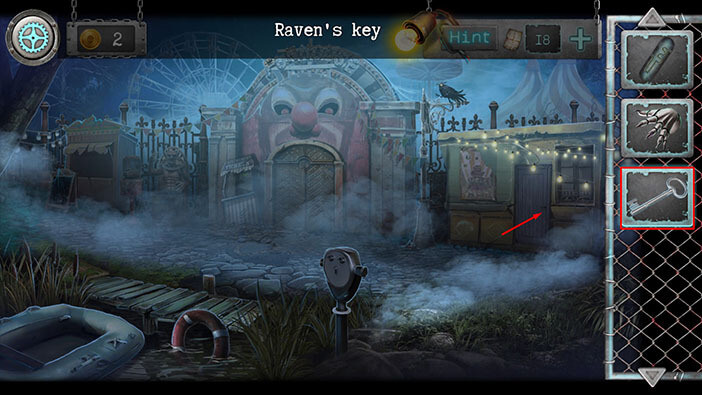
Select the “Raven’s Key” from the inventory and use it to unlock the door on the right. After that, tap on the door to proceed inside.
Ok, let’s explore this room. Tap on the shelf on the right to take a closer look at it.
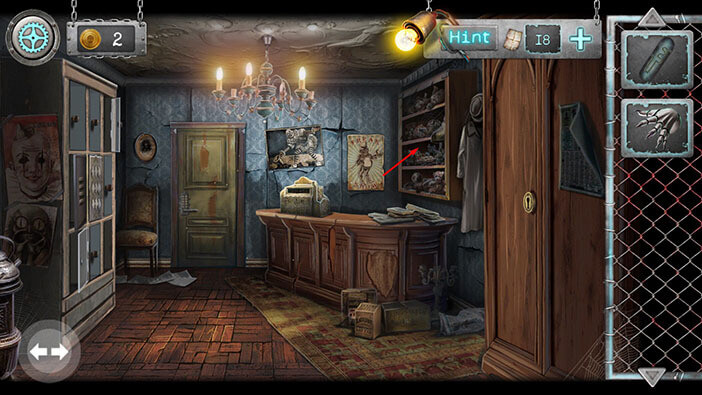
If you look at the shelves from bottom to top, you will notice that there’s something behind the dolls on the second shelf. So, drag the dolls to the right and left to move them aside.
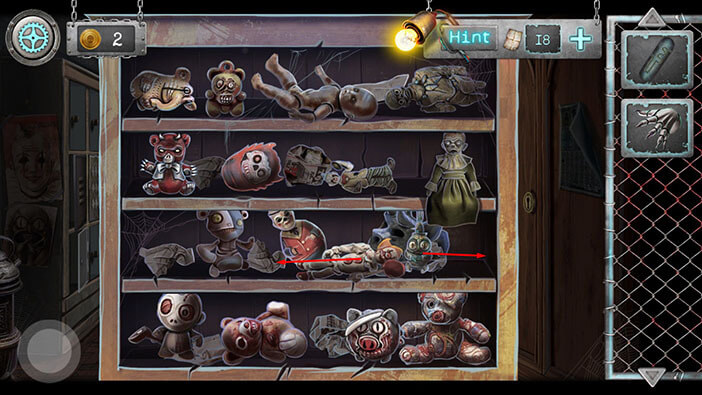
With the dolls out of the way tap on the item that was hidden behind them to pick it up. “Gargoyle head” will be added to your inventory.
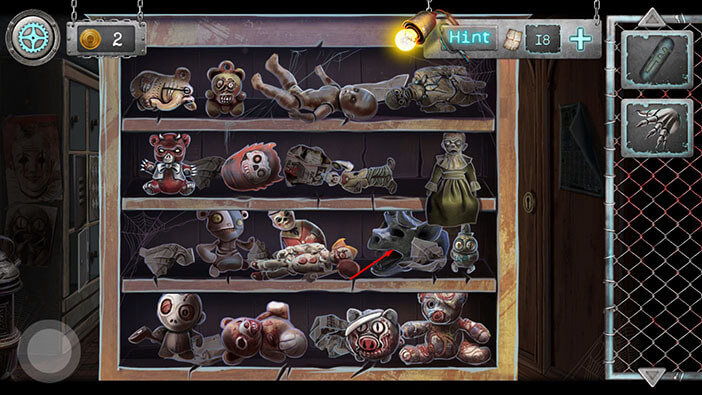
Our character wants to go back to the other side of the lake and attach the head to the gargoyle statue. However, we will do that a bit later, because there are several more things that are left to do here.
Tap on the arrow in the lower left corner to go back.
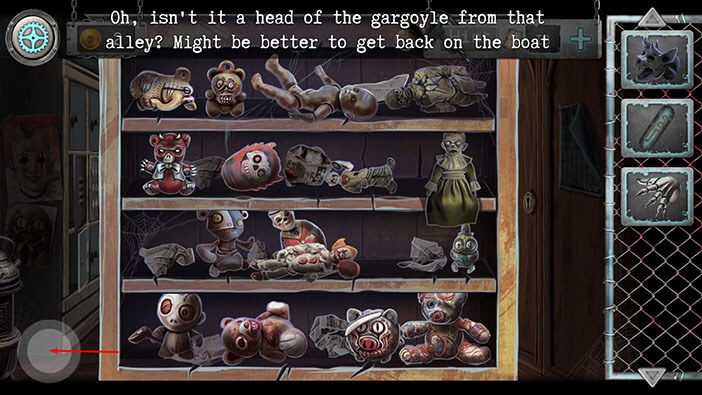
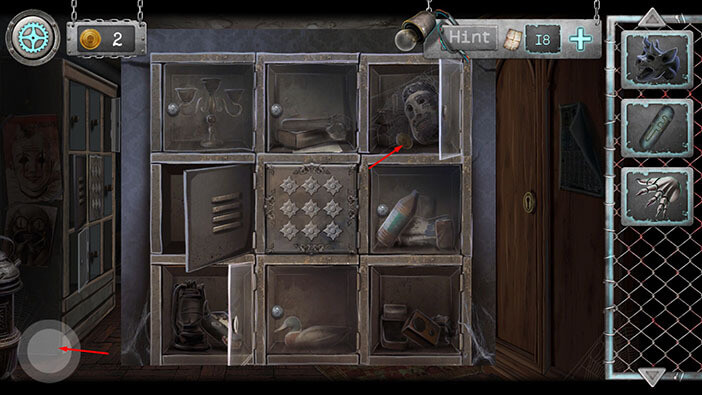
Tap on the cabinet on the left to take a closer look at it.
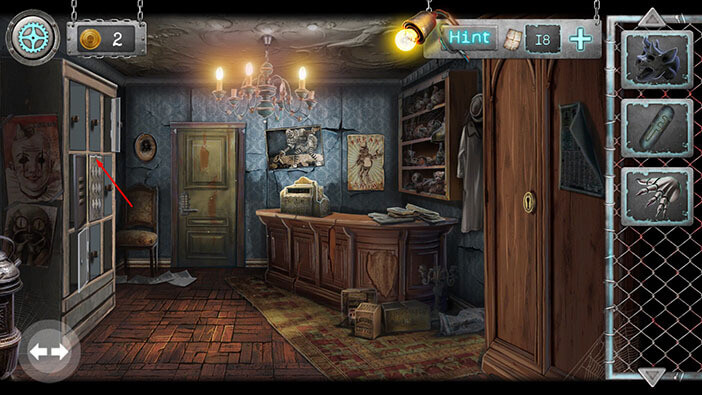
On the third cabinet (left to right) in the top row, you will notice a gold coin hidden below the spider web. Tap on the gold coin to pick it up. This is the third secret gold coin that we found so far.
Once you have the coin, tap on the button in the lower left corner to go back.
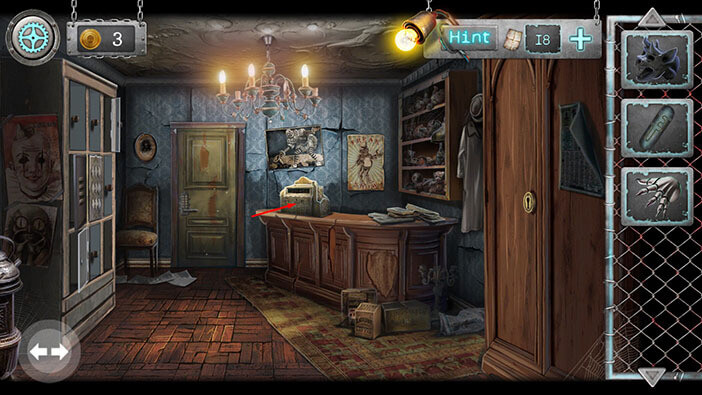
Tap on the cash register to take a closer look at it.
You will notice some kind of mechanism on the first drawer below the cash register. Tap on the mechanism to start the interaction.
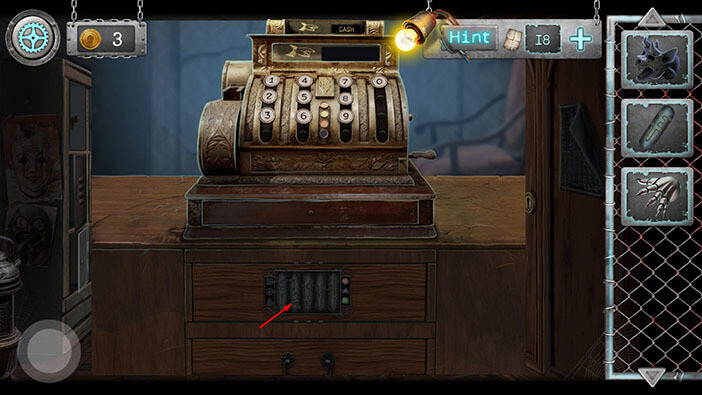
Here, we can see that the second bar of the bars is missing, so select the “Part of the lock” from the inventory and insert it into the empty slot.
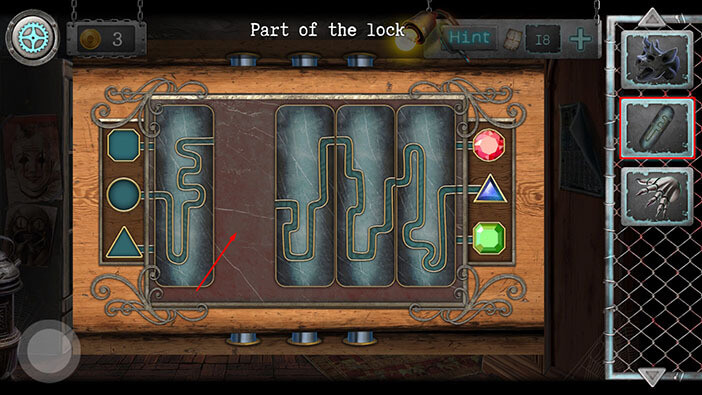
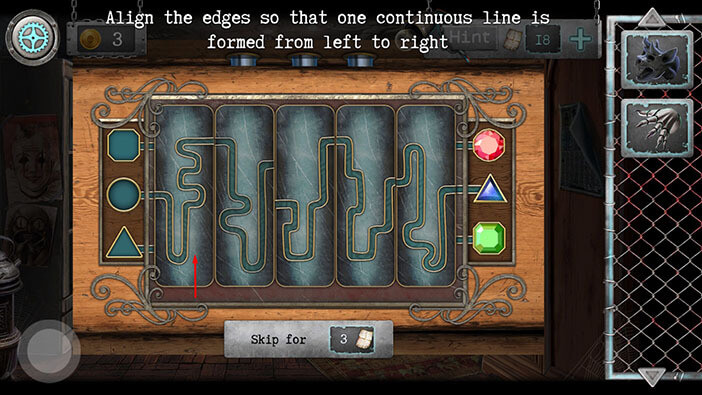
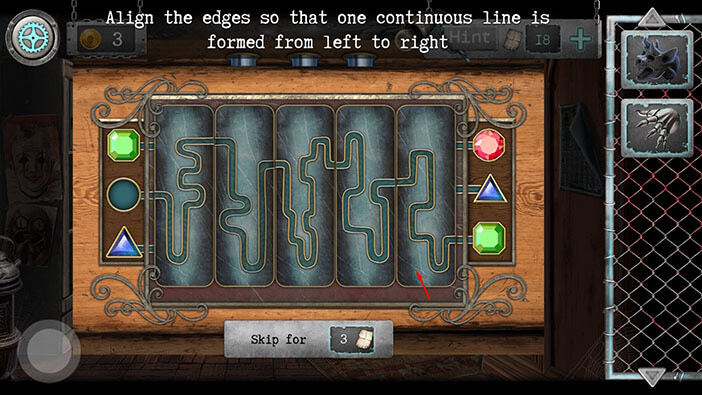
Ok, we assembled the lock, and now we have another puzzle to solve. Our goal is to connect the objects on the left with the matching objects on the right. We will solve this puzzle in multiple steps. Let’s begin.
First, we will connect the triangle on the left with the triangle on the right.
Step 1
Tap once on the first piece of lock (looking from left to right).
Step 2
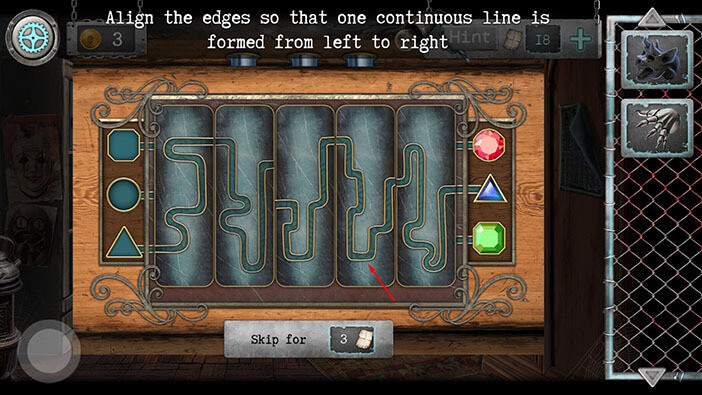
Tap twice on the fourth piece of lock (the lines aren’t actually aligned/connected by default).
Step 3
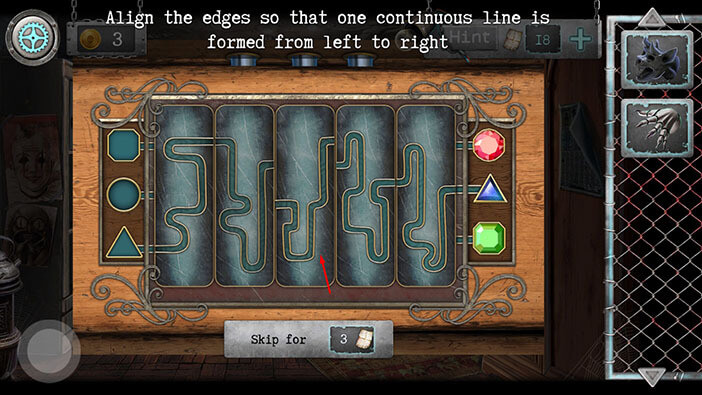
Tap once on the third piece of lock and you will connect the triangle slot on the left with the blue triangle on the right. You will also notice that there’s now a blue triangle on the left side.
Step 4
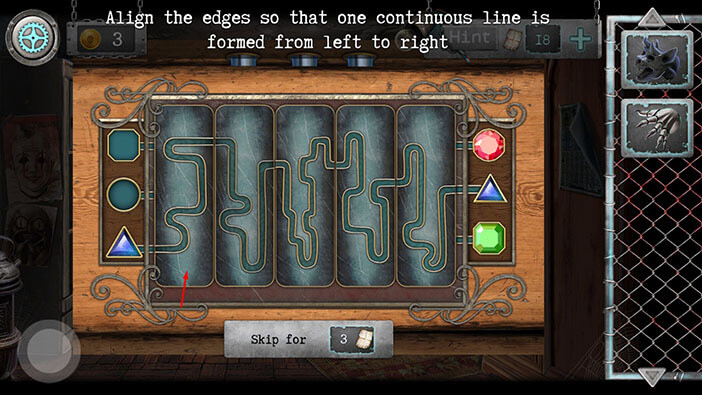
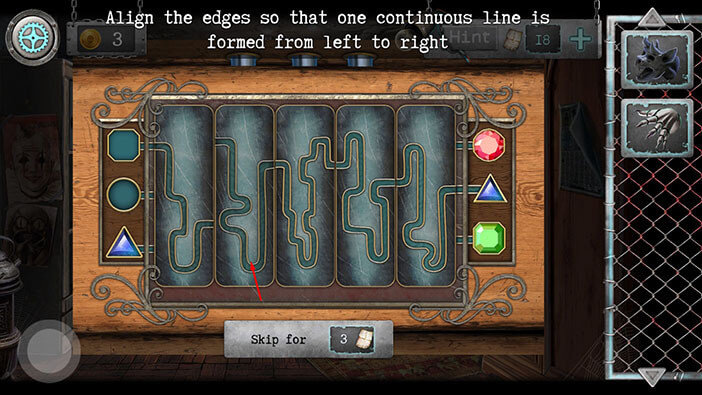
Ok, we should now connect the square on the left with the square on the right.
Tap once on the first piece of the lock.
Step 5
Tap once on the second piece of the lock.
Step 6
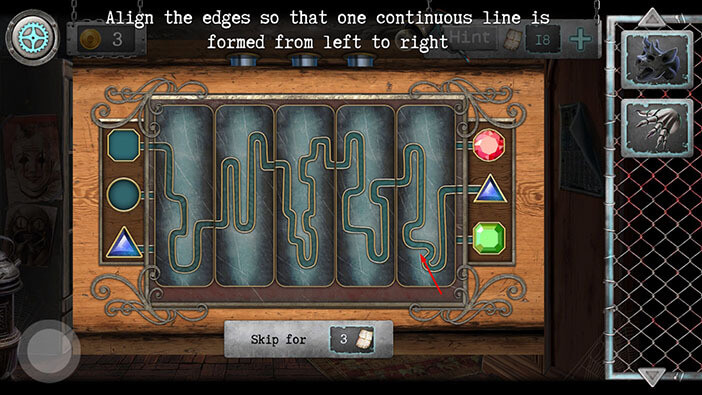
Tap once on the fifth piece and you will connect the square slot on the left with the green square on the right. You will also notice that there’s now a green square on the left side.
Step 7
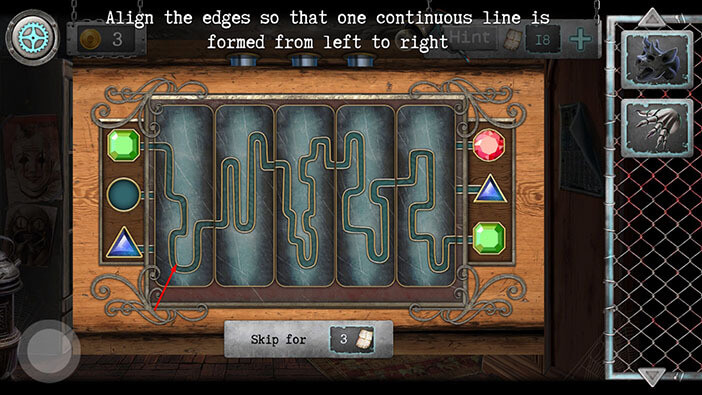
Lastly, let’s connect the circle slot on the left with the red circle on the right.
Tap once on the first piece of the lock.
Step 8
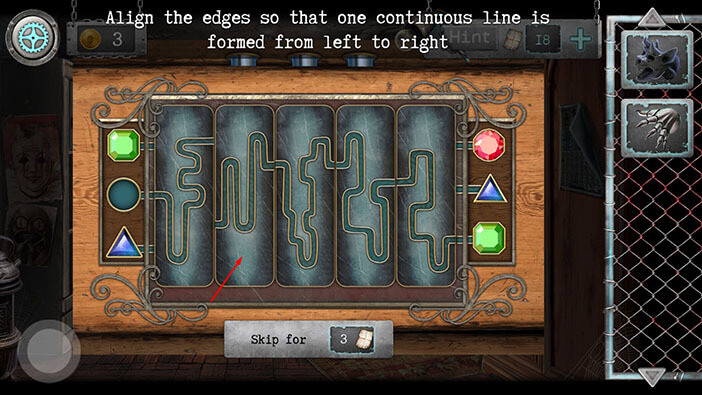
Tap twice on the second piece of the lock.
Step 9
Tap once on the fifth piece of the lock and you will connect the square slot on the left with the red square on the right. With this last step, you will unlock the cash register.
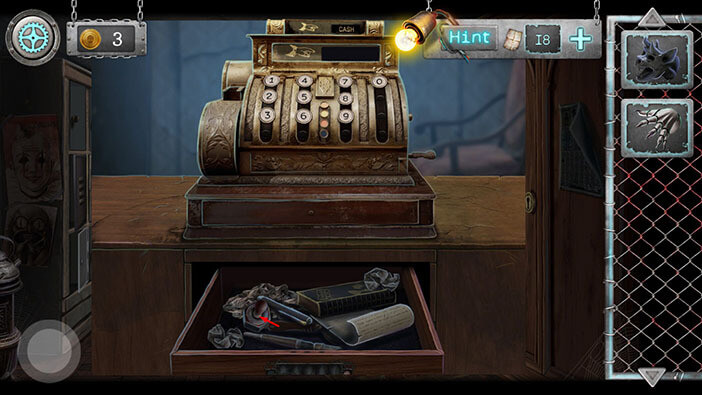
There are a bunch of items in the cash register but we can only pick up something that looks like a switch. So, tap on this item to pick it up, and the “Toggle switch” will be added to your inventory.
After that, tap on the button in the lower left corner to go back.
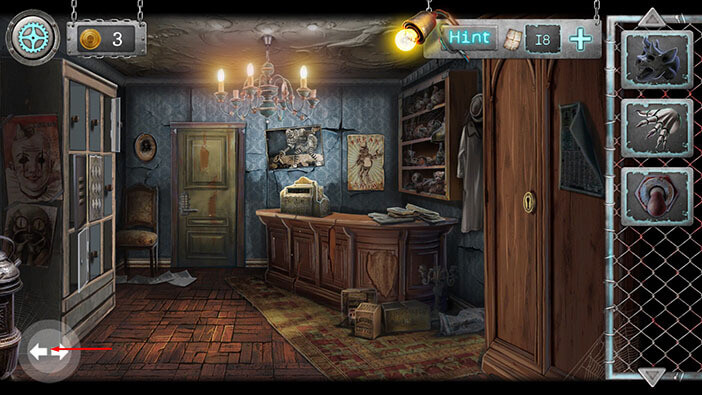
Ok, we can now go back to the other side of the lake and “install” the head on the gargoyle statue. Tap on the button in the lower left corner to go back outside.
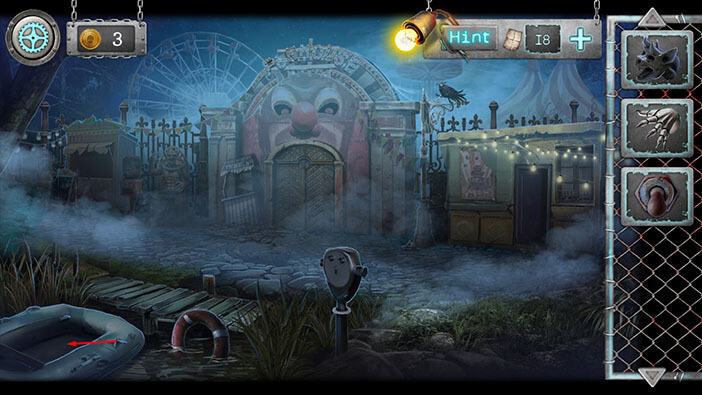
Tap on the boat to travel to the other side of the lake.
Tap on the arrow in the lower left corner to go to the area with gargoyle statues.
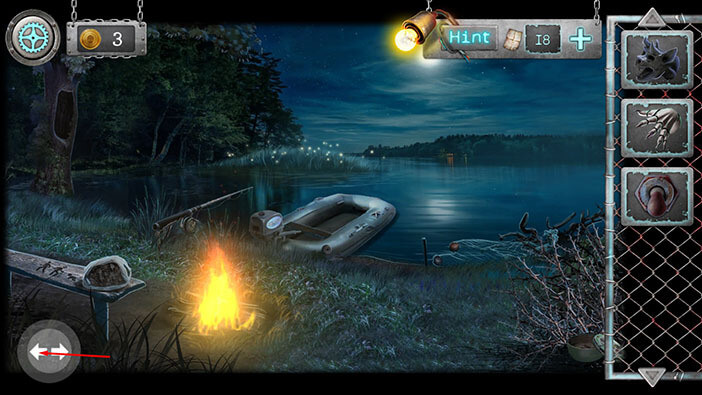
Tap on the headless gargoyle statue to take a closer look at it.
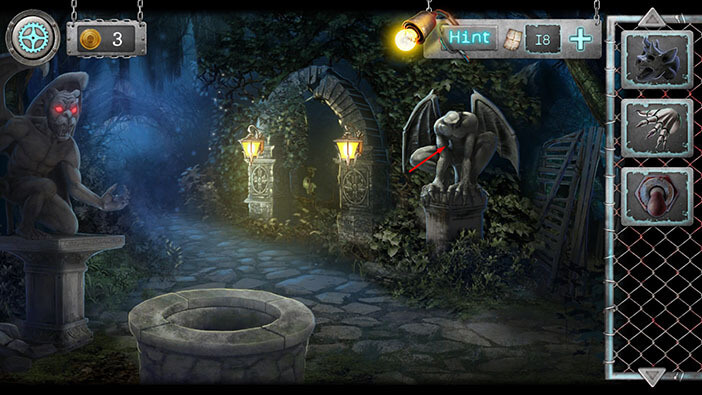
Select the “Gargoyle head” from the inventory and install it on the neck of the statue.
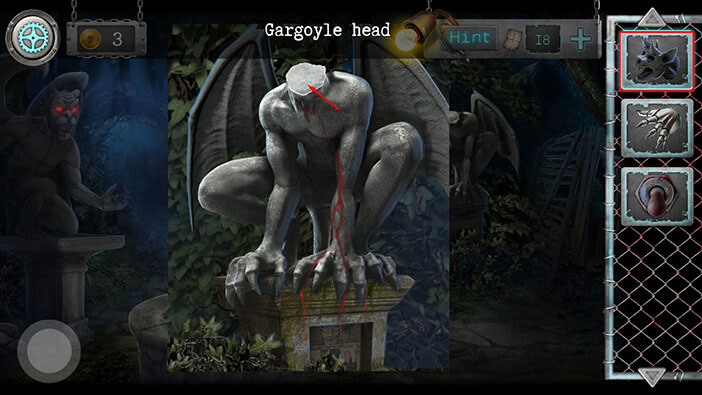
When we attached the head, something appeared at the base of the stone pillar (below the statue). Tap on the pillar to take a closer look.
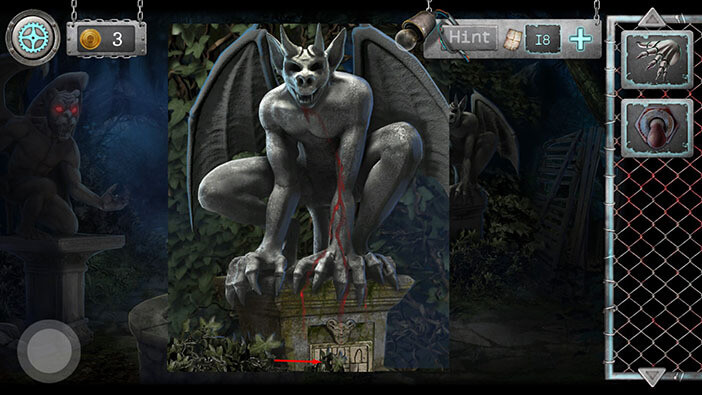
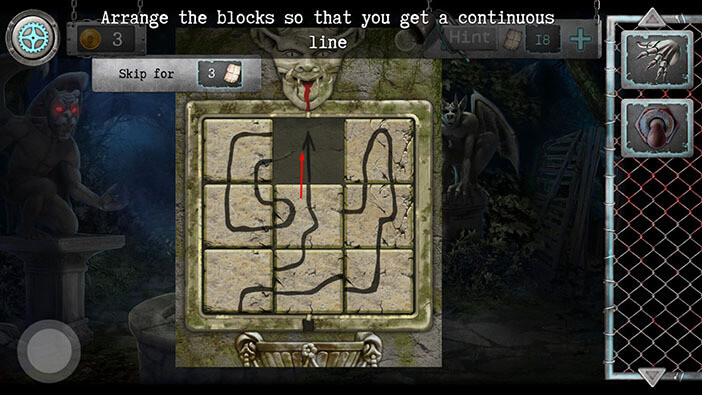
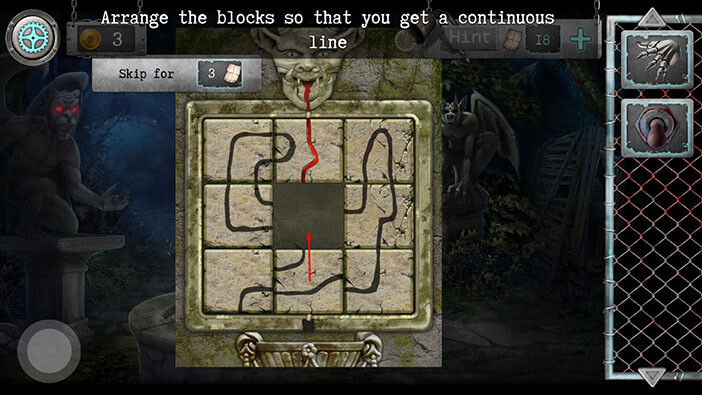
Here, we have another puzzle to solve. The goal is to connect the blood which is dripping out of the statue’s mouth with the “maze” exit at the bottom. We will solve this puzzle in several steps. Let’s begin.
Step 1
Move the third piece (left to right) in the third row (top to bottom) to the empty slot on the left.
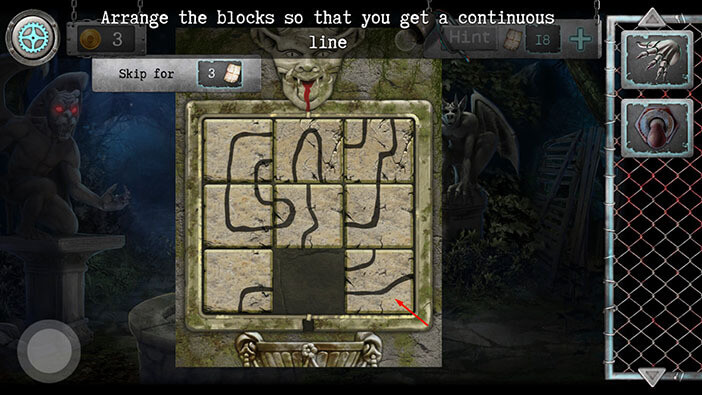
Step 2
Move the third piece in the second row to the empty slot below it.
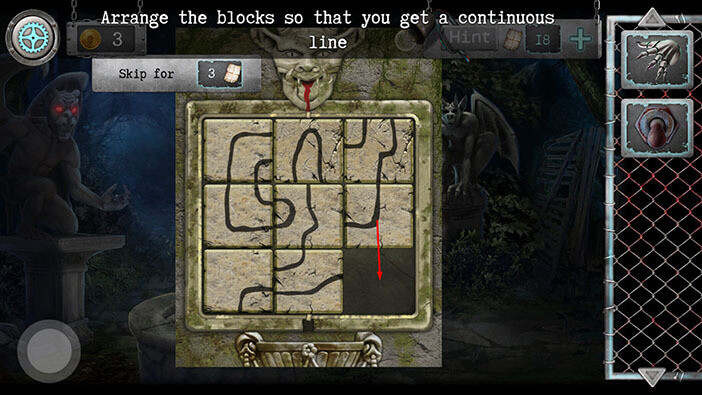
Step 3
Move the third piece in the first row to the empty slot below it.
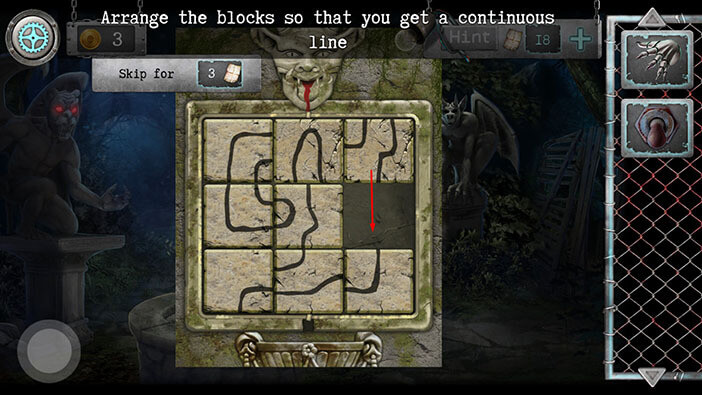
Step 4
Move the second piece in the first row to the empty slot on the right.
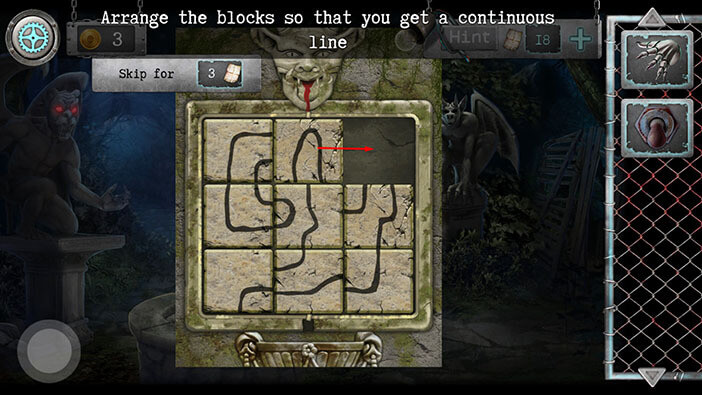
Step 5
Move the second piece in the second row to the empty slot above it.
Step 6
Move the second piece in the third row to the empty slot above it.
Step 7
Lastly, move the first piece in the third row to the empty slot on the right and you will solve this puzzle.
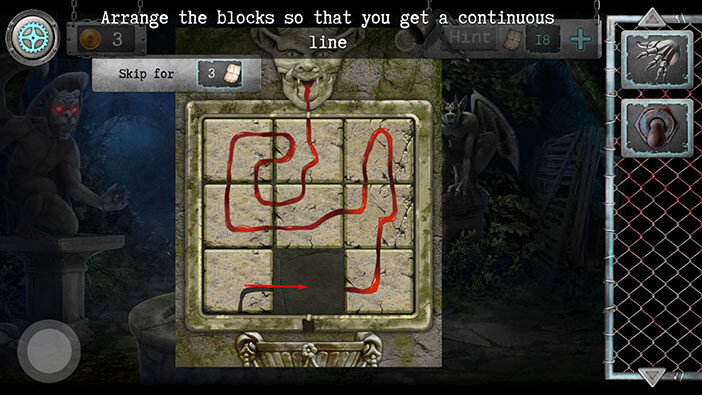
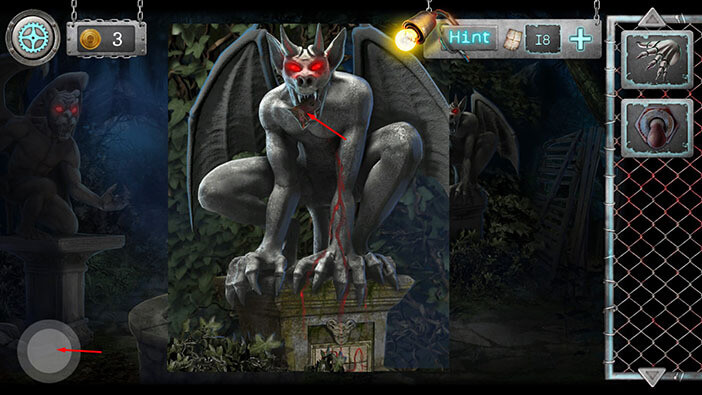
As soon as you solve the puzzle, the gargoyle’s eyes will turn red, and some kind of note will appear in its mouth. Tap on it to pick it up and “Piece of poster” will be added to your inventory.
After that, tap on the button in the lower left corner to go back.
Ok, our work here is done, so let’s go back to the other side of the lake.
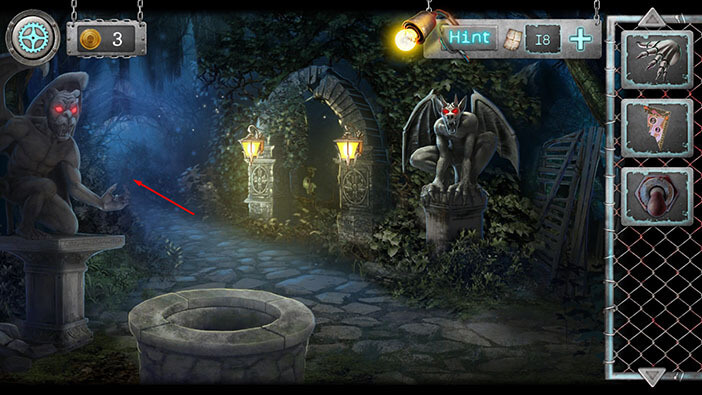
Tap on the boat to go back to the amusement park.
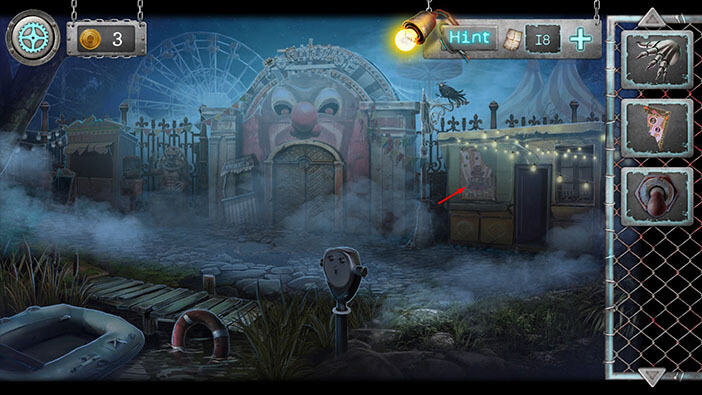
Tap on the poster on the right to take a closer look at it.
Select the “Piece of poster” from the inventory and attach it to the upper right corner of the poster.
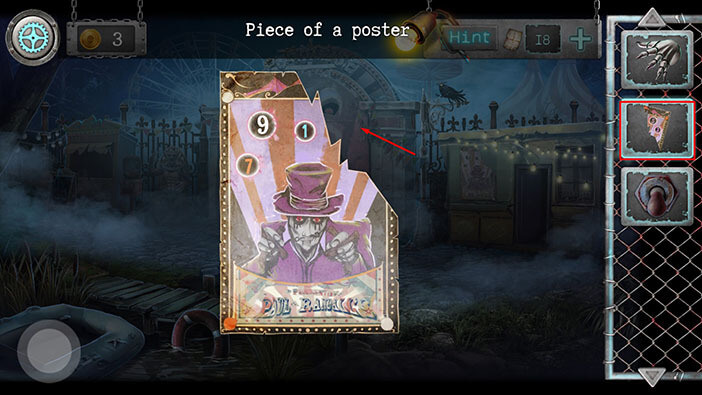
Ok, we have now assembled the poster, and we can see several numbers. If you look at the numbers from left to right, we will see a combination “79153”. Memorize/write down this number because we will need it for the next puzzle.
Once you’re done tap on the button in the lower left corner to go back.
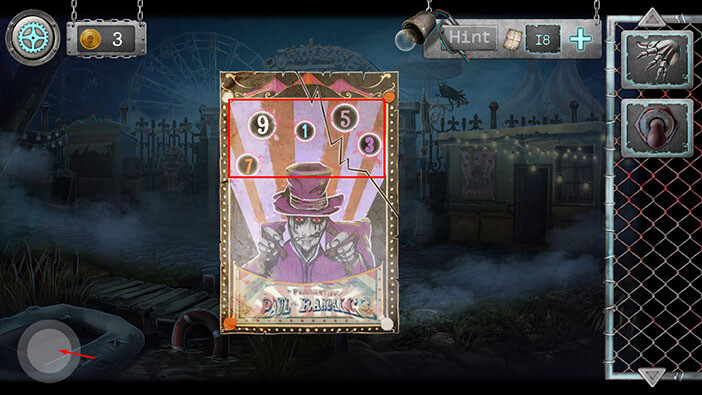
Tap on the door on the right to go into the building.
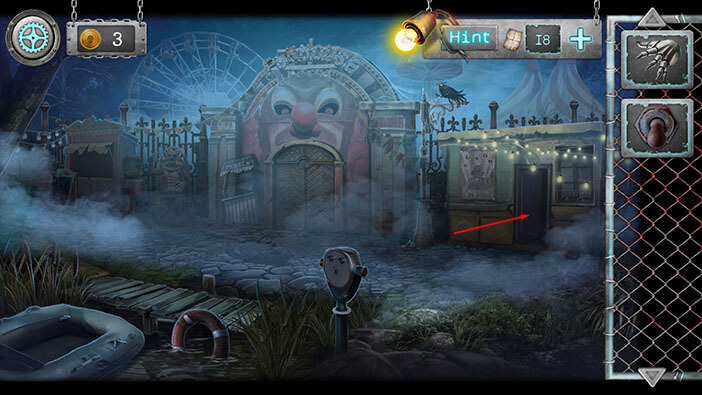
Tap on the cash register to take a closer look at it.
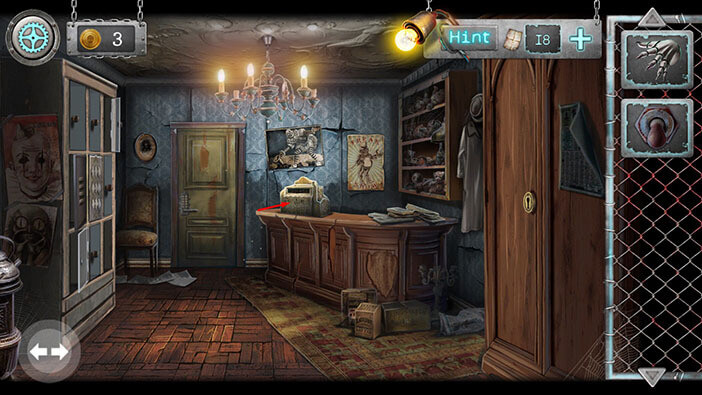
Tap on the cash register again to start the interaction.
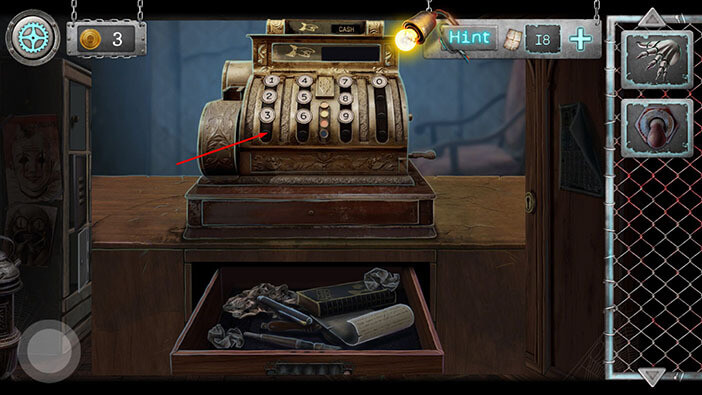
Enter the code that we found on the poster. The code was “79153”.
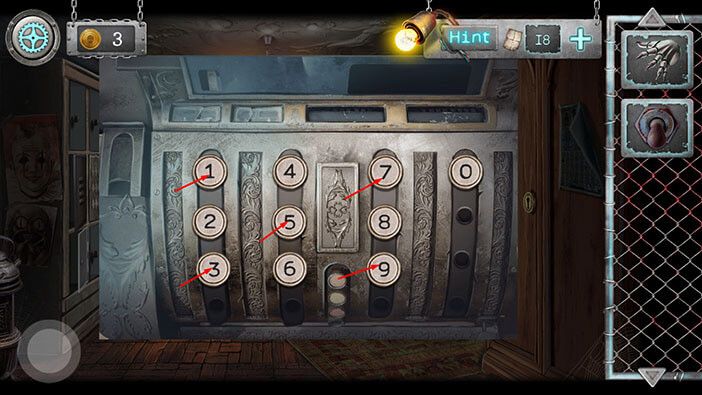
Ok, we unlocked and opened the cash register. First, tap on the two coins on the right to pick them up. “Coin with a horned profile” and “Square coin” will be added to your inventory.
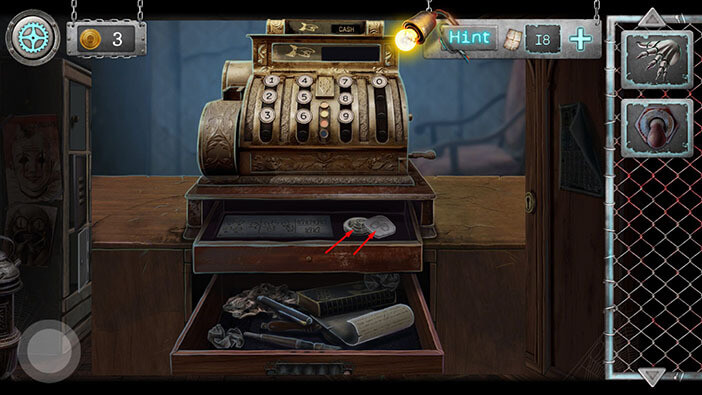
Next, let’s tap on the note on the left side of the drawer to take a closer look at it.
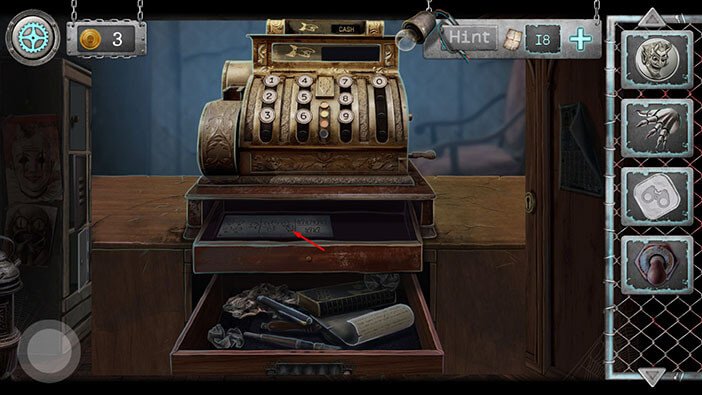
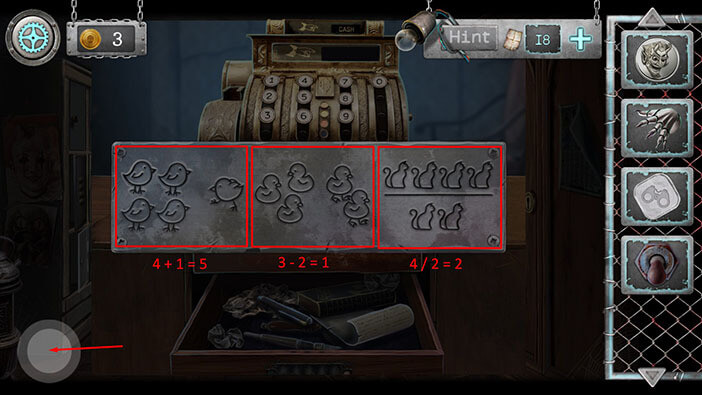
This note represents a hint for the next puzzle. We can crack this puzzle with some basic math.
In the first image, we can see five chickens. On the left, there is a group of four chickens, and the chicken on the right is walking toward the group. So, 4 + 1 = 5.
In the second image, we can see five ducks. A group of 3 ducks on the left is sitting, but the two ducks on the right are walking away from the group. So, 3 – 2 = 1.
In the third image, we can see six cats. Four in the top row, a vertical line, and two cats in the bottom row. So, 4 / 2 = 2.
When we put it all together, we will get the code “512”. Memorize/ write down this code because we will need it for the next puzzle.
Once you’re done, tap twice on the button in the lower left corner to go back.
Next, tap on the green door to start the interaction.
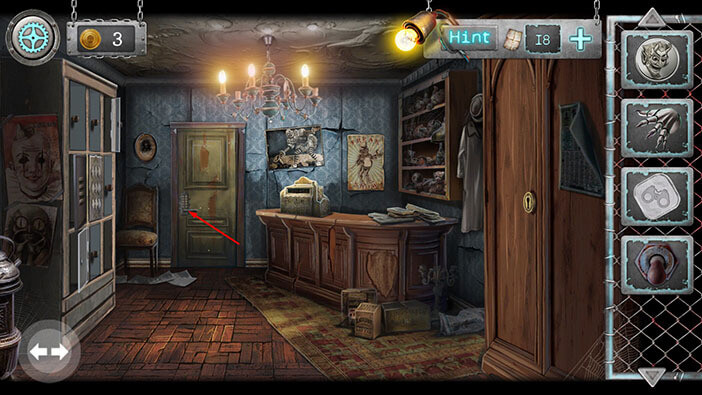
Enter the code that we discovered by deciphering the note in the cash register. It was “512”.
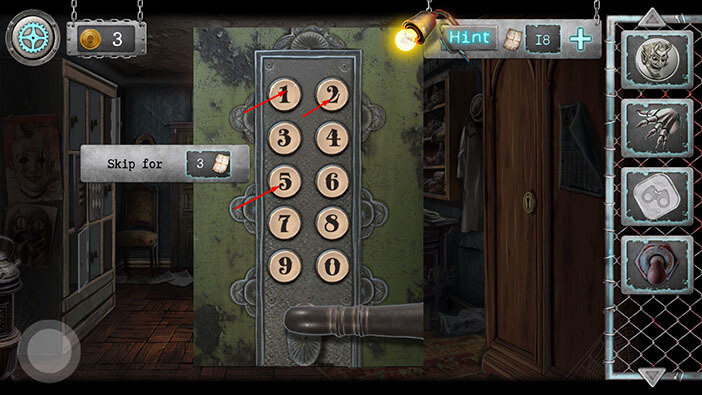
As soon as you enter the correct code, the door will open. Tap on the door to explore the next room.
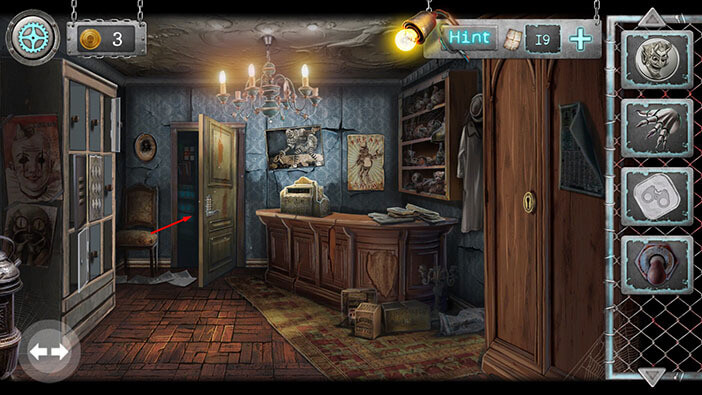
Tap on the two red tablets on the ground to pick them up. “Numbers” will be added to your inventory.
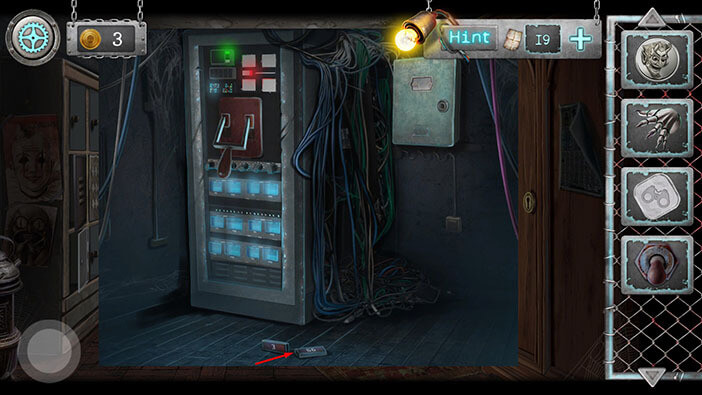
Next, tap on the lever to activate it and you will restore the power. After that, tap on the button in the lower left corner to go back.
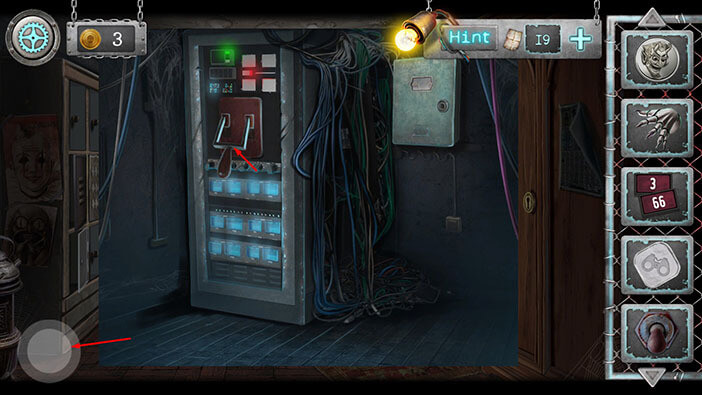
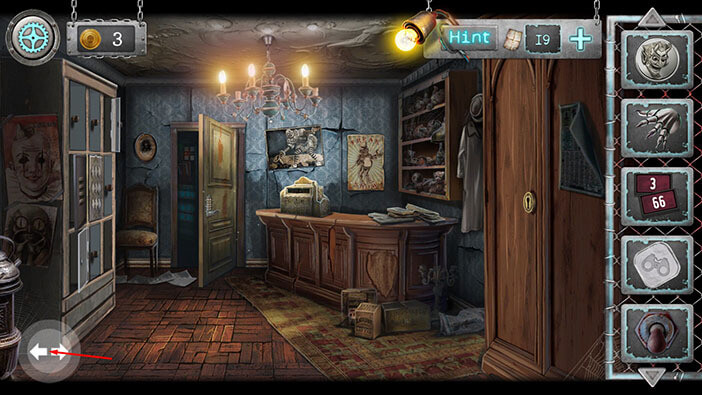
Tap on the arrows in the lower left corner to go outside.
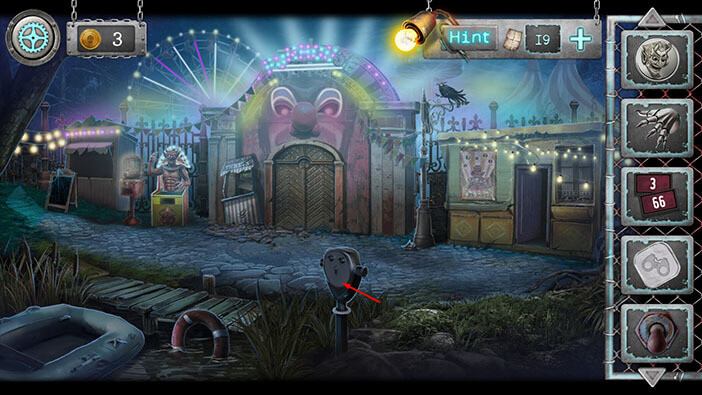
Next, tap on the periscope, located to the right of the boat, near the shore, to take a closer look at it.
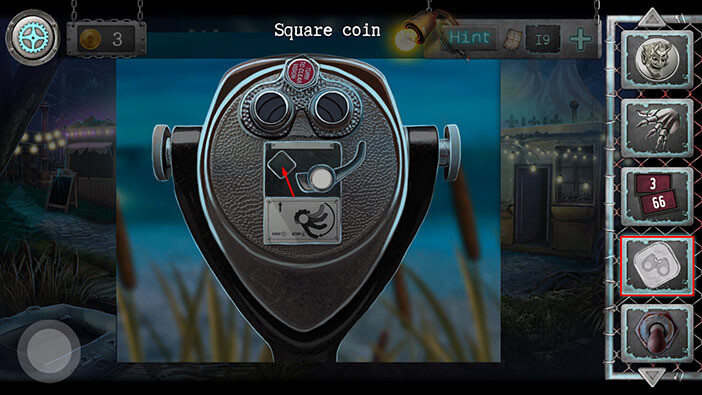
If you examine this device, you will notice a square-shaped slot next to the handle. So, let’s select the “Square coin” from the inventory and insert it into the slot.
As soon as you insert the coin, the lever on the right will move down, and two round slots in the top part of the device will get a purple glow. Tap on these slots to start the interaction.
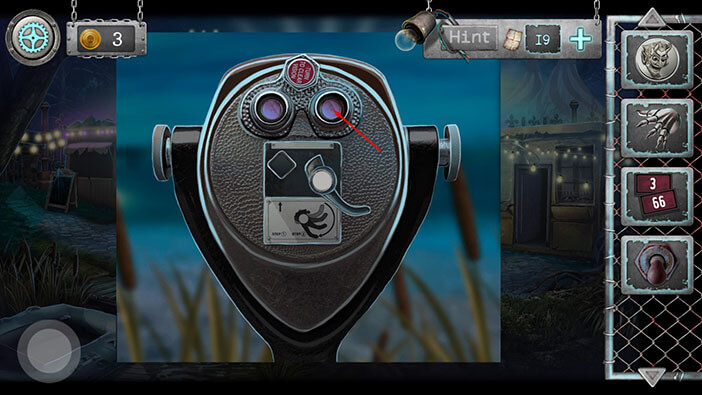
Ok, we are making progress. Let’s zoom in by raising the red line on the bar on the right. You should stop raising the line once you reach the 75-80 value on the bar.
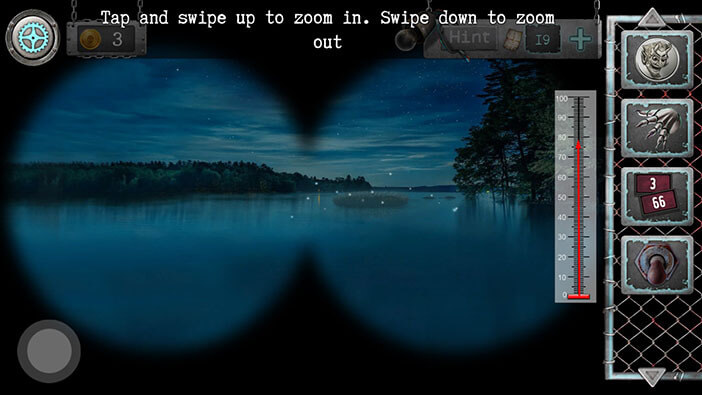
As soon as you reach the value of 75-80 you will see 9 white lights shaped like circles. These lights are arranged in a 3×3 grid. A few seconds later, the lights will disappear, and they will appear again, one by one. Our task is to memorize/write down the position of the lights on the grid because their order of appearance represents a hint for the next puzzle.
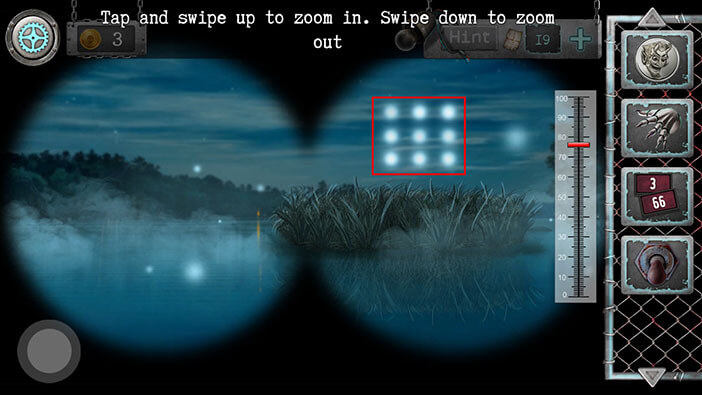
Ok, we will do this puzzle in the 9 steps. Let’s begin.
Step 1
The first light = first position (left to right) in the first row (top to bottom).
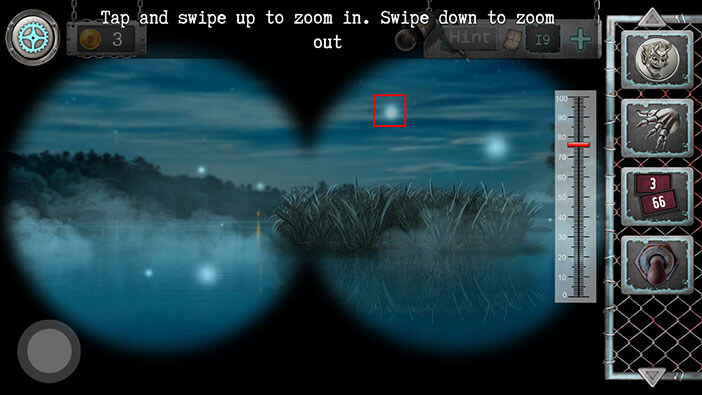
Step 2
Second light = third position in the first row.
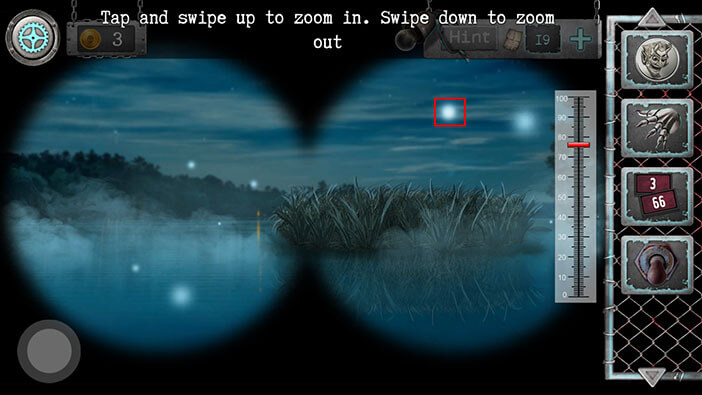
Step 3
Third light = second position in the second row.
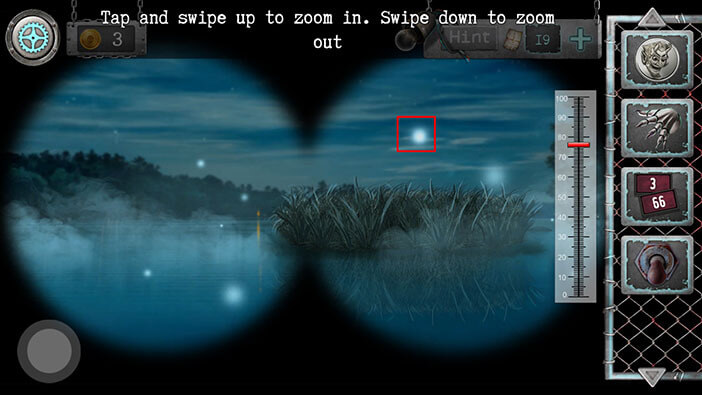
Step 4
Fourth light = first position in the third row.
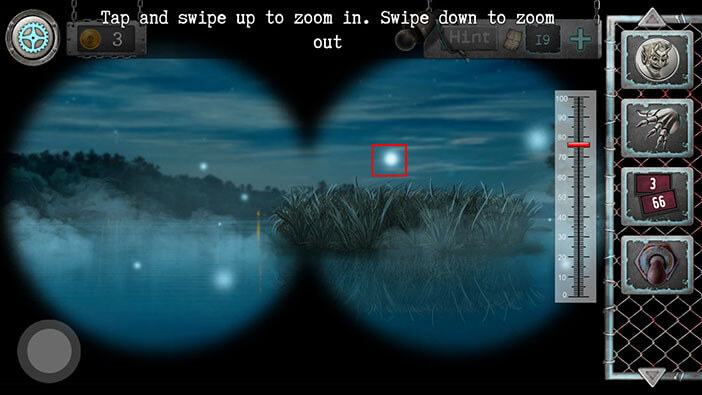
Step 5
Fifth Light = second position in the third row.
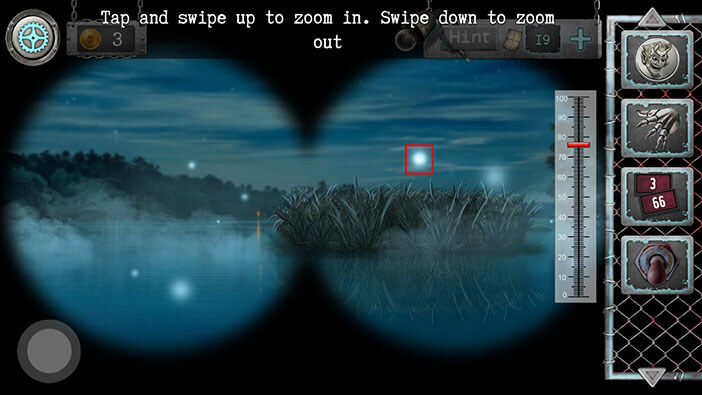
Step 6
Sixth Light = third position in the third row.
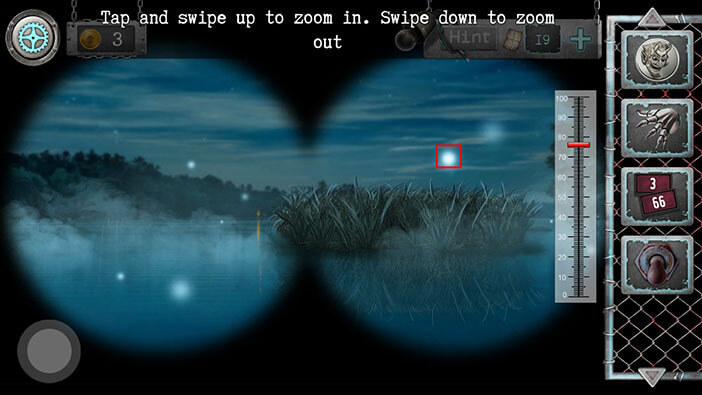
Step 7
Seventh Light = third position in the second row.
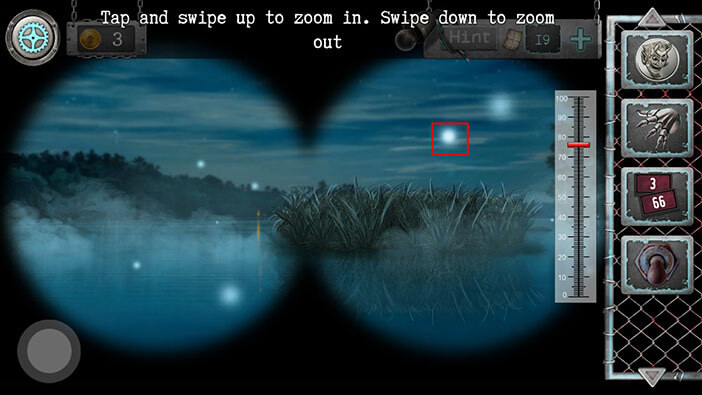
Step 8
Eighth light = first position in the second row
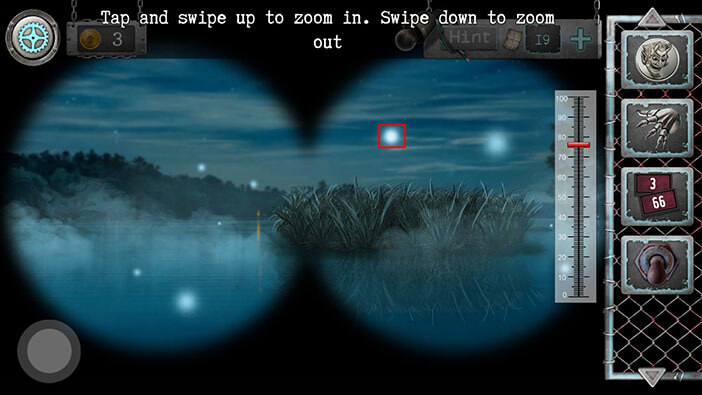
Step 9
Ninth light = second position in the first row.
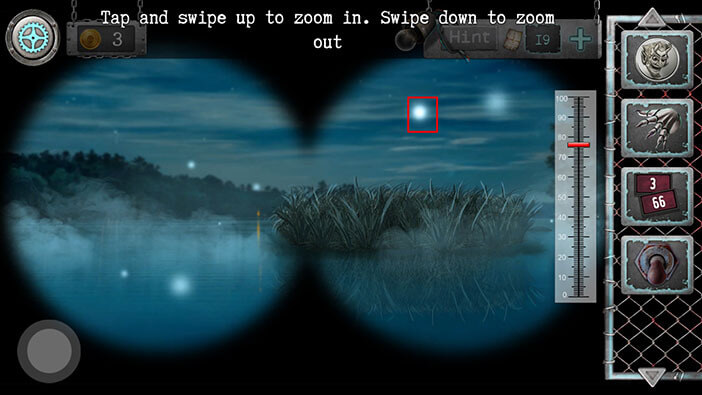
When we put it all together, we get this order
First = first position (left to right) in the first row (top to bottom).
Second = third position in the first row.
Third = second position in the second row.
Fourth = first position in the third row.
Fifth = second position in the third row.
Sixth = third position in the third row.
Seventh = third position in the second row.
Eighth = first position in the second row.
Ninth = second position in the first row.
Memorize/ write down this sequence, then tap twice on the button in the lower left corner to go back.
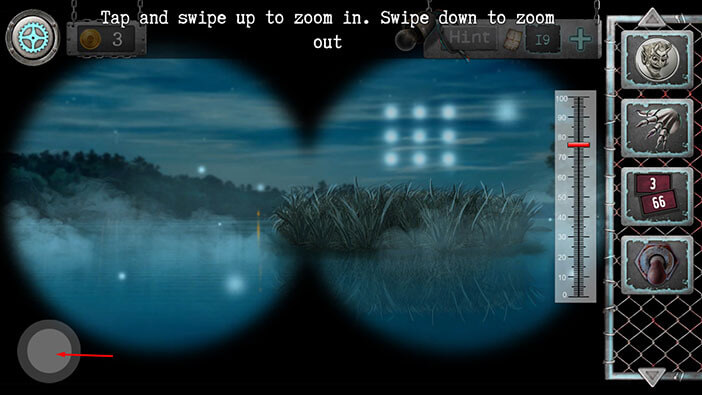
Tap on the door on the right to go back to the previous room.
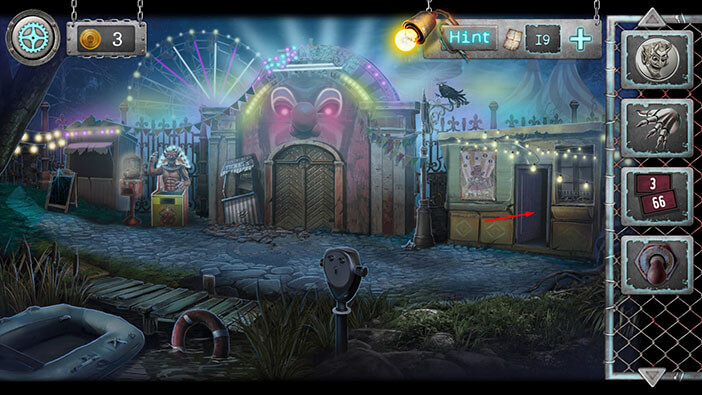
Next, tap on the cabinet on the left to take a closer look at it.
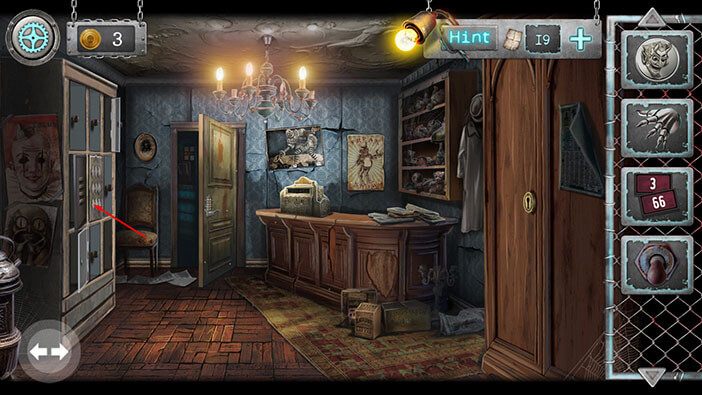
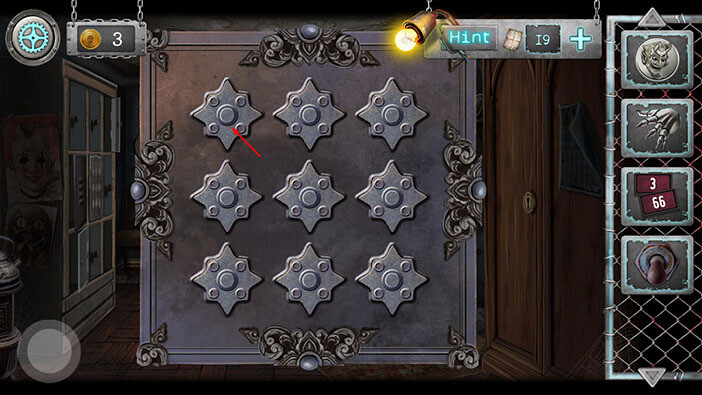
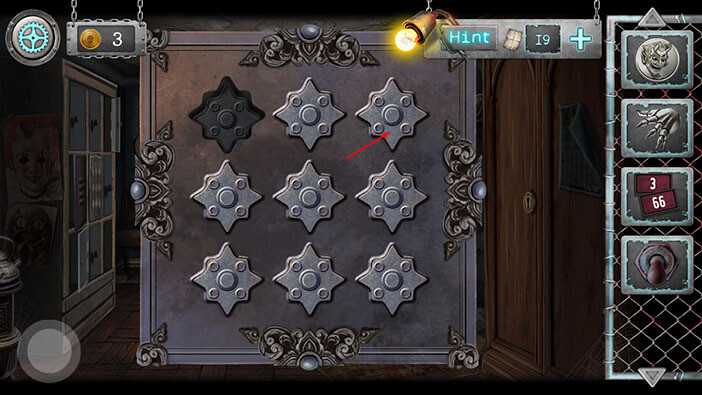
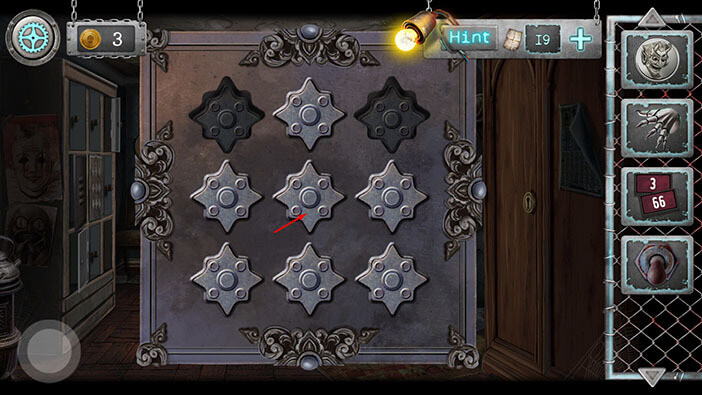
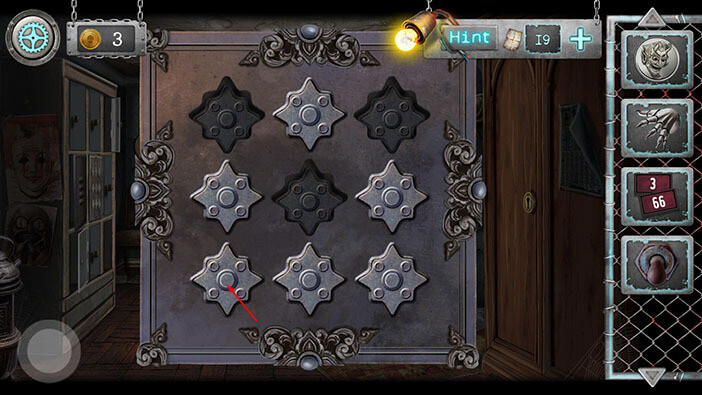
Here, we can see the metallic stars arranged in a 3 x 3 grid, which matches the pattern on the lights that we saw outside. Let’s tap on this grid to start the interaction.
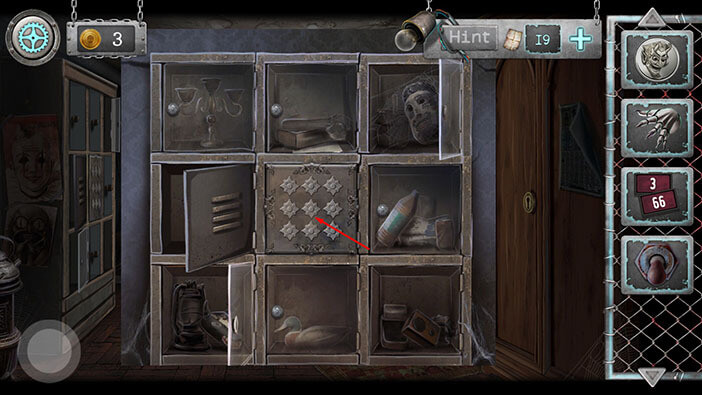
Ok, let’s tap on the stars, and match the order of appearance of the lights that we saw outside.
Step 1
Tap on the first star in the first row.
Step 2
Tap on the third star in the first row.
Step 3
Tap on the second star in the second row.
Step 4
Tap on the first star in the third row.
Step 5
Tap on the second star in the third row.
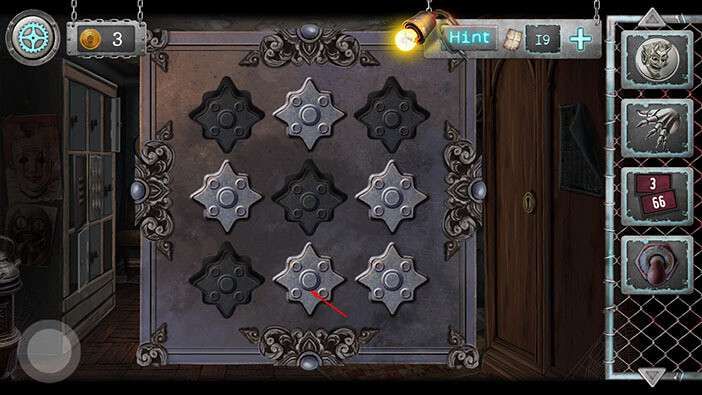
Step 6
Tap on the third star in the third row.
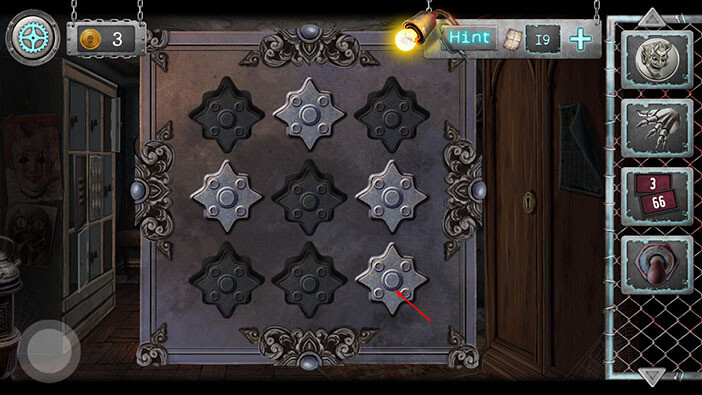
Step 7
Tap on the third star in the second row.
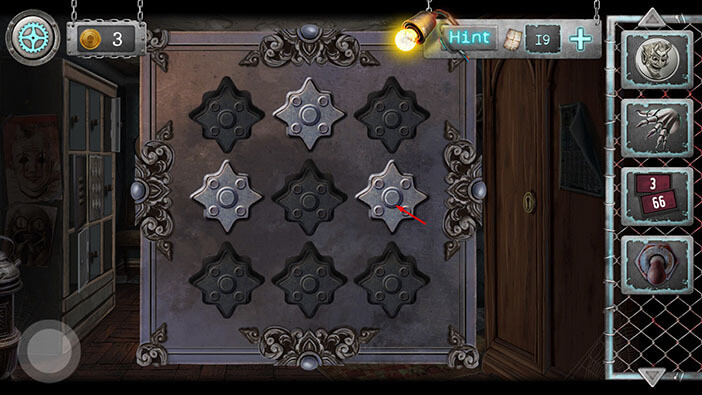
Step 8
Tap on the first position in the second row.
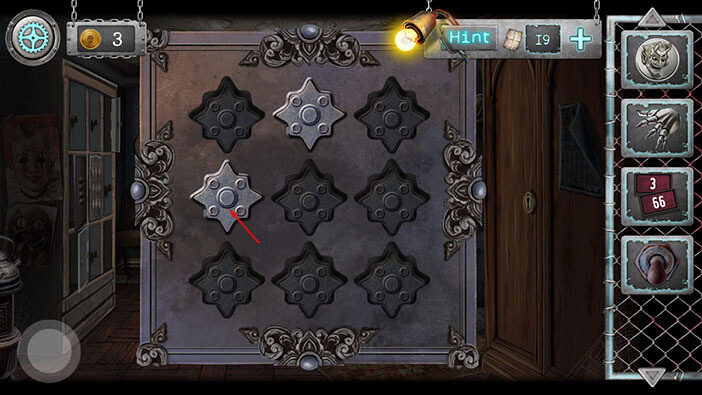
Step 9
Lastly, tap on the second star in the first row.
As soon as you press the stars in the correct order, the small cabinet door will open. Tap on the two items inside to pick them up. “Razor Blade” and a “Mysterious Cube” will be added to your inventory.
After that, tap on the button in the lower left corner to go back.
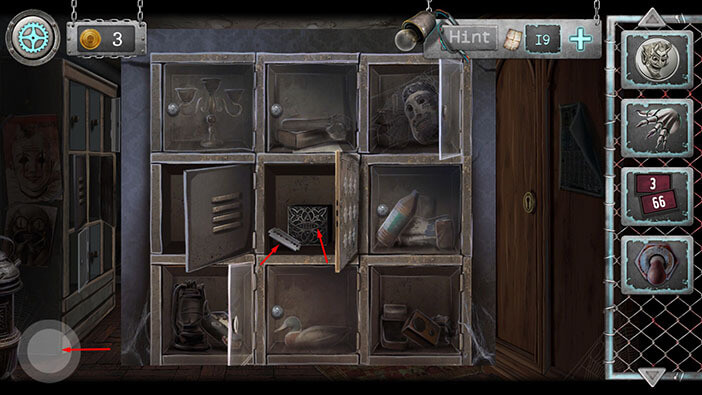
Tap on the arrows in the lower-left corner of the screen to go back outside.
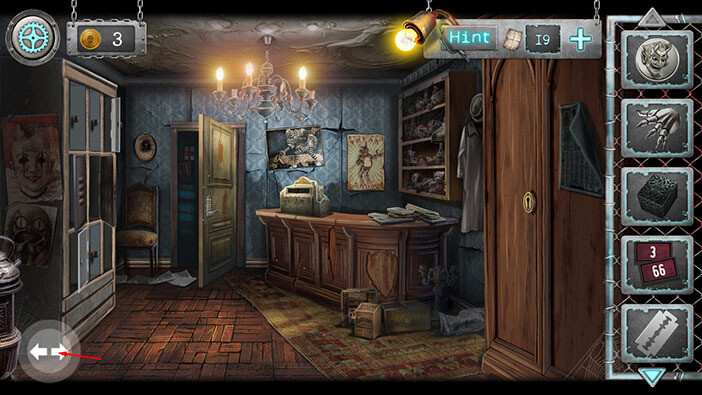
Tap on the boat to go back to the previous area.
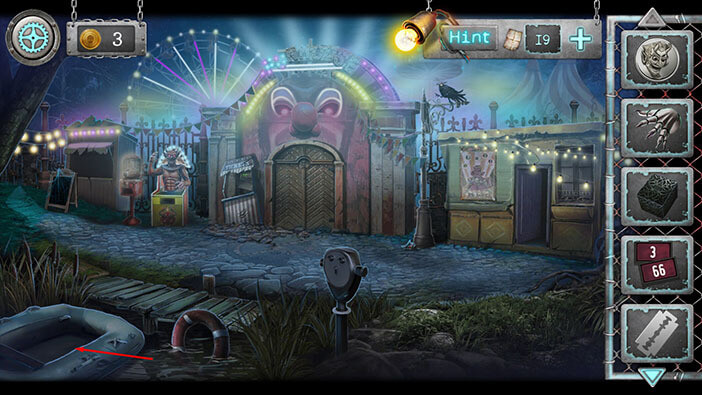
Tap on the arrows in the lower left corner to go to the area with gargoyle statues.
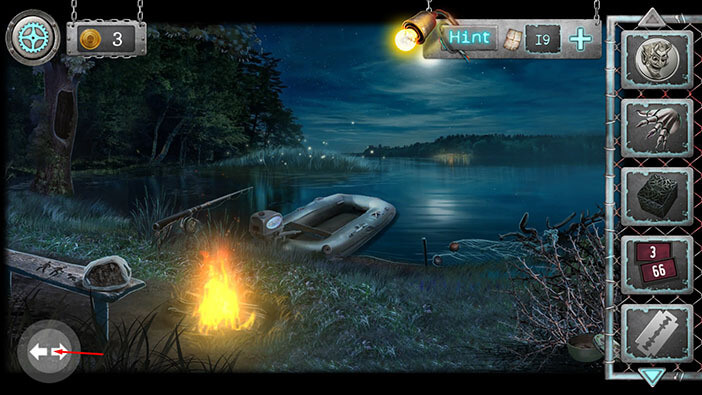
Tap on the gargoyle statue on the left to take a closer look at it.
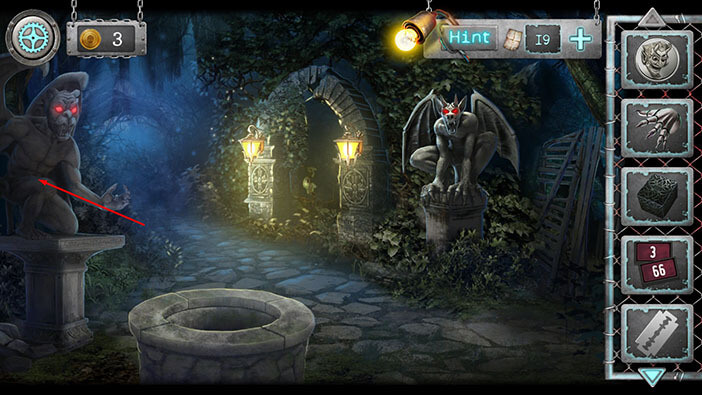
You will notice that there is some kind of a pin on a gargoyle’s hand. Select the “Mysterious Cube” from the inventory and place it on the pin.
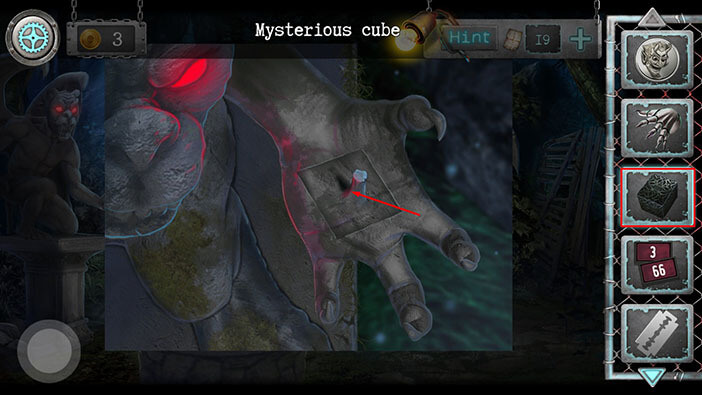
The cube will open, revealing some kind of a puzzle. Tap on the puzzle to start the interaction.
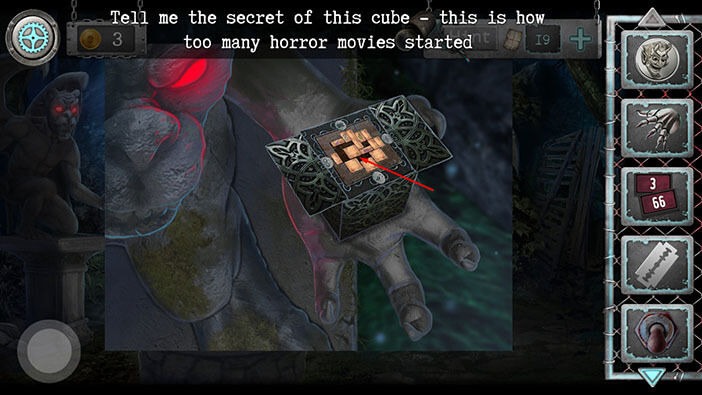
The goal of this puzzle is to place the blocks next to the matching images (so we should place them in the four slots). We will do this puzzle in multiple steps. Let’s begin.
Step 1
Move the large cube in the middle to the upper right corner. After that, move the rectangular piece with the purple image on the left all the way to the right – just below the square which we moved previously.
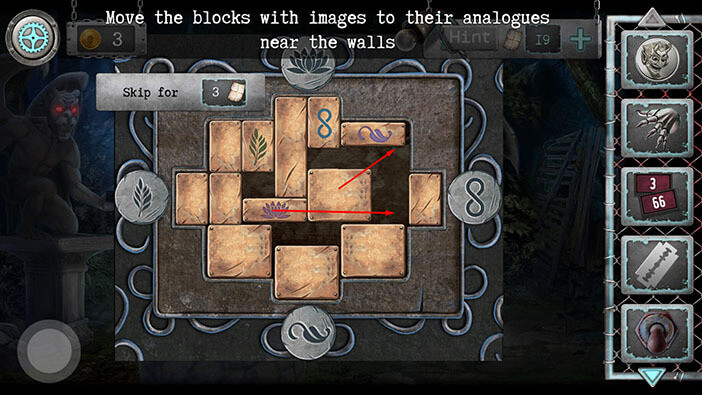
Step 2
Move the long rectangular piece located on the left side of the top slot, all the way down and to the right. After that, take a smaller rectangular piece and move it to the left side of the upper slot (where the long piece has been).
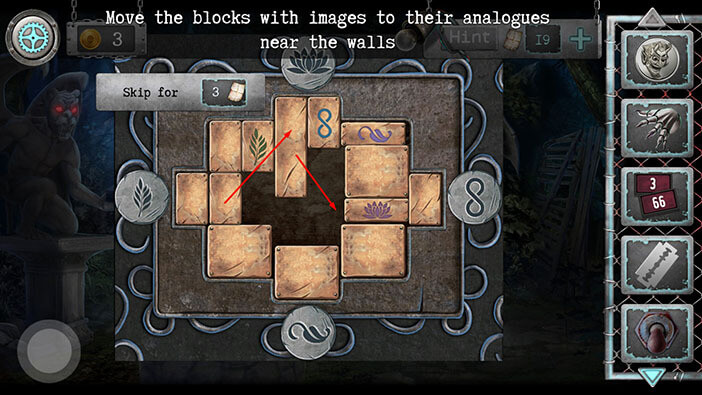
Step 3
Move the small rectangular piece from the left slot all the way to the right. After that, take the piece with the green image and place it into the matching slot on the left. With that, we will match the first out of four pieces with the appropriate image.
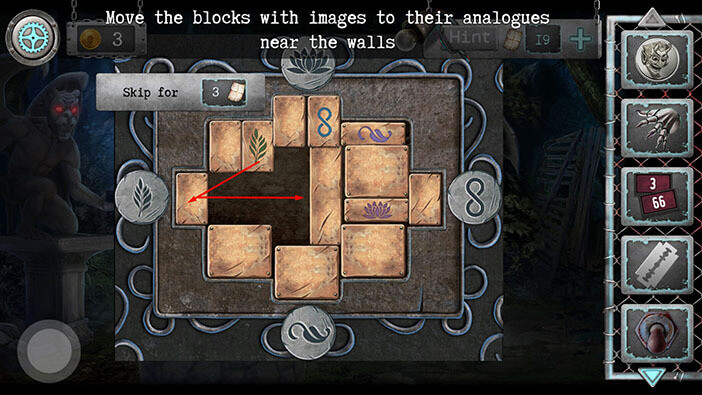
Step 4
Take the small piece in the middle which we moved in the previous step, and move it all the way to the left – next to the piece with the green image. After that, move the long piece from the middle slightly to the left, next to the cube which is located in the lower-left corner of the puzzle.
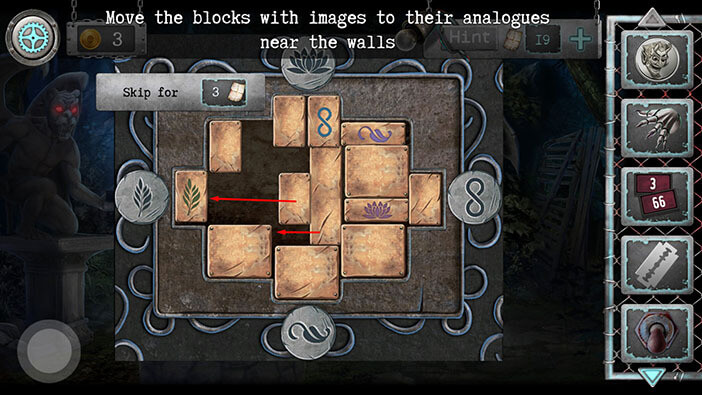
Step 5
Move the piece with the blue sign all the way down. After that, move the small piece located on the left side of the top piece and place it above the piece with the blue sign. Lastly, take the long piece on the left side and move it into the empty space on the left.
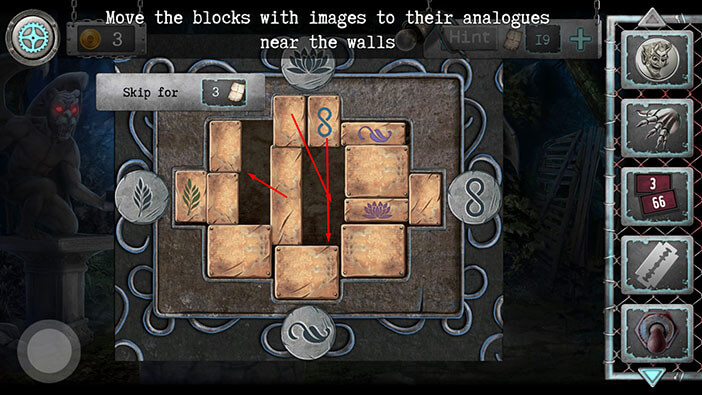
Step 6
Take the small piece on the right and move it all the way up, to the left side of the top slot. After that, take the piece with the blue image and place it next to the previous piece (left side of the top slot). Lastly, take the piece with the purple flower image and place it below the two pieces in the top slot.
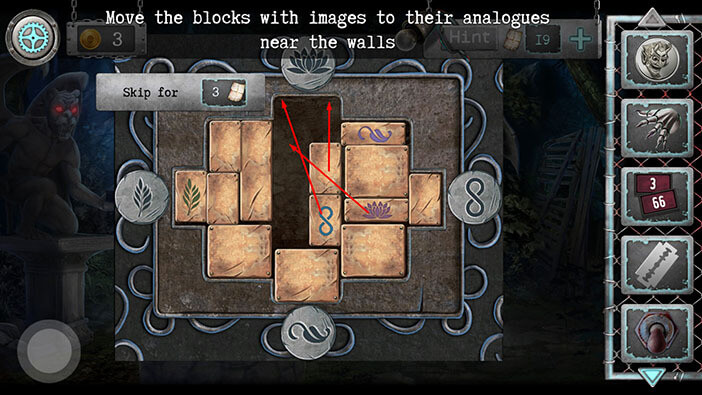
Step 7
Take the cube on the right and move it all the way down. After that, take the piece with the purple image and place it above the cube that we just moved (between the cube and the other purple piece)
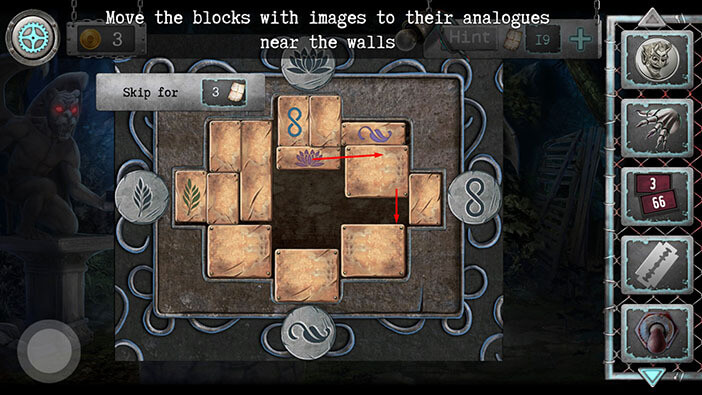
Step 8
Take the two pieces from the top slot, and move them all the way down. After that, take the piece with the image of the purple flower and place it into the top slot. With that done, we have a second match.
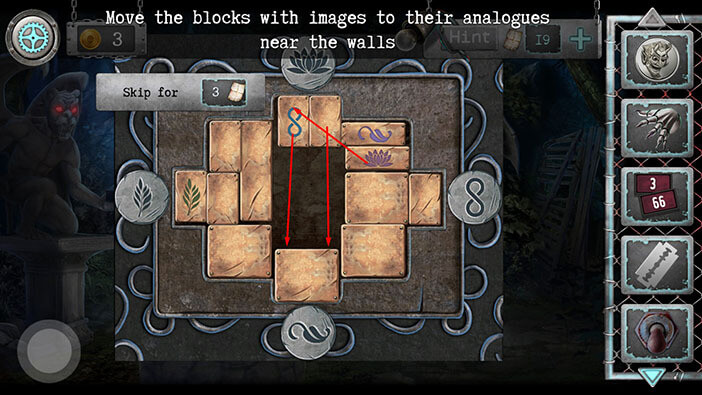
Step 9
Take the other piece with the purple sign and move it below the piece with the purple flower. After that, move the cube on the right all the way up.
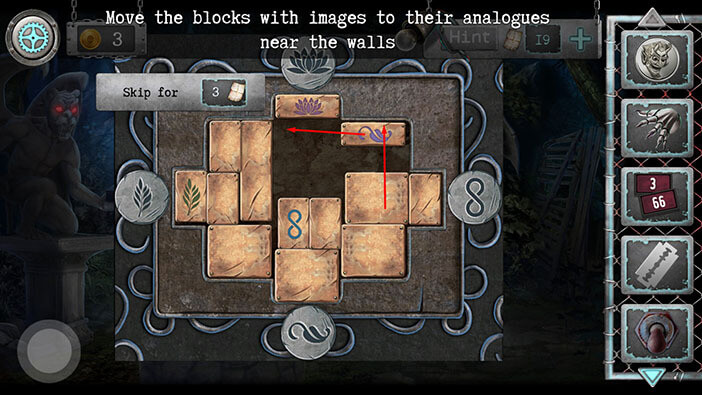
Step 10
Ok, now take the other piece with the purple sign and put it below the cube which is sitting in the upper right corner. After that, take the piece with the blue sign and the small piece next to it, and move them all the way up (below the piece with the purple flower).
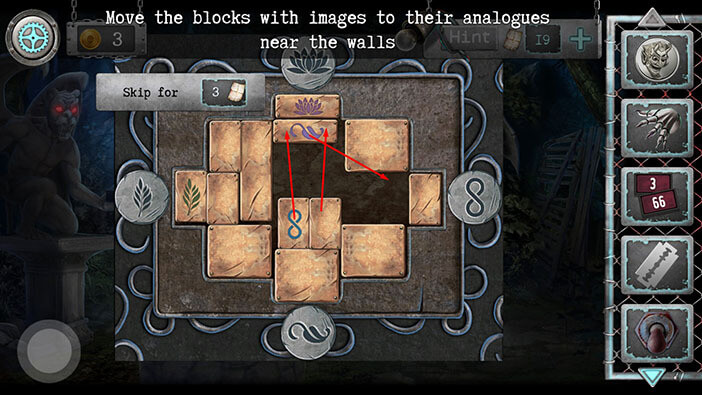
Step 11
Take the cube from the bottom right corner and move it up and to the left (below the piece with the blue image). After that, take the cube from the bottom slot, and move it all the way up (below the cube which we just moved). Lastly, take the piece with the purple sign, and move it all the way down (to the bottom right corner).
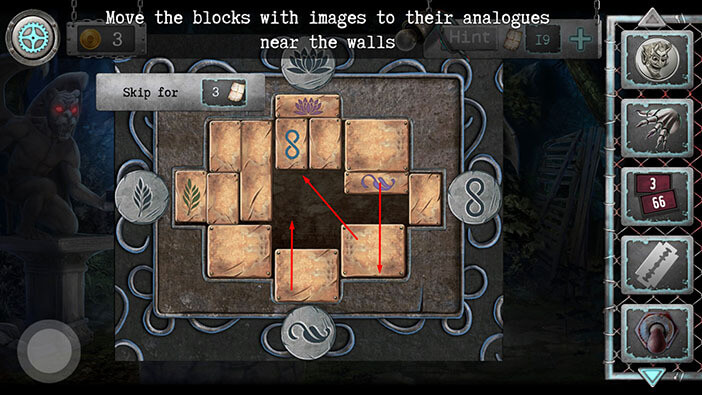
Step 12
Take the cube below the piece with the blue sign, and move it all the way to the right. After that, take the cube that was below it, and move it all the way up (below the piece with the blue sign). Lastly, take the piece with the purple sign and put it into the bottom slot. With this last step, we placed the third piece into the matching slot.
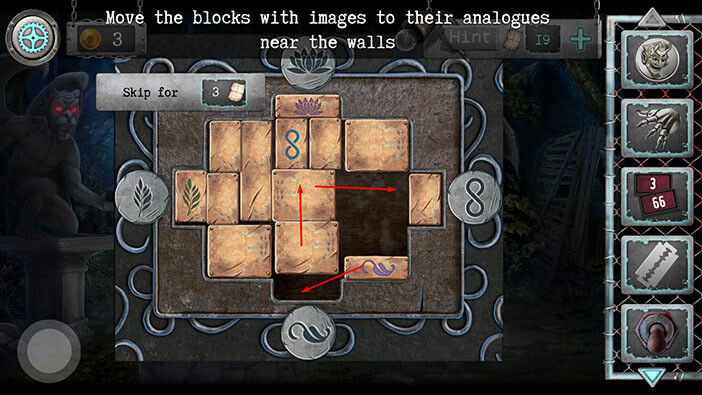
Step 13
Take the cube from the right and place it above the piece with the purple sign in the bottom slot. After that, take the cube from the top right corner and move it all the way down (to the bottom right corner).
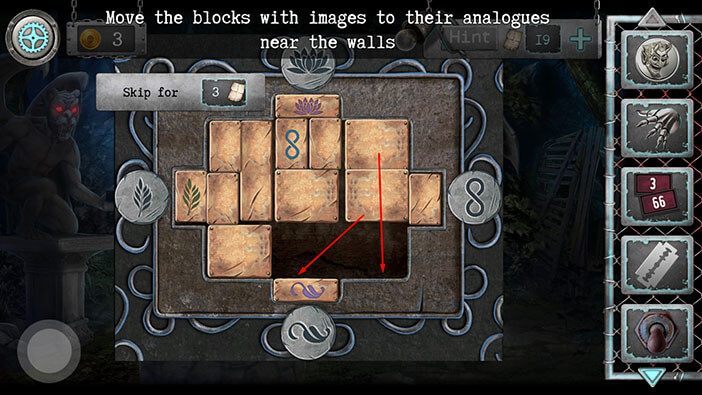
Step 14
Take the two pieces below the top slot (the piece with the blue sign, and the piece next to it) and move them all the way to the right (into the top right corner). After that, take the cube from the middle and move it all the way up (below the piece with the purple flower).
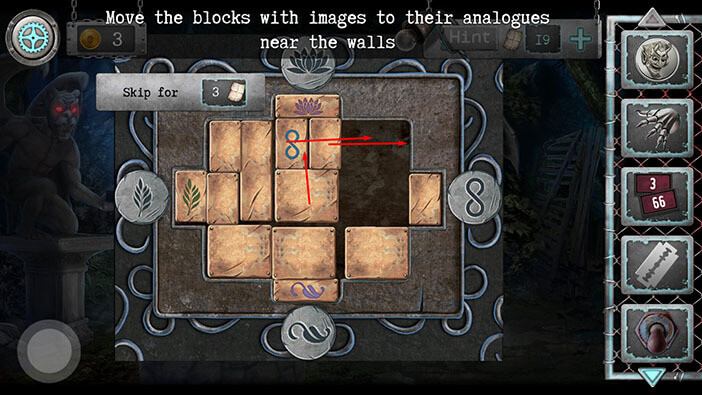
Step 15
Take the small piece from the right slot, and move it all the way to the left.
Finally, take the piece with the blue sign and place it into the matching slot on the right. With this last step, we will solve the puzzle.
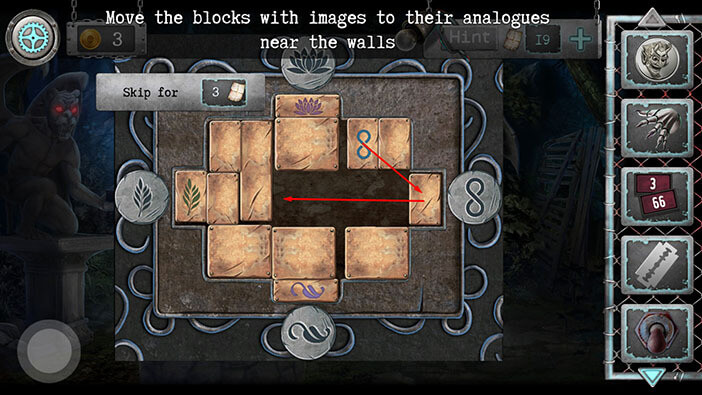
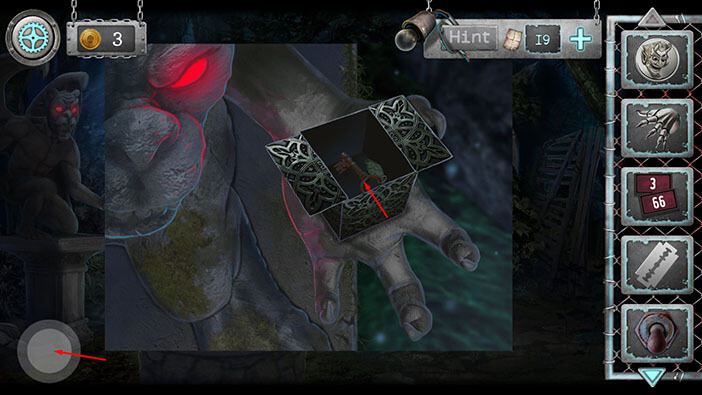
As soon as you solve the puzzle the box will open and you will see a key. Tap on it to pick it up and the “Locker key” will be added to your inventory.
After that, tap on the button in the lower left corner to go back.
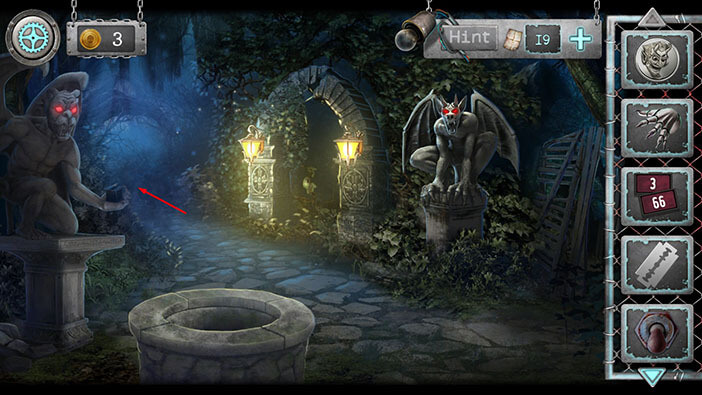
Ok, let’s go back to the amusement park. Tap on the path to go to the lakeside area.
Tap on the boat to go back to the amusement park.
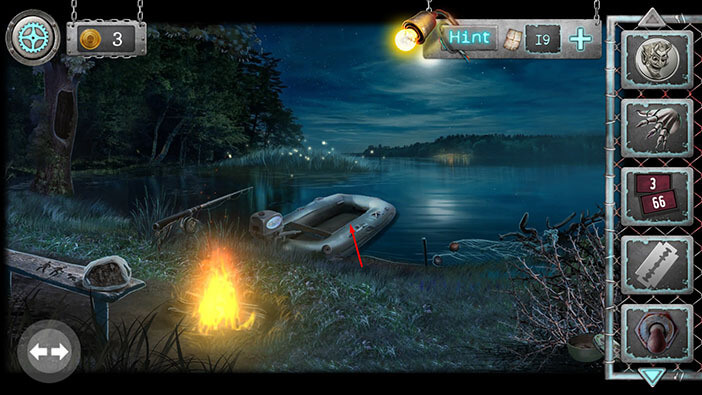
Before we proceed, let’s quickly check out the “Devil” arcade game on the left.
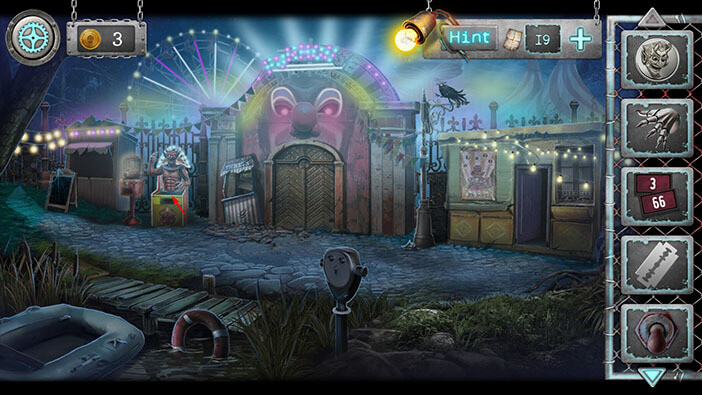
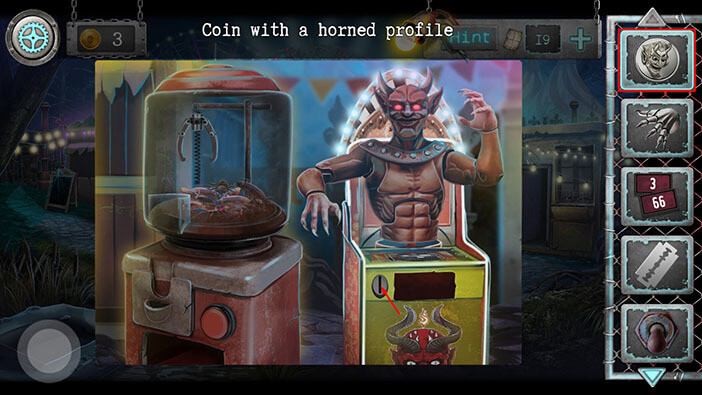
Select the “Coin with a horned profile” from the inventory and insert it into the coin slot.
Here, we have a very simple minigame. Tap the button on the left to move the devil forward. When you get close to an angle, tap on the down arrow to duck below it. When you get close to a cauldron tap on the up arrow to jump over it.
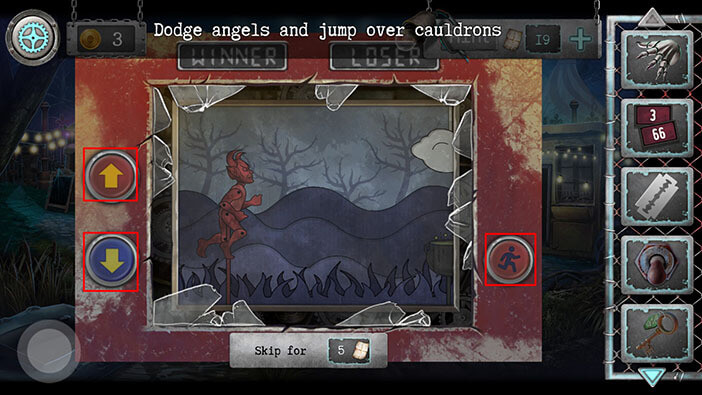
Once you complete the minigame, the compartment next to the coin slot will open. Tap on the inside compartment to pick it up and “Pouch with coins” will be added to your inventory.
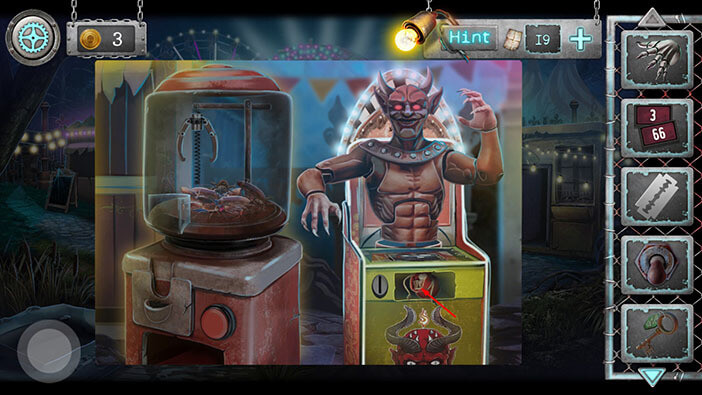
Select the “Pouch with coins” from the inventory and insert the coin into the slot on the left.
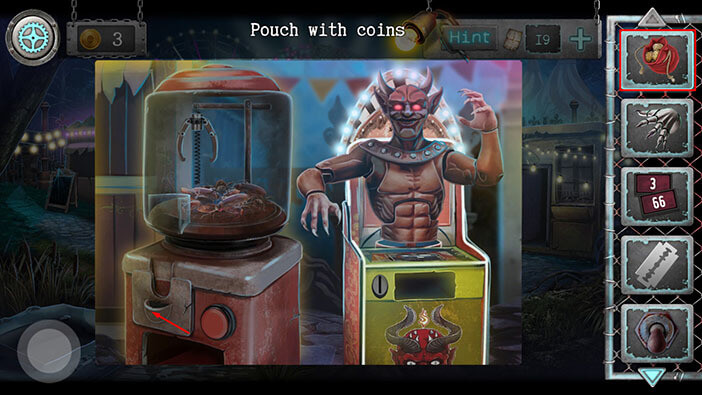
Tap on the red button to stop the hand, and grab the item from the machine. More likely than not, you will grab one of the bugs on your first few tries.
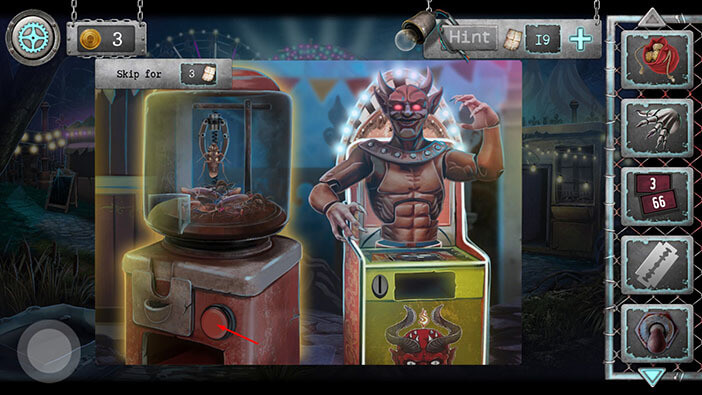
After a few tries, you should grab the blue “Puck” and it will be added to your inventory. Keep operating the machine until you find the next item.
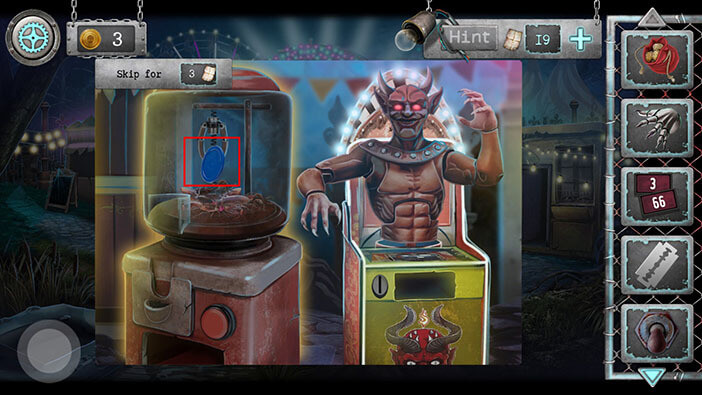
After a few more tries, you should be able to grab the “Chewing gum” and it will be added to your inventory.
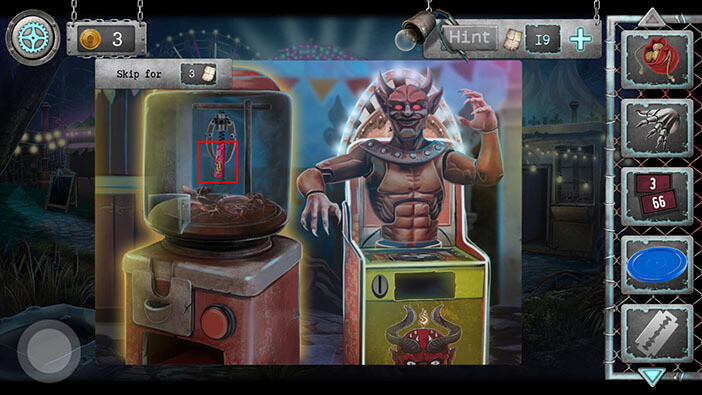
That’s all we can get from this machine. So, let’s tap on the button in the lower left corner to go back.
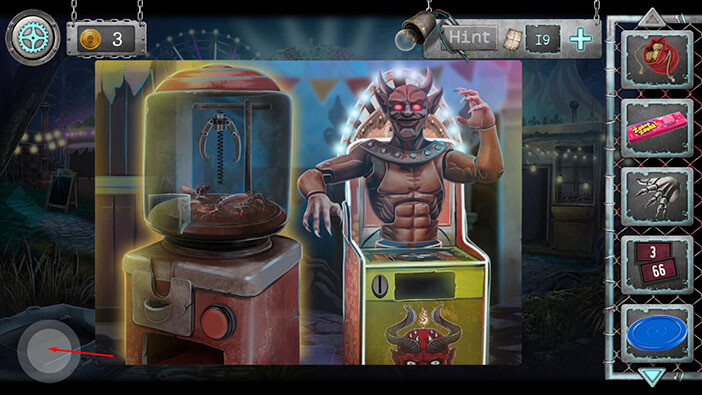
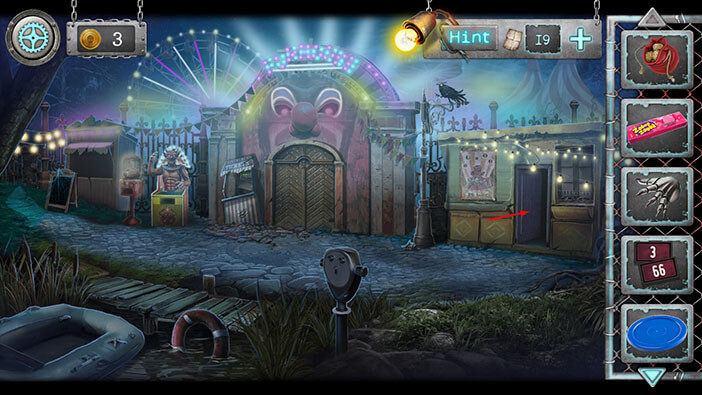
Tap on the door on the right to proceed inside.
Select the “Locker key” from the inventory and tap on the keyhole in the closet on the right to unlock it.
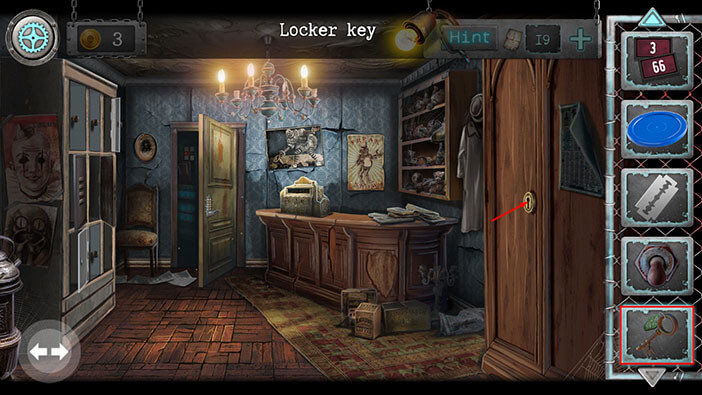
Inside the pocket, you will see a key. Tap on it to pick it up and the “Panel key” will be added to your inventory.
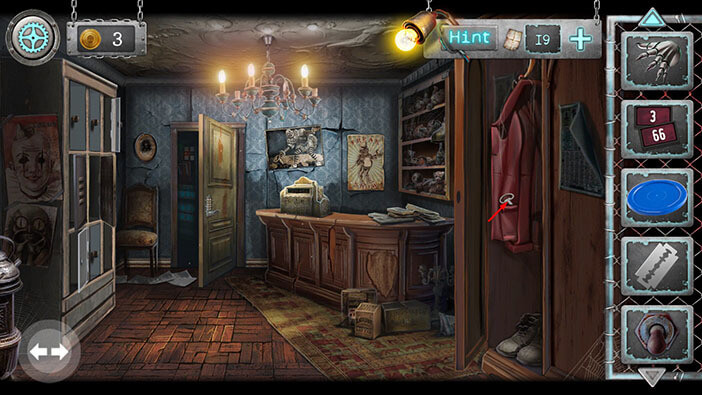
Tap on the green door to proceed into the next room.
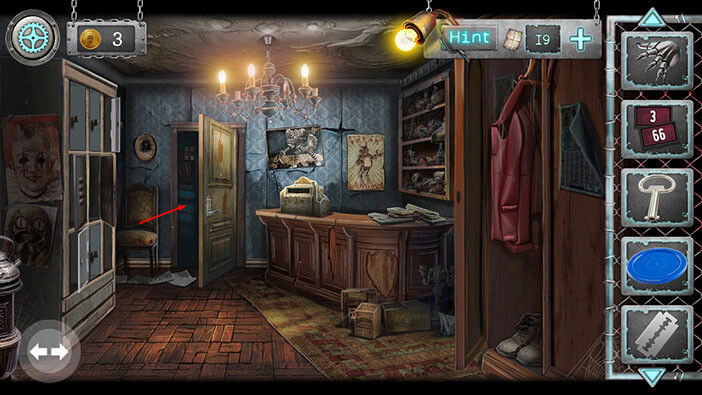
Select the “Panel key” from the inventory and use it to unlock the panel on the right. After that, tap on the panel to take a closer look.
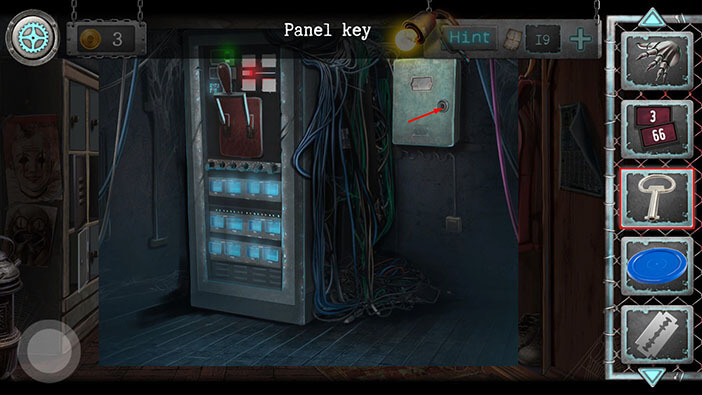
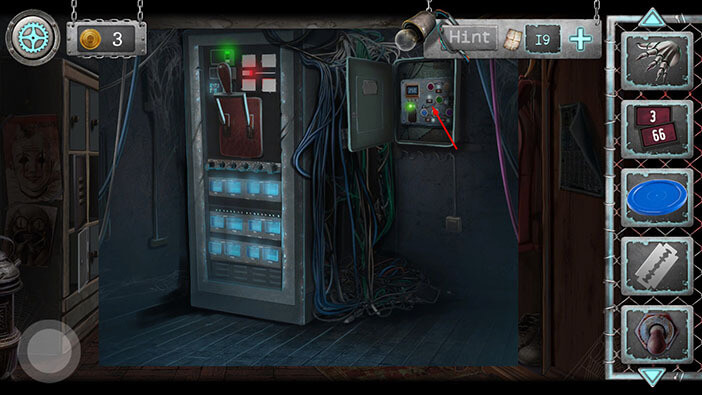
As soon as you start interacting with the panel, you will notice the number “250” in the upper left corner. This number represents the voltage that we have to set.
You will also notice that the two slots on the right are empty, so select the “Numbers” from the inventory and insert them into the empty slots.
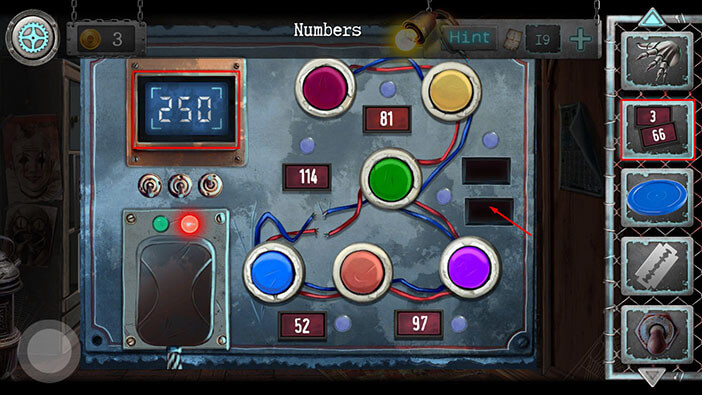
Next, select “Chewing gum” from the inventory and use it to connect the wires on the left.
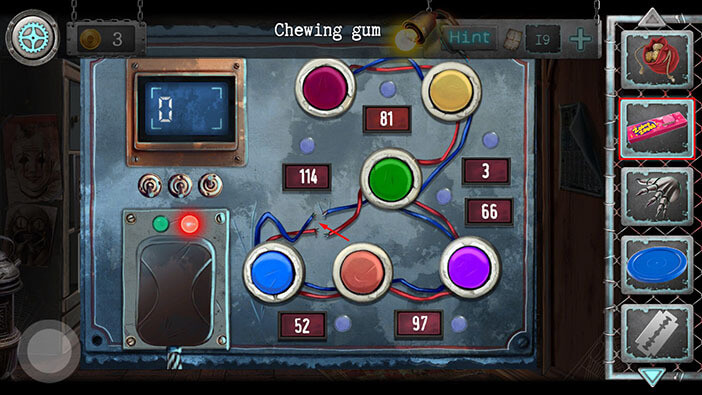
Ok, our next goal is to connect the right buttons and get a total sum of 250. The buttons themselves do not have value. The numbers represent the value of the connection between the two buttons. We will do this puzzle in several steps. Let’s begin.
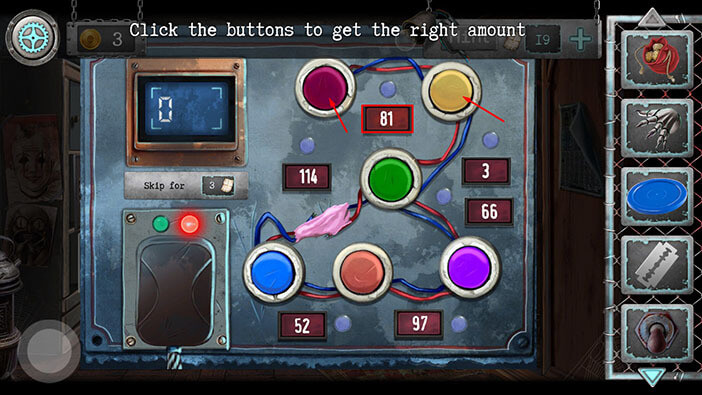
Step 1
Tap on the pink button, then tap on the yellow button. This will activate the connection between these two buttons, and the connection has a value of 81.
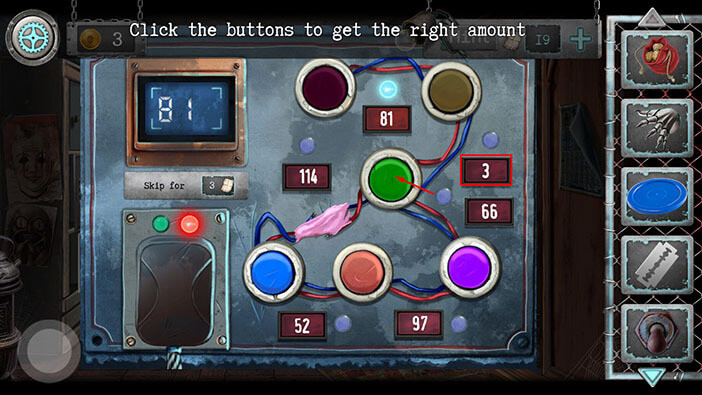
Step 2
Tap on the green button. This will activate the connection between the yellow and the green buttons, which has a value of 3. So, the total is 81 + 3 = 84.
Step 3
Tap on the blue button. This will activate the connection between the blue and the green buttons, which has a value of 114. So, the total is 81 + 3 +114 = 198.
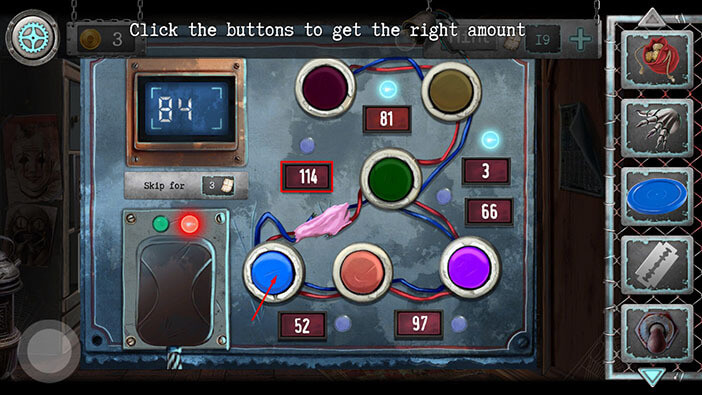
Step 4
Tap on the orange button. This will activate the connection between the blue and the orange buttons, which has a value of 52. So, the total is 81 + 3 +114 = 250. With this last step, you will solve the puzzle.
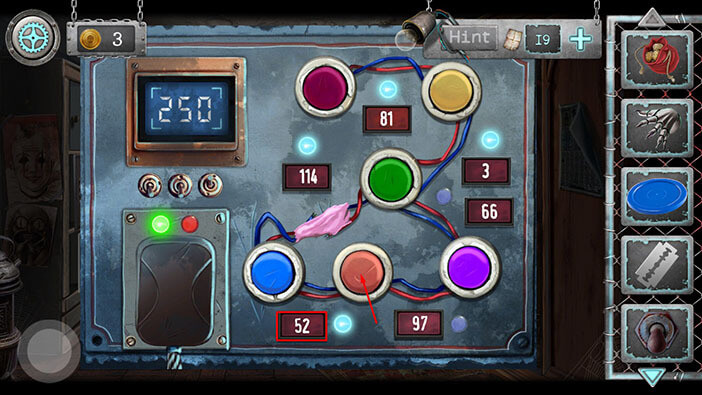
Tap on the button in the lower left corner to go back.
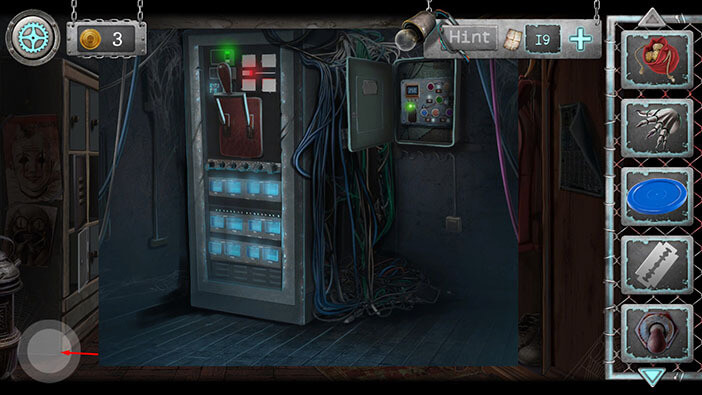
Tap on the arrows in the lower left corner to go outside.
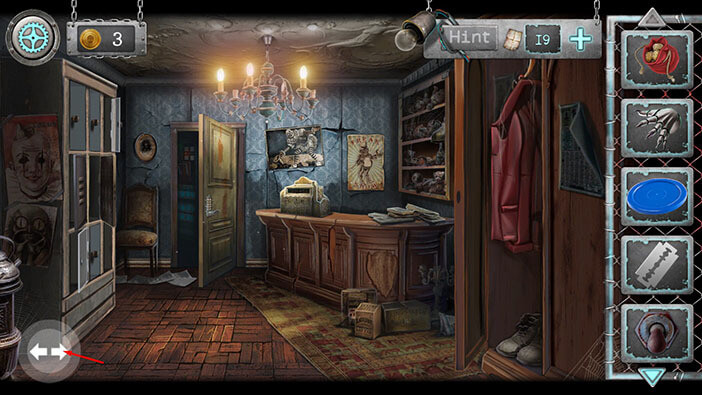
Tap on the gate to take a closer look at it.
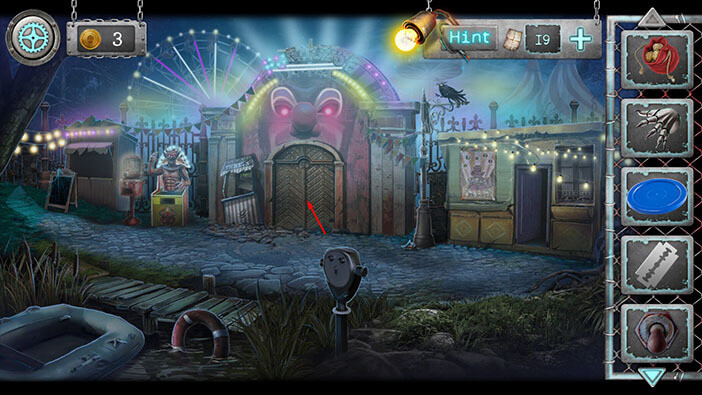
If you pay attention to the left wall, you will notice the number “648”. Memorize/ write down this number because we will need it for the next puzzle.
Once you’re done, tap on the machine on the left to start the interaction.
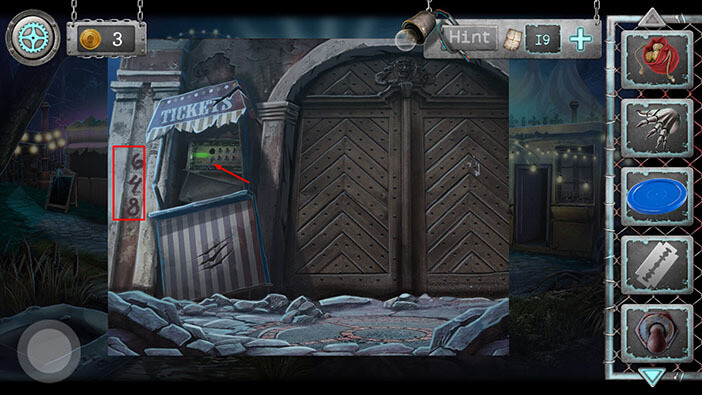
You will immediately notice that the switch in the first slot is missing. So, select the “Toggle switch” from the inventory and insert it into the empty slot.
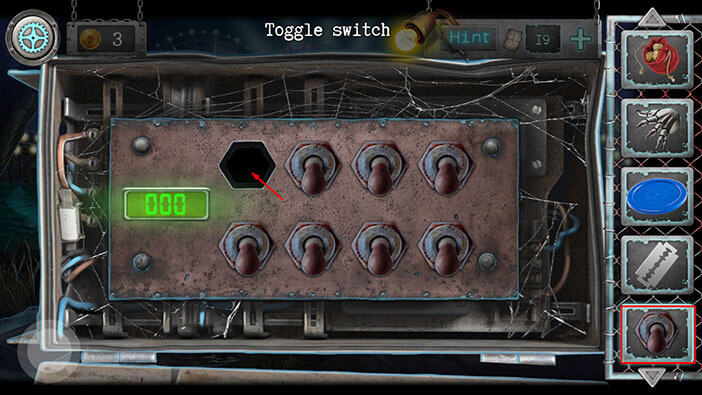
By flipping all switches on and off, one by one, you will discover that each switch has a specific value.
In the top row, we have values (looking from left to right): 112, 302, 84, and 54.
In the bottom row, we have values: 160, 248, 204, and 145.
Our goal is to flip on the switches which will generate a total value of 648.
So, in the first row tap on the:
First switch = 112
Third Switch = 84
In the second row tap on the:
Second switch = 248
Third switch = 204
When we add it all together, we will get 112 + 84 + 248 + 204 = 648. This is exactly the number that was required to solve this puzzle.
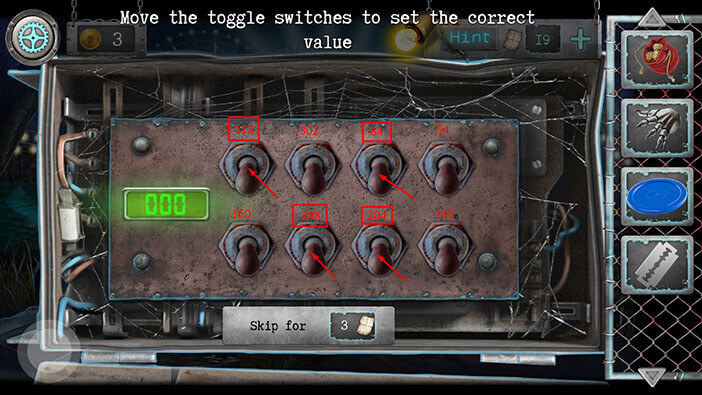
As soon as you enter the number “648” the gate will open, and we will gain access to the new area. However, we will end the second part of the walkthrough at this point and continue the story in the third part. You can check out the third part by tapping on the “Next Part” button.
Thank you for reading.