Scary Horror 2 – Chapter 3, Part 1
Hello everyone and welcome to Part I of our walkthrough for Chapter 3 of the “Scary Horror 2: Escape Games”. At the end of Chapter 2, our character tried to escape through the roof of the horror house. He found rope long enough to descend to the ladder, but when he tried to climb down the ladder, one of the steps broke, and he fell… Let’s see what happens next.
The game starts with our character getting up from the concrete and dusting himself off. It seems that he didn’t suffer any serious injuries after he fell.
NOTE: The first part of the walkthrough ends when our character cuts down the thorns and gains access to the strange box in the lake area. This puzzle is solved in part 2.
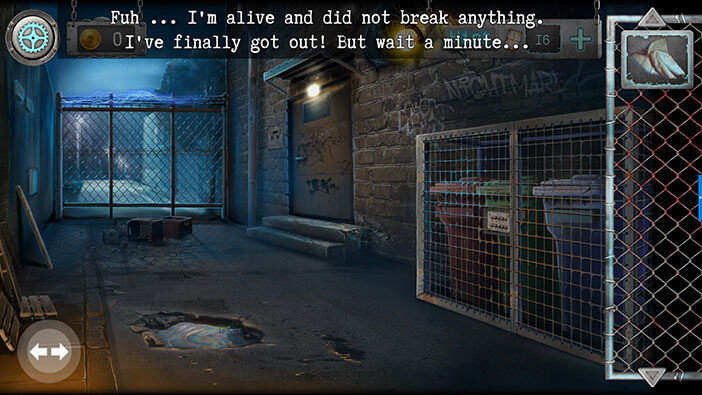
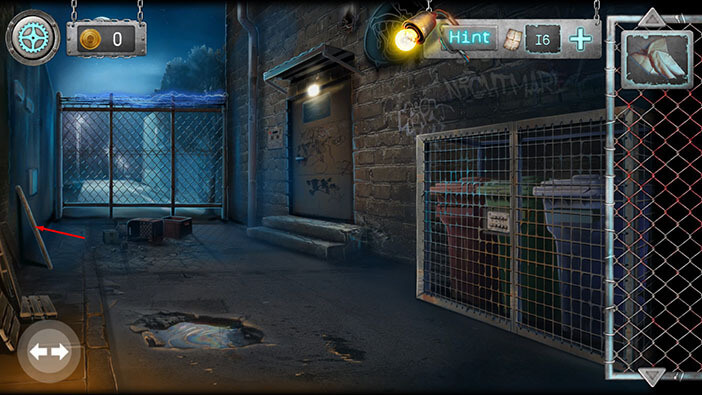
Ok, let’s see what we can find in this alley. Tap on the “stick” to pick it up – it’s leaning against the wall on the left.
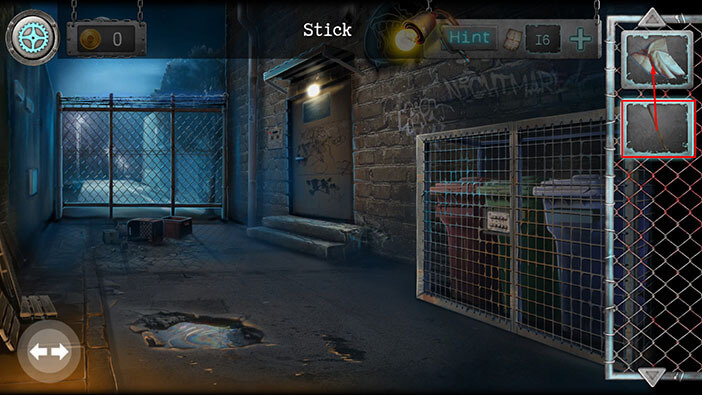
Tap on the “Stick” in your inventory to select it, then drag it to the “Dirty neckerchief” to combine these two items. “Wrapped stick” will be added to your inventory.
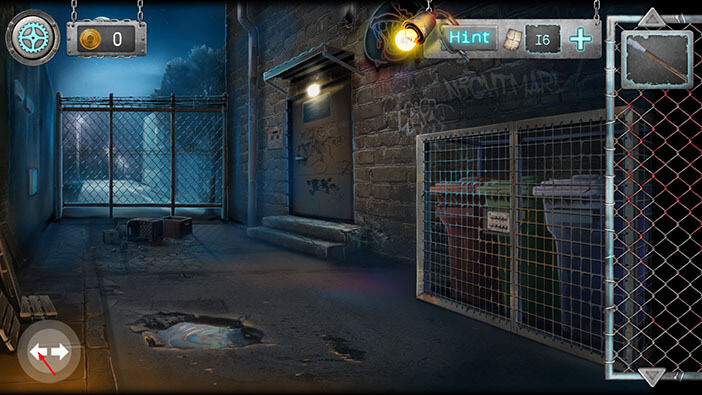
We can’t do much in this area, for now, so tap on the left arrow, in the bottom left corner, to proceed to the next area.
In the bottom right corner (below the burning barrel) you will see a “Jerrycan with fuel”. Tap on it to pick it up.
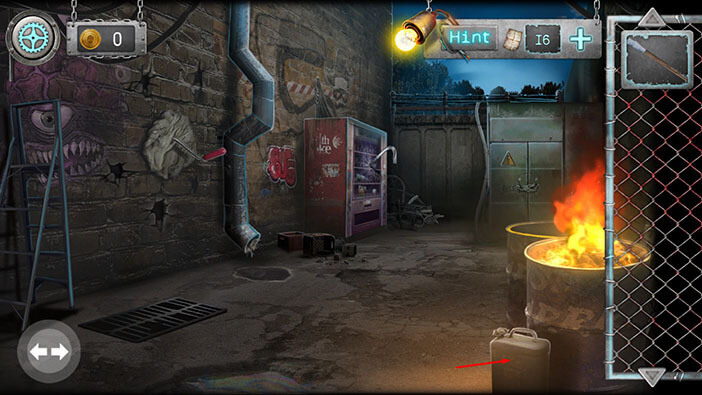
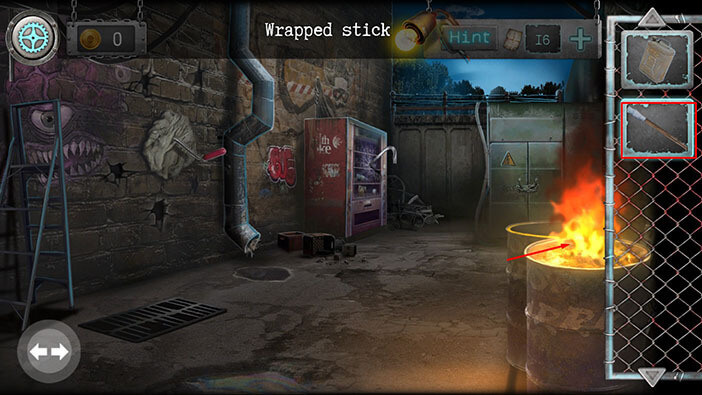
Ok, we can now make a torch. Select the “Wrapped stick” from the inventory, then tap on the burning barrel to light up the stick. A “Torch” will be added to your inventory.
Tap on the ladder on the left to take a closer look at it. As your screen zooms in on the ladder, you will see a lot of red, glowing eyes looking at you from the halls in the wall.
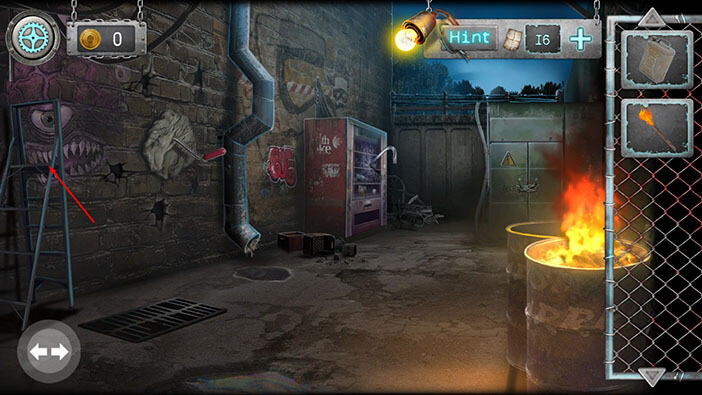
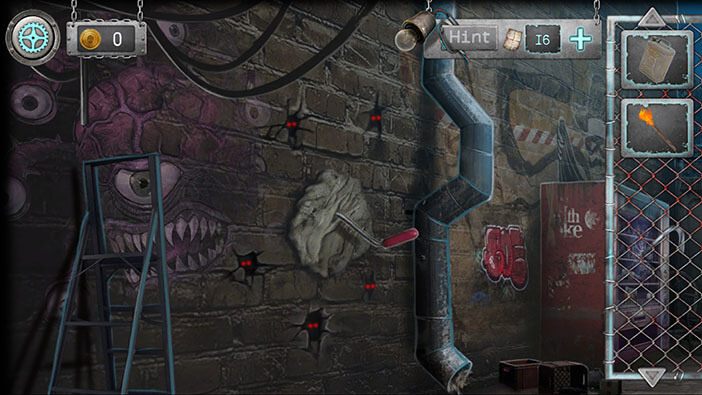
Tap on the “Stepladder” again to pick it up.

Next, tap on the gutter on the left to take a closer look at it.
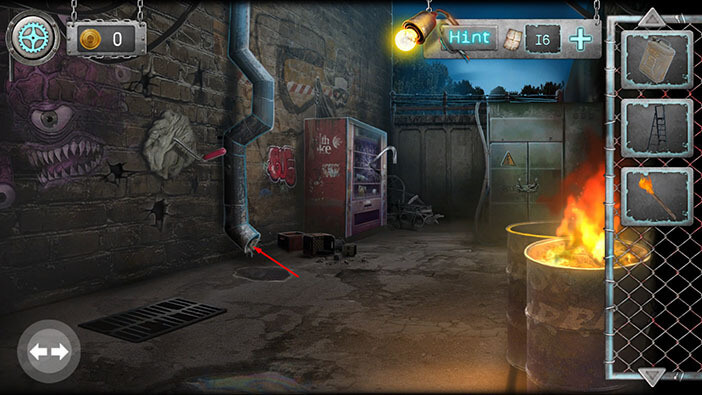
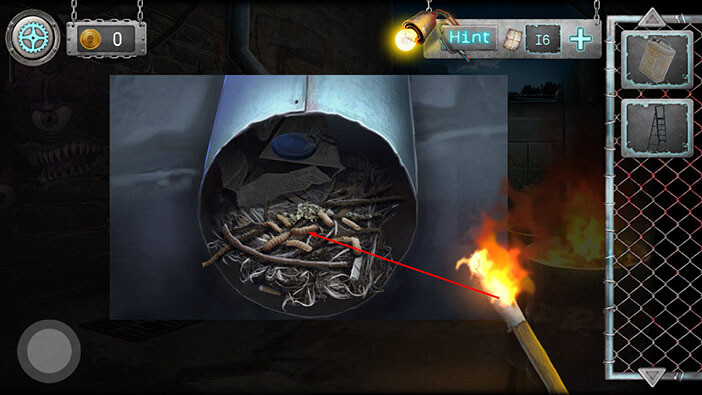
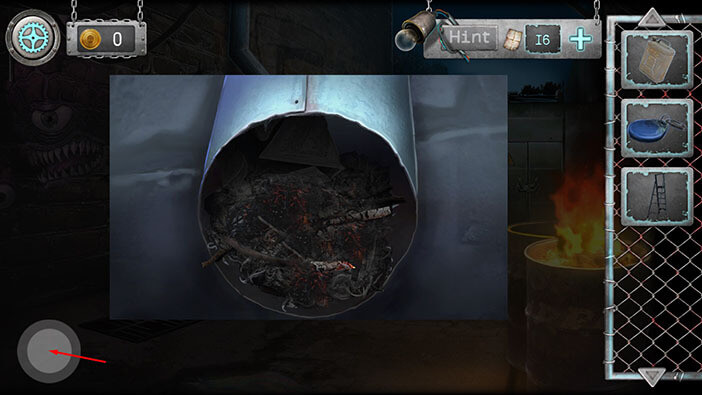
Here, we can see a bunch of worms, crawling around the garbage. Quickly select the “Torch” from the inventory and tap on the worms to start the interaction. After that, drag the torch on the worms to burn them down.
Also, drag the torch over the garbage a few more times to burn everything flammable.
NOTE: If you fail to react in time, the giant centipede will jump out from the trash and bite you.
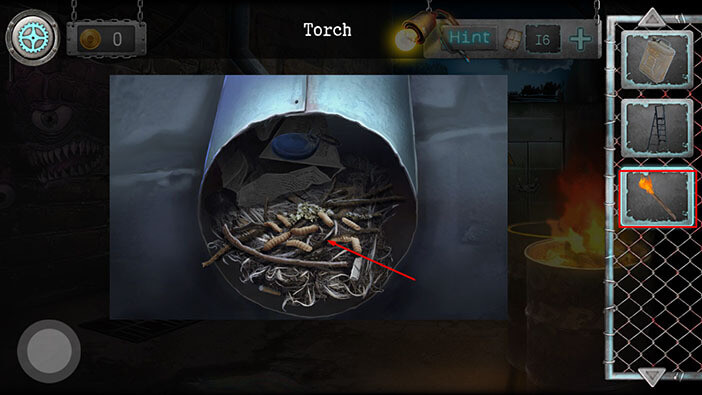
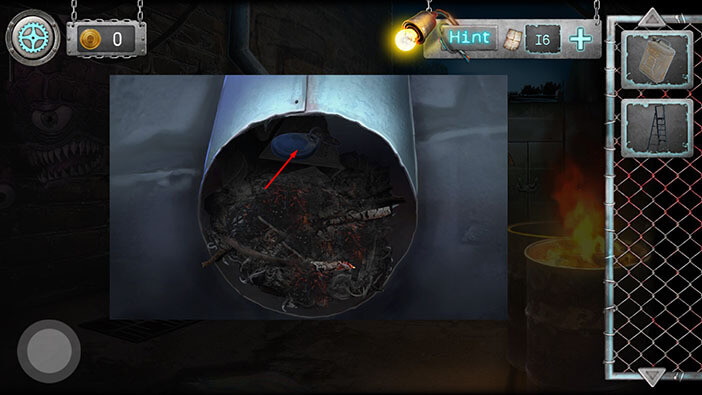
After that, tap on the item in the back to pick it up. A “Chip” will be added to your inventory.
Ok, let’s go back. Tap on the button in the bottom left corner of the screen.
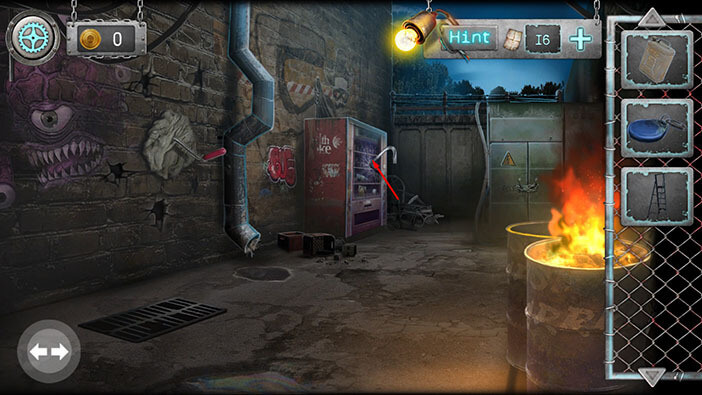
If you take a look at the wending machine, you will notice a crowbar sticking out of it. Let’s take a closer look at the crowbar.
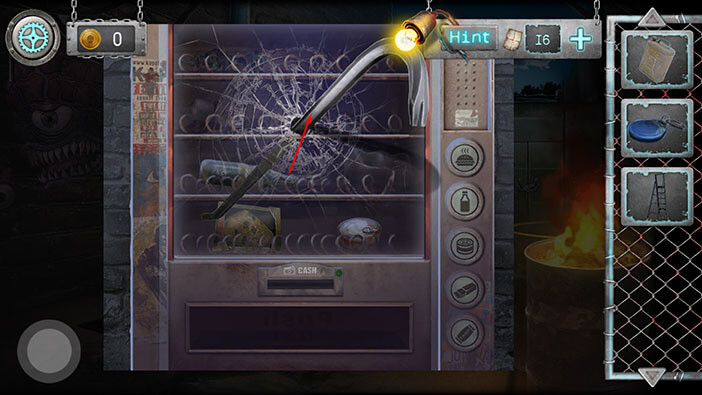
Tap on the “Crowbar” to pull it out, and it will be added to your inventory.
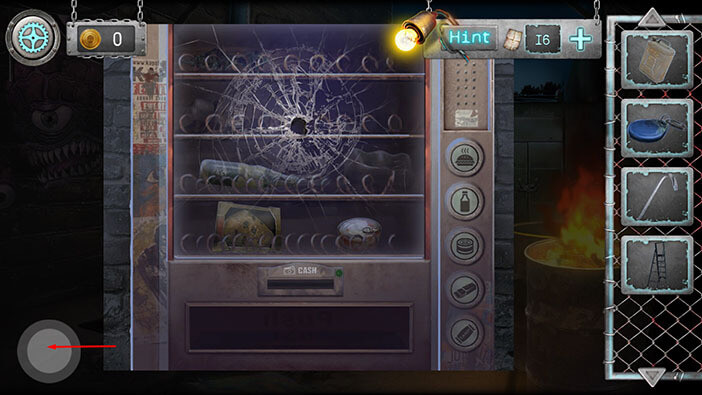
We will return to the wending machine in a few moments. For now, tap on the button in the lower left corner to go back.
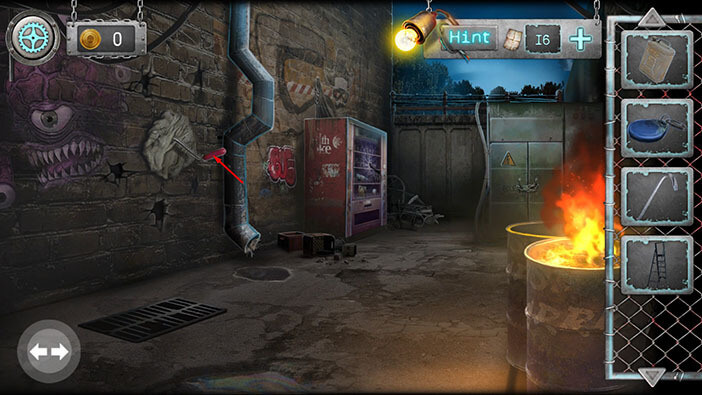
If you take a look at the wall on the left, you will notice a red handle stuck into the wall. Tap on the handle to take a closer look.
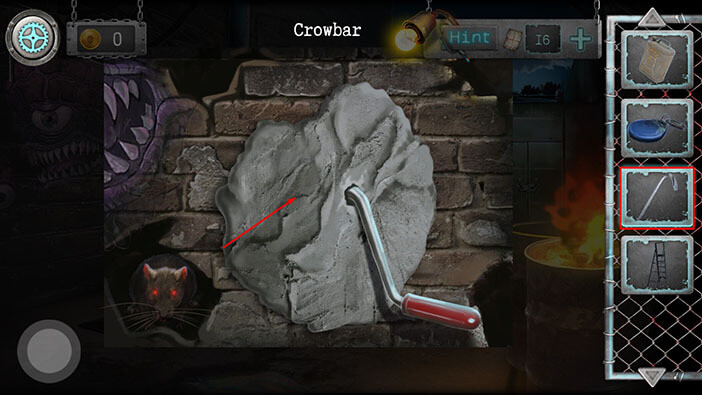
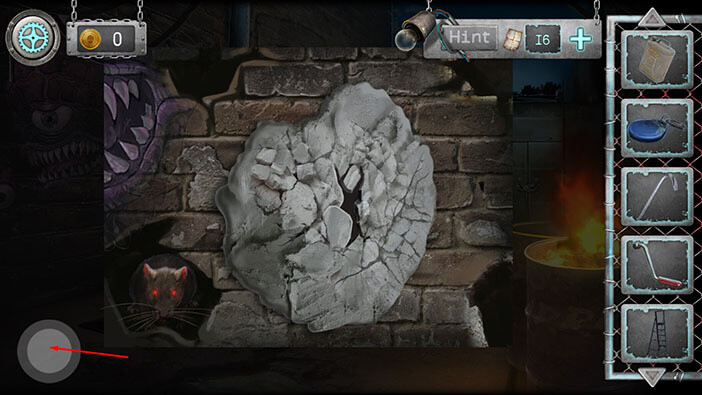
Ok, now we can see that the rats were looking at us from the holes in the wall. Let’s find a way to pull out the handle. Select the “Crowbar” from the inventory and use it to smash the concrete around the handle. Your character will automatically pull out the item that was stuck inside the wall, and the “Lever” will be added to your inventory.
Tap on the button in the lower left corner to go back.
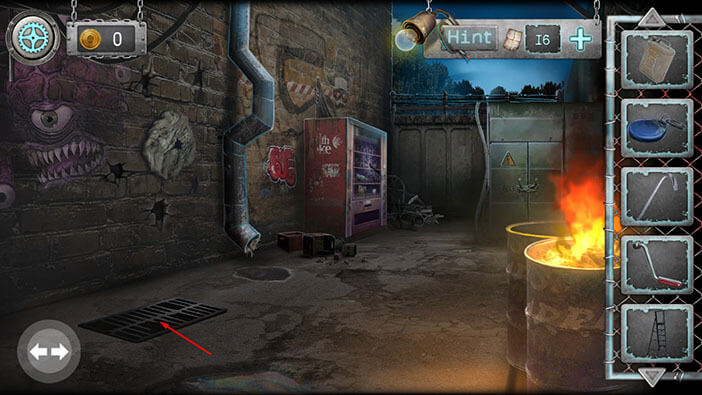
Next, let’s take a closer look at the sewage shaft on the left.
Select the “Crowbar” from the inventory and use it to remove the lid.
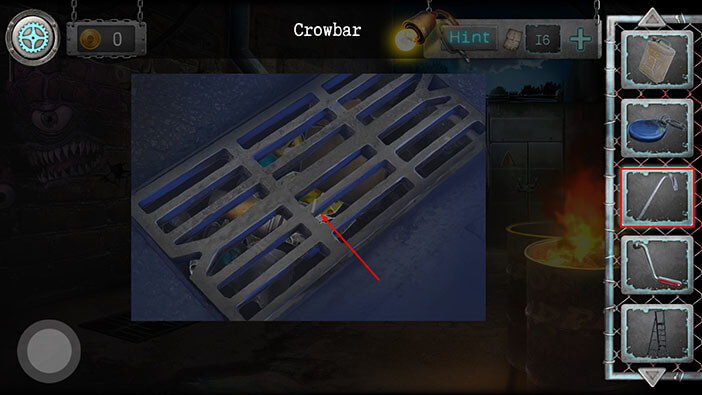
Drag the garbage to remove it.
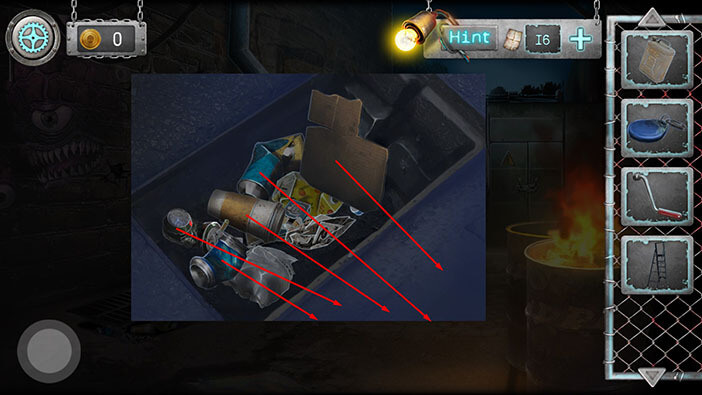
When you remove the garbage, you will discover a wallet and a red button, which were previously hidden below the thick layer of garbage. Tap on the “Wallet with money” to pick it up.
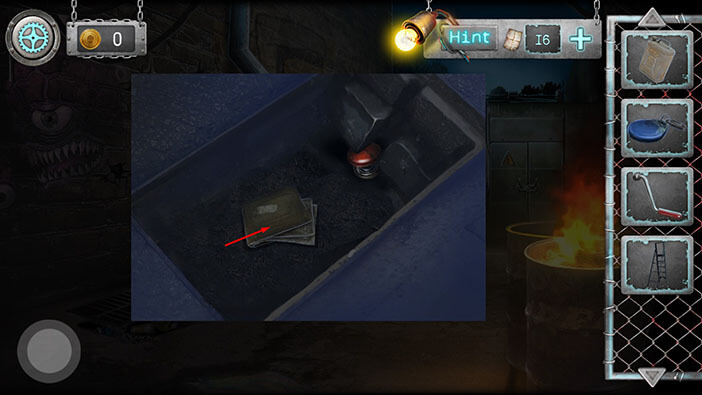
If you tap on the red button, you will discover that it is stuck. We will come back to it, a bit later. For now, tap on the button in the lower left corner to go back.
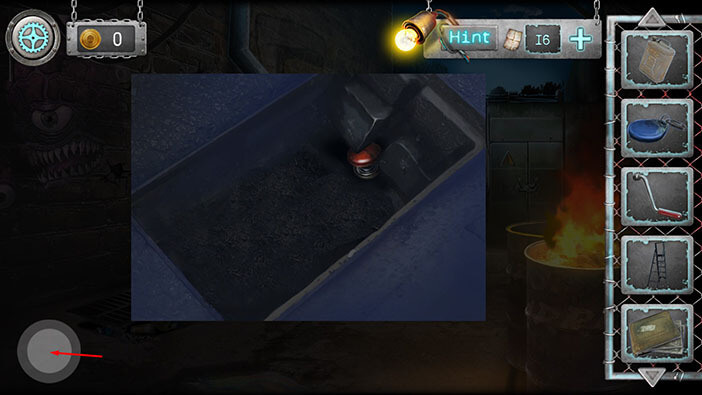
Let’s go back to the wending machine.
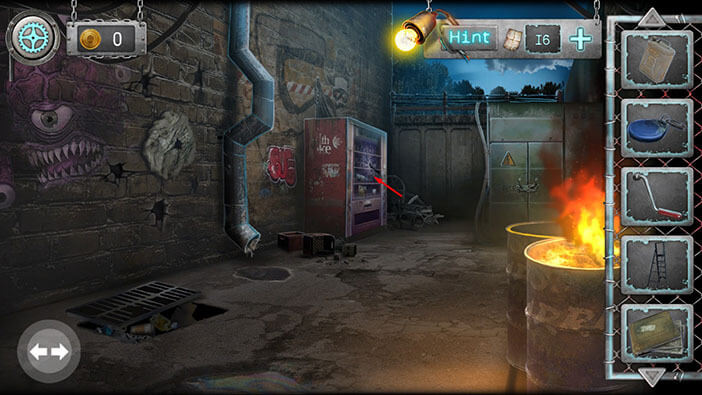
Select the “Wallet with money” from the inventory, then tap on the cash slot to insert the bill.
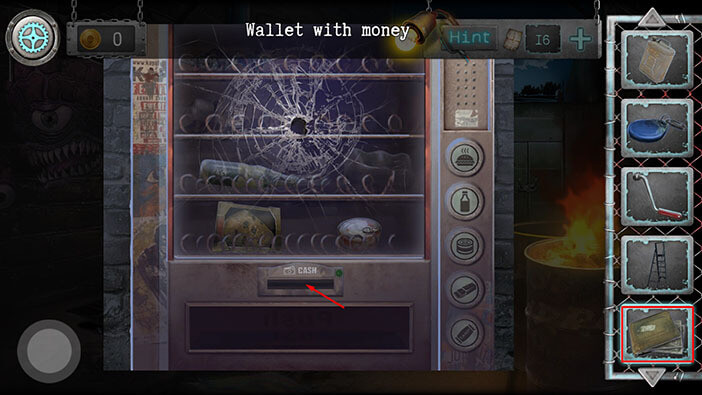
Choose the first icon (pie).
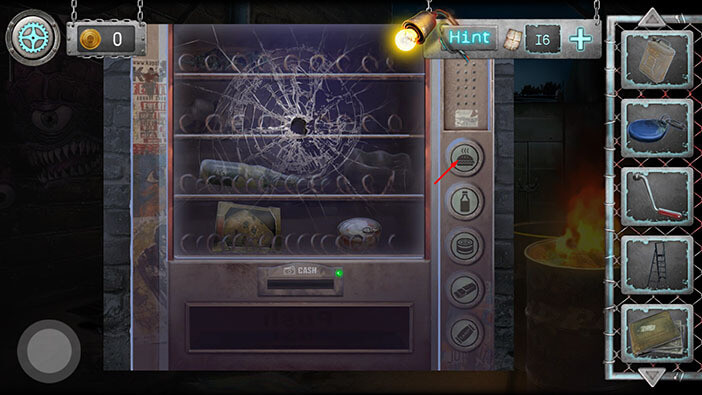
After that, tap on the pie to pick it up, and “Rotten pie” will be added to your inventory. Well, our character is starving, and it seems that all food in the wending machine is spoiled, which is very bad.
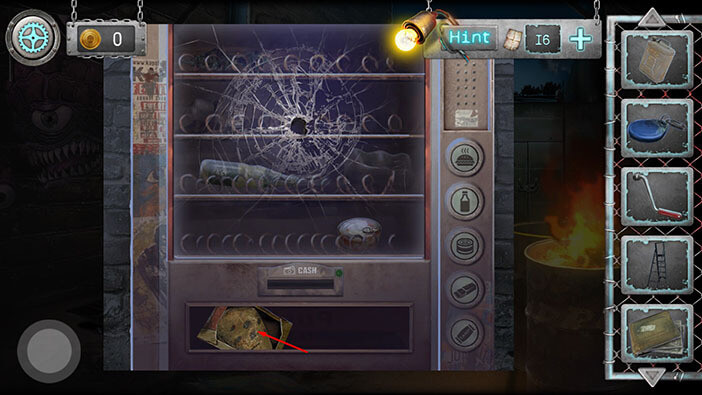
Again, select the “Wallet with money” from the inventory and tap on the cash slot to insert the bill. After that, tap on the second icon (bottle).
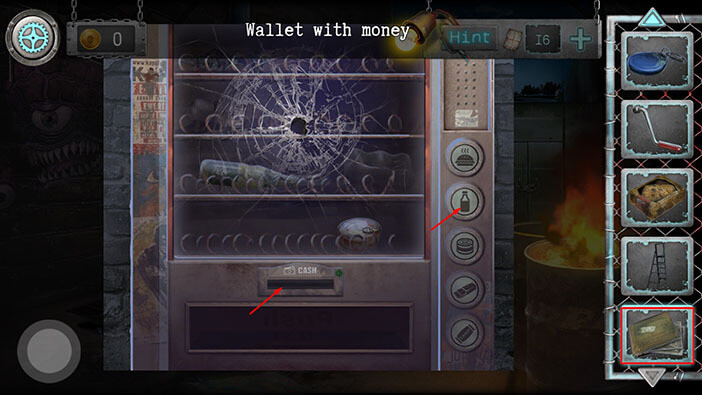
Tap on the bottle to pick it up and “Dirty soda” will be added to your inventory.
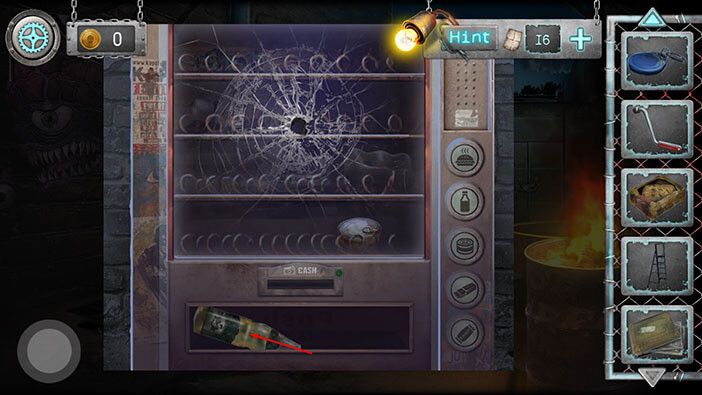
Lastly, select the “Wallet with money” from the inventory and tap on the cash slot to insert the bill. After that, tap on the third icon (can of food).
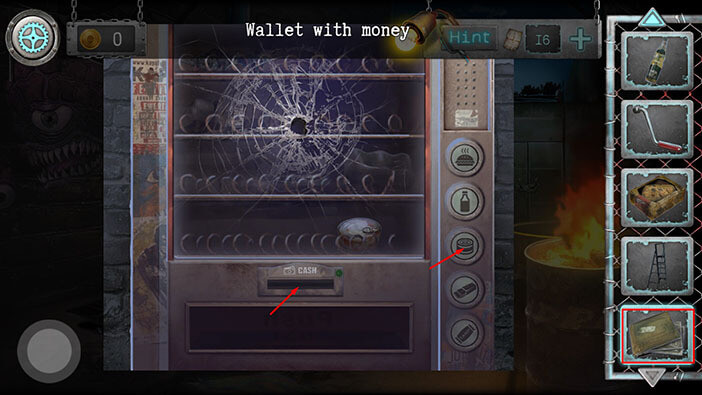
Tap on the can of food to pick it up, and “Expired canned food” will be added to your inventory.
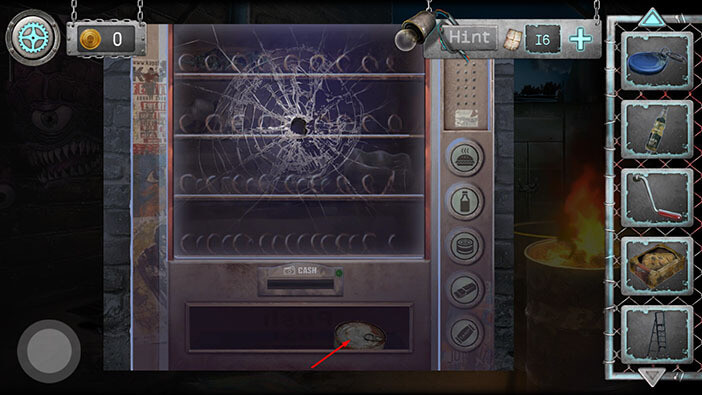
Ok, we picked up the items from the wending machine, but all of them are spoiled, so our character is afraid that he might starve to death. Tap on the button in the lower left corner to go back.
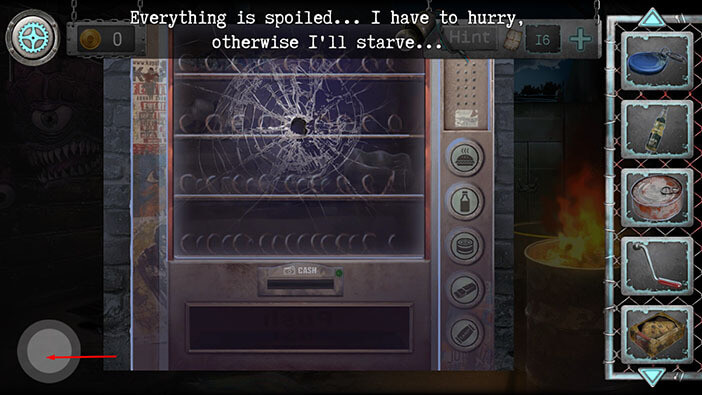
Tap on the left arrow in the lower left corner to go back to the previous alley.
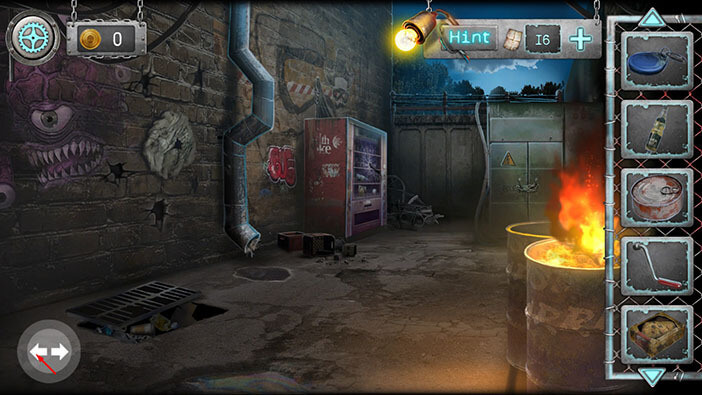
Tap on the door on the right to take a closer look at it. After that, tap on the display panel on the left to start the interaction.
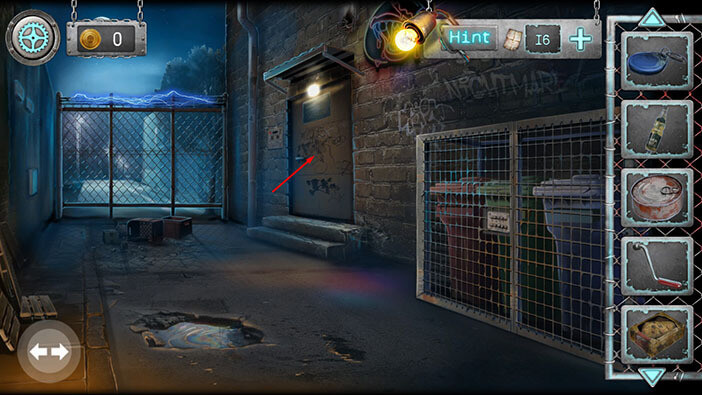
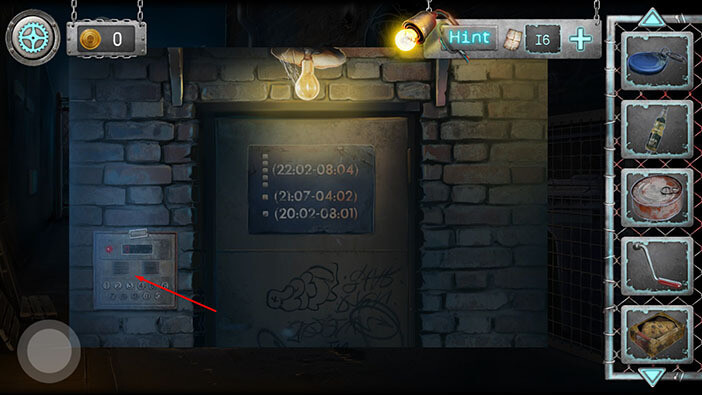
Ok, let’s find a way to open this door. Select the “Chip” from the inventory, then tap on the display panel to activate the chip.
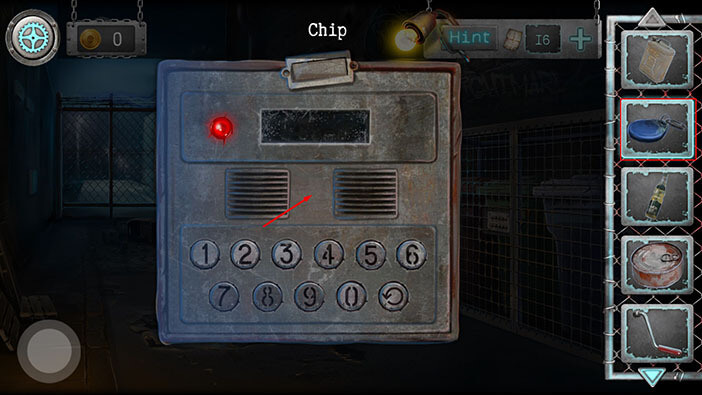
Looks like we will also have to enter some kind of code in order to open this door. Let’s go back.
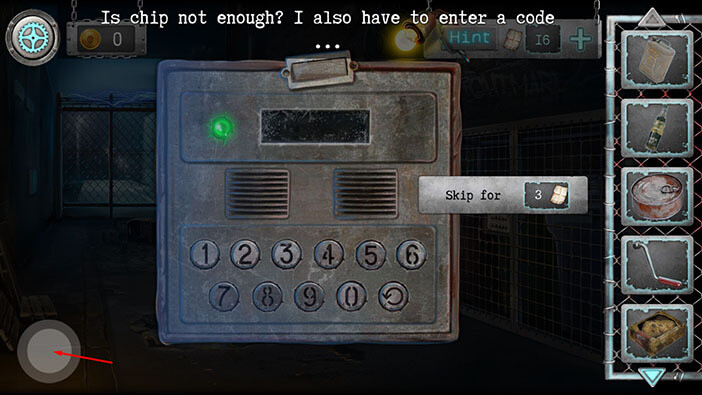
Take a look at the time stamps on the door. They actually represent a very simple mathematical problem. For example, the first line is actually 22 divided by 2 minus 08 divided by 04.
So, let’s calculate:
22:2 – 08:04 = 11 – 2 = 9 (First number)
21:07 – 04:02 = 3 – 2 = 1 (Second number)
20:2 – 08:01 = 10 – 8 = 2 (Third number)
So, we have the number “912”. Memorize/write it down, then tap on the display screen on the left to start the interaction.
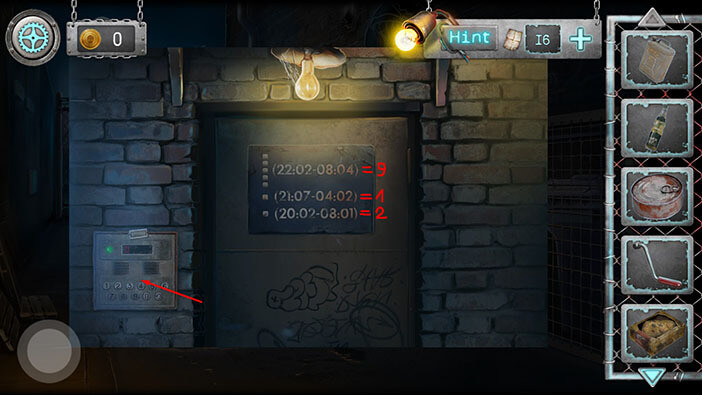
Enter the code “912”.
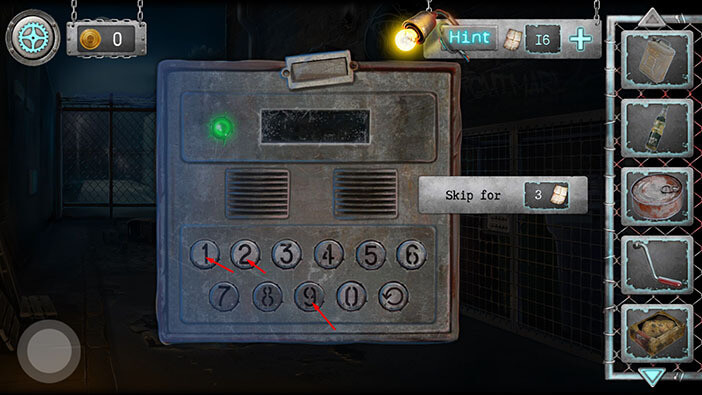
When you enter the correct code, the box on the left will open. We will need a magnet in order to solve the puzzle on the left side of the box. So, let’s tap on the note on the right side of the box to pick it up. “Flyer” will be added to your inventory.
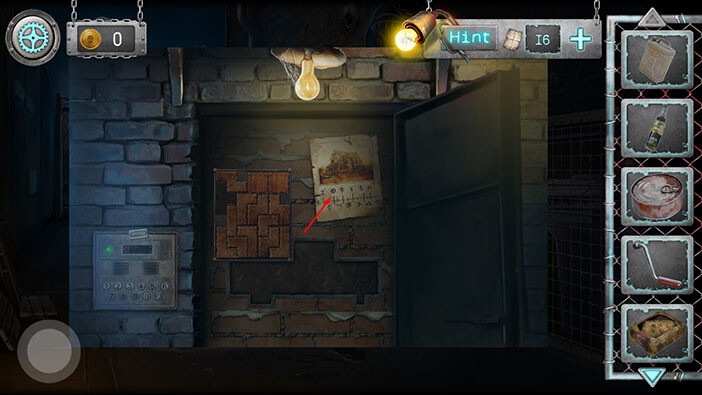
Tap on the button in the lower left corner to go back.
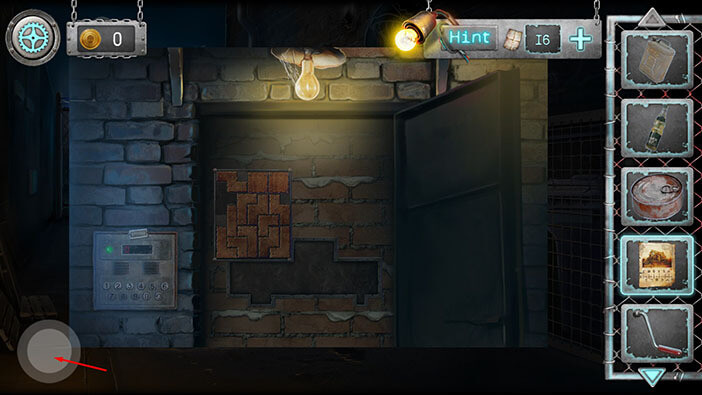
On the right, you will see three trash cans inside the wire fence. Tap on the lock on the wire fence to take a closer look at it.
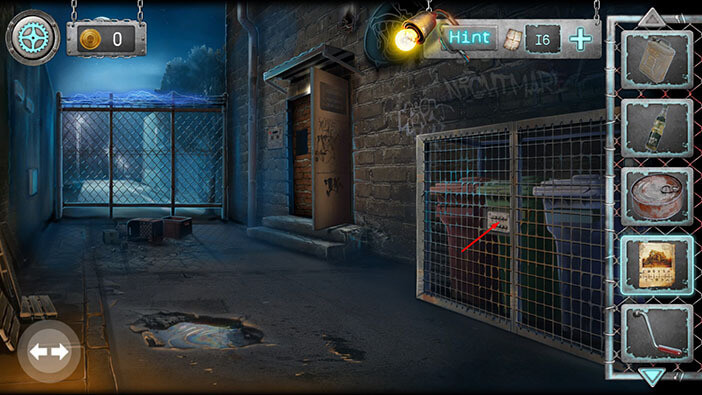
Your character will automatically attach the “Flyer” from the inventory next to the code. So, let’s try to crack this code.
Before we proceed, memorize/write down the symbols on the lock. After that, tap on the “Flyer” to take a closer look at it.
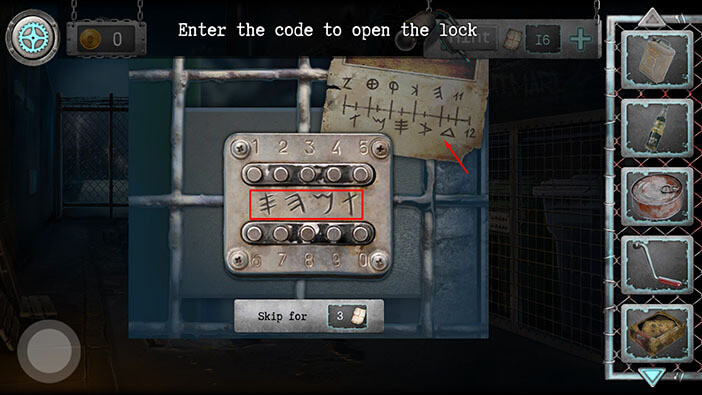
Ok, here we can see a bunch of symbols located above and below the horizontal line. If you take a closer look at the horizontal line, you will notice that there are 12 smaller, vertical lines, on it. You will also notice the number 12 below the last (looking from left to right) vertical line, and the number eleven above the line before it. So, we can conclude that each vertical line represents a single number. It starts with the number 1 on the first line (on the far left) and ends with the number 12 (on the far right). Again there are 12 lines, that’s how we came to this conclusion.
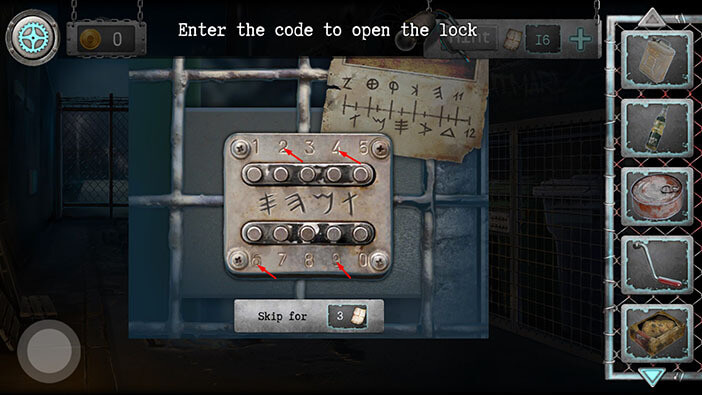
Ok, with that information we should be able to easily crack the code. We just need to find the symbols that we saw previously, and write down the numbers of their lines. When we do this we will get the number “6942”. Memorize/write down this number, then tap on the button in the lower left corner to go back.
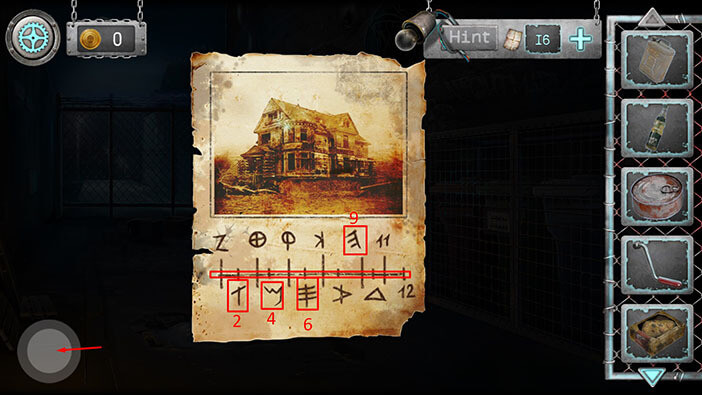
Enter the code “6942” to unlock the gate. After that, tap to proceed to the next area.
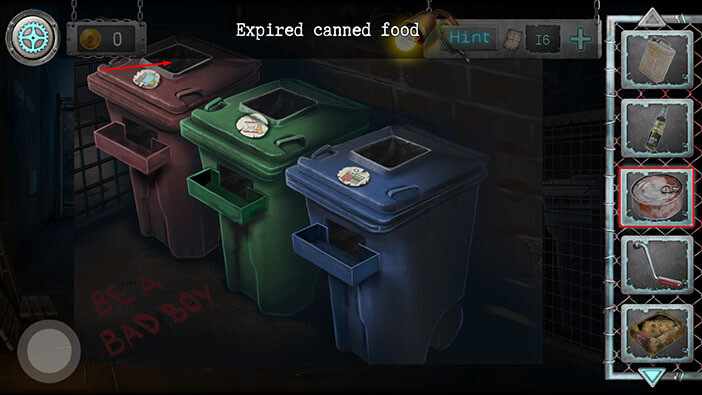
Select the “Expired canned food” from the inventory and tap on the brown trash can. A “Can” will fall out of the trash can, and it will be added to your inventory.
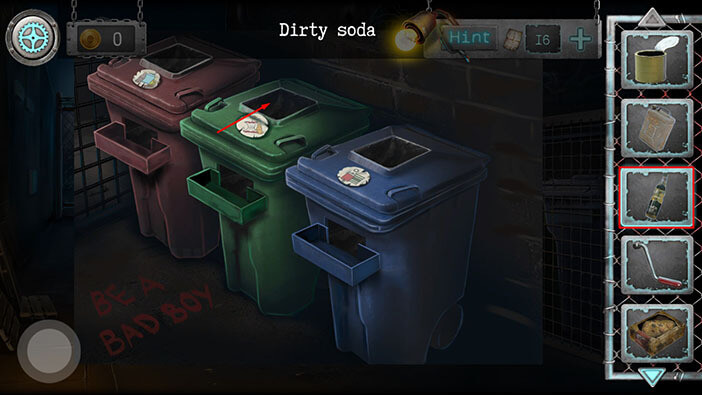
Next, select the “Dirty Soda” from the inventory and throw it into the green trash can. A “Circuit Diagram” and the gold coin will fall out of the trash can. The “Circuit Diagram” will be automatically added to your inventory.
Tap on the coin to pick it up. There are several coins in the game, and they are secret items, which you can find if you finish the puzzles in a specific way.
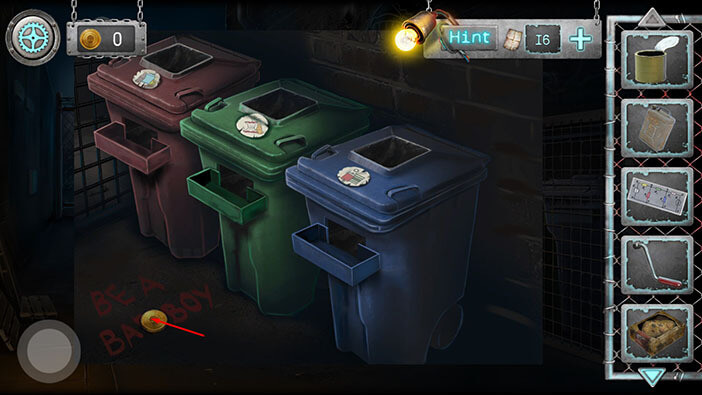
Let’s continue. Select the “Rotten pie” from the inventory and throw it into the blue trash can. You will get “Bolt Cutter” from the blue trash can.
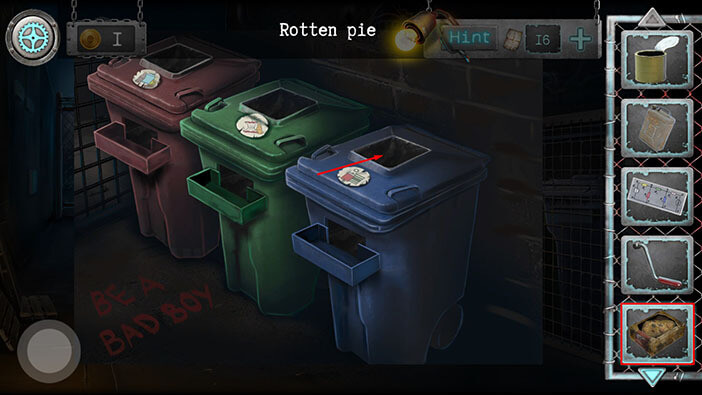
Tap on the button in the lower left corner to go back.
Let’s go back to the previous area.
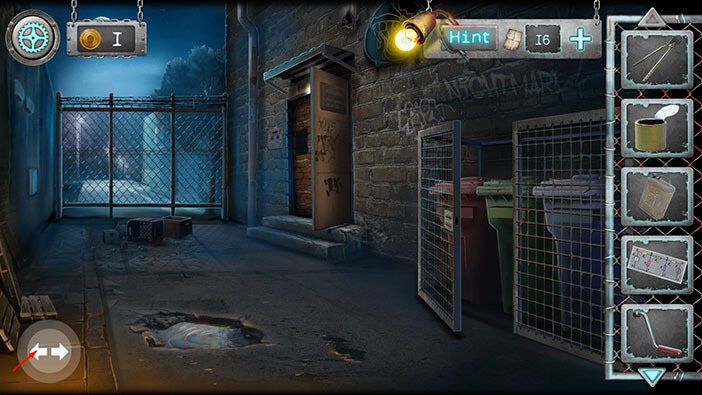
Tap on the chained-up cabinet on the left side of the alley to take a closer look at it.
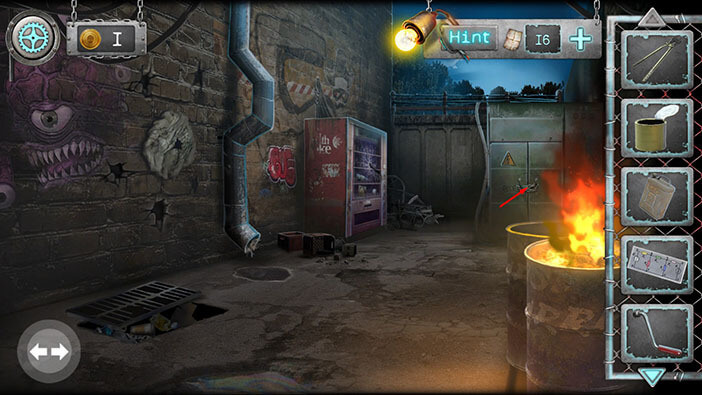
Select the “Bolt Cutter” from the inventory and use it to cut the chain.
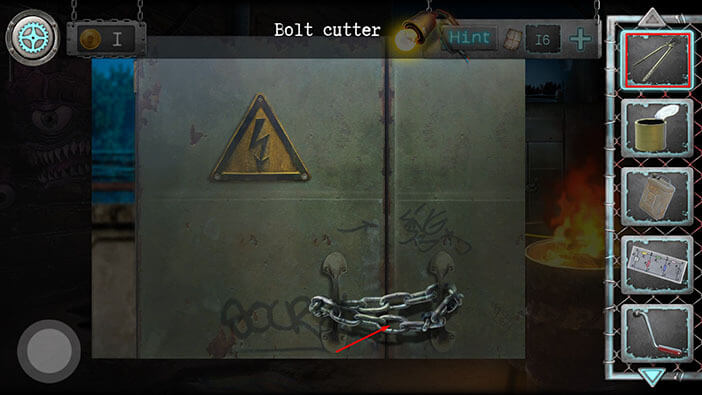
Tap on the small item inside the electrical cabinet to pick it up. “Magnet” will be added to your inventory.
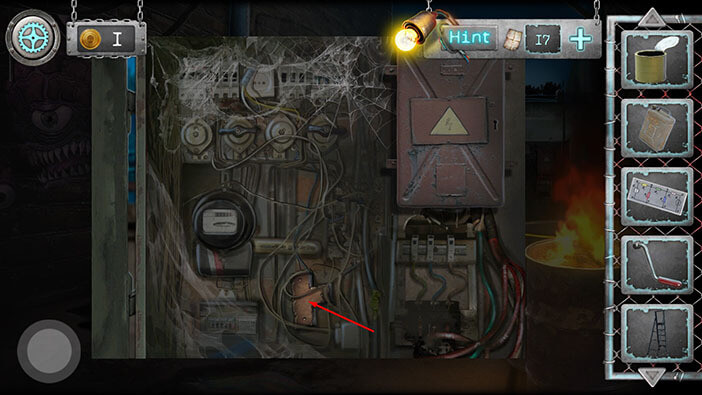
Let’s go back to the previous alley.
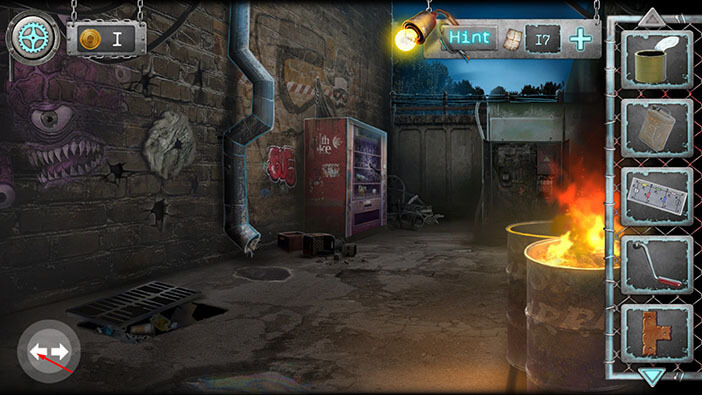
Tap on the door to take a closer look at it, then tap on the puzzle box on the left to start the interaction.
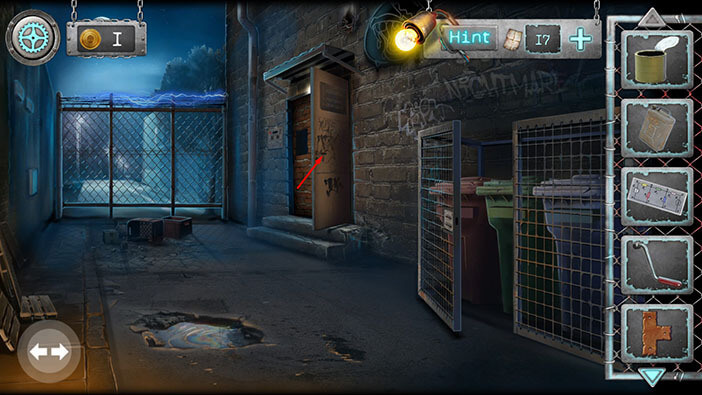
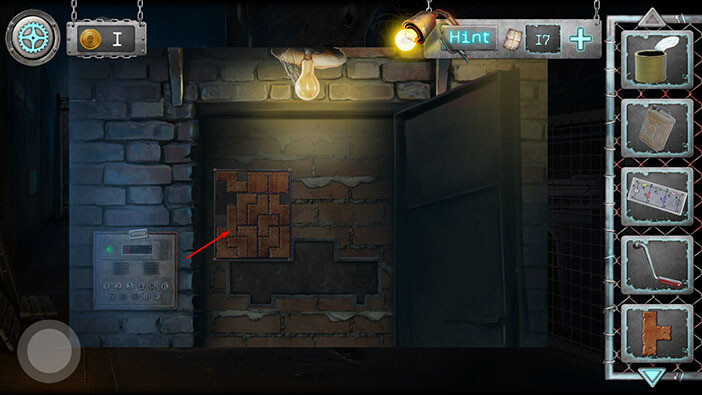
Select the magnet from the inventory and insert it into the puzzle box.
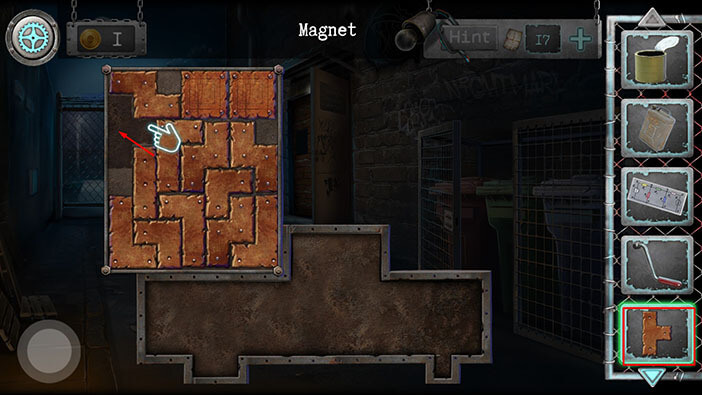
Ok, all pieces are now in place, and we can begin solving this puzzle. The goal is to fill the entire bottom area with puzzle pieces. We will solve this puzzle in multiple steps. Let’s begin.
Step 1
Take the puzzle piece from the top left corner and drag it to the lower left area on the bottom. After that, take both square pieces and drag them into the topmost part of the puzzle area.
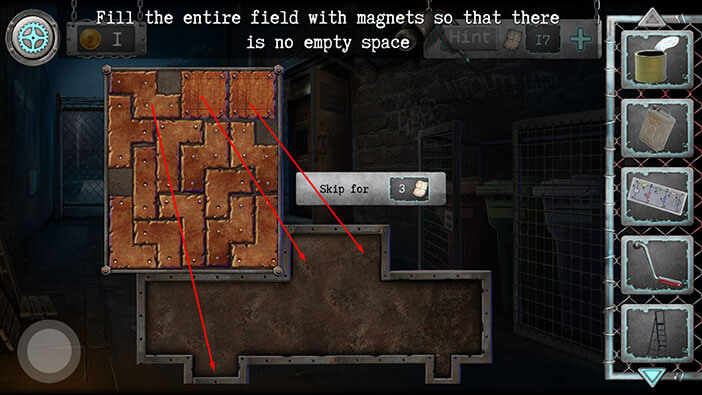
Step 2
Take the “right T” shape and place it on the bottom left side of the area. After that, take the “small inverted L” shape and place it next to the “right T” shape.
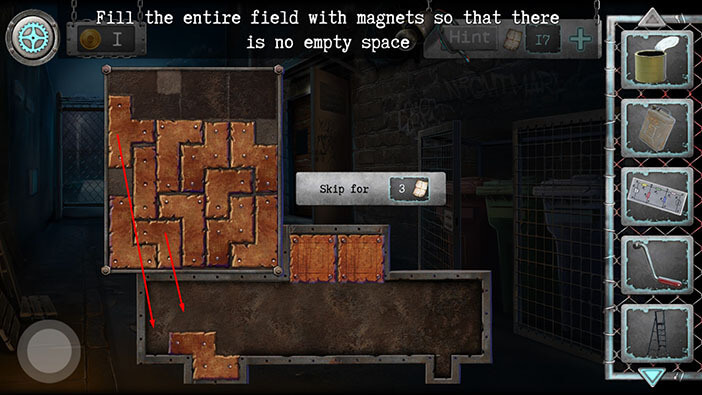
Step 3
Take the “vertical Z” shape and place it into the bottom right side of the area. After that, take the “small inverted L” shape and place it above the “vertical Z”.
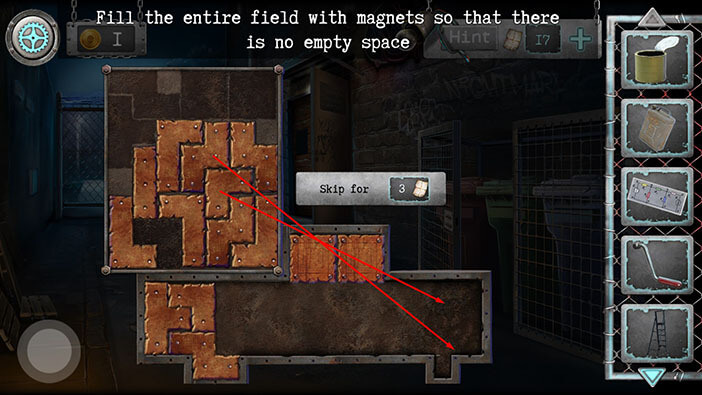
Step 4
Next, take the “left L” shape and place it next to the previous two shapes on the right side of the box. After that, take the “vertical Z” shape and place it next to the “left L” shape.
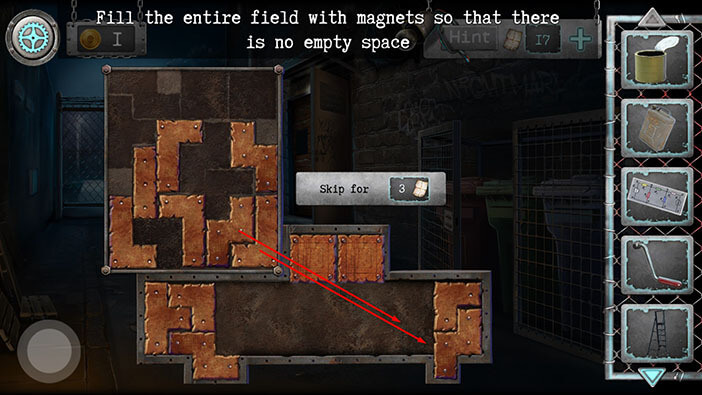
Step 5
Take the “L” shape and place it on the left side of the box. After that, take the “vertical Z” shape and place it next to the “L” shape.
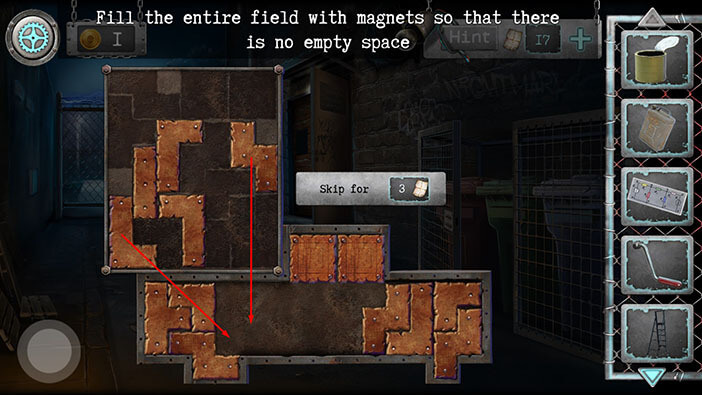
Step 6
Place two “inverted L” shapes on the left and right sides of the box. Lastly, place the “I” shape between them and you will complete the puzzle.
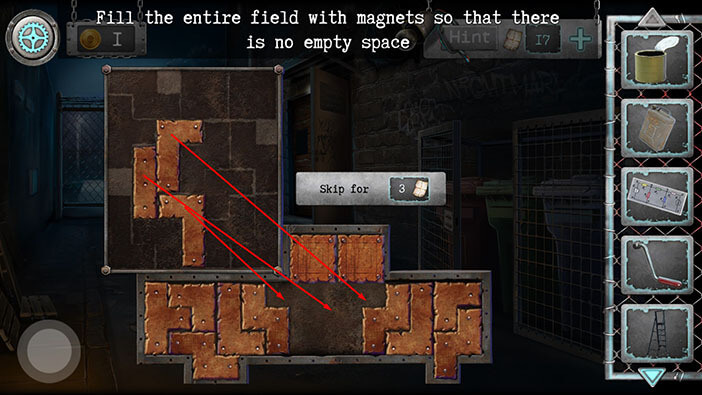
When you complete the puzzle, tap on it, and the hidden door will open. Inside the small safe you will find two items – tap on them to pick them up. “Scheme” and “Wire Cutters” will be added to your inventory.
After that, tap on the button in the lower left corner to go back.
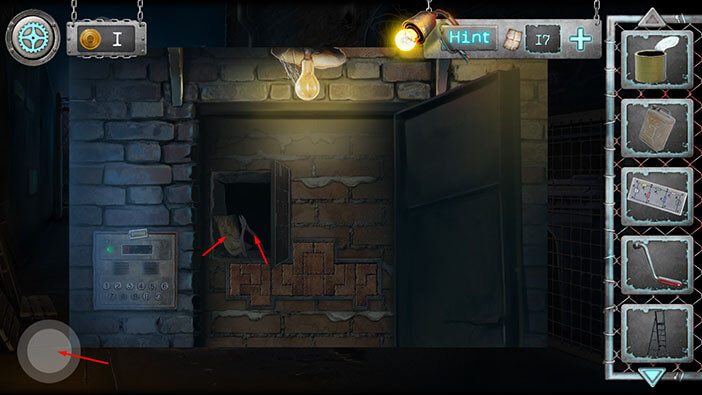
Let’s continue. Select the “Stepladder” from the inventory and place it next to the door.
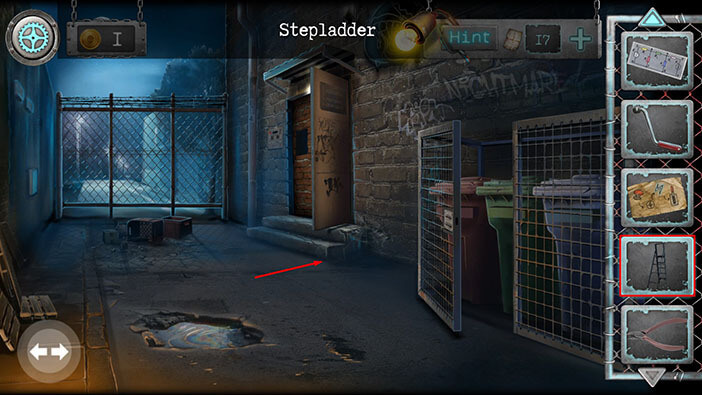
With the ladder in place, we should be able to reach the wires above the door. Let’s take a look.
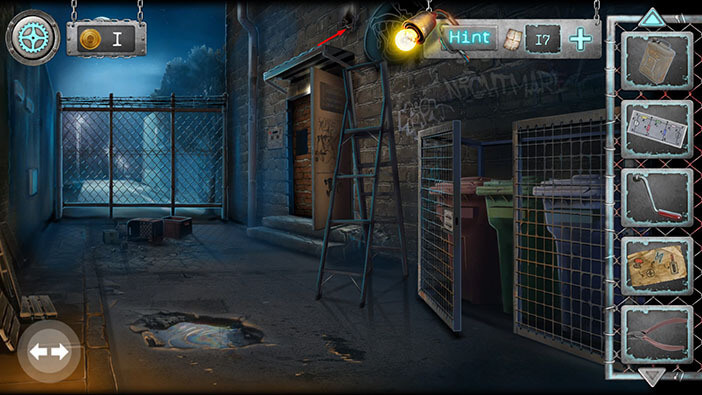
Select the “Wire Cutters” from the inventory and use them to cut the exposed wires.
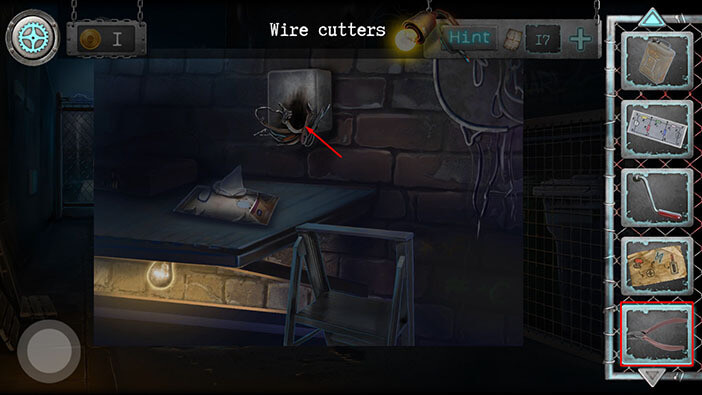
Tap on the “Wet Wipes” to pick them up.
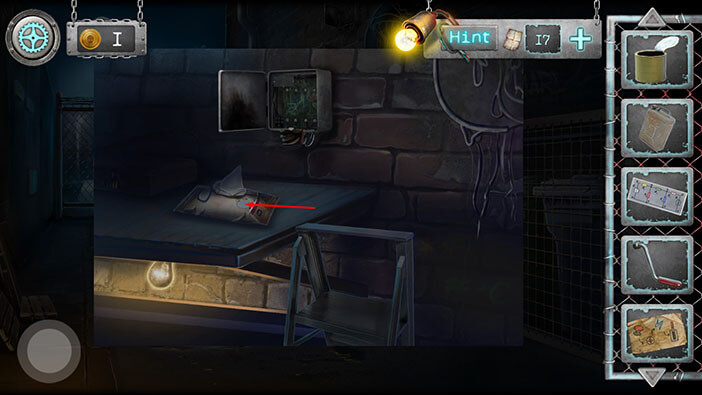
Ok, we should now take a look at the electrical box.
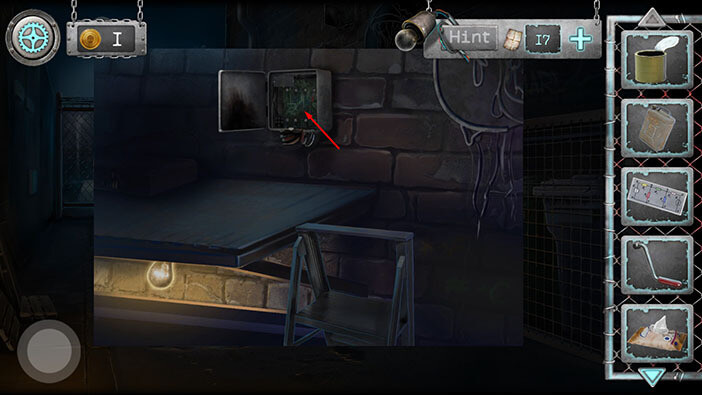
Your character will automatically pin the scheme next to the motherboard. Ok, let’s figure out a way to solve this puzzle.
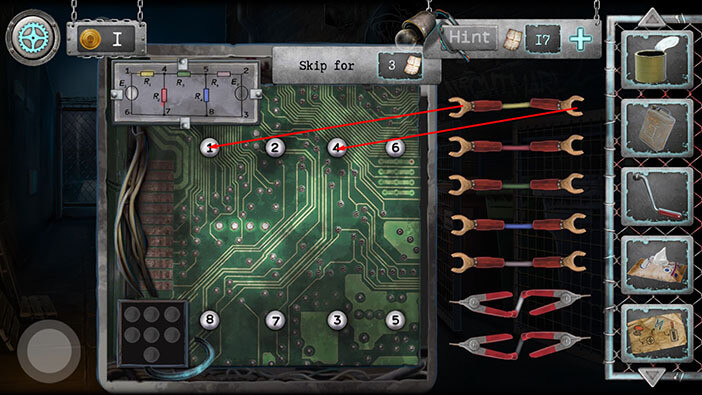
If you look at the right side of the screen, you will see five wires (yellow, red, green, blue, and gray) and two “pins” (white and black).
Now, if we take a look at the scheme in the top left of the screen, we will see five rectangles, and their colors match the colors of the wires. Also, each rectangle is located between two numbers.
So, all we have to do is follow the scheme and attach the wires to the correct numbers. We will do this puzzle in several steps. Let’s begin.
Step 1
If you look at the scheme, you will see that the yellow rectangle is located between numbers 1 and 4. So, drag the ends of the yellow wire and attach them to the numbers 1 and 4.
Step 2
By looking at the scheme, we can see that the red rectangle is located between the numbers 4 and 7. So, drag the ends of the red wire and attach them to the numbers 4 and 7.
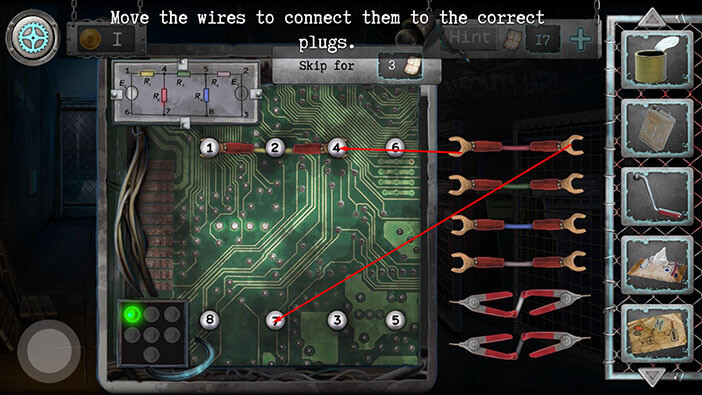
Step 3
By looking at the scheme, we can see that the green rectangle is located between the numbers 4 and 5. So, drag the ends of the green wire and attach them to the numbers 4 and 5.
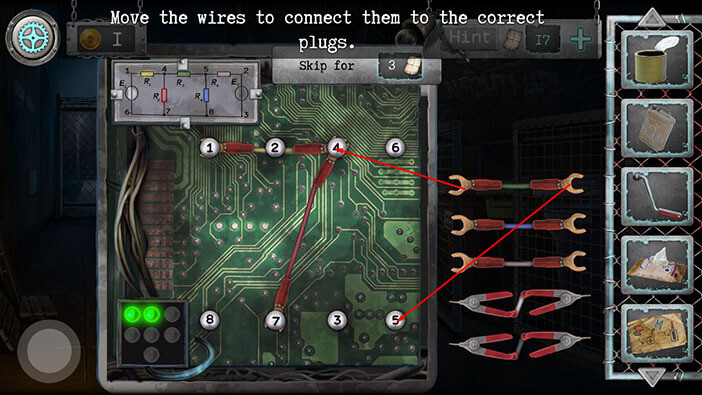
Step 4
By looking at the scheme, we can see that the blue rectangle is located between the numbers 5 and 8. So, drag the ends of the blue wire and attach them to the numbers 5 and 8.
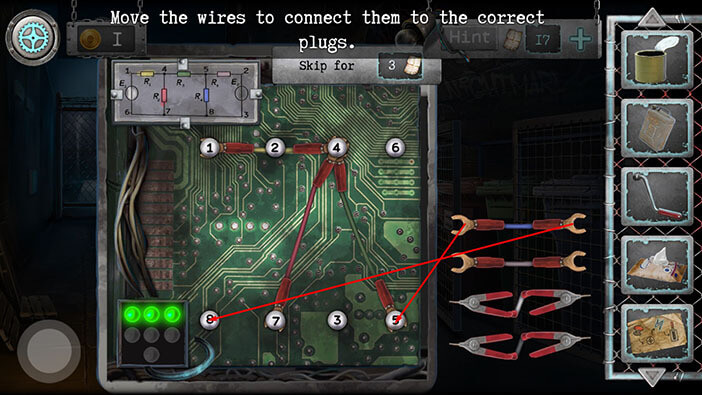
Step 5
By looking at the scheme, we can see that the gray rectangle is located between the numbers 5 and 2. So, drag the ends of the gray wire and attach them to the numbers 5 and 2.
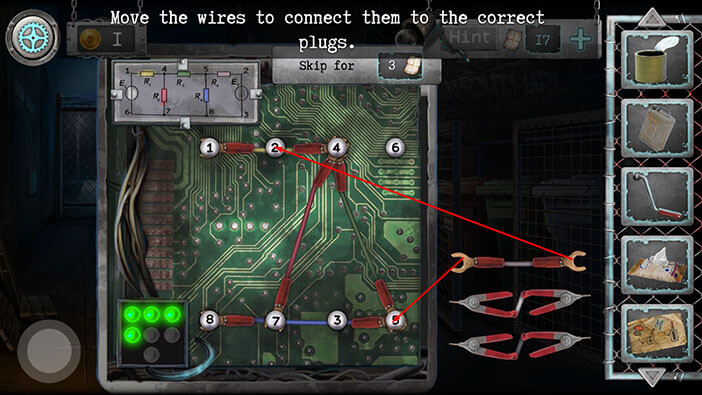
Step 6
Ok, let’s move on to the next part of the puzzle. If you look at the scheme, you will see two circles, one on the left, and one on the right side of the scheme. The circle on the left is painted white, and it is located between numbers 1 and 6.
So, drag the ends of the white “pins” and place attach them to the numbers 1 and 6.
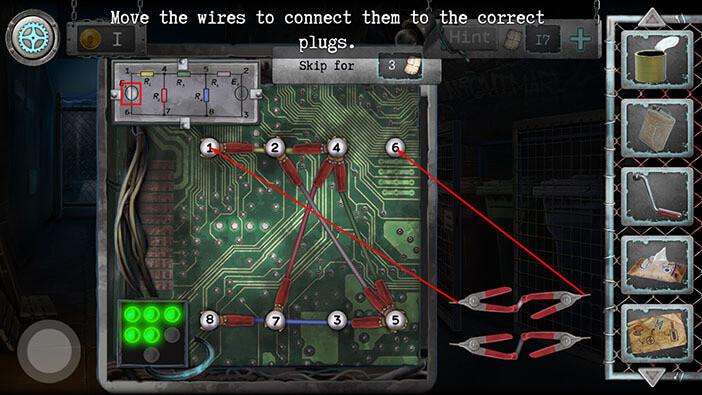
Step 7
The circle on the right is painted black, and it is located between numbers 2 and 3.
So, drag the ends of the black “pins” and place attach them to the numbers 2 and 3.
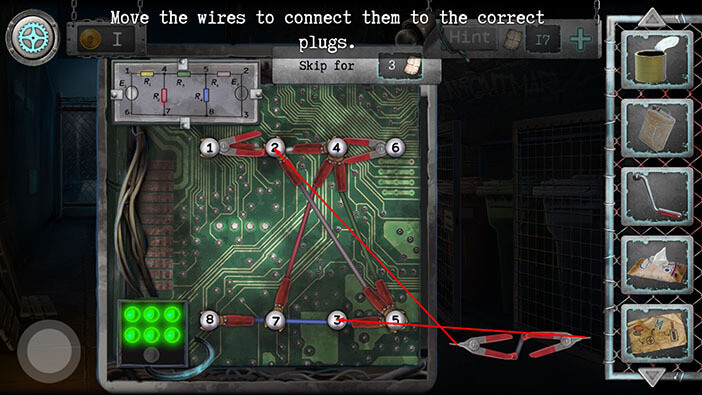
We solve the puzzle and restored the power, and the lights are now working. So, let’s take a look at the electrical box above the door, again.
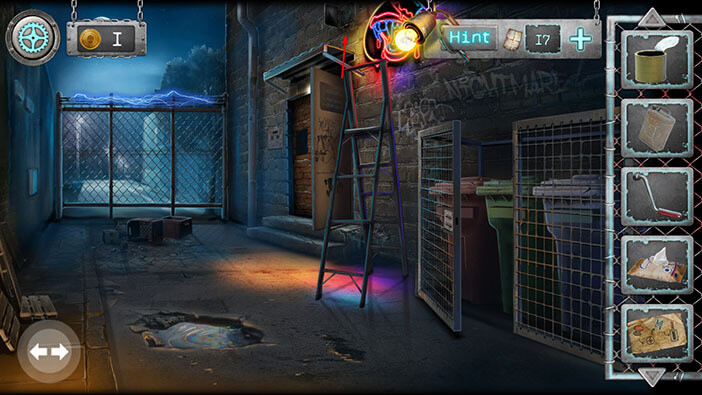
Tap on the stick on the left to pick it up and “Pike Pole” will be added to your inventory.
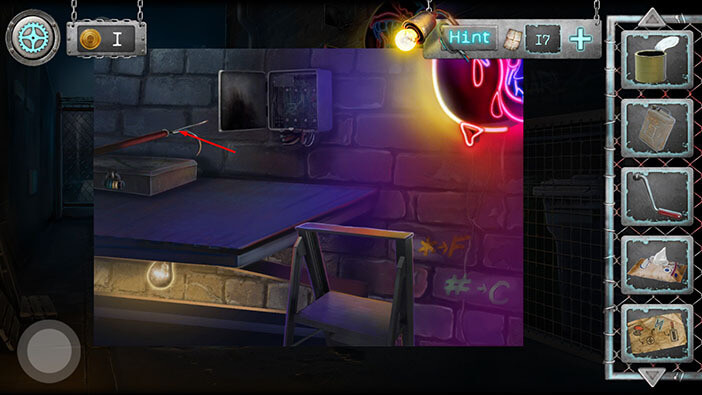
One small hint is located in the lower-left corner of the screen. Here, we can see orang * and F, and below them turquoise # and C. These symbols are helpful (but not crucial) for the next puzzle.
Tap on the box on the left to take a closer look at it.

This puzzle is quite easy, and it represents a very simple mathematical problem.
On the green line, we can see the numbers 5 and 9, with the large “X” sign between them. The “X” represents the multiplication. So,
5 x 9 = 45
On the yellow line, we can see the numbers 8 and 6, also with the large “X” sign between them.
8 x 6 = 48.
So, we have 45 green and 48 yellow. Memorize/write down this information, then tap on the padlock to start the interaction.
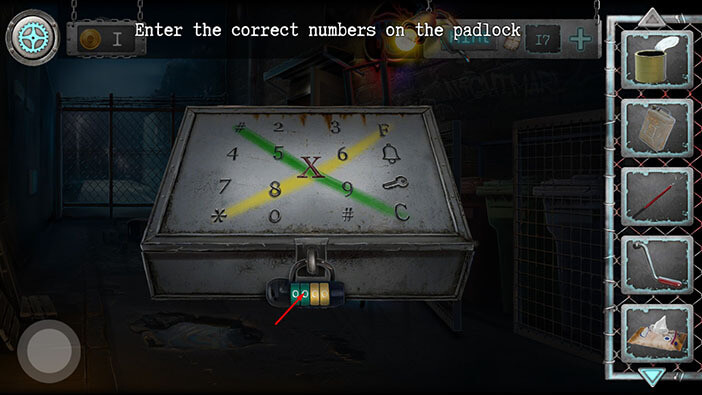
Enter the number 45 in the turquoise slots, and the number 48 in the yellow slots.
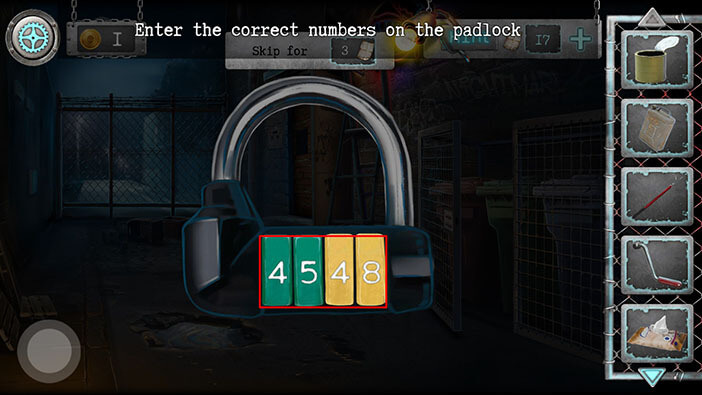
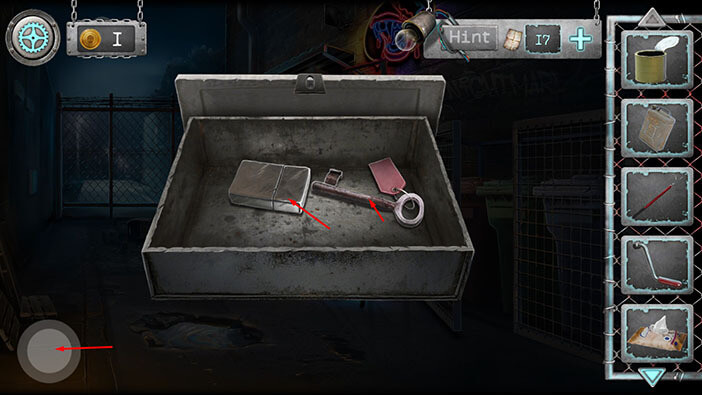
Entering the correct combination will unlock the box. Tap on the items inside the box to pick them up. “Key for transformer” and a “Lighter” will be added to your inventory.
After that, tap twice on the button in the lower left corner to go back to the alley.
Let’s go back to the area with the electrical cabinet.
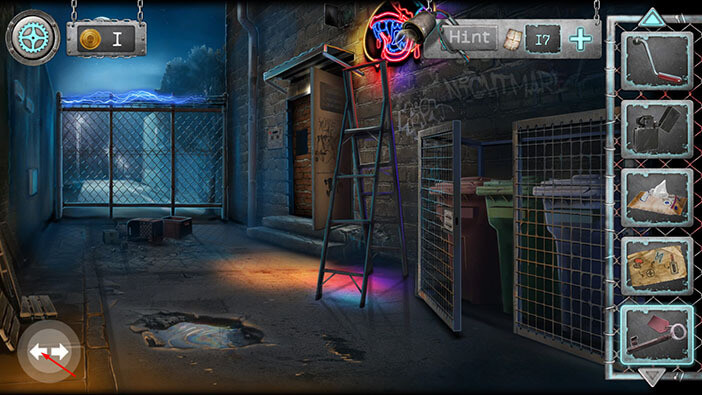
Tap on the electrical cabinet to take a closer look at it.
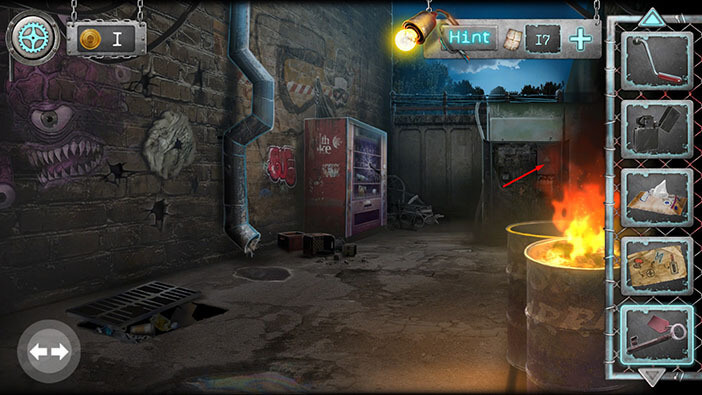
Select the “Key for transformer” from the inventory, and use it to unlock the red box.
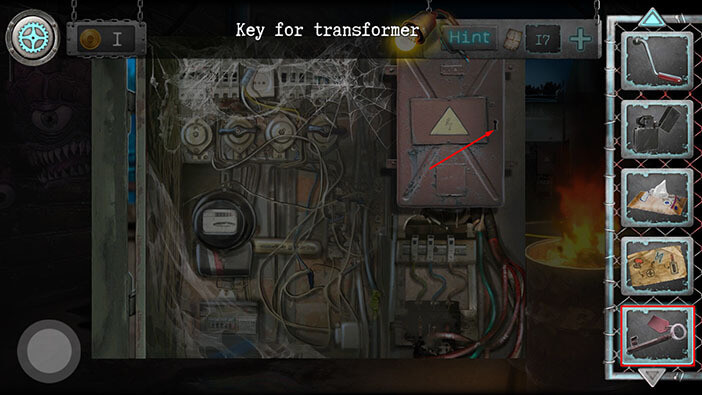
Actually, I just remembered that we are lacking one item that is required to finish this puzzle. Tap on the button in the lower left corner to go back.
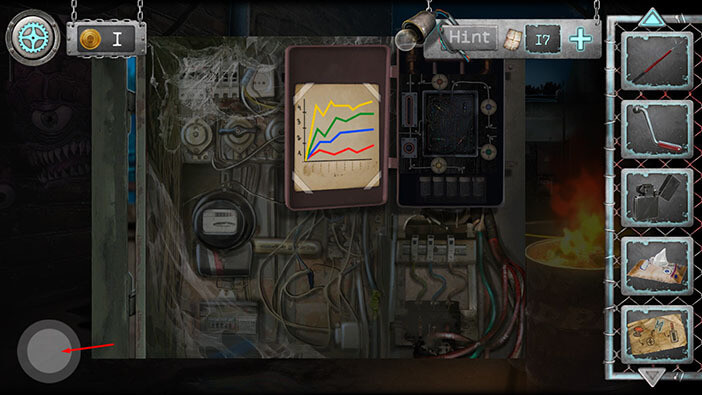
Tap on the sewage shaft to look inside.
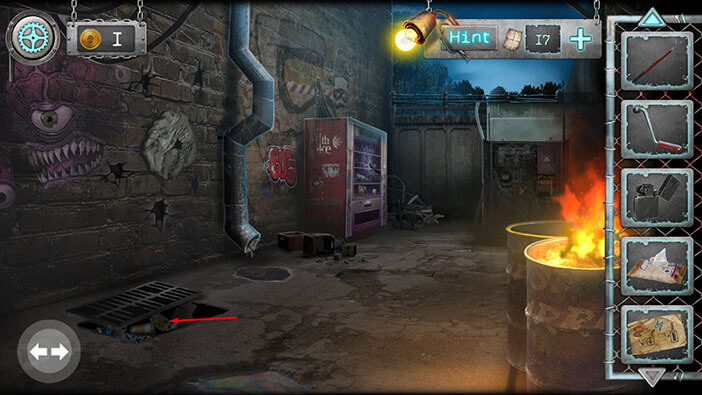
Select the “Pike Pole” from the inventory and use it to get the “Red button”.
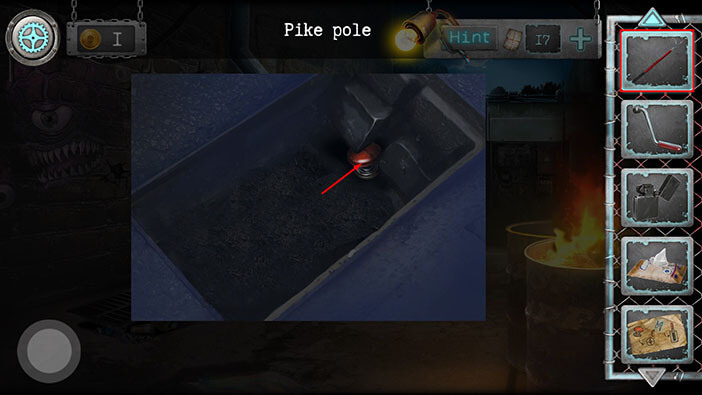
Ok, now let’s go back to the electrical cabinet.
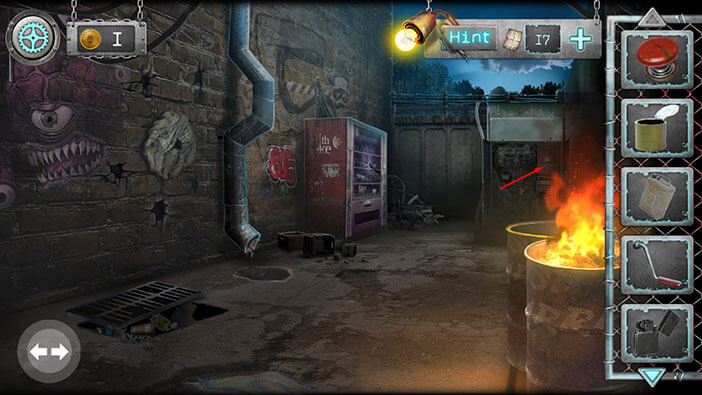
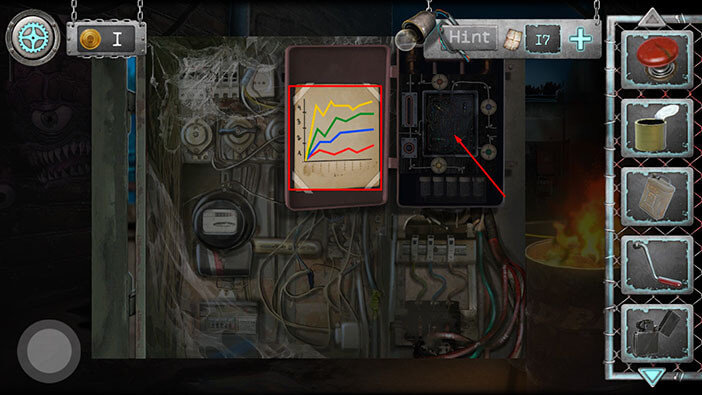
Let’s take a look at the diagram on the left.
The yellow line is the highest, and it is somewhat in line with the number 4.
Green line = 3
Blue line = 2
Red line = 1.
Memorize/write down this information, because we will need it for the following puzzle.
Once you’re done, tap on the red box to start the interaction.
If we look at the scheme in the top left, we will see everything that is required to cause a shortcut, and complete this puzzle.
First, we need to press the button.
Second, we need to set the dials to the correct value.
Third, we need to pull the lever.
If you look at the slots on the left, you will notice that the button and the lever are missing. So, select the “Red button” from the inventory and insert it into the smaller bottom slot.
After that, select the lever from the inventory and insert it into the larger, upper slot.
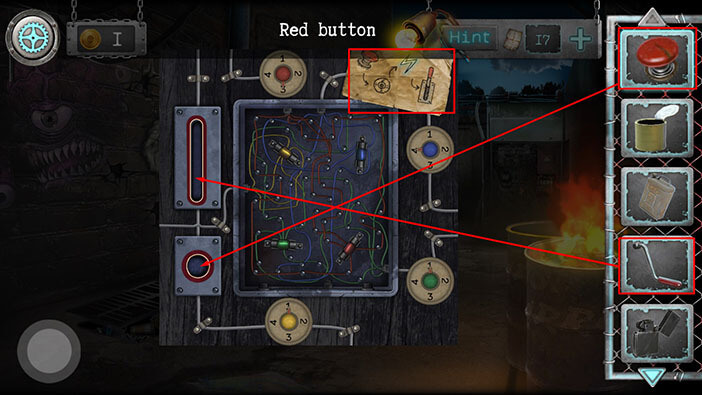
Tap on the “Red button”. Doing this will allow you to set the values on the dials.
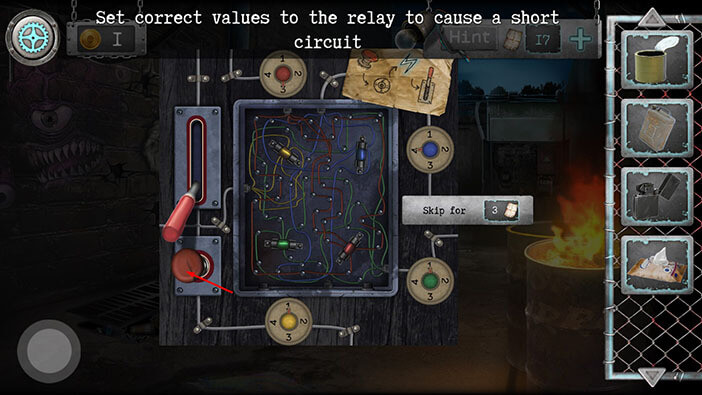
Ok, we already know the correct values, but if you need a reminder you can always go back to the scheme, and take another look.
The value of the yellow dial should match the value of the yellow line on the previous diagram, so set the yellow dial to 4.
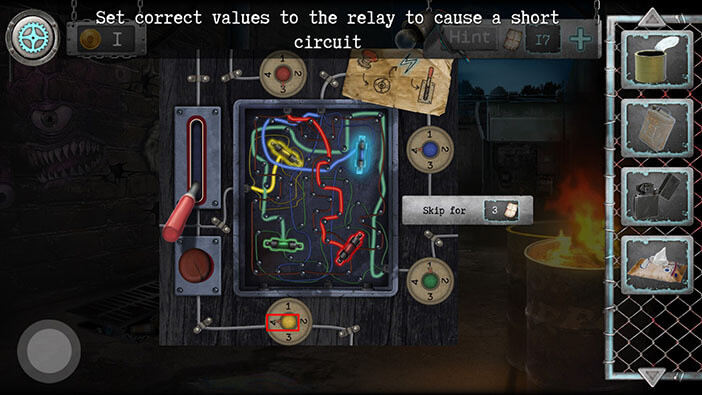
Next, the value of the green dial should match the value of the green line on the previous diagram, so set the green dial to 3.
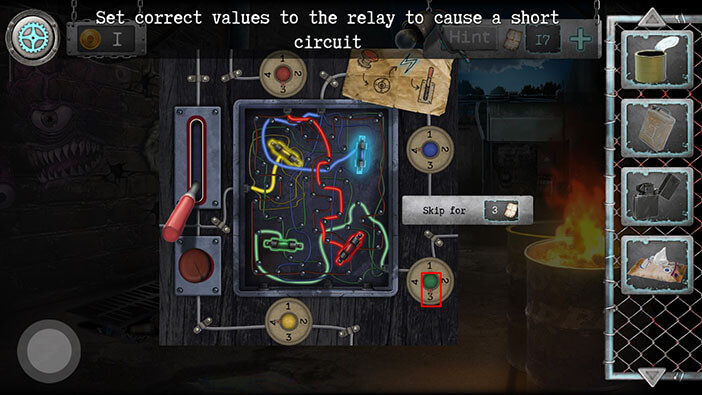
Next, the value of the blue dial should match the value of the blue line on the previous diagram, so set the blue dial to 2.

Lastly, the value of the red dial should match the value of the red line on the previous diagram, so set the red dial to 1.
Once you set the dials to the correct vials, tap on the lever to turn on the power.
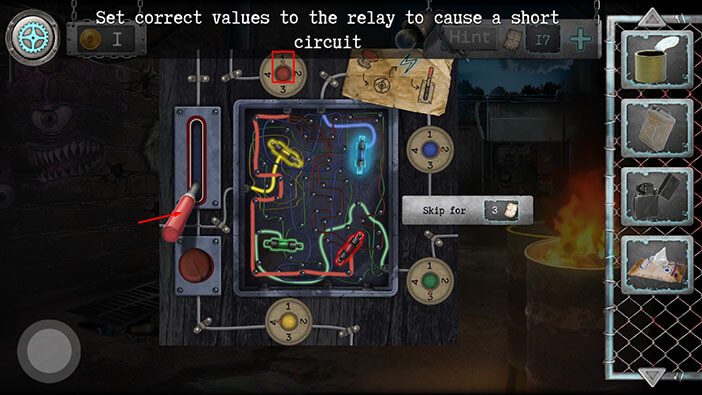
We managed to cause a short circuit and this action disabled the electric fence in the alley. Let’s go back.
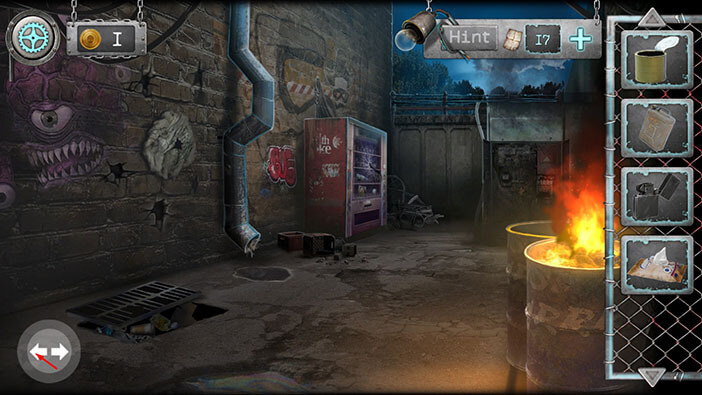
Tap on the stepladder to push it next to the fence. After that, tap slightly above the top of the stepladder to jump over the fence.
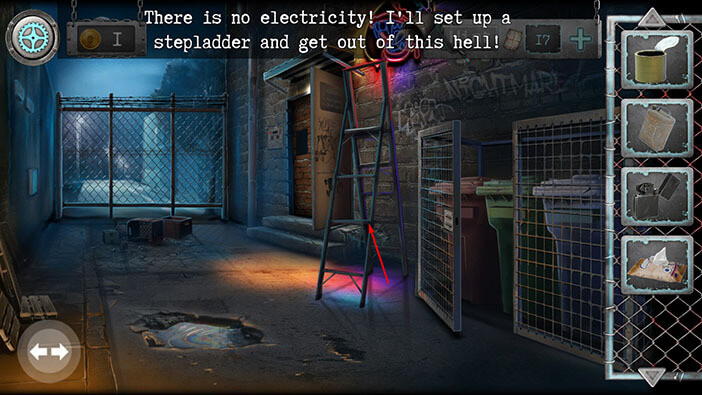
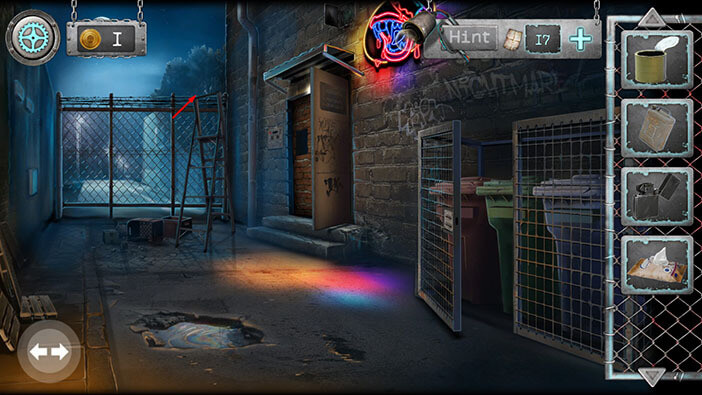
After he jumped over the fence, our character saw a man, dressed in a dark robe. This dark figure was curiously looking at him, and I character thought that the stranger would help him and get him to safety. But then, he saw a scary-looking dog, with unnatural red eyes next to the robed man. The dog was definitely hostile, and it was snarling at him. A few moments later, the dark stranger pulled out a bloody meat cleaver, and, at this moment our character realized that his troubles are far from over. He started running for his life, and the angry dog gave chase.
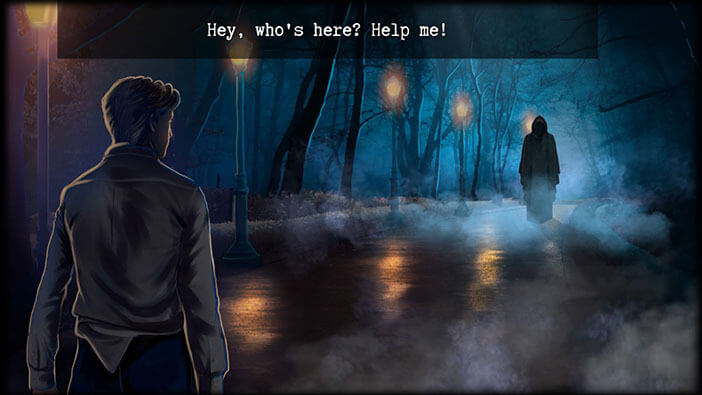
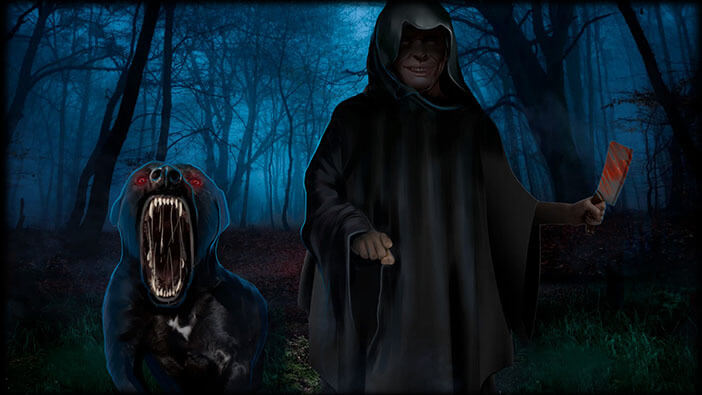
Luckily, our character managed to jump over the fence and evade his pursuers. With that, we reached a new area. Let’s explore it.
Ok, first let’s try to illuminate this area. Tap on the first lantern on the right to take a closer look at it. After that, tap on the glass to open the small door.
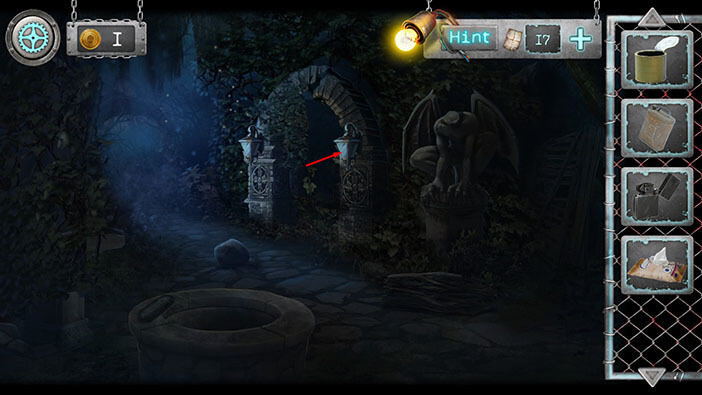
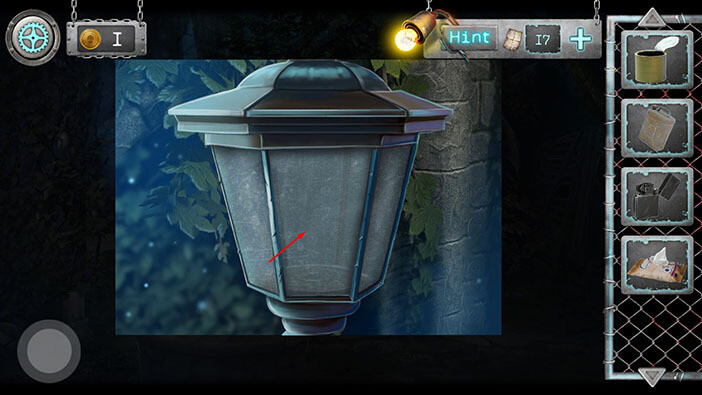
Next, select the “Jerrycan with fuel” from the inventory, then tap on the inside of the lantern to fill it up with fuel.

Lastly, select the “Lighter” from the inventory, and use it to start a fire.
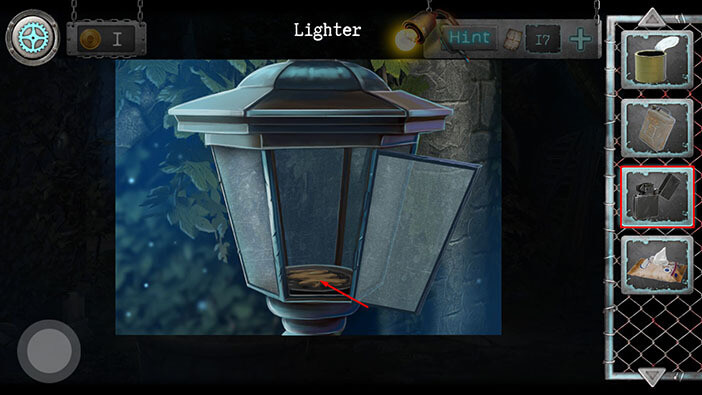
Once you get the fire going, tap on the button in the lower left corner to go back.
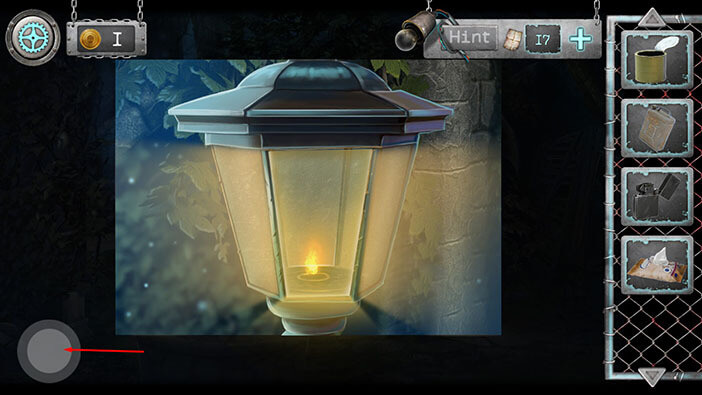
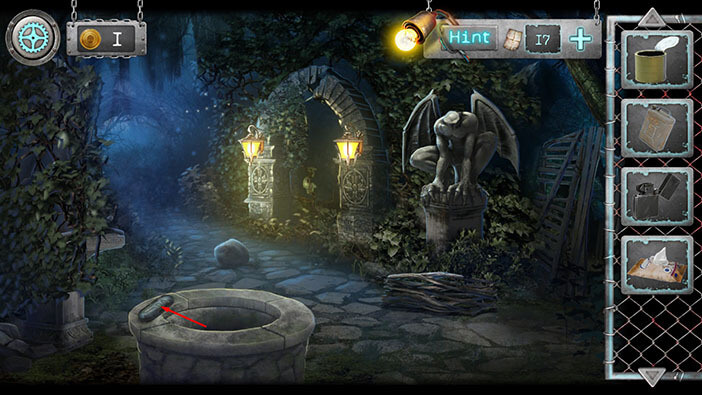
Ok, now we have some illumination, and we can see that there’s some stone object on the left side of the well. Tap on it to pick it up and “Stone lock” will be added to your inventory.
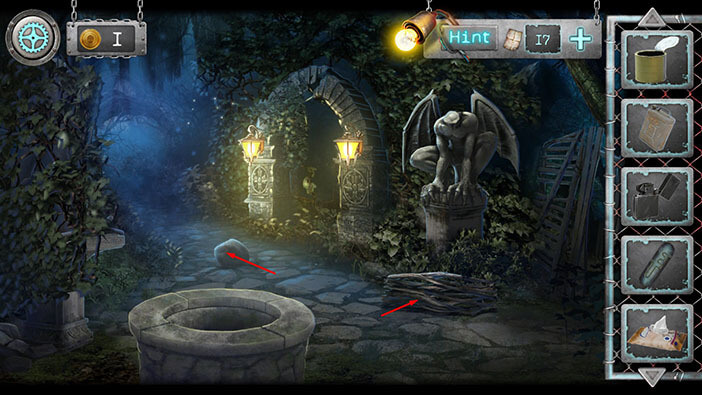
Next, we can see a large rock on the upper part of the path, and a pile of branches to the left. Tap on them to pick them up. “Stone” and “Dry branches” will be added to your inventory.
If you tap on the wooden fence on the right, you will see the angry dog that chased you. Luckily, it can’t get through the fence.
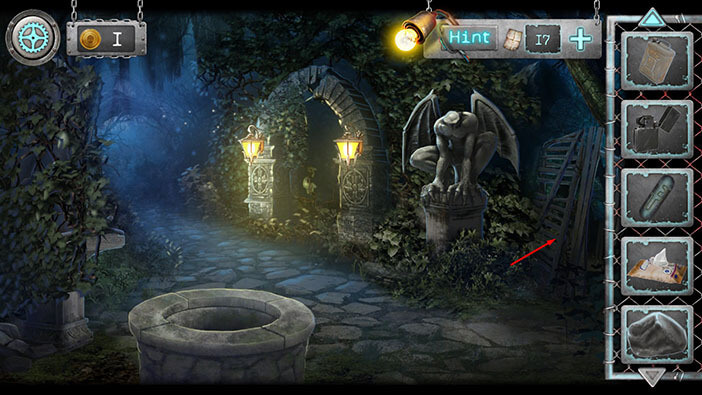
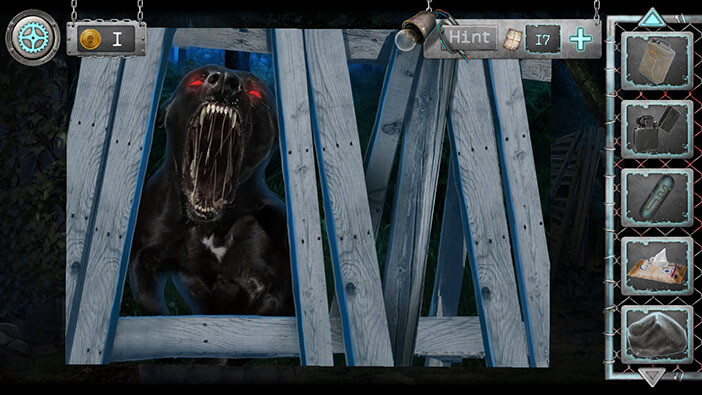
We are finished with this area, for now. So, tap on the upper part of the path to proceed to the next area.
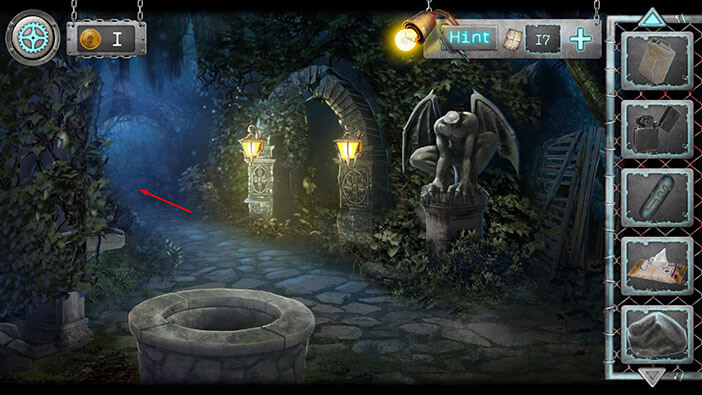
We are now at the lake shore. Tap on the “Bucket” in front of you to pick it up.
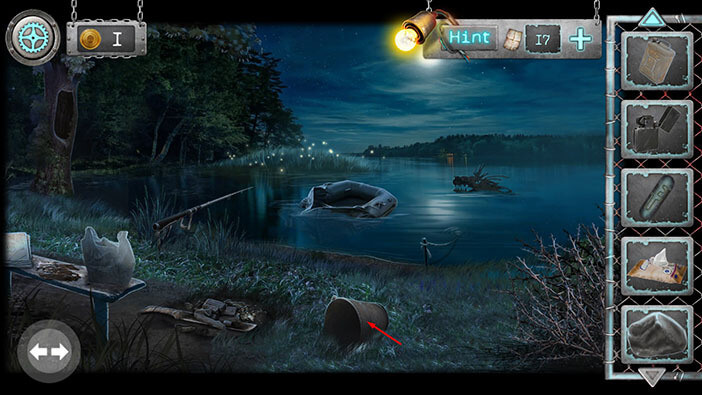
Next, tap on the bench on the left to take a closer look at it.
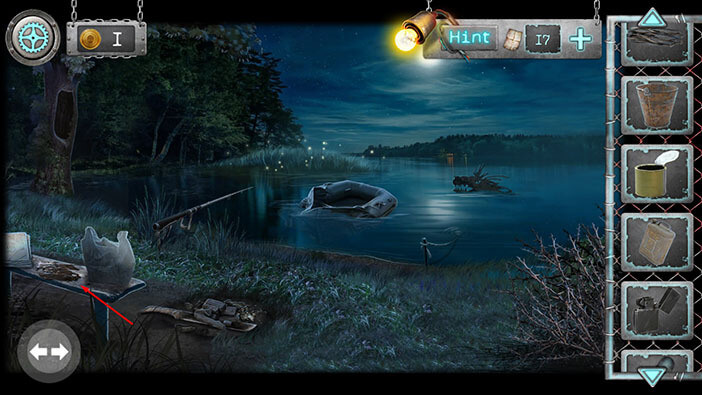
Tap on the bag to flip it.
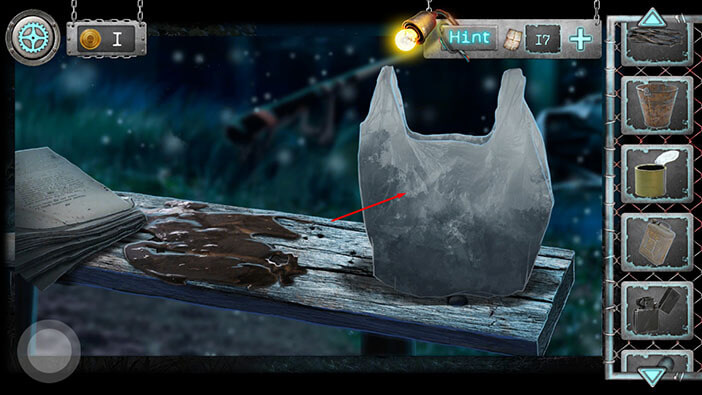
Our character saw a fishing pole next to the lake, and he thinks that he could use the worms to catch a fish. He then plans to throw the fish to the dog to distract it. Not a bad plan, but we can’t put it in motion right now.
So, let’s tap on the note located behind the bag to pick it up. “Boat repair manual” will be added to your inventory.
After that, tap on the pile of paper on the left side of the bench to pick it up. “Paper” will be added to your inventory.
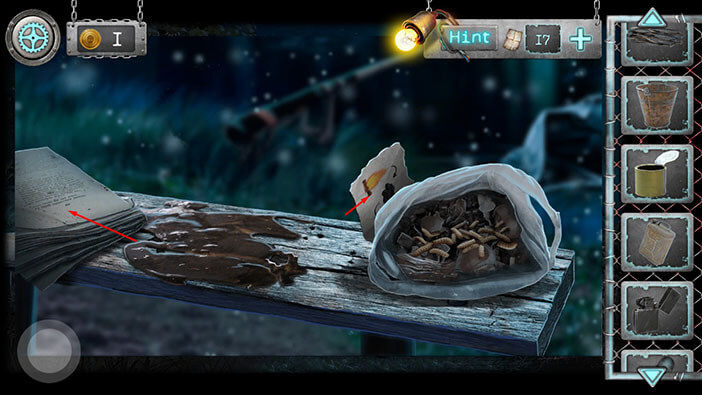
Next, select the “Wet wipes” from the inventory and use them to clean the oil from the bench.
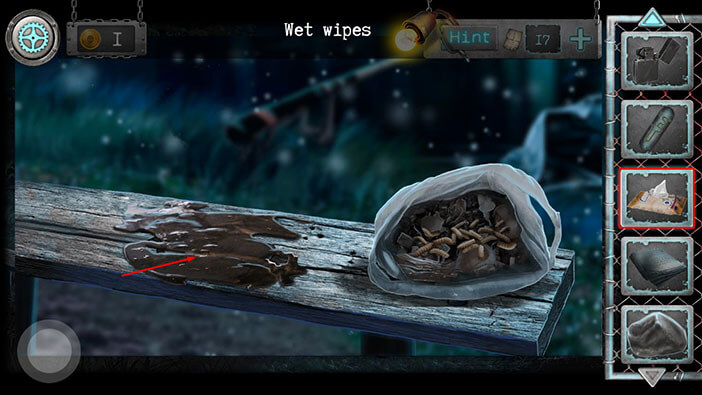
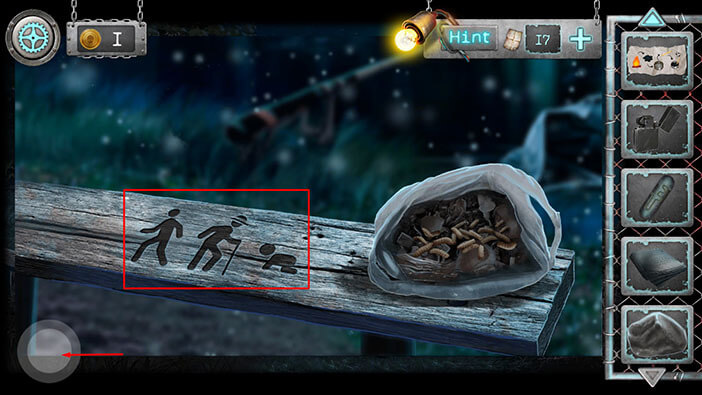
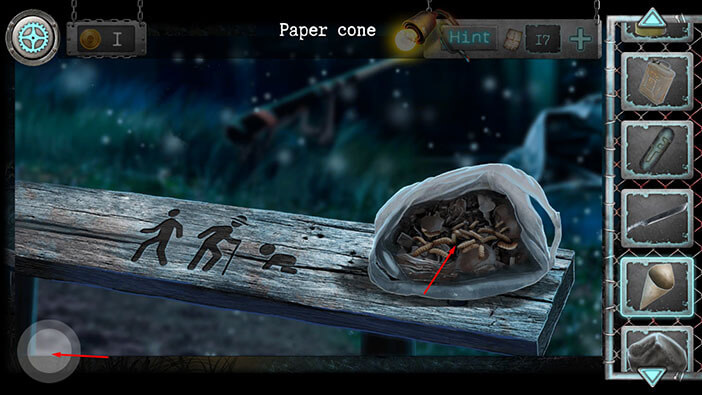
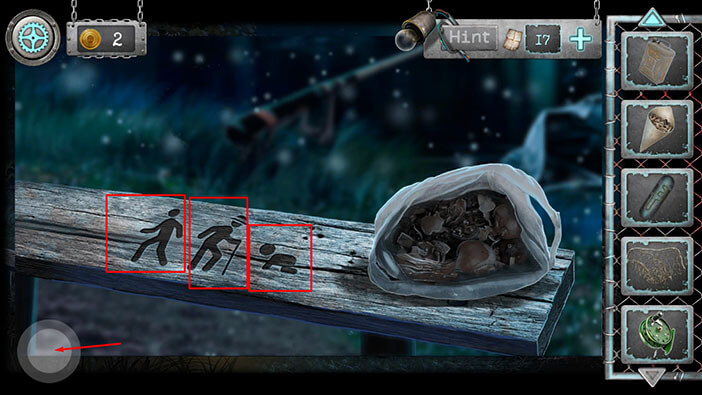
After we removed the oil stain, we can see three drawings of human figures which were previously hidden below the oil. The figures represent a hint for one of the following puzzles. For now, just remember that these figures are drawn on the bench, and tap on the button in the lower left corner to go back.
Next, let’s tap on the machete located below the bench, to take a closer look at it.
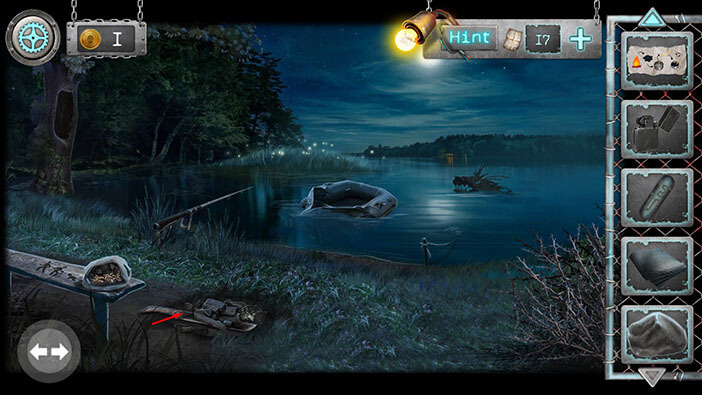
Our character will automatically attach the “Boat repair manual” on the upper left side of the screen. However, before we look at the manual, let’s tap on the “Machete” to pick it up.
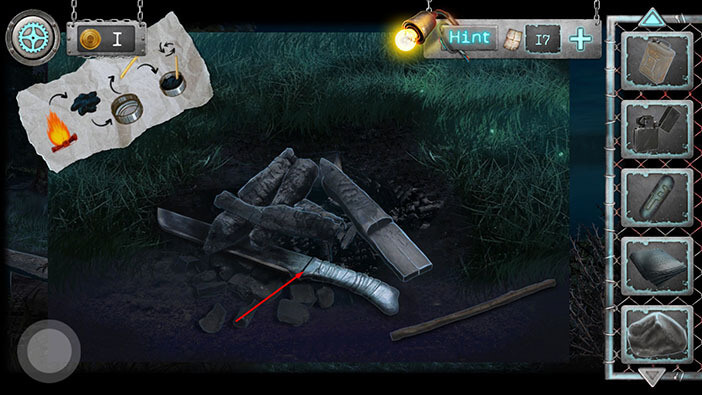
Ok, now let’s take a look at the manual in the upper left corner. The first thing that we need to do is start a fire. So, select the “Paper” from the inventory and place it into the improvised fireplace. Your character will use the rest of the paper to make a “Paper cone” and it will be added to your inventory.
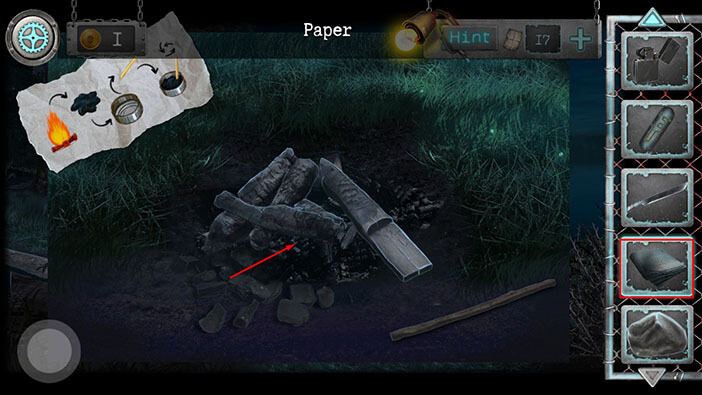
Next, select the “Dry Branches” from the inventory and place them on the paper.
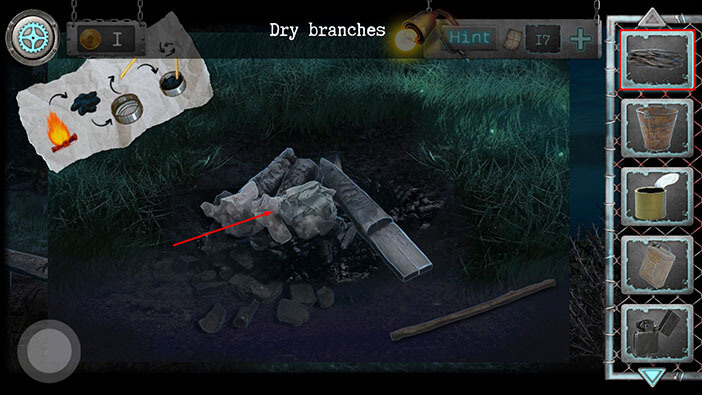
Finally, select the “Lighter” from the inventory and use it to start the fire.
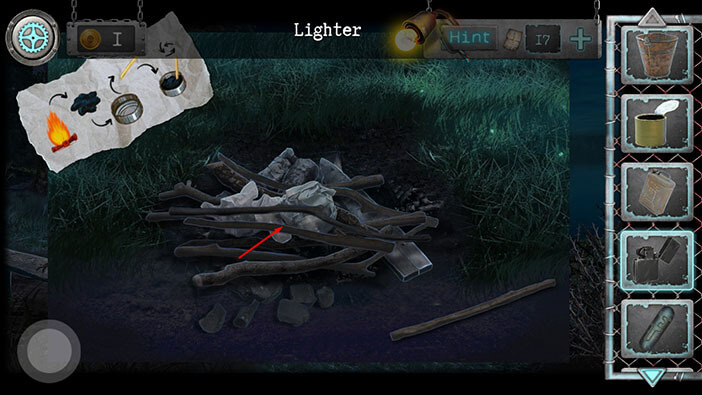
Ok, we got the fire going, but we can’t complete the rest of the steps. So, tap on the button in the lower left corner to go back.
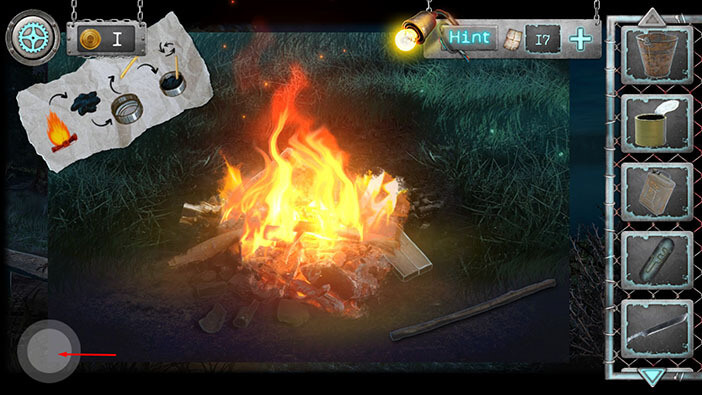
Tap on the bench again to take a closer look.
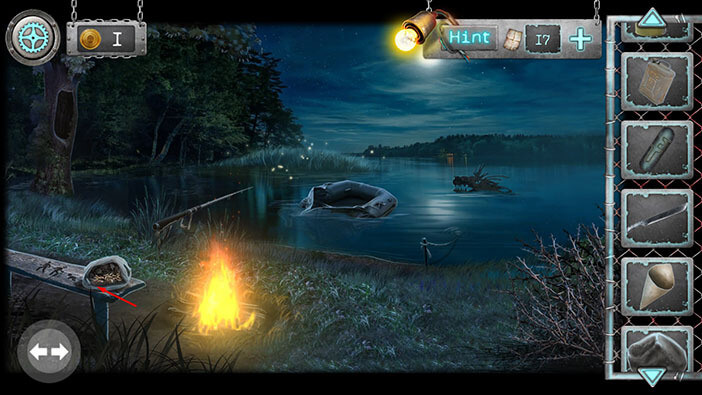
Select the “Paper cone” from the inventory and use it to collect the worms. “Paper cone with maggots” will be added to your inventory. After that, tap on the button in the lower left corner to go back.
Next, select the “Stone” from the inventory and throw it at the pile of branches in the middle of the lake.
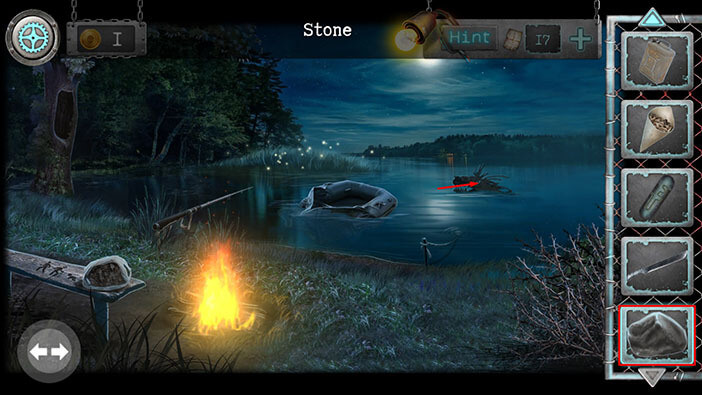
Next, tap on the net to pull it towards you.

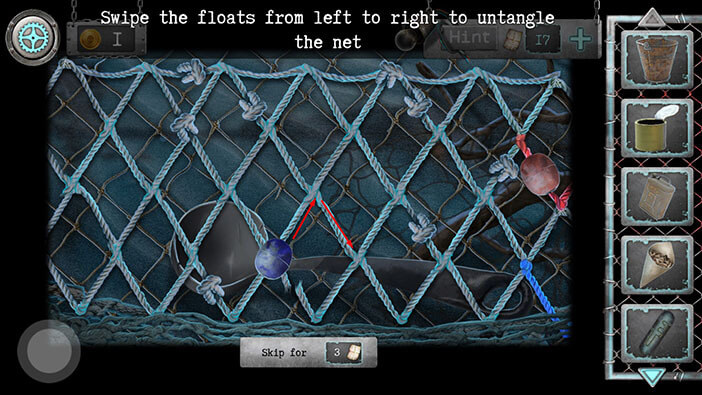
Here, we have another puzzle. The goal is to untangle the net, by moving the blue and red dots to the spots of the matching color on the right side. We will do this puzzle in multiple steps. Let’s begin.
Step 1
Move the red dot by two nodes up and to the right. After that, move the blue dot one node down and to the right.
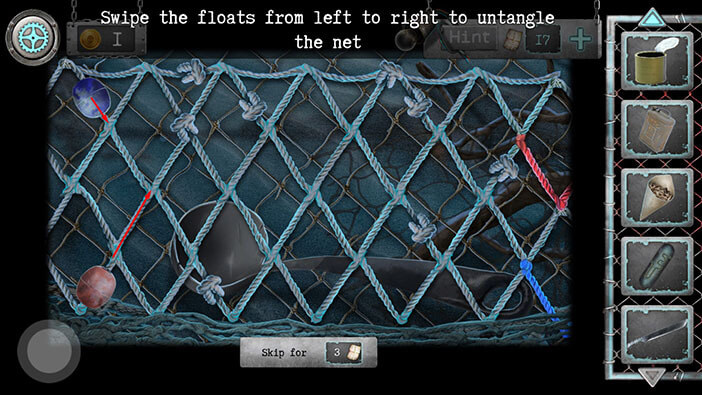
Step 2
Move the blue dot one node down and to the left. After that, move the blue dot two nodes down and to the right.
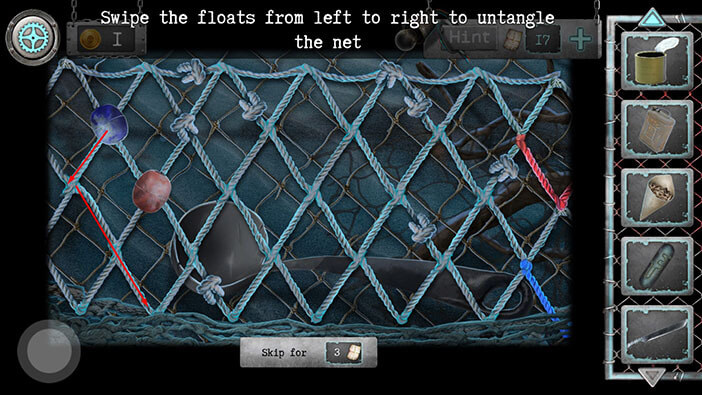
Step 3
Move the blue dot two nodes up and to the right, after that move the blue dot one node down and to the right. Also, try to move the blue dot one more node down and to the right (the net will break, at this point).
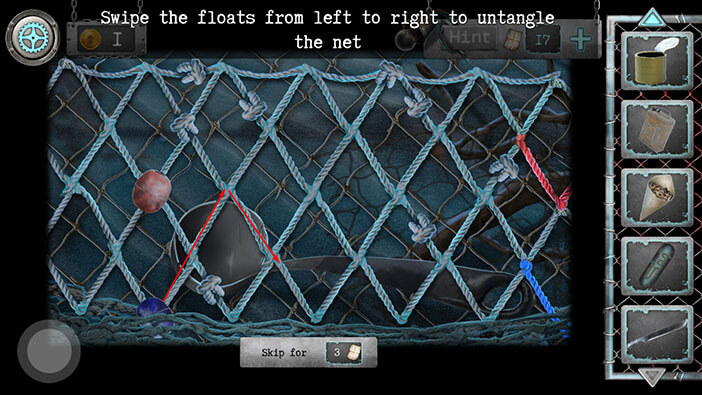
Step 4
Move the red dot one node down and to the left. After that, move the red dot one node down and to the right.
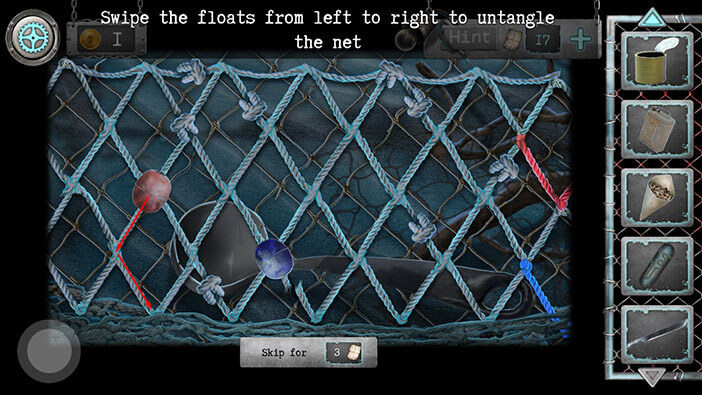
Step 5
Move the red dot three nodes up and to the right. After that, move the red dot one node down and to the right.
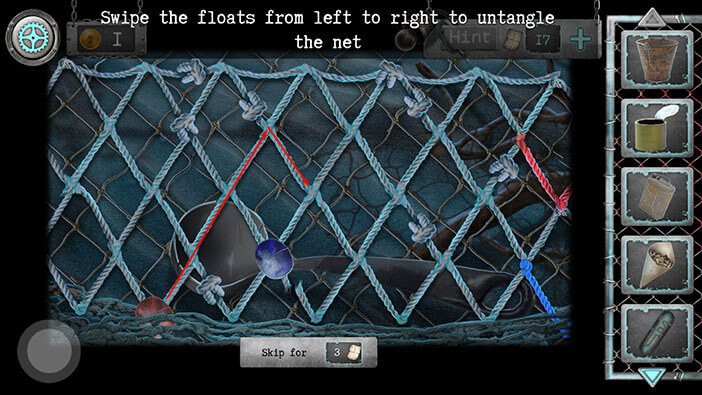
Step 6
Move the red dot one node up and to the right. After that, move the red dot one node down and to the right.
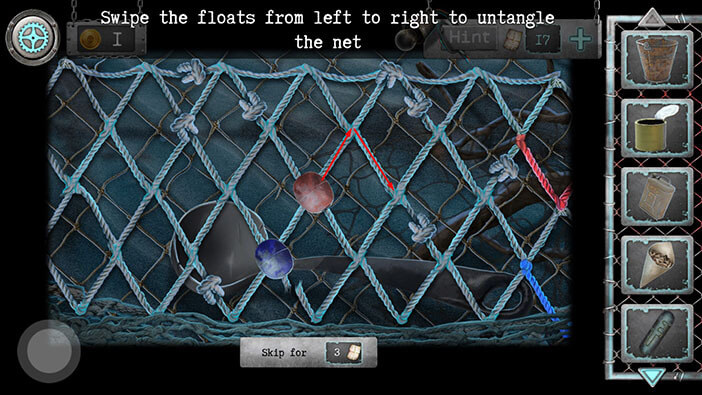
Step 7
Move the red dot two nodes up and to the right. After that, move the red dot two nodes down and to the right.
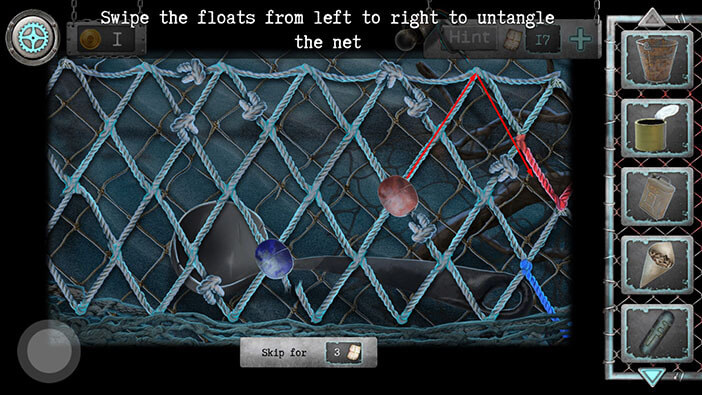
Step 8
Move the blue dot one node up and to the right. After that, move the blue dot two nodes down and to the right.
Step 9
Move the blue dot two nodes up and to the right. After that, move the blue dot three nodes down and to the right. With this last step, you will complete the puzzle.
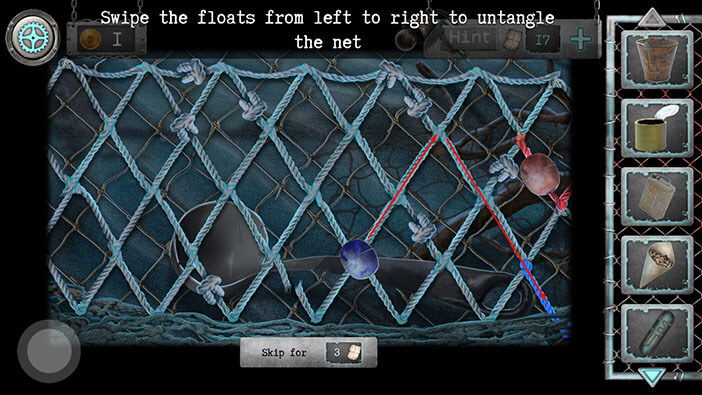
As soon as you untangle the net, two items will be added to your inventory “Ladle” and the “Net”.
Ok, now select the “Bucket” from the inventory and fill it up with water from the lake. “Bucket with water” will be added to your inventory.

Ok, let’s go back to the area with the well and gargoyle statues.
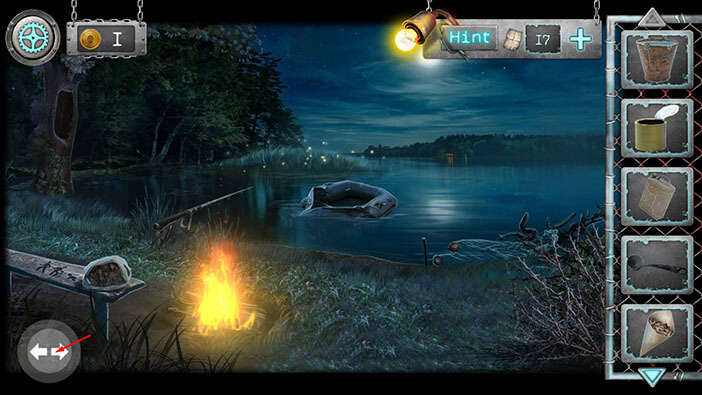
Select the “Machete” from the inventory then tap on the vines on the left to cut them down.
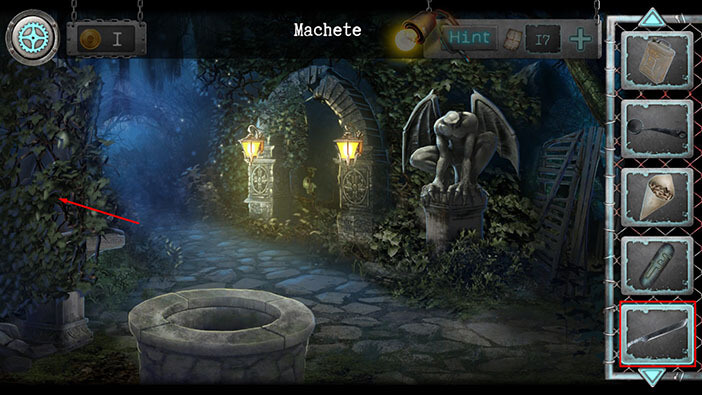
After cutting down the brush you will discover another gargoyle statue, and it will turn around to face you. Tap on the stick below the statue to pick it up and the “Forked stick” will be added to your inventory.
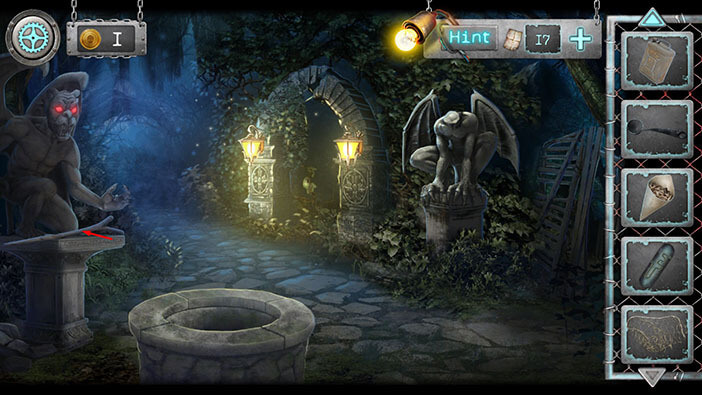
Next, tap on the well to take a closer look at it.
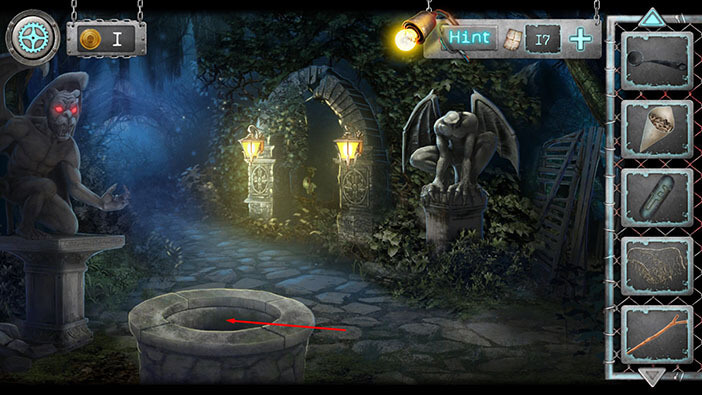
Inside the well, on the left wall, you will notice another “Gold Coin”. Tap on it to pick it up.
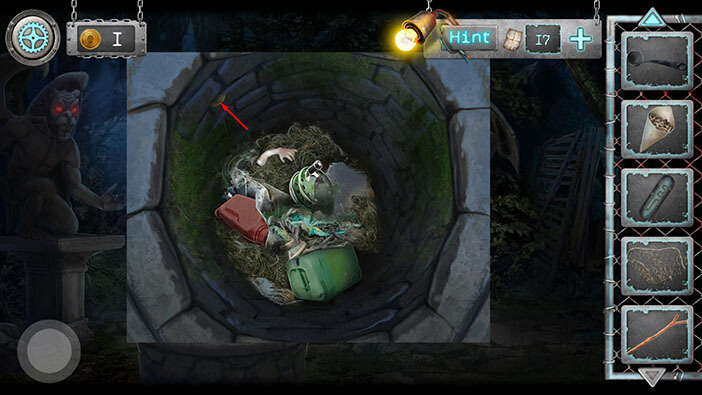
Ok, now let’s select the “Bucket with water” from the inventory and pour the water into the well. The goal is to raise the water high enough so that we can reach the floating items, but one bucket of water probably won’t be enough to achieve this goal.
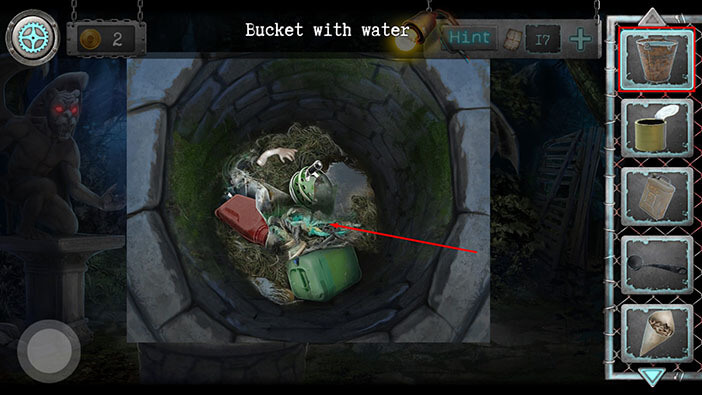
Yup, one bucket of water wasn’t enough. Tap on the button in the lower left corner to go back.
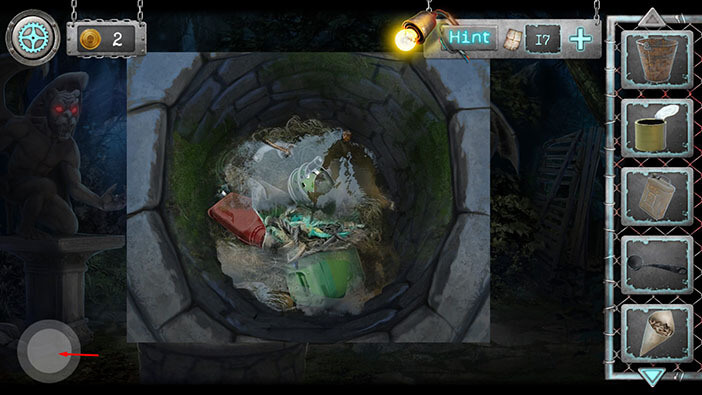
Let’s go back to the lake and bring back another bucket of water.
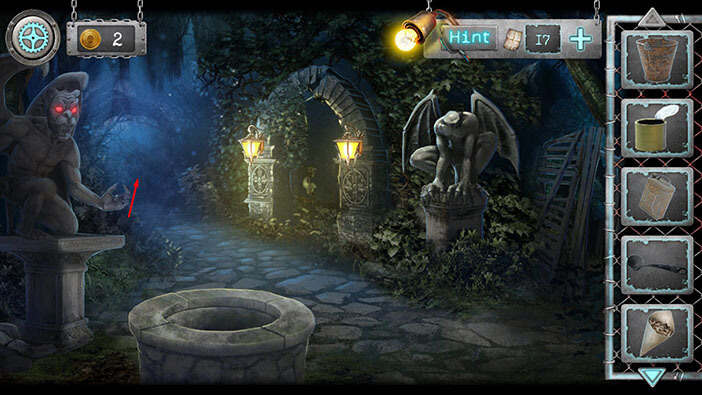
Select the “Bucket” from the inventory and fill it with water.
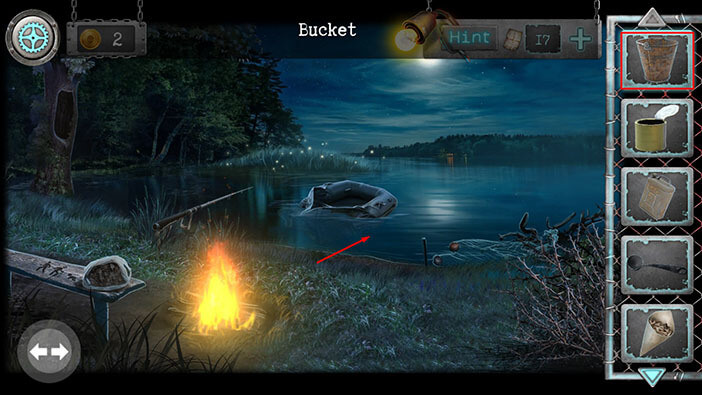
Tap on the button in the lower left corner to go back to the area with the well and gargoyle statues.

Tap on the well to take a closer look at it.
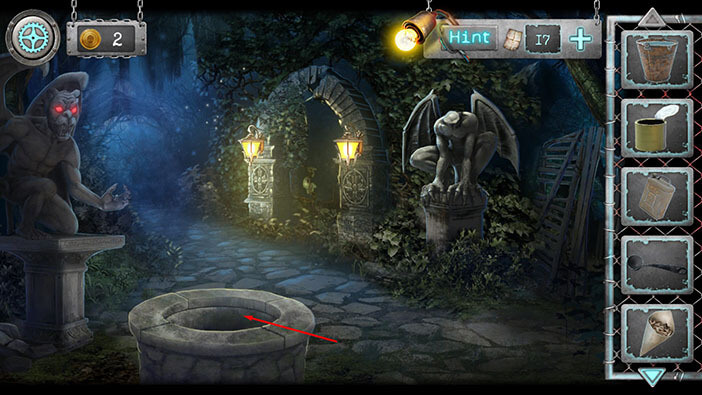
Select the “Bucket with water” from the inventory and pour the water into the well.
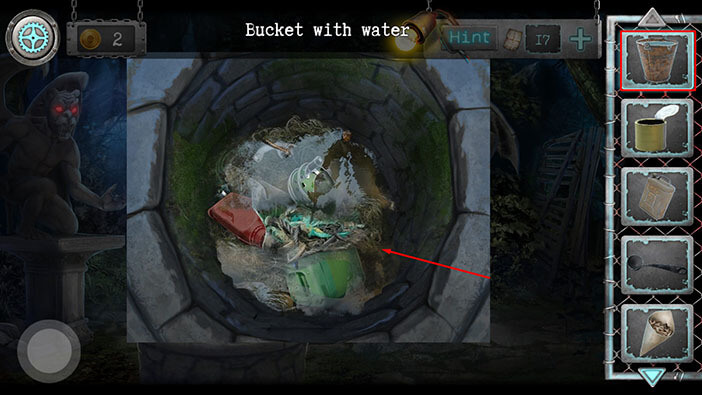
The water level is high enough, so select the “Ladle” from the inventory and tap on the water. Your character will reach down with the ladle, and he will pull out the “Reel”.
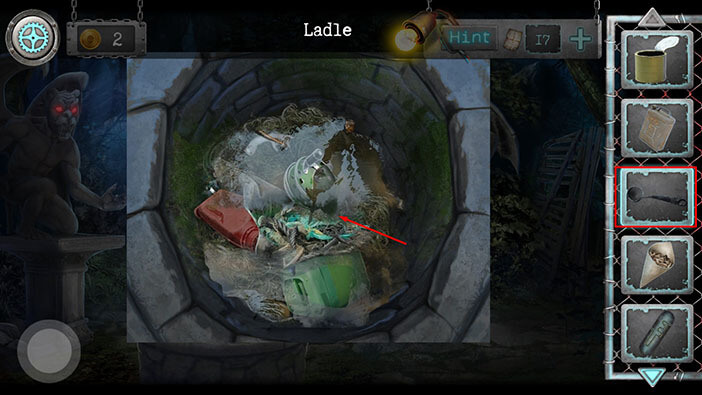
Tap on the button in the lower left corner to go back.
Let’s go back to the lake.
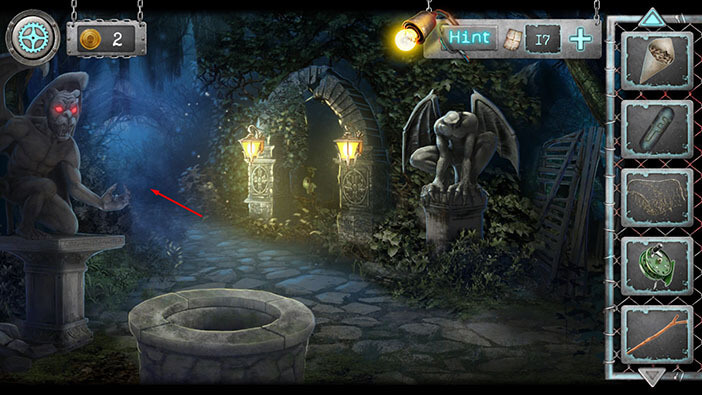
Tap on the hollow tree to take a closer look at it.
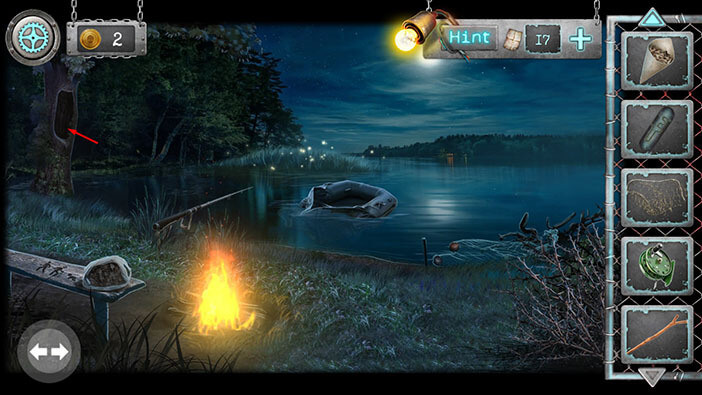
If you tap on the padlock to interact with it, a snake will jump at you from the hole in the tree. So, select the “Forked stick” from the inventory and use it to get rid of the snake.
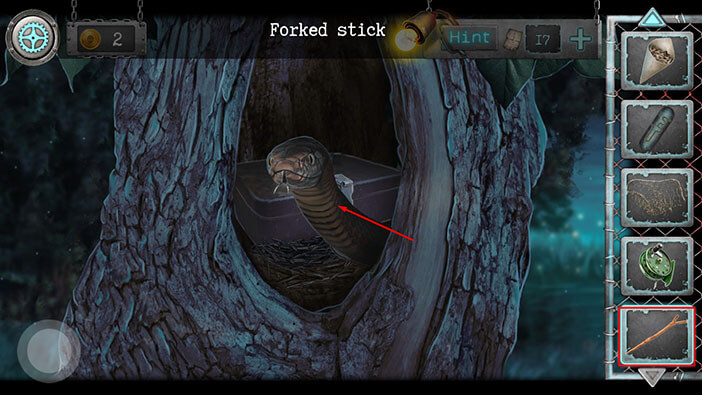
Tap on the padlock to take a closer look at it.
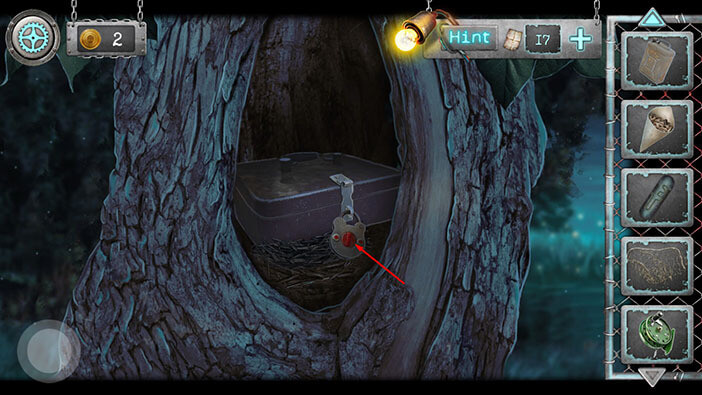
Tap on the note above the padlock to take a look at it.
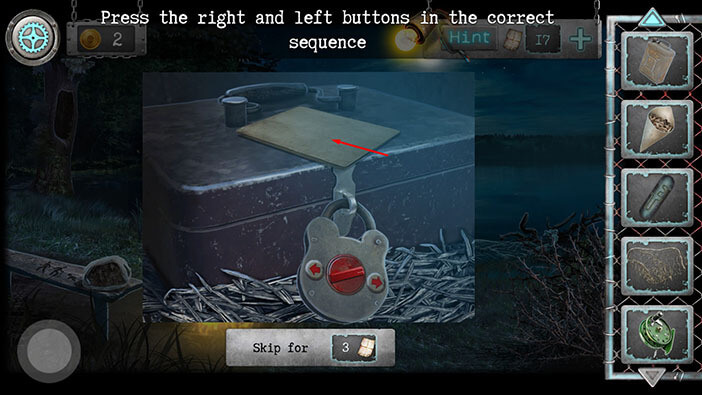
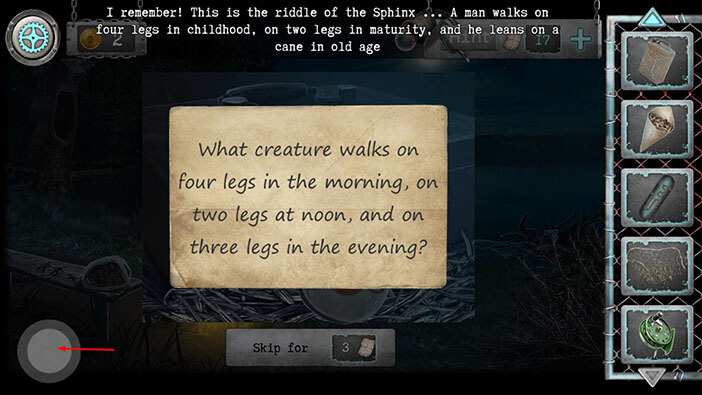
On the note, you will see the puzzle: “What creature walks on four legs in the morning, two legs at noon, and on three legs in the evening?”
Your character will remember that the solution for this puzzle is a man, in different stages of the life cycle. We already saw images that resemble this solution, and the images were drawn on the bench.
Tap on the button in the lower left corner to go back.
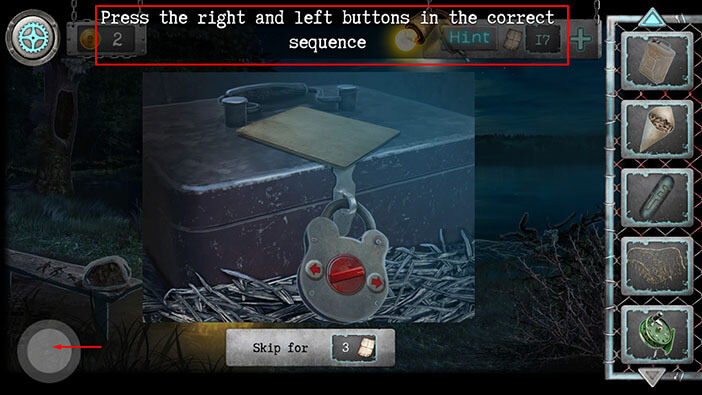
In order to solve this puzzle we will have to press the right and left buttons in the correct sequence. Let’s tap two more times on the button in the lower left corner one more time to go back.
Let’s take another look at the figures drawn on the bench.
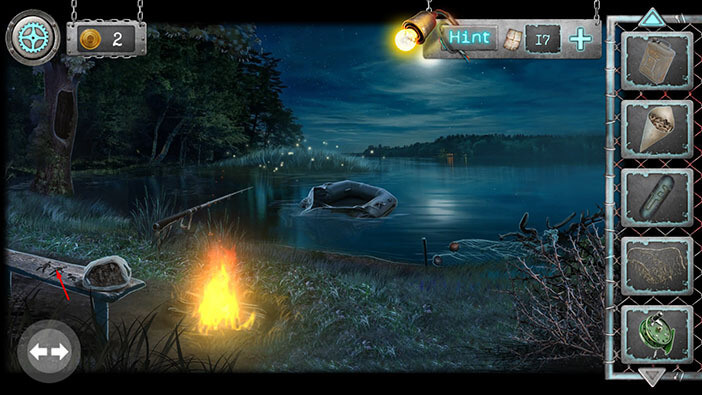
Ok, let’s examine the drawings starting from left to right.
The first figure walks on two legs, and it is facing left. So, our first combination is 2 times left.
The next figure is the figure of an old man, and his walking stick counts as the third limb. The old man figure is facing right. So, our next combination is 3 times right.
Lastly, the figure of an infant is walking on all four limbs and facing left. So, our last combination is 4 times left.
We should use this information to unlock the padlock in the hollow tree. Memorize or write down this information, then tap on the button in the lower left corner to go back.
Tap on the hollow tree again, to take a closer look at it.
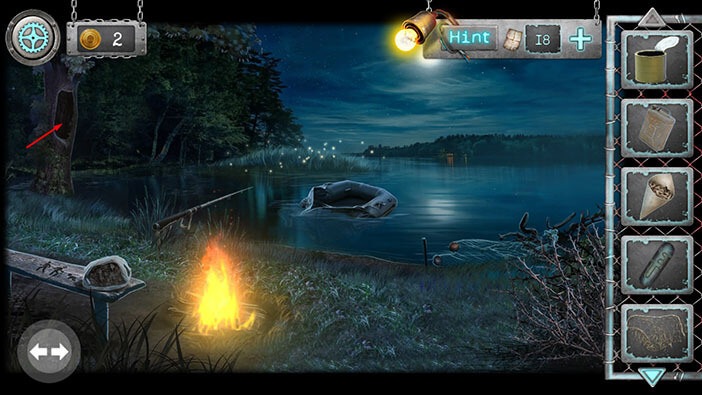
Tap on the padlock to start the interaction.
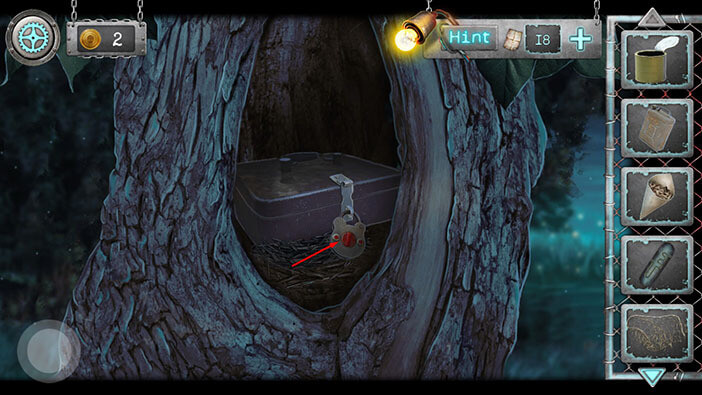
Ok, we already cracked this puzzle by looking at the figures drawn on the bench, so let’s solve it by pressing on the correct arrows.
Step 1
Tap twice on the left arrow (because the first figure walks on two legs, and it is facing left)
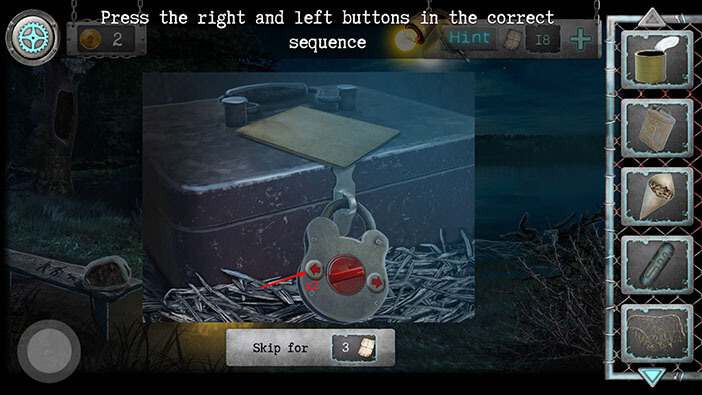
Step 2
Tap three times on the right arrow (because the second figure is the figure of an old man, and his walking stick counts as the third limb. The old man figure is facing right.)
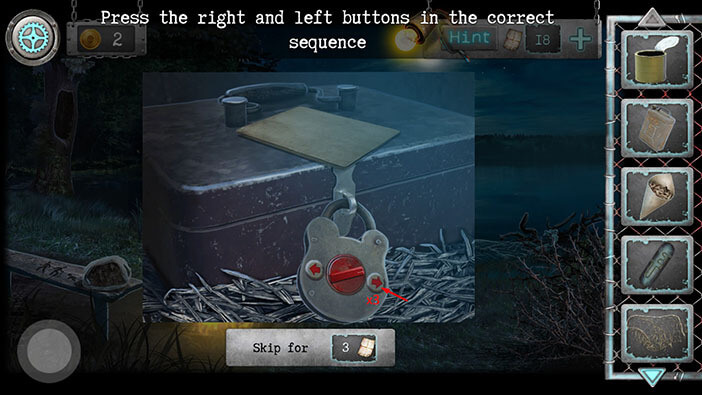
Step 3
Tap 4 times on the left arrow (because the last figure is the figure of an infant walking on all four limbs and facing left.)

As soon as you press the buttons in the correct order the box will open. Tap on the items inside to pick them up. “Pruning shears” and “Bitumen” will be added to your inventory.
After that, tap twice on the button in the lower left corner to go back.
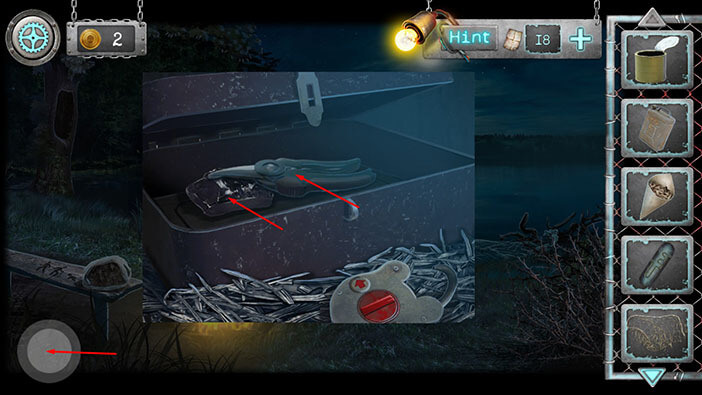
If you take a look at the lake, you will notice a small boat. Select the “Net” from the inventory and use it to drag the boat to the shore.
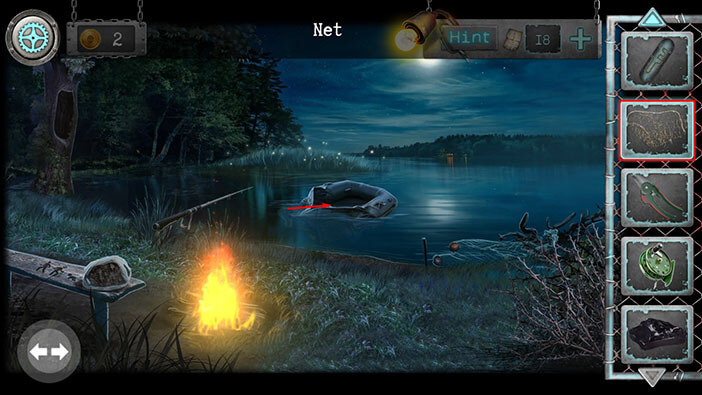
Let’s take a closer look at the boat.
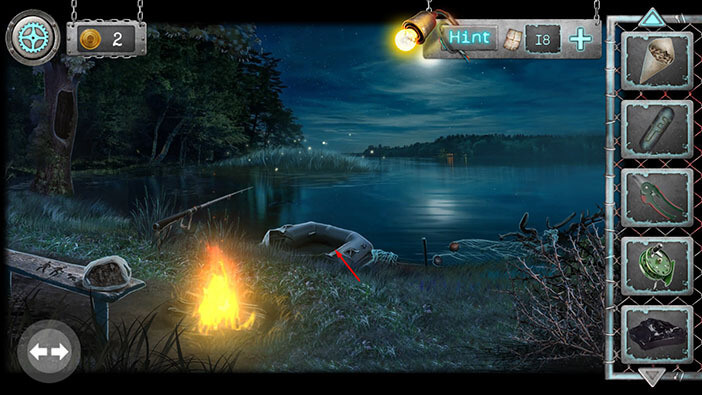
There is a large cut on the inflatable boat, and there is no way for us to get across the lake while the boat is in this condition. So, we will first have to find some way to patch up the boat.
Tap on the button in the lower left corner to go back.
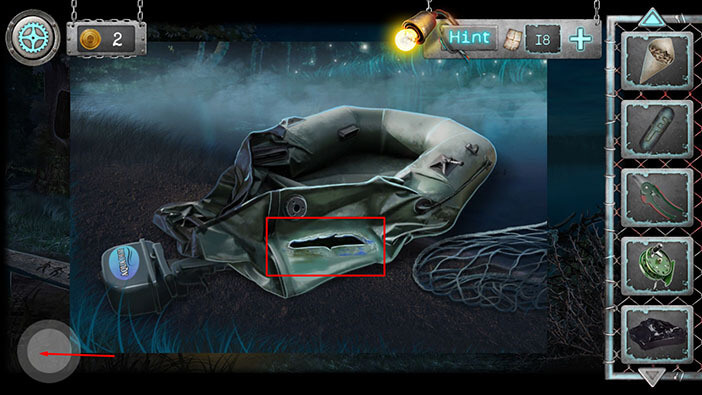
Let’s take a closer look at the thorns in the lower right corner of the screen.

Some kind of a box is hidden behind the thorns. So, select the “Pruning shears” from the inventory and tap on the thorns to cut them down. You will have to repeat this process several times to cut down all thorns.
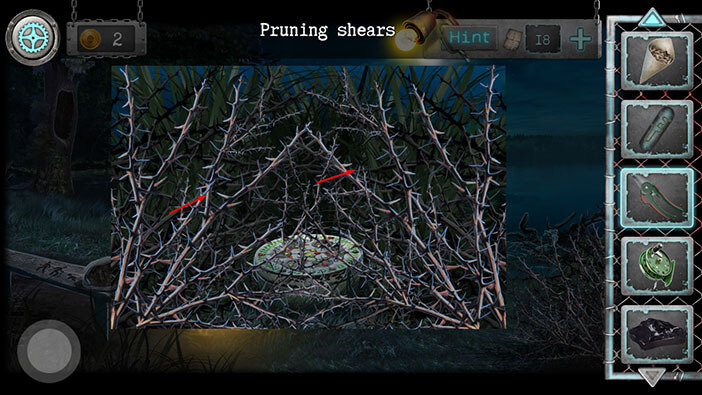
Cutting down the thorns allowed us access to the strange box. Tap on it to take a closer look.
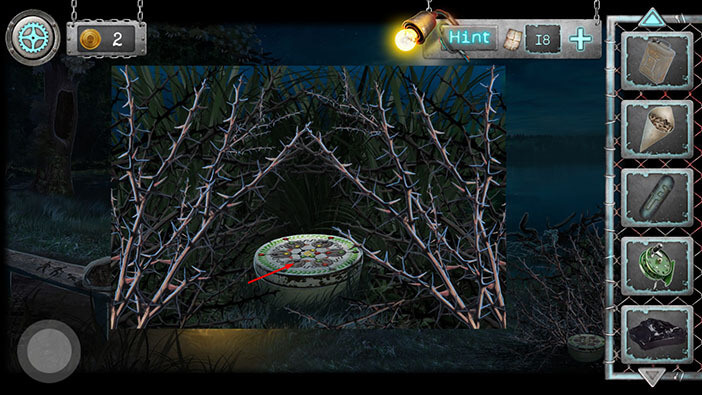
We are now faced with another puzzle. However, we will end the first part of our walkthrough at this point, and crack this puzzle in the next part. You can check out the second part by tapping on the “Next Part” button.
Thank you for reading.