Scary Horror 2 – Chapter 2, Part 3
Hello everyone and welcome to Part III of our walkthrough for Chapter 2 of the “Scary Horror 2: Escape Games”. At the end of Part II, we opened the secret door by placing a three-cornered hat on the statue of Napoleon and discovered another secret room. Let’s continue this adventure.
NOTE: The third part of the picks up the story from the point when you discover a secret room by placing a three-cornered hat on the head of the statue of Napoleon.
Tap on the secret door to proceed into the next room.

As soon as we stepped into the secret room, our character saw the head of a raging bull roaring at him. After a few moments, he calmed down and saw that he is in a room, with a very strange statue that looks like a huge boar, with horns and wings. Very weird. Let’s explore this room.
Tap on the “Fishing rod without hook” and the flag to pick them up.

Well, we managed to pick up the fishing rod, but when we tried to pick up the flag, a sliding gate struck our character.
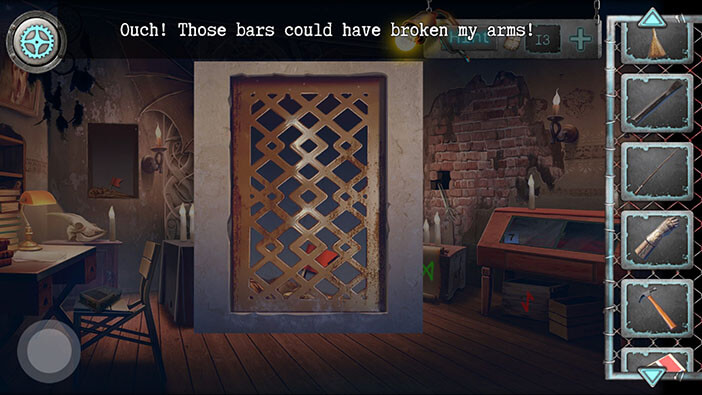
So, let’s solve this problem. Select the “Gauntlet” from the inventory and tap next to the flag.
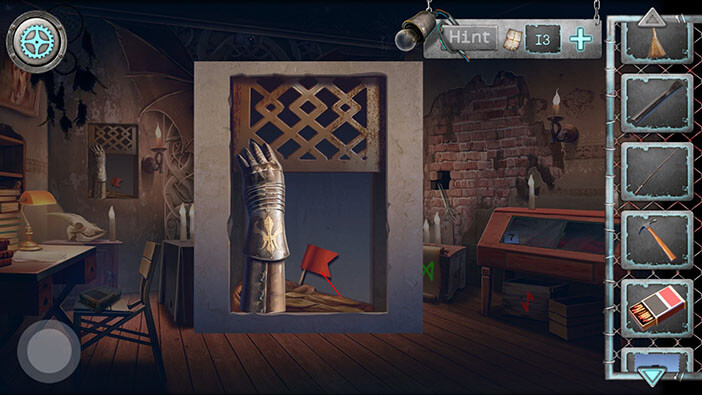
Our character will use the gauntlet to block the sliding gate.
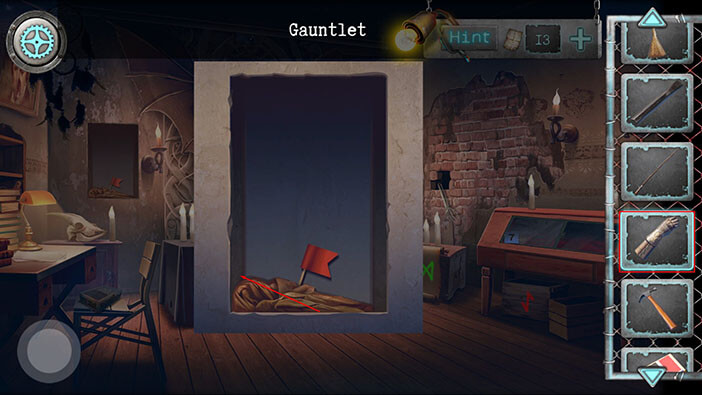
Ok, now tap on the “Flag” to pick it up. The “Flag” is the last piece that we need in order to assemble the ship model that we found in the previous room. But, before we do that, let’s see what else we can find in this room.
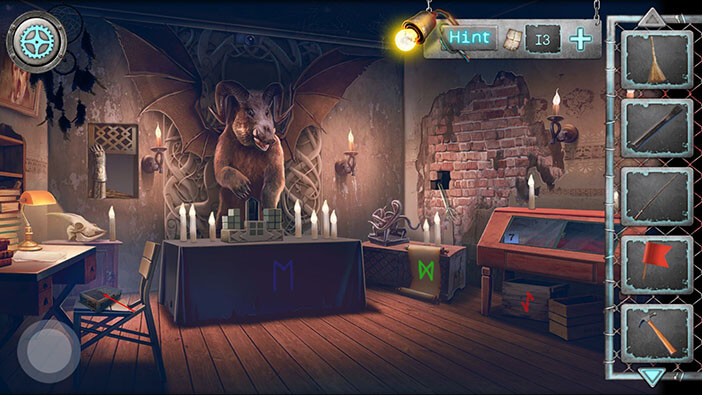
If we look around the room, we can see three symbols painted in blue, green, and red. Let’s memorize/ write down the color and shape of these symbols because we will need them in order to solve the next puzzle. So, we have
Blue = letter “M”
Green = horizontal “Sand Clock”
Red = something that looks like reversed letter “Z”
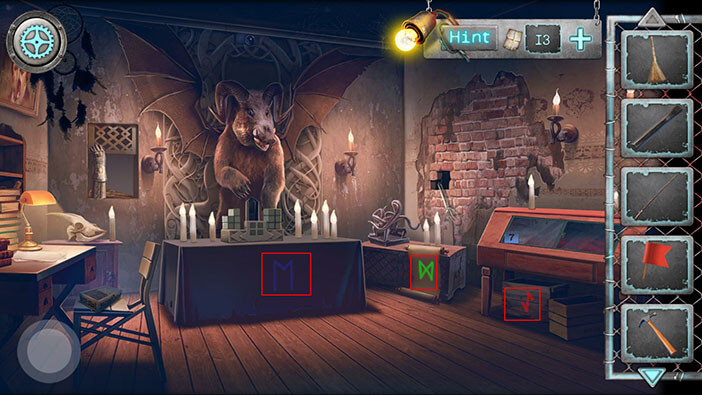
After taking note of the symbols, tap on the wooden box, located on the chair on your left.
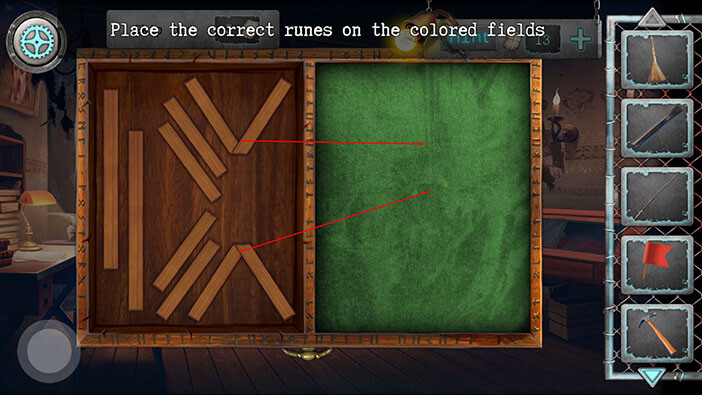
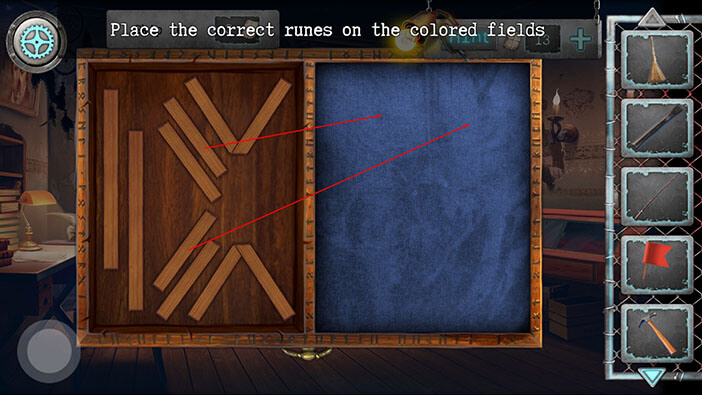
As the instruction says, we should use the sticks on the left to form the runes on the colored fields. We already memorized/wrote down these runes, so, now, we just have to assemble them on the field.
On the green field, we should assemble the rune that resembles a horizontal “Sand Clock” (because this symbol was painted with green paint).
To do that, we will first need two larger pieces that look like the letter “V” and the upside-down letter “V”. Drag them in the middle of the field. The letter “V” should be above the upside-down letter “V” and these two pieces should form the “X” sign.
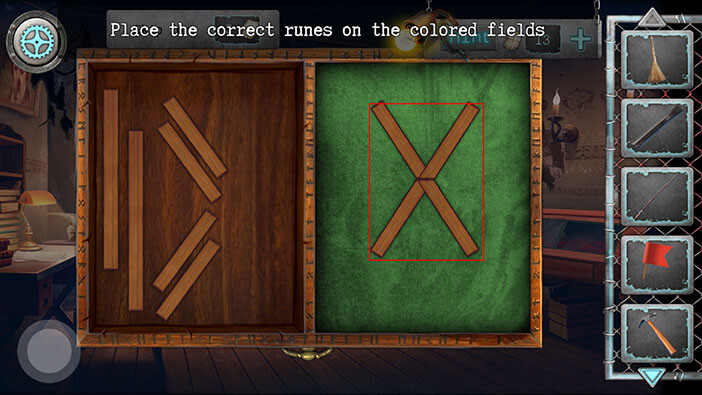
Next, drag the two vertical pieces (far left) and place them on each side of the letter “X”. With that, you will assemble the green rune.
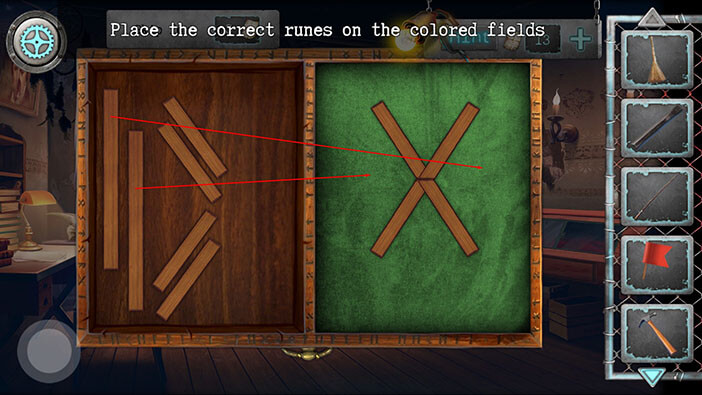
Well, now we have a blue background. The blue rune was something that resembled the letter “M”.
To assemble it we will first take two diagonal pieces (one left to right, and the other right to left) and assemble them in the middle of the field. These two pieces should form the letter “V”.
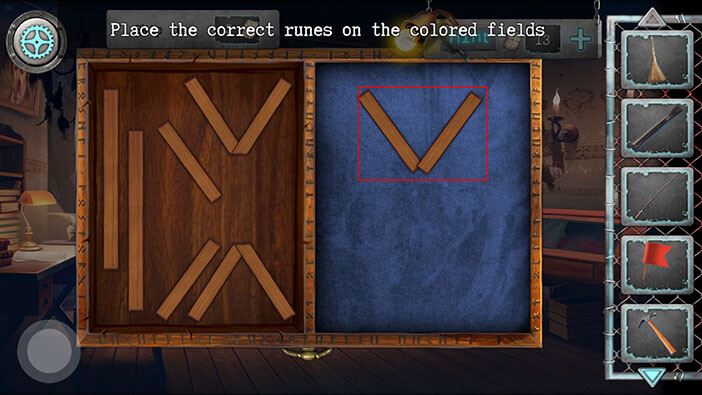
Next, we will drag the two vertical pieces (far left) and place them on each side of the diagonal pieces (“V”). With that, you will assemble the blue rune (letter “M”).
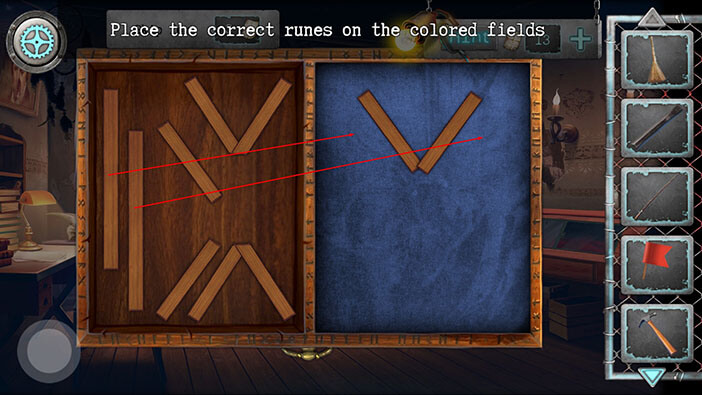
Now, we have a red background. The red rune was something that looks like reversed letter “Z” (kind of).
To assemble this rune, we will start by placing one of the vertical pieces in the middle of the field.
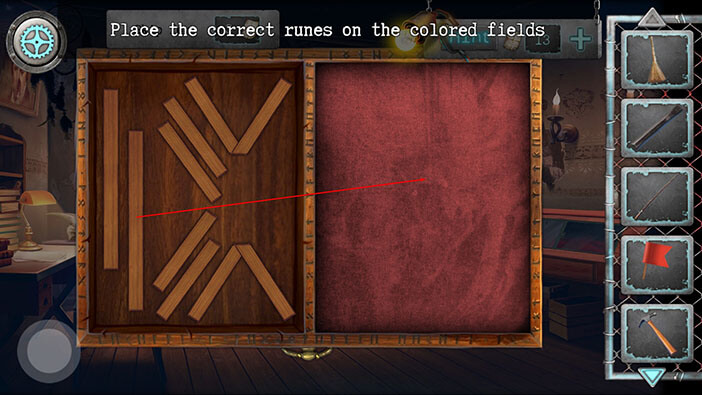
Next, we will take one of the left-to-right diagonal pieces and place it on the top-right side of the vertical piece.
After that, we will take the other left-to-right diagonal piece and place it on the bottom-left side of the vertical piece.
With that, we will form the third and final rune.
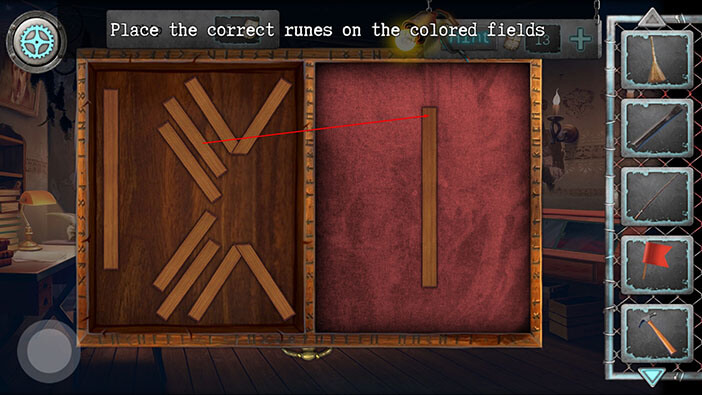
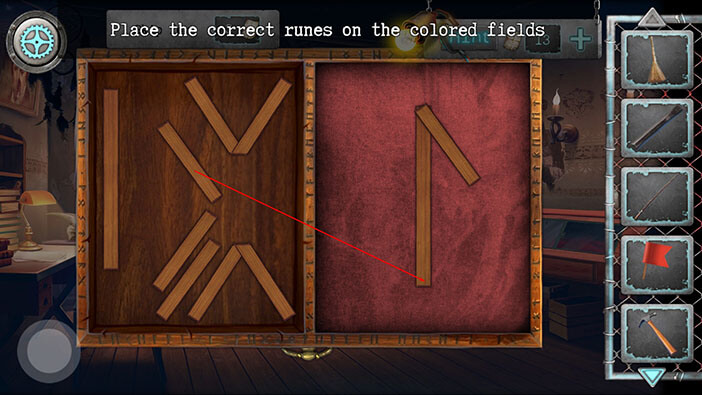
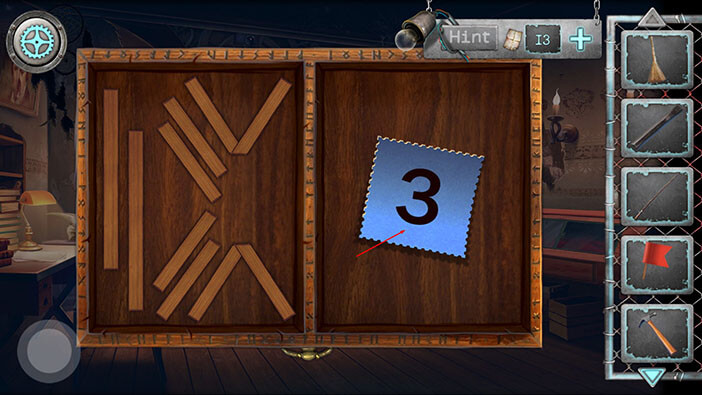
Well, after we solved the puzzle, a card with the number “3” appeared. Tap on it to pick it up and “Sheet with number 3” will be added to your inventory.
Inside this room, you will also notice a brick wall on the right, with the skeletal arm sticking out of it. Let’s take a closer look.
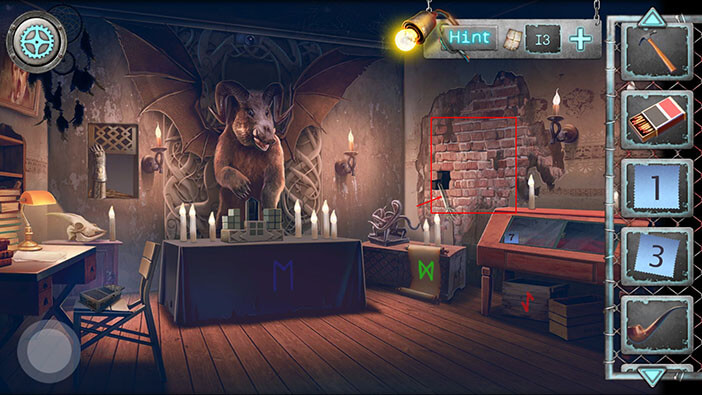
Well, it looks like something might be hidden behind this wall. Let’s try to break it down. To do that, first, select the “Chisel” from the inventory and combine it with the “Hammer”. “Chisel Hammer” will be added to your inventory.
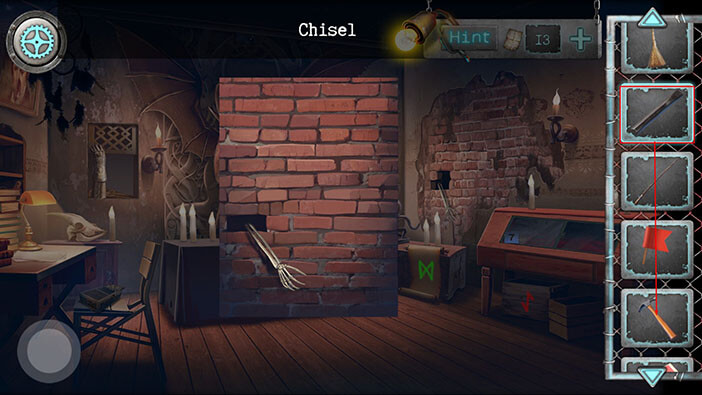
Next, select the “Chisel Hammer” from the inventory, and tap around the hole. You will have to strike at several spots in order to break down the wall.
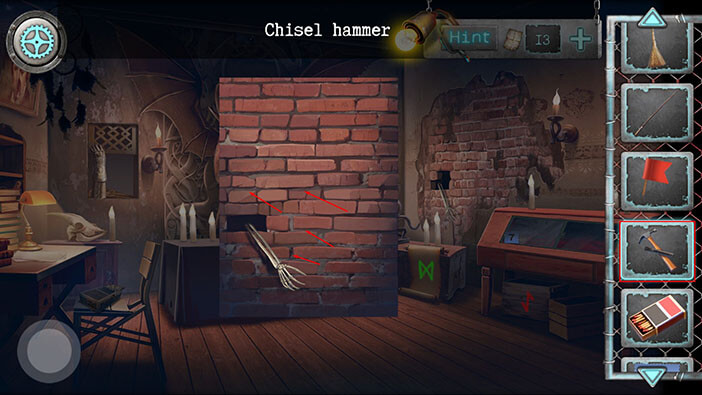
We discovered a skeleton behind the brick wall. It seems that this person was walled-in (possibly while it was still alive). Tap on the “Pendant” to pick it up.
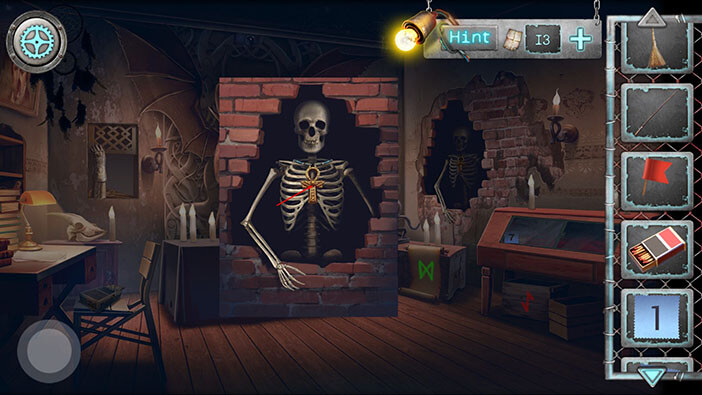
Next, let’s take a closer look at the display case on our right.
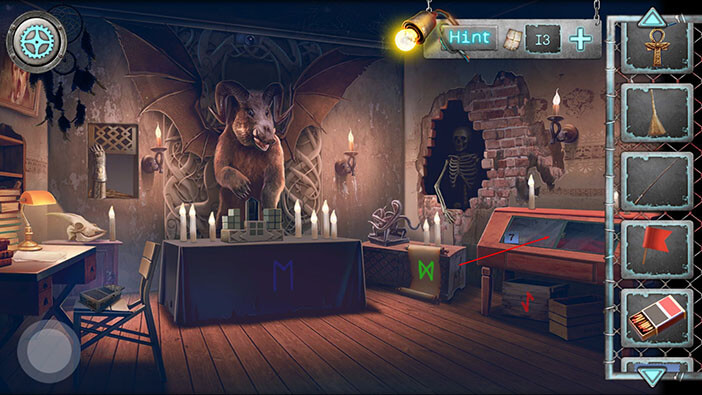
On the left side, we can see a photo and personal items of our character. On the right, we can see a photo of an unknown man and a photo of a skeletal arm sticking out of the brick wall. It seems that this man met his end by being walled-in behind the brick wall.
Tap on the “Sheet with number 7” to pick it up.
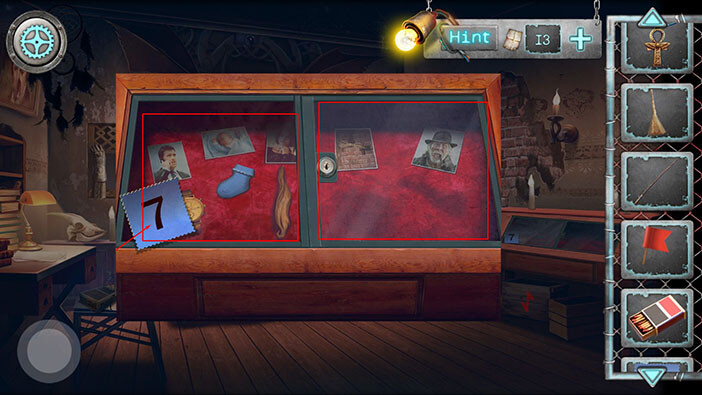
Ok, we should now go back to the previous room, and assemble the ship model. Tap on the button in the lower-left corner.
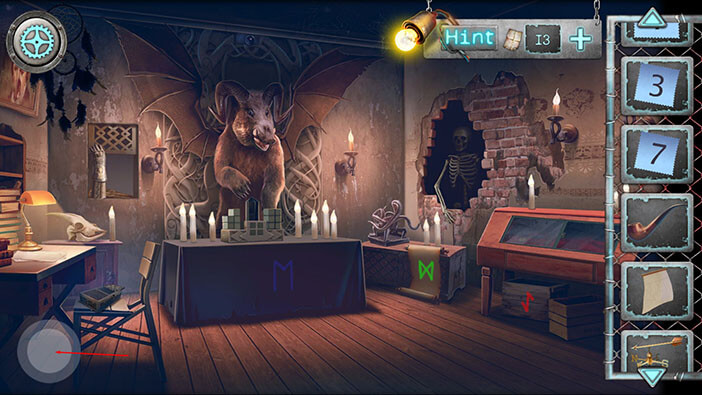
Tap on the ship model to take a closer look at it.
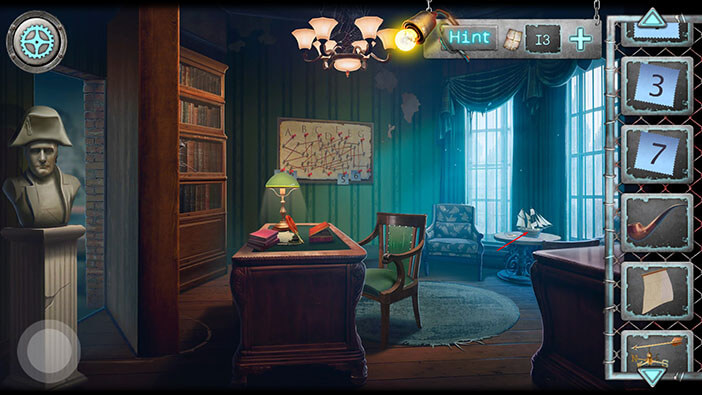
Select the “Flag” and “Sail” and add them to the ship model.
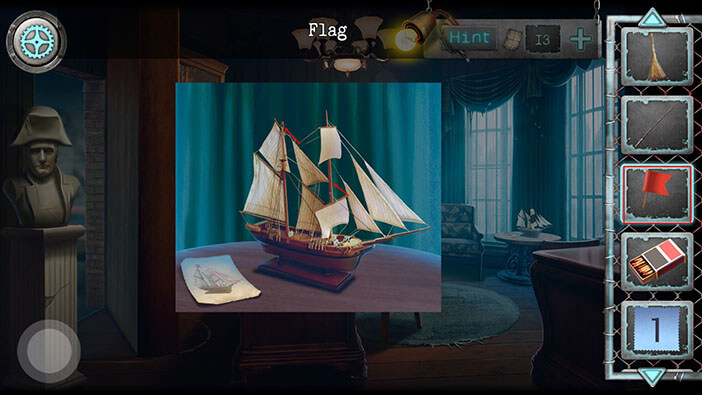
When we assembled the ship model, some tiny items fell out of it. Tap on the small item to pick it up and “Rune” will be added to your inventory.
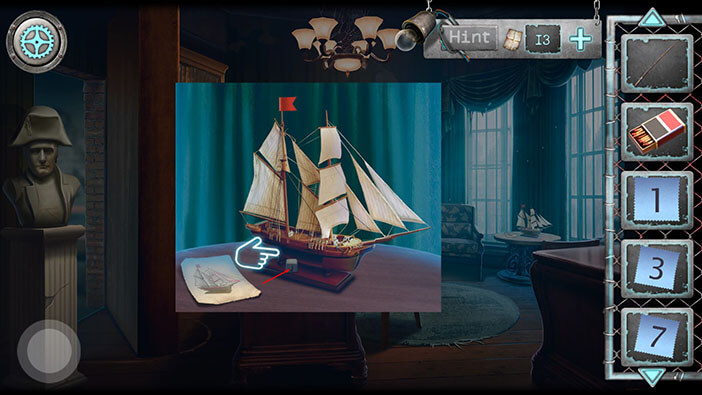
Ok, let’s go back to the secret room.
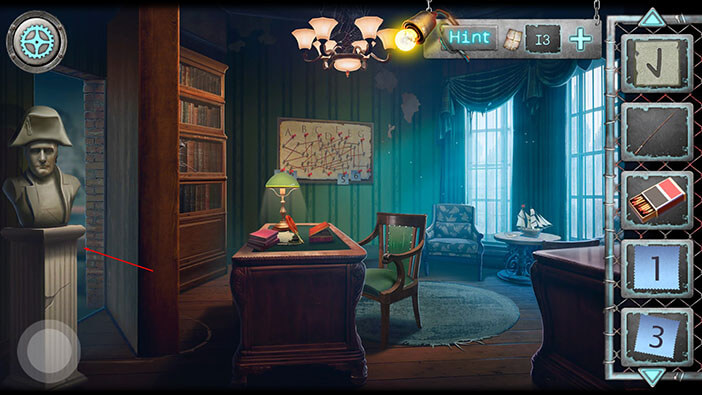
Tap on the cubes below the statue to take a closer look.
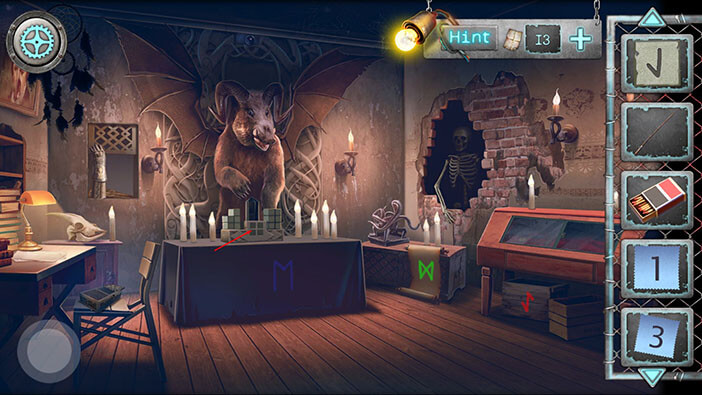
Here, we can see six tiles with runes on the right side, but there are only five of them on the left side. So, select the “Rune” from the inventory and place it on the empty spot on the left.
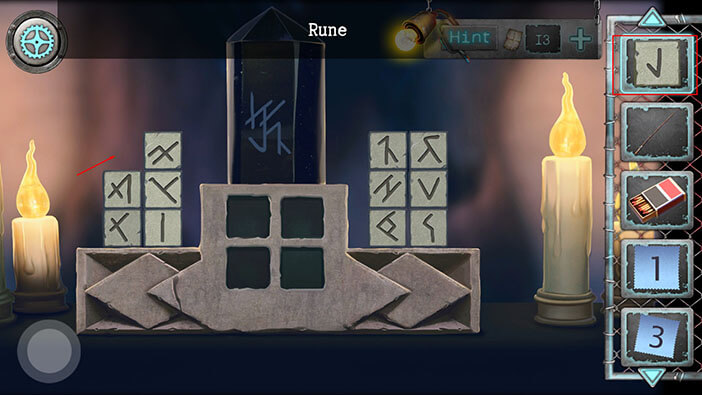
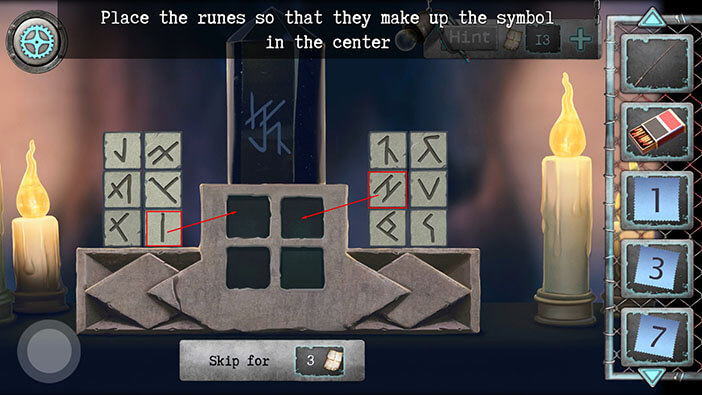
Ok, here we have another puzzle. Our task is to assemble the given rune, by combining the six runes from the right and left and arranging them into the four slots in the middle. We will do this puzzle in several steps. Let’s begin.
Step 1
First, we will take the second (left to right) rune from the third (top to bottom) row on the left and place it into the upper-left slot.
Next, we will take the second rune from the second row on the right and place it into the upper-right slot.
Step 2
Next, we will take the first rune from the first row on the left and place it into the lower-left slot.
Next, we will take the first rune from the first row on the right and place it into the lower-right slot.
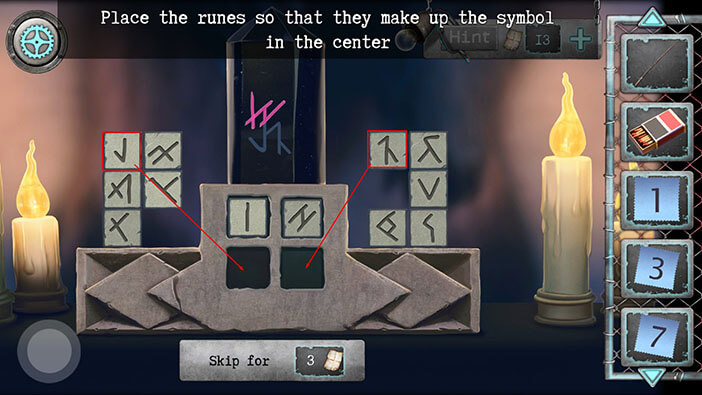
With that, we will assemble the first rune. Let’s proceed.
Step 3
First, we will take the second rune from the third row on the right and place it into the upper-left slot.
Next, we will take the second rune from the second row on the left and place it into the upper-right slot.
Step 4
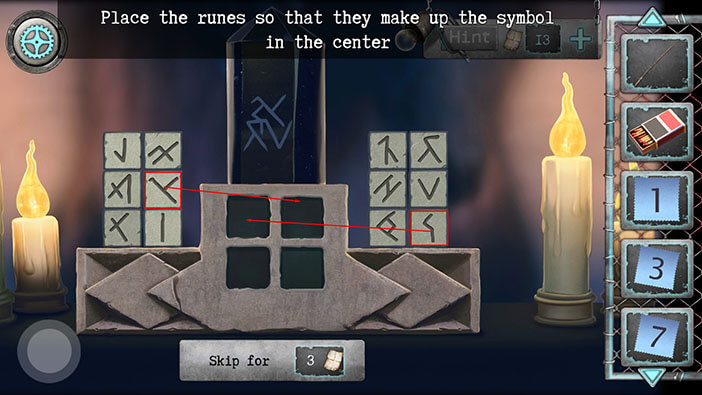
Next, we will take the second rune from the first row on the right and place it into the lower-left slot.
Next, we will take the second rune from the second row on the right and place it into the lower-right slot.
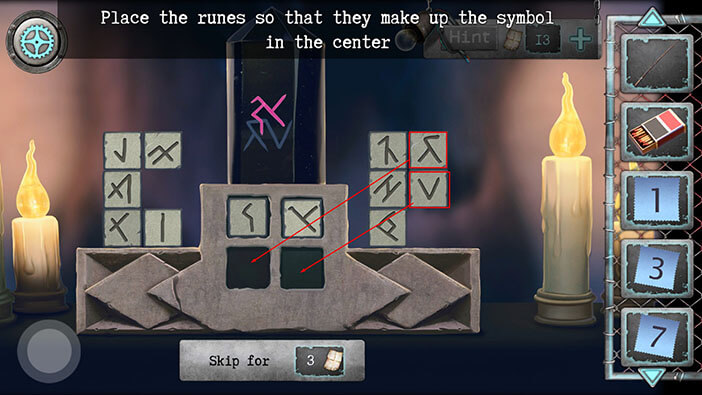
With that, we will assemble the second rune. Let’s proceed.
Step 5
We will take the first rune from the third row on the left and place it into the upper-left slot.
Next, we will take the second rune from the first row on the left and place it into the upper-right slot.
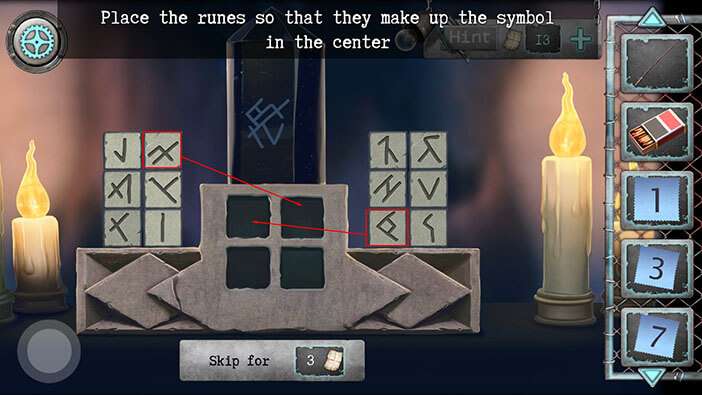
Step 6
Next, we will take the first rune from the third row on the left and place it into the lower-left slot.
Next, we will take the second rune from the second row on the right and place it into the lower-right slot.
With that, we will assemble the third rune.
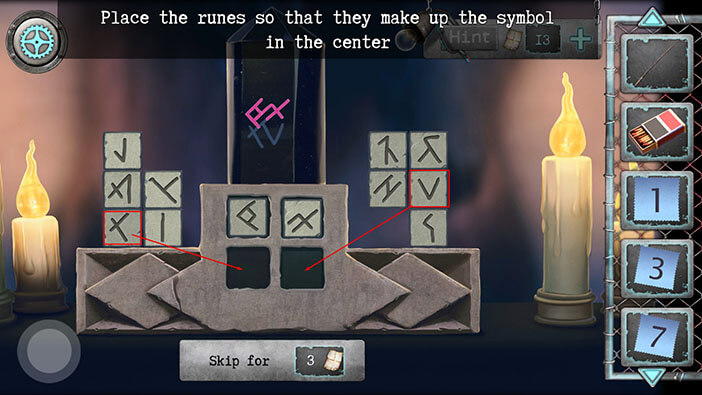
After assembling the third rune, the secret compartment opened and we can see a tile with the number 3. Tap on it to pick it up and “Button for elevator, 3rd floor” will be added to your inventory.
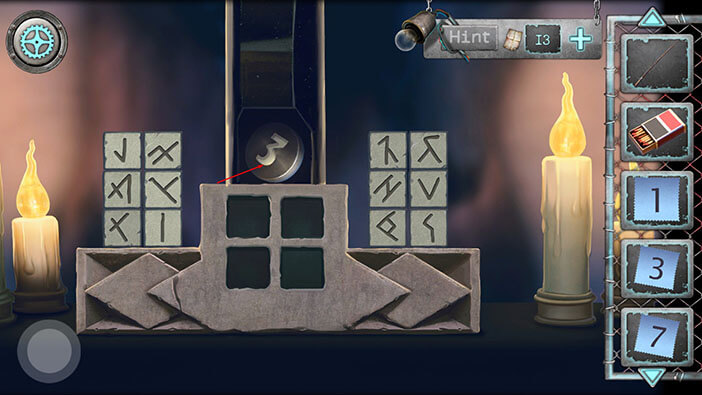
Before we go to the elevator, there are a few more things that we could do on this floor. Let’s go back to the previous room.
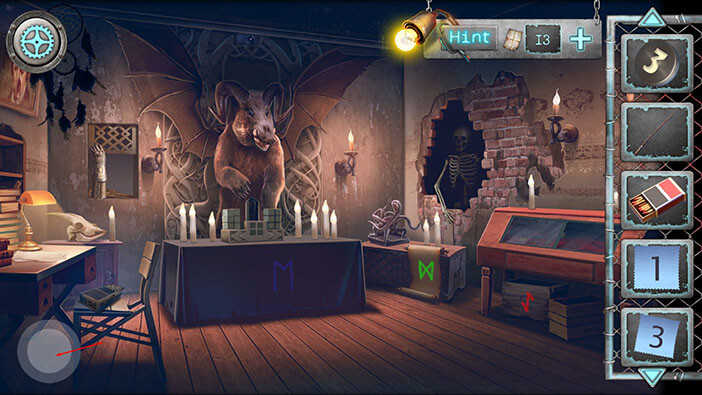
Tap on the notice board to take a closer look at it.
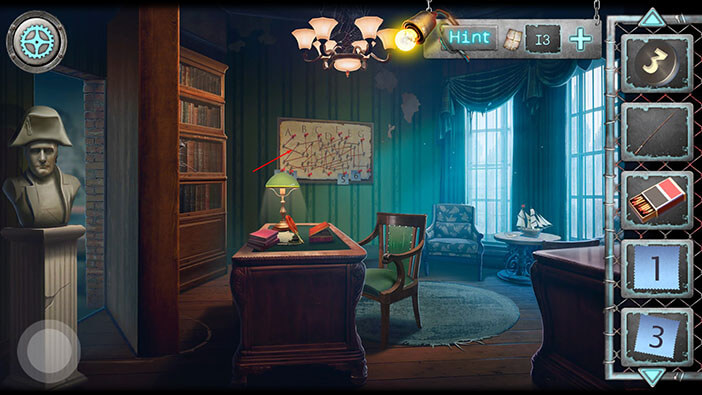
Here, we can see that three “sheets with numbers” are missing. So, select the “Sheet with numbers I, III, and VII” and them to the board. The game will automatically place them in random positions, so you can’t manually place the sheet at a certain spot.
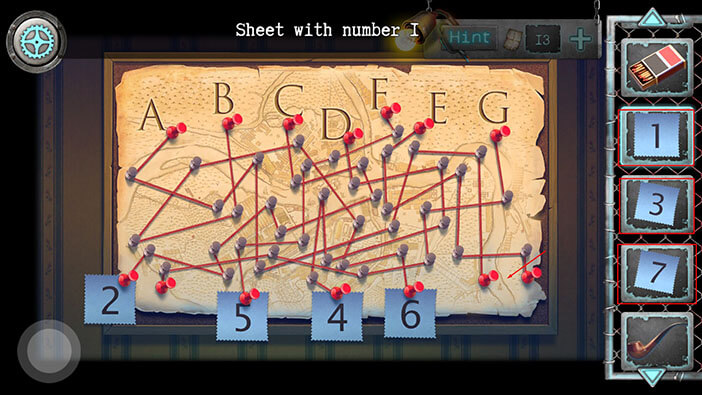
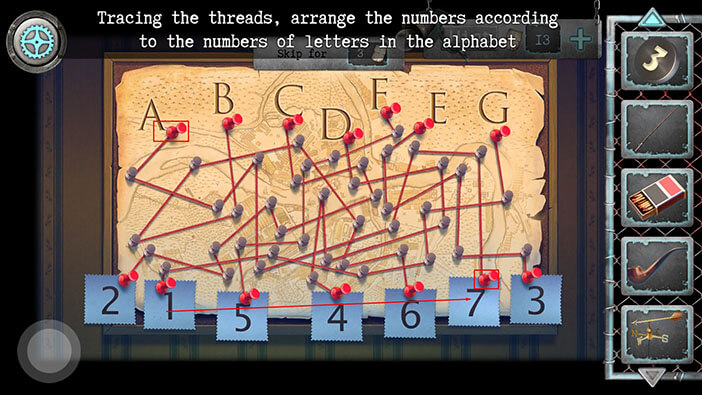
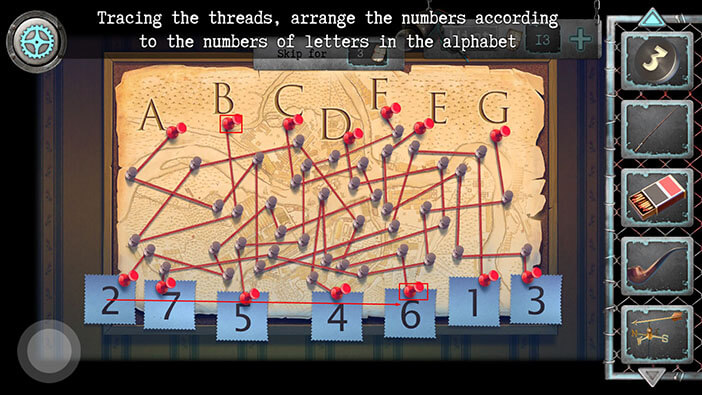
The instruction says “Tracing the threads, arrange the numbers according to the numbers of letters in the alphabet”. We will do this in several steps. Let’s begin.
Step 1
Let’s start by tracing the thread from the letter “A”.
The red thread from the letter “A” ends at the sixth pin. Since “A” is the first letter of the alphabet, we should drag the “Sheet with number 1” and place it on the sixth pin.
Step 2
Next, we will trace the thread from the letter “B”.
The red thread from the letter “B” ends at the fifth pin. Since “B” is the second letter of the alphabet, we should drag the “Sheet with number 2” and place it on the fifth pin.
Step 3
Next, we will trace the thread from the letter “C”.
The red thread from the letter “C” ends at the first pin. Since “C” is the third letter of the alphabet, we should drag the “Sheet with number 3” and place it on the first pin.
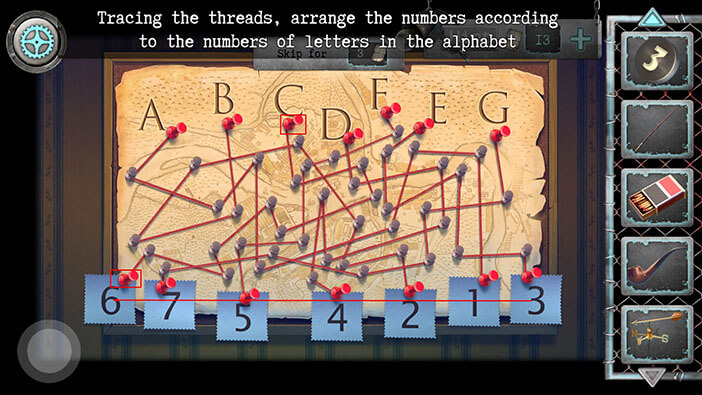
Step 4
Next, we will trace the thread from the letter “D”.
The red thread from the letter “D” ends at the fourth pin. “D” is the fourth letter of the alphabet, and “Sheet with number 4” is already at the fourth pin, so we can move on to the next letter.
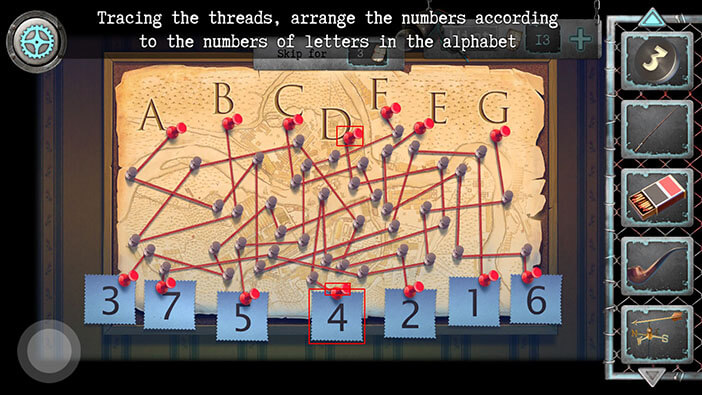
Step 5
Next, we will trace the thread from the letter “F”.
The red thread from the letter “F” ends at the third pin. Since “F” is the sixth letter of the alphabet, we should drag the “Sheet with number 6” and place it on the third pin.
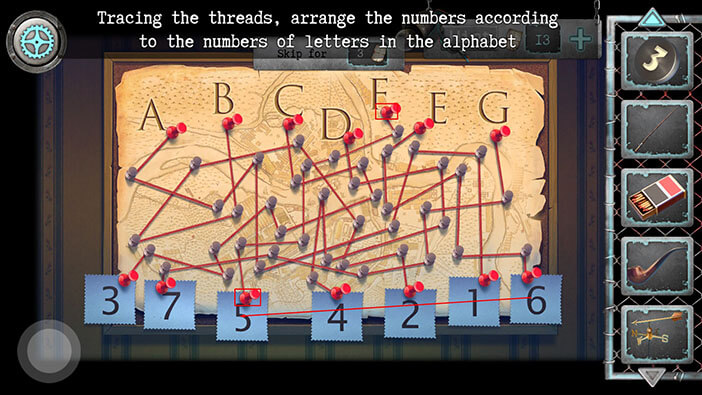
After the last step, we opened the secret compartment.
NOTE: For some reason, the position of “Sheet with number 5” and “Sheet with number 6” will reset once you open the notice board.
Inside the compartment, we can see a key and a saw. Tap on these items to pick them up and “Key from the showcase” and “Bone saw” will be added to your inventory.
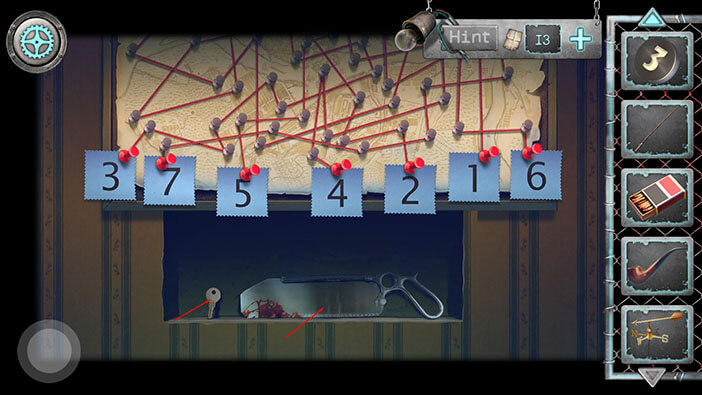
Ok, let’s go back to the secret room on the left.
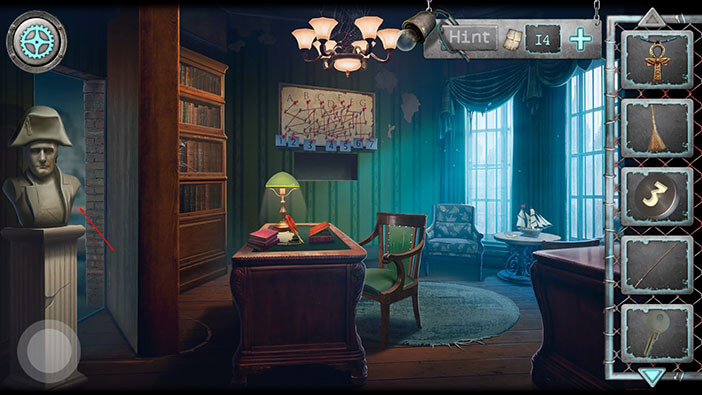
Tap on the display case to take a closer look at it.
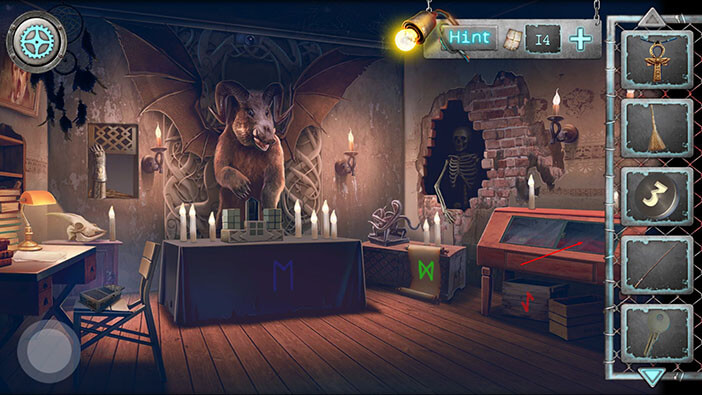
Select the “Key from the showcase” and use it to unlock the display case.
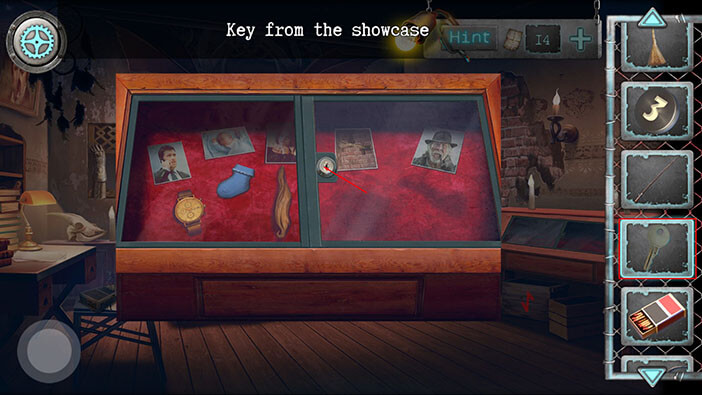
The man in the photo on the right is smoking a pipe. We have a smoking pipe so let’s put it on the right side of the display case since it’s one of his personal items. So, select the “Tube” from the inventory and tap on the right side of the display case.
We can also see a photo of an unknown man and the photo of a skeletal arm sticking out of the brick wall. So, we should probably check out the brick wall, again.
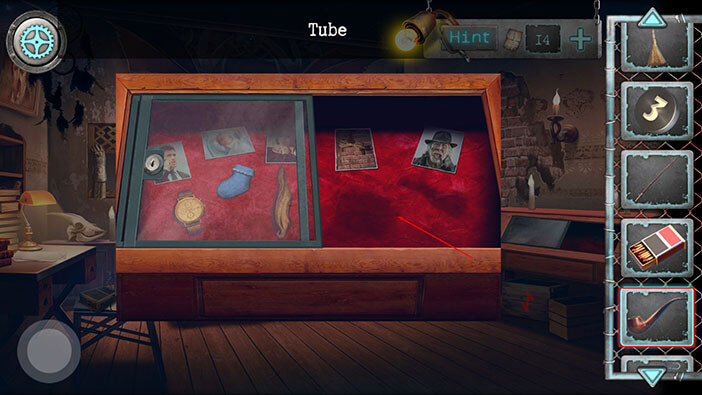
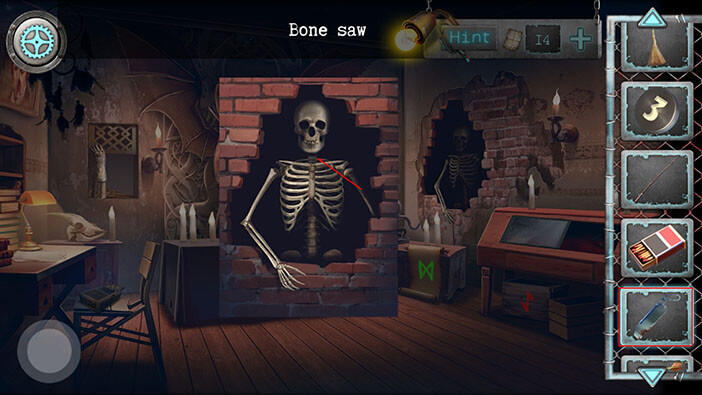
Tap on the skeleton to take a closer look at it.
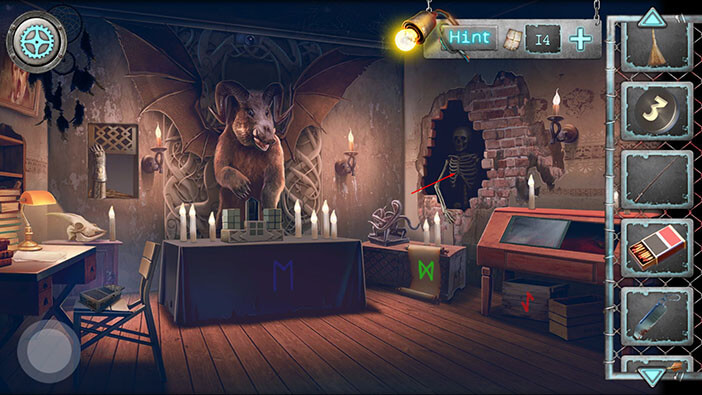
Select the “Bone saw” from the inventory and use it to cut off the skull. “Scull” will be added to your inventory.
Let’s go back to the display case.
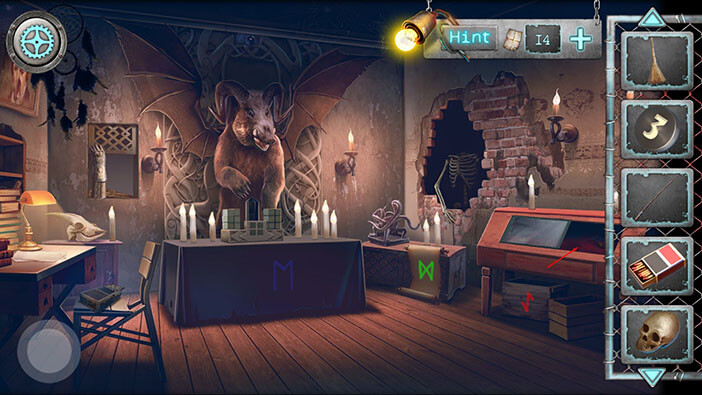
Select the “Scull” from the inventory and place it on the right side of the display case.
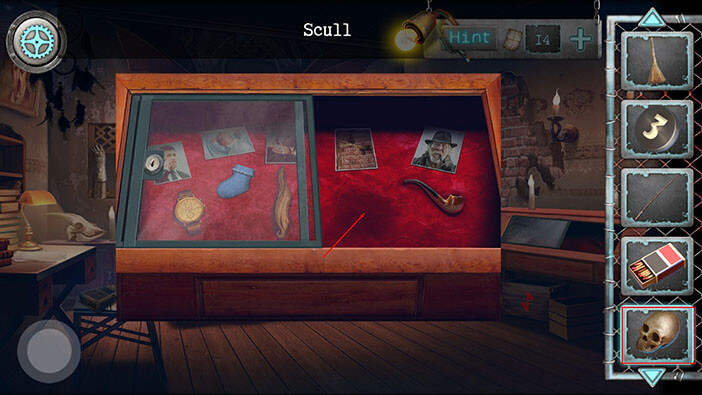
As soon as we dropped in the skull, the secret drawer below the display case opened. Tap on both items to pick them up and “Mirror shard I” and “Gramophone handle” will be added to your inventory.
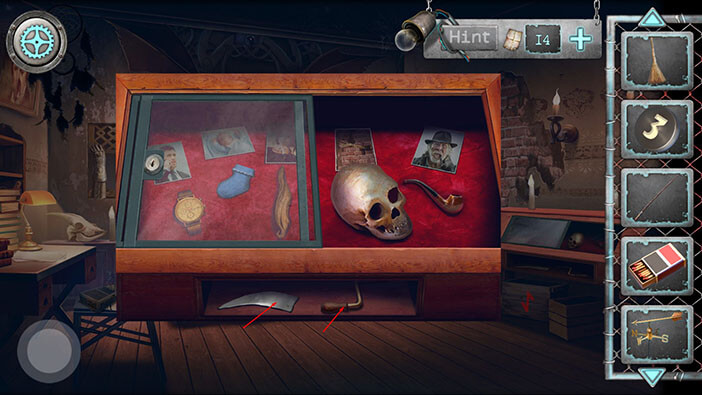
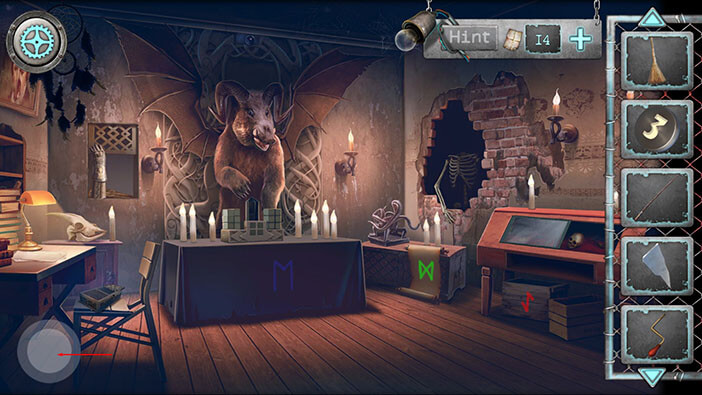
Well, with that, we explored this entire floor, and it is now time to get back to the elevator and visit the third floor (since we found the button for the third floor). To get back to the elevator, tap four times on the button in the lower-left corner.
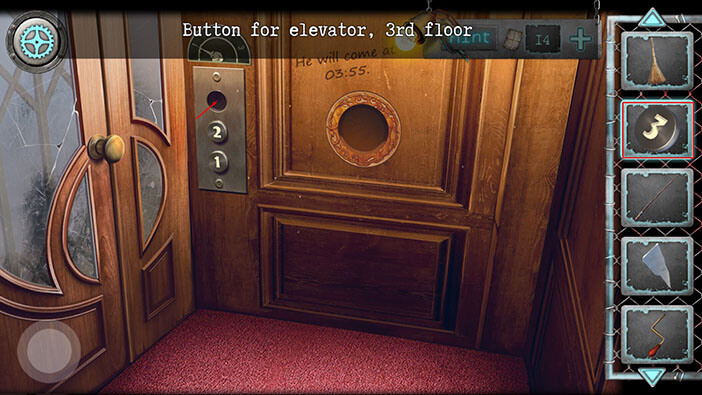
Once you get inside the elevator, select the “Button for elevator, 3rd floor” and tap on the empty slot to insert it.
After that, tap on the button to go to the third floor.
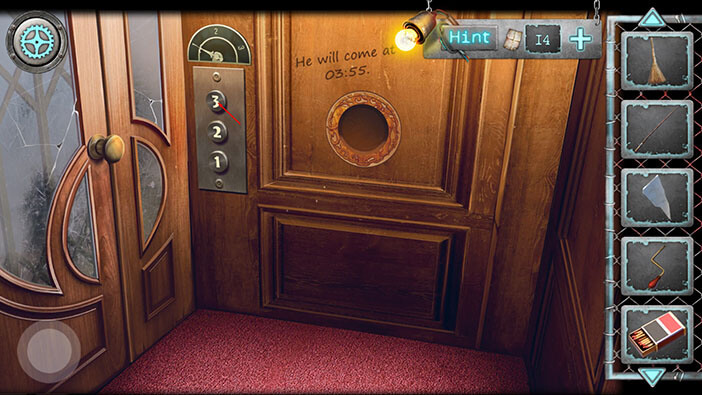
Well, it seems that we reached a trophy room. Let’s look around.
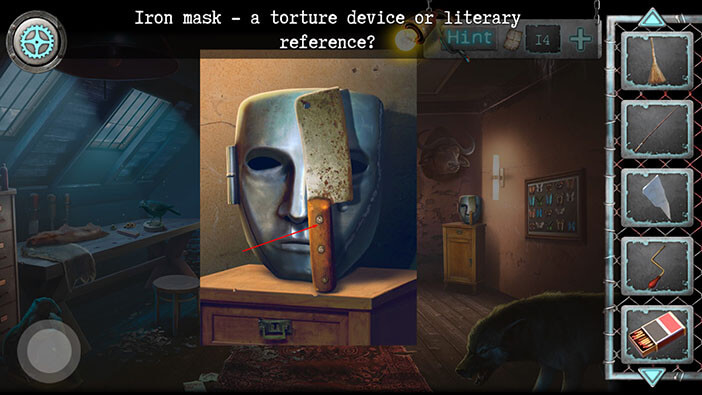
Tap on the mask on your right to take a closer look at it.
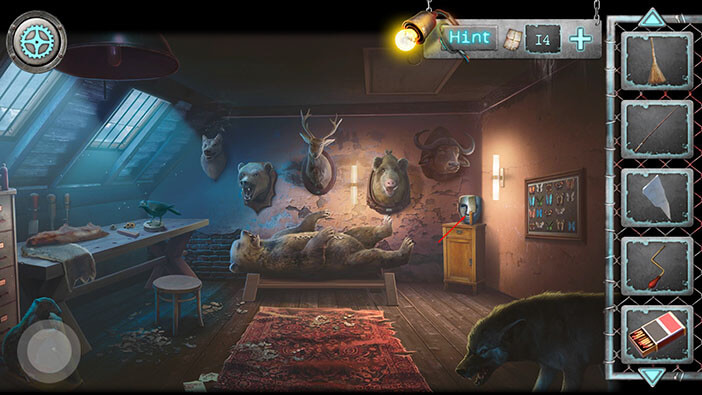
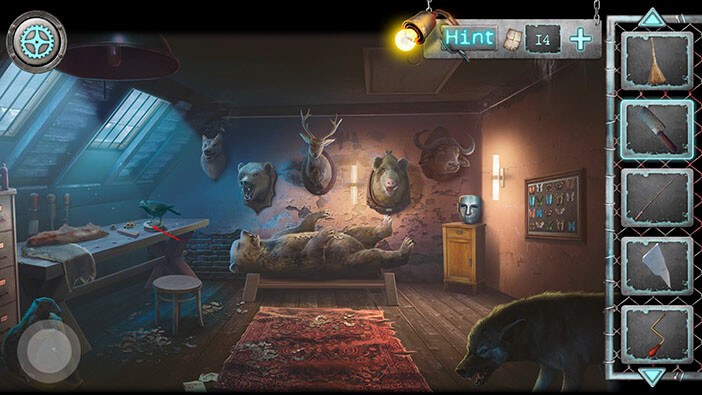
Tap on the “Rusty cleaver” to pick it.
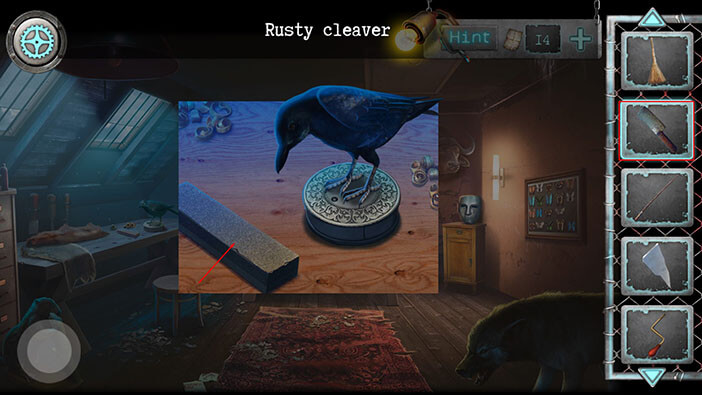
Next, tap on the crow trophy to take a closer look at it.
Here, we can also see a grinding stone. So, select the “Rusty cleaver” from the inventory and tap on the grinding stone to sharpen it. “Sharp cleaver” will be added to your inventory.
Next, let’s take a look at the stuffed bear.
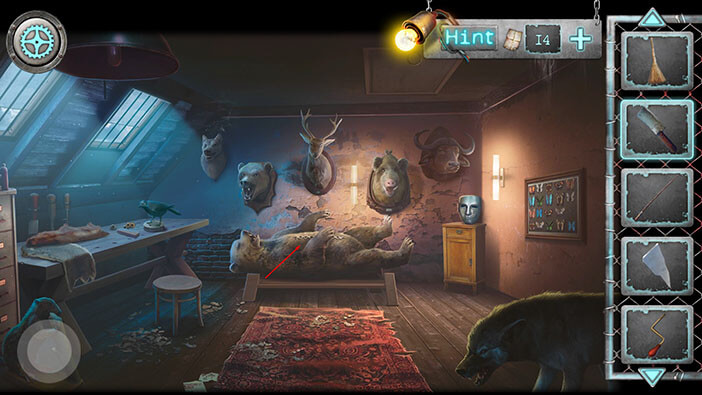
Select the “Sharp cleaver” from the inventory and use it to cut open the bear.
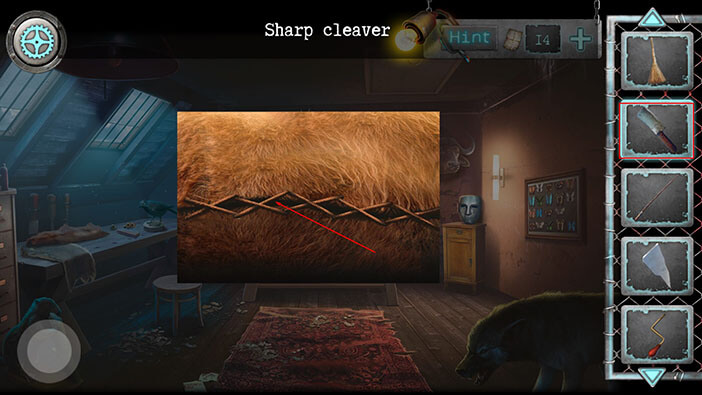
Tap to remove the first two patches of fur.
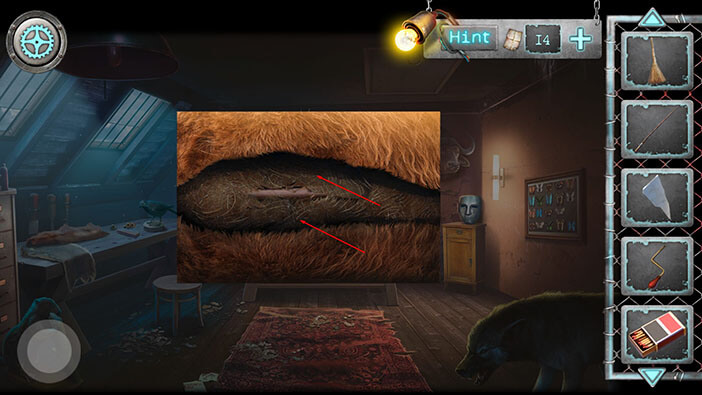
Beneath the fur, we discovered a fishing hook. Tap on it to pick it up and “Hook” will be added to your inventory.
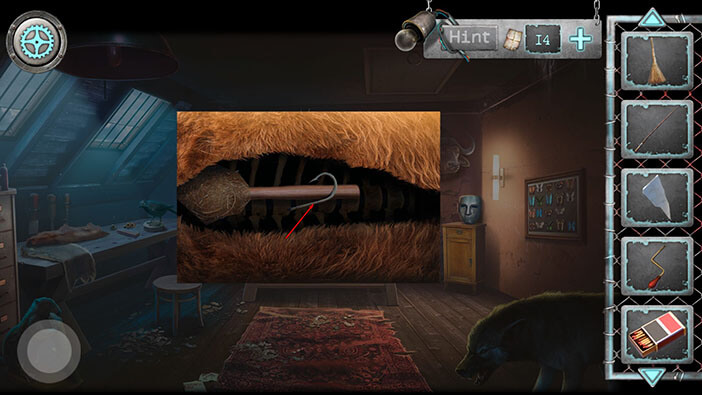
We can see that there’s something else inside the bear. Tap on the last patch of fur to remove it.
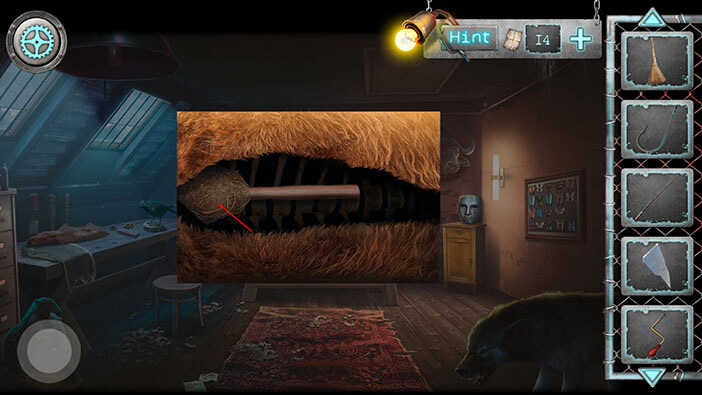
Well, we found a “Hammer with pry bar”. Tap on it to pick it up.
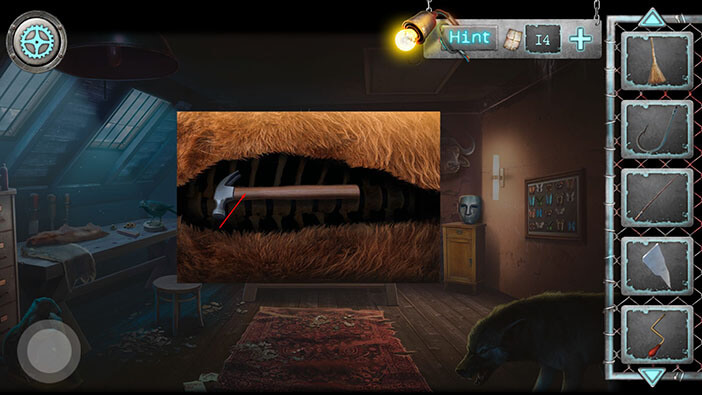
Next, select the “Fishing rod without hook” and combine it with a “Hook”. “Fishing rod with hook” will be added to your inventory.
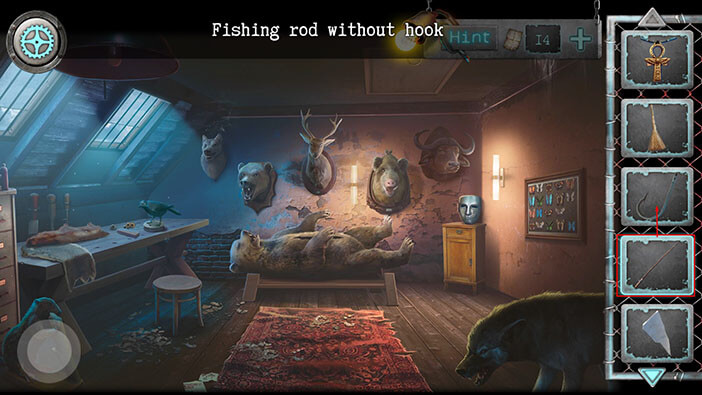
Now, we can go to the new area. Select the “Fishing rod without hook” and tap on the ceiling trap door.
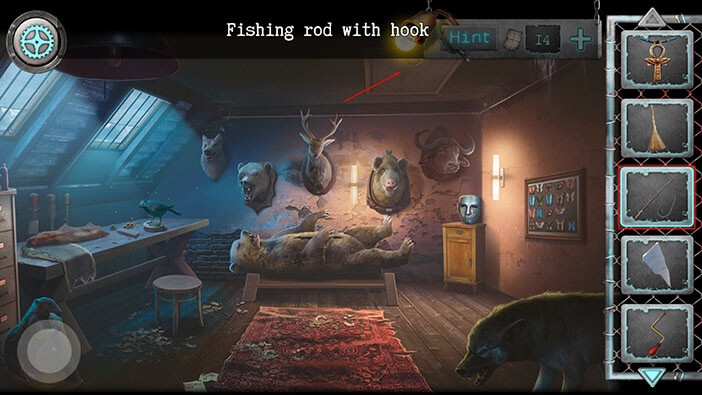
Our character will use the “Fishing rod without hook” to lower the ladders and we can now go to the attic.
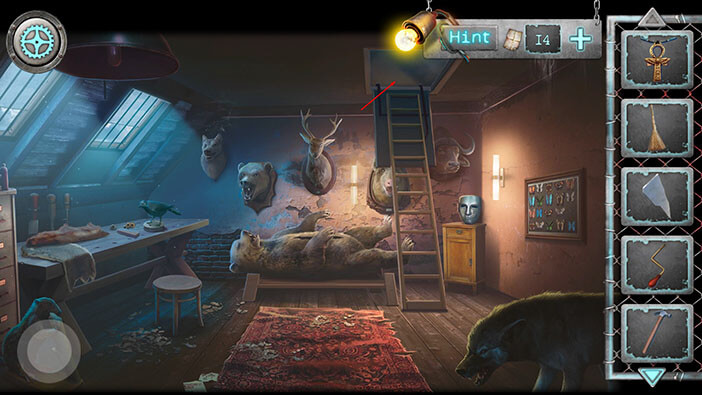
When you climb to the attic, you will see a transparent, green ghost, and it is standing in some kind of a magic circle. Well, I think that we will have to find a way to get rid of this ghost.
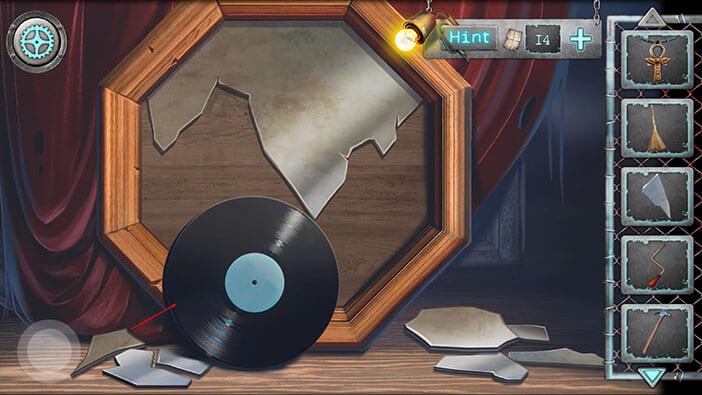
But, before we start fiddling with the ghost, let’s explore this room. Tap on the broken mirror on the left to take a closer look at it.
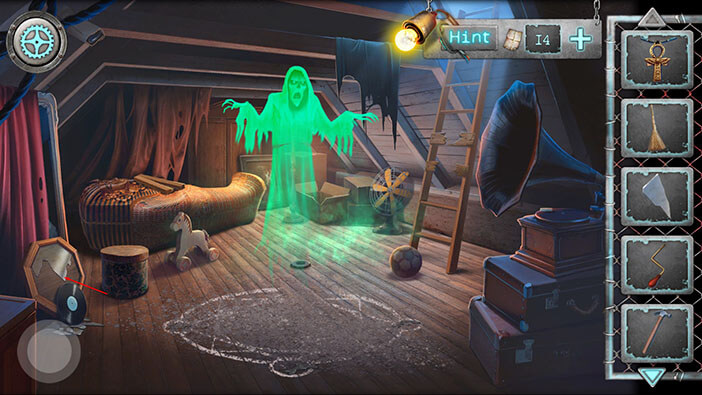
Tap on the “Vinyl record” to pick it up.
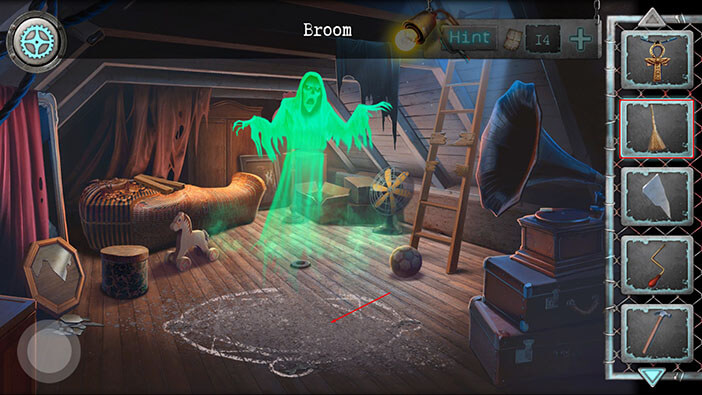
Next, select the “Broom” from the inventory and use it to clean up the magic circle.
Next, tap on the gramophone on your right to take a closer look at it.
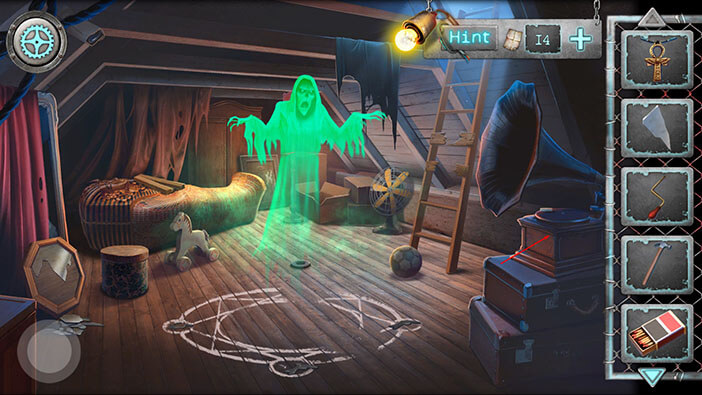
Tap on the small, white item to pick it up and “Chalk” will be added to your inventory.
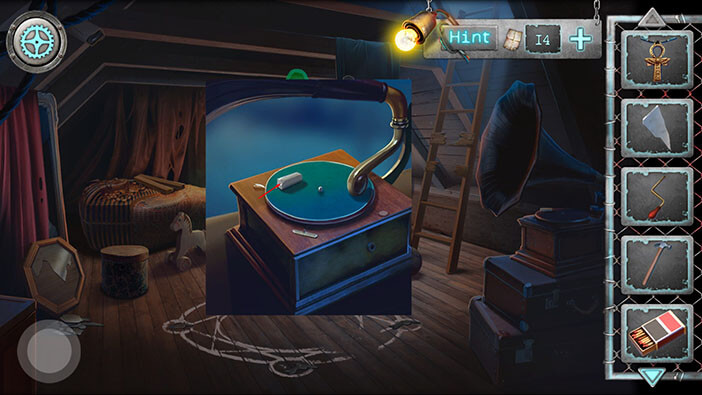
Next, select the “Vinyl record” from the inventory and insert it into the slot on the gramophone.
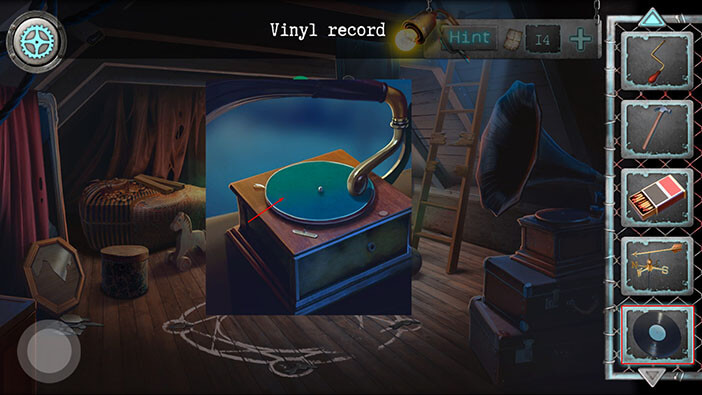
After that, select the “Gramophone handle” from the inventory and insert it into the slot on the right side of the gramophone.
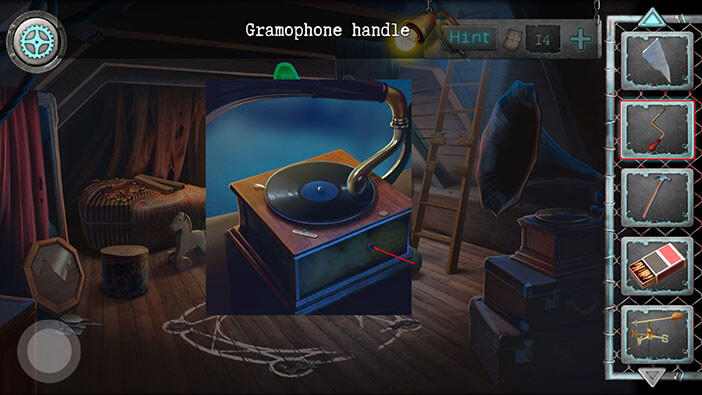
Finally, tap on the handle to play the gramophone.
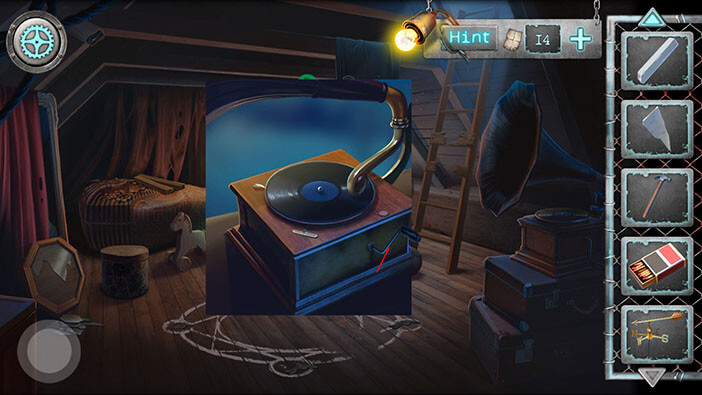
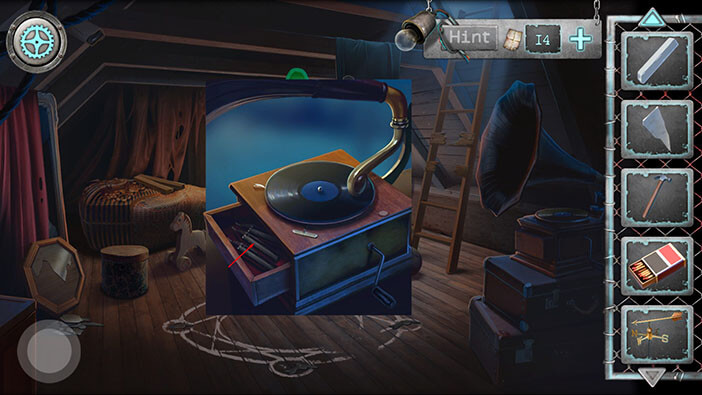
After some disturbing music, the gramophone “drawer” will open. Tap on the black items inside the drawer to pick them up and “Black candles” will be added to your inventory.
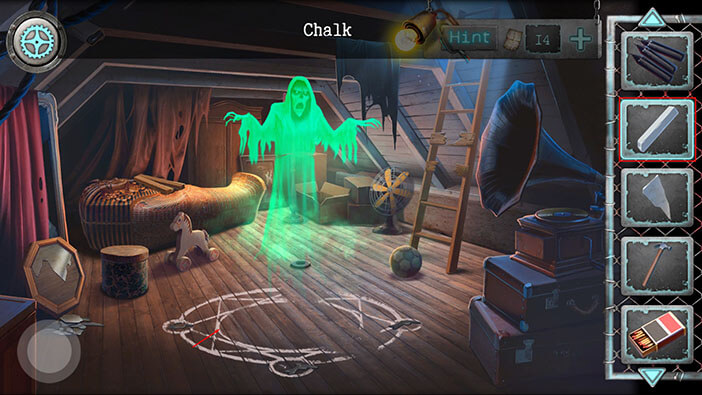
Let’s turn our attention to the magic circle and the ghost. If we take a closer look at the magic circle, we will notice that some of the lines have faded away. So, select the “Chalk” from the inventory and use it to draw the missing lines.
Well, if we now look at the magic circle, we will notice that there are three smaller circles at the edge of the bigger circles. We can also see that the black wax has melted inside these circles. So, let’s select the “Black candles” from the inventory and place them inside the circles. Hopefully, nothing bad will happen by completing this ritual.
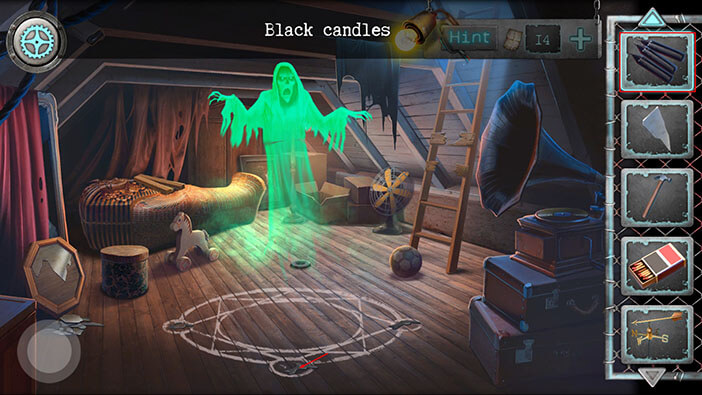
Next, select the “Matchbox” from the inventory and use the matches to light the candles, and finish the ritual.
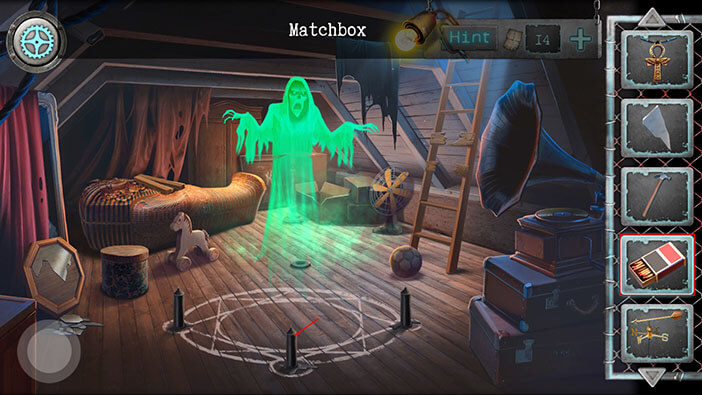
Well, somehow, by completing the ritual, we turned on the fan, and it blew away the ghost. Ahem, I thought that all kinds of crazy things could happen by completing the ritual, by could never guess that our character would turn on the fan by completing it… Very, very, strange.
Anyway, we now have access to the other half of the room, so let’s tap on the ladder to take a closer look at it.
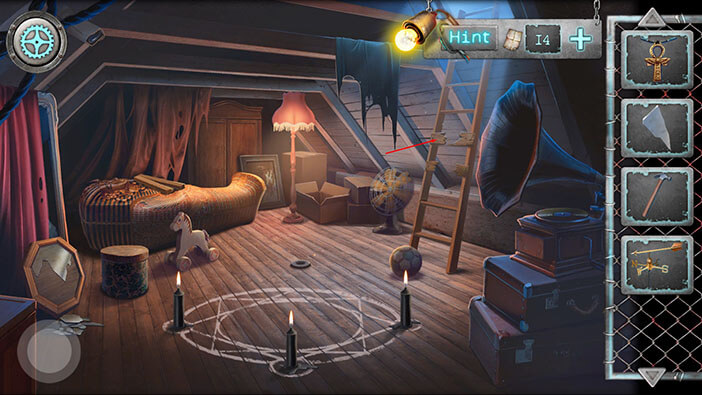
Tap on the key to pick it up and “Silver key” will be added to your inventory.
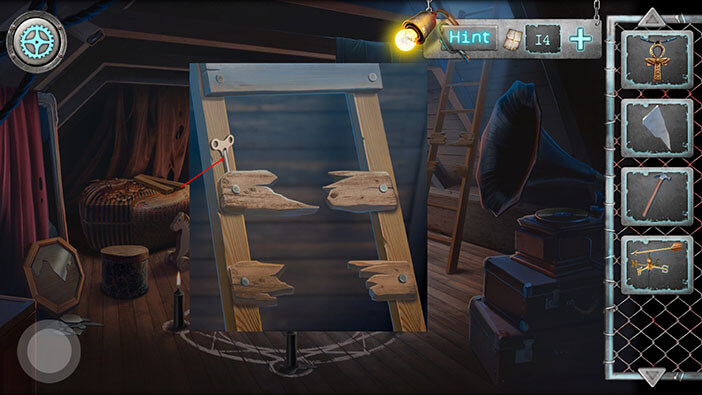
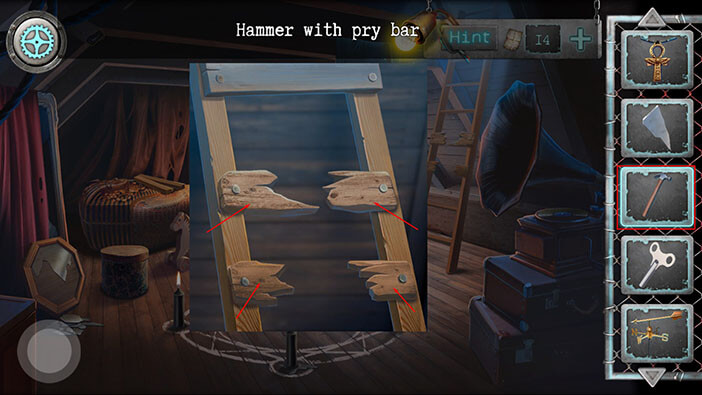
If we take a closer look at the ladder, we will notice that two of the steps are broken. So, select the “Claw Hammer” from the inventory and use it to pull out the nails and remove the broken steps.
Next, let’s take a closer look at the sarcophagus on the left.
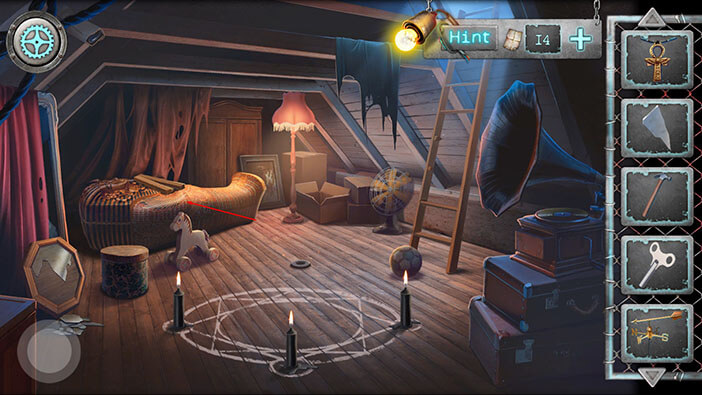
Tap on the wooden “Planks” to pick them.
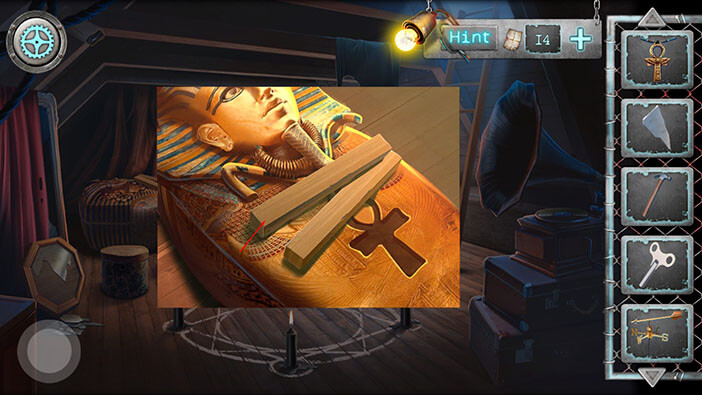
Well, if we take a closer look at the sarcophagus we will notice a slot whose shape matches the pendant that we found earlier. So, select the “Pendant” from the inventory and tap on the slot to insert it.
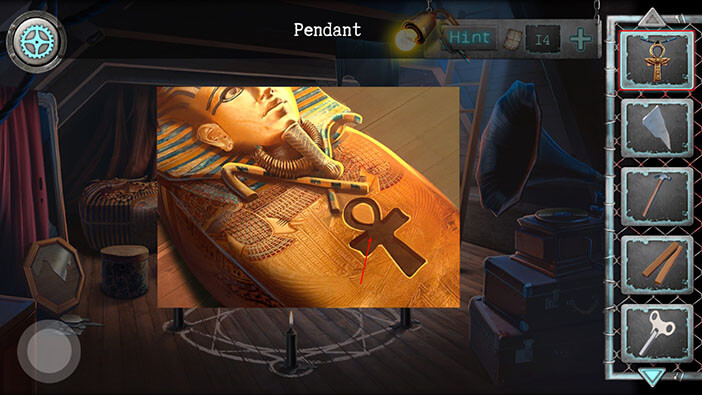
By, inserting the pendant, we managed to open the sarcophagus. Tap on the item inside to pick it up and a “Plasma cutter” will be added to your inventory.
Ok, we should now go back to the previous room. Tap on the button in the lower-left corner.
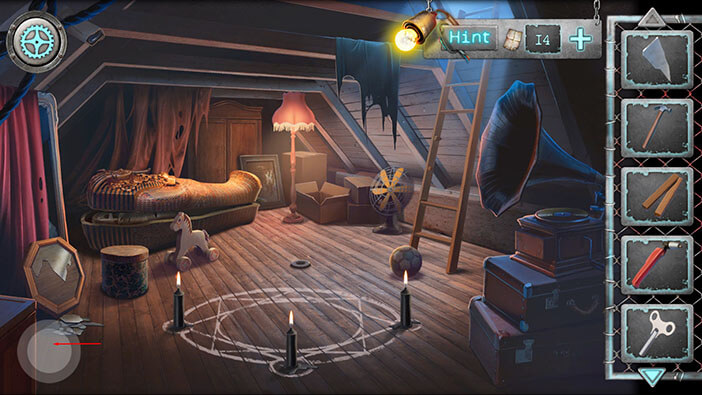
Let’s take a closer look at the iron mask, once more.
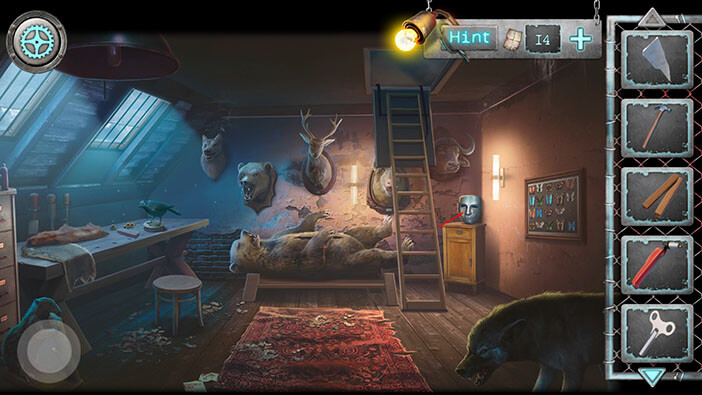
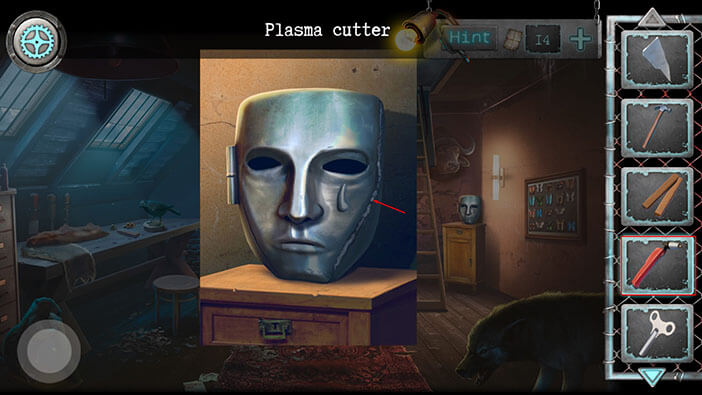
Select the “Plasma Cutter” from the inventory and tap on the iron mask to open it.
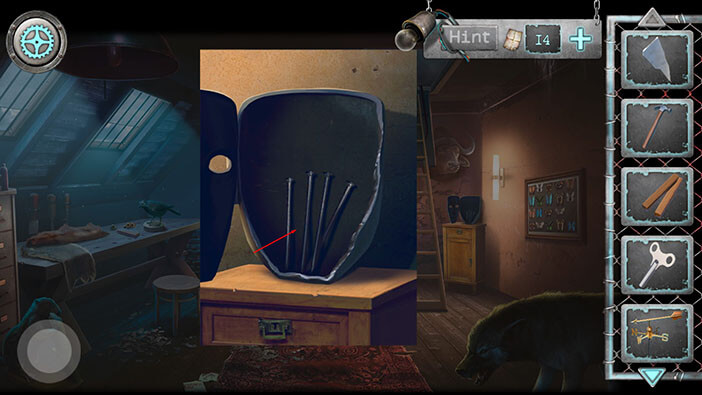
Well, it looks like we found some nails inside the mask. Tap on the “Nails” to pick them up.
Ok, since we have the nails, we should now go back to repair the ladder.
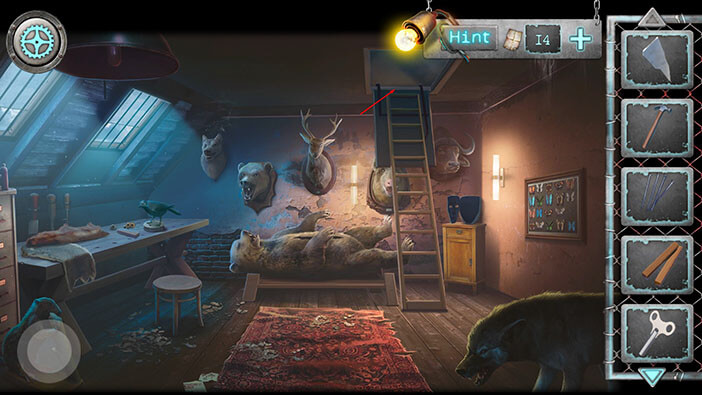
Tap on the ladder to take a closer look.
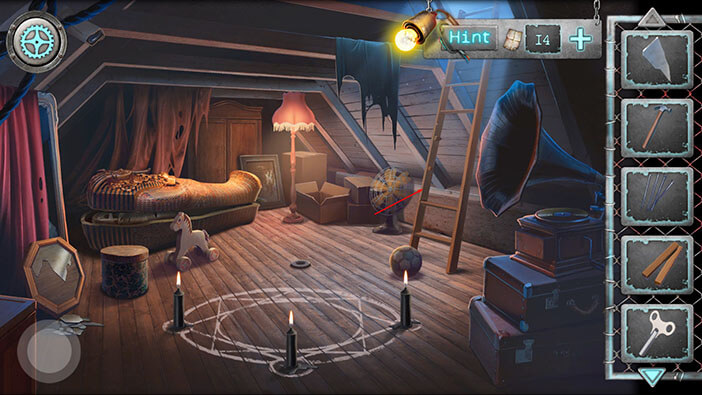
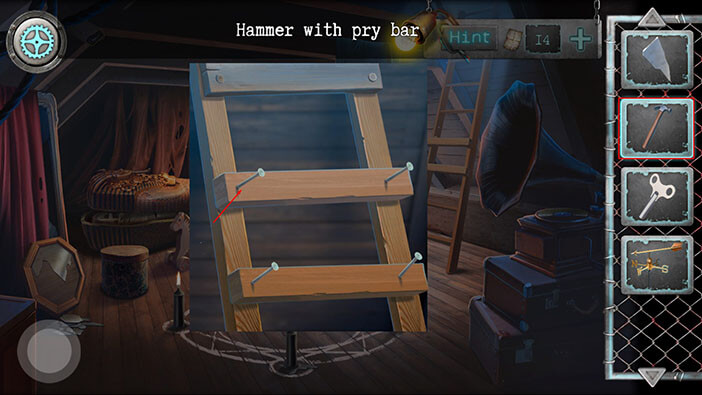
Let’s repair the ladder. First, select the “Planks” from the inventory and tap on the ladder. Our character will use the “Planks” to replace the broken steps.
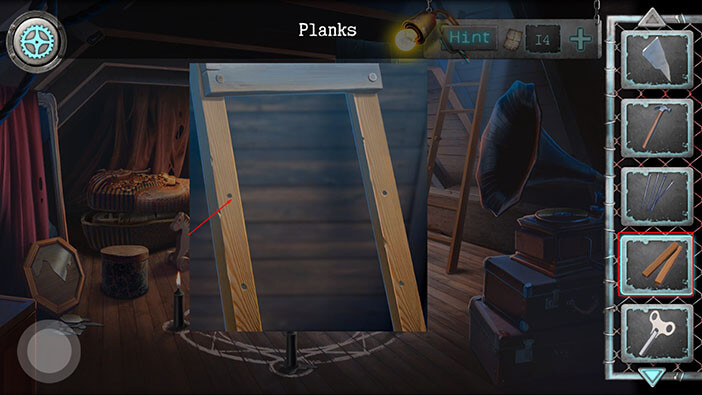
Next, select the “Nails” from the inventory and place them on the planks.
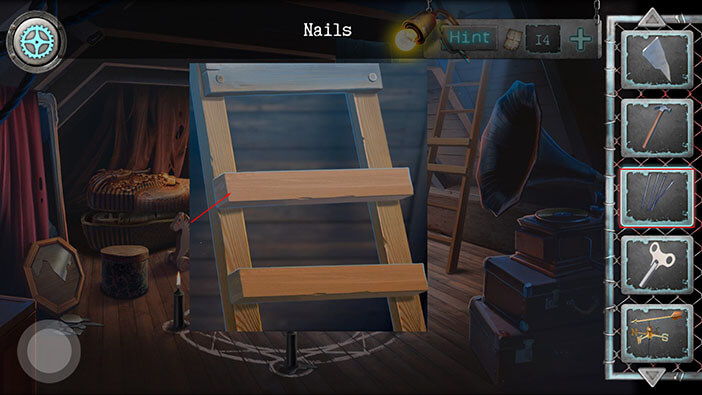
Finally, select the “Hammer with pry bar” from the inventory and use it to hammer down the nails, and repair the ladder.
Ok, we should now have access to the roof. Let’s check it out.
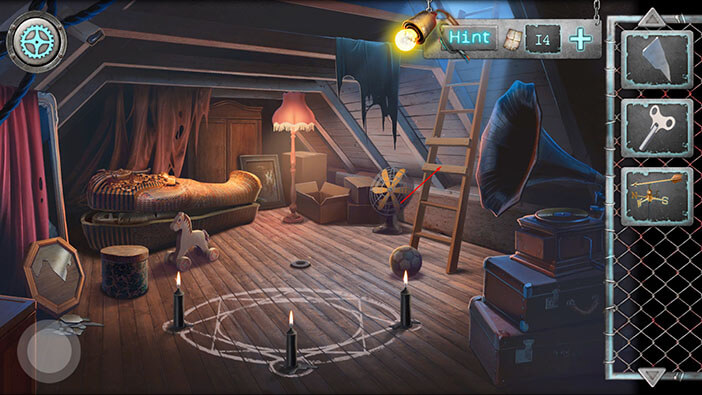
It seems that our character intends to escape from this cursed place by descending from the roof. A bit risky, but generally, a good plan. Let’s explore the roof.
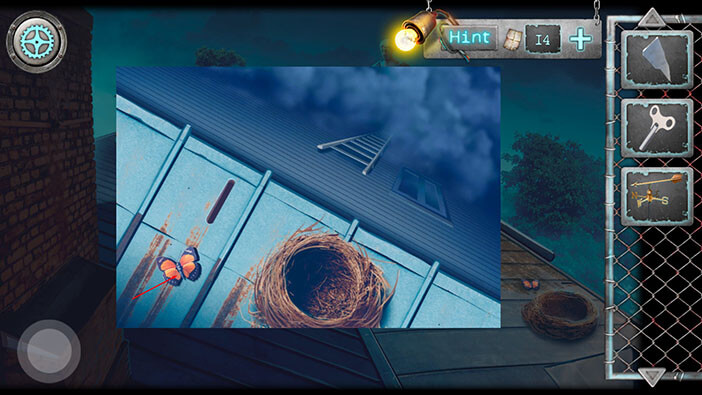
Tap on the bird’s nest on the right to take a closer look at it.
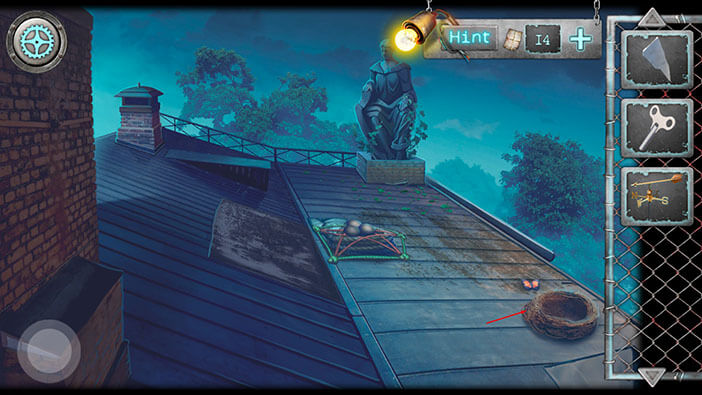
The nest is empty, but we can see a butterfly, next to the nest. Tap on the “Butterfly” to pick it up. In the first room on the third floor (the room with animal trophies) we also saw a butterfly collection on the right wall. However, we should thoroughly explore the roof before we go back.
Also, we can see that the ladder is very close to the roof, so if our character could find a way to reach it, he could safely reach the ground and make his escape…
Next, let’s take a closer look at the rope and the eggs in the middle of the roof.
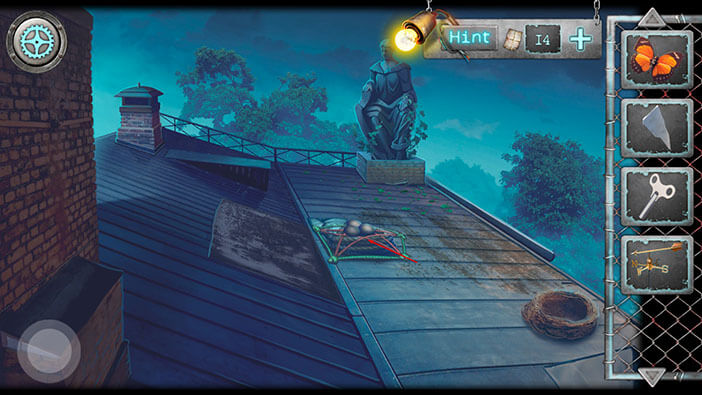
Well, in order to get to the rope, we first have to move the eggs, and our character can’t do that, for some reason. So, let’s tap on the “Dirty neckerchief” to pick it up.
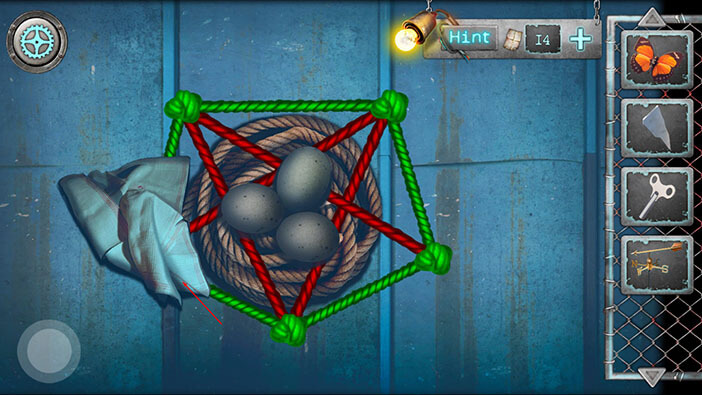
Next, let’s take a closer look at the chimney on the left.
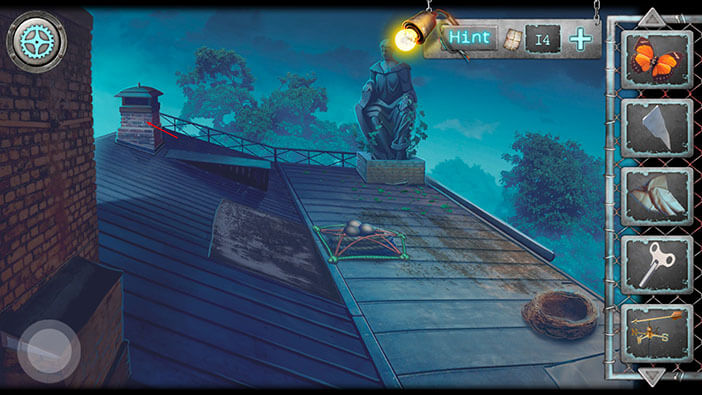
Select the “Vane” from the inventory and tap on top of the chimney to attach it.
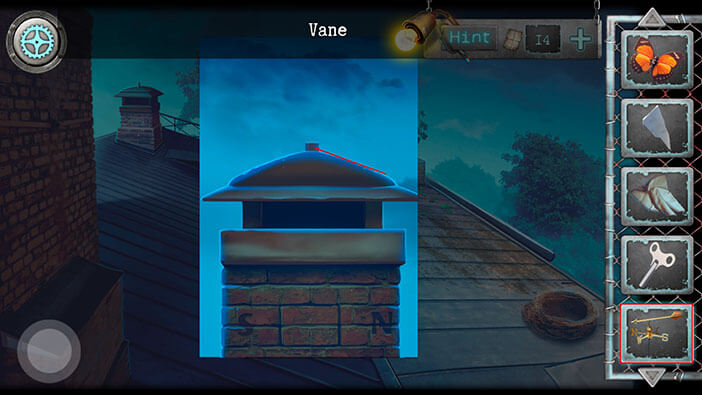
If you take a closer look at the chimney, you will notice the letter “N” on the right side and the letter “S” on the left side. However, on the vane, we have the letter “E” (east) on the right side and the letter “W” (west) on the left side.
So, let’s tap on the vane to rotate it to the correct position.
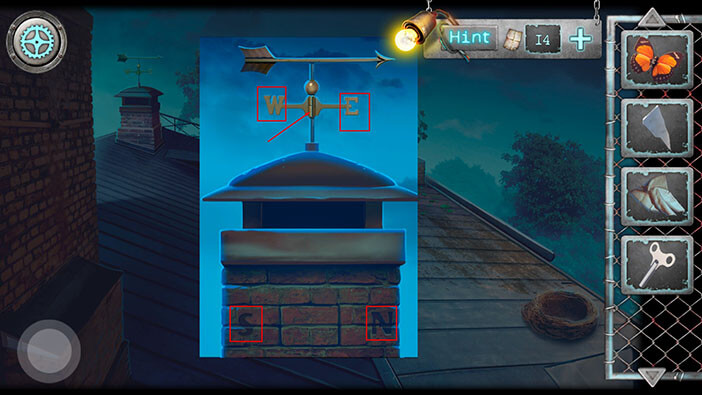
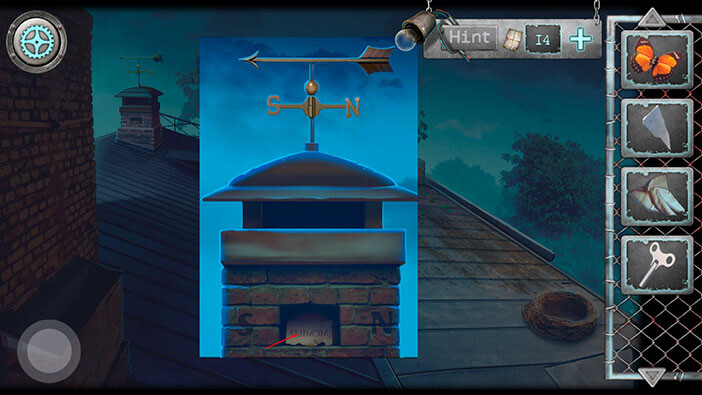
After we rotated the vane into the correct position, one of the bricks from the chimney fell out revealing a secret compartment. Tap on the note inside the secret compartment to pick it up and “Latin inscription” will be added to your inventory.
Finally, let’s take a closer look at the statue on the right.
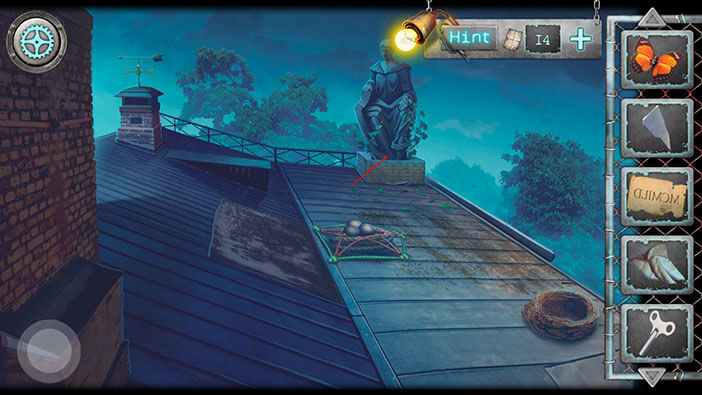
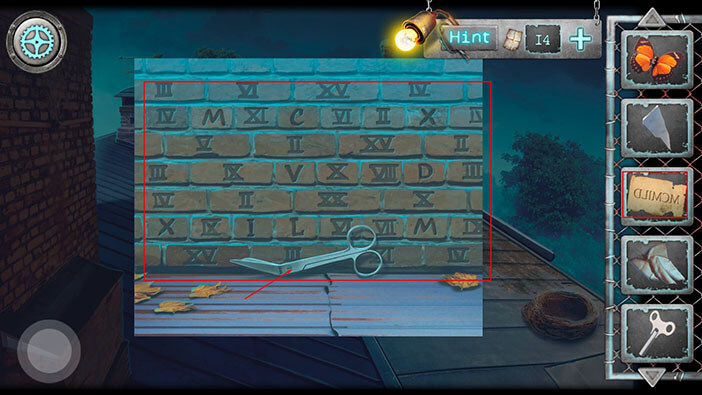
Tap on the “Medical scissors” to pick it up. You will also notice that the bricks below the statue are marked with Roman numerals. However, our “Latin inscription” is backward, so we will have to find a way to fix it, before solving this puzzle.
Ok, we found some new items, so let’s go back to the previous room (the attic). Tap on the button in the lower-left corner of the screen.
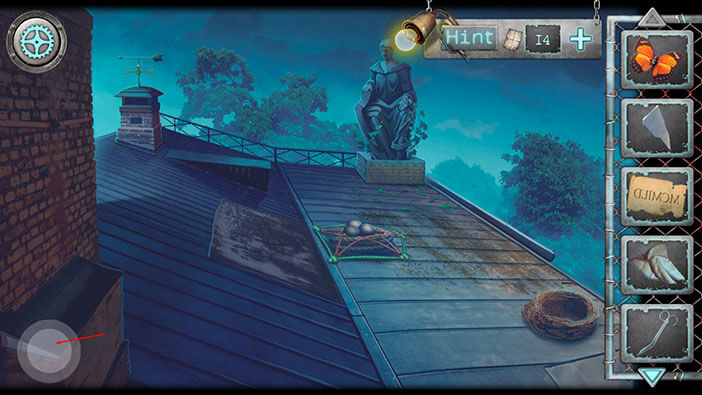
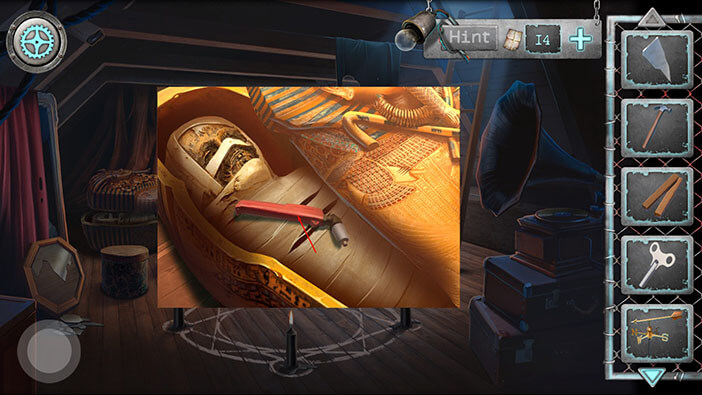
Let’s take another look at the sarcophagus.
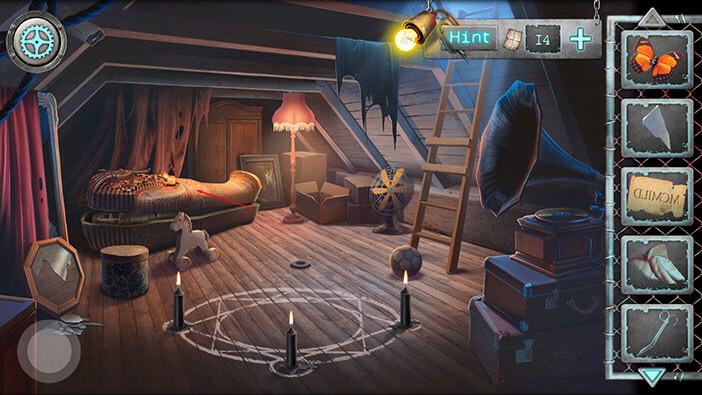
Select the “Medical scissors” from the inventory and tap on the mummy to cut open the bandages.
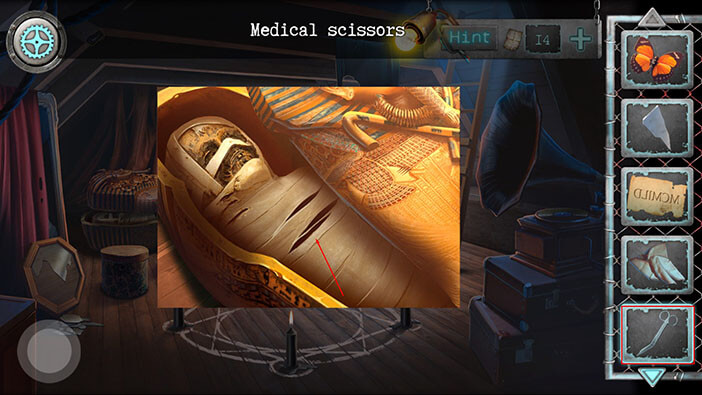
Tap on the glass shard to pick it up and “Mirror shard 3” will be added to your inventory.
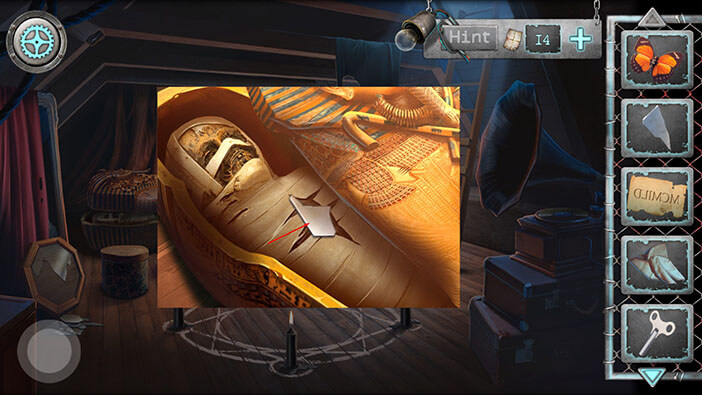
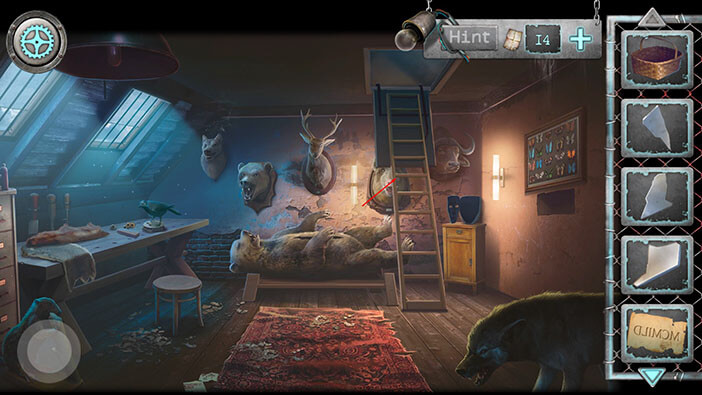
Ok, now let’s go back to the first room on the third floor (room with animal trophies). Tap on the button in the lower-left corner of the screen.
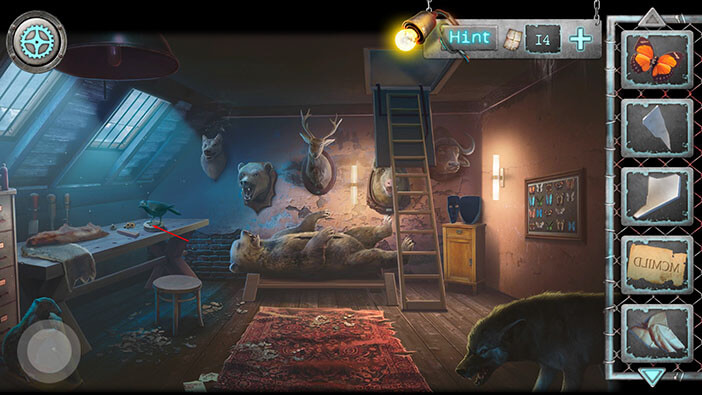
Tap on the crow to take another look at it.
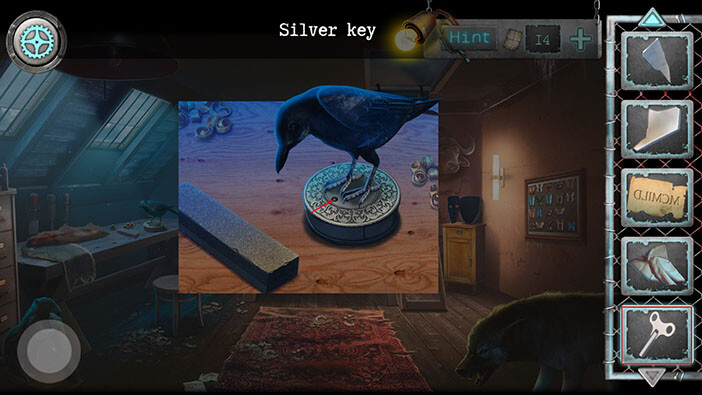
Select the “Silver key” from the inventory and tap on the keyhole to start the music box.
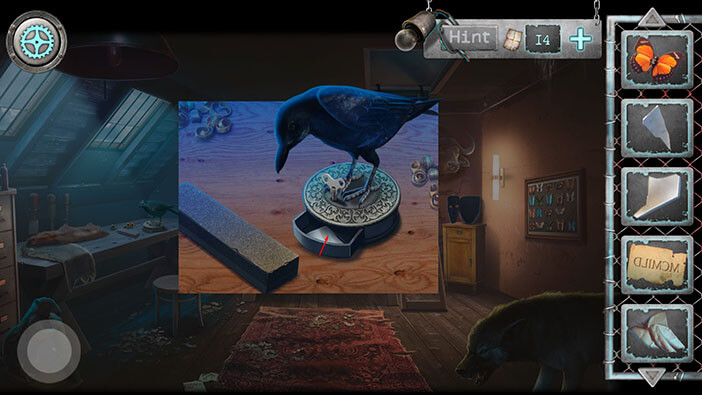
Well, we managed to open the music box. Tap on the glass shard to pick it up and “Mirror shard 2” will be added to your inventory.
Ok, now let’s take a closer look at the butterfly collection on the wall on our right.
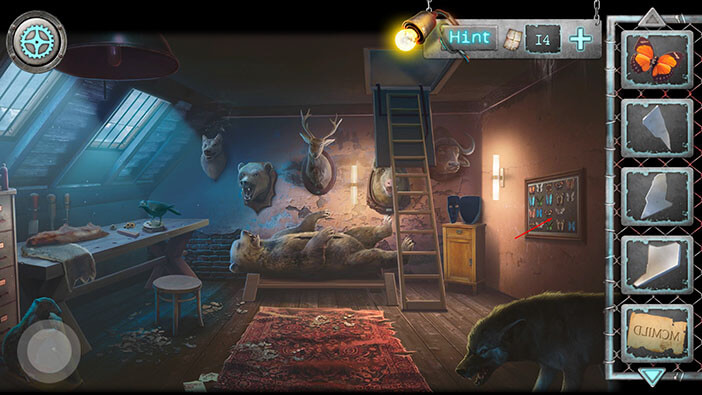
We can see that one butterfly is missing. So, select the “Butterfly” from the inventory and tap on the empty spot.
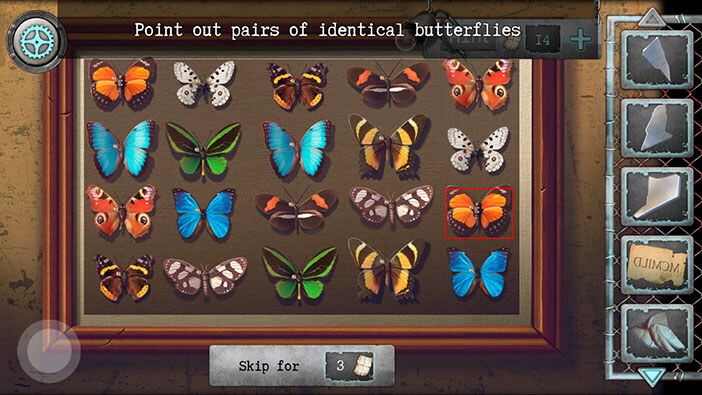
The collection is now complete, and our next task is to find the matching pairs of butterflies. We will do this in several steps, pair by pair. Let’s begin.
Step 1
Tap on the first (left to right) butterfly in the first (top to bottom) row to select it. After that, tap on the fifth butterfly in the third row.
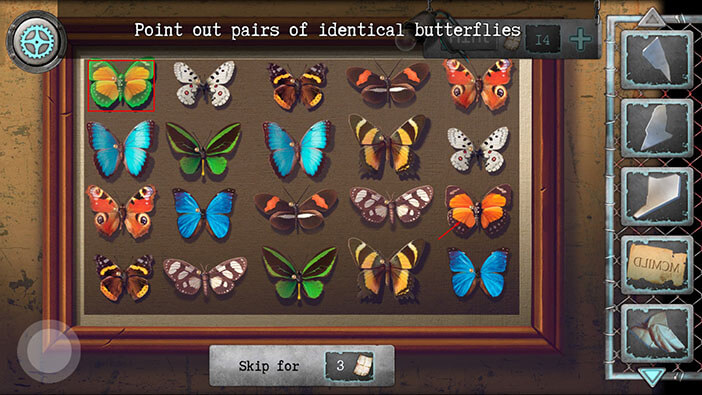
Step 2
Tap on the second butterfly in the first row to select it. After that, tap on the fifth butterfly in the second row.
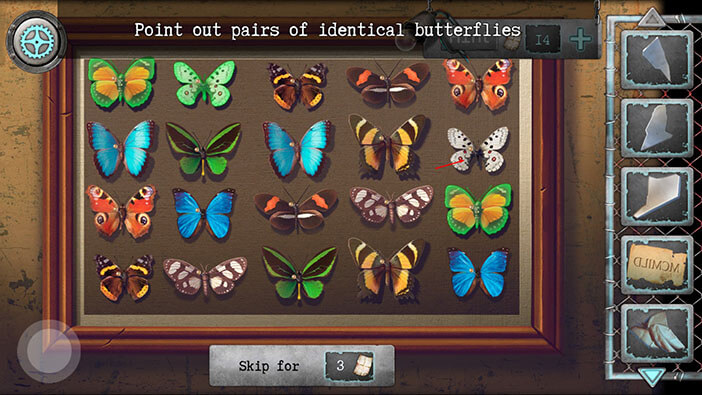
Step 3
Tap on the third butterfly in the first row to select it. After that, tap on the first butterfly in the fourth row.
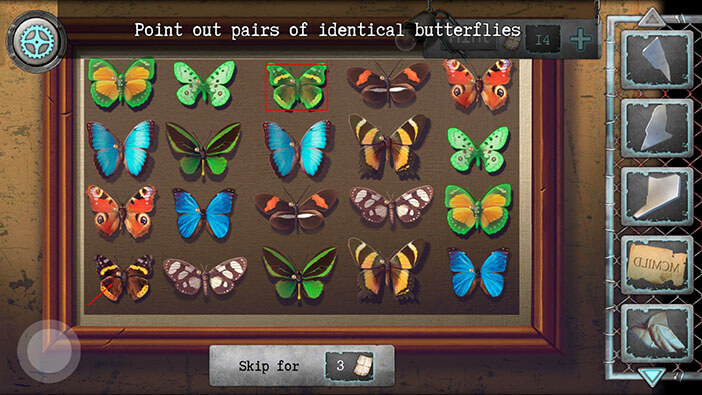
Step 4
Tap on the fourth butterfly in the first row to select it. After that, tap on the third butterfly in the third row.
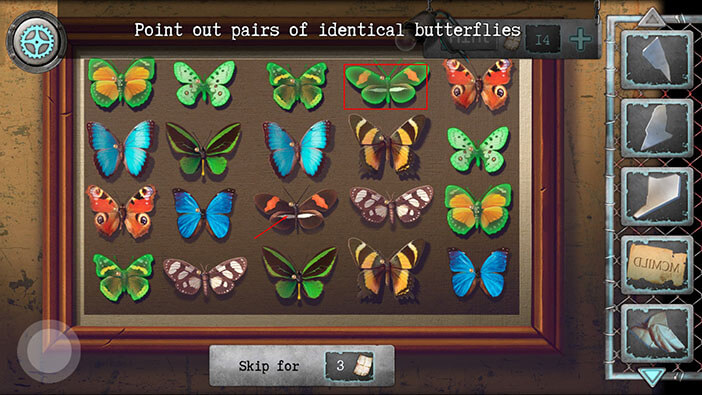
Step 5
Tap on the fifth butterfly in the first row to select it. After that, tap on the first butterfly in the third row.
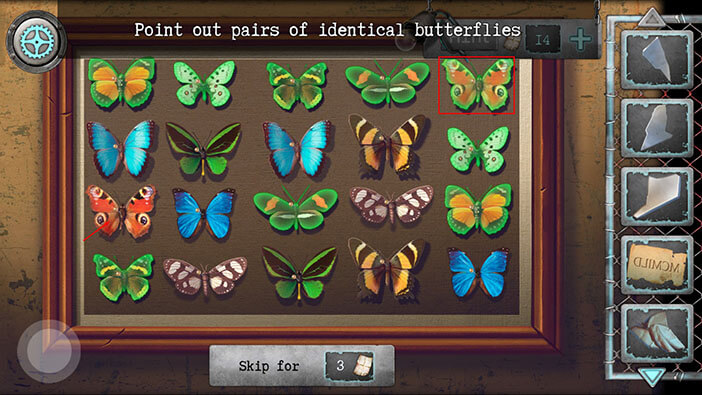
Step 6
Tap on the first butterfly in the second row to select it. After that, tap on the third butterfly in the second row.
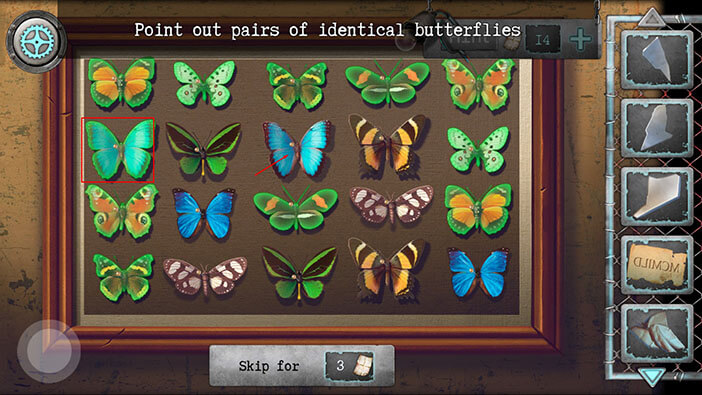
Step 7
Tap on the second butterfly in the second row to select it. After that, tap on the third butterfly in the fourth row.
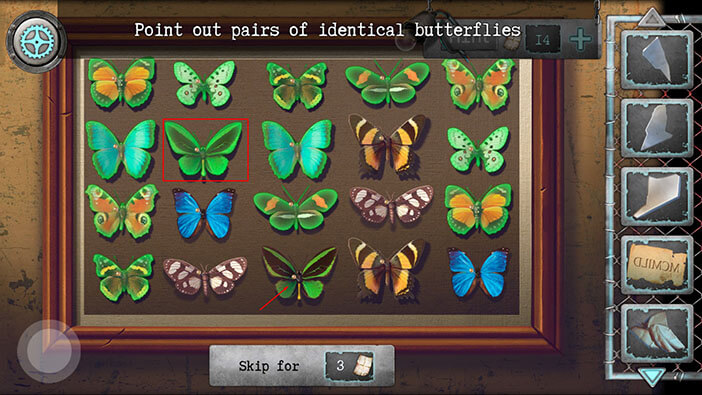
Step 8
Tap on the fourth butterfly in the second row to select it. After that, tap on the fourth butterfly in the fourth row.
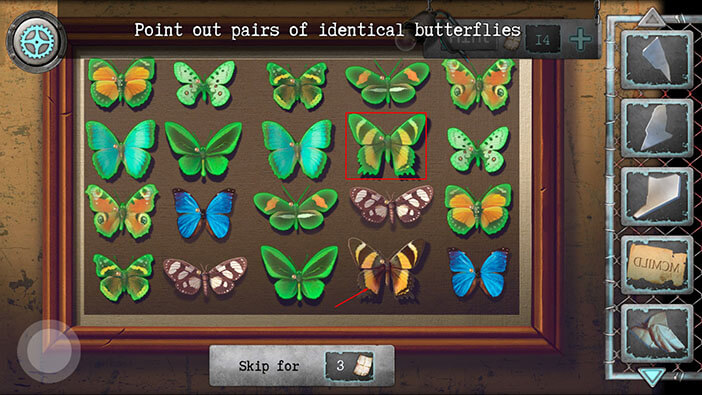
Step 9
Tap on the second butterfly in the third row to select it. After that, tap on the fifth butterfly in the fourth row.
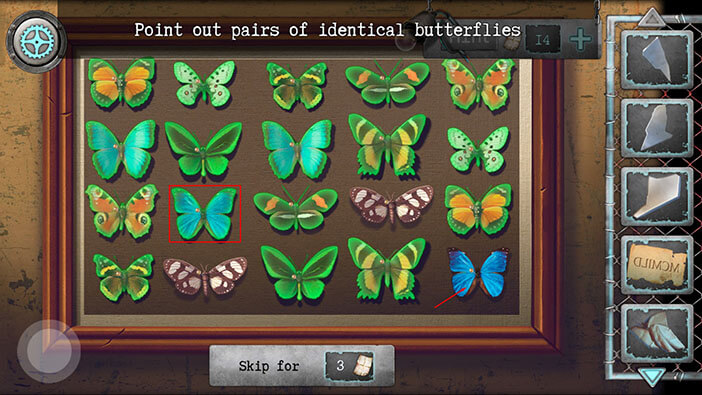
Step 10
Finally, tap on the fourth butterfly in the third row to select it. After that, tap on the second butterfly in the fourth row. With that, we found all matching pairs.
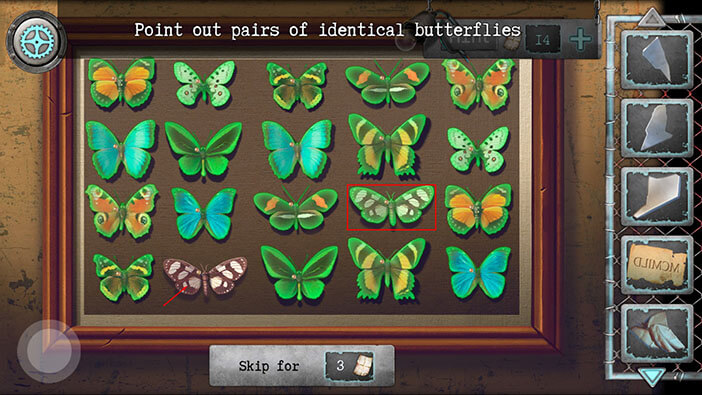
By finding all matching pairs of butterflies, we managed to open a secret compartment. Tap on the “Basket” to pick it up.
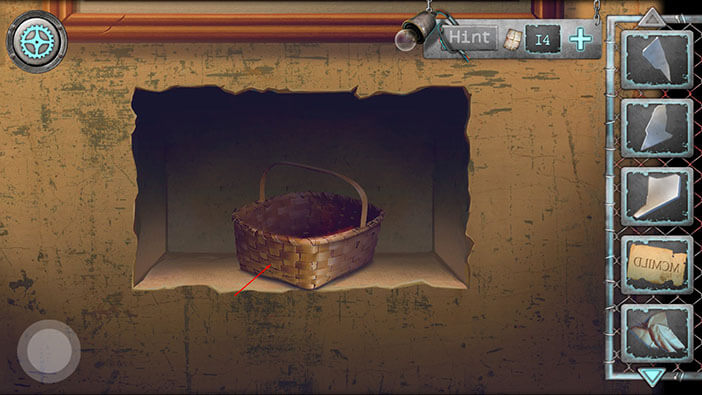
Let’s go back to the attic, because, now, we should have all mirror shards.
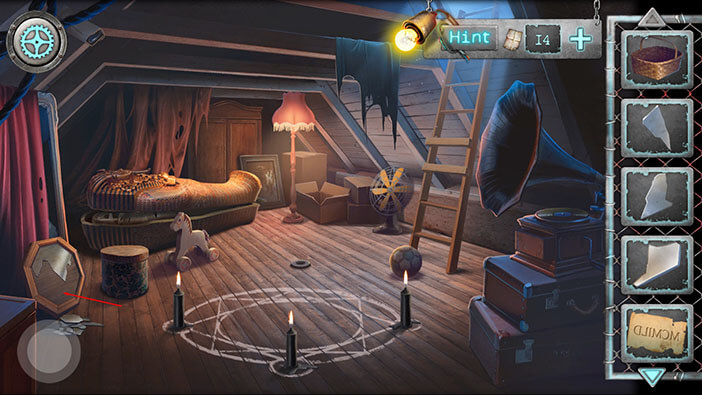
Tap on the mirror on the left to take a closer look at it.
Select the “Mirror Shard 1” “Mirror Shard 2” and “Mirror Shard 3” from the inventory and tap below mirror to put them next to the other shards.
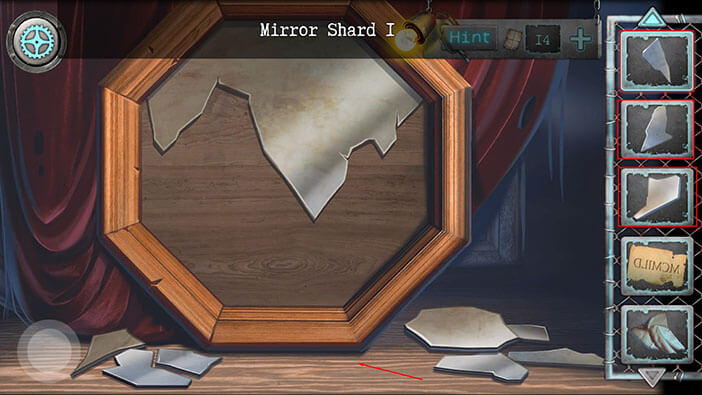
Ok, now, we should assemble the mirror by placing the mirror shards in the correct position. We will do this in several steps. Let’s begin.
Step 1
We will start by placing the missing shard on the far right.
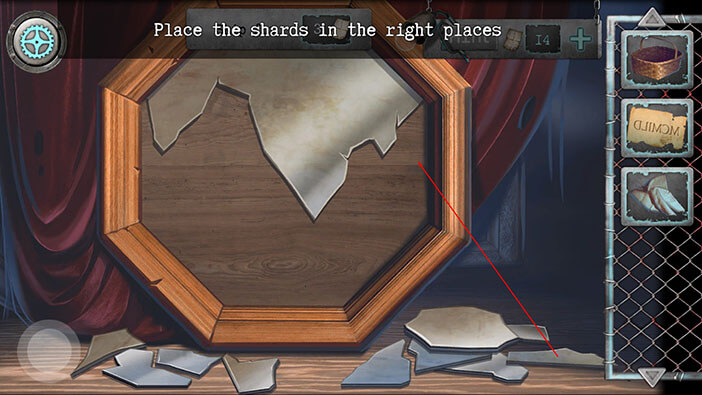
Step 2
Next, we will place the shard that fits in the lower-left corner.
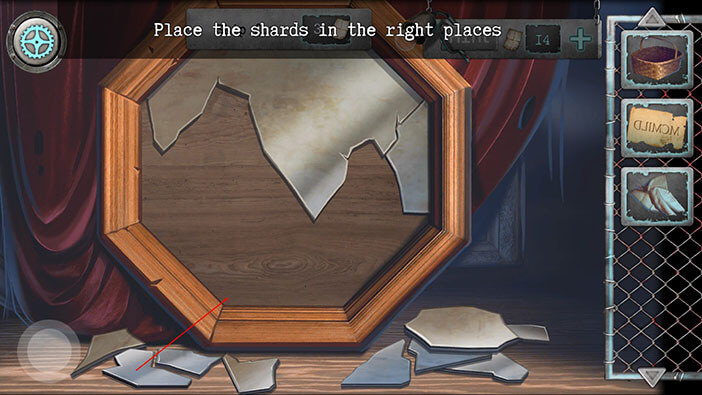
Step 3
Next, we will place the missing shard on the far left.
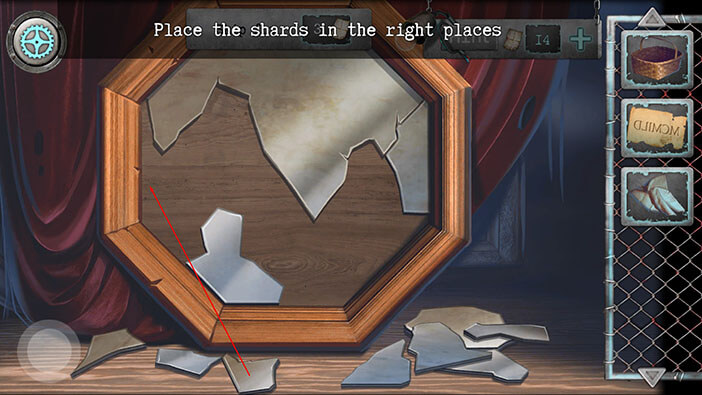
Step 4
Next, we will place the shard that fits in the lower right corner.
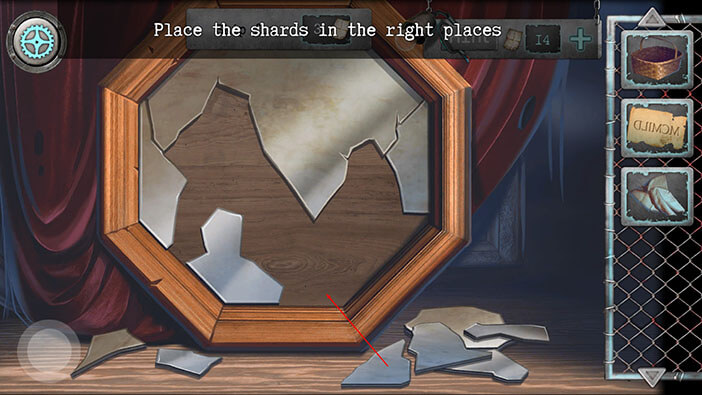
Step 5
Next, we will complete the right side of the mirror by placing the last missing shard.
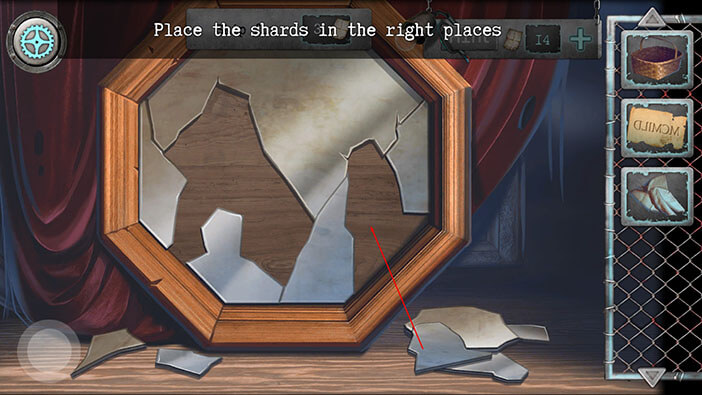
Step 6
Next, we will complete the left side of the mirror by filling the hole between the shard on the left and the shard in the lower-left corner.
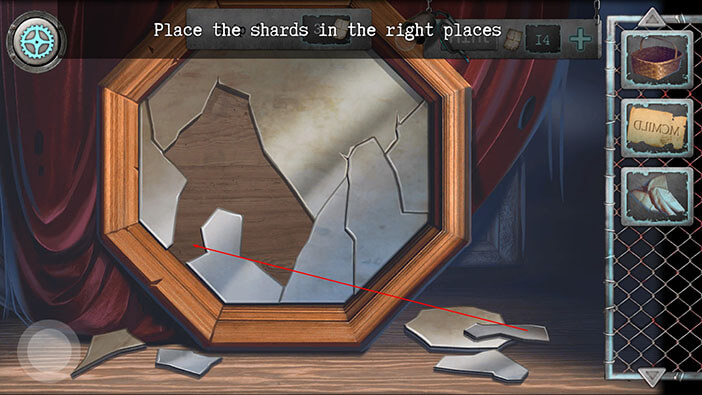
Step 7
Next, we will place the missing shard in the upper left corner.
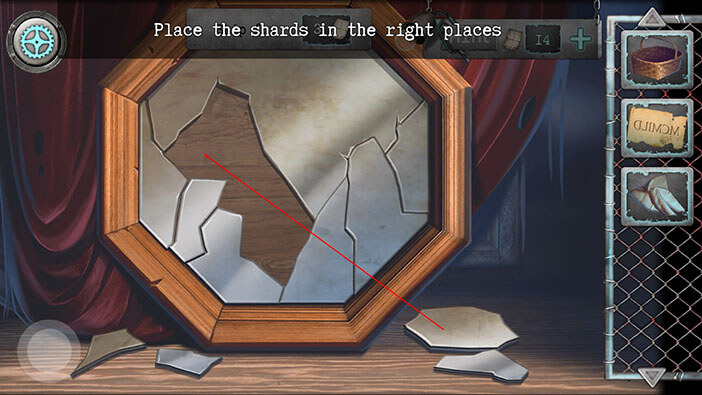
Step 8
Next, we will place the shard that will fill the hole in the upper part of the mirror.
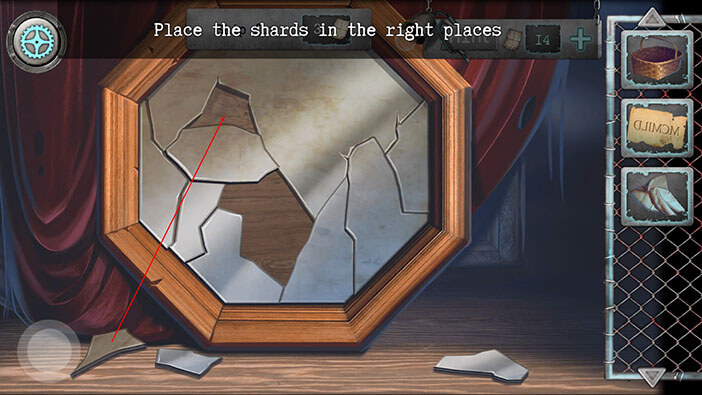
Step 9
Finally, we will use the last two shards to fill in the hole in the middle of the mirror.
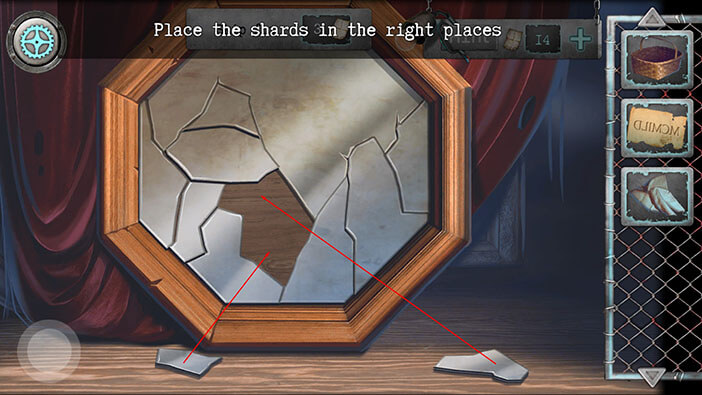
Well, we managed to assemble the mirror. So, let’s select the “Latin inscription” and tap on the mirror.
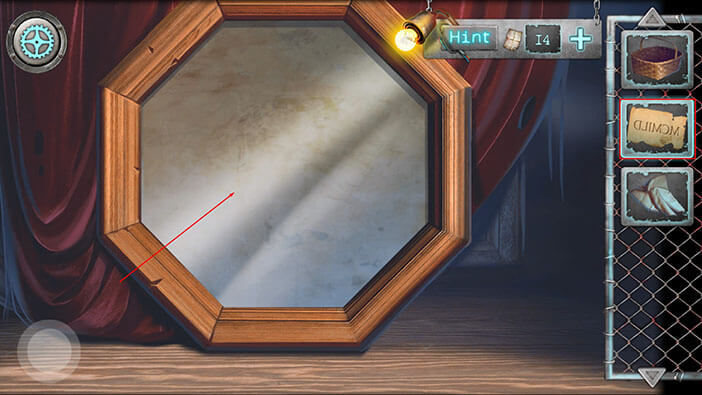
The Roman numerals are no longer inverted, so let’s go back to the roof.
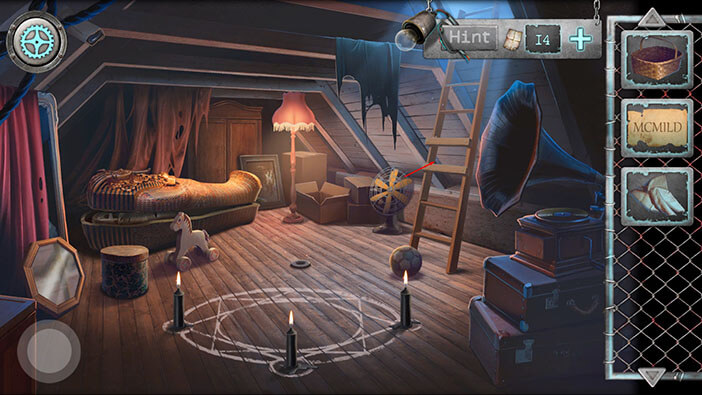
Tap on the statue to take a closer look at it.
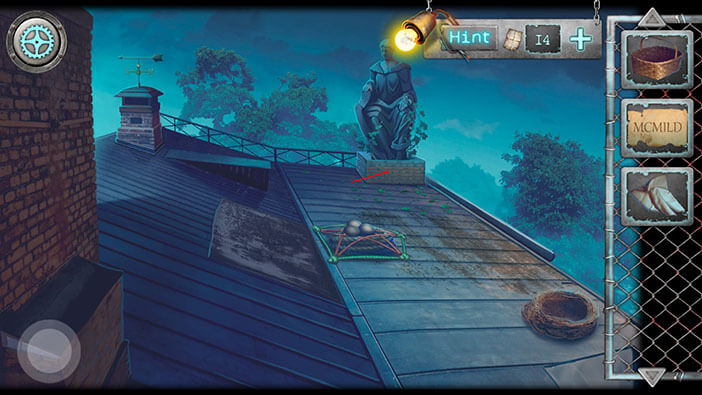
Our character will automatically stick the “Latin inscription” in the upper right. Now, we just have to look at the markings on the bricks, and tap on them in the same order as the letters on the “Latin inscription”. So, tap on bricks with the letters “MCMILD” (the first “M” brick is in the second row (top to bottom) and the second “M” brick is in the sixth row).
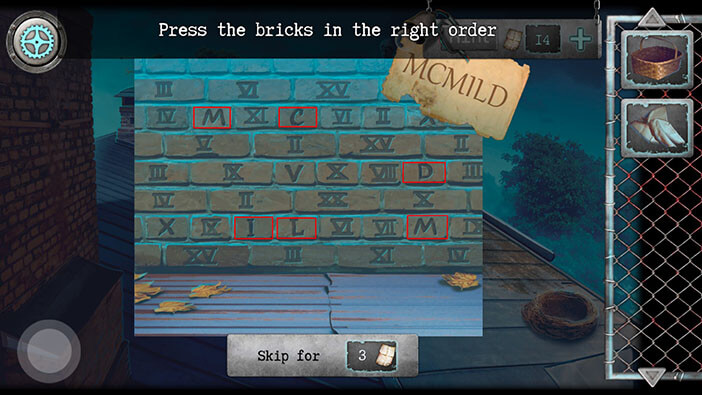
As soon as we pressed the bricks in the correct order, the bricks in the middle fell out revealing a secret compartment (yeah, there were a lot of those in this game). Tap on the item inside the secret compartment to pick it up and “Metal Ring” will be added to your inventory.
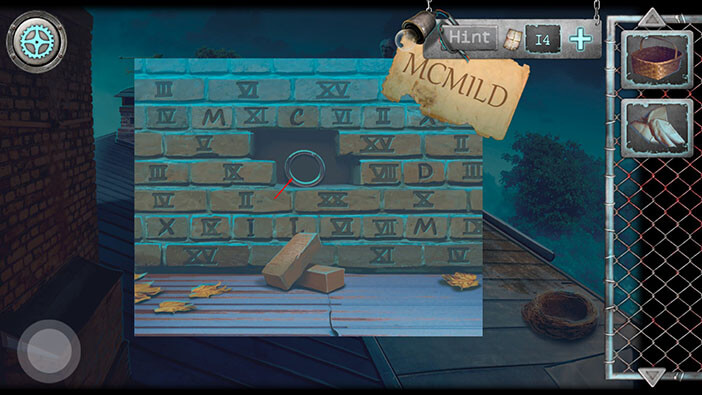
Next, we should take another look at the eggs.
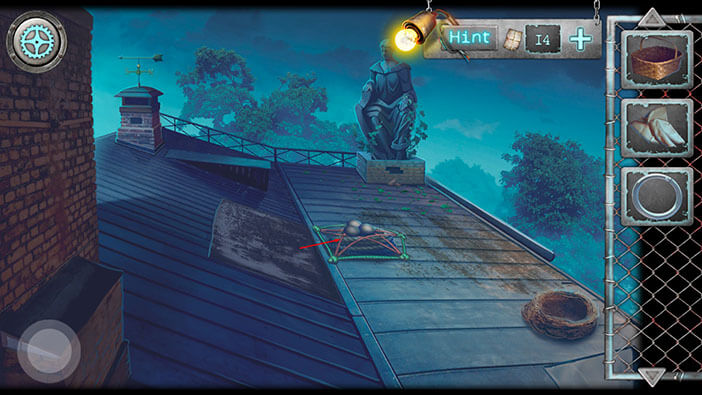
Select the basket from the inventory and place it next to the eggs.
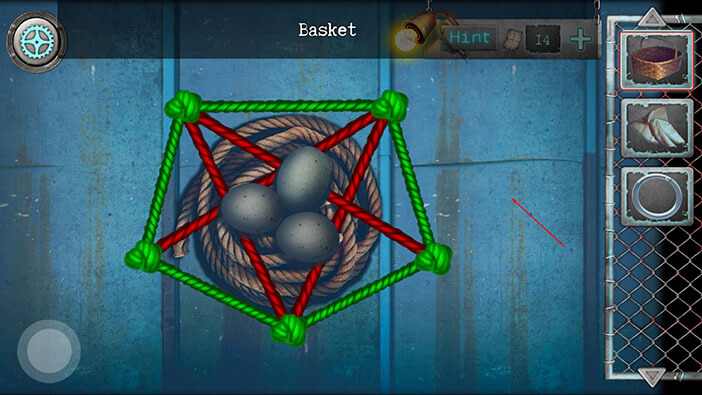
Ok, now drag the eggs and put them into the basket.
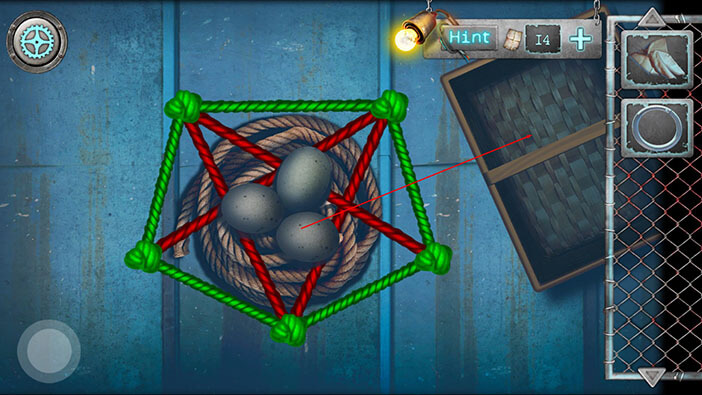
Well, we can now interact with the rope. However, our character will have to untie the knots, in order to pick up the rope. We will do this puzzle in several steps. Let’s begin.
Step 1
We will start by dragging the knot on the left between the knots on the right.
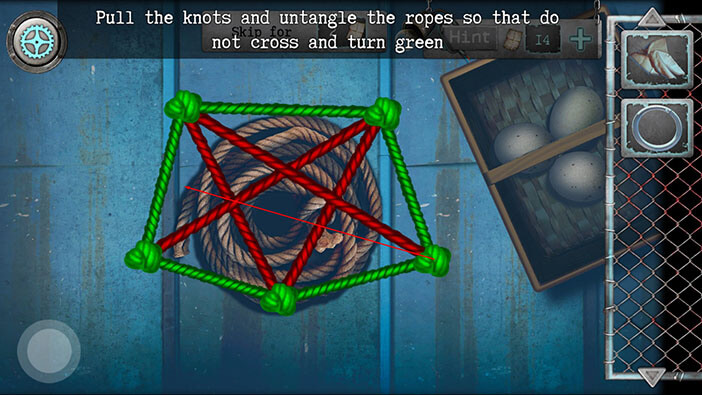
Step 2
Next, we will drag the bottom knot, and place it between the two top knots.
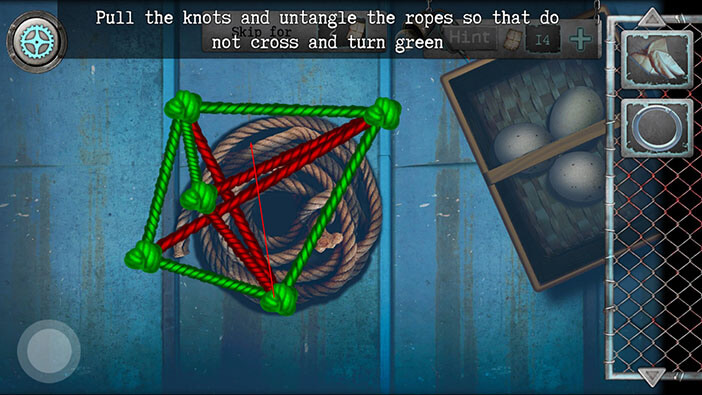
Step 3
Next, we will drag the top right knot, and move it down and to the right.
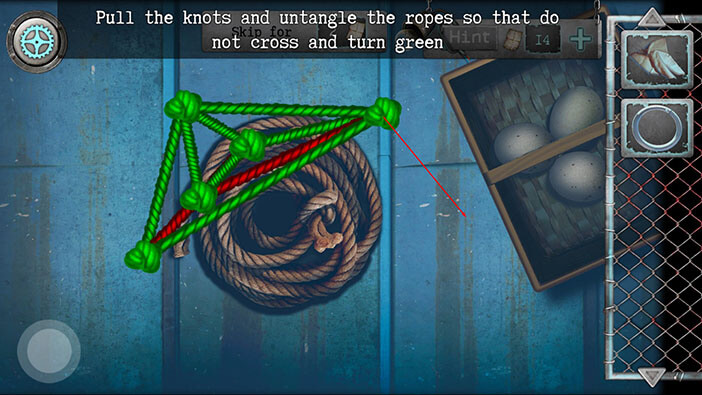
Step 4
Finally, drag the top-left knot down and to the left.
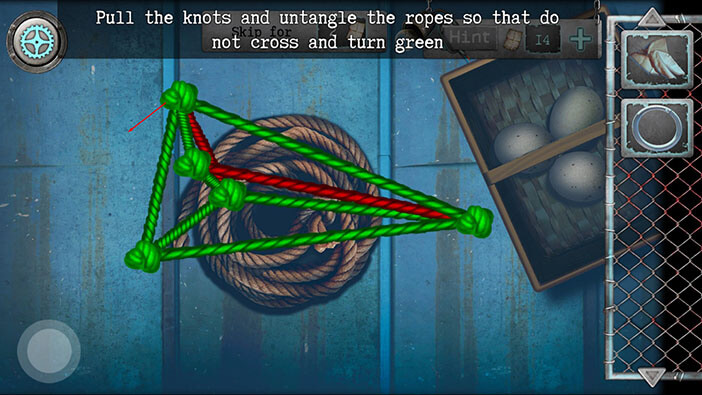
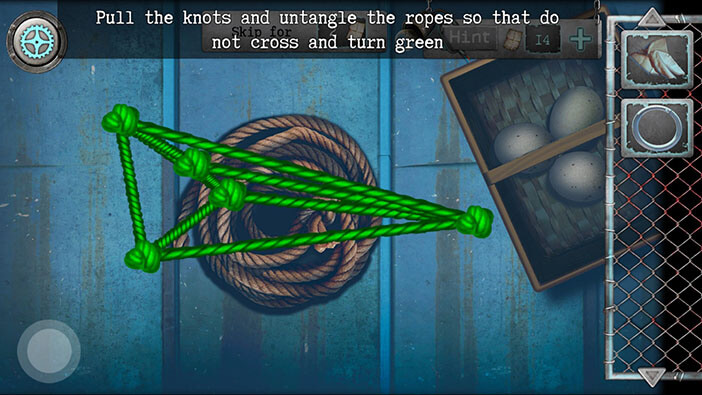
Well, we managed to untie the knots, so tap on the “Long rope” to pick it up.
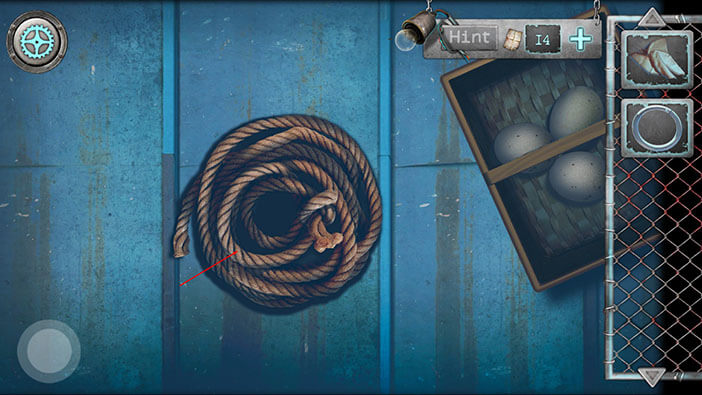
Next, tap on the “Basket with eggs” to pick it up.
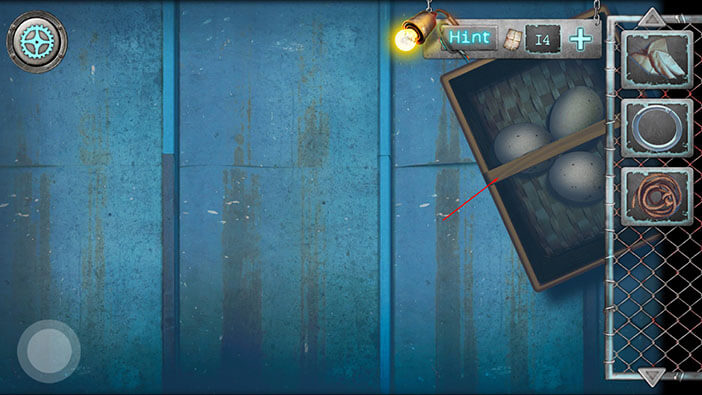
Well, with the rope and metal ring, we should be able to reach the ladders and climb down from the roof. Select the “Metal ring” from the inventory and combine it with the “Long rope”. “Rope with ring” will be added to your inventory.
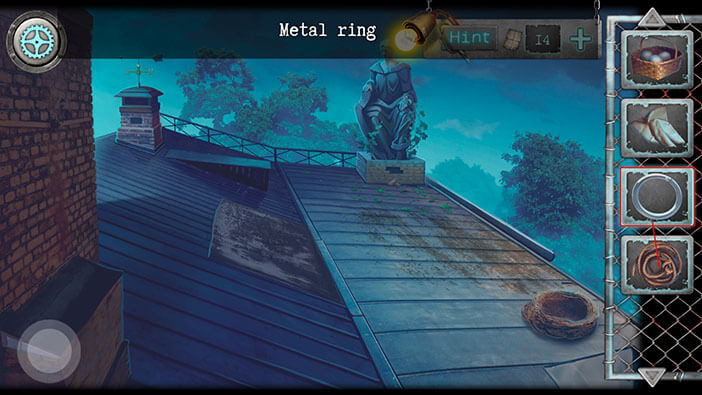
Ok, one last stop before we make our escape. Let’s take a look at the bird’s nest again.
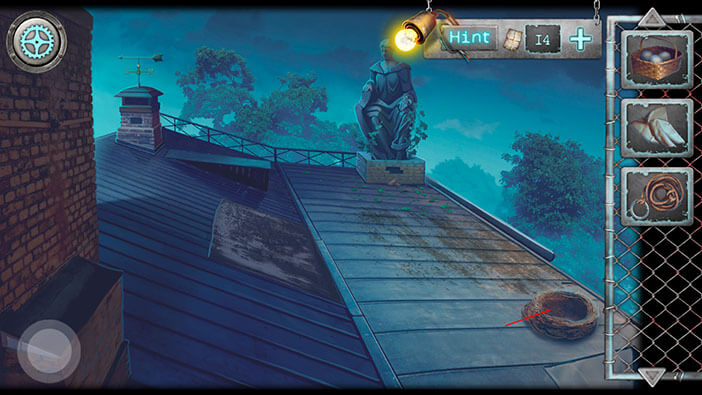
Select the “Basket with eggs” and tap on the nest to unload the eggs.
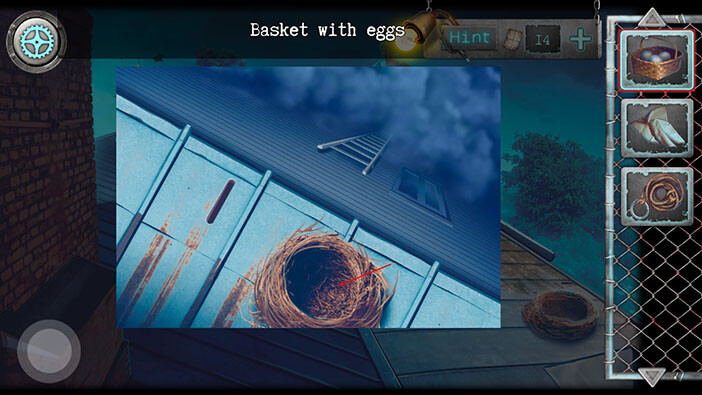
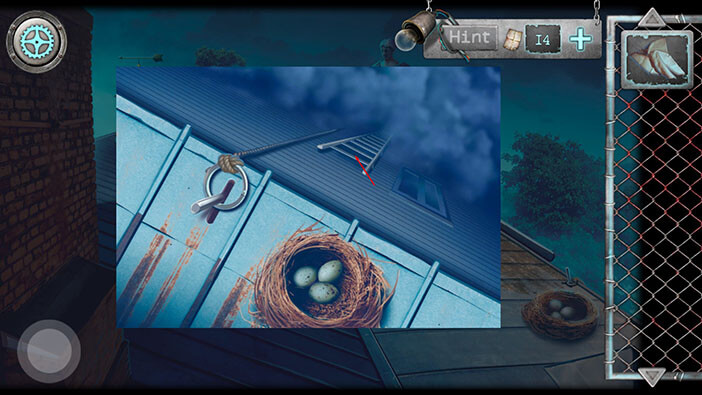
As soon as we put the eggs back into the nest, an iron bar rose up from the slot in the roof. Great, we can use it to hook the rope. So, select the “Rope with ring” and tap on the iron bar.
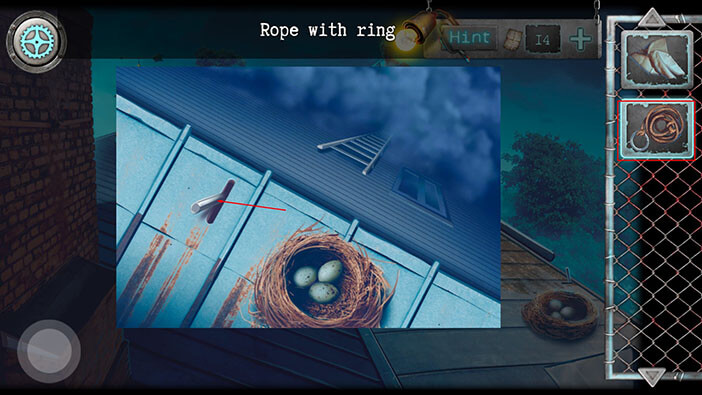
Well, that’s it. We can finally escape from this horror house. Tap on the ladder to climb down (our character will use the rope to reach the ladder).
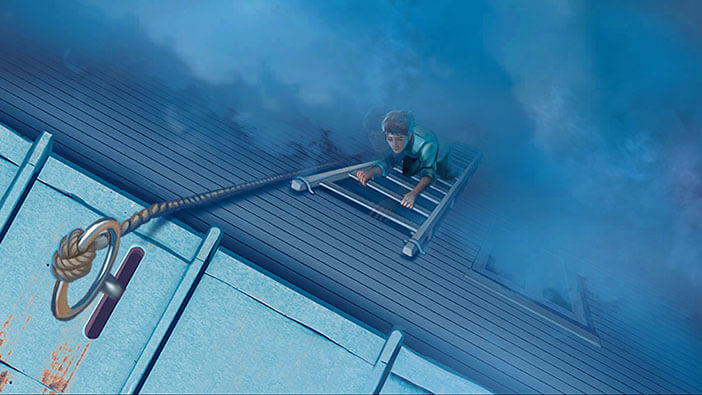
Unfortunately, it seems that one of the steps broke, and our character lost his footing. Tap on the broken step to continue…
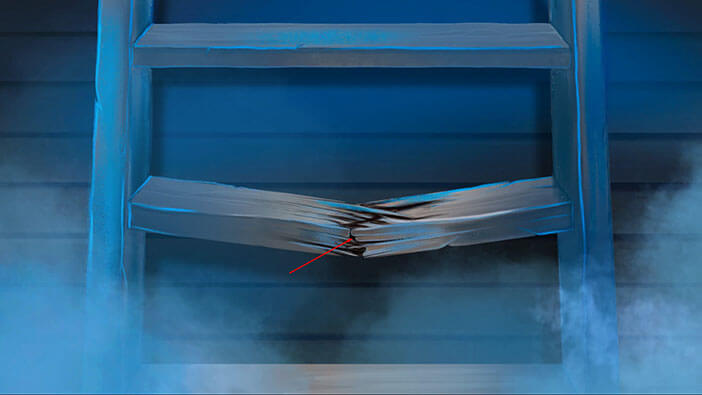
Well, it looks like our character fell down… On the plus side, the game will continue in chapter 3, so this is not the end of the story.

Well, that brings us to the end of this chapter. If you’re interested in Escape Room games, check out our guides for the other games of this genre. Also, as I already mentioned, this is not the end of the “Scary Horror 2: Escape Games” and the story will continue in Chapter 3.
Thank you for reading.