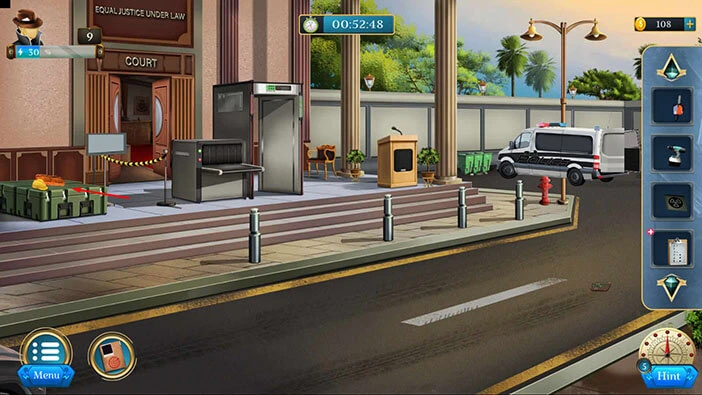
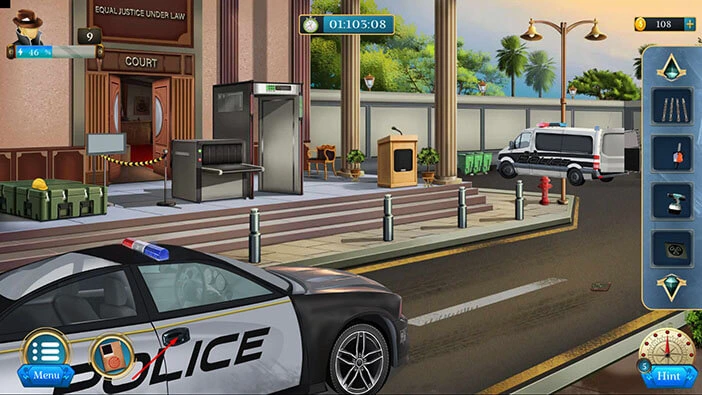
Room Escape: Detective Phantom | Level 9
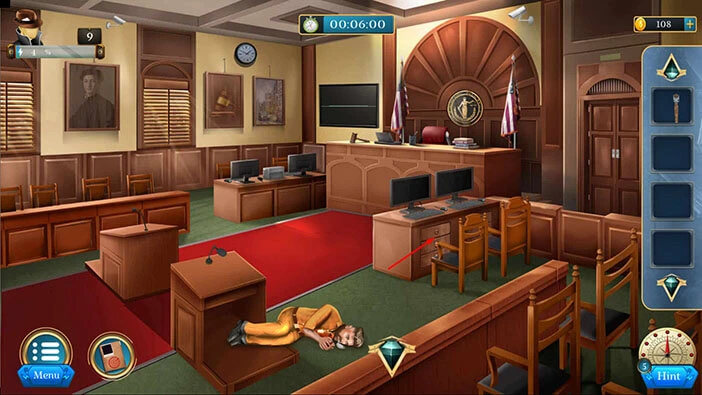
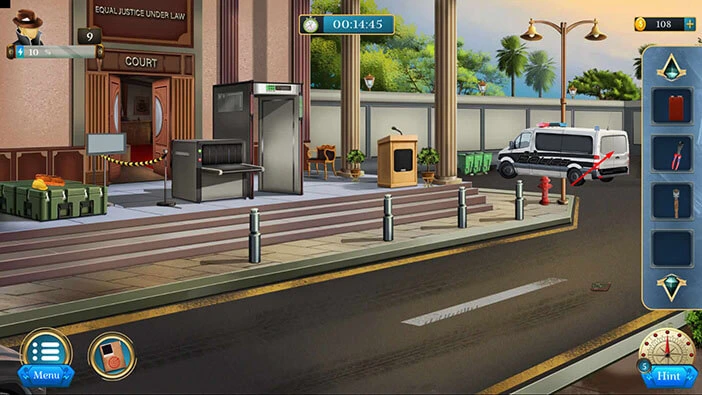
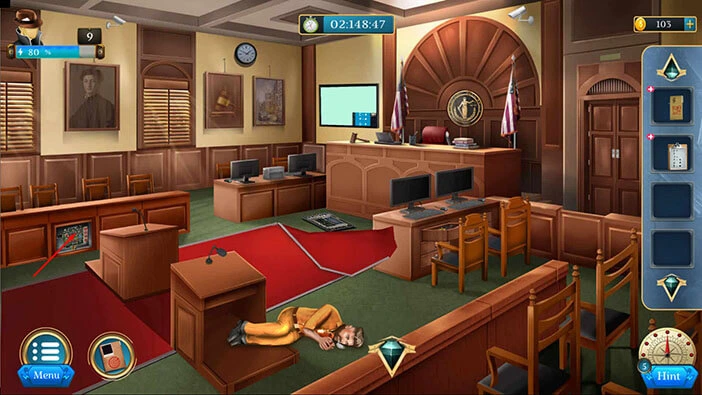
Hello everyone and welcome to the walkthrough for the ninth level of “Room Escape: Detective Phantom”. In the ninth level, Frederick Cassatt will drop dead in the courtroom. Our task is to investigate his death.
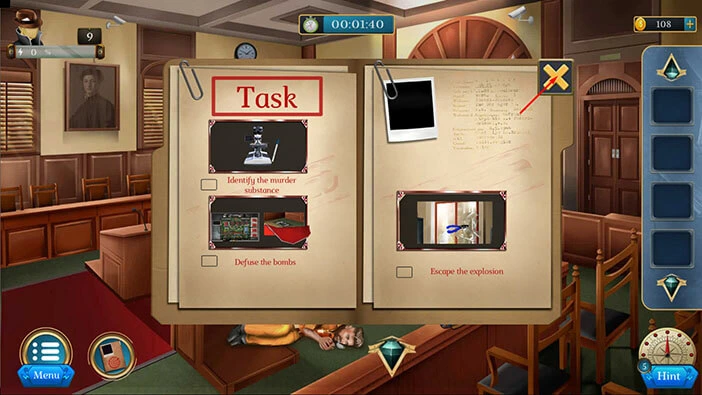
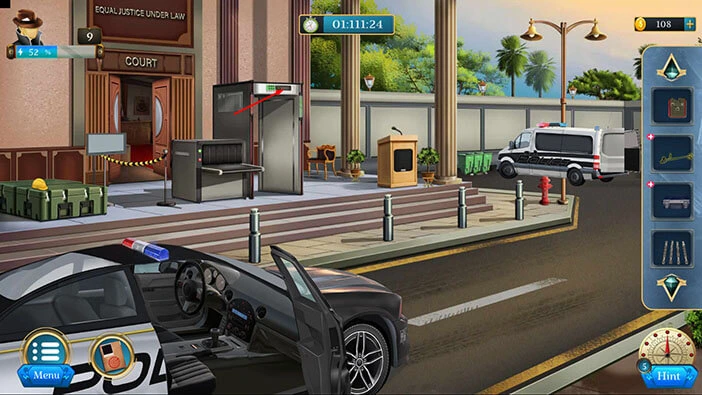
Our objectives are to “Identify the murder substance” “Defuse the bombs” and “Escape the explosion”. Tap on the “X” button to go back.
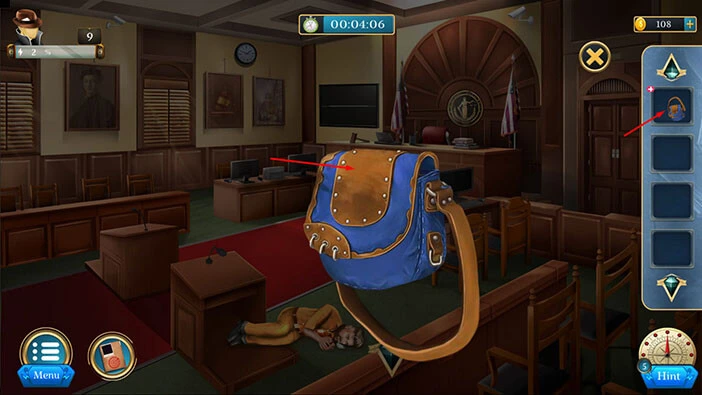
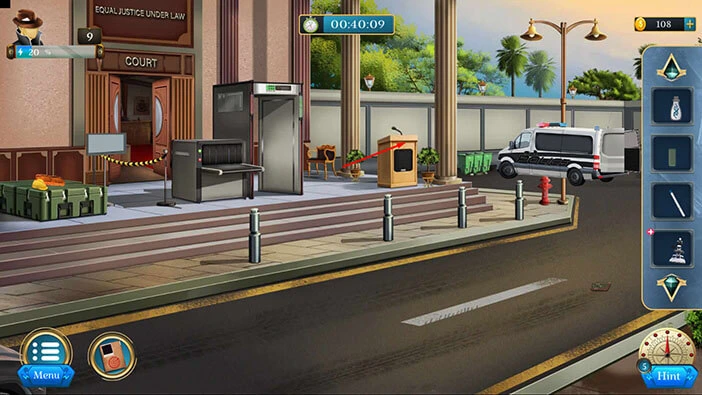
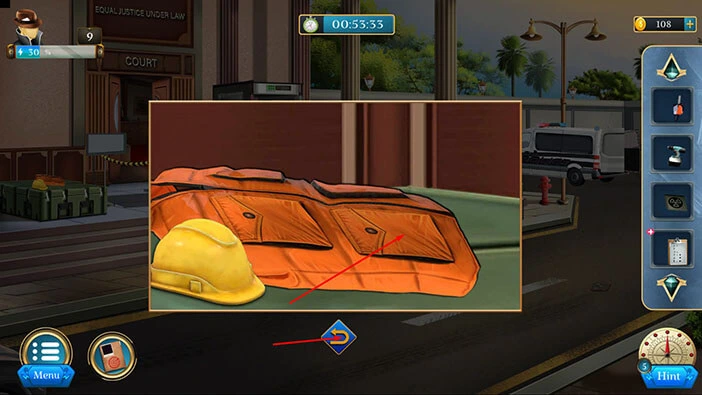
On the wooden fence, you will notice a “Satchel”. Let’s tap on it to take a closer look, and tap again to pick it up.
After that, tap on the arrow at the bottom to go back.
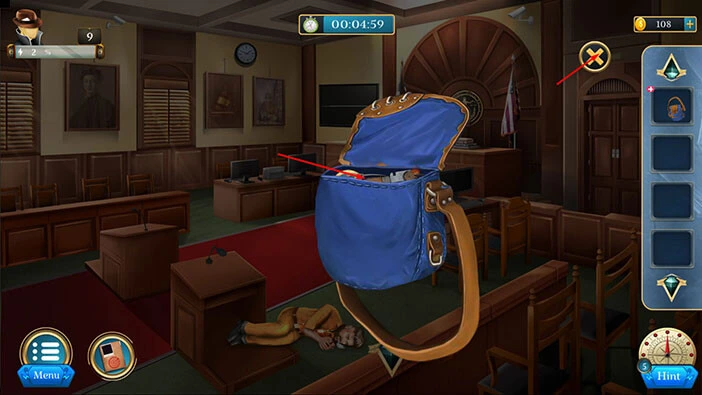
Next, let’s select the “Satchel” from the inventory and it will appear in the middle of the screen. Let’s tap on the satchel to open it.
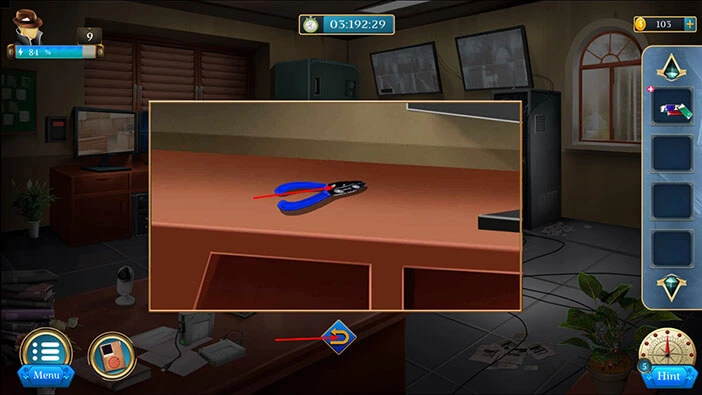
In the satchel, you will find a “Glass Cutter”. Let’s tap on it to pick it up.
After that, tap on the “X” button to close this window.
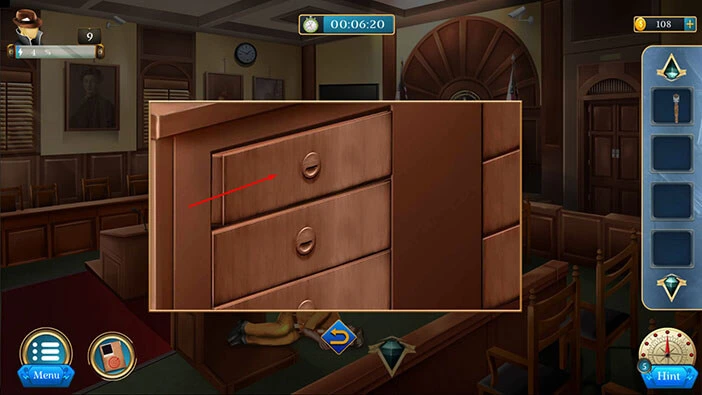
Let’s tap on the drawers on the right to take a closer look at them.
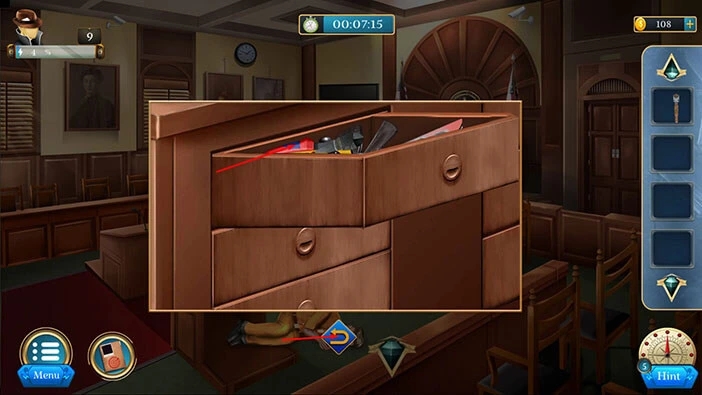
Let’s tap on the top drawer to open it.
In the drawer, you will find a “Wire cutter”. Let’s tap on it to pick it up.
After that, tap on the arrow at the bottom to go back.
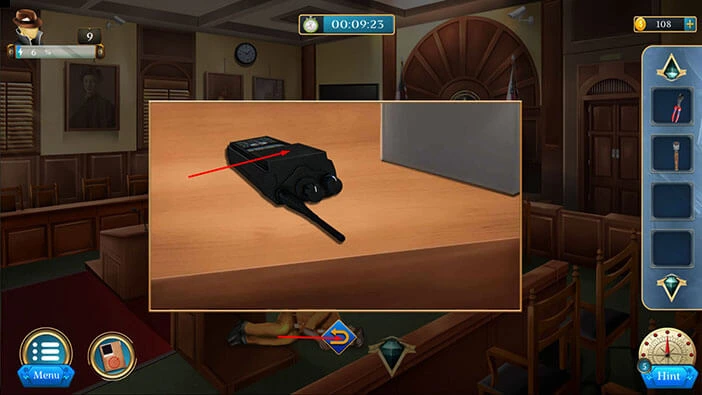
Next, let’s tap on the table in the top right corner of the room to take a closer look at it.
Here, you will find a “Walkie-talkie”. Let’s tap on it to pick it up. After that, tap on the arrow at the bottom to go back.
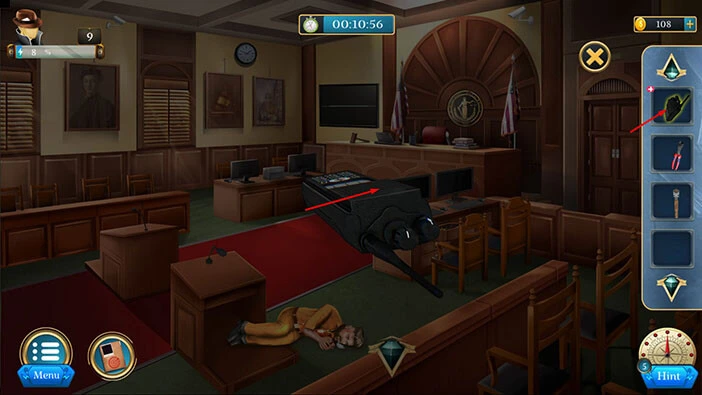
Select the “Walkie-talkie” from the inventory and it will appear in the middle of the screen. Tap on the “Walkie-talkie” to examine it.
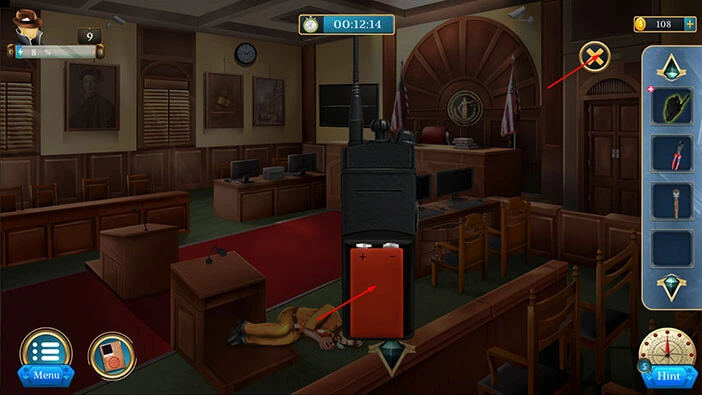
Tap on the lid to remove it, then tap on the “Battery” to pick it up. After that, tap on the “X” button to close this window.
Let’s go outside. Tap on the arrow at the bottom of the screen.
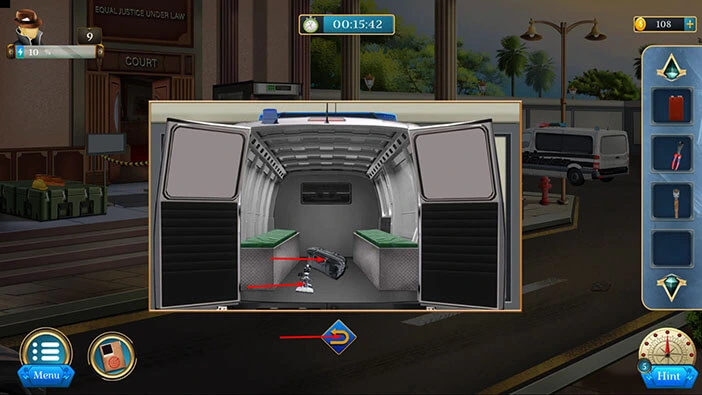
Next, let’s tap on the van on the right to take a closer look at it and tap again to open the backdoor.
In the van, you will find a “Bag” and a “Microscope”. Let’s tap on it to pick it up.
After that, tap on the arrow at the bottom to go back.
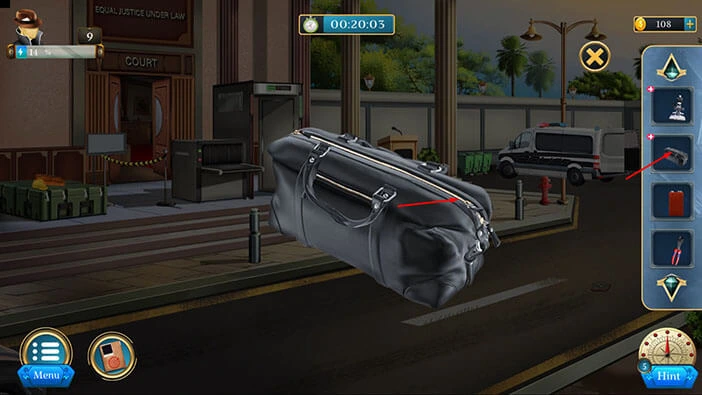
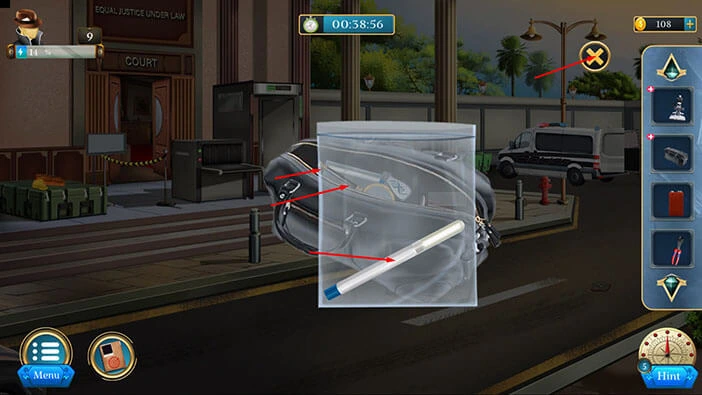
Select the “Bag” from the inventory and it will appear in the middle of the screen. Let’s tap on the bag to open it.
In the bag, you will find “Swabs”, “Microscope slide”, and “Immersion oil”. Let’s tap on these items to pick them up.
After that, tap on the “X” button to close this window.
Next, let’s tap on the stand on the right to take a closer look at it, and tap again to look behind it.
Here, you will find a “Notepad”. Let’s tap on it to pick it up.
After that, tap on the arrow at the bottom to go back.
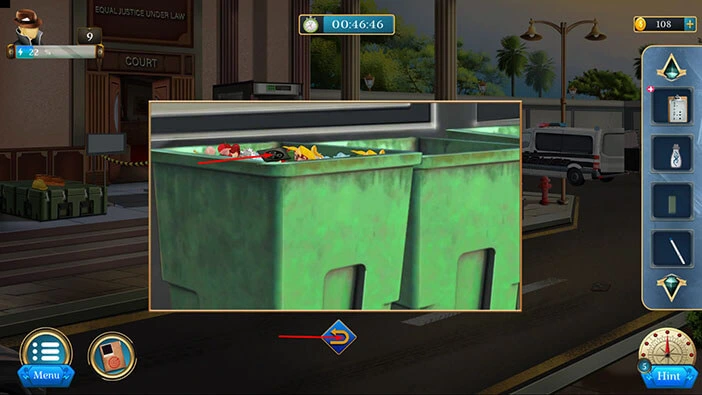
Next, let’s tap on the dumpsters on the right to take a closer look at them.
Here, you will find a “Button”. Let’s tap on it to pick it up. After that, tap on the arrow at the bottom to go back.
Next, tap on the machine in front of you to take a closer look at it.
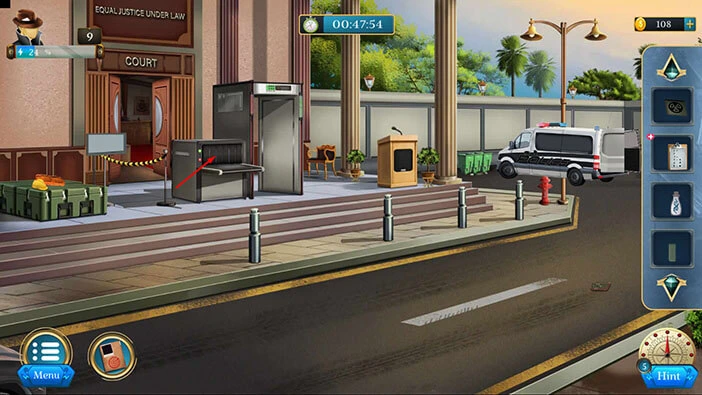
Let’s tap on the green button to start the interaction.
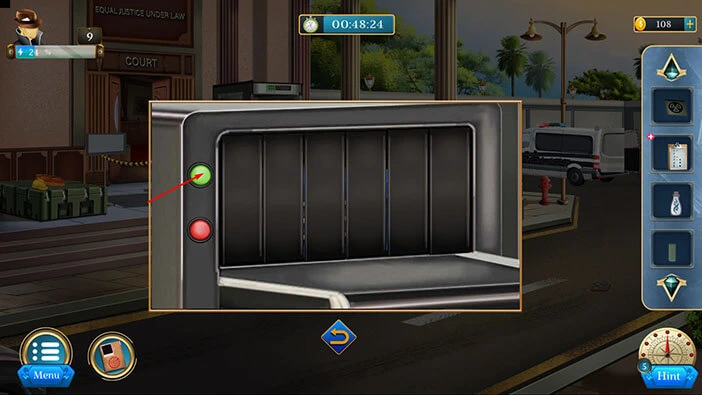
You will find a “Toolbox”. Let’s tap on it to pick it up. After that, tap on the arrow at the bottom to go back.
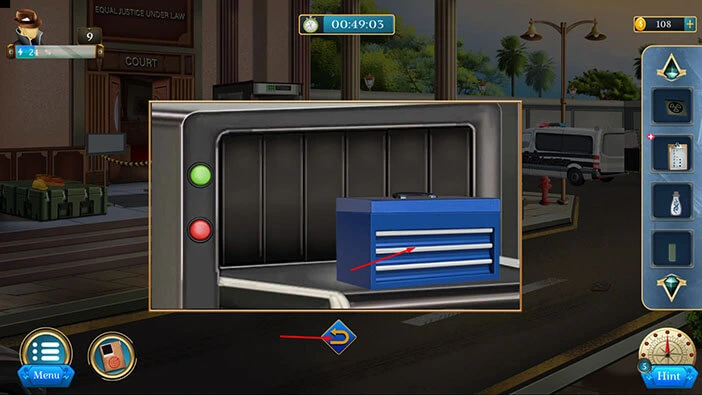
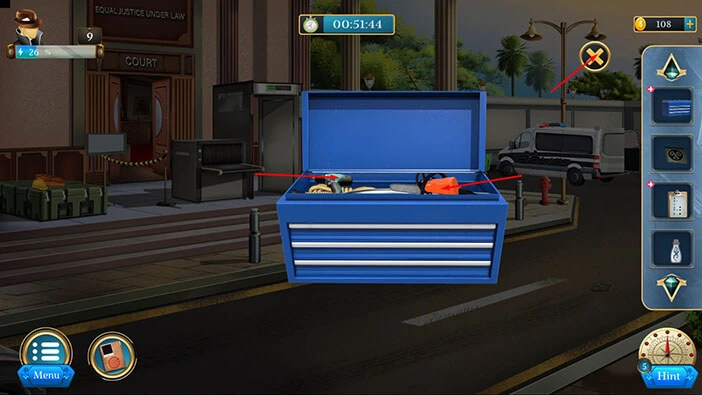
Select the “Toolbox” from the inventory and it will appear in the middle of the screen. After that, tap on the toolbox to open it.

In the toolbox, you will find a “Chainsaw”, and a “Hand drill”. After that, tap on the “X” button to close this window.
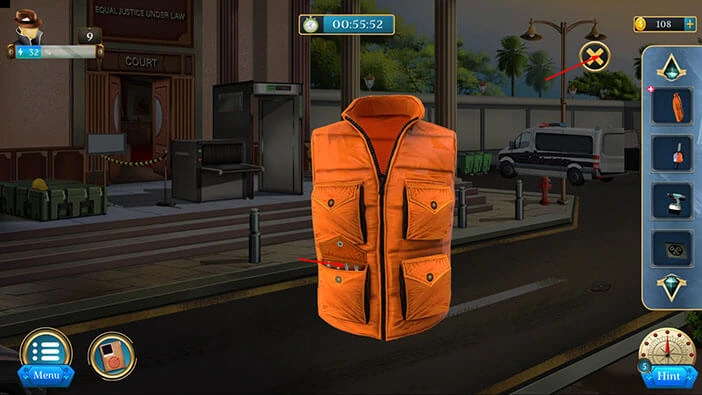
Let’s tap on the green box on the left to take a closer look at it.
Here, you will find a “Jacket”. Let’s tap on it to pick it up. After that, tap on the arrow at the bottom to go back.
Select the “Jacket” from the inventory and it will appear in the middle of the screen. Tap on the bottom left pocket to open it.

In the pocket, you will find “Screw heads”. Let’s tap them to pick them up.
After that, tap on the “X” button to close this window.
Next, let’s tap on the door to proceed inside.

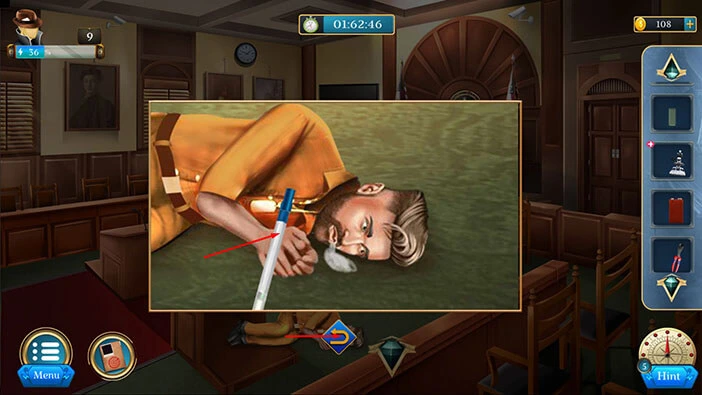
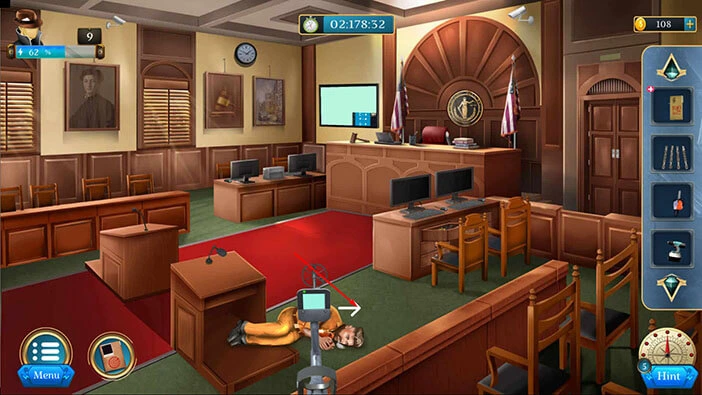
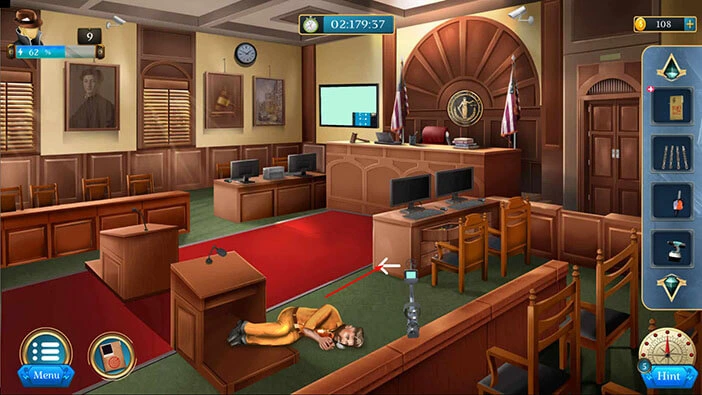
Next, let’s tap on the body to take a closer look at it.

Select the “Swabs” from the inventory and use it to collect the samples.
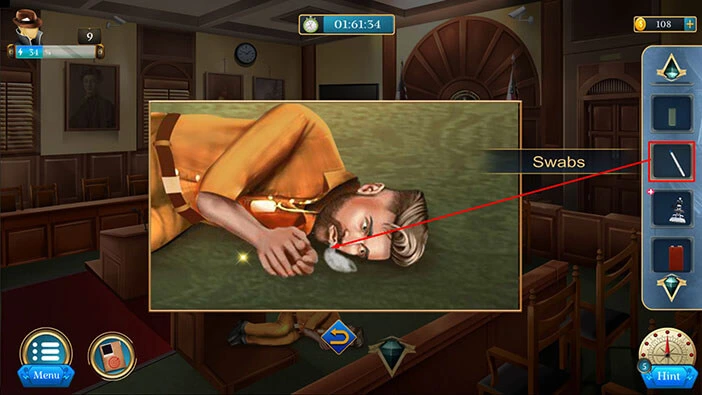
Tap on the “Swabs” to collect it. After that, tap on the arrow at the bottom to go back.
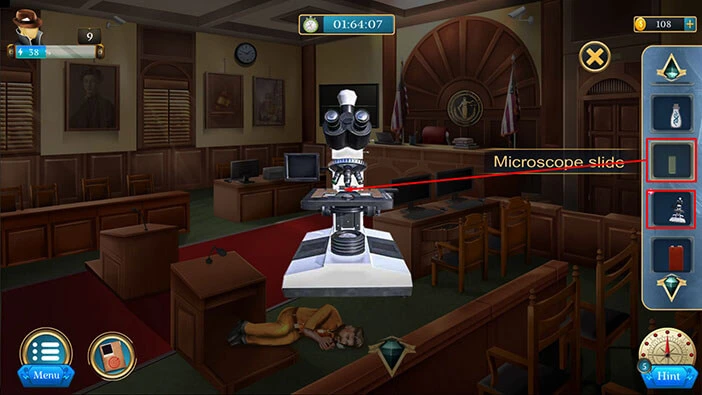
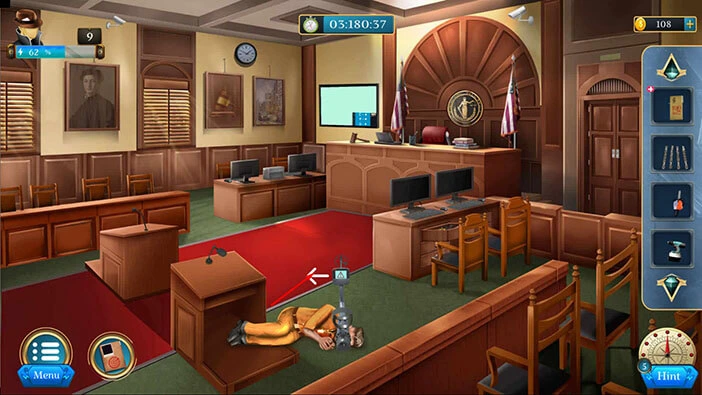
Next, select the “Microscope” from the inventory and it will appear in the middle of the screen. After that, select the “Microscope slide” from the inventory and insert it into the empty slot.
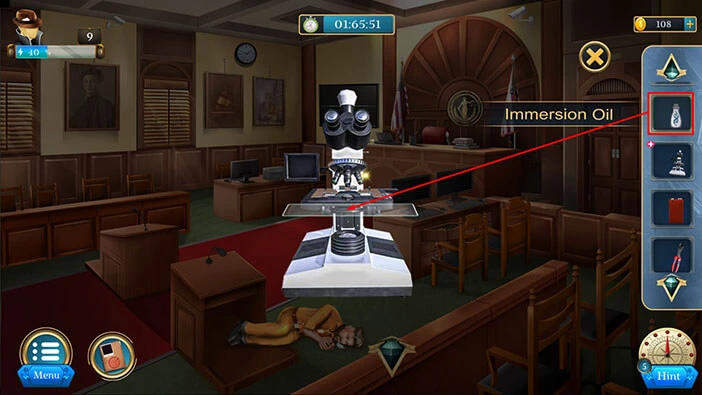
Next, select the “Immersion Oil” from the inventory and spill it on the microscope slide.
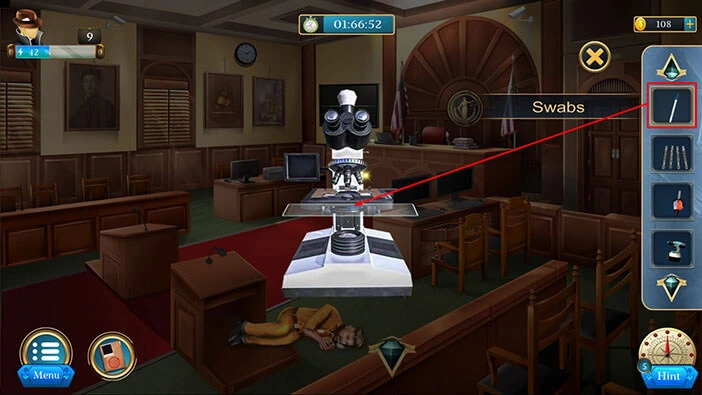
Next, select the “Swabs” from the inventory and use it to add the sample. After that, tap on the microscope to start the interaction.
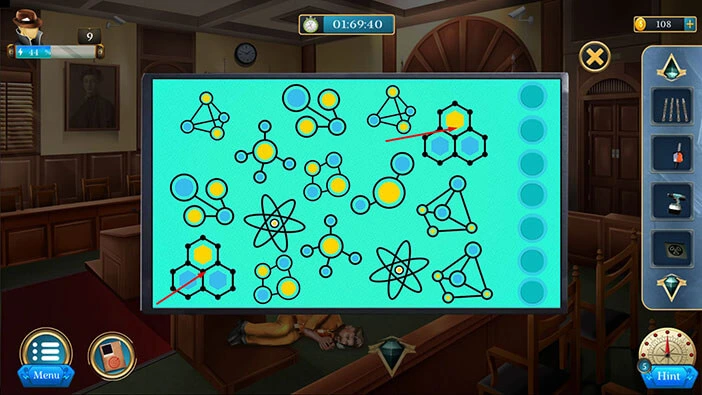
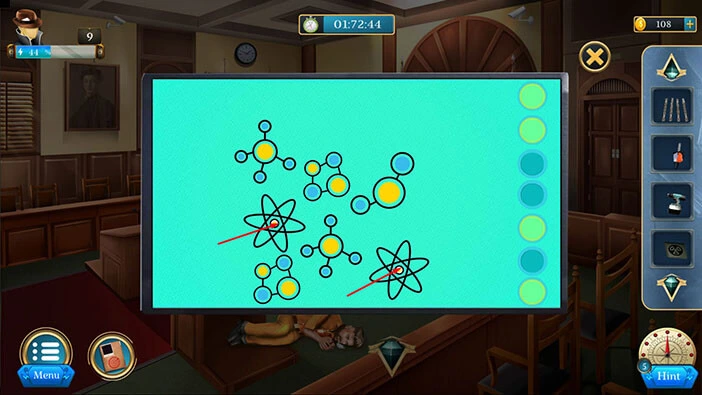
Here, we have another puzzle. Our task is to find the pairs of molecules. We will do this puzzle in several steps. Let’s begin.
Step 1
Select the molecule in the bottom left corner of the screen, then tap on the molecule in the top right corner of the screen.
Step 2
Select the molecule in the top left corner of the screen, then tap on the molecule in the top right corner of the screen.
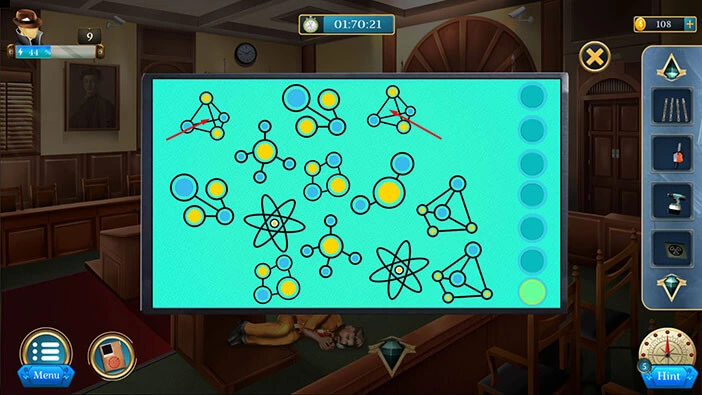
Step 3
Select the two molecules on the right side of the screen.
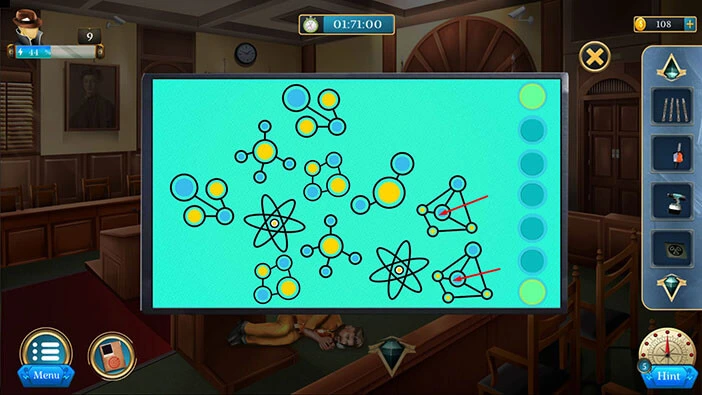
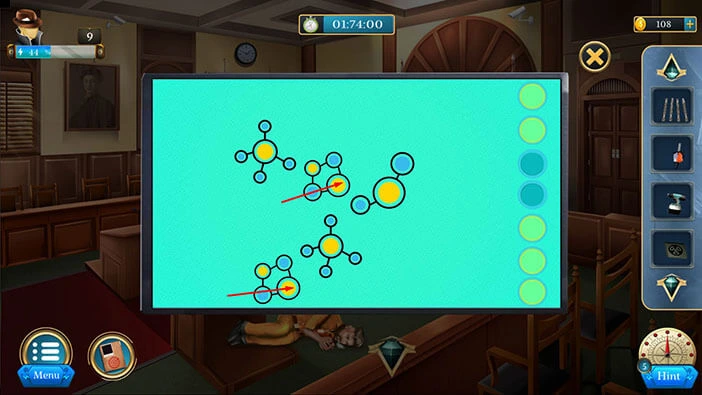
Step 4
Select the molecule on the left side of the screen, then tap on the molecule at the top of the screen.
Step 5
Select the molecule in the bottom right corner of the screen, then tap on the molecule on the left side of the screen.
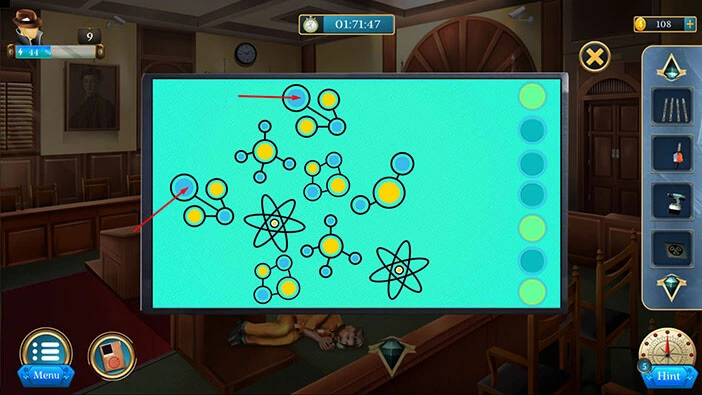
Step 6
Select the molecule at the bottom of the screen, then tap on the molecule in the middle of the screen.
Step 7
Tap on the last pair of molecules, and you will solve this puzzle.
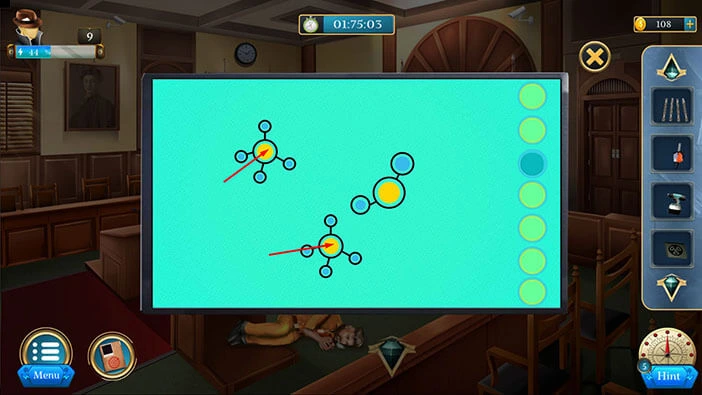
You will discover Hydrogen cyanide. You will discover that the victim inhaled the cyanide. Our detective suspects that this happened when the reporters swarmed the victim.

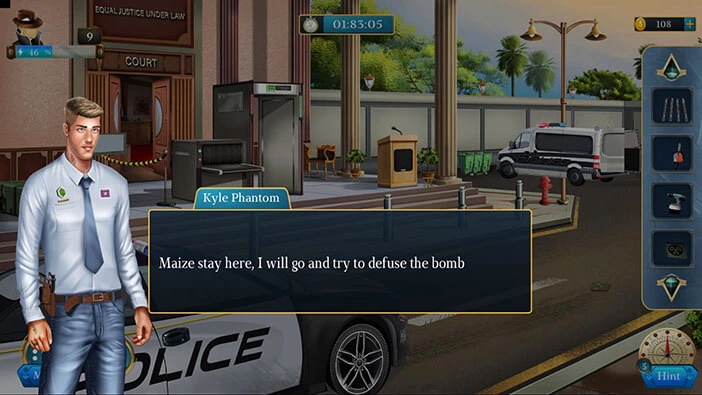
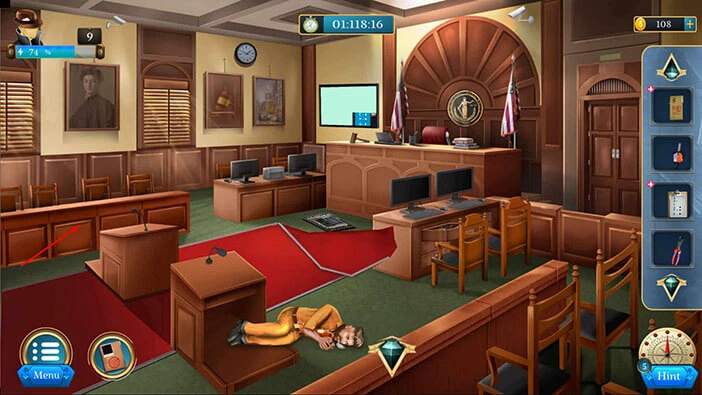
The Black Spider will appear on the screen. He will mock you, but more importantly, he will reveal that he planted several bombs in the courtroom. Maize called the bomb squad, but they were already preoccupied with another case. Well, at least we got the equipment. So, our next task is to defuse the bombs.
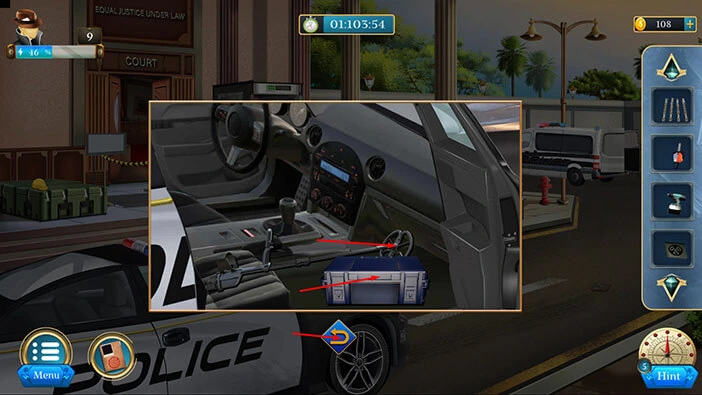
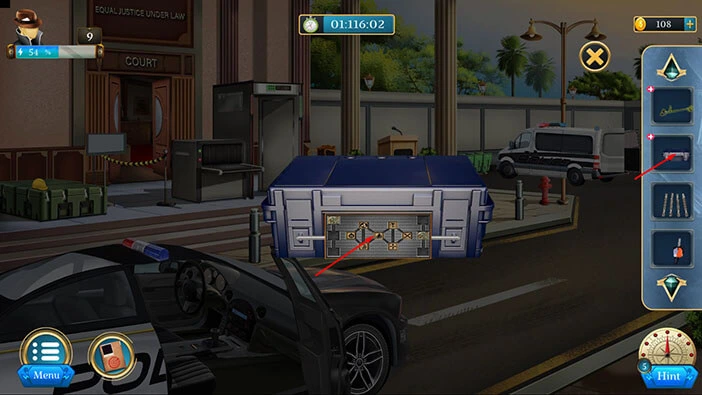
Let’s tap on the police car door to take a closer look at it and tap again to open it.
In the car, you will find a “Box” and a “Bomb detector”. Let’s tap on these two items to pick them up.
After that, tap on the arrow at the bottom to go back.
In the street on the right, you will notice an item. Let’s tap on it to pick it up.
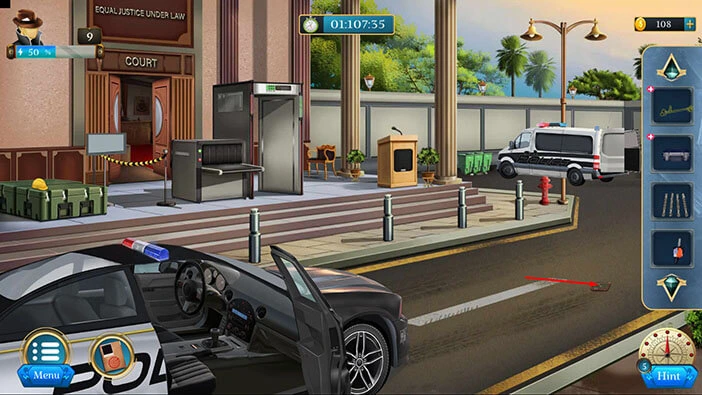
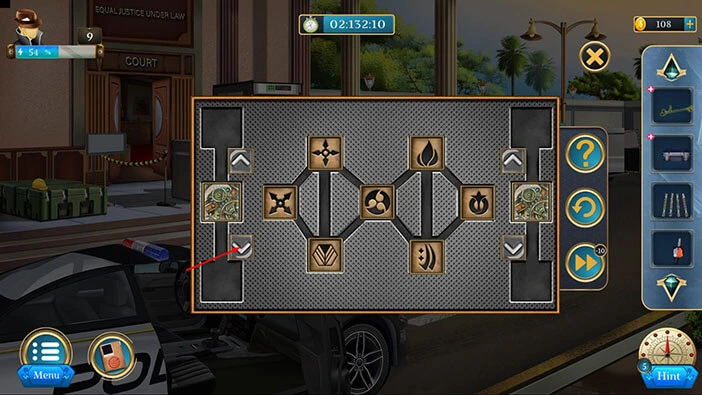
Here, you will find a “Metal panel”. Let’s tap on it to pick it up. So, our next task is to assemble the metal panel and discover all the symbols. We will need this information to solve the next puzzle.
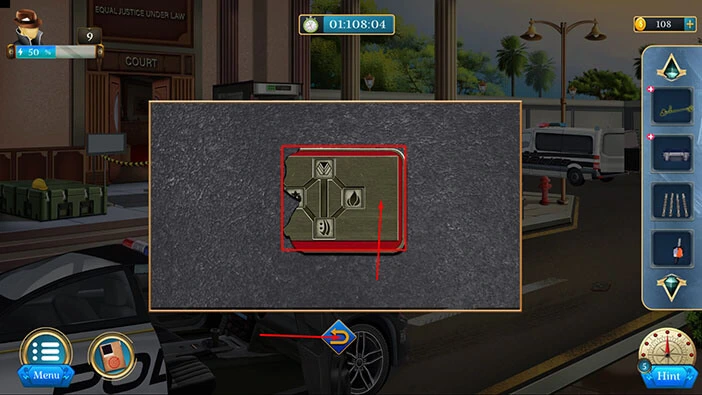
Next, let’s tap on the top of the metal detector to take a closer look at it.
Select the “Metal panel” from the inventory and merge it with the other half of the panel.
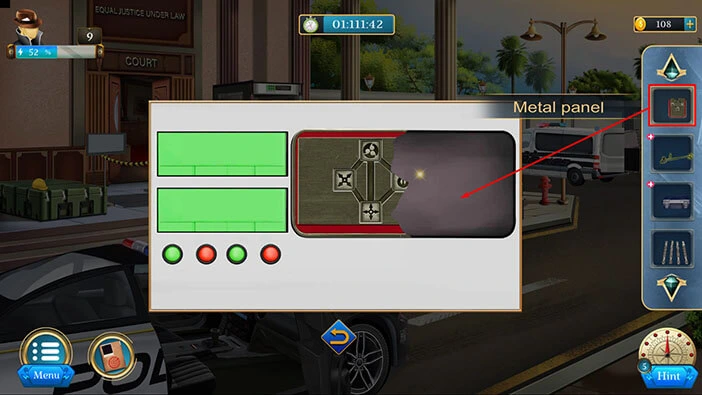
Here, we can see seven symbols, arranged in seven slots. Let’s memorize/write down the position of the symbols because we will need this information for the next puzzle.
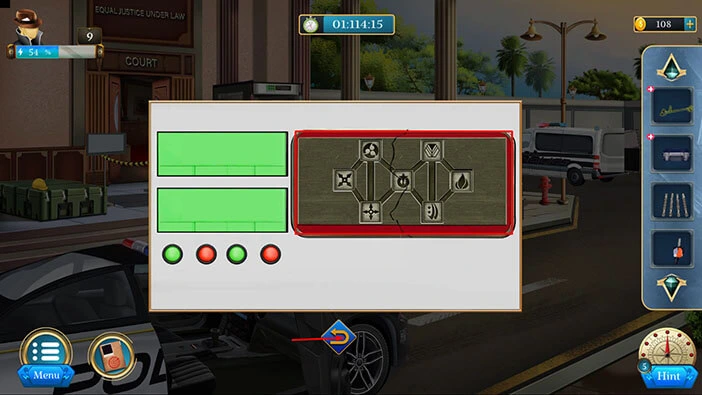
Next, select the box in your inventory and it will appear in the middle of the screen. Tap on the box again to start the interaction.
The order of the symbols on the box should match the order of the symbols that we saw previously. So, our task is to rearrange the symbols. We will do this puzzle in several steps. Let’s begin.
Step 1
Tap twice on the down arrow on the right to rotate the symbols.

Step 2
Tap twice on the down arrow on the left to rotate the symbols.
Step 3
Tap on the down arrow on the right to rotate the symbols.

Step 4
Tap once on the up arrow on the right to rotate the symbols.
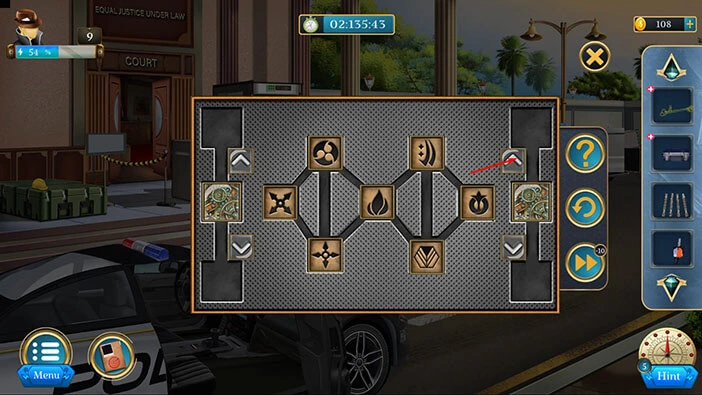
Step 5
Tap twice on the down arrow on the right to rotate the symbols.

Step 6
Tap once on the up arrow on the right to rotate the symbols. With that, you will solve this puzzle.

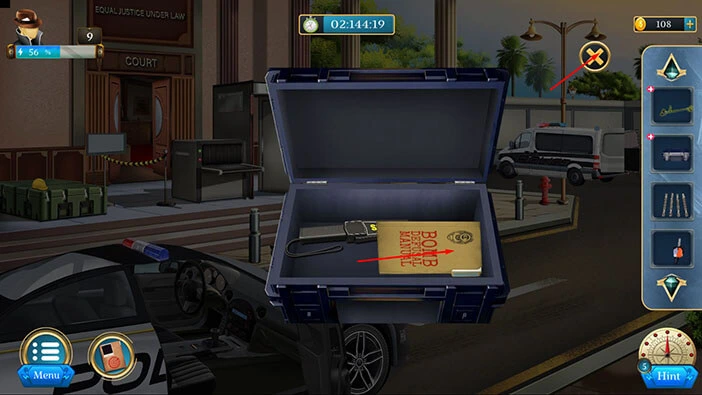
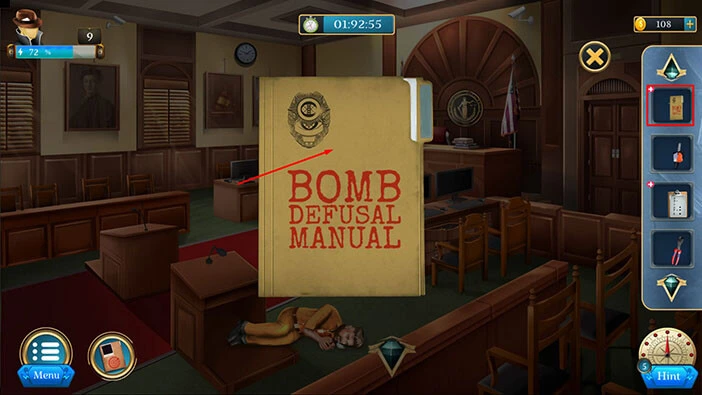
In the box, you will find a “Bomb Defusal Manual”. Let’s tap on it to pick it up. After that, tap on the “X” button to close this window.
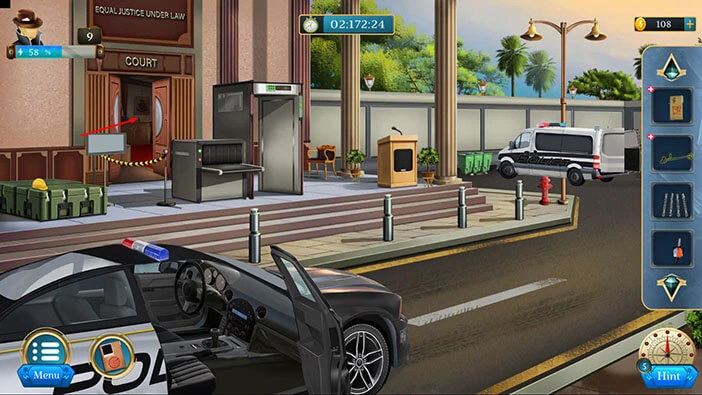
Let’s tap on the door to go back, inside.
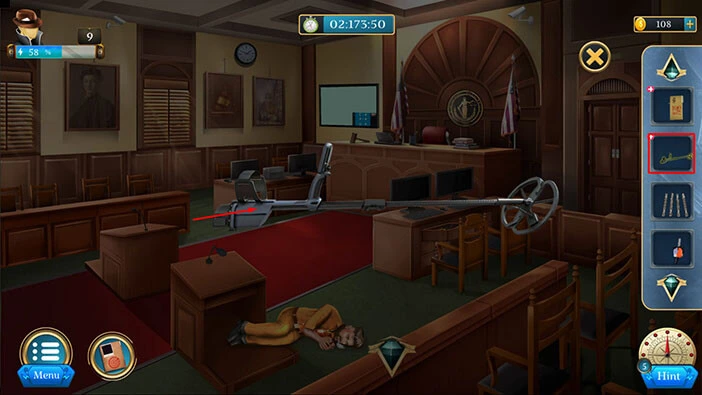
Our next task is to find and disarm the bombs. Let’s do that. Select the “Bomb detector” from the inventory and it will appear in the middle of the screen. Let’s tap on the “Bomb detector” to examine it.
Select the “Battery” from the inventory and insert it into the empty slot.
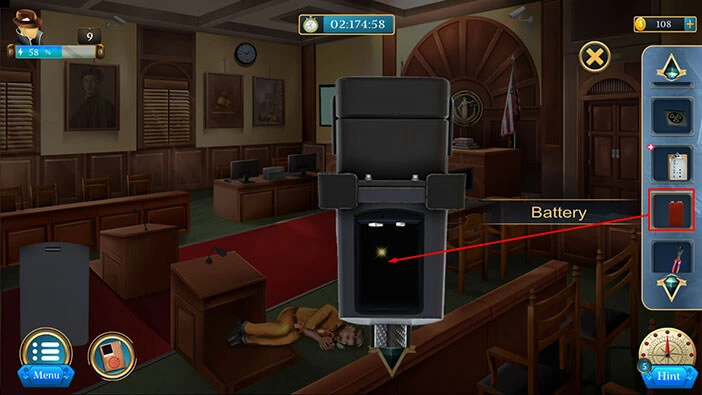
We now have a functional “Detector” so let’s tap on it to pick it up. After that, tap on the “X” button to close this window.
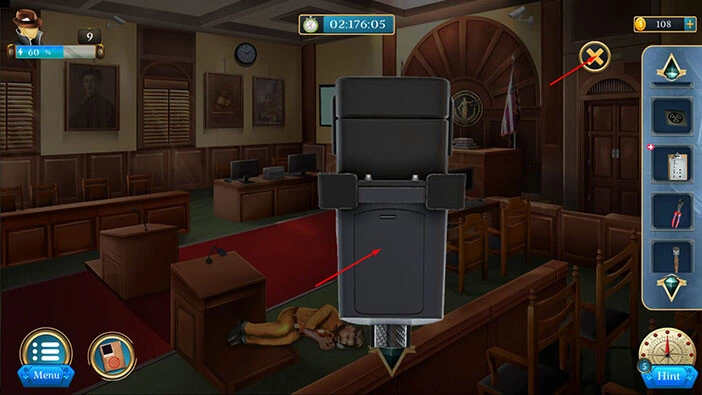
Next, drag the “Detector” from the inventory to start the interaction.
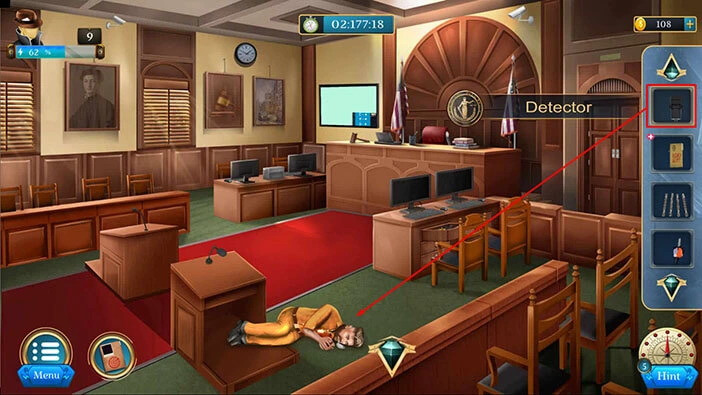
Let’s tap on the arrow on the right to scan the right side of the room.
Next, let’s tap on the middle arrow to scan the middle of the room.
In the middle of the room, we detected a bomb. Let’s continue. Let’s tap on the left arrow to scan the left side of the room.
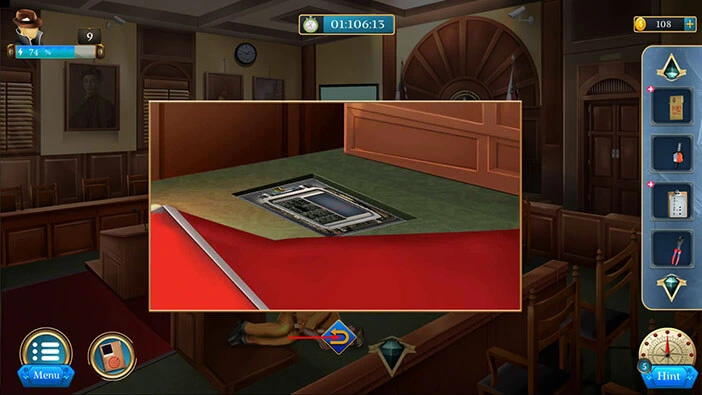
We will also detect a bomb on the left side of the room. First, let’s concentrate on the bomb in the middle of the room. Tap on the red carpet to take a closer look at it, and tap again to look under it.

Select the “Hand drill” from the inventory and “Screw heads” from the inventory and place them on the metal panel.
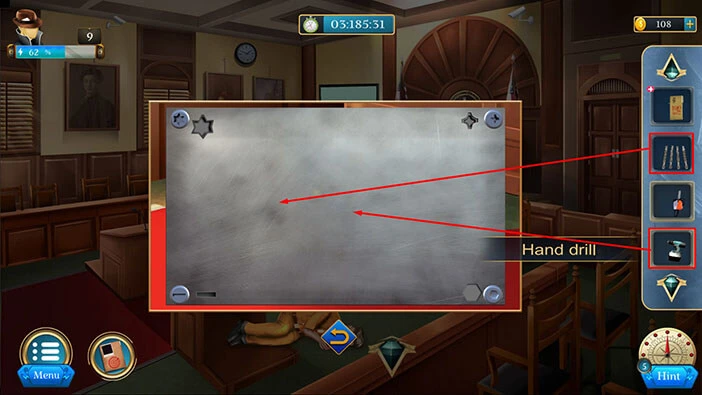
Select the first “Screw head” and insert it into the drill. Our character will remove the screw in the top left corner.
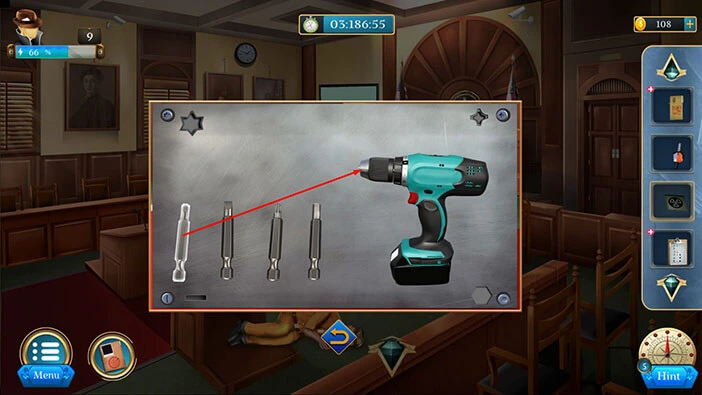
Select the second “Screw head” and insert it into the drill. Our character will remove the screw in the bottom left corner.

Select the third “Screw head” and insert it into the drill. Our character will remove the screw in the top right corner.

Lastly, select the fourth “Screw head” and insert it into the drill. Our character will remove the screw in the bottom right corner.
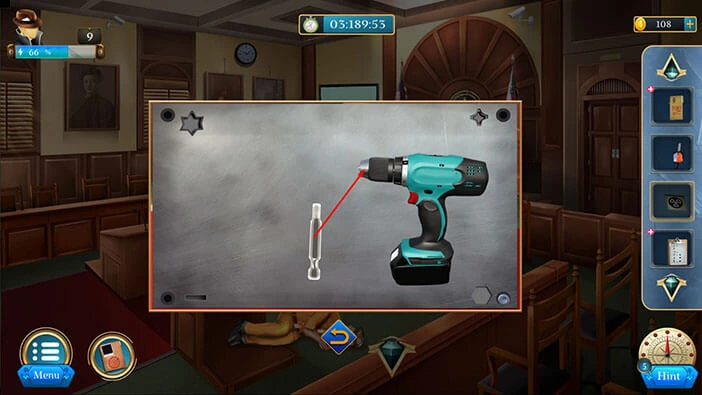
We removed the metal panel, but we still have to get through the glass, in order to reach the bomb. Select the “Glass Cutter” from the inventory and use it to cut the glass.
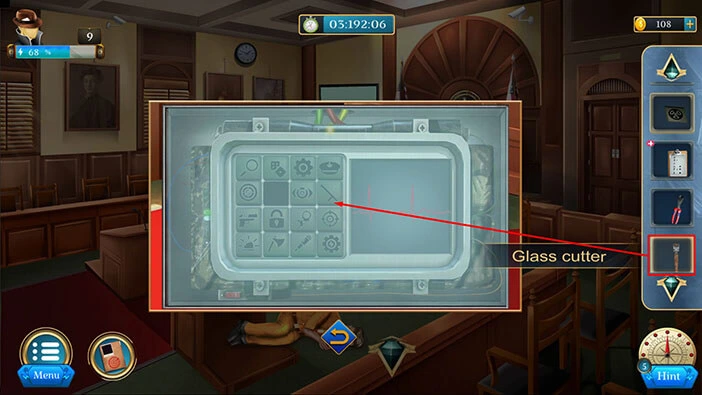
You will notice an empty slot on the left. So, let’s select the “Button” from the inventory and insert it into the empty slot.
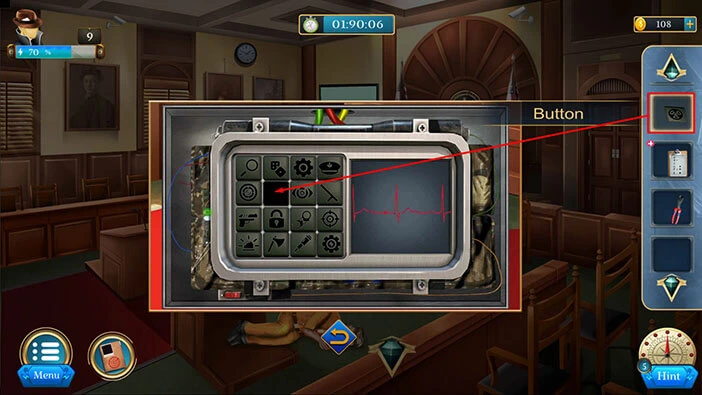
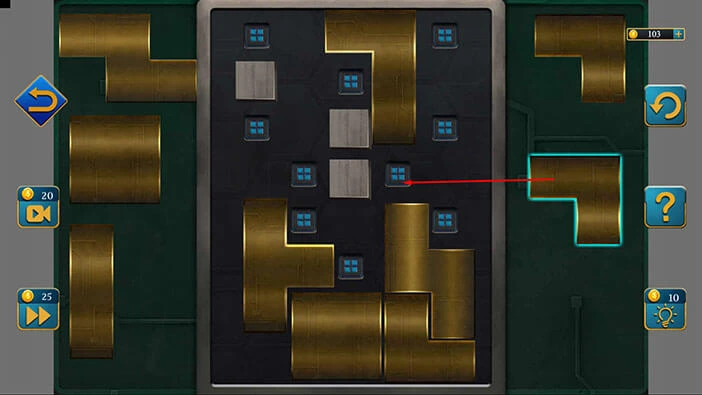
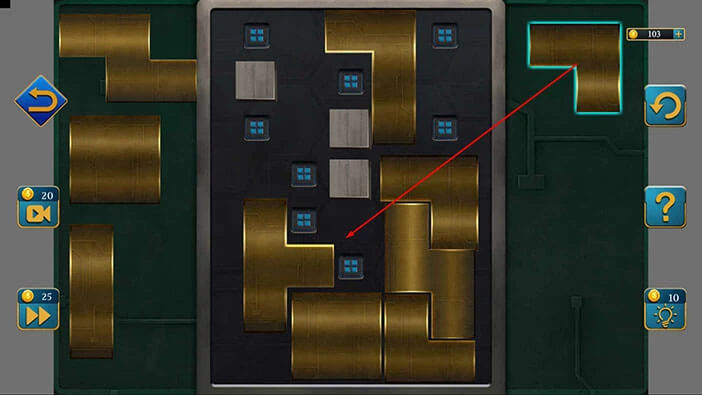
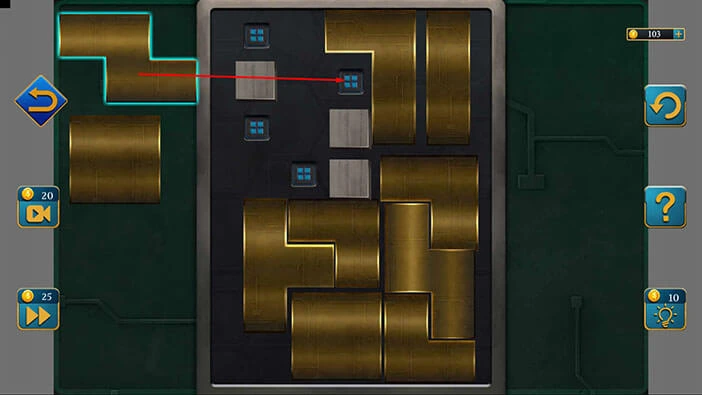
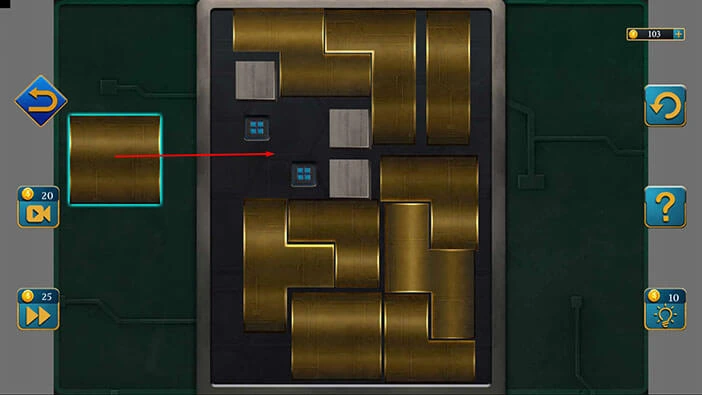
Let’s try to memorize the overall shape of the red line on the right. After that, let’s tap on the arrow at the bottom to go back.
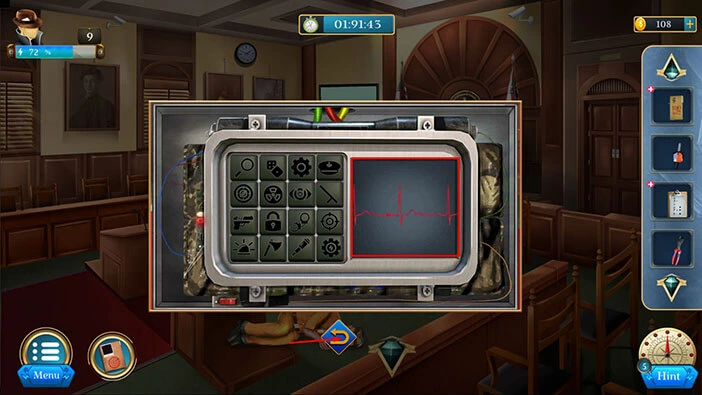
Next, select the “Bomb defusal manual” from the inventory and it will appear in the middle of the screen. Let’s tap on it again to open it.
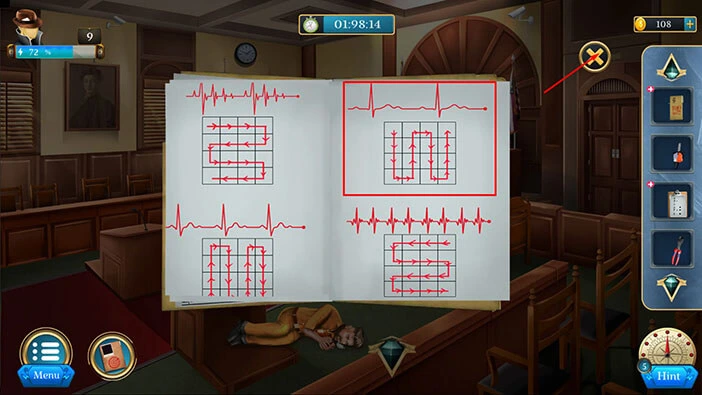
Let’s take a look at the next page. In the top right corner, we can see the line that matches the shape of the line that we saw on the bomb. Below the line, we can see several arrows on the 4 x 4 grid. So, to defuse the bomb, we just need to follow the arrow and activate the slots on the grid in the same order.
Let’s memorize/write down the direction of the arrows. Once you’re done, tap on the “X” button to close this window.
Let’s go back to the bomb. Tap on it to start the interaction.

So, our task is to activate the slots on the grid in a certain order (by following the instructions from the manual). We will do this puzzle in several steps. Let’s begin.
Step 1
Tap on the first slot in the first row, then tap on the first slot in the second row, then tap on the first slot in the third row, then tap on the first slot in the fourth row.
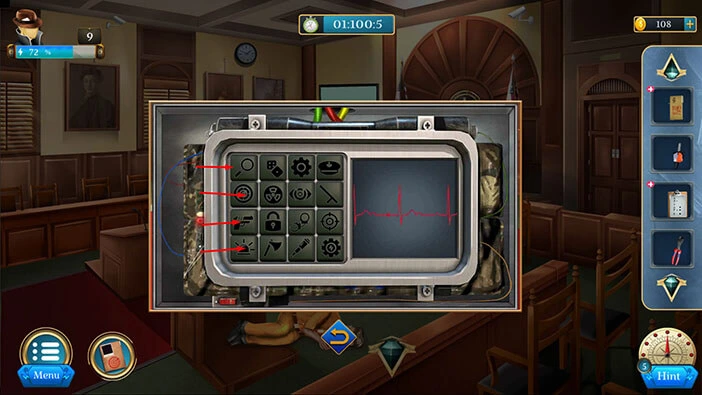
Step 2
Tap on the second slot in the fourth row, then tap on the second slot in the third row, then tap on the second slot in the second row, then tap on the second slot in the first row.

Step 3
Tap on the third slot in the first row, then tap on the third slot in the second row, then tap on the third slot in the third row, then tap on the third slot in the fourth row.

Step 4
Tap on the fourth slot in the fourth row, then tap on the fourth slot in the third row, then tap on the fourth slot in the second row, then tap on the fourth slot in the first row.

With that, you will disarm the bomb. Let’s tap on the arrow at the bottom to go back.
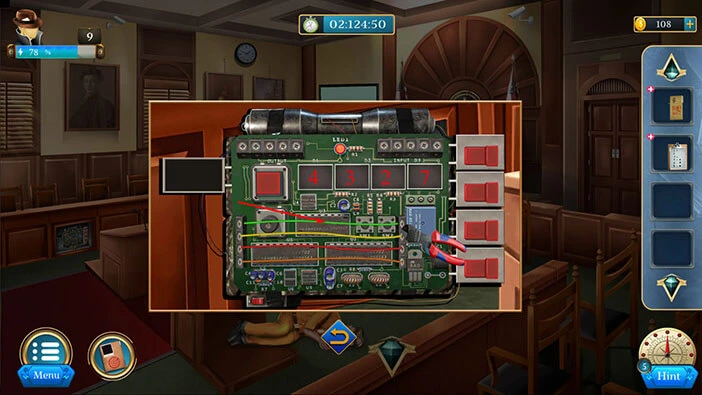
Let’s take a look at the second bomb.
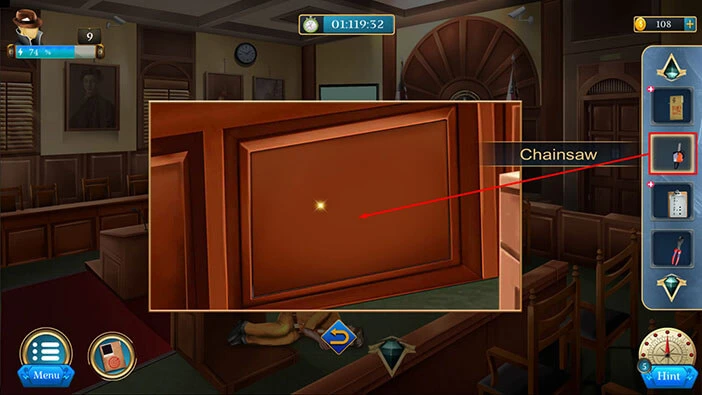
Next, let’s tap on the large desk on the left to take a closer look at it.
Next, select the “Chainsaw” from the inventory and use it to cut out the piece of wood.
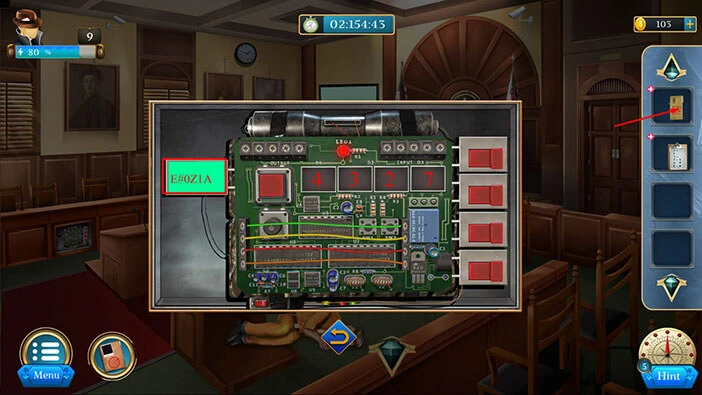
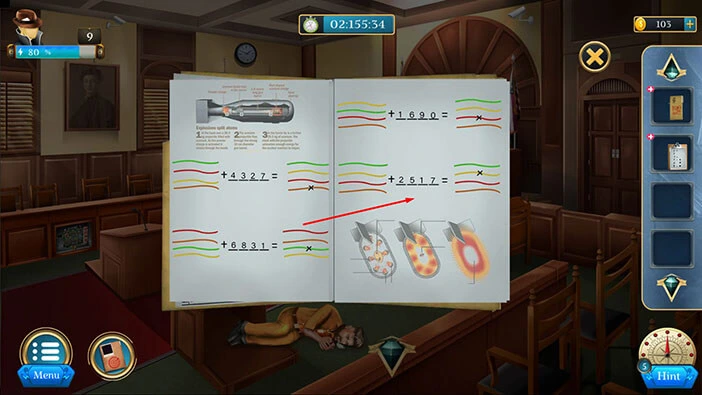
We discovered the second bomb. Select the “Wire cutters” from the inventory and place them next to the bomb.
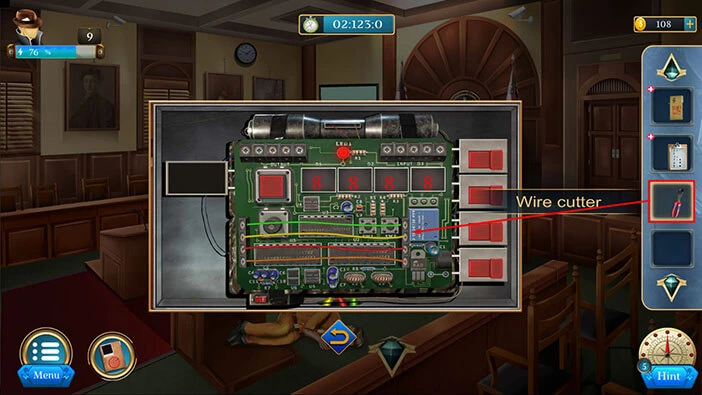
Once you see the number “2517”, tap on the green arrow. Next, once you see the number “4327” tap on the green arrow. Next, once you see the number “1692” tap on the green arrow. Lastly, once you see the number “6831” tap on the green arrow. With that, you will stop the timer.
Next, let’s tap on the arrow at the bottom to go back.
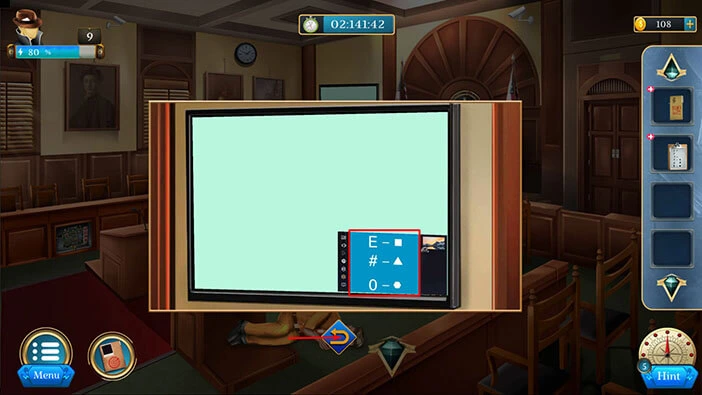
Next, let’s tap on the bottom right corner of the TV screen to take a closer look at the note.

Here, we can see another hint. Let’s memorize/write down this hint.
E = Square
# = Triangle
0 = Hexagon
Once you’re done, tap on the arrow at the bottom to go back.
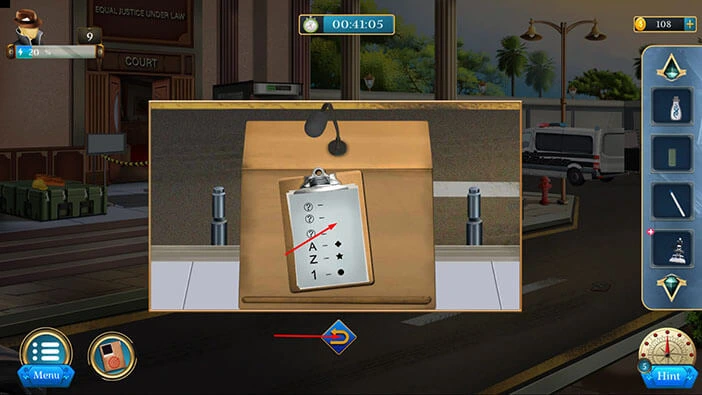
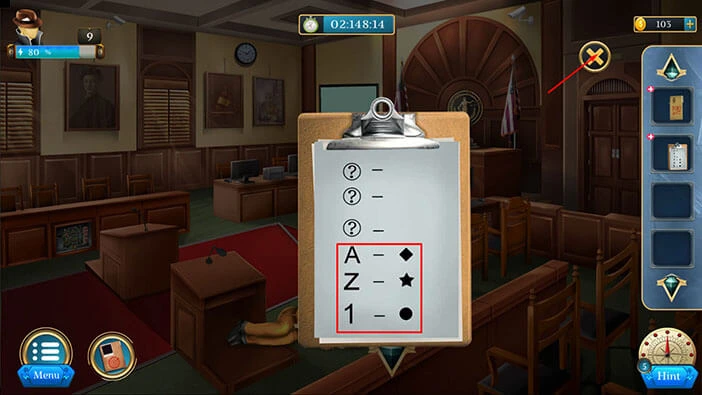
Next, select the “Notepad” from the inventory and it will appear in the middle of the screen. We already discovered the value of the first three symbols, so let’s memorize/write down the value for the other three symbols. Here, we have,
A = diamond
Z = star
1 = Circle
Once you’re done, tap on the “X” button to close this window.
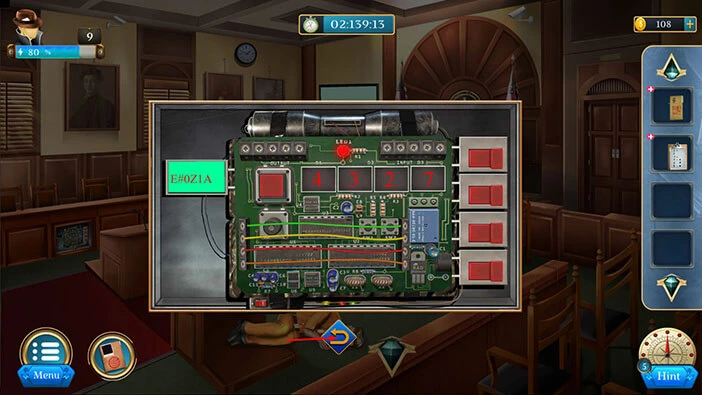
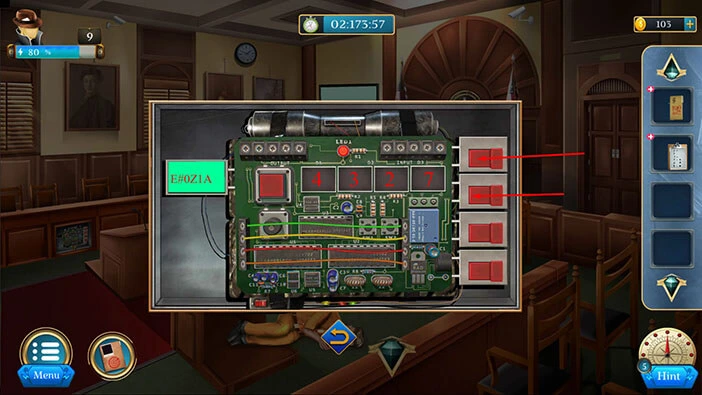
Let’s go back to the bomb. Tap on it to start the interaction.
On the left side, we can see “E#0Z1A”, This should be a hint for disarming the bomb, but there is a bug (as you will see in a moment), the order should be “E#0A1Z”.
Our next task is to replace these symbols with the geometrical shapes that we discovered by examining the notepad and the note on the TV screen.
So, we had,
E = Square
# = Triangle
0 = Hexagon
A = Diamond
1 = Circle
Z = Star
So, when we put it all together, we will get Square/ Triangle/ Hexagon/ Diamond/ Circle/Star. Let’s memorize/write down this information.
Once you’re done, tap on the “Bomb difusal manual” to examine it.
Let’s take a look at the last page. Tap twice to turn the page.
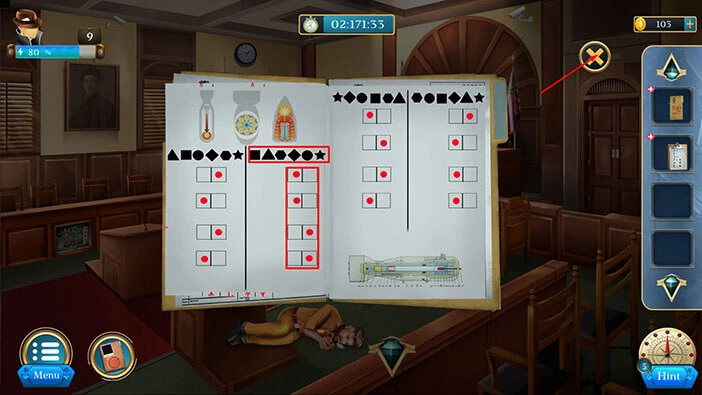
Here, we are looking for a combination of shapes that matches the combination of shapes that we discovered (Square/ Triangle/ Hexagon/ Diamond/ Circle/Star).
You will notice these symbols in the second column on the left page. Below it, we can see four pairs of slots with red circles. The positions of the circles are the final hint that we will use to disarm the bomb. So, let’s memorize/write down the position of the circles.
First row = left side
Second row = left side
Third row = right side
Fourth row = right side
Once you’re done, tap on the “X” button to close this window.
Let’s go back to the bomb.

On the left side, you will see four switches. Let’s tap on the first two switches to change their position to the left (the positions of the switches will match the hint that we saw in the manual). With that, you will disarm the bomb.
Our character thinks that the suspect wants to blow up the courthouse because he left some evidence. So, the Detective decided to take a look at the CCTV footage.
Let’s explore this room. On the desk in front of you, you will notice some “Books”. Let’s tap on them to take a closer look, and tap again to pick them up. After that, tap on the arrow at the bottom to go back.
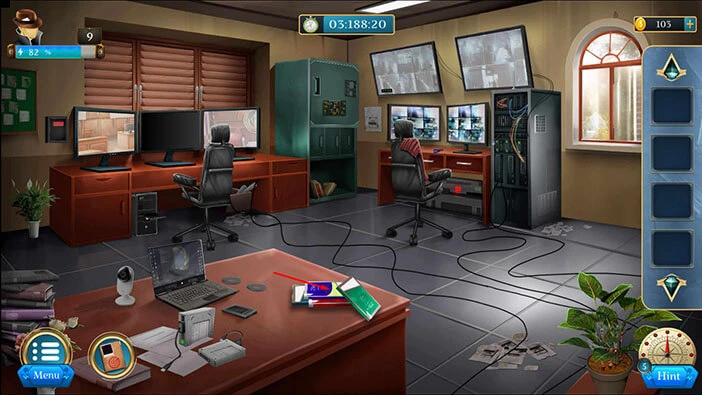
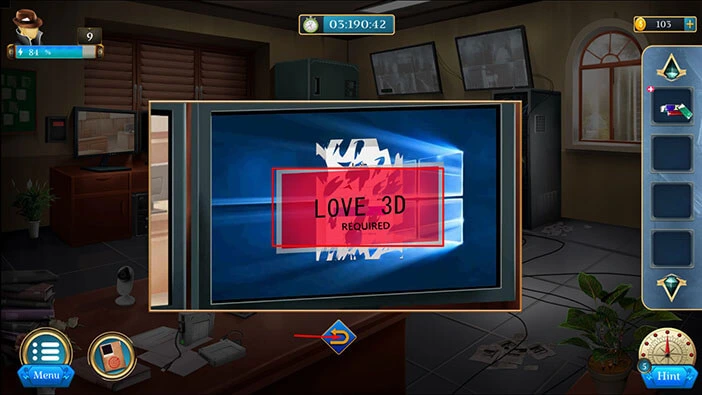
Let’s tap on the middle screen on the left to take a closer look at it, and tap again to turn it on.
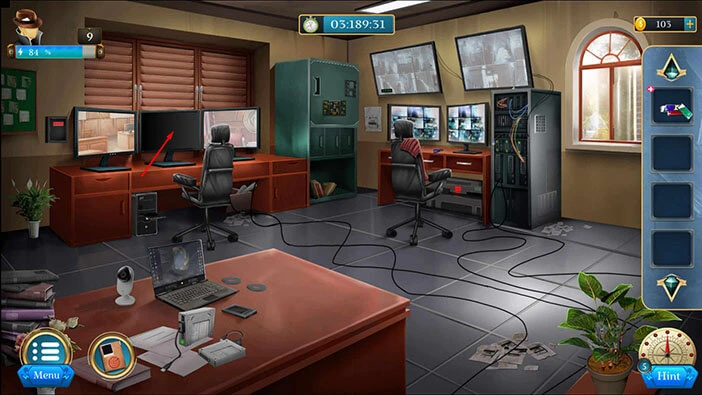
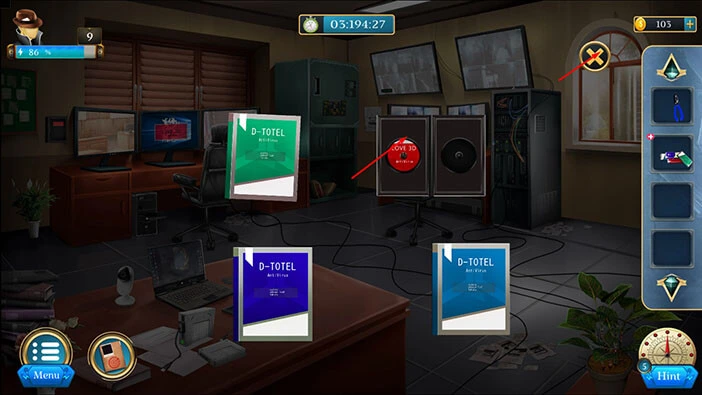
The system is under a virus attack, and we have to find a “Love 3D” CD in order to gain access to the computer.
Tap on the arrow at the bottom to go back.
Next, let’s tap on the desk on the right to take a closer look at it.

Here, you will find a “Wire Cutter”. Let’s tap on it to pick it up.
After that, tap on the arrow at the bottom to go back.
Next, select the “Books” in your inventory and they will appear in the middle of the screen. Let’s tap on the book in the top right slot to open it.

In the book, you will find Love 3D “CD”. Let’s tap on it to pick it up.
After that, tap on the “X” button to close this window.
Before we go back to the PC, let’s tap on the large, green locker on the left to take a closer look at it, and tap again to start the interaction.
Here, we have another puzzle. Our task is to place all shapes. We will do this puzzle in several steps. Let’s begin.
Step 1
Select the third shape on the right side, and insert it into the bottom left corner of the grid.
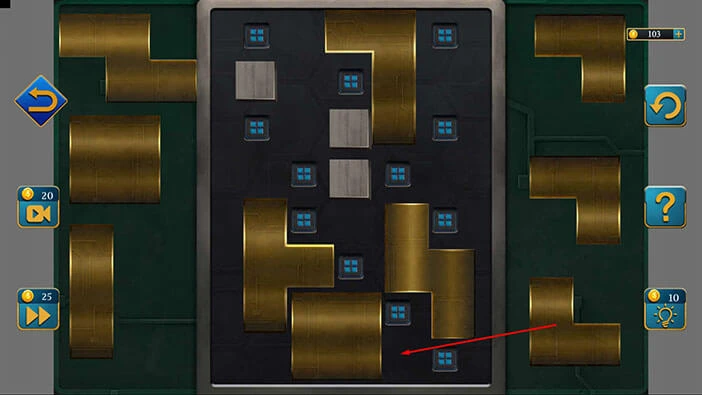
Step 2
Select the second shape on the right side, and insert it into the right side of the grid.
Step 3
Select the first shape on the right side, and insert it into the middle of the grid.
Step 4
Select the third shape on the left side, and insert it into the top right corner of the grid.

Step 5
Select the first shape on the left side, and insert it into the top left corner of the grid.
Step 6
Select the second shape on the left side, and insert it into the last empty space.
In the locker, you will find a “Pocket memo”. Let’s tap on it to pick it up.
After that, tap on the arrow at the bottom to go back.
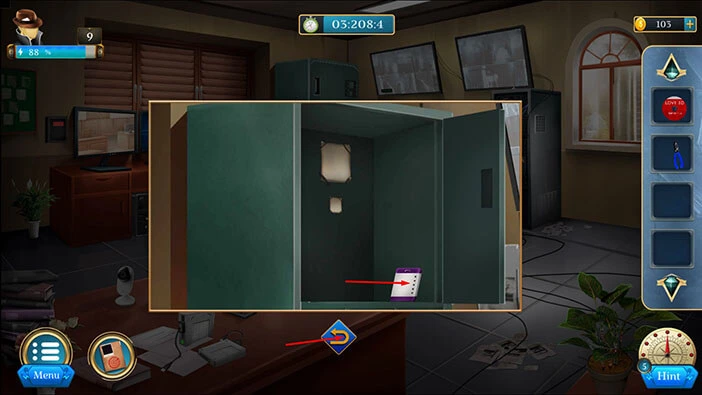
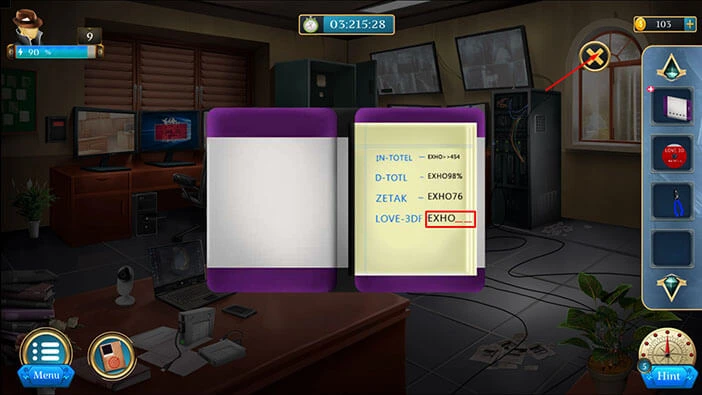
Select the “Pocket memo” from the inventory and it will appear in the middle of the screen. Let’s tap on the “Pocket memo” to open it.
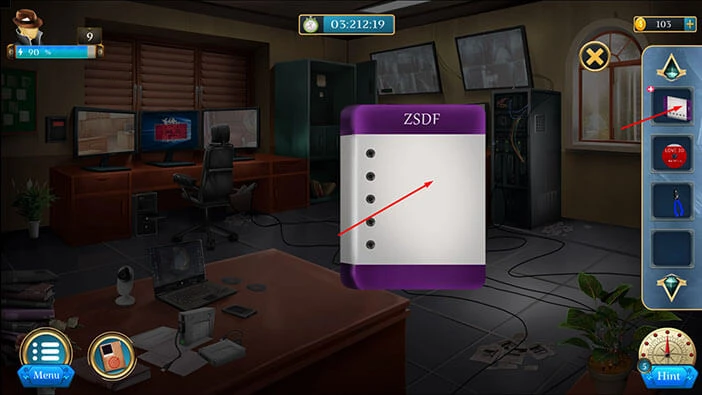
Here, we are interested in the last entry, “LOVE 3D = EXHO __”. Love 3D is the name of the CD that we need in order to defeat the virus, so let’s memorize/write down the password “EXHO”.
Also, you will notice that the last two letters of the password are missing, and discovering them is our next task.
Once you’re done, tap on the “X” button to close this window.
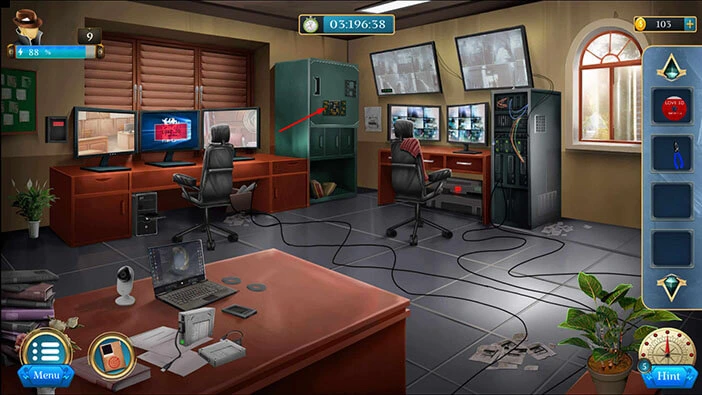
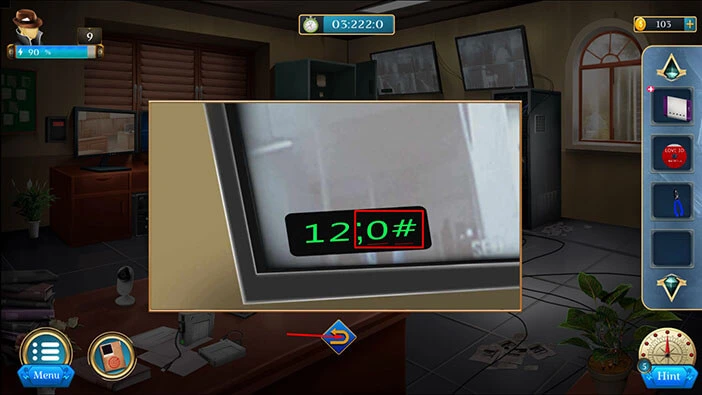
Next, let’s tap on the screen in the top left corner of the room to take a closer look at it.
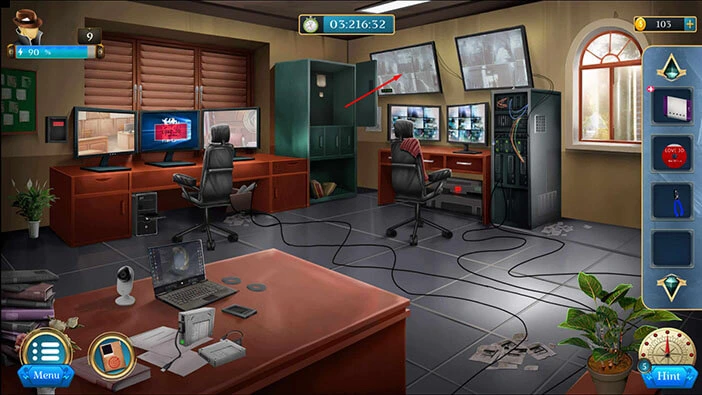
Here, you will discover the two symbols that we were looking for. The symbols are “O#”. When we put it all together, we will get the password “EXHO ; 0#”.
Let’s tap on the arrow at the bottom to go back.
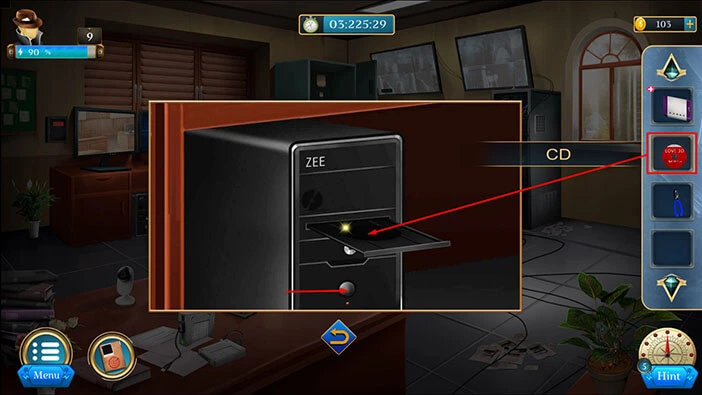
Let’s tap on the PC on the left to take a closer look at it.

Select the “CD” from the inventory and insert it into the empty slot. After that, tap on the button to start the interaction.
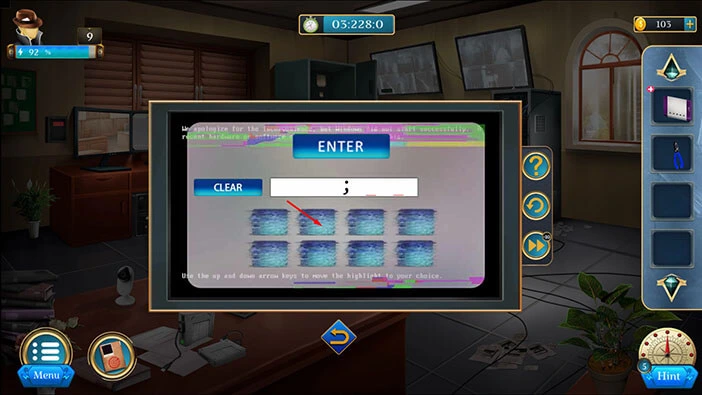
Our next task is to enter the password “EXHO ; 0#” that we discovered previously. We will do that in several steps. Let’s begin.
Step 1
Let’s tap on the second button in the first row to enter the letter “E”.
Step 2
Let’s tap on the first button in the first row to enter the letter “X”.

Step 3
Let’s tap on the fourth button in the first row to enter the letter “H”.

Step 4
Let’s tap on the third button in the first row to enter the letter “O”.

Step 5
Let’s tap on the second button in the second row to enter the number “0”.
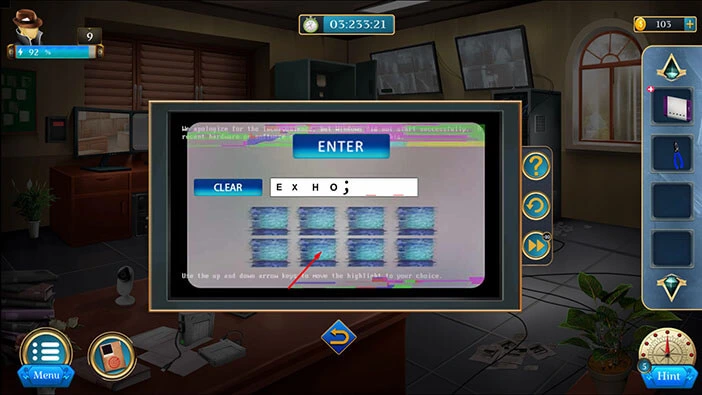
Step 6
Let’s tap on the first button in the second row to enter the symbol “#”.

Lastly, tap on the “Enter” button to confirm.

Let’s tap on the third folder to open it.
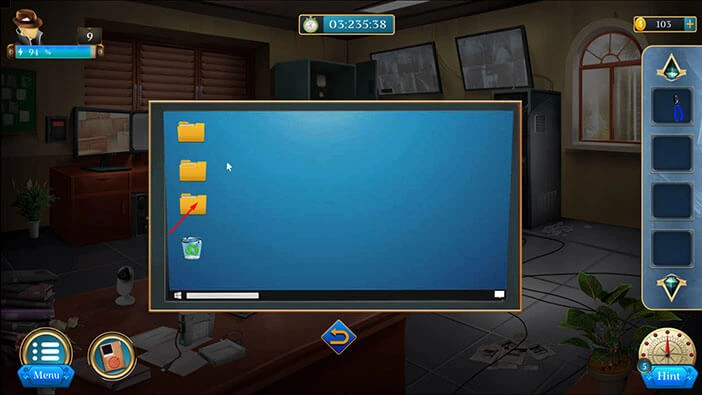
Let’s tap on the arrow at the bottom to go back.

Next, let’s tap on the small box on the wall on the left to take a closer look at it, and tap again to open it.

Here, you will discover another bomb. Select the “Wire cutter” from the inventory and drag it to the bomb to start the interaction. Our task is to disarm the button. We will do that in several steps. Let’s begin.
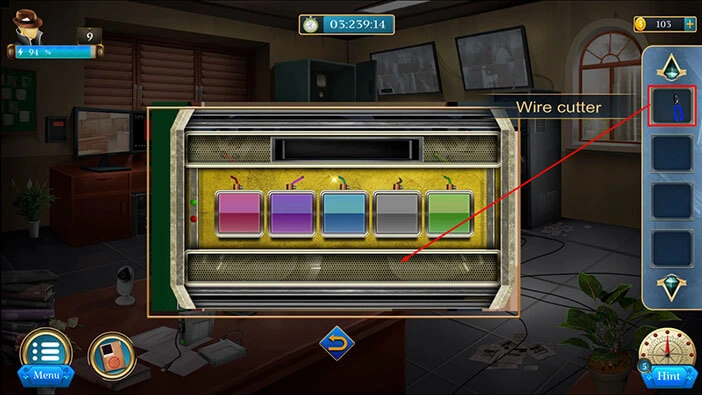
Step 1
Select the “Wire cutter” from the inventory and use it to cut the wire above the blue button.

Step 2
Select the “Wire cutter” from the inventory and use it to cut the wire above the green button.
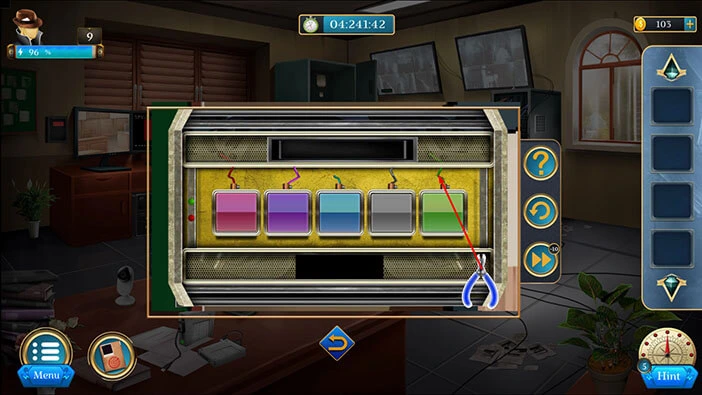
Step 3
Select the “Wire cutter” from the inventory and use it to cut the wire above the grey button.

Step 4
Select the “Wire cutter” from the inventory and use it to cut the wire above the purple button.

Step 5
Select the “Wire cutter” from the inventory and use it to cut the wire above the pink button.

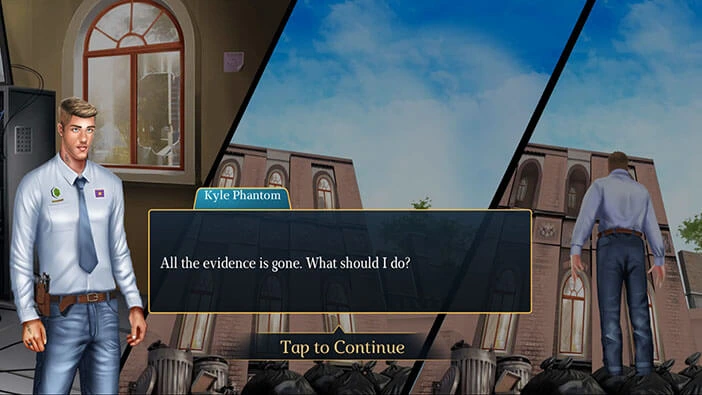
Our character will activate the countdown on the bomb and he will be forced to jump out of the window. He managed to save himself, but all evidence was destroyed in the explosion.
With that, we have reached the end of the ninth level. If you want to see the walkthrough for the tenth level, tap on the next part button.
Thank you for reading.