Room Escape: Detective Phantom | Level 8
Hello everyone and welcome to the walkthrough for the eighth level of “Room Escape: Detective Phantom”. In the eighth level, our task is to stop the Black Spider from eliminating his next victim.
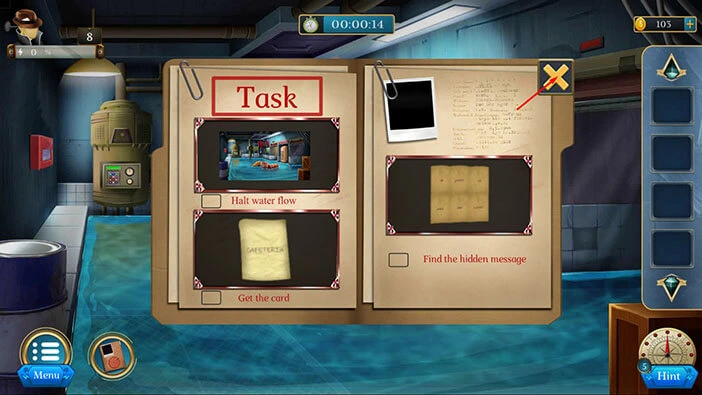
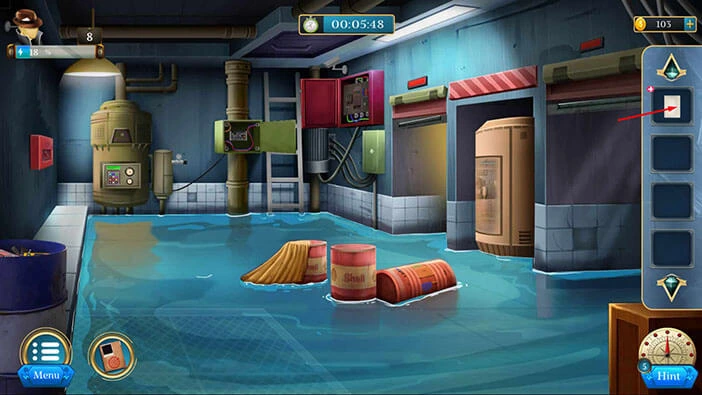
Our objectives are to “Halt the water flow” “Get the Card” and “Find the hidden message”. Tap on the “X” button to go back.
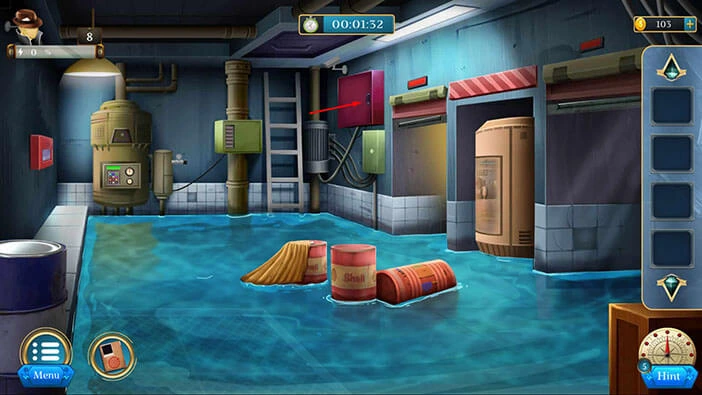
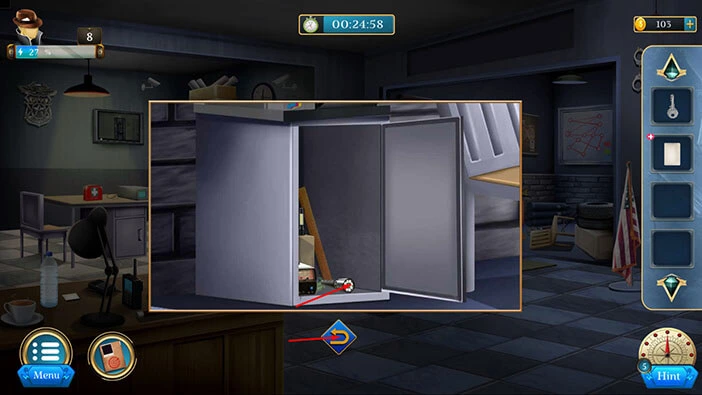
Let’s tap on the red box on the wall on the right, to take a closer look at it, and tap again to open it.
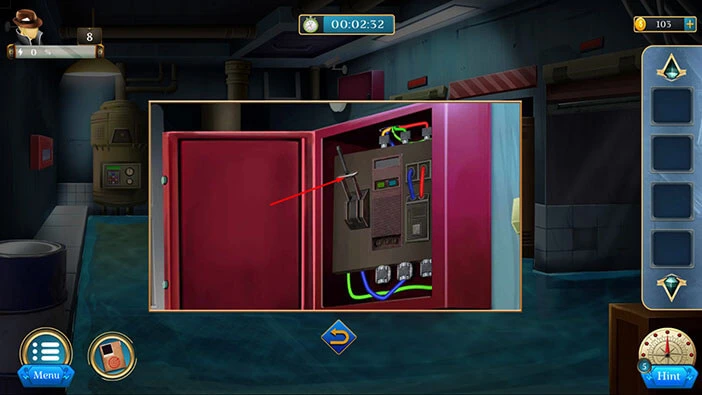
Let’s activate the lever. With that, you will close the two doors on the right.
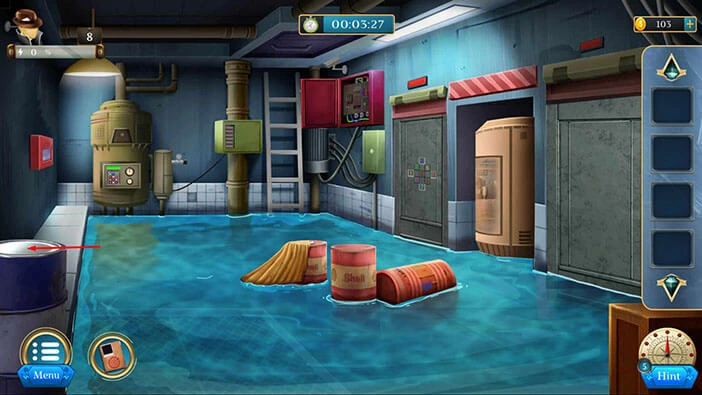
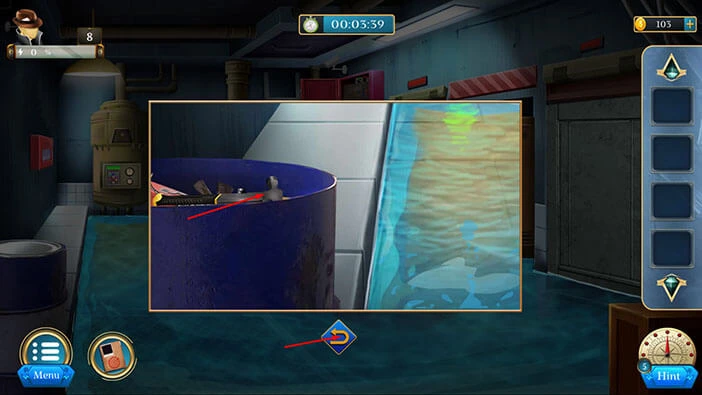
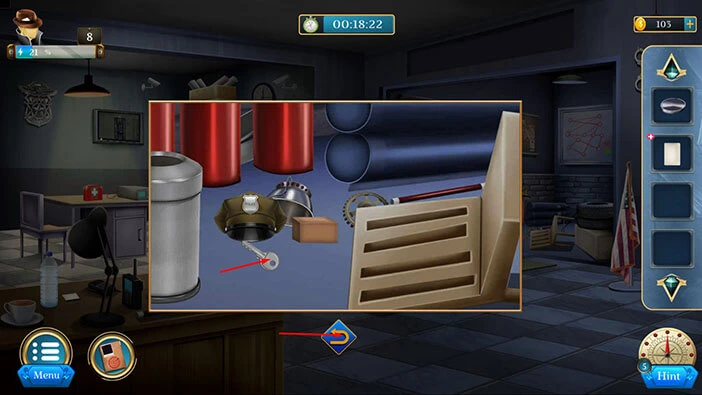
Let’s tap on the blue barrel in the bottom left corner to take a closer look at it, and tap again to open it.
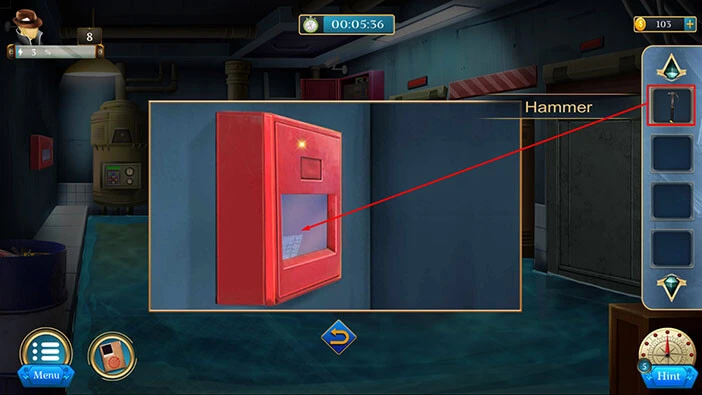
In the barrel, you will find a “Hammer”. Let’s tap on it to pick it up.
After that, tap on the arrow at the bottom to go back.
Next, let’s tap on the red box on the wall on the left to take a closer look at it.

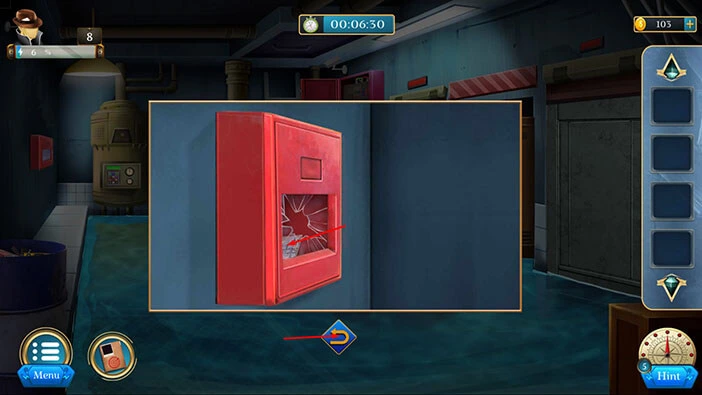
Select the “Hammer” from the inventory and use it to break the glass.
In the red box, you will find an “Equation paper”. Let’s tap on it to pick it up.
After that, tap on the arrow at the bottom to go back.
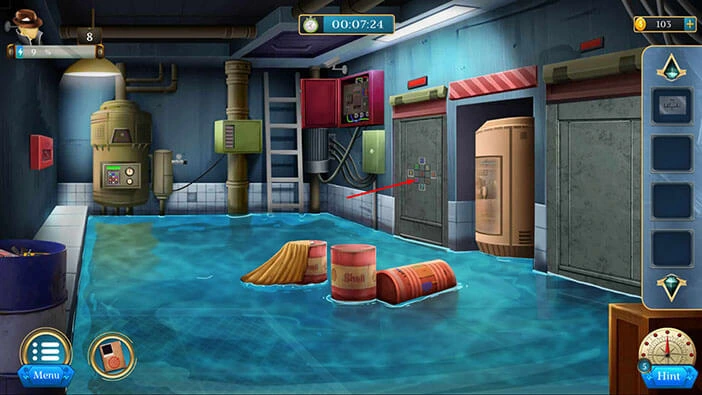
On one of the doors on the right, you will see some numbers. Let’s tap on this door to take a closer look at it.
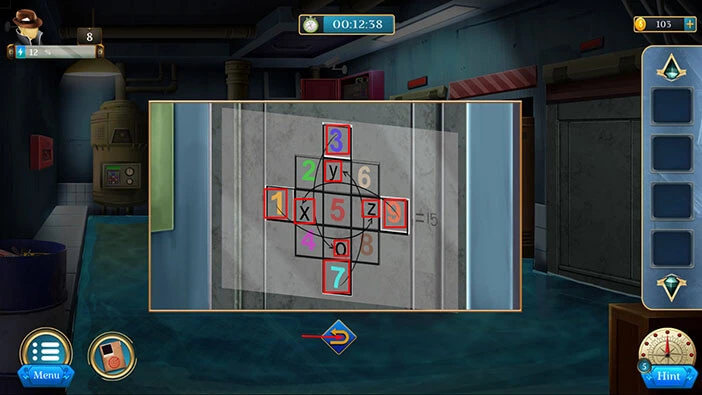
Select the “Equation paper” from the inventory and place it over the numbers.
Here, we can see that the x, y, z, and o are connected with a certain number. Let’s memorize/write down the value and the color associated with each letter.
X = 9 = Orange
Y = 7 = Light Blue
Z = 1 = Yellow
O = 3 = Blue
Once you’re done, tap on the arrow at the bottom to go back.
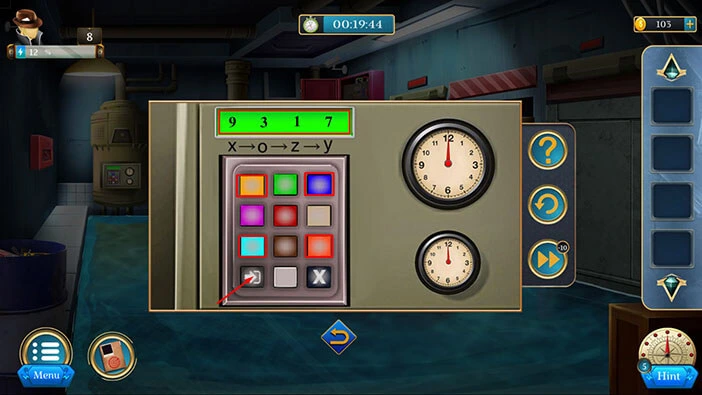
Let’s tap on the machine to take a closer look at it, and tap again to start the interaction.

Let’s enter the values that we discovered previously. Above the keypad, we can see the order of the symbols, X -> O -> Z -> Y. So, let’s enter the values for these symbols.
X = 9 = Orange. So, first, let’s tap on the orange button.
O = 3 = Blue. Second, let’s tap on the blue button.
Z = 1 = Yellow. Third, let’s tap on the yellow button.
Y = 7 = Light Blue. Fourth, let’s tap on the Light Blue button.
Once you’re done, tap on the “Enter” button. With that, you will activate the machine.
Tap on the arrow at the bottom to go back.
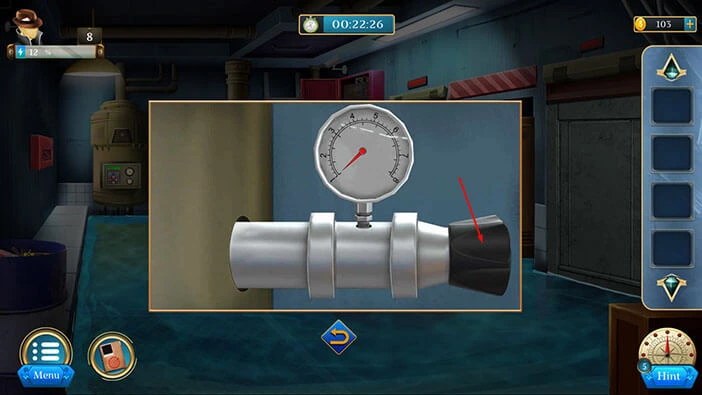
Next, let’s tap on the dial on the right side of the machine to take a closer look at it.
Tap several times on the handle on the left to turn on the power.
Here, we have another puzzle. In the bottom left corner, we can see the lightning symbols, and it represents the power source. In the other three corners, we can see three red dots. Our task is to create the connection between the power source and the three dots. Once we do that, we will activate the red dot, and it will turn green. However, once we activate one of the dots, we can break the connection in order to activate the other dots. Lastly, we can create the connection by rotating the wires.
We will do this puzzle in several steps. Let’s begin.
Step 1
Tap three times on the first slot in the second row to rotate the wire.

Step 2
Tap three times on the second slot in the second row to rotate the wire.
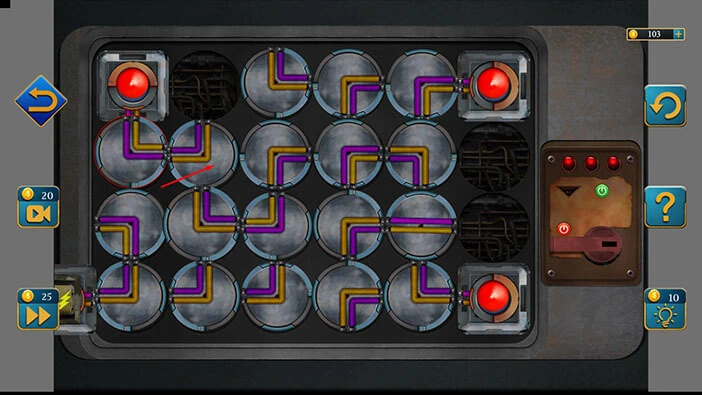
Step 3
Tap three times on the second slot in the third row to rotate the wire.
Step 4
Tap three times on the first slot in the third row to rotate the wire and you will connect the power source with the dot in the top left corner.

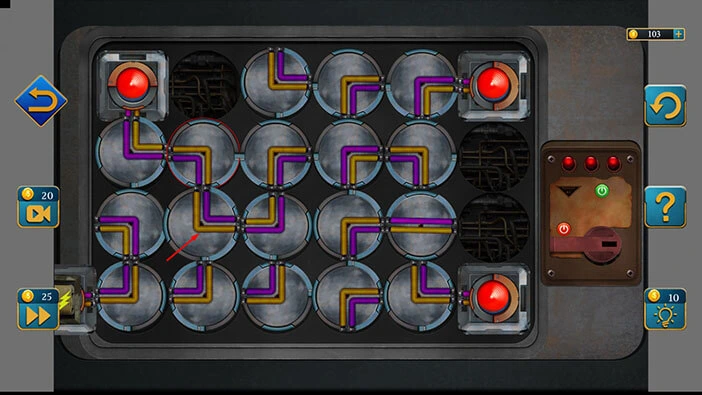
Step 5
Tap once on the fifth slot in the second row to rotate the wire.
Step 6
Tap twice on the fourth slot in the third row to rotate the wire.
Step 7
Tap twice on the third slot in the third row to rotate the wire.
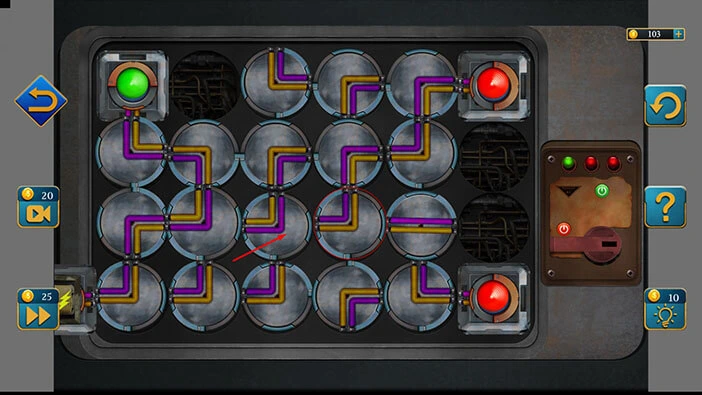
Step 8
Tap once on the second slot in the fourth row to rotate the wire.

Step 9
Tap three times on the second slot in the third row to rotate the wire, and you will connect the power source with the dot in the top right corner.
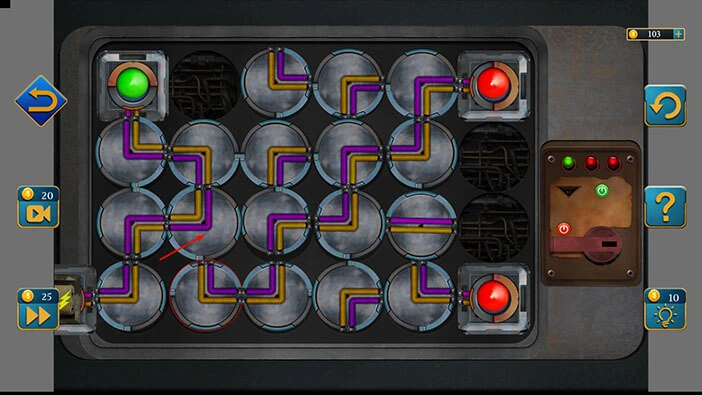
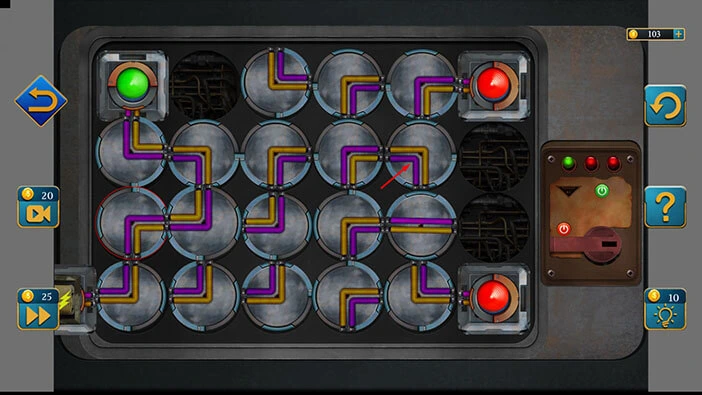
Step 10
Tap once on the fifth slot in the third row to rotate the wire.
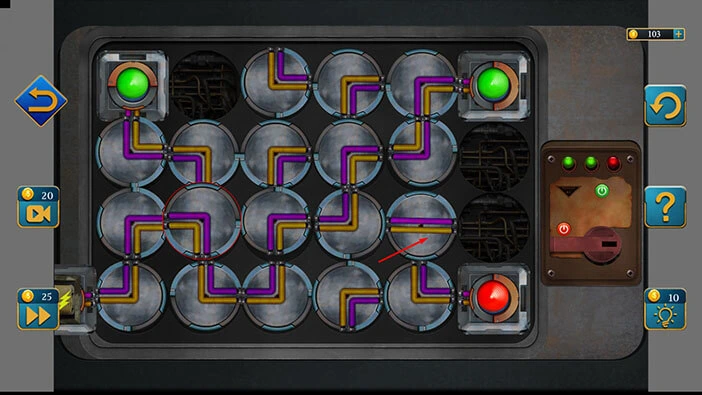
Step 11
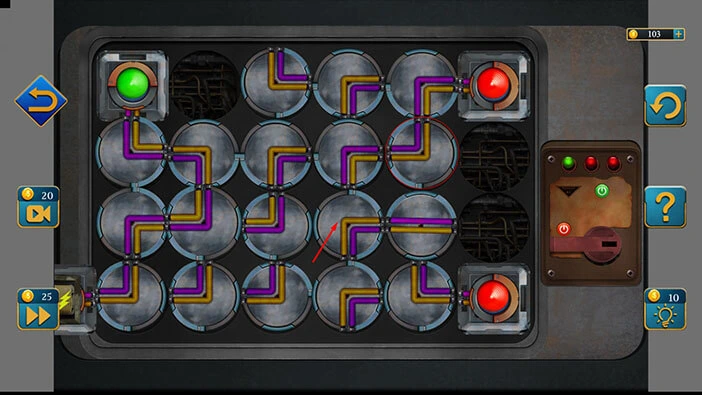
Lastly, tap three times on the fifth slot in the second row to rotate the wire. With that, you will solve this puzzle.

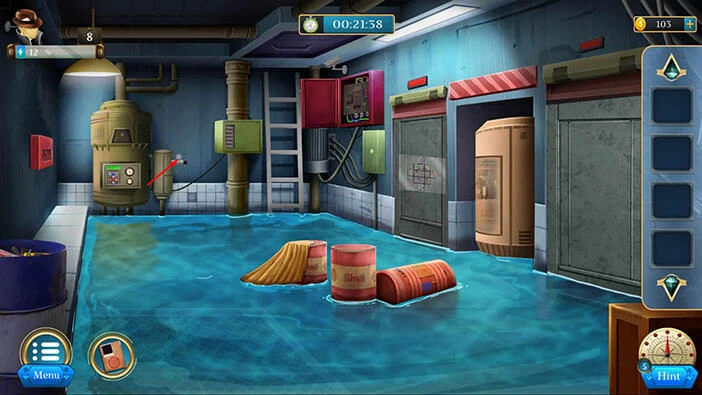
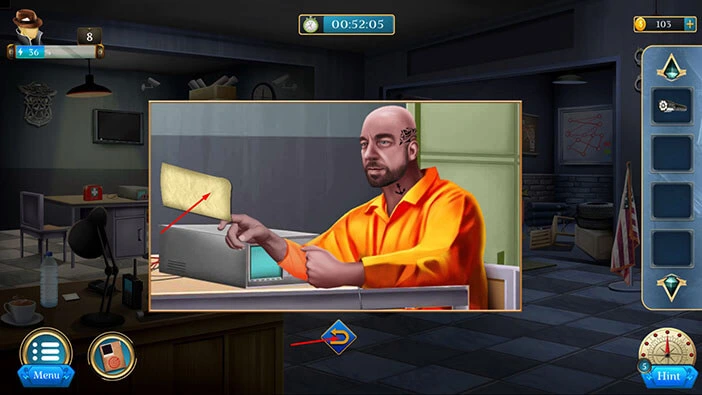
Next, tap on the barrel in front of you to take a closer look at it, and you will discover a “Prisoner card”. Let’s tap on it to pick it up. After that, tap on the arrow at the bottom to go back.
Lastly, let’s tap on the “Prisoner card” in the inventory to examine it.
With that, you will open the doors on the right. Let’s tap on the door on the right to proceed to the next room.
Our next task is to look at the CCTV camera and discover who caused the flooding. Tap on the arrow at the bottom to go back.
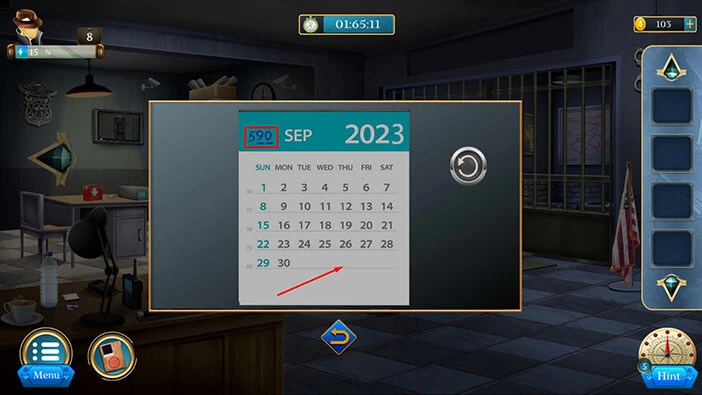
On the wall on the right, next to the clock, you will notice a calendar. Let’s tap on the calendar to take a closer look at it.
Next to September, you will notice the number “590”. Let’s memorize/write down this number because it represents the hint for the next puzzle.
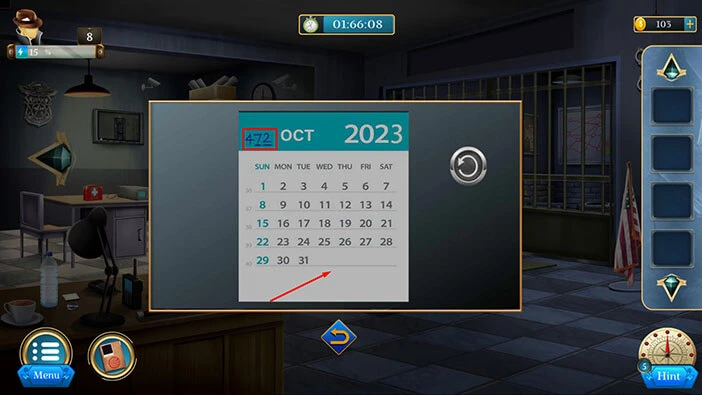
After that, tap on the calendar to take a look at the next month.
Next to October, you will notice the number “472”. Let’s memorize/write down this number.
After that, tap on the calendar to take a look at the next month.
Next to November, you will notice the number “361”. Let’s memorize/write down this number.
After that, tap on the arrow at the bottom to go back.

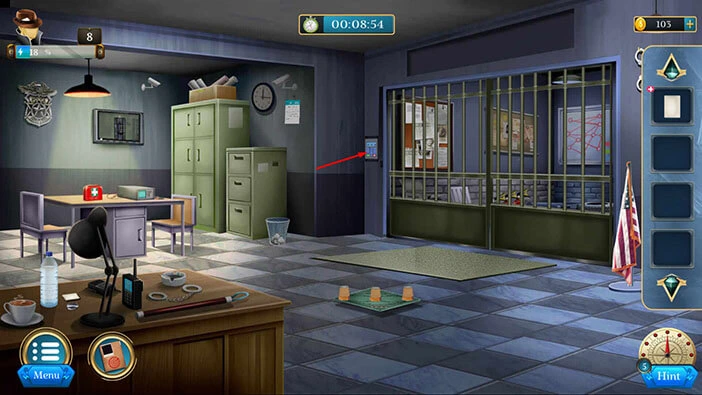
Next, let’s tap on the keypad on the wall on the right to take a closer look at it, and tap again to start the interaction.
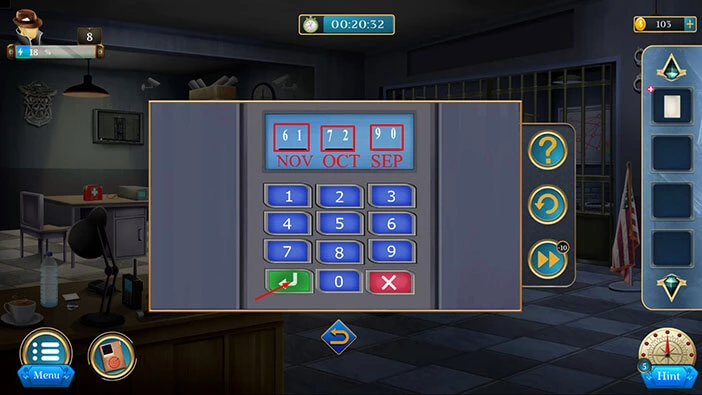
Here, we can see “Nov” “Oct” and “Sep” and two numbers are associated with each month. So, let’s enter the last two numbers for each month (we discovered the numbers by examining the Calendar). We had,
Nov = 361. So, let’s enter the number “61”.
Oct = 472. So, let’s enter the number “72”.
Sep = 590. So, let’s enter the number “90”.
Once you’re done, tap on the “Enter” button to confirm.
With that, you will raise the bars on the right. Before we explore this room, let’s tap on the desk on the left to take a closer look at it.

Here, you will find a “Button”. Let’s tap on it to pick it up. After that, tap on the arrow at the bottom to go back.
In the room on the right, you will notice a trash can. Tap on it to take a closer look, and tap again to move the trash can.
Behind the trash can, you will find a “Key”. Let’s tap on it to pick it up.
After that, tap on the arrow at the bottom to go back.
Next, let’s tap on the safe, located on the left side, to take a closer look.
Select the “Button” from the inventory and use it to unlock the safe.

In the safe, you will find a “Torchlight”. Let’s tap on it to pick it up. After that, tap on the arrow at the bottom to go back.
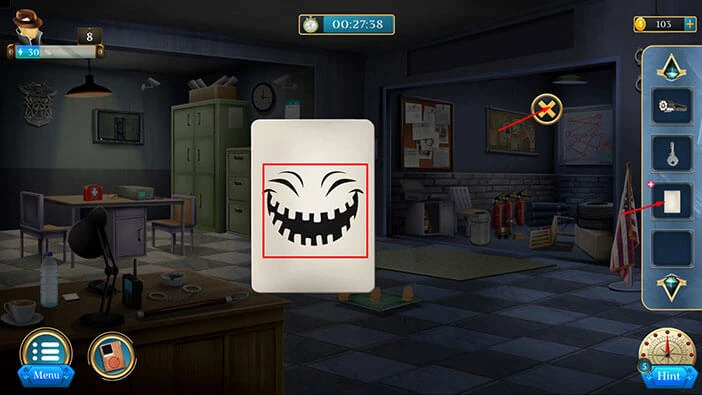
Next, let’s take another look at the “Prisoner Card” in our inventory.
Here, you will see a smiling symbol. Let’s memorize it because we will need it for the next puzzle. Once you’re done, tap on the “X” button to close this window.
Let’s go back to the CCTV camera. It is located on the wall on the left.
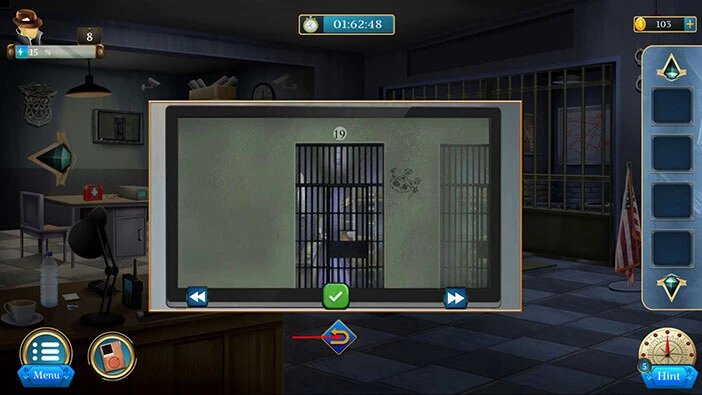
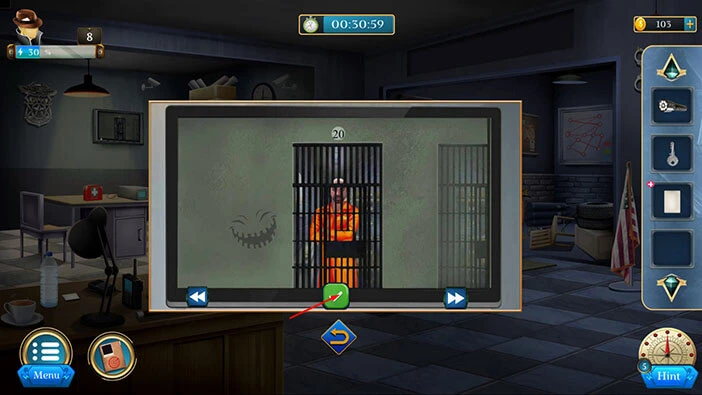
Our next task is to located the symbol that we saw when we examined the “Prisoner Card”. Tap on the arrow on the right to take a look at the next cell.
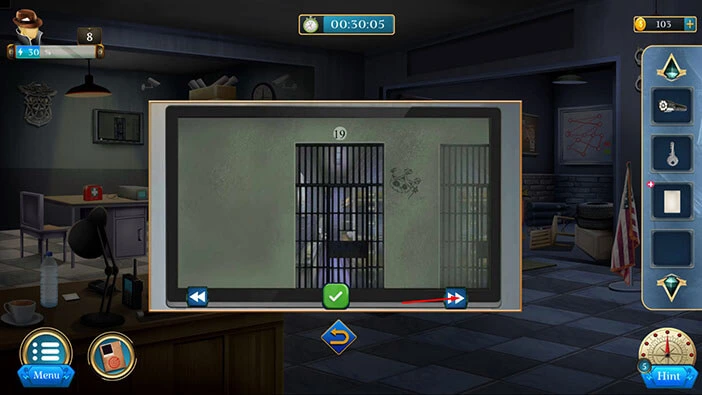
Here, you will notice the symbol on the wall. Let’s tap on the checkmark button to confirm.
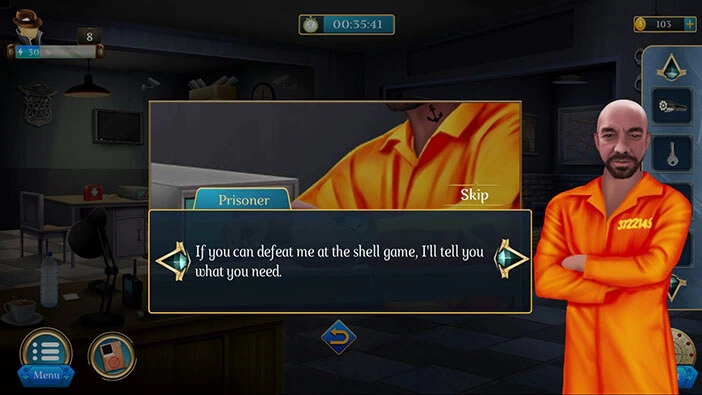
In the next scene, the warden will bring the prisoner for questioning. Let’s tap on the prisoner to start the interaction.

The prisoner admitted that he flooded the room to get our attention. He did that because he was following the orders of the Black Spider. He said that he will reveal everything that we wanted to know if we beat him in the shell game. Our character will agree to these terms.
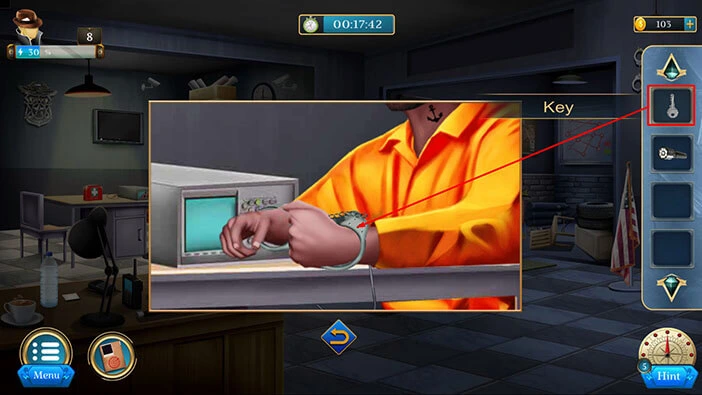
Let’s play. Select the “Key” from the inventory and use it to unlock the handcuffs.
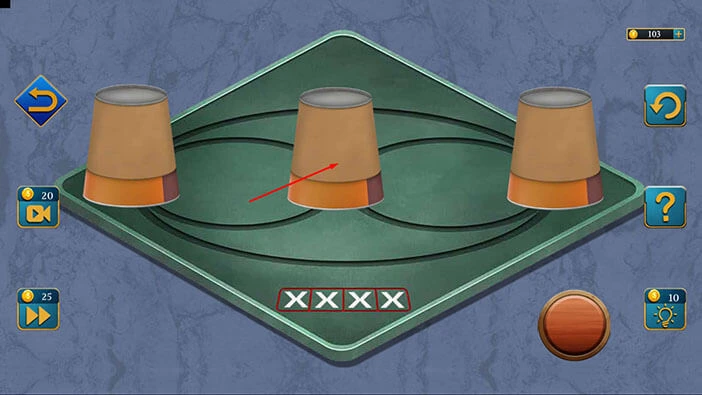
Let’s tap on the game to start the interaction.
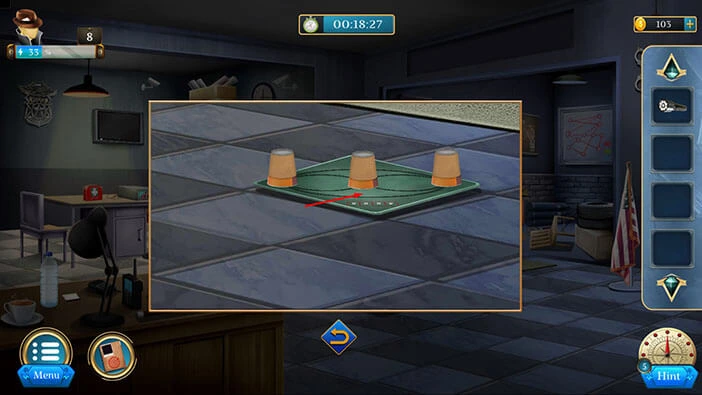
Tap on the red button to start the game.

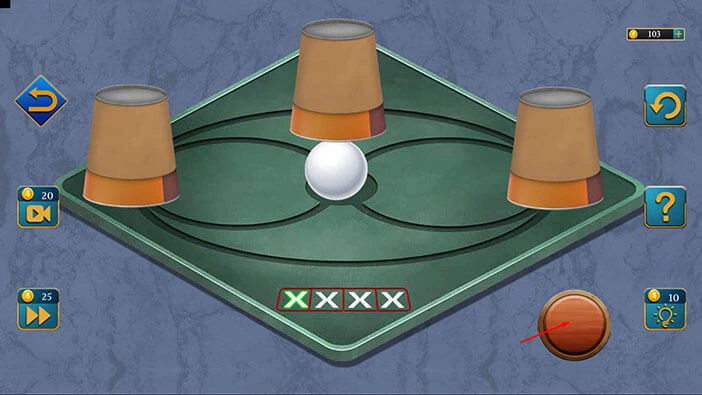
The prisoner will shuffle the glasses, and our task is to guess the location of the ball. Let’s tap on the middle glass.
Our guess was correct, and the first “X” symbol will turn green. So, we have to make a correct guess three more times in order to win. Let’s tap on the button on the right to play again.
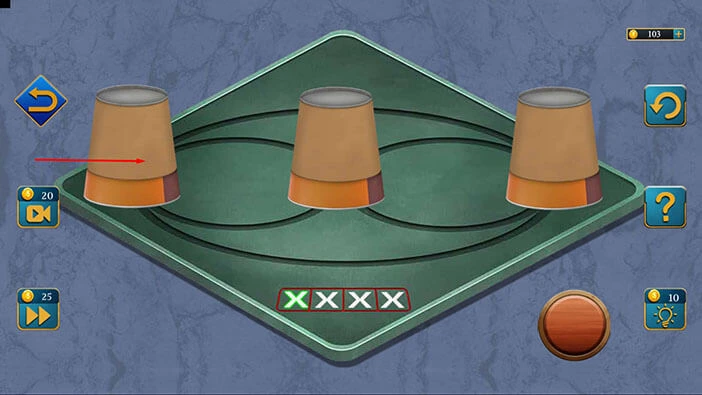
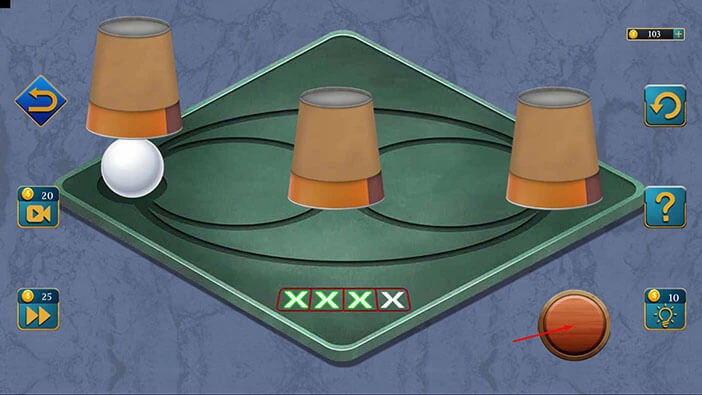
The prisoner will shuffle the glasses, and our task is to guess the location of the ball. Let’s tap on the left glass.
We have to make a correct guess two more times in order to win. Let’s tap on the button on the right to play again.

The prisoner will shuffle the glasses, and our task is to guess the location of the ball. Let’s tap on the left glass.

We have to make a correct guess one more time in order to win. Let’s tap on the button on the right to play again.
The prisoner will shuffle the glasses, and our task is to guess the location of the ball. Let’s tap on the middle glass.

Once you defeat the prisoner in his own game, will give you a “Clue hint”. Let’s tap on it to pick it up.
After that, tap on the arrow at the bottom to go back.
Let’s examine this message. Tap on the “Clue hint” from the inventory and it will appear in the middle of the screen. However, we can only see a blank paper. Let’s select the “Torchlight” from the inventory and use it on the clue hint.
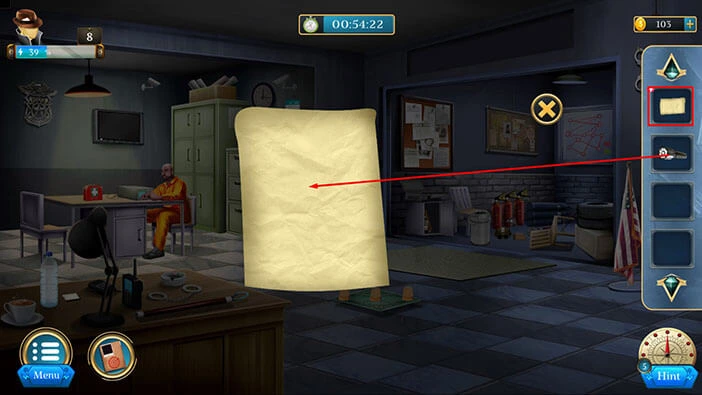
The word cafeteria will appear on the paper. So, our next task is to investigate the cafeteria. Let’s continue.
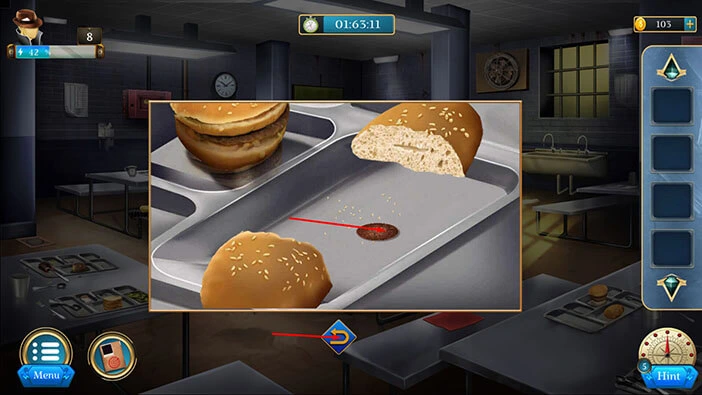
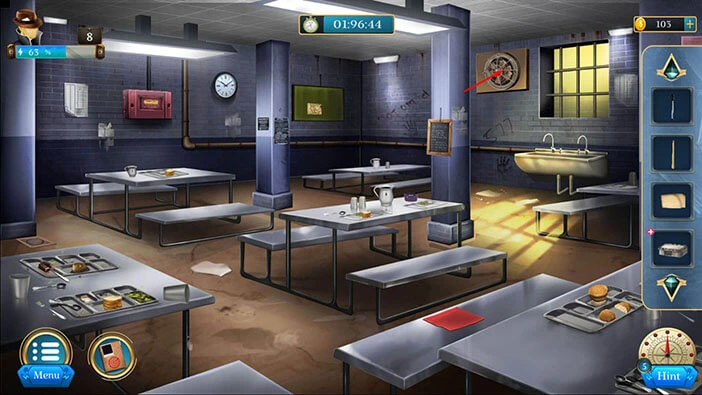
Let’s explore the cafeteria. On the table on the left you will notice a loaf of bread. Let’s tap on it to take a closer look, and tap on it again to break it in half.

You will find a “Coin” inside the bread. Let’s tap on the “Coin” to pick it up. After that, tap on the arrow at the bottom to go back.
On the floor in front of you, you will notice a “Knife”. Tap on it to take a closer look, and tap again to pick it up.
After that, tap on the arrow at the bottom to go back.

Next, let’s tap on the sink on the right to take a closer look at it, and tap again to look inside.
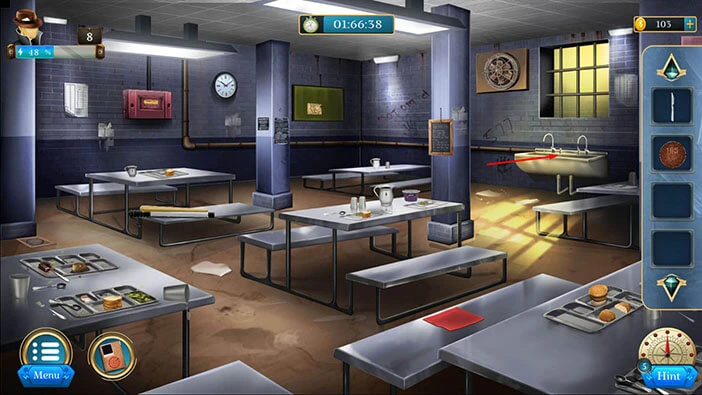
Let’s tap on the cafeteria trays to move them aside.
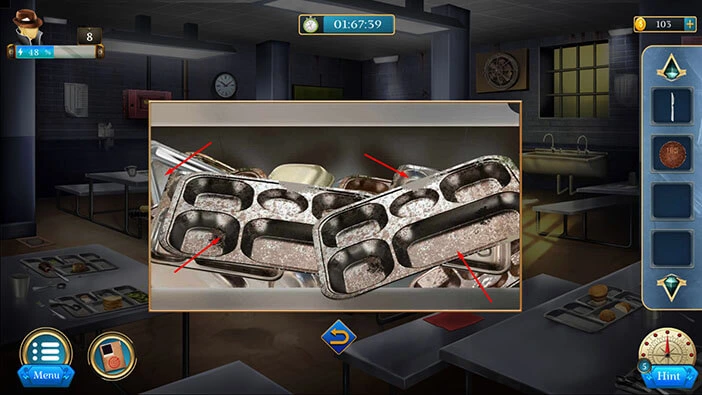
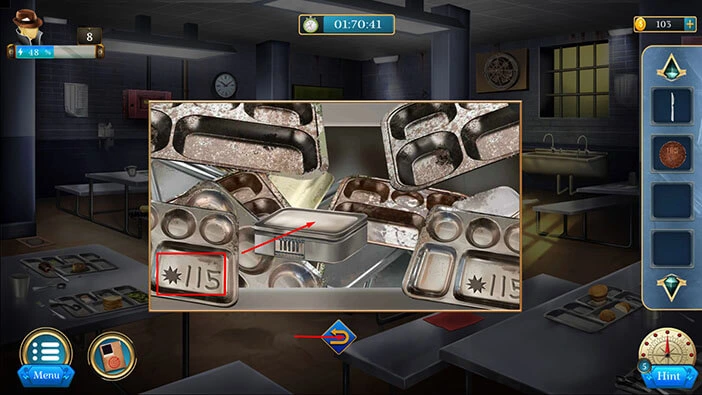
Here, you will find an “Aluminum box”. Let’s tap on it to pick it up. Also, on the trays in the corner of the sink, you will notice a star and next to it the number 115. Let’s memorize/write down this information (Star 115) because it represents a hint for a puzzle that we will encounter later in the walkthrough.
Once you’re done, tap on the arrow at the bottom to go back.
If you take a look at the table in the middle, you will notice a purple can. Let’s tap on it to take a closer look.
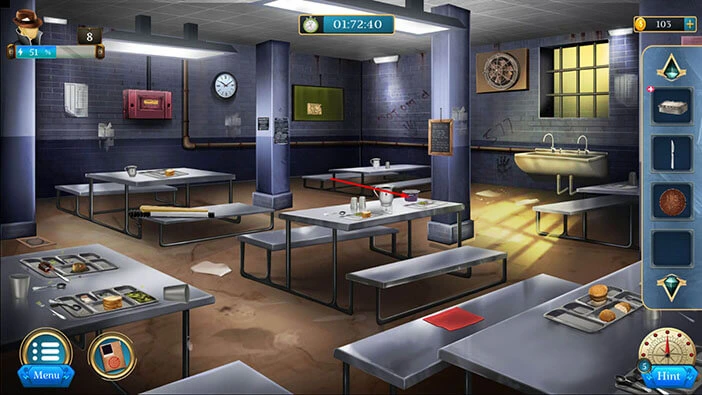
Select the “Knife” from the inventory and use it to cut open the can. After that, tap on the can to look inside.
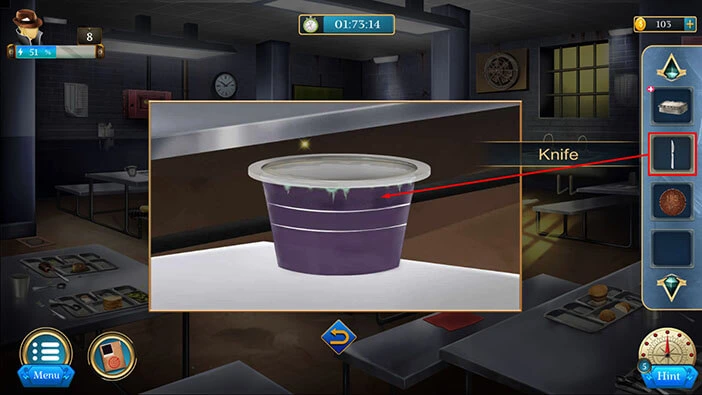
Inside you will find a “Paper piece”. Let’s tap on it to pick it up. After that, tap on the arrow at the bottom to go back.
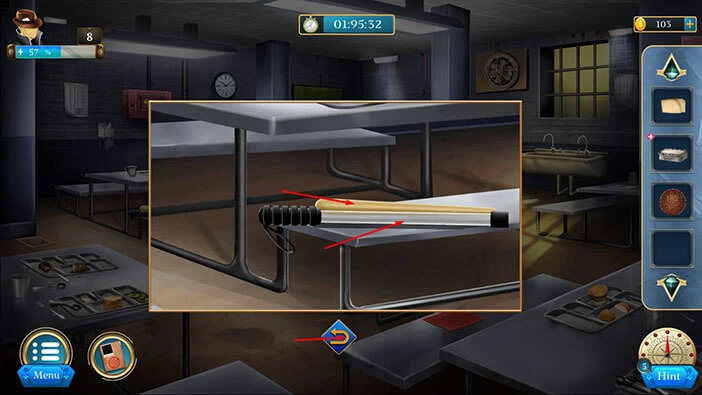
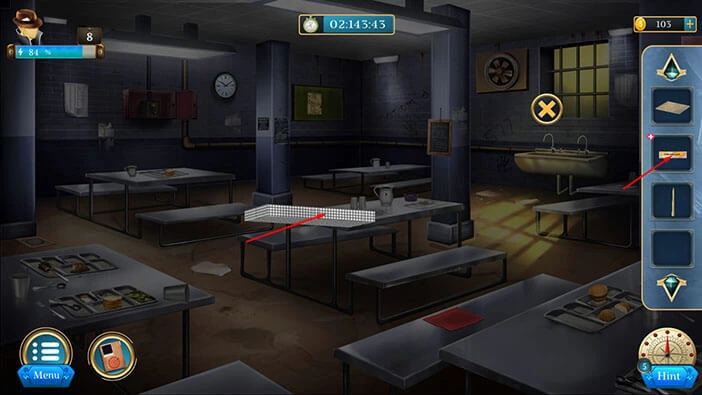
Next, you will notice two items on the bench. Let’s tap on the bench to take a closer look.
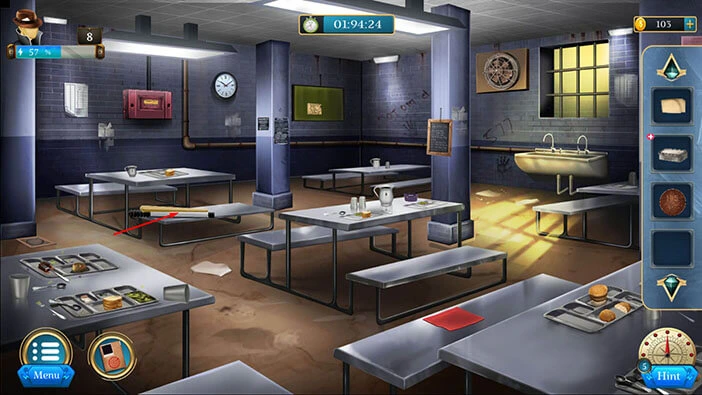
Here, you will find a “Baton” and a “Nightstick”. Let’s tap on these two items to pick them up.
After that, tap on the arrow at the bottom to go back.
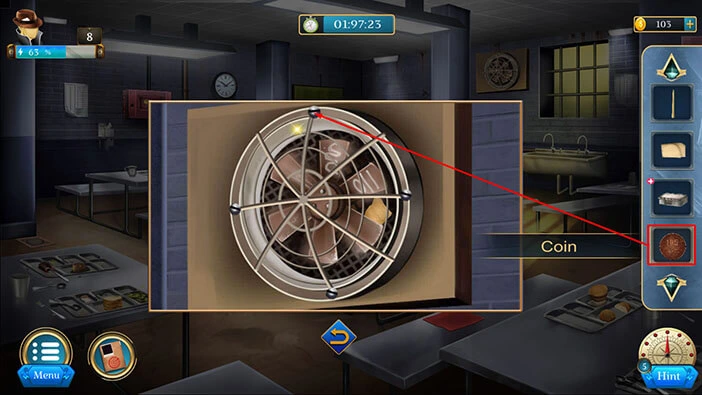
Next, let’s tap on the ventilator on the right to take a closer look at it.
Select the “Coin” from the inventory and use it to remove the screws.
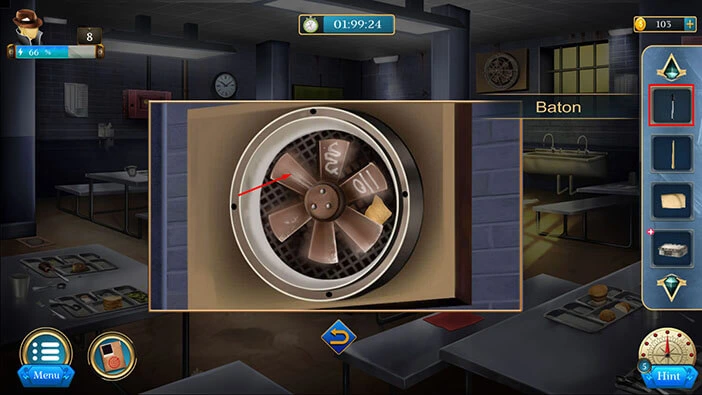
We can see a note behind the fan, but we must find a way to stop the fan in order to reach the item. Select the “Baton” from the inventory and use it to stop the fan.
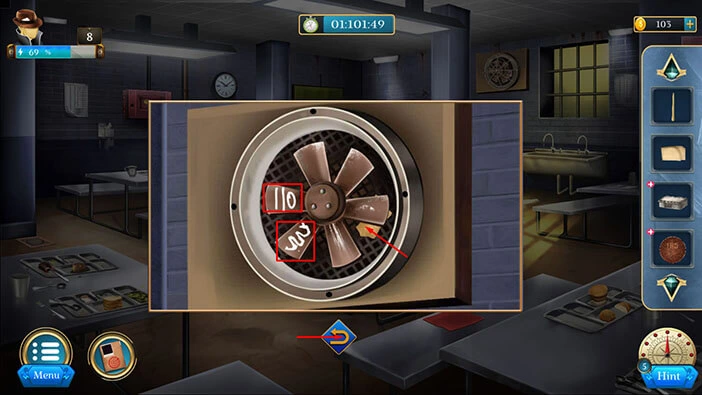
We can now reach the “Paper piece” so let’s tap on it to pick it up. Here, you will also see a wiggly line and the number 110. Let’s memorize/write down this information (the wiggly line and the number 110) because we will need it for one of the puzzles that we will encounter later in the walkthrough.
Once you’re done, tap on the arrow at the bottom to go back.
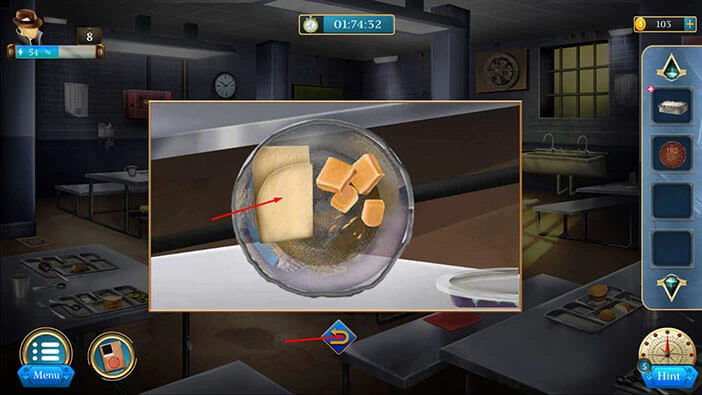
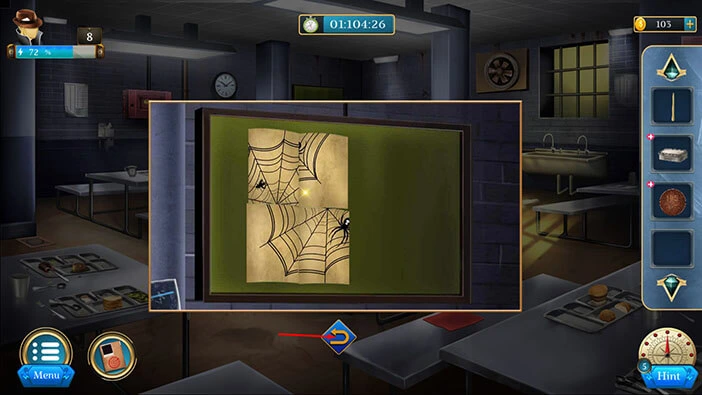
Next, let’s tap on the green panel on the wall on the right to take a closer look at it.

Select the two “Paper pieces” from the inventory and place them on the panel.
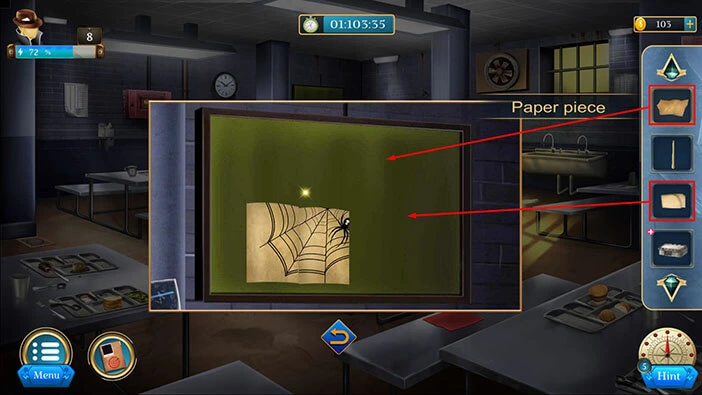
We are still missing two puzzle pieces, so let’s tap on the arrow at the bottom to go back.
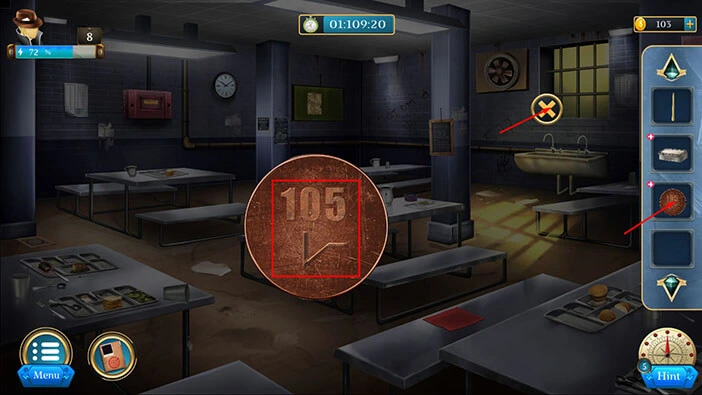
Let’s tap on the “Coin” in our inventory and it will appear in the middle of the screen. Let’s examine the coin.
Here, we can see a line and the number “105”. Let’s memorize/write down this information because we will need it for the next puzzle.
Once you’re done, tap on the “X” button to close this window.
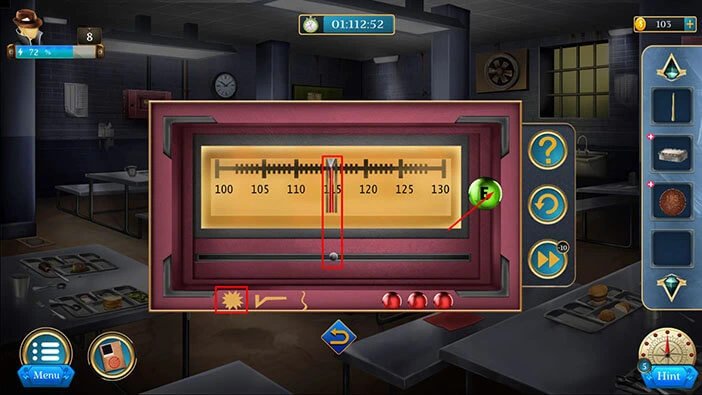
Next, let’s tap on the red box on the wall on the left to take a closer look at it, and tap again to start the interaction.
At the bottom of the box, we can see three symbols. We saw these symbols next to numbers that we memorized (on the coin, lunch tray, and on the fan). So, let’s set the scales to the values that we discovered. We will do this puzzle in three steps. Let’s begin.
Step 1
The first symbol is the “Star”. We saw the star symbol on the lunch tray, and next to it, the number 115. So, let’s set the red line to number 115. After that, tap on the green button on the right to confirm.
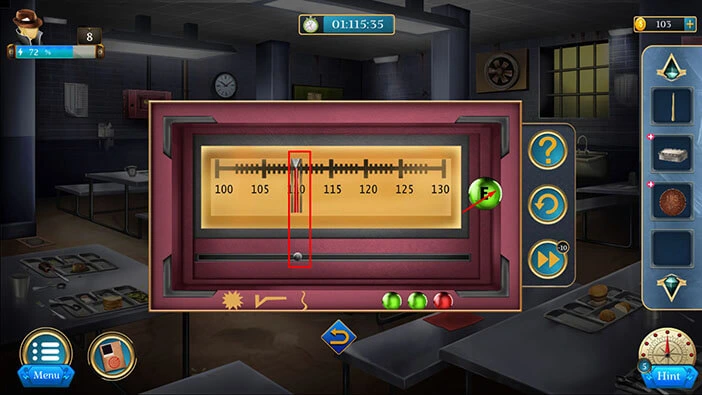
Step 2
The second symbol is the “Line”. We saw the line, and next to it, the number 105 on the coin. So, let’s set the red line to number 105. After that, tap on the green button on the right to confirm.

Step 3
The third symbol is the “Wiggly line”. We saw the wiggly line, and next to it, the number 110 on the fan. So, let’s set the red line to number 110. After that, tap on the green button on the right to confirm.
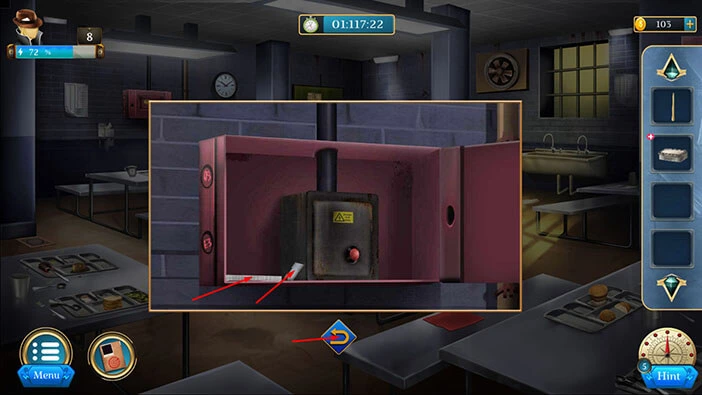
With that, you will open the red box. Inside, you will find a “Chewing gum” and a “Metal piece”. Let’s tap on these two items to pick them up.
Once you’re done, tap on the arrow at the bottom to go back.
Next, let’s select the metal box in our inventory and it will appear in the middle of the screen. Tap on the box to start the interaction.
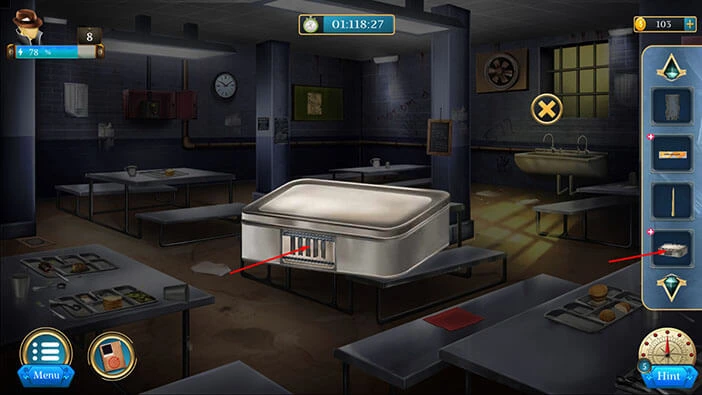
Let’s select the “Metal piece” from the inventory and insert it into the empty slot.
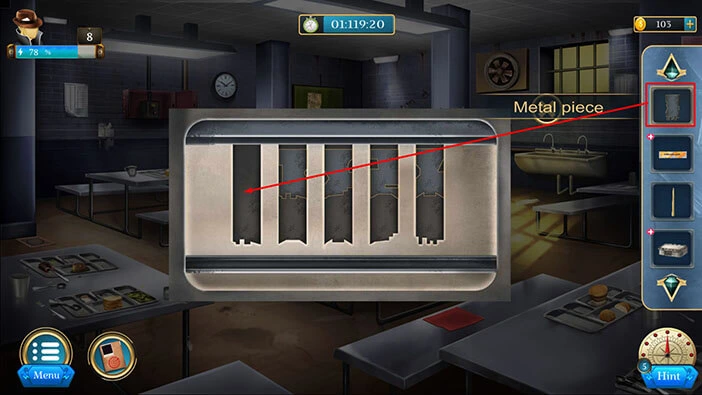
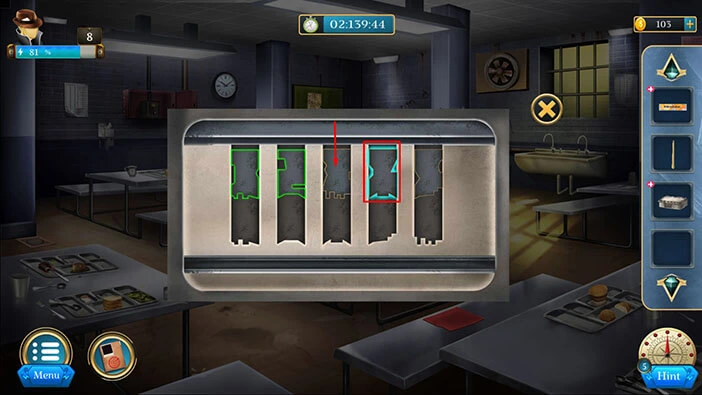
Here, we have another puzzle. The shape of the metal pieces should also match the shape at the bottom of the slot. So, let’s rearrange the pieces (we can only move the pieces by one slot to the left or right). We will do this puzzle in several steps.
Step 1
Select the metal piece in the second slot, and swap its position with the metal piece in the first slot.

Step 2
Select the metal piece in the fourth slot, and swap its position with the metal piece in the third slot.

Step 3
Select the metal piece in the third slot, and swap its position with the metal piece in the second slot.

Step 4
Select the metal piece in the fifth slot, and swap its position with the metal piece in the fourth slot.

Step 5
Select the metal piece in the fourth slot, and swap its position with the metal piece in the third slot.
Step 6
Lastly, select the metal piece in the fifth slot, and swap its position with the metal piece in the fourth slot.

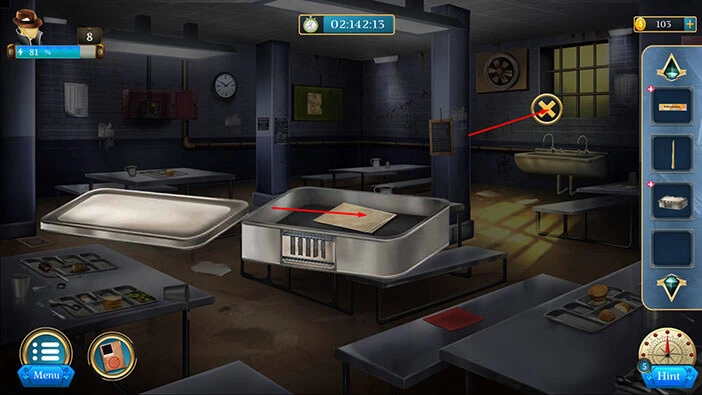
With that, you will open the box and inside you will find a “Paper piece”. Let’s tap on it to pick it up. After that, tap on the “X” button to close this window.
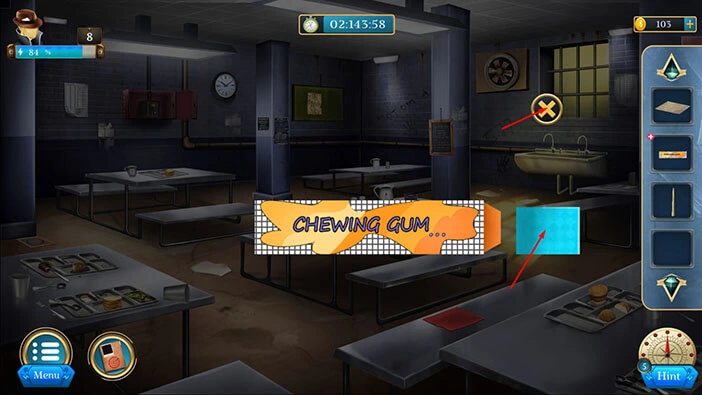
Next, select “Chewing gum” from the inventory and it will appear in the middle of the screen. Tap on it to open it.
Let’s tap on the “Chewing gum” to pick it up. After that, tap on the “X” button to close this window.
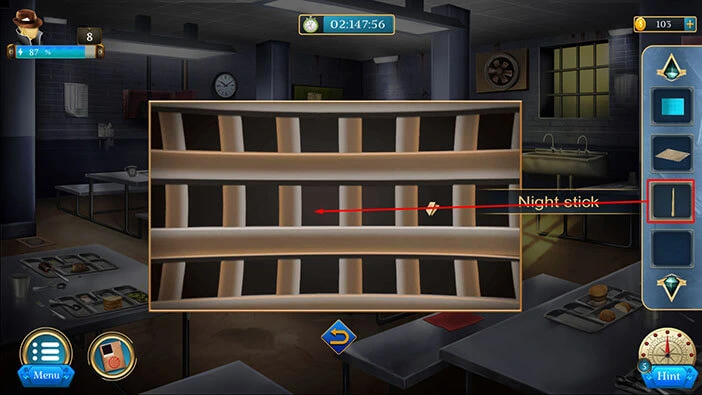
Next, let’s tap on the water drain in the top left corner of the floor to take a closer look at it, and tap again to start the interaction.

Select the “Nightstick” from the inventory and place it on the bars.
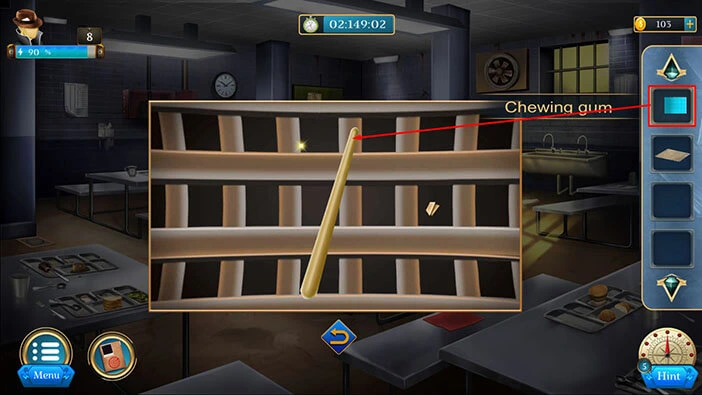
Next, select “Chewing gum” from the inventory and attach it to the top of the stick.
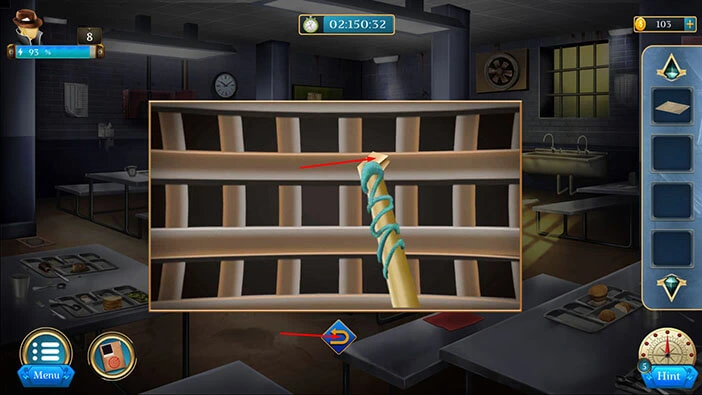
Our character will use the stick with the chewing gum to reach the “Paper piece”. Let’s tap on it to pick it up.
After that, tap on the arrow at the bottom to go back.
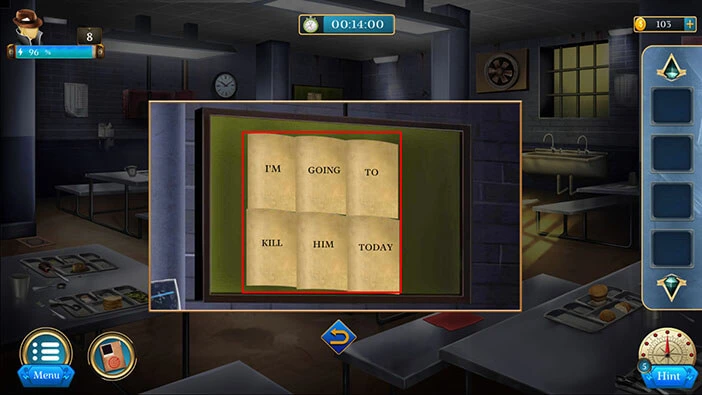
Next, let’s tap on the green board on the wall on the right to take a closer look at it.
Select the two “Paper pieces” from the inventory and place them on the board.
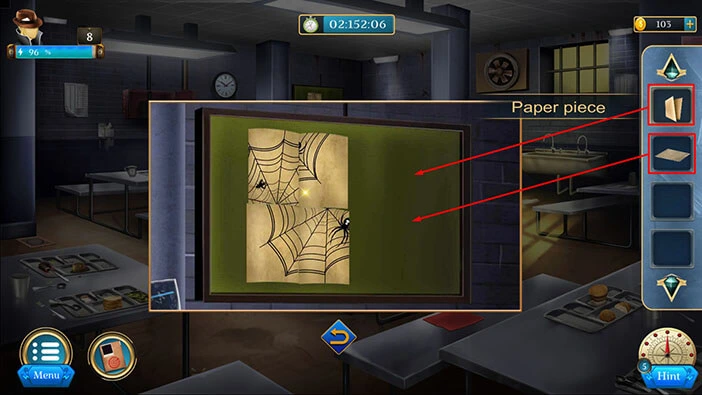
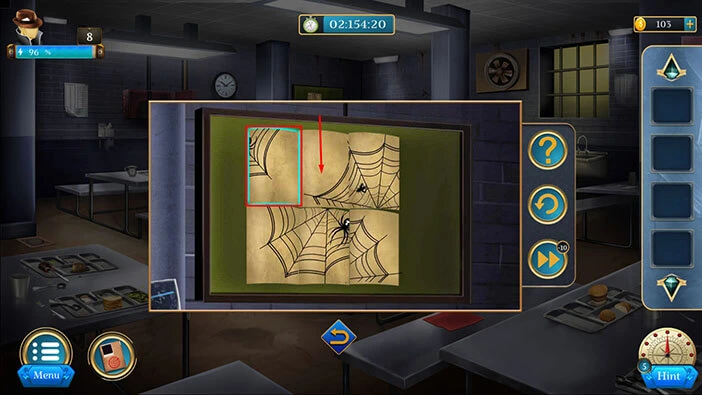
Our next task is to assemble the puzzle. We will do this in several steps.
Step 1
Select the first puzzle piece in the first row, then tap on the second puzzle piece in the first row to swap their positions.
Step 2
Select the second puzzle piece in the first row, then tap on the third puzzle piece in the first row to swap their positions.
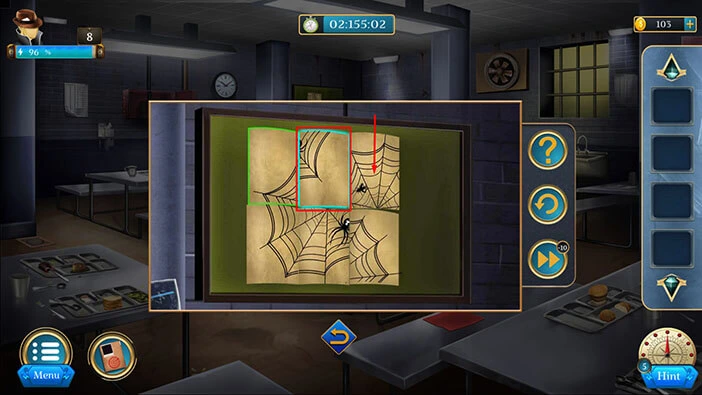
Step 3
Select the third puzzle piece in the first row, then tap on the third puzzle piece in the second row to swap their positions. With that, you will assemble the puzzle.

Let’s tap on the six pieces to turn them around. You will see the text “I’m going to kill him today”.

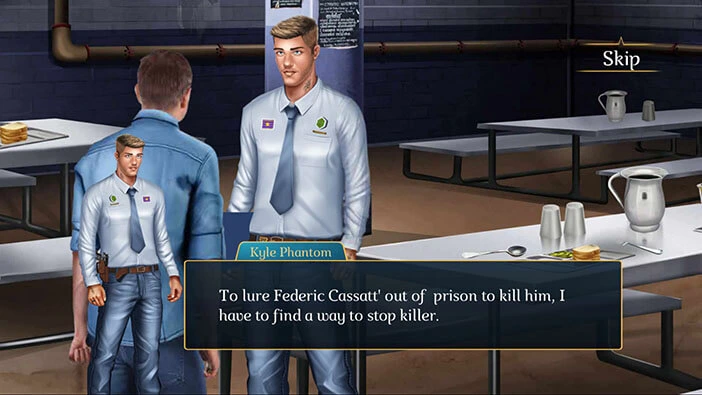
The Black Spider managed to incite public protests and Frederick Cassatt’s trial will be held today. Our character has to transfer him to the courtroom today. Detective Kyle suspects that the Black Spider will make his move during the transportation.
With that, we have reached the end of the eighth level. If you want to see the walkthrough for the ninth level, tap on the next part button.
Thank you for reading.