Room Escape: Detective Phantom | Level 7
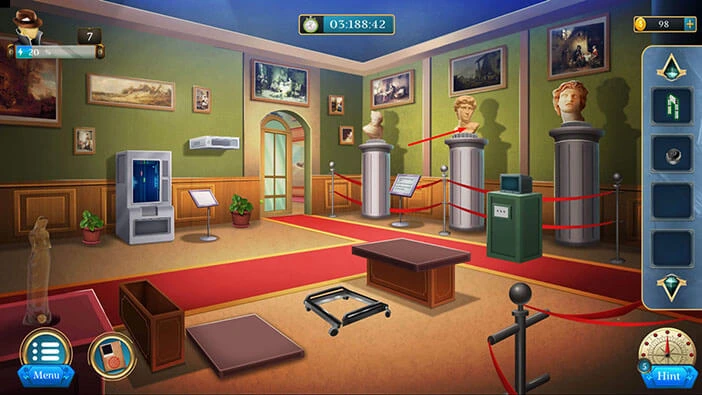
Hello everyone and welcome to the walkthrough for the seventh level of “Room Escape: Detective Phantom”. In the seventh level, our task is to investigate another crime scene.
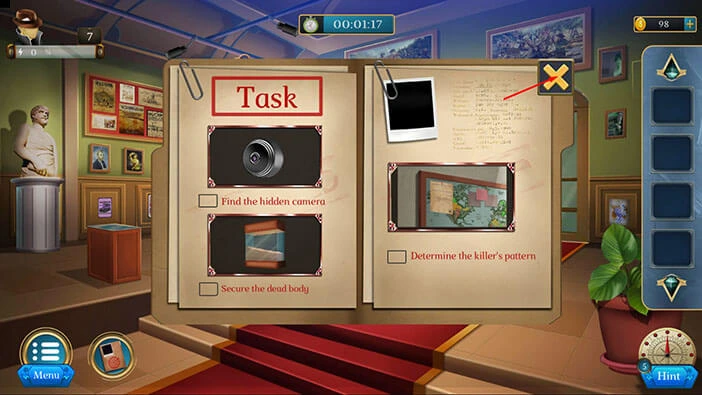
Our objectives are to “Find the hidden camera” “Secure the dead body” and “Determine the killer’s pattern”. Tap on the “X” button to go back.
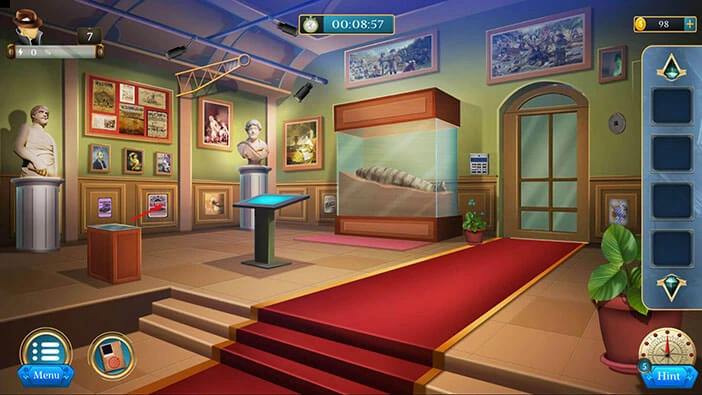
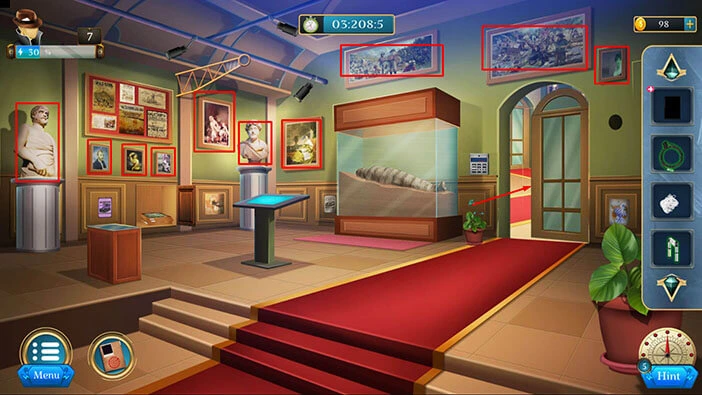
Let’s investigate. Tap on the picture on the wall on the right to take a closer look at it, and tap again to remove it.

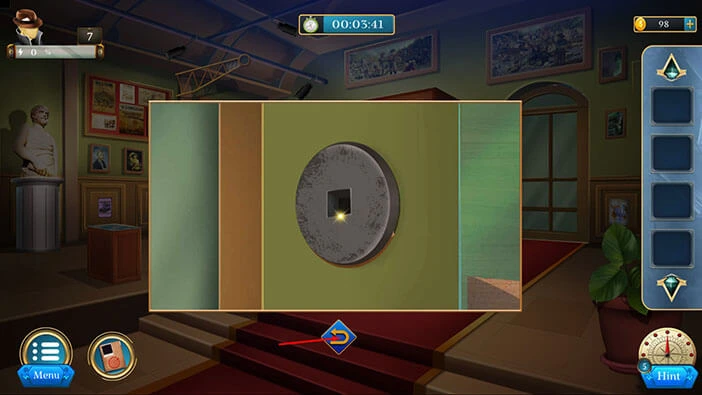
Under the picture, you will discover a hidden mechanism. We will come back to it later in the walkthrough. For now, tap on the arrow at the bottom to go back.
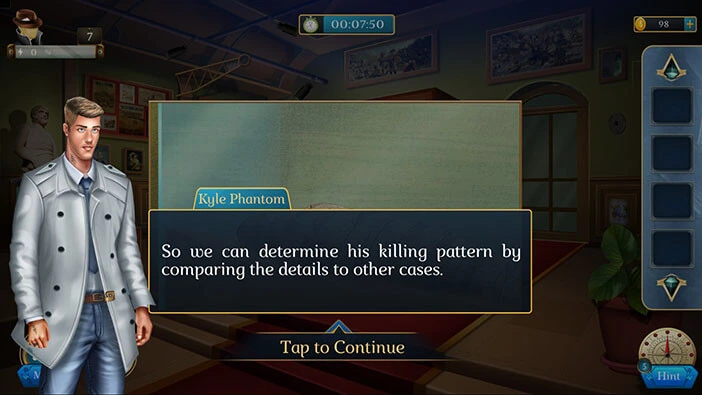
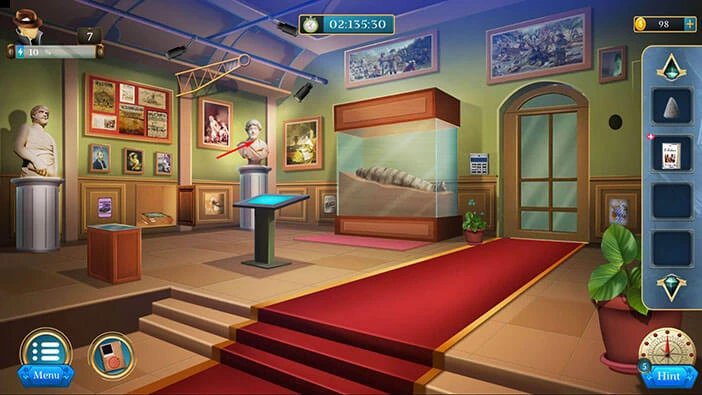
Next, let’s tap on the mummy to take a closer look at it.

The mummy is another victim of the Black Spider. Our character believes that we can figure out Black Spider’s pattern by examining this crime and comparing it with previous crimes.
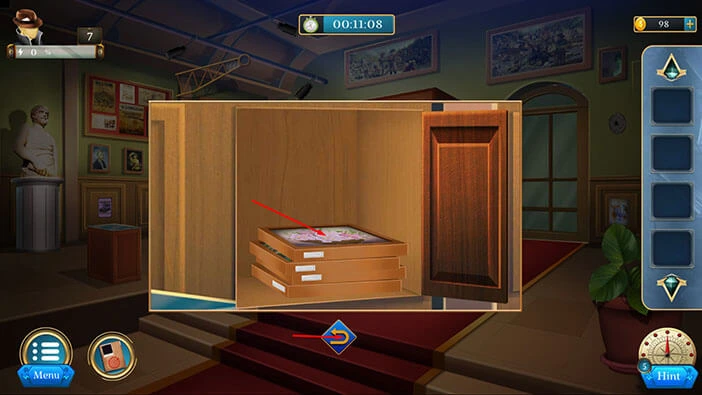
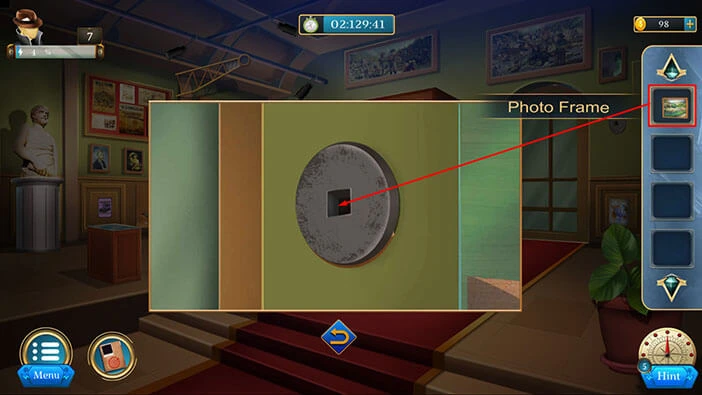
Next, let’s tap on the cabinet on the left to take a closer look at it, and tap a few more times to remove the poster. Lastly, tap on the cabinet door to open it.
In the cabinet, you will find a “Photo frame”. Let’s tap on it to pick it up.
After that, tap on the arrow at the bottom to go back.
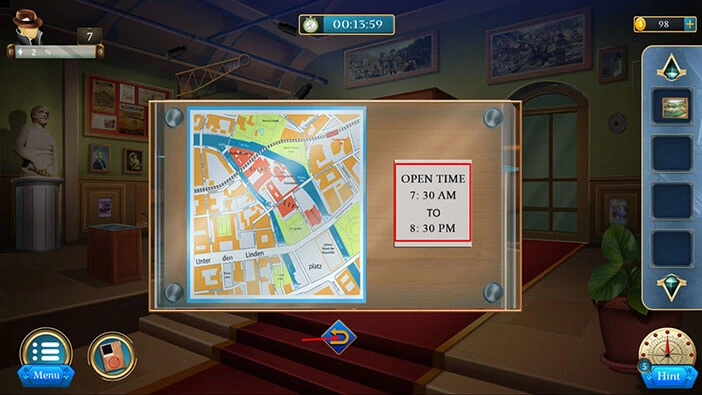
Next, let’s tap on the display case on the left to take a closer look at it, and tap again to start the interaction.

On the left, you will see the text “Open time 7:30 AM TO 8:30 PM”. Let’s memorize/write down the time because it represents the hint for the next puzzle.
Once you’re done, tap on the arrow at the bottom to go back.
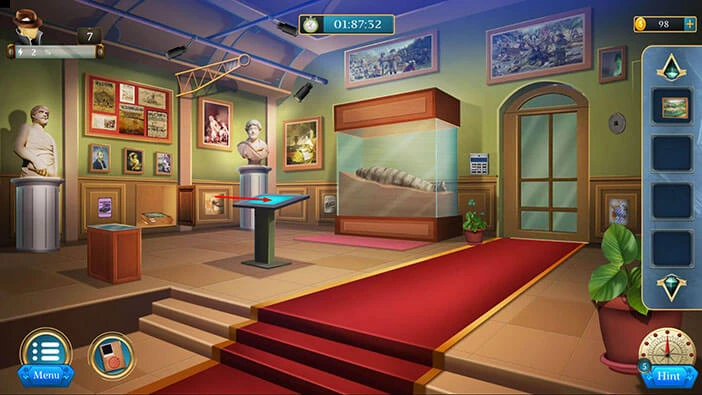
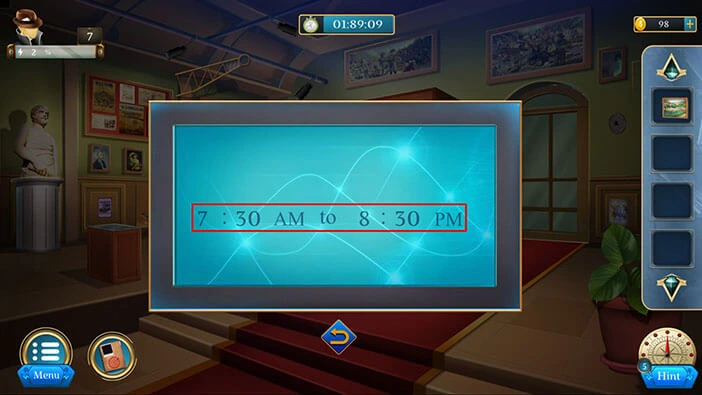
Next, in the middle of the room you will notice a display screen. Let’s tap on it to take a closer look, and tap again to start the interaction.
We already discovered the correct time. So, let’s set the times on the display screen, “7:30 AM to 8:30 PM”.
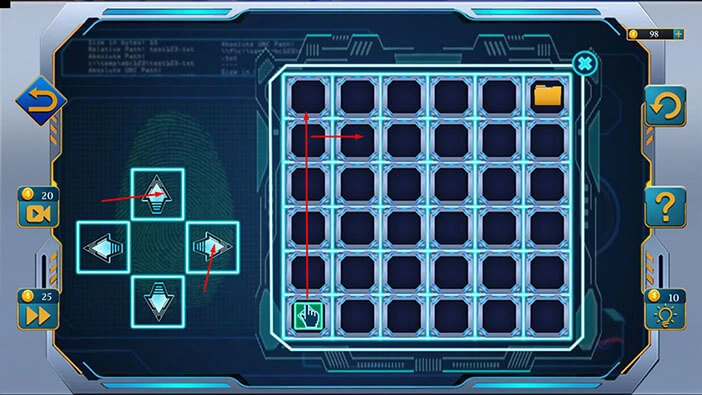
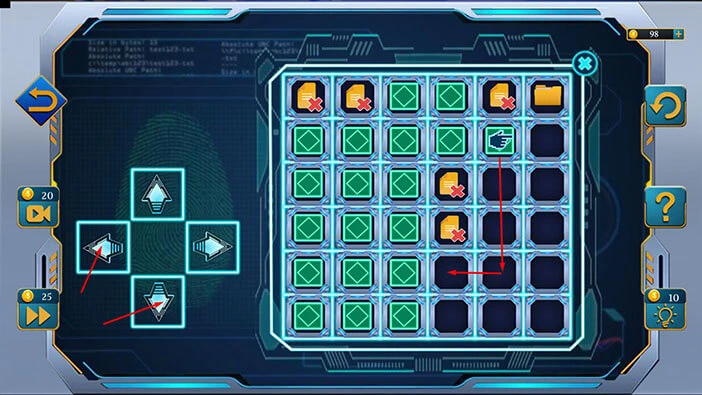
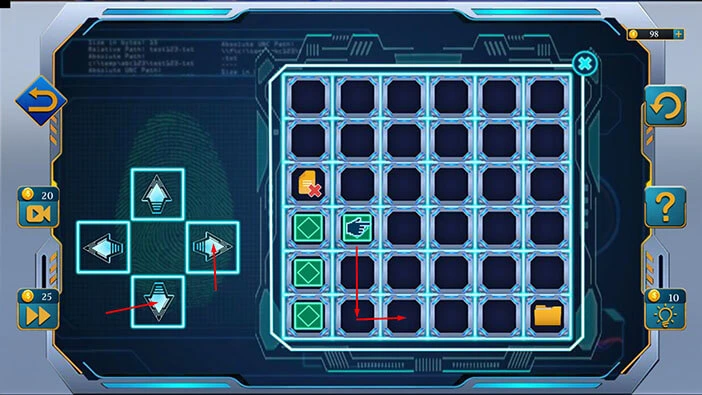
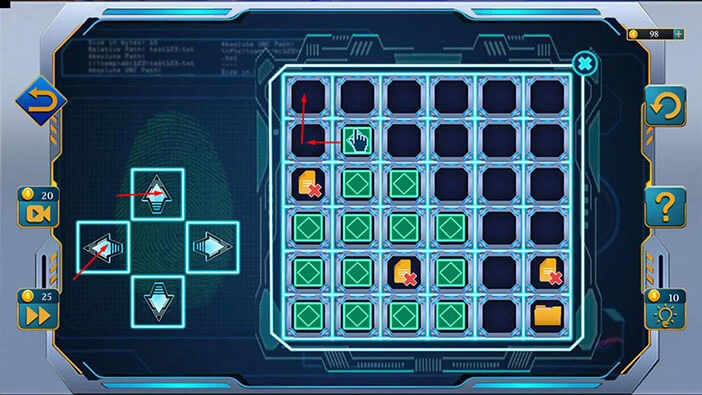
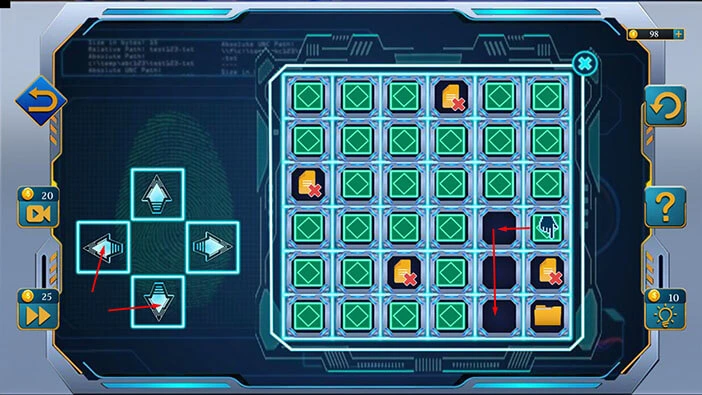
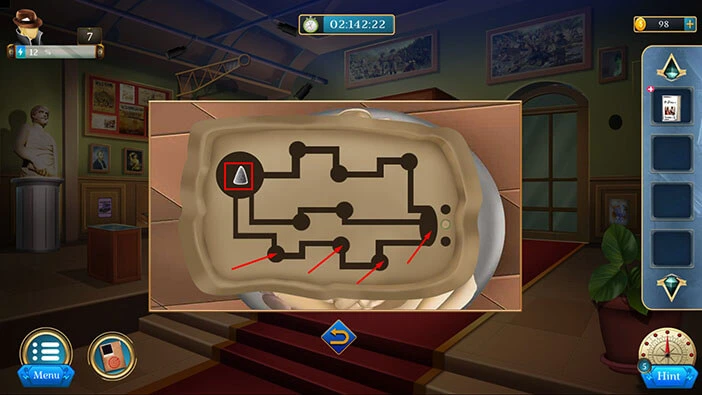
Here, we have another puzzle. Our task is to create the path to the folder, and this path should include the entire grid. We can move by tapping on the arrows on the left.
We will do this puzzle in several steps. Let’s begin.
Step 1
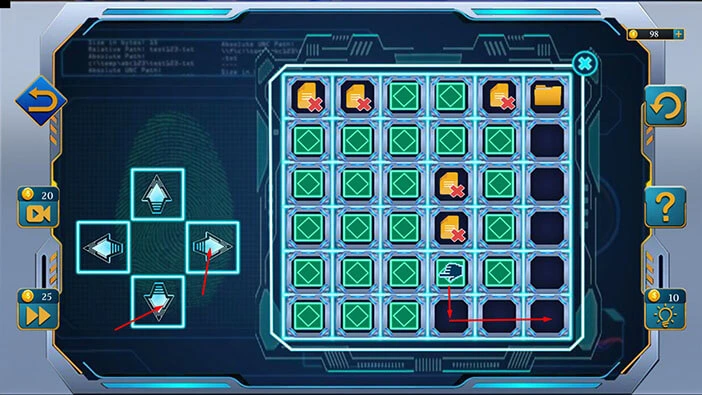
Tap five times on the “Up” arrow. After that, tap once on the “Right” arrow.
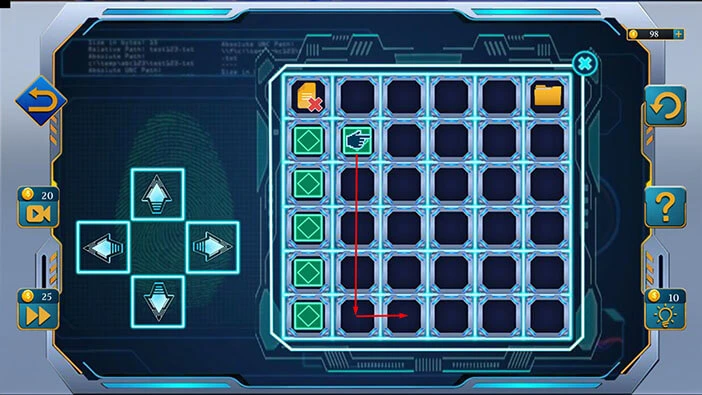
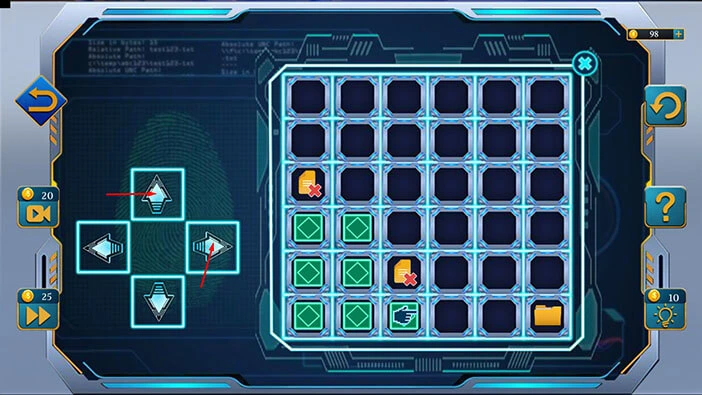
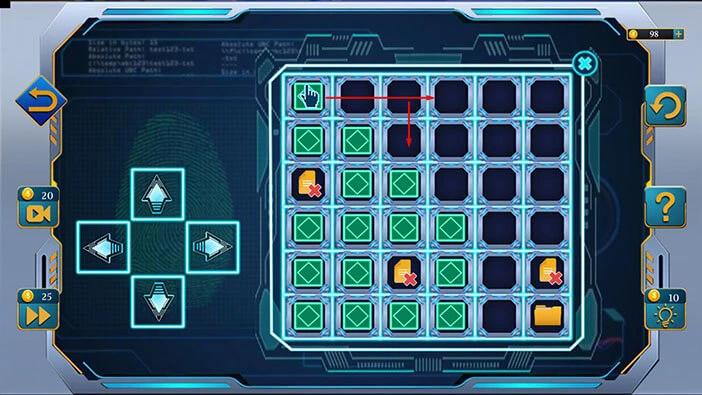
Step 2
Tap four times on the “Down” arrow. After that, tap once on the “Right” arrow.
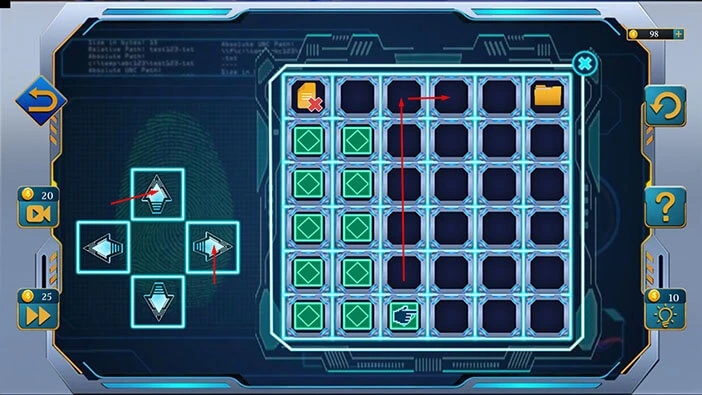
Step 3
Tap five times on the “Up” arrow. After that, tap once on the “Right” arrow.
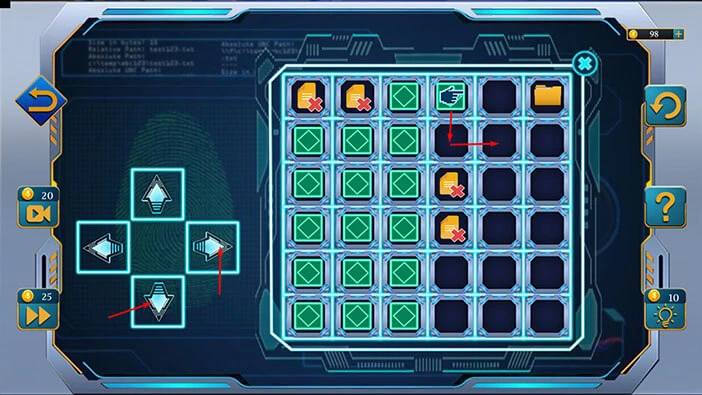
Step 4
Tap once times on the “Down” arrow. After that, tap once on the “Right” arrow.
Step 5
Tap three times on the “Down” arrow. After that, tap once on the “Left” arrow.
Step 6
Tap once on the “Down” arrow. After that, tap twice on the “Right” arrow.
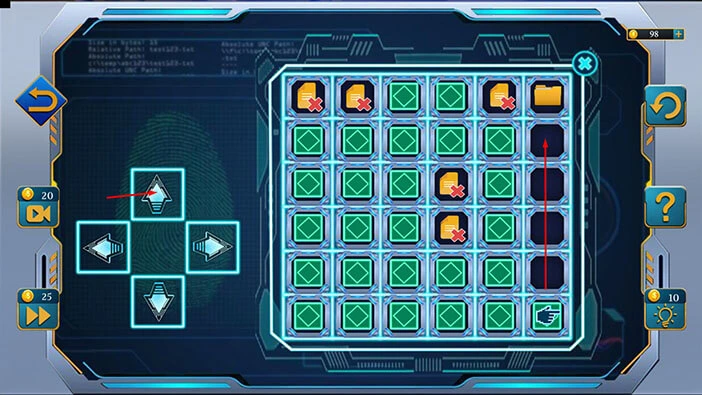
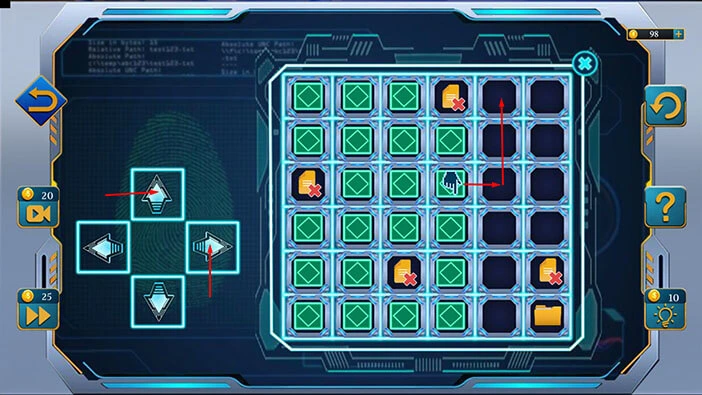
Step 7
Tap four times on the “Up” arrow. With that, you will complete this puzzle.
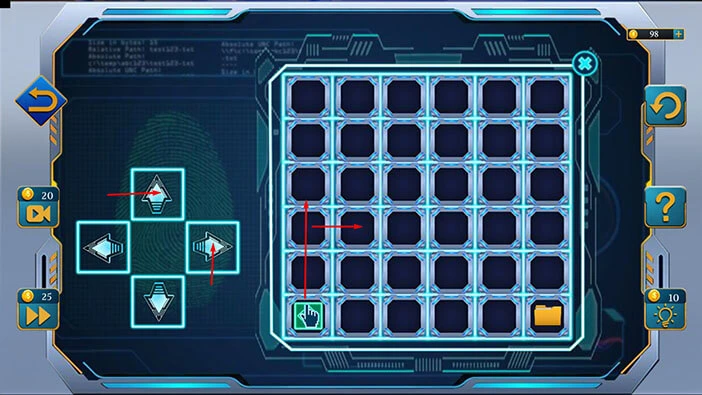
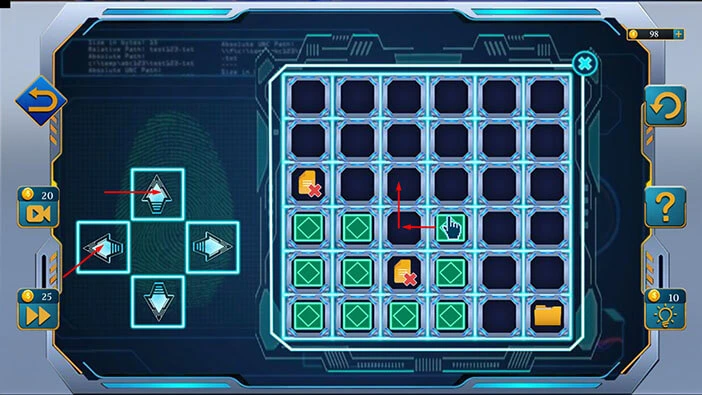
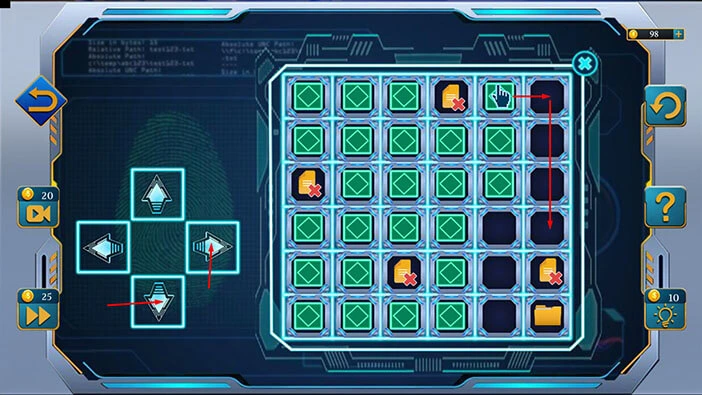
Now, we have to do the same thing again. So, let’s begin.
Step 1
Tap three times on the “Up” arrow. After that, tap once on the “Right” arrow.
Step 2
Tap twice on the “Down” arrow. After that, tap once on the “Right” arrow.
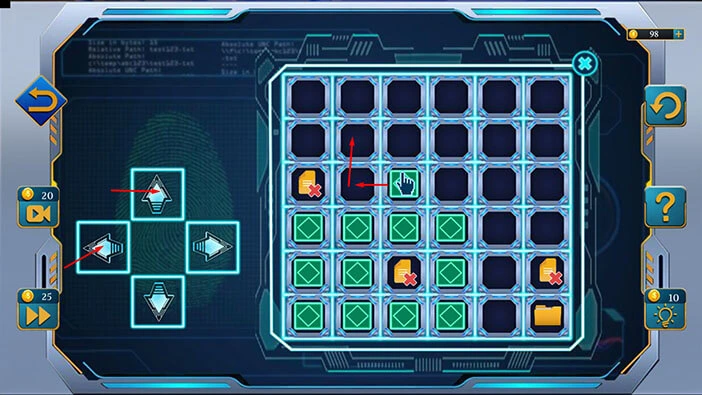
Step 3
Tap once on the “Right” arrow. After that, tap twice on the “Up” arrow.
Step 4
Tap once on the “Left” arrow. After that, tap once on the “Up” arrow.
Step 5
Tap once on the “Left” arrow. After that, tap once on the “Up” arrow.
Step 6
Tap once on the “Left” arrow. After that, tap once on the “Up” arrow.
Step 7
Tap three times on the “Right” arrow. After that, tap once on the “Down” arrow.
Step 8
Tap once on the “Right” arrow. After that, tap once on the “Down” arrow.

Step 9
Tap once on the “Right” arrow. After that, tap twice on the “Up” arrow.
Step 10
Tap once on the “Right” arrow. After that, tap three times on the “Down” arrow.
Step 11
Tap once on the “Left” arrow. After that, tap twice on the “Down” arrow. With that, you will solve this puzzle.
Here, we can see three lines, purple, green, and blue. We can also see a number next to each line. Let’s memorize/write down this information.
Top line = Purple = 3
Middle line = Green = 1
Bottom line = Blue = 2
Once you’re done, tap on the arrow at the bottom to go back.

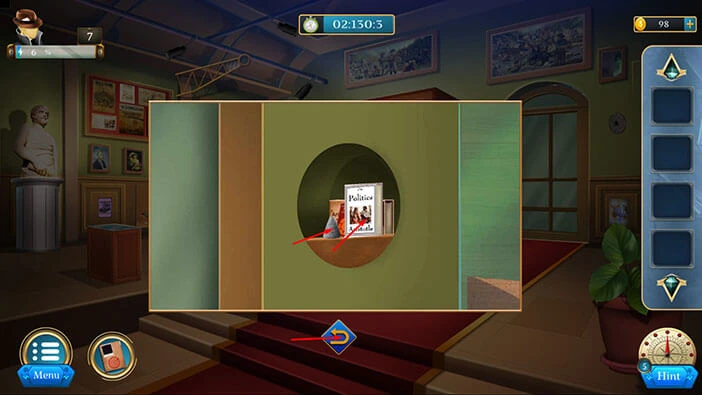
Next, tap on the slot on the wall on the right to take another look at it.

Select the “Photo Frame” from the inventory and use it to remove the lid.
In the hole in the wall, you will find a “Book” and a “Stone”. Let’s tap on these two items to pick them up.
After that, tap on the arrow at the bottom to go back.
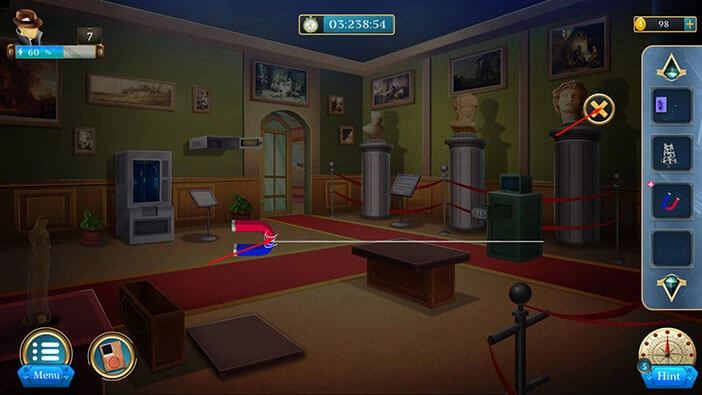
Next, let’s tap on the statue in the top left corner of the room to take a closer look at it.
Select the “Stone” from the inventory and insert it into the empty slot. After that, tap on the puzzle to start the interaction.

Here, we have another puzzle. Our task is to lead the stone down the three paths and get it to the slot on the right. However, we need to select the paths in the correct order.
Previously, we saw three paths and a number next to each path. So, let’s follow that hint.
We will do this puzzle in several steps. Let’s begin.
Step 1
Previously, we saw the middle line = Green = 1. So, let’s first go down the middle path.

Step 2
Next, we saw the bottom line = Blue = 2. So, let’s go down the bottom path.
Step 3
Lastly, we saw the top line = Purple = 3. So, let’s go down the top path.

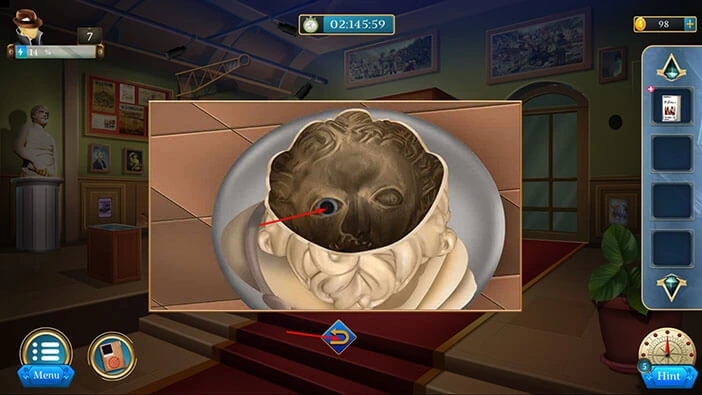
With that, you will remove the top of the statue, and inside you will find a “CCTV Camera”. Let’s tap on it to pick it up.
After that, tap on the arrow at the bottom to go back.
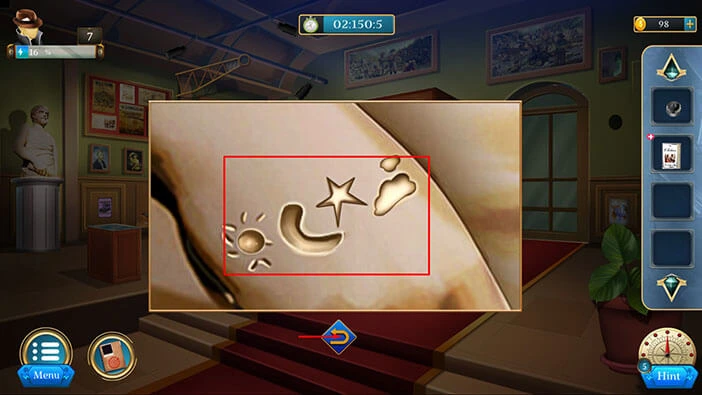
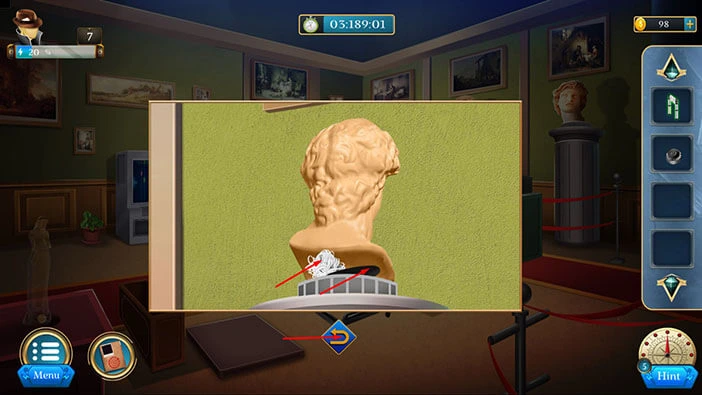
Let’s examine the other statue. Tap on it to take a closer look.
Here, you will see four symbols. Let’s memorize/write down these symbols because they represent the hint for the next puzzle. Looking from left to right, we have,
Sun, Moon, Star, and Cloud symbol.
Once you’re done, tap on the arrow at the bottom to go back.
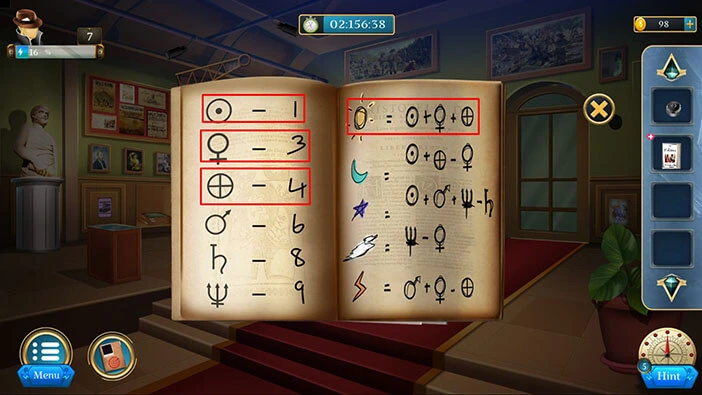
Next, select the “Book” in your inventory, and it will appear in the middle of the screen. After that, tap on the book to examine it.

On the page on the left, we can see six symbols, and each symbol has a certain numerical value. On the page on the right, we can see the same symbols that we saw on the statue. So, our next task is to calculate the numerical value of the symbols that we saw on the statue.
We will do this puzzle in several steps. Let’s begin.
Step 1
Sun was the first symbol. Let’s calculate the numerical value of this symbol.
Sun = 1 + 3 + 4 = 8.
Let’s memorize/write down this information.
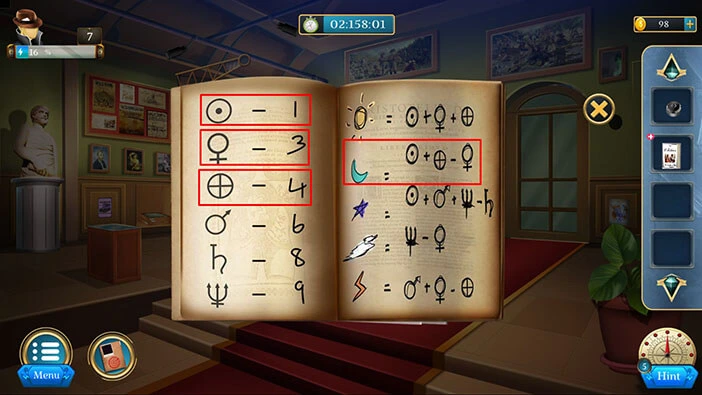
Step 2
The moon was the second symbol. Let’s calculate the numerical value of this symbol.
Moon = 1 + 4 – 3 = 2.
Let’s memorize/write down this information.
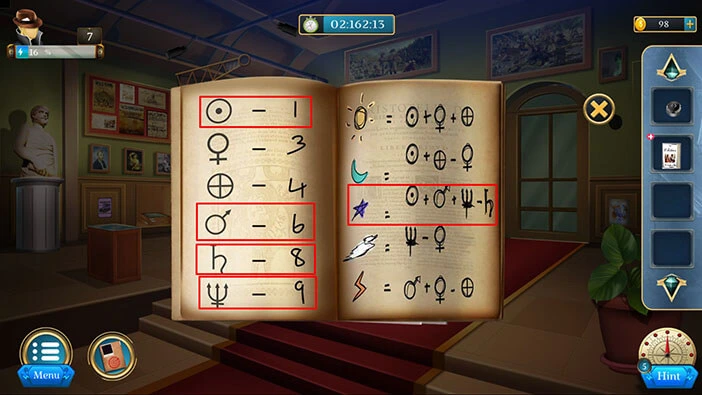
Step 3
The star was the third symbol. Let’s calculate the numerical value of this symbol.
Star = 1 + 6 + 9 – 8 = 8.
Let’s memorize/write down this information.
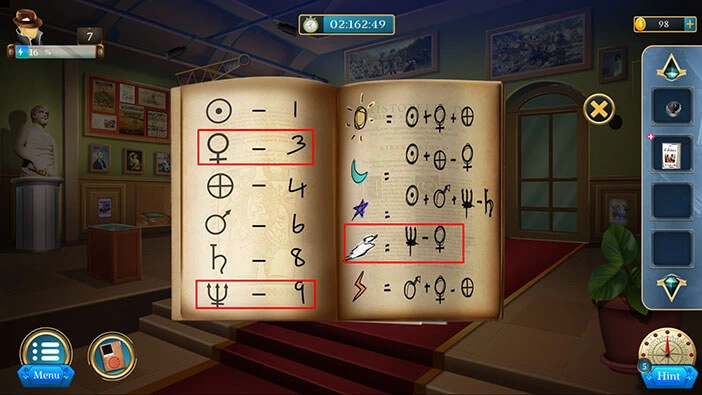
Step 4
The cloud was the fourth symbol. Let’s calculate the numerical value of this symbol.
Cloud = 9 – 3 = 6.
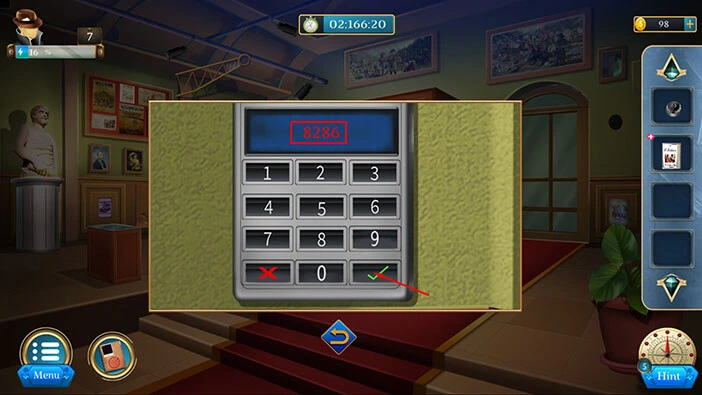
When we put all the numbers together, we will get “8286”. Let’s memorize/write down this information.
Once you’re done, tap on the “X” button to go back.
Next, let’s tap on the keypad, located just to the left of the door, to take a closer look at it.

Enter the number “8286” that we discovered previously. After that, tap on the checkmark to confirm, and you will unlock the door.
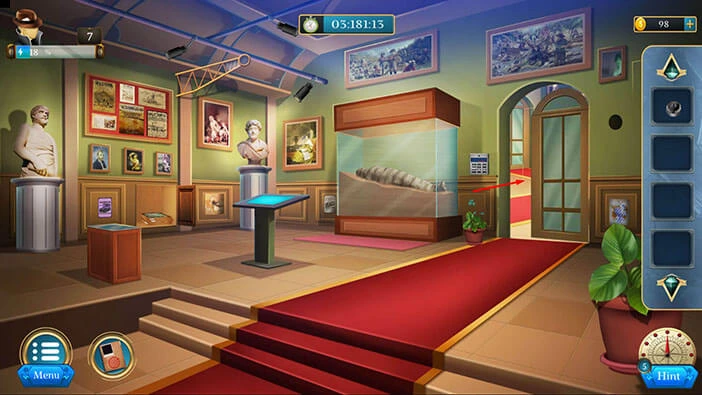
Let’s tap on the door to proceed to the next room.
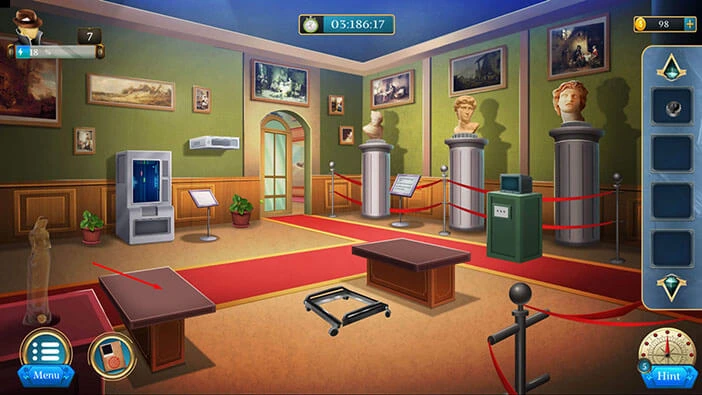
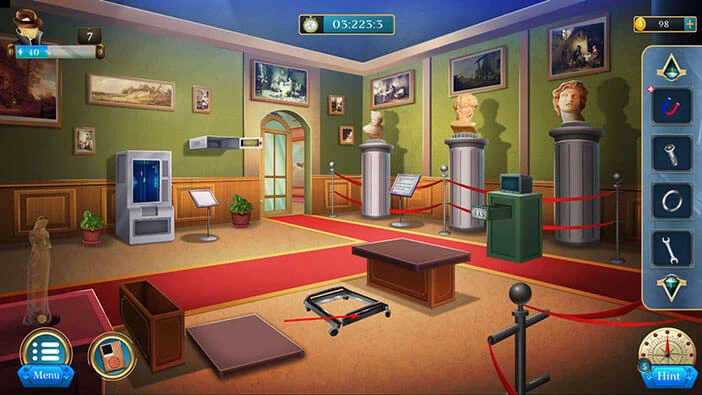
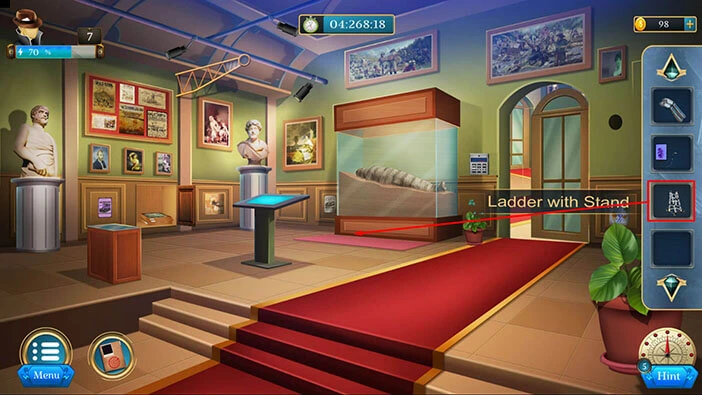
Let’s explore this room. Tap on the small table on the left to take a closer look at it, and tap again to remove the top of the table.
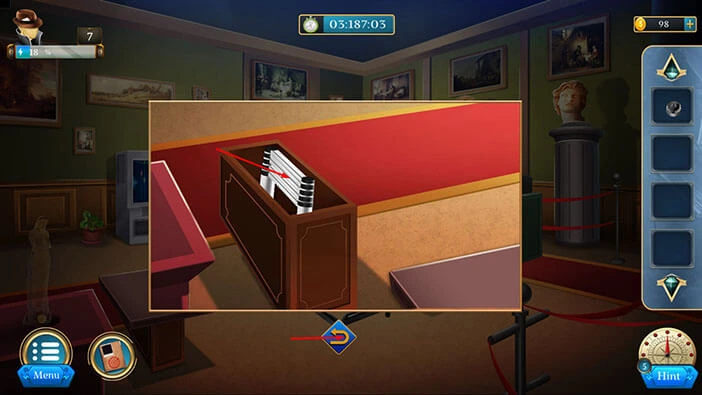
In the table, you will find a “Ladder”. Let’s tap on it to pick it up. After that, tap on the arrow at the bottom to go back.
Next, let’s tap on the middle statue on the right to take a closer look at it, and tap again to turn it around.
Here, you will find a “Thread” and a “Sensor Remote”. Let’s tap on these two items to pick them up.
After that, tap on the arrow at the bottom to go back.
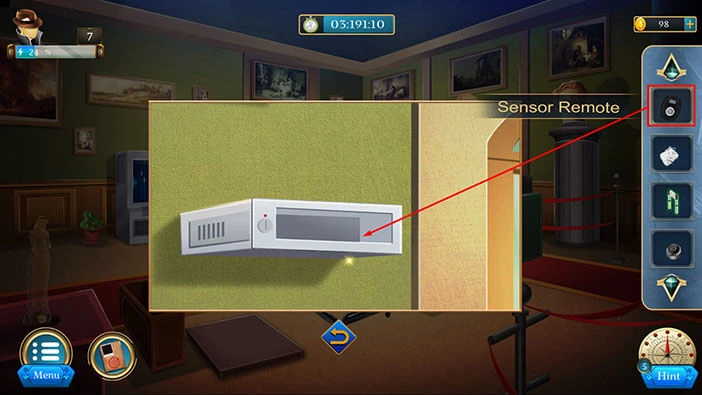
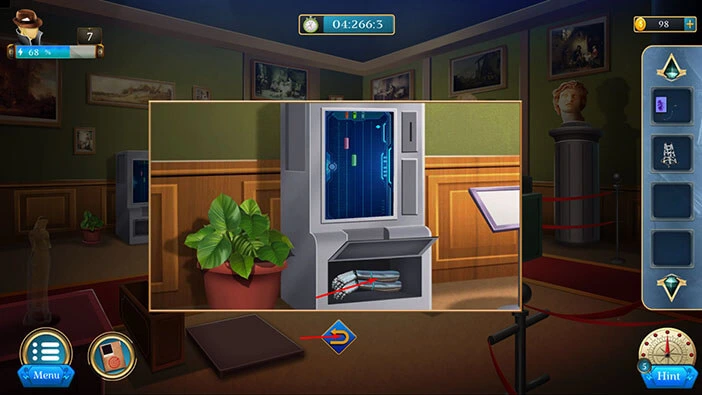
Next, tap on the machine on the left side of the door to take a closer look at it.

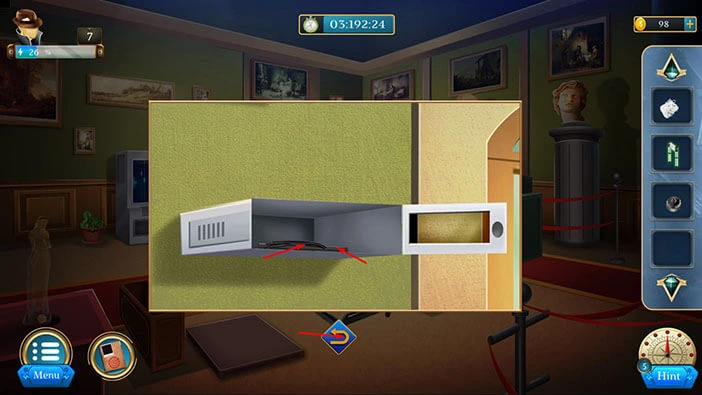
Select the “Sensor Remote” from the inventory and use it to open the machine (tap on it).
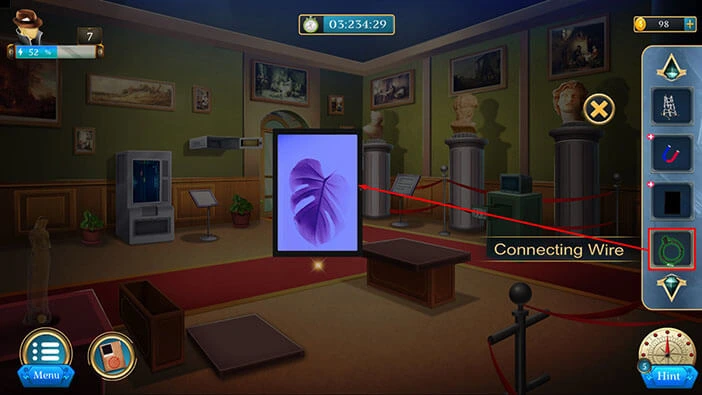
Inside, you will find a “Connecting Wire” and an “I-Pad”. Let’s tap on these two items to pick them up.
After that, tap on the arrow at the bottom to go back.
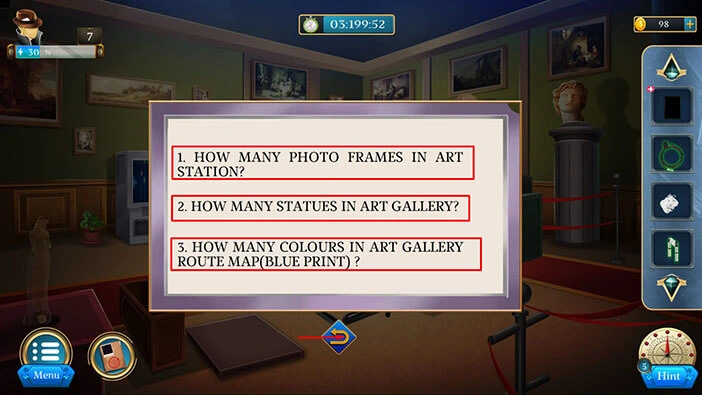
Next, let’s tap on the notice board on the right to take a closer look at it, and tap again to examine it.

Here, we can see three questions, and these questions represent the hint for the next puzzle. Let’s memorize/write down these questions.
1. How many photo frames in the art station?
2. How many statues in the art gallery?
3. How many colors in the art gallery route map(blueprint)?
Let’s find answers to these questions. Tap on the arrow at the bottom to go back.
Let’s go back to the previous room. Tap on the door.
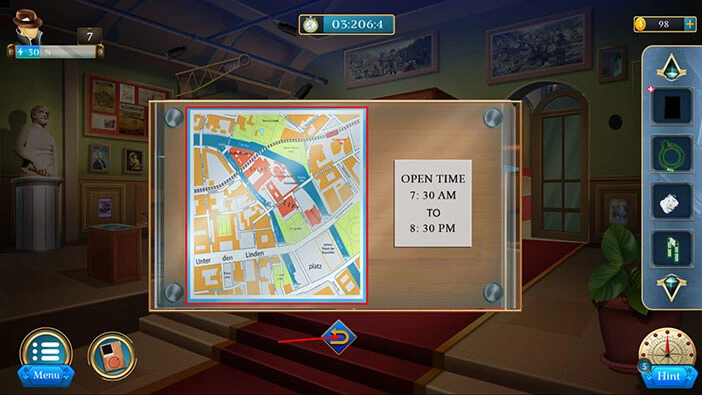
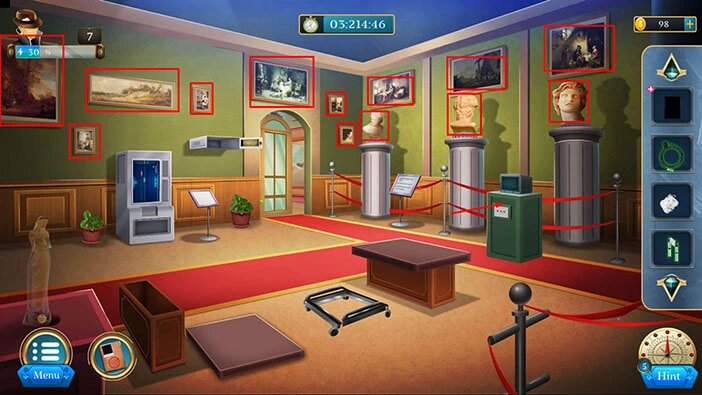
Let’s tap on the display case on the left to take a closer look at it.
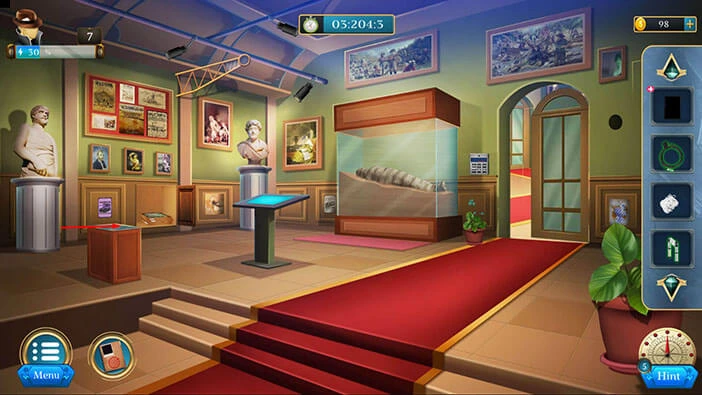
Here, we can see the art gallery map. There are five colors on the map (Orange, Yellow, Blue, Red, and Grey). Let’s memorize/write down this information, 5 colors because it represents the answer to the third question.
Once you’re done, tap on the arrow at the bottom to go back.
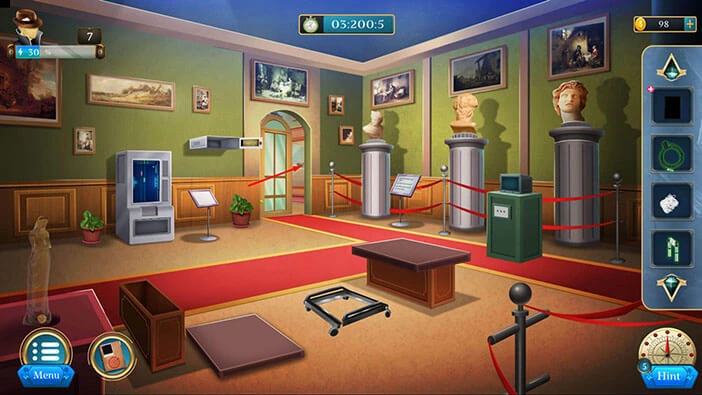
Next, let’s count the photo frames and the statues because we will need this information for the first and second question.
Here, we can see 8 photo frames and 2 statues. Let’s memorize/write down this information. Once you’re done, tap on the door to proceed to the next room.
Let’s count the photo frames and the statues in this room. Here, we have, 10 photo frames, and 3 statues.
When we combine this with the statues and photo frames in the first room, we will get,
Photo Frames = 8 + 10 = 18.
Statues = 2 + 3 = 5.
Let’s memorize/write down this information. Once you’re done, tap on the machine on the right to take a closer look at it, and tap again to start the interaction.
Here, we have another puzzle, and our task is to discover three numbers. We already discovered these numbers, by answering the three questions that we saw on the notice board.
So, the first number should be the answer to the question “How many photo frames in the art station?”. We found 18 photo frames, so let’s enter the number 18.
The second number should be the answer to the question “How many statues in the art gallery?”. We found 5 statues, so let’s enter the number 5.
The third number should be the answer to the question “How many colors in the art gallery route map(blueprint)?”. We saw 5 colors, so let’s enter the number 5.
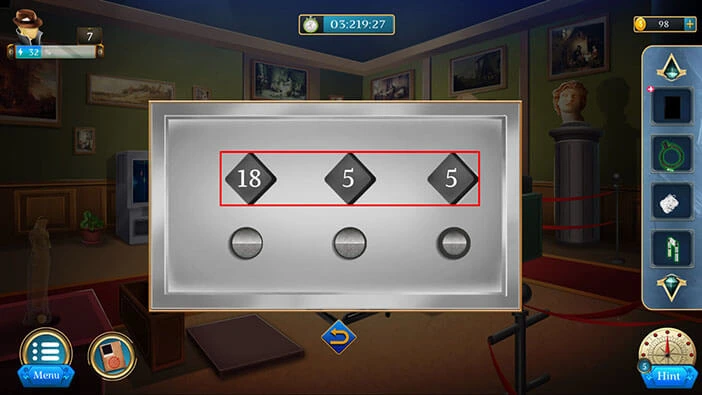
With that, you will open the machine, and inside you will find a “Spanner”, a “Ring”, a “Nut”, and a “Magnet”. Let’s tap on these items to pick them up.
Once you’re done, tap on the arrow at the bottom to go back.
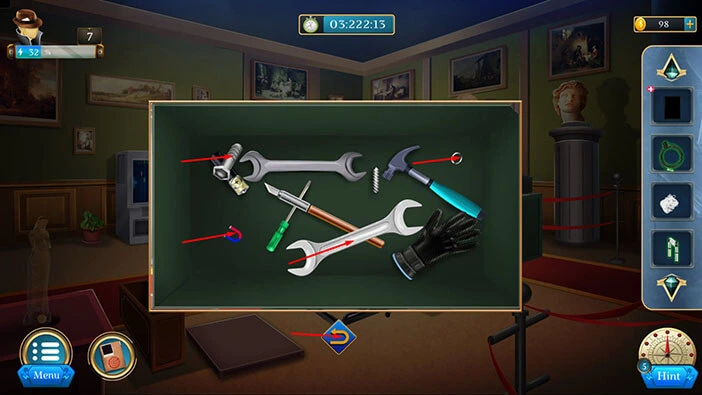
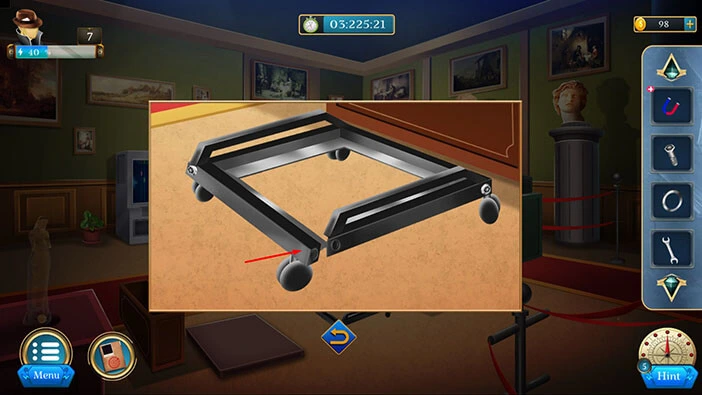
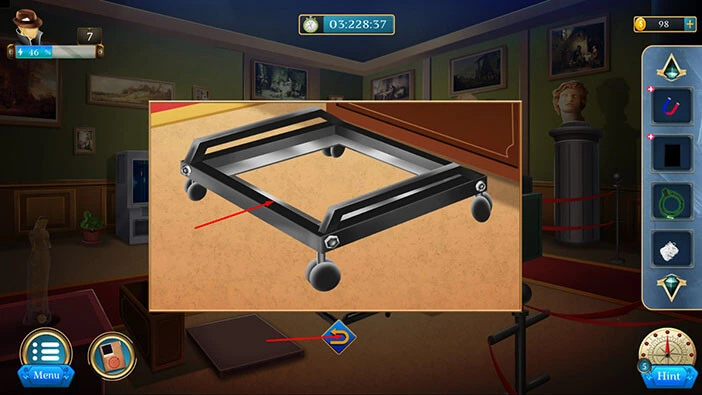
Next, let’s tap on the frame on the floor to take a closer look at it.
Tap on the frame to connect it.
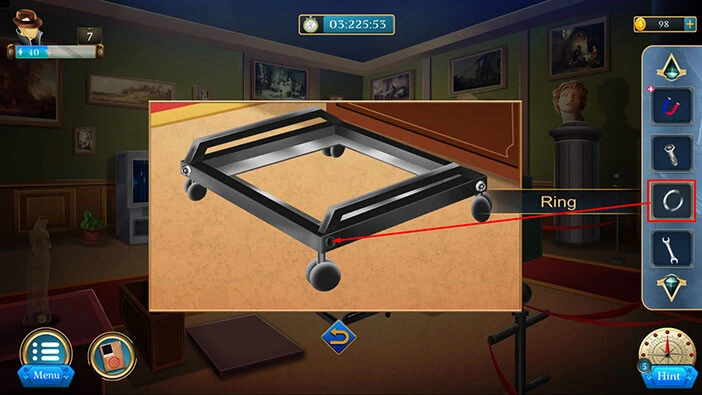
Select the “Ring” from the inventory and use it to connect the frame.
Next, select the “Nut” from the inventory and insert it into the empty slot.
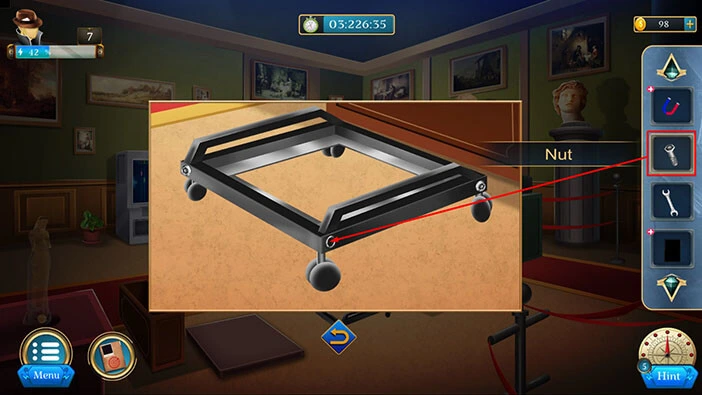
Lastly, select the “Spanner” from the inventory and use it on the nut.
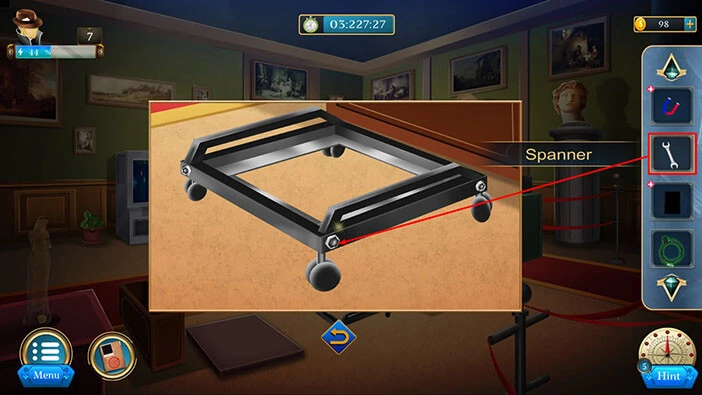
We have assembled the “Wheel Stand” so let’s tap on it to pick it up. After that, tap on the arrow at the bottom to go back.
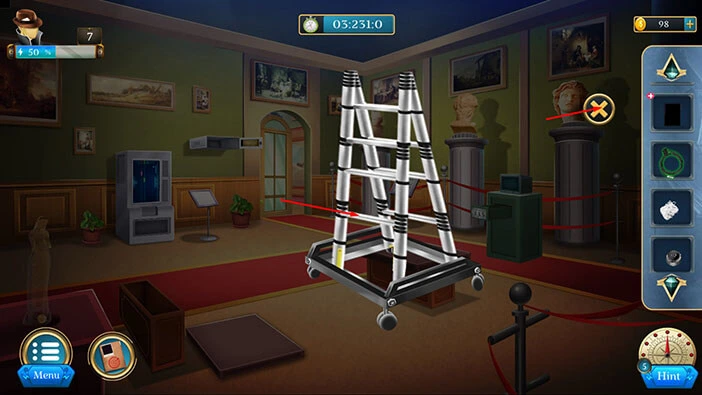
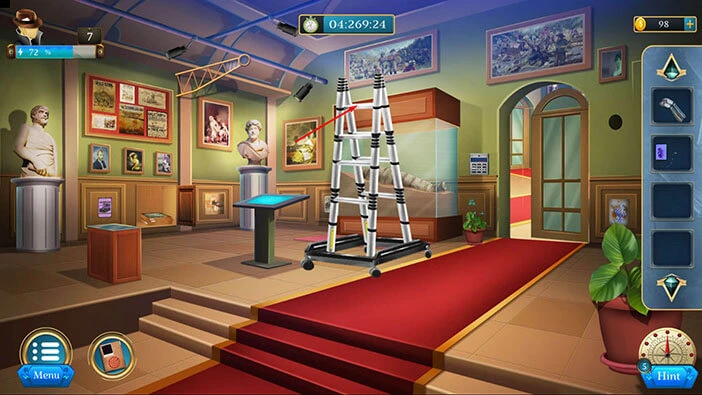
Next, select the “Wheel Stand” from the inventory and it will appear in the middle of the screen. After that, select the “Ladder” from the inventory and combine it with the “Wheel Stand”.

You will create the “Ladder with Stand”. Let’s tap on it to pick it up.
After that, tap on the “X” button to close this window.
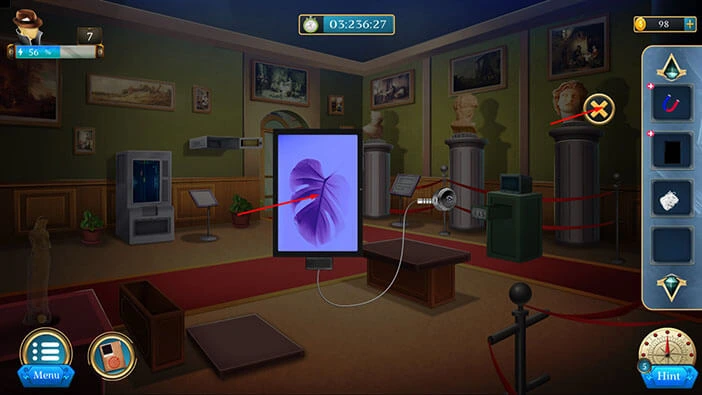
Next, select the “I-Pad” from the inventory and it will appear in the middle of the screen. Let’s tap on the “I-Pad” to turn it on.
Next, select the “Connecting Wire” from the inventory and attach it to the “I-Pad”.
Lastly, select the “CCTV” camera from the inventory and attach it to the “Connecting Wire”.
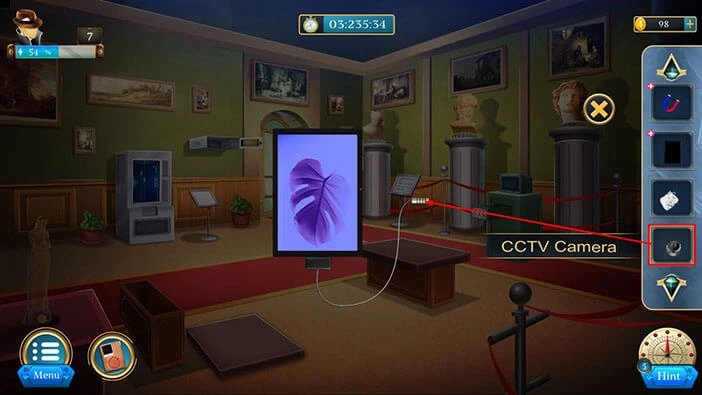
We have assembled the “I-Pad” so let’s tap on it to pick it up. After that, tap on the “X” button to close this window.
Next, select the “Magnet” from the inventory and it will appear in the middle of the screen. After that, select the “Thread” from the inventory and attach it to the “Magnet”.
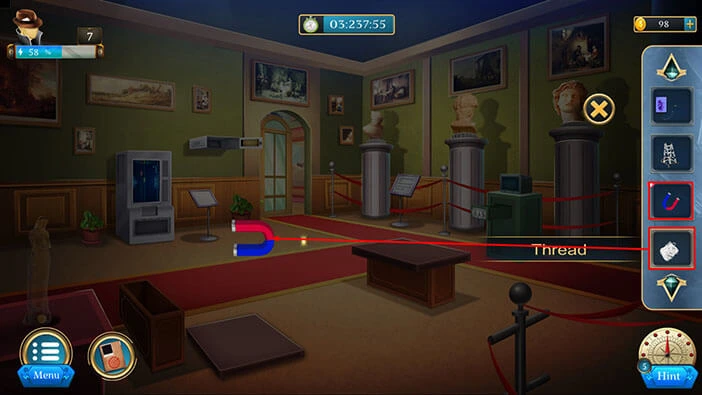
Let’s tap on the “Magnet with Thread” to pick it up. After that, tap on the “X” button to go back.
Next, let’s tap on the transparent statue on the left to take a closer look at it.

Select the “Magnet with Thread” from the inventory and use it to get the coin at the bottom of the statue.
Let’s tap on the “Coin” to pick it up. After that, tap on the arrow at the bottom to go back.

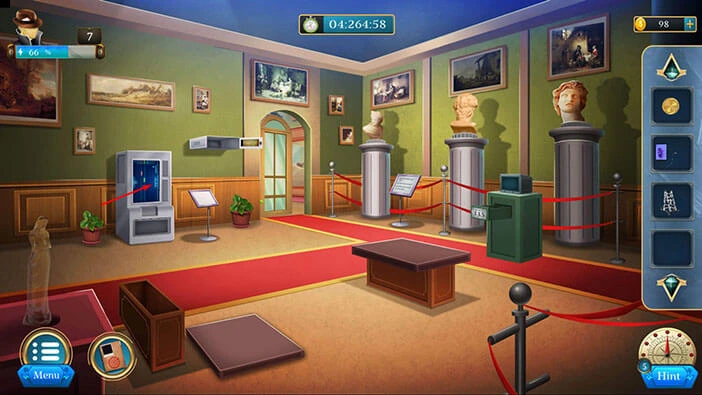
Next, let’s tap on the slot machine on the left to take a closer look at it.
Select the “Coin” from the inventory and insert it into the slot.
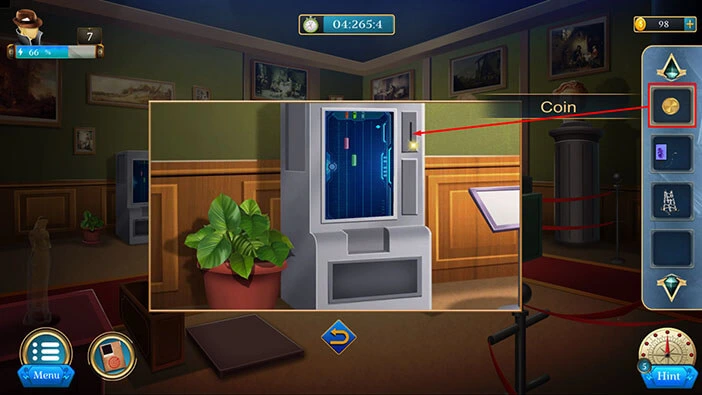
In the slot machine, you will discover a “Robotic Hand”. Let’s tap on this item to pick it up.
After that, tap on the arrow at the bottom to go back.
Let’s tap on the door to go back to the first room.

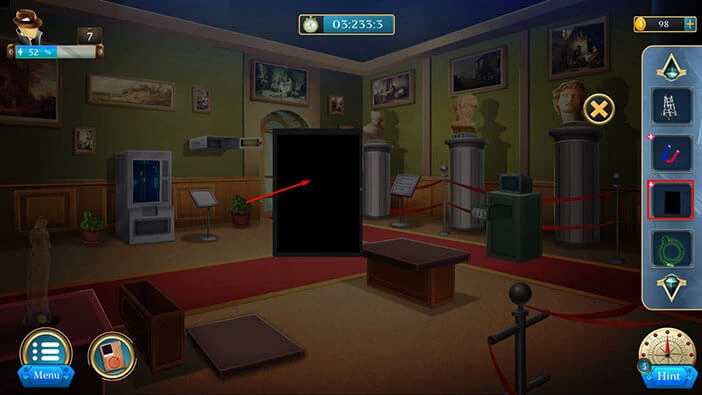
Select the “Ladder with Stand” from the inventory and place it in front of the large display case.
Let’s tap on the “Ladder with Stand” to climb on it, and we will gain access to the display case.
Let’s select the “Robotic Hand” from the inventory and use it to get the body.
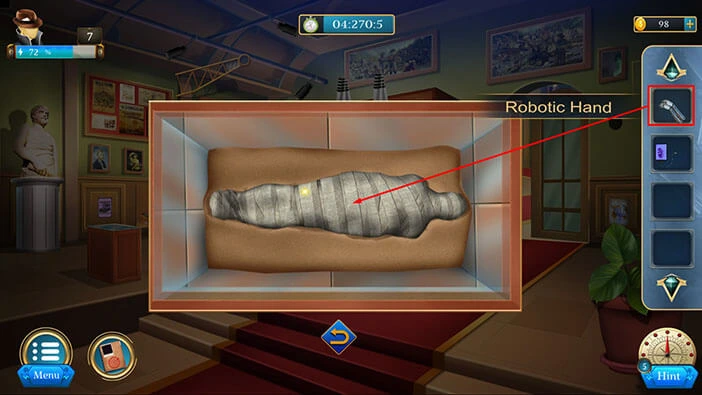
Our character will send the body to the forensic department for analysis.
In the next scene, we are back in the police station, and our task is to analyze the report.
Next, let’s tap on the desk on the right to take a closer look at it.

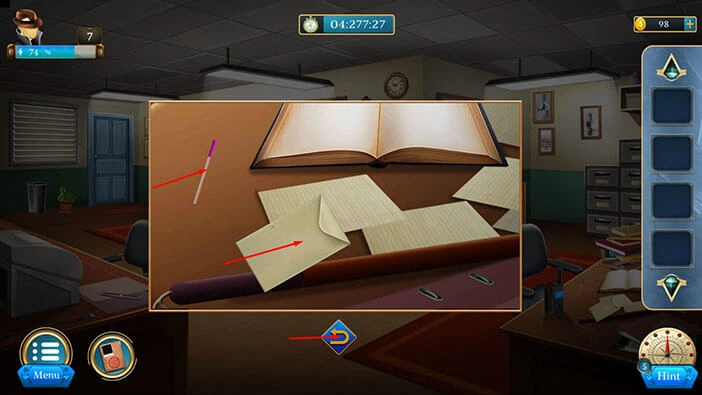
Here, you will find an “Envelope” and a “Pen”. Let’s tap on these two items to pick them up.
After that, tap on the arrow at the bottom to go back.
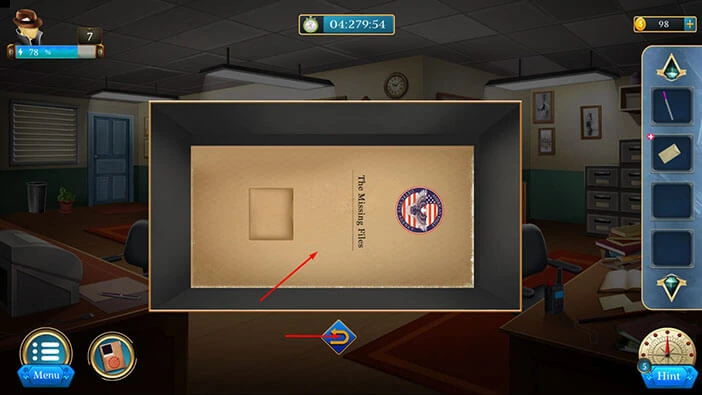
Next, let’s tap on the lockers on the right to take a closer look at them. After that, tap on the locker again to open it.
In the locker, you will find a “File”. Let’s tap on it to pick it up.
After that, tap on the arrow at the bottom to go back.
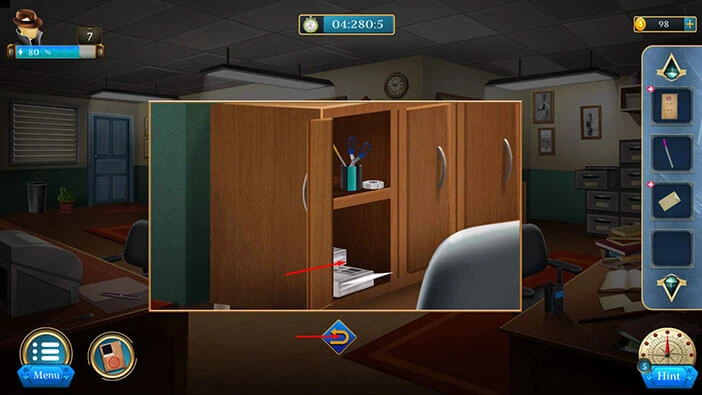
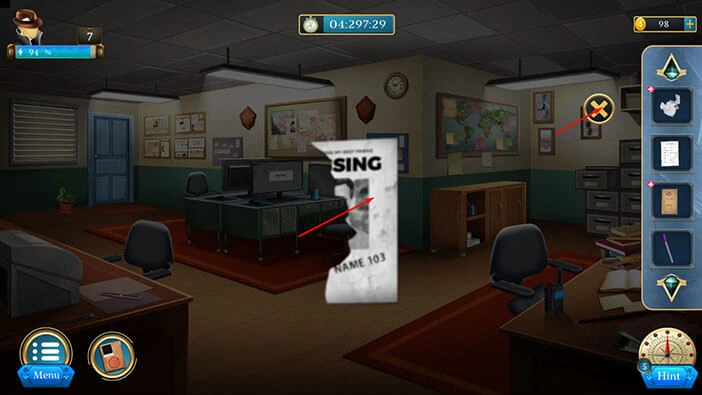
Next, let’s tap on the cabinet on the left to take a closer look at it, and tap again to open it.

Here, you will find a “Paper”. Let’s tap on it to pick it up. After that, tap on the arrow at the bottom to go back.
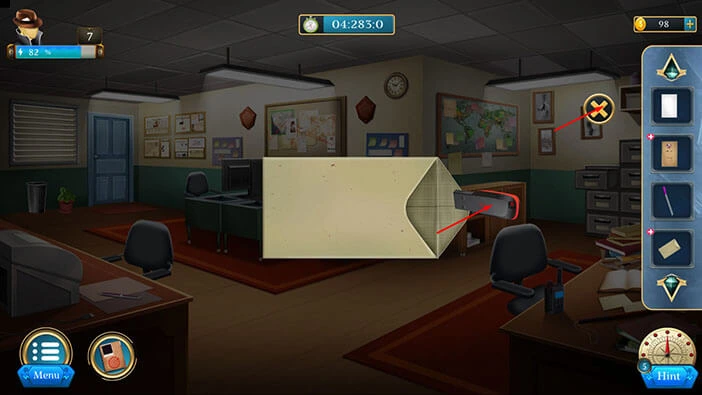
Select the “Envelope” from the inventory and it will appear in the middle of the screen. Let’s tap on the “Envelope” to open it.
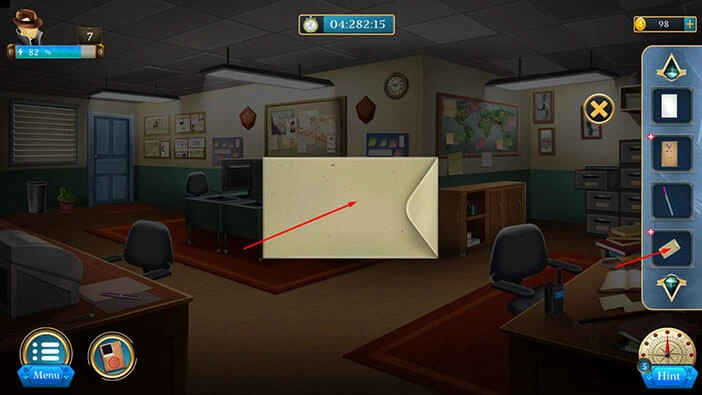
In the envelope, you will find a “Pendrive”. Let’s tap on it to pick it up. After that, tap on the “X” button to close this window.
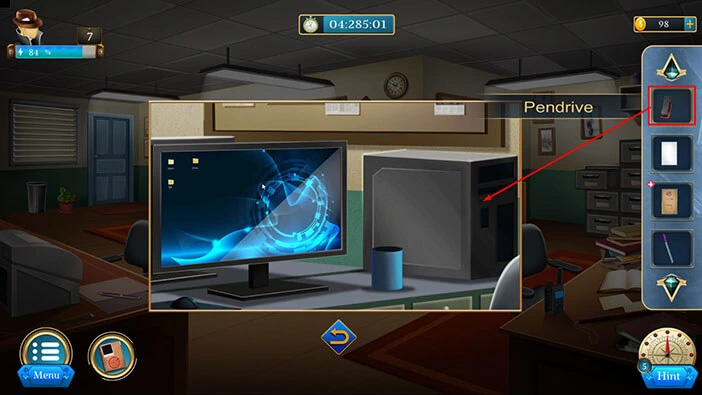
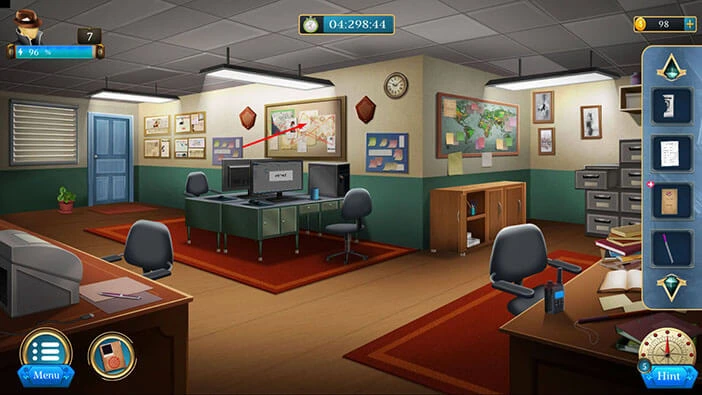
Next, let’s tap on the PC screen to take a closer look at it, and tap again to turn it on.
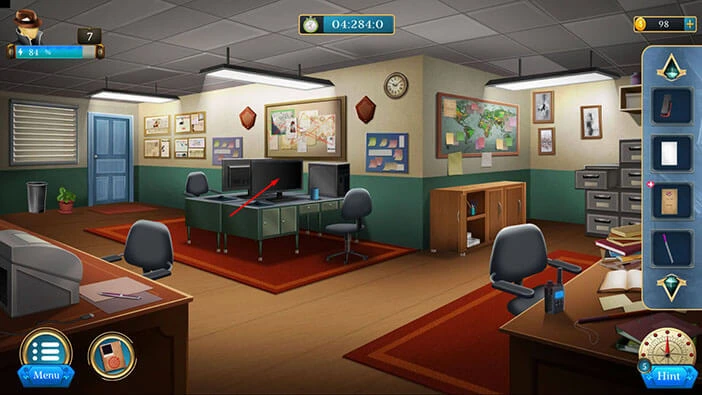
Select the “Pendrive” from the inventory and plug it into the PC.
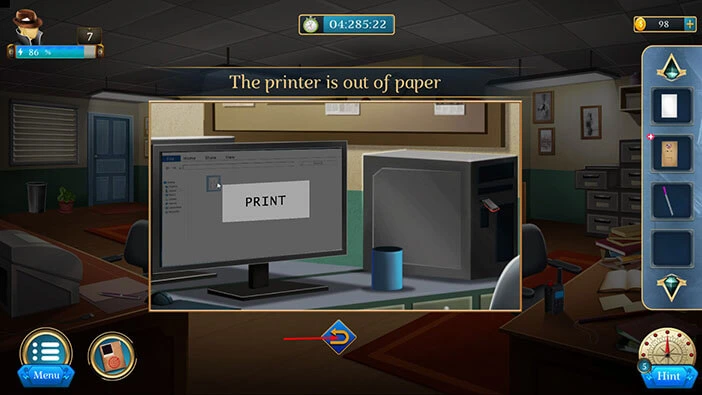
The printer is out of paper, so let’s tap on the arrow at the bottom to go back.
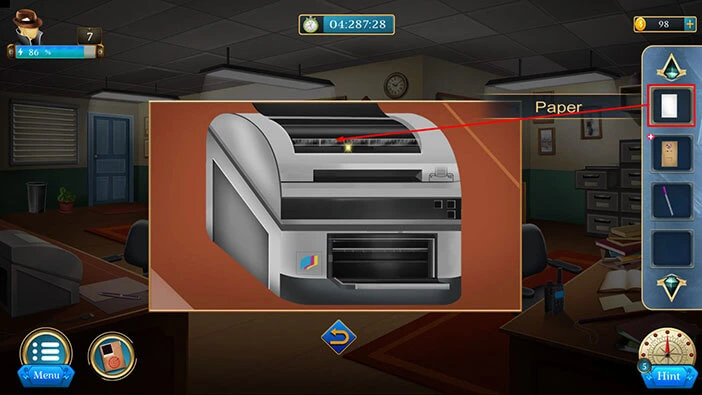
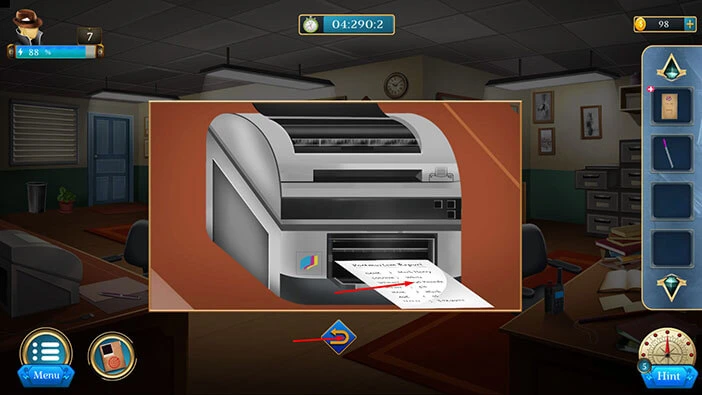
Next, let’s tap on the printer on the left to take a closer look at it, and tap again to start the interaction.

Select the “Paper” from the inventory and insert it into the printer. After that, tap on the arrow at the bottom to go back.
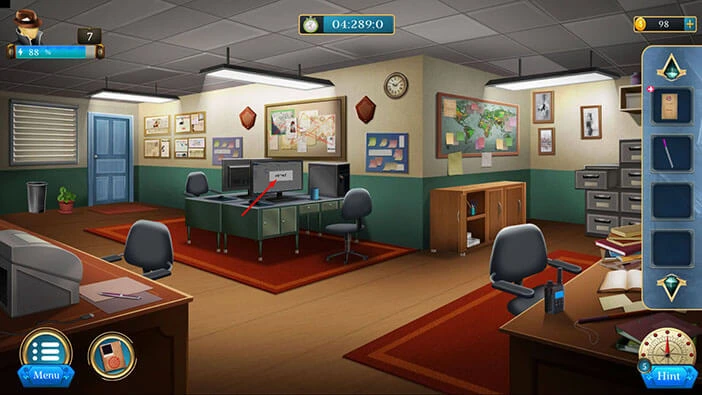
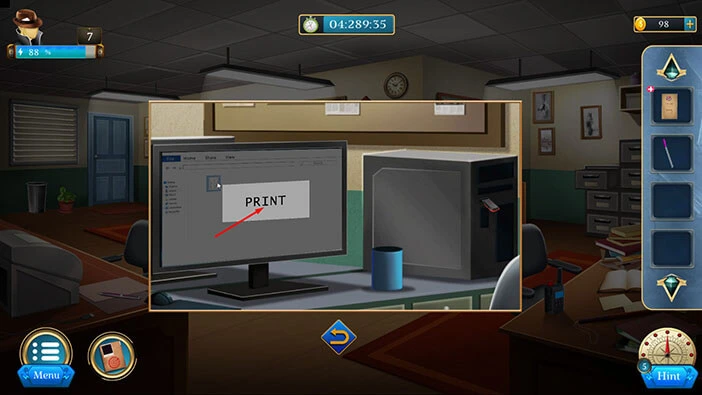
Let’s go back to the PC screen. Tap on it.
Tap on “Print”.
Let’s tap on the “Paper” to pick it up. After that, tap on the arrow at the bottom to go back.
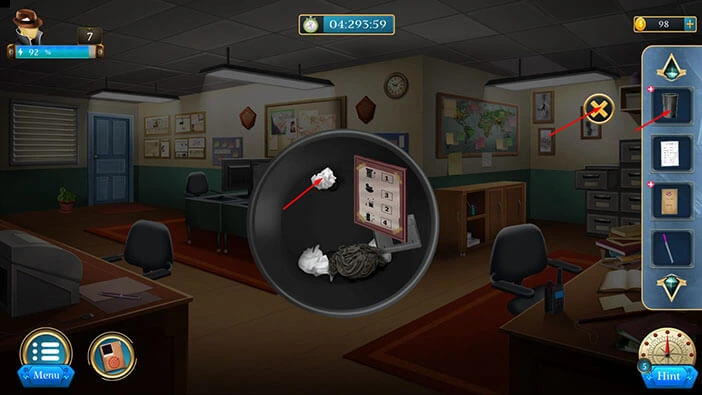
Next, to the door on the left, you will notice a “Bucket”. Let’s tap on it to pick it up. After that, tap on the arrow at the bottom to go back.

Select the “Bucket” in your inventory, and it will appear in the middle of the screen. Tap on the trash in the bucket to move it aside, and you will discover a “Paper”. Tap on it to pick it up.
After that, tap on the “X” button to close this window.
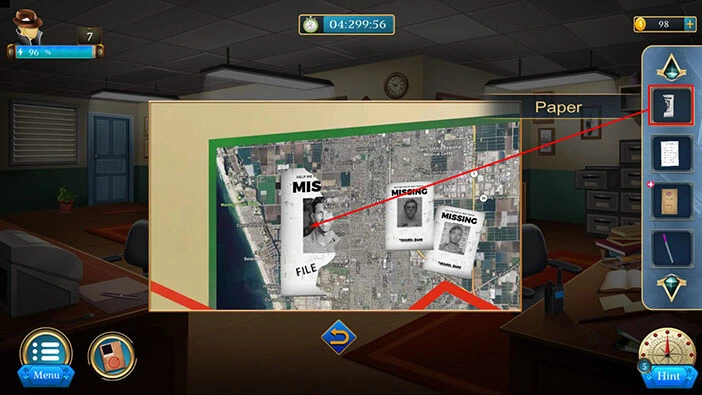
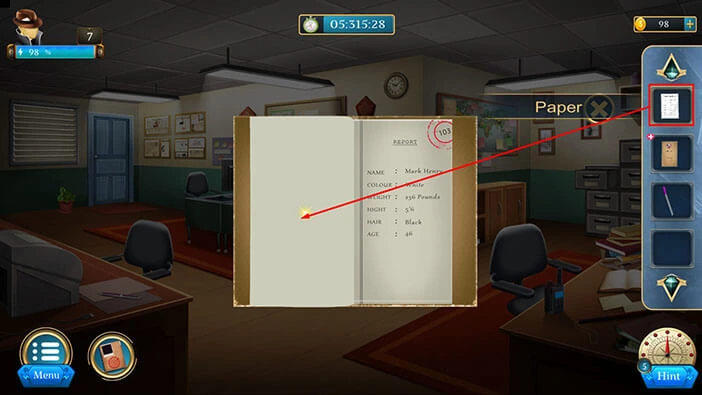
Select the “Paper” in your inventory, and it will appear in the middle of the screen. Let’s tap on the paper to unroll it.
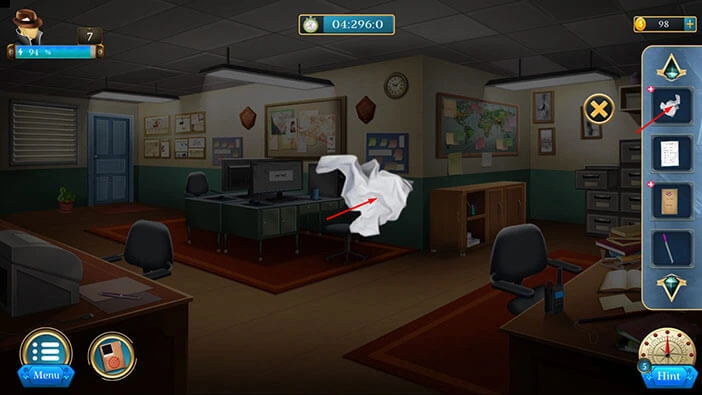
We can see that the “Paper” represents half of the photo. Let’s tap on the “Paper” to pick it up.
After that, tap on the arrow “X” button to close this window.
Next, let’s tap on the panel above the PCs to take a closer look at it.
Select the “Paper” from the inventory and use it to assemble the photo. After that, tap on the arrow at the bottom to go back.
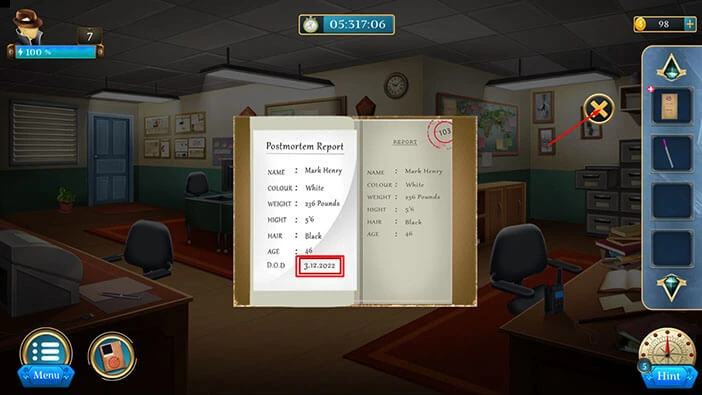
Next, let’s select the “File” from the inventory, and it will appear in the middle of the screen. Let’s tap on the file to open it.
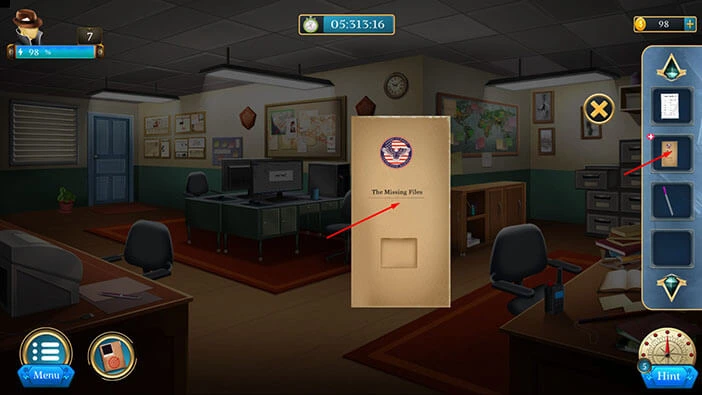
Tap on the file until you get to the last page.
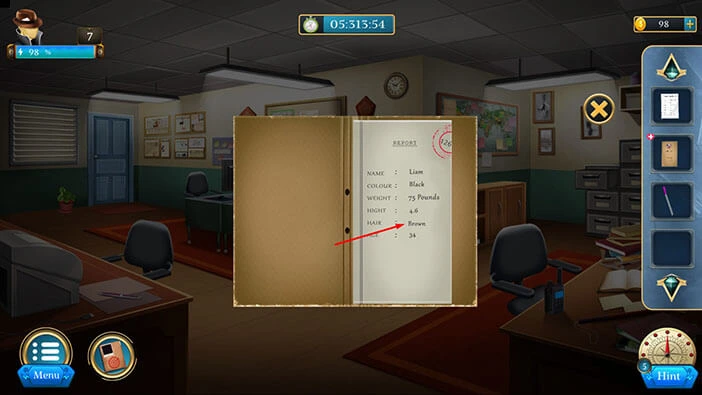
Select the “Paper” from the inventory and place it on the left side.
Here, you will see the date 03.12.2022. Let’s memorize/write down the date.
Once you’re done, tap on the “X” button to close this window.
Next, let’s tap on the large map on the wall on the right to take a closer look at it.
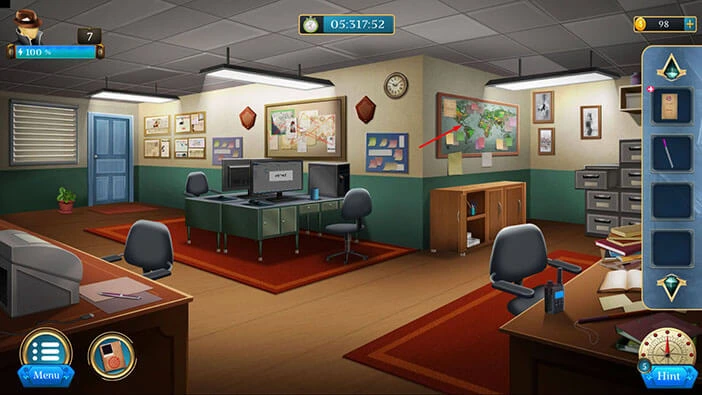
Select the “Pen” from the inventory and use it to write down the information for the 35th victim.
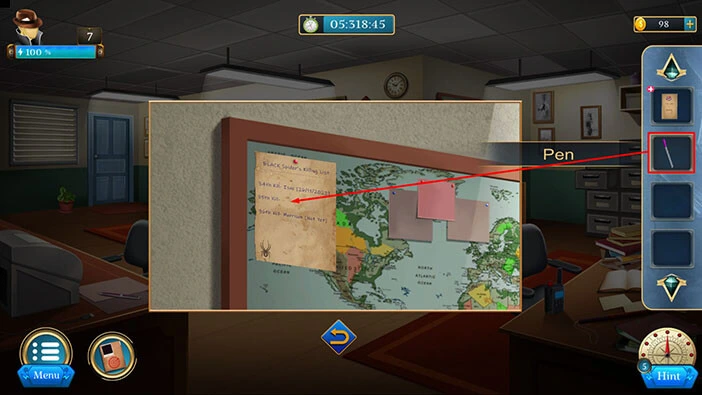
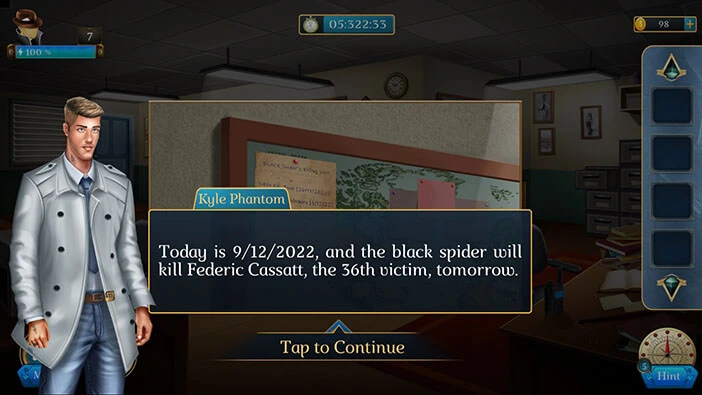
You will discover that the Black Spider eliminates one victim every seven days. That is the pattern. By this timetable, he will commit his next crime tomorrow. Frederick Cassatt is marked as the next victim, and he is currently in prison. So, our detectives decided to head back to the prison and try to stop Black Spider before he could commit the next crime.
With that, we have reached the end of the seventh level. If you want to see the walkthrough for the eighth level, tap on the next part button.
Thank you for reading.