Room Escape: Detective Phantom | Level 6
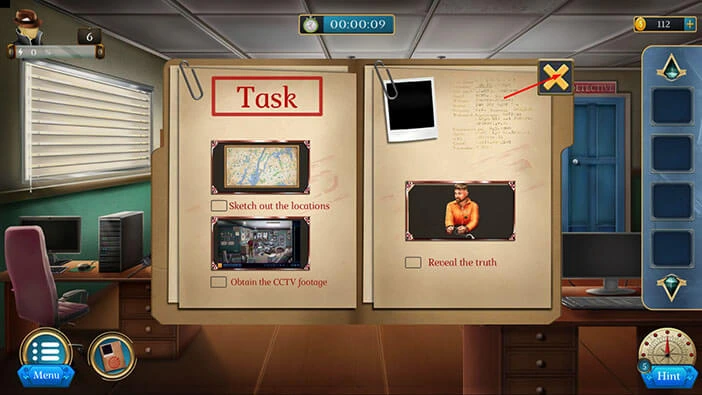
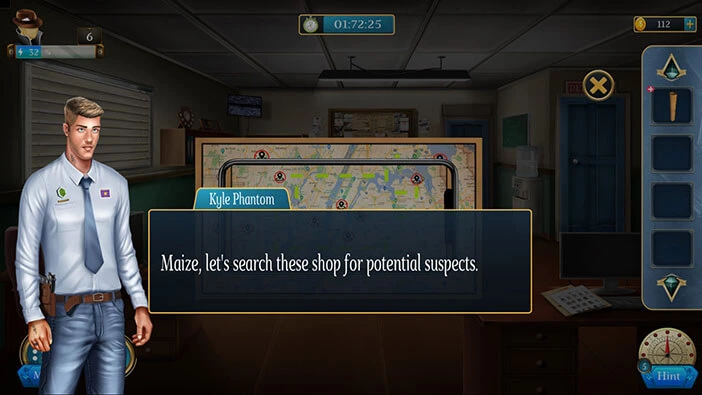
Hello everyone and welcome to the walkthrough for the sixth level of “Room Escape: Detective Phantom”. In the sixth level, our task is to examine the lab analysis.
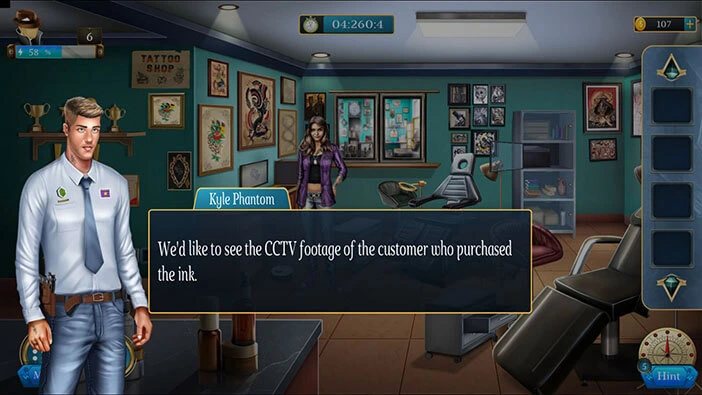
Our objectives are to “Sketch out the locations” “Obtain the CCTV footage” and “Reveal the truth”. Tap on the “X” button to go back.
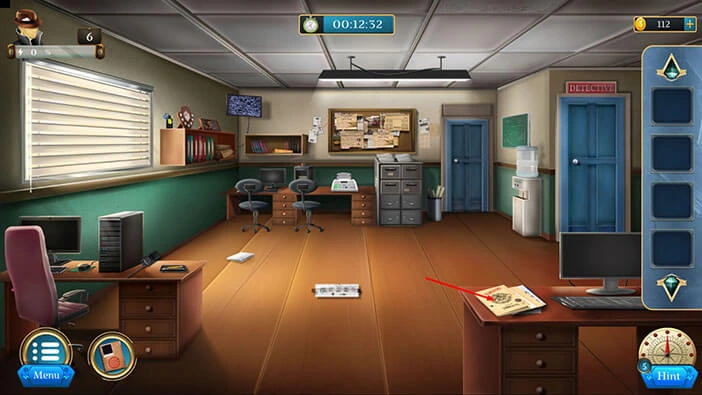
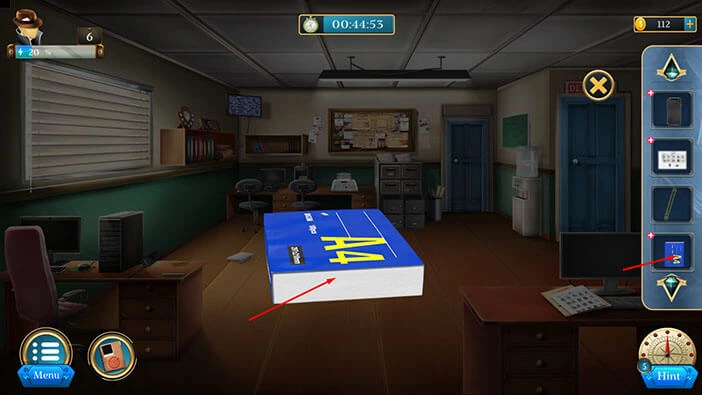
On the right side, you will notice a pile of files on the desk. Let’s tap on the files to take a closer look at them.
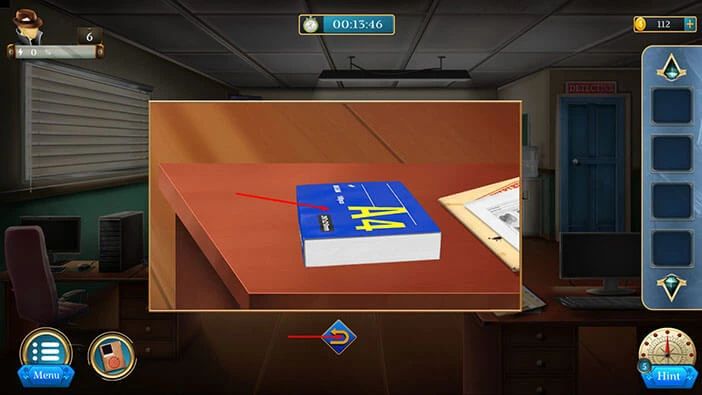
Tap on the first two files to remove them, and under them, you will find a “Paper Bundle”. Let’s tap on it to pick it up.
After that, tap on the arrow at the bottom to go back.
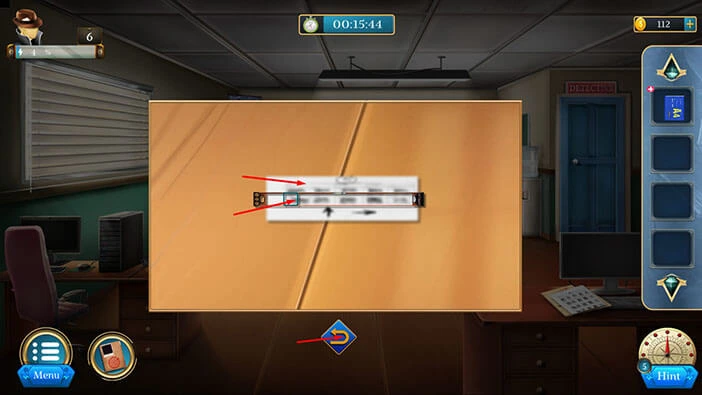
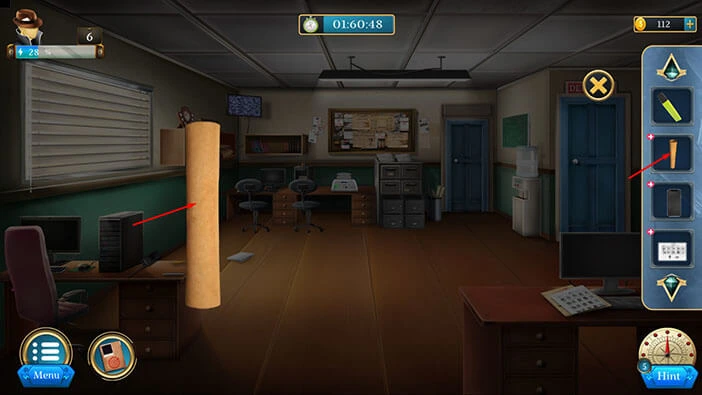
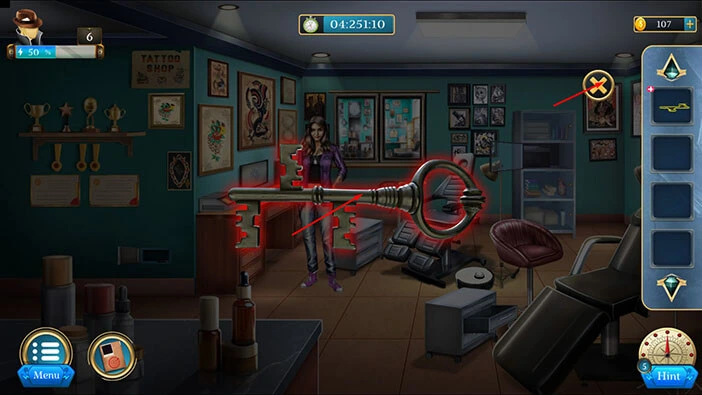
Next, if you pay attention to the part of the floor in the middle of the room, you will notice two items. Tap on them to take a closer look.
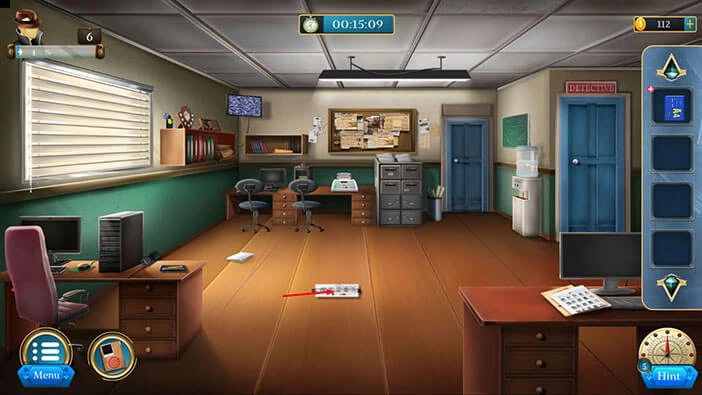
Here, you will find a “Scale” and a “Paper”. Let’s tap on these two items to pick them up. Once you’re done, tap on the arrow at the bottom to go back.
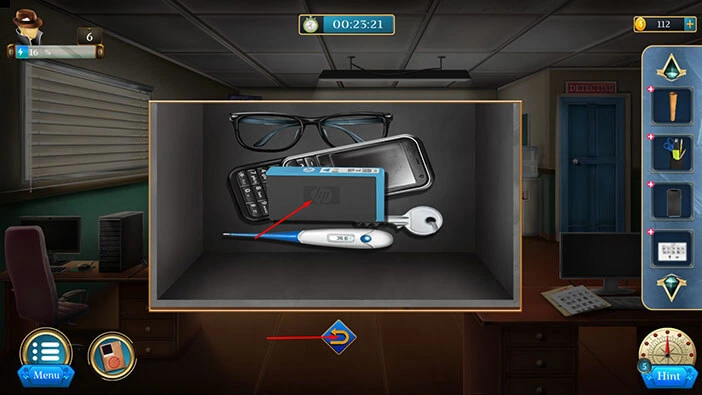
Next, let’s tap on the desk on the left to take a closer look at it.

Let’s tap on the two pencils to move them aside. After that, tap on the “Mobile” to pick it up.
After that, tap on the arrow at the bottom to go back.

Next, let’s tap on the bookshelf on the left to take a closer look at it.
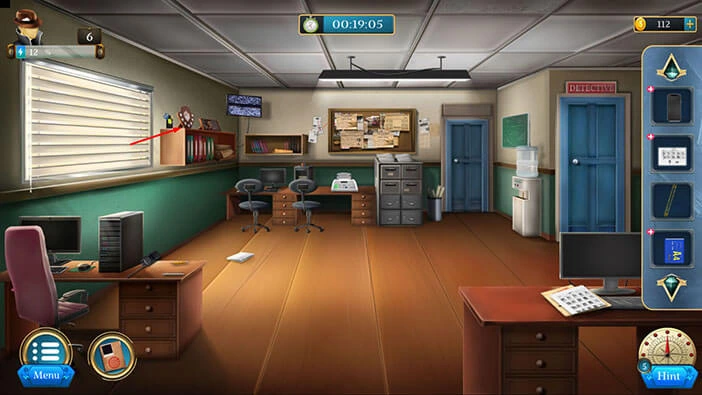
Here, you will find a “Pen stand”. Let’s tap on it to pick it up.
After that, tap on the arrow at the bottom to go back.
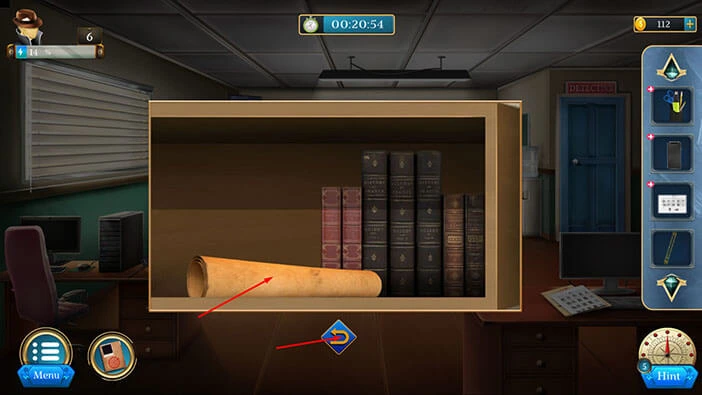
Next, let’s tap on the bookshelf on the back wall to take a closer look at it.

Here, you will find a “Map”. Let’s tap on it to pick it up. After that, tap on the arrow at the bottom to go back.
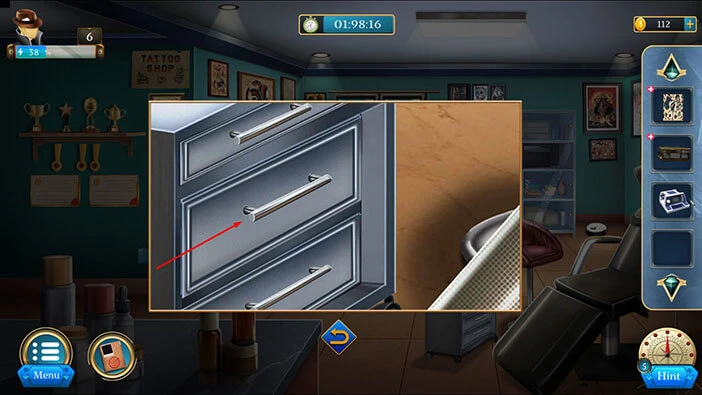
Next, let’s tap on the cabinet on the right to take a closer look at it.

Let’s tap on the bottom right drawer to open it, and tap again to look inside.
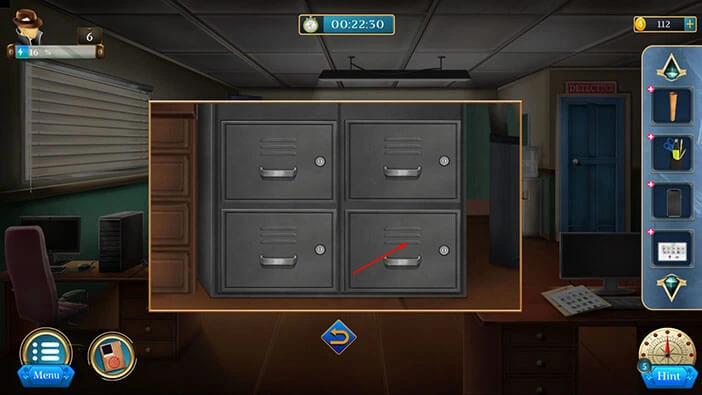
In the drawer, you will find an “Ink cartridge”. Tap on it to pick it up.
After that, tap on the arrow at the bottom to go back.
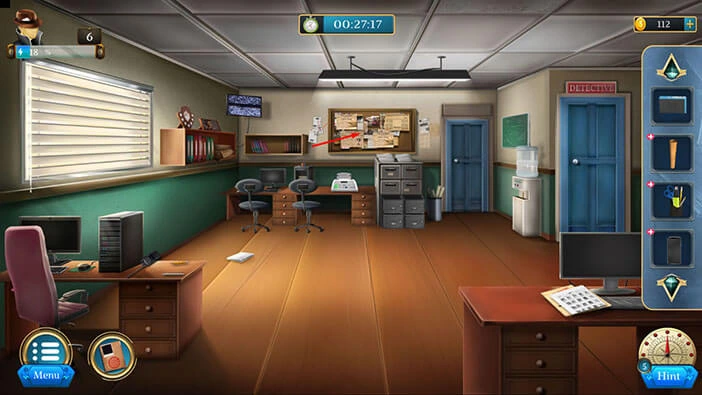
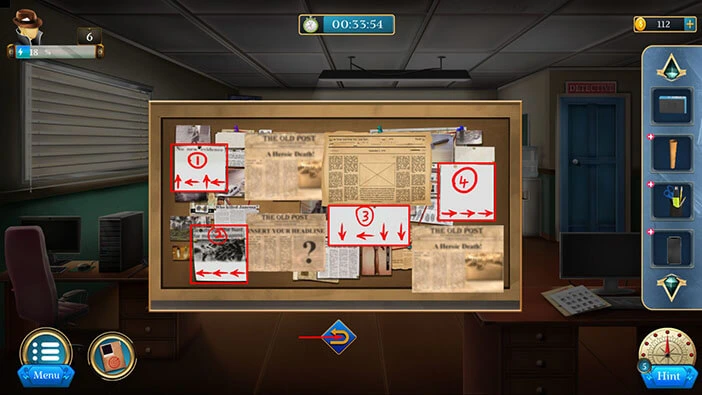
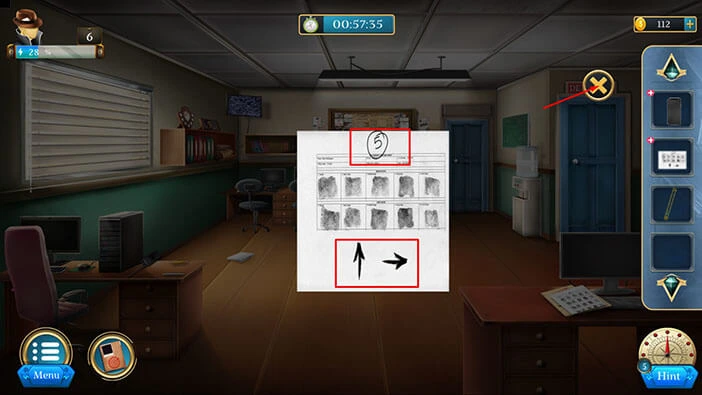
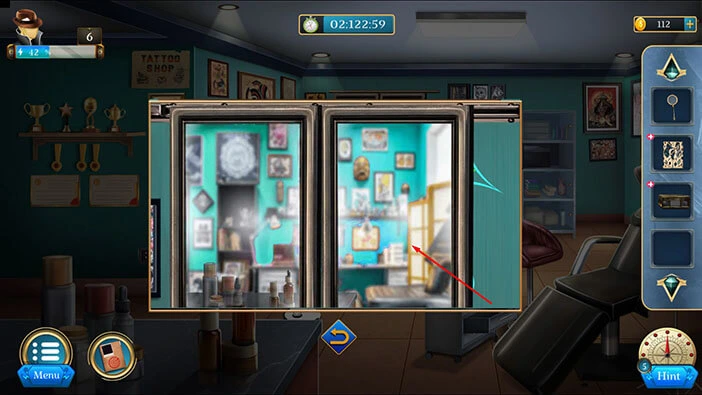
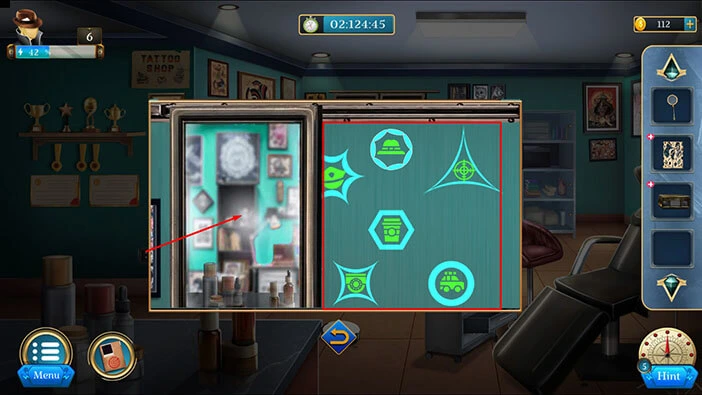
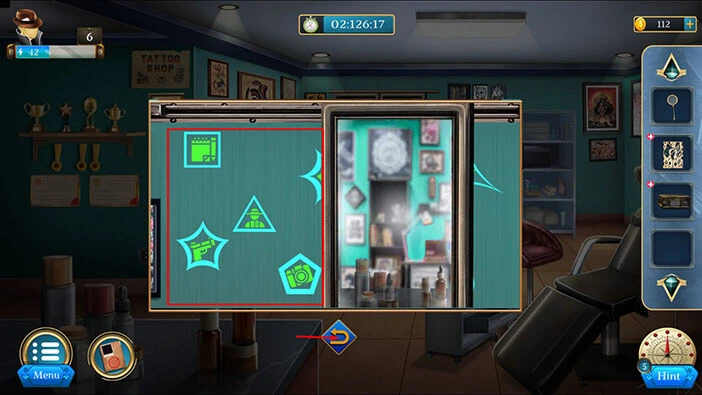
Next, let’s tap on the board on the back wall to take a closer look at it.
Let’s tap on the four pieces of paper to move them aside.
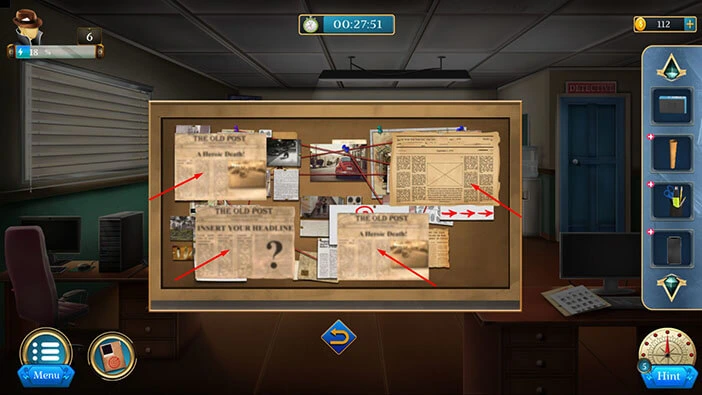
Here, we can see the hint for the next puzzle. Let’s memorize/write down these hints.
First hint = Up/Left/Up/Left
Second hint = Left/Left/Left
Third hint = Down/Left/Down/Down
Fourth hint = Right/Right/Right
Once you’re done, tap on the arrow at the bottom to go back.
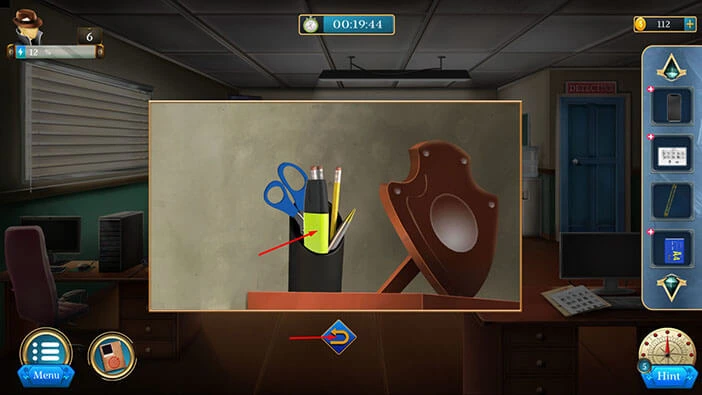
Next, let’s tap on the “Pen Stand” in our inventory to examine it, and it will appear in the middle of the screen. Tap on the “Marker” to pick it up.
After that, tap on the “X” button to close this window.

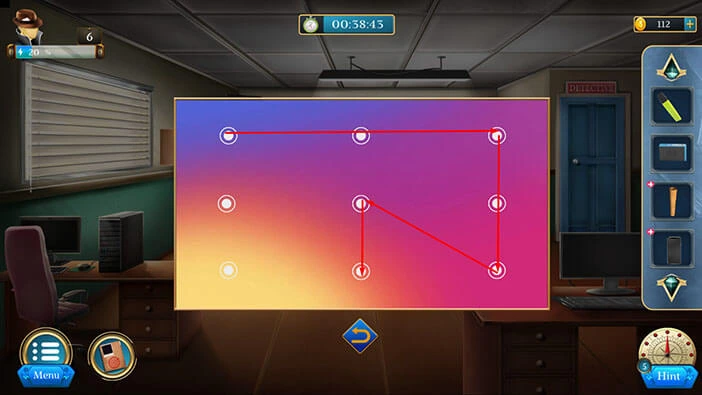
Next, let’s select the “Mobile” in our inventory and it will appear in the middle of the screen. After that, tap on the mobile to start the interaction.
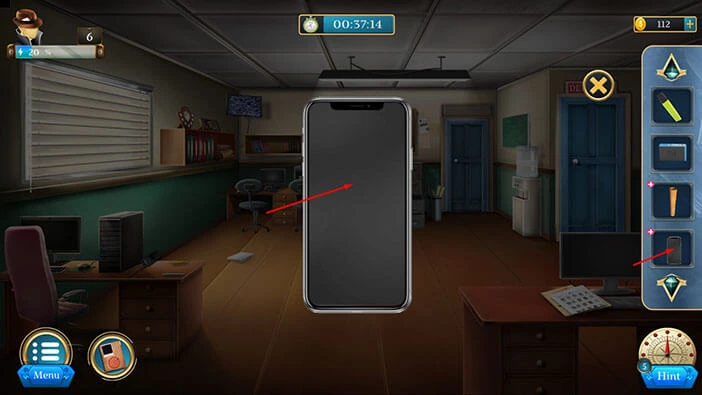
Our first task is to unlock the mobile. Just repeat the pattern and you will unlock it.
Tap on the mobile to start the interaction. Currently, we can’t see anything useful. We will come back to the mobile a bit later in the walkthrough. For now, tap on the “X” button to close this window.
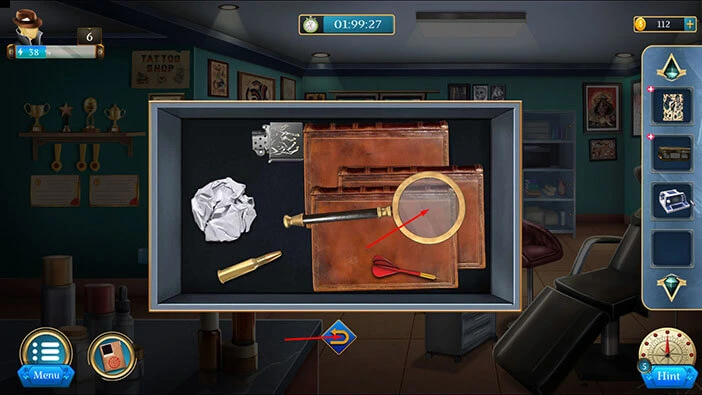
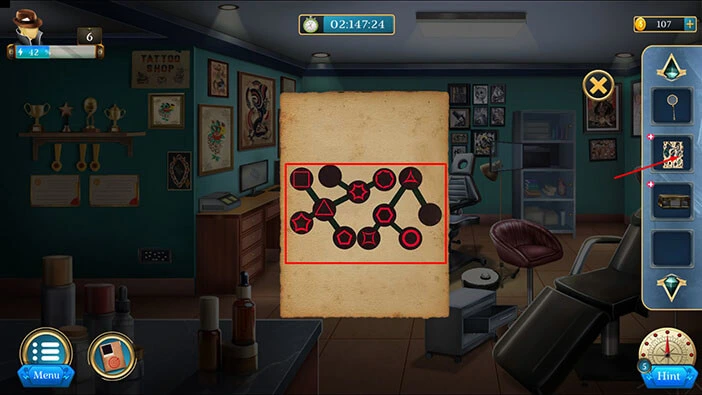
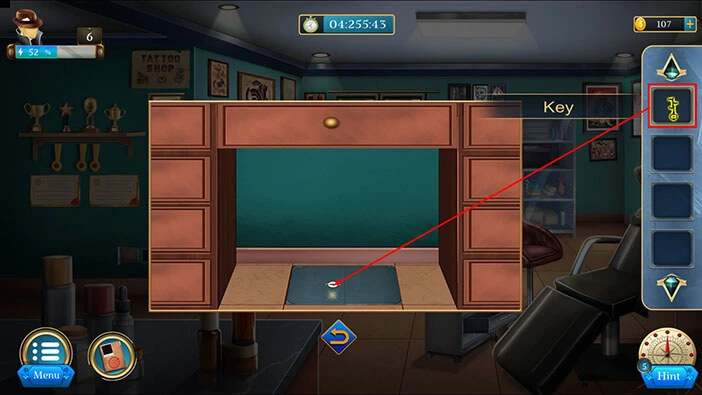
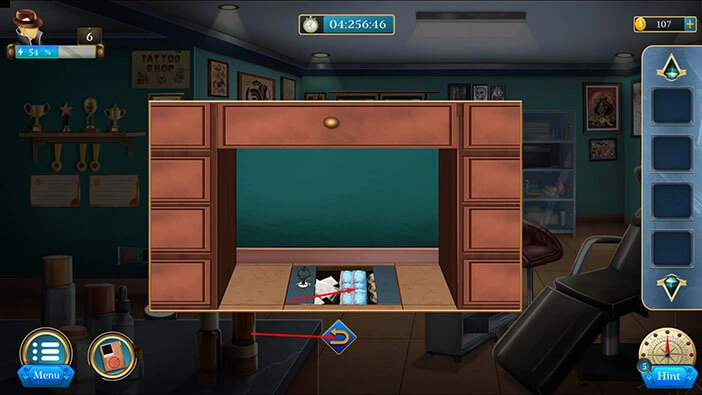
Next, let’s select the “Paper bundle” in our inventory and it will appear in the middle of the screen. After that, tap on the “Paper Bundle” again and you will discover a “Paper”. Let’s tap on it to pick it up.
After that, tap on the “X” button to close this window.
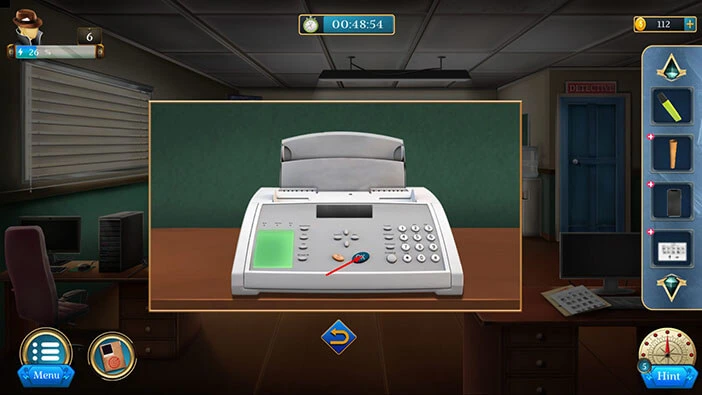
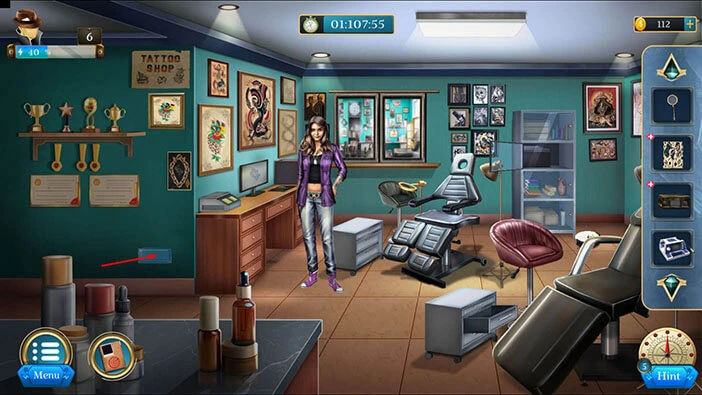
Next, let’s tap on the fax machine, located on the desk in front of you, to take a close look at it.
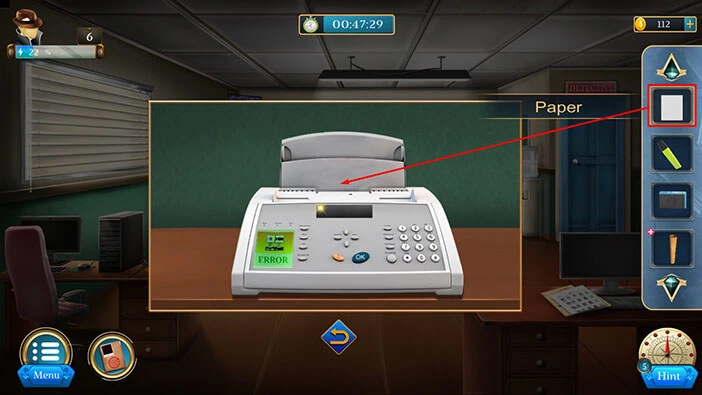
Select the “Paper” from the inventory and insert it into the fax machine.
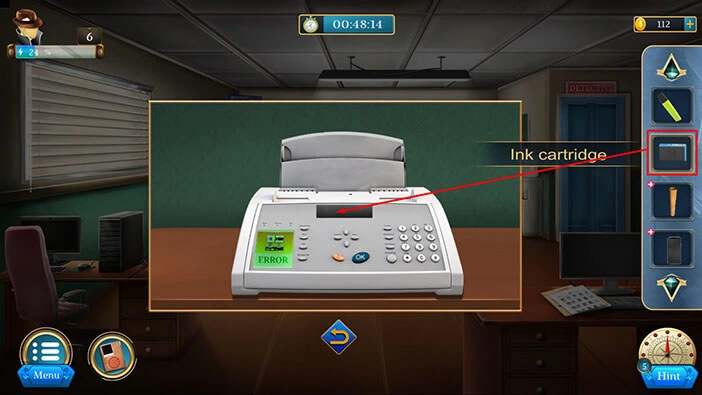
Next, select the “Ink Cartridge” from the inventory and insert it into the empty slot.
Lastly, tap on the “OK” button.
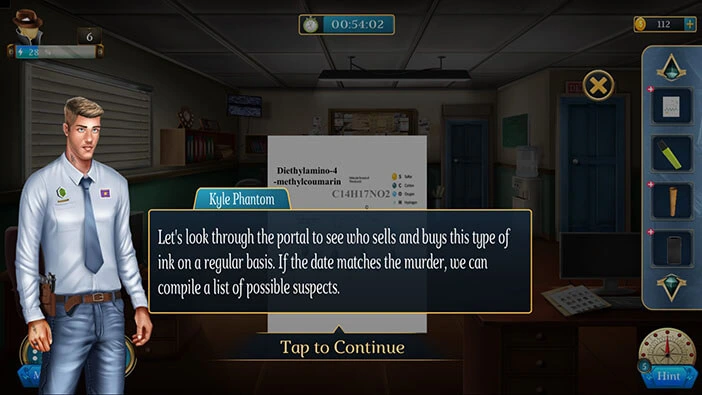
You will get a “Report”. Let’s tap on it to pick it up. After that, tap on the arrow at the bottom to go back.

Next, let’s tap on the “Report” to examine it.

Our character wants to investigate the people who buy this ink on a regular basis. Let’s go back.
Next, let’s select the “Paper” in our inventory and it will appear in the middle of the screen. Here, we can see the fifth hint (we already discovered the first four hints).
Fifth hint = Up/Right
Once you’re done, tap on the “X” button to close this window.
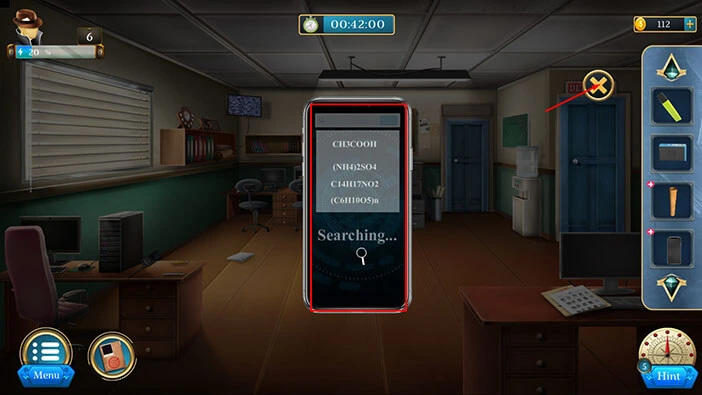
Next, select “Mobile” from the inventory and it will appear in the middle of the screen. After that, tap on the “Mobile” to start the interaction.
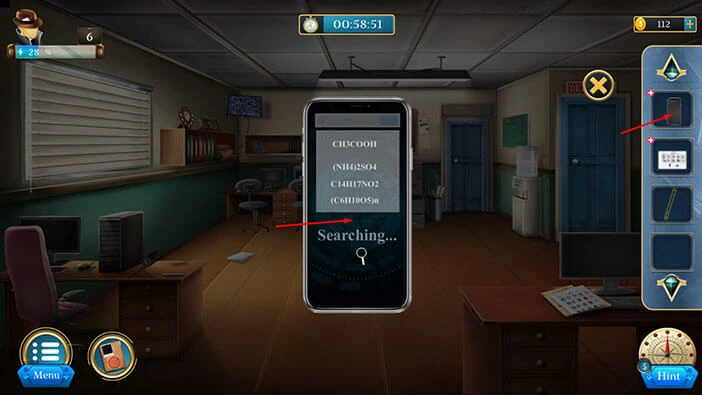
Our next task is to find the shops that are close to the crime scene. Let’s do that.
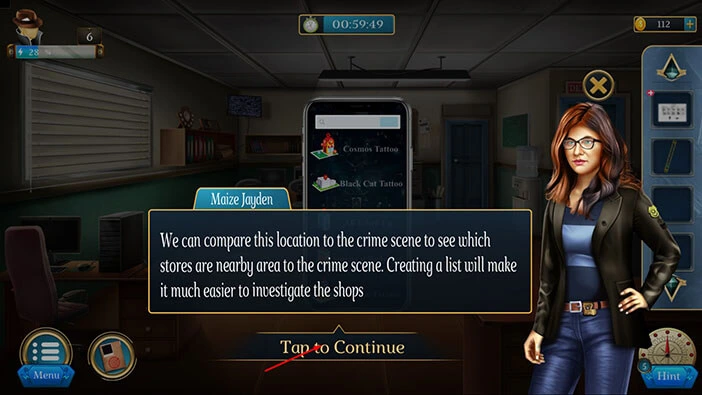
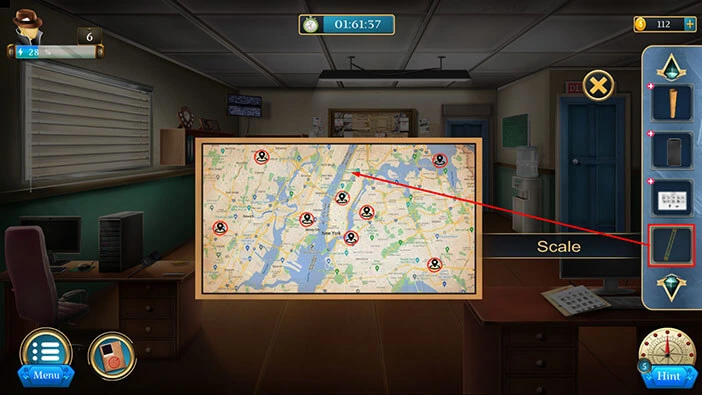
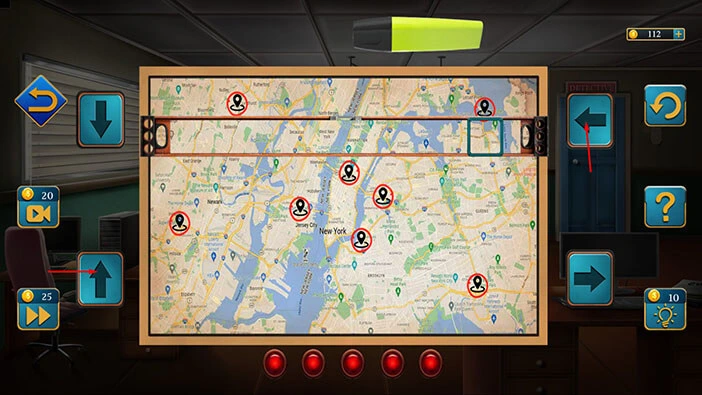
Next, let’s select the “Map” from the inventory and it will appear in the middle of the screen. After that, tap on the map again to start the interaction.
Next, select the “Scale” from the inventory and place it on the map.
Next, select the “Marker” from the inventory and place it next to the map. After that, tap on the map to start the interaction.
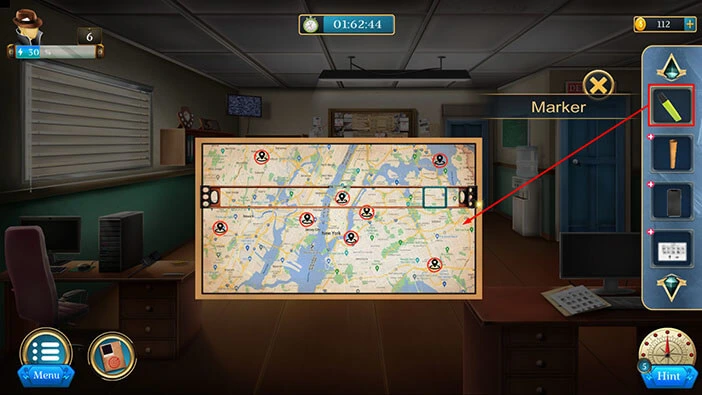
Ok, our next task is tap on the arrows that we discovered in the five hints. We will do that in several steps. Let’s begin.
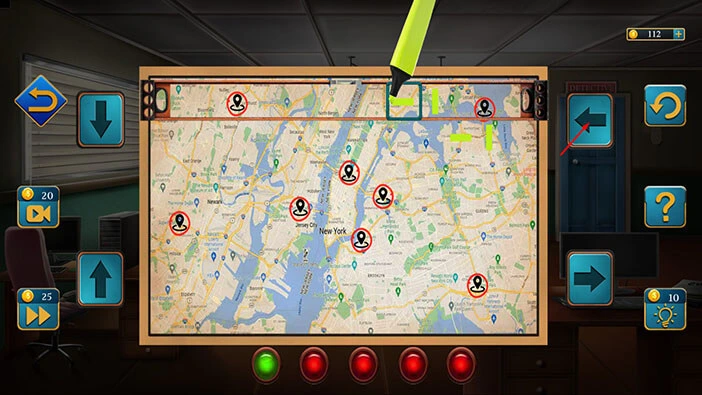
Step 1
Let’s tap on the arrows that we discovered in the first hint. First hint = Up/Left/Up/Left. Once you tap on these arrows, our character will take the marker and he will draw the path on the map.
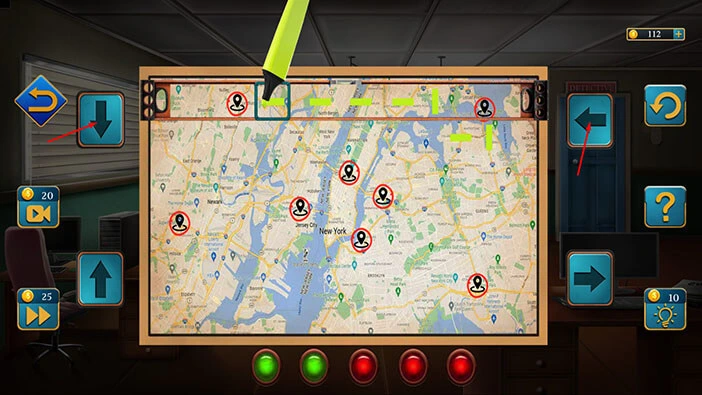
Step 2
Let’s tap on the arrows that we discovered in the second hint. Second hint = Left/Left/Left
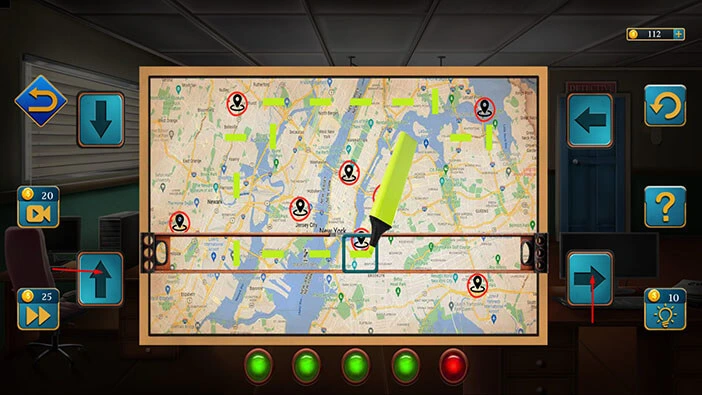
Step 3
Let’s tap on the arrows that we discovered in the third hint. Third hint = Down/Left/Down/Down
Step 4
Let’s tap on the arrows that we discovered in the fourth hint. Fourth hint = Right/Right/Right

Step 5
Let’s tap on the arrows that we discovered in the fifth hint. Fifth hint = Up/Right
With that, we will discover the location of the shop, and our character will go to that location to investigate it.
In the next scene, we arrive at the shop. The seller claims that the shop doesn’t sell the invisible ink. However, the Detectives want to search the shop.
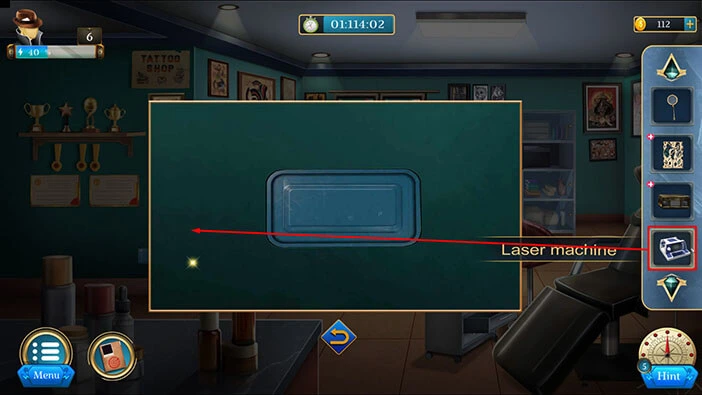
Let’s begin the investigation. Just to the right of the seller, you will notice a “Laser machine”. Let’s tap on it to take a closer look, and tap again to pick it up.
After that, tap on the arrow at the bottom to go back.

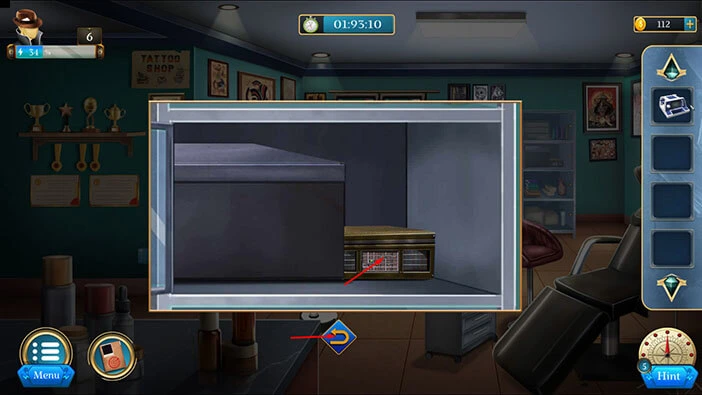
Next, let’s tap on the cabinet on the right to take a closer look at it, and tap again to open it.

Inside, you will find a “Box”. Let’s tap on it to pick it up.
After that, tap on the arrow at the bottom to go back.
You will notice a poster on the wall, located behind and to the right of the seller. Let’s tap on the poster to take a closer look at it.

Tap on the duct tape pieces in the top right and bottom left corner of the poster to remove them.
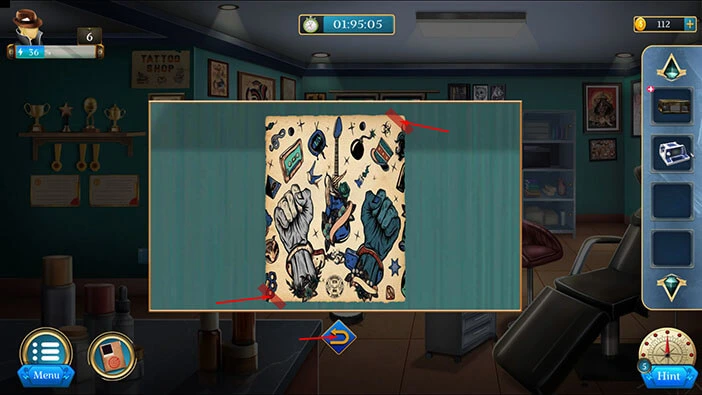
Let’s tap on the “Poster” to pick it up. After that, tap on the arrow at the bottom to go back.
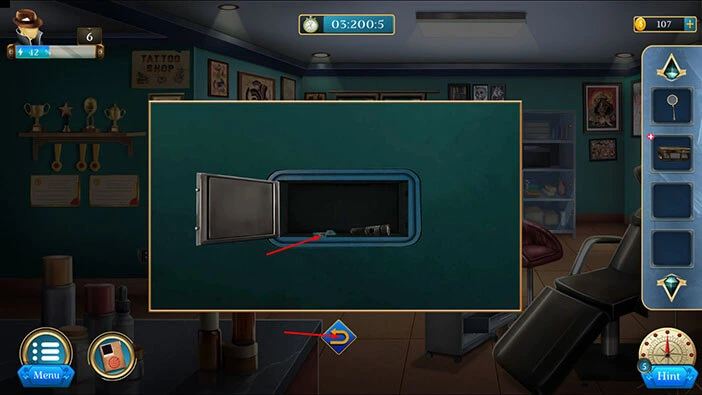
Tap on the small cabinet in front of you to take a closer look at it.

Let’s tap on the middle drawer to open it.
In the drawer, you will find a “Magnifier”. Tap on it to pick it up. After that, tap on the arrow at the bottom to go back.
Next, let’s tap on the small panel, located on the wall on the left, to take a closer look at it.
Select the “Laser machine” from the inventory and drag it next to the panel.
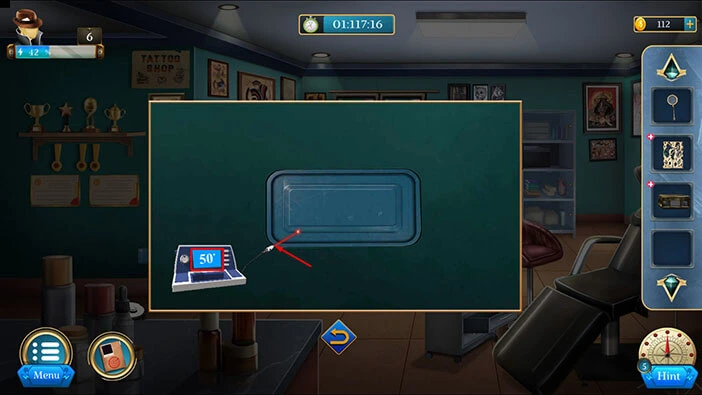
Next, let’s tap on the “Laser machine” to turn it on. Tap on the laser machine a few more times. The goal is to set the power (shown on the display) to 50.
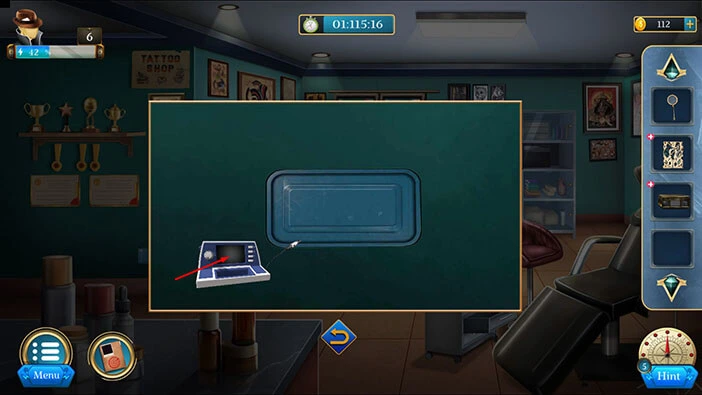
Once you set the power to 50, you should tap on the laser to activate it. Our character will use the laser to cut the panel.
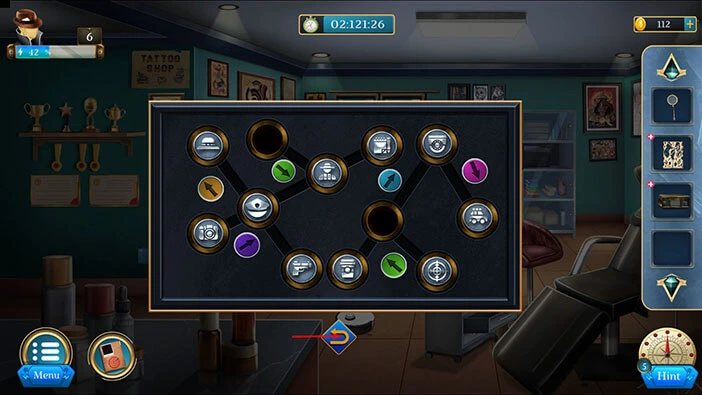
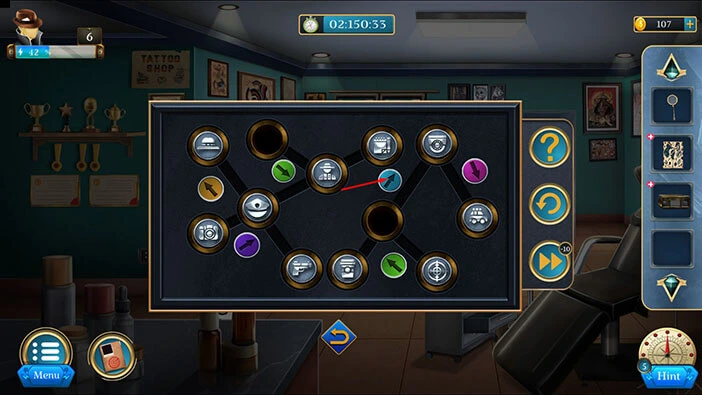
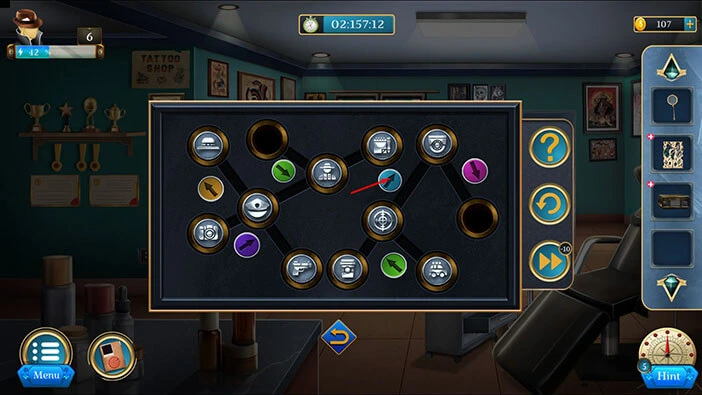
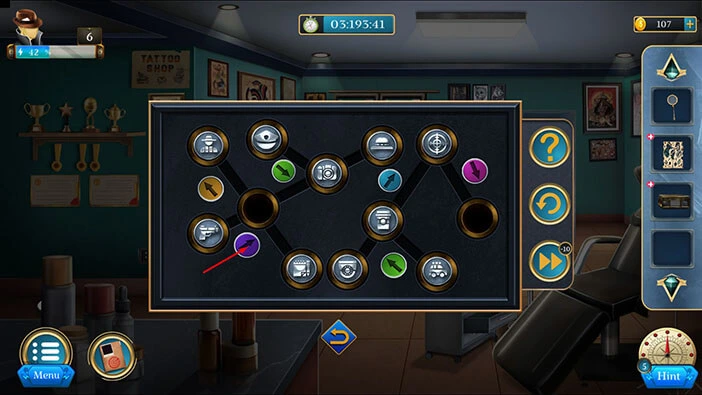
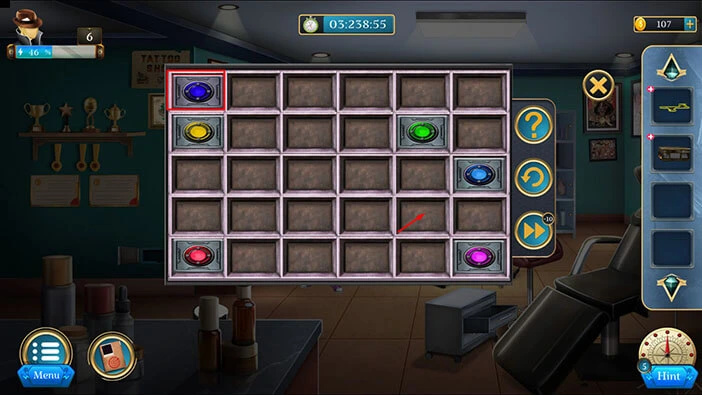
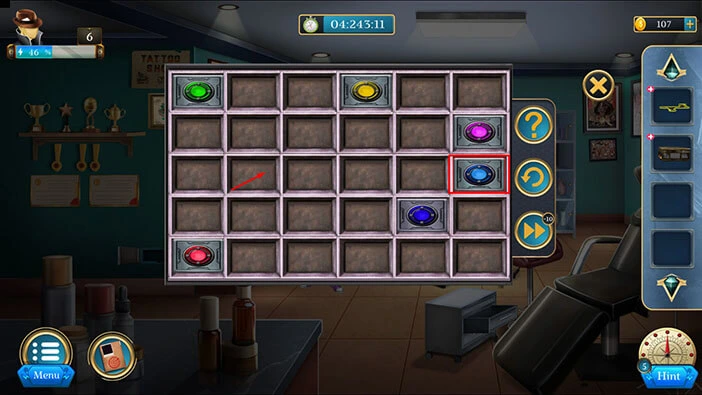
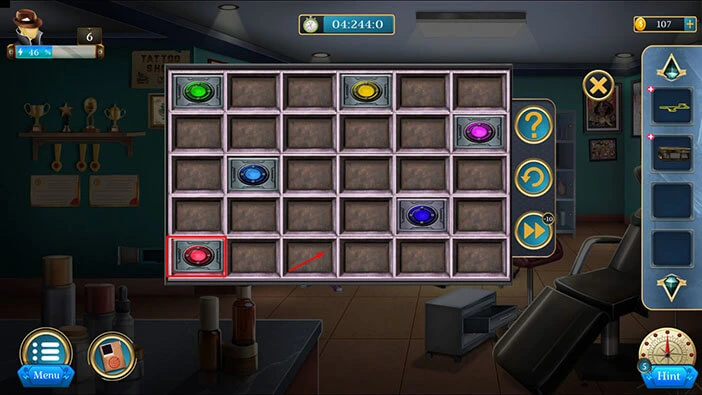
Under the panel, you will discover another puzzle. So, let’s tap on the puzzle to take a closer look at it.
Here, we will see a number of slots, with a certain symbol in each slot. We will come back to this puzzle, once we discover the hint that we can use to solve it.
For now, let’s tap on the arrow at the bottom to go back.
Next, let’s tap on the panel, located just behind the seller, to take a closer look at it.
Tap on the right side of the panel to move it aside.
You will notice five symbols. This is the hint for the correct position of the symbols. Of course, I am talking about the puzzle that we saw previously (in the wall, behind the panel).
So, let’s memorize/write down the position of the symbols. Once you’re done, tap on the panel on the left to move it aside.
Here, we can see the second part of the hint for the previous puzzle. Let’s memorize/write down the position of the symbols.
Once you’re done, tap on the arrow at the bottom to go back.
Next, let’s go back to the previous puzzle. Tap on the open panel on the left to look inside.

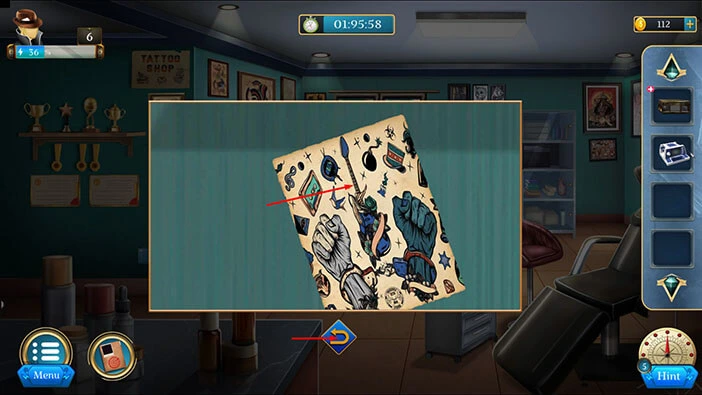
Next, let’s select the poster in our inventory and it will appear in the middle of the screen. Tap on the poster again to look at its back. Here, you will see the final hint for the previous puzzle. Let’s memorize/write down the position of the nodes.
Once you’re done, tap on the “X” button to closer this window.
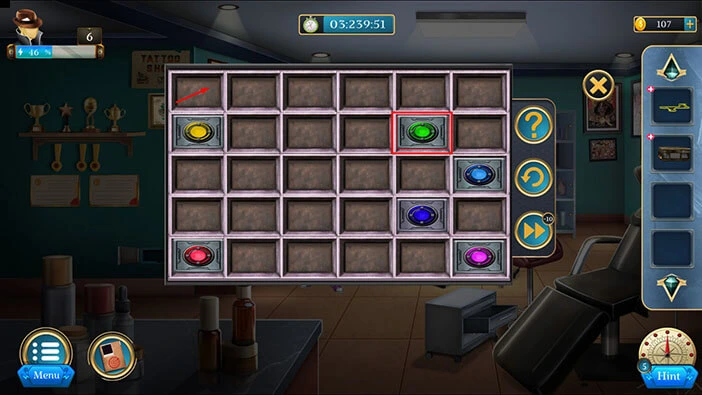
Let’s go back to the puzzle. Tap on the panel on the left side of the wall.

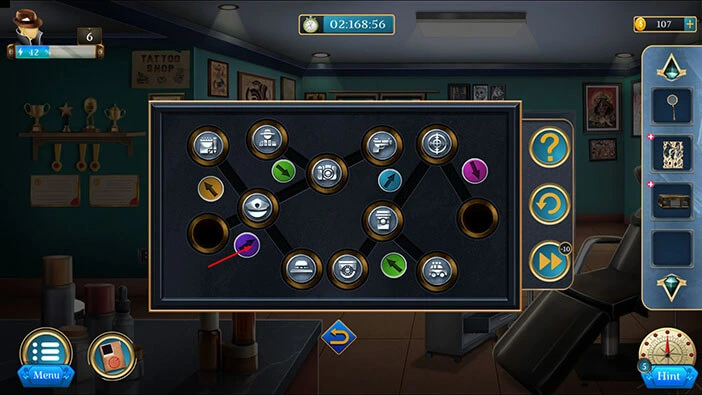
Ok, the position of the symbols should match the hint that we saw previously. So, our task is to
rearrange the symbols. We will do this puzzle in several steps. Let’s begin.
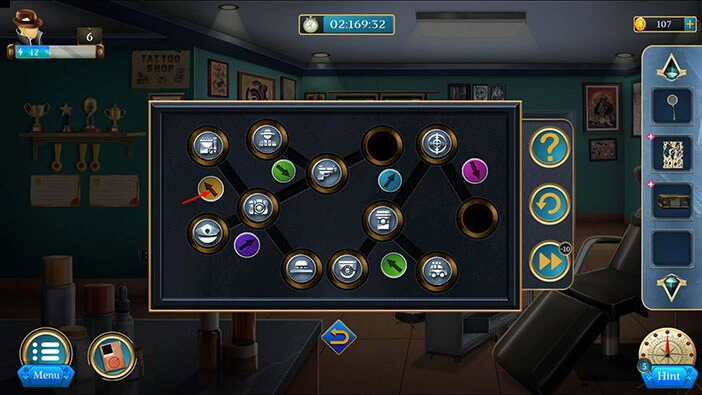
Step 1
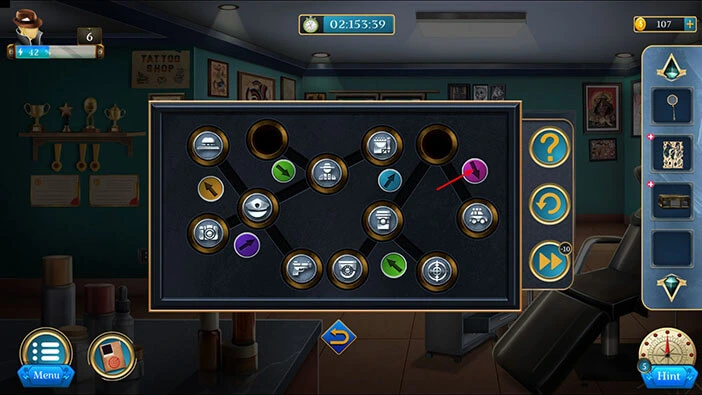
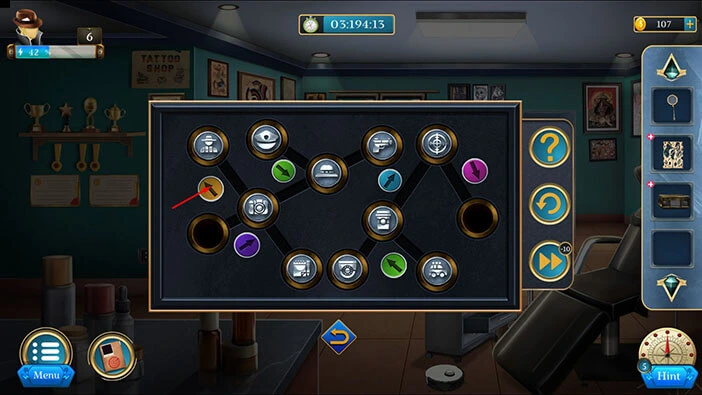
Tap on the blue arrow in the first row to change the position of the symbols in the slots.
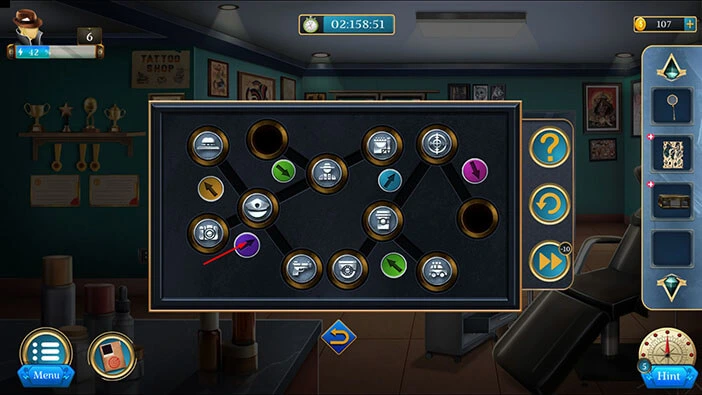
Step 2
Tap on the pink arrow in the first row to change the position of the symbols in the slots.
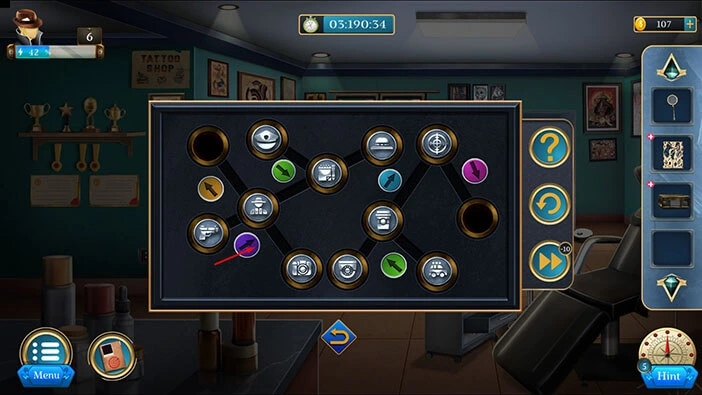
Step 3
Tap on the blue arrow in the first row to change the position of the symbols in the slots.
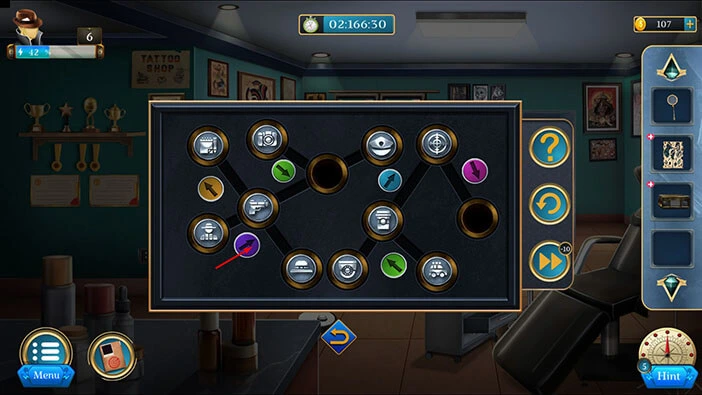
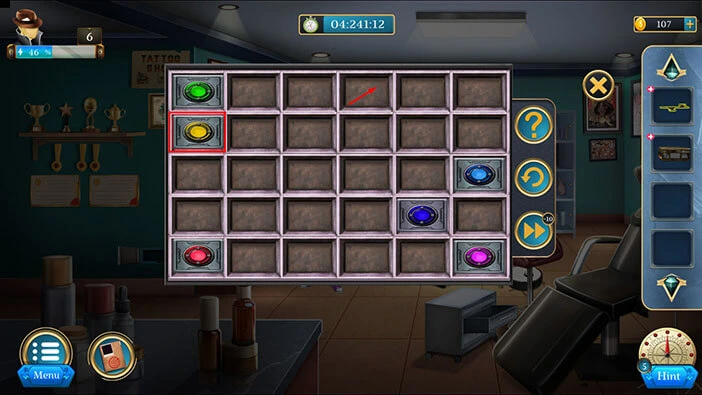
Step 4
Tap on the blue arrow in the first row again to change the position of the symbols in the slots.
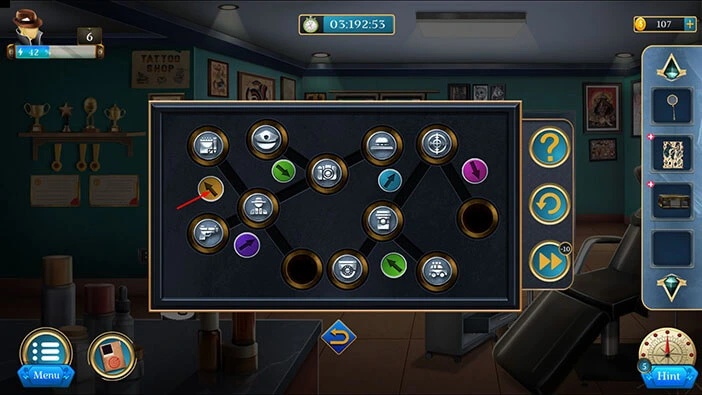
Step 5
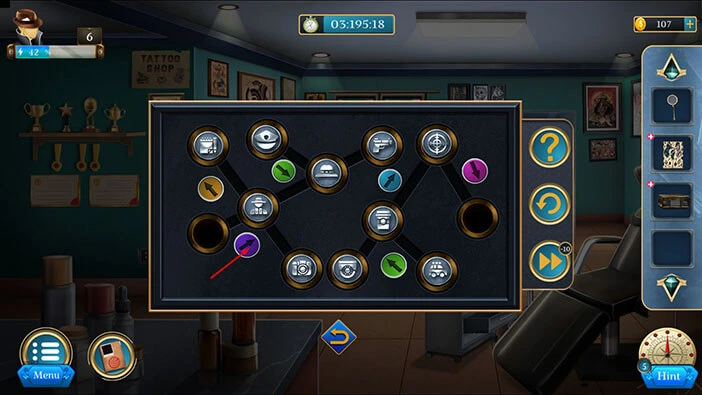
Tap on the green arrow in the second row to change the position of the symbols in the slots.

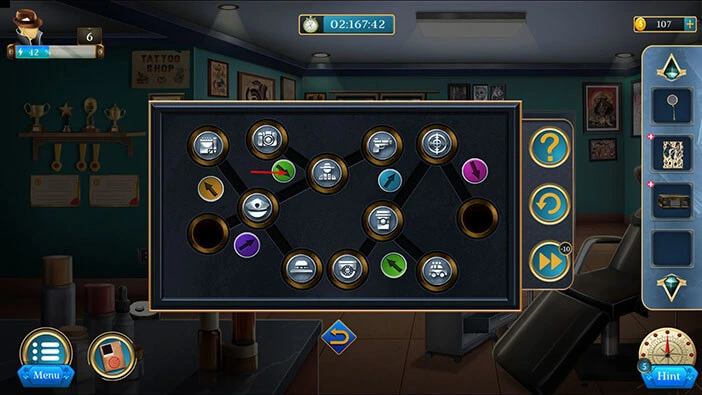
Step 6
Tap on the blue arrow in the first row to change the position of the symbols in the slots.
Step 7
Tap twice on the purple arrow in the second row to change the position of the symbols in the slots.
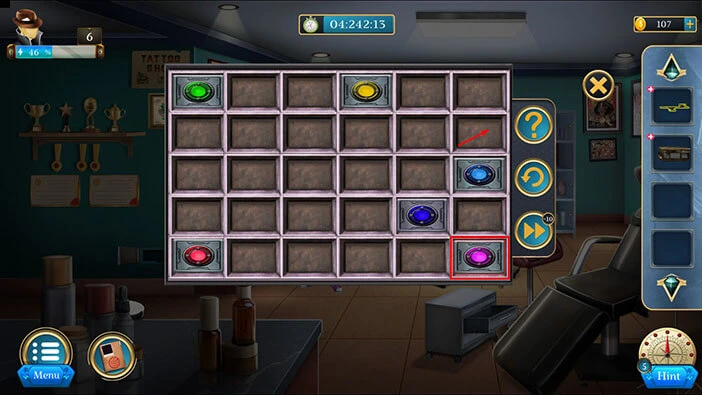
Step 8
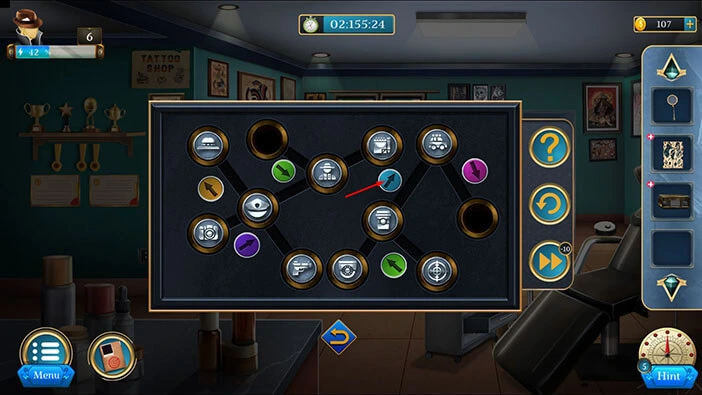
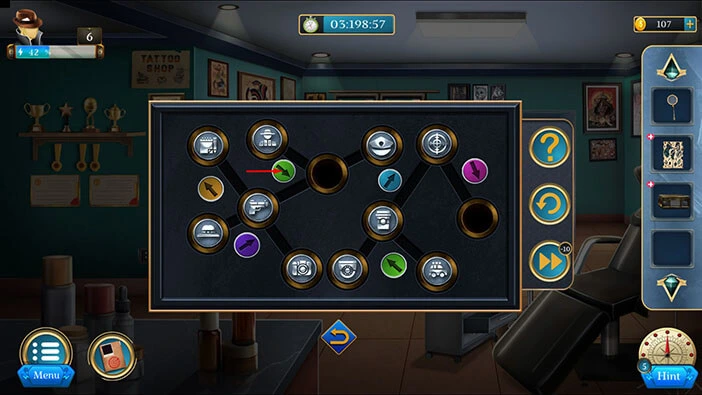
Tap on the orange arrow in the first row to change the position of the symbols in the slots.

Step 9
Tap on the green arrow in the first row to change the position of the symbols in the slots.

Step 10
Tap twice on the purple arrow in the second row to change the position of the symbols in the slots.
Step 11
Tap on the green arrow in the first row to change the position of the symbols in the slots.
Step 12
Tap on the purple arrow in the second row to change the position of the symbols in the slots.
Step 13
Tap on the orange arrow in the first row to change the position of the symbols in the slots.
Step 14
Tap twice on the purple arrow in the second row to change the position of the symbols in the slots.

Step 13
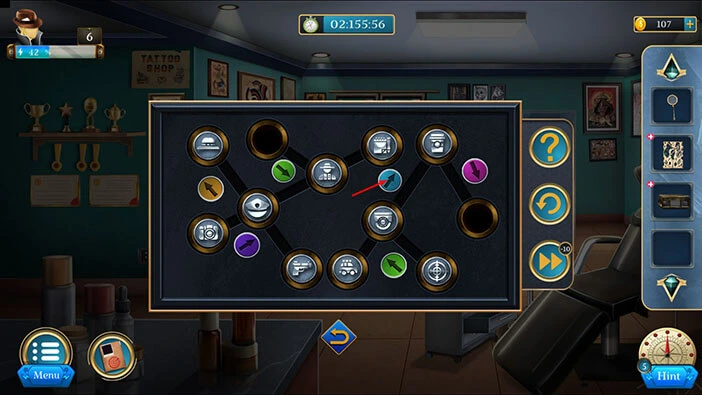
Tap on the orange arrow in the first row to change the position of the symbols in the slots.

Step 15
Tap three times on the purple arrow in the second row to change the position of the symbols in the slots.

Step 16
Tap on the green arrow in the first row to change the position of the symbols in the slots.

Step 16
Tap on the purple arrow in the second row to change the position of the symbols in the slots.

Step 17
Tap on the green arrow in the first row to change the position of the symbols in the slots.

Step 18
Tap on the purple arrow in the second row to change the position of the symbols in the slots.
Step 19
Tap on the orange arrow in the first row to change the position of the symbols in the slots.

Step 20
Tap three times on the purple arrow in the second row to change the position of the symbols in the slots.

Step 21
Tap on the orange arrow in the first row to change the position of the symbols in the slots.
Step 22
Tap on the purple arrow in the second row to change the position of the symbols in the slots.
Step 23
Tap twice on the orange arrow in the first row to change the position of the symbols in the slots.
Step 24
Tap three times on the purple arrow in the second row to change the position of the symbols in the slots.
Step 25
Tap on the green arrow in the first row to change the position of the symbols in the slots.

Step 26
Tap three times on the purple arrow in the second row to change the position of the symbols in the slots.

Step 27
Tap on the green arrow in the first row to change the position of the symbols in the slots.
Step 28
Finally, tap on the purple arrow in the second row to change the position of the symbols in the slots, and you will solve this puzzle.

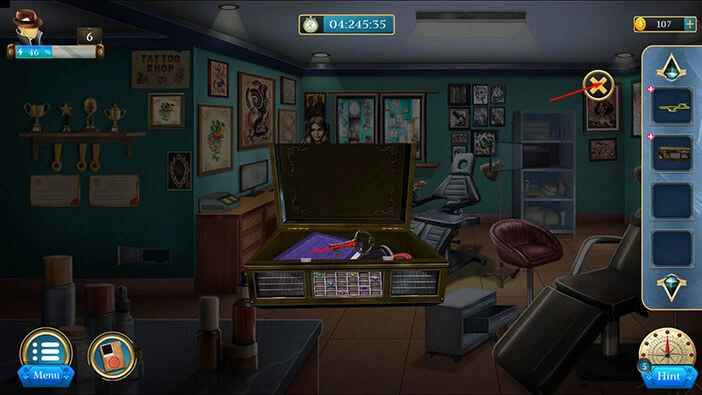
In the safe, you will find a “Key Part”. Let’s tap on it to pick it up.
After that, tap on the arrow at the bottom to go back.
Next, let’s tap on the picture on the wall on the left to take a closer look at it.

Select the “Magnifier” from the inventory and use it to examine the picture.

Tap on all parts of the picture to examine them.
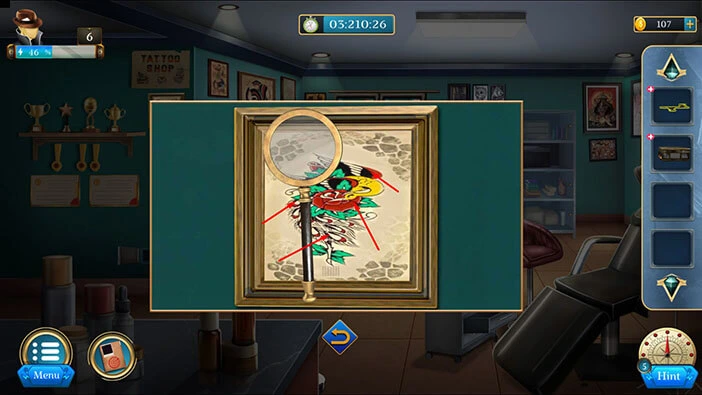
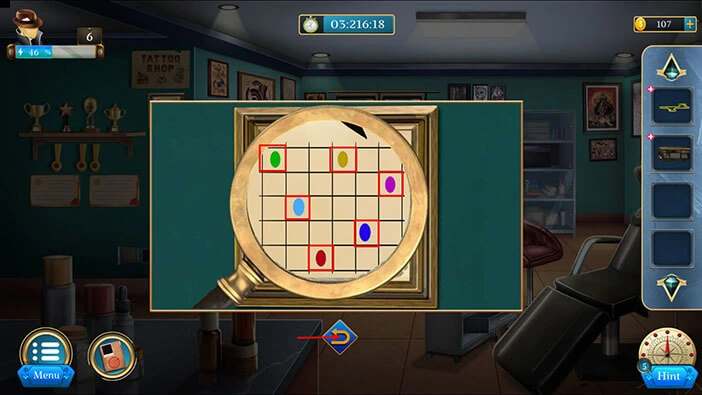
Once you examine the entire picture, you will discover the hint for the next puzzle. In this hint, we can see a grid with six circles of various colors. So, let’s memorize/write down the position of each circle because we will need this information for the next puzzle.
Green circle = First slot in the first row
Yellow circle = Fourth slot in the first row
Purple circle = Sixth slot in the second row
Light blue circle = Second slot in the third row
Blue circle = Fifth slot in the fourth row
Red circle = Third slot in the fifth row
Once you’re done, tap on the arrow at the bottom to go back.
Next, select the “Box” in your inventory and it will appear in the middle of the screen. After that, tap on the puzzle on the “Box” to start the interaction.
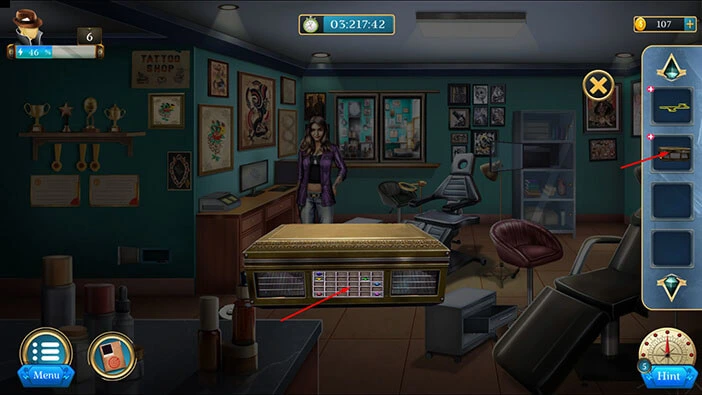
Let’s rearrange the circles to match the positions that we saw in the picture. We will do this puzzle in several steps. Let’s begin.
Step 1
Select the Blue circle and place it into the fifth slot in the fourth row.
Step 2
Select the Green circle and place it into the first slot in the first row.
Step 3
Select the Yellow circle and place it into the fourth slot in the first row.
Step 4
Select the Purple circle and place it into the sixth slot in the second row.
Step 5
Select the Light blue circle and place it into the second slot in the third row.
Step 6
Select the Red circle and place it into the third slot in the fifth row.
With that, you will unlock the box, and inside you will find another “Key part”. Tap on it to pick it up.
After that, tap on the “X” button to close this window.
Next, select the “Key part” from the inventory, and it will appear in the middle of the screen. After that, select the other “Key part” and merge it with the first one.
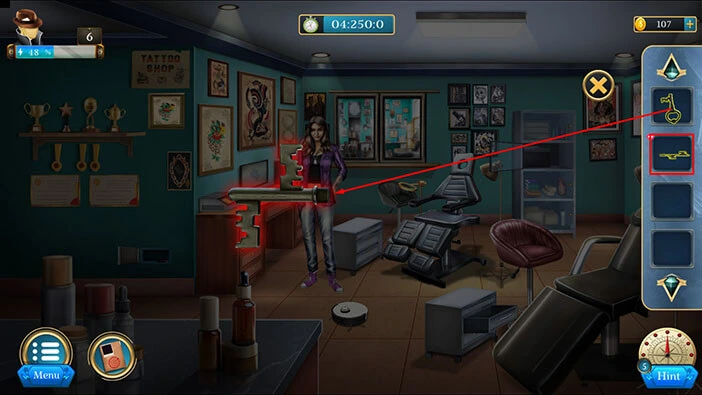
You will assemble a “Key” so let’s tap on it to pick it up. After that, tap on the “X” button to close this window.
Next, tap on the desk on the left to take a closer look at it (tap on the trash can if it is still there to remove it, I did that earlier).

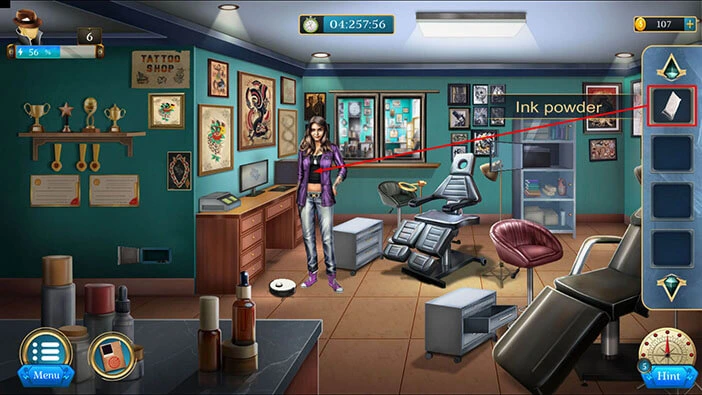
Under the desk, you will discover a safe. Select the “Key” from the inventory and use it to unlock the safe.
In the safe, you will find an “Ink powder”. Tap on it to pick it up. After that, tap on the arrow at the bottom to go back.
Select the “Ink powder” from the inventory and drag it to the seller.
Faced with facts, the seller will admit that they do sell the invisible ink. However, know she is willing to cooperate. So, our character will ask to see the surveillance video of a person who bought the invisible ink.
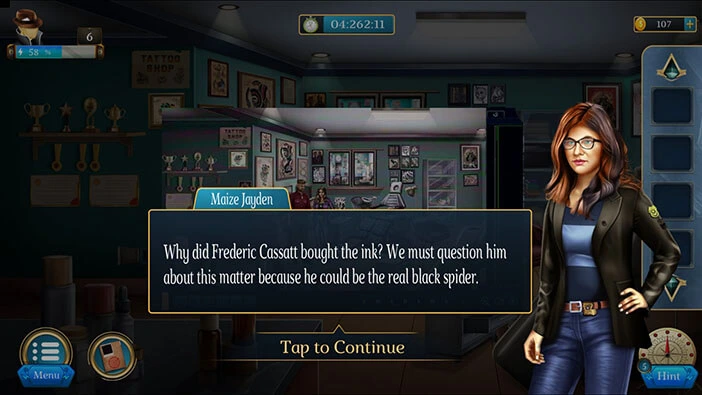
You will discover that Frederic Cassatt bought the ink, so our next task is to interrogate him.
Let’s continue. Tap on the small table on the right to take a closer look at it.
Here, you will find two “Photos” and a “Report”. Let’s tap on these items to pick them up.
After that, tap on the arrow at the bottom to go back.

Next, let’s tap on the door to take a closer look at it, then tap on the bars to pull them up.
Here, you will find a “Ball”. Let’s tap on it to pick it up. After that, tap on the arrow at the bottom to go back.
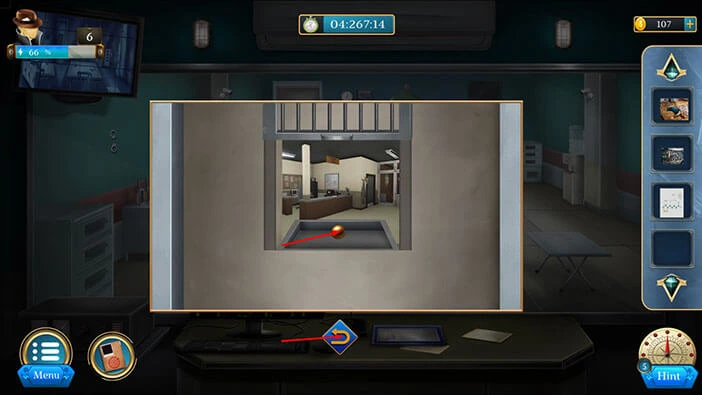
Next, let’s tap on the machine in the wall on the left to take a closer look at it, and tap again to start the interaction.
Select the “Ball” from the inventory and place it into the puzzle.
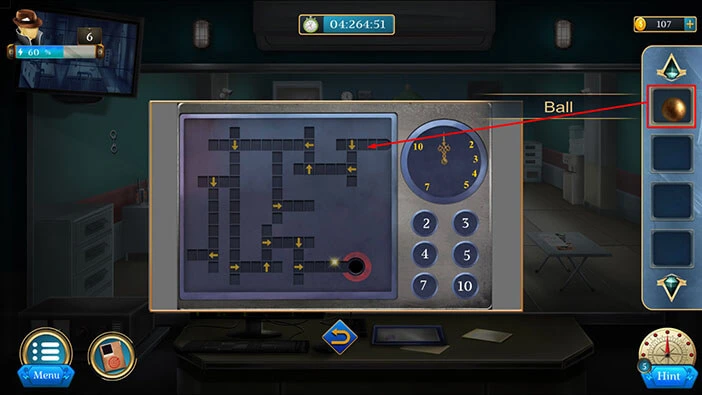
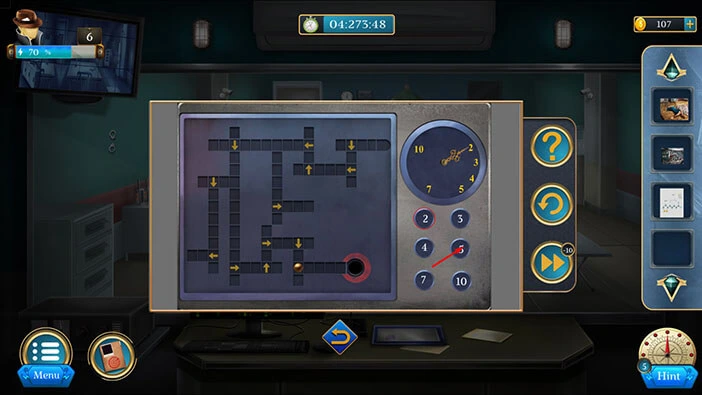
Here, we have another puzzle. Our task is to bring the ball to the finish line which is marked with the red circle (bottom right corner). We can move the ball by rotating the arrows, and we can rotate the arrows by setting the clock hands.
We will do this puzzle in several steps. Let’s begin.
Step 1
Tap on the number 3 to set the clock hand, and the ball will move to the arrow on the left.

Step 2
Tap on the number 2 to set the clock hand, and the ball will down to the next arrow.

Step 3
Tap on the number 4 to set the clock hand, and the ball will move left to the next arrow.

Step 4
Tap on the number 2 to set the clock hand, and the ball will up to the next arrow.
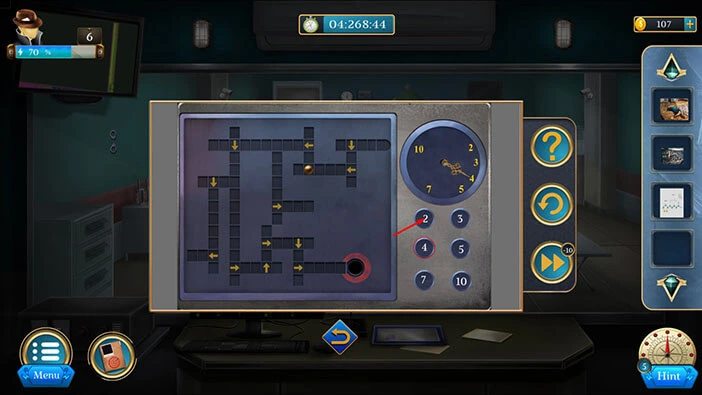
Step 5
Tap on the number 7 to set the clock hand, and the ball will move left to the next arrow.

Step 6
Tap on the number 10 to set the clock hand, and the ball will move down to the next arrow.

Step 7
Tap on the number 3 to set the clock hand, and the ball will move right to the next arrow.
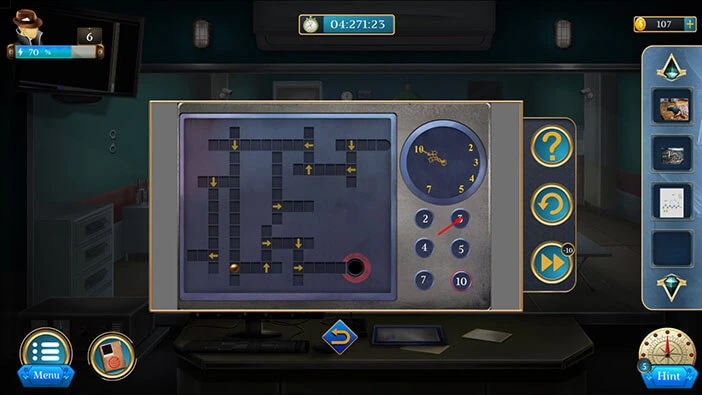
Step 8
Tap on the number 2 to set the clock hand, and the ball will move up to the next arrow.

Step 9
Tap on the number 3 to set the clock hand, and the ball will move right to the next arrow.

Step 10
Tap on the number 2 to set the clock hand, and the ball will move down to the next arrow.

Step 11
Tap on the number 5 to set the clock hand, and the ball will move to the finish line.
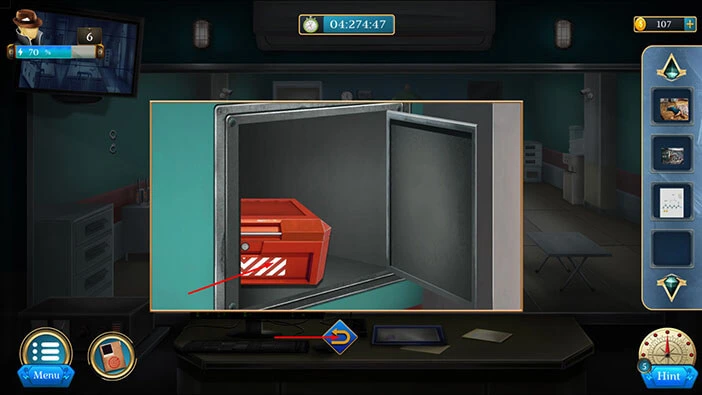
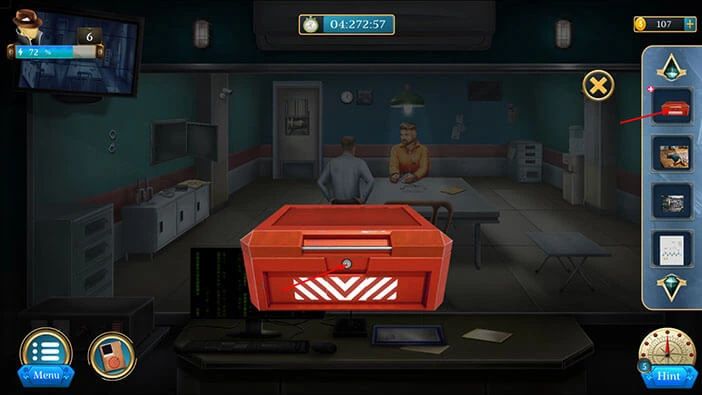
With that, you will unlock the safe, and inside you will find a “Safe box”. Let’s tap on it to pick it up.
After that, tap on the arrow at the bottom to go back.
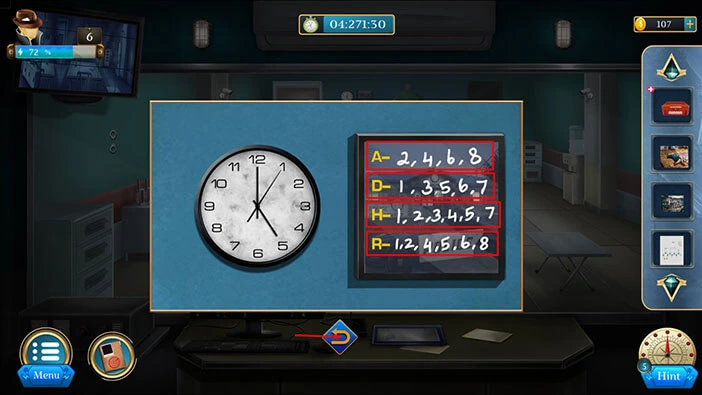
Next, let’s tap on the clock to take a closer look at it.
Here, we can see four letters, and we can also see several numbers next to each letter. Let’s memorize/write down the letters and the numbers because we will need this information for the next puzzle. So, here we have,
A = 2, 4, 6, 8
D = 1, 3, 5, 6, 7
H = 1, 2, 3, 4, 5, 7
R = 1, 2, 4, 5, 6, 8
Once you’re done, tap on the arrow at the bottom to go back.
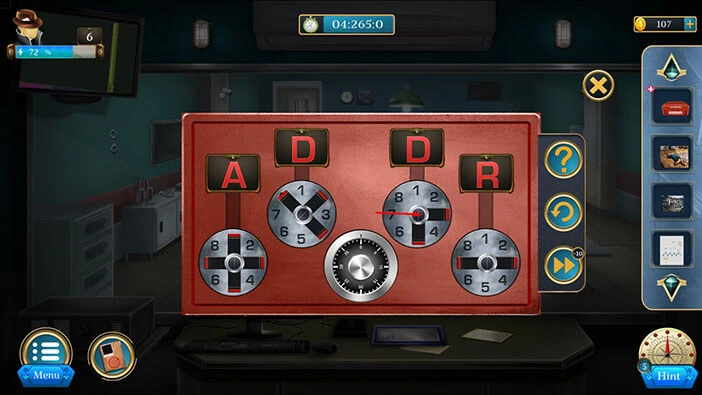
Next, select the “Safe box” in your inventory and it will appear in the middle of the screen. Tap on the box again to start the interaction.
Here, we can see four letters and some numbers on the disk below each letter. The letters and the numbers should match the letters and numbers that we saw next to the clock.
We will do this puzzle in several steps. Let’s begin.
Step 1
Tap on the second disk (looking from left to right) to rotate it.
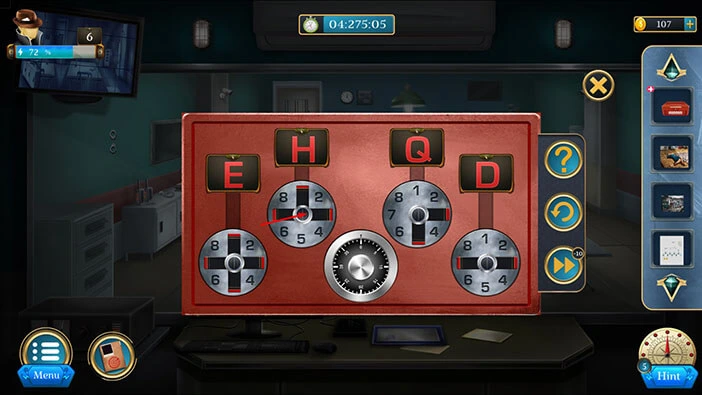
Step 2
Tap three times on the third disk, and you will solve this puzzle.
You will unlock the safe box, and inside you will find a “Truth serum”. Tap on it to pick it up. After that, tap on the “X” button to close this window.
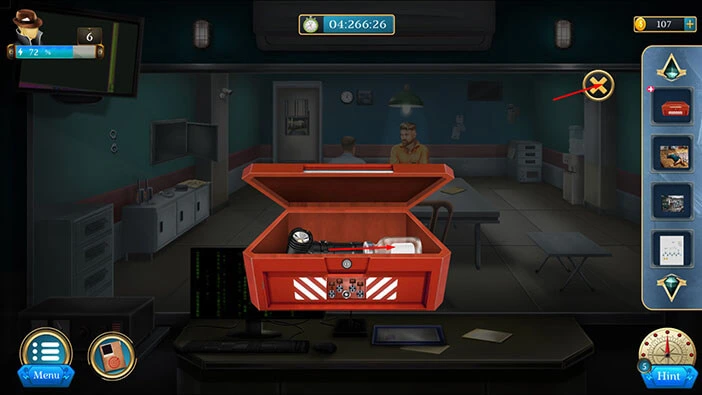
Next, let’s tap on the cabinets on the left to take a closer look at them.
Here, you will find a “Syringe box”. Let’s tap on it to pick it up.
After that, tap on the arrow at the bottom to go back.
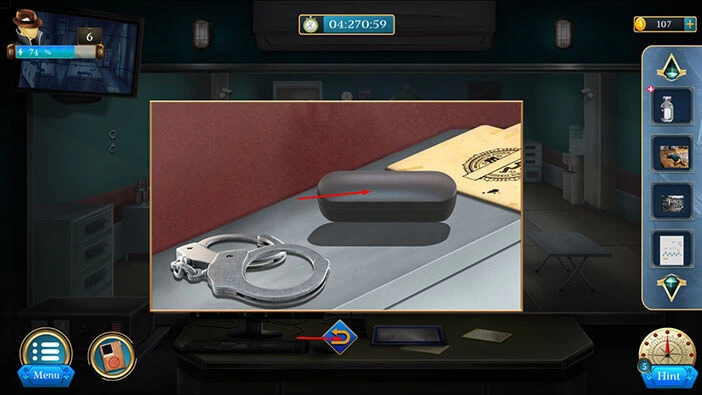
Select the “Syringe box” from the inventory and it will appear in the middle of the screen. Tap on the “Syringe box” again to open it.

In the box, you will find a “Syringe”. Let’s tap on it to pick it up.
After that, tap on the “X” button to close this window.
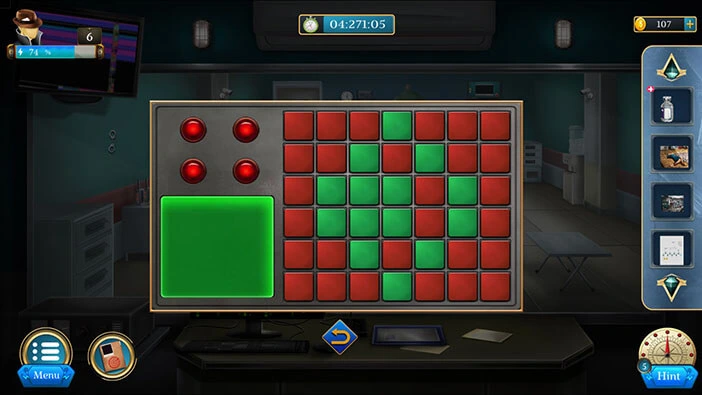
Next, in the top right corner of the room, you will notice a TV. Let’s tap on it to take a closer look, and tap again to turn on the TV.
Tap on the folder on the left to open it.
Here, you will see some green slots on the grid. This represents the hint for the next puzzle, so let’s memorize/write down the position of the green slots. So, we can see the green nodes in,
First row = Fourth slot
Second row = third and fifth slot
Third row = second, third, fourth, and sixth slot
Fourth row = second, third, fourth, and sixth slot
Fifth row = third and fifth slot
Sixth row = fourth slot
Once you’re done, tap on the arrow at the bottom to go back.
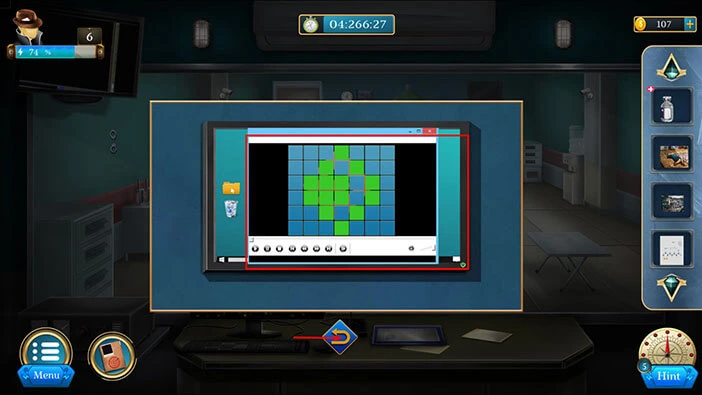
Next, let’s tap on the machine in the top right corner of the room to take a closer look at it, and tap again to start the interaction.

Let’s tap activate the green slots that we saw on the TV. You can see the solution in the image below.
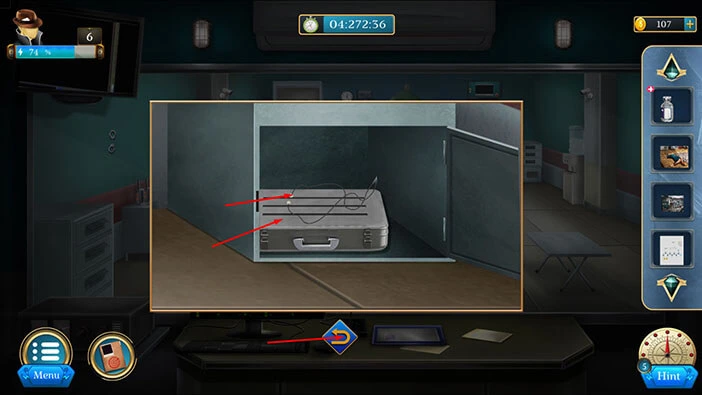
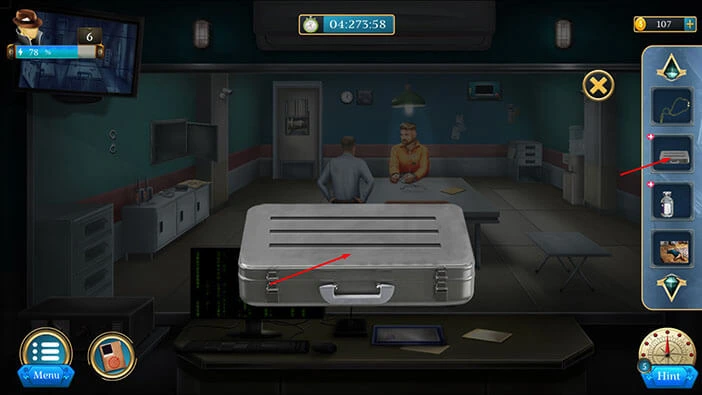
Inside, you will find a “Wire” and a “Lie Detector”. Let’s tap on these two items to pick them up. After that, tap on the arrow at the bottom to go back.
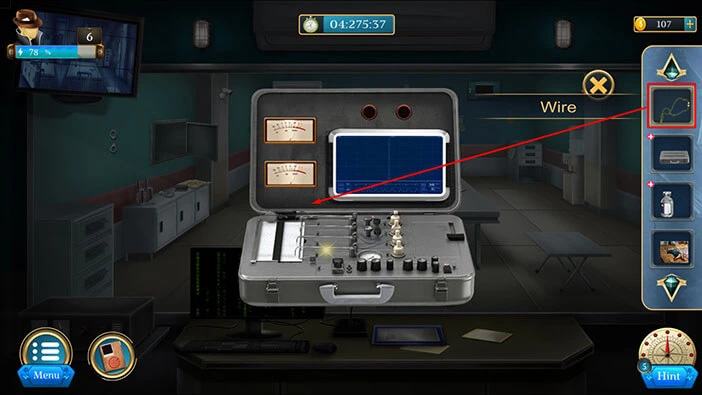
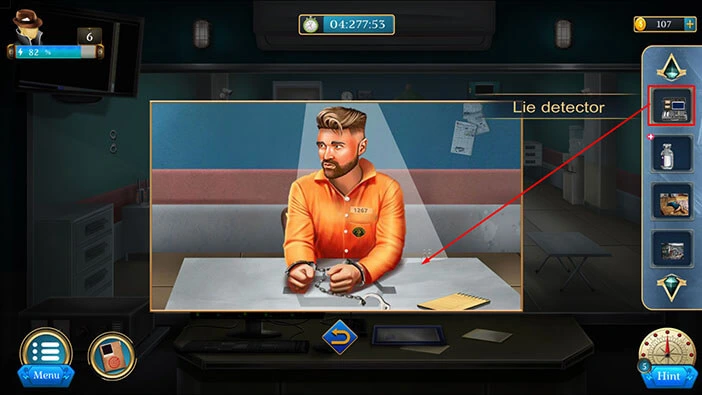
Next, let’s select the “Lie Detector” in our inventory and it will appear in the middle of the screen. Tap on the “Lie Detector” again to open it.
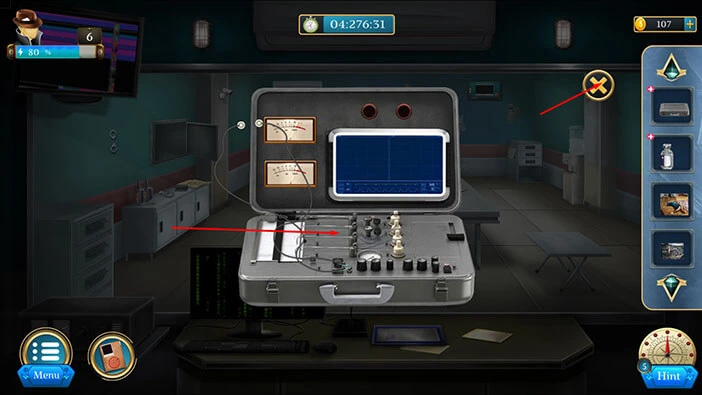
Select the “Wire” from the inventory and attach it to the “Lie Detector”.
Lastly, tap on the “Lie Detector” to pick it up. After that, tap on the “X” button to close this window.
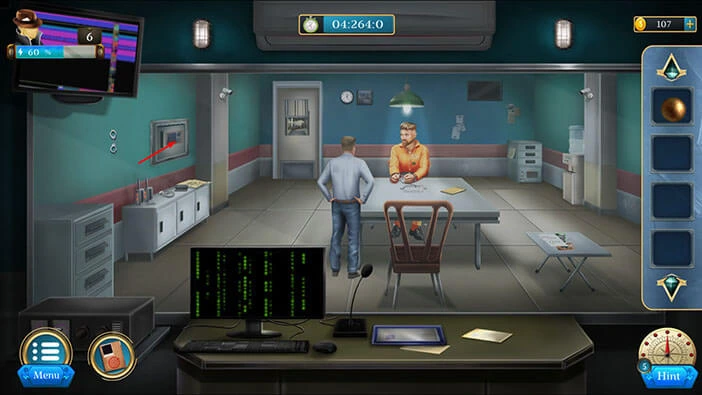
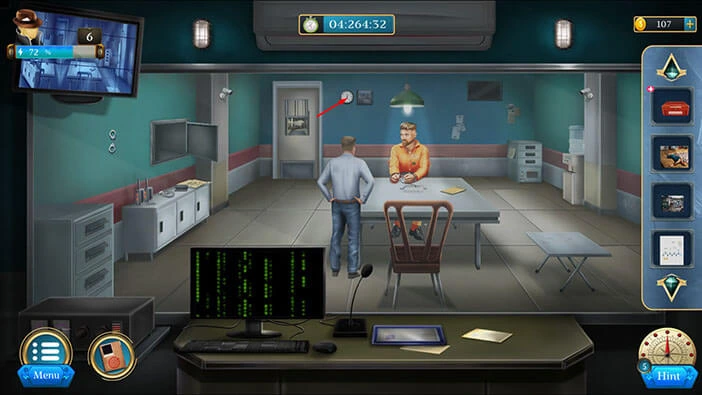
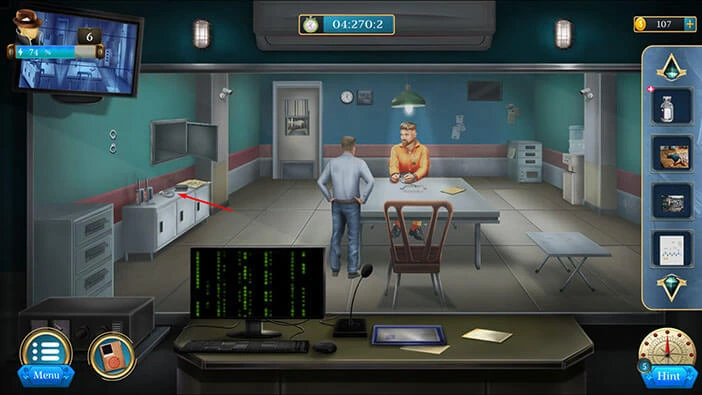
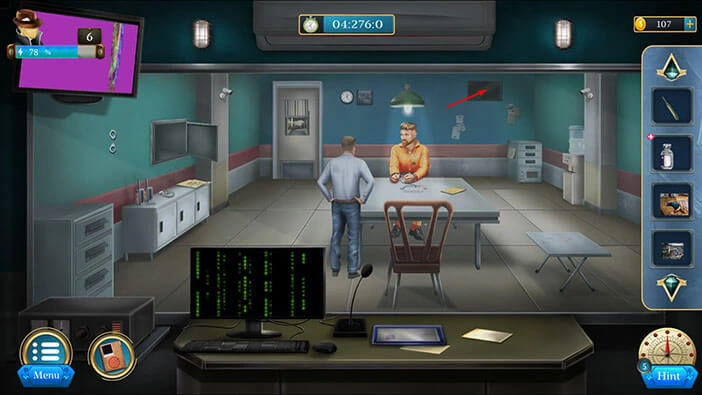
Next, let’s tap on the suspect to take a closer look at him.
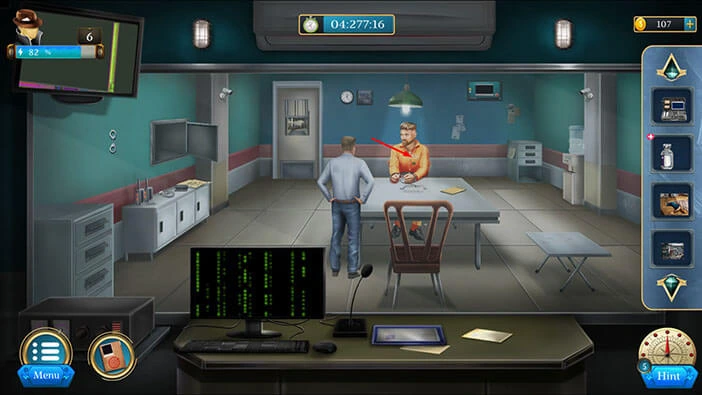
Select the “Lie Detector” from the inventory and place it on the table.
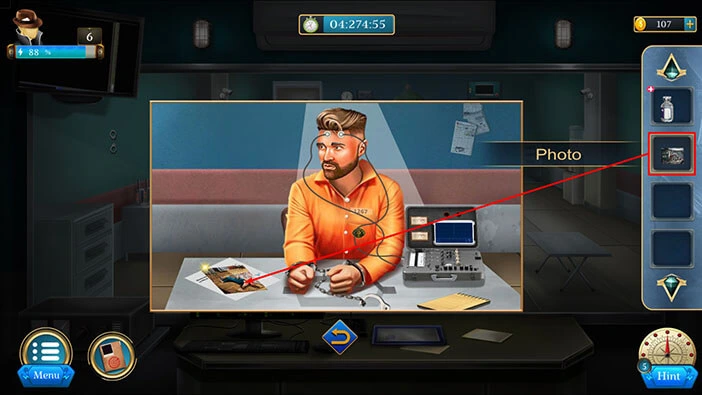
Select the “Photo” from the inventory and place it on the table.
Our detective will begin the investigation. He will ask the suspect why he murdered his girlfriend. However, the suspect claims that he is suffering from memory loss. He woke up in jail, and he doesn’t remember anything about the last couple of days.

Next, select the “Report” from the inventory and place it on the table.
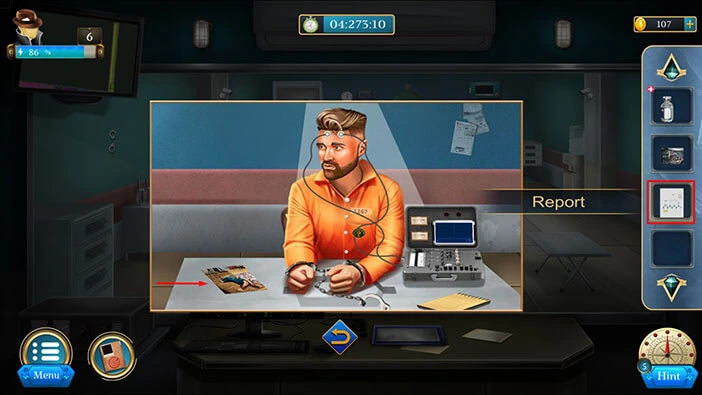
Next, our detective wants to know if the suspect knows Dan Vade. However, the suspect claims that he doesn’t know this person.

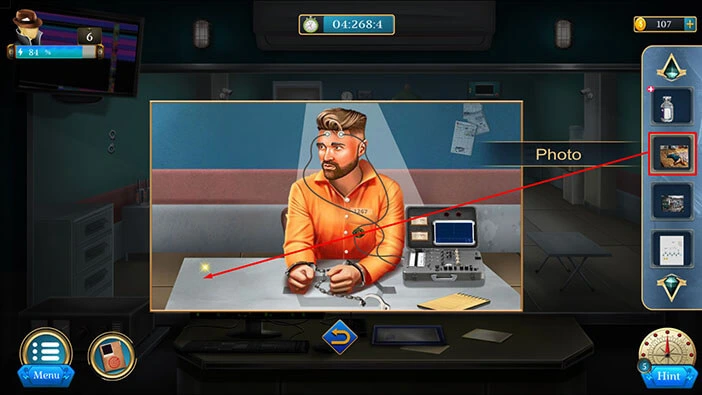
Select the other photo from the inventory and place it on the table.
Our character wants to know why the suspect bought invisible ink. However, the suspect claims that he didn’t buy invisible ink.

Looks like the suspect genuinely doesn’t remember anything. But, if we give him the truth serum we should be able to restore his memory.

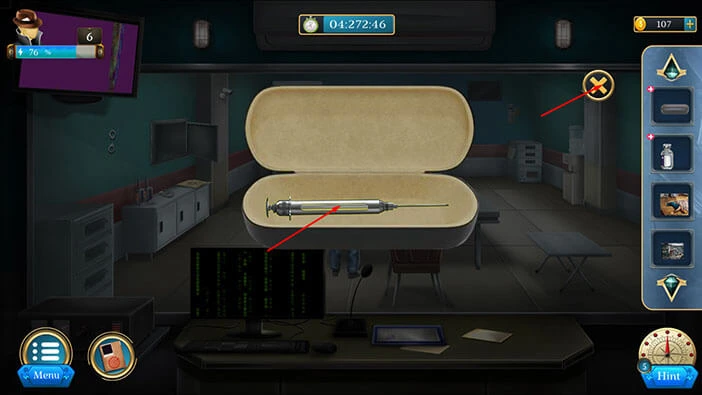
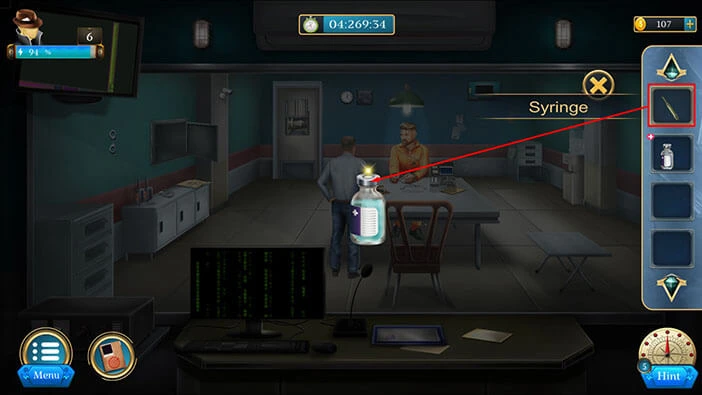
Select the “Truth Serum” from the inventory and it will appear in the middle of the screen. After that, select the “Syringe” from the inventory and drag it to the “Truth Serum”.
Tap on the “Syringe” with truth serum to pick it up. After that, tap on the “X” button to close this window.
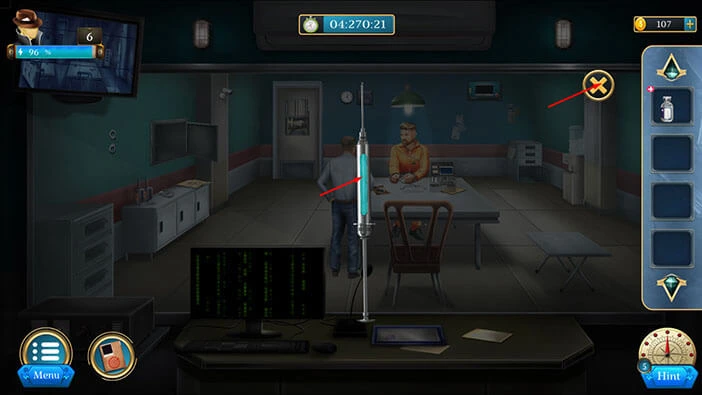
Next, select the “Syringe” from the inventory and use it on the suspect to inject him with the truth serum.
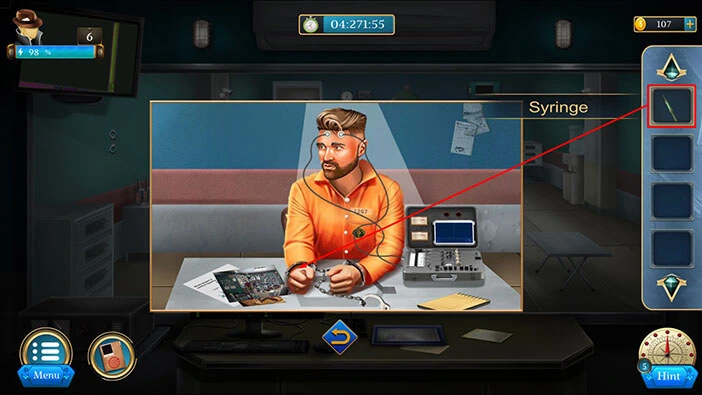
The Black Spider hypnotized Frederick (our suspect) and forced him to commit the crime. Frederick is also marked by the black spider, so he is also one of the potential victims.
So, our character thinks that he can stop the Black Spider if he figures out his pattern.

With that, we have reached the end of the sixth level. If you want to see the walkthrough for the seventh level, tap on the next part button.
Thank you for reading.