Room Escape: Detective Phantom | Level 10
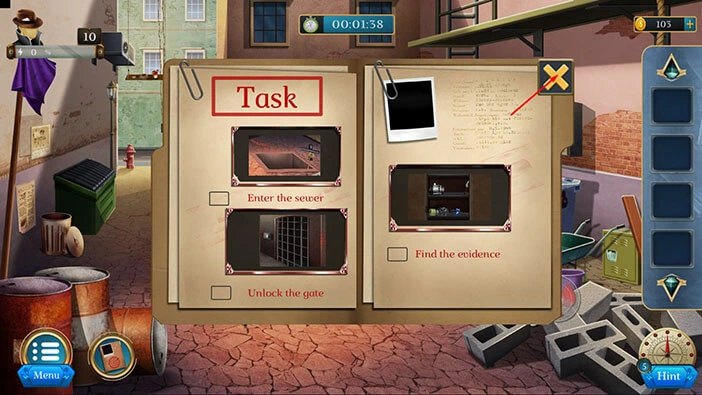
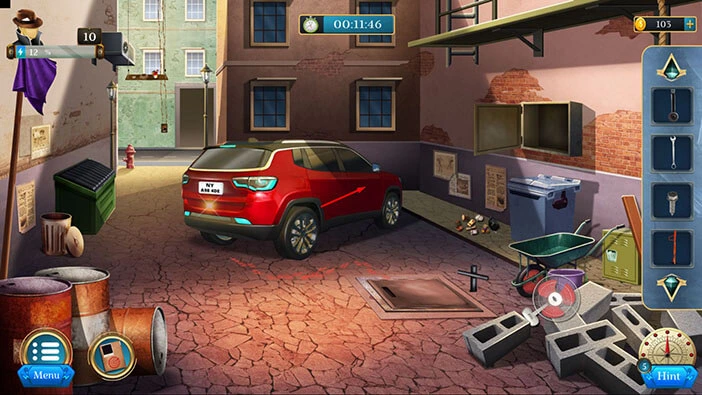
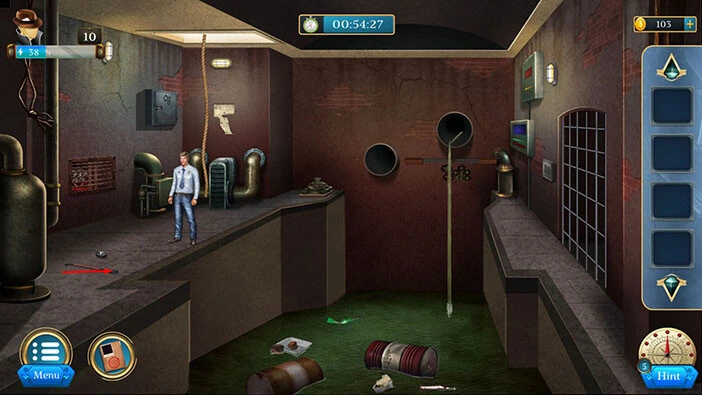
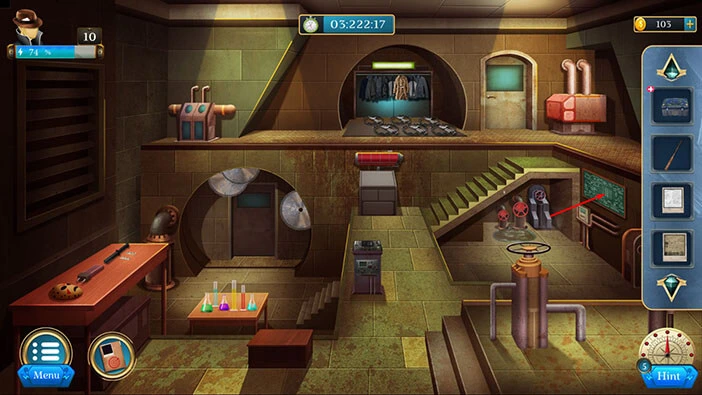
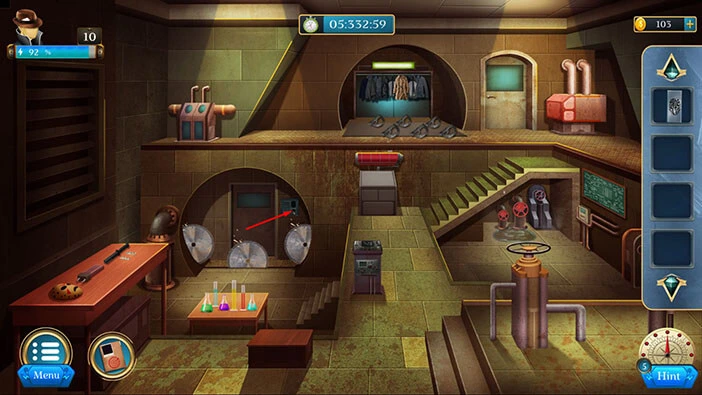
Hello everyone and welcome to the walkthrough for the tenth level of “Room Escape: Detective Phantom”. In the tenth level, our task is to follow the suspect.
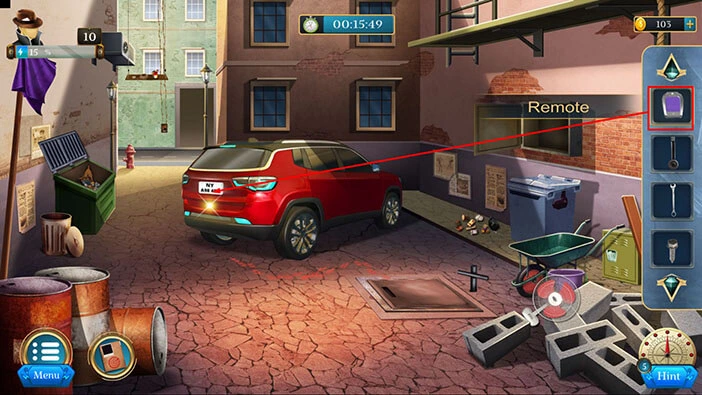
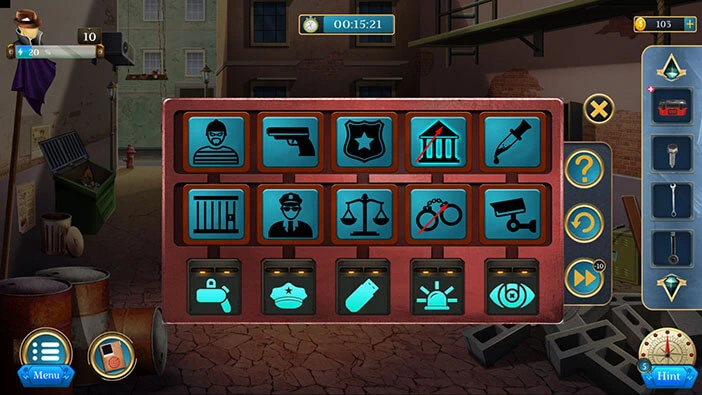
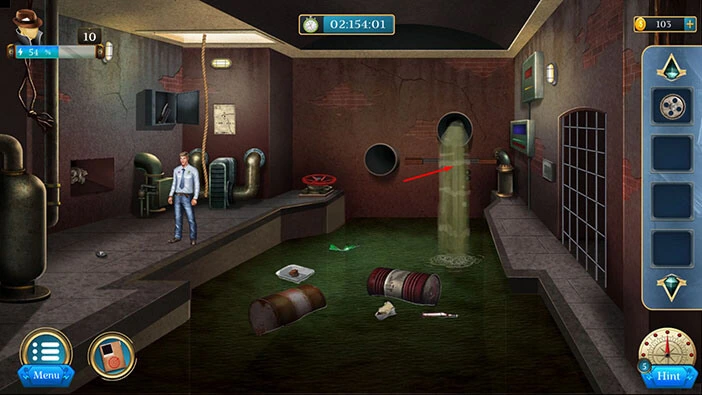
Our objectives are to “Enter the sewer” “Unlock the gate” and “Find the evidence”. Tap on the “X” button to go back.
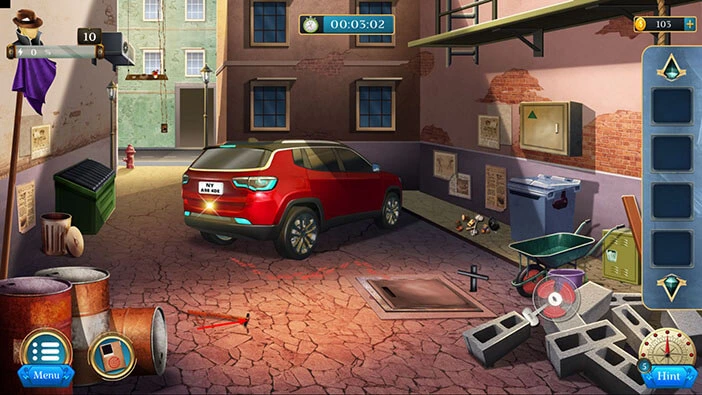
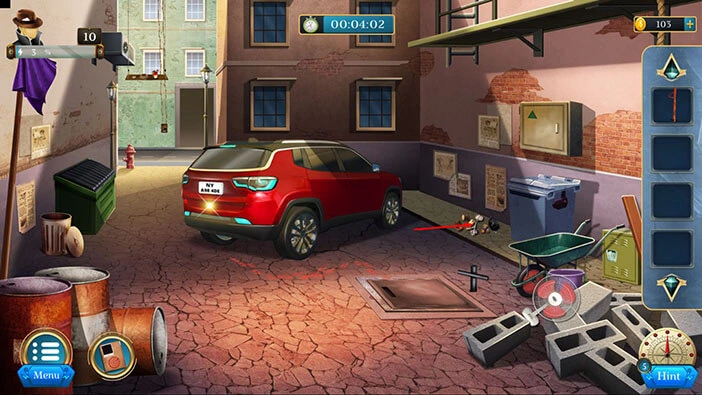
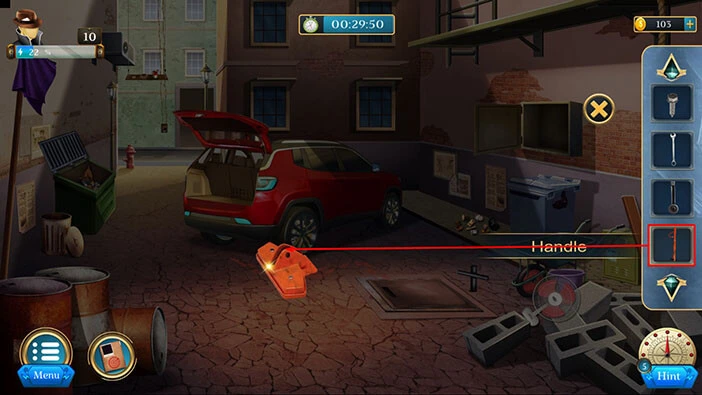
On the left side of the floor, you will notice a “Handle”. Let’s tap on it to take a closer look, and tap again to pick it up.
After that, tap on the arrow at the bottom to go back.
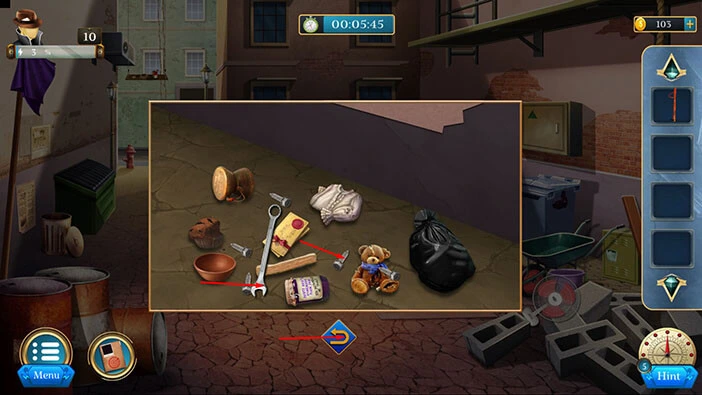
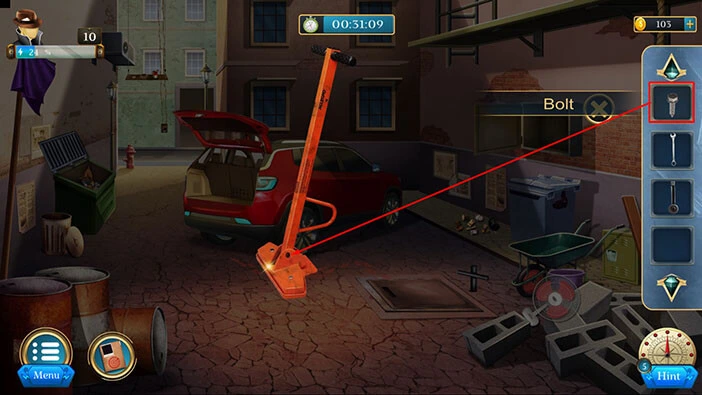
Next, let’s tap on the trash on the left to take a closer look at it.
Here, you will find a “Bolt” and a “Spanner”. Let’s tap on them to pick them up. After that, tap on the arrow at the bottom to go back.
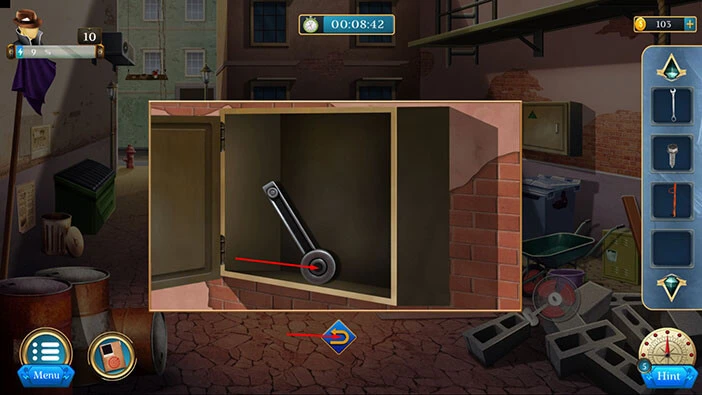
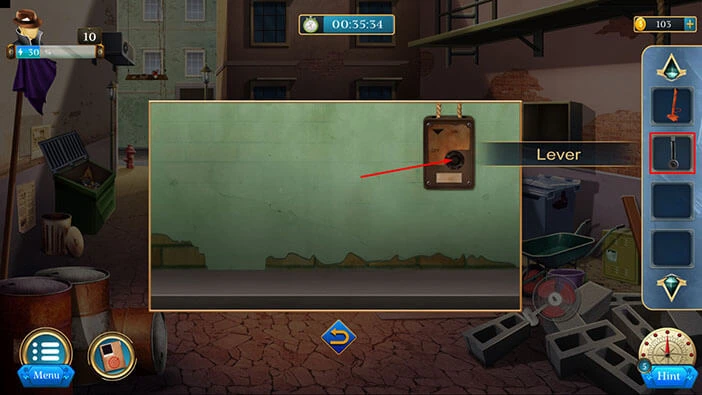
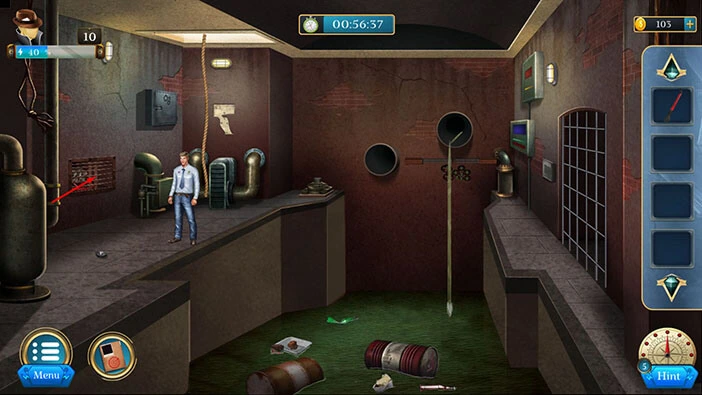
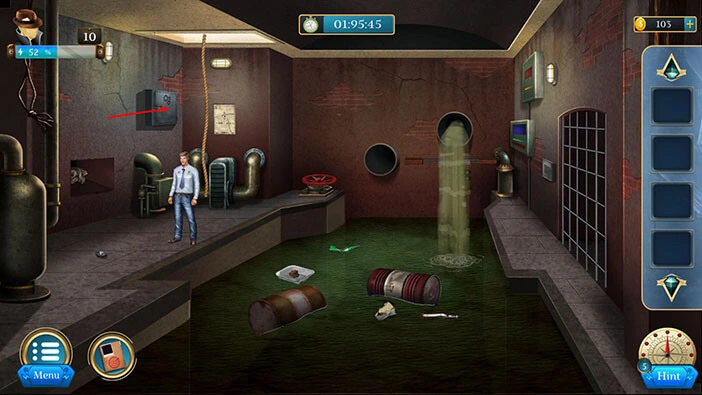
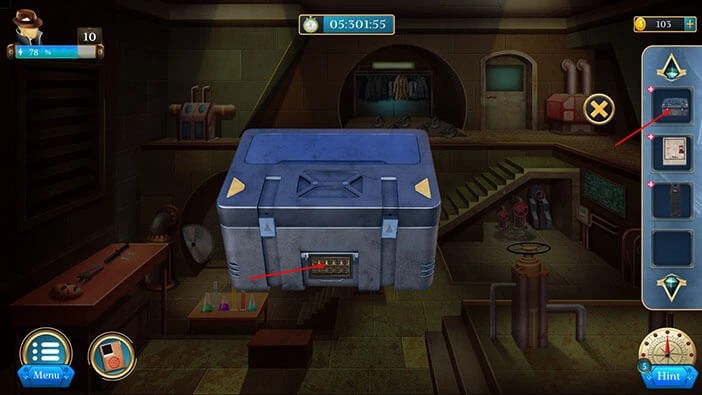
If you take a look at the wall on the left, you will notice a large box. Let’s tap on it to take a closer look, and tap again to open it.

In the box, you will find a “Lever”. Let’s tap on it to pick it up. After that, tap on the arrow at the bottom to go back.
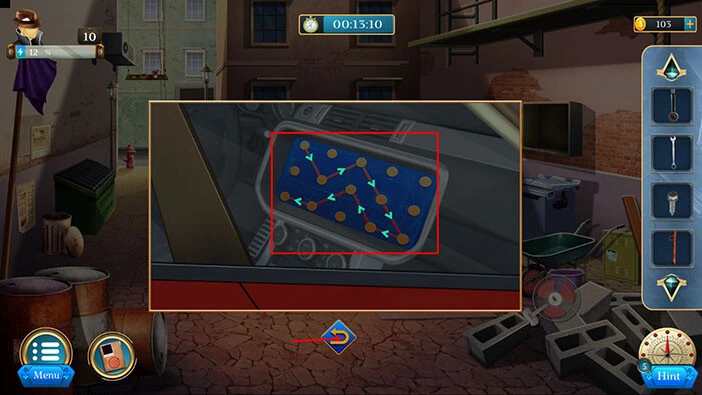
Next, let’s tap on the car door to look inside.
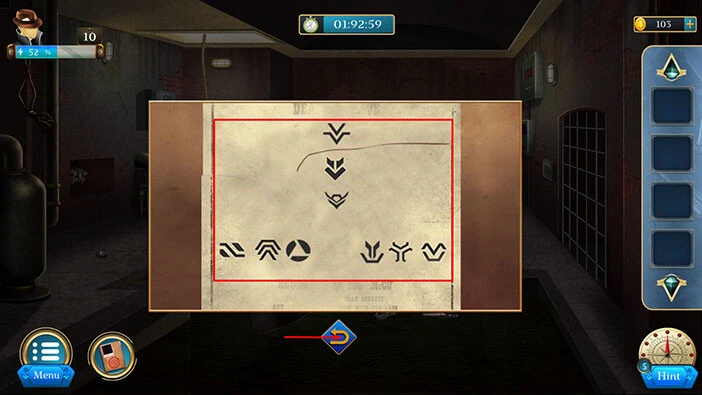
Here, you will discover the hint for the next puzzle. Let’s memorize/write down the direction of the arrows.
Once you’re done, tap on the arrow at the bottom to go back.
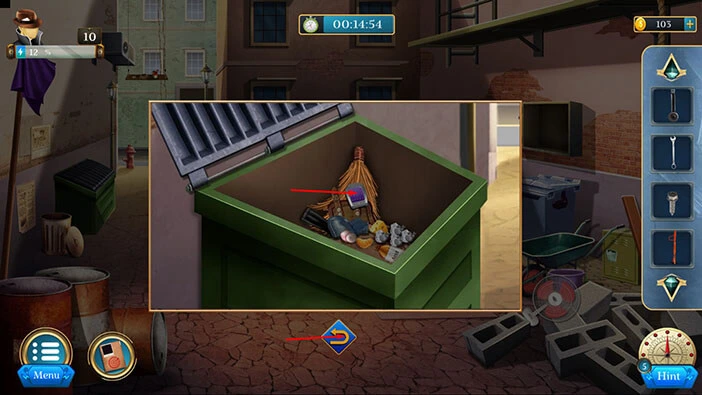
Next, let’s tap on the dumpster on the left to take a closer look at it, and tap again to open it.

In the dumpster, you will find a “Remote”. Let’s tap on it to pick it up. After that, tap on the arrow at the bottom to go back.
Select the “Remote” from the inventory and drag it to the trunk.
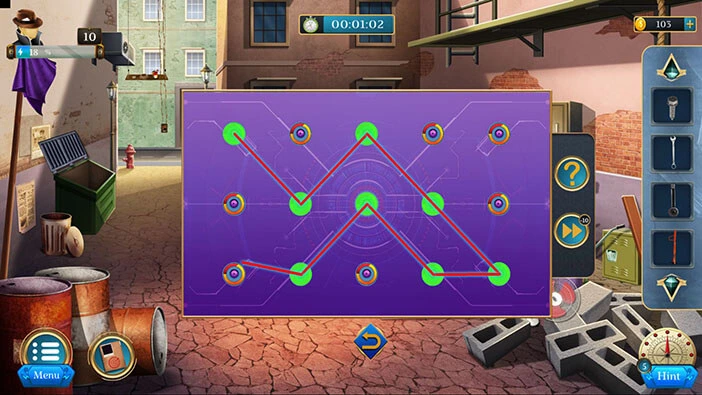
Let’s tap on the remote to start the interaction.

Our next task is to unlock the remote. We can do that by repeating the pattern that we saw in the card. You can see the solution in the image below.
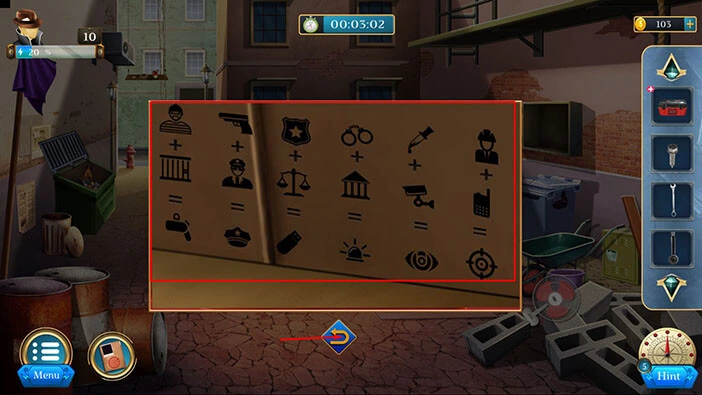
In the trunk, you will see a box. Let’s tap on it to take a closer look, and tap again to pick it up.

In the trunk, you will also find a hint for the next puzzle. Let’s memorize/write down this hint.
Once you’re done, tap on the arrow at the bottom to go back.
Select the “Box” in your inventory, and it will appear in the middle of the screen. Tap on the box again to start the interaction.
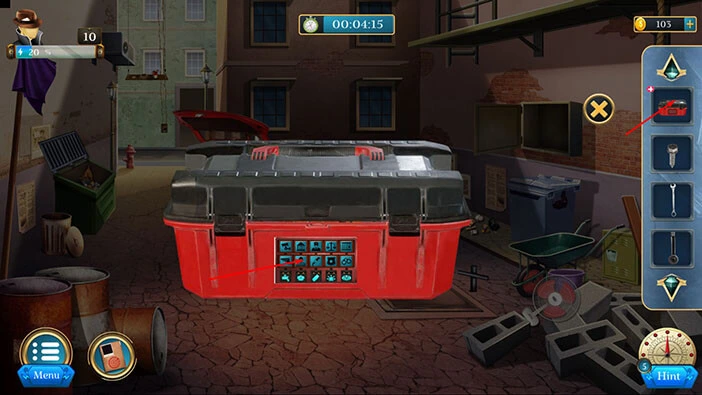
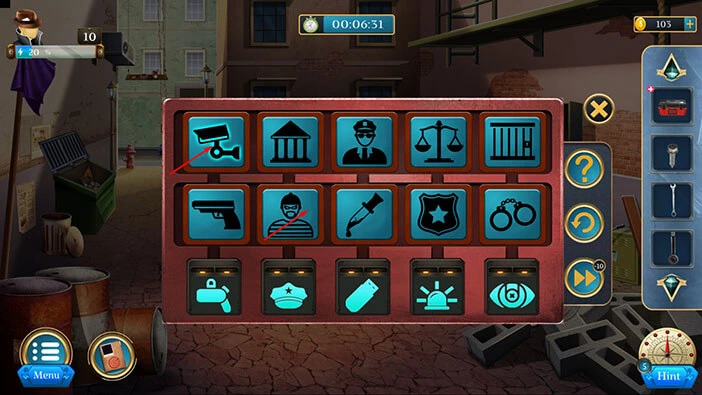
Here, we have another puzzle. Our task is to rearrange the icons on the grid. The order of the icons should match the picture that we saw in the trunk.
We will do this puzzle in several steps. Let’s begin.
Step 1
Select the first slot in the first row, then tap on the second slot in the second row to swap their positions.
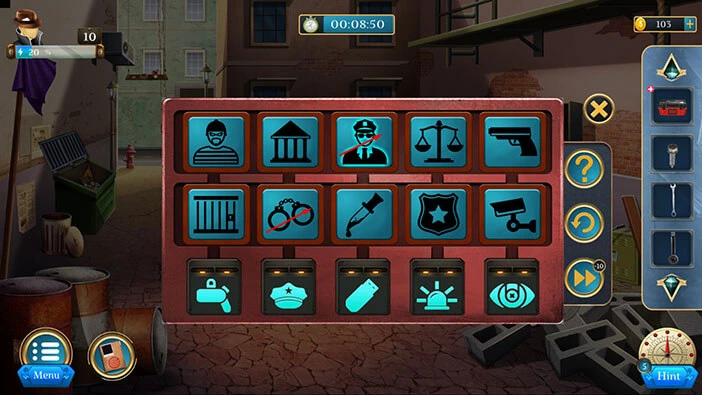
Step 2
Select the first slot in the second row, then tap on the fifth slot in the first row to swap their positions.

Step 3
Select the second slot in the second row, then tap on the fifth slot in the second row to swap their positions.

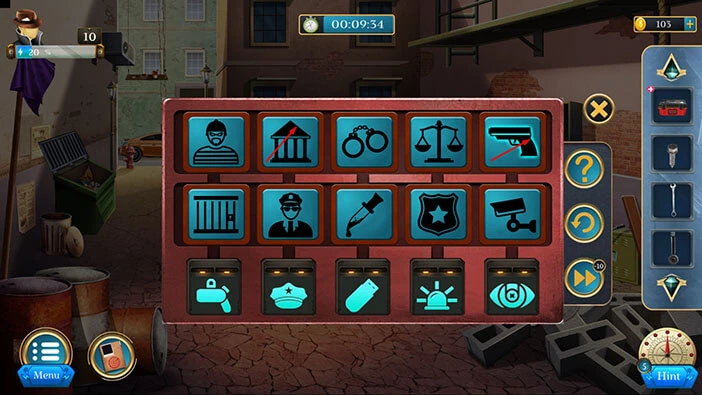
Step 4
Select the third slot in the first row, then tap on the second slot in the second row to swap their positions.
Step 5
Select the fifth slot in the first row, then tap on the second slot in the first row to swap their positions.
Step 6
Select the third slot in the second row, then tap on the fifth slot in the first row to swap their positions.

Step 7
Select the fourth slot in the first row, then tap on the third slot in the second row to swap their positions.

Step 8
Select the third slot in the first row, then tap on the fourth slot in the second row to swap their positions.
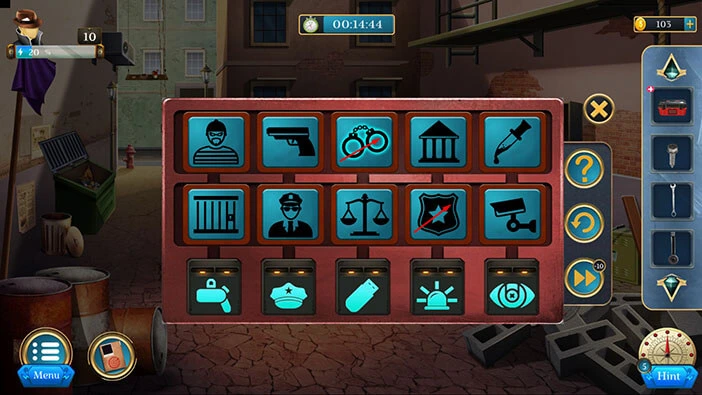
Step 9
Lastly, select the fourth slot in the first row, then tap on the fourth slot in the second row to swap their positions.
In the box, you will find a “Lifter base”. Let’s tap on it to pick it up. After that, tap on the “X” button to close this window.

Next, select the “Lifter base” from the inventory and it will appear in the middle of the screen. After that, select the “Handle” from the inventory and attach it to the “Lifter base”.
Select the “Bolt” from the inventory and insert it into the empty slot.
Lastly, select the “Spanner” from the inventory and use it to tighten the bolt.

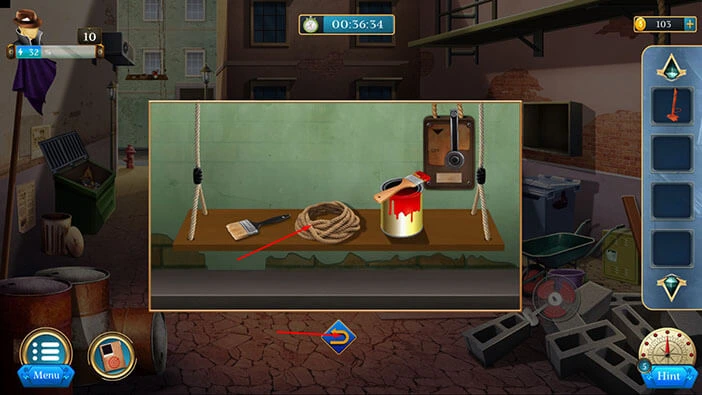
With that, you will assemble the “Magnetic lid filter”. Let’s tap on it to pick it up.
After that, tap on the “X” button to close this window.

Next, on the wall, across the street, you will notice a box. Let’s tap on it to take a closer look.

Next, select the “Lever” from the inventory and insert it into the empty slot.
Here, you will find a “Rope”. Let’s tap on it to pick it up.
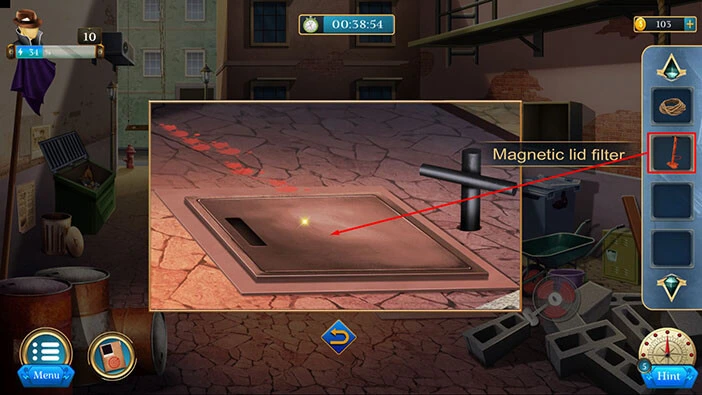
You probably already noticed a large trapdoor on the floor. Let’s tap on it to take a closer look.
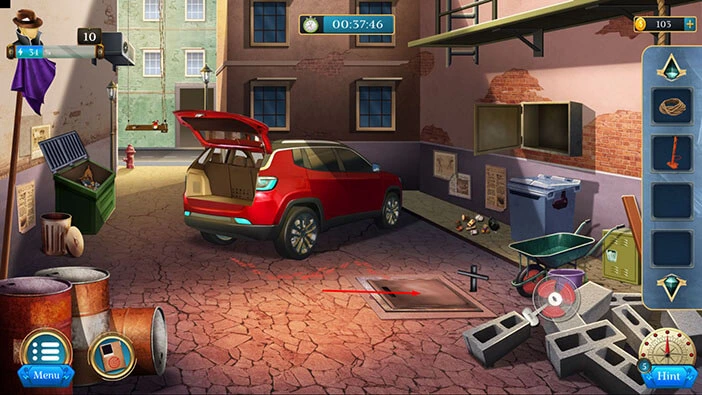
Select the “Magnetic lid filter” from the inventory and use it to open the trapdoor.
Let’s go after the suspect. Select the “Rope” from the inventory and attach it to the bars.
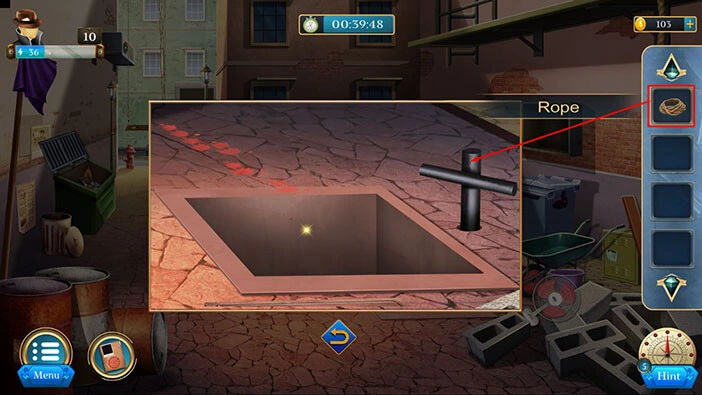
Let’s tap on the rope to proceed to the sewer.

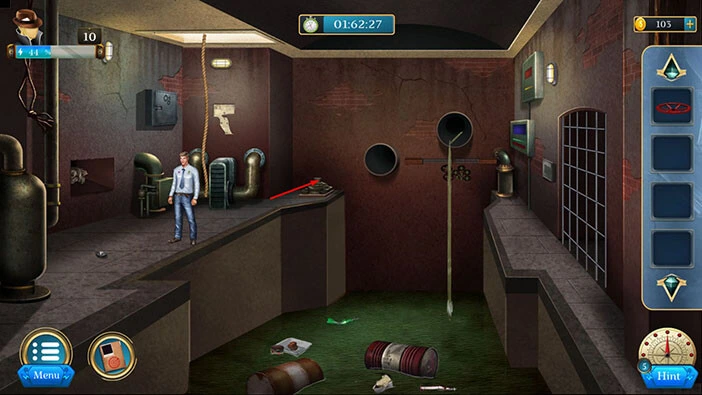
On the floor, on the left, you will notice a “Crowbar”. Let’s tap on it to take a closer look, and tap again to pick it up. After that, tap on the arrow at the bottom to go back.
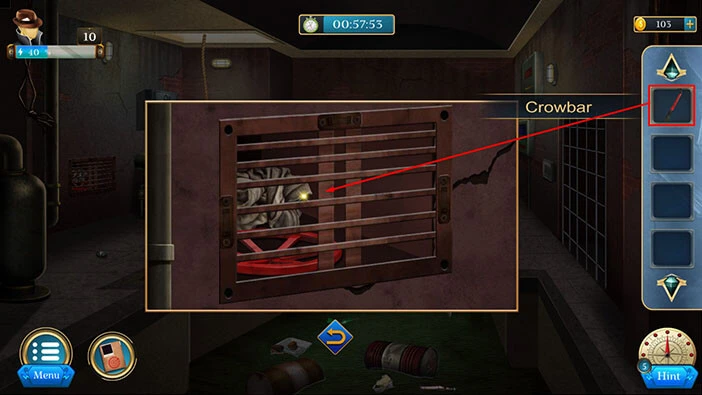
Next, let’s tap on the bars on the left to take a closer look at them.
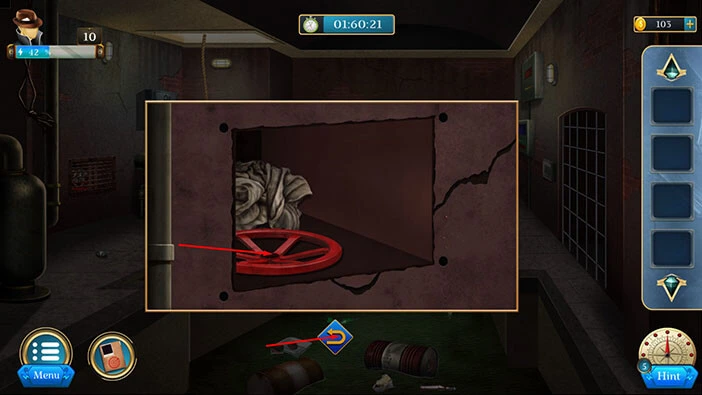
Select the “Crowbar” from the inventory and use it to remove the bars.
Inside, you will find a “Wheel”. Let’s tap on it to pick it up. After that, tap on the arrow at the bottom to go back.
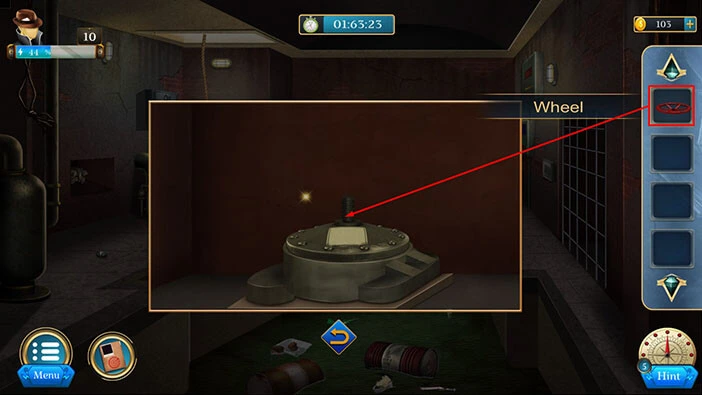
Let’s tap on the machine on the left to take a closer look at it.
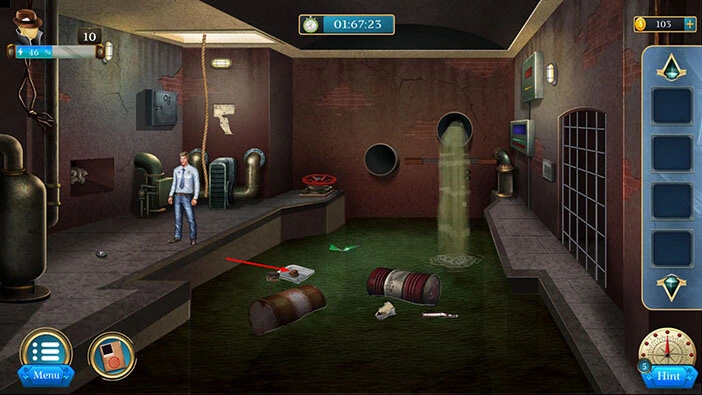
Select the “Wheel” from the inventory and mount it on the bar. Our character will turn the wheel, and with that, we will raise the water level.
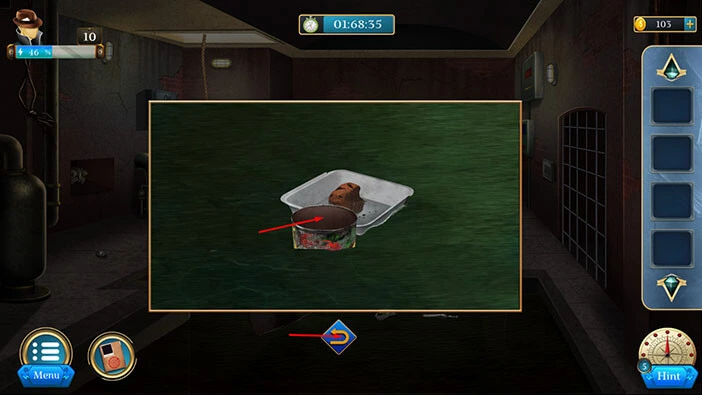
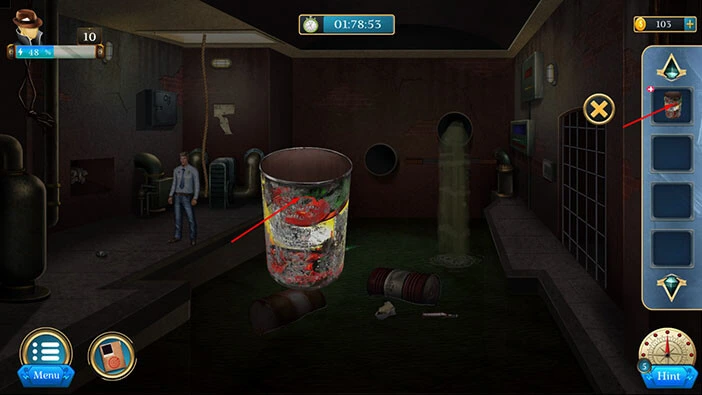
Next, let’s tap on the trash in the water to take a closer look at it.
Here, you will find a “Tin”. Let’s tap on it to pick it up. After that, tap on the arrow at the bottom to go back.
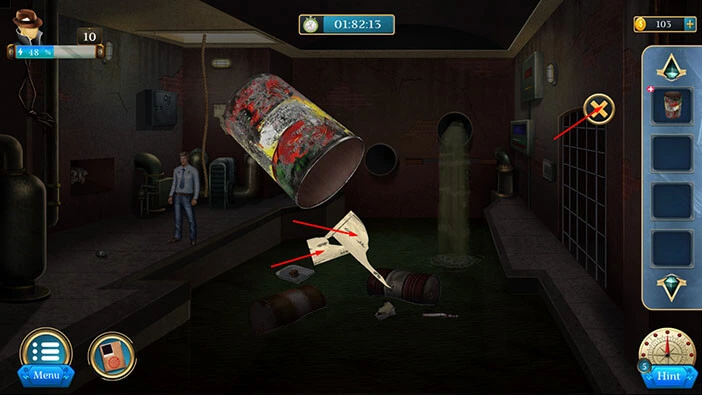
Select the “Tin” from the inventory and it will appear in the middle of the screen. Let’s tap on the “Tin” again to start the interaction.
Two “Paper pieces” will drop from the tin. Let’s tap on them to pick them up.
After that, tap on the “X” button to close this window.
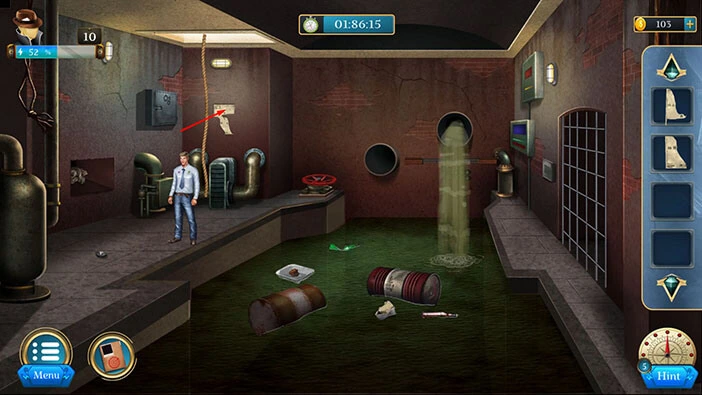
Next, let’s tap on the paper on the wall to take a closer look at it.
Select the two “Pieces of Paper” from the inventory and use them to assemble the poster on the wall.
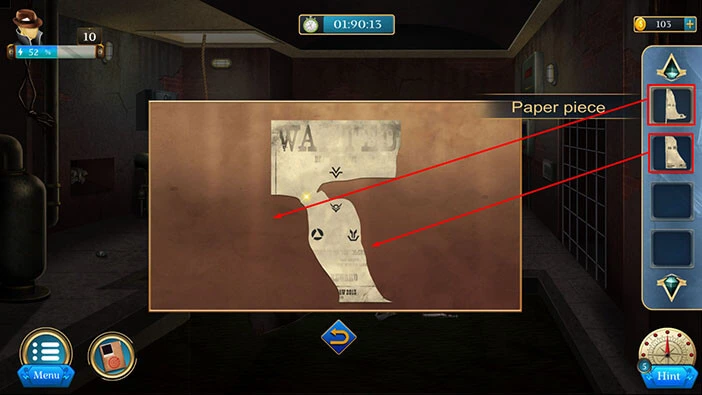
Here, we can see nine symbols. Let’s memorize/write down these symbols because they represent the hint for the next puzzle.
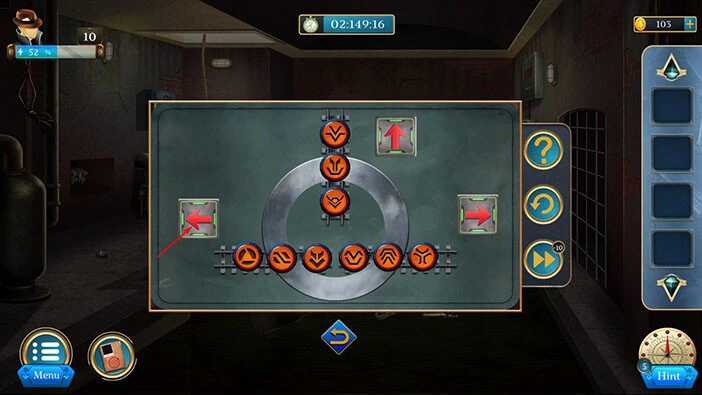
On the wall on the left, you will notice a gray box. Let’s tap on it to take a closer look and tap again to start the interaction.
Here, you will discover another puzzle. We have already seen these nine symbols on the poster. So, the order of the symbols here should match the order of the symbols on the poster.
We will do this puzzle in several steps. Let’s begin.
Step 1
Tap on the arrow on the left to change the position of the three symbols on the left side.

Step 2
Tap on the ring to rotate the position of the three symbols on the ring.

Step 3
Tap on the arrow on the right to change the position of the three symbols on the right side.

Step 4
Tap twice on the arrow on the left to change the position of the three symbols on the left side.

Step 5
Tap twice on the ring to rotate the position of the three symbols on the ring.

Step 6
Tap on the arrow on the left to change the position of the three symbols on the left side.

Step 8
Tap twice on the ring to rotate the position of the three symbols on the ring.

Step 9
Tap twice on the arrow on the left to change the position of the three symbols on the left side.
Step 10
Tap on the ring to rotate the position of the three symbols on the ring.

Step 11
Lastly, tap twice on the arrow on the right to change the position of the three symbols on the right side. With that, you will solve this puzzle.

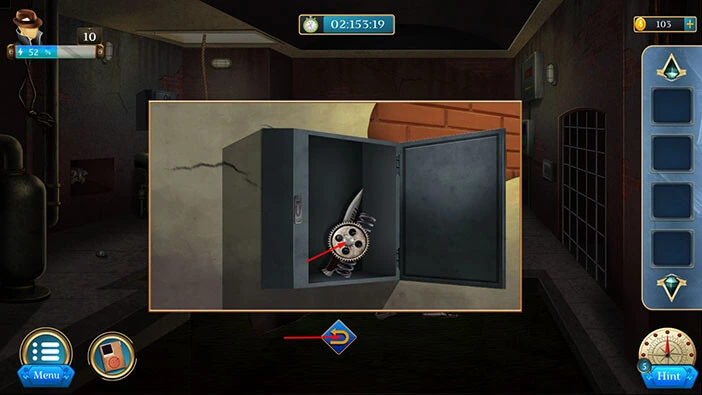
In the box, you will find a “Gear”. Let’s tap on it to pick it up. After that, tap on the arrow at the bottom to go back.
Next, let’s tap on the waterfall on the right to take a closer look at it.
After that, tap on the space on the left and on the right side to split the water.
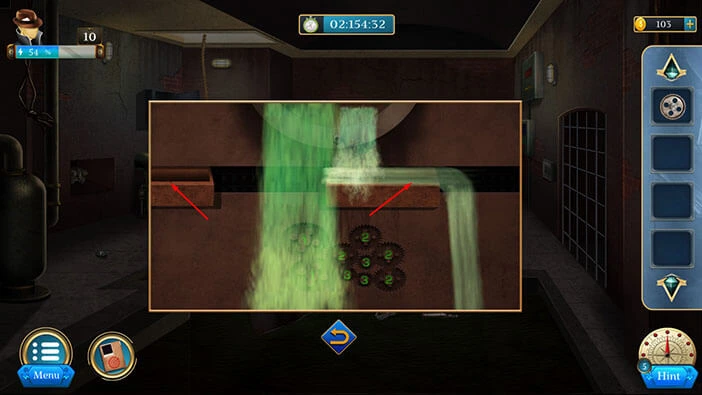
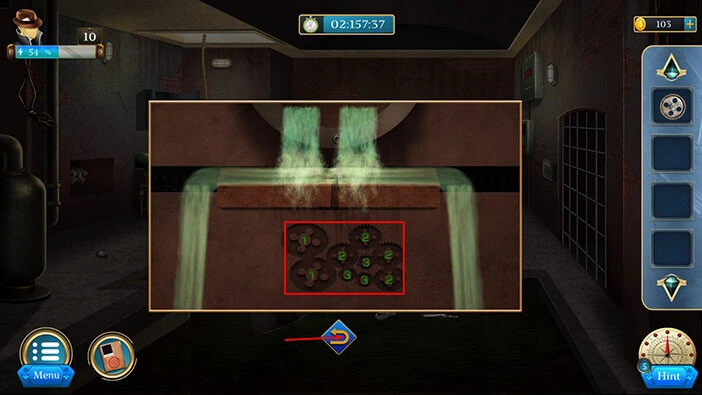
On the wall, you will discover a hint for the correct position of the gears. Let’s memorize/write down this hint because we will need it for the next puzzle.
Once you’re done, tap on the arrow at the bottom to go back.
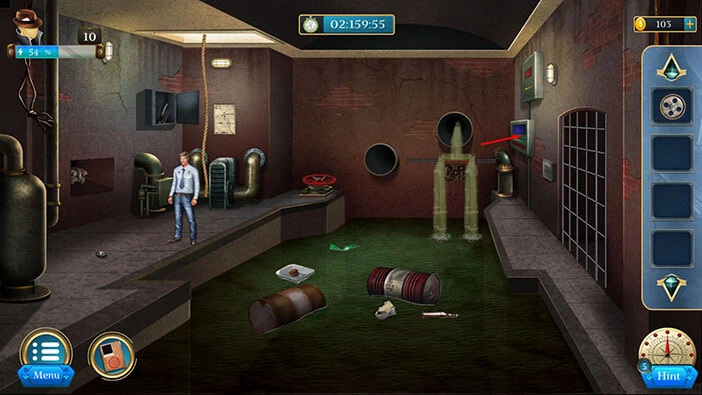
Next, let’s tap on the machine, located on the wall on the left, to take a closer look at it.
You will notice that one of the gears is missing. So, let’s select the gear from the inventor and insert it into the empty slot.
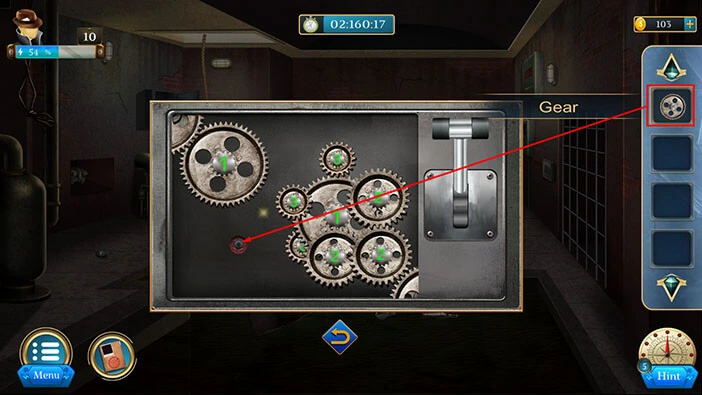
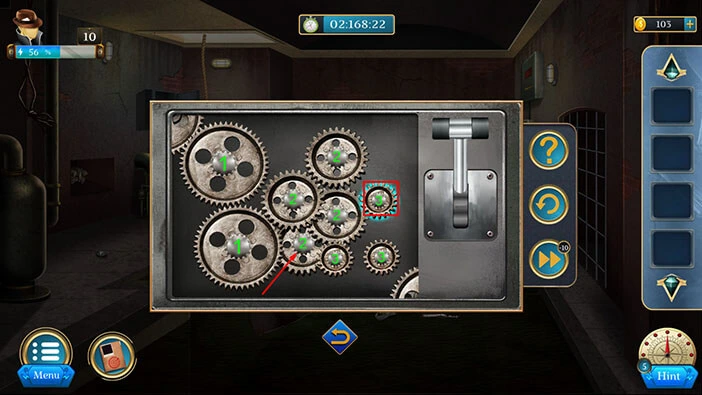
Our next task is to rearrange the gears, and their position should match the drawing that we saw on the wall. We will do this puzzle in several steps.
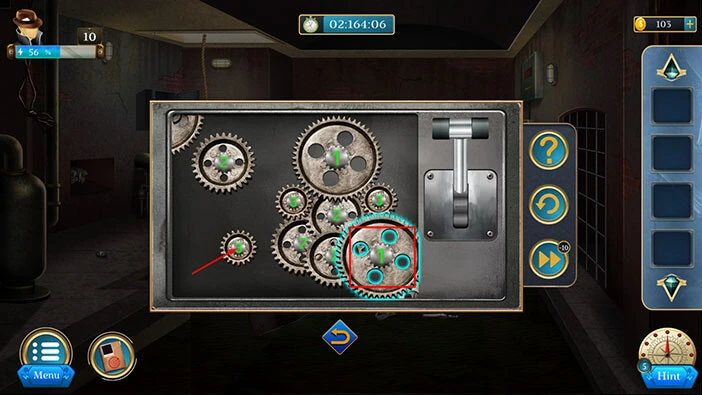
Step 1
Select the number 1 Gear, located in the bottom right corner of the puzzle, then tap on the number 3 Gear on the left side of the puzzle to swap their positions.
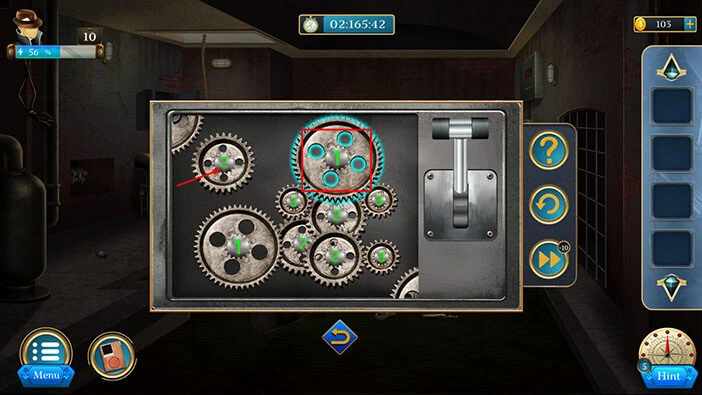
Step 2
Select the number 1 Gear, located in the top right corner of the puzzle, then tap on the number 2 Gear in the top left side of the puzzle to swap their positions.
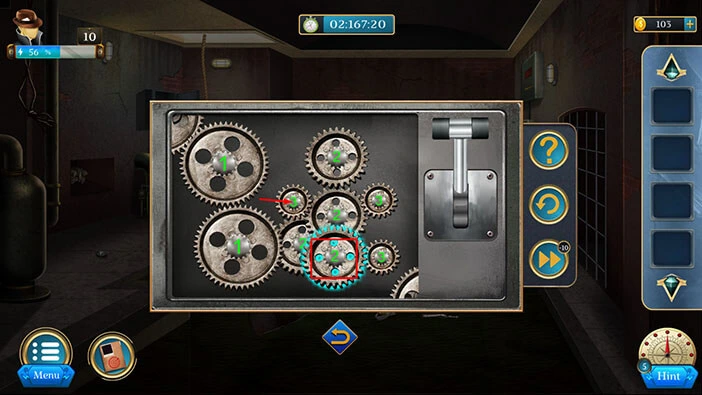
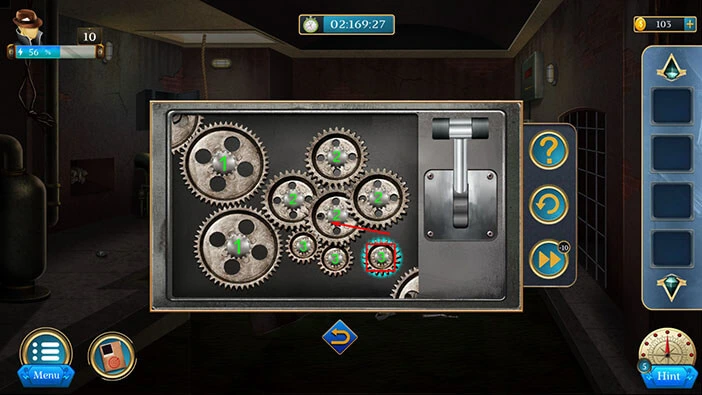
Step 3
Select the number 2 Gear, located at the bottom of the puzzle, then tap on the number 3 Gear in the middle left side of the puzzle to swap their positions.
Step 4
Select the number 3 Gear, located in the top right corner of the puzzle, then tap on the number 2 Gear in the bottom left side of the puzzle to swap their positions.
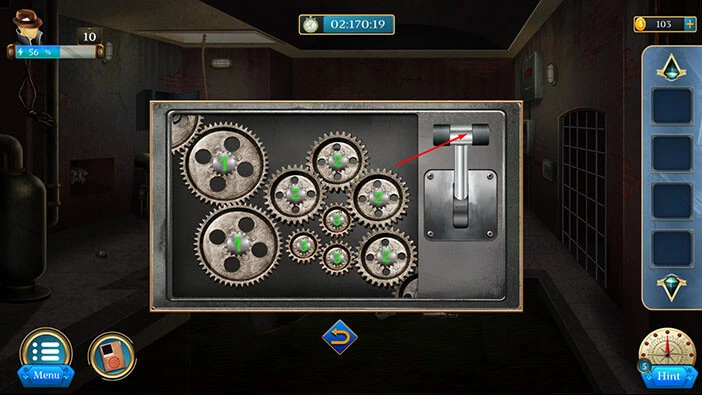
Step 5
Select the number 3 Gear, located in the bottom right corner of the puzzle, then tap on the number 2 Gear in the middle of the puzzle to swap their positions. With that, you will solve this puzzle.
Let’s tap on the lever on the right to activate it.
With that, you will open the door on the left, and you will proceed to the next room.
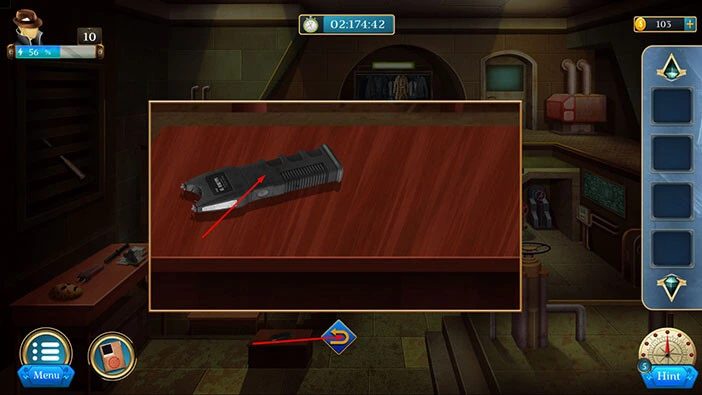
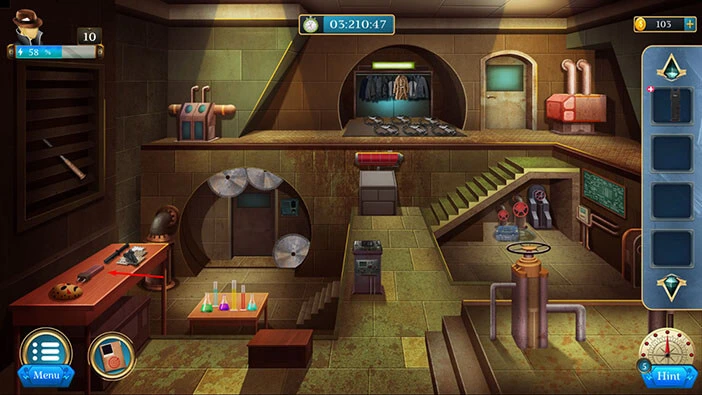
Let’s explore this room. Tap on the small wooden box in front of you.
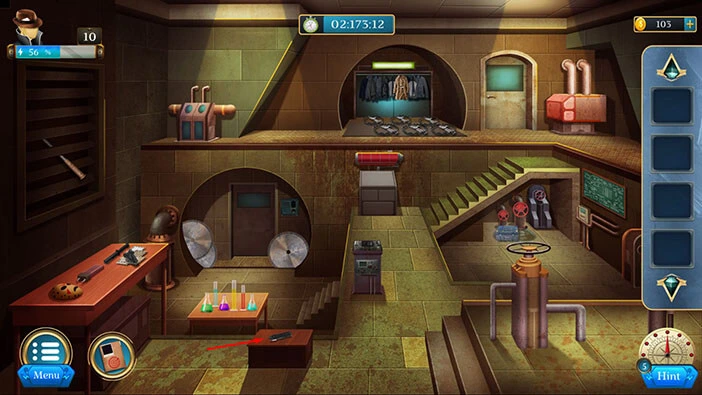
Here, you will find a “Taser”. Let’s tap on it to pick it up.
After that, tap on the arrow at the bottom to go back.
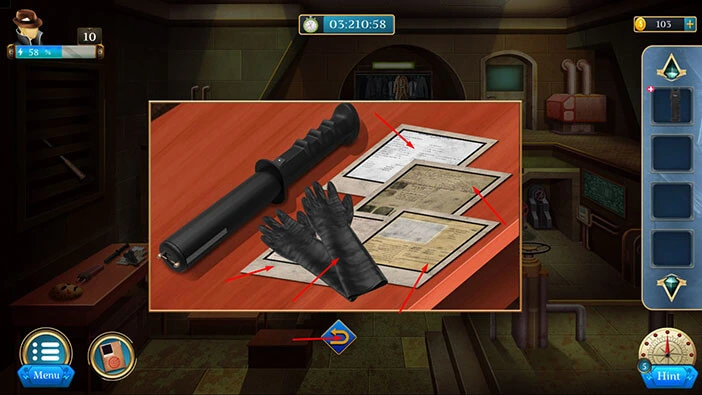
Let’s tap on the large table on the left side of the room to take a closer look at it.
Here, you will find “Gloves” and four pieces of “Paper”. Let’s tap on these items to pick them up.
After that, tap on the arrow at the bottom to go back.
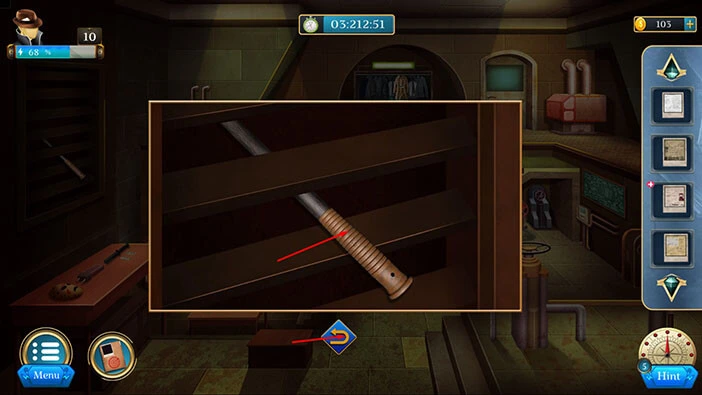
Next, let’s tap on the ventilation on the left to take a closer look at it.
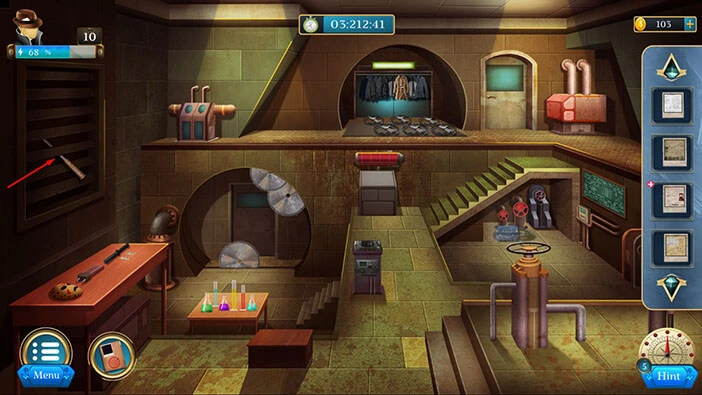
Here, you will find a “Safety stick”. Let’s tap on it to pick it up.
After that, tap on the arrow at the bottom to go back.
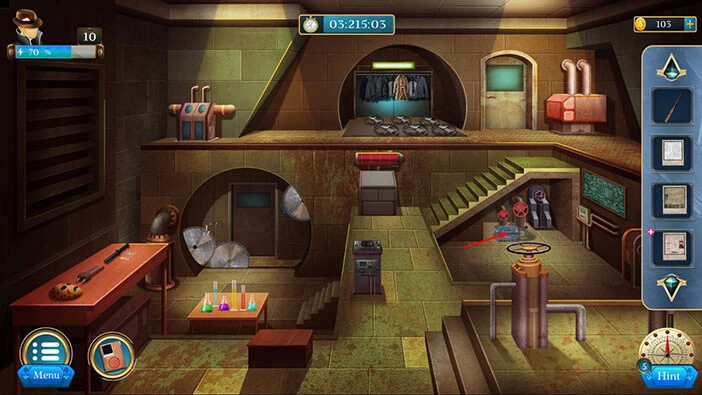
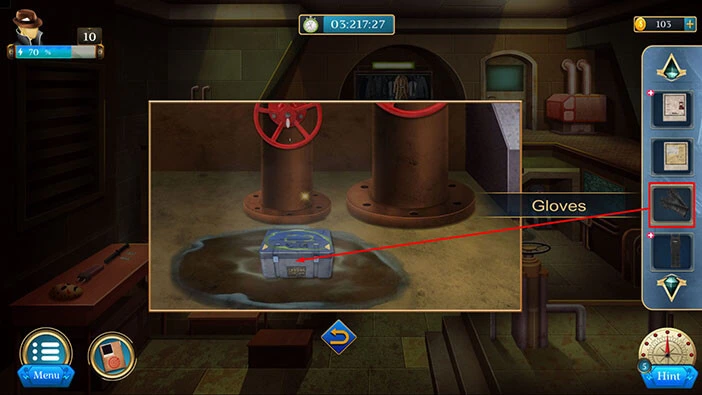
If you take a look at the lower floor on the right, you will notice a blue box. Let’s tap on it to take a closer look.
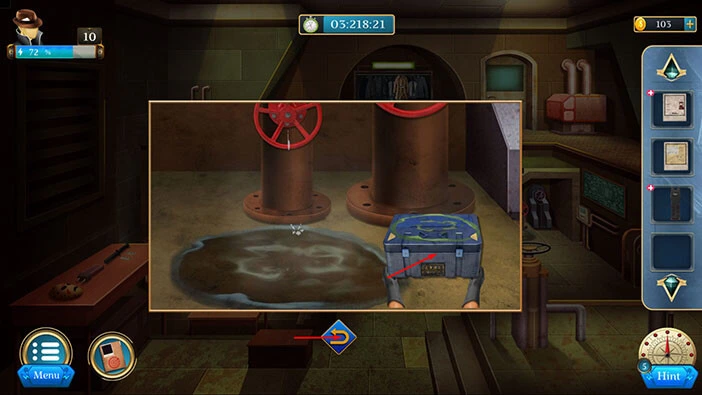
If you try to pick up the box, our character will say that it is too hot to touch with the bare hands. So, select the “Gloves” from the inventory and use them to pick up the “Box”.
Tap on the “Box” and it will be added to your inventory. After that, tap on the arrow at the bottom to go back.
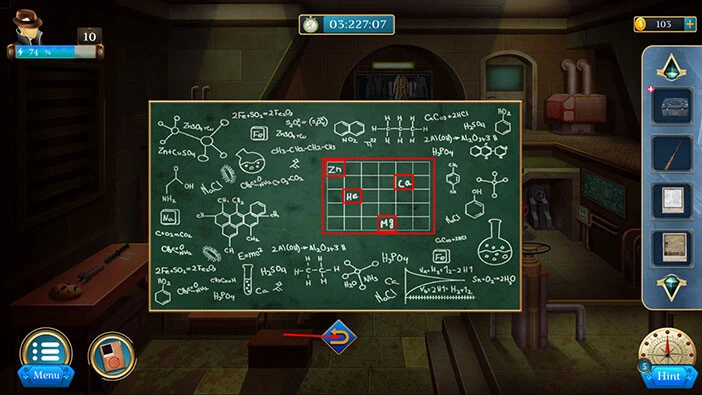
Next, let’s tap on the writing board on the right to take a closer look at it, and tap again to examine it.
Here, you will see the grid with four elements, Zn, He, Mg, and Ca. The position of the elements on the grid represents the hint for the next puzzle. So, let’s memorize/write down this information.
Zn = First slot in the first row
He = Second slot in the third row
Mg = Fourth slot in the fifth row
Ca = Fifth slot in the second row
Once you’re done, tap on the arrow at the bottom to go back.
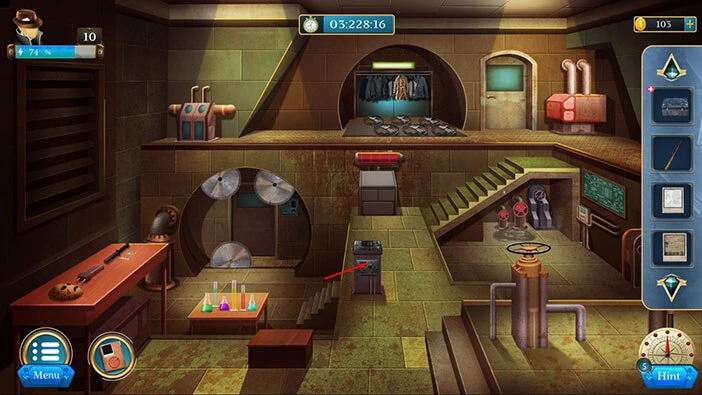
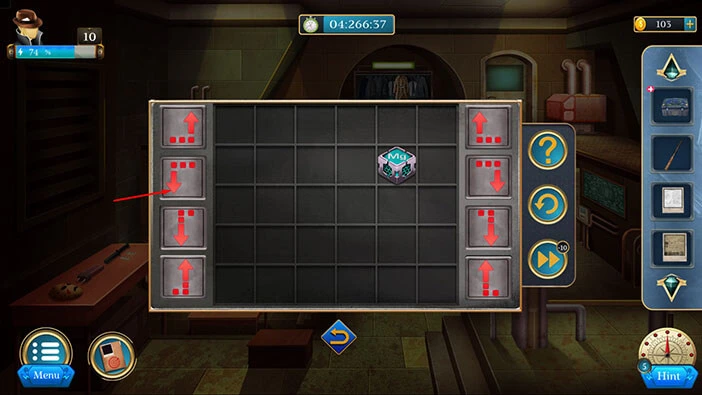
Next, tap on the machine in front of you to take a closer look at it, and tap again to start the interaction.
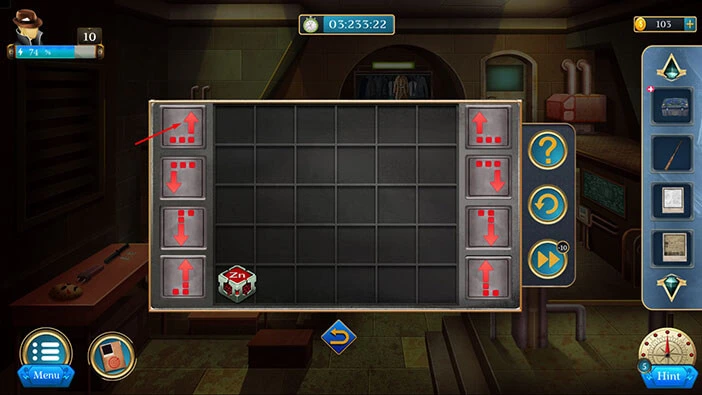
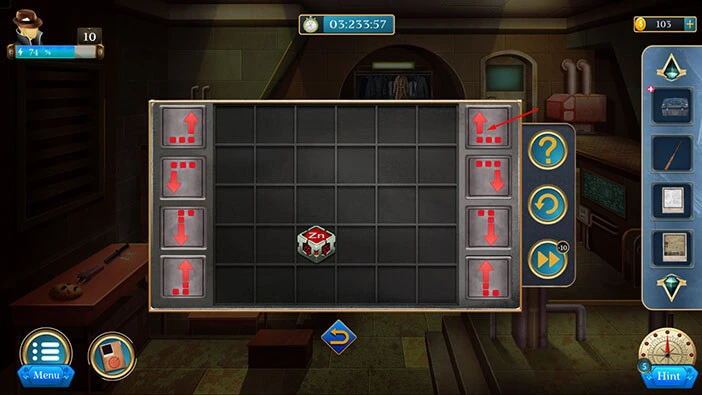
Here, we can see the “Zn” box on the grid. Our task is to place the box in the correct position. We already discovered the correct position of the box. Once we place the “Zn” box in the correct position (first slot in the first row), the next box will appear and we will have to repeat the process.
We will do this puzzle in several steps. Let’s begin.
Step 1
Let’s tap on the first arrow on the left side, and we will move the box two slots to the right, and one slot up.
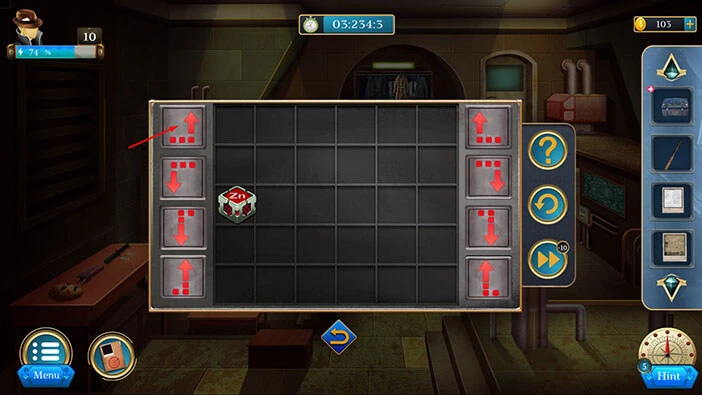
Step 2
Let’s tap on the first arrow on the right side, and we will move the box two slots to the left, and one slot up.
Step 3
Let’s tap on the first arrow on the left side, and we will move the box two slots to the right, and one slot up.
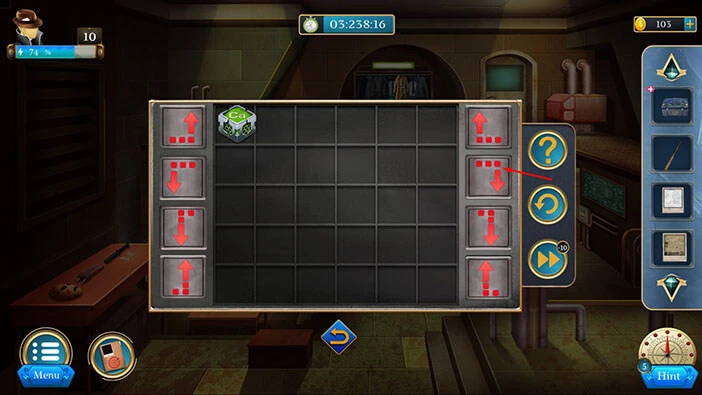
Step 4
Let’s tap on the first arrow on the right side, and we will move the box two slots to the left, and one slot up.

Step 5
We placed the “Zn” box into the correct position, and the “Ca” box appeared. Our next task is to place the Ca box into the fifth slot in the second row.
Let’s tap on the second arrow on the right side, and we will move the box two slots to the right, and one slot down.
Step 6
Let’s tap on the third arrow on the right side, and we will move the box one slot to the right, and two slots down.

Step 7
Let’s tap on the fourth arrow on the left side, and we will move the box one slot to the right, and two slots up.
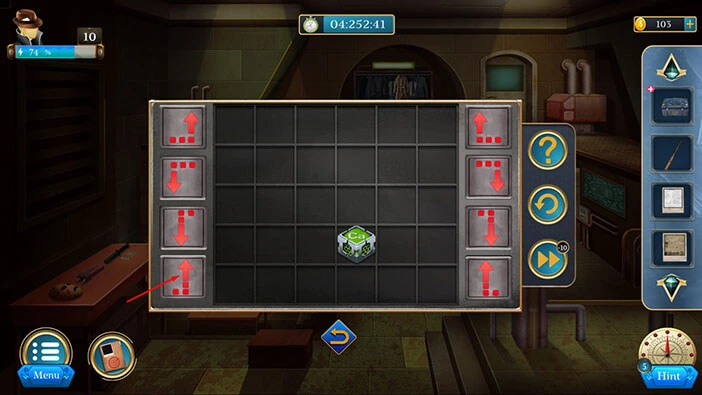
Step 8
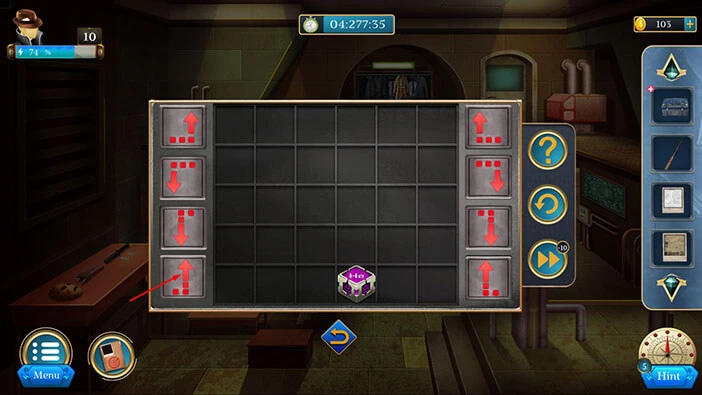
We placed the “Ca” box into the correct position, and the “Mg” box appeared. Our next task is to place the Mg box into the fourth slot in the fifth row.
Let’s tap on the second arrow on the left side, and we will move the box two slots to the left, and one slot down.
Step 9
Let’s tap on the third arrow on the right side, and we will move the box one slot to the right, and two slots down.

Step 10
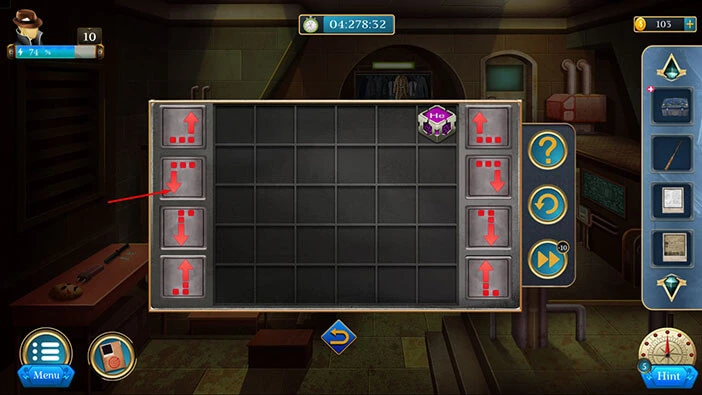
We placed the “Mg” box into the correct position, and the “He” box appeared. Our next task is to place the He box into the second slot in the third row.
Let’s tap twice on the fourth arrow on the left side, and we will move the box two slots to the right, and four slots up.
Step 11
Let’s tap twice on the second arrow on the left side, and we will move the box four slots to the left, and two slots down. With that, you will place the “He” box into the second slot in the third row, and we will solve this puzzle.
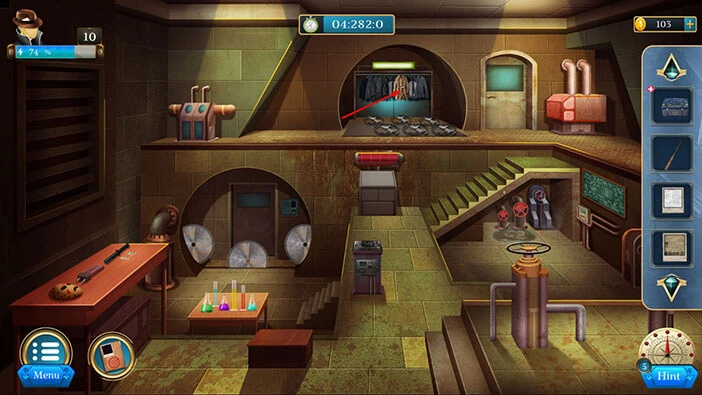
You will stop the saws in front of the door located on the lower floor on the left. Tap on the cloth in front of you to take a closer look at it.
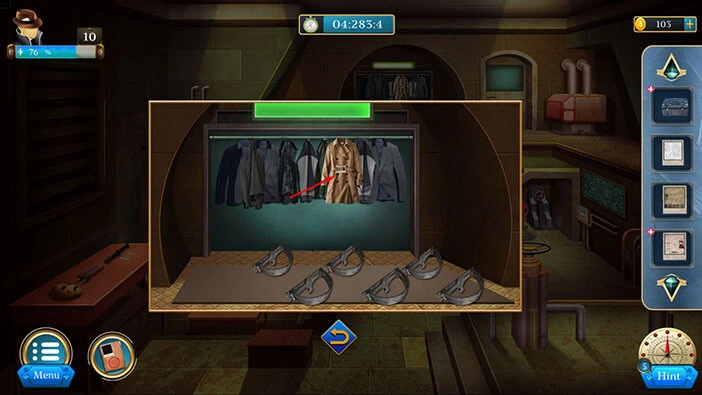
Select the “Safety Stick” from the inventory and use it to activate the bear traps.
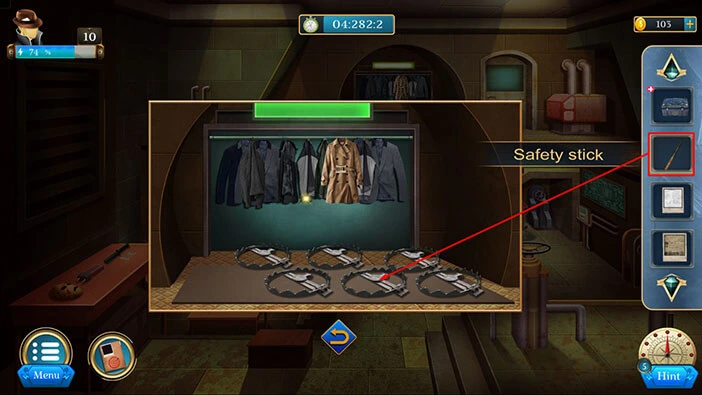
We can now reach the coat in the back. So, let’s tap on the coat and we will find another “Paper”. Let’s tap on it to pick it up.
After that, tap on the arrow at the bottom to go back.
Let’s take a look at the next clue. Select the five pieces of “Paper” from the inventory and place them on the screen.
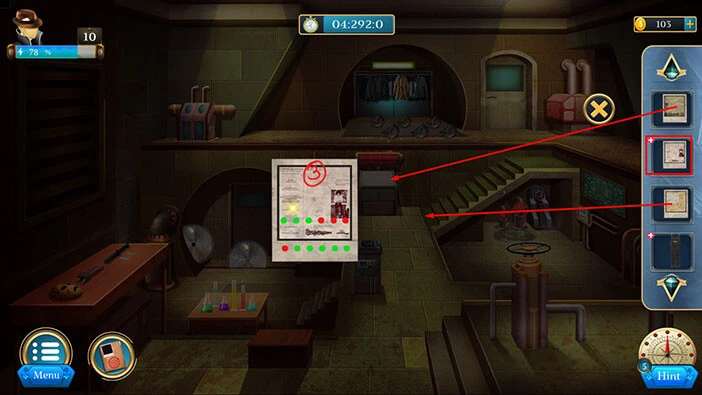
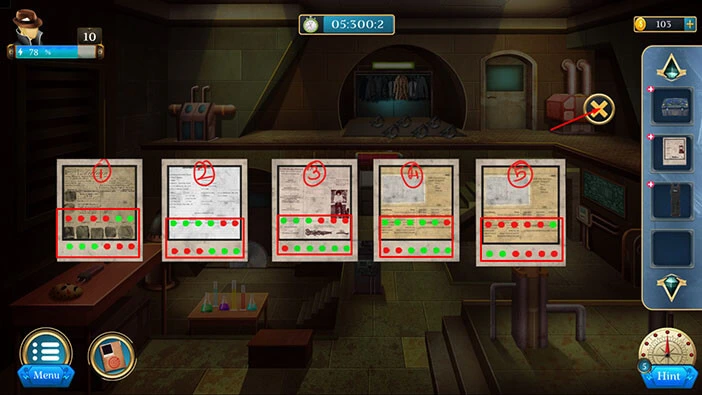
Here, we can see two rows of six dots on each paper. Some dots are green, and some dots are red. So, our next task is to memorize/write down the amount of green and red dots on each paper and each row. This information represents the hint for the next puzzle. So, let’s do that.
First Paper
First row = four red, and two green dots
Second row = three green, and three red dots
Second Paper
First row = four green, and two red dots
Second row = three red, and three green dots
Third Paper
First row = three green, and three red dots
Second row = one red, and five green dots
Fourth Paper
First row = five green, and one red dot
Second row = two red, and four green dots
Fifth Paper
First row = five red, and one green dot
Second row = two green, and four red dots
Once you’re done, tap on the “X” button to close this window.
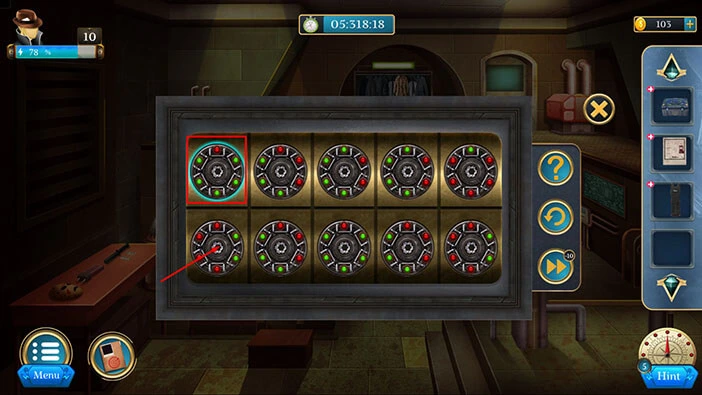
Select the “Box” from the inventory and it will appear in the middle of the screen. Tap on the box again to start the interaction.
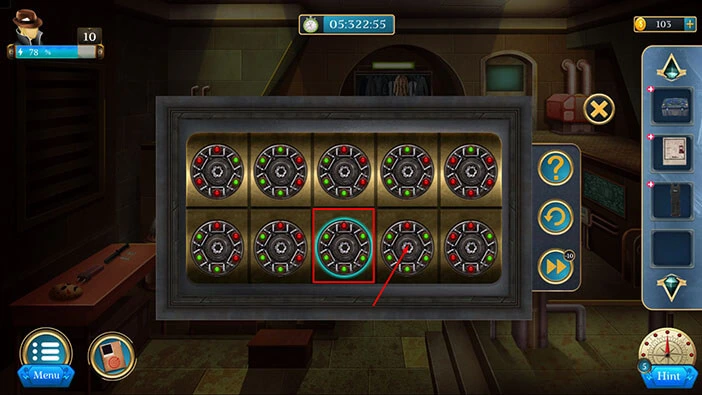
Here, we have another puzzle. We can see twelve disks, arranged in two rows (6 disks per row). Also, on each disk, we can see 6 dots, some are red and some are green.
Our task is to rearrange the disks. The color of the dots on the disk should match the color of the dots that we saw on the paper hint.
We will do this puzzle in several steps. Let’s begin.
Step 1
Select the first disk in the first row, then tap on the first disk in the second row to swap their positions.
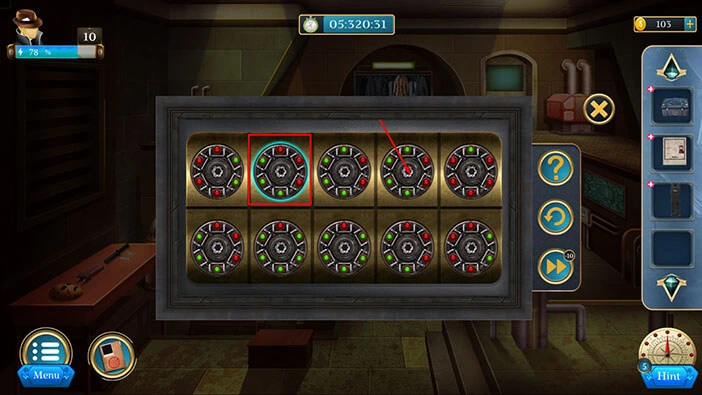
Step 2
Select the first disk in the second row, then tap on the second disk in the second row to swap their positions.

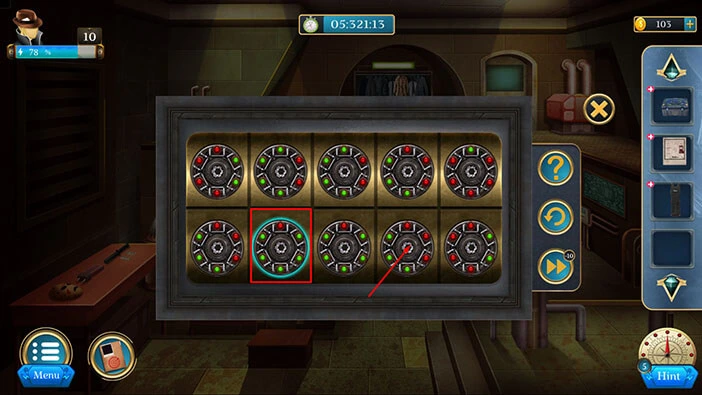
Step 3
Select the second disk in the first row, then tap on the fourth disk in the first row to swap their positions.
Step 4
Select the second disk in the second row, then tap on the fourth disk in the second row to swap their positions.
Step 5
Select the third disk in the first row, then tap on the fourth disk in the first row to swap their positions.

Step 6
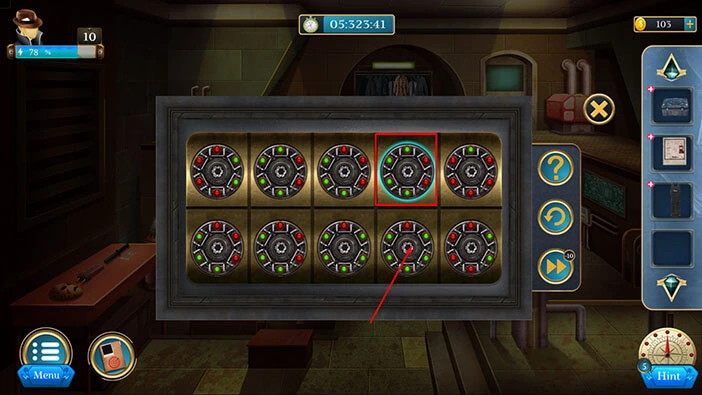
Select the third disk in the second row, then tap on the fourth disk in the second row to swap their positions.
Step 7
Select the fourth disk in the first row, then tap on the fourth disk in the second row to swap their positions. With that, you will solve this puzzle.
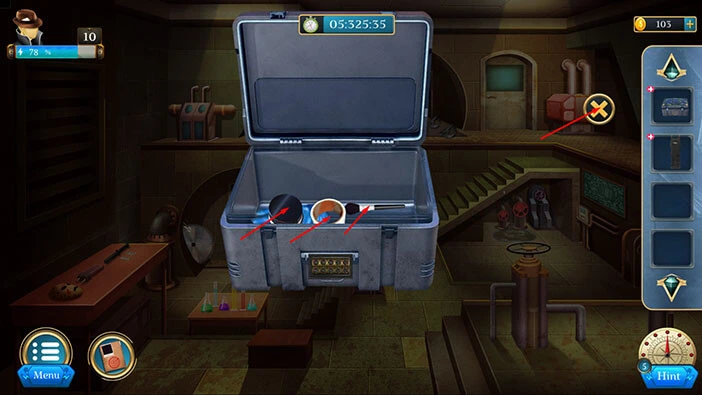
In the box, you will find a “Tape” a “Powder” and a “Brush”. Let’s tap on these items to pick them up.
After that, tap on the “X” button to close this window.
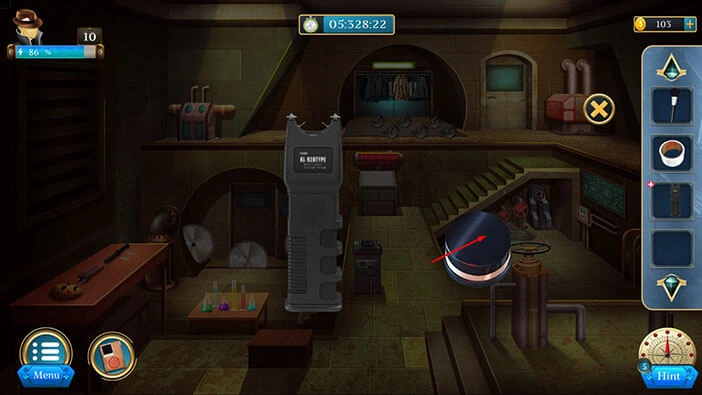
Next, select the “Taser” from the inventory and it will appear in the middle of the screen. After that, select “Powder” from the inventory and drag it next to the “Taser”.
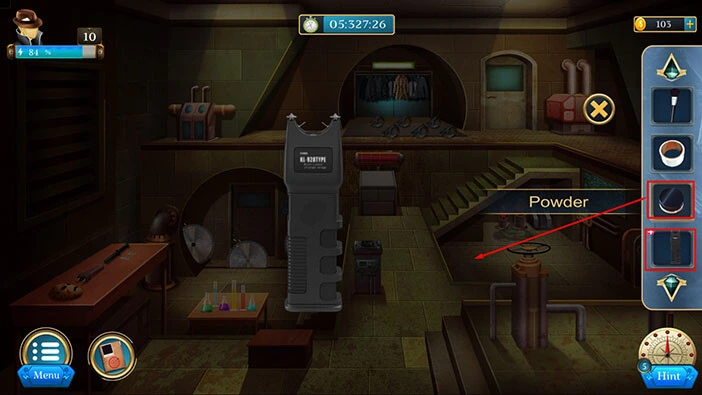
Next, tap on the “Powder” to open it.
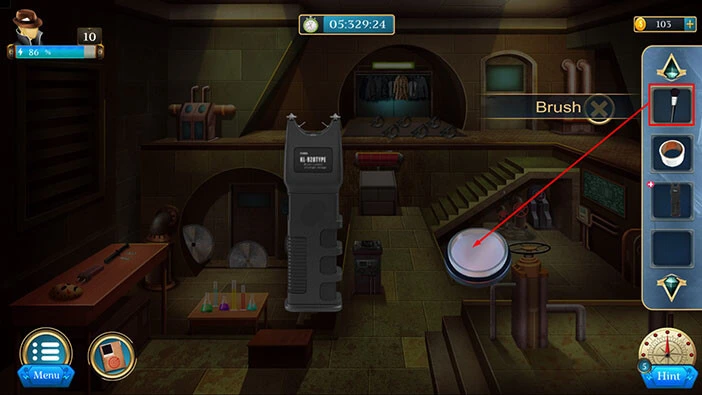
Next, select the “Brush” from the inventory and drag it to the powder. You will discover fingerprints on the taser.
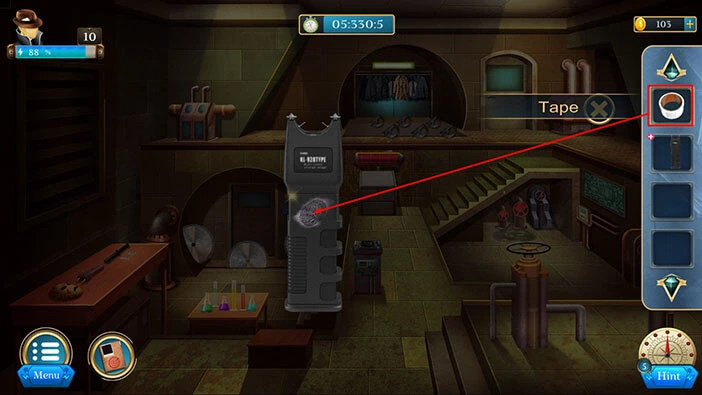
Lastly, select the “Tape” from the inventory and use it to get the fingerprints from the taser.
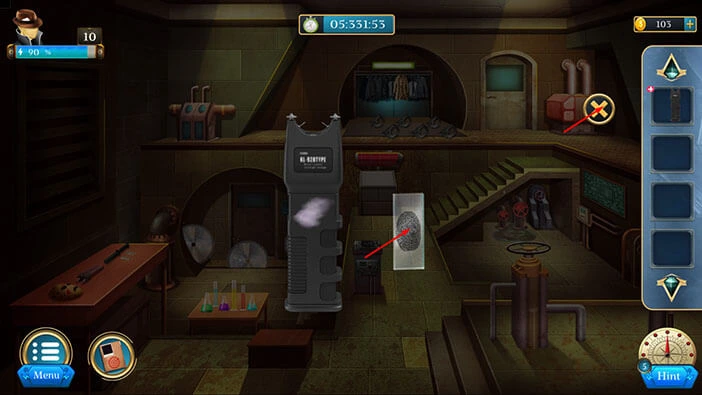
Tap on the “Fingerprint” to pick it up. After that, tap on the “X” button to close this window.
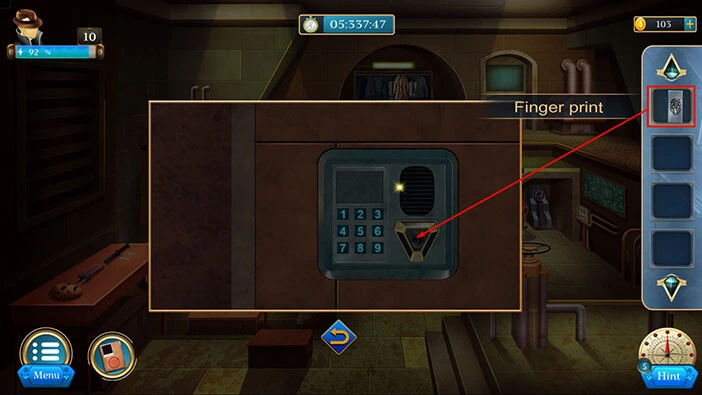
Let’s tap on the keypad, located next to the door on the left side of the room, to take a closer look at it.
Next, select the “Fingerprint” from the inventory and place it on the keypad. With that, you will unlock the next puzzle, so let’s tap on it to start the interaction.
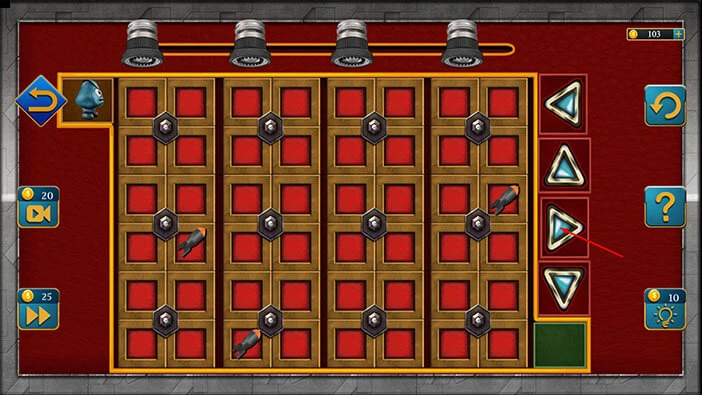
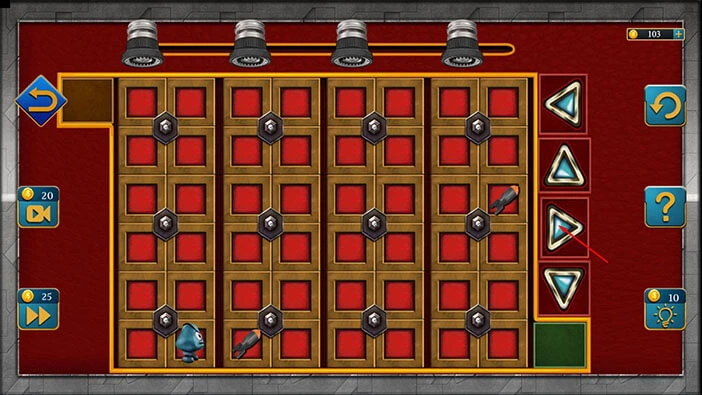
Our next task is to lead the little monster (our character) from the top left slot to the finish line in the bottom right slot while avoiding the lasers. Also, along the way, we should collect the three bombs.
We will do this puzzle in several steps. Let’s begin.
Step 1
Tap twice on the right arrow.
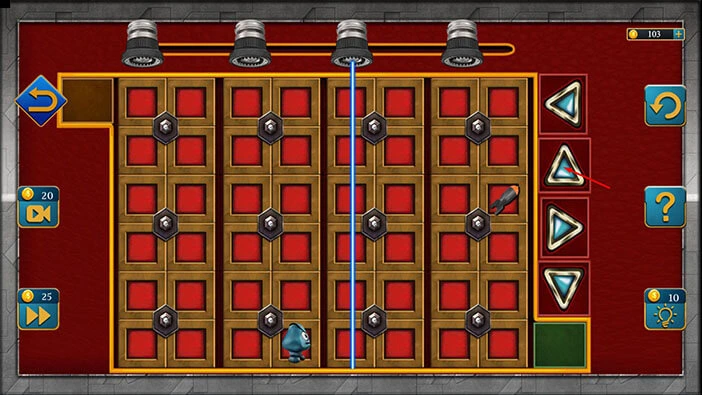
Step 2
Tap five times on the down arrow. You will pick up the first bomb.
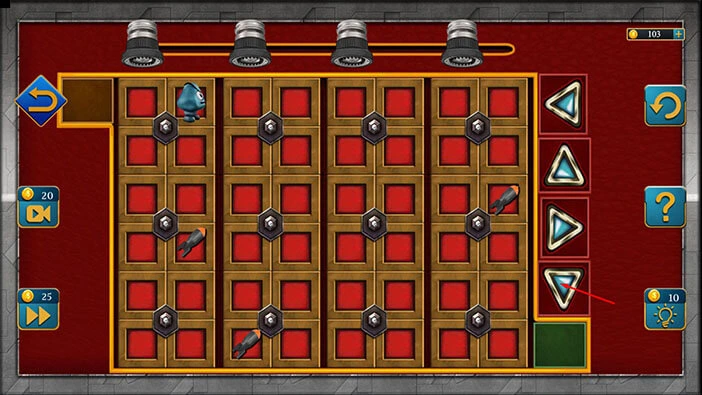
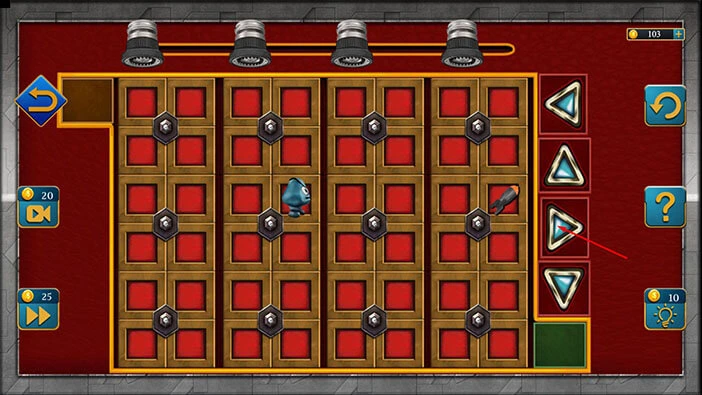
Step 3
Tap twice on the right arrow. You will pick up the second bomb.
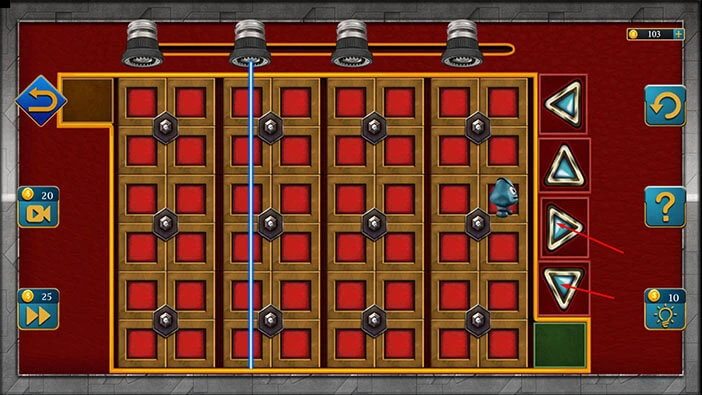
Step 4
Tap three times on the up arrow.
Step 5
Tap four times on the right arrow. You will pick up the third bomb.
Step 6
Tap three times on the down arrow, then tap once on the right arrow, and you will solve this puzzle.
Behind the door, you will find the Black Spider’s lair. All evidence will be sent to the laboratory. However, our character is suspicious, because he thinks that he easily discovered the Black Spider’s lair. Probably, too easy.
Maize couldn’t find any DNA on the evidence. So, our character concluded that the Black Spider led them to investigate this place.
With that, we have reached the end of the tenth level. If you want to see the walkthrough for the eleventh level, tap on the next part button.
Thank you for reading.