Room Escape: Detective Phantom | Level 11
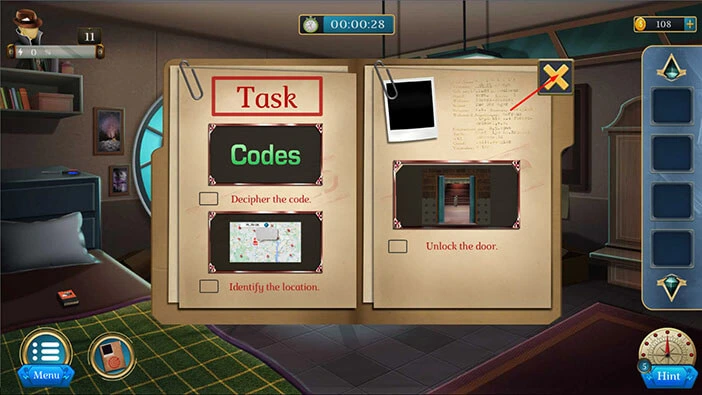
Hello everyone and welcome to the walkthrough for the eleventh level of “Room Escape: Detective Phantom”. In the eleventh level, our task is to locate the suspect.
Our objectives are to “Decipher the code” “Identify the location” and “Unlock the door”. Tap on the “X” button to go back.
On the right side of the room, you will notice a “Toolbox”. Let’s tap on it to take a closer look, and tap again to pick it up.
After that, tap on the arrow at the bottom to go back.
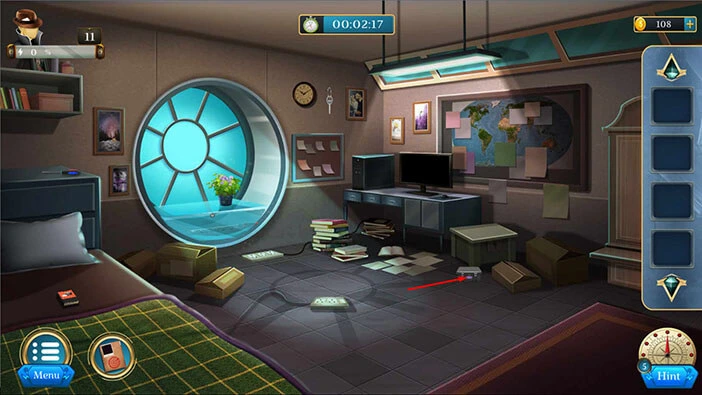
Next, let’s tap on the desk on the left to take a closer look at it. After that, tap on the drawer to open it.
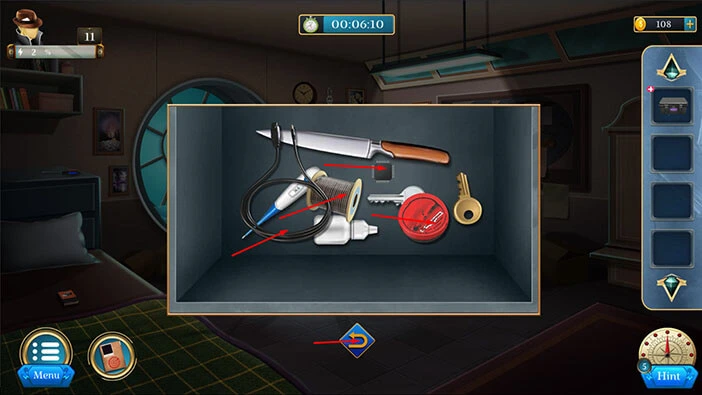
In the drawer, you will find a “Cable” a “Soldering”, a “Chip” and a “Paste”. Let’s tap on these items to pick them up.
After that, tap on the arrow at the bottom to go back.
Next, let’s tap on the bed on the left to take a closer look at it.
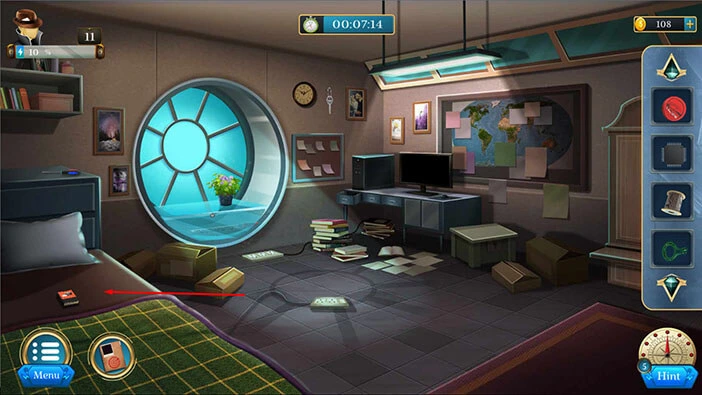
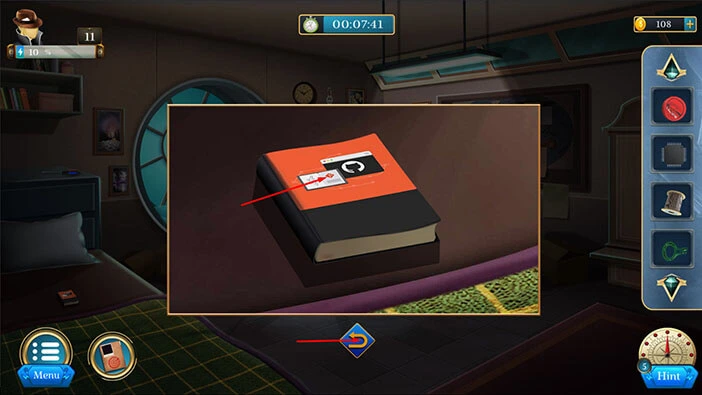
Here, you will find a “Book”. Let’s tap on it to pick it up. After that, tap on the arrow at the bottom to go back.
Next, let’s tap on the cabinet above the bed to take a closer look at it.
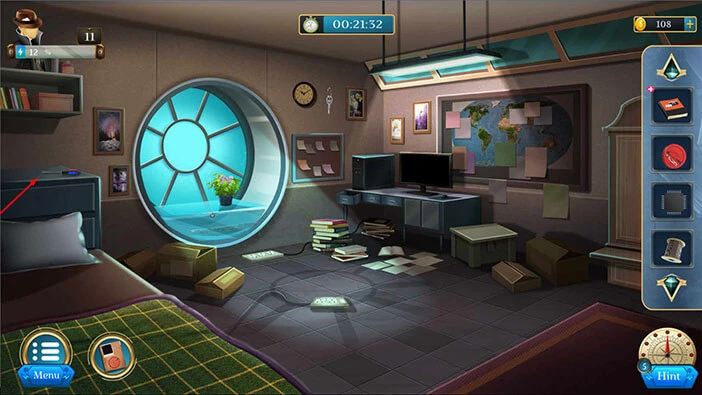
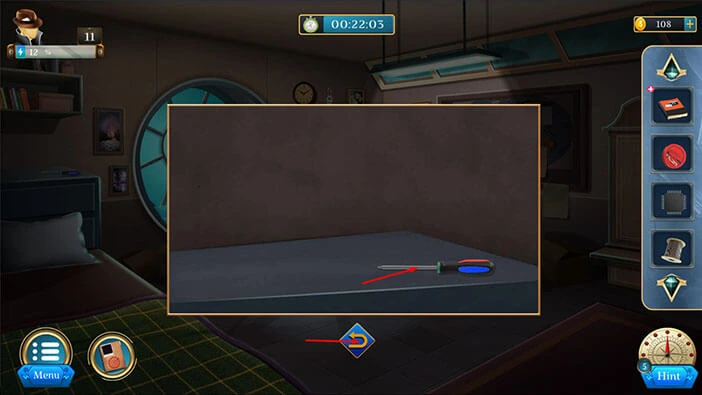
Here, you will find a “Screwdriver”. Tap on it to pick it up. After that, tap on the arrow at the bottom to go back.
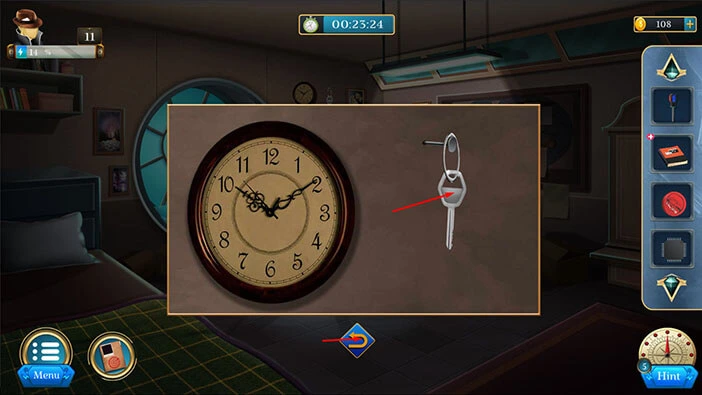
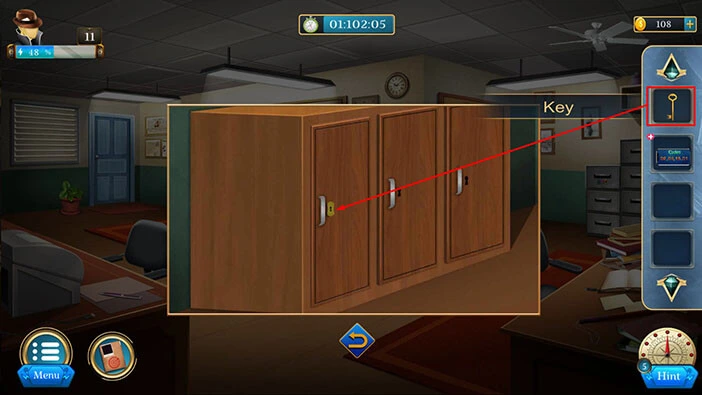
Next, let’s tap on the clock, located on the wall on the right, to take a closer look at it.

Here, you will find a “Key”. Let’s tap on it to pick it up. After that, tap on the arrow at the bottom to go back.
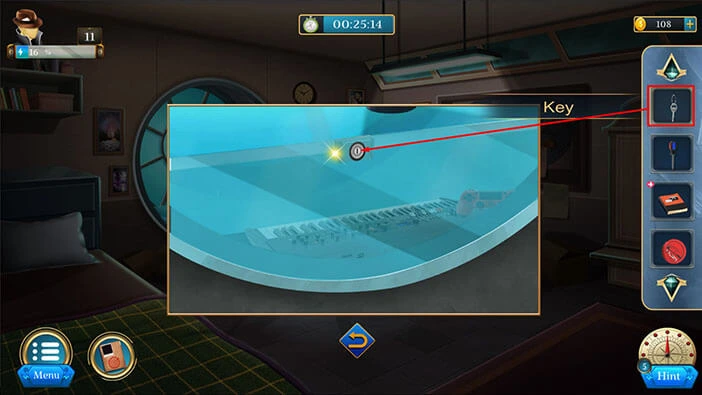
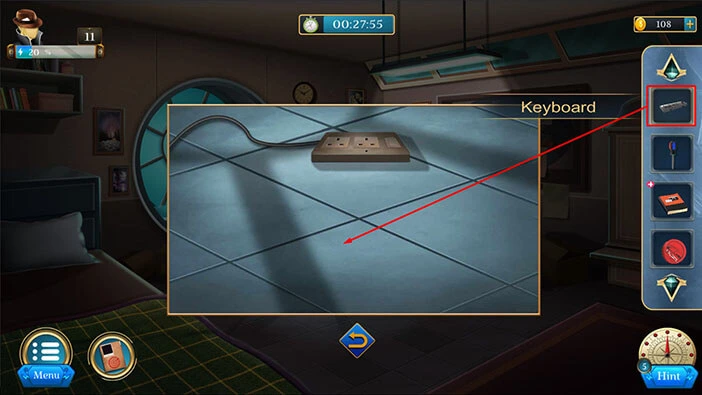
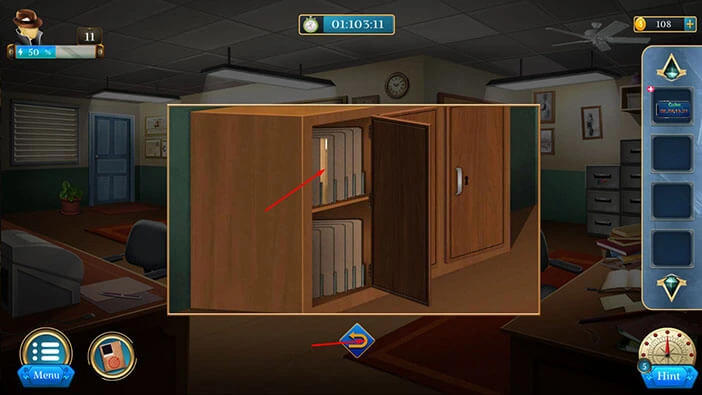
Next, let’s tap on the display case, located below the large window, to take a closer look at it.

Select the “Key” from the inventory, and use it to unlock the display case.
Here, you will find a “Keyboard”. Let’s tap on it to pick it up. After that, tap on the arrow at the bottom to go back.
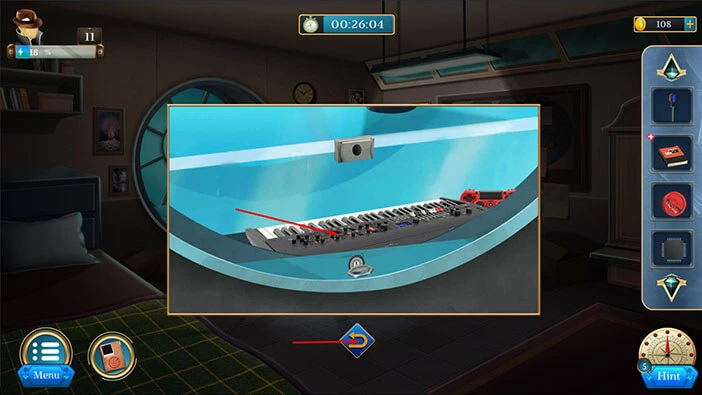
Next, tap on the machine on the floor in front of you to take a closer look at it.
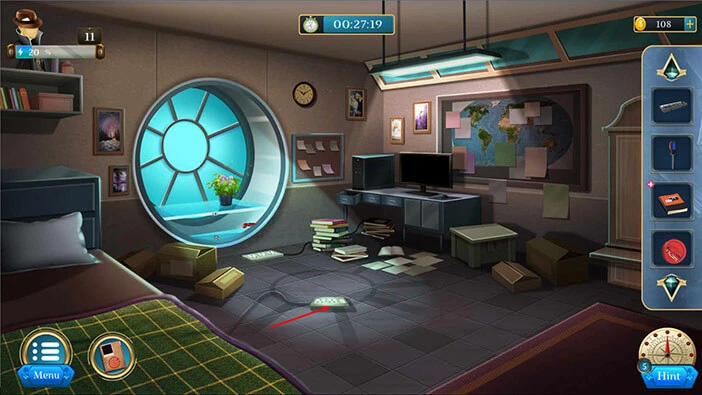
Select the “Keyboard” from the inventory and place it on the floor. After that, tap on the keyboard to turn it over.
Next, select the “Screwdriver” from the inventory and use it to remove the screws.

We will come back to the keyboard later in the walkthrough. For now, tap on the arrow at the bottom to go back.
Select the “Book” from the inventory and it will appear in the middle of the screen. Tap on the book again to open it.
In the book, you will find a “Sheet”. Let’s tap on it to pick it up. After that, tap on the “X” button to close this window.
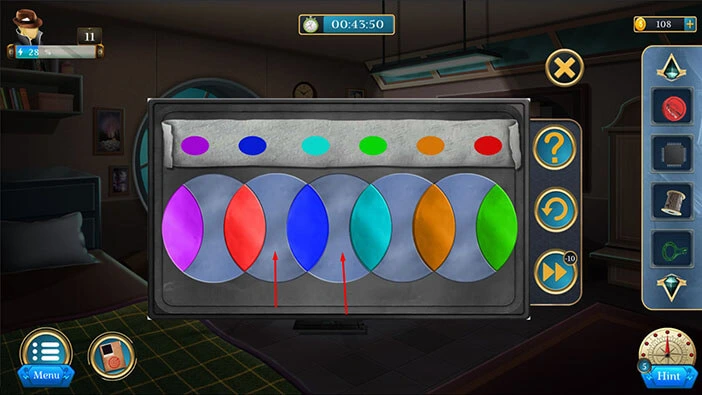
Select the “Toolbox” from the inventory and it will appear in the middle of the screen. Tap on the toolbox again to start the interaction.
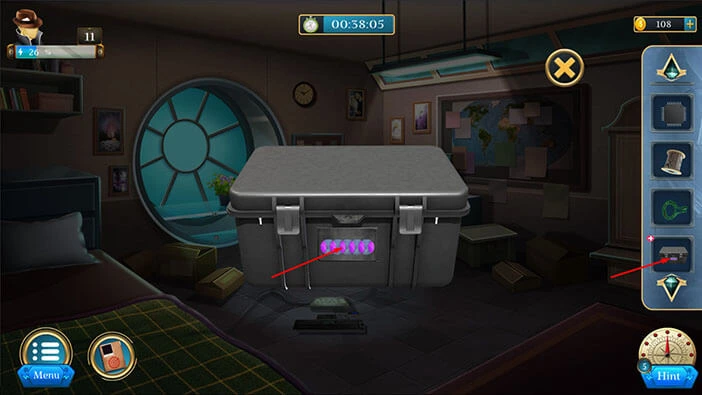
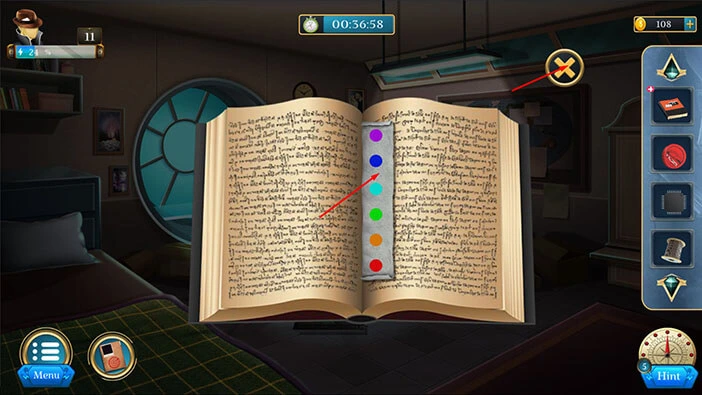
Next, select the “Sheet” from the inventory and place it above the circles.
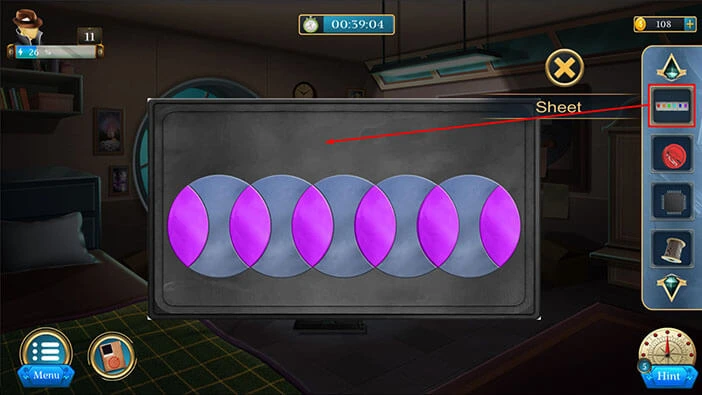
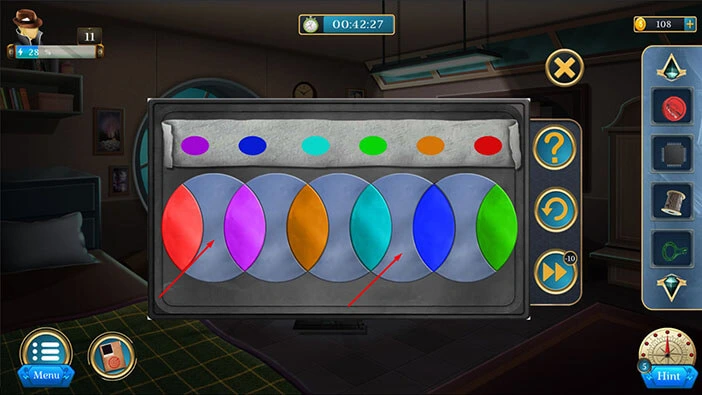
Here, we have another puzzle. Our task is to rearrange the colors of the circles. The order of colors of the circle should match the order of the colors on the sheet.
We will do this puzzle in several steps. Let’s begin.
Step 1
Tap on the first circle to rotate it. After that, tap on the fourth circle to rotate it.
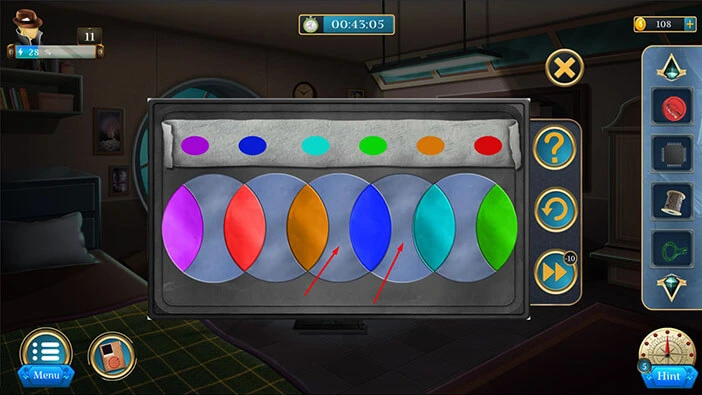
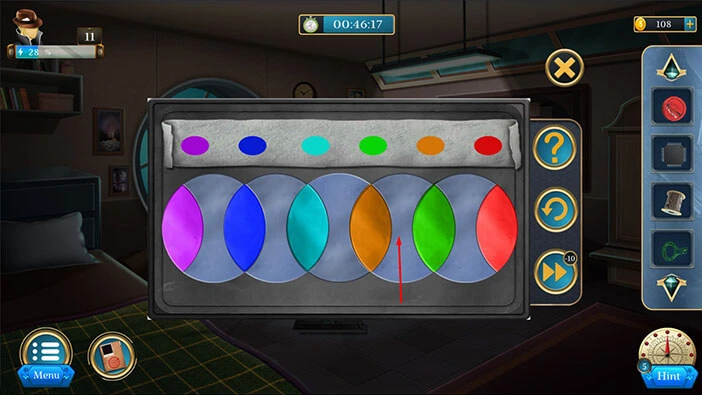
Step 2
Tap on the third circle to rotate it. After that, tap on the fourth circle to rotate it.
Step 3
Tap on the second circle to rotate it. After that, tap on the third circle to rotate it.
Step 4
Tap on the fourth circle to rotate it. After that, tap on the fifth circle to rotate it.

Step 5
Tap on the fourth circle to rotate it. With that, you will solve this puzzle.
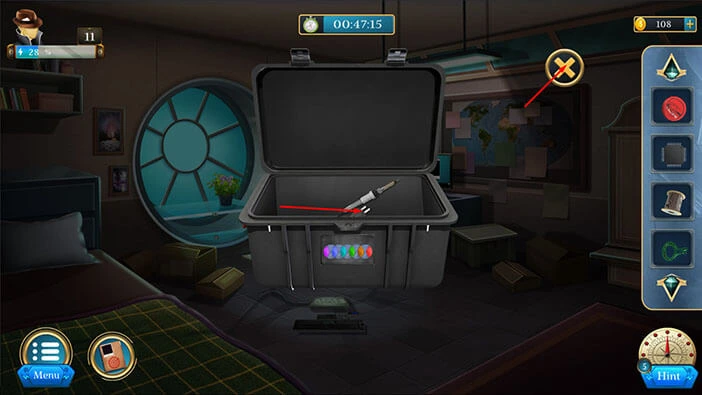
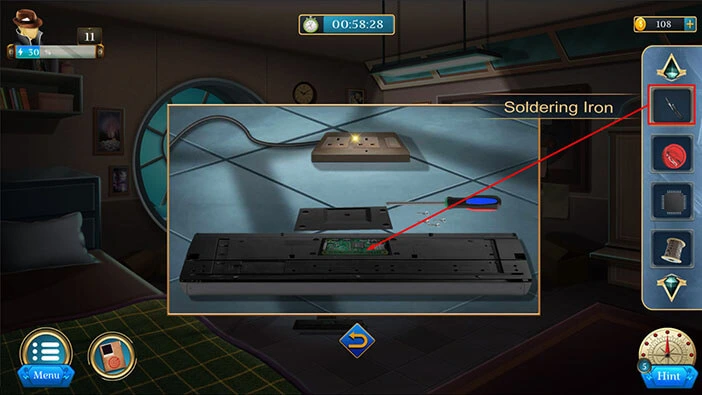
In the box, you will find “Soldering Iron”. Let’s tap on it to pick it up. After that, tap on the “X” button to close this window.
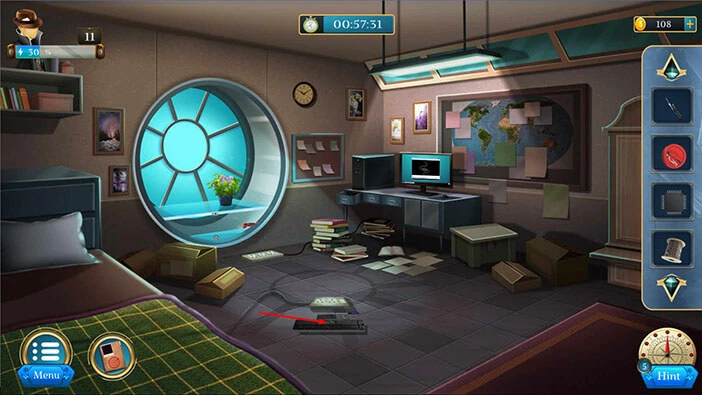
Next, let’s tap on the keypad on the floor to take another look at it.
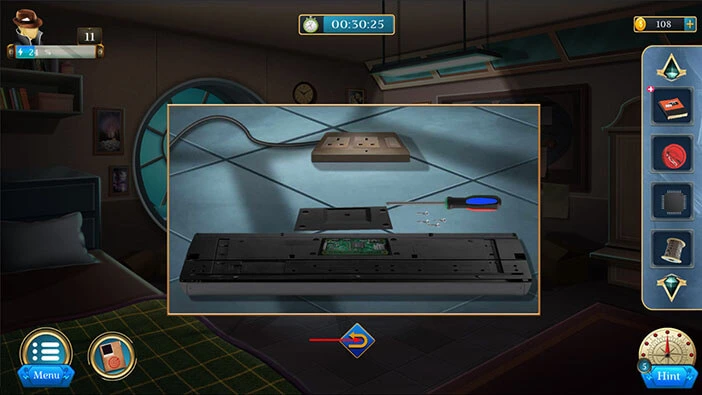
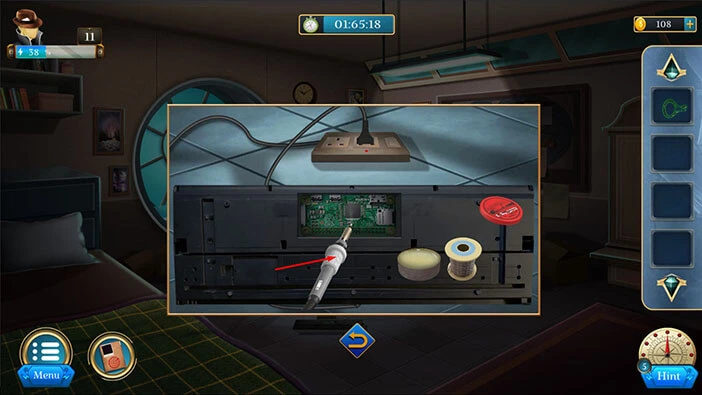
Select the “Soldering Iron” from the inventory and drag it to the keyboard. After that, tap on the keyboard to start the interaction.
Select the “Paste” from the inventory and place it on the keyboard.
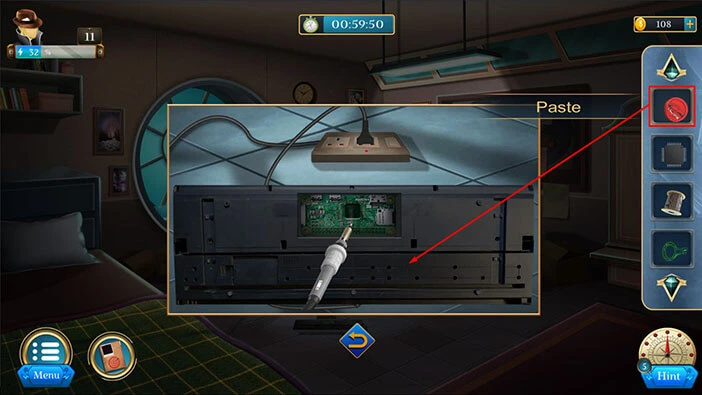
Next, select “Soldering” from the inventory and place it next to the paste.
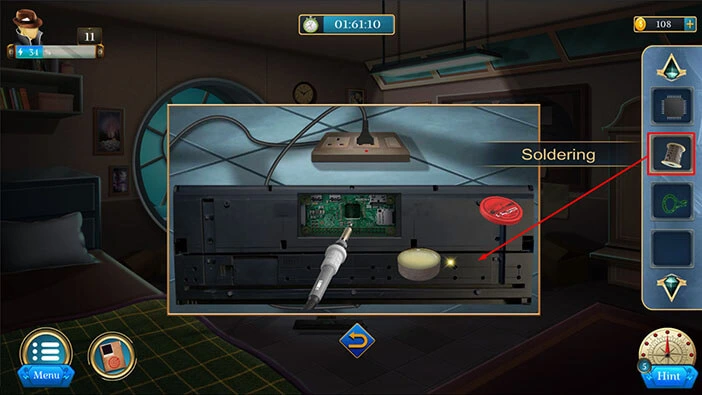
Next, select the “Chip” from the inventory and insert it into the empty slot.
Lastly, tap on the “Soldering Iron” to start the interaction.
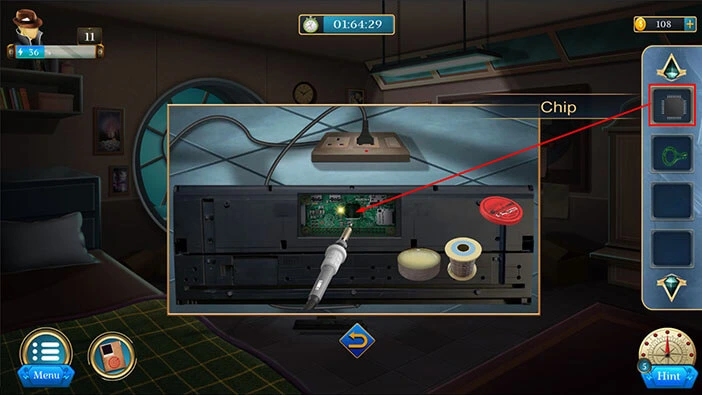
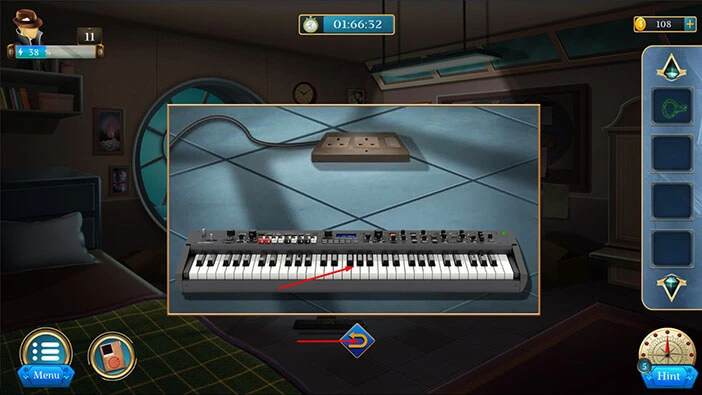
With that, you will repair the keyboard. Let’s tap on the “Keyboard” to pick it up.
After that, tap on the arrow at the bottom to go back.
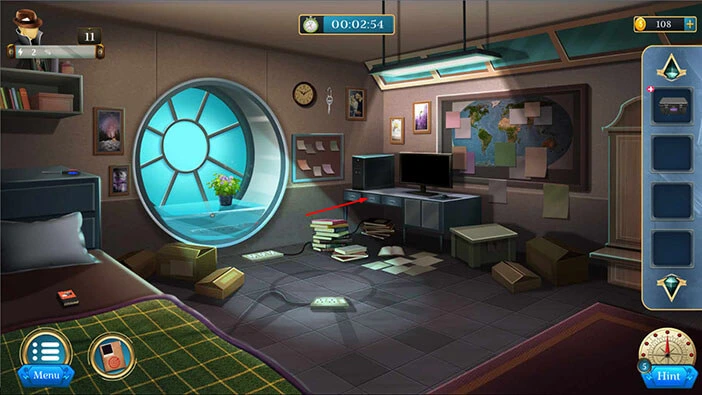
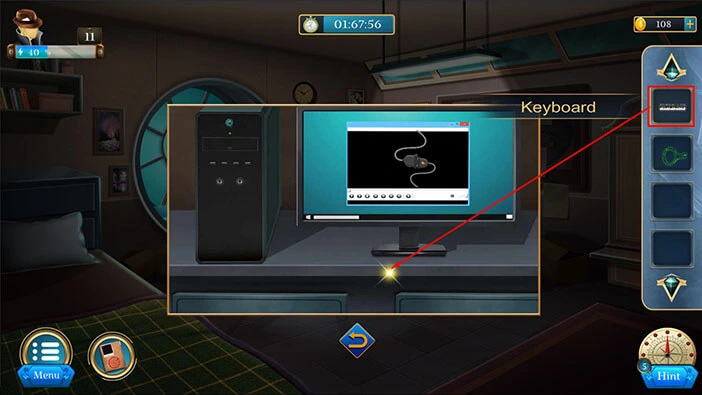
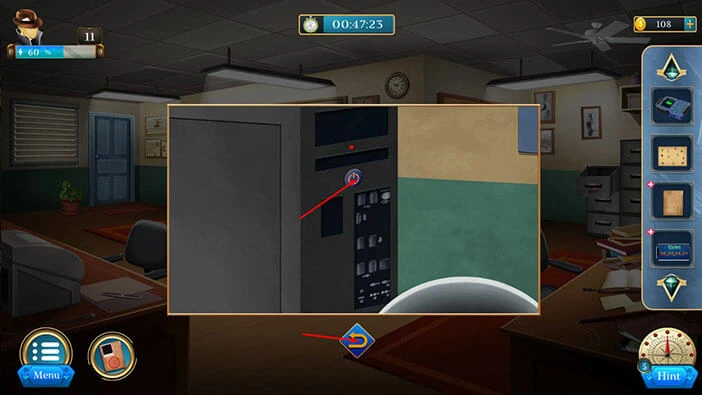
Next, let’s tap on the PC on the right to take a closer look at it, then tap on the power button to turn on the PC.

Select the “Keyboard” from the inventory and place it in front of the PC.
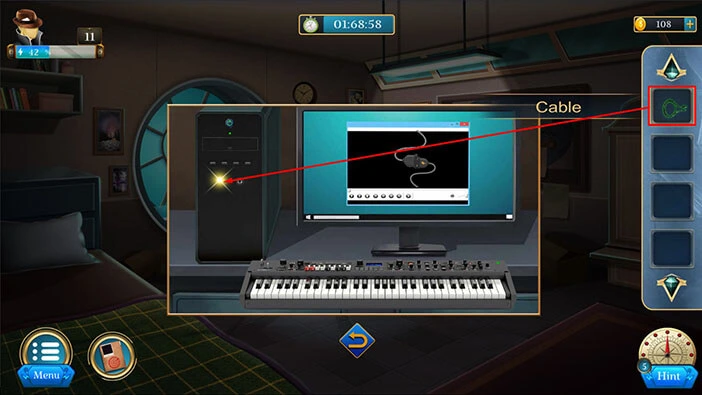
Next, select the “Cable” from the inventory and use it to connect the keyboard to the PC. After that, tap on the PC screen to start the interaction.
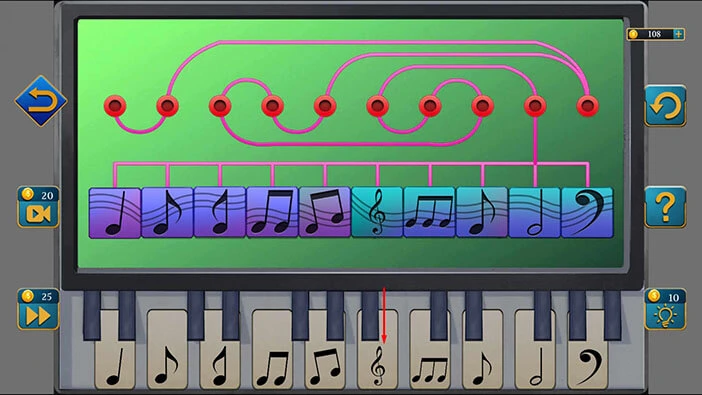
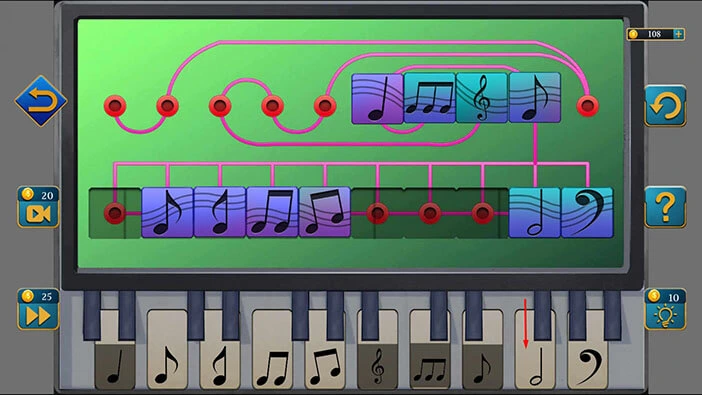
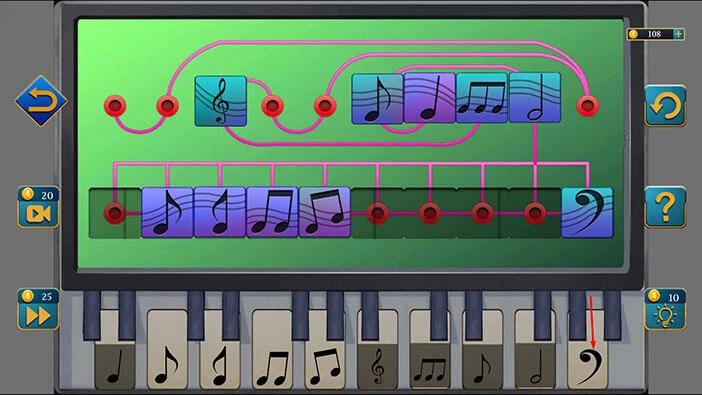
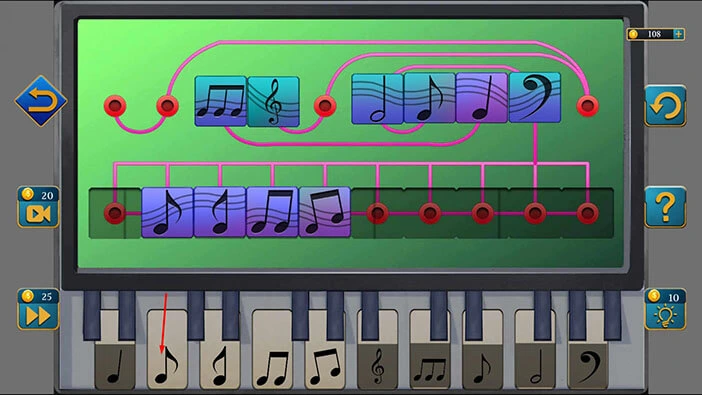
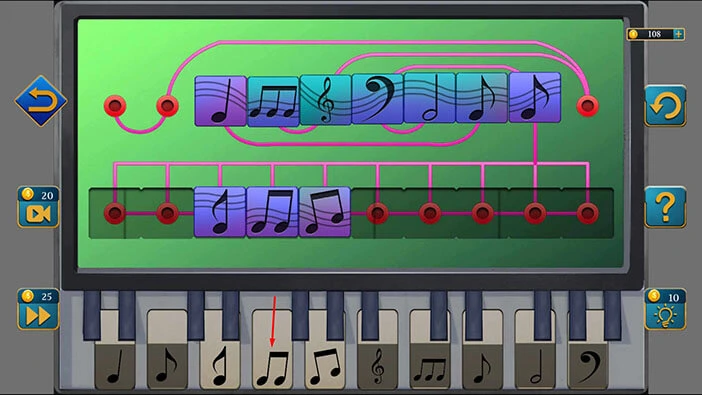
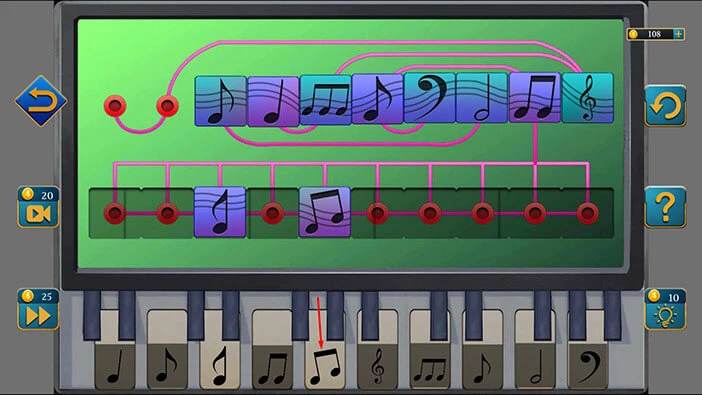
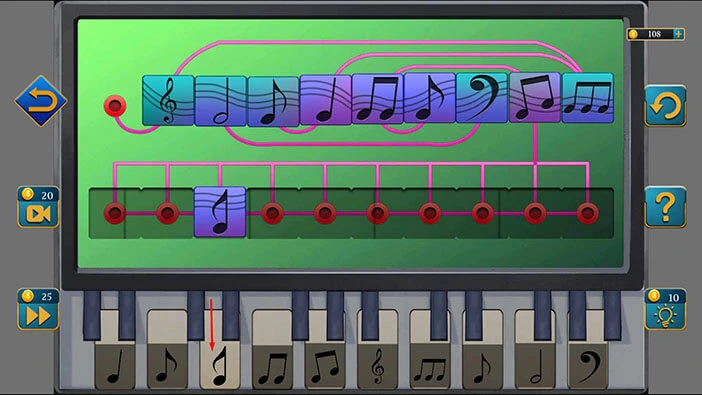
Here, we have another puzzle. Our task is to arrange the papers with notes. We should match the papers by color and by the lines behind the notes. The paper in the first slot (on the left) should be the one with the violin key.
We will do this puzzle in several steps. Let’s begin.
Step 1
Let’s tap on the sixth paper to activate the same symbol in the row above.
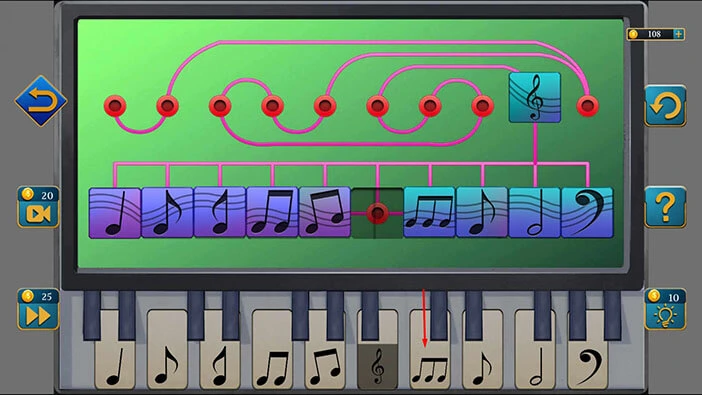
Step 2
Let’s tap on the seventh paper to activate the same symbol in the row above.
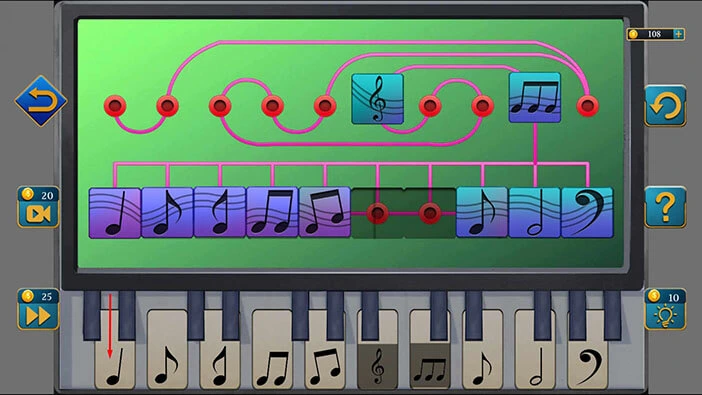
Step 3
Let’s tap on the first paper to activate the same symbol in the row above.
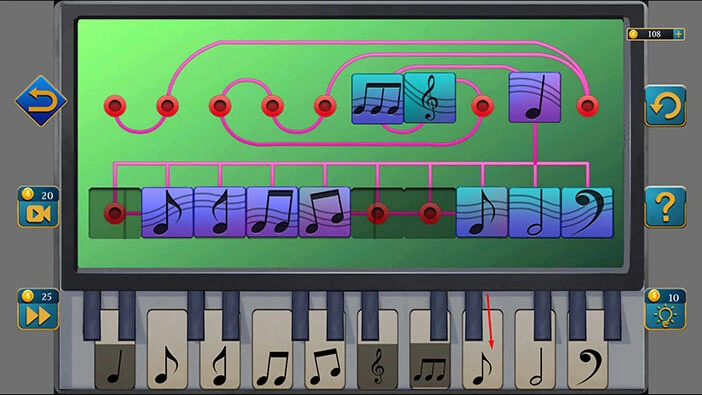
Step 4
Let’s tap on the eighth paper to activate the same symbol in the row above.
Step 5
Let’s tap on the ninth paper to activate the same symbol in the row above.
Step 6
Let’s tap on the tenth paper to activate the same symbol in the row above.
Step 7
Let’s tap on the second paper to activate the same symbol in the row above.
Step 8
Let’s tap on the fourth paper to activate the same symbol in the row above.
Step 9
Let’s tap on the fifth paper to activate the same symbol in the row above.
Step 10
Lastly, let’s tap on the third paper to activate the same symbol in the row above.
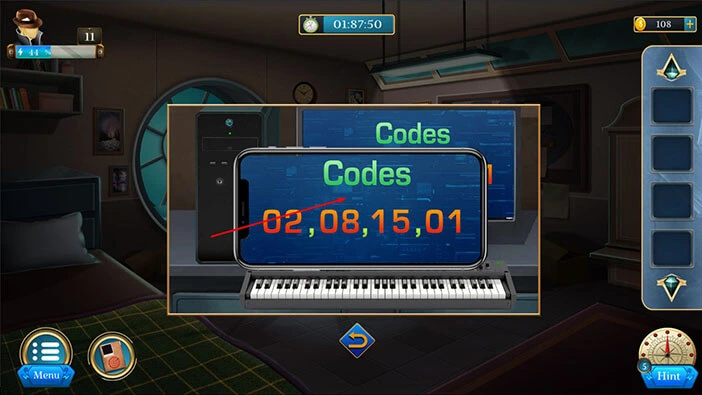
With that, you will unlock the system, and you will see the codes “02, 08, 15, 01”. Our character will take a photo of the screen with his mobile phone. Let’s tap on the “Mobile” to pick it up.
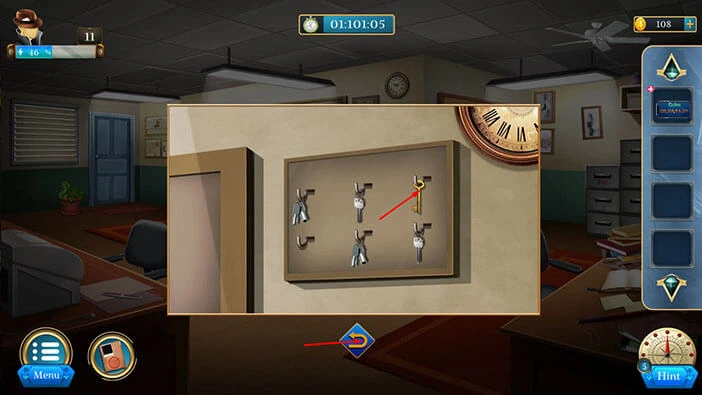
Let’s explore this room. Next, to the clock on the right, you will notice several keys. Let’s tap on them to take a closer look.

Tap on the yellow “Key” to pick it up. After that, tap on the arrow at the bottom to go back.
Next, let’s tap on the cabinet on the right to take a closer look at it.

Select the “Key” from the inventory and use it to unlock the cabinet.
In the cabinet, you will find a “File”. Let’s tap on it to pick it up. After that, tap on the arrow at the bottom to go back.
Next, let’s tap on the notice board on the left to take a closer look at it.
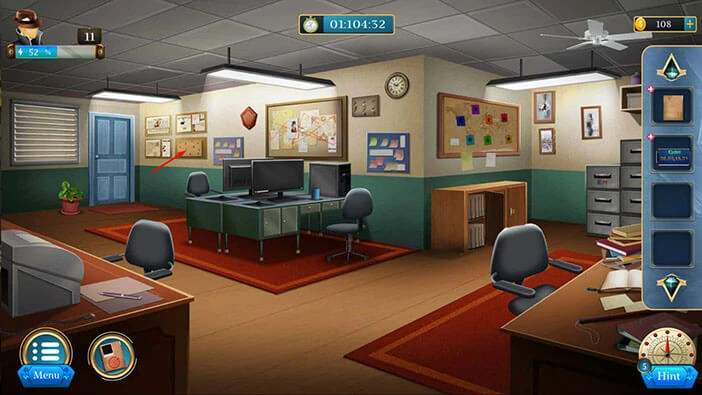
Here, you will discover a “City Layout”. Let’s tap on it to pick it up. After that, tap on the arrow at the bottom to go back.
Select the “File” in your inventory and it will appear in the middle of the screen. After that, tap on the file to open it.
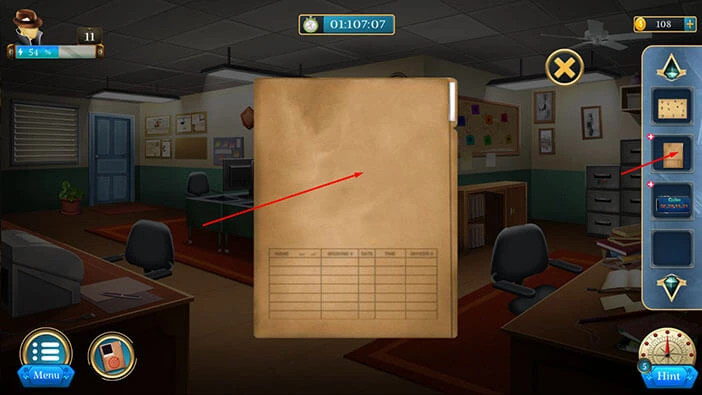
Here, we can see a hint for one of the puzzles that we will encounter later in the walkthrough. We will come back to it a bit later. For now, let’s tap on the arrow at the bottom to go back.

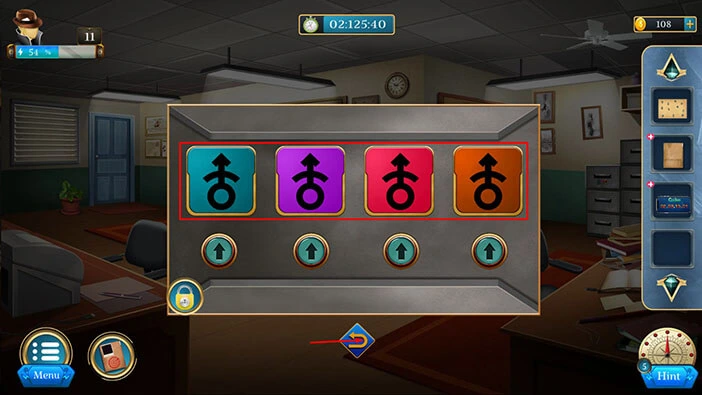
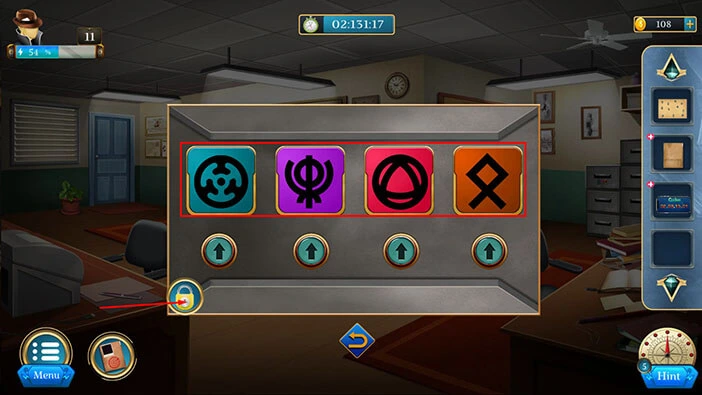
If you take a look at the lockers on the right, you will see several slots of different colors. Let’s tap on this locker to take a closer look at it, and tap again to start the interaction.

We need to discover four symbols in order to unlock the locker. Let’s memorize/write down the color of each slot.
First = Light blue
Second = Purple
Third = Red
Fourth = Orange
Once you’re done, tap on the arrow at the bottom to go back.
Next, let’s take a closer look at the notice board on the wall on the right to take a close look at it.
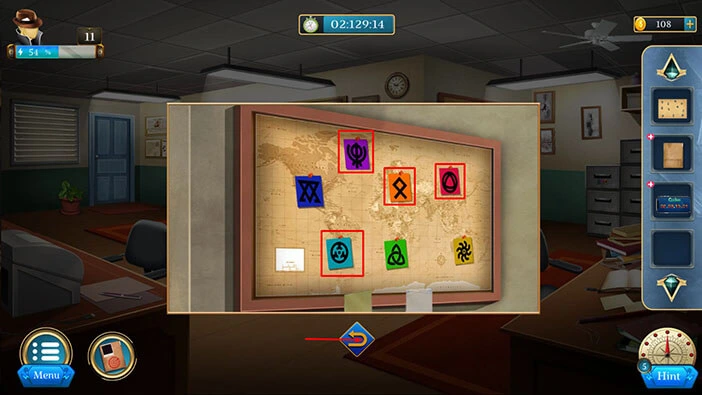
Here, we can see several symbols. Let’s memorize/write down the symbols that match the colors that we saw on the locker.
First, we can see the light blue symbol in the bottom left corner of the board.
Second, we can see the purple symbol at the top of the board.
Third, we can see the red symbol in the top right corner of the board.
Fourth, we can see the orange symbol in the middle of the notice board.
Once you’re done, tap on the arrow at the bottom to go back.
Let’s go back to the locker.

Let’s enter the symbols that we discovered by examining the notice board. Once you’re done, tap on the padlock in the bottom left corner of the puzzle.
With that, you will unlock the drawer. Let’s tap on it to look inside.
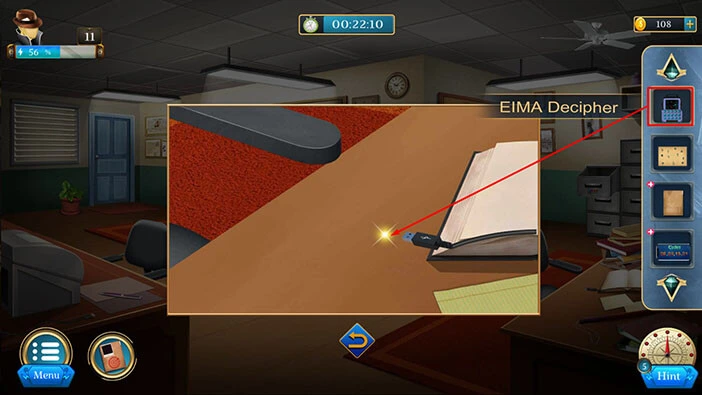
Here, you will find an “EIMA Decipher”. Let’s tap on it to pick it up. After that, tap on the arrow at the bottom to go back.
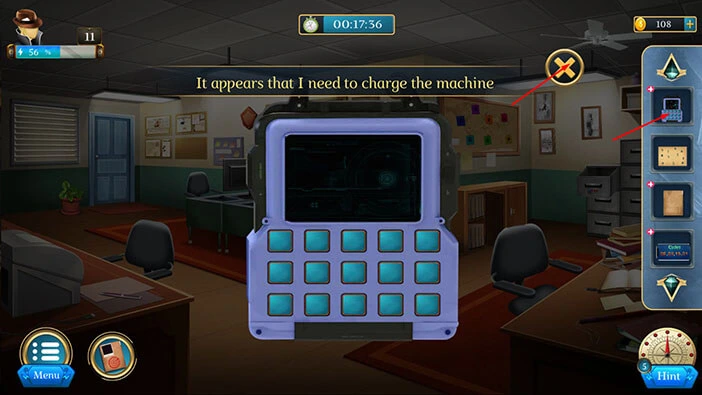
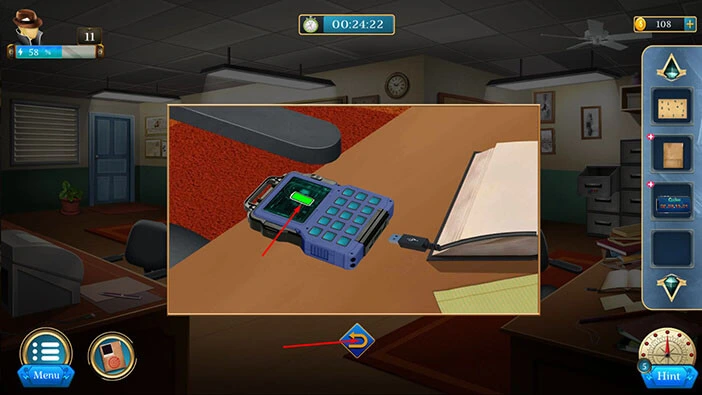
Select the “EIMA Decipher” from the inventory and it will appear in the middle of the screen. Tap on the “EIMA Decipher” to start the interaction. You will discover that the battery is empty. Let’s tap on the “X” button to close this window.
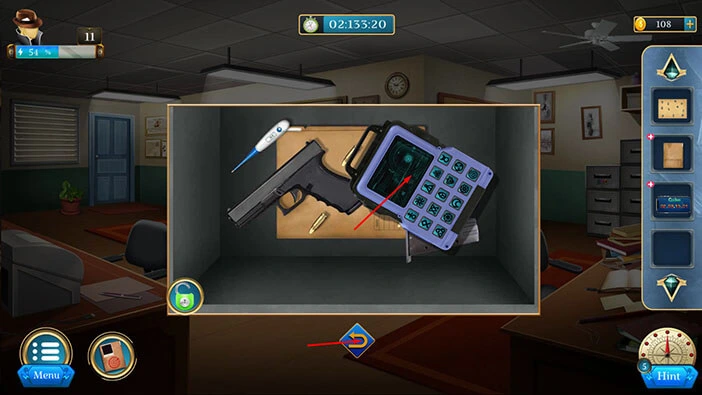
Let’s tap on the desk in the bottom right corner of the screen to take a closer look at it.

Select the “EIMA Decipher” from the inventory and connect it to the power cable.
Once you power up the “EIMA Decipher”, tap on it to pick it up.
After that, tap on the arrow at the bottom to go back.
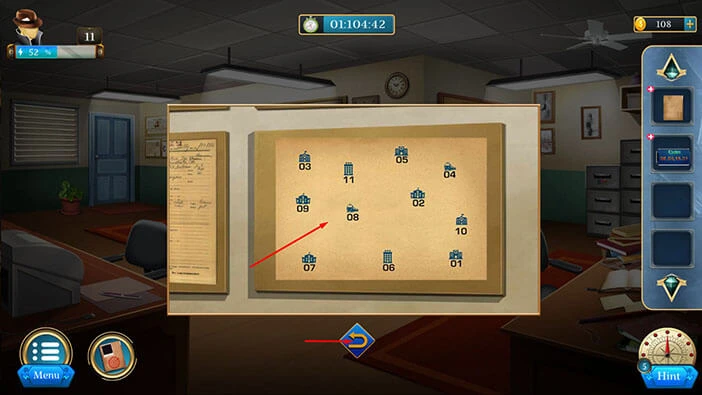
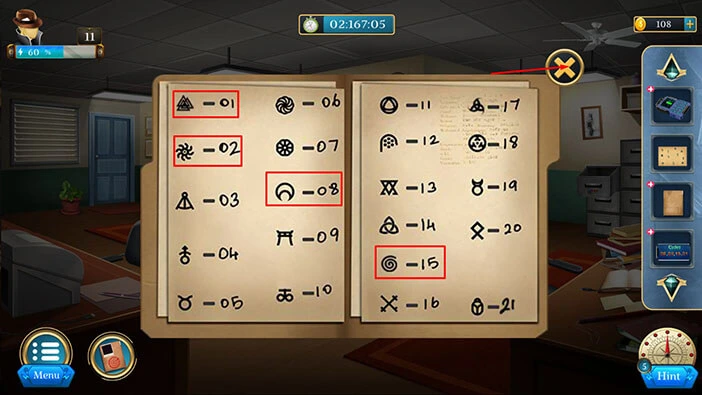
Let’s take another look at the “File” in our inventory. Select it, and it will appear in the middle of the screen.
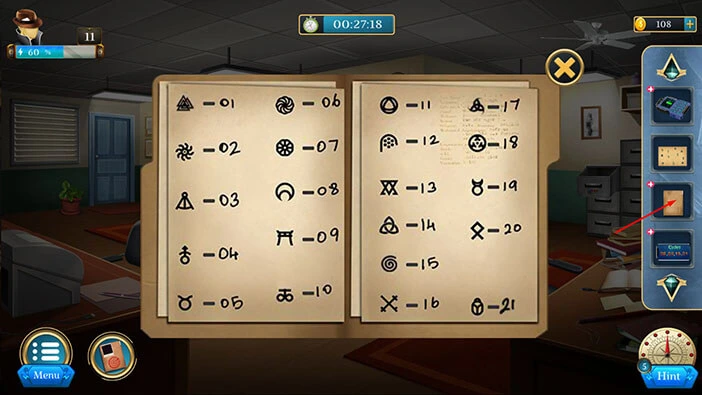
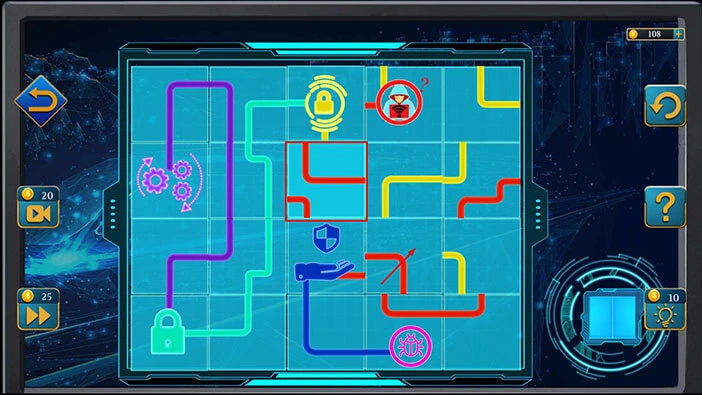
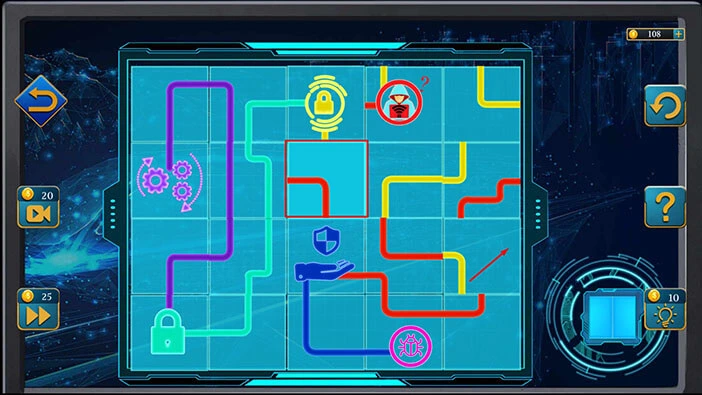
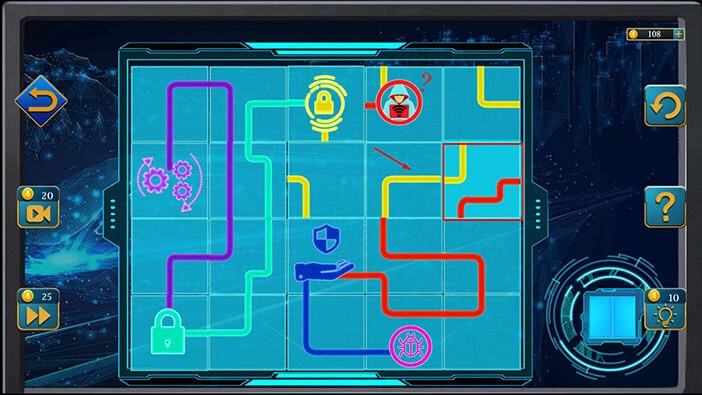
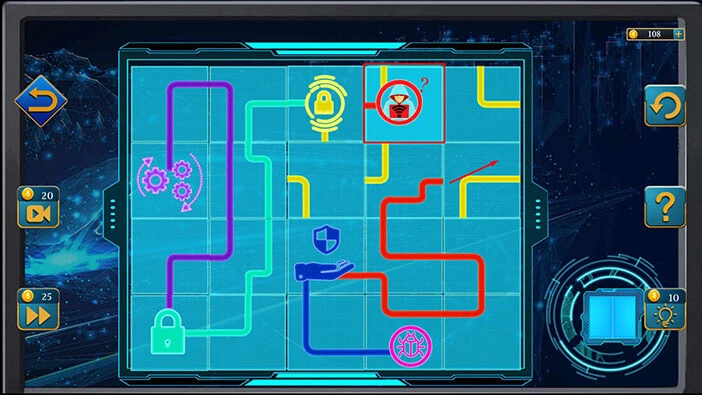
In the file, we can see a lot of symbols, and next to each symbol, we can see a number. Previously, we took a photo of the codes (take a look at the mobile in your inventory if you need a reminder). There, we had four numbers “02, 08, 15, 01”. Let’s find these symbols and memorize/write them down (take a look at the image below).
Once you’re done, tap on the “X” button to close this window.
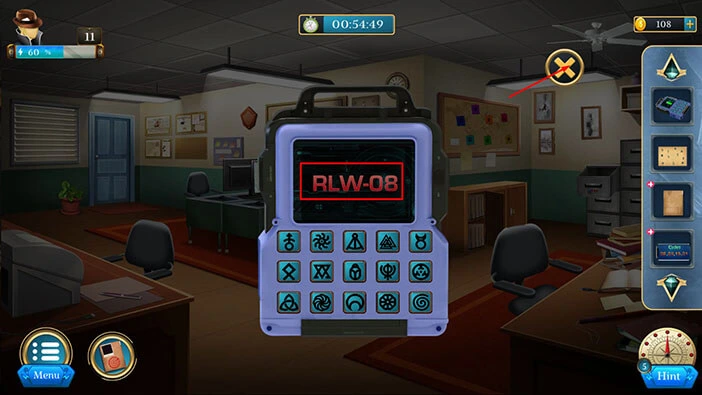
Select the “EIMA Decipher” from the inventory and it will appear in the middle of the screen. Let’s enter the symbols that we discovered.
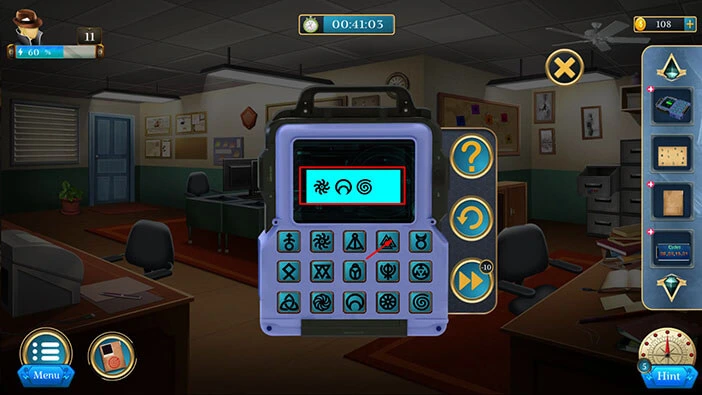
With that, you will unlock the “EIMA Decipher” and you will see the location “RLW-08”. Let’s memorize/write down this location. After that, tap on the “X” button to close this window.
Next, let’s tap on the PC on the right to take a closer look at it.
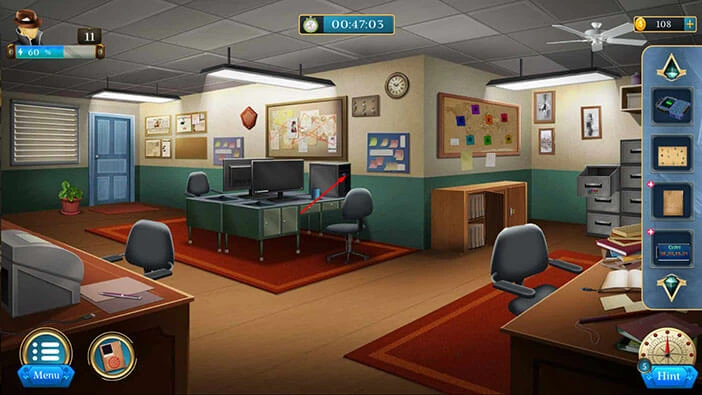
Tap on the power button to turn on the PC.
Next, let’s tap on the last icon on the screen to start the interaction.
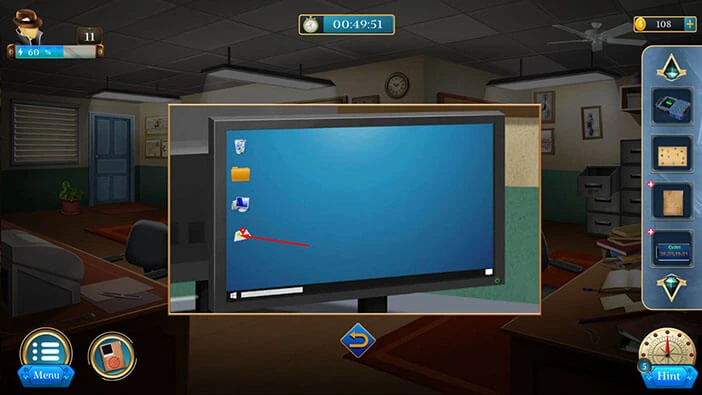
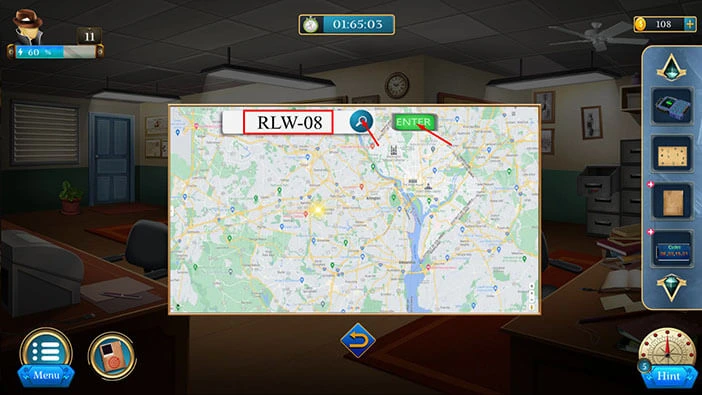
Next, we should search for the “RLW-08” location. Let’s tap on the search button, several times until we find this location. After that, tap on the “Enter” button to confirm.
Select the “City Layout” from the inventory and drag it over the screen.
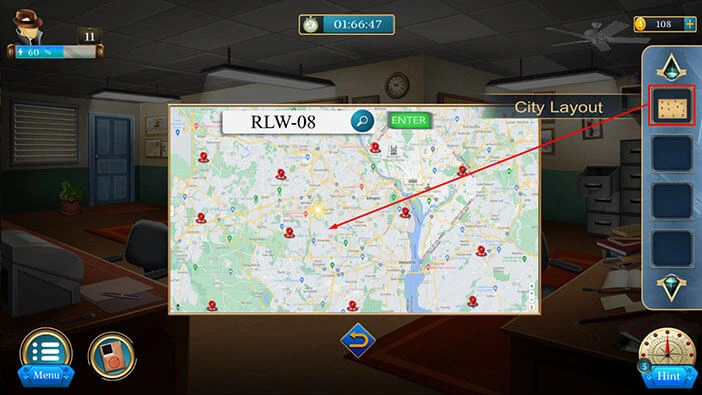
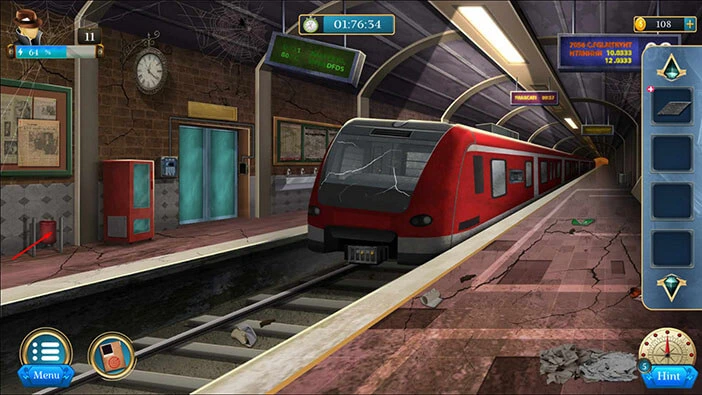
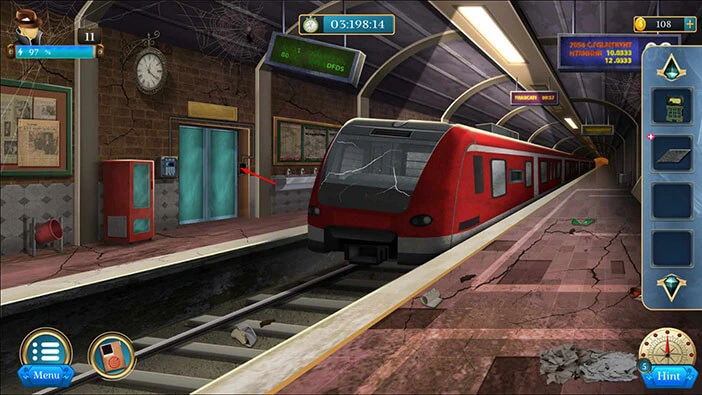
With that, you will discover the location of the station. When you arrive at the station, you will notice that someone is in trouble, locked behind a nearby door. So, our next task is to open that door.
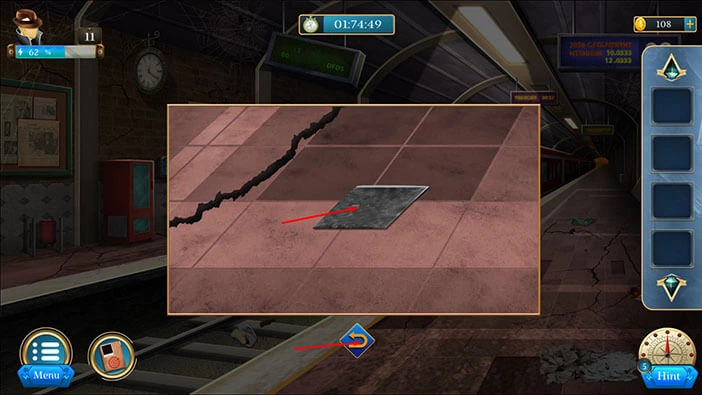
You will notice a metal board on the right side of the floor. Let’s tap on it to pick it up.
Here, you will find a “Cover”. Let’s tap on it to pick it up. After that, tap on the arrow at the bottom to go back.
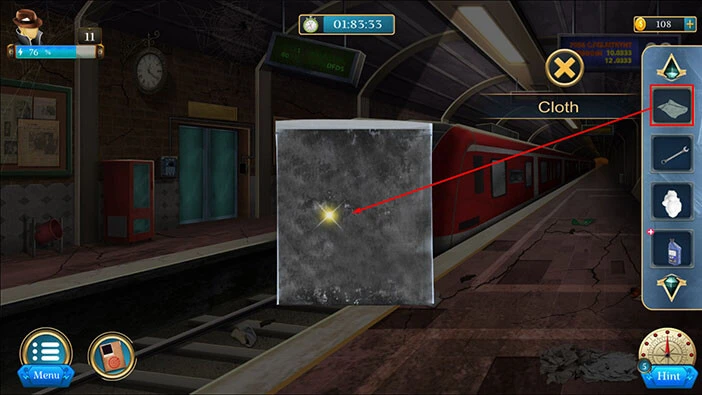
Next, let’s tap on the trash can on the left, and tap again to look inside.
In the trash can, you will find a “Cloth” a “Rust Remover” and a “Cotton”. Let’s tap on these items to pick them up. After that, tap on the arrow at the bottom to go back.

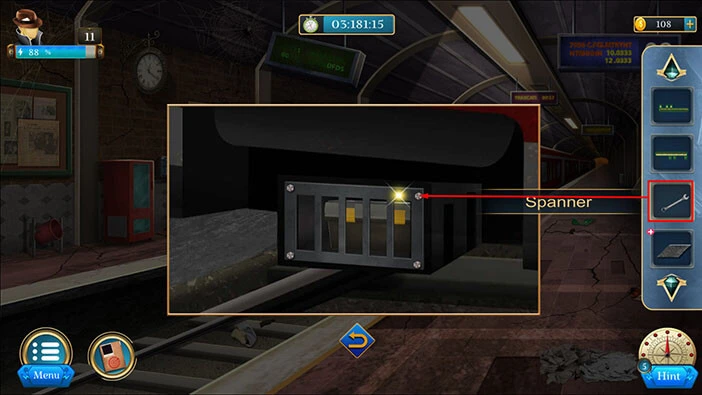
Next, let’s tap on the sink, located on the wall on the left, to take a closer look at it, and tap again to start the interaction.

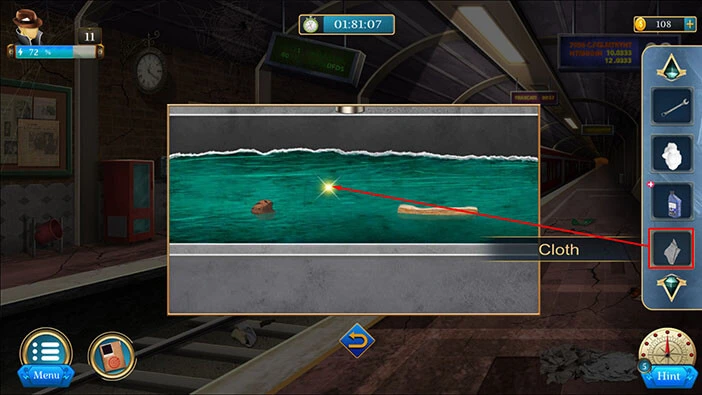
In the sink, you will find a “Spanner”. Let’s tap on it to pick it up.
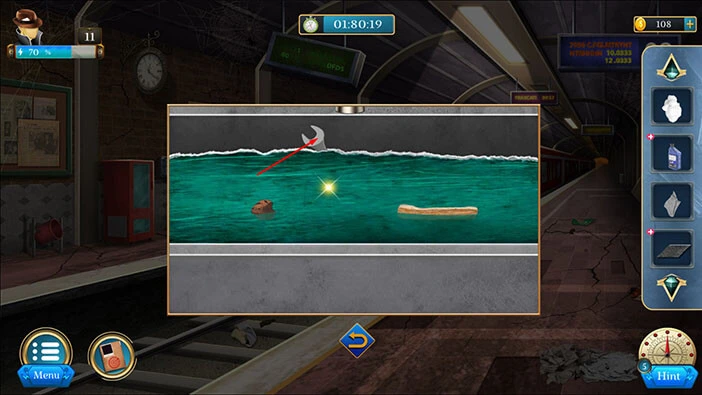
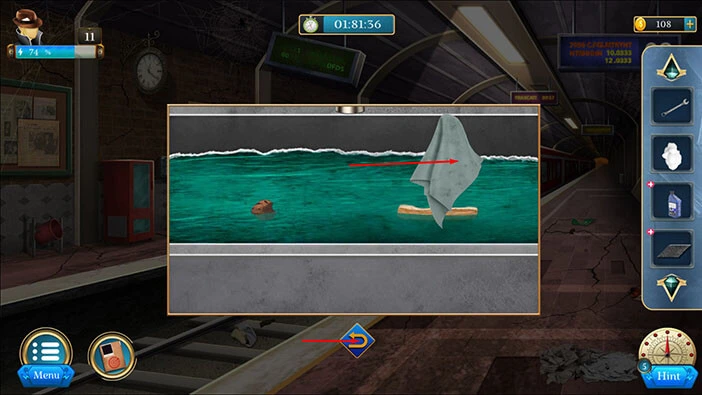
Next, select the “Cloth” from the inventory and soak it in the water.
Tap on the “Cloth” to pick it up. After that, tap on the arrow at the bottom to go back.
Select the “Cover” from the inventory and it will appear in the middle of the screen. After that, select the “Cloth” from the inventory and use it to clean the “Cover”. After that, tap on the “X” button to close this window.
Next, select the “Rust Remover” from the inventory and it will appear in the middle of the screen. After that, select the “Cotton” from the inventory and place it next to the rust remover.
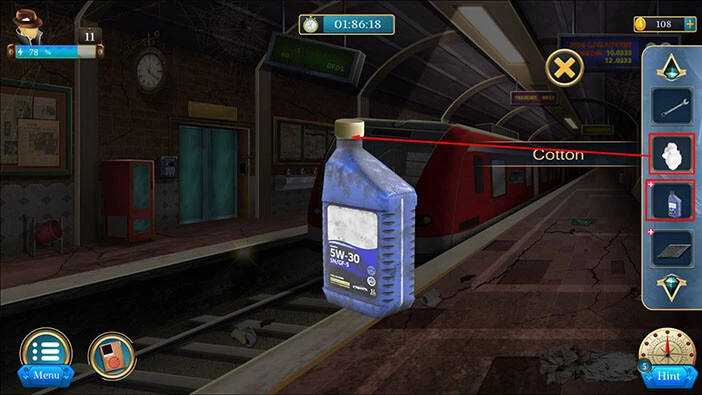
Next, tap on the “Rust Remover” to open it.
Our character will apply some rust remover to the cotton. So, let’s tap on the “Cotton” to pick it up. After that, tap on the arrow at the bottom to go back.
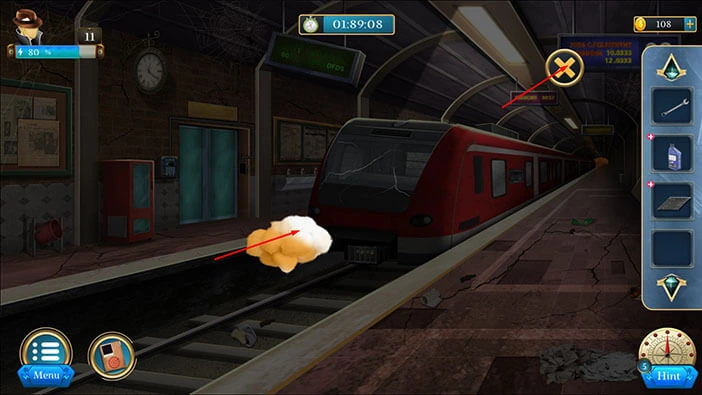
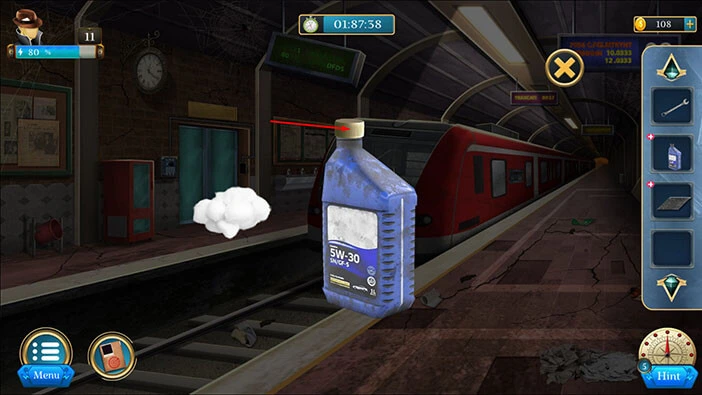
Next, let’s tap on the board on the train to take a closer look at it, and tap again to start the interaction.

Select the “Cotton” from the inventory and use it to remove the rust.
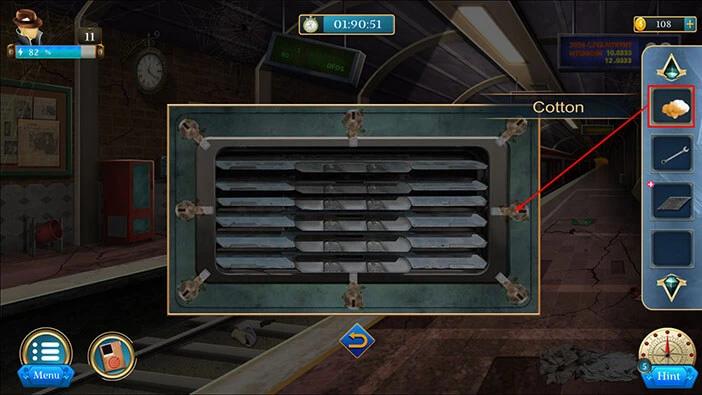
Next, tap on the eight bars to unlock the cover plate.

Inside, you will find two “Pins”. Let’s tap on them to pick them up.
After that, tap on the arrow at the bottom to go back.
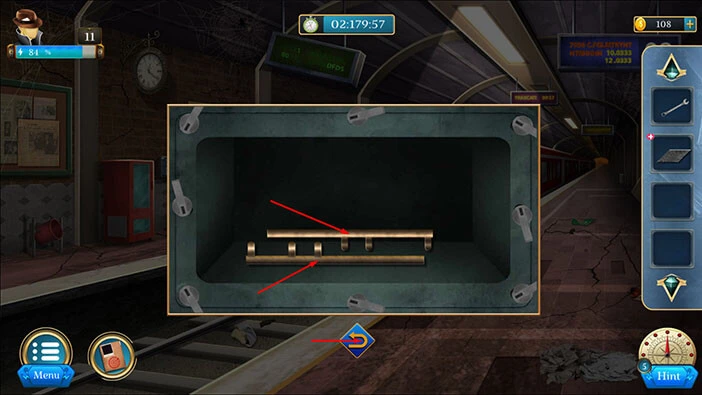
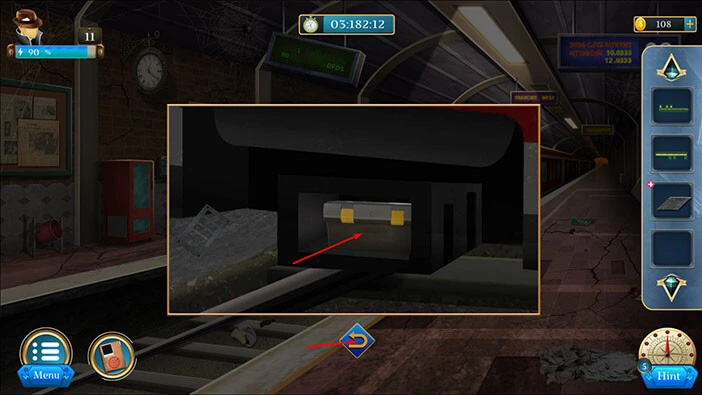
Next, let’s tap on the bars, located under the front of the train, to take a closer look at it.

Select the “Spanner” from the inventory and use it to remove the screws.
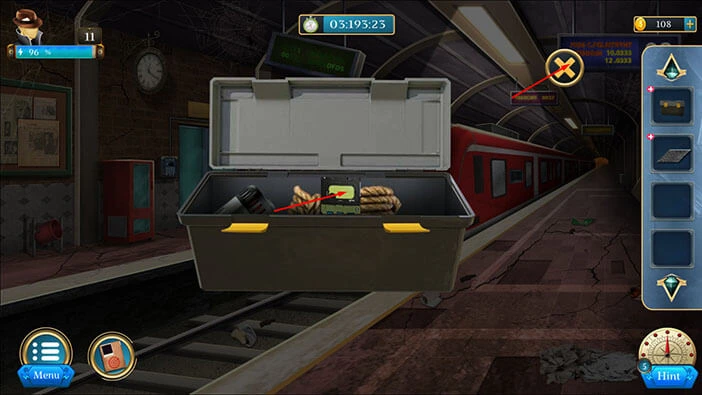
Inside, you will find a “Box”. Let’s tap on it to pick it up. After that, tap on the arrow at the bottom to go back.
Select the “Box” from the inventory and it will appear in the middle of the screen. After that, tap on the box to start the interaction.
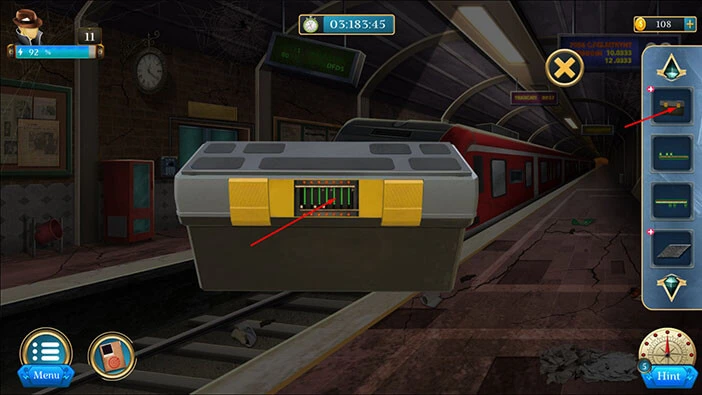
Here, we have another puzzle. Let’s select the two “Pins” from the inventory and insert them into the empty slots.
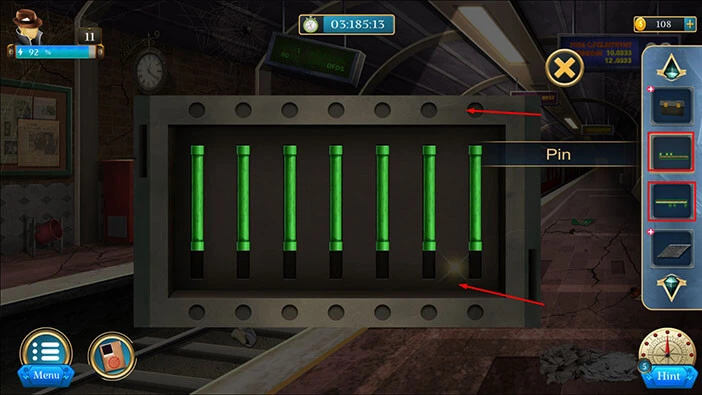
Our next task is to unlock the box. We will do this puzzle in several steps. Let’s begin.
Step 1
Pull down all green bars.
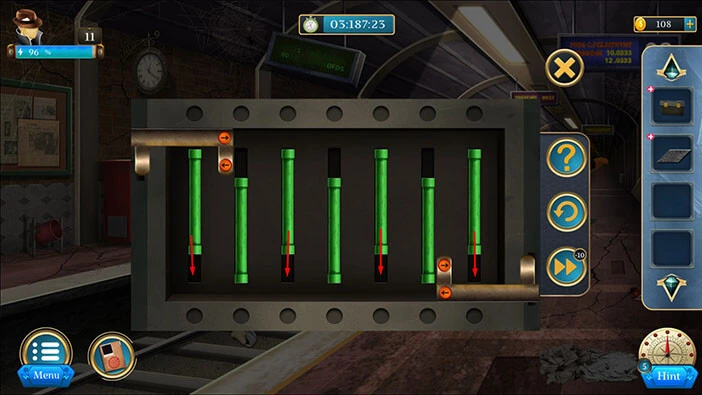
Step 2
Next, let’s tap on the right arrow at the top “Pin” and move the pin all the way to the right.
Step 3
Next, let’s move all green bars to the pin at the top.
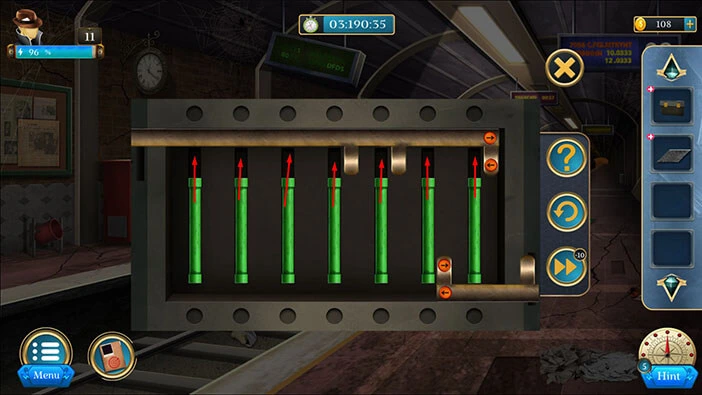
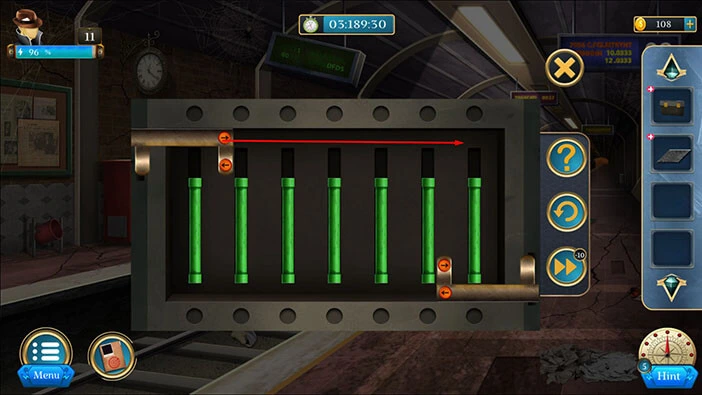
Step 4
Next, let’s tap on the left arrow at the down “Pin” and move the pin all the way to the left.
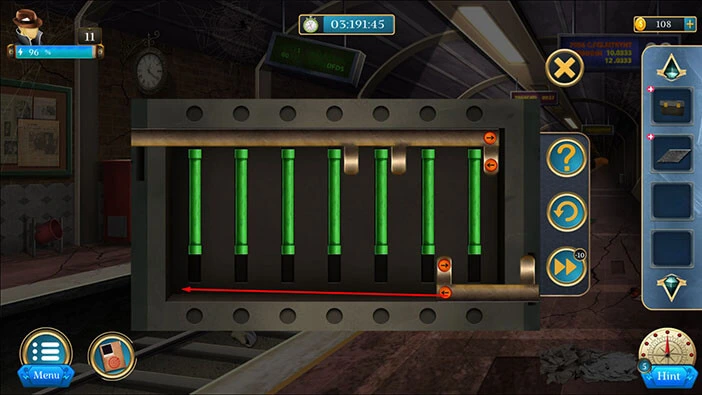
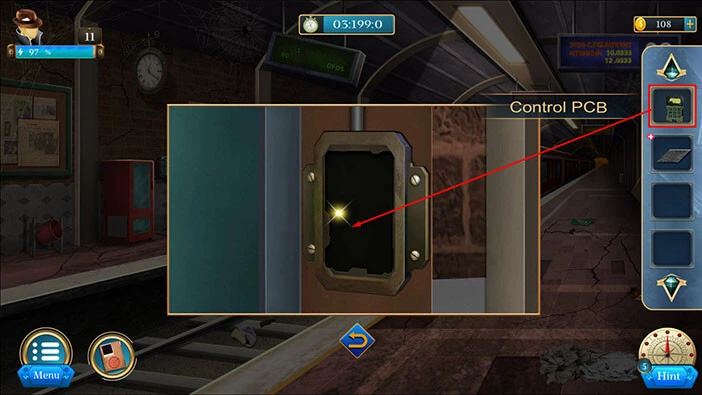
In the box, you will find a “Control PCB”. Let’s tap on it to pick it up. After that, tap on the “X” button to close this window.
Next, select the “Cover” from the inventory, and it will appear in the middle of the screen. Here, you will see the password “H2U9”. Let’s memorize/write down this number because we will need it for the next puzzle.
After that, tap on the “X” button to close this window.

Next, to the door on the left, you will notice an empty slot. Let’s tap on it to take a closer look.
Select the “Control PCB” from the inventory and insert it into the empty slot. After that, tap on the “Control PCB” to start the interaction.
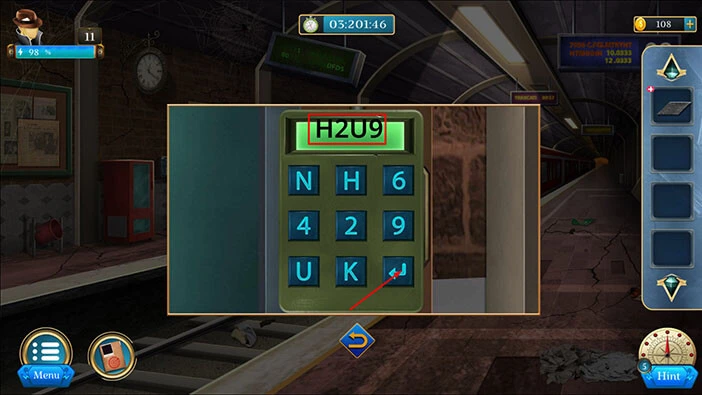
Let’s enter the password “H2U9” that we discovered on the cover. Once you’re done, tap on “Enter” to confirm.
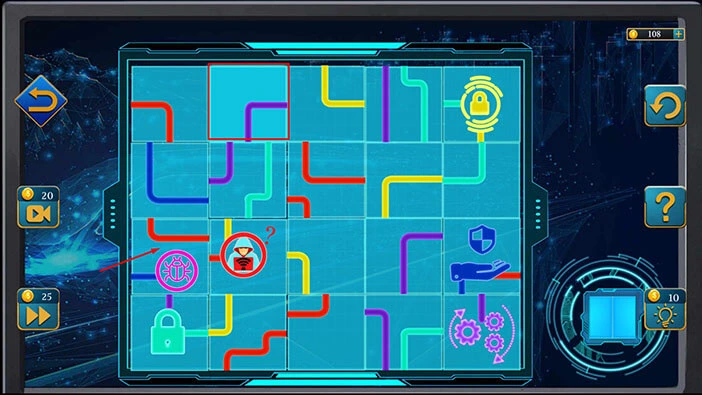
With that, you will activate the keypad on the left. Let’s tap on it to take a closer look, and tap again to start the interaction.

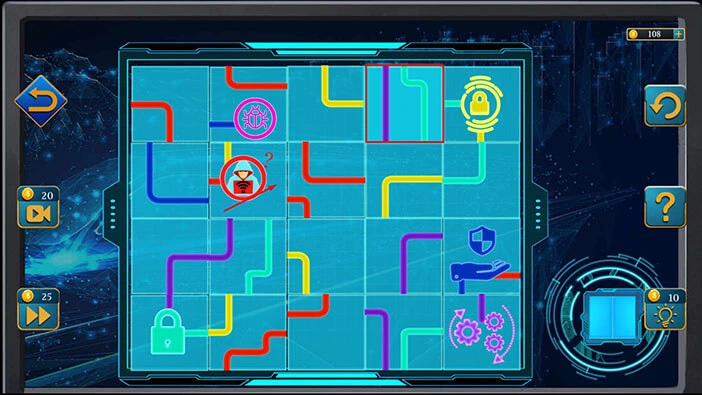
Here, we have another puzzle and our task is to assemble it. We will do that in several steps. Let’s begin.
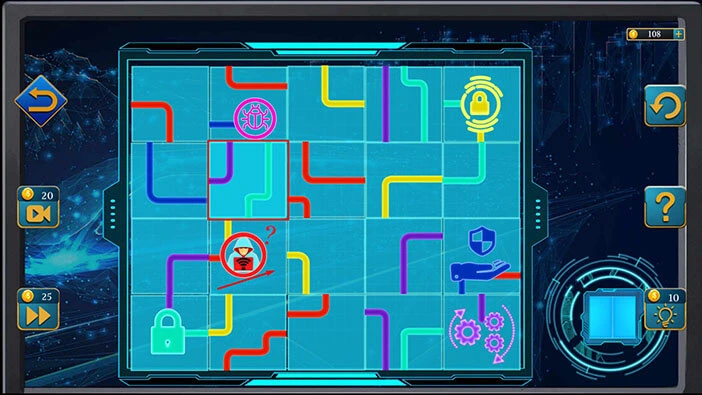
Step 1
Select the third puzzle piece in the fourth row, then tap on the first puzzle piece in the fourth row to swap their positions.

Step 2
Select the second puzzle piece in the first row, then tap on the first puzzle piece in the third row to swap their positions.
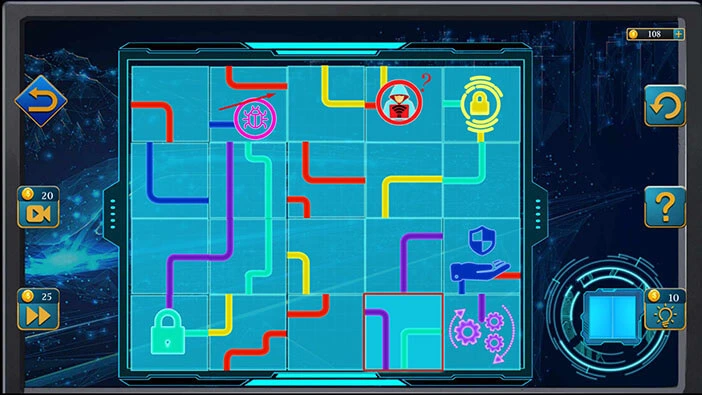
Step 3
Select the second puzzle piece in the second row, then tap on the second puzzle piece in the third row to swap their positions.
Step 4
Select the fourth puzzle piece in the first row, then tap on the second puzzle piece in the second row to swap their positions.
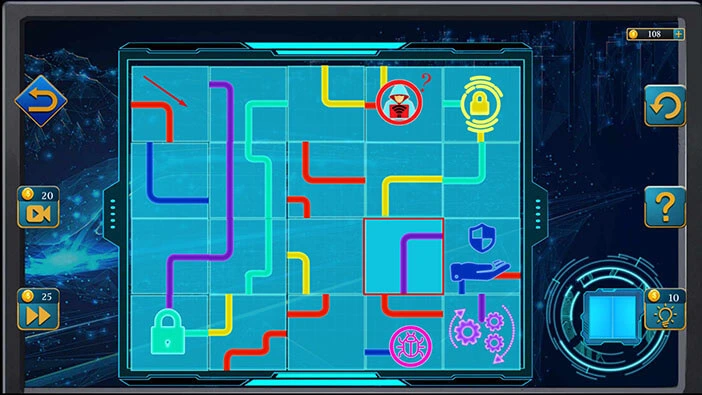
Step 5
Select the fourth puzzle piece in the fourth row, then tap on the second puzzle piece in the first row to swap their positions.
Step 6
Select the fourth puzzle piece in the third row, then tap on the first puzzle piece in the first row to swap their positions.
Step 7
Select the fifth puzzle piece in the fourth row, then tap on the first puzzle piece in the second row to swap their positions.
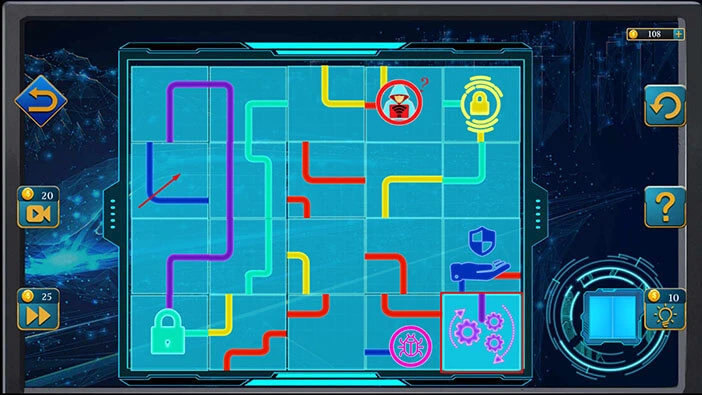
Step 8
Select the fifth puzzle piece in the second row, then tap on the second puzzle piece in the fourth row to swap their positions.
Step 9
Select the fifth puzzle piece in the first row, then tap on the third puzzle piece in the first row to swap their positions.
Step 10
Select the fifth puzzle piece in the fourth row, then tap on the third puzzle piece in the fourth row to swap their positions.
Step 11
Select the fifth puzzle piece in the third row, then tap on the third puzzle piece in the third row to swap their positions.
Step 12
Select the third puzzle piece in the second row, then tap on the fourth puzzle piece in the third row to swap their positions.
Step 13
Select the third puzzle piece in the second row, then tap on the fifth puzzle piece in the third row to swap their positions.
Step 14
Select the fifth puzzle piece in the second row, then tap on the fourth puzzle piece in the second row to swap their positions.
Step 15
Select the fourth puzzle piece in the first row, then tap on the fifth puzzle piece in the second row to swap their positions.
Step 16
Lastly, select the fifth puzzle piece in the first row, then tap on the third puzzle piece in the second row to swap their positions. With that, you will solve the puzzle, and you will complete this level.
With that, we have reached the end of the eleventh level. If you want to see the walkthrough for the twelfth level, tap on the next part button.
Thank you for reading.