Room Escape: Detective Phantom | Level 4
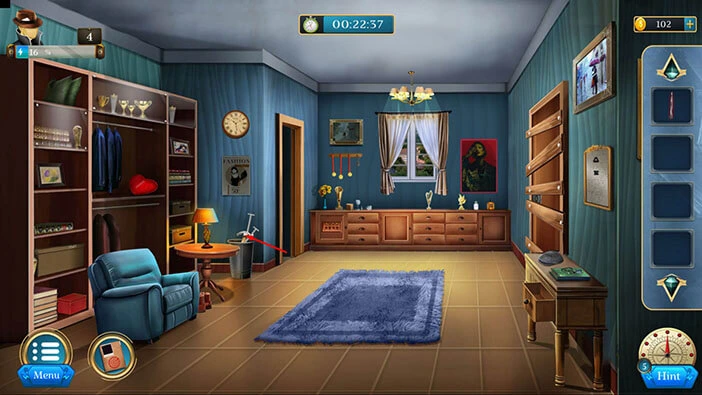
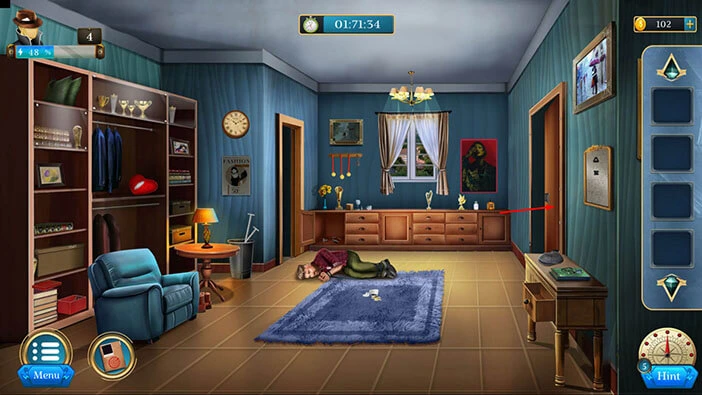
Hello everyone and welcome to the walkthrough for the fourth level of “Room Escape: Detective Phantom”. In the fourth level, our task is to interrogate the witness and search his home for clues.
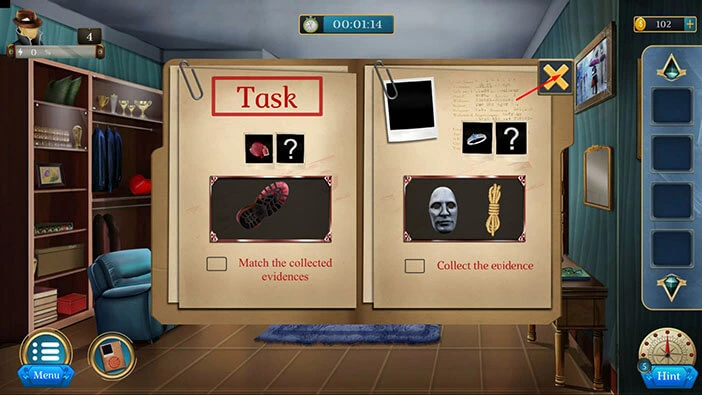
Our objectives are to “Match the collected evidence” and “Collect the evidence”. Tap on the “X” button to go back.
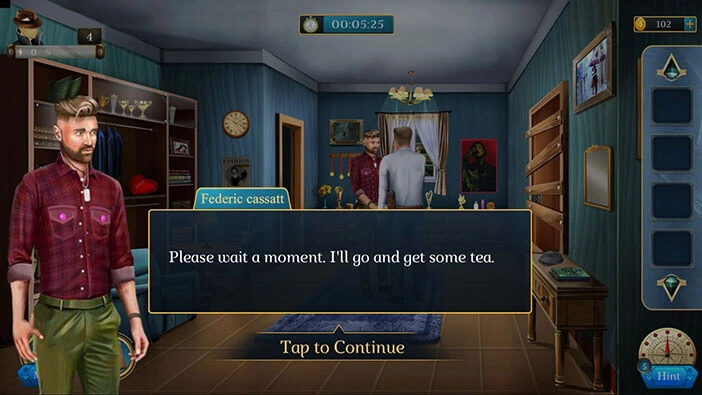
In the next scene, our character begins the conversation with the witness Frederick. But, the witness claims that the victim didn’t have any enemies. So, our character decided to ask for some tea. The witness will leave, so we can search this room while he’s gone.
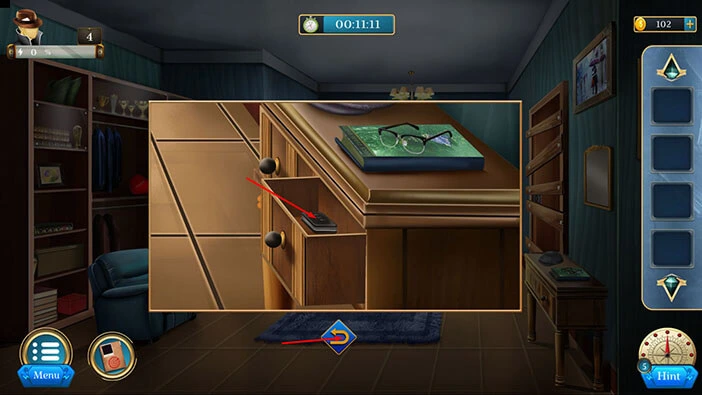
Let’s explore. Tap on the cabinet on the right to take a closer look at it, and tap again to open the drawer.

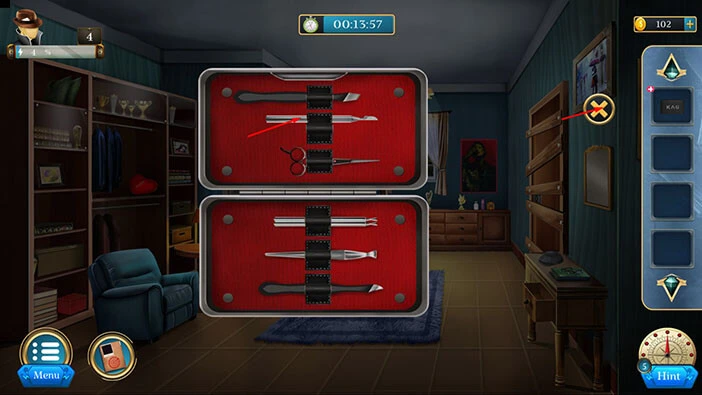
In the drawer, you will find “Vanity box”. Tap on it to pick it up.
After that, tap on the arrow at the bottom to go back.
Select the “Vanity box” from the inventory and it will appear in the middle of the screen, and tap on it to open it.
In the box, you will find a “Knife”. Tap on it to pick it up. After that, tap on the “X” button to close the window.
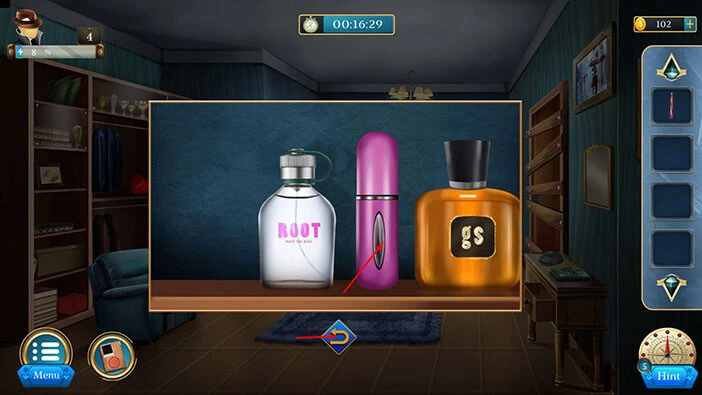
If you take a look at the top right corner of the room, you will notice three bottles. Let’s tap on them to take a closer look.

Here, you will find “Chemical perfume”. Tap on it to pick it up. After that, tap on the arrow at the bottom to go back.
Next, on the wall on the right, you will notice a mirror. Let’s tap on it to take a closer look.

Select the “Chemical perfume” from the inventory and use it on the mirror.
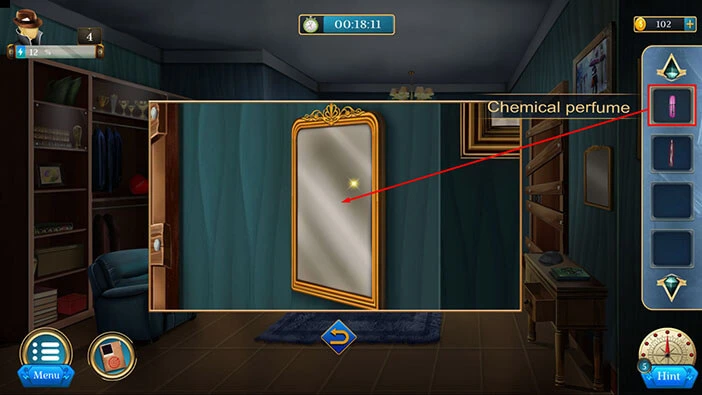
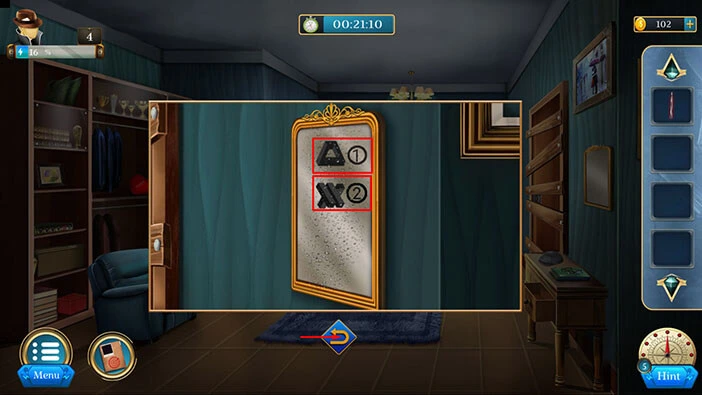
Our character will spray the “Chemical perfume” on the mirror. After that, two symbols and two numbers will appear. Let’s memorize/write down these numbers because we will need this information later in the walkthrough.
Triangle = 1
XX= 2
Once you’re done, tap on the arrow at the bottom to go back.
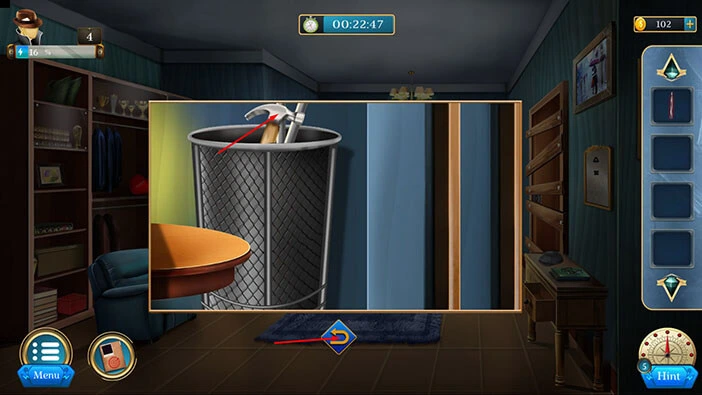
Next, let’s tap on the basket on the left side of the room.
Here, you will find a “Hammer”. Tap on it to pick it up. After that, tap on the arrow at the bottom to go back.
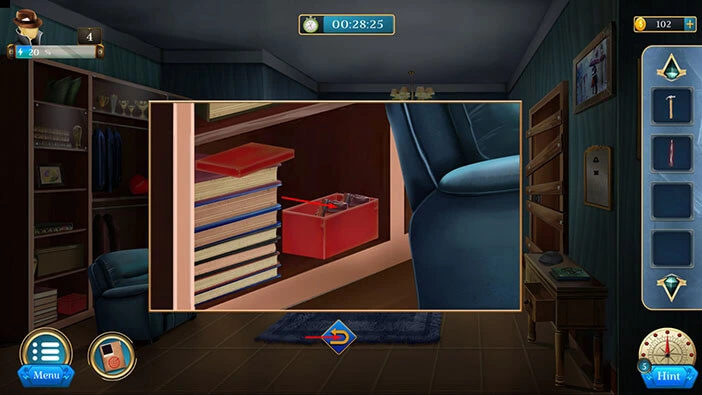
Next, let’s tap on the red box, located at the bottom on the shelf on the left, to take a closer look at it. After that, tap on the box to open it.

In the box, you will find a “Shoe”. Tap on it to pick it up. Also, our character will confirm his suspicion, because there are traces of nail polish on these shoes. So, our witness is now a suspect.
Tap on the arrow at the bottom to go back.
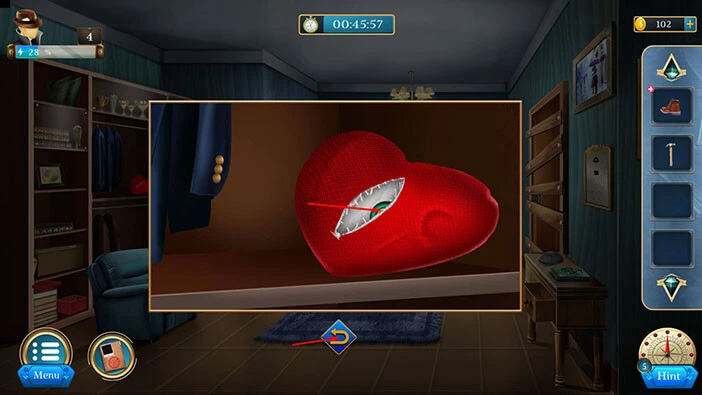
Next, on the shelf on the right, you will notice a large, red pillow shaped like a heart. Let’s tap on it to take a closer look.

Select the “Knife” from the inventory and use it to cut open the heart.
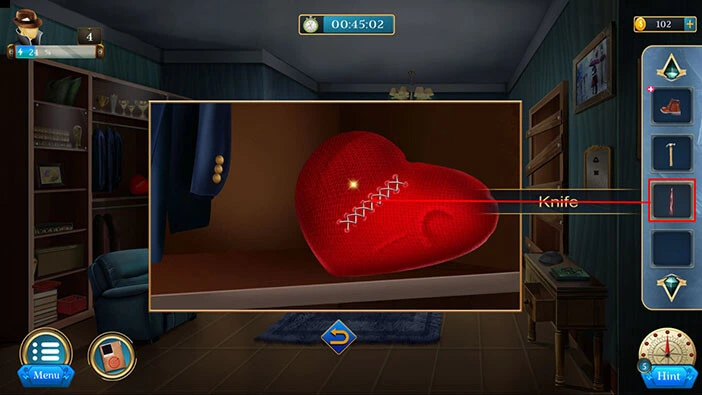
In the heart, you will find a “Button”. Tap on it to pick it up. After that, tap on the arrow at the bottom to go back.
Next, let’s tap on the “Shoe” in our inventory, and it will appear in the middle of the screen. Tap on the shoe again to examine it.
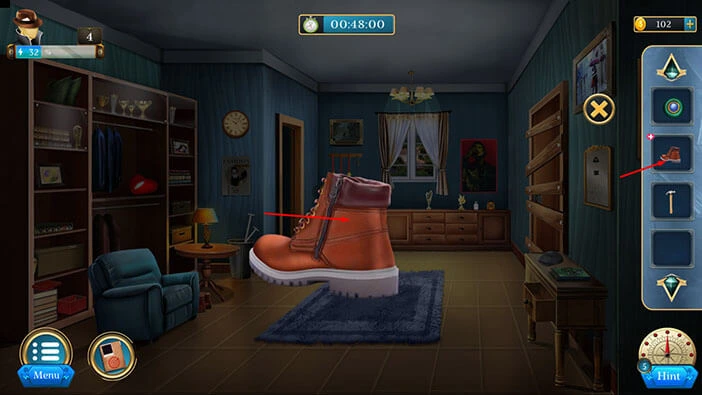
Well, we found traces of nail polish on the shoe, so we now have a confirmation. The witness is now officially our primary suspect.
Here, we can also see two symbols and two numbers. Let’s memorize/write down this information because we will need it for the next puzzle.
Rhombus with vertical line = 3
Cube = 4
Once you’re done, tap on the “X” button to close this window.

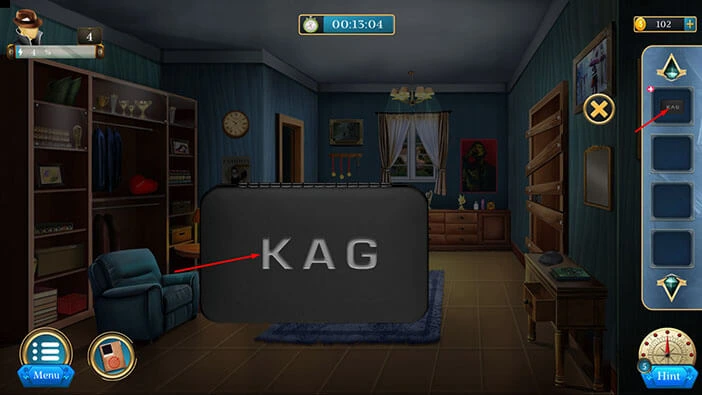
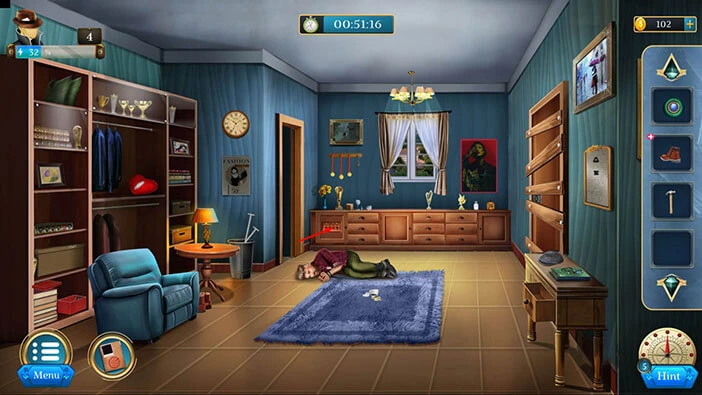
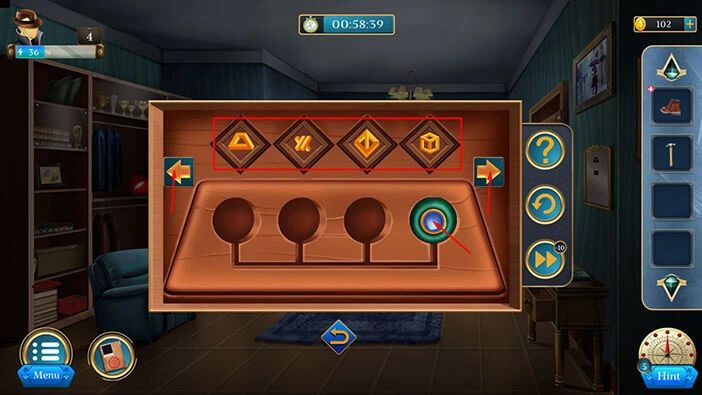
Our character will automatically restrain the suspect. Let’s continue. In the bottom left corner of the screen you will notice a strange machine. Let’s tap on it to take a closer look.
Select the “Button” from the inventory and insert it into the empty slot. With that, you will reactivate the machine.
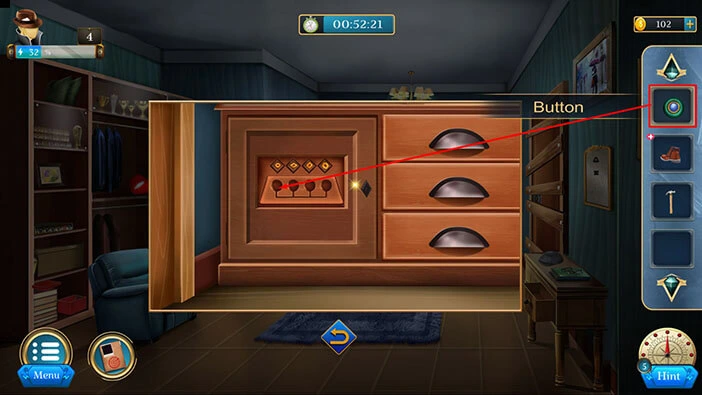
Here, we can see four slots with symbols. Our task is to set the correct symbols. We already discovered the correct symbols by examining the mirror and the shoe. So, let’s enter the following symbols, starting from left to right
First = Triangle (1)
Second = XX (2)
Third = Rhombus with a vertical line (3)
Fourth = Cube (4)
NOTE: Tap on the button to change the symbol in the slot. Tap on the Left/Right
Arrow to go to the next/previous slot.
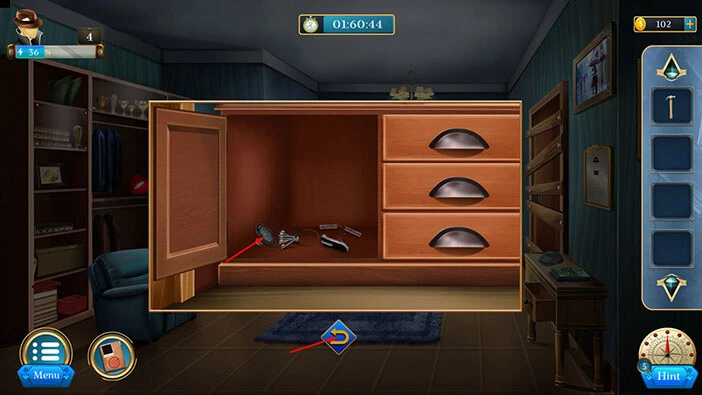
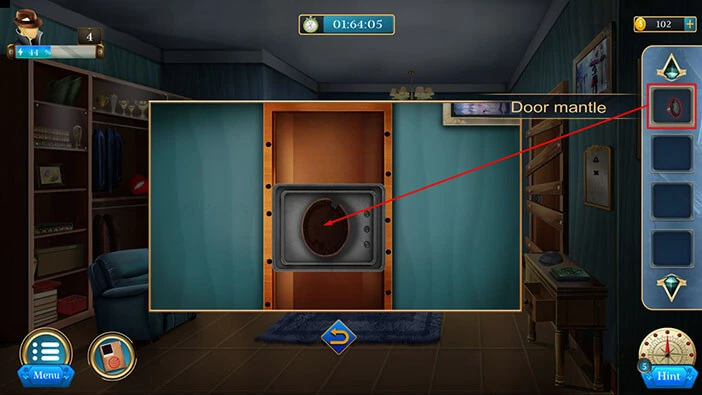
In the cabinet, you will find a “Door mantle”. Tap on it to pick it up.
After that, tap on the arrow at the bottom to go back.
Next, let’s tap on the door on the right to take a closer look at it.
Select the “Hammer” from the inventory and use it to remove the planks.
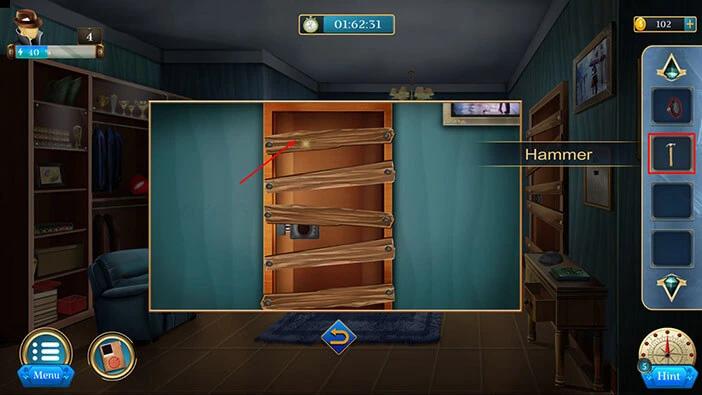
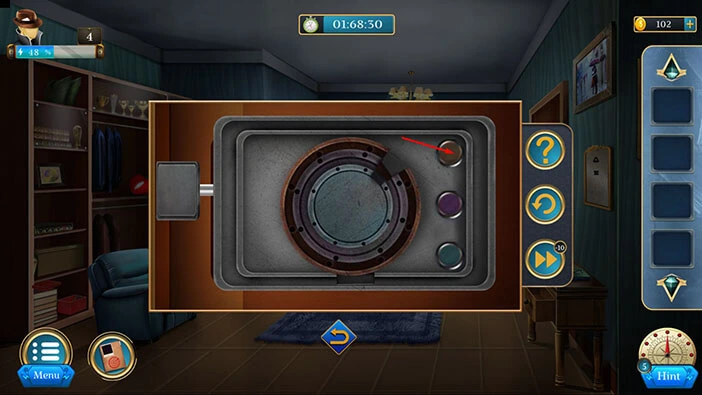
Next, select the “Button” from the inventory and insert it into the empty slot. After that, tap on the lock to start the interaction.
Here, we can see three rings, and we can also see a hole in each ring. Our task is to rotate the rings and align the hole on each ring with the hole at the bottom of the lock.
We will do this puzzle in several steps. Let’s begin.
Step 1
Tap three times on the top button to rotate the outer ring, and you will align it with the hole at the bottom of the lock.
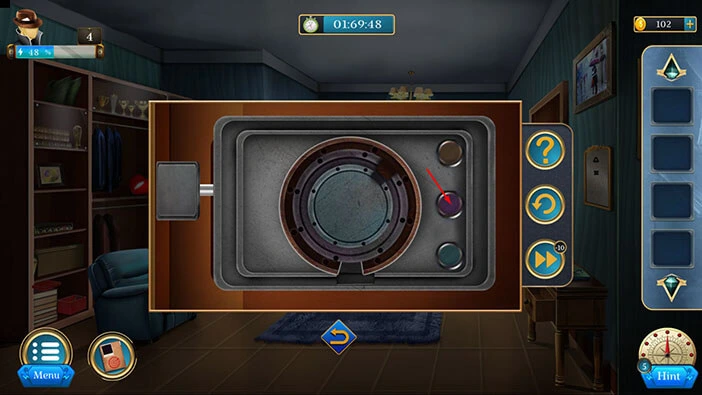
Step 2
Tap three times on the middle button to rotate the middle ring, and you will align it with the hole at the bottom of the lock.
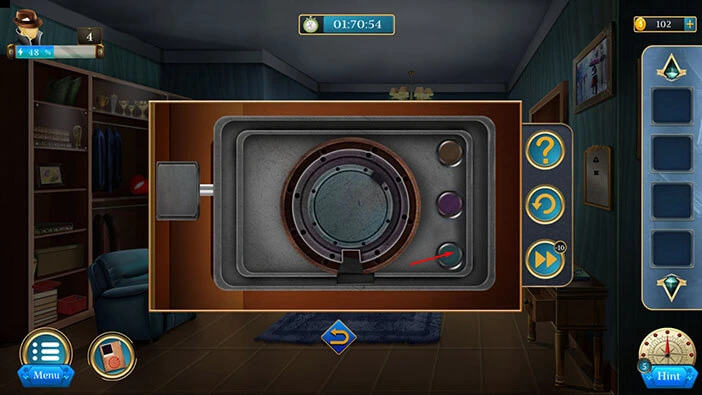
Step 3
Lastly, three times on the button at the bottom to rotate the inner ring, and you will align it with the hole at the bottom of the lock. With that, you will unlock the door.
Let’s tap on the door on the right to proceed to the next room.
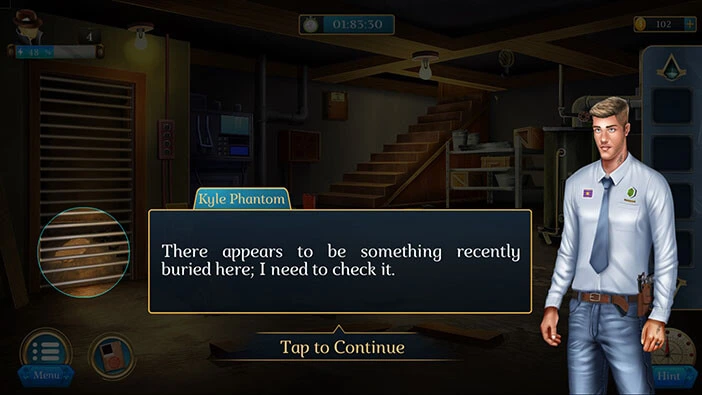
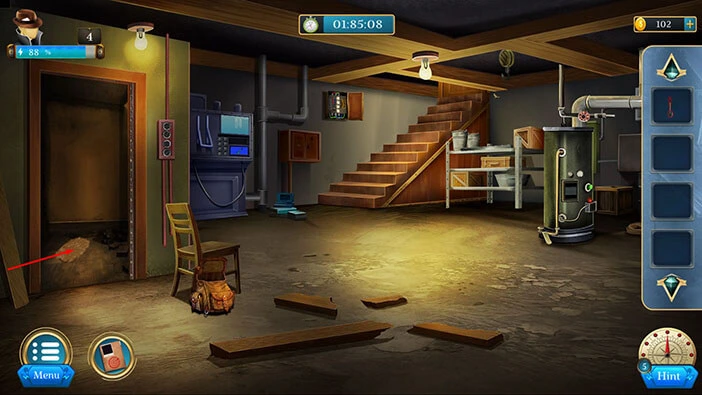
Our character suspects that something might be buried in this room, so let’s investigate.
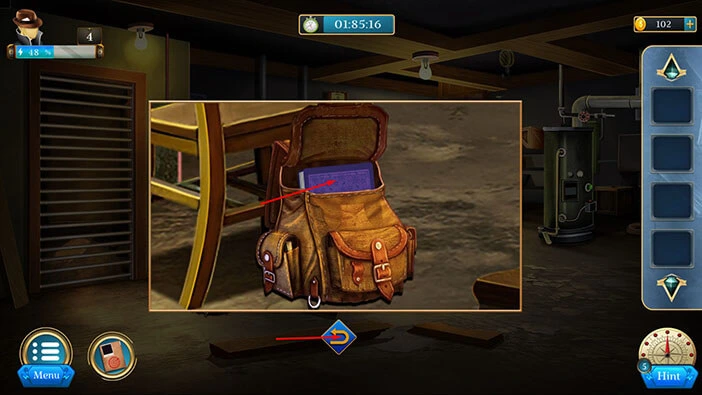
On the left, you will notice a bag. Tap on it to take a closer look and tap again to open the bag.
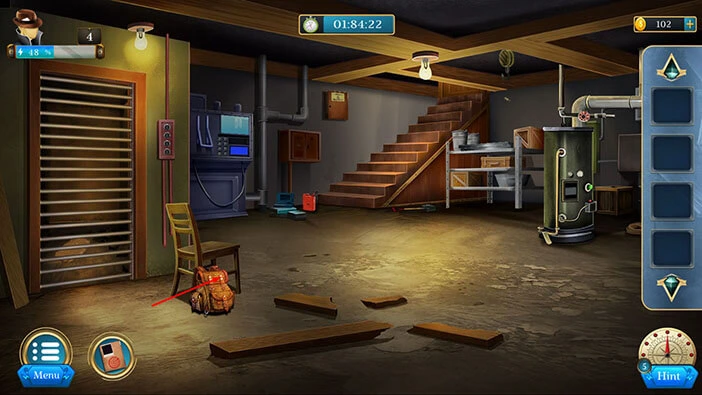
In the bag, you will find a “CNC Book”. Tap on it to pick it up. After that, tap on the arrow at the bottom to go back.
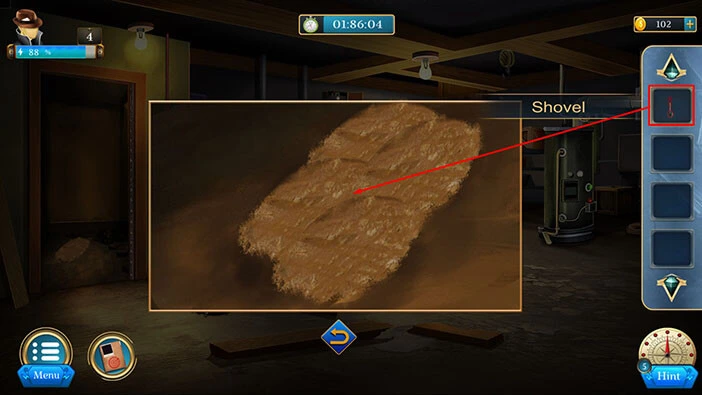
Next to the stairs on the left, you will notice a “Shovel”. Tap on it to take a closer look, and tap again to pick it up.
After that, tap on the arrow at the bottom to go back.
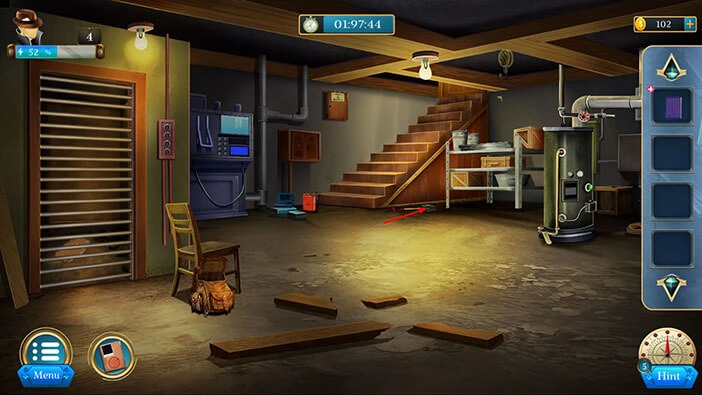
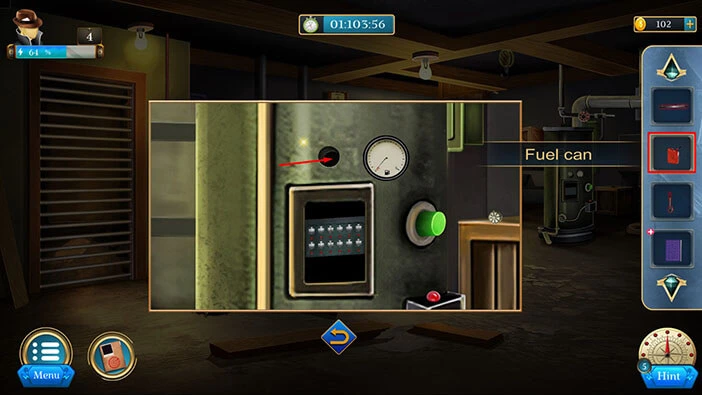
If you look at the bottom of the stairs, you will notice a “Fuel Can”. Tap on it to take a closer look, and tap again to pick it up.
After that, tap on the arrow at the bottom to go back.
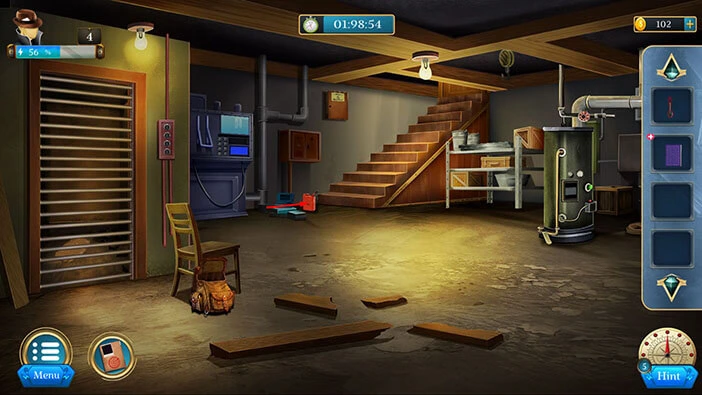
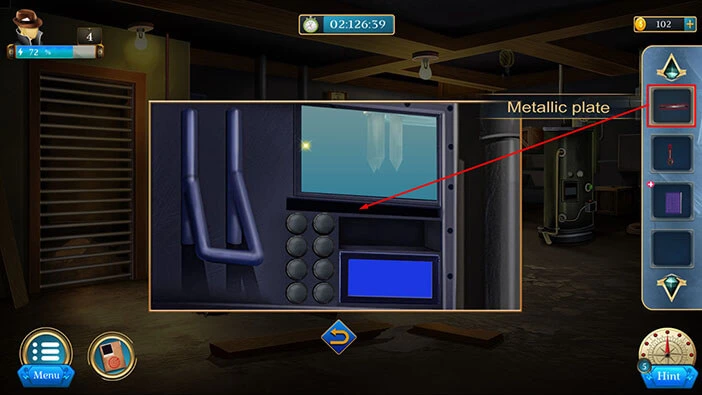
Next, let’s tap on the large shelf, located just to the right of the stairs, to take a closer look at it.

Here, you will find a “Metal plate”. Tap on it to pick it up. After that, tap on the arrow at the bottom to go back.
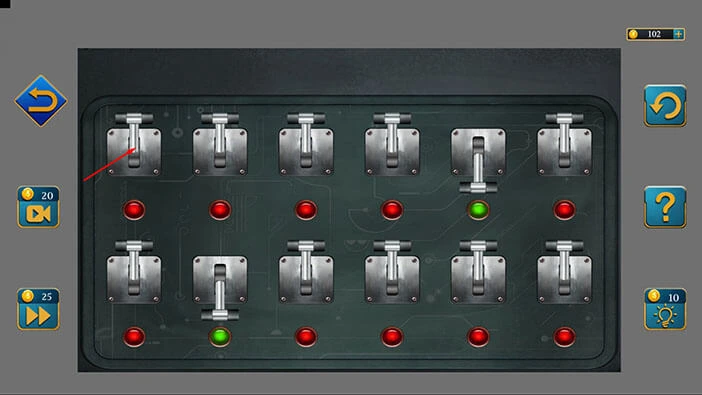
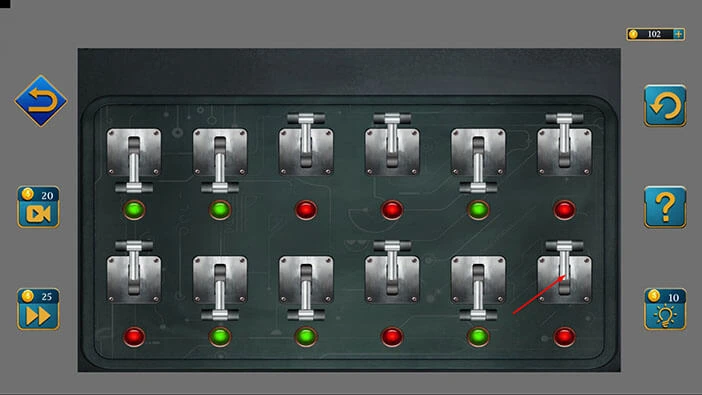
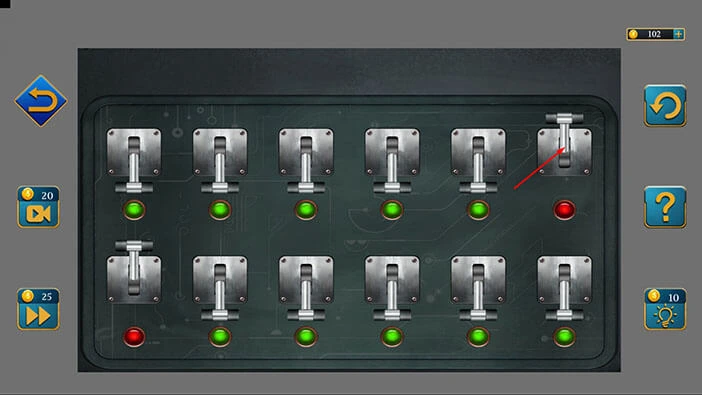
Next, let’s tap on the large machine on the right to take a closer look at it.

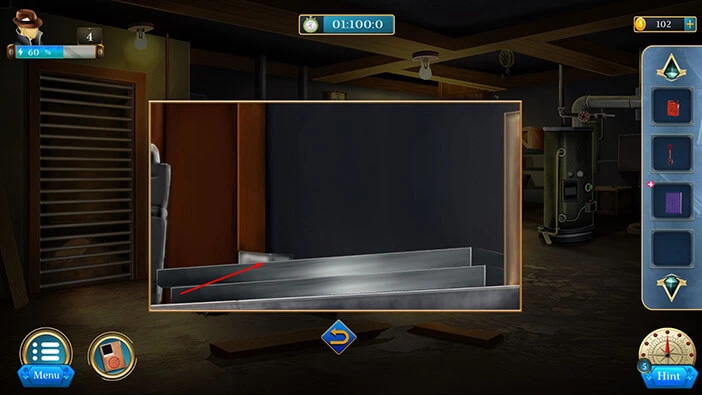
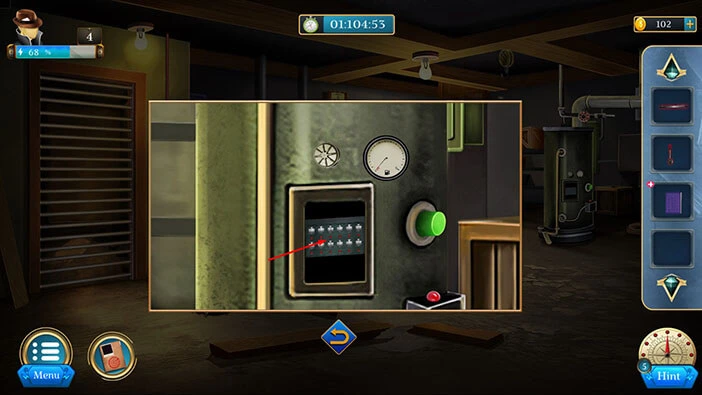
Here, you will notice two rows with six buttons in each row. Above the buttons, you will see a white screw. Let’s tap on this screw to remove it.
Select the “Fuel Can” from the inventory and pour some fuel into the tank.
Next, tap on the two rows of buttons to start the interaction.
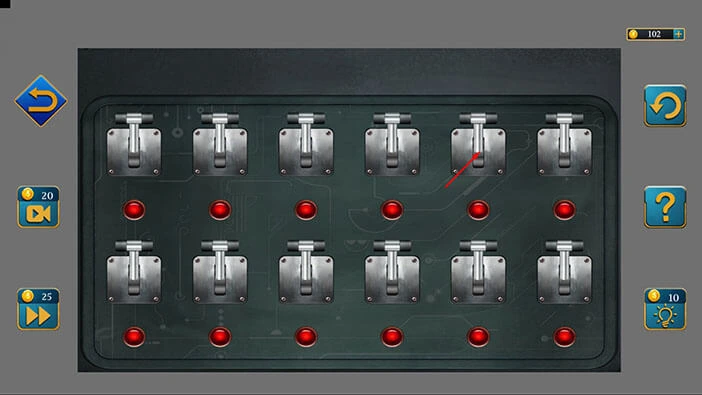
Here, we have another puzzle. Our task is to activate the levers in the correct order. I didn’t find a hint for this puzzle, so we will have to guess the correct order.
We will do this puzzle in several steps. Let’s begin.
Step 1
Tap on the fifth lever in the first row to activate it.
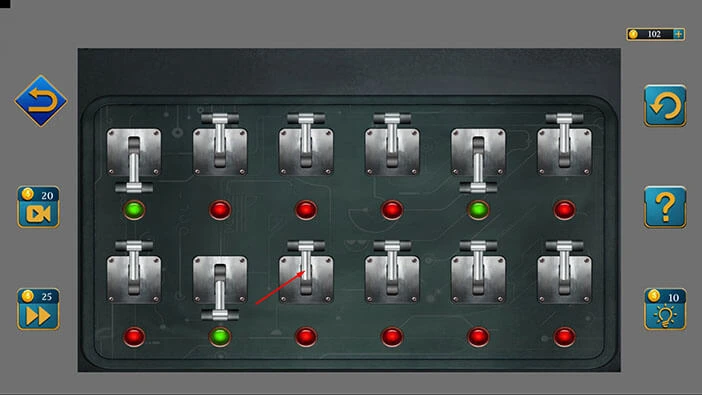
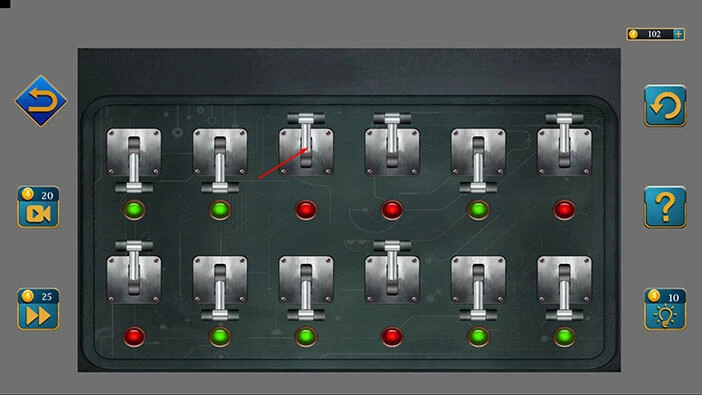
Step 2
Tap on the second lever in the second row to activate it.
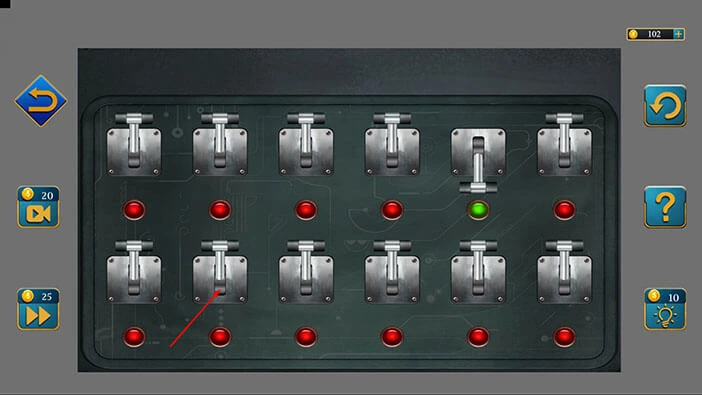
Step 3
Tap on the first lever in the first row to activate it.
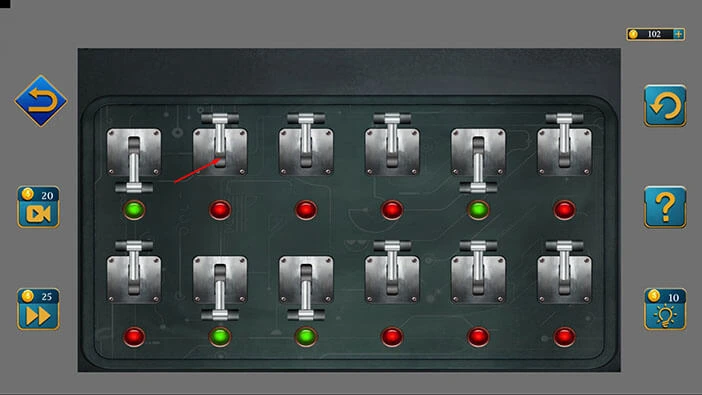
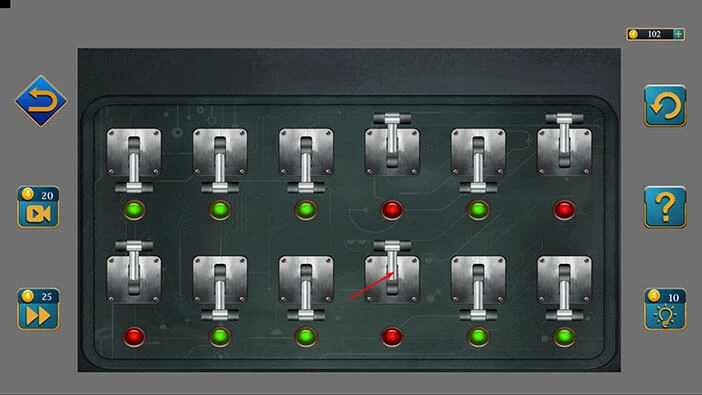
Step 4
Tap on the third lever in the second row to activate it.
Step 5
Tap on the second lever in the first row to activate it.
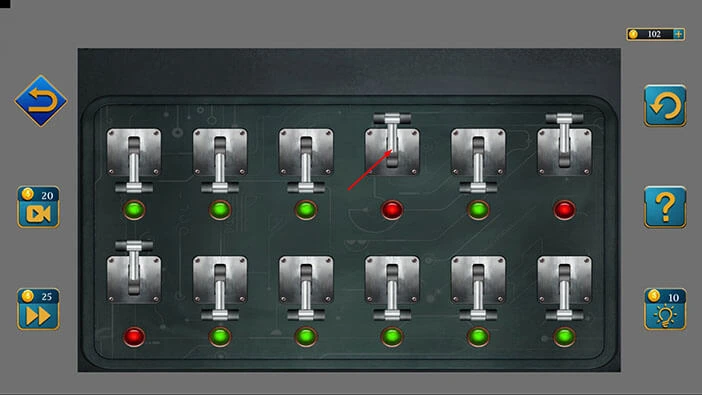
Step 6
Tap on the fifth lever in the second row to activate it.
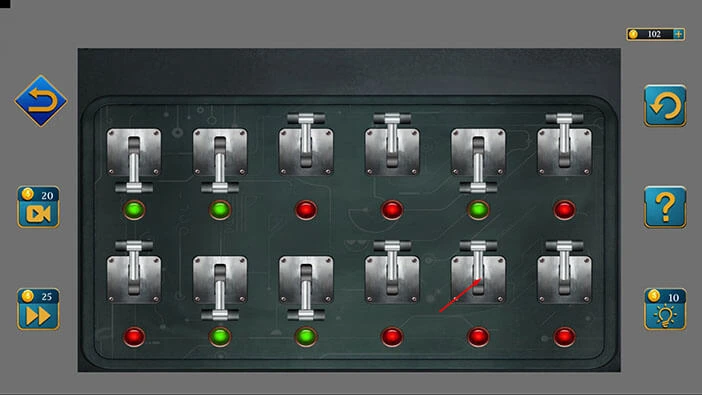
Step 7
Tap on the sixth lever in the second row to activate it.
Step 8
Tap on the third lever in the first row to activate it.
Step 9
Tap on the fourth lever in the second row to activate it.
Step 10
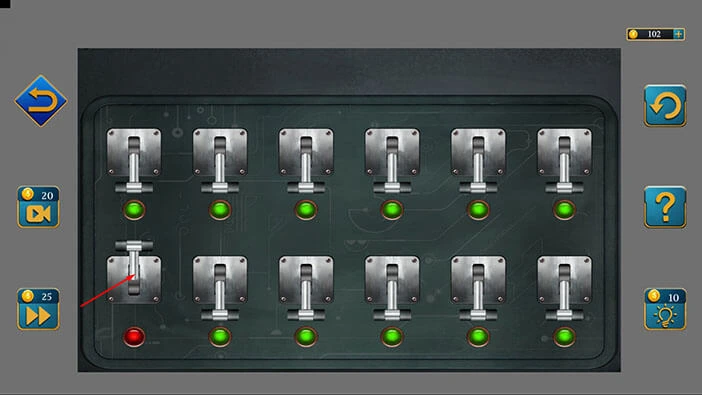
Tap on the fourth lever in the first row to activate it.
Step 11
Tap on the sixth lever in the first row to activate it.
Step 12
Lastly, tap on the first lever in the second row to activate it.
We activated all twelve levers, so let’s tap on the green button on the left to activate the machine.
Select the “Metal plate” from the inventory and insert it into the empty slot on the machine (above the buttons).
Next, let’s tap on the “CNC Book” in our inventory to select it and it will appear in the middle of the screen. After that, tap on the book to open it.

Tap twice on the page on the left to examine the last page.
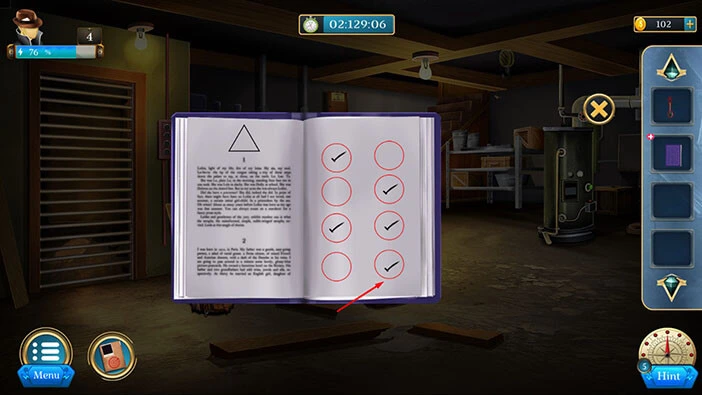
Here, we will see four rows of circles, with two circles in each column. We can see the check mark sign in six circles. Let’s memorize/write down the circles with check marks, starting from the top.
The first circle in the first row.
The second circle in the first row.
The second circle in the second row.
The first circle in the third row.
The second circle in the third row.
The first circle in the fourth row.
Once you’re done, tap on the “X” button to close the book.
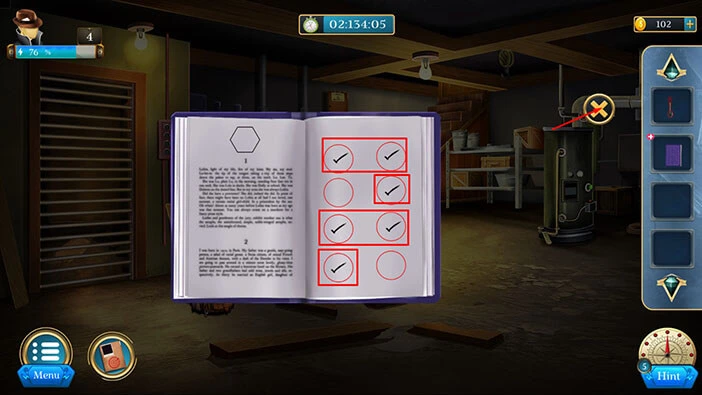
Let’s go back to the machine on the left. Tap on it to take a closer look.
Let’s tap on the buttons that we saw previously.
The first button in the first row.
The second button in the first row.
The second button in the second row.
The first button in the third row.
The second button in the third row.
The first button in the fourth row.
Once you tap on the correct button, you will get the “Handle”. Tap on it to pick it up.
After that, tap on the arrow at the bottom to go back.
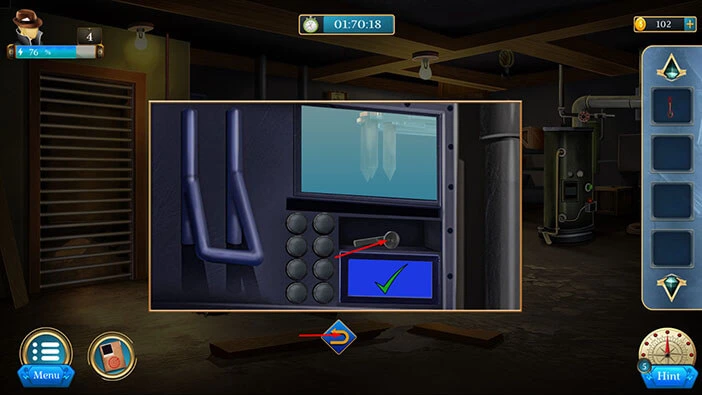
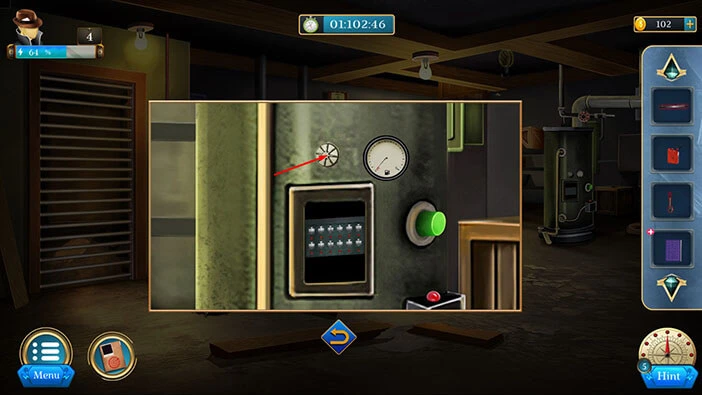
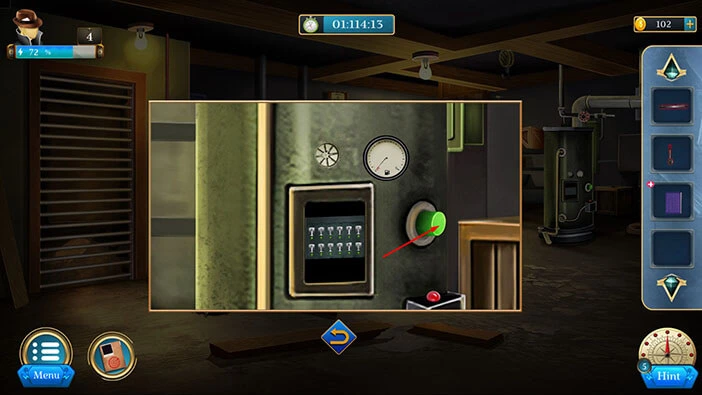
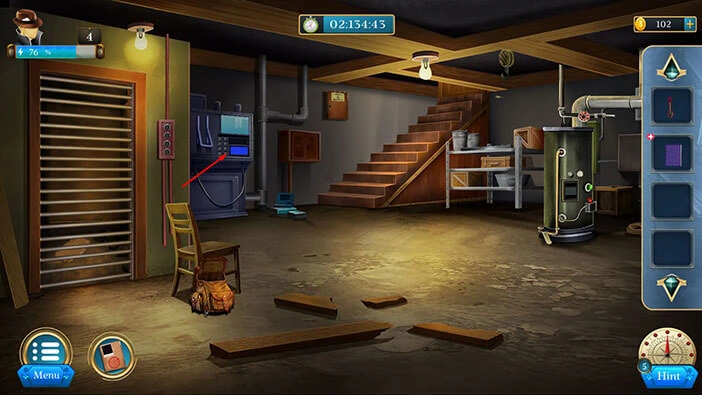
On the wall on the left, just above the stairs, you will notice an electrical box. Let’s tap on it to take a closer look.

Select the “Handle” from the inventory and insert it into the empty slot. With that, you will open the box.

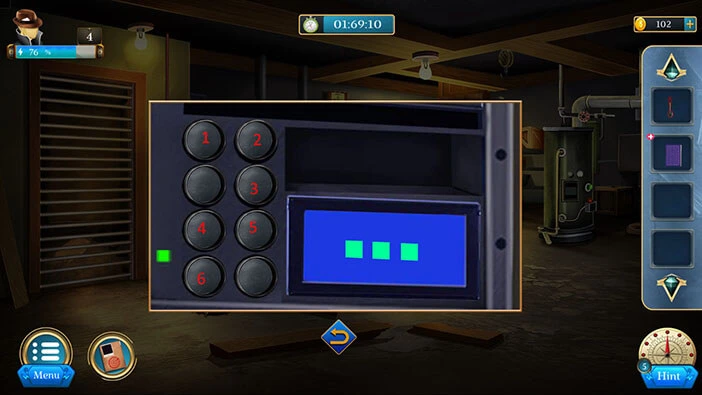
Let’s tap on the lever on the right to reveal the next hint.
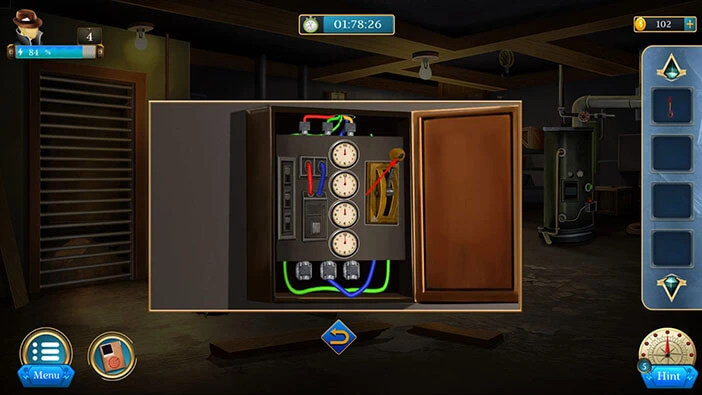
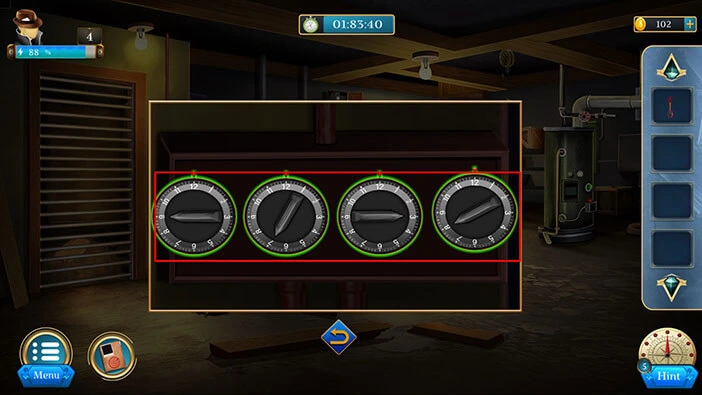
Here, we can see four dials, so let’s memorize/write down the position of the arrow on each dial. We will need this information for the next puzzle. Looking from left to right, we have
The arrow on the first dial = 9
The arrow on the second dial = 7
The arrow on the third dial = 3
The arrow on the fourth dial = 8
Once you’re done, tap on the arrow at the bottom to go back.
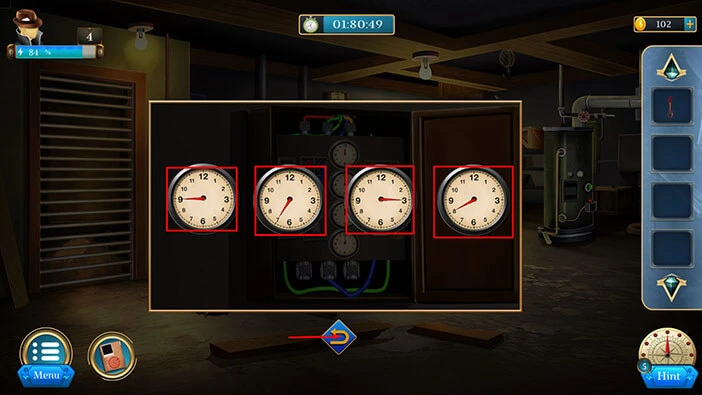
On the wall left, you will notice four buttons. Let’s tap on them to take a closer look, and tap again to start the interaction.
We already discovered the correct position for each arrow, so let’s set the arrows to these positions.
The arrow on the first dial = 9
The arrow on the second dial = 7
The arrow on the third dial = 3
The arrow on the fourth dial = 8
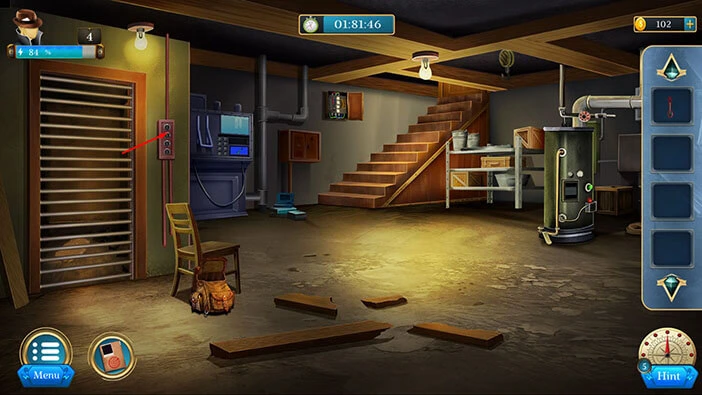
Once you set the arrows to the correct positions, you will remove the bars on the small room on the left. In this room, we can see some freshly dug earth. Let’s tap on it to take a closer look.
Select the “Shovel” from the inventory and use it to dig a hole.
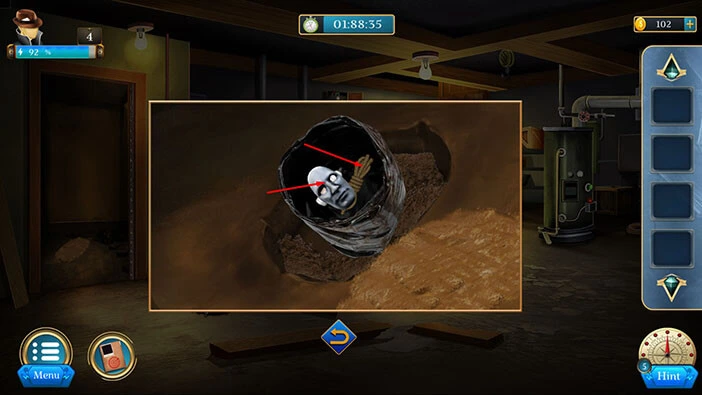
You will discover a plastic bag. Let’s tap on it to take a closer look, and tap again to look inside.
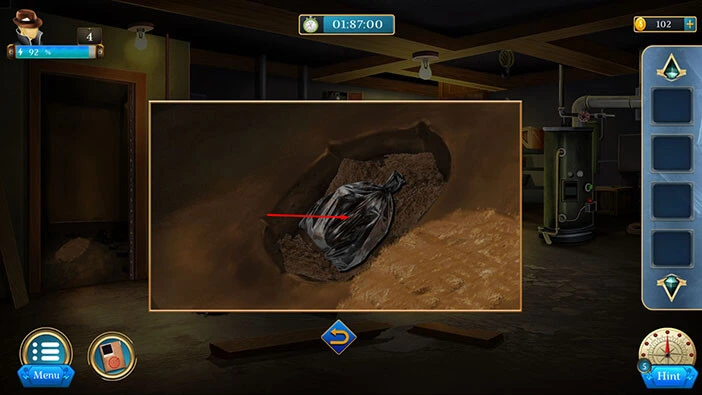
In the bag, you will find a “Face Mask” and a “Rope”. Let’s tap on these two items to pick them up. With that, you will complete this level.
With that, we have reached the end of the fourth level. If you want to see the walkthrough for the fifth level, tap on the next part button.
Thank you for reading.