Room Escape: Detective Phantom | Level 24
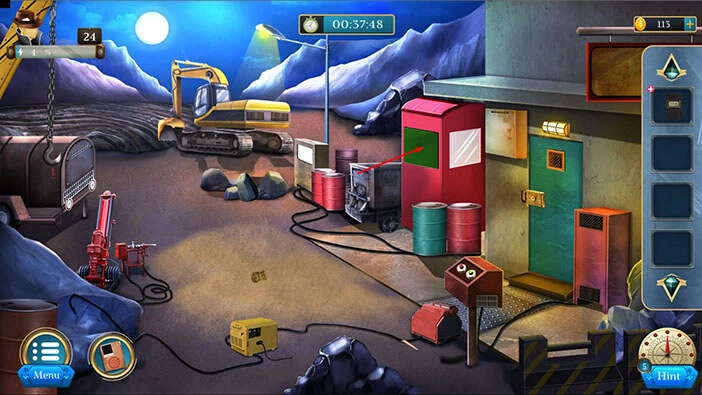
Hello everyone and welcome to the walkthrough for the twenty-fourth level of “Room Escape: Detective Phantom”. In the twenty-fourth level, our task is to find the Black Spider’s underground hideout and try to save Maze.
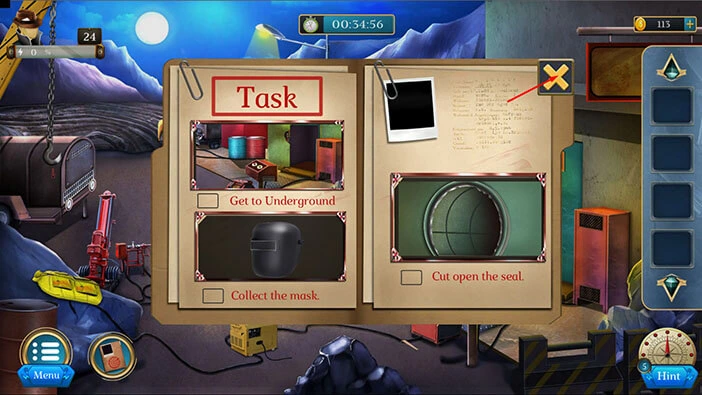
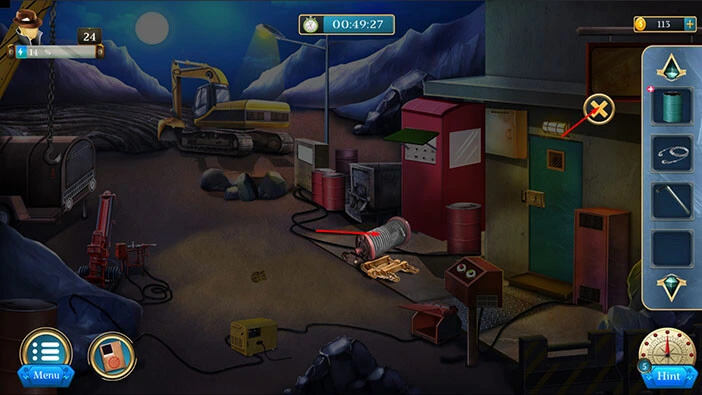
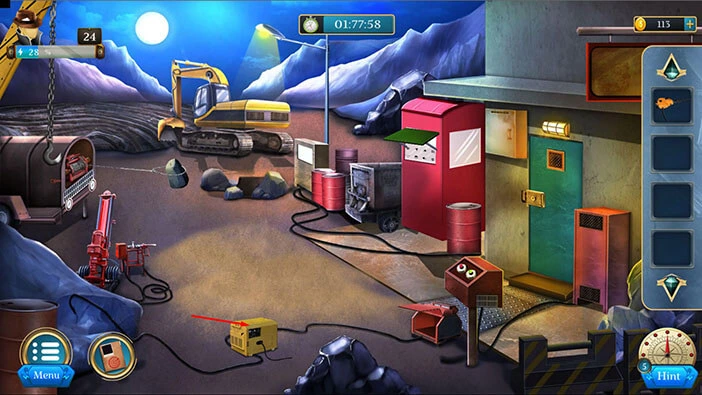
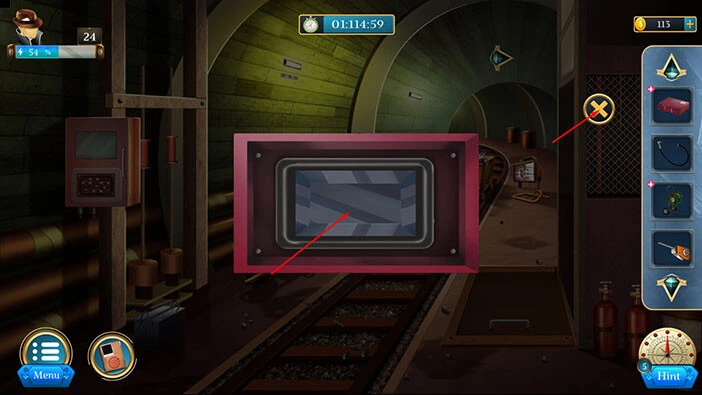
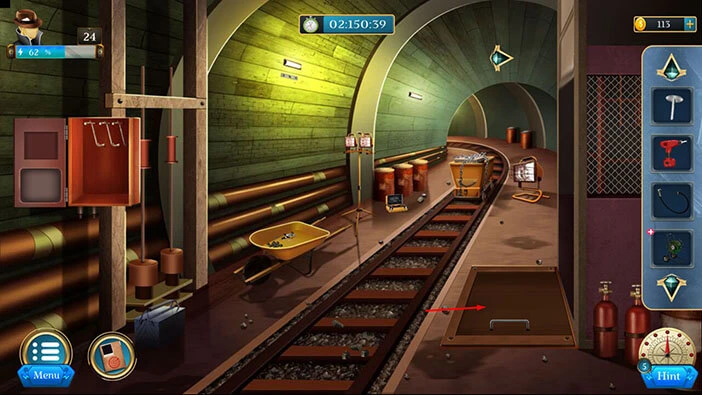
Our objectives are to “Get to Underground” “Collect the Mask” and “Cut open the seal”. Tap on the “X” button to go back.
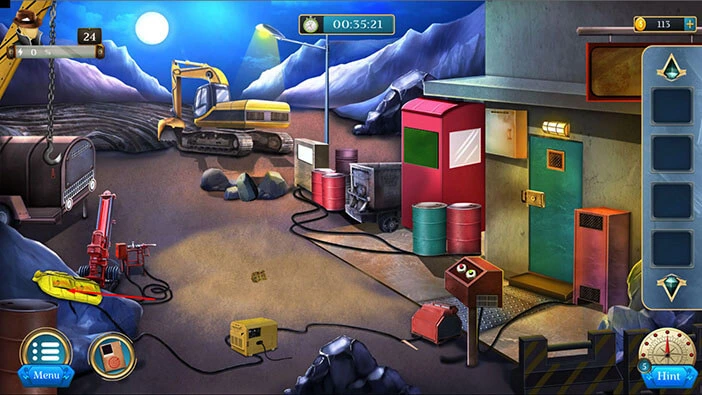
On the left, you will notice a yellow “Jacket”. Let’s tap on it to take a closer look and tap again to pick it up.
After that, tap on the arrow at the bottom to go back.
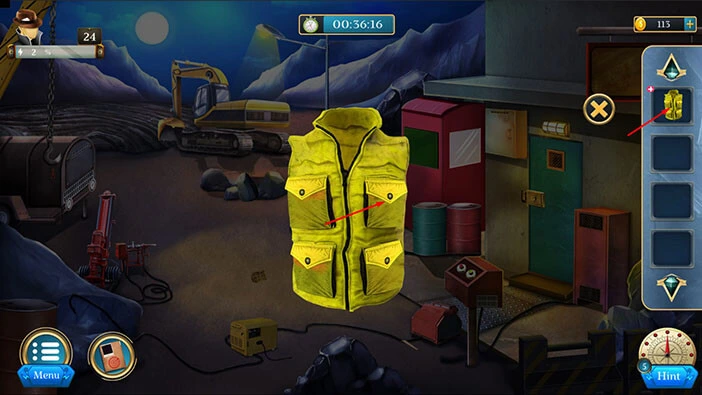
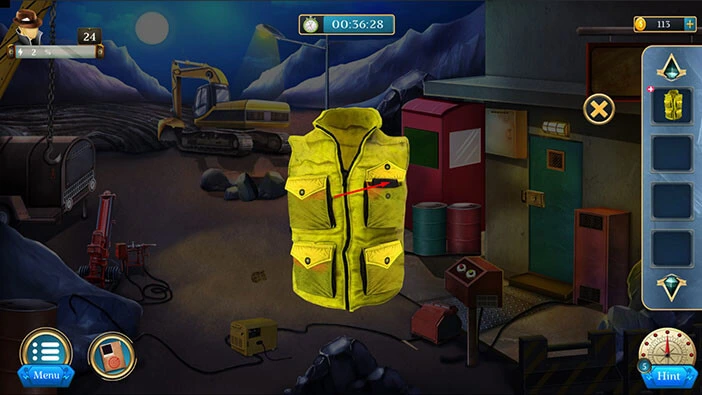
Select the “Jacket” from the inventory and it will appear in the middle of the screen. After that, tap on the top right pocket to open it.
Inside, you will find a “Pouch”. Let’s tap on it to pick it up. After that, tap on the “X” button to close this window.
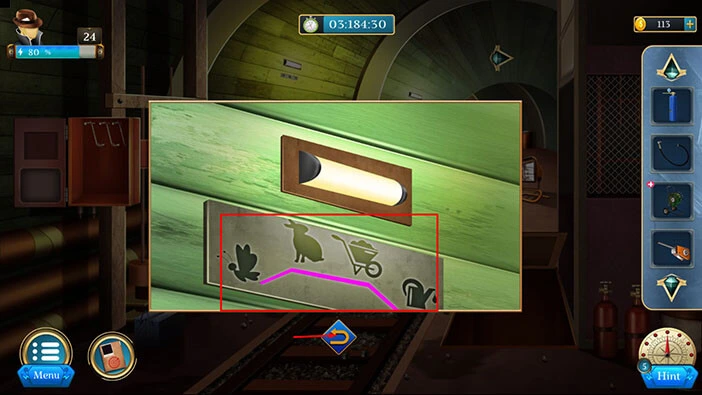
Next, let’s tap on the green panel on the right to take a closer look at it, and tap again to open it.
Here, we have the hint for the next puzzle. Let’s memorize/write down the symbols on the hint. After that, tap on the pocket in our inventory to examine it.

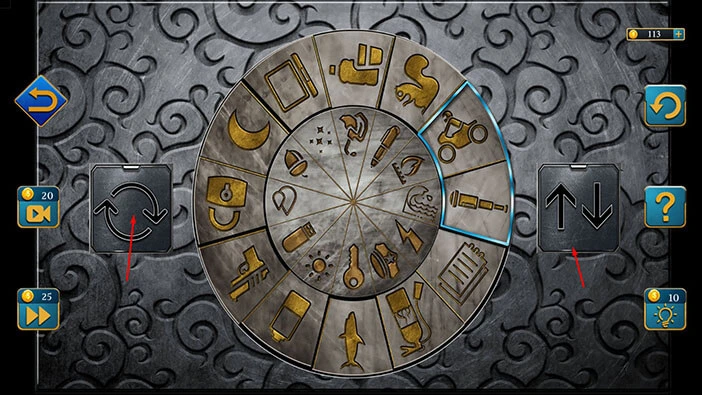
Our next task is to set the correct symbol (the symbols should match the hint that we just discovered). We will do that in several steps. Let’s begin.
Step 1
Let’s tap twice on the first arrow to shuffle the symbols.

Step 2
Let’s tap twice on the third arrow to shuffle the symbols. With that, you will solve this puzzle, and you will open the pocket.
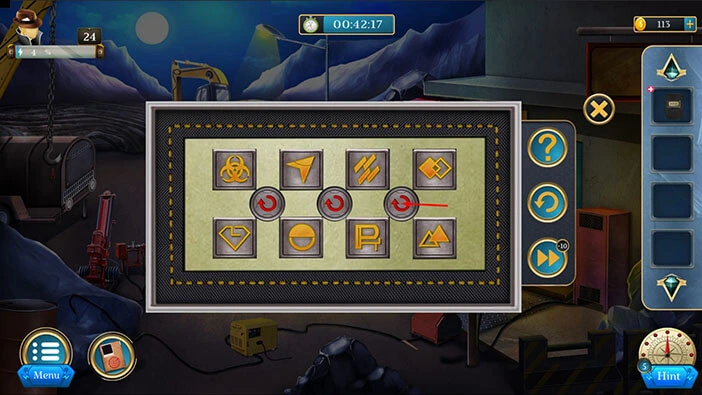
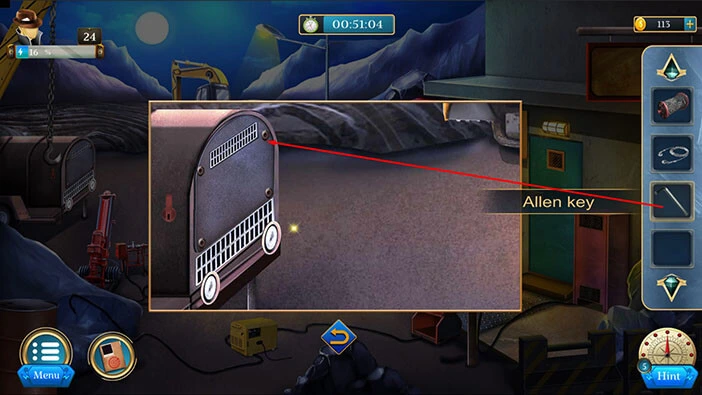
In the pocket, you will find the “Allen key”. Let’s tap on it to pick it up. After that, tap on the “X” button to close this window.

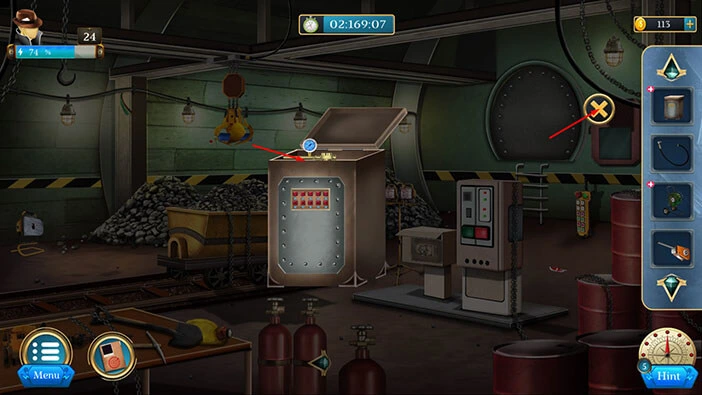
Next, let’s tap on the red box on the right to take a closer look at it, and tap again to open it.
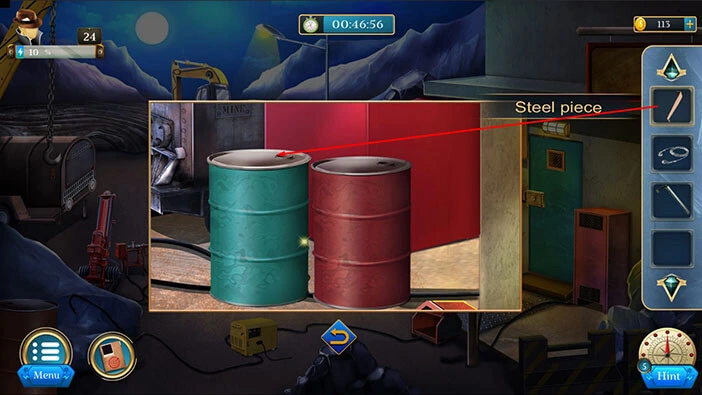
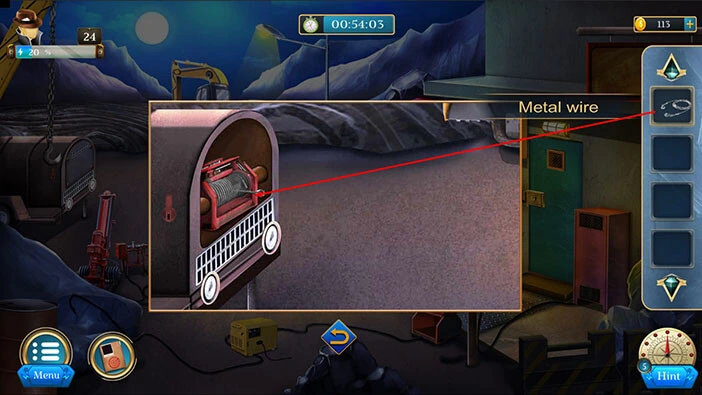
In the box, you will find a “Metal wire” and a “Steel Piece”. Let’s tap on these two items to pick them up. After that, tap on the arrow at the bottom to go back.
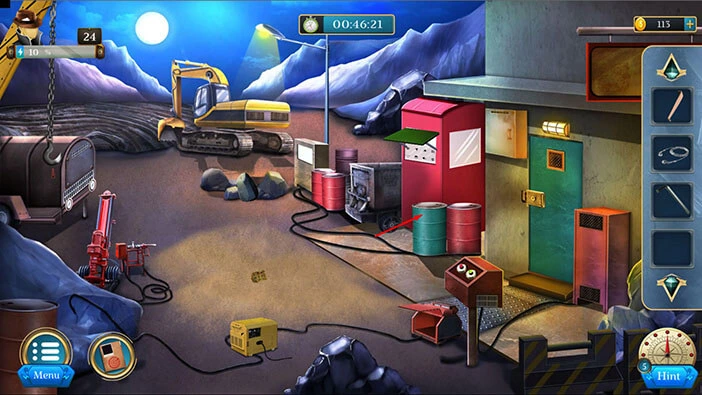
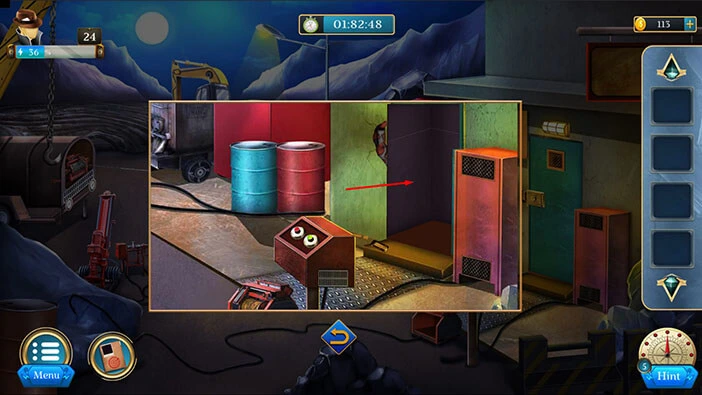
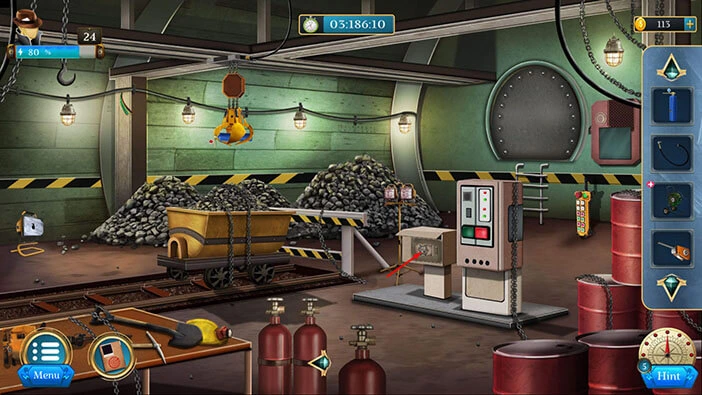
Let’s tap on the barrels on the right to take a closer look at it.
Select the “Steel Piece” from the inventory and use it to open the blue barrel.
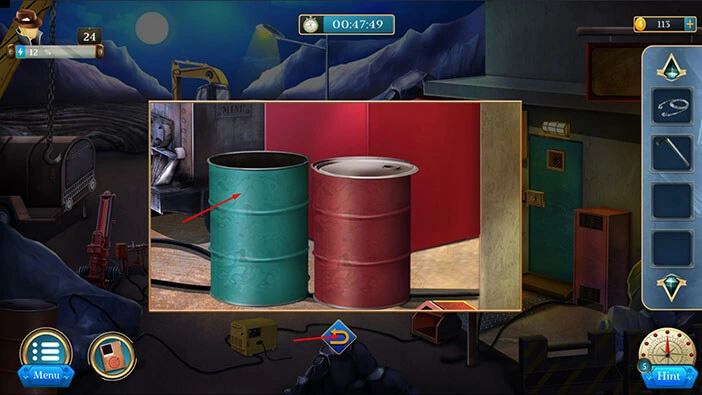
Let’s tap on the “Steel barrel” to pick it up. After that, tap on the arrow at the bottom to go back.
Select the “Steel barrel” from the inventory and it will appear in the middle of the screen. After that, tap on the barrel to turn it over.
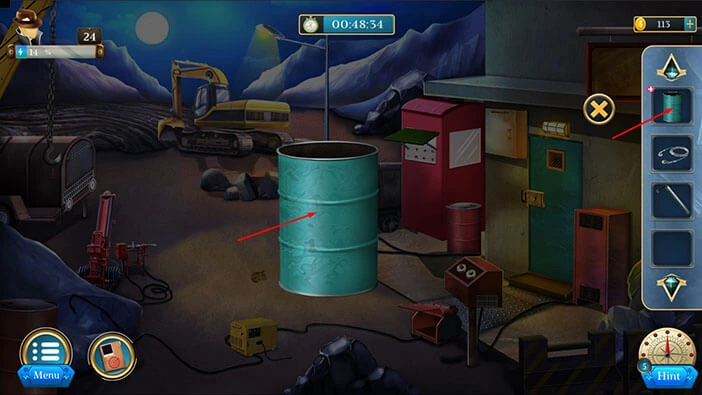
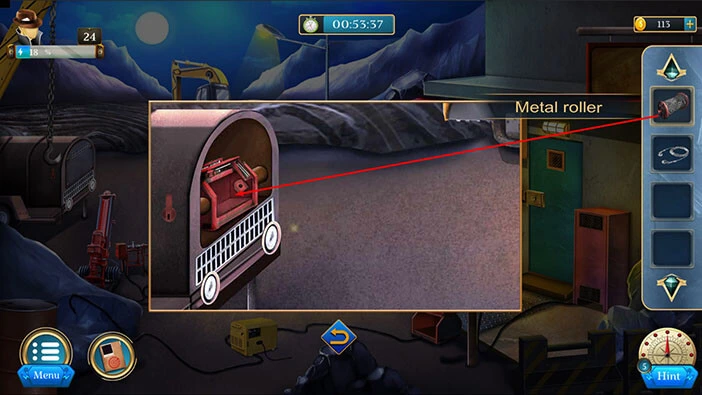
You will find a “Metal roller”. Let’s tap on it to pick it up. After that, tap on the “X” button to close this window.
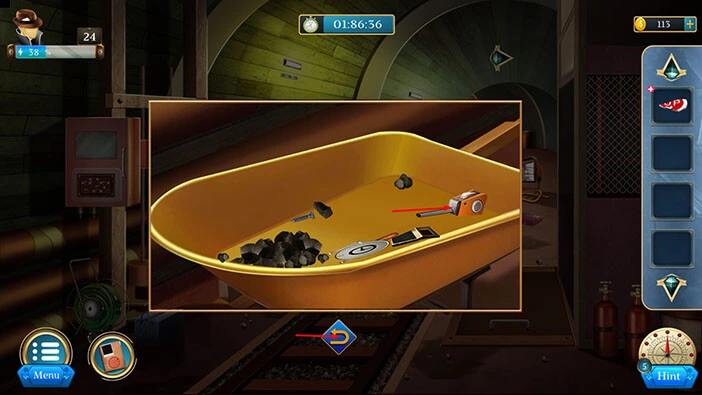
Let’s tap on the metal box on the left to take a closer look at it.

Select the “Allen key” from the inventory and use it to open the box.
Select the “Metal Roller” from the inventory and insert it into the machine.
Next, select the “Metal wire” from the inventory and attach it to the machine. After that, tap on the lever on the left side of the machine to activate it.
The machine will move the stone to the left, so let’s see what’s hidden under it.

Here, you will find a “Box”. Let’s tap on it to pick it up. After that, tap on the arrow at the bottom to go back.
Next, you will notice a small, yellow item, on the the ground in front of you. Let’s tap on it to take a closer look, and tap again to pick it up. A “Shield” will be added to your inventory.
After that, tap on the arrow at the bottom to go back.
Select the “Shield” from the inventory and it will appear in the middle of the screen. Here, you will discover the hint for the next puzzle. Let’s memorize/write it down.
After that, tap on the “X” button to close this window.

Select the “Box” from the inventory and it will appear in the middle of the screen. After that, tap on the box to start the interaction.
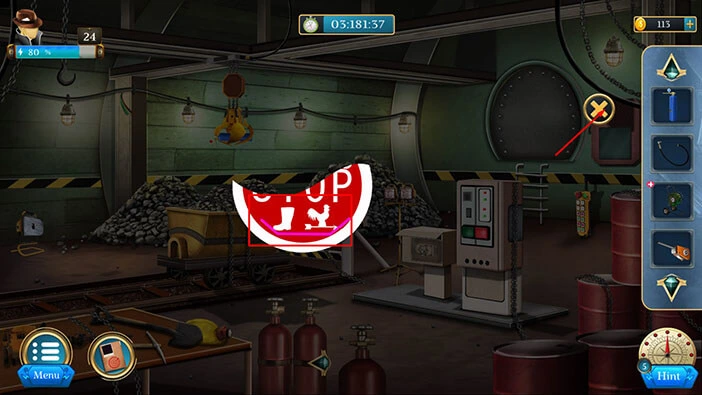
Here, we have another puzzle. If you tap on the “Play” button, the arrow will begin to move. Our task is to stop it by pressing the “Stop” button, once it gets to the correct symbol (we discovered the correct symbols by examining the badge).
We will do this puzzle in several steps. Let’s begin.
Step 1
Tap on the “Play” button to start the clock. After that, stop the arrow once it points to the symbol at the six o’clock position.
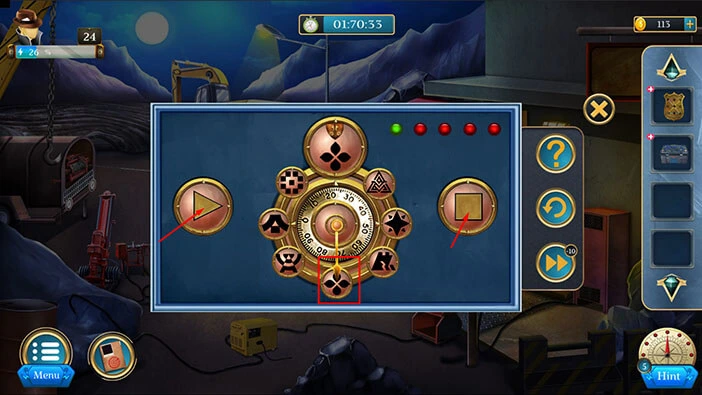
Step 2
Next, wait for the arrow to reach the symbol at the nine o’clock position, then tap on the “Pause” button to stop it.
Step 3
Next, wait for the arrow to reach the symbol at the five o’clock position, then tap on the “Pause” button to stop it.
Step 4
Next, wait for the arrow to reach the symbol at the eleven o’clock position, then tap on the “Pause” button to stop it.
Step 5
Next, wait for the arrow to reach the symbol at the one o’clock position, then tap on the “Pause” button to stop it. With that, you will solve this puzzle, and you will open the box.

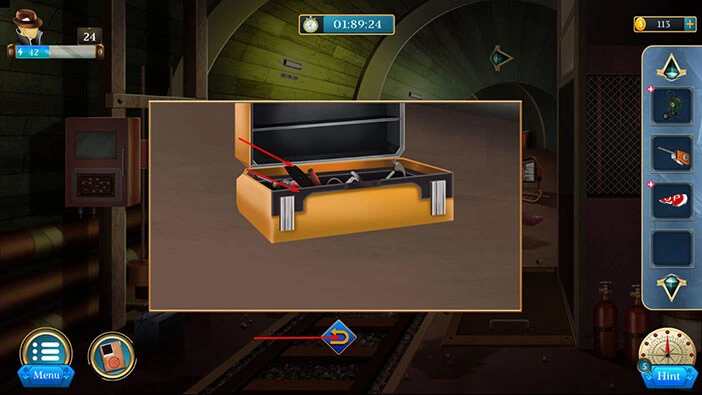
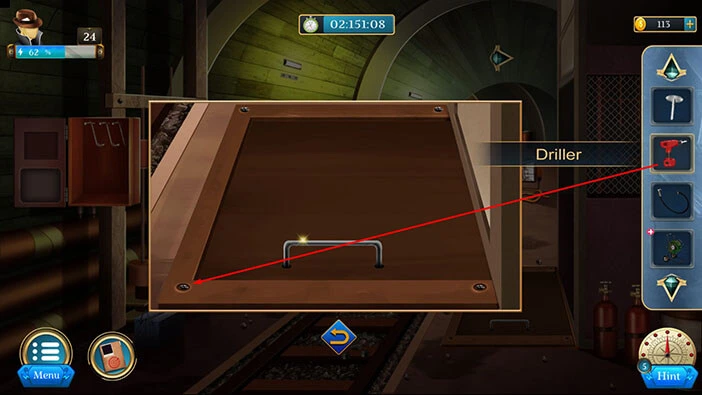
In the box, you will find a “Driller”. Let’s tap on it to pick it up. After that, tap on the “X” button to close this window.
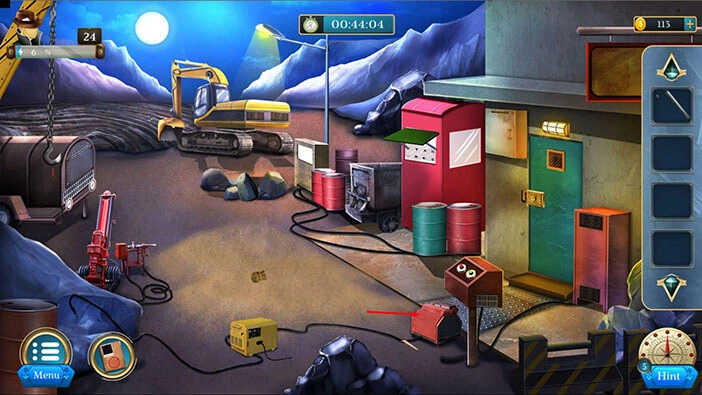
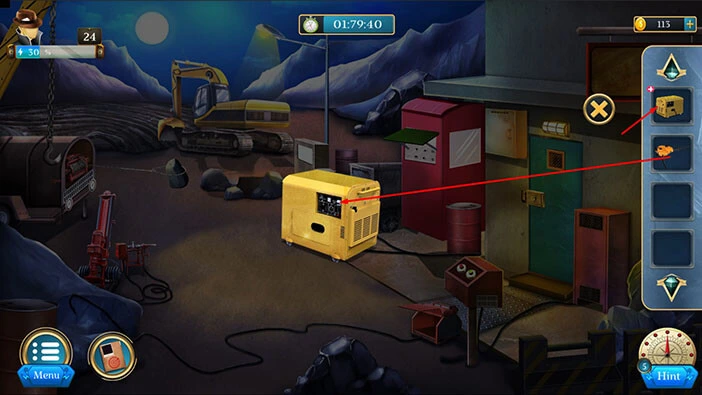
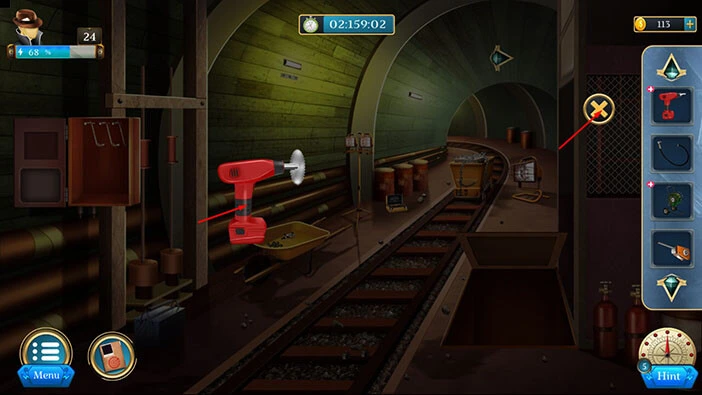
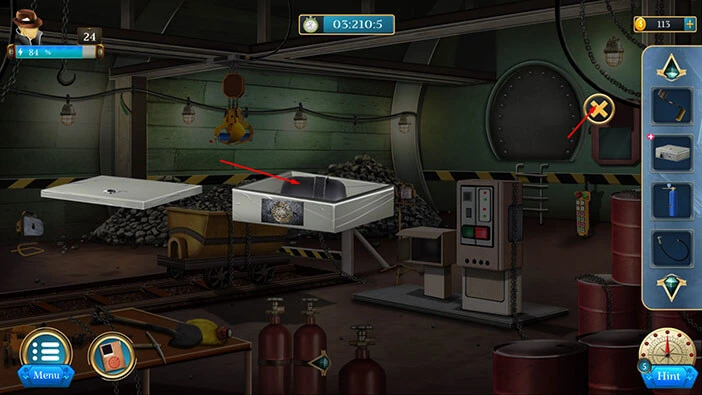
Next, let’s tap on the yellow “Machine” to take a closer look at it, and tap again to pick it up. After that, tap on the arrow at the bottom to go back.
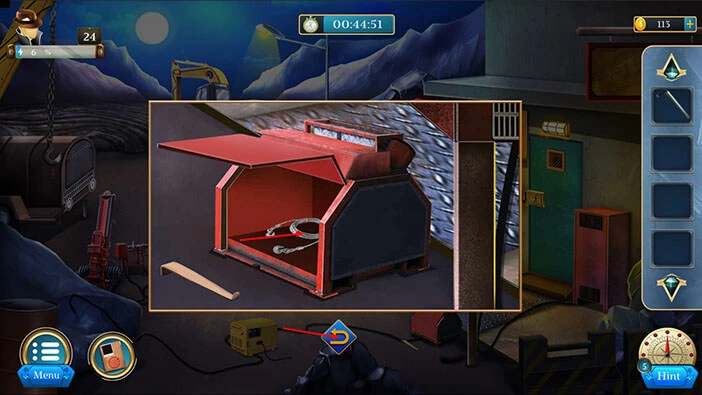
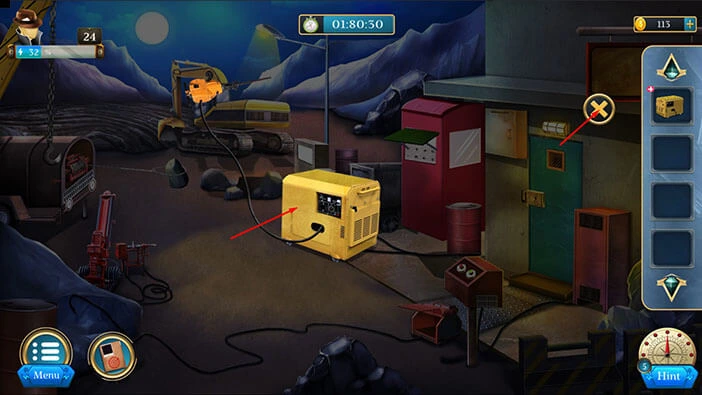
Select the “Machine” from the inventory and it will appear in the middle of the screen. After that, select the “Driller” from the inventory and plug it into the machine.
You will craft a “Wall Breaker”. Let’s tap on it to pick it up. After that, tap on the “X” button to close this window.
Let’s tap on the green door on the right to take a closer look at it.

Select the “Wall Breaker” from the inventory and use it to break the wall near the lock.
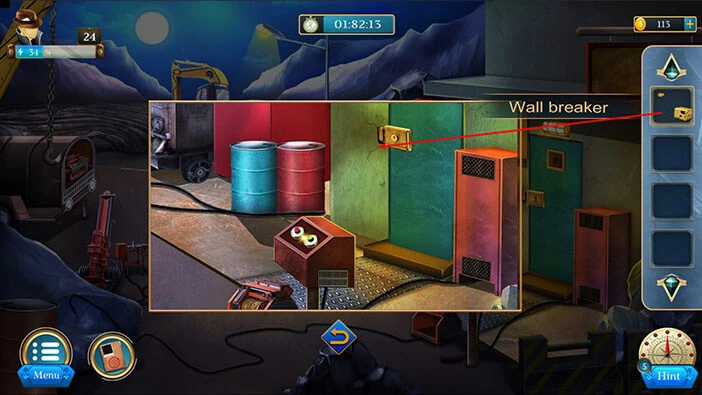
With that, we have removed the lock. Let’s tap on the door to proceed to the next area.
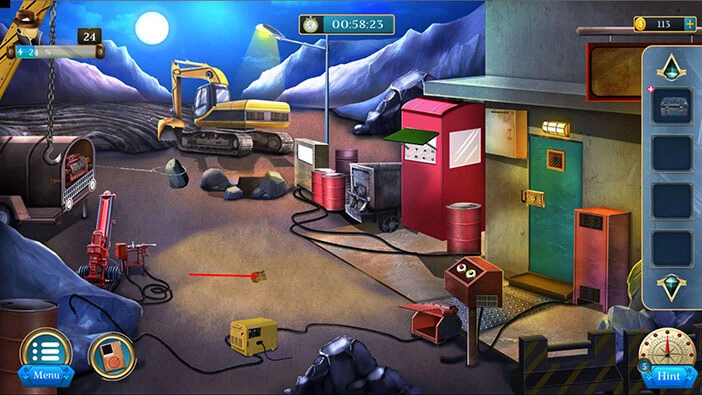
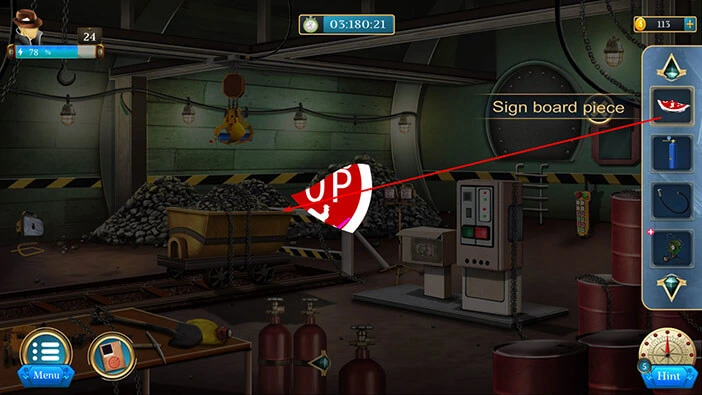
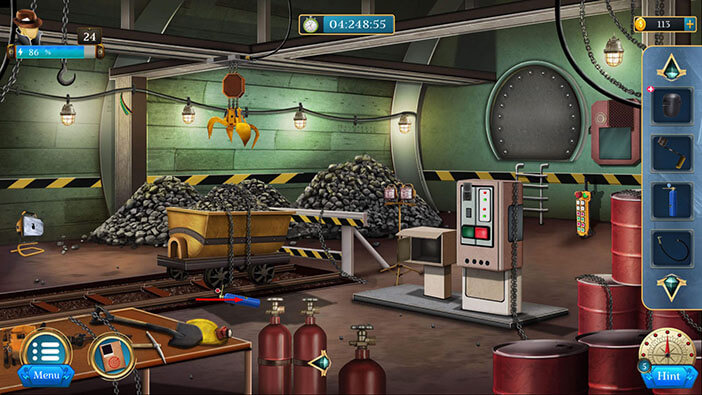
Let’s explore this area. Tap on the wheelbarrow on the left to take a closer look at it.

Tap on the rubble in the wheelbarrow to push it aside, and you will discover a “Sign board piece”. Let’s tap on it to pick it up.

Next, on the right side of the wheelbarrow, you will notice a “Lighter”. Let’s tap on it to pick it up.
After that, tap on the arrow at the bottom to go back.
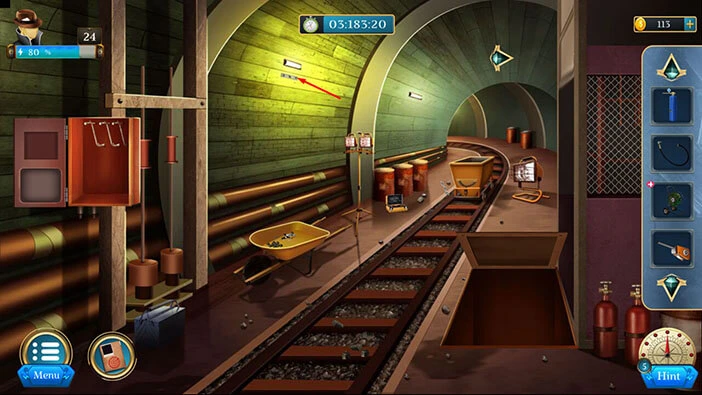
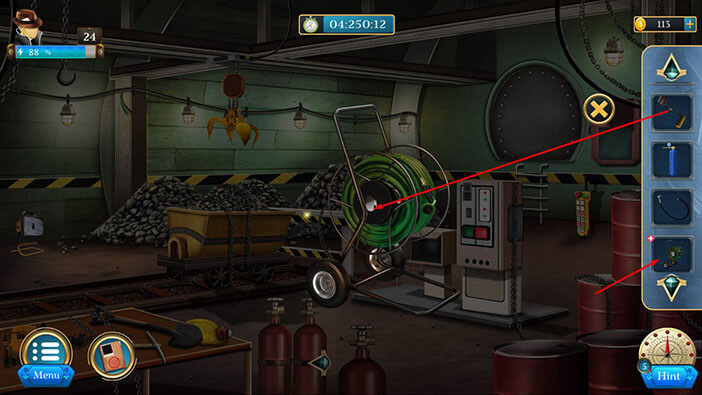
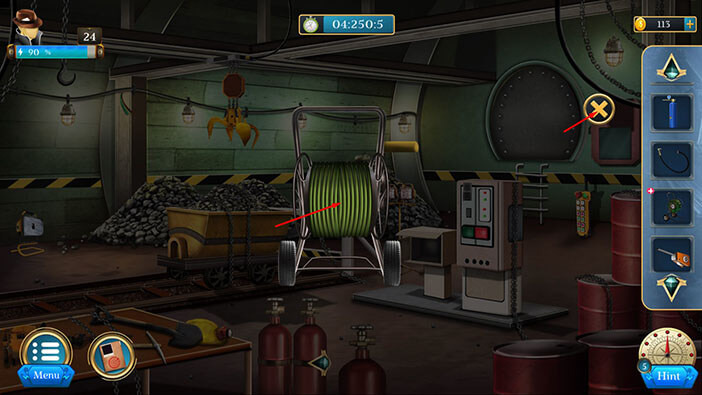
In the bottom left corner of the screen, you will notice a “Roller”. Let’s tap on it to take a closer look, and tap again to pick it up. After that, tap on the arrow at the bottom to go back.

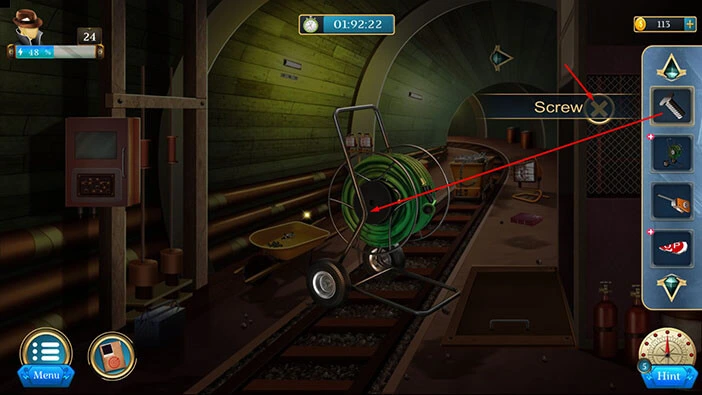
Next, you will notice a yellow box on the floor. Let’s tap on it to take a closer look and tap again to open it.

In the box, you will find a “Screw” and a “Waser”. Let’s tap on these two items to pick them up.
After that, tap on the arrow at the bottom to go back.
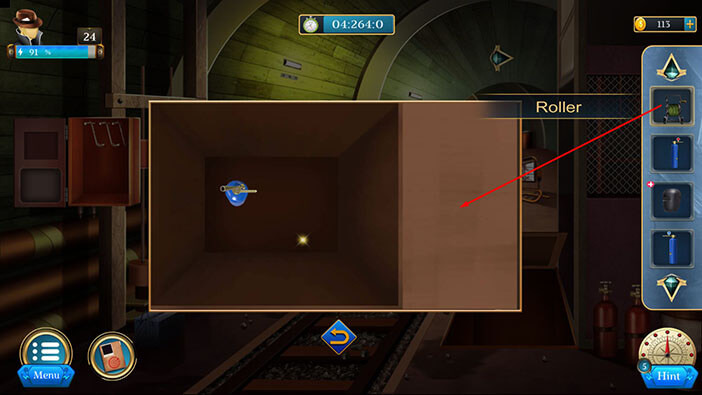
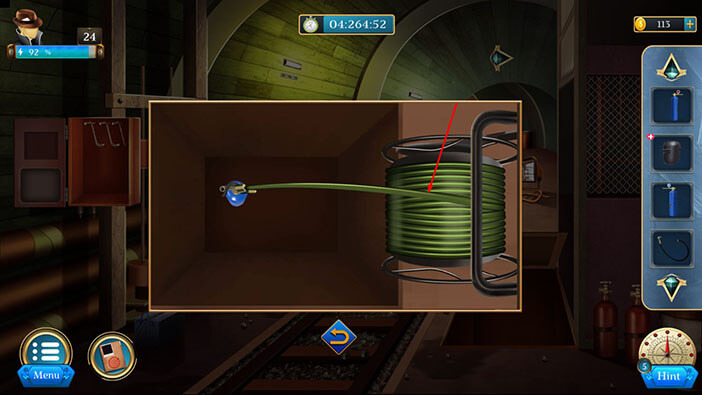
Select the “Roller” from the inventory and it will appear in the middle of the screen. After that, select the “Waser” from the inventory and attach it to the “Roller”.
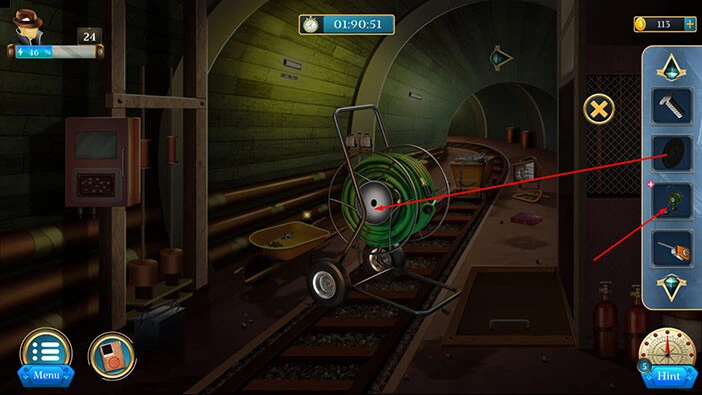
Next, select the “Screw” from the inventory and use it to connect the waser and the roller. Once you’re done, tap on the “X” button to close this window.
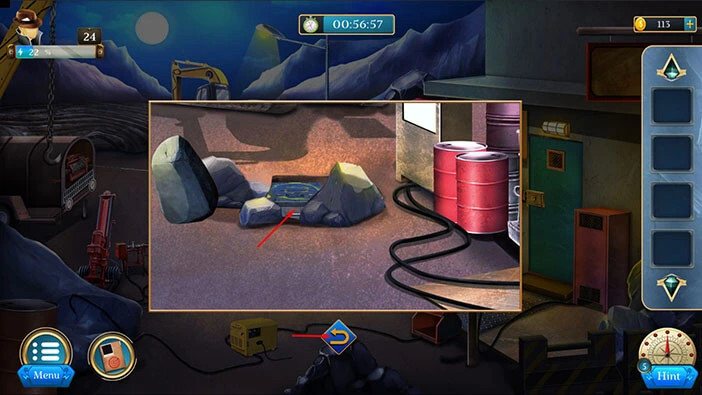
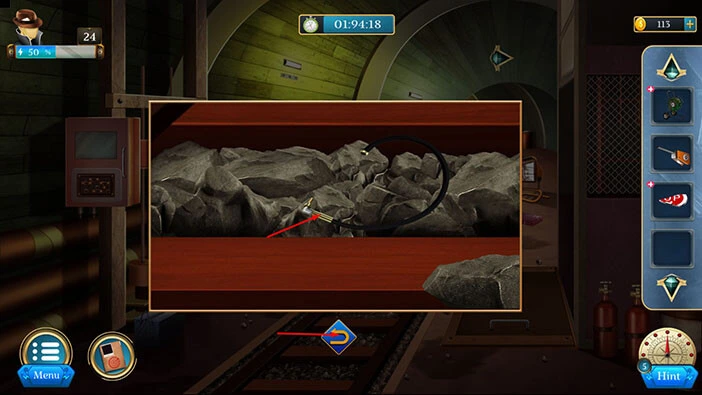
Next, let’s tap on the stones to take a closer look at them. After that, tap on the stones, several times, to move them aside.
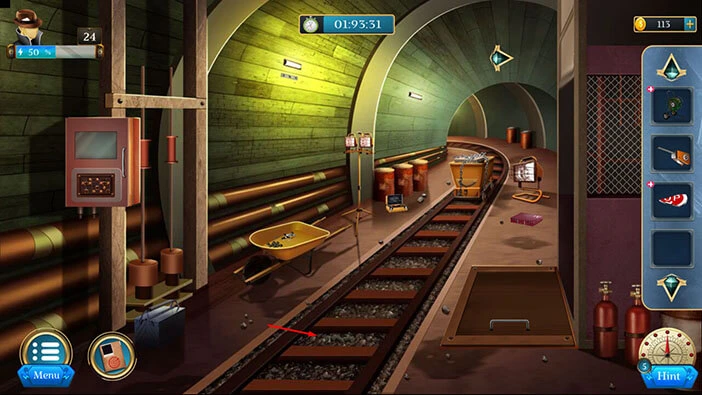
Under the stones, you will find a “Welding nozzle”. Let’s tap on it to pick it up. After that, tap on the arrow at the bottom to go back.
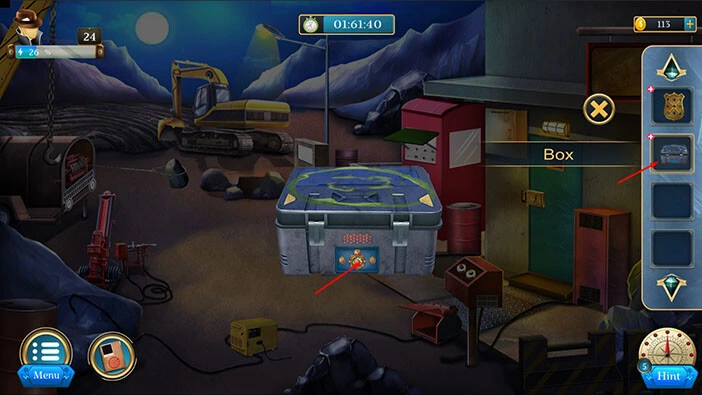
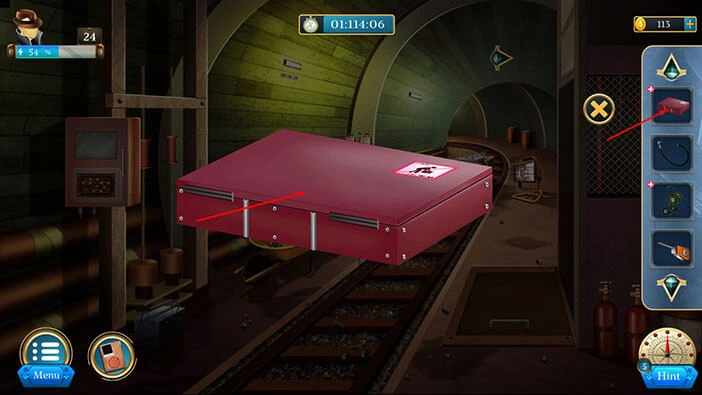
On the right, you will notice a red “Box”. Let’s tap on it to take a closer look, and tap again to pick it up.
After that, tap on the arrow at the bottom to go back.

Select the “Box” from the inventory and it will appear in the middle of the screen. After that, tap on the box again to open it.
In the box, you will find a “Glass Cover”. Let’s tap on it to pick it up.
After that, tap on the “X” button to close this window.
Let’s proceed to the next area. Tap on the arrow in the top right corner of the screen.
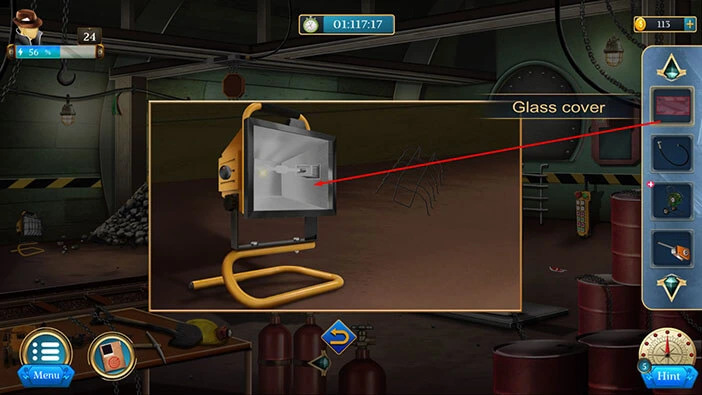
Let’s tap on the lamp on the left to take a closer look at it, and tap again to remove the bars from the lamp.

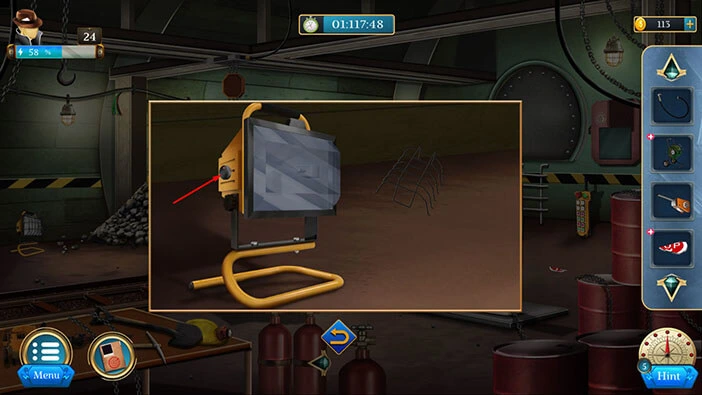
Select the “Glass Cover” from the inventory and install it on the lamp.
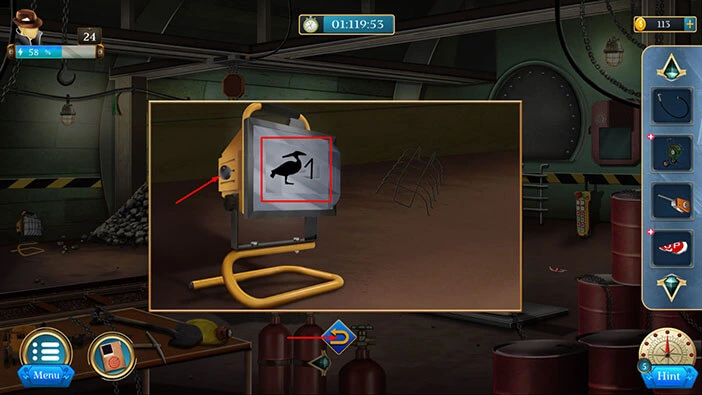
Let’s tap on the lamp to start the interaction.
This is the first part of the hint, so let’s memorize/write down the symbol on the lamp. Tap on the switch a few more times to change the symbols and memorize/write down all the hints because we will need this information for one of the puzzles that we will encounter a bit later in the walkthrough.
Once you’re done, tap on the arrow at the bottom to go back.
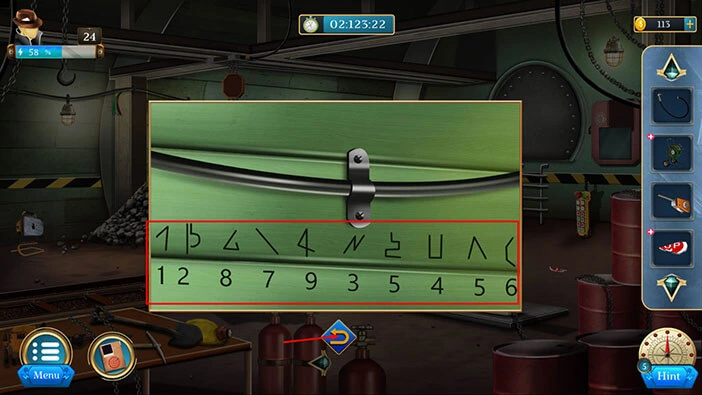
Next, let’s tap on the part of the wall, located in the top left corner of the screen to take a closer look at it.

Here, we can see the hint for the next puzzle. Above each number, we can see a certain symbol. Let’s memorize/write down each connection between the symbols and the numbers.
Once you’re done, tap on the arrow at the bottom to go back.
Let’s go back to the previous room. Tap on the arrow at the bottom of the screen.
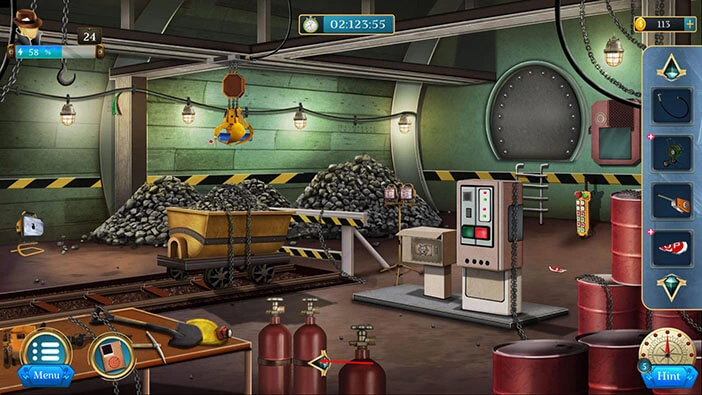
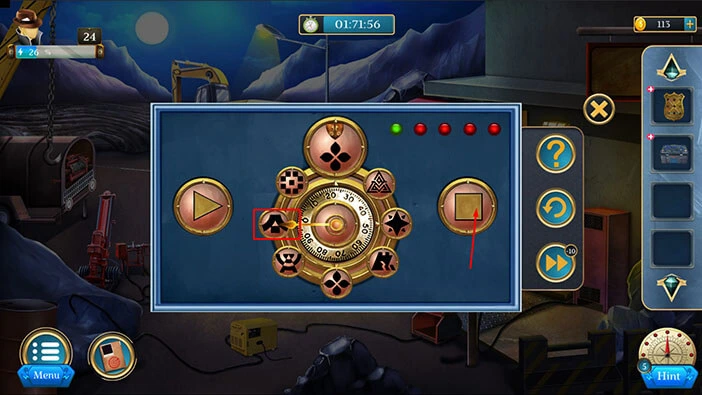
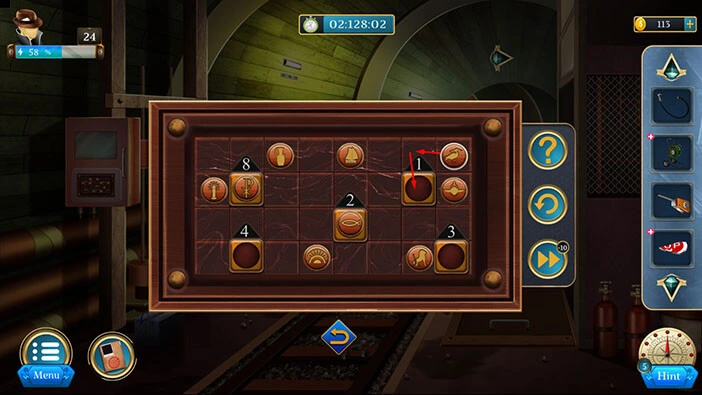
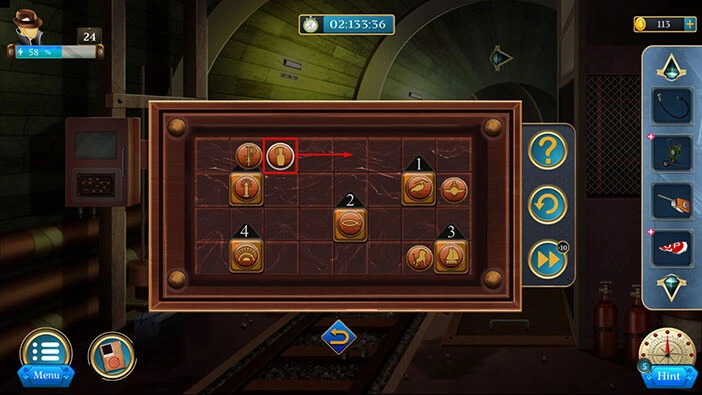
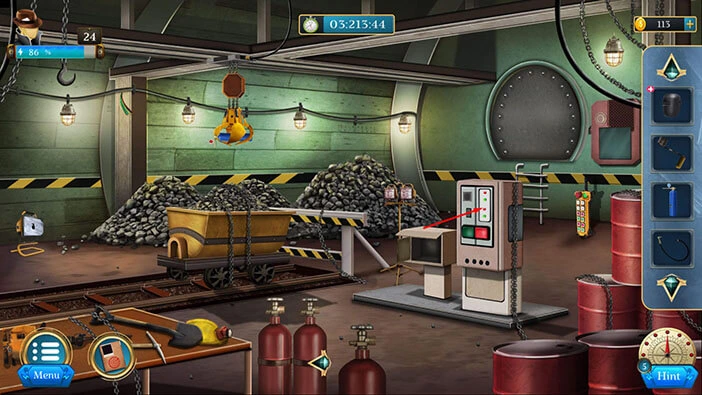
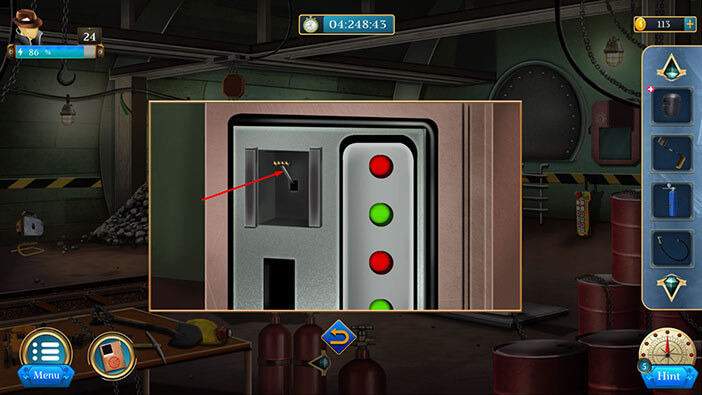
Next, let’s tap on the machine on the left to take a closer look at it, and tap again to start the interaction.

Here, we have another puzzle. We will use the hint that we discovered in the previous room to solve it. We will do this puzzle in several steps. Let’s begin.
Step 1
Select the symbol in the seventh slot in the second row and move it one slot to the right.
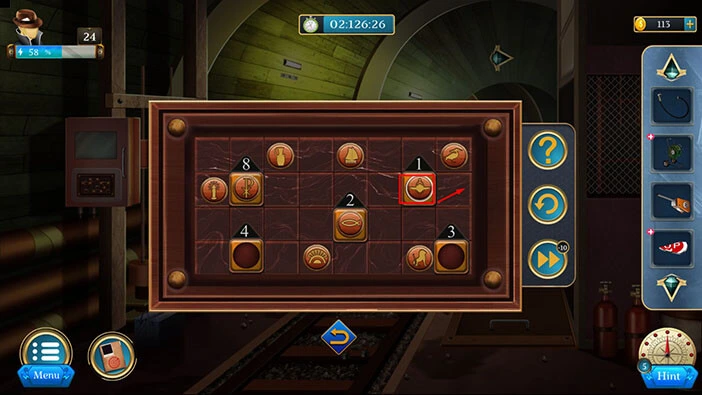
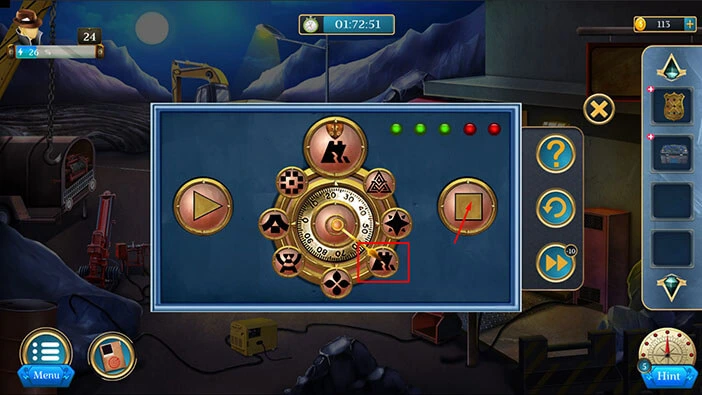
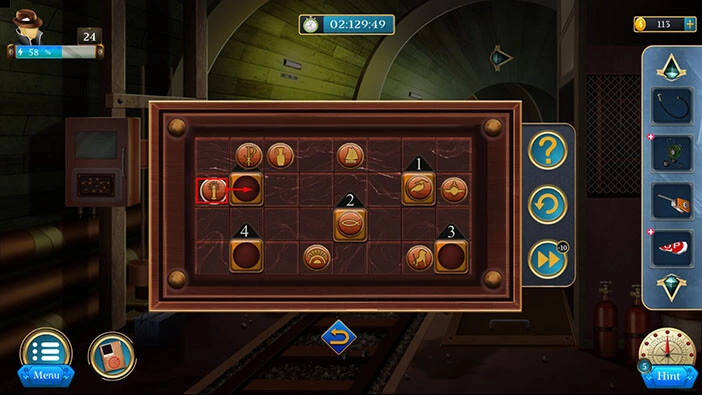
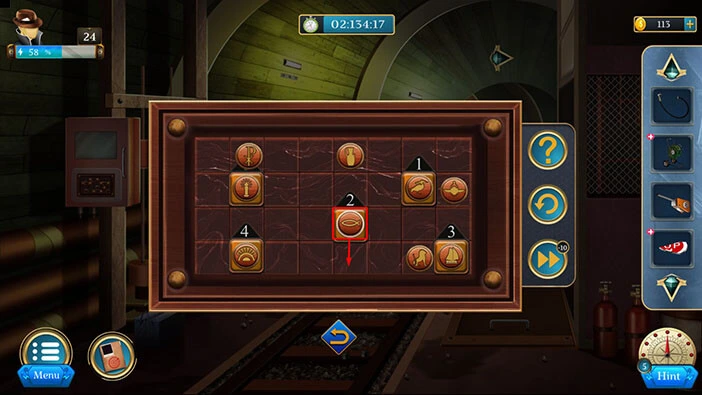
Step 2
Select the symbol in the eighth slot in the first row and move it one slot to the left, and then one slot down (to the seventh slot in the second row).
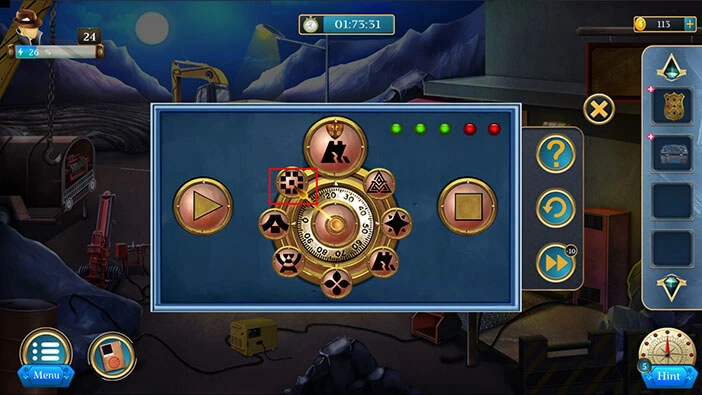
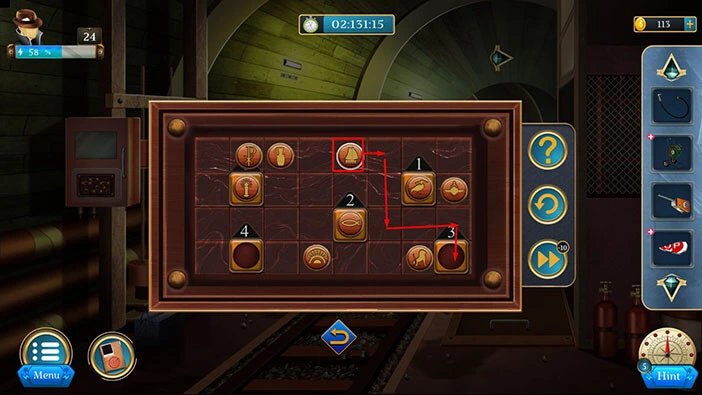
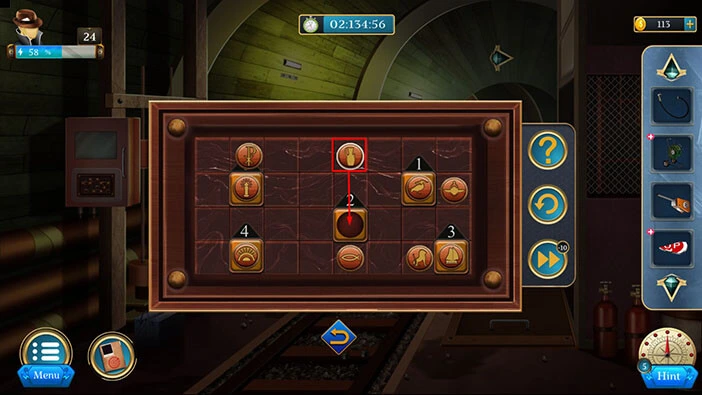
Step 3
Select the symbol in the second slot in the second row and move it one slot up.

Step 4
Select the symbol in the first slot in the second row and move it one slot to the right.
Step 5
Select the symbol in the fifth slot in the first row and move it top the bottom right corner of the grid (the eighth slot in the fourth row).
Step 6
Select the symbol in the fourth slot in the fourth row and move it two slots to the left.
Step 7
Select the symbol in the third slot in the first row and move it two slots to the right.
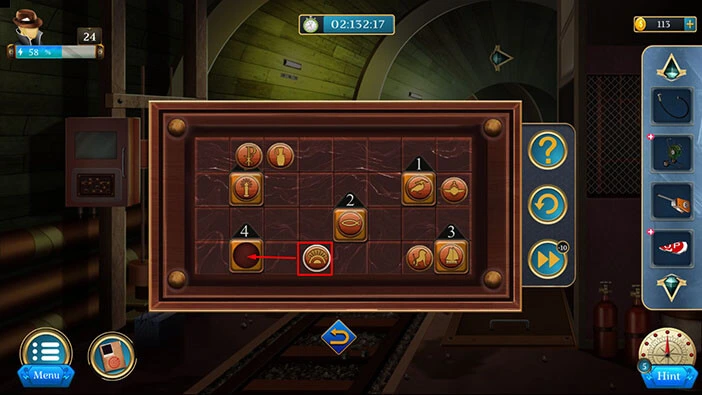
Step 8
Select the symbol in the fifth slot in the third row and move it one slot down.
Step 9
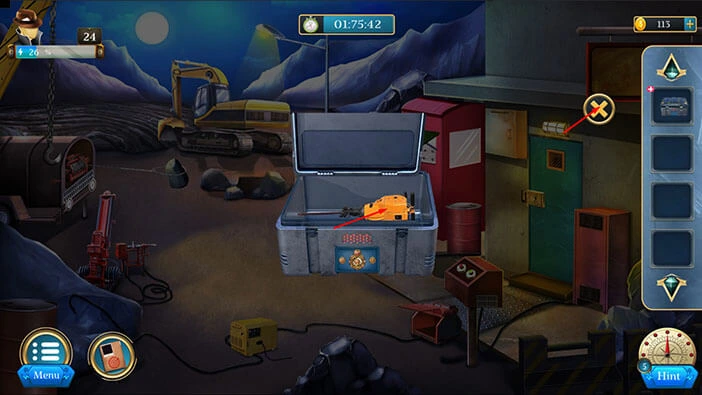
Finally, select the symbol in the fifth slot in the first row and move it two slots down. With that, you will solve this puzzle, and you will open the box.
In the box, you will find a “Driller” and a “Cutting Blade”. Let’s tap on these two items to pick them up.
After that, tap on the arrow at the bottom to go back.
Next, let’s tap on the trapdoor on the right to take a closer look at it.
Select the “Driller” from the inventory and use it to remove the screws and you will open the trapdoor.
At the bottom of the hole, you will notice a blue item, but our character can’t reach it with his bare hands. So, we will have to come back to it a bit later.
For now, let’s tap on the arrow at the bottom to go back.
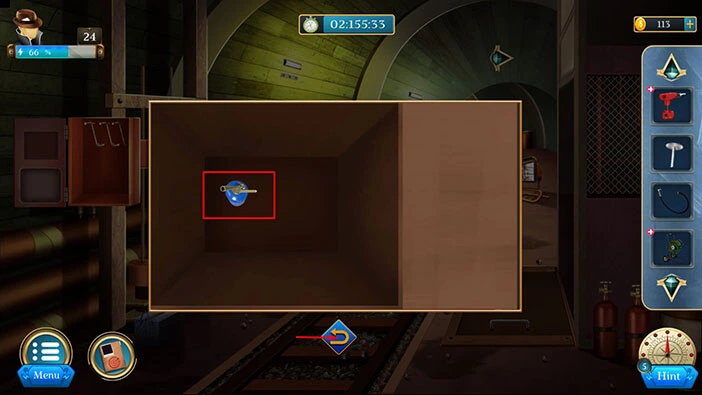
Select the “Driller” from the inventory and it will appear in the middle of the screen. After that, tap on the drill to remove it.

Next, select the “Cutting Blade” from the inventory and attach it to the driller. With that, you will create a cutting machine.
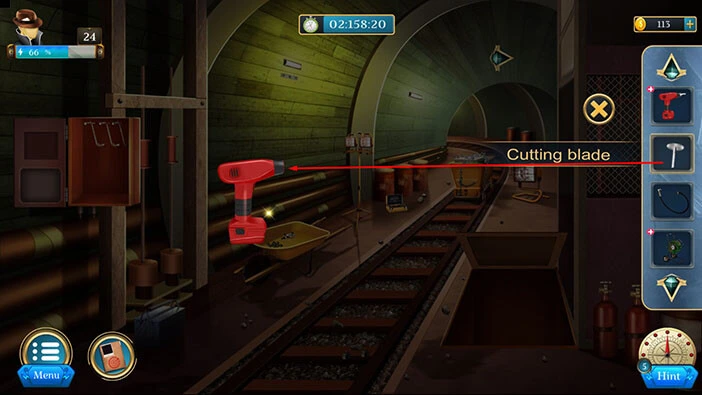
Let’s tap on the “Cutting machine” to pick it up. After that, tap on the “X” button to close this window.
Next, let’s tap on the cart to take a closer look at it.
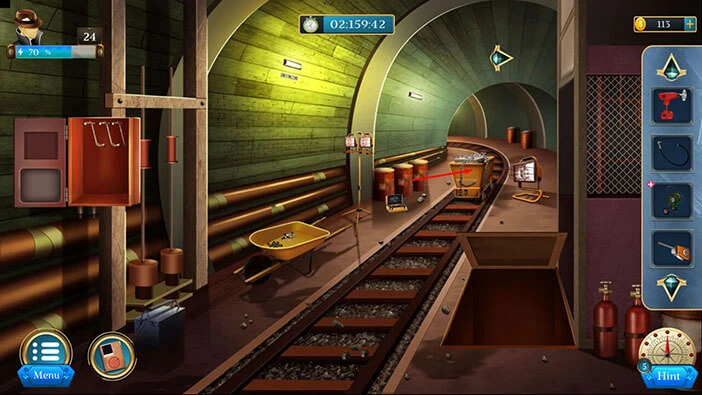
Select the “Cutting machine” from the inventory and use it to cut the chains.
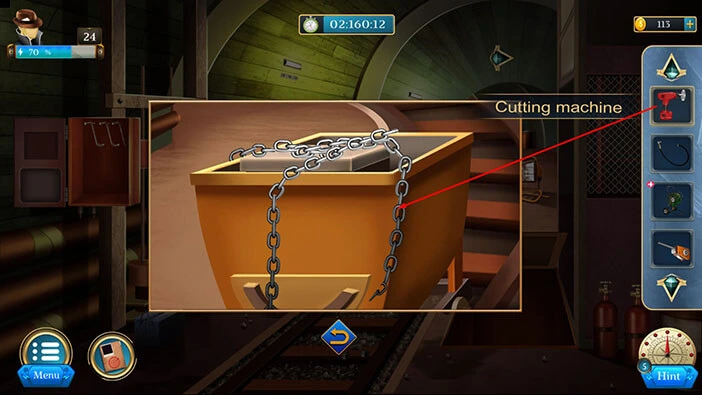
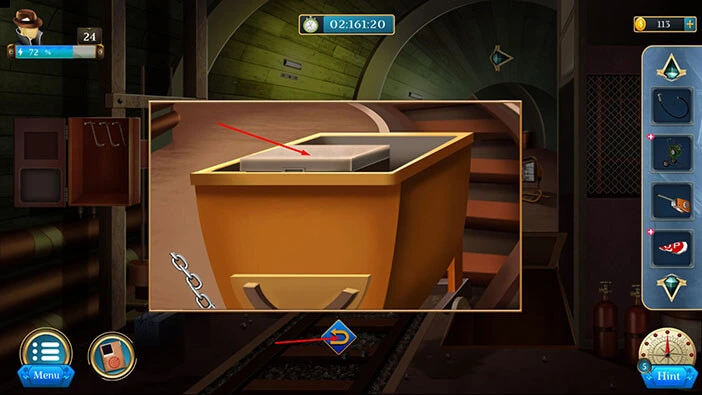
Inside you will find a “Box”. Let’s tap on it to pick it up. After that, tap on the arrow at the bottom to go back.
Let’s go back to the previous room. Tap on the arrow in the top right corner of the screen.

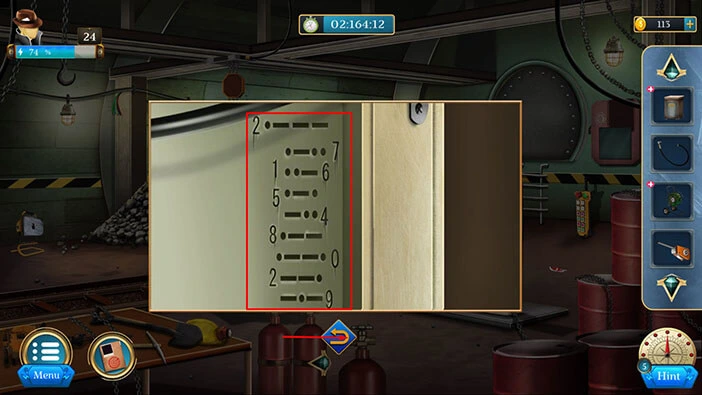
Let’s tap on the wires on the left to take a closer look at them, and tap again to move them aside.
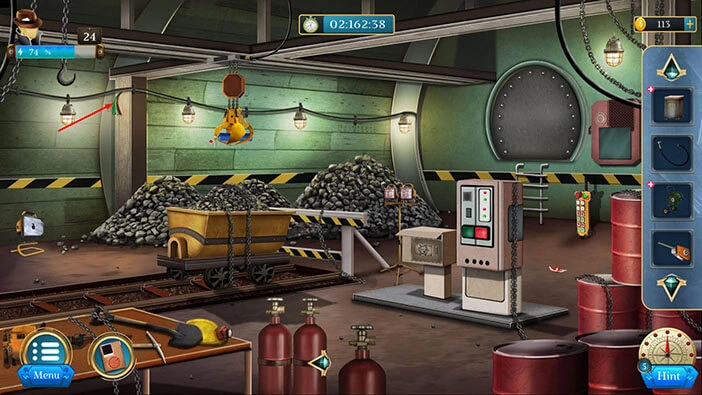
Here, you will discover the hint for the next puzzle. Beside each number, you will discover a combination of dashes and dots. Let’s memorize/write down this information because we will need it for the next puzzle.
Once you’re done, tap on the arrow at the bottom to go back.
Select the “Box” from the inventory and it will appear in the middle of the screen, and tap again to start the interaction.
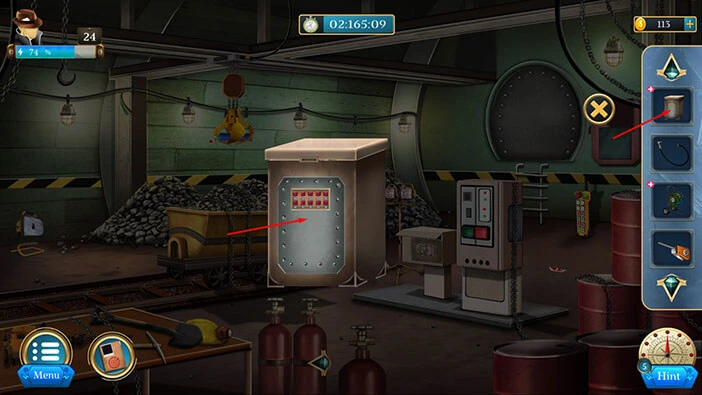
Here, we have another puzzle. We already discovered the hint for this puzzle (under the wires), so we just need to insert the correct number below each symbol.
So, let’s enter the number “90457”. With that, you will open the box.
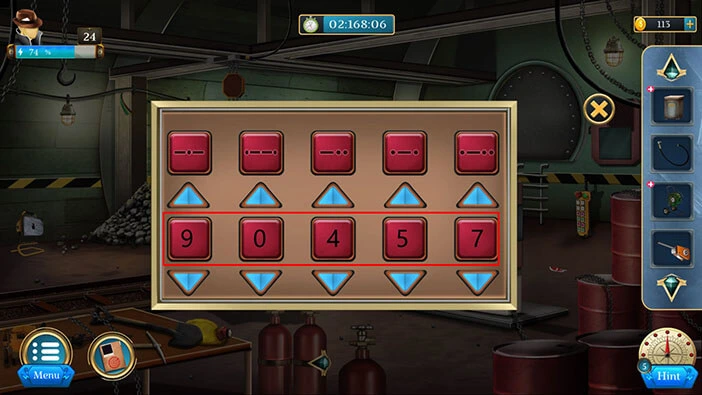
In the box, you will find a “Cylinder”. Let’s tap on it to pick it up. After that, tap on the “X” button to close this window.
Next, let’s tap on the “Sing board piece” located on the floor on the right to take a closer look at it, and tap again to pick it up. After that, tap on the arrow at the bottom to go back.

Select the “Signboard piece” (the one with the plus sign) and it will appear in the middle of the screen. After that, select the other “Signboard piece” from the inventory and merge it with the first one.
At the bottom of the sign, you will notice two symbols. Let’s memorize/write down these symbols and their position because this information represents the first part of the hint for the next puzzle.
Once you’re done, tap on the “X” button to close this window.
Let’s go back to the previous room, and look for the second part of the hint. Tap on the arrow at the bottom of the screen.

Let’s tap on the lamp on the left to take a closer look at it.
Here, you will discover the second part of the hint. Let’s memorize/write down these symbols and their position because this information represents the second part of the hint for the next puzzle.
Once you’re done, tap on the arrow at the bottom to go back.
Let’s go back to the previous room. Tap on the arrow in the top right corner of the screen.

Let’s tap on the machine on the right to take a closer look at it, and tap again to start the interaction.
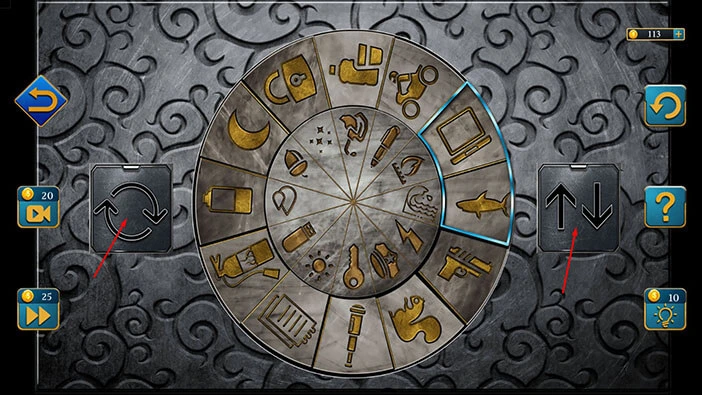
Here, we have another puzzle. Our task is to place the symbols into the correct slots. We already discovered the correct position of the symbols by examining two previous hints (the sign in our inventory and the wall below the lamp in the previous room).
We will solve this puzzle in several steps. Let’s begin.
Step 1
Let’s tap five times on the “Butterfly” symbol to rotate the slots.
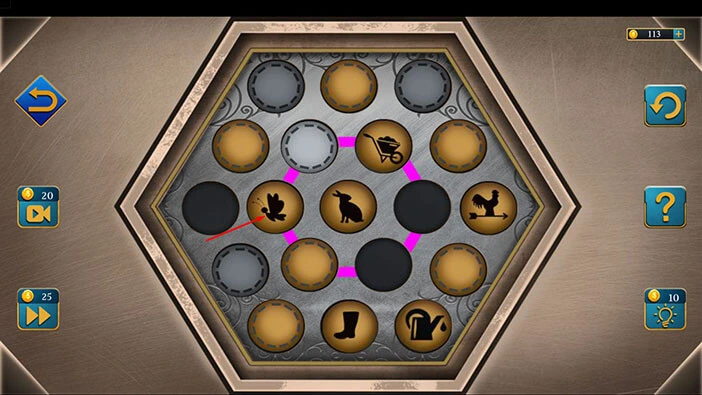
Step 2
Let’s tap two times on the slot in the bottom right corner to rotate the symbols.
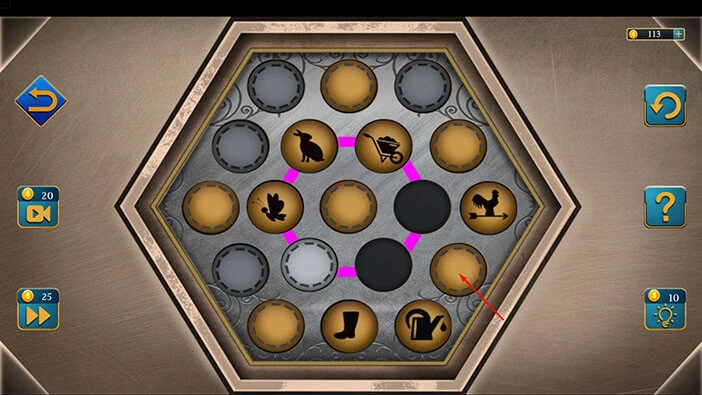
Step 3
Lastly, let’s tap two times on the slot in the bottom left corner to rotate the symbols. With that, you will solve this puzzle, and you will unlock the door.
In the machine, you will find a “Box” and a “Lever”. Let’s tap on these two items to pick them up.
Once you’re done, tap on the arrow at the bottom to go back.
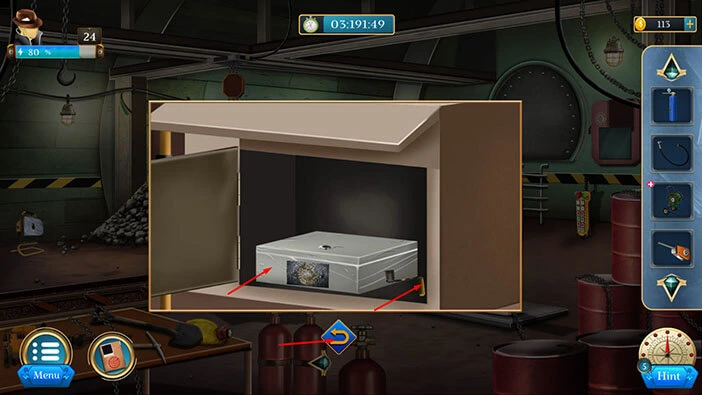
Select the “Box” from the inventory and it will appear in the middle of the screen. After that, tap on the box to start the interaction.
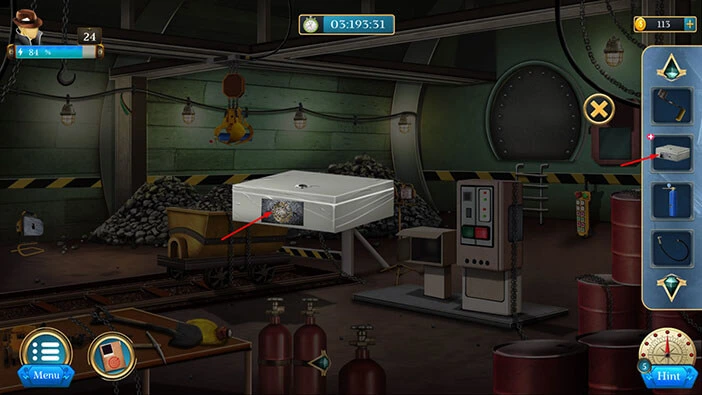
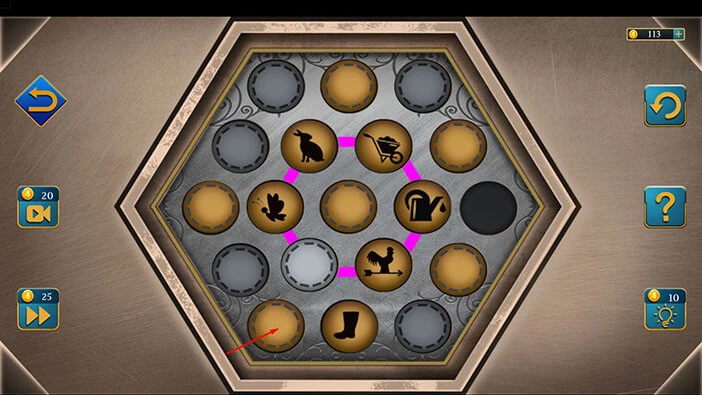
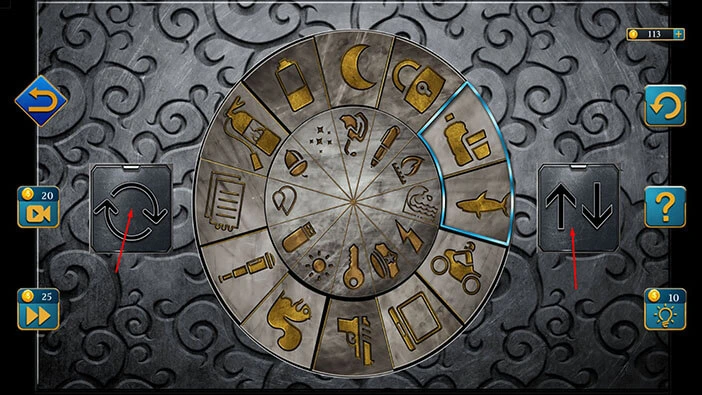
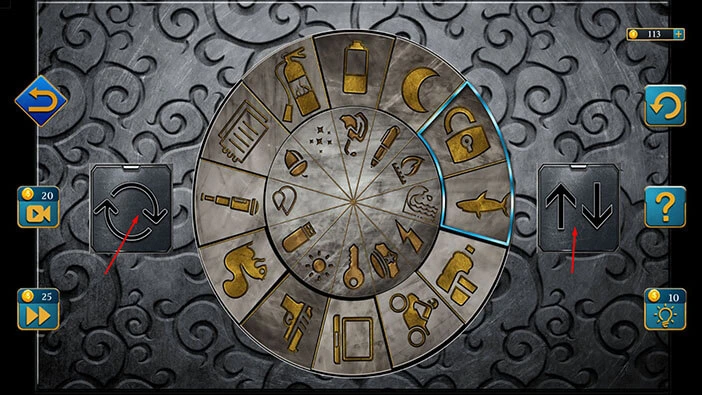
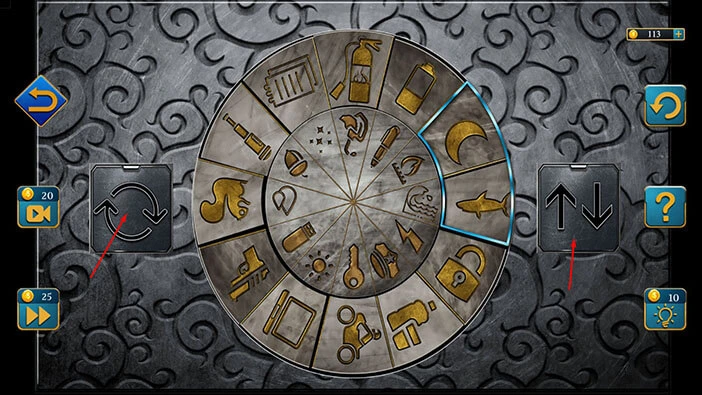
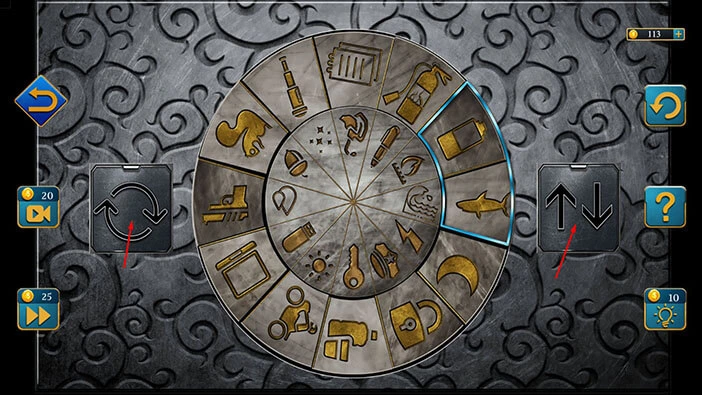
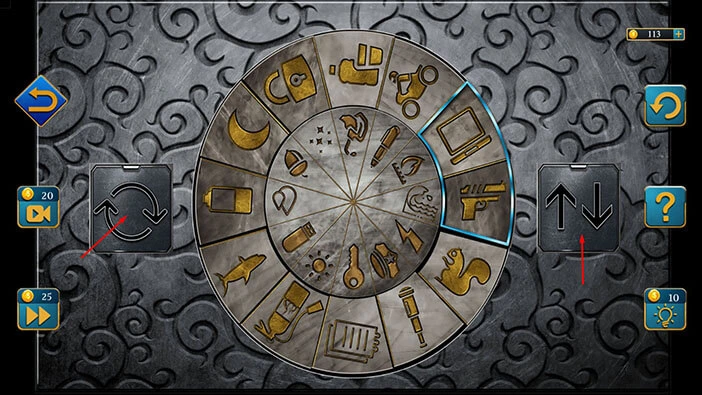
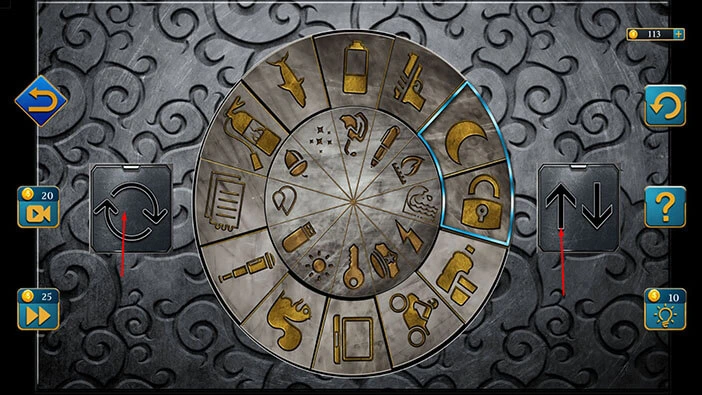
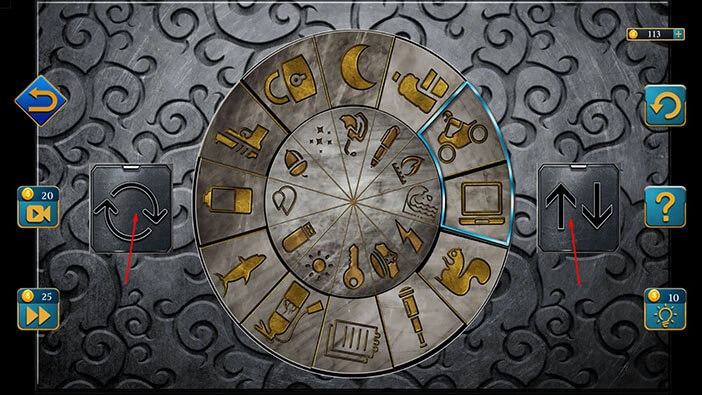
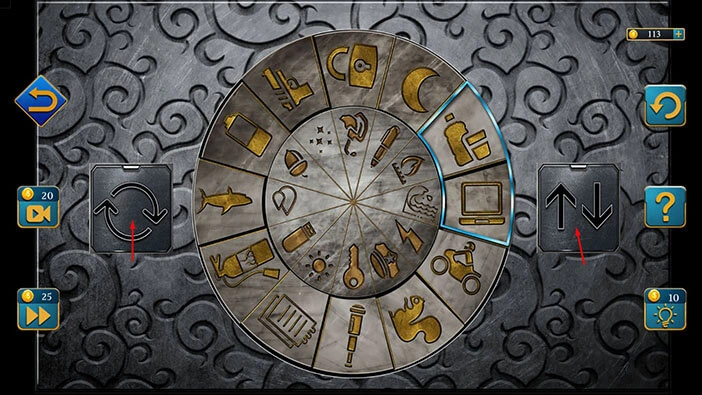
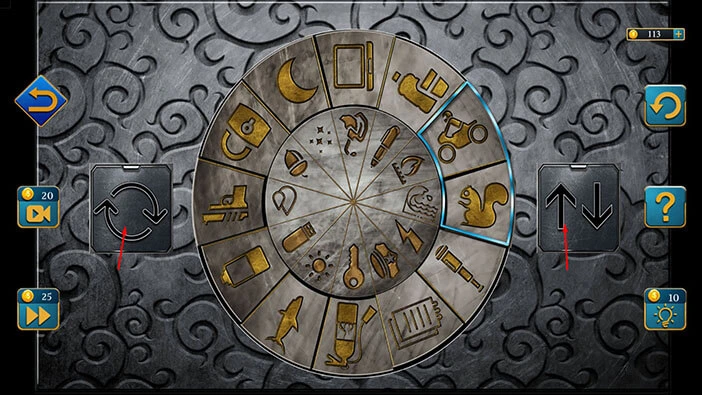
Here, we have another puzzle. Our task is to pair up similar symbols (for example, a squirrel and a nut, a shark and a wave, etc.). We will do this puzzle in several steps. Let’s begin.
Step 1
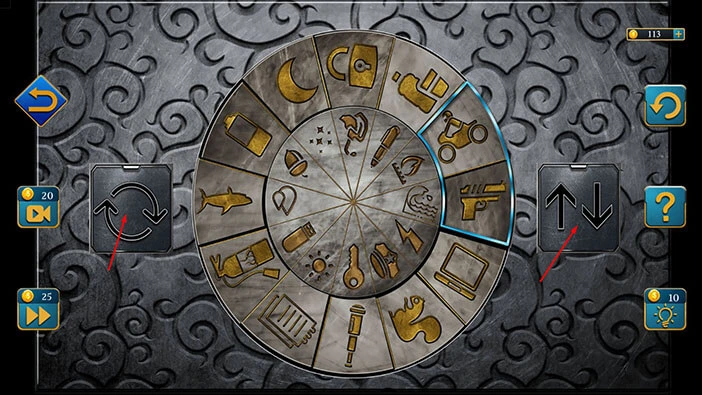
Tap five times on the arrow on the left to turn the wheel. After that, tap on the arrow on the right to swap the position of the symbols in the blue slots.
Step 2
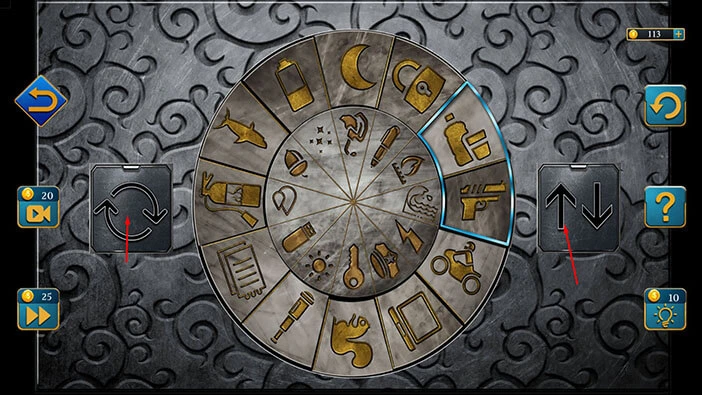
Tap once on the arrow on the left to turn the wheel. After that, tap on the arrow on the right to swap the position of the symbols in the blue slots.

Step 3
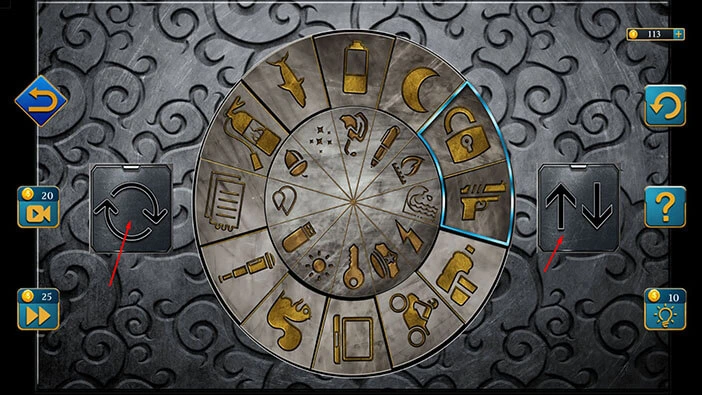
Tap once on the arrow on the left to turn the wheel. After that, tap on the arrow on the right to swap the position of the symbols in the blue slots.
Step 4
Tap once on the arrow on the left to turn the wheel. After that, tap on the arrow on the right to swap the position of the symbols in the blue slots.
Step 5
Tap once on the arrow on the left to turn the wheel. After that, tap on the arrow on the right to swap the position of the symbols in the blue slots.
Step 6
Tap once on the arrow on the left to turn the wheel. After that, tap on the arrow on the right to swap the position of the symbols in the blue slots.
Step 7
Tap six times on the arrow on the left to turn the wheel. After that, tap on the arrow on the right to swap the position of the symbols in the blue slots.
Step 8
Tap once on the arrow on the left to turn the wheel. After that, tap on the arrow on the right to swap the position of the symbols in the blue slots.
Step 9
Tap once on the arrow on the left to turn the wheel. After that, tap on the arrow on the right to swap the position of the symbols in the blue slots.
Step 10
Tap once on the arrow on the left to turn the wheel. After that, tap on the arrow on the right to swap the position of the symbols in the blue slots.
Step 11
Tap once on the arrow on the left to turn the wheel. After that, tap on the arrow on the right to swap the position of the symbols in the blue slots.

Step 12
Tap eleven times on the arrow on the left to turn the wheel. After that, tap on the arrow on the right to swap the position of the symbols in the blue slots.
Step 13
Tap nine times on the arrow on the left to turn the wheel. After that, tap on the arrow on the right to swap the position of the symbols in the blue slots.
Step 14
Tap once on the arrow on the left to turn the wheel. After that, tap on the arrow on the right to swap the position of the symbols in the blue slots.
Step 15
Tap ten times on the arrow on the left to turn the wheel. After that, tap on the arrow on the right to swap the position of the symbols in the blue slots.
Step 16
Tap eleven times on the arrow on the left to turn the wheel. After that, tap on the arrow on the right to swap the position of the symbols in the blue slots.
Step 17
Finally, tap nine times on the arrow on the left to turn the wheel and you will solve this puzzle.

You will open the box as soon as you solve the previous puzzle. Inside you will find a “Mask”. Let’s tap on it to pick it up.
After that, tap on the “X” button to close this window.
Let’s tap on the machine on the right to take a closer look at it, and tap again to start the interaction.
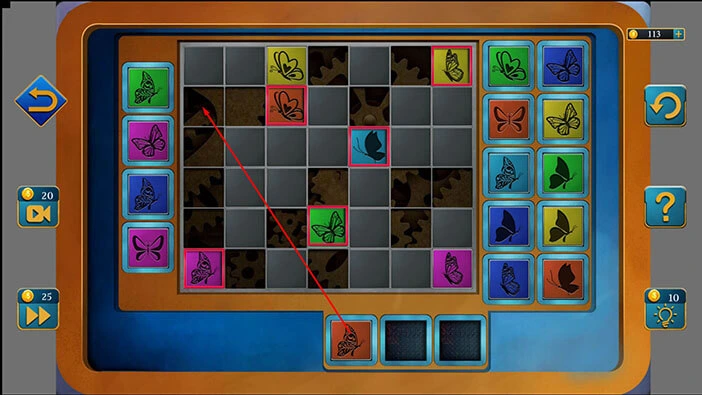
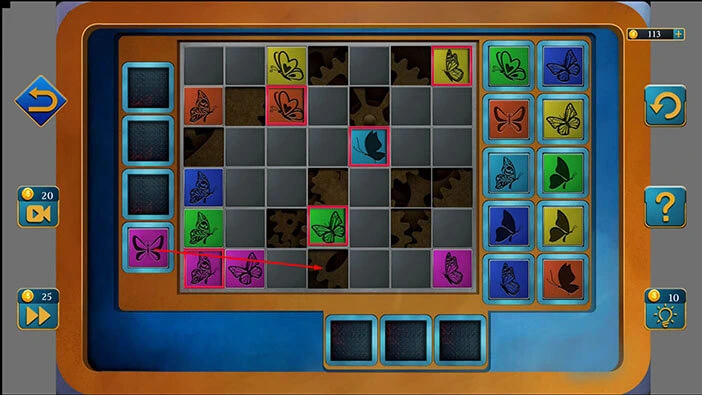
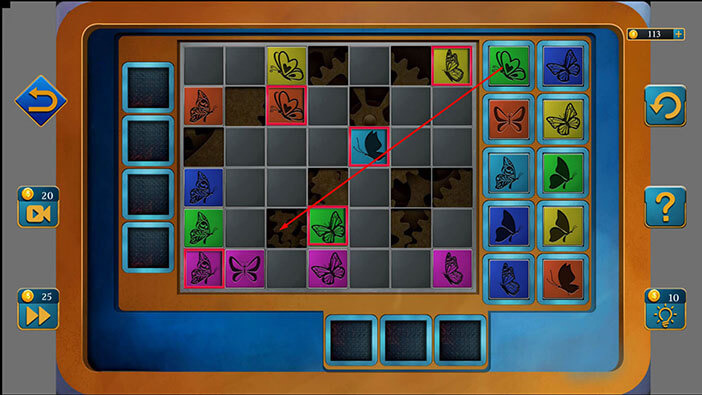
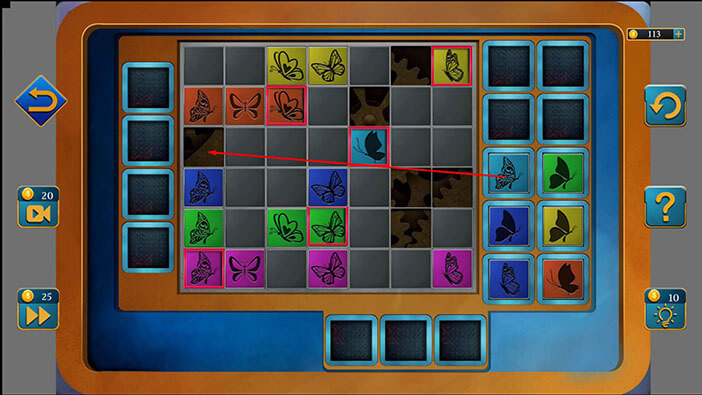
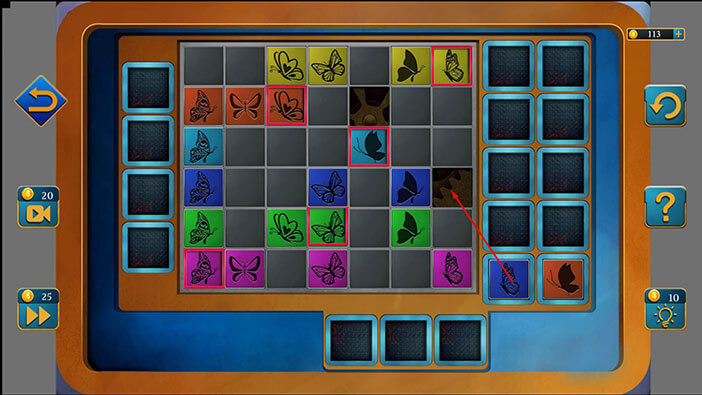
Here, we have another puzzle. Our task is to place the symbols into the correct slots. We will do this puzzle in several steps. Let’s begin.
Step 1
Select the purple butterfly from the bottom, and insert it into the seventh slot in the sixth row.
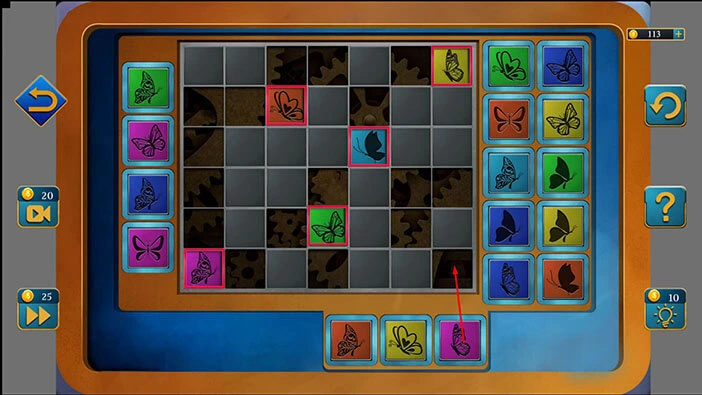
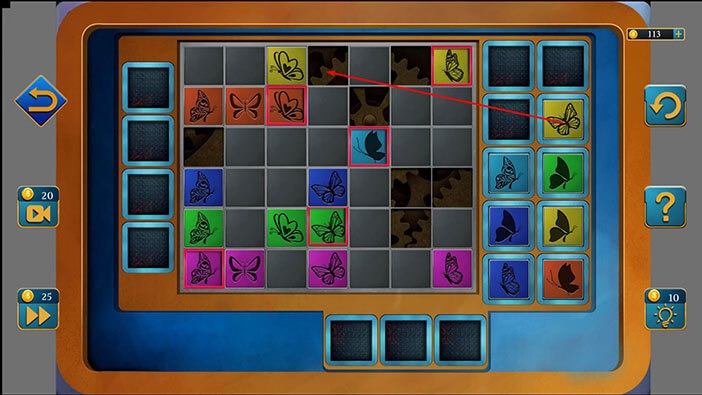
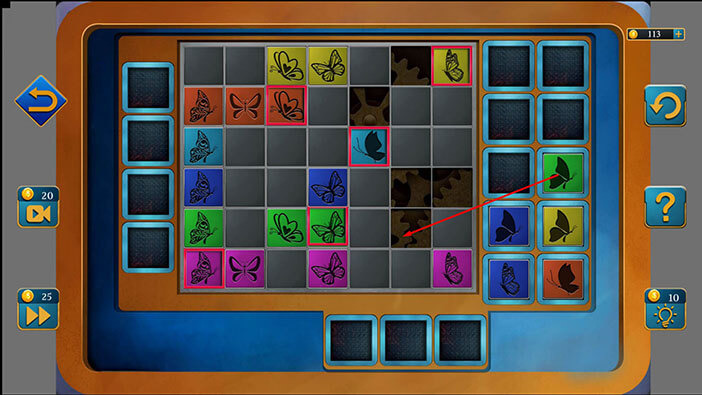
Step 2
Select the yellow butterfly from the bottom, and insert it into the third slot in the first row.

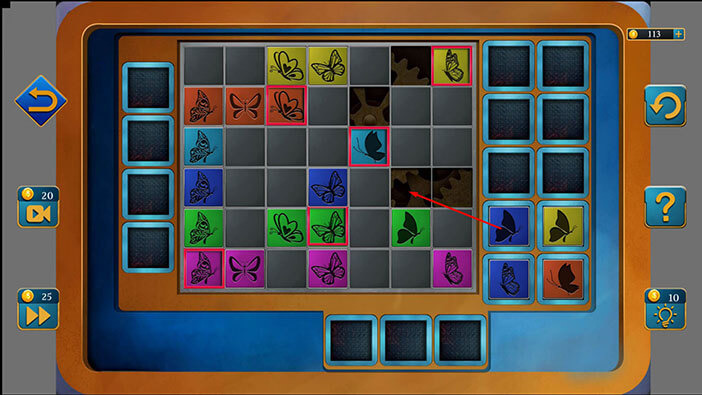
Step 3
Select the brown butterfly from the bottom, and insert it into the first slot in the second row.
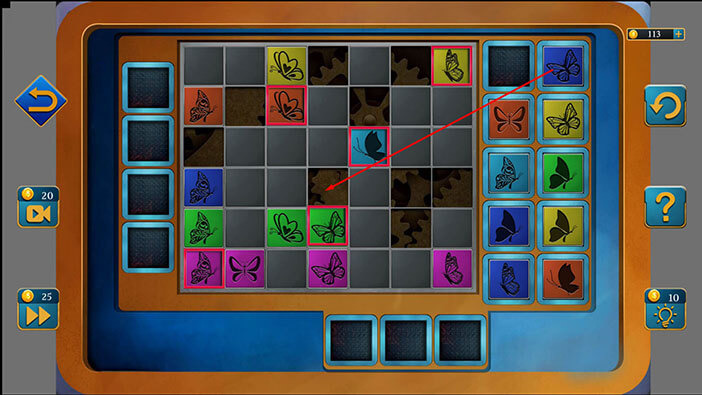
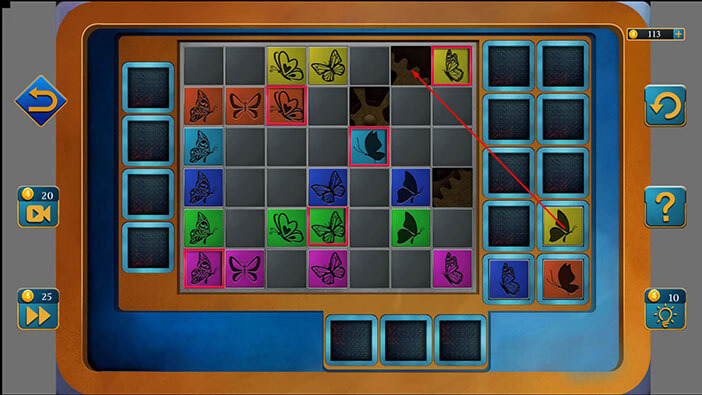
Step 4
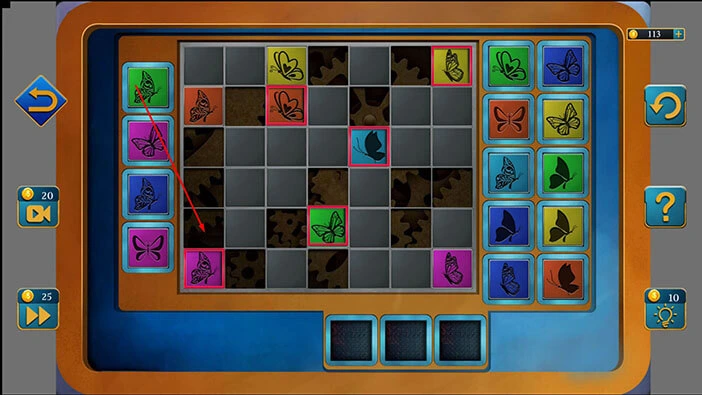
Select the green butterfly from the left, and insert it into the first slot in the fifth row.
Step 5
Select the purple butterfly from the left, and insert it into the second slot in the sixth row.
Step 6
Select the blue butterfly from the left, and insert it into the first slot in the fourth row.
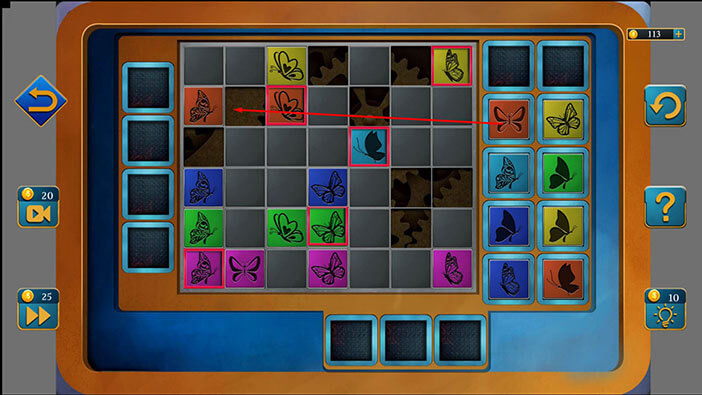
Step 7
Select the purple butterfly from the left, and insert it into the fourth slot in the sixth row.
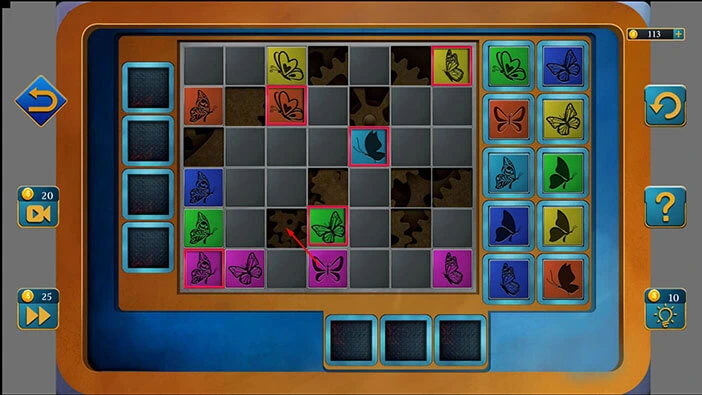
Step 8
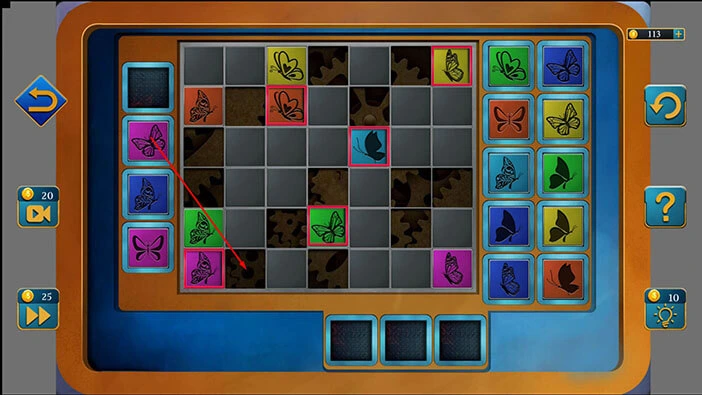
Select the purple butterfly, located in the fourth slot in the sixth row, and move it to the third slot in the fifth row.
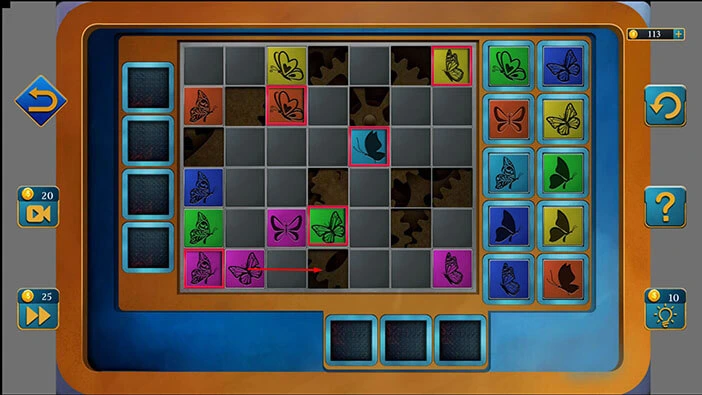
Step 9
Select the purple butterfly, located in the second slot in the sixth row, and move it to the fourth slot in the sixth row.
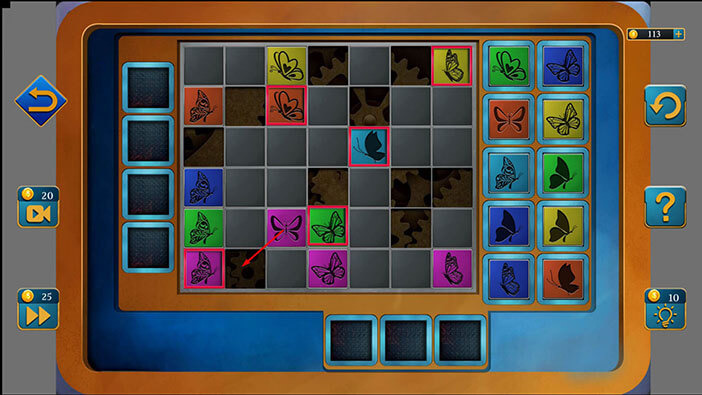
Step 10
Select the purple butterfly, located in the third slot in the fifth row, and move it to the second slot in the sixth row.
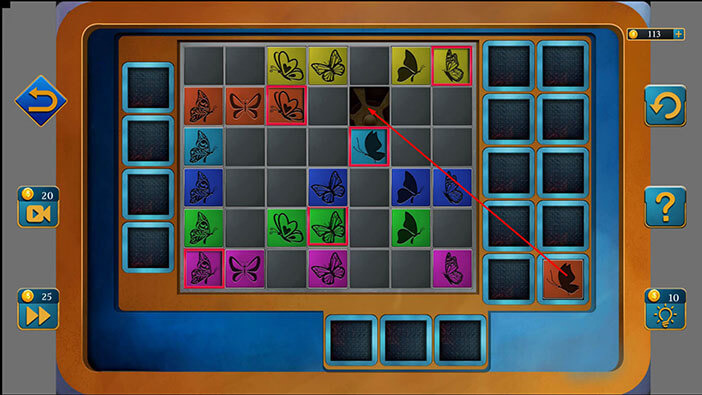
Step 11
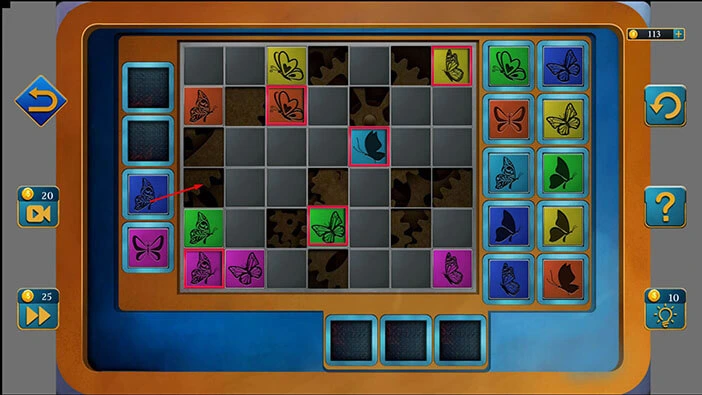
Select the butterfly in the first slot in the left column, and place it into the third slot in the fifth row.
Step 12
Select the butterfly in the first slot in the right column, and place it into the fourth slot in the fourth row.
Step 13
Select the butterfly in the second slot in the left column, and place it into the second slot in the second row.
Step 14
Select the butterfly in the second slot in the right column, and place it into the fourth slot in the first row.
Step 15
Select the butterfly in the third slot in the left column, and place it into the first slot in the third row.
Step 16
Select the butterfly in the third slot in the right column, and place it into the sixth slot in the fifth row.
Step 17
Select the butterfly in the fourth slot in the left column, and place it into the sixth slot in the fourth row.
Step 18
Select the butterfly in the fourth slot in the right column, and place it into the sixth slot in the first row.
Step 19
Select the butterfly in the fifth slot in the left column, and place it into the seventh slot in the fourth row.
Step 20
Select the butterfly in the fifth slot in the right column, and place it into the fifth slot in the second row. With that, you will solve this puzzle, and you will open the door.
Inside, you will find a “Lever”. Let’s tap on it to start the interaction. The mechanical hand will drop something.
Let’s tap on the item that we dropped by activating the lever to take a closer look. Tap on this item again to pick it up, and “Cylinder” will be added to your inventory.
After that, tap on the arrow at the bottom to go back.
Select the “Roller” from the inventory and it will appear in the middle of the screen. After that, select the “Lever” from the inventory and attach it to the “Roller”.
Let’s tap on the “Roller” to pick it up. After that, tap on the “X” button to close this window.
Let’s go back to the previous room. Tap on the arrow at the bottom of the screen.

If you recall, previously we discovered an item in the hole under the trapdoor. However, we couldn’t reach that item back then. So, let’s go back and acquire this item.

Select the “Roller” from the inventory and place it next to the hole.
We hooked the item, so let’s tap on the roller to drag the item to the surface.
We can now reach the “Cylinder”. Let’s tap on it to pick it up.
After that, tap on the arrow at the bottom to go back.

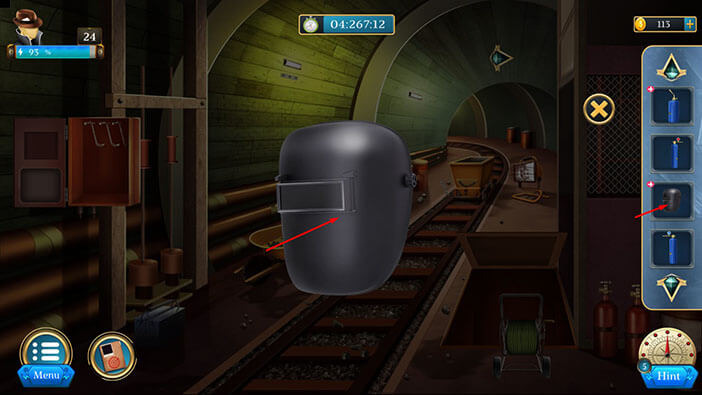
Next, select the “Mask” in our inventory and it will appear in the middle of the screen. Tap on it again to look inside.
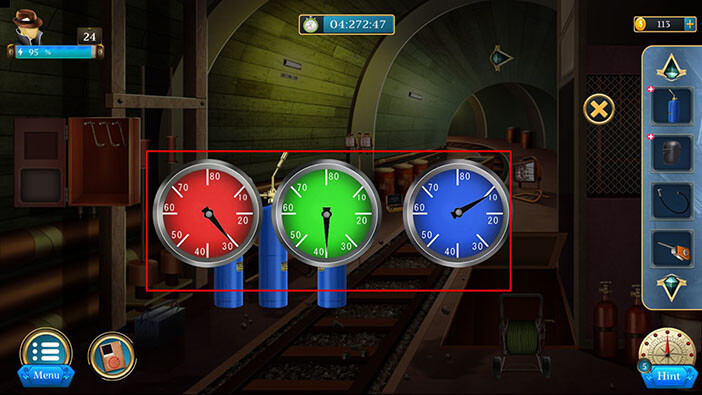
Here, you will see red number 30, green number 40, and blue number 10. Let’s memorize/write down this information because we will need it for the next puzzle.
Once you’re done, tap on the “X” button to close this window.

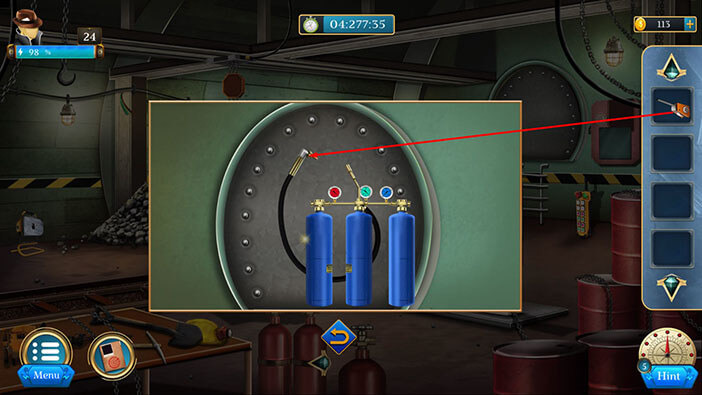
Select the “Cylinder” from the inventory (the one with the plus sign) and it will appear in the middle of the screen.
After that, select the other two “Cylinders” from the inventory and attach them to this one.
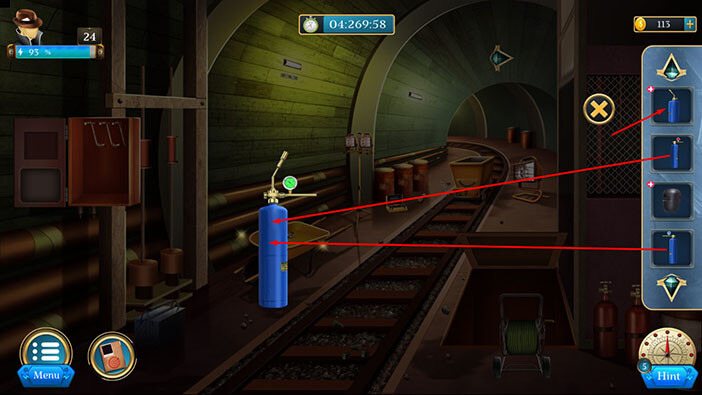
We have assembled the “Cylinders” so let’s tap on them to start the interaction.
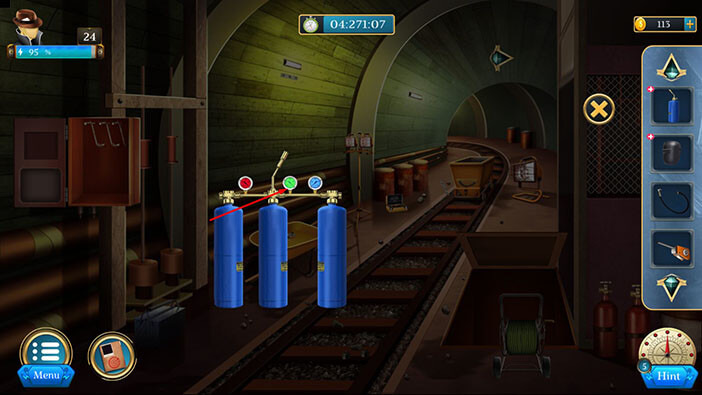
Here, we have another puzzle. Our task is to correct the set value in all three slots. We already discovered the correct numbers by examining the “Mask”. So, let’s enter red number 30, green number 40, and blue number 10.
With that, you will solve this puzzle.
Next, select the “Welding nozzle” from the inventory and attach it to the cylinders.
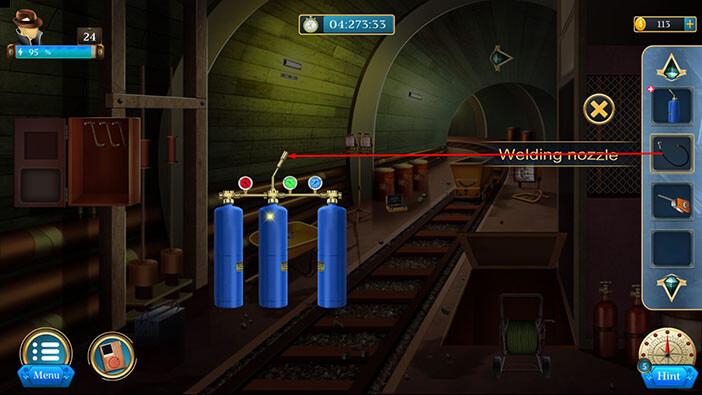
Let’s tap on the “Welding Equipment” to pick it up. After that, tap on the “X” button to close this window.
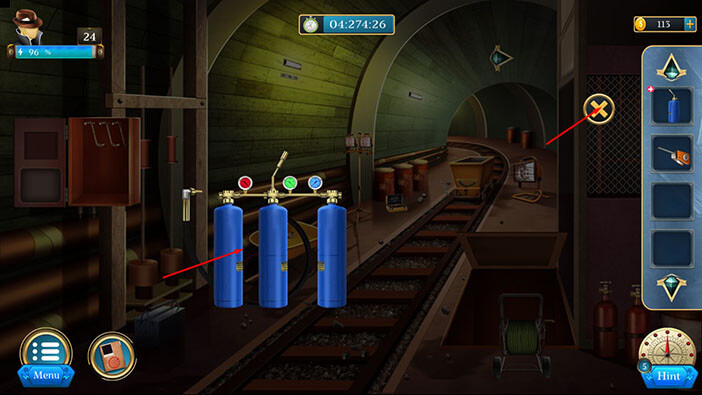
Let’s go back to the previous room. Tap on the arrow in the top right corner of the screen.
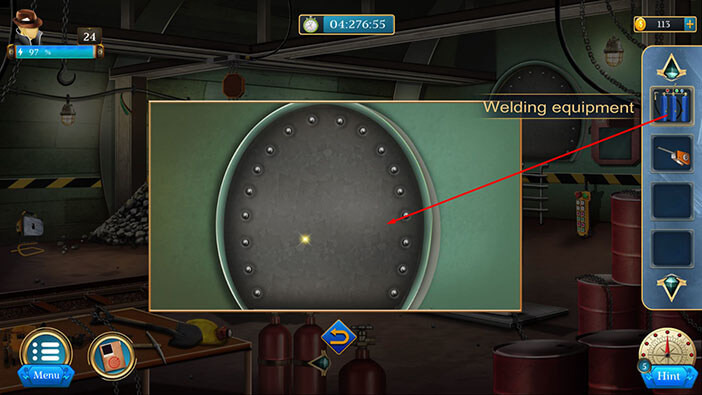
Let’s tap on the large metal door on the right to take a closer look at it.
Select the “Welding Equipment” from the inventory and place it in front of the door.
Select the “Lighter” from the inventory and use it to start the fire. With that, you will break the door and you will complete this level.
With that, we have reached the end of the twenty-fourth level. If you want to see the walkthrough for the final, twenty-fifth level, tap on the next part button.
Thank you for reading.