Room Escape: Detective Phantom | Level 23
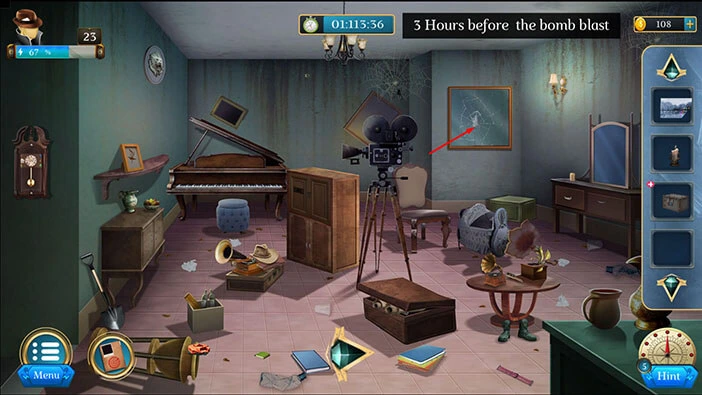
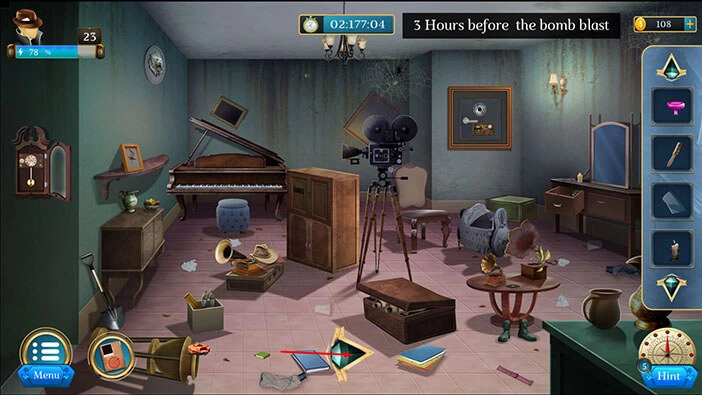
Hello everyone and welcome to the walkthrough for the twenty-third level of “Room Escape: Detective Phantom”. In the twenty-third level, our task is to discover the Black Spider’s secret, and we will use it to save Maze.
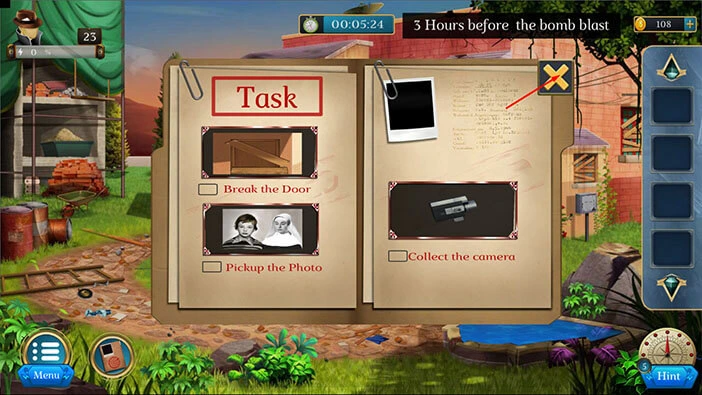
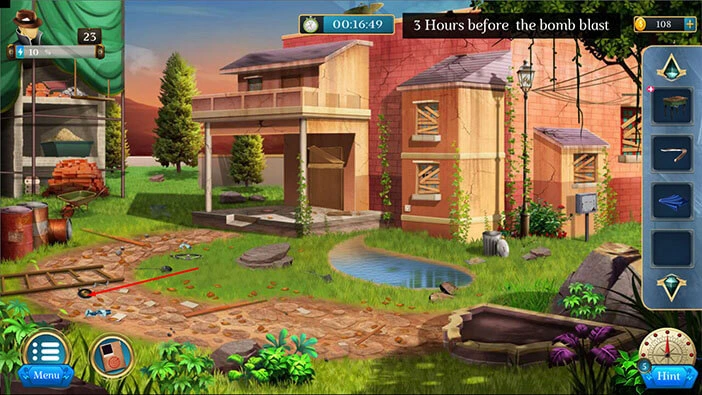
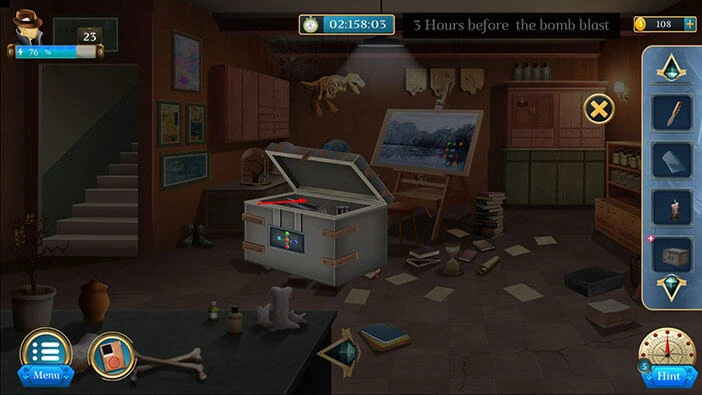
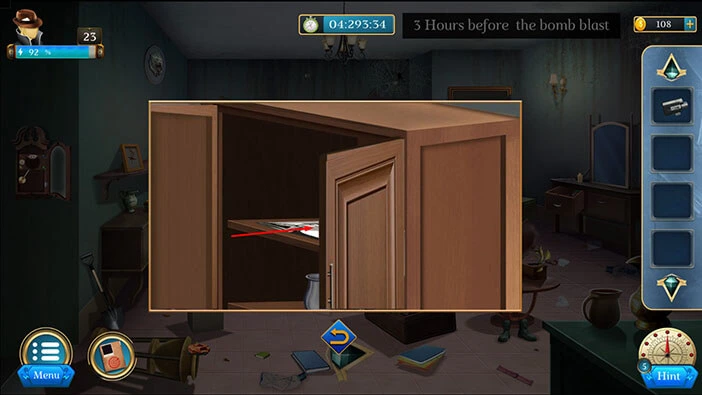
Our objectives are to “Break the door” “Pickup the Photo” and “Collect the camera”. Tap on the “X” button to go back.
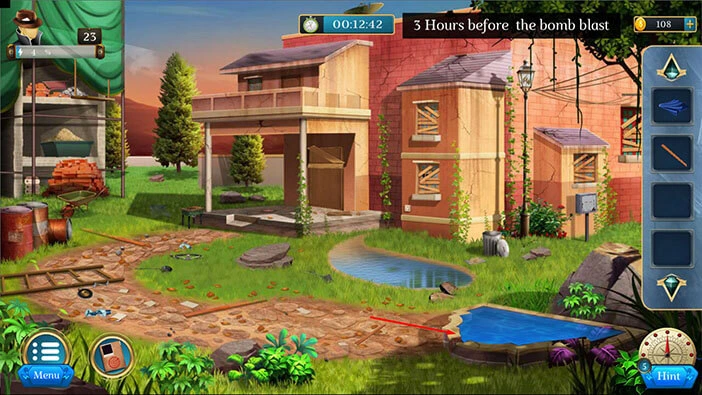
Let’s tap on the items on the ground on the right to take a closer look at them.
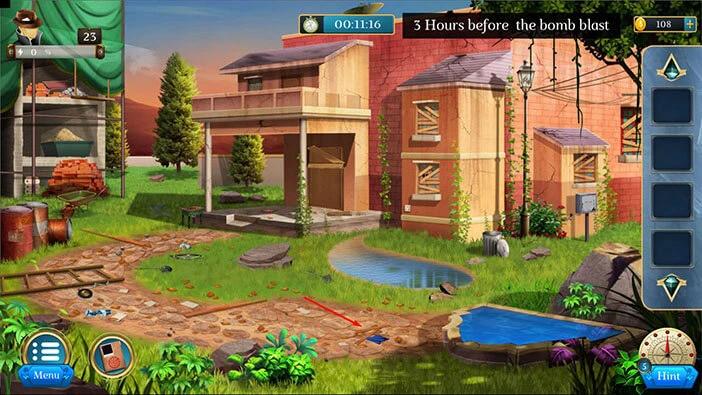
Here, you will find a “Plank” and a “Cloth”. Let’s tap on these two items to pick them up.
After that, tap on the arrow at the bottom to go back.

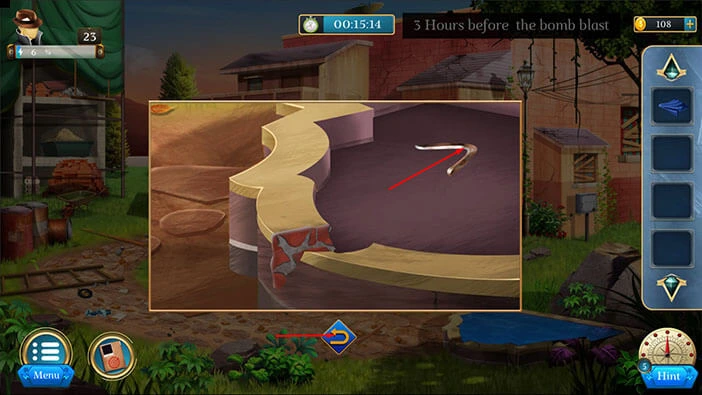
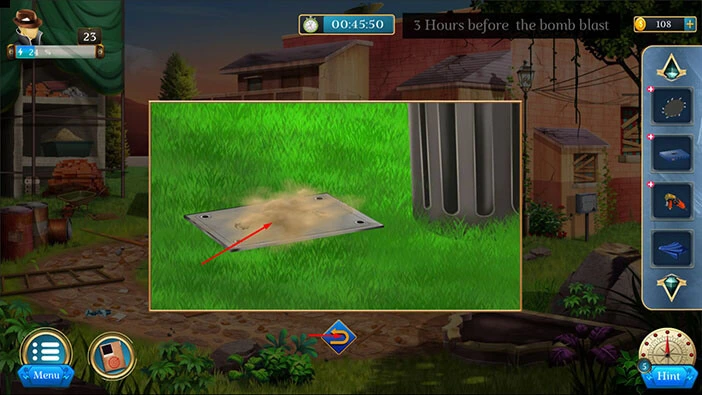
Let’s tap on the small pond on the right to take a closer look at it.
Select the “Plank” from the inventory and use it to break the cracked wall.
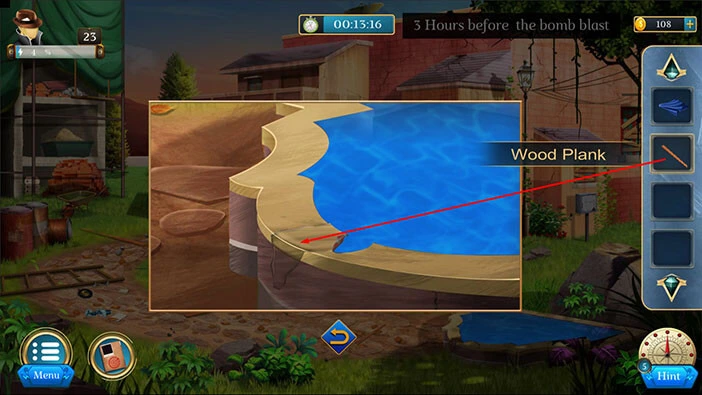
With that, you will drain the water from the pond, and inside you will find a “Boomerang”. Let’s tap on it to pick it up.
After that, tap on the arrow at the bottom to go back.
Let’s tap on the machine on the left to take a closer look at it, and tap again to pick it up. After that, tap on the arrow at the bottom to go back.

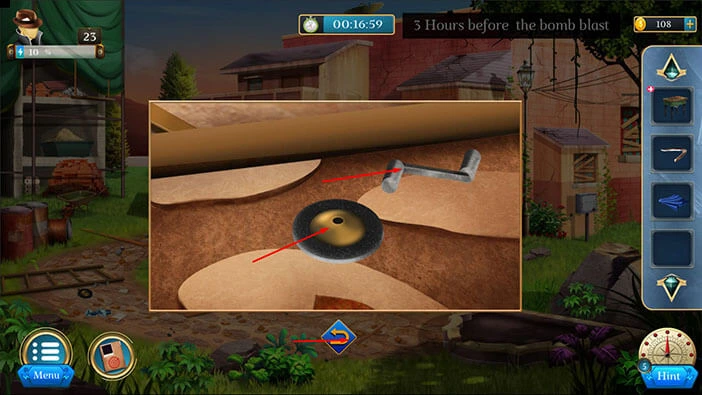
Next, let’s tap on the items on the ground on the left to take a closer look at them.
Here, you will find a “Sharpener” and a “Handle”. Let’s tap on these two items to pick them up.
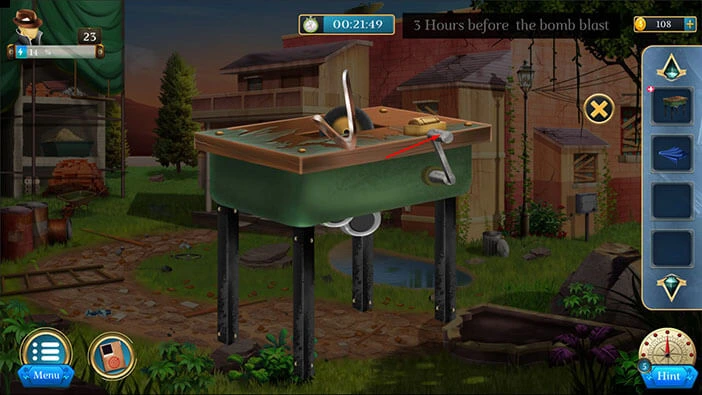
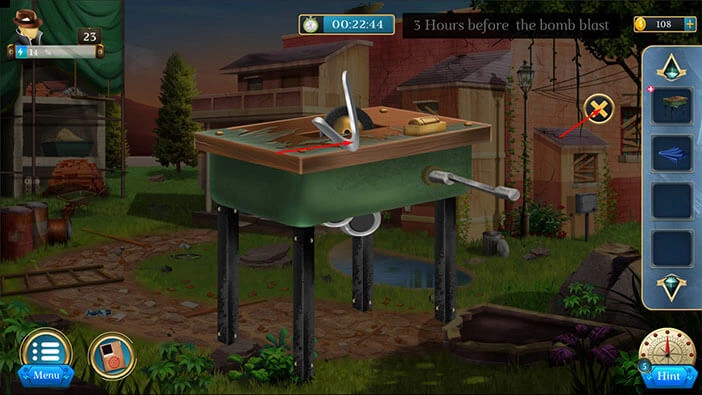
Select the “Machine” from the inventory and it will appear in the middle of the screen. After that, select the “Handle” from the inventory and insert it into the empty slot.
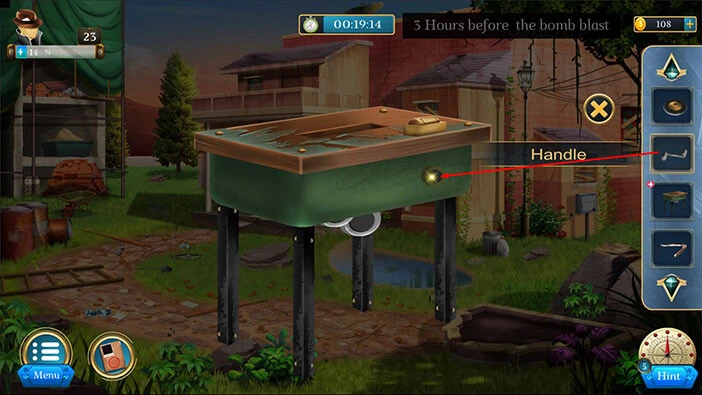
Next, select the “Sharpener” from the inventory and insert it into the empty slot.

Lastly, select the “Boomerang” from the inventory and put it on the machine.
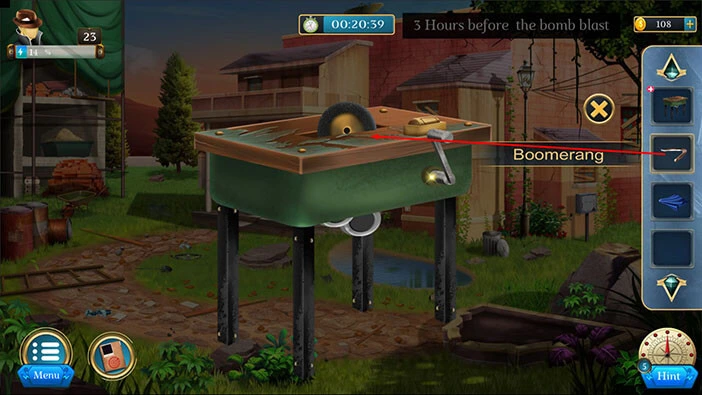
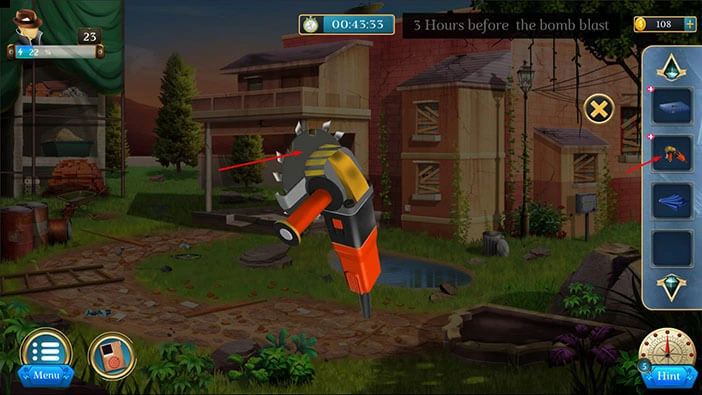
Tap on the handle to start the interaction and you will sharpen the boomerang.
Tap on the “Boomerang” to pick it up. After that, tap on the “X” button to close this window.
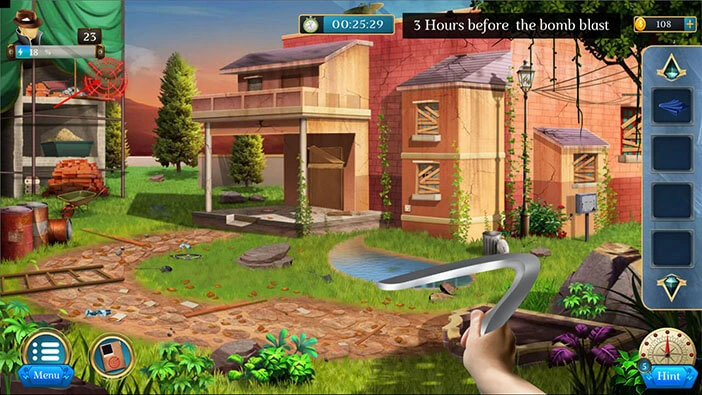
Select the “Boomerang” from the inventory and drag it to the bottom of the screen.

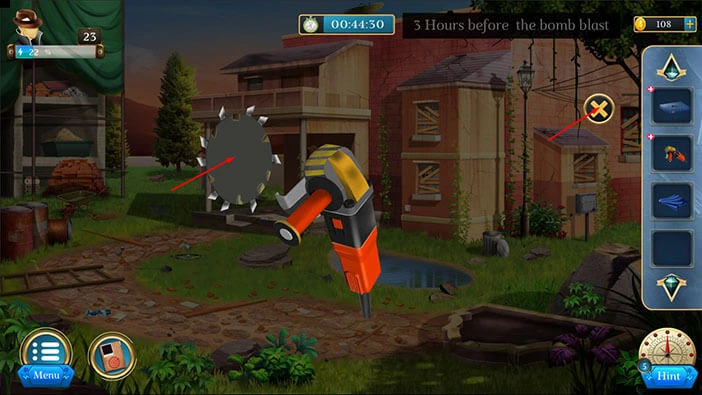
Our next task is to use the “Boomerang” to cut the ropes that are holding the item on the left. So, wait until the crosshair is in the correct position, and tap on the detective’s hand to throw the boomerang.
Let’s tap on the items that fell down to take a closer look at them.

Here, you will find a “Toolkit” and a “Cutter Machine”. Let’s tap on these two items to pick them up.
After that, tap on the arrow at the bottom to go back.

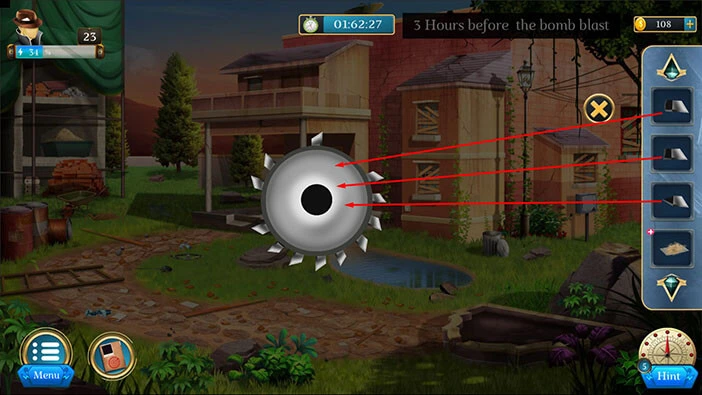
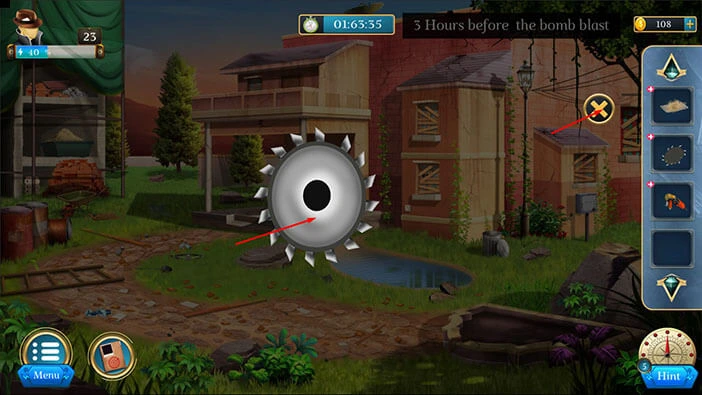
Select the “Cutter Machine” from the inventory and it will appear in the middle of the screen. After that, tap on the saw blade to remove it.
Let’s tap on the “Blade” to pick it up. After that, tap on the arrow at the bottom to go back.
Let’s tap on the trash can on the right to take a closer look at it.
Here, you will find a “Board”. Let’s tap on it to pick it up.
After that, tap on the arrow at the bottom to go back.
Select the “Board” from the inventory and it will appear in the middle of the screen. After that, select the “Cloth” from the inventory and use it to clean the board.
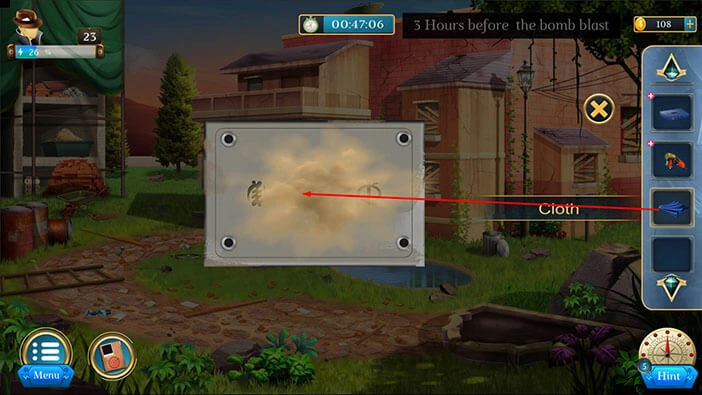
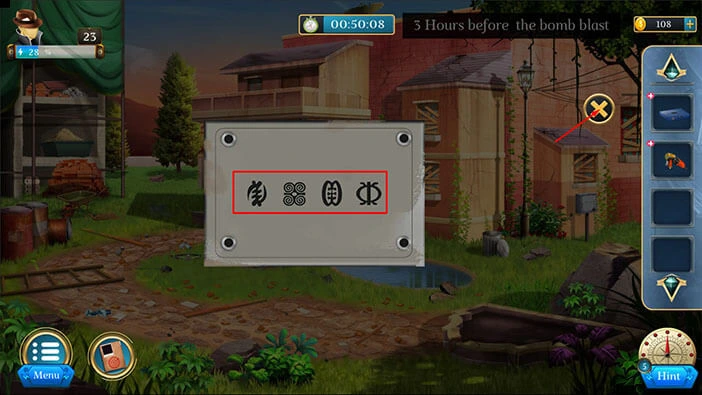
Let’s tap on the board to turn it around and look at the other side.
Here, you will notice four symbols. Let’s memorize/write down these symbols because we will need them for the next puzzle.
Once you’re done, tap on the “X” button to close this window.
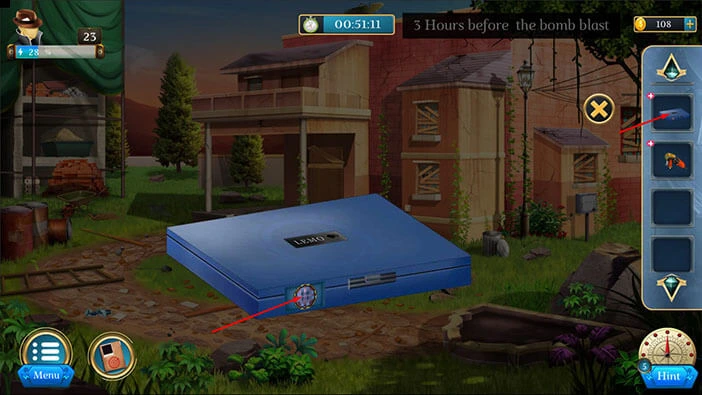
Next, select the “Toolkit” from the inventory and it will appear in the middle of the screen. After that, tap on the toolkit to start the interaction.
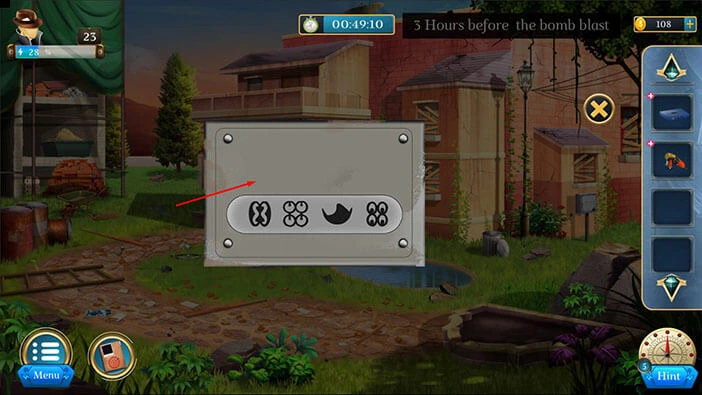
Here, we have another puzzle. Our task is to rearrange the symbols. We will do that in several steps. Let’s begin.
Step 1
Tap once on the first button on the left.

Step 2
Tap three times on the first button at the top.
Step 3
Tap once on the second button on the right.
Step 4
Tap three times on the second button on the right.

Step 5
Tap once on the first button at the bottom.

Step 6
Tap once on the second button on the left.
Step 7
Tap once on the first button on the left.

Step 8
Tap once on the first button at the bottom.

Step 9
Lastly, tap once on the first button on the right. With that, you will solve this puzzle.

You will unlock and open the toolbox as soon as you solve the puzzle. Inside you will find three “Teeth” that we need to repair the saw blade. Let’s tap on them to pick them up.
After that, tap on the “X” button to close this window.
Select the “Blade” from the inventory and it will appear in the middle of the screen. Select the three “Teeth” from the inventory and attach them to the blade.
Let’s tap on the “Blade” to pick it up. After that, tap on the “X” button to close this window.
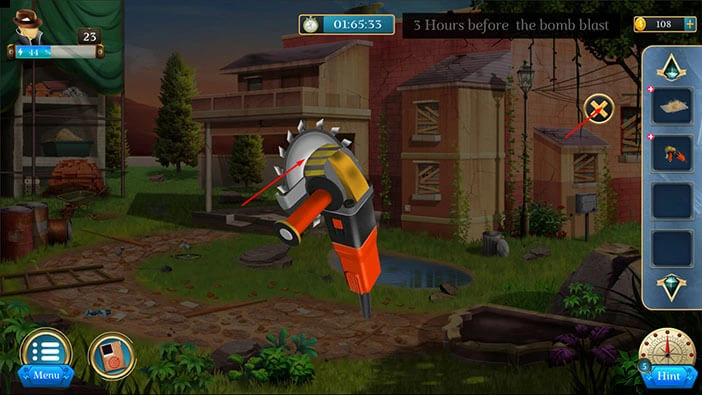
Next, select the “Cutter Machine” from the inventory and it will appear in the middle of the screen. After that, select the “Blade” from the inventory and reattach it to the machine.
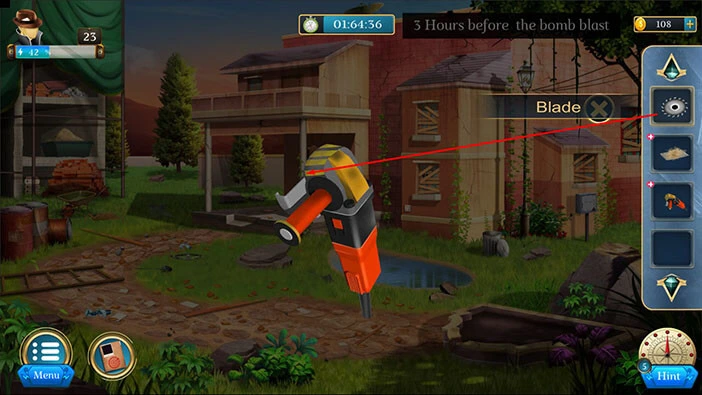
Let’s tap on the “Cutter Machine” to pick it up. After that, tap on the “X” to close this window.
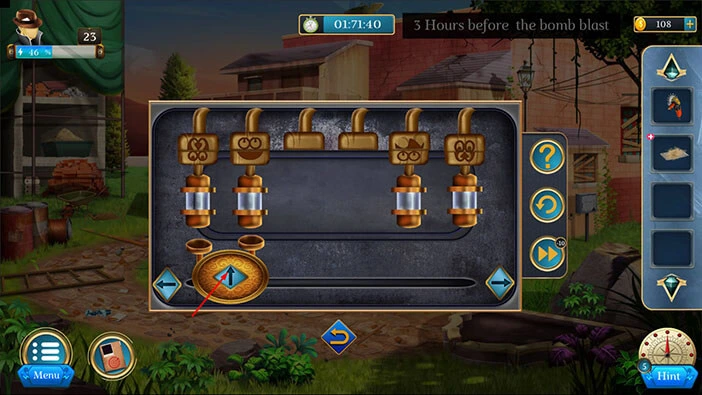
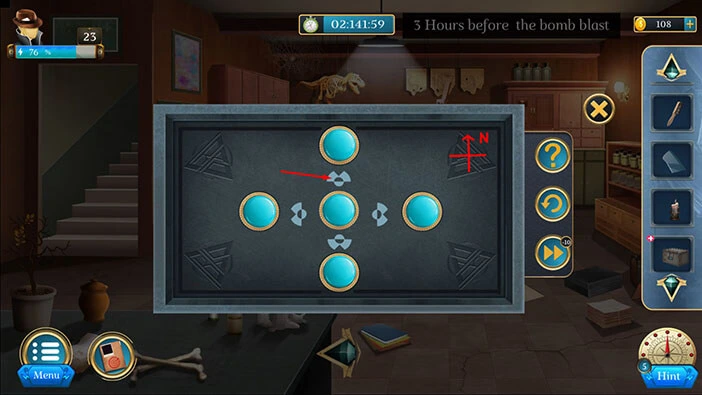
Next, let’s tap on the machine on the right to take a closer look at it, and tap again to start the interaction.

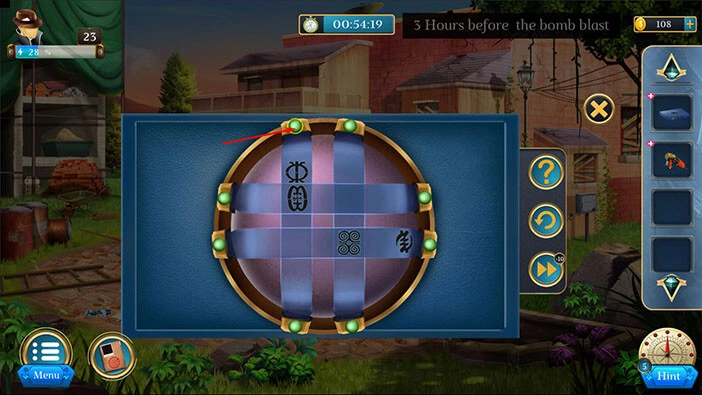
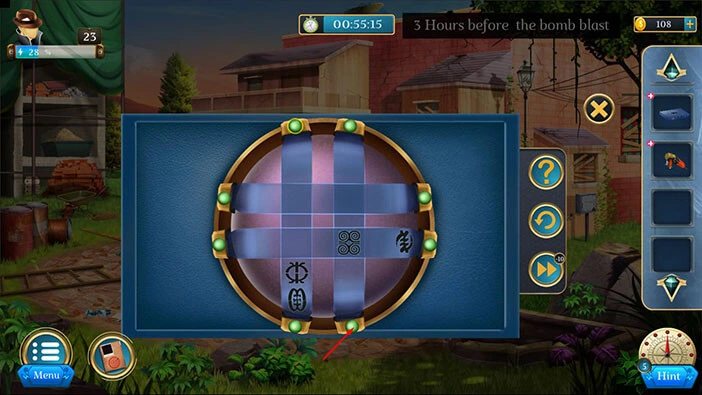
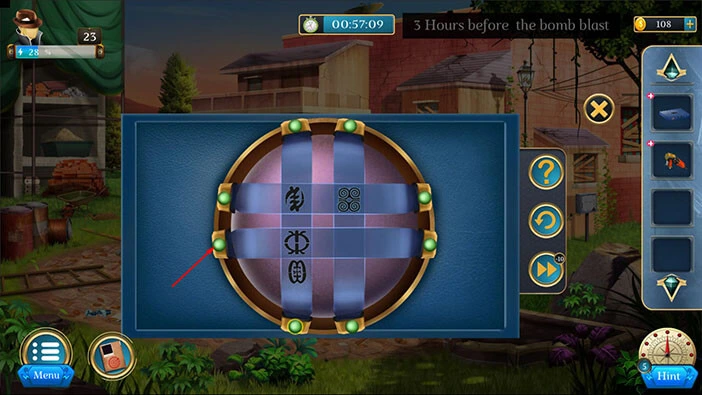
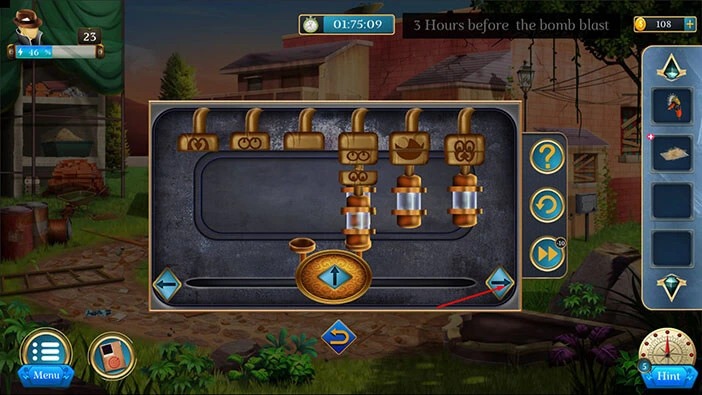
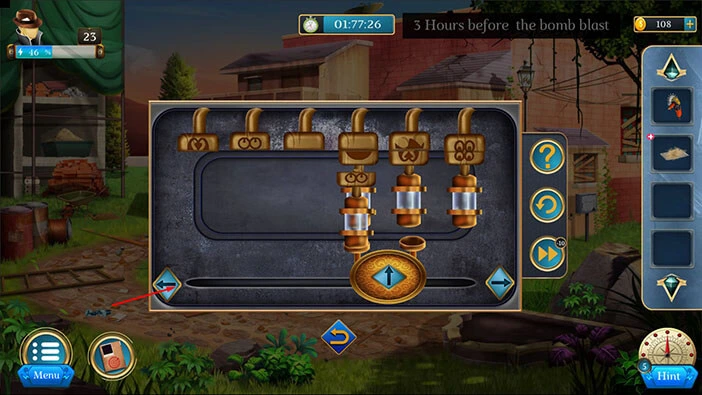
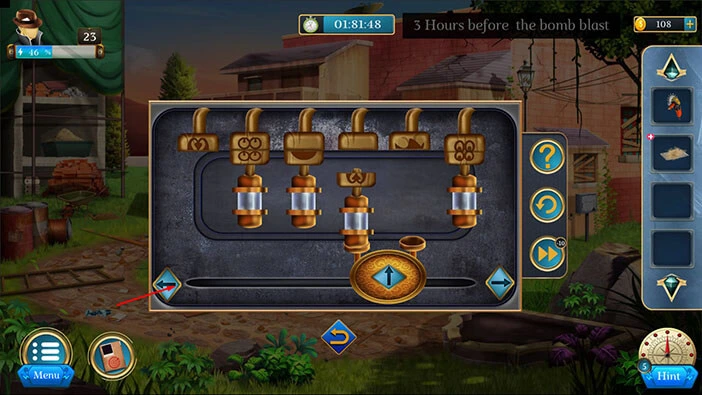
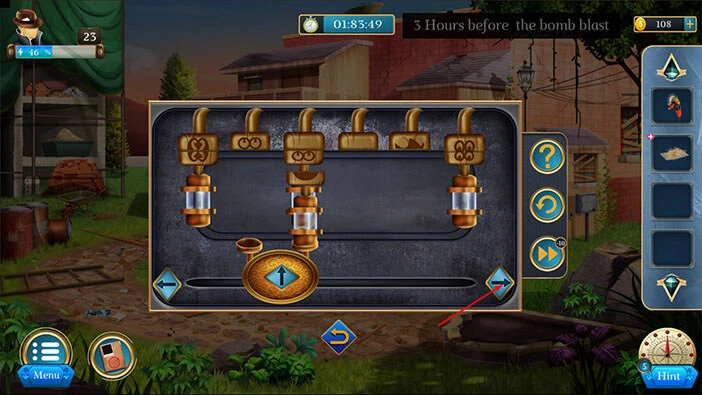
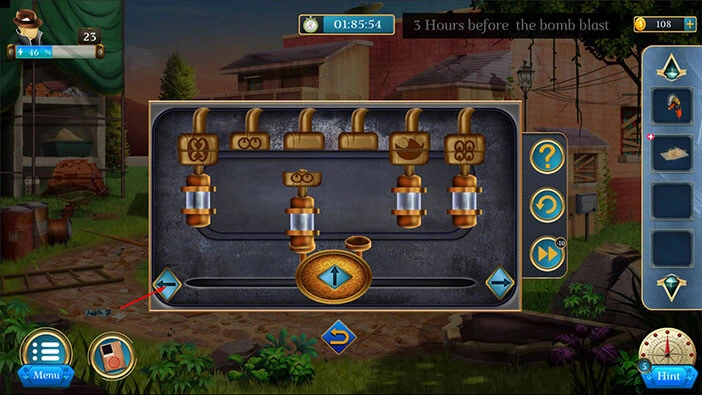
Here, we have another puzzle. We saw the correct order of the symbols when we looked at the backside of the board in our inventory, so take another look if you need a reminder. Our task is to assemble the symbols that will match the symbols on the hint.
We will do this puzzle in several steps. Let’s begin.
Step 1
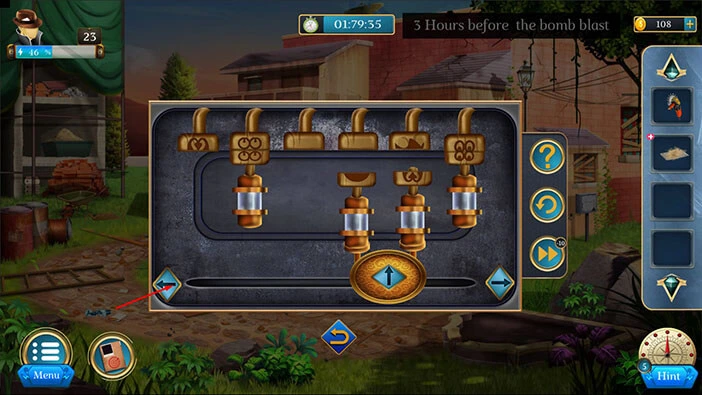
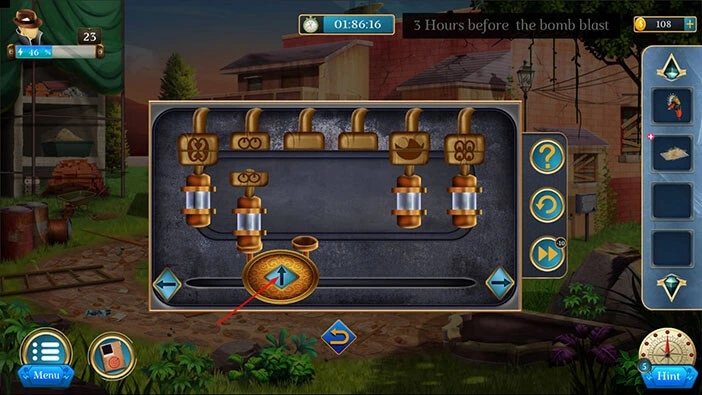
Let’s tap on the up arrow to pick up the modules.
Step 2
Tap three on the right arrow to move the machine.
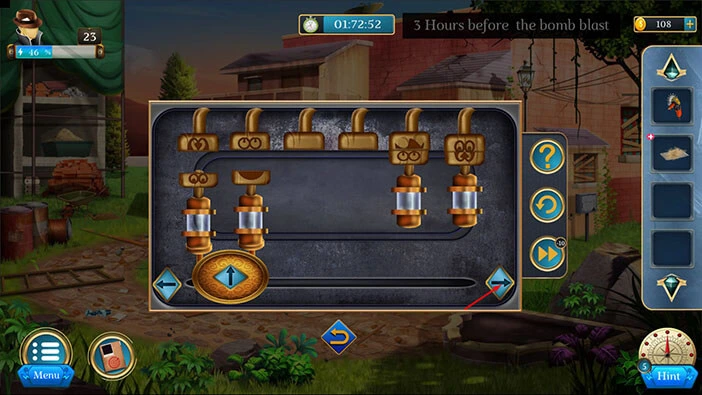
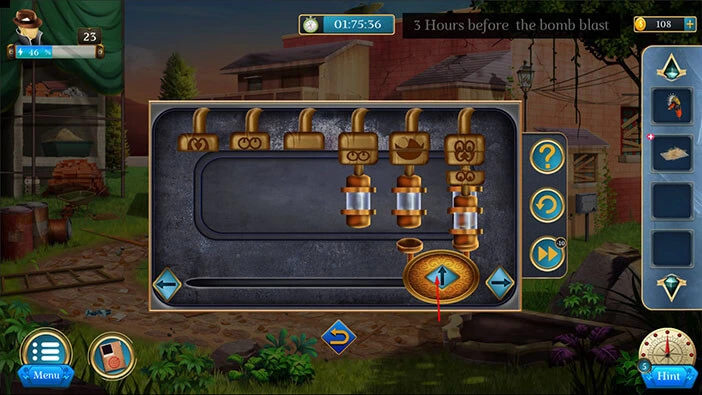
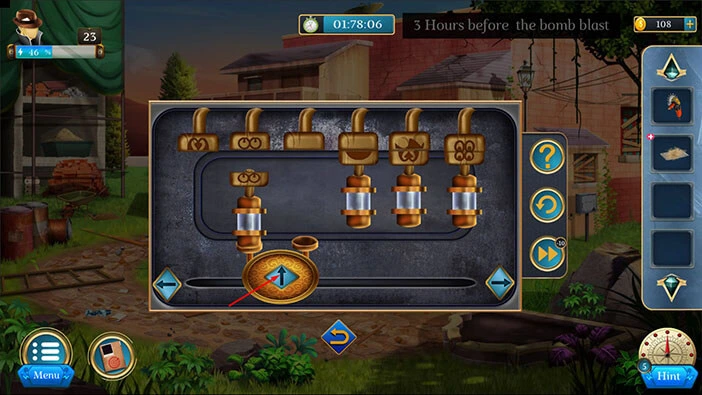
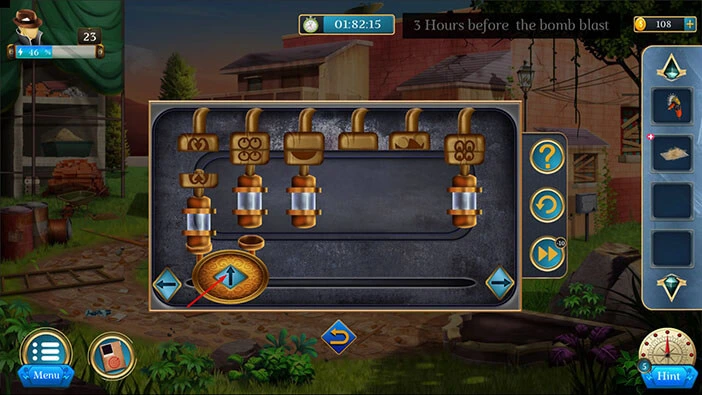
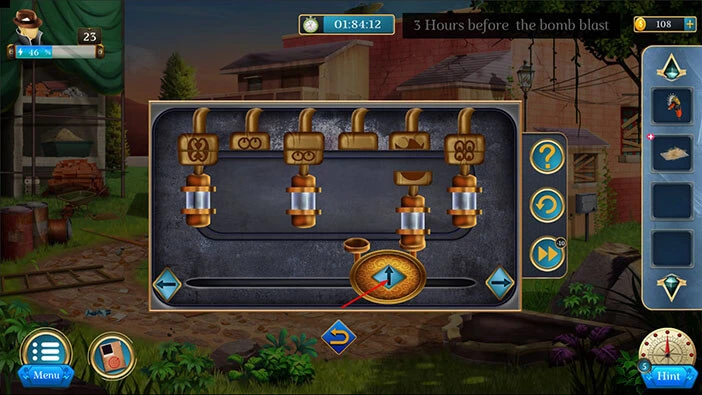
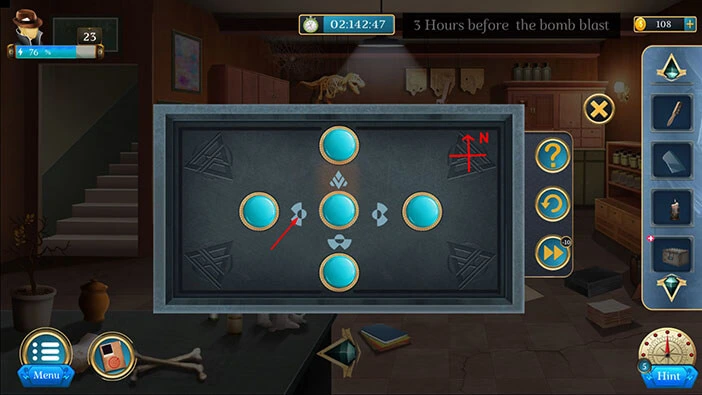
Step 3
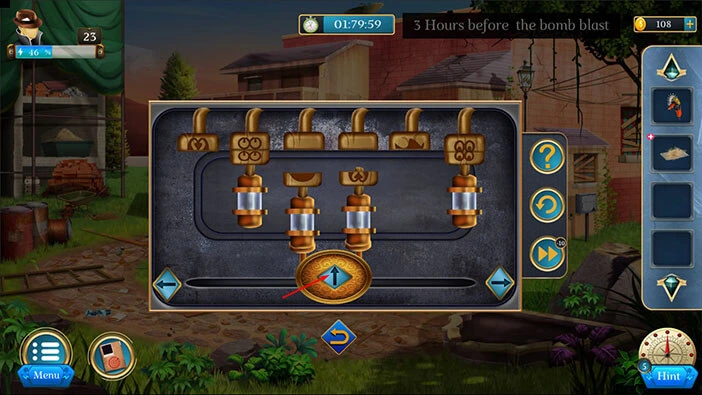
Let’s tap on the up arrow to swap the modules.
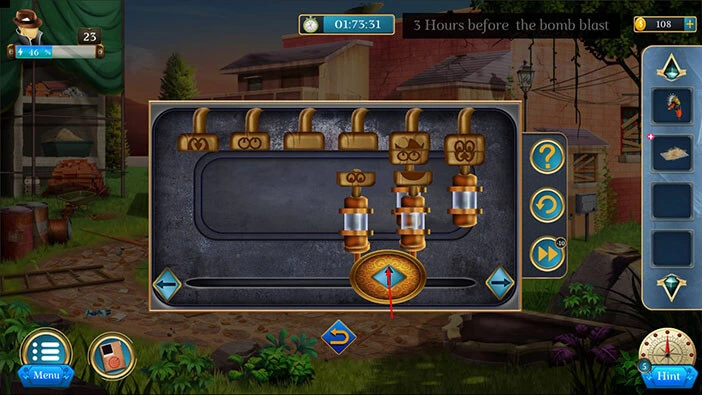
Step 4
Tap once on the left arrow to move the machine.
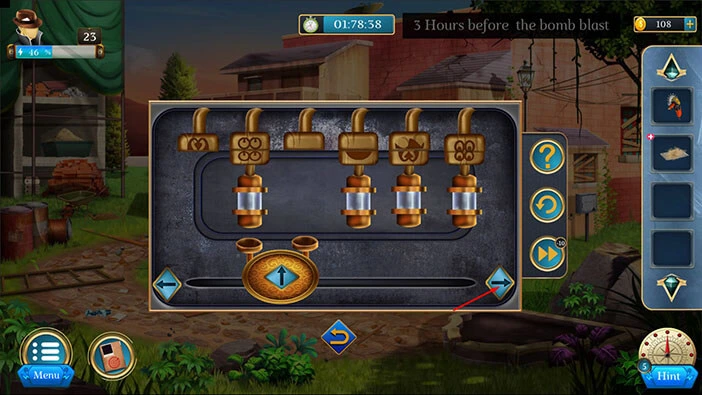
Step 6
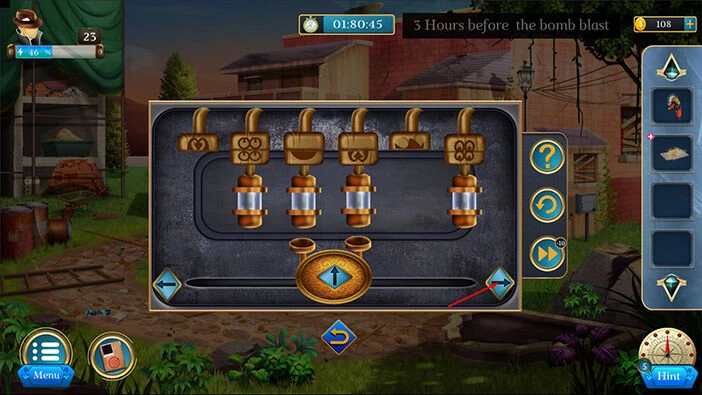
Let’s tap on the up arrow to swap the modules.

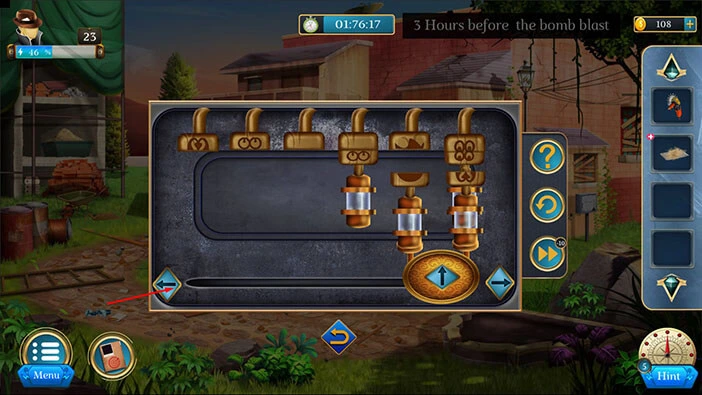
Step 7
Tap twice on the right arrow to move the machine.
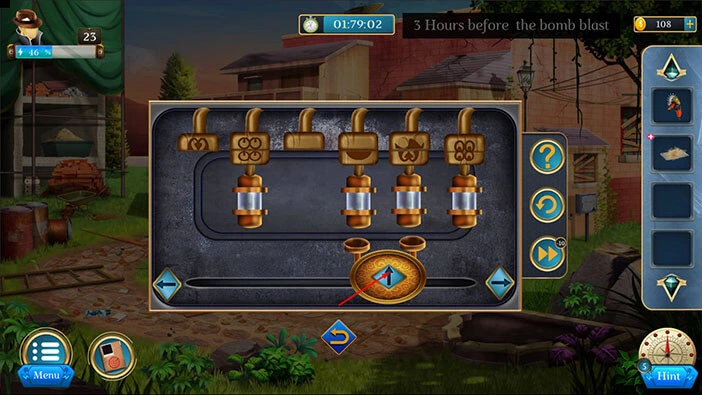
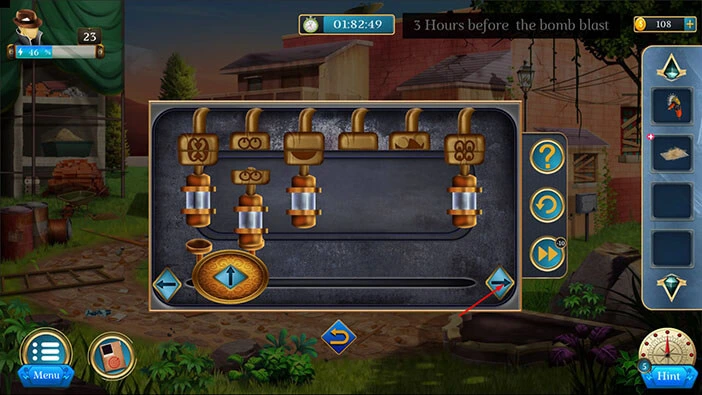
Step 8
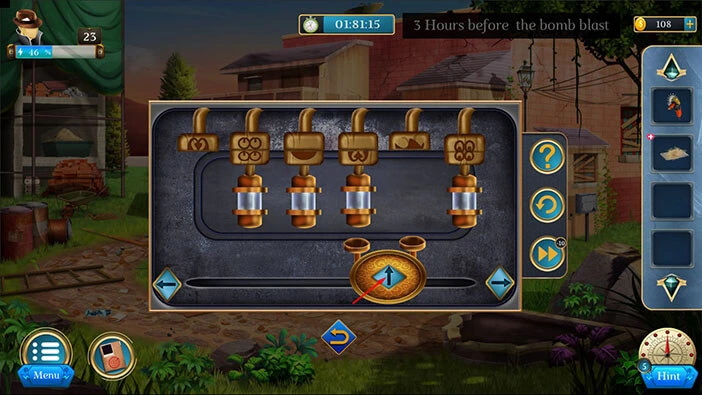
Let’s tap on the up arrow to swap the modules.
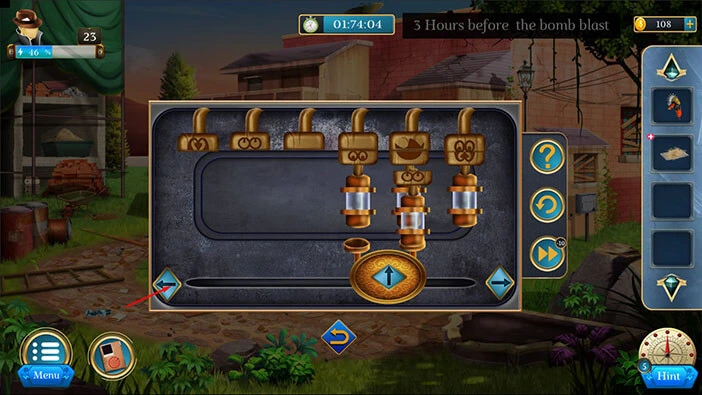
Step 9
Tap once on the left arrow to move the machine.
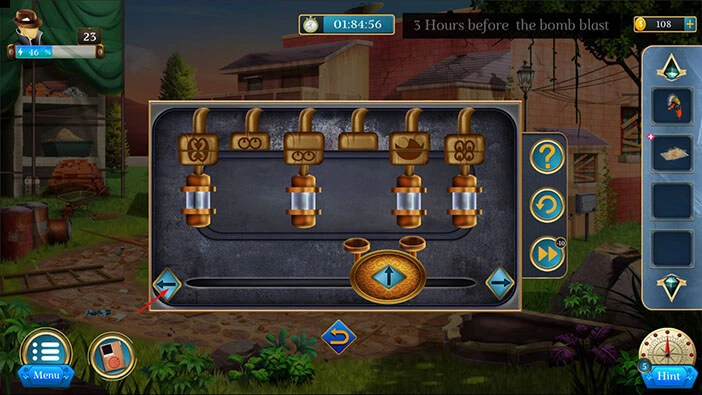
Step 10
Let’s tap on the up arrow to swap the modules.
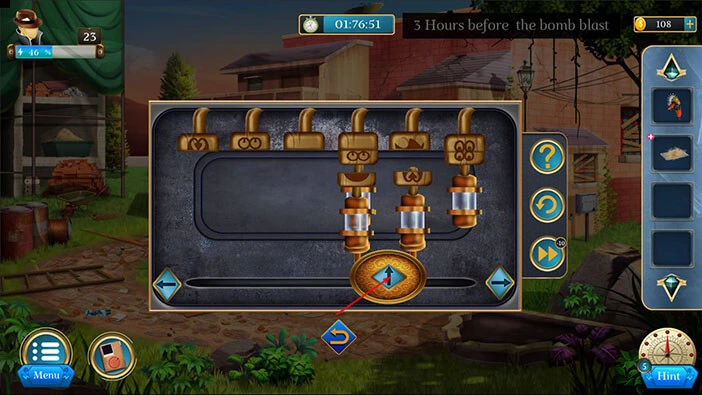
Step 11
Let’s tap twice on the left arrow to move the machine.
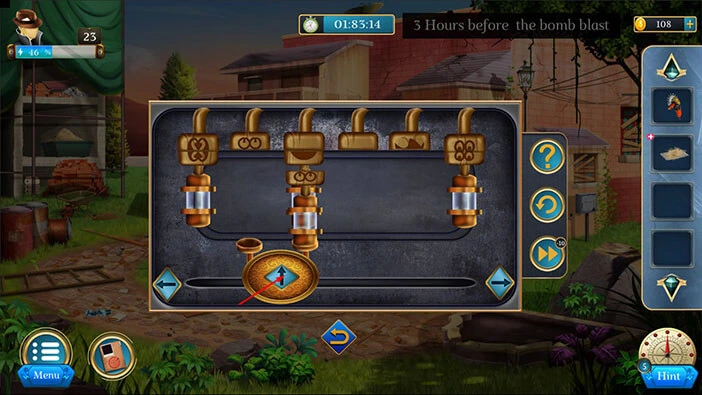
Step 12
Let’s tap on the up arrow to swap the modules.
Step 13
Let’s tap twice on the right arrow to move the machine.
Step 14
Let’s tap on the up arrow to swap the modules.
Step 15
Let’s tap once on the left arrow to move the machine.
Step 16
Let’s tap on the up arrow to swap the modules.
Step 17
Let’s tap once on the right arrow to move the machine.
Step 18
Let’s tap on the up arrow to swap the modules.
Step 19
Let’s tap three times on the left arrow to move the machine.
Step 20
Let’s tap on the up arrow to swap the modules.
Step 21
Let’s tap once on the right arrow to move the machine.
Step 22
Let’s tap on the up arrow to swap the modules.
Step 23
Let’s tap twice on the right arrow to move the machine.
Step 24
Let’s tap on the up arrow to swap the modules.
Step 25
Let’s tap once on the left arrow to move the machine.
Step 26
Let’s tap on the up arrow to swap the modules.
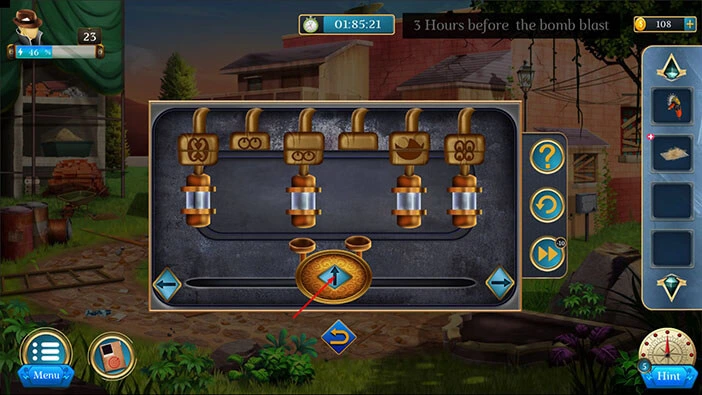
Step 27
Let’s tap once on the left arrow to move the machine.
Step 28
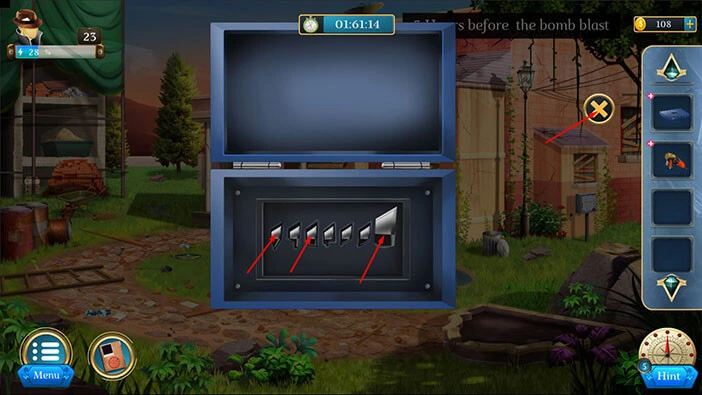
Let’s tap on the up arrow to swap the modules. With that, you will assemble the symbols.
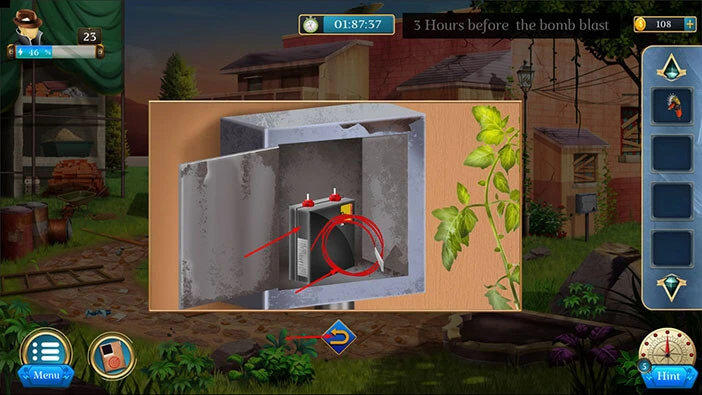
You will unlock the box as soon as you solve the puzzle, and inside you will find a “Battery” and a “Wire”. Let’s tap on these two items to pick them up.
After that, tap on the arrow at the bottom to go back.
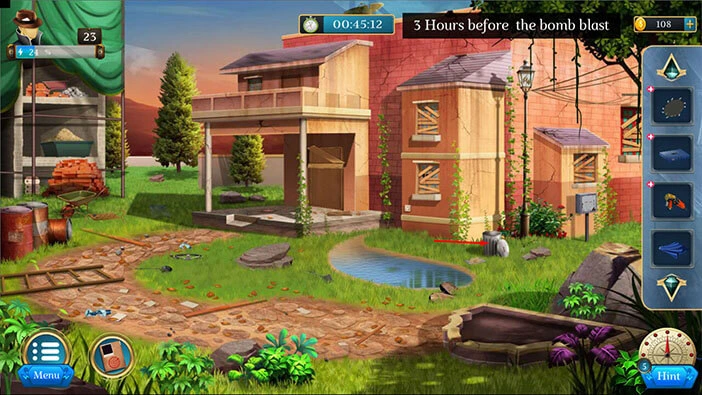
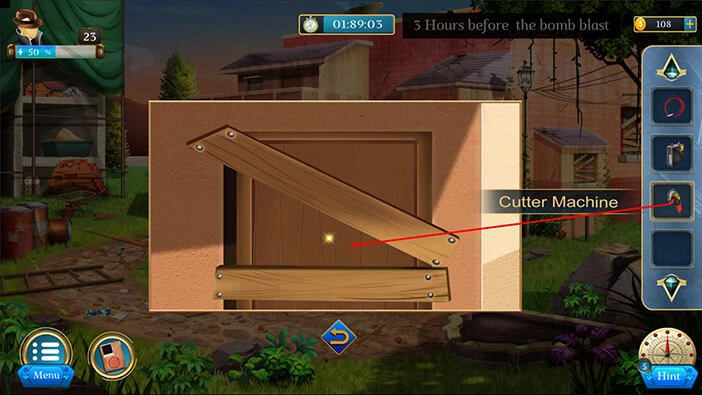
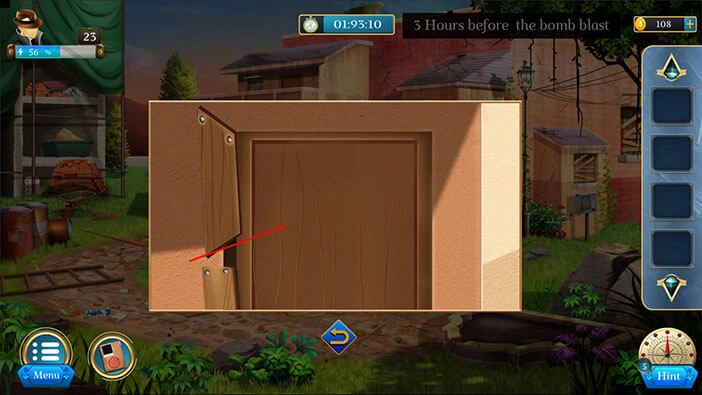
Let’s tap on the front door to take a closer look at it.
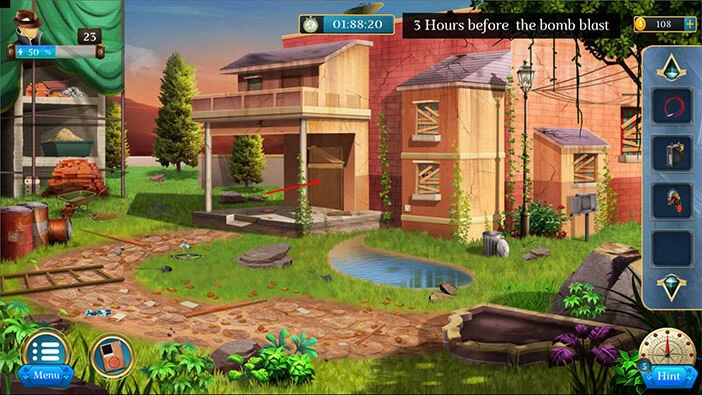
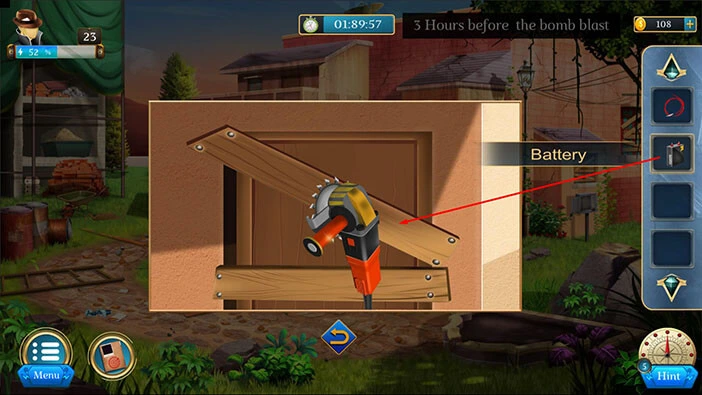
Select the “Cutter Machine” from the inventory and put it in front of the door.
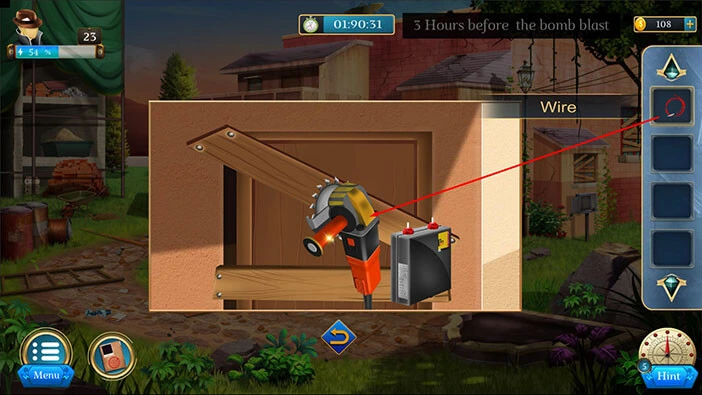
Select the “Battery” from the inventory and put it next to the cutter machine.
Lastly, select the “Wire” and use it to connect the machine and the battery.
Let’s tap on the “Cutter Machine” and our character will use it to remove the planks.
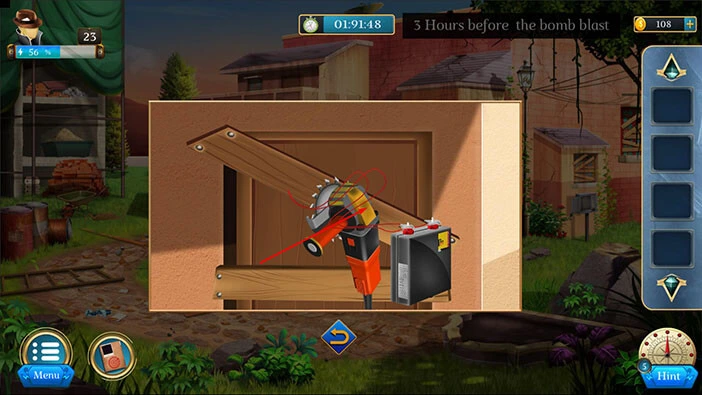
We removed the planks, so let’s tap on the door to open it, and tap again to proceed inside.
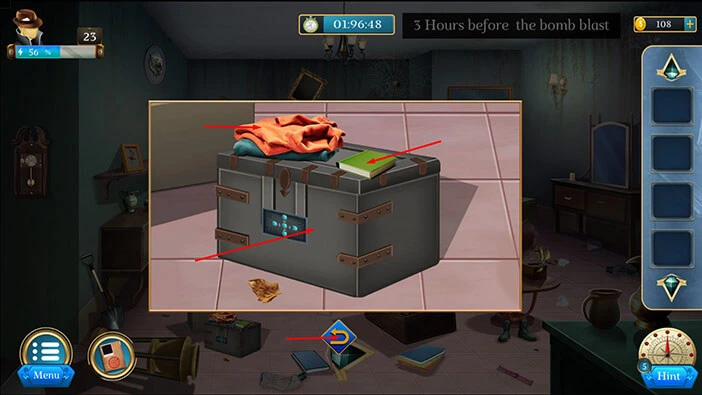
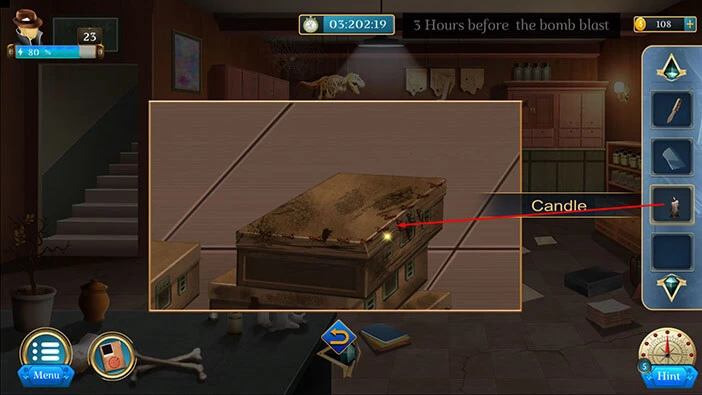
Let’s tap on the box on the left to take a closer look at it.
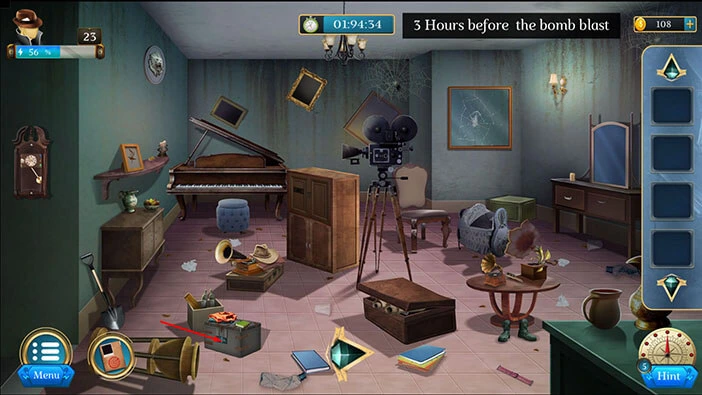
Tap on the items on the box to remove them. After that, tap on the box to pick it up.
Once you’re done, tap on the arrow at the bottom to go back.
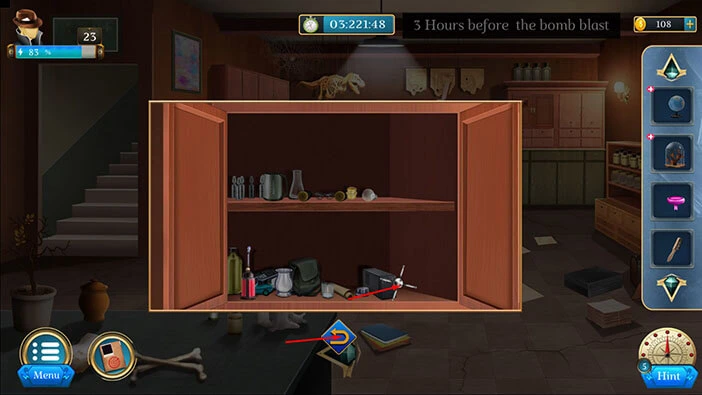
Let’s tap on the shelf on the left to take a closer look at it.
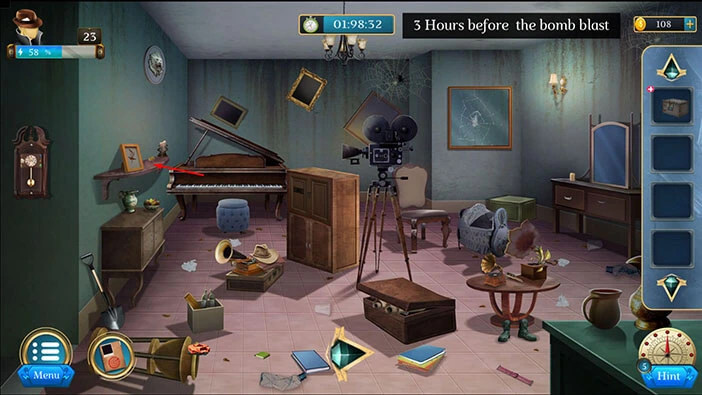
Here, you will find a “Matchbox”. Let’s tap on it to pick it up.
After that, tap on the arrow at the bottom to go back.
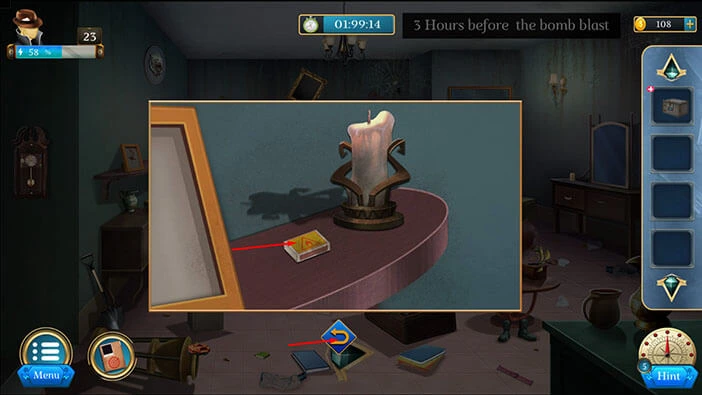
Actually, before you go back, also tap on the “Candle” to pick it up.
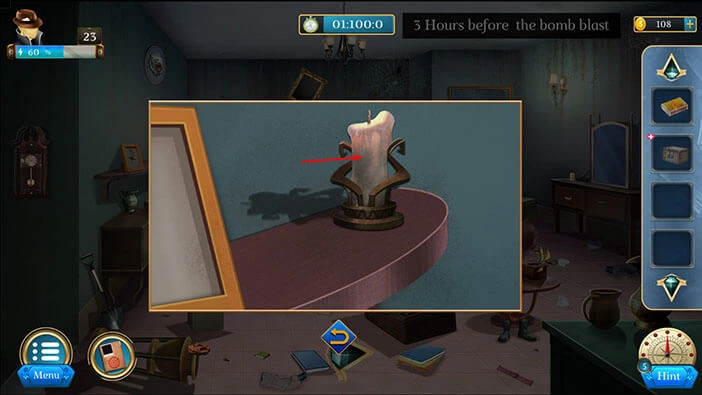
Select the “Candle” from the inventory and it will appear in the middle of the screen. After that, select the “Match Box” from the inventory and use it to light the candle.
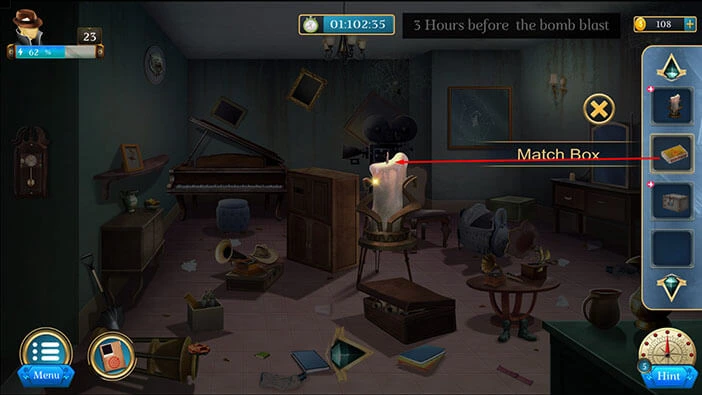
Let’s tap on the lit “Candle” to pick it up. After that, tap on the “X” button to close this window.
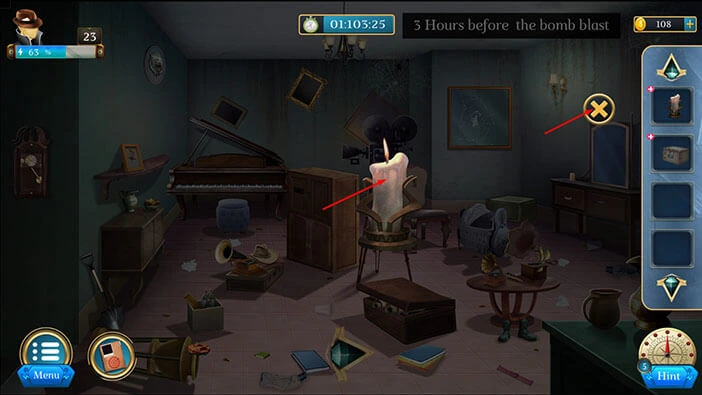
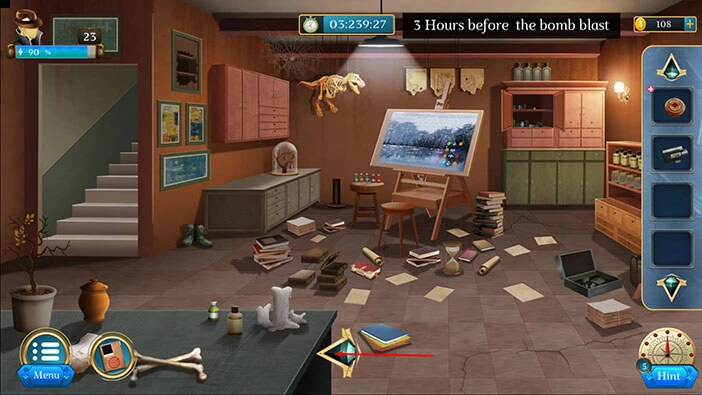
The room is now illuminated, and it will be easier to explore it. On the wall in front of you, you will notice a “Photo Frame”. Let’s tap on it to take a closer look, and tap again to pick it up.
After that, tap on the arrow at the bottom to go back.

Select the “Photo Frame” from the inventory and it will appear in the middle of the screen. Tap on it again to start the interaction.
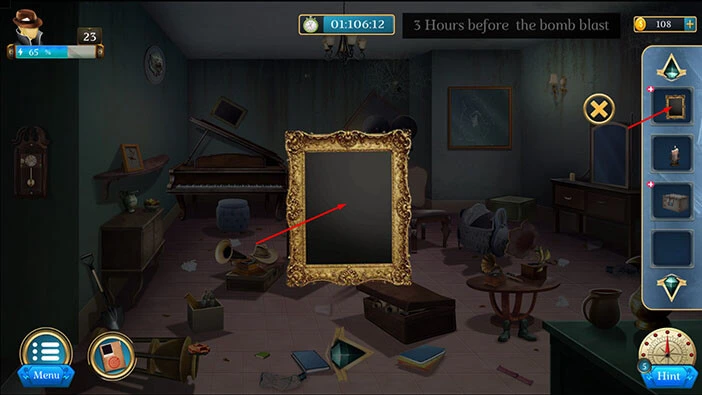
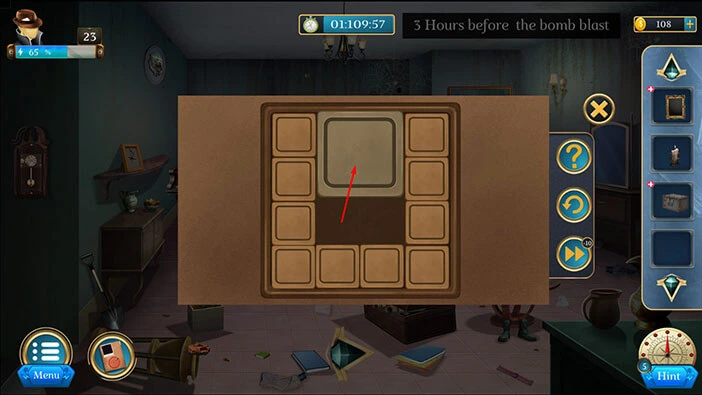
Here, we have a short puzzle. Our task is to move down the large block at the top. We will do this puzzle in several steps. Let’s begin.
Step 1
Take two blocks from the left, and move them up.
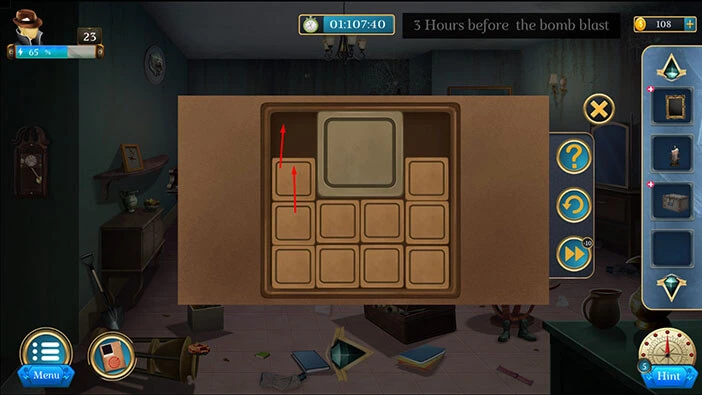
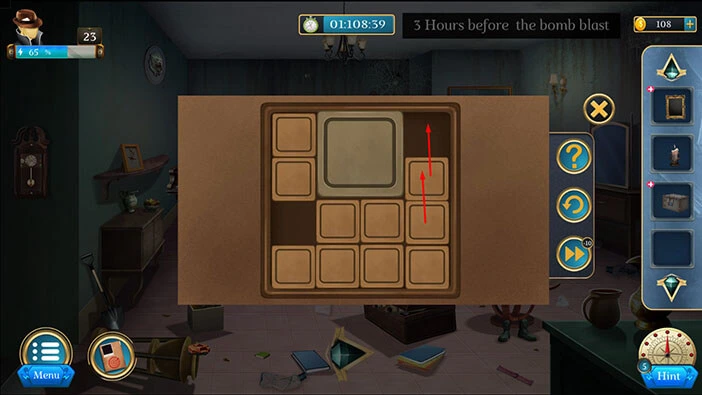
Step 2
Take two blocks from the right, and move them up.
Step 3
Take two blocks below the large block, and move them to the left and right.
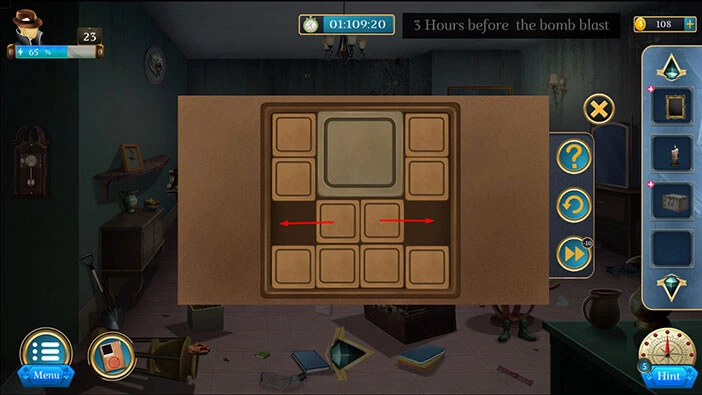
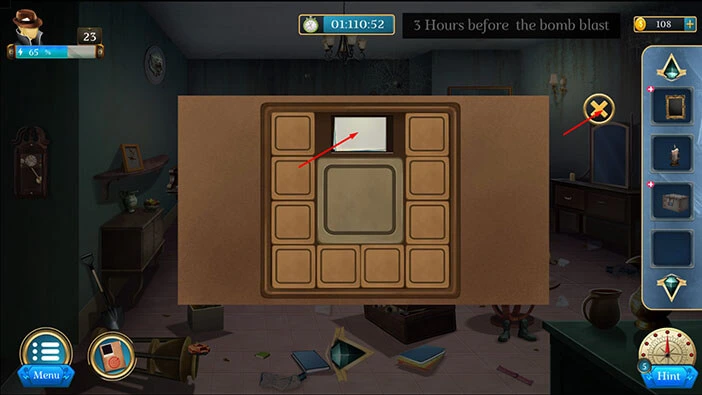
Let’s tap on the large block to move it down.
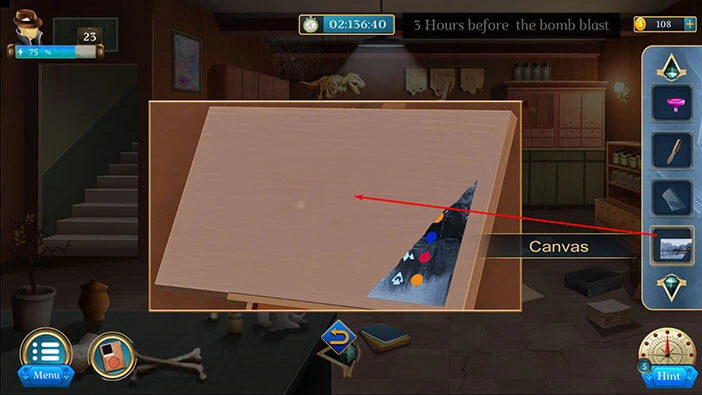
Under the large block, you will discover a “Canvas”. Let’s tap on it to pick it up.
After that, tap on the “X” button to close this window.
Select “Canvas” from the inventory and it will appear in the middle of the screen. Let’s tap on it twice to unfold it.
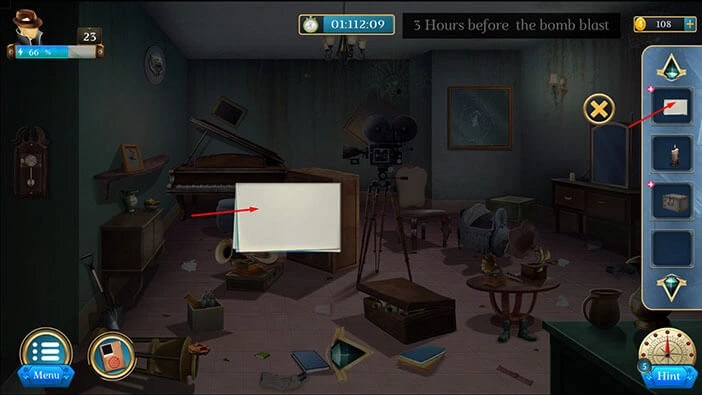
Let’s tap on the “Canvas” to pick it up. After that, tap on the “X” button to close this window.
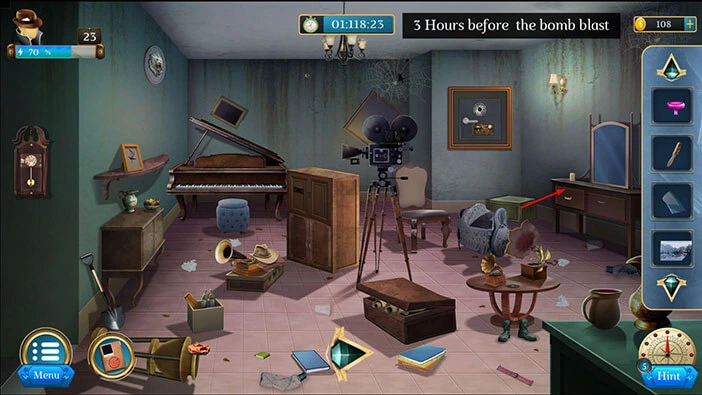
Let’s tap on the mirror on the right to take a closer look at it.
Tap on the mirror, several times, to break it.

In the bottom right corner, you will notice a “Glass Piece”. Let’s tap on it to pick it up. After that, tap on the arrow at the bottom to go back.
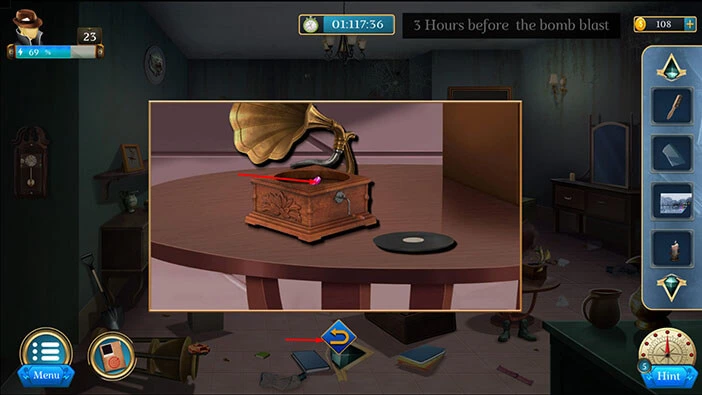
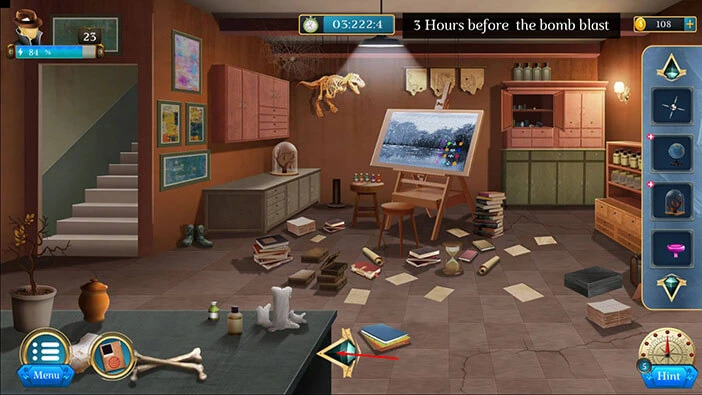
Let’s tap on the table on the right to take a closer look at it.
Here, you will find a “Brush”. Let’s tap on it to pick it up. After that, tap on the record to remove it.
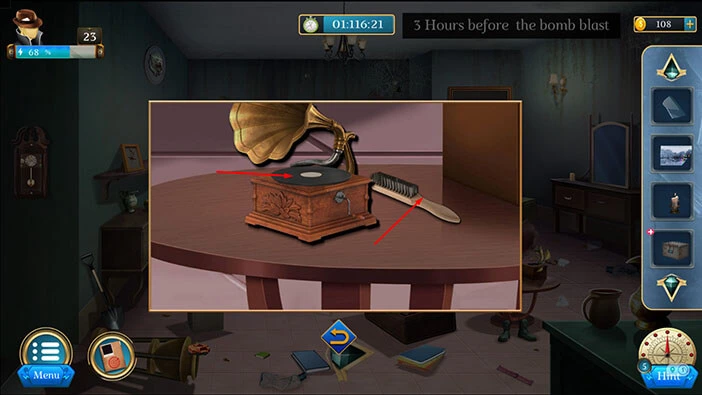
In the gramophone, you will find a “Button”. Let’s tap on it to pick it up. After that, tap on the arrow at the bottom to go back.
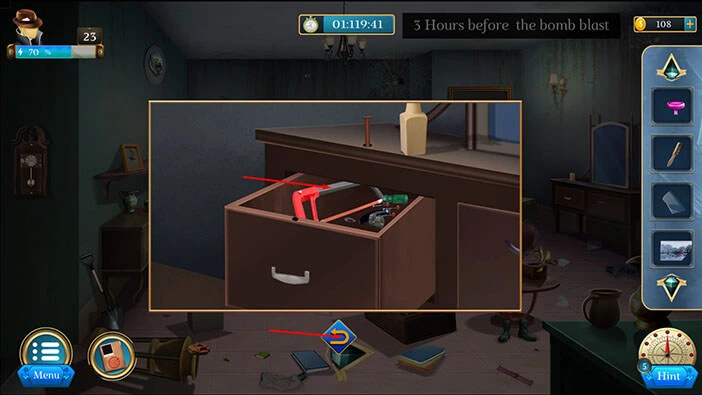
Let’s tap on the cabinet on the right to take a closer look at it.
Tap twice on the drawer to unlock it and to open it.

In the drawer, you will find a “Saw Blade”. Let’s tap on it to pick it up. After that, tap on the arrow at the bottom to go back.
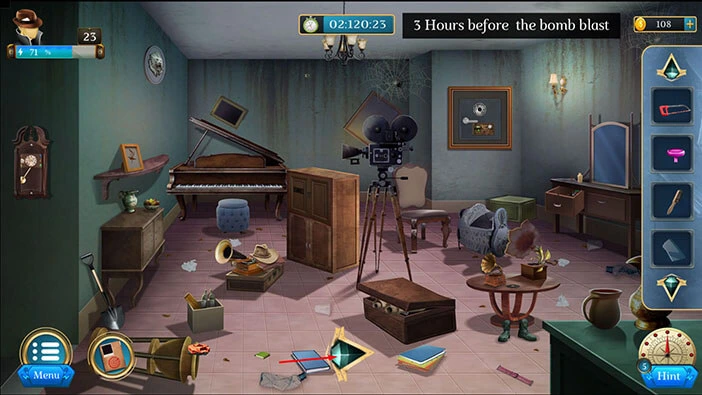
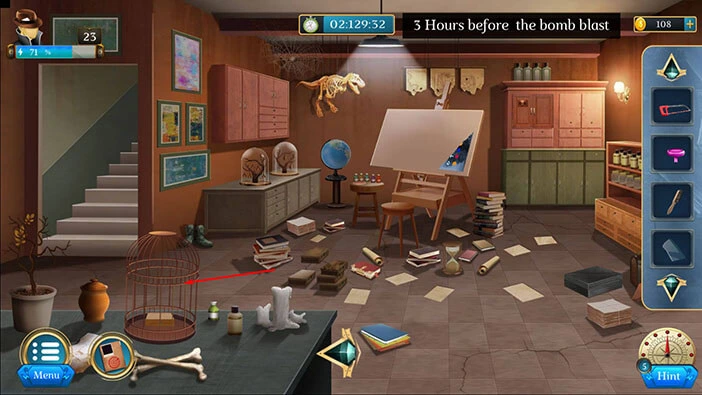
Let’s proceed to the next room. Tap on the arrow at the bottom of the screen.
On the left, you will notice a birdcage. Let’s tap on it to pick it up.
Select the “Bird cage” from the inventory and it will appear in the middle of the screen. After that, tap on select the “Saw Blade” from the inventory and use it to cut the bars.
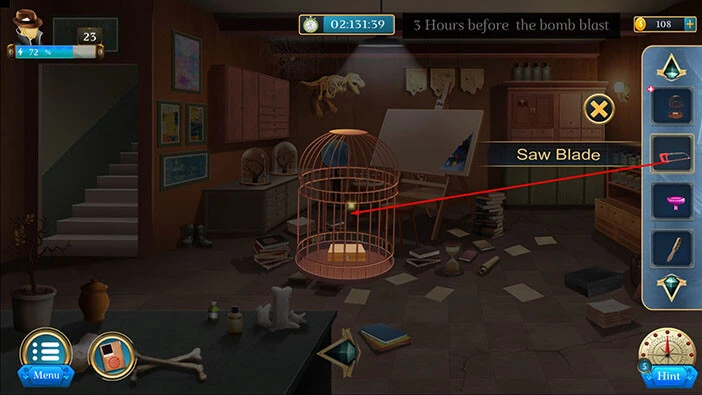
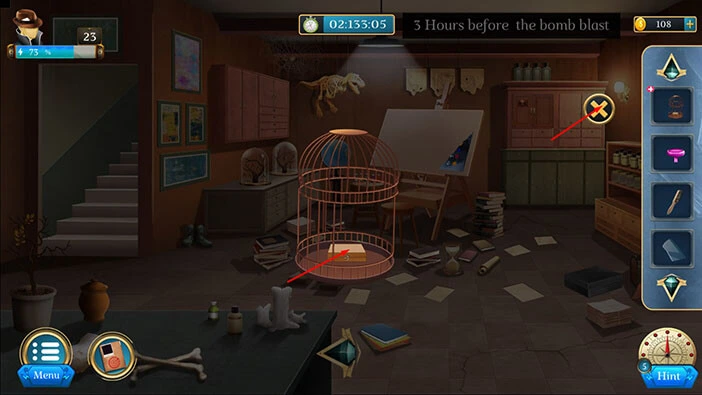
In the bird cage, you will find a “Wooden Box”. Let’s tap on it to pick it up.
After that, tap on the “X” button to close this window.
Select the “Wooden Box” from the inventory and it will appear in the middle of the screen. After that, tap on the lock several times to open the box – you will notice a progress bar increasing every time you tap.
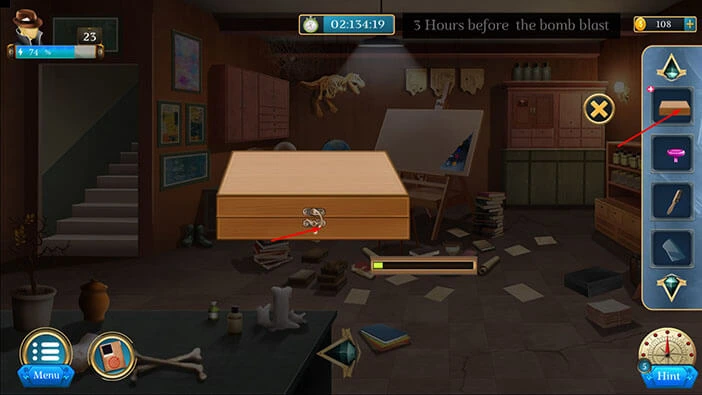
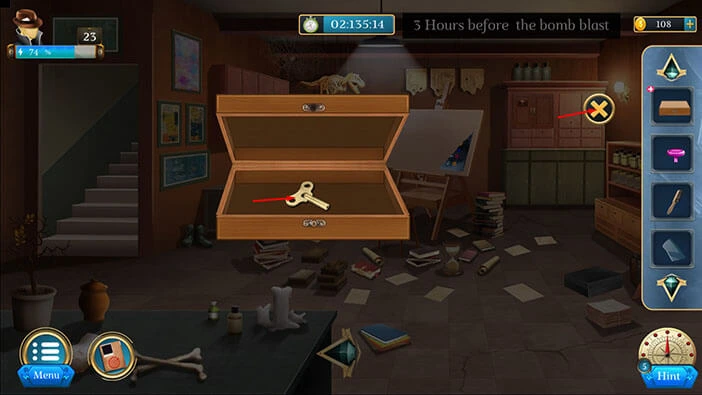
In the box, you will find a “Key”. Let’s tap on it to pick it up.
After that, tap on the “X” button to close this window.
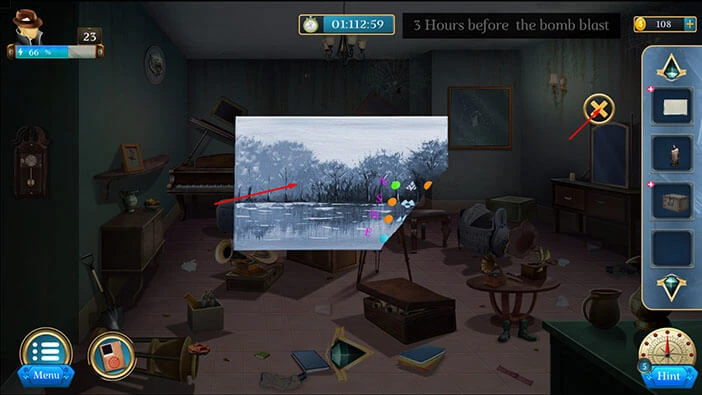
Next, let’s tap on the part of the picture in front of us to take a closer look at it.

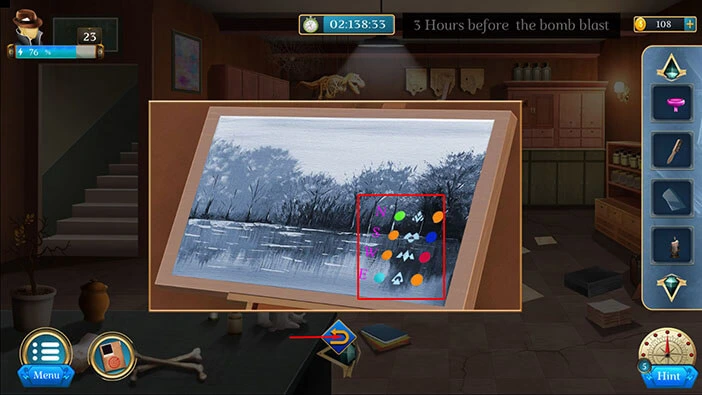
Select the “Canvas” from the inventory and use it to assemble the picture.
In the bottom right corner of the picture, you will notice a hint for the next puzzle. So, let’s memorize/write down this information.
Once you’re done, tap on the arrow at the bottom to go back.
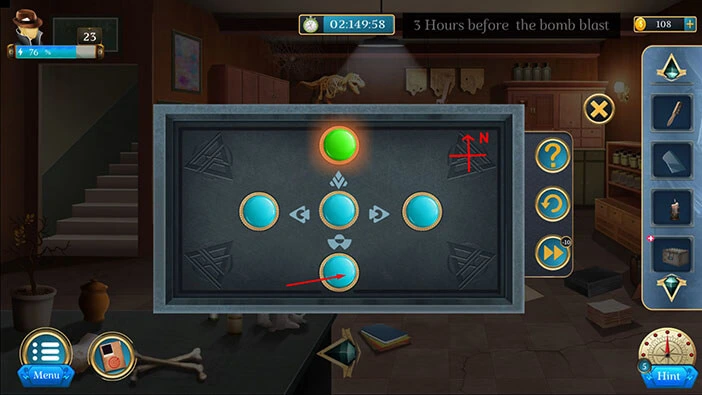
Select the “Box” from the inventory and it will appear in the middle of the screen. After that, tap on the box to start the interaction.
Here, we have another puzzle. We saw the hint for this puzzle when we assembled a picture.
We will solve this puzzle in several steps. Let’s begin.
Step 1
Tap once on the top symbol to change it.
Step 2
Tap three times on the symbol on the left to change it.
Step 3
Tap two times on the symbol on the right to change it.

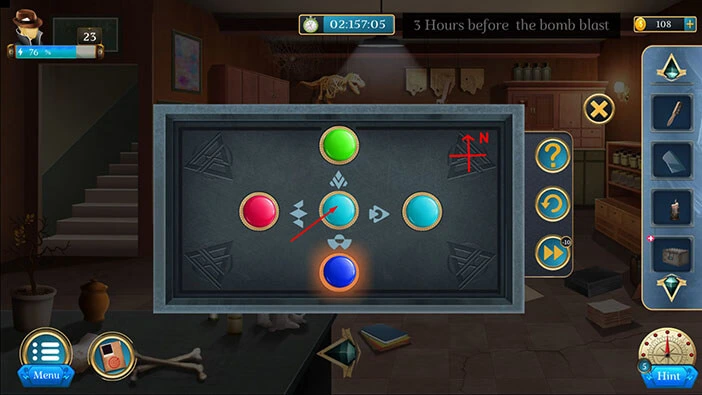
Step 4
Tap once on the top slot to change its color to green.

Step 5
Tap twice on the bottom slot to change its color to blue.
Step 6
Tap three times on the slot on the left to change its color to red.

Step 7
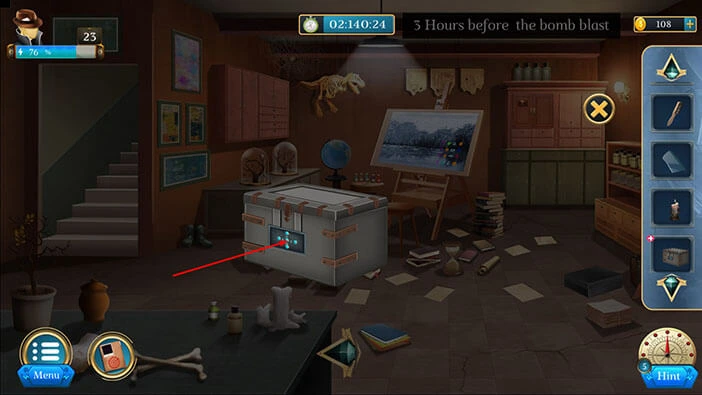
Lastly, tap four times on the slot in the center to change its color to orange. With that, you will solve this puzzle, and you will unlock the chest.
In the chest, you will find a “Screwdriver”. Let’s tap on it to pick it up.
Let’s go back to the previous room. Tap on the arrow at the bottom of the screen.

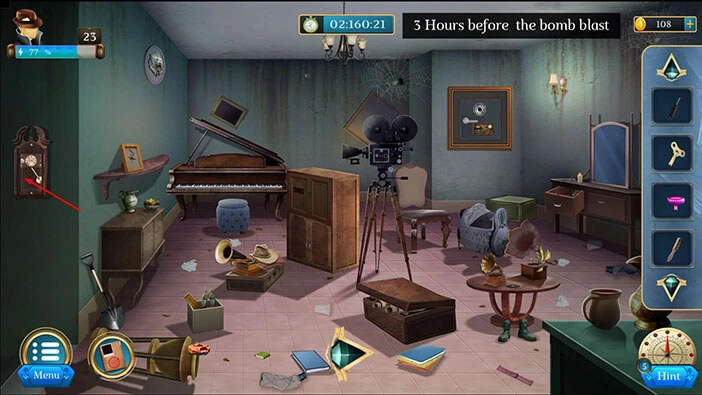
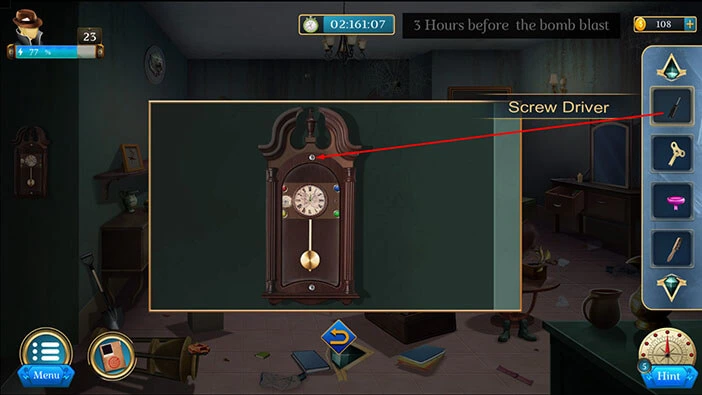
Let’s tap on the wall clock on the left to take a closer look at it.
Next, select the “Screwdriver” from the inventory and use it to open the clock.
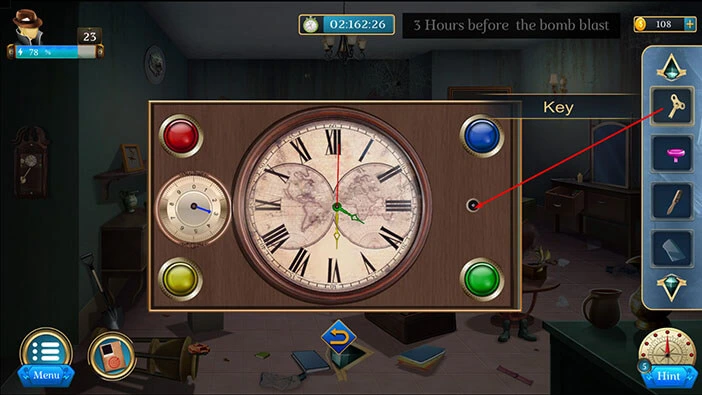
Let’s tap on the clock to start the interaction. Next, select the “Key” from the inventory and insert it into the empty slot.
Here, we have another puzzle, but we will have to come back to it a bit later because we need to find a hint in order to solve it. For now, tap on the arrow at the bottom to go back.
Let’s go back to the previous room. Tap on the arrow at the bottom of the screen.
Let’s tap on the glass on the left to take a closer look at it.

Here, you will find the “Antique”. Let’s tap on it to pick it up. After that, tap on the arrow at the bottom to go back.
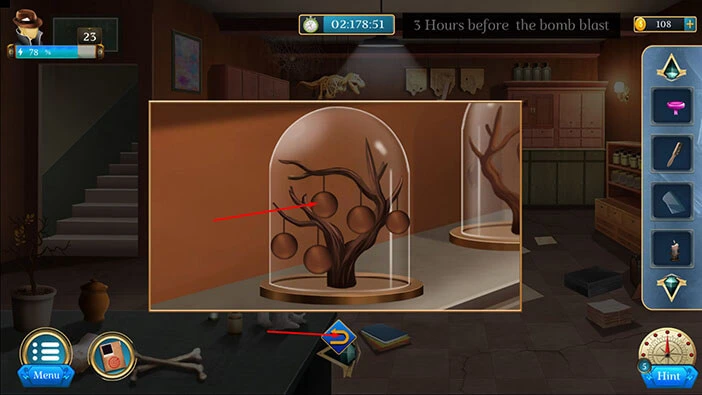
Select the “Antique” from the inventor and it will appear in the middle of the screen. After that, tap on the antique to start the interaction.
You will see several symbols, so let’s memorize/write down these symbols because they represent the hint for the next puzzle. After that, tap on the arrow at the bottom to go back.

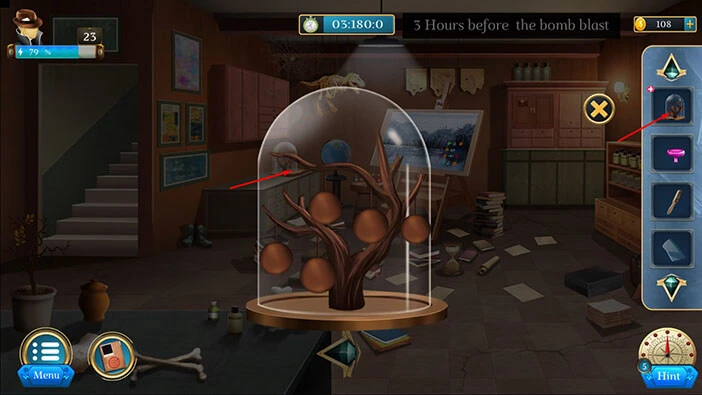
In the top left corner of the room, you will notice a “Globe”. Let’s tap on it to pick it up.
After that, tap on the arrow at the bottom to go back.
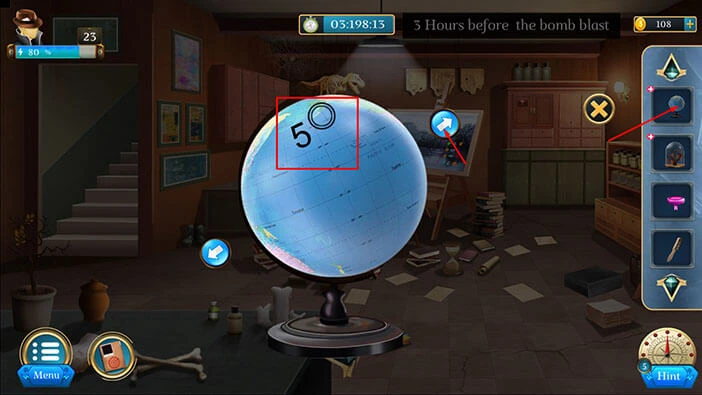
Select the “Globe” from the inventory and it will appear in the middle of the screen. After that, tap on the arrows to rotate the globe, and memorize/write down the numbers next to the symbols. These numbers represent the hint for the next puzzle.
Previously, we saw these symbols on the antique in our inventory, so if we replace these symbols with the numbers that we saw on the globe, we will get the number “1524”. Let’s memorize/write down this number because it represents the solution for the next puzzle.

Next, let’s tap on the box in front of us to take a closer look at it.
Select the “Candle” from the inventory and use it to open the box, by melting the wax. After that, tap on the box to open it.
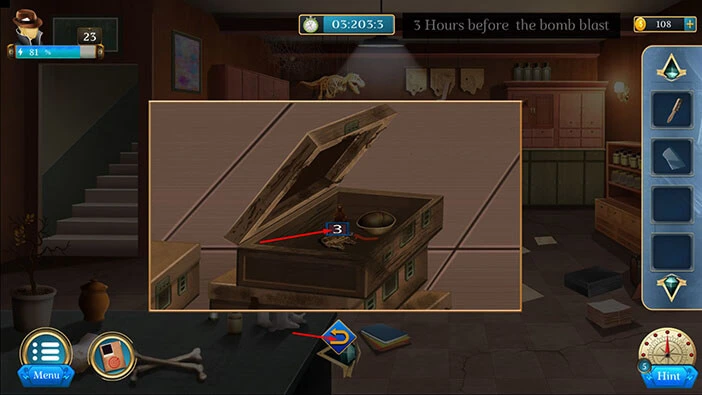
Inside, you will find a “Puzzle piece”. Let’s tap on it to pick it up. After that, tap on the arrow at the bottom to go back.

Next, let’s tap on the cabinet on the right to take a closer look at it, and tap again to start the interaction.
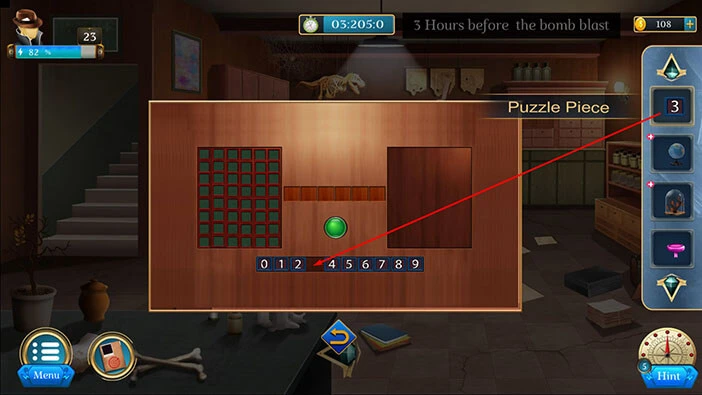
Select the “Puzzle piece” from the inventory and insert it into the empty slot. After that, tap on the puzzle to start the interaction.
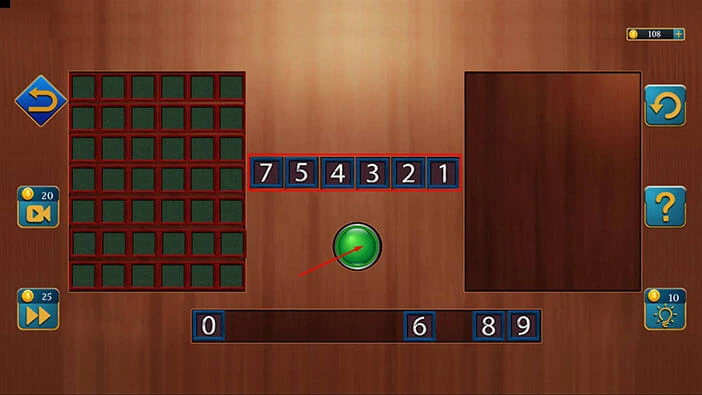
You can solve this puzzle by trial and error. If you place the correct number in the correct slot, you will see a green color, if not you will see a grey color. So, to solve this puzzle, insert the following number “754321”. After that, tap on the green button to confirm. With that, you will solve this puzzle.
You will open the cabinet as soon as you solve the puzzle. Inside, you will find a “Wheel”. Let’s tap on it to pick it up.
After that, tap on the arrow at the bottom to go back.
Let’s go back to the previous room. Tap on the arrow at the bottom of the screen.

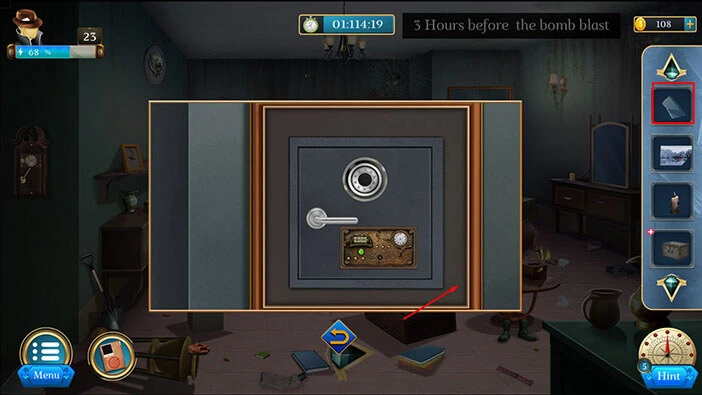
Let’s tap on the safe to take a closer look at it and tap again to start the interaction.
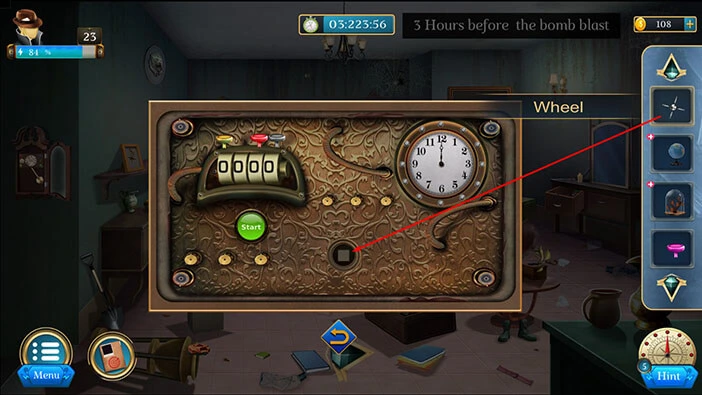
Select the “Wheel” from the inventory and insert it into the empty slot.
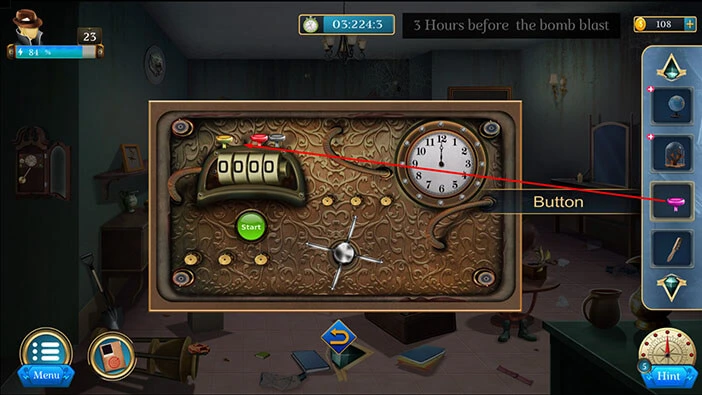
Next, select the “Button” from the inventory and insert it into the empty slot.
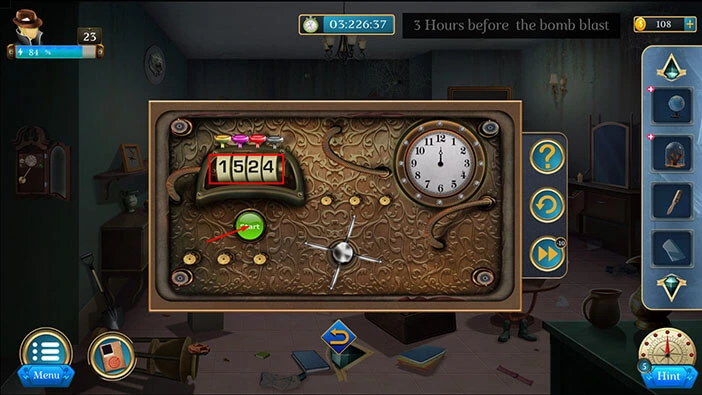
Previously, we discovered the solution to this puzzle by examining the “Globe” and the “Antique”. So, let’s enter the number “1524”.
After that, tap on the “Start” button to confirm.
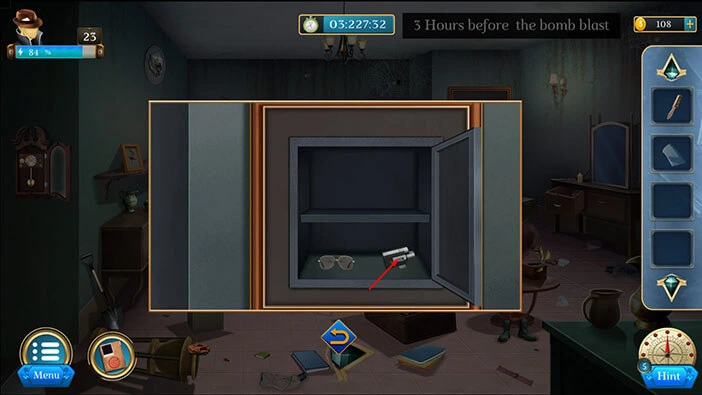
With that, you will open the safe, and inside you will find a “Camera”. Let’s tap on it to pick it up.

Let’s go back to the previous room. Tap on the arrow at the bottom of the screen.

Let’s tap on the picture on the left to take a closer look at it.
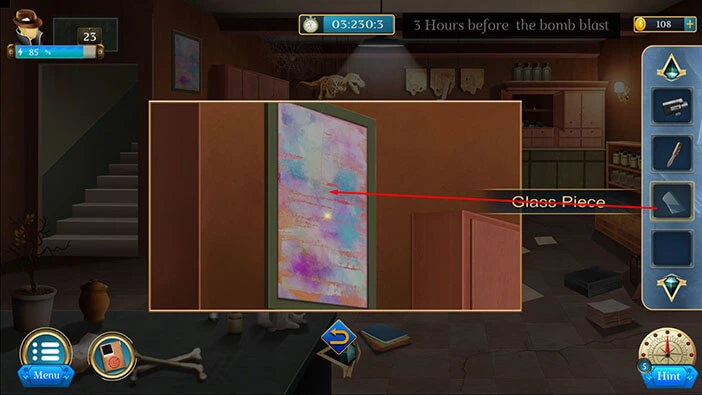
Select the “Glass piece” from the inventory and use it to cut the picture. After that, tap on the arrow at the bottom to go back.

Next, let’s tap on the black box on the right to take a closer look at it, and tap again to open it.
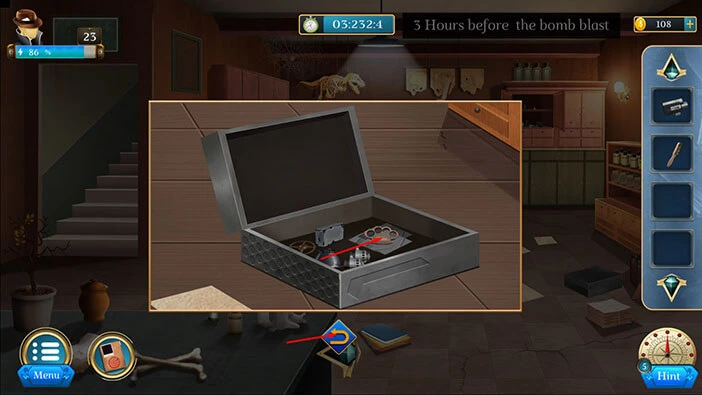
Inside you will find a “Knuckle buster”. Let’s tap on it to pick it up. After that, tap on the arrow at the bottom to go back.

Let’s go back to the picture on the left.
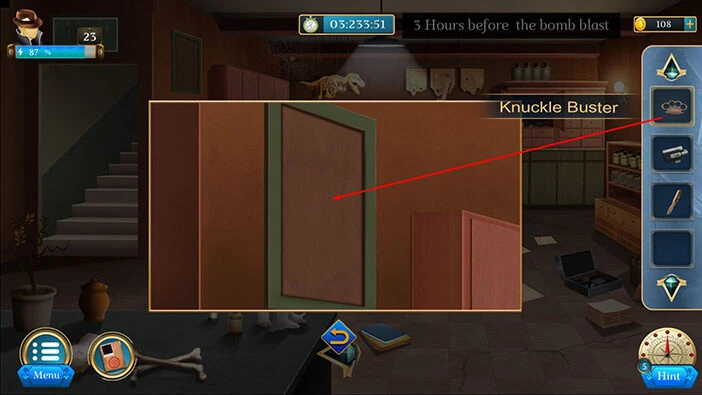
Select the “Knuckle buster” from the inventory and use it to smash the fake wall.
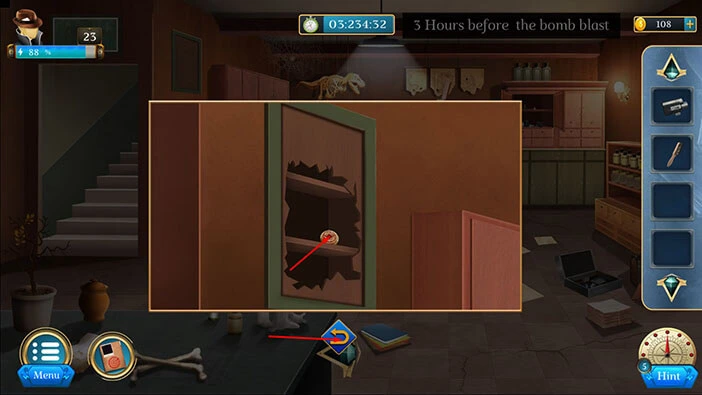
Inside you will find a “Pendant”. Let’s tap on it to pick it up. After that, tap on the arrow at the bottom to go back.
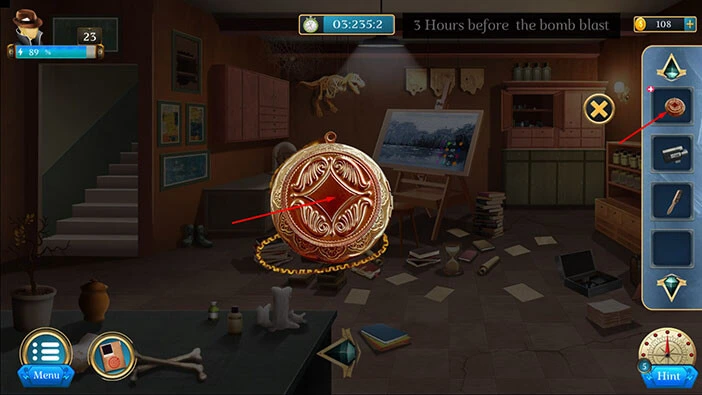
Select the “Pendant” from the inventory and it will appear in the middle of the screen. After that, tap on the “Pendant” to open it.
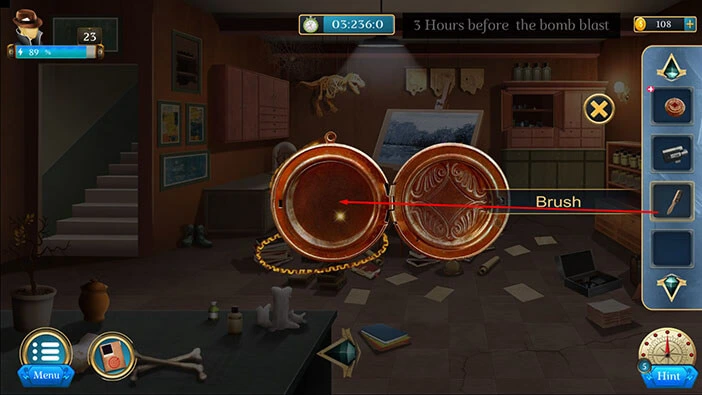
Select the “Brush” from the inventory and use it to clean the pendant.
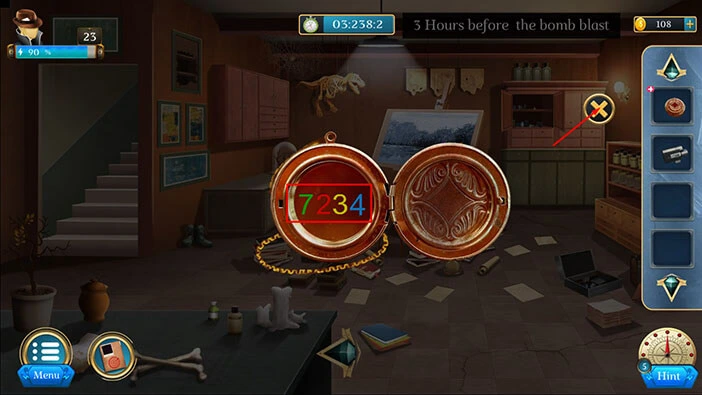
Here, you will see green number 7, red number 2, yellow number 3, and blue number 4. Let’s memorize/write down this information because we will need it for the next puzzle.
Once you’re done, tap on the “X” button to close this window.
Let’s go back to the previous room. Tap on the arrow at the bottom of the screen.

Let’s tap on the clock on the left to take a closer look at it.
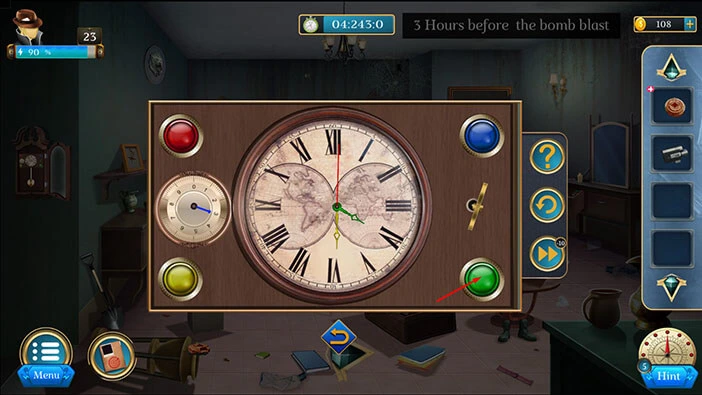
We already discovered the correct number, green number 7, red number 2, yellow number 3, and blue number 4, when we cleaned the “Pendant”. So, let’s enter this number.
We will do this puzzle in several steps. Let’s begin.
Step 1
Tap once on the green button.
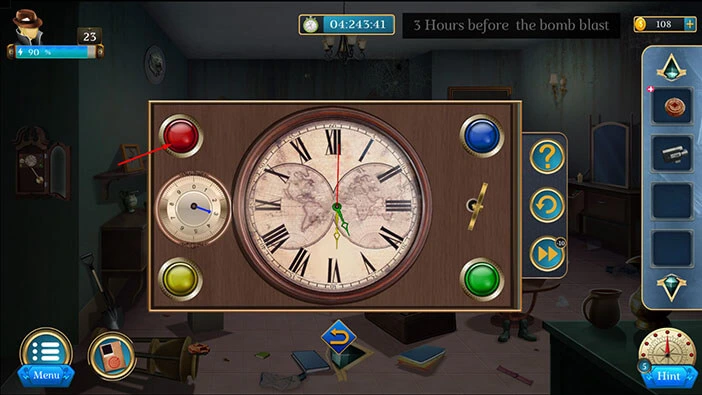
Step 2
Tap twice on the red button.

Step 3
Tap eight times on the blue button.

Step 4
Tap eight times on the yellow button.

Step 5
Finally, tap once on the blue button and you will solve this puzzle.
In the clock, you will find a “Puzzle Piece”. Let’s tap on it to pick it up. After that, tap on the arrow at the bottom to go back.

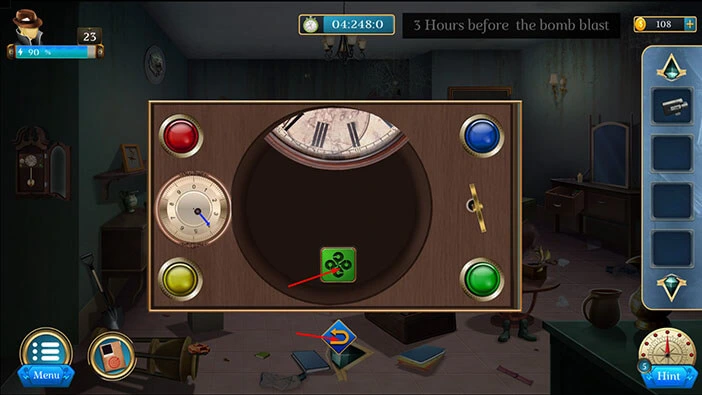
Next, tap on the cabinet in front of you, and tap again to start the interaction.
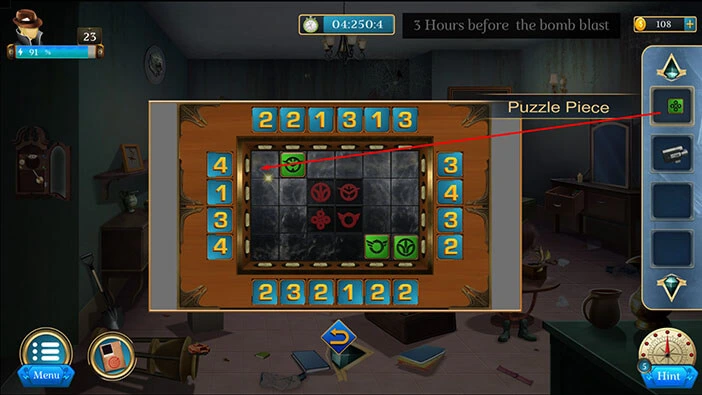
Select the “Puzzle piece” from the inventory and place it on the board.
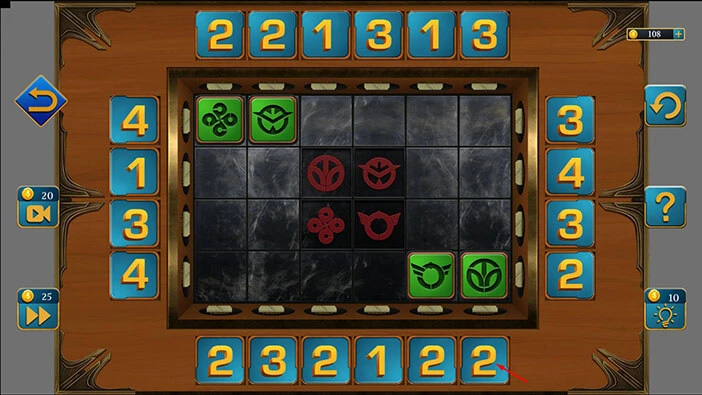
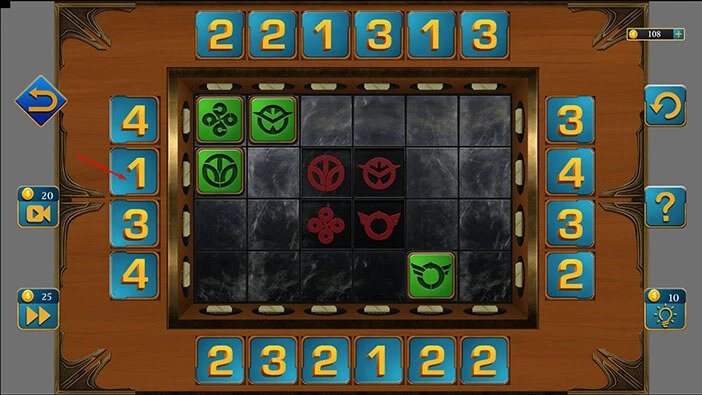
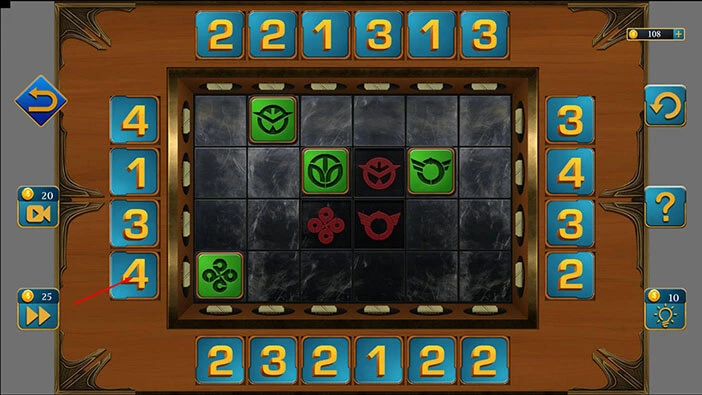
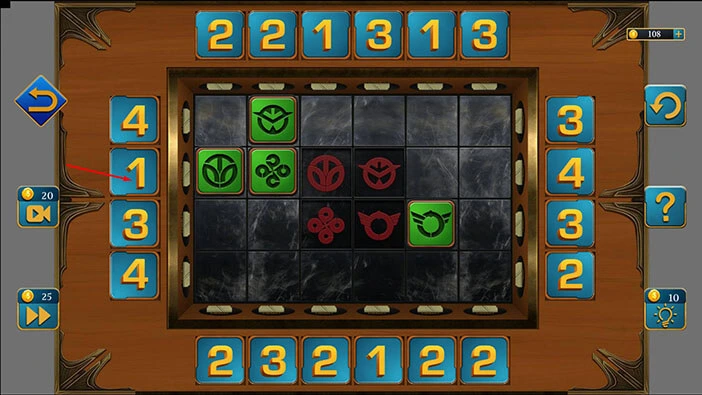
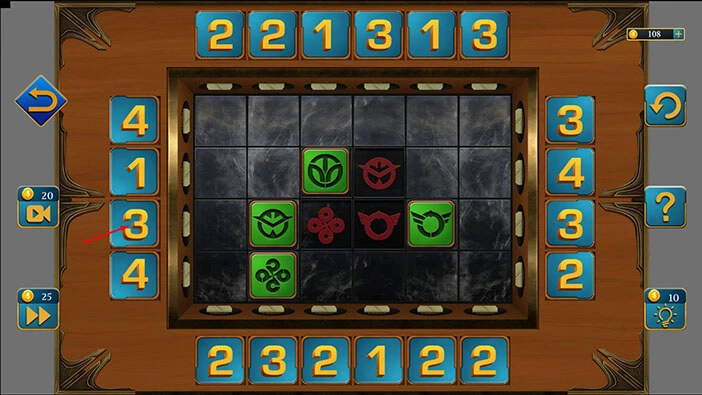
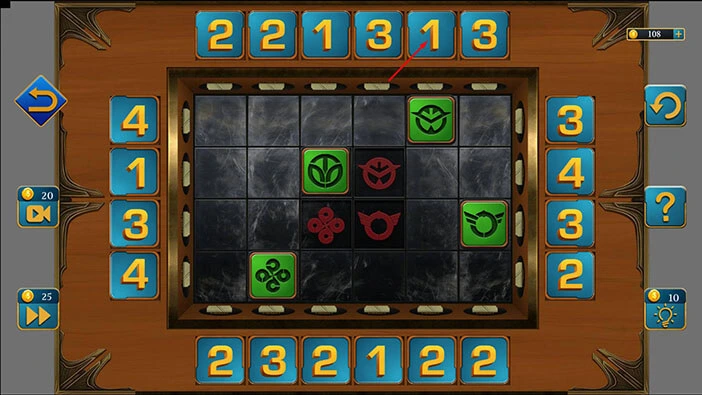
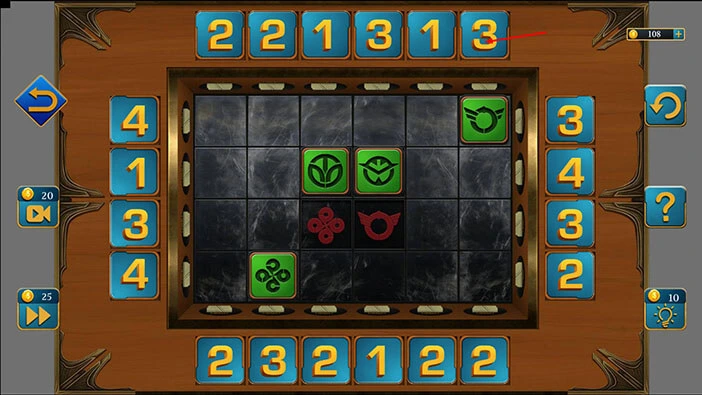
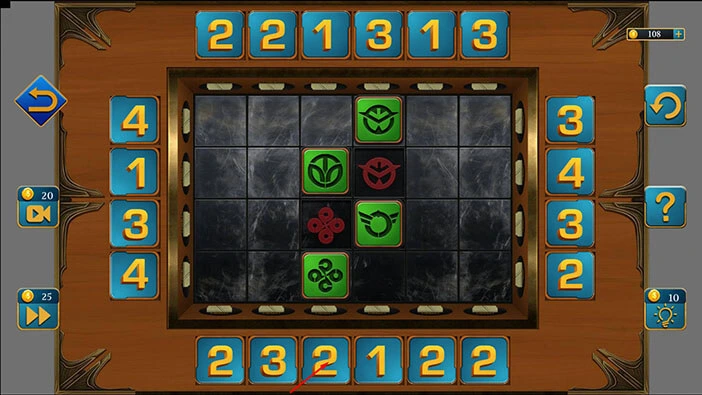
Here, we have another puzzle. Our task is to place the green puzzle pieces into the matching slots in the middle of the puzzle. We will do this puzzle in several steps. Let’s begin.
Step 1
Tap on the sixth button at the bottom and you will move the puzzle piece two slots up.
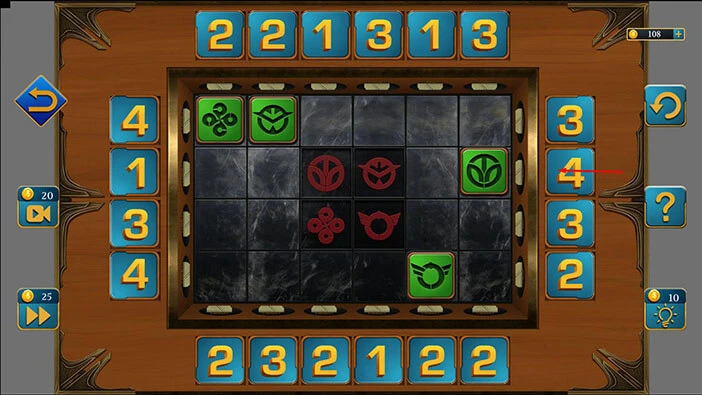
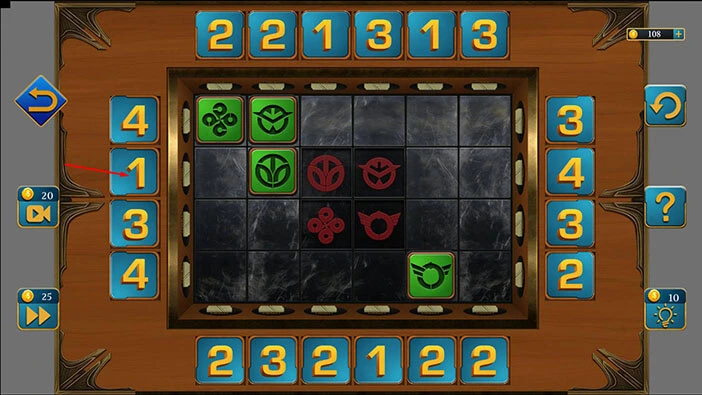
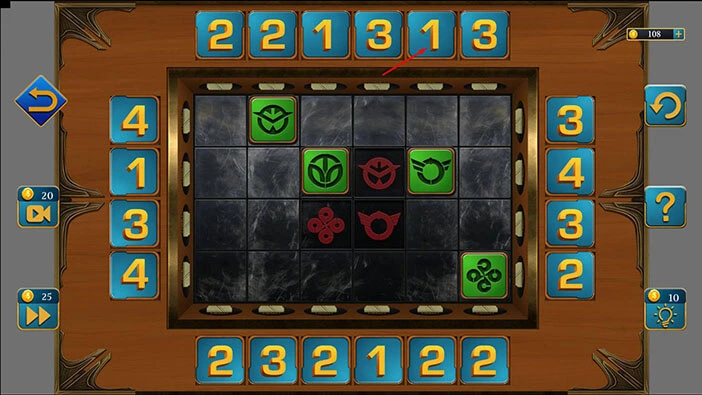
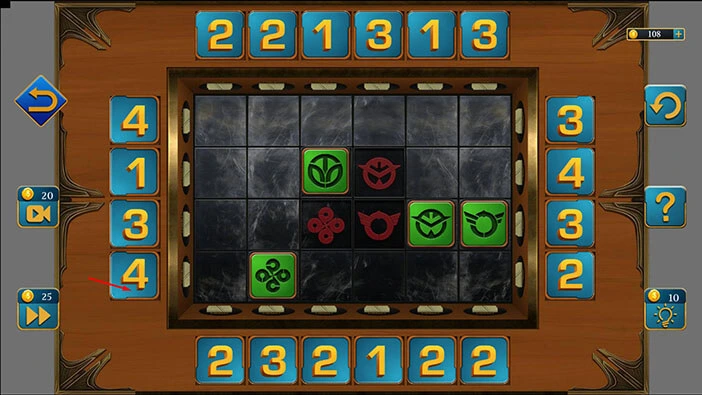
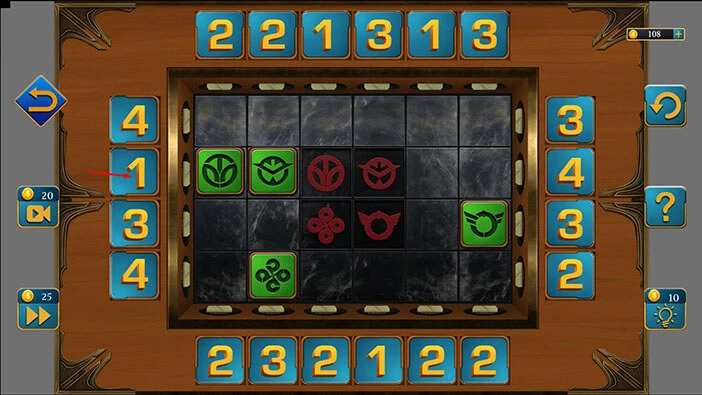
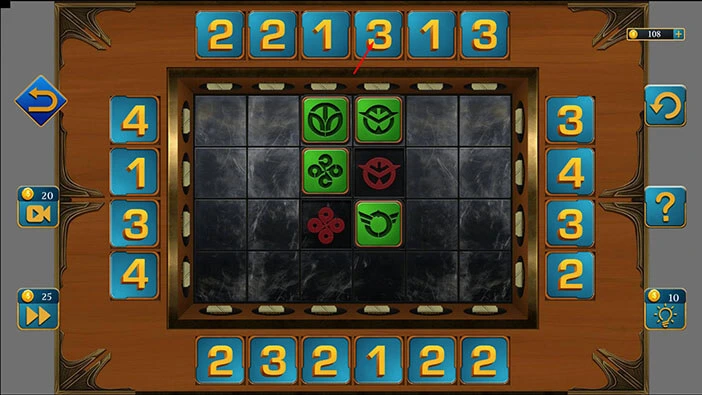
Step 2
Tap on the second button at the right and you will move the puzzle piece four slots to the left (it will slide over the slots in the middle).
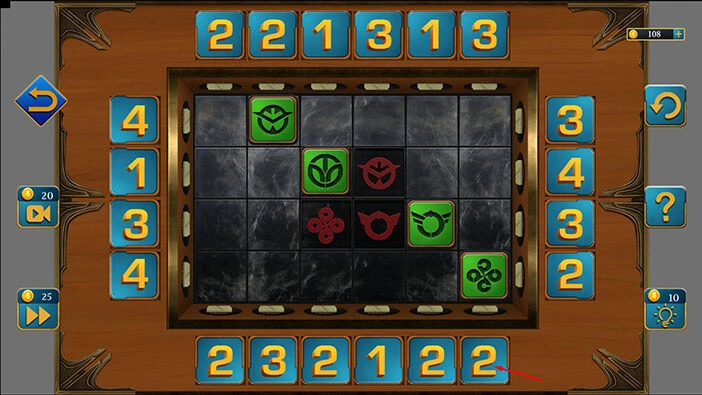
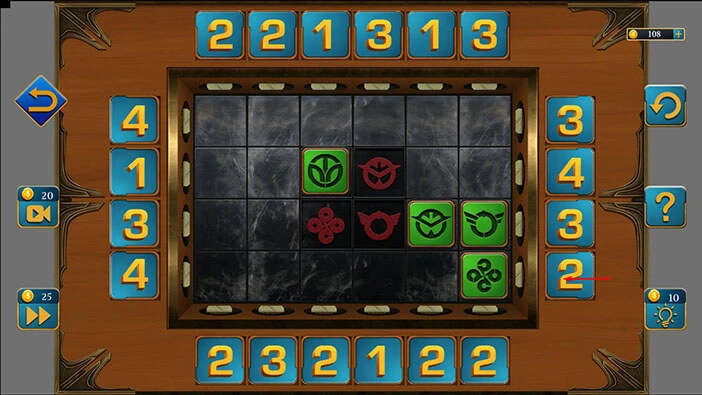
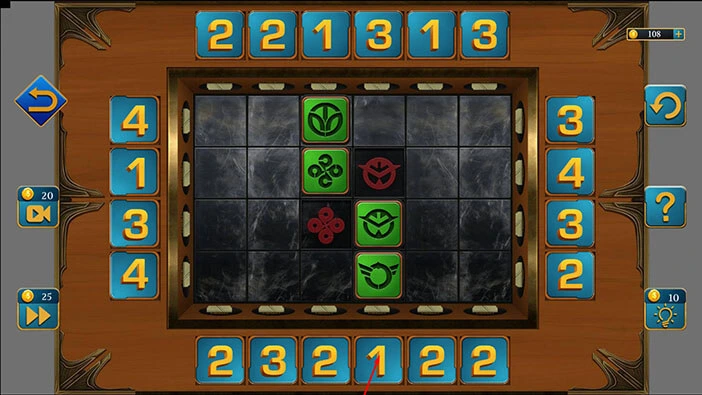
Step 3
Tap on the second button at the left and you will move the puzzle piece one slots to the right.
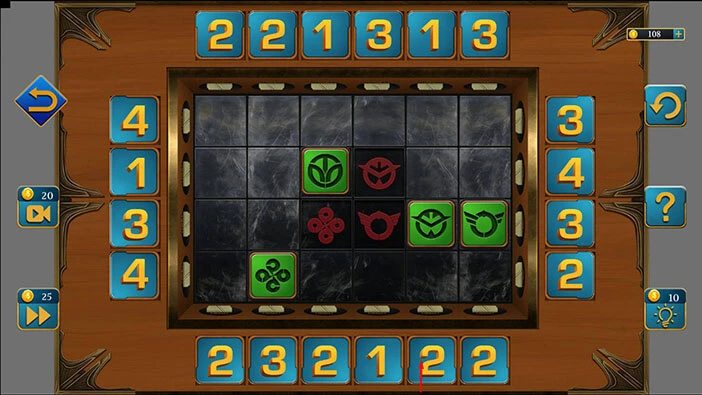
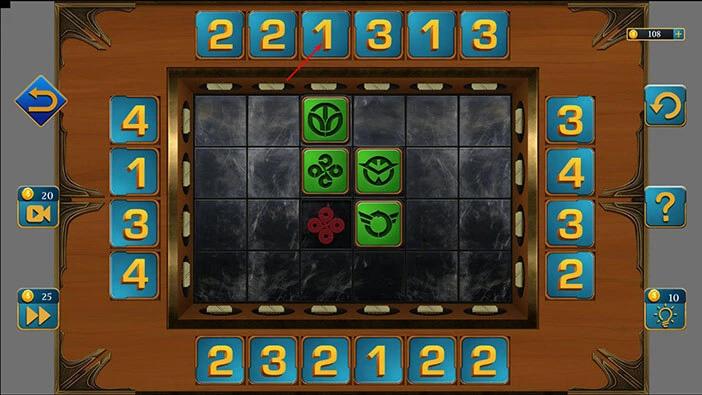
Step 4
Tap on the second button at the left, again, and you will move the puzzle piece one slot to the right.
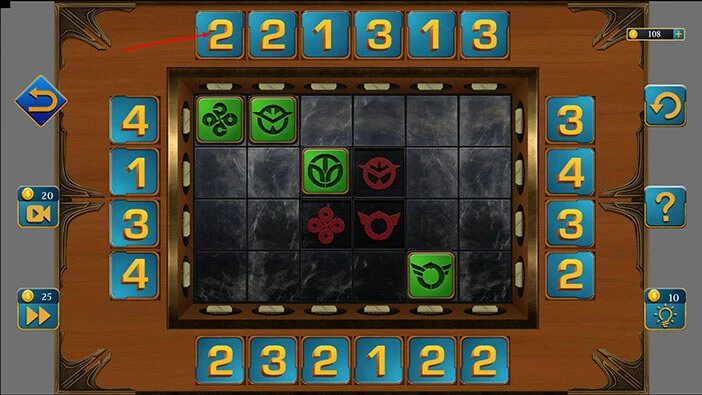
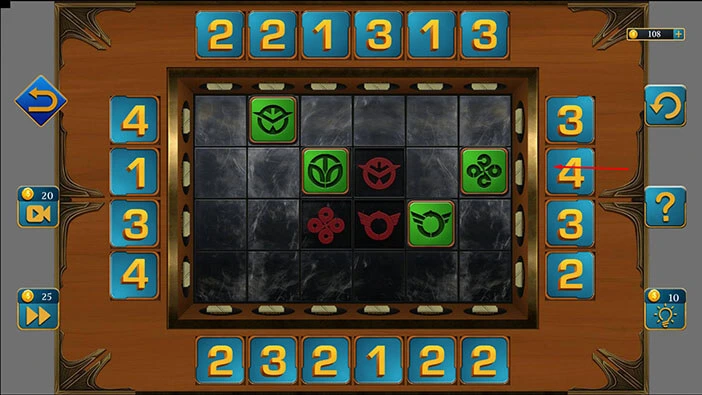
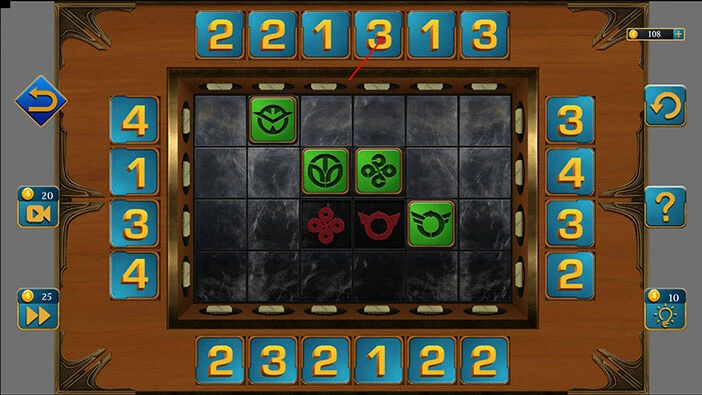
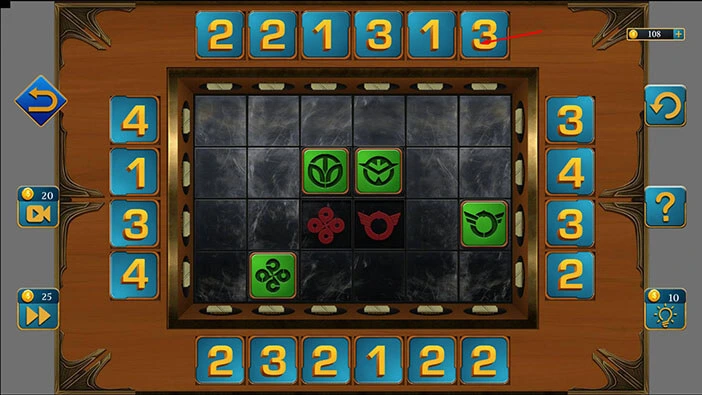
Step 5
Tap twice on the first button at the top and you will move the puzzle piece four slots down.
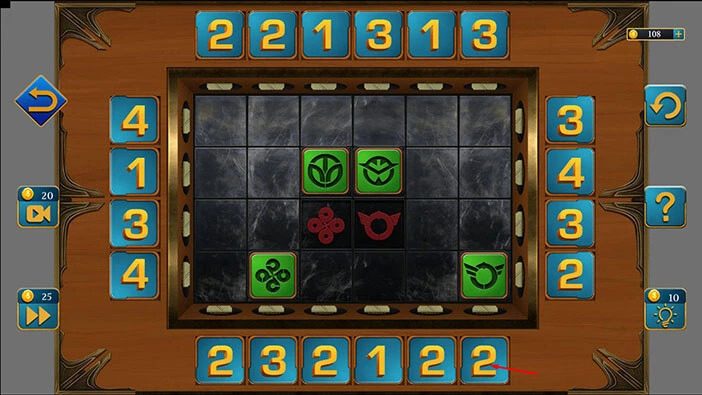
Step 6
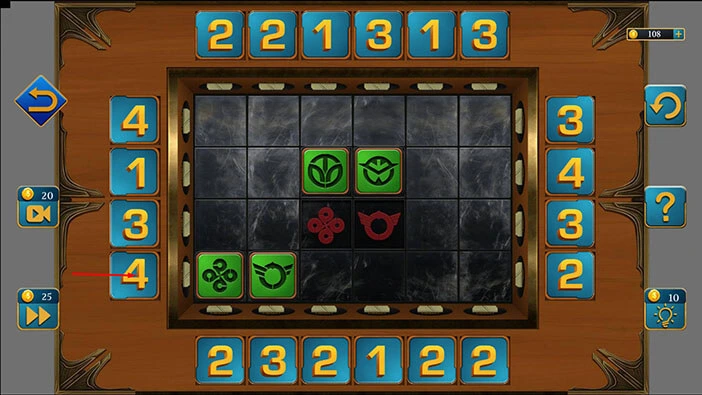
Tap on the fifth button at the bottom and you will move the puzzle piece two slots up.
Step 7
Tap on the fourth button at the left and you will move the puzzle piece four slots to the right.
Step 8
Tap on the fifth button at the top and you will move the puzzle piece one slots down.
Step 9
Tap on the sixth button at the bottom and you will move the puzzle piece two slots up.
Step 10
Tap on the second button on the right and you will move the puzzle piece four slots to the left.
Step 11
Tap twice on the second button on the left and you will move the puzzle piece one slot to the right.
Step 12
Tap on the fourth button at the top and you will move the puzzle piece two slots down.
Step 13
Tap on the fourth button on the right and you will move the puzzle piece two slots to the left.
Step 14
Tap on the second button at the top and you will move the puzzle piece two slots down.
Step 15
Tap on the third button on the left and you will move the puzzle piece three slots to the right.
Step 16
Tap on the fourth button on the left and you will move the puzzle piece four slots to the right.
Step 17
Tap twice on the fourth button on the right and you will move the puzzle piece two slots to the left.
Step 18
Tap on the fifth button at the bottom and you will move the puzzle piece two slots up.
Step 19
Tap on the fifth button at the top and you will move the puzzle piece one slot down.

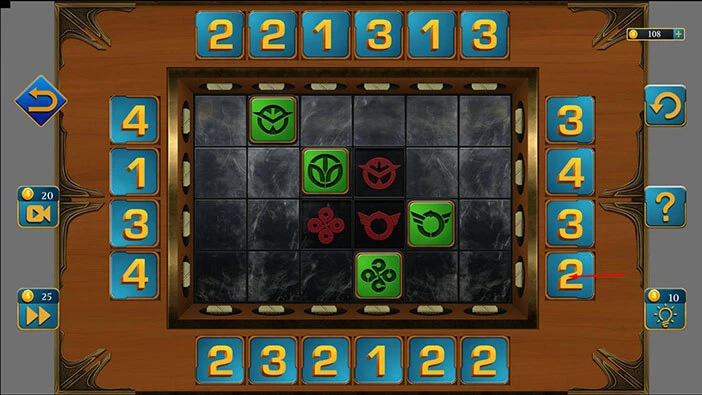
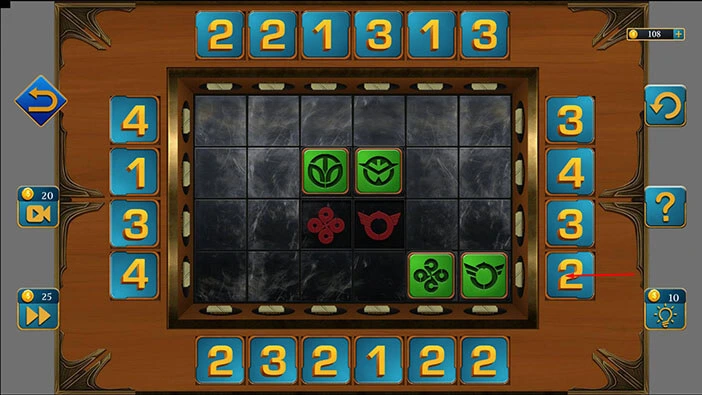
Step 20
Tap on the second button on the right and you will move the puzzle piece two slots to the left.
Step 21
Tap twice on the second button on the left and you will move the puzzle piece one slot to the right.
Step 22
Tap on the sixth button at the top and you will move the puzzle piece one slots down.
Step 23
Tap twice on the sixth button at the bottom and you will move the puzzle piece two slots up.
Step 24
Tap on the sixth button at the top and you will move the puzzle piece three slots down.

Step 25
Tap twice on the fourth button on the right and you will move the puzzle piece four slots to the left.
Step 26
Tap on the fourth button on the left and you will move the puzzle piece four slots to the right.
Step 27
Tap on the fourth button on the right and you will move the puzzle piece two slots to the left.
Step 28
Tap on the fourth button at the bottom and you will move the puzzle piece one slot up.
Step 29
Tap on the third button at the bottom and you will move the puzzle piece two slots up.
Step 30
Tap on the fourth button at the top and you will move the puzzle pieces three slots down.
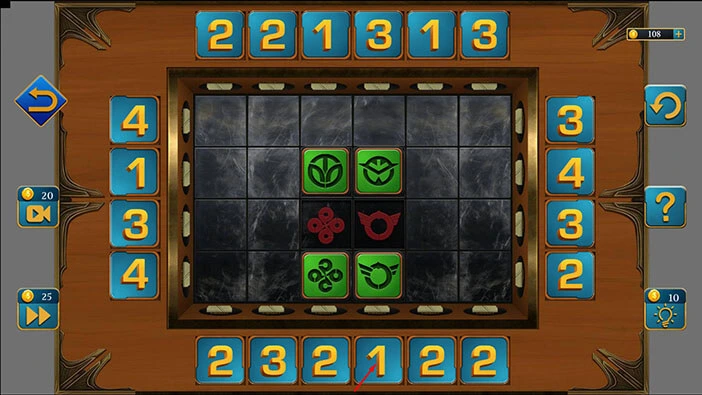
Step 31
Tap on the fourth button at the bottom and you will move the puzzle piece one slot up.
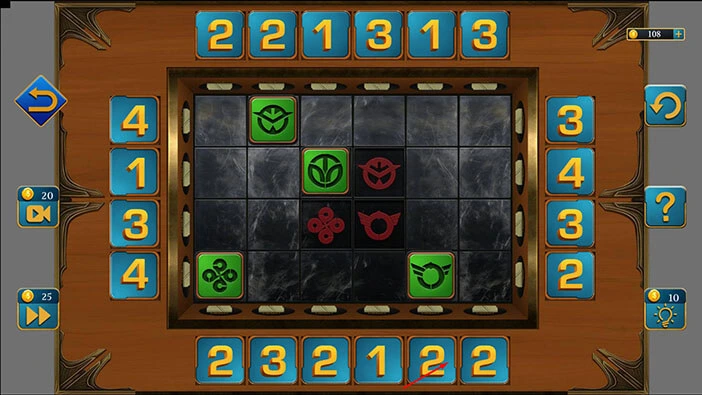
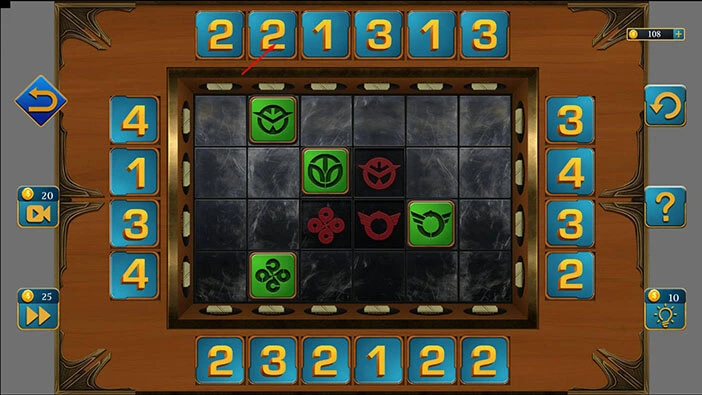
Step 32
Tap on the third button at the top and you will move the puzzle piece one slot down. With that, you will solve this puzzle.
You will open the cabinet as soon as you solve the puzzle, and inside you will find a “Photo”. Let’s tap on it to pick it up.

Let’s tap on the “Photo” in our inventory to examine it.
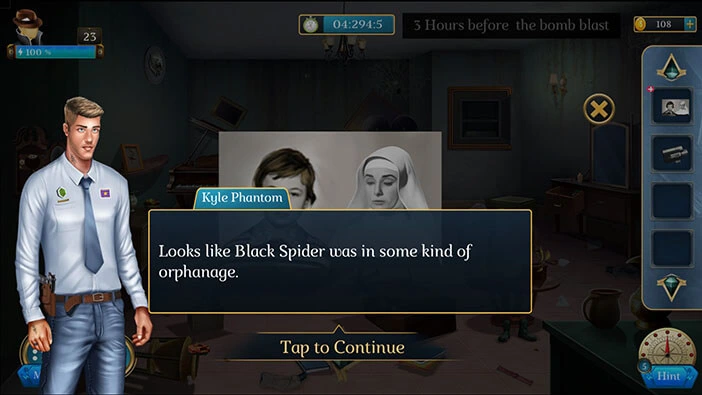
Our character will examine the photo, and he will conclude that the “Black Spider” was raised in the orphanage.
With that, we have reached the end of the twenty-third level. If you want to see the walkthrough for the twenty-fourth level, tap on the next part button.
Thank you for reading.