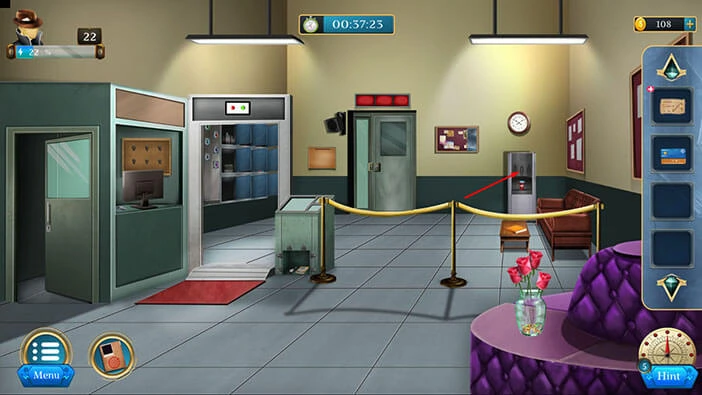
Room Escape: Detective Phantom | Level 22
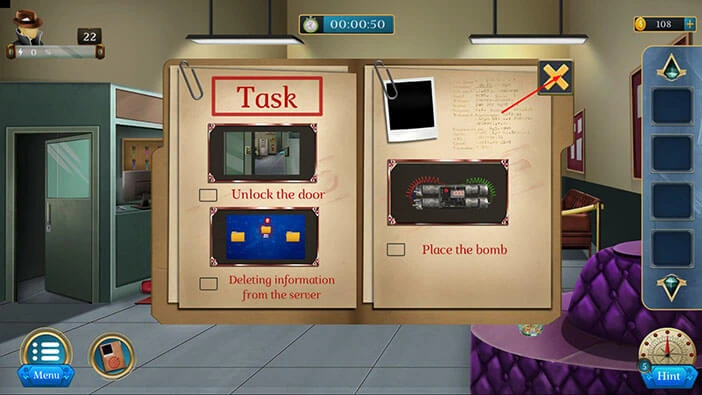
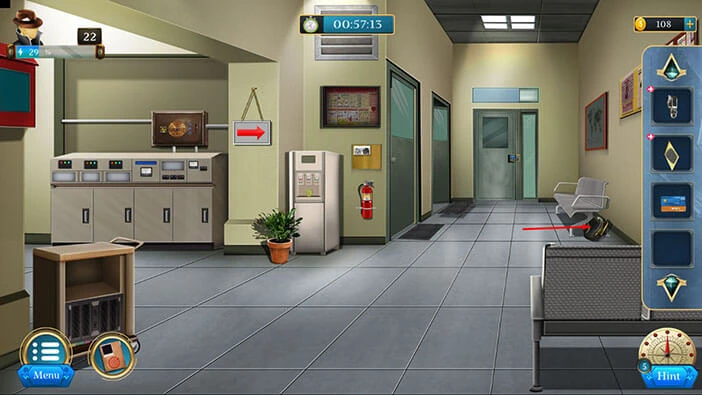
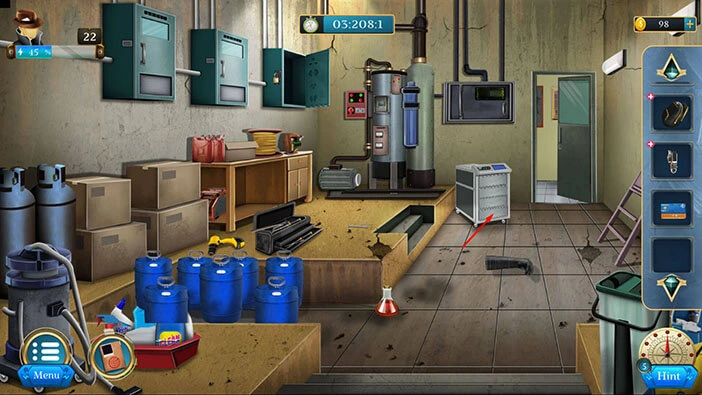
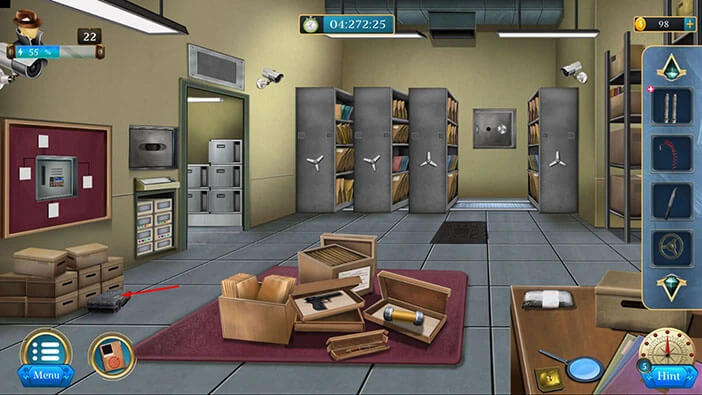
Hello everyone and welcome to the walkthrough for the twenty-second level of “Room Escape: Detective Phantom”. In the twenty-second level, our task is to destroy the evidence in the police station because that’s the only way to save Maze.
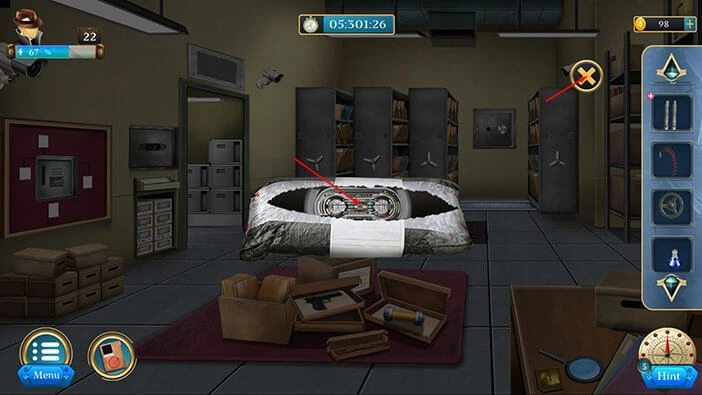
Our objectives are to “Unlock the door” “Deleting information from the server” and “Place the bomb”. Tap on the “X” button to go back.
On the floor on the left, you will notice a “Cup”. Let’s tap on it to take a closer look at it, and tap again to pick it up. After that, tap on the arrow at the bottom to go back.

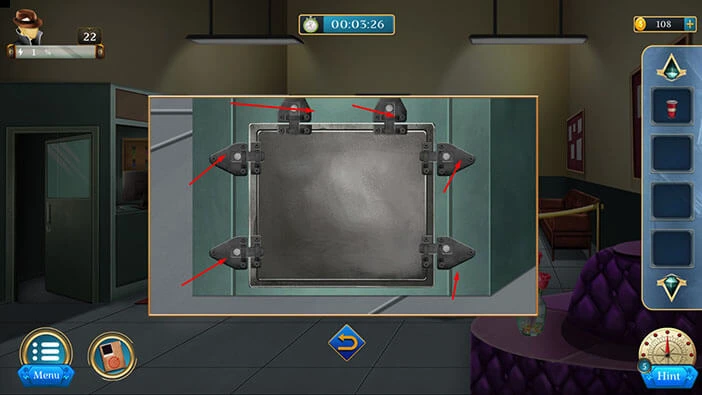
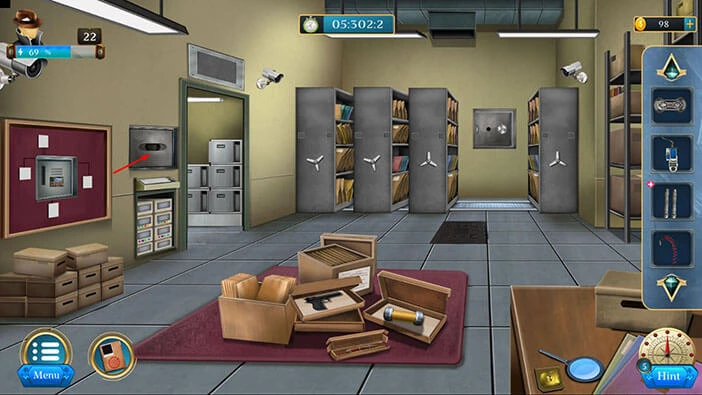
Next, tap on the small hatch to take a closer look at it.

Tap on the hinges to unlock this small door.
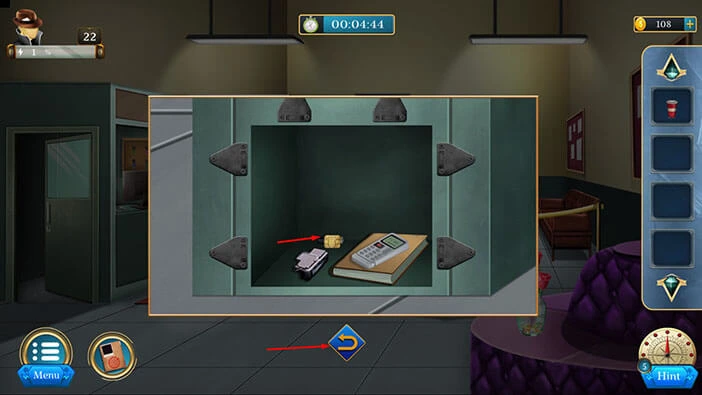
Inside you will find a “Chip”. Let’s tap on it to pick it up. After that, tap on the arrow at the bottom to go back.
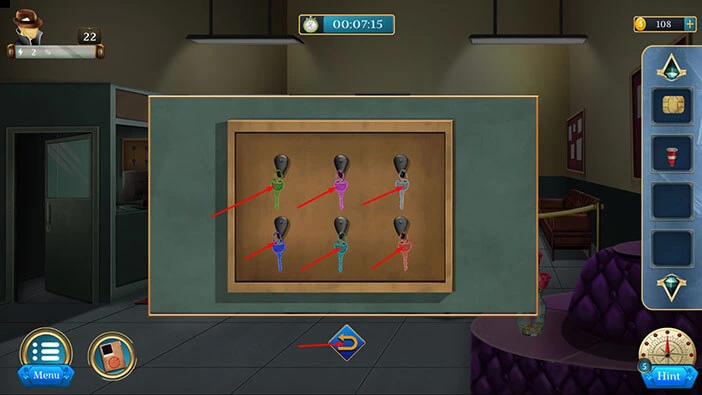
Let’s tap on the “Keys” located on the wall on the left to take a closer look at them.
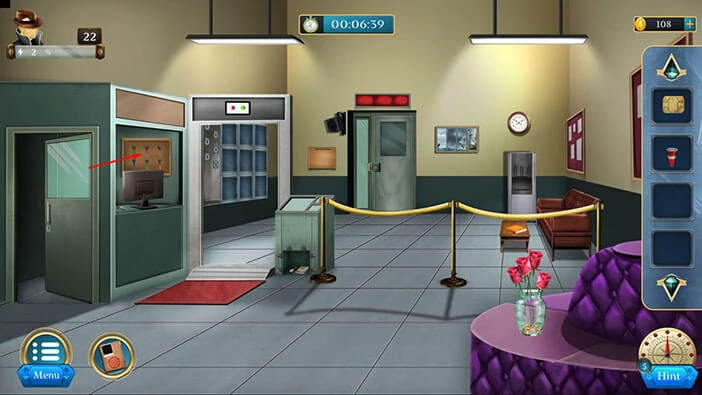
Let’s tap on all six keys to pick them up. After that, tap on the arrow at the bottom to go back.
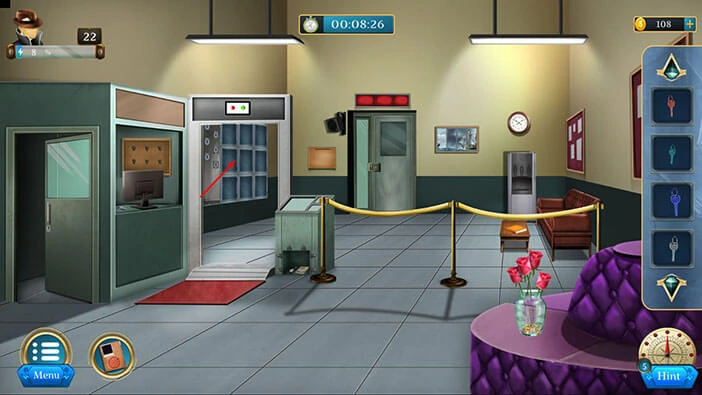
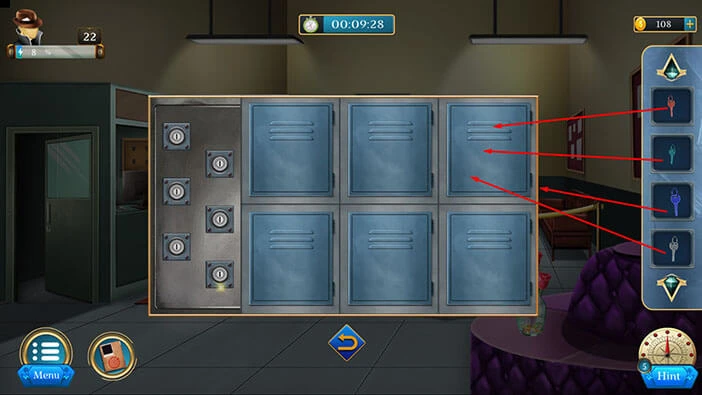
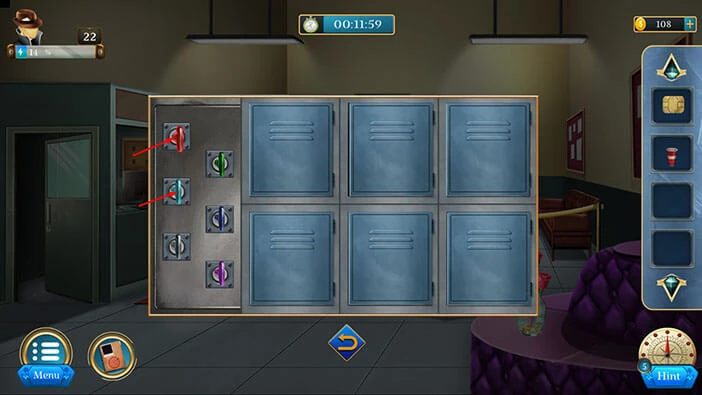
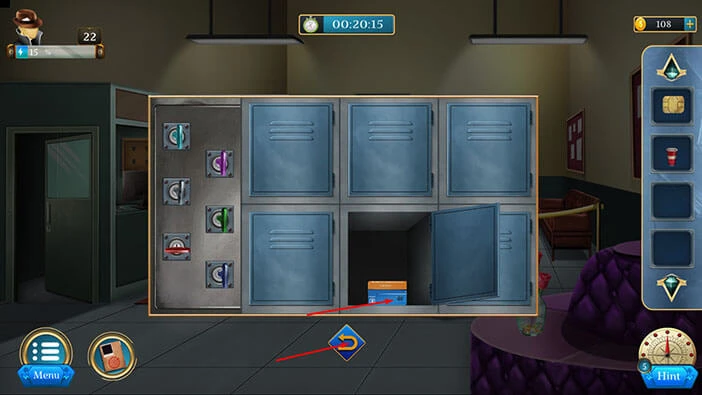
Next, let’s tap on the lockers in the backroom to take a closer look at them.
Drag all six keys to the locker. With that, you will automatically place all six keys into the keyholes on the left.
Let’s rearrange the keys. We will do that in several steps. Let’s begin.
Step 1
Select the green key then tap on the red key to swap their positions.
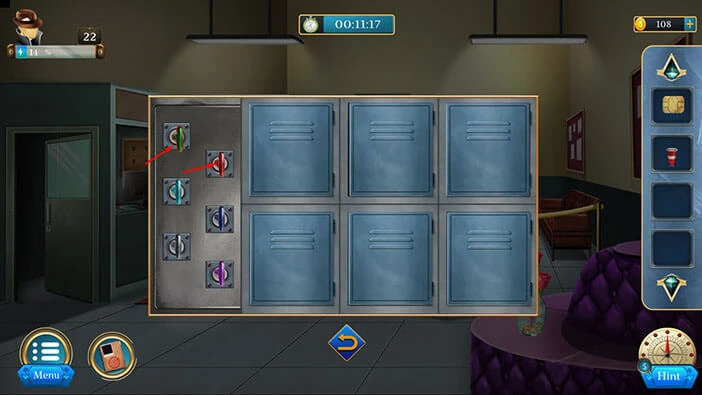
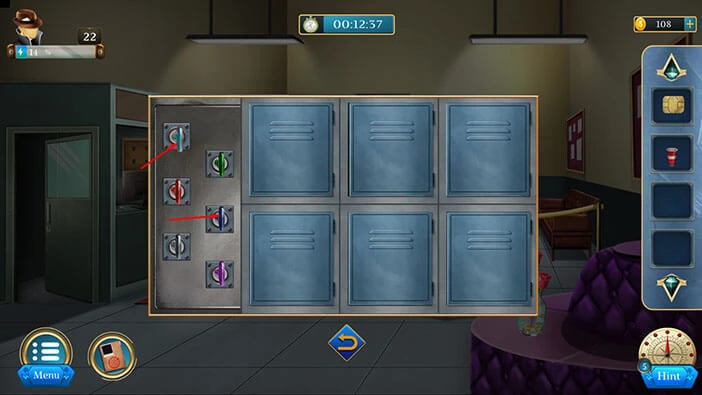
Step 2
Select the red key then tap on the light blue key to swap their positions.
Step 3
Select the light blue key then tap on the blue key to swap their positions. With that, you will unlock the first locker.
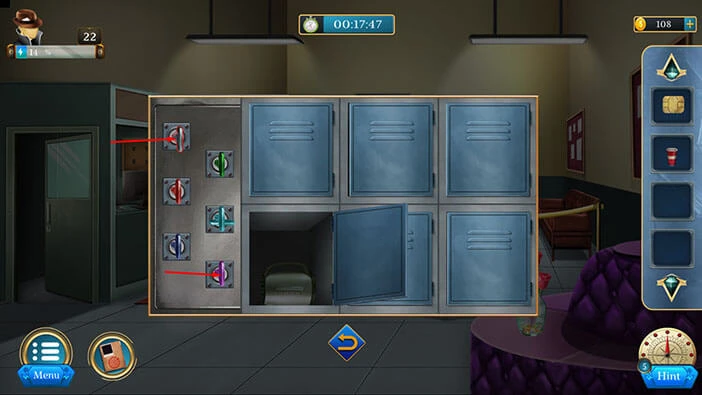
Step 4
Select the blue key then tap on the grey key to swap their positions.

Step 5
Select the grey key then tap on the purple key to swap their positions. With that, you will unlock another locker.
Step 6
Select the green key then tap on the red key to swap their positions.
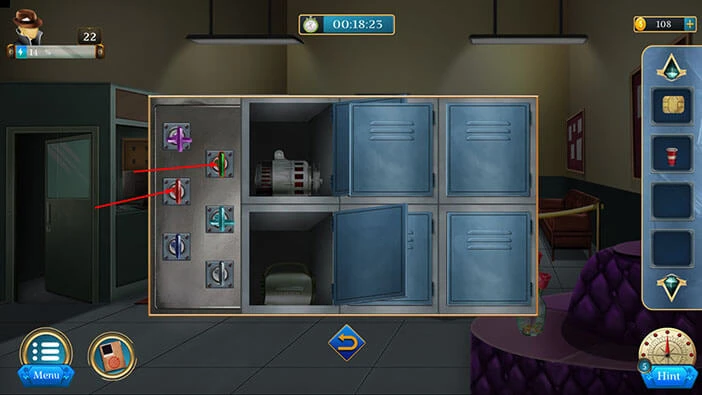
Step 7
Select the red key then tap on the blue key to swap their positions. With that, you will unlock the third locker.

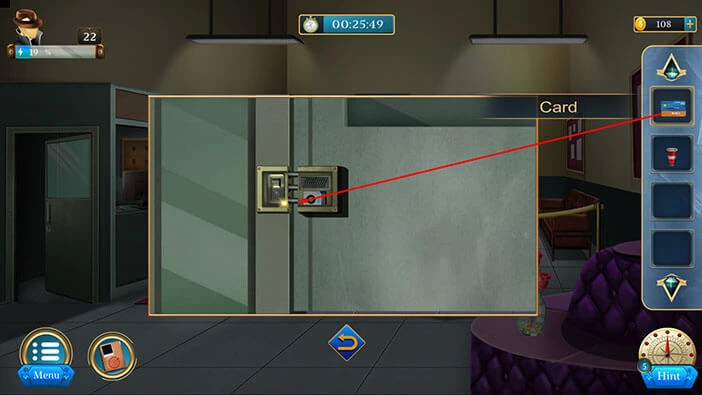
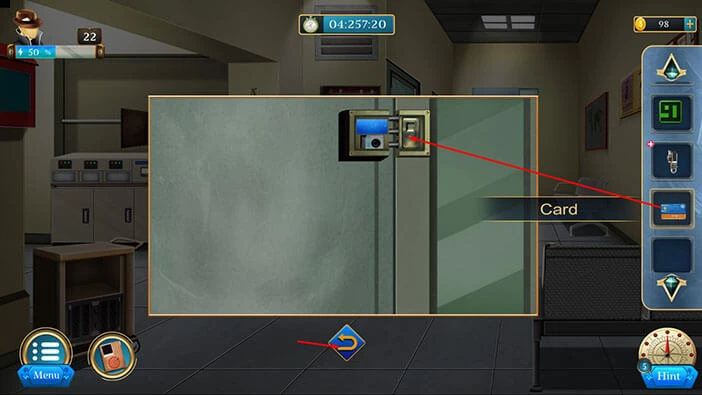
In this locker, you will find a “Card”. Let’s tap on it to pick it up.
After that, tap on the arrow at the bottom to go back.
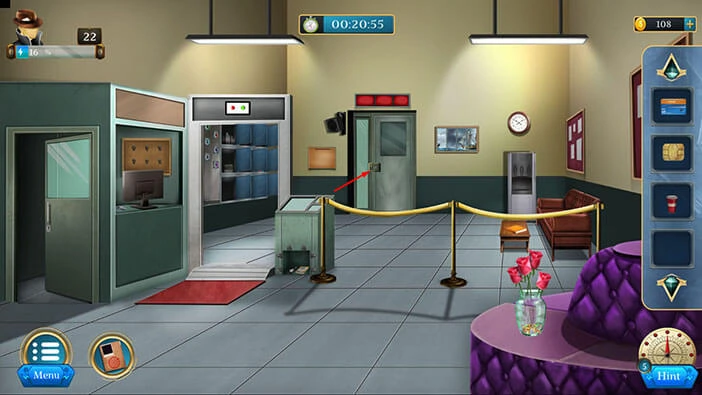
Next, tap on the door in front of you to take a closer look at it.
Select the “Card” from the inventory and try to unlock the door.
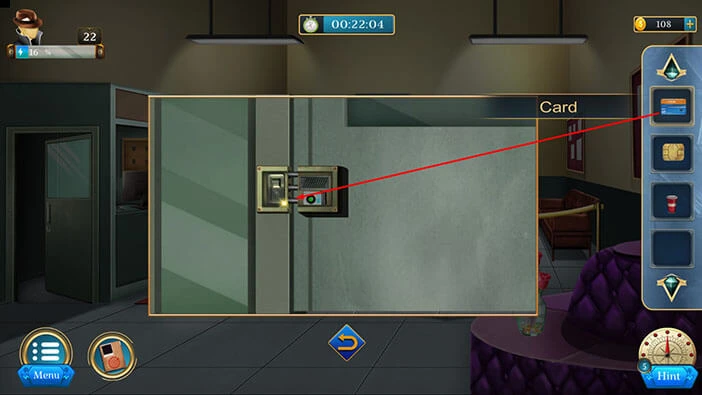
Damn, that didn’t work. Let’s go back.
Select the “Card” from the inventory and it will appear in the middle of the screen. After that, select the “Chip” from the inventory and insert it into the empty slot. After that, tap on the card to pick it up.
Once you’re done, tap on the “X” button to close this window.

Let’s go back to the door and try again.

Select the “Card” from the inventory and try to unlock the door.
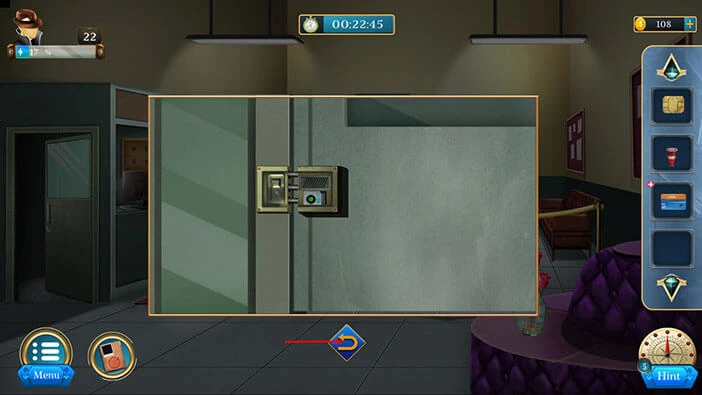
Let’s tap on the lock to start the interaction.
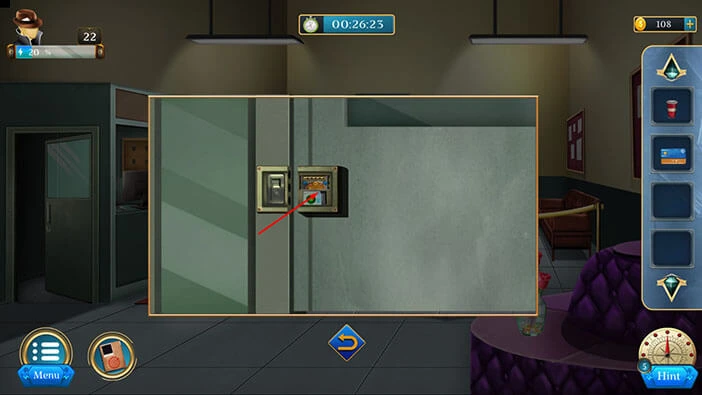
Here, we have another puzzle. We will come back to it a bit later.
For now, tap on the arrow at the bottom to go back.
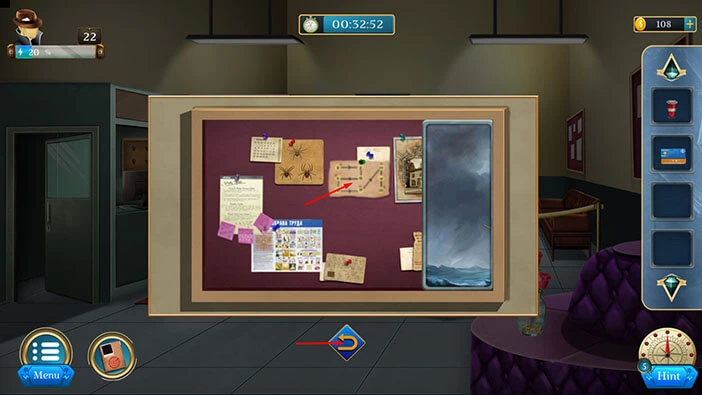
Next, let’s tap on the picture on the wall on the right to take a closer look at it.

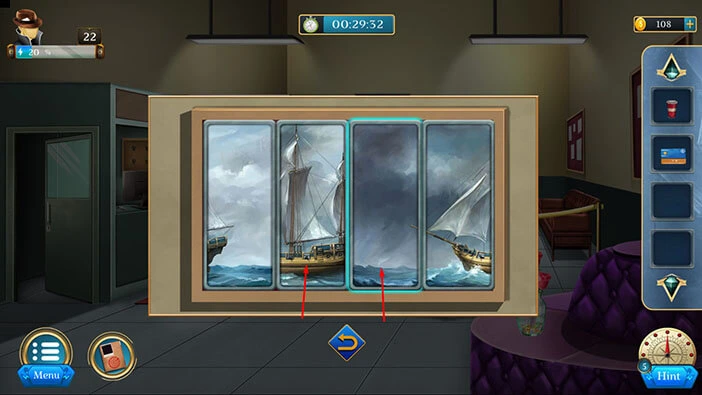
Our next task is to assemble the picture. We will do that in several steps. Let’s begin.
Step 1
Select the third piece of the picture and swap its position with the fourth piece of the picture.
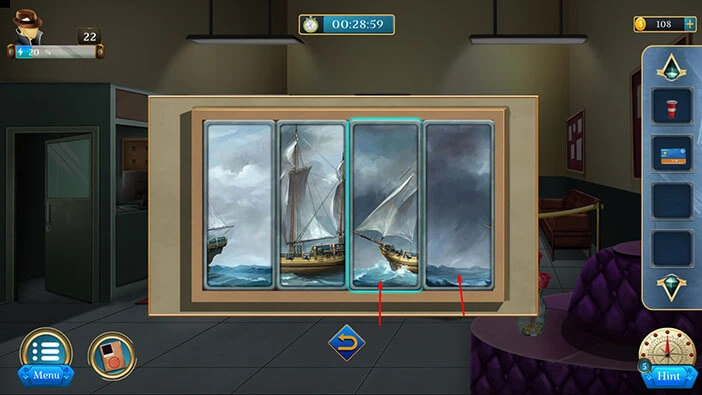
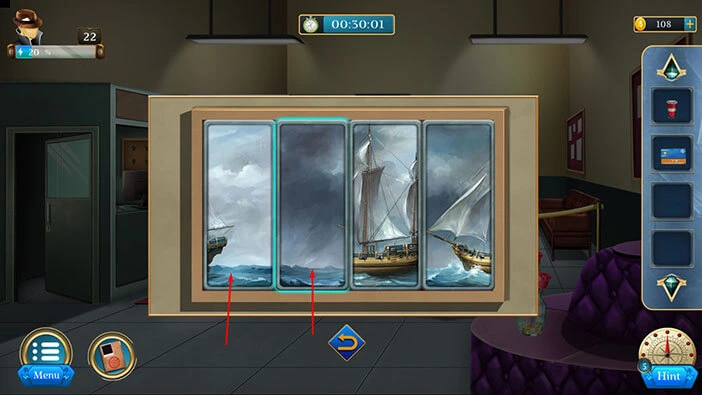
Step 2
Select the third piece of the picture and swap its position with the second piece of the picture.
Step 3
Select the second piece of the picture and swap its position with the first piece of the picture.
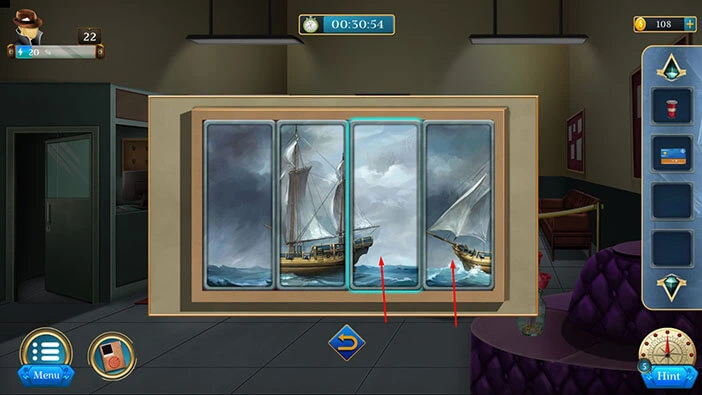
Step 4
Select the third piece of the picture and swap its position with the second piece of the picture.

Step 5
Select the third piece of the picture and swap its position with the fourth piece of the picture.
Step 6
Select the third piece of the picture and swap its position with the second piece of the picture.
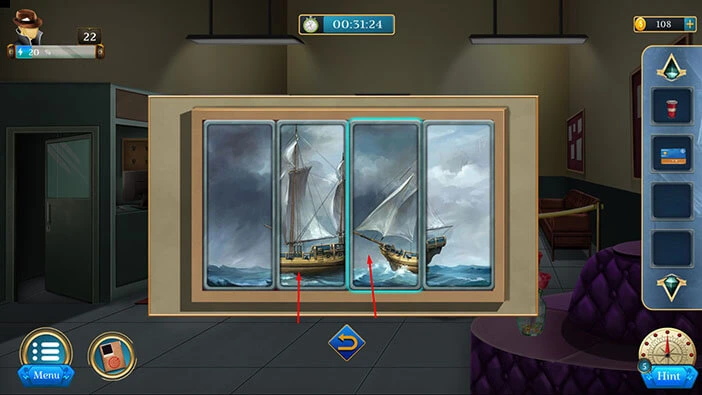
With that, you will open the secret compartment and inside you will find a “Clue Paper”. Let’s tap on it to pick it up.
After that, tap on the arrow at the bottom to go back.
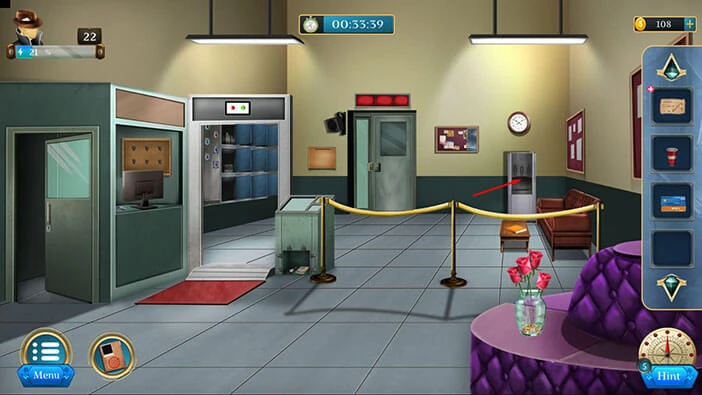
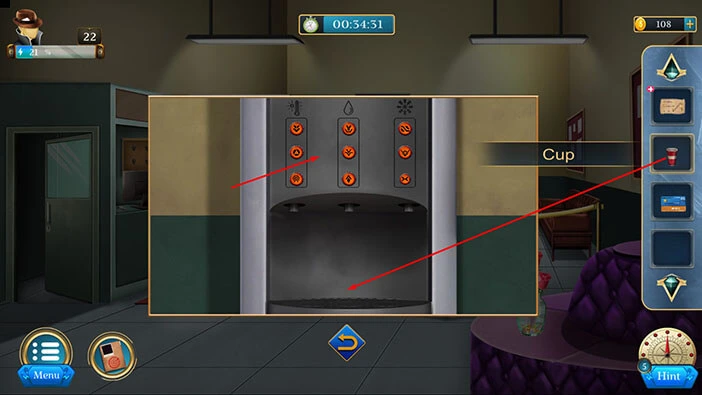
Next, let’s tap on the vending machine on the right to take a closer look at it.
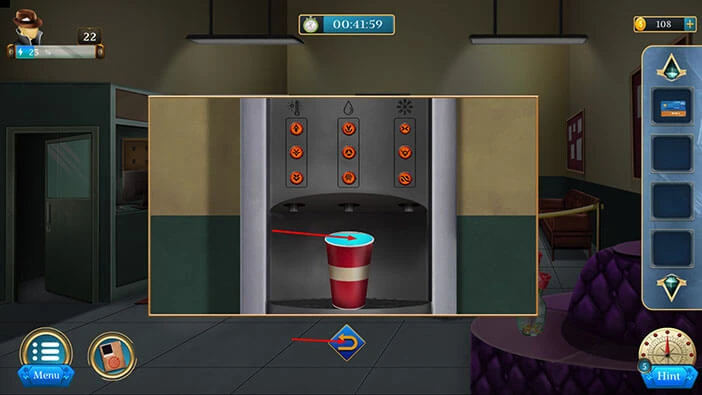
Select the “Cup” from the inventory and drag it into the empty slot. After that, tap on the display screen to start the interaction.
We will come back to this puzzle in a moment. Let’s tap on the arrow at the bottom to go back.
Next, select “Clue Paper” from the inventory and it will appear in the middle of the screen. Here, we can see the correct order of buttons. So, let’s memorize/write down this sequence.
Once you’re done, tap on the “X” button to close this window.

Let’s go back to the vending machine.
We will do this puzzle in several steps. Let’s begin.
Step 1
Tap on the first button in the first row. After that, tap on the first button in the second row.
Step 2
Tap on the second button in the third row. After that, tap on the third button in the first row.

Step 3
Lastly, tap on the third button in the third row, and you will solve this puzzle.

Let’s tap on the “Water Cup” to pick it up. After that, tap on the arrow at the bottom to go back.
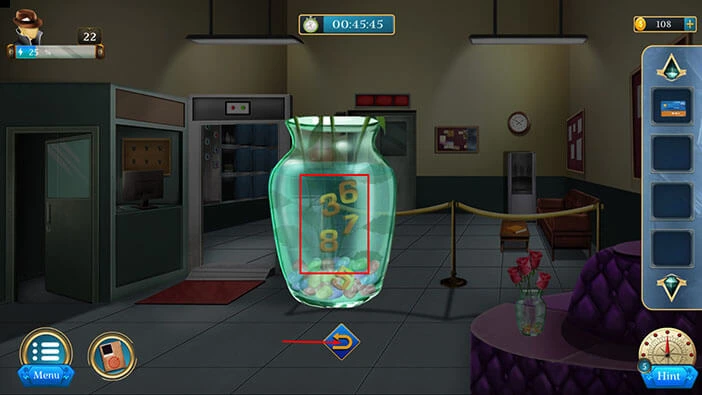
On the table on the right, you will notice a vase with some flowers. Let’s tap on it to take a closer look, and it will appear in the middle of the screen.

Select the “Water Cup” from the inventory and use it to water the flowers.
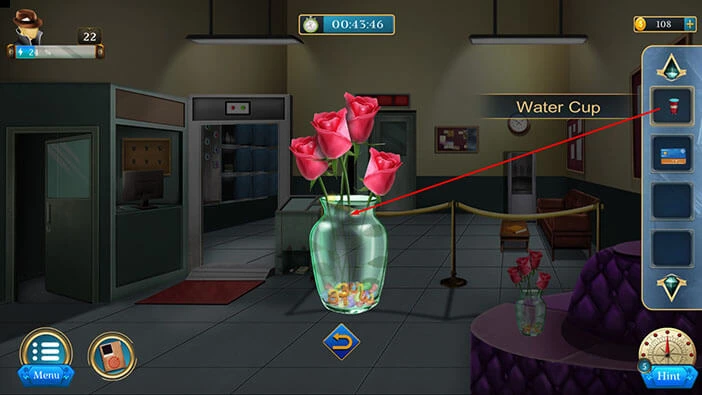
Now, we can see five numbers in the vase. Looking from top to bottom, we have “63185”. Let’s memorize/write down these numbers because we will need them for the next puzzle.
Once you’re done, tap on the arrow at the bottom to go back.
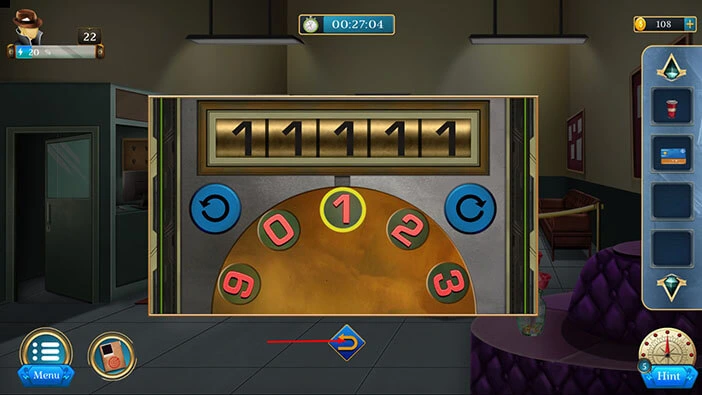
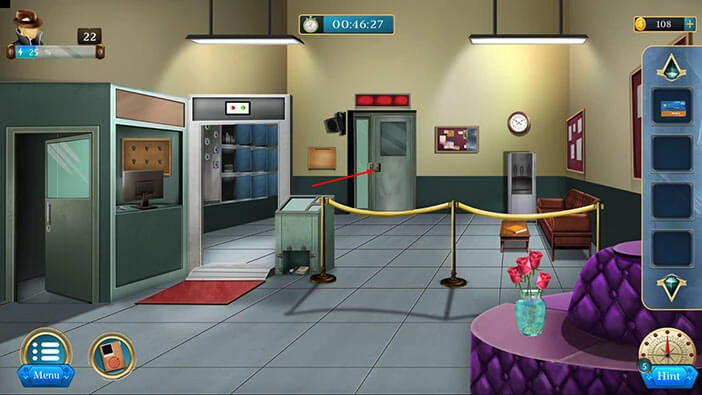
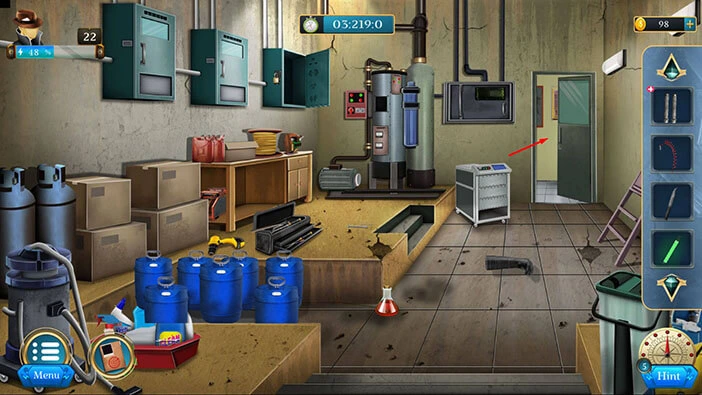
Next, let’s tap on the door to take a closer look at it.
Enter the number “63185” and you will solve this puzzle.
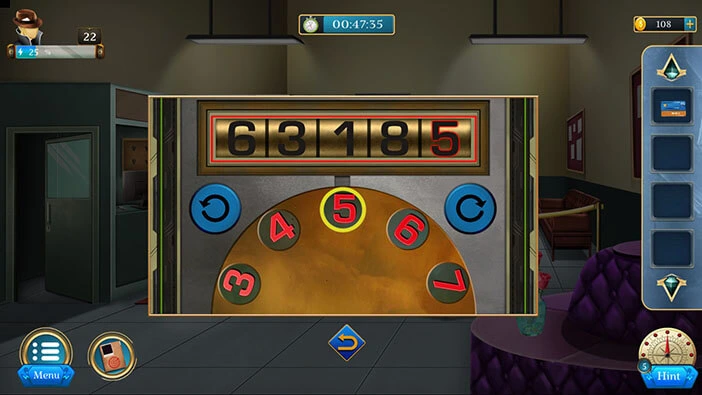
With that, you will unlock and open the door. Let’s tap on it to proceed to the next room.

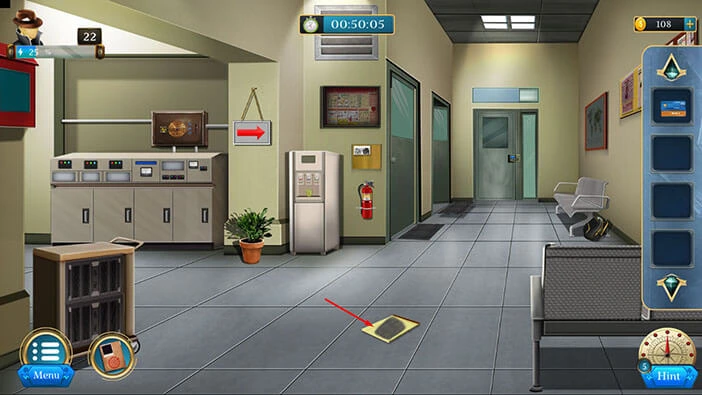
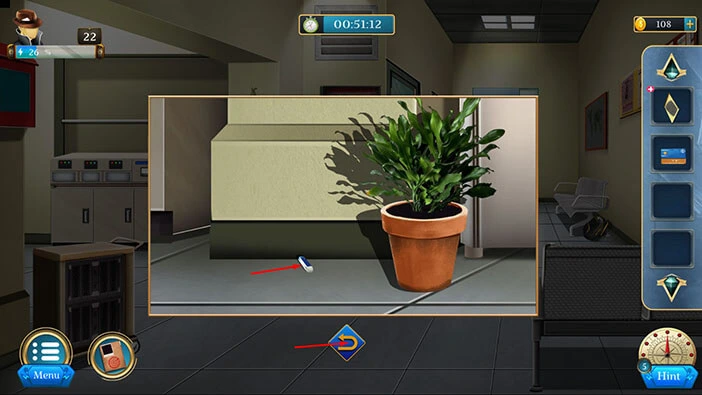
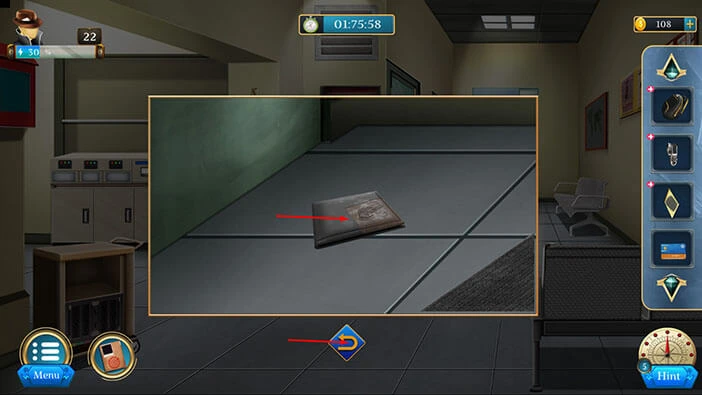
Let’s explore this room. On the floor in front of you, you will notice a “Note”. Let’s tap on it to take a closer look and tap again to pick it up.
Next, let’s tap on the vase on the left to take a closer look at it, and tap again to move it aside.

Behind the vase, you will find an “Eraser”. Let’s tap on it to pick it up. After that, tap on the arrow at the bottom.
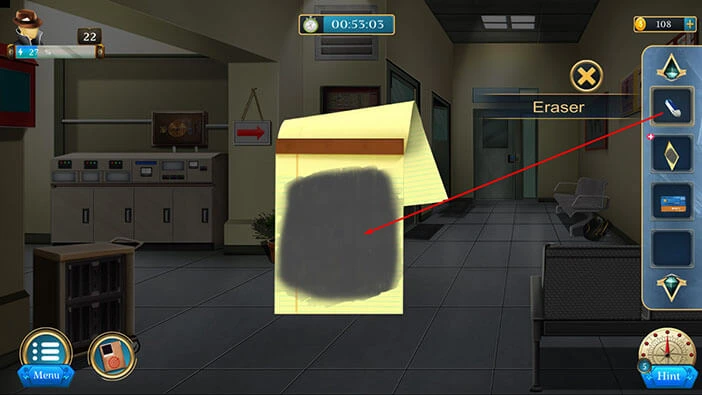
Select the “Note” from the inventory and it will appear in the middle of the screen. After that, tap on the note to turn the page.
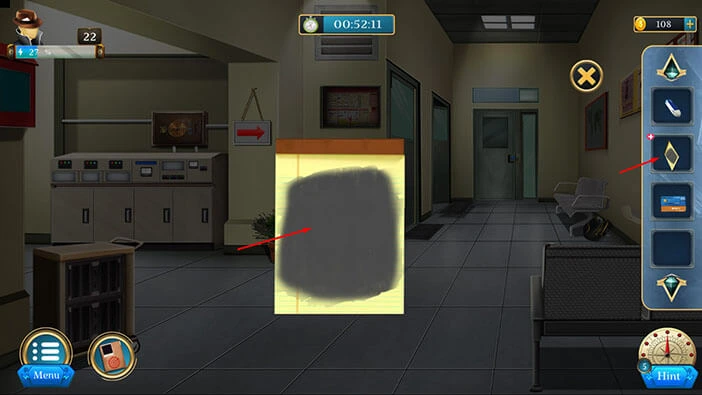
Select the “Eraser” from the inventory and use it on the page.
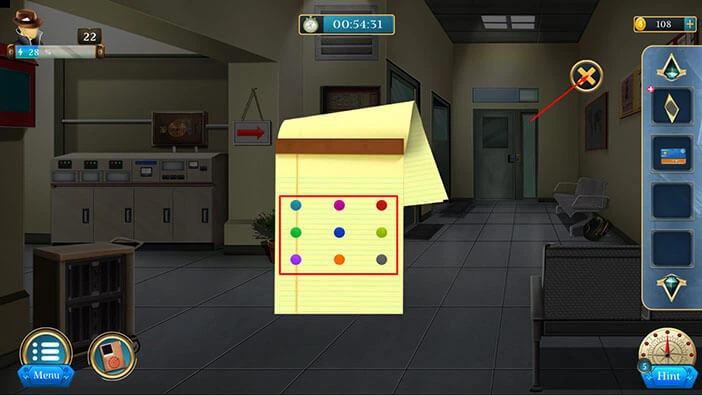
Here, you will see nine dots of different colors. Let’s memorize/write down the color of the dots because we will need this information for the next puzzle.
Once you’re done, tap on the “X” button to close this window.
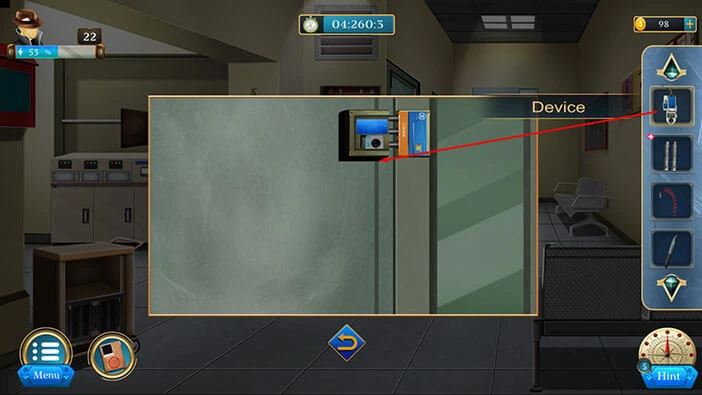
Next, let’s tap on the cabinet on the left to take a closer look at it, and tap again to open it.

In the cabinet, you will find a “Device”. Let’s tap on it to pick it up.
After that, tap on the arrow at the bottom.

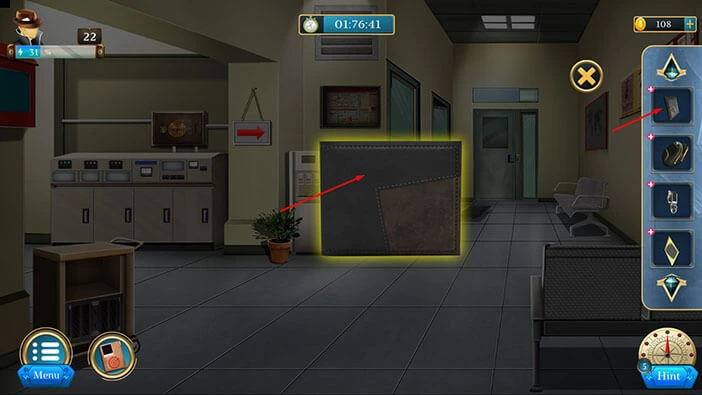
Next, to the wall on the right, you will notice a “Bag”. Let’s tap on it to take a closer look, and tap again to pick it up.
After that, tap on the arrow at the bottom.
Select the “Bag” from the inventory and it will appear in the middle of the screen. Let’s tap on the padlock to start the interaction.
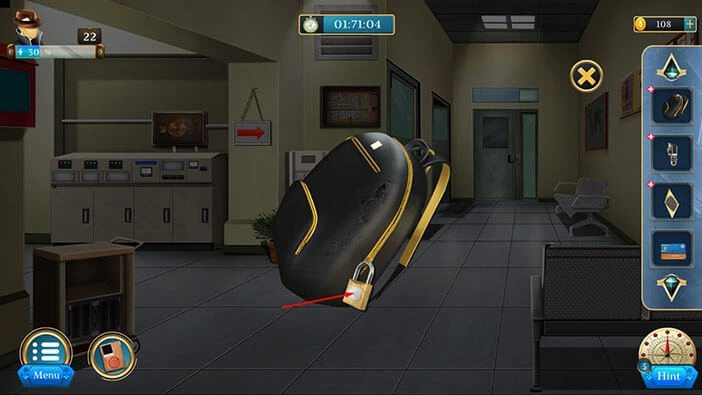
Here, we have another puzzle. We will come back to it a bit later. For now, tap on the “X” button to close this window.
Next, let’s tap on the doormat to take a closer look at it, and tap again to move it aside.
Under the doormat, you will find a “Wallet”. Let’s tap on it to pick it up.
After that, tap on the arrow at the bottom.
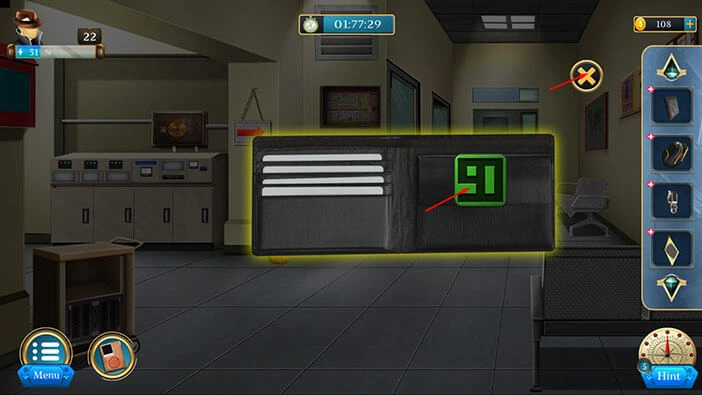
Select the “Wallet” from the inventory and it will appear in the middle of the screen. After that, tap on the wallet to open it.
In the wallet, you will find a “Button”. Let’s tap on it to pick it up. After that, tap on the “X” button to close this window.
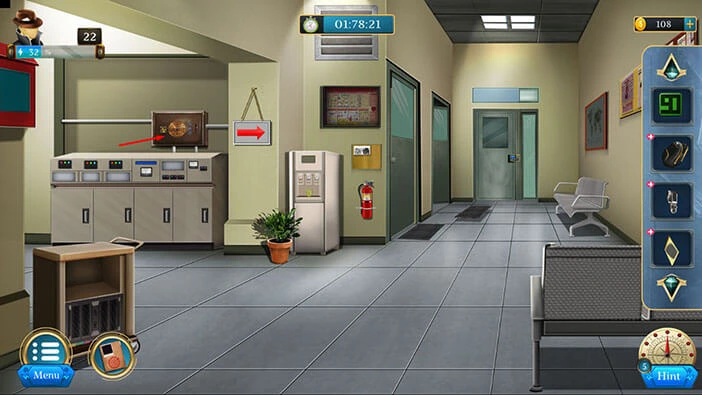
Next, let’s tap on the brown box, located on the wall on the left, to take a closer look at it, and tap again to start the interaction.
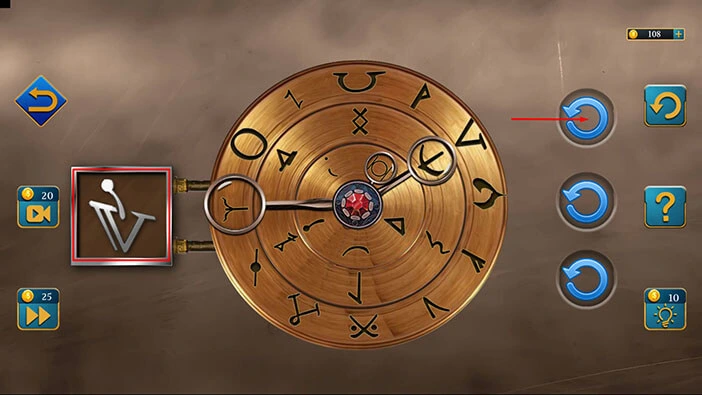
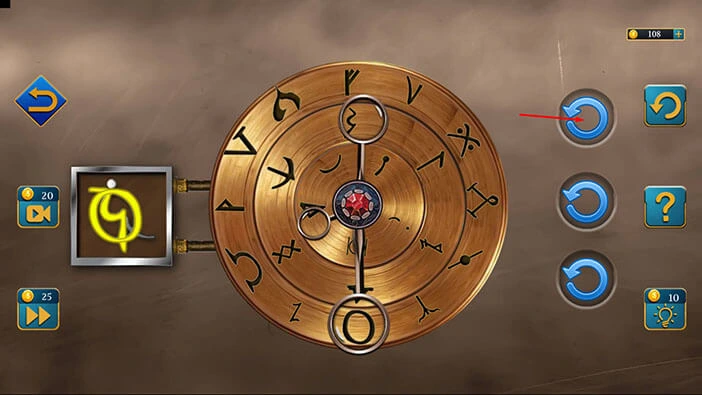
Here, we have another puzzle. On the left side, we can see a certain symbol. On the right, we can see three glasses, and there is a symbol below each glass. We can also see three rings with symbols. So, our task is to assemble the symbols on the left, by placing the glasses on the three symbols that, when put together, form the symbol on the left.
We will do this puzzle in several steps. Let’s begin.
Step 1
Let’s tap three times on the top arrow to rotate the inner ring, and you will move the glass to the correct symbol.
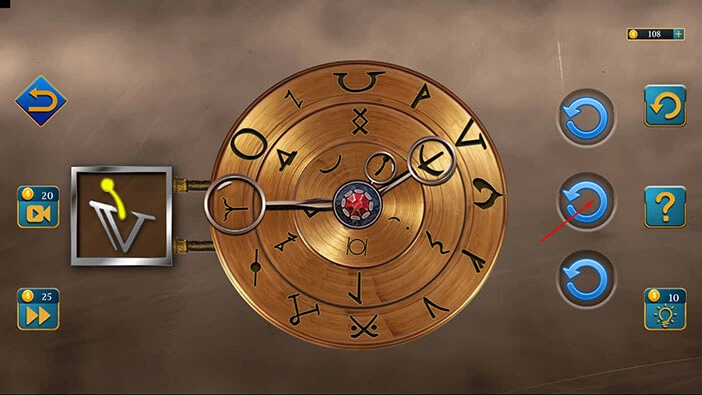
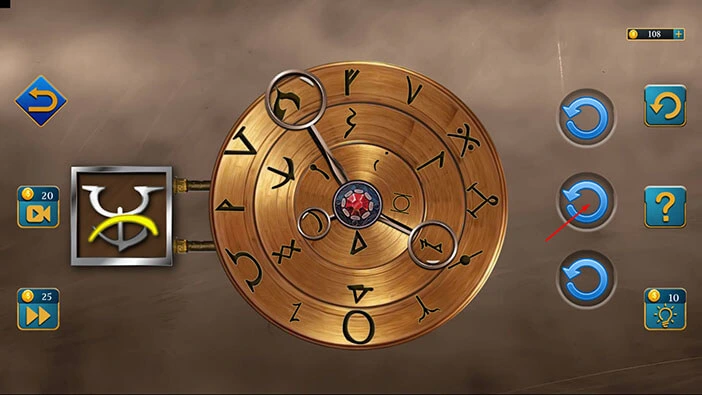
Step 2
Let’s tap three twice on the middle arrow to rotate the middle ring, and you will move the glass to the correct symbol.
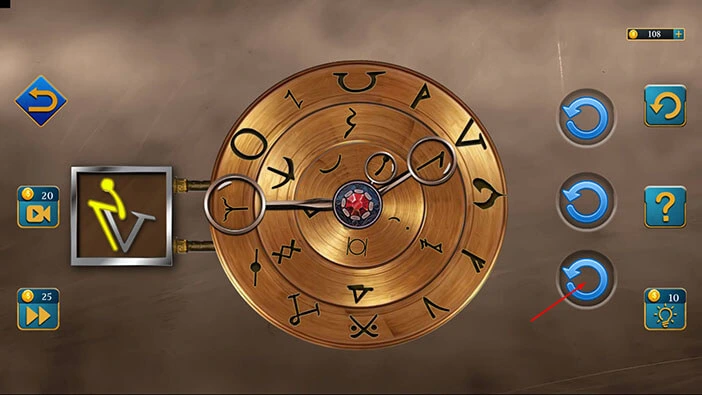
Step 3
Let’s tap five times on the bottom arrow to rotate the outer ring, and you will move the glass to the correct symbol.
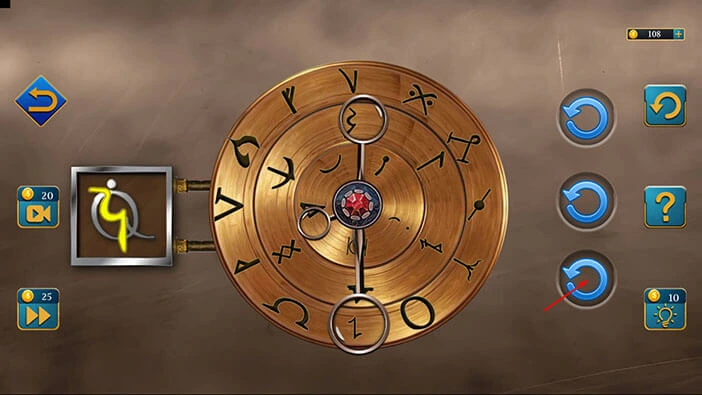
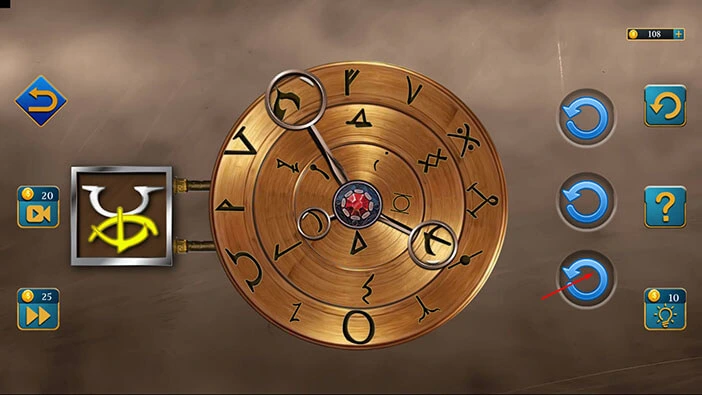
Now, we have another symbol and, just like before, our task is to assemble it. Let’s do that.
Step 1
Let’s tap eleven times on the bottom arrow to rotate the outer ring, and you will move the glass to the correct symbol.
Step 1
Let’s tap three times on the top arrow to rotate the inner ring, and you will move the glass to the correct symbol.
Let’s assemble the next symbol.
Step 1
Let’s tap three times on the top arrow to rotate the inner ring, and you will move the glass to the correct symbol.

Step 2
Let’s tap three times on the middle arrow to rotate the middle ring, and you will move the glass to the correct symbol.
Step 3
Let’s tap nine times on the bottom arrow to rotate the outer ring, and you will move the glass to the correct symbol. With that, you will solve this puzzle.
Here, you will discover four symbols representing the hint for the next puzzle. Let’s memorize/write down these symbols.
Once you’re done, tap on the arrow at the bottom to go back.

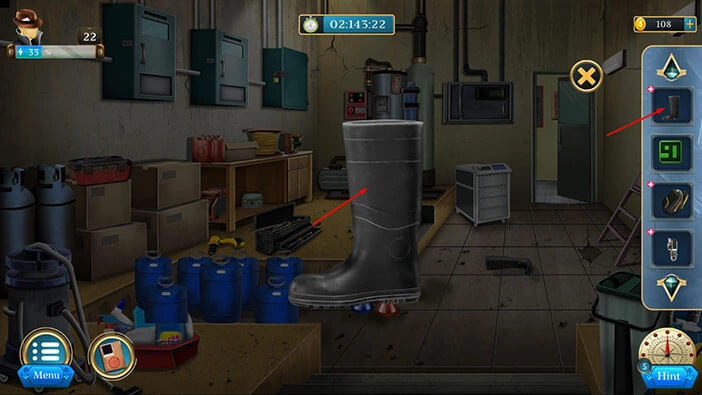
On the floor, you will find a “Shoe”. Let’s tap on it to take a closer look at it, and tap again to pick it up.
After that, tap on the arrow at the bottom to go back.
Select the “Shoe” from the inventory and it will appear in the middle of the screen. After that, tap on the “Shoe” to start the interaction.
In the “Shoe” you will find a “Button”. Let’s tap on it to pick it up. After that, tap on the “X” button to close this window.
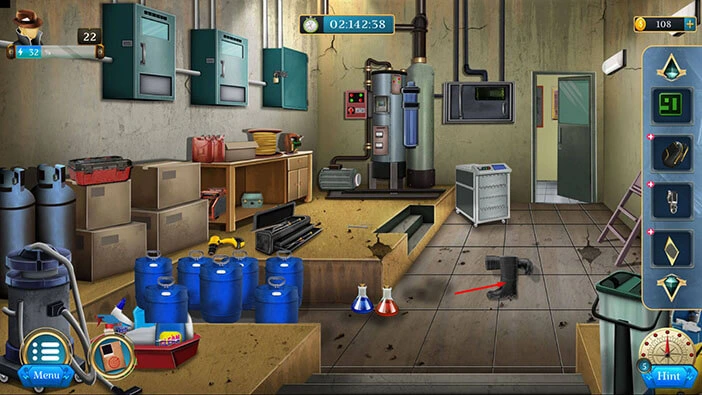
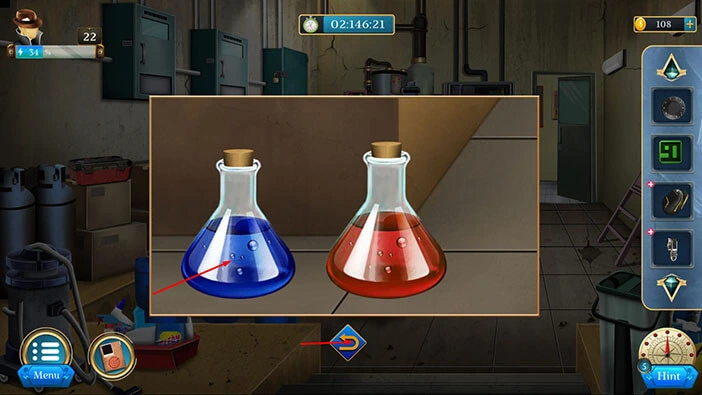
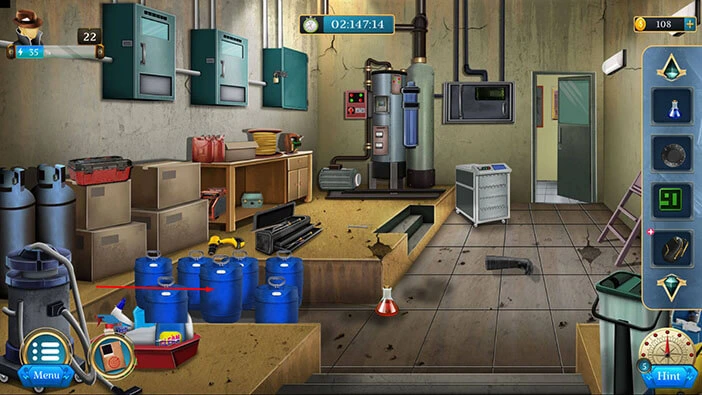
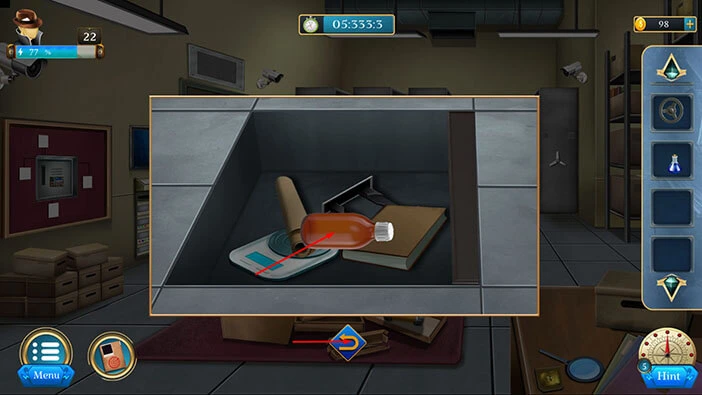
Let’s tap on the two bottles to take a closer look at them.
Tap on the blue bottle to pick it up, and “Solution” will be added to your inventory.
After that, tap on the arrow at the bottom to go back.
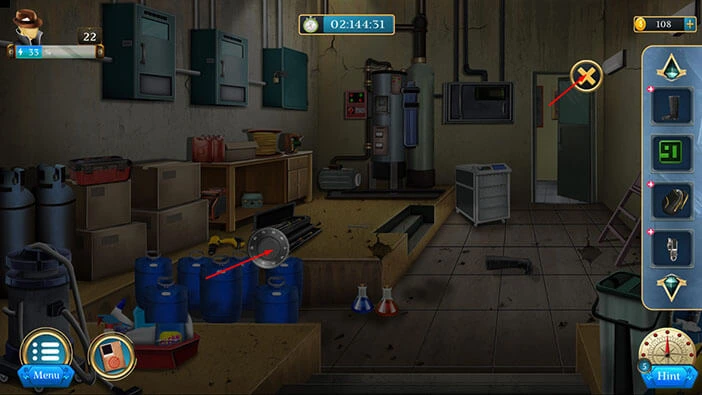
Let’s tap on the blue barrels on the left to take a closer look at them.
Tap on the left barrel and the right barrel to move them aside.
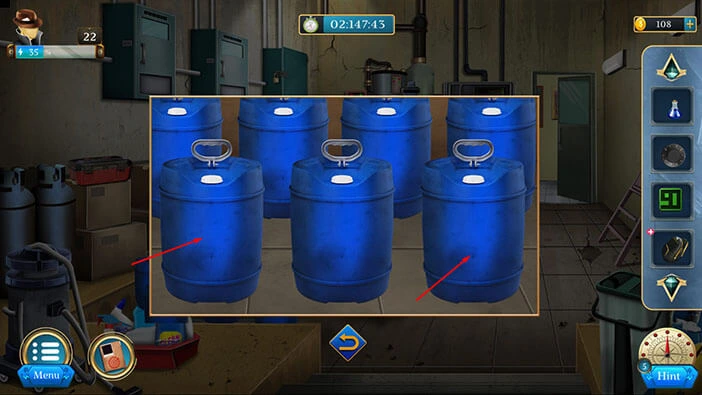
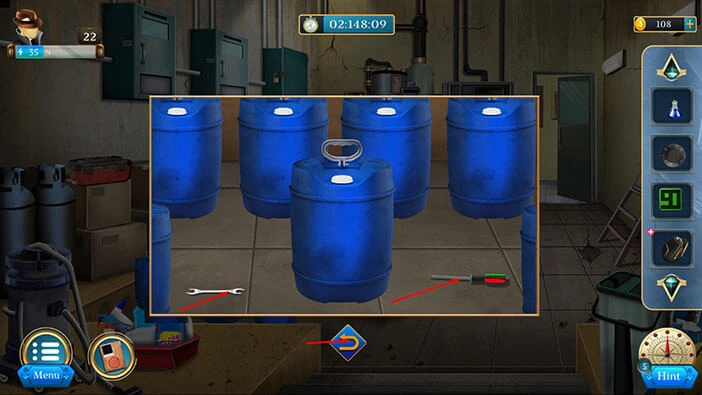
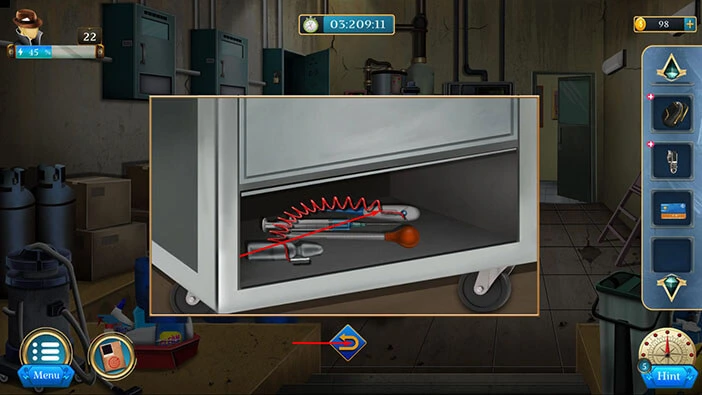
Under the barrels, you will find a “Spanner” and a “Screwdriver”. Let’s tap on these two items to pick them up.
After that, tap on the arrow at the bottom to go back.
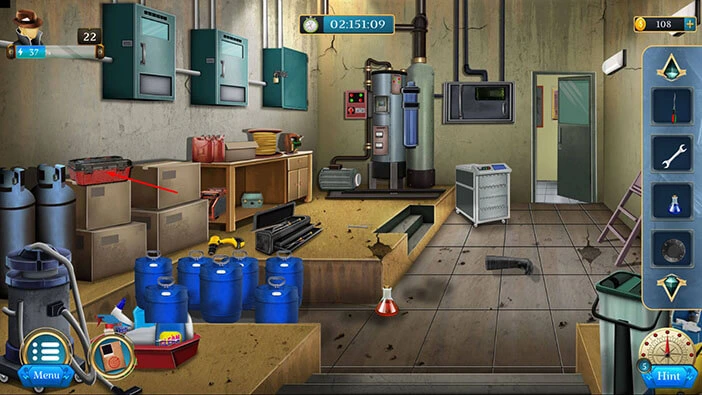
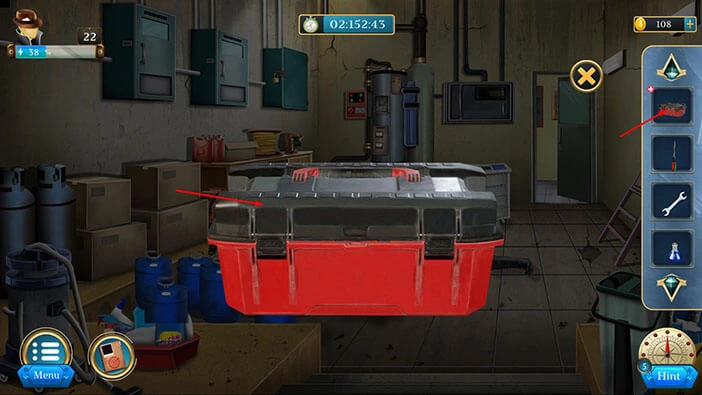
Next, on the cardboard boxes on the left, you will notice a toolbox. Let’s tap on it to pick up and the “Box” will be added to your inventory.
After that, tap on the arrow at the bottom to go back.
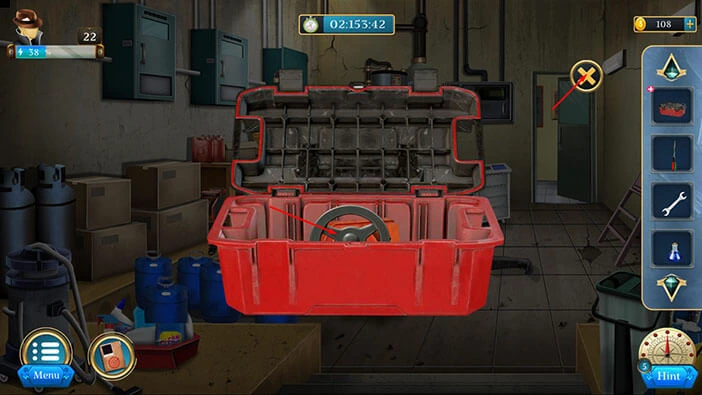
Select the “Box” from the inventory and it will appear in the middle of the screen. After that, tap on the “Box” to open it.
In the box, you will find a “Wheel”. Let’s tap on it to pick it up. After that, tap on the “X” button to close this window.
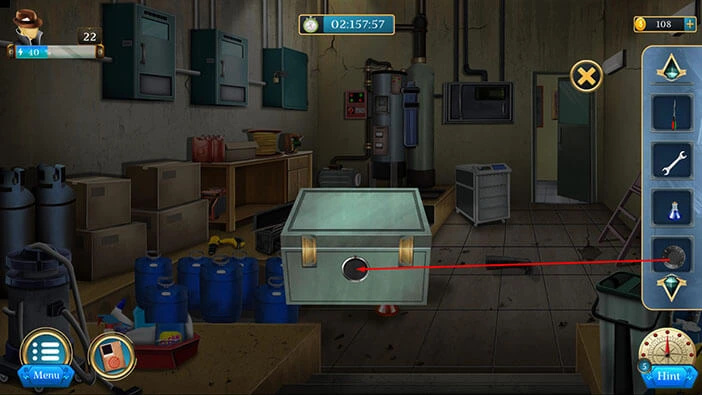
On the left, you will notice a small “Box”. Let’s tap on it to take a closer look, and tap again to pick it up. After that, tap on the arrow at the bottom to go back.

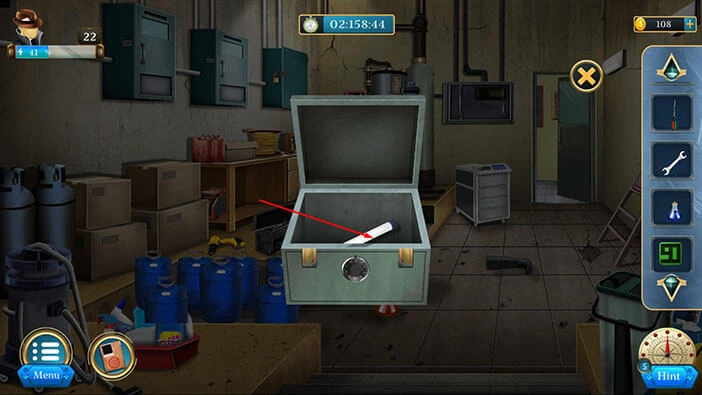
Next, select the “Box” from the inventory and it will appear in the middle of the screen. After that, select the “Button” from the inventory and insert it into the empty slot.
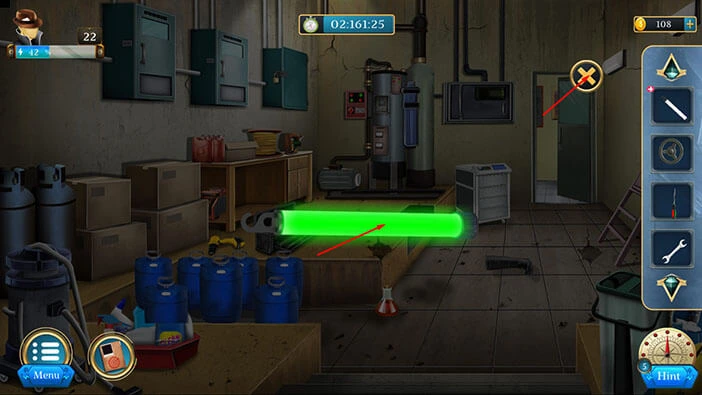
In the box, you will find a “Light Stick”. Let’s tap on it to pick it up. After that, tap on the “X” button to close this window.
Select the “Light Stick” from the inventory and it will appear in the middle of the screen. Let’s tap on it to break it. With that, it will activate the stick and it will start to glow.

Let’s tap on the “Light stick” to pick it up. After that, tap on the “X” button to close this window.
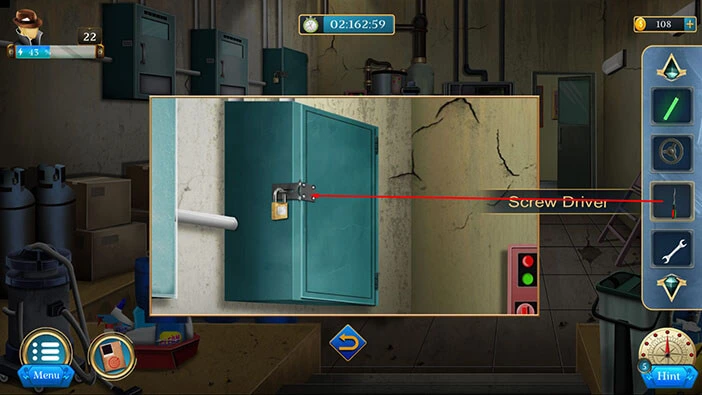
Next, let’s tap on the blue box, located on the wall on the left to take a closer look at it.
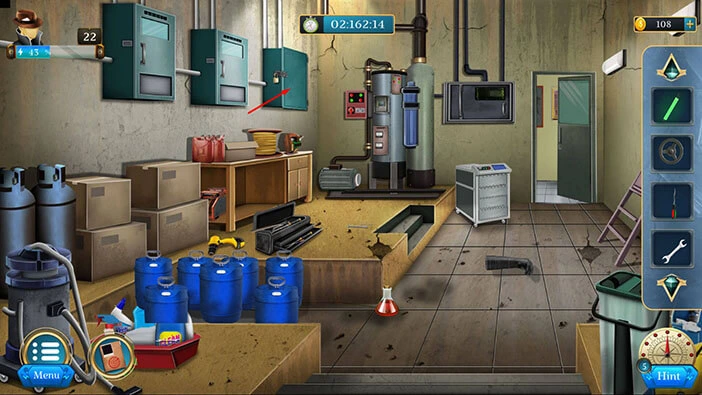
Select the “Screwdriver” from the inventory and use it to open the box.
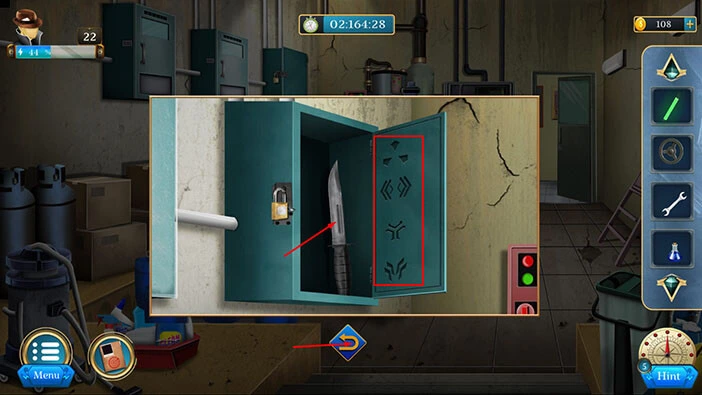
In the box, you will find a “Knife”. Let’s tap on it to pick it up. Also, on the door, you will notice several symbols. Let’s memorize/write down these symbols because we will need this information for the next puzzle.
Once you’re done, tap on the arrow at the bottom to go back.
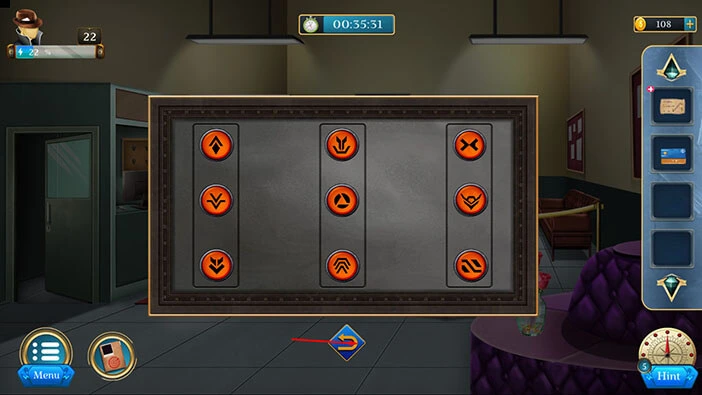
Next, let’s tap on the control panel to take a closer look at it, and tap again to start the interaction.
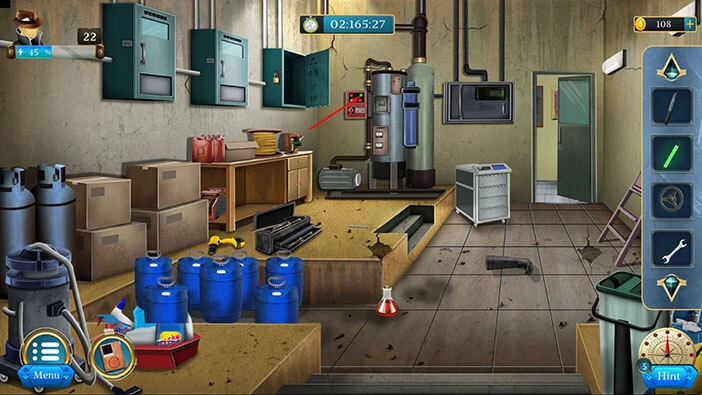
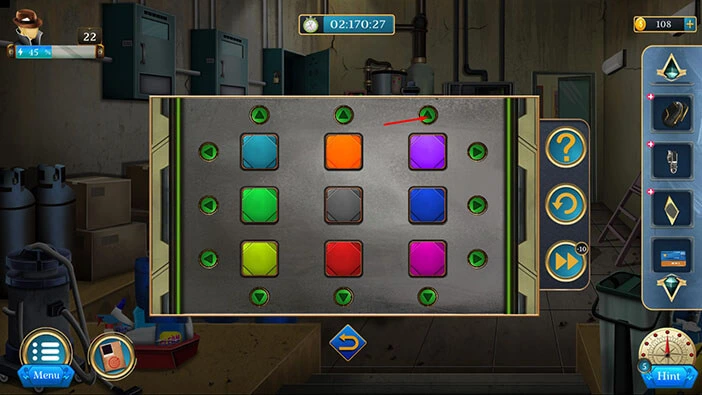
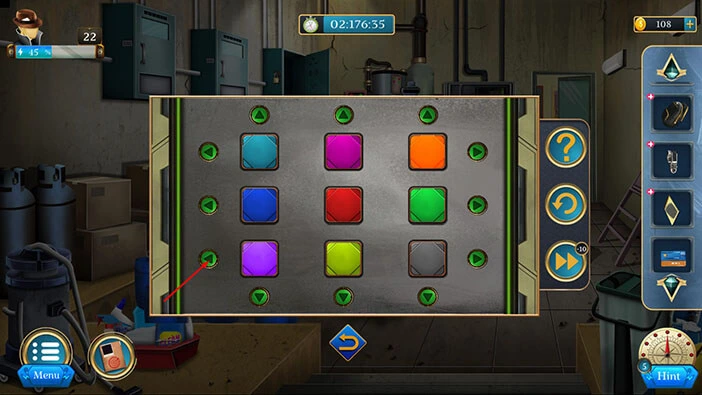
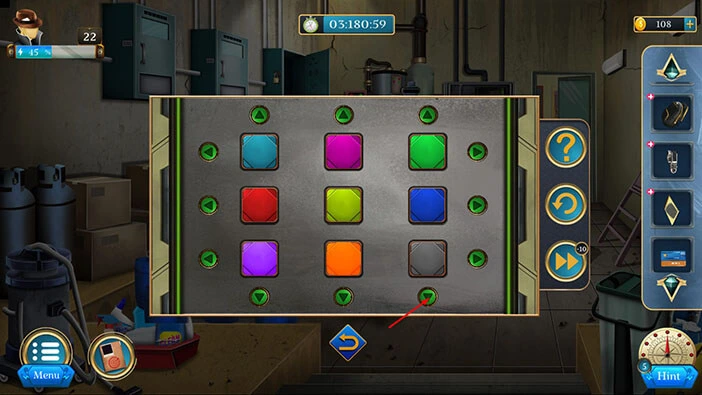
Here we have another puzzle. We saw the hint for this puzzle when we examined the notebook in our inventory. Take another look at it if you need a reminder.
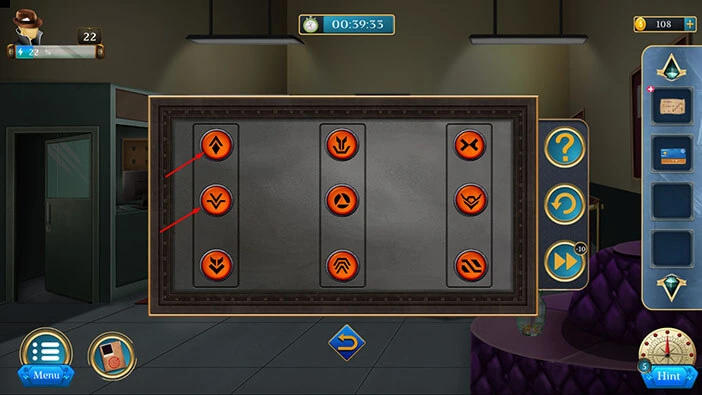
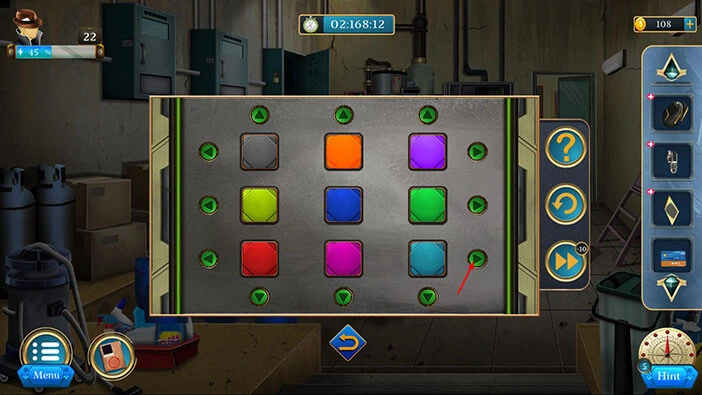
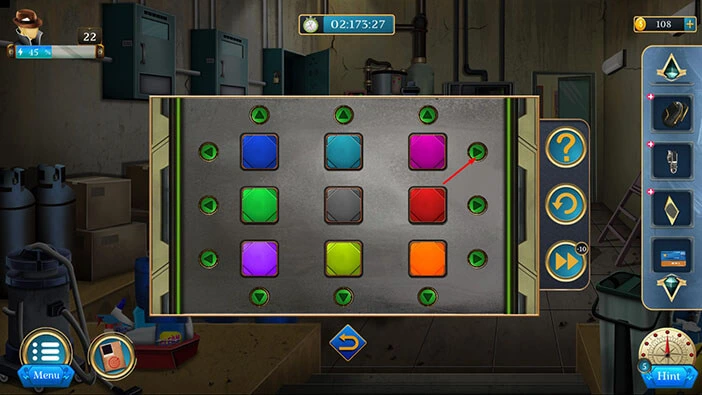
So, our task is to rearrange the colors. We will do this puzzle in several steps. Let’s begin.
Step 1
Tap twice on the right arrow in the third row to shuffle the colors.
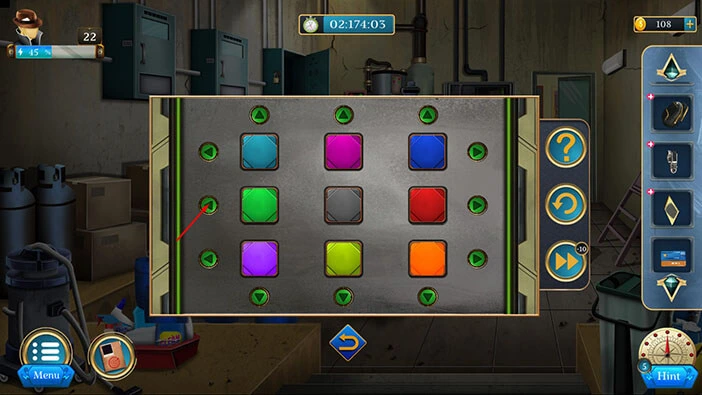
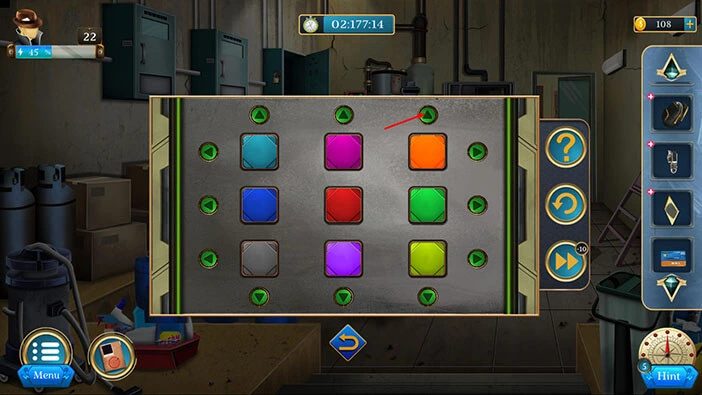
Step 2
Tap once on the first arrow in the top row to shuffle the colors.
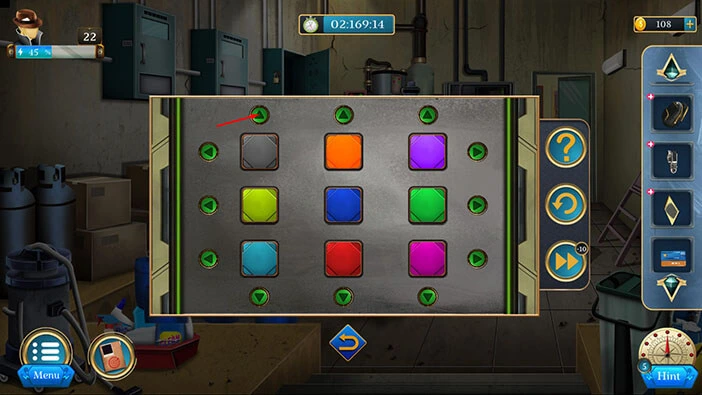
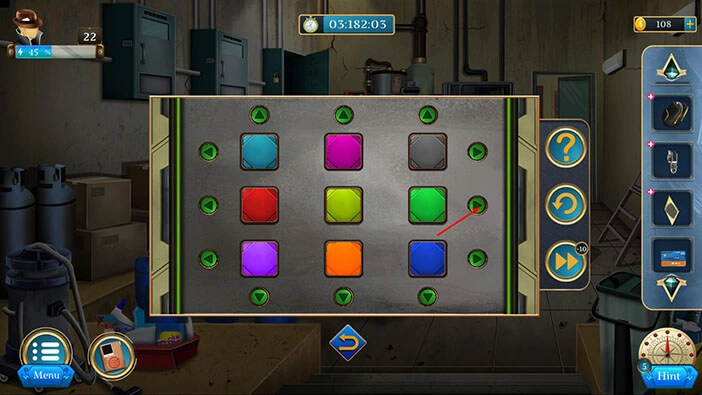
Step 3
Tap twice on the right arrow in the second row to shuffle the colors.
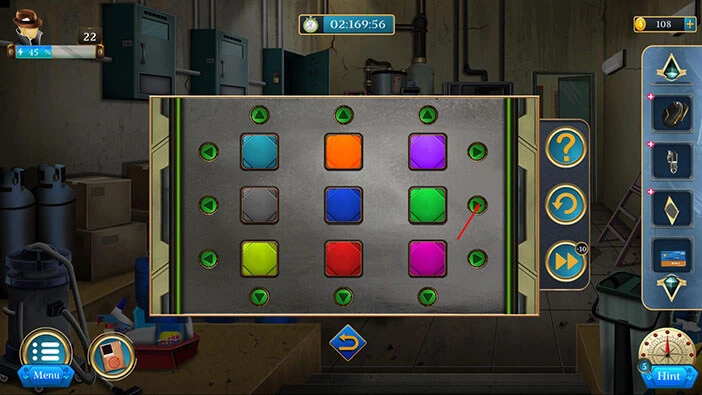
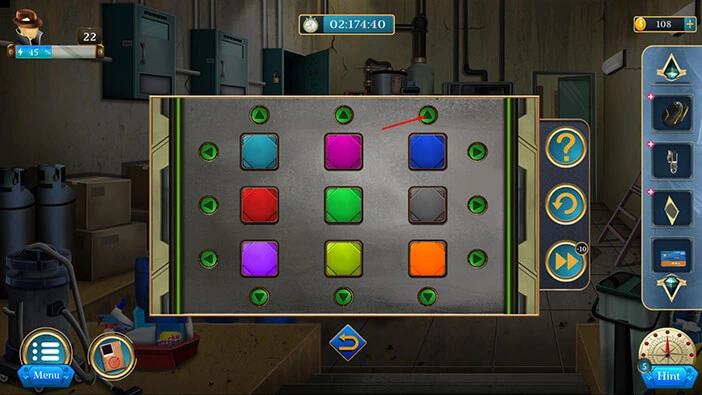
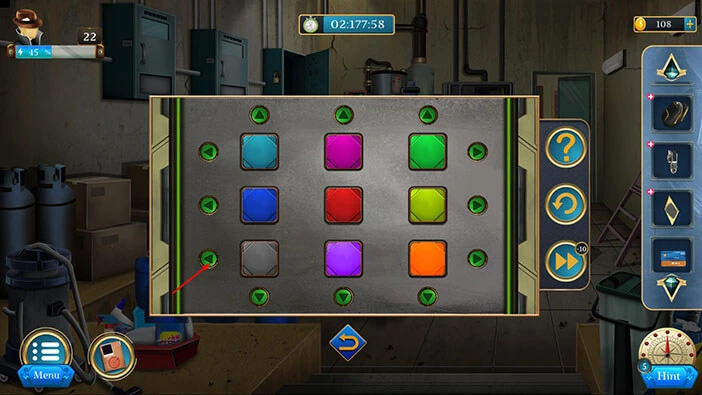
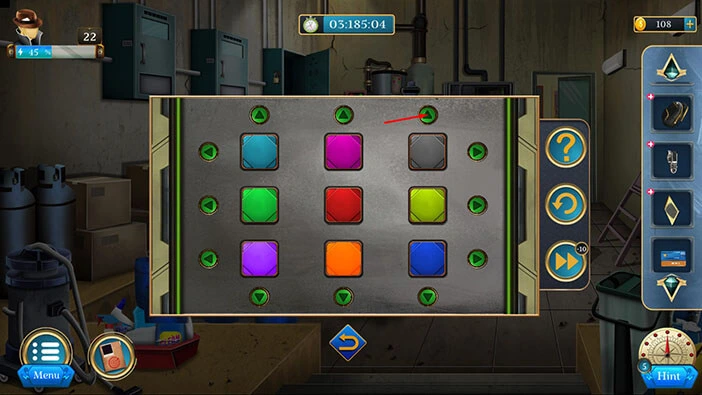
Step 4
Tap twice on the third arrow in the top row to shuffle the colors.
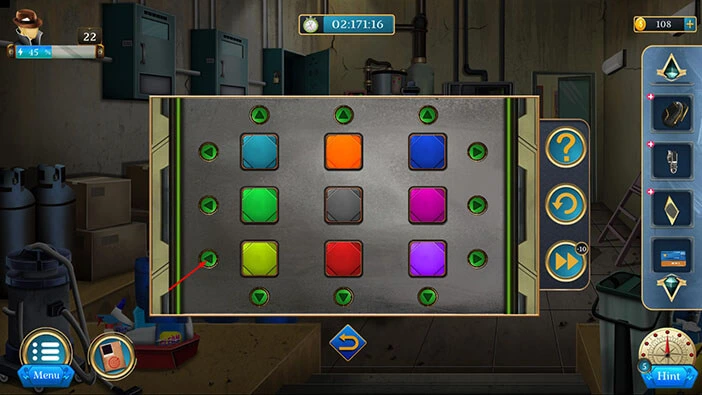
Step 5
Tap once on the left arrow in the third row to shuffle the colors.
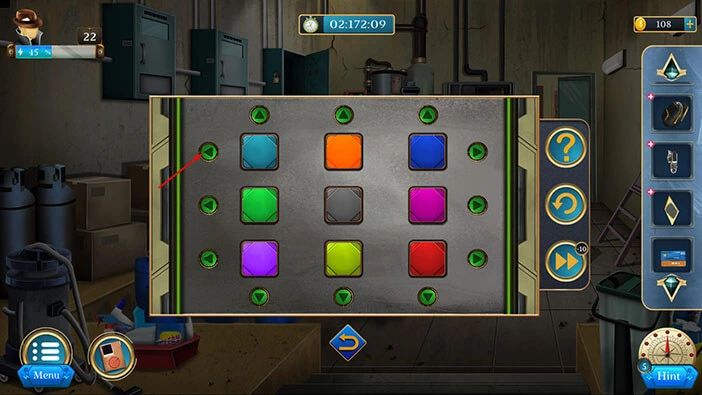
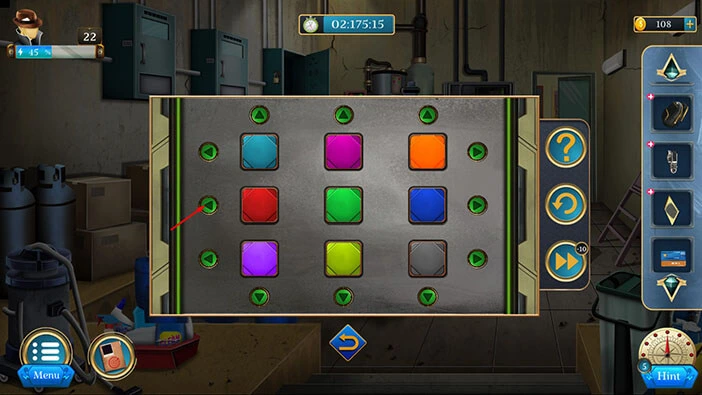
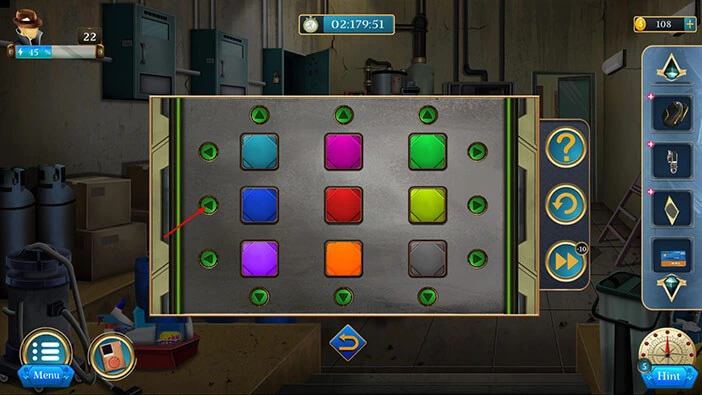
Step 6
Tap once on the left arrow in the first row to shuffle the colors.
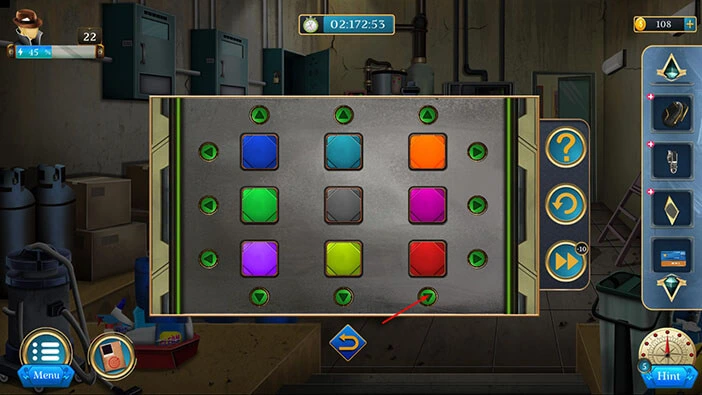
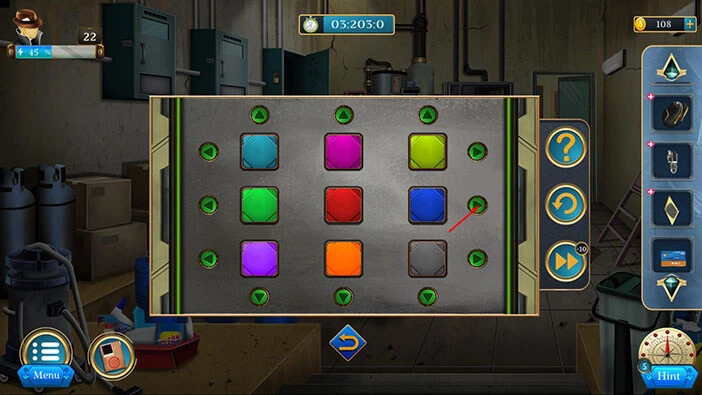
Step 7
Tap once on the third arrow in the bottom row to shuffle the colors.
Step 8
Tap once on the right arrow in the first row to shuffle the colors.
Step 9
Tap once on the left arrow in the second row to shuffle the colors.
Step 10
Tap once on the third arrow in the top row to shuffle the colors.
Step 11
Tap once on the left arrow in the second row to shuffle the colors.
Step 12
Tap once on the left arrow in the third row to shuffle the colors.
Step 13
Tap twice on the third arrow in the top row to shuffle the colors.
Step 14
Tap twice on the left arrow in the third row to shuffle the colors.
Step 15
Tap twice on the left arrow in the second row to shuffle the colors.
Step 16
Tap twice on the third arrow in the bottom row to shuffle the colors.
Step 17
Tap twice on the right arrow in the second row to shuffle the colors.
Step 18
Tap twice on the third arrow in the top row to shuffle the colors.
Step 19
Tap twice on the right arrow in the second row to shuffle the colors.
Step 20
Tap once on the third arrow in the top row to shuffle the colors. With that, you will solve this puzzle.

We will need a tool in order to open the safe. Let’s tap on the arrow at the bottom to go back.

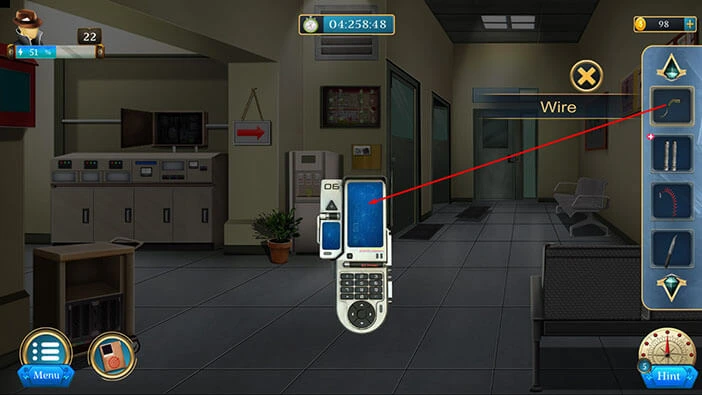
Let’s tap on the cabinet on the right to take a closer look at it, and tap again to open it.
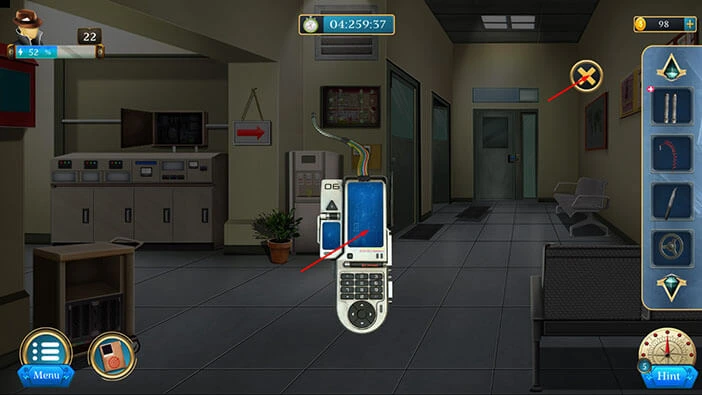
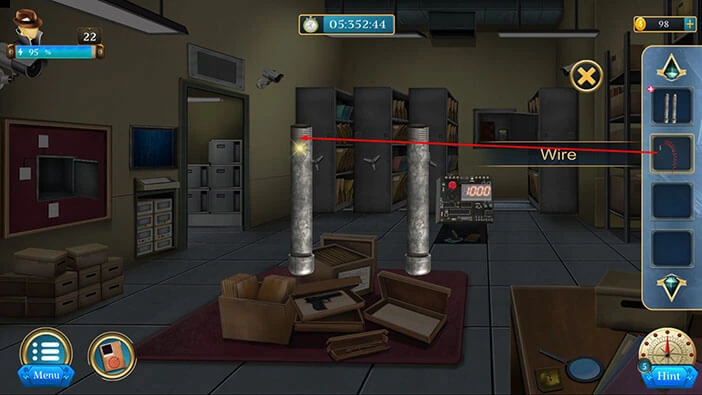
Inside, you will find a “Wire”. Let’s tap on it to pick it up.
After that, tap on the arrow at the bottom to go back.
Let’s go back to the safe.

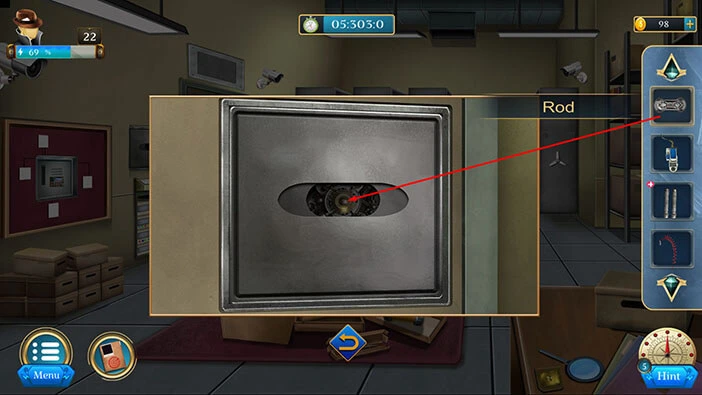
Select the “Spanner” from the inventory and use it to remove the screws.
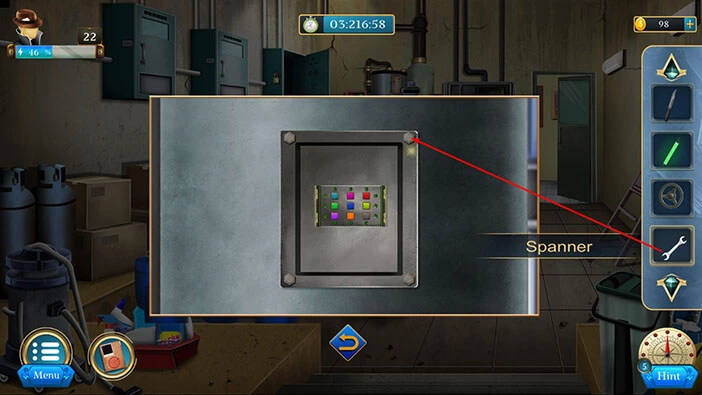
Inside, you will find a “Rod”. Let’s tap on it to pick it up.
After that, tap on the arrow at the bottom to go back.

Let’s tap on the door on the right to proceed to the next room.
Let’s tap on the board in front of us to take a closer look at it.

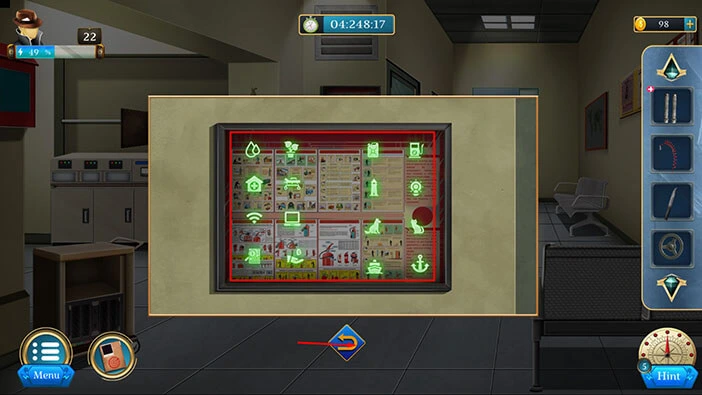
Select the “Light Stick” from the inventory and use it on the board.
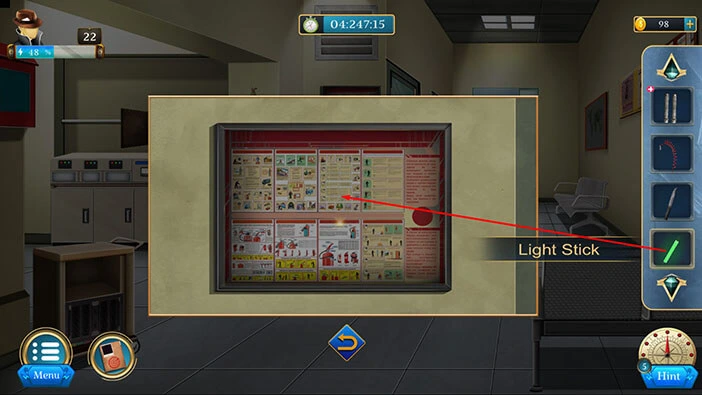
Here, you will discover several symbols. Let’s memorize/write down these symbols because we will need this information for the next puzzle.
Once you’re done, tap on the arrow at the bottom to go back.
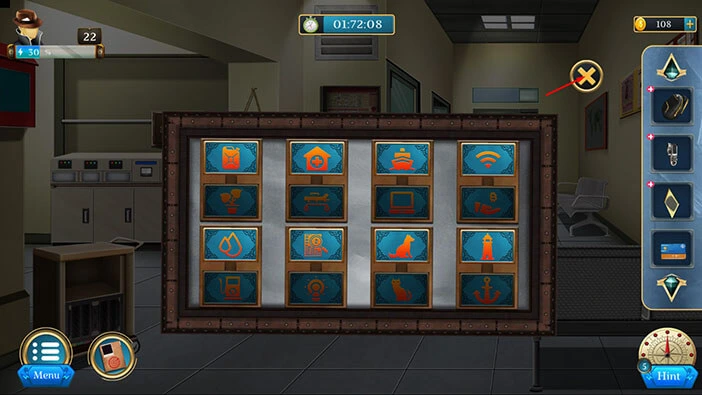
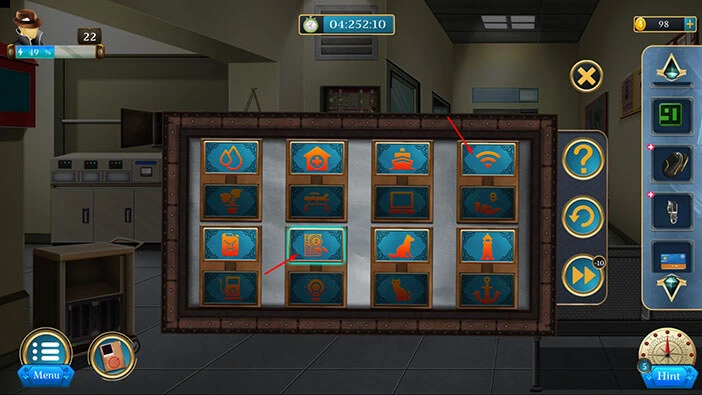
Select the “Bag” from the inventory and the puzzle will appear in the middle of the screen.
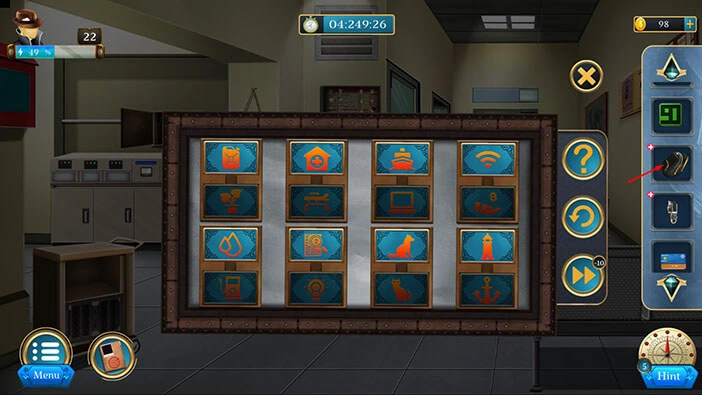
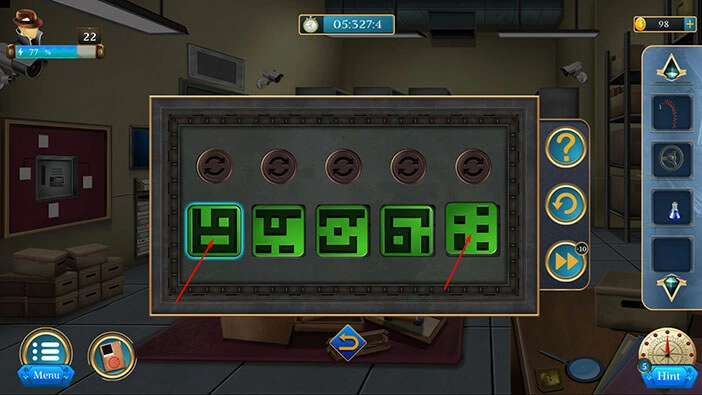
In this puzzle, our task is to rearrange the symbols. Their position should match the hint that we just discovered.
We will do this puzzle in several steps. Let’s begin.
Step 1
Select the first symbol in the first row, then tap on the first symbol in the third row to swap their positions.
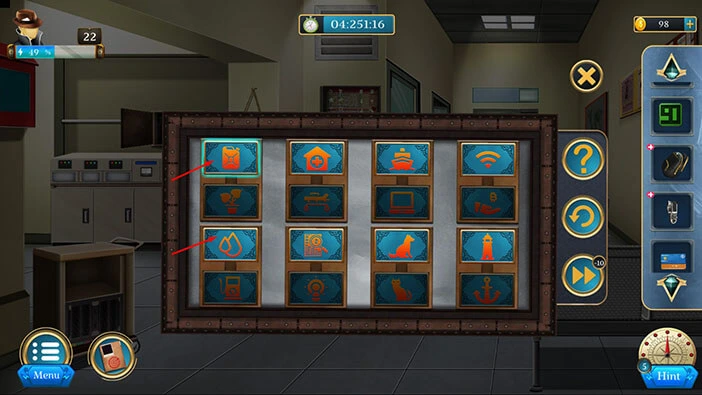
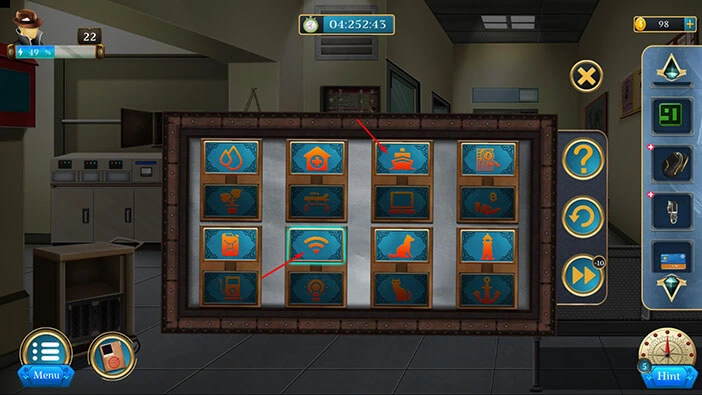
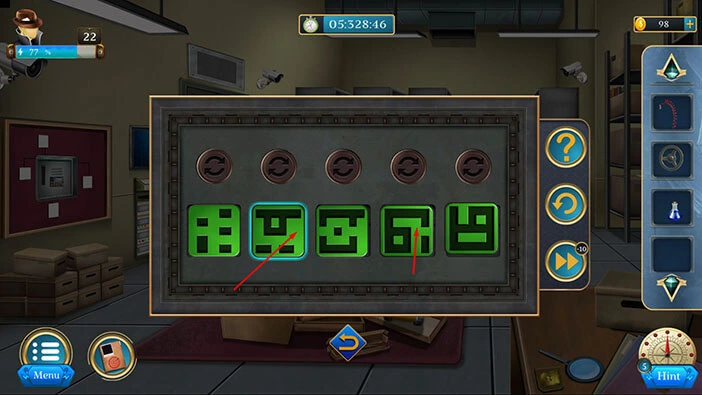
Step 2
Select the second symbol in the third row, then tap on the fourth symbol in the first row to swap their positions.
Step 3
Select the second symbol in the third row, then tap on the third symbol in the first row to swap their positions.
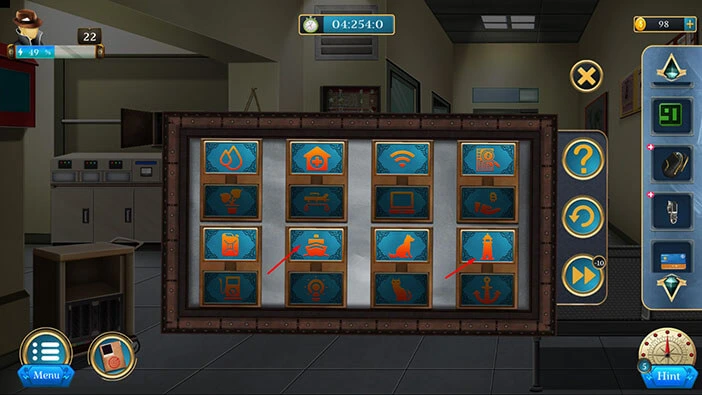
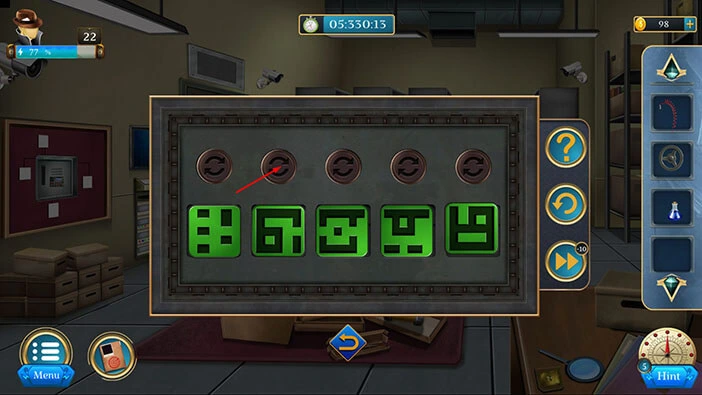
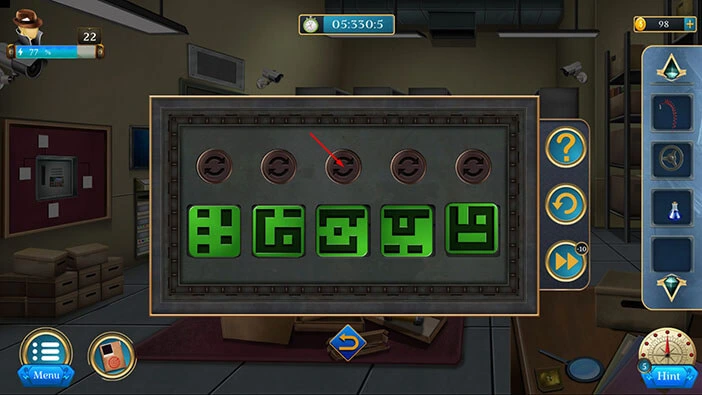
Step 4
Select the second symbol in the third row, then tap on the fourth symbol in the second row to swap their positions. With that, you will solve this puzzle.
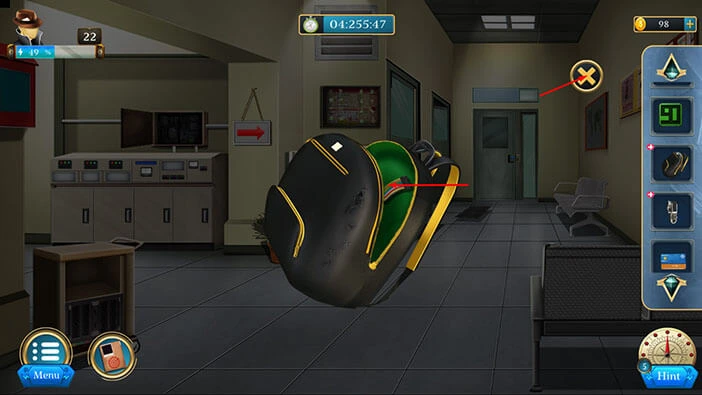
In the “Bag” you will find a “Wire” Let’s tap on it to pick it up. After that, tap on the “X” button to close this window.
Next, let’s tap on the lock on the door in front of us to take a closer look.

Select the “Card” from the inventory and put it next to the lock. After that, tap on the arrow at the bottom to go back.
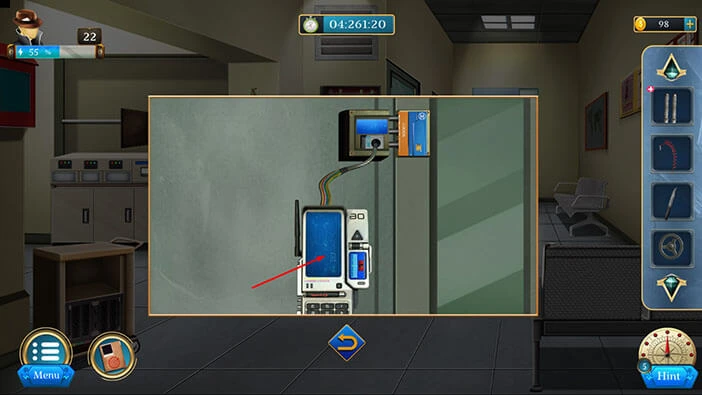
Select the “Device” from the inventory and it will appear in the middle of the screen. After that, select the “Wire” and attach it to the device.
Next, let’s tap on the “Device” to pick it up. After that, tap on the “X” button to close this window.
Let’s go back to the lock on the door.

Select the “Device” from the inventory and attach it to the lock.
After that, tap on the device to start the interaction.
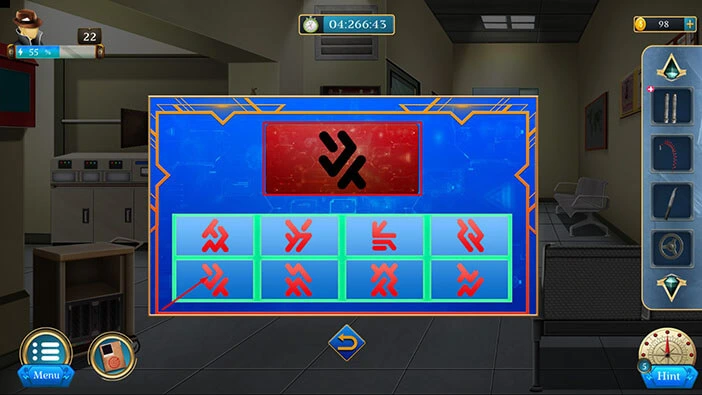
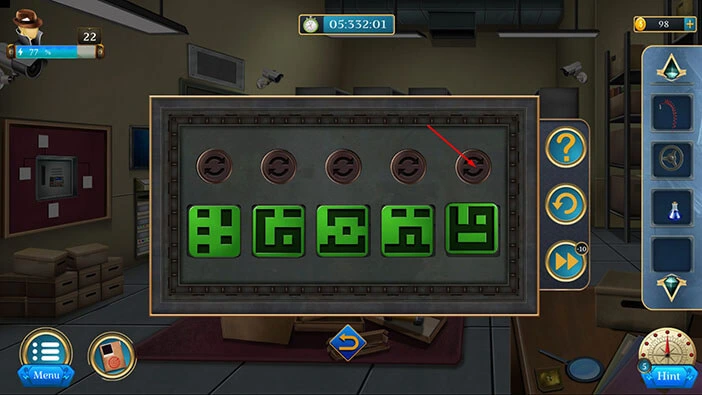
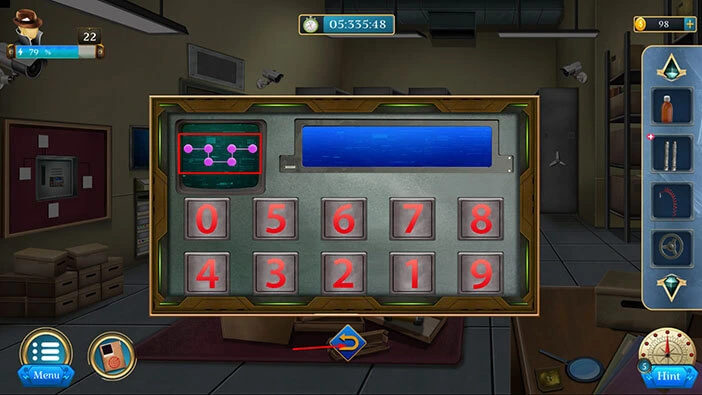
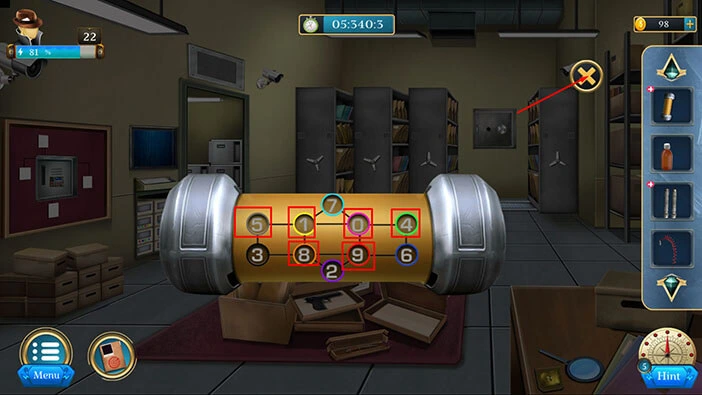
Here, we have another puzzle. Our task is to tap on the correct button. We will do that in several steps. Let’s begin.
Step 1
Let’s tap on the third button in the first row.

Step 2
Let’s tap on the first button in the second row.
Step 3
Let’s tap on the third button in the second row.

Step 4
Let’s tap on the fourth button in the second row.

Step 5
Let’s tap on the second button in the second row.
Step 6
Let’s tap on the fourth button in the first row.

Step 7
Let’s tap on the first button in the first row.

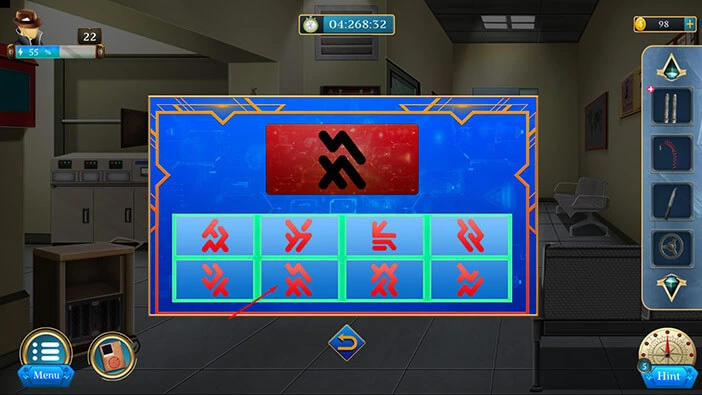
Step 8
Let’s tap on the second button in the first row. With that, you will solve this puzzle.

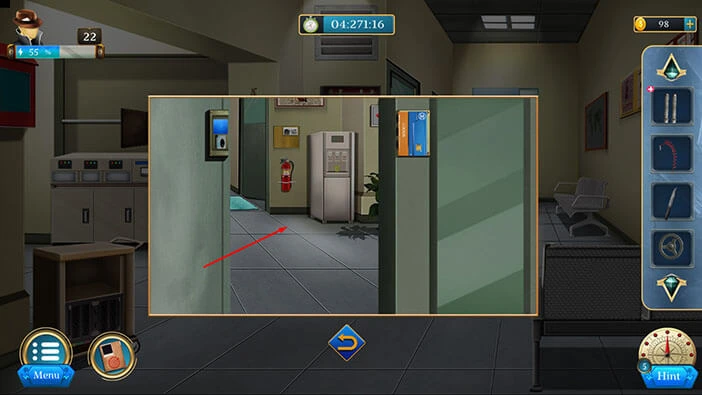
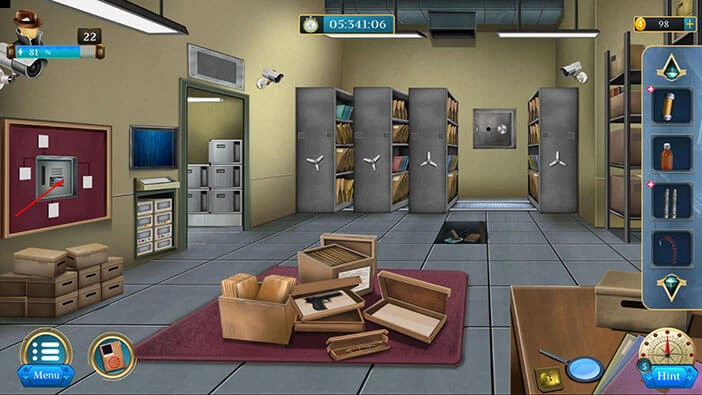
Let’s proceed to the next room. Tap on the door.
On the left side of the room, you will notice a black “Box”. Let’s tap on it to pick it up. After that, tap on the arrow at the bottom to go back.
Select the “Box” from the inventory and it will appear in the middle of the screen. Let’s tap on it to start the interaction.
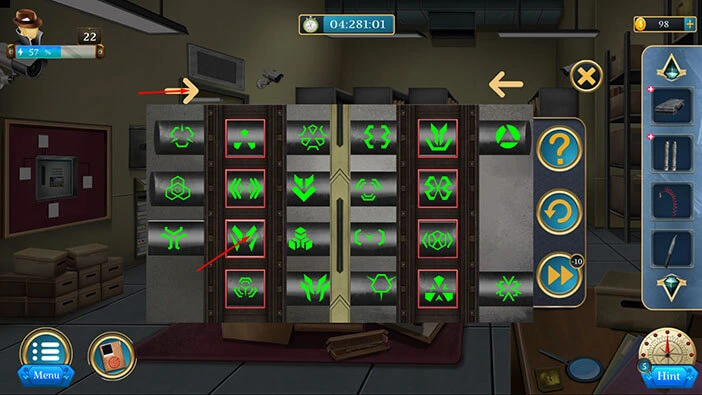
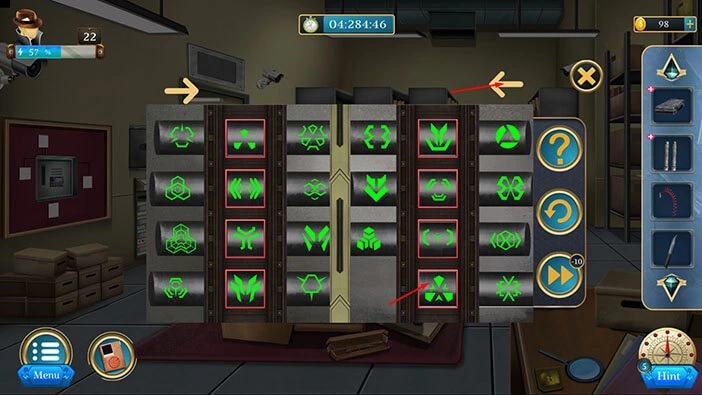
Our next task is to place the correct symbol into the two columns. We already discovered the correct symbols (one hint we found in the power box, and the other on the small door).
We will do this puzzle in several steps. Let’s begin.
Step 1
Select the first row, then tap once on the arrow pointing to the right to shuffle the symbols.
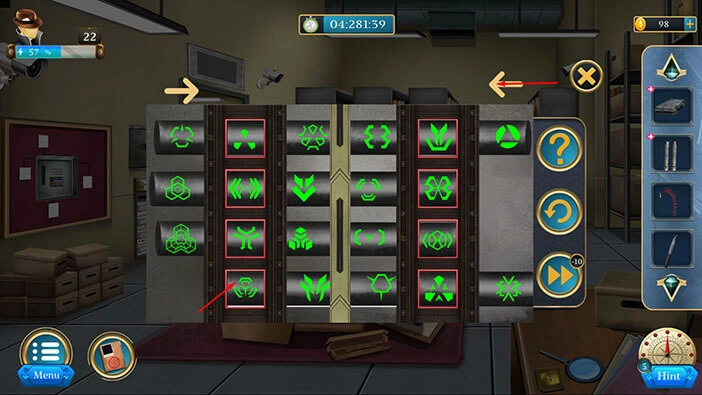
Step 2
Select the second row, then tap once on the arrow pointing to the left to shuffle the symbols.
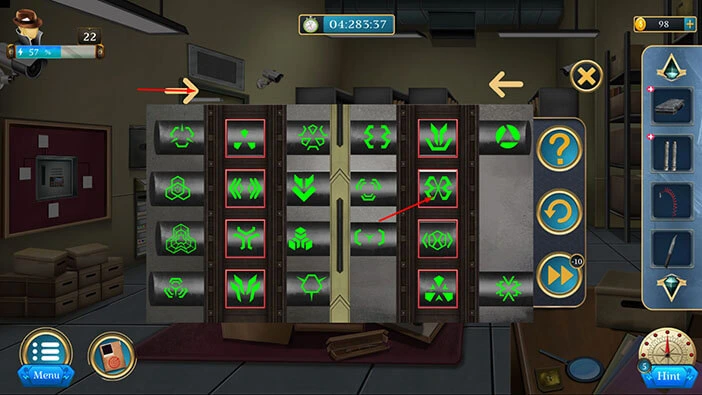
Step 3
Select the third row, then tap once on the arrow pointing to the right to shuffle the symbols.
Step 4
Select the fourth row, then tap once on the arrow pointing to the left to shuffle the symbols.
Step 5
Select the second row, then tap once on the arrow pointing to the right to shuffle the symbols.
Step 6
Select the third row, then tap once on the arrow pointing to the right to shuffle the symbols.
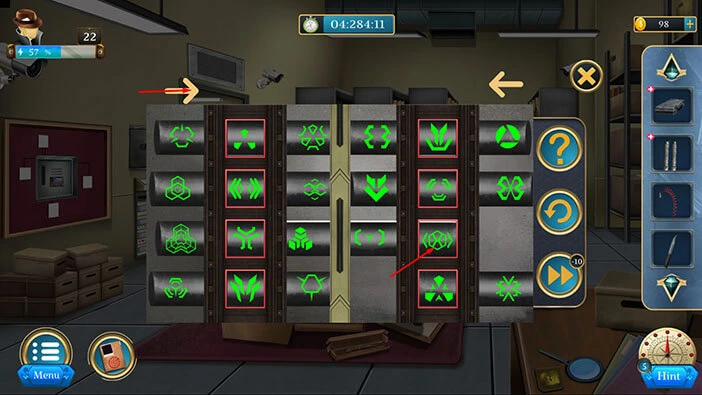
Step 7
Select the fourth row, then tap once on the arrow pointing to the left to shuffle the symbols. With that, you will solve this puzzle.
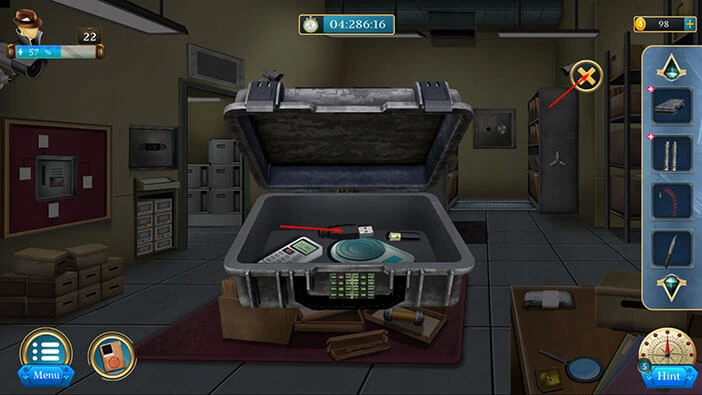
You will unlock and open the box, as soon as you solve the puzzle. Inside you will find the “USB cable”. Let’s tap on it to pick it up. After that, tap on the “X” button to close this window.
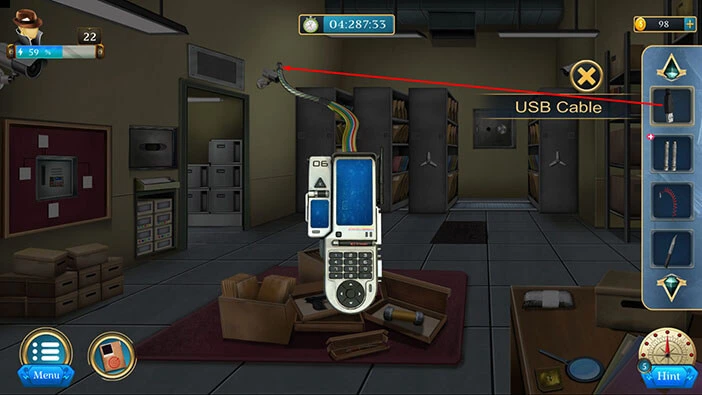
Select the “Device” from the inventory and it will appear in the middle of the screen. After that, select the “USB cable” from the inventory and attach it to the wire on the device.
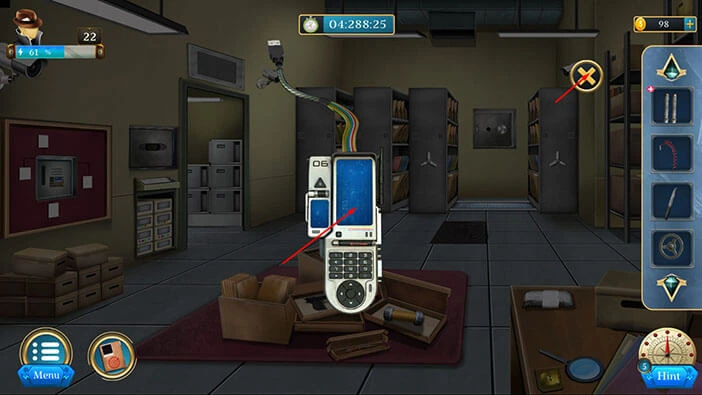
Let’s tap on the assembled “Device” to pick it up. After that, tap on the “X” button to close this window.
On the table on the right, you will notice a “Package”. Let’s tap on it to pick it up. After that, tap on the arrow at the bottom.
Select the “Package” from the inventory and it will appear in the middle of the screen. After that, select the “Knife” from the inventory and use it to cut open the package.

Inside you will find a “Rod”. Let’s tap on it to pick it up. After that, tap on the “X” button to close this window.
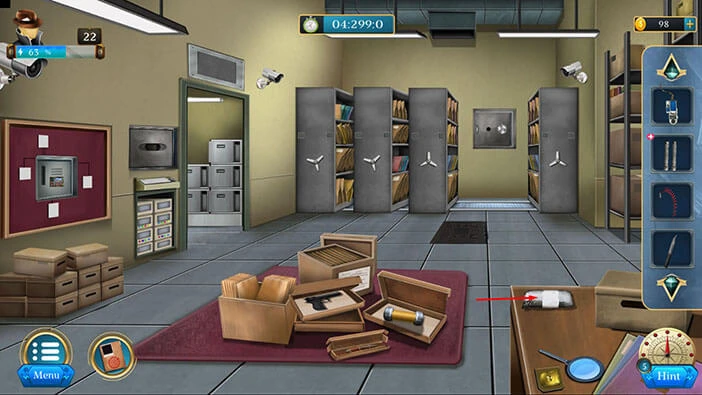
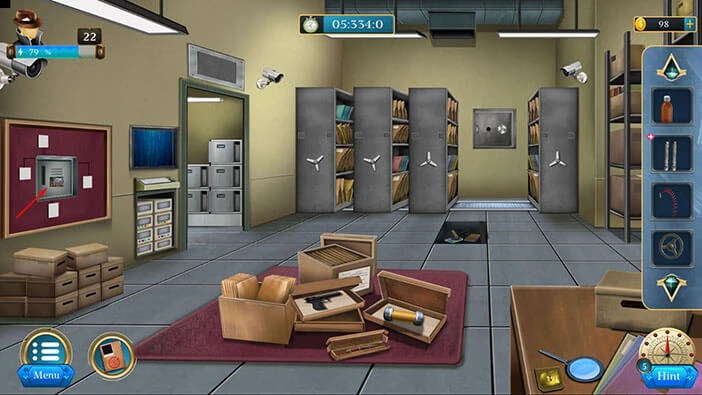
Next, let’s tap on the metal panel next to the door to take a closer look at it.
Select the “Rod” from the inventory and insert it into the empty slot.
Let’s tap on the camera to start the interaction.
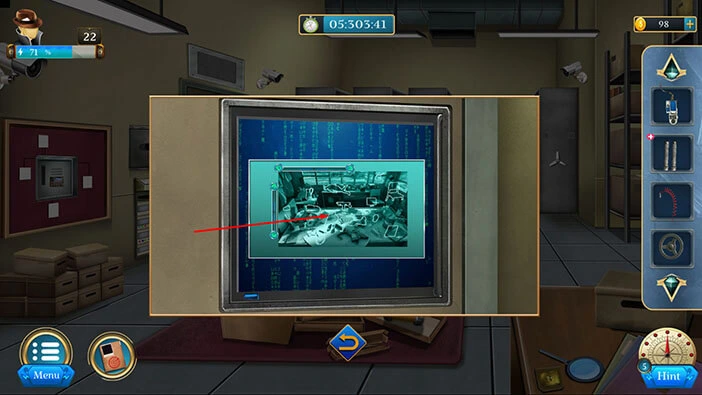
Our next task is to move the camera and find the items in this room. For example, you can see the outline of the SMG in the middle of the screen. On the table, just below and to the right, we can see the SMG on the table. So, the task is to find all the other items.
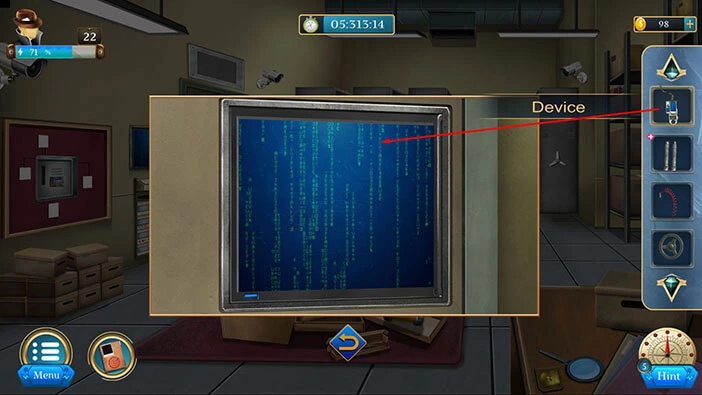
Once we solve the previous puzzle, we should select the “Device” from the inventory and plug it into the computer.
Let’s tap on the “Black Spider” folder on the Pc and our character will delete it.
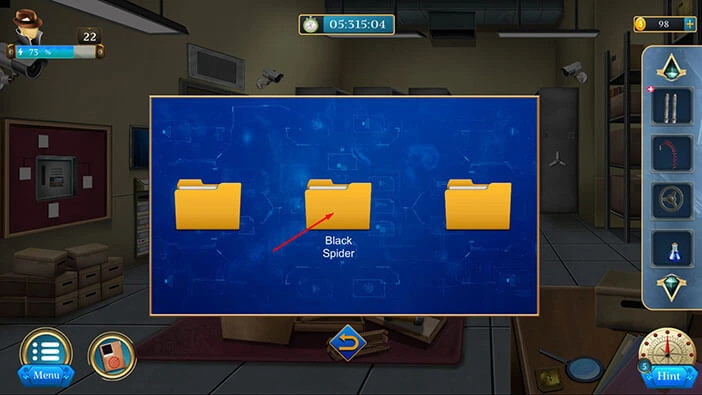
Let’s memorize/write down the symbols on the screen because we will need this information for the next puzzle.
Once you’re done, tap on the arrow at the bottom.

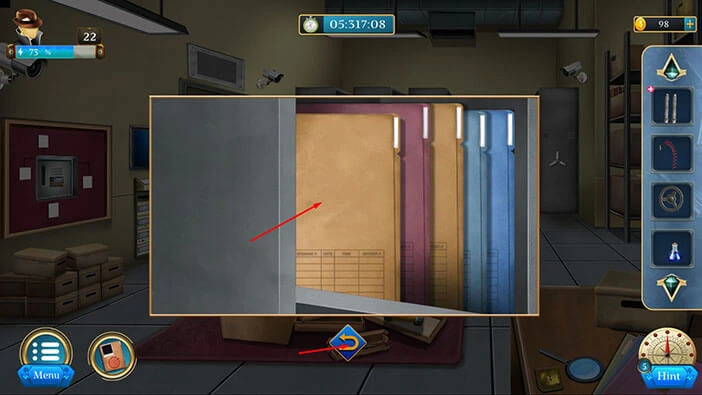
Let’s tap on the files to take a closer look at them.
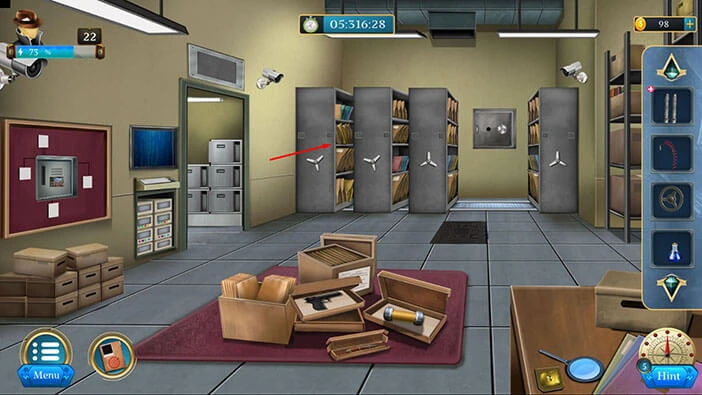
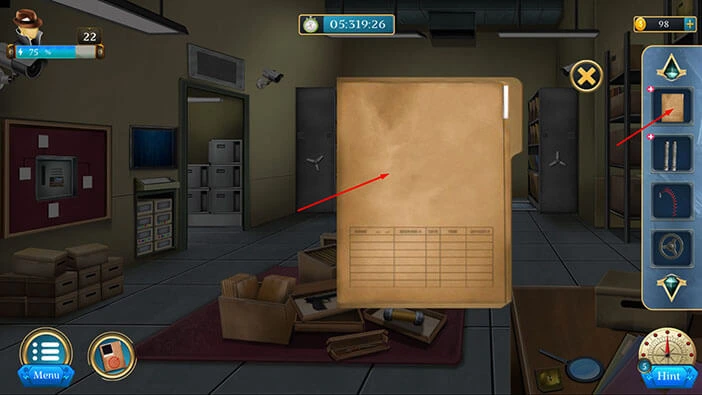
Here, you will find a “File”. Let’s tap on it to pick it up. After that, tap on the arrow at the bottom to go back.
Select the “File” from the inventory and it will appear in the middle of the screen. After that, tap on the file to examine it.
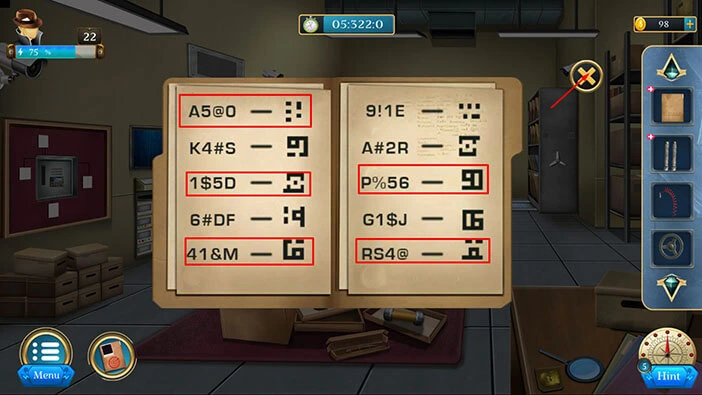
We can use the hint that we discovered previously, to find the correct symbols for the next puzzle. The symbols that we are looking for are,
The first symbol on the left page,
The fifth symbol on the left page,
The third symbol on the left page,
The fifth symbol on the right page,
The third symbol on the right page,
Once you’re done, tap on the “X” button to close this window.
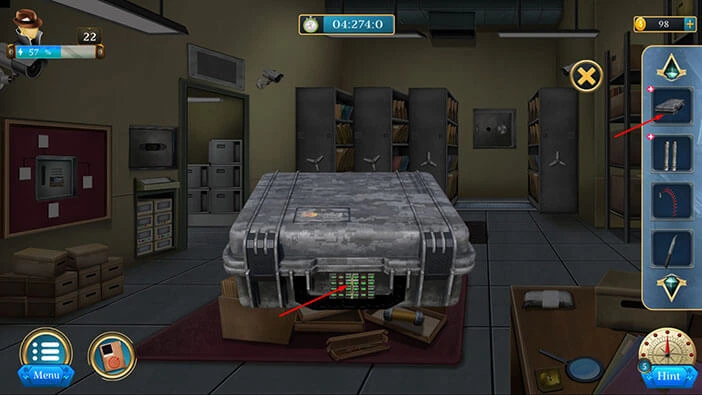
Next, let’s tap on the machine on the floor to take a closer look at it, and tap again to start the interaction.

Select the “Button” from the inventory and insert it into the empty slot.
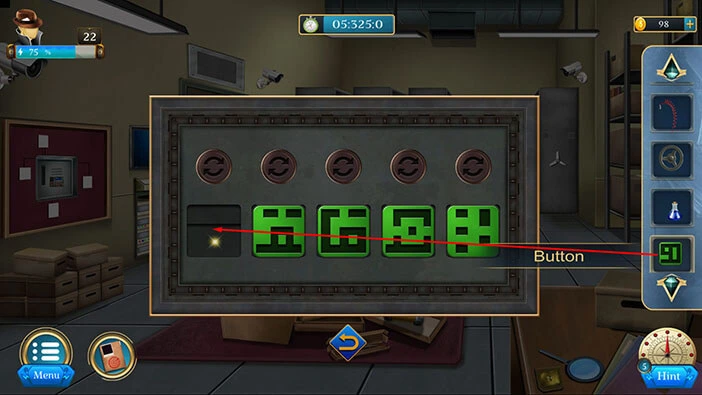
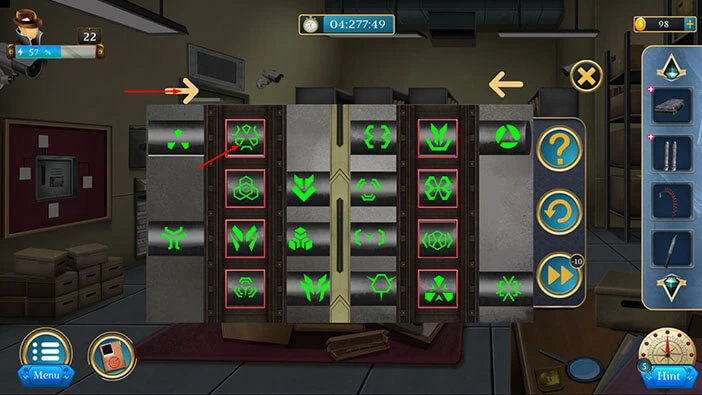
Here, we have another puzzle. If you pay attention to the symbols in front of you, you will notice that we already discovered these symbols when we deciphered the previous puzzle. So, our next task is to reorder and rotate the symbols to match the symbols on the hint.
We will do this puzzle in several steps. Let’s begin.
Step 1
Select the first button then tap on the fifth button to swap their positions.
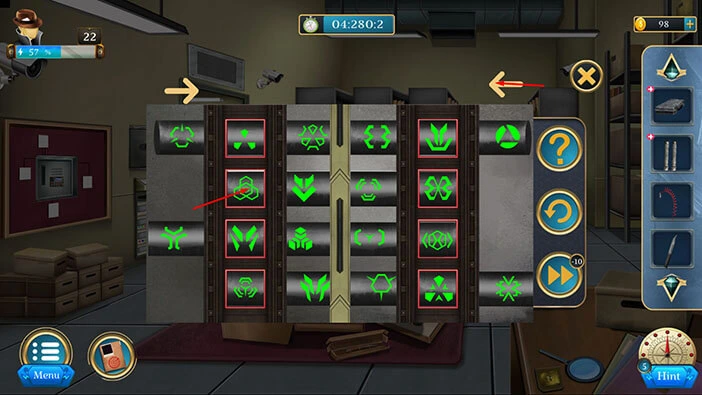
Step 2
Select the second button then tap on the fourth button to swap their positions.
Step 3
Let’s tap two times on the first arrow to rotate the symbol in the first slot.

Step 4
Let’s tap three times on the second arrow to rotate the symbol in the second slot.
Step 5
Let’s tap two times on the third arrow to rotate the symbol in the third slot.
Step 6
Let’s tap two times on the fourth arrow to rotate the symbol in the fourth slot.

Step 7
Let’s tap three times on the fifth arrow to rotate the symbol in the fifth slot. With that, you will solve this puzzle.
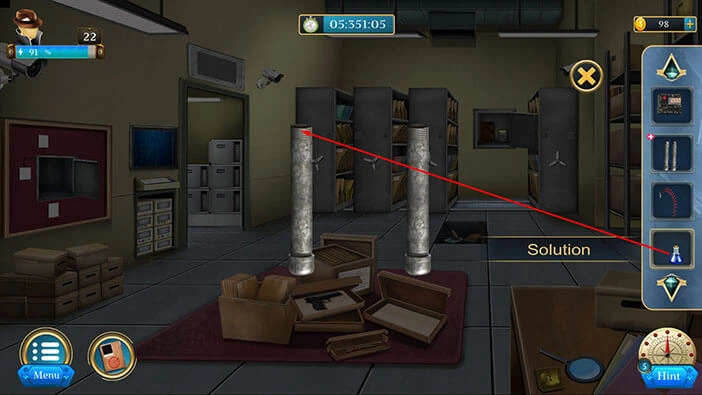
You will unlock and open the floor safe, as soon as you solve the previous puzzle. Inside you will find a “Solution”. Let’s tap on it to pick it up.
After that, tap on the arrow at the bottom to go back.
Let’s tap on the wall safe on the left to take a closer look at it, and tap again to stat the interaction.
Here, you will notice a pattern consisting of six dots, in the top left corner. Let’s memorize/write down this pattern because we will need this information for the next puzzle.
Once you’re done, tap on the arrow at the bottom to go back.
If you take a look at the box in front of you, you will notice a weight. Let’s tap on it to take a closer look and tap again to pick it up.
After that, tap on the arrow at the bottom to go back.

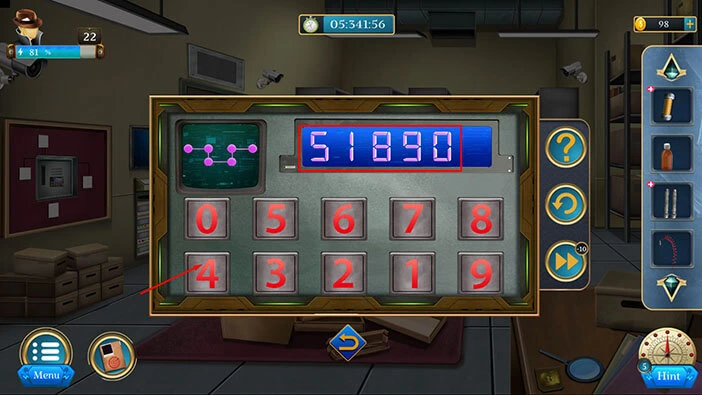
Select the “Weight” from the inventory and it will appear in the middle of the screen. Let’s examine the numbers on the weight.
If we follow the pattern that we saw on the wall safe, we will discover the following numbers, 5, 1, 8, 9, 0, 4. So, let’s memorize/write down the number “518904”.
Once you’re done, tap on the “X” button to close this window.
Let’s go back to the wall safe.
Let’s enter the number “518904” that we discovered, and we will unlock the safe.
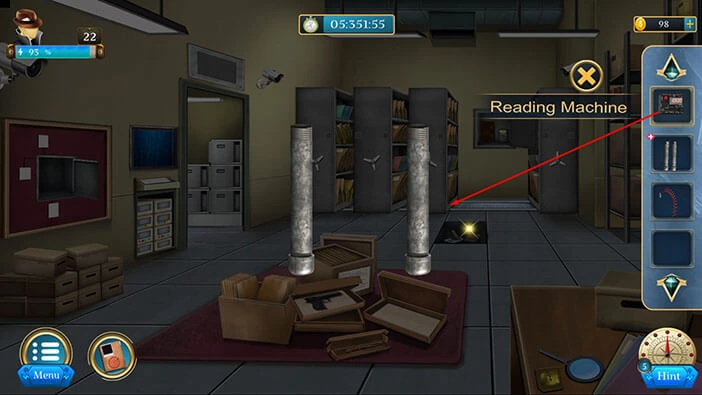
In the safe, you will find a “Reading Machine”. Let’s tap on it to pick it up. After that, tap on the arrow at the bottom to go back.
Let’s tap on the other wall safe to take a closer look at it.

Select the “Wheel” from the inventory and insert it into the empty slot.
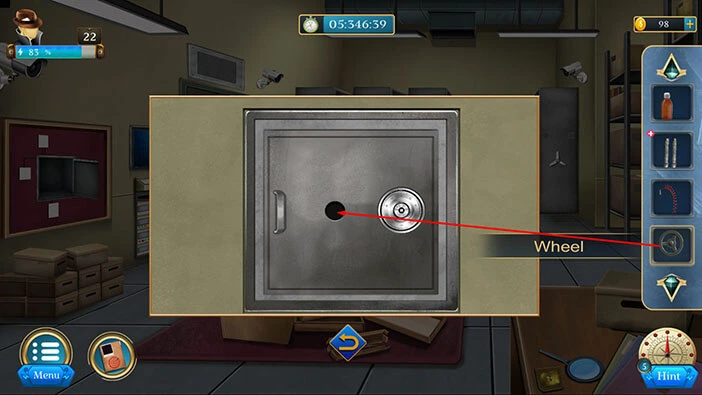
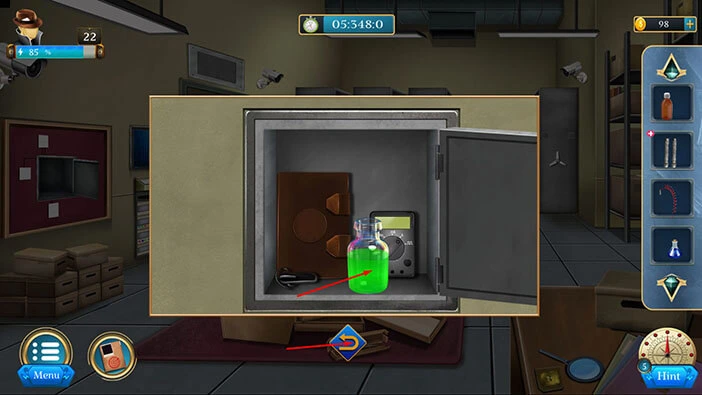
With that, you will unlock the safe. Inside you will find another “Solution”. Let’s tap on it to pick it up.
After that, tap on the arrow at the bottom to go back.
Select the “Rod” from the inventory and it will appear in the middle of the screen. After that, select the green “Solution” from the inventory and pour it into the “Rod”.

Next, select the brown “Solution” from the inventory and pour it into the “Rod”.

Next, select the blue “Solution” from the inventory and pour it into the “Rod”.
Next, select the “Reading Machine” from the inventory and put it next to the rod.
Finally, select the “Wire” from the inventory and put it into the rod.
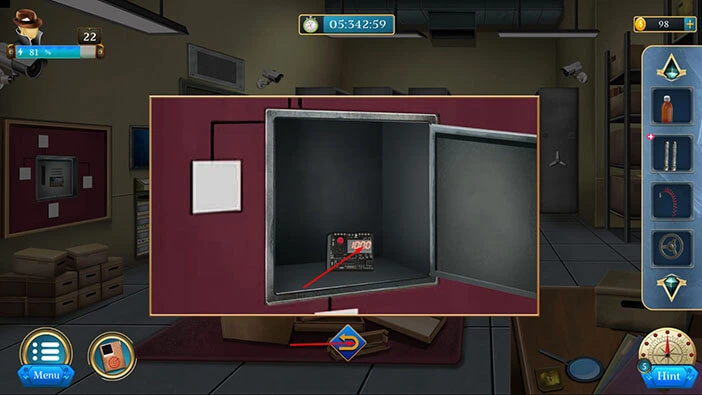
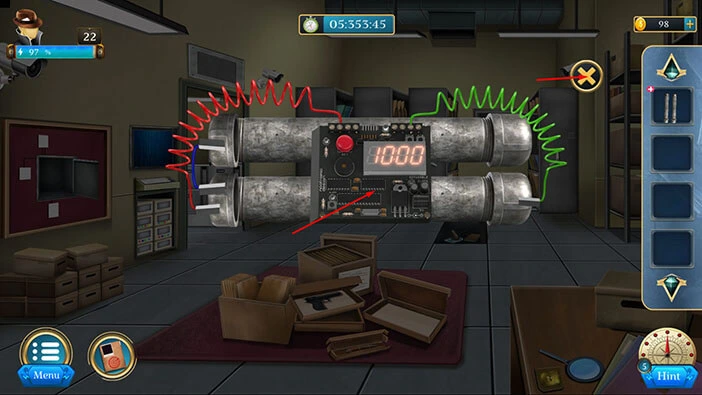
We have finished our task. Let’s tap on the “Bomb” to pick it up. After that, tap on the “X” button to close this window.
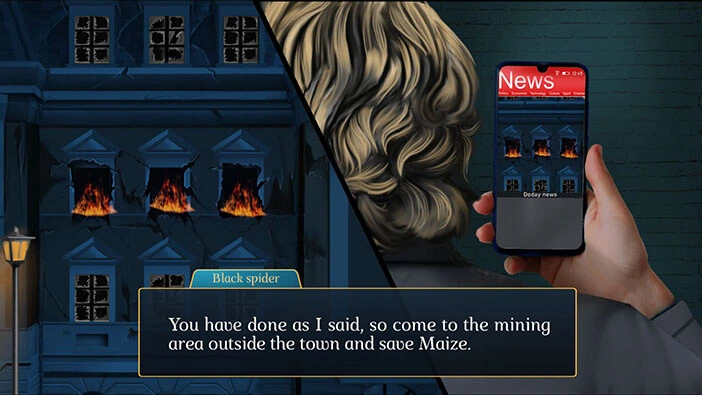
Our character accomplished his task and managed to destroy the evidence. In the next level, our task is to save Maze.
With that, we have reached the end of the twenty-second level. If you want to see the walkthrough for the twenty-third level, tap on the next part button.
Thank you for reading.