Room Escape: Detective Phantom | Level 20
Hello everyone and welcome to the walkthrough for the twentieth level of “Room Escape: Detective Phantom”. In the twentieth level, our task is, once again, to save our friend, but we will have to move quickly.
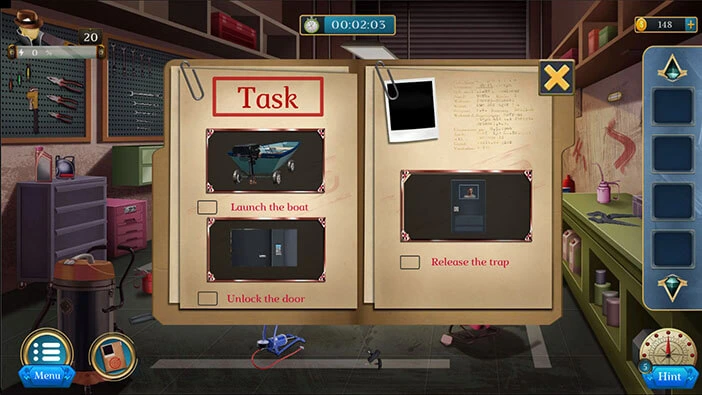
Our objectives are to “Launch the boat” “Unlock the door” and “Release the trap”. Tap on the “X” button to go back.
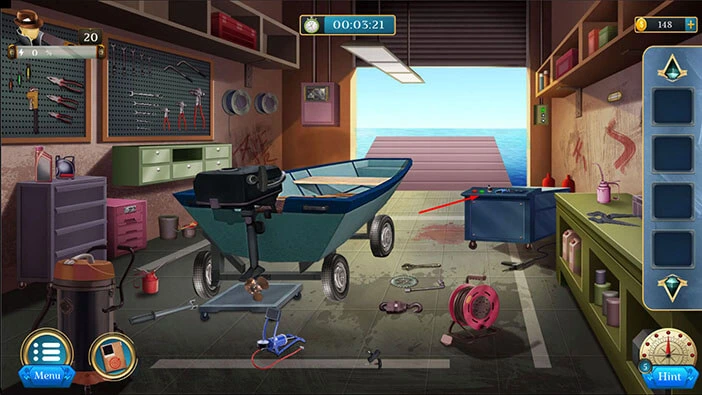
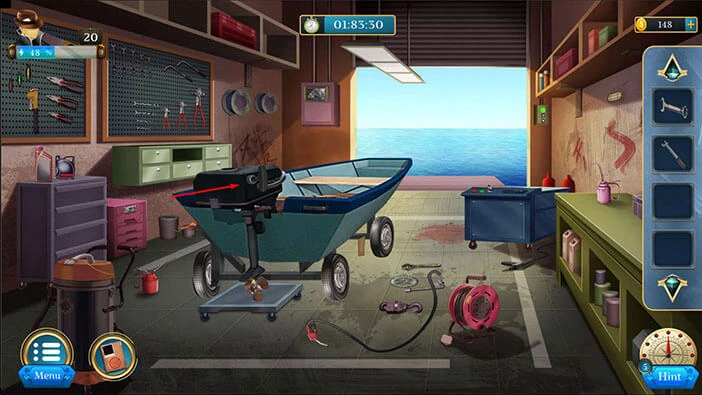
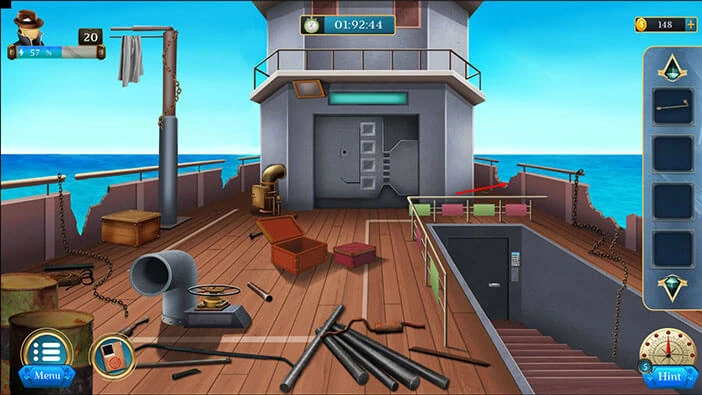
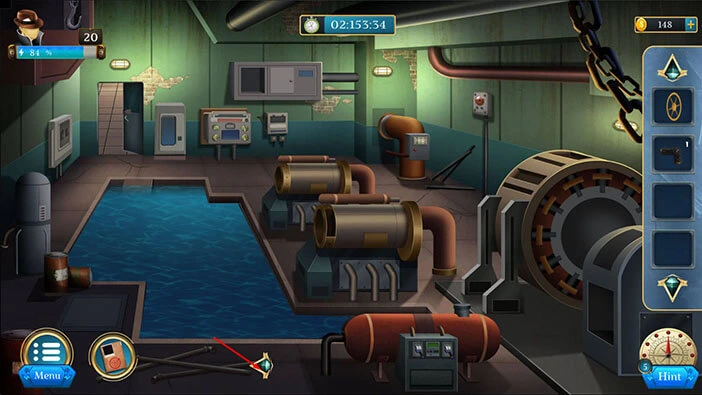
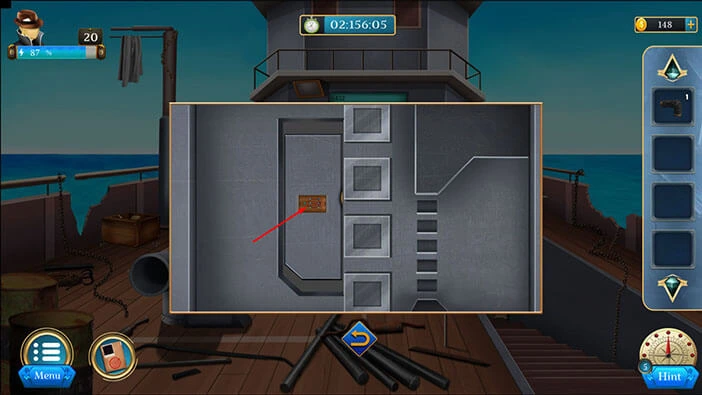
Let’s explore. Tap on the machine on the right to take a closer look at it.
Here, you will find a “Spray”. Let’s tap on it to pick it up. After that, tap on the arrow at the bottom to go back.
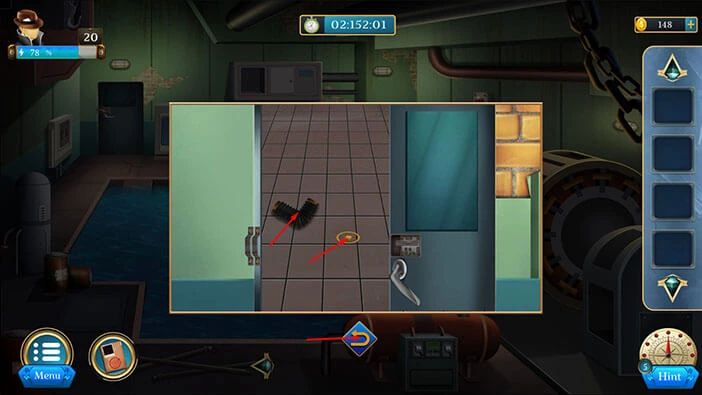
On the cabinet on the right, you will notice a “Puller”. Let’s tap on it to pick it up.
Also, on the floor on the left, you will discover a “Lever”. So, let’s tap on it to pick it up.
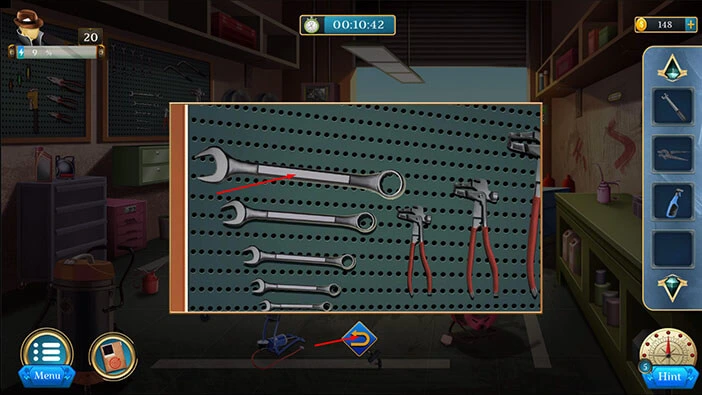
Next, let’s tap on the tools on the wall on the left to take a closer look at them.

Here, you will find a “Spanner”. Let’s tap on it to pick it up. After that, tap on the arrow at the bottom to go back.
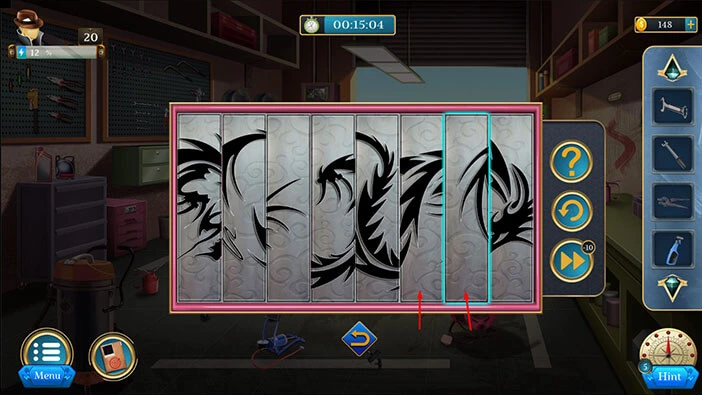
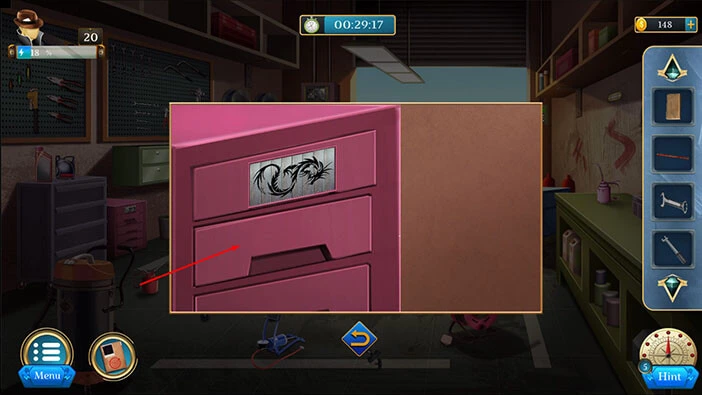
Next, let’s tap on the pink cabinet on the left to take a closer look at it and tap again to start the interaction.

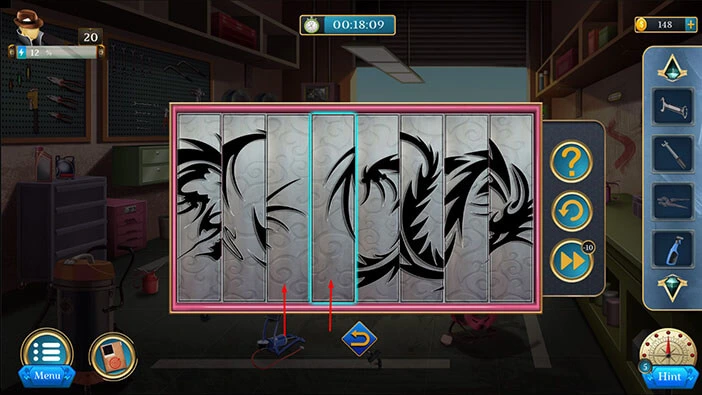
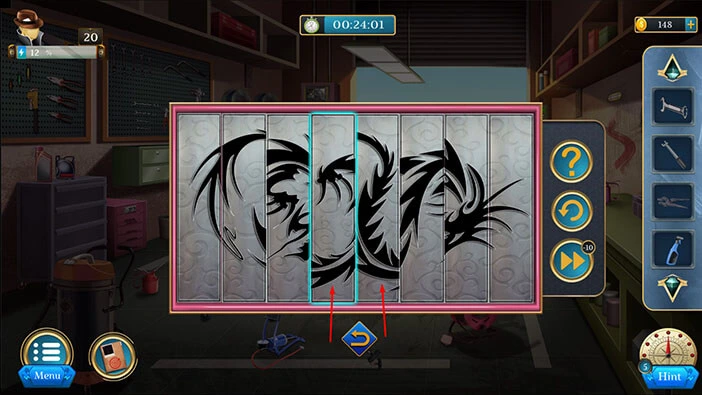
Here, we have another puzzle. Our task is to shuffle the pieces and assemble the picture. We will do that in several steps. Let’s begin.
Step 1
Select the seventh puzzle piece, and swap its position with the sixth puzzle piece.
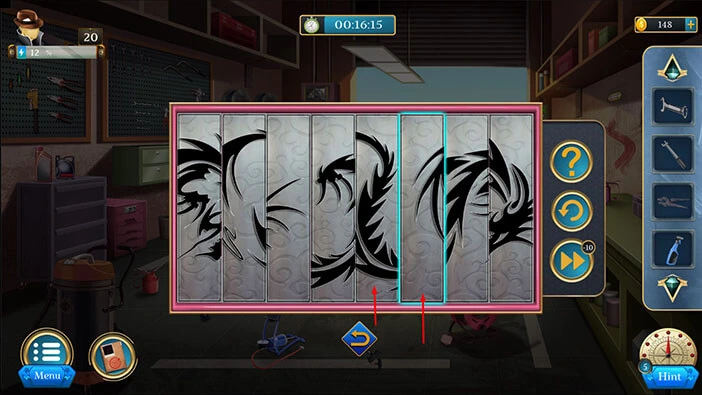
Step 2
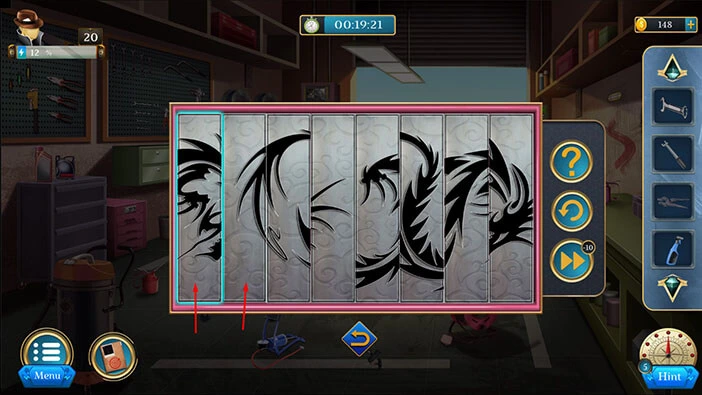
Select the sixth puzzle piece, and swap its position with the fifth puzzle piece.
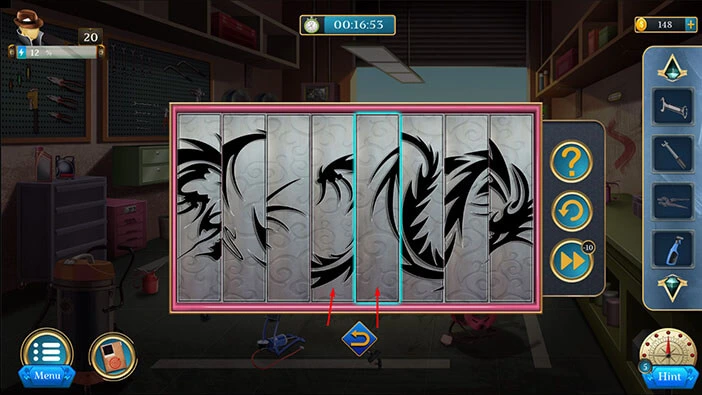
Step 3
Select the fifth puzzle piece, and swap its position with the fourth puzzle piece.
Step 4
Select the fourth puzzle piece, and swap its position with the third puzzle piece.
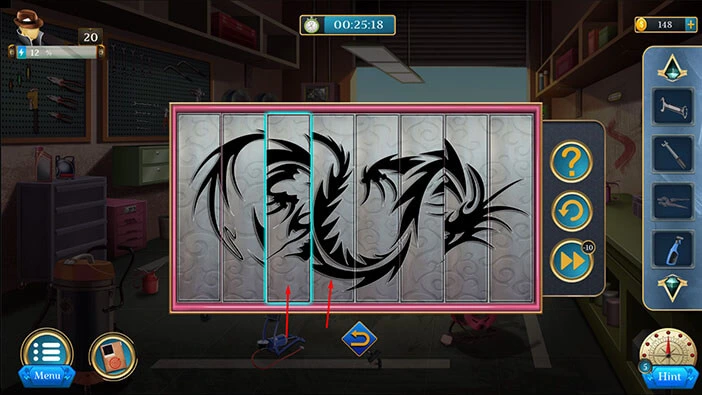
Step 5
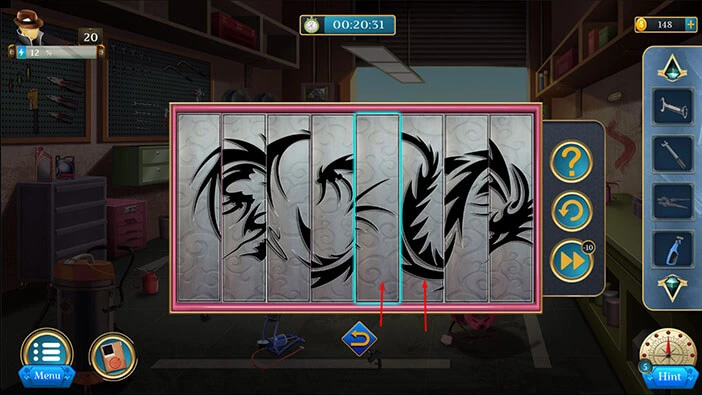
Select the third puzzle piece, and swap its position with the second puzzle piece.

Step 6
Select the first puzzle piece, and swap its position with the second puzzle piece.
Step 7
Select the fourth puzzle piece, and swap its position with the fifth puzzle piece.

Step 8
Select the fifth puzzle piece, and swap its position with the sixth puzzle piece.
Step 9
Select the sixth puzzle piece, and swap its position with the seventh puzzle piece.

Step 10
Select the seventh puzzle piece, and swap its position with the eighth puzzle piece.

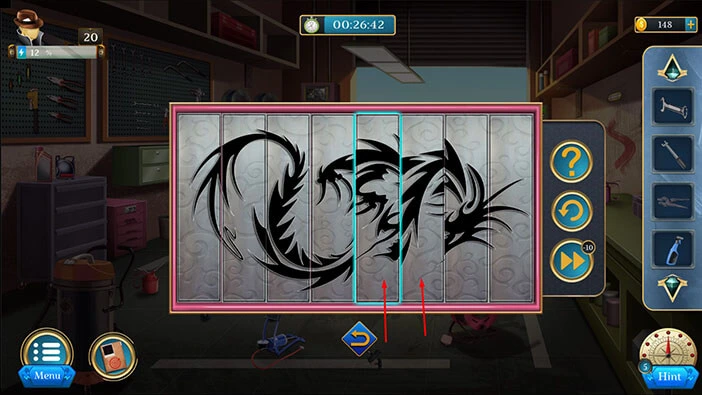
Step 11
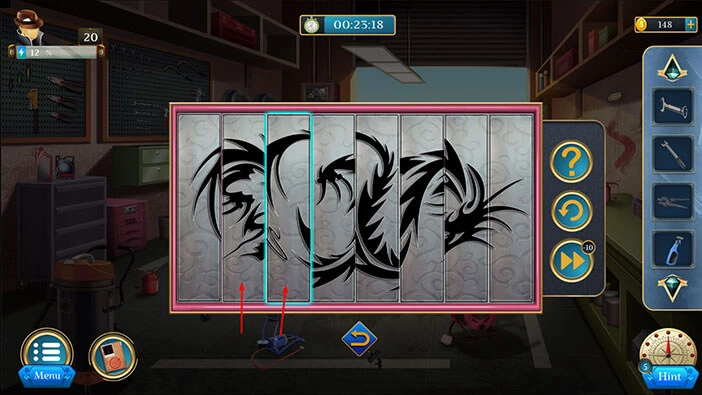
Select the third puzzle piece, and swap its position with the second puzzle piece.
Step 12
Select the fourth puzzle piece, and swap its position with the fifth puzzle piece.
Step 13
Select the third puzzle piece, and swap its position with the fourth puzzle piece.
Step 14
Select the fourth puzzle piece, and swap its position with the fifth puzzle piece.

Step 15
Lastly, select the fifth puzzle piece, and swap its position with the sixth puzzle piece. With that, you will solve this puzzle.
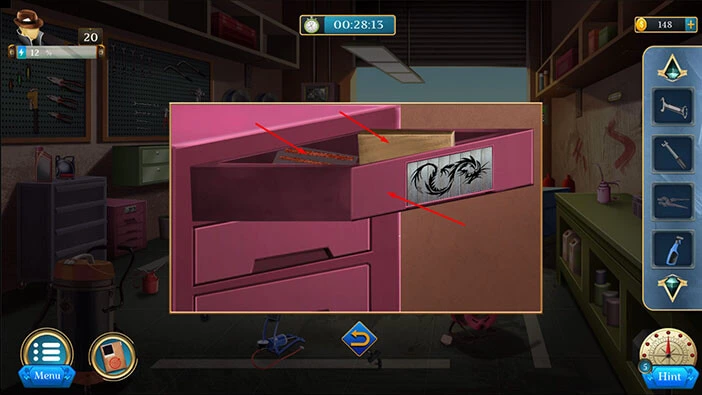
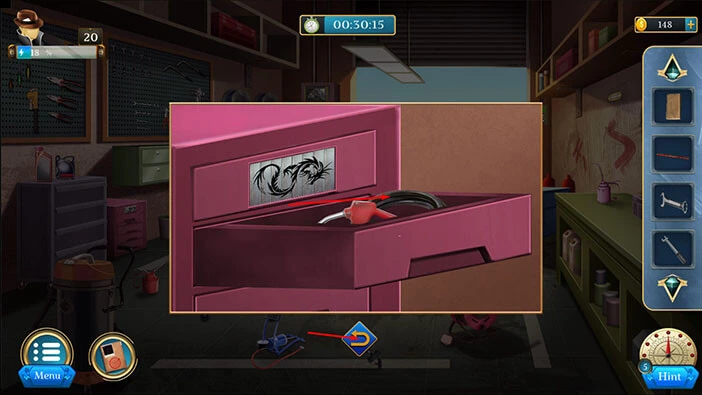
You will open the drawer, and inside you will find a “Support block” and a “Repair strip”. Let’s tap on these two items to pick them up. After that, our character will automatically close the drawer.
Next, let’s tap on the middle drawer to open it.
In the drawer, you will find a “Filling nozzle”. Let’s tap on it to pick it up. After that, tap on the arrow at the bottom to go back.
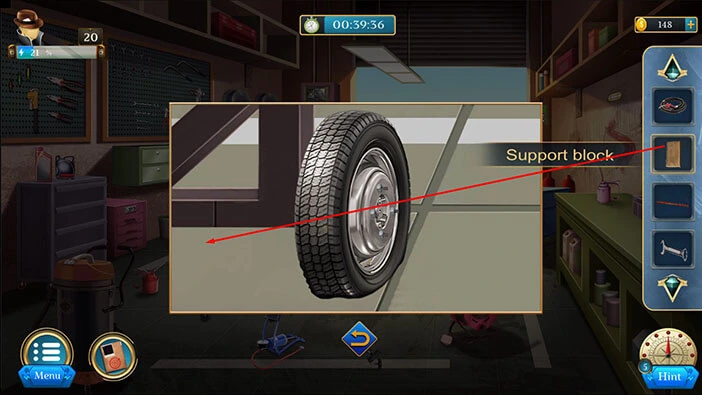
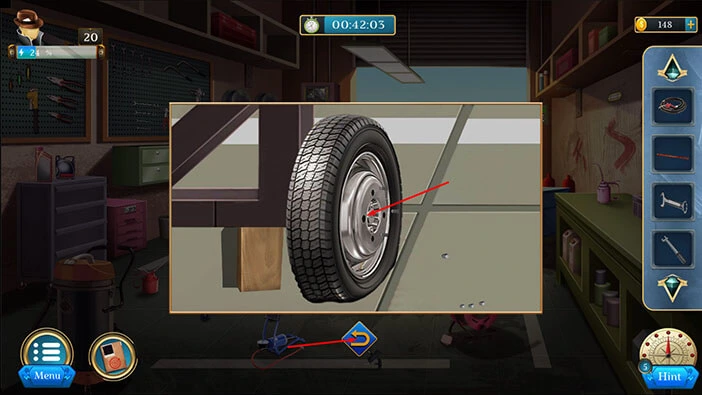
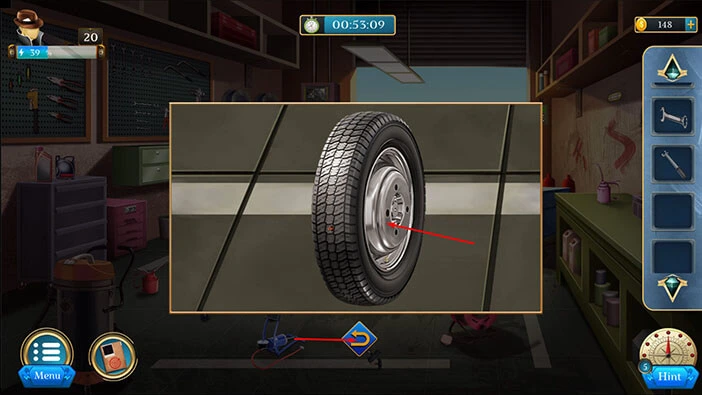
Next, let’s tap on the front right wheel of the trailer to take a closer look at it.

Here, you will notice a flat tire, so our next task is to replace/repair it. Let’s do that.
First, select the “Support block” from the inventory and place it next to the wheel.
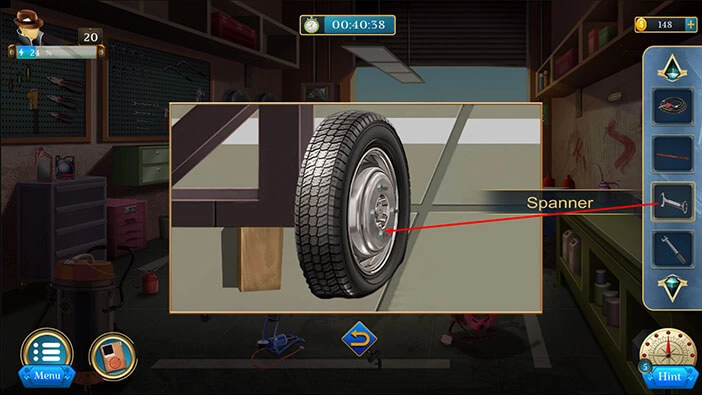
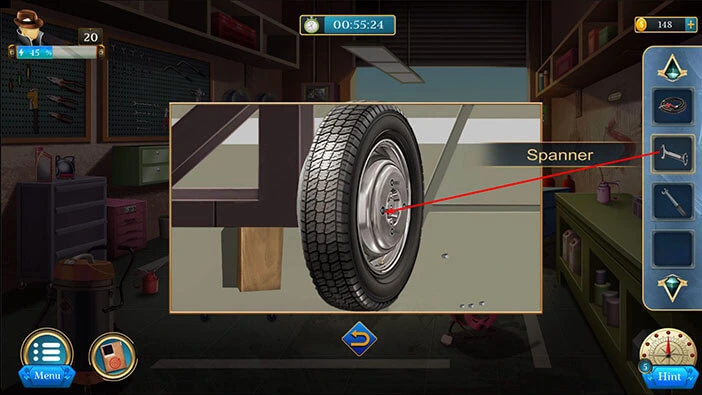
Next, select the “Spanner” from the inventory and use it to remove the screws.
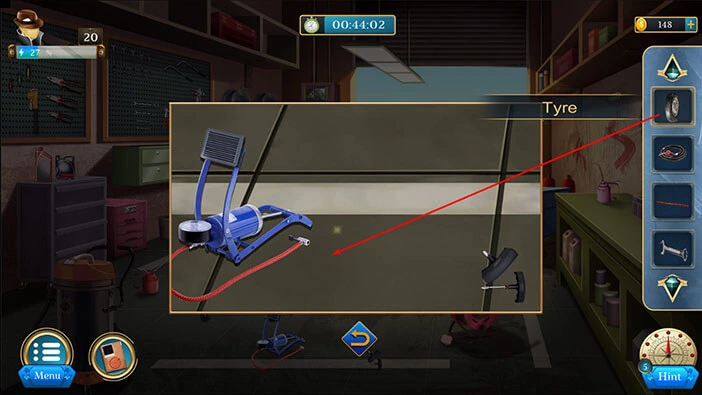
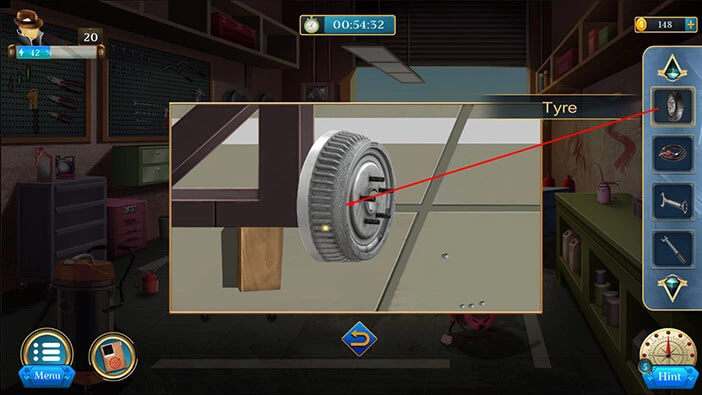
Let’s tap on the “Tire” to pick it up. After that, tap on the arrow at the bottom to go back.
Next, let’s tap on the air pump to take a closer look at it.

Select the “Tire” from the inventory and place it next to the air pump.
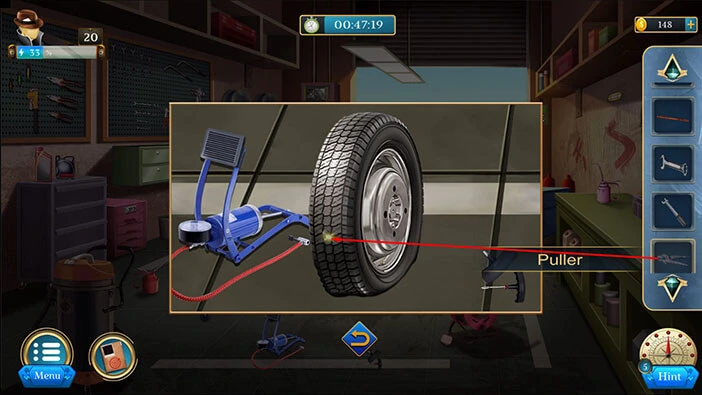
Select the “Spray” from the inventory and use it on the tire.

You will notice a nail stuck in the tire. So, let’s select the “Puller” from the inventory and use it to remove the nail.
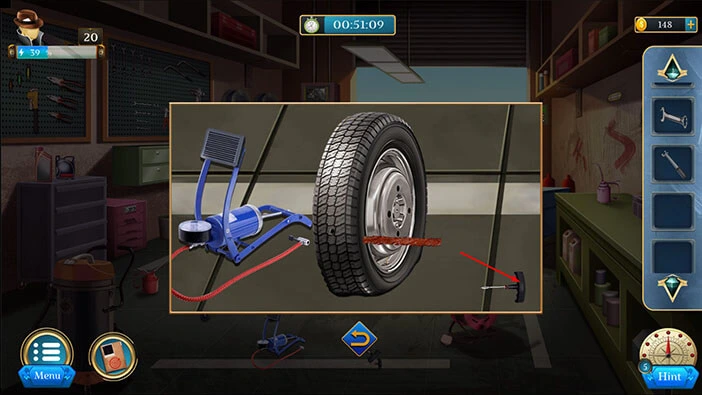
Use the tool on the right to prepare the hole. We will seal it in the next step.

Next, select the “Repair strip” and drag it next to the tire.

Another object is required to seal the hole. So, let’s tap on the other tool on the right to perform this task.
Lastly, tap on the air pump and our character will use it to inflate the tire.

Well, we repaired the “Tire” so let’s tap on it to pick it up.
Next, let’s tap on the wheel to take another look at it.

Select the “Tire” from the inventory and attach it to the wheel.
Next, select the “Spanner” from the inventory and use it to put back the screws.
We are done here, so let’s go back. Tap on the arrow at the bottom to go back.
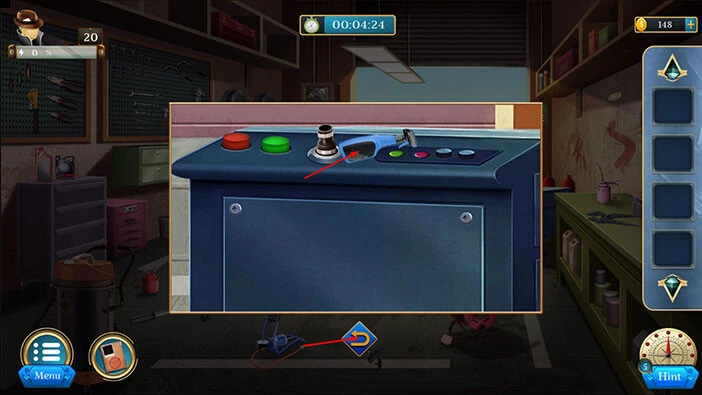
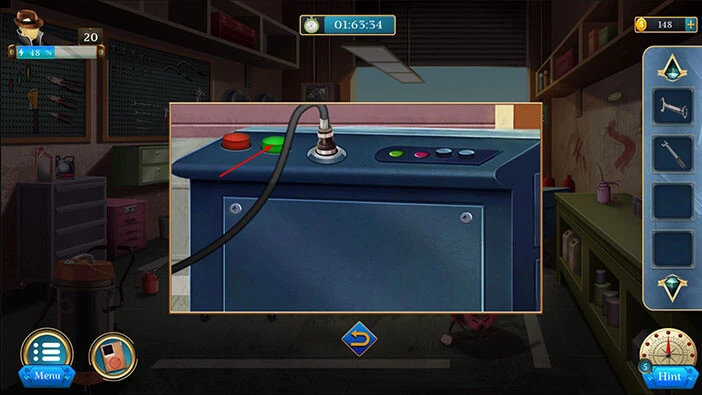
Let’s tap on the machine on the right to take a closer look at it.

Select the “Filling nozzle” from the inventory and attach it to the hole on the machine.

Lastly, tap on the green button to fill up the boat.
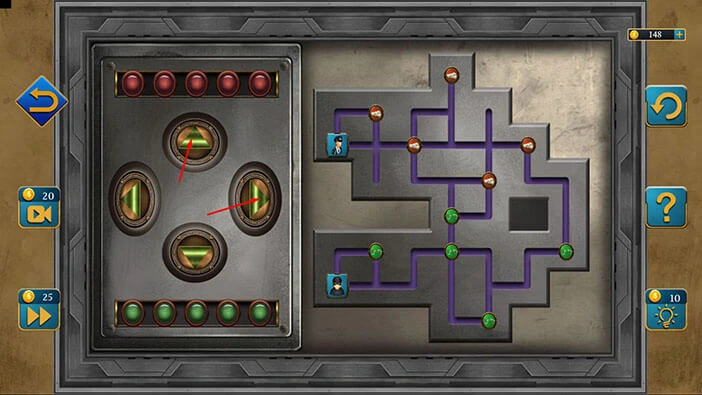
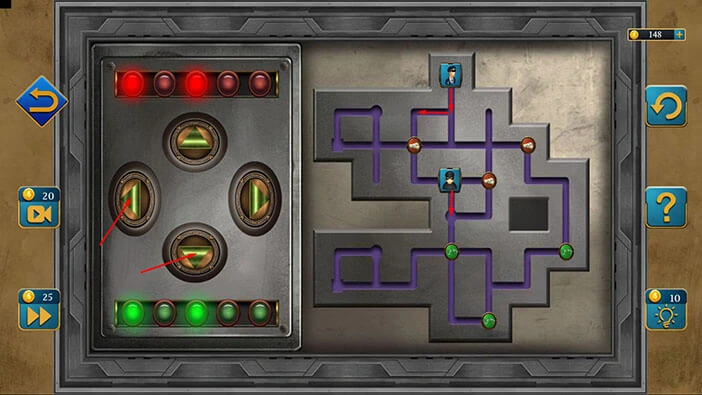
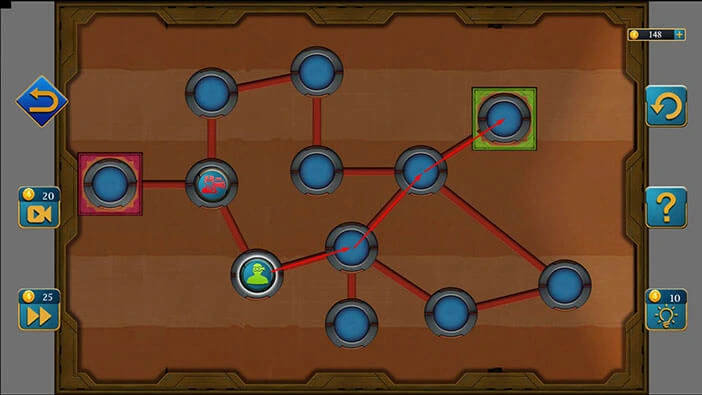
Let’s tap on the box, located on the wall on the left, next to the door to take a closer look at it. After that, tap on the box again to start the interaction.

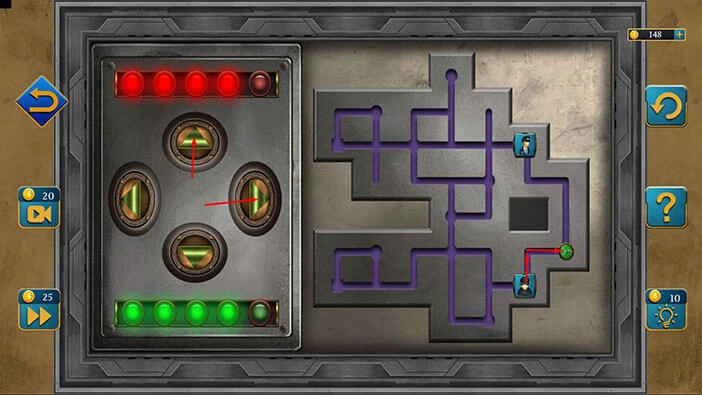
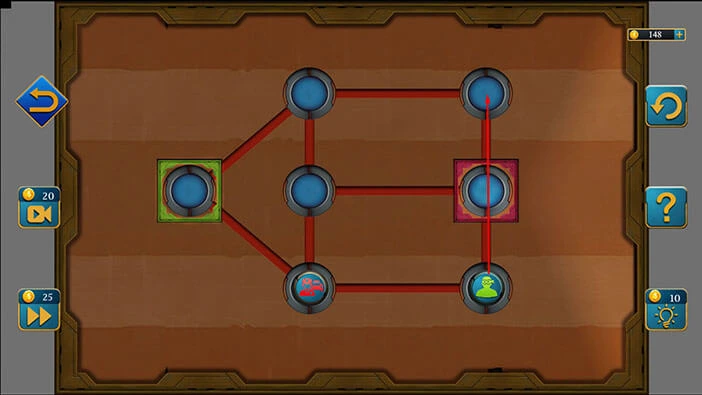
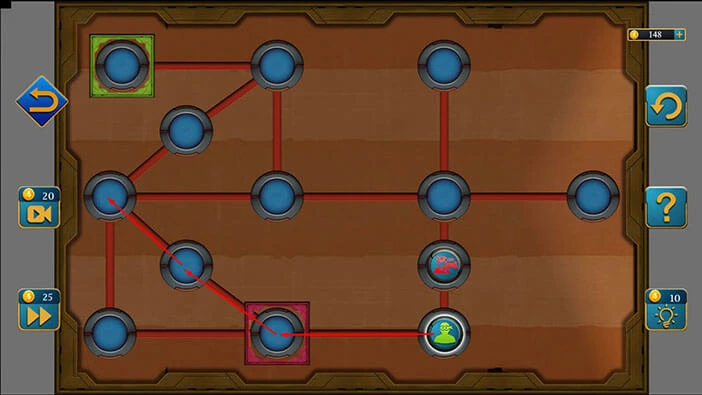
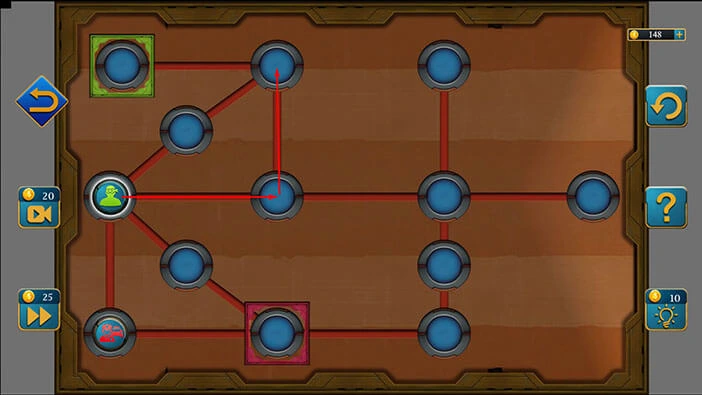
Here, we have another puzzle. Our task is to move the two characters through the maze and collect all green and red coins. We will do this puzzle in several steps. Let’s begin.
Step 1
Tap on the right arrow, then tap on the up arrow. You will notice that both characters will move whenever you press the arrows. Also, you will notice that the first of five green lights has been turned on, and the same is true for the red lights. These lights have been turned on because we collected one green coin and one red coin. We will have to collect four more of red and green coins in order to complete this puzzle.
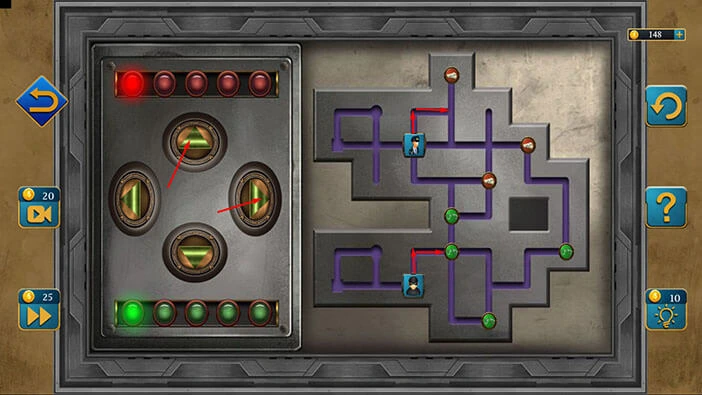
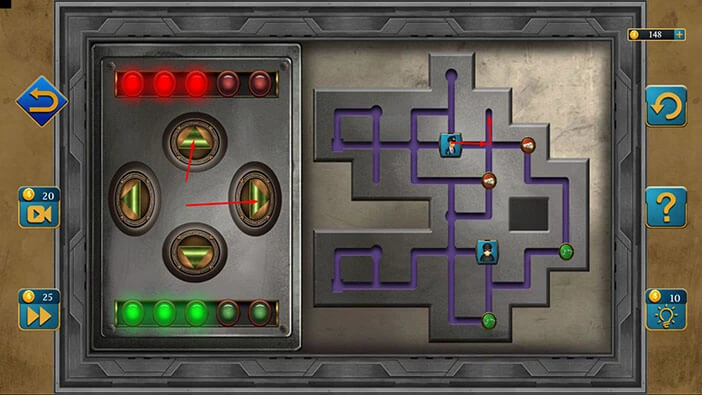
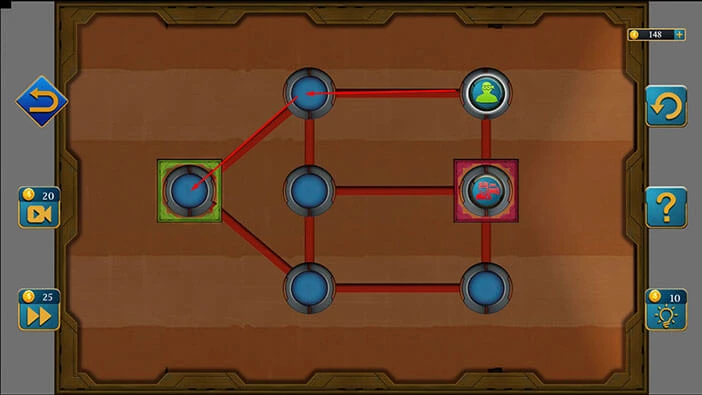
Step 2
Tap on the down arrow, then tap on the right arrow.

Step 3
Tap on the up arrow, then tap on the right arrow.
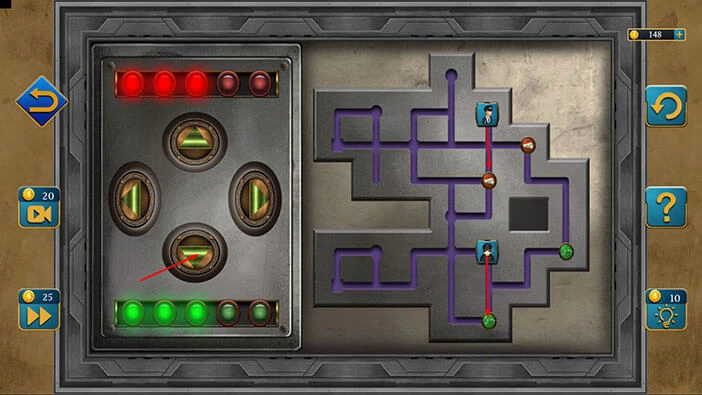
Step 4
Tap twice on the up arrow.
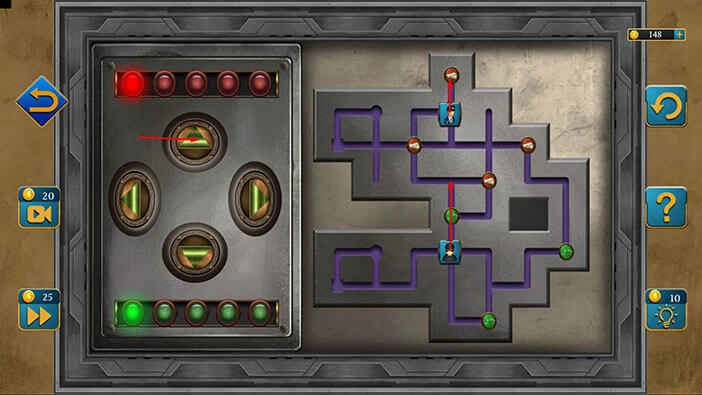
Step 5
Tap on the down arrow, then tap on the left arrow.
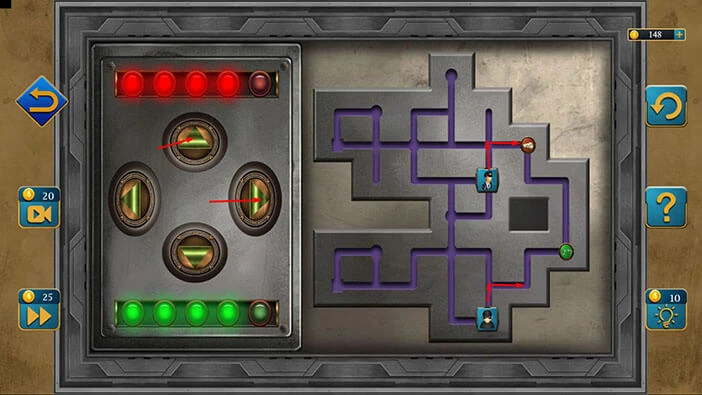
Step 6
Tap on the down arrow, then tap on the right arrow.

Step 7
Tap on the right arrow, then tap on the up arrow.
Step 8
Tap twice on the down arrow.
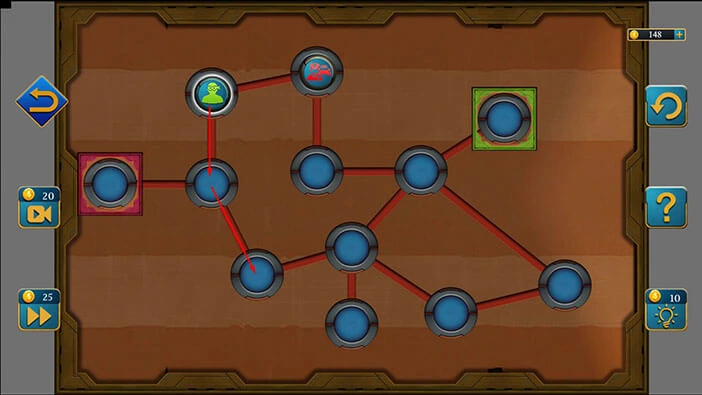
Step 9
Tap on the up arrow, then tap on the right arrow.
Step 10
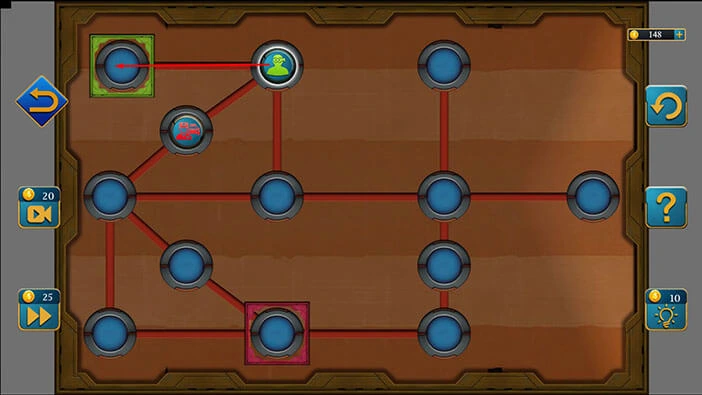
Tap on the up arrow, then tap on the right arrow. With that, you will collect all coins, and you will solve this puzzle.
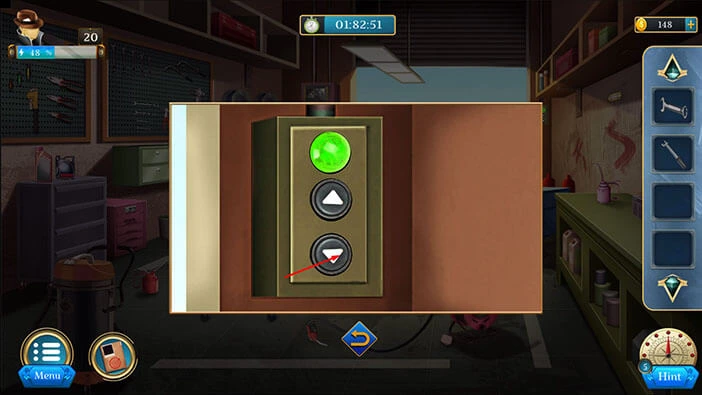
Let’s tap on the down arrow to lower the platform.
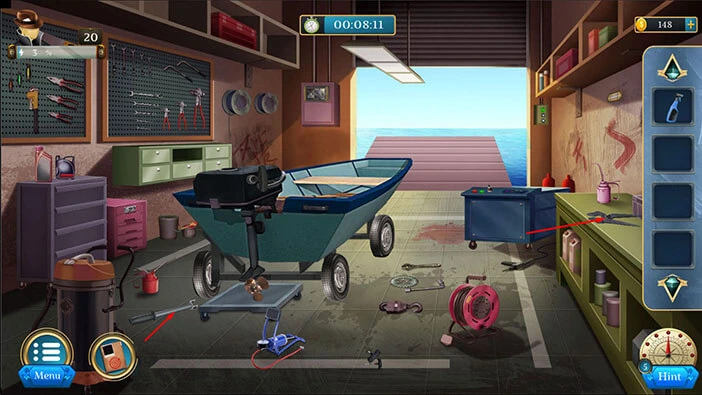
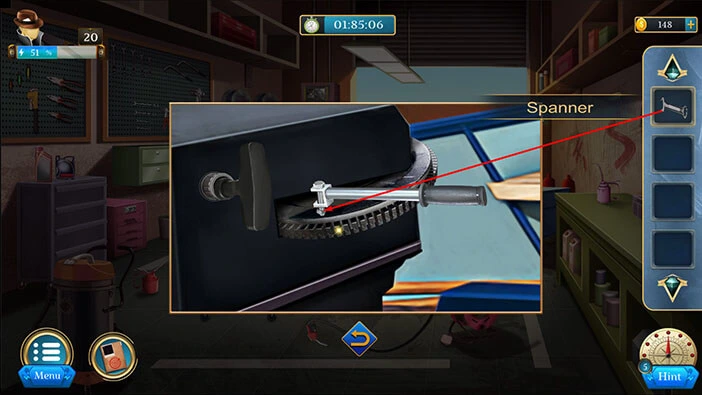
Next, let’s tap on the engine to take a closer look at it.
Next, select the “Lever” from the inventory and place it on the gear.
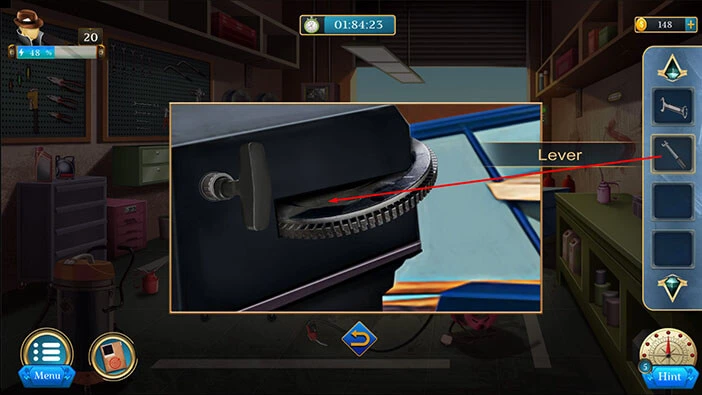
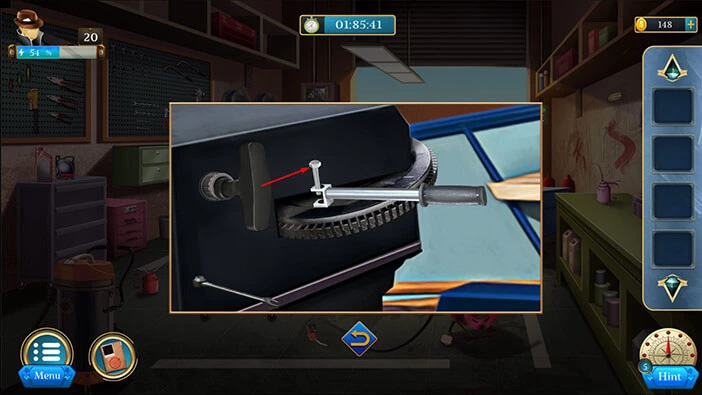
Next, select the “Spanner” from the inventory and use it to remove the screw.
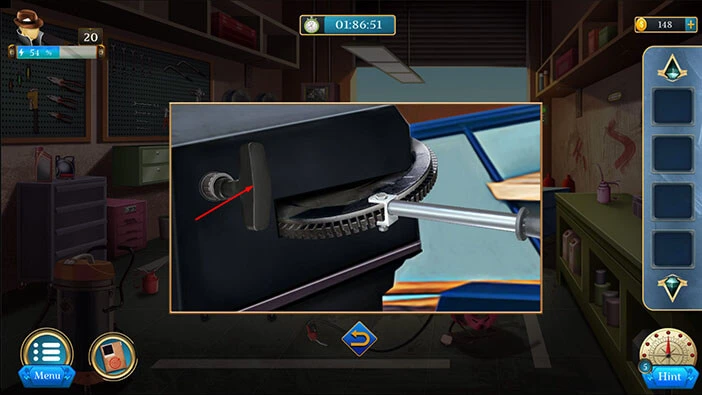
Tap on the screw and our character will place it into the correct slot.
Lastly, tap on the handle on the left, and you will start the engine.
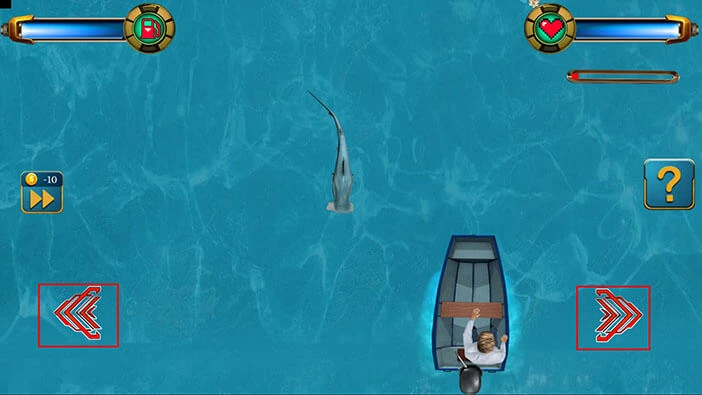
Next, we have a minigame. Use the left and right arrows to steer the boat, and try to avoid the obstacles.
Once you complete the minigame, you will reach the next ship. Let’s explore it.
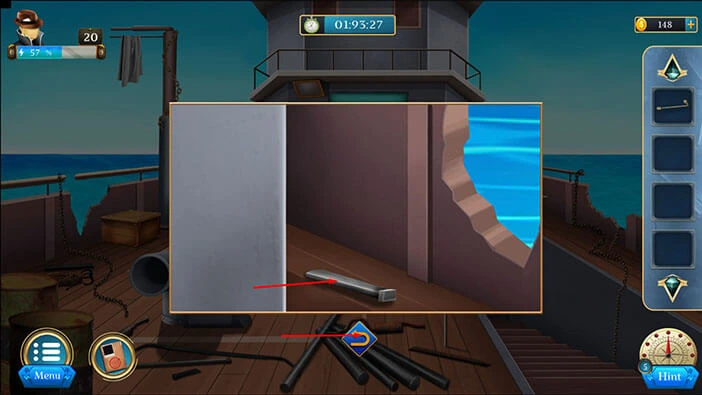
On the floor in front of you, you will notice a “Rod”. Let’s tap on it to take a closer look, and tap again to pick it up.
After that, tap on the arrow at the bottom to go back.

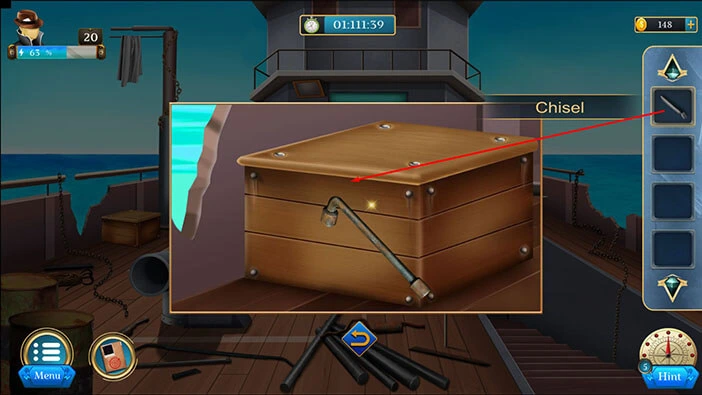
Next, let’s tap on the hole, located in the top right corner of the boat, to take a closer look at it.
Here, you will find a “Chisel”. Let’s tap on it to pick it up. After that, tap on the arrow at the bottom to go back.
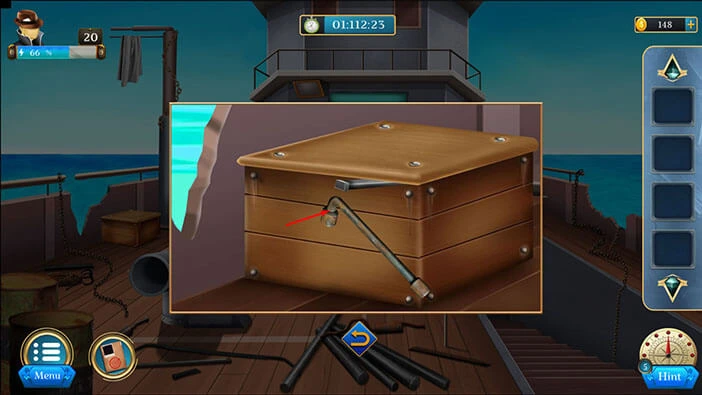
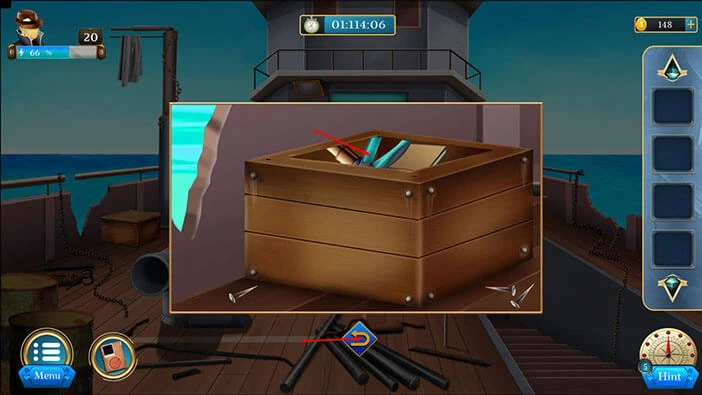
Next, let’s tap on the wooden box on the left to take a closer look at it.

Select the “Rod” from the inventory and drag it in front of the box.

Next, select the “Chisel” from the inventory and place it under the top of the box.
Lastly, tap on the rod to remove the nails. After that, tap on the top of the box to remove it.
In the box, you will find a “Cutter”. Let’s tap on it to pick it up. After that, tap on the arrow at the bottom to go back.
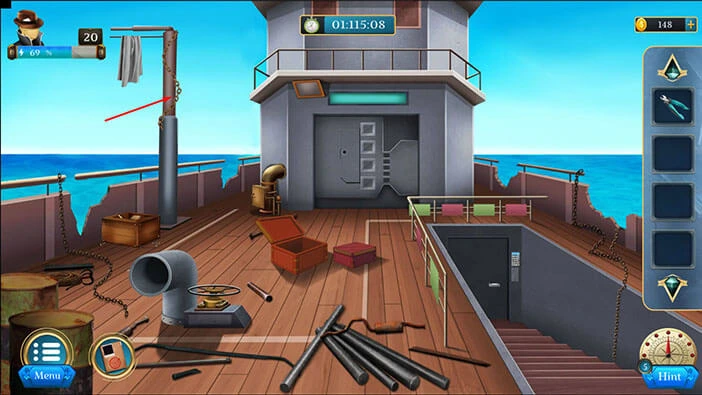
Next, if you take a look at the metal pole on the left, you will notice a chain wrapped around it. Let’s tap on the chain to take a closer look at it.
Select the “Cutter” from the inventory and use it to cut the chain.
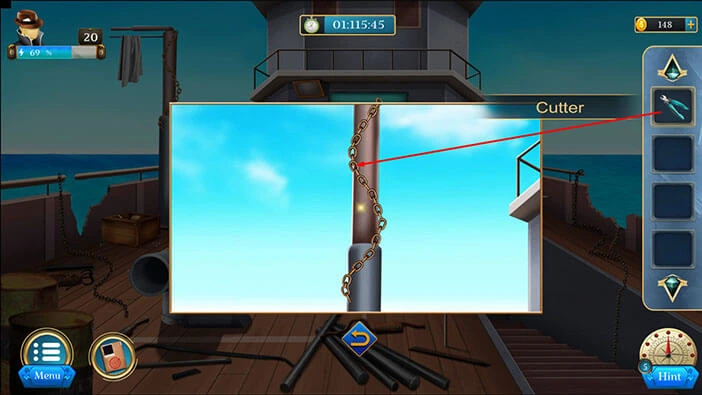
A “Chain” will drop to the floor, so let’s tap on it to pick it up.

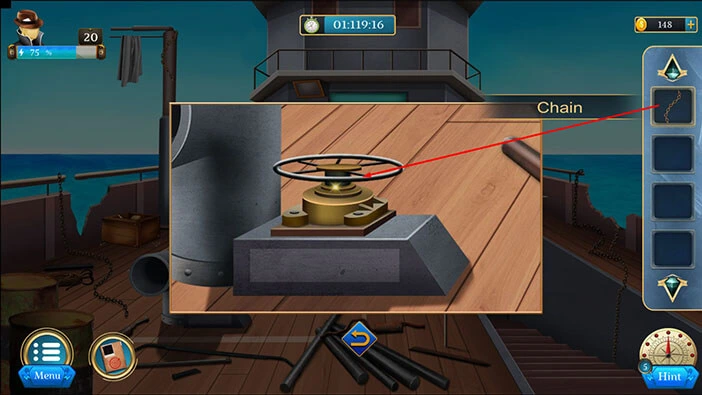
Next, tap on the valve in front of you to take a closer look at it.

Select the “Chain” from the inventory and attach it to the valve. After that, tap on the chain to start the interaction.
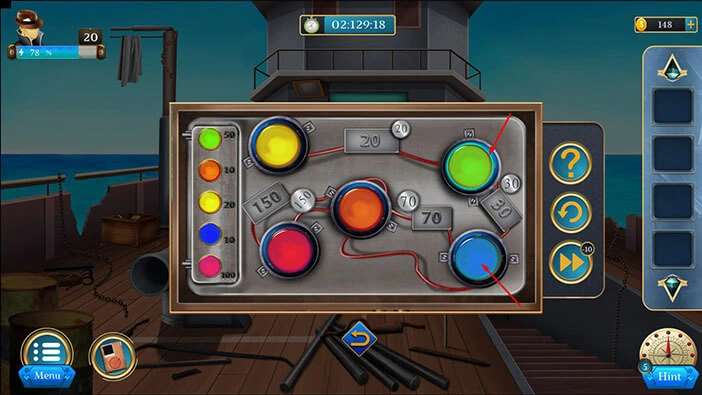
Our character will use the chain to break open the door on the small cabinet in front of you. So, let’s tap on the cabinet to take a closer look, and tap again to start the interaction.

Here, we have another puzzle. On the left side, we can see the correct value for each color. Our task is to shuffle the colored buttons and place them into the slots with the proper values.
We will do this puzzle in several steps. Let’s begin.
Step 1
Select the red button then tap on the green button to swap their positions.
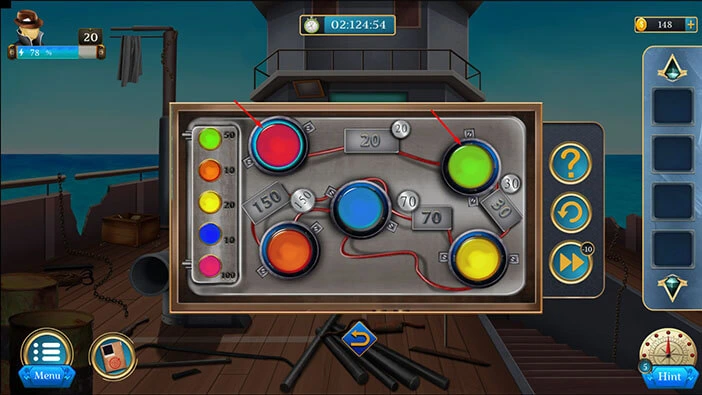
Step 2
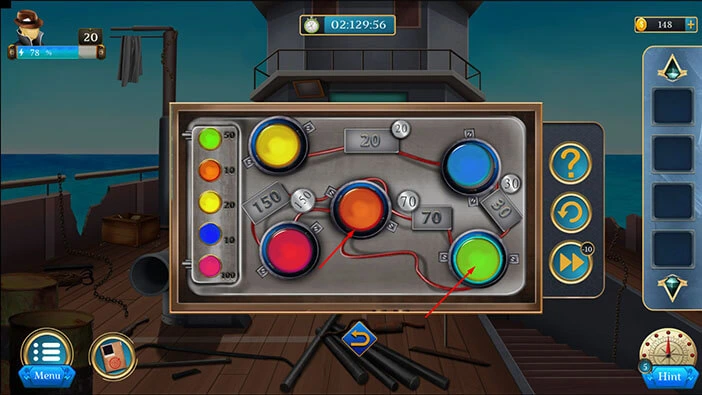
Select the red button then tap on the yellow button to swap their positions.
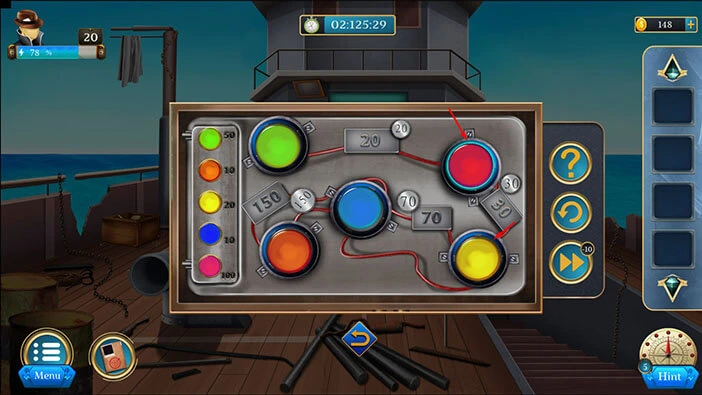
Step 3
Select the red button then tap on the blue button to swap their positions.
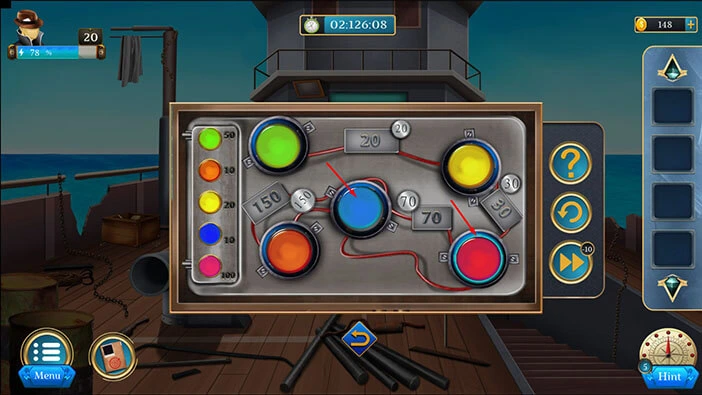
Step 4
Select the red button then tap on the orange button to swap their positions.
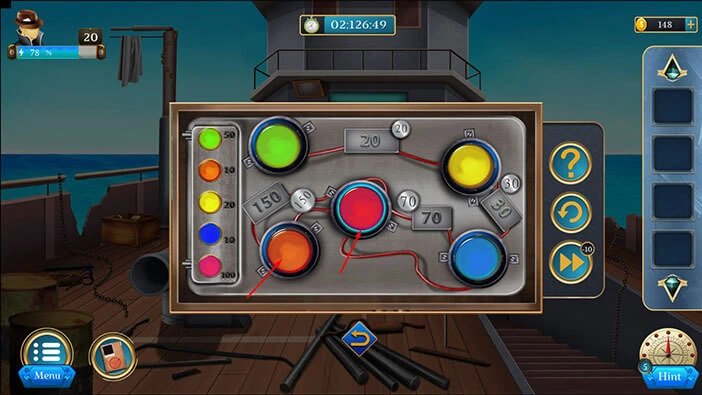
Step 5
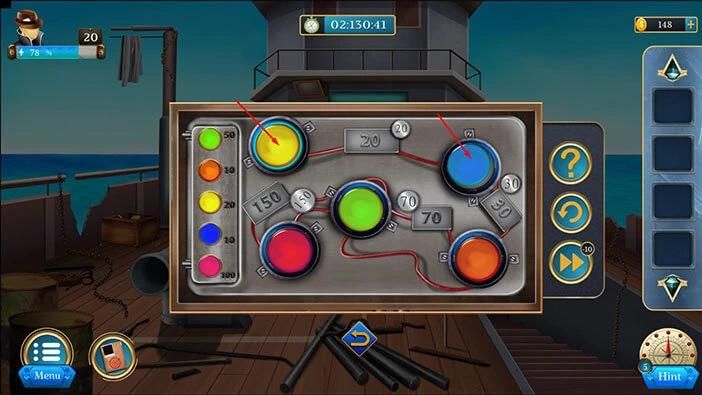
Select the green button then tap on the yellow button to swap their positions.

Step 6
Select the green button then tap on the blue button to swap their positions.
Step 7
Select the green button then tap on the orange button to swap their positions.
Step 8
Select the yellow button then tap on the blue button to swap their positions.
Step 9
Select the yellow button then tap on the orange button to swap their positions. With that, you will place all buttons in the correct slots.
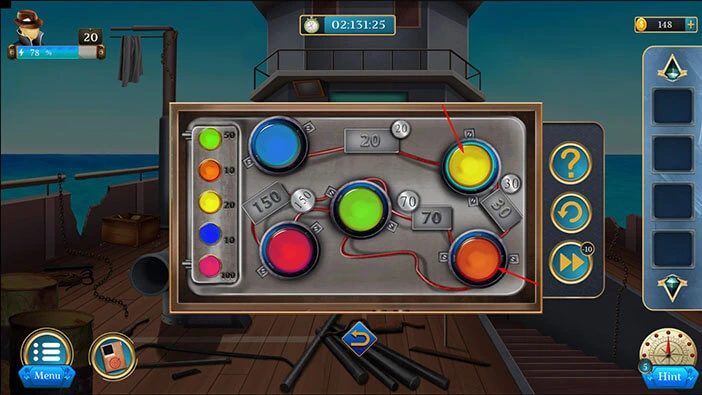
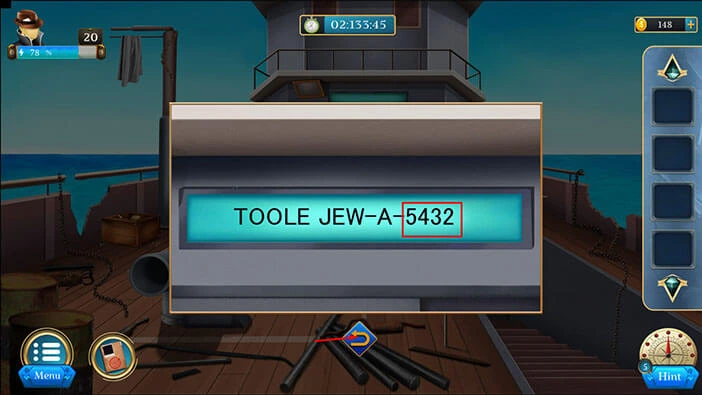
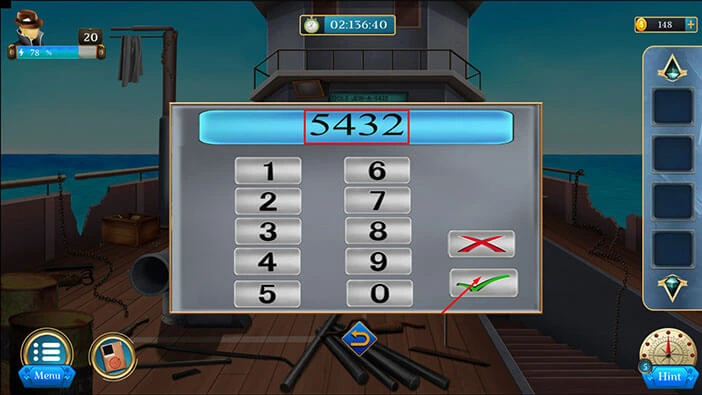
As soon as you solve the previous puzzle, you will discover another hint. Let’s memorize/write down the number “5432” because it represents the code for unlocking the cabin door.
Once you’re done, tap on the arrow at the bottom to go back.
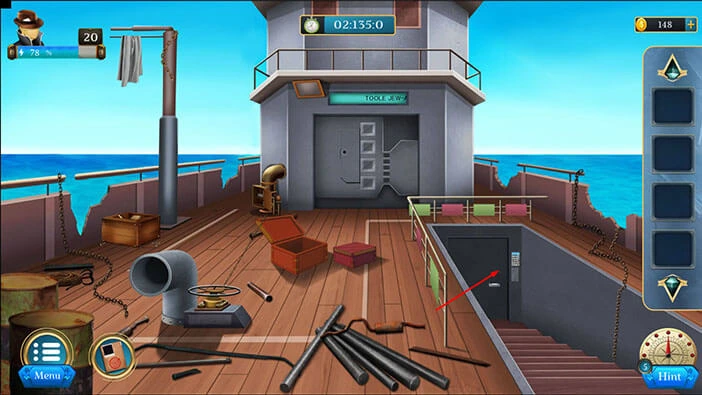
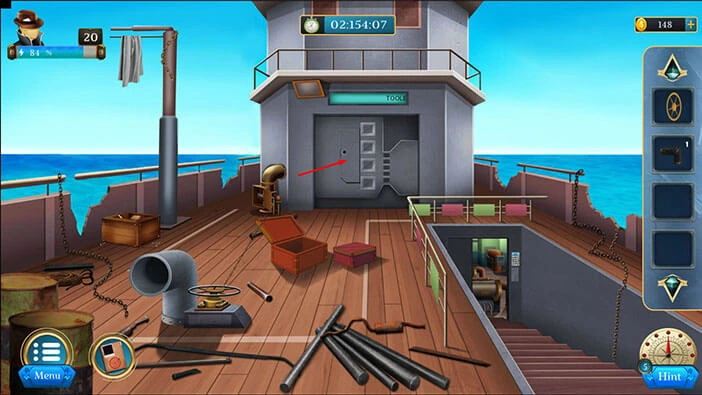
Tap on the door on the right to take a closer look at it. After that, tap on the keypad to start the interaction.
Let’s enter the code “5432” that we discovered previously. After that, tap on the green check mark to confirm.
With that, you will unlock the door. Let’s tap on it to proceed to the next room.
The “Black Spider” will lower the cage with Detective’s friend into the hole in the pool. After that, he will fill the pull with water. So, we will have to find a way to quickly drain the water.
Let’s tap on the door to take a closer look at it, and tap again to open it.
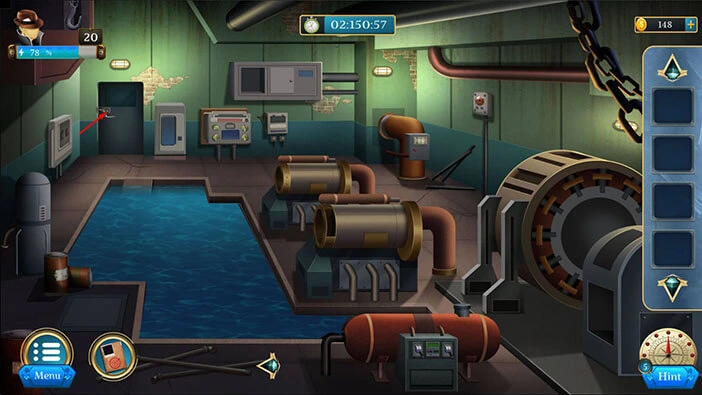
Inside, you will find a “Pipe” and a “Wheel”. Let’s tap on these two items to pick them up. After that, tap on the arrow at the bottom.
Let’s go back to the deck. Tap on the arrow at the bottom.
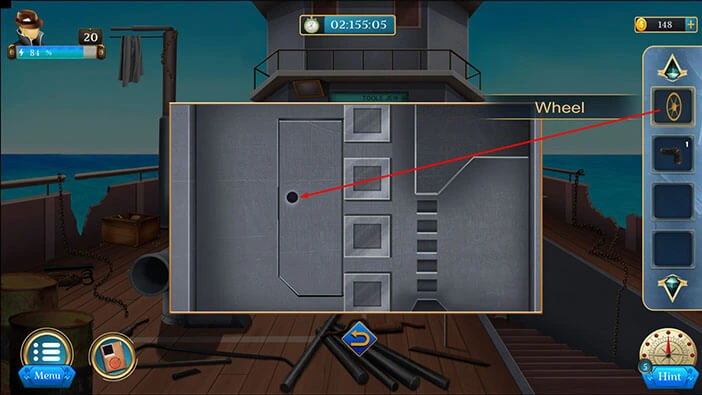
Let’s tap on the panel in front of us to take a closer look at it.
Select the “Wheel” from the inventory and insert it into the empty slot. After that, tap on the wheel to open the door.
Tap on the puzzle inside to take a closer look at it.
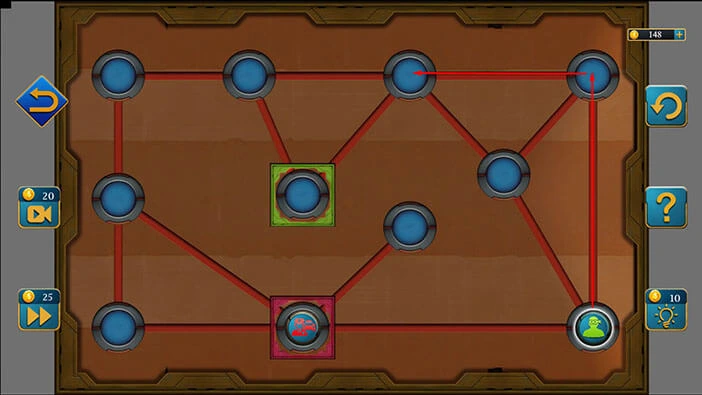
Here, we have another puzzle. Our task is to bring the green to the finish line, which is the slot on the left with the green line. Also, we have to avoid the red guy who will try to prevent us from reaching this destination.
We will do this puzzle in several steps. Let’s begin.
Step 1
Let’s move our character two slots up.
Step 2
Let’s move our character one slot to the left, and then one slot down and to the left, to the finish line.
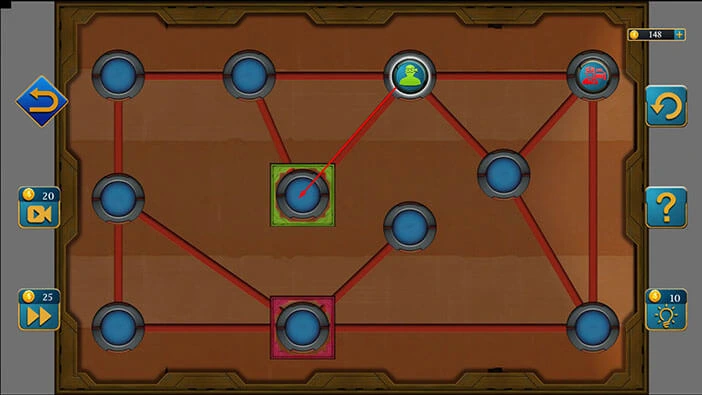
Now, we have to solve another puzzle of the same type. Like before, we will do that in several steps. Let’s begin.
Step 1
Let’s move our character one slot down, and then one slot down and to the right.
Step 2
Let’s move our character three slots up and to the right, and he will reach the main slot.
Now, we have to solve one more puzzle of the same type. Like before, we will do that in several steps. Let’s begin.
Step 1
Let’s move our character one slot up, and then one slot to the left.
Step 2
Let’s move our one slot down and to the left, to the main slot.
Again, we have to solve one more puzzle of the same type. Like before, we will do that in several steps. Let’s begin.
Step 1
Let’s move our character two slots down.
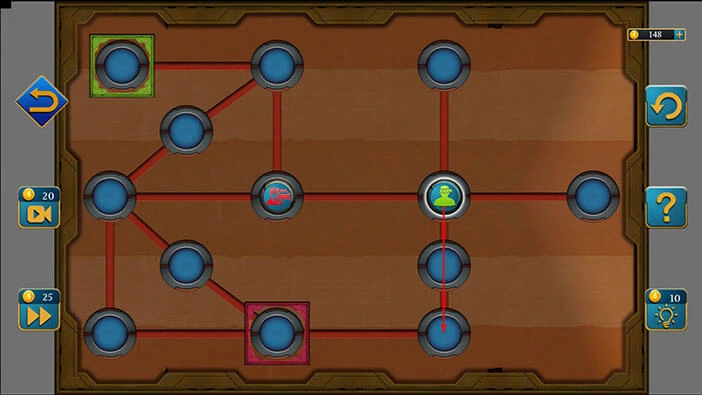
Step 2
Let’s move our character one slot to the left, and then two slots up and to the left.
Step 3
Let’s move our character one slot to the right, and then one slot up.
Step 4
Lastly, let’s move our character one slot to the left, to the main slot.
With that, you will unlock the small door, and in this compartment, you will find a “Pipe”. Let’s tap on it to pick it up.
After that, tap on the arrow at the bottom to go back.
Let’s go back to the lower level. Tap on the door on the right.

Let’s tap on the first machine on the right to take a closer look at it.
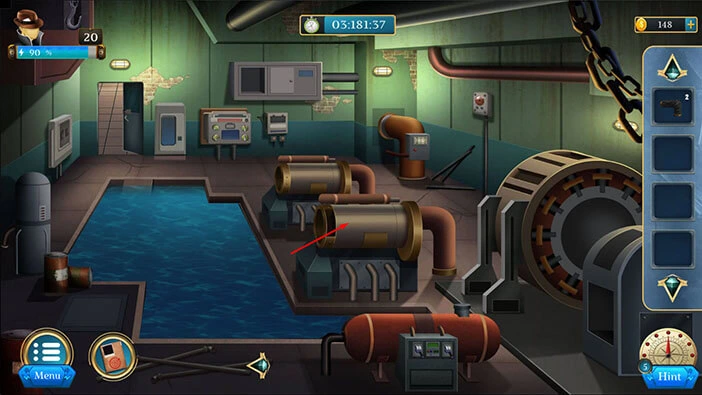
Select the “Pipe” from the inventory and attach it to the machine. After that, select the other “Pipe” and attach it to the second machine.
After that, tap on the arrow at the bottom to go back.

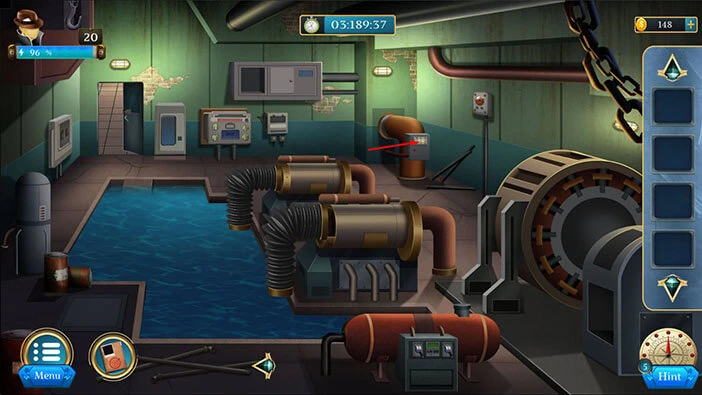
Next, let’s tap on the machine on the back wall to take a closer look at it.
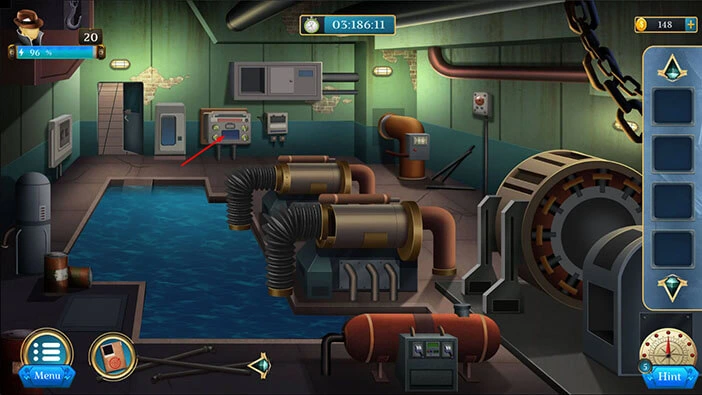
Here, we can discover another hint. Let’s tap once on each button to activate it.
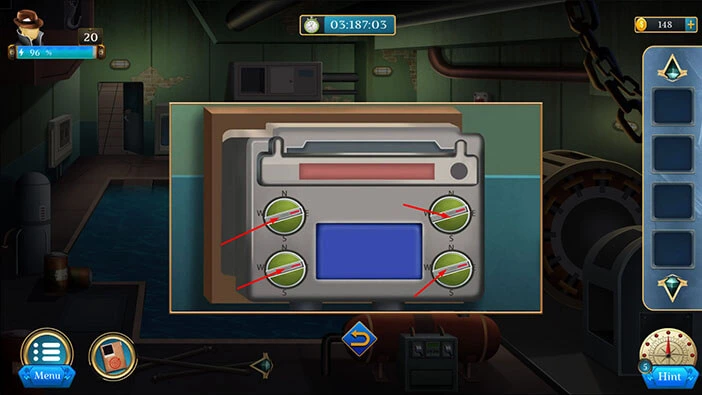
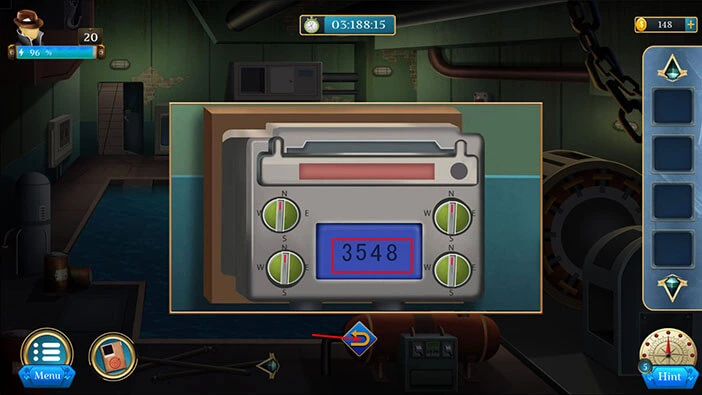
The number “3548” will appear on the screen. Let’s memorize/write down this number because it represents the hint for the next puzzle.
Once you’re done, tap on the arrow at the bottom to go back.
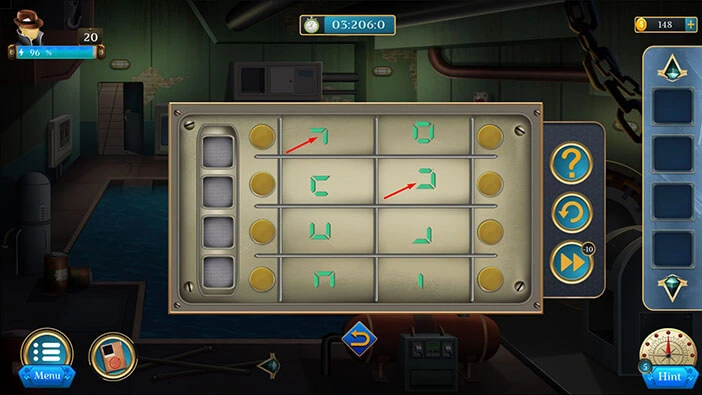
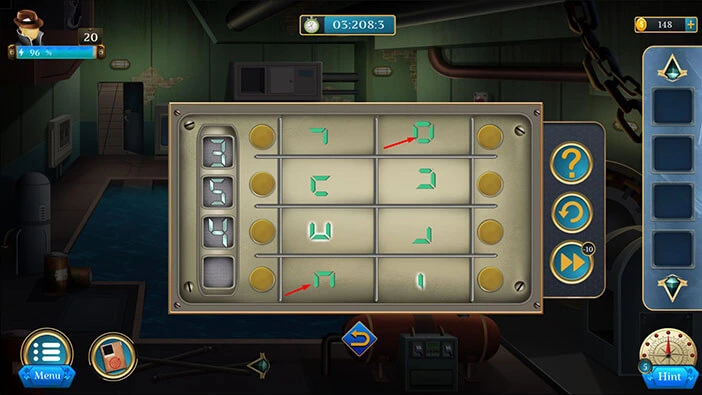
Next, let’s tap on the machine in the top left corner of the room to take a closer look at it. Tap on it again to start the interaction.
Here, we can see some kind of keypad. Our task is to enter the number “3458” that we discovered previously. However, we first have to assemble the numbers from the parts. As always, we will do that in several simple steps. Let’s begin.
Step 1
Select the first slot in the column on the left, then select the second slot in the column on the right. With that, you will assemble the number 3.
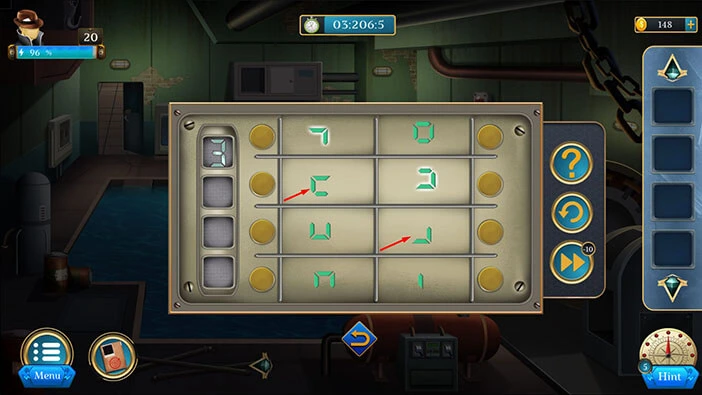
Step 2
Select the second slot in the column on the left, then select the third slot in the column on the right. With that, you will assemble the number 5.
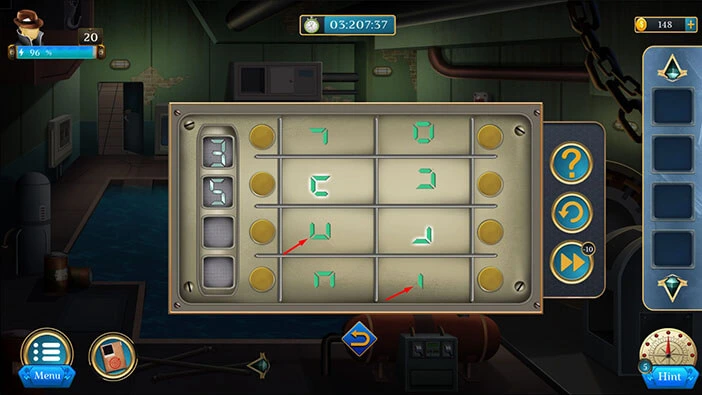
Step 3
Select the third slot in the column on the left, then select the fourth slot in the column on the right. With that, you will assemble the number 4.
Step 4
Select the fourth slot in the column on the left, then select the first slot in the column on the right. With that, you will assemble the number 8.
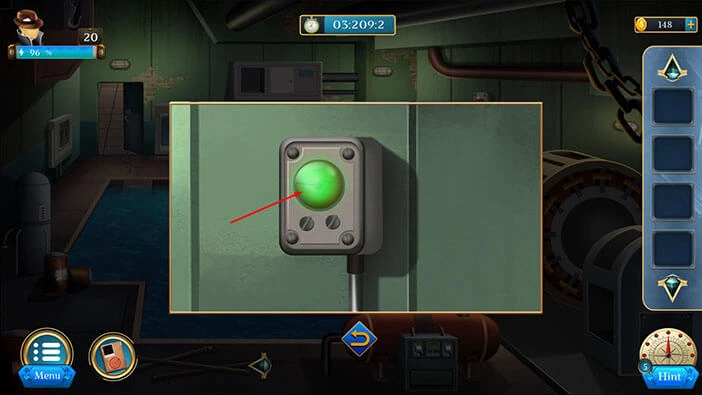
With that, you will solve the previous puzzle, and you will see a large green button. So, let’s tap on it.
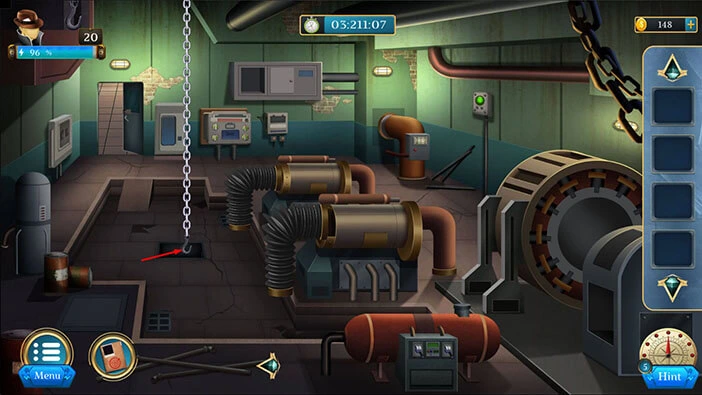
With that, you will drain the water, and you will also lower the chain with the hook. Let’s tap on the hook to take a closer look at it, and tap again to attach it to the cage in the hole.
With that, you will free the detective’s friend. However, as soon as they climbed to the deck, a helicopter appeared, and a person from the helicopter shot at our character and his friend.
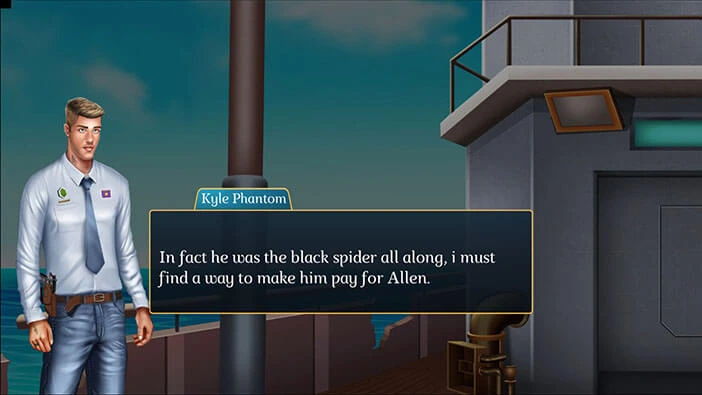
The detective’s friend reacted quickly and pushed our character aside, saving his life. However, the friend was left completely in the open and was shot by the person in the helicopter.
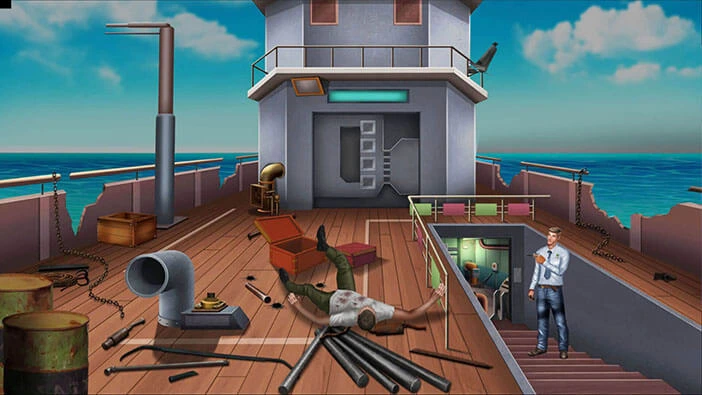
Our character was furious and he is now more determined than ever to bring the Black Spider to justice.
With that, we have reached the end of the twentieth level. If you want to see the walkthrough for the twenty-first level, tap on the next part button.
Thank you for reading.