Room Escape: Detective Phantom | Level 16
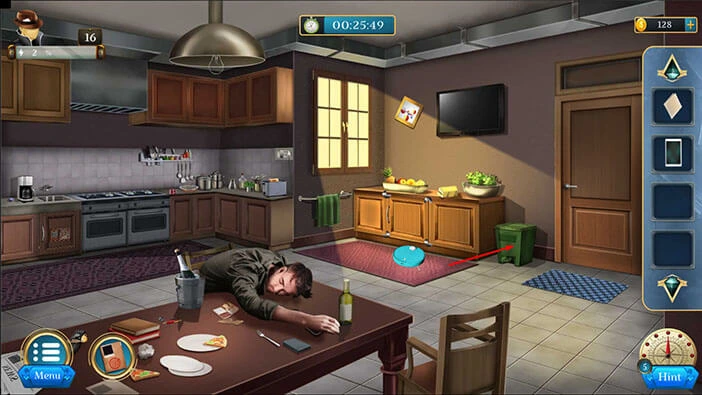
Hello everyone and welcome to the walkthrough for the sixteenth level of “Room Escape: Detective Phantom”. In the sixteenth level, our task is to investigate another crime scene and determine if Black Spider is behind this crime.
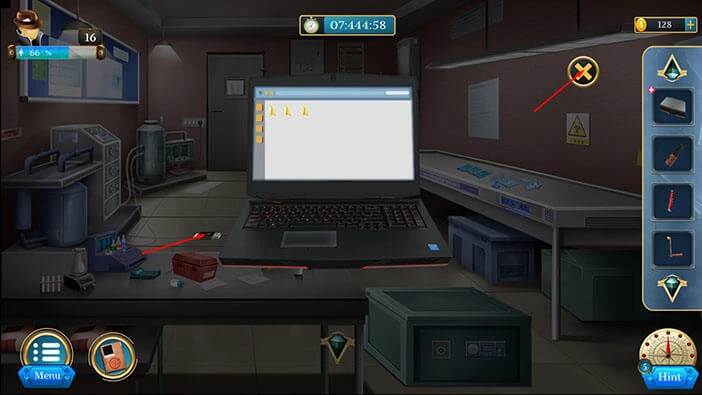
Our objectives are to “Obtain the sheet” “Open the chamber” and “Determine the cause”. Tap on the “X” button to go back.

Tap on the small paper on the left to pick it up. A “Letter” will be added to your inventory.
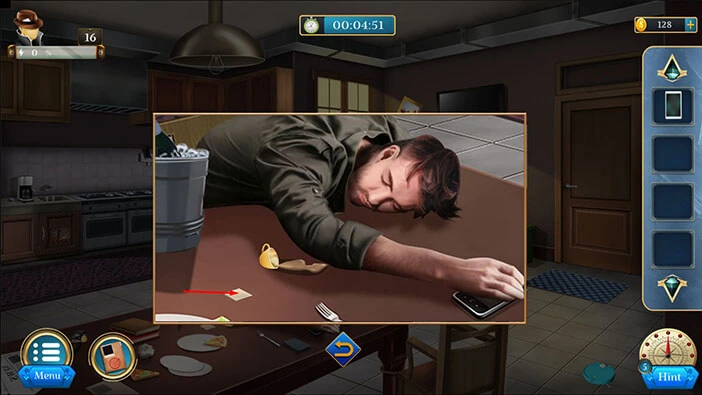
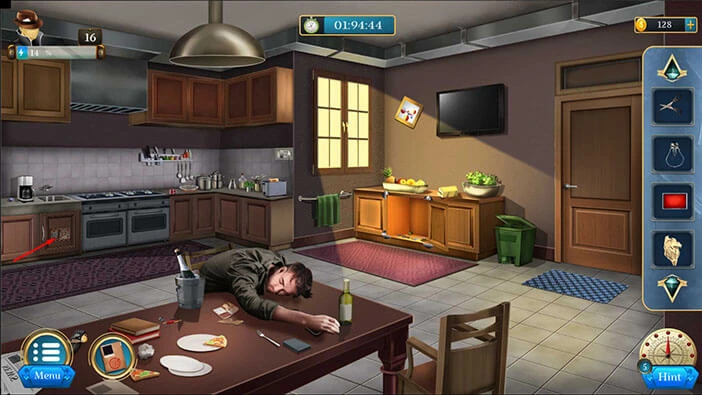
Next, let’s tap on the cup to examine it, and it will appear in the middle of the screen.
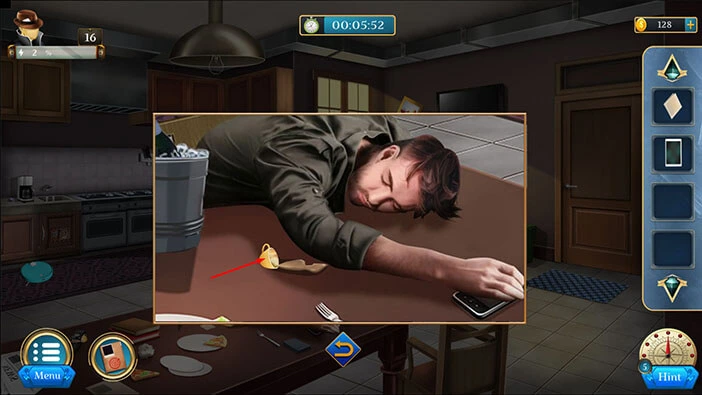
If you tap on the cup, you will discover that we should scan it. So, let’s select the “Tablet” from the inventory and use it to scan the cup.
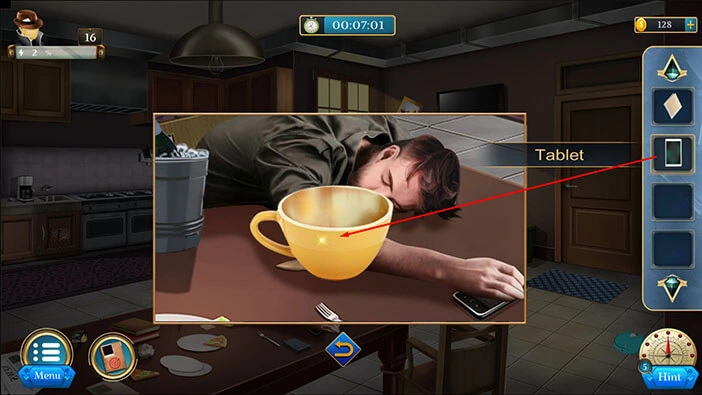
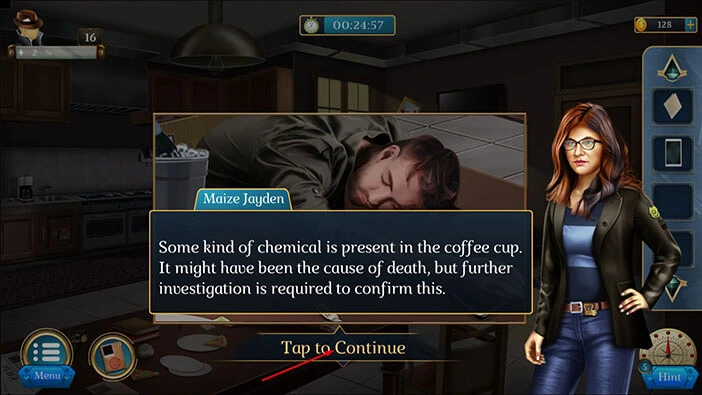
It seems that the victim was poisoned, but we should continue the investigation to confirm this. Let’s tap on the arrow at the bottom to go back.
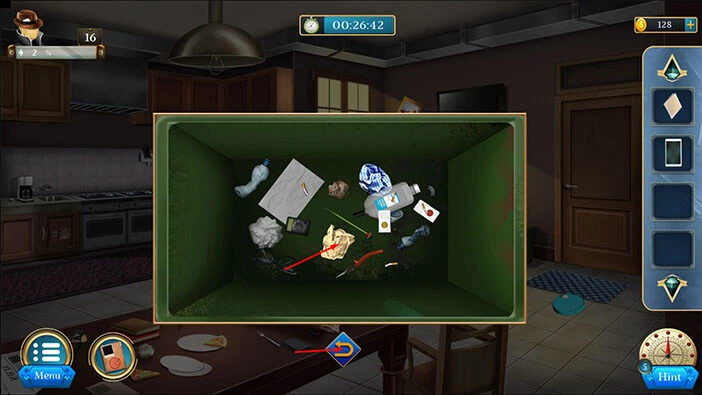
Let’s tap on the trash can on the right to take a closer look at it, and tap again to open it.
In the trash can you will find a “Piece of paper”. Let’s tap on it to pick it up.
After that, tap on the arrow at the bottom to go back.
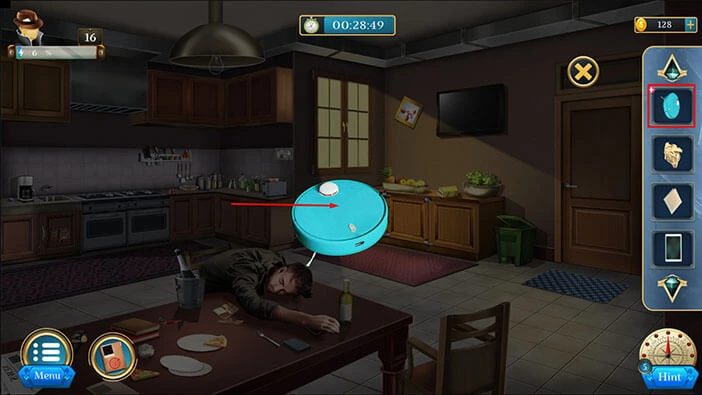
Next, let’s tap on the “Vacuum bot” to pick it up.

Select the “Vacuum bot” from the inventory and it will appear in the middle of the screen. Tap on it again to turn it around and open it.
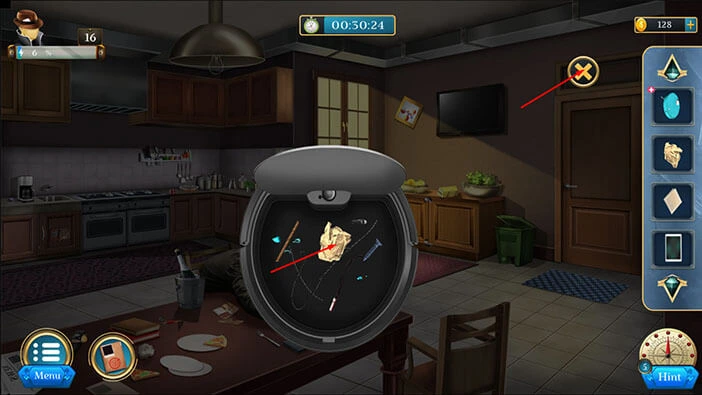
Inside, you will find a “Piece of paper”. Let’s tap on it to pick it up. After that, tap on the “X” button to close this window.
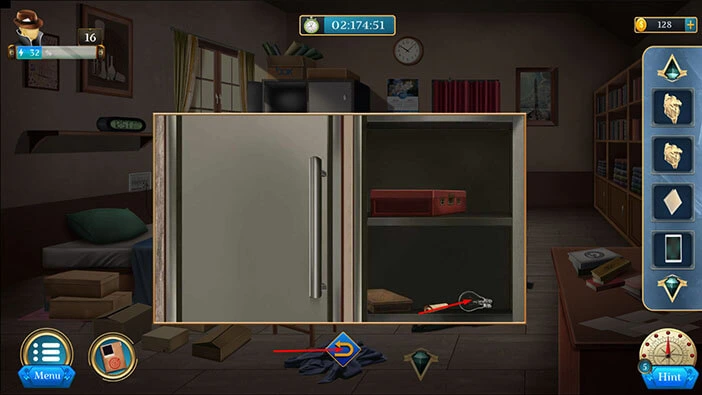
Next, let’s tap on the middle cabinet on the right to take a closer look at it.
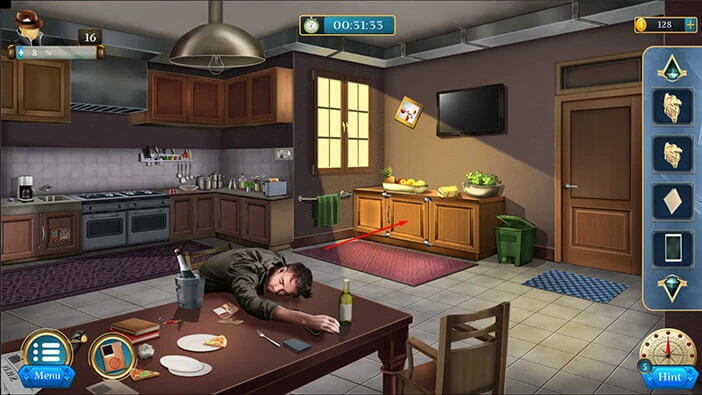
Our next task is to unlock the cabinet door. We can do that by rotating the four locks in the corners of the door. The empty part of the locks should face the inner corner of the cabinet. Let’s do that.
Tap four times on the lock in the top right corner to rotate it into the correct position.
Tap three times on the lock in the bottom right corner to rotate it into the correct position.
Tap once on the lock in the bottom left corner to rotate it into the correct position.
Tap twice on the lock in the top left corner to rotate it into the correct position.
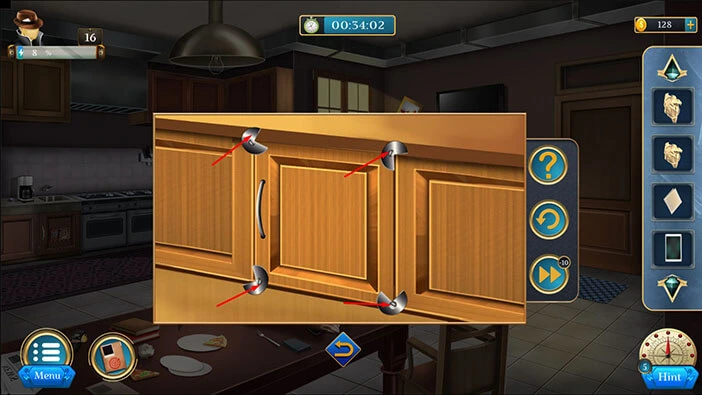
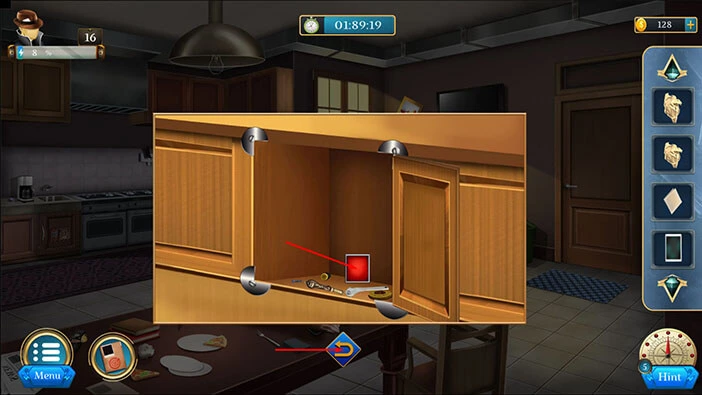
With that, you will open the cabinet door. Inside you will find a “Puzzle piece”. Let’s tap on it to pick it up.
After that, tap on the arrow at the bottom to go back.
Next, let’s tap on the ceiling lamp to take a closer look at it.
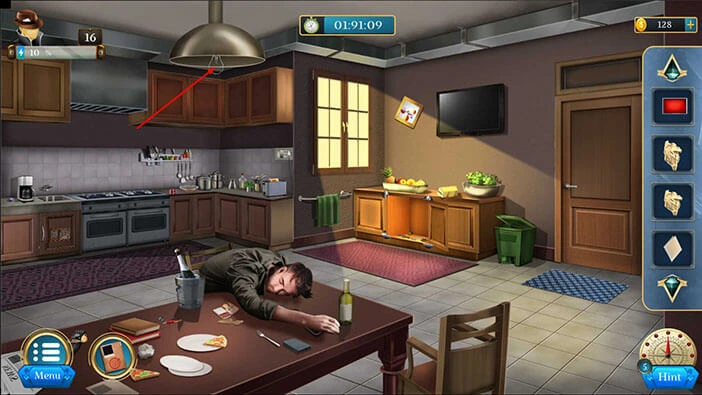
Here, you will find a “Bulb”. Let’s tap on it to pick it up. After that, tap on the arrow at the bottom to go back.

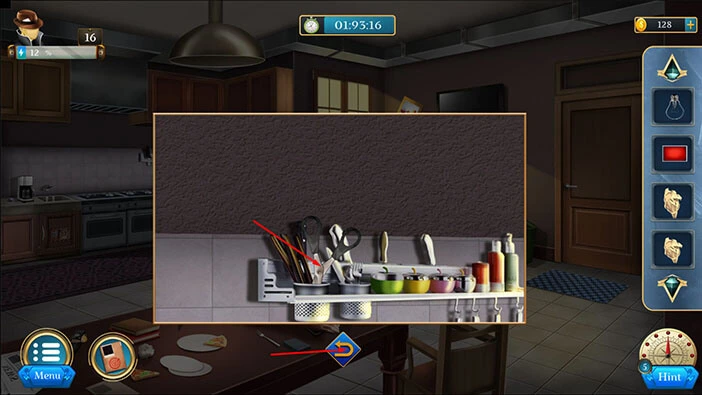
Next, let’s tap on the kitchen shelf to take a closer look at it.

Here, you will find “Scissors”. Let’s tap on it to pick it up. After that, tap on the arrow at the bottom to go back.
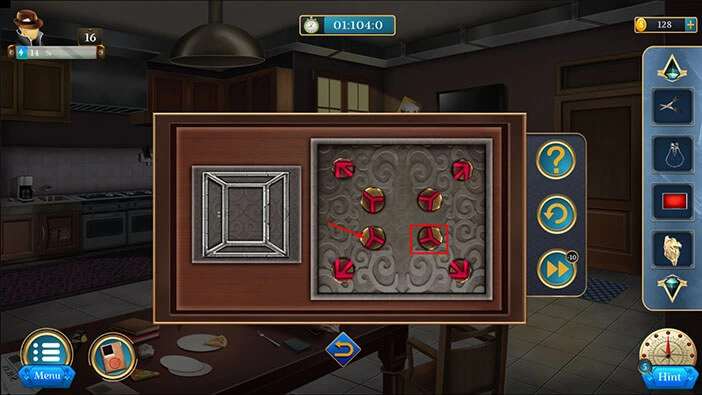
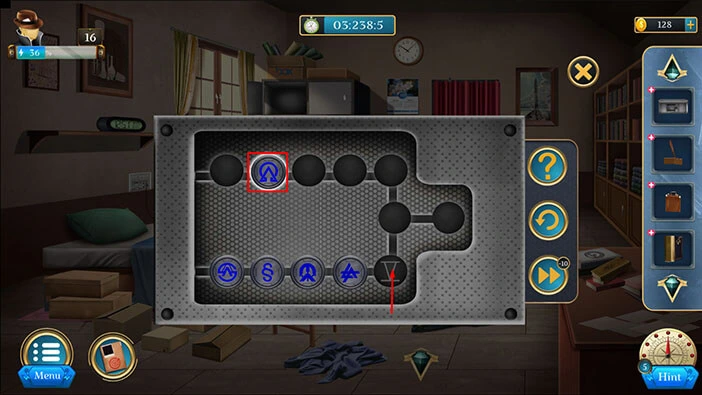
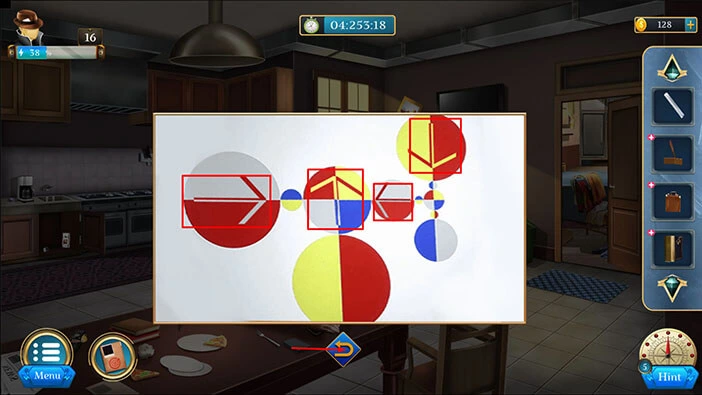
Next, let’s tap on the cabinet in the top left corner of the screen to take a closer look at it. Here, you will notice another puzzle. Let’s tap on it to start the interaction.
In this puzzle, our task is to assemble the arrows. The arrow in the top left corner should point up and to the left, the arrow in the top right corner should point up and to the right, etc.
We will do this puzzle in several steps. Let’s begin.
Step 1
Tap once on the top part of the arrow in the top left corner to rotate it to the correct position.
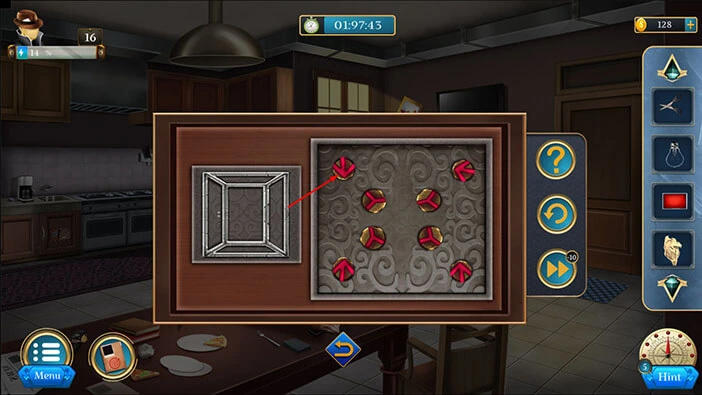
Step 2
Tap twice on the top part of the arrow in the top right corner to rotate it to the correct position.

Step 3
Tap three times on the top part of the arrow in the bottom right corner to rotate it to the correct position.

Step 4
Tap four times on the top part of the arrow in the bottom left corner to rotate it to the correct position.

Step 5
Tap three times on the bottom part of the arrow in the top left corner to rotate it to the correct position.

Step 6
Tap once on the bottom part of the arrow in the top right corner to rotate it to the correct position.

Step 7
Tap twice on the bottom part of the arrow in the bottom left corner to rotate it to the correct position. The bottom part of the arrow in the bottom right corner is already in the correct position. With that, you will solve this puzzle.
With that, you will unlock the cabinet door. Inside you will find another “Bulb”. Let’s tap on it to pick it up.
After that, tap on the arrow at the bottom to go back.
Next, let’s tap on the door on the right to open it. After that, tap on the door to proceed to the next room.
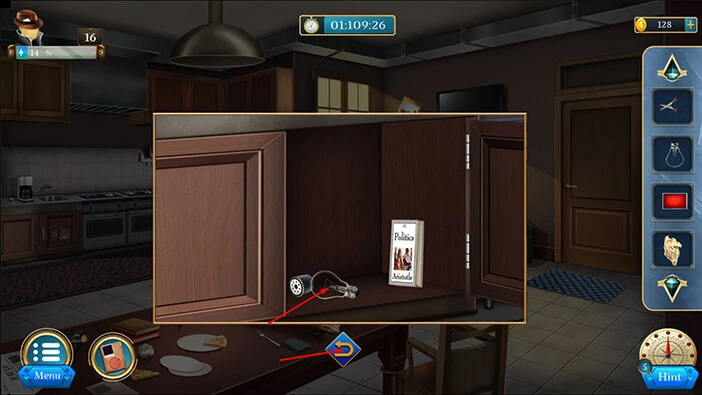
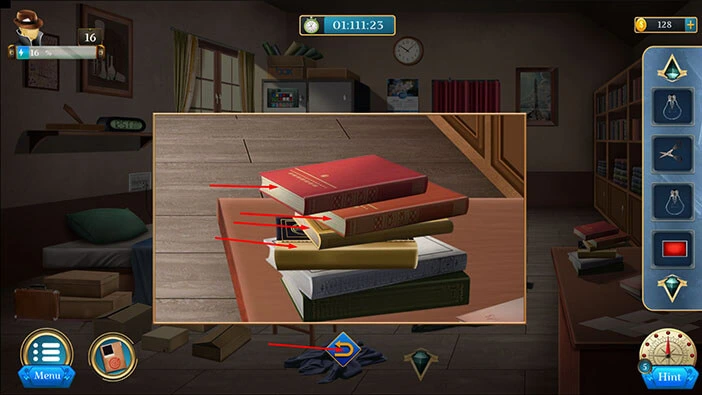
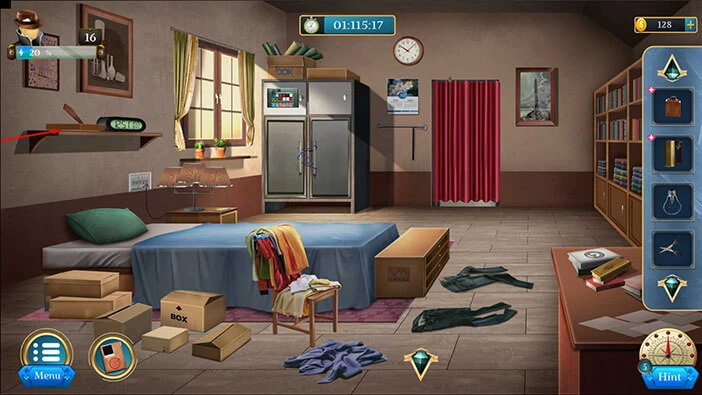
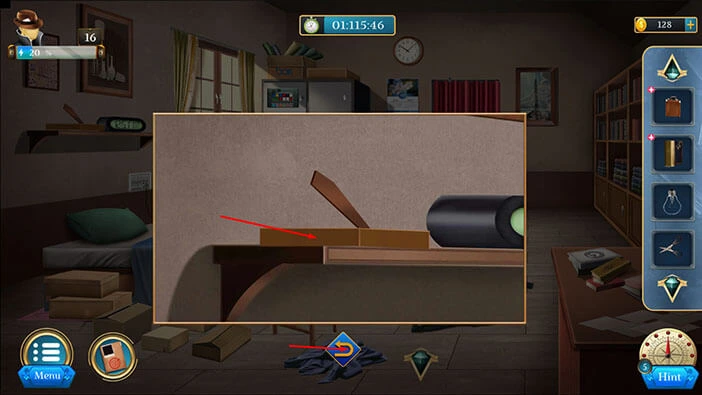
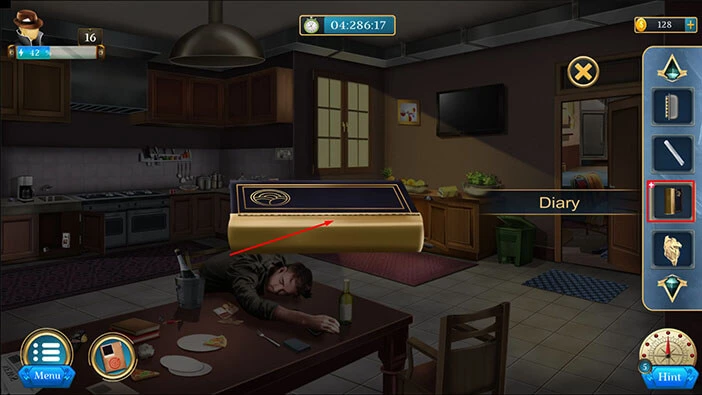
Next, let’s tap on the pile of books on the right to take a closer look at it.
Let’s tap on the three books at the top to move them aside. After that, tap on the fourth book and you will pick up a “Diary”. Let’s tap on it to pick it up.
After that, tap on the arrow at the bottom to go back.
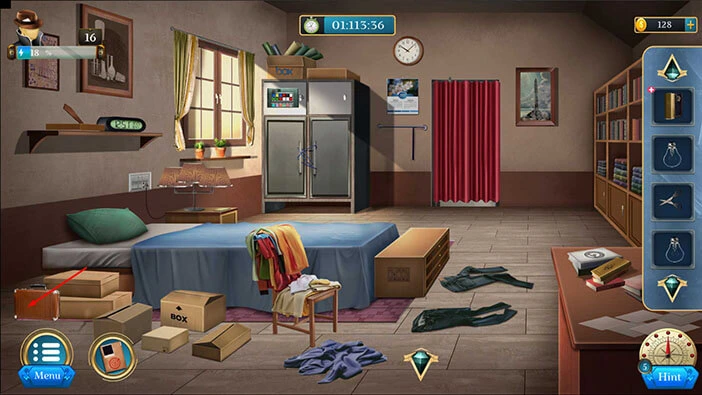
On the left, you will notice a “Suitcase”. Let’s tap on it to take a closer look, and tap again to pick it up.
After that, tap on the arrow at the bottom to go back.
Let’s tap on the shelf on the left to take a closer look at it.
Here, you will find a “Photo frame”. Let’s tap on it to pick it up.
After that, tap on the arrow at the bottom to go back.
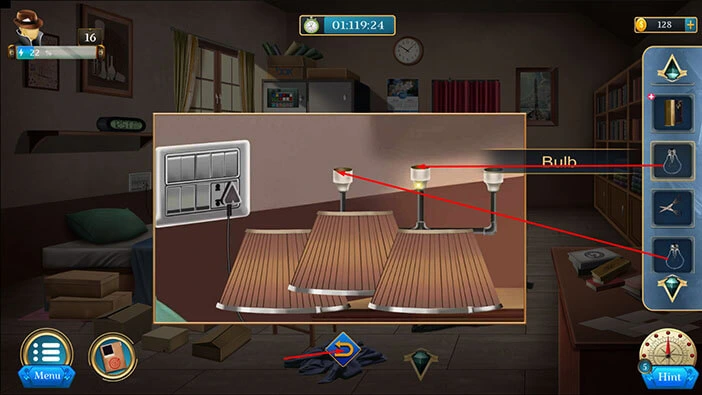
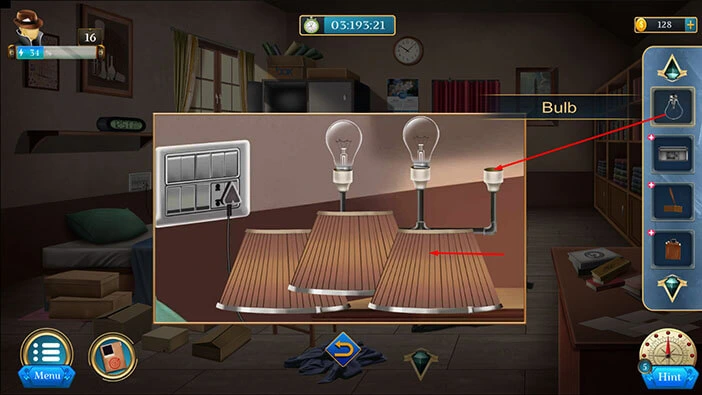
You will notice three lamps on the left. Let’s tap on them to take a closer look, and tap again to remove the top of the lamps.

You will notice that all three light bulbs are missing. So, let’s select the two light “Bulbs” from the inventory and insert them into the two empty slots. We are still missing one light bulb so we will come back to the lamps once we find it.
For now, tap on the arrow at the bottom to go back.
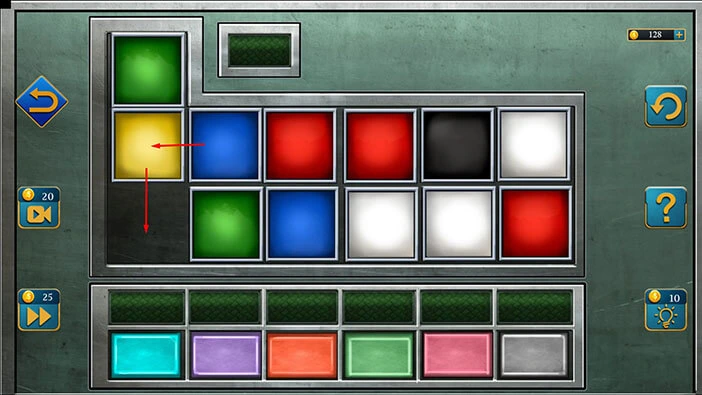
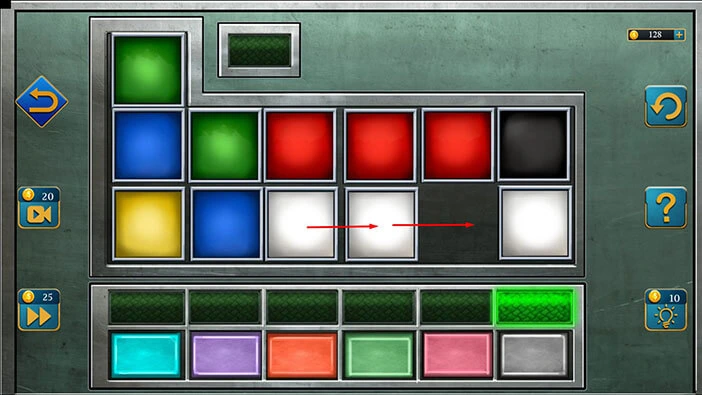
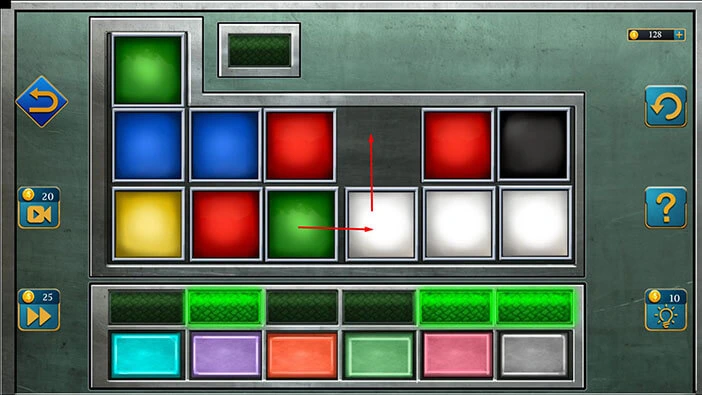
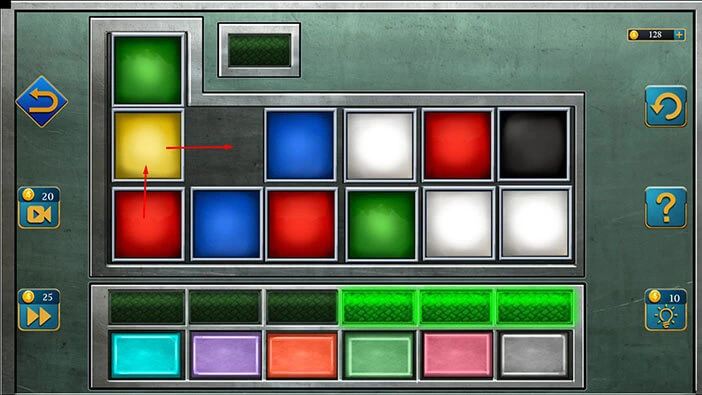
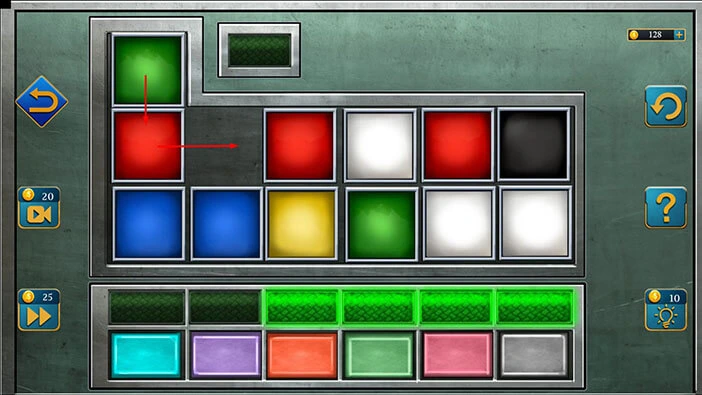
Next, below the box in the top left corner of the room, you will notice a multi-colored grid. Let’s tap on it to take a closer look.

You will notice that one tile is missing. So, let’s select the “Puzzle piece” from the inventory and insert it into the empty slot. After that, tap on the grid to start the interaction.
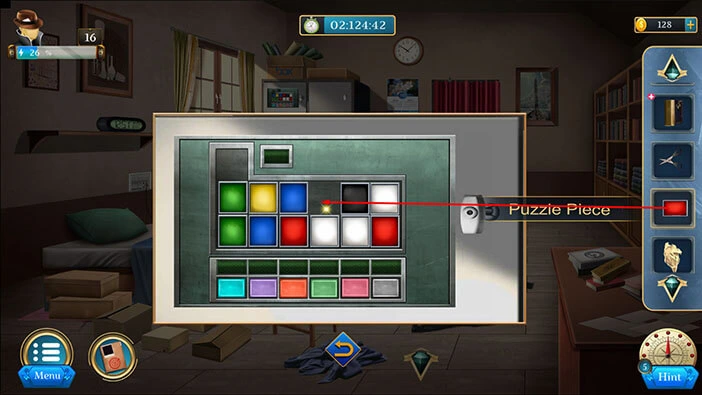
Here, we have another puzzle. We can combine two tiles per column to get a certain color, and that color should match the color at the bottom row. For example, at below the first column we can see the teal color. To get this color, we should place a green tile and a blue tile into the first column.
We will do this puzzle in several steps. Let’s begin.
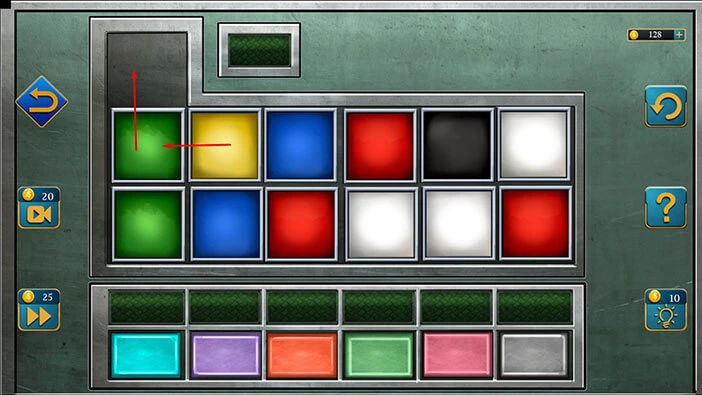
Step 1
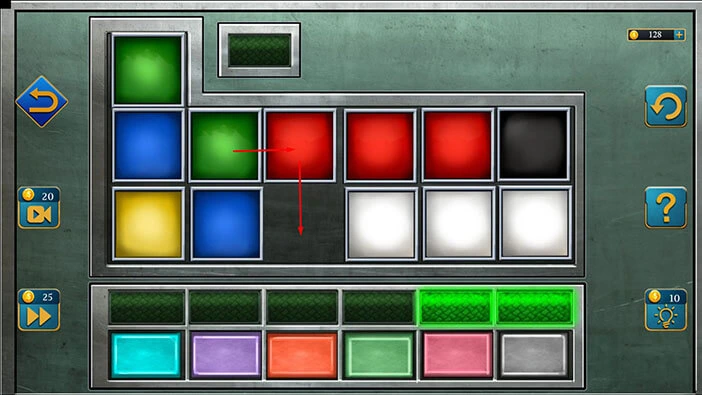
Tap on the green tile, located in the first slot of the first row, to move it up. After that, tap on the yellow tile, located in the second slot of the first row to move it to the left.
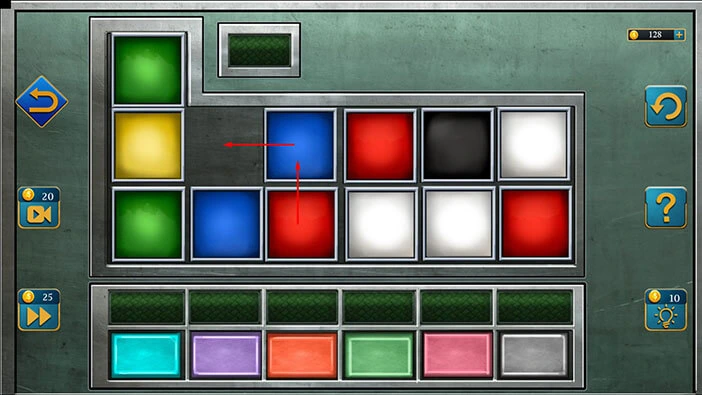
Step 2
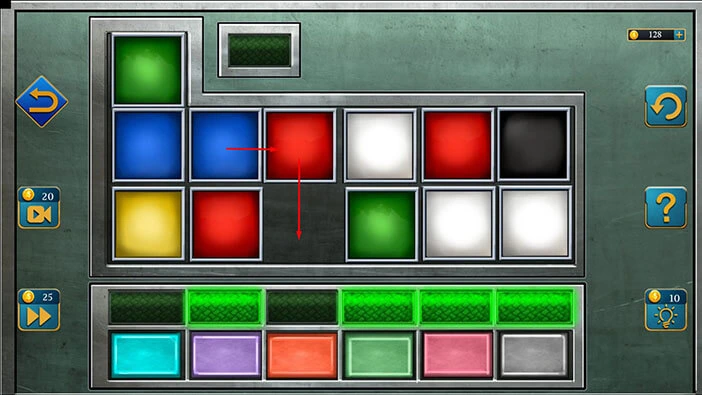
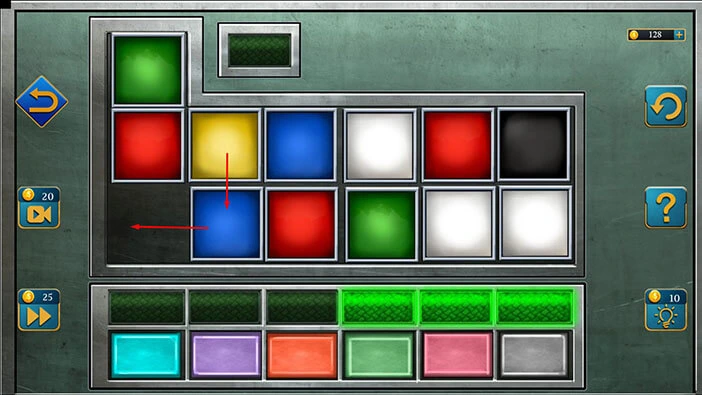
Tap on the blue tile, located in the third slot of the second row, to move it to the left. After that, tap on the red tile, located in the third slot of the second row to move it up.
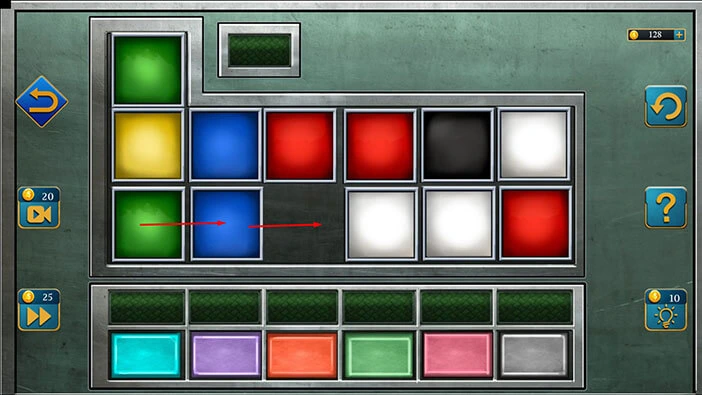
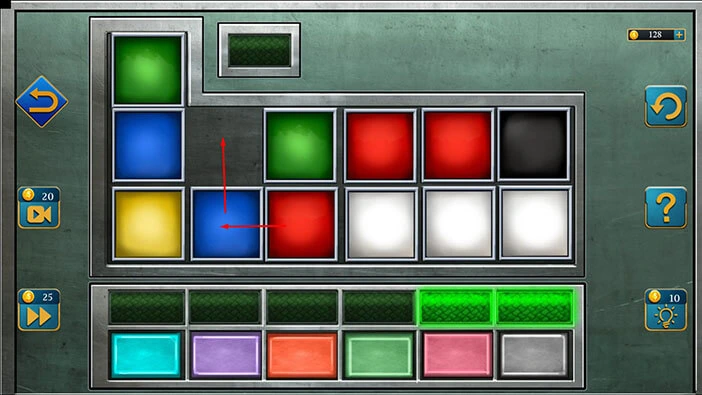
Step 3
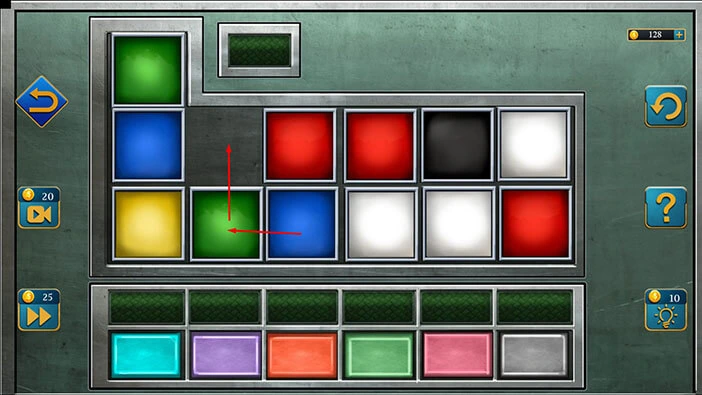
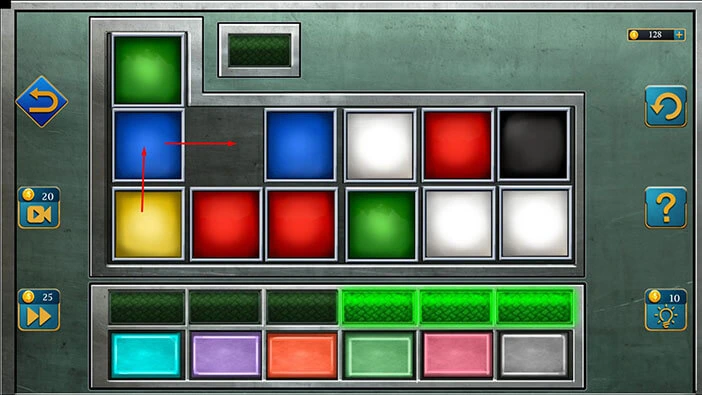
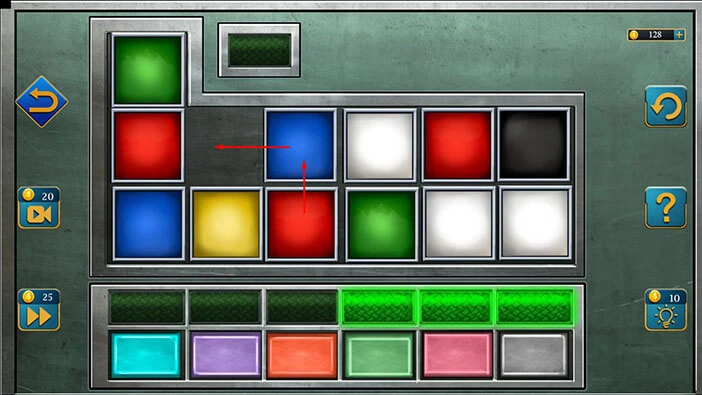
Tap on the blue tile, located in the second slot of the second row, to move it to the right. After that, tap on the green tile, located in the first slot of the second row to move it to the right.
Step 4
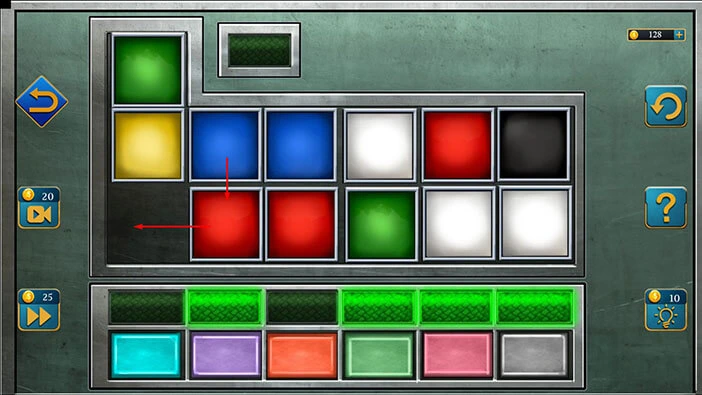
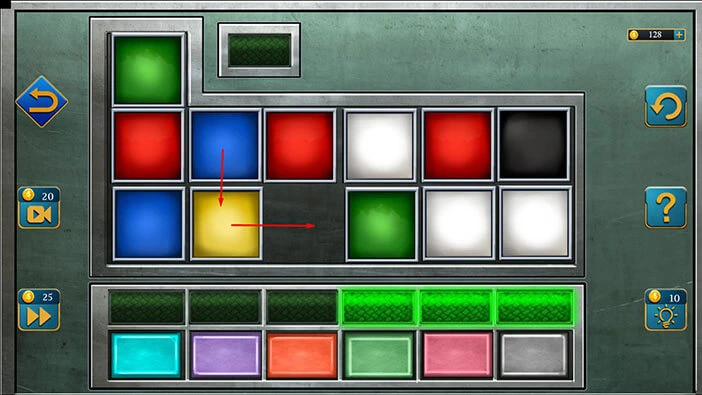
Tap on the yellow tile, located in the first slot of the first row, to move it to the down. After that, tap on the blue tile, located in the second slot of the first row to move it to the left.
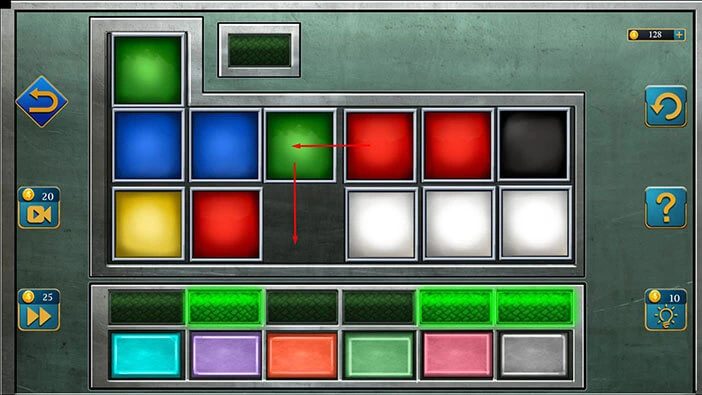
Step 5
Tap on the green tile, located in the second slot of the second row, to move it up. After that, tap on the blue tile, located in the third slot of the second row to move it to the left.
Step 6
Tap on the white tile, located in the fourth slot of the second row, to move it to the left. After that, tap on the white tile, located in the fifth slot of the second row to move it to the left.

Step 7
Tap on the red tile, located in the sixth slot of the second row, to move it to the left. After that, tap on the white tile, located in the sixth slot of the first row to move it down.
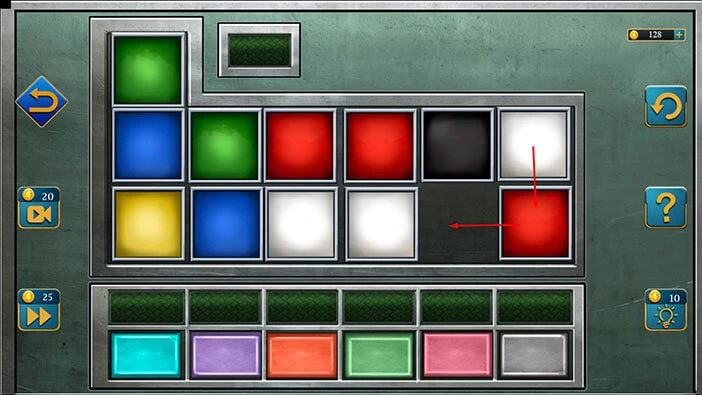
Step 8
Tap on the black tile, located in the fifth slot of the first row, to move it to the right. After that, tap on the red tile, located in the fifth slot of the second row to move it up.
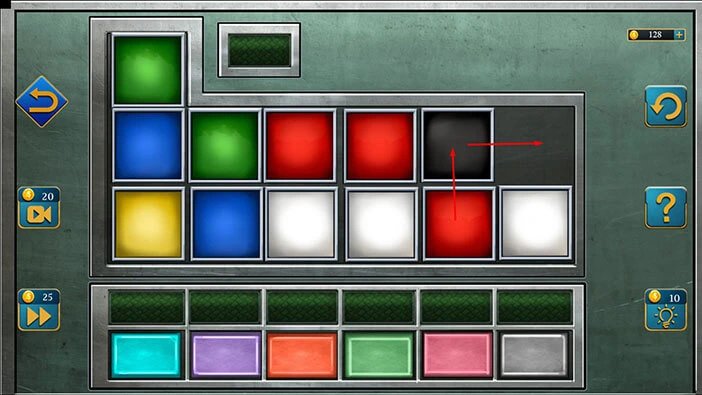
Step 9
Tap on the white tile, located in the fourth slot of the second row, to move it to the right. After that, tap on the white tile, located in the third slot of the second row to move it to the right.
Step 10
Tap on the red tile, located in the third slot of the first row, to move it down. After that, tap on the green tile, located in the second slot of the first row to move it to the right.
Step 11
Tap on the blue tile, located in the second slot of the second row, to move it up. After that, tap on the red tile, located in the third slot of the second row to move it to the left.
Step 12
Tap on the green tile, located in the first slot of the first row, to move it down. After that, tap on the red tile, located in the fourth slot of the first row to move it to the left.
Step 13
Tap on the white tile, located in the fourth slot of the second row, to move it up. After that, tap on the green tile, located in the third slot of the second row to move it to the right.
Step 14
Tap on the red tile, located in the third slot of the first row, to move it down. After that, tap on the blue tile, located in the second slot of the first row to move it to the right.
Step 15
Tap on the blue tile, located in the first slot of the first row, to move it to the right. After that, tap on the yellow tile, located in the first slot of the second row to move it up.
Step 16
Tap on the red tile, located in the second slot of the second row, to move it to the left. After that, tap on the blue tile, located in the second slot of the first row to move it down.
Step 17
Tap on the yellow tile, located in the first slot of the first row, to move it to the right. After that, tap on the red tile, located in the first slot of the second row to move it up.
Step 18
Tap on the blue tile, located in the second slot of the second row, to move it to the left. After that, tap on the yellow tile, located in the second slot of the first row to move it down.
Step 19
Tap on the blue tile, located in the third slot of the first row, to move it to the left. After that, tap on the red tile, located in the third slot of the second row to move it up.
Step 20
Tap on the yellow tile, located in the second slot of the second row, to move it to the right. After that, tap on the blue tile, located in the second slot of the first row to move it down.
Step 21
Finally, tap on the red tile, located in the first slot of the first row, to move it to the right. After that, tap on the green tile, located in the top left slot to move it down. With that, you will solve this puzzle.
With that, you will unlock the safe, and inside you will find a “Box”. Let’s tap on it to pick it up.
After that, tap on the arrow at the bottom to go back.
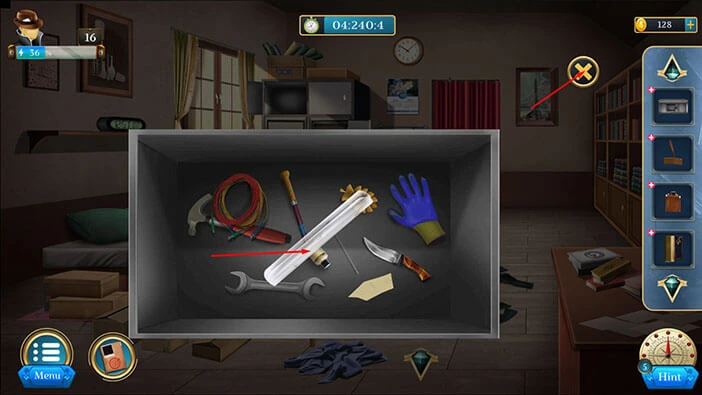
Let’s proceed. Tap on the cabinet in front of you to take a closer look at it.
Select the “Scissors” from the inventory and use it to cut the rope.
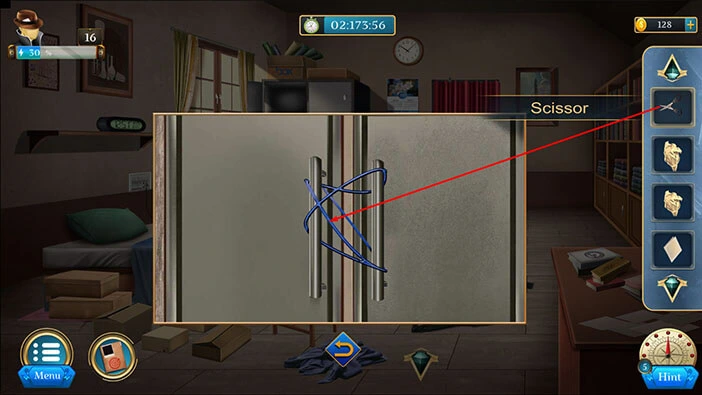
In the cabinet, you will find the last “Bulb”. Let’s tap on it to pick it up.
After that, tap on the arrow at the bottom to go back.
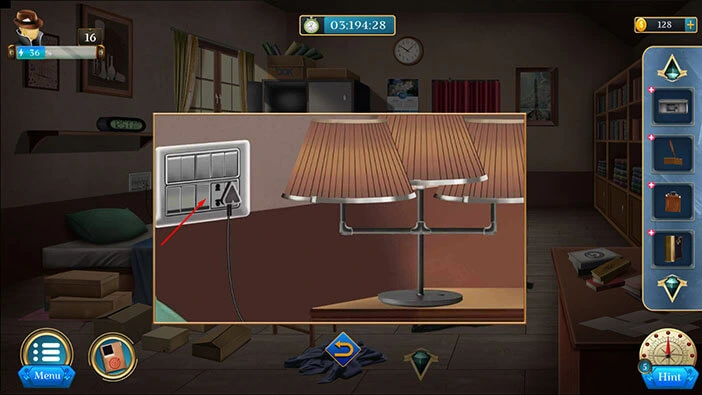
Let’s go back to the three lamps on the left to take a closer look at them.

Select the “Bulb” from the inventory and insert it into the last empty slot. After that, tap on the top of the lamps to put them back on.
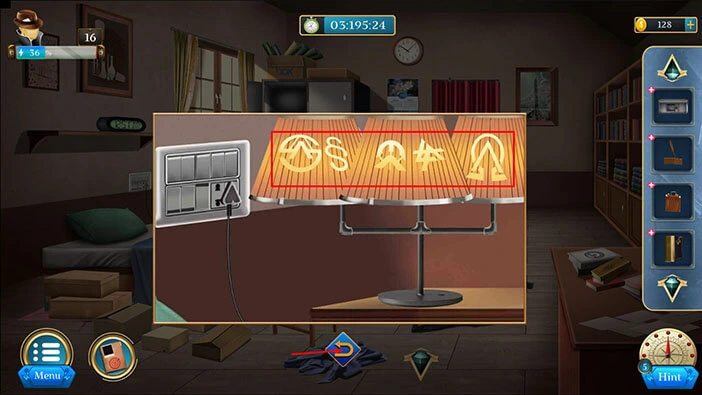
Next, let’s tap on the switch on the left to turn on the lights.
Here, we will discover five symbols. Let’s memorize/write down these symbols because we will need them for the next puzzle.
Once you’re done, tap on the arrow at the bottom to go back.
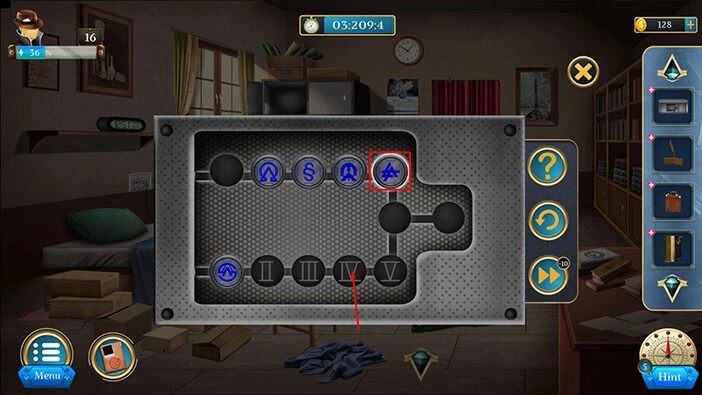
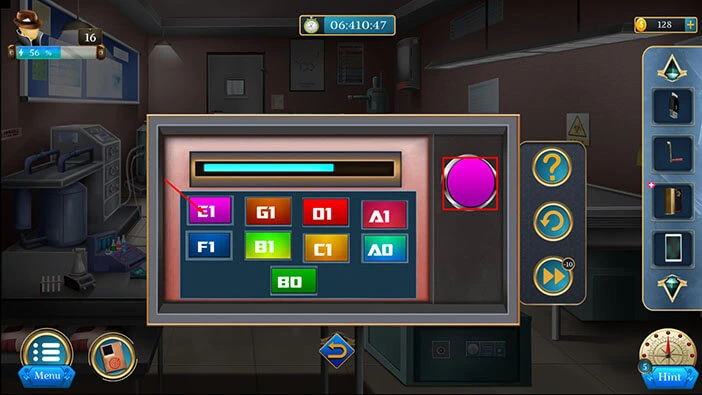
Select the “Box” from the inventory and it will appear in the middle of the screen. Tap on the box again to start the interaction.
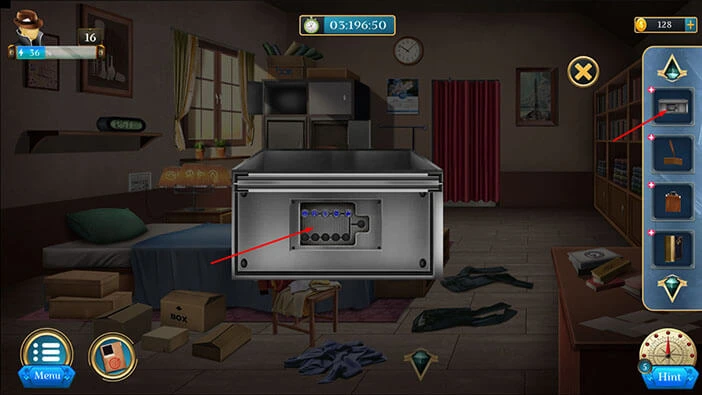
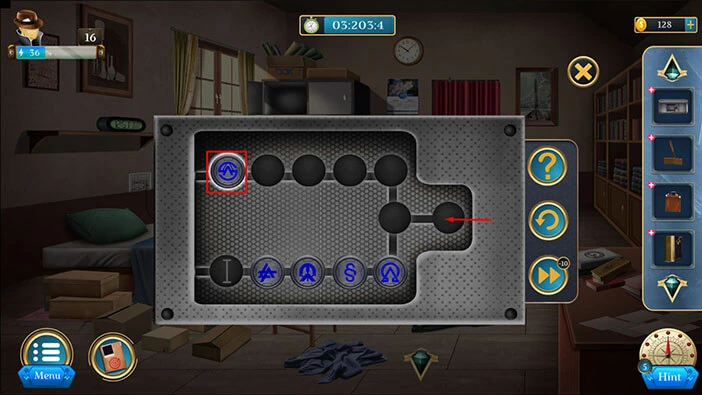
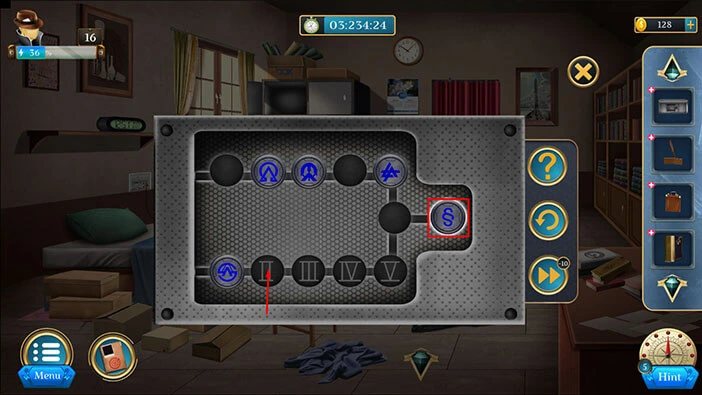
Here, we can see the symbols that we discovered on the lamps. Our task is to place these symbols into the slots at the bottom in the order that matches the order of the symbols on the lamp.
We will do this puzzle in several steps. Let’s begin.
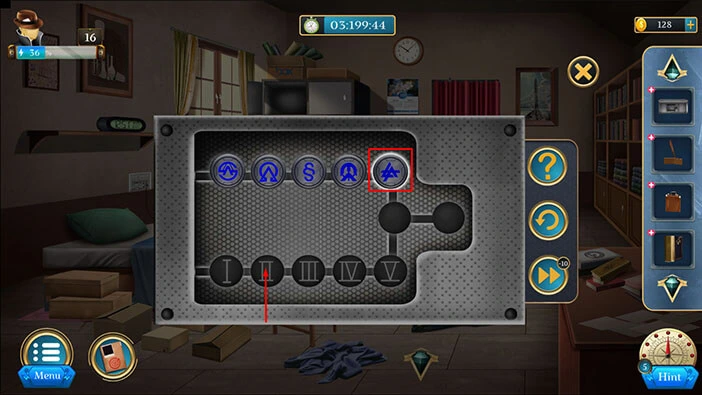
Step 1
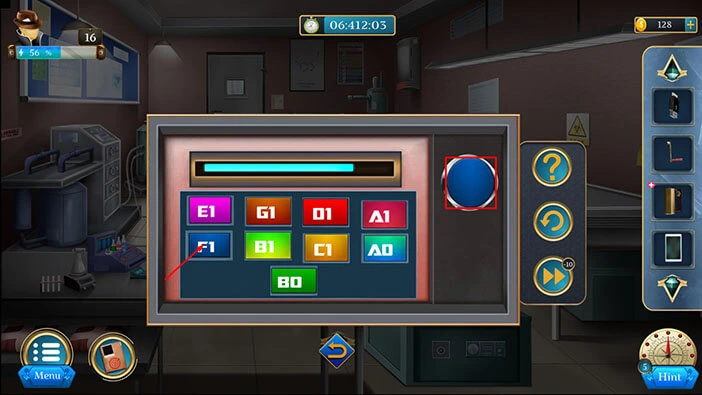
Select the symbol, located in the fifth slot in the first row, and move it to the “II” slot.
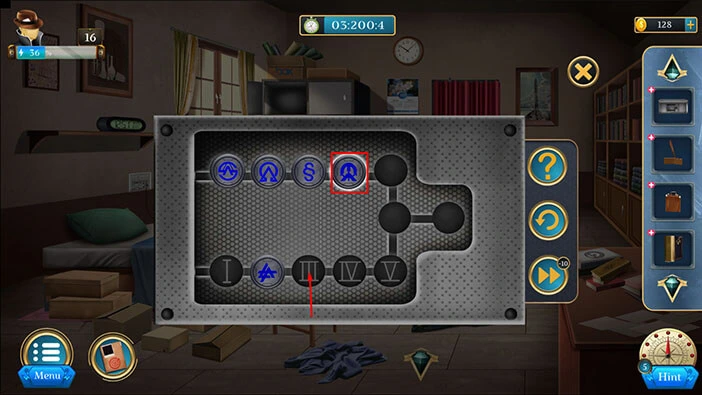
Step 2
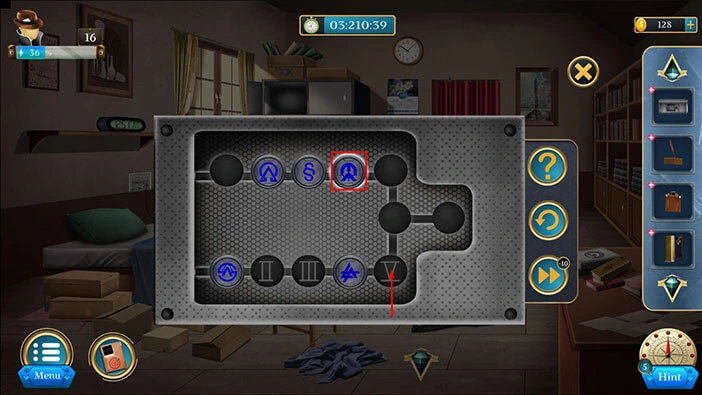
Select the symbol, located in the fourth slot in the first row, and move it to the “III” slot.
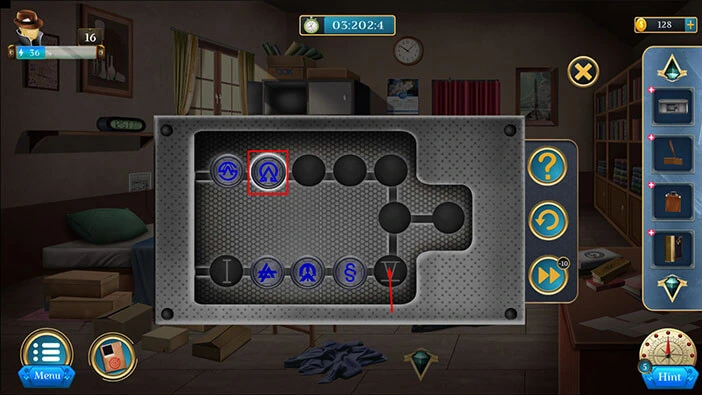
Step 3
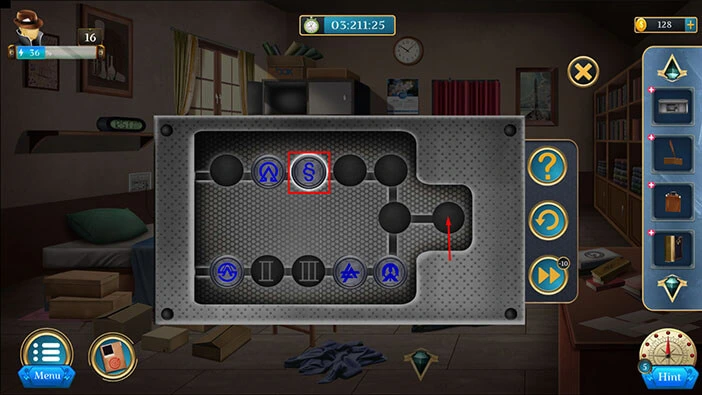
Select the symbol, located in the third slot in the first row, and move it to the “IV” slot.

Step 4
Select the symbol, located in the second slot in the first row, and move it to the “V” slot.
Step 5
Select the symbol, located in the first slot in the first row, and move it to the right slot.
Step 6
Select the symbol, located in the “V” slot, and move it to the second slot in the first row.

Step 7
Select the symbol, located in the “IV” slot, and move it to the third slot in the first row.
Step 8
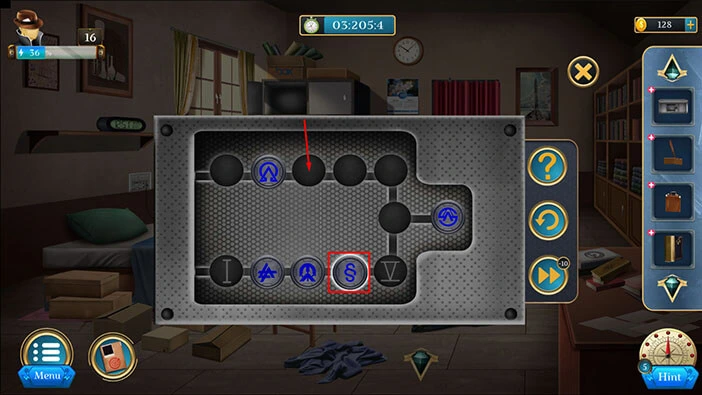
Select the symbol, located in the “III” slot, and move it to the fourth slot in the first row.
Step 9
Select the symbol, located in the “II” slot, and move it to the fifth slot in the first row.
Step 10
Select the symbol, located in the “right” slot, and move it to the “I” slot in the first row.

Step 11
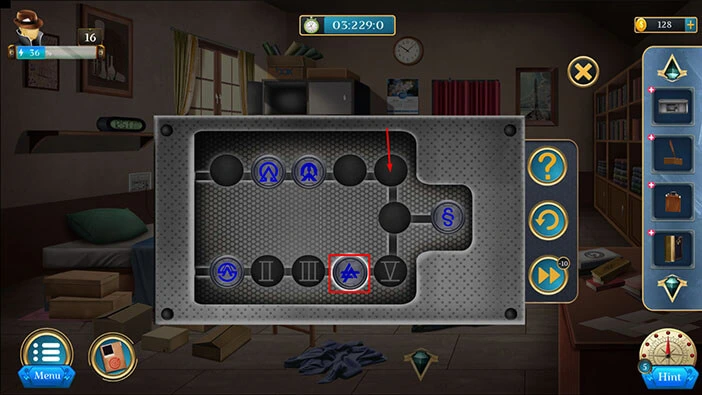
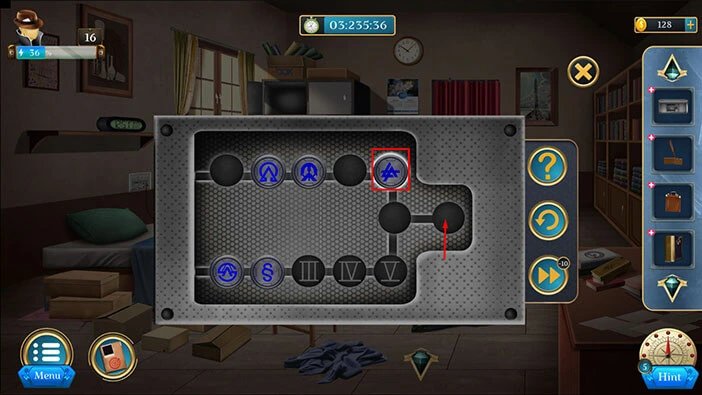
Select the symbol, located in the fifth slot in the first row, and move it to the “IV” slot.
Step 12
Select the symbol, located in the fourth slot in the first row, and move it to the “V” slot.
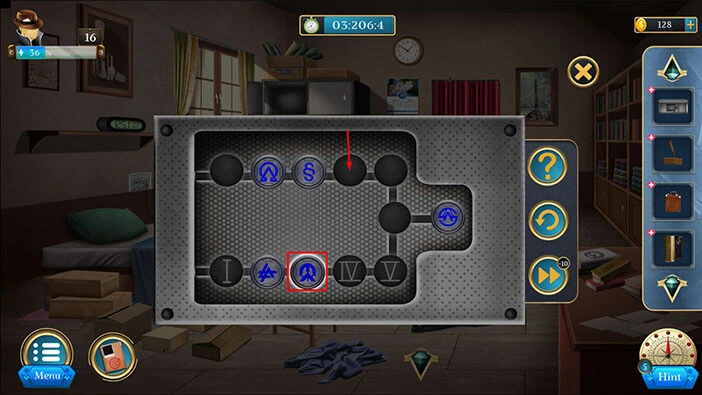
Step 13
Select the symbol, located in the third slot in the first row, and move it to the “right” slot.
Step 14
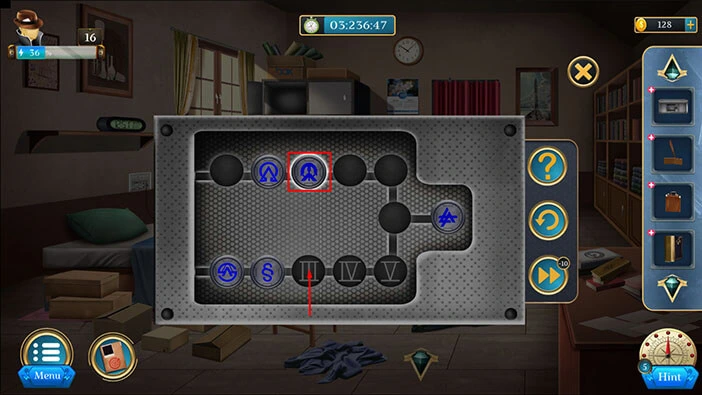
Select the symbol, located in the “V” slot, and move it to the third slot in the first row.

Step 15
Select the symbol, located in the “IV” slot, and move it to the fifth slot in the first row.
Step 16
Select the symbol, located in the “right” slot, and move it to the “II” slot.
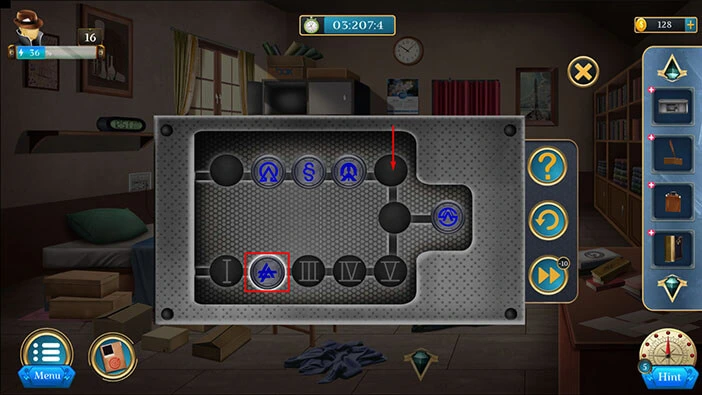
Step 17
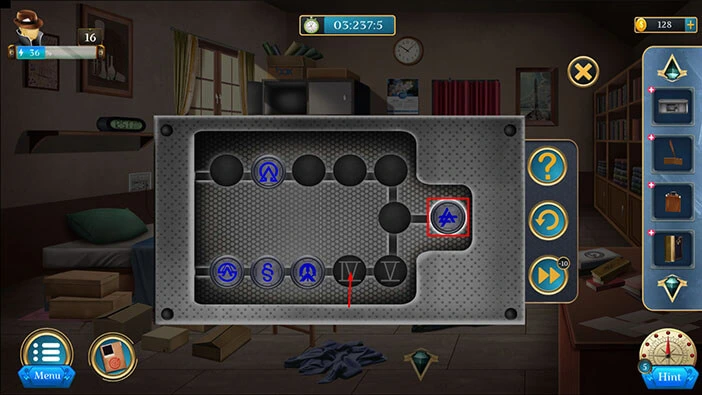
Select the symbol, located in the fifth slot in the first row, and move it to the right slot.
Step 18
Select the symbol, located in the third slot in the first row, and move it to the “III” slot.
Step 19
Select the symbol, located in the “right” slot, and move it to the “IV” slot.
Step 20
Finally, select the symbol, located in the second slot in the first row, and move it to the “V” slot.
With that, you will solve this puzzle, and you will unlock the box. In the box, you will find a “Sheet”. Let’s tap on it to pick it up.
After that, tap on the “X” button to close this window.
Let’s go back to the previous room. Tap on the arrow at the bottom to go back.
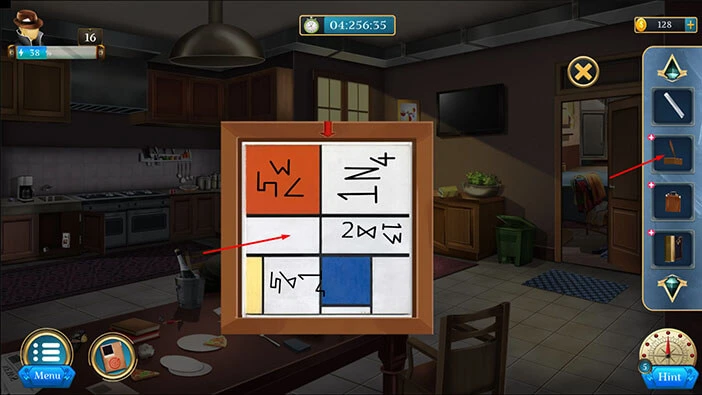
Tap on the picture on the wall on the left to take a closer look at it, and tap again to straighten the image.
Here, we can see four arrows. Let’s memorize/write down the direction of the arrows because this information represents the first part of the hint for the next puzzle. Looking from left to right, we have,
Right arrow, Up arrow, Left arrow, Down arrow.
Once you’re done, tap on the arrow at the bottom to go back.
Select the “Photo frame” from the inventory and it will appear in the middle of the screen. On the photo frame, you will notice a red arrow pointing down. In the previous hint, we discovered that the arrow should point to the right. So, let’s tap on the frame to rotate it.
In the bottom left corner, you will notice the number “7”. Let’s memorize/write down this number because it represents the first number for the next puzzle.
Next, we discovered that the arrow should point up, so let’s tap on the frame to rotate it.
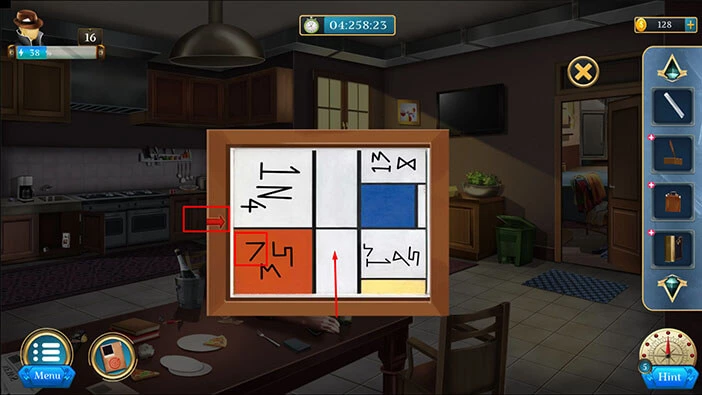
In the top right corner, you will notice the number “4”. Let’s memorize/write down this number because it represents the second number for the next puzzle.
Next, we discovered that the arrow should point to the left, so let’s tap on the frame to rotate it.
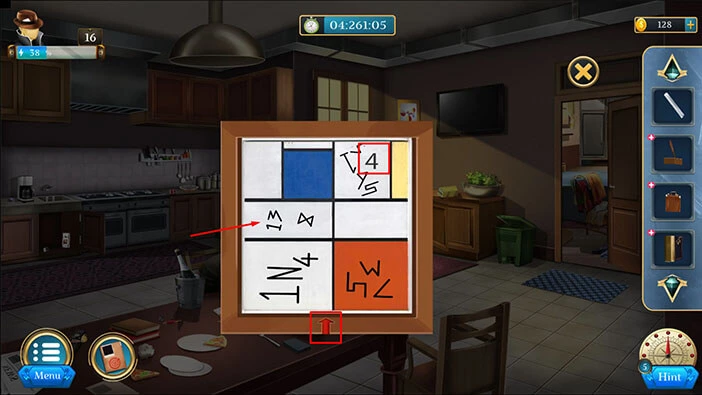
In the middle, you will notice the number “5”. Let’s memorize/write down this number because it represents the third number for the next puzzle.
Next, we discovered that the arrow should point down, so let’s tap on the frame to rotate it.
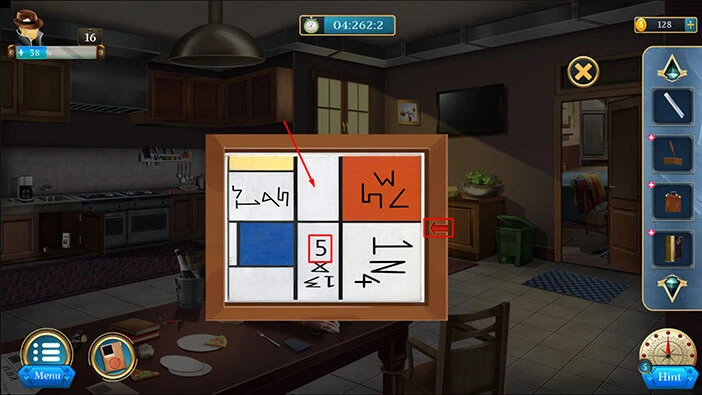
In the middle, you will notice the number “2”. When we put it all together, we will get the number “7452”. Let’s memorize/write down this number because it represents the solution for the next puzzle.
Once you’re done, tap on the “X” button to go back.

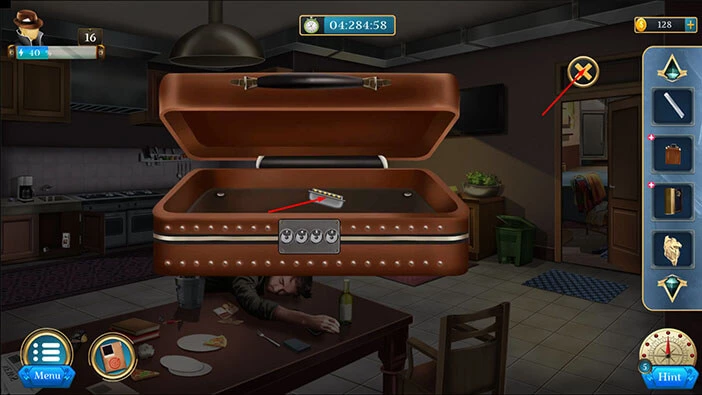
Let’s tap on the “Suitcase” in our inventory to select it, and it will appear in the middle of the screen. Tap on the suitcase again to start the interaction.
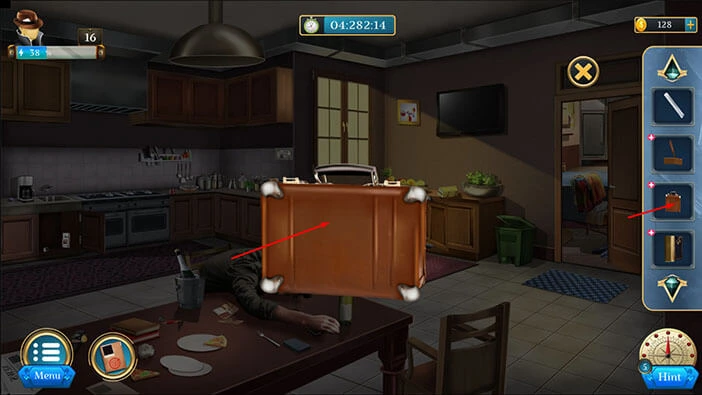
Let’s enter the number “7452” that we discovered previously. Once you’re done, tap on the padlock in the bottom left corner of the suitcase to confirm.
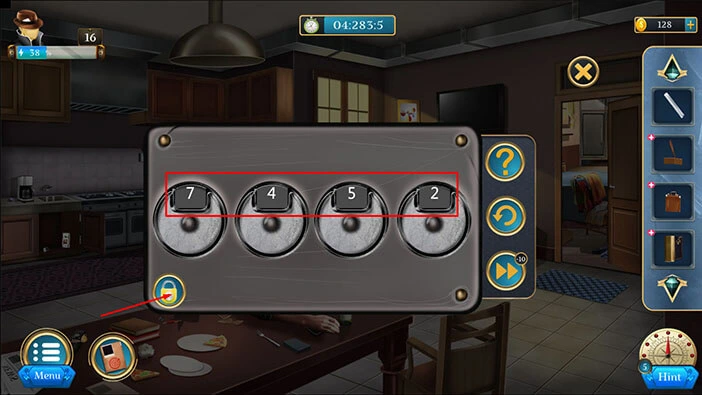
In the suitcase, you will find a “Key”. Let’s tap on it to pick it up. After that, tap on the “X” button to close this window.
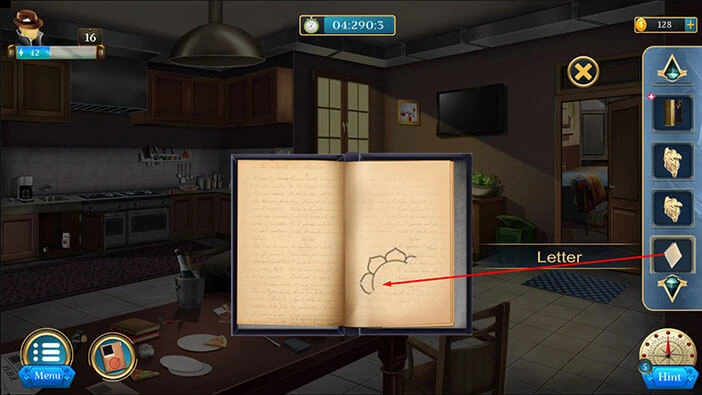
Select the “Diary” from the inventory and it will appear in the middle of the screen. After that, tap on the “Diary” to start the interaction.
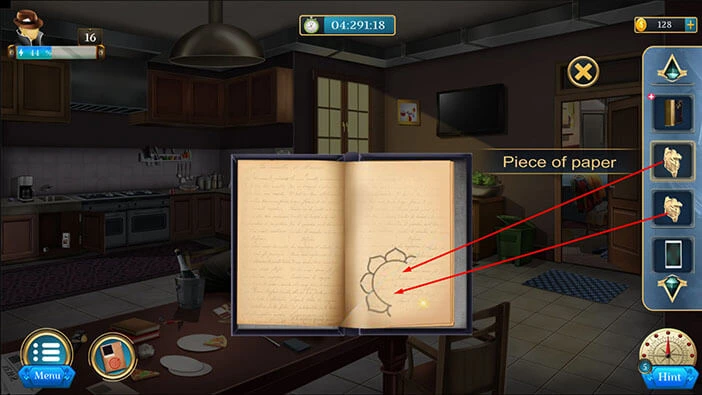
You will notice a part of the flower in the bottom right corner of the screen. Let’s assemble the flower. Select the letter from the inventory and drag it to the part of the flower.
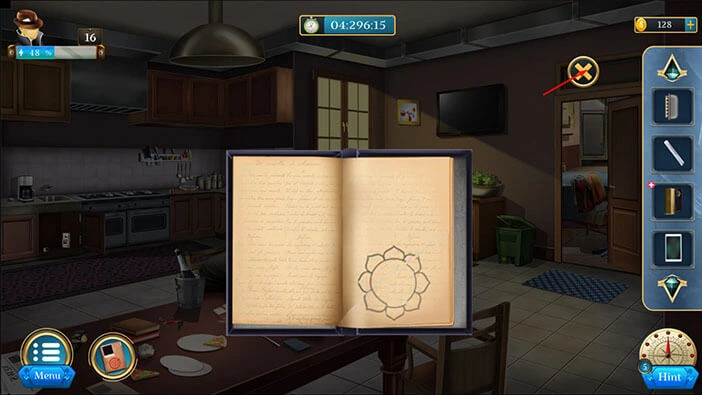
After that, select the two “Pieces of paper” from the inventory and drag them next to the part of the flower.
Well, Detective Maize will say that the diary is written with “invincible” ink – they probably meant invisible ink. Regardless, I find these kinds of mistakes quite entertaining. So, our next task is to discover what’s written in the diary.
Let’s tap on the “X” button to close this window.
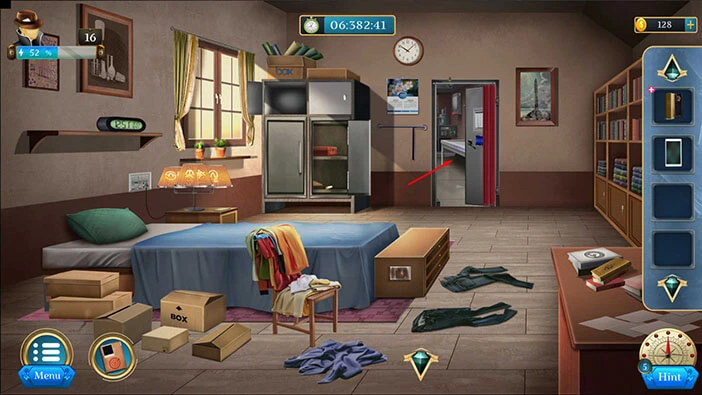
Let’s tap on the door to go back to the previous room.

If you take a look at the cabinet, located next to the bottom part of the bed, you will notice a drawing. Let’s tap on this drawing to take a closer look at it.
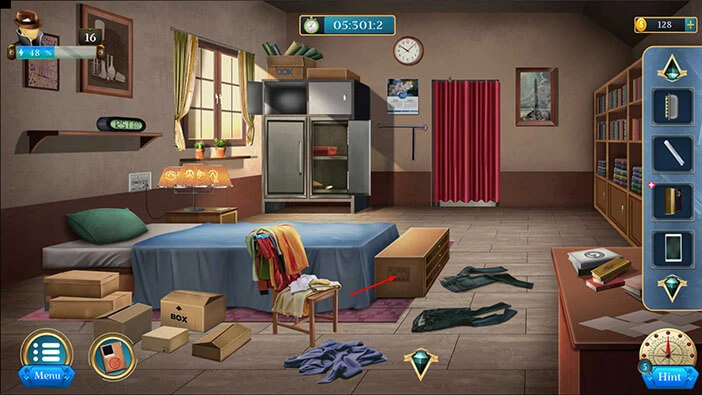
Here, you will notice some symbols arranged on the grid. Let’s select the “Sheet” from the inventory and place it over the grid.
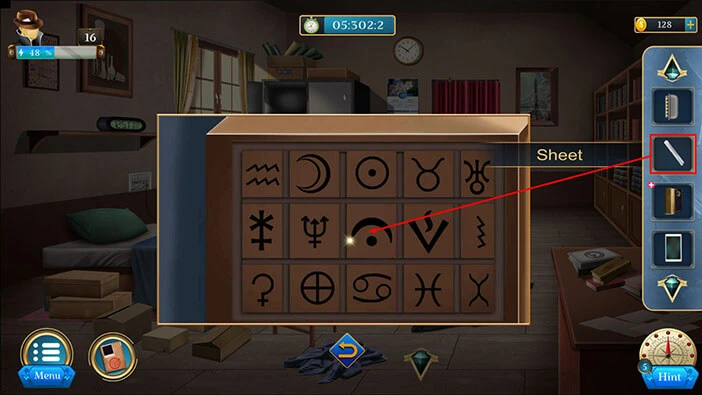
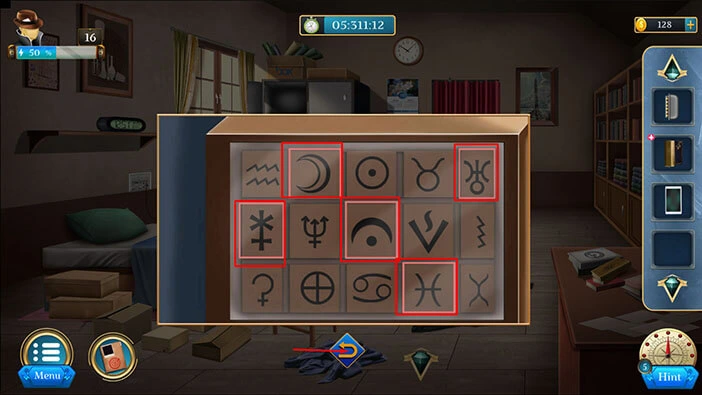
You will notice a red outline around one symbol in each column. So, let’s memorize/write down these symbols because we will need them for the next puzzle. Here, we have,
The first symbol = A snowflake + cross
The second symbol = A white crescent moon
The third symbol = A black crescent moon + dot
The fourth symbol = -)-(-
The fifth symbol = strange letter + dot at the bottom
Once you’re done, tap on the arrow at the bottom to go back.
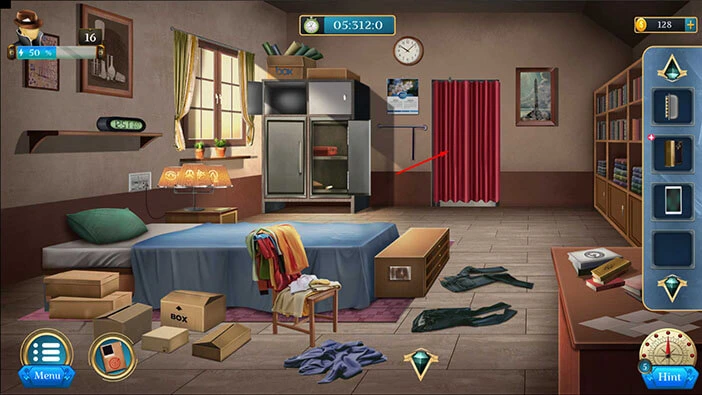
Next, tap on the curtain on the wall in front of you to take a closer look at it, and tap again to move it aside.
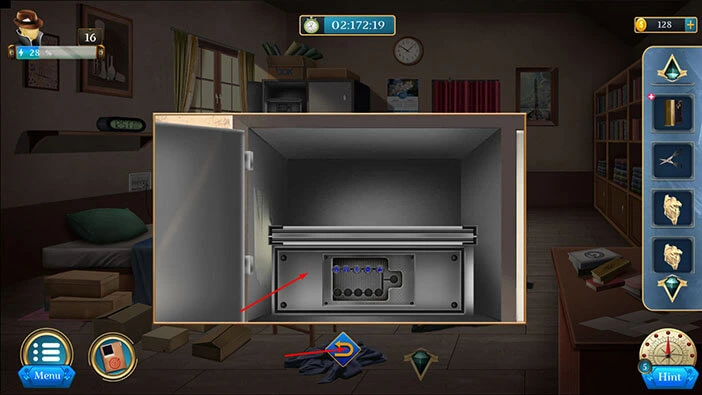
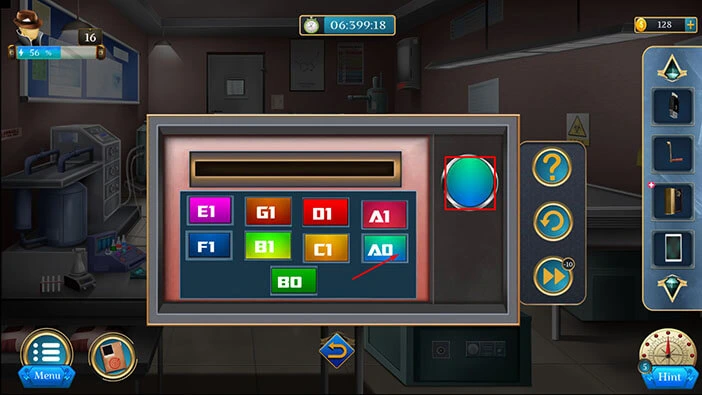
Let’s tap on the display screen to start the interaction.
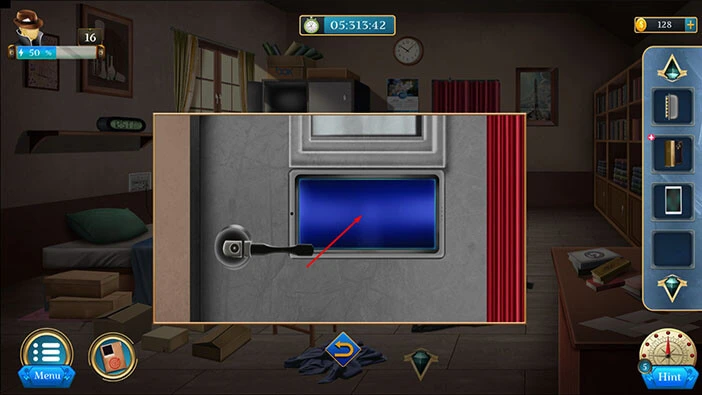
Select the “Key” from the inventory and plug it into holes next to the display screen.
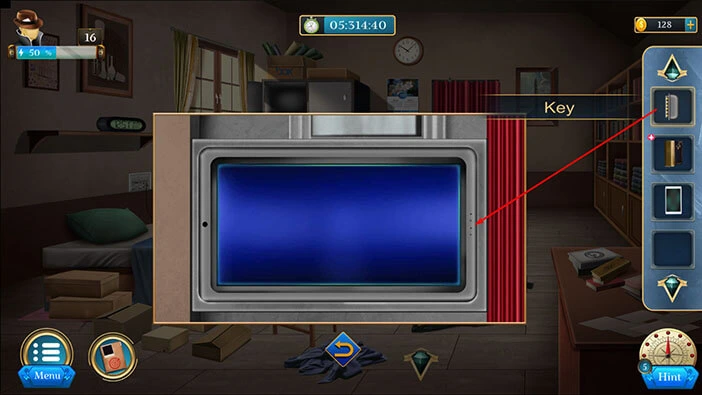
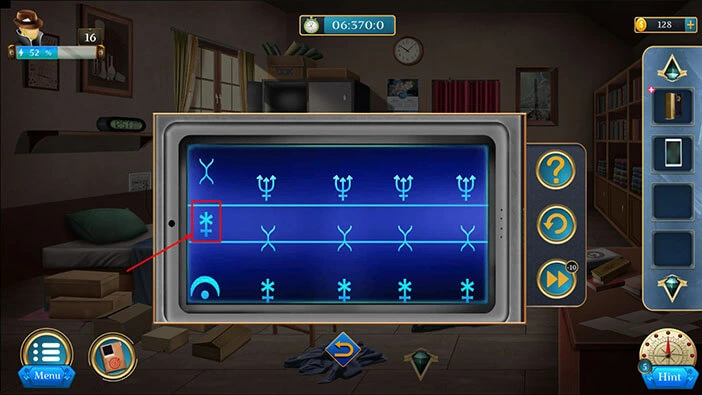
With that, you will activate the display screen, and some symbols will appear on the screen. Our task is to tap on the line in the middle and select the correct symbol. We already discovered the correct symbols in the previous step, so let’s solve this puzzle. We will do that in several steps. Let’s begin.
Step 1
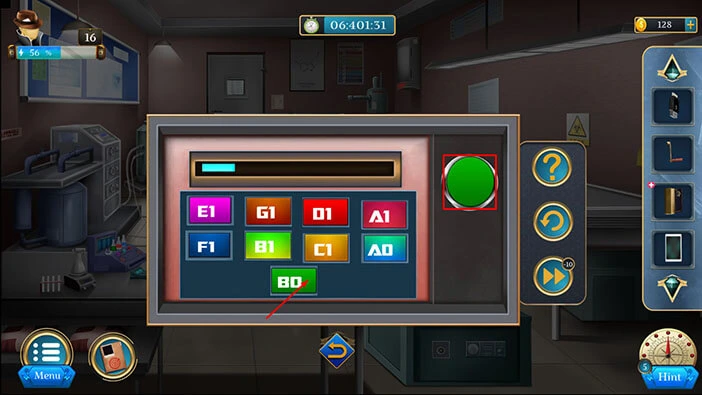
The first symbol = A snowflake + cross. So, let’s tap on the line once we see this symbol.
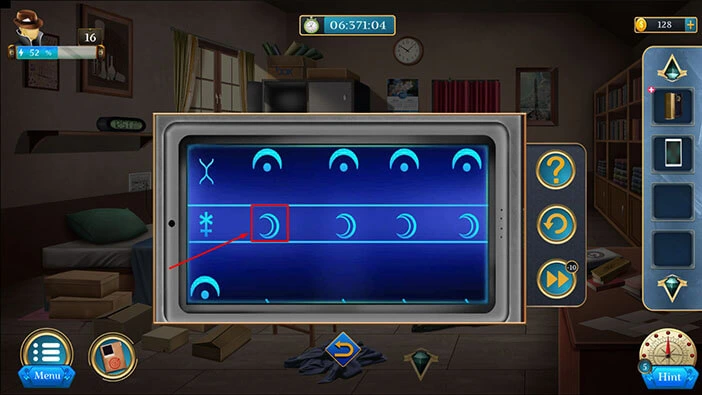
Step 2
The second symbol = A white crescent moon. So, let’s tap on the line once we see this symbol.
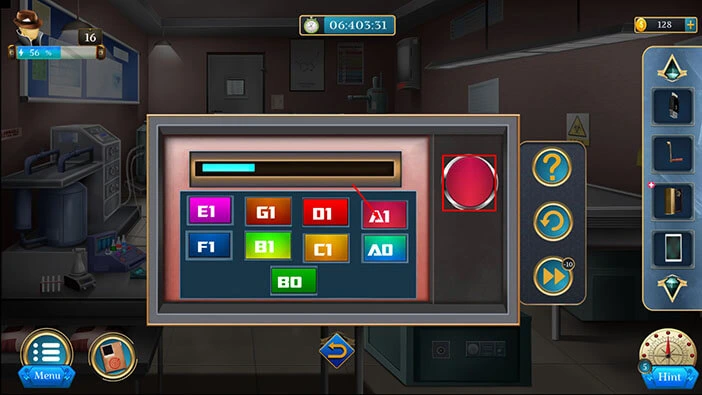
Step 3
The third symbol = A black crescent moon + dot. So, let’s tap on the line once we see this symbol.

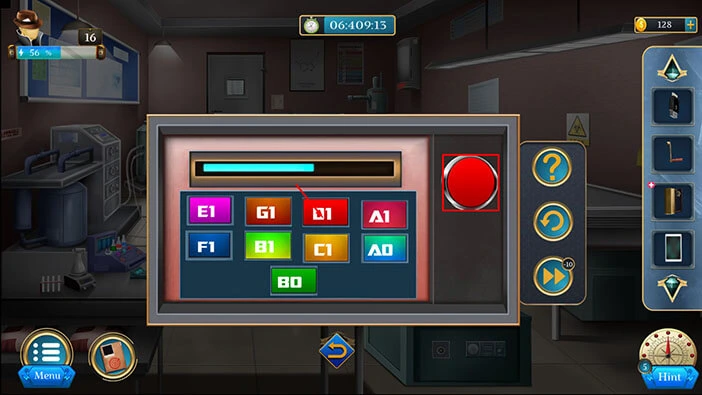
Step 4
The fourth symbol = -)-(- . So, let’s tap on the line once we see this symbol.
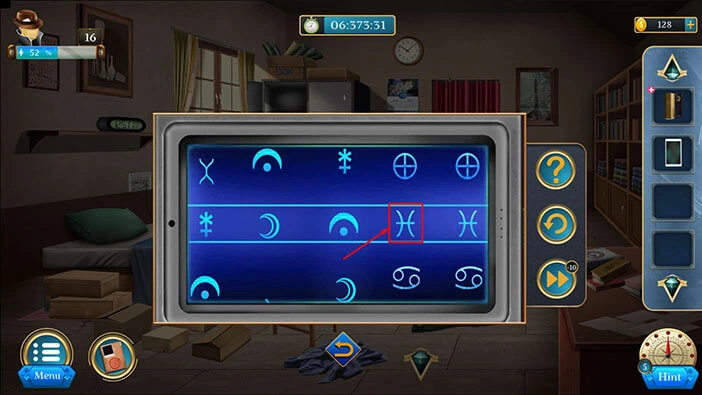
Step 5
The fifth symbol = strange letter + dot at the bottom. So, let’s tap on the line once we see this symbol. With that, you will solve this puzzle.

With that, you will unlock the secret door. Let’s tap on it to proceed to the next room.
Let’s explore the secret room. Tap on the red box on the table on the left to take a closer look at it, and tap again to move it aside.
Behind the box, you will find a “Handle” and a “Pendrive”. Let’s tap on these two items to pick them up.
After that, tap on the arrow at the bottom to go back.
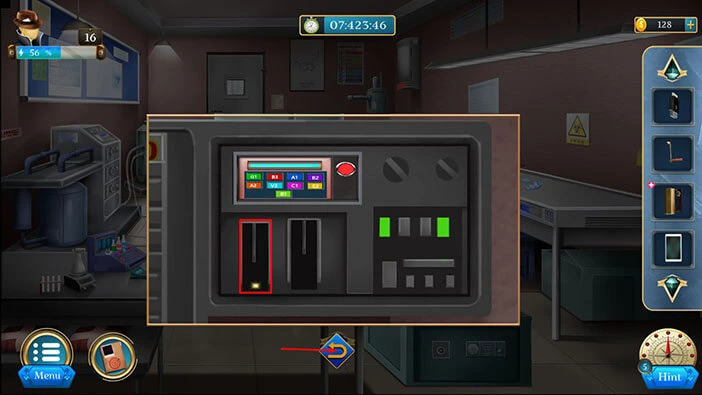
Next, let’s tap on the display screen on the machine in the top right corner of the room to take a closer look at it, and tap again to start the interaction.

Here, we have another puzzle. Our next task is pretty straightforward. We should tap on the color that matches the color of the button on the right. Every time we tap on the correct color, the color of the button on the right will change.
We will do this puzzle in several steps. Let’s begin.
Step 1
The button on the right is teal. So, let’s tap on the fourth button in the second row.
Step 2
The button on the right is dark green. So, let’s tap on the button in the third row.
Step 3
The button on the right is dark red. So, let’s tap on the fourth button in the first row.
Step 4
The button on the right is light green. So, let’s tap on the second button in the second row.

Step 5
The button on the right is light orange. So, let’s tap on the third button in the second row.

Step 6
The button on the right is light red. So, let’s tap on the third button in the first row.
Step 7
The button on the right is purple. So, let’s tap on the first button in the first row.
Step 8
The button on the right is blue. So, let’s tap on the first button in the second row.
Step 9
The button on the right is dark orange. So, let’s tap on the second button in the first row. With that, you will solve this puzzle.

Here, you will notice an empty slot. We will come back to it a bit later. For now, let’s tap on the arrow at the bottom to go back.
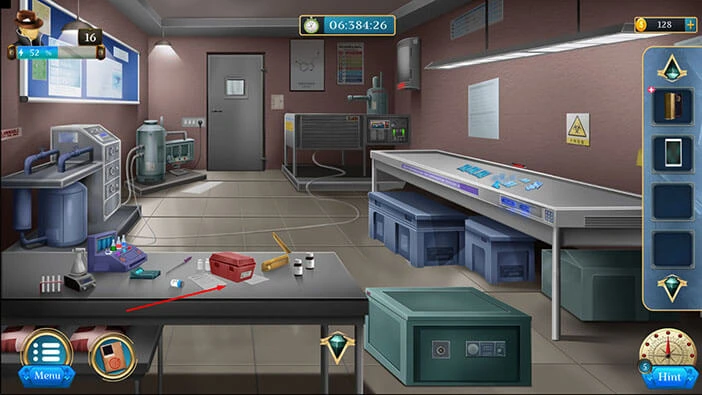
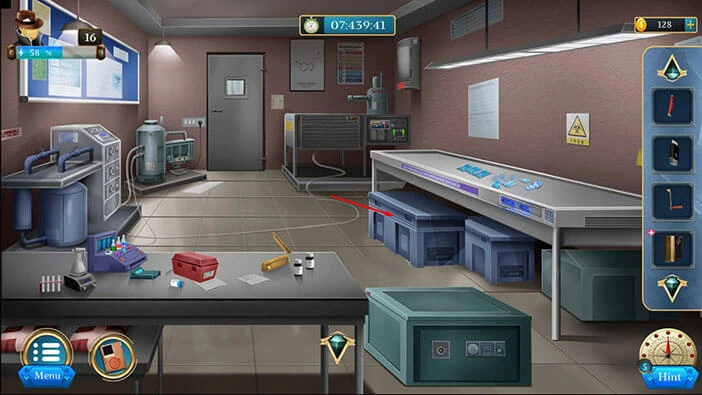
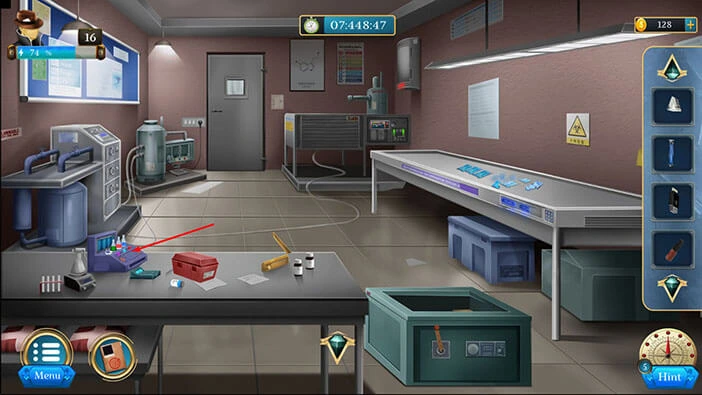
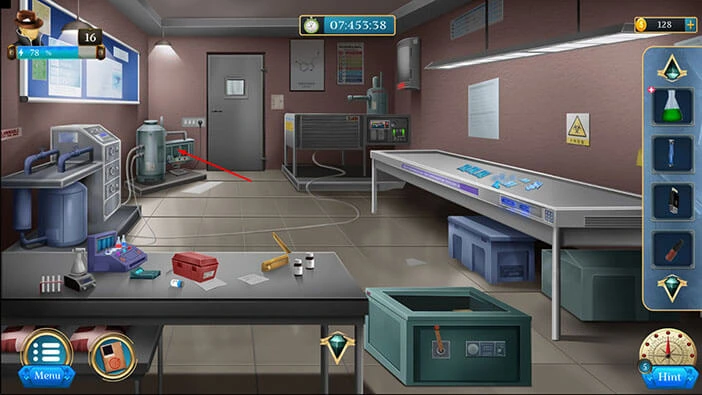
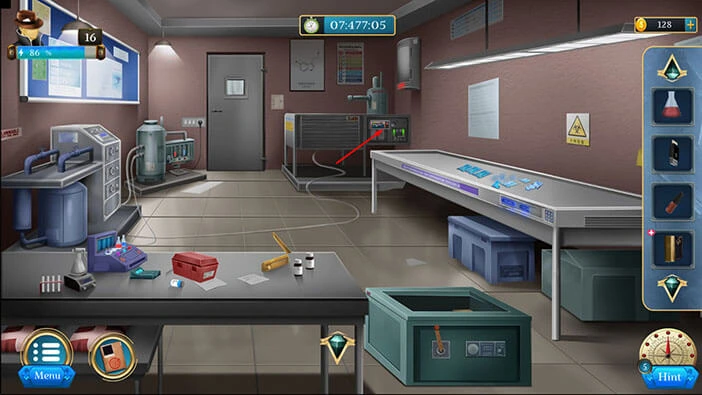
Let’s tap on the large workbench on the right to take a closer look at it.
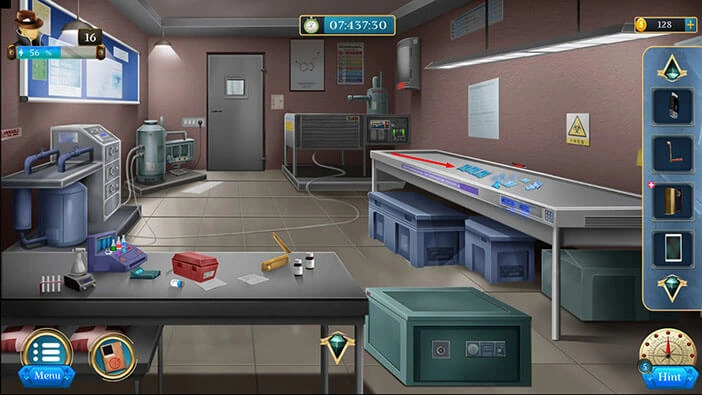
Here, you will discover a “Chemical”. Let’s tap on it to pick it up.
After that, tap on the arrow at the bottom to go back.

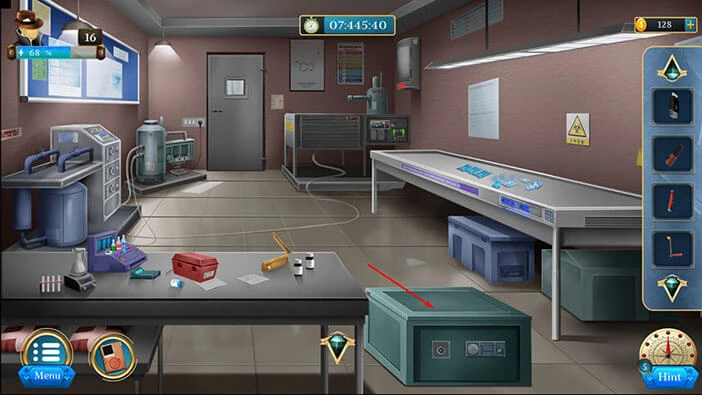
Next, under the workbench, you will notice a large “Box”. Let’s tap on it to take a closer look, and tap again to pick it up.
After that, tap on the arrow at the bottom to go back.
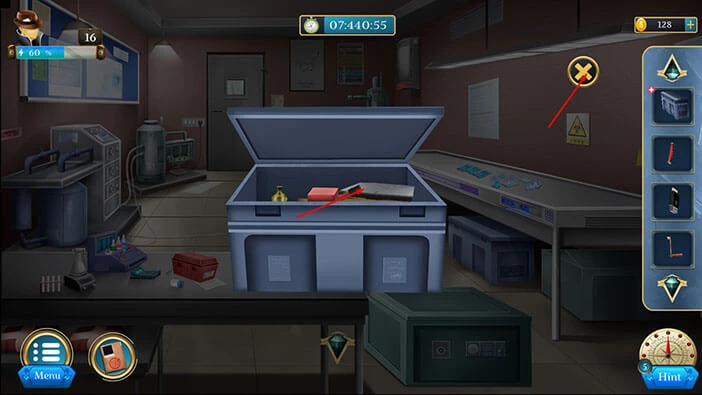
Select the “Box” in your inventory and it will appear in the middle of the screen. Let’s tap on the box to open it.
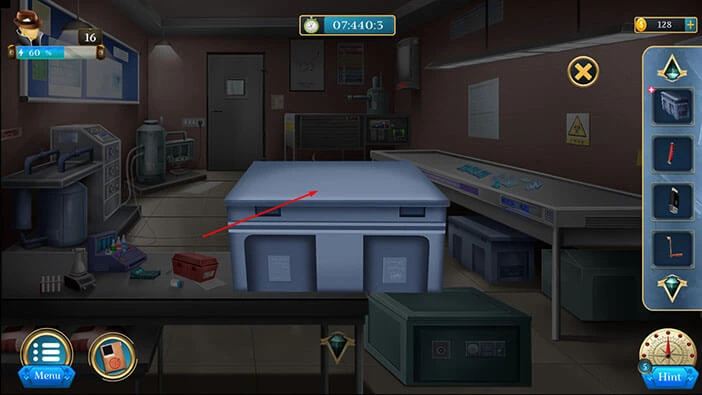
Inside, you will find a “Spray” and a “Laptop”. Let’s tap on these two items to pick them up.
After that, tap on the arrow at the bottom to go back.
Let’s tap on the “Laptop” from the inventory and it will appear in the middle of the screen. After that, tap on the laptop to open it.

Next, select the “Pendrive” from the inventory and plug it into the laptop.
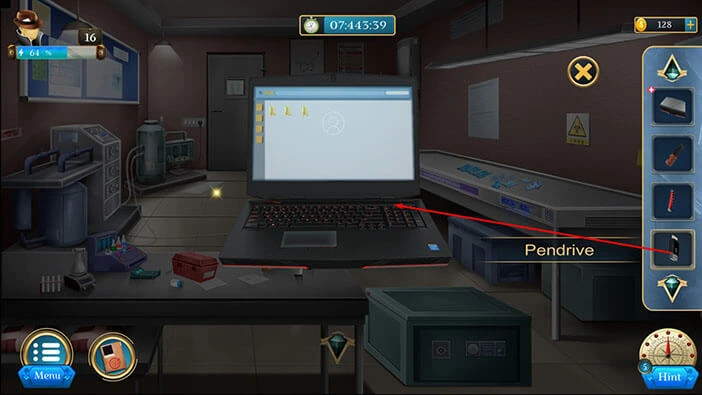
Once you download the data, tap on the “Pendrive” to pick it up. After that, tap on the “X” button to close this window.
Next, let’s tap on the large box on the right to take a closer look at it.
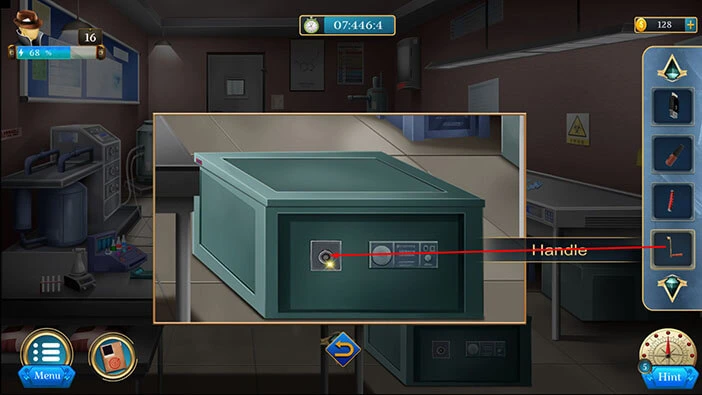
You will notice an empty slot on the left side of the box. So, let’s select the “Handle” from the inventory and insert it into the empty slot. After that, tap on the handle to open the box.
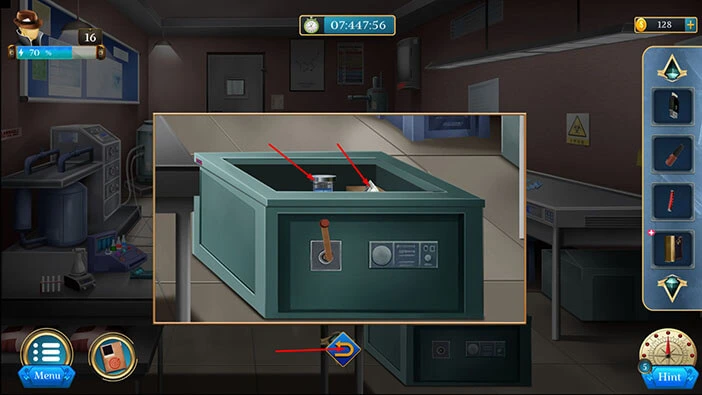
In the box, you will find a “Chemical” and a “Prism”. Let’s tap on these two items to pick them up.
After that, tap on the arrow at the bottom to go back.
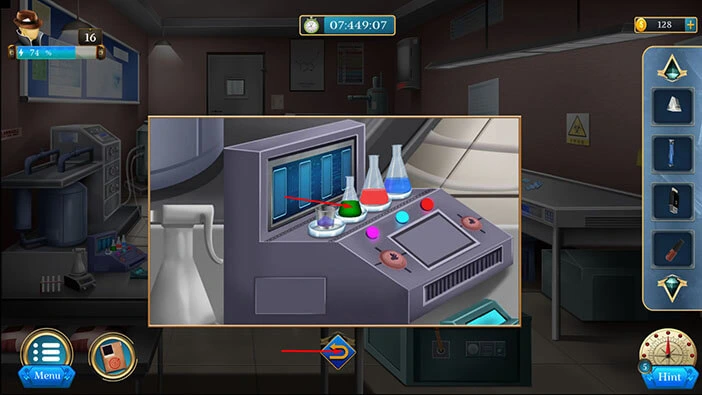
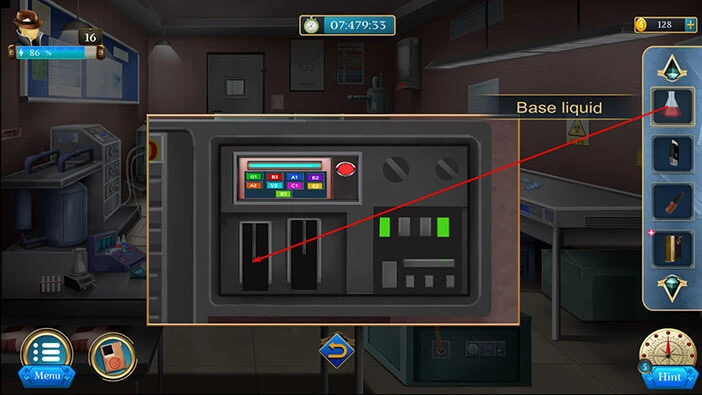
Next, let’s tap on the machine, located on the table on the left, to take a closer look at it.
Here, you will find a “Base liquid”. Let’s tap on it to pick it up. After that, tap on the arrow at the bottom to go back.
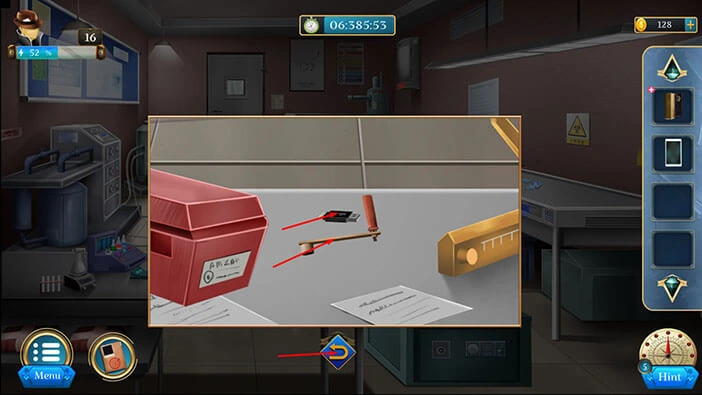
If you take a look around the room, you will notice a note on the machine on the right. Let’s tap on this note to take a closer look at it.

Next, select the “Prism” from the inventory and put it over the note.
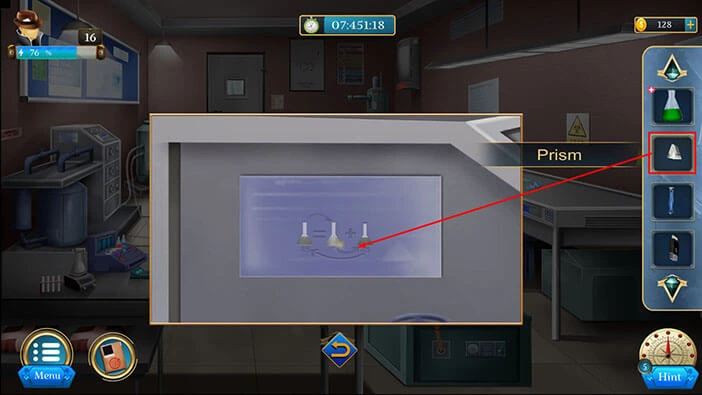
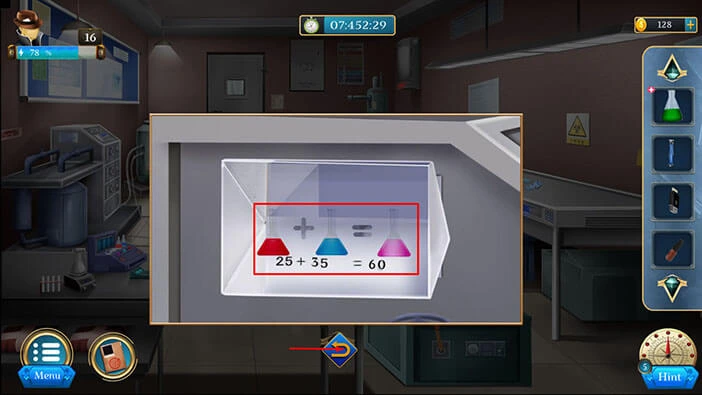
Here, you will discover a hint for the next puzzle. Let’s memorize/write down this information.
25 Red liquid + 35 blue liquid = 60 purple liquid.
Once you’re done, tap on the arrow at the bottom to go back.
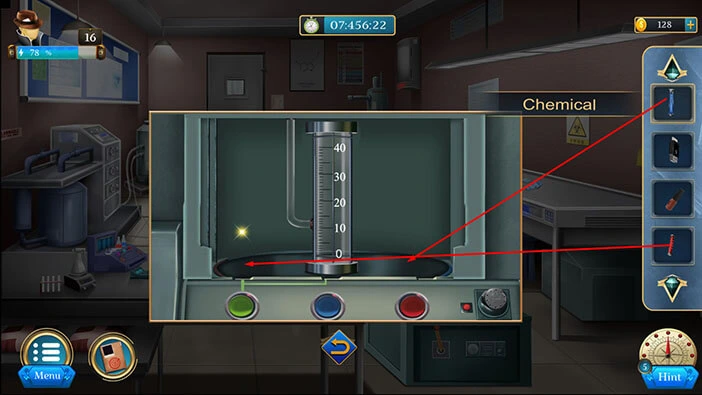
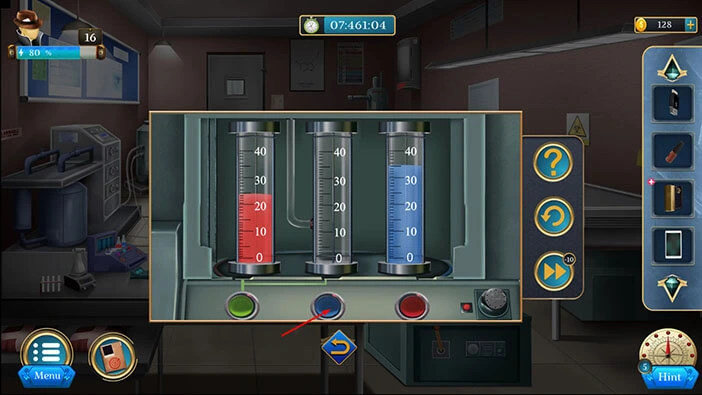
Next, let’s tap on the machine, located in the top left corner of the room, to take a closer look at it.
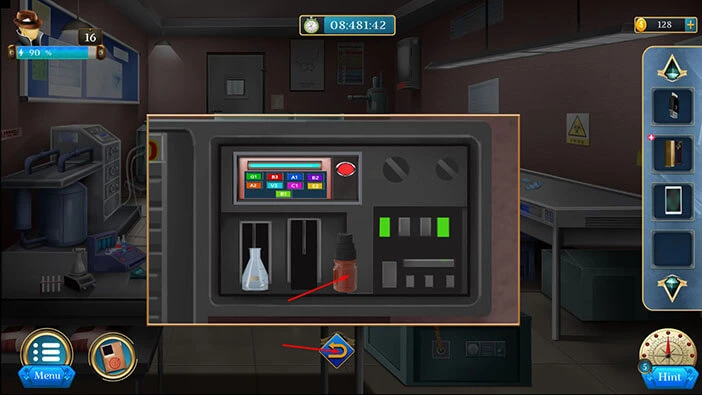
You will notice an empty vial in the middle, but the other two slots are empty. So, select the two “Chemicals” from the inventory and place them into the two empty slots.
Previously, we saw the hint for the correct amount of liquids. As a reminder, we saw 25 Red liquid + 35 blue liquid. So, let’s tap once on the red button, below the Blue liquid on the right, and the level of liquid will drop to 35.
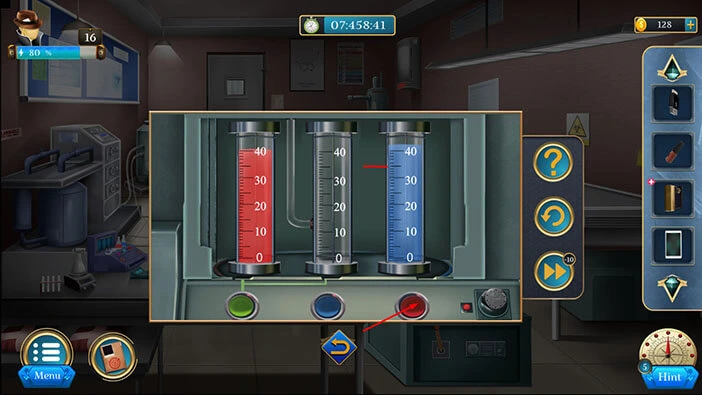
Next, tap three times on the green button, below the Red liquid on the left, and the level of liquid will drop to 25.
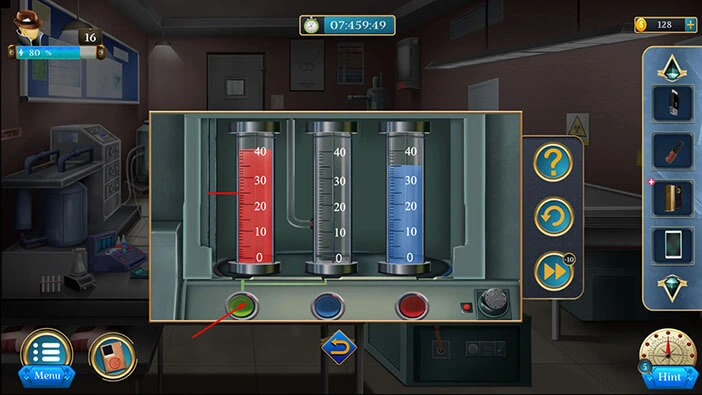
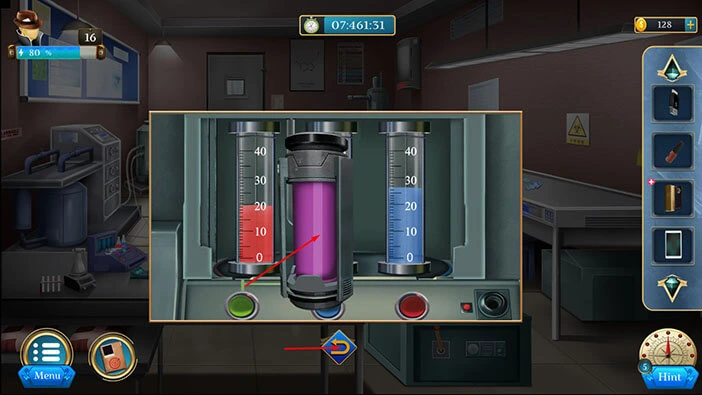
Lastly, tap on the blue button, located below the empty vial, to mix the two liquids.
We created the “Liquid agent” so let’s tap on it to pick it up. After that, tap on the arrow at the bottom to go back.
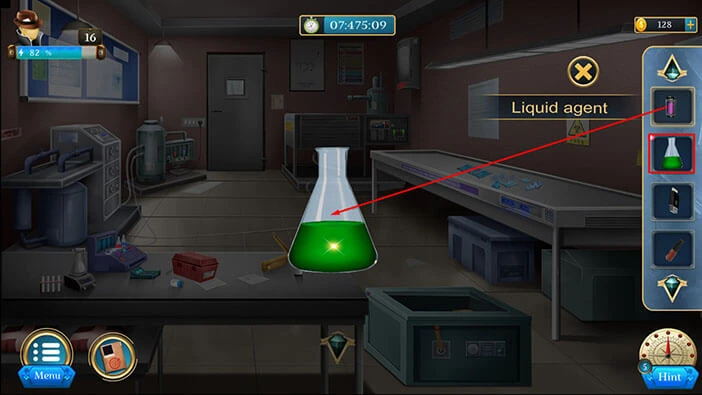
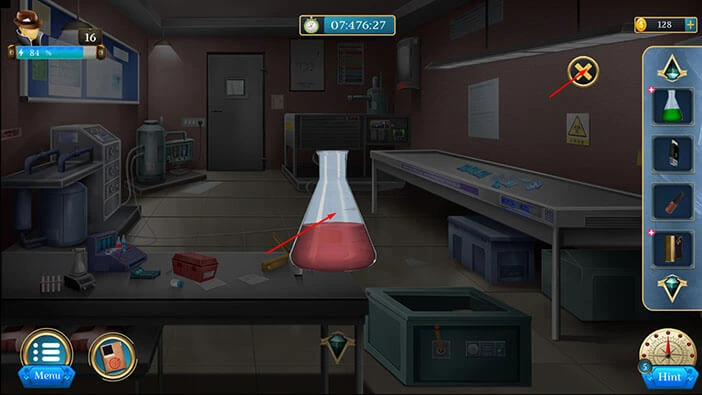
Next, select the “Base liquid” from the inventory and it will appear in the middle of the screen. After that, select the “Liquid agent” from the inventory and mix it with the “Base liquid”.
Next, tap on the “Base liquid” to pick it up. After that, tap on the “X” button to close this window.
Let’s go back to the display screen, located on the machine in the top right corner of the room. Tap on it to take a closer look.
Select the “Base liquid” from the inventory and insert it into the slot on the left.
After that, select the “Spray” from the inventory and insert it into the slot on the right (you will have to tap on the spray to open it).
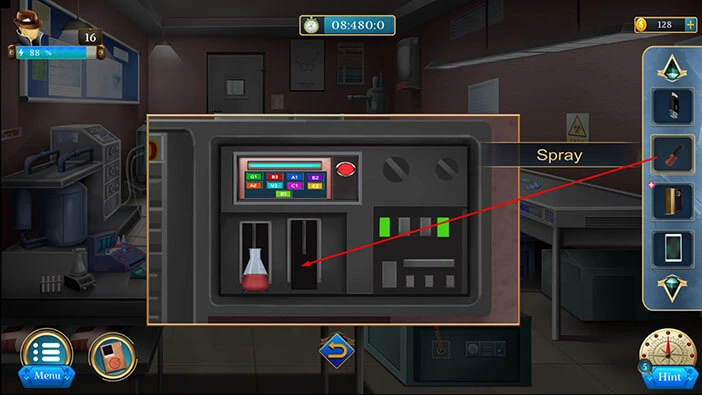
The machine will transfer the liquid into the spray bottle, so let’s tap on the “Spray” to pick it up.
After that, tap on the arrow at the bottom to go back.
Next, select the “Diary” from the inventory and it will appear in the middle of the screen. After that, select “Spray” from the inventory and use it on the flower in the bottom right corner of the page.
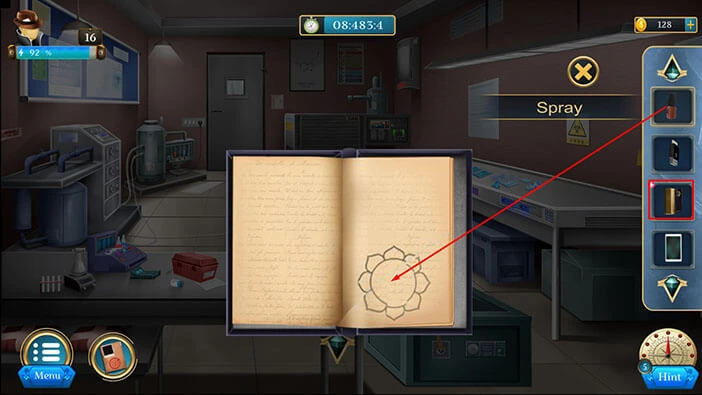
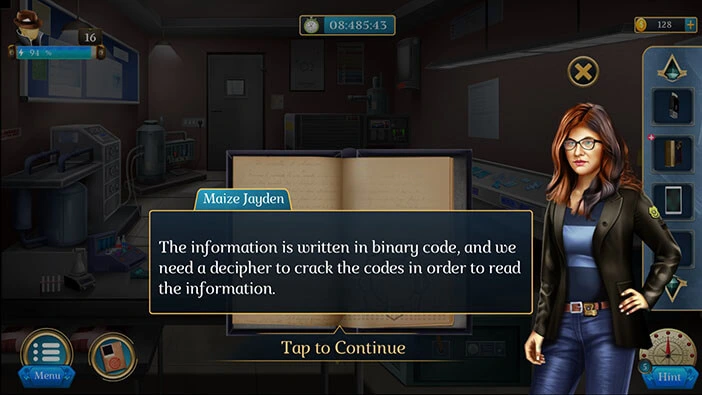
The information, written with the “invincible” ink (just kidding, it’s invisible ink) will appear on the page. However, everything is written in binary (0 and 1) so our next task is to decipher it.
Select the “Tablet” from the inventory and place it in front of the binary code.
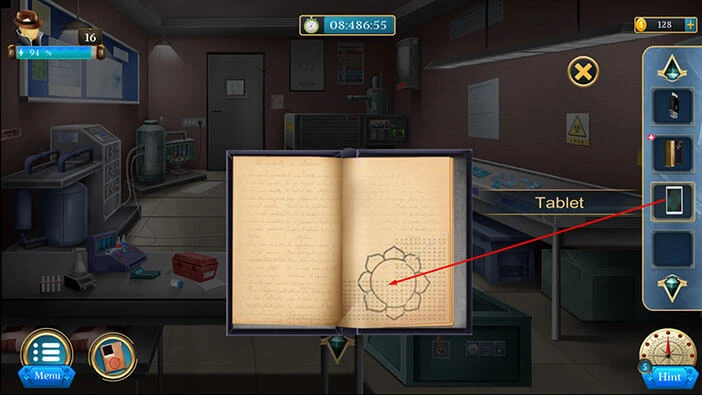
After that, select the “Pendrive” from the inventory and insert it into the tablet.
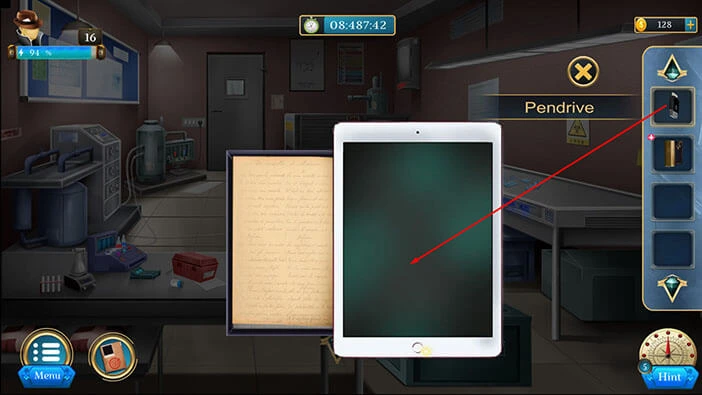
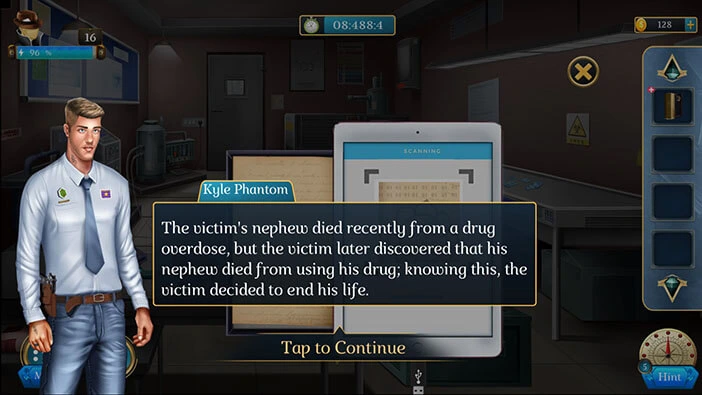
You will discover that the victim decided to end his life because he felt responsible for the death of his nephew. So, it seems that this case isn’t connected with the “Black Spider”.
With that, we have reached the end of the sixteenth level. If you want to see the walkthrough for the seventeenth level, tap on the next part button.
Thank you for reading.