Room Escape: Detective Phantom | Level 15
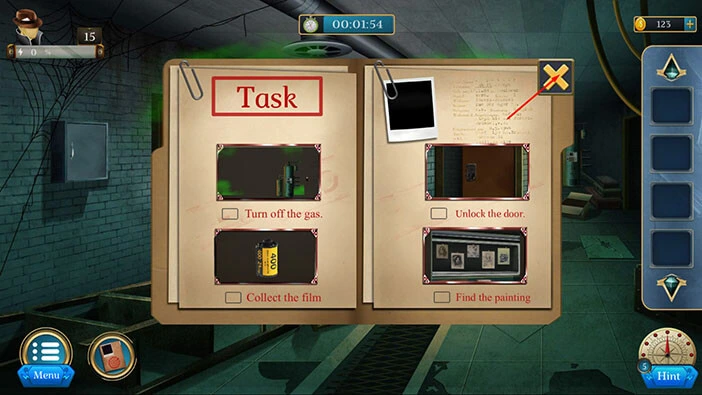
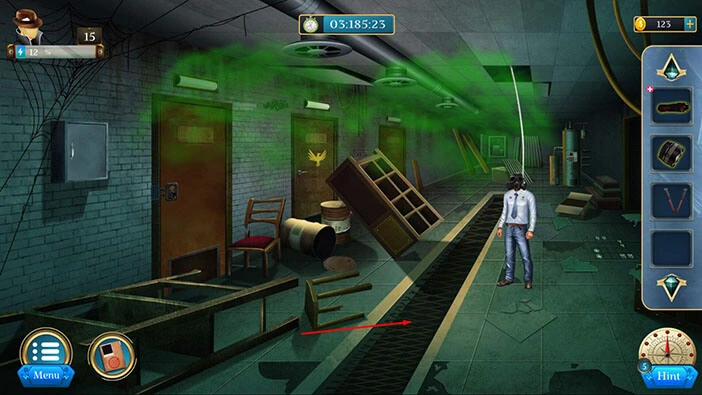
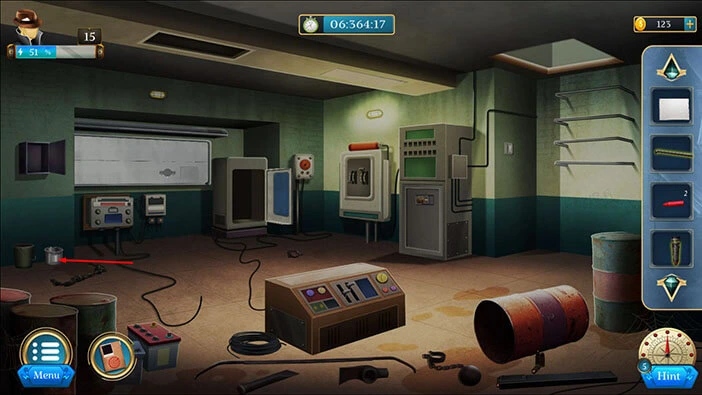
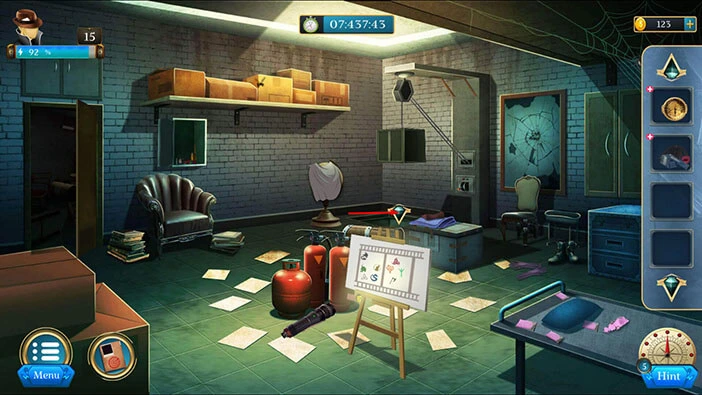
Hello everyone and welcome to the walkthrough for the fifteenth level of “Room Escape: Detective Phantom”. In the fifteenth level, our task is to explore Black Spider’s hideout.
Our objectives are to “Turn off the gas” “Collect the film” “Unlock the door” and “Find the painting”. Tap on the “X” button to go back.
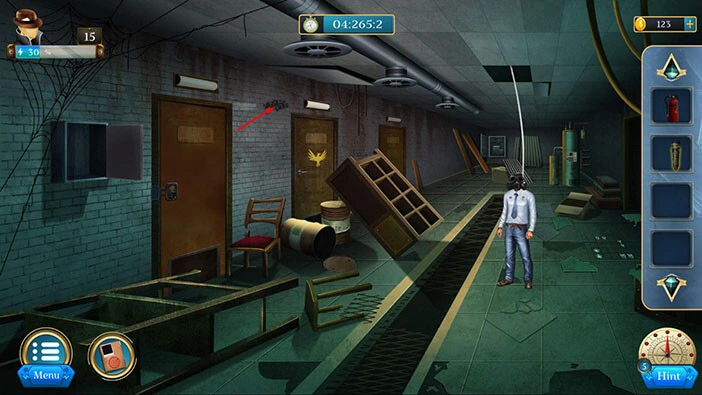
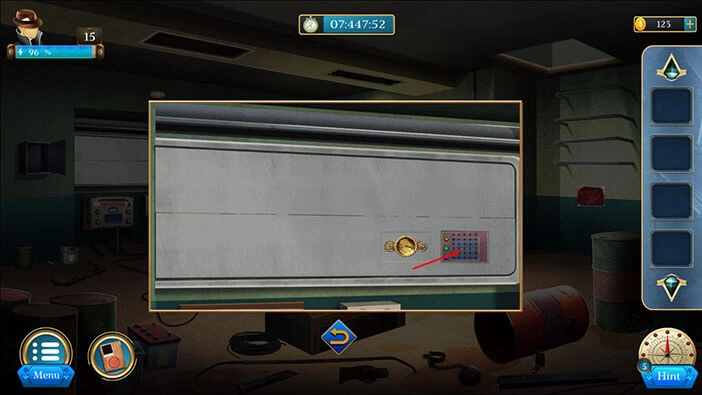
Let’s explore this level. On the right side of the room, you will notice a broken tile. Let’s tap on it to take a closer look. After that, tap on the broken pieces to move them aside.

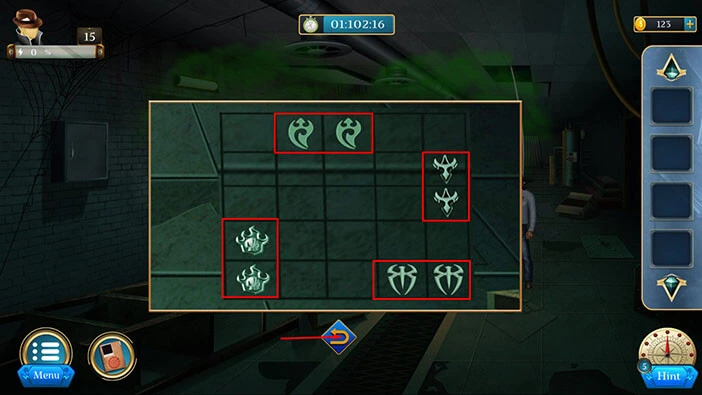
Here, we can see the hint for the next puzzle. Let’s memorize/write down the position of the symbols on the grid because we will need this information for the next puzzle.
Ghost symbols = second slot in the first row and third slot in the second row.
Fire symbol = the first slot in the fourth row, and the first slot in the fifth row
Bug symbol = the fourth slot in the fifth row, and the fifth slot in the fifth row
Bird symbol = the fifth symbol in the second row, and the fifth symbol in the third row
Once you’re done, tap on the arrow at the bottom to go back.
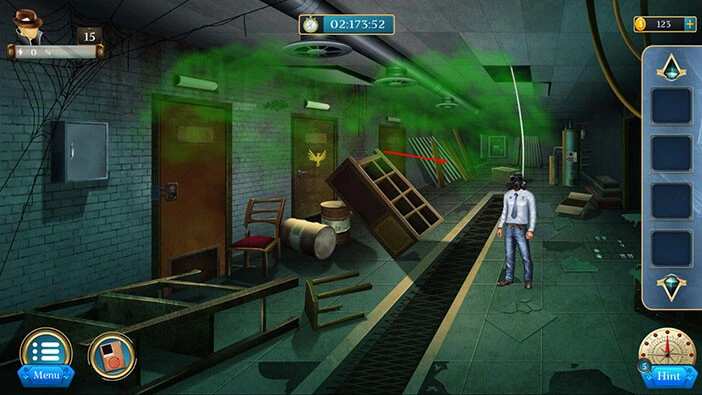
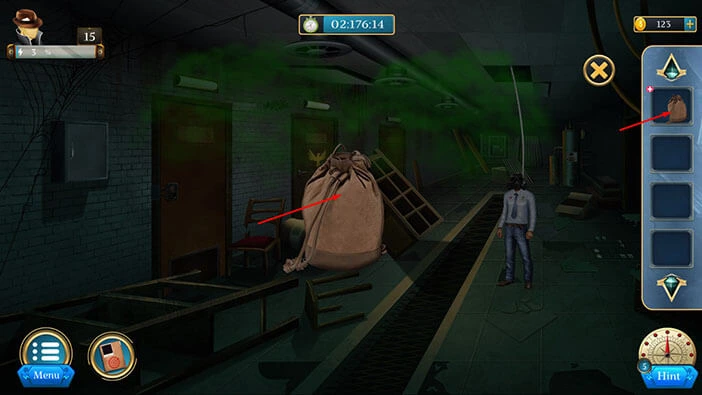
Next, let’s tap on the metal panel, located in the top left corner of the room, to take a closer look at it. After that, tap on the panel and the boards to move them aside.
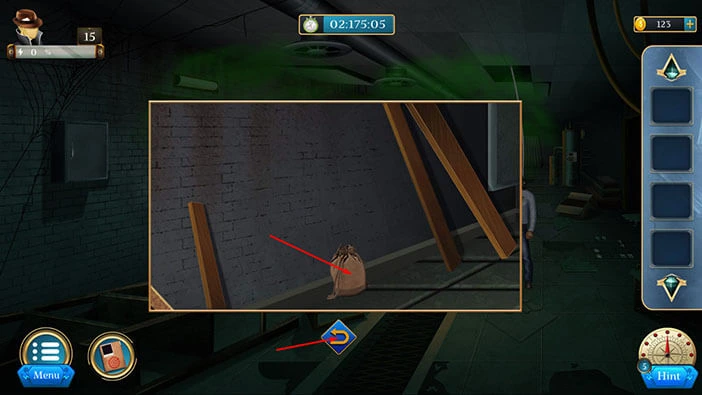
Under the panel, you will find a “Bag”. Let’s tap on it to pick it up.
After that, tap on the arrow at the bottom to go back.
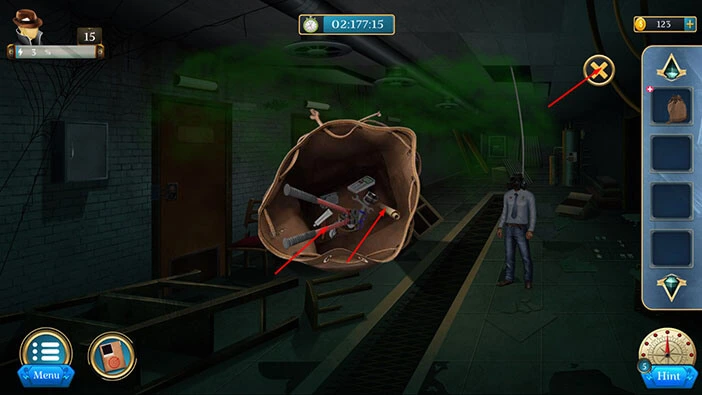
Next, select the “Bag” from the inventory and it will appear in the middle of the screen. After that, tap on the bag to open it.
In the bag, you will find a “Torch head” and a “Steel cutter”. After that, tap on the “X” button in the top right corner of the window.
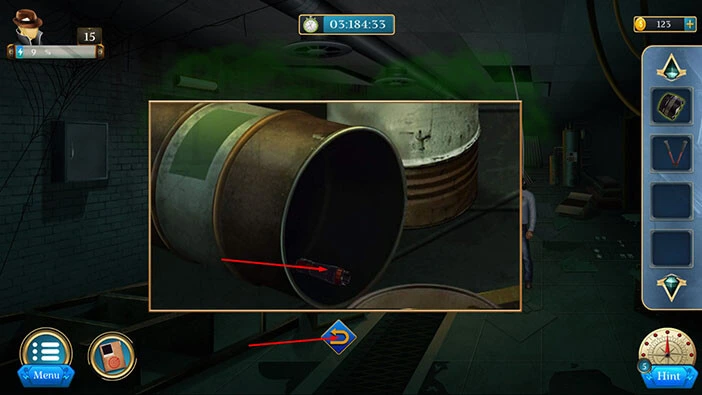
Next, let’s tap on the barrel on the left to take a closer look at it, and tap again to open it.
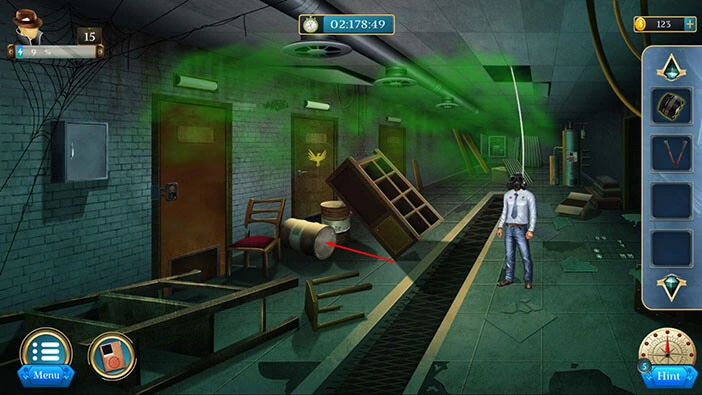
In the barrel, you will find a “Torch handle”. Let’s tap on it to pick it up.
After that, tap on the arrow at the bottom to go back.
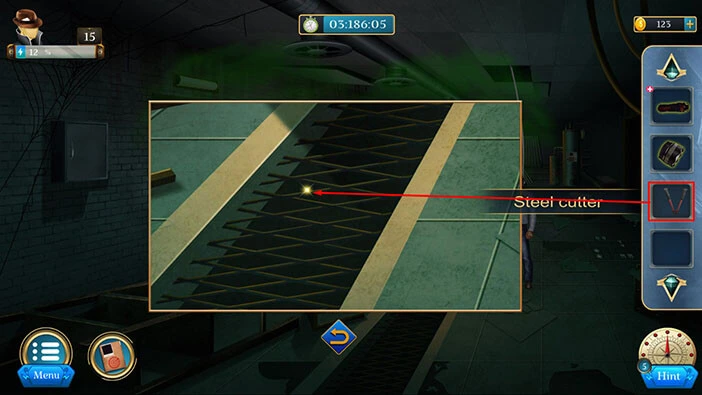
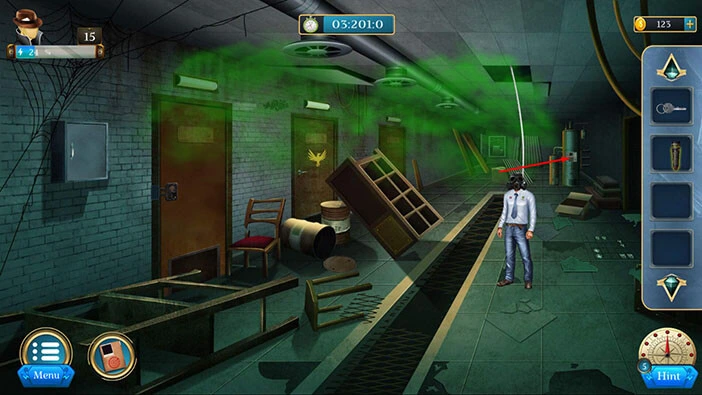
Next, let’s tap on the wire on the floor to take a closer look at it.
Select the “Steel cutter” from the inventory and use it to cut the wire.
The area under the wire is dark, so we will have to find a way to illuminate it if we want to explore it.
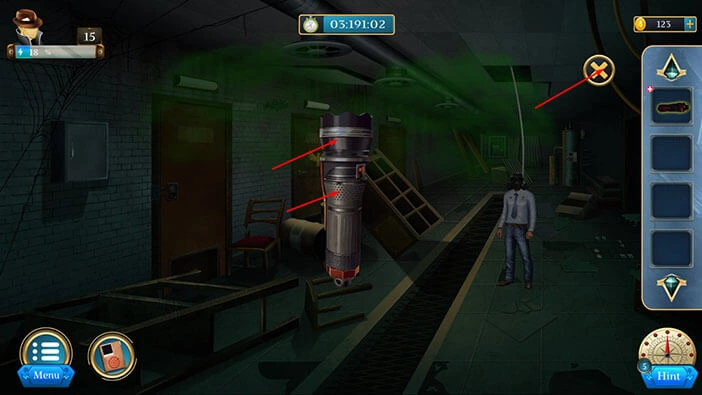
So, select the “Torch handle” from the inventory and it will appear in the middle of the screen. After that, select the “Torch head” from the inventory and attach it to the “Torch handle”.
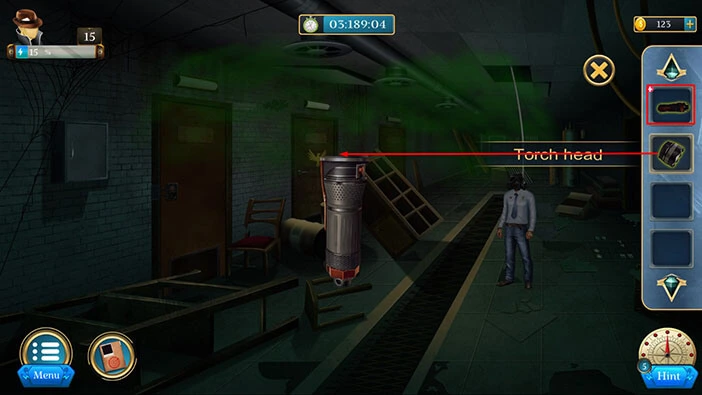
Next, tap on the “Torch head” to screw it into the handle. With that, you will create a “Torchlight”. Let’s tap on it to pick it up.
After that, tap on the “X” button to close this window.
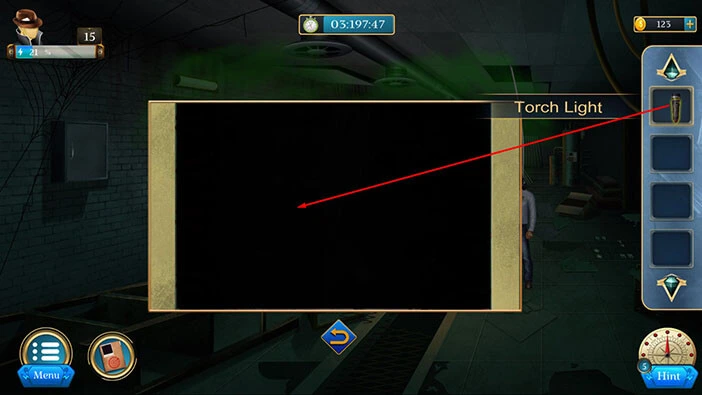
Let’s go back to the hole in the wire. Tap on it to take a closer look, and tap again to look inside.

Select the “Torchlight” from the inventory and use it to illuminate the hole.
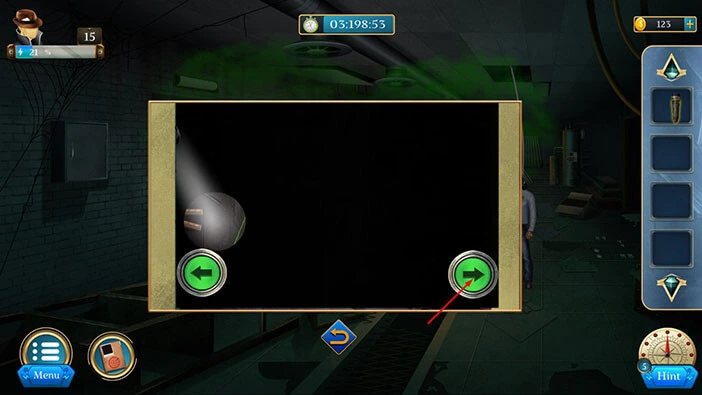
You will only illuminate a small, circular part of the floor. Tap on the arrow on the right four times to move the torchlight.
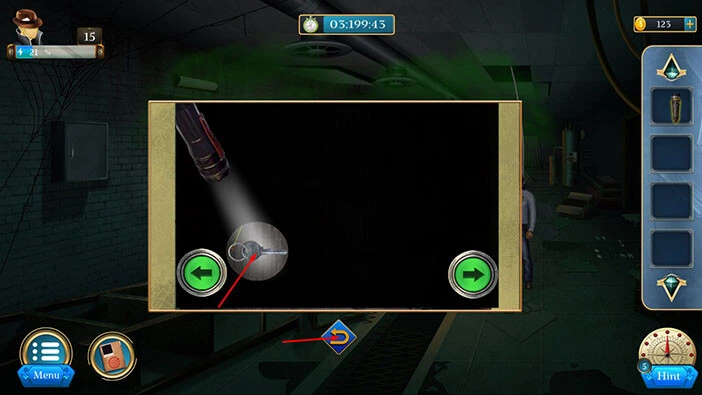
Once you tap on the arrow four times, you will discover a “Key”. Let’s tap on it to pick it up.
After that, tap on the arrow at the bottom to go back.
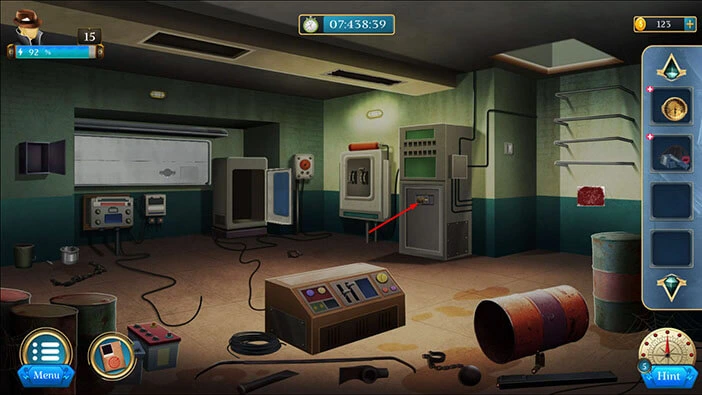
Next, let’s tap on the panel, located on the boiler on the right, to take a closer look at it.
Select the “Key” from the inventory and use it to unlock the panel. Below the panel, you will discover another puzzle. So, let’s tap on it to start the interaction.
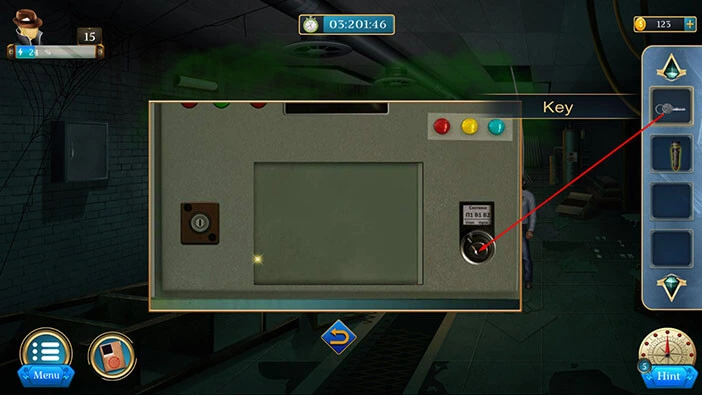
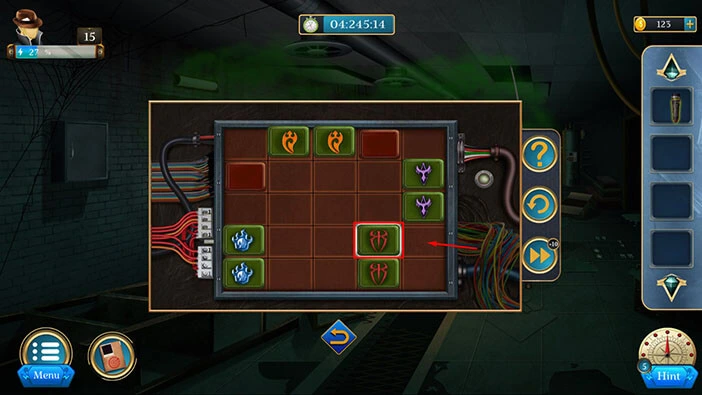
Here, we can see the symbols that we saw on the hint, previously. So, our task is to arrange the symbols to the grid to match the positions on the hint.
We will do this puzzle in several steps. Let’s begin.
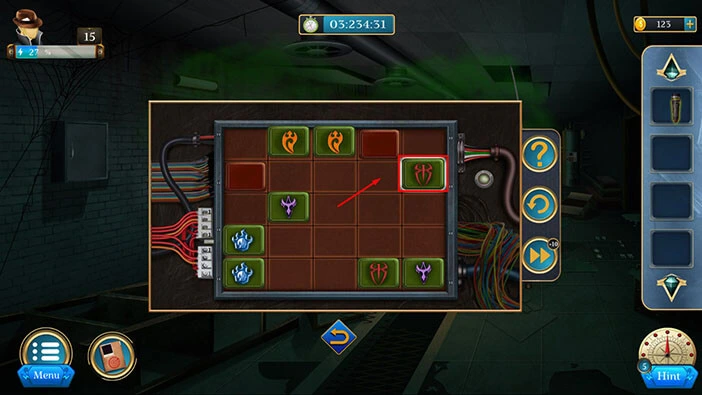
Step 1
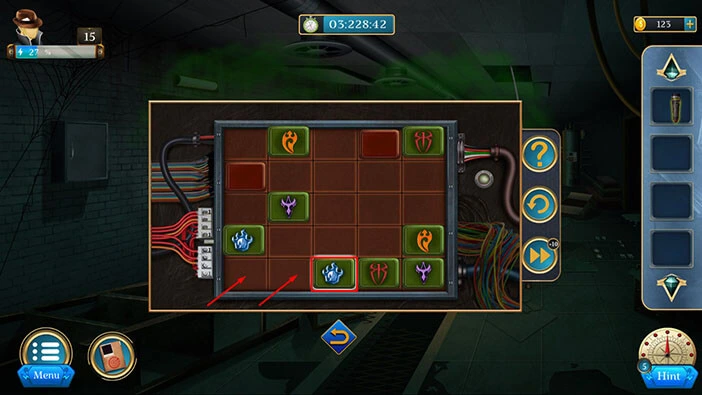
Select the “Fire symbol” located in the first slot of the first row. After that, tap on the second and the third slots in the first row to move the symbol.
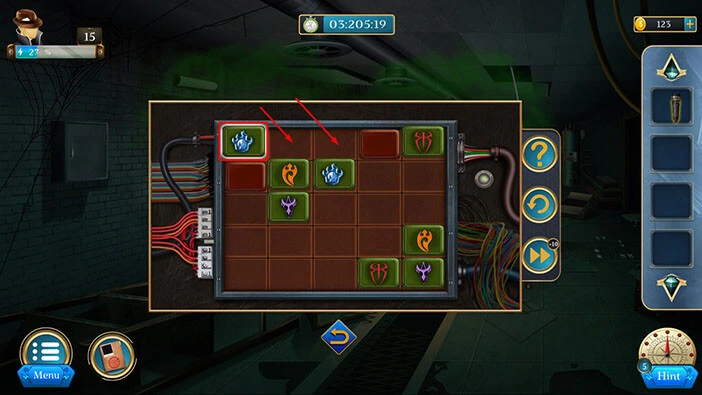
Step 2
Select the “Ghost symbol” located in the second slot of the second row. After that, tap on the second slot in the first row to move the symbol.

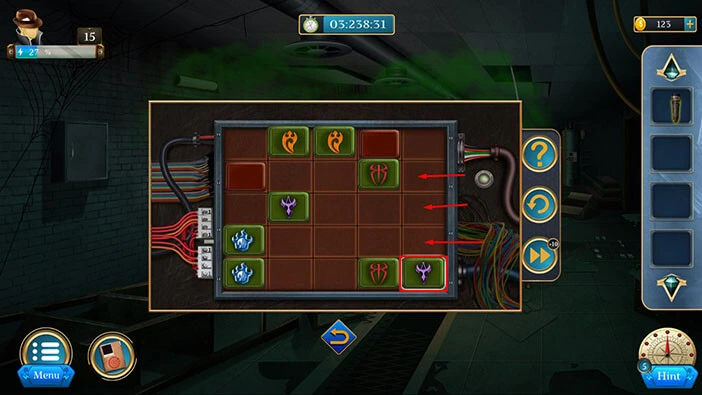
Step 3
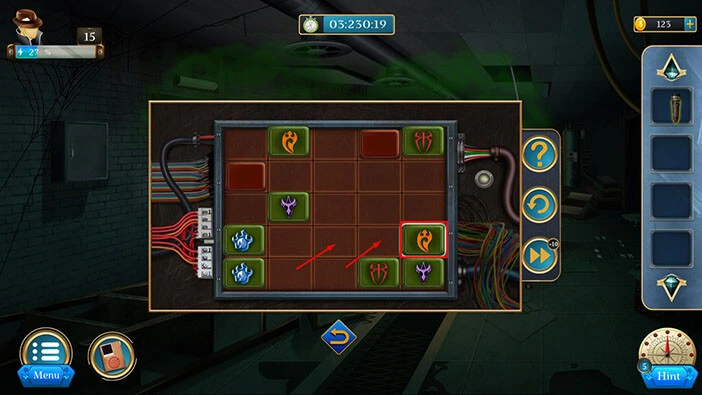
Select the “Fire symbol” located in the third slot of the second row. After that, tap on the third slot in the third and fourth rows to move the symbol.
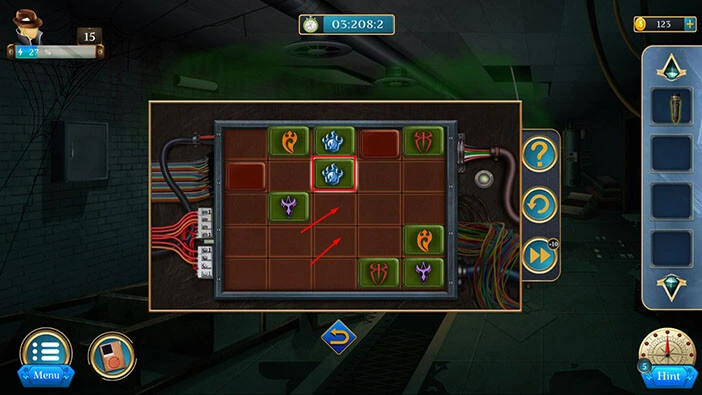
Step 4
Again, select the “Fire symbol” located in the third slot of the fourth row. After that, tap on the second and first slots in the fourth row to move the symbol.
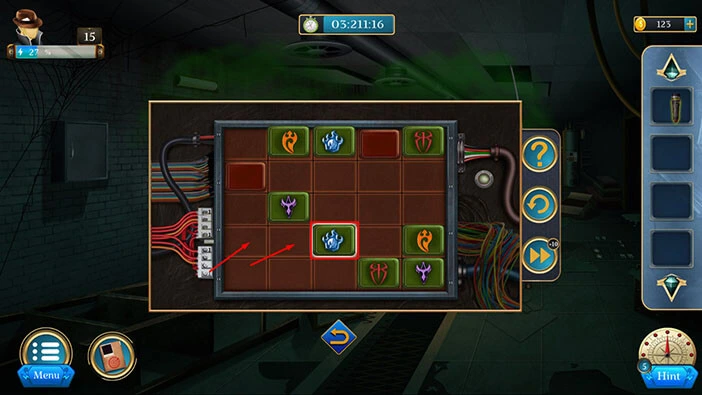
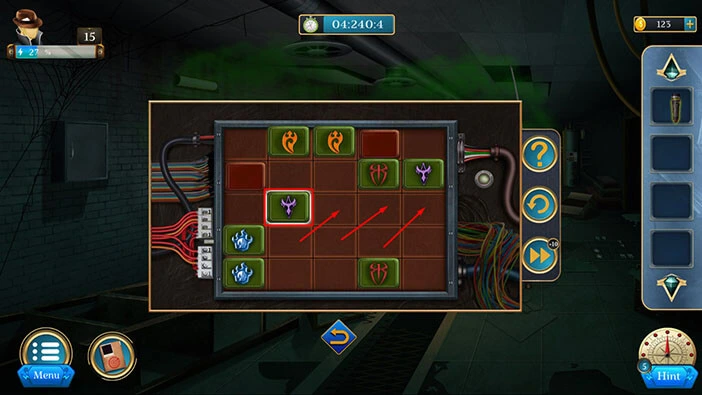
Step 5
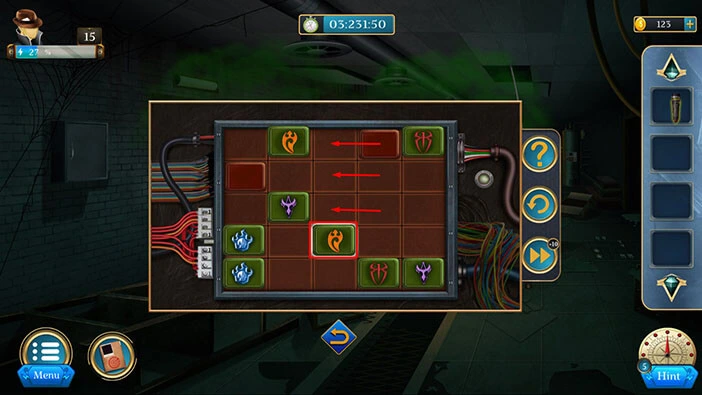
Select the “Fire symbol” located in the third slot of the first row. After that, tap on the second slot in the second, third, fourth, and fifth rows to move the symbol.

Step 6
Select the “Fire symbol” located in the third slot of the fifth row. After that, tap on the second and first slots in the fifth row to move the symbol.
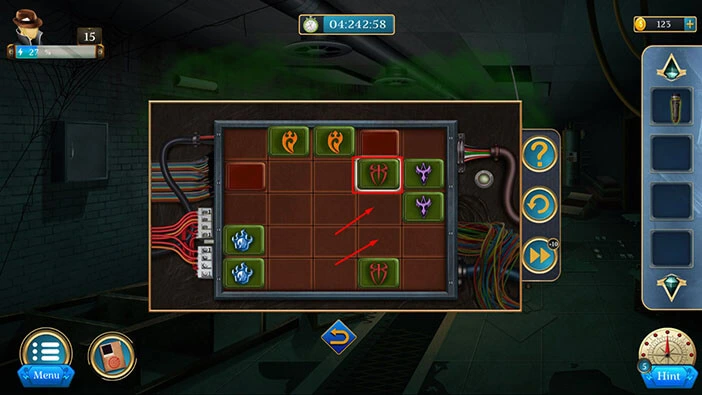
Step 7
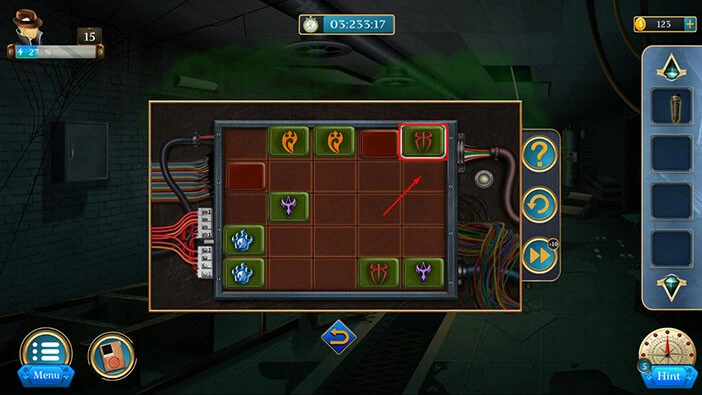
Select the “Ghost symbol” located in the fifth slot of the fourth row. After that, tap on the fourth and third slots in the fourth row to move the symbol.
Step 8
Again, select the “Ghost symbol” located in the third slot of the fourth row. After that, tap on the third slot in the third, second, and first rows to move the symbol.
Step 9
Select the “Bug symbol” located in the fifth slot of the first row. After that, tap on the fifth slot in the second row to move the symbol.
Step 10
Again, select the “Bug symbol” located in the fifth slot of the second row. After that, tap on the fourth slot in the second row to move the symbol.
Step 11
Select the “Bird symbol” located in the fifth slot of the fifth row. After that, tap on the fifth slot in the fourth, third, and second rows to move the symbol.
Step 12
Select the “Bird symbol” located in the second slot of the third row. After that, tap on the third, fourth, and fifth slots in the third row to move the symbol.
Step 13
Select the “Bug symbol” located in the fourth slot of the second row. After that, tap on the fourth slot in the third, and fourth rows to move the symbol.
Step 14
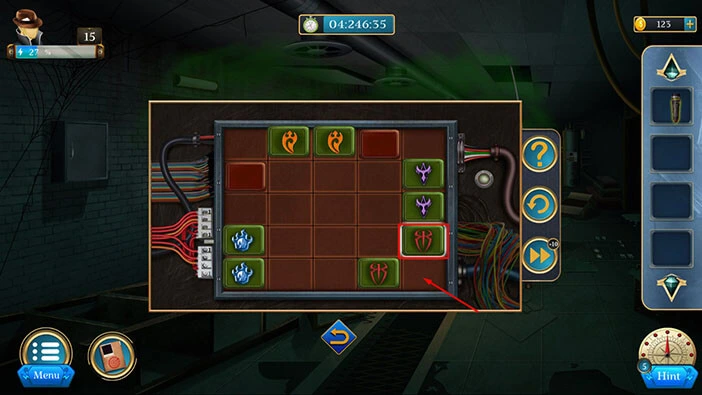
Again, select the “Bug symbol” located in the fourth slot of the fourth row. After that, tap on the fifth slot in the fourth row to move the symbol.
Step 15
Finally select the “Bug symbol” located in the fifth slot of the fourth row, once more. After that, tap on the fifth slot in the fifth row to move the symbol. With that, you will solve this puzzle, and you will stop the flow of the toxic gas.
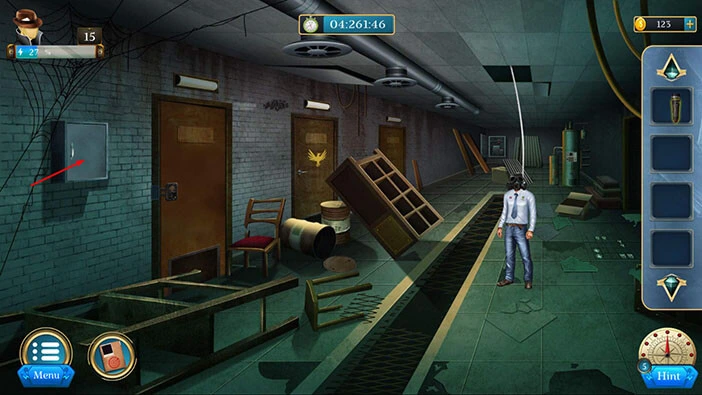
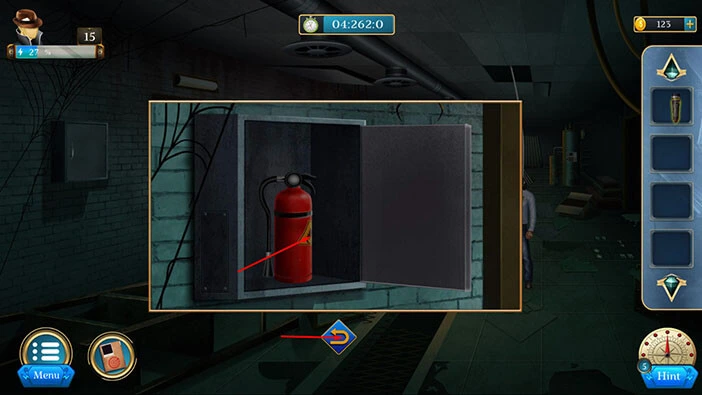
Next, let’s tap on the box, located on the wall on the left, to take a closer look at it. Tap again to open the box.
In the box, you will find a “Fire Extinguisher”. Let’s tap on it to pick it up.
After that, tap on the arrow at the bottom to go back.
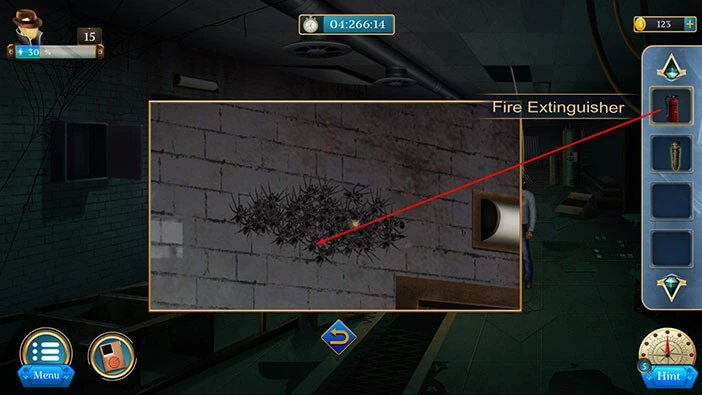
On the left wall, near the ceiling, you will notice a pile of spiders. Let’s tap on it to take a closer look.
Select the “Fire Extinguisher” from the inventory and use it to chase off the spiders.
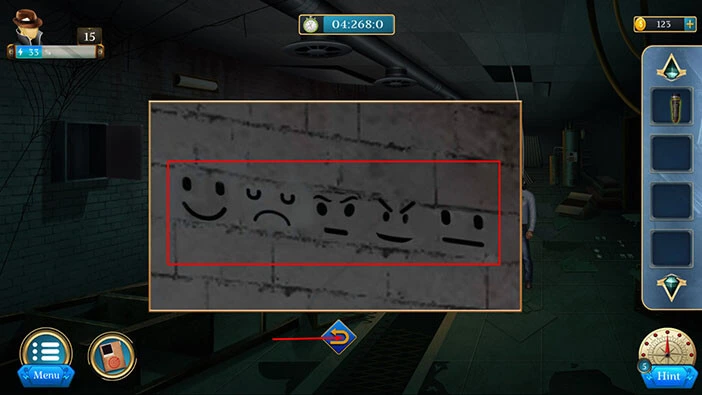
On the wall, you will discover five emojis. Let’s memorize/write them down because we will need them for the next puzzle.
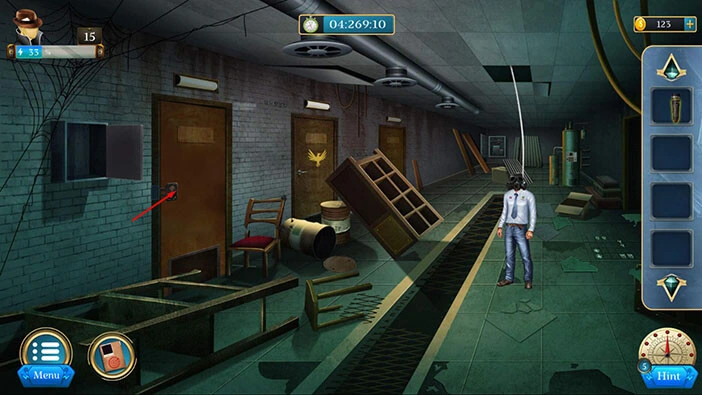
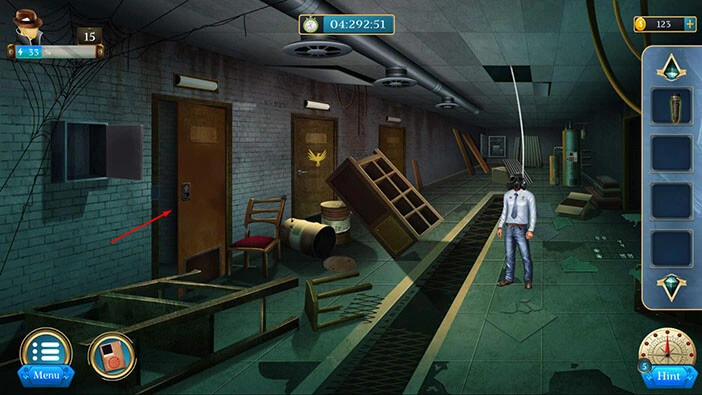
Next, let’s tap on the lock on the first door on the left to take a closer look at it, and tap again to start the interaction.
Here, we have another puzzle. Our task is to place the emojis that we saw previously into the slot in the middle. We can do that by assembling the two halves of the emojis in the puzzle.
We will do this puzzle in several steps. Let’s begin.
Step 1
Select the outer emoji in the top row then tap on the inner emoji in the right row.
Step 2
Select the outer emoji in the top left row then tap on the inner emoji in the bottom left row.
Step 3
Select the outer emoji in the left row then tap on the inner emoji in the top row.

Step 4
Select the inner emoji in the bottom right row then tap on the inner emoji in the bottom left row.

Step 5
Select the outer emoji in the top right row then tap on the inner emoji in the left row. With that, you will solve this puzzle, and you will unlock the door.

Let’s tap on the door to proceed to the next room.
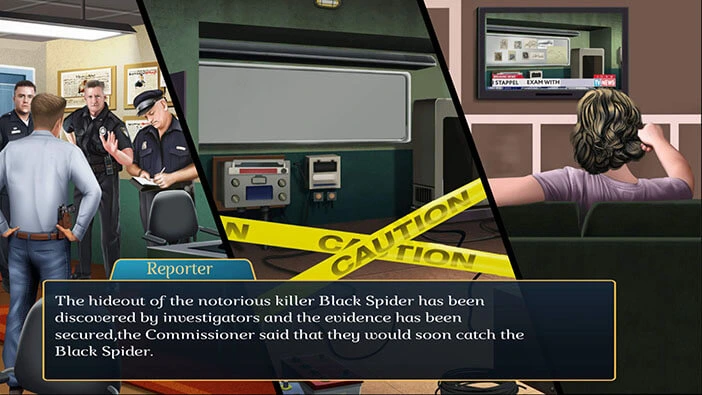
In this room, our character found “Hypnotizing powder” and concluded that he found the Black Spider’s hideout.
Let’s explore the Black Spider’s hideout. Tap on the table on the right to take a closer look at it.
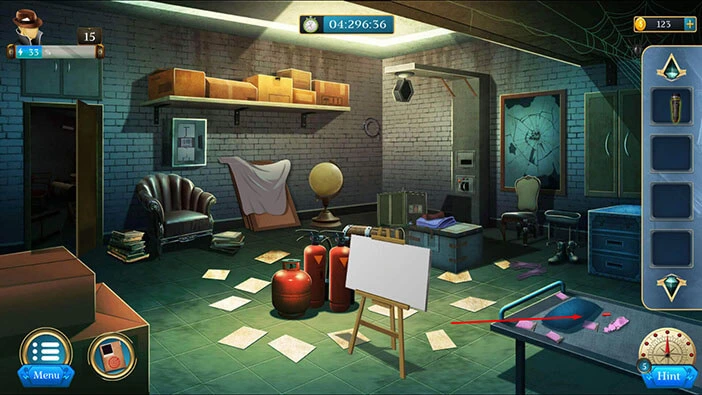
Here, you will find “Crayons”. Let’s tap on them to pick them up. After that, tap on the arrow at the bottom to go back.
If you take a look around the room, you will notice a “Steel Rope” on the wall, in the top left corner of the room. Let’s tap on it to take a closer look, and tap again to pick it up.
After that, tap on the arrow at the bottom to go back.

Next, let’s tap on the lever on the right to take a closer look at it.

Select the “Steel rope” from the inventory and insert it into the empty slot.
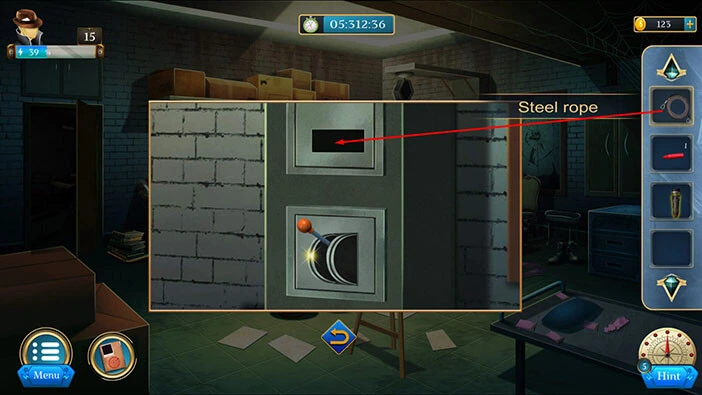
After that, tap on the lever and you will lift the box.
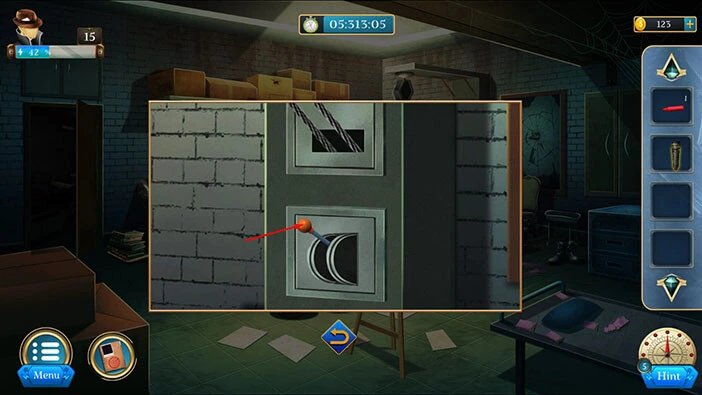
There is a secret entrance under the box. Let’s tap on the arrow to proceed to the next room.

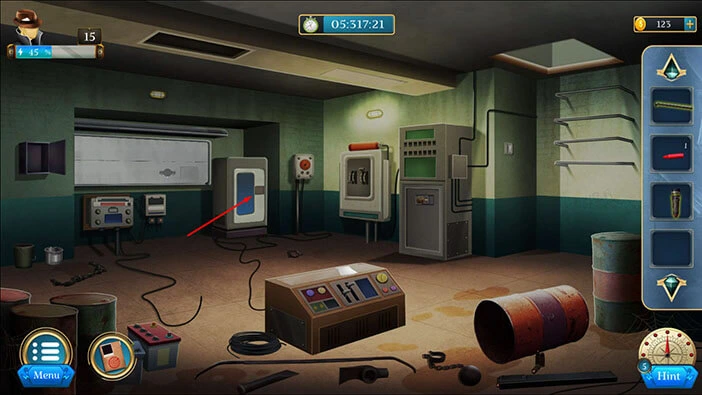
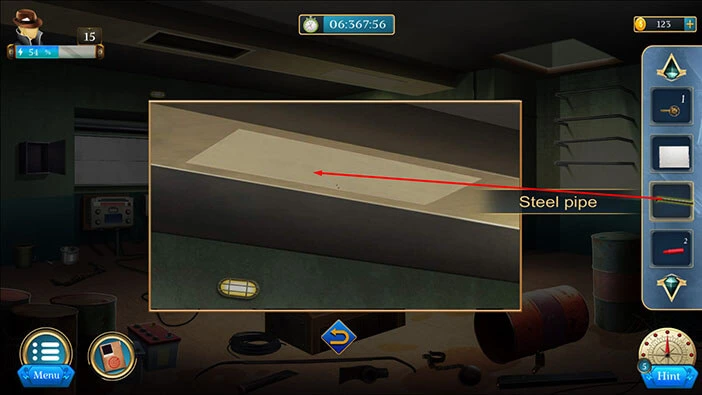
Let’s explore. On the right, you will notice a “Steel pipe”. Let’s tap on it to pick it up. After that, tap on the arrow at the bottom to go back.

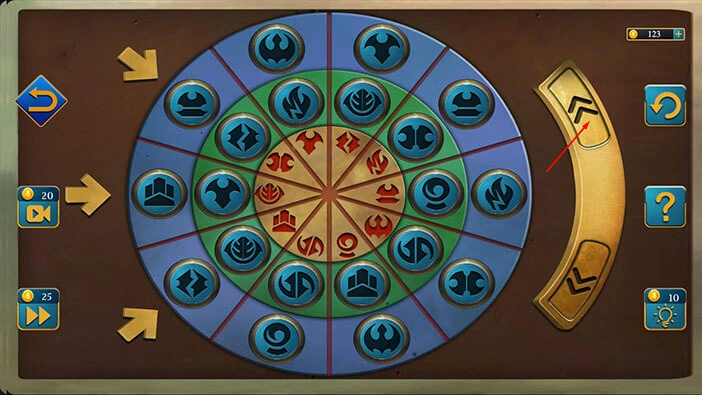
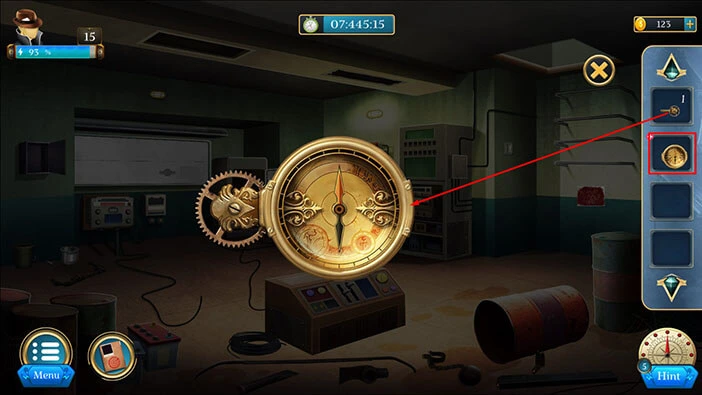
Next, let’s tap on the machine on the left to take a closer look at it, and tap again to start the interaction.
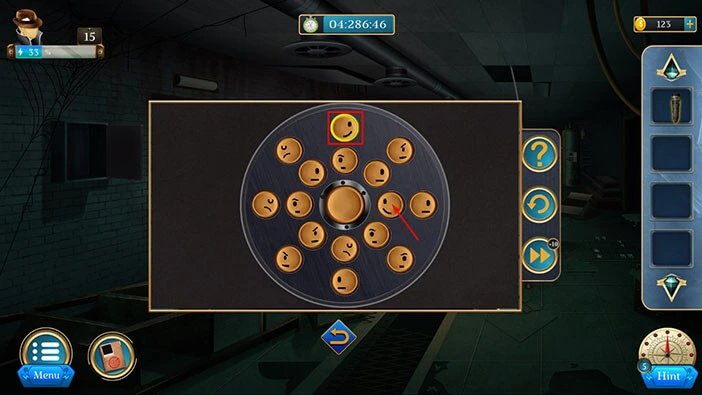
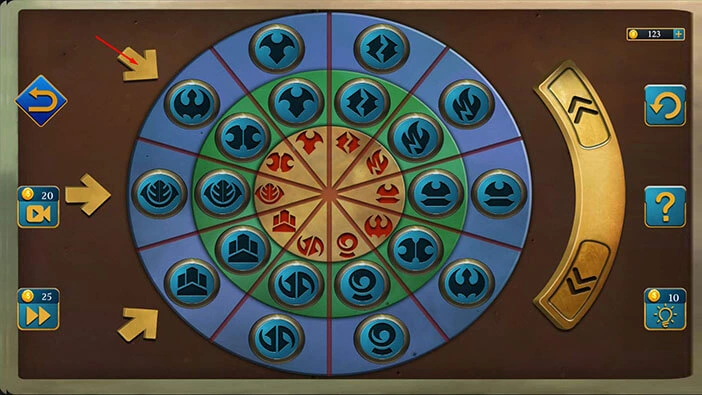
Here, we have another puzzle. The symbols in the middle and outer circles should match the symbols in the inner circle. We will do this puzzle in several steps. Let’s begin.
Step 1
Tap nine times on the “Up” arrow on the right to rotate the symbols in the middle ring.
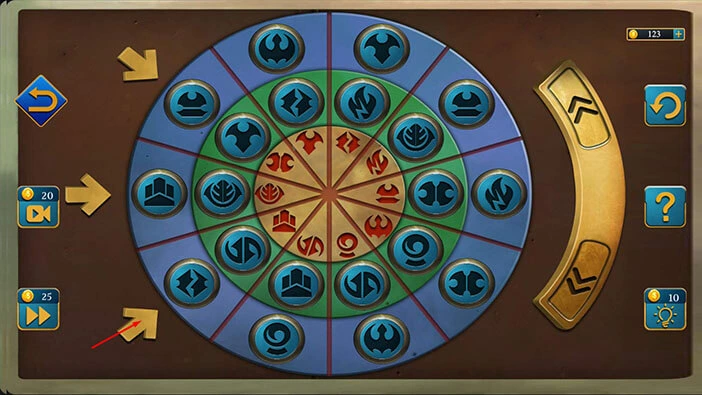
Step 2
Tap three times on the bottom arrow on the left to exchange the symbols.
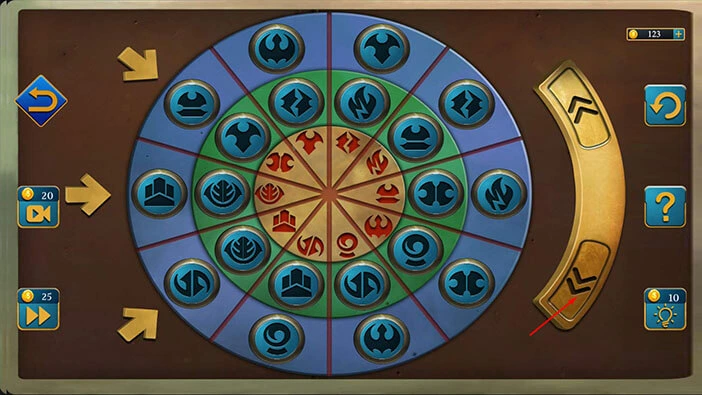
Step 3
Tap nine times on the “Down” arrow on the right to rotate the symbols in the outer ring.
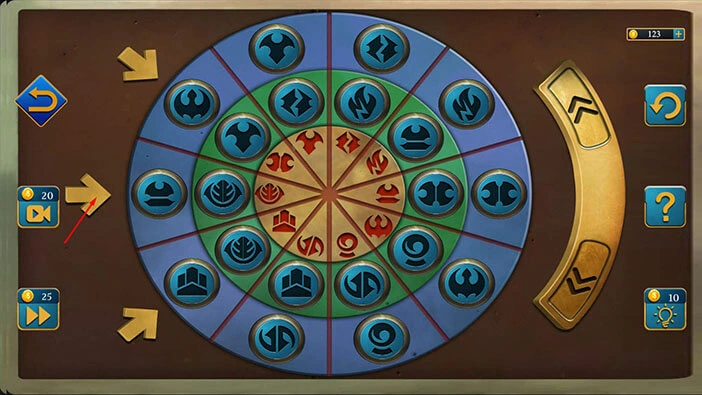
Step 4
Tap three times on the middle arrow on the left to exchange the symbols.
Step 5
Tap nine times on the “Up” arrow on the right to rotate the symbols in the middle ring.
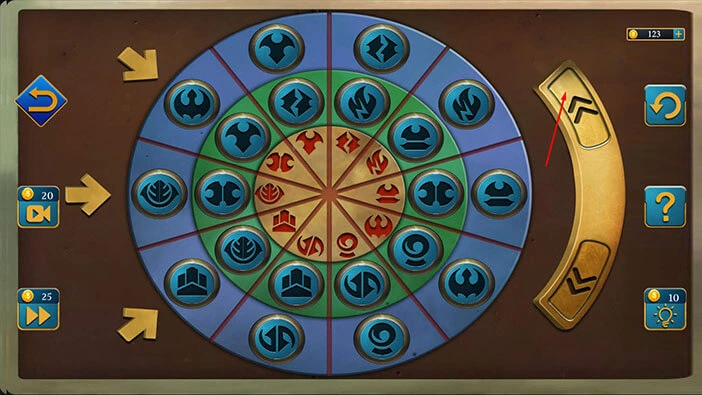
Step 6
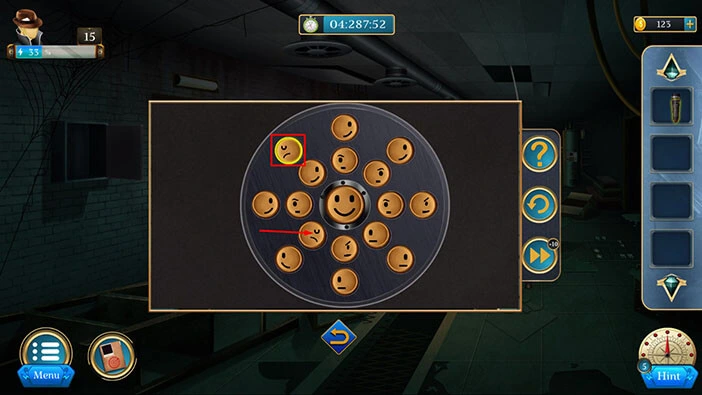
Tap three times on the top arrow on the left to exchange the symbols and you will solve this puzzle.
With that, you will unlock the safe, and inside you will find another “Crayon”. Let’s tap on it to pick it up (you will see the number 2 next to the crayons in the inventory).
After that, tap on the arrow at the bottom to go back.
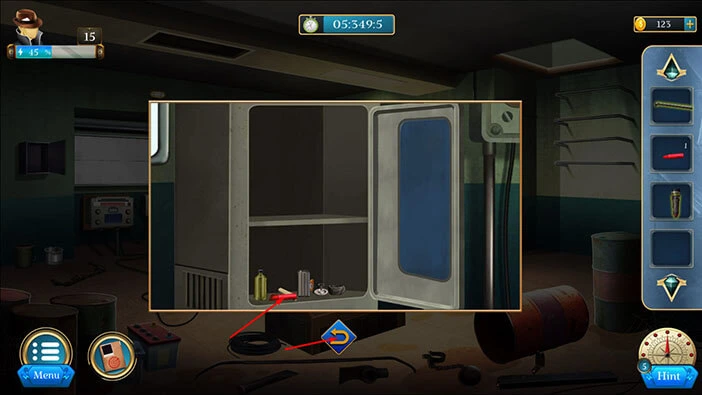
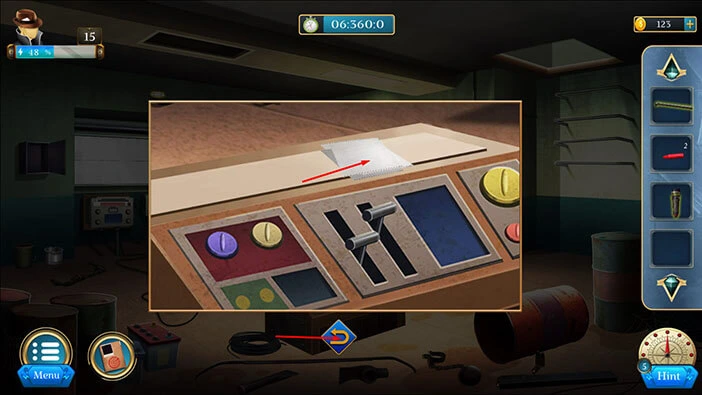
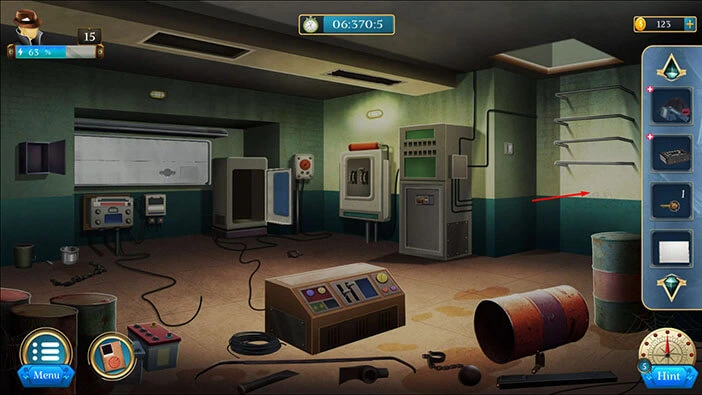
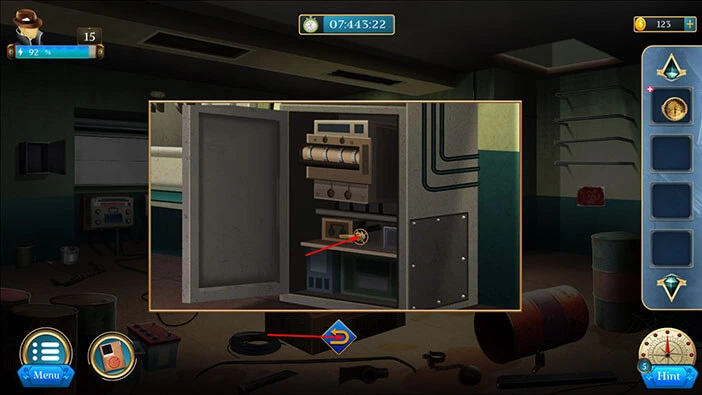
Let’s tap on the machine in front of us to take a closer look at it.

Here, you will find a “Paper”. Let’s tap on it to pick it up. After that, tap on the arrow at the bottom to go back.
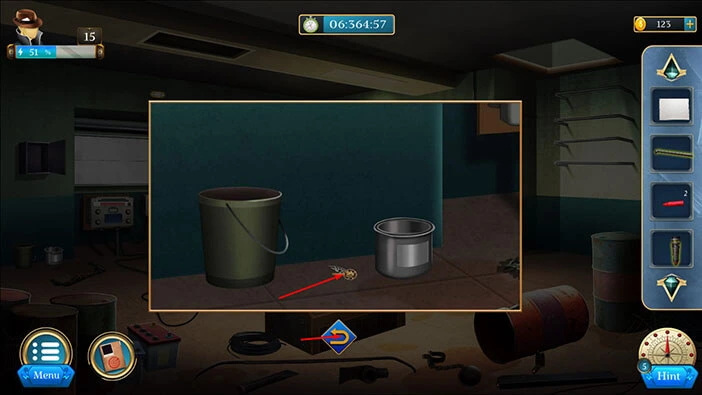
Next, let’s tap on the bucket on the left to take a closer look at it, and tap again to move it aside.
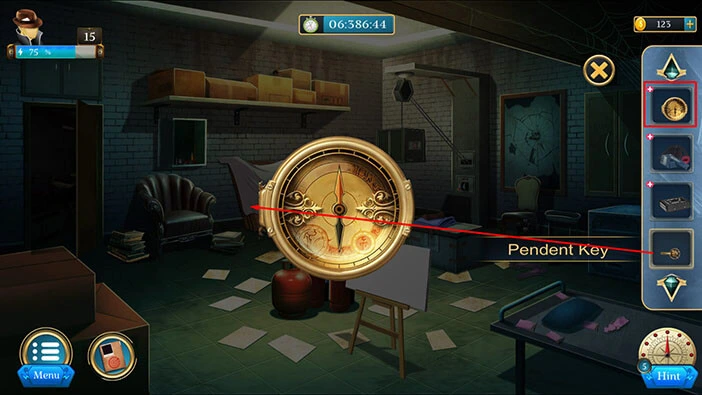
Behind the bucket, you will find a “Pendent key”. Let’s tap on it to pick it up.
After that, tap on the arrow at the bottom to go back.
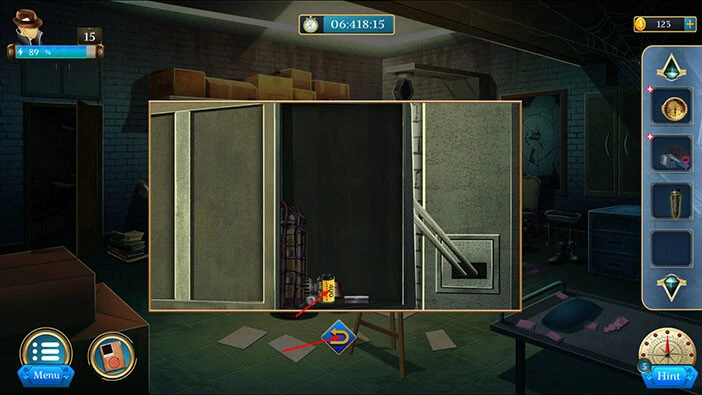
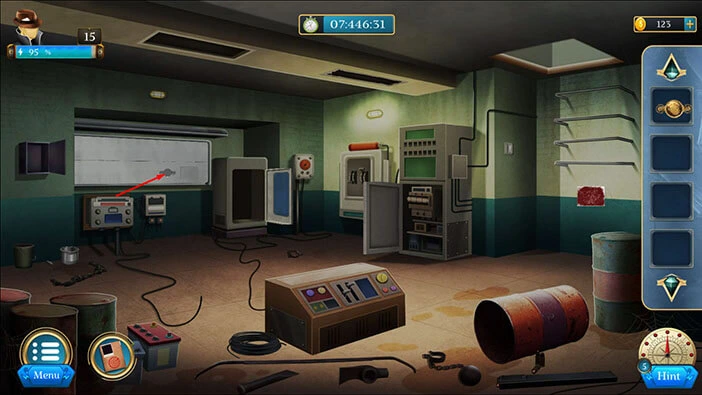
Next, on the right side, you will notice a bit lighter part of the ceiling. Let’s tap on it to take a closer look.
Select the “Steel pipe” from the inventory and use it to smash this part of the ceiling.
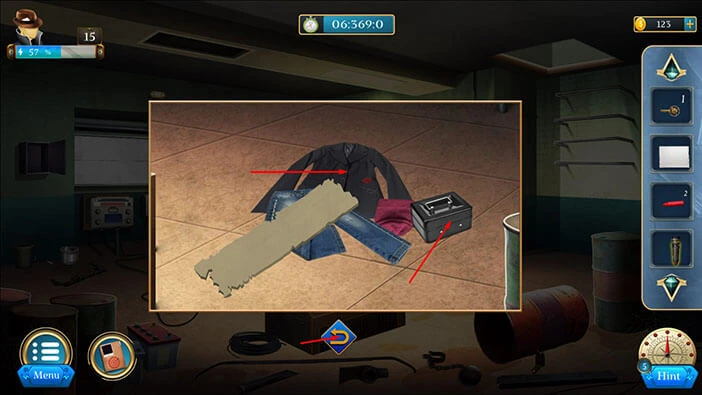
Here, you will discover a “Toolbox” and “Clothes”. Let’s tap on these two items to pick them up.
After that, tap on the arrow at the bottom to go back.
Next, let’s tap on the wall on the right to take a closer look at it.
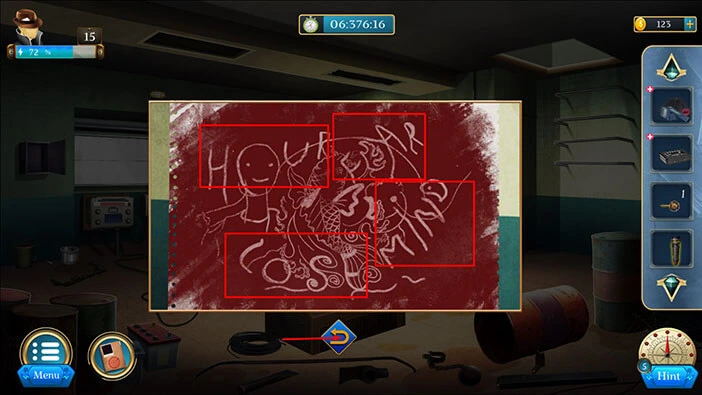
Here, we can see a drawing, but it is barely visible. So, let’s select the “Paper” from the inventory and place it over the drawing.
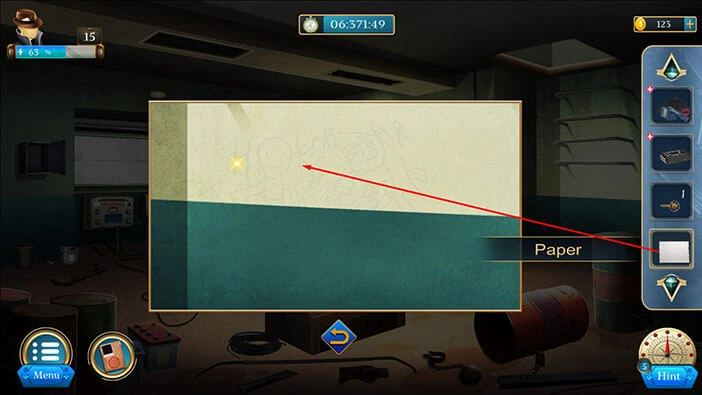
After that, select the “Crayons” from the inventory and use them to copy the drawing.
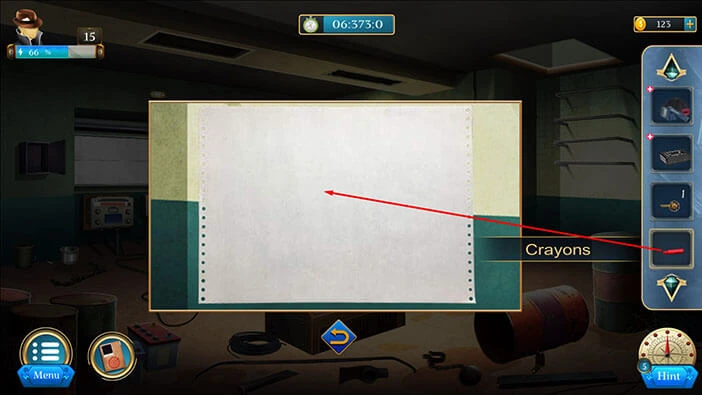
If you closely examine the drawing, you will notice four words. Let’s memorize/write down these words because we will need them for the next puzzle. Here, we have, “Hour”, “Fear” “Mind”, and “Lose”.
Once you’re done, tap on the arrow at the bottom to go back.
Let’s go back to the previous room. Tap on the hole in the ceiling.

Let’s tap on the box on the left to take a closer look at it, and tap again to start the interaction.
Here, we can see four red letters that can’t be changed. So, let’s enter the words that we discovered previously. The order of the words, looking from top to bottom, should be “Hour”, “Lose”, “Mind”, and “Fear”.
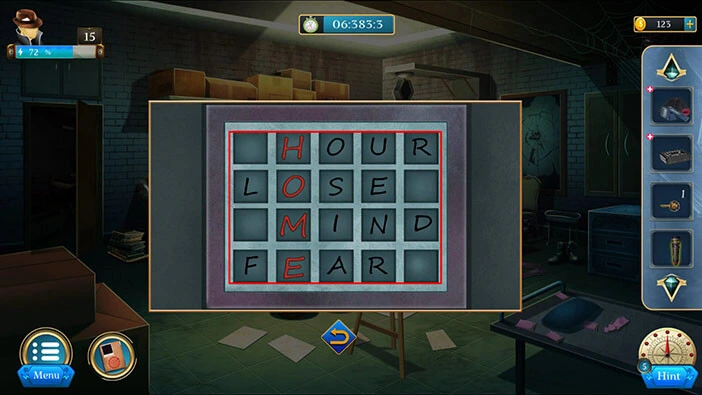
With that, you will unlock the box, and inside you will find a “Pendent”. Let’s tap on it to pick it up.
Once you’re done, tap on the arrow at the bottom to go back.
Select the “Pendent” from the inventory and it will appear in the middle of the screen. After that, select the “Pendent key” from the inventory and insert it into the “Pendent”.
We will need one more item to assemble the “Pendent”. We will come back to it a bit later.
For now, tap on the “X” button to close this window.

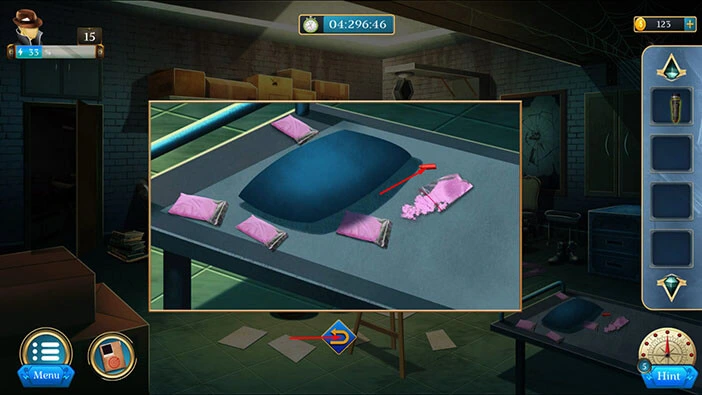
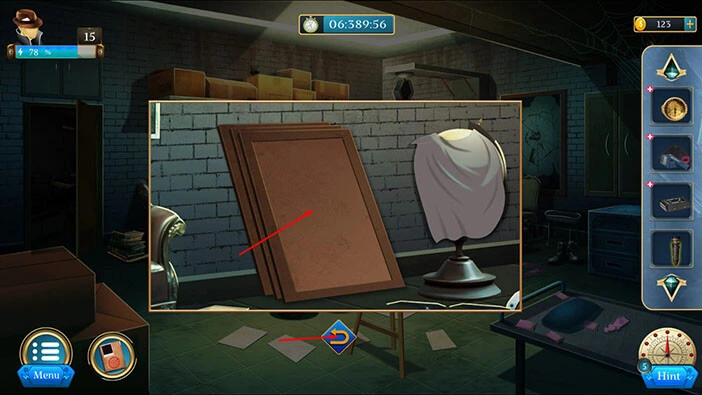
Next, let’s tap on the sheet on the left to take a closer look at it, and tap again to move it aside.
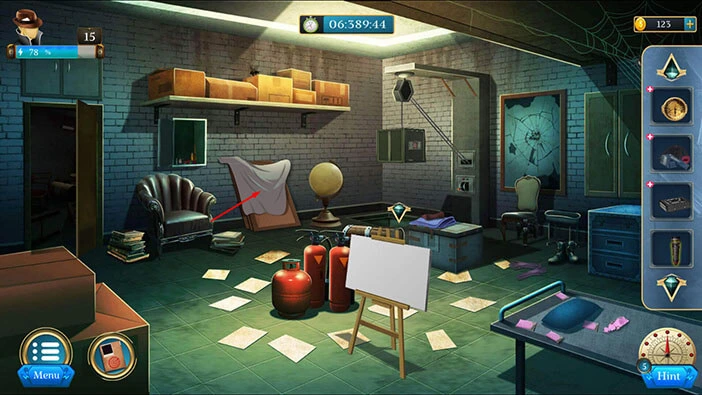
Under the sheet, you will discover three “Portraits”. Let’s tap on them to pick them up.
After that, tap on the arrow at the bottom to go back.
Let’s go back to the “secret” room. Tap on the arrow under the box.

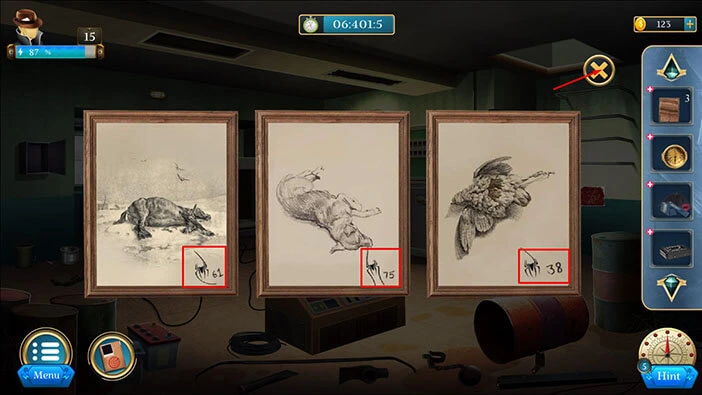
Let’s examine the three “Portraits” by selecting them in the inventory. They will appear in the middle of the screen.
In the bottom right corner of each picture, you will notice two numbers and a spider. These numbers represent the hint for the next puzzle. But, we first have to discover the order of the numbers.
So, let’s examine the spiders in the pictures. You will notice that the spider in the third picture doesn’t have one longer leg.
The spider in the first picture has one long leg, and the spider in the second picture has two long legs.
So, if we order the picture by this standard, we will get,
First = Third picture = 38
Second = First picture = 61
Third = Second picture = 75
When we put it all together, we will get the number “386175”. Let’s memorize/write down this number.
Once you’re done, tap on the “X” button to close this window.
Select the “Toolbox” from the inventory and it will appear in the middle of the screen. After that, tap on the lock on the “Toolbox” to start the interaction.
Let’s enter the number “386175” that we discovered by examining the portraits. Once you’re done, tap on the “Enter” button to confirm.
With that, you will unlock the toolbox, and inside you will find a “Weighing stone”. Let’s tap on it to pick it up. After that, tap on the “X” button to close this window.
Let’s go back to the previous room. Tap on the hole in the ceiling.
Let’s tap on the box to take a closer look at it, and tap again to start the interaction.

Select the “Weighing stone” from the inventory and attach it to the hook.
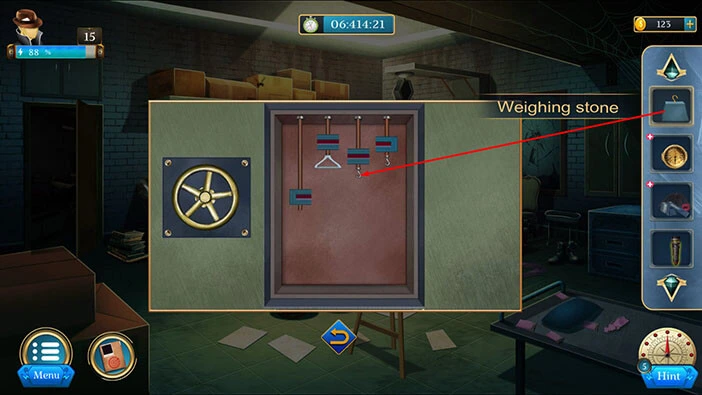
Every string should have the same length as the string with the “Weighing stone”. So, let’s tap three times on the second string. After that, tap three times on the fourth string.
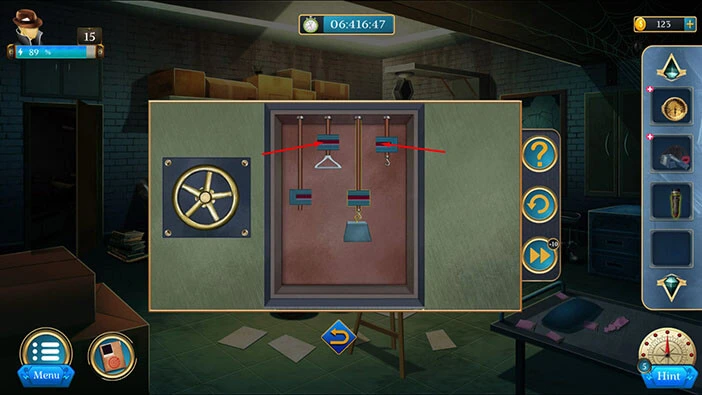
With that, you will unlock the box, and inside you will find a “Film”. Let’s tap on it to pick it up. After that, tap on the arrow at the bottom to go back.
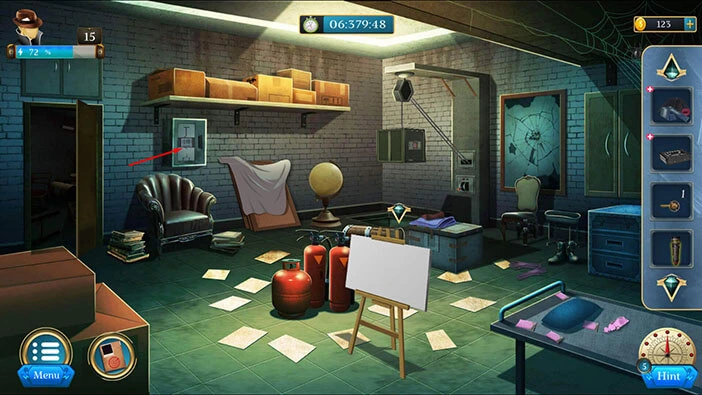
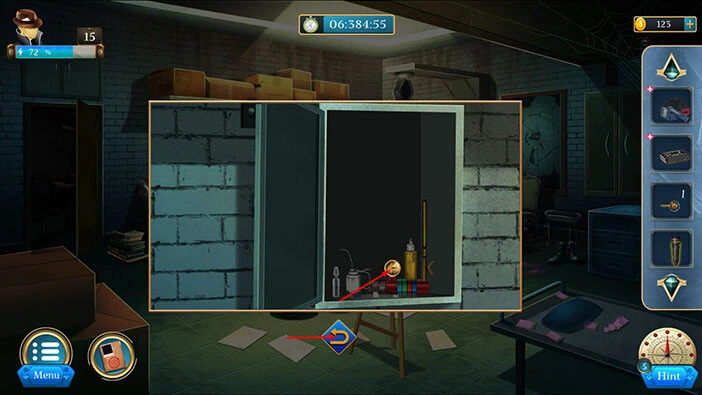
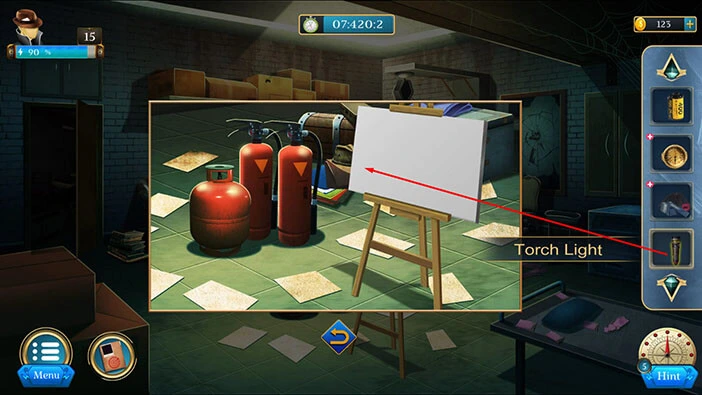
Next, let’s tap on the white board to take a closer look at it.
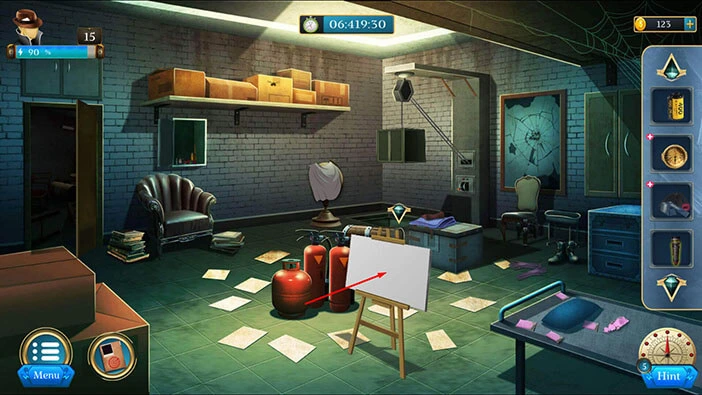
Next, select the “Torchlight” from the inventory and place it in front of the board.
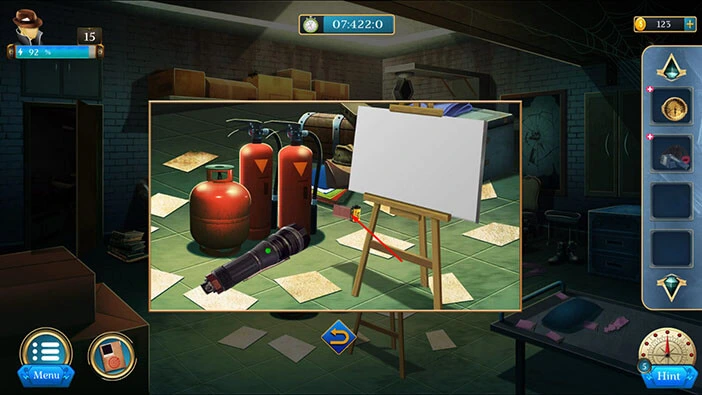
After that, select the “Film” from the inventory and place it in front of the board.
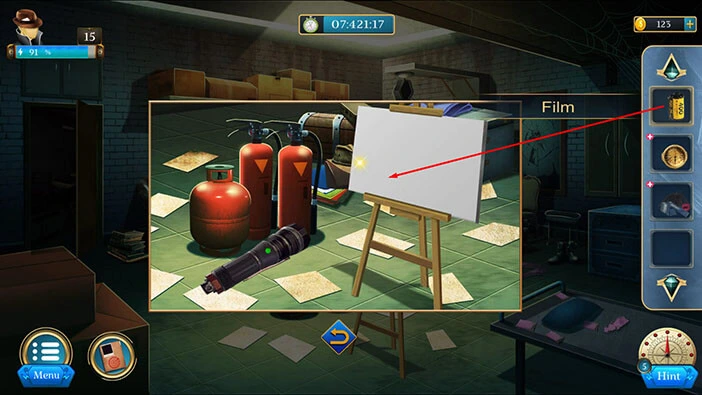
Lastly, tap on the “Film” to turn on the “Torchlight”.
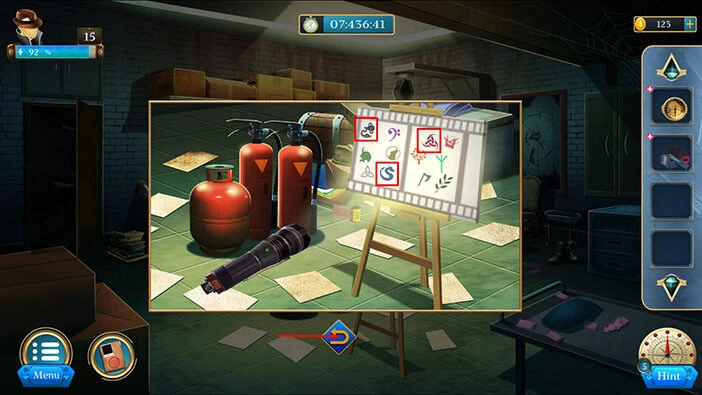
Some symbols will appear on the board. Let’s memorize/write down the black symbol, the blue symbol, and the red symbol. We will use these three symbols to solve the next puzzle.
Once you’re done, tap on the arrow at the bottom to go back.
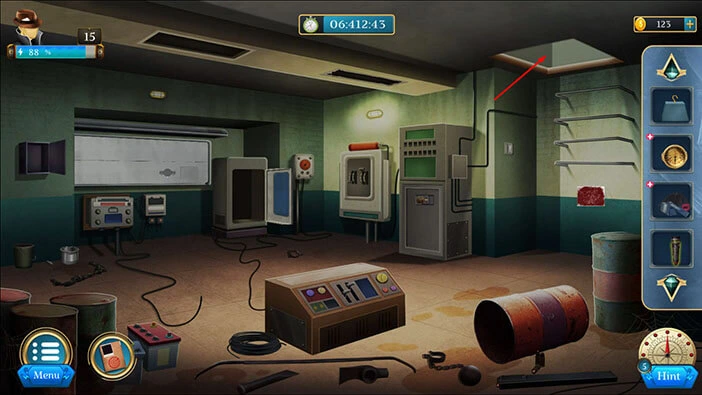
Let’s go back to the secret room. Let’s tap on the arrow under the box.
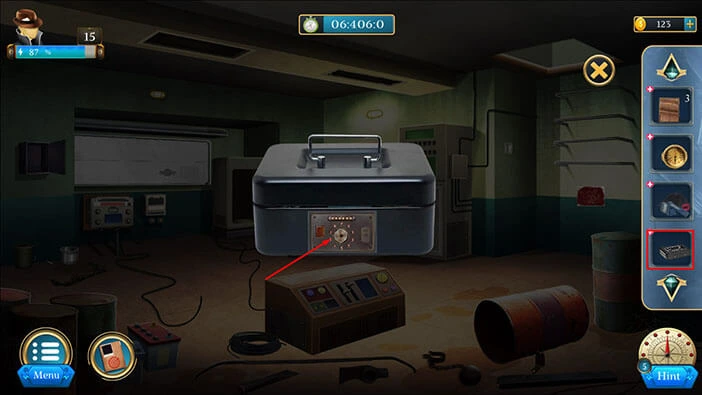
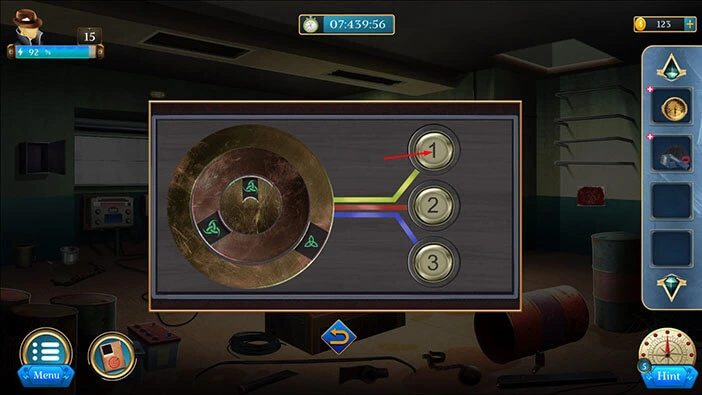
Next, let’s tap on the machine on the right to take a closer look at it, and tap again to start the interaction.
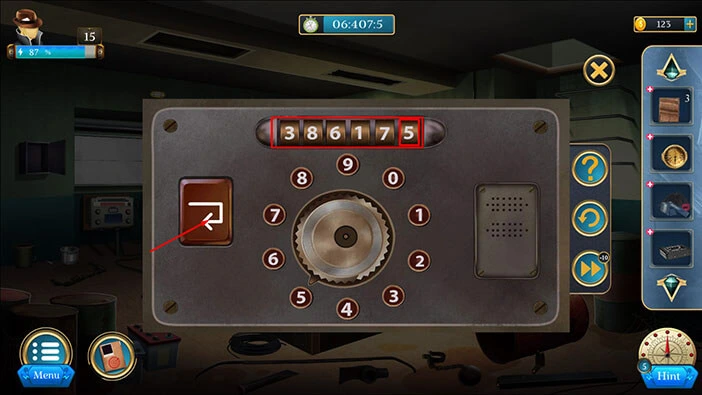
Our next task is to set the three symbols that we saw on the board. We will do that in several steps. Let’s begin.
Step 1
Let’s tap twice on the number 1.
Step 2
Let’s tap five times on the number 2.
Step 3
Let’s tap eight times on the number 3.

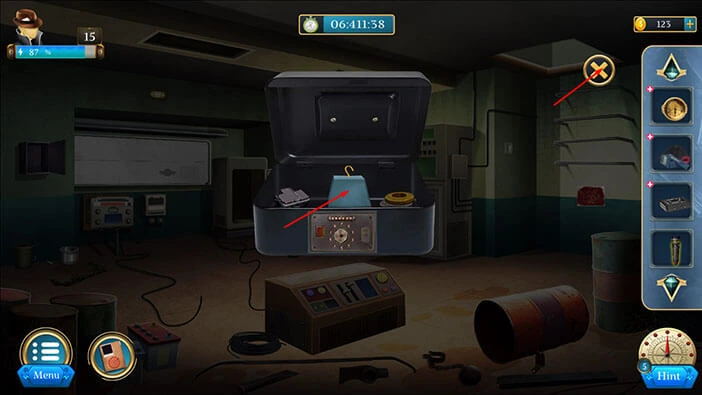
With that, you will unlock the machine, and inside you will find a “Pendent key”. Let’s tap on it to pick it up.
After that, tap on the arrow at the bottom to go back.
Let’s select the “Pendent” from the inventory and it will appear in the middle of the screen. After that, select the “Pendent key” from the inventory and insert it into the other slot.
With that, you will assemble the “Pendent”. Let’s tap on it to pick it up. After that, tap on the “X” button to close this window.

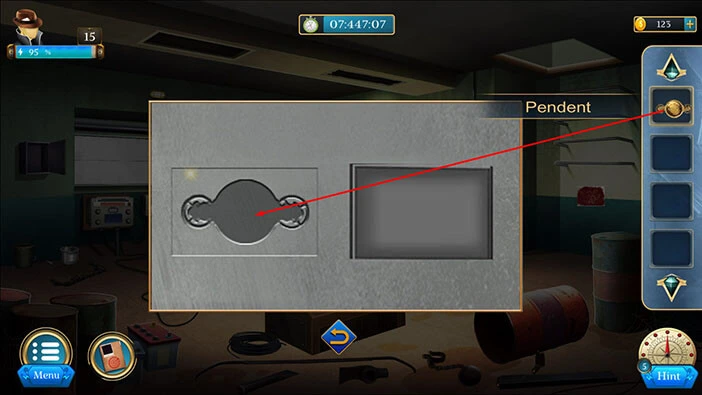
Next, let’s tap on the empty slot in the large board on the left to take a closer look at it.
Select the “Pendent” from the inventory and insert it into the empty slot.
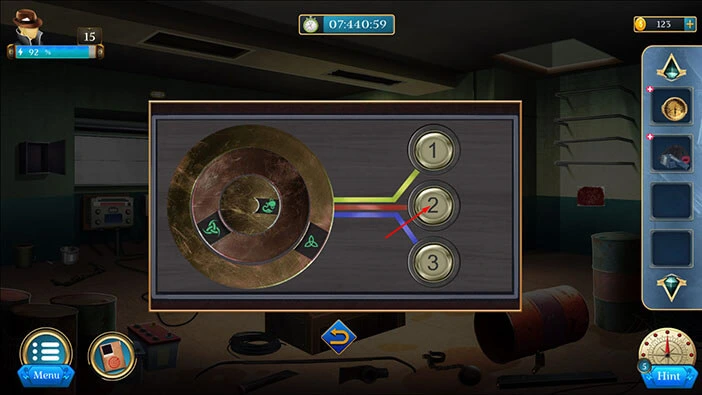
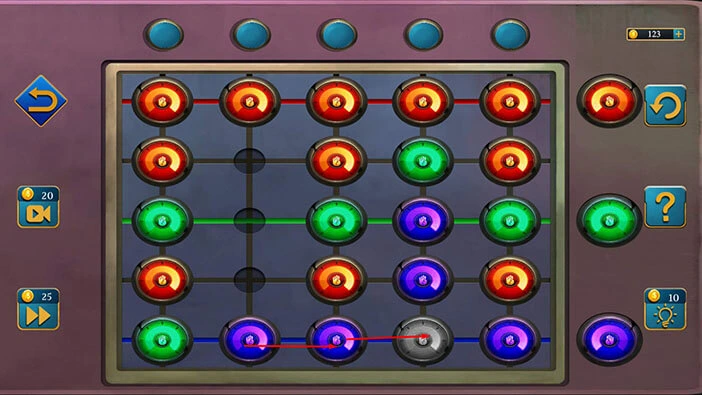
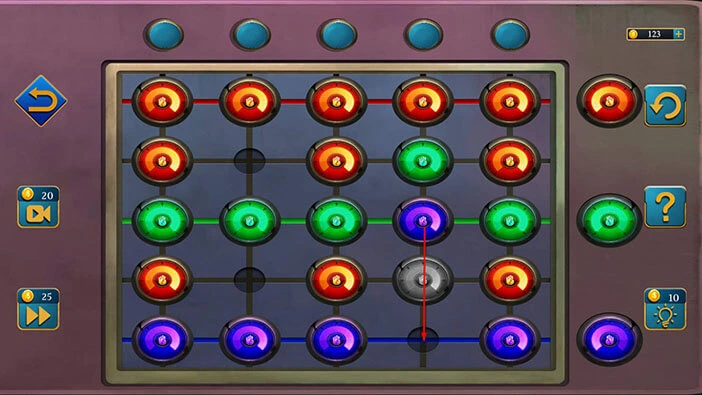
Here, you will discover another puzzle. Let’s tap on it to start the interaction.
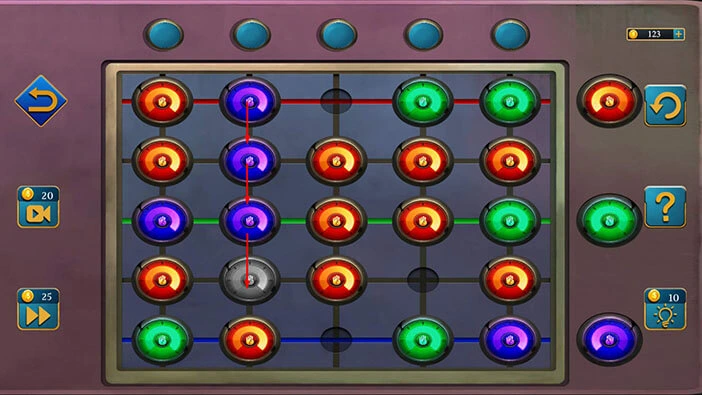
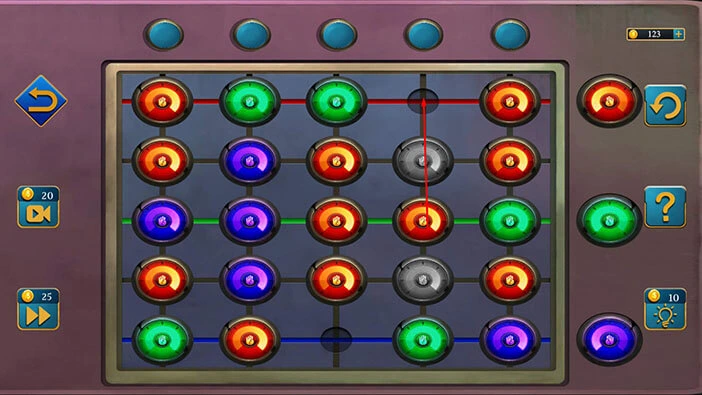
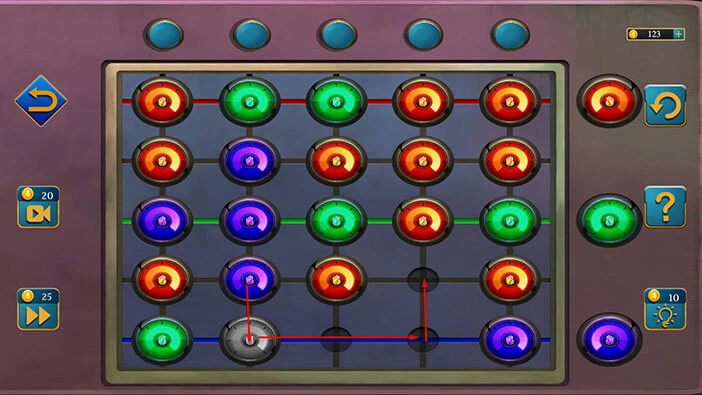
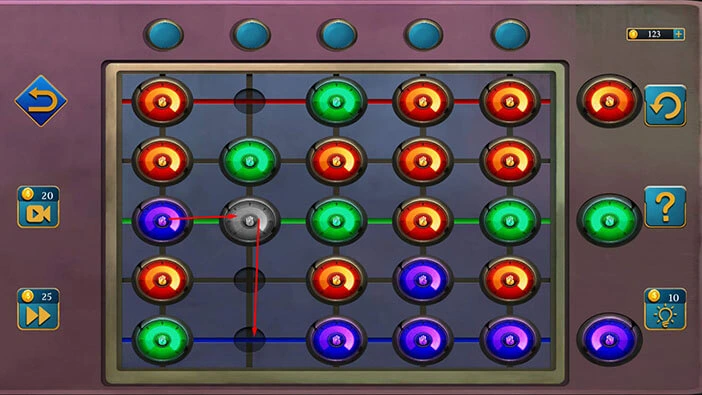
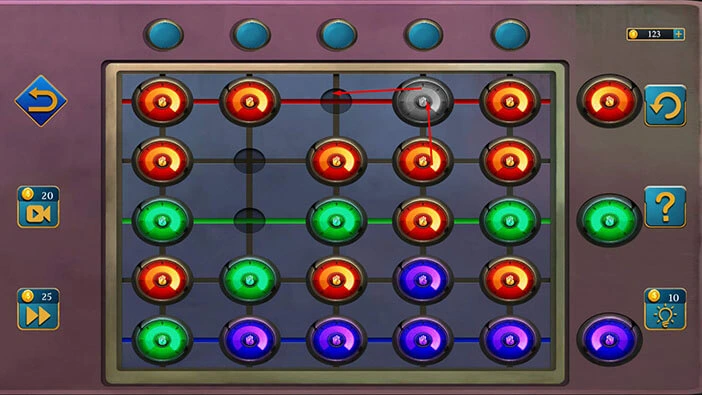
You will notice a red line, a green line, and a purple line. Besides that, you will also notice two grey lines.
Our task is to place all five purple disks on the purple line, all five green disks on the green, line, and five of the red disks on the red line (you will be left with six red disks, and you should place them somewhere on the two grey lines).
We will do this puzzle in several steps. Let’s begin.
Step 1
Select all three purple disks in the second column and move them one slot down.
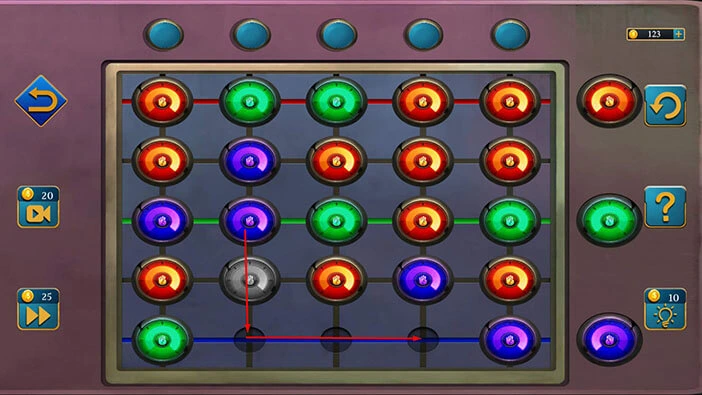
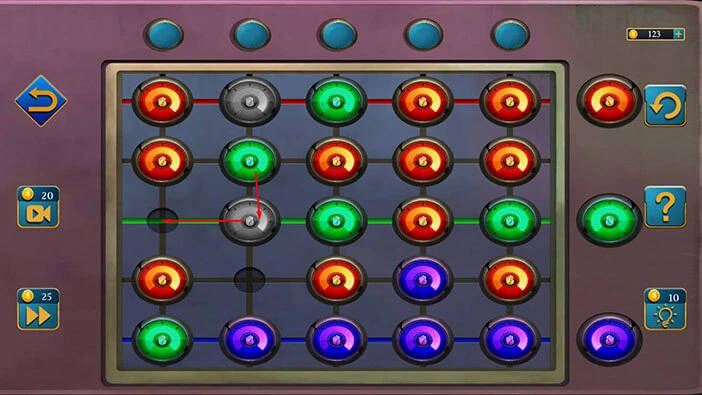
Step 2
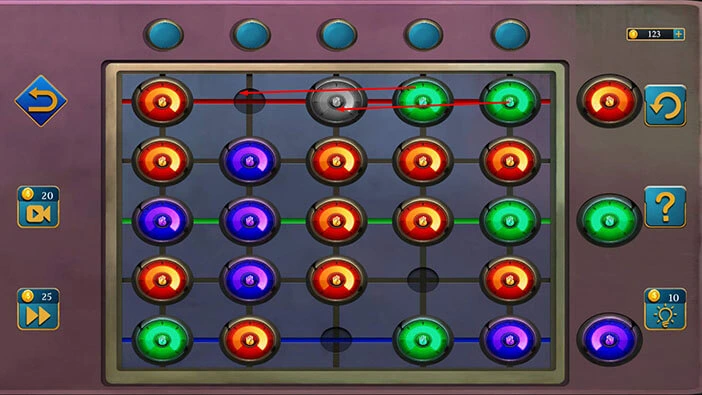
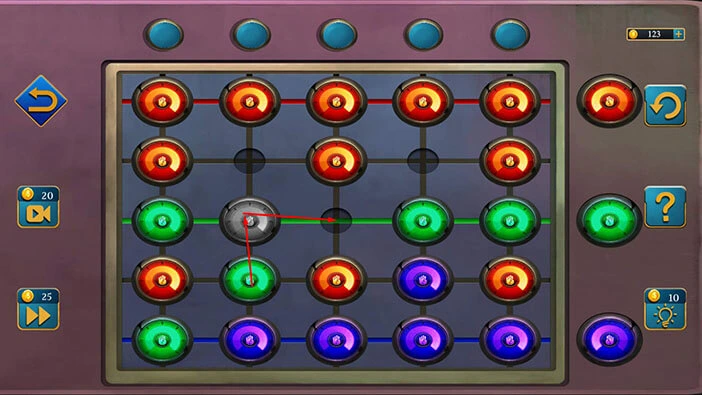
Select the two green disks in the first row and move them two slots to the left.
Step 3
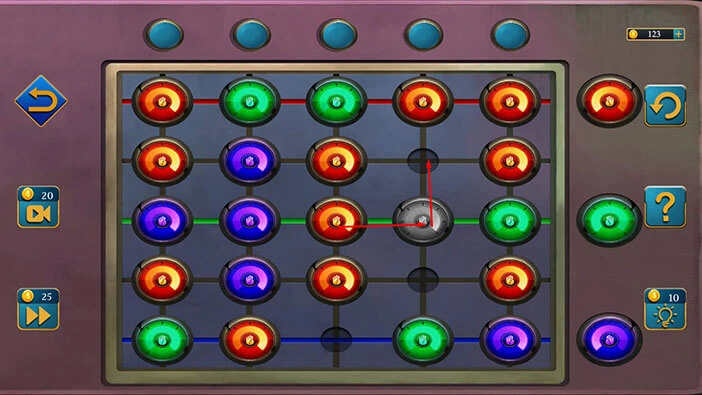
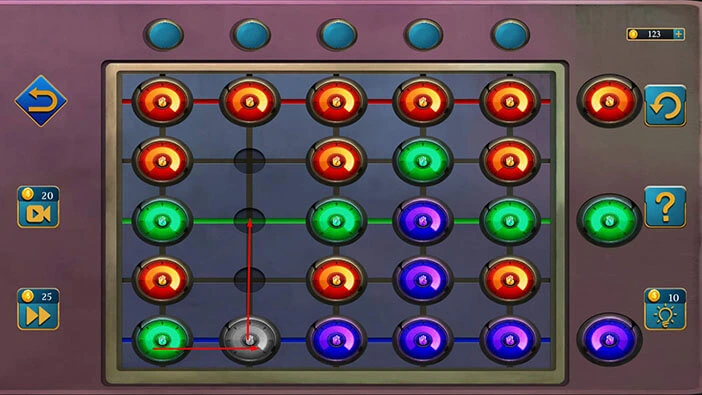
Select the red disk located in the fourth slot of the second row, and move it one slot up, and then one slot to the right.
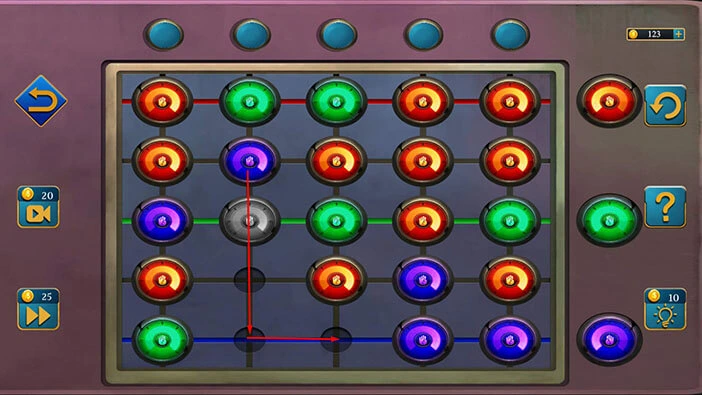
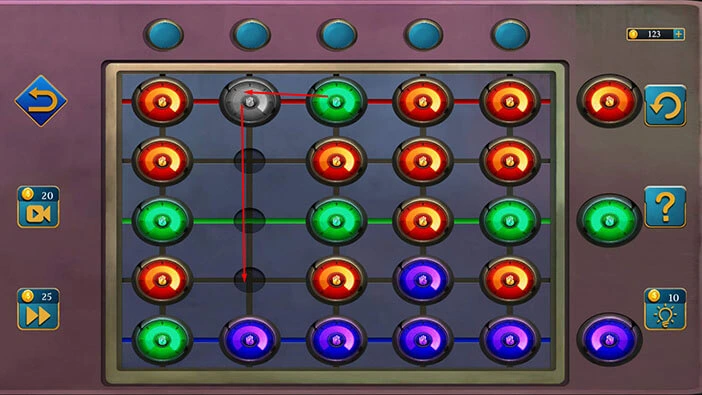
Step 4
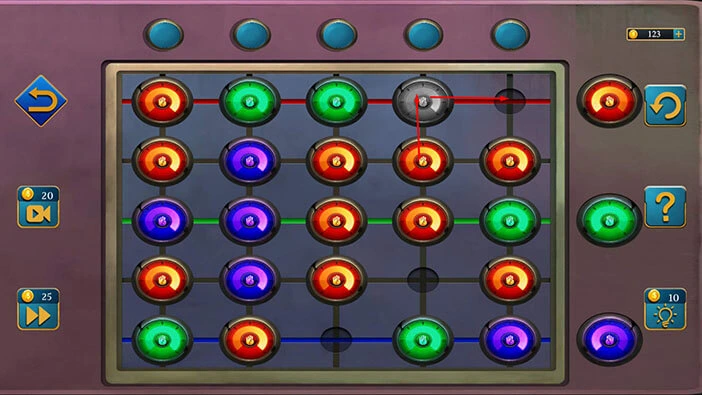
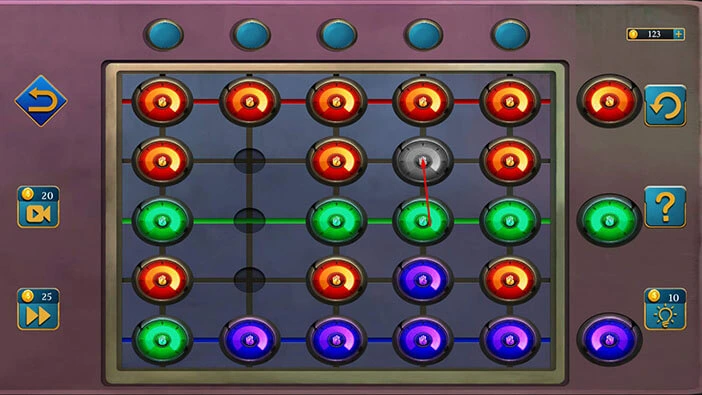
Select the red disk located in the fourth slot of the third row, and move it two slots up.
Step 5
Select the red disk located in the third slot of the third row, and move it one slot to the right, then one slot up.
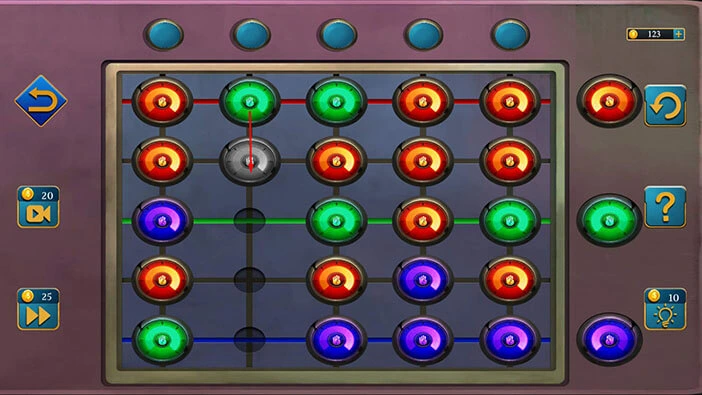
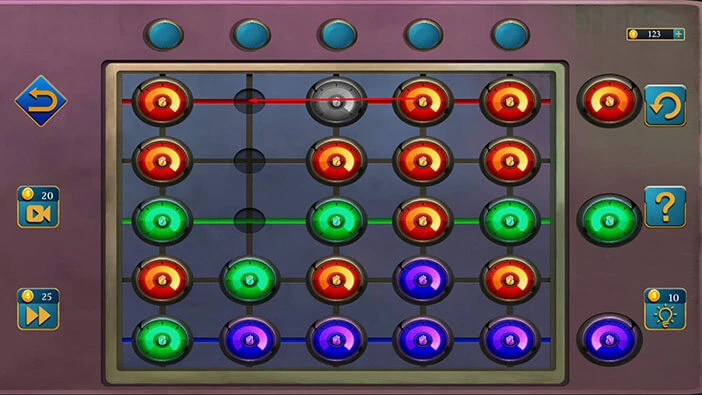
Step 6
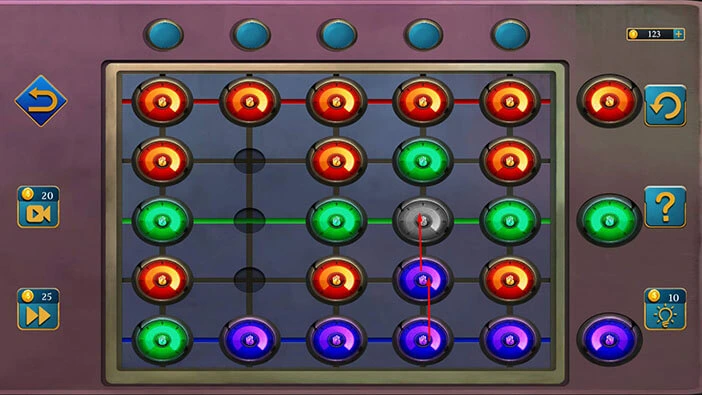
Select the green disk located in the fourth slot of the fifth row, and move it two slots up, and then one slot to the left.
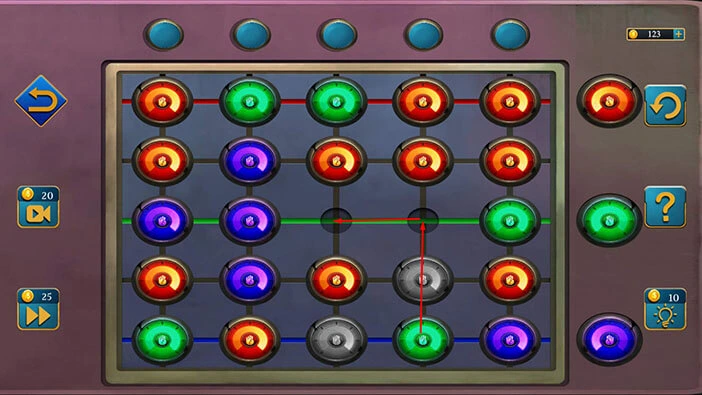
Step 7
Select the red disk located in the second slot of the fifth row, and move it two slots to the right, and then two slots up.
Step 8
Select the purple disk located in the second slot of the fourth row, and move it one slot down, and then two slots to the right. Lastly, move this disk one slot up.
Step 9
Select the purple disk located in the second slot of the third row, and move it two slots down, and then two slots to the right.
Step 10
Select the purple disk located in the second slot of the second row, and move it three slots down, and then one slot to the right.
Step 11
Select the green disk located in the second slot of the first row, and move it one slot down.
Step 12
Select the purple disk located in the first slot of the third row, and move it one slot to the right, and then two slots down.
Step 13
Select the green disk located in the second slot of the second row, and move it one slot down, and then one slot to the left.
Step 14
Select the green disk located in the third slot of the first row, and move it one slot to the left, and then three slots down.
Step 15
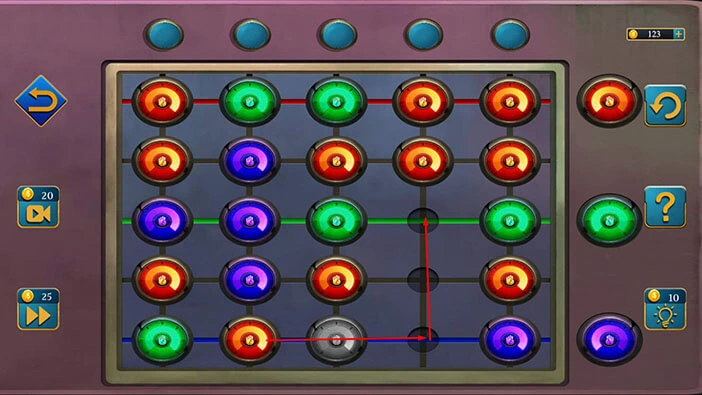
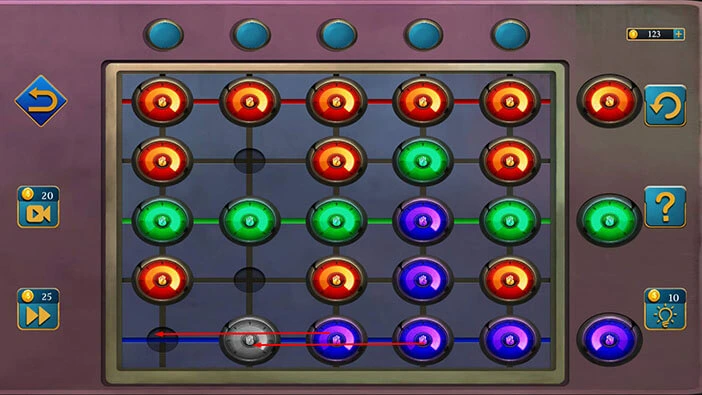
Select the red disk located in the fourth slot of the first row, and move it two slots to the left.
Step 16
Select the red disk located in the fourth slot of the second row, and move it one slot up, and then one slot to the left.
Step 17
Select the red disk located in the fourth slot of the third row, and move it two slots up.

Step 18
Select the green disk located in the third slot of the third row, and move it one slot to the right.

Step 19
Select the green disk located in the second slot of the fourth row, and move it one slot up, and then one slot to the right.
Step 20
Select the green disk located in the fourth slot of the third row, and move it one slot up.
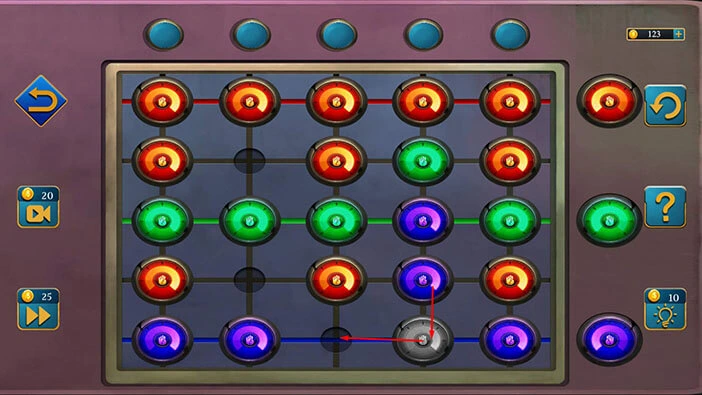
Step 21
Select the purple disks located in the fourth slot of the fourth and fifth rows, and move them one slot up.
Step 22
Select the purple disks located in the third and second slots of the fifth row, and move them one slot to the right.
Step 23
Select the green disk located in the first slot of the fifth row, and move it one slot to the right, and then two slots up.
Step 24
Select the purple disks located in the third and fourth slots of the fifth row, and move them two slots to the left.
Step 25
Select the purple disk located in the fourth slot of the fourth row, and move it one slot down, and then one slot to the left.
Step 26
Select the purple disk located in the fourth slot of the third row, and move it two slots down.
Step 27
Finally, select the green disk located in the fourth slot of the second row, and move it one slot down. With that, you will solve this puzzle.
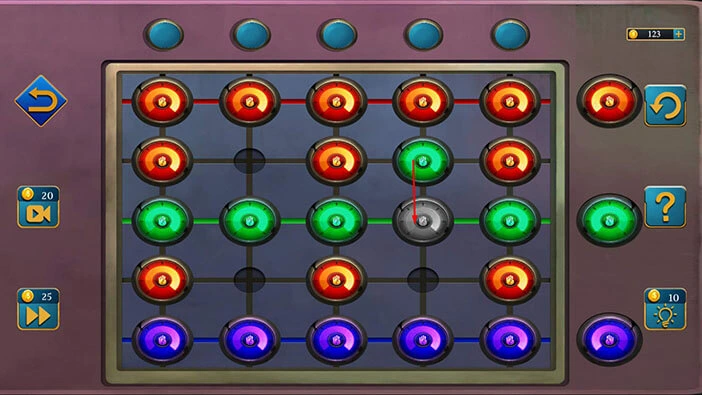
Here, you will discover the pictures of the Black spider’s victims. Let’s tap on the arrow at the bottom.

Our character thinks that the Black Spider regularly visited this hideout because he has a need to look at the pictures that we discovered previously. We denied him access to this hideout, and our character believes that this will make him nervous. So, Detective Kyle predicts that we should be able to catch the distracted Black Spider in the next few days.
With that, we have reached the end of the fifteenth level. If you want to see the walkthrough for the sixteenth level, tap on the next part button.
Thank you for reading.