Room Escape: Detective Phantom | Level 14
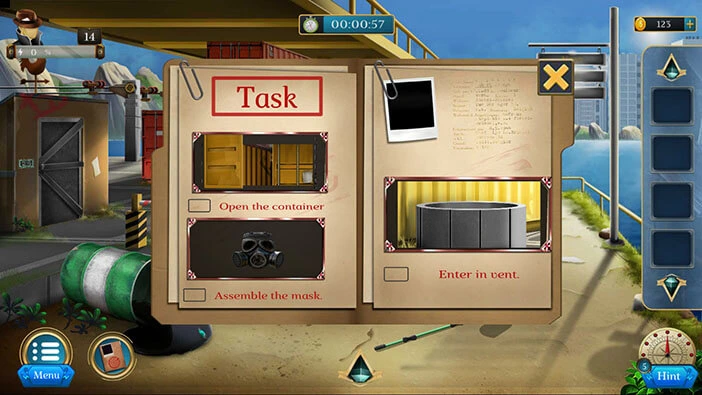
Hello everyone and welcome to the walkthrough for the fourteenth level of “Room Escape: Detective Phantom”. In the fourteenth level, our task is to find Black Spider’s hideout.
Our objectives are to “Open the container” “Assemble the mask” and “Enter in vent”. Tap on the “X” button to go back.
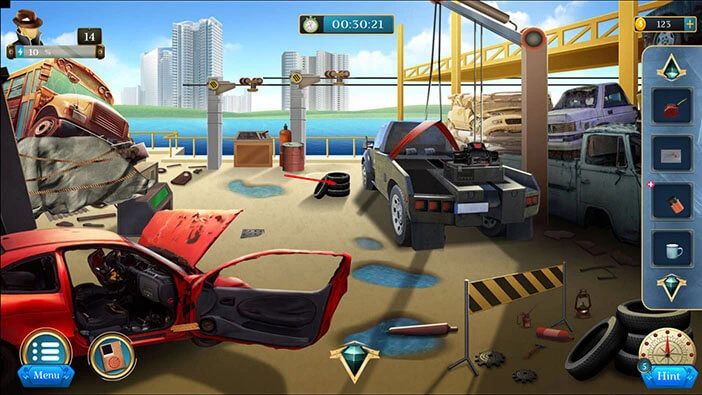
Let’s explore this level. You will see two items on the ground in front of you. Let’s tap on them to take a closer look.
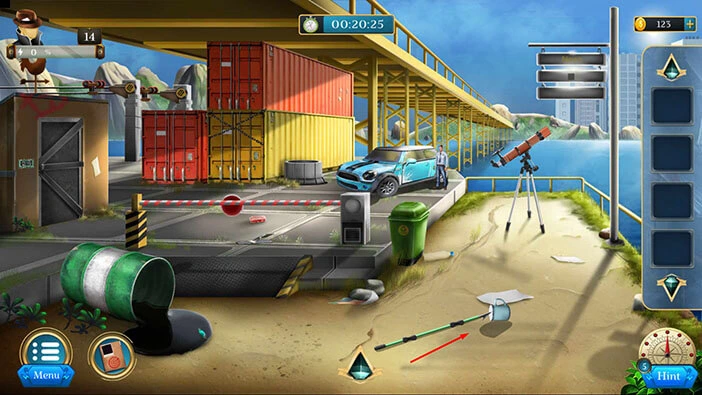
Here, you will find a “Spear hook” and a “Cup”. Let’s tap on these two items to pick them up. After that, tap on the arrow at the bottom to go back.
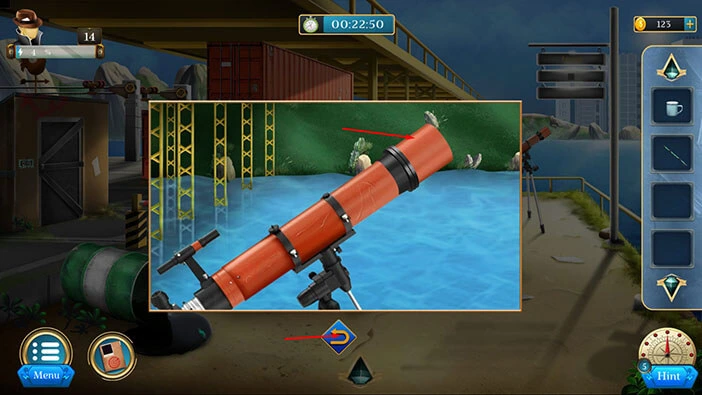
Next, let’s tap on the telescope to take a closer look at it.

Next, tap on the top of the telescope to unscrew it, and tap again to pick it up. “Lens” will be added to your inventory.
After that, tap on the arrow at the bottom to go back.
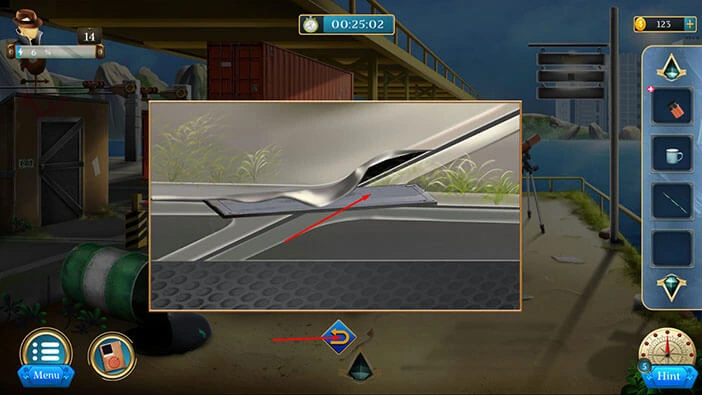
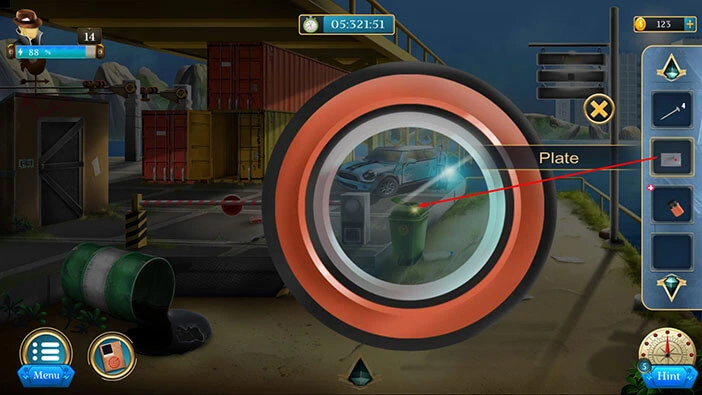
If you take a closer look at the floor, you will notice a hole. Let’s tap on it to take a closer look.

You will notice that something is stuck here. Tap on it, several times, to pull it out, and you will get the “Plate”.
After that, tap on the arrow at the bottom to go back.
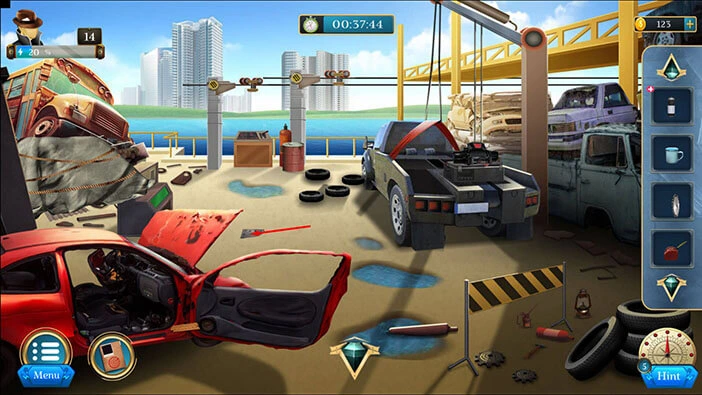
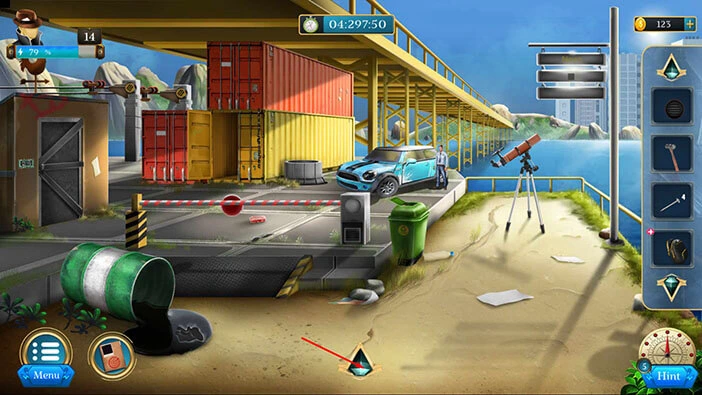
Let’s go to the next area. Tap on the arrow at the bottom of the screen.

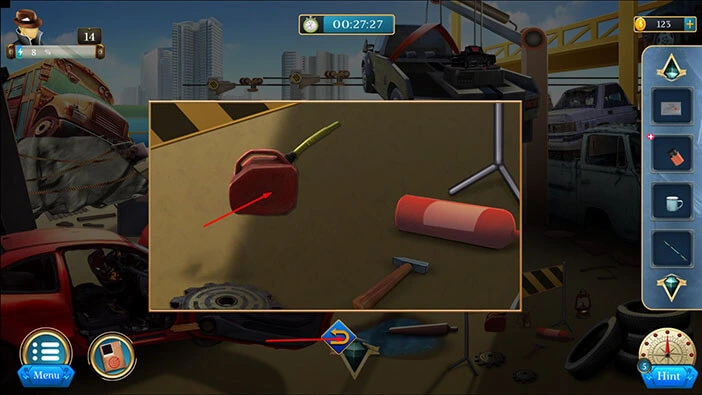
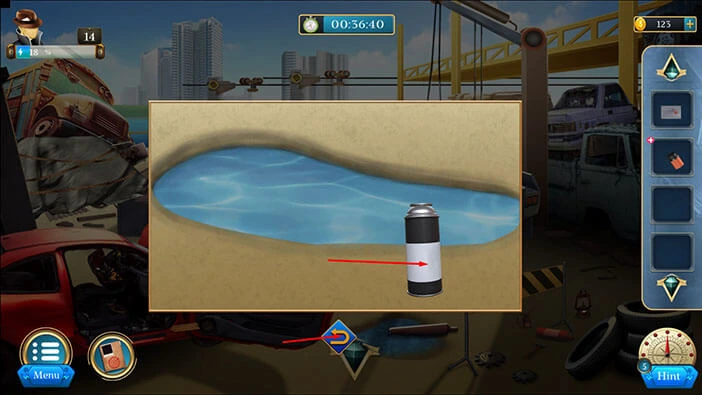
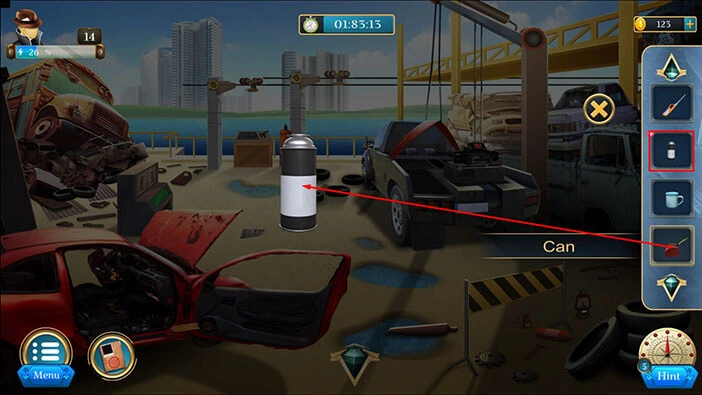
Let’s tap on the bottom right corner of the screen to take a closer look at this area.

Here, we will find a “Can”. Let’s tap on it to pick it up. After that, tap on the arrow at the bottom to go back.
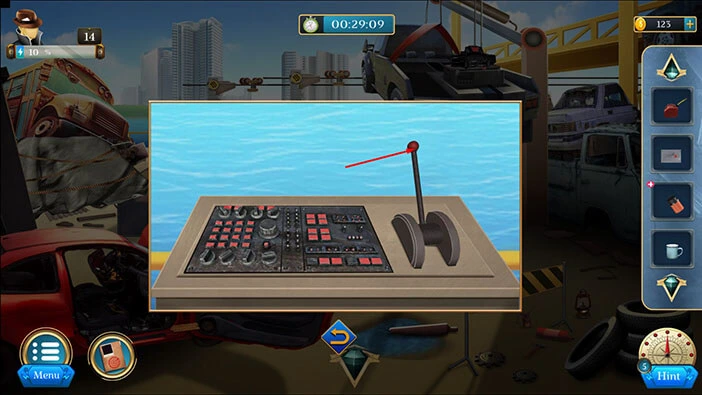
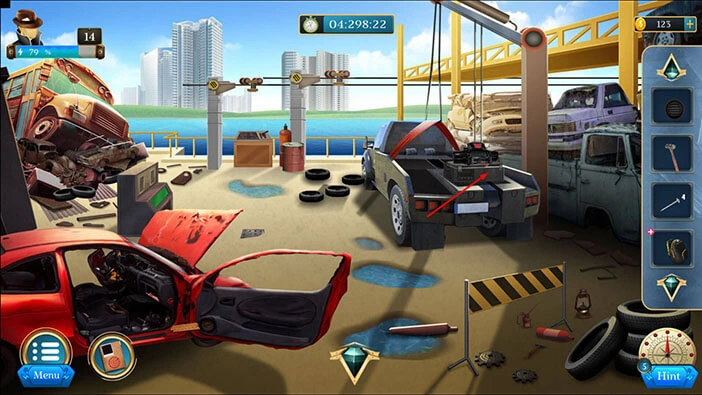
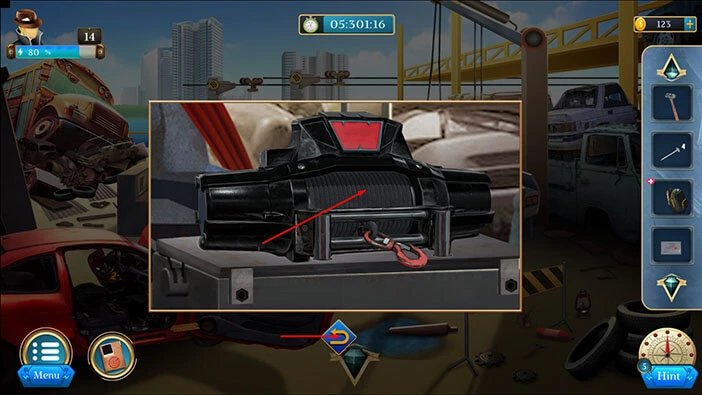
Next, tap on the machine in front of you to take a closer look at it.
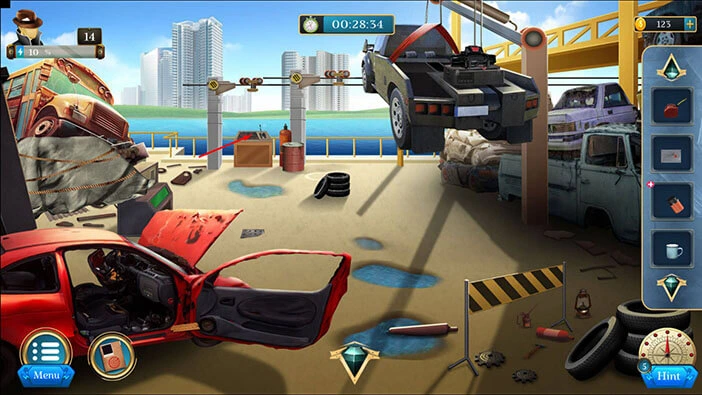
Let’s pull the lever. With that, we will lower the car.
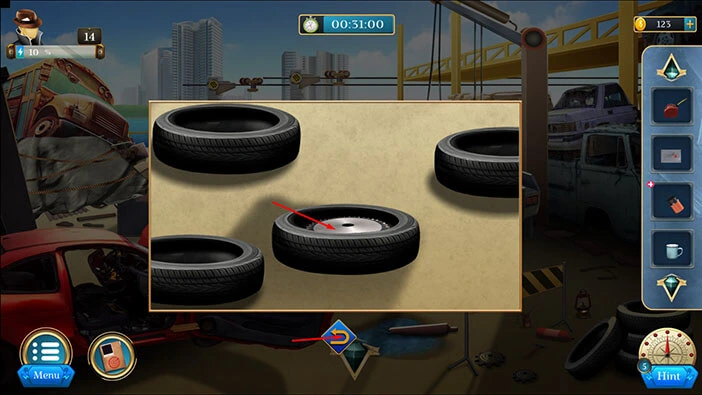
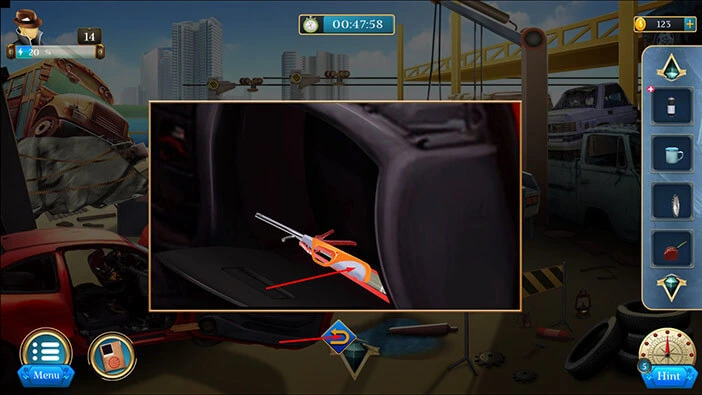
Next, let’s tap on the pile of tires to take a closer look at them. After that, tap on the tires, several times to move them aside.
Under the tires, you will find a “Round blade”. Let’s tap on it to pick it up. After that, tap on the arrow at the bottom to go back.
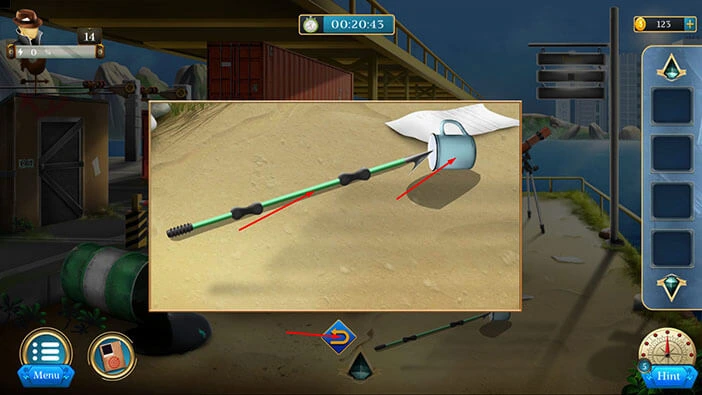
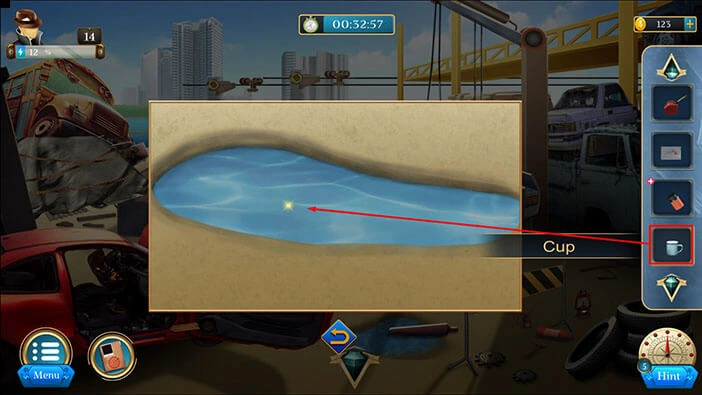
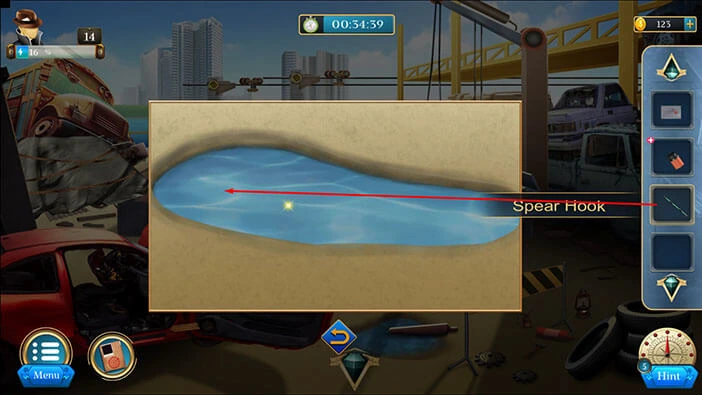
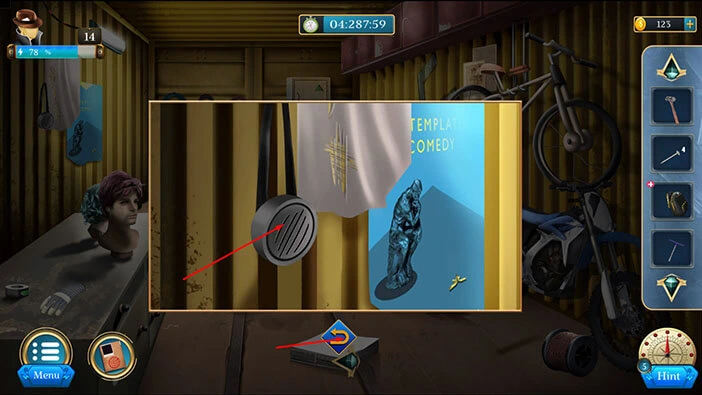
Next, tap on the small pond in front of you to take a closer look.
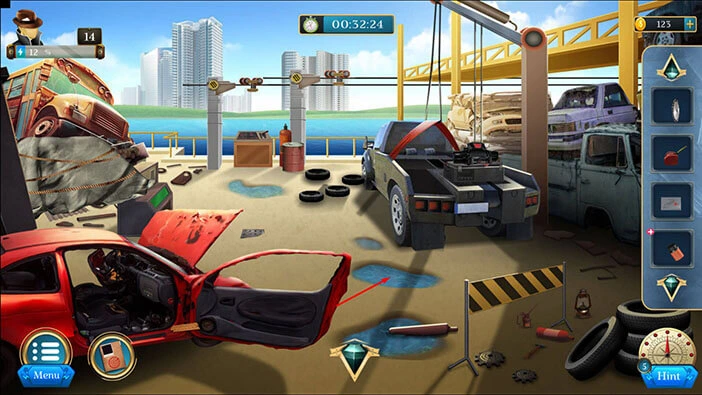
Select the “Cup” from the inventory and fill it with water. After that, tap on the cup to pick it up, and “Water” will be added to your inventory.
Next, select the “Spear hook” from the inventory and drag it to the water.
Next, tap on the left side of the pond and you will discover a bag with an item.
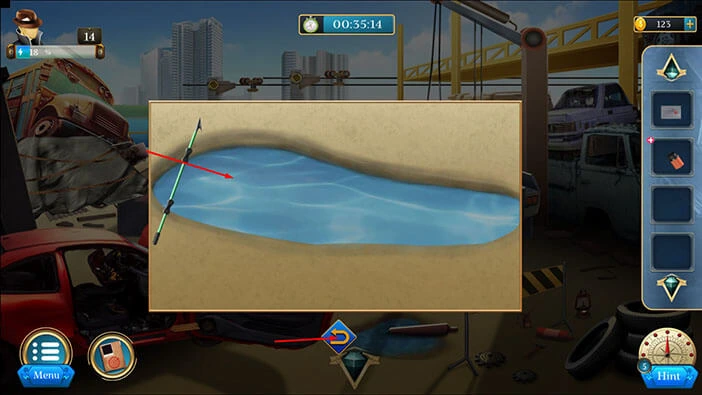
Here, you will discover a “Fire torch”. Let’s tap on it to pick it up. After that, tap on the arrow at the bottom to go back.
Next, if you examine the ground you will notice a metal plate. Let’s tap on it to take a closer look, and tap again to examine it.
Here, you will see four symbols. Starting from left to right we have, a “Car and Wrench”, “Gas Pump Gun”, “Car and lamp”, and “Car in a garage”. Let’s memorize/write down these symbols because we will need them for the next puzzle.
Once you’re done, tap on the arrow at the bottom to go back.
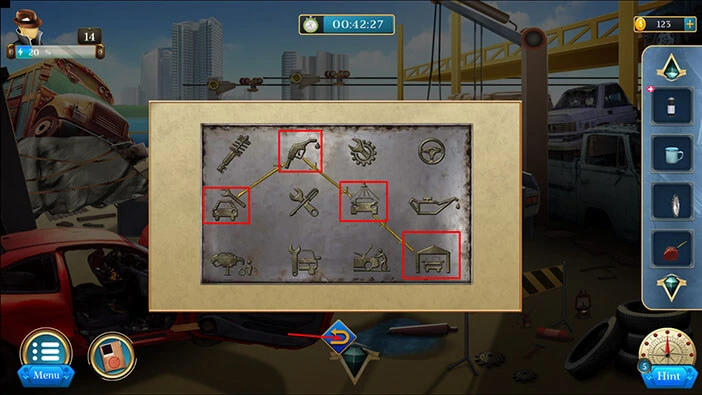
Next, let’s tap on the car on the left to take a closer look at it, and tap again to start the interaction.

Let’s enter the symbols that we previously discovered. Starting from left to right we had, a “Car and Wrench”, “Gas Pump Gun”, “Car and lamp”, and “Car in a garage”.
Once you enter the correct symbols, you will unlock the glove box. Inside you will find a “Lighter”. Let’s tap on it to pick it up.
After that, tap on the arrow at the bottom to go back.
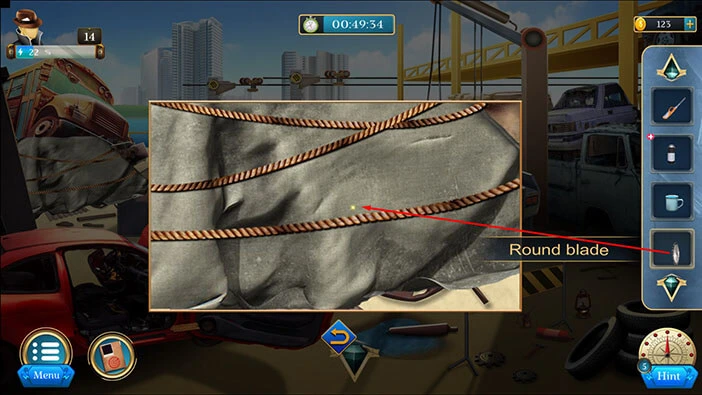
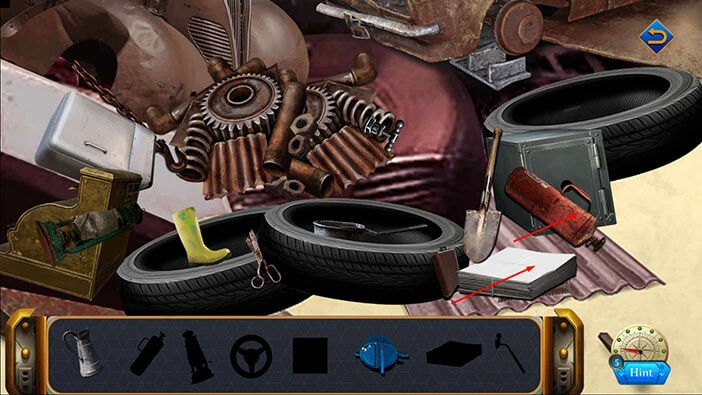
Next, let’s tap on the pile on the left to take a closer look at it.

Let’s see what’s below the sheet. Select the “Round blade” from the inventory and use it to cut the rope. After that, tap on the sheet to remove it and tap again to start the interaction.
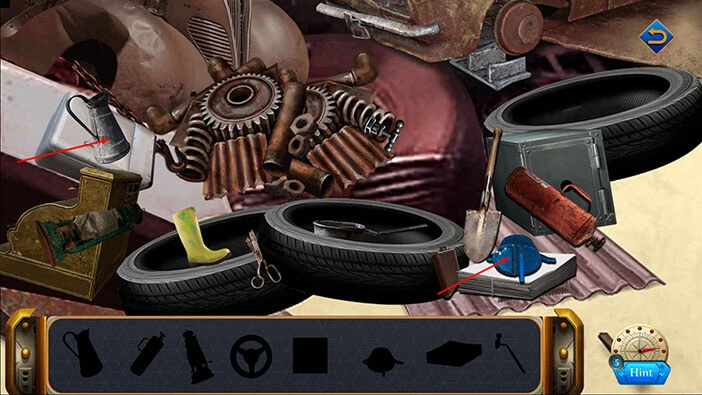
Our next task is to fill the empty slots with items. We will do that in several steps. Let’s begin.
Step 1
Tap on the blue item on the right, then tap on the silver jug on the left.
Step 2
Next, let’s tap on the paper, and the fire extinguisher, both located on the right side.
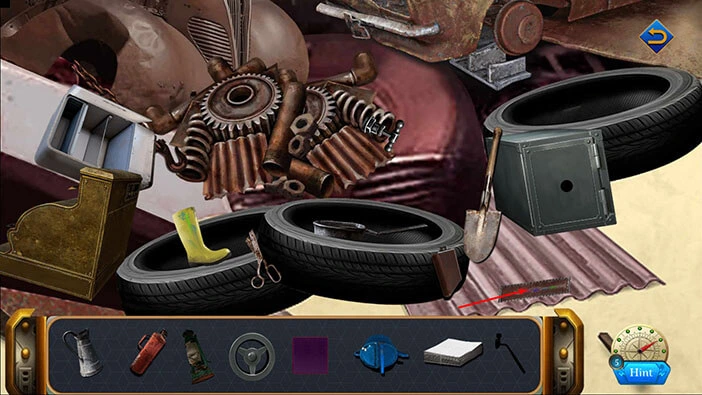
Step 3
Next, let’s tap on the green lantern on the left to pick it up. After that, tap on the fridge (above the lantern) to take a closer look at it, and tap again to open it.

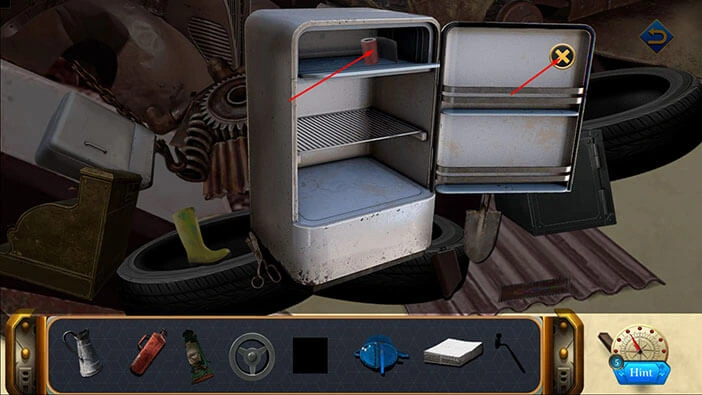
Step 4
In the fridge, you will find a wheel. Let’s tap on it to pick it up. After that, tap on the top part of the fridge to open it.
Here, you will find a piece of cloth. Let’s tap on it to take a closer look and tap again to take a piece of cloth. After that, tap on the “X” button to close this window.
Next, let’s tap on the dirty plate, located below the shovel to take a closer look at it.
Select the “Piece of cloth” from the bottom of the screen and use it to clean the dirty plate.
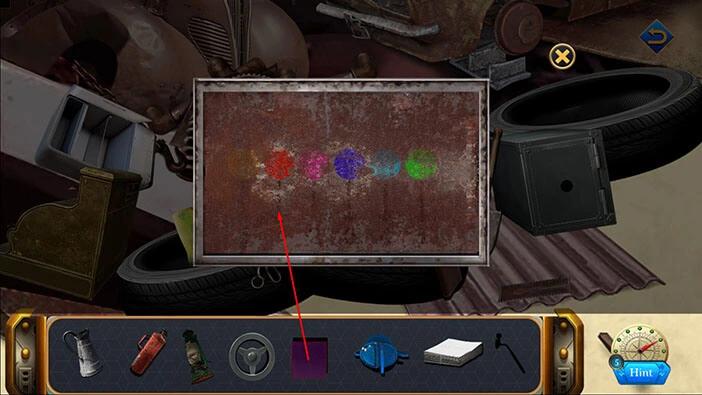
Once you clean the plate, you will discover a hint. Let’s memorize/write down the correct order of the colors. Here, we have,
The first color = Red
The second color = Pink
The third color = Green
The fourth color = Light blue
The fifth color = Yellow
The sixth color = Blue
Once you’re done, tap on the “X” button to put down the plate.
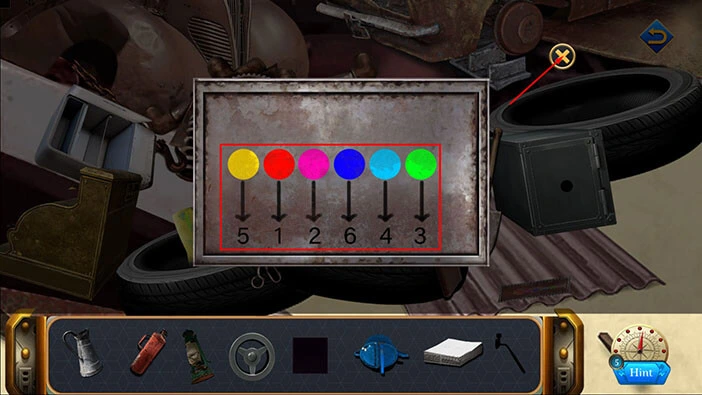
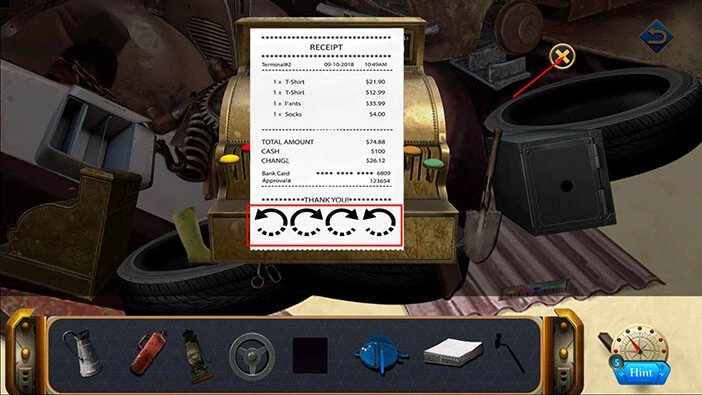
Next, let’s tap on the cash register on the left to take a closer look at it.

Let’s tap on the colors in the order that we previously discovered.
The first color = Red
The second color = Pink
The third color = Green
The fourth color = Light blue
The fifth color = Yellow
The sixth color = Blue
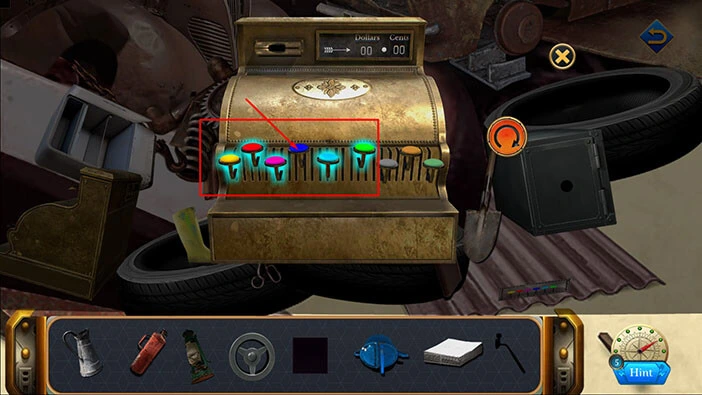
Once you tap on the correct colors, you will get the “Ticket”. Let’s tap on it to pick it up.
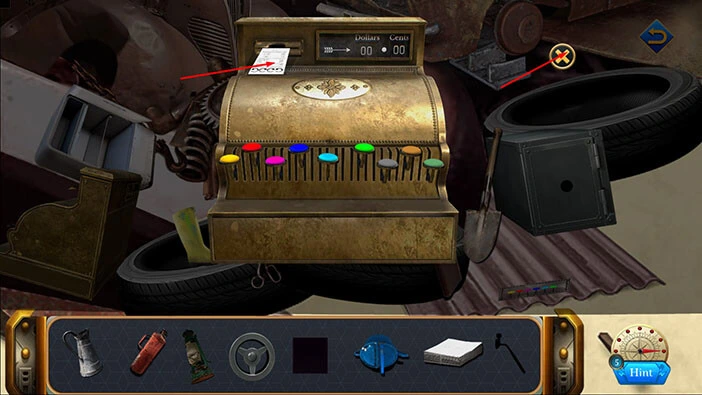
Here, we can see four arrows. Let’s memorize/write down the direction of the arrows because this information represents a hint for the next puzzle. So, we have,
Left/Right/Right/Left. Once you’re done, tap on the “X” button to put down the ticket.
Next, let’s tap on the safe on the right to take a closer look at it.

Select the wheel from the bottom and insert it into the empty slot.
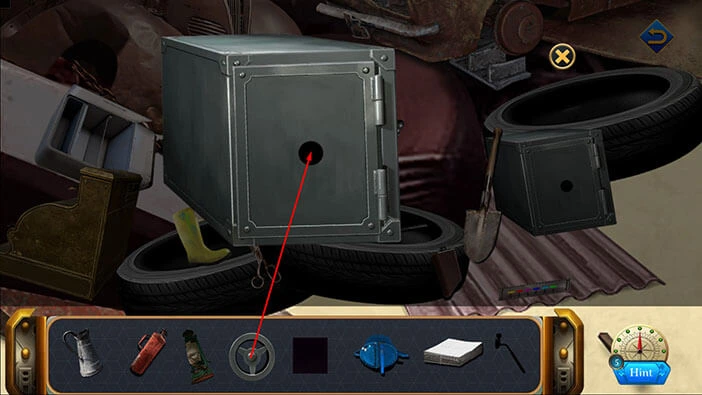
Two arrows will appear on the right, so let’s tap on them in the order that we discovered previously. So, tap on the Left/Right/Right/Left arrow.
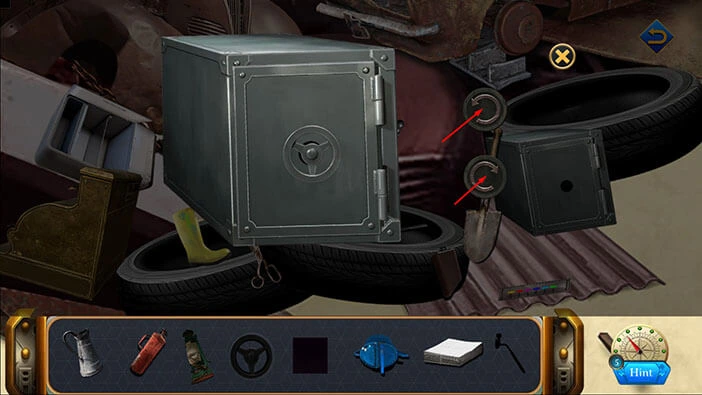
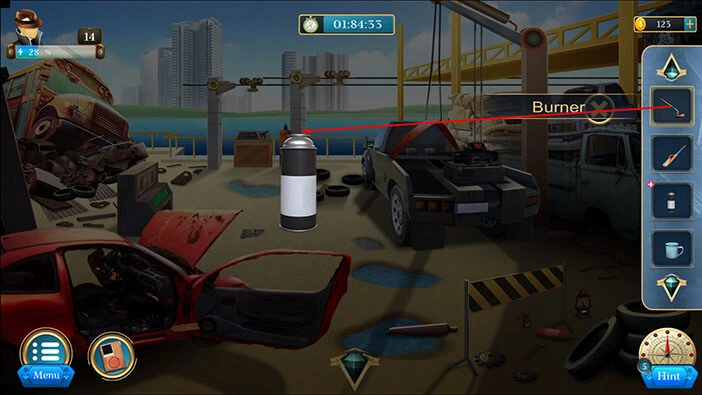
In the safe, you will find a “Burner”. Let’s tap on it to pick it up.
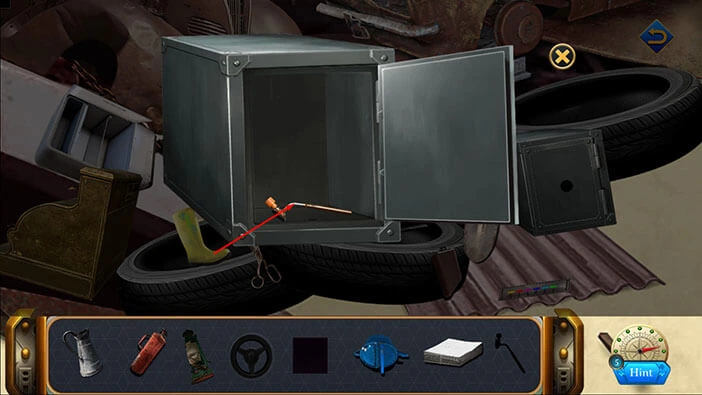
Select the “Fire Torch” from the inventory and it will appear in the middle of the screen. After that, select the “Can” from the inventory and pour some gasoline into the “Fire Torch”.
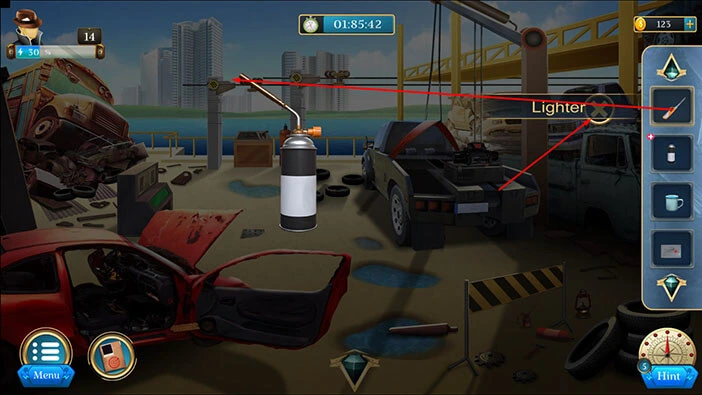
Next, select the “Burner” from the inventory and attach it to the top of the “Fire Torch”.
Lastly, select the “Lighter” from the inventory and test the “Fire Torch”. After that, tap on the assembled “Fire Torch” to pick it up.
Once you’re done, tap on the “X” button to close this window.
Let’s go back to the previous area. Tap on the arrow at the bottom of the screen.
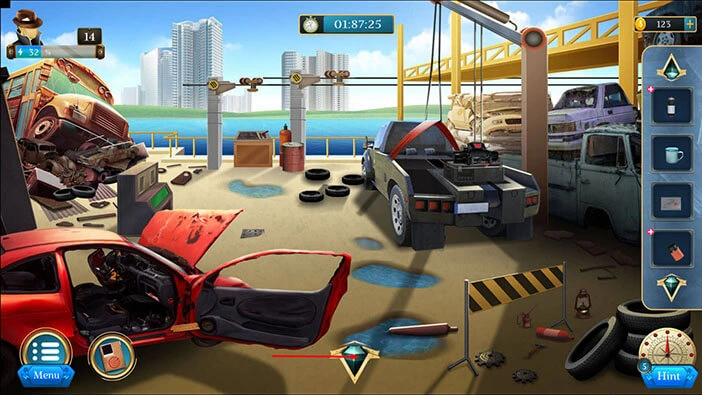
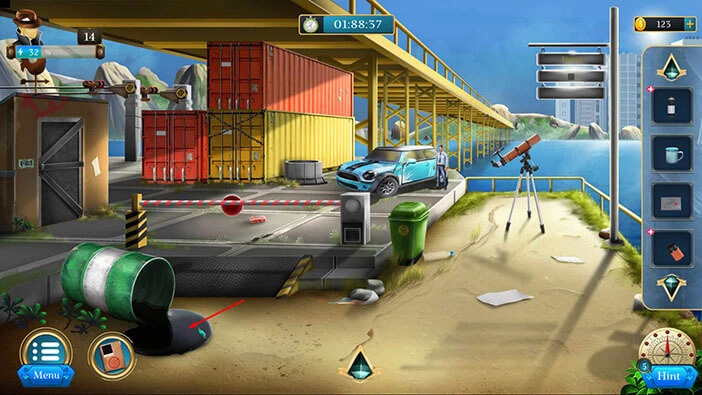
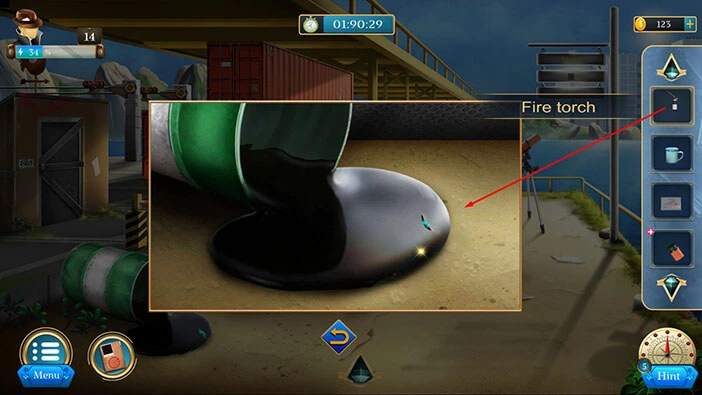
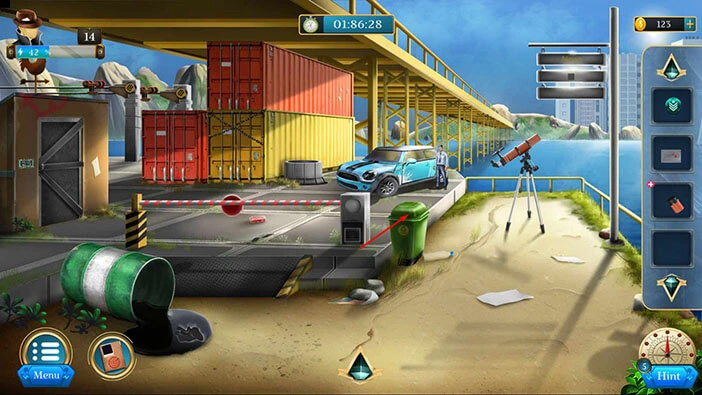
Next, tap on the spilled oil on the left to take a closer look at it.
You will notice an item in the oil, but our character can’t reach it. So, let’s select the “Fire Torch” from the inventory and drag it next to the oil.
Next, select the “Lighter” from the inventory and place it next to the torch.
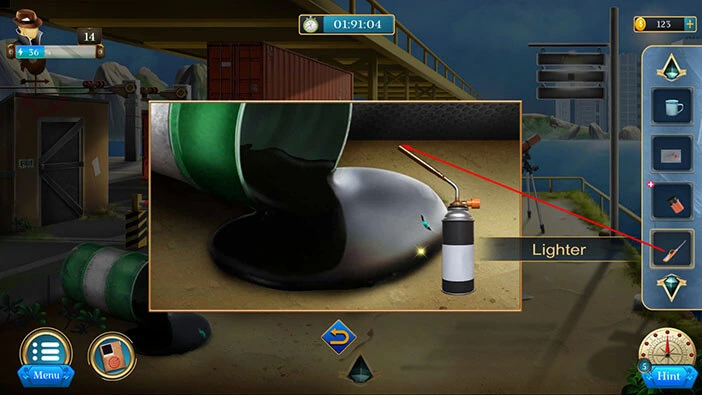
Lastly, tap on the torch and lighter to activate them, and you will have an active “Fire Torch”.
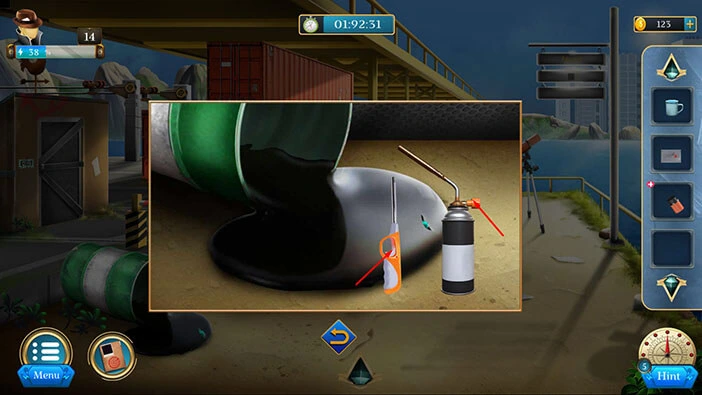
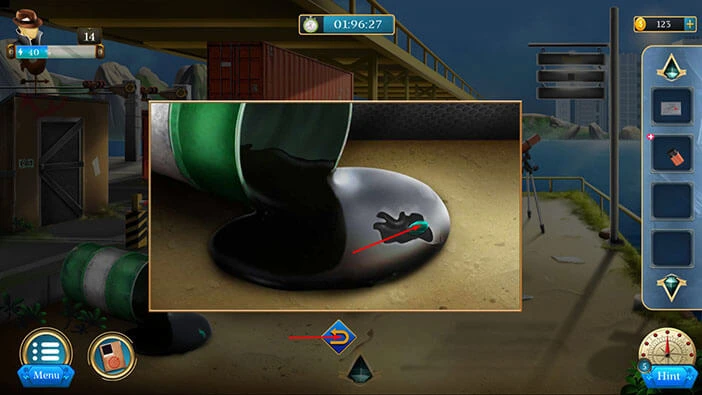
We can now reach the item, but it is too hot. So, select the water from the inventory and pour it on the item.
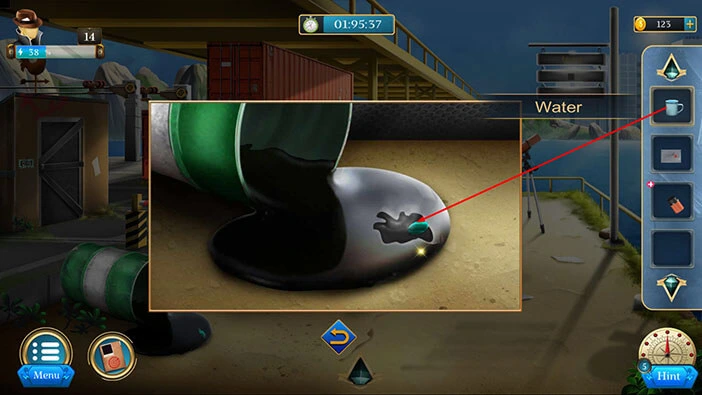
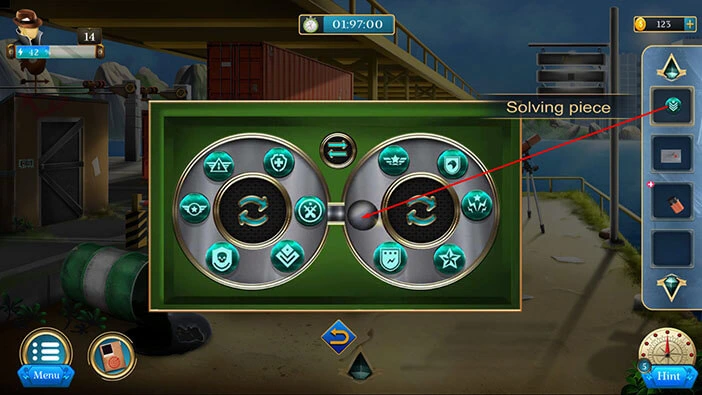
Lastly, let’s tap on the “Solving Piece” to pick it up. After that, tap on the arrow at the bottom to go back.
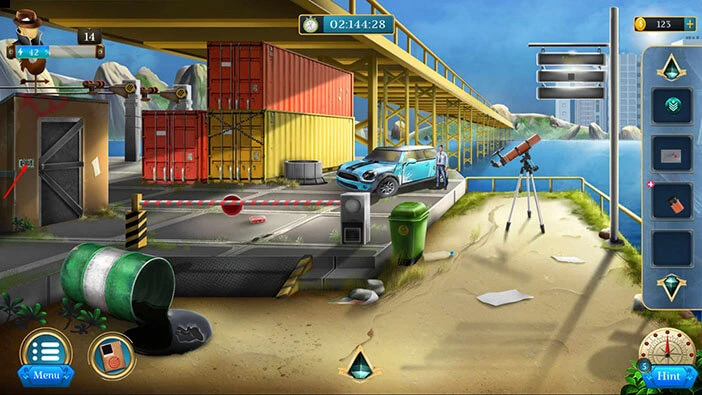
We can use the “Solving Piece” to solve the next puzzle, but first, we need to gather a bit more information. So, let’s take a look around.
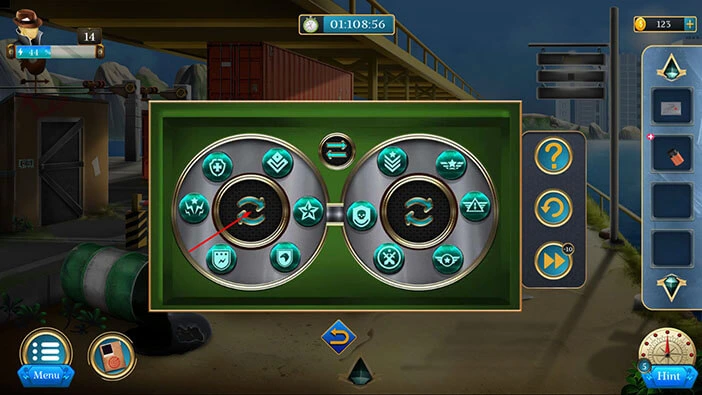
On the left, you will notice a door, and next to it, you will see a small panel. Let’s tap on it to take a closer look and tap again to examine it.
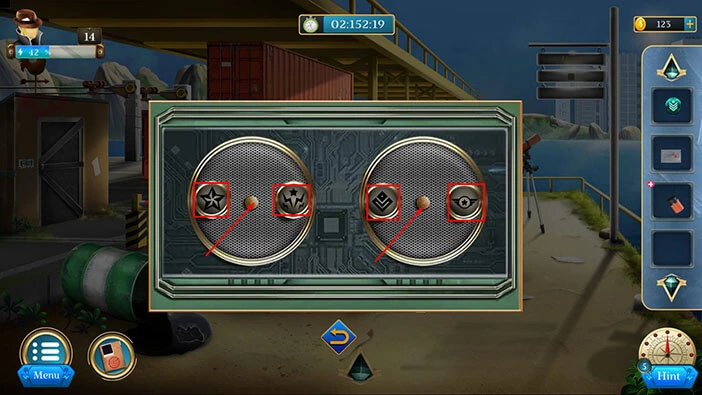
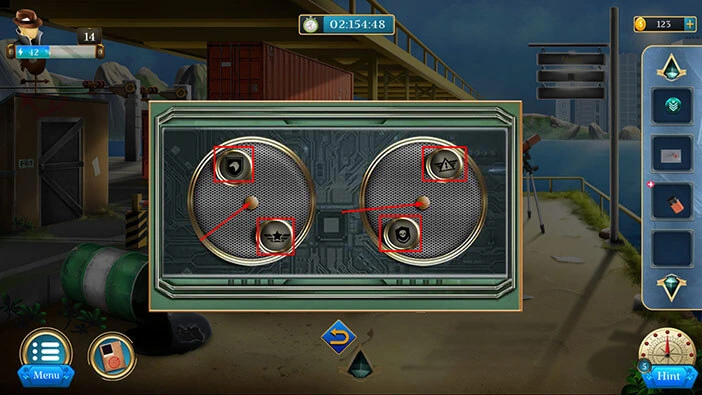
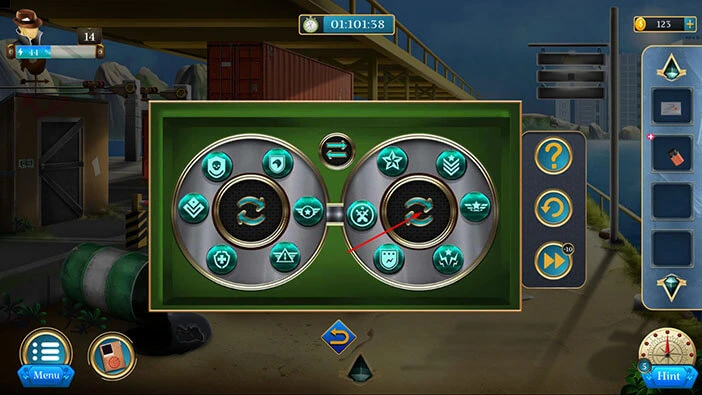
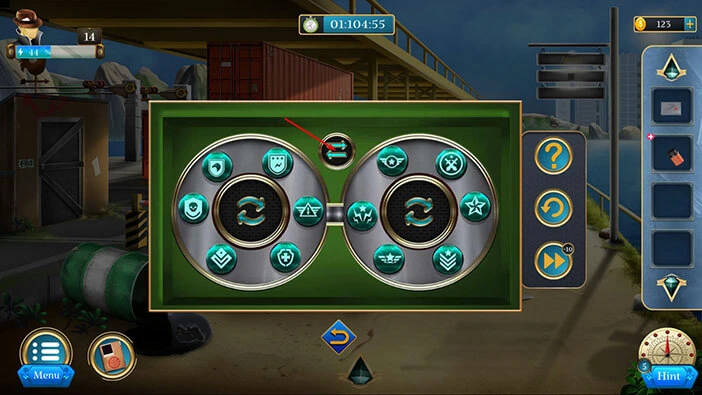
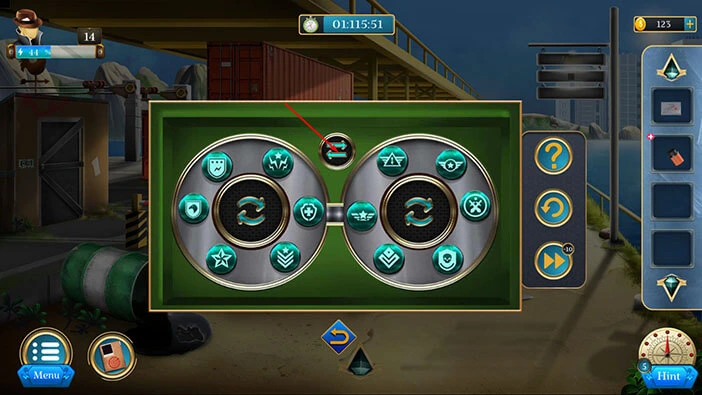
Ok, our next task is to memorize/write down the symbols in the slots in both circles, because we will need this information for the next puzzle.
We will do that in several steps. Let’s begin.
Step 1
We will start with the circle on the left. So, circle on the left,
Left slot = “Star”
Right slot = “Star with lightning”
In the circle on the right, we can see,
Left slot = “Down arrow”
Right slot = “Star in circle + wings”
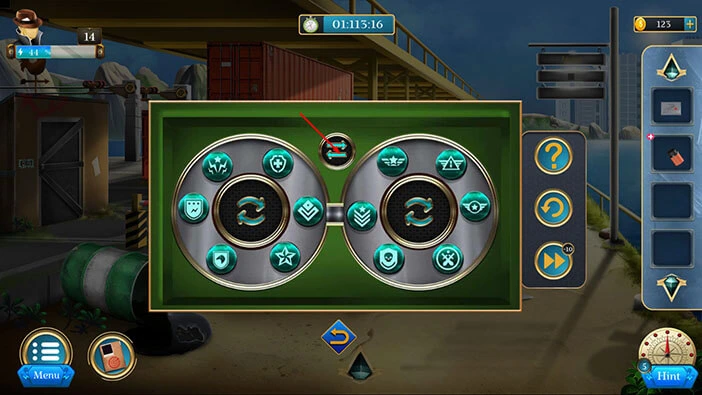
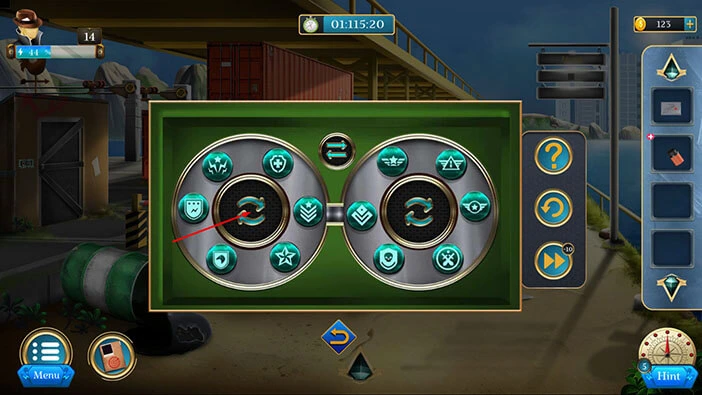
Once you’re done, tap on the buttons in the middle of left and right circles to uncover the next two slots.
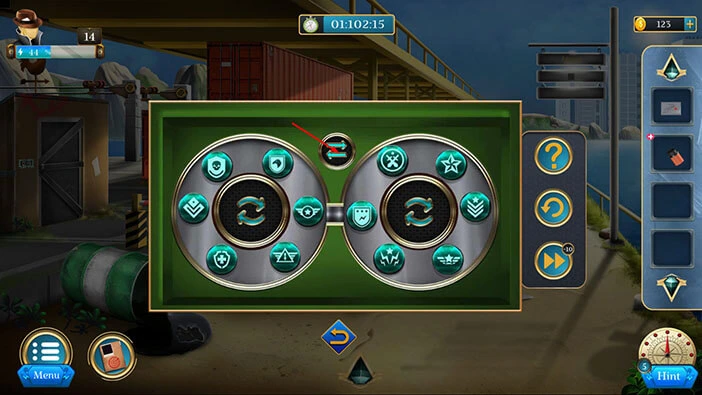
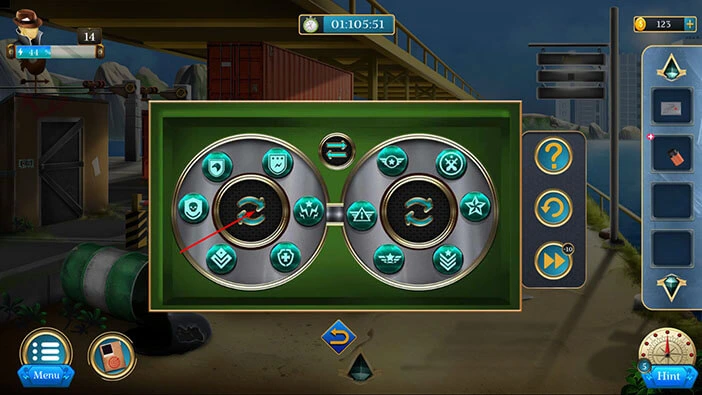
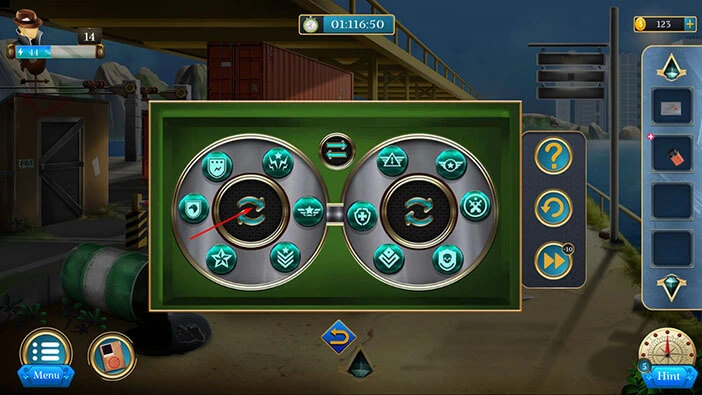
Step 2
In the circle on the left, we can see,
The Bottom right slot = “Star and wings”
The Top left slot = “Shield with eagle”
In the circle on the right, we can see,
The Top right slot = “Sword in triangle + wings”
The Bottom left slot = “Skull on shield”
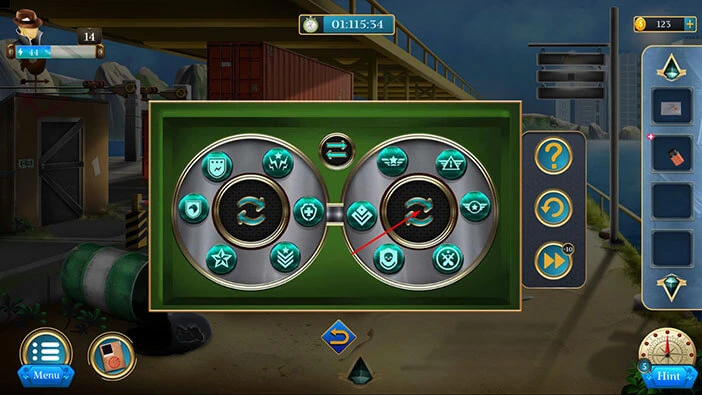
Once you’re done, tap on the buttons in the middle of left and right circles to uncover the next two slots.
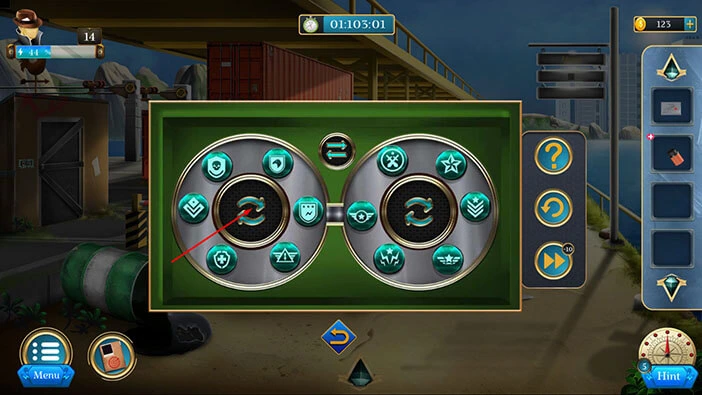
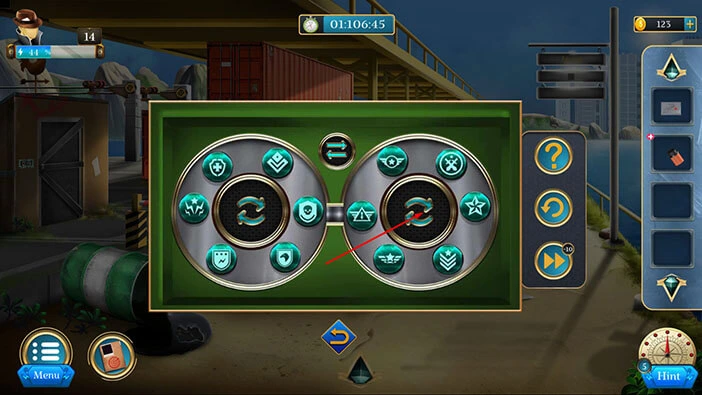
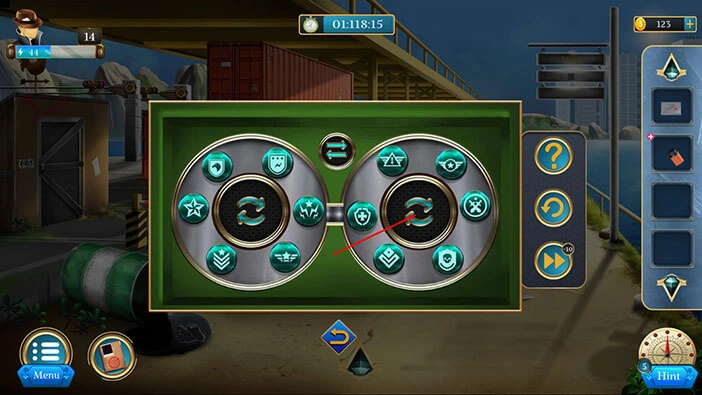
Step 3
In the circle on the left, we can see,
The Bottom left slot = “Star with three down arrows”
The Top right slot = “Shield with three stars and lightning”
The In the circle on the right, we can see,
The Top left slot = “Cross with outline”
The Bottom right slot = “Crossed swords”
With that, we discovered the symbols in each slot. Let’s tap on the arrow at the bottom to go back, and use this information.

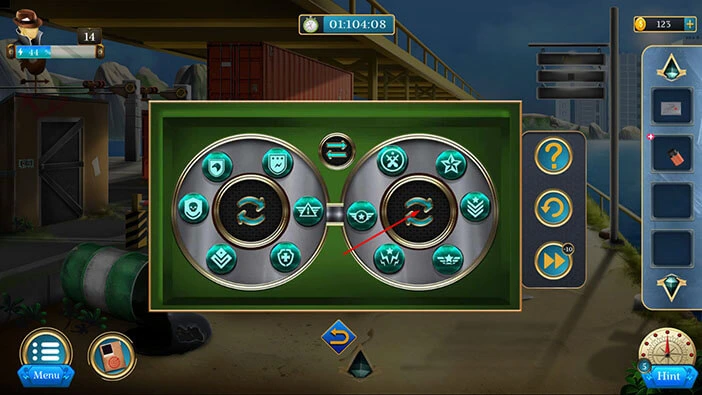
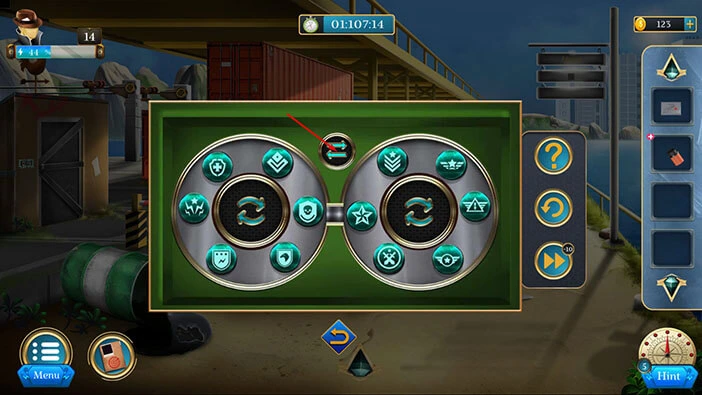
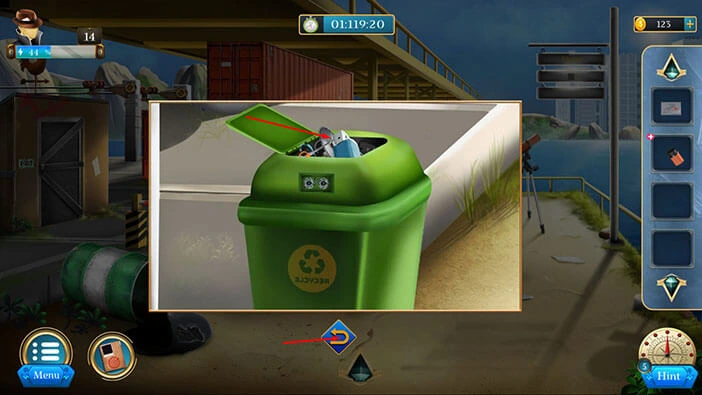
Next, let’s tap on the trash can on the right to take a closer look at it, and tap again to start the interaction.
Here, we can see that one symbol is missing. So, let’s select the “Solving Piece” from the inventory and insert it into the empty slot.
Here, we have another puzzle. We can see all the symbols that we saw previously (on the panel next to the door), but they are in the incorrect positions. So, our task is to rearrange the symbols to match the hint that we discovered previously.
We will do this puzzle in several steps. Let’s begin.
Step 1
Tap on the “Arrows” between the two circles to swap the symbols.
NOTE: If you can’t swap the symbols, go back to the two circles on the panel, and rotate both circles to see the symbols.
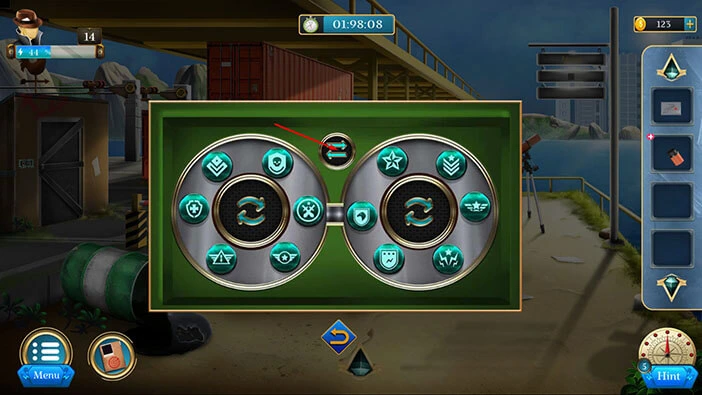
Step 2
Tap five times on the arrows in the left circle to rotate the symbols.

Step 3
Tap once on the circle on the right to rotate the symbols.
Step 4
Tap on the “Arrows” between the two circles to swap the symbols.
Step 5
Tap five times on the arrows in the left circle to rotate the symbols.
Step 6
Tap once on the arrows in the right circle to rotate the symbols.
Step 7
Tap on the “Arrows” between the two circles to swap the symbols.
Step 8
Tap three times on the arrows in the left circle to rotate the symbols.
Step 9
Tap three times on the arrows in the right circle to rotate the symbols.
Step 10
Tap on the “Arrows” between the two circles to swap the symbols.
Step 11
Tap once on the arrows in the left circle to rotate the symbols.
Step 12
Tap five times on the arrows in the right circle to rotate the symbols.

Step 13
Tap on the “Arrows” between the two circles to swap the symbols.
Step 14
Tap once on the arrows in the left circle to rotate the symbols.
Step 15
Tap five times on the arrows in the right circle to rotate the symbols.
Step 16
Tap on the “Arrows” between the two circles to swap the symbols.
Step 17
Tap once on the arrows in the left circle to rotate the symbols.
Step 18
Lastly, tap once on the arrows in the right circle to rotate the symbols and you will solve this puzzle.
With that, you will unlock the trash can, and inside you will find a “Cutter”. Let’s tap on it to pick it up.
After that, tap on the arrow at the bottom to go back.
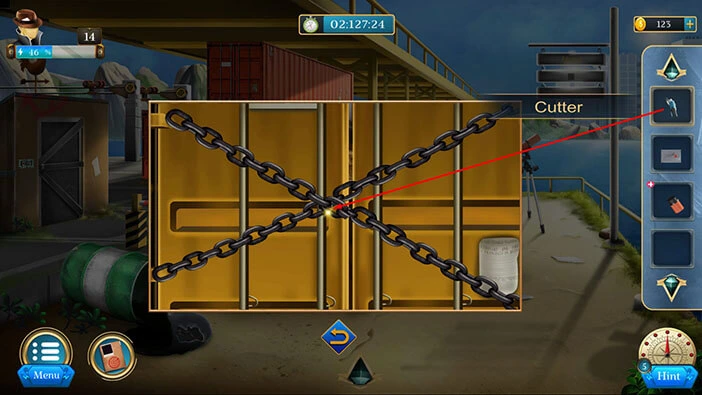
Next, let’s tap on the chained yellow container to take a closer look at it.

Select the “Cutter” from the inventory and use it to cut the chains. After that, tap on the container door to proceed inside.
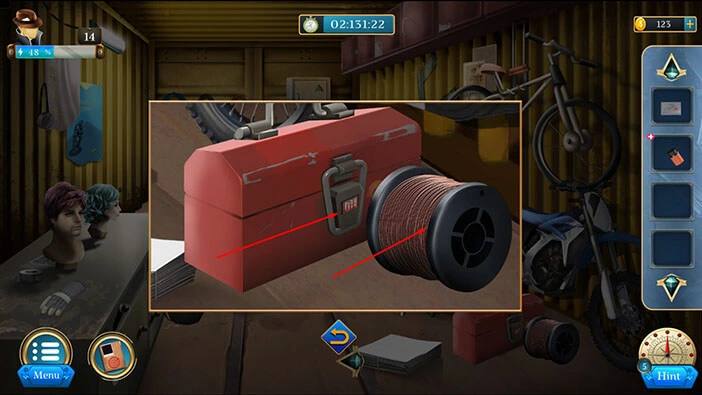
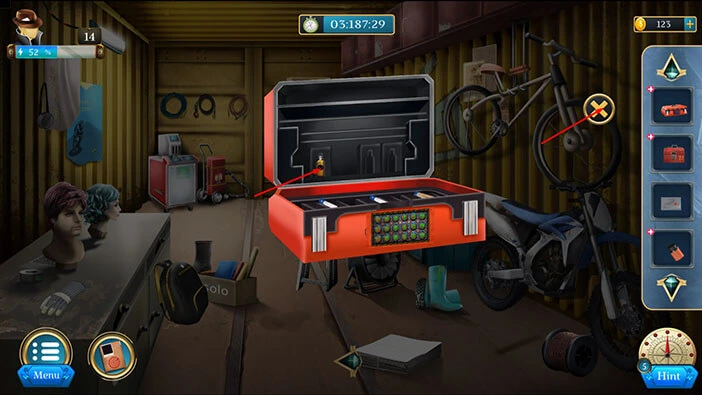
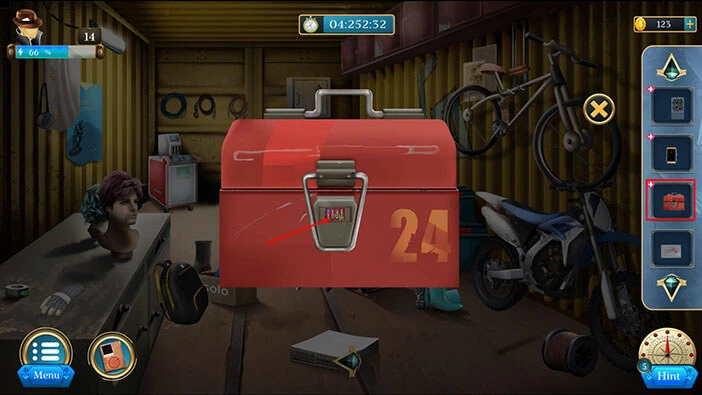
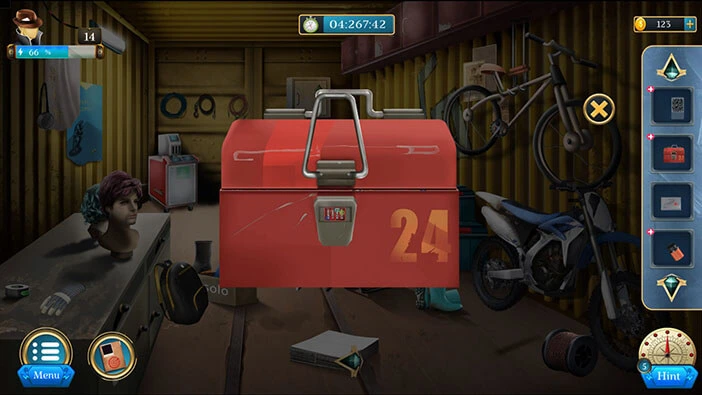
Let’s tap on the red toolbox on the right to take a closer look at it.
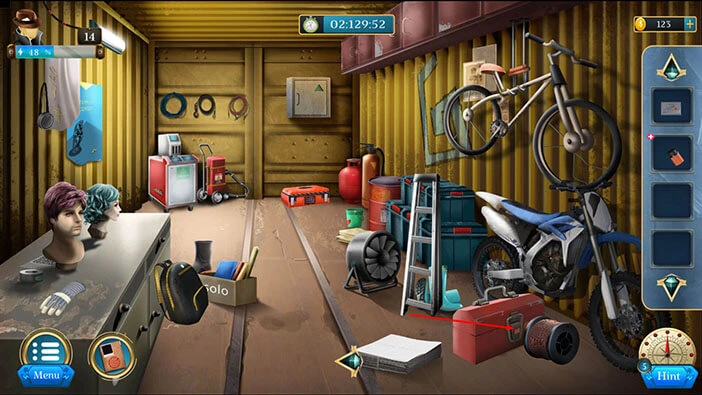
Tap on the wire on the right to move it aside. After that, tap on the “Box” to pick it up.
Once you’re done, tap on the arrow at the bottom to go back.
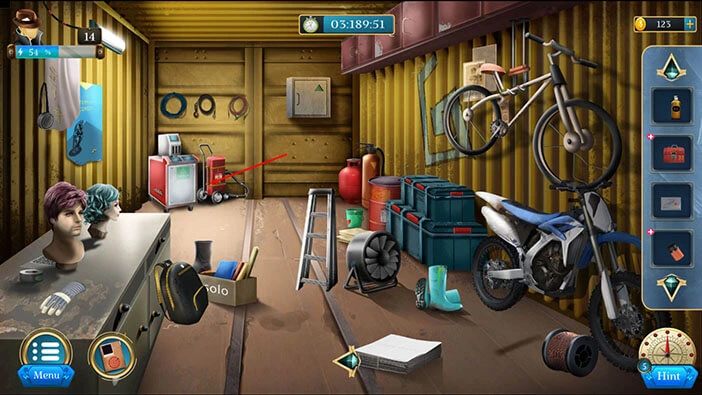
Next, let’s tap on the ladder on the right to take a closer look at it.
Tap on the ladder to move it aside. After that, tap on the blue box to start the interaction.
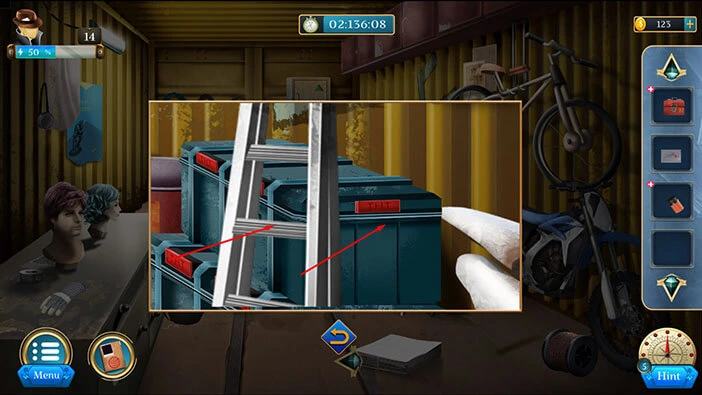
Here, we have another puzzle. We will come back to it a bit later. For now, let’s tap on the arrow at the bottom to go back.
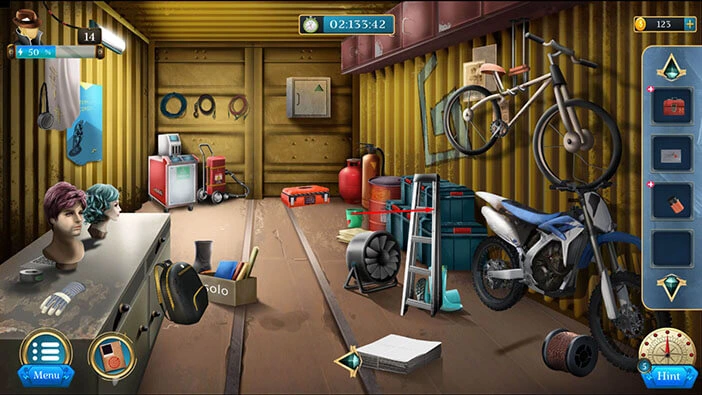
In the top right corner of the container, you will notice a red toolbox. Let’s tap on it to take a closer look, and tap again to pick it up. “Toolbox” will be added to your inventory.
Once you’re done, tap on the arrow at the bottom to go back.
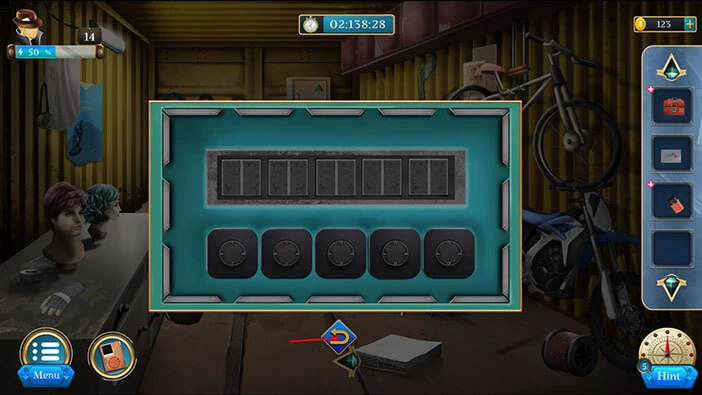
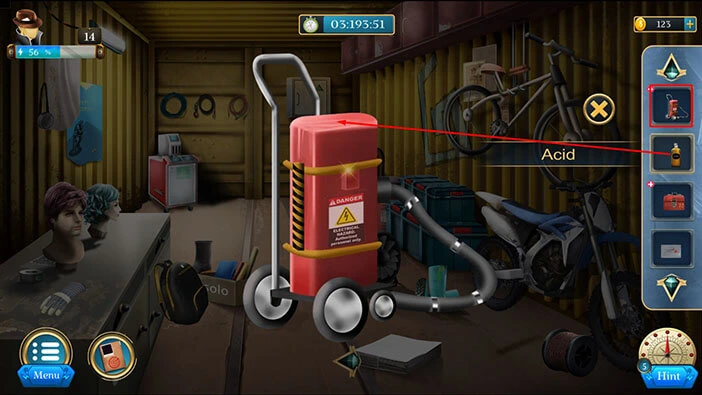
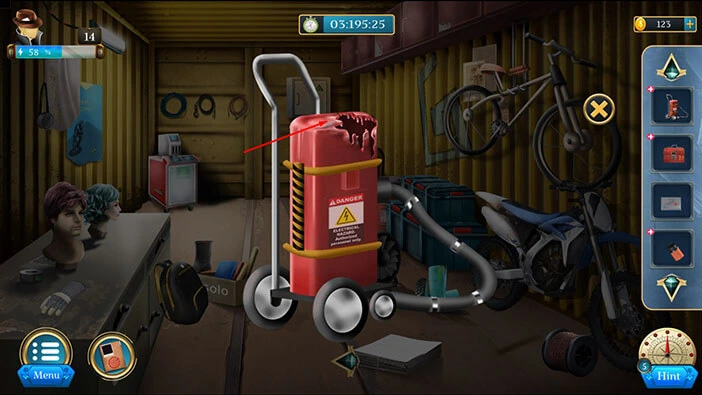
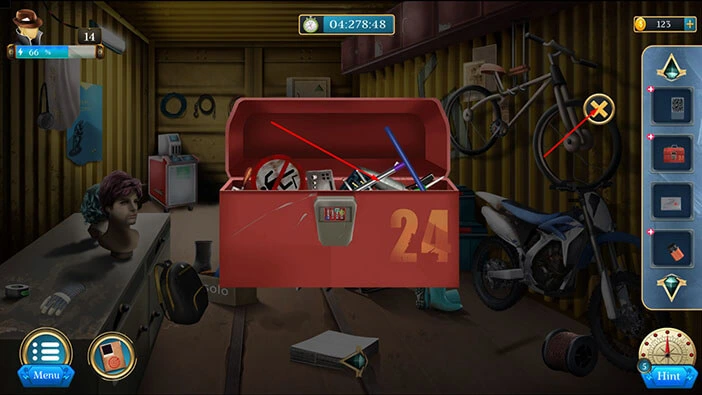
Next, select the “Toolbox” from the inventory and it will appear in the middle of the screen. After that, tap on the toolbox to start the interaction.
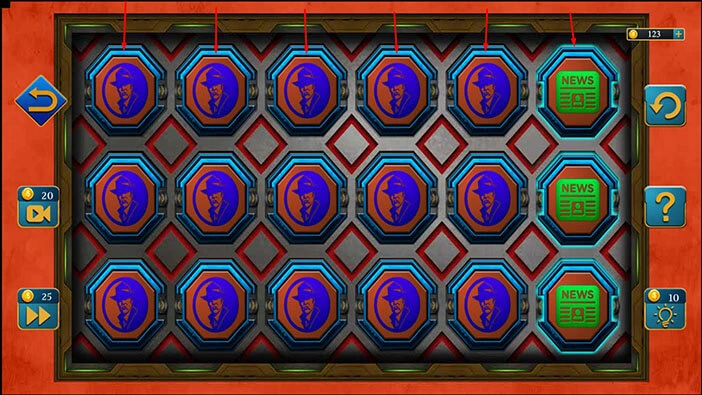
Here, we have another “Puzzle”. Just tap on all three slots in the sixth column, then the fifth column, the fourth column, etc.
In the toolbox, you will find an “Acid”. Let’s tap on it to pick it up.
After that, tap on the “X” button to go back.
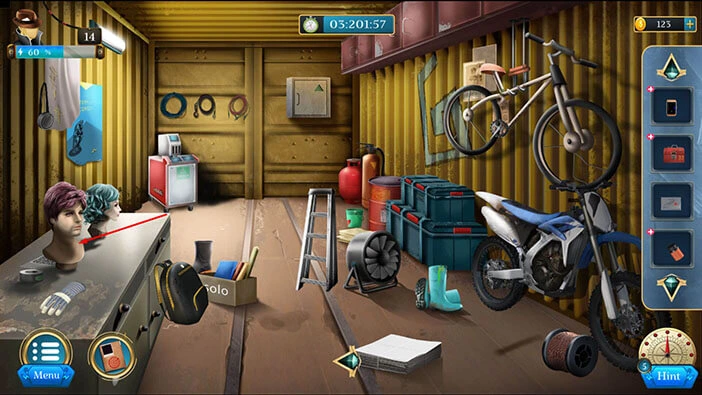
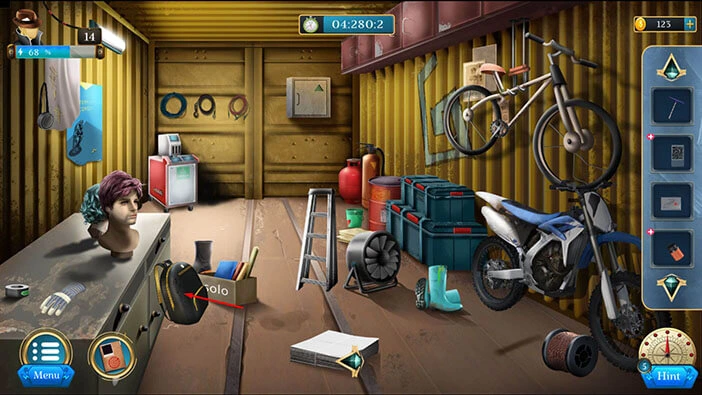
Let’s tap on the top left corner of the container to take a closer look at this area.
Here, you will find a “Container”. Let’s tap on it to pick it up. After that, tap on the arrow at the bottom to go back.
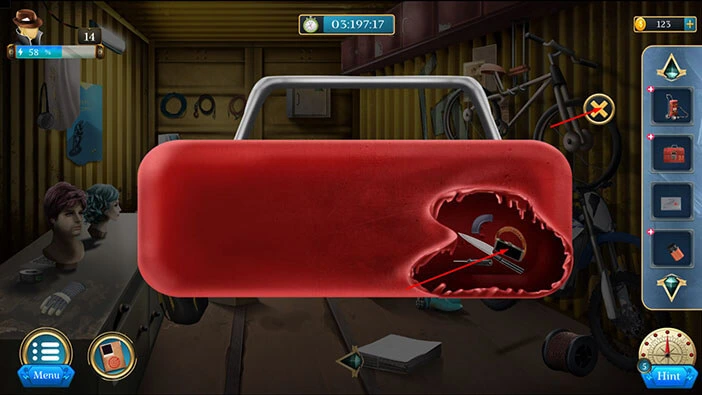
Select the “Container” from the inventory and it will appear in the middle of the screen. After that, select the “Acid” from the inventory and use it to melt the top of the container.
Next, tap on the container to turn it over.
Inside, you will find a “Watch”. Let’s tap on it to pick it up. After that, tap on the “X” button to close this window.
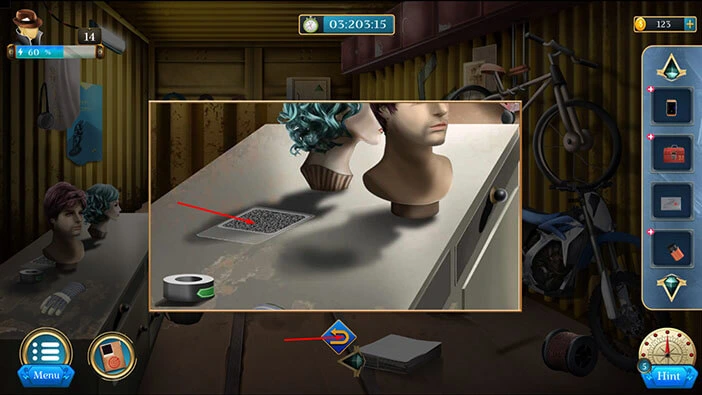
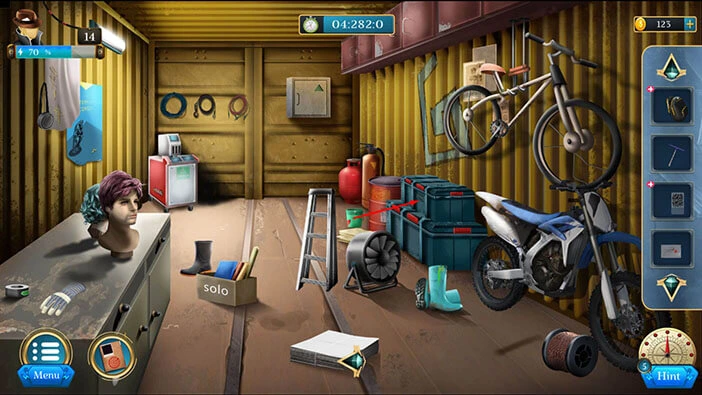
Next, let’s tap on the table on the left to take a closer look at it. After that, tap on the mannequin’s head to move it aside.
Behind the mannequin’s head, you will find a “QR card”. Let’s tap on it to pick it up.
After that, tap on the arrow at the bottom to go back.
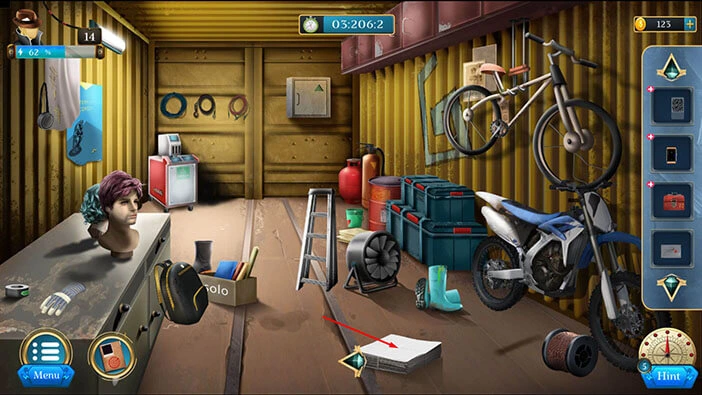
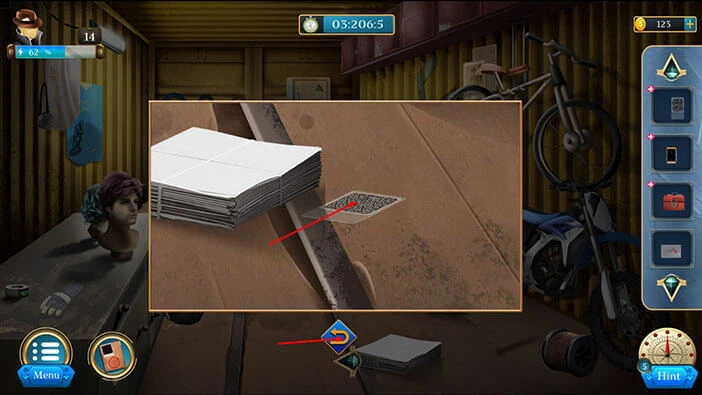
Next, let’s tap on the pile of paper on the floor to take a closer look at it, and tap again to move it aside.
Under the paper, you will discover another “QR card”. Let’s tap on it to pick it up.
After that, tap on the arrow at the bottom to go back.
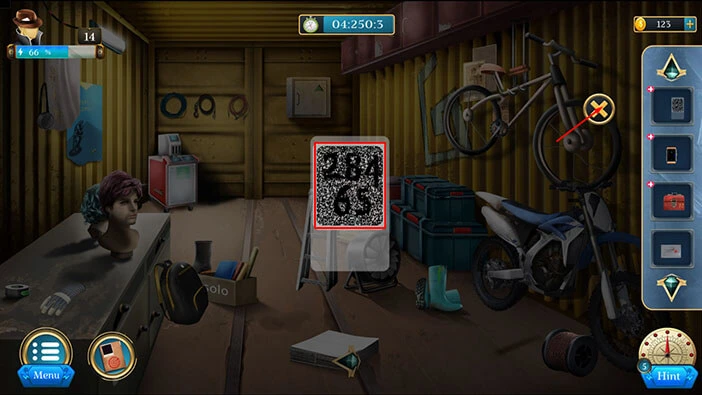
Select the “QR card” (with a plus sign) from the inventory and it will appear in the middle of the screen. After that, select the other “QR card” from the inventory and place it over the first QR card.
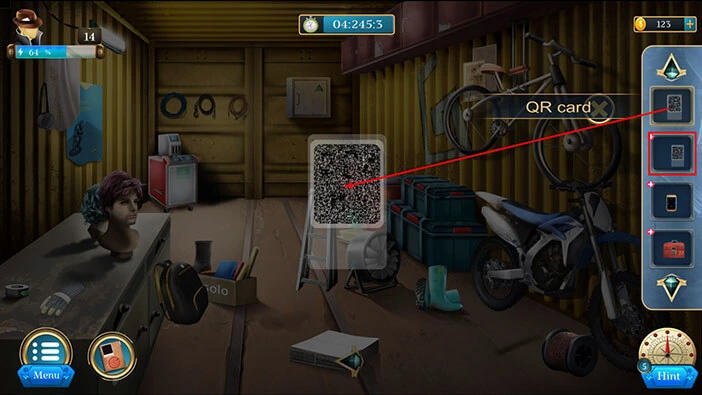
You will discover the number “28465”. Let’s memorize/write down this number because we will need it to solve the next puzzle.
Once you’re done, tap on the “X” button to close this window.
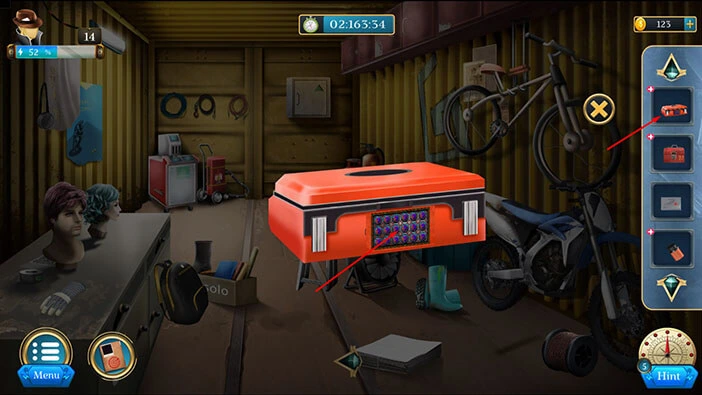
Next, select the “Box” from the inventory and it will appear in the middle of the screen. After that, tap on the lock to start the interaction.
You will notice that we will need a “Blue number”, a “Red number”, “Light blue number”, and a “Green number”. Let’s look for this information.
Tap on the “X” button to close this window.
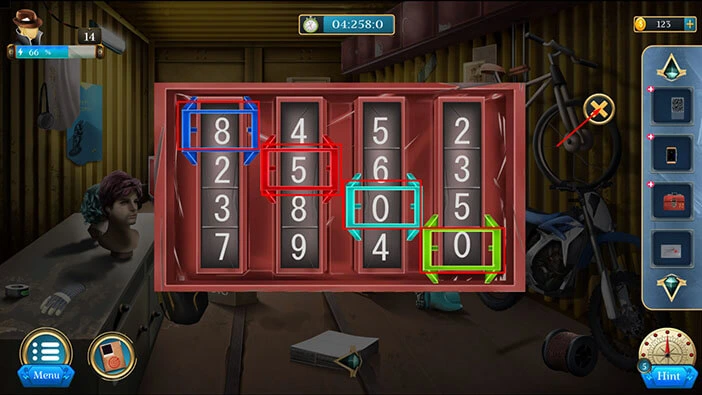
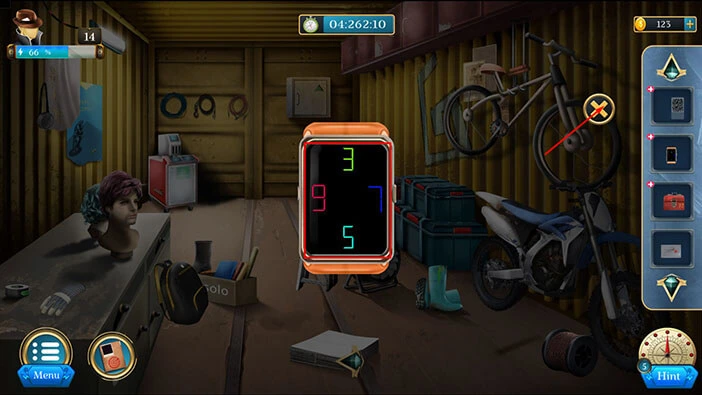
Next, select “Watch” from the inventory and it will appear in the middle of the screen. Here, we will discover the number that we were looking for. Let’s memorize/write down this information.
Green number = 3
Blue number = 7
Light Blue number = 5
Red number = 9
Once you’re done, tap on the “X” button to close this window.
Let’s solve the previous puzzle. Select the “Box” from the inventory and it will appear in the middle of the screen. Let’s set the numbers,
Blue number = 7
Red number = 9
Light Blue number = 5
Green number = 3
With that, you will unlock the box, and inside you will find a “T-spanner”. Let’s tap on it to pick it up.
After that, tap on the “X” button to go back.
Next, on the left, you will notice a “Bag”. Let’s tap on it to take a closer look, and tap again to pick it up.
After that, tap on the arrow at the bottom to go back.
Let’s go back to the blue boxes on the right. Tap on them to start the interaction.
Let’s enter the code “28465” that we discovered by examining the “QR code”.

With that, you will unlock the box. Let’s tap on it to look inside.
Inside you will find a “Hammer” and four “Nails”. Let’s tap on them to pick them up.
After that, tap on the arrow at the bottom to go back.

Next, let’s tap on the grey rag on the left to take a closer look at it.

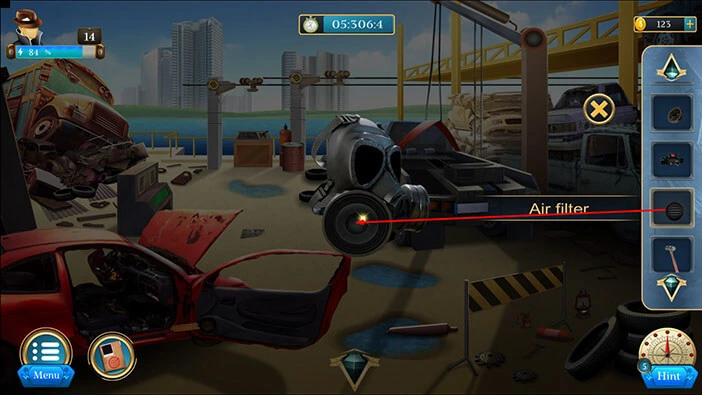
Here, you will find an “Air filter”. Let’s tap on it to pick it up.
After that, tap on the arrow at the bottom to go back.
Let’s go back, outside. Tap on the arrow at the bottom of the screen.

Next, let’s tap on the arrow at the bottom of the screen to go to the next area.
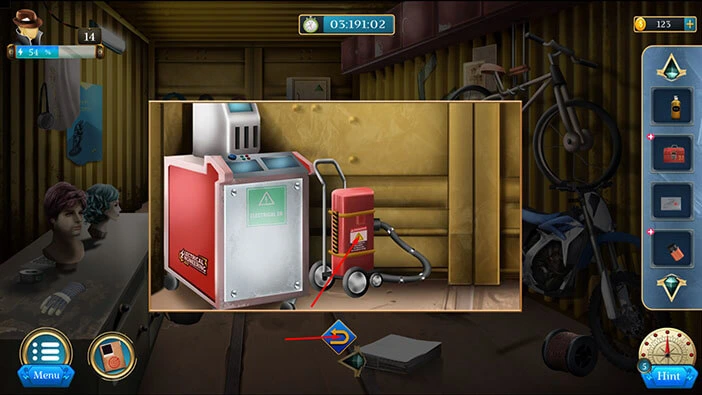
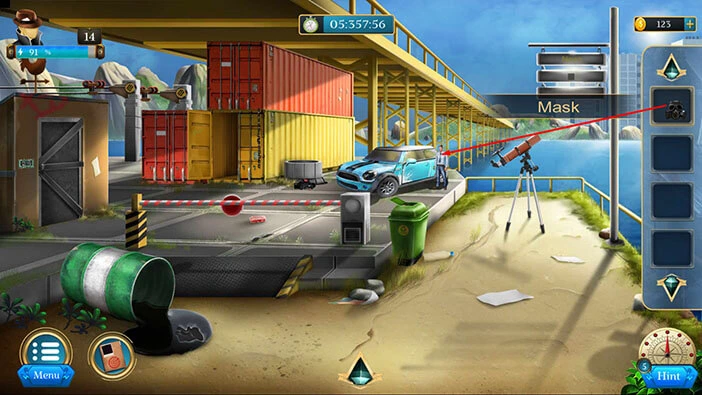
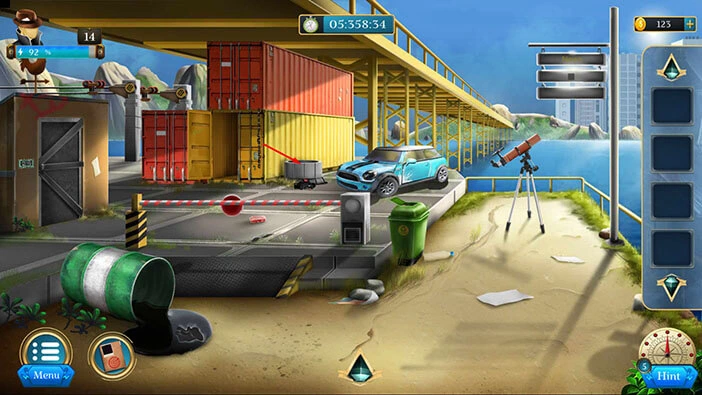
Let’s tap on the car engine on the right to take a closer look at it.
Select the “T-spanner” from the inventory and use it to remove the screws.
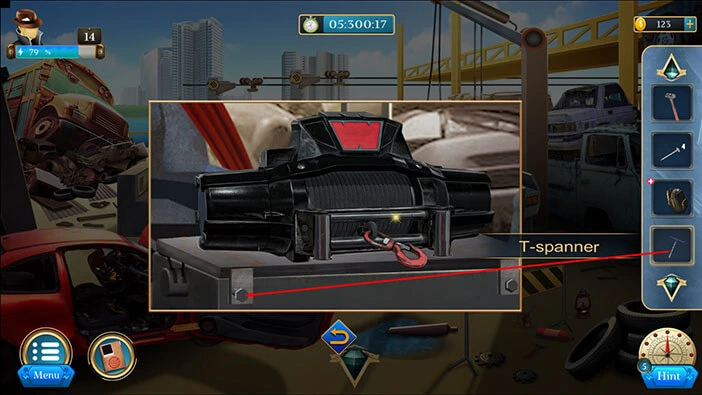
Let’s, tap on the “Rope pulley” to pick it up. After that, tap on the arrow at the bottom to go back.
Next, let’s select the “Bag” from the inventory and it will appear in the middle of the screen. After that, tap on the zipper to open the bag.
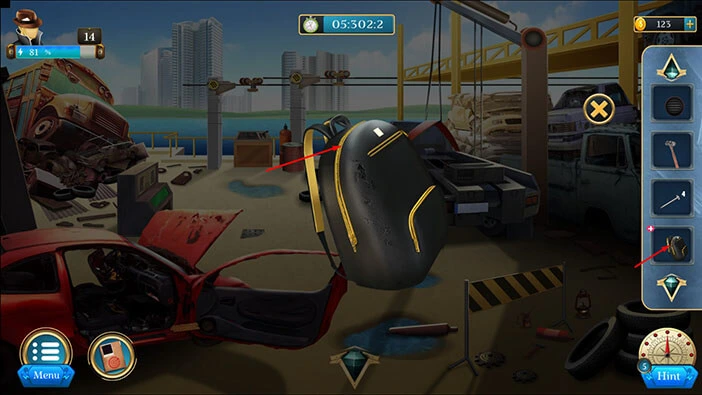
In the bag, you will find an “Air filter”, the “Googles”, and a “Mask”. Let’s tap on these three items to pick them up.
After that, tap on the “X” button to go back.
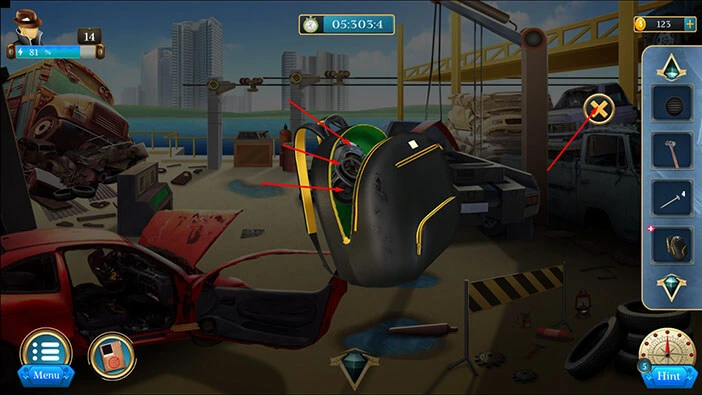
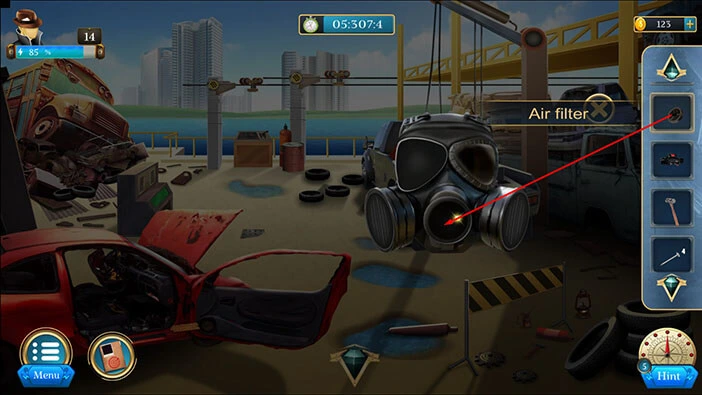
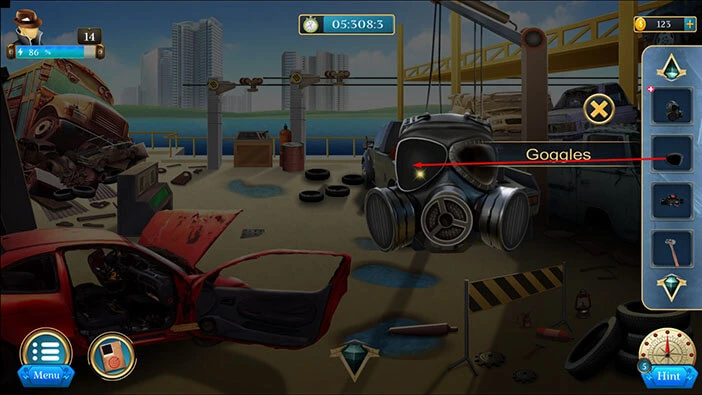
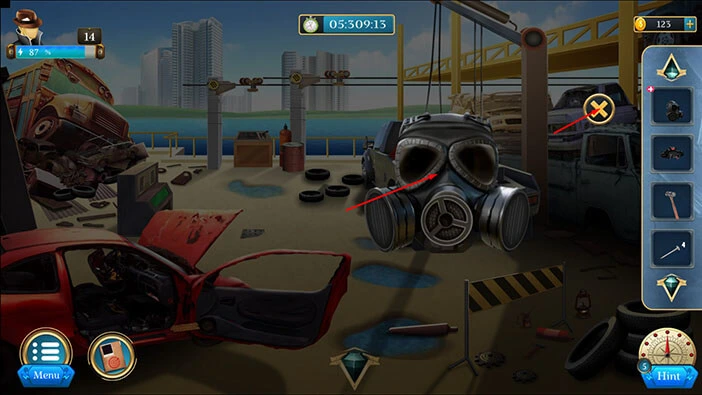
Next, select the “Mask” from the inventory and it will appear in the middle of the screen. Let’s assemble the mask.
Select the “Air filter” from the inventory and attach it to the mask.
Next, select the other “Air filter” from the inventory and put it into the empty slot.
Lastly, select the “Googles” from the inventory and insert them into the empty slots.
We now have a functional gas “Mask”, so let’s tap on it to pick it up. After that, tap on the “X” button to go back.
NOTE: Once you pick up the assembled “Mask” the plus sign will disappear.
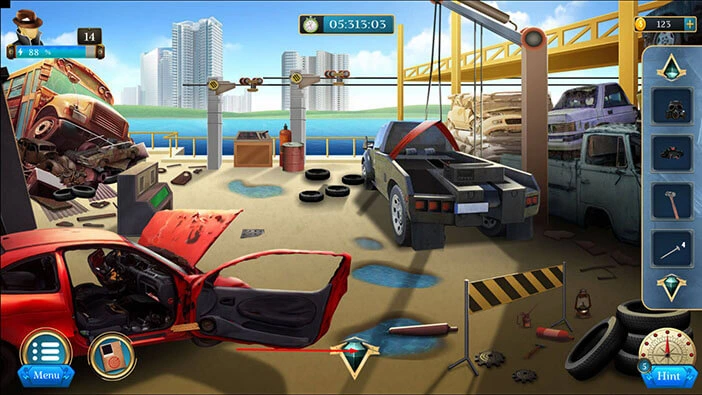
Let’s go back to the previous area. Tap on the arrow at the bottom of the screen.
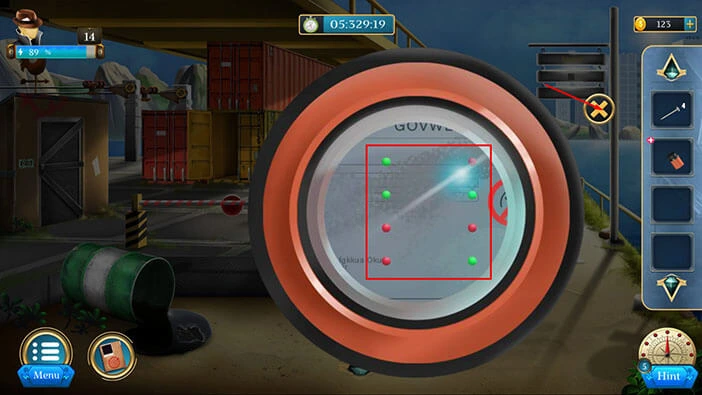
Select the “Lens” from the inventory and it will appear in the middle of the screen. After that, tap on the “Lens” to start the interaction.

Next, select the “Plate” from the inventory and place it in front of the “Lens”.
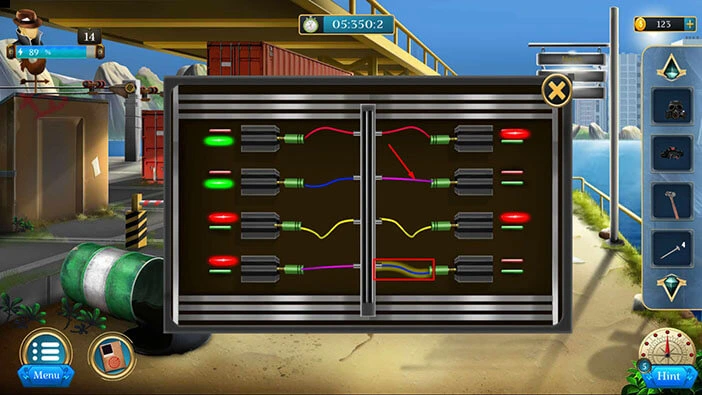
Here, we can see four dots in the left column and four dots in the right column. Let’s memorize/write down the color of each dot because we will need this information for the next puzzle.
So, looking from the top, in the left column, we have Green, Green, Red, Red.
Again, looking from the top, in the second column, we have Red, Green, Red, Green.
Once you’re done, tap on the “X” button to close this window.
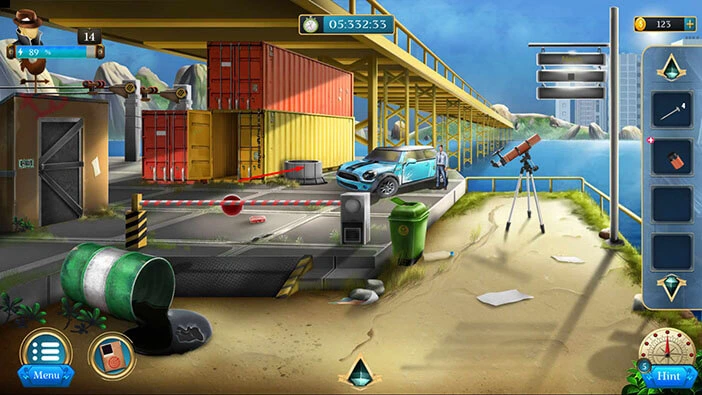
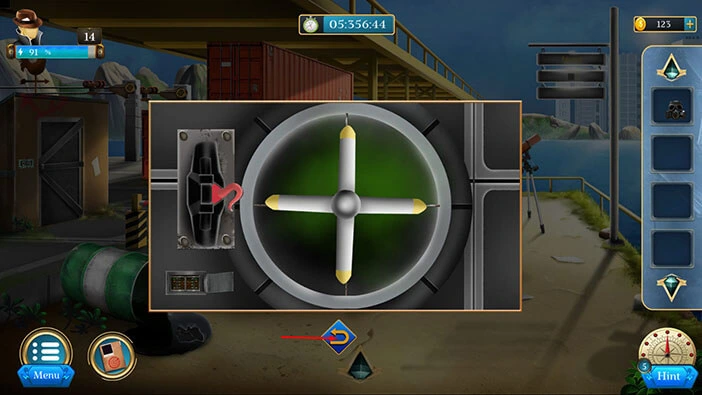
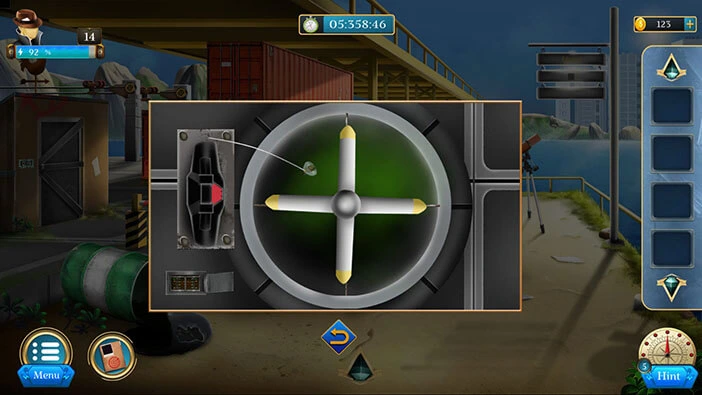
Just to the right of the yellow container, you will notice a large ventilation hole. Let’s tap on it to take a closer look, and tap again to look inside.
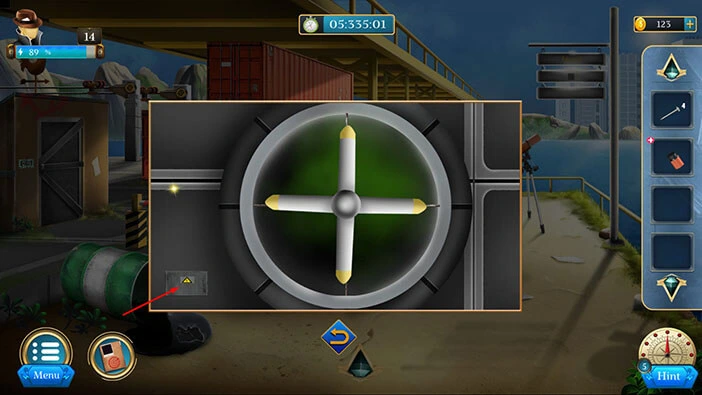
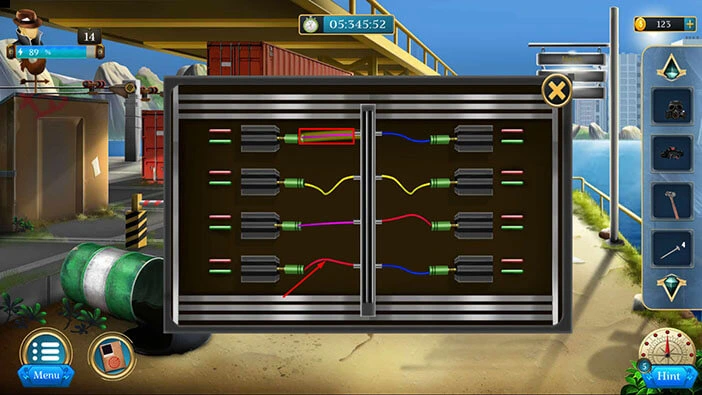
Our next task is to stop the fan. Let’s do that. In the bottom left corner, you will notice a small panel. Let’s tap on it to open it, and tap again to start the interaction.
We already discovered the solution for this puzzle. The colors in the columns should match the hint that we saw previously. We will do this puzzle in several steps. Let’s begin.
Step 1
Select the first wire in the left column, then tap on the fourth wire in the left column to swap their positions.
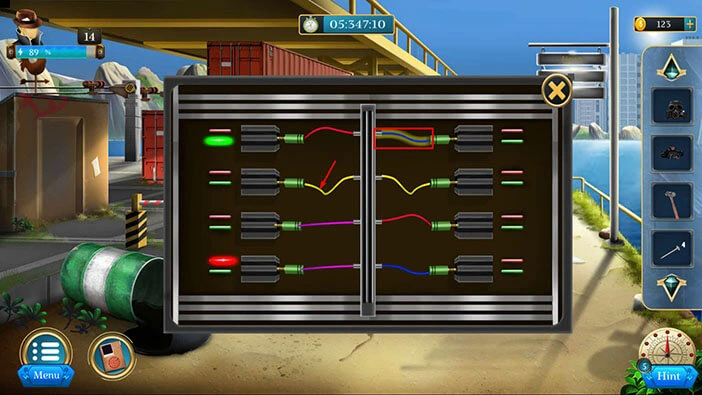
Step 2
Select the first wire in the right column, then tap on the second wire in the left column to swap their positions.
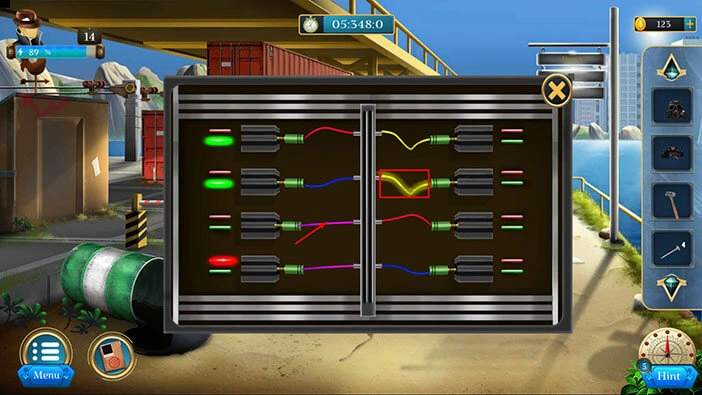
Step 3
Select the second wire in the right column, then tap on the third wire in the left column to swap their positions.
Step 4
Select the third wire in the right column, then tap on the first wire in the right column to swap their positions.
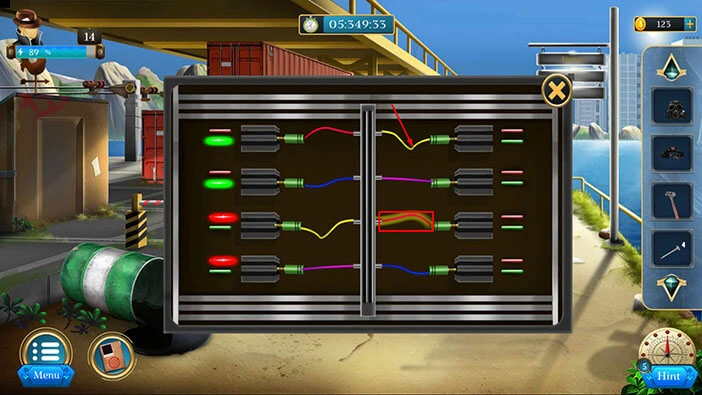
Step 5
Select the fourth wire in the right column, then tap on the second wire in the right column to swap their positions.
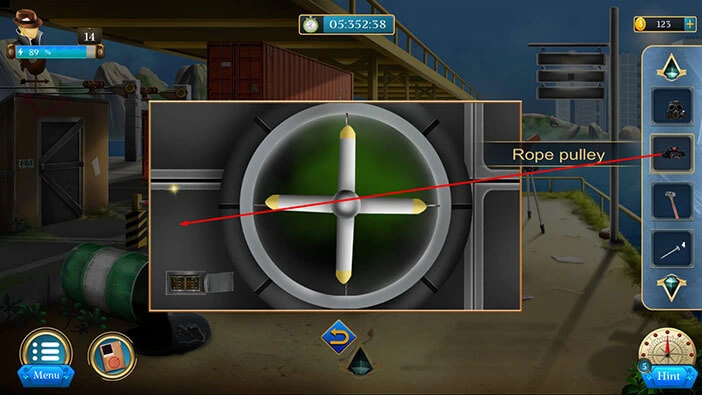
We will need the gas mask because the shaft is filled with poisonous gas. Let’s prepare. Select the “Rope pulley” and place it on the left.
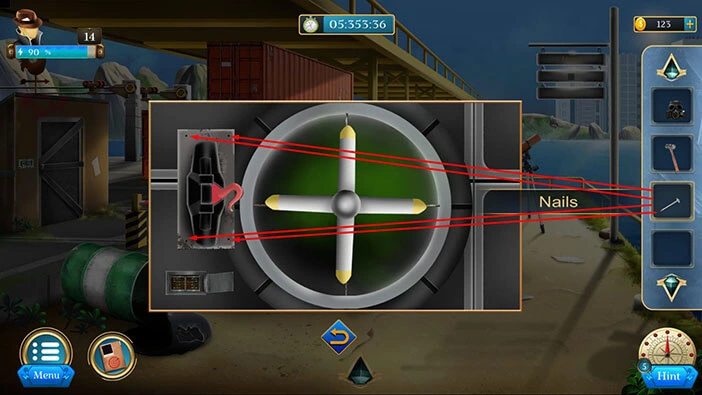
Next, let’s select the “Nails” from the inventory and place them into the four empty slots.
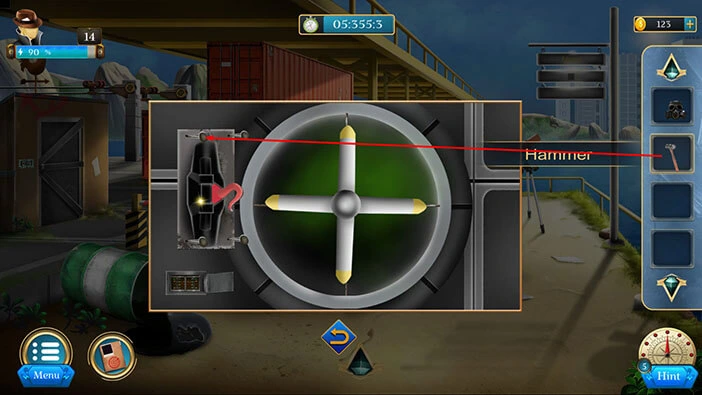
Select the “Hammer” from the inventory and use it to hammer down the nails.
Lastly, we need to put on the mask before we can descend. Let’s tap on the arrow at the bottom to go back.
You will notice our character standing next to the car. So, let’s select the “Mask” from the inventory and put it on the detective.
Let’s tap on the ventilation hole to start the interaction, and our character will descend down the hole.
With that, we have reached the end of the fourteenth level. If you want to see the walkthrough for the fifteenth level, tap on the next part button.
Thank you for reading.