Room Escape: Detective Phantom | Level 13
Hello everyone and welcome to the walkthrough for the thirteenth level of “Room Escape: Detective Phantom”. In the thirteenth level, our task is to find the shop that sells the hypnotic powder.
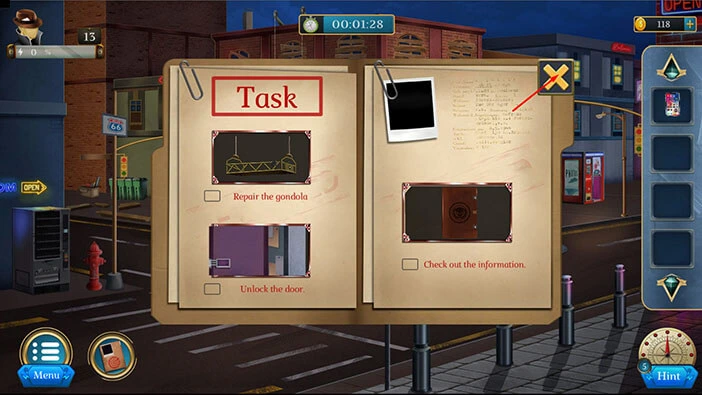
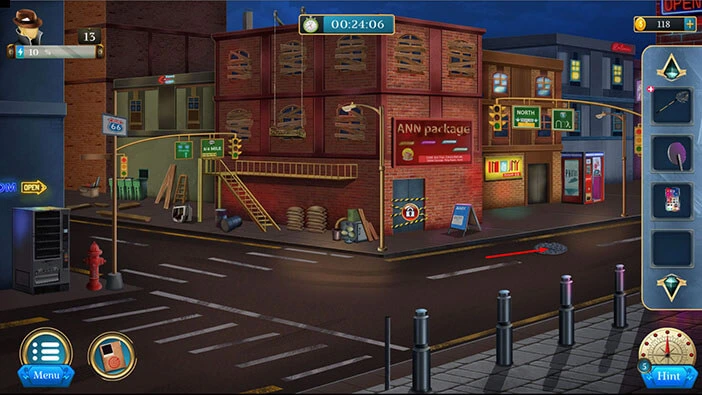
Our objectives are to “Repair the gondola” “Unlock the door” and “Check out the information”. Tap on the “X” button to go back.
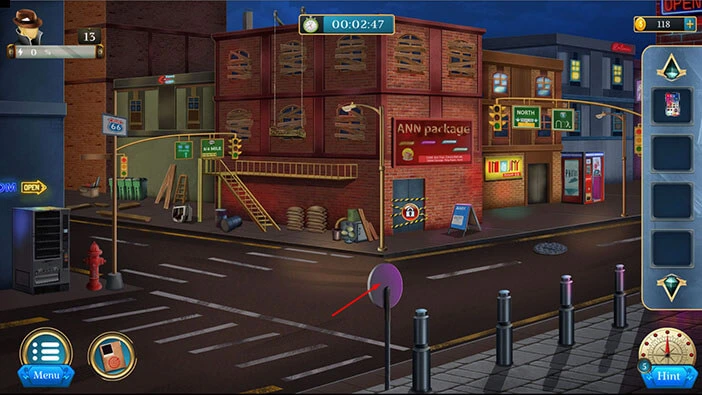
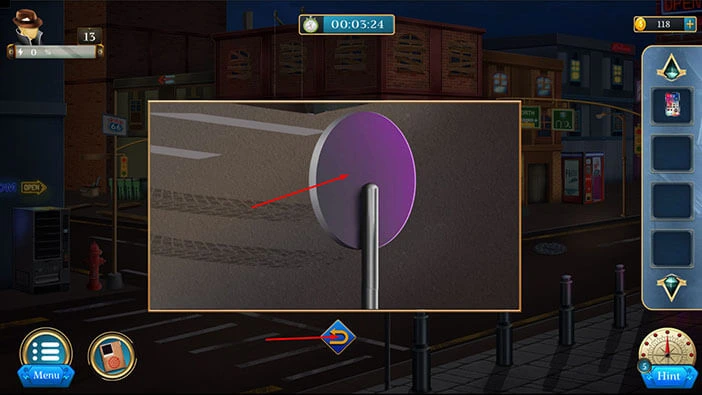
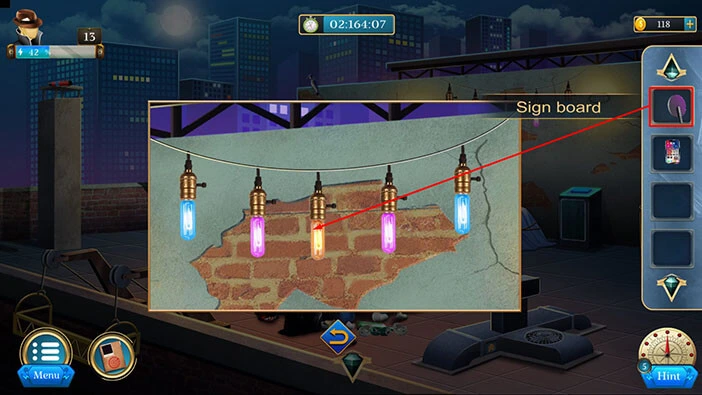
Next, let’s tap on the sign to take a closer look at it.
Tap on the sign to break it off, and the “Signboard” will be added to your inventory. After that, tap on the arrow at the bottom to go back.
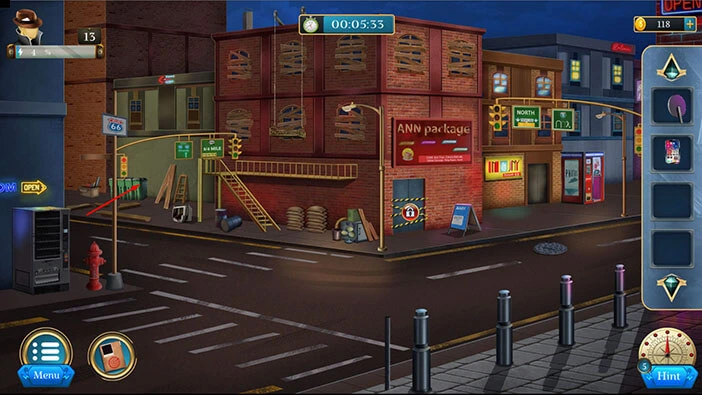
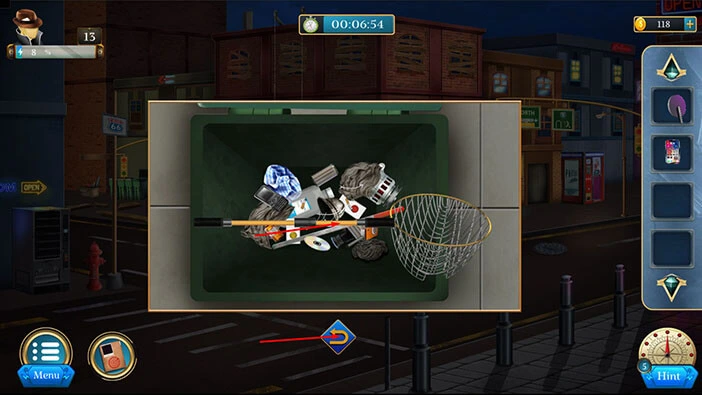
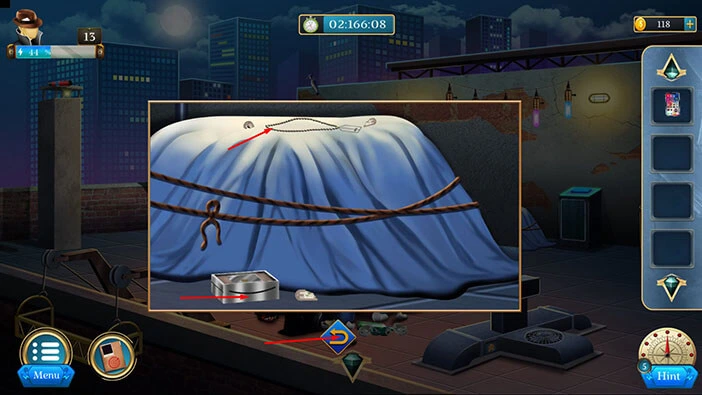
Next, in the alley on the left, you will see several trash cans. Let’s tap on them to take a closer look. After that, tap on the trash can to look inside.
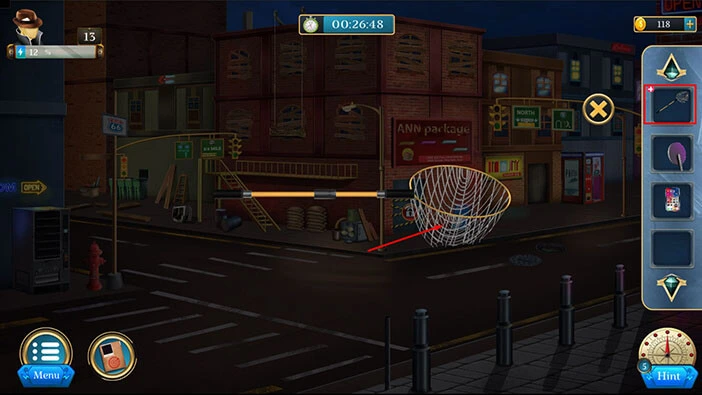
In the trash can, you will find a “Fishing net”. Let’s tap on it to pick it up. After that, tap on the arrow at the bottom to go back.
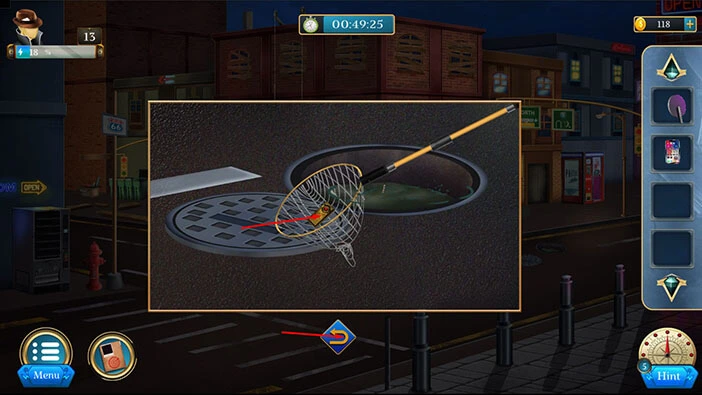
Next, let’s tap on the manhole cover on the right to take a closer look at it, and tap again to move it aside.
Next, select the “Fishing net” from the inventory and it will appear in the middle of the screen. After that, tap twice on the “Fishing net” in the middle of the screen to repair it and pick it up.
Once you’re done, tap on the “X” button to close this window.
Let’s tap on the sewer again to look inside.

You will notice something in the sewer. Let’s select the “Fishing net” from the inventory and use it to reach the item in the sewer.

You will find a “Button piece”. Let’s tap on it to pick it up. After that, tap on the arrow at the bottom to go back.
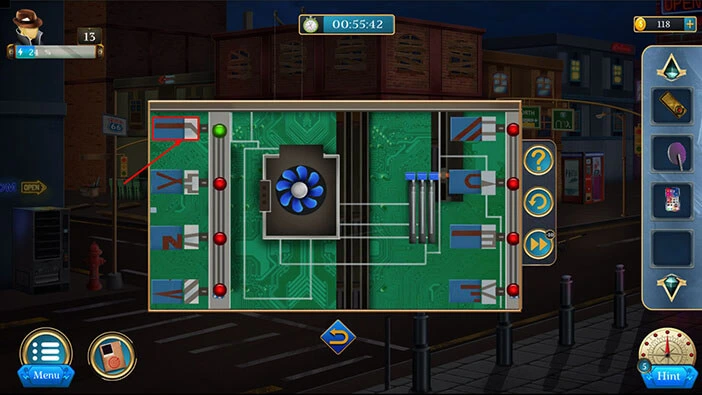
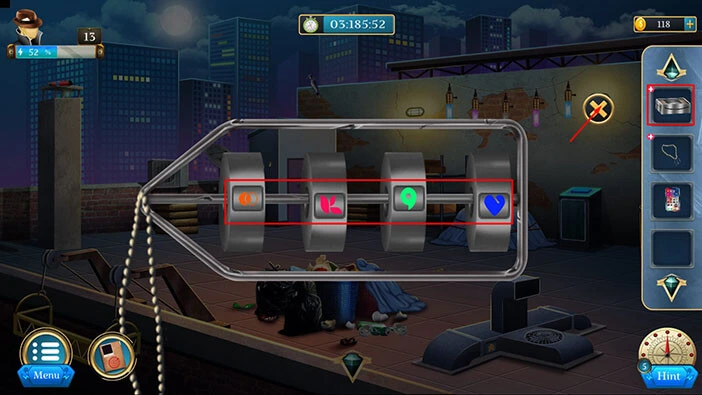
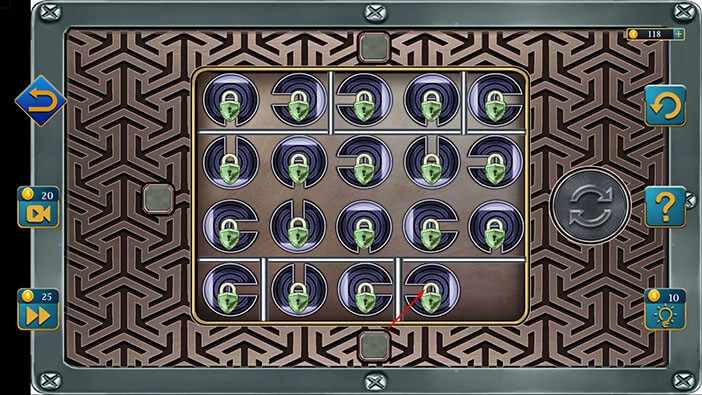
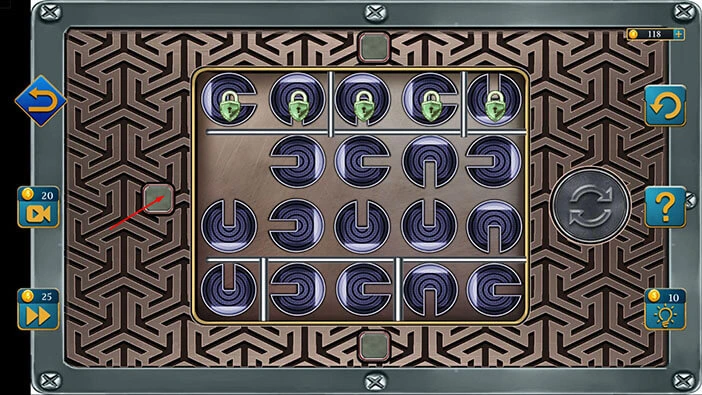
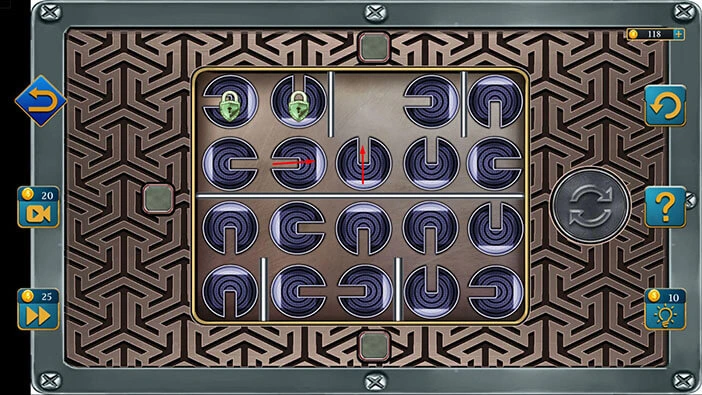
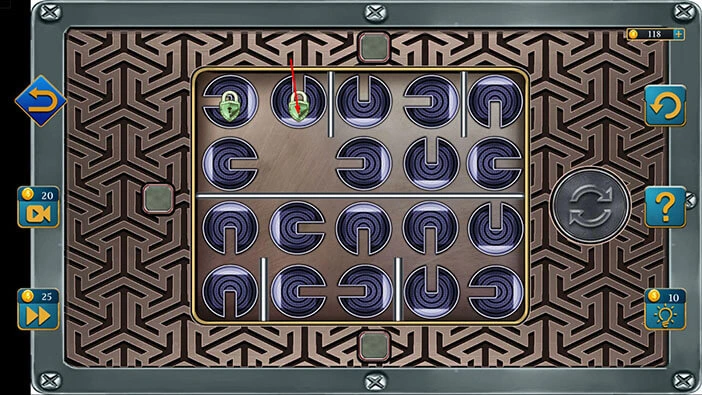
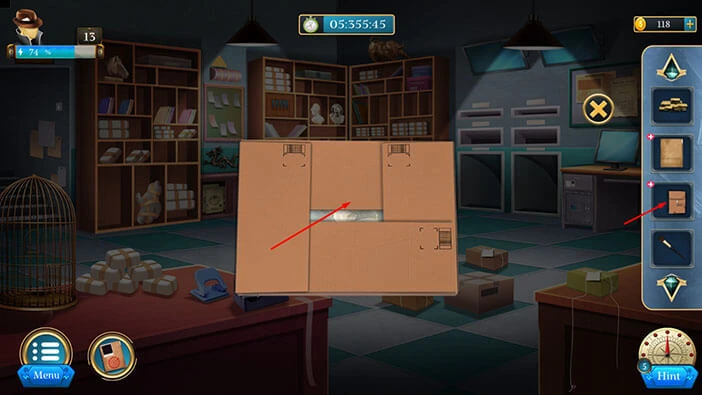
Next, let’s tap on the street stand on the right to take a closer look at it.

Tap on the lid on the pink pillar to open it, and tap again to start the interaction.

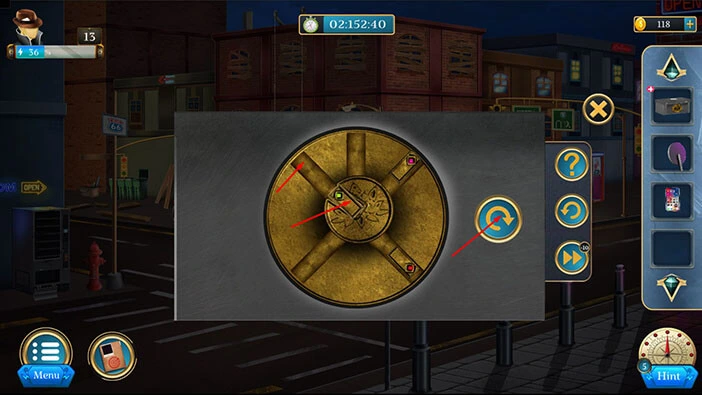
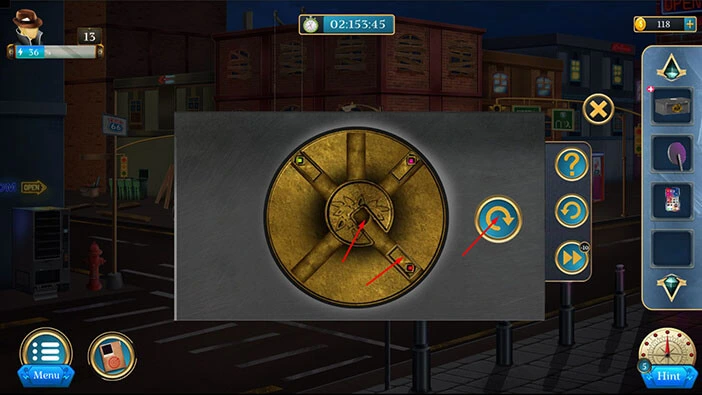
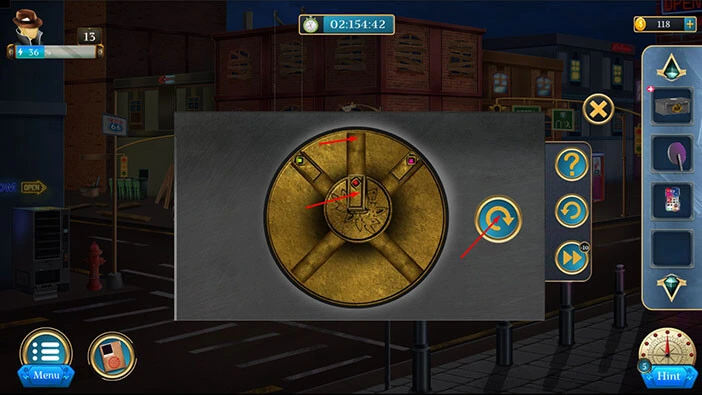
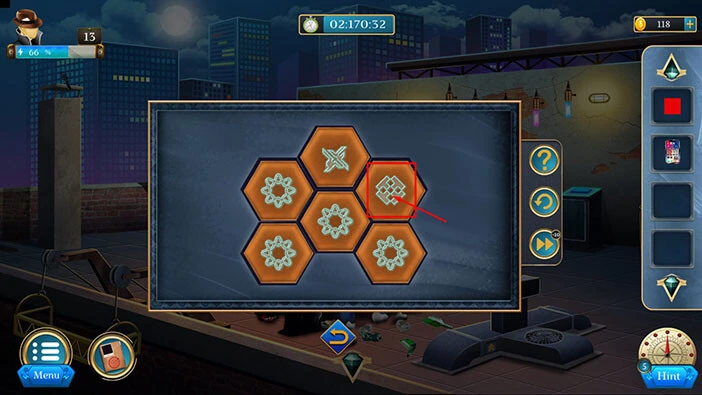
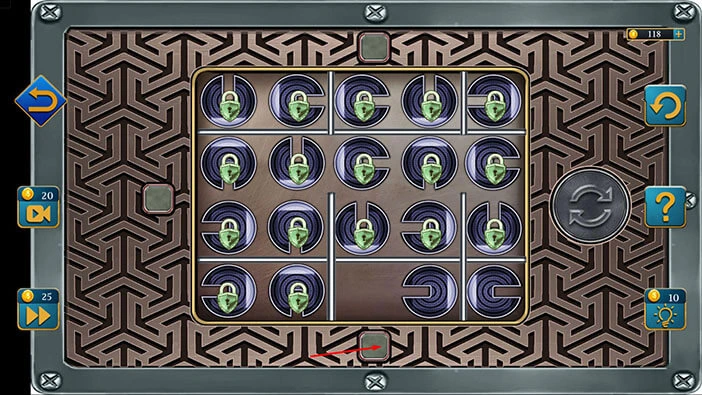
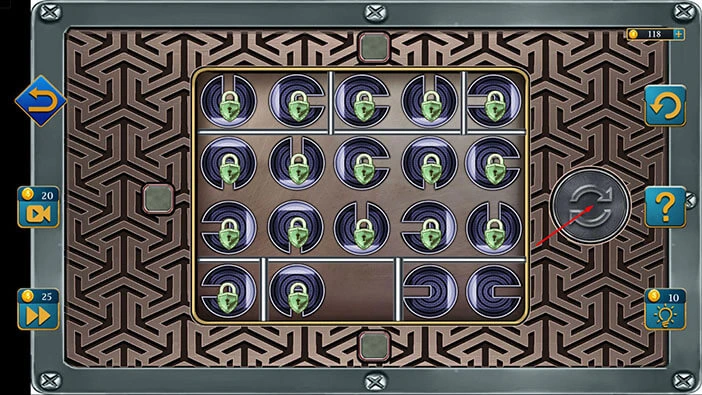
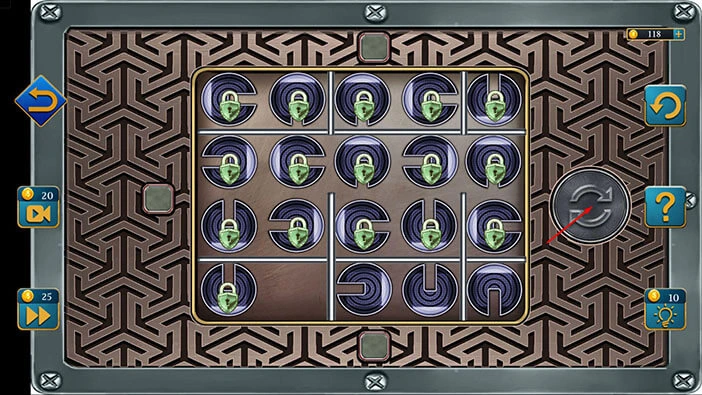
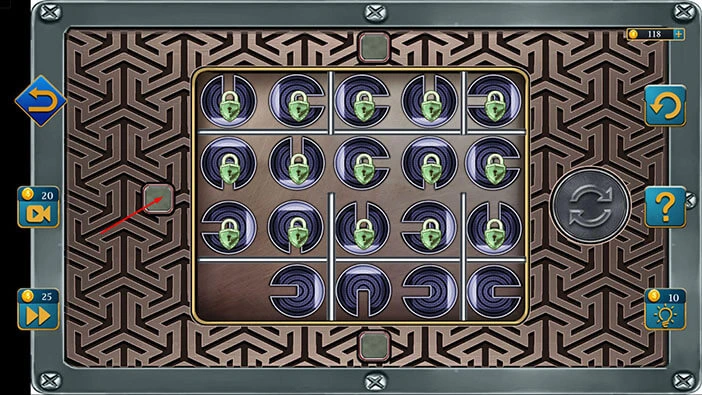
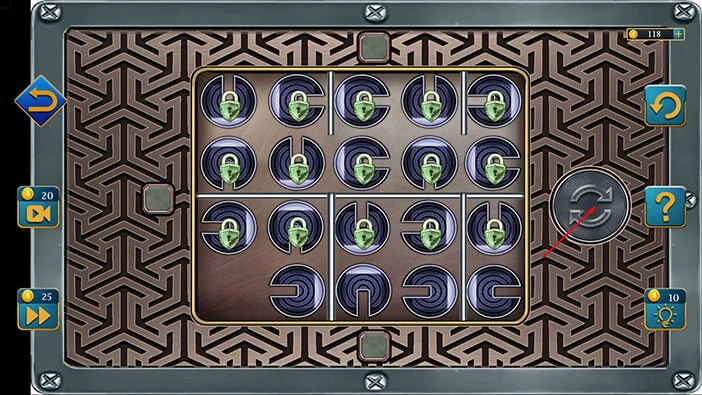
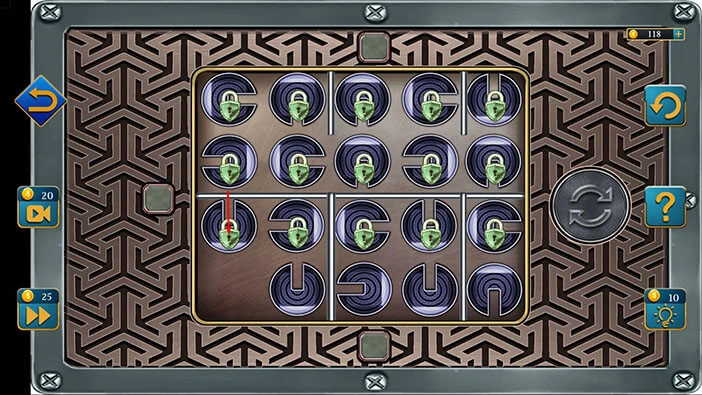
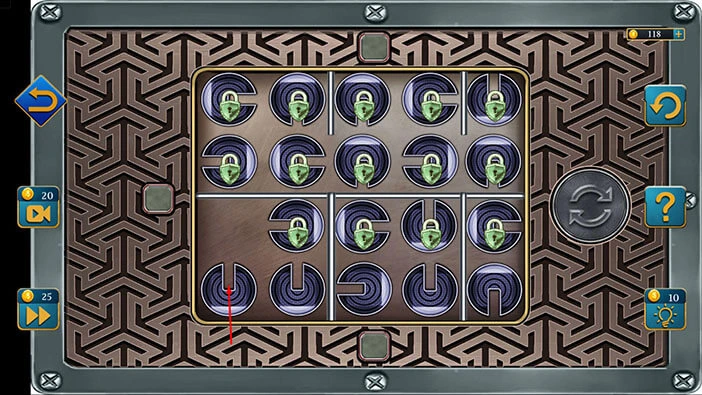
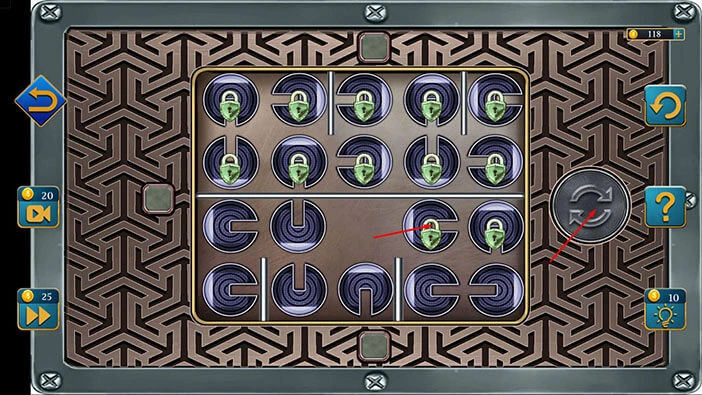
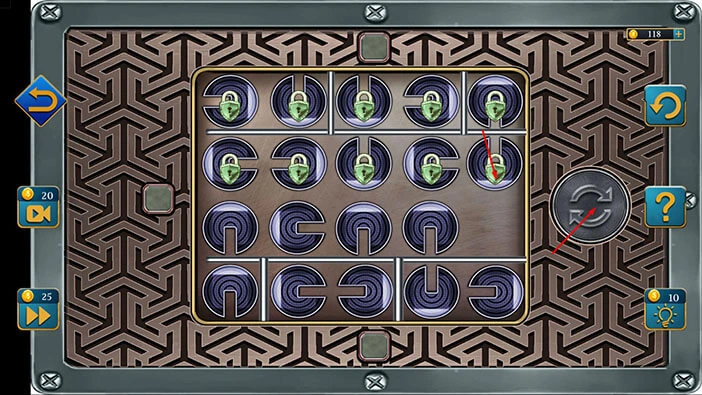
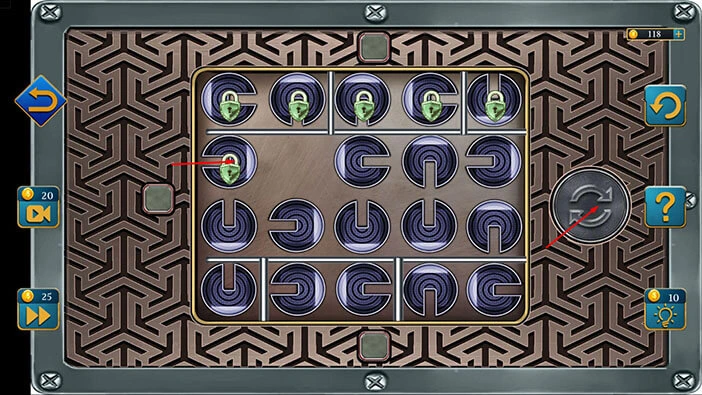
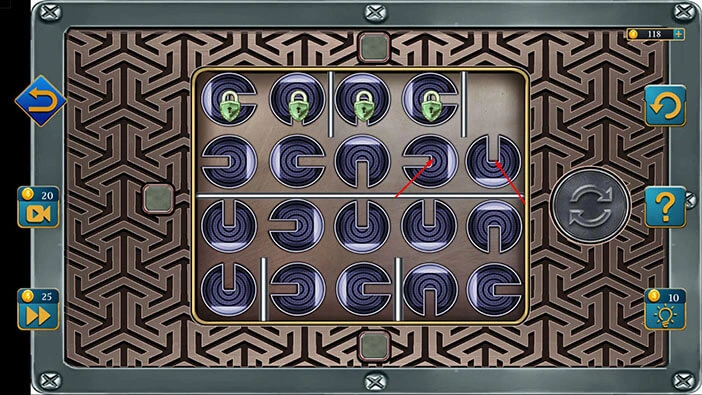
Here, we can see eight slots connected to a cooler in the middle. We can change the symbol in the top half of each slot. So, the symbol in the top half of the slot should be a continuation of the symbol in the bottom half of the slot.
We will solve this puzzle in several steps. Let’s begin.
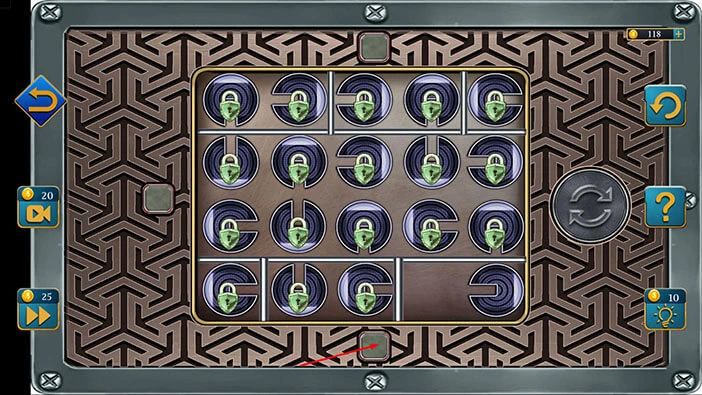
Step 1
Let’s tap five times on the first slot on the left to set the correct symbol.
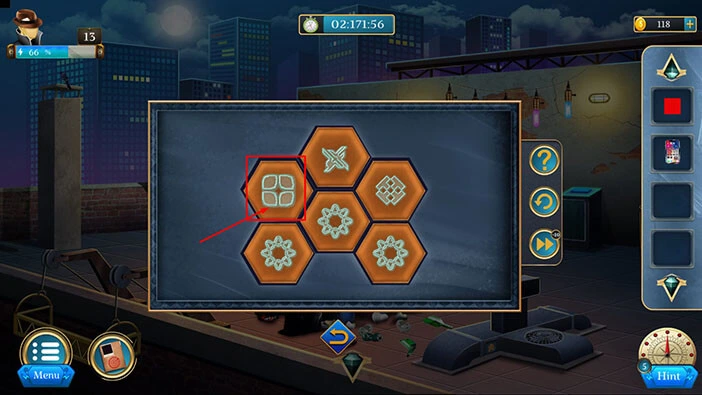
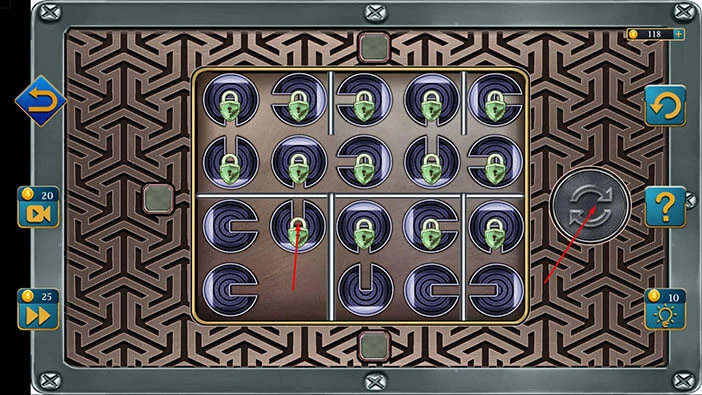
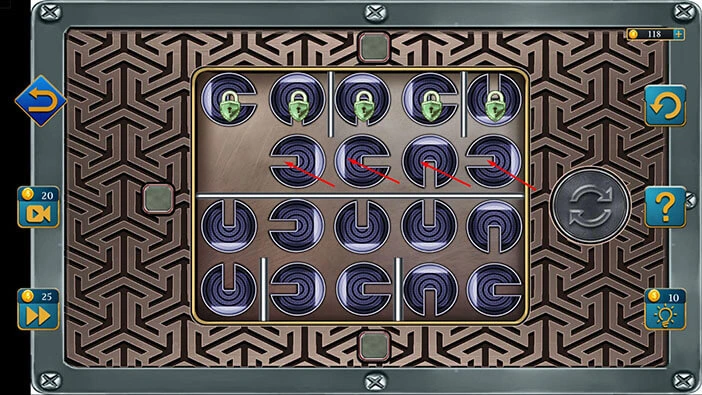
Step 2
Let’s tap seven times on the second slot on the left to set the correct symbol.
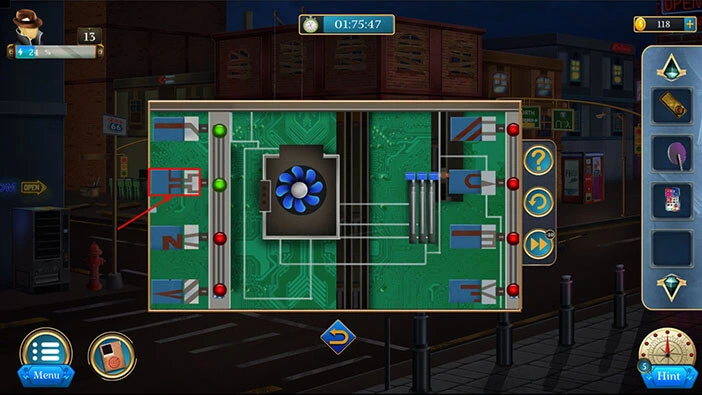
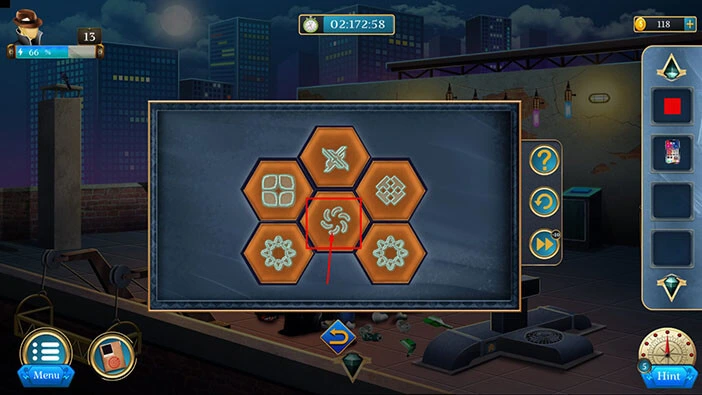
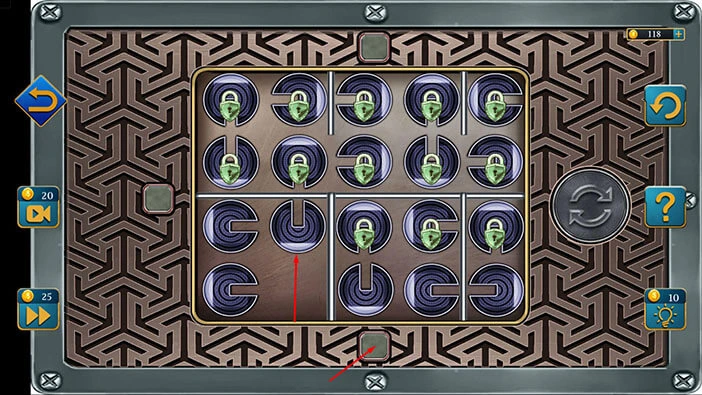
Step 3
Let’s tap four times on the third slot on the left to set the correct symbol.
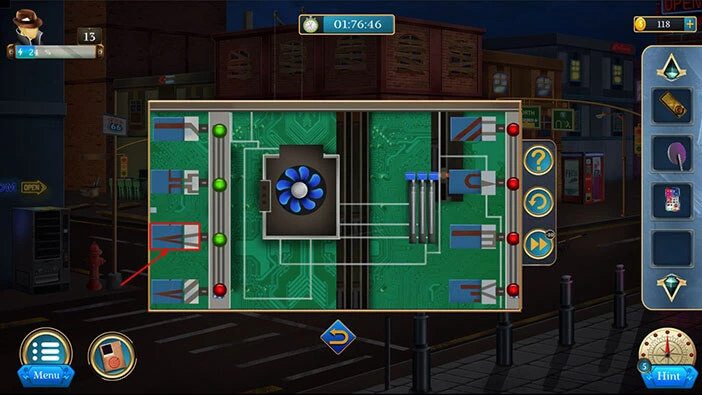
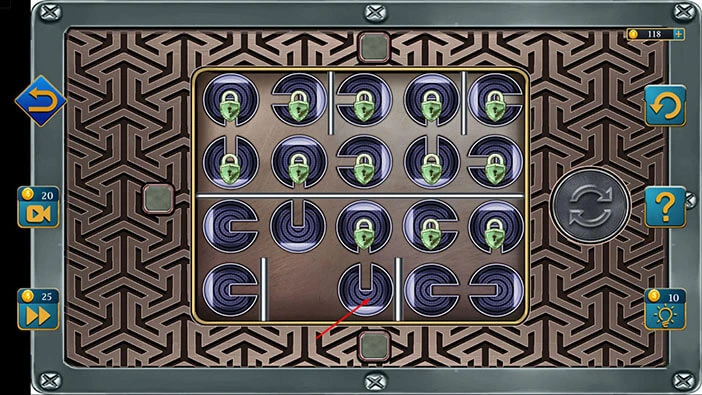
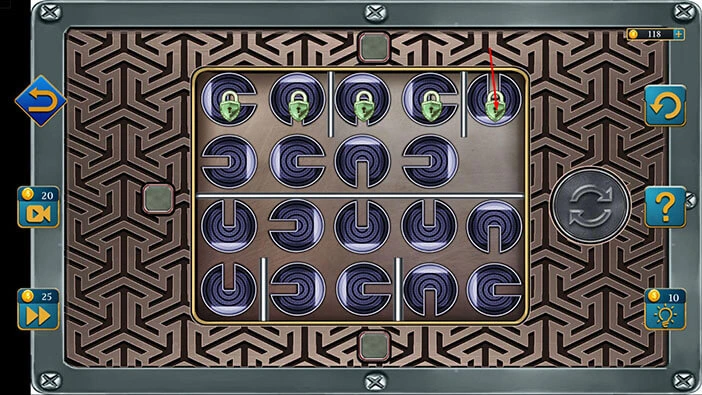
Step 4
Let’s tap once on the fourth slot on the left to set the correct symbol.
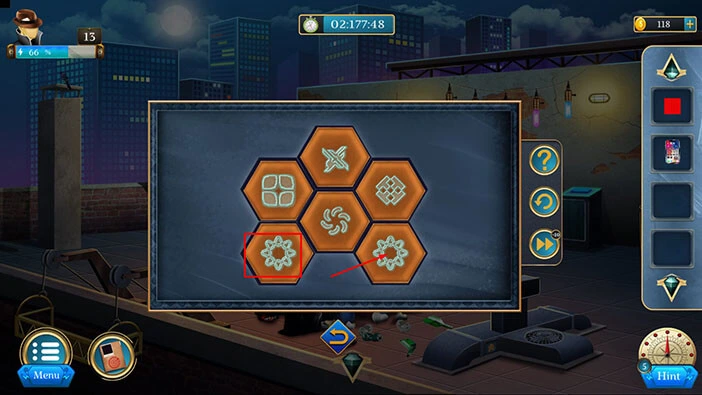
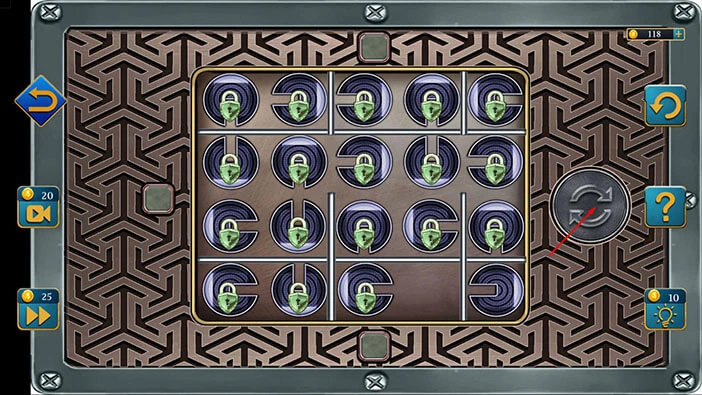
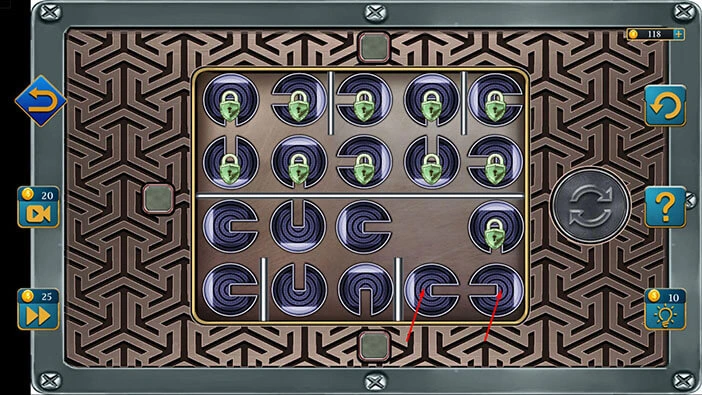
Step 5
Let’s tap four times on the first slot on the right to set the correct symbol.
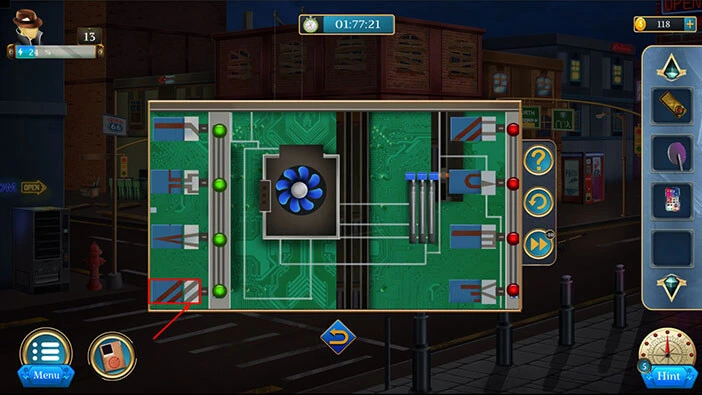
Step 6
Let’s tap seven times on the second slot on the right to set the correct symbol.

Step 7
Let’s tap seven times on the third slot on the right to set the correct symbol.
Step 8
Let’s tap five times on the fourth slot on the right to set the correct symbol.
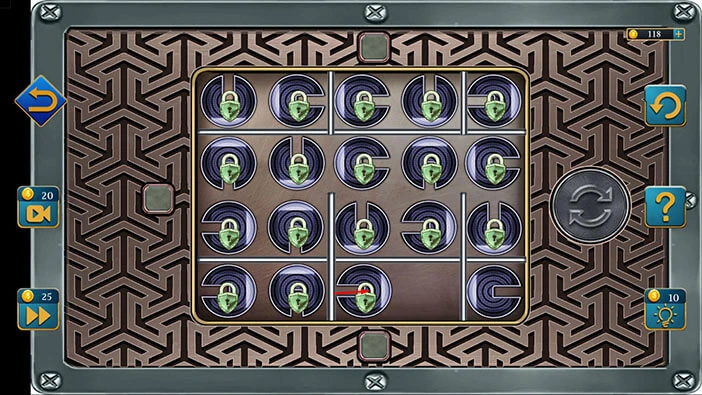
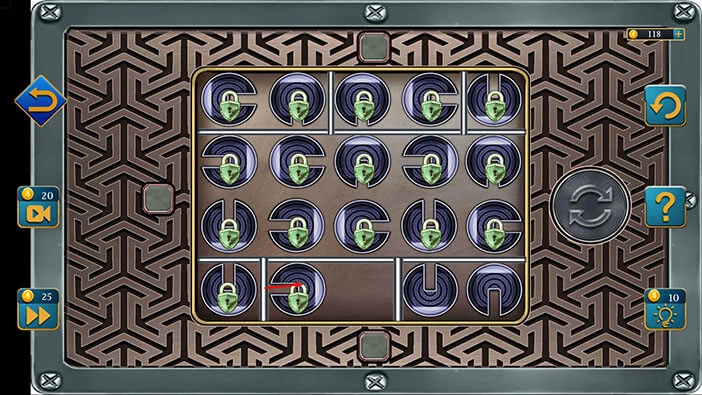
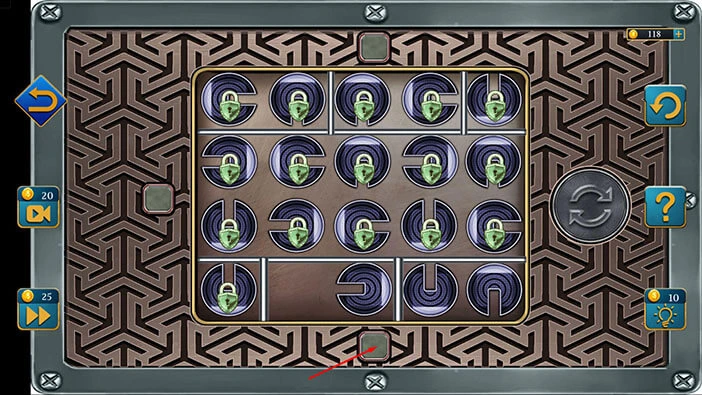
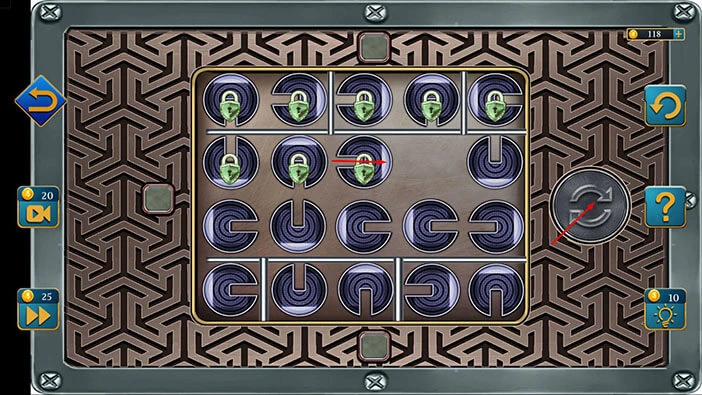
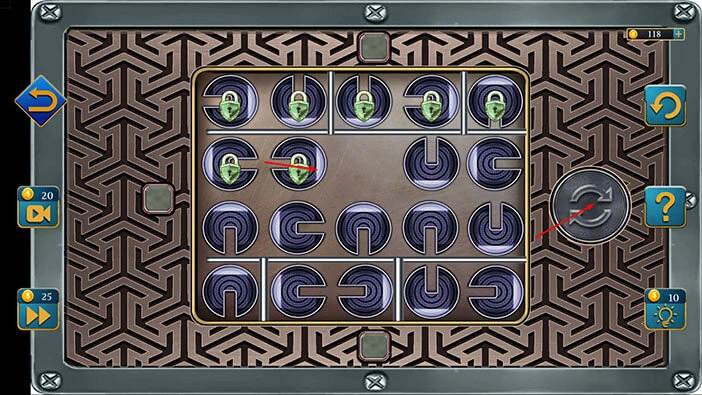
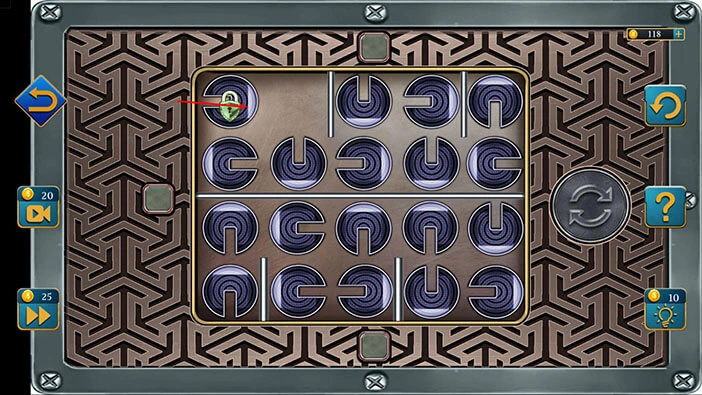
With that, you will unlock the this door, and you will discover a hint for the next puzzle. Let’s memorize/write down the colors.
Top left = Green
Top = Red
Top right = Pink
Once you’re done, tap on the arrow at the bottom to go back.
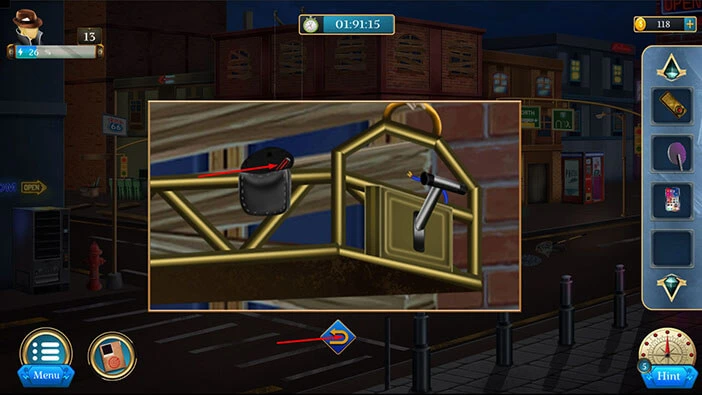
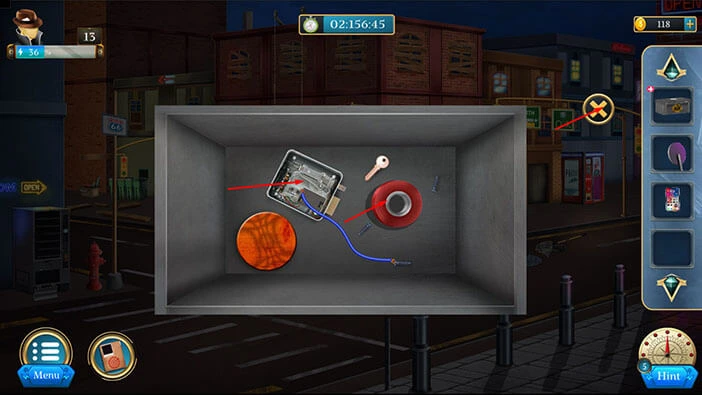
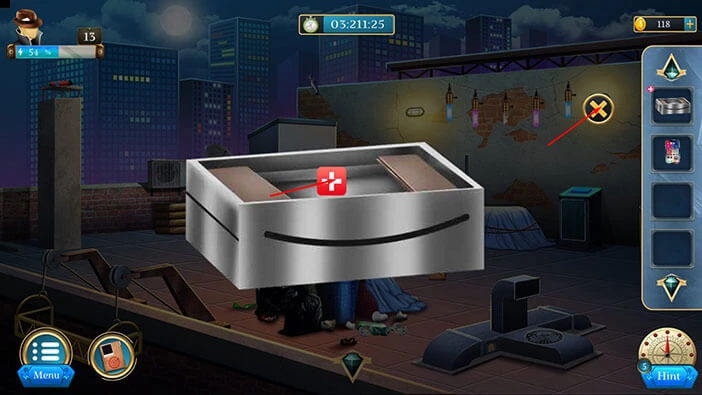
Let’s tap on the gondola to take a closer look at it.

Let’s tap on the black bag to open it and inside we will find a “Screwdriver”. Let’s tap on it to pick it up.
After that, tap on the arrow at the bottom to go back.
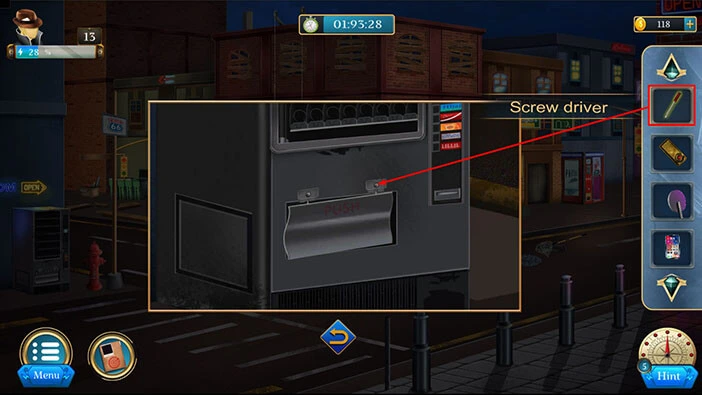
Next, let’s tap on the machine on the left to take a closer look at it.

Select the “Screwdriver” from the inventory and use it to remove the cover.
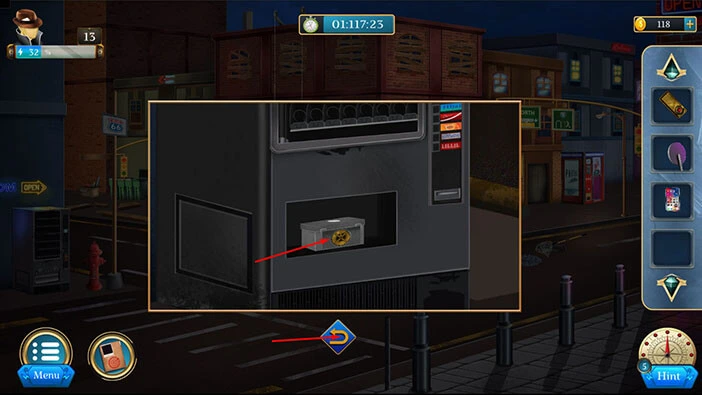
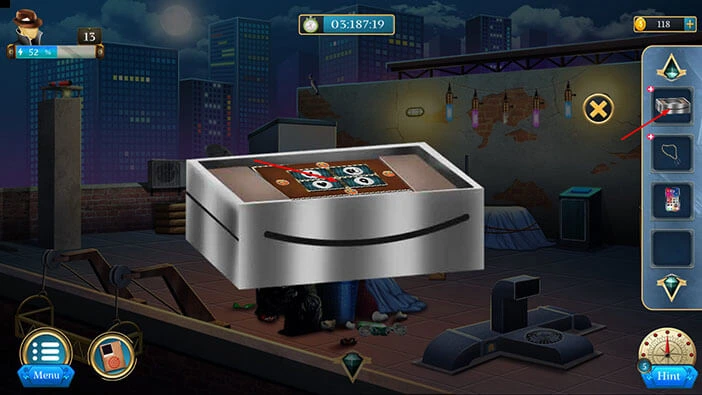
Inside you will find, a “Box”. Let’s tap on it to pick it up. After that, tap on the arrow at the bottom to go back.
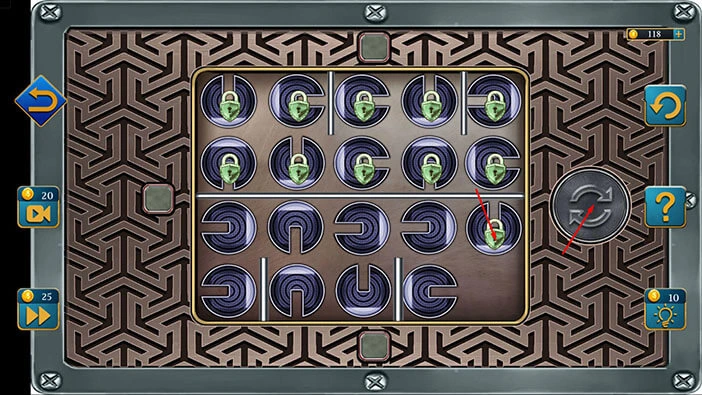
Select the “Box” from the inventory and it will appear in the middle of the screen. Let’s tap on it to examine it.
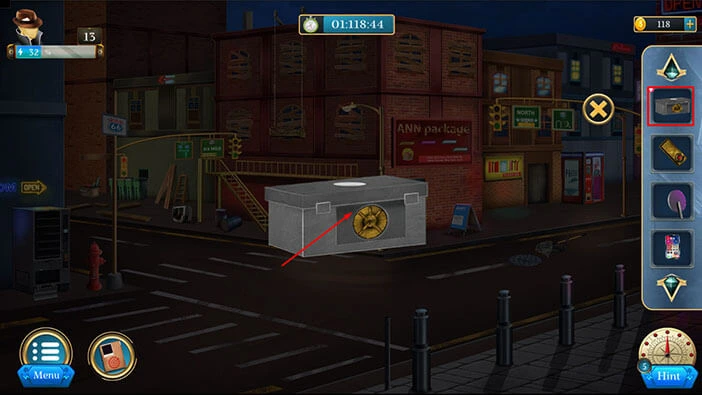
Select the “Button piece” from the inventory and insert it into the empty slot.
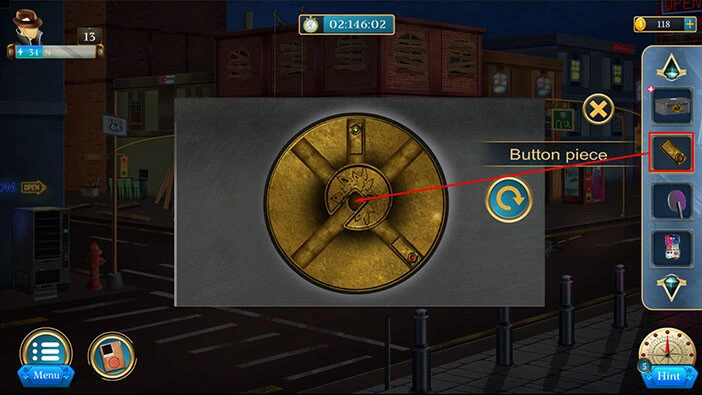
If you examine the gems, you will notice that we have green, purple, and red gems. Our task is to rearrange the gems to match the hint that we found previously. So, the gems should be in the following slots,
Top left = Green
Top = Red
Top right = Pink
We will do this puzzle in several steps. Let’s begin.
Step 1
Tap twice on the arrow on the right to rotate the ring, and you will place the empty slot below the green gem. After that, tap on the green gem to select it, and put it into the empty slot.

Step 2
Tap four times on the arrow on the right to rotate the ring, and you will place the slot with the green gem below the top left slot. After that, tap on the green gem to select it, and put it into the top left slot.
Step 3
Tap three times on the arrow on the right to rotate the ring, and you will place the empty slot below the red gem. After that, tap on the red gem to select it, and put it into the empty slot.
Step 4
Tap three times on the arrow on the right to rotate the ring, and you will place the slot with the red gem below the top slot. After that, tap on the red gem to select it, and put it into the top slot.
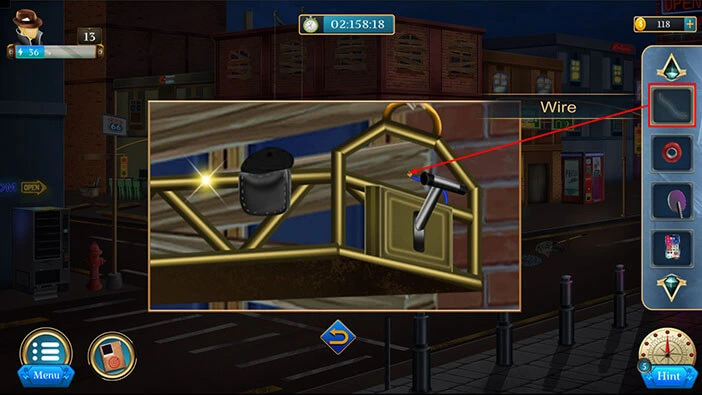
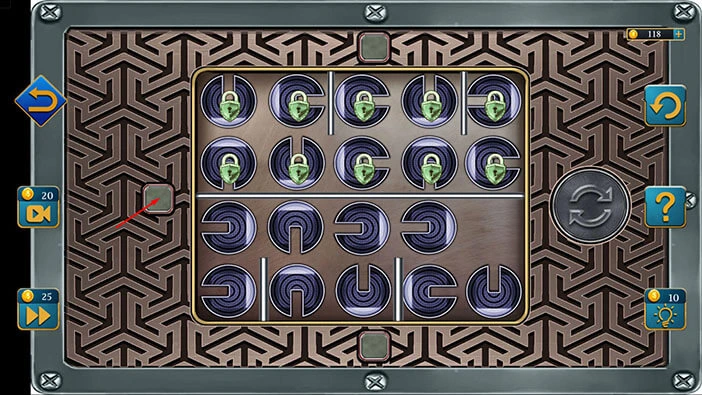
With that, you will open the box, and inside you will find an “Insulation tape”, and a “Wire”. Let’s tap on these two items to pick them up.
After that, tap on the “X” button to close this window.
Next, let’s go back to the gondola. Tap on it to take a closer look.

Select the “Wire” from the inventory and attach it to the wire on the gondola.
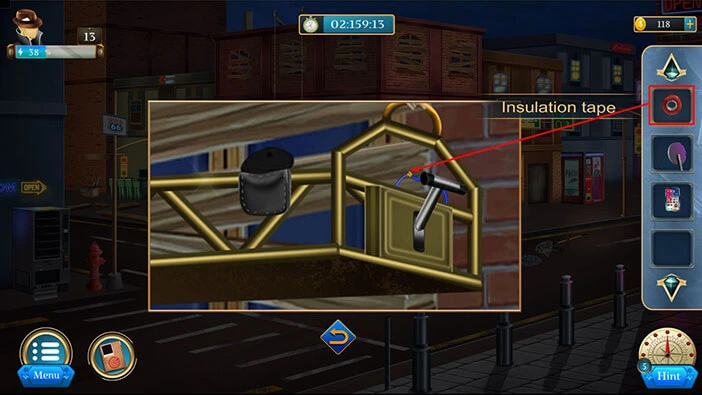
Next, select the “Insulation tape” from the inventory and use it to connect the wires. After that, tap on the lever to start the interaction.
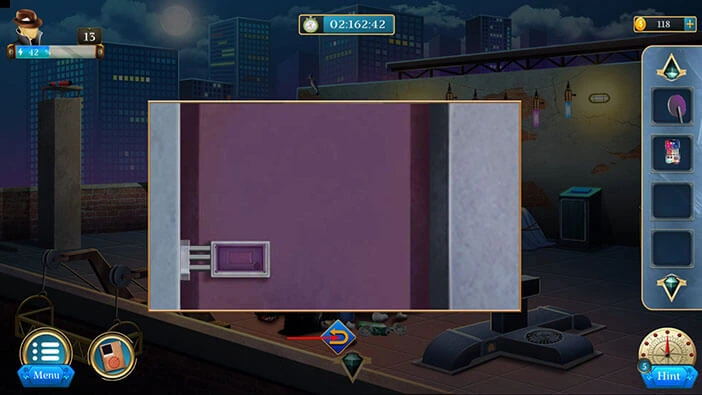
We now have access to the roof. Let’s tap on it.

Our next task is to unlock the purple door. Let’s tap on the arrow at the bottom to go back.
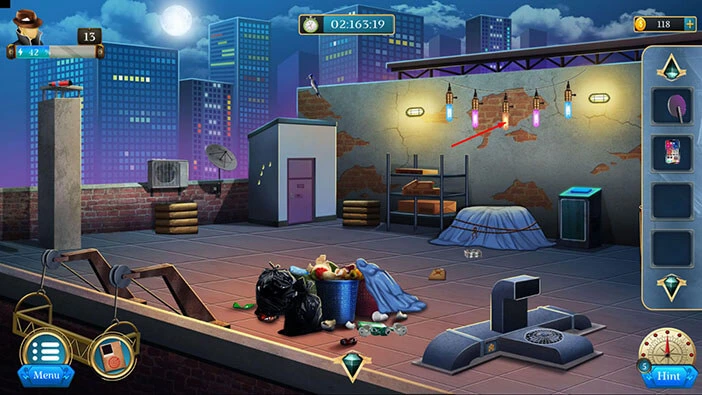
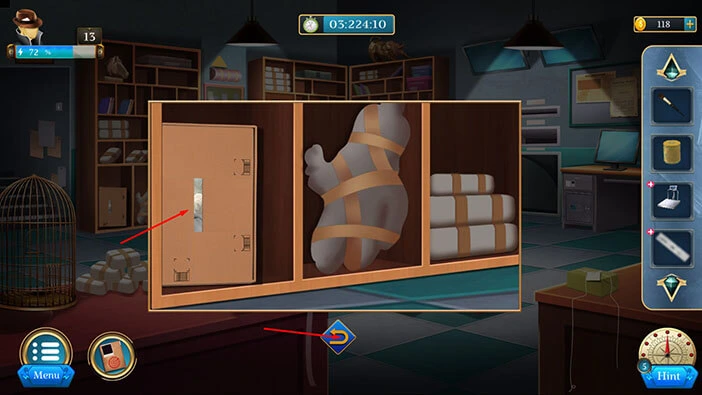
Next, let’s tap on the lights on the right to take a closer look at them.
Select the “Signboard” from the inventory and use it to smash the light.
Here, you will find a “Chain” and a “Steel box”. Let’s tap on these two items to pick them up.
After that, tap on the arrow at the bottom to go back.
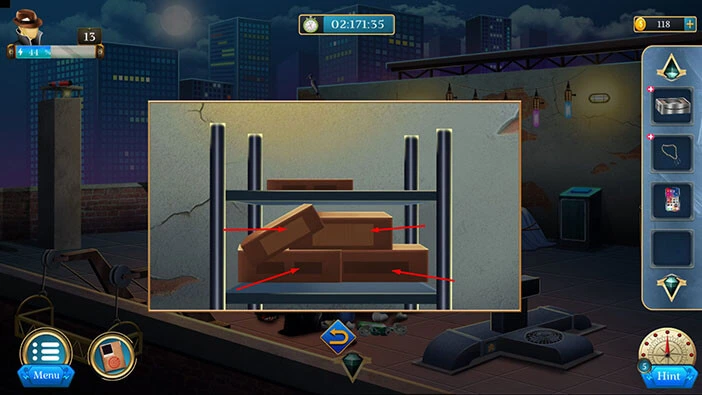
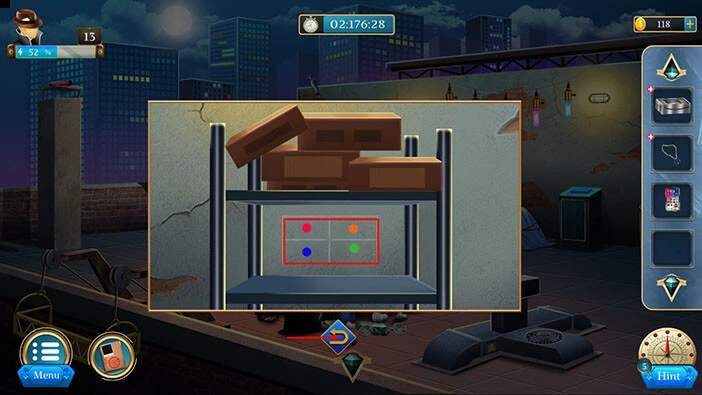
Next, let’s tap on the shelf on the right to take a closer look at it.

Here, you will see four cardboard boxes. Let’s tap on them to move them to the top shelf.
On the wall, behind the boxes, you will discover four dots. Let’s memorize/write them down because we will need this information for the next puzzle. So, here we have,
Top left slot = Red dot
Top right slot = Orange dot
Bottom left slot = Blue dot
Bottom right slot = Green dot
Once you’re done, tap on the arrow at the bottom to go back.
Let’s select the “Chain” from the inventory and it will appear in the middle of the screen. Let’s select the following symbols on the chain, Orange, Red, Green, and Blue.
Our next task is to memorize/write down the symbols of each color because this is the second part of the hint. So, here we have,
Orange = One full, and one empty circle
Red = Three leaves
Green = 9
Blue = Heart
Once you’re done, tap on the “X” button to close this window.
Next, select the “Steel box” from the inventory, and it will appear in the middle of the screen. After that, tap on the puzzle on the box to examine it.
Here, we have four symbols. We already discovered the symbols that represent the solution for this puzzle, because we previously saw four dots that represent the position of the symbols, and then we discovered the symbol that each dot represents. So, we had,
Top left slot = Red dot = Three leaves
Top right slot = Orange dot = One full, and one empty circle
Bottom left slot = Blue dot = Heart
Bottom right slot = Green dot = 9.
So, let’s set these symbols. We will do that in several steps. Let’s begin.
Step 1
Tap twice on the arrow on the left to change the symbols in the top right and bottom left slots.
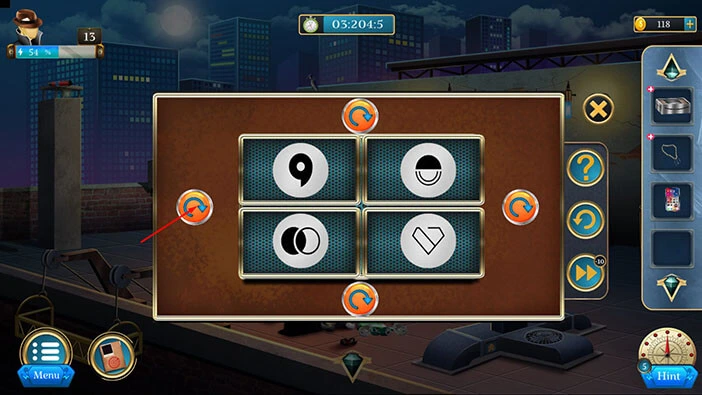
Step 2
Tap once on the arrow on the right to change the symbols in the top left and bottom right slots.
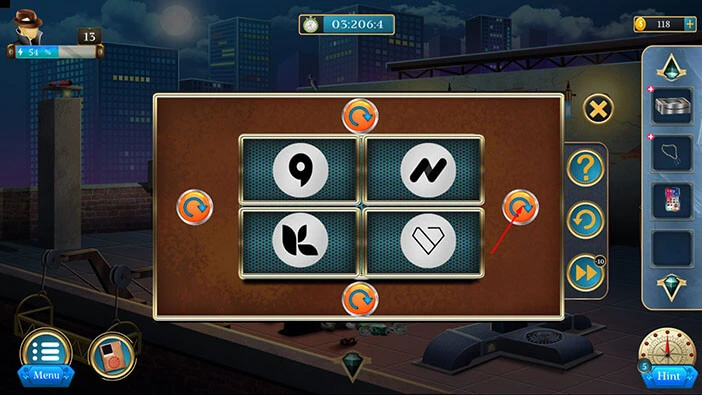
Step 3
Tap twice on the arrow on the left to change the symbols in the top right and bottom left slots.

Step 4
Tap three on the arrow at the bottom to change the symbols in the bottom right and bottom left slots. With that, you will solve this puzzle.

You will unlock the box, and inside you will find a “Button piece”. Let’s tap on it to pick it up. After that, tap on the “X” button to close this window.
Next, let’s tap on the trash on the ground to take a closer look at it.
Next, let’s tap on the green bottle to start the interaction, and our character will break it.
Let’s tap on the “Glass piece” to pick it up. After that, tap on the arrow at the bottom to go back.

Next, let’s tap on the arrow at the bottom of the screen to go back to the street level.
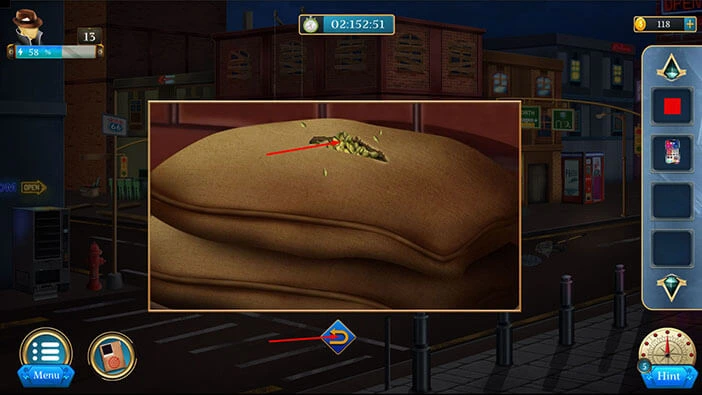
Next, let’s tap on the grain bags to take a closer look at them.

Select the “Glass piece” from the inventory and use it to cut open the bag.
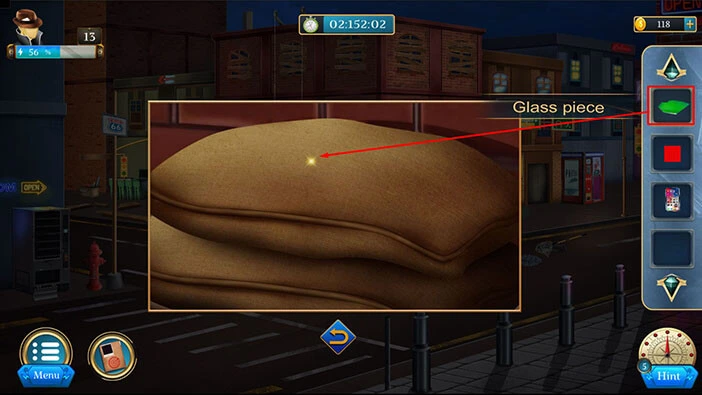
Next, let’s tap on the “Grains” to pick them up. After that, tap on the arrow at the bottom to go back.
Let’s go back to the roof. Tap on the gondola.

Select the “Grains” from the inventory and put it into the chimney on the right.
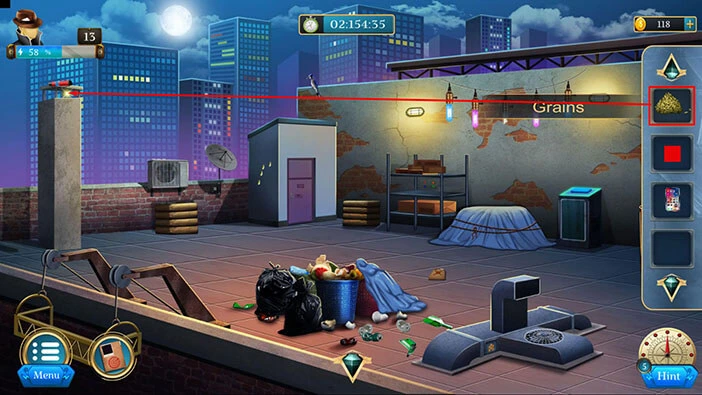
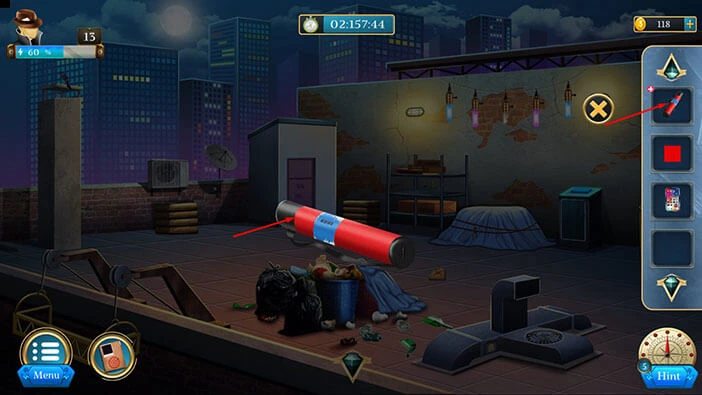
The bird will fly after that grain, and it will knock down a red item from the chimney. Let’s tap on the red item to take a closer look at it, and tap again to pick it up. “Sheet holder” will be added to your inventory.
After that, tap on the arrow at the bottom to go back.

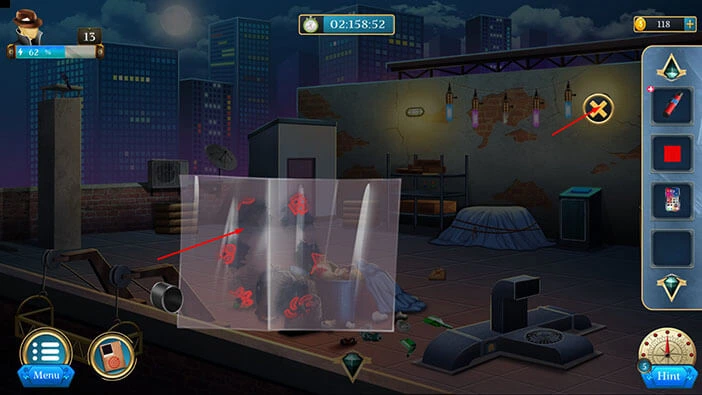
Select the “Sheet holder” from the inventory and it will appear in the middle of the screen. After that, tap on the “Sheet holder” to open it.
You will find a “Transparent sheet”. Let’s tap on it to pick it up. After that, tap on the “X” button to close this window.
Let’s go back to the street level. Tap on the arrow at the bottom of the screen.

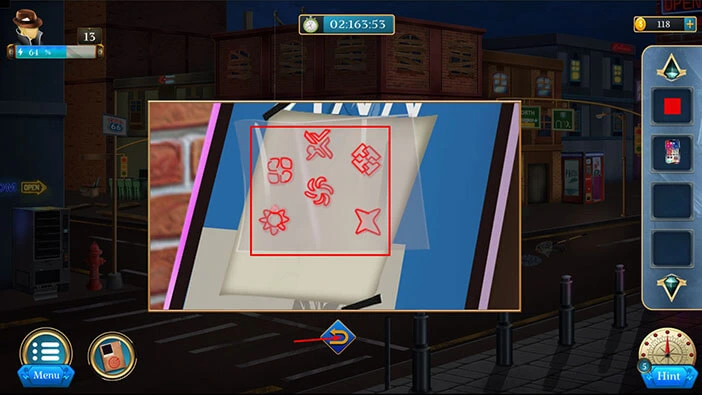
Next, let’s tap on the blue sign on the right to take a closer look at it.

Here, you will discover partially drawn symbols. So, let’s select the “Transparent sheet” from the inventory and place it over the symbols.
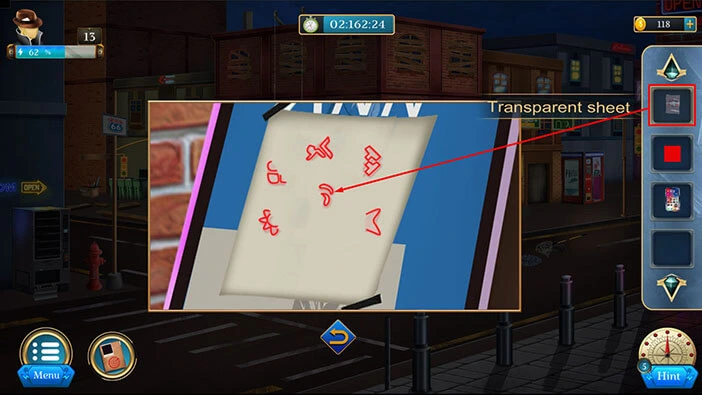
We can now see six complete symbols. Let’s memorize/write down these symbols because we will need this information for the next puzzle.
Let’s go back to the roof. Tap on the gondola.
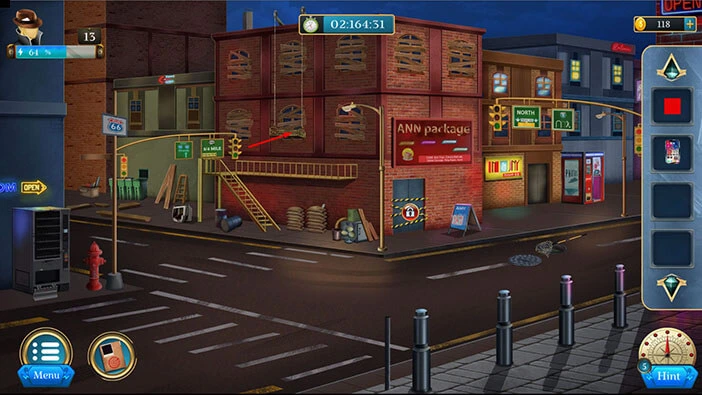
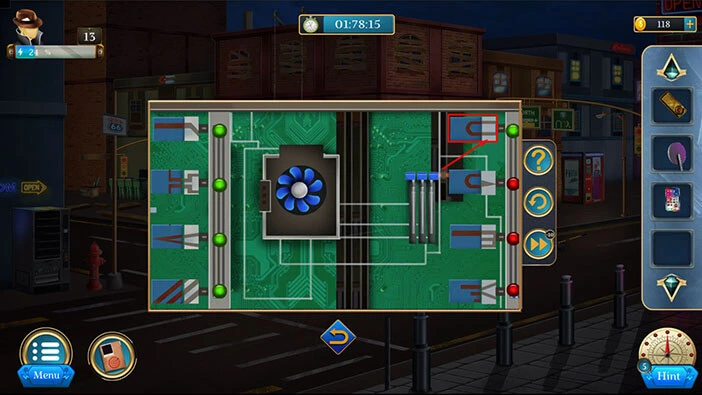
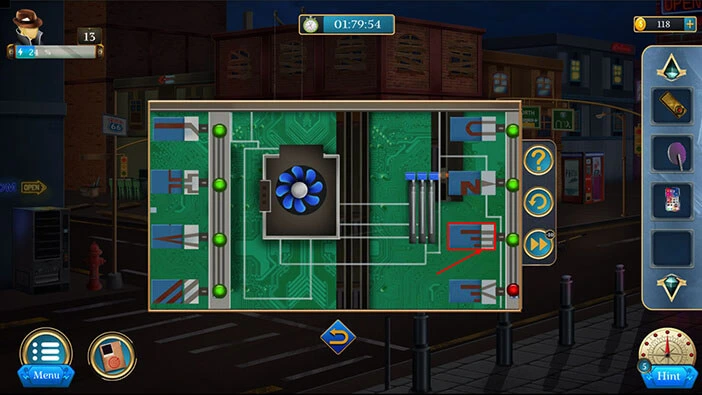
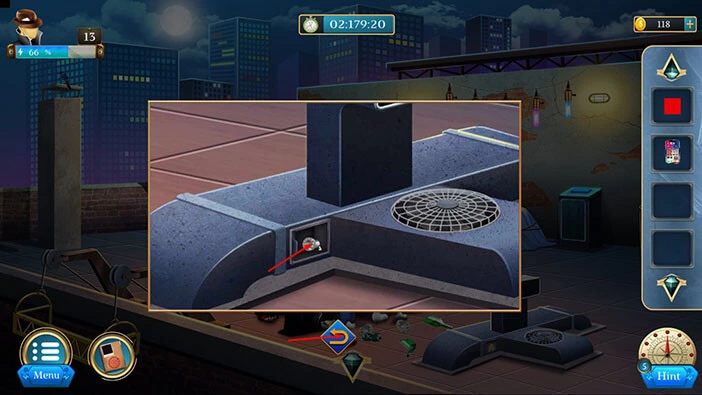
Let’s tap on the symbols on the ventilation pipe to take a closer look at them and tap again to start the interaction.

Let’s set the symbols that we previously discovered. We will do that in several steps. Let’s begin.
Step 1
Tap eleven times on the top slot to set the correct symbol.
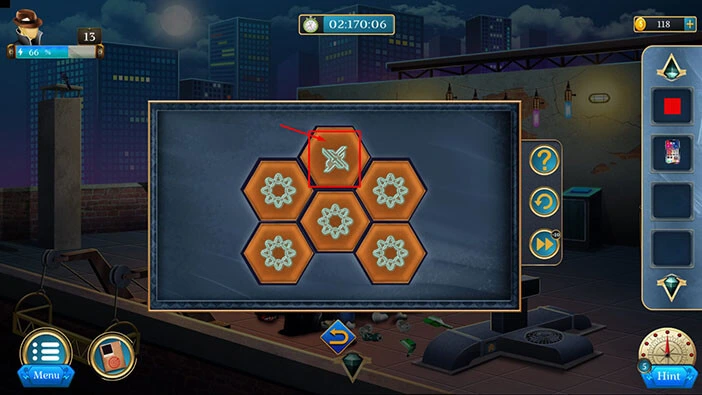
Step 2
Tap eight times on the top right slot to set the correct symbol.
Step 3
Tap ten times on the top left slot to set the correct symbol.
Step 4
Tap three times on the bottom slot to set the correct symbol.
Step 5
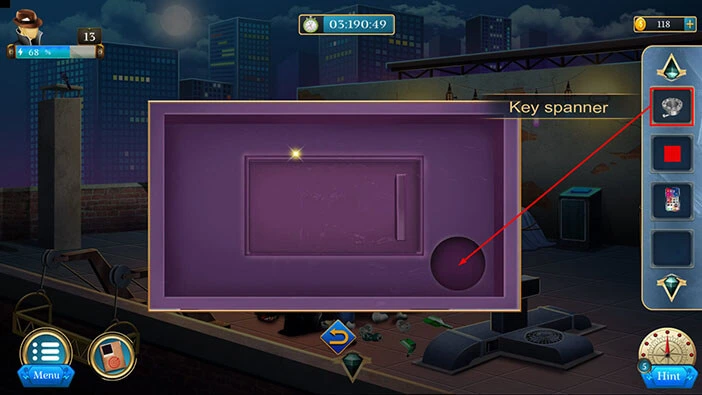
Tap two times on the bottom right slot, and you will set the correct symbol. We already have the correct symbol in the bottom left slot, so with this step, you will solve this puzzle.
With that, you will open the secret compartment, and inside you will find a “Key spanner”. Let’s tap on it to pick it up.
After that, tap on the arrow at the bottom to go back.
Let’s tap on the purple door to take a closer look at it, and tap again on the lock to examine it.

You will notice an empty slot in the bottom right corner of the lock. So, let’s select the “Key spanner” from the inventory and insert it into the empty slot.
Next, you will notice that one of the buttons is missing. So, let’s select the “Button piece” from the inventory and insert it into the empty slot. After that, tap on the lock to start the interaction.
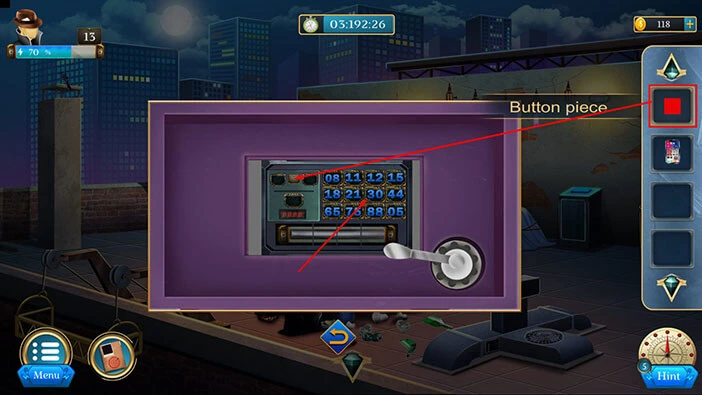
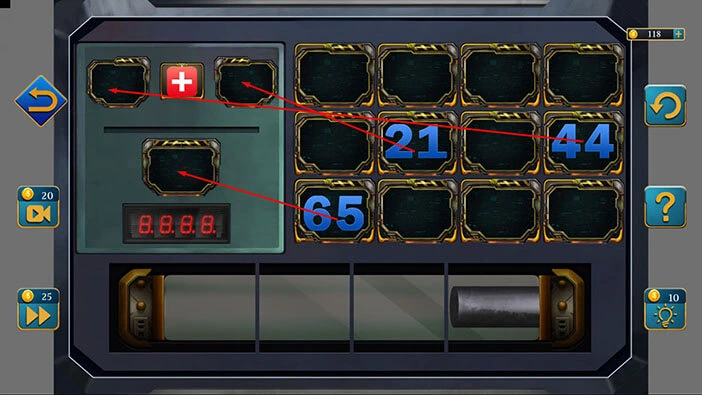
Our next task is to solve the mathematical puzzle. Our task is to use the numbers on the right to reach the correct result. We will do this puzzle in several steps. Let’s begin.
Step 1
Select the number 15, located in the fourth slot of the first row, and place it as the first digit.
Next, select the number 5, located in the fourth slot of the third row, and place it as the second digit.
15 x 5 = 75. So, let’s select the number 75, located in the second slot of the third row, and place it into the “result” slot.
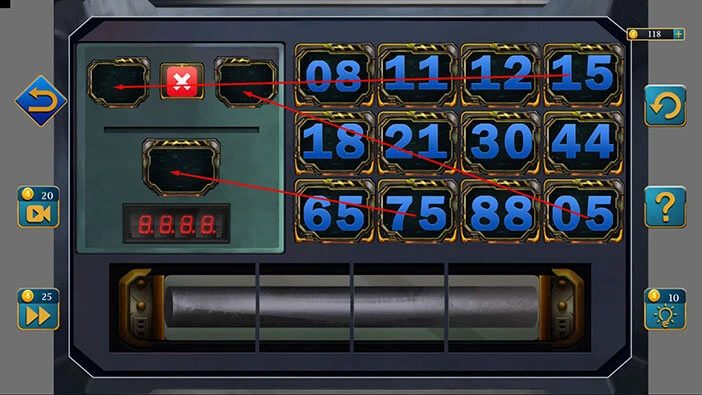
Step 2
Select the number 30, located in the third slot of the second row, and place it as the first digit.
Next, select the number 18, located in the first slot of the second row, and place it as the second digit.
30 – 18 = 12. So, let’s select the number 12, located in the third slot of the first row, and place it into the “result” slot.
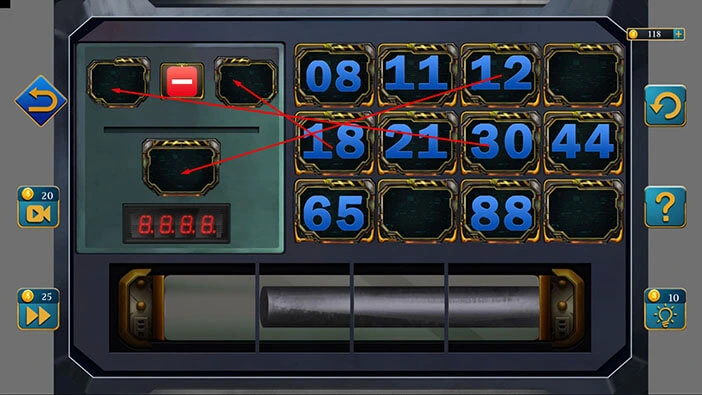
Step 3
Select the number 88, located in the third slot of the third row, and place it as the first digit.
Next, select the number 11, located in the second slot of the first row, and place it as the second digit.
88 / 11 = 08. So, let’s select the number 08, located in the first slot of the first row, and place it into the “result” slot.

Step 4
Select the number 44, located in the fourth slot of the second row, and place it as the first digit.
Next, select the number 21, located in the second slot of the second row, and place it as the second digit.
44 + 21 = 65. So, let’s select the number 65, located in the first slot of the third row, and place it into the “result” slot.
With that, you will unlock and open the door. Let’s tap on it to proceed to the next room.

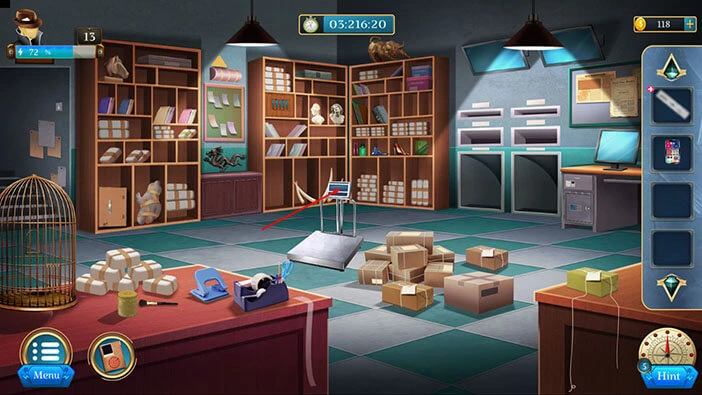
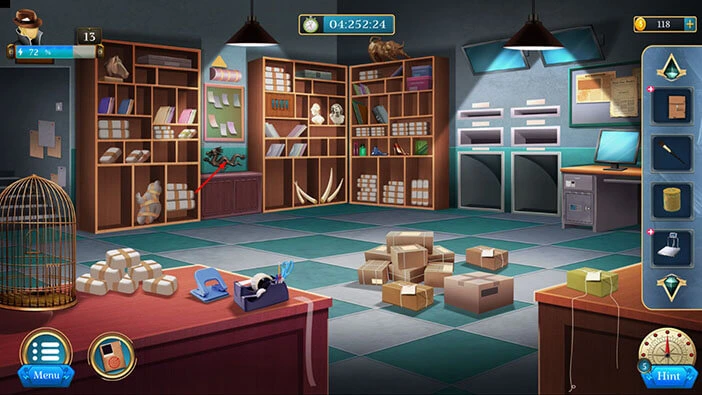
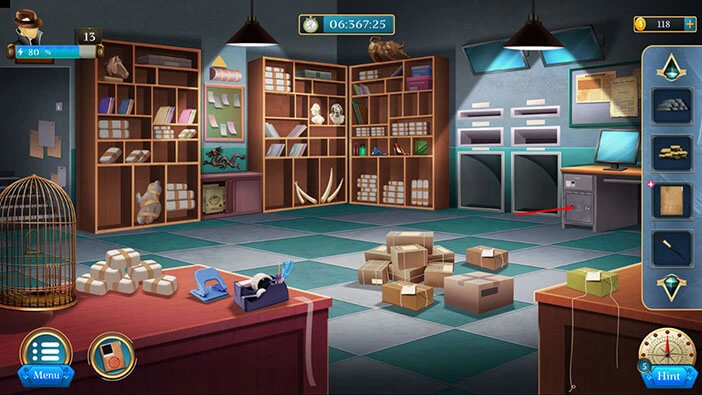
It appears that we discovered a smuggler’s warehouse. Let’s explore it.
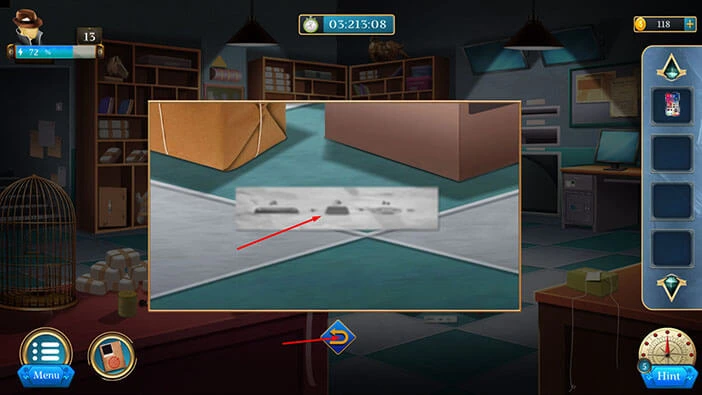
Tap on the item on the floor, just next to the cardboard boxes, to take a closer look at it.
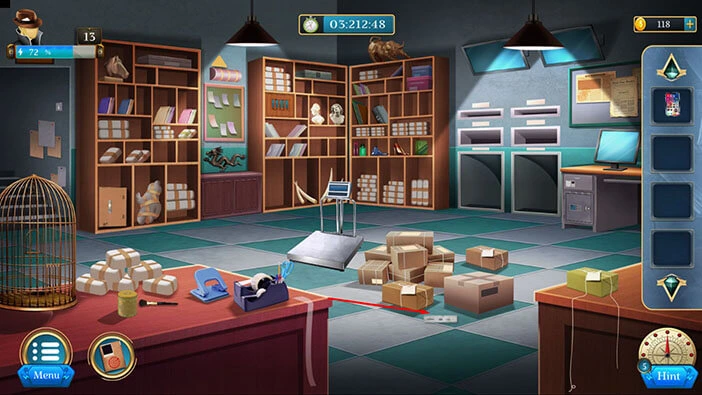
Here, you will find a “Sheet”. Let’s tap on it to pick it up. After that, tap on the arrow at the bottom to go back.
To the left of the boxes, you will notice a “Weight machine”. Let’s tap on it to pick it up.
Next, let’s tap on the desk on the left to take a closer look at it.
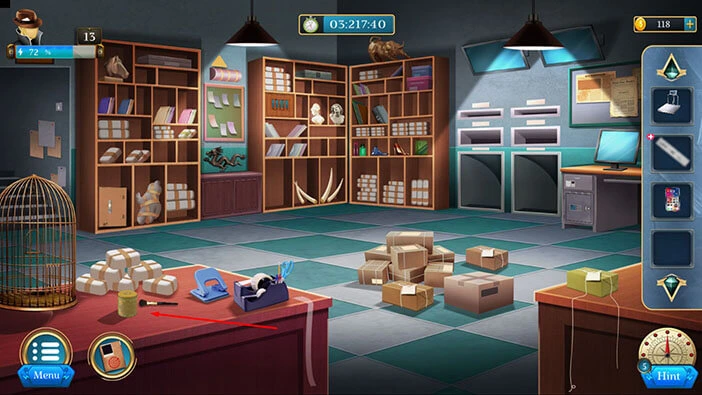
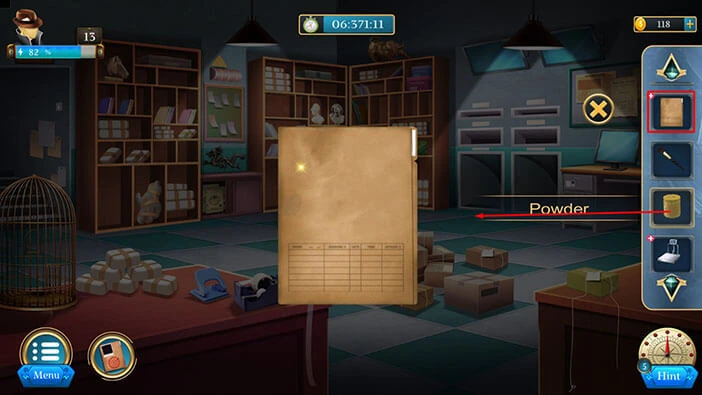
Here, you will find a “Brush” and a “Powder”. Let’s tap on these two items to pick them up.
After that, tap on the arrow at the bottom to go back.
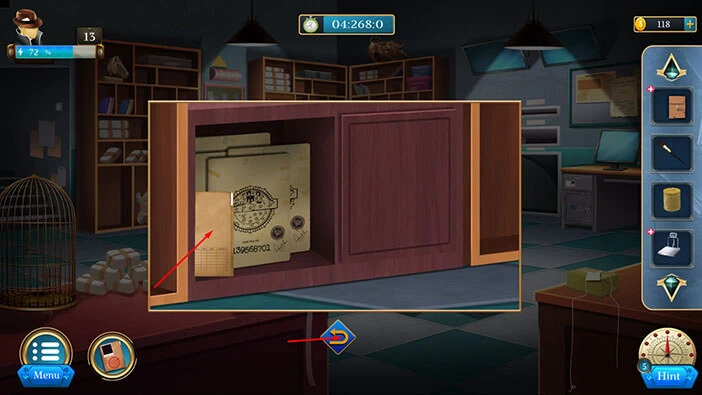
Next, let’s tap on the bottom part of the shelf on the left to take a closer look at it.
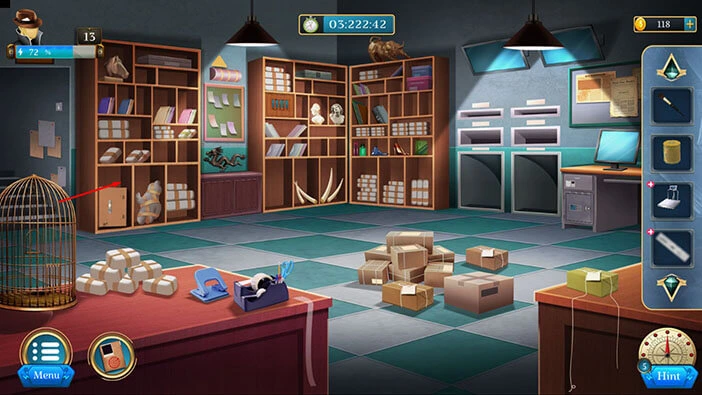
Here, you will find a “Painting”. Let’s tap on it to pick it up. After that, tap on the arrow at the bottom to go back.
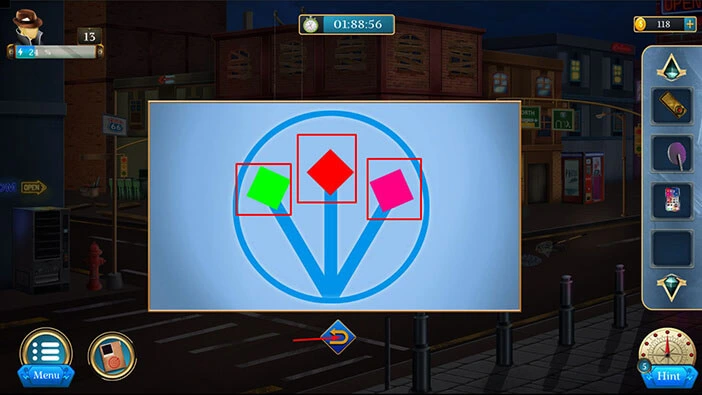
Next, on the left, you will notice a statue of the dragon. Let’s tap on it to take a closer look.
Here, we have another puzzle. Our task is to modify the statue of the dragon to match the symbol in the top right corner.
We will do that in several steps. Let’s begin.
Step 1
Tap twice on the right leg.

Step 2
Tap twice on the right arm.
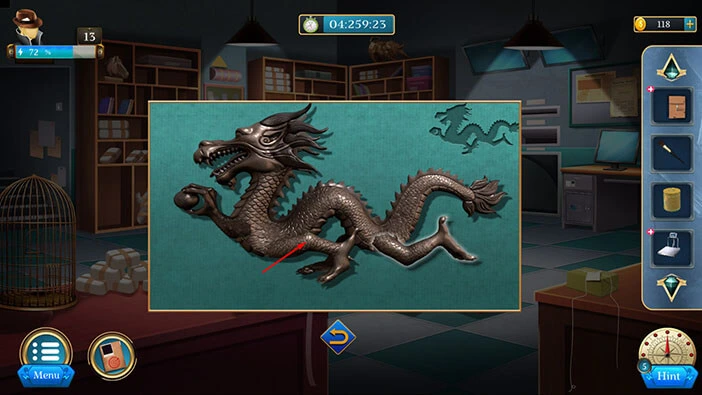
Step 3
Lastly, tap once on the left arm, and you will set the statue into the correct pose.
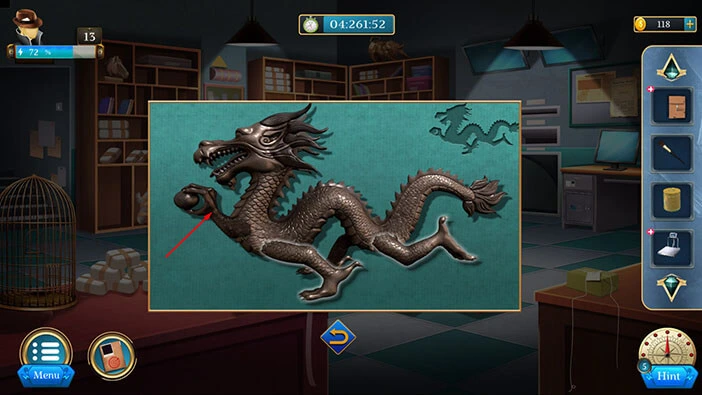
With that, you will solve this puzzle, and you will unlock the door below the statue. Inside, you will find a “File”. Let’s tap on it to pick it up.
After that, tap on the arrow at the bottom to go back.
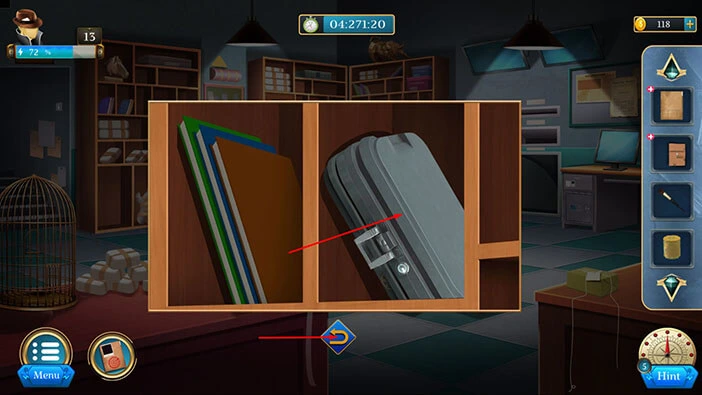
Let’s proceed. Tap on the shelf on the right to take a closer look at it.

Here, you will find a suitcase. Let’s tap on it to pick it up.
After that, tap on the arrow at the bottom to go back.
Next, select the suitcase in your inventory, and it will appear in the middle of the screen. After that, tap on the suitcase to start the interaction.
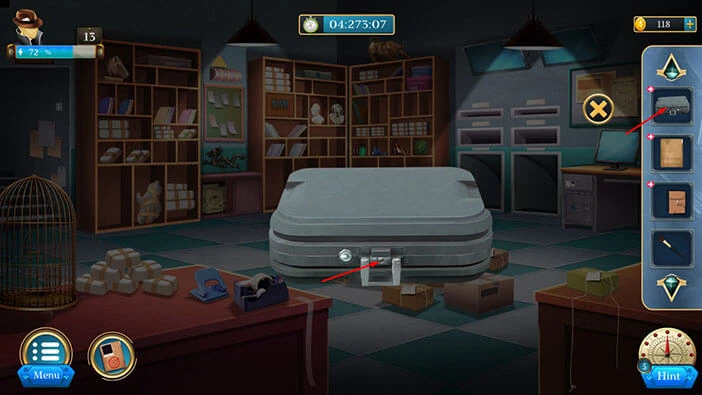
Here, we have another puzzle. Our task is to unlock all the coins on the grid. We will do this puzzle in several steps. Let’s begin.
Step 1
Tap three times on the arrow on the right to rotate the coins.
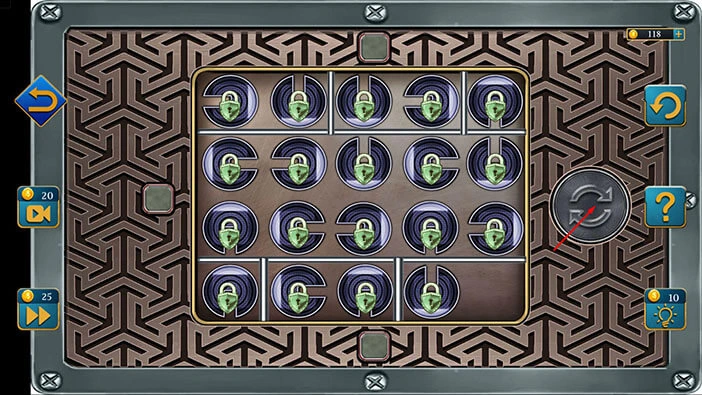
Step 2
Let’s tap on the fourth coin in the fourth row to unlock it.
Step 3
Next, let’s tap on the button at the bottom to change locked areas.
Step 4
Let’s tap twice on the arrow on the right to rotate the coins.
Step 5
Tap on the third coin in the fourth row to unlock it, and move it into the empty slot on the right.
Step 6
Next, let’s tap on the button at the bottom to change locked areas.
Step 7
Let’s tap once on the arrow on the right to rotate the coins.
Step 8
Tap on the second coin in the fourth row to unlock it, and move it into the empty slot on the right.
Step 9
Next, let’s tap on the button at the bottom to change locked areas.
Step 10
Let’s tap three times on the arrow on the right to rotate the coins.
Step 11
Tap on the first coin in the fourth row to unlock it, and move it into the empty slot on the right.

Step 12
Next, let’s tap on the button on the left to change locked areas.
Step 13
Let’s tap once on the arrow on the right to rotate the coins.
Step 14
Tap on the first coin in the third row to unlock it, and move it into the empty slot on the right.
Step 15
Next, let’s tap on the first button in the fourth row to move it to the first slot in the third row.
Step 16
Next, let’s tap on the second button in the fourth row to move it to the first slot in the fourth row.

Step 17
Let’s tap once on the arrow on the right to rotate the coins. After that, tap on the second coin in the third row to unlock it, and you will move it to the second coin in the fourth row.
Step 18
Let’s tap on the second button in the third row to move it back to the second slot in the third row. After that, tap on the button at the bottom to change the locked areas.
Step 19
Next, let’s tap on the button in the third slot in the fourth row to move it to the second slot in the fourth row.
Step 20
Let’s tap twice on the arrow on the right to rotate the coins. After that, tap on the third coin in the third row to unlock it, and you will move it to the third slot in the fourth row.

Step 21
Let’s tap twice on the arrow on the right to rotate the coins. After that, tap on the coin in the fourth slot in the third row to unlock it, and you will move it to the third slot in the third row.
Step 22
Next, let’s tap on the fourth coin in the fourth row to move it to the fourth slot in the third row. After that, tap on the coin in the fifth slot in the fourth row, and you will move it to the fourth slot in the fourth row.
Step 23
Let’s tap twice on the arrow on the right to rotate the coins. After that, tap on the fifth coin in the third row to unlock it, and you will move it to the fifth slot in the fourth row.
Step 24
Next, let’s tap on the button on the left to change the locked areas.
Step 25
Let’s tap three times on the arrow on the right to rotate the coins. After that, tap on the fifth coin in the second row to unlock it, and you will move it to the fifth slot in the third row.
Step 26
Let’s tap twice on the arrow on the right to rotate the coins. After that, tap on the fourth coin in the second row to unlock it, and you will move it to the fifth slot in the second row.
Step 27
Let’s tap once on the arrow on the right to rotate the coins. After that, tap on the third coin in the second row to unlock it, and you will move it to the fourth slot in the second row.
Step 28
Let’s tap once on the arrow on the right to rotate the coins. After that, tap on the second coin in the second row to unlock it, and you will move it to the third slot in the second row.
Step 29
Let’s tap twice on the arrow on the right to rotate the coins. After that, tap on the first coin in the second row to unlock it, and you will move it to the second slot in the second row.
Step 30
Next, let’s tap on the button on the left to change the locked areas.
Step 31
Next, let’s tap on all coins in the second row to move them one slot to the left.
Step 32
Let’s tap on the fifth coin in the first row to unlock it, and you will move it to the fifth slot in the second row.
Step 33
Let’s tap on the fifth coin in the second row to move it to the fifth slot in the first row. After that, tap on the fourth coin in the second row to move it to the fifth slot in the second row.
Step 34
Let’s tap three times on the arrow on the right to rotate the coins. After that, tap on the fourth coin in the first row to unlock it, and you will move it to the fourth slot in the second row.
Step 35
Let’s tap on the fourth coin in the second row to move it to the fourth slot in the first row. After that, tap on the third coin in the second row to move it to the fourth slot in the second row.
Step 36
Let’s tap three times on the arrow on the right to rotate the coins. After that, tap on the third coin in the first row to unlock it, and you will move it to the third slot in the second row.
Step 37
Let’s tap on the third coin in the second row to move it to the third slot in the first row. After that, tap on the second coin in the second row to move it to the third slot in the second row.
Step 38
Next, let’s tap on the second coin in the first row to unlock it, and you will move it to the second slot in the second row.
Step 39
Lastly, let’s tap on the first coin in the first row to unlock it, and you will move it to the second slot in the first row.
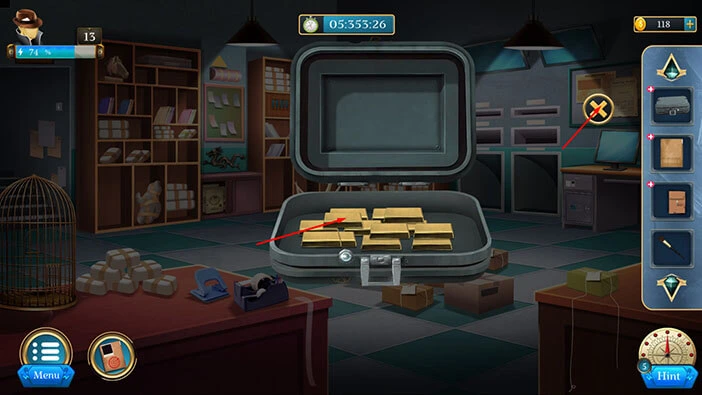
With that, you will unlock the suitcase and inside you will find “Gold”. Let’s tap on it to pick it up. After that, tap on the “X” button to close this window.
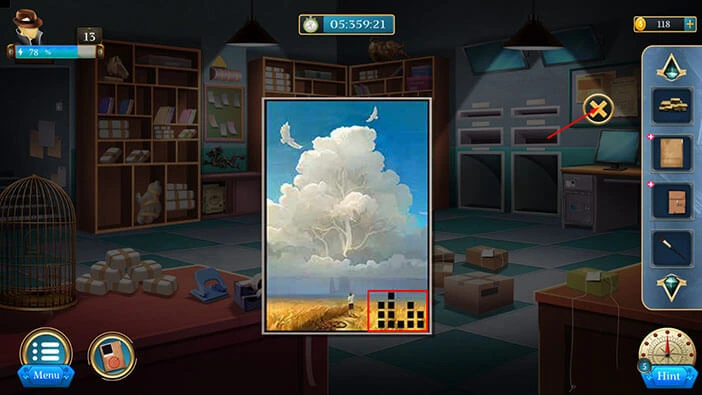
Next, let’s tap on the “Painting” in our inventory to select it, and it will appear in the middle of the screen. After that, tap on the painting in the box to take a look at it.
In the bottom right corner of the painting, we can see the hint for the next puzzle. Let’s memorize/write down the number of squares in each column. So, starting from left to right, we have,
First column = Three squares
Second column = Four squares
Third column = One square
Fourth column = Three squares
Fifth column = Two squares
Once you’re done, tap on the “X” button to close this window.
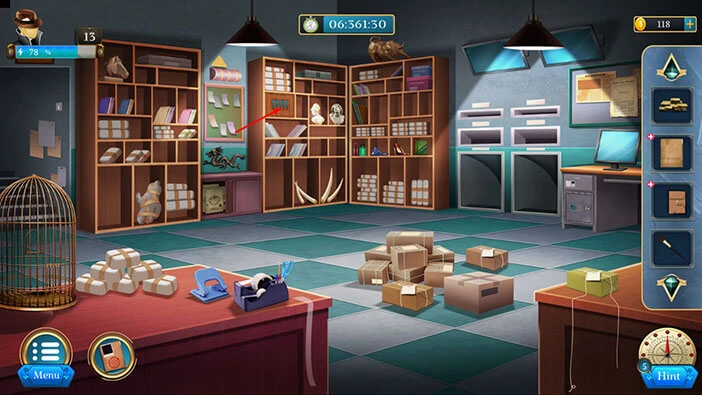
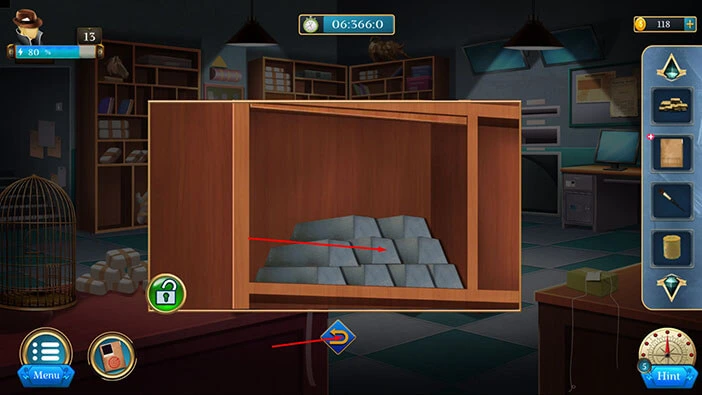
Next, if you take a look at the second shelf on the left, you will notice a compartment with five blue columns. Let’s tap on it to take a closer look, and tap again to start the interaction.
Here, we have another puzzle. The number of squares in the columns should match the number of squares in the picture (hint in our inventory). So, let’s solve this puzzle. Enter the following number of squares.
First column = Three squares
Second column = Four squares
Third column = One square
Fourth column = Three squares
Fifth column = Two squares
Once you’re done, tap on the padlock in the bottom left corner to unlock this compartment.
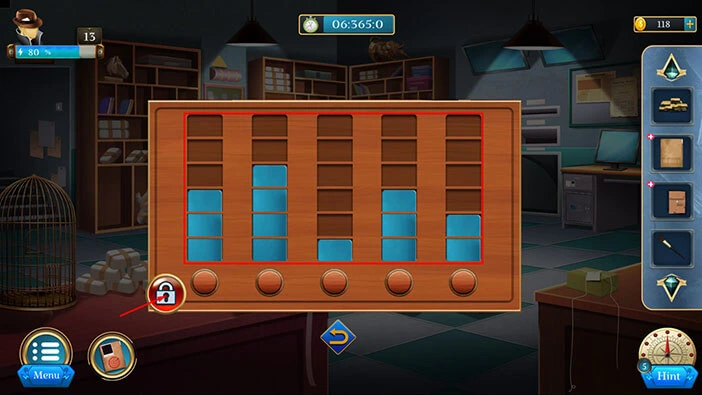
In the compartment, you will find “Silver”. Let’s tap on it to pick it up. After that, tap on the arrow at the bottom to go back.
Let’s proceed. If you take a look at the desk on the right, you will notice a small door. Let’s tap on it to take a closer look and tap again to start the interaction.
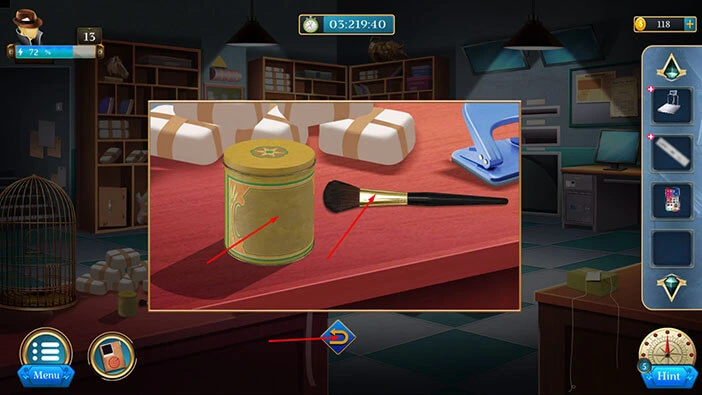
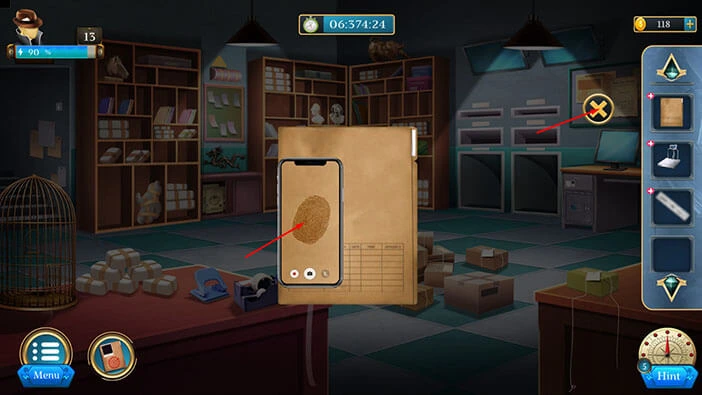
Before we proceed, let’s select the “File” from the inventory, and it will appear in the middle of the screen. After that, select “Powder” from the inventory and place it next to the file. Lastly, tap on the “Powder” to open it.
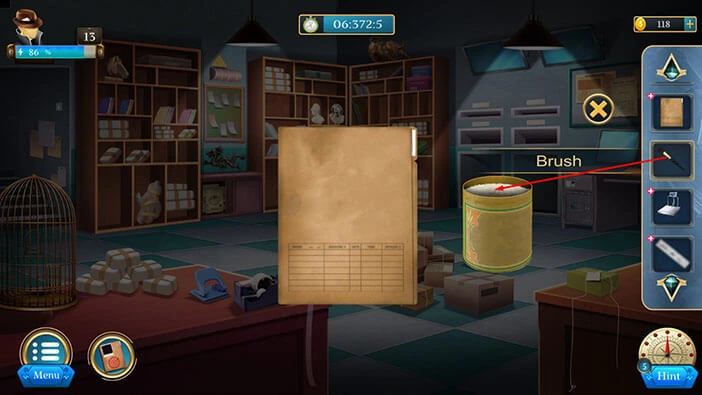
Next, select the “Brush” from the inventory and drag it to the powder. Our character will use the brush to discover the fingerprint on the file cover.
Next, select “Mobile” from the inventory and use it to take a photo of the fingerprint.

Lastly, tap on the “Mobile” to pick it up. After that, tap on the “X” button to close this window.
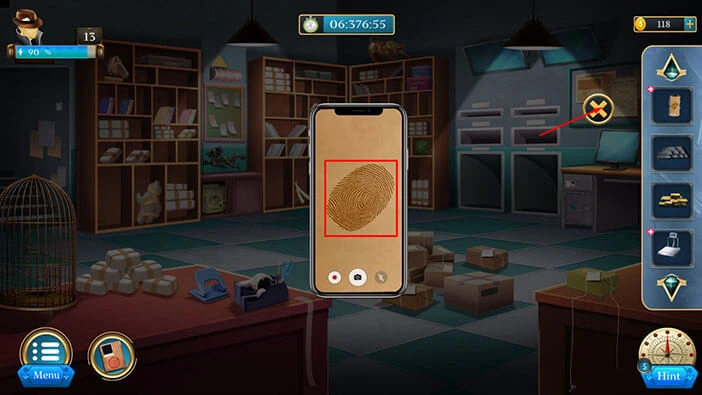
Ok, let’s check out the fingerprint. Select “Mobile” from the inventory and it will appear in the middle of the screen. Try to memorize/write down this fingerprint, because we will need it for the next puzzle.
Once you’re done, tap on the “X” button to close this window.
Let’s go back to the previous puzzle. Tap on the small cabinet on the right.
Let’s set the fingerprint to match the one that we found on the file. We will do that in several steps. Let’s begin.
Step 1
Let’s tap once on the top right slot.
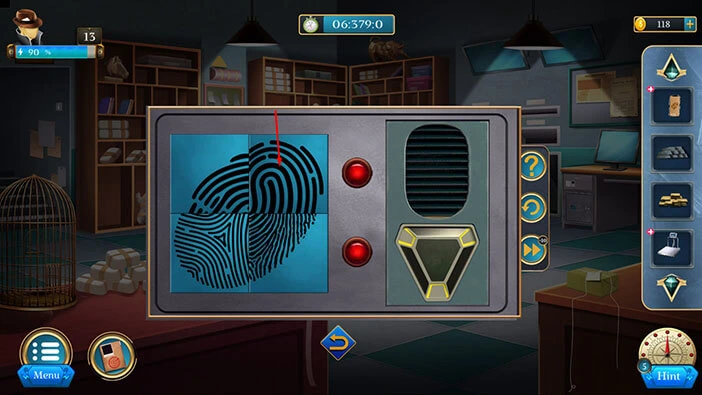
Step 2
Let’s tap twice on the bottom left slot.

Step 3
Let’s tap three times on the top left slot.
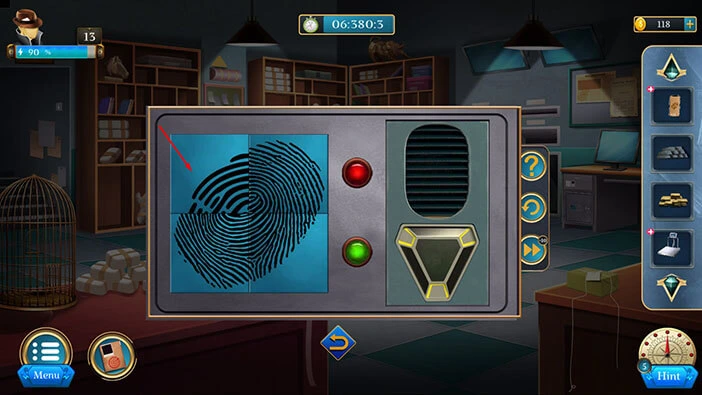
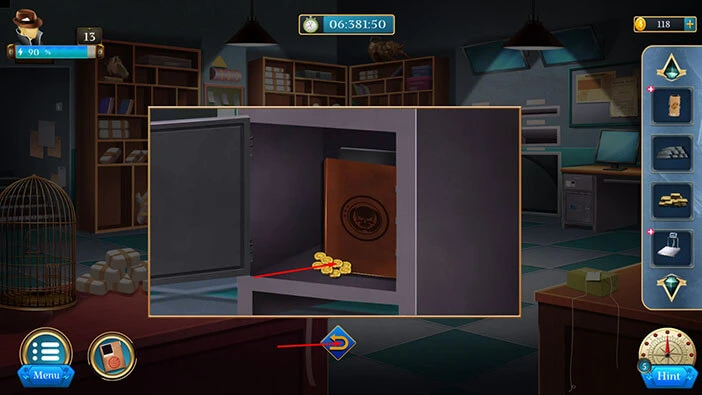
With that, you will solve this puzzle, and you will unlock the door. Inside you will find “Coins” and a “Ledger”. Let’s tap these two items to pick them up. After that, tap on the arrow at the bottom to go back.
Next, select the “Weight Machine” from the inventory and it will appear in the middle of the screen. After that, drag the “Gold”, “Silver”, and “Coins” from the inventory and place them next to the machine.
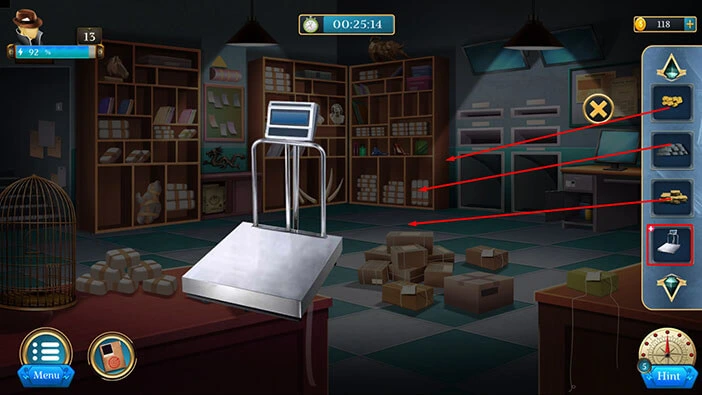
Let’s try to memorize the look of these there icons, Silver, Gold, and Coins. After that, tap on the “Sheet” in your inventory to select it.
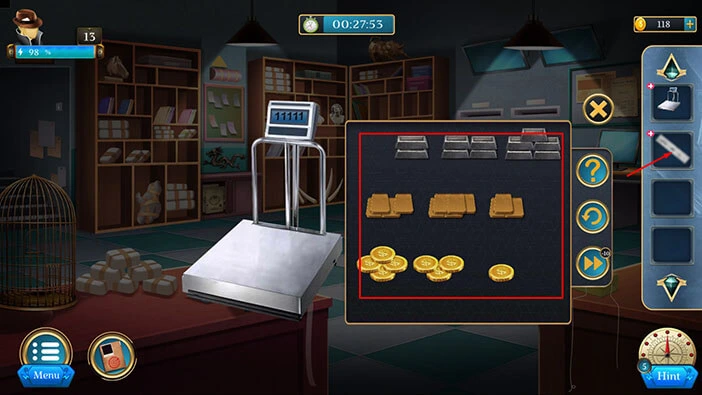
Here, we can see 2 Silver + 3 Gold + 4 Coins. Let’s memorize/write down this information. Once you’re done, tap on the “Weight Machine” in your inventory to start the interaction.
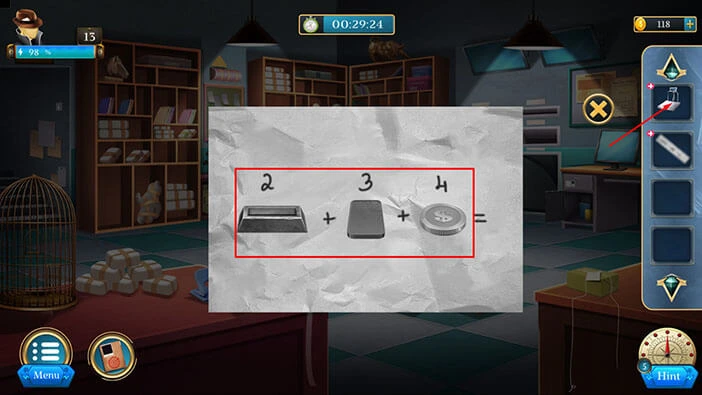
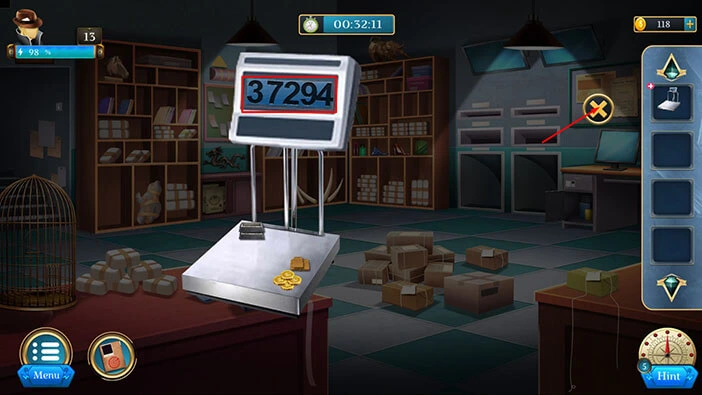
So, let’s place 2 Silver, 3 Gold, and 4 Coins on the weight machine.

Number “37294” will appear on the display. Let’s memorize/write down this number because we will need it for the next puzzle.
Once you’re done, tap on the “X” button to close this window.
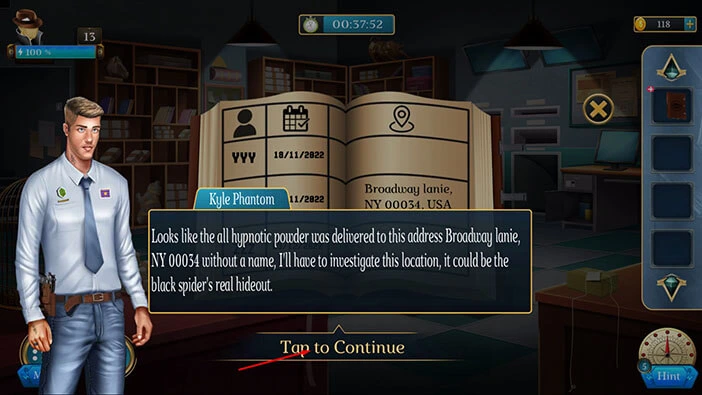
Next, select the “Ledger” from the inventory and it will appear in the middle of the screen. After that, tap on the “Ledger” to start the interaction.
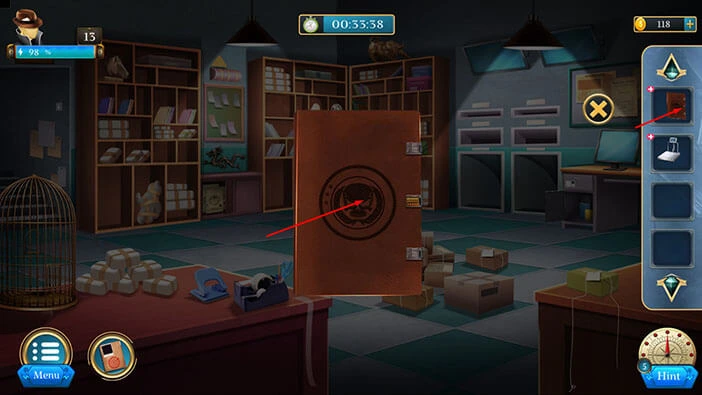
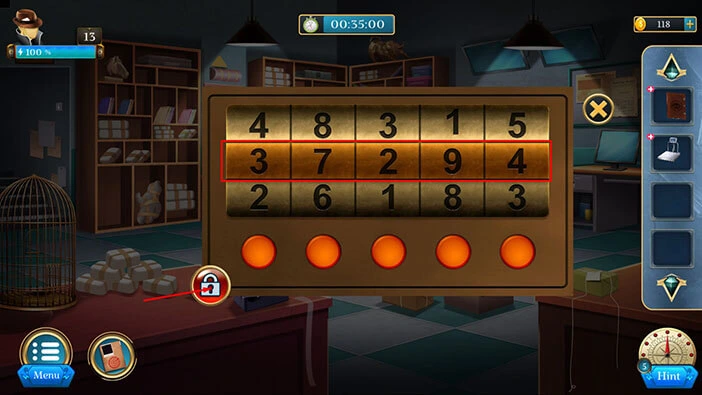
Let’s enter the number “37294” that we discovered on the weight machine. After that, tap on the padlock in the bottom left corner to unlock the ledger.
We discovered where the smugglers delivered the hypnotizing powder. Detective Kyle thinks that this could be Black Spider’s hideout, and he intends to investigate this location.
With that, we have reached the end of the thirteenth level. If you want to see the walkthrough for the fourteenth level, tap on the next part button.
Thank you for reading.