Escape From The Shadows | Part 4
Hello everyone and welcome to Part 4 of our walkthrough for “Escape from the Shadows” an escape room game created by the Dark Dome. Escape from the Shadows is the seventh game in the series, and like the other games, the story is set in Hidden Town, which is filled with all kinds of mysteries. In this walkthrough, we will show you how to solve all the puzzles and finish the game.
NOTE: Some puzzles will CHANGE with each playthrough, but the logic behind solving the puzzles will always remain the SAME. For example, in one playthrough a code to open a safe could be 1234, and in another playthrough, the code could be 4321. However, you will always discover the numbers for the code at the same location and by using the same hints.
NOTE: In the fourth part of the story, we will again play as Detective Larsen, who discovered the secret cabin. The fourth part of the walkthrough ends with Detective Larsen creating a “Portal to Penumbra” and the fifth part will start with the continuation of Bastian’s and Laia’s story.
Detective Larsen used the map to discover the secret cabin from Bastian’s childhood. He went in and concluded that the cabin had been abandoned for some time. However, he quickly noticed a trapdoor that led to the basement and decided to go down and investigate.
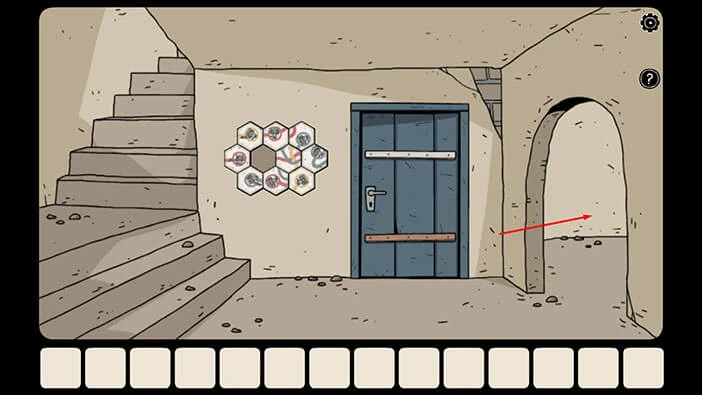
Let’s explore the basement. In the first room, we can see a puzzle on the wall, but one of the puzzle pieces is missing. We can also see a locked blue door. We will come back to these two problems a bit later.
For now, let’s tap on the doorway on the right to proceed to the next room.
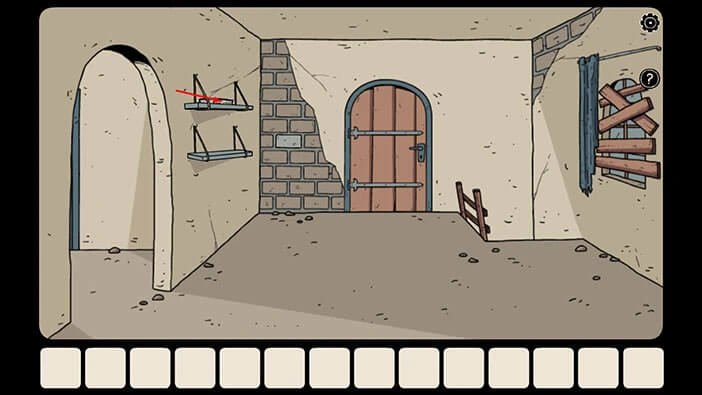
Tap on the upper wall shelf on the left to take a closer look at it. Here, we can see a purple book. Tap on it again to examine it.
Tap on the arrow in the lower right corner to open the book.
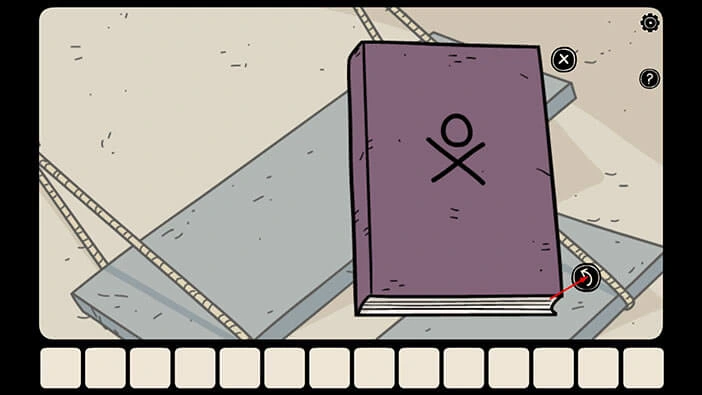
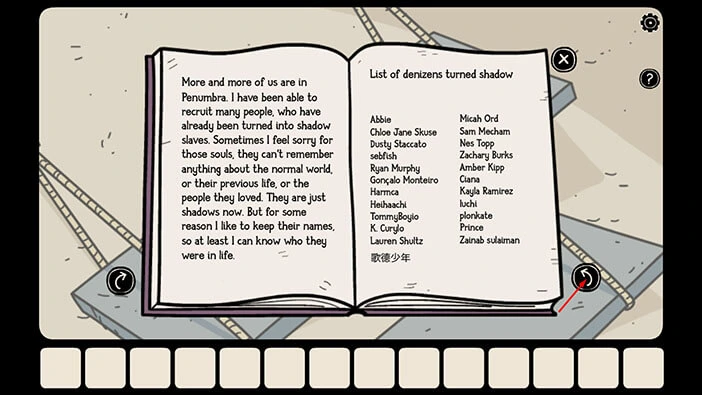
We can see that many people have been kidnapped, dragged into Penumbra, and turned into shadows (slaves). Once they were turned into shadows, they lost all memories of their previous life. Whoever wrote this book, decided to write down their names.
Let’s tap on the arrow in the lower right corner to take a look at the next page.
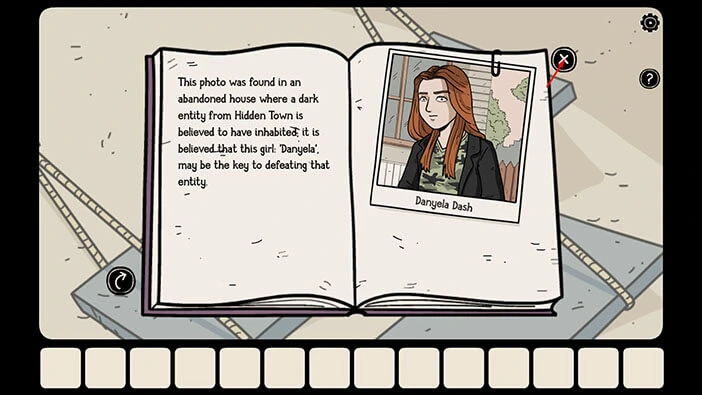
On the next page, we can see a photo of “Danyela Dash” and looks like she is the key to defeating this powerful evil creature.
Tap on the “X” button in the top right corner to put down the book. After that, tap on the arrow in the lower left corner to go back.
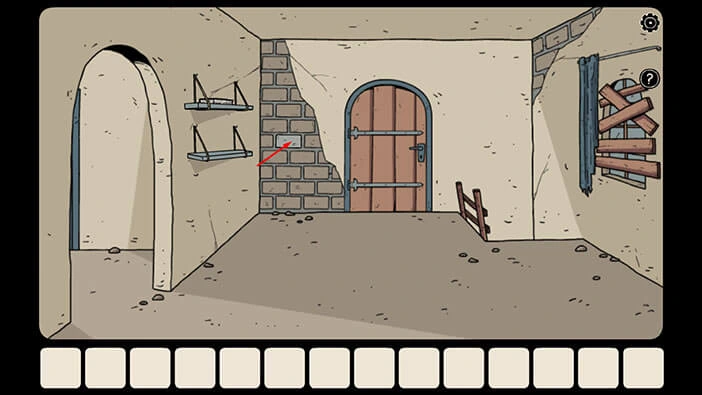
Next, if you take a look at the brick wall located just to the left of the door, you will notice that one brick is gray, while the other bricks are brown. Tap on the gray brick to take a closer look at it.
Tap on the gray brick again, and our character will pull it out of the wall.
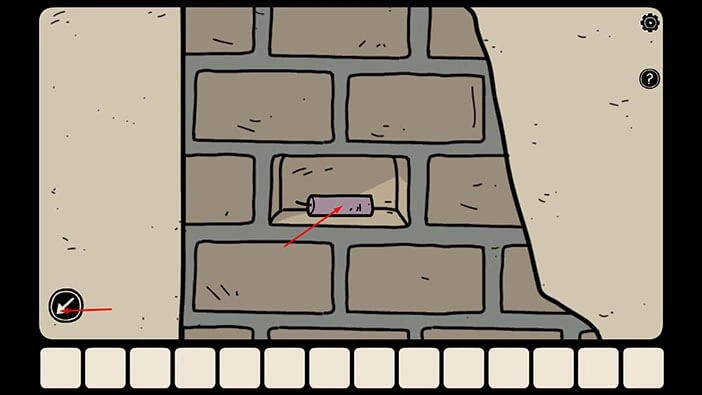
Behind the gray brick, you will find a “Candle” so let’s tap on it to pick it up.
Let’s go to the next room. Tap on the ladder on the right.
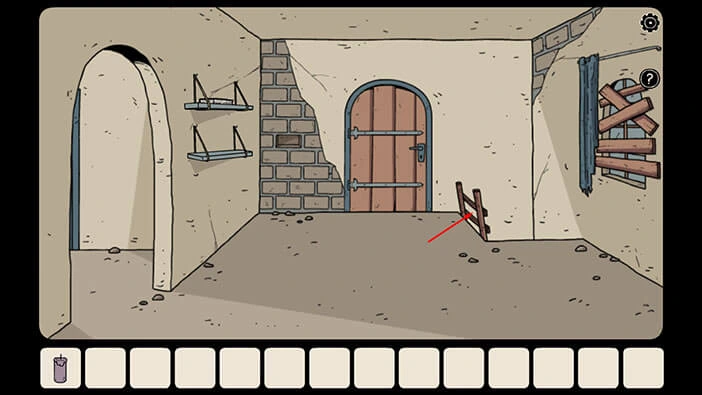
In this room, you will notice a book on the pedestal. We will come back to it a bit later in the walkthrough.
For now, tap on the arrow on the left to proceed to the next room.
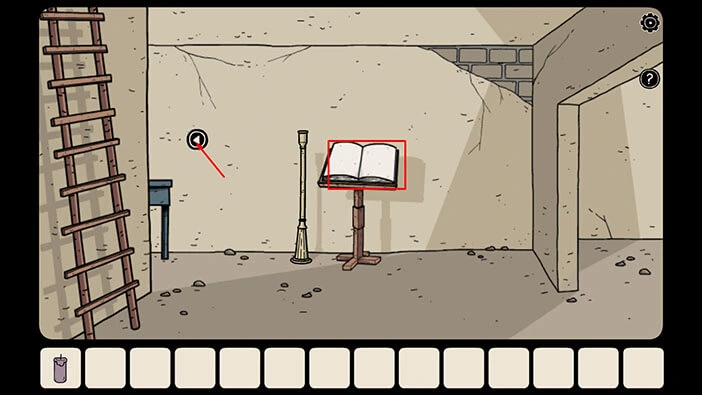
On the wall on the left, you will notice some kind of board. Tap on it to start the interaction.
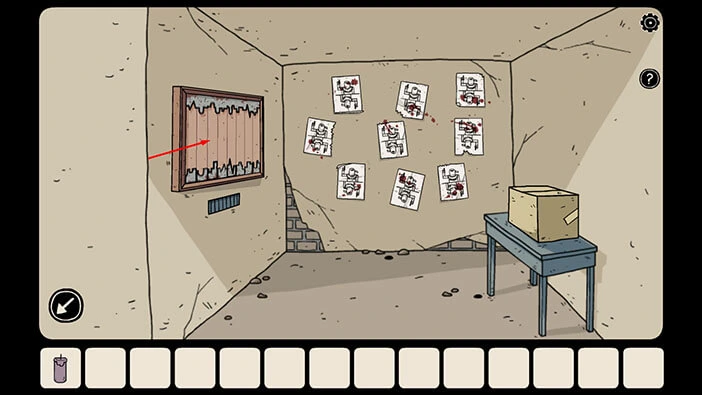
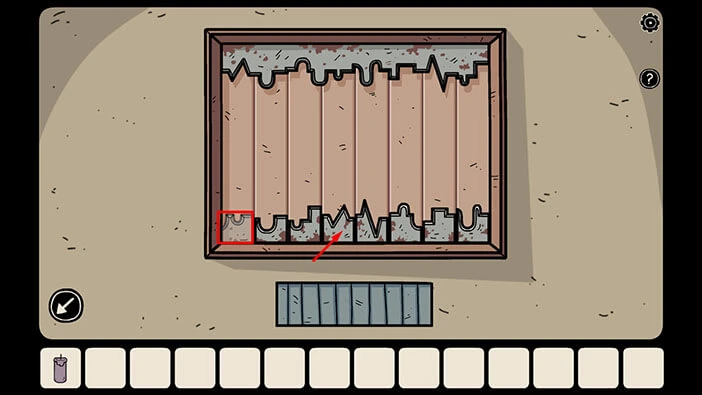
Ok, here, we can see that the top part of the puzzle has a very specific shape and the entire top shape is a single piece. On the other hand, the bottom part of the puzzle consists of eight pieces. We can shuffle the pieces of the bottom.
Our task is simple, when merged together, the top and the bottom part of the puzzle should form a rectangle. So, we should swap the positions of the pieces at the bottom to achieve this goal. We will do this puzzle in several steps. Let’s begin.
Step 1
Select the first piece (looking from left to right) then tap on the fourth piece to swap their positions.
Step 2
Select the third piece then tap on the sixth piece to swap their positions.
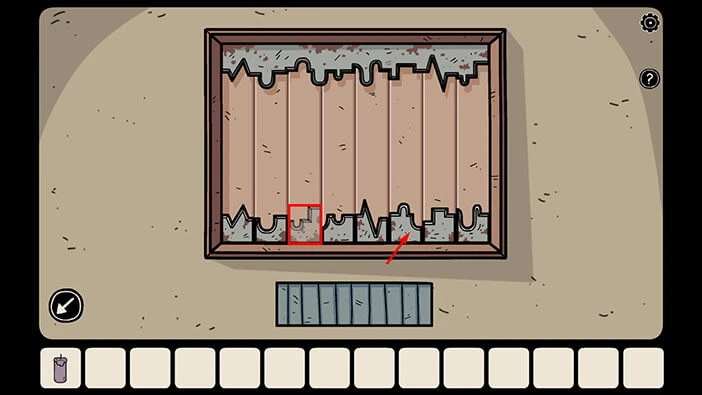
Step 3
Select the fifth piece then tap on the eighth piece to swap their positions.
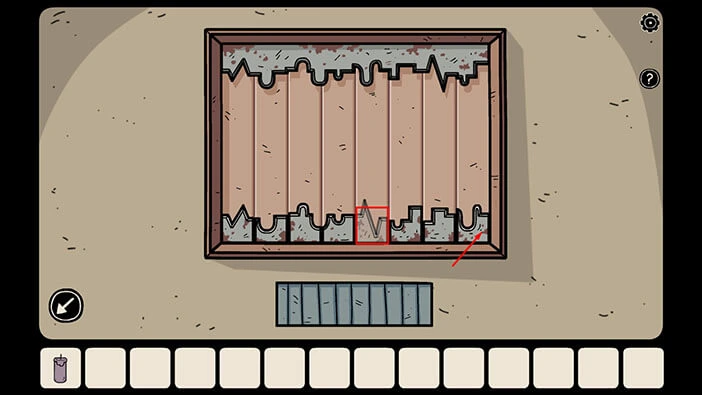
Step 4
Select the sixth piece then tap on the seventh piece to swap their positions.
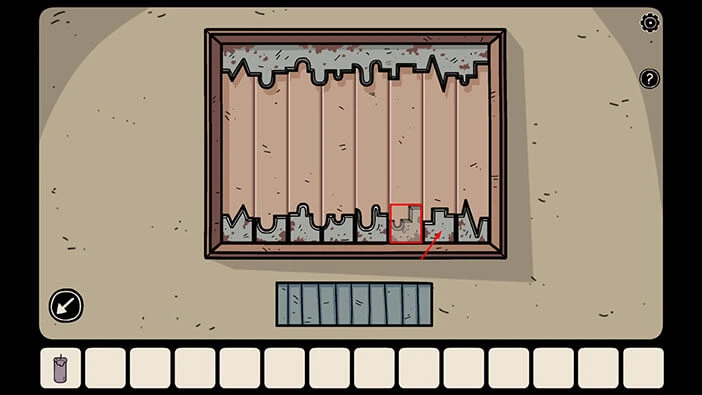
Step 5
Lastly, select the seventh piece then tap on the eighth piece to swap their positions. With this last step, you will solve the puzzle.
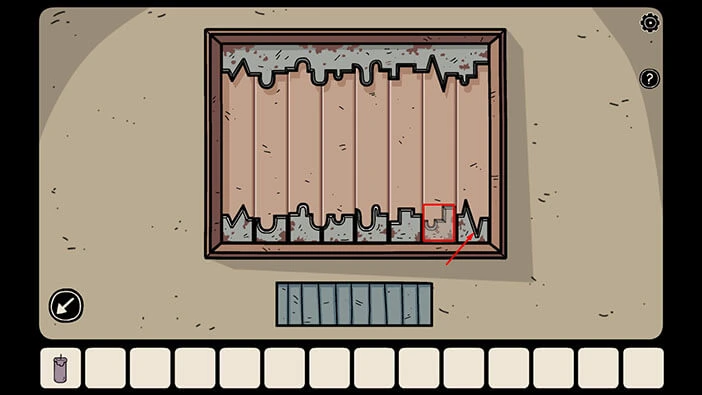
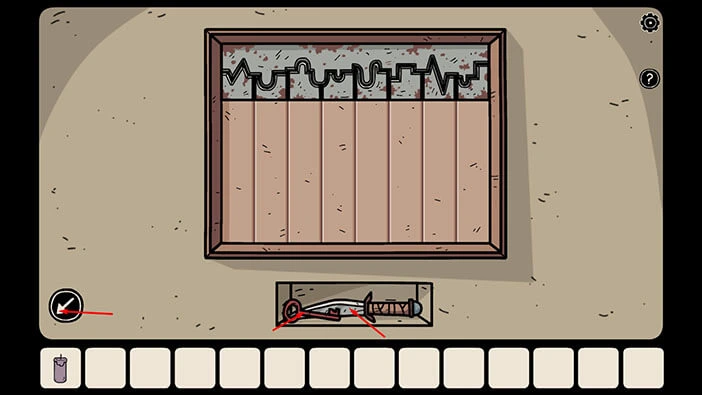
The bottom part of the puzzle will go up and it will merge with the top part. Several moments later, the small compartment below the puzzle will open, and inside you will find a “Red key” and a “Sharp knife”. Tap on them to pick them up.
After that, tap on the arrow in the lower left corner to go back.
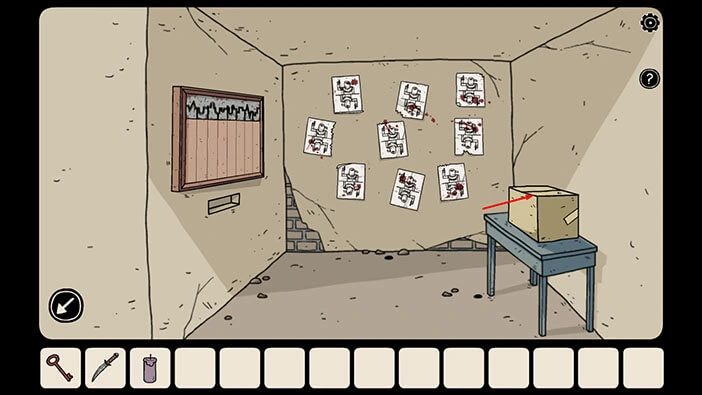
Next, tap on the box on the table on the right to take a closer look at it, and tap again to open it.
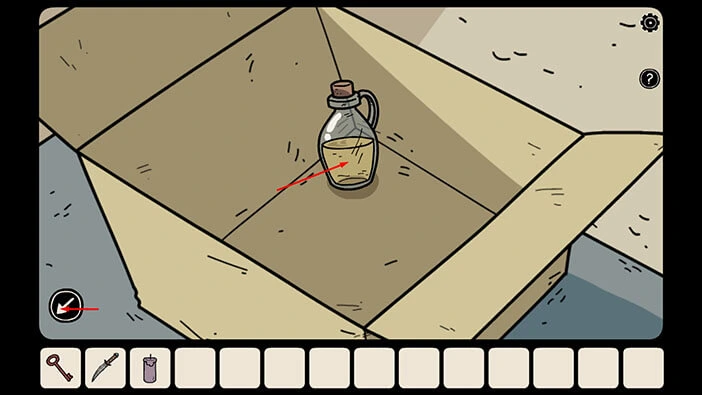
In the box, you will find a “Bottle of cooking oil”. Tap on it to pick it up.
After that, tap on the arrow in the lower left corner to go back.
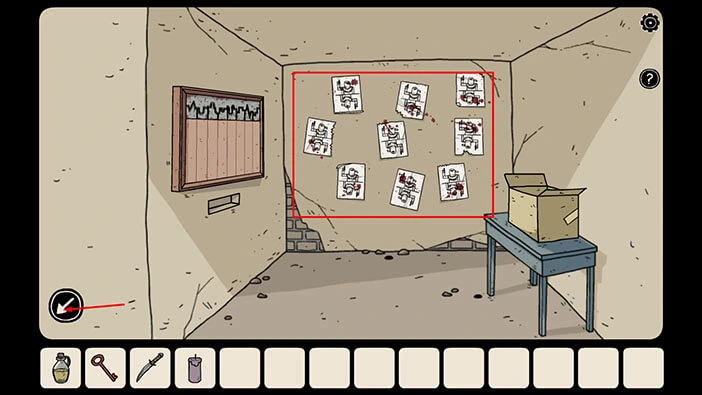
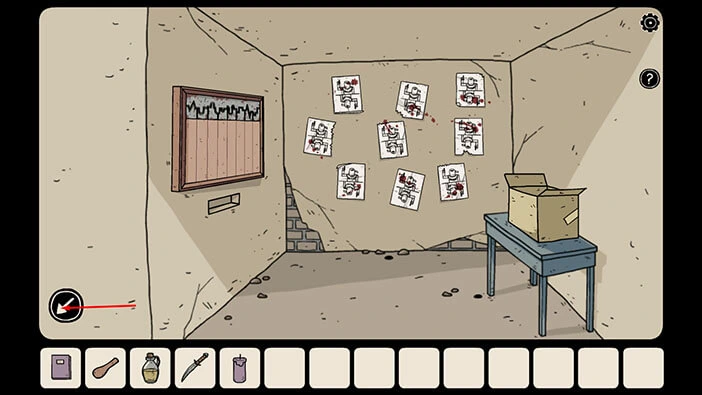
In this room, we can also see 9 pictures on the wall, arranged in three rows. The statues in these pictures are pointing up, and the bottom statue is pointing down. For now, just take note of these pictures because they will be important later during the walkthrough.
Tap on the arrow in the lower left corner to go back to the previous room.
Let’s explore the next room on this floor. Tap on the doorway on the right.
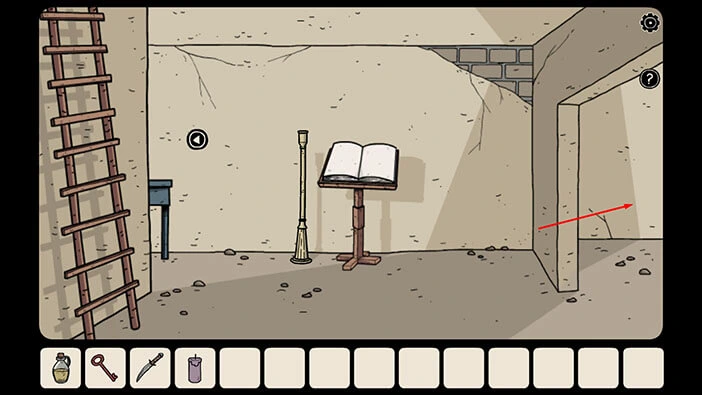
Tap on the table on the left to take a closer look at it. On the table, you will find a “Pestle” and a “Purple book”. Tap on them to pick them up.
After that, tap on the arrow in the lower left corner to go back.
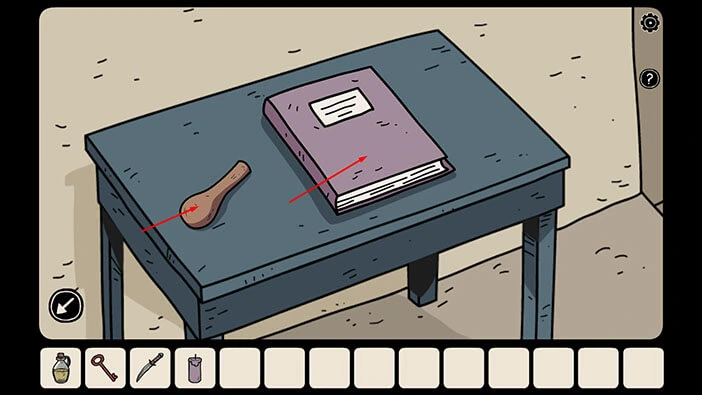
Let’s examine the purple book. Tap on the “Purple book” in your inventory to pick it up, then tap on the arrow in the lower right corner to open the book and you will see a blank page. Tap again on the arrow in the lower right corner to take a look at the next page.
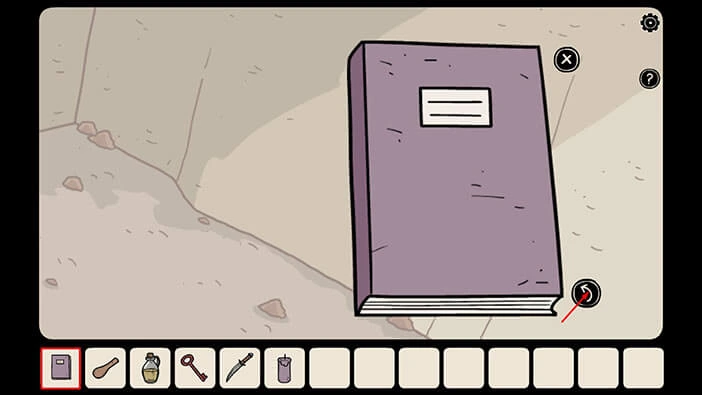
Here, we can see the instructions for one of the following puzzles. We will come back to it a bit later. Tap on the arrow in the lower right corner again to take a look at the next page.
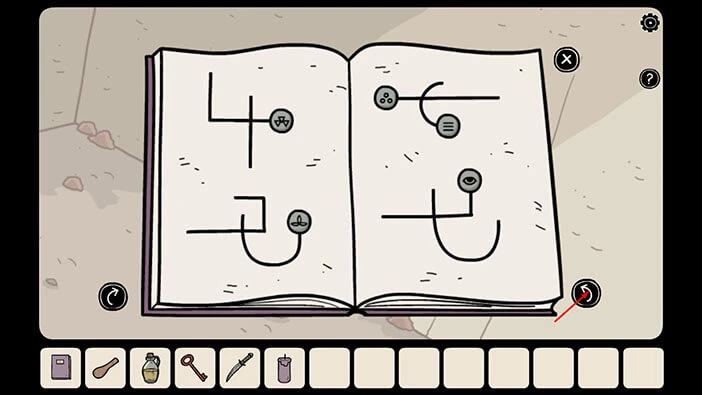
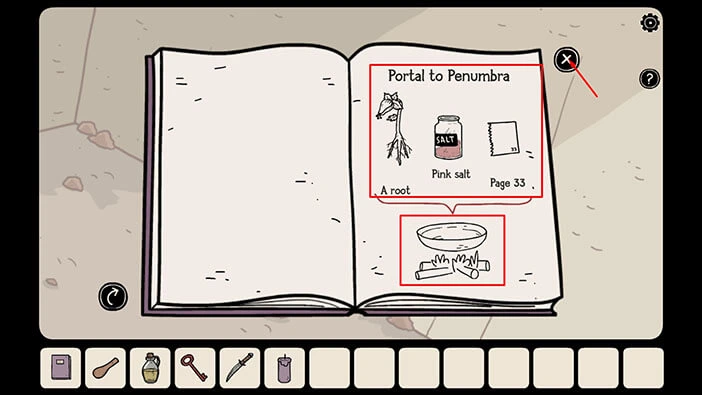
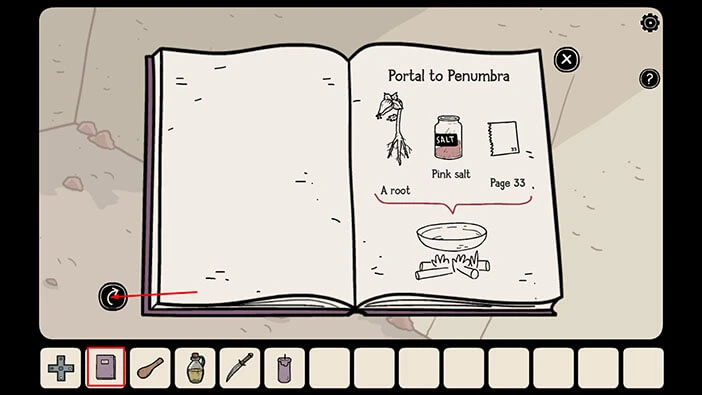
Here, we can see a recipe for creating a “Portal to Penumbra”. So, in order to craft this portal, we will need a “Root”, a “Jar of pink salt”, and a “Page 33”. All three ingredients should be placed in a bowl, and we should start a fire under this bowl.
So, our main goal is to gather these ingredients and create a “Portal to Penumbra”.
Let’s go back. Tap on the “X” button to put down the book. After that, tap on the arrow in the lower left corner to go back.
Tap on the stairs to go to the lower floor.
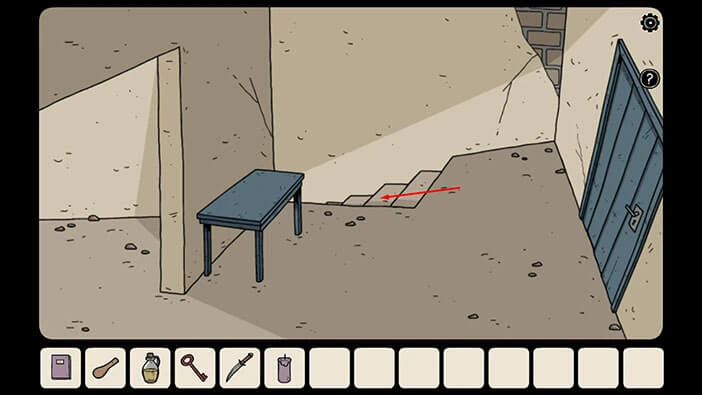
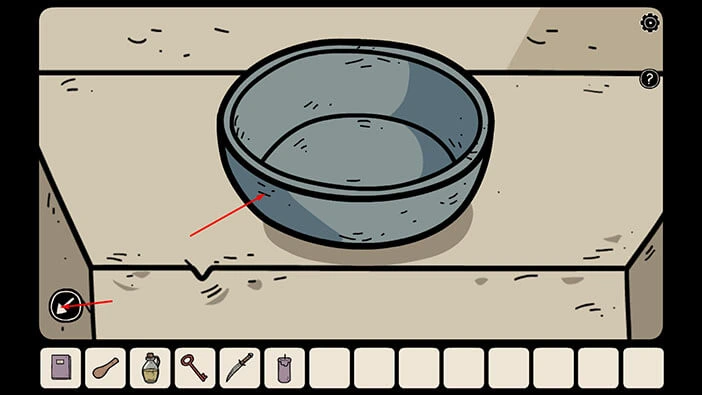
On the stone on the right, we can see a bowl. Above the bowl, we can see a piece of paper with instructions. Let’s tap on it to take a closer look.
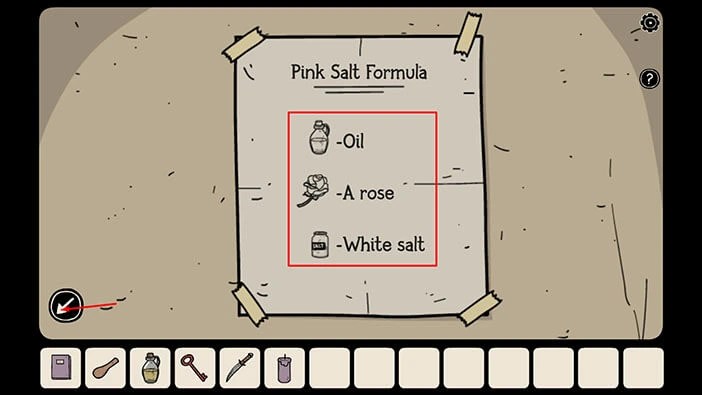
Here, we can see the instructions for crafting a “Pink Salt”. “Pink salt” is one of the ingredients for creating a “Portal to Penumbra”. So, in order to create “Pink salt” we will need three ingredients, “Oil”, a “Rose”, and a “White salt”. Memorize/Write down this information because we will need it later.
After that, tap on the arrow in the lower left corner to go back.
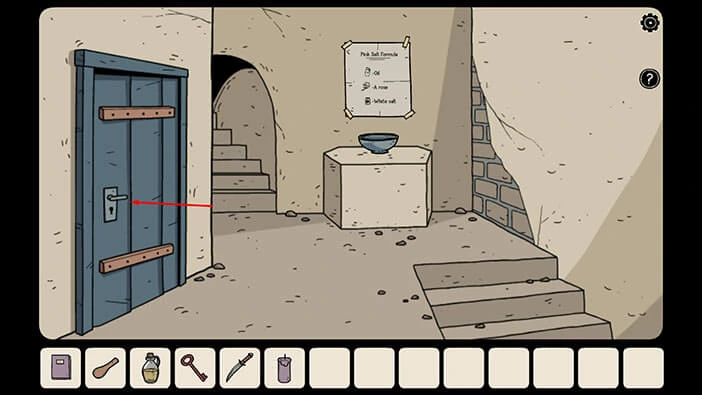
Next, tap on the blue door to open it, and tap again to proceed to the next room.
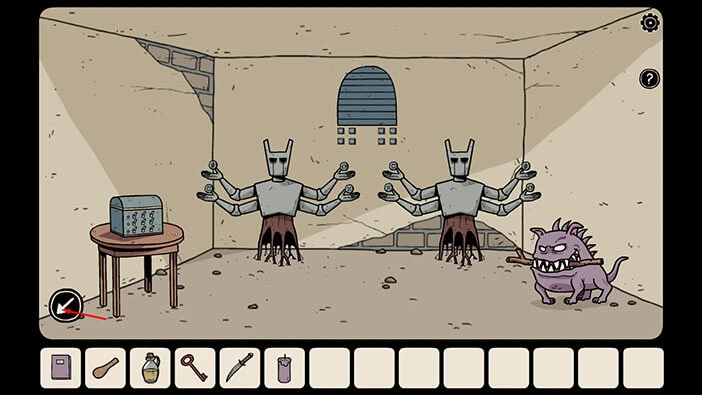
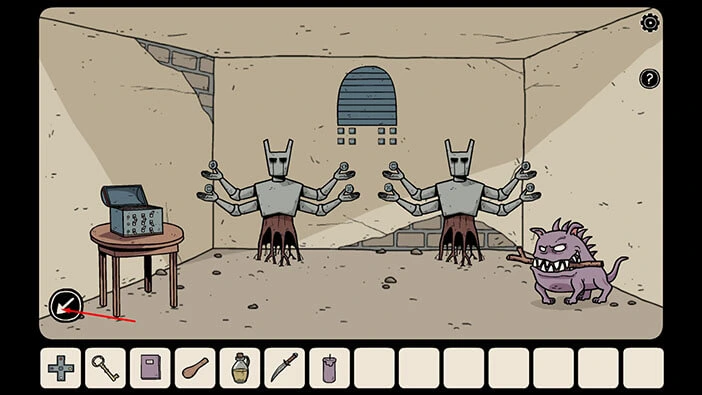
Here, we have four items of interest that will be important later on. A box with nine switches on the table on the left, two four-armed statues, some puzzles above the statues, and a demon dog that is holding a stick in its mouth.
For now, we can’t solve any of these puzzles, so let’s tap on the arrow in the lower left corner to go back.
Let’s check out the room downstairs.
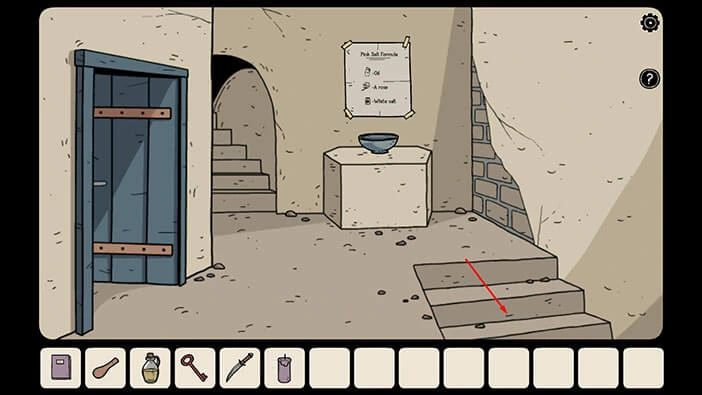
This room is totally dark, so we will have to find a way to illuminate this room before we can explore it.
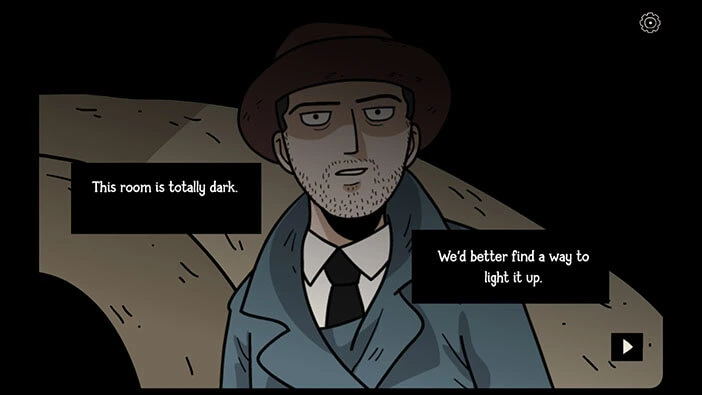
Let’s tap on the stairs to go back to the previous floor.
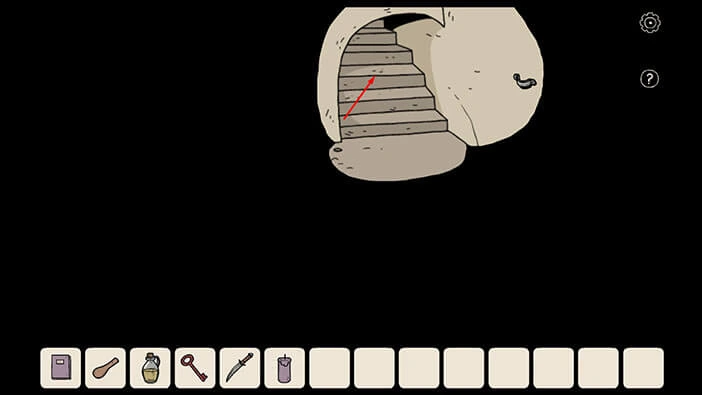
We found the “Red key” and we can use it to unlock the blue door, located all the way back in the first room. So, let’s go back to the first room. To get there, tap on the stairs to go one floor up.
After that, tap on the doorway on the left. From there, tap on the ladders to climb up to the next floor.
Lastly, tap on the doorway on the left and you will reach the first room.
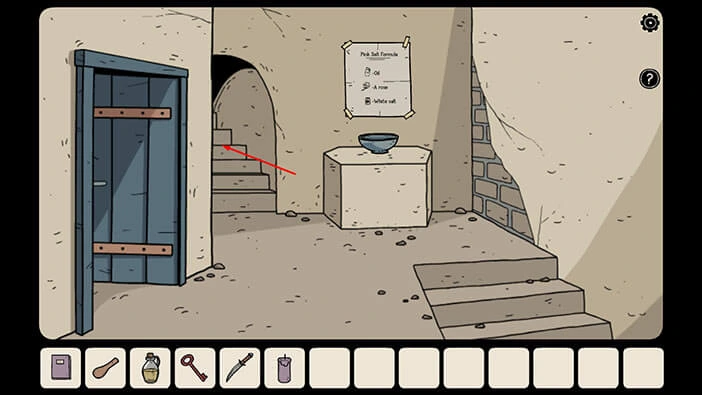
Select the “Red key” from the inventory and use it to unlock the blue door. After that, tap on the door to open it, and tap again to proceed inside.
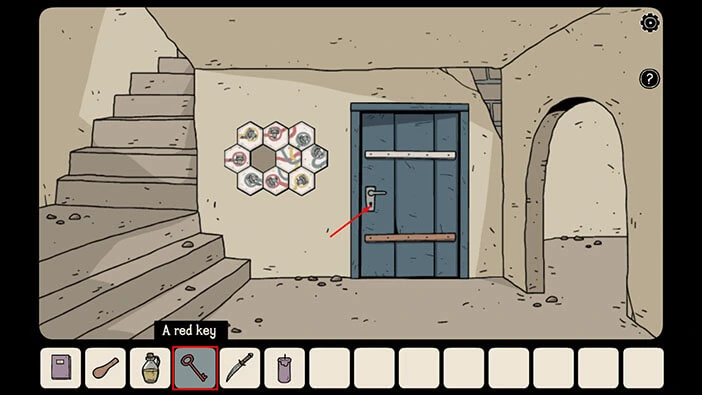
Tap on the table on the left to take a closer look at it, then tap on the drawer to open it.
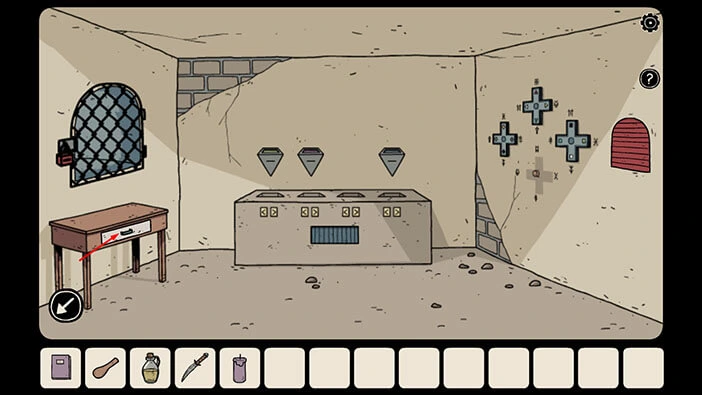
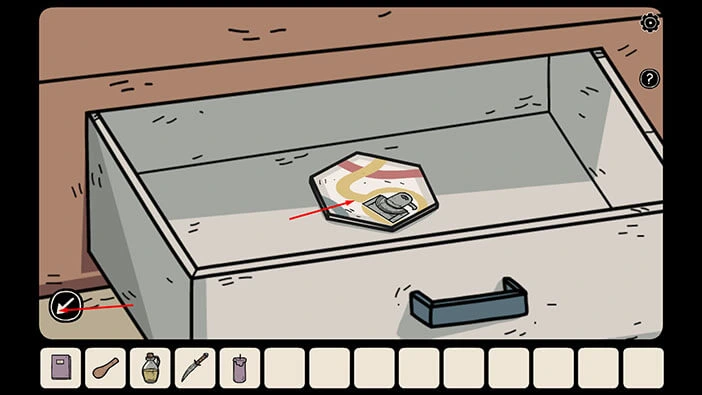
In the drawer, you will find a “Hexagon-shaped tile”. Tap on it to pick it up. This tile is the missing piece of the puzzle, located on the wall in front of this room.
Once you’re done, tap on the arrow in the lower left corner to go back.
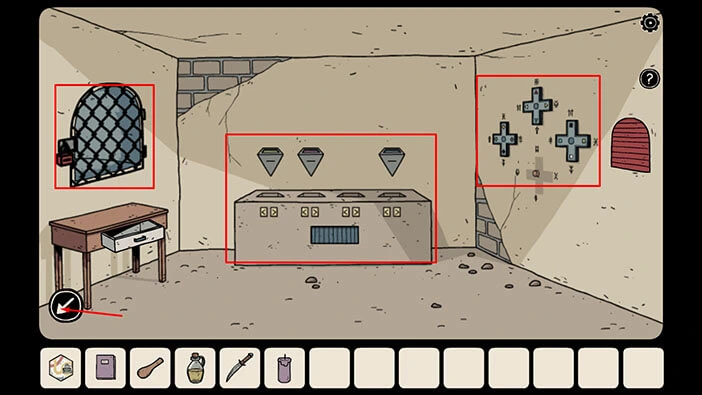
In this room, we have three more items of interest. A “Flame” is located behind the locked window on the left, a puzzle on the wall in front of us, and a puzzle on the wall on the right. We will come back to them a bit later.
For now, tap on the arrow on the left to go back, outside, and let’s use the hexagonal piece to solve the puzzle on the wall next to the entrance to this room.
Tap on the puzzle on the wall to take a closer look at it. Select the “Hexagon-shaped tile” from the inventory and insert it into the empty slot.
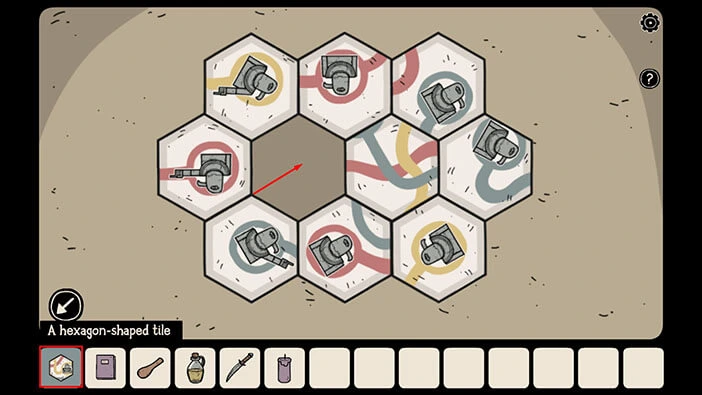
Let’s examine this puzzle. Here, we can see ten tiles arranged in three rows. There are three tiles in the top and bottom rows and four tiles in the middle row. All tiles have a statue of an eagle, except the one tile in the middle row.
We can also see three lines, blue, red, and yellow. More importantly, you will notice that for each color, we have one tile with a statue of an eagle, and the statue is pointing in a certain direction. These tiles represent the starting point for each line. So, our task is to rotate the pieces of the puzzle and assemble the three lines.
We will do this puzzle in several steps. Let’s begin.
Step 1
Tap five times on the first tile (left to right) in the third row (top to bottom) to rotate it. The eagle statue that marks the start of the blue line will point up and to the right.
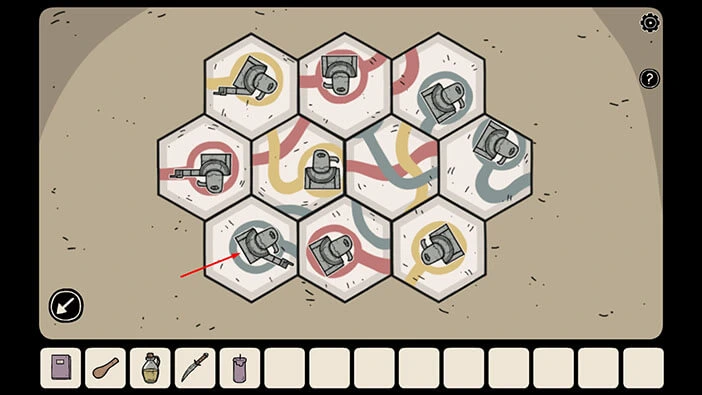
Step 2
Tap five times on the second tile in the third row to rotate it. You will connect the blue line in the first and the second tile in the third row.
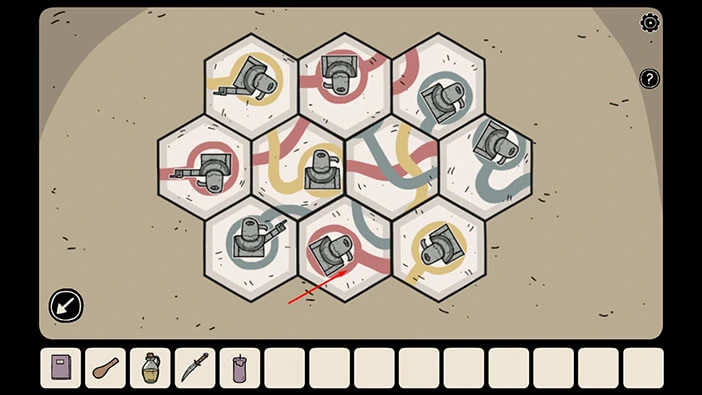
Step 3
Tap two times on the third tile in the second row to rotate it. You will connect the blue line in this tile with the blue line in the second tile in the third row.
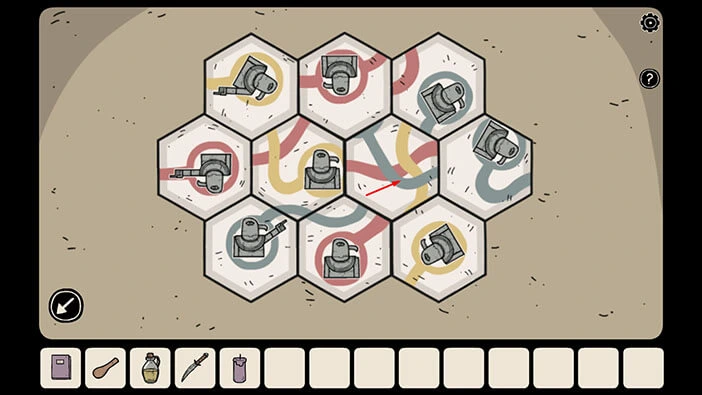
Step 4
Tap two times on the third tile in the third row to rotate it. You will connect the yellow line in this tile with the yellow line in the third tile in the second row.
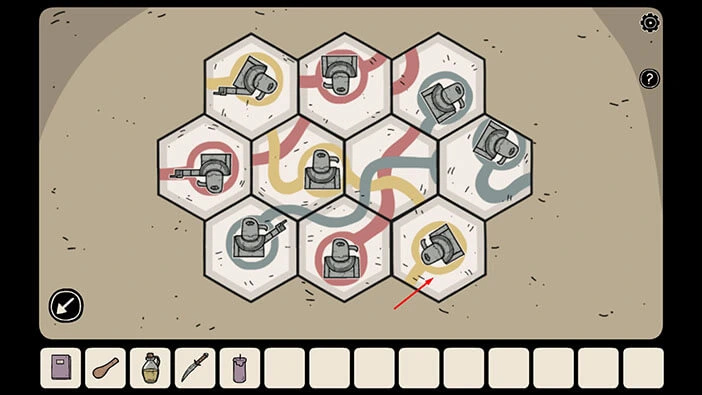
Step 5
Tap four times on the fourth tile in the second row to rotate it. You will connect the blue line in this tile with the blue line in the third tile in the second row.
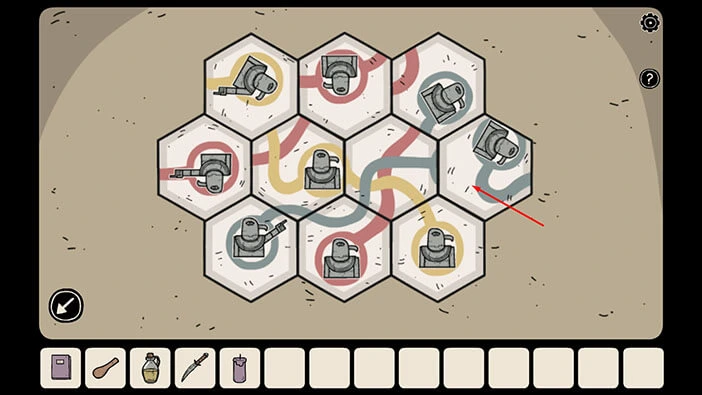
Step 6
Tap five times on the third tile in the first row to rotate it. You will connect this tile with the rest of the blue line.
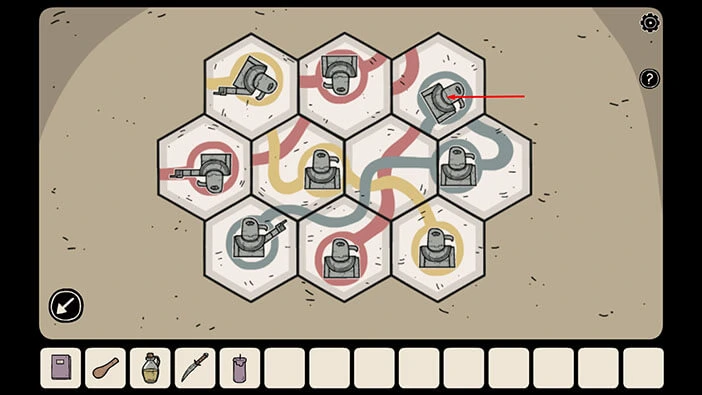
Step 7
Tap three times on the second tile in the first row to rotate it. You will connect this tile with the red line in the third tile in the second row, and the red line in the second tile in the second row.
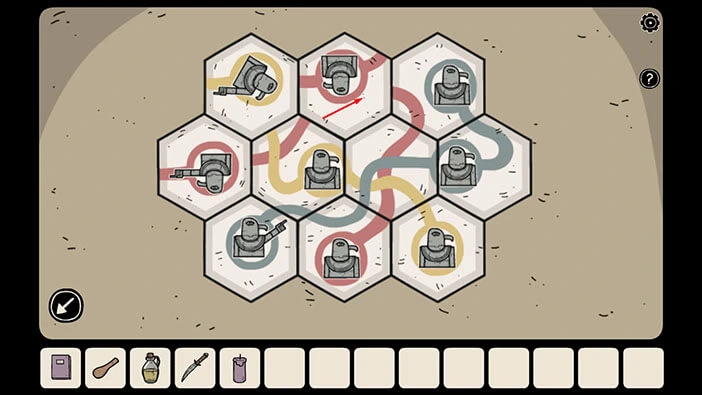
Step 8
Tap three times on the first tile in the second row to rotate it. You will connect this tile (the starting tile of the red line) with the rest of the red line.
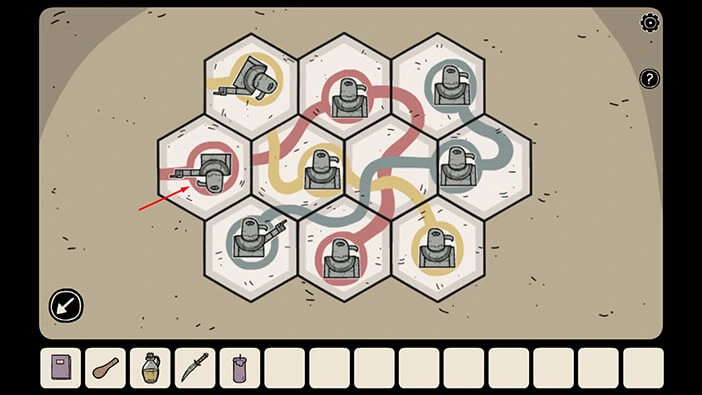
Step 9
Last step. Tap four times on the first tile in the first row to rotate it. You will connect this tile (the starting tile of the yellow line) with the rest of the yellow line.
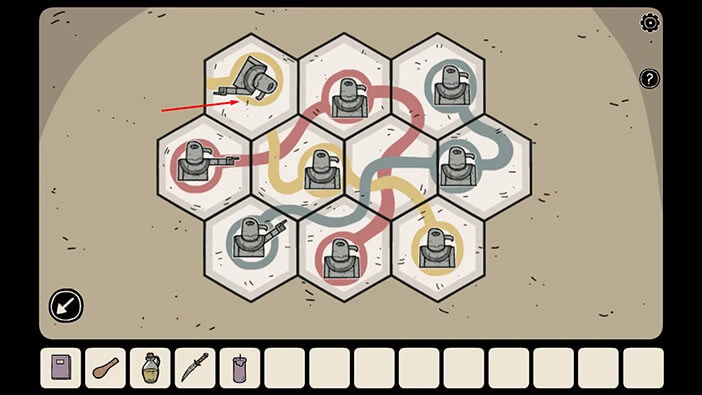
As soon as you connect all three lines, you will hear a specific melody, indicating that you have successfully solved this puzzle. However, this puzzle doesn’t solve anything, it is just a hint that will help us solve the next puzzle. So, let’s examine the tiles of this puzzle before we move on.
If we look only at the tiles that have an eagle statue (excluding the third tile in the second row), we will notice that they are arranged in three rows, and each row consists of three tiles.
Next, let’s take a look at each line individually (yellow, red, and blue lines).
The yellow line starts in the first tile in the first row (the eagle statue that points down and to the right). Next, the yellow line goes to the second tile in the second row and ends in the third tile in the third row.
The red line starts in the first tile in the second row (the eagle statue that points to the right). Next, the red line goes to the second tile in the first row and ends in the second tile in the third row.
The blue line starts in the first tile in the third row (the eagle statue that points up and to the right). Next, the blue line goes to the third tile in the second row and ends in the third tile in the first row.
Let’s memorize/write down the following information because we will need it in order to solve the next puzzle. So,
Yellow = First tile in the first row/ second tile in the second row/ third tile in the third row
Red = First tile in the second row/ second tile in the first row/ second tile in the third row
Blue = First tile in the third row/ third tile in the second row/ third tile in the first row
Once you’re done, tap on the arrow in the lower left corner to go back.
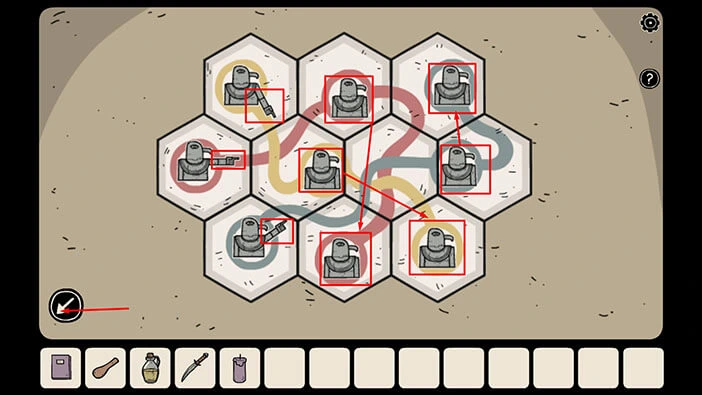
Now, we should go back to the room with nine pictures on the wall, and use the information that we just discovered. Let’s do that.
Tap on the doorway on the right to proceed to the next room.
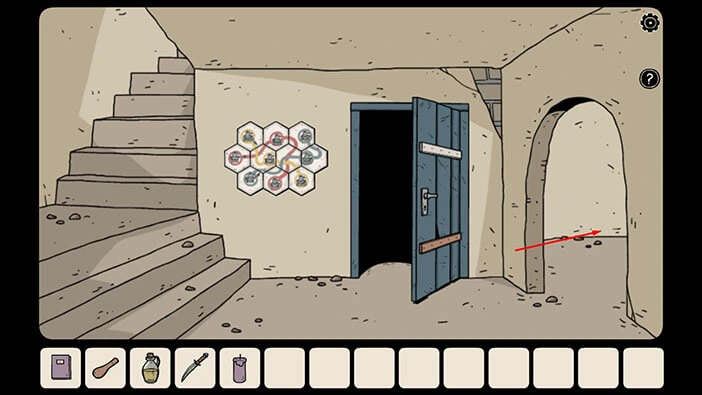
After that, tap on the ladder to go down to the lower floor.
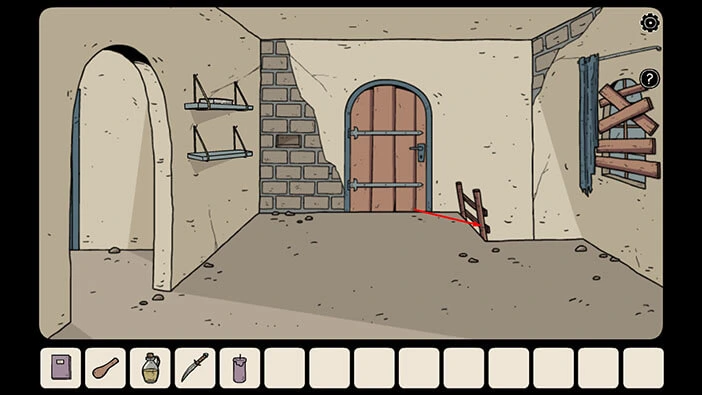
Lastly, tap on the arrow on the left to proceed to the next room.
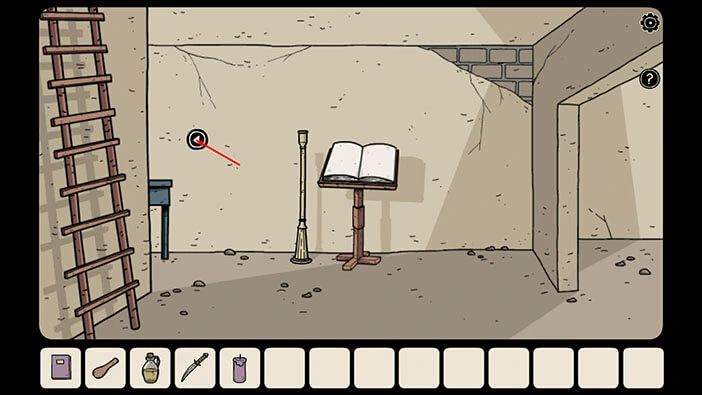
Ok, we reached the wall with nine pictures. Tap on the wall to take a closer look at these pictures.
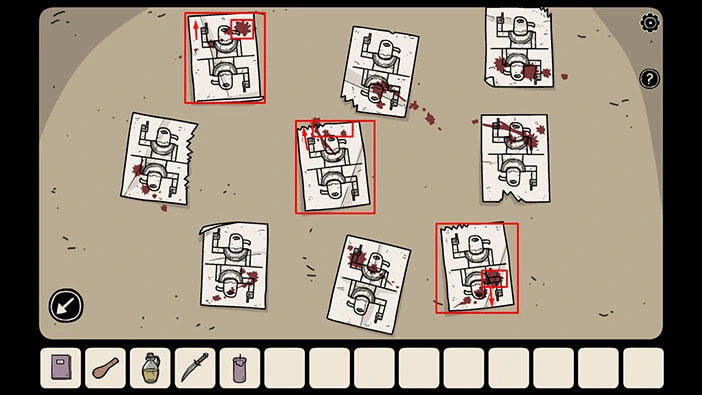
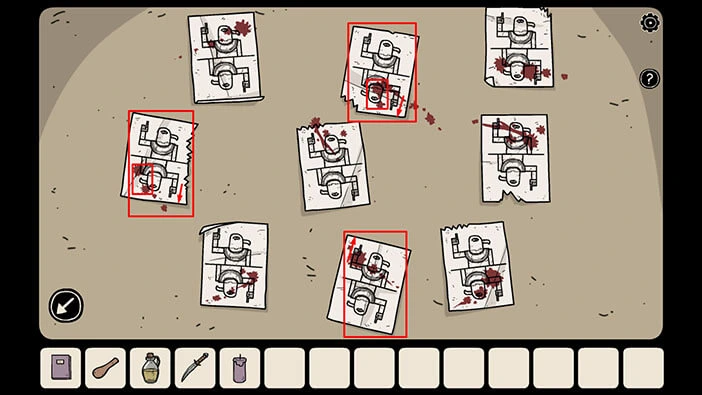
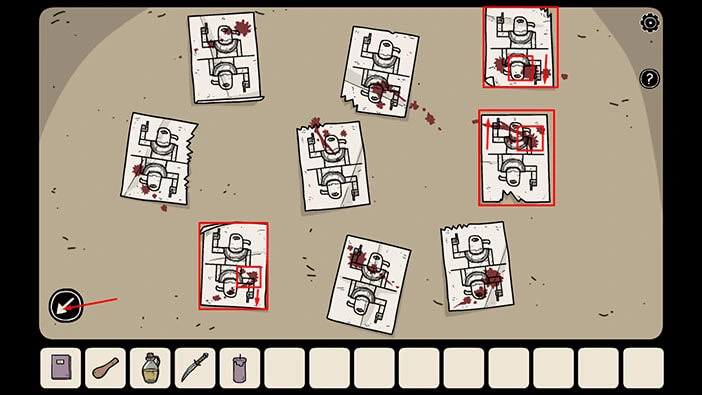
We can see that the pictures are arranged in three rows with three pictures in each row – just like the tiles in the previous puzzle. All pictures are the same. In these pictures, we can see two eagle statues, one pointing up, and the other pointing down. The only difference is the bloodstain which is sometimes located next to the eagle at the top, and sometimes next to the eagle at the bottom.
The bloodstain marks the correct direction (up/down) for each picture. So, our next task is to use the information from the previous puzzle and determine the direction for each color. It’s actually easier than it sounds. Let’s begin.
In the previous puzzle, for the yellow color, we had
Yellow = First tile in the first row/ second tile in the second row/ third tile in the third row
If we look at the bloodstains in the pictures, and the direction in which the eagle next to the bloodstain is pointing, we will get,
Yellow = Up/ Up/ Down
Memorize/write down this information.
In the previous puzzle, for the red color, we had
Red = First tile in the second row/ second tile in the first row/ second tile in the third row
If we look at the bloodstains in the pictures, and the direction in which the eagle next to the bloodstain is pointing, we will get,
Red = Down/ Down/ Up
Memorize/write down this information.
In the previous puzzle, for the blue color, we had
Blue = First tile in the third row/ third tile in the second row/ third tile in the first row
If we look at the bloodstains in the pictures, and the direction in which the eagle next to the bloodstain is pointing, we will get,
Blue = Down/ Up/ Down
Memorize/write down this information. Once you’re done, tap on the arrow in the lower left corner to go back.
Ok, we can now use the information that we gathered to solve the next puzzle, and this puzzle is located in the room with the two statues. To get to this room, tap on the arrow in the lower left corner.
After that, tap on the doorway on the right. Next, tap on the stairs to go to the lower floor.
Lastly, tap on the blue door on the left, and you will reach the room with the two statues.
Tap on the box with the nine switches, located on the table on the left, to start the interaction.
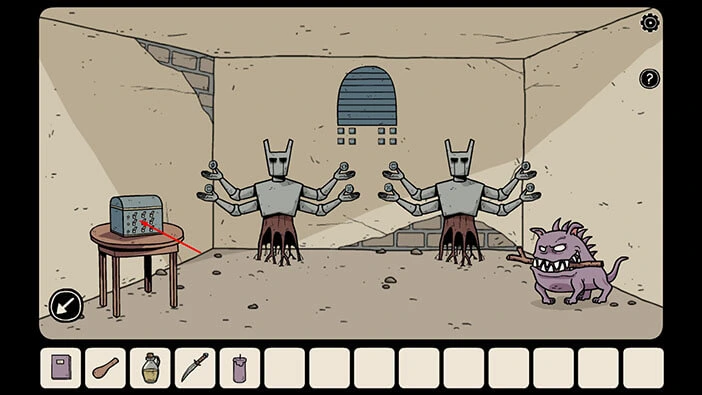
Here, we can see nine switches, arranged in three rows, with three switches in each row. Next to each row, we can see red, yellow, or blue circles – the three colors that we saw on the puzzle with tiles, and the same arrangement (3×3).
So, let’s use the information that we discovered to set the switches. We will start with the first which is marked with the red color. So, for the red color, we had
Red = Down/ Down/ Up
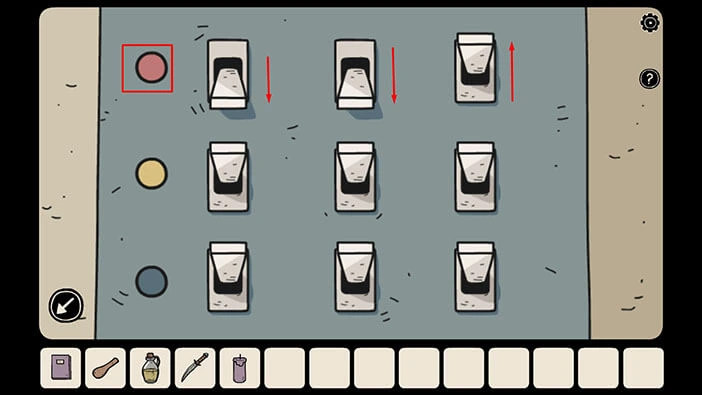
Next, we will set the switches in the second row which is marked with the yellow color. So, for the yellow color, we had
Yellow = Up/ Up/ Down
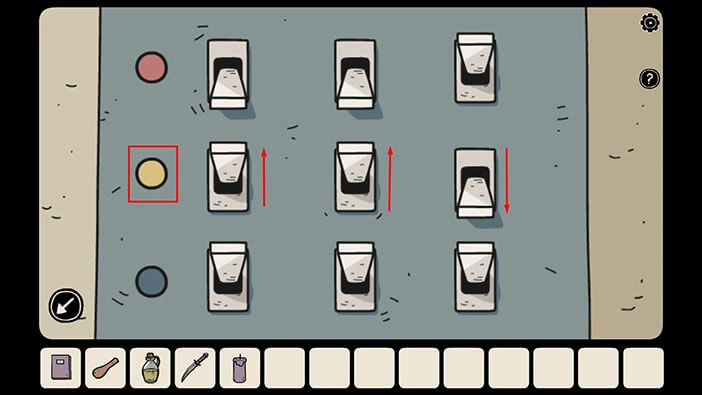
Lastly, we will set the switches in the third row which is marked with the blue color. So, for the blue color, we had
Blue = Down/ Up/ Down
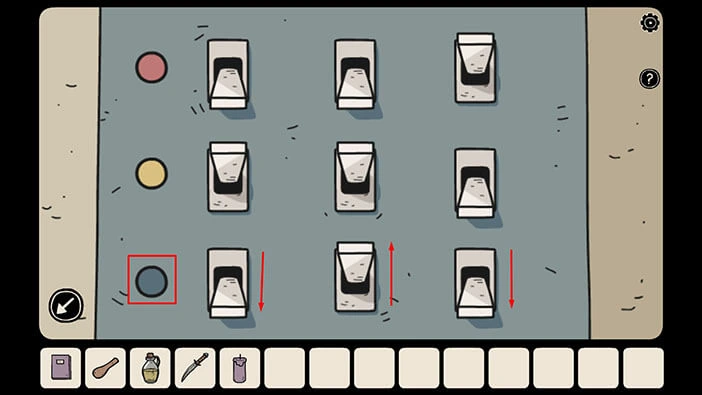
As soon as you set the switches to the correct positions, the box will open and inside you will find a “White key” and a “Cross”. Tap on these two items to pick them up.
After that, tap on the arrow in the lower left corner to go back.
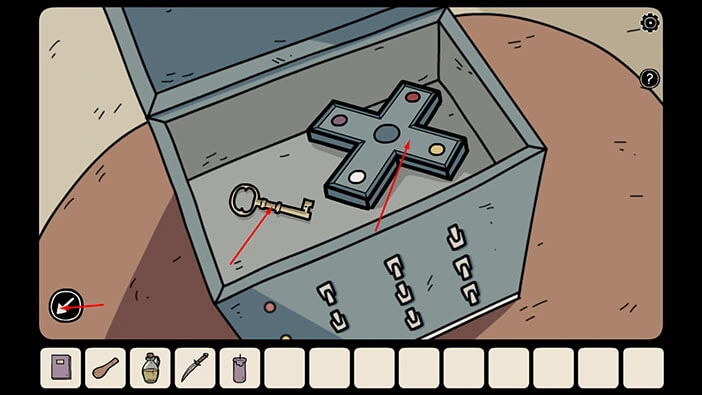
We can use the “White key” to unlock the door on the first floor, which is located in the room with the ladder (in this room we pulled out a brick from the wall). So, let’s go back to this room.
Tap on the arrow in the lower left corner to go back. Next, tap on the stairs in front of you to go one floor up. After that, tap on the doorway on the left to proceed to the next room. Lastly, tap on the ladder to go back to the first floor.
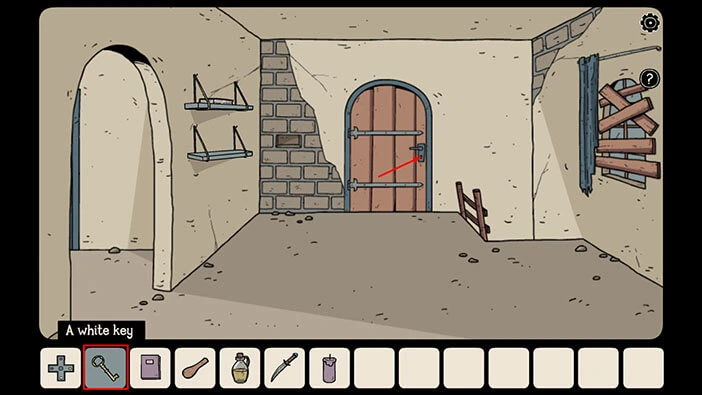
Select the “White key” from the inventory and use it to unlock the wooden door. After that, tap on the door to open it, and tap again to proceed to the next room.
Tap on the puzzle on the wall on the right to take a closer look at it.
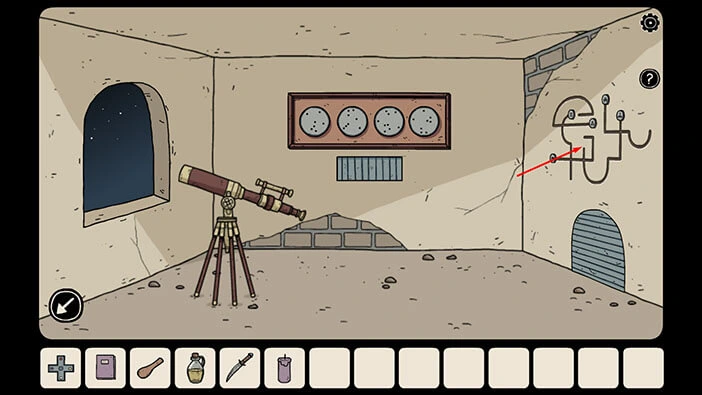
Well, this puzzle is very similar to the hint that we saw in the purple book. So, let’s take another look at this hint.
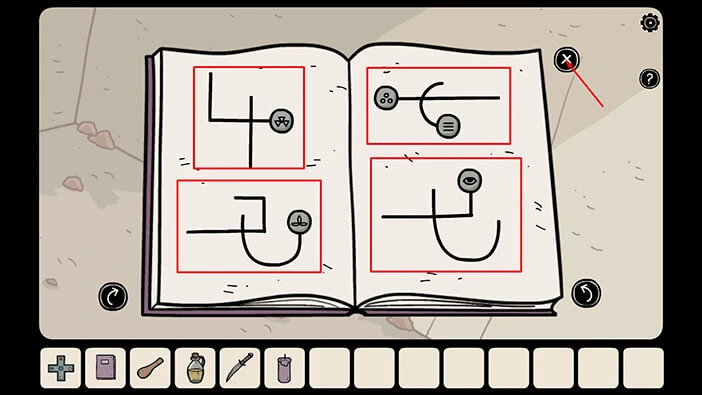
Tap on the “Purple book” in your inventory to pick it up, then tap on the arrow on the left to go back to the previous page.
Here, we can see the five symbols that we also saw in the puzzle, so let’s memorize/write down the position of each symbol.
Once you’re done, tap on the “X” button to put down the book.
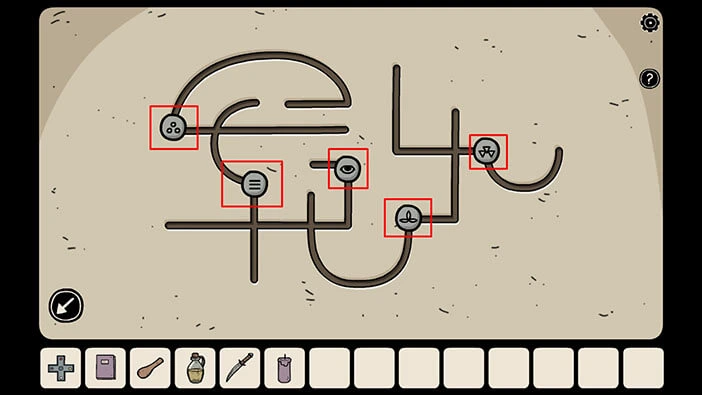
Next, let’s set the disks with symbols into the correct positions.
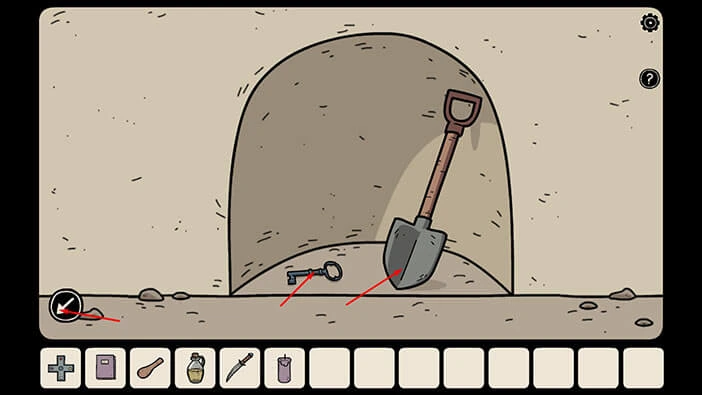
As soon as you place the symbols into the correct positions, the secret compartment below the puzzle will open and inside you will find a “Shovel” and a “Blue key”. Tap on these items to pick them up.
After that, tap on the arrow in the lower left corner to go back.
We can use the “Blue key” to unlock the door on the floor below, so let’s do that. Tap on the arrow in the lower left corner to go back.
After that, tap on the ladder to go down to the next floor. Lastly, tap on the doorway on the right to proceed to the next room, and you will reach the blue door.
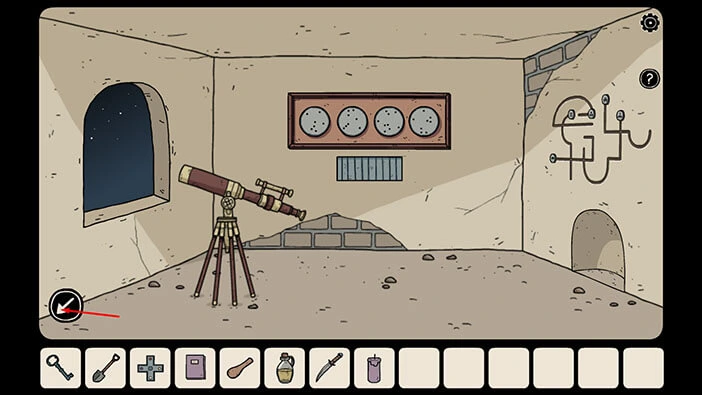
Select the “Blue key” from the inventory and use it to unlock the blue door. Tap on the door to open it and tap again to proceed to the next room.
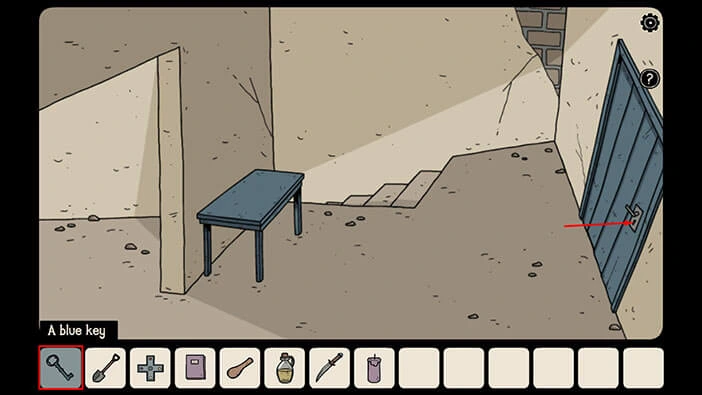
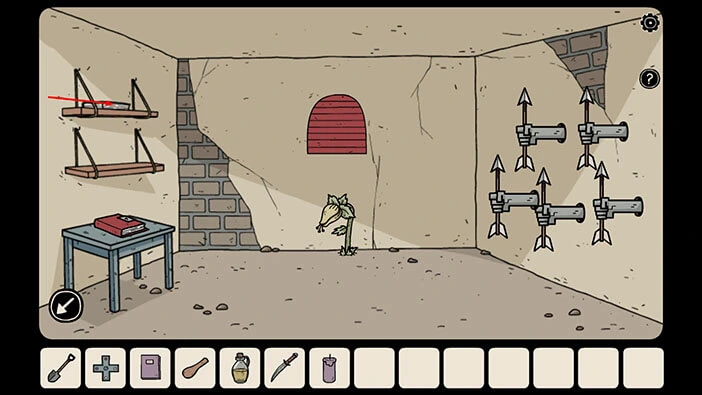
Tap on the upper wall shelf on the left to take a closer look at the book. After that, tap on the book to open it.
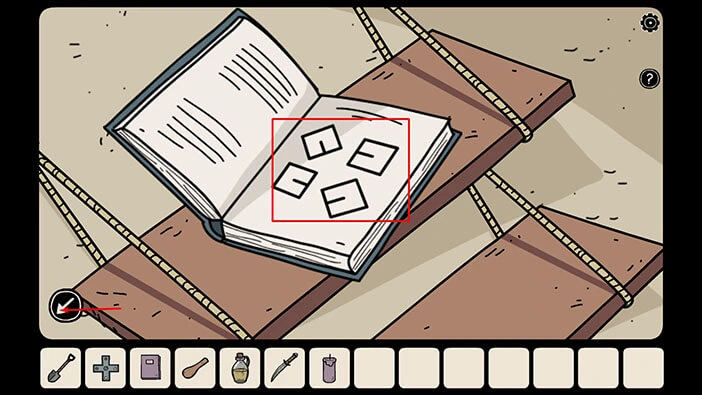
Here, we can see four squares with a single line, and each square is rotated differently. Let’s memorize/write down the position of the line on the squares because we will need this information to solve the next puzzle.
The line in the first square in the first row points down and to the right.
The line in the second square in the first row points to the left.
The line in the first square in the second row points to the right.
The line in the second square in the second row points down and to the left.
Once you’re done, tap on the arrow in the lower left corner to go back.
We can use the information about the squares to unlock the “Flame” locked behind the window. This window is located in the room with the demon dog that holds a stick in its mouth.
So, let’s go back to this room. To get there, tap on the arrow in the lower left corner to go back. After that, tap on the doorway on the left to go back to the previous room. From there, tap on the ladder to climb up to the next floor.
Lastly, tap on the doorway on the left to go back to the first room.
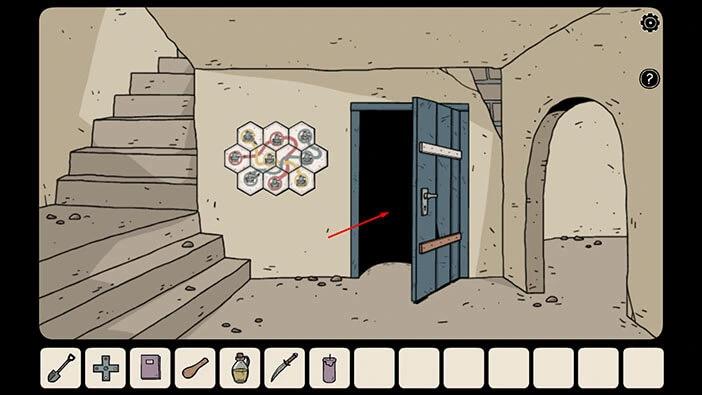
Tap on the blue door to go to the room with the “Flame” locked behind the window.
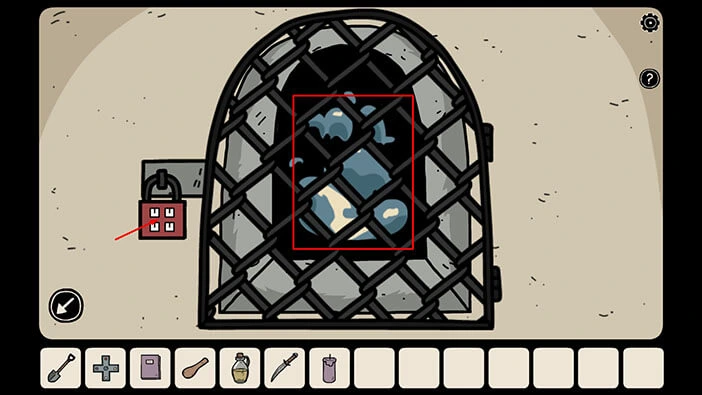
Tap on the window on the left to take a closer look at it, and you will notice a padlock. Tap on the padlock to start the interaction. We can also see a blue flame behind the bars.
Let’s rotate the squares. As a reminder, the book we saw
The line in the first square in the first row points down and to the right.
The line in the second square in the first row points to the left.
The line in the first square in the second row points to the right.
The line in the second square in the second row points down and to the left.
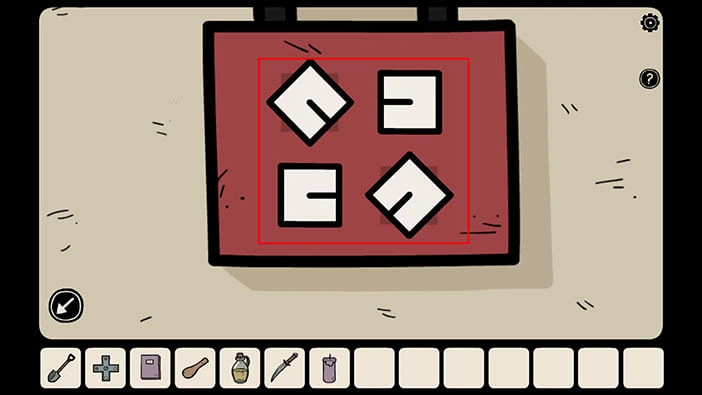
As soon as you correctly rotate the square you will hear a clicking sound, and the padlock will fall down. Tap on the window to open it.
Select the “Candle” from the inventory and use the flame to light the candle. After that, tap on the arrow in the lower left corner to go back.
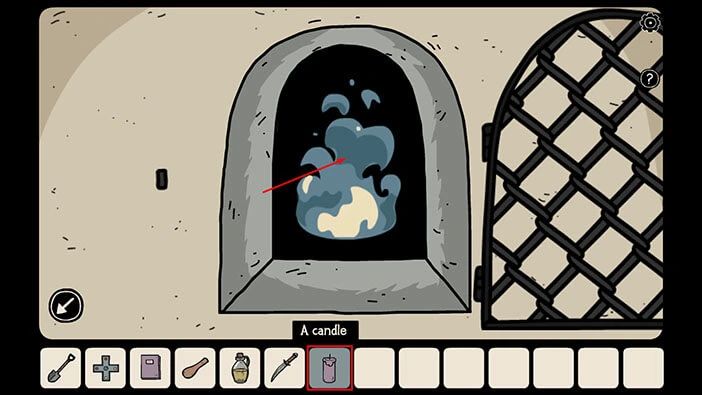
We now have a “Lit candle” and we can install it on the large candlestick, located next to the book on the pedestal in the room below. So, let’s go there.
Tap on the arrow in the lower left corner to go back to the first room. Next, tap on the doorway on the right to proceed to the next room. From there, tap on the ladder to go to the floor below.
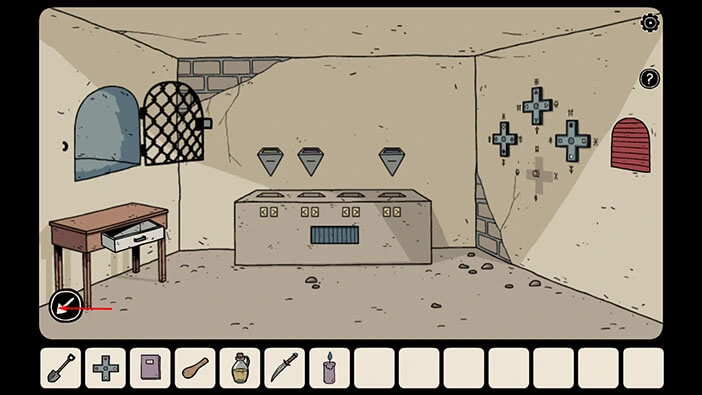
Tap on the large candlestick to take a closer look at it.
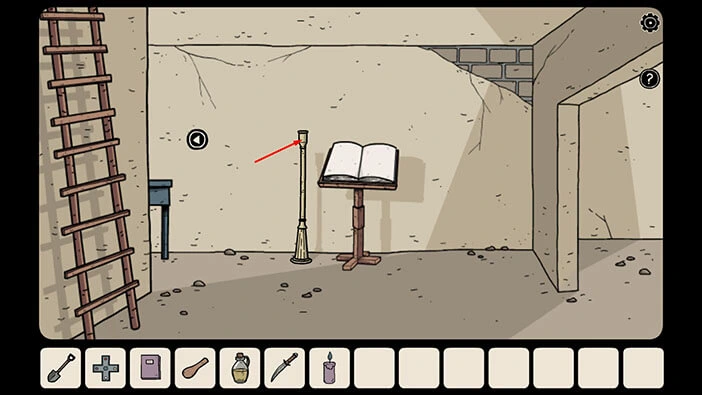
Select the “Lit candle” from the inventory and install it into the large candlestick.
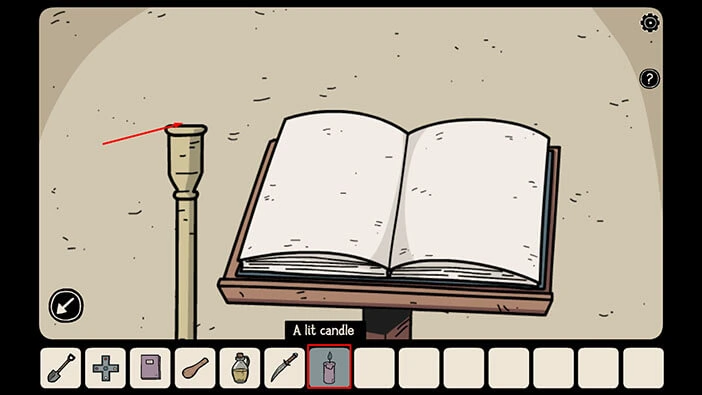
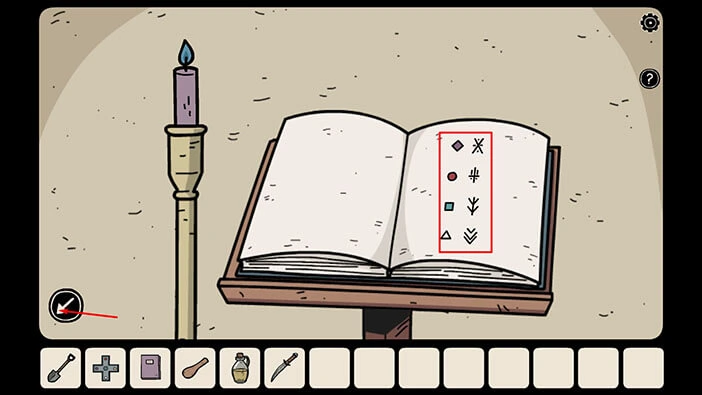
As soon as you place the candle, four shapes and symbols will appear on the right page of the book. Let’s write down all the symbols,
Purple rhombus = “X” sign with four dots
Red circle = “Trident” with two dots
Blue square = upside-down tree (at least that’s how I see it)
White triangle = three arrows pointing down
Once you’re done, tap on the arrow in the lower left corner to go back.
We should now go back to the room with a dog that is holding a stick in its mouth. To get there, tap on the ladder to go back to the first floor.
Next, tap on the doorway on the left to go back to the first room. From there, tap on the blue door and you will reach the room with the demonic dog.
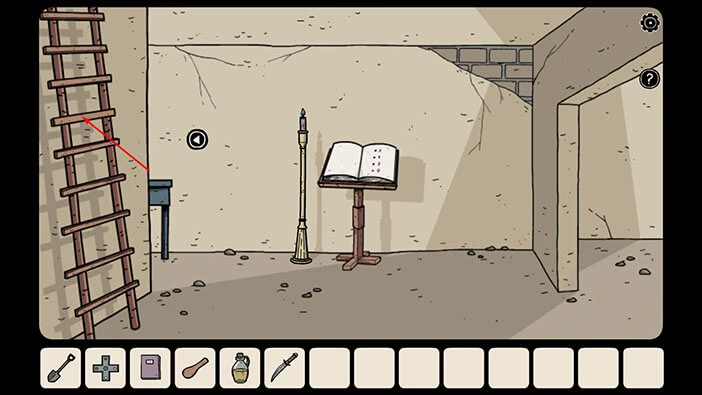
Tap on the three crosses on the wall on the right to take a closer look.
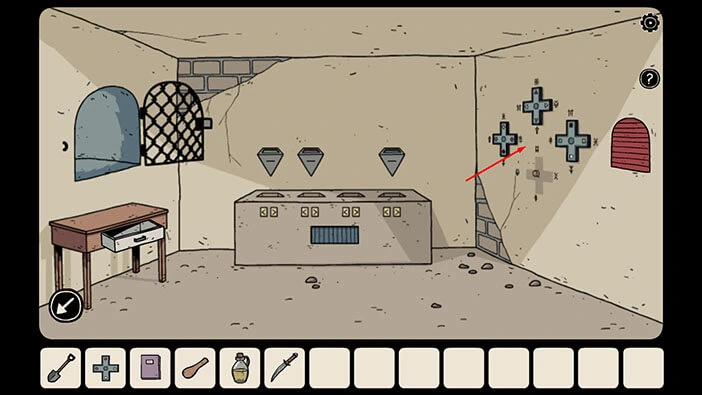
We can see three crosses and an empty slot at the bottom. So, select the “Cross” from the inventory and insert it into the empty slot.
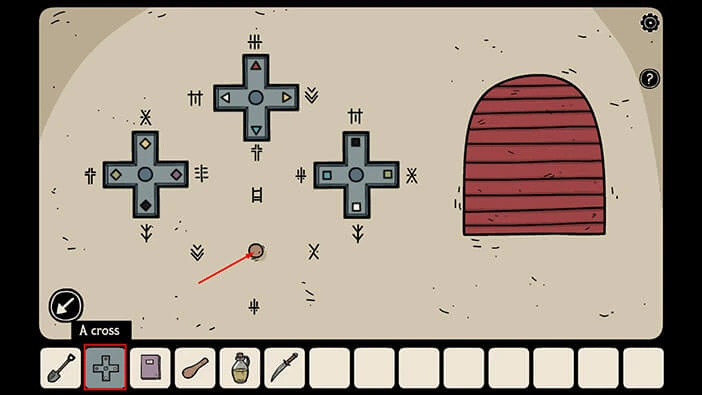
You will notice one of the four geometric shapes on each of the four crosses. Around each cross, we can see four symbols. So, our task is to rotate the crosses and set the geometric shape, of a certain color, next to the symbol. In other words, the color of the geometric shape and symbol next to it should match the hint that we saw in the book on the pedestal. Let’s do that.
Rotate the cross at the top, and set the white triangle next to a symbol that looks like three arrows pointing down.
Rotate the cross at the left, and set the purple rhombus next to a symbol that looks like an “X” sign with four dots
Rotate the cross at the right, and set the blue square next to a symbol that looks like an upside-down tree
Rotate the cross at the bottom, and set the red circle next to a symbol that looks like a trident with two dots
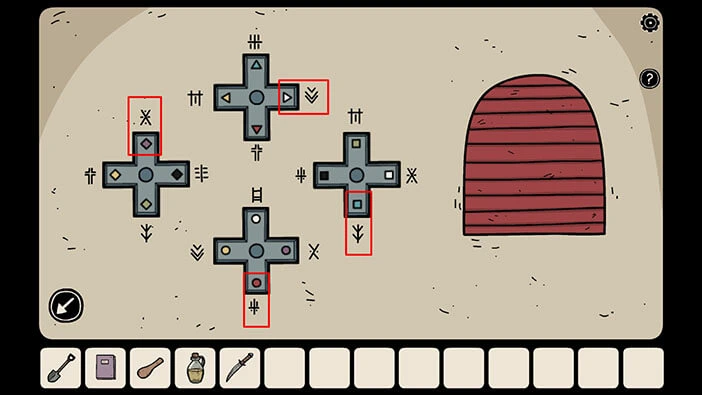
As soon as you set the crosses to the correct positions the compartment on the right will open and inside you will find a “Jar with salt” and a “Note with arrows”. Tap on these two items to pick them up.
After that, tap on the arrow in the lower left corner to go back.
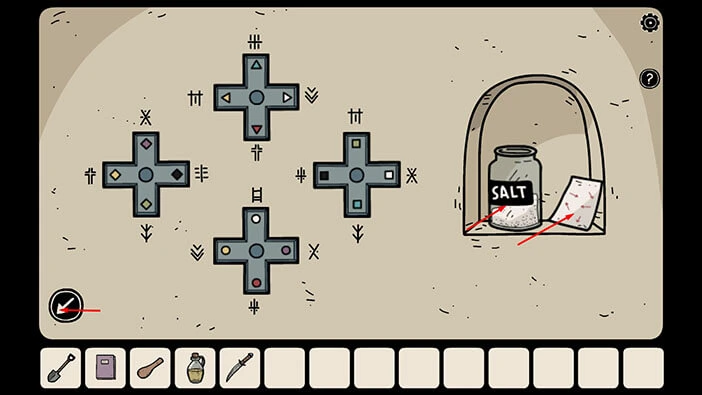
We can use the “Note with arrows” to solve the puzzle with arrows on the wall (arrows as in projectiles) located in the room on the floor below. So, let’s do that.
To get to this room, tap on the arrow in the lower left corner to go back to the first room. After that, tap on the doorway on the right to go to the next room and you will reach the ladders. Tap on the ladders to go to the floor below.
Tap on the doorway on the right to proceed to the next room. From there, tap on the blue door on the right and you will reach our destination.
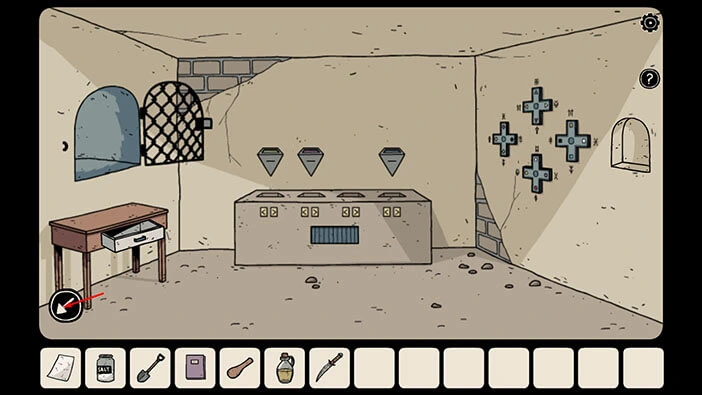
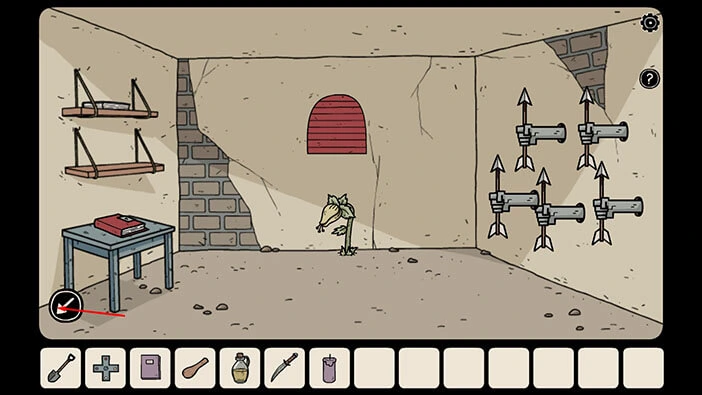
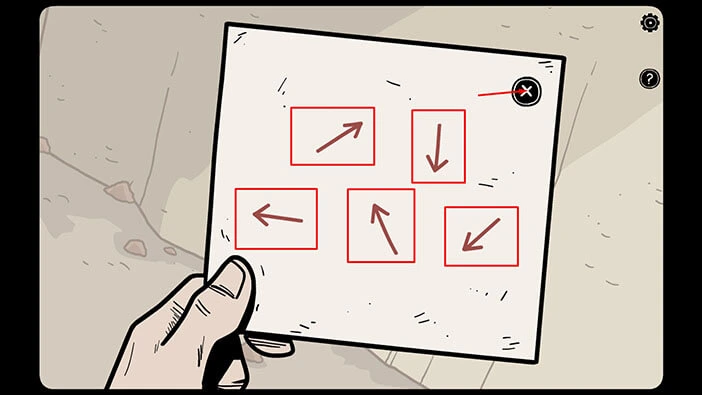
On the wall on the right we can see five hands with arrows and all arrows are pointing up. Let’s examine the note in our inventory. Tap on the “Note with arrows”.
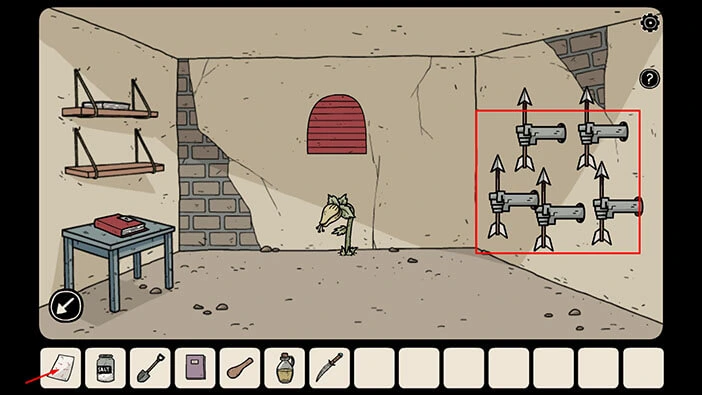
Here, we can see five arrows, two in the top row, and three in the bottom row. Let’s memorize/write down the direction of the arrows in the note.
First arrow in the top row = up and to the right
Second arrow in the top row = down
First arrow in the bottom row = left
Second arrow in the bottom row = up and to the left
Third arrow in the bottom row = down and to the left
Once you’re done, tap on the “X” button to put down the note.
Let’s tap on the arrows on the wall on the right to start the interaction. Next, let’s tap on the hands on the wall and set the arrows in the hands to match the direction of the arrows in the note.
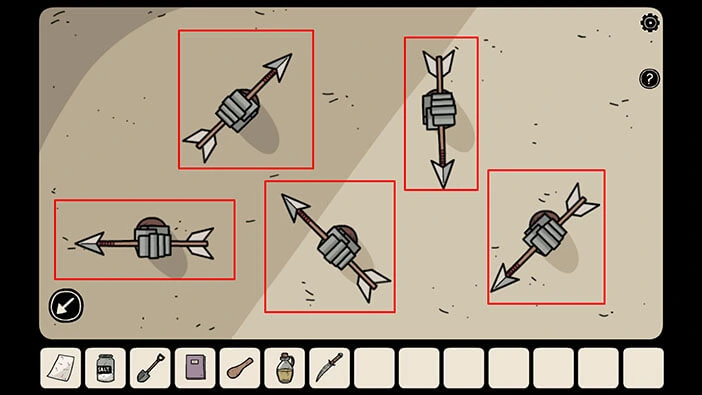
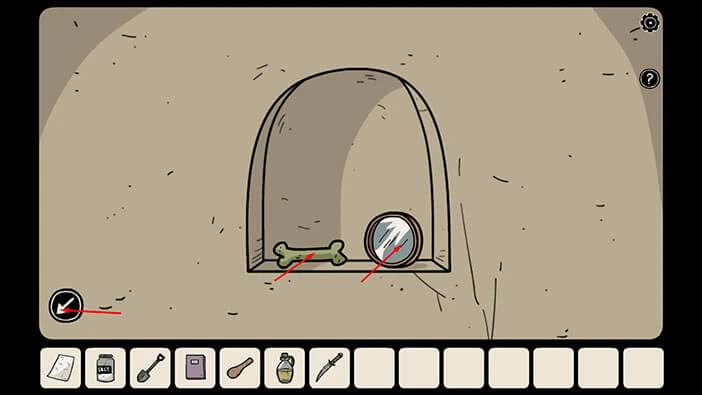
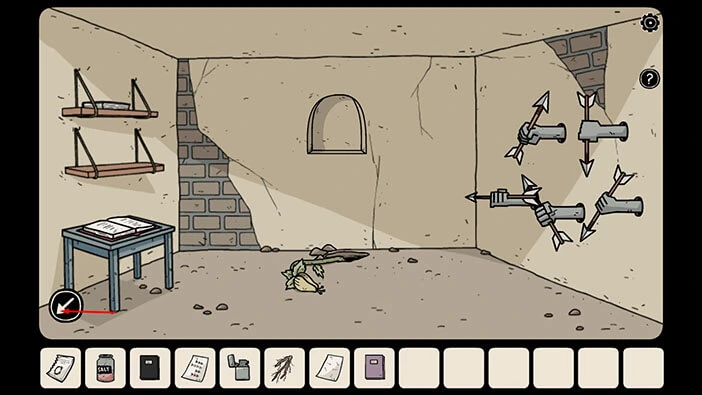
As soon as you rotate the arrows in the correct direction, the compartment in the wall above the plant will open and inside you will find a “Magnifying lens” and a “Rubber bone”. Tap on these two items to pick them up.
After that, tap on the arrow in the lower left corner to go back.
Next, tap on the plant to take a closer look at it. Select the “Shovel” from the inventory and use it to dig up the plant.
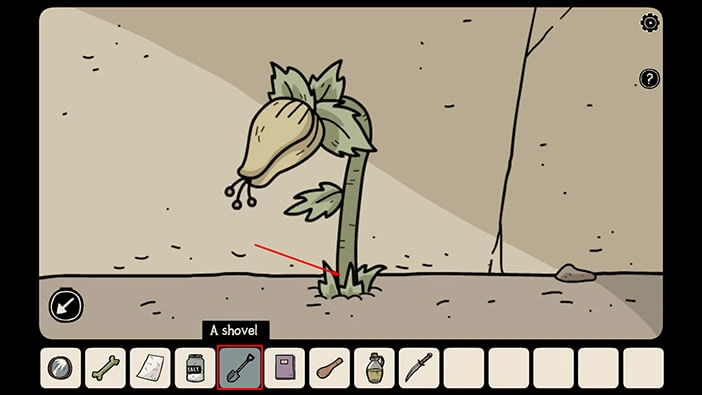
You will see a short cutscene. Detective Larsen will dig up the plant and he will take the “Root” (which will be added to your inventory). We need the root because it is one of the three ingredients for crafting the “Portal to Penumbra”.
We can now see a hole at the base of the plant. Tap on this hole to approach it, and tap again to look inside.
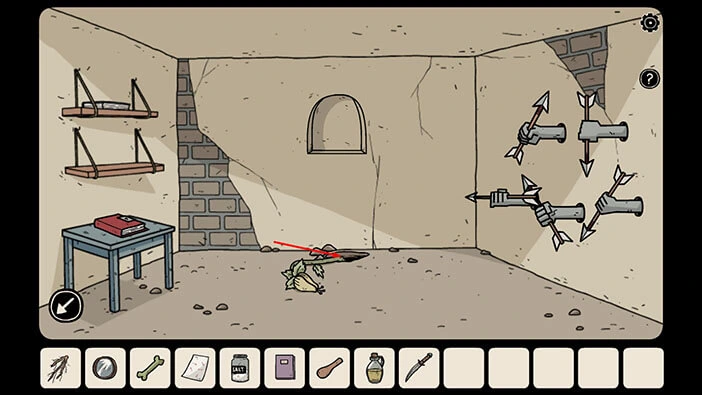
In the hole, you will find another shadow hamster. So far, we found seven out of ten shadow hamsters.
Once you’re done tap on the arrow in the lower left corner to go back.
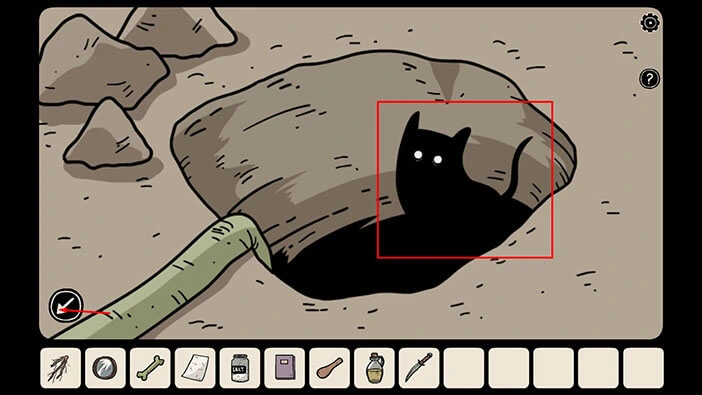
We have obtained the “Rubber bone” by solving the puzzle in this room. We should now go back to the room with the demonic dog, and give it the bone.
To get to this room, tap on the arrow in the lower left corner to go back. After that, tap on the stairs to go to the next floor. Next, tap on the blue door on the left and you will reach the room with the demonic dog.
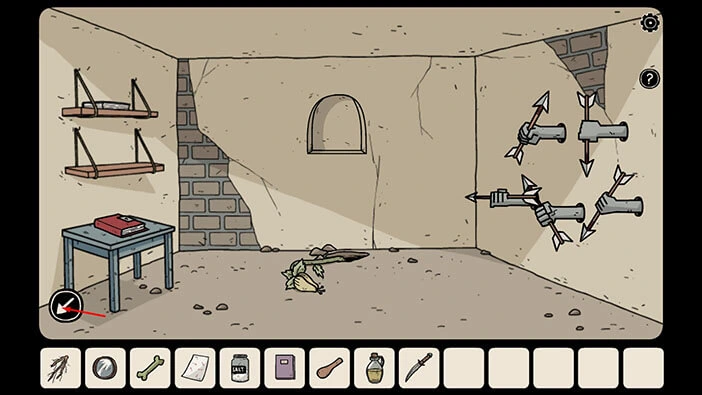
Tap on the demonic dog to take a closer look at it.
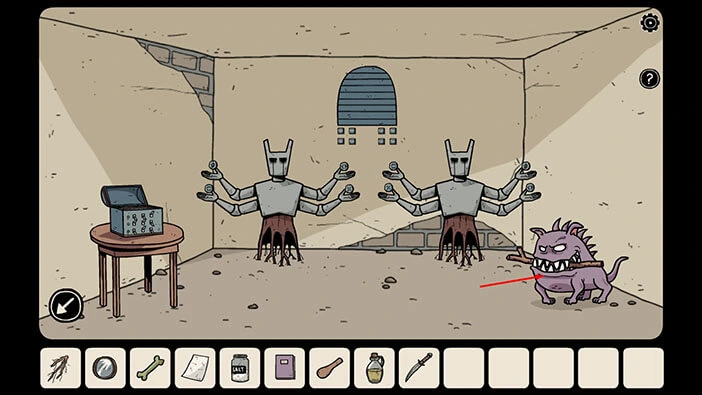
Select the “Rubber bone” from the inventory and give it to the dog.
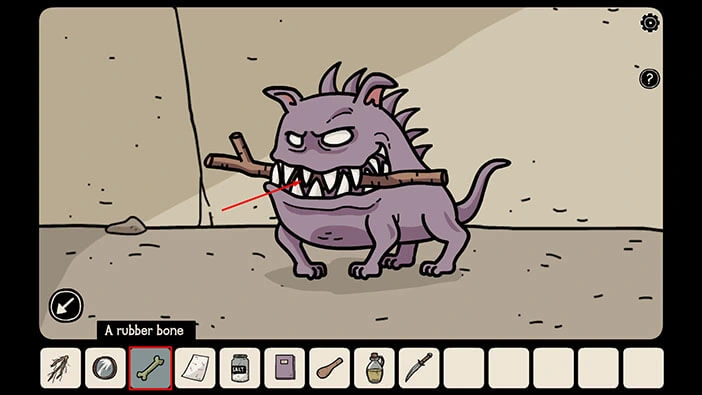
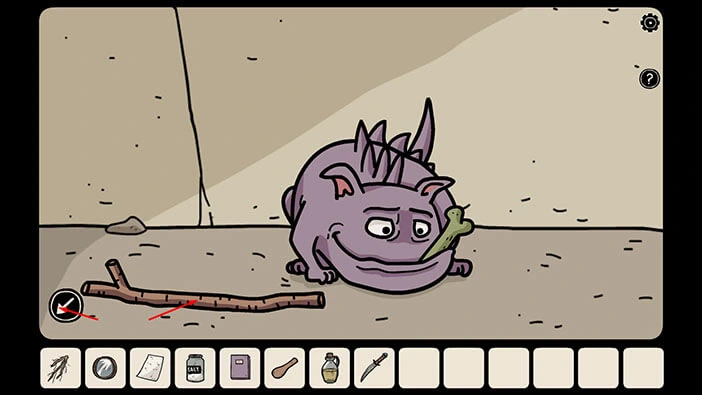
The dog will drop the branch and it will happily take the rubber bone. Tap on the “Branch” to pick it up.
After that, tap on the arrow in the lower left corner to go back.
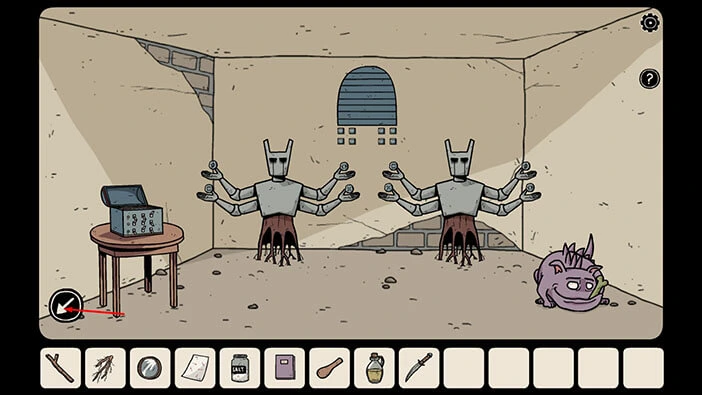
Next, we can use the “Magnifying glass” to reactivate the telescope in one of the rooms on the first floor. To get to this room, tap on the arrow in the lower left corner to go back. After that, tap on the stairs in front of you to go to the floor above.
Next, tap on the doorway on the left and you will reach the room with ladders. Tap on the ladders to go back to the first floor. Lastly, tap on the wooden door in front of you to proceed into the room with the telescope.
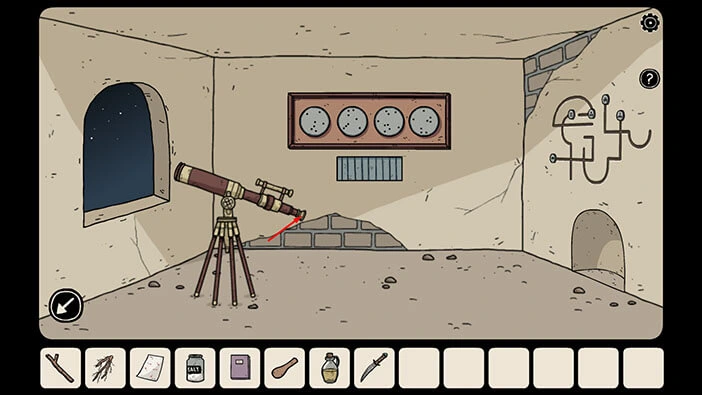
Tap on the telescope to take a closer look at it.
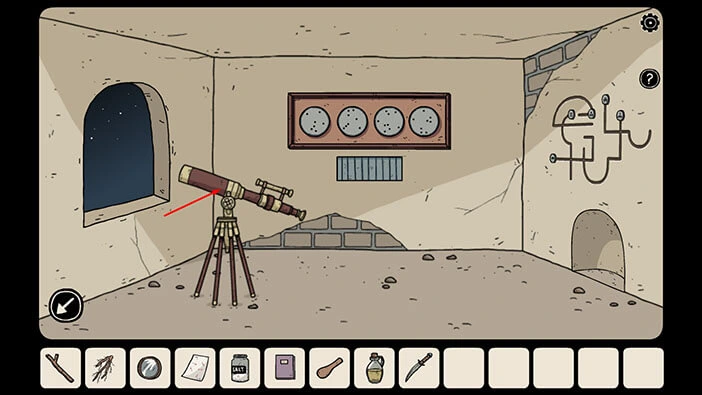
You will notice that the end of the telescope tube is empty. So, let’s select the “Magnifying glass” from the inventory and install it at the end of the tube.
After that, tap on the arrow in the lower left corner to go back.
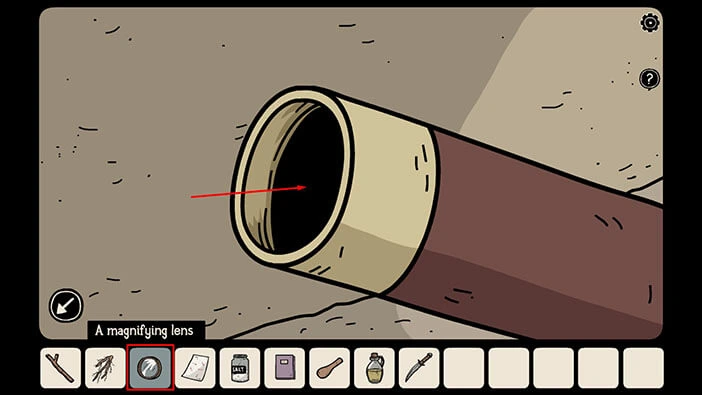
Next, tap on the other end of the telescope to take a look at the sky.
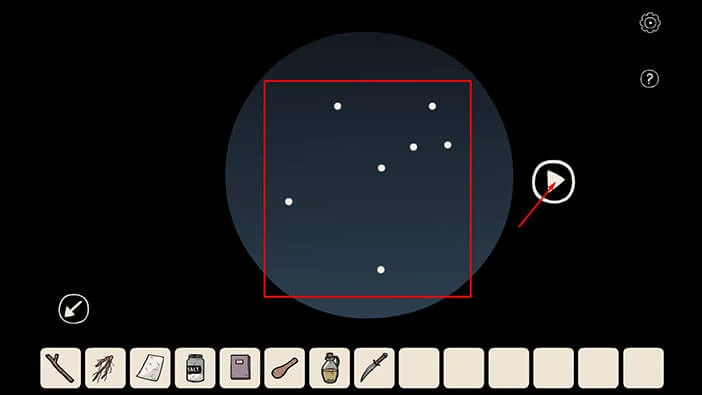
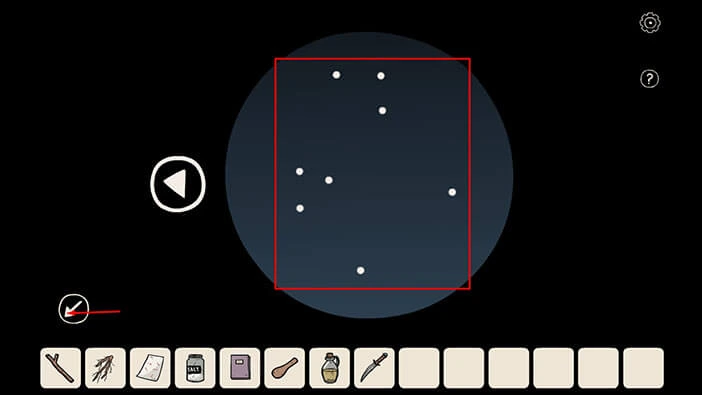
We can see seven white dots, and these dots are actually stars. So, let’s write down the position of the seven dots because we will need this information to solve the next puzzle.
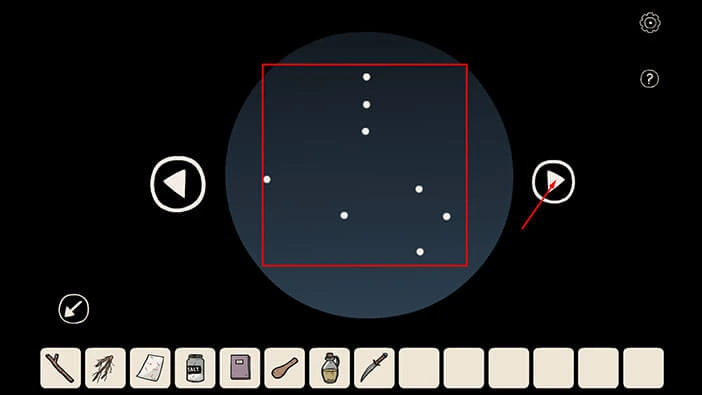
Once you’re down, tap on the arrow on the right to look at the next part of the sky.
In the second picture, we can see eight white dots, so let’s write the position of the dots. Once you’re down, tap on the arrow on the right to look at the next part of the sky.
In the third picture, we can see nine white dots, so let’s write the position of the dots. Once you’re down, tap on the arrow on the right to look at the next part of the sky.
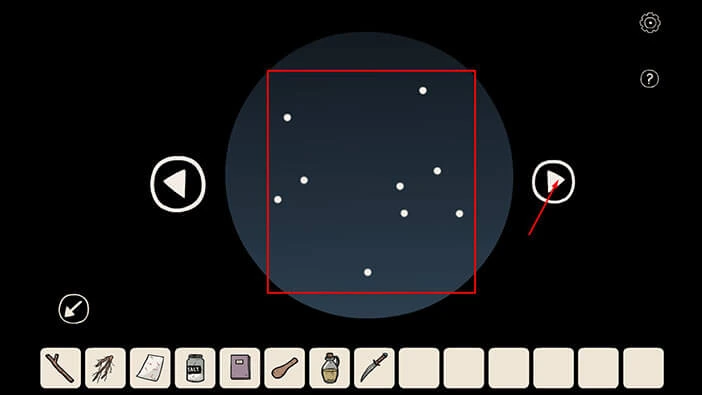
In the fourth picture, we can see eight white dots, so let’s write the position of the dots. Once you’re down, tap on the arrow in the lower left corner to go back.
Next, tap on the four discs on the wall in front of you to take a closer look at them.
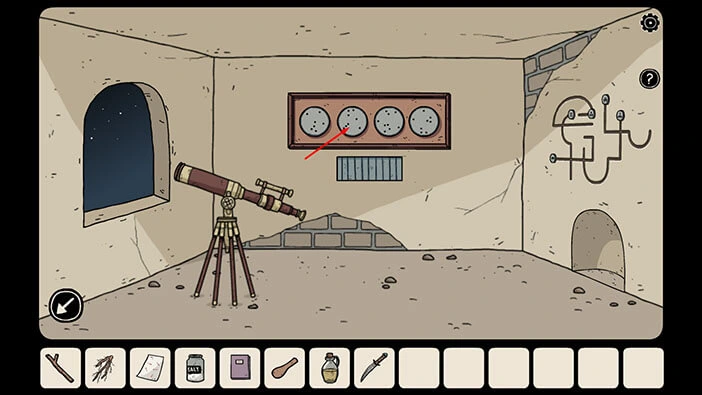
We can see that the dots on the discs look like dots that we saw through the telescope. Our task is to rotate the discs and set them to match the position of the dots that we saw through the telescope. We will do this in several steps. Let’s begin.
Step 1
Tap five times on the first disc (looking from left to right) to rotate it into the position that matches the dots that we saw through the telescope.
Step 2
Tap three times on the second disc to rotate it into the position that matches the dots that we saw through the telescope.
Step 3
Tap six times on the third disc to rotate it into the position that matches the dots that we saw through the telescope.
Step 4
Tap four times on the fourth disc to rotate it into the position that matches the dots that we saw through the telescope.
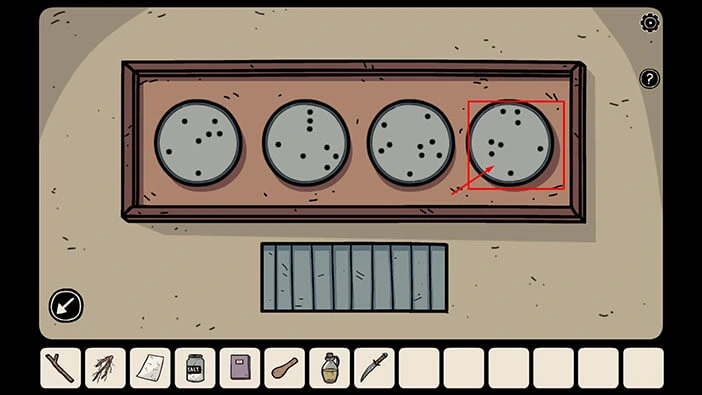
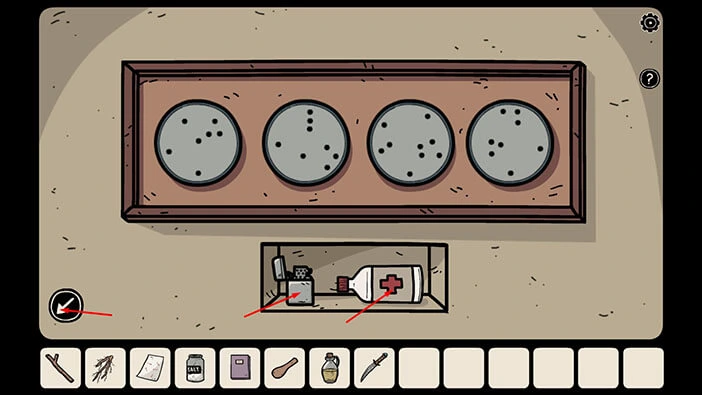
With this last step, you will complete the puzzle, and the small compartment below the discs will open. Inside you will find a “Lighter” and a “Bottle of alcohol” so tap on these two items to pick them up.
After that, tap on the arrow in the lower left corner to go back.
Let’s look through the telescope one more time.
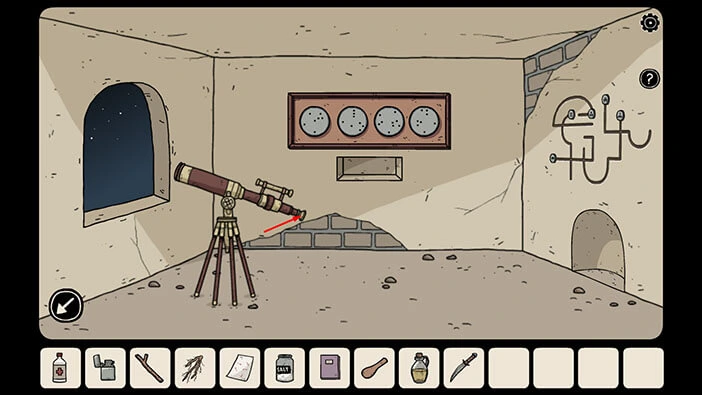
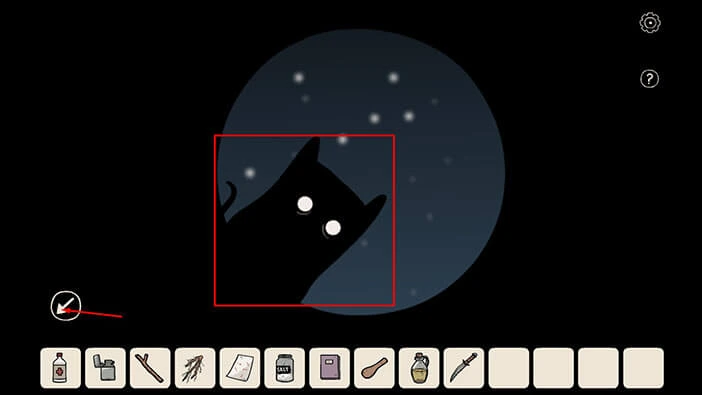
Here, you will discover another shadow hamster. So far, we have found eight out of ten. Let’s continue.
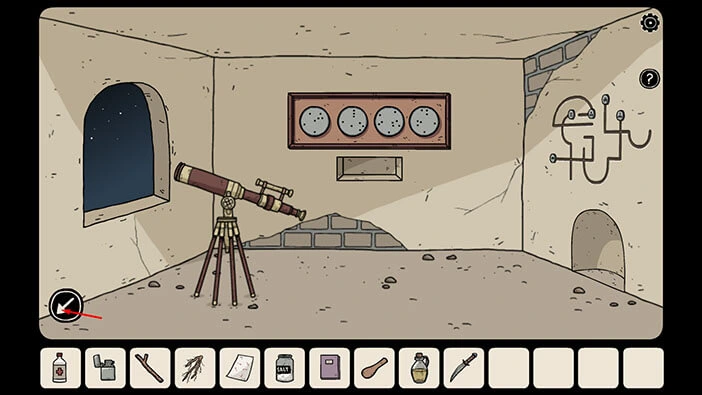
Tap on the arrow in the lower left corner to go back.
Next, we can use a “Sharp knife” to cut off a piece of curtain. So, let’s do that. Tap on the arrow in the lower left corner to go back.
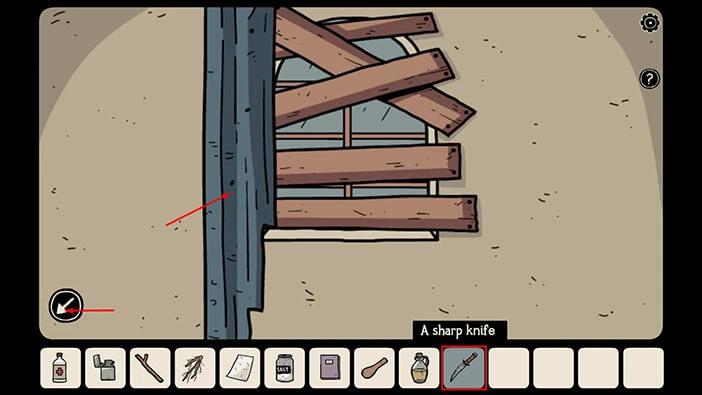
On the right, you will notice a barred window and a curtain. Tap on the window to take a closer look at it.
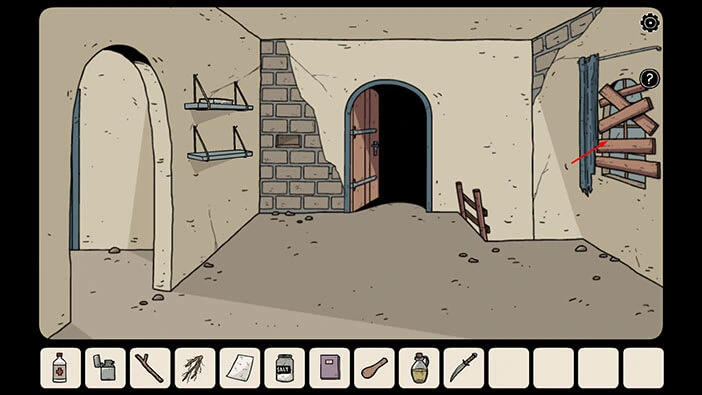
Select the “Sharp knife” from the inventory and use it to cut off a piece of curtain. A “Piece of blue cloth” will be added to your inventory.
After that, tap on the arrow in the lower left corner to go back.
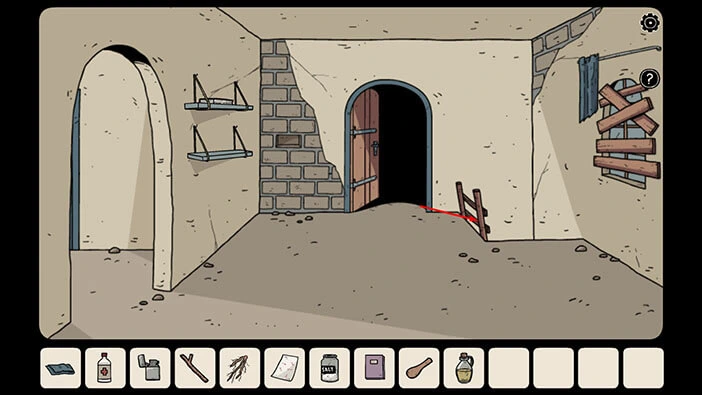
We can now use the items that we gathered so far, and create a torch to illuminate the room at the bottom floor (we found this room at the beginning of the walkthrough).
To get to the dark room on the bottom floor, tap on the ladders to go to the next floor. Next, tap on the doorway on the right to proceed to the next room. After that, tap on the stairs to go to the lower floor.
Lastly, tap on the stairs that lead down to go to the bottom floor.
We have reached the dark room at the bottom floor. So, let’s tap on the torch stand on the wall on the right to take a closer look at it.
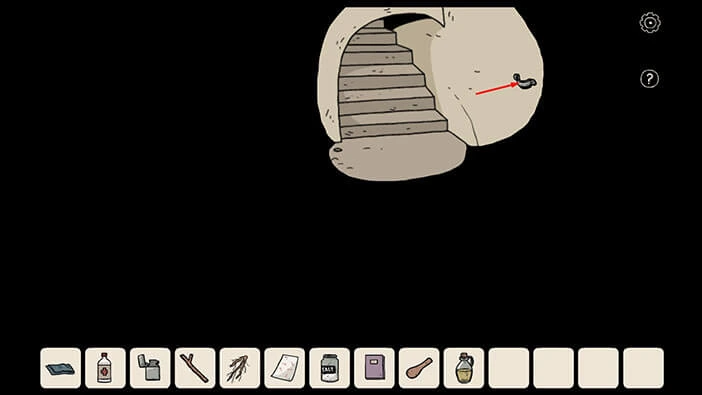
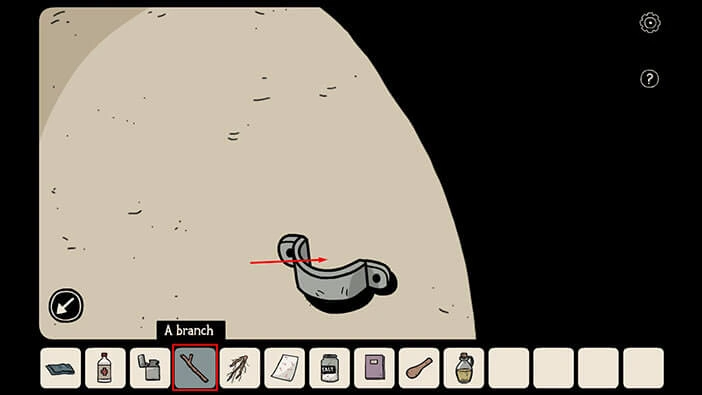
We will now create the torch to illuminate this dark room. Let’s begin. Select the “Branch” from the inventory and put it into the torch stand.
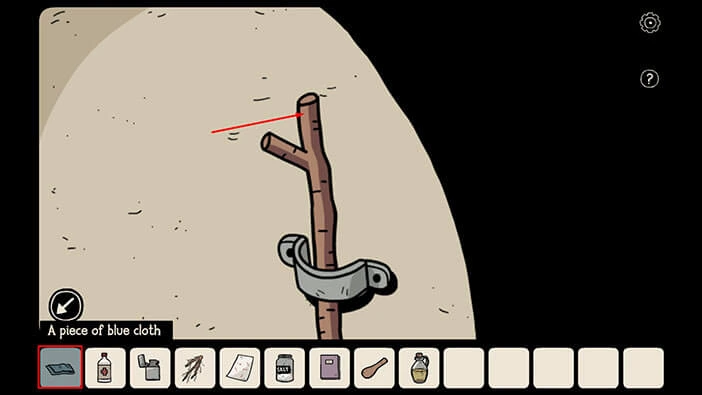
Next, select the “Piece of the blue cloth” from the inventory and attach it to the top of the branch.
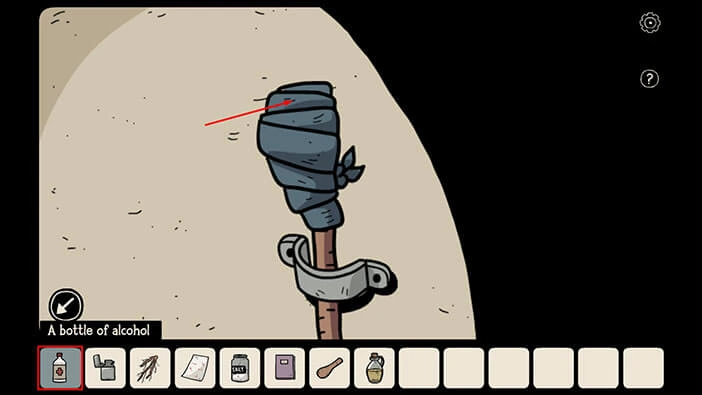
Next, select the “Bottle of alcohol” and pour it on the cloth.
Lastly, let’s select the “Lighter” and use it to light up the torch.
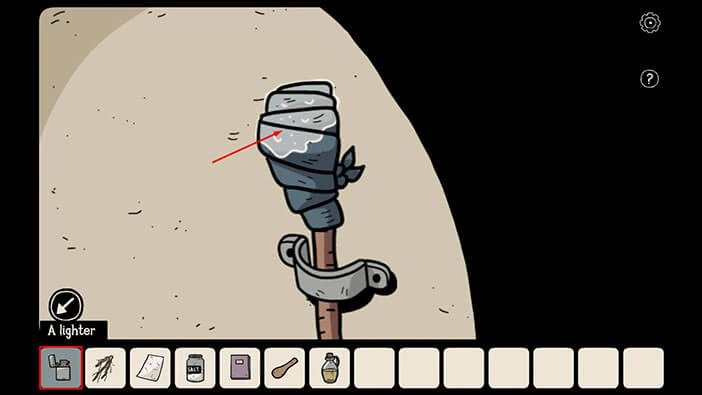
We illuminated the room, so let’s explore it. Tap on the wall cabinet on the left to take a closer look at it, then tap on both doors to open them.
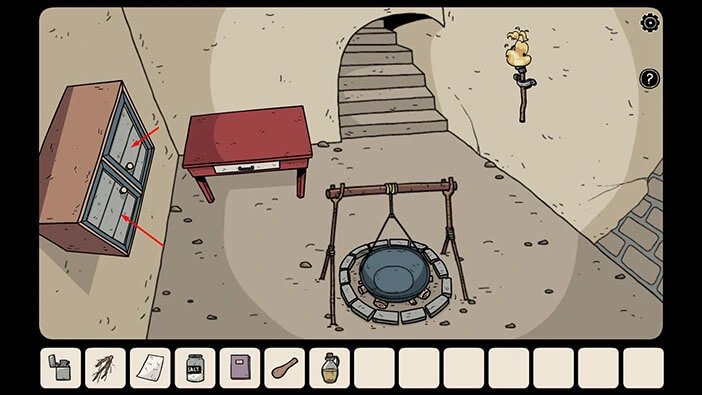
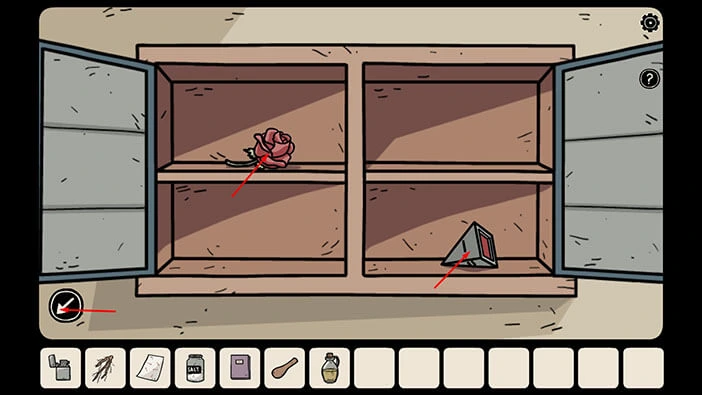
In the cabinet, you will find a “Small pyramid” and a “Rose”. Tap on these two items to pick them up.
After that, tap on the arrow in the lower left corner to go back.
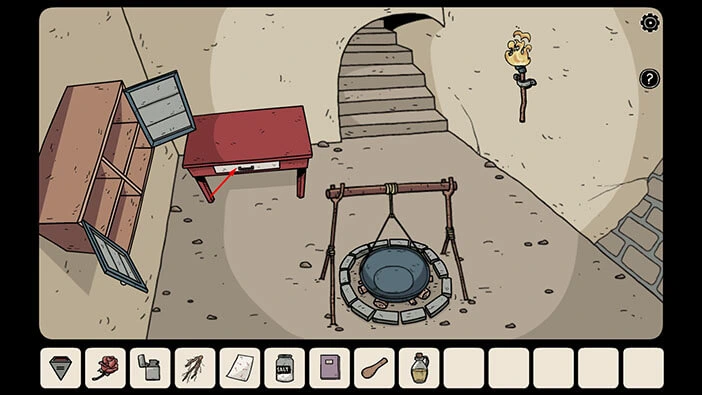
Next, you will notice a red table with a white drawer. Tap on this drawer to take a closer look at it, and tap again to open it.
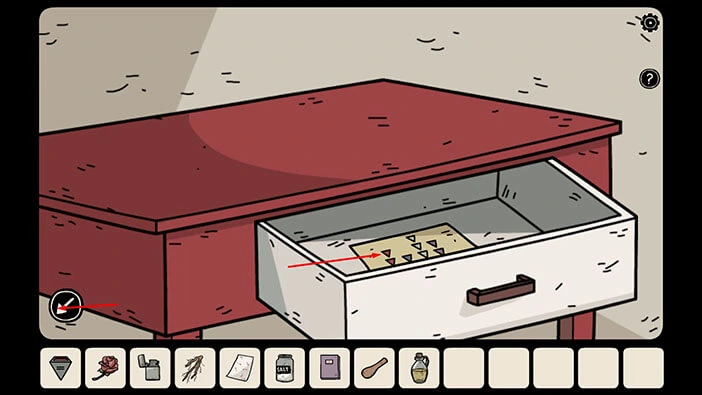
In the drawer, you will find a “Note with triangles” so tap on it to pick it up. We can use this hint to solve the puzzle in one of the first rooms at the top/first floor.
Tap on the arrow in the lower left corner to go back.
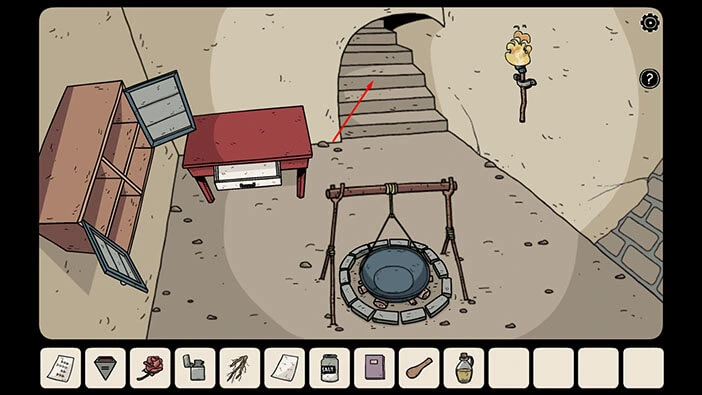
Let’s go back to the top floor. Tap on the stairs to go back to the upper floor. Next, tap on the stairs leading up to go to the next floor.
After that, tap on the doorway on the left to go to the room with ladders. Next, tap on the ladders to go to the first floor. When you reach the first floor, tap on the doorway on the left to go back to the first room.
Tap on the blue door to proceed to the next room.
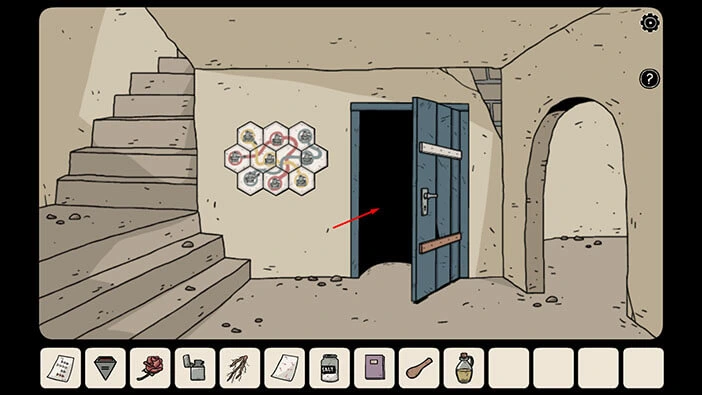
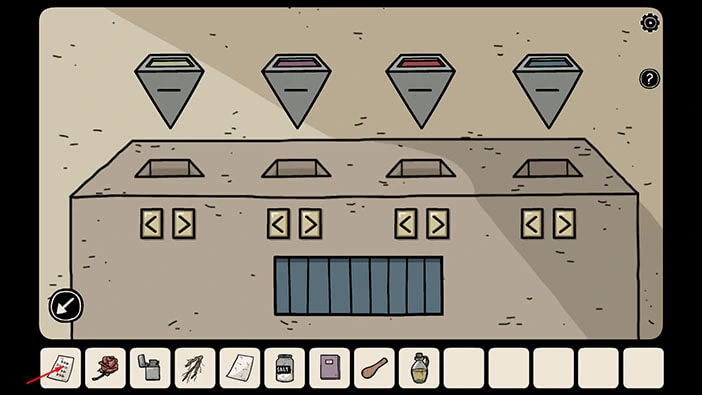
Tap on the three small pyramids on the wall in front of you to take a closer look.
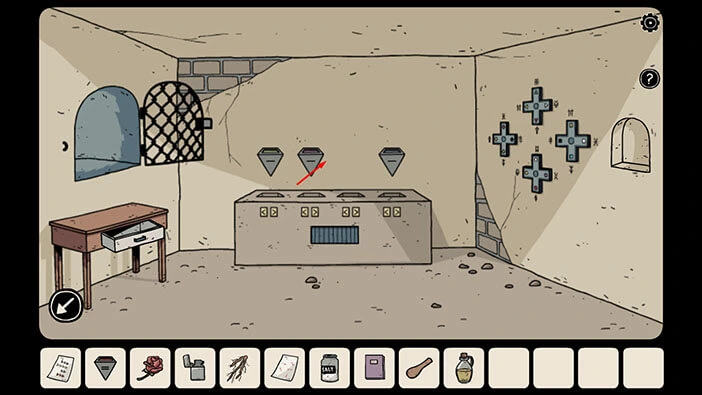
You will notice that the third slot is empty. So, select the “Small pyramid” from the inventory and insert it into the empty slot.
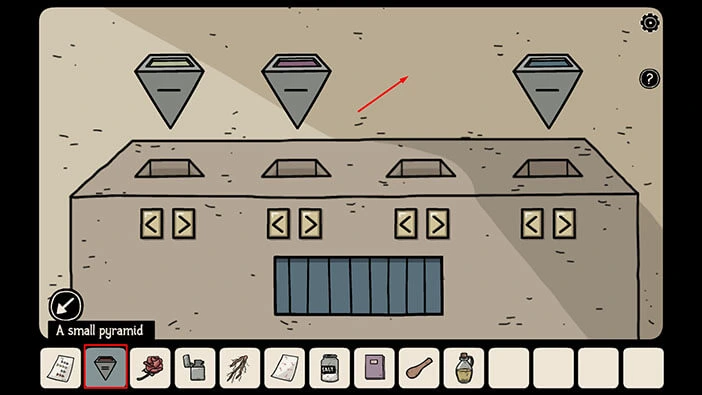
We should now tap on the “Note with triangles” in our inventory to examine it.
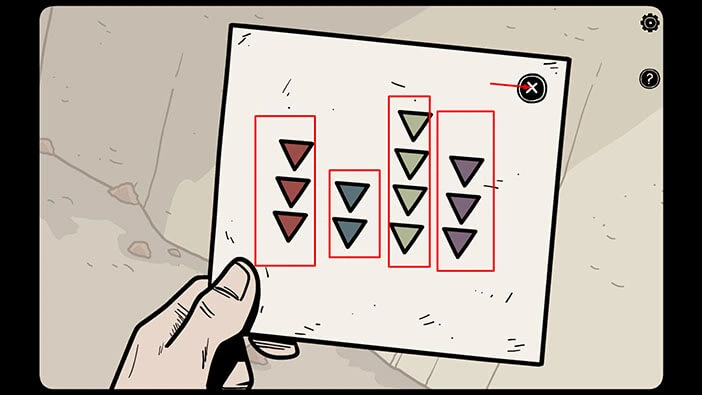
Here, we can see red, blue, green, and purple triangles, arranged in the four columns. Let’s memorize/write down this information.
First column = Three Red triangles
Second column = Two Blue triangles
Third column = Four Green triangles
Fourth column = Three Purple triangles
Once you’re done, tap on the “X” button to put down the note.
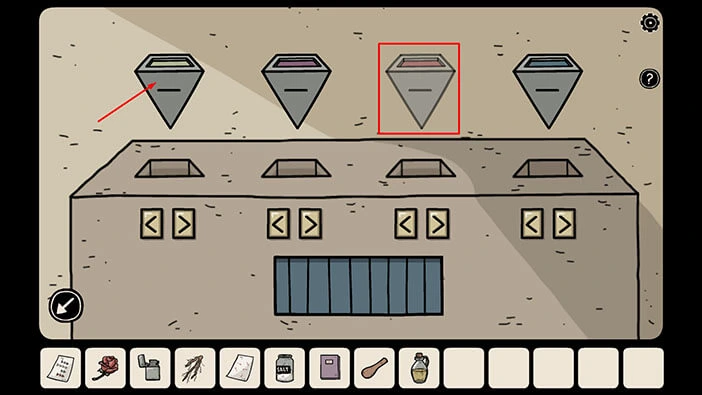
First, let’s arrange the pyramids by color.
Select the “Red” pyramid and place it into the first slot, instead of the “Green” pyramid.
Next, select the “Blue” pyramid and place it into the second slot, instead of the “Purple” pyramid. With that done, all four pyramids will be correctly arranged by color.
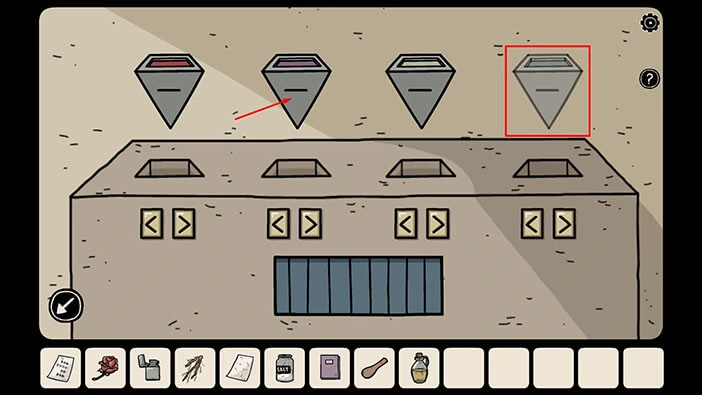
Next, we can use the Left/Right arrows below the pyramids to increase/decrease the number of triangles. So, let’s set the correct number of triangles on each pyramid. We had,
First pyramid = Three Red triangles
Second pyramid = Two Blue triangles
Third pyramid = Four Green triangles
Fourth pyramid = Three Purple triangles
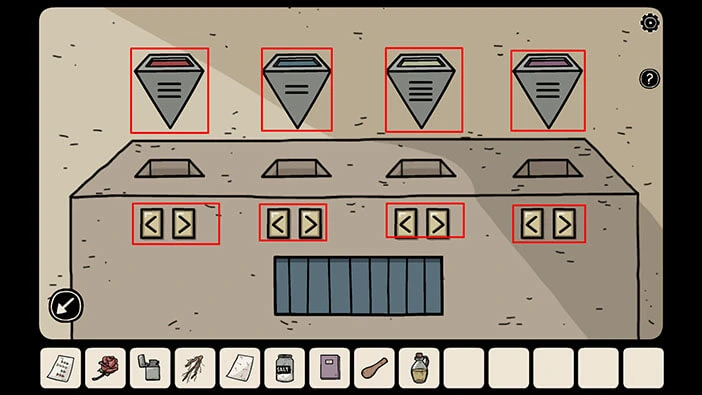
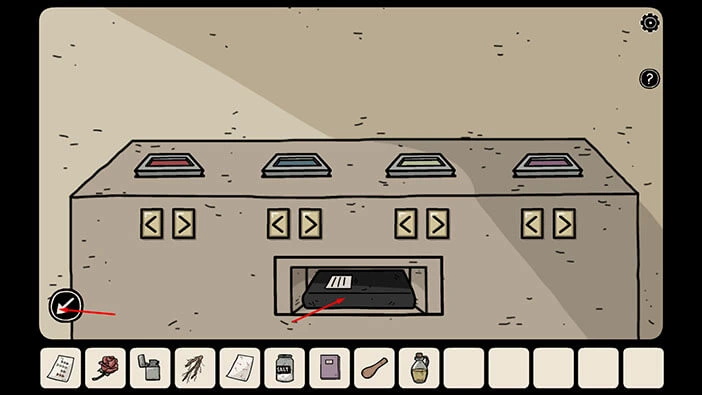
As soon as you solve the puzzle, the small compartment below the pyramids will open, and inside you will find a “Black book”. Tap on it to pick it up.
After that, tap on the arrow in the lower left corner to go back.
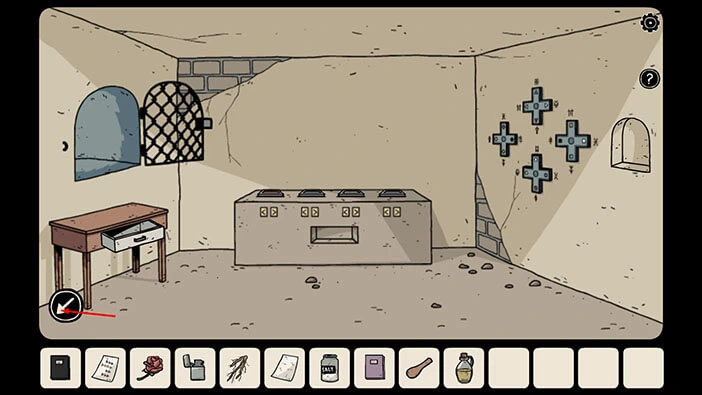
Next, we should go down to the lower floor, and craft the “Pink salt” which we will need in order to create the “Portal to Penumbra”.
Let’s do that. Tap on the arrow in the lower left corner to go back to the first room. From there, tap on the doorway on the right to proceed to the next room. After that, tap on the ladder to go to the lower floor.
Next, tap on the doorway on the right to proceed to the next room. After that, tap on the stairs to go down, to the next floor.
Tap on the blue bowl to take a closer look at it.
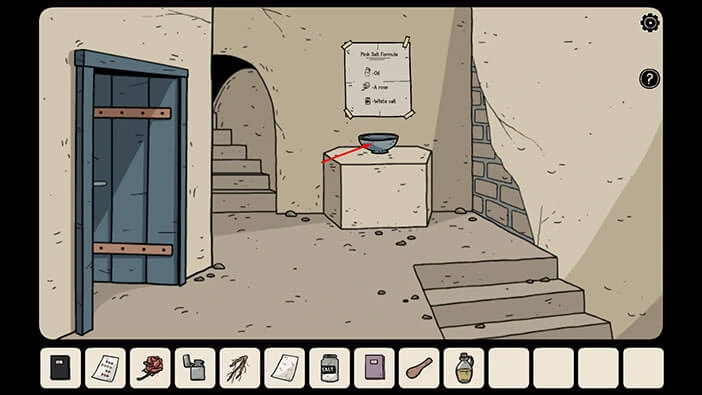
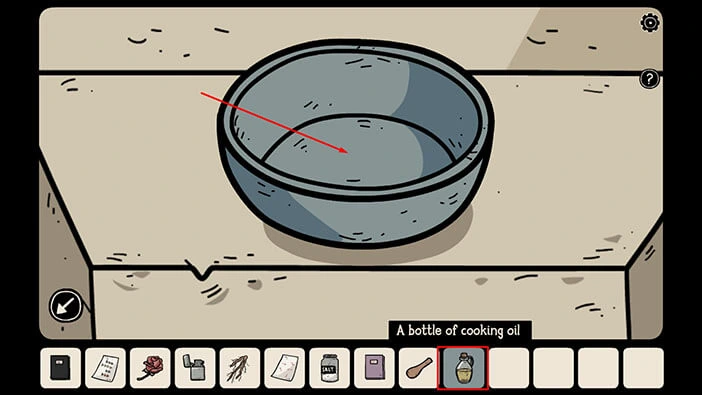
We will now craft the “Pink salt”. If you need a refresher, you can find the formula for the “Pink salt” above the blue bowl. So, to create a “Pink Salt” we will need
Oil (we have a “Bottle of cooking oil”)
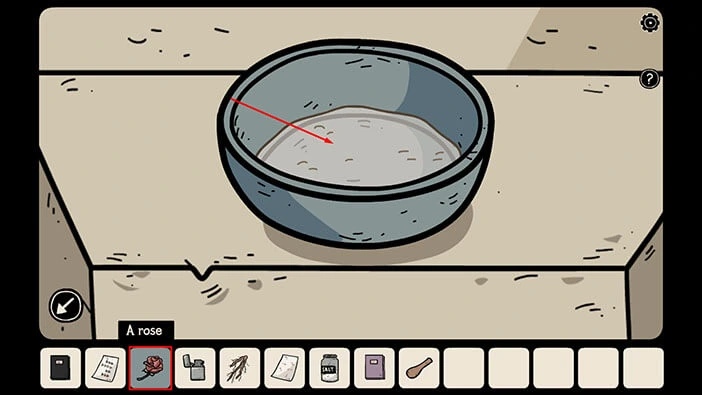
A Rose (we have it)
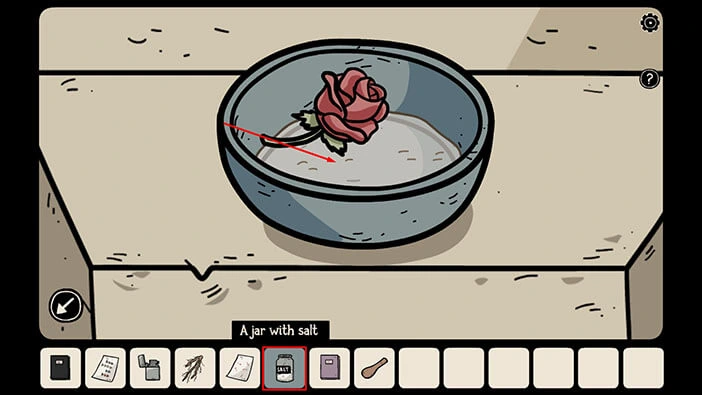
A White Salt (we have a “Jar with white salt”)
So, select the “Bottle of cooking oil” from the inventory and pour the oil into the bowl.
Next, select the “Rose” from the inventory and put it into the bowl.
Lastly, select the “Jar with white salt” from the inventory and pour the salt into the bowl.
Next, select the “Pestle” from the inventory and use it to mix the ingredients in the bowl.
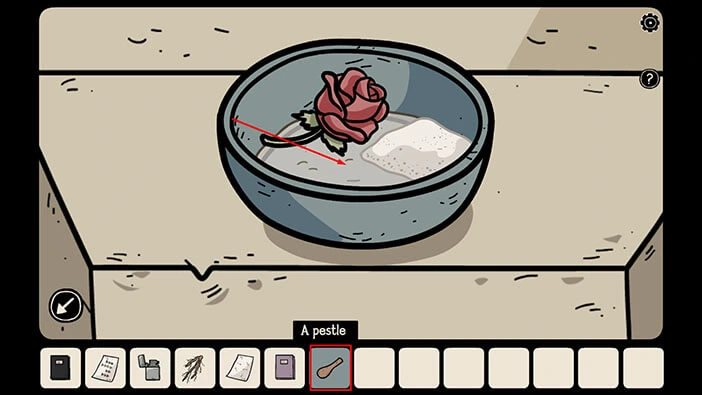
After a short cutscene, a “Jar with Pink salt” will be added to your inventory.
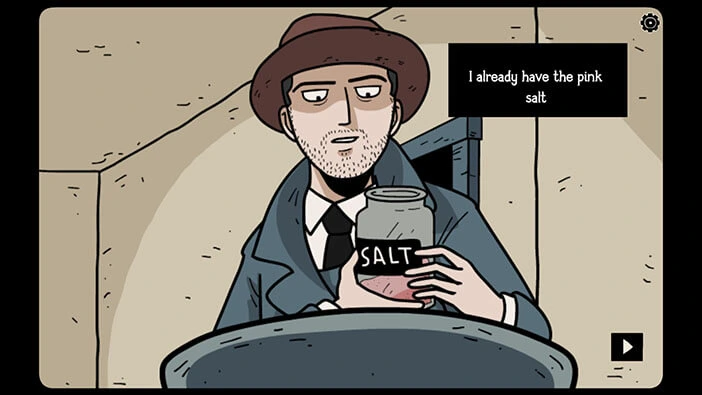
Next, let’s go to the room on the left.
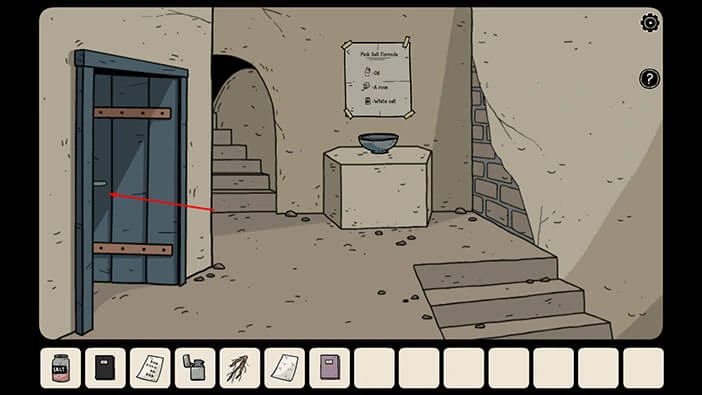
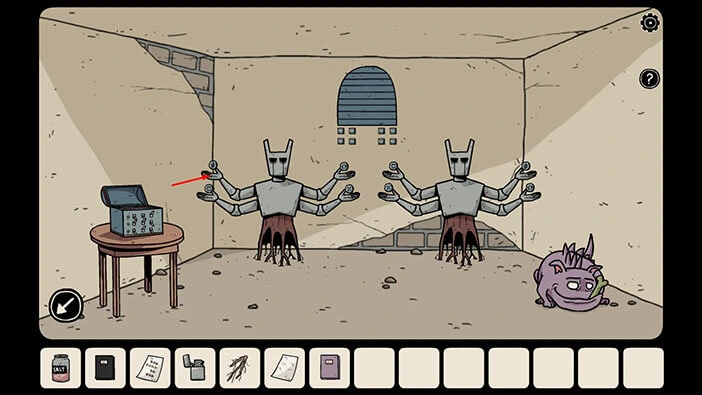
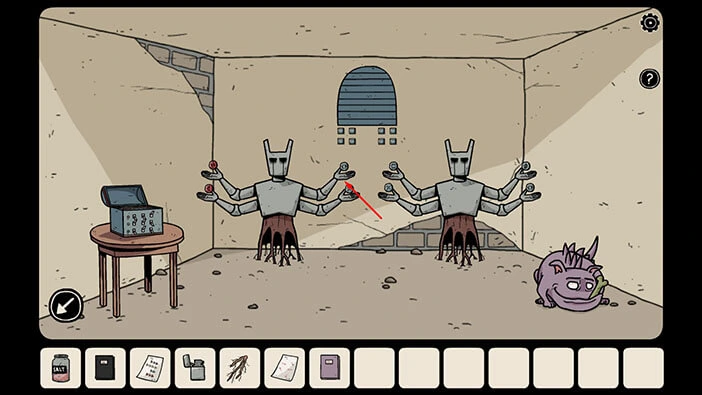
Here, we can see two four-armed statues, and in each of the eight hands, we can see a disc with a specific symbol.
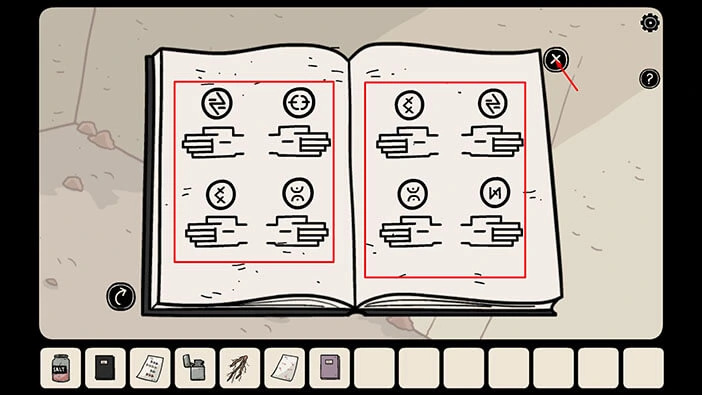
Let’s take a look at the “Black book” in our inventory, because there we will find a hint for this puzzle.
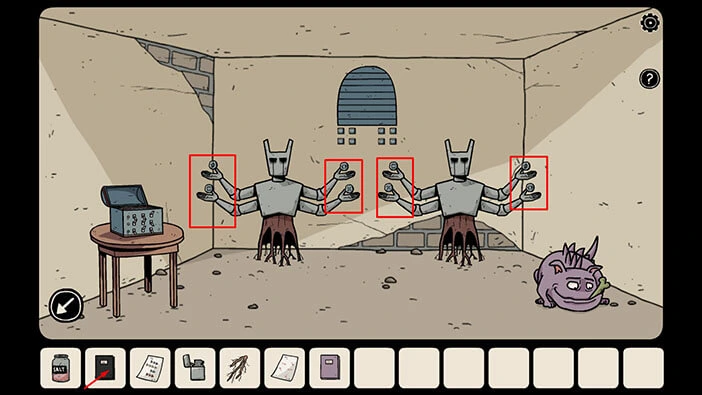
Tap twice on the arrow in the lower right corner to open the book, and to take a look at the next page.
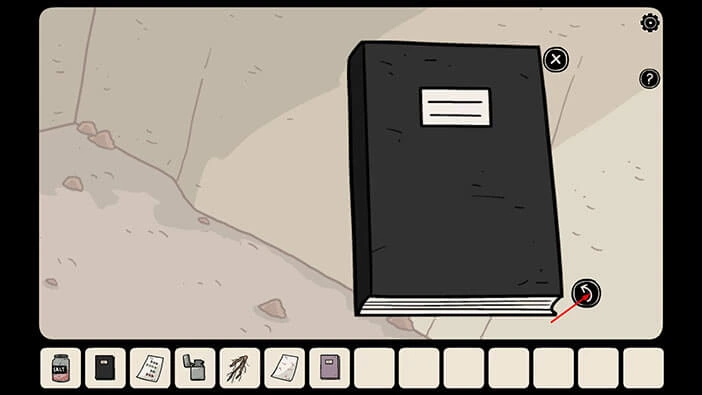
Here, we can see 8 hands, and 8 symbols, one per hand. So, here we have the same number of hands and the symbols, as the two four-armed statues.
The page on the left represents the four hands and symbols on the left statue, and the page on the right represents the symbols on the right statue. Let’s memorize/write down these symbols.
Once you’re done, tap on the “X” button to put down the book.
Tap on the symbols on the left side, of the left statue to take a closer look at them.
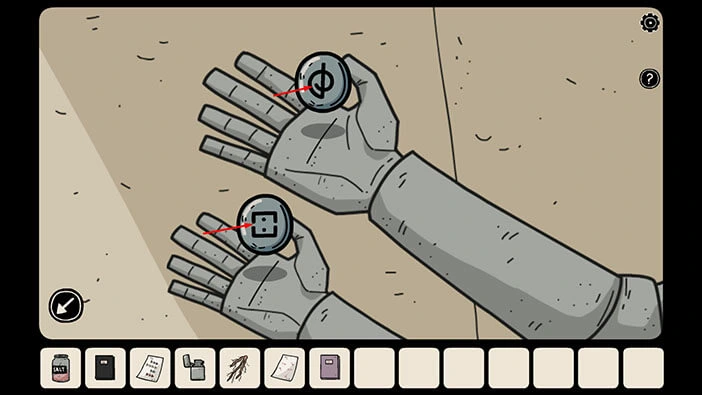
We can see that the symbols in the hands do not match the symbols in the book. So, tap on these two symbols to rotate them.
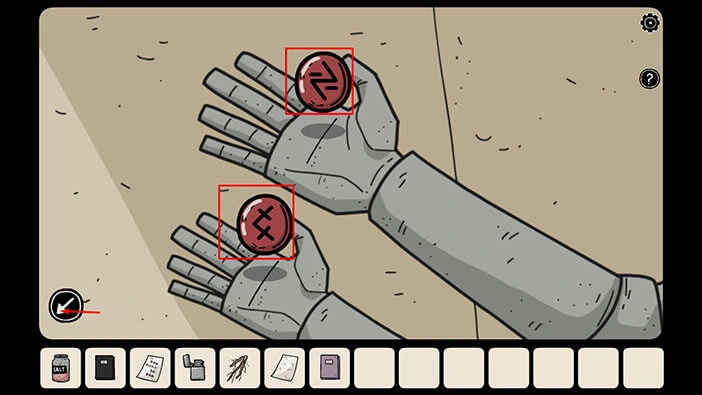
We can now see the correct symbols, and the other side of the discs is red. Tap on the arrow in the lower left corner to go back.
Next, tap on the symbols on the right side, of the left statue to take a closer look at them.
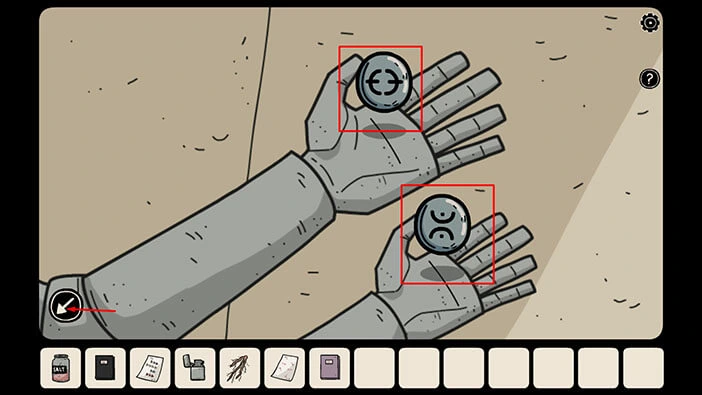
The symbols here match the symbols that we saw in the book, so let’s continue. Tap on the arrow in the lower left corner to go back.
Next, tap on the symbols on the left side, of the right statue to take a closer look at them.
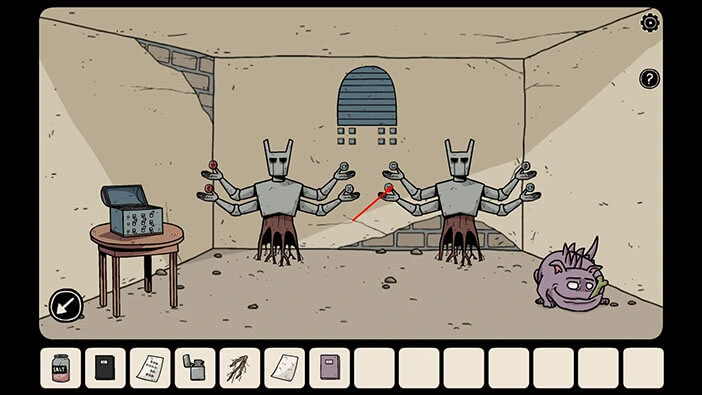
The symbol in the lower hand matches the symbol in the book, but the symbol in the upper hand does not. So, tap on the disc in the upper hand to rotate it.
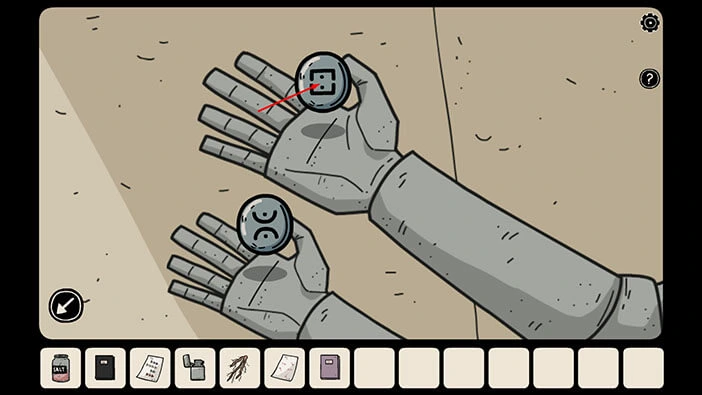
Both symbols now match the symbols in the book, and we have a red disc in the upper hand, and a gray disc in the lower hand.
Tap on the arrow in the lower left corner to go back.
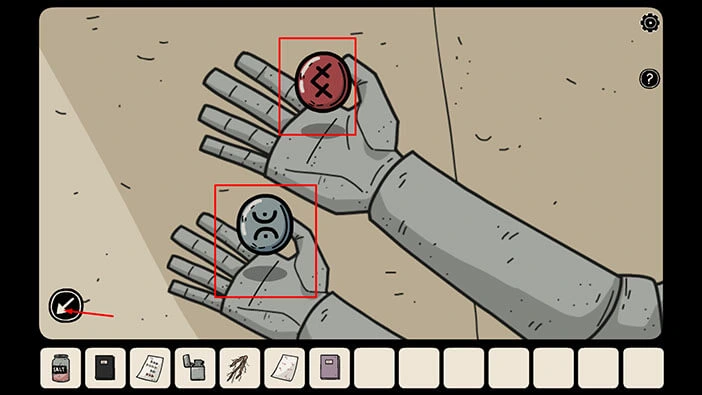
Finally, tap on the symbols on the right side, of the right statue to take a closer look at them.
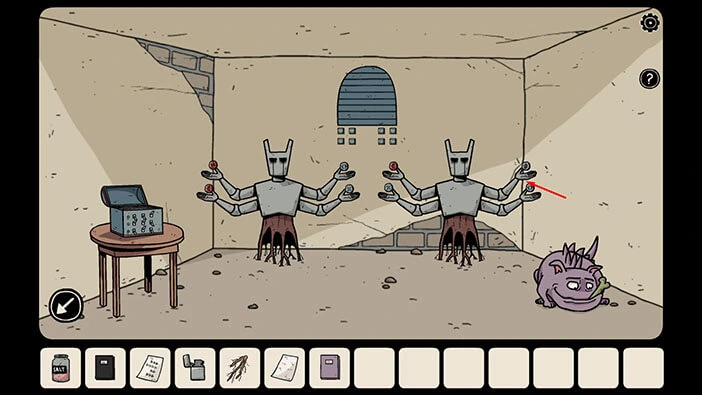
The symbols in both hands do not match the symbols in the book, so let’s tap on them to rotate them.
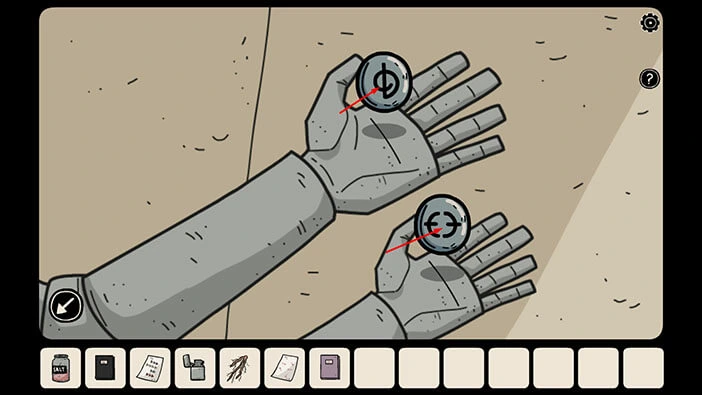
We now have two red discs, and the symbols on the discs match the symbols in the book. So, tap on the arrow in the lower left corner to go back.
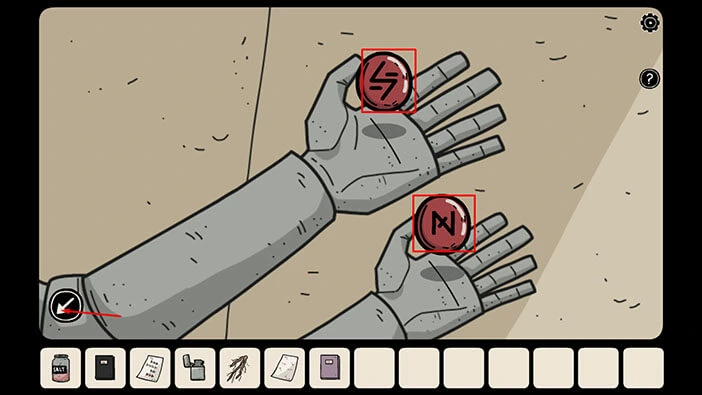
Ok, we should now memorize/write down the color of the eight discs, because we will need this information for the next puzzle. Let’s do that.
For the left statue we have
Upper left disc = Red
Lower left disc = Red
Upper right disc = Gray
Lower right disc = Gray
For the right statue we have
Upper left disc = Red
Lower left disc = Gray
Upper right disc = Red
Lower right disc = Red
Once you’re done, tap on the two squares on the wall behind the statues to take a closer look.
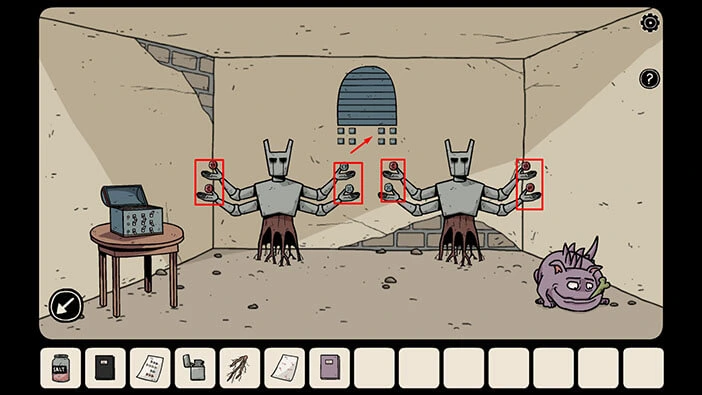
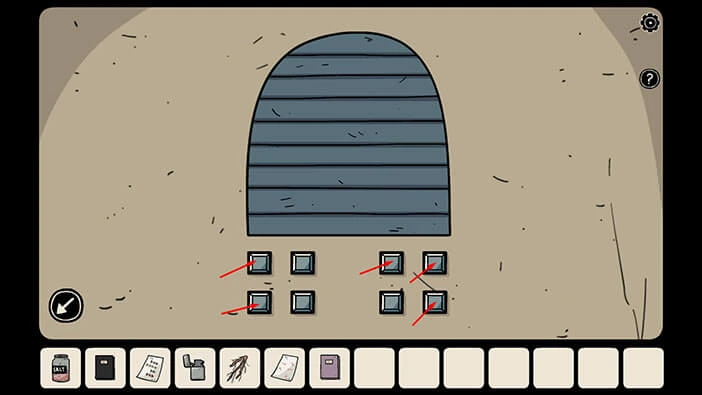
Here, we can see four squares on the left and four squares on the right. The four squares on the left represent the symbols in the hands of the statue on the left. The four squares on the right represent the symbols in the hands of the statue on the right.
So, our task is to set the color of the squares to match the color of the discs in the hands of the statue. Let’s do that.
Tap on the top left square on the left, and the bottom left square on the left to change their color to red.
After that, tap on the top left square on the right, the top right square on the right, and the bottom right square on the right to change their color to red.
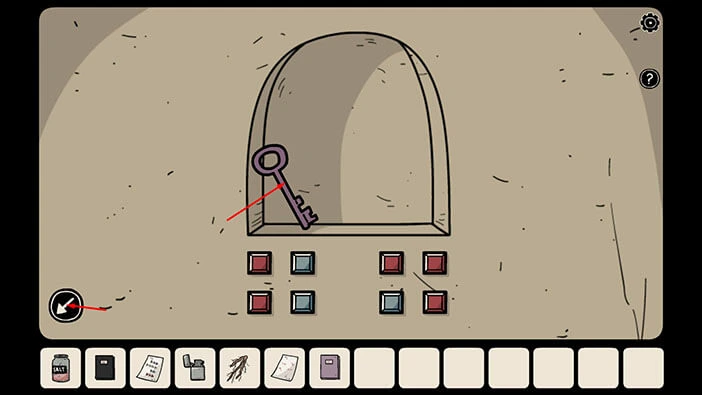
As soon as you set the squares to the correct color, the compartment in the wall will open, and inside you will find a “Purple key”. Tap on it to pick it up.
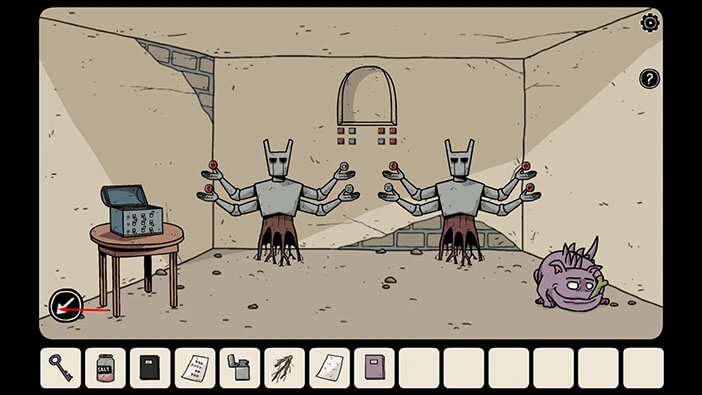
After that, tap on the arrow in the lower left corner to go back.
We can use the “Purple key” to unlock the book in the room with the plant (previously we dug up this plant and took the root). After that, we can take page number “33” from the book, and with that item, we will have all the ingredients to craft the “Portal to Penumbra”.
To get to the room with the plant, tap on the arrow in the lower left corner to go back. After that, tap on the stairs in front of you to go to the upper floor. Once you get there, tap on the blue door on the left and you will reach the room with the plant.
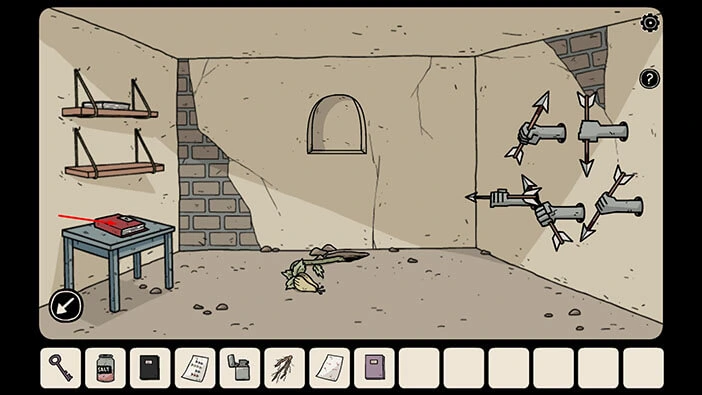
Tap on the locked red book located on the table on the left to take a closer look at it.
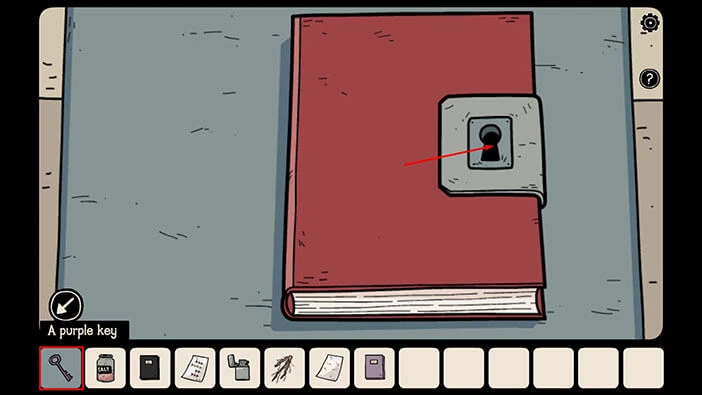
Select the “Purple key” from the inventory and use it to unlock the book. After that, tap on the arrow on the right to open the book.
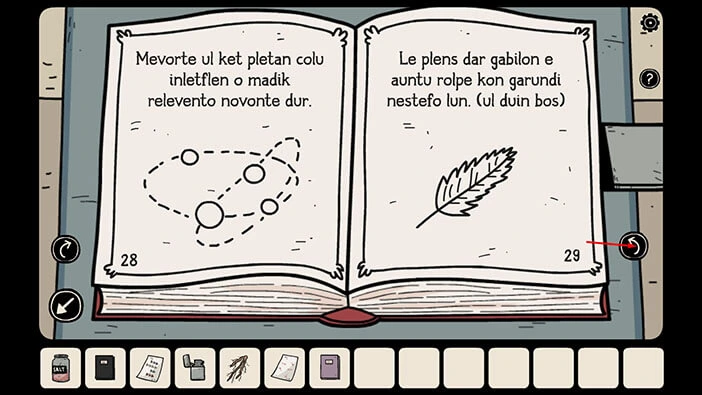
Tap twice on the arrow on the right to view page number 33.
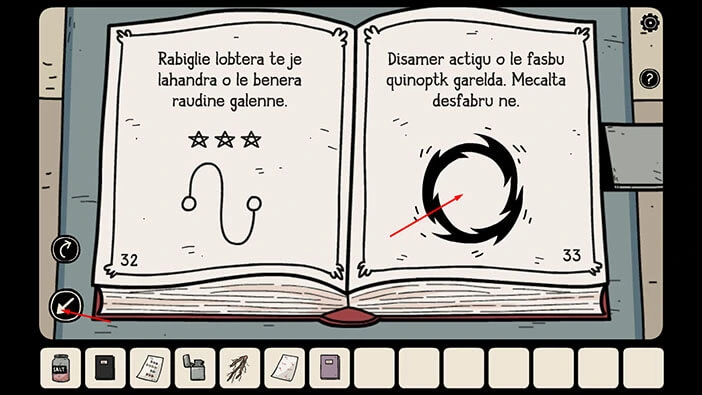
Tap on page number 33 to tear it out of the book (we can see a drawing that looks like a portal on this page).
After that, tap on the arrow in the lower left corner to go back.
Ok, let’s go back to the room on the bottom floor, and use the ingredients that we gathered to craft the “Portal to Penumbra”.
To get to this room, tap on the arrow in the lower left corner to go back. After that, tap on the stairs to go to the floor below. Lastly, tap on the stairs leading down, and you will reach the room at the bottom floor.
The recipe for crafting the “Portal to Penumbra” is located in the purple book in your inventory, so take a look at it if you need a refresher.
Since we have all the necessary ingredients, let’s craft the portal. Tap on the cauldron in the middle of the room to start the interaction.
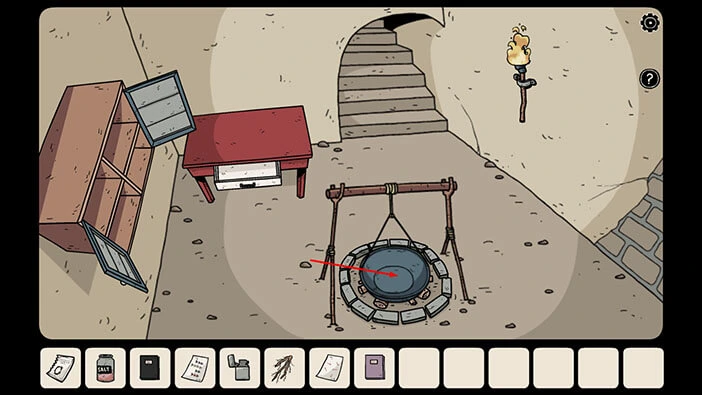
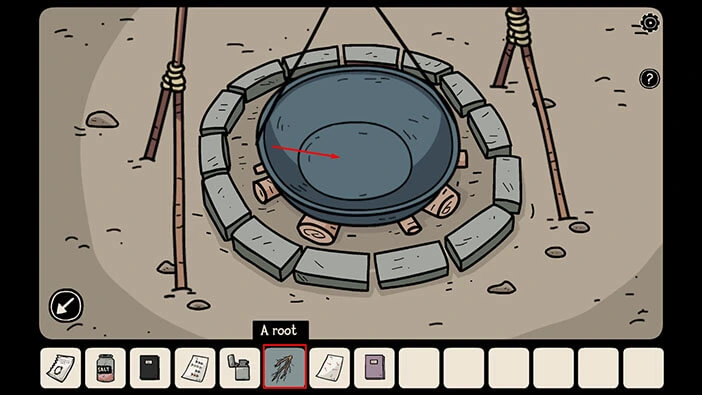
Select the “Root” from the inventory and put it into the cauldron.
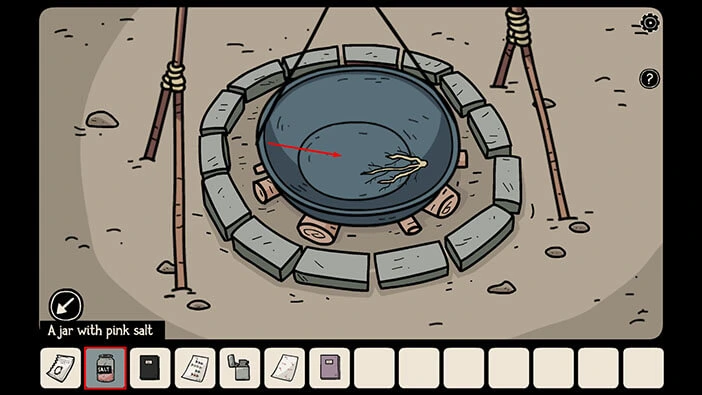
Next, select the “Jar with the pink salt” from the inventory and put it into the cauldron.
Lastly, tap on the page number “33” in your inventory, and select the “Grab” option. After that, tap on the cauldron to put the page inside.
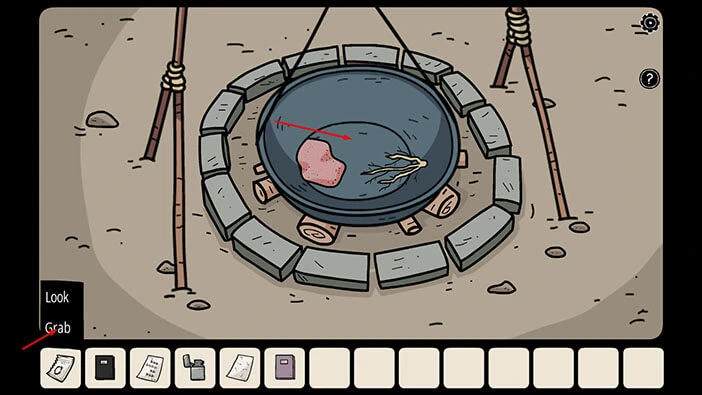
Finally, select the “Lighter” from the inventory and use it to start the fire, and we will complete the crafting process.
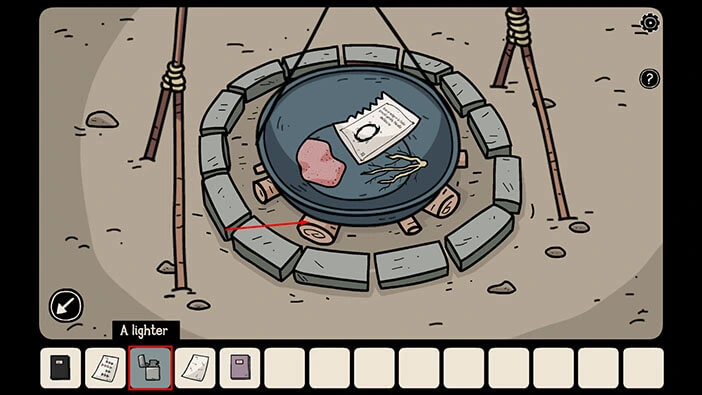
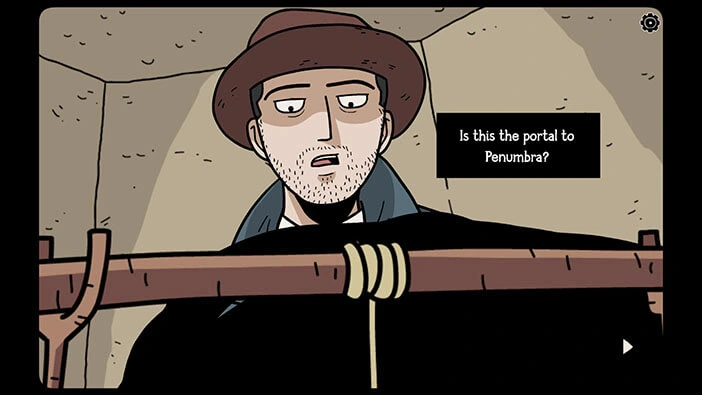
Detective Larsen wasn’t sure, at first, if he had done everything correctly. However, his fears were dispelled several moments later, when “Portal to Penumbra” formed in front of him.
We will have to end the fourth part of our walkthrough here. Join us in the fifth part of the walkthrough, in which we will explore the continuation of Bastian’s and Laia’s story.
Thank you for reading.