Dream Life Chapter 2 Levels 6-10
Level 6
Hello and welcome to our walkthrough for the game Escape Room Adventure – Dream Life Mystery 2021. This is level 6 in Chapter 2. In the previous level, we needed an address. We could only find that in the school office.
We had a hard time getting to the address because we didn’t even know which teacher we were looking for. We only know that our name is Edward and that we have come to this situation of not remembering much of the past.
Some items are well-protected since they are private data. Now we have to move on. Let’s go without fear and with a lot of luck! Good luck! Let us begin.
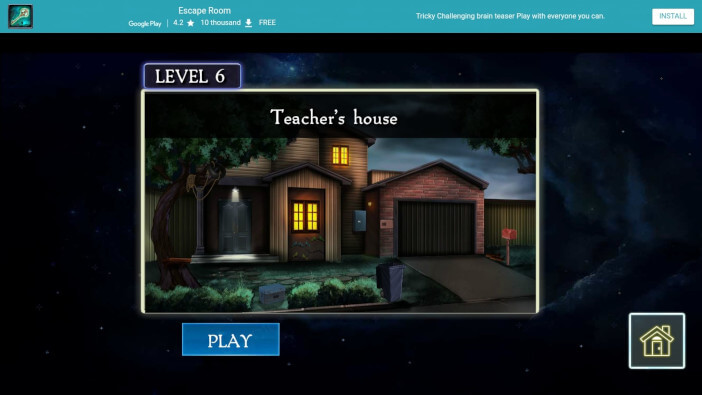
Level 6 has two objectives in one. The first objective is to open the shutter. Here are some things that are important to others. And the other objective is to unlock the door.
If you notice that Fredrick is portrayed as the protagonist in some shots, know that there is a mistake in the game because Fredrick was the hero in chapter 1.
This chapter belongs to Edward and himself. Here you start from the yard where the house is located. Let’s move!
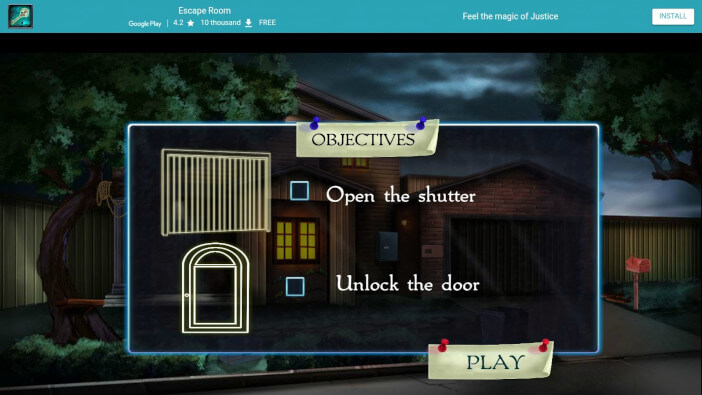
We are in front of the house. It is the yard of the house and it is so spacious that it hides some of its secrets. We will immediately walk to the part where the mailbox is located.
There are two wooden steps. These are two items that we use to install on one part in front of the house. We know it is wood but we need to find a way to install them.
We can’t just do that. Now we go back a little to the street. At the entrance where the sidewalk is, there is a trash can.
Click on the bucket and the bucket will be dropped. Now the problem is that there are several items there. We only need one. The sprayer is the only item we need. Move on.
A few steps to the left, and here we are. We are where we need to be. We are next to a box that is locked with a rather nice code. The code is very simple.
Click on the box to access a clearer frame. Click on each shape of an insect and rotate them so that they are precisely placed in the slot. Then open the box.
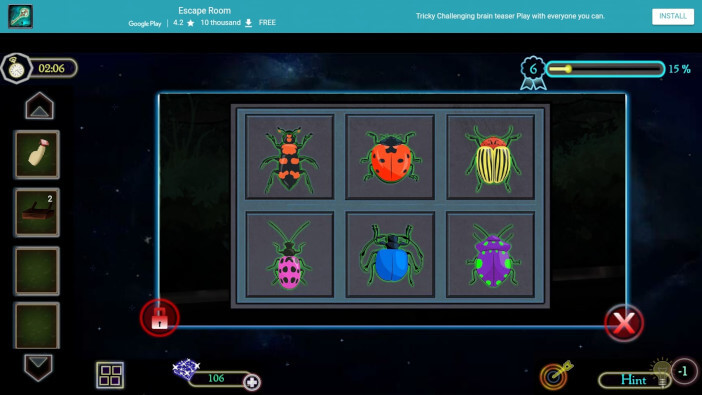
When the box is opened, you can take a bucket of paint. This is material that we will use soon. Place a bucket of paint and spray in a coarse frame. Click on the paint bucket and remove the lid.
Then remove the top of the sprayer and pour the paint. The paint is red. Then pour the paint into the sprayer and close the sprayer. Save the newly created item. We will use this item immediately.
Look at the first wall and window to the right of the front door. There is a drawing. The only drawing is not colored. And this is an opportunity to paint it. Use a sprayer and paint the drawing.
Then you can remember the newly created drawing. Remember the number of all colored birds and the numbers will be our new code. Immediately to the right of these drawings is a door of a small secret partition. Enter the numbers 2 4 3 1.
This way you open the compartment and take four nails and one hammer. It is a sign to us that it is time to be craftsmen. Go to the big tree.
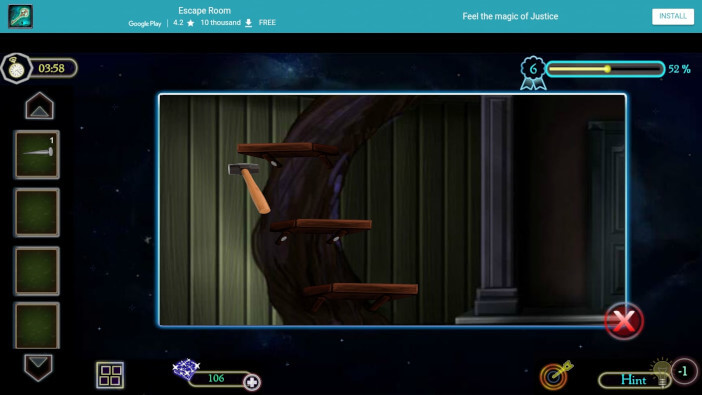
There are already installed wooden stairs, but we have to install a few more stairs. Learn the steps against the wood, insert two nails into each step and nail it with a hammer.
After that, you get the opportunity to climb to the top of the tree. There is a tire hanging on a rope. Click on the tire and three stickers will fall to the floor.
This time we call them buttons. Let’s save all three buttons. And we will insert these three buttons where they are needed. It’s next door to the shutter.
Insert them and move them to your sign on the board. It’s simple. This way you open the shutter door and you can get inside. Before that, just click a button to open the door. The first part of level 6 has been completed.
Objective ½ completed. We are now in the shutter. We have to be concentrated here because coordination is very important. In the right part of the shutter, there is a shelf.
There is one important item. It’s tape. Save this item. In the central part of the shutter, there is another item. It is just hard to spot because it is buried under many other objects.
There is a hat, saxophone, and other items. But we need a toy that fits beneath all the details. Click on each item and move them aside. This allows you to take the toy.
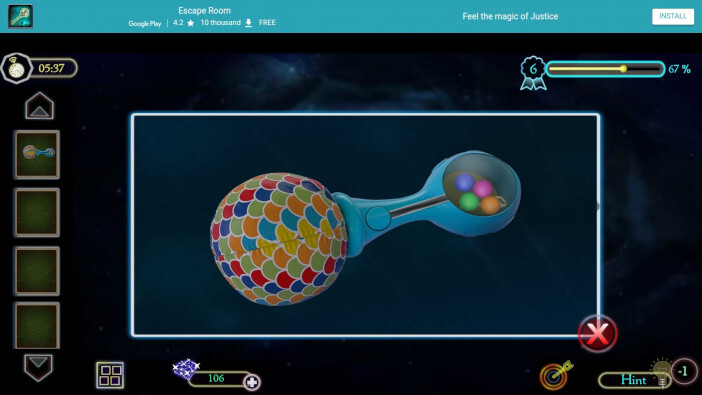
Place the toy in a close-up. In the middle of the toy is a toy zipper. Throw out all the balls through that hole. Then take the key that is stored inside. Only this time you save that key.
And now comes the most important part of this level. That is an important part because we do not know how we will arrange everything. We will help you.
Arrange the triangles in such a way that when you click on the play option, the triangles are placed so that everything is aligned. Then click on play and you will get an image that is extremely needed.
The goal of this image is to close the box. Only then can we unlock it with the key we have. Insert the key and take the letter. It’s a letter that we put in a close-up. Click on the letter and you will open the content.
There is a paper that has numbers printed on it. The numbers are 4 1 3 2. We enter those numbers in the part that is hung on the top of the wall. It is a wooden drawer in the upper left corner of the room.
Enter these numbers and open the wooden door. There’s a coin. Save this coin.
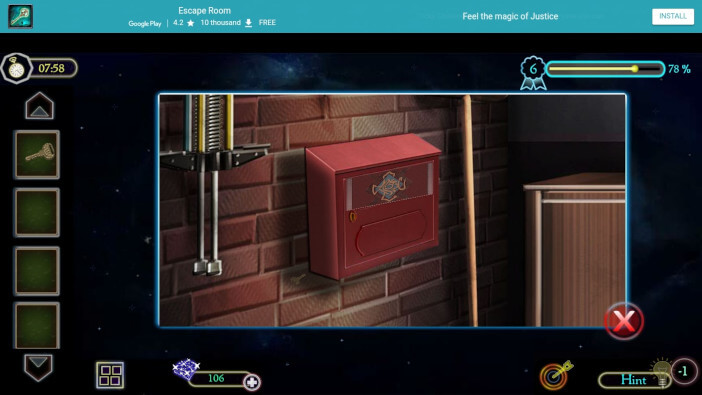
Now comes a very experimental part. And that is to return this coin to the state that once adorned it with gold. And that is a liquid state.
You see a gold smelter. Connect the cables with the tape we saved. That way we will avoid a shock. It is a tape used in working with wires and electricity.
Put in a gold smelter. Open the machine, insert the coin, and close the door of the machine. Click on the buttons so that the lights glow green.
Then it is a sign that the machine is working and that the coin is melting. We get the key using a 3D printer. It is the key that unlocks the front door of the house.
Click on the front door. Transfer the key and so we finish level 6 in great style.
That would be it for this level. Level 6 is shown as a detailed description of the day of one person who owns a house. Lots of work around the yard and in the yard.
It’s all part of the household. Looking at some details from earlier levels, this is an opportunity to brag about how resourceful and insightful we are.
Follow our walkthrough and find out what awaits Edward in level 7. Have a nice day. Thank you for reading.
Level 7
Hello and welcome to our walkthrough for the game Escape Room Adventure – Dream Life Mystery 2021. This is level 7 in Chapter 2. In the previous level, we had specific intentions.
We did a great thing. This means that we have come to a place where the teacher can bring us certain answers. We were standing in the yard where there were a lot of obligations and a lot of enigmas.
From solving an enigma in a shutter to painting a house wall. After that, we set up wooden stairs to climb a tree. We did everything we could and now we entered the house.
That is where our teacher lives. Edward had to do his best to do every part flawlessly and we were his drive. We hope to continue at the same pace as it is now the first turning point in Edward’s life where he has to do the right thing.
As before, we are here to help. Let’s move. Let’s go without fear and with a lot of luck! Good luck! Let us begin.
As in level 6, in level 7 we have two parts in objective. One is to open the door. We assume we have to open the door inside the house where we are. Another objective is to find the address.
The address is the next destination we visit. We don’t want to be aggressive. We have to be fast and precise. To be inconspicuous because this is someone else’s house.
The law forbids us to enter a house where we have not been invited. But all this is solved in a few steps. We have to do that now and move on.
Edward desperately demands answers to some of his questions and has to break some rules to be informed. Let’s do it with dignity and quickly. Good luck!

We are in the living room. This is a house where the child also stays, considering that we see a lot of toys. In the left part of the room, there is a shelf for toys.
Among other things, we can find a box there. Let’s save this box. But we are not leaving this part of the room.
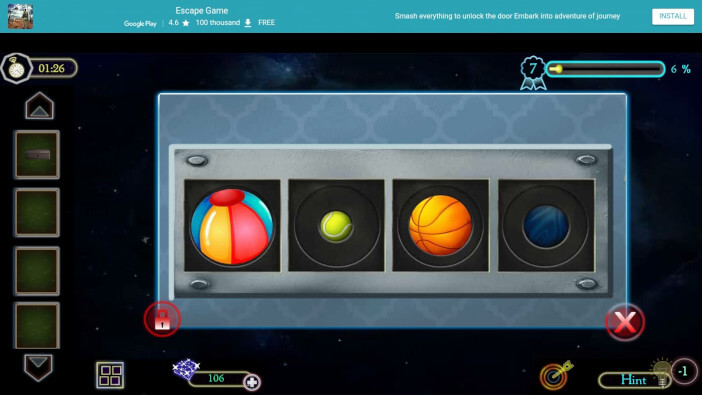
There are play balls in the upper left corner of the toy shelf. Based on the layout of these balls from left to right, you can see which schedule is current.
This means that the arrangement of these balls corresponds to the code we enter in the safe. Immediately to the right of the toy shelf is safe.
Enter the position and appearance of the ball from the shelf. Unlock the shelf and take the wooden box. That’s the only thing we’re going to do in this part of the room.
Now we will look at the situation a little differently. We observe other parts of the room. We look at every detail. Look at the table in the living room.
You can see that there are tea utensils. We’ll just take the jug. Next to the exit door, there is a mirror and a shelf for leaving the keys to the car or apartment.
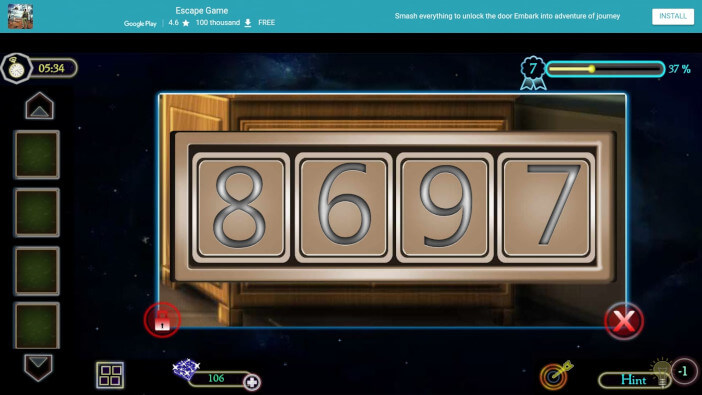
But there is another glass. Pour hot water into a glass. Hot water will be able to paint the details on the glass with the help of the laws of physics. You will see the numbers 8 6 9 7.
Remember these numbers because they are important for the next step. The next step is to enter these numbers in the drawer under the cup. There is a drawer and it requires a code.
Enter the code and open the drawer. Enter numbers 8 6 9 7. The drawer opens. That’s where the key is. Save this item.
Now we’ll have to find out what time it is. Important because we have to have an idea of time. Next to the stairs leading to the first floor of the house, there is a clock.
The wall clock has the time written above 7.15. We have to set that time on the clock. Use the click to enter the time to be 7.15.
After that, the key is removed from the upper part of the watch. The mechanical key we have to keep. It is this mechanical key that is essential for the next step.
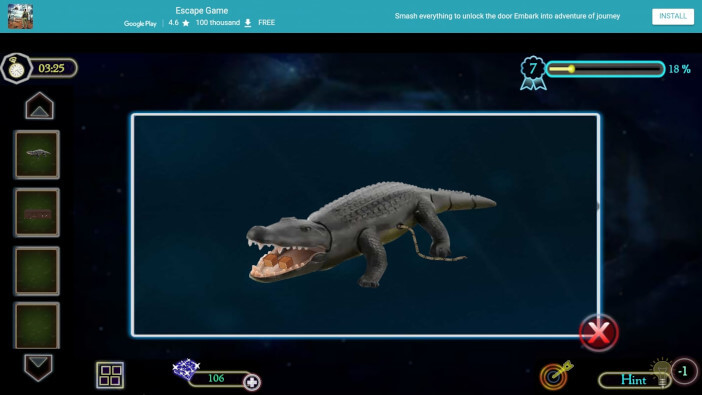
A mechanical key unlocks the metal box. And inside is one item. Crocodile toy. Save this toy. Place the toy in the close-up immediately. Click on the lever located at the hind legs of the crocodile.
The crocodile’s mouth opens and there are two things inside. Click on the lever several times to open the mouth with cheese. So take two tiles. Save these items.
So that we can continue our investigation in full swing, go to the table lamp located under the wall clock. There is a lamp that keeps some little secrets. Click on the lamp to shake it several times.
Two more tiles will fall from the part where the light bulb is. Take both items. These are the four key items that open a wooden box for us. Place the wooden box in a large frame.
Insert each tile into the slots. Do it slowly and without pressure because we are not staring anywhere at the moment. The box opens and we have new items inside that we will save. It’s the key. Another key we need to keep.
It is these two keys that open the door on the right side of the room. Insert both keys into both locks. The blue key is inserted into the upper keyhole. The second key is inserted into the lower keyhole.
All this results in unlocking the door and successfully solving the first objective in level 7.
Edward and his friend used to come here and play together. This is a place reminiscent of a place where children play during a school break. But now is not the time to play because this is one of the worst periods.
A period when we don’t remember anything and we have no way to refute it. We need to investigate further so that we can find answers.
When we enter the classroom, look at the first table where the student bench is. There’s a notebook. Save this item. And now look at the board. There are many things that a teacher needs to teach students.
Rulers, triangles, and crayons. All that is needed. We’ll take the crayon. In this case, you have three colors. Take all three crayons and save them. Place the notebook in close-up.
Click and open the cover of the notebook. Take each crayon and color and connect the dots in the notebook. This way you will get a drawing of a dog, dog collars, and bones that the dog gnaws. You can see the solution below in the pictures.
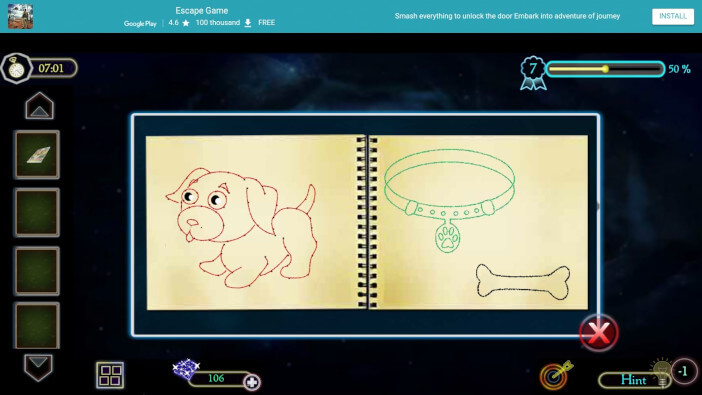
Now we go to the left part of the classroom. There is a teacher’s closet. One item can be taken here. But that item is hidden in the lower part. It is protected by a code.
We have to be ingenious. And that’s where we’ll help you. It is necessary to guess the position of the mechanism. This mechanism is solved by moving the wheels with a click. After that, the screen where the puzzle was solved appears.
And as a reward for that, we get a chart. Place the chart in close-up. Click on the chart and see what it says on the chart. You will see a table where you can see some small pictures and numbers that decorate these pictures.
Remember this information in more detail. There is a safe in the right part of the room. It is a safe that is located on the right side of the school board and the code is simple. Just remember what color a particular image is painted in the notebook.
Here you can see what color they painted and connected the dots for the dog, the collar, and the bone. And based on the chart, see which numbers match the dog, the collar, and the chart.
After a short reflection, we can conclude that the combination for the safe is as follows. The numbers are 8 7 2.
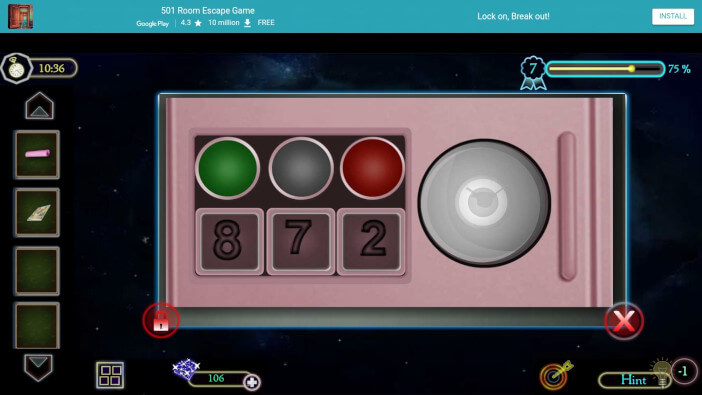
There are two tiles in the safe. Save both tiles. In addition to these two items, there is also a metal box. Let’s save this box too.
And we need another tile. We can find that tile in one secret place. If you take a good look at the teacher’s desk, you will see that there is a globe on the edge of the desk. Click on the globe and open this item.
There is another tile. Save this item. Move on. We need to find more tiles. We go to the table which is located in the right part of the room. There are three tiles on the table.
Take those three too. Enter all these tiles in the board installed on the teacher’s desk. There are several gaps. All those gaps are there for a reason.
We should place the tiles in these gaps so that we can get the following information. We get one line that has its path. So then we take the shape of that line and apply it to the box we saved. Draw the path from the board and open the box.
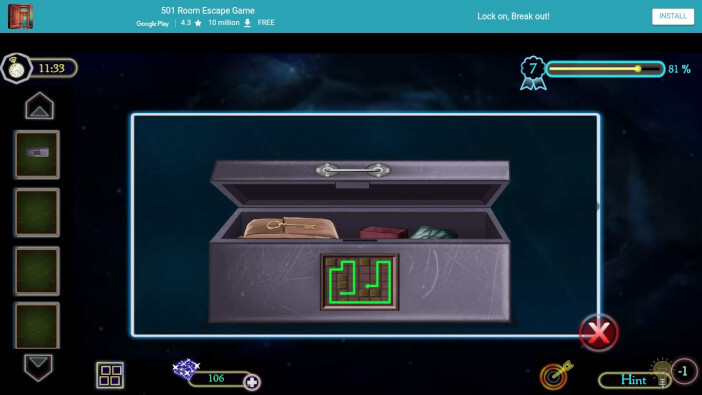
The key kept in the box is for you. Take the key and unlock the teacher’s closet on the left side of the room. Above a drawer that was protected by a code.
Unlock the closet and get a book. Place the book in close-up. Click on the book and you will get the middle of the book and the address you have been looking for this whole level.
That way you will be able to continue. You are going to level 8 and there are some new challenges ahead of you. Edward found his friend’s name. His name is Jake.
You need to meet him. What will your meeting look like? We will find that in level 8.
Therefore, follow our walkthrough and find out what awaits you in level 8. We wish you a pleasant day. Thank you for reading.
Level 8
Hello and welcome to our walkthrough for the game Escape Room Adventure – Dream Life Mystery 2021. This is level 8 in Chapter 2. In the previous level, we entered the house. The first room in the house was the living room.
After that, we had to explore every corner of this room. Tiles were the main factor that allowed us to move on and solve every enigma at this level. Level 7 was special because we had a problem with one time-consuming puzzle game.
The goal was to line up the mechanical wheels so that the whole mechanism would move. Level 8 is called ‘Edward the locksmith’. What a title for our young adventurer. That means we’re going to have to break into another house.
And this time unannounced, and this time we risk our safety. Let’s move. Let’s go without fear and with a lot of luck! Good luck! Let us begin.
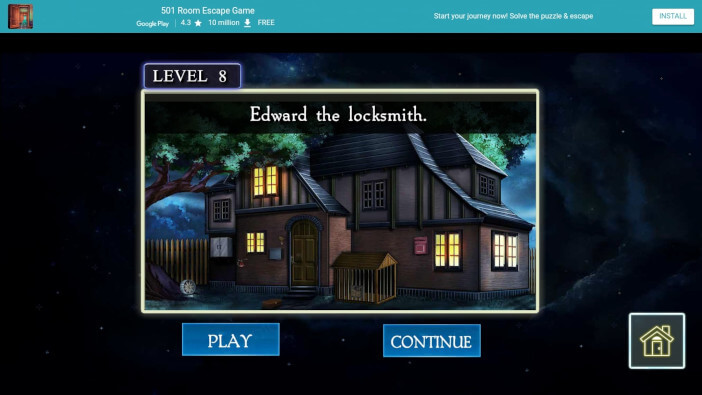
Level 8 begins with Edward standing in front of the house. He realized that his friend was in the house and that he would like to surprise him. At this level, the goal is to do two things. The first thing is to open the door.
Another thing is to duplicate the key. We do not know what needs to be done at this level. We only know that we have a long way to go. A long way to that point. We are ready for any challenge.
We will understand this as a great opportunity to prove ourselves as serious and resourceful people. We don’t have to prove ourselves to certain people.
We have to prove ourselves exclusively to ourselves and no one else. Because everything depends on us. Good luck!

New house, a new adventure. We are in front of a house where we have to go inside. We start from the yard and that is clear to us.
We look at the yard as a whole. Everything is so set up that the grass is covered. But we have to look at those little things hidden in the grass.
Look at the right side of the yard. Go all the way to the right to the end of the yard, to the fence. There is a stick. Save this item leaning against a wooden fence. Use this item as your extended arm.
Next to the front door, you can see a cage for pets. Dogs are probably the only animal kept in a cage. People have divided opinions about keeping a dog in a cage. But we will open the cage, help the stick we will take the key, and then bring the key closer to ourselves.
Take the key and save this item. One by one, we use the objects that we find. Take the key that has been saved and use it to open the mailbox for letters and packages. It is located above the cage where the stick helped you take the key.
Insert the key inside, click on the key and turn the key in a few strokes so you can unlock this metal box. There is a pin inside. In addition to the pin, take a cloth. That way you will be able to move on.
Place the cloth in close-up. Click on the cloth and you will expand this item. You see that each letter has its shape. This means that somewhere you have to adjust these shapes to match the letters.
We’ll do it in a box. The box is placed on the driveway paved with concrete slabs. There’s a box. It says MERLIN. Each letter has its sign.
Adjust the characters so that each dot in the middle of the box turns green. That’s how this box is unlocked.
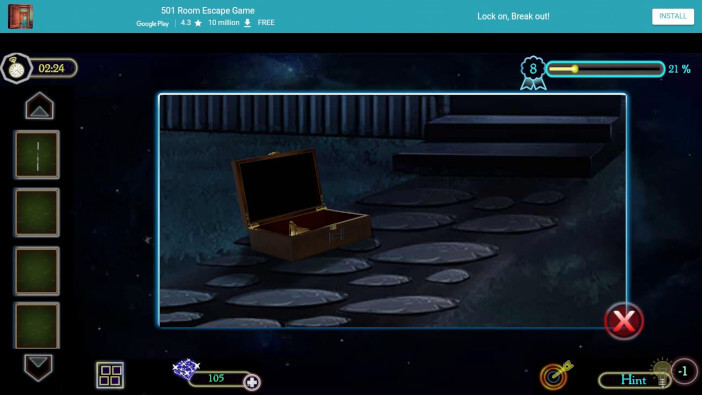
The box opens, and there is a bell inside. Save this item. It’s weird how sometimes we find things that have nothing to do with the level we’re at.
But it serves us well. About that in progress level. To the left of the front door is another object. It’s about oil can.
This item is nailed with a metal hoop to the wall. Use the pin and remove the oil can from the wall. Save this item as well. Oil can contain oil. With this fluid, we can lubricate some mechanisms to work better and more productively.
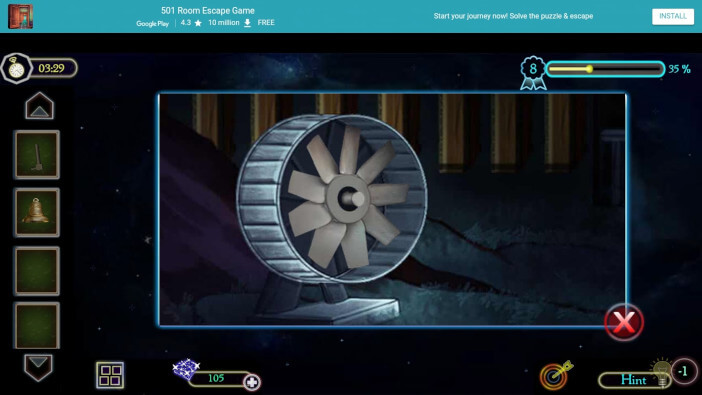
In the left part of the yard, there is a large and strong mechanism. It’s a fan. Some call it an outdoor unit. But this unit is important because it helps us get some of the things we need.
One important item is stuck in this unit. Apply oil from the oil can to the mechanism and turn on this mechanism to work. Work is needed to get rid of this item.
When it jumps out of the mechanism, it falls to the ground. Save him from the earth. It is a steel rod. This is required for the next step.
We all know that every house has some way of advertising. Some call it a bell, some call it something else. We have to show why this house has a bell like this. Next to the front door, on the left, place a bell.
Then place the steel rod on the bell. And now that the bell is complete, click on the bell to ring. The place where the mail goes opens.
That’s where the clue paper is. Clue paper is one of the most important and common subjects we have at our disposal in Chapter 1. It gives us a lot of information about how an enigma should be solved.
The enigma that needs to be solved is set on the front door. First, place the clue paper in the close-up. Then click on the paper so you can see the arrangement of dots and colors that adorn this paper.
This means that the scheme is shown in such a way that it serves us as a skeleton for the next step. The next step is to go to the front door. The front door has the first enigma on it.
That is to put together an image of an owl that is not clear at the moment. The goal is to arrange the three rings so that you get an image of an owl. When all this is put together properly, the picture changes into a new enigma.
A mechanism appears that contains lots of different colors as with clue paper. After that, with the help of a click, dots change the place to get the same arrangement of colors and dots as on clue paper.
In this way, the points are brought into place, and then the front door can be easily unlocked. And you can enter the house.
We enter the house. A very rich house adorned with incredibly expensive things. Our goal is to multiply the key. But we have to do some things that are not related to duplicating the key.
Look to the left of the room. There are drums and cymbals. These are musical instruments that usually go together when it comes to playing.
Next to the cymbal is a soccer ball. That ball is the first item we will take to this level. Move on. We look at the living room.
There is a table with two armchairs. The left armchair sways one item. It’s a knife. Click on the knife to move it in front of the armchair, then click again to save this item. Now the goal is to find a handle.
You don’t know that yet but Edward is in such a situation that he has to take the handle. Place the soccer ball in close-up. Take a knife and cut one part around the valve.
After removing the valve, slide your hand into the cavity and take the handle. Red object. Now we come to the part where we talk about the middle ground.
That part has one partition. That partition keeps a wooden box. Take this wooden box.
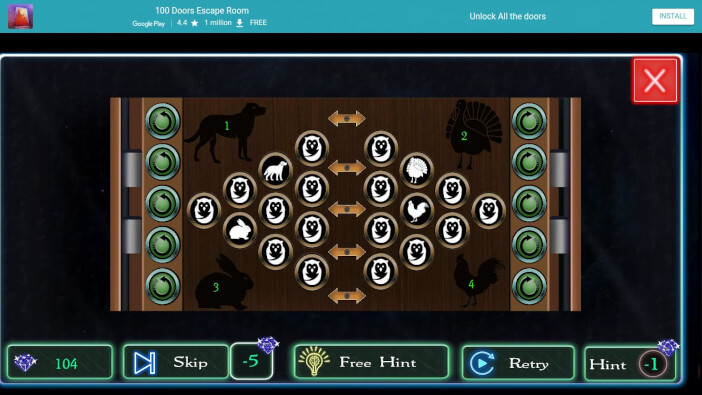
Now follows a very important and complicated enigma. Place the found wooden box in close-up. One game can be seen on the box. That is an important part.
Edward doesn’t know how to solve this enigma but we have to show them how to solve it. The goal is to unlock the buttons on which the animals are drawn. Looking at every detail, we have to play this game in a certain order.
The dog button is unlocked first. After that, the peacock button is unlocked. The third is the rabbit button. The fourth is the rooster button. The Dog button is unlocked by using the rotation buttons on the outside of the screen.
We look at every button. For the dog button, we use the third button on the left and the first upper button on the right. This moves the arrow in the center of the screen. When the dog button lights up, it means it is unlocked.
And that also means moving on. The Peacock button is unlocked by clicking the third button on the right side of the screen. Then click the first button on the top left of the screen.
At that point, the peacock button turns on, which means that this sign is also unlocked. The next button is the rabbit button. This button is unlocked by clicking the rotate button. Click the first button at the bottom left of the screen.
Then click the second button at the top right of the screen. This is the only way to unlock the rabbit button. The last button is the rooster button.
This button is unlocked by clicking the second button at the bottom right of the screen. And in the left part of the screen, click the second button at the top.
Only in this way do you get the opportunity to solve this enigma. The game will address and congratulate you. And so you opened this wooden box.
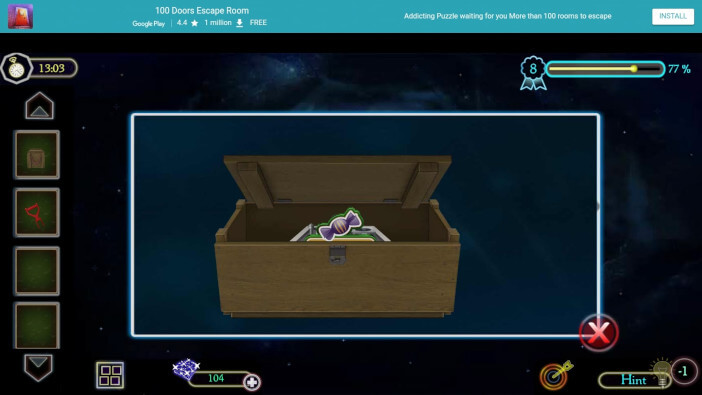
We receive a toy in a wooden box as a gift. This toy looks like a candy store. Save this item. Place the toy in close-up. Install the handle and then run this toy. Lamp lights in the form of various sweets.
You will get four types of lollipops. Enter this combination in the right part of the room. This is the part where one can see a metal door that asks for a code.
The code is in the form of lollipops that we found a while ago. Put these lollipops in the door and unlock the door. But input is not about changing places or shapes.
The entry is to click a specific lollipop at a specific time. Timing is the most important thing. First, click the fourth lollipop. Then click the second lollipop. Then click the third lollipop and finally click the fourth lollipop.
This is a sign to you that the door is unlocked and that you can take the item hidden inside. The item is a magnifying glass. Very interesting. But let’s move on. Between the cymbal and the beginning of the stairs leading upstairs, there is a window.
That window is important because that’s where we’ll use the magnifying glass. Click on the window. Place a magnifying glass on the window and you will see that one detail can be seen.
These are numbers that are very important to us. The numbers are 5 3 4 2. We enter both numbers in the machine that is placed in the right part of the room under the stairs. You will see a dial and an arrow that is there to move as desired.
Click on the numbers in this order (5 3 4 2). That way you will get the key as a reward at the amusement park. The partition in the lower part of the machine gives us the key. Save this item for the next step.
We go upstairs. Upstairs is the door. That door is very important because that’s where we’ll insert the key and unlock it. In that way, we will be able to do other lenses that we have been solving for so long.
That’s what level 8 is about. We’ve solved a few enigmas and that’s important. We didn’t let things like brain games get in the way.
We have shown that we are faithful support to our Edward and that we are still up to the task. We look to the future because there we can only rely on ourselves.
Level 9 is around the corner and knowing how gradationally harder and harder levels are coming, we will have to be ready this time as well. We were not one of those people who complained about every obstacle.
We weren’t one of those people who didn’t want to move on when things got thick or serious. We will not even allow something like that to happen to us because we are people of our word.
What we start, we have to finish. This is the only way to create responsible and quality people. Discipline is the solution for everyone.
Follow our walkthrough and find out what awaits you in level 9. We wish you a pleasant day. Thank you for reading.
Level 9
Hello and welcome to our walkthrough for the game Escape Room Adventure – Dream Life Mystery 2021. This is level 9 in Chapter 2. In the previous level, we entered the house.
Edward was housed in a house that was decorated with rich items that still have great material value today. We encountered many obstacles and level 8 was so demanding that we could not rest.
We had a lot of opportunities in our quest to move to level 9. Looking at just the little things, they cost us a lot. The puzzle that gave us a lot of trouble is the puzzle where we had to use our logical abilities and unlock the buttons where the animals are drawn.
Logic and resourcefulness are the two greatest virtues we possess. If we are lucky enough to get into a puzzle situation again, we will not have to give up. We are here for you at all times.
We will not allow you to feel lonely. We want to help you at every opportunity. Let’s move. Let’s go without fear and with a lot of luck! Good luck! Let us begin.
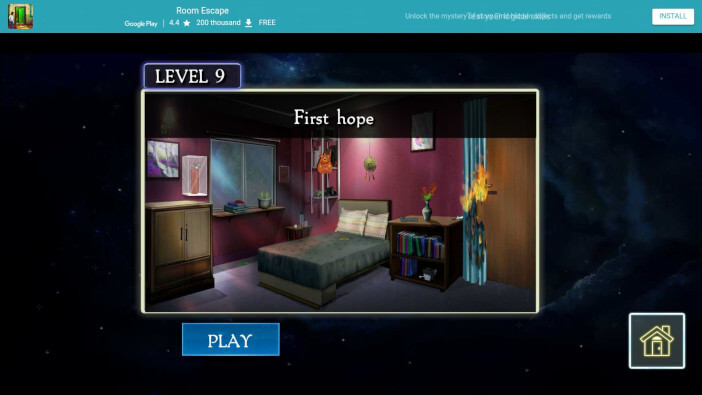
Level 9 begins with Edward entering the upstairs room. But things upstairs are not what we expected. Not even the smallest detail is in our favor. We have to fix that. Namely, Edward is amazed.
All the curtains are burning. This place is set on fire. Jake must have done it. We don’t know where Jake is. But we have two goals. The first goal is to open the door. Another goal is to indicate treatment.
In situations like this, fire is a good servant but a bad master. We cannot guarantee our safety, let alone someone else’s. We need to be fast and effective because only discipline and concentration can save us.
We are looking for a way to solve all this. But don’t forget. We are here for you. Good luck!
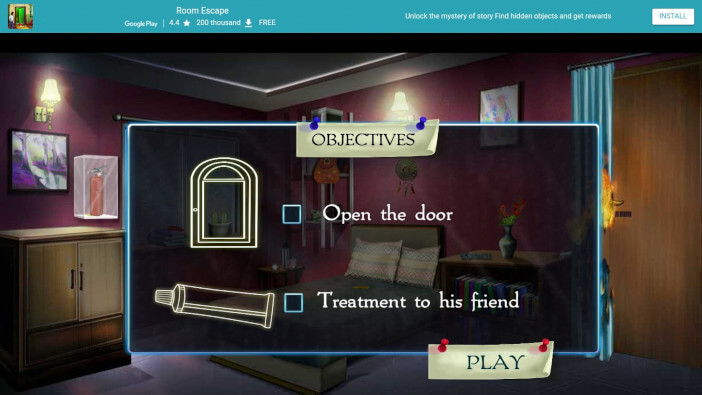
First thing. Look at the bed. The bed is not engulfed in flames but there is something we need. Take the feather off the bed and save.
The same feather only another color is located on the floor under the window. Look at the ground on which the feather is located. Save this feathered item as well. As we continued in the same rhythm, we are going to the next endeavor.
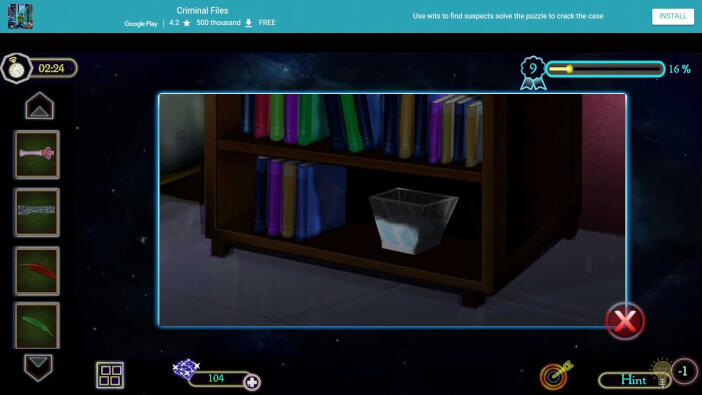
There are books in the window. We don’t need books at the moment even though a book is man’s best friend. Take the third feather from the book.
As a note, we have to explain to you that all three feathers are different colors and that there is no reason to be bothered. We will deal with feathers in one part of this level. But before we use feathers, let’s take a stick.
The stick is placed at the bottom of the bedside table next to the bed. On the bottom shelf, behind the plate. But be careful, the fire is very close, you can hurt yourself.
We stay in the bed area but this time we go to the other side of the bed. It is a glass shelf that is installed on the wall. We have to be careful.
There is a children’s backpack that has the shape of a cheerful bear. Like any backpack, there is something inside. Look what’s inside. Click on the backpack to access the close-up.
Click on the item in the backpack. It’s a butterfly. Click on the butterfly and save this item. Now follows the merger process. Place the stick in a close-up frame. Add a butterfly to the stick.
The butterfly is used as an accessory. Such an object as a whole is kept in your possession. Based on the order of light emitted by this stick, remember and enter these colors in the cylinder.
In this case, pull certain feathers in the order of the light emitted by the butterfly stick. Now comes the period when the feathers we found are used. Above the pillow, on the wall, is a cylinder.
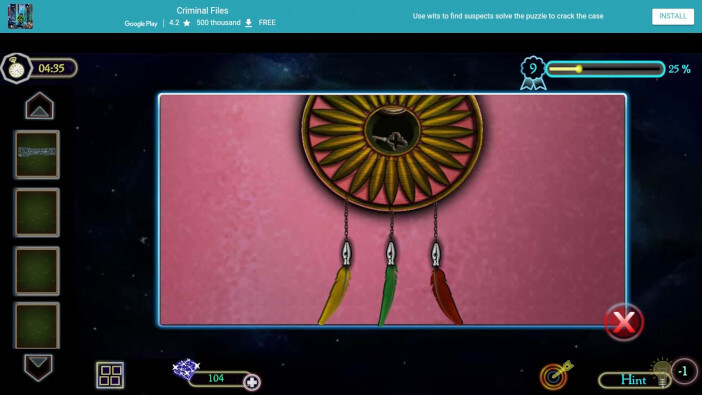
That cylinder has three hooks. We will do one important thing. Apply the feathers on the hooks to get a complete item. Every hook we see, we have to pull down. Pull each pen down to open the center of this item.
The central part has important parts. These are secret barriers. Inside is the key when the secret barrier opens. Save this item.
Now we’ll use the key. We have to use this key to unlock one door. That door is part of the closet located on the left side of the screen. It’s a closet under the fire extinguisher.
The door opens after inserting the key. Then take the iron box. In addition to the iron box, there is also a button. Save both items. The iron box is a very solid object. It is composed mainly of metal.
Metal is a very strong material. Strong enough to break the glass. Who would say? That is exactly what we are going to do. Break the glass box and get a fire extinguisher. In addition, take in a yellow button.
And on the right side of the bed, take the torch. In the very corner of the room, there is another item that we need. It’s a clock. Take this item too. Place the clock in close-up. All we need is a battery that is inserted into the back of the watch.
Just a click on the clock. Turn the clock and take the battery. Use the battery immediately and insert it into the torch. These things are important to us because the next moves are done in a few moves.
We need a fire extinguisher to put out the fire at the exit door. Our goal is to leave the room. But we have to do that by bringing the fire extinguisher to the burning curtain. Then put out the fire.
We enter the buttons in the door because there are two slots for entering these buttons. But since we don’t know how to solve this, we have to look for a further combination.
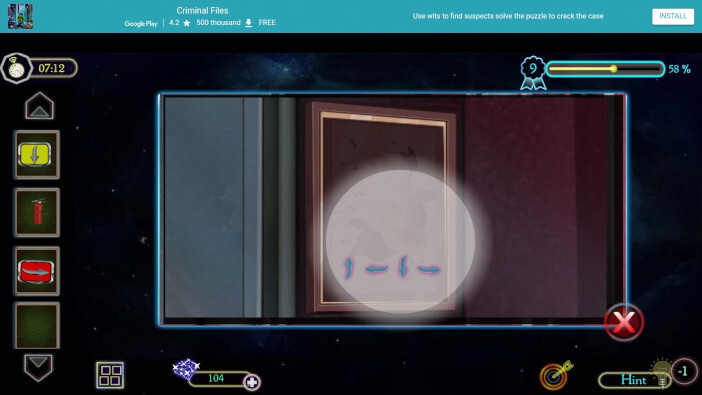
That’s where we use the torch now. Turn on the torch and bring the picture frame that is placed on the wall in the very corner of the room. You will see what combination is needed to adjust the door.
Light up the picture frame and enter the combination from the picture into the door. The combination is Up, Left, Down, Right. The first part of the objective is solved!
We are in a new room. This is a study. Room for the work of young people and their training. At first glance, this is the room where Edward’s friend spends time. We won’t have much time to rest because the first thing that comes to mind is a puzzle.
Behind the office chair is a metal chamber. It is a safe that is locked so it is necessary to assemble one geometric shape. Click on the safe.
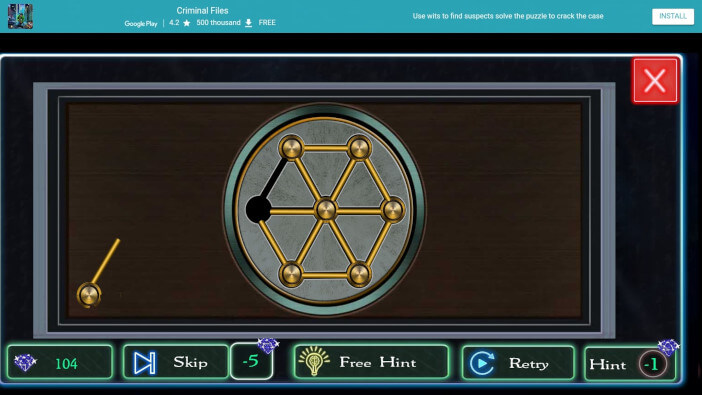
You will see that we have offered lines that are placed outside the slot. The goal is to arrange the lines so that they do not overlap and that each line that has its direction is placed in a slot.
Let’s do it with dignity. After placing these lines in the slot, the game will especially suggest that the puzzle is completed in a quality way.
There is one glass tube in the safe. The tube is large and is liquid. Save this item.
Above the bed is a built-in shelf. This shelf is installed so that it only serves to store books and small items used by young students. But we have to look at the last shelf.
Shelf at the top. That part keeps a toy that means a lot to us. Once we do that, we are free to walk to the opposite side of the room.
There is a closet that hides the remote. There is a remote on the shelf. Save this item. The Remote is on the blue books. Knowing how wireless connections work, we need to do the following. Place the toy in close-up.
Then place the remote next to the toy. The toy is opened using a remote. Click on the button and you will open the upper part of the toy.
Then take the two butterflies hiding inside. Above the bed, next to an ancient shelf, is a glass door. That door opens a butterfly.
Only butterflies interest us. Insert these two butterflies into the slots and open this door. Inside is a book that we will preserve.
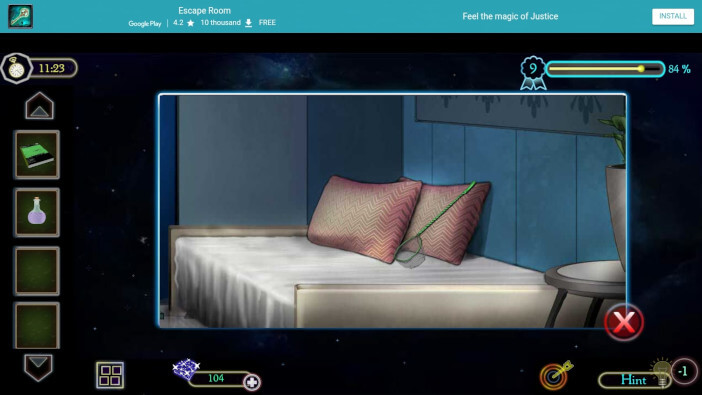
Take the net from the bed where Edward’s friend sleeps. To help this network we need to take one essential item. Walk to the aquarium located on the left side of the room.
There is an aquarium with fish. Do not touch the fish. Just use the net and get a cork remover. Use the cork remover to remove the cork from the bottle.
That way you can pour the liquid. But where to pour liquid? Pour in the notes. Place notes in close-up. Click on the notes and open the notes.
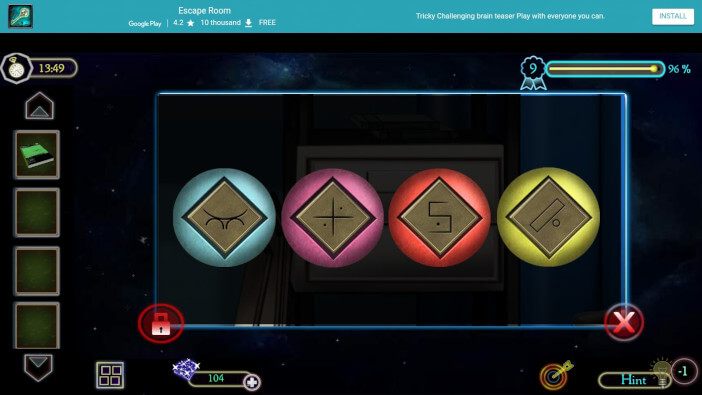
Pour in the liquid so that you can see the schematic clearly shown. It is a sign that you have managed to get the information you want. Based on the image and the color order from the image above the aquarium, enter a combination of characters in the drawer.
The drawer is part of the desk. This is an important part because you have to adjust the signs so that the drawer unlocks. There is only one single combination.
See which character is associated with a particular character. So just enter the characters in the drawer and unlock the drawer.
We have already shown you what the code should look like. We’re guarding your back.
There is medicine in the drawer. It is an ointment that we will apply to our friend’s knee. Edward is a good friend as far as we can see. Being human is a difficult thing.
It’s even harder when you have your level and problems kill you from the side. Being a friend is hard and it is even harder for someone to be your true friend.
We are telling you this because we do not know what awaits us, but we are always welcomed by someone. If possible, help a friend. We are here to be your help and daily support. We are your real friends.
Follow our walkthrough and find out what awaits you in level 10. We wish you a pleasant day. Thank you for reading.
Level 10
Hello and welcome to our walkthrough for the game Escape Room Adventure – Dream Life Mystery 2021. This is level 10 in Chapter 2. In the previous level, we came to a room where a fire engulfed an important part of the room.
The door that led us to our friend was under fire. The curtain that covered the door was on fire because someone or something had caused the fire. Looking at just a few essential things, we had to find a cure that saw the wounds of our friend.
We don’t know how it all happened because we were surprised. All we know is that we had to help him. And we did it in the end. Level 10 is called “Old memories”. That means we are going back in time in some way. We had this situation in Chapter 1.
Then Fredrick had the opportunity to go back to a period when he was happy and aware of his happiness and situation. We will see if this is a similar case with Edward in Chapter 2. Let’s go without fear and with a lot of luck! Good luck! Let us begin.
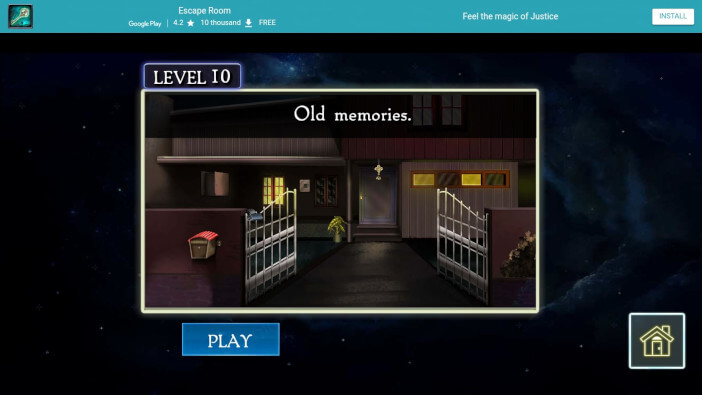
Level 10 began its duration and existence. We are in front of a house. Déjà vu. But don’t think that this is a house that can be compared to the house that occupied our attention in previous levels.
This house is something special. This is a rich house that occupies a large porch. The gate opens with electric voltage. Protected house with high technology.
But even that is not unsolvable because we have someone who can enter the house. It’s you, dear readers! We are here to help you. We are here for you. Good luck!
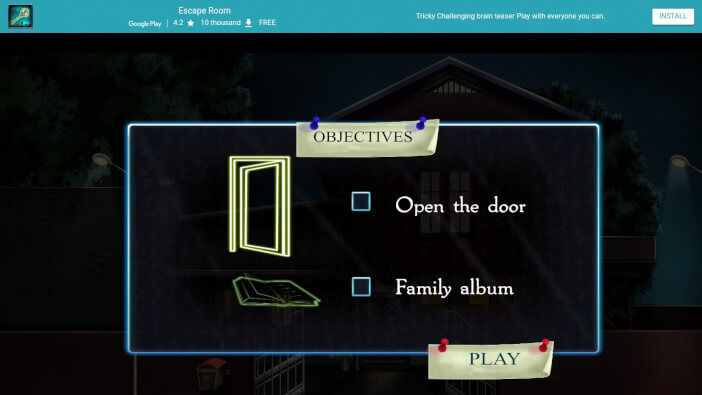
We are in front of the house. Off we go. Look at the part where the path leads to the front door. There is one object on the left side of the path. It’s lighter.
We’re going to need fires, that’s for sure. In front of the gate, on the right side of the driveway, there is confusion. Very dense confusion and that is where we will use the lighter.
Bring the fire from the lighters into confusion and ignite one part of the confusion. That part when it burns, you will see the can. A red can that we will save. At the entrance to the house, there is a wire that is not the right shape.
The wire is distorted and has the shape of a key. But that can only mean that we will be as skilled a locksmith as before. Use the pin we found and go to the left of the house. It is a part that is a little darker and close to the attic.
There is a metal box that is locked. Use the pin and unlock the box. The tin door opens. Get a card and a new box. Save both items. Looking at the two windows to the left of the front door. There is no light on one window.
A light shone on the other window. Between those two windows is one board. Something special has to be done here. You will see a board with buttons showing the characters that can also be found on the maps.
Diamond, club, heart, and spade. There is a proper order that unlocks this door. Click on these buttons in this order and unlock the door. The code is spade, diamond, heart, and club.
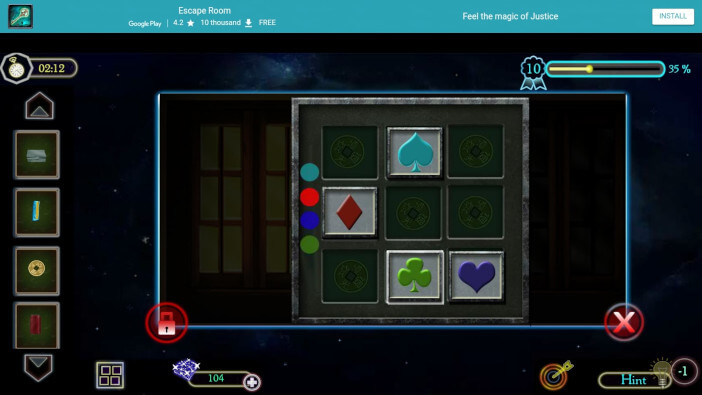
The door opens, and there is crumpled clue paper inside. Save this item. In front of the front door is a chain with coins. Click on one coin and save it.
It is needed for the next step. Insert the card into the close-up. Then take the coin and remove the yellow pass over the card. In this way, we will see a pin that is very important to us. The pin is AB with several characters.
This is our chance to compare with the clue paper. Place the clue paper in close-up. This is how you determine the code. The code is 5 3 7 1. And that code is the cheese that unlocks the box we saved.
Open the box and there are scissors inside. Use scissors to cut part of the can. Place the can in a large frame. Cut the can with scissors and then save part of the can. That way we’ll unlock the front door.
The front door leads us into the house. We don’t have a credit card like in the movies but we have a piece of the can.
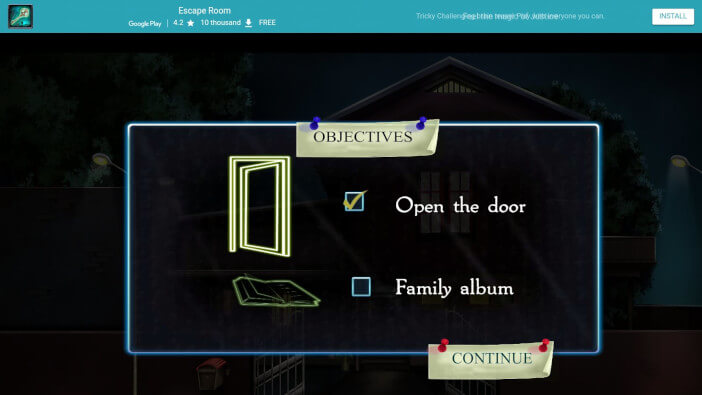
The new room is a house. Inside the house is a poorly designed interior. But we are not here because of the energy. We are here to do something much more. We start from the beginning.
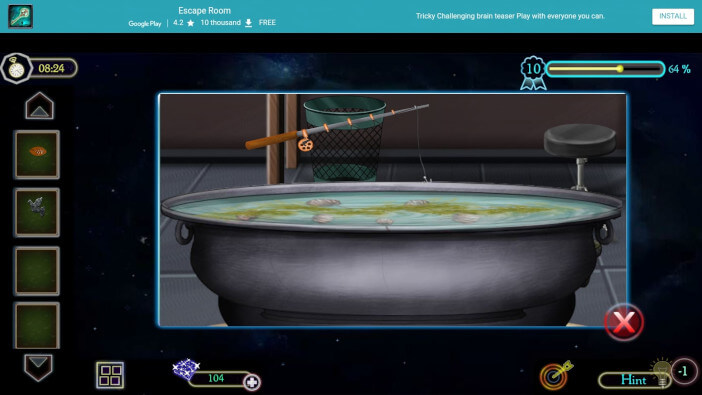
First, click on the window. Remove the hooks from the window and open the window. One detail can be seen here. It’s a wire. A wire is characterized as a hook. It is used to be applied to a rod and a fishing rod is obtained.
But before we form a fishing rod, we need to take some parts of the room. There is a part of a broom on the floor. It is a straw used for a broom.
A broom is used for cleaning. Save the broomstick. Above the window on the right is a cobweb. A cobweb that obscures one object. To get to that item, use a broomstick and take off the cobweb.
Take the bird. It’s just one of two birds we have. We’re looking for another bird. Next to the closet is a stick. The stick is stuck so we have to remove the pegs that hold the stick to the wall.
Take off the pegs and take this stick. The game is renamed as a handle. We’ll hook that handle to the hook and get a fishing rod.
Using a fishing rod, we will take one important item from the aquarium, which is located in the central part of the room. But this is not an aquarium.
This is when filled with water. But we call it an aquarium because we believe there is something alive inside this object filled with water.
Insert the puzzle piece into the bottom of the closet. It is the part that is located in the right corner of the room. It is inserted into the lower part. After that, we have to solve the puzzle.
When we put a puzzle piece in this closet, we have to solve the enigma. We solve it by rotating the circles by clicking on the central part of the circle.
We move so that the cross-section of these sets is a different color. But that the three sets get such parts that they are all one color.
We did it with a few moves. The goal is to break the combinatory in our minds and thus practice the ability.
We can show you what it would look like at one point. Or at least a moment before assembling and solving a whole enigma.
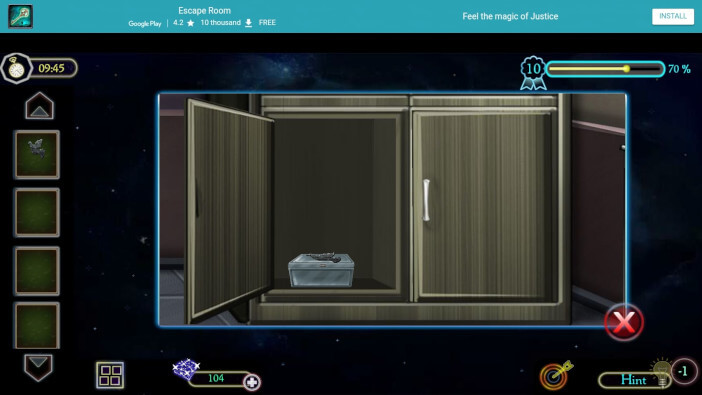
The door opens. As a reward, we can get some items. One item we take is another bird. That’s great news. The next item we get is a box. Let’s save this item as well. Now we go to the exit door.
On the left side of the door, hanging on the wall, there is a large board. That board is set so that it is locked and the only way to unlock it is to insert two birds that we have saved on several occasions.
Insert stories into slots that are empty and unlock these doors that are closed with chains. A secret barrier opens and numbers are seen. The numbers are 3 1 2 8. These numbers are important for unlocking the box.
The box is placed in a close-up. Enter the numbers and open the box. Only one pen is inside. We need that for now. On the other side of the room, there is a table.
There is a glass of water on the table. Take a glass and place it in a close-up. Open the pen and dip the paper in a glass of water. The water will penetrate deep into the paper and release ink that will draw the marks.
Remember these characters and the order in which the arrows are written. These are things that are very important to us. Enter these characters in the wooden drawer located in the lower-left corner of the screen.
Just look at the whole screen, the room where we are. There is a drawer in the lower-left corner. Enter these characters so that the order is correct. We look at the paper we dipped in the water.
Then look at the arrow that shows that the characters are entered from the last from the bottom and are entered in the order that goes to the top.
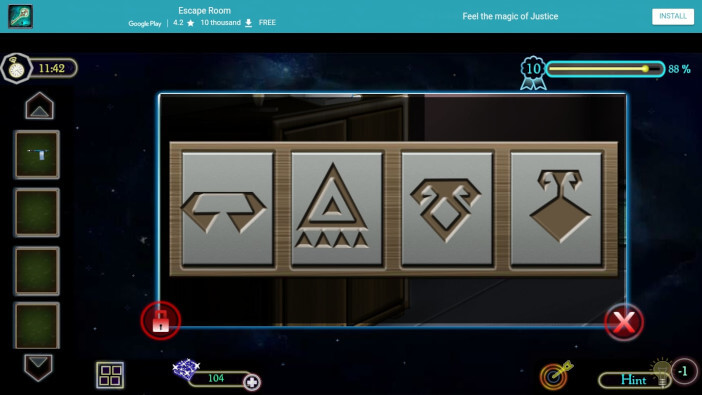
The drawer opens and takes the key. Use this key to unlock the metal drawer that is part of the table. That table is on the right side of the room.
There was a glass of water. Unlock this drawer as well. Inside is an album. In that way, the second part of this level was solved and so the whole level was solved completely.
Now comes the part where Edward tells us how he finally found a family picture album. Looking at the picture, Edward noticed that his mother was in the picture and had completely forgotten about her.
He also remembers his father holding him in his arms and walking him when he was little. This album has so many nostalgic memories encrusted within it. Edward wishes to take this with him even to his grave.
Today we found out who our other family members are. Follow our walkthrough and find out what awaits you in level 11. We wish you a pleasant day. Thank you for reading.