Dream Life Chapter 2 Levels 21-25
Level 21
Hello and welcome to our walkthrough for the game Escape Room Adventure – Dream Life Mystery 2021. This is level 21 in Chapter 2. In the previous level, we found Elena. She was one of the women who helped us find the backpack.
This backpack belonged to us, but Elena mistakenly brought her backpack to her house. She could not enter the apartment by herself, so we had to enter the apartment and help her. We went in and took the backpack. Let’s move on now.
That is the detail we need. Like any young person, some parents are responsible for the existence of a young person. Edward is a young person who has parents of his own.
The question is where they are and whether they are alive. Memory does not serve him as with almost every person, but that does not mean that we will not help him. We start from safe destinations. Good luck! Let us begin.
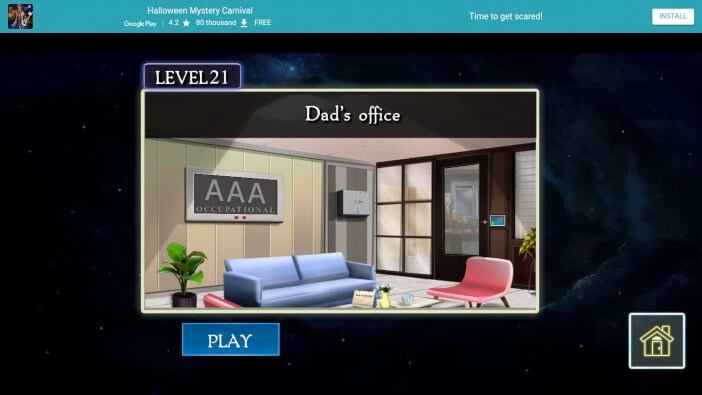
We are in the office. It is a place where a lot of people show their working ability and their working mentality. We are in level 21 called “Dad’s office”.
We’re guessing we’re looking for our father. Edward’s father has already been featured once in a photo album filled with family pictures. We will do that now. Let’s look for the father and try to get some information about us.
We need everything at this moment. Any information is welcome as the end of chapter 2 is near. And that means Edward has his deadline to achieve his goal. The goal is to show how he got into that situation to come to the basement after the pill.
And that after all, he doesn’t know where he was supposed to go and where he started from. Traffic accidents are one thing but not everything is as clear as it should be. We are here to help. Good luck! Let’s move!
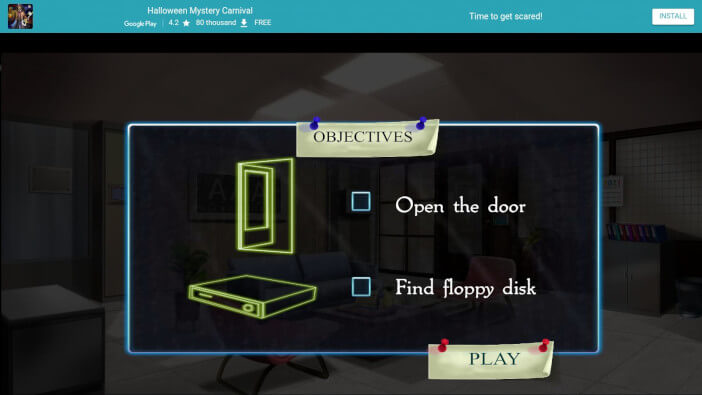
Open the door, and find the floppy disc. Here we go. AAA Occupational is an inscription that adorns the wall. The wall is on the left side of the room. The screen can be an indicator for us. Next to the AAA Occupational label, you can see one safe.
The safe is on the left. Here you can see that this safe is unlocked by clicking the mouse several times. The mouse is inserted so we have to click a few times. After that this safe is opened. You can take one item that is hidden inside.
That’s a meter pen. Let’s save this item. Place the meter pen in a large frame. Click button 1, click button 2 and click button 3. Each button is set to a meter pen. After each click, new knowledge is gained.
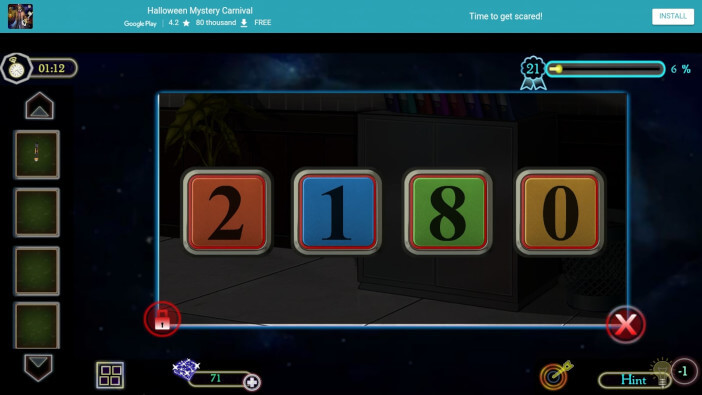
New knowledge is that numbers are appearing. The numbers are 0 1 2 8. Each number has its color. But we enter these numbers in the closet that is located in the right part of the room. The tin door is locked and they are looking for a code.
This code in this case is a combination of these numbers (0 1 2 8). The new number is 2 1 8 0. Open the door and take the metal suitcase.
Place the suitcase in close-up. This is where our brain structure comes into play. A new enigma has come to the fore. Solving this enigma leads to the unlocking of this suitcase.
The goal of this enigma is clear. By rotating these balls, one should reach such positions that the patterns from the balls coincide with the patterns that are outside the slots of these balls.
The goal is for the center ball to be blank. The rest should be placed in the slots so that the patterns around the slots are aligned with the patterns on the balls. That’s the rule. This is the only way to unlock this suitcase.
After completing these rules, we unlock the suitcase. There is something inside that we need. Take the fillet that is hidden in the compartment of the lid. Place the file in a large frame. Click on the file and open it.
You will see a diagram and some details related to the diagram. Now we come to the part where we talk about the middle ground. Take the remote off the table. We will attach this remote to the AAA Occupation label.
Bring the remote and click to move the circuit and start the algorithm. This is where algorithms and structures change. You will get letters of different colors. That means we have to remember the colors and the quantity.
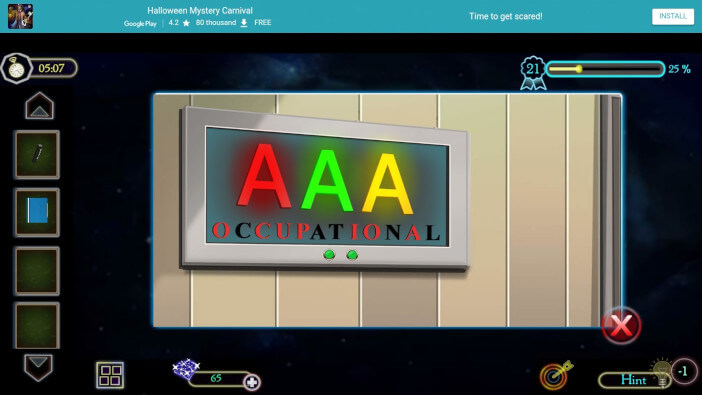
There is one shelf in the central corner of this room. This shelf is password protected. The code is to combine numbers and letters. Find out the code based on the newly created colors on the AAA Occupation label and the diagram we got from the file.
We will help you. The code for the top two rectangles is C7 and N4. The middle rectangle is L3. The bottom two rectangles are T2 and A6.
Unlock, open the door and take the pen. The pen cap is in a bag that hangs on the wall. The bag is located on the left side of the calendar. Right next door that leads on. Place the pen cap in a close-up.
Then insert the pen into the pen cap and save this item in its entirety. There is one display next to the front door. The display has a button that can be pressed with one click. But that click must be done with a laser that is placed in the pen.
The laser will hit the button the moment you bring the pen with the pen cap to this display. In this way, we will solve the first part of the objective and that is to open the door. We are entering a new office.
We need a floppy disc now. We look straight out the window. There is no floppy disc. But we will first look at the scheme that is located in the right part of the window. That is the right wall next to the window.
Here is a schematic of how and what to click. Then we go to the left corner of the room. There, next to the calendar, there is one device that requires a code. Based on the schematic, click on the numbers that change the position on the chart.
To cut a long story short, click on these numbers 7 4 1 9 5 10. A secret barrier opens. Take the item. It’s a pen drive.
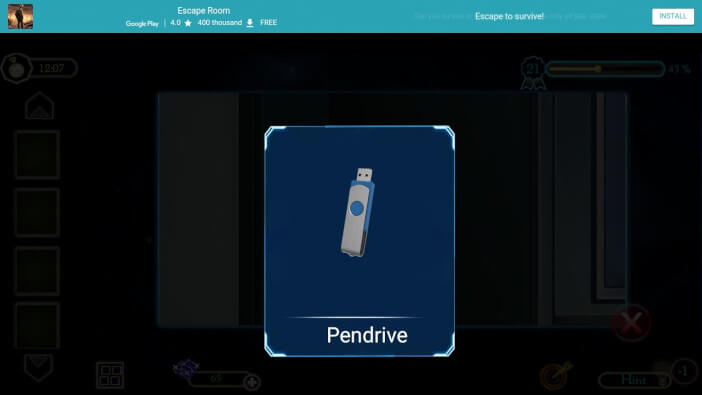
We will now walk to the right side of the room. This office belongs to our father, but we must act as if it were ours. Let’s put the pen drive in the safe that is located next to the shelf in the right part of the room. Insert the pen drive and you will get a new enigma.
Since we already had one enigma to fight for, we will not have a problem in this case either. The goal of this game is to follow the central vertical. And the two larger external verticals should be changed according to the affinities of the game.
The first vertical should be the flame, the Rorschach stain, and then the third sign. That is an acceptable schedule. The second vertical is determined. And the third vertical should be the third sign, the Rorschach stain, and the third sign.
That’s all it takes. And when the door opens, take the box. In addition to the box, take a screwdriver. It’s all part of the inventory we have to keep. And we’ll get right to the table where the table lamp is. There is only the part we need.
Lamp without a light bulb. The part we need for analysis is the base of this lamp. Take a screwdriver and remove the black metal part. Then take the button that is located inside. Save this button.
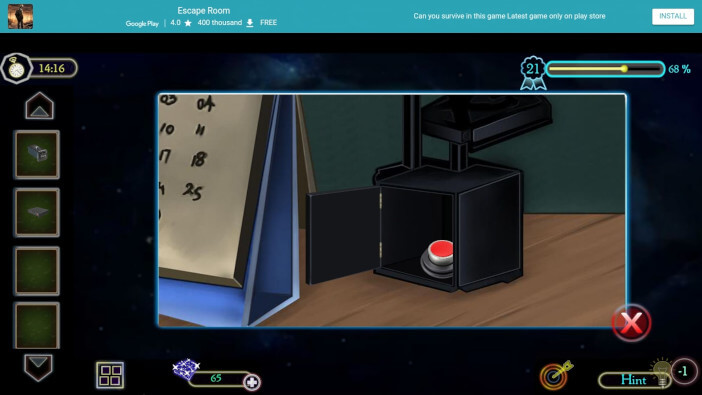
To the left of our office desk, but not our desk but Edward’s father is a toy robot. It’s a toy where we’ll insert this button. Start the toy by clicking on the button and the display of the toy will show you the numbers.
The numbers are 0 1 2 9. Enter the numbers in the box we saved from the safe. There’s a key inside. This key unlocks the drawer in the closet on the right side of the room. Insert key and open drawer.
Take a new button from the drawer. Place the button in the close-up. Click the middle of the button and remove the cover. Inside is a memory card. That’s it. Save the memory card. Carry such a preserved memory card with you.
But take another box from the top of the shelf. It is located next to the cup. It’s another shelf in the closet. The floppy disc is in the box. And the box opens by inserting a memory card into the box.
The box opens on its own. In this way, every detail that is required of us to be executed in level 21 is completed.
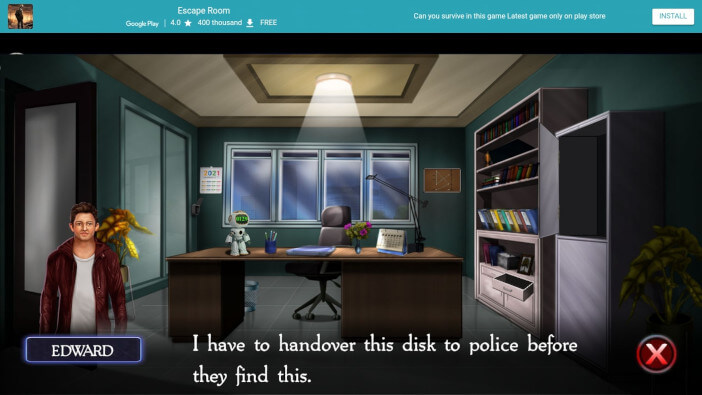
Level 21 is completed. That’s what we needed. Everything we wanted to do, we did. Remember that all this was done thanks to you. And thanks to you, we have become the person we are supposed to be today.
They are smart, resourceful, discreet, and successful people. Intelligence is something that is highly valued today.
And we can only envy you for showing generosity to Edward. Shooting is a virtue and that is another thing you have. Don’t think that you will be ignored in the circumstances we are in. We have to move on.
That is inevitable. We are here for you and we will not leave you. As long as your new destination is our walkthrough, we are grateful to you.
Follow our walkthrough and find out what awaits us in the next levels. Don’t think you’re alone. No, we are here for you. Have a nice day. Thank you for reading.
Level 22
Hello and welcome to our walkthrough for the game Escape Room Adventure – Dream Life Mystery 2021. This is level 22 in Chapter 2. In the previous level, we were in a corporate environment.
Edward’s father is the founder of this firm. That person is not there but Edward is present. It is necessary to find a floppy disc. He has to show himself to the police because it will be too late if the police come along.
And that means that we are only for a moment from the fact that everything is resolved. Let’s move slowly! We start from safe destinations. Good luck! Let us begin.
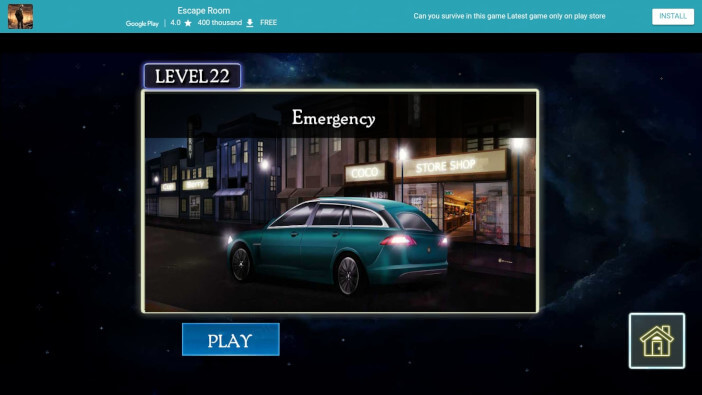
Level 22 started in a very interesting way. Edward’s father finds himself in a seemingly impossible situation. The problem is that the man is stuck inside the car and has to get out because if he doesn’t get out, there can be serious consequences.
It’s a new objective. Open the car door. Find the location. Never be one of those people who takes situations lightly. The biggest problem in these situations is that complications can occur.
The automobile is a useful thing but the gases emitted are poisonous. Slightly prolonged exposure to carbon monoxide is lethal. Just be exposed for a few minutes and your skin gets a weird color.
It is the color of ash and a person slowly loses his breath and dies. It feels like she is sleeping, but in fact, one atom of oxygen in combination with carbon is deadly and poisonous. Blood is poisoned and lungs are damaged.
The person slowly and imperceptibly loses the battle and goes out. So we have to be determined because Edward’s father is in trouble. Let’s help him and we’ll show you how. Good luck!
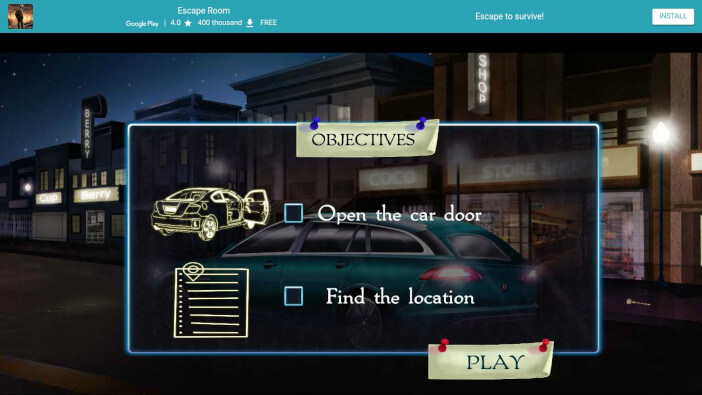
The car is located in the middle of the street. It’s a fact. But we need to open the door as efficiently and quickly as possible because Edward’s father is not in good shape. There is a sidewalk in front of the Store.
The sidewalk is such that it is composed of stone. There is a lever on the sidewalk. Save this item. We need a lever for the next step. This step is important. Walk to the trunk of the car.
There is a slot to insert the lever. Insert the lever and now you have to click on the lever up and down to be able to unlock the trunk.
The trunk opens and you have a few things inside that you can take. Take the purse. That is an important item. After taking the purse, place the purse in a close-up. Now that we still have the lever, use the lever to open the purse. Inside the purse is a knob.
Save this item. We need him. There is a brown screw on the edge of the trunk. It is a part of consumables that will be of great benefit to us in the next period at this level.
In addition to having two items, take the box that is placed in the back of the trunk. To be thorough, let’s do one more thing left.
We will make the next move and that is to save the suitcase that is placed in the left part of the trunk. We will save everything in the trunk.
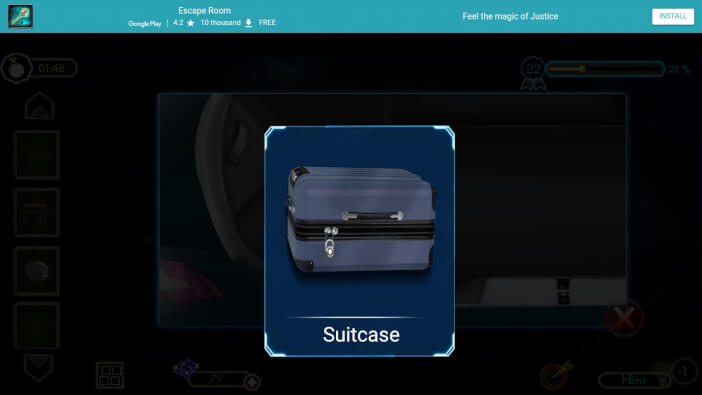
We place the box in a close-up. That is an important detail. We will see that the box is locked and opened by solving the puzzle.
This puzzle is solved by clicking on each segment of this image, merging the image into one whole. When assembling the picture, keep in mind that we need to get a house located on a glade.
The picture was created in the morning because the morning sun shone brightly on the house and the house has its perfect details. Move on. There is a cutting plier in the box. Let’s save this item.
Now back to the trunk. The trunk is deserted but we have to be even more ingenious. We will prove this by seeing a secret barrier and a small door locked in the background of this trunk. Insert the brown screw into the key slot.
That’s how this little door opens. Then click on the positive part of the button. This will release the circuit and start the power. Electricity will supply parts of the trunk.
Specifically, it powers the part where the lamp was turned on. So you can click on that part of the trunk. Several numbers were seen there. The numbers are 1 2 8 0. Remember, it’s a code.
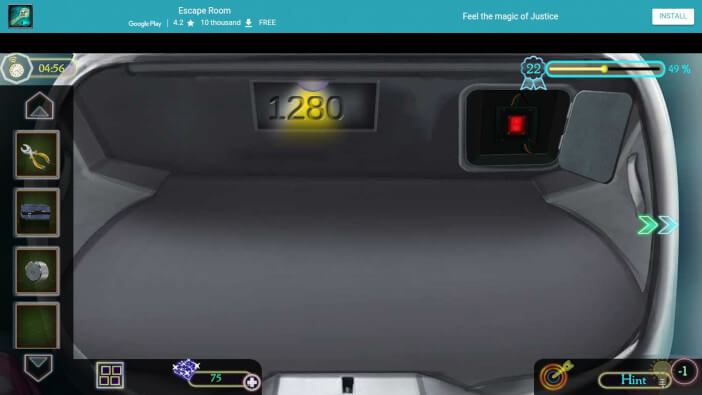
Now click on the suitcase. It’s the biggest item we’ve taken from the trunk. It can be seen that one part is missing. We saved that part. Put the knob we saved in the empty slot on the suitcase.
That means we now have to enter the code we discovered a few moments ago. Click on 1, 2, 8, 0. Only then can you unlock this suitcase. There is a hanger inside.
Save this item. Cutting pliers are a tool that helps us cut some solid materials. Click on the hanger and place this item in a close-up. Then take the cutting pliers and cut a piece of wire. Make a pin that has the shape of a question mark.
This means that you will get wire-thin enough that it can be used as an artificial key. Take this pin and pass it through a small part of the driver’s seat window. Insert the pin and click on the car unlock button on the inside of the car.
That way you will be able to click on the door and open the car door. You can go inside and make the car fit for driving. The first part of the two objectives was successfully solved.
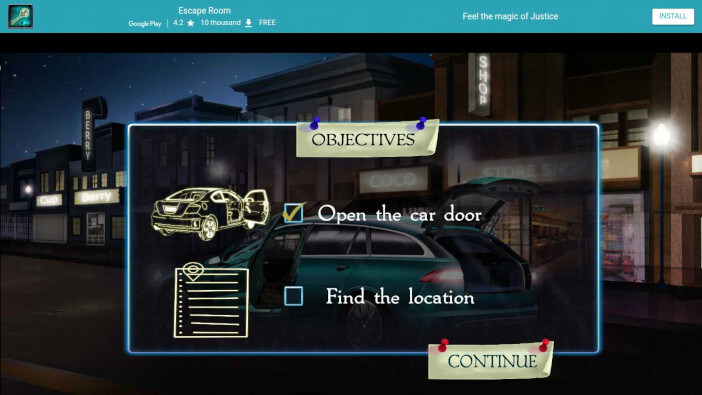
Now that the car door opens for us, where the driver’s seat is, we can get in the car. The interior of the car is perfect. In addition to navigation and more advanced technology, you can also feel comfortable.
It is something that instills confidence in us. There is a key on the control panel but the passenger seat. The key is placed next to the hood. It can be stated that we have to save the key because it is very important to us.
We can’t start the car with the key. We need a key to open the bulkhead in front of the passenger seat. Enter the key and open the compartment. Inside, you can find a detail. That detail is the file.
We have to save the file. Next to the driver’s seat, in the door, there is a baton. That is a detail we noticed and we have to save the pen drive. Move on.
Between the passenger and driver’s seats, there is a zone that belongs to the no man’s land. This is a place to lean.
As a rule, the driver has the advantage, but it is not determined by some written rules. That’s where the paper is. Save this item.
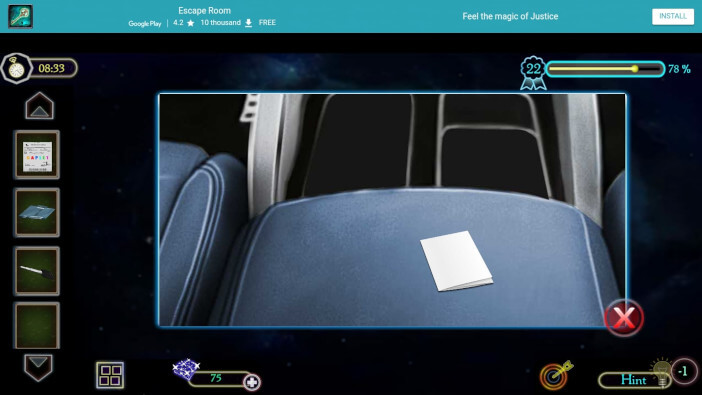
The pen drive we saved now can be useful to us. In the middle of the control panel is multimedia. We need this screen so we can get some information. But that leads us to our biggest nightmare.
This is a puzzle game. This game serves to show us how capable we are and how good a person Edward is. The goal of this game is as clear as day. It is necessary to rotate the parts that have the shape of a hexagon.
Rotate so that each part is in place. That way we will get one clear whole. And the whole is a picture. The image has a clear shape. We get a picture of a dragon that solves this puzzle game successfully.
The screen unlocks and we need a password. The code can be found in the file we took from the compartment in the passenger seat. Place the fillet in a close-up.
After that, click on the file and we get the paper with the code. The code is (smO27). Enter the code smO27 in the display. The contents of this tablet open. Click on the Location app.
Then enter a specific word in the search. Now comes the real brainstorming. We don’t know what to bring. But we can only enter it if we look at that file again. There is a piece of paper. Open the Report file.
Take and store one piece of paper inside. It says CAPLET on paper. Each letter has its color. Save this paper. In addition to the CAPLET paper, you will see the inscription SAM CARE.
Enter SAMCARE in the display and you will achieve everything that was required of you in level 22. Insert the same key into the car ignition slot and go to the desired location. This is the location of the hospital. That’s where Edward’s father is supposed to go.
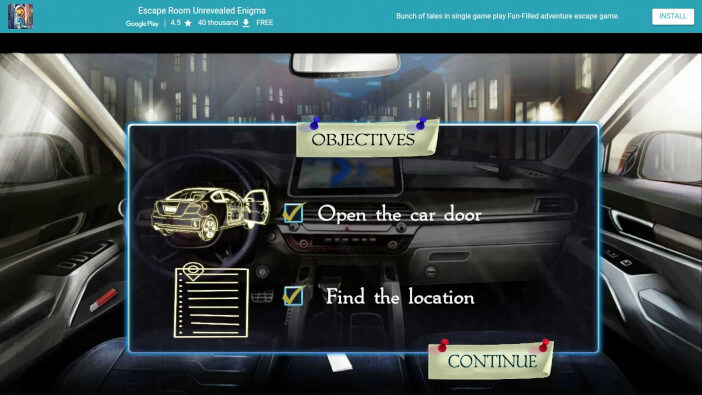
Level 22 is completed. That’s what we needed. Everything we wanted to do, we did. Remember that all this was done thanks to you.
And thanks to you, we have become the person we are supposed to be today. They are smart, resourceful, discreet, and successful people.
Intelligence is something that is highly valued today. And we can only envy you for showing generosity to Edward. Shooting is a virtue and that is another thing you have. Don’t think that you will be ignored in the circumstances we are in. We have to move on. That is inevitable.
We are here for you and we will not leave you. As long as your new destination is our walkthrough, we are grateful to you. Follow our walkthrough and find out what awaits us in the next levels. Don’t think you’re alone. No, we are here for you. Have a nice day. Thank you for reading.
Level 23
Hello and welcome to our walkthrough for the game Escape Room Adventure – Dream Life Mystery 2021. This is level 23 in Chapter 2. In the previous level, we were on the street. A street that is deserted and there is no one to offer to help us.
We are used to doing everything ourselves, that’s why we succeeded at every level. We needed help because Edward’s father was in trouble. Health problems and he was locked in a car.
But being locked in a car is not always a big problem. He is seriously ill and needs medical intervention. So we had to find a way to get in the car and drive it to the nearest hospital.
We entered the location of the nearest hospital and so we went to treat our father. The problem also arose when we realized we had to do everything ourselves. If you remember, in previous levels we were forced to help foreigners.
Nobody helped us and we had to do everything ourselves. This time we will not whine because we have come to help the person who raised us. The father is a great figure in the family and then we will get into a situation where we have to give a little of ourselves to be able to help close people.
But that is only a small part of what our father gives us during our growing up. We are not aware of that but we hope to be soon. Let’s move on, my father needs to go to the hospital urgently. Don’t panic, please. Good luck! Let us begin.
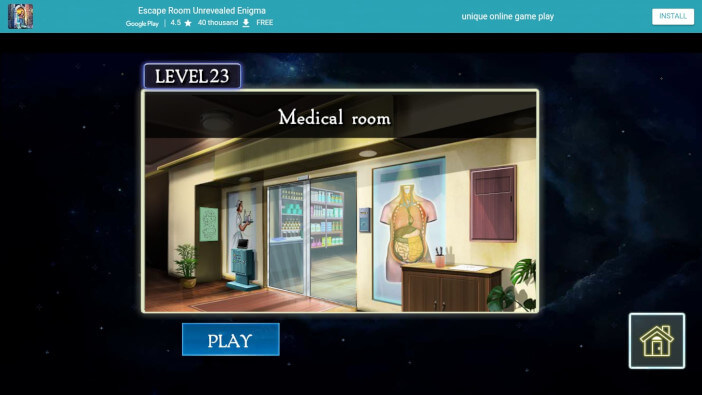
We arrived at the doctor’s office. It is a place where we hope to get proper medical care. Edward’s father found a place where he could be treated.
And he urgently needs treatment. From a human point of view, no person on the planet deserves to suffer. And since Edward found an empty office, we have to help him. We need to help him get proper medical care.
We have two objectives in level 23. One part is to open the door. It’s the office door. That is the main detail. Another detail is to find a cure. But let’s be careful. Not all drugs are effective in such situations.
That means we have to find an adequate cure. We want to help you and guide you through this part of the office. Everything for the family. Good luck! Off we go!
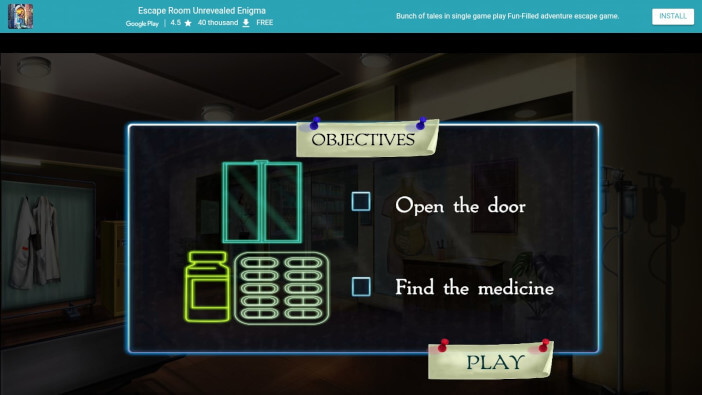
We are in front of the office. Now we have to start from one part. Looking at the front door, to the right is a closet. On the surface of the closet is a bowl for storing stationery. We need clue paper that is placed next to the plate. Save the clue paper.
Click on the paper to place it in a close-up. We will see nine points some points are connected. To be able to determine what we need to do next, follow our guidelines. There is a poster in the left part of the room.
That poster is located on the left side of the entrance door of the office. There is a poster on the small wall. This means that we will have to pay attention to these details. Click on the poster to access closer to this part of the room.
Then click to remove the top left of the poster. The new clue paper can be seen here. Peel a squash, grate it and squeeze the juice. Now comes the revelation of the secret of this clue paper. Place the first clue paper in the frame.
Then place the new paper with the numbers in a close-up. Place them next to each other. So then you can see which numbers are in the places where the line is drawn. These are the numbers 3 5 9 8.
We enter these numbers in the wooden safe located on the left part of the screen.
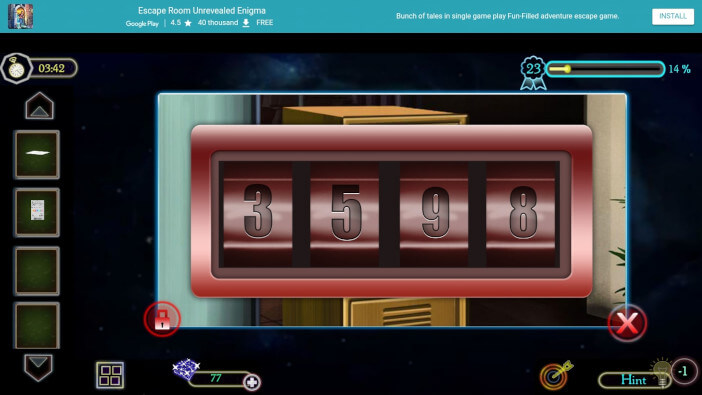
Enter the numbers 3 5 9 8 in the safe so you can open the safe door. There is a key and a shirt. It is not an everyday situation but you can be thankful that you will be able to save both items.
The first thing we’re going to do is put the shirt in a close-up. You will see that the shirt is as white as snow. But we don’t need a shirt but the contents of a shirt pocket. That means we’ll take notes from the shirt pocket.
And let’s save the notes. Move on. It’s time for the first puzzle game which is on level 23. The puzzle game is an integral part of the door.
The door is located on the right part of the screen. Above the shelf that kept the first clue paper. There are doors installed on the wall. Click on the door and you will access a puzzle game that stands in our way.
But we will solve it. You need to place these star shapes in certain fields on the board. Here’s how it’s done. Place the yellow star shape on the first field on the left in the first row. It’s a simple move.
The orange star shape is placed in the last row, the first free field on the left, right next to the occupied field. Next to the box. The blue star shape is placed in the penultimate front, the second free field looking to the right.
And we are left with the last star shape. This shape is placed in the third row looking from above. But the first field looks from the right. This is where the last star shape is placed. After that, the screen changes.
The puzzle is completed. That means we have successfully solved this enigma. The door opens and you can take a magnifying glass that hides inside. We will save that item.
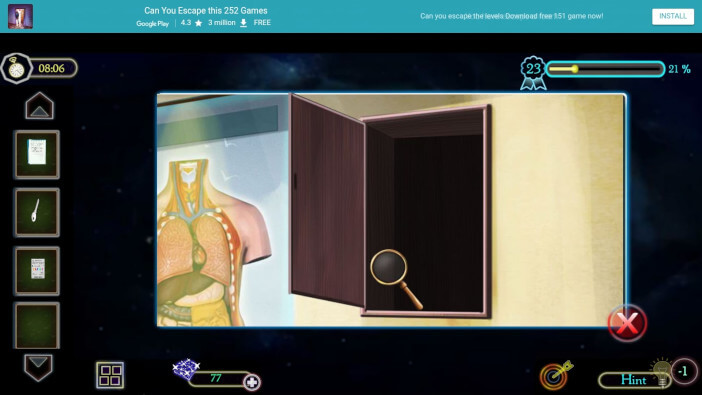
Other notes that we have saved will be placed in a close-up by clicking on the notes. Take a magnifying glass and drag over the note so you can see the details from the paper more clearly.
That means we have to be Sherlock Holmes at this point. The magnifying glass is the main tool. You will see that the number is printed. The four-digit number is 9 3 9 6. Let’s remember this detail.
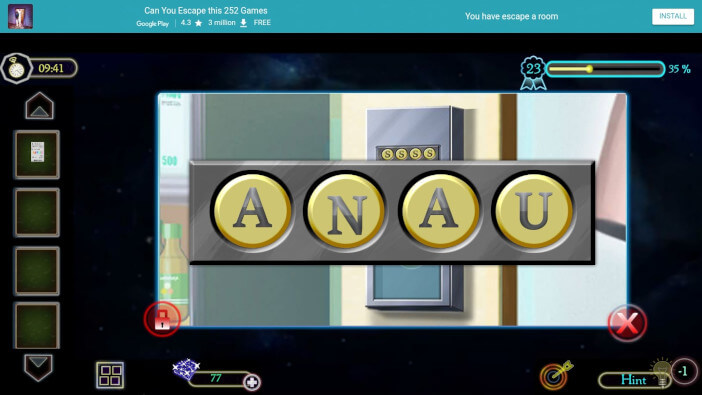
We need that detail for the next step. And the next step is to go to the machine that is installed on the left side of the side door. There is one machine that is locked. We’ll use the key to open the machine.
This means that it is our turn to click on the button behind the metal door. Click on the button and then the display installed on the top of the machine will be displayed. The code must be entered here to unlock.
Click on the display and get closer access to this device. Enter 9 3 9 6 and click ENTER. So you get the word A N A U. That means we now remember the word A N A U. And on the right side of the door is a new device.
The word A N A U can be entered here. After entering, the option that the mechanical wheel can be rotated opens. Click on the wheel 11 times. This is the only way to move the pointer from right to left.
Then you will open the door of the clinic and so you will be able to take a successful step towards taking the medicine. The first half of the objective is solved. Congratulations!
Edward came to the office. But the problem arose when he realized there was no electricity. A light source must be found so that he can continue. The first thing we need is to find the key.
The key is stored on the shelf. We look right at the first shelf in front of us. Take the key that is placed on top of the shelf. To move forward, we must use this key. Look at the left side of the screen.
You will see that there is a safe in the far left part of the office. This safe is locked and unlocked with this key. Insert the key, and unlock the door. There are three buttons behind the door. Each button has its function.
They are assigned numbers from 1 to 3. This means clicking on each button in ascending order. Only in this way will we be able to let the current flow through the cables and thus illuminate the room.
Each white dot on the buttons must be on the underside. In the left part of the room, there is one item on the floor. It is a device we call a remote control. We do not have a TV set that is designed to be paired with this remote control.
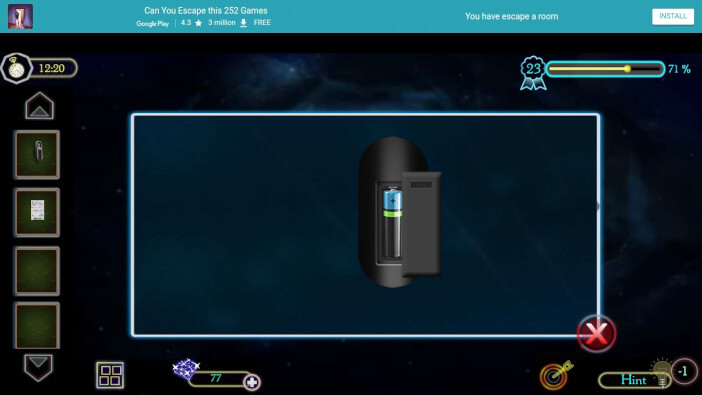
But we have to do the next thing. Click on the remote control so that we can place it in the croup. Then click on the remote control to turn it to the other side. Click on the cover to remove it. There is one battery inside. We need that battery. Save this item.
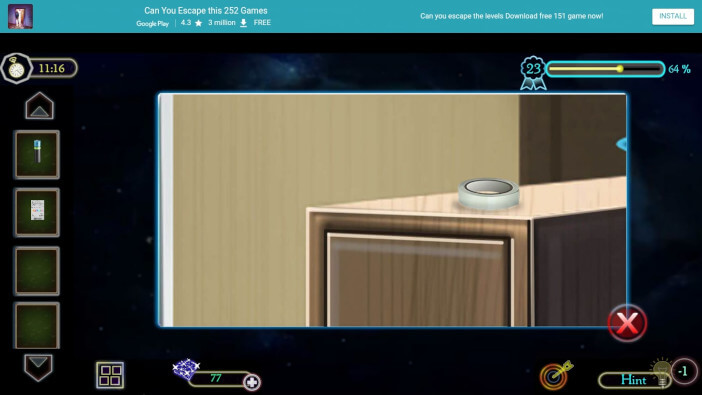
On the left side of the shelf in front of us, you can see the edge that is the endpoint of this shelf. That corner on the shelf hides one important detail. And that’s cello tape. Take this item and save it.
This material is used to unite two separated objects. It can’t connect people like bridges but it can help in the next case. Let’s go to the corner of the room. There is a hole in the wall. That wall is designated to conduct several wires.
Those wires are separated and we have to connect them. We connect by taking cello tapes and connecting them. The display next to the wire is then switched on. The goal of this enigma is to click certain fields so we have to open the door.
If we look at the display as a dial, we have to click certain fields from 1 to 5. We have 3×3 fields. The first three fields are from 1 to 3. The second three fields are from 4 to 6. The third three fields are from 7 to 9.
Our goal is to click field numbers 2, 4, 1, 9, and 3. These are the fields that we will click, looking at the logic from the phones. After that, the door opens. There is another remote inside. It is a newer and more modern remote that we have to preserve. Place the new remote in close-up.
That is the detail that is needed. Then click on the remote to turn to the other side. Instead of removing the battery, we now insert the battery. We bring in the battery and then we will enable this remote control to be used.
On the left side of the exit door, there is one detail. These are doors that are locked with a digital code. We had that digital code housed in a new remote controller.
Use this remote control and unlock the door. Inside this safe, there is one puzzle game. The goal of this game is simple. You need to swap these parts inside the circle to get a clear picture.
And the picture is to get a shape that has clear boundaries. And clear boundaries are obtained by moving wooden planks several times. Just change places and you will get a clear picture.
Behind the door and the enigma, the paper was obtained. Let’s save this item. We will use this paper immediately. We go to the shelf in the left part of the room. There is a shelf that is built into the wall.
And on the shelf is a kind of ATM that requires paper to be read. Read the paper at the ATM and you will get the numbers 0 2 4 5 6 7 in ascending order and colored in different colors. And if you remember, we saved the paper from the previous level. It says the word C A P L E T. If we compare the color of letters and numbers, we can get a cipher.
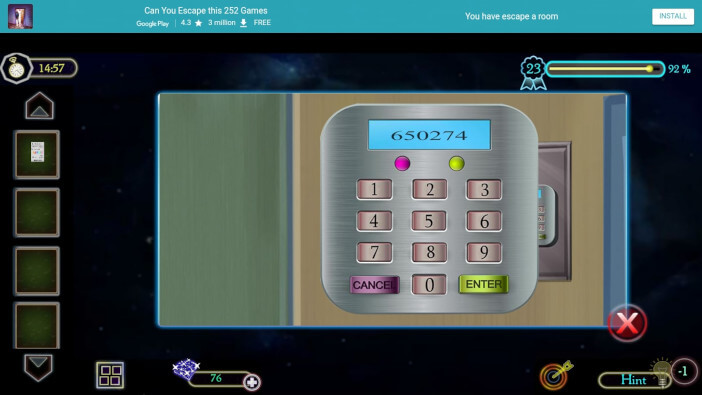
Based on the word C A P L E T, arrange the numbers so that the colors of the numbers match the colors of the word C A P L E T. Finally, we get the numbers 6 5 0 2 7 4. We enter these numbers in the safe located on the right side of the door. Behind the first shelf in front of us.
On the right side of the door is safe. Enter numbers 6 5 0 2 7 4. Open the safe and take the medicine and tablets. This means that you have managed to solve every task assigned to you by level 23.
Level 23 is completed. That’s what we needed. Everything we wanted to do, we did. Remember that all this was done thanks to you. And thanks to you, we have become the person we are supposed to be today.
They are smart, resourceful, discreet, and successful people. Intelligence is something that is highly valued today. And we can only envy you for showing generosity to Edward. Shooting is a virtue and that is another thing you have.
Don’t think that you will be ignored in the circumstances we are in. We have to move on. That is inevitable. We are here for you and we will not leave you. As long as your new destination is our walkthrough, we are grateful to you.
Follow our walkthrough and find out what awaits us in the next levels. Don’t think you’re alone. No, we are here for you. Have a nice day. Thank you for reading.
Level 24
Hello and welcome to our walkthrough for the game Escape Room Adventure – Dream Life Mystery 2021. This is level 24 in Chapter 2. In the previous level, we were on the street. A street that is deserted and there is no one to offer to help us.
We are used to doing everything ourselves, that’s why we succeeded at every level. We needed help because Edward’s father was in trouble.
The father is a great figure in the family and then we will get into a situation where we have to give a little of ourselves to be able to help close people. But that is only a small part of what our father gives us during our growing up.
We are not aware of that but we hope to be soon. Let’s move on, my father needs to go to the hospital urgently. Don’t panic, please. Good luck! Let us begin.
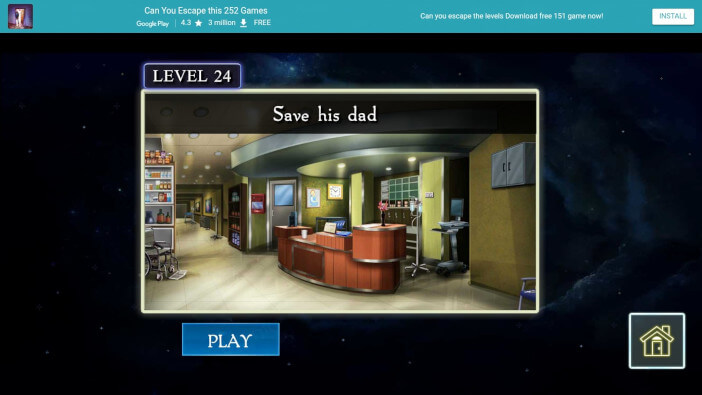
Level 24 began with Edward’s father being transferred to the intensive care unit. It is a place that deals with slightly more serious cases.
It is not the slightest problem for the father to be transferred to the intensive care unit, but we do not know what the problem is and what caused this to happen. Someone tried to kill him. We must open the door to violent attempts.
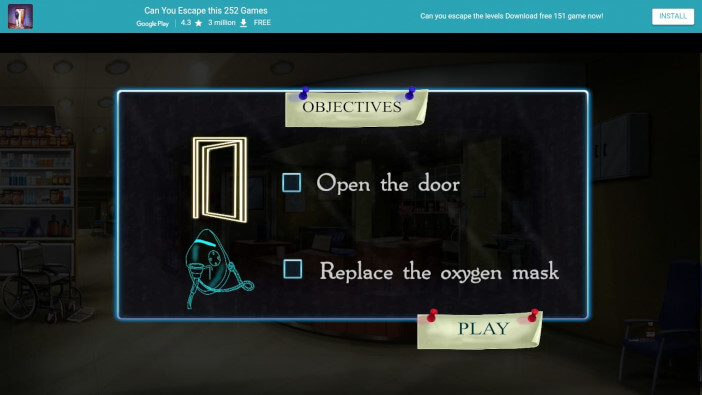
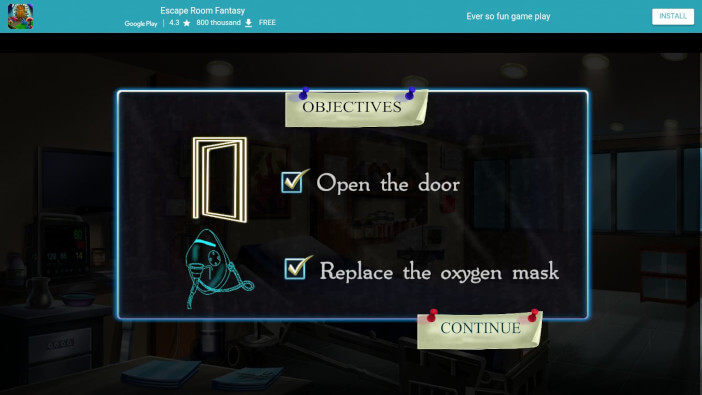
This is already a serious situation and we must be quick and responsible. We will do something that is not good but the goal justifies the means and that is all normal. We have two parts. The first objective is to open the door.
The other part is to replace the oxygen mask. Let’s not allow ourselves not to try to do something good if we have the opportunity to do so. Be a person who can do a good thing at a good time. Good luck!
We are in the clinic. Very interesting hallway. We don’t have much idle time. The first step we take at this level is an enigma. A puzzle game that is a frequent guest on our doorstep.
We usually have two puzzle games at some level. This time we have our first puzzle game at the beginning of this level 24. And the puzzle game is in the middle of the hallway. Behind the infusion, the stand is a small metal cabinet.
This metal cabinet is special in that medical care accessories are stored inside. We have to unlock it by solving this puzzle game.
On the screen, we have one image that is in the background and that is seen a little less clearly. But that’s why we have 15 circles that have clear parts of the picture.
The object of this game is to move each part of the image with each click on each circle and set the clearer part of the image from the circle to match the less clear background image.
But clear enough to see the whole picture. You need to concentrate on the pillars in the picture. Let that be some detail that orients us.
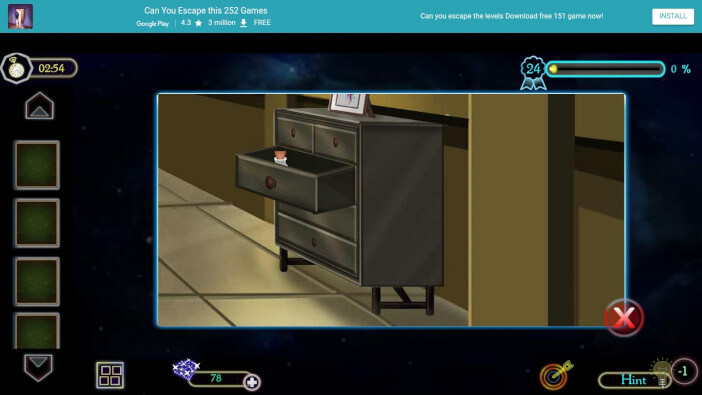
The drawer opens and we can take one bottle inside. It is a glass bottle that has certain content. Before we discover the contents of this bottle, take an empty glass from the reception. And while we’re at the front desk, get the key.
The key is placed on a real file which is also located at the reception. Take the key. If we look at the part behind the reception, you will see yourself in the part where the wall is, there is a place for documents and keys. It’s a shelf.
But this shelf also has a metal door that protects the safe. We’ll take the key we saved and unlock the door. Behind the door is a cable. Save this item. There is a computer in the right part of the reception.
But we don’t think it’s a classic computer that we use for some office work. But that doesn’t matter to us now. We’ll plug in the cable and connect the computer to the power supply. The screen only shows us the blue surface and the number 32.
Let’s remember this number. When we are already in the right part of the room, let’s take some items from the chair. There is a bottle on the chair that says sulfur.
Take tweezers too. We need that. And now comes the analysis. Place the bottle in a close-up frame. Using tweezers, remove the cap that closes the bottle. Click on the bottle to remove the item from the bottle.
It’s clue paper. It is neither the first nor the last we find. Save the clue paper. Click on the clue paper and place it in a close-up. Then click to see the content. The crossed-out numbers 31 and number 18 are written on clue paper.
Very interesting, but we should remember this number as well.
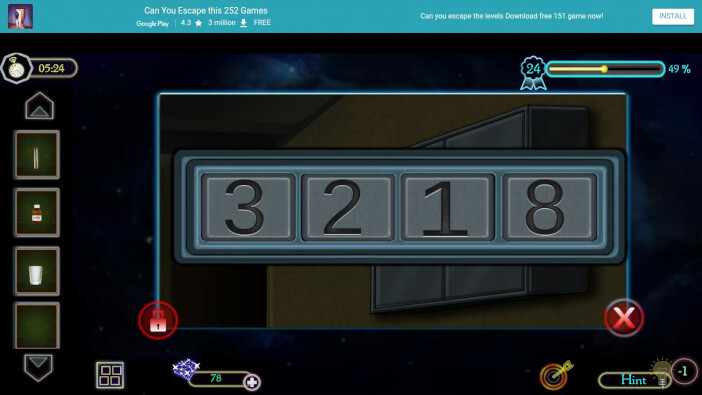
Now let’s just remember the number 32 from the monitor behind the reception and combine these two numbers. Let’s continue to the right part of the screen.
That part is located on the far right. You will see that a small closet is hung. That door is locked with a code. The code is very simple. The code is 3 2 1 8. The reason for this is the combination of two numbers with clue paper.
And we found out the other part of the code on the monitor behind the reception. Enter the code and unlock the door. There are two symbols inside. Save both items. Now comes chemistry. Place the empty glass in a large frame.
Then place the bottle next to the glass. Click on the bottle and remove the cap. Then pour the contents of the bottle into the glass. It’s sulfur. The last thing we do is take both symbols and put them in the sulfur in the glass.
It will be one of the moves that only Edward knows why he is doing. And so dipped in sulfur, keep it with you again. And we will get rid of these symbols immediately. We go to the left part of the reception. There is a door.
Doors leading to office space. Our goal is to stand next to the door where the emergency box is. Here it is seen that a symbol is hung. We will place the two symbols we have with us on the other two nails.
Then click a few times on each symbol to slowly lower it into its slot. The goal is for each slot to have its symbol. The plastic cover moves and the lever appears. Click on the lever to move down.
Then the first of the two objectives is solved. We can enter the room.

Edward’s father is currently suffering from oxygen loss because no one has replaced the mask. We have to help him save him. That is the goal.
We don’t want to have nightmares because we didn’t help when we had the chance. It is a unique opportunity can show our human and moral greatness. The first thing we’re going to do is go to the window.
In the corner where the wall and the window meet, there is a fire extinguisher. We don’t need an appliance, but we need the contents of a safe that is located above the fire extinguisher. We don’t know the code and we don’t have to search the room.
It is enough to equalize the shape of the slot with the shape of the central part of the slot. Only then will we be able to unlock this door and open it. There is one bottle inside the safe.
Let’s save this item. Place the bottle in close-up so you can see the inscription. It’s about numbers. These are the numbers 4 1 2 7. There is a small closet under the window.
This closet is closed by a glass door. That door is important because it is locked with a code. And our code is very clear. Enter 4 1 2 7 and unlock the door.
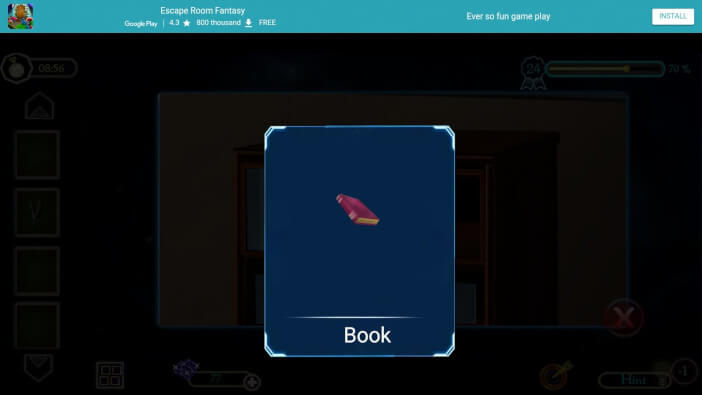
There is a book inside. We deserved it all with our work. Save the book and immediately place it in the close-up with a click. Click to open the book again. You will see that something is written in three lines.
The letter S is equal to 60 degrees. The letter V is equal to 20 degrees. The letter W is equal to 40 degrees. And this is the information that precedes the new puzzle game. We will now take a quick step to the monitor that shows the vital signs of Edward’s father.
That screen is locked. Instead of vital signs, we are shown a new enigma. We have to solve the enigma to get vital signs. Enigma is solved by having two hexagons. The common point is in the central part.
The goal of this game is to get a schematic view by clicking and swapping places. And that schematic is such that each character is placed in its slot. Slots have their characters and the characters must match the slots.
We have a few empty slots so we can move some characters to that place, all because of the creation of spare space for other characters. After successfully solving this enigma, the screen changes. A display with vital signs was obtained.
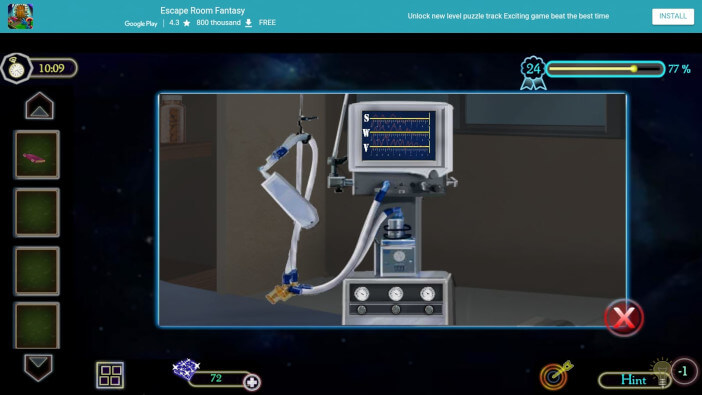
In front of the bed is a hospital table. There are files on the table and scissors on the fillet. Let’s save the scissors.
Let’s use scissors so we can cut off the excess plastic pipe. These plastic tubes are placed under the display. Use scissors and get the job done.
Then go to the hospital bed. At the foot of the edge of the bed is a hospital card showing certain information about the patient. In this case, there is information about Edward’s father.
One yellow piece of paper is attached to the cardboard. It is attached with a paper clip. The word “glass” is written on the paper. It doesn’t mean anything to us, but we need it. We enter the word “glass” in the drawer located in the far left corner.
You will see that there is a monitor, but also a drawer. The drawer is unlocked by entering the word “glass” and unlocking it. There is a new pipe inside. Let’s save the pipe.
Let’s use it right away and install the pipe where we cut the excess broken pipe. This is where a certain amount of oxygen and drug dosage is adjusted. Enter the information as in the book. The letter S is equal to 60 degrees.
The letter V is equal to 20 degrees. The letter W is equal to 40 degrees. After that, Edward’s father’s condition stabilized. But that’s not the end. He noticed that someone was playing in a bad way.
Someone is trying to kill his father. And you can hear someone walking down the hall and going to the parking lot. It’s time to face this bad man.
We have fulfilled each of our obligations in level 54 and that is the end for now. But evil people are waiting for us.
Level 24 is completed. That’s what we needed. Everything we wanted to do, we did. Remember that all this was done thanks to you. And thanks to you, we have become the person we are supposed to be today.
They are smart, resourceful, discreet, and successful people. Intelligence is something that is highly valued today. And we can only envy you for showing generosity to Edward.
Shooting is a virtue and that is another thing you have. Don’t think that you will be ignored in the circumstances we are in. We have to move on. That is inevitable.
We are here for you and we will not leave you. As long as your new destination is our walkthrough, we are grateful to you. Follow our walkthrough and find out what awaits us in the next levels.
Don’t think you’re alone. No, we are here for you. Have a nice day. Thank you for reading.
Level 25
Hello and welcome to our walkthrough for the game Escape Room Adventure – Dream Life Mystery 2021. This is level 25 in Chapter 2. In the previous level, we were on the street. A street that is deserted and there is no one to offer to help us. We are used to doing everything ourselves, that’s why we succeeded at every level.
Let’s move on, my father needs to go to the hospital urgently. We also managed to replace the mask that kept Edward’s father alive.
But all that was not resolved because the father was there for a reason. Someone tried to kill him and we heard that someone had a part in it.
Let’s go find that bad person. Don’t panic, please. Good luck! Let us begin.
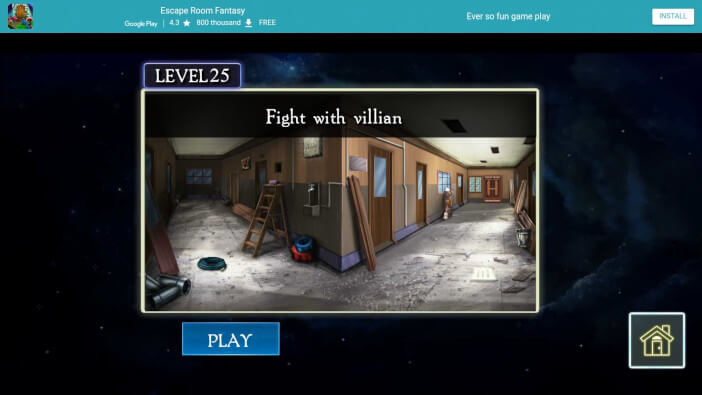
Edward eventually suspected level 24 that there was someone responsible for the attempt to damage Edward’s father’s health. But not everything has been proven. This time there is proof.
Evidence is inevitable because Edward heard the story over the phone and there is one person who does not wish well for our protagonist and his father.
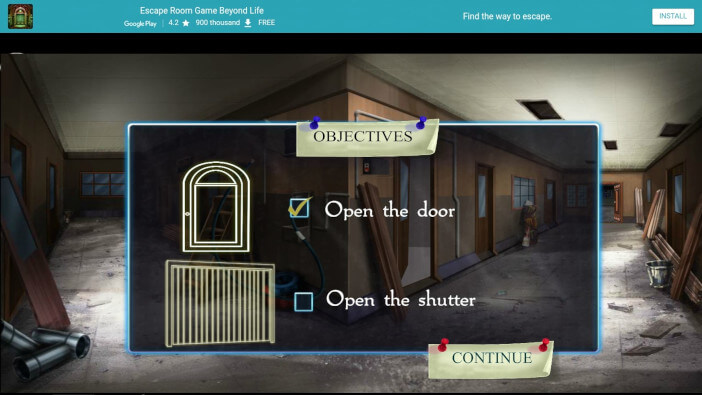
Someone is talking on the phone about Edward’s father and he must be stopped. This level has two objectives. One is to open the door.
The second is to open the shutter. It’s all in our hands. It is time to open the cards and sharply condemn the person who is responsible for all our problems. Let’s start without panic and with a lot of self-confidence.
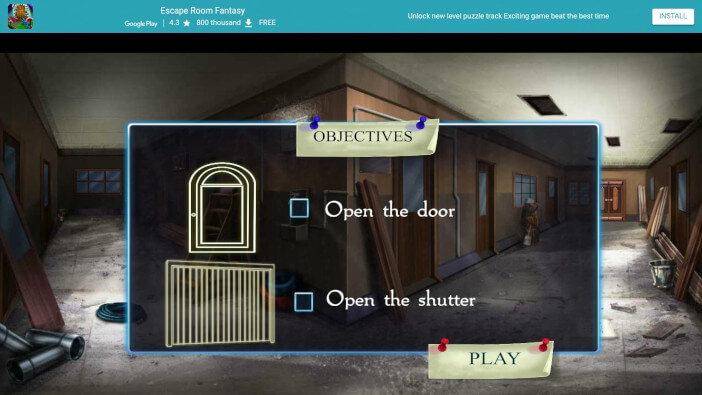
We are located in a hallway that has two directions. Left direction and right direction. It is important for us now to conclude that this is an extremely untidy hallway and it seems to us that it has been abandoned.
We look to the left of the hallway, you will see black taps on the floor. Save this tap. Right next to the wall you can see the ladder that is placed next to the wall.
We don’t need ladders, but we need a box on top of the ladder. Place the box in a close-up with a click and only then can you see what details adorn this box.
You will see that the box is locked and unlocks when the enigma is solved. We have four pictures and each picture requires to be solved to get a clear picture where some concrete things are seen.
Here’s how to solve it. Each image is composed of very small parts of the image. The fragments are placed randomly and require our full attention.
With the help of a click, the fragments are moved from place to place and the places between the two fragments are changed. The images are eventually obtained as clear images.
But what is in the pictures is confusing and disturbing. Images are obtained showing chemical accidents and chemical hazard labels. It’s as if the game is trying to make sense of something.
But when we get clear pictures, the game informs us that everything went well. The box opens.
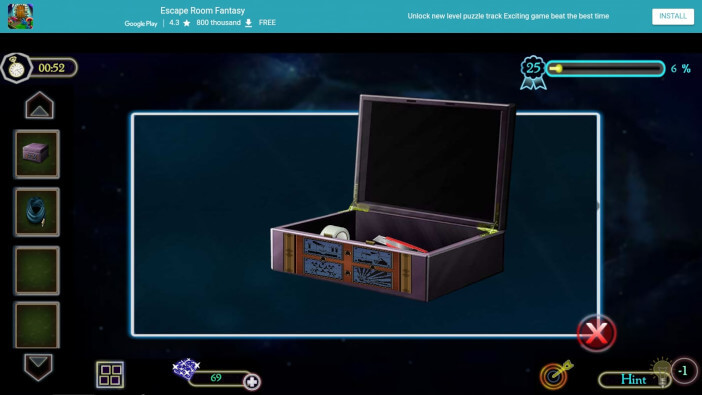
There are several items inside the box. One subject is the cutter. We will save that item. The second item is tape. And we have to save this item because we need it.
Looking to the right part of the hallway, we see a piece of paper placed on the floor. Let’s save this paper. Click on the paper to see this item up close.
You will see that the equation is written on the paper. Moreover, three simple equations have been written, but that is only an indication that this information also means something to us.
We are now focusing on the left corridor. There is a fountain on the corner between the left and right corridors. That fountain is out of order, but we will make it possible. Install taps on this tap.
Since the fountain is set up so that the taps can fall at any time, use tape. Stick the tape over the faucet and flush the water by clicking on the faucet.
The water will pass through the pipe at high speed and will spray the part above the tap. That part is a safe that is placed in the wall.
He’ll take the mud off the wall and the safe. We are in the left part of the hallway again. Here it can be seen that two doors have been installed. Between these doors, there is a partition that is protected by a rope.
That rope is the only obstacle for us to take the hold out of the secret barrier. But that’s why we have a cutter. This cutter is enough to cut the rope and to be free to take the contents and items.
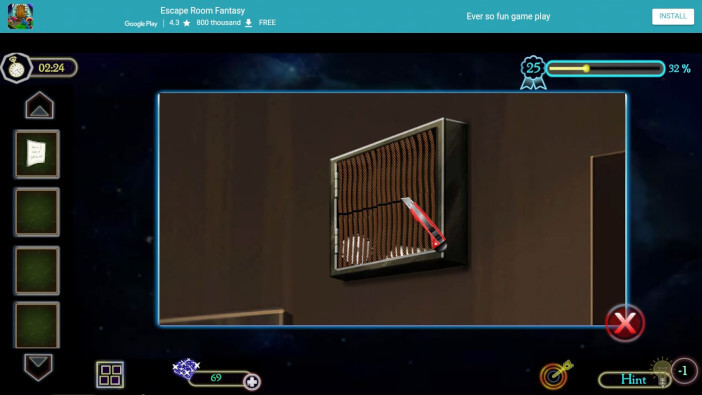
The first item we need to take is the blade. For the second item, we take his paper. That paper is our key thing. That key thing is that there is a code on paper.
The code that opens the safe was previously cleaned of mud. Signs from the paper are inserted into the part we cleaned so we could open this safe.
All we can take from the safe is a screwdriver. That is the item that follows us. And we will use this tool immediately.
Let’s just move to the first door in the right hallway. Next to the door, boards are stacked on the left side. Wooden boards. And above the wooden plank is a metal plate that is nailed to the wall with screws.
Using a screwdriver, we will remove the screws and remove the metal plate. There’s a switch. Click on the switch and something happens that we have been waiting for from the beginning.
The first door was unlocked and opened so we can take what we need. Believe it or not, it’s both a spice. All you have to do is take the box.
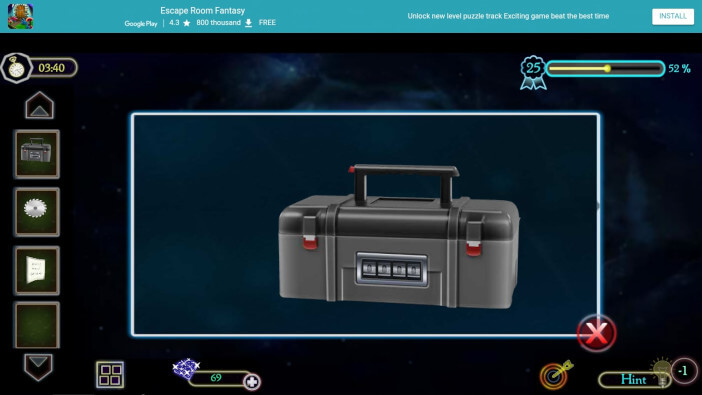
The box needs to be unlocked. We are the ones who dictate the pace. We are the ones who reveal secrets. And the secret is the code.
We can discover the code when we do something very important and that is to apply the basics of mathematics. Looking at the paper we saved a few minutes ago, we can determine the code.
The first two equations give the numbers 0 and 8. These are the first two digits of this equation. And the third equation gives a two-digit result and that means that the second part of the code is exactly this two-digit number.
The numbers are 2 and 1. The final code is 0 8 2 1. Enter these numbers and open the box. Get a new cutter out of the box.
Place the cutter in a close-up with a click. One part is missing. Take the blade and install it on the cutter.
Then you can do one important thing. To save such a complete tool because it is a dangerous weapon in our hands. And now we can do the only thing left.
And that is to go to the end of the right hallway and use the cutter to cut the lock. That way we can get into the next room. This is how the first part of level 25 is solved.
The new room consists of one small room and stairs leading further. We do not know where those stairs lead, but here we have to realize several requirements to be able to reach the desired point.
Therefore, let’s move slowly. Right on the floor, we can see one item. It is an S-shaped button. Let’s save this item. Let’s get him in the door.
And we can find the door built into the wall. We look straight out the window. To the right of the window is a small wall and at the top of the wall is a small closet that has a door where there is a slot for the letter S.
This is where we will insert the S button. And open the door to take only one item. It’s a ball. Let’s save this item. We’ll get rid of these balls right away.
We look out the window. Immediately to the right of the window is a mechanism. In the middle of the mechanism is a green screen and below the green screen is an empty slot. That’s where we throw the ball.
Just transfer the ball to the slot. When you insert the ball into the slot, the appearance of the screen changes. The word START will be displayed. You click on the ball several times to see the numbers that change.
A few numbers will change and remember the color order because it is a new code. To the left of the window is a door and that door is protected by a code. Enter the code 2 5 9 5 and thus solve all the problems related to the code.
Open the door and take the only item there. It’s a wire. Now let’s go to the stairs. If you get to the beginning of the stairs from the bottom, you can see that two displays can be seen on that wall.
Each display has some enigma. But we need the first display for now. The one on the left. Near the foot of the stairs. That display is nothing but a new puzzle game. And we know how to solve it.
Very easy. On the display, we have slots that have some shapes drawn around them. The shapes are different. We have to move the buttons so that each button comes to a slot that suits it.
That is the only right thing to do. That’s the only way we can move on. When this puzzle game is solved, the screen changes and the game gives us a sign that it has been solved successfully.
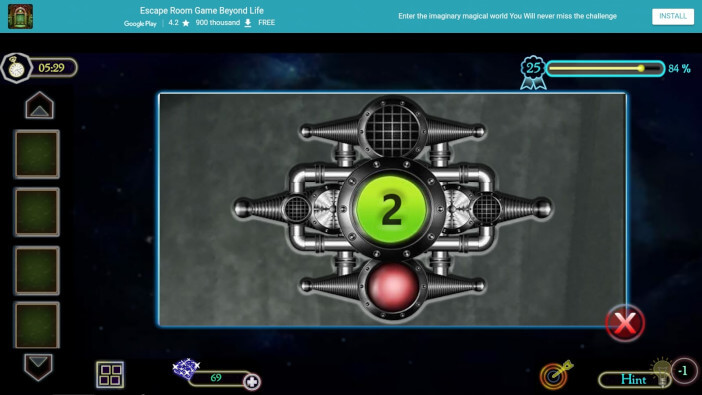
Several switches are displayed behind the screen. Each switch is connected by a cable. Every switch except the first one on the left. Here we insert the wire we saved a few minutes ago.
An important detail is to remember which signs these red arrows on the buttons show. Because I know that is an indicator that we are going a step further, that is, a step to the right. That step to the right is up to the next display.
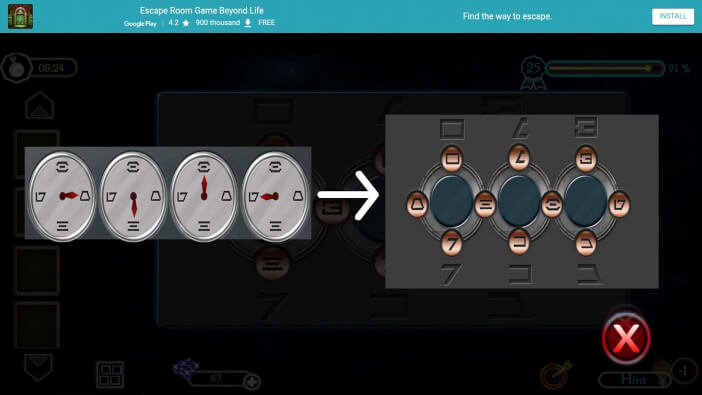
The most important part of this enigma is to place the signs so that they correspond to the schematic representation on the display located on the left, at the beginning of the stairs, closer to the foot.
When this enigma is solved, the door at the top of the stairs opens. It’s a shutter door. We enter a new room where we find a person who tried to harm Edward’s father. But as much as Edward was demanding, he got hit and fell to the floor.
The suspect escaped and escaped, for now. We noticed that this is a person who has an identity and a person we have seen. We don’t want it to be like before, we don’t want to wait.
The end is near and we will find out the person who did this. She has done a serious thing and will not get rid of our anger so easily. Justice must be served and we have no desire to stop.
It is one thing for someone to oppose us as a unique person. It’s another thing when it attacks people close to us and drags them into our problem. We will not allow it again and we now have a clear view of the person who did it.
We set off in search, hunting for a suspect. Level 25 is completed. That’s what we needed. Everything we wanted to do, we did. Remember that all this was done thanks to you.
And thanks to you, we have become the person we are supposed to be today. They are smart, resourceful, discreet, and successful people. Intelligence is something that is highly valued today.
And we can only envy you for showing generosity to Edward. Shooting is a virtue and that is another thing you have. Don’t think that you will be ignored in the circumstances we are in. We have to move on.
That is inevitable. We are here for you and we will not leave you. As long as your new destination is our walkthrough, we are grateful to you.
Follow our walkthrough and find out what awaits us in the next levels. Don’t think you’re alone. No, we are here for you. Have a nice day. Thank you for reading.