Dream Life Chapter 2 Levels 26-30
Level 26
Hello and welcome to our walkthrough for the game Escape Room Adventure – Dream Life Mystery 2021. This is level 26 in Chapter 2. In the previous level, we were on the street. A street that is deserted and there is no one to offer to help us.
We are used to doing everything ourselves, that’s why we succeeded at every level. Edward has to move on and so do we. The end is near, we do not give the last atom of strength to a person who does not wish us well.
We’re just looking ahead. It’s not the end until we say so. Don’t panic, please. Good luck! Let us begin.
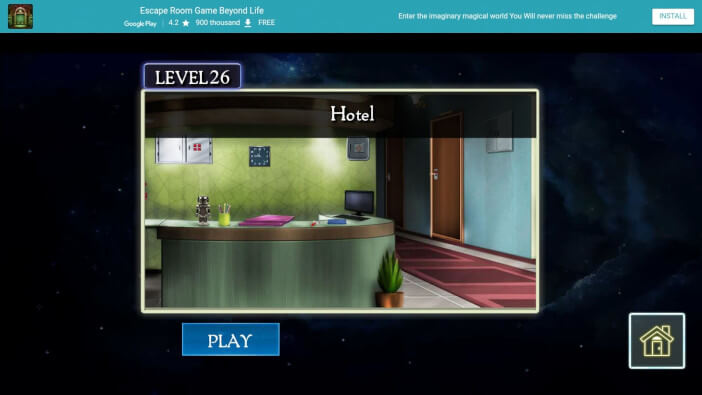
Edward was knocked to the floor. It’s a fact. The man responsible for Edward’s father’s poor condition escaped. We were not able to find out where he was going, but we heard through the conversation that he might be staying at the hotel where we are.
It’s not reliable, but it’s the only thing that keeps us here. Since the hotel is empty and there is no one at the reception, we have to do everything ourselves as before. But we are such that we cope with every new situation.
We will do the same now. We look right and we look to the future. We have self-confidence and we don’t want to bring it down because of people who think they have a significant stake in our lives. Let’s go without fear and panic. Good luck!
We are at the reception of the hotel. That’s where it all begins. We won’t wait a second. We’re leaving now. The place we orient ourselves towards is the reception desk. On the counter, on the left, is a robot.
It is a toy that has been our guest several times in our efforts to solve some enigmas. Move on. Let’s save the toy. Place the toy in the close-up immediately. That is the situation when we have to be careful.
Click on the hull of the toy to open the secret compartment and take the wooden piece. I need to get another wooden piece. That piece is located in the far left part of the reception. You see a vase of flowers.
Next to the vase is another wooden piece with another shape drawn on it. Next to the monitor at the reception, there is one inkpad. Let’s save this item as well. To continue collecting wooden pieces, place the ink pad in a large frame.
Then click on the inkpad to open it.
Then take another wooden piece that is placed inside. We are looking for a fourth wood piece. We’ll find that one behind the wall clock. A wall clock is placed on the wall behind the reception.
The clock shows that it is 09.00. Just click on the clock and the clock falls to the floor. You will see that there is a secret partition and that partition contains the fourth wood piece. Let’s save this item as well.
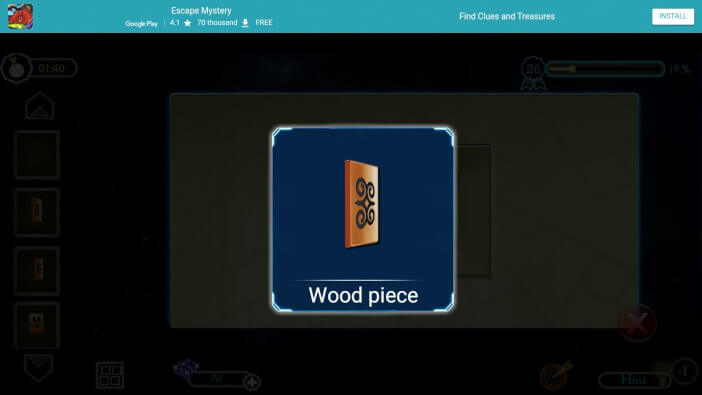
Now that we have all four wooden pieces, we can place them where they belong. We go behind the reception to the wall where the safe is installed.
There are four slots for inserting these parts. We just did the only smart thing and that was to put the parts in the slots.
We do not have a schedule for what all this should look like, but we know that by rotating with a click we can reach the final solution. Take the box to the safe. Click on the box and place it in a close-up.
After that, you have the option to solve the enigma that locks this box. The rules are simple. On the left, you have red buttons that have a picture of a bird on them. On the right side, you have the same kind of buttons only green.
The goal of this game is to swap the places of the green and red buttons. It’s simple. Just click on each button so you can move them across the field to swap places. You have two rules. The first rule is that one click moves one field.
The second rule is that buttons cannot stand in the same field. That’s why we have a lot of fields and so you can avoid overlapping buttons without any problems. The box opens and there is one card.
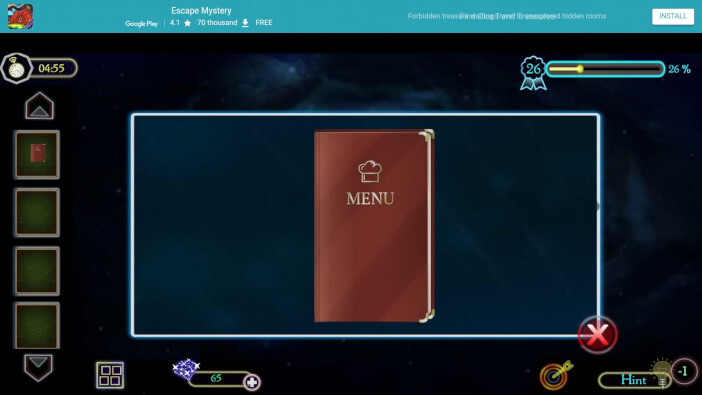
We are only looking at the contents of this card. Let’s put the card in a close-up. Then click on the card to open the middle and see the contents. You will see numbers and arrows in the arc direction.
They extend left or right. Remember this combination. We still stay at the front desk. That is where we are currently staying. Right behind the monitor, there is a safe on the wall. That safe is locked with a code. And the code is in the card we saved and opened a while ago.
That is now the case we are discovering. Enter 25, 75, 50, 10. This is the code. We turn the rudder and thus get rid of the locked safe. There is one file inside. Place the fillet in a close-up.
Click on the file and open the file. Inside is a paper with a schematic representation. You will see that the word PAST is associated with the red star. White and black stars are associated with the word NOW.
Yellow and blue stars are associated with the word FUTURE. Now we have to be very careful. We go to a two-seater where patients and clients can rest. Waiting is a hassle but we are not waiting for anyone anymore.
We go to the two-seater and the TV next to and above the two-seater. Click on the TV to see the contents of the TV scheme. You will see several numbers painted in different colors.
But those colors are the same colors as the colors from the paper we found in the file. Let’s remember these colors and numbers. We will take the numbers 0 7 4 2.
Immediately enter these numbers into the safe located on the other side of the edge of the wall. The wall where the TV is located. Enter 0 7 4 2 and open the safe.
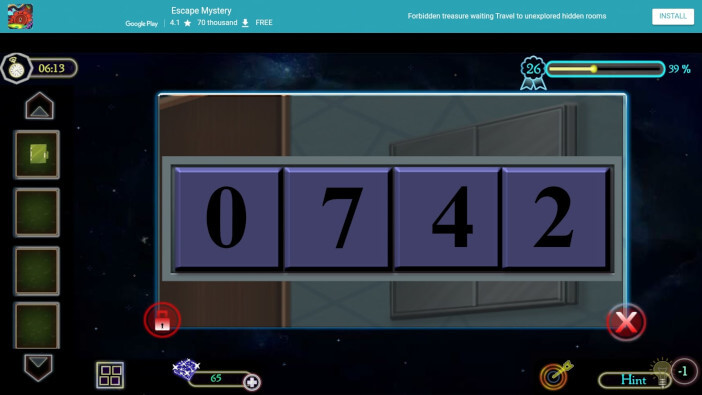
There is a card behind the door. This is a sign that we have solved the first of the two parts for level 26. Lean the card against the door and enter the room.
We are in a room that is one of those rooms that belongs to a person. But that person is the bully who tried to harm Edward’s father. As soon as we enter the room, we know what we are going to do.
There is a charger on the floor. Let’s save this item. We need a device that goes hand in hand with this charger. That device is mobile.
We’ll find the mobile under the pillow on the bed. The pillows are placed so that they cover the mobile. Click once on the pillows to access the pillows. Click a second time to move to the side of this pillow.
Then take the mobile. It’s a device we’re going to save. Next to the bed, on the right side, is a bedside table. That table is not empty. There is a telephone base on the bedside table. It’s so full.
But first, we’re going to put a charger on the wall and base. Then set the mobile to charge. These are the fastest phone chargers.
Just a few moments are enough to charge our mobile. And then save the charged phone again.
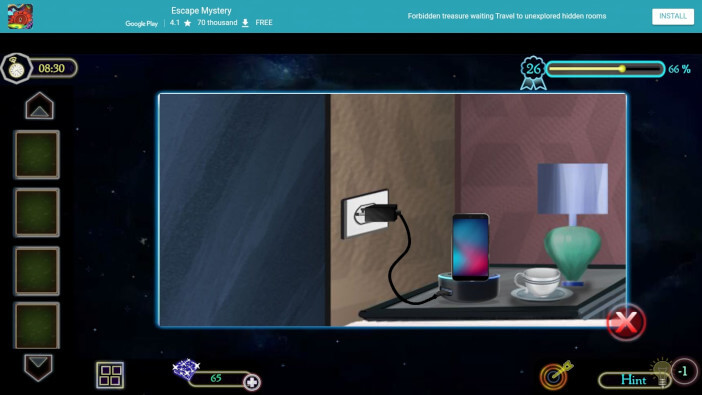
Now we go to the right part of the room. There is a workspace. Desk. There is a remote on the table. Save this item. Move on. Above the bed are three doors.
One of those doors has its secret. And the middle door is locked with an enigma. Click on the middle door to access this puzzle game.
A brief overview of the game. You see a fork that can take two adjacent balls. One ball can be green, the other ball can be blue. And sometimes they can be the same color. The goal of this game is to move the balls to get a layout that matches the slots.
Each slot has a dot above it that is green or blue. Therefore, blue balls and green balls must be in slots that contain the same color.
Good luck! Because after successfully solving the enigma, we come to the point that the game suggests that the puzzle game has been successfully solved. And so the door opens and we can take the wallet that is placed inside.
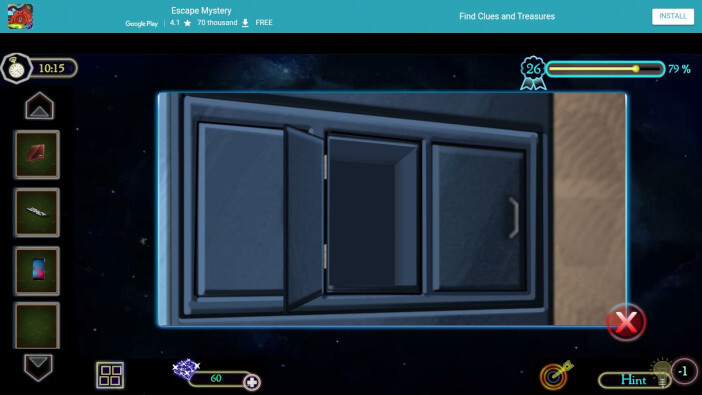
We will now place the mobile in close-up. After that, we place the wallet next to the mobile. All that has been successfully resolved, but we must continue. You have to see how to proceed.
Click on the mobile to turn it on. Click on the wallet to open it. Open the wallet and take the card. Under the bed is a suitcase. That suitcase is kept. Save this item. The initials R M are written on the suitcase.
It is not Real Madrid but it has some value. The suitcase must be unlocked and the code can be seen on the back of the card. Place the card in a large frame. Click to turn the back. You will see that under the letters R and M you can see the code.
The code is 8 1 2 5. The suitcase opens. Get a laptop. Take the CD. These are essential things to keep. Go to the TV. There is one CD slot.
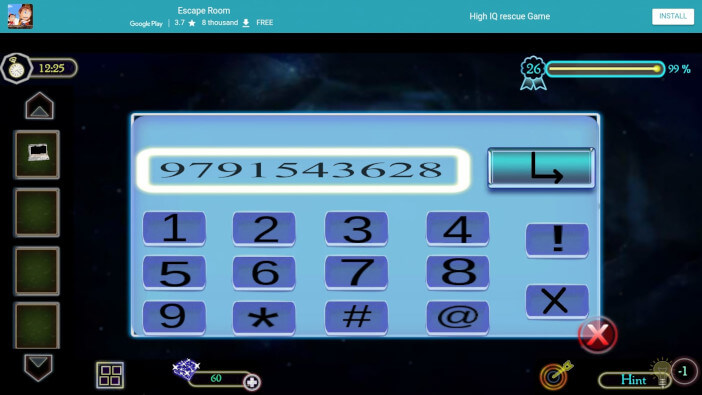
Insert the CD into the slot and the TV can be turned on with the remote. You will see that it is written Mr. Fabric and numbers 9 7 9 1 5 4 3 6 2 8. Now place the laptop and close-up. Enter 9 7 9 1 5 4 3 6 2 8 and unlock the laptop.
You will be shown the location of this infamous gentleman and we need to find him. This is the last thing we will do in level 26.
Level 26 is completed. That’s what we needed. Everything we wanted to do, we did. Remember that all this was done thanks to you.
And thanks to you, we have become the person we are supposed to be today. They are smart, resourceful, discreet, and successful people.
Intelligence is something that is highly valued today. And we can only envy you for showing generosity to Edward. Shooting is a virtue and that is another thing you have.
Don’t think that you will be ignored in the circumstances we are in. We have to move on. That is inevitable. We are here for you and we will not leave you. As long as your new destination is our walkthrough, we are grateful to you.
Follow our walkthrough and find out what awaits us in the next levels. Don’t think you’re alone. No, we are here for you. Have a nice day. Thank you for reading.
Level 27
Hello and welcome to our walkthrough for the game Escape Room Adventure – Dream Life Mystery 2021. This is level 27 in Chapter 2. In the previous level, we managed to get medicine. We had to solve two puzzle games to find a cure.
The safe hid the medicine and we opened the safe after a few successful moves. Everything was found. And let’s move on, we’re close. The end is near, we do not give the last atom of strength to a person who does not wish us well.
We’re just looking ahead. It’s not the end until we say so. Don’t panic, please. Good luck! Let us begin.
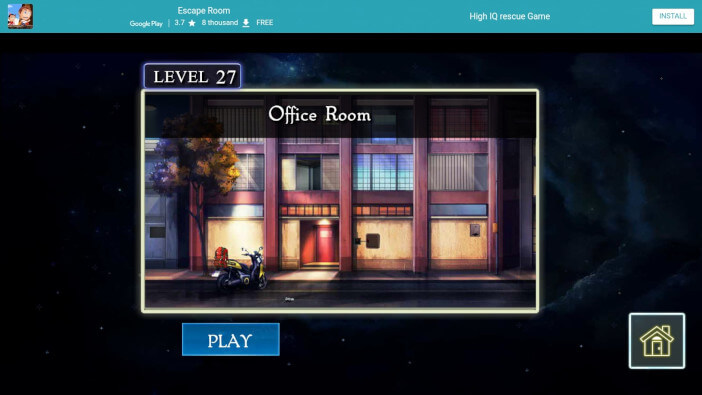
Edward has come to a location where the culprits for what is happening are. He is not completely sure that he is at the right address, but the location with the laptop led him to the place that is only shown. It’s time to settle accounts.
It is time to show who is the person responsible for what is happening. But given what is written on the scoreboard, we have to say the following. The fact is, we have no way to unlock the door leading to the building.
That’s why we have to go through the window. It’s not high and the ladder will help us. Edward is a person who has repeatedly had the opportunity to enter a room through a window. We entered the house, we entered the apartments.
This is the first time we have entered a building. We don’t know if this is a business building or a residential one. We have to find out. Let’s move slowly! Good luck!
We are located in a place where it is passable for cars and citizens. We have to be careful because this is an opportunity that can get us into trouble. Witnesses are on every corner. Off we go.
There is one screw in the middle of the street. Let’s save this item. Click on the screw to place it in a close-up. Then click on the nut to remove the screw. So we can conclude that we only need a nut.
Let’s save the nut and move on. Let’s go to the far left of this our current screen. We go to a metal brown plate that is closed with screws. Use a nut and remove all four screws. Behind the metal plate is paper.
In addition to the paper, there is also a lighter. The knife is the last item we will save. We need everything we find. Place the knife in a close-up frame. After that, you can relax and save this item.
Now approach the bike that is set up and parked in front of the building entrance. You can bypass this bike, but that is not our goal and it is not recommended. Take a knife and cut the rear of the bike. Cut the rope on the trunk and take the backpack.
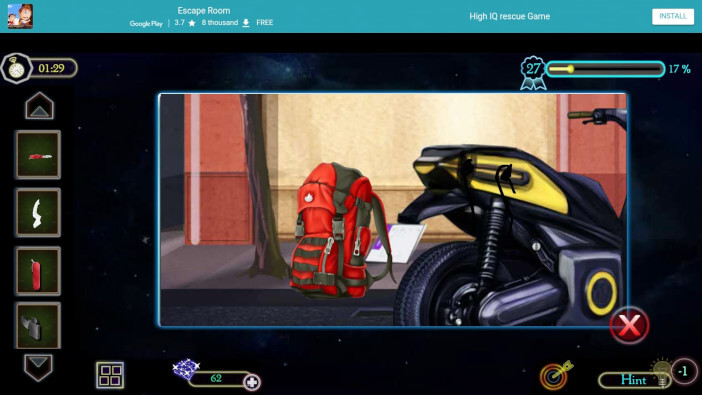
Place the backpack in close-up. Click to open the backpack and take the box from the backpack. We stay with the motorcycle. Get to the steering wheel. There is one wire that is hung.
Take a knife and cut the wire. Only then can you move on. Save the wire. To the right of the entrance to the building, there is one fuse box. That fuse box is where the wire is missing. Take the wire that we saved and put it in the fuse box.
Take a lighter and remove the stain from the partition door. The heat will do its thing and so you can open the door. Click on the fuse box and the lever goes down. That means you can open the door. Inside is a box. Save the box.
Then place the box in the close-up immediately. Click on the box lid. You will see a new puzzle game. It looks a little confusing but this is nothing to worry about. Look at the puzzle game, the goal of this game is simple.
Take your power to click on the rotary buttons. So you can rotate the rings. The object of the game is to rotate the rings so that you can get a colored string on the board. The green stones should be in the row from the first to the last place.
It’s all the same color. This is the only way you can solve this puzzle game. No problem if you need a little more time for this. Everything is fine. After successfully solving this enigma, try to drink a glass of water and become aware of the chaos this enigma has created for us.
The box opens after the inscription that it is Puzzle Completed. The box opens and inside you can see some items we need.
There is one rope in the box. That’s the item we need. In addition to rope, take a needle. It’s all in the box. We will use these items immediately.
We only look at the details that interest us. Place the rope and close-up. Insert the needle and make one big hook. Place the paper in a large frame. Look at the back of the paper. Click to turn the back.
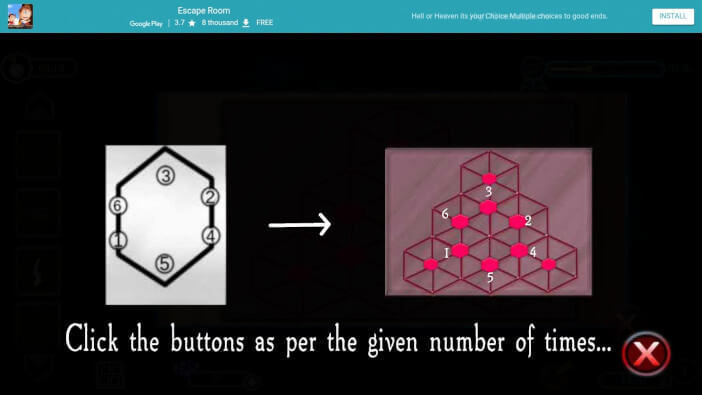
You will see a hexagon with numeric features. Those are the things we need to remember. Now we go to the part next to the front door. The far-right part of the building is interesting. There is one very important part.
Mailbox and schematic view of connected points. Look at the central hexagon. That hexagon is important because it has a goal.
Let’s compare it to a hexagon on paper. Each corner of the hexagon clicks as many times as the number displays. If one topic displays the number 4, click four times. If a topic has the number 6, click six times.
It’s simple. The mailbox is unlocked and take the gloves as a gift. In addition to gloves, take the paper. Place the paper in a large frame.
Click to turn the back of the paper. There you see the code. The code is 3 1 6 4. This is the code to open the box we have.
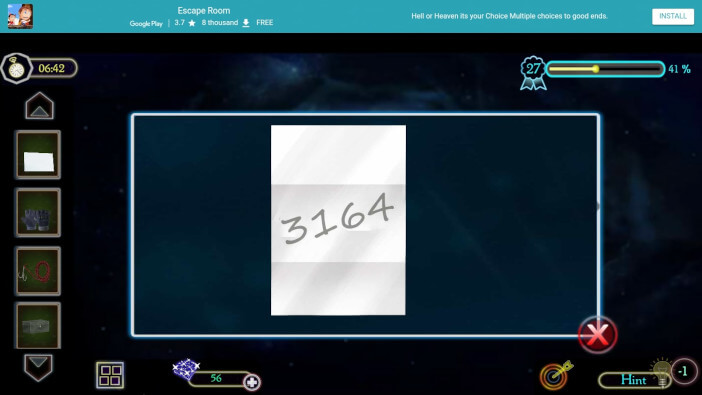
There is a helmet in the box. Everything we need for hiking, we found. Place a rope with a hook under the window. This is how you solve the first part of this level.
Move on. An address needs to be found. We are in the office. It is most important. We have little time and a lot of obligations. We move slowly. We are next to the table. It’s the place where it has mostly the most stuff.
The first thing we should take is the remote. Point the remote at the screen and projector. Click to activate the projector. But to turn it on to work properly, we need to adjust the buttons so that the pointer on the button has the same direction as the arrow above the button.
The first button points down, and the second button points to the left. The third button points to the right. The projector turns on and displays certain shapes on the screen. Remember these details.
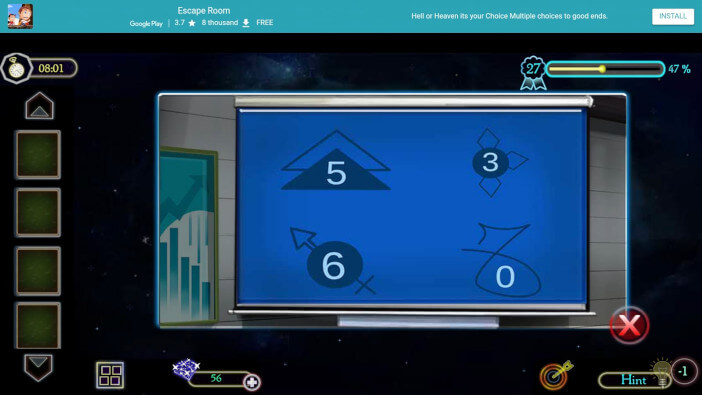
In the right part of the room, there is a closet on the wall. Here the closet is unlocked with a code. And the code is a number from the schematic representation of the shape that is on the canvas.
On the left side, near the exit door, there is an engraved pattern on the wall. This is the order in which numbers and shapes are entered. Enter 0 3 5 6 and identify them with the shapes they take.
That’s how the door is unlocked. There is a box behind the door, save this item. Take the pin from the table. We would put a pin in the close-up.
Then stretch the pin to get the pin. That needle would open the box we have. I don’t have a key, so we have to figure it out. There is a sim card in the box. Save the card. And next to the table is a chair.
Click to move the chair and take the piece that is hidden under the chair. Put that piece in the closet. The closet is designed to have one part that we opened. It’s in the right part of the room.
The other part of the closet is locked using a puzzle game. Place the missing piece in the closet and you get a complete enigma. The goal of this game is simple. Place the ball and transfer using rotating slots.
It is transferred from one hole to another and with the help of a click, it moves through the slots. It’s simple. This is how the enigma in level 27 is solved.
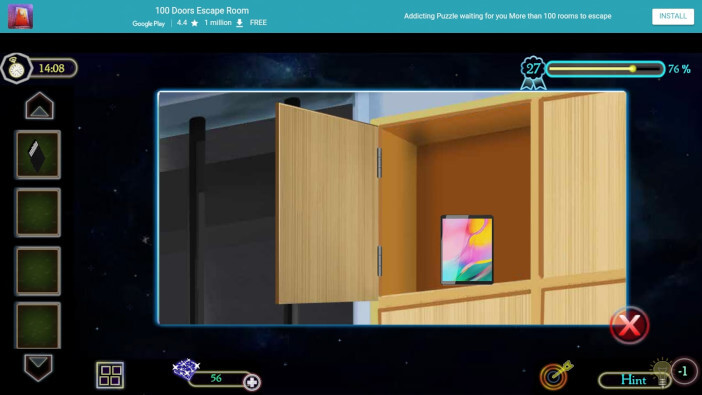
There is a mobile in the closet. Save this device. Place the mobile in a close-up. Click on the mobile to set it first and then rotate it to the side. The reason for this is that we have to insert the sim card into the mobile slot.
After that, the screen changes from mobile. You will see that the new schematic is set to mobile. In addition, the order in which a particular character follows is shown.
Something new can be seen next to the projection screen. Look at the safe on the right. It is locked with a code.
Password is through the characters from the mobile that we saw a while ago. Signs are (from left to right) Fire, Wi-Fi signal, pin, tree leaves, and flower. It is the only combination that unlocks this safe.
Inside is a new mobile. Let’s save this virgin too. Place the mobile in a close-up. It needs to be unlocked. Click to display the dial with the code entry.
Looking at the old dial on old phones, we enter as on the phone. Imagine that the numbers are from 1 to 9. Three rows and three columns.
Then click on the points where the numbers could be. The numbers are 8 6 2 4 5. The phone is unlocked and we get the address we asked for this whole level 27.
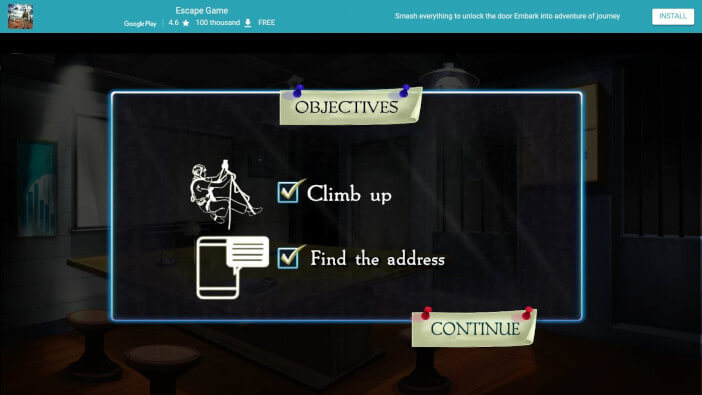
Level 27 is completed. That’s what we needed. Everything we wanted to do, we did. Remember that all this was done thanks to you. And thanks to you, we have become the person we are supposed to be today.
They are smart, resourceful, discreet, and successful people. Intelligence is something that is highly valued today. And we can only envy you for showing generosity to Edward. Shooting is a virtue and that is another thing you have.
Don’t think that you will be ignored in the circumstances we are in. We have to move on. That is inevitable. We are here for you and we will not leave you.
As long as your new destination is our walkthrough, we are grateful to you. Follow our walkthrough and find out what awaits us in the next levels.
Don’t think you’re alone. No, we are here for you. Have a nice day. Thank you for reading.
Level 28
Hello and welcome to our walkthrough for the game Escape Room Adventure – Dream Life Mystery 2021. This is level 27 in Chapter 2. In the previous level, we managed to get medicine. We had to solve two puzzle games to find a cure.
The safe hid the medicine and we opened the safe after a few successful moves. This counts as a burglary, but the rules no longer apply to anyone, since we have entered into dubious business.
They tried to kill my father. We did not allow it. We had to do everything ourselves. We found the address and headed to the same address. And let’s move on, we’re close.
The end is near, we do not give the last atom of strength to a person who does not wish us well. We’re just looking ahead. It’s not the end until we say so. Don’t panic, please. Good luck! Let us begin.
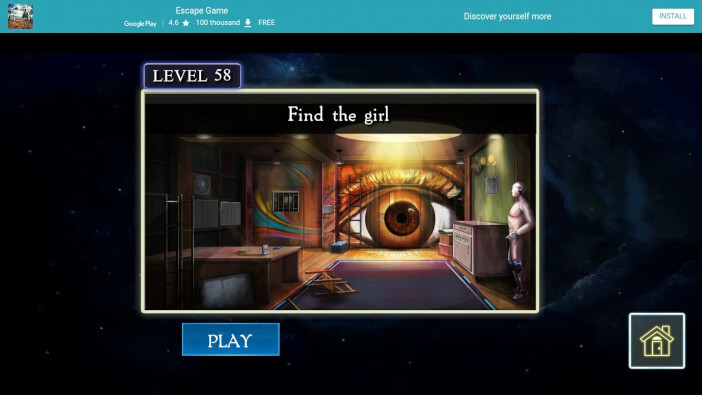
Edward came to a secret place. It’s amazing how strange this interior is. A place where you will never be able to stay without serious legal problems before that. Edward is sure Elena is in this building.
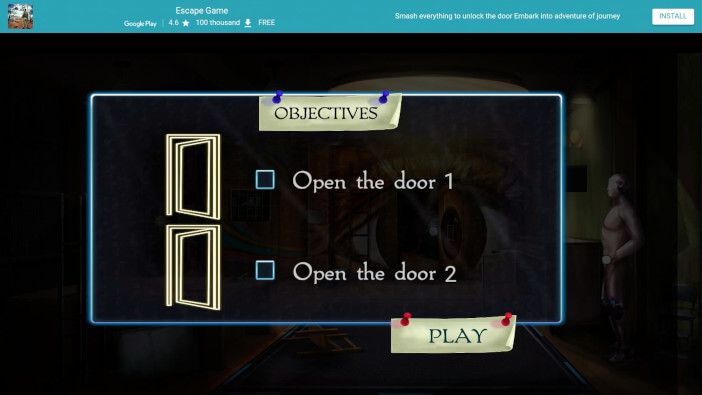
Our task is simple. We have to open one door. After that, we open the other door. It all falls into that part where we have to do and solve a few enigmas to be able to reach the desired goal.
The road to glory is paved with thorns and suffering. Work is an indispensable part of our lives. Let’s go slowly and without panic. You can do it. We are here with you.
There is one chair on the floor that has been knocked down. But that downed chair is broken. Next to the chair is a wooden stick. Save this item. We go to the sculpture that is placed in the right part of the room.
There is a sculpture with an artificial hand. Take an artificial hand and save it. Before that, click on the hand to see the image up close. When you take your hand, now comes the new circuit. Place the wooden stick in a close-up frame.
Then place your hand next to the stick and put your hand on the stick. So you get a wooden stick with a hand. Save the newly created device. On the left side of the wall where the eye is located, you can see one gap where the button is visible.
That button is inaccessible because it is behind bars. But we have the tools. We made a tool a few moments ago. That tool is a great thing. Put your hand on the stick. Insert it between the grids and click the button to turn green.
It’s a sign that the door has opened. But the door that means to us in the objective is not open. These are the doors on the left side of the room. There is a steering wheel. The more accurate name is the rudder.
Used to guide the ship. There is one scheme at the helm and that scheme is important for the next steps. It is surrounded by wooden parts that have numbers written on them.
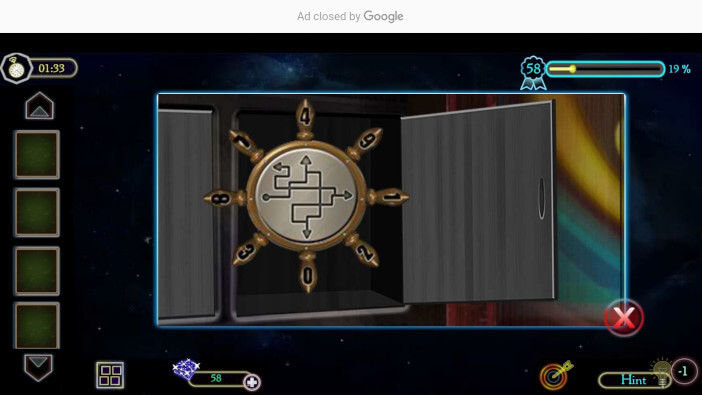
Now we go to the right part of the room where there is a small closet. The closet is placed horizontally and placed on the floor.
One detail can be seen here. Unlock code required. The cipher is 8 4 0 1 7. We got this cipher because we saw the rudder and that rudder had a schematic. That’s how we get the code.
Enter the code and unlock the door. Inside is a rib cutter. Save this item. In the very left part of the screen, there are bars. Use a rib cutter and remove the rod. Save the family. We will use this genus by placing it in the slot on the table.
Install the rod in the slot and pull it down. After that, click on the button located next to the gender slot. This is a way to open the door of the safe that is installed at the wall where the eye is painted.
There is a small space. Get a remote. We need to point the remote at the pupil of the eye. That pupil is painted on the wall. Many do not notice but the pupil is a safe that is not visible at first glance.
Set the remote and click to open the safe. You’ll see a new rudder inside and that’s it for now.
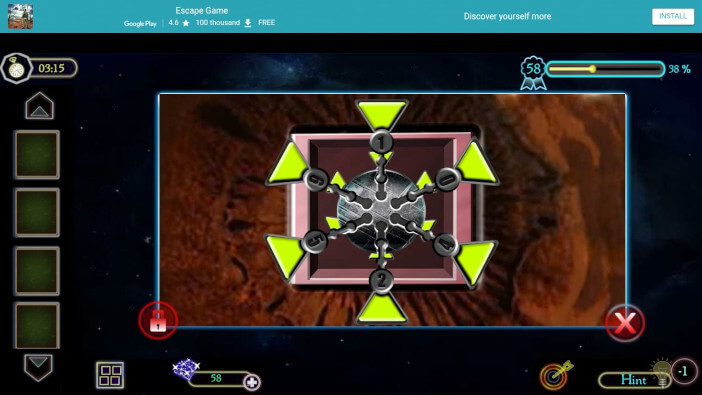
The right wall has a built-in enigma in it. That is the most important detail at the moment. Click to access this enigma. You will see that the puzzle game is the most complex detail now. The goal of this puzzle game is simple.
We have to click one arrow from 13 attempts and connect as long a string as possible and all arrows disappear within 13 attempts. We have 49 fields. That is the most important detail for us.
The fields are 7×7. Imagine that the first row is from 1 to 7. The second field is from 7 to 14. So everything goes to 49. We will tell you which field to click each time. First, click field 47.
There is an arrow pointing to the left. Then click on field number 1. There is an arrow pointing to the right. Then click on field 29. The arrow shows the direction up. Then click on field 28.
This is the field where the arrow points upwards. Then click on field number 3. The arrow points down. Click on box 23. The arrow points to the right. Click on field 38. Click on field 4. Click on field 12.
Then click on field 30 and field 31. That would be enough to solve this enigma.
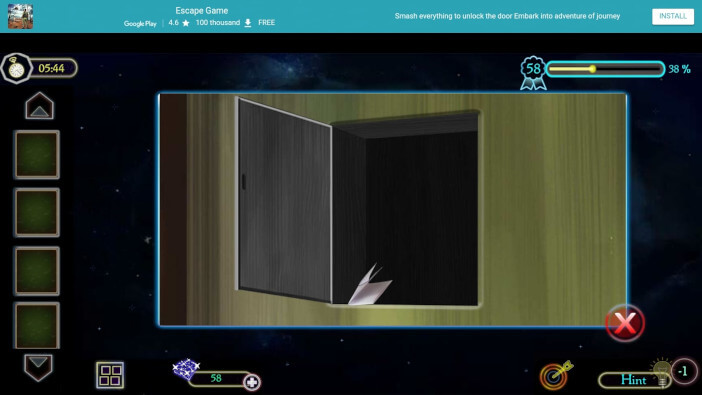
Behind the solved enigma is clue paper. Place the clue paper in a large frame. Click to expand the clue paper and see what all the data is.
You will see a series of numbers printed in different colors. The numbers are 2 0 5 1 4 9. We can use all that for the part where the rudder is. It is in the part where the pupil of the eye is located. Change the colors on the rudder.
The colors should match the numbers and colors on the clue paper. So we open the first door and we can move on. The next room is a secret room.
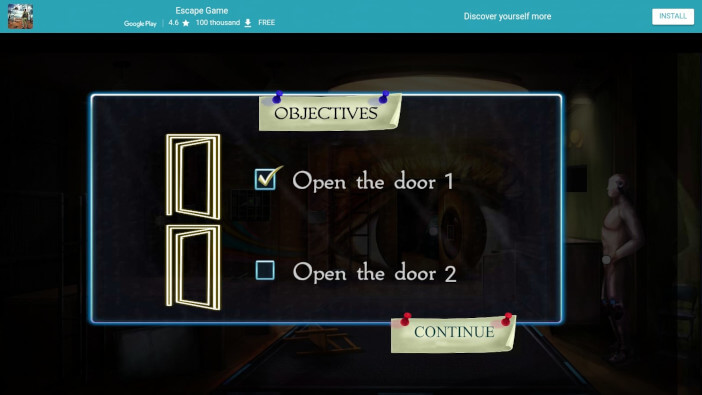
The new room is a secret room. Let’s start from the beginning. Next to the door is a table. There is a stick on the table. Save this item. In the right part of the room, there is a large machine.
The right part of the machine has its drawers. We need a smaller drawer. Click on the drawer and then you will be able to open it. There is a battery inside. Save the battery. Above the machine, on the left, is a new puzzle game.
The rules are clear. The goal is to eliminate all the elements by rotating so you can solve this puzzle game. Here’s how. You have three rounds and each round has two rotations. The middle circle has a rotation left and right.
The left and right circles rotate up and down. We tell you chronologically how to rotate. Rotate the middle circle to the left. Rotate the middle circle 6 times to the right. Then we go to the right circle.
Rotate the right circle up five times. Now let’s go to the left circle. Rotate the left circle 4 times up. Then we go to the middle circle. Rotate the middle circle 3 times to the left.
Rotate the middle circle five times to the right. Rotate the middle circle to the left three times. Then we go to the left circle. Rotate the left circle down 4 times. Let’s go to the middle circle again.
Rotate it 3 times to the right. Twice down in the left circle. Rotate the middle circle to the left once. Seven times the middle circle to the right. Rotate the middle circle to the left 4 times. Once to the right and then three times to the left.
Well then once again to the right. Now let’s go to the right circle. Eight times up. That would be enough to solve this enigma and open the safe.
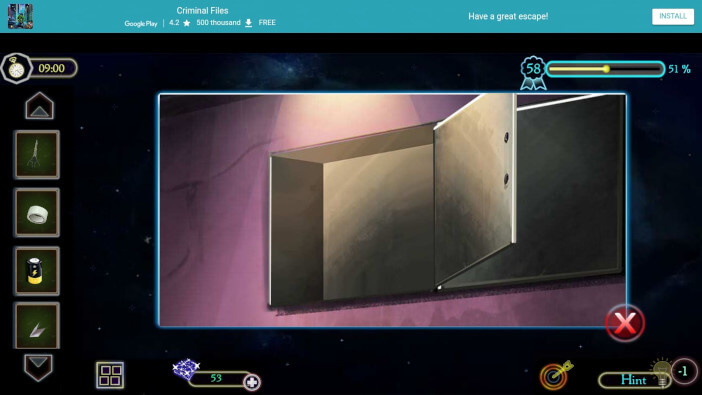
There are scissors and tape in the safe. Save both items. Use scissors to cut the bag hanging on the rope. The bag falls to the floor so you can see the contents of the bag. Get sticks with labels and a battery.
Insert both batteries into the door above the machine but on the right side. Insert the batteries into the slots and click to open the door. Behind the door is paper with a pattern and shapes in different textures.
If you click on each stick we took, you will see a little more clearly that each number is in textures such as circles on clue paper. With this combination, we get a new code for the safe that is under the machine but on the left side.
The word is A M R I. There is a wire in the safe. Save the wire. Insert the wire into the area next to the exit door. There is a button that opens the door, but since the wire was cut, we will insert the one we found.
And tape it with tape so there is no electric shock to Edward. Click the button to release the circuit. That means we go to the machine. Click on the control panel and you will see that several lights are on.
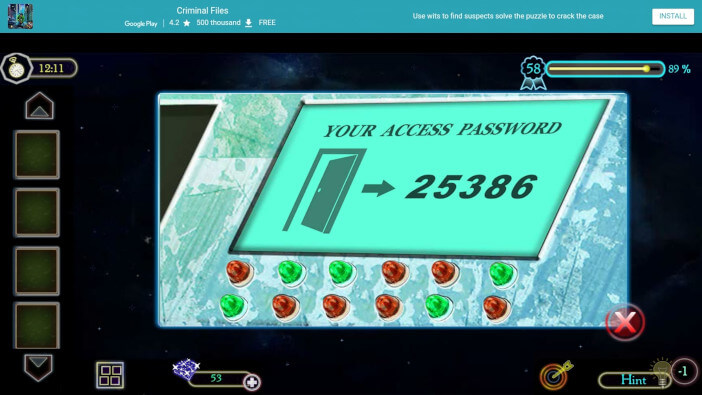
The goal is to click on each lamp that lights up. Click in the order in which it normally lit up. We will help you. Two rows of six lamps. The numbers of the click lights are 2 11 3 6 7.
The screen changes and we get a code for the exit door. Enter 2 5 3 8 6 in the exit door and leave the creepy room.
Level 28 is completed. That’s what we needed. Everything we wanted to do, we did. Remember that all this was done thanks to you. And thanks to you, we have become the person we are supposed to be today.
They are smart, resourceful, discreet, and successful people. Intelligence is something that is highly valued today. And we can only envy you for showing generosity to Edward. Shooting is a virtue and that is another thing you have.
Don’t think that you will be ignored in the circumstances we are in. We have to move on. That is inevitable. We are here for you and we will not leave you. As long as your new destination is our walkthrough, we are grateful to you.
Follow our walkthrough and find out what awaits us in the next levels. Don’t think you’re alone. No, we are here for you. Have a nice day. Thank you for reading.
Level 29
Hello and welcome to our walkthrough for the game Escape Room Adventure – Dream Life Mystery 2021. This is level 29 in Chapter 2. In the previous level, we managed to get medicine. We had to solve two puzzle games to find a cure.
The safe hid the medicine and we opened the safe after a few successful moves. Now it is time to do everything for the father to take the medicine and thus save the life of the person who raised and shaped us in such a way that we can fight for ourselves and others.
The father is a great figure in the family and then we will get into a situation where we have to give a little of ourselves to be able to help close people. No way to find Elena who’s been here all along.
Edward is looking for her from hour to hour. We have to be aggressive and persistent. The reason is simple. The end is near, we do not give the last atom of strength to a person who does not wish us well.
We’re just looking ahead. It’s not the end until we say so. Don’t panic, please. Good luck! Let us begin.
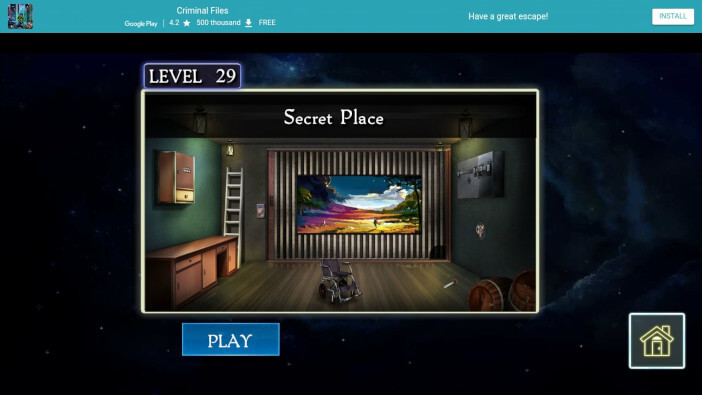
Edward came to that position hoping to find a secret room. Something needs to be done to find this girl. We did not have the opportunity to embark on easy challenges.
The very fact that we had a lot of work to do with demanding enigmas, strengthened us mentally and mentally. It remains for us now in level 29 to try to do what we know best and that is to be at the top of the task. Off we go.
We have two tasks. That is to find a secret room. The second task is to open the door. We have everything we need. And to get to the secret room of the war, we have to solve several tasks that lead us to that point. Off we go!
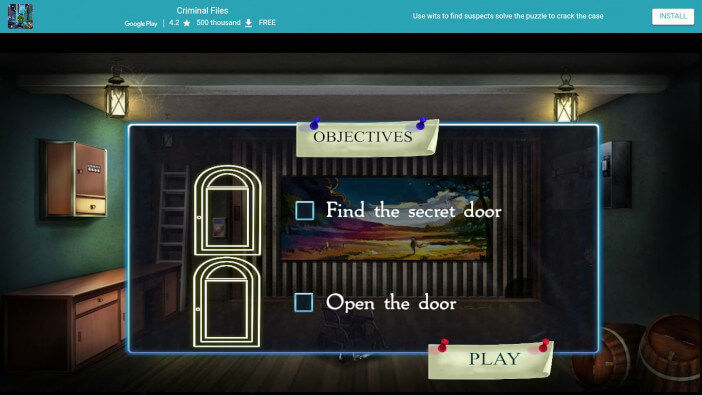
We look into the room where we see the wheelchair. That’s not a good sign. Wheelchairs are orthopedic aids that are most important in the movement of disabled people. We hope he stays on this.
But they are not there for no reason. On the right side of the floor is a knob. Take this item. This is an important item for us because we have to preserve it. In the left part of the room, there is a desk.
That desk is usually set up in the office. We see a drawer that can’t be opened without a knob. Place the knob in the slot where the drawer is and open the drawer.
There’s a clock. It is not an ordinary watch but we need this item. Save this item. Now we have to click on the wheelchair. Click to move them aside. There is a new clock under the wheelchair.
Save this item as well. Every watch has one missing piece. We have to live without those parts. Here’s how we’re going to handle it. Look to the right of the room. Place clocks in empty slots.
The object of this game is to rotate the used clocks around the cylinder in such a way that the missing part matches the cylinder.
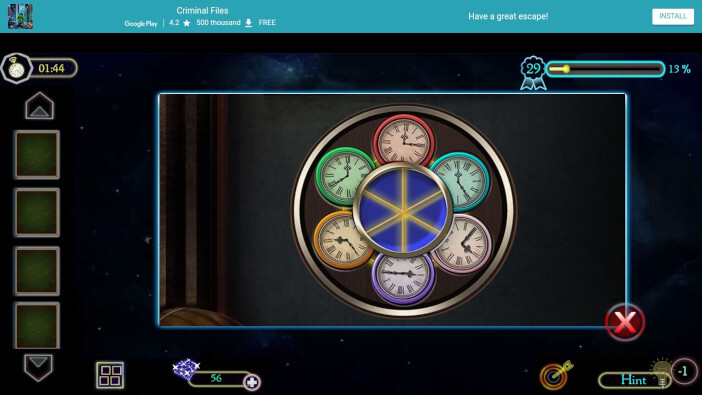
Now we go to the left part of the room where the desk is. Here we can look back at the hanging part that is installed on the wall. It needs to be opened with a code.
The code consists of clocks that have different colors. Now comes the combination of clocks on the right side of the wall.
Here we will see clocks that are light blue, orange, red, and green. See what time it is on each hour. Then add the time from those clocks to the hanging part. That’s the only way you can open this little door.
The first hour is 19.00. The second hour is 21.23. It’s 3:15 in the third hour. It’s 8 o’clock at four o’clock. You open the door and you can take the wheel and the phone. We need both items. We need a wheel at the moment.
We go to the right part of the room where there is a very important hanging part. We also have a small closet that is set at a slightly higher height. Install a wheel on the door so you can open this little closet.
Inside you can find a spray can. Save this item. In addition to this item, get a mobile. Save both items because they are extremely important for us to continue. Now we go to the central wall.
This wall is important because the wall is the place where we should use spray cans. Spray on the wall and you will see that we have got three groups of characters.
Three stars, four dots, and two squares. We just need to remember that because the next step is crucial.
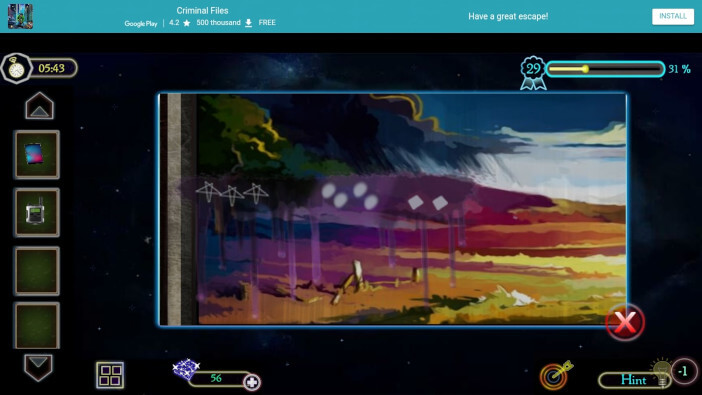
Let’s put the phone in a close-up. Click to see from a closer angle. Three buttons are visible on the phone. Each button has a purpose.
Signs on the wall are engraved with buttons and we have to click each button as many questions as there are characters. So the first button clicks three times. The second button click four times. Click the third button twice.
When you do all this, you get a very important shape that forms a line. This line shows us the direction and combination to unlock the mobile we own. If we look at it as a combination of 9 numbers.
We need to be clear about unlocking. Transfer this combination to your mobile and unlock it. Keep your mobile unlocked. On the left side of the central zigzag with the picture, there is one device.
Now that we’ve got a mobile that has its digital scanner, we’re just going to lean the mobile on this device. So we can do what we have been waiting for since the beginning of our level 29.
The big door is opening for us. These are the secret doors that lead us to a new enigma in the game. You will see a closet that is placed horizontally. This closet contains the enigma we need to continue the game.
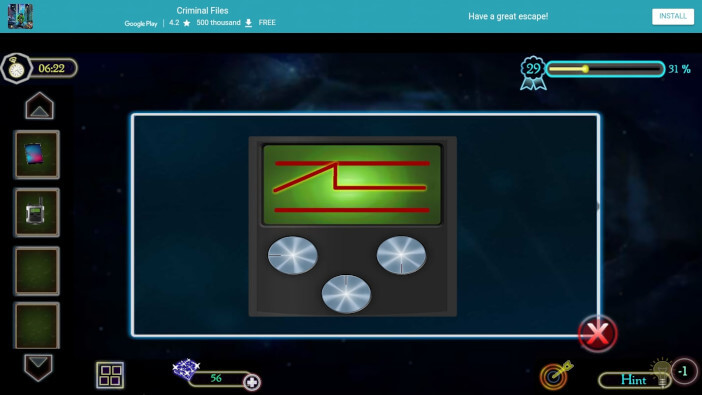
Here’s how to solve it. Click to access it in more detail. So, the goal of this game is simple. You have four balls and five slots. One slot is always free because we need a place to reserve.
The object of this game is to move the balls to obtain a diagonal that connects the upper right slot with the lower-left slot. This is obtained by making an arrangement of balls which we will now explain to you.
A white ball should be placed in the upper left slot. A blue ball should be placed in the upper right corner. A green ball should be placed in the lower-left corner. A red ball should be placed in the lower right corner. This is the only way to solve this enigma.
There are two new items in the closet. The first item is the wheel. This is an item we have already had the opportunity to store before.
But this subject appears to us again. We will save him. Now we have to save the new item. It’s lighter.
A very important item because we had the opportunity to find a lighter in previous levels where we lit some things with this item. Now we will take the crowbar that is on the floor in the secret room.
The Crowbar is placed on the floor next to the enigma we solved. To solve the first part of the objectives we had in level 29, we will look at the ground of the secret room. The right part of the secret room is very important.
There is a door that is placed on the ground. We open the ground and we can enter another room that is lower than the level we are in at the moment. Insert the wheel into the slot on the door on the floor.
So we will open the secret door and do the first part that was set for us at the beginning.
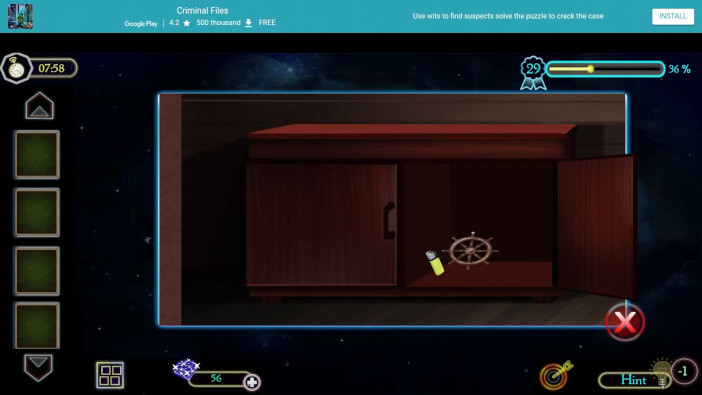
This is incredible. We found ourselves in the sewers. A place where ninja turtles live. We have to be organized because this is a very dangerous route where we are going. We start from the beginning.
This part is very important. In the left part of the driveway, we have a wooden board that can be used as a crossing over the canal. There is one fun toy. We need that gun. Save this item. Place the gun in the close-up.
Click on the tank where the water is added. This will allow you to separate the tank from the gun. Save only part of the gun without the tank. Save the tank separately. You need to sweep the tank and fill it with water.
Fill it by clicking on the part next to the wooden driveway. Here you will be able to lower the tank into the canal. Take water and apply the gun to the rest. Save such a gun filled with water. The water isn’t exactly the cleanest but it’s the only thing we can have at the moment.
That way you will get a water gun. There is one box on the right part of the screen. A wooden box protected by a cipher. Save this box. The box opens very easily. Each slot has a frame that has a specific color.
But the dots in these slots are different colors. The goal of this game is to bring points to the slot whose color corresponds to the points by simple rotation.
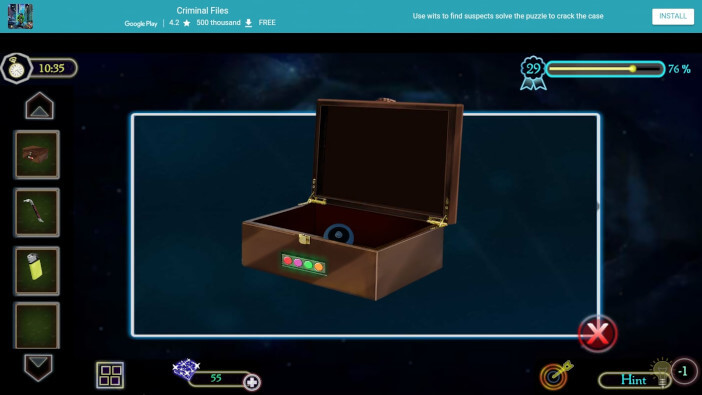
Inside is a wheel. Save this item. We find the wheel again. This is our third wheel in this part. There is one object in the middle of the screen.
These are carts that are used to carry slightly heavier goods. But we need a wheel to install in the base. That way we can move the cart to the right. At the place where the cart was, there is a small secret door.
Take the crowbar to open the secret door. There’s a bottle. In addition to the bottle, there is also a button. Save both items. Place the bottle in a close-up. Then take the lighter and light the top of the bottle.
That means you will burn the top. Then you can take the contents out of the bottle. That is an important item for us. This item is a scroll. Save the scroll and the bottle will be thrown away.
Place the scroll in close-up. That is an important move. Open the scroll and you will see that there is a combination printed there. At first glance, it seems like nothing is understandable but this is an important detail.
Just look at the right side of the screen. The very right part of the screen features a small wall that is not noticeable at first glance. There is one dial that has essential characteristics.
Place the button we have in an empty slot. The empty wall below this dial is where we will use the water gun. Spray water from the water gun on the wall to burn the dirt. Then you will see the arrangement of colors and dots that correspond to the dial above.
You will see a schematic of everything we need. You will see how and in what order we should place the buttons on the dial above.
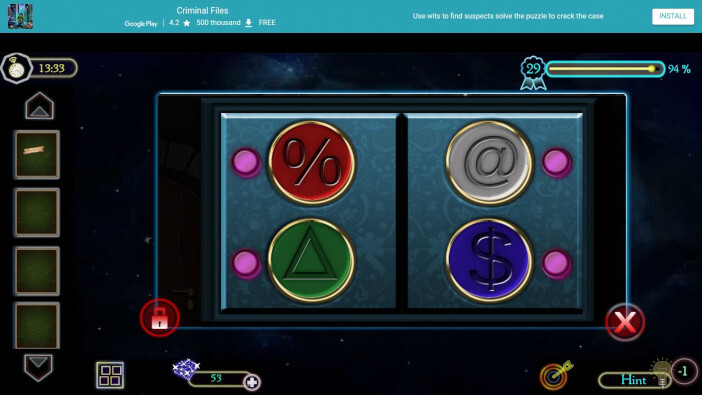
Based on the paper and schematic we just saw on the wall, adjust the code as intended. How to set the password? Very easy. Follow our instructions. Let’s just look at the order of the characters.
The order of the characters is (%, @, triangle, and dollar sign). That way you will only be able to unlock this box. Then click on the padlock in the corner to unlock. But that’s not the end. Based on the combination from the wall, you have to click on each sign.
Only in this way can you completely unlock this item. Click on these characters in order (@, $, %, triangle). Then you completely unlock this dial. You open the electrical junction box.
This is one of the details that draw our attention to level 29. The goal of this enigma is clear.
All you have to do is unplug the wires and connect them properly. The first wire to be connected is a light blue wire. It goes from the upper part to the first lower left part. And so we go from left to right.
No wires would intertwine. The first is light blue, the second is green, the third is purple, and the fourth is orange. The heel is dark blue. The electrical junction box opens.
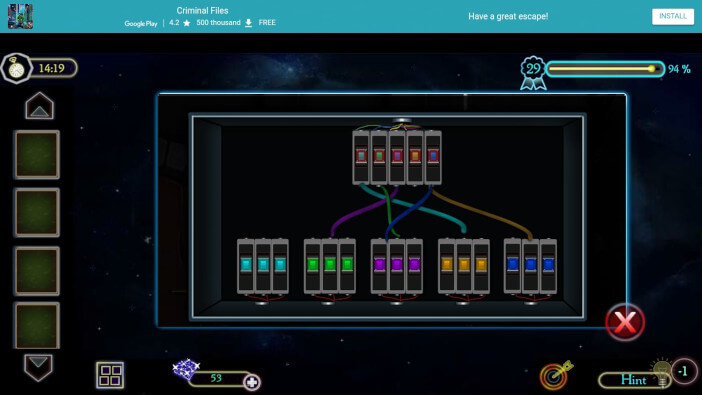
Pull the handle and the wooden driveway will lengthen. That way you will be able to cross to the other side.
That other side is the place across the canal. Let’s go to the left door. The doors are locked. The enigma that regularly strikes us is the enigma where parts of one whole move.
That’s how we get a complete whole. And that whole is important because by assembling it into a clear whole, we get the door unlocked. And that door is very important to us.
Rotate moving parts. Rotate them so that you get circles where the intersections of the circles can be seen.
After that, the game will explain to you that the enigma has been successfully solved and you will open the door to the secret room. Go inside and Edward will speak to you.
Level 29 is completed. That’s what we needed. Everything we wanted to do, we did. Remember that all this was done thanks to you.
And thanks to you, we have become the person we are supposed to be today. They are smart, resourceful, discreet, and successful people. Intelligence is something that is highly valued today.
And we can only envy you for showing generosity to Edward. Shooting is a virtue and that is another thing you have. Don’t think that you will be ignored in the circumstances we are in. We have to move on. That is inevitable.
We are here for you and we will not leave you. As long as your new destination is our walkthrough, we are grateful to you.
Follow our walkthrough and find out what awaits us in the next levels. Don’t think you’re alone. No, we are here for you. Have a nice day. Thank you for reading.