Detective – Escape Room Games | Chapter 5: A Wolf in Sheep’s Clothing
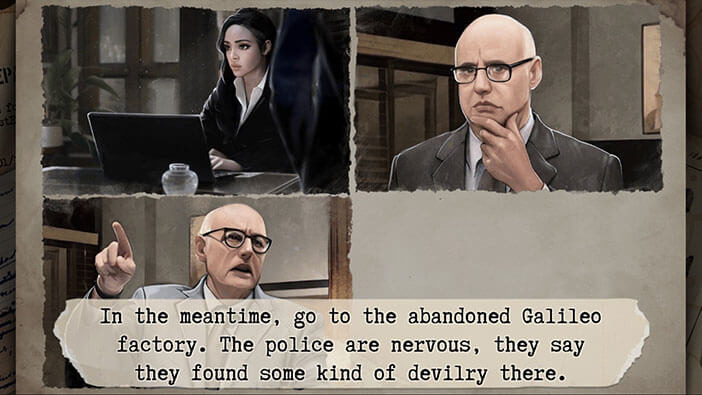
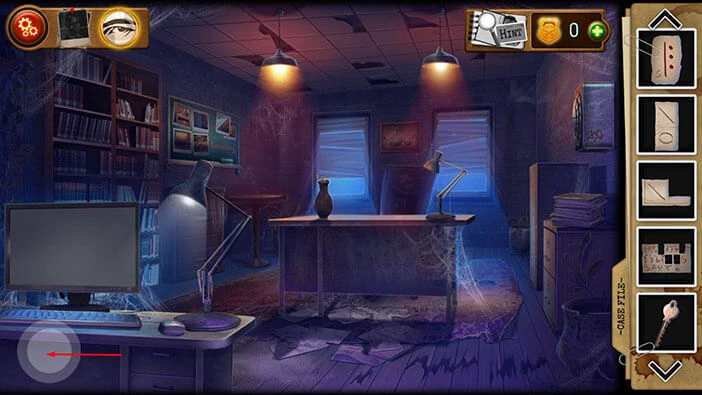
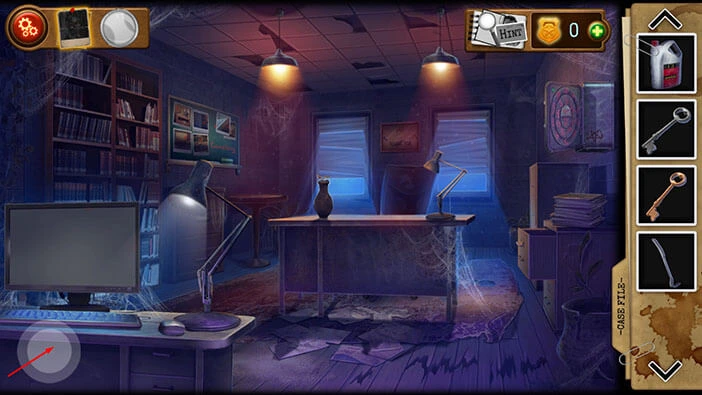
Hello everyone and welcome to the walkthrough for Chapter 5 of the “Detective: Escape Room Games”. At the beginning of the fifth chapter, Detective Simon’s superior realizes that his most capable detective didn’t report back after he went in to investigate a lead regarding a clue in the “Collector’s” case. So, the superior, presumably a chief of police decided to investigate this clue himself. In the meantime, our character, Detective Jones, was sent to investigate the strange symbols in the Galileo factory.
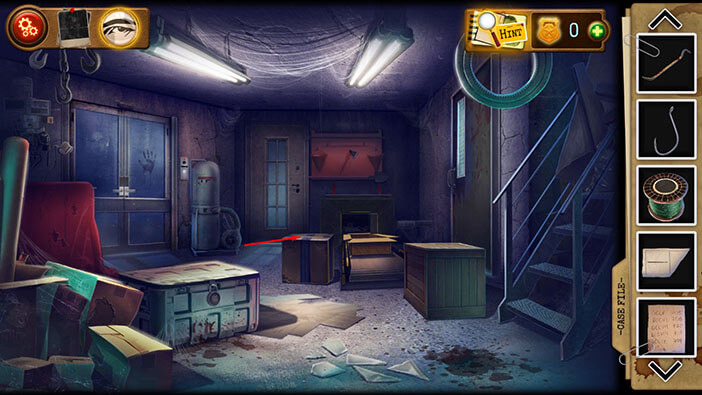
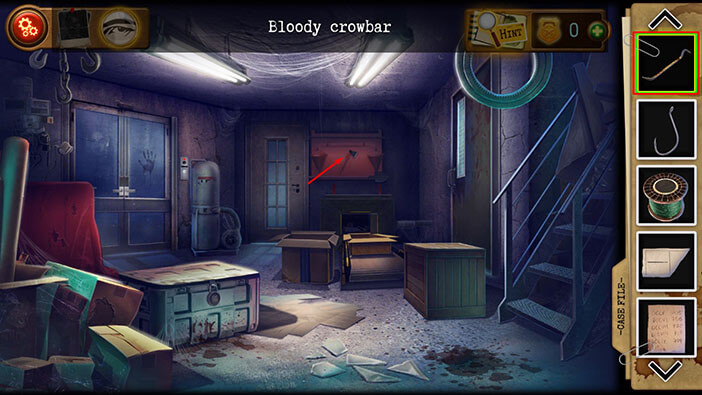
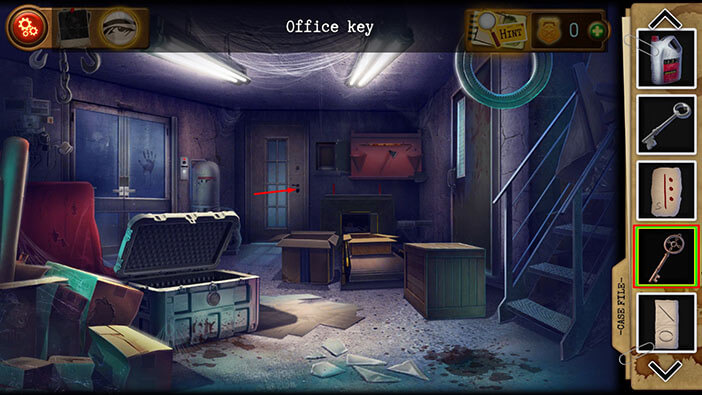
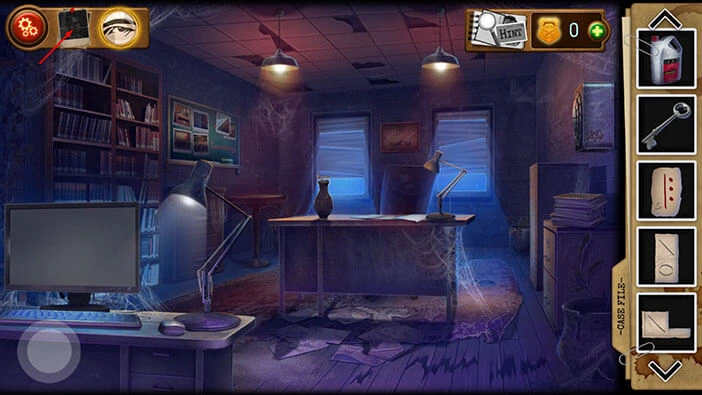
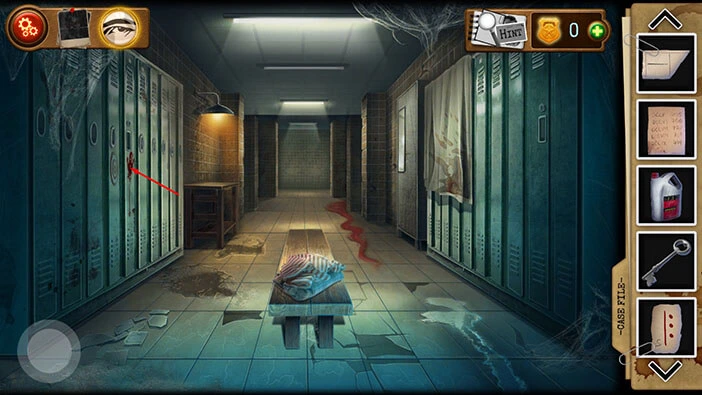
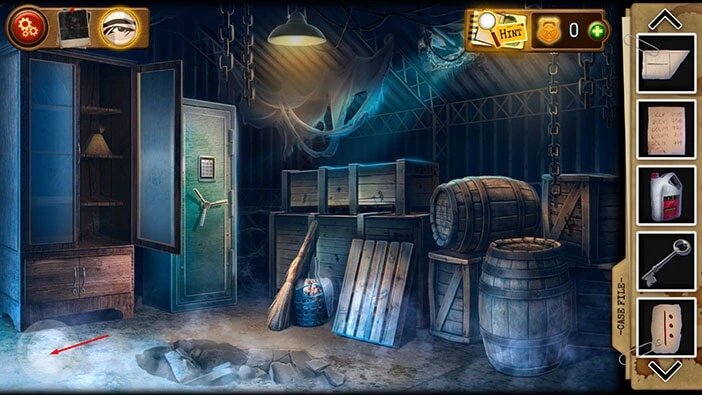
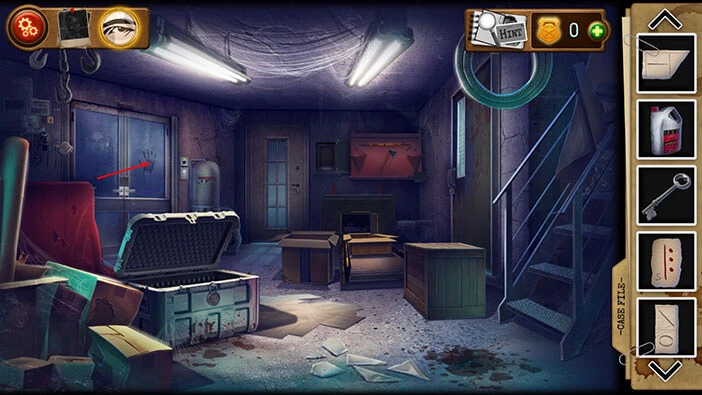
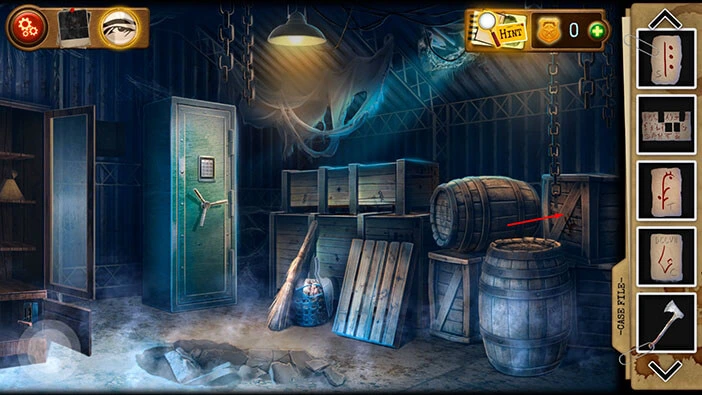
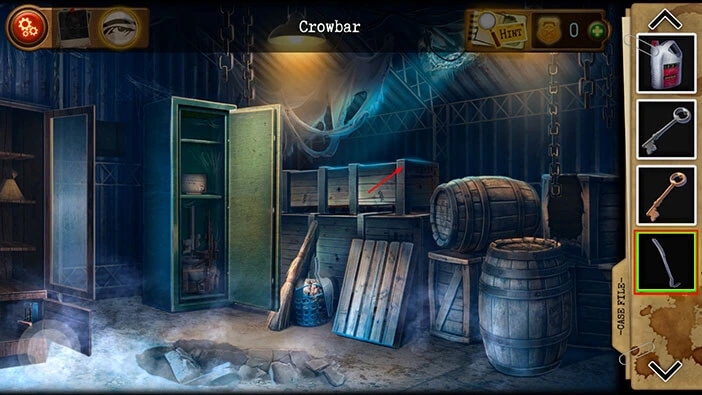
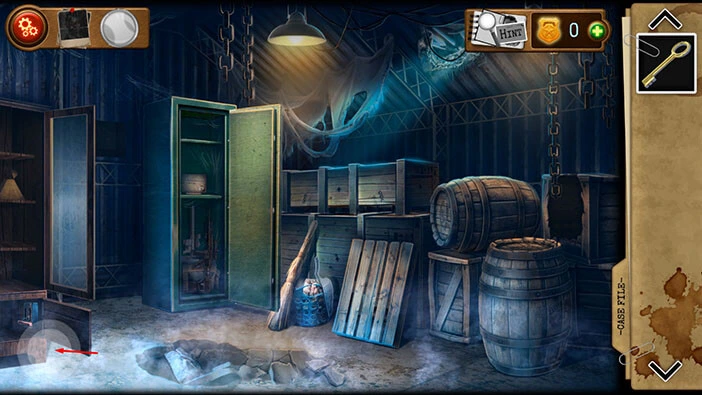
On the right side of the floor, you will notice a “Bloody crowbar”. Tap on it to pick it up.
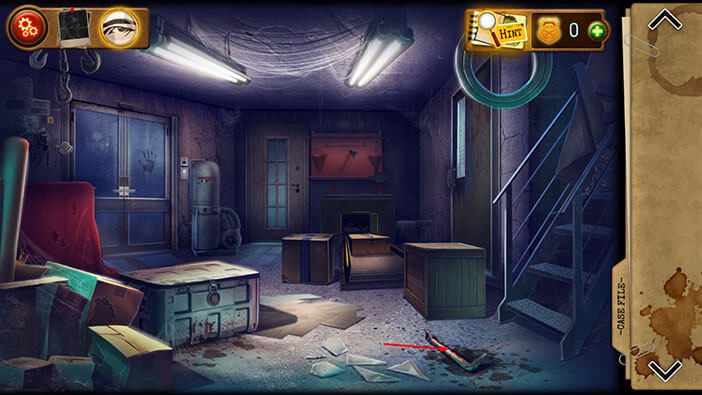
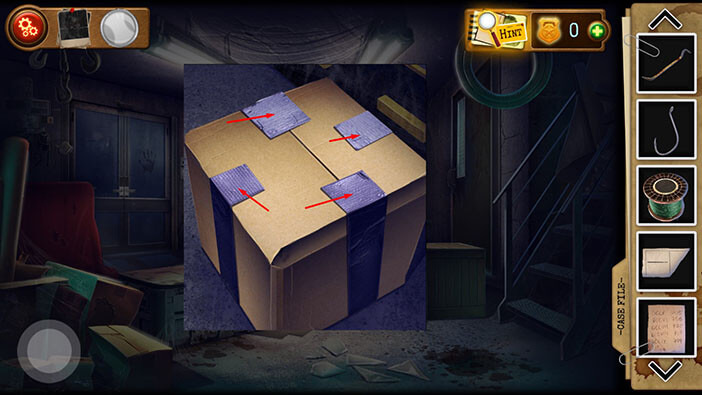
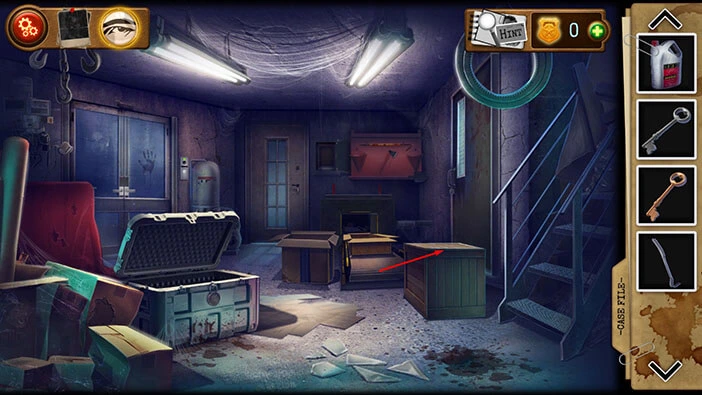
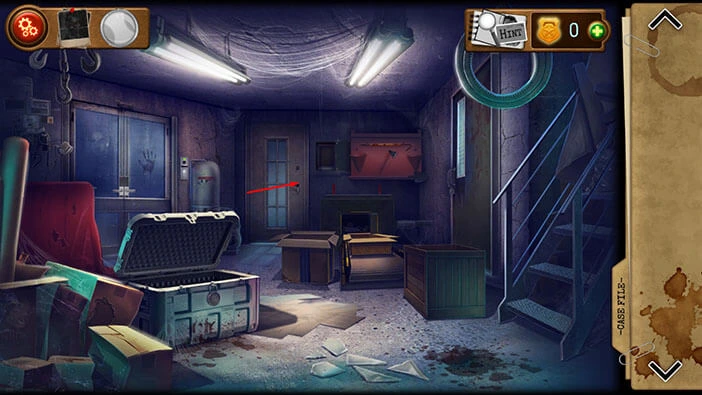
You will notice a cardboard box on the right, so let’s tap on it to take a closer look.
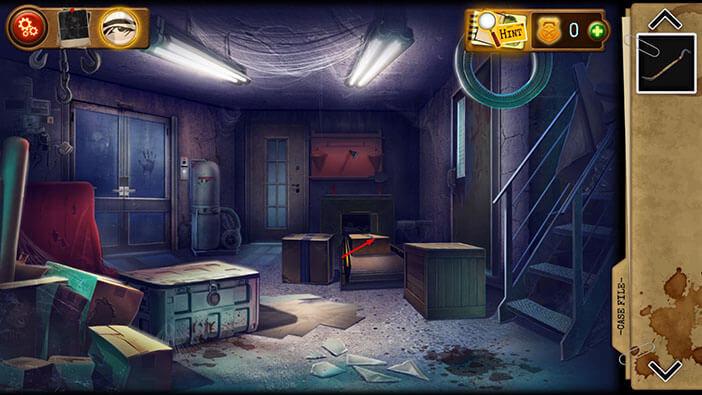
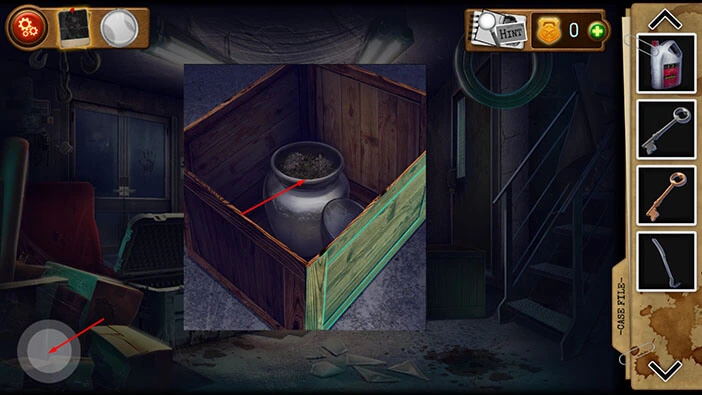
Drag up to open the box.
In the box, you will find a severed hand and several other items. Let’s tap on them to take a photo, and our character will file it as evidence.

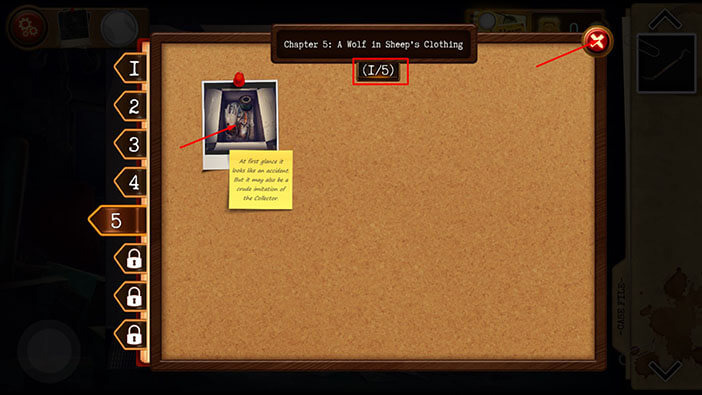
Let’s tap on the photo in the top left corner of the screen to examine the evidence.

You will notice that we have 1 out of 5 pieces of evidence. Tap on the first photo to examine it.
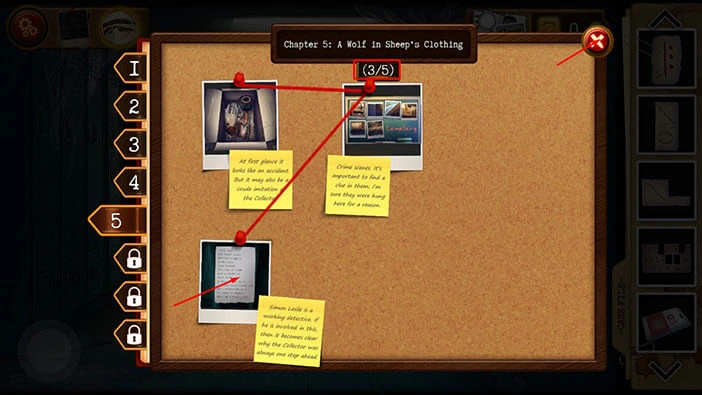
Our character believes that someone is trying to imitate the Collector.
Let’s go back. Tap on the red “X” symbol in the top right corner.
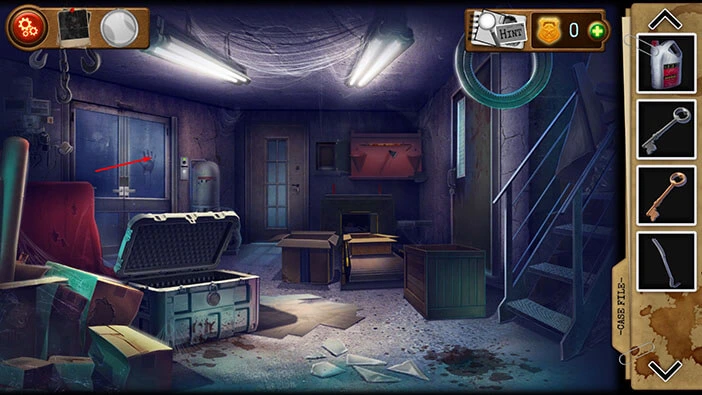
Next, drag the severed hand and the tools from the box, and our character will remove them.
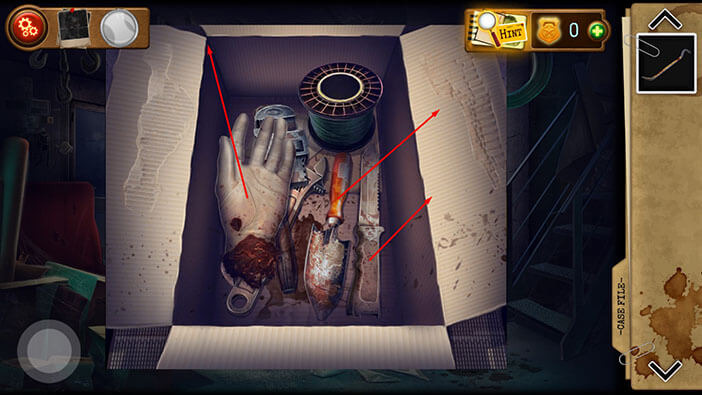
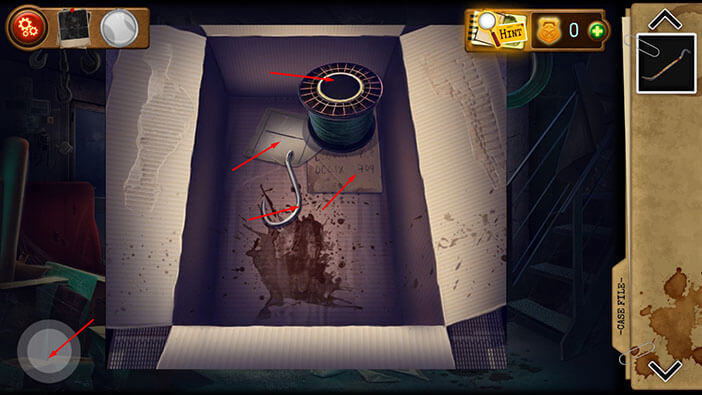
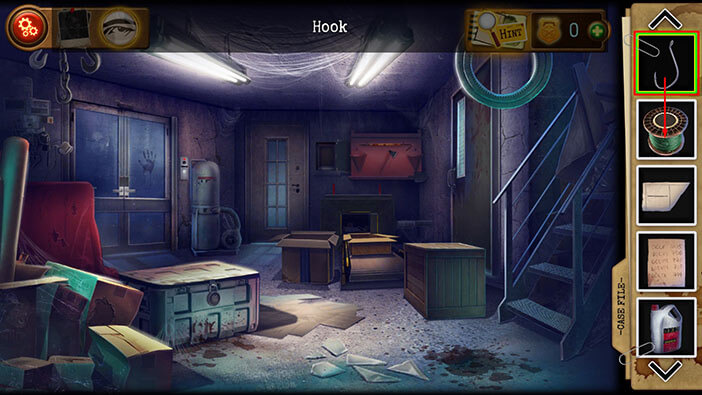
At the bottom of the box, you will find four items, so let’s tap on them to pick them up. A “Hook”, a “Fishing line”, “Hint Fragment No.1”, and a “Leaf from a Latin textbook”.
Once you’re done, tap on the button in the bottom left corner of the screen to go back.
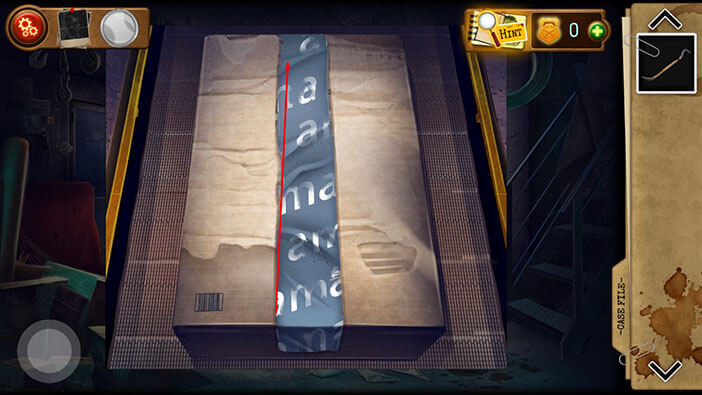
Next, let’s tap on the other cardboard box to take a closer look at it.
Next, let’s tap on the tape on the sides of the box to remove it. With that, you will open the box.
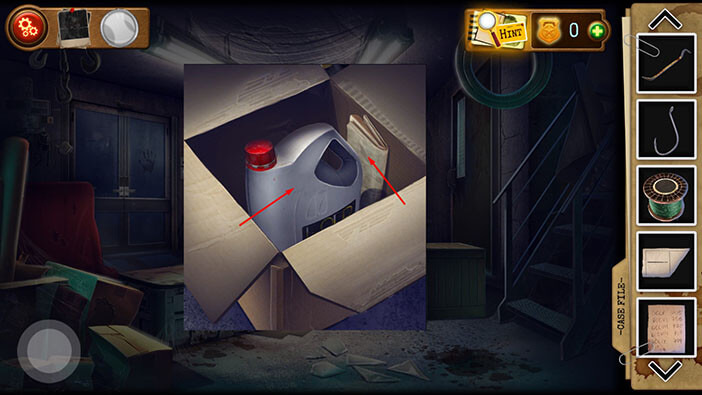
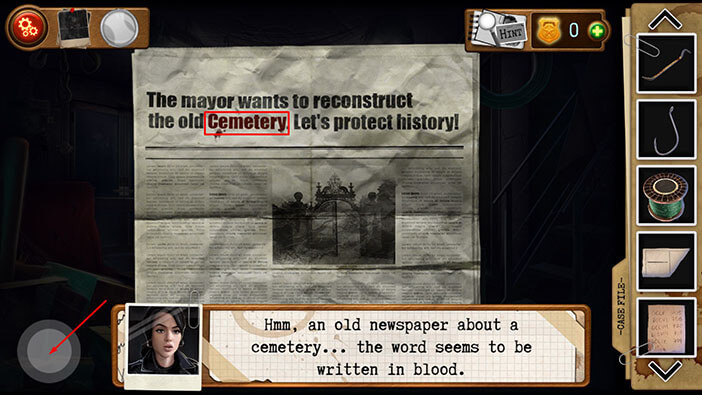
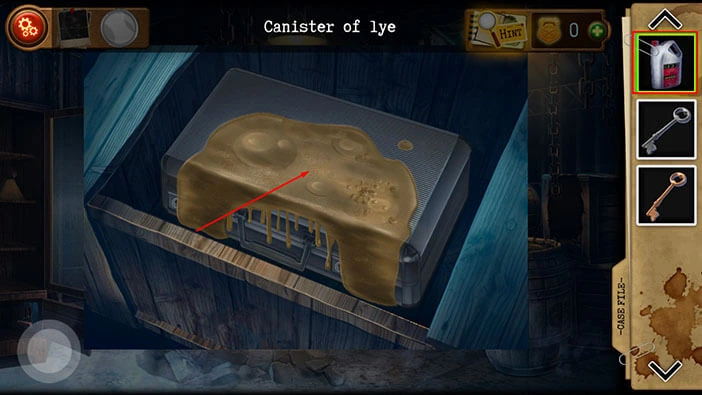
In the box, you will find a “Canister of lye” and a newspaper. So, let’s tap on the “Canister of lye” to pick it up. After that, tap on the newspaper to examine it.
Here, we can see the “Cemetery” word written in red letters. Let’s memorize/write down this word because we will need it later in the walkthrough.
If you tap on this word, our character will conclude that the word is written in blood.
Once you’re done, tap on the button in the bottom left corner of the screen to go back.
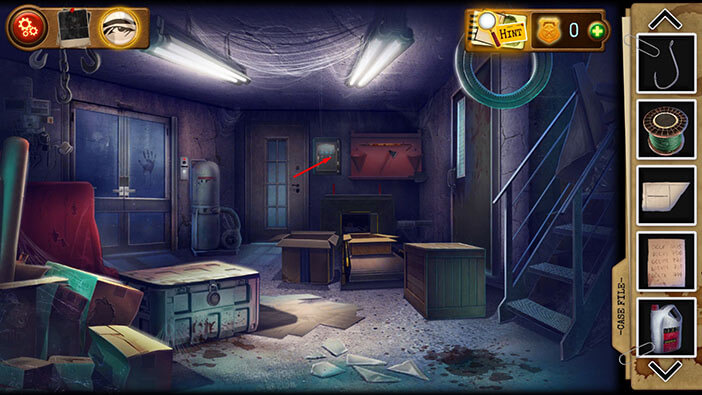
Next, select the “Bloody crowbar” from the inventory and use it to remove the large, red board on the wall in front of you.
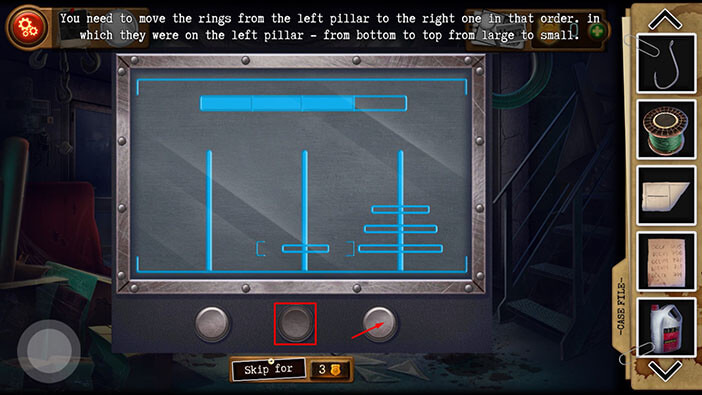
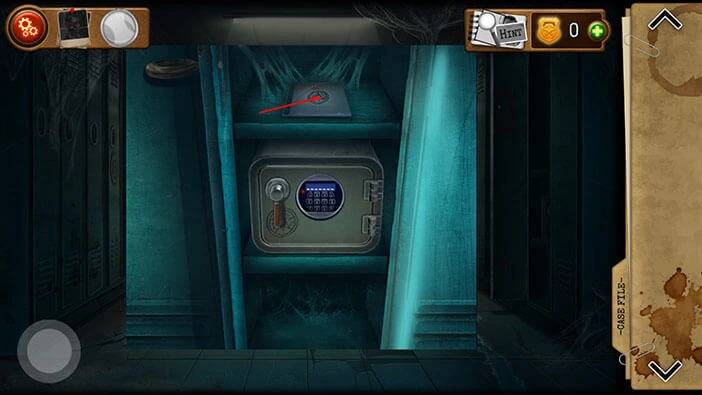
You will reveal some kind of a control panel that was previously hidden behind the board. Let’s tap on the control panel to take a closer look at it, and tap again to start the interaction.
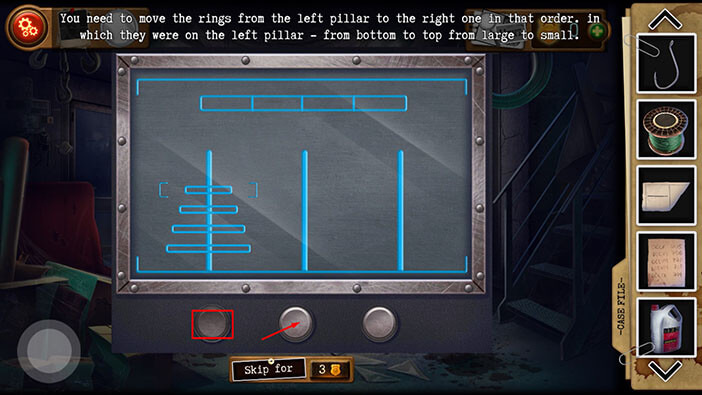
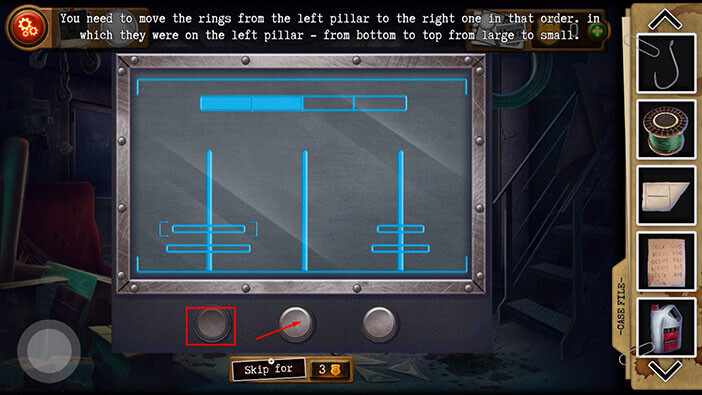
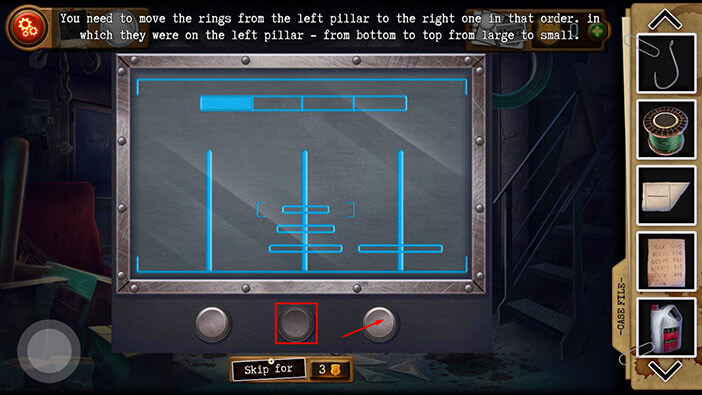
Our next task is to transfer the “Rings” from the pillar on the left to the pillar on the right. The rings should be arranged from the largest at the bottom to the smallest one at the top.
We will do this puzzle in several steps. Let’s begin.
Step 1
Tap once on the first button to select the first ring, then tap on the middle button to transfer this ring to the middle pillar.
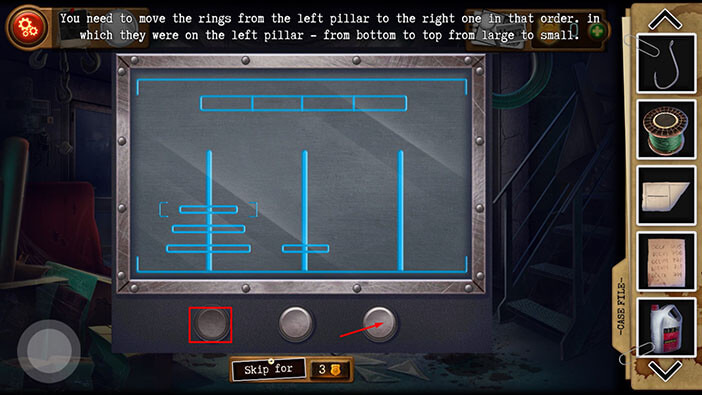
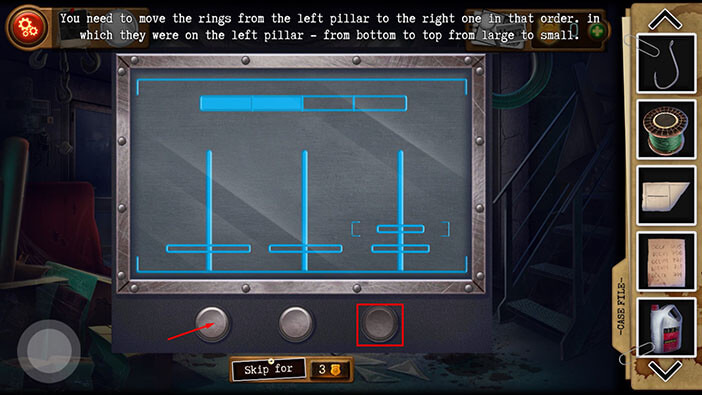
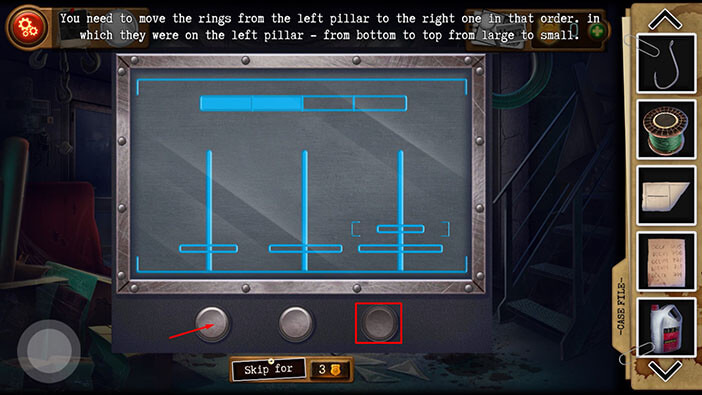
Step 2
Tap once on the first button to select the next ring, then tap on the right button to transfer this ring to the right pillar.
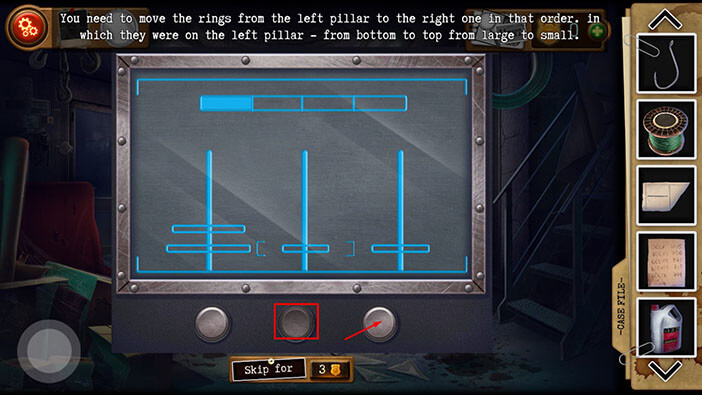
Step 3
Tap once on the middle button to select the first ring, then tap on the right button to transfer this ring to the right pillar.
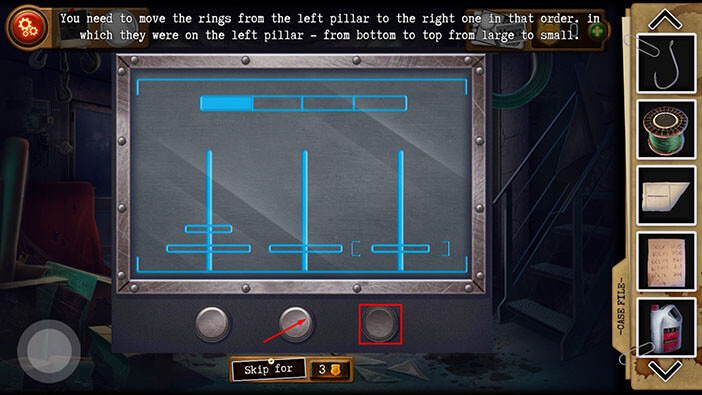
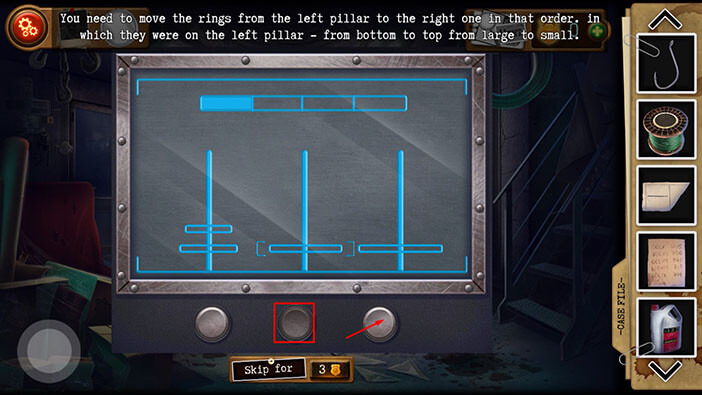
Step 4
Tap once on the left button to select the first ring, then tap on the middle button to transfer this ring to the middle pillar.
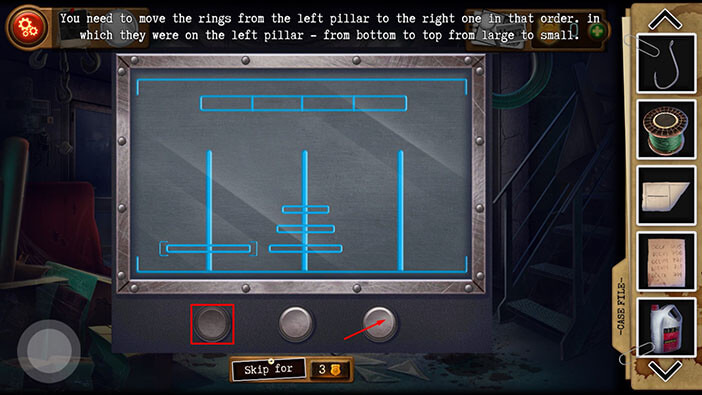
Step 5
Tap once on the right button to select the first ring, then tap on the left button to transfer this ring to the left pillar.
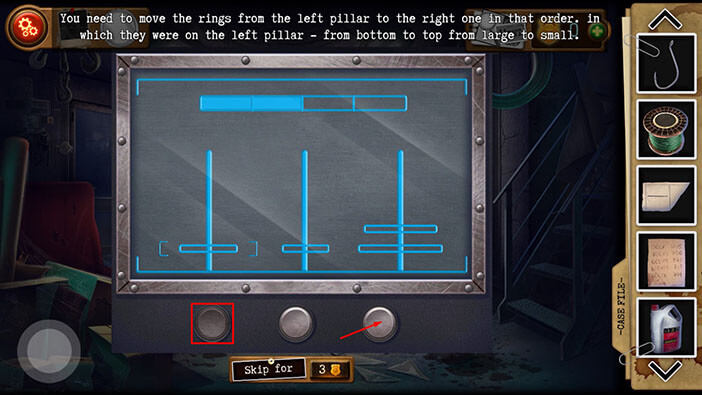
Step 6
Tap once on the right button to select the first ring, then tap on the middle button to transfer this ring to the middle pillar.
Step 7
Tap once on the left button to select the first ring, then tap on the middle button to transfer this ring to the middle pillar.

Step 8
Tap once on the left button to select the first ring, then tap on the right button to transfer this ring to the right pillar.
Step 9
Tap once on the middle button to select the first ring, then tap on the right button to transfer this ring to the right pillar.
Step 10
Tap once on the middle button to select the first ring, then tap on the left button to transfer this ring to the left pillar.

Step 11
Tap once on the right button to select the first ring, then tap on the left button to transfer this ring to the left pillar.
Step 12
Tap once on the middle button to select the first ring, then tap on the right button to transfer this ring to the right pillar.
Step 13
Tap once on the left button to select the first ring, then tap on the middle button to transfer this ring to the middle pillar.

Step 14
Tap once on the left button to select the first ring, then tap on the right button to transfer this ring to the right pillar.
Step 15
Tap once on the middle button to select the first ring, then tap on the right button to transfer this ring to the right pillar. With that, you will solve this puzzle.
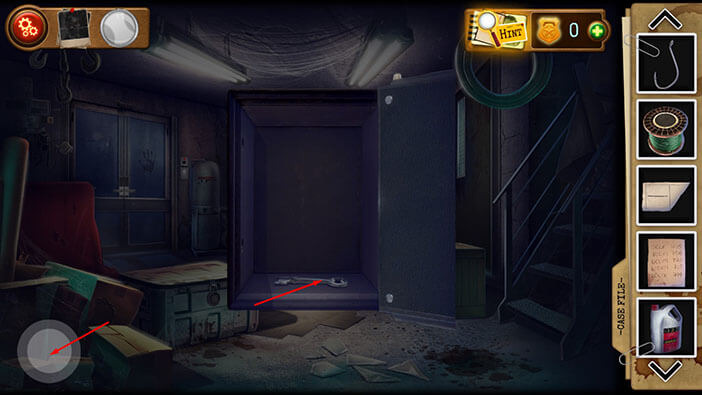
You will unlock and open the box as soon as you solve the puzzle. In this box, you will find a “Key to the case”. Tap on it to pick it up.
After that, tap on the button in the bottom left corner of the screen to go back.
Next, select the “Hook” from the inventory and combine it with the “Fishing line”. You will create the “Hook with line”.
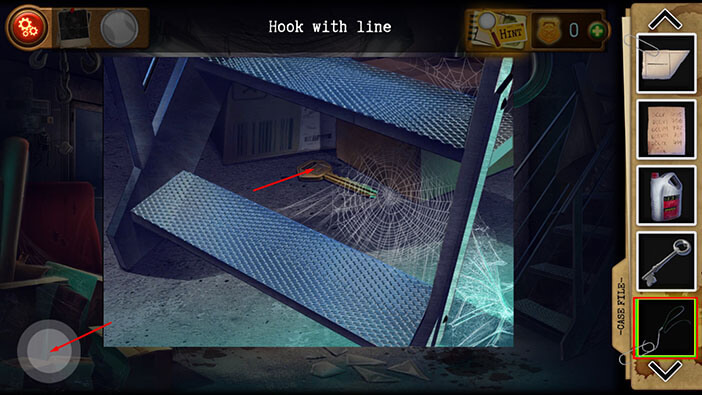
Next, let’s tap on the space under the stairs to take a closer look at it.
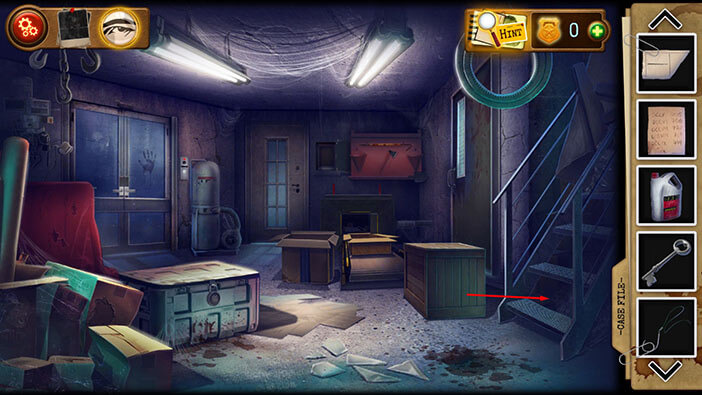
Here, you will discover a key, but our character won’t reach through the cobweb to grab it. So, let’s select the “Hook with line” to reach the key. “Box key” will be added to your inventory.
After that, tap on the button in the bottom left corner of the screen to go back.
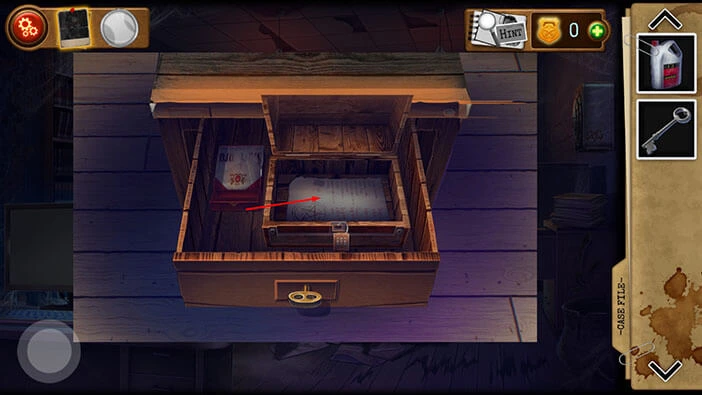
Next, let’s tap on the large chest on the left to take a closer look at it.
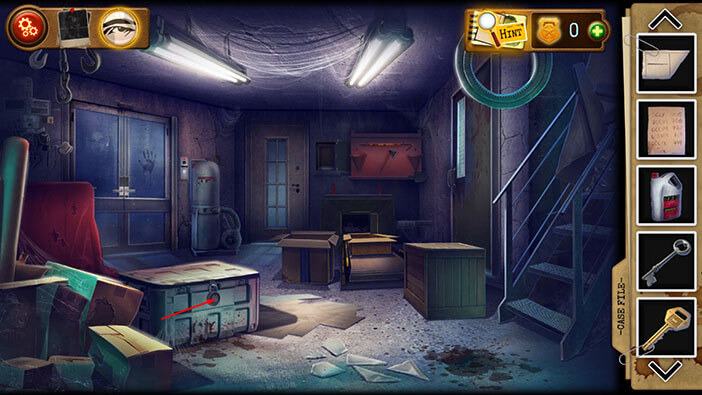
Select the “Box key” from the inventory and use it to unlock the chest.
On the left side, you will notice a “Piece of paper with symbol No.1”. Tap on it to pick it up.
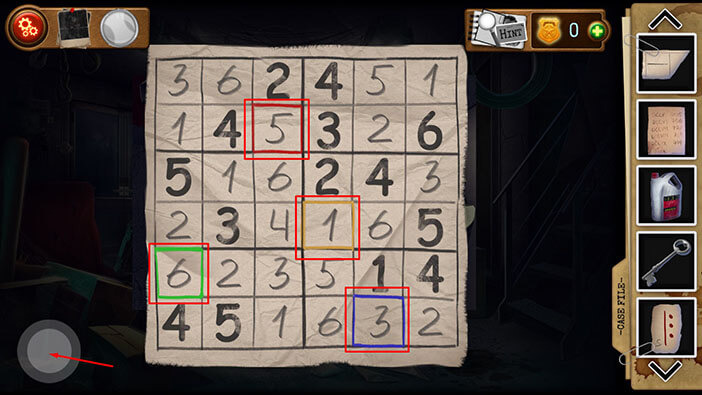
After that, tap on the note with the grid (also on the left side) to start the interaction.
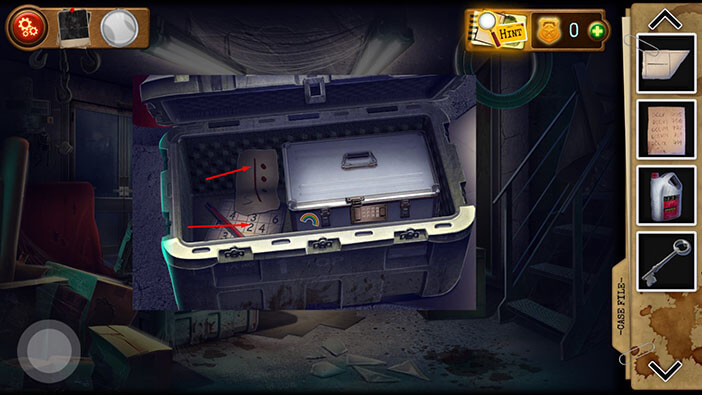
Here, we can see a 6 by 6 grid, and it is also divided into six blocks. Our task is simple. We should populate each field of the grid with numbers while following three simple rules.
First, each row should have numbers 1-6 (no duplicates)
Second, each column should have numbers 1-6 (no duplicates)
Third, each block should have numbers 1-6 (no duplicates)
Also, you will notice that four cells have outlines (red, green, yellow, and blue).
You can find the solution to this puzzle in the image below.
Here, you will discover the numbers,
Red = 5
Yellow = 1
Green = 6
Blue = 3
Let’s memorize/write down these numbers (and the colors associated with them) because this information represents part of the solution for the next puzzle.
Once you’re done, tap on the green button in the bottom left corner of the screen to go back.
In the chest, we also have a locked box. On the left side of the box, you will notice a rainbow. Let’s memorize/write down the order of the colors of the rainbow, starting with the largest color. The order of the colors represents the correct order of the numbers that we discovered previously.
First = Red = 5
Second = Yellow = 1
Third = Green = 6
Fourth = Blue = 3
When we put it all together, we will get the number “5163”. Let’s memorize/write down this number.
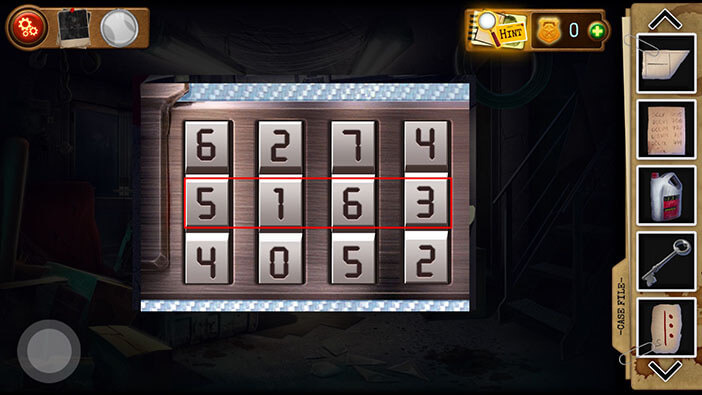
Once you’re done, tap on the keypad on the locked box to start the interaction.
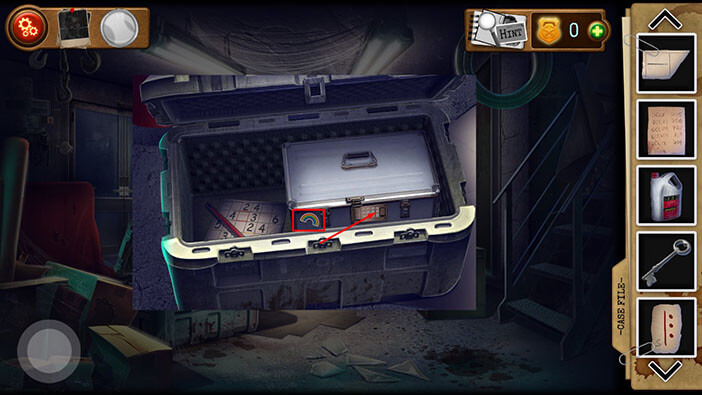
Next, enter the number “5163” and you will unlock the box.
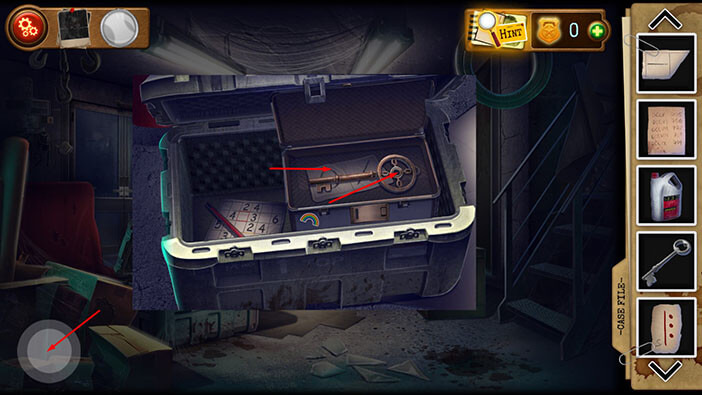
You will open the box as soon as you enter the correct numbers. Inside you will find the “Office key” and “Hint fragment No. 2”. Let’s tap on these two items to pick them up.
Once you’re done, tap on the button in the bottom left corner of the screen to go back.
Select the “Office key” from the inventory and use it to unlock the door on the left. After that, tap on the door to proceed to the next room.
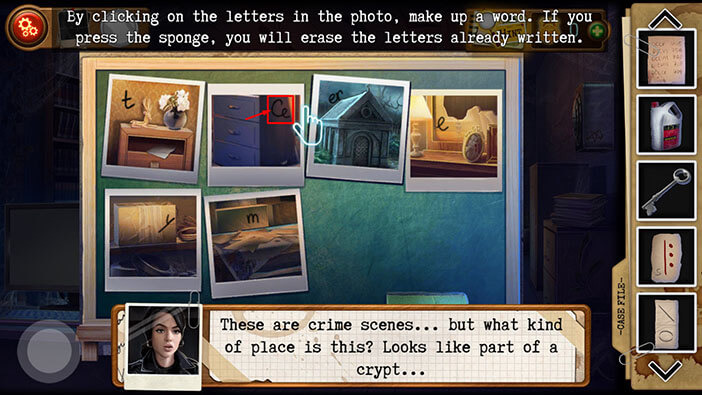
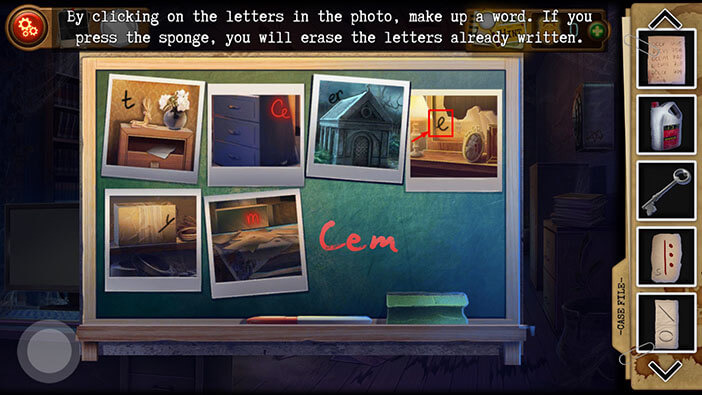
Let’s explore this room. Tap on the green board on the wall on the left to take a closer look at it.
Our character thinks that the photos on the board represent different parts of the crypt. Our task is to rearrange the photos. If you examine the photos, you will notice that there is one or more letter(s) on each photo. If you recall, previously we saw the word “Cemetery” written in blood. So, to correctly arrange the photos, we just need to form the word “Cemetery”.
We will do this puzzle in several steps. Let’s begin.
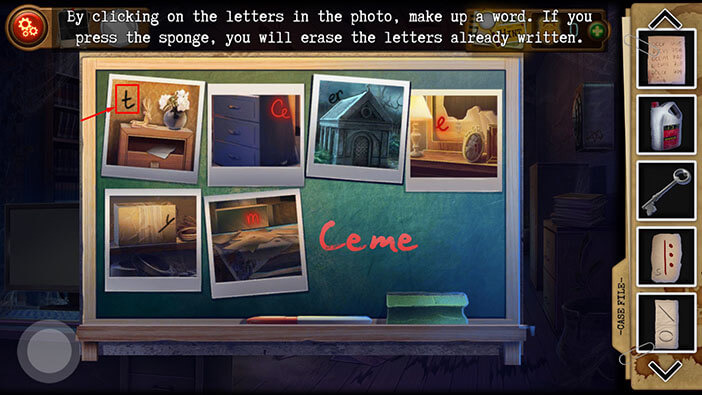
Step 1
Tap on the second photo in the first row (“Ce”). The letters “Ce” will appear on the board.
Step 2
Tap on the second photo in the second row (“m”). The letters “Cem” will appear on the board.
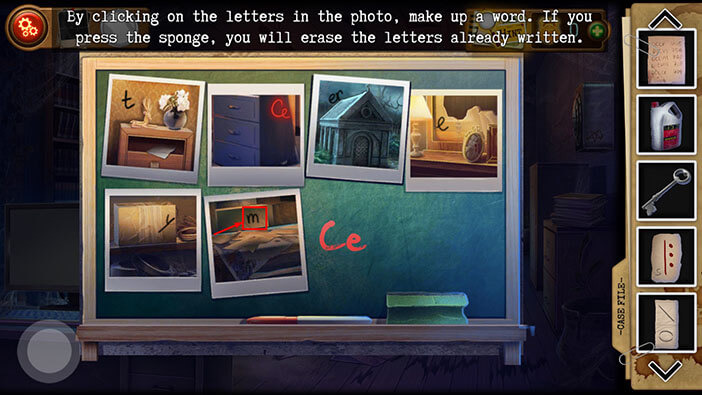
Step 3
Tap on the fourth photo in the first row (“e”). The letters “Ceme” will appear on the board.
Step 4
Tap on the first photo in the first row (“t”). The letters “Cemet” will appear on the board.
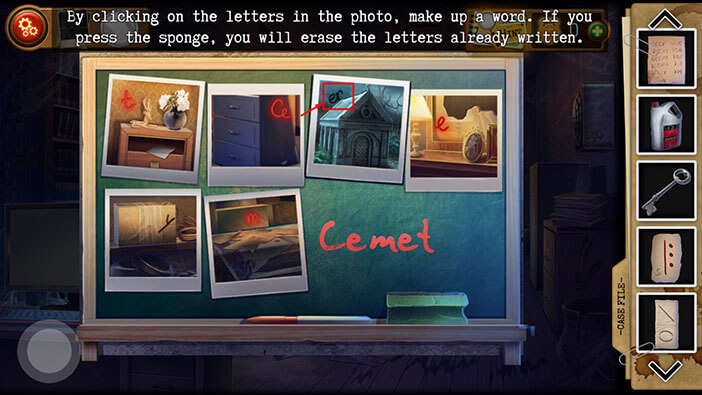
Step 5
Tap on the third photo in the first row (“er”). The letters “Cemeter” will appear on the board.
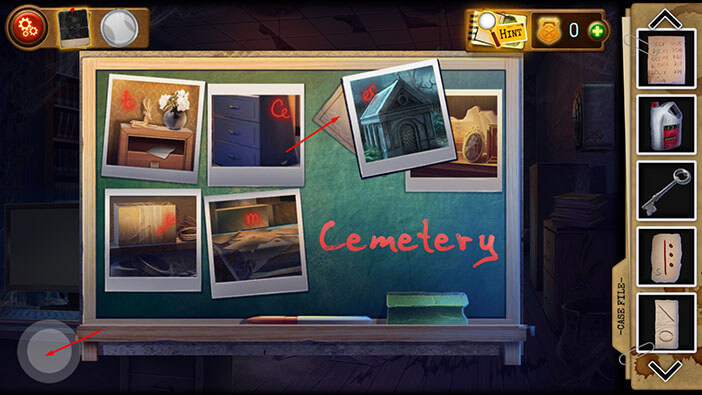
Step 6
Lastly, tap on the first photo in the second row (“y”). With that, you will form the word “Cemetery”.

Our character will take a photo and file it as evidence, as soon as you form the word “Cemetery”.
Also, the third photo in the first row will move, and you will notice something sticking out behind it. Tap on this item to pick it up. “Hint fragment No.4” will be added to your inventory.
After that, tap on the button in the bottom left corner of the screen to go back.
Let’s tap on the photo in the top left corner of the screen to examine the evidence.
You will notice that we have 2 out of 5 pieces of evidence. Tap on the second photo to examine it.
Our character believes that photos of the crime scenes were placed on the board for a reason, and she also believes that there might be a hidden clue in the photos.
Let’s go back. Tap on the red “X” symbol in the top right corner.

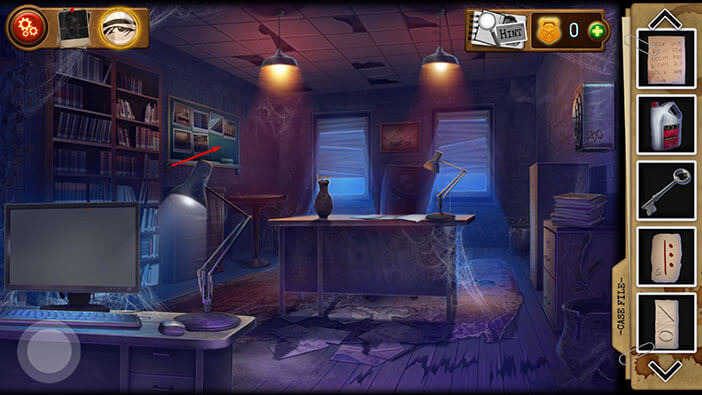
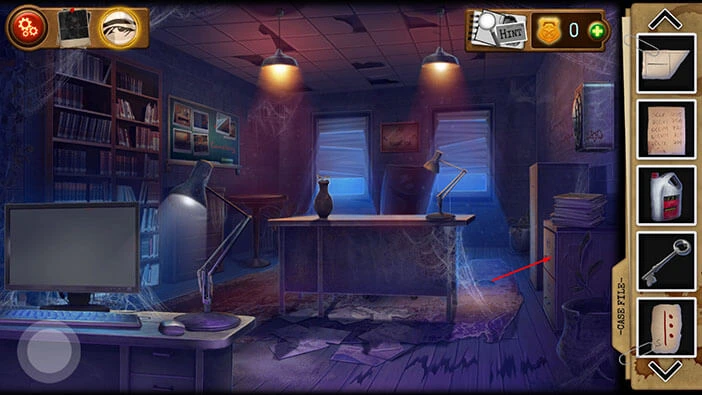
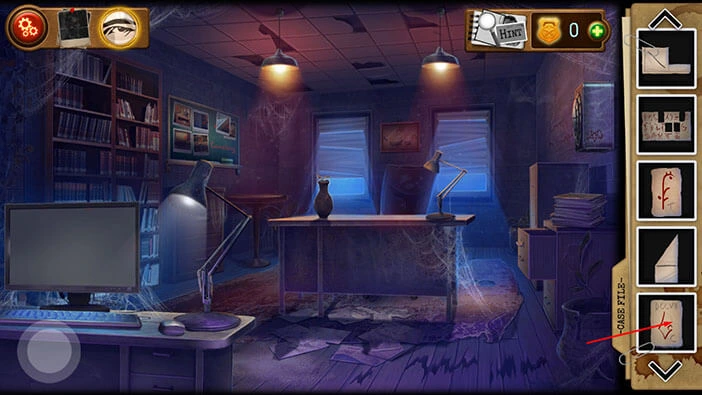
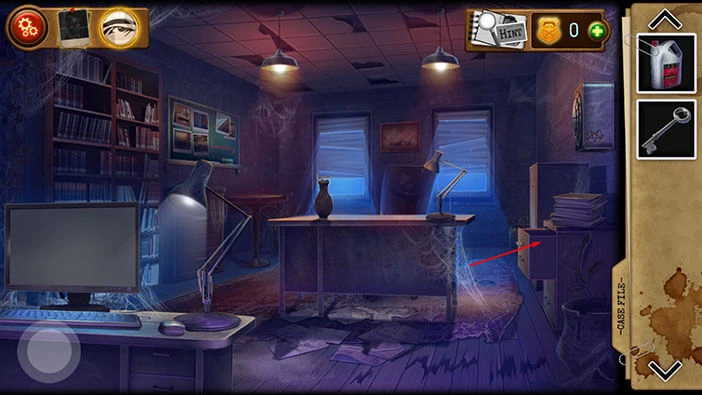
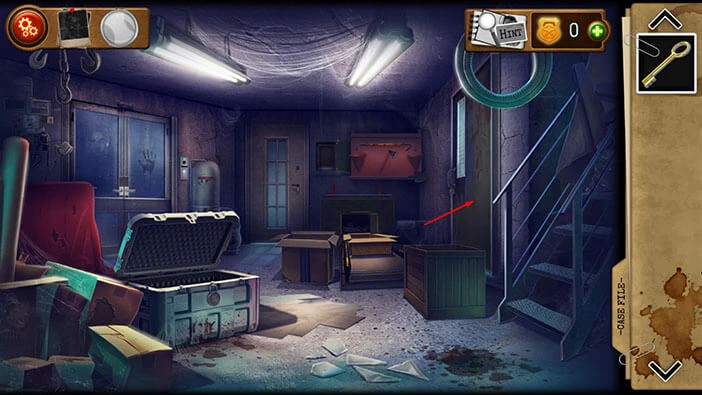
Next, let’s tap on the desk to take a closer look at it.
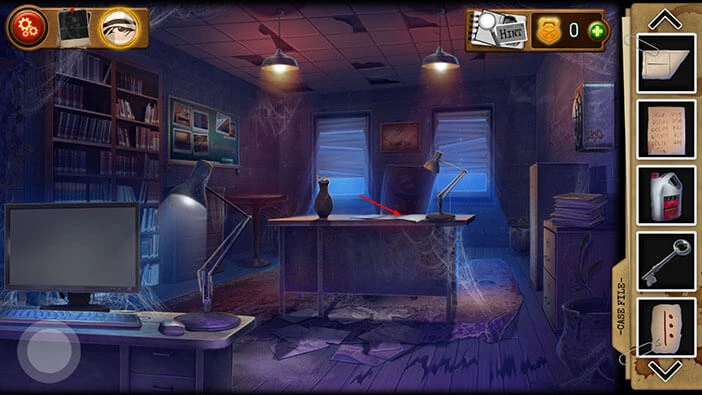
Drag on the papers to remove them.
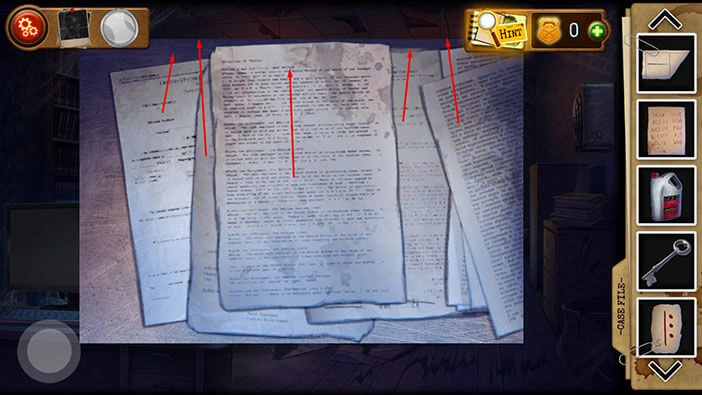
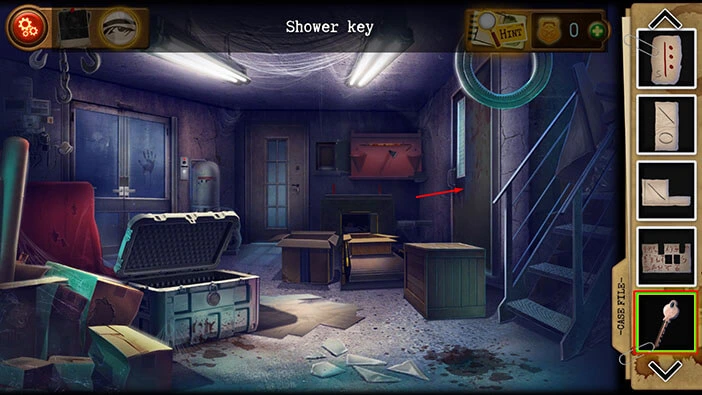
Below the papers, you will find a “Sheet with symbols” and a “Shower key”. Tap on these two items to pick them up.
After that, tap on the button in the bottom left corner of the screen to go back.
We found the “Shower key” and we can use it to unlock the door in the first room. So, let’s go back. Tap on the button in the bottom left corner of the screen.
Select the “Shower key” from the inventory and use it to unlock the door on the right. After that, tap on the door to proceed to the next room.
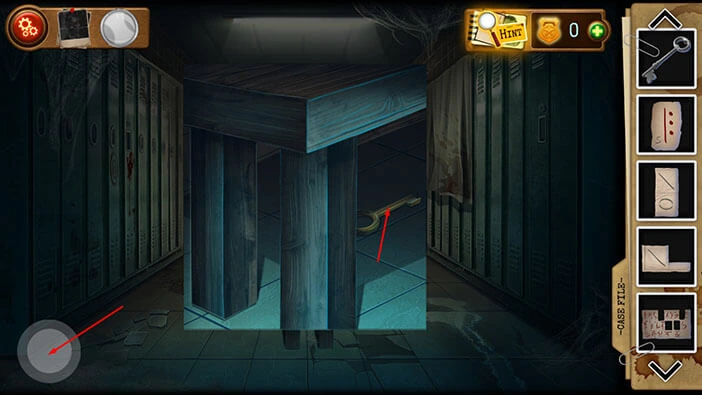
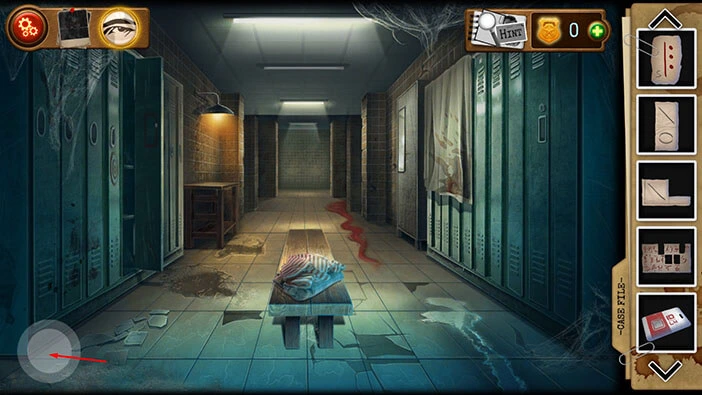
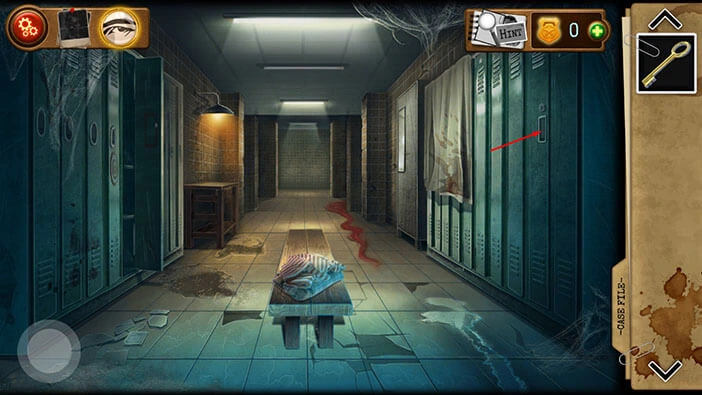
Tap on the bench to take a closer look at it.
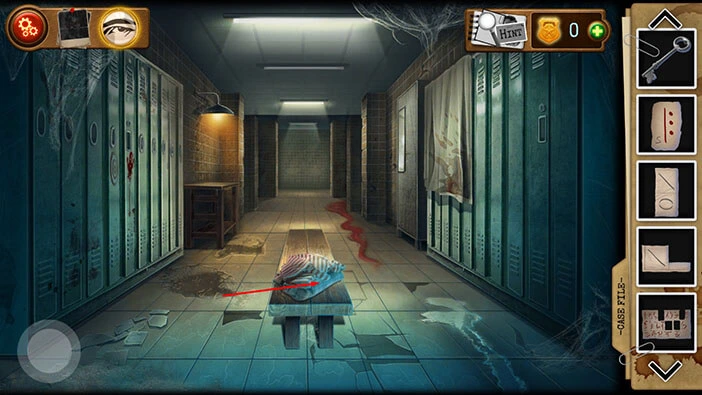
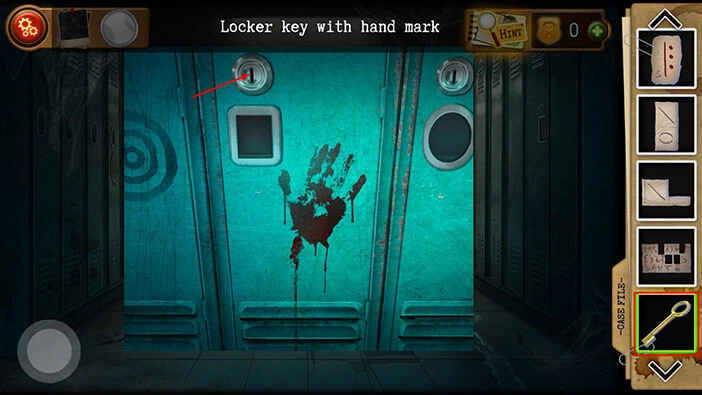
Under the table, you will find a “Locker key with hand mark”. Tap on it to pick it up.
After that, tap on the button in the bottom left corner of the screen.
On the left, you will notice a locker with a bloody handprint. Let’s tap on this locker to take a closer look at it.
Select the “Locker key with hand mark” and use it to unlock the locker.
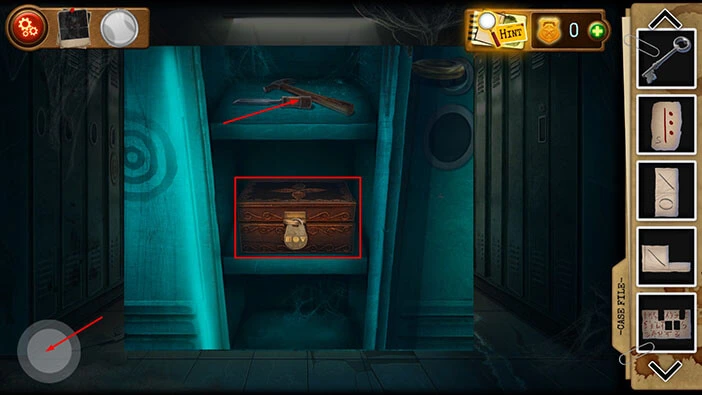
In the locker, you will find “Hammer and chisel”. Tap on these two items to pick them up. At the bottom, you will also notice a locked box. We will come back to it a bit later.
Once you’re done, tap on the button in the bottom left corner of the screen to go back.
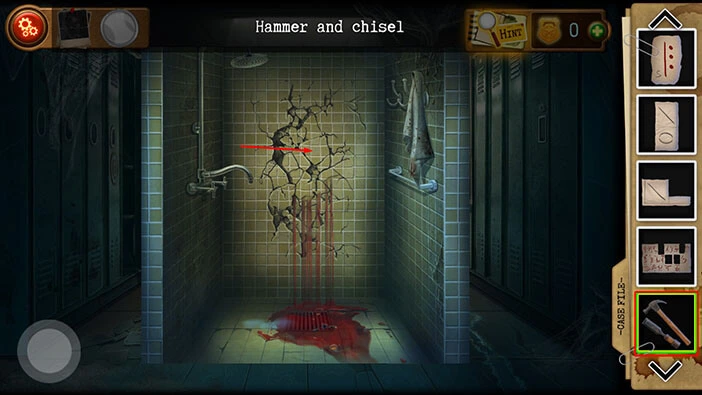
Next, let’s tap on the wall at the end of the hallway.
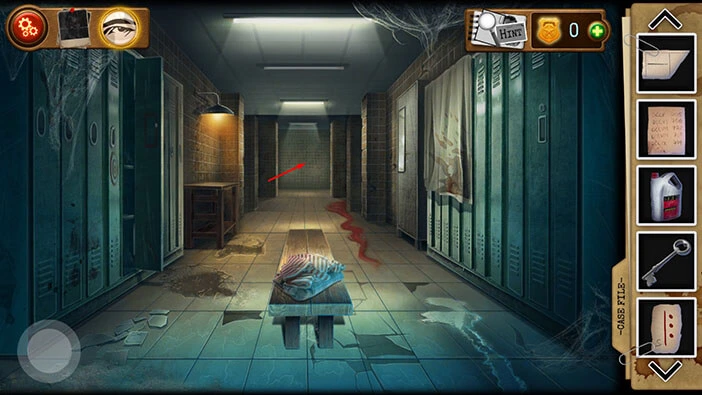
We can see the blood dripping through the cracks in the wall. Let’s see what’s behind the wall. Select the “Hammer and chisel” from the inventory and use them to break down the wall.
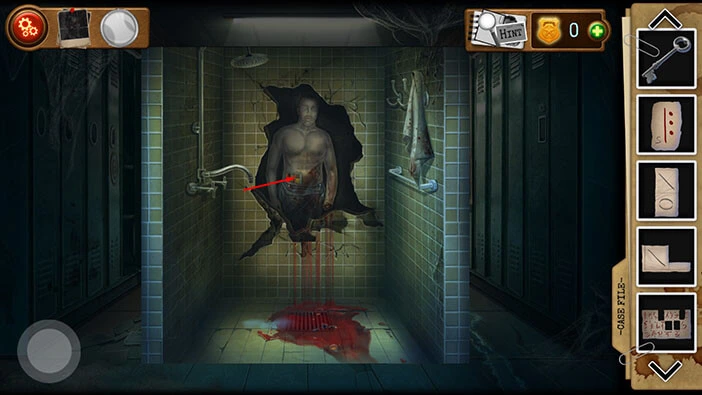
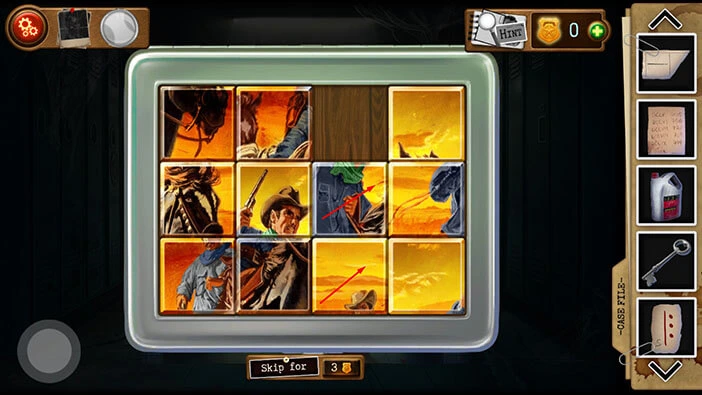
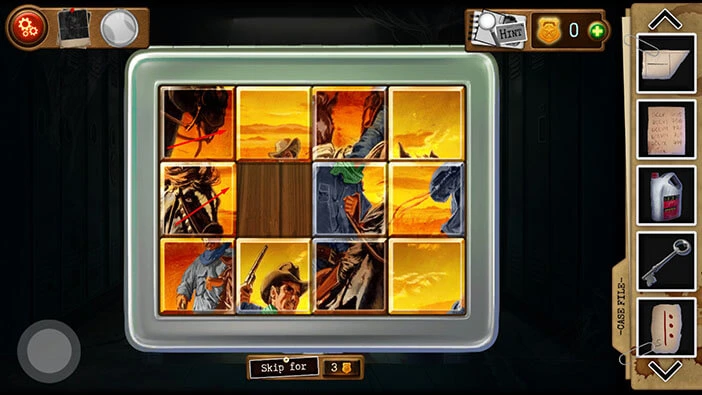
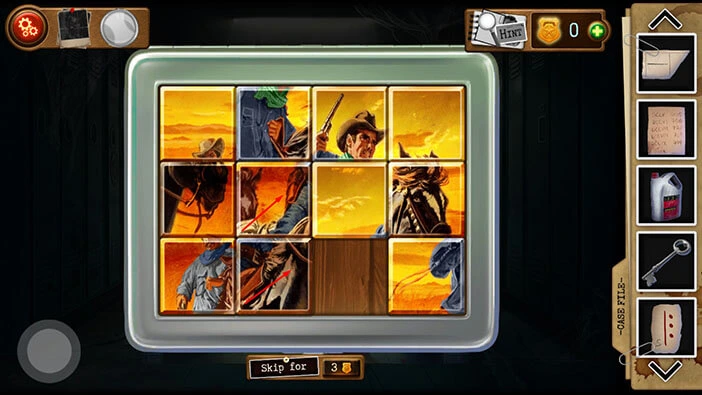
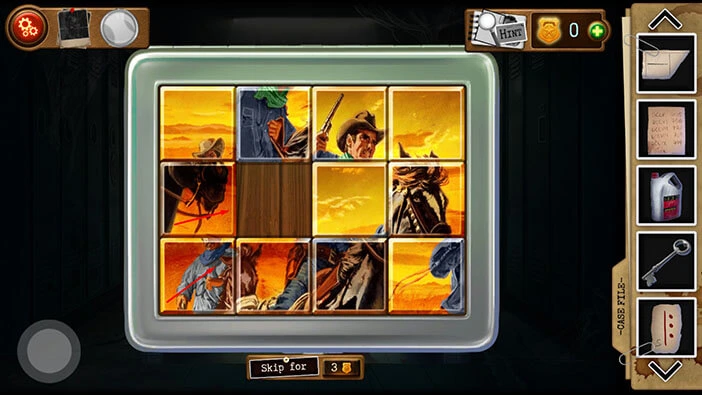
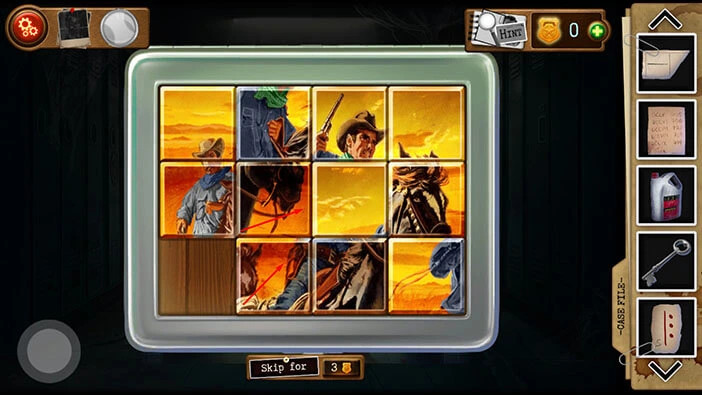
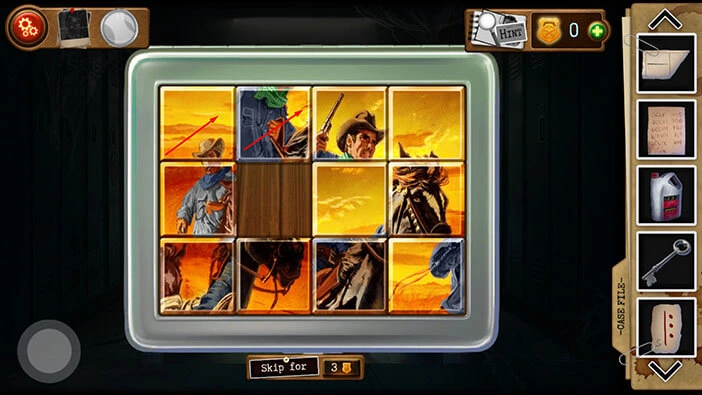
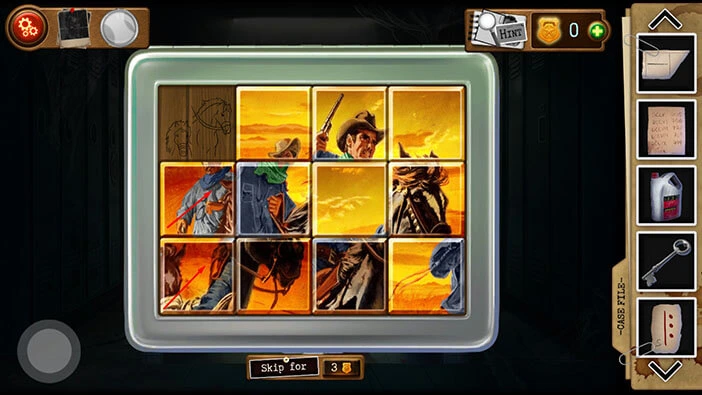
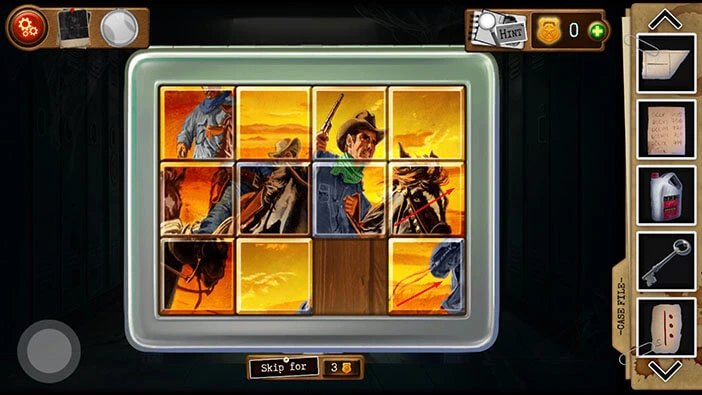
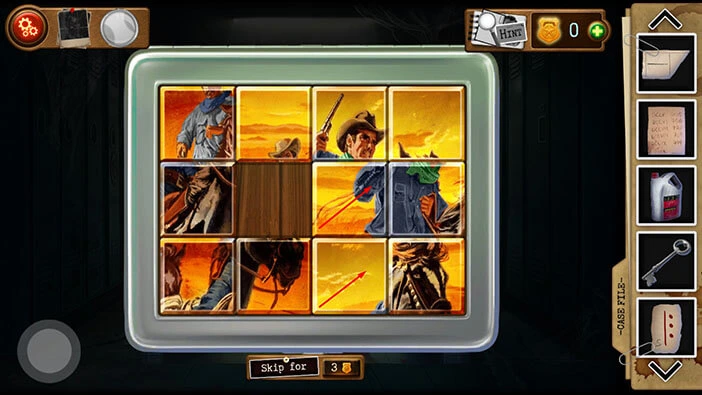
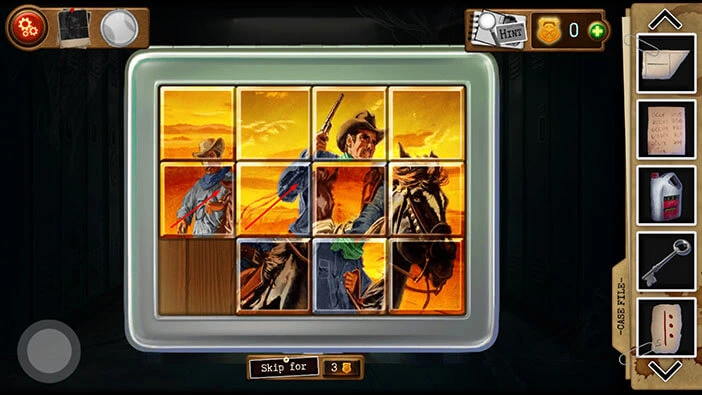
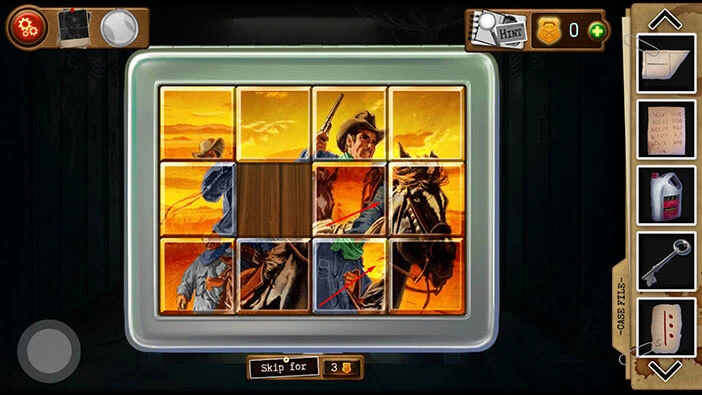
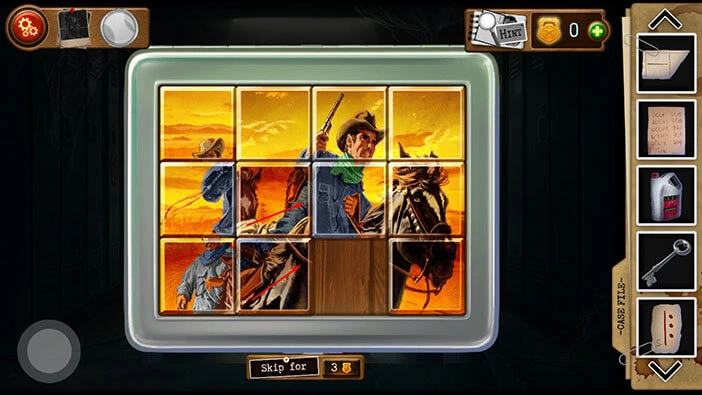
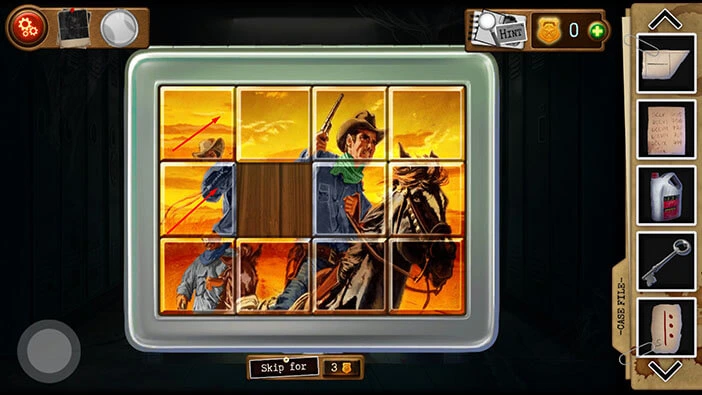
Behind the wall, you will discover a dead man. You will notice a puzzle on his left hip, so let’s tap on it to take a closer look.
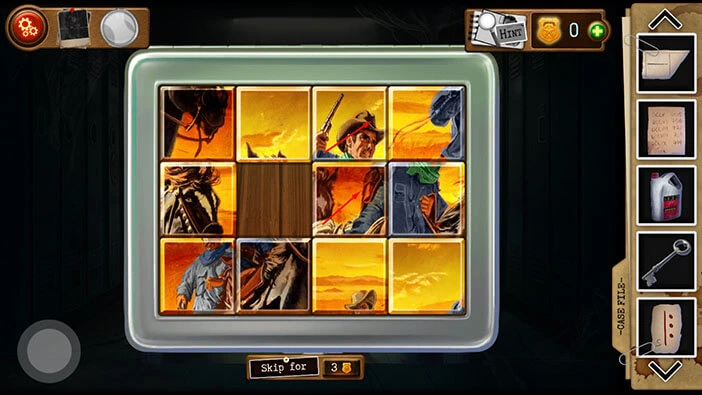
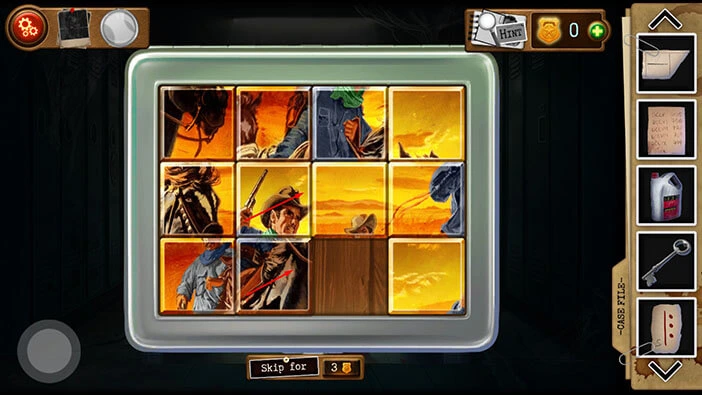
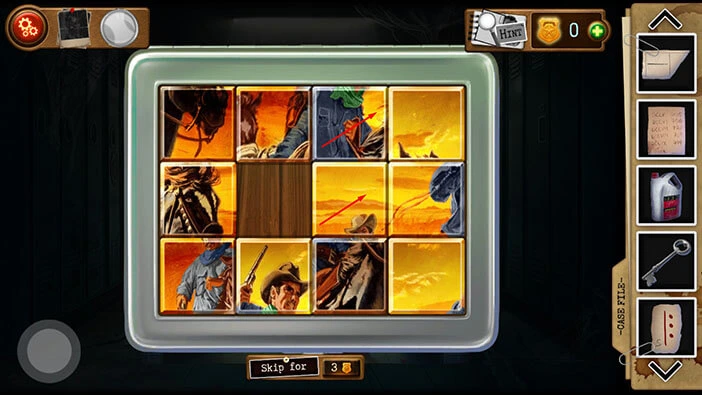
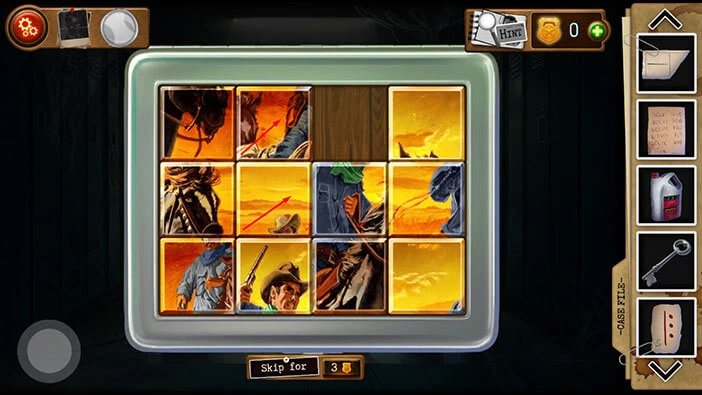
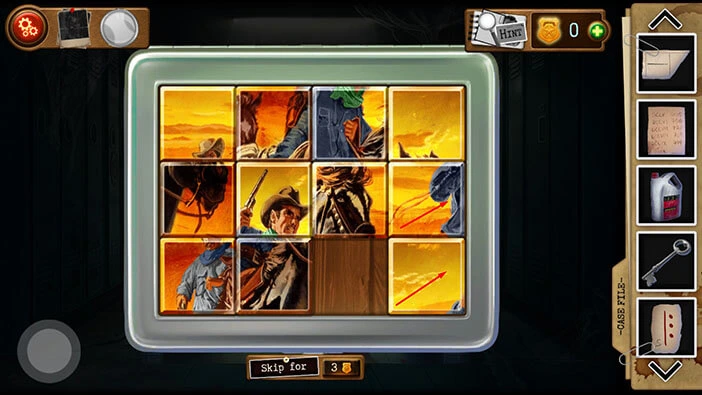
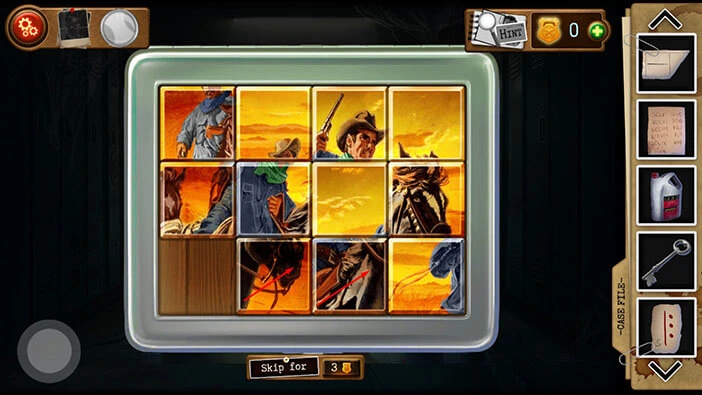
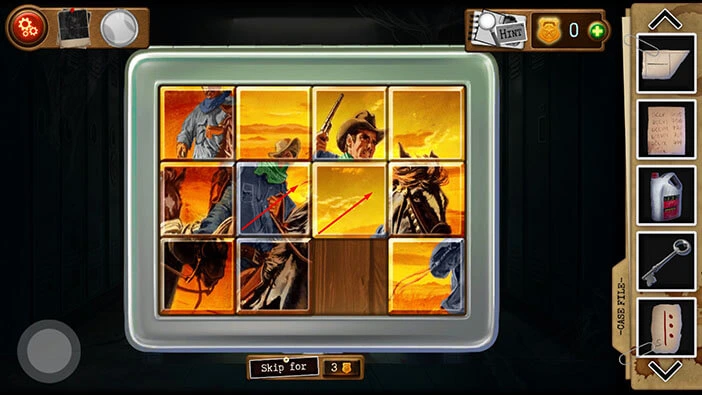
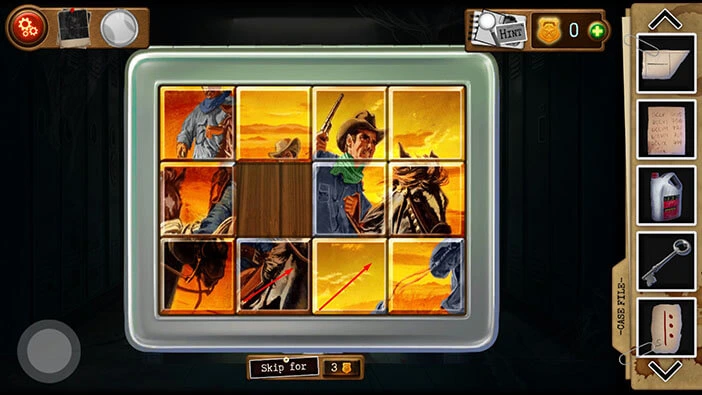
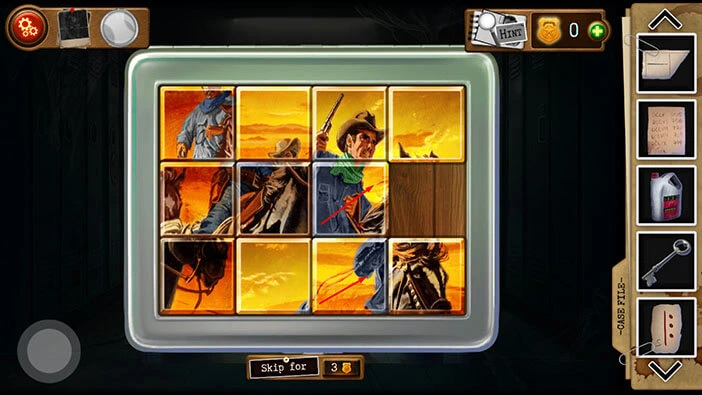
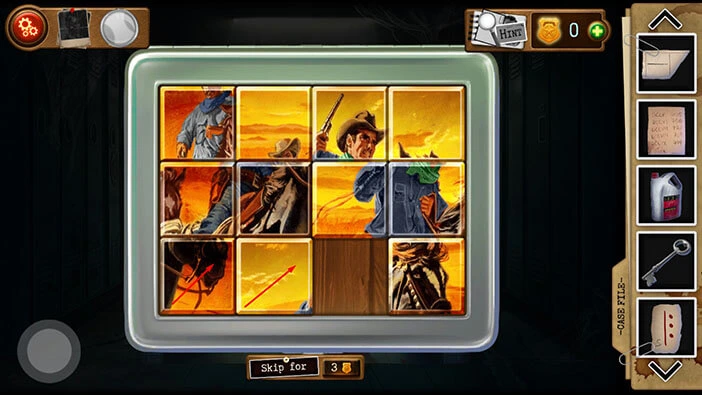
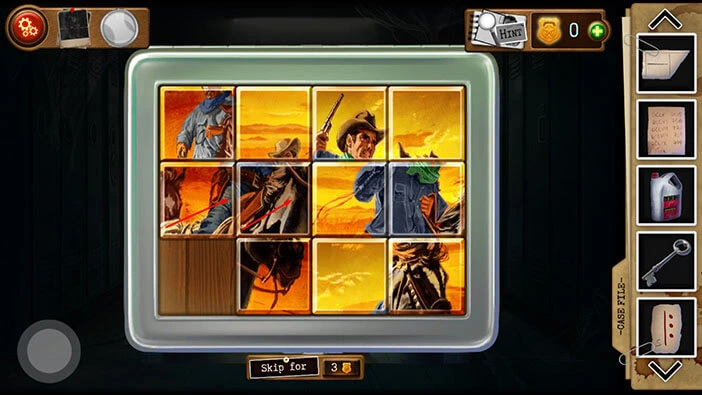
Here, we have another puzzle, and our task is to assemble the picture. We will do this puzzle in multiple steps. Let’s begin.
Step 1
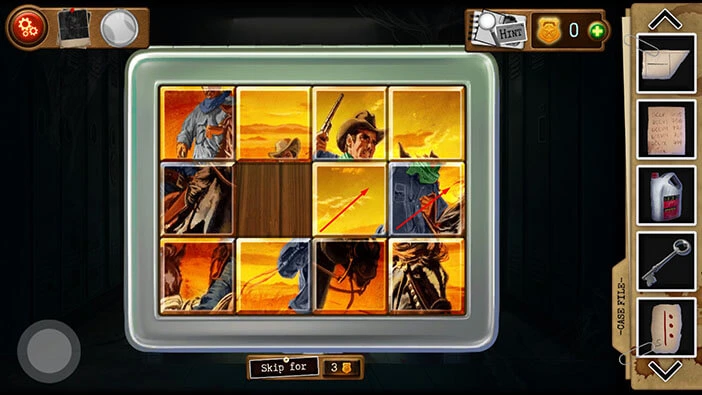
Tap on the first slot in the second row to move the puzzle piece up. After that, tap on the first slot in the third row to move the puzzle piece up.
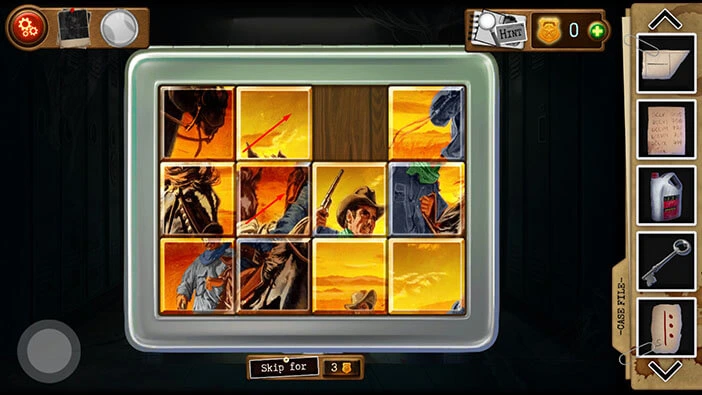
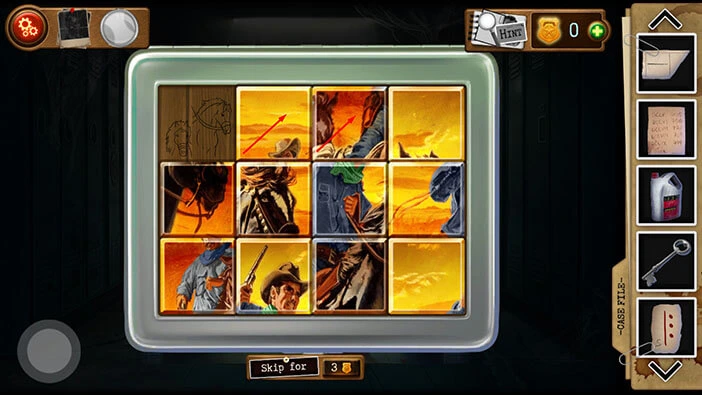
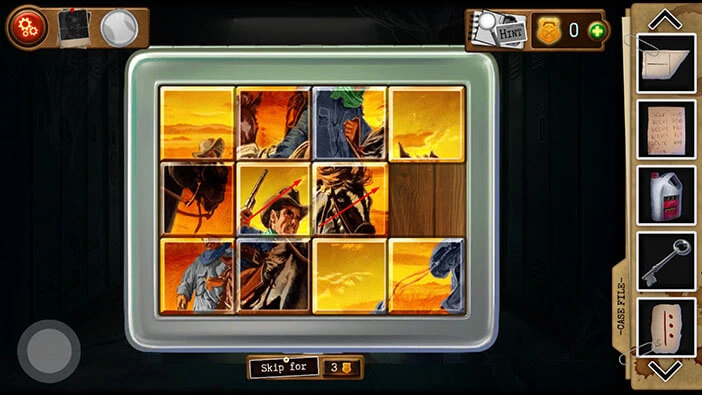
Step 2
Tap on the second slot in the third row to move the puzzle piece to the left. After that, tap on the second slot in the second row to move the puzzle piece down.
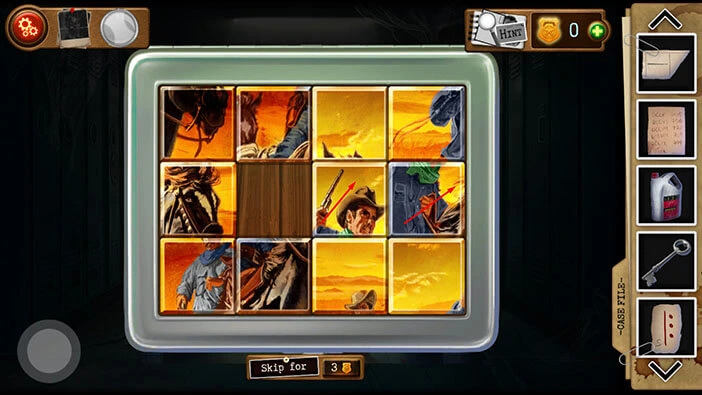
Step 3
Tap on the third slot in the second row to move the puzzle piece to the left. After that, tap on the third slot in the first row to move the puzzle piece down.
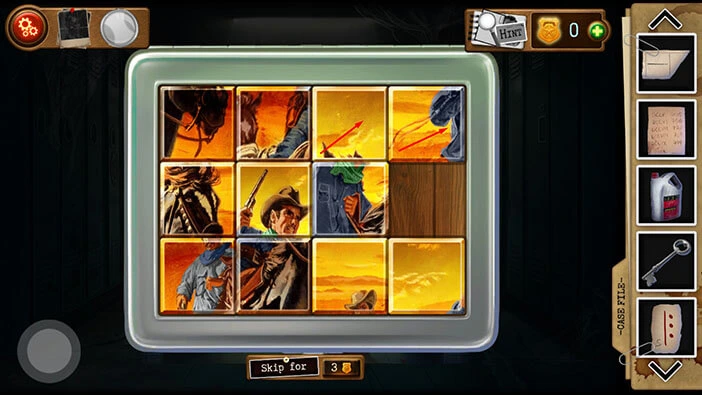
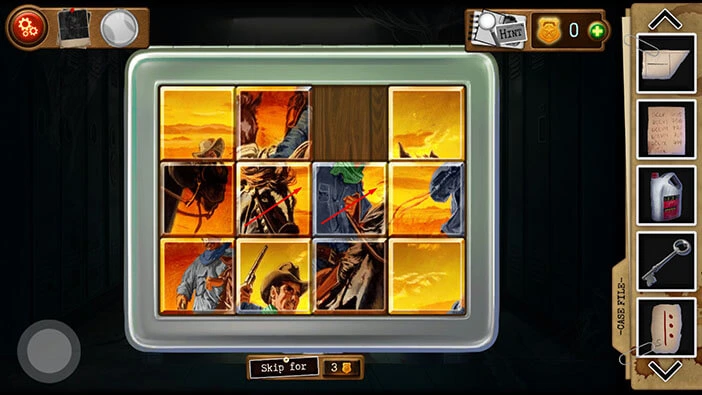
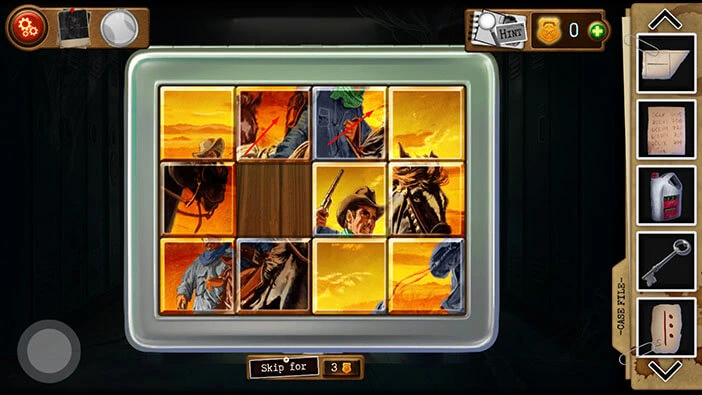
Step 4
Tap on the second slot in the first row to move the puzzle piece to the right. After that, tap on the second slot in the second row to move the puzzle piece up.
Step 5
Tap on the third slot in the second row to move the puzzle piece to the left. After that, tap on the fourth slot in the second row to move the puzzle piece to the left.
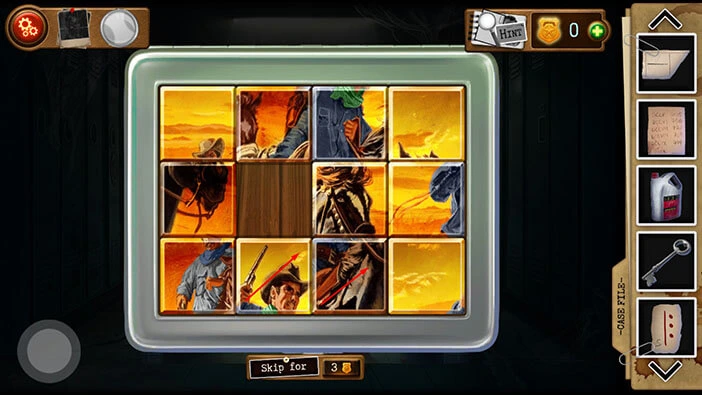
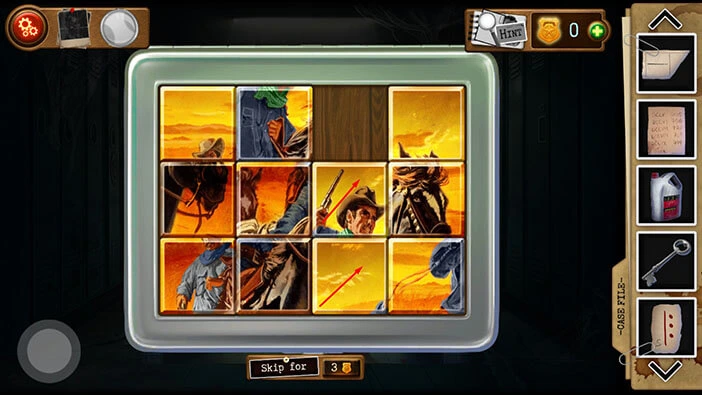
Step 6
Tap on the fourth slot in the first row to move the puzzle piece down. After that, tap on the third slot in the first row to move the puzzle piece to the right.
Step 7
Tap on the third slot in the second row to move the puzzle piece up. After that, tap on the third slot in the third row to move the puzzle piece up.
Step 8
Tap on the second slot in the third row to move the puzzle piece to the right. After that, tap on the second slot in the second row to move the puzzle piece down.
Step 9
Tap on the third slot in the second row to move the puzzle piece to the left. After that, tap on the third slot in the first row to move the puzzle piece down.
Step 10
Tap on the second slot in the first row to move the puzzle piece to the right. After that, tap on the second slot in the second row to move the puzzle piece up.
Step 11
Tap on the first slot in the second row to move the puzzle piece to the right. After that, tap on the first slot in the first row to move the puzzle piece down.
Step 12
Tap on the second slot in the first row to move the puzzle piece to the left. After that, tap on the third slot in the first row to move the puzzle piece to the left.
Step 13
Tap on the third slot in the second row to move the puzzle piece up. After that, tap on the second slot in the second row to move the puzzle piece to the right.
Step 14
Tap on the second slot in the third row to move the puzzle piece up. After that, tap on the third slot in the third row to move the puzzle piece to the left.
Step 15
Tap on the fourth slot in the third row to move the puzzle piece to the left. After that, tap on the fourth slot in the second row to move the puzzle piece down.
Step 16
Tap on the third slot in the second row to move the puzzle piece to the right. After that, tap on the second slot in the second row to move the puzzle piece to the right.
Step 17
Tap on the second slot in the first row to move the puzzle piece down. After that, tap on the third slot in the first row to move the puzzle piece to the left.
Step 18
Tap on the third slot in the second row to move the puzzle piece up. After that, tap on the third slot in the third row to move the puzzle piece up.
Step 19
Tap on the second slot in the third row to move the puzzle piece to the right. After that, tap on the second slot in the second row to move the puzzle piece down.
Step 20
Tap on the first slot in the second row to move the puzzle piece to the right. After that, tap on the first slot in the third row to move the puzzle piece up.
Step 21
Tap on the second slot in the third row to move the puzzle piece to the left. After that, tap on the second slot in the second row to move the puzzle piece down.
Step 22
Tap on the second slot in the first row to move the puzzle piece down. After that, tap on the first slot in the first row to move the puzzle piece to the right.
Step 23
Tap on the first slot in the second row to move the puzzle piece up. After that, tap on the first slot in the third row to move the puzzle piece up.
Step 24
Tap on the second slot in the third row to move the puzzle piece to the left. After that, tap on the third slot in the third row to move the puzzle piece to the left.
Step 25
Tap on the third slot in the second row to move the puzzle piece down. After that, tap on the second slot in the second row to move the puzzle piece to the right.
Step 26
Tap on the second slot in the third row to move the puzzle piece up. After that, tap on the third slot in the third row to move the puzzle piece to the left.
Step 27
Tap on the fourth slot in the third row to move the puzzle piece to the left. After that, tap on the fourth slot in the second row to move the puzzle piece down.
Step 28
Tap on the third slot in the second row to move the puzzle piece to the right. After that, tap on the third slot in the third row to move the puzzle piece up.
Step 29
Tap on the second slot in the third row to move the puzzle piece to the right. After that, tap on the first slot in the third row to move the puzzle piece to the right.
Step 30
Tap on the first slot in the second row to move the puzzle piece down. After that, tap on the second slot in the second row to move the puzzle piece to the left.
Step 31
Tap on the third slot in the second row to move the puzzle piece to the left. After that, tap on the third slot in the third row to move the puzzle piece up.
Step 32
Tap on the second slot in the third row to move the puzzle piece to the right. After that, tap on the second slot in the second row to move the puzzle piece down.

Step 33
Tap on the third slot in the second row to move the puzzle piece to the left. After that, tap on the fourth slot in the second row to move the puzzle piece to the left.
Step 34
Tap on the fourth slot in the third row to move the puzzle piece up. After that, tap on the third slot in the third row to move the puzzle piece to the right.
Step 35
Tap on the second slot in the third row to move the puzzle piece to the right. After that, tap on the first slot in the third row to move the puzzle piece to the right.
Step 36
Tap on the first slot in the second row to move the puzzle piece down. After that, tap on the first slot in the first row to move the puzzle piece down.
Step 37
Tap on the second slot in the first row to move the puzzle piece to the left. After that, tap on the second slot in the second row to move the puzzle piece up.
Step 38
Tap on the second slot in the third row to move the puzzle piece up. After that, tap on the third slot in the third row to move the puzzle piece to the left.

Step 39
Tap on the third slot in the second row to move the puzzle piece down. After that, tap on the second slot in the second row to move the puzzle piece to the right.
Step 40
Tap on the second slot in the third row to move the puzzle piece up. After that, tap on the first slot in the third row to move the puzzle piece to the right.
Step 41
Tap on the first slot in the second row to move the puzzle piece down. After that, tap on the second slot in the second row to move the puzzle piece to the left.
Step 42
Tap on the third slot in the second row to move the puzzle piece to the left. After that, tap on the third slot in the third row to move the puzzle piece up.
Step 43
Tap on the second slot in the third row to move the puzzle piece to the right. After that, tap on the second slot in the second row to move the puzzle piece down.
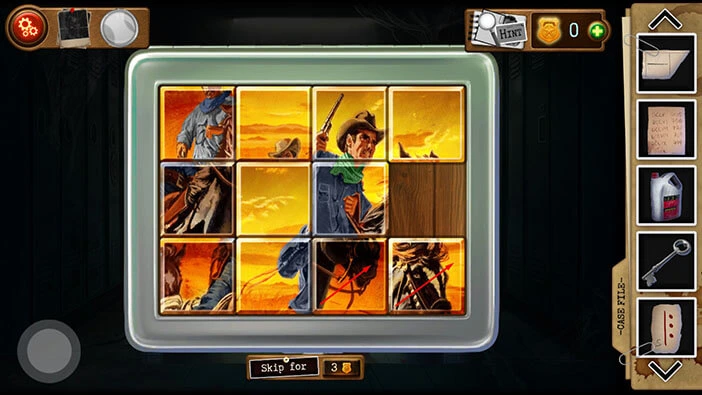
Step 44
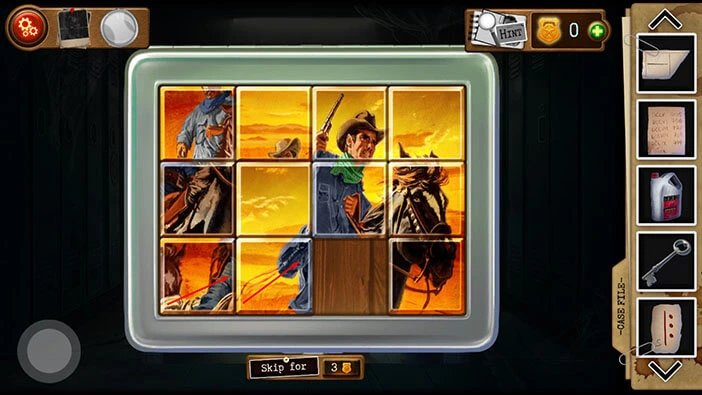
Finally, tap on the first slot in the second row to move the puzzle piece to the right. After that, tap on the first slot in the first row to move the puzzle piece down. With that, you will solve this puzzle.
Tap on the letter in the box to examine it.
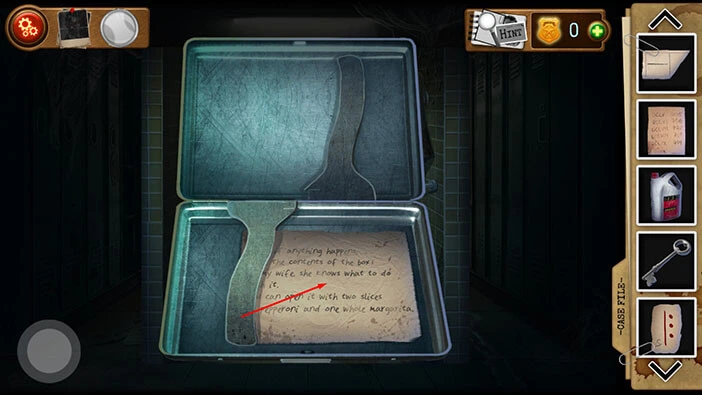
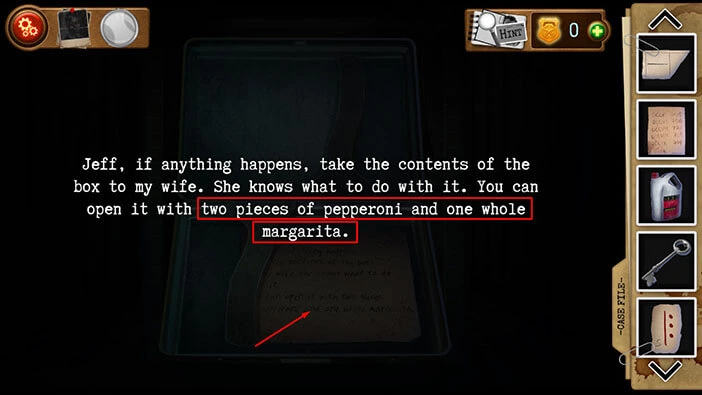
We can open this box with two pieces of pepperoni and one whole margarita. Let’s memorize/write down this information.
Once you’re done, tap on the empty space on the screen to put down the letter, then tap on the button in the bottom left corner of the screen to go back.
Next, let’s tap on the locker on the left to take another look at it, then tap on the box in the locker to start the interaction.

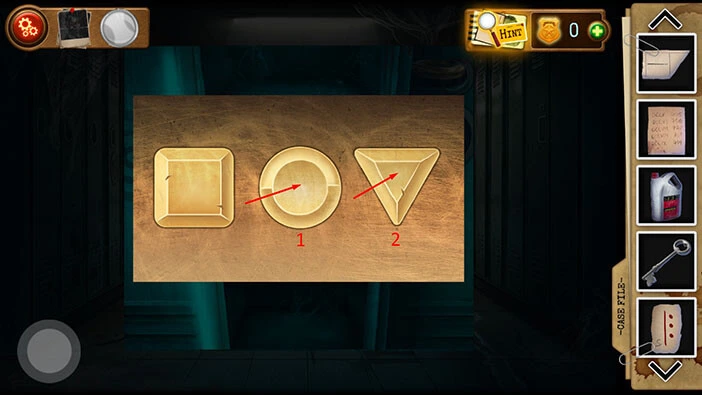
Previously, we discovered that to open the box we will need “two pieces of pepperoni and one whole margarita”. The triangle represents the pepperoni, and the circle represents the margarita.
So, let’s tap twice on the triangle, and once on the circle.
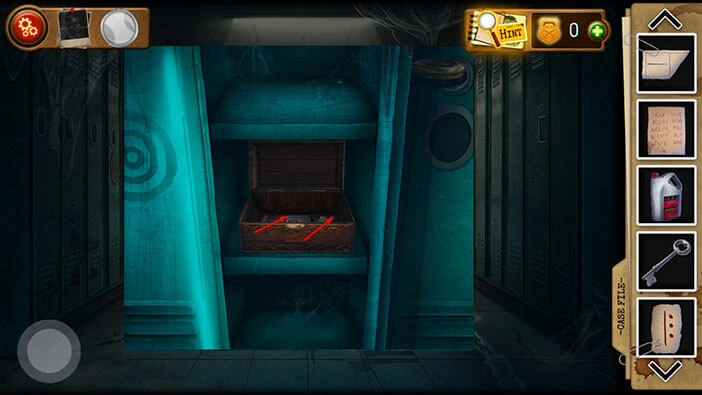
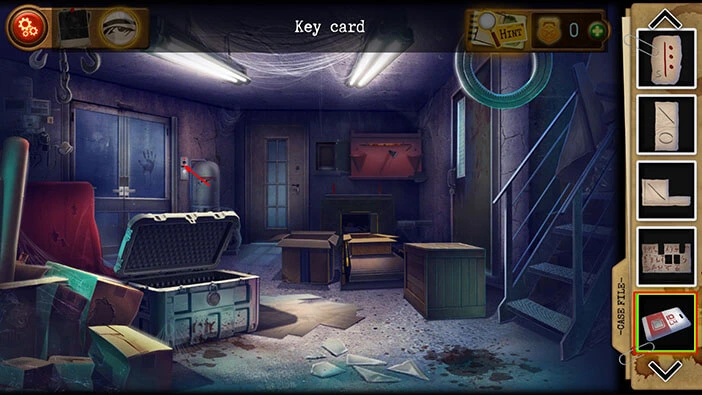
With that, you will open the box. Inside you will find, a “Key card” so let’s tap on it to pick it up. After that, tap on the photo on the right to take a closer look at it.
Our character will automatically take a photo and file it as evidence. On the back of the photo, we can see an interesting text.
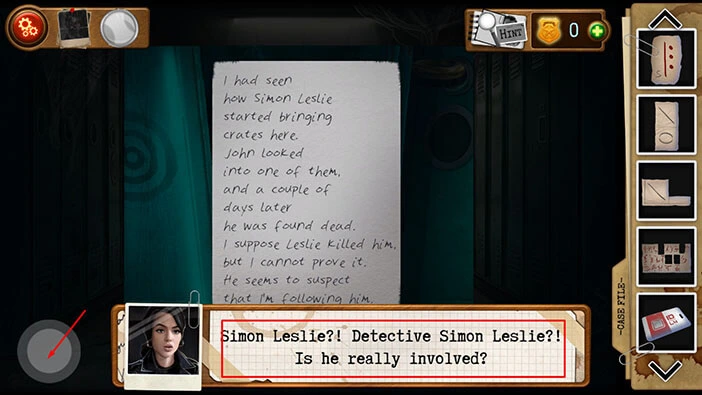
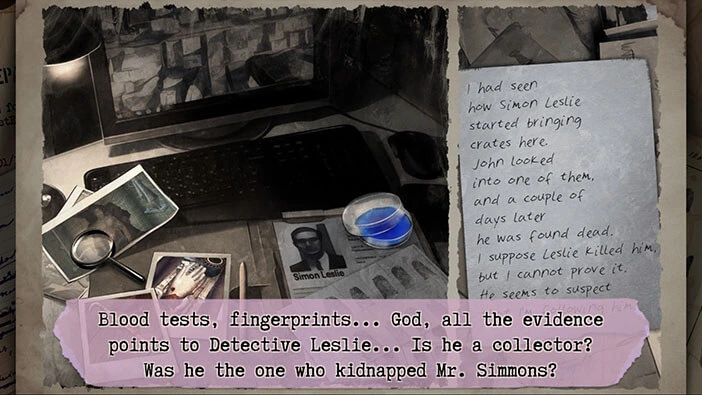
Leslie Simons brought some crates into this building, but when John looked inside one of them, he was found dead a few days later. So, the person who wrote this text (the dead guy that we found behind the bathroom wall) believes that Leslie killed John to cover something up.
Also, it would be reasonable to assume that Leslie also killed the guy who wrote this text.
Interesting. Let’s tap on the letter to start the interaction.
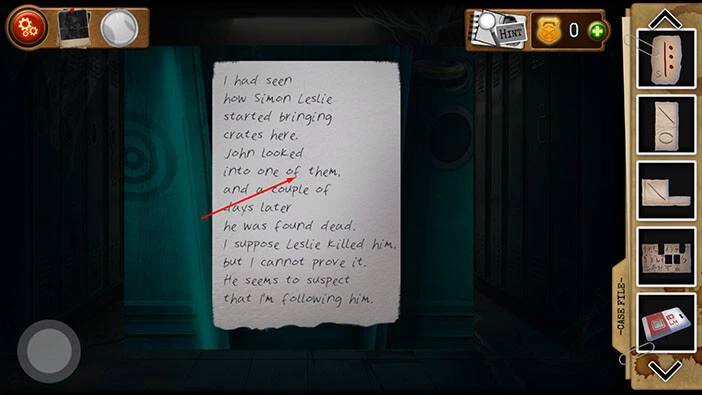
Well, our character knows Simon Leslie because he is one of the detectives in her station.
Let’s go back. Tap on the button in the bottom left corner of the screen.
Let’s tap on the photo in the top left corner of the screen to examine the evidence.

We can see that we gathered three out of five pieces of evidence. Tap on the third photo to examine it.
Our character thinks that Simon Leslie was the “inside man” who informed the Collector about everything that the police knew.
Let’s go back. Tap on the red sign in the top right corner.
Let’s go back to the previous room. Tap on the button in the bottom left corner of the screen.
Just to the right of the window, you will notice a key card slot. So, select the “Key card” from the inventory and use it to unlock the window.
After that, tap on the window to proceed to the next room.
Tap on the cabinet on the left to open it, and inside you will see a pyramid. Tap on this pyramid to start the interaction.

Here, we have another puzzle. We will solve this puzzle in several steps. Let’s begin.
Step 1
Tap once on the top part of the pyramid.

Step 2
Tap twice on the second (looking from top to bottom) part of the pyramid.
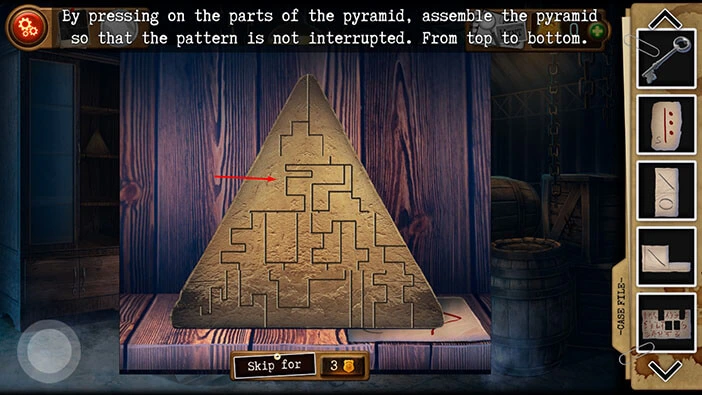
Step 3
Tap three times on the third (looking from top to bottom) part of the pyramid.

Step 4
Lastly, tap twice on the bottom part of the pyramid.
The top of the pyramid will open, as soon as you solve the puzzle, and inside you will see a key. Tap on it to pick it up, and “Key to the drawer in the cabinet” will be added to your inventory.
After that, tap on the button in the bottom left corner of the screen to go back.

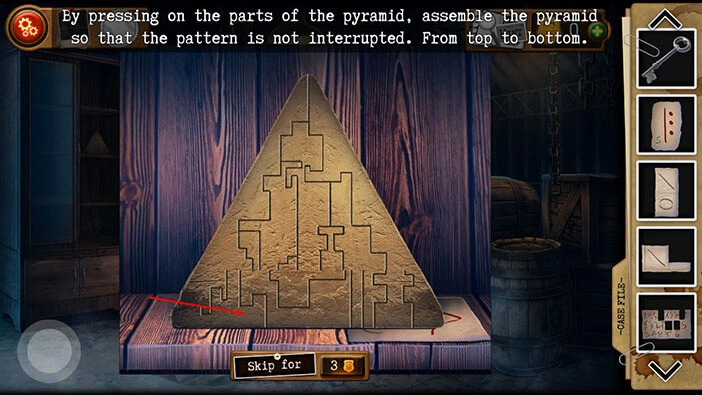
Actually, I forgot something, so let’s go back to the pyramid.
At the bottom of the pyramid, on the right side, you will see a note. Tap on it to pick it up and a “Piece of paper with symbol No.3” will be added to your inventory.
After that, tap on the button in the bottom left corner of the screen to go back.

Let’s go back to the previous room. Tap on the button in the bottom left corner of the screen.
Next, tap on the door in front of you to go to the office.

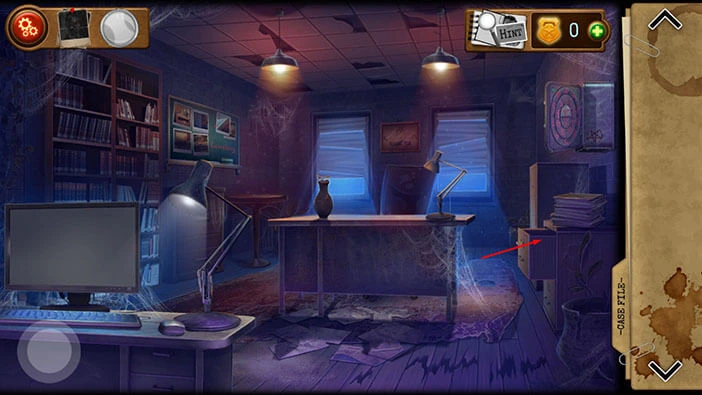
Next, tap on the cabinet on the right to take a closer look at it.
Select the “Key to the drawer in the cabinet” from the inventory and use it to unlock the drawer.
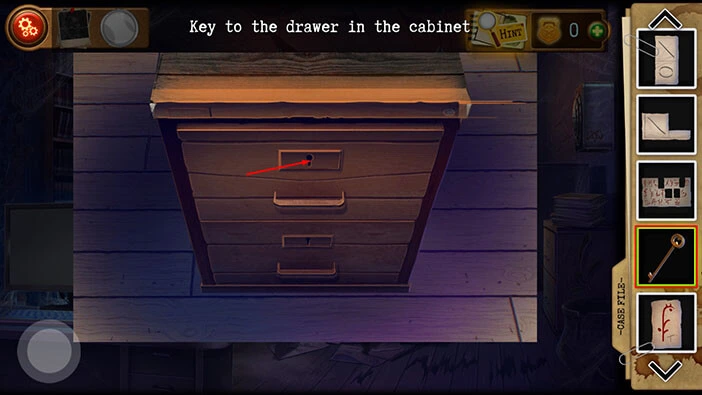
Here, you will see a small, locked chest. On the left side of the drawer, you will see two items. Tap on them to pick them. “Hint fragment No.3” and a “Piece of paper with symbol No.2” will be added to your inventory.
Once you’re done, tap on the button in the bottom left corner of the screen to go back.
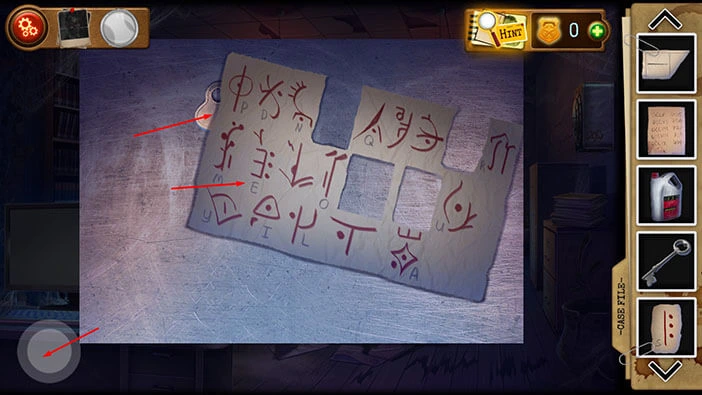
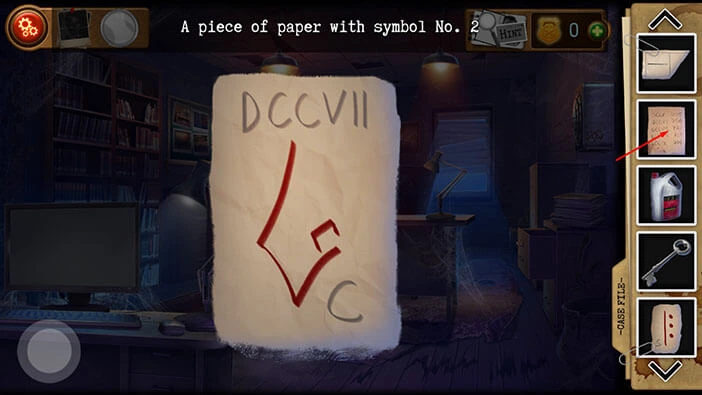
Next, tap on the “Piece of paper with symbol No.2” in your inventory to examine it.
You will notice the symbol “DCCVII”. Let’s memorize/write down these symbols because they represent the hint for the next puzzle.
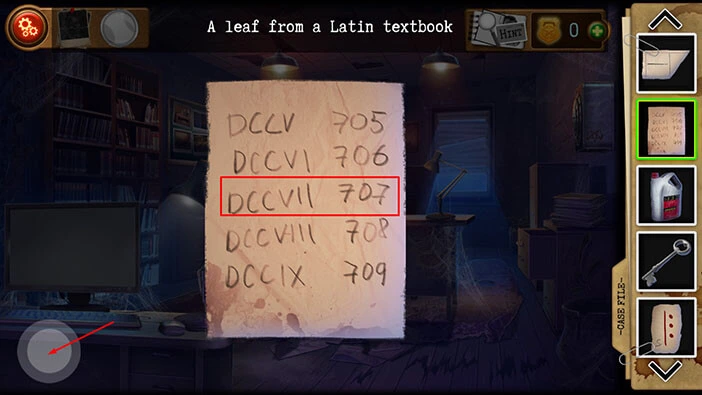
Once you’re done, tap on the “Leaf from a Latin textbook” to examine it.
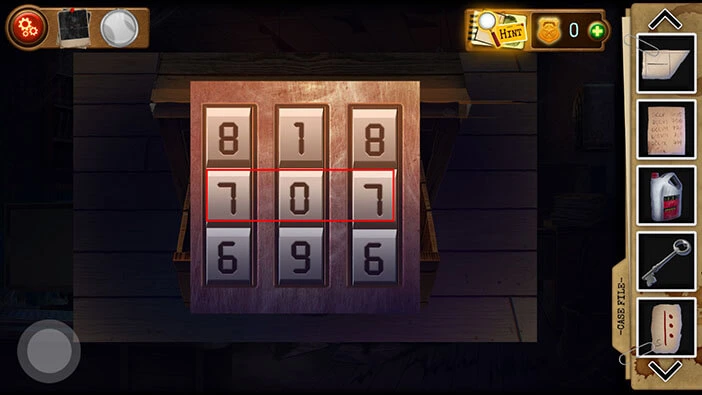
We can see “DCCVII” here, and next to it, we can see the number “707”. Let’s memorize/write down this number because it represents the solution for the next puzzle.
Once you’re done, tap on the button in the bottom left corner of the screen to put down the note.
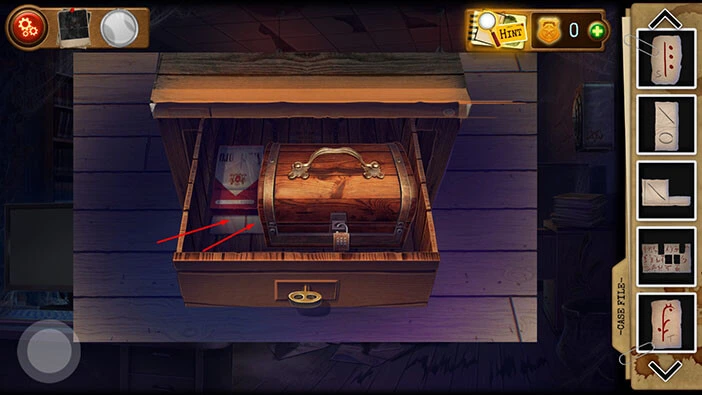
Next, let’s tap on the drawer on the right to take another look at it, then tap on the to start the interaction.
Enter the code “707” that we just discovered, and you will unlock the small chest.
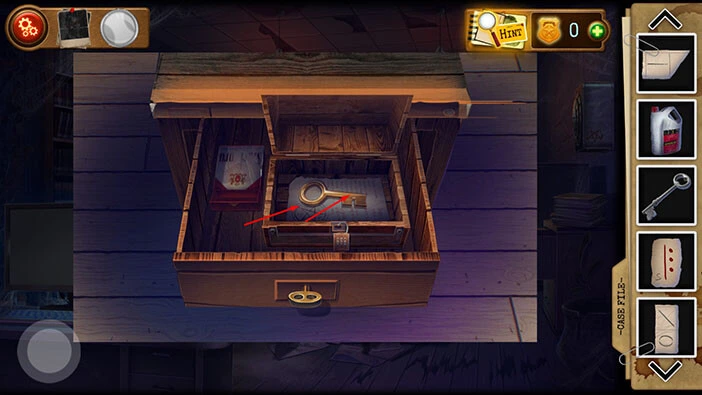
In the chest, you will find a “Cabinet key”. Tap on it to pick it up. After that, tap on the note under the key to examine it.
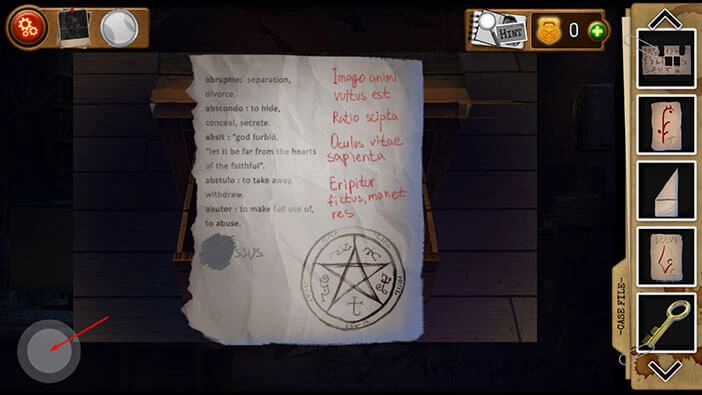
Here, we can see some text in Latin, but our character can’t remember the meaning of the words.
Let’s tap on the button in the bottom left corner of the screen to go back.
Let’s go back to the previous room, tap on the button in the bottom left corner of the screen to go back.
Tap on the window on the left to proceed to the next room.
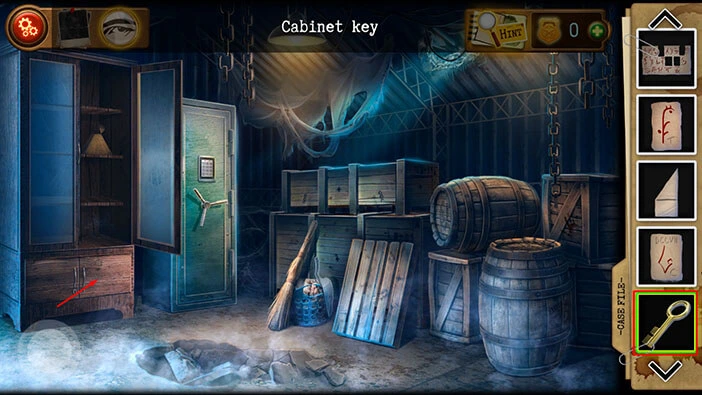
Select the “Cabinet key” from the inventory, then tap on the bottom part of the cabinet on the left to unlock it.
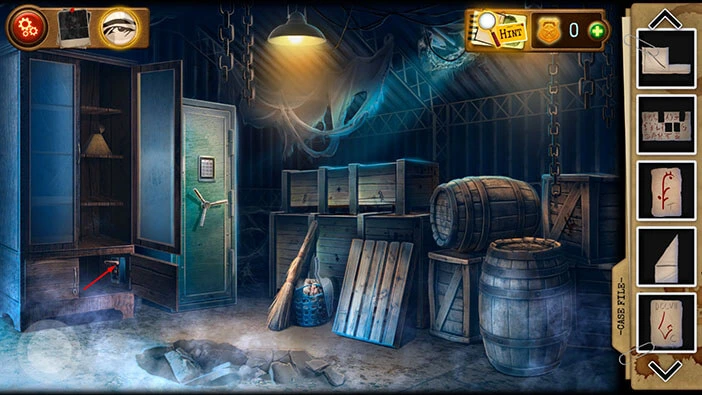
Inside you will find a lever, so let’s tap on it to activate it.
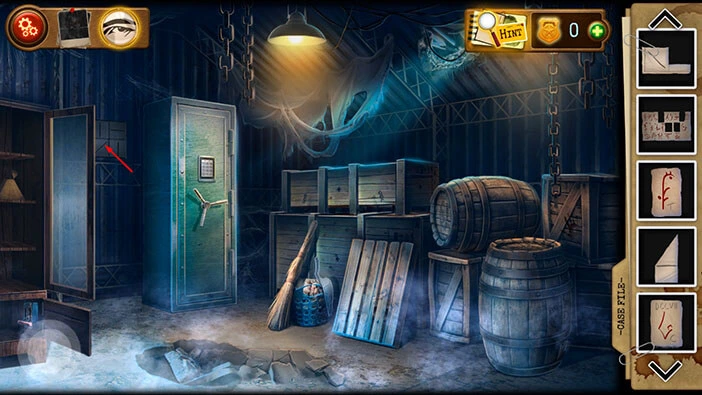
The cabinet will slide to the left, and behind it, you will discover another puzzle. Let’s tap on it to start the interaction.
Your character will automatically place all hint fragments on the left side. Our next task is to match the shape on the hint. We will do this puzzle in several steps. Let’s begin.
Step 1
Tap twice on the first slot in the first row to change the symbol to the horizontal line.
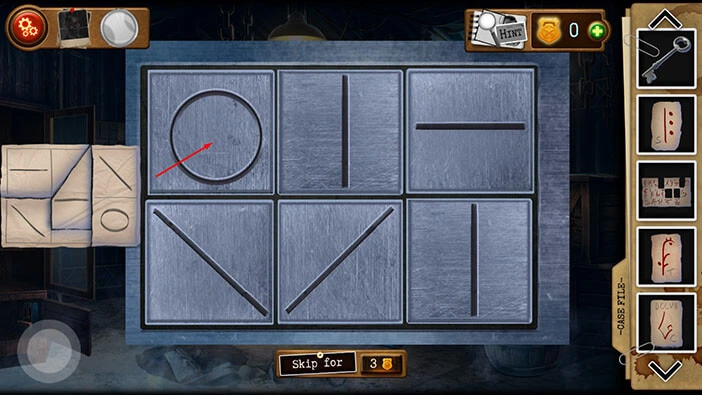
Step 2
Tap three times on the second slot in the first row to change the symbol to the diagonal line.

Step 3
Tap once on the third slot in the first row to change the symbol to the diagonal line.
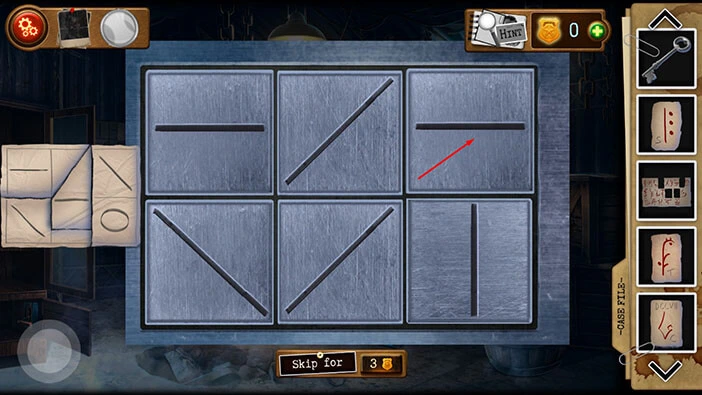
Step 4
Tap three times on the second slot in the second row to change the symbol to the horizontal line.

Step 5
Tap four times on the third slot in the second row to change the symbol to a circle.
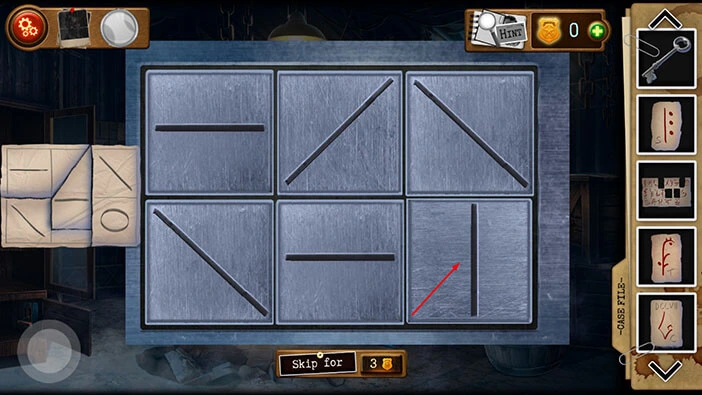
With that, you will open the safe, and inside you will find the “Hatchet”. Tap on it to pick it up.
After that, tap on the button in the bottom left corner of the screen to go back.
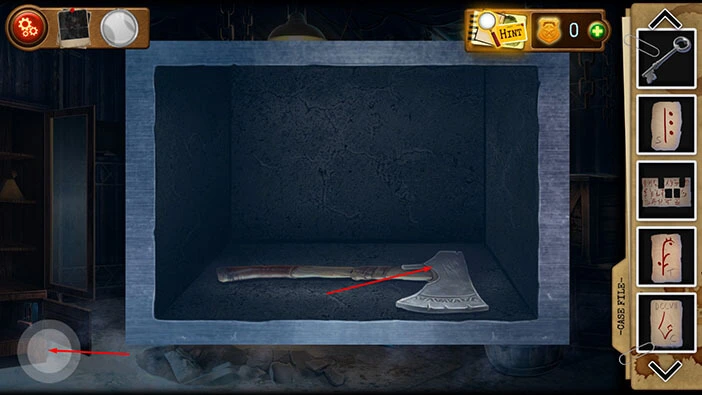
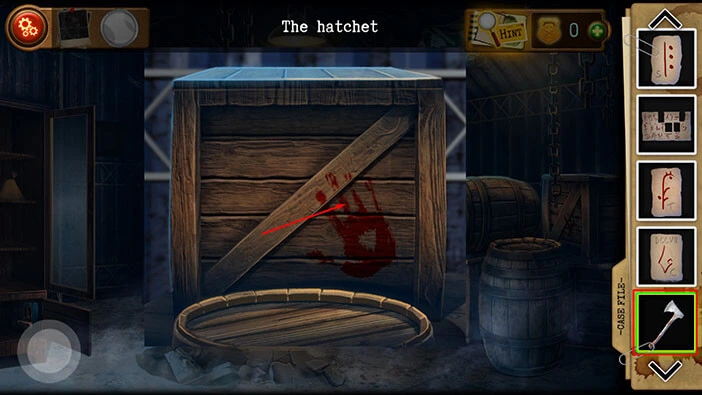
In the right corner of the room, you will notice a wooden crate with a bloody handprint. Let’s tap on it to take a closer look.
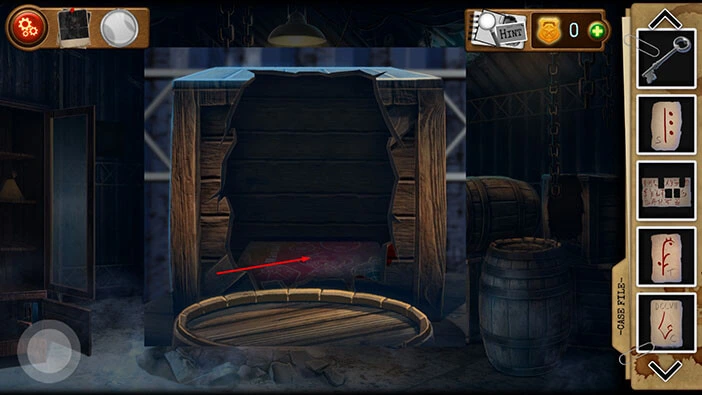
Select the “Hatchet” from the inventory and use it to smash the crate.
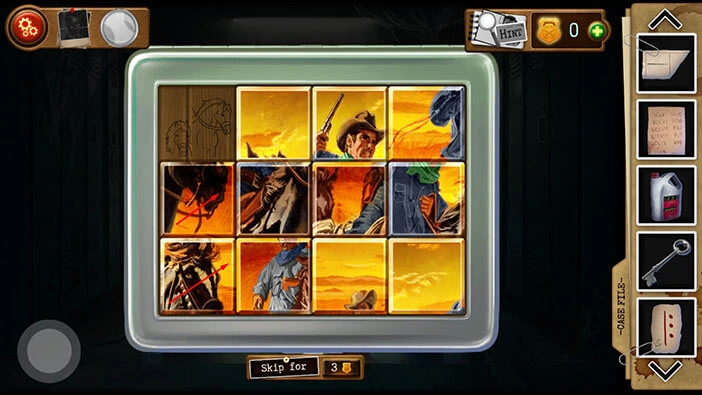
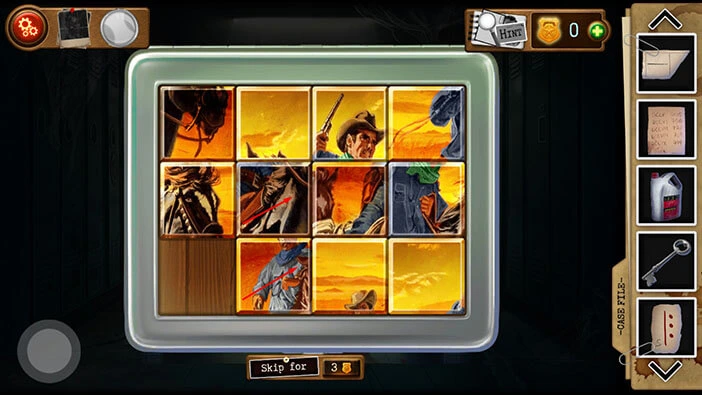
In the create, you will find a “Manual”. Tap on it to take a closer look, and tap again to start the interaction.
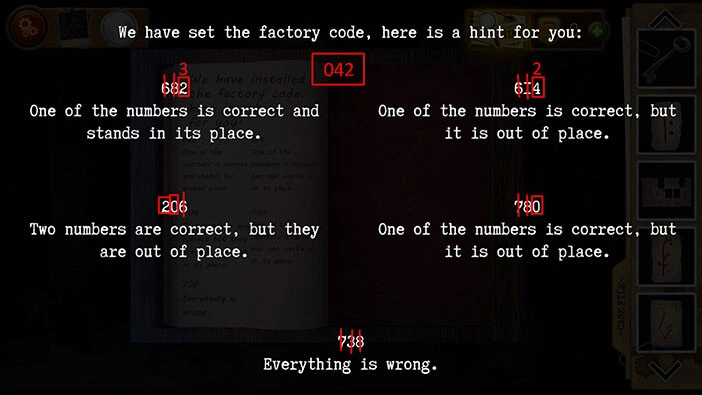
Here, we have another puzzle. Our task is to discover the correct three-digit code, based on the hint. This is a very interesting puzzle, although it might seem complicated at first glance. We will do this puzzle in two steps. Let’s begin.
Step 1
If you take a look at the hint at the bottom, you will see the number “738” and below them, you will see the text “Everything is wrong”. So, we can eliminate the numbers 7, 3, and 8 from all the other hints.
Next, if we take a look at the second hint in the second row, we will see the numbers “780” and below them, you will see the text “One of the numbers is correct, but it is out of place”. We already eliminated the numbers 7 and 8, so we can conclude that 0 is the correct number. We can also conclude that 0 shouldn’t be in the third position.
Next, if we take a look at the first hint in the second row, we will see the number “206” and below it, you will see the text “Two numbers are correct, but they are out of place”.
Well, we already know that 0 is the correct number and that it shouldn’t be in the third position. From this hint, we also discovered that the number 0 shouldn’t be in the second position. So, the number 0 should be in the first position.
Also, we discovered that there is number 2 in this code and that it isn’t in the first position.
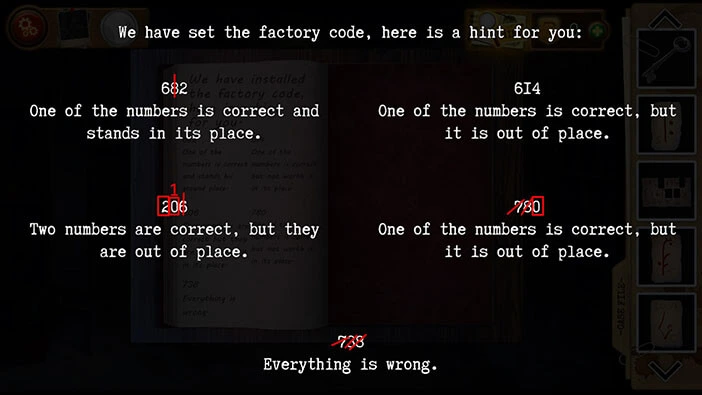
Step 2
Next, if we take a look at the first hint in the first row, we will see the numbers “682” and below them, you will see the text “One of the numbers is correct, and stands in its place”.
Well, we already know that there is number 2 in this code and that it isn’t in the first position. So, the number 2 should be in the third position.
Also, we can eliminate the number 6 from the second hint in the first (because only one of the numbers is correct).
Next, if we take a look at the second hint in the first row, we will see the numbers “6I4” and below them, you will see the text “One of the numbers is correct, but it is out of place”.
So, we already eliminated the number 6, and we can eliminate the letter “I” (because it isn’t a number). So, the number 4 is the correct number, but it isn’t in the third position.
We already know that the number 0 should be in the first position and that the number 2 should be in the third position. So, the number 4 has to be in the second position.
When we put it all together, we will get the number “042”. Let’s memorize/write down this number because it represents the solution for the next puzzle.
Once you’re done, tap on the screen to put down the manual, then tap on the button in the bottom left corner of the screen to go back.
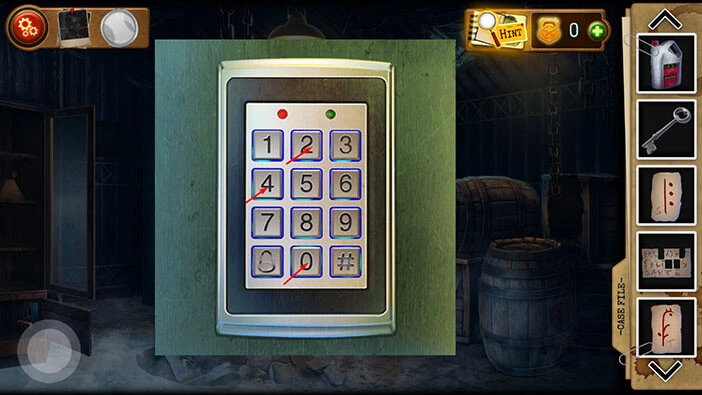
Next, let’s tap on the large safe on the left to take a closer look at it, and tap again to start the interaction.
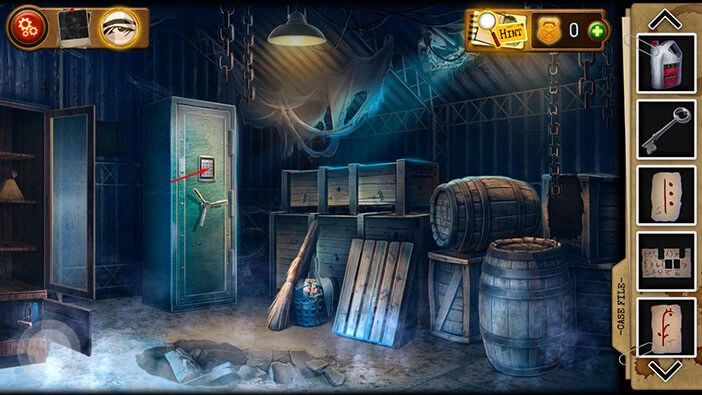
Enter the code “042” that we discovered previously, and you will unlock the safe. Tap on it to open it.
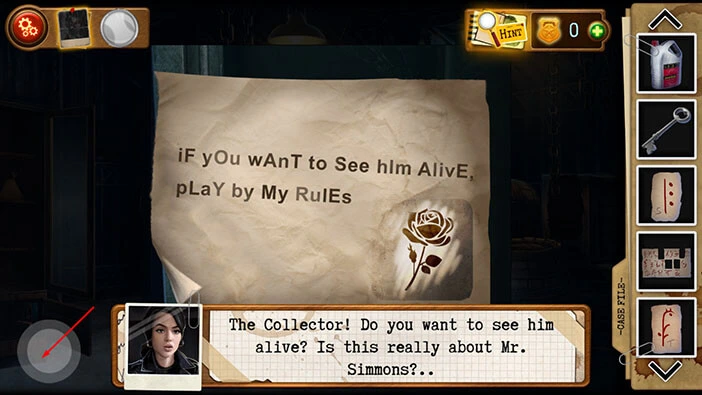
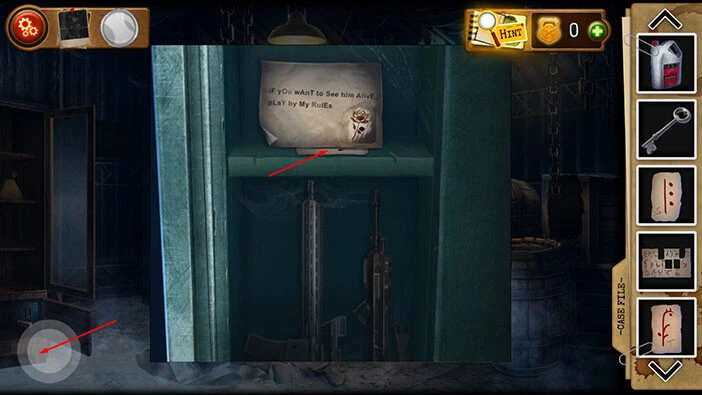
Next, tap on the note on the top shelf to take a closer look at it.

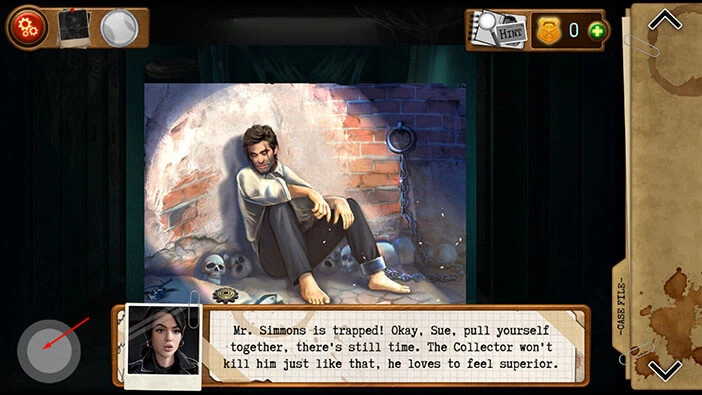
It looks like the Collector left a message for our character, “If you want to see him alive, play by my rules”. So, Detective Simons is still alive, so we might have a chance to save him. Also, our character will take a photo of the note, and file it as evidence.
Tap once on the button in the bottom left corner of the screen to put down the note.
Before we proceed, you will notice a note under the message that we just saw. So, let’s tap on this note to pick it up. Our character will merge this hint with other ones, and “Sheet with symbols” will be added to your inventory.
Once you’re done, tap on the button in the bottom left corner of the screen to go back.
Let’s go back to the office. Tap on the button in the bottom left corner of the screen to go back to the first room.
Next, tap on the door in front of you to go to the office.
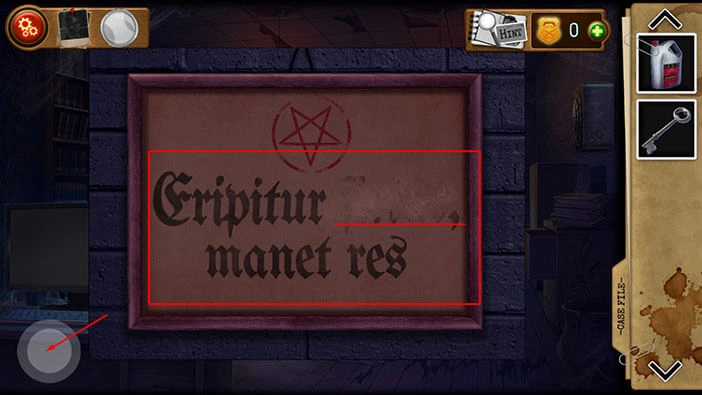
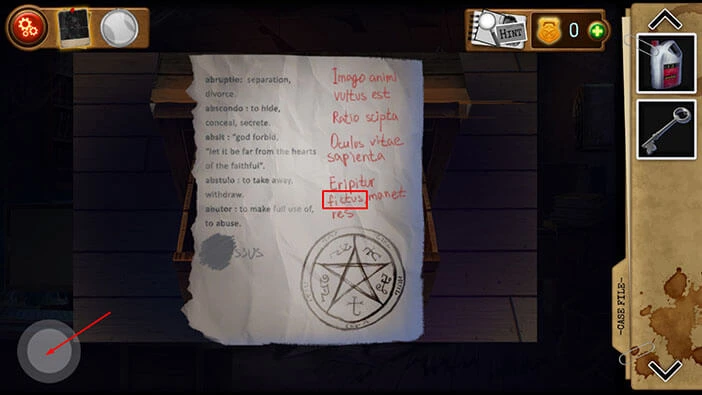
Next, tap on the picture on the wall in front of you to take a closer look at it.

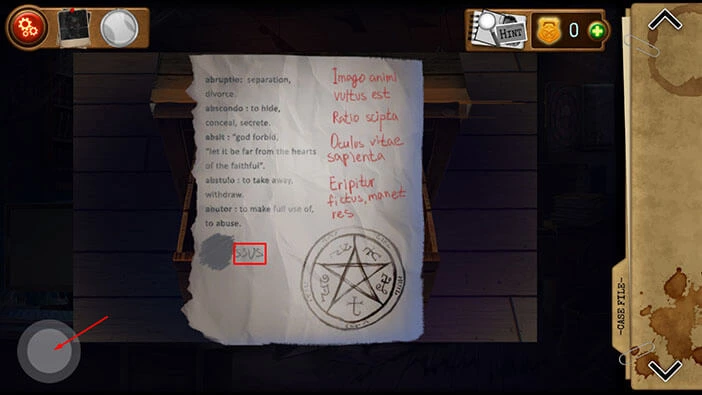
Our character will notice that the symbol here is the same as the symbol on the safe. More importantly, you will notice some text in Latin, but one word is missing. Let’s memorize/write down this text.
Eripitur –Missing Word- manet res.
Once you’re done, tap on the button in the bottom left corner of the screen to go back.
Next, let’s tap on the open drawer on the right to take another look at it.
Let’s tap on the note to examine it.
We are interested in the last piece of text because it matches the text that we saw previously.
Eripitur –Missing Word- manet res.
So, we have now discovered the missing word, “fictus”. Let’s memorize/write down this word because it represents part of the solution for the next puzzle.
Once you’re done, tap on the button in the bottom left corner of the screen to go back.
On the wall on the right, you will notice a safe. Let’s tap on it to take a closer look.

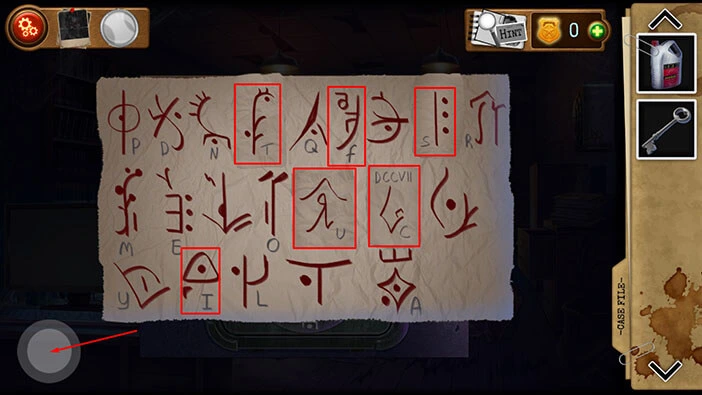
Our character will automatically place the hint on the left side of the puzzle. Let’s tap on the hint to examine it.
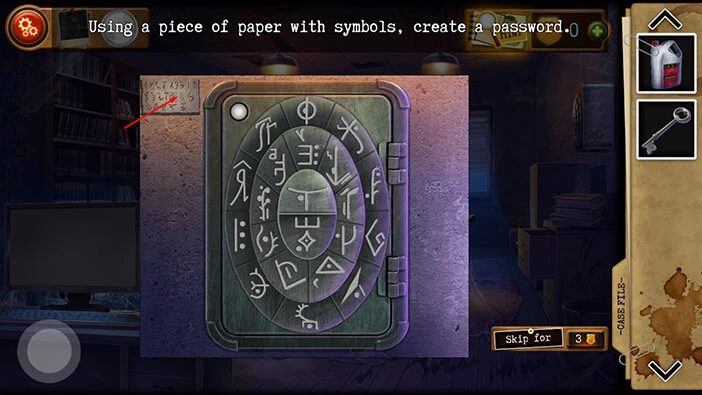
Here, you can see some symbols, and you will also notice that there is a letter below each symbol. Our task is to discover the symbols that would form the word “fictus”. Let’s do that.
Letter “f” = sixth symbol in the first row
Letter “i” = second symbol in the third row
Letter “c” = sixth symbol in the second row
Letter “t” = fourth symbol in the first row
Letter “u” = fifth symbol in the second row
Letter “s” = eighth symbol in the first row
Let’s memorize/write down these symbols. Once you’re done, tap on the button in the bottom left corner of the screen to go back.
Let’s tap on the symbols that we discovered.
First, tap on the symbol located at eleven o’clock in the middle ring.
Second, tap on the symbol located at five o’clock in the middle ring.
Third, tap on the symbol located at four o’clock in the outer ring.
Fourth, tap on the symbol located at two o’clock in the outer ring.
Fifth, tap on the symbol located at ten o’clock in the outer ring.
Sixth, tap on the symbol located at eight o’clock in the outer ring.
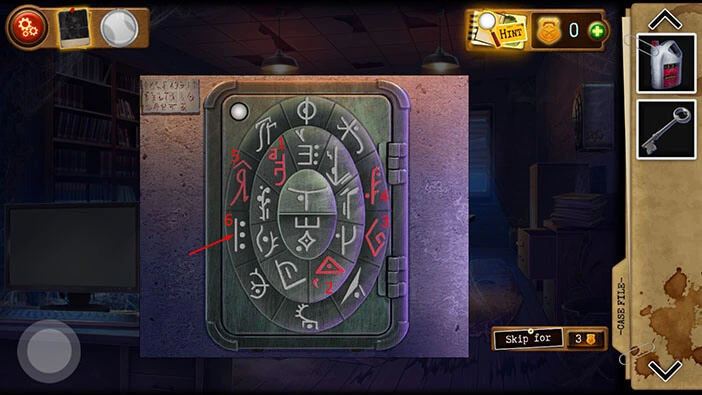
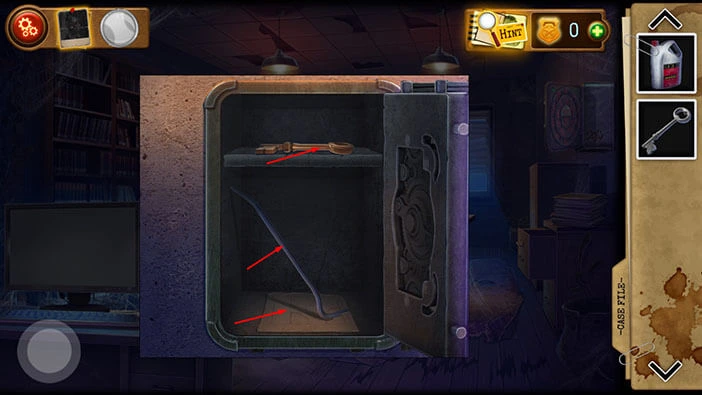
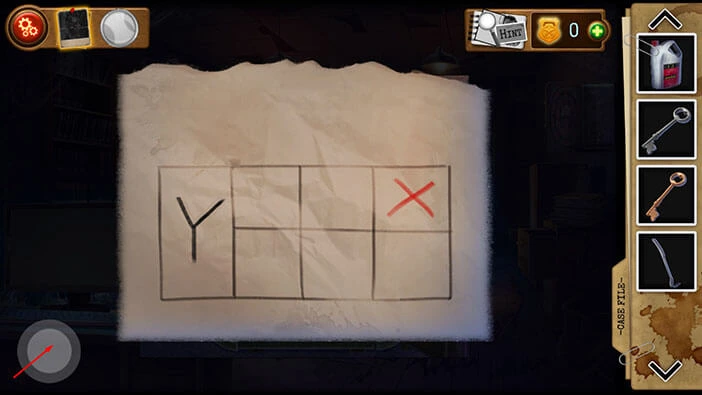
You will unlock and open the safe as soon as you tap on the correct symbols. Inside, you will find, a “Key to the case”, a “Crowbar”, and a note. Tap on the first two items to pick them up, then tap on the note to examine it.
Here, we can see “Y” in the large slot on the left. On the right, we can see six slots arranged in two rows. The red “X” is in the third slot, first row. Let’s take note of this information.
After that, tap on the button in the bottom left corner of the screen to go back.
Let’s go back to the first room. Tap on the button in the bottom left corner of the screen to go back.
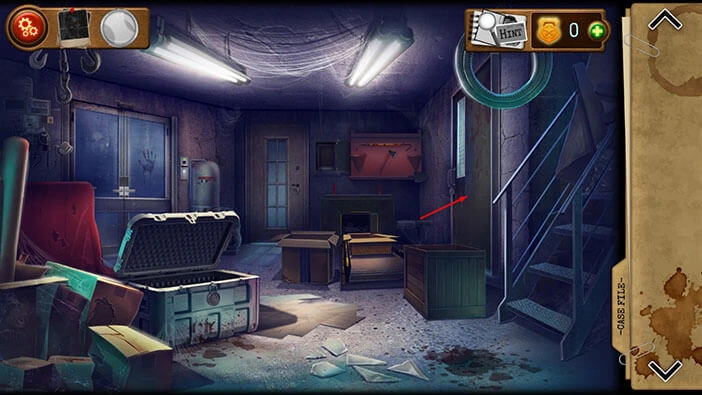
Next, tap on the wooden crate on the right side of the room to take a closer look at it.
Select the “Crowbar” from the inventory and use it to open the crate.

Tap on the items in the crate to take a photo, and our character will file it as evidence.
After that, tap on the button in the bottom left corner of the screen to go back.
Next, let’s tap on the window on the left to proceed to the next room.
If you tap on the wooden crates on the left, you will discover that our character can’t open them with her bare hands. So, select the “Crowbar” from the inventory and use it to open the crate on the right.
Inside, you will discover a dirty suitcase. So, select the “Canister of lye” from the inventory and use it to clean the suitcase.
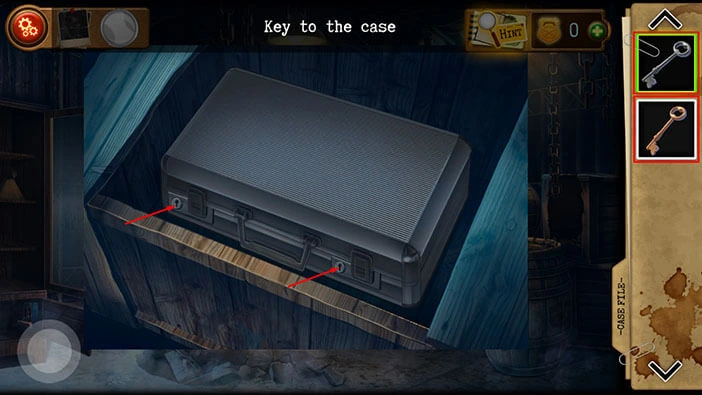
Select the two “Keys to the case” from the inventory and use them to unlock the suitcase.
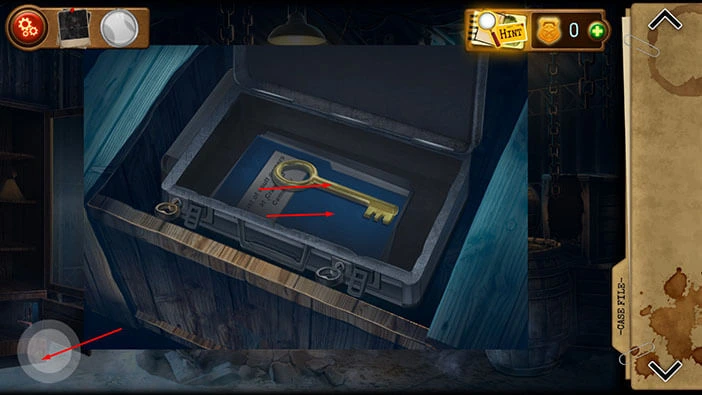
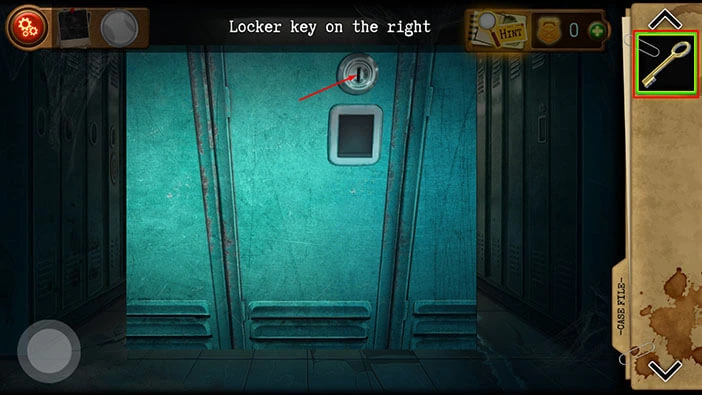
In the suitcase, you will find a “Locker key on the right”. Tap on it to pick it up. Under the key, you will see a file, so let’s tap on it to examine it.
You will discover a list of Crawford Cemetery owners. Our character will double-check this information once she gets back to the station.
Once you’re done, tap on the button in the bottom left corner of the screen to go back.
Let’s go back to the first room. Tap on the button in the bottom left corner of the screen to go back.
Let’s tap on the door on the right to proceed to the next room.
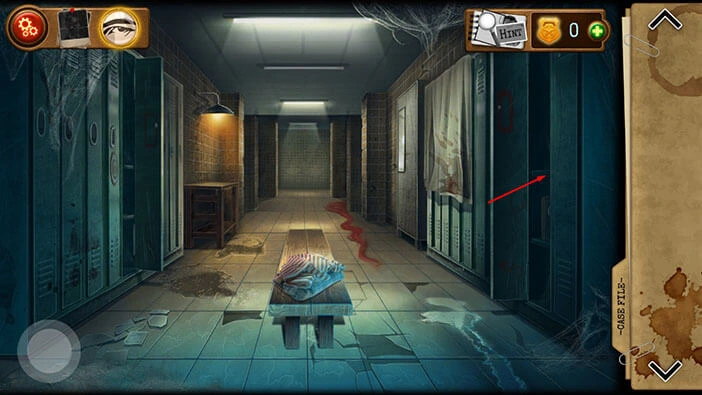
Next, let’s tap on the locker on the right to take a closer look at it.
Select the “Locker key on the right” from the inventory and use it to unlock the locker.
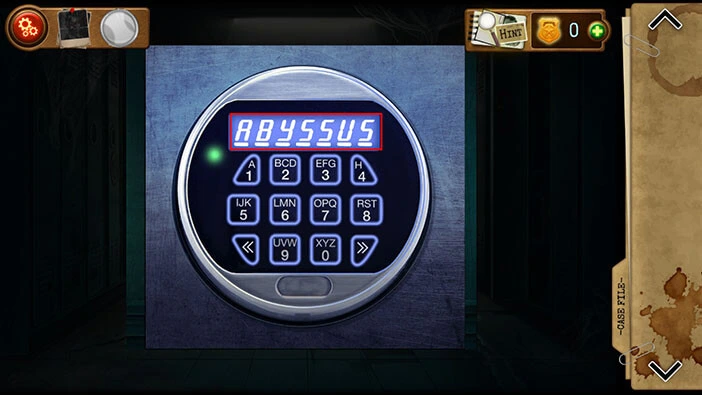
On the bottom of the shelf, you will see a safe. We will need a seven-digit password in order to open this safe.
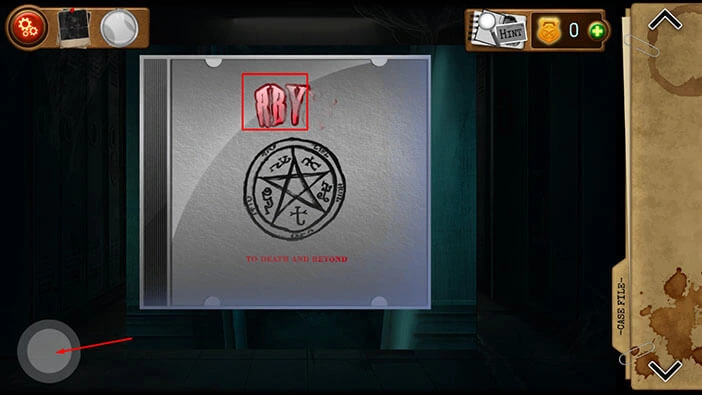
On the top shelf, you will notice a file. Let’s tap on it to examine it.
Here, you will discover the first three letters of the password, “ABY”, but the other three letters have been erased. Let’s memorize/write down these letters.
Below the letters, you will notice a strange symbol. Just take note of it, there is no need to memorize the exact shape.
Once you’re done, tap on the button in the bottom left corner of the screen to go back.
Let’s look for the other four letters. Tap on the button in the bottom left corner of the screen to go back to the first room.

Tap on the door in front of you to proceed to the office.
Next, let’s tap on the open drawer on the right to look inside, then tap on the file in the drawer to examine it.
In the bottom right corner of the file, you will see the same symbol that we saw in the file above the safe.
On the left side, we can see the letters “SSUS”. When we merge these letters with the three letters that we previously discovered, we will get,
“ABYSSUS”. Memorize/write down this word, because it represents the password that we will use to unlock the safe.
Once you’re done, tap on the button in the bottom left corner of the screen to go back.
Let’s go back to the safe. Tap on the button in the bottom left corner of the screen to go back to the first room.

Next, let’s tap on the door on the right to proceed to the next room.
Tap on the locker on the right to look inside, then tap on the safe to start the interaction.
Enter the password “ABYSSUS” and you will unlock the safe.
In the safe, you will see a photo. Let’s tap on it to examine it.
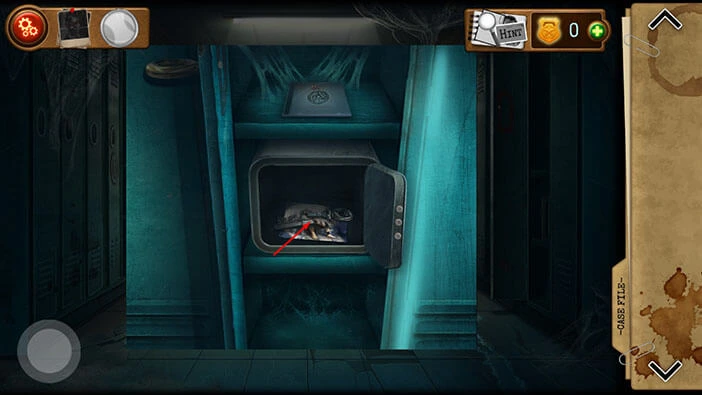
Well, we now have the confirmation that Detective Simons is still alive. Let’s tap on the button in the bottom left corner of the screen to go back.
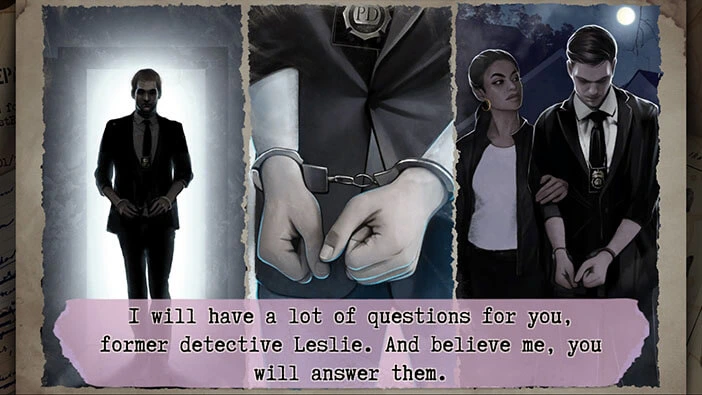
All the evidence points to Detective Leslie, but our character isn’t convinced that he is the Collector.
In the next scene, we can see that Detective Leslie has been arrested, and our character wants to interrogate him.
We reached the end of the fifth chapter of the walkthrough. You can check out the walkthrough for the sixth chapter, “Ashes to Ashes”, by tapping on the “Next Part” button.
Thank you for reading.