Detective – Escape Room Games | Chapter 6: Ashes to Ashes
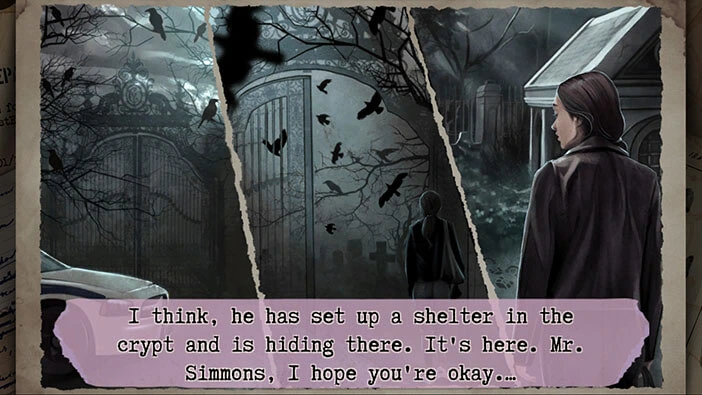
Hello everyone and welcome to the walkthrough for Chapter 6 of the “Detective: Escape Room Games”. At the beginning of the sixth chapter, by interrogating the former Detective Leslie, we discover that the Collector eliminated Henry Winslow because he was the last owner of the Oceanside Cemetery crypt. Our character concluded that the Collector’s base of operation is located in the Oceanside Cemetery crypt. So, she decided to go there and investigate…
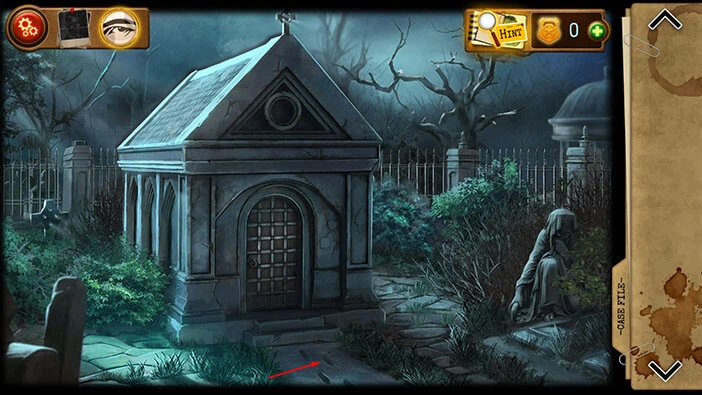
Let’s explore this level. On the path in front of the door, you will notice some footprints. Tap on them and our character will take a photo and file them as evidence.
Our character will also conclude that footprints are fresh, so the suspect is probably still somewhere close.
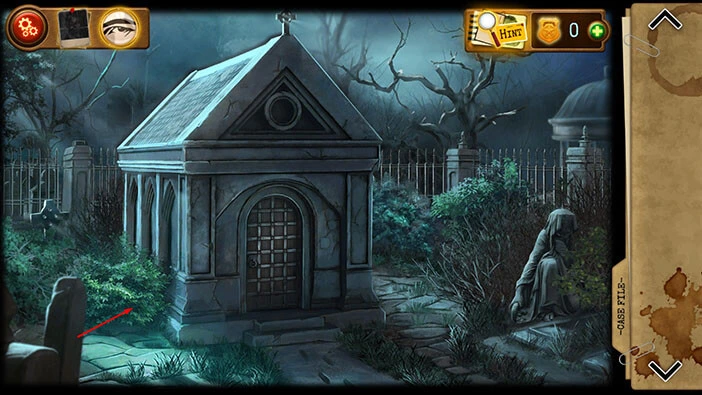
Tap on the bush, just to the left of the crypt, to take a closer look at it.
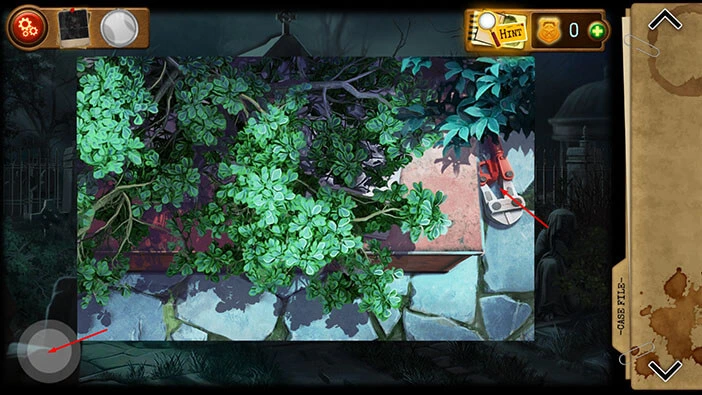
On the right, you will notice “Wire cutters”. Tap on them to pick them up. Here, you will also see a toolbox hidden under the brush. We will come back to it a bit later.
For now, tap on the button in the bottom left corner of the screen to go back.
Next, let’s tap on the bush on the right, to take a closer look at it.
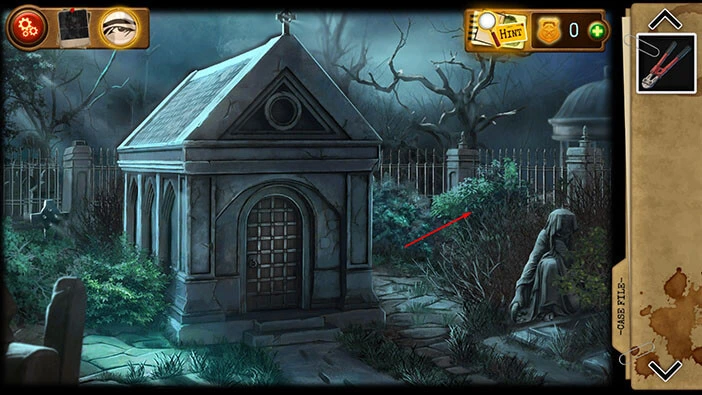
On the ground, you will find “Garden shears”. Tap on them to pick them up.
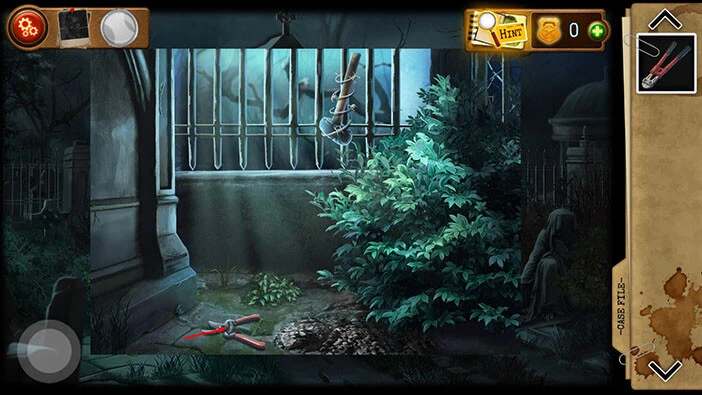
Next, let’s select the “Wire cutters” from the inventory and use them to cut the wire that is wrapped around the hammer.
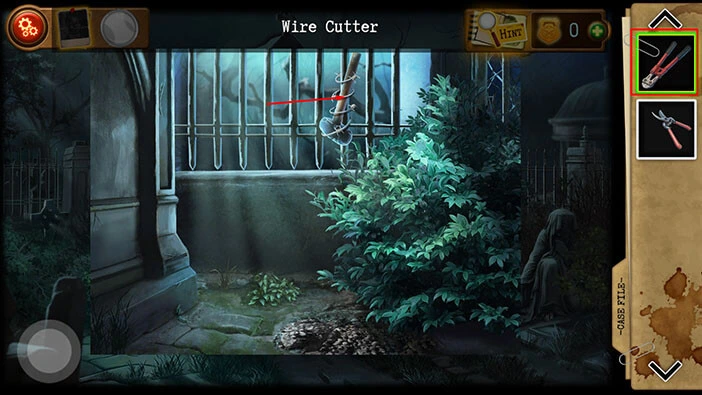
The “Hammer” will fall to the ground, so let’s tap on it to pick it up.
After that, tap on the button in the bottom left corner of the screen to go back.
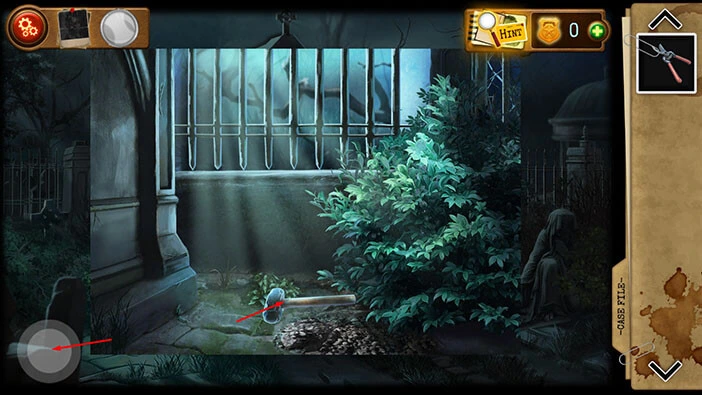
Tap on the bush, located to the right of the crypt, to take another look at it.
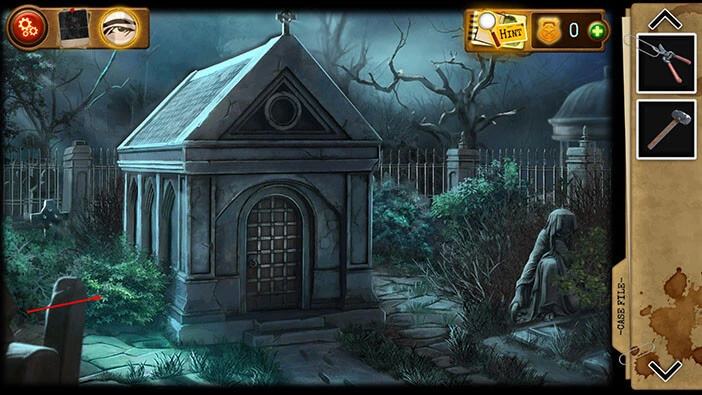
Select the “Garden shears” from the inventory and use them to cut the small branches and clear the path to the toolbox.
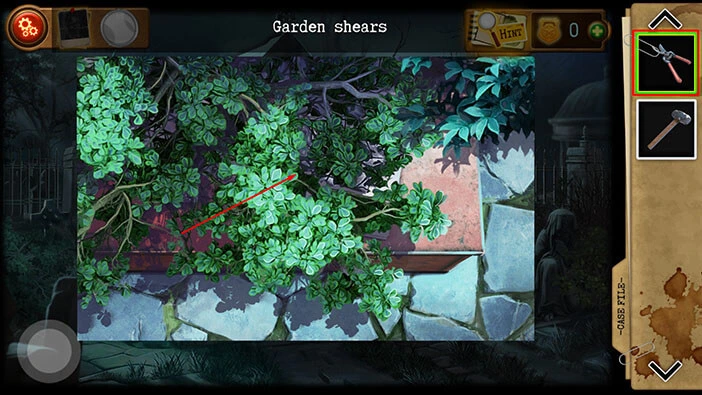
You will discover a notebook. Let’s tap on it to examine it.
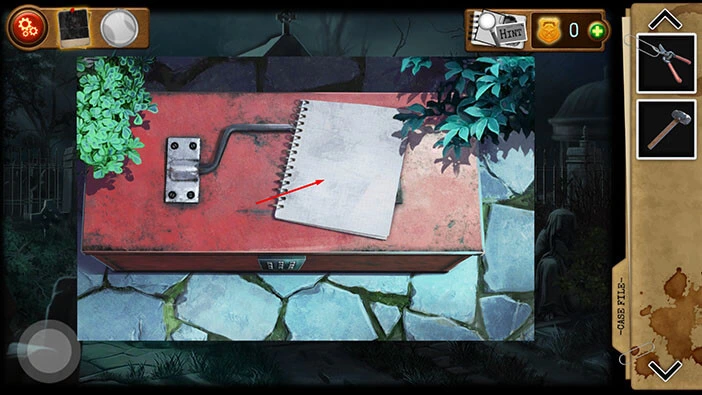
Well, the Collector left the message “Hello Sue”, so he knew that our character would eventually come here to investigate.
On the page on the left, we can see a hint. There is some kind of secret mechanism just to the right of the crypt door. Let’s investigate this hint.
Tap on the button in the bottom left corner of the screen to go back.
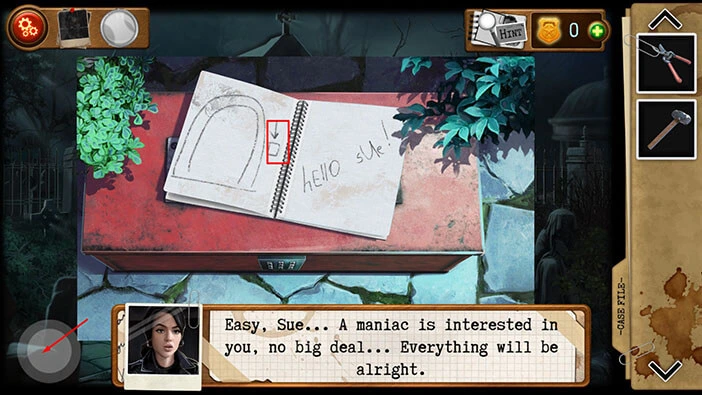
Select the “Hammer” from the inventory and tap just to the right of the door (at the point that we saw in the picture/hint).
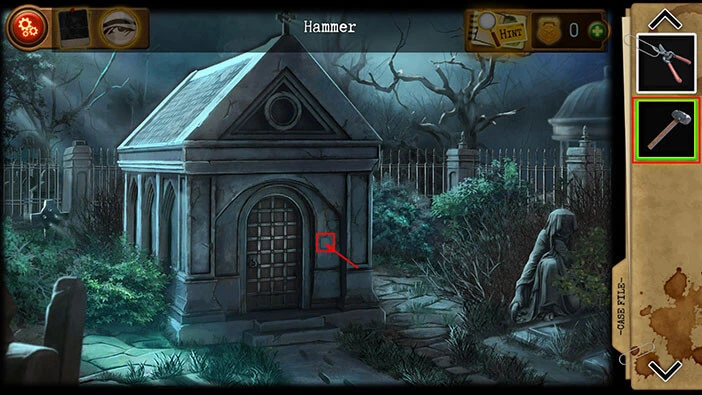
You will discover a button. Tap on it to open the door. After that, tap on the door to proceed into the crypt.
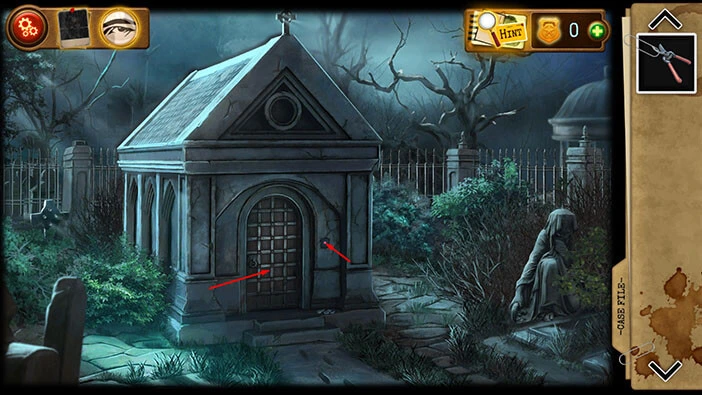
In the right corner of the room, you will notice a “Shovel”. Let’s tap on it to pick it up.
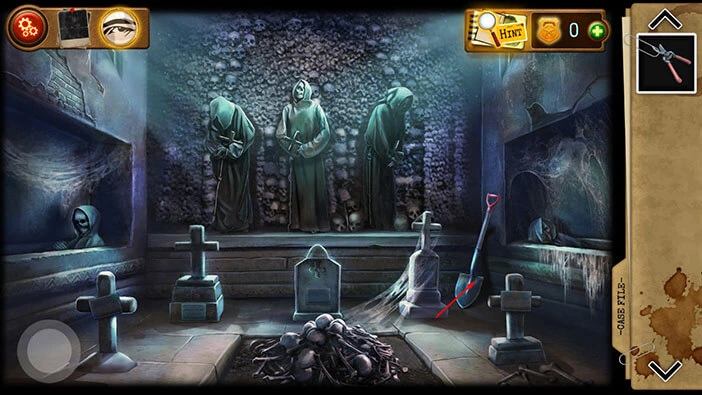
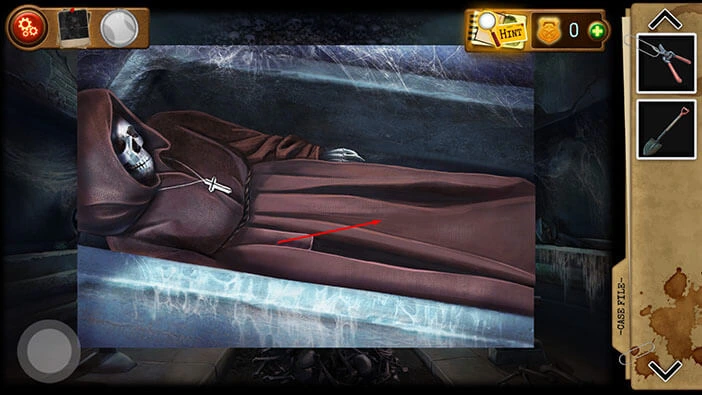
Next, let’s tap on the skeleton in the sarcophagus on the right, to take a closer look.
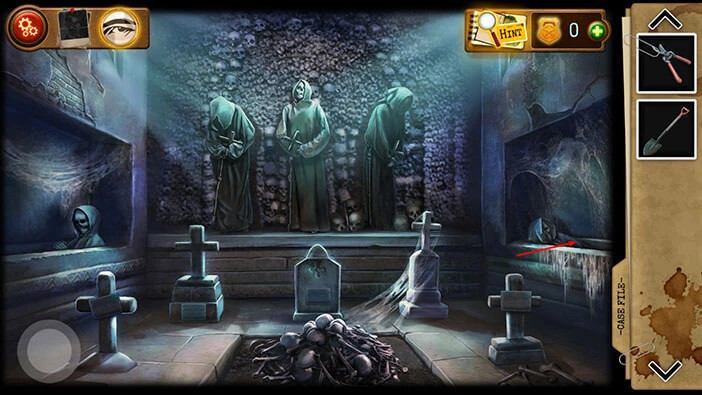
Tap on the robe to move it aside. You will discover an ornate box. Tap on it to start the interaction.
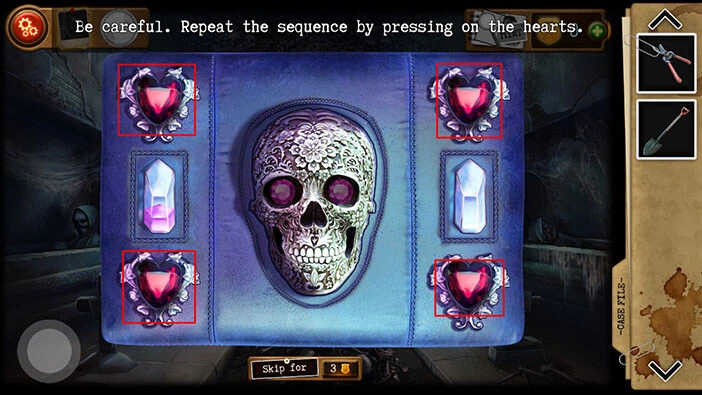
Here, you will see a large skull in the middle, and four purple jewels (one in each corner). The jewels will “light up” in a certain sequence, and our task is to repeat this sequence. You will have to repeat this task, several times. Once you activate both eye sockets, you will solve the puzzle.
This is one of the randomized puzzles, so the sequence will be different in each walkthrough. Because of that, it would be pointless to write a detailed walkthrough for this puzzle.
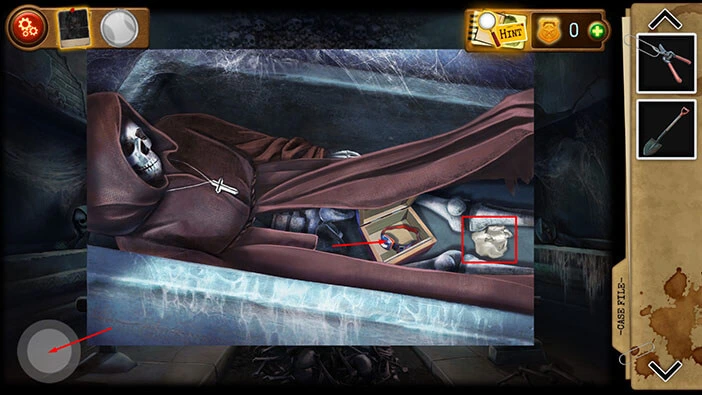
You will open the box as soon as you solve the puzzle. In the box, you will find a “Headlamp”. Let’s tap on it to pick it up. Also, you will notice a note/hint, just to the right of the box. We will come back to it later in the walkthrough.
Once you’re done, tap on the button in the bottom left corner of the screen to go back.
Next, let’s tap on the three statues in front of us. Each statue will drop a key.
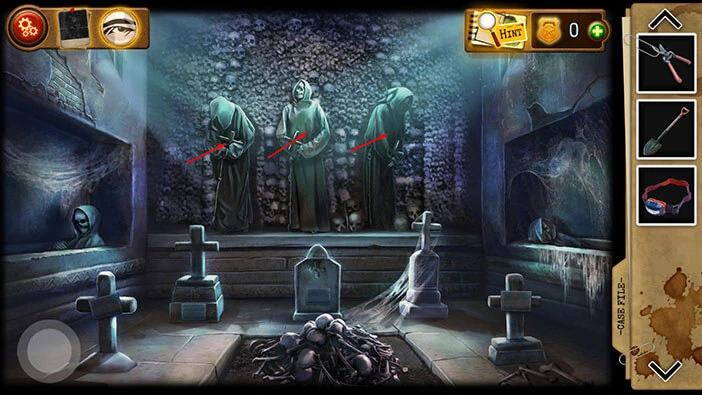
Tap on the three keys to pick them up. “Key 1”, “Key 2”, and “Key 3” will be added to your inventory.
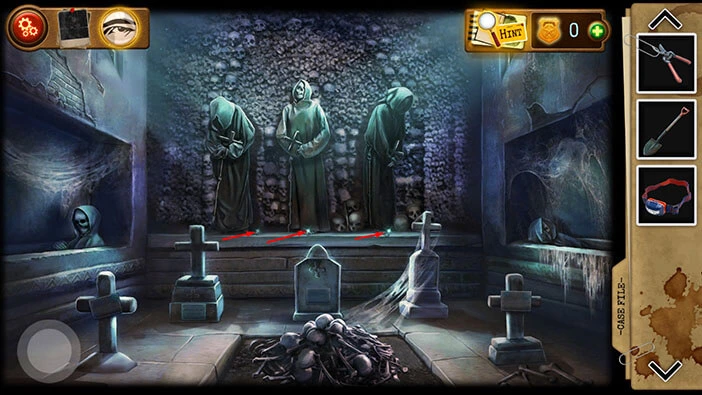
Next, let’s tap on the sarcophagus on the left to take a closer look at it.
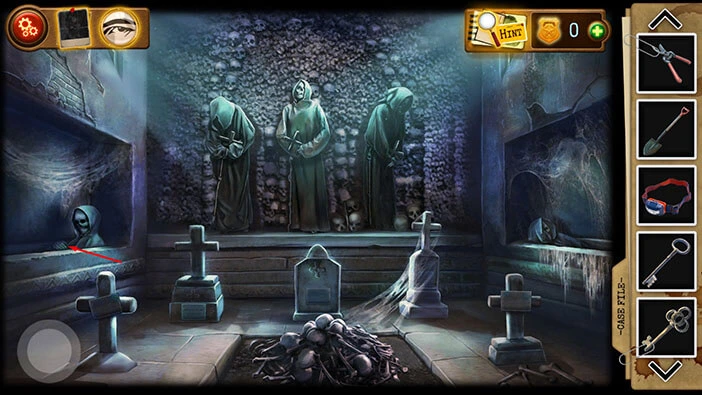
Drag the robe to move it aside, and you will discover the puzzle box. Tap on it to start the interaction.
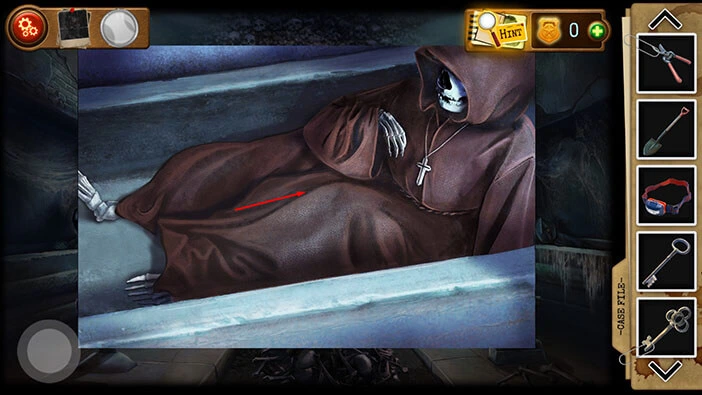
Here, we have another puzzle. Our task is to assemble the image. We will do this puzzle in several steps. Let’s begin.
NOTE: This is one of the randomized puzzles, so the starting position of the puzzle pieces might be different in your game.
Step 1
Select the second puzzle piece in the first row, and drag it into the third slot in the first row.
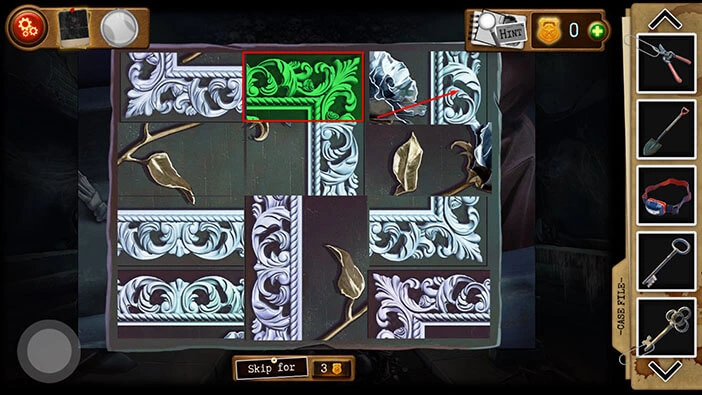
Step 2
Select the second puzzle piece in the second row, and drag it into the third slot in the second row.
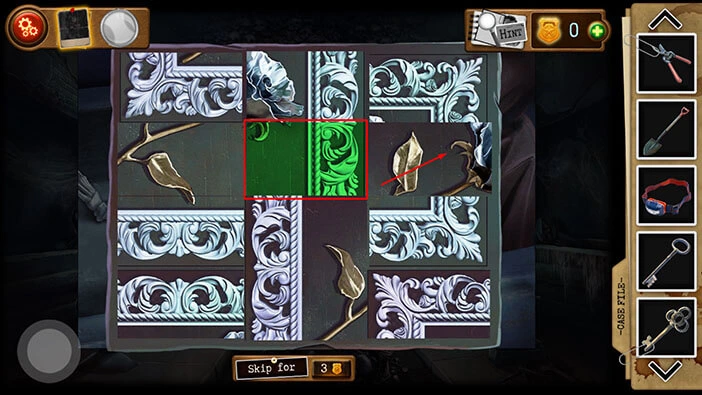
Step 3
Select the third puzzle piece in the third row, and drag it into the third slot in the fourth row.
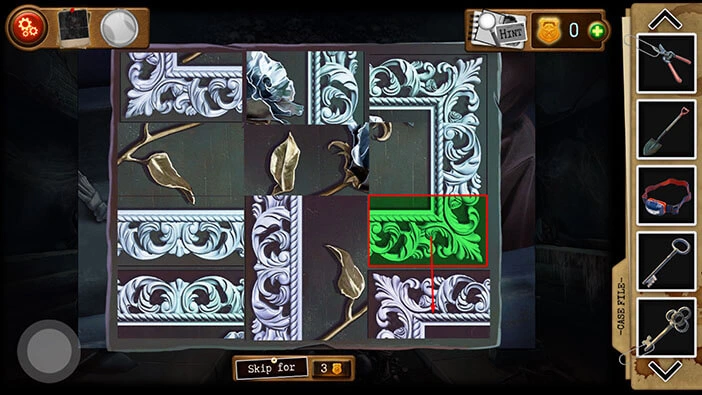
Step 4
Select the second puzzle piece in the first row, and drag it into the third slot in the third row.
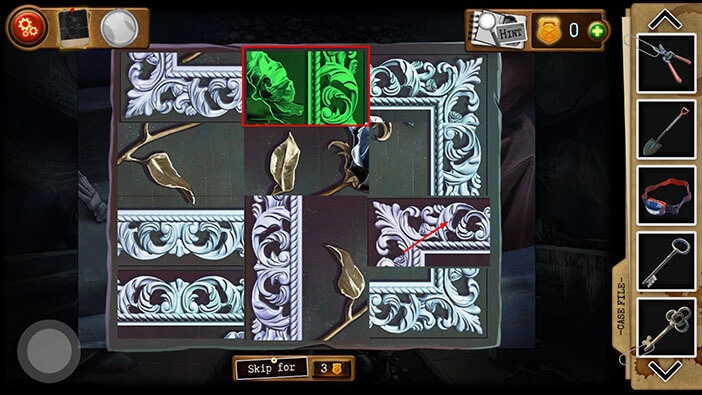
Step 5
Select the third puzzle piece in the third row, and drag it into the third slot in the second row.
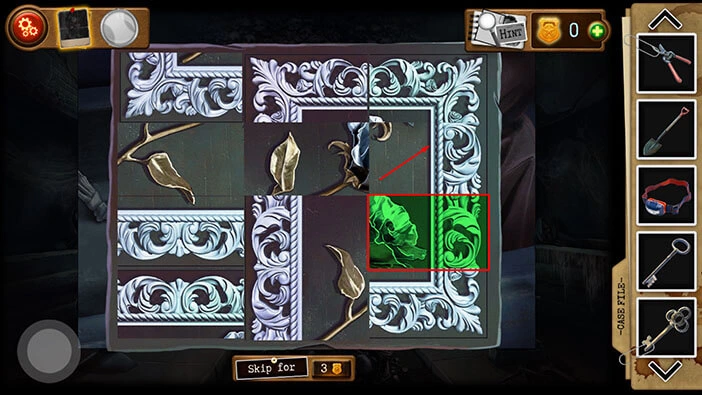
Step 6
Select the first puzzle piece in the fourth row, and drag it into the second slot in the first row.
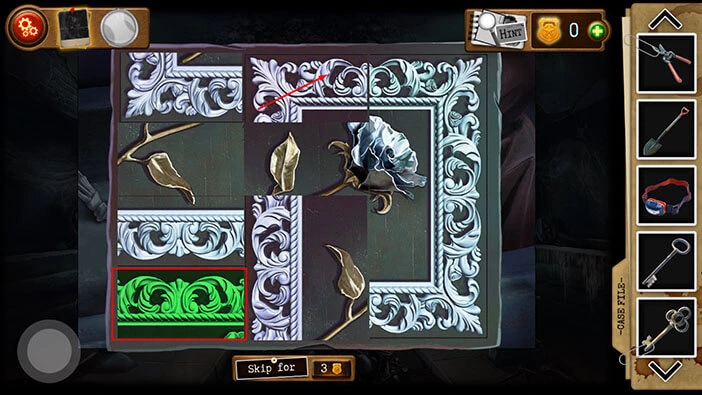
Step 7
Select the first puzzle piece in the fourth row, and drag it into the first slot in the first row.
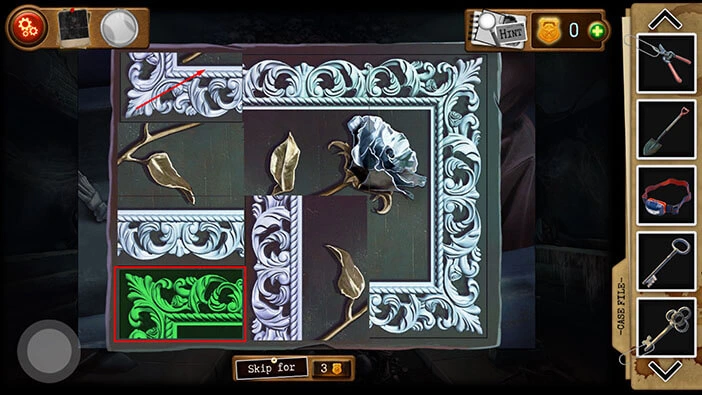
Step 8
Select the first puzzle piece in the second row, and drag it into the second slot in the third row.
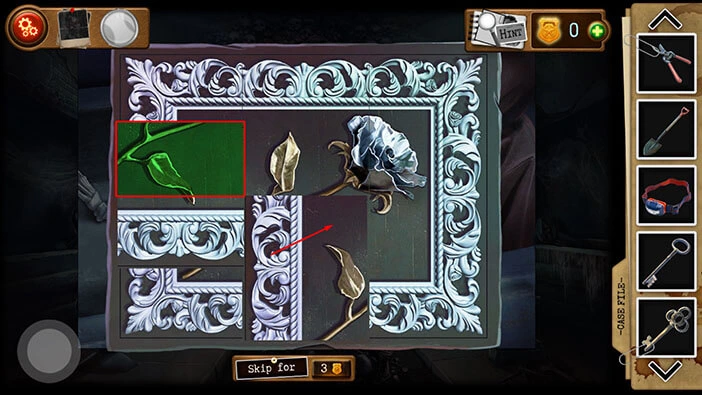
Step 9
Lastly, select the second puzzle piece in the fourth row, and drag it into the first slot in the third row. With that, you will solve this puzzle.
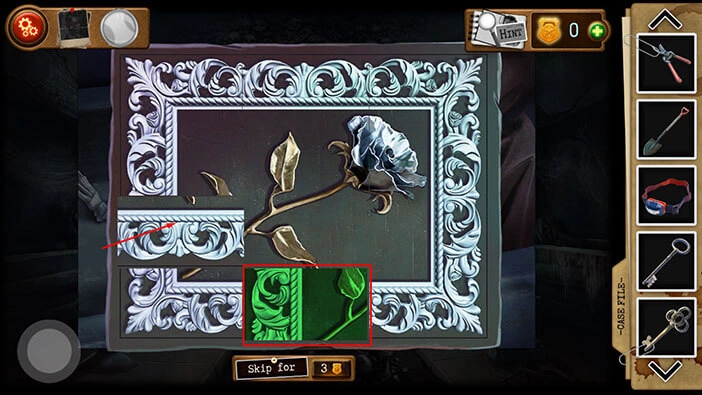
You will open the box, and inside you will find “Epinephrine”. Our character will say that epinephrine can be used to bring back an unconscious person. Here, you will also see number 7. We will come back to it a bit later. For now, just take note of it.
Once you’re done, tap on the button in the bottom left corner of the screen to go back.
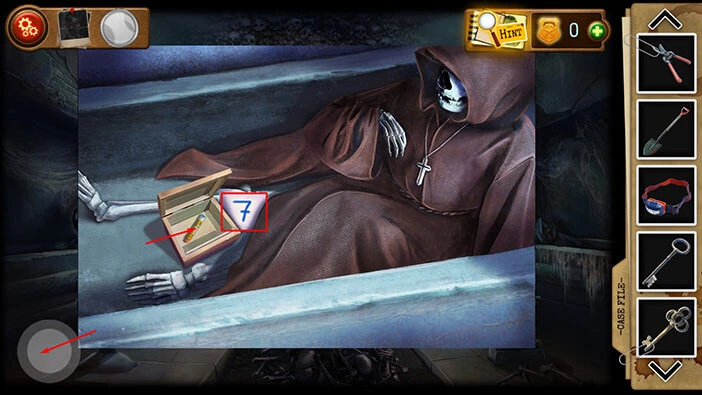
Next, select the shovel from the inventory and use it to remove the bones located in the middle of the room.
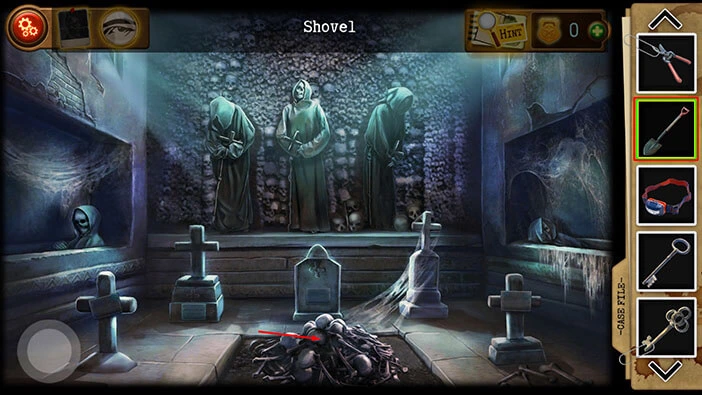
Beneath the bones, you will discover a secret trapdoor. It is locked, so we will come back to it a bit later.
For now, tap on the button in the bottom left corner of the screen to go back.
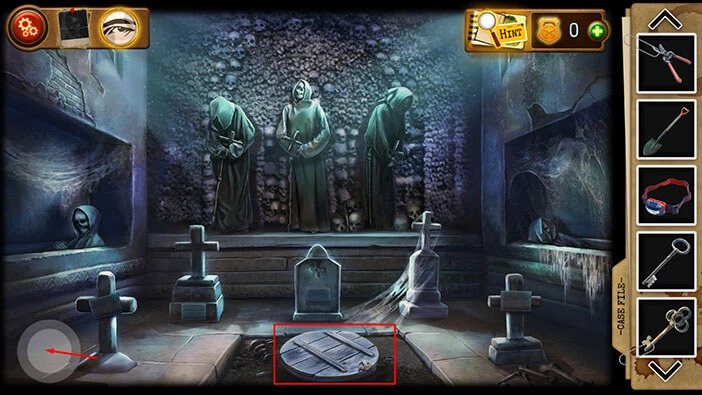
Next, tap on the area behind and to the right of the crypt to take a closer look at it.
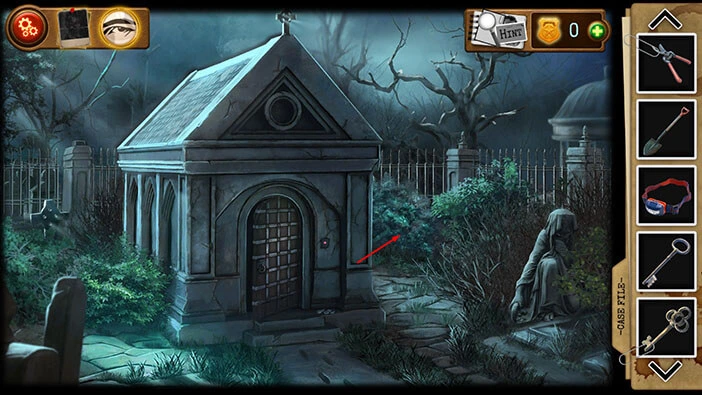
Select the “Shovel” from the inventory and use it to dig up the dirt on the right side.
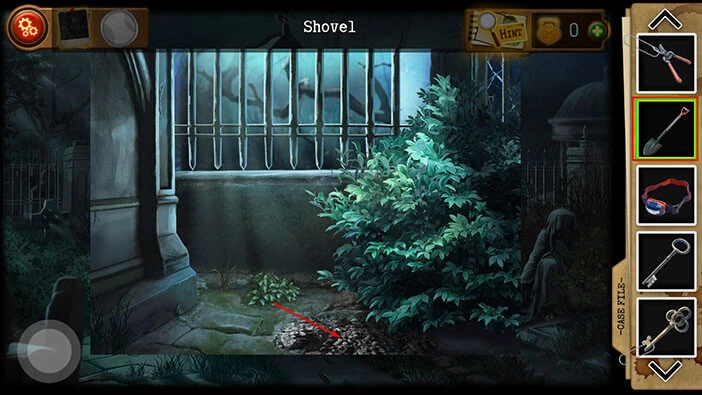
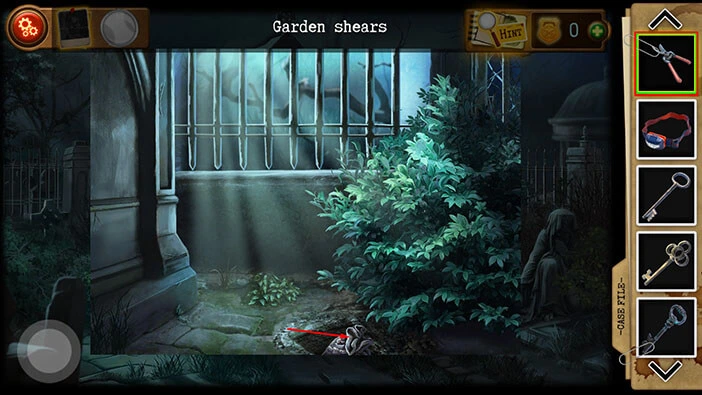
In the hole, you will discover a closed bag. So, select the “Garden shears” from the inventory and use them to cut open the bag.
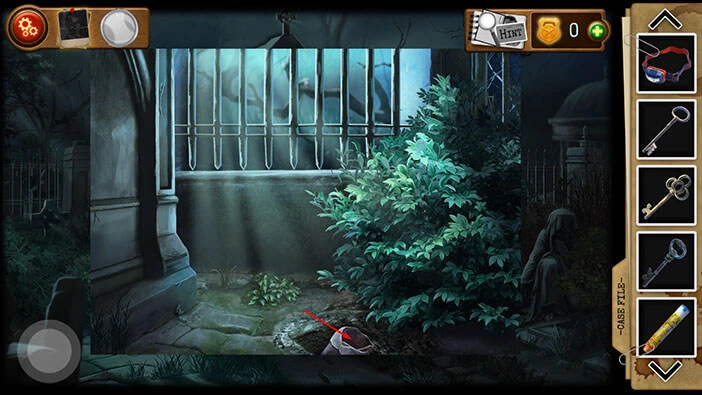
Tap on the bag to look inside.
Here, you will see a lot of junk, so let’s remove it.
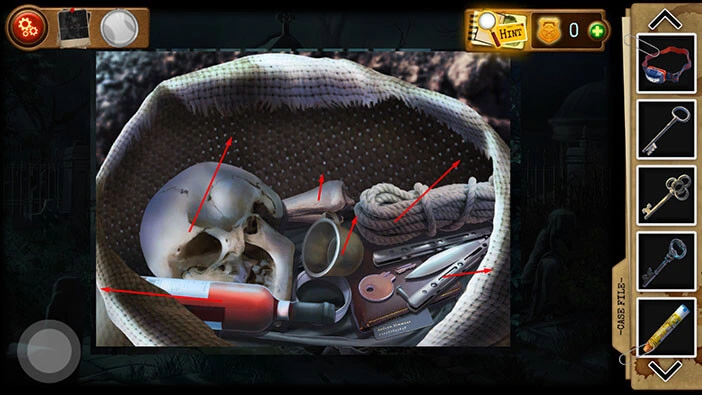
At the bottom of the bag, you will find a Detective Simmons wallet. Tap on it to take a photo and file it as evidence. Our character is now certain that she is on the right track.
On the left, you will also find an “Old key”. Tap on it to pick it up.
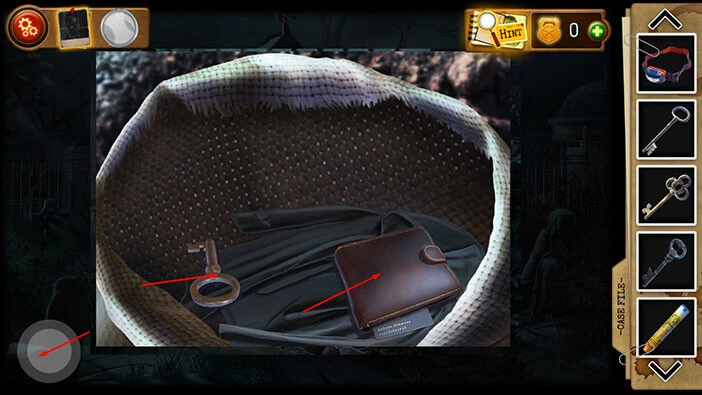
Before we continue, let’s also remove the wallet and the shirt.
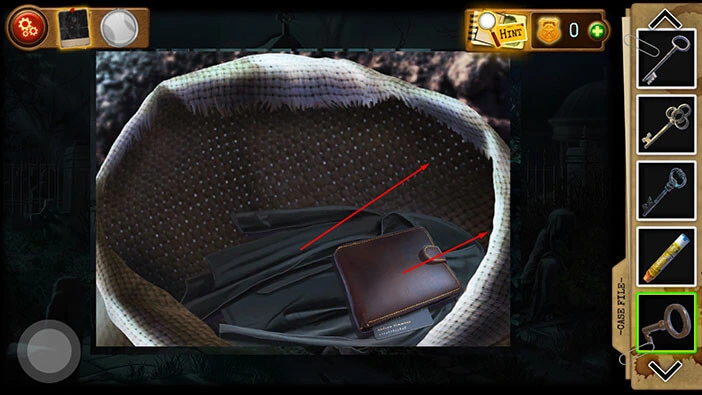
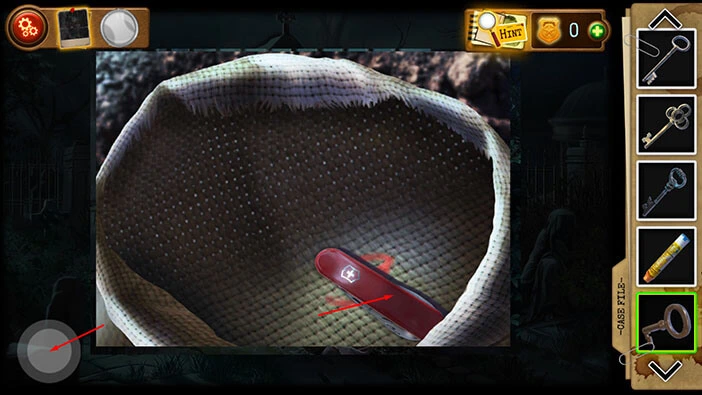
At the bottom of the bag, you will find a “Swiss knife”. Tap on it to pick it up. Once you do that, you will see the number 9. We will come back to this hint a bit later.
Once you’re done, tap on the button in the bottom left corner of the screen to go back.
Tap on the button at the bottom of the screen to go back to the previous area, then tap on the crypt to proceed inside.
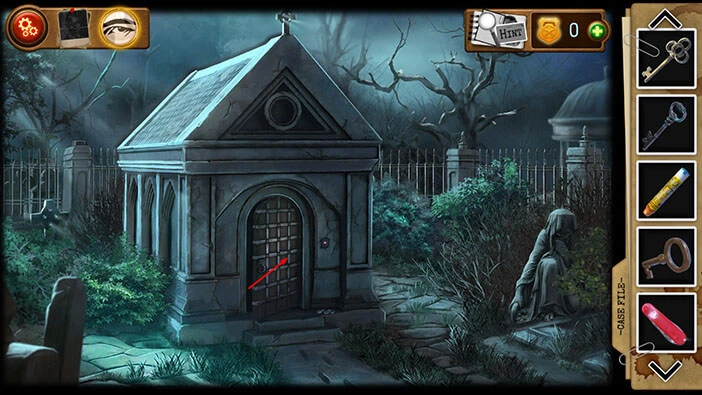
Select the “Old key” from the inventory and use it to unlock the trapdoor. After that, tap on the trapdoor to open it and proceed to the next area.
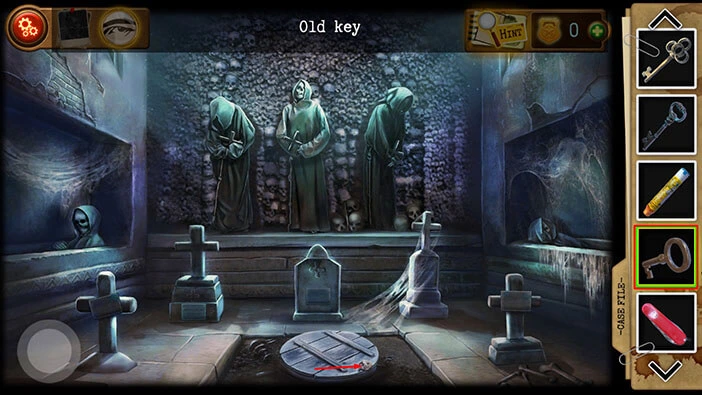
On the right wall on the right, you will notice three skulls. Tap on them to pick them up. “Skull of an Adult”, “Skull of a Baby”, and “Old Skull” will be added to your inventory.
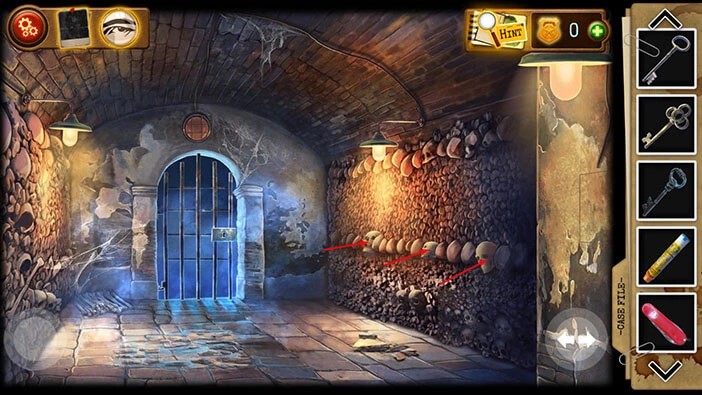
Once you pick up the skull, our character will say that the skulls represent a hint. We should arrange the skulls starting from the youngest to the oldest one, and write down the numbers on the skulls. Let’s do that.
Tap on the “Skull of a Baby” in your inventory to examine it.
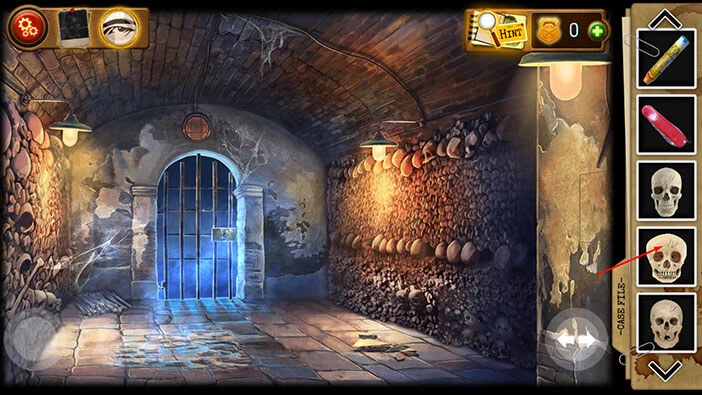
Here, we can see the number “4”. This is our first number, so let’s write it down.
Next, let’s tap on the “Skull of an Adult” to examine it.
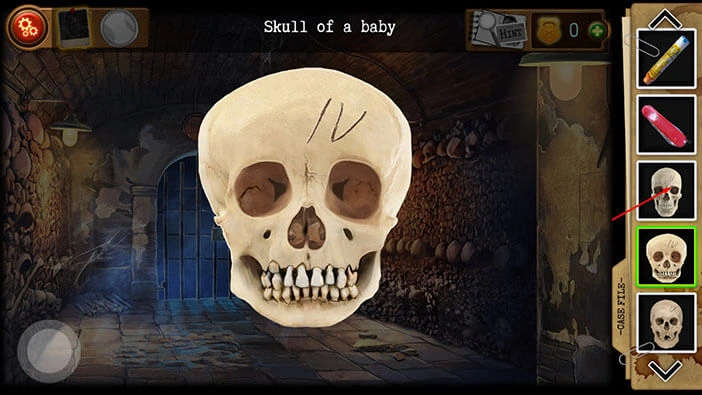
Here, we can see the number “2”. This is our second number, so let’s write it down.
Next, let’s tap on the “Old Skull” to examine it.
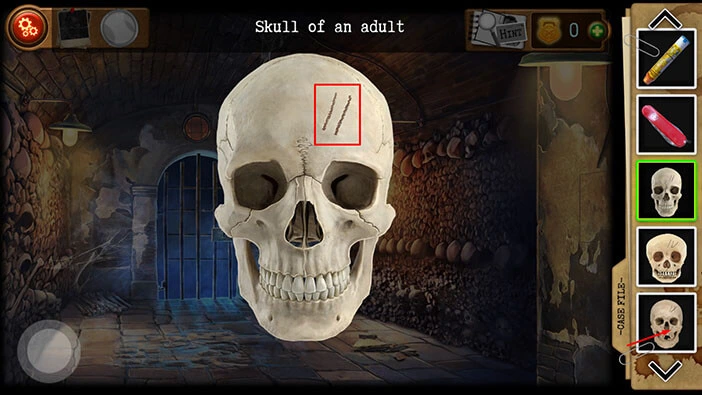
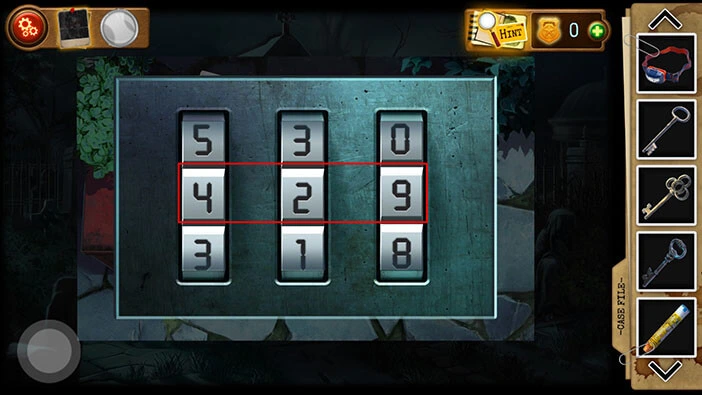
Here, we can see the number “9”. This is our third number. When we put it all together, we will get the number “429”. Let’s memorize/write down this number.
Once you’re done, tap on the button in the bottom left corner of the screen to go back to the ground level.
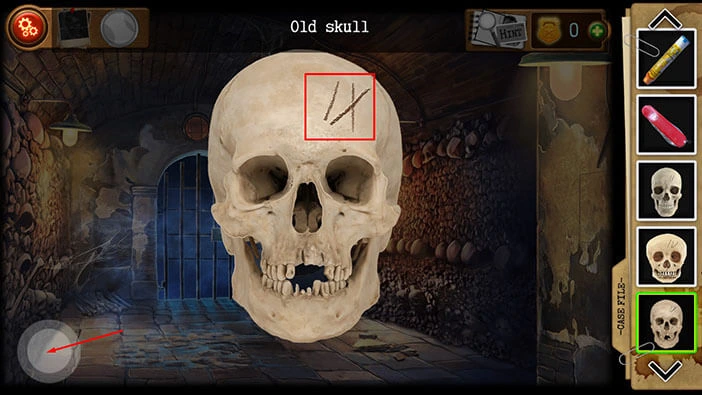
We can use this code to unlock the toolbox that we saw previously, so let’s go outside. Tap on the button in the bottom left corner of the screen.
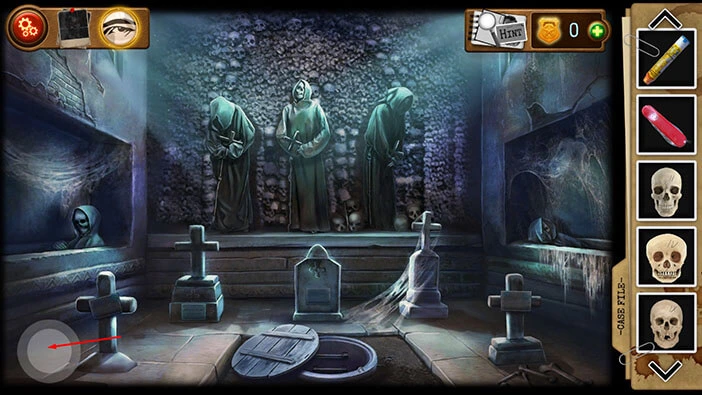
Tap on the bush on the left to take a closer look at it.
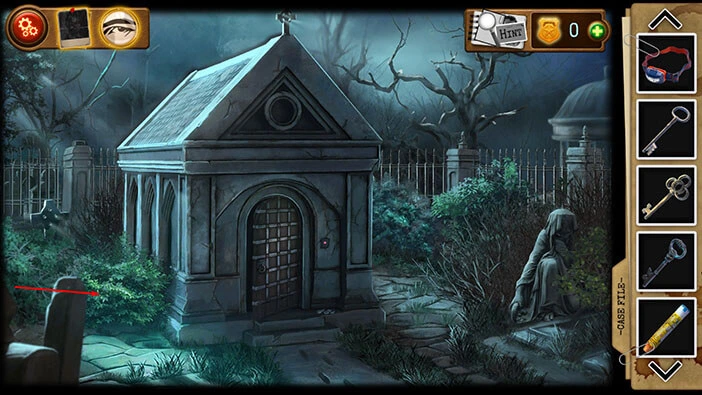
Next, let’s tap on the toolbox to start the interaction.
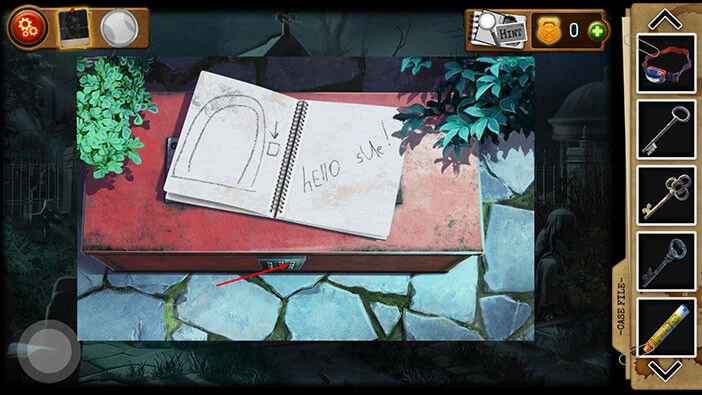
Enter the code “429” and you will unlock the toolbox.
Next, tap on the “Urn with ashes” (Jeremiah Brown) to pick it up. After that, tap on the remote control, to take a closer look at it.
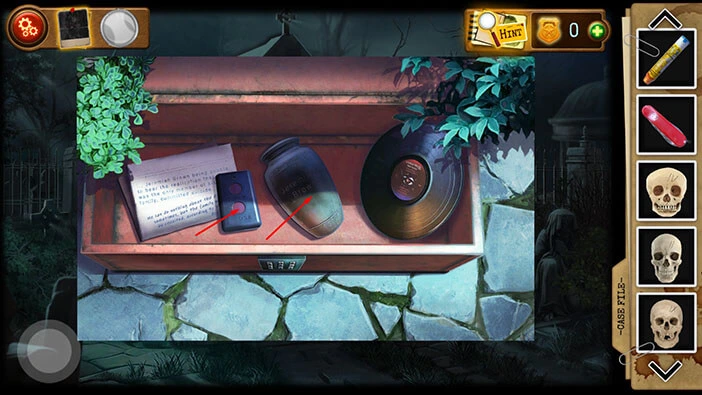
Next, tap on the “Open” button and our character will comment that something is now open.
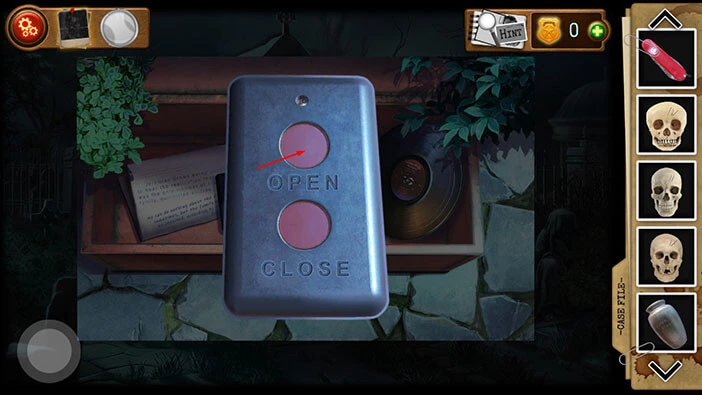
Next, let’s tap on the newspapers on the left to examine it.
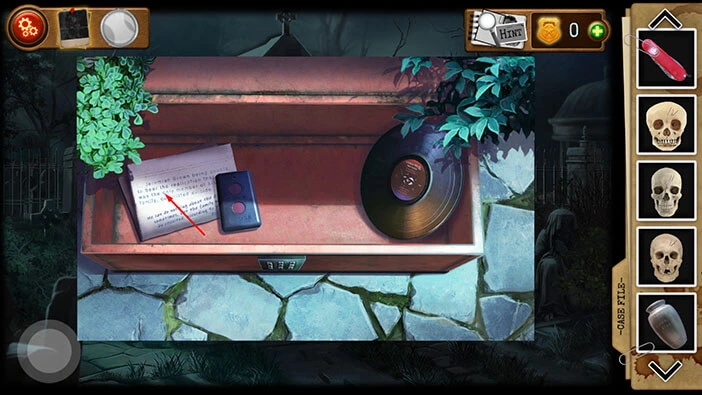
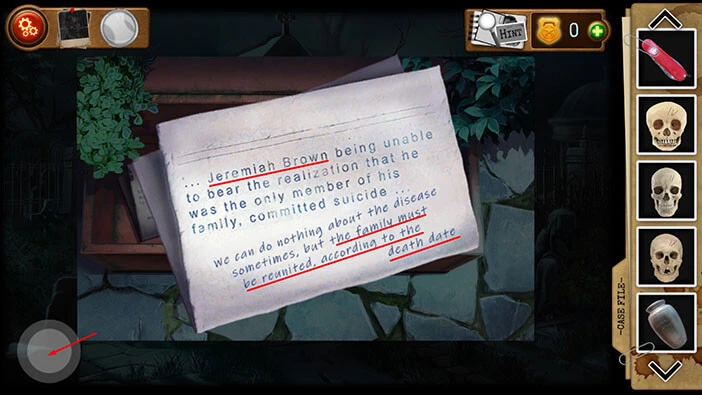
Here, we can see the text. From the first paragraph, we need to memorize/write down the name “Jeremiah Brown”.
From the second paragraph, we need to memorize/write down the following piece of text “The family must be reunited, according to the Death Date”. So, here we have a hint for the next puzzle.
Tap on the button in the bottom left corner of the screen to go back.
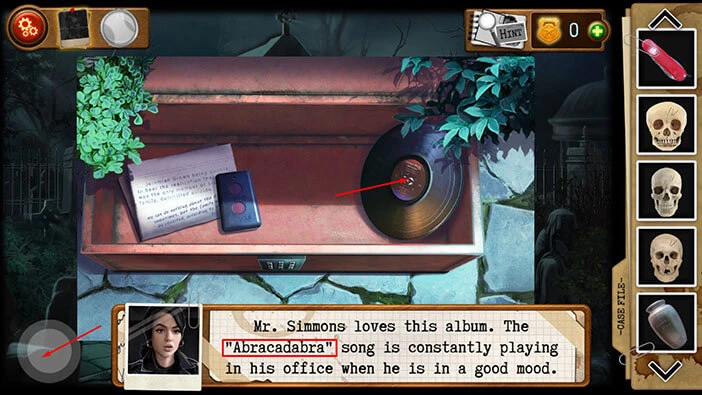
Before we continue, let’s tap on the record on the right to examine it. Our character will say that Detective Simmons listened to the “Abracadabra” song in his office. Let’s memorize/write down the name of the song because this information represents the hint for one of the following puzzles.
Once you’re done, tap on the button in the bottom left corner of the screen to go back.
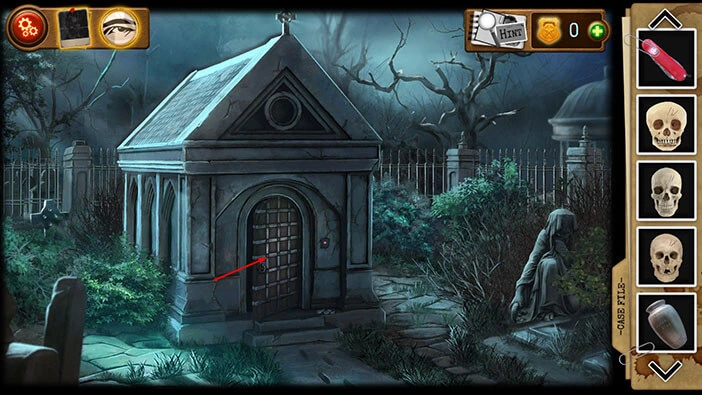
Let’s go back, into the crypt. Tap on the crypt door to proceed inside.
Ok, our next task is to find the graves of Jeremiah Brown’s family members and memorize/write down their dates of death. Let’s do that.
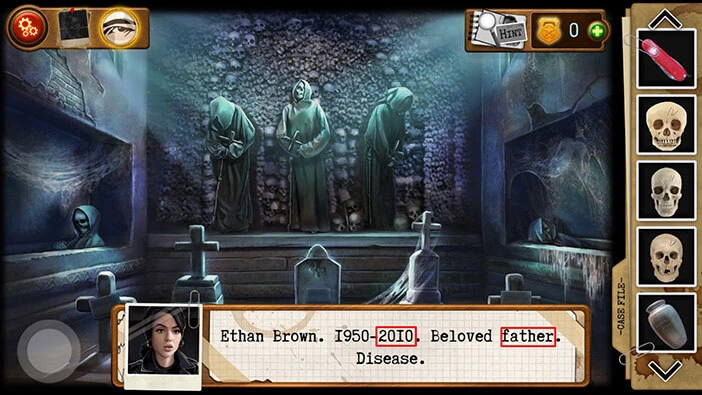
Let’s tap on the cross on the left to examine it.
You will discover that Jeremiah’s father died in 2010. So, the “Old skull” in our inventory belongs to him. Let’s memorize/write down this information.
“Old skull” = 2010.
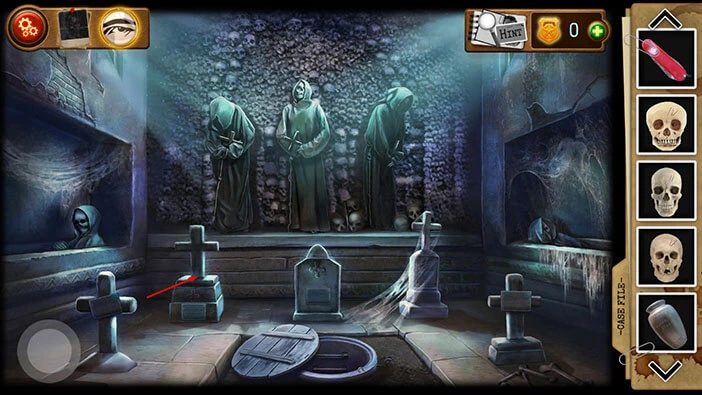
Next, let’s tap on the cross in the top left to take a closer look at it.
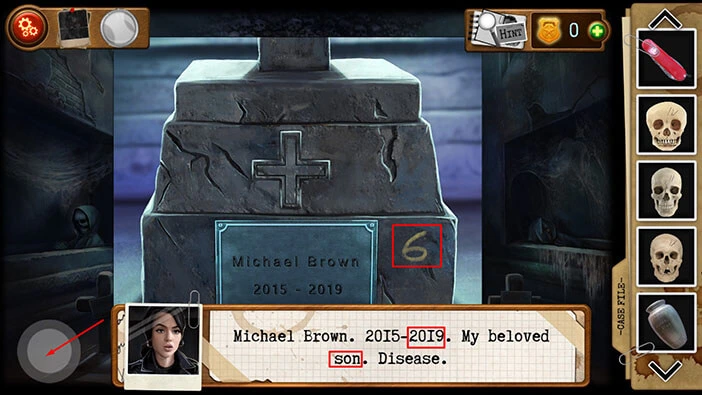
You will discover that Jeremiah’s son died in 2019. So, the “Skull of a Baby” in our inventory belongs to him. Let’s memorize/write down this information.
“Skull of a baby” = 2019.
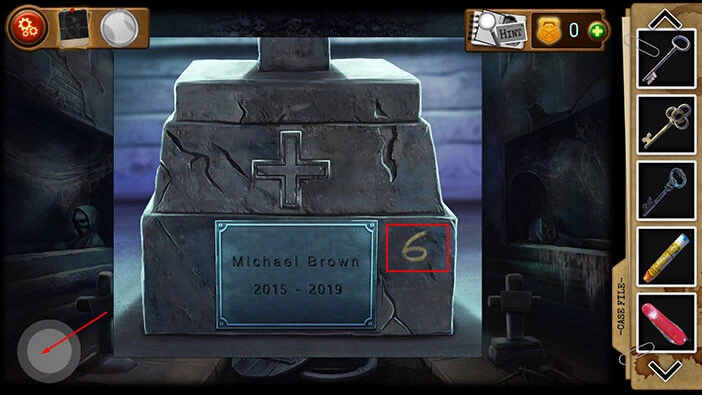
Here, you will also notice a yellow number 6. For now, just take note of it. We will come back to it later in the walkthrough.
Once you’re done, tap on the button in the bottom left corner of the screen to go back.
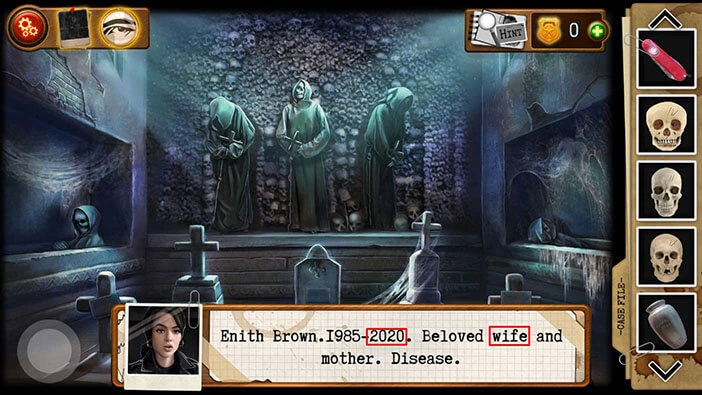
Lastly, let’s tap on the gravestone in front of us to examine it.
You will discover that Jeremiah’s wife died in 2020. So, the “Skull of an Adult” in our inventory belongs to her. Let’s memorize/write down this information.
“Skull of an Adult” = 2020.
So, let’s arrange the skulls by the date of death (we saw this hint in the newspapers). We have,
“Old skull” = 2010.
“Skull of a baby” = 2019.
“Skull of an Adult” = 2020.
Next, let’s tap on the trapdoor to proceed to the lower level.
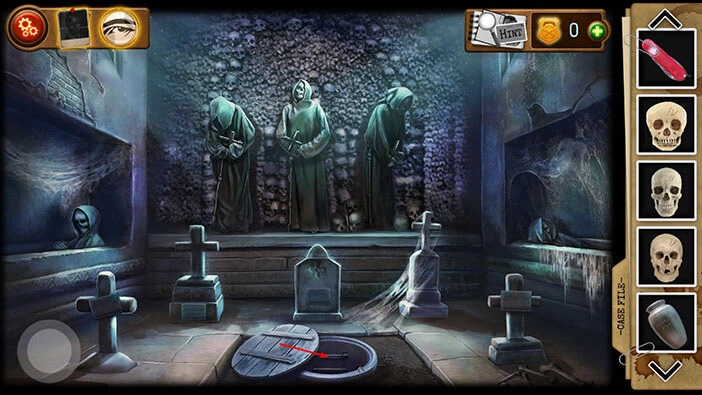
Let’s tap on the button in the bottom right corner of the screen to proceed to the next room.
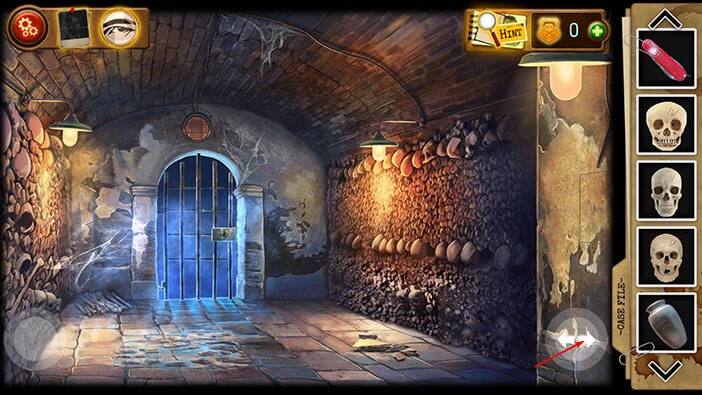
By pressing on the remote control button (outside) we have opened the three slots in the wall. Let’s tap on the slots to take a closer look at them.
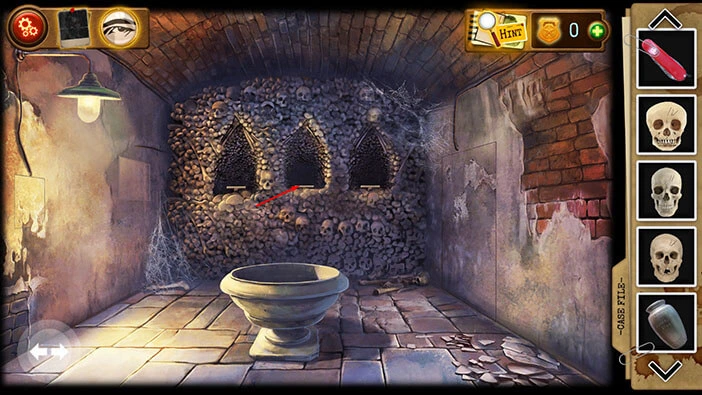
Our next task is to arrange the skulls by the date of death. We already discovered this information, so let’s place the skulls into the correct slots. We will do this in three steps. Let’s begin.
Step 1
Select the “Old Skull” (Jeremiah’s father, who died in 2010.) from the inventory and insert it into the first slot (looking from left to right).
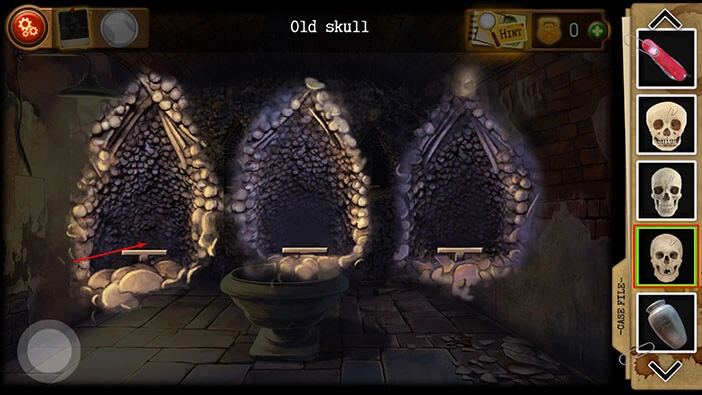
Step 2
Select the “Skull of a Baby” (Jeremiah’s son, who died in 2019.) from the inventory and insert it into the second slot.
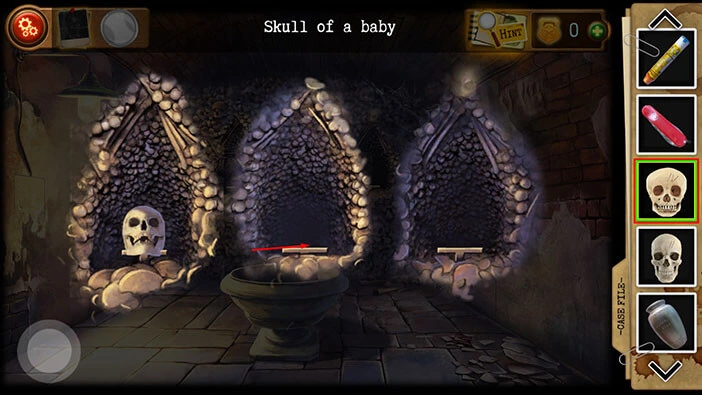
Step 3
Select the “Skull of an Adult” (Jeremiah’s wife, who died in 2020.) from the inventory and insert it into the third slot.
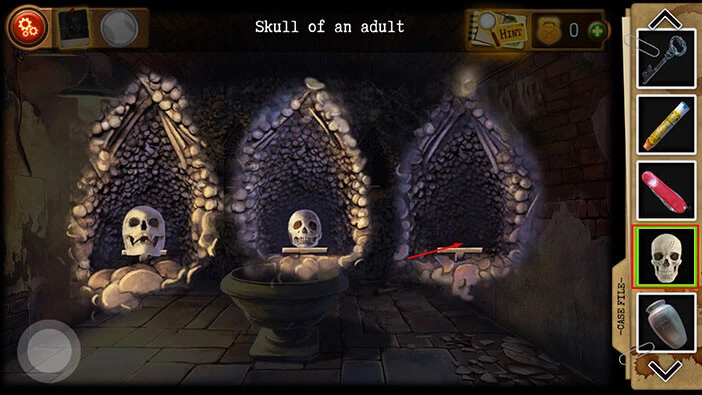
Next, select the “Urn with ashes” (Jeremiah’s ashes) from the inventory and put the ashes into the large, stone bowl in front of you.
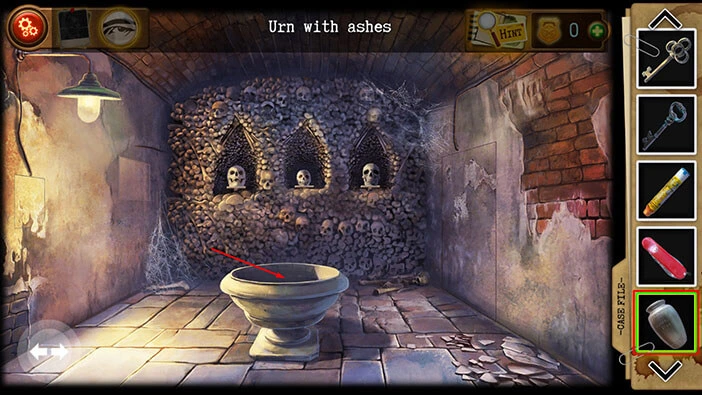
The secret door in the wall on the left will open, as soon as you reunite the Brown family. Let’s tap on the secret door to take a closer look at it.
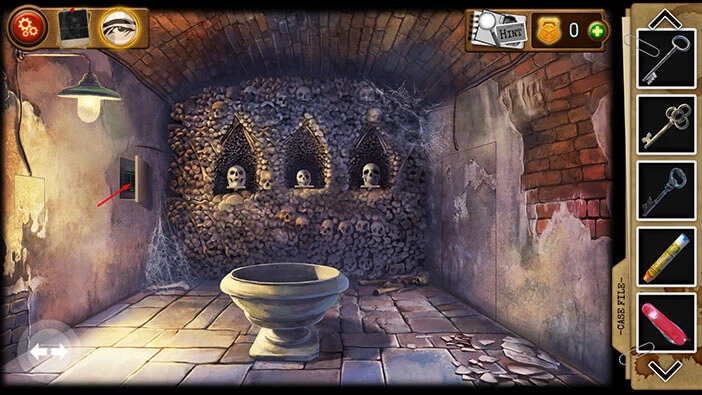
Here, you will notice a keypad with numbers, and three colors at the bottom, blue, red, and yellow. On the left, you will notice three slots and the first slot has a purple border. Our task is to discover the value of each slot. To do that, we will first have to go back and gather some information.
Tap on the button in the bottom left corner of the screen to go back, and tap again to go to the first floor.
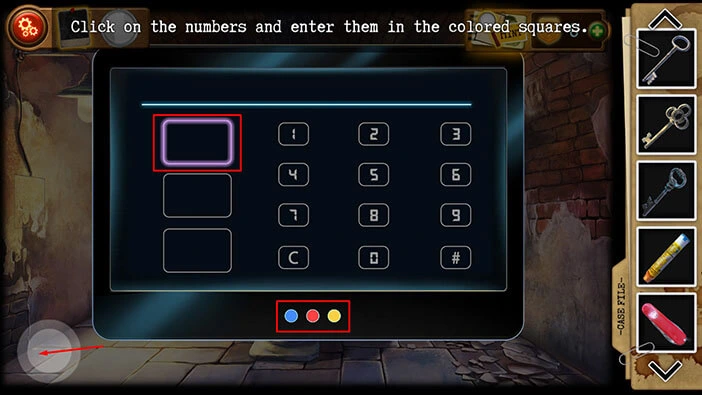
Let’s look for hints. Tap on the sarcophagus on the left to take a closer look at it.
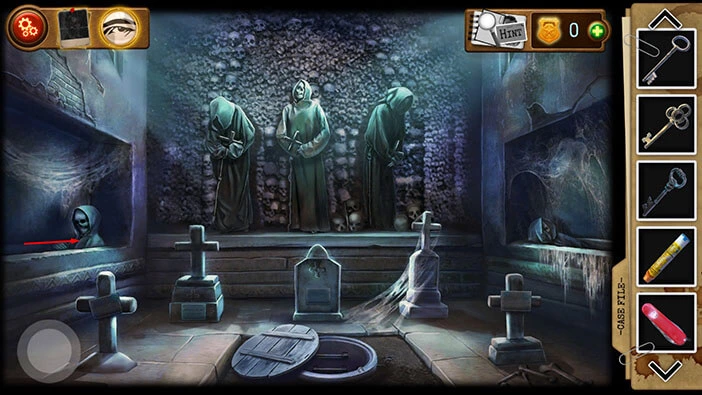
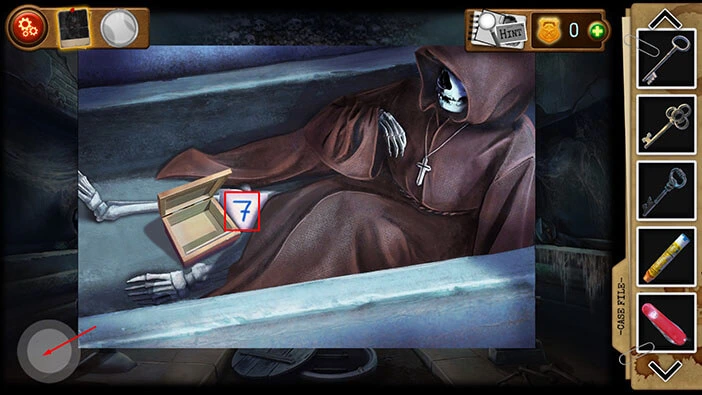
Here, you will see the note with the Blue number 7. Let’s memorize/write down this information because it represents the hint for the next puzzle.
Once you’re done, tap on the button in the bottom left corner of the screen to go back.
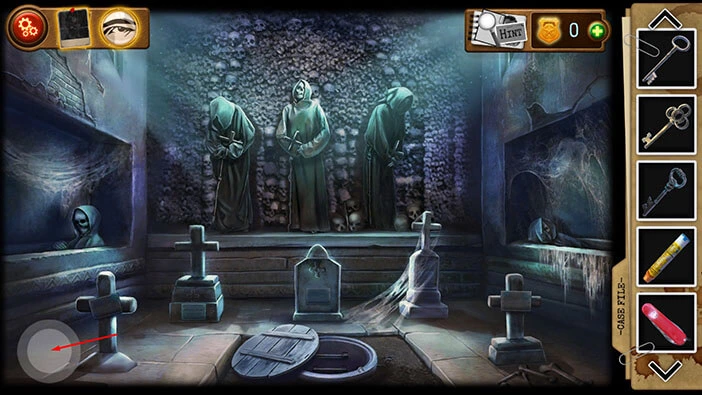
Let’s go outside. Tap on the button in the bottom left corner of the screen.
Let’s tap on the bush on the right to take a closer look at this area.
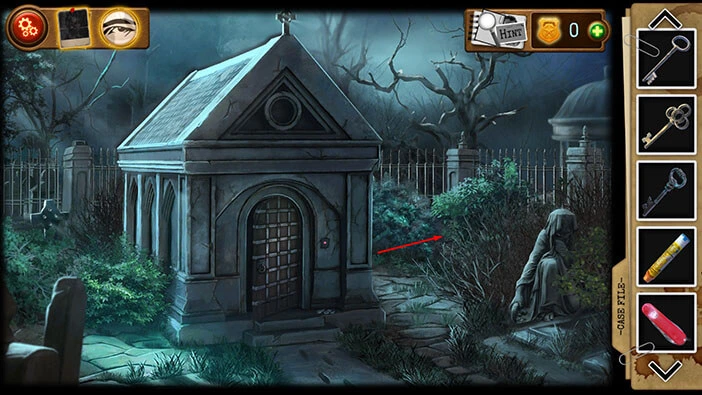
Tap on the bag to look inside.
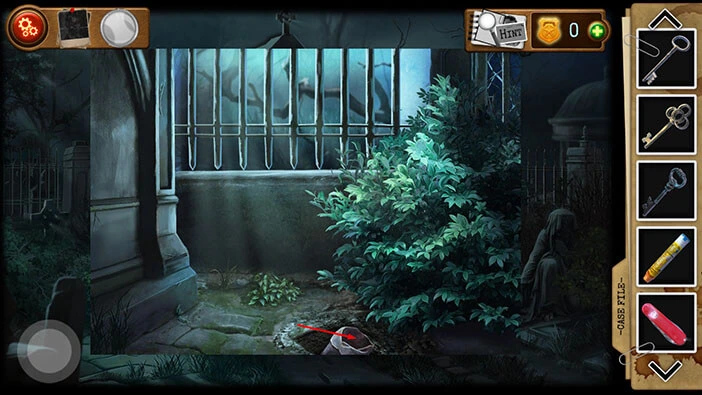
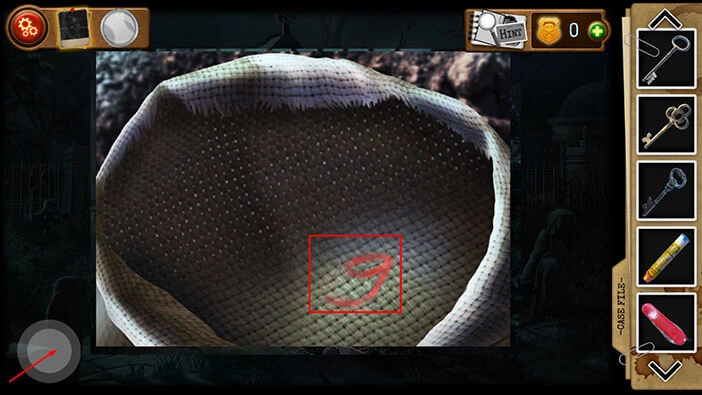
Here, you will see the note with the Red number 9. Let’s memorize/write down this information.
Once you’re done, tap twice on the button in the bottom left corner of the screen to go back to the first area.
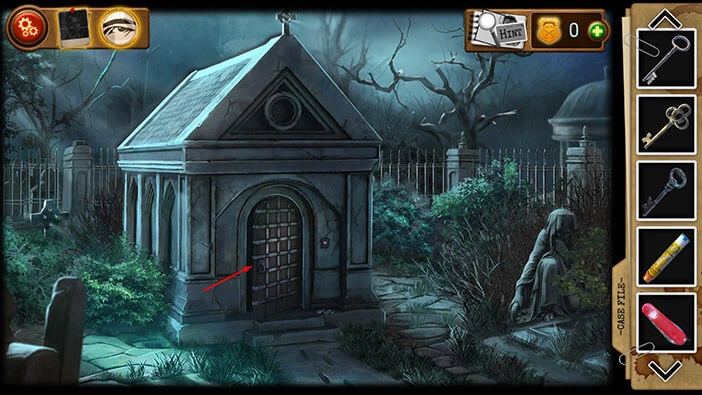
Tap on the crypt door to proceed inside.
Let’s tap on the cross in the top left corner to take a closer look at it.
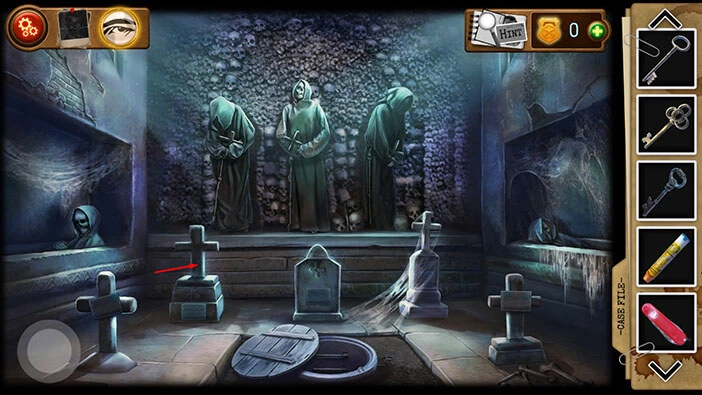
Here, you will see the note with the Yellow number 6. Let’s memorize/write down this information.
Once you’re done, tap twice on the button in the bottom left corner of the screen to go back.
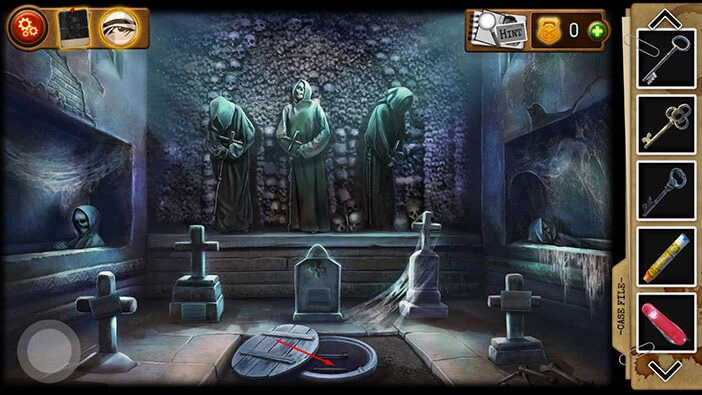
We have gathered the hints, so let’s go back to the last puzzle. Tap on the trapdoor to go to the basement.
Tap on the button in the bottom right corner of the screen to proceed to the next room.
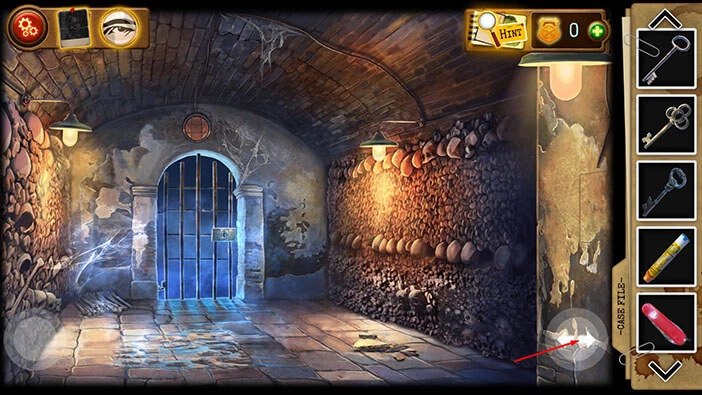
Tap on the puzzle on the wall on the left to take another look at it.
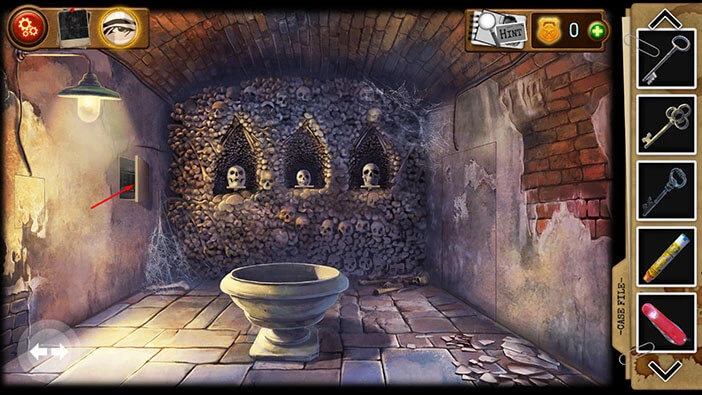
Ok, we can finally solve this puzzle. At the bottom, we can see three colors, blue, red, and yellow, and we have discovered the values of these colors. We have,
Blue = 7
Red = 9
Yellow = 6
The combination of two colors at the bottom will give us the color of the slot on the left. We will do this puzzle in three steps. Let’s begin.
Step 1
The first slot on the left has a purple border. Blue and Red will give us Purple. So, let’s calculate.
7 (Blue) + 9 (Red) = 16 (Purple). So, let’s enter the number 16 into the first slot.
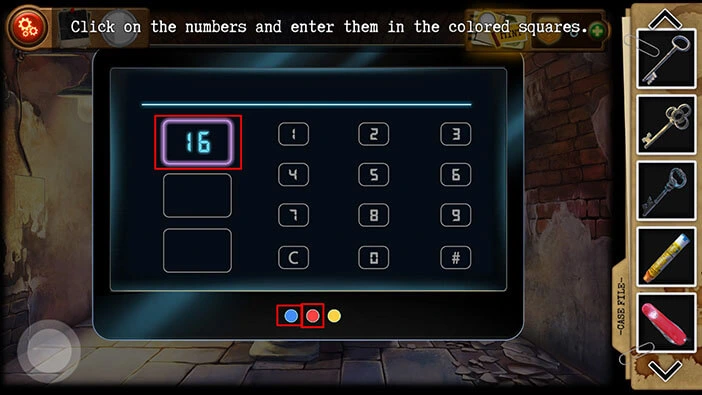
Step 2
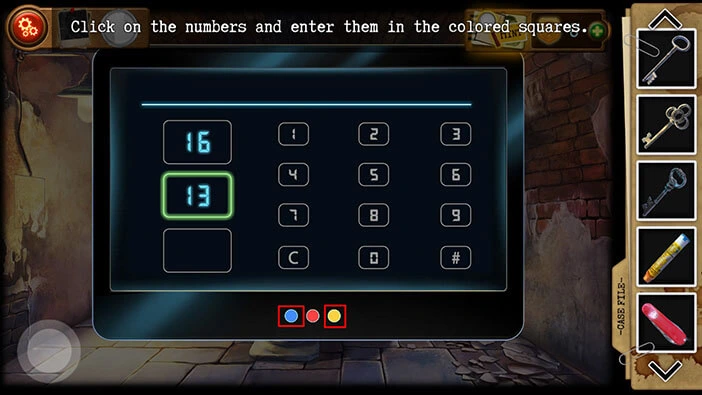
The second slot on the left has a green border. Blue and Yellow will give us Green. So, let’s calculate.
7 (Blue) + 6 (Yellow) = 13 (Green). So, let’s enter the number 13 into the second slot.
Step 3
The third slot on the left has an orange border. Red and Yellow will give us Orange. So, let’s calculate.
9 (Red) + 6 (Yellow) = 15 (Orange). So, let’s enter the number 15 into the third slot.
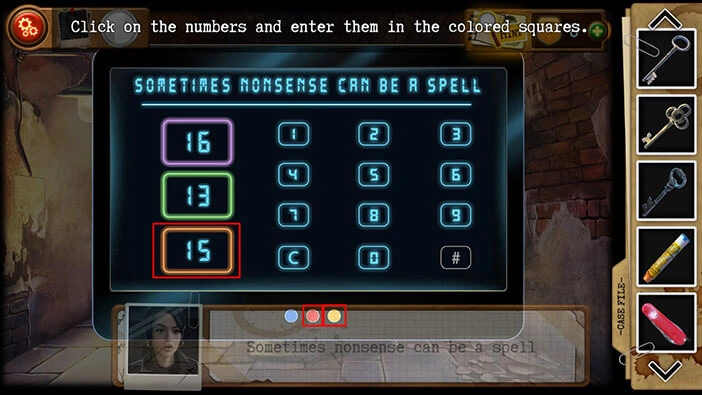
You will see the text “Sometimes nonsense can be a spell” (this is a hint for the next puzzle). Let’s tap on the button in the bottom left corner of the screen to go back.
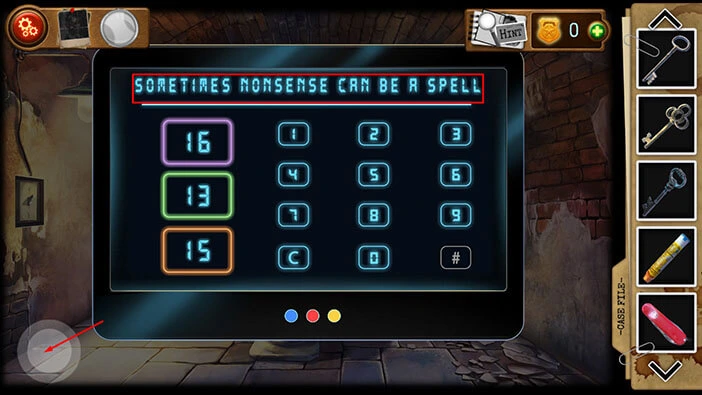
You will notice that we now have access to the switch on the wall on the left. So, let’s tap on it to turn off the lights.
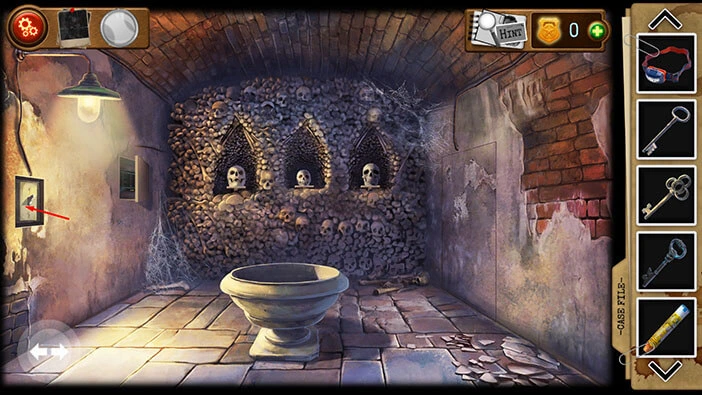
Let’s go back to the previous room. Tap on the button in the bottom left corner of the screen.
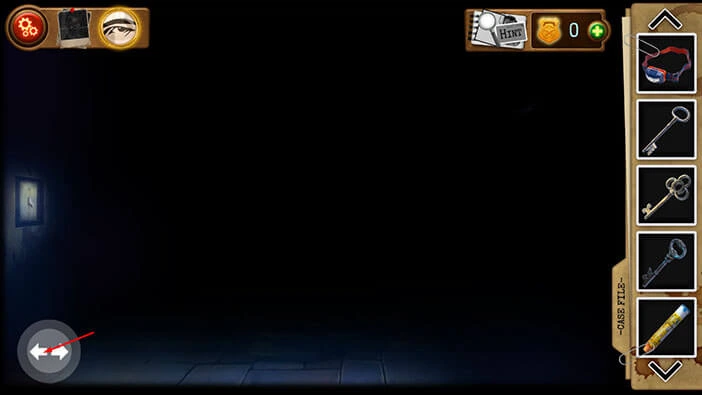
You will notice that some letters have appeared on the wall on the left. Let’s tap on these letters to take a closer look at them.
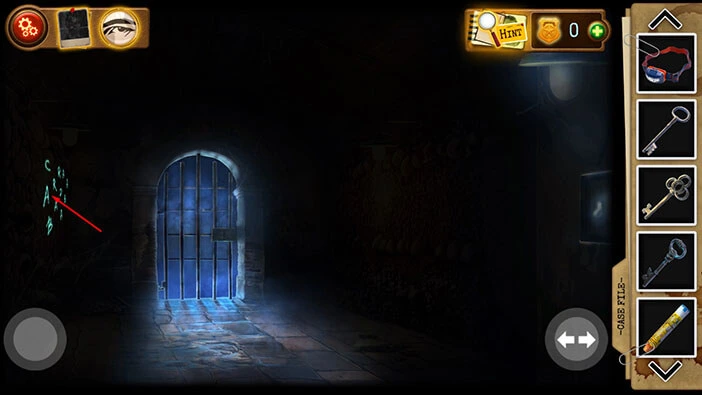
Previously, we discovered that Detective Simmons played the song “Abracadabra” in his office (the hint is the record, located in the toolbox outside), and we also saw the text, “Sometimes nonsense can be a spell”.
Let’s tap on the letters of the word “Abracadabra”. We will do this puzzle in several steps. Let’s begin.
Step 1
Tap on the letter “A” then tap on the letter “B”.
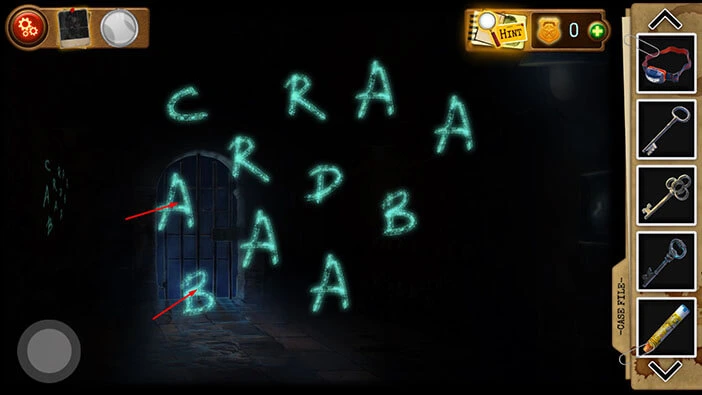
Step 2
Tap on the letter “R” then tap on the letter “A”.
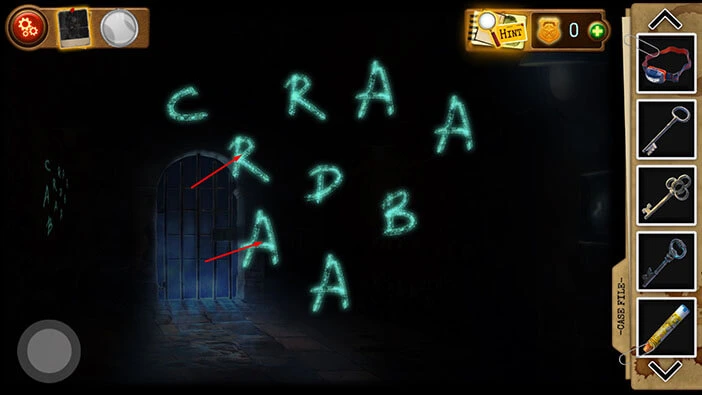
Step 3
Tap on the letter “C” then tap on the letter “A”.
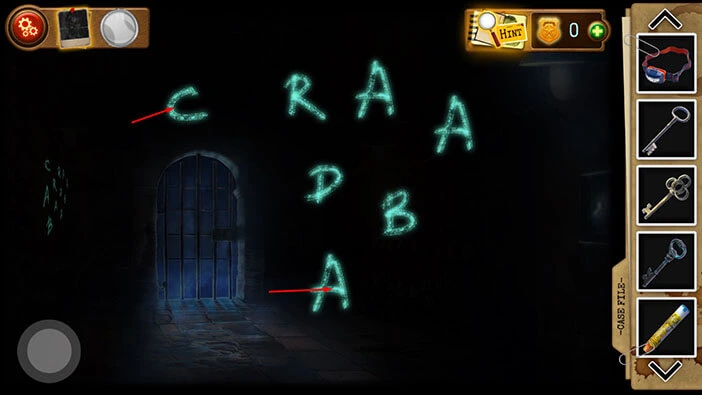
Step 4
Tap on the letter “D” then tap on the letter “A”.
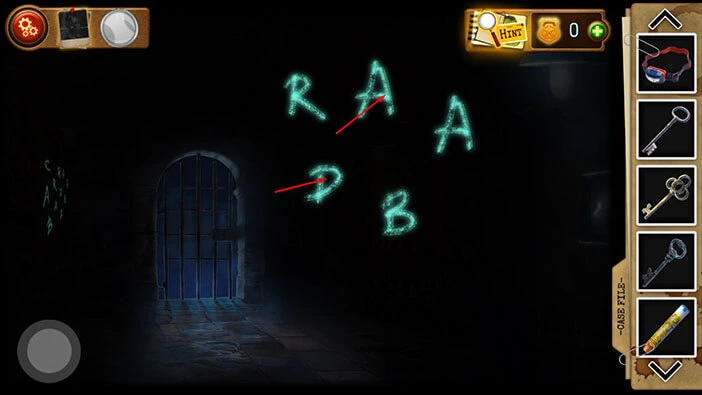
Step 5
Lastly, tap on the letters “B”, “R”, and “A”.
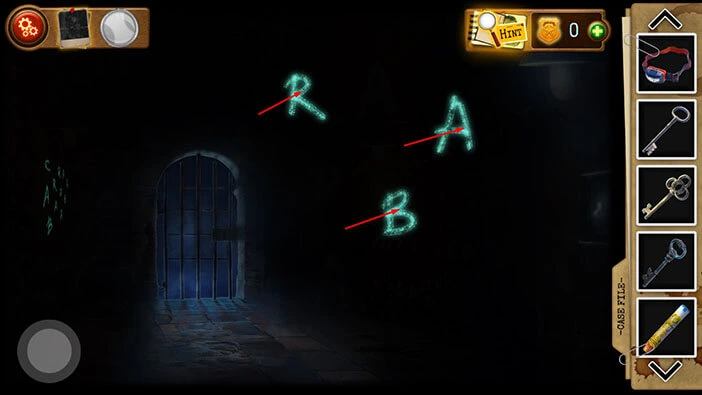
Our character will say that she heard the sound of bones falling to the stone floor. So, let’s tap on the switch to turn on the lights and take a look.
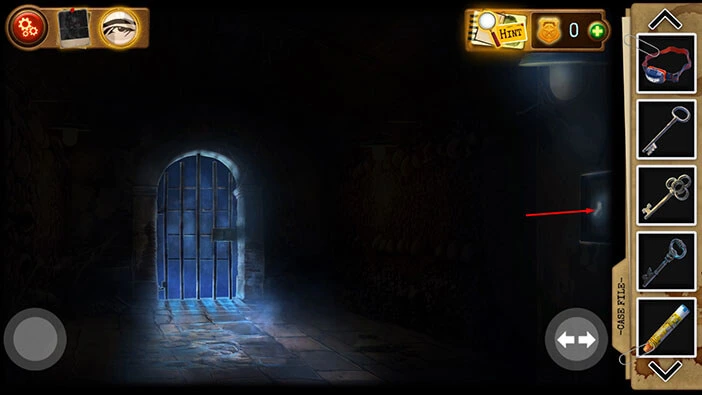
You will notice a pile of bones on the left side, so let’s tap on them to start the interaction. Our character will take a photo, and she will file it as evidence.
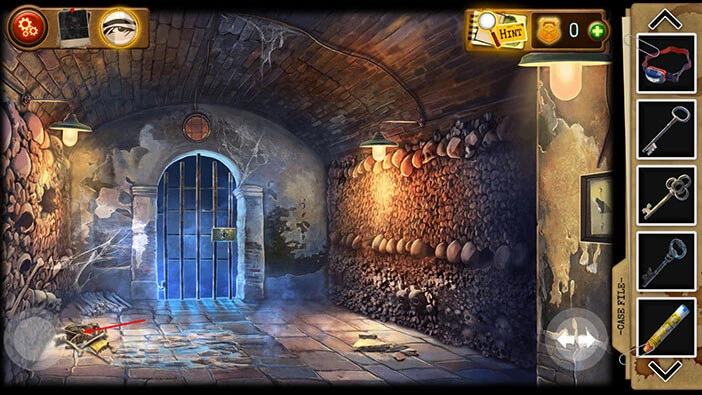
Next, let’s tap on the hole in the wall on the left to take a closer look at it.
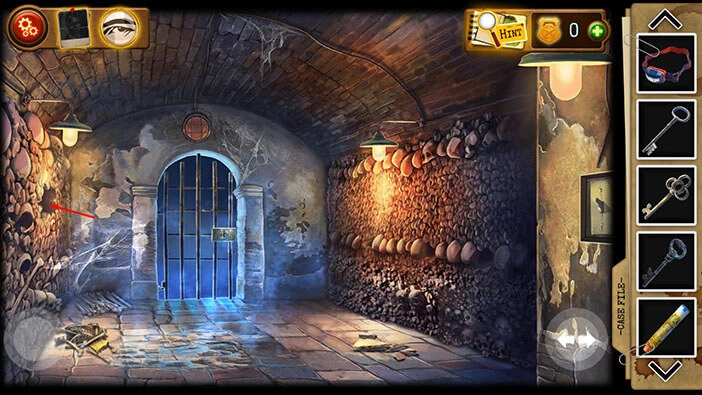
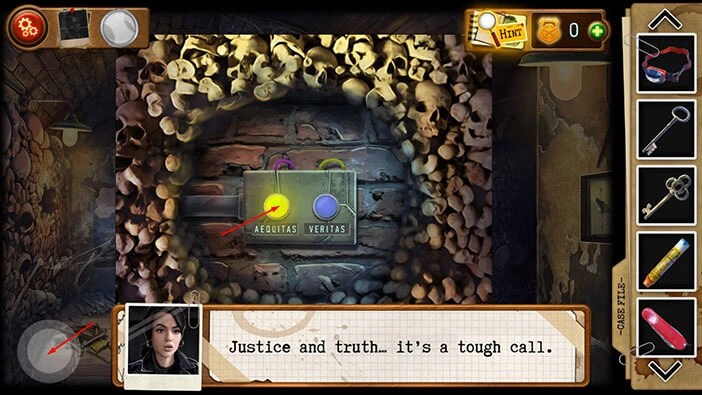
You will notice two buttons. The blue button on the right is glowing (it is activated) and below it, we can see the word “Veritas”.
Let’s tap on this button.
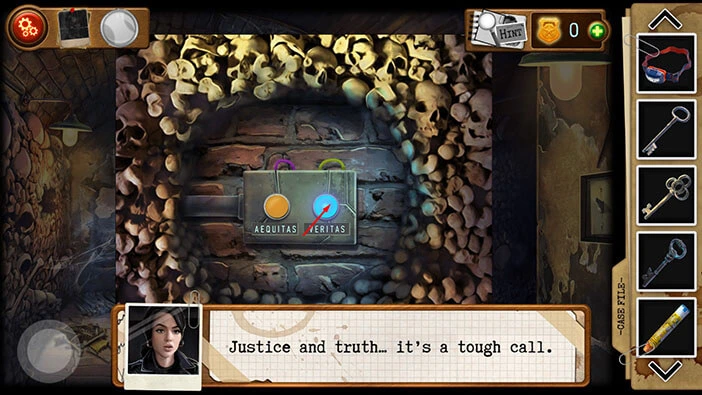
Something moved in the next room. So, let’s tap on the button in the bottom left corner of the screen to go back.
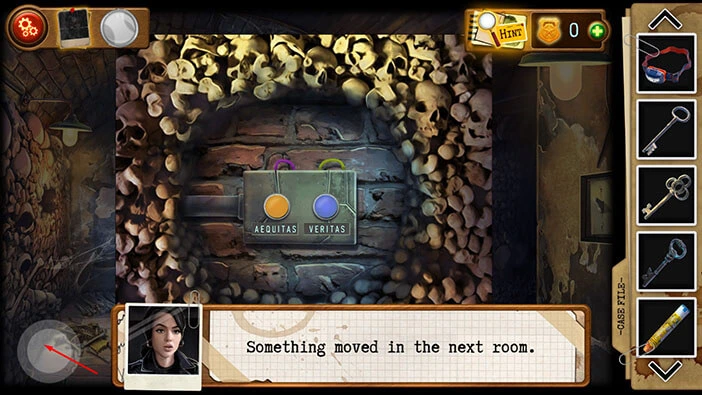
Tap on the button in the bottom right corner of the screen to go to the room with skulls.
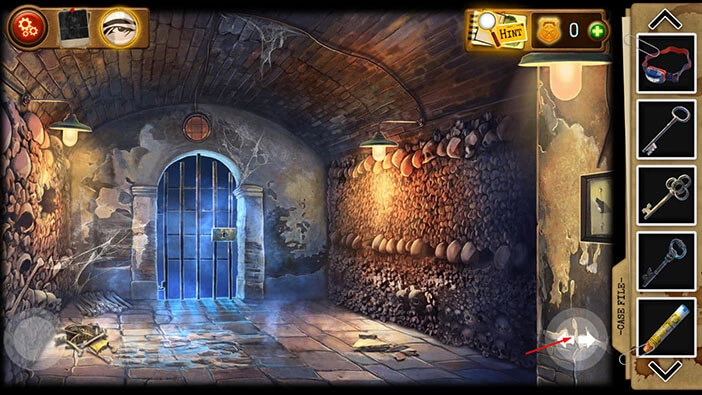
Next, you will notice that we opened the secret door in the wall on the right. So, let’s tap on the door to proceed to the next room.
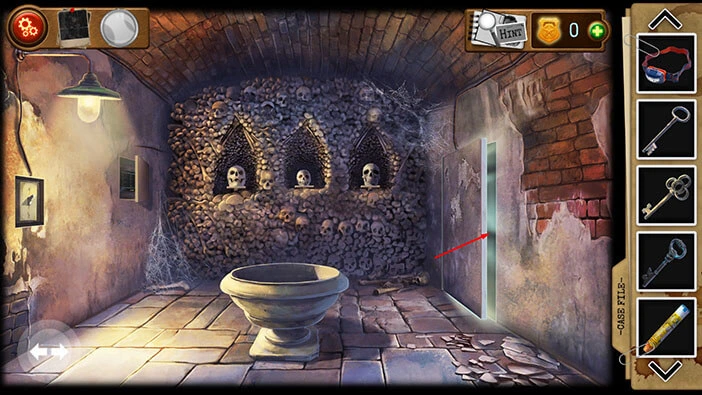
Tap on the mask and coat on the right to take a photo, and our character will file it as evidence. Our character thinks that they will catch the Collector, very soon.
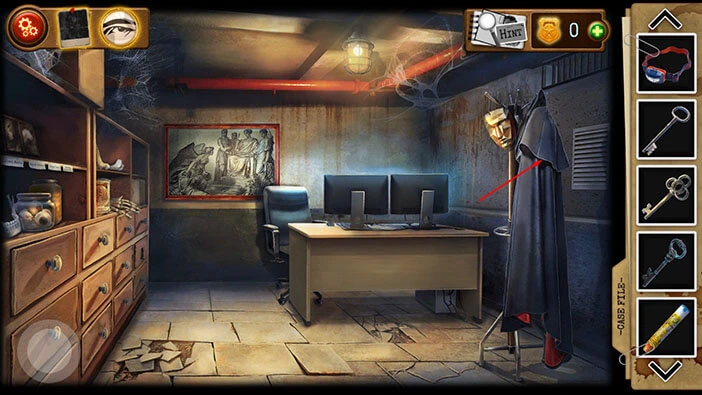
Next, tap on the PC screen to take a closer look at it.
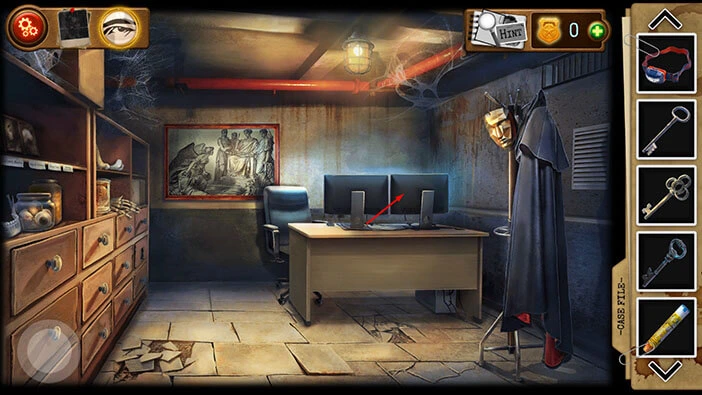
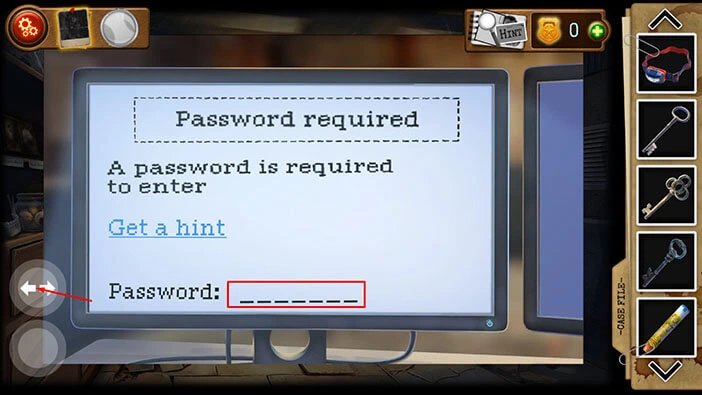
We will need a seven-letter password in order to access the computer. Let’s tap on the button with the left and right arrows on the left side of the screen.
Tap on the “Start the camera” button.
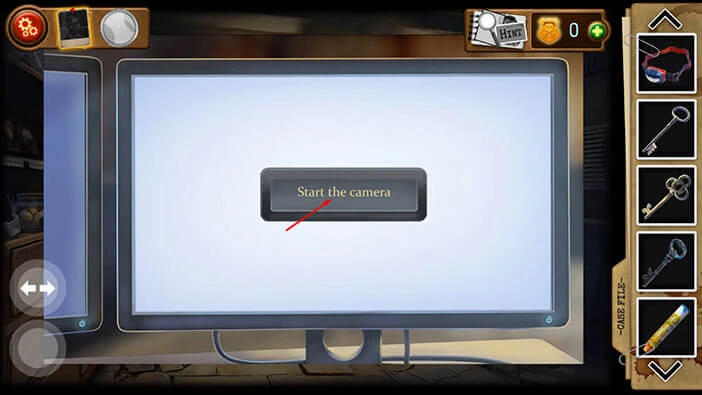
You will see Detective Simmons, locked in a cell. We will have to find a way to rescue him. Let’s tap twice on the button in the bottom left corner of the screen to go back.
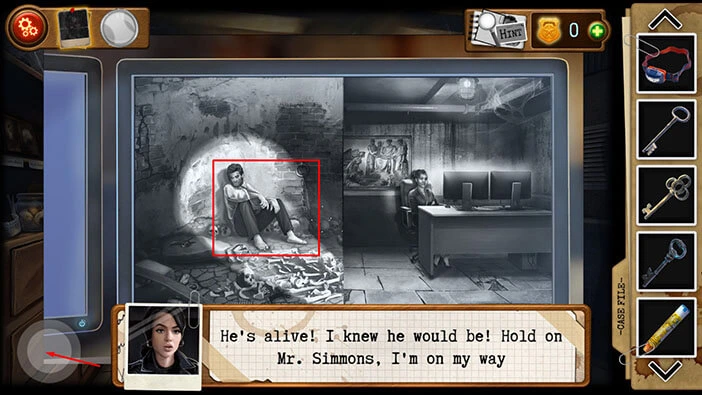
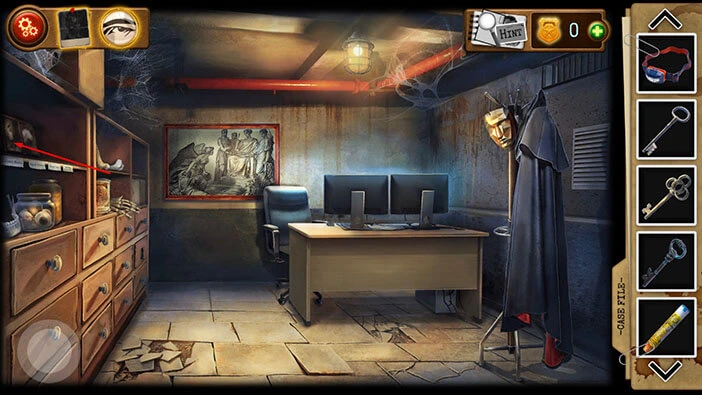
Next, let’s tap on the shelf on the left to take a closer look at it.
Here, we can see all of Collcector’s victims. There are five of them. We can see five photos and names below each photo. Our task is to arrange the photos in chronological order.
This shouldn’t be too difficult. The only thing that we don’t know is the correct position of the two victims, Gilbert Bucks, and Jeffrey Miles.
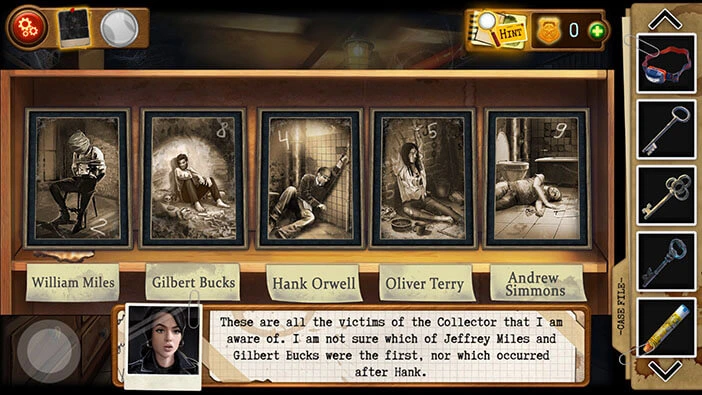
We will do this puzzle in several steps. Let’s begin.
Step 1
Well, below the fifth slot, we will see the name “Andrew Simmons”. Well, we can see the Detective in the second photo. So, let’s select the second photo, and swap its position with the photo in the fifth slot.
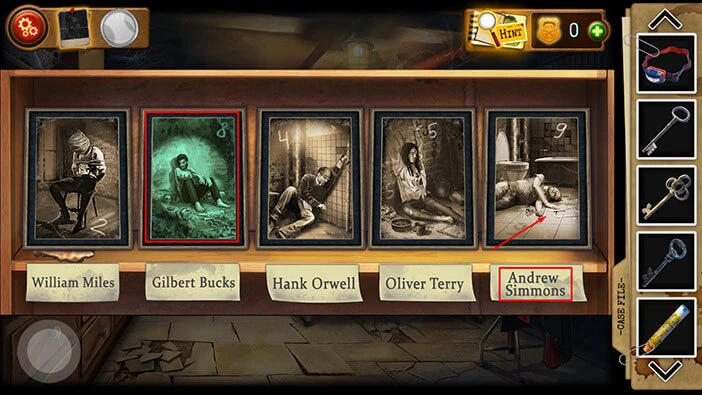
Step 2
Next, we already saw Oliver Terry’s photo, and he was the last Collector’s victim (excluding Detective Simmons). Reminder: we found him in Chapter 4. So, this photo is already in the correct slot (fourth slot).
Next, Hank Orwell was Detective Simmons’ partner, and we investigated his case in the first chapter. He was found dead on the bathroom floor. There is no need to go into the details because we can his photo in the second slot. So, let’s select the second photo, and swap its position with the photo in the third slot.
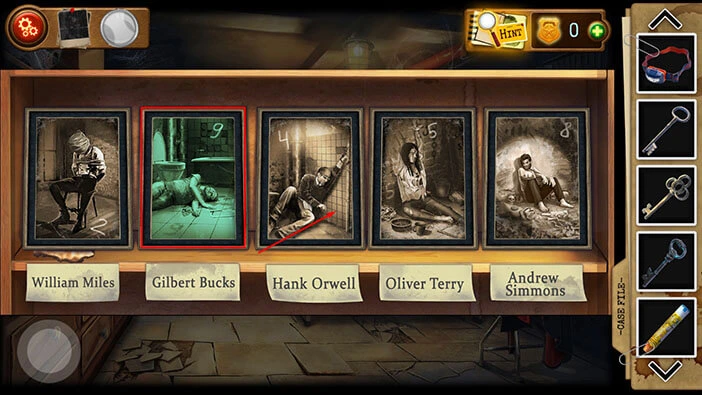
Step 3
Well, we know that the photos in the third, fourth, and fifth slots are correct. So, let’s swap the photos in the first and second slots.
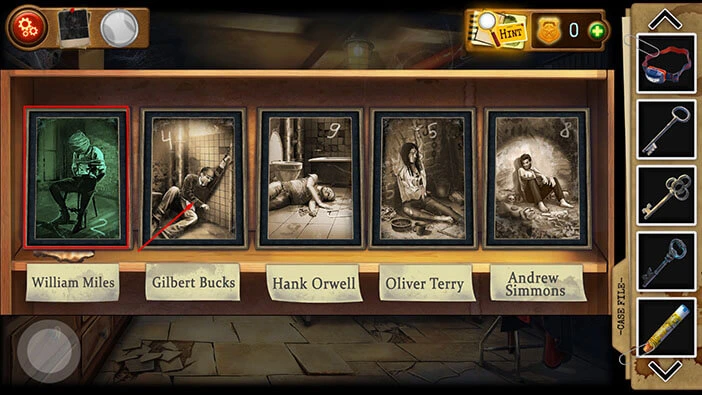
With that, you will arrange the photos in the correct order. Let’s tap on the button in the bottom left corner of the screen to go back.
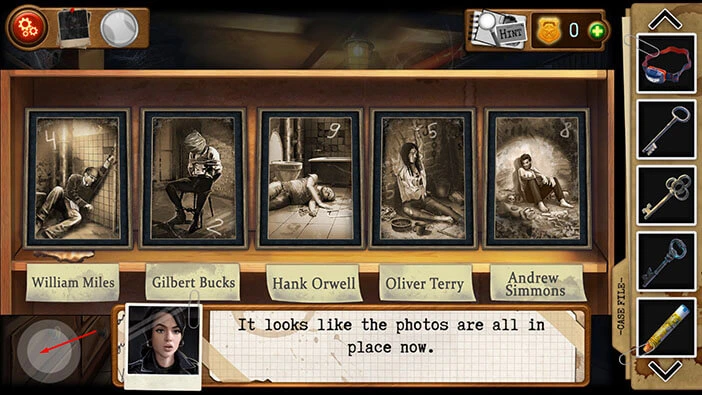
Next, tap on the safe on the wall in front of you to take a closer look at it.
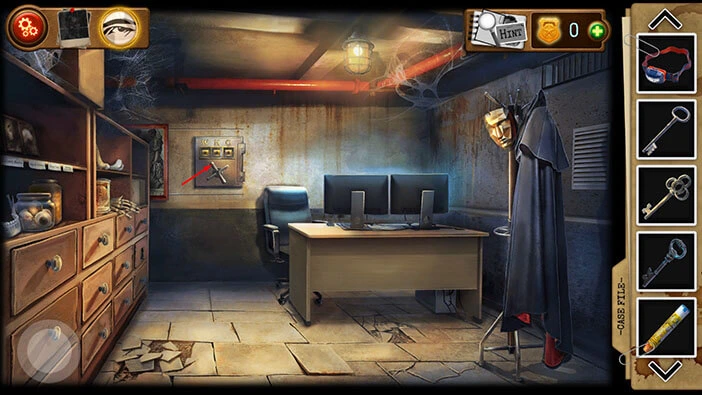
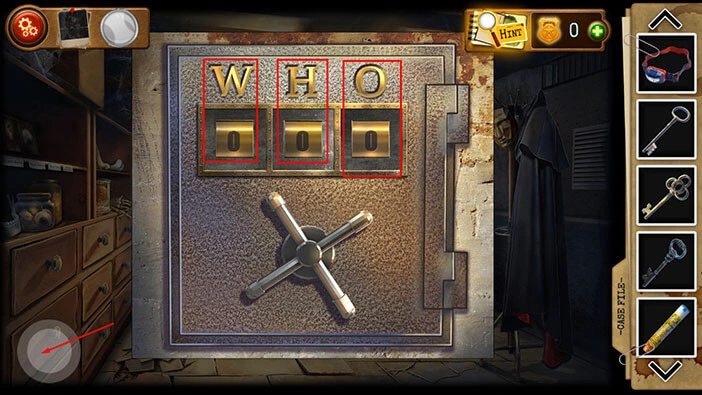
Here, you will see three letters, W, H, and O, and each letter is associated with one of the digits. Let’s go back. Tap on the button in the bottom left corner of the screen.
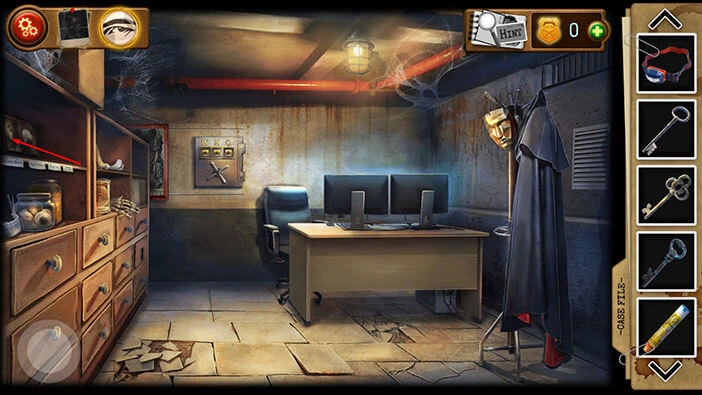
Tap on the photos on the shelf on the left to take another look at them.
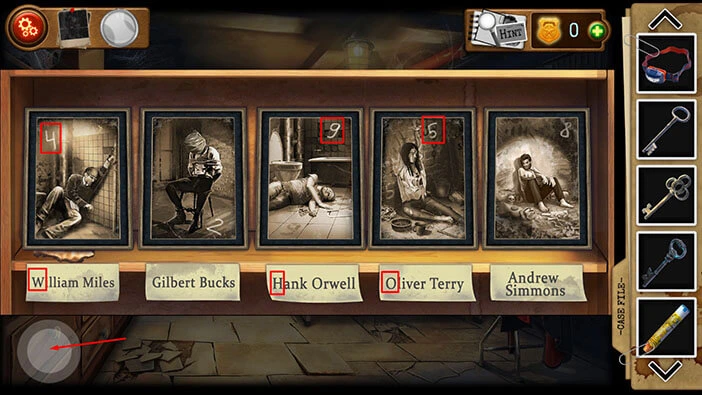
We already arranged the photos in the correct order. You will notice that there is a number on each photo. We discovered the letters W, H, and O on the safe. So, let’s look at the names that start with these letters.
“W” – William Miles = 4
“H” – Hank Orwell = 9
“O” – Oliver Terry = 5
When we put it all together, we will get the number “495”. Let’s memorize/write down this number because it represents the code for the safe.
Once you’re done, tap on the button in the bottom left corner of the screen to go back.
Let’s go back to the safe.
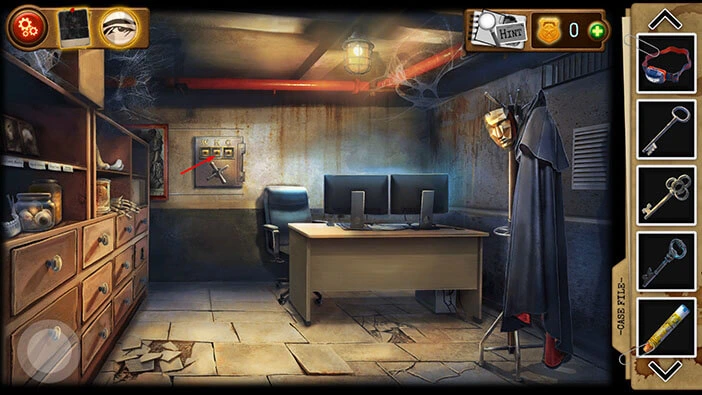
Enter the code “495” and you will unlock the safe.
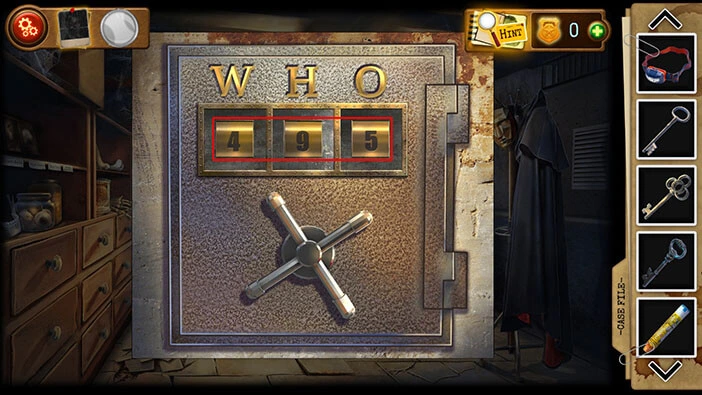
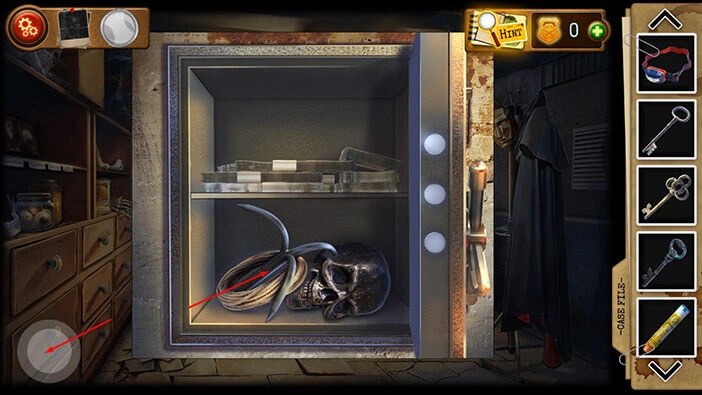
You will unlock the safe, and inside you will find a “Grapnel”. Tap on it to pick it up.
After that, tap on the button in the bottom left corner of the screen to go back.
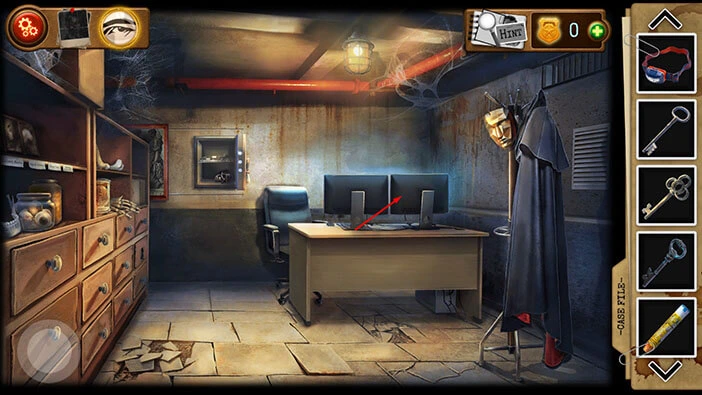
Next, let’s tap on the PC screen again to take another look at it.
Next, tap on the button with the two arrows on the left.
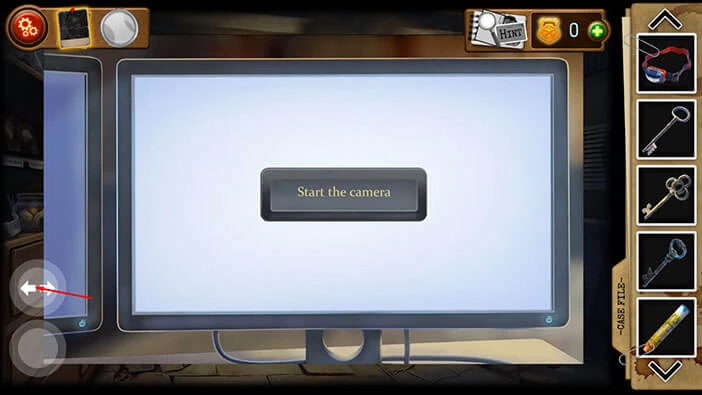
Next, let’s tap on the “Get the hint” link. You will discover that the password is “Truth” in Latin. Let’s memorize/write down this information. We can discover the password by going back to the two buttons that we saw previously.
Once you’re done, tap on the button in the bottom left corner of the screen to go back.
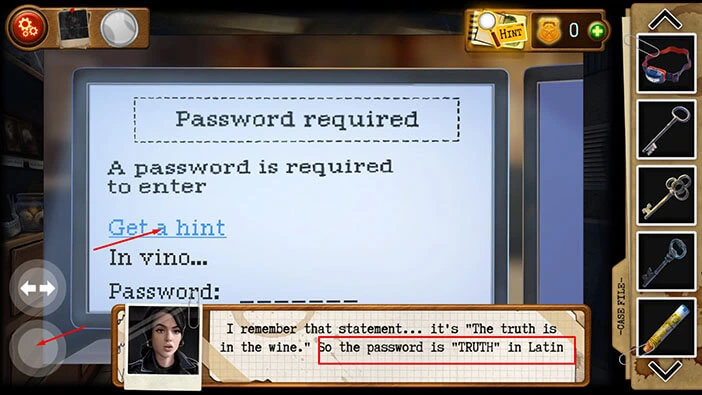
Tap twice on the button in the bottom left corner of the screen to go back to the first room in the underground level.
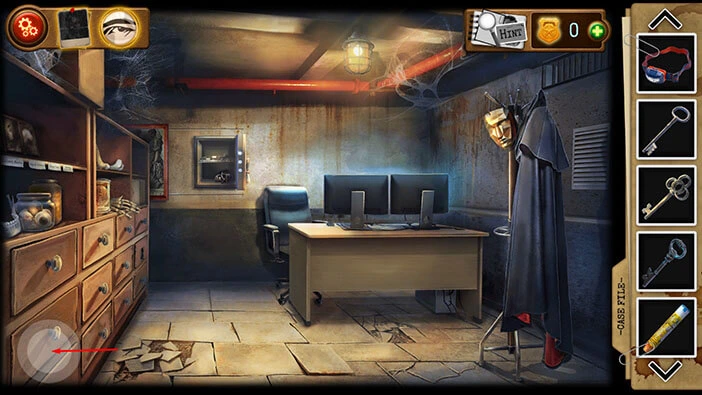
Tap on the hole in the wall on the left to take a closer look at it.
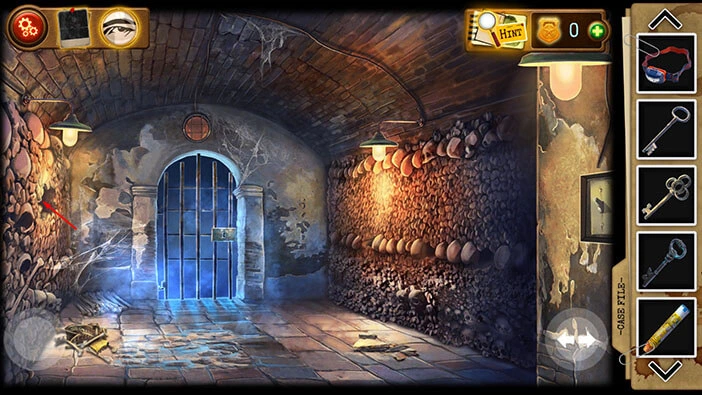
You will discover that “Aequitas” = Justice, and “Veritas” = Truth.
So, Veritas is the password for the PC. Let’s memorize/write down this password.
Once you’re done, tap on the button in the bottom left corner of the screen to go back.
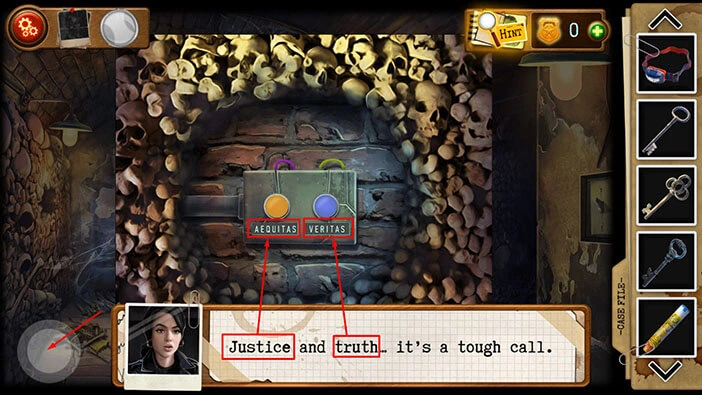
Let’s go back to the secret room with the PC. Tap on the button in the bottom right corner of the screen, then tap on the door in the wall on the right.
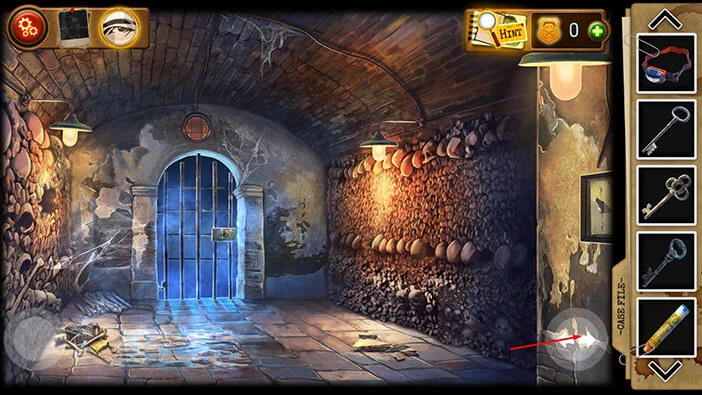
Tap on the PC screen to take a closer look at it, then tap on the password to start the interaction.
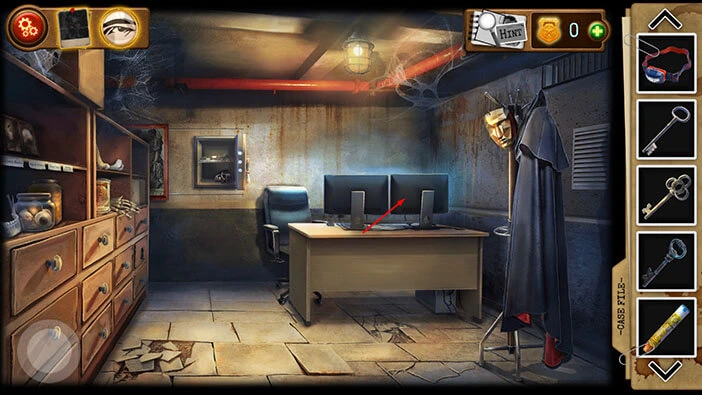
Enter the password “Veritas”.
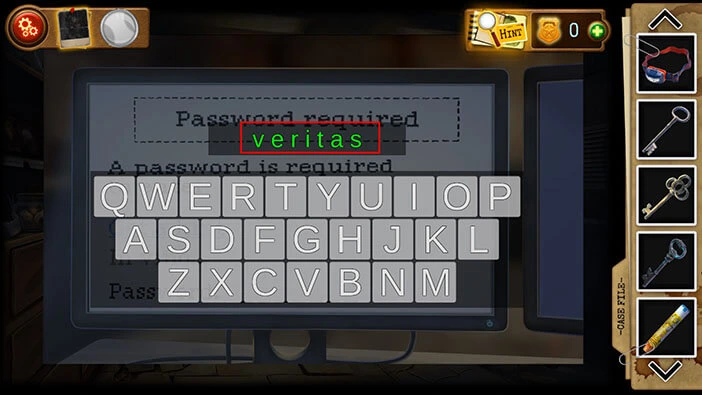
Tap on the “Unlock the Cache” button, and you will unlock the secret cache, located down and to the left of the crypt door.
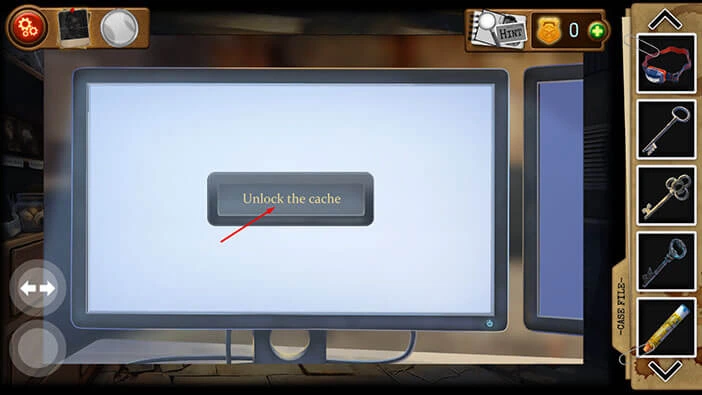
Tap several times on the button in the bottom left corner of the screen to go back, outside.
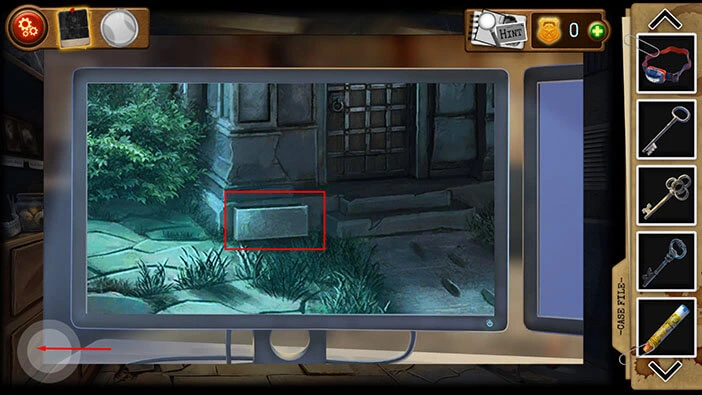
Let’s tap on the secret stash to take a closer look at it.
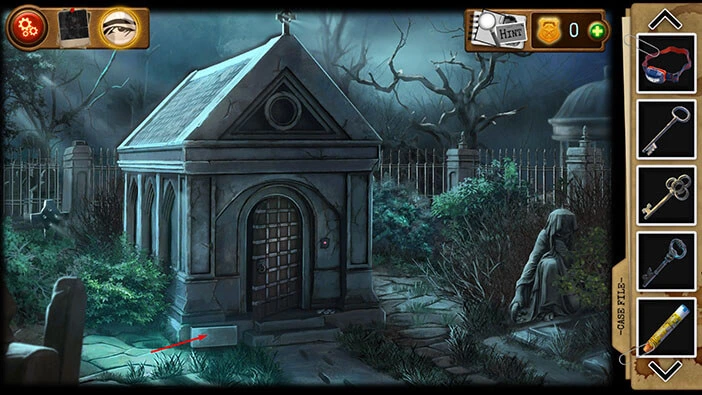
Next, select the “Key 3” and use it to unlock the secret stash.
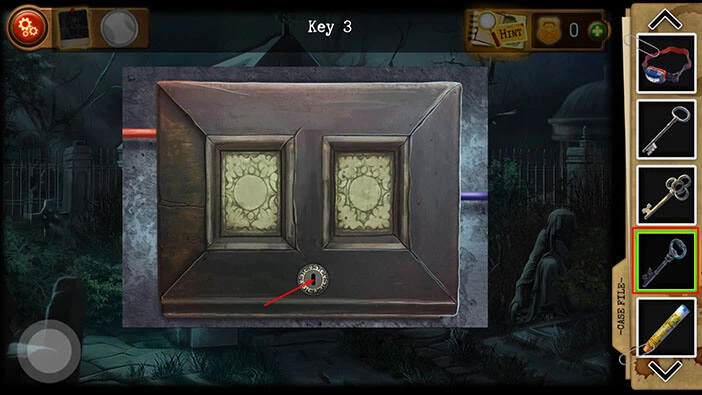
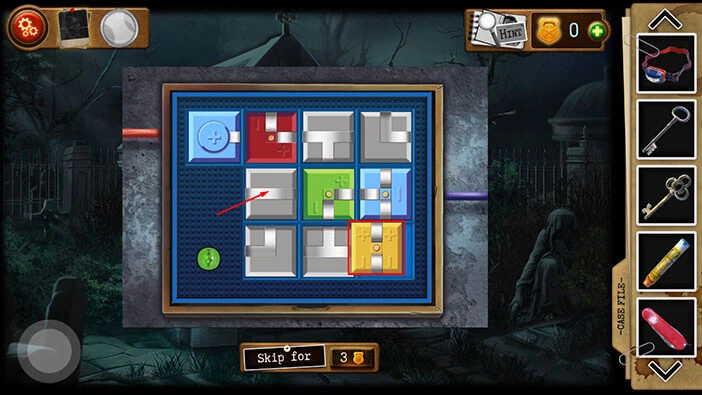
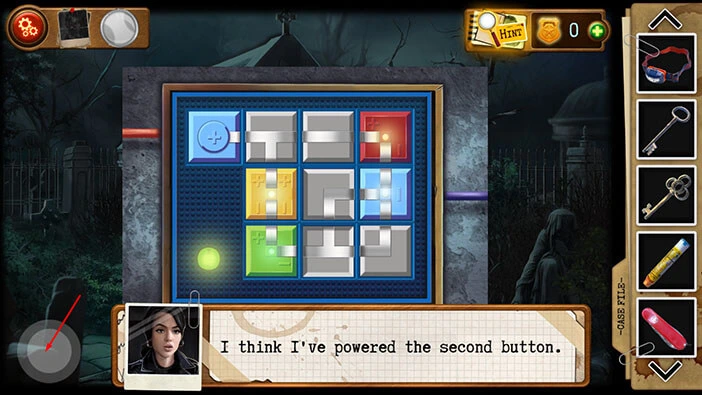
Here, we have another puzzle. Our task is to create a closed electrical circuit and activate all light bulbs (light bulbs are located inside the red, blue, yellow, and green slots). We will do this puzzle in several steps. Let’s begin.
Step 1
Select the third puzzle piece in the third row and swap its position with the first puzzle piece in the second row.
Step 2
Select the second puzzle piece in the second row and swap its position with the first puzzle piece in the third row.
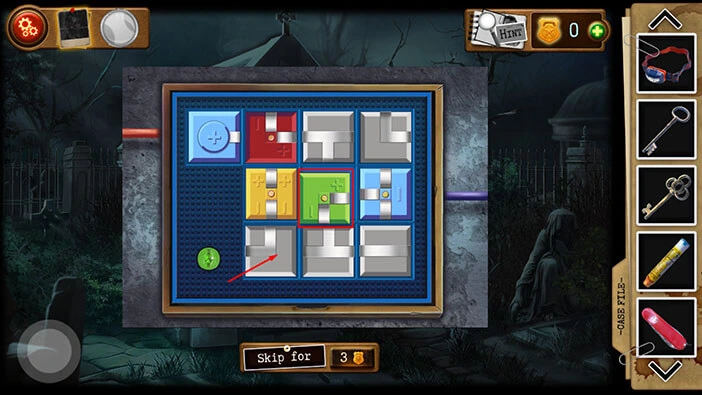
Step 3
Tap on the first puzzle piece in the third row to rotate it.
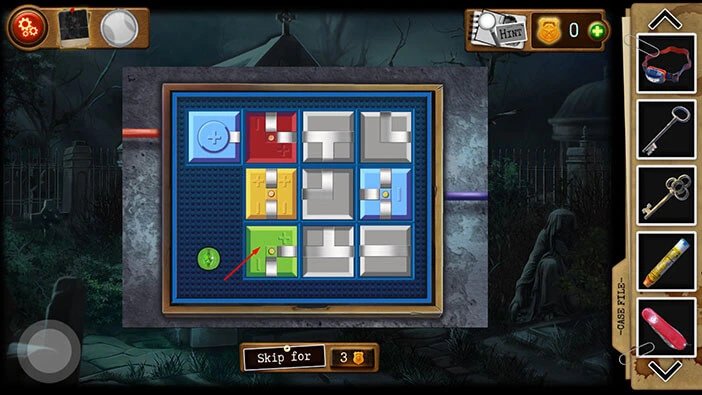
Step 4
Select the first puzzle piece in the first row and swap its position with the third puzzle piece in the first row.
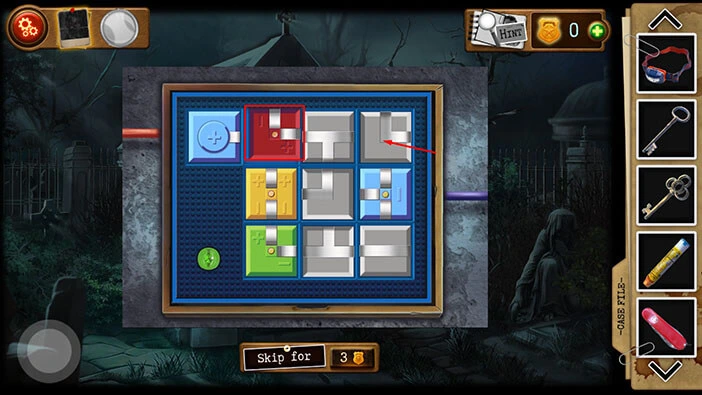
Step 5
Tap twice on the third puzzle piece in the first row to rotate it.
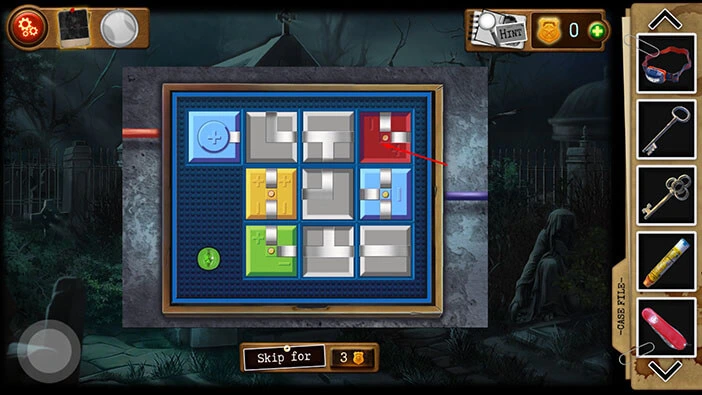
Step 6
Select the second puzzle piece in the first row and swap its position with the first puzzle piece in the first row.
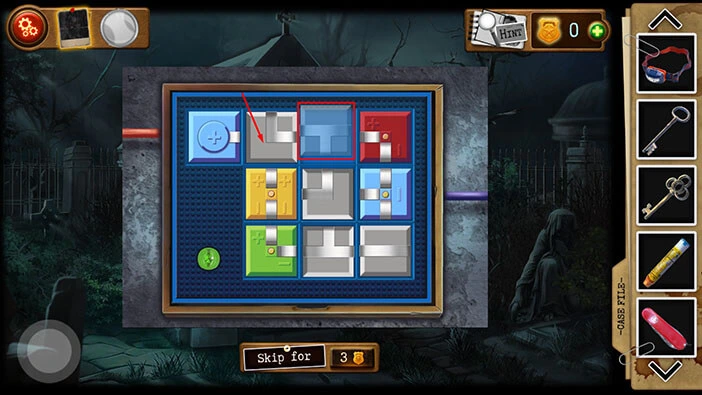
Step 7
Select the third puzzle piece in the third row and swap its position with the second puzzle piece in the first row.
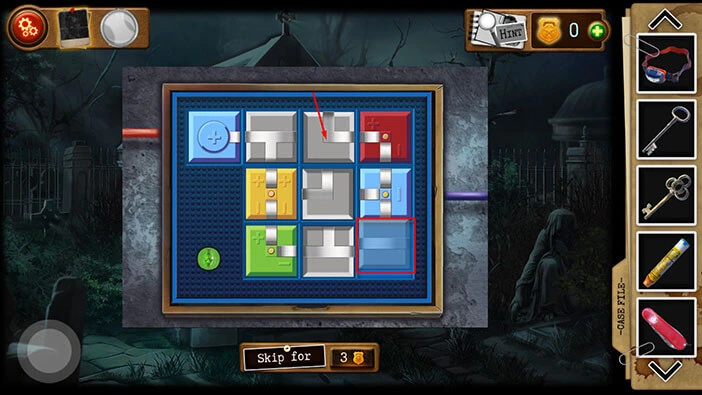
Step 8
Tap once on the third puzzle piece in the third row to rotate it.
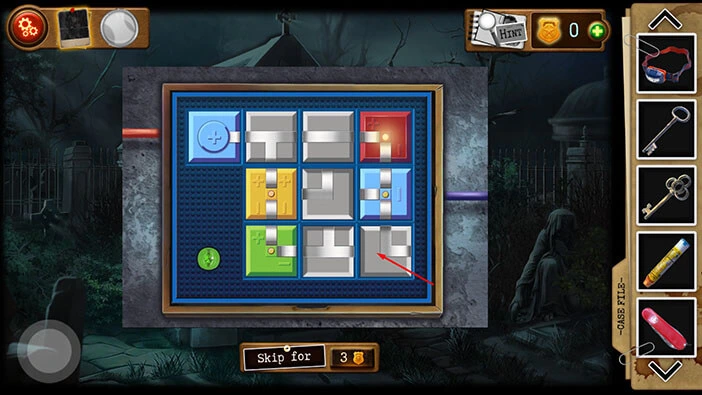
Step 9
Lastly, tap twice on the second puzzle piece in the second row to rotate it.
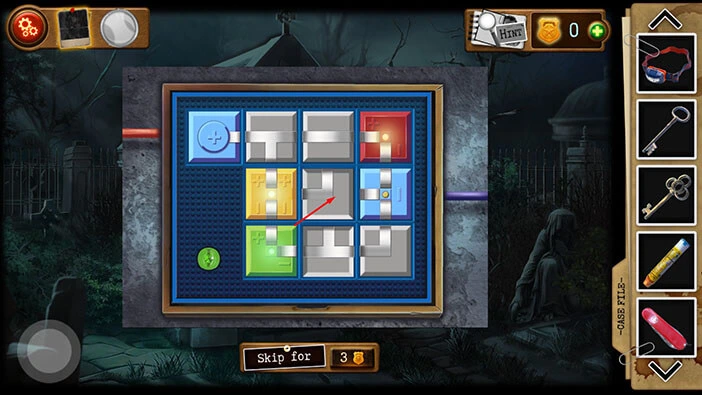
With that, you will solve the puzzle, and you will restore the power to the other button (“Justice button”).
Let’s go back. Tap on the button in the bottom left corner of the screen.
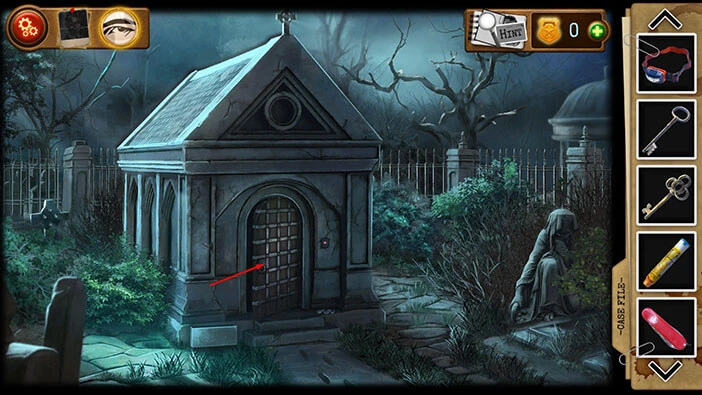
Let’s go back into the crypt. Tap on the front door.
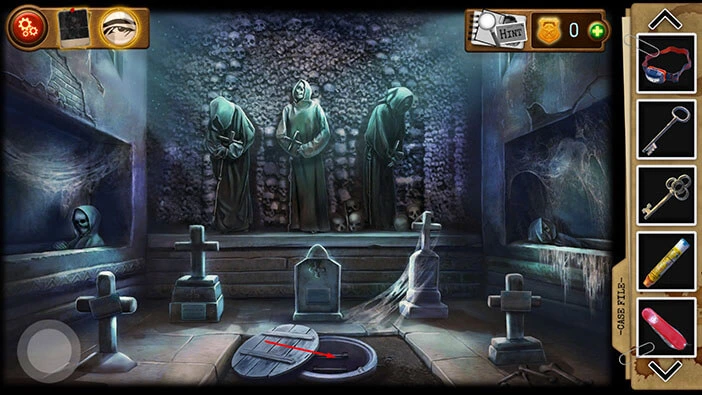
Next, let’s tap on the trapdoor to go to the underground level.
Tap on the hole in the wall on the left to take another look at it.
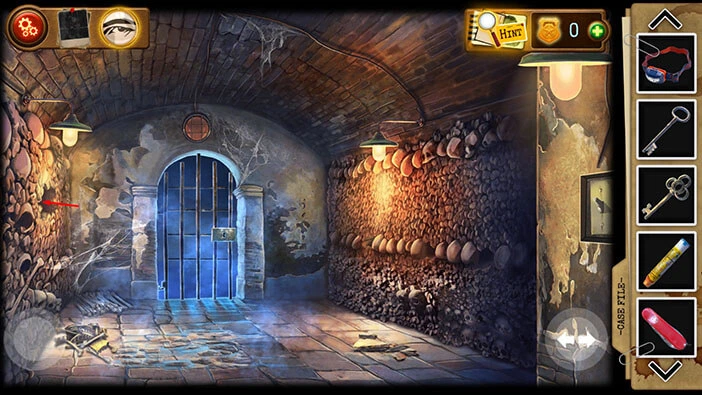
We restored the power to the yellow button on the left, so let’s tap on it to activate it.
After that, tap on the button in the bottom left corner of the screen to go back.
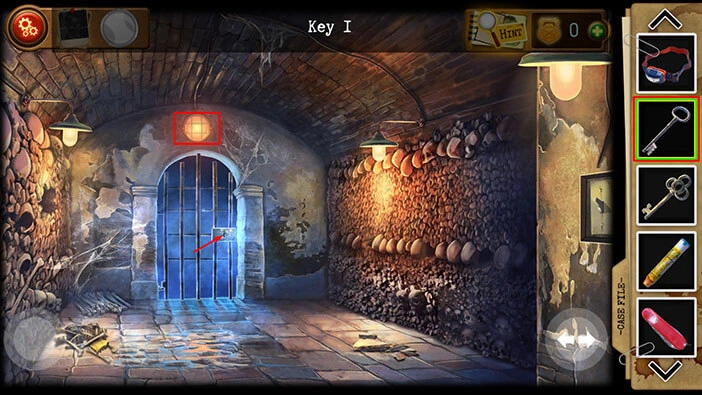
You will restore power to the gate in front of you. Select the “Key I” from the inventory and use it to unlock the gate.
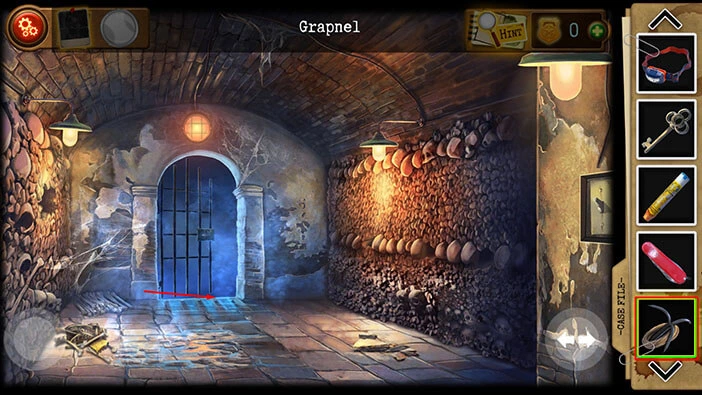
Our character has to find a way to descend to the cell below. So, select the “Grapnel” from the inventory and tap on the floor to start the interaction.
After that, tap on the grappling hook to climb down to the cell.
You will reach Detective Simmons’ cell. Let’s explore this cell. Here, we can find five items. Let’s tap on them to pick them up. “Gear I”, “Gear 2”, “Bottle of water”, “Spring”, and “Pickaxe” will be added to your inventory.
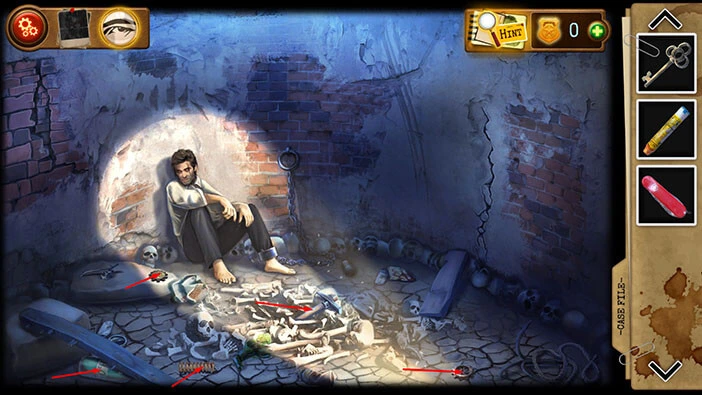
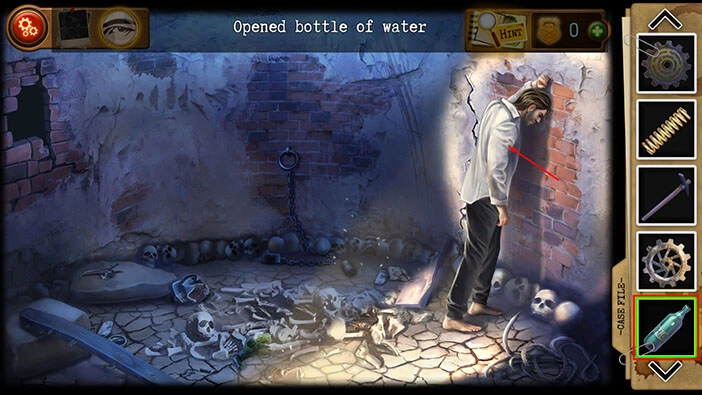
Next, select the “Swiss knife” in your inventory and drag it to the “Bottle of water” (also in your inventory). Our character will use the “Swiss knife” to open the bottle, and “Opened bottle of water” will be added to your inventory.
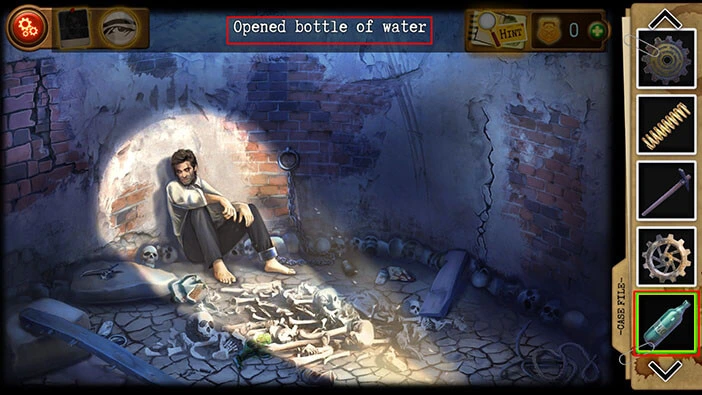
Next, let’s tap on Detective Simmons to take a closer look at him.
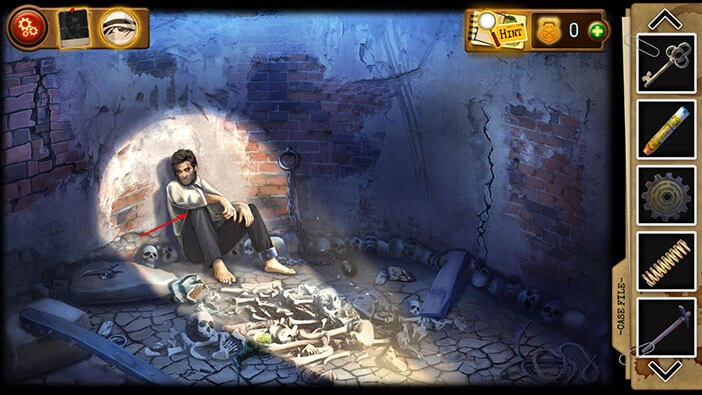
You will notice that Detective Simmons is chained to the wall. So, let’s select “Key 2” from the inventory and use it to free the detective.
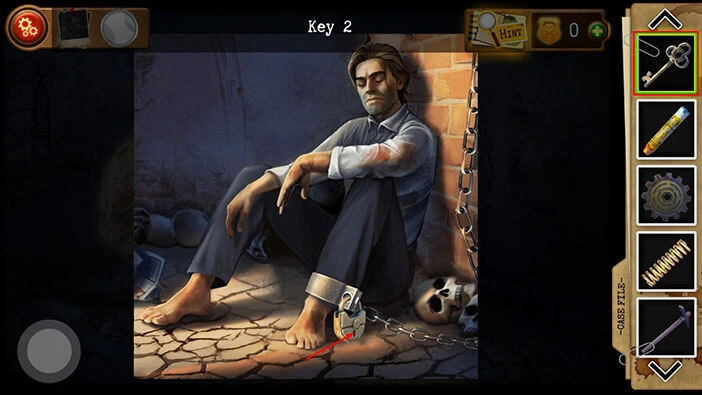
Next, if you tap on the detective, your character will conclude that the detective is unconscious, and we have to find a way to wake him up.
So, select the “Epinephrine” from the inventory and use it to wake up the detective.
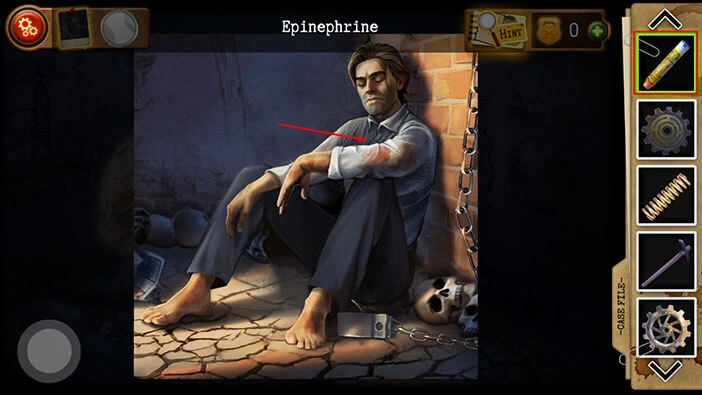
Detective Simmons will wake up and he will say that the two of you should try to find a way out of the cell. That’s our next task.
If you take a look at the wall on the left, you will notice a large crack. So, select the “Pickaxe” from the inventory and use it to break the wall.
After that, tap on the hole in the wall to examine it.
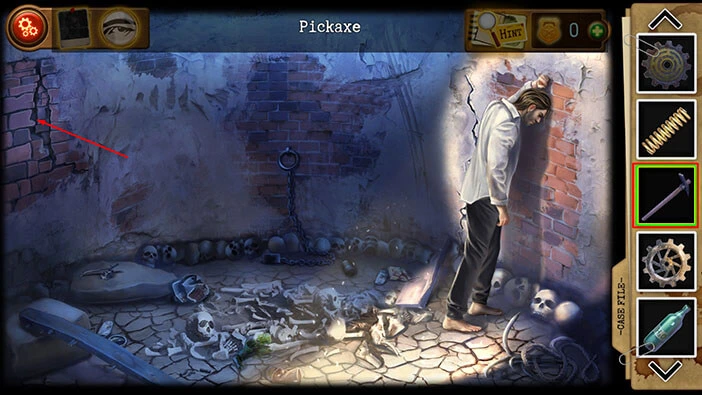
Here, we can see the safe, but we still don’t know how to open it. So, let’s look for hints.
Tap on the button in the bottom left corner of the screen to go back.
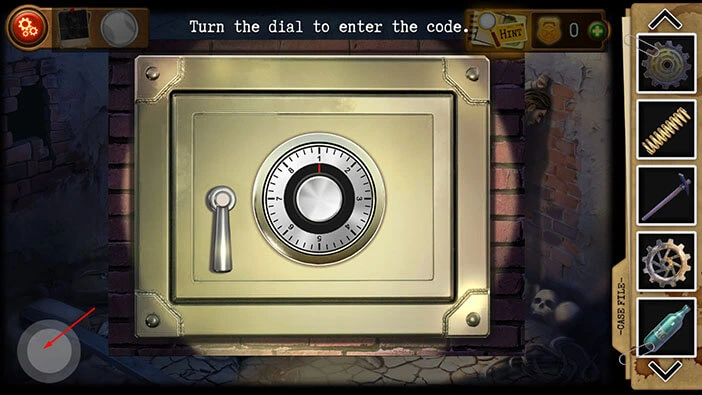
Let’s tap on the skulls in the middle of the room to take a closer look at them.
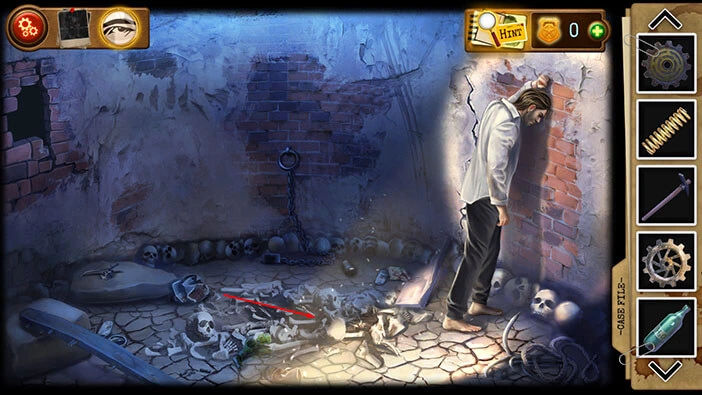
Here, we can see a left/right arrow and a number on each of the skulls. The arrow indicates the direction in which we should turn the dial on the safe, and the number tells us at which number the dial should be pointing.
So, let’s memorize/write down arrows and numbers on the skulls, starting from the smallest skull on the left, and working our way toward the larger skulls on the right.
First skull = 5, right arrow
Second skull = 2, right arrow
Third skull = 3, left arrow
Fourth skull = 3, left arrow
Fifth skull = 4, right arrow
Once you’re done, tap on the button in the bottom left corner of the screen to go back.
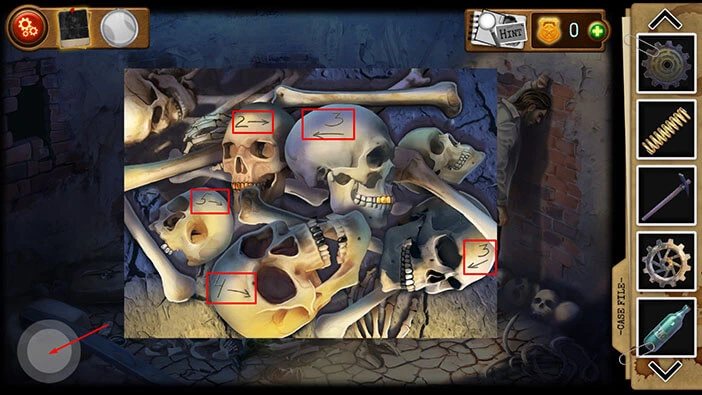
Next, let’s tap on the hole in the wall on the left to take another look at the safe.
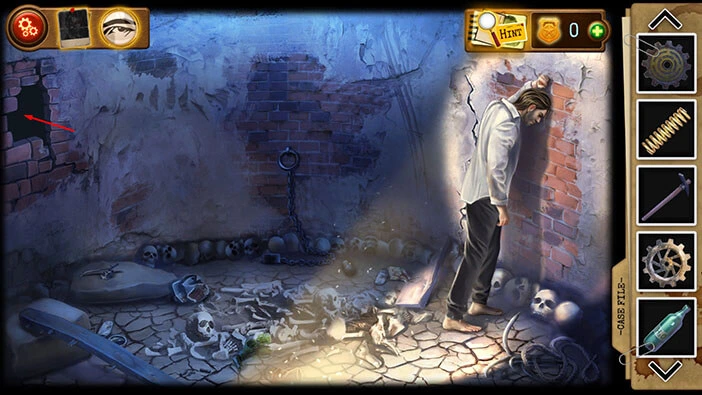
So, let’s unlock the safe. We will do this in several steps. Let’s begin.
Step 1
On the first skull, we saw the right arrow and the number 5. So, let’s rotate the dial to the right until we get the number 5 just above the red line.
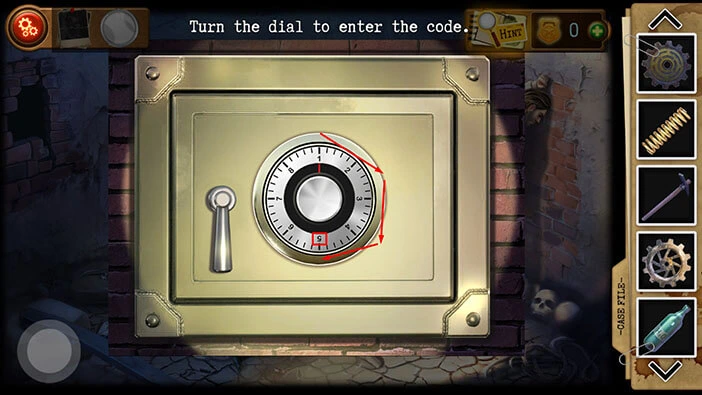
Step 2
On the second skull, we saw the right arrow and the number 2. So, let’s rotate the dial to the right until we get the number 2 just above the red line.
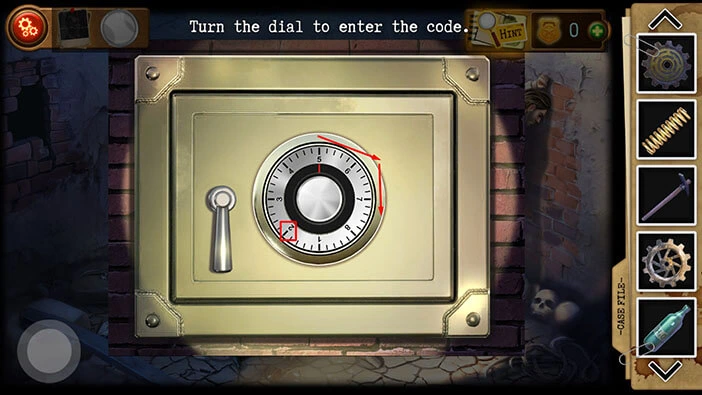
Step 3
On the third skull, we saw the left arrow and the number 3. So, let’s rotate the dial to the left until we get the number 3 just above the red line.
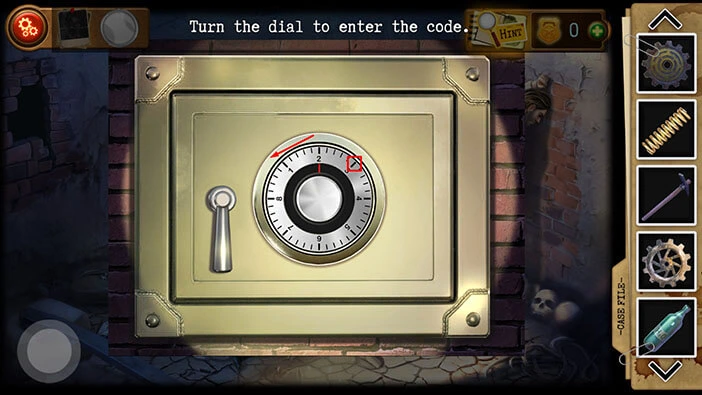
Step 4
On the fourth skull, we saw the left arrow and the number 3. So, let’s rotate the dial to the left until we get the number 3 just above the red line (one full circle).
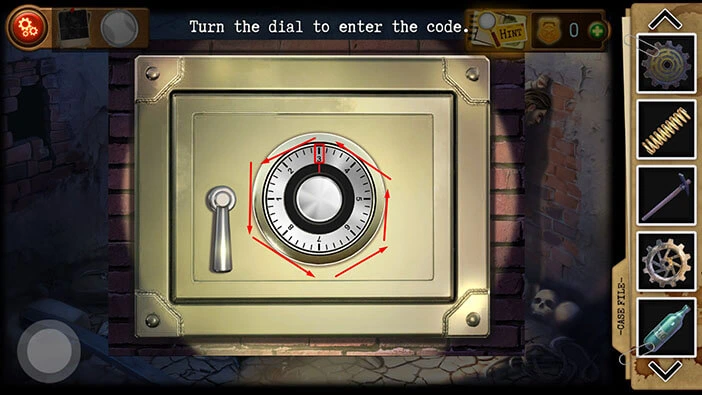
Step 5
On the fifth skull, we saw the right arrow and the number 4. So, let’s rotate the dial to the right until we get the number 4 just above the red line (almost one full circle).
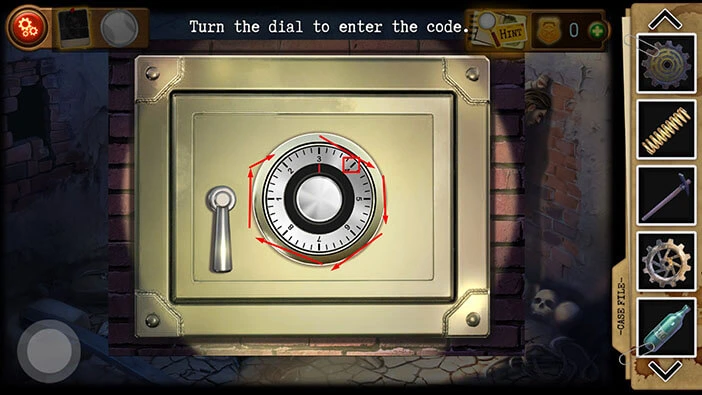
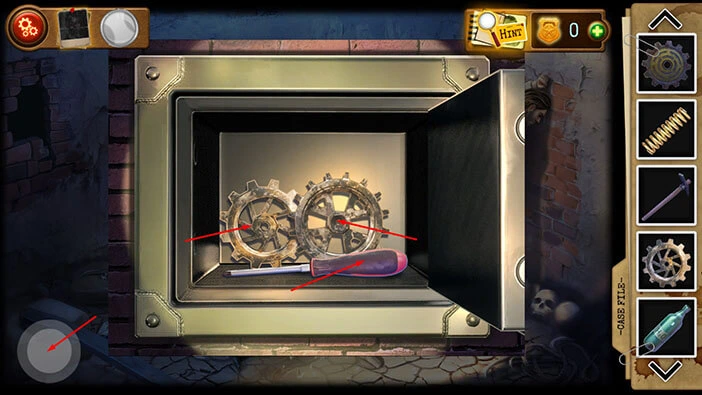
With that, you will unlock and open the safe. In the safe, you will find a “Screwdriver”, “Gear 3”, and a “Gear 4”. Tap on these items to pick them up.
After that, tap on the button in the bottom left corner of the screen to go back.
If you tap on Detective Simmons, you will discover that he is very thirsty. So, select the “Opened bottle of water” from the inventory and give it to Detective Simmons (open the bottle with the “Swiss knife” if you haven’t done that already).
Detective Simmons will ask for a pickaxe. So, select the “Pickaxe” from the inventory and give it to Detective Simmons.
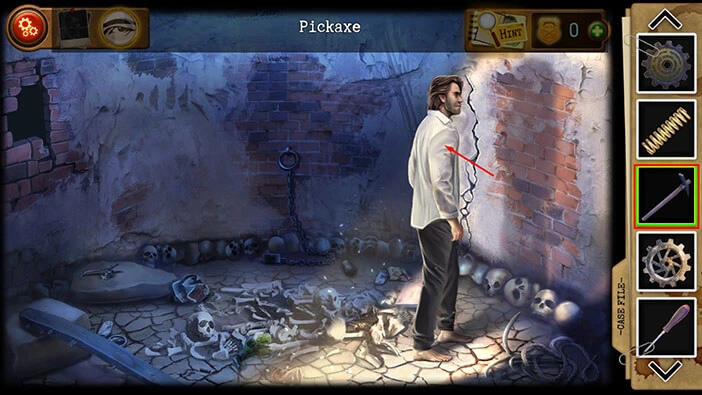
He will use the pickaxe to smash a hole in the wall on the right. Let’s tap on the hole to take a closer look at it.
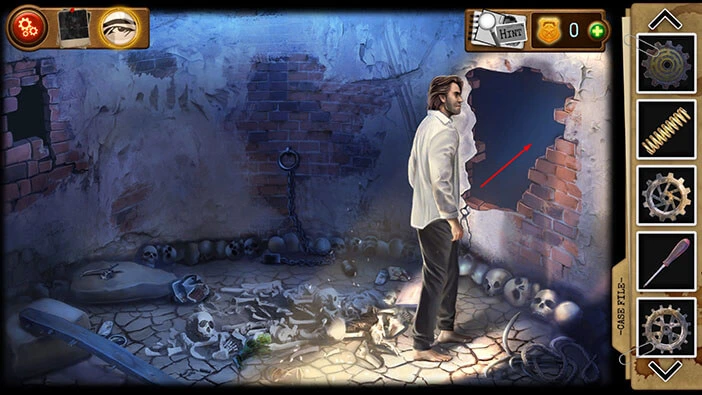
You will notice some kind of mechanism at the top of the door. Select the “Screwdriver” from the inventory and use it to open the mechanism. After that, tap on the mechanism to start the interaction.
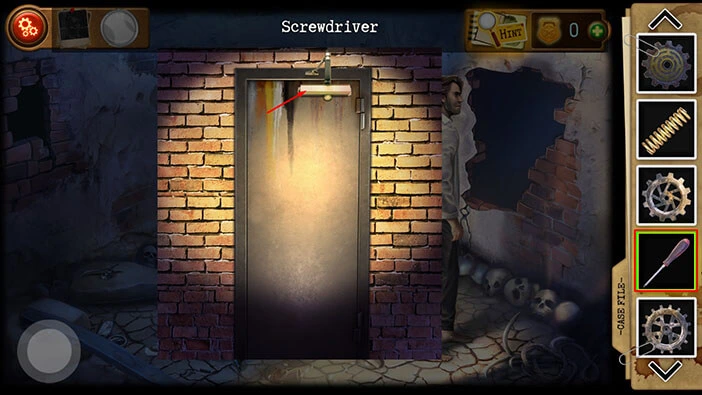
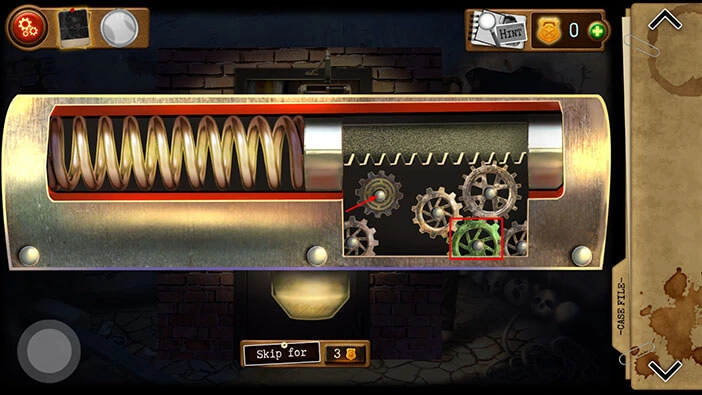
Select “Spring” from the inventory and insert it into the empty slot on the left. After that, select the four “Gears” from the inventory and insert them into the slot on the right.
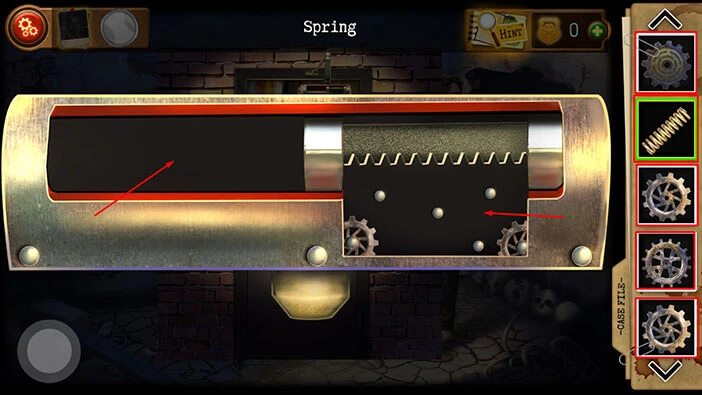
Our next task is to place the gears into the correct slots. We will do this in two steps. Let’s begin.
Step 1
Select the gear in the bottom right slot, and swap its position with the gear in the top left slot.
Step 2
Select the gear in the top right slot, and swap its position with the gear in the middle.
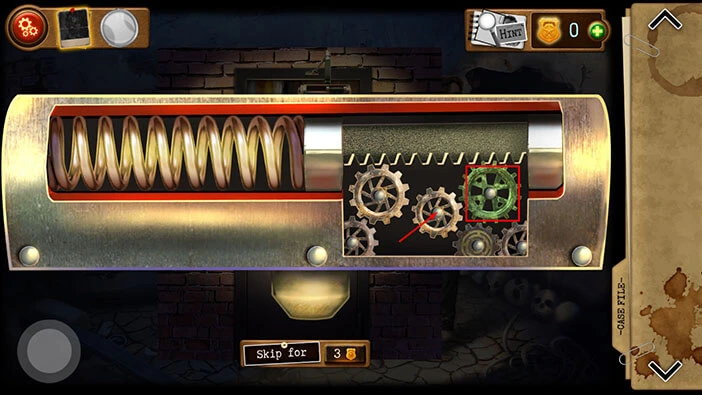
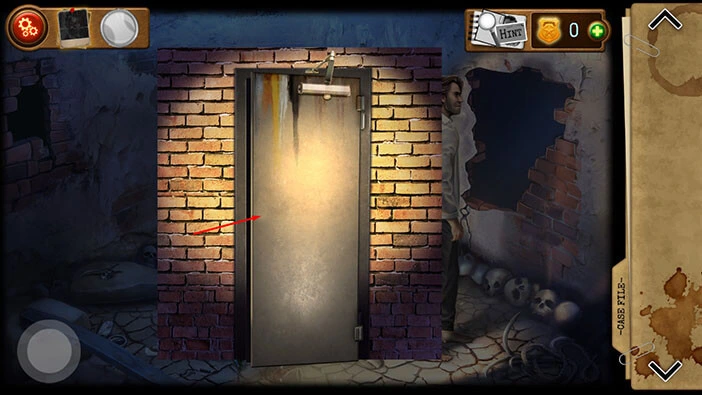
With that, you will unlock and open the door. Tap on the door to escape from the cell.
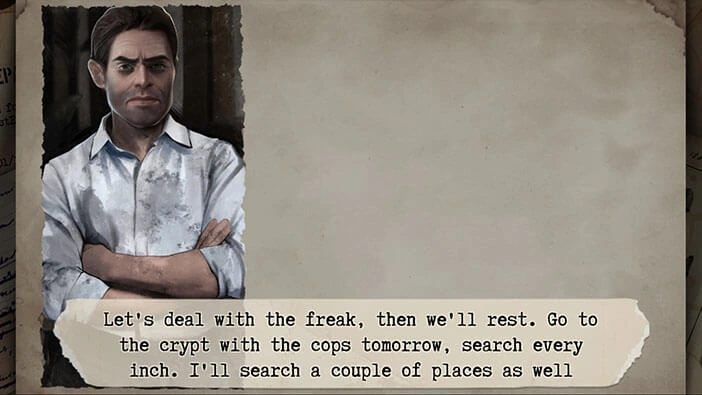
In the next scene, we can see that Detectives Jones and Simmons managed to escape, and they went back to the police station.
Detective Simmons that the Collector is going to lie low. So, they should look for clues before the trail goes cold.
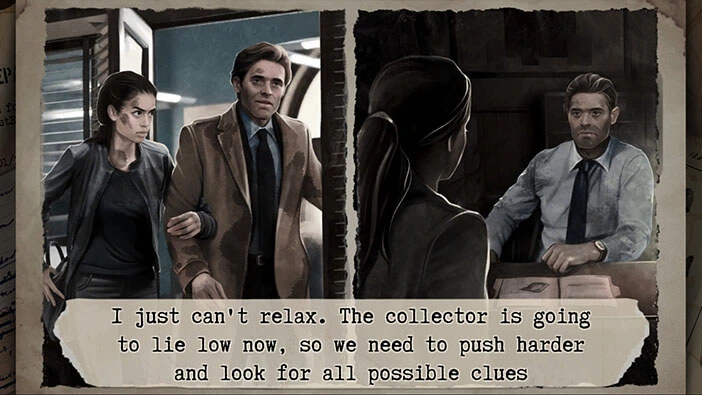
There is no time to rest. Tomorrow, Detective Jones will go back to the crypt with the police officers and they will conduct a thorough search.
Meanwhile, Detective Simmons will investigate several other locations.
We reached the end of the sixth chapter of the walkthrough. We will cover the seventh chapter as soon as it becomes available.
Thank you for reading.