Detective – Escape Room Games | Chapter 4: Cat and Mouse
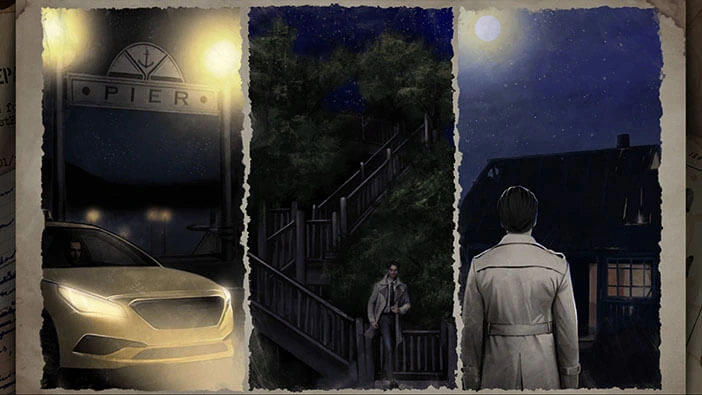
Hello everyone and welcome to the walkthrough for Chapter 4 of the “Detective: Escape Room Games”. At the beginning of the fourth chapter, our character, Detective Simons, informs Chester that he knows that the next victim will be at the pier – I have no idea how he came to this conclusion. Regardless, it seems that Detective Simons just discovered this information, so he will run out, call a cab, and head to a pier. In the next scene, he will arrive at the pier, and this is where our mission begins.
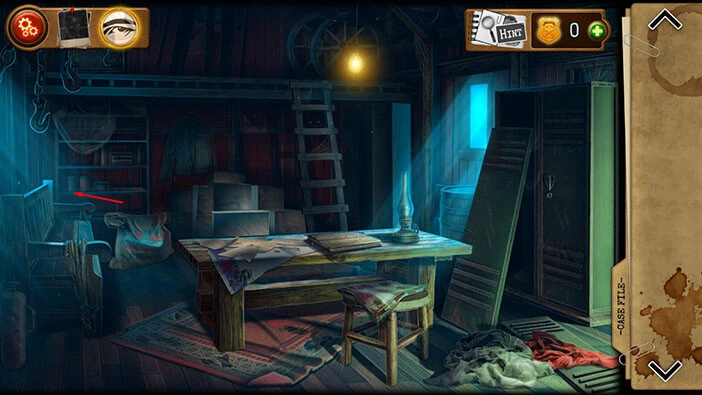
Let’s explore the first room. Tap on the shelf in the top left corner of the room to take a closer look at it.
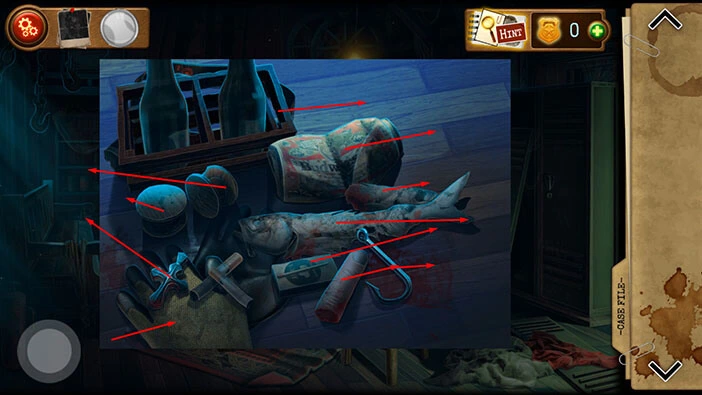
Tap on the “Gloves” (bottom left corner) to pick them up. After that, drag the other items to move them aside.
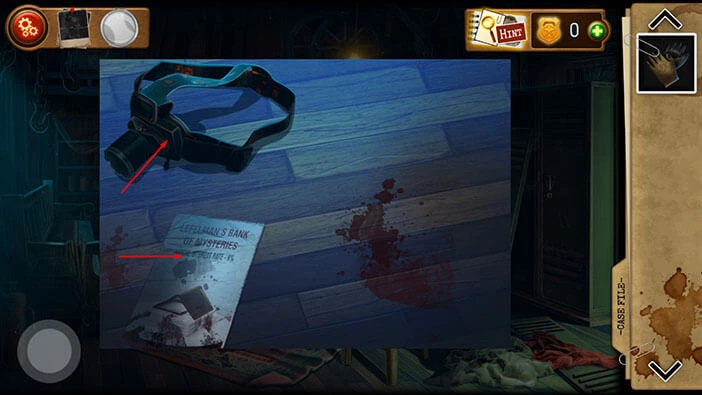
Next, tap on the “Headlamp” to pick it up. After that, tap on the “Leefman’s Bank of Mysteries” flyer to take a photo, and our character will file it as evidence.
Once you’re done, tap on the button in the bottom left corner of the screen to go back.
Let’s examine the evidence. Tap on the photo in the top left corner of the screen.
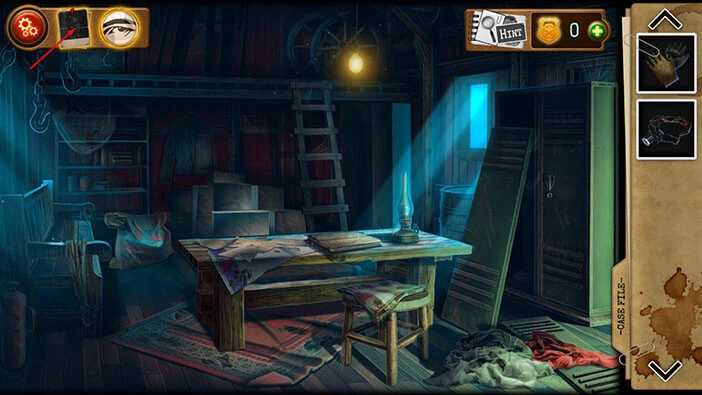
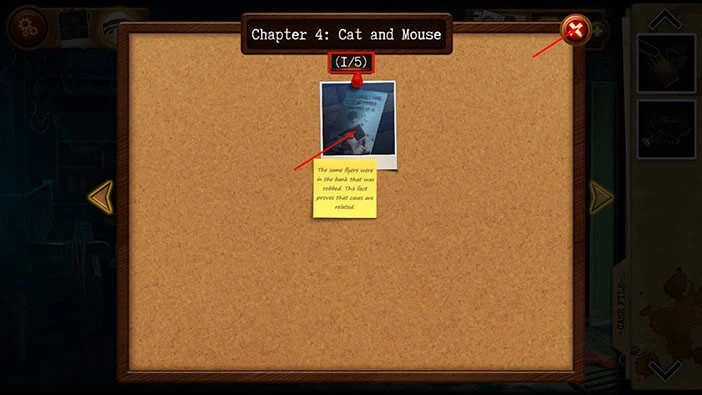
We have discovered the first out of five pieces of evidence. Tap on the photo of the “Leefman’s Bank of Mysteries” flyer to examine it. Our character remembered that he saw the same flyers in the bank that was robbed, back in chapter 2. So, he concluded that these two cases are connected.
Once you’re done, tap on the “X” button in the top right corner to go back.
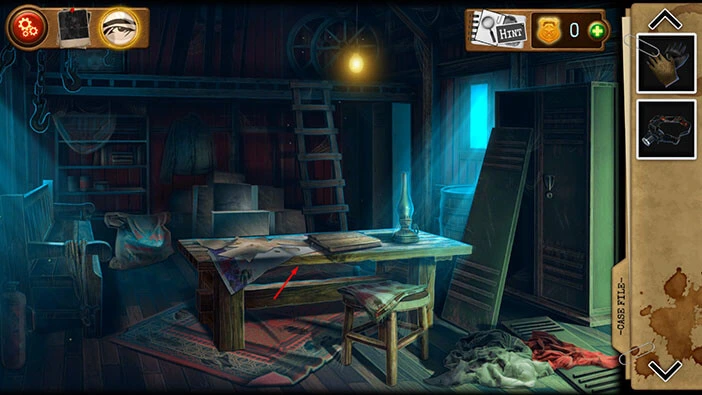
Next, tap on the table to look under it.
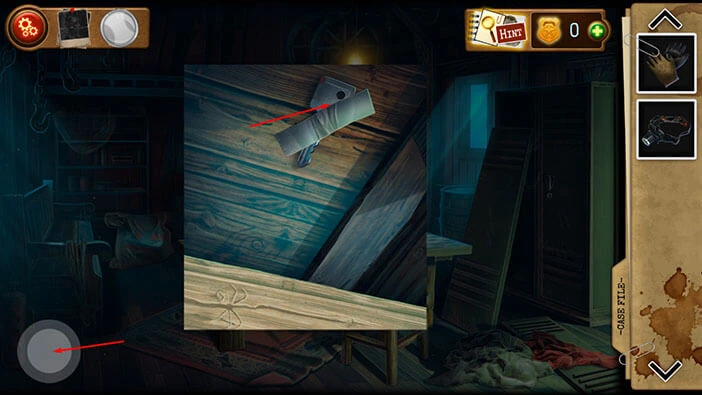
You will notice a key, ducted taped under the table. Tap on the key to pick it up and a “Locker key” will be added to your inventory.
After that, tap on the button in the bottom left corner of the screen to go back.
Let’s use this key. Tap on the locker on the right to take a closer look at it.
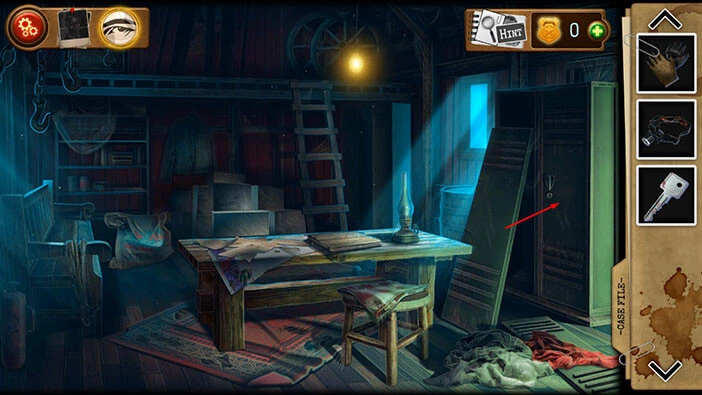
Select the “Locker key” from the inventory and use it to unlock the locker.
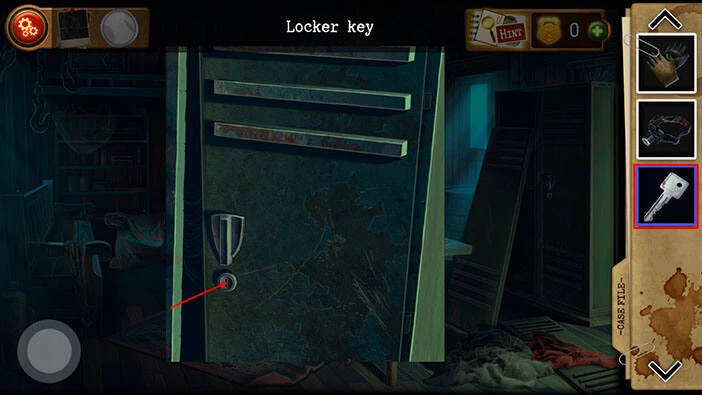
In the locker, you will find a bucket full of rotten fish. If you tap on the fish, our character will say that he won’t touch it with his bare hand. So, select the “Gloves” from the inventory and use it to remove the fish from the bucket.
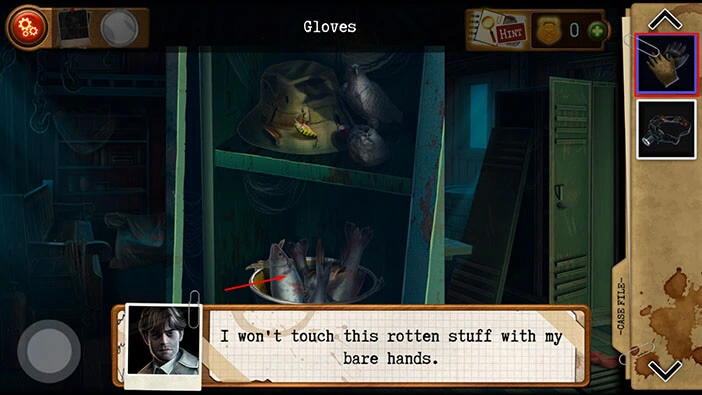
Once you remove the fish from the bucket, you will find “Wire cutters”. Tap on them to pick them up.
Also, if you take a look at the top shelf, you will notice a “Hawk figurine”. Tap on it to pick it up.
Once you’re done, tap on the button in the bottom left corner of the screen to go back.
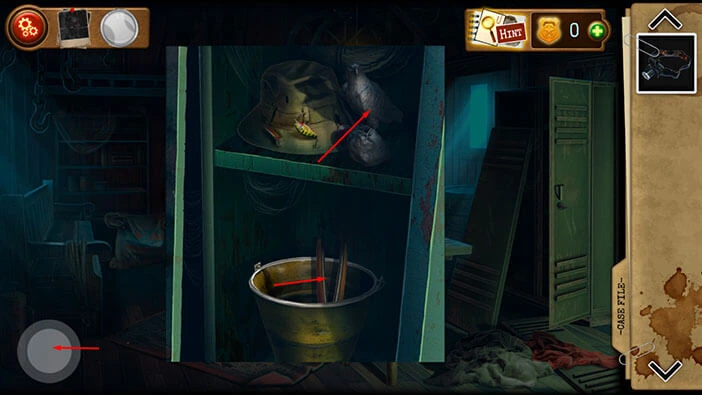
Next, let’s tap on the book on the table to examine it, and tap again to open it.
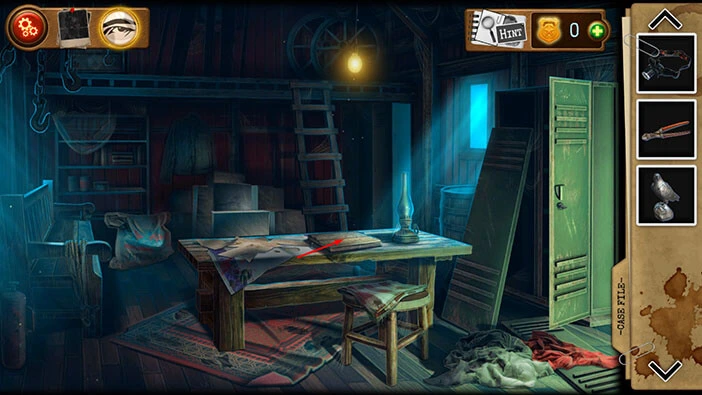
If you take a look at the page on the left, you will see an interesting text. Someone broke into the fisherman’s cabin, opened the diary, and began exploring, ignoring the warnings. So, this person drove himself into the trap. Hmm, our character is doing exactly that. Oh, well, we will worry about it later.
Let’s take a look at the page on the right. Here, we can see tree numbers made of matches (“367”). We can see that this number actually represents the number “564”. So, let’s figure out this puzzle.
Let’s count the matches that are used to construct the numbers. If you look at the number “3” you will notice that is made of 5 matches. Five is also the first number below.
Next, let’s take a look at the second number, number “6”. You will notice that this number is made out of “6” matches. Six is also the second number below.
Lastly, let’s take a look at the third number, number “7”. You will notice that this number is made out of “4” matches. Four is also the third number below.
So, we discovered the pattern. Next, we decipher the number at the bottom of the page.
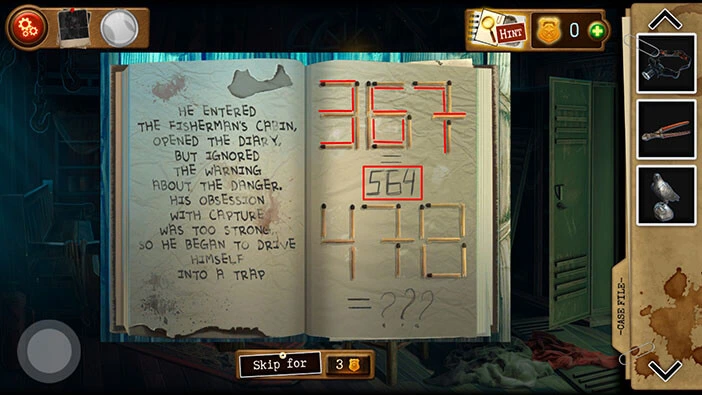
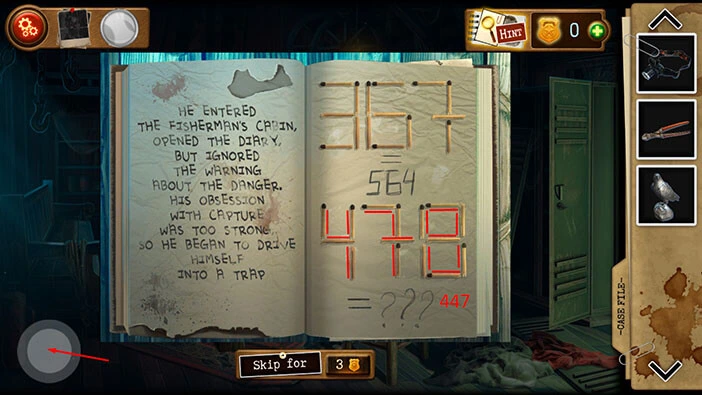
At the bottom of the page, we can see the number “478”. Let’s count the matches and decipher this number.
Let’s look at the first number, number 4. If we count the matches that are used to create the number 4, you will see that it is made out of four matches. So, the first number is number “4”.
Let’s look at the second number, number 7. If we count the matches that are used to create the number 7, you will see that it is made out of four matches. So, the second number is number “4”.
Lastly, let’s look at the third number, number 8. If we count the matches that are used to create the number 8, you will see that it is made out of seven matches. So, the third number is number “7”.
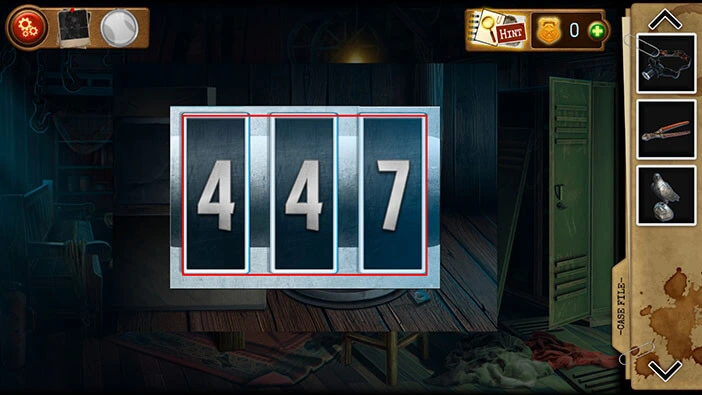
When we put it all together, we will get the number “447”. Memorize/write down this information because we will need it for the next puzzle. Once you’re done, tap on the button in the bottom left corner of the screen to go back.
Next, tap on the pile of boxes in the back of the room (just to the left of the ladder) to take a closer look.
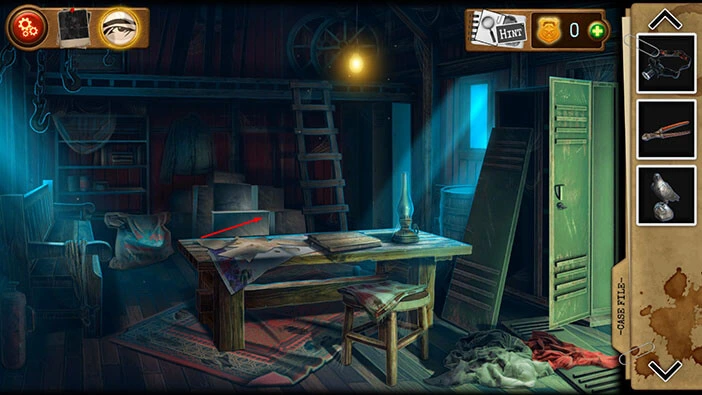
Drag the boxes on the right to move them aside.
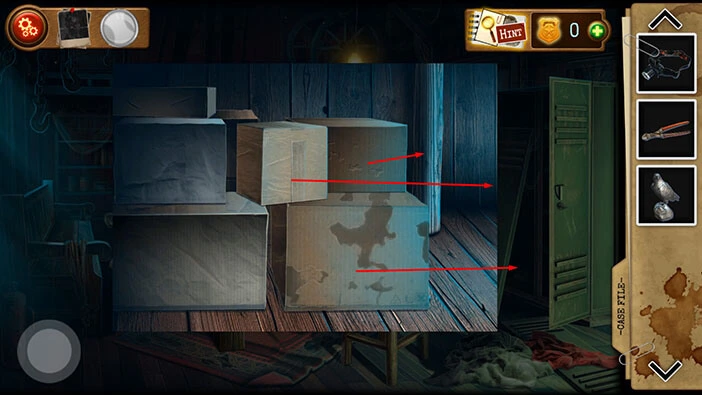
Under the boxes, you will discover a locked hatch. Tap on it to start the interaction.
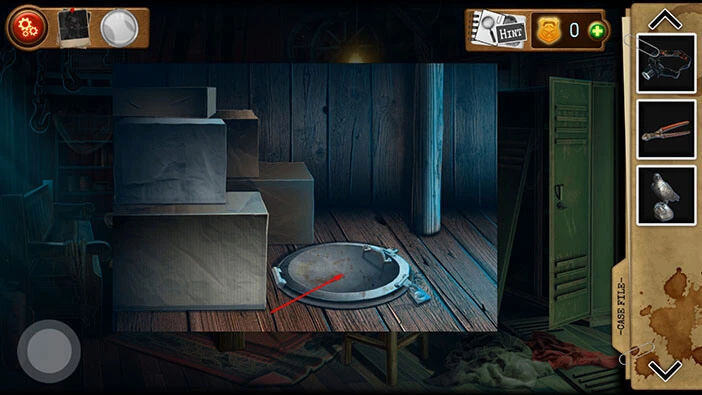
Enter the code “447” (that we discovered by deciphering the numbers made of matches) and you will unlock the hatch.
Let’s go to the basement. Tap on the hatch.
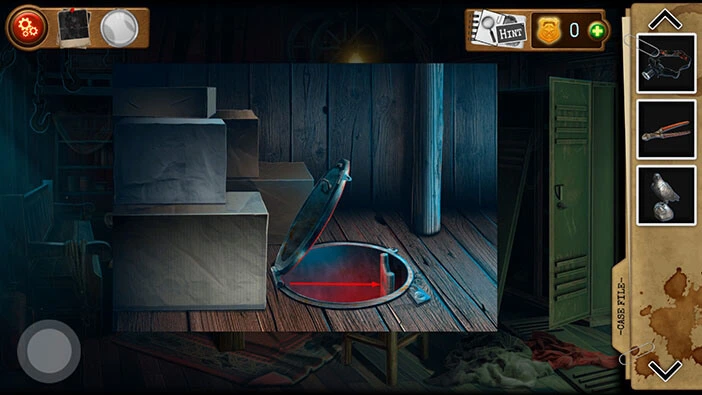
Tap on the cobwebs on the left to look into the cell.
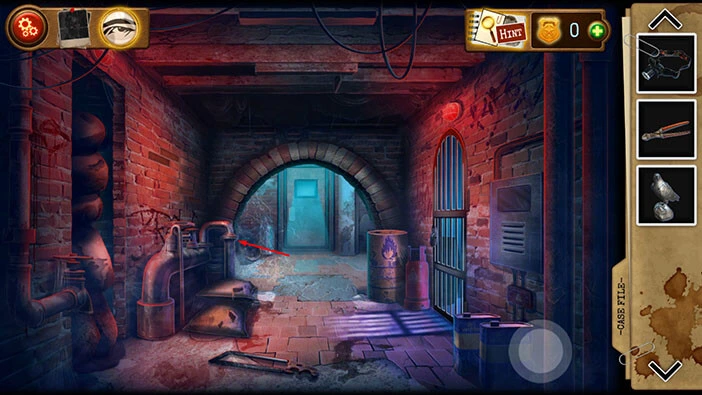
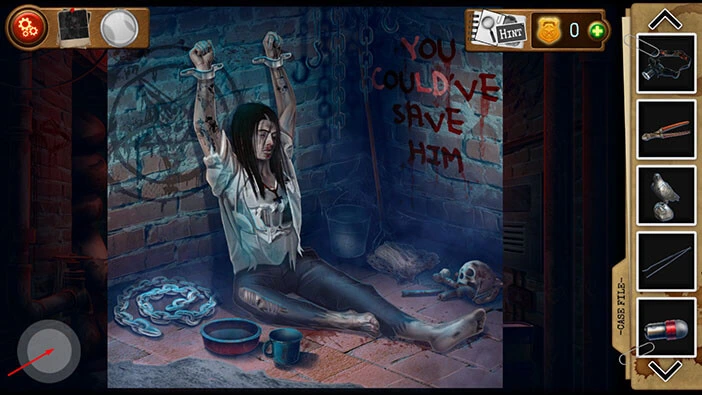
In the cell, you will discover a dead prisoner, chained to the wall. Let’s explore this cell.
On the floor in front of you, you will find the “Tweezers”. Tap on them to pick them up.
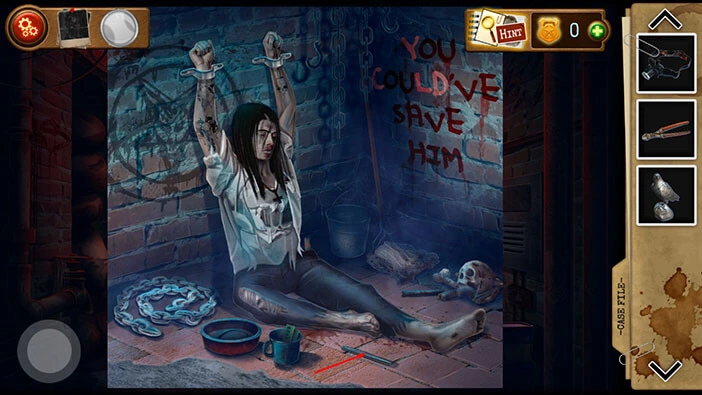
Next, tap on the mug to take a closer look at it. In it, you will find two items, so let’s tap on them to pick them up. “Ultraviolet Light Bulb” and “RAM sticks” will be added to your inventory.
Once you’re done, tap on the button in the bottom left corner of the screen to go back.
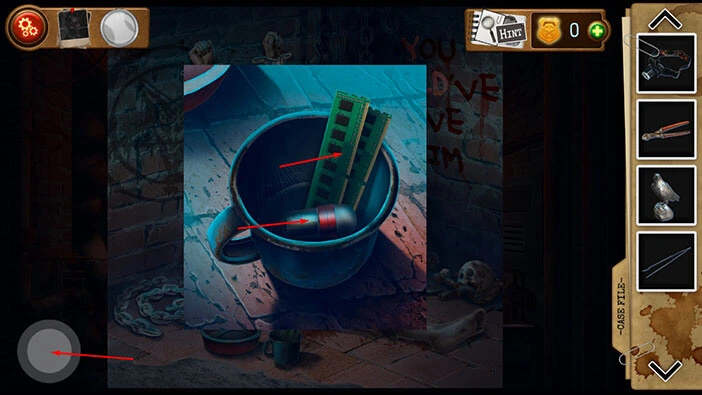
Next, tap on the bowl, located just to the left of the mug, to look inside. You will find a “Connector”. Tap on it to pick it up.
After that, tap on the button in the bottom left corner of the screen to go back.
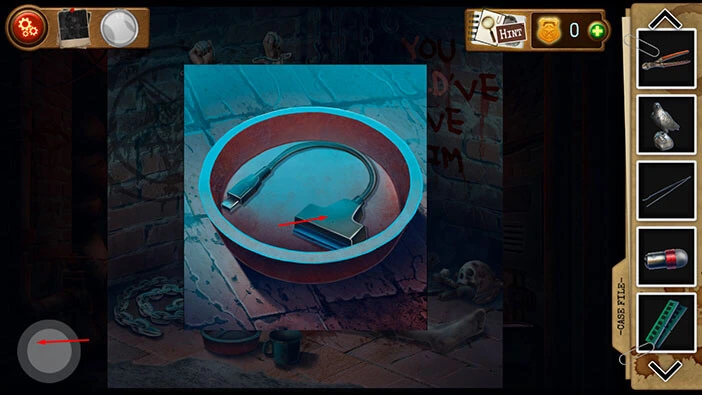
In the top right corner of the room, between the prisoner and the bucket, you will notice a small note. Tap on it to pick it up, and “1st part of notes” will be added to your inventory.
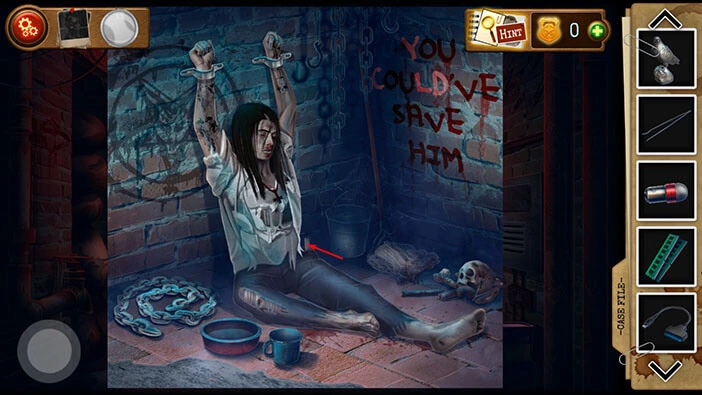
Next, tap on the prisoner, and our character will take a photo and file it as evidence. Apparently, the police officers didn’t manage to find all the Satanists who murdered the priest in the previous chapter. One of them managed to get away, and now we found him.
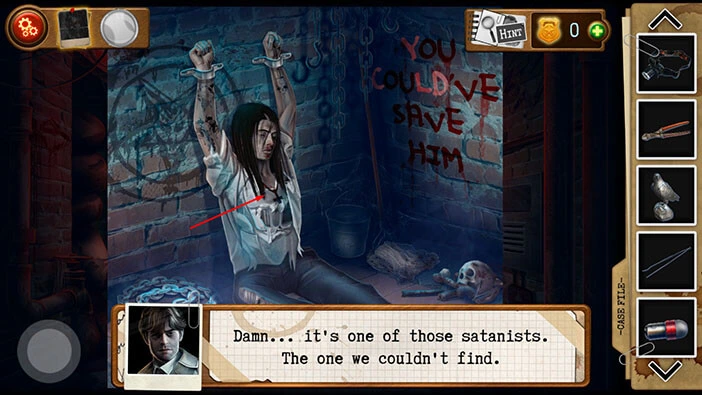
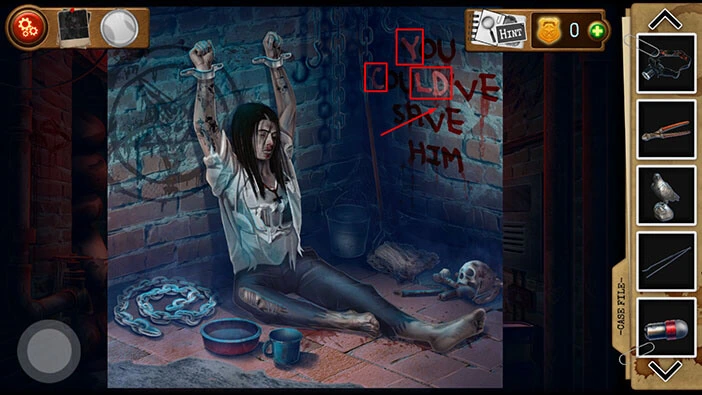
Next, tap on the writing on the wall on the right to take a photo, and our character will file it as evidence. You will notice that the letters “YCLD” are bright red, while the other letters are dark red. This is a hint for one of the future puzzles. For now, just take note of it, we will come back to this hint later in the walkthrough.
Let’s take a look at the evidence. Tap on the photo in the top left corner of the screen.
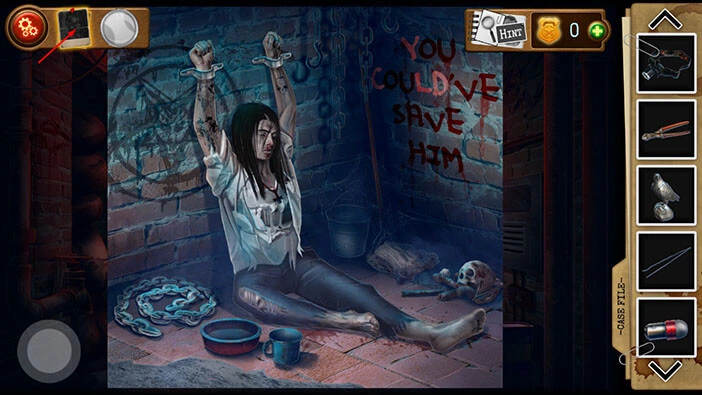
You will notice that we now have three out of five pieces of evidence. Let’s examine the last two photos. We will start with the photo of the writing on the wall. Once you tap on it, our character will conclude that everything about this case reminds him of the past, when he lost his partner, Hank.
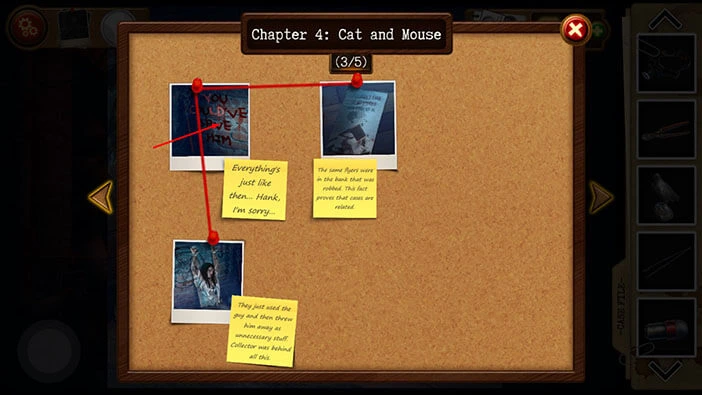
Next, let’s examine the next photo. Once you tap on the photo, our character will conclude that the “Collector” is behind this. He used the person chained to the wall, and he got rid of him once he was no longer needed.
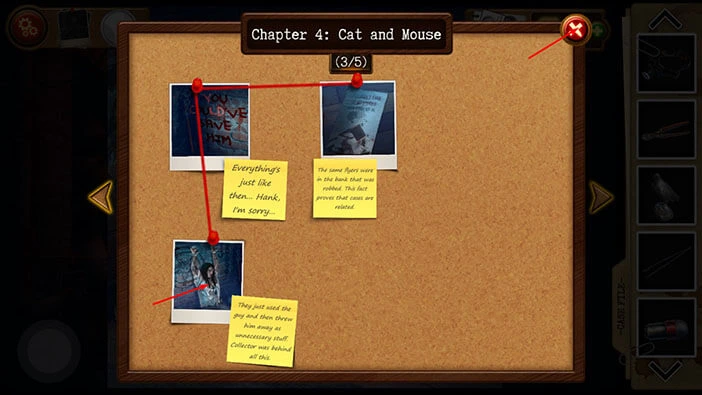
Let’s go back. Once you’re done, tap on the “X” button in the top right corner of the screen.
Let’s go back to the hallway. Tap on the button in the bottom left corner of the screen.
Tap just to the right of the door to take a closer look.
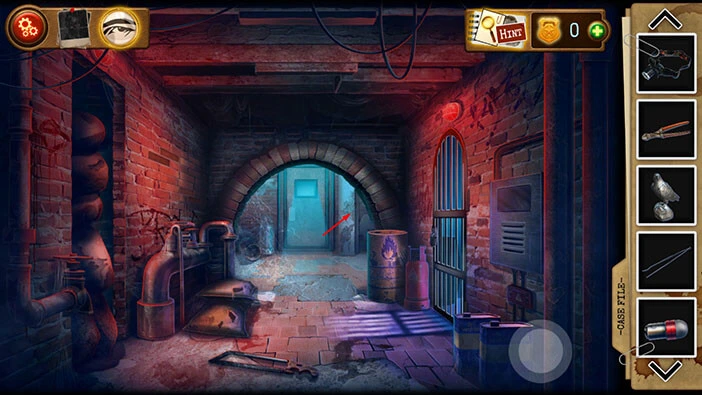
Here, you will see a machine. On the left side, partially hidden behind the machine, you will notice a “Wolf figurine”. Tap on it to pick it up.
After that, tap on the button in the bottom left corner of the screen to go back.
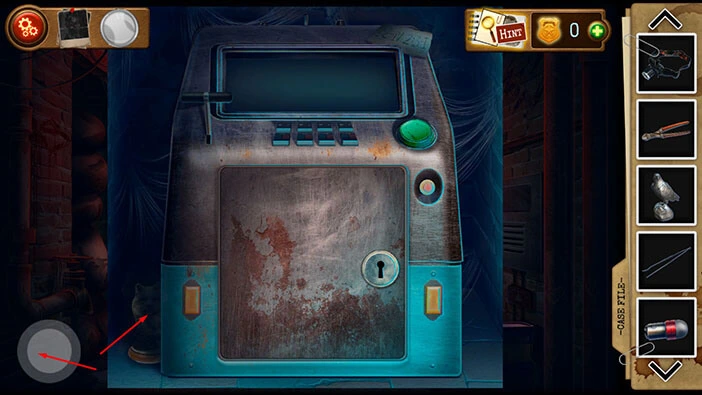
Let’s take a closer look at the wall on the left.
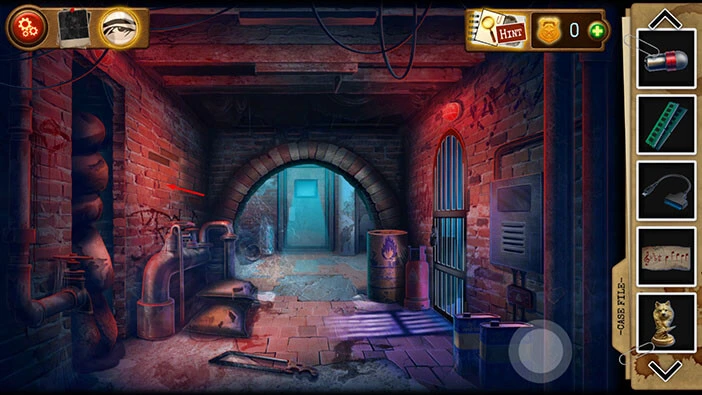
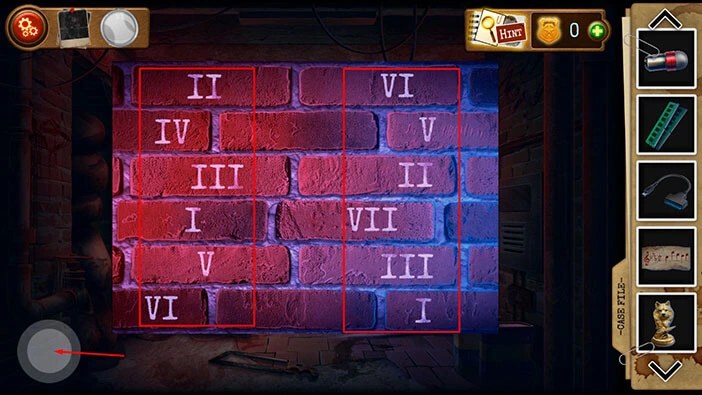
Here, we have another puzzle. On the brick wall, we can see several Roman numerals. However, we still do not have a hint for this puzzle, so let’s look for it.
Tap on the button in the lower-left corner of the screen to go back.
Let’s go back to the machine that we saw previously. Tap just to the right of the door in front of you.
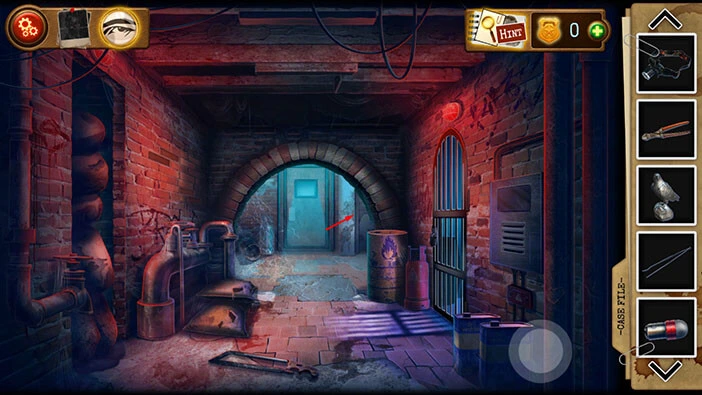
In the top right corner of the screen, you will find a note. Let’s tap on it to take a closer look.

Let’s examine this hint.
On the left side of the note, we can see, “1: 2 – IV”. This hint reveals what bricks (with Roman numerals) we should press in order to solve the previous puzzle. 1 tells us that this is the first part of the hint. 2 tells us how many times we should tap on the brick. Finally, number IV tells us which brick we should tap. So, we should first tap twice on the IV brick.
On the right side of the note, we can see, “2: 3-I”. 2 tells us that this is the second part of the hint. 3 tells us how many times we should tap on the brick. Finally, number I tells us which brick we should tap. So, we should tap three times on the I brick.
When we put both parts of the hint together, we will get the solution for the brick wall puzzle. So, we should tap twice on the brick with IV, then three times on the brick with I. Memorize/write down this information.
Once you’re done, tap on the button in the lower-left corner of the screen to go back.
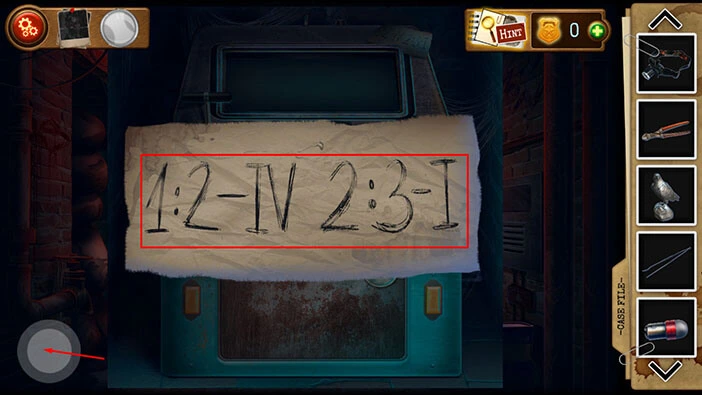
Tap on the brick wall on the left, again, to start the interaction.
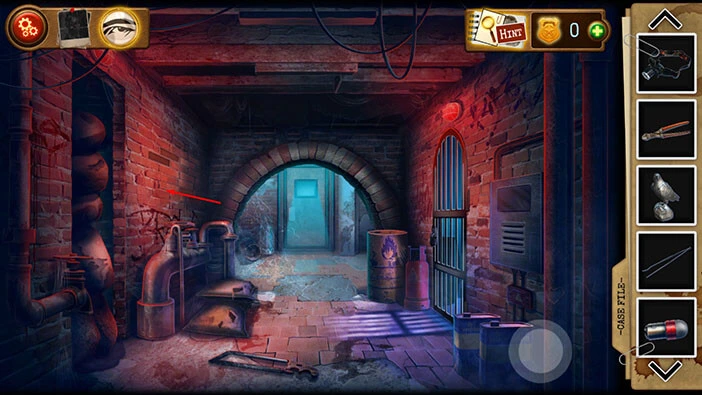
Tap twice on the brick with IV, then three times on the brick with I.
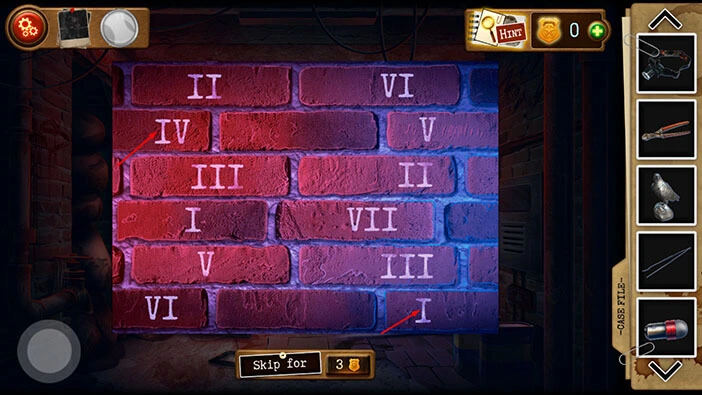
The brick wall will retract into the floor, and behind it, you will discover some bags on the trapdoor. Tap on the bags. The trapdoor will open, and the bags will fall down.
Our character will say that the path is now clear. So, let’s tap again on the wall on the left to proceed to the next room.
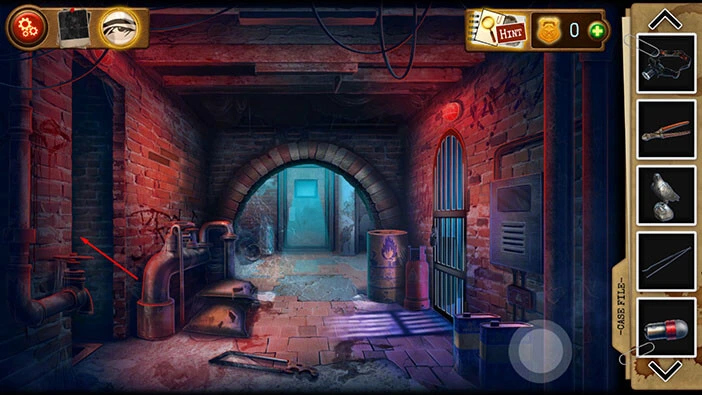
Let’s explore this room. Tap on the scales, located on the table in front of you, to take a closer look.
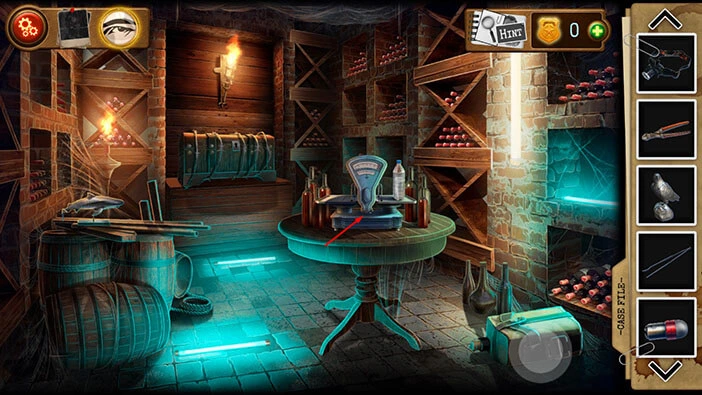
Tap on the battle on the left to remove it.
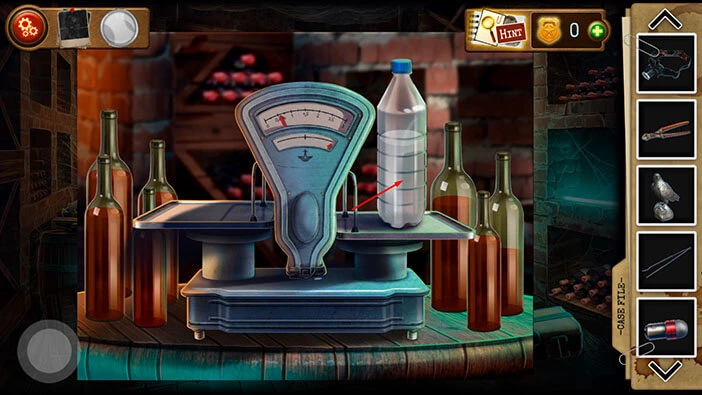
Our character will comment that the scales activate some kind of mechanism when they’re balanced. Here, we have another task. We should use the bottles to place the maximum weight on the scales, but the two sides of the scales must have the same weight. We can determine the maximum weight by measuring the weight of each bottle. However, we will skip this step, and go straight to the solution. Let’s begin.
Step 1
Drag all three bottles from the right side, and place them on the right pan.
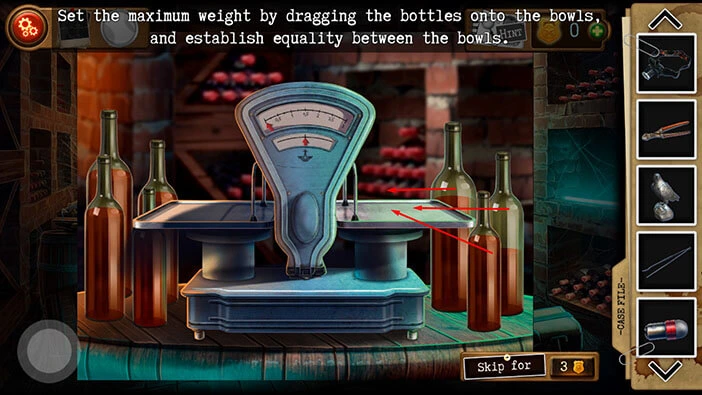
Step 2
Drag the two largest bottles from the left side, and place them on the left pan.
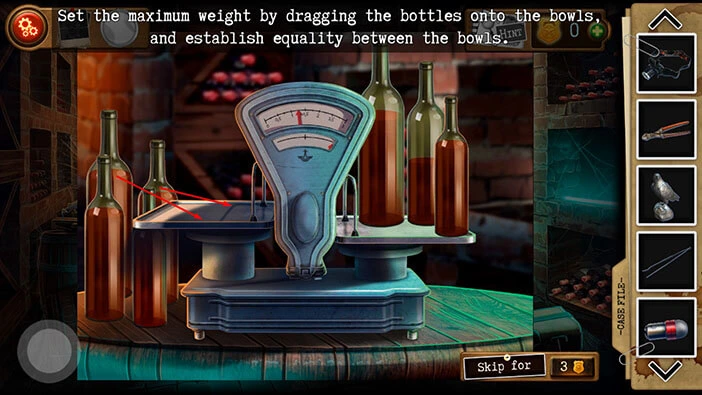
Step 3
The left side is a bit heavier, so let’s balance the scale. Drag the smallest bottle from the left side, and place it on the right pan.
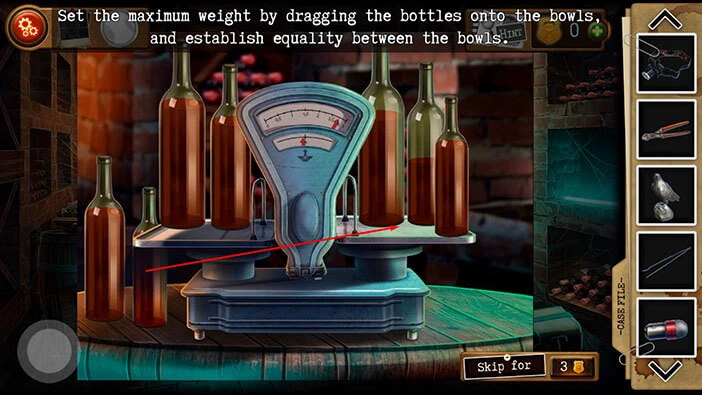
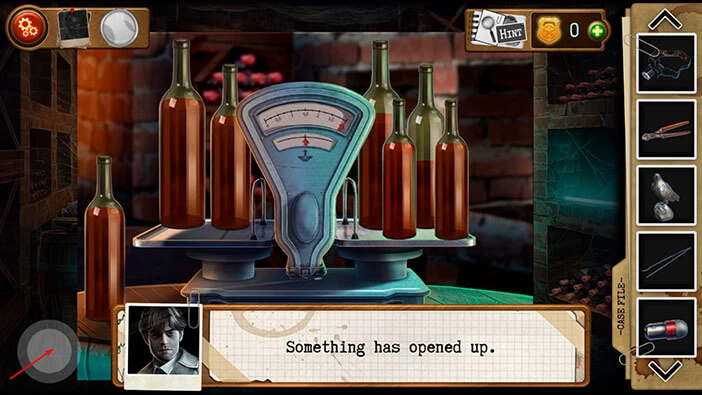
As soon as you place the bottles on the scale, our character will say that something opened up. Let’s take a look.
Tap on the button in the bottom left corner of the screen to go back.
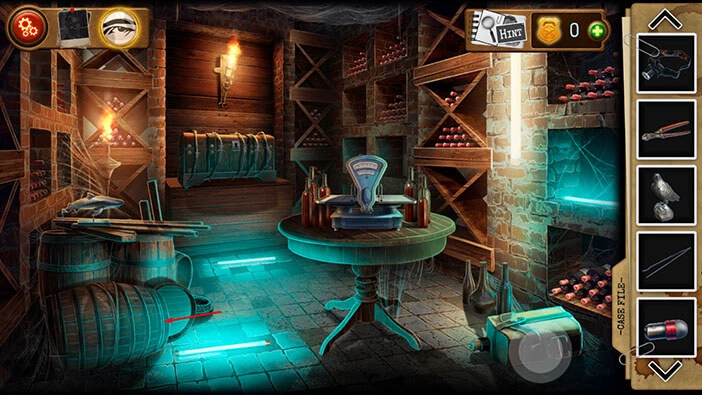
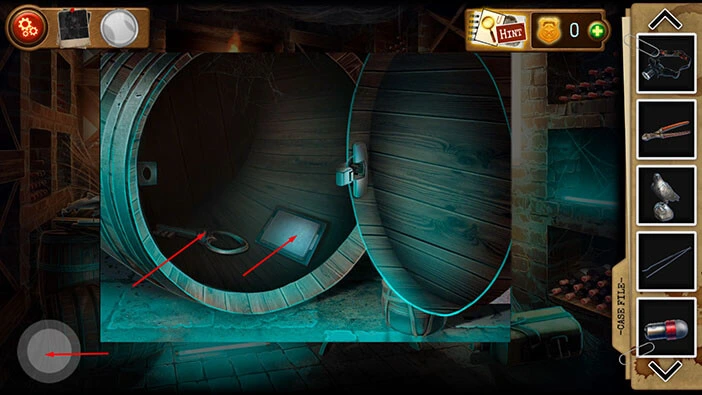
If you take a look at the turned-over barrel on the left, you will notice that it is now open. Tap on it to take a closer look.
The barrel is filled with junk. So, drag these times to toss them aside.
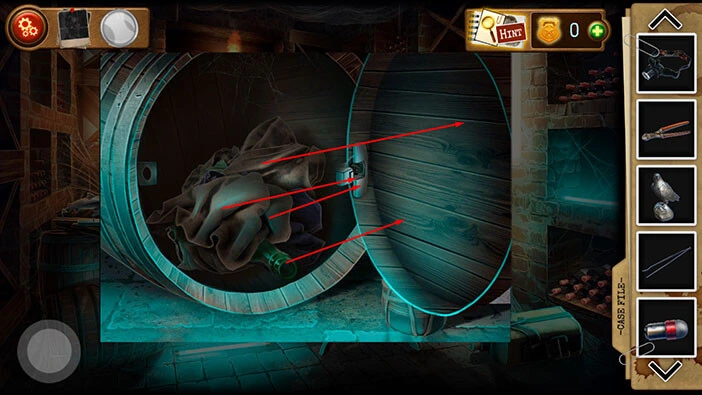
Below the junk, you will find two items. Tap on them to pick them up, and “Chest key” and “Central processor” will be added to your inventory.
Once you’re done, tap on the button in the bottom left corner of the screen to go back.
Next, at the back wall of this room, you will notice a locked chest. Tap on it to take a closer look.
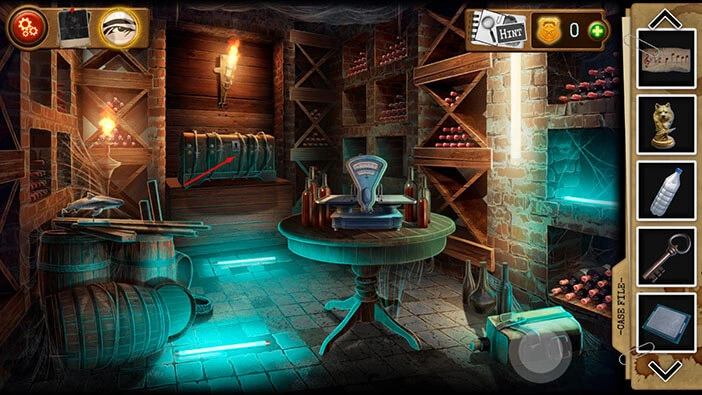
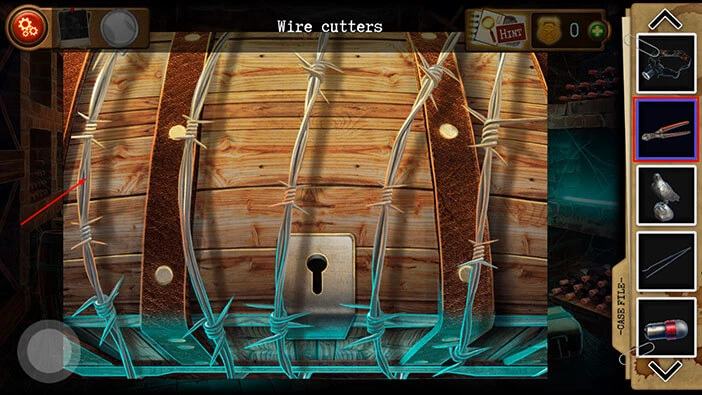
The chest is wrapped with barbed wire, and we have to remove it before we can proceed. So, select the “Wire cutters” from the inventory and use them to remove the barbed wire.
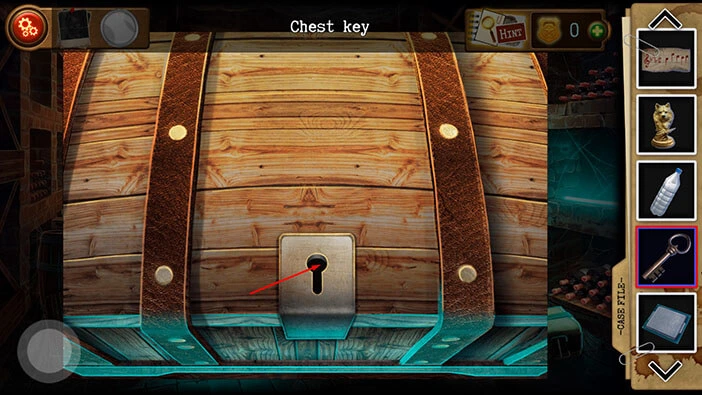
Next, select the “Chest key” from the inventory and use it to unlock the chest.
Here, you will see a blue chest, and to the left of it, you will notice a “Hard disk drive”. Tap on it to pick it up.
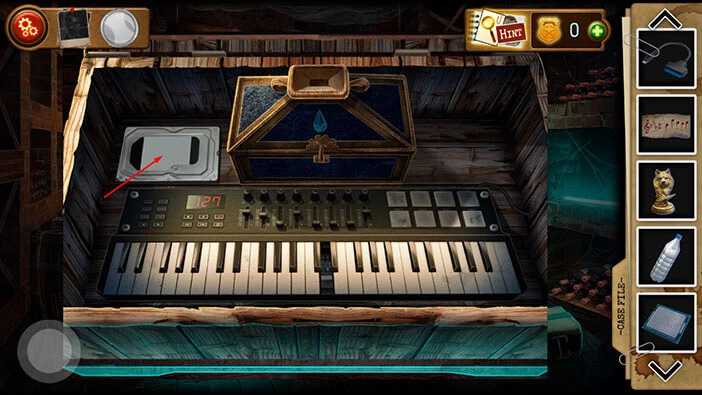
Next, select the “Water bottle” from the inventory and pour the water into the blue chest. This will unlock and open the chest.
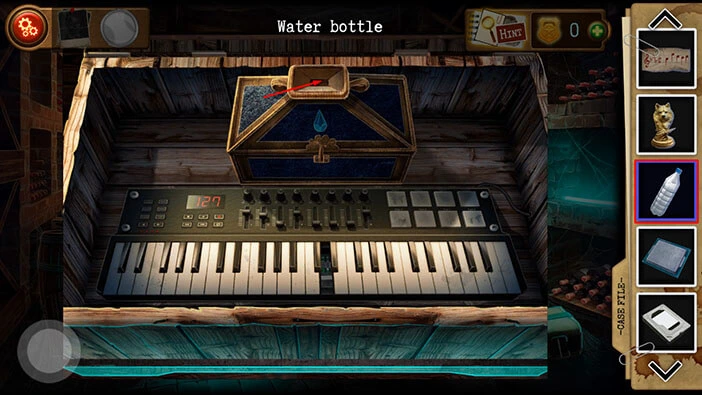
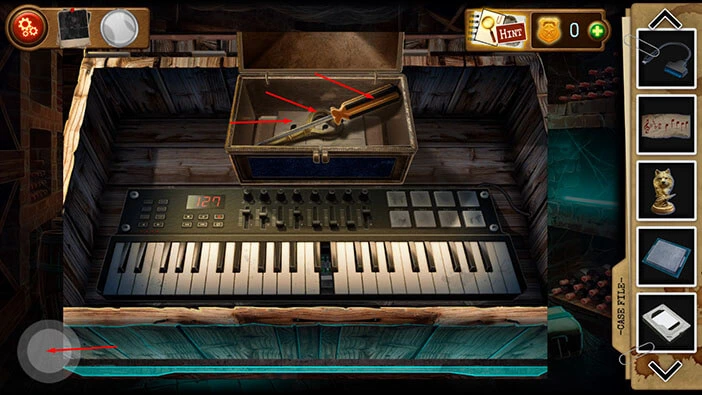
In the chest, you will find three items. Tap on them to pick them up. A “Screwdriver”, a “Room key”, and “a 2nd part of the notes” will be added to your inventory.
Once you’re done, tap on the button in the bottom left corner of the screen to go back.
On the barrel on the left, you will notice a “Shark figurine”. Tap on it to pick it up.
We are done here, for now. Tap on the button in the bottom left corner of the screen to go back.
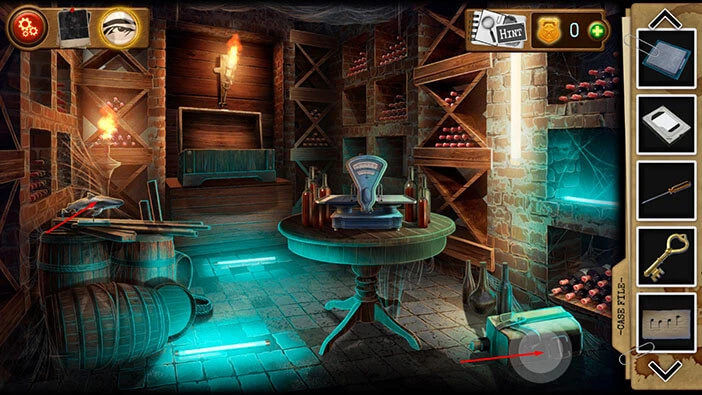
Select the “Room key” from the inventory and use it to unlock the door on the left. Tap on the door to proceed to the next room.
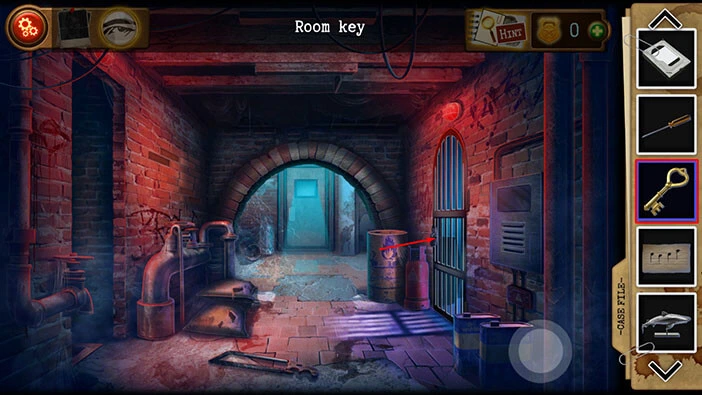
On the left side of the floor, you will notice a “3rd part of the notes”. Tap on it to pick it up.
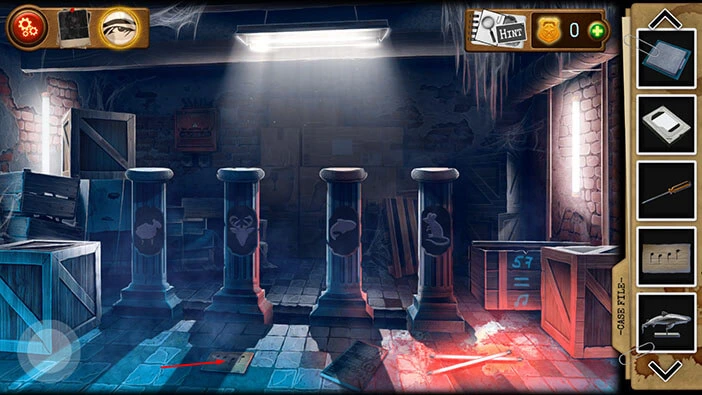
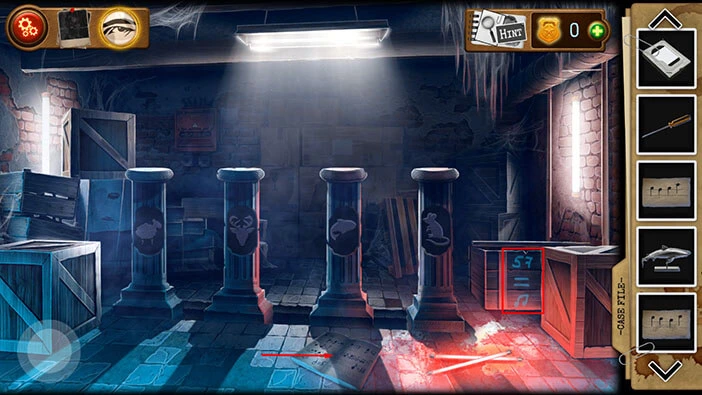
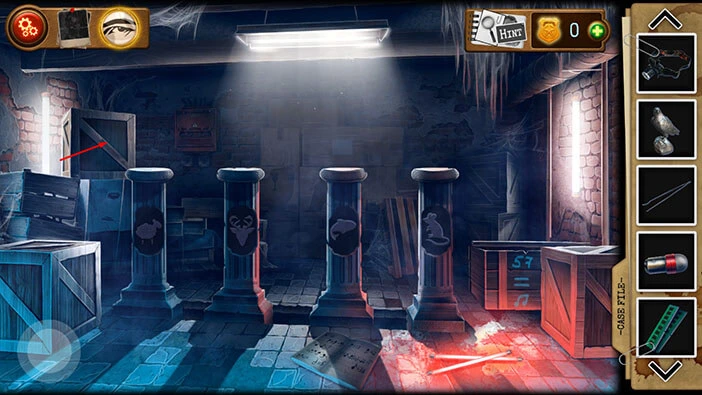
If you take a look at the box on the right, you will notice “57 = two notes”. Memorize/write down this information because we will need it in order to solve the next puzzle.
Next, let’s take a look at the floor. On the right side of the floor, you will find a “Music prayer”. Tap on it to take a closer look, and tap again to examine it.
Here, we have a mathematical puzzle. Our task is to solve the three puzzles. We will do this in several steps. Let’s begin.
Step 1
We will begin with the first puzzle on the left. Here, our task is to calculate the value of the note that looks like the number 9.
If we take a look at the notes on the right, we can see that the values of the notes are “17” and “2”.
So, the solution is “17 x 2 = 34”. This is the value of the note that looks like number 9. Memorize/write it down.
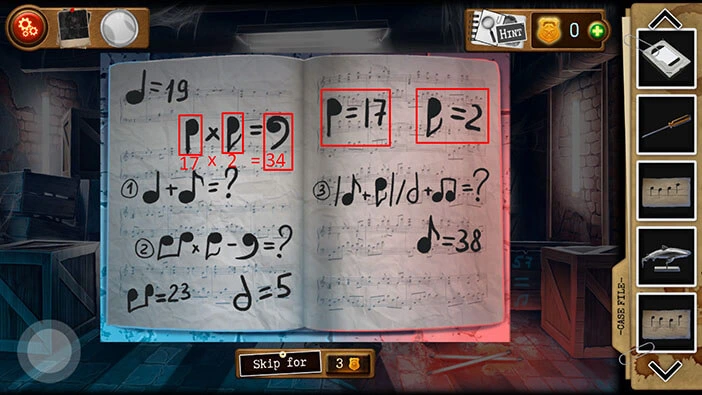
Step 2
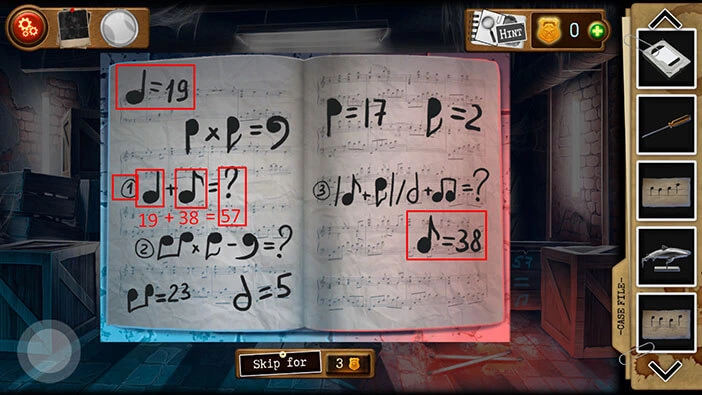
Let’s solve the first puzzle, marked with the number “1”, located on the left page.
The value of the first note is “19” (top left corner of the left page).
The value of the second note is “38” (bottom right corner of the right page).
So, the solution for this puzzle is “19 + 38 = 57”. Memorize/write down this number (57) because it is the first part of the solution for the next puzzle.
Step 3
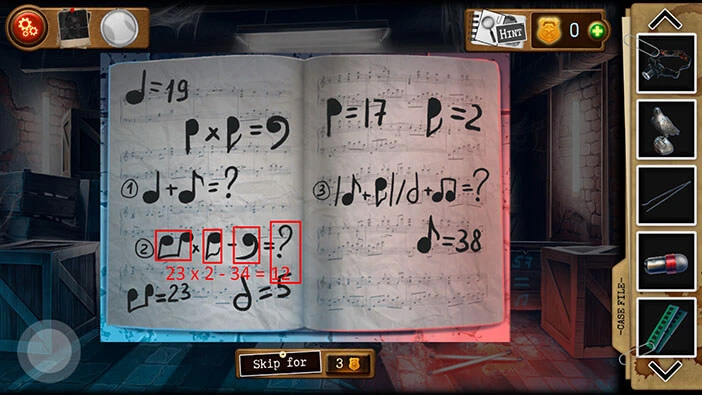
Let’s solve the second puzzle, marked with the number “2”, located on the left page.
The value of the first note is “23” (bottom left corner of the left page).
The value of the second note is “2” (top right corner of the right page).
The value of the third note is “34” (we calculated the value of this note in the first step).
So, the solution for this puzzle is “23 x 2 – 34 = 12”. Memorize/write down this number (12) because it is the second part of the solution for the next puzzle.
Step 4
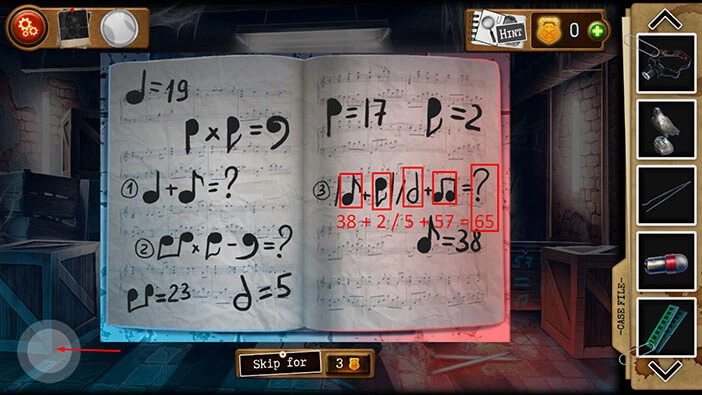
Let’s solve the third puzzle, marked with the number “3”, located on the right page.
The value of the first note is “38” (bottom right corner of the right page).
The value of the second note is “2” (top right corner of the right page).
The value of the third note is “5” (bottom right corner of the left page).
The value of the fourth note is “57” (we discovered the value of this note on the box (box is in this room)).
So, the solution for this puzzle is “|38 + 2| / 5 + 57 = 40 / 5 + 57 = 8 +57 = 65”. Memorize/write down this number (65) because it is the third part of the solution for the next puzzle.
When we put it all together, we have the numbers “57 / 12 / 65”. Memorize/write down these numbers.
Once you’re done, tap on the button in the bottom left corner of the screen to go back.
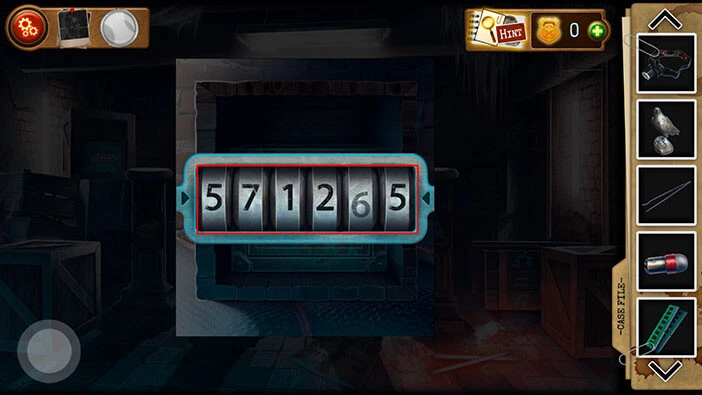
Tap on the box in the top left corner of the room, and you will open it. You will discover a safe, hidden in this box. Tap on the safe to start the interaction.
Enter the code “571265” that we discovered by solving the previous puzzle.
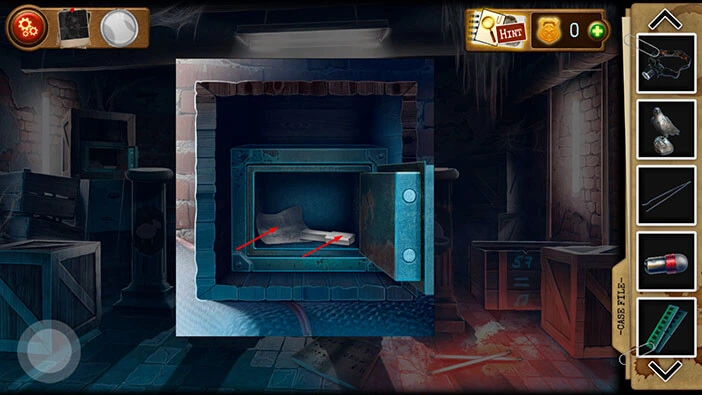
Tap on the item on the right to pick it up, and “Key” will be added to your inventory. After that, tap on the note on the left side of the safe to examine it.
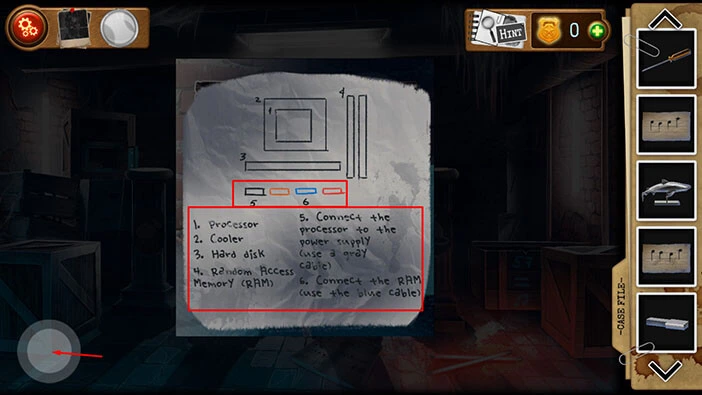
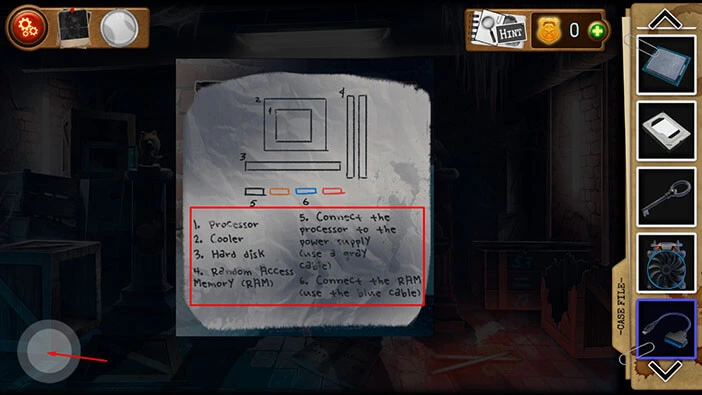
Here, we can see the instructions for activating and assembling something, probably a PC. Anyway, we will need a “Processor”, a “Cooler”, a “Hard disk”, and “RAM”.
Once we have all the components, we should use the gray cable to connect the processor to the power supply. After that, we should use the blue cable to connect the RAM.
We will need the instructions later, so memorize/write down the instructions (or come back to them later when we need them).
Once you’re done, tap on the button in the bottom left corner of the screen to put down the note, and go back to the room.
Previously, we found all 3 parts of the note, so let’s use them to solve the next puzzle. Tap on the button in the bottom left corner of the screen to go back to the hallway.
Let’s go back to the room on the left.
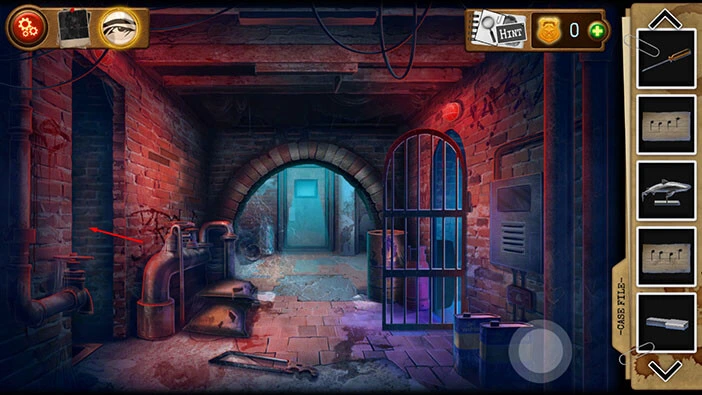
Tap on the chest on the back wall to take a closer look at it. Our character will automatically put down all three parts of the note from your inventory.
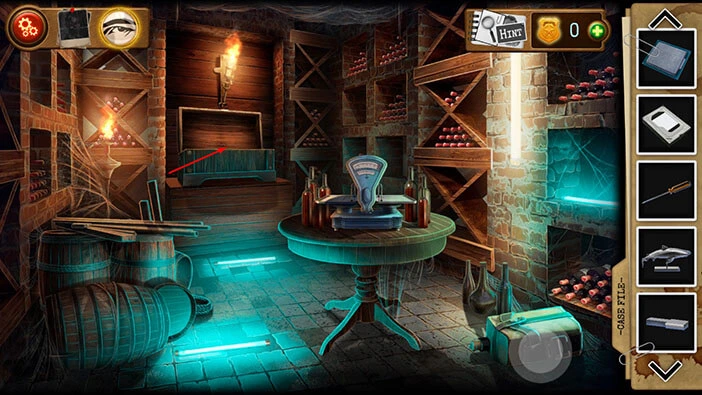
You will notice that the key in the middle is missing. So, select the “Key” from the inventory and insert it into the empty slot.
After that, tap on the keys again to start the interaction.
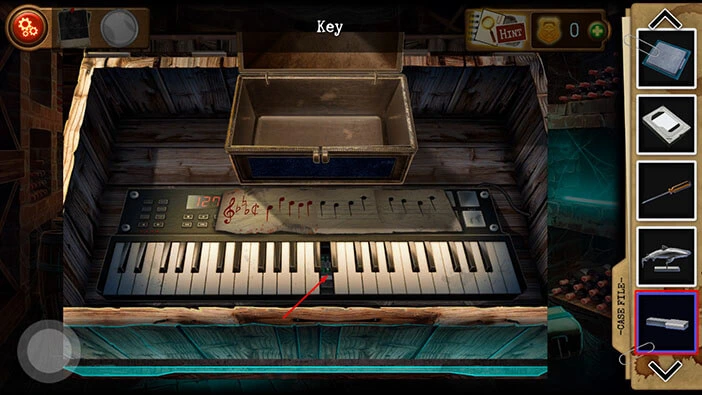
Our next task is to play the first melody and we can see the hint above the keys (first note looking from left to right). Here, we have red notes.
The vertical position of the notes represents their order. The lowest position of the note on the hint represents the first key (looking from left to right). So, the lower keys are on the left, and vice versa. The highest position of the note on the hint represents the last key (looking from left to right).
With all that said, we should now look at the hint, and try to play the melody, by pressing on the correct keys. We will do this in several steps. Let’s begin.
Step 1
The first note is very low, so let’s tap on the first key (looking from left to right). The first note on the hint will glow green, indicating that we pressed the correct key.
NOTE: If you tap on the wrong key, you will have to start over.

Step 2
The second note is a bit higher, so let’s tap on the fifth key. The second note on the hint will glow green, indicating that we pressed the correct key.

Step 3
The third note is a bit lower, so let’s tap on the third key. The third note on the hint will glow green, indicating that we pressed the correct key.

Step 4
The fourth note is a bit lower, so let’s tap on the second key. The fourth note on the hint will glow green, indicating that we pressed the correct key.
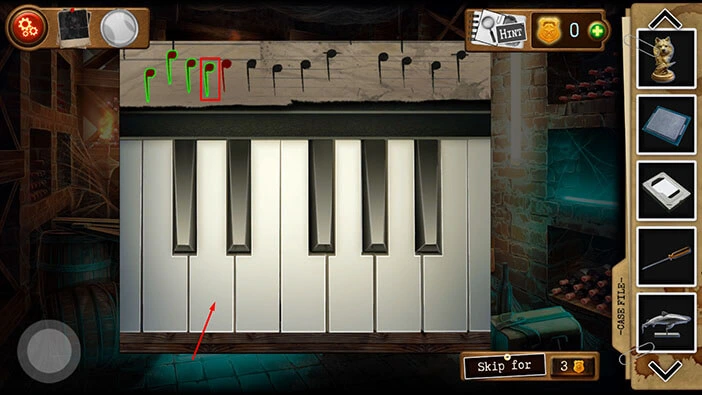
Step 5
The fifth note is a bit higher, so let’s tap on the third key. The fifth note on the hint will glow green, indicating that we pressed the correct key.

Step 6
The sixth note is at the same height, so let’s tap on the third key, again. The sixth note on the hint will glow green, indicating that we pressed the correct key.

Step 7
The seventh note is a bit lower, so let’s tap on the second key. The seventh note on the hint will glow green, indicating that we pressed the correct key.

Step 8
The eighth note is a bit higher, so let’s tap on the third key. The eighth note on the hint will glow green, indicating that we pressed the correct key.

Step 9
The ninth note is a lot higher, so let’s tap on the sixth key. The ninth note on the hint will glow green, indicating that we pressed the correct key.
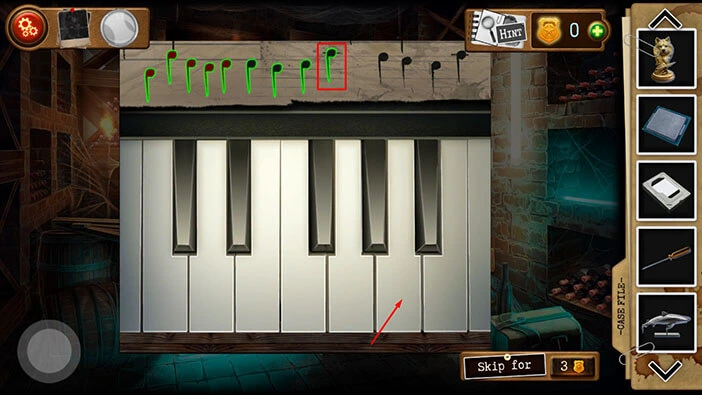
Step 10
The tenth note is a bit lower, so let’s tap on the fifth key. The tenth note on the hint will glow green, indicating that we pressed the correct key.

Step 11
The eleventh note is a bit lower, so let’s tap on the fourth key. The eleventh note on the hint will glow green, indicating that we pressed the correct key.

Step 12
The twelfth note is a bit lower, so let’s tap on the third key. The twelfth note on the hint will glow green, indicating that we pressed the correct key.

Step 13
The thirteenth note is a lot higher, so let’s tap on the sixth key. The thirteenth note on the hint will glow green, indicating that we pressed the correct key. With that, we pressed on all the keys from the hints, and we played the correct melody.
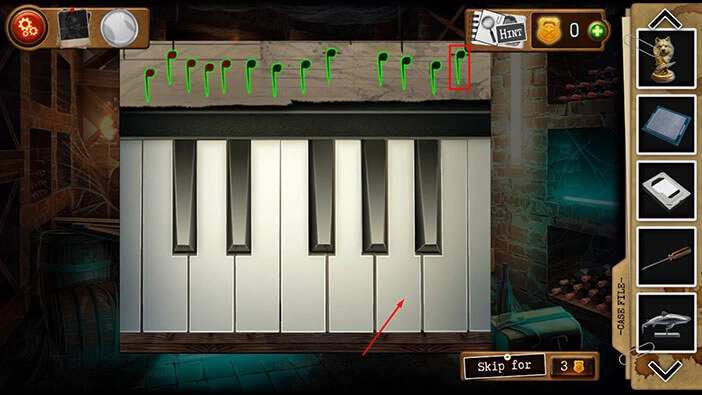
Our character will repeat the melody that we played, and the part of the wall will move. We can now see a wall safe on the right, located between two wine shelves.
Tap on the safe to take a closer look at it.
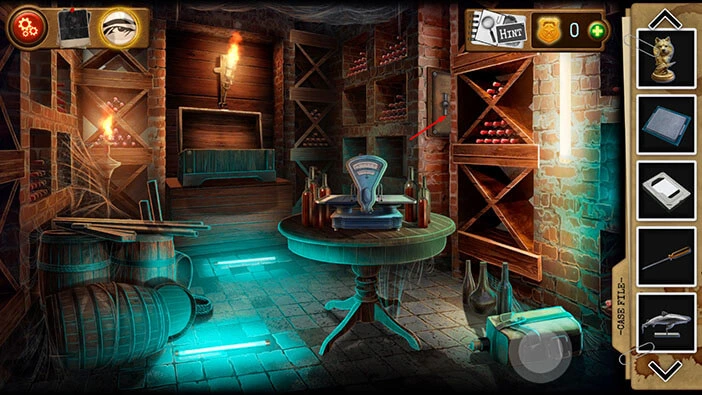
Select the “Screwdriver” from the inventory and use it to remove the screws.
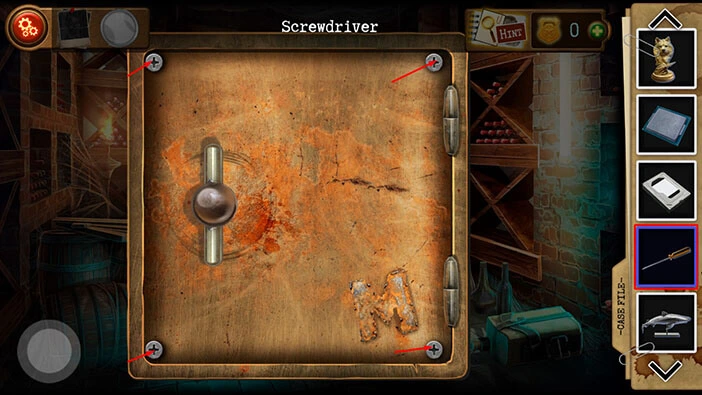
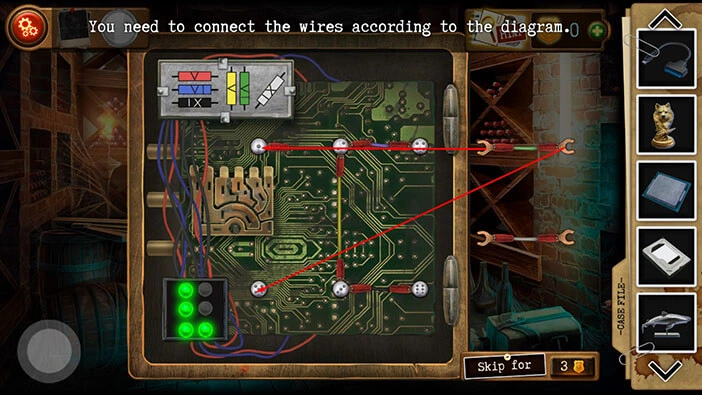
Here, we have another puzzle. The goal is to correctly connect the wires. First, let’s take a look at the hint in the top left corner. Every rectangle has three attributes, color, position, and value.
Here, we can see six rectangles (red, blue, black, yellow, green, and gray). Color is the first attribute.
Each rectangle also has a certain position, horizontal, vertical, or diagonal (in the case of the gray rectangle). The position is the second attribute.
Each rectangle also has a Roman numeral. The Roman numeral represents the value of the rectangle, and this is the third attribute.
We will use these attributes to correctly connect the wires. Before we proceed, we can also see six buttons (arranged in two rows) and each button has a value (1-6). Lastly, on the right, we can see six wires, and they have the same colors as the rectangles.
We will solve this puzzle in several steps. Let’s begin.
Step 1
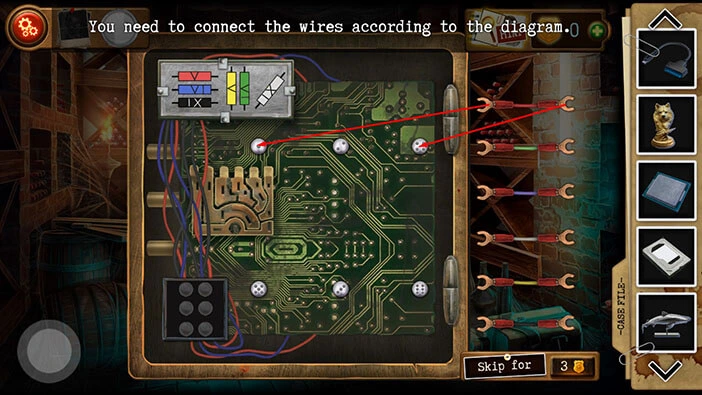
Let’s look at the attributes of the first rectangle in the top left. Its color is Red, its position is horizontal, and its value is 5. With that said, we should take the Red wire and horizontally connect two buttons. The total value of these two buttons should be 5.
So, let’s take the Red wire from the right, and connect it to the button that has the value of 1 (the first in the top row), then take the other end of the wire and connect it to the button that has the value of 4 (the third in the top row).
As soon as you connect the red wire, one of the six buttons in the bottom left corner will glow green, indicating that we correctly connected the first wire.
Step 2
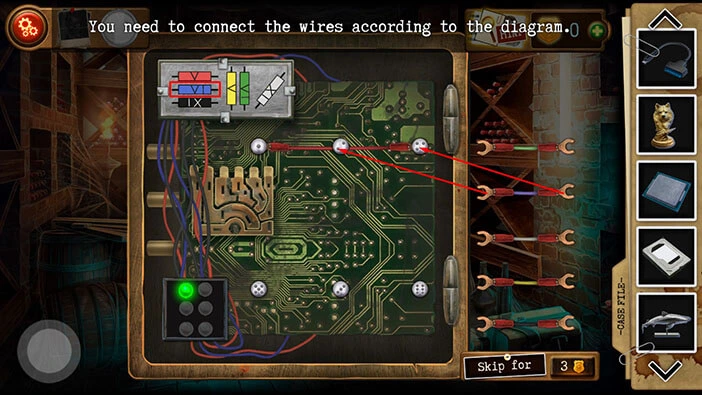
Let’s look at the attributes of the second rectangle in the top left. Its color is Blue, its position is horizontal, and its value is 6. With that said, we should take the Blue wire and horizontally connect two buttons. The total value of these two buttons should be 6.
So, let’s take the Blue wire from the right, and connect it to the button that has the value of 2 (the second in the top row), then take the other end of the wire and connect it to the button that has the value of 4 (the third in the top row).
As soon as you connect the blue wire, one of the six buttons in the bottom left corner will glow green, indicating that we correctly connected the second wire.
Step 3
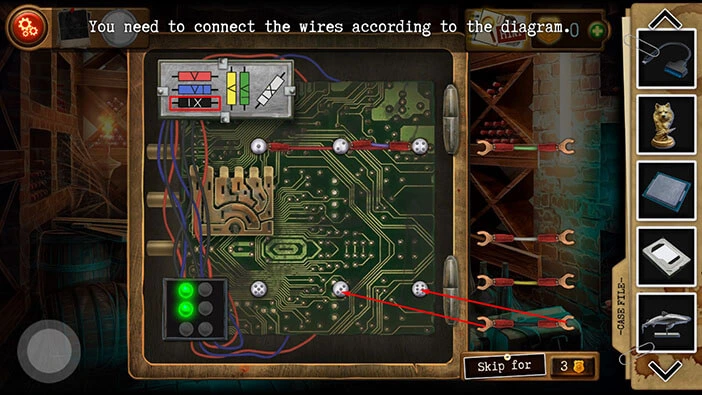
Let’s look at the attributes of the third rectangle in the top left. Its color is Black, its position is horizontal, and its value is 9. With that said, we should take the Black wire and horizontally connect two buttons. The total value of these two buttons should be 9.
So, let’s take the Black wire from the right, and connect it to the button that has the value of 3 (the second in the bottom row), then take the other end of the wire and connect it to the button that has the value of 6 (the third in the bottom row).
As soon as you connect the black wire, one of the six buttons in the bottom left corner will glow green, indicating that we correctly connected the third wire.
Step 4
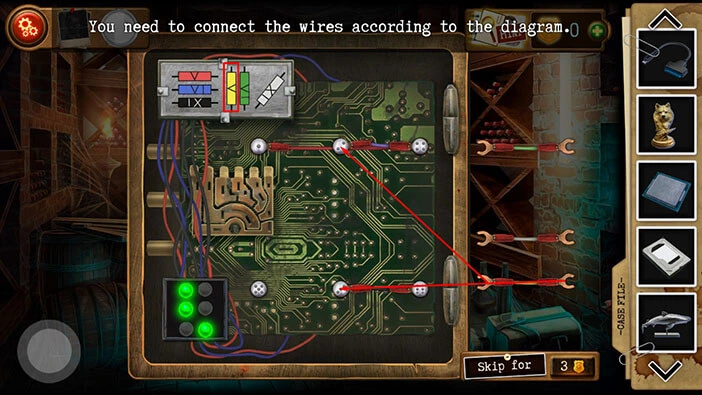
Let’s look at the attributes of the fourth rectangle in the top left. Its color is Yellow, its position is vertical, and its value is 5. With that said, we should take the Yellow wire and vertically connect two buttons. The total value of these two buttons should be 5.
So, let’s take the Yellow wire from the right, and connect it to the button that has the value of 2 (the second in the top row), then take the other end of the wire and connect it to the button that has the value of 3 (the second in the bottom row).
As soon as you connect the yellow wire, one of the six buttons in the bottom left corner will glow green, indicating that we correctly connected the fourth wire.
Step 5
Let’s look at the attributes of the fifth rectangle in the top left. Its color is Green, its position is vertical, and its value is 6. With that said, we should take the Green wire and vertically connect two buttons. The total value of these two buttons should be 6.
So, let’s take the Green wire from the right, and connect it to the button that has the value of 1 (the first in the top row), then take the other end of the wire and connect it to the button that has the value of 5 (the first in the bottom row).
As soon as you connect the green wire, one of the six buttons in the bottom left corner will glow green, indicating that we correctly connected the fifth wire.
Step 6
Let’s look at the attributes of the sixth rectangle in the top left. Its color is Grey, its position is diagonal, and its value is 9. With that said, we should take the Grey wire and diagonally connect two buttons. The total value of these two buttons should be 9.
So, let’s take the Grey wire from the right, and connect it to the button that has the value of 5 (the first in the bottom row), then take the other end of the wire and connect it to the button that has the value of 4 (the third in the top row).
As soon as you connect the grey wire, one of the six buttons in the bottom left corner will glow green, indicating that we correctly connected the sixth wire.
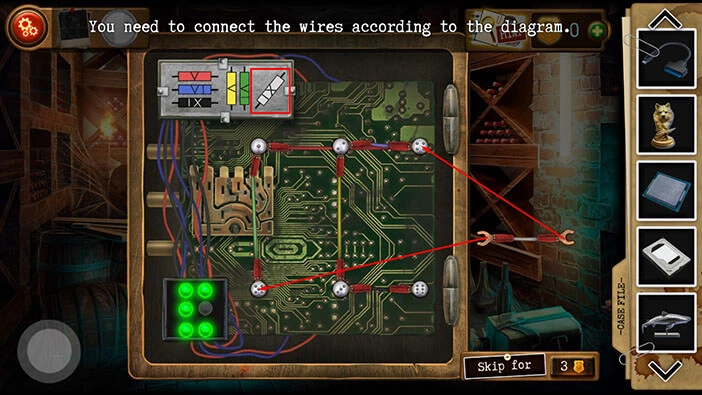
As soon as you correctly connect all six wires, the safe will open. Inside you will find two items. Tap on them to pick them up. “Generator Key” and “Bear figurine” will be added to your inventory.
After that, tap on the button in the lower-left corner of the screen to go back.
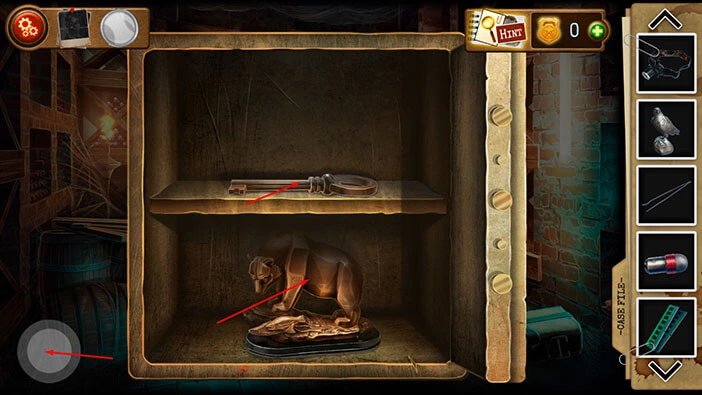
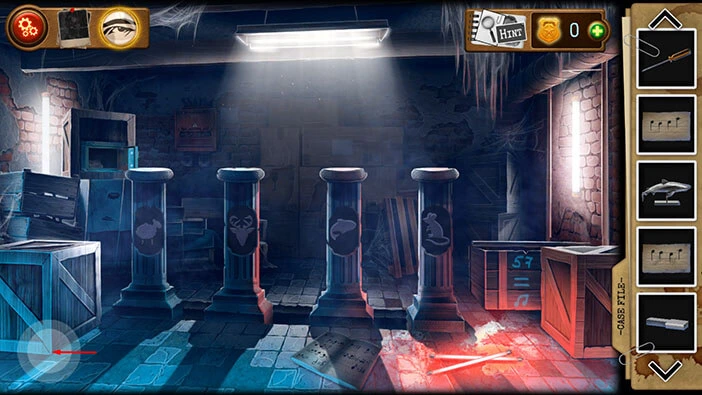
We should go back to the room with four pillars because we now have all four figurines. So, tap on the button in the bottom right corner of the screen to go back.
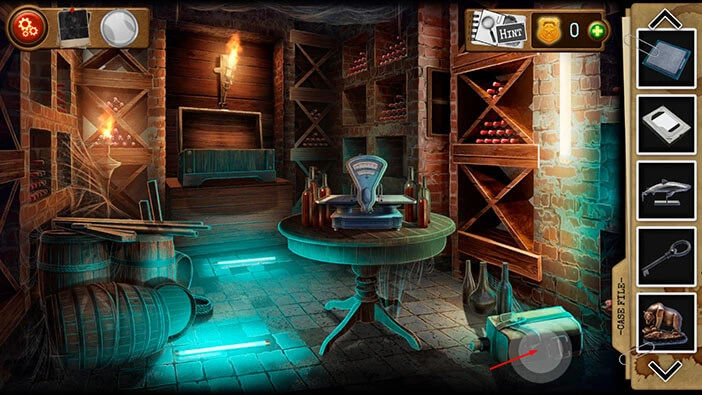
Next, tap on the door on the right to proceed to the next room.
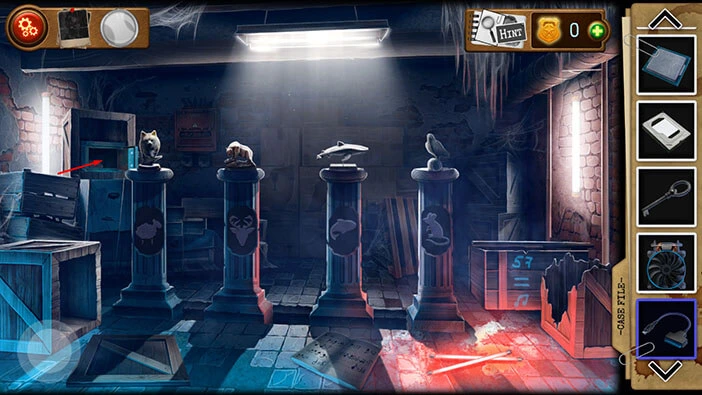
Here, we can see four pillars, and there is a drawing of a specific animal on each pillar. Our task is to place the figurines on the correct pillars. The drawings on the pillars represent the food of the animal figurines in our inventory. We will do this puzzle in several steps. Let’s begin.
Step 1
Eagles like to eat mice, so select the “Eagle figurine” from the inventory and place it on the fourth pillar (looking from left to right).
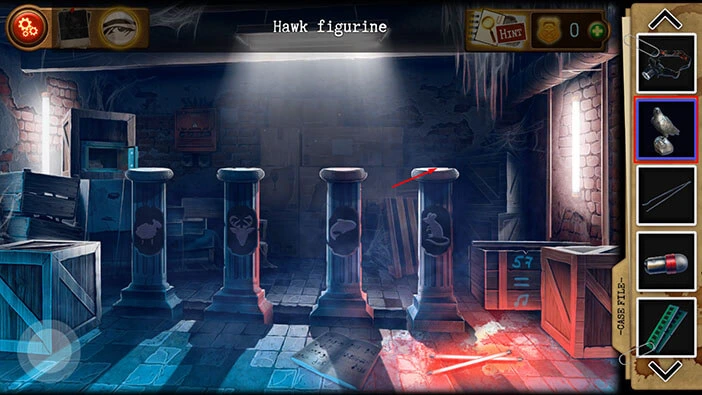
Step 2
Wolves like to eat sheep, so select the “Wolf figurine” from the inventory and place it on the first pillar.
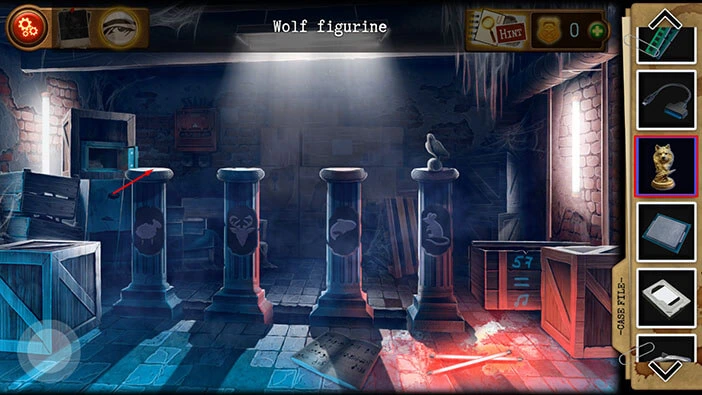
Step 3
Sharks like to eat fish, so select the “Shark figurine” from the inventory and place it on the third pillar.
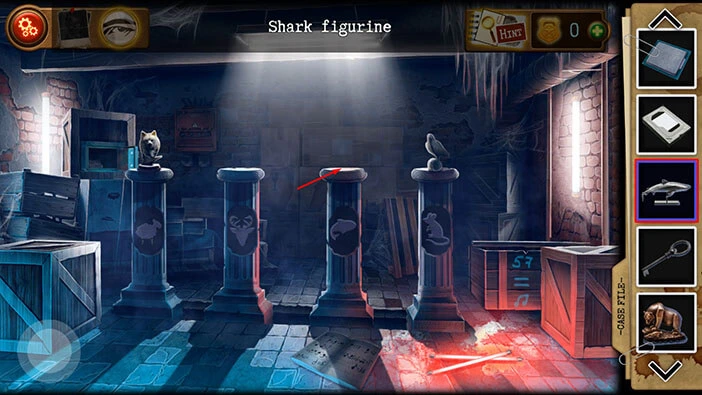
Step 4
Lastly, we have the “Bear figurine”. So, select this figurine and place it on the second pillar (with the deer head).
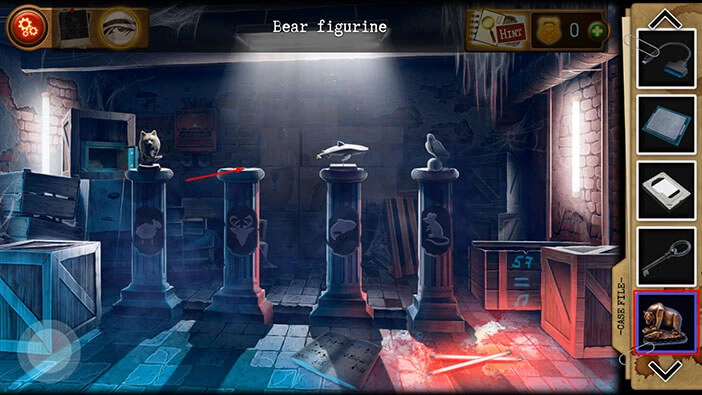
As soon as you place the figurines on the correct pillars, the large box on the left will open. Tap on it to take a closer look.
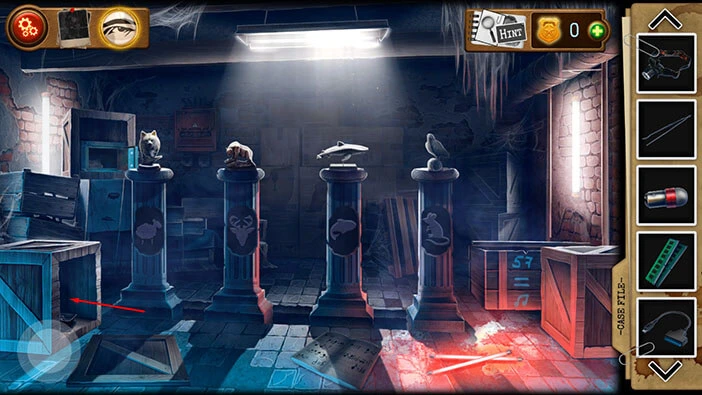
In the box, you will find an “Axe” and a “Cooler”. Tap on these two items to pick them up.
After that, tap on the button in the bottom left corner of the screen to go back.
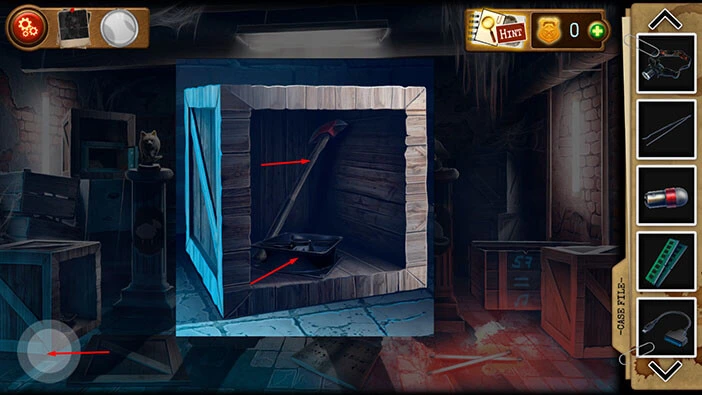
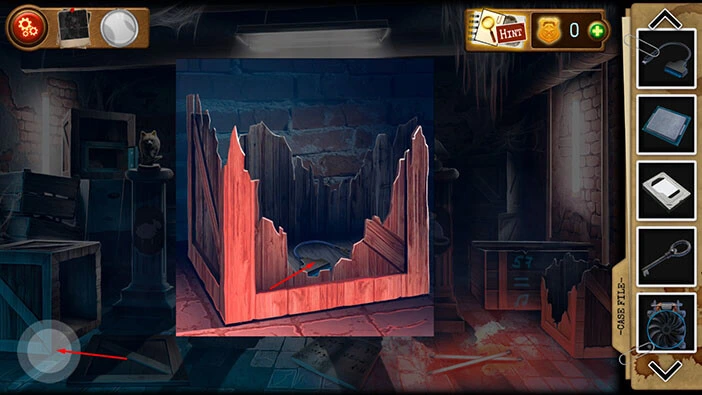
On the right side of the room, you will notice a large wooden box. Let’s break it apart. Select the “Axe” from the inventory and use it to break the box.
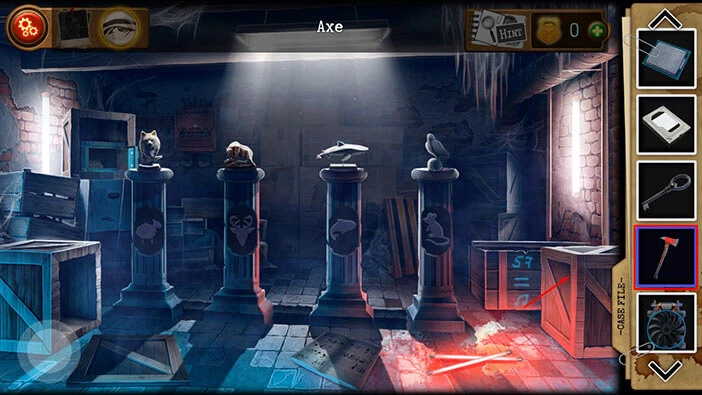
In the box, you will find a “Connector”. Tap on it to pick it up. After that, tap on the button in the bottom left corner of the screen to go back.
We have now found all the items, so let’s take another look at the instructions. Tap on the small safe on the left, and you will see the instructions. After that, tap on the instructions note to examine it.
Let’s memorize/write down the instructions.
First, we should hook up the processor.
Second, we should connect the cooler.
Third, we should connect the hard disk.
Fourth, we should install the RAM.
Fifth, we should use a gray power cable to connect the processor to the power supply.
Sixth, we should use the blue cable to connect the RAM.
Once you’re done, tap on the button in the bottom left screen to go back.
Let’s go back to the hallway. Tap on the button in the bottom left corner of the screen.
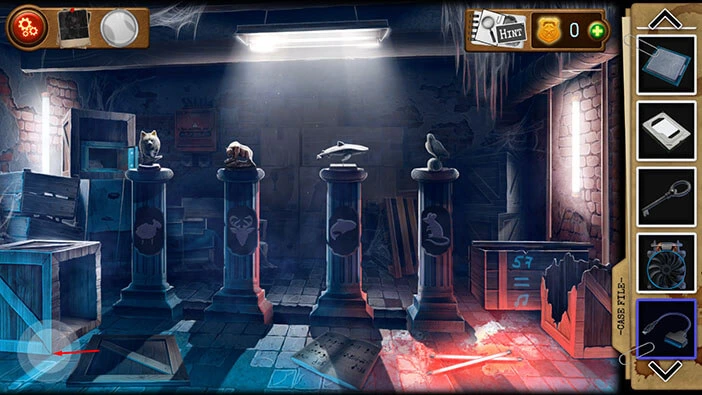
Tap just to the right of the door at the end of the hallway to start the interaction.
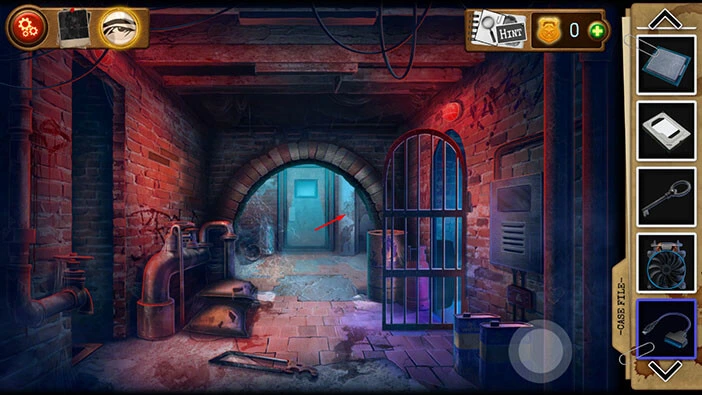
Select the “Generator key” from the inventory and use it to unlock the machine.
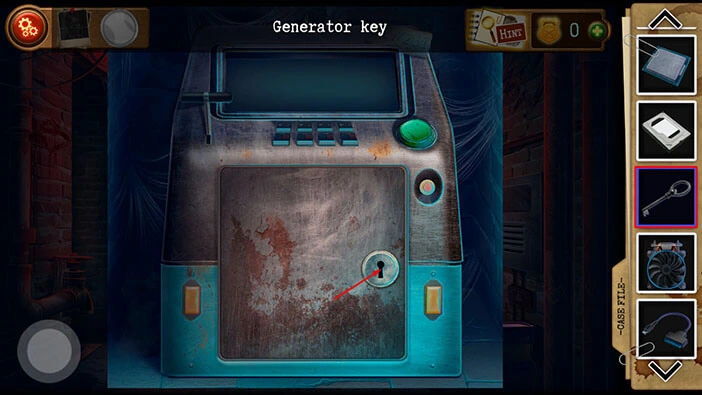
Ok, let’s follow the instructions and assemble the computer. We will do this in several steps. Let’s begin.
Step 1
Select the “Central Processor” from the inventory and install it into the motherboard.
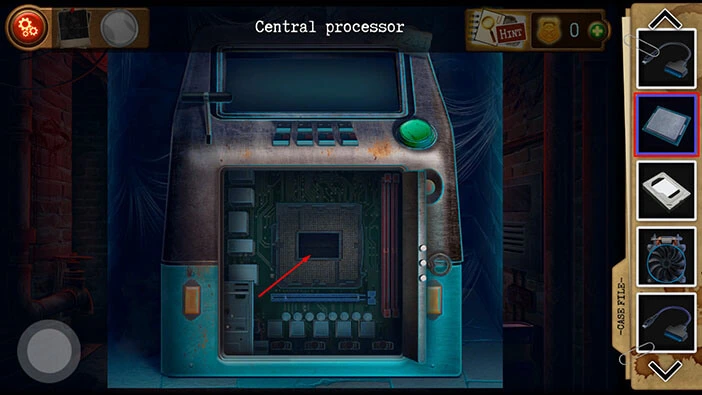
Step 2
Select the “Cooler” from the inventory and install it into the motherboard.
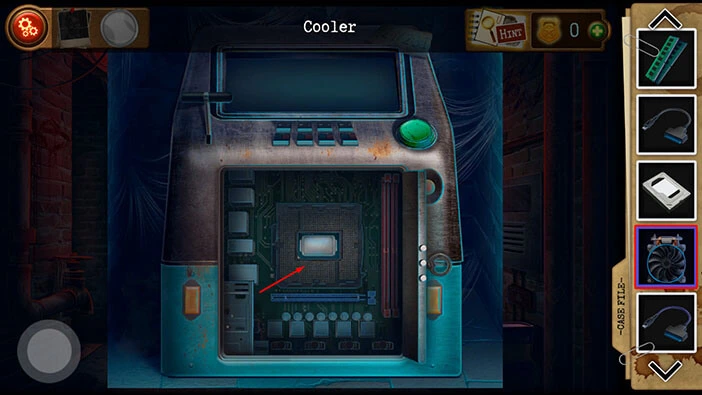
Step 3
Select the “Hard disk drive” from the inventory and install it into the motherboard.
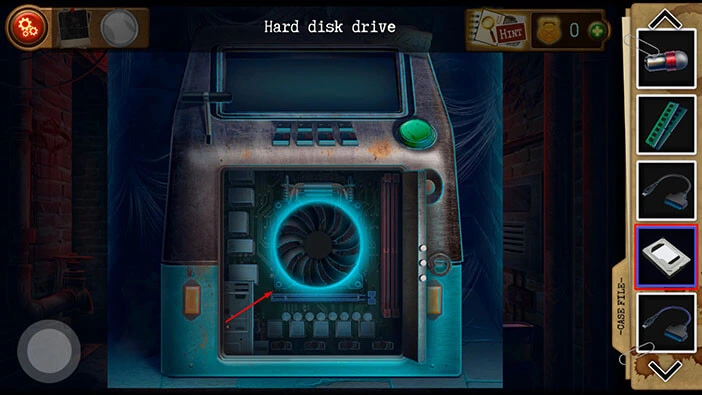
Step 4
Select the “RAM sticks” from the inventory and install them into the motherboard.
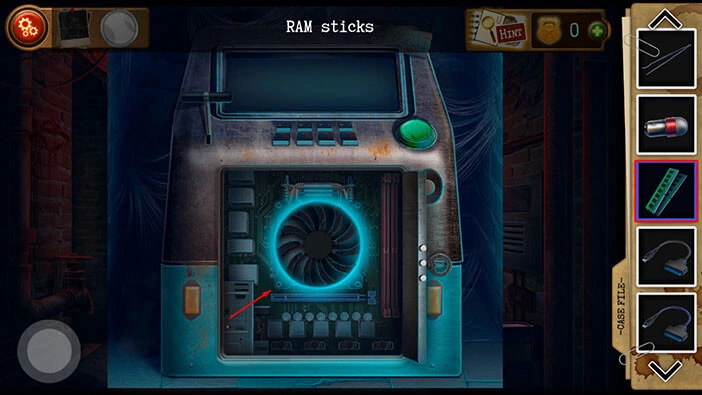
Step 5
Select the “Connector” (gray power cable) from the inventory and plug it into the motherboard.
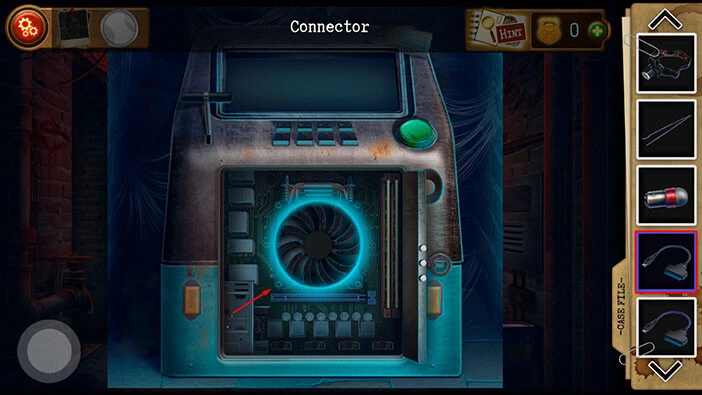
Step 6
Select the “Connector” (blue power cable) from the inventory and plug it into the motherboard.
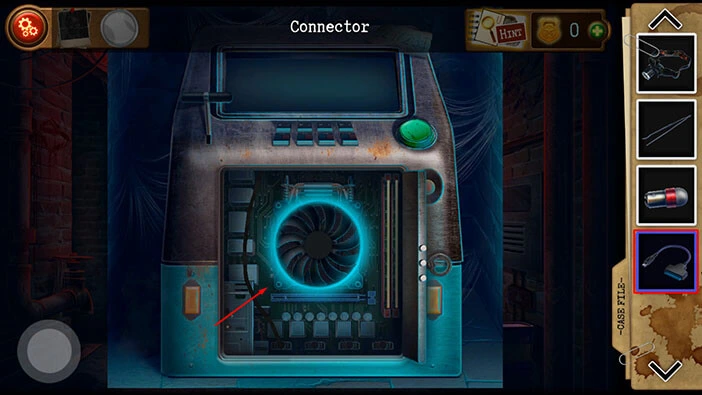
Tap on the green button to turn on the computer.
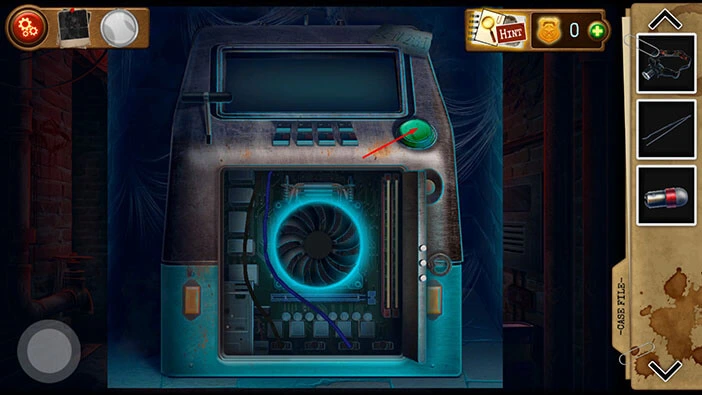
You will see a message “Password required” on the display screen. Tap on it to take a closer look.
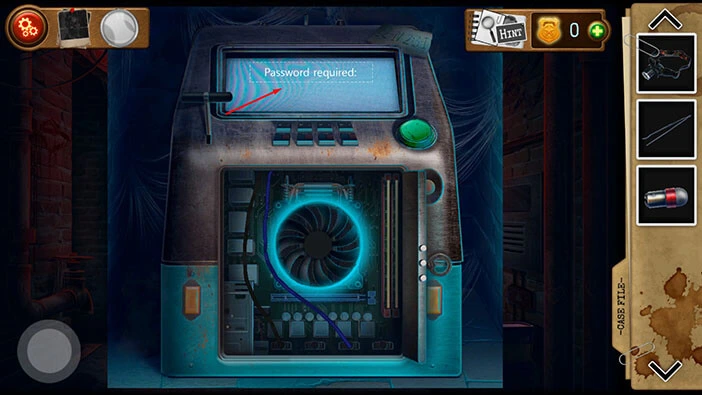
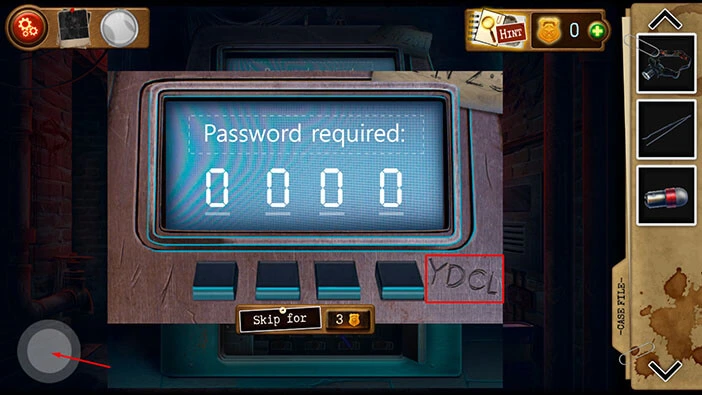
Our next task is to discover a four-digit password. If you take a look at the bottom right corner, you will notice four letters “YDCL”. Memorize/write down these letters because they represent the hint for discovering a computer password.
Once you’re done, tap on the button in the bottom left corner of the screen to go back.
Let’s go back to the prisoner cell. Tap on the space in the wall on the left.
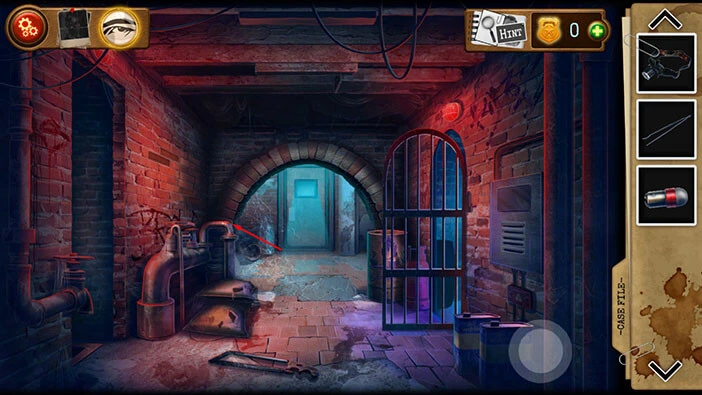
If you take a look at the writing on the wall, you will notice that three letters are in light red. These letters are “YCLD” – the same letters (but in a different order) that we saw next to the display.
Let’s examine the letters on the wall. We will look at them in the order that we saw on the display (“YDCL”).
First, we will take a look at the letter “Y”. This is the first letter in the sentence, so let’s memorize/write down the following information, “Y” = 1. This is the first number of the password.
Next, let’s take a look at the second letter, “D”. This is the eighth letter in the sentence, so let’s memorize/write down the following information, “D” = 8. This is the first number of the password.
Next, let’s take a look at the third letter, “C”. This is the fourth letter in the sentence, so let’s memorize/write down the following information, “C” = 4. This is the third number of the password.
Lastly, let’s take a look at the fourth letter, “L”. This is the seventh letter in the sentence, so let’s memorize/write down the following information, “L” = 7. This is the fourth number of the password.
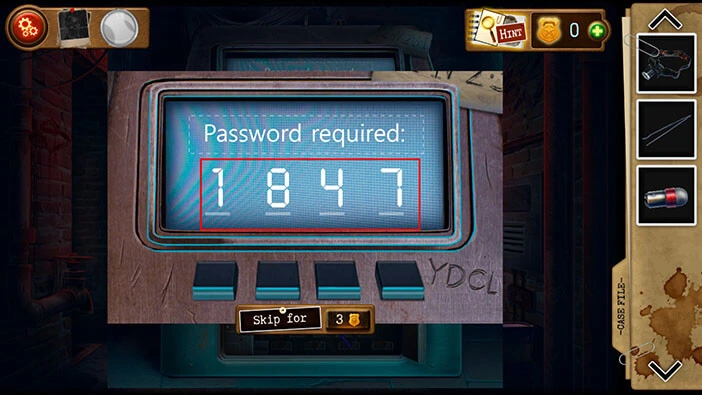
When we put all this information together, we will get the number “1847”. Memorize/write down this number.
Once you’re done, tap on the button in the bottom left corner of the screen to go back to the hallway.
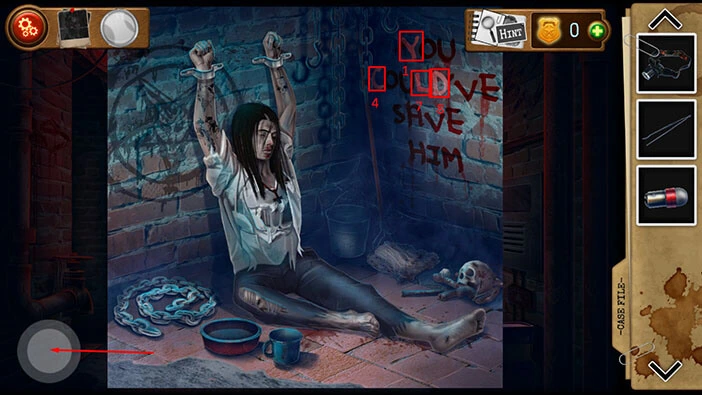
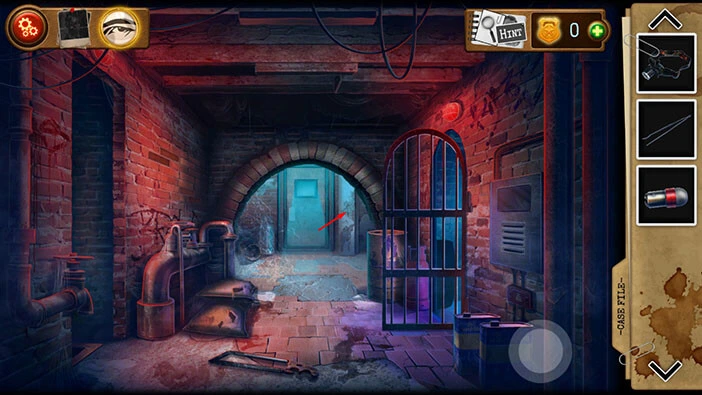
Let’s go back to the computer. Tap just to the right of the door in front of you to take a closer look at the computer, then tap on the display screen to start the interaction.
Enter the code “1847”.
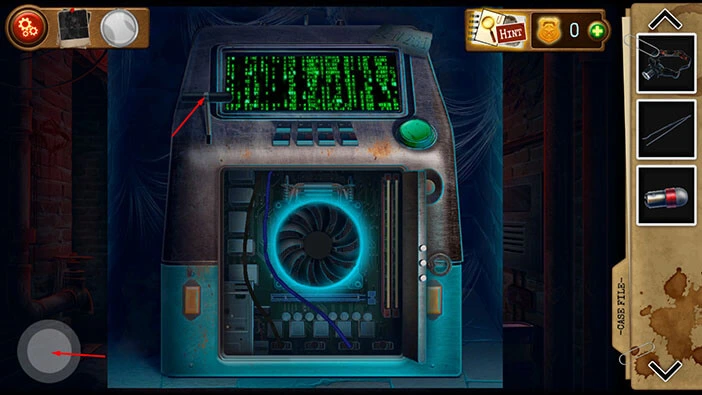
You will turn on the computer. Next, tap on the lever in the top left corner to pull it down, and you will unlock this door.
Once you’re done, tap on the button in the bottom left corner of the screen to go back.
Tap on the door to proceed to the next room.
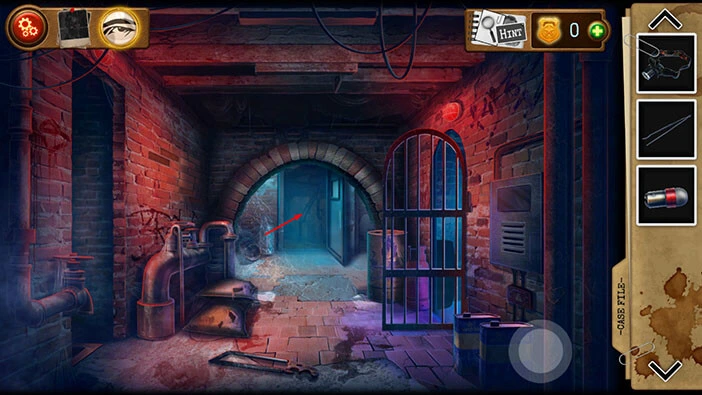
You will probably notice a locked coffin on the right. We will have to find three keys in order to unlock this coffin because we can see three padlocks.
Let’s look for keys. Tap on the table on the right to take a closer look at it.
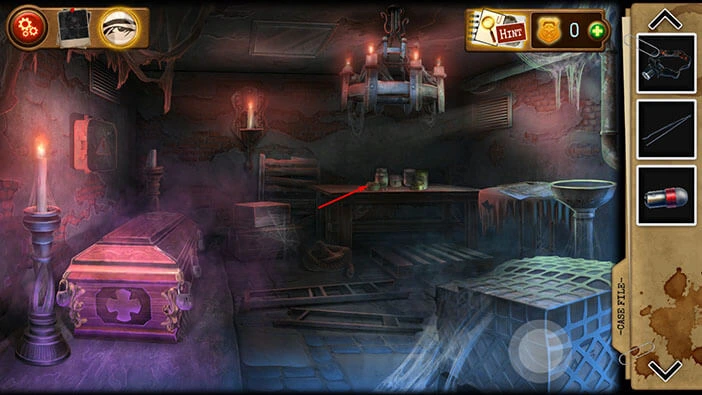
You will notice several jars on the table. Tap on the jar in the middle to turn it over.
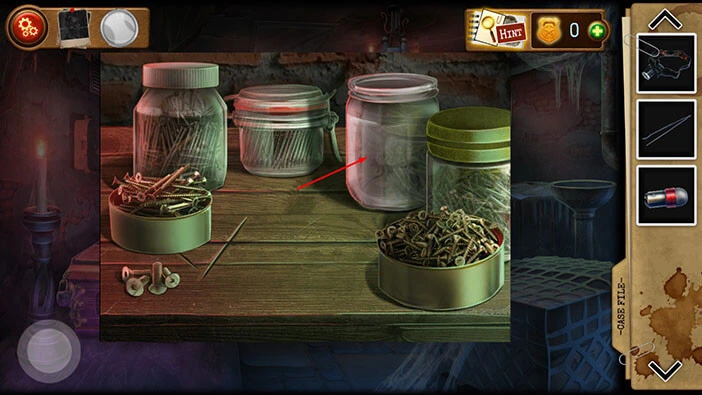
Three “Coffin keys” will drop out of the jar. Tap on them to pick them up.
Once you’re done, tap on the button in the bottom left corner of the screen to go back.
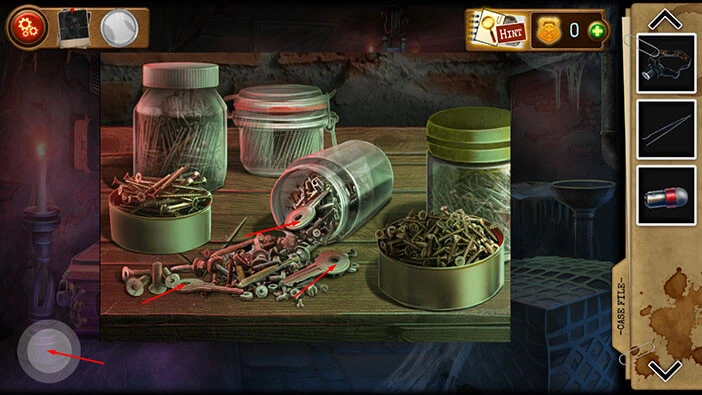
Next, tap on the newspapers, located on the table on the right to take a closer look at them.
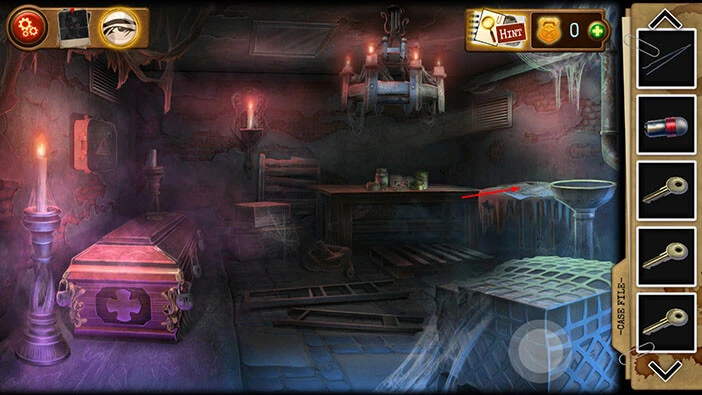
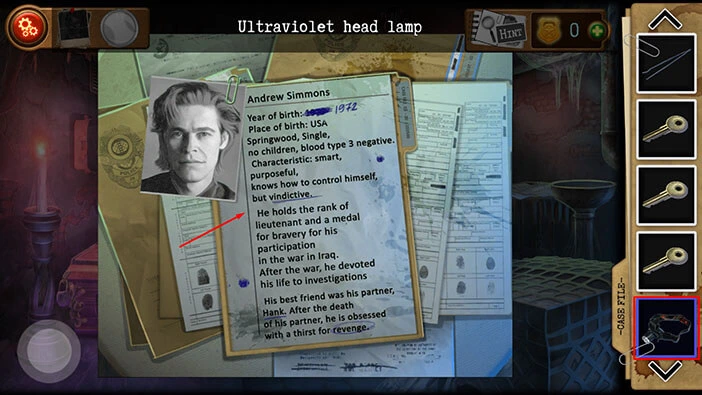
Here, you will see Andrew Simmons’ file (our character). Tap on the file, and our character will take a photo of the file, and place it with the rest of the evidence. Hmm, looks like the criminal knows almost everything about our character. It almost seems like he’s luring us into a trap, by using our character’s thirst for revenge.
Once you’re done, tap on the button in the bottom left corner of the screen to go back.
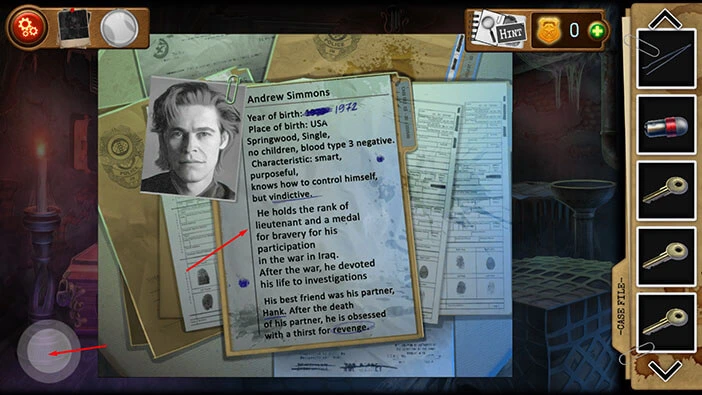
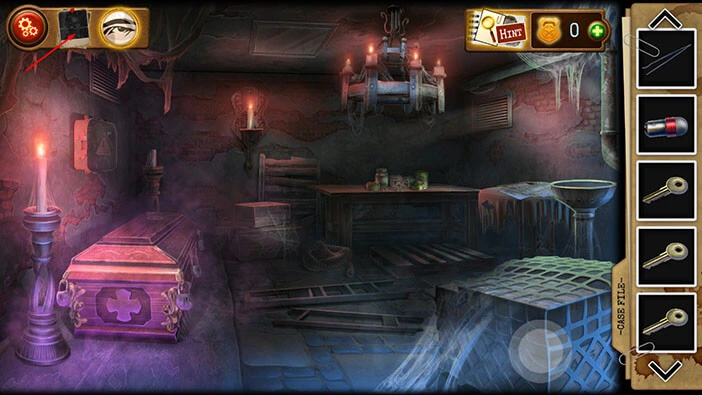
Tap on the photo in the top left corner of the screen to examine the evidence.
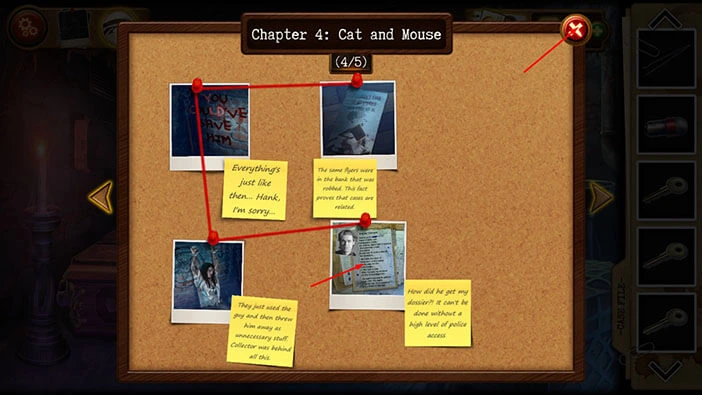
Tap on the photo of our character’s file to examine it. You will notice that we have 4 out of 5 pieces of evidence.
The detective believes that the criminal must have someone in the police department because that’s the only way he could get our character’s file. Interesting. His contact in the police station could also inform him about our character’s movement, meaning that this could be a trap.
Once you’re done, tap on the button in the top right corner to go back.
Well, I forgot one very important thing. Select the “Ultraviolet light bulb” from the inventory and combine it with the “Headlamp”. You will create an “Ultraviolet headlamp”.
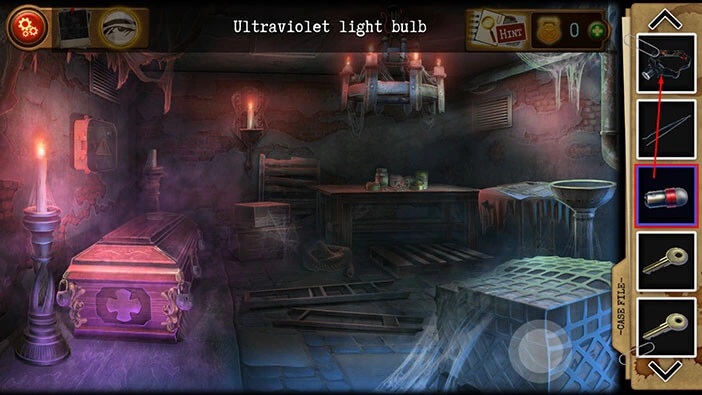
Let’s take another look at our character’s file.
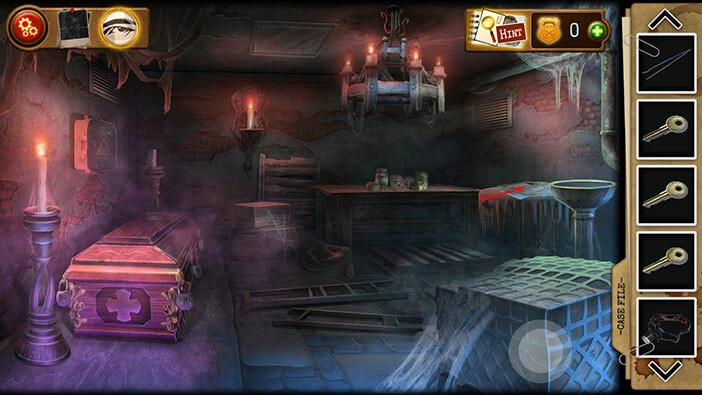
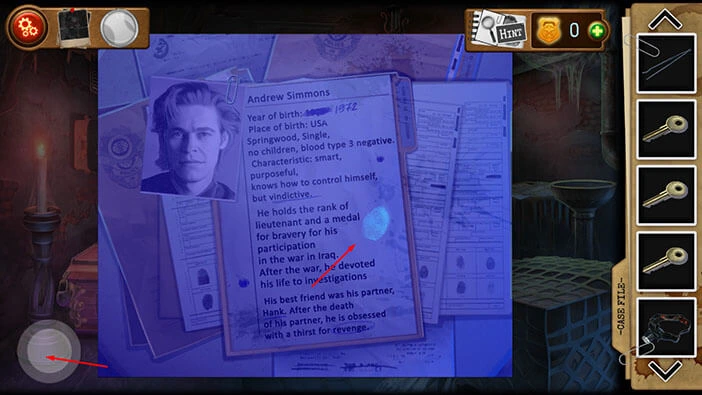
Select the “Ultraviolet headlamp” from the inventory, and let’s use it to look at the file under the ultraviolet light.
You will notice a fingerprint. Tap on the file again to take a photo of the fingerprint. After that, tap on the button in the bottom left corner of the screen to go back.
Tap on the photo in the top left corner of the screen to examine the evidence.
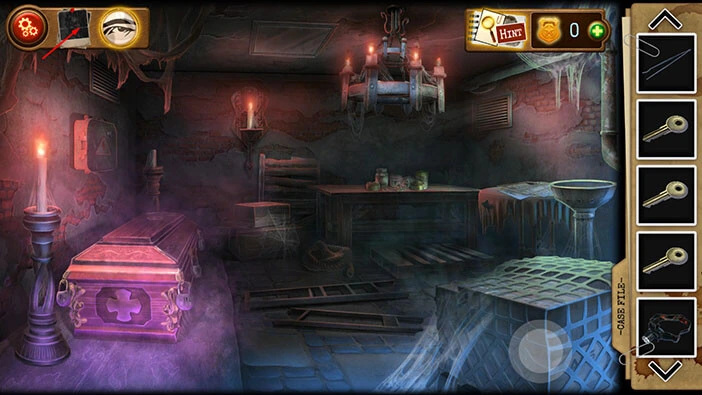
We now have 5 out of 5 pieces of evidence. Tap on the photo of the fingerprint to examine it. Our character believes that he can identify the person that stole his file, by running the fingerprint through the police database.
Once you’re done, tap on the “X” button in the top right corner to go back.
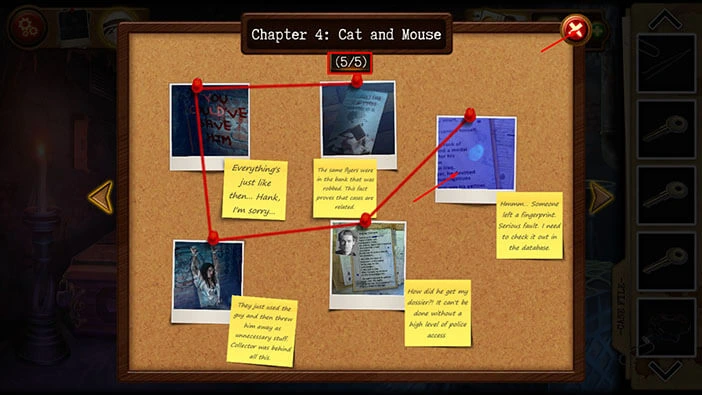
Select the “Coffin keys” from the inventory and use them to unlock the three padlocks.
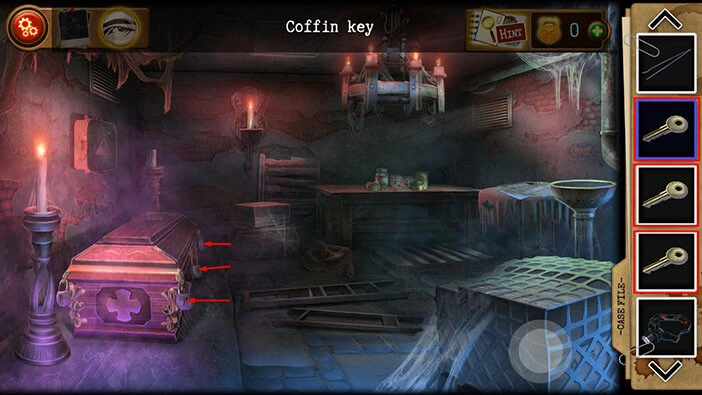
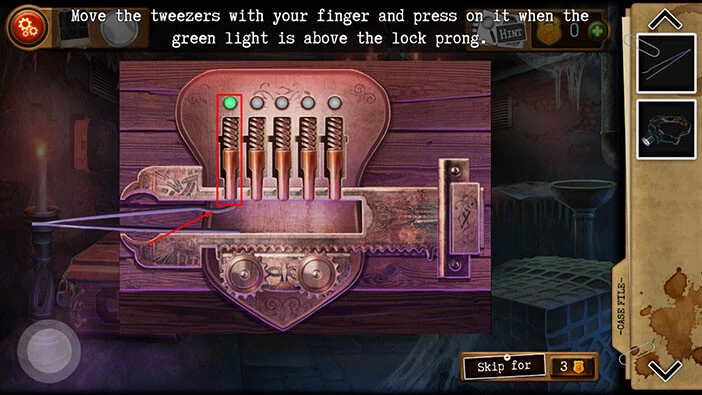
We still have one padlock that needs to be unlocked. So, select the “Tweezers” from the inventory and use it to start the interaction with that padlock on the left.
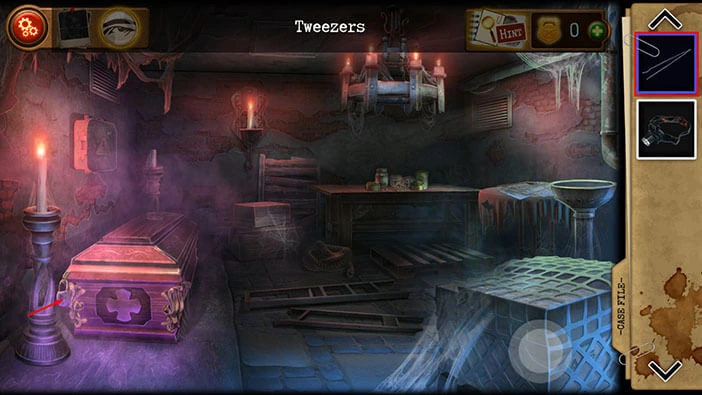
This puzzle is very straightforward. Position the tweezers below the lock prong, and press on the tweezers once the green light is above that lock prong. This will lock the lock prong in place. You will have to do this five times, once for each lock prong.
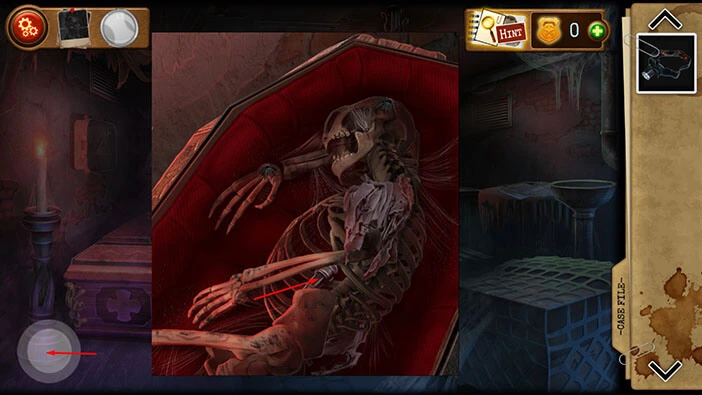
Once you complete the previous puzzle, the coffin will open and inside you will find a skeleton. In the skeleton’s ribcage, you will notice the “Spark plug of the electrical panel”. Tap on it to pick it up.
Once you’re done, tap on the button in the bottom left corner of the screen to go back.
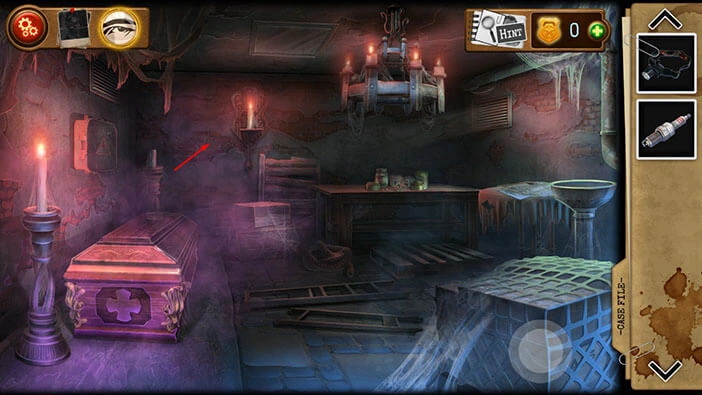
Next, tap on the part of the wall located just to the left of the burning candle, to take a closer look at it.
Let’s examine the wall under the UV light. Select the “Ultraviolet headlamp” from the inventory and tap on the wall to examine it.
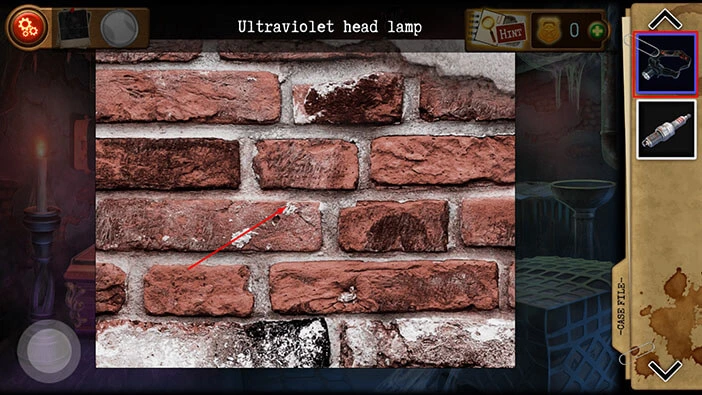
Under the UV light, you will discover some kind of hidden panel on the left. Tap on it to start the interaction and another panel with numbers will appear. Tap on it to start the next puzzle.
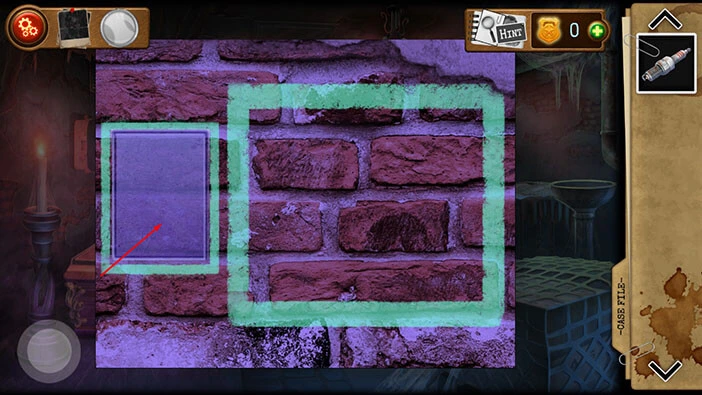
Here, we have another puzzle. On the left, we can see three numbers, arranged vertically. These numbers are 42, 55, and 87. Next, to each number, we can see three slots, and they can be either red, grey, or black. In the horizontal row, we can see nine numbers, and the wires below these numbers can also be either red, grey, or black.
So, our task is to plug in three numbers from the horizontal row into the number in the vertical row, and the sum of these three numbers should be equal to the number in the vertical row. The wires of these three numbers from the vertical row should match the color of the slots of the number on the left.
We will do this puzzle in three steps. Let’s begin.
Step 1
Take the red number 12 and insert it into the red slot next to the number 42. After that, take the grey number 17 and insert it into the grey slot next to the number 42. Lastly, take the black number 13 and insert it into the black slot next to the number 42. The sum of these three numbers is 42, and we also have the matching colors.
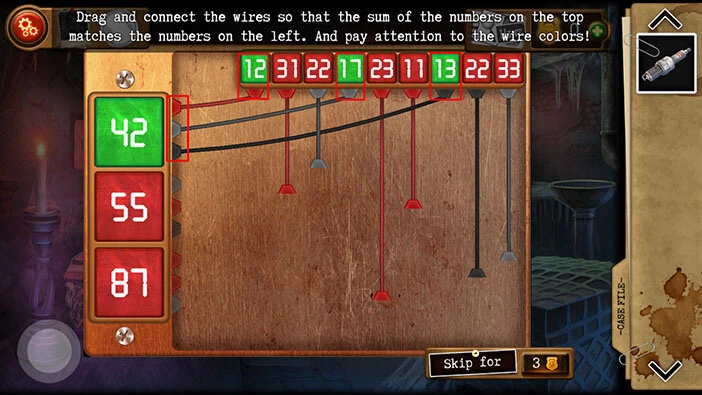
Step 2
Take the grey number 22 and insert it into the grey slot next to the number 55. After that, take the red number 11 and insert it into the red slot next to the number 55. Lastly, take the black number 22 and insert it into the black slot next to the number 55. The sum of these three numbers is 55, and we also have the matching colors.
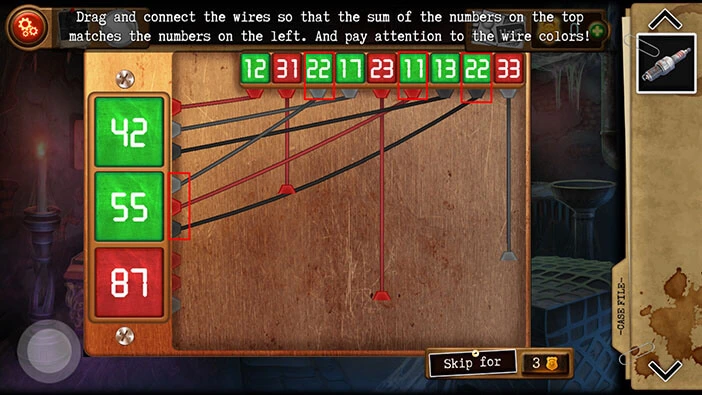
Step 3
Take the red number 31 and insert it into the red slot next to the number 87. After that, take the red number 21 and insert it into the red slot next to the number 87. Lastly, take the black number 33 and insert it into the black slot next to the number 87. The sum of these three numbers is 87, and we also have the matching colors.
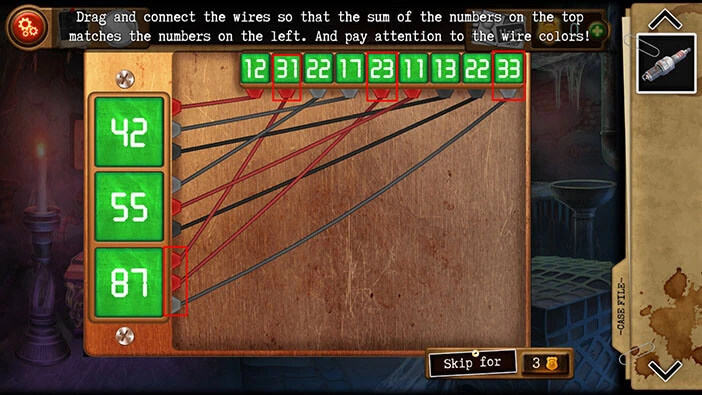
As soon as you correctly connect the numbers the safe will open and inside you will find the “Electrical panel key”. Tap on it to pick it up.
After that, tap on the button in the bottom left corner of the screen to go back.
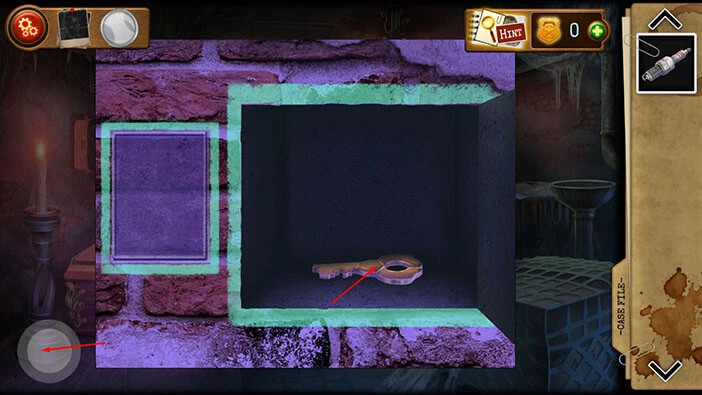
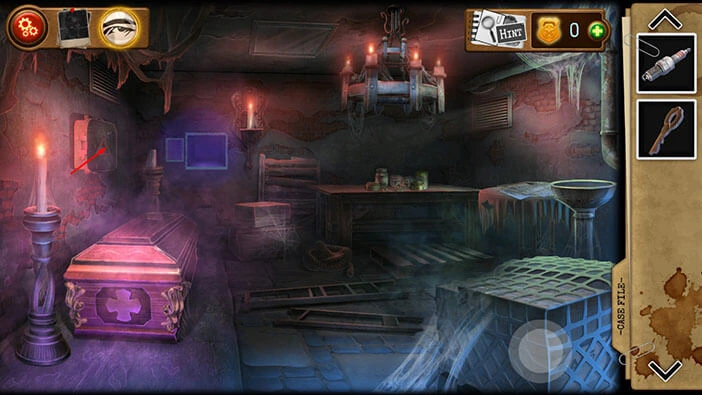
If you take a look at the wall on the left (above the coffin) you will see an electric panel. Tap on it to take a closer look.
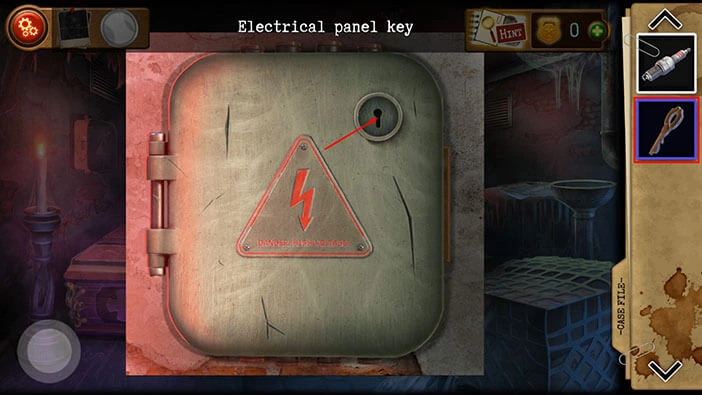
Select the “Electrical panel key” from the inventory and use it to unlock the panel.
You will notice three plugs, but the fourth slot is missing. So, select the “Spark plug of electrical panel” from the inventory and insert it into the empty slot.
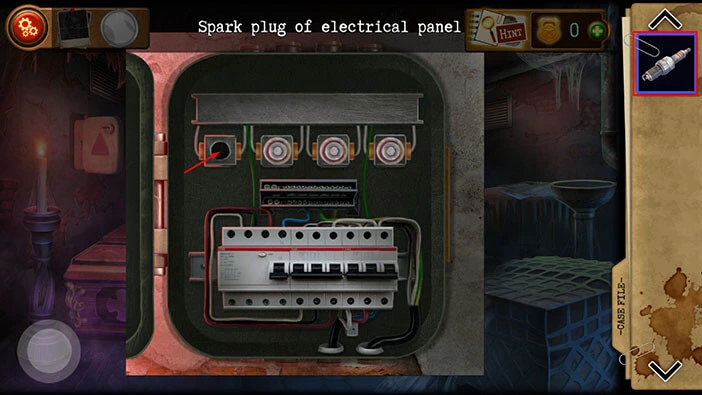
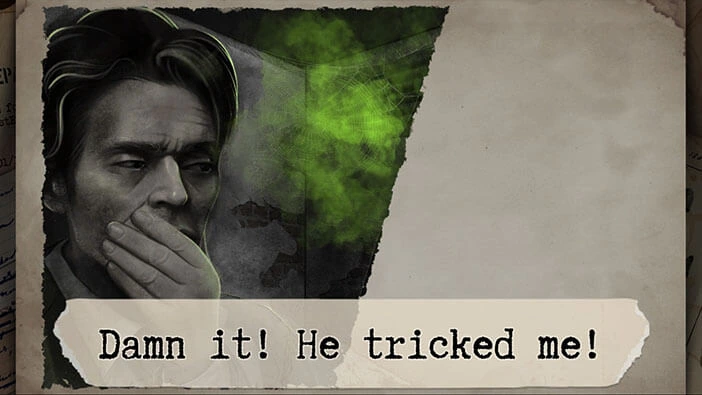
As soon as you insert the plug, the green gas will be released into the room through the ventilation. At this moment, our character realizes that the “Collector” has ruled him into a trap. There was nothing he could do, and a few moments later the detective fell unconscious.
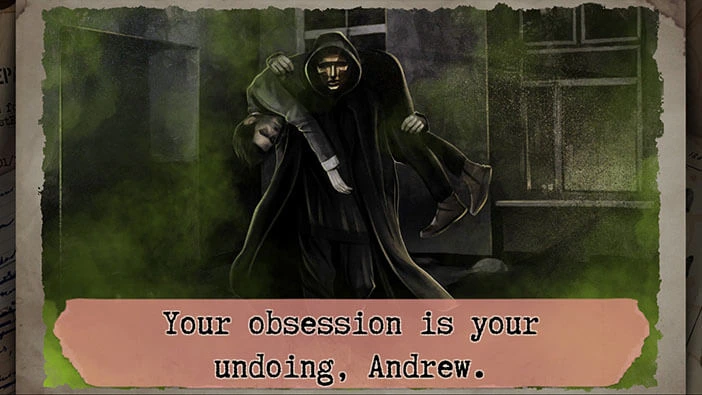
In the last scene, we can see a large man, dressed in dark clothes, and wearing a golden mask, enter the room. He picked up our character, threw him over his shoulder, and carried him out of the room. Before he left, he said, “Your obsession is your undoing, Andrew”.
So, our character blindly pursues the “Collector” because he wishes to avenge the death of his partner. In this pursuit, he became careless and fell into the “Collector’s” trap. Now, he is “The Collector’s” hostage, and he has to quickly find a way to escape, otherwise, he will become the “Collector’s” newest victim.
With that, we have come to the end of the fourth chapter. The following chapter should be released in the near future, and we will cover them as soon as they come out. The story changed dramatically at the end of this chapter, with our character, who hunted the “Collector”, becoming the prey. I suspect that the following chapters will be very interesting and that we will probably discover a lot more about the mysterious “Collector”.
Thank you for reading.