Can you escape the 100 room 17 | Levels 9-12
Hello everyone and welcome to the third part of the walkthrough for “Can you escape the 100 room 17”. In the third part of the walkthrough, we will cover levels 9 to 12.
Level 9
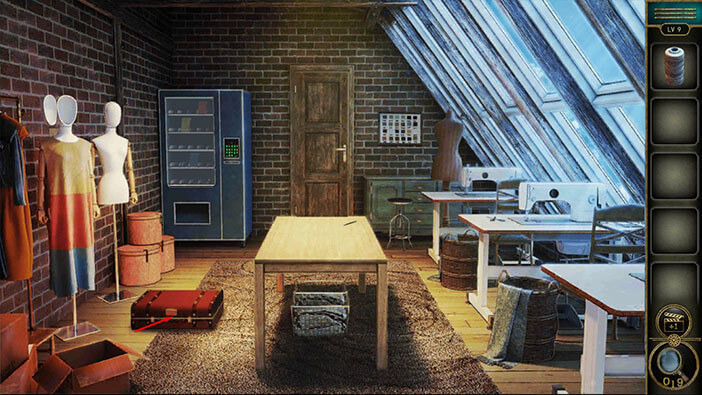
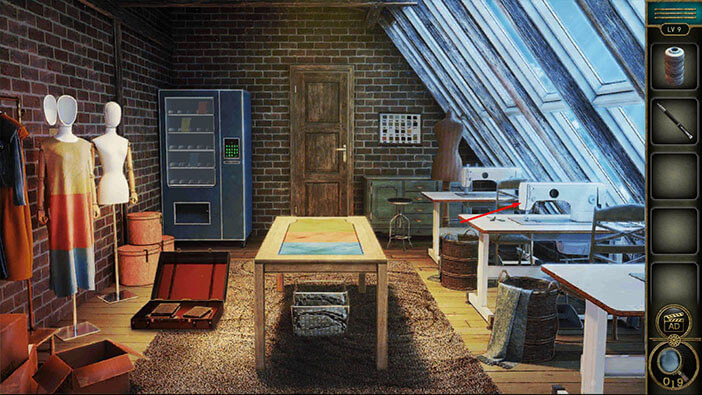
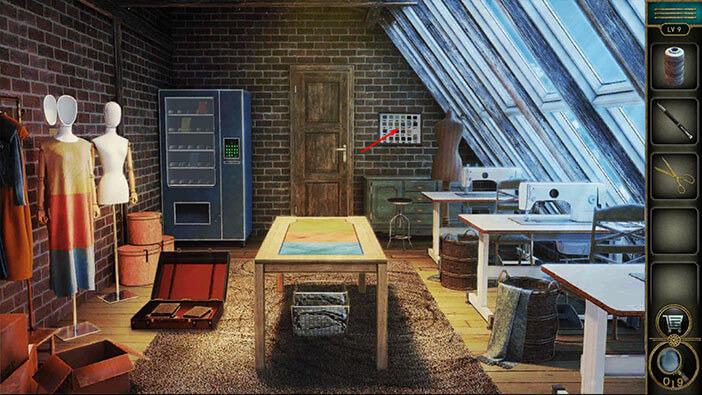
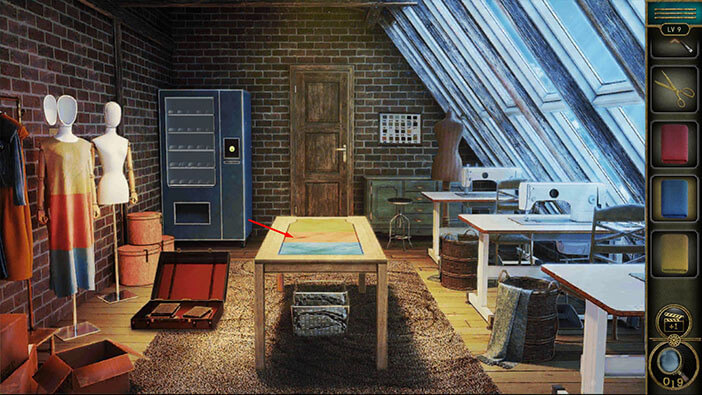
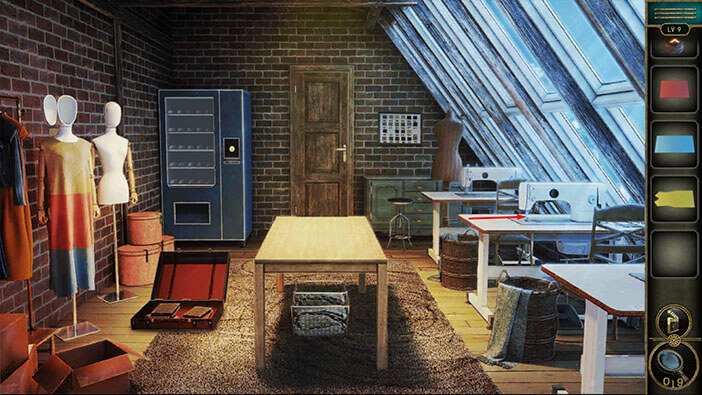
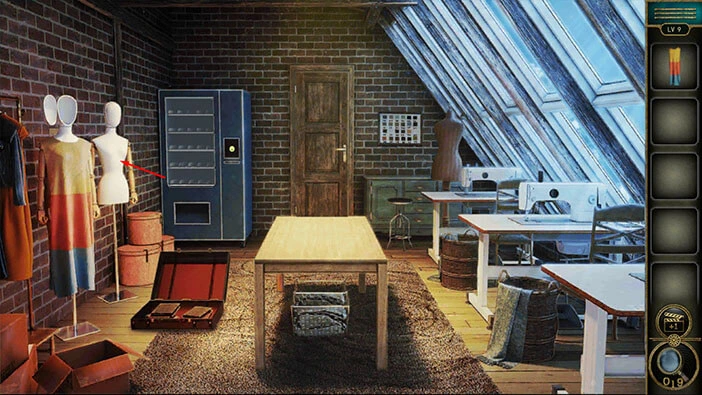
Let’s explore the ninth level. This time we are in the tailor’s workshop. Let’s explore it. Tap on the mannequin with the dress on the right to take a closer look at it.
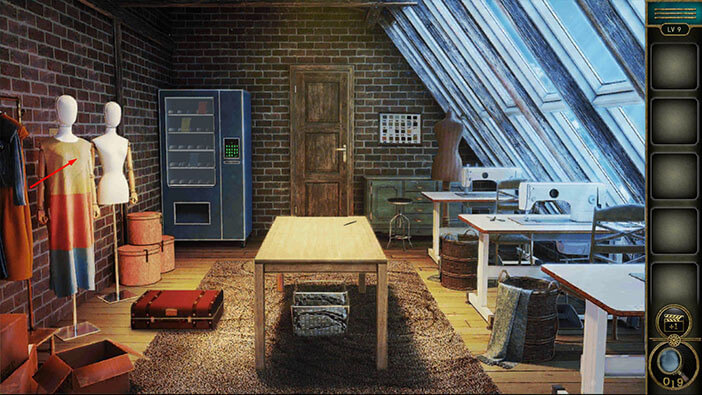
Tap on the mannequin’s head to open it.
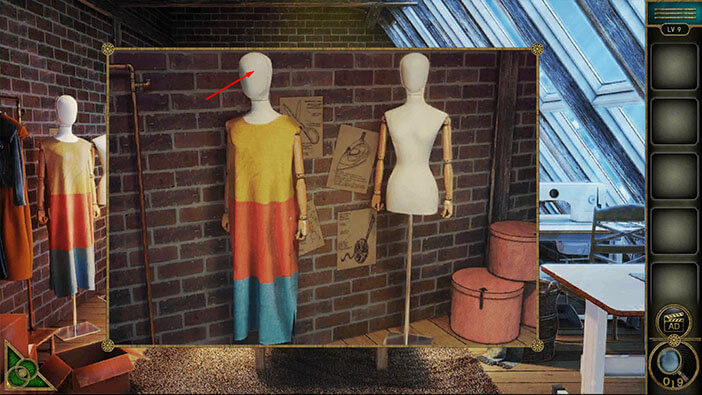
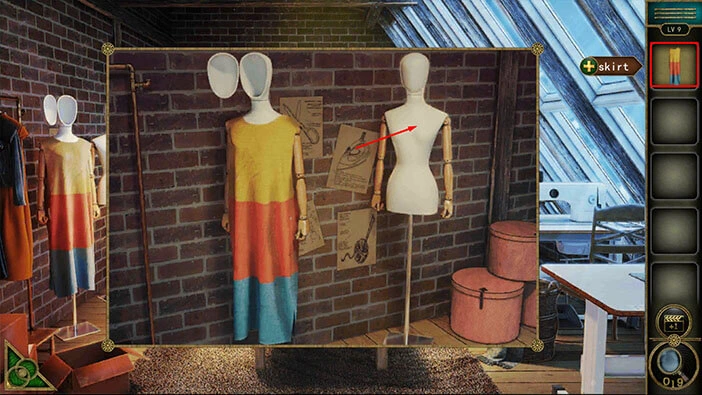
Inside you will find a “Wire” so let’s tap on it to pick it up. Before we proceed, you should know that the final task for this level is to make a dress that looks like the dress on the mannequin.
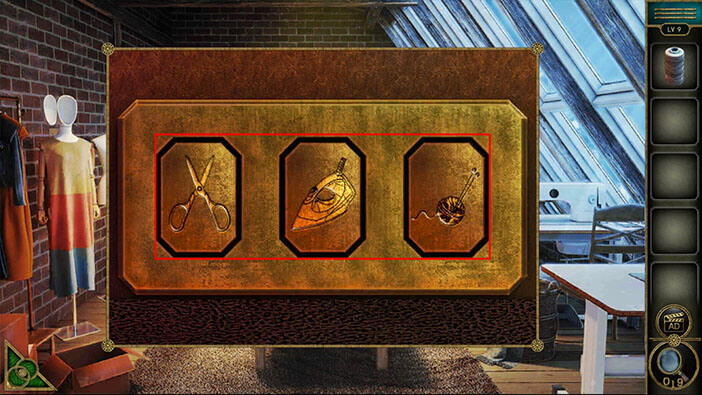
On the posters on the wall, we can see some kind of instructions. These instructions represent the hint for the next puzzle. Starting from the top, on the posters we can see “Scissors”, “Iron”, and “Yarn”. Memorize/write down this information because we will need it for the next puzzle.
Once you’re done, tap on the green button in the bottom left corner of the screen to go back.

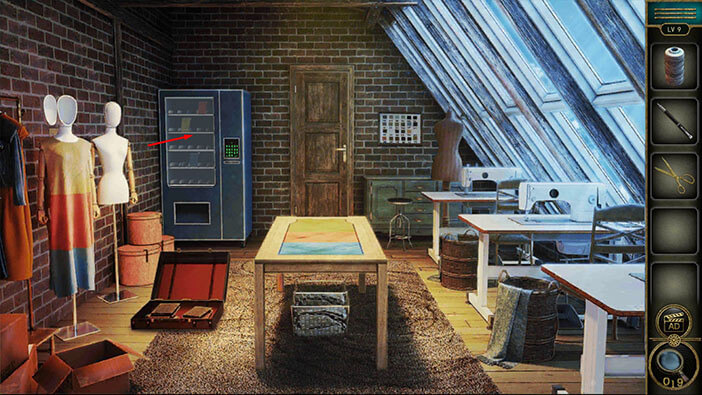
Next, tap on the suitcase, located just to the right of the mannequins to take a closer look at it and tap again to start the interaction.
We need three symbols in order to unlock the suitcase. So, let’s enter the symbols that we saw on the posters. These were “Scissors”, “Iron”, and “Yarn”. Once you enter these symbols, you will unlock the suitcase.
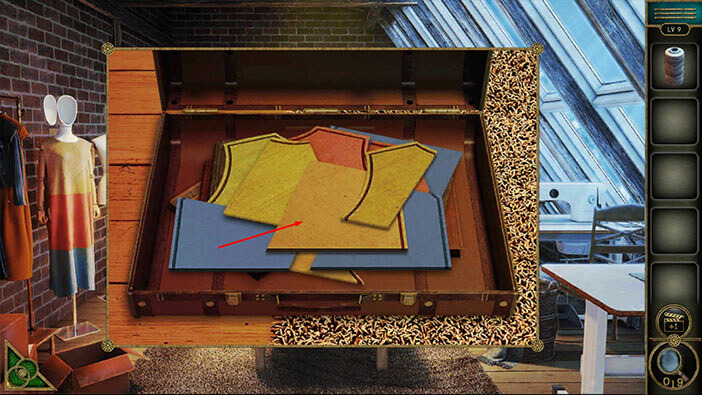
In the suitcase, you will find “Template pieces”. Tap on them to pick them up.
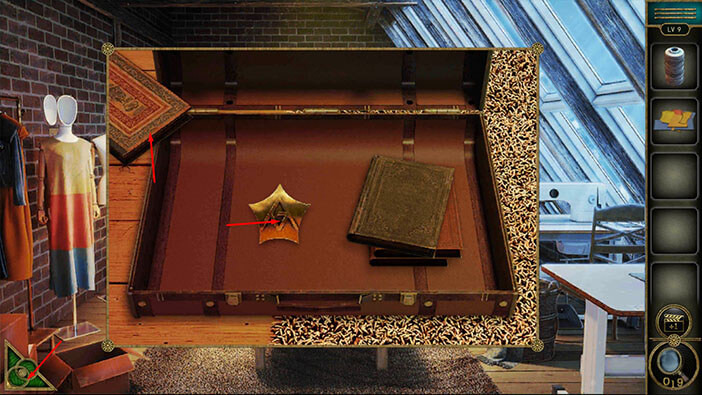
Before we continue, you will notice three books on the left side of the suitcase. Tap on them to move them aside, and you will discover another achievement star hidden below the books. Tap on the star to pick it up.
Once you’re done, tap on the green button in the bottom left corner of the screen to go back.
Next, tap on the table to take a closer look at it.
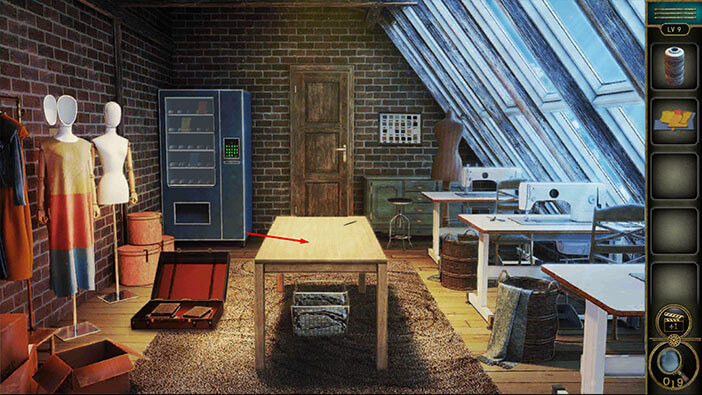
On the right, you will notice a “Pen”. Tap on it to pick it up.
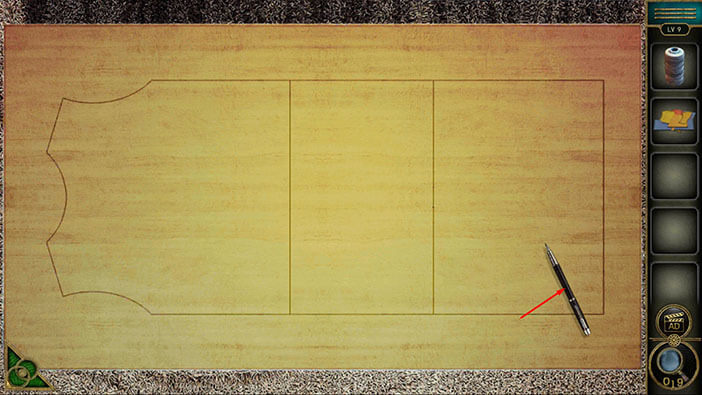
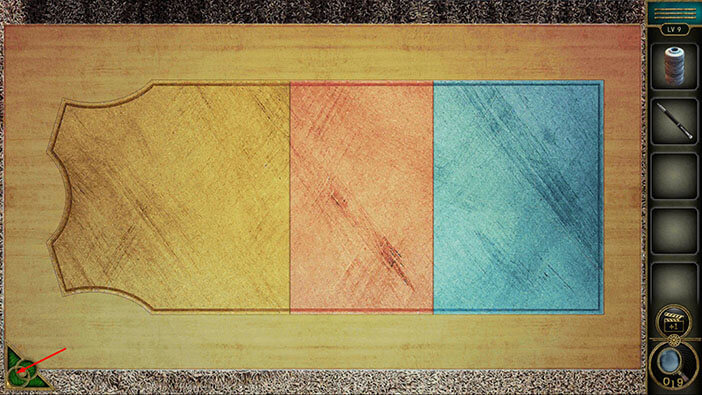
Here, we can see a rough outline for the dress. So, let’s take “Template pieces” from the inventory and put them down, on the table.
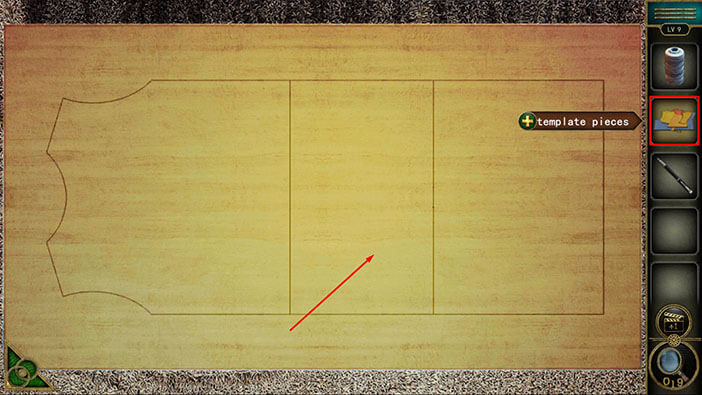
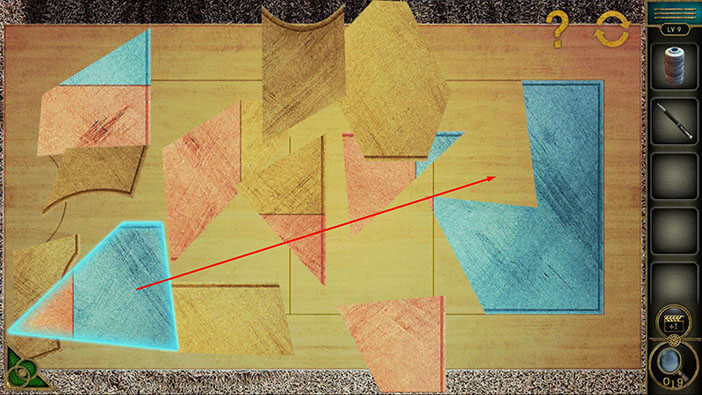
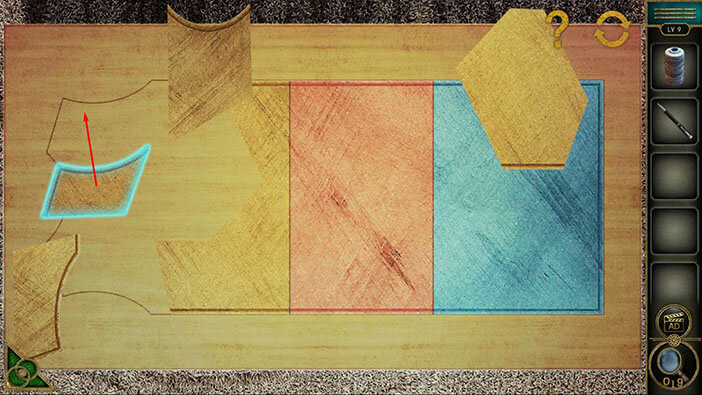
Here, we can see a lot of pieces of cloth, and our task is to arrange them. The pieces should be arranged by color, and the colors should match the color of the dress on the mannequin. So, Blue should be on the right, Red should be in the middle, and Brown should be on the left.
We will do this puzzle in several steps. Let’s begin.
Step 1
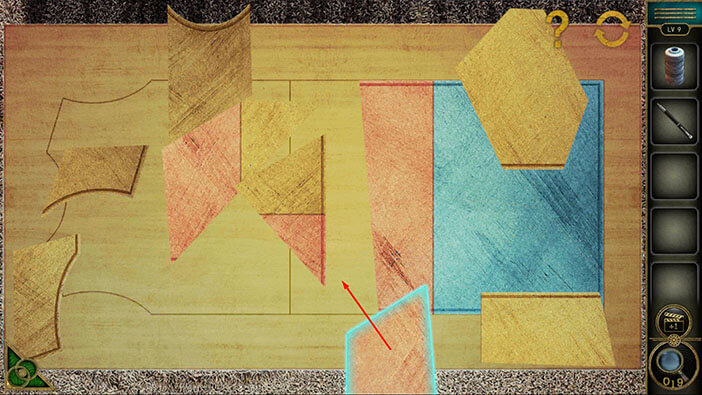
First, let’s move the pieces on the right a bit to the left so that we can assemble the blue part.
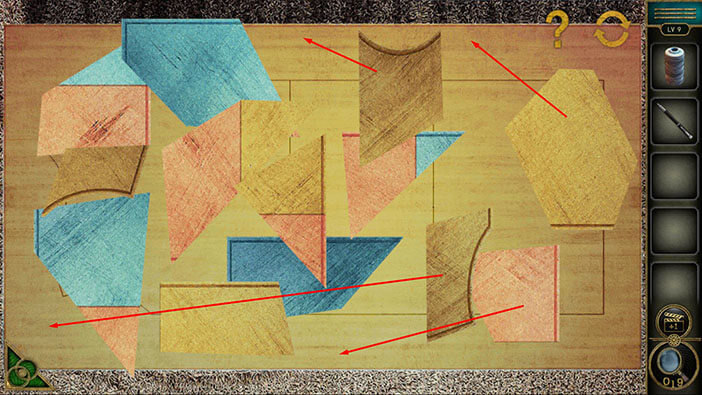
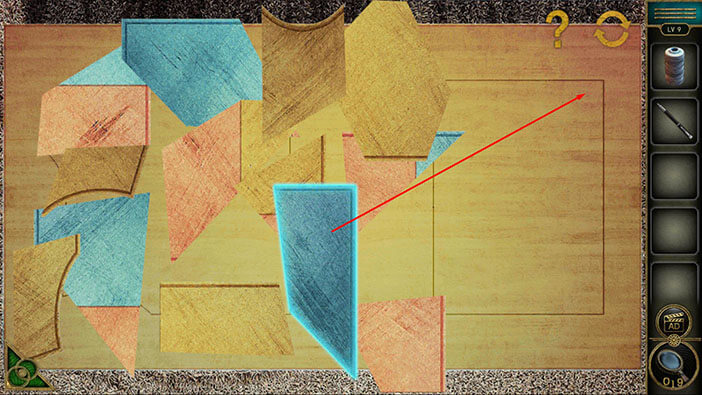
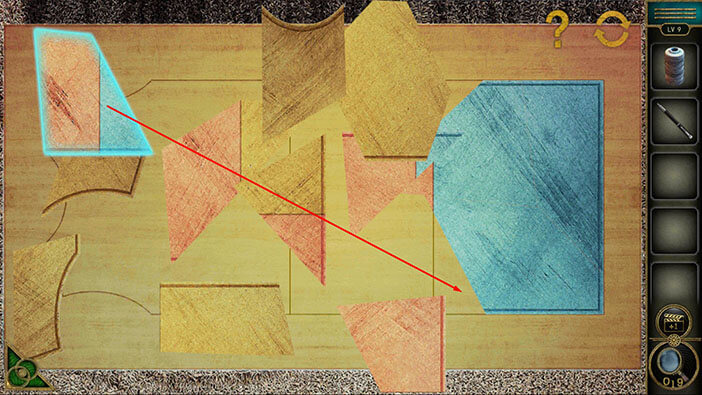
Step 2
Tap three times on the blue piece to rotate, then place it into the top right corner. Take a look at the image below.
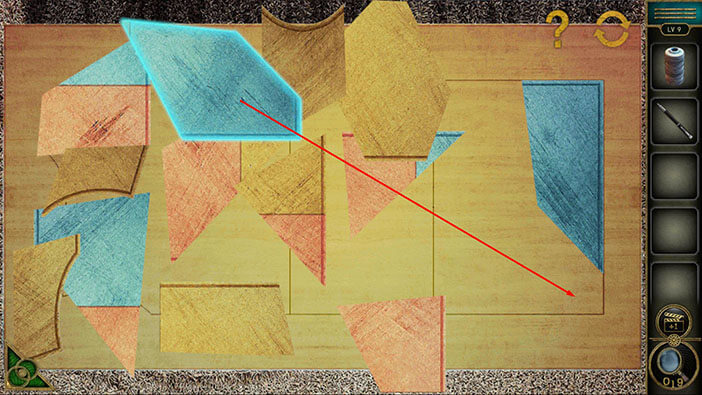
Step 3
Tap two times on the next blue piece to rotate, then place it into the bottom right corner. Take a look at the image below.
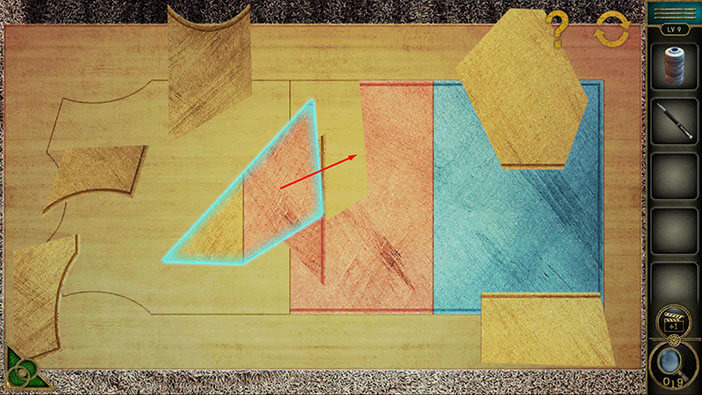
Step 4
Tap three times on the blue and red piece to rotate, then place it next to the blue piece. Take a look at the image below.
Step 5
Tap three times on the next blue and red piece to rotate, then place it next to the blue piece. Take a look at the image below.
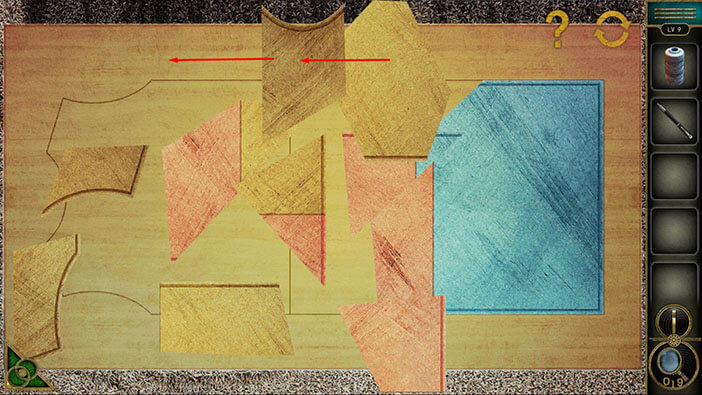
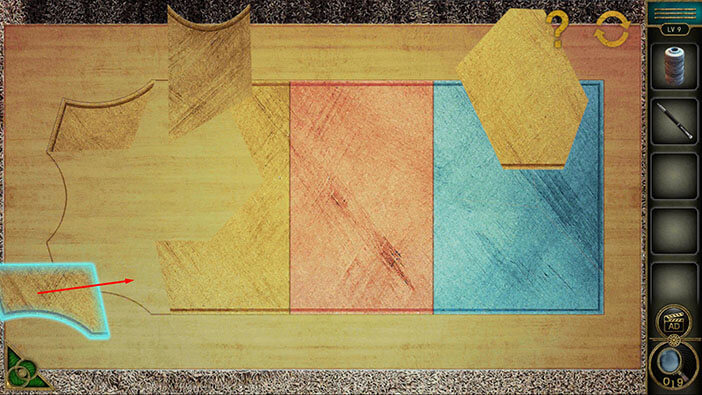
Step 6
Let’s move the two brown pieces from the top a bit to the left.
Step 7
Take the last blue and red piece and place it next to the blue piece. Take a look at the image below. With this step, you will finish the blue part.

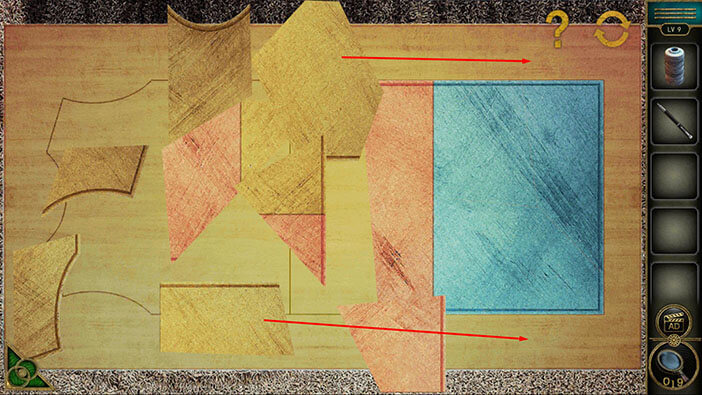
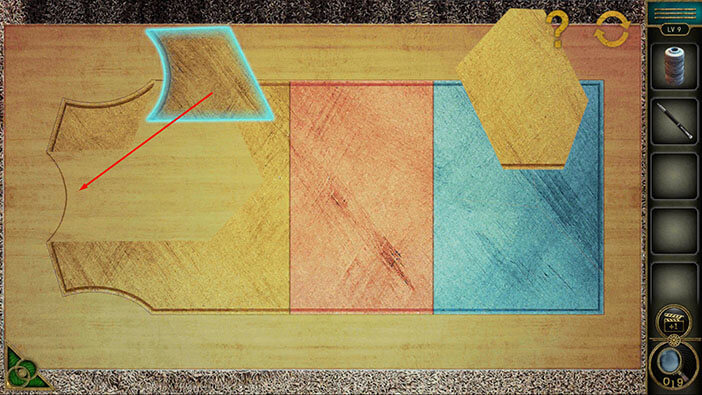
Step 8
Let’s move two brown pieces to the right so that we can see clearly the middle part.
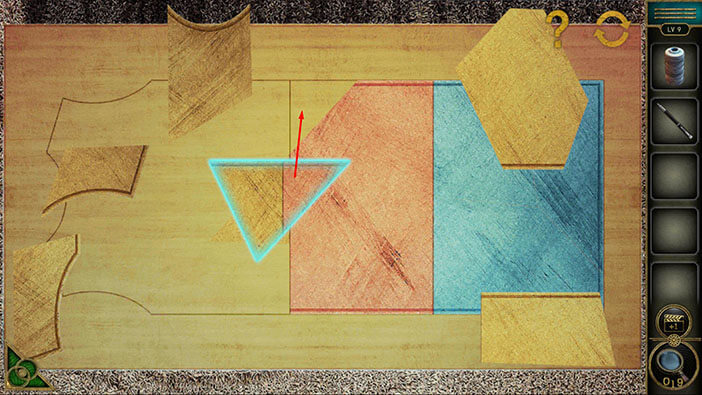
Step 9
Tap three times on the red piece to rotate it, then place it next to the red piece. Take a look at the image below.
Step 10
Tap two times on the red and brown piece to rotate it, then place it next to the red piece. Take a look at the image below.
Step 11
Tap once on the last red and brown piece to rotate it, then place it next to the red piece. Take a look at the image below. With that, you will assemble the red part.
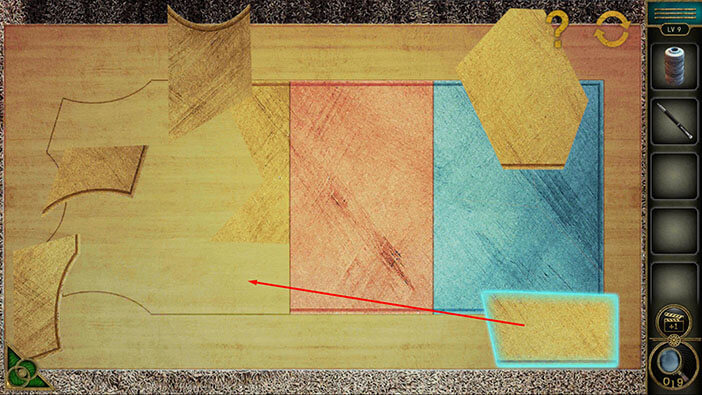
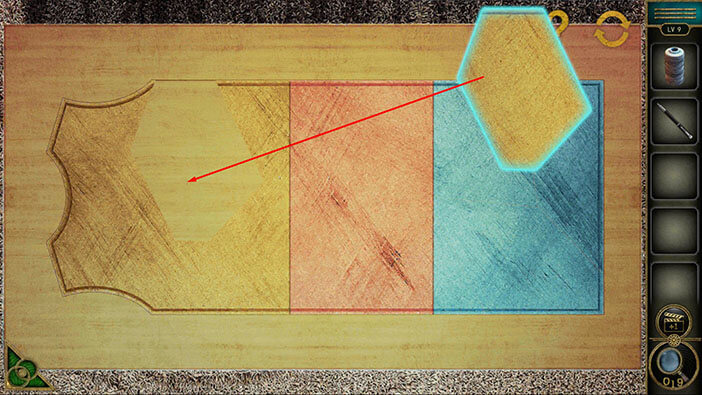
Step 12
Tap two times on the brown piece to rotate it, then place it at the bottom. Take a look at the image below.
Step 13
Tap two times on the brown piece to rotate it, then place it on the left. Take a look at the image below.
Step 14
Tap three times on the brown piece to rotate it, then place it at the bottom left. Take a look at the image below.
Step 15
Tap once on the brown piece to rotate it, then place it on the left. Take a look at the image below.
Step 16
Lastly, tap two times on the brown piece to rotate it, then place it in the middle. Take a look at the image below. With that, you will complete this puzzle.
Let’s go back. Tap on the green button in the bottom left corner of the screen.
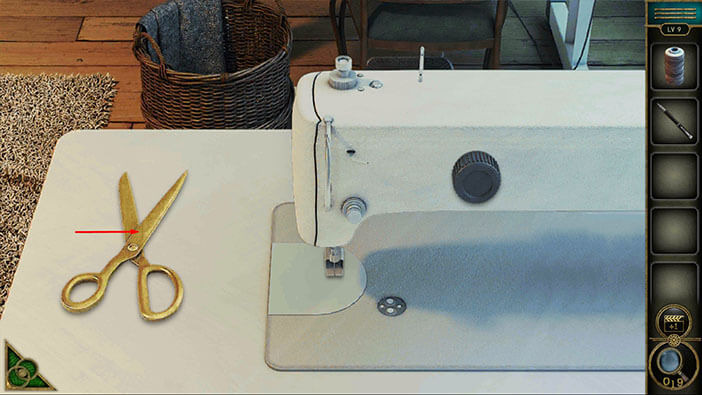
Let’s continue. Next, tap on the sewing machine on the right.
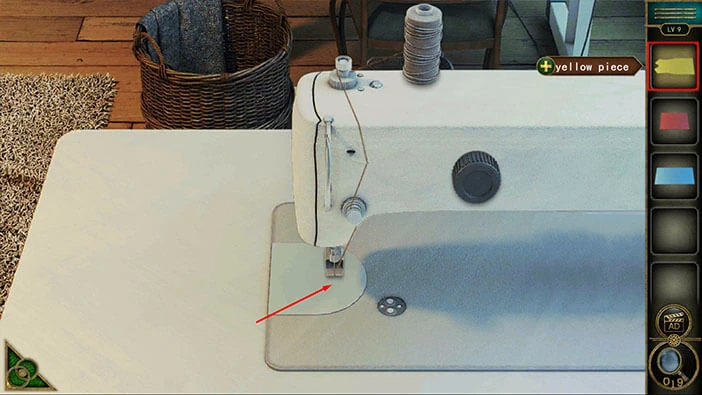
On the left, you will see “Scissors”. Tap on them to pick them up.
After that, tap on the green button in the bottom left corner of the screen to go back.
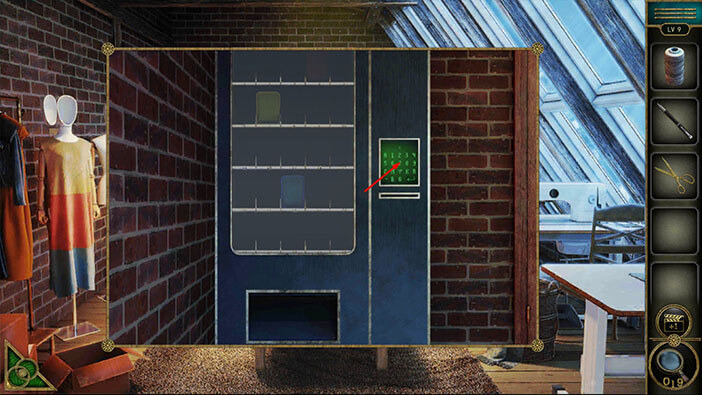
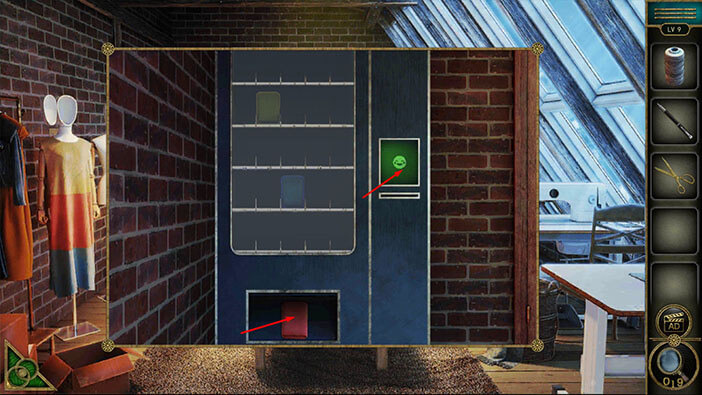
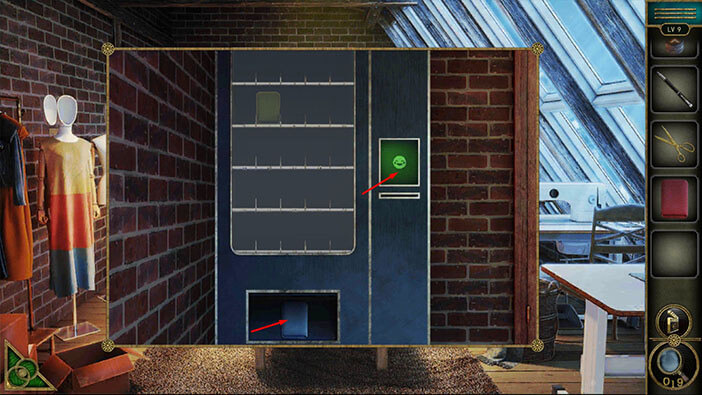
Next, let’s take a look at the machine in the top left to take a closer look at it.
In the machine, we can see three pieces of cloth, blue, red, and yellow. We will need them in order to make a dress. If you look at the right side of the machine, you will notice a keypad with numbers and letters. In short, we need to enter the correct combination of letters and numbers in order to get the three pieces of cloth.
Let’s look for these combinations. Tap on the green button in the bottom right corner of the screen to go back.

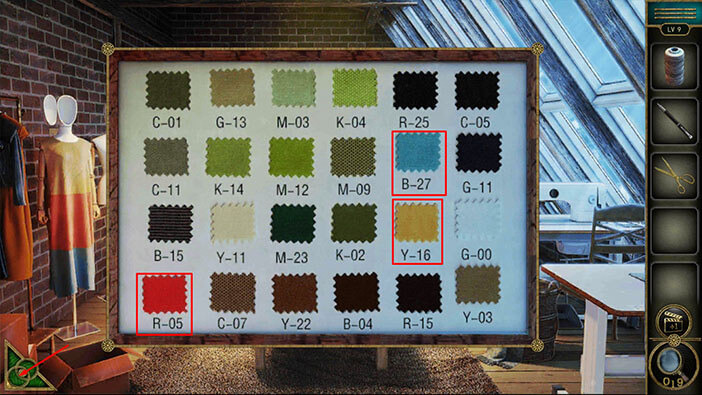
On the right, you will see a board with pieces of cloth of different colors. Tap on it to take a closer look.
Let’s look at the codes for the three colors that we need.
For the Red color, we have “R-05”.
For the Blue color, we have “B-27”.
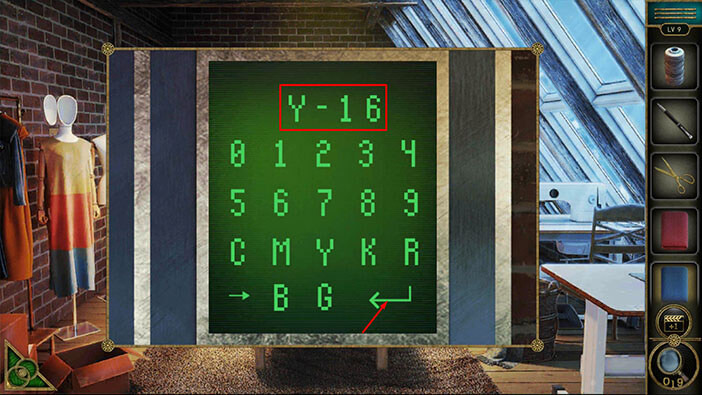
For the Yellow color, we have “Y-16”.
Memorize/write down this information. Once you’re done, tap on the green button in the bottom left corner of the screen to go back.
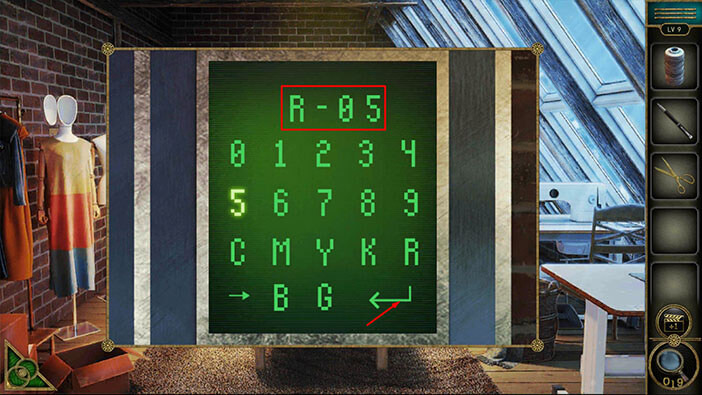
Tap on the machine again to take a look at it again, then tap on the display on the right to start the interaction.
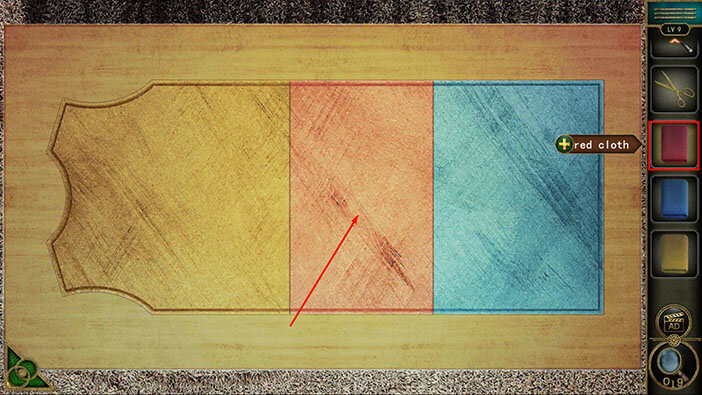
First, let’s get the Red color. Enter the code “R-05”, then tap on the “Enter” button to confirm.
Tap on the “Red cloth” to pick it up. After that, tap on the keypad again to start the interaction.
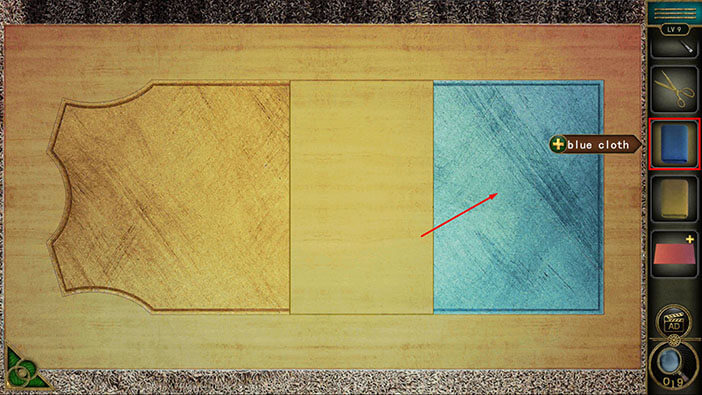
Next, let’s get the Blue color. Enter the code “B-27”, then tap on the “Enter” button to confirm.

Tap on the “Blue cloth” to pick it up. After that, tap on the keypad again to start the interaction.
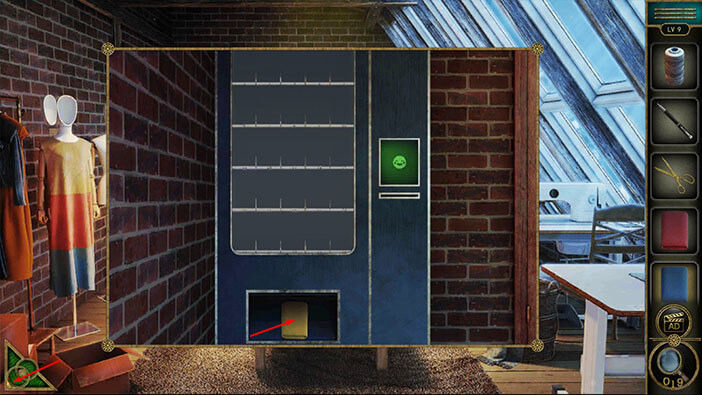
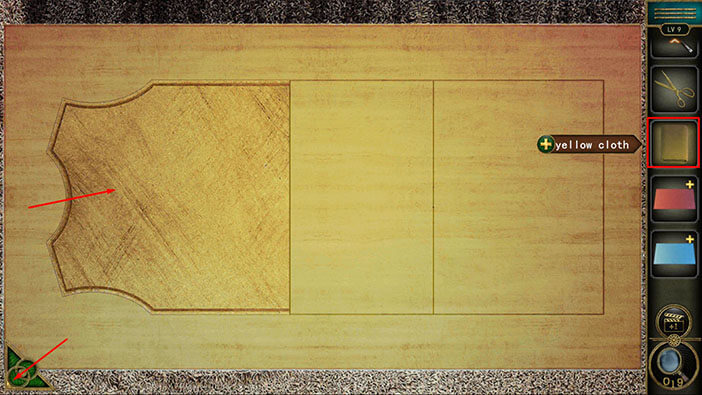
Lastly, let’s get the Yellow color. Enter the code “Y-16”, then tap on the “Enter” button to confirm.
Tap on the “Yellow cloth” to pick it up. After that, tap on the green button in the bottom left corner of the screen to go back.
Let’s go back to the table.
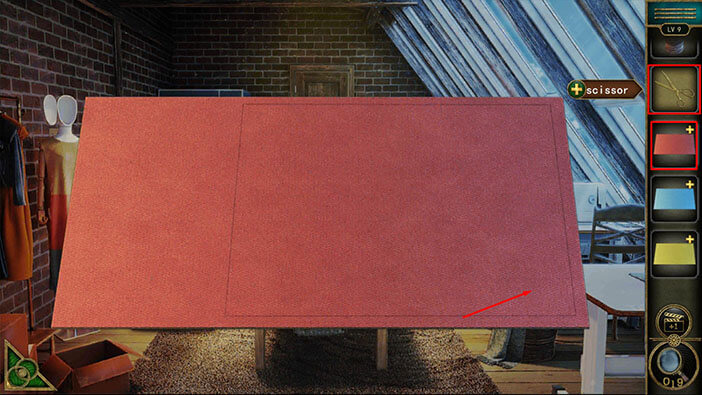
Select the “Red cloth” from the inventory and place it on the table. Our character will automatically cut out the “Red template” and it will be added to your inventory.
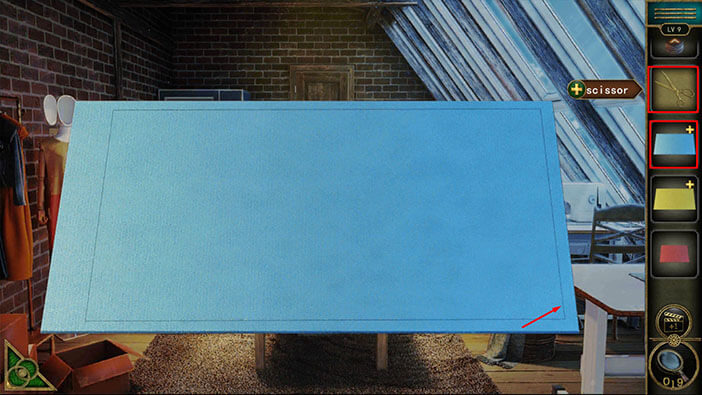
Next, select the “Blue cloth” from the inventory and place it on the table. Our character will automatically cut out the “Blue template” and it will be added to your inventory.
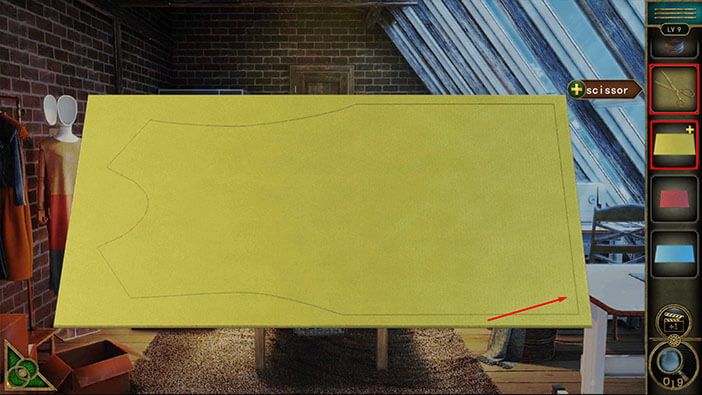
Lastly, select the “Yellow cloth” from the inventory and place it on the table. Our character will automatically cut out the “Yellow template” and it will be added to your inventory.
Once you’re done, tap on the green button in the bottom left corner of the screen to go back.
Next, select the “Red template” from the inventory, then select the “Scissors”. After that, tap on the template, and our character will cut out the “Red piece” (which will be automatically added to your inventory).
Next, select the “Blue template” from the inventory, then select the “Scissors”. After that, tap on the template, and our character will cut out the “Blue piece” (which will be automatically added to your inventory).
Lastly, select the “Yellow template” from the inventory, then select the “Scissors”. After that, tap on the template, and our character will cut out the “Yellow piece” (which will be automatically added to your inventory).
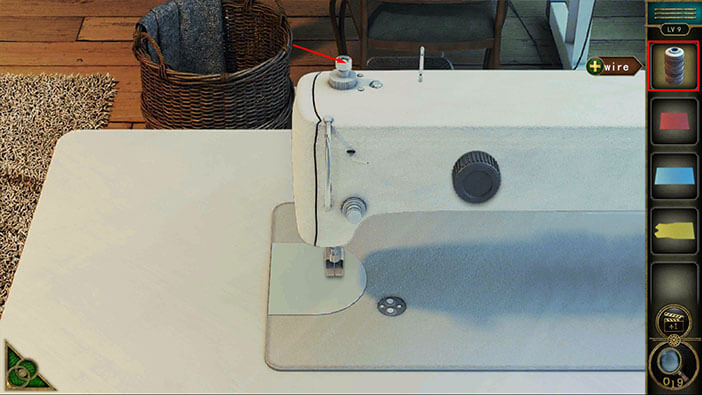
Next, tap on the sewing machine to take a closer look at it.
Select the “Wire” from the inventory, and insert it into the slot on the top of the sewing machine.
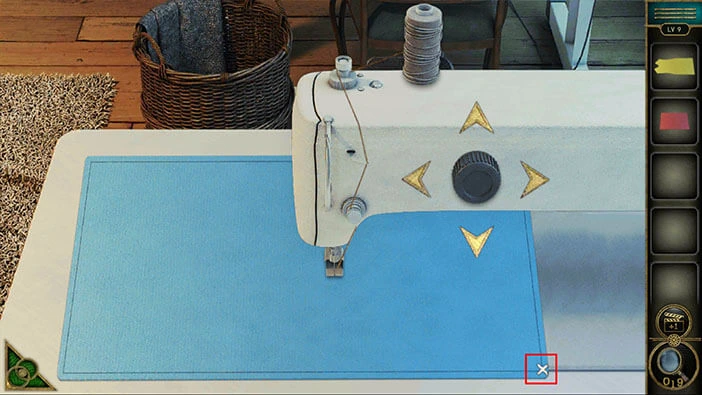
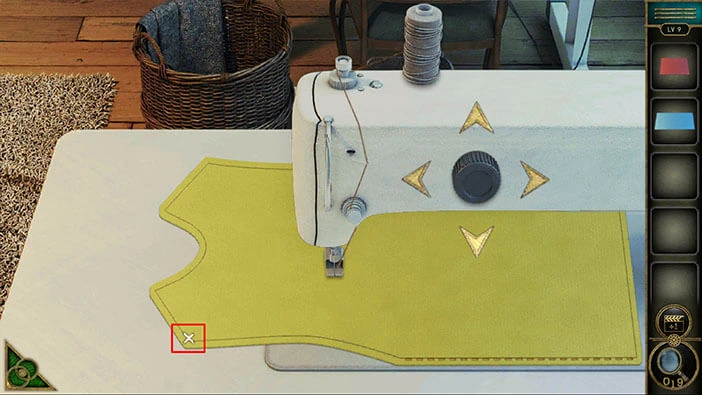
Next, select the “Red piece” from the inventory and place it on the table.

You will notice the “X” mark in the bottom right corner of the “Red piece”. We should use the four arrows on the right to position the needle above the “X” mark.
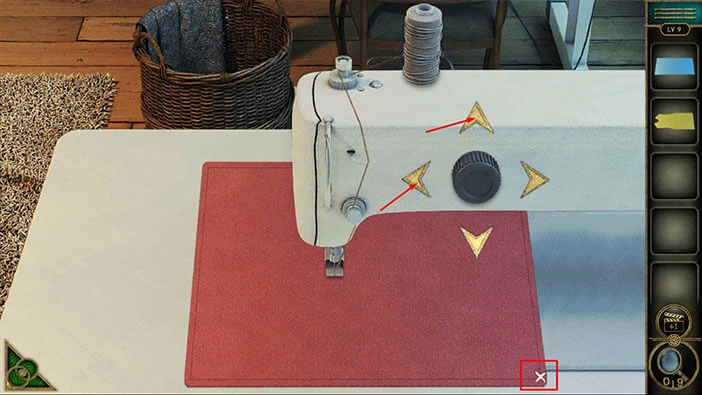
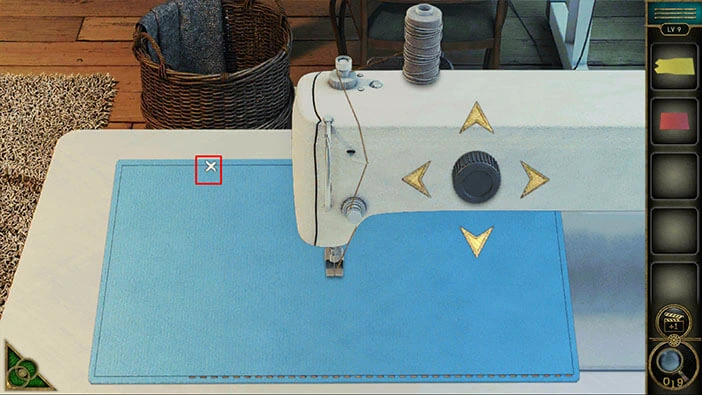
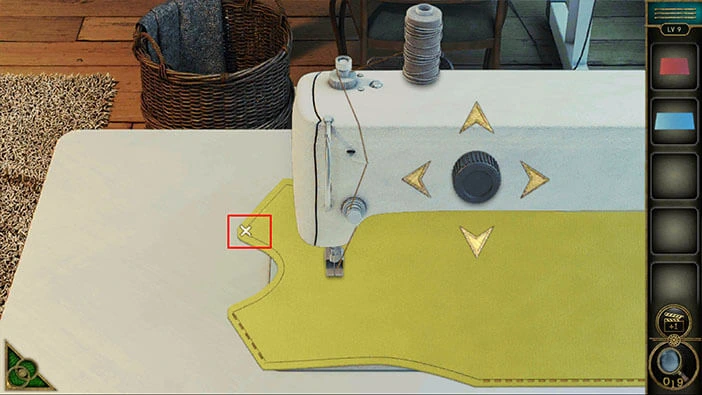
Next, use the four arrows to place the needle above the “X” mark in the top left corner.
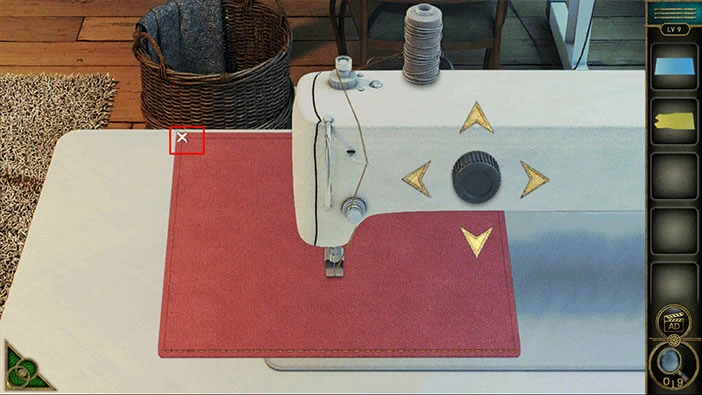
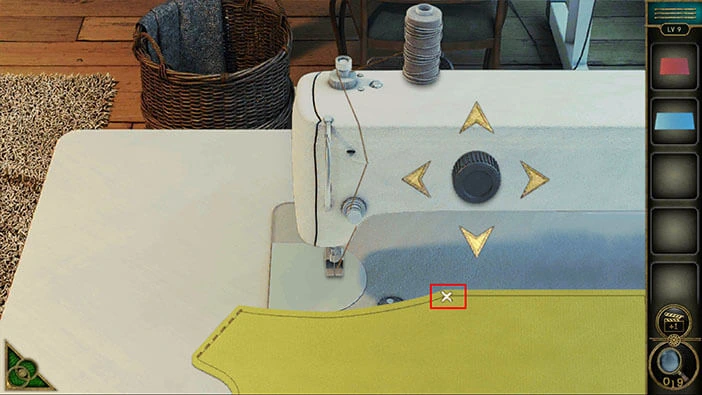
We are done with the red piece, so let’s select the “Blue piece” from the inventory and place it on the table.
Same as before, let’s use the four arrows to place the needle above the “X” mark in the bottom right corner.
Same again, position the needle on the next “X” spot.
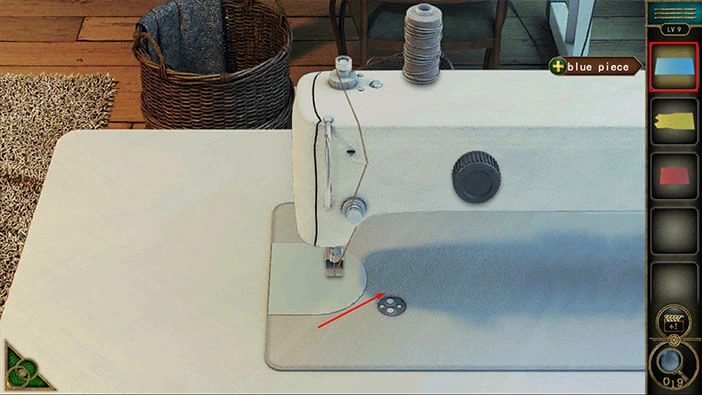
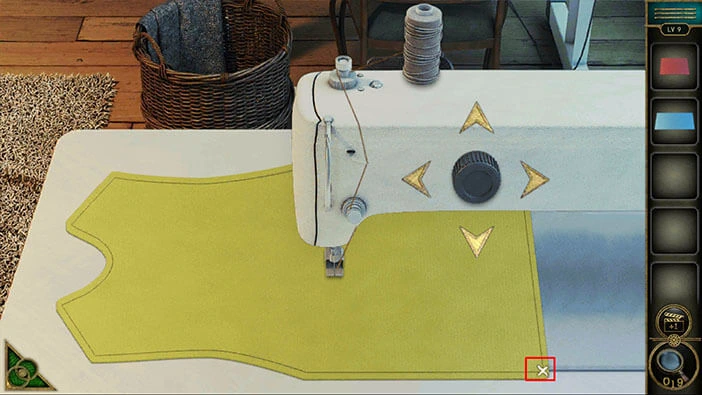
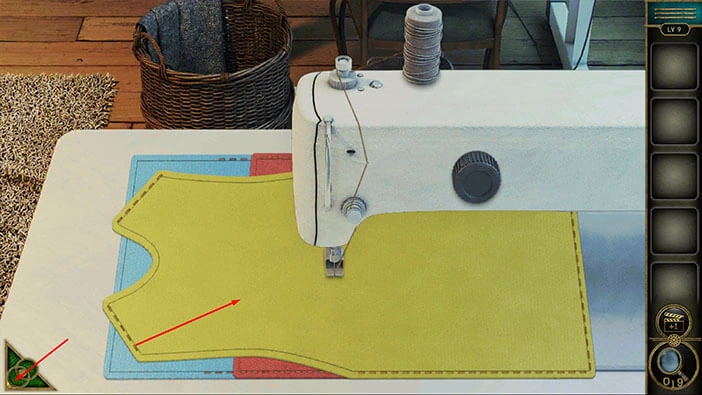
We are done with the blue piece, so let’s select the “Yellow piece” from the inventory and place it on the table.
Same again, position the needle on the “X” spot in the bottom right corner.
Same again, position the needle on the next “X” spot.
Same again, position the needle on the next “X” spot.
One more time, position the needle on the next “X” spot.
Once you complete this, our character will place down the cloth. He will perform one more operation, and assemble the dress. Tap on the “Skirt” to pick it up.
Once you’re done, tap on the green button in the bottom left corner of the screen to go back.
Tap on the mannequin (without dress) on the left to take a closer look at it.
Next, select the “Skirt” from the inventory and put it on the mannequin.
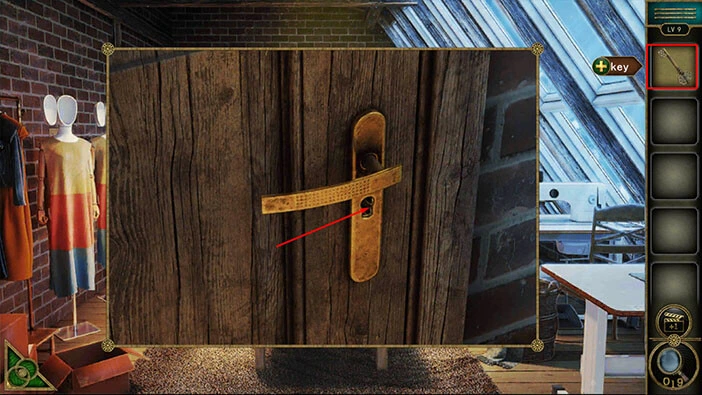
The head of the mannequin will open, and inside you will find a “Key”. Tap on it to pick it up.
After that, tap on the green button in the bottom left corner of the screen to go back.

Tap on the front door to take a closer look at it. Select the “Key” from the inventory and use it to unlock the door.
After that, tap on the door to proceed to the next level.
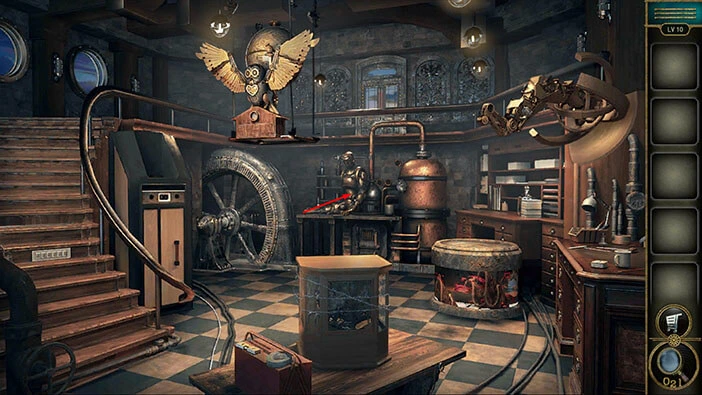
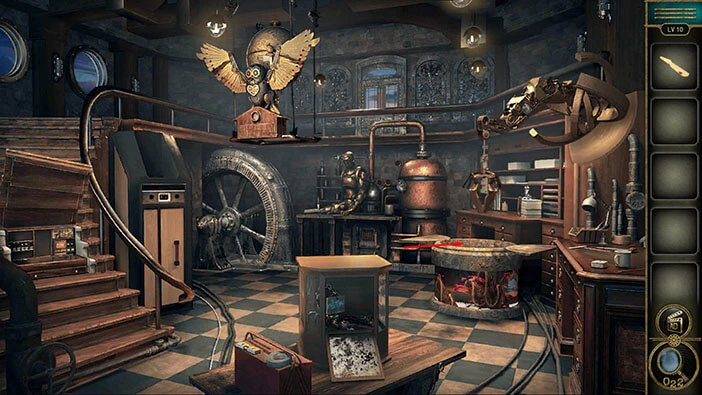
Level 10
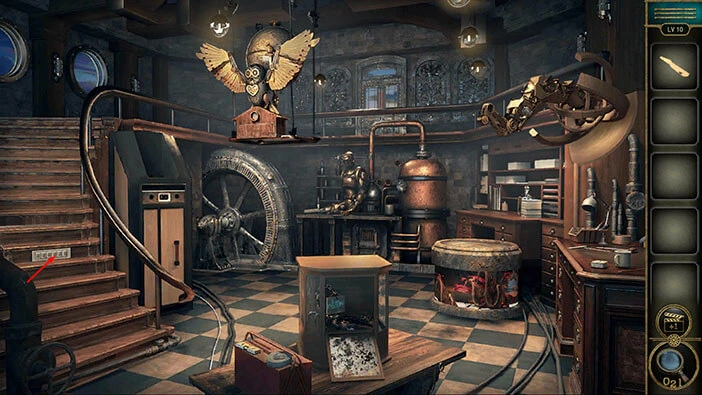
Let’s explore the tenth level. This time we are in the mechanical workshop. Let’s explore it.
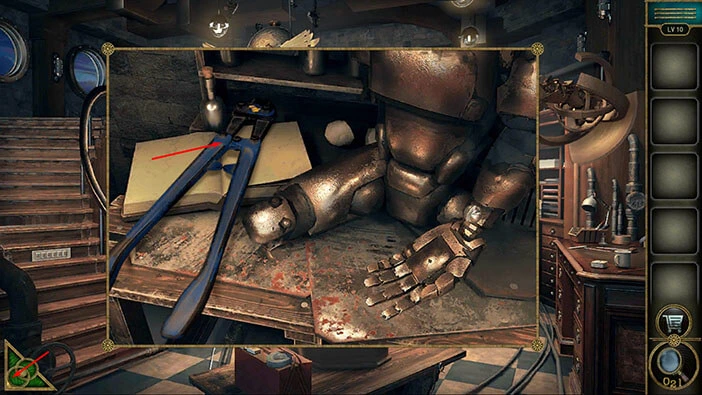
Tap on the unfinished robot, located on the workbench in front of you, to take a closer look at it.
On the left side of the bench, you will see “Pliers”. Tap on them to pick them up. After that, tap on the green button in the bottom left corner of the screen to go back.
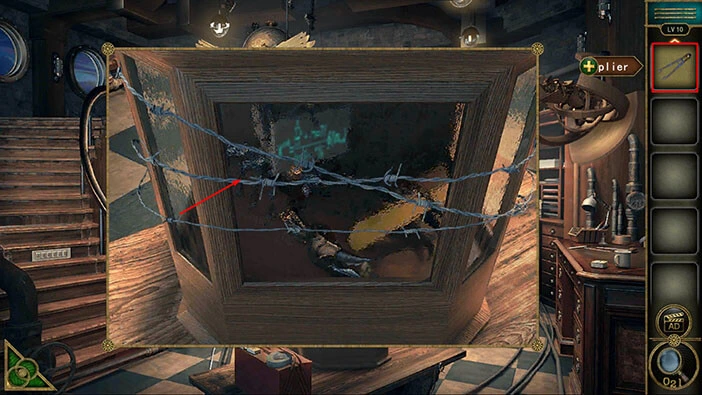
Next, tap on the box located on the table in front of you.

You will notice that the box is enveloped with barbed wire. So, let’s select the “Pliers” from the inventory and use them to cut the wire.
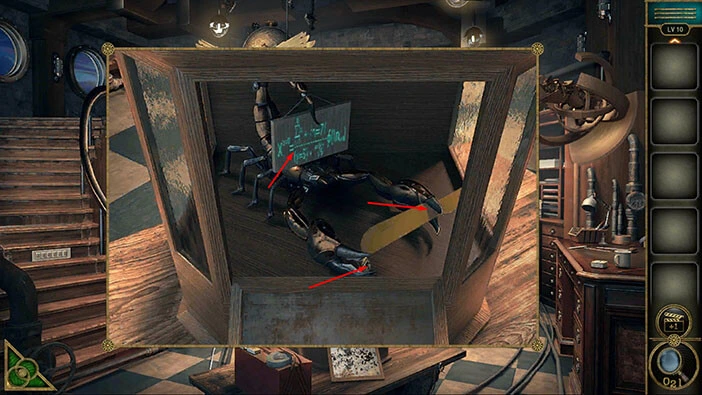
Here, we can see a large mechanical scorpion and it’s holding an item in each of its pincers. Let’s tap on these two items to pick them up. You will get another “Accomplishment star” and a “Feather”.
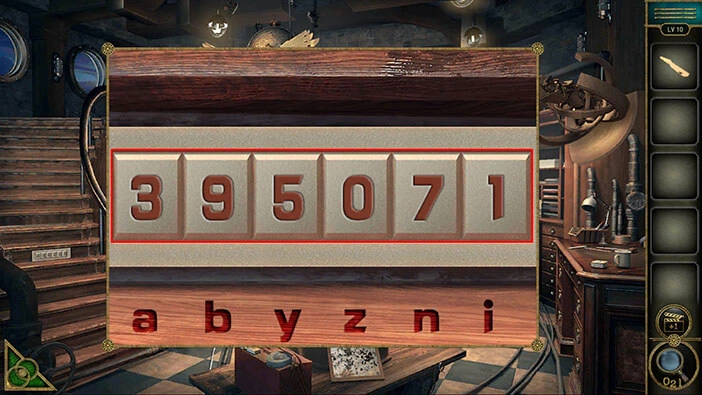
Once you take both items, tap on the display that he is hanging from the scorpion’s tale to take a closer look at it.
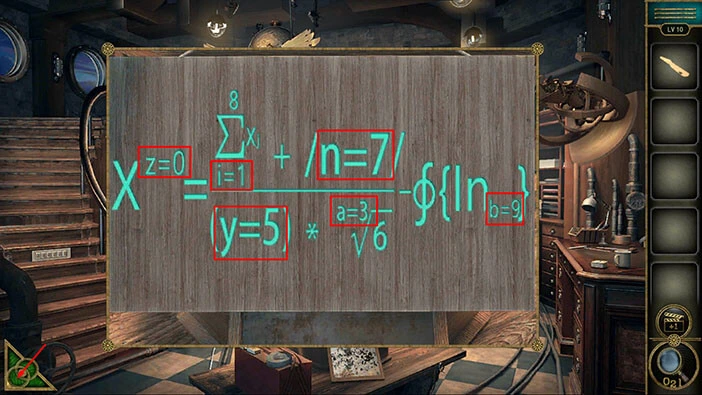
Here, we are interested in the values of the letters. So, let’s memorize/write them down because we will need this information for the next puzzle. We have,
z = 0, i = 1, y = 5, n = 7, a = 3, b = 9.
Once you’re done, tap on the green button in the bottom left corner of the screen to go back.
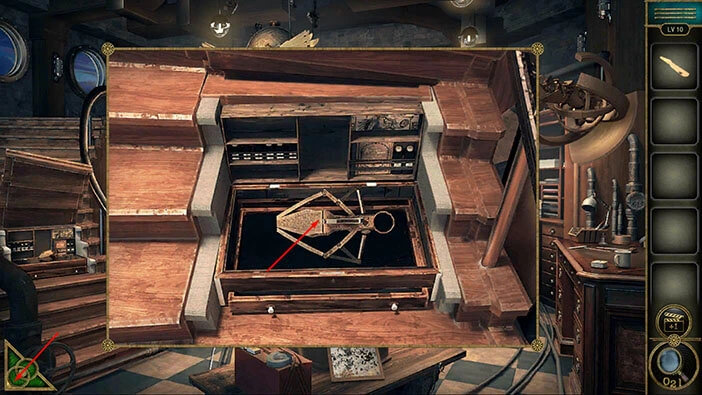
Next, you will notice a small board on the stairs. Tap on it to take a closer look at it, and tap again to start the interaction.
Here, you will see the same six letters that we saw previously. So, to solve this puzzle, we just need to enter the values above each letter, and we already discovered these values. We had,
z = 0, i = 1, y = 5, n = 7, a = 3, b = 9.
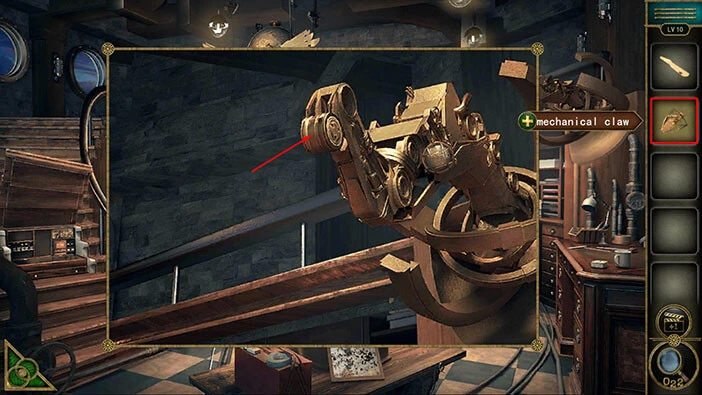
As soon as you enter the correct code the secret compartment in the stairs will open and inside you will find “Mechanical claw”. Tap on it to pick it up.
Once you’re done, tap on the green button in the bottom left corner of the screen to go back.
Tap on the machine that is attached to the top right wall of the room to take a closer look at it.
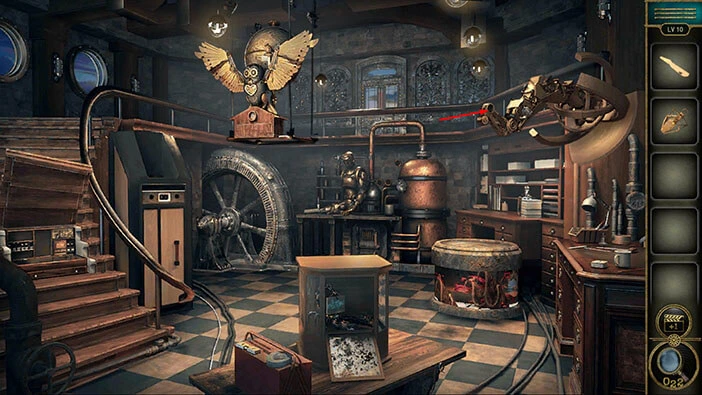
This machine is missing one part. Let’s select the “Mechanical claw” from the inventory and attach it to the mechanical arm.
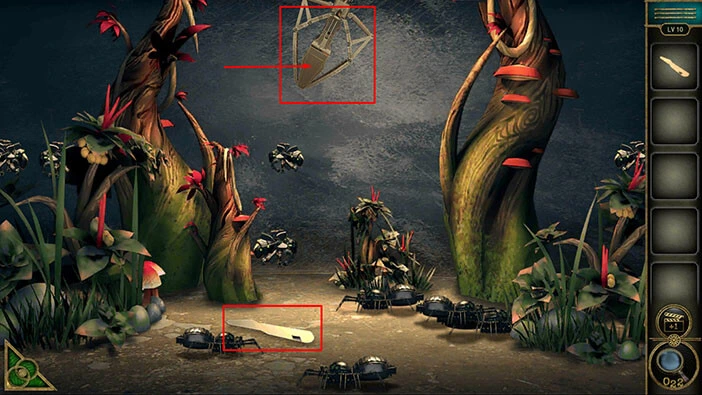
The mechanical claw will automatically open the well on the right, so let’s take a closer look at it.
Here, we can see a bunch of mechanical flies and spiders, running left and right. On the ground, close to the middle of the screen, we can see another feather. At the top of the screen, we can see a mechanical claw, and it is rotating left/right.
Our task is to bring down the mechanical claw, and use it to grab the “Feather”. However, we have to avoid the mechanical flies and spiders (the flies will block the claw from reaching the ground, and the claw will pick up the spiders) Tap on the mechanical claw to bring it down.
Once you have the “Feather” tap on the green button in the bottom left corner of the screen to go back.
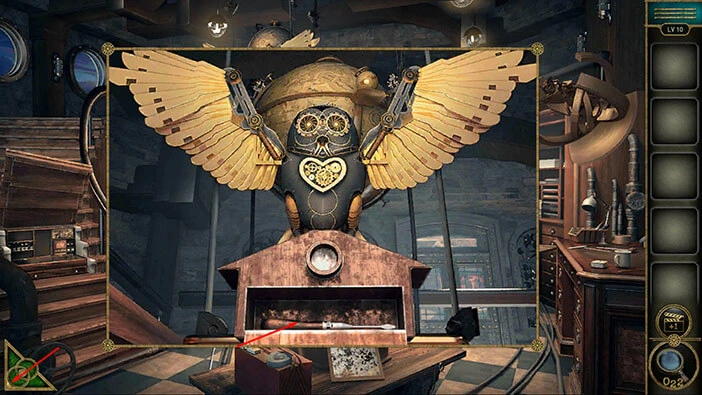
Next, you will notice a mechanical owl, and it is hanging from the ceiling in the middle of the room. Tap on it to take a closer look.

You will notice that the owl is missing two feathers. So, let’s select the “Feathers” from the inventory and insert them into the empty slot.
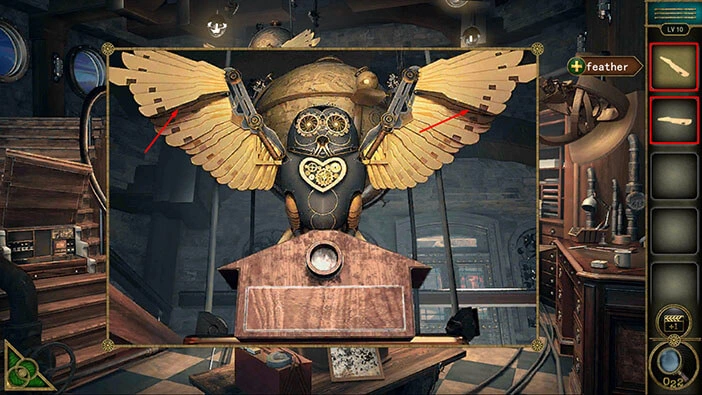
As soon as you insert the “Feathers” the small house below the owl will open, and inside you will find a “Screwdriver”. Tap on it to pick it up.
After that, tap on the green button in the bottom left corner of the screen to go back.
We should now go back to the robot, and use the screwdriver to remove some of its parts. Let’s do that. Tap on the robot to take a closer look at it.

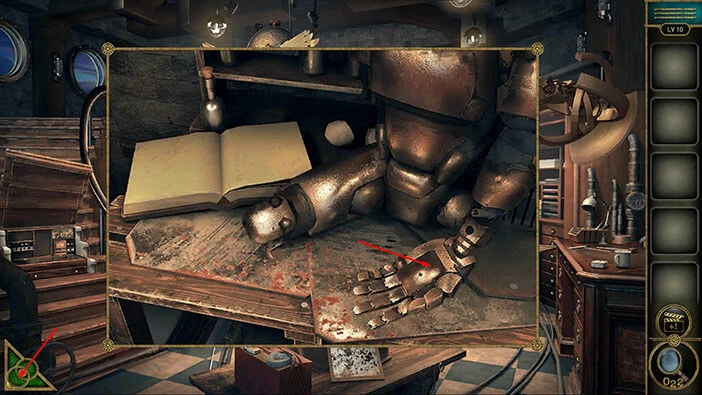
Select the “Screwdriver” from the inventory and use it to detach the robot’s hand from its arm.
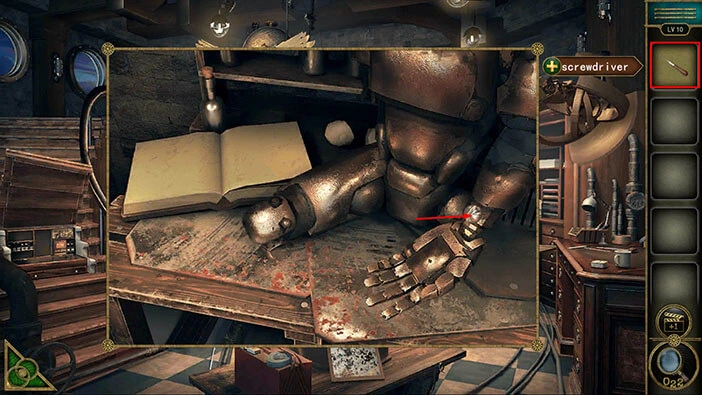
Next, tap on the “Hand” to pick it up. After that, tap on the green button in the bottom left corner of the screen to go back.
Next, tap on the machine, located next to the stairs, to take a closer look at it.
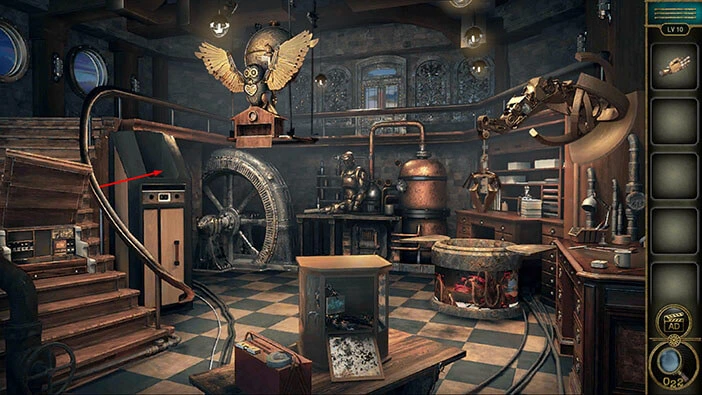
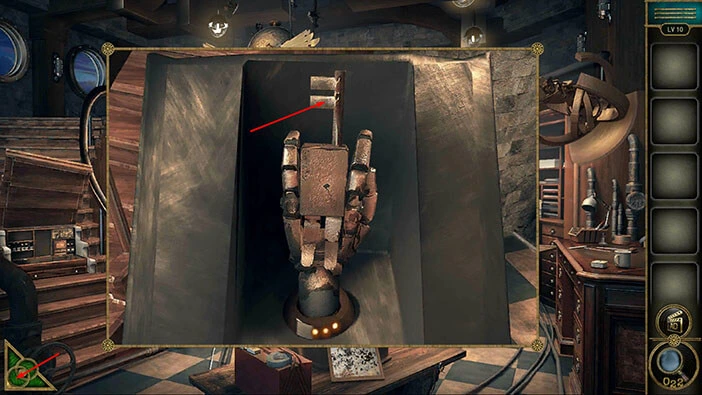
Select the “Hand” from the inventory and insert it into the empty slot.
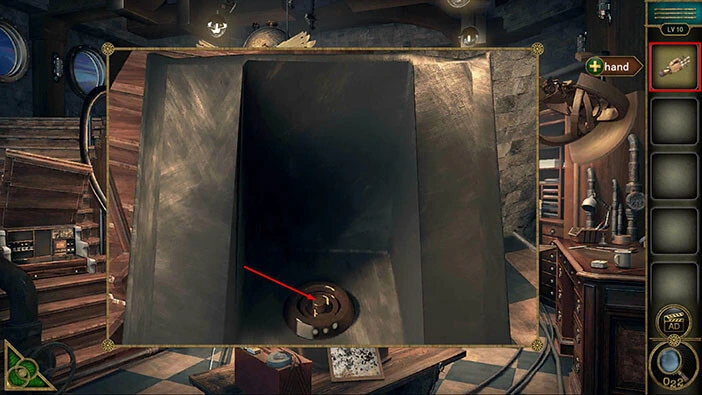
The fingers on the hand will rotate downwards, and a “Key” will rise from the hand. Tap on it to pick.
After that, tap on the green button in the bottom left corner of the screen to go back.
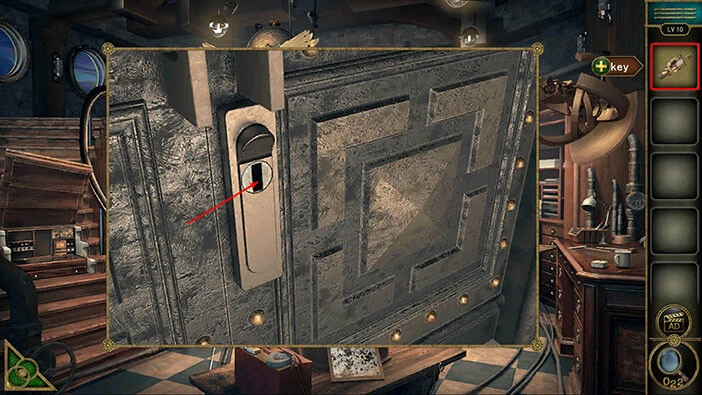
Let’s get out of here. Tap on the door, located on the second floor, to take a closer look.

Select the “Key” from the inventory and use it to unlock the door. Tap on the door again to proceed to the next level.
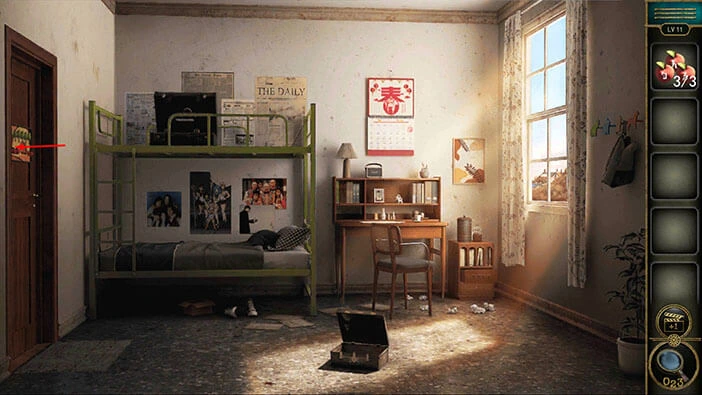
Level 11
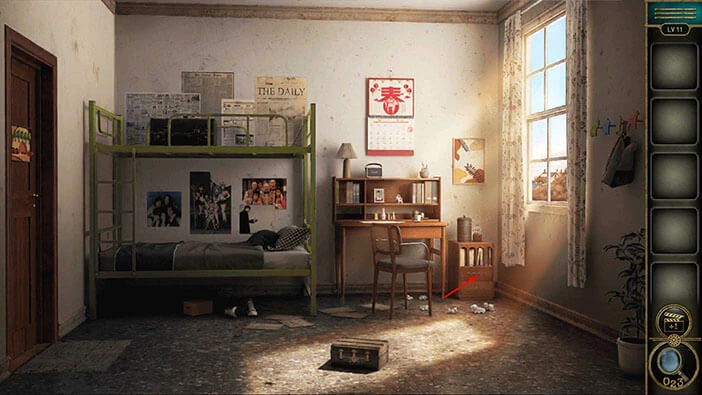
Let’s explore the eleventh level. This time we are in the bedroom. Let’s explore it.
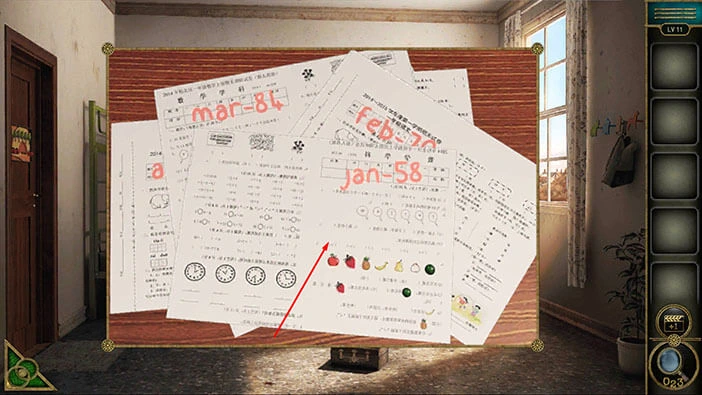
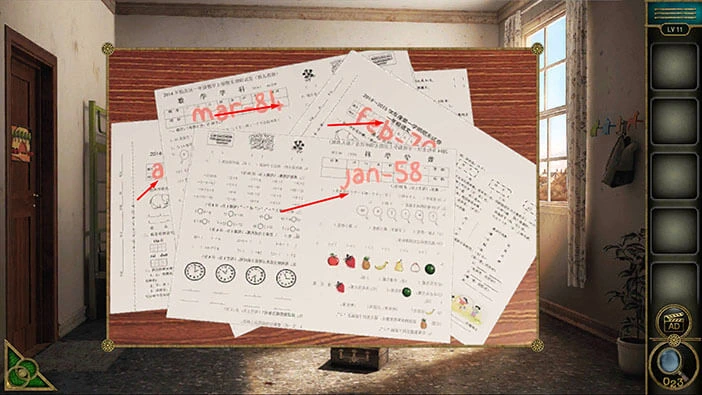
Tap on the papers on the table to take a closer look at them, and tap again to examine them.

On the first paper, you will notice “jan-58”. Memorize/write down this information. Once you’re done, tap on the green button in the bottom left corner of the screen to go back.

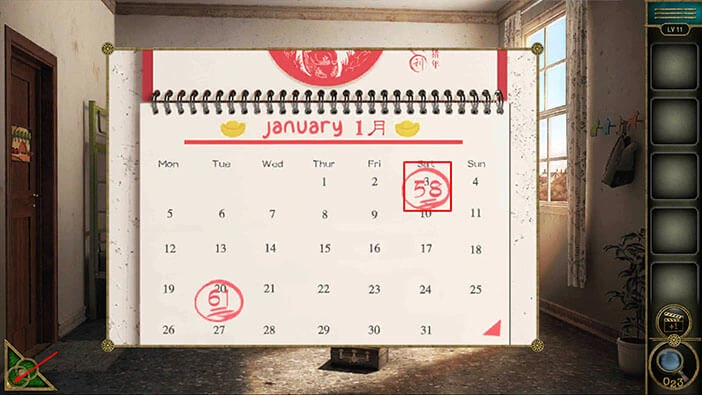
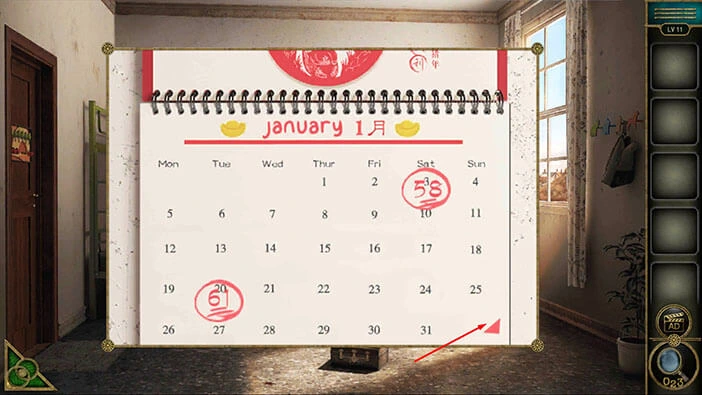
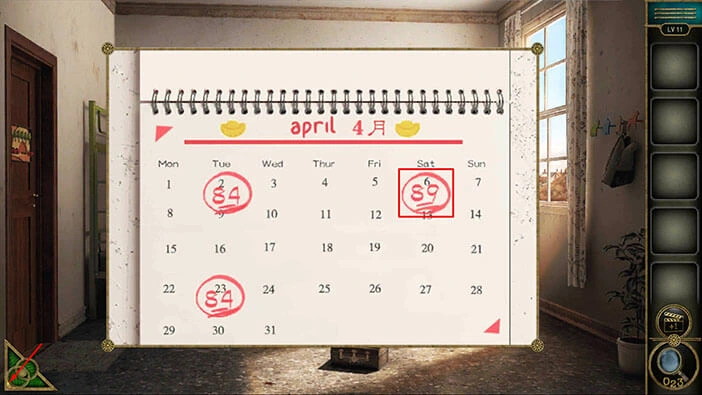
Next, tap on the calendar, located above the desk, to take a closer look at it.
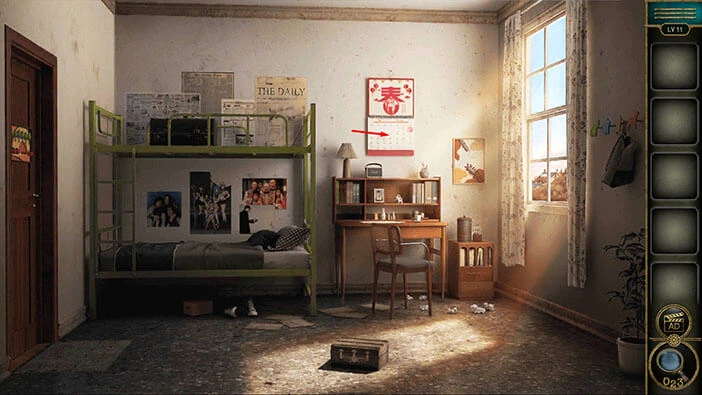
You will notice that for January, we have two red numbers, 58 and 61. Previously, we saw “jan-58”. If you look at the calendar, you will notice the number 3, inside the red circle with the number 58.
So, let’s memorize/write down this information. January = 3. This is the first part of the solution for the next puzzle, and we will take a look at this puzzle in the next step.
Once you’re done, tap on the green button in the bottom left corner of the screen to go back.
Next, tap on the cabinet, located in the right corner of the room, to take a closer look at it, and tap again to start the interaction.
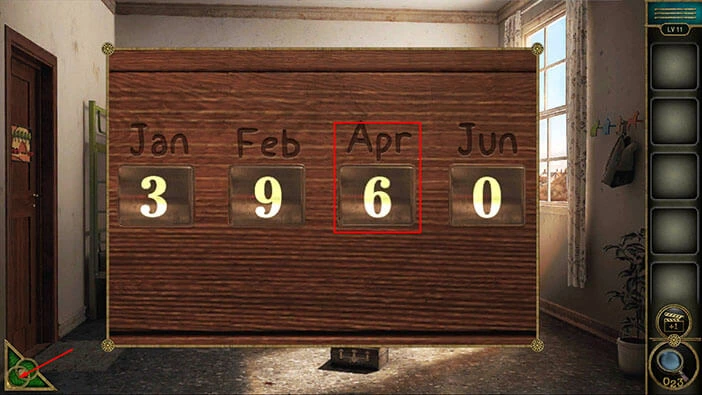
Here, you will notice four months, January, February, April, and June. In order to solve this puzzle, we will need one digit for each month. We already discovered the digit for January (January = 3) by examining the calendar and papers on the desk.
So, let’s enter the number 3 in the first slot (below “Jan”).
Once you’re done, tap on the green button in the bottom left corner of the screen to go back.

Let’s repeat the process, and look for the digit for February. Tap on the papers on the desk to take a closer look, and tap again to examine them.
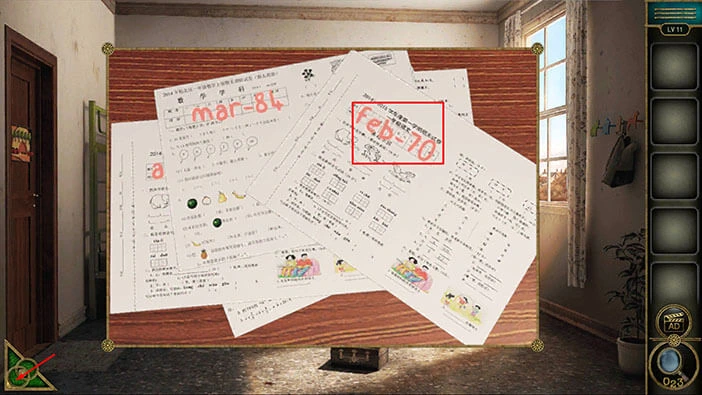
Tap on the “Jan-58” to move it aside, so that we can take a look at the paper below it.
On the second paper, you will notice “feb-70”. Memorize/write down this information. Once you’re done, tap on the green button in the bottom left corner of the screen to go back.
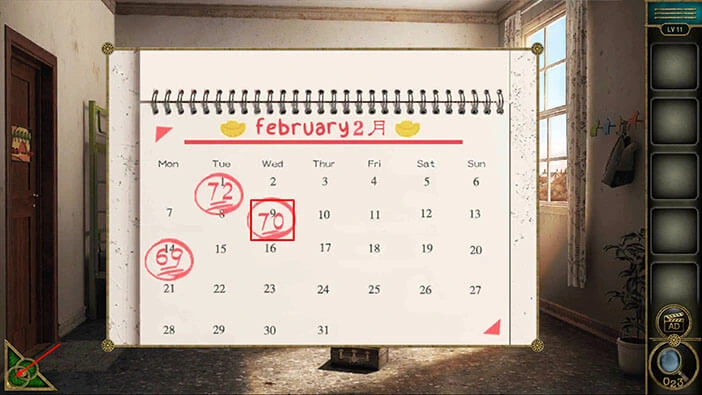
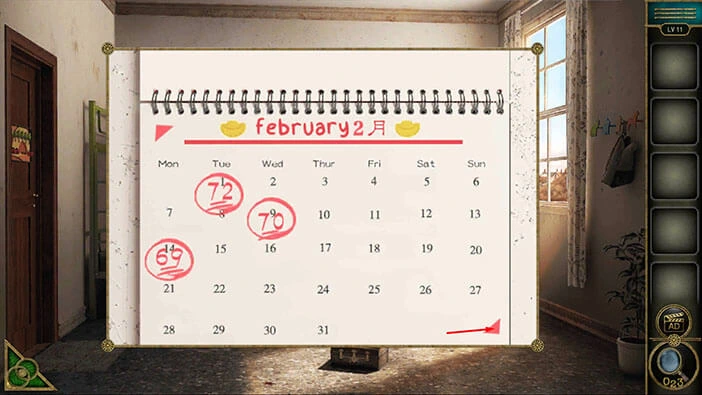
Next, tap on the calendar, located above the desk, to take a closer look at it. After that, tap on the arrow located in the bottom right corner of the calendar to look at the next page.
You will notice that for February, we have three red numbers, 72, 70, and 69. Previously, we saw “feb-70”. If you look at the calendar, you will notice the number 9, inside the red circle with the number 70.
So, let’s memorize/write down this information. February = 9. This is the second part of the solution for the next puzzle.
Once you’re done, tap on the green button in the bottom left corner of the screen to go back.
Next, tap on the cabinet to take a closer look at it, and tap again to start the interaction.
Let’s enter the second number. February = 9.
Once you’re done, tap on the green button in the bottom left corner of the screen to go back.

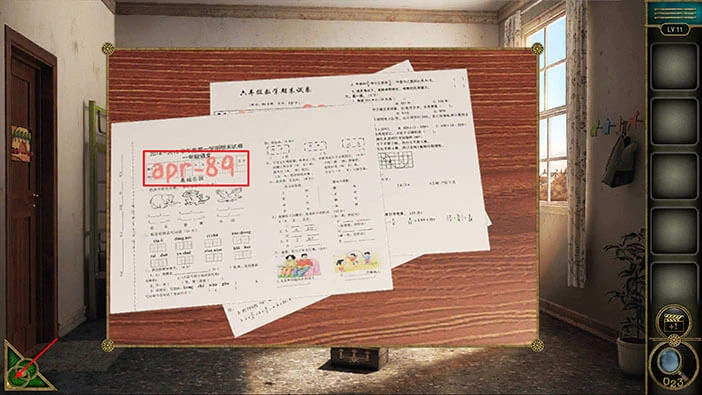
Let’s repeat the process, and look for the third digit for April. Tap on the papers on the desk to take a closer look, and tap again to examine them.
Tap on the papers to move them aside, until you see April (we don’t need the digit for March because the months on the cabinet puzzle are January, February, April, and June).

On the fourth paper, you will notice “apr-89”. Memorize/write down this information. Once you’re done, tap on the green button in the bottom left corner of the screen to go back.
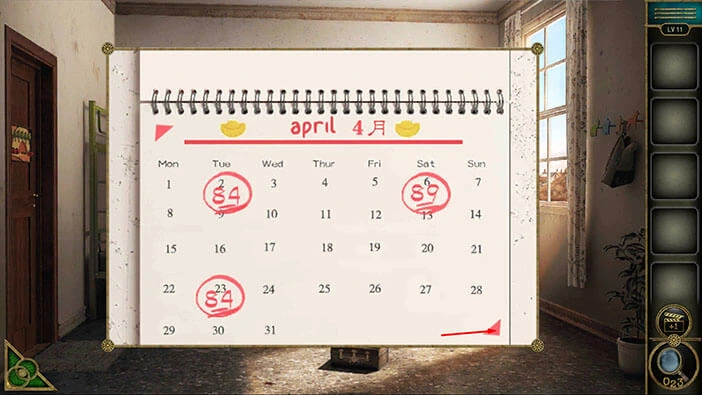
Next, tap on the calendar, located above the desk, to take a closer look at it. After that, tap two times on the arrow located in the bottom right corner of the calendar to look at the April page.
You will notice that for April, we have three red numbers, 84, 89, and 84. Previously, we saw “apr-89”. If you look at the calendar, you will notice the number 6, inside the red circle with the number 89.
So, let’s memorize/write down this information. April = 6. This is the third part of the solution for the next puzzle.
Once you’re done, tap on the green button in the bottom left corner of the screen to go back.
Next, tap on the cabinet to take a closer look at it, and tap again to start the interaction.
Let’s enter the third number. April = 6.
Once you’re done, tap on the green button in the bottom left corner of the screen to go back.
Let’s repeat the process, and look for the fourth digit for April. Tap on the papers on the desk to take a closer look, and tap again to examine them.
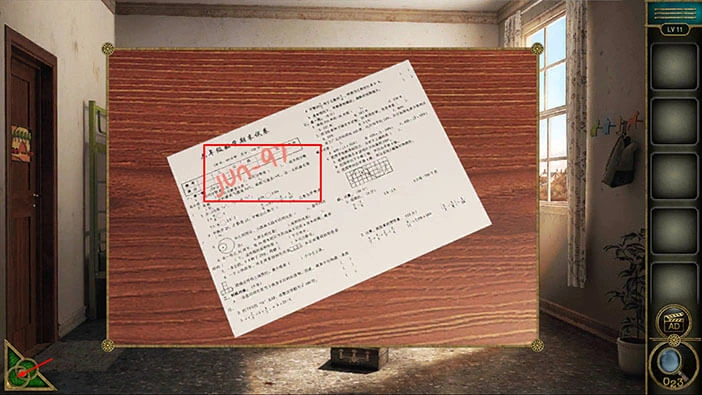
Tap on the papers to move them aside, until you see June.
On the sixth paper, you will notice “jun-97”. Memorize/write down this information. Once you’re done, tap on the green button in the bottom left corner of the screen to go back.
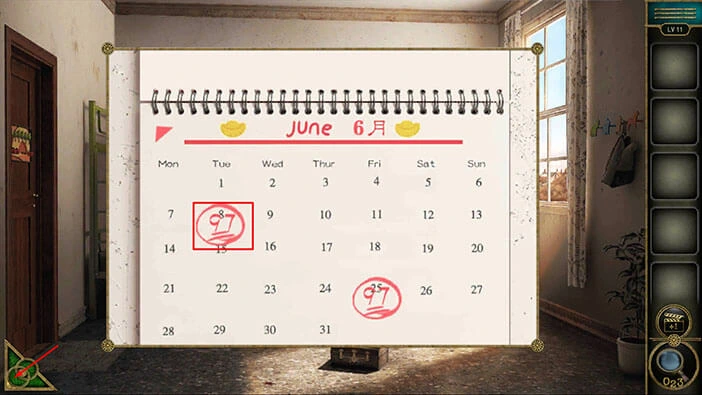
Next, tap on the calendar, located above the desk, to take a closer look at it. After that, tap two times on the arrow located in the bottom right corner of the calendar to look at the June page.
You will notice that for June, we have three red numbers, 97, and 97. Previously, we saw “apr-97”. We are looking for a single digit, so we need the first number 97, with the number 8 inside the red circle.
So, let’s memorize/write down this information. June = 8. This is the fourth part of the solution for the next puzzle.
Once you’re done, tap on the green button in the bottom left corner of the screen to go back.
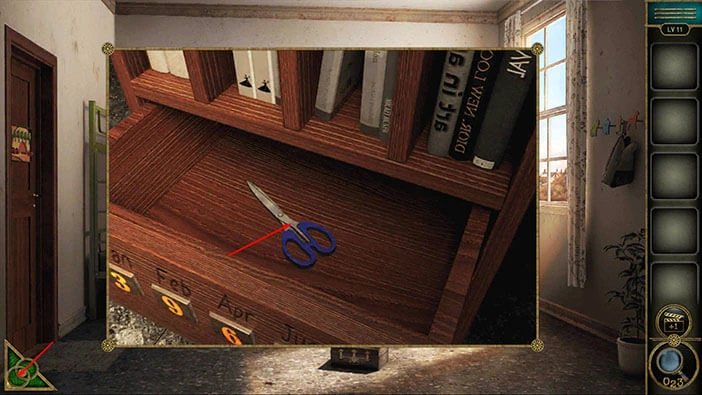
Next, tap on the cabinet to take a closer look at it, and tap again to start the interaction.
Let’s enter the last number. June = 8.

As soon as you enter the last number, you will unlock the drawer, and inside you will find “Scissors”. Tap on them to pick them up.
After that, tap on the green button in the bottom left corner of the screen to go back.
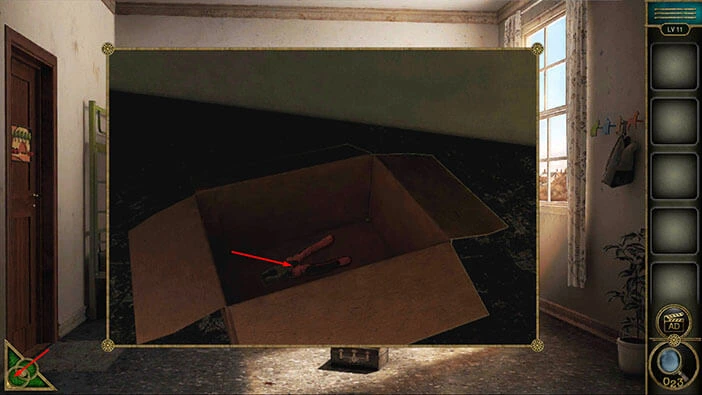
Next, if you pay attention to the bed on the left, you will notice a cardboard box under it. Let’s tap on the box to take a closer look at it.

Select the “Scissors” from the inventory and use them to open the box.
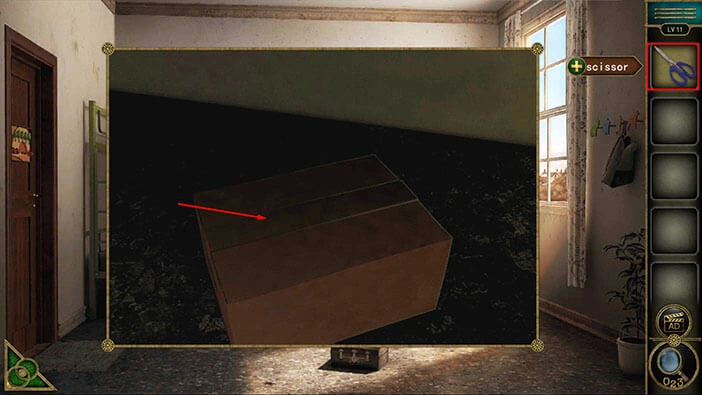
In the box, you will find “Pliers”. Tap on them to pick them up.
After that, tap on the green button in the bottom left corner of the screen to go back.
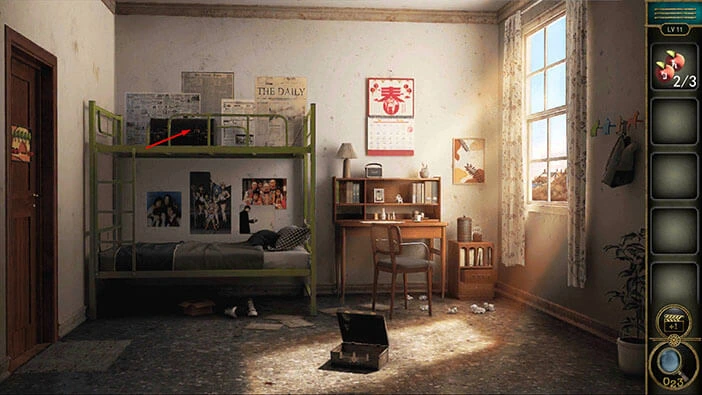
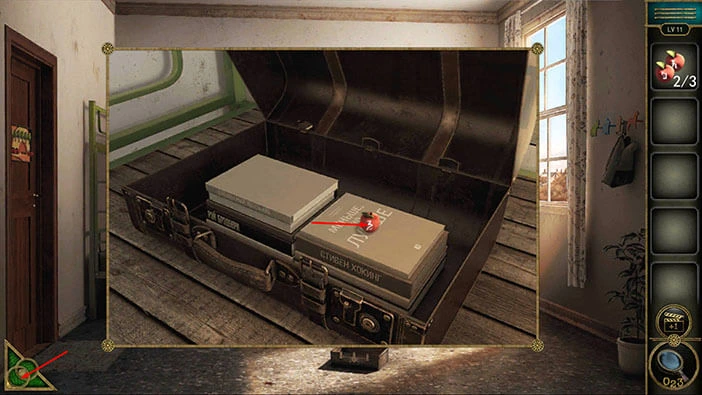
Next, tap on the suitcase, located on the floor in the middle of the room, to take a closer look at it.

Select the “Pliers” from the inventory and use them to open the suitcase.
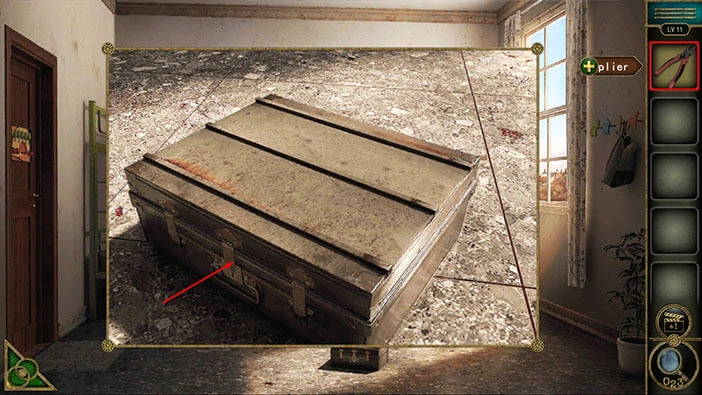
In the suitcase, you will find an “Apple with a symbol”. Tap on it to pick it up. This is the first of the three apples that we will have to find.
Once you’re done, tap on the green button in the bottom left corner of the screen to go back.

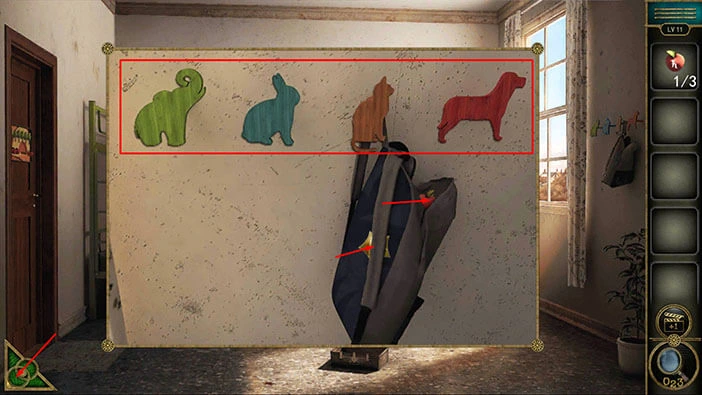
Next, tap on the symbols on the wall on the right to take a closer look at them.
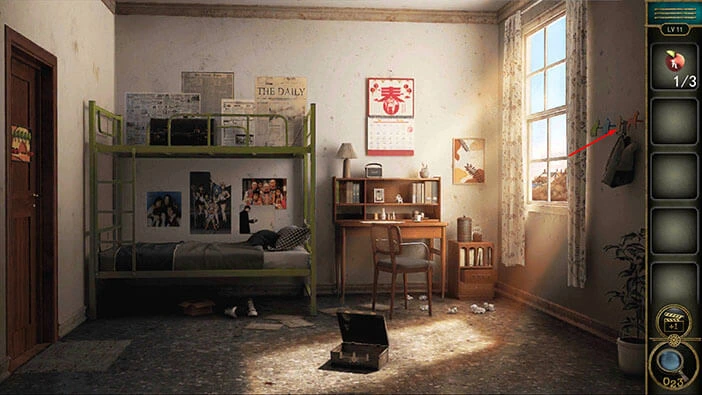
Tap on the “Accomplishment star” (in the vest) to pick it up. After that, tap on the “Apple with a symbol” (also in the vest) to pick it up.
Before we continue, let’s look at the animal symbols. Here we have,
Green Elephant, Blue Rabbit, Orange Cat, and Red Dog. Memorize/write down the color of each animal because we will need it for the next puzzle.
Once you’re done, tap on the green button in the bottom left corner of the screen to go back.
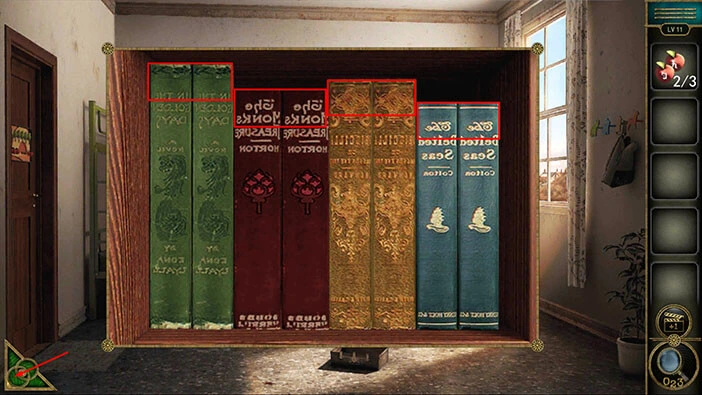
Next, tap twice on the bookshelf, located above and to the left of the desk to take a closer look at it.

Here, we need to memorize/write down the height of each book, and its color. So, starting from the book at the highest position, we have,
High = Green
Middle high = Orange
Middle low = Red
Low = Blue
Once you’re done, tap on the green button in the bottom left corner of the screen to go back.
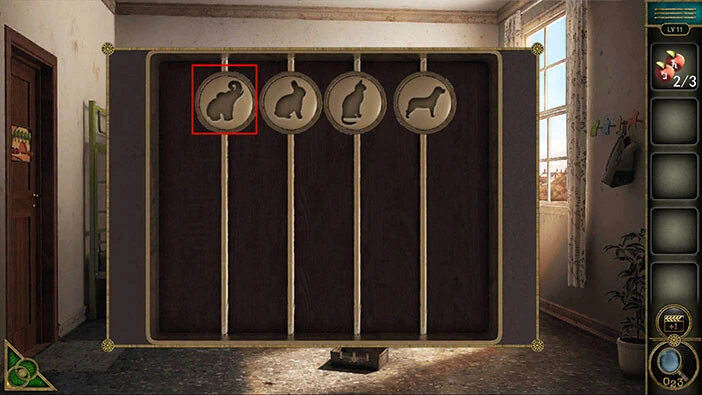
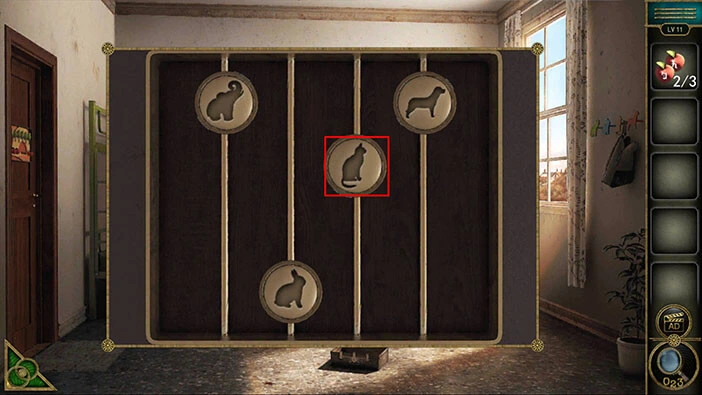
Next, let’s tap on the black chest, located at the top bed, to take a closer look at it. After that, tap on the bars on the top of the chest to start the interaction.
Here, we can see four coins with the same four animal symbols that we saw previously, an elephant, a rabbit, a cat, and a dog. However, the animals here are grey(ish). So, our task is to arrange the coins by height. We will do this puzzle in several steps. Let’s begin.
Step 1
The first coin has the elephant symbol. Previously we saw the Green Elephant. The green book was at the “High” position. So, green color = Elephant.
With that, said the elephant coin should be at the “High” position. It is already at this position, so let’s move on to the next coin.
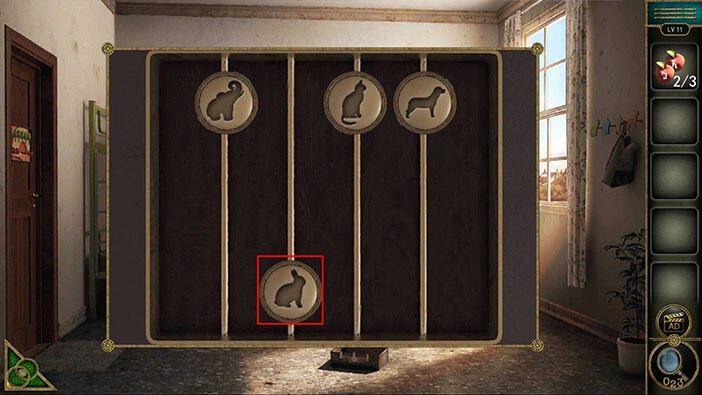
Step 2
The second coin has the rabbit symbol. Previously we saw the Blue Rabbit. The blue book was at the “Low” position. So, blue color = Rabbit.
With that, said the rabbit coin should be at the “Low” position. So, let’s move it to this position.
Step 3
The third coin has the cat symbol. Previously we saw the Orange Cat. The orange book was at the “Middle high” position. So, orange color = Cat.
With that, said the cat coin should be at the “Middle high” position. So, let’s move it to this position.
Step 4
The fourth coin has the dog symbol. Previously we saw the Red Dog. The red book was at the “Middle low” position. So, red color = Dog.
With that, said the dog coin should be at the “Middle low” position. So, let’s move it to this position. Once you complete this step, you will solve the puzzle.
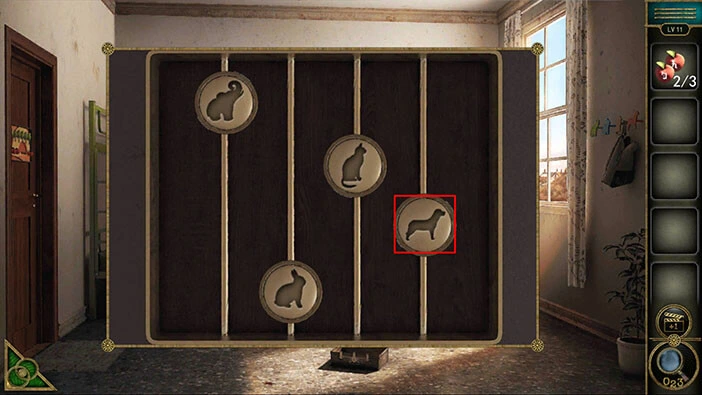
As soon as you correctly arrange the coins, you will unlock the chest, and inside you will find another “Apple with a symbol”. Tap on it to pick it up.
After that, tap on the green button in the bottom left corner of the screen to go back.
Next, if you take a look at the door, you will notice a picture. Let’s tap on this picture to examine it.
You will notice that three apples are missing. So, select the “Apples” from the inventory and insert them into the empty slots. After that, tap on the picture to start the interaction.

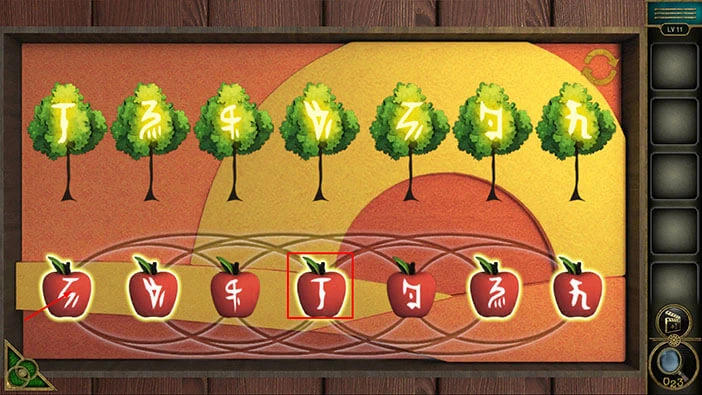
If you pay attention to the trees, you will notice that they have the same symbols as the apples. So, our next task is to shuffle the apples and match them with the symbols on the trees above.
We will do this in several steps. Let’s begin.
Step 1
Select the fourth apple (looking from left to right) then tap on the seventh apple to swap their position.

Step 2
Select the fourth apple then tap on the first apple to swap their position.
Step 3
Select the fifth apple then tap on the second apple to swap their position.

Step 4
Select the second apple then tap on the fourth apple to swap their position.

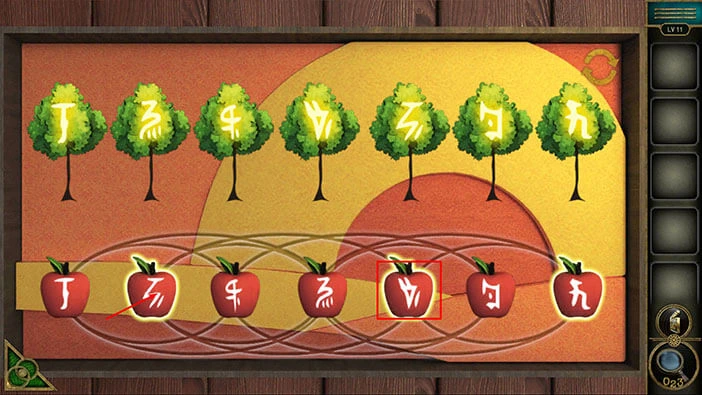
Step 5
Select the fourth apple then tap on the sixth apple to swap their position.

Step 6
Select the fifth apple then tap on the second apple to swap their position.
Step 7
Select the second apple then tap on the fourth apple to swap their position. With that, you will solve this puzzle.

The door will open as soon as you arrange the apples in the correct order. Tap on the door to proceed to the next level.
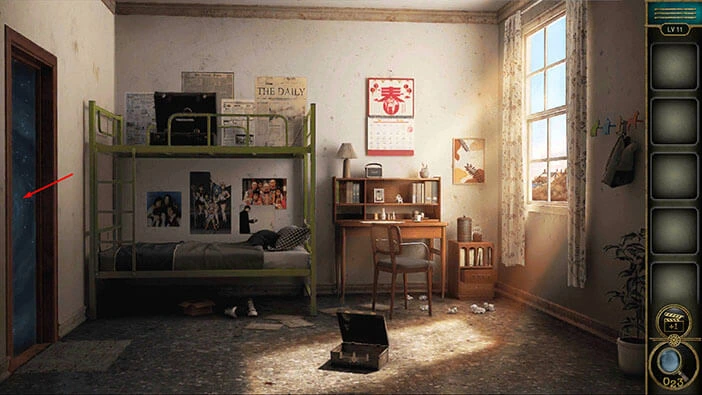
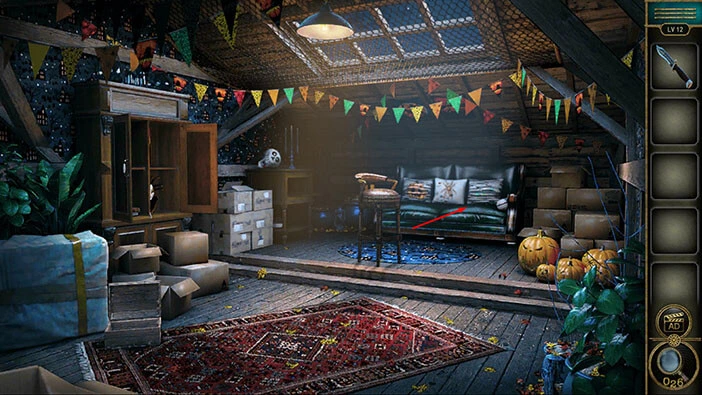
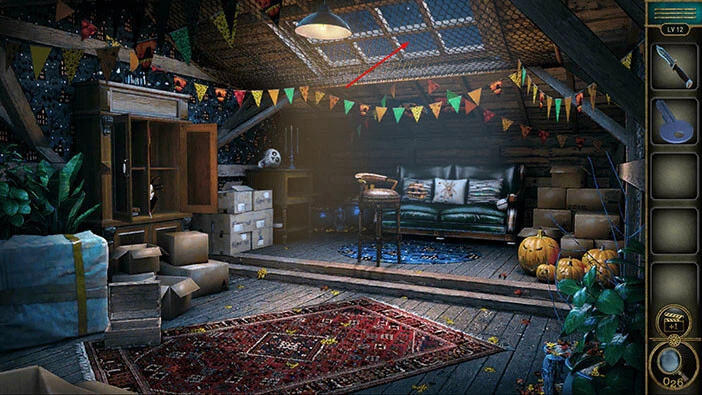
Level 12
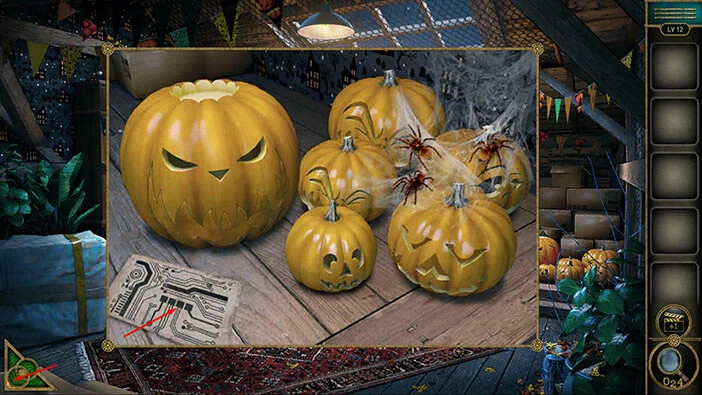
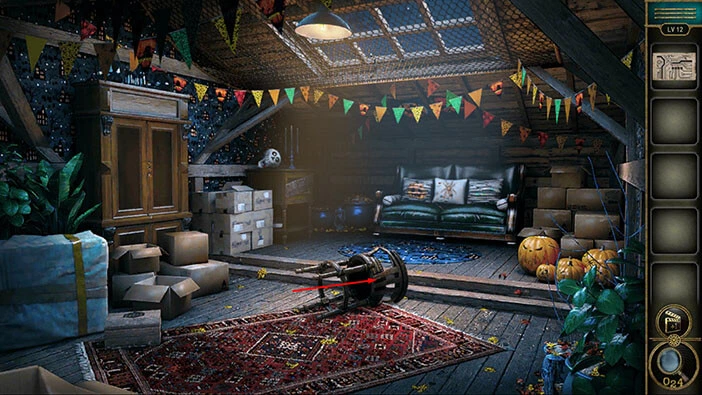
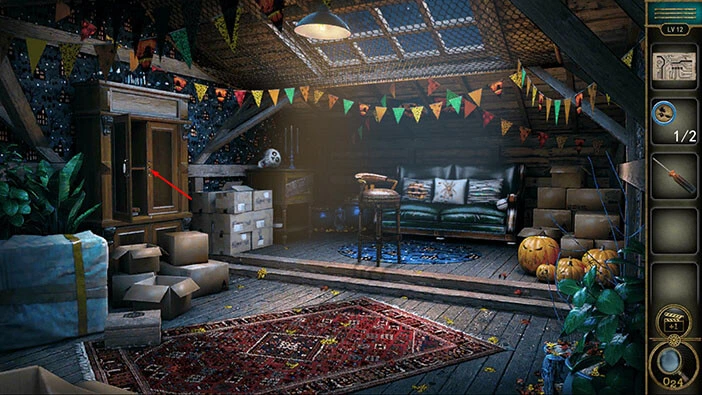
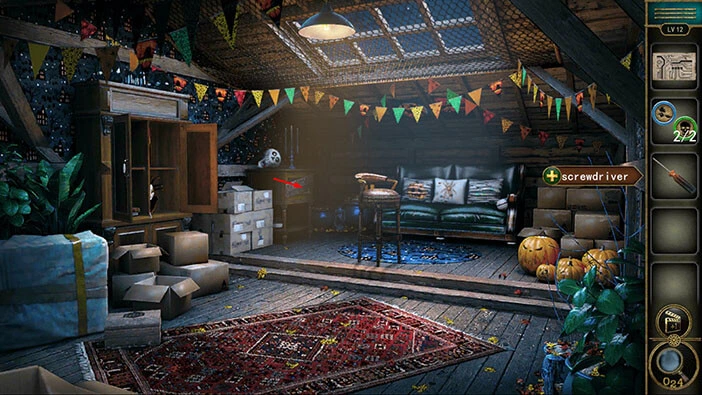
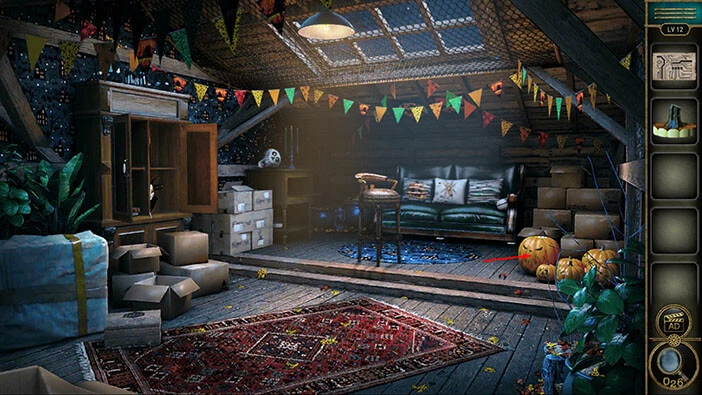
Let’s explore the twelfth level. This time we are in the attic. Let’s explore it.
Tap on the pumpkin heads on the right to take a closer look at them.
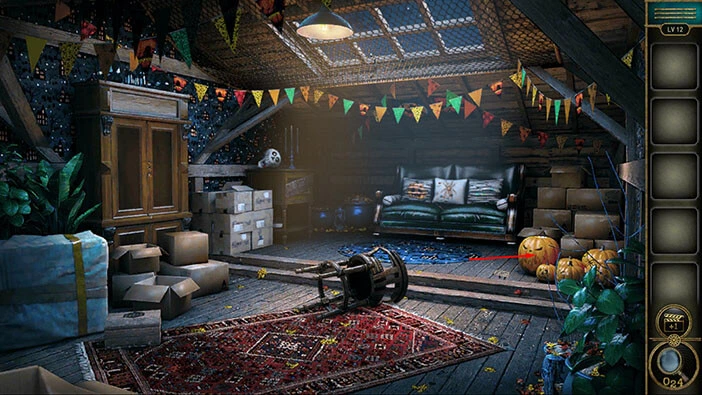
Here, you will find a “Paper with hints” so tap on it to pick it up.
After that, tap on the green button in the bottom left corner of the screen to go back.
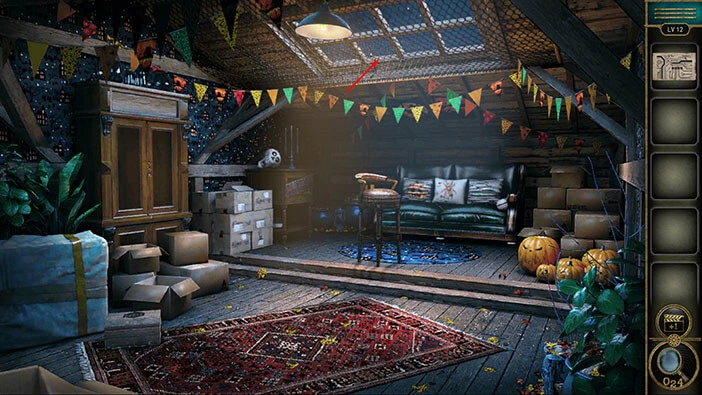
Next, tap on the turned-over chair to pick it up and place it down.
We can now reach the roof window, so let’s tap on it to take a closer look.
Here, you will find a “Handle” so tap on it to pick it up. After that, tap on the green button in the bottom left corner of the screen to go back.
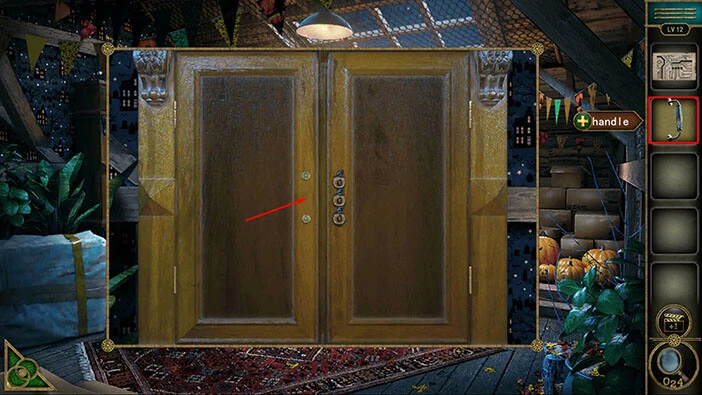
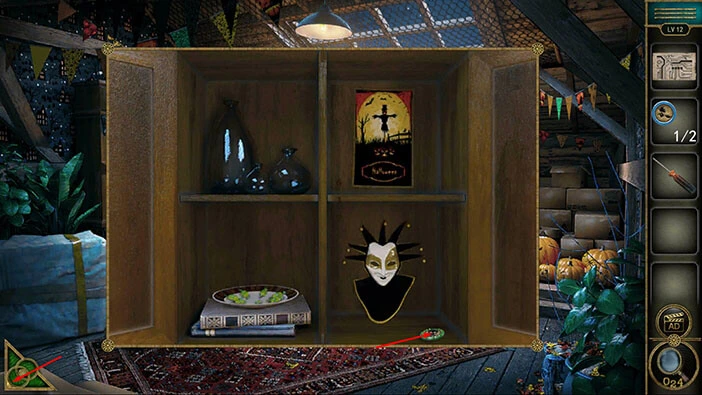
Next, tap on the cabinet on the right to take a closer look at it.

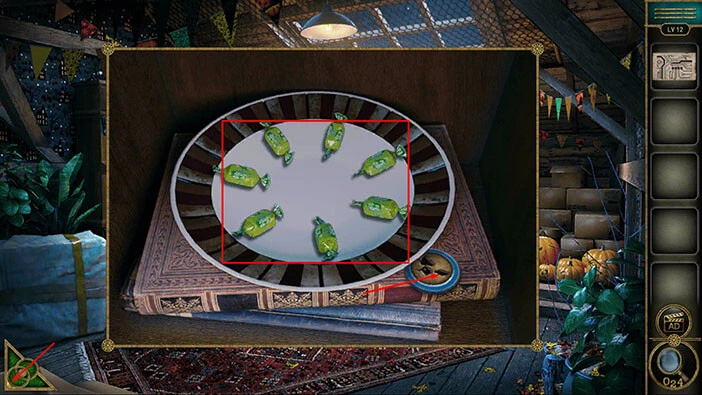
You will notice that one handle is missing, so select the “Handle” from the inventory and insert it into the empty slot. The cabinet door will open, and inside you will see a plate. Tap on it to examine it.
On the right you will see a “Blue button”. Tap on it to pick it up. Here, you will also notice seven green candies. Memorize/write down this information because it represents a hint for the next puzzle.
Once you’re done, tap on the green button in the bottom left corner of the screen to go back.
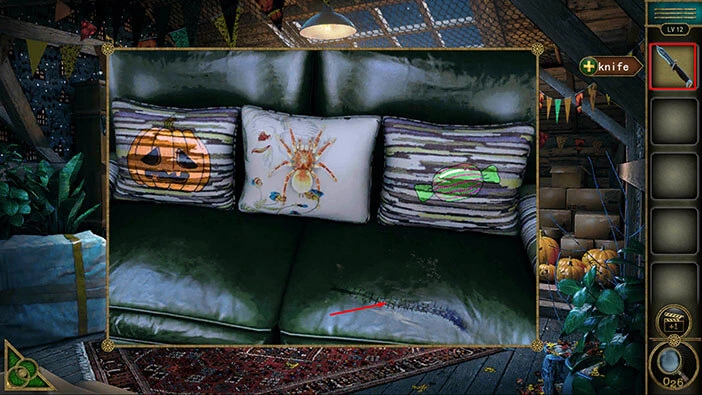
Next, tap on the couch to take a closer look at it.
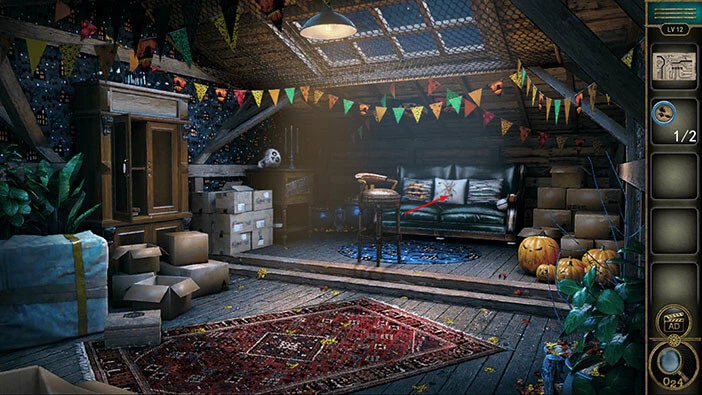
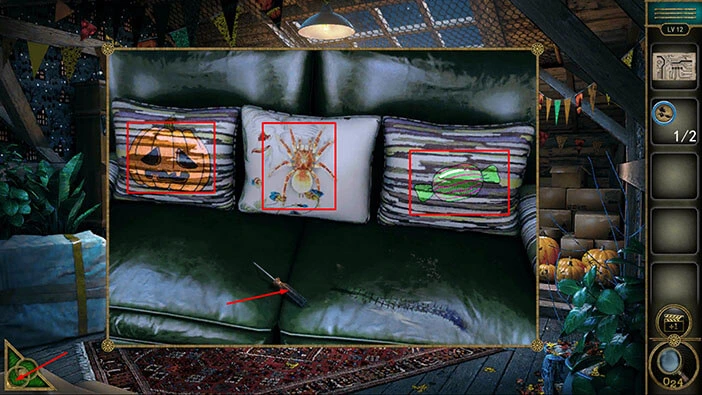
On the couch, you will find a “Screwdriver”. Tap on it to pick it up. Here, we should also pay attention to the three pillows. The order of the symbols on the pillows represents the hint for the next puzzle, so let’s memorize/write it down. Looking from left to right, we have,
First = Pumpkin head
Second = Spider
Third = Candy
Once you’re done, tap on the green button in the bottom left corner of the screen to go back.
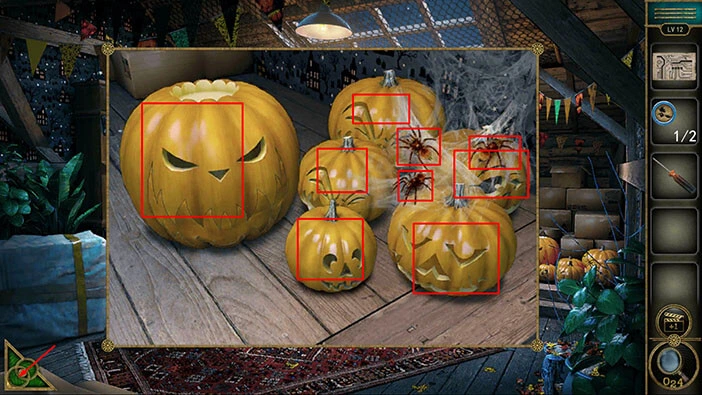
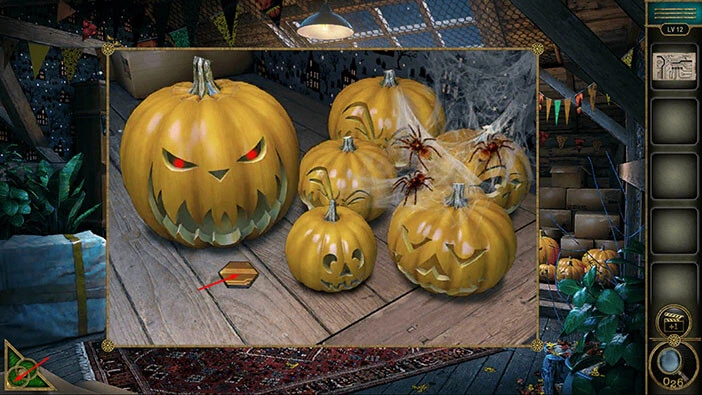
Next, tap on the pumpkin heads on the right to take a closer look at them.

Here, we can see 6 pumpkin heads and 3 spiders. Memorize/write down this information. After that, tap on the green button in the bottom left corner of the screen to go back.
Next, we should go back to the cabinet on the left. This time, tap on the cabinet door on the right to start the interaction.
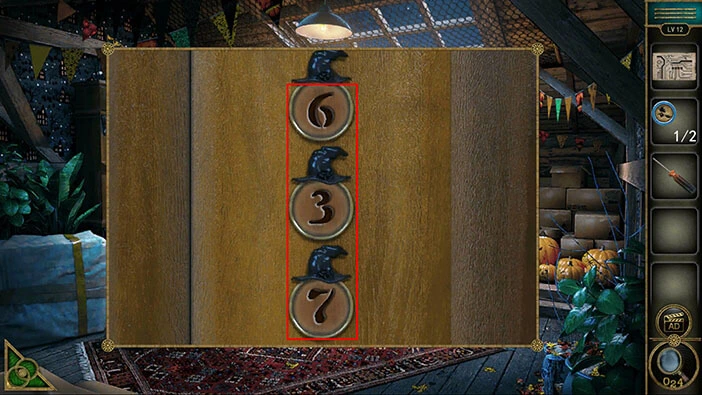
We will need a three-digit code in order to unlock the cabinet. This puzzle is very simple, once you figure out the logic behind it. The pillows on the couch represent the order of the symbols. We found all of these items in the room, so if we count the amount of each item type, we will get the correct solution. Let’s do that.
The first symbol on the pillow was a pumpkin head. We saw six pumpkin heads in the room. So, the first number = 6.
The second symbol on the pillow was a spider head. We saw three spiders in the room. So, the second number = 3.
The third symbol on the pillow was a candy. We saw seven candies on the plate. So, the third number = 7.
On the shelf on the right, you will find another “Round block”. Tap on it to pick it up.
After that, tap on the green button in the bottom left corner of the screen to go back.
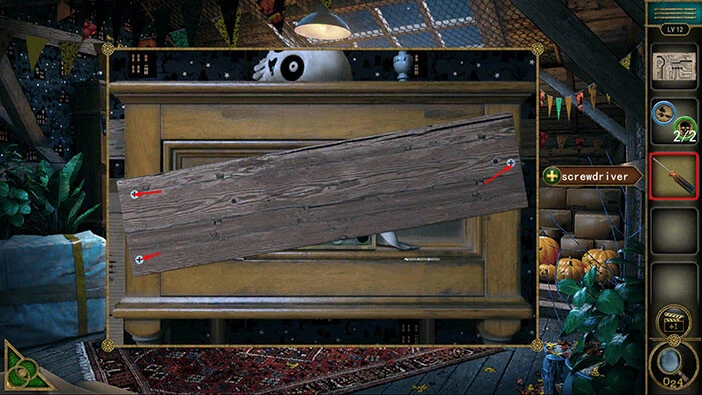
Next, in the top left corner of the room, you will see a boarded cabinet. Tap on it to take a closer look.
Select the “Screwdriver” from the inventory and use it to remove the screws, and the board will automatically fall. Under the board, you will discover another puzzle. Tap on it to start the interaction.
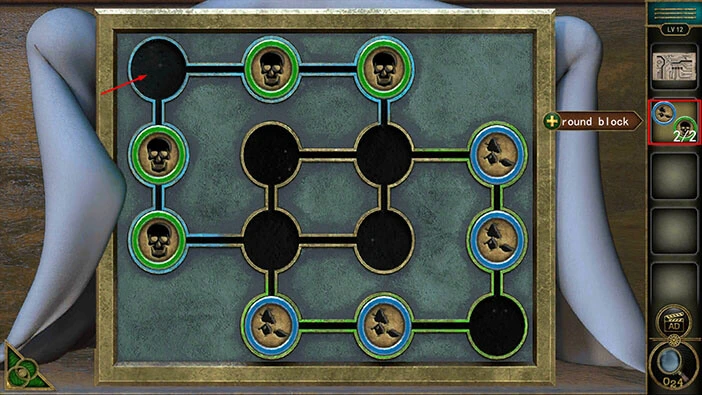
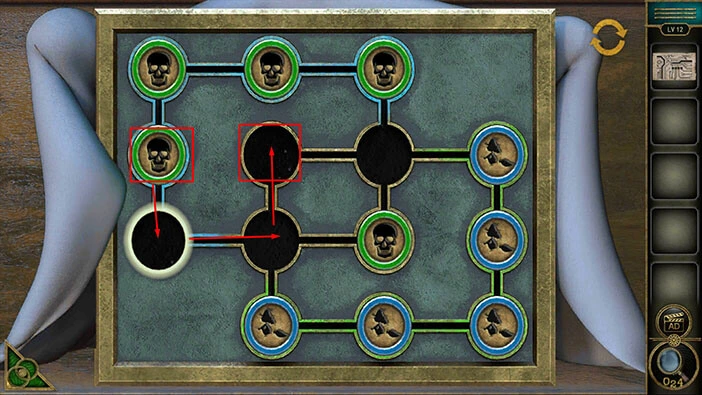
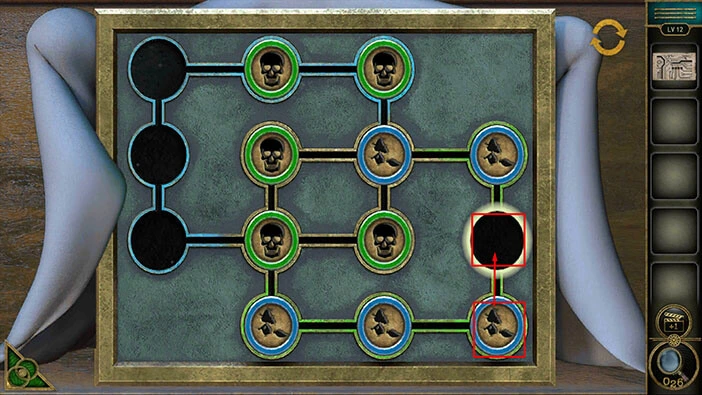
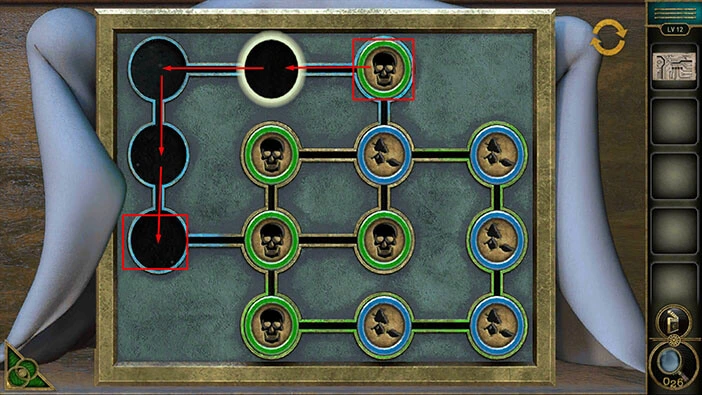
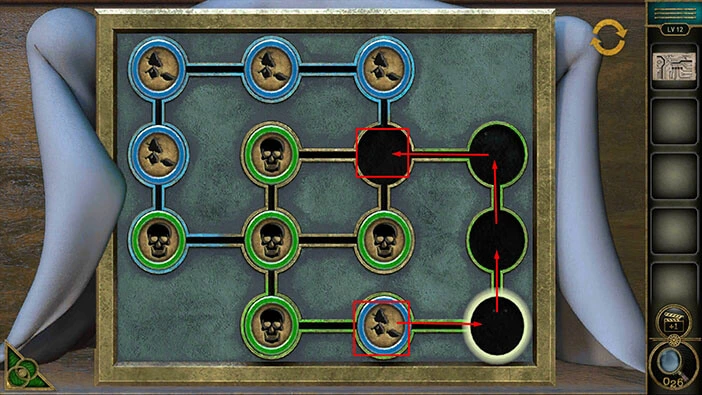
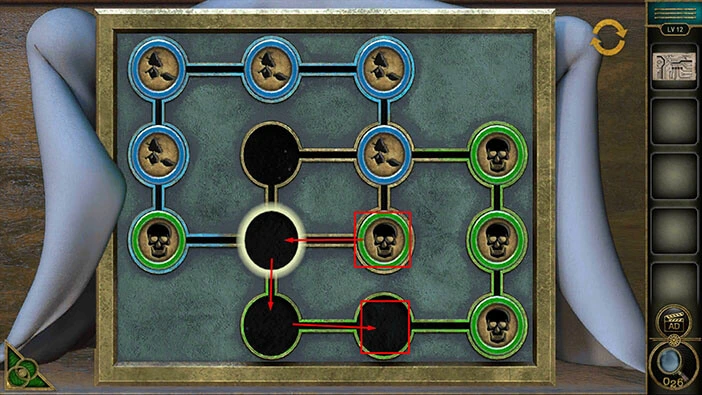
Here, we have another puzzle. Our task is to place all the green coins into the green slots (bottom right corner) and all the blue coins into the blue slots (top left corner).
But, before we can do that, you probably noticed that two coins are missing. So, select the “Round blocks” from the inventory and insert them into the empty slots. Also, you will notice that the grid consists of two rectangles. All the blue slots are in the top rectangle and all the green slots are in the bottom rectangle.
We will do this puzzle in several steps. Let’s begin.
Step 1
Select the green coin in the bottom left corner of the top rectangle and move it all the way to the right (to the bottom right corner of the top rectangle).
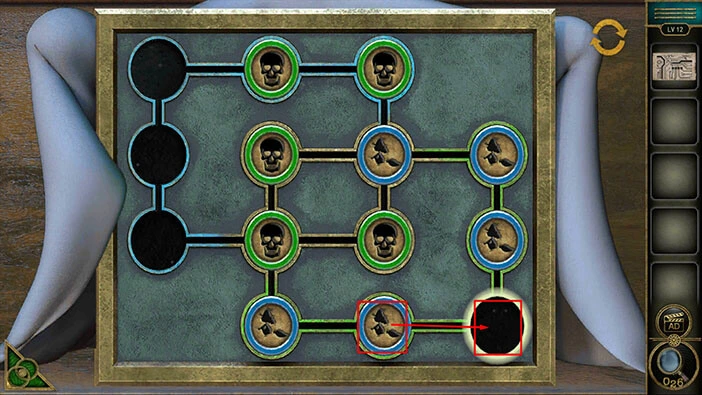
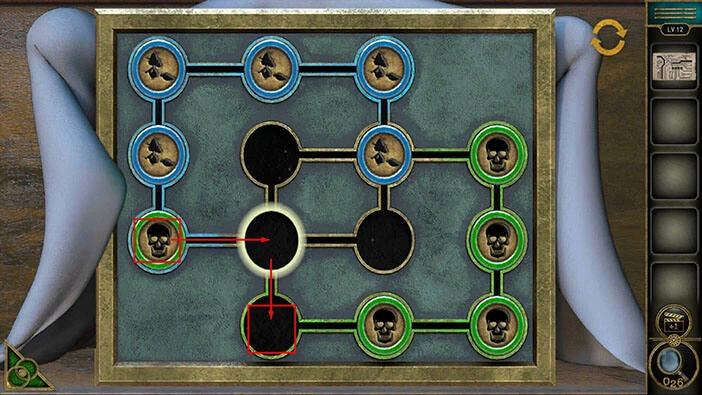
Step 2
Select the green coin located on the left side of the top rectangle, and move it to the top left slot of the bottom rectangle.
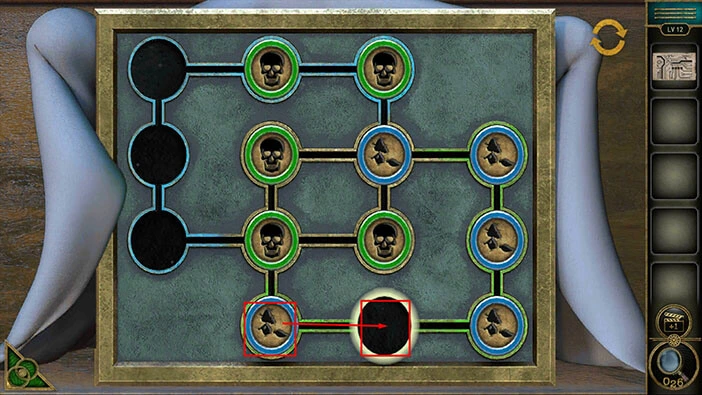
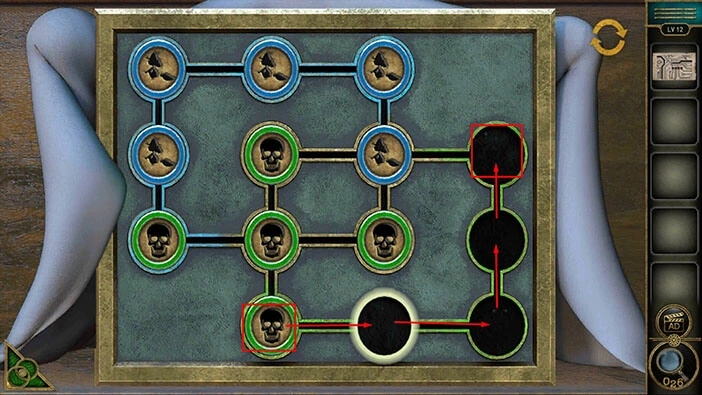
Step 3
Select the green coin located in the top left corner of the top rectangle, and move it to the bottom slot of the top rectangle.
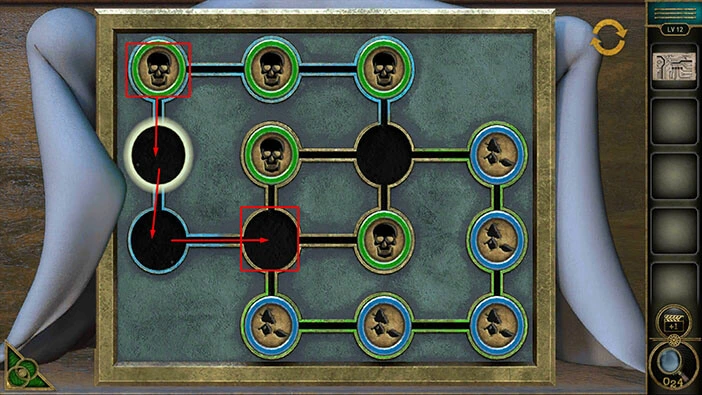
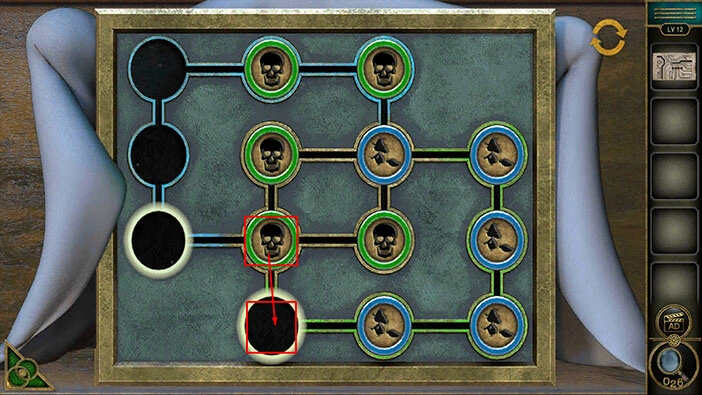
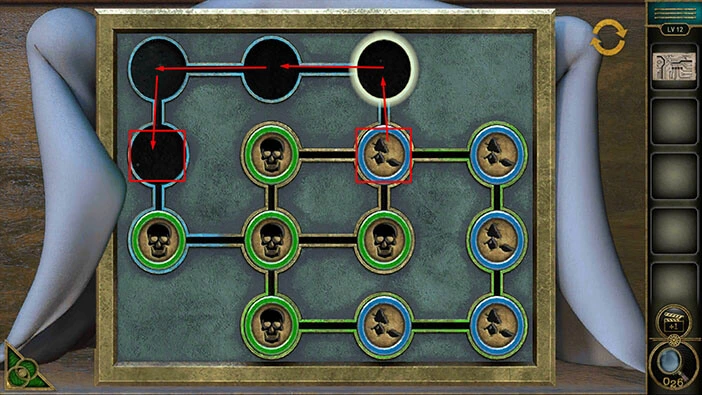
Step 4
Select the blue coin located in the top right slot of the bottom rectangle, and move it one slot to the left.
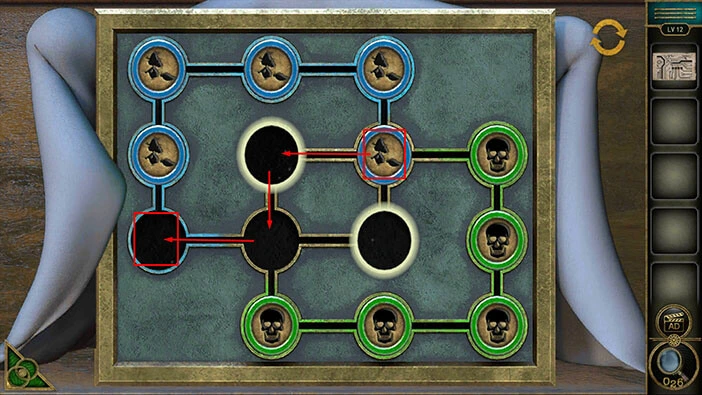
Step 5
Select the blue coin located in the right slot of the bottom rectangle, and move it one slot up.
Step 6
Select the blue coin located in the bottom right slot of the bottom rectangle, and move it one slot up.
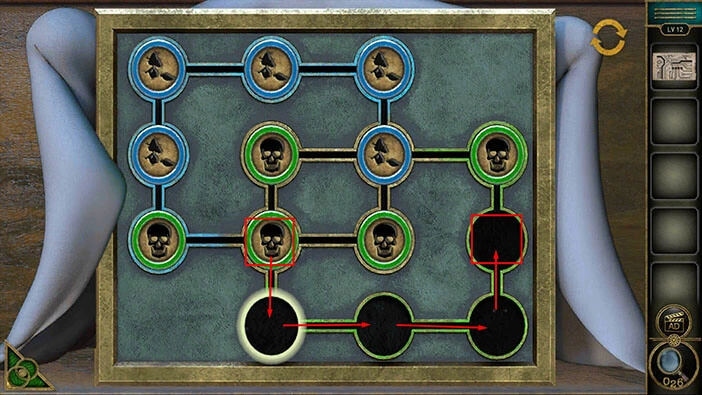
Step 7
Select the blue coin located in the bottom slot of the bottom rectangle, and move it one slot to the right.
Step 8
Select the blue coin located in the bottom left slot of the bottom rectangle, and move it one slot to the right.
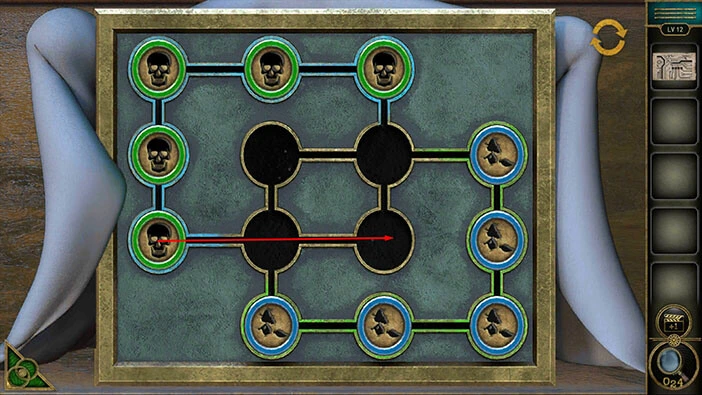
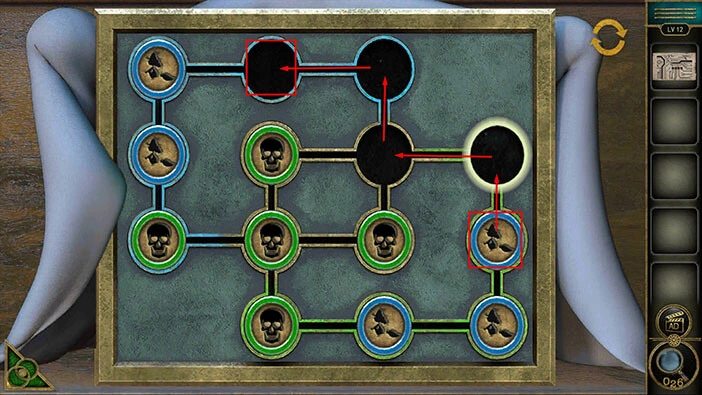
Step 9
Select the green coin located in the left slot of the bottom rectangle, and move it one slot down.
Step 10
Select the green coin located in the top slot of the top rectangle, and move it to the bottom slot of the top rectangle.

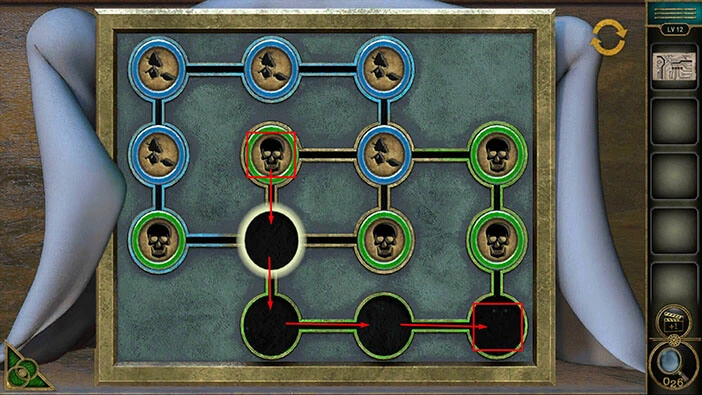
Step 11
Select the green coin located in the top right slot of the top rectangle, and move it to the bottom left slot of the top rectangle.
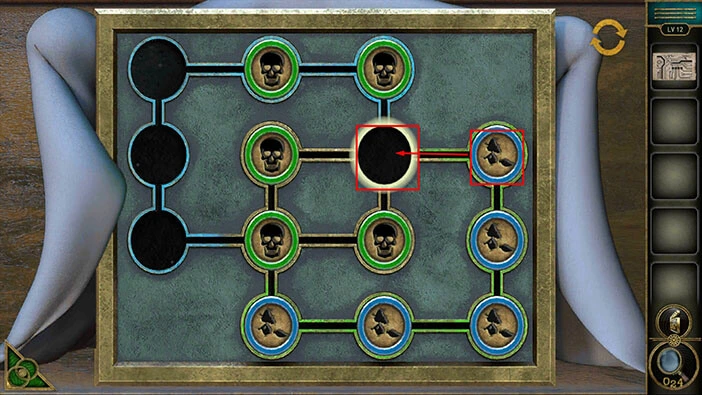
Step 12
Select the blue coin located in the right slot of the top rectangle, and move it to the left slot of the top rectangle.
Step 13
Select the blue coin located in the top right slot of the bottom rectangle, and move it to the top left slot of the top rectangle.

Step 14
Select the blue coin located in the right slot of the bottom rectangle, and move it to the top slot of the top rectangle.
Step 15
Select the blue coin located in the bottom right slot of the bottom rectangle, and move it to the top right slot of the top rectangle.
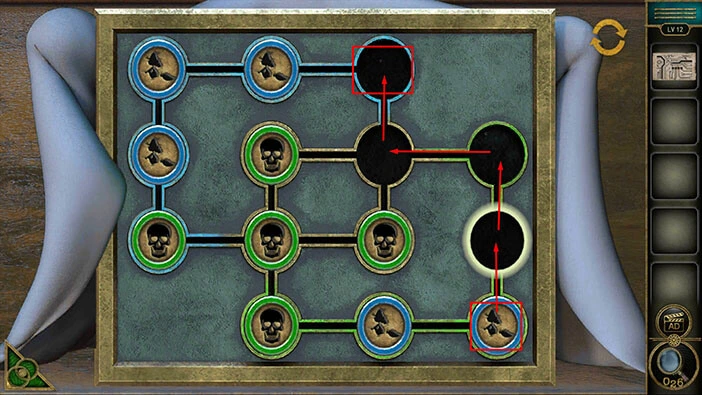
Step 16
Select the blue coin located in the bottom slot of the bottom rectangle, and move it to the right slot of the top rectangle.
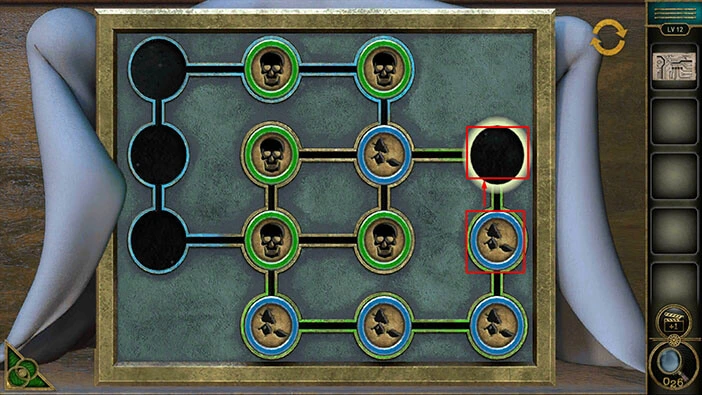
Step 17
Select the green coin located in the bottom left slot of the bottom rectangle, and move it to the top right slot of the bottom rectangle.
Step 18
Select the green coin located in the left slot of the bottom rectangle, and move it to the right slot of the bottom rectangle.
Step 19
Select the green coin located in the top left slot of the bottom rectangle, and move it to the bottom right slot of the bottom rectangle.
Step 20
Select the green coin located in the bottom right slot of the top rectangle, and move it to the bottom slot of the bottom rectangle.
Step 21
Select the green coin located in the bottom left slot of the top rectangle, and move it to the bottom left slot of the bottom rectangle.
Step 22
Finally, select the blue coin located in the right slot of the top rectangle, and move it to the bottom left slot of the top rectangle. When you complete this step, you will solve the puzzle.
As soon as you solve the puzzle, you will open the secret compartment. Inside you will find a “Pumpkin handle”. Tap on it to pick it up.
After that, tap on the green button in the bottom left corner of the screen to go back.
Next, tap on the pumpkin heads on the right to take a closer look.
You will notice that the top of the large pumpkin head on the left is missing. So, select the “Pumpkin handle” from the inventory and insert it into the empty slot.

As soon as you insert the handle, you will activate the pumpkin head and its eyes will glow with a bright red glow. “Game prop” will drop out of the pumpkin head’s mouth. Tap on it to pick it up.
After that, tap on the green button in the bottom left corner of the screen to go back.
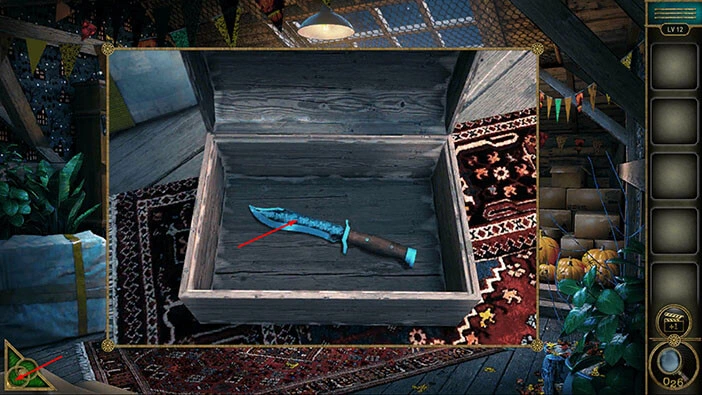
Next, tap on the box in the bottom left corner of the room, to take a closer look at it. Tap on the box again to start the interaction.
Here, we can see twelve game props, but the thirteenth slot is empty. So, select the “Game prop” from the inventory and insert it into the empty slot.
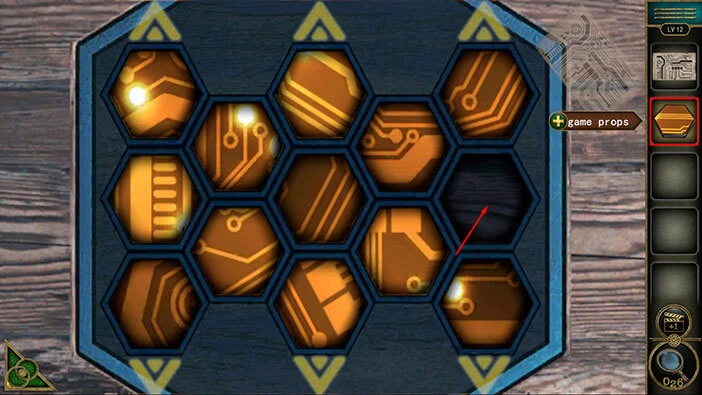
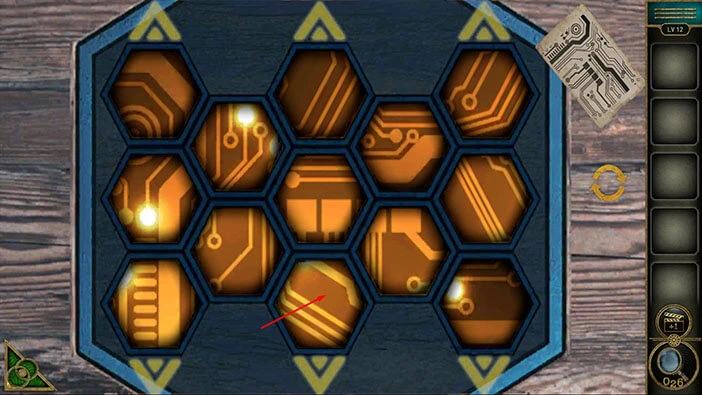
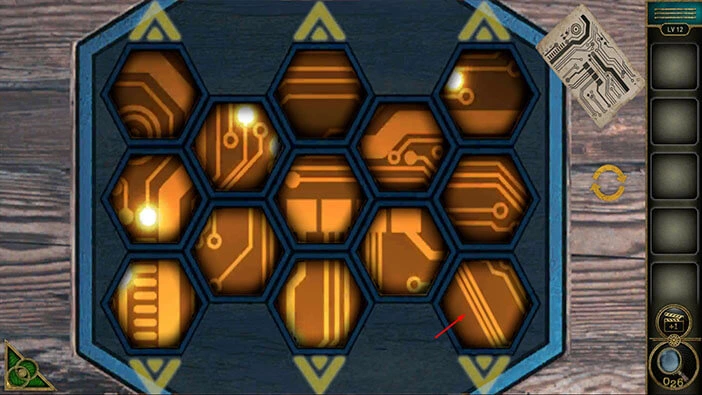
Here, we have another puzzle. If you take a look at the top right corner you will notice an outline of the schematic. So, select the “Paper with hints” from the inventory and put it into this slot. After that, tap on the “Paper with hints” to examine it.
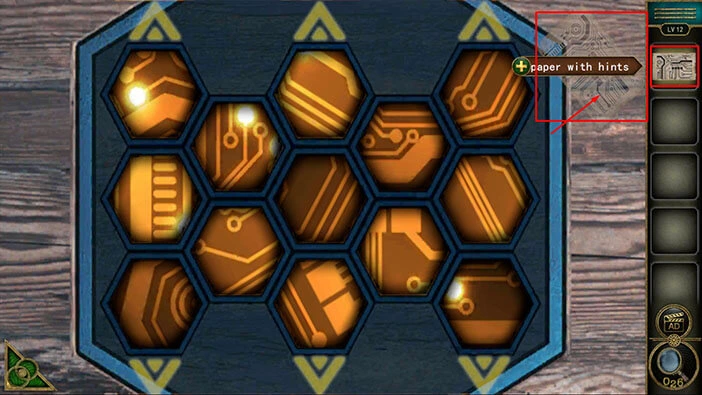
Here, we can see the solution to this puzzle. So, our task is to create a schematic that will match the one on the “Paper with hints”. Let’s do that.
Tap on the green button in the bottom left corner of the screen to go back.

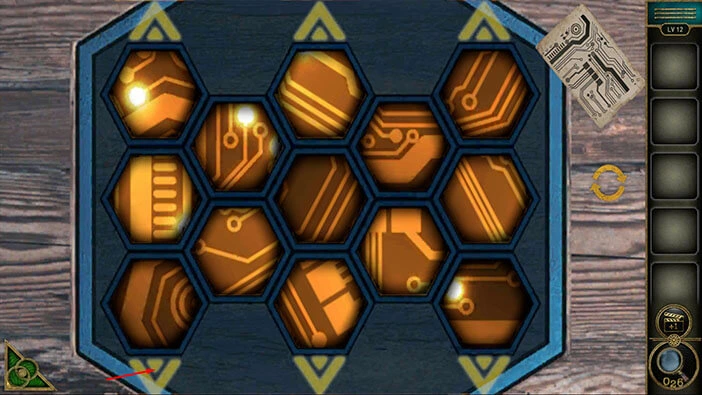
We can see that the puzzle pieces are arranged in five columns. We can tap on the puzzle pieces in each slot to rotate them. Also, above and below the first, third, and fifth columns you will notice Up and Down arrows, and we can use them to cycle through the puzzle pieces.
We will do this puzzle in several steps. Let’s begin.
Step 1
Tap on the “Down” arrow below the first column to move down the slots.
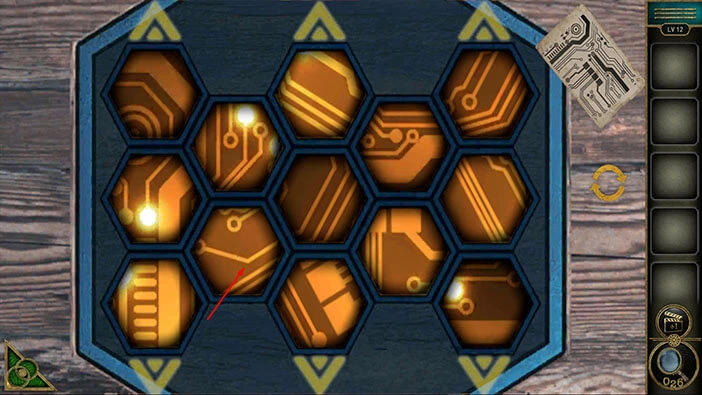
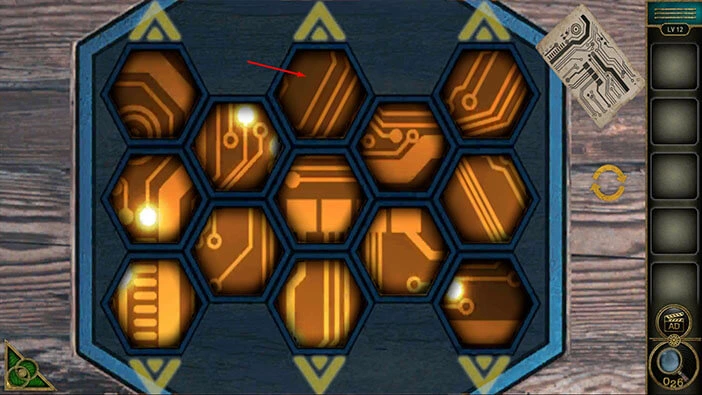
Step 2
Tap three times on the third slot in the first column to rotate the puzzle piece.

Step 3
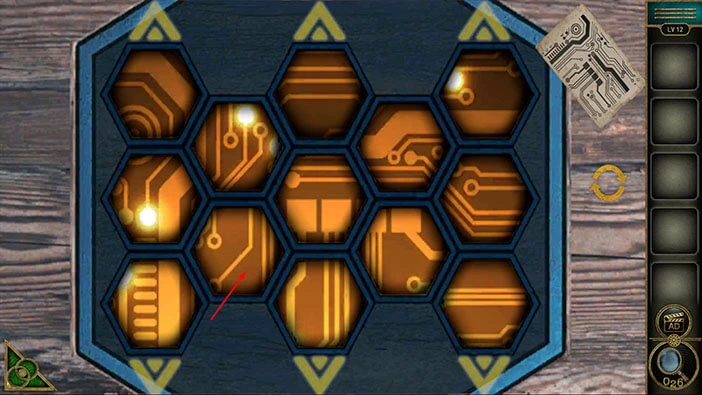
Tap once on the second slot in the first column to rotate the puzzle piece.

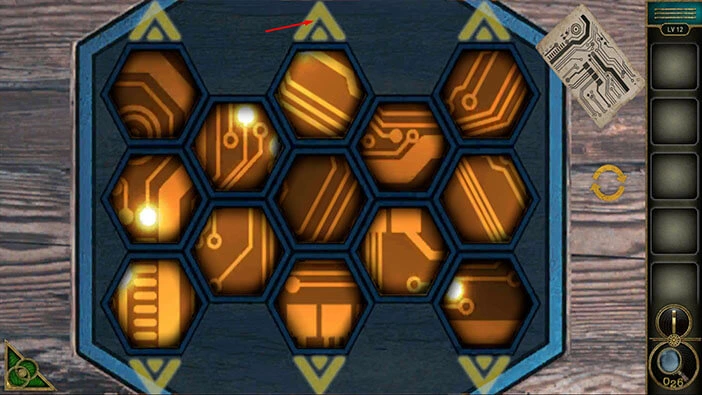
Step 4
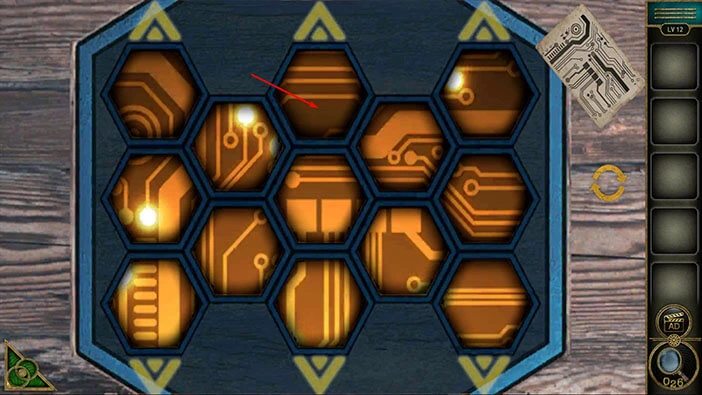
Tap four times on the first slot in the first column to rotate the puzzle piece.

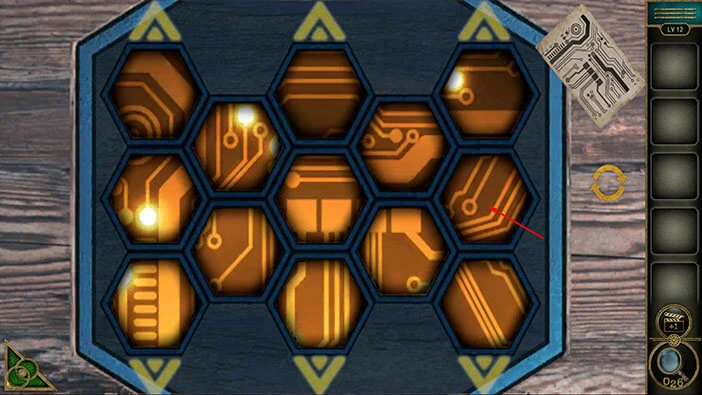
Step 5
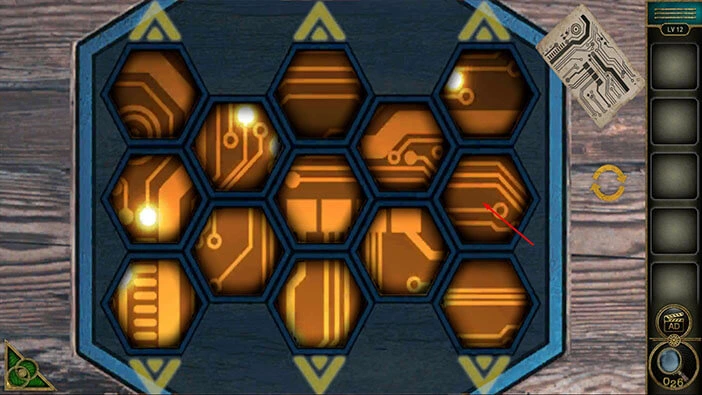
Tap once on the second slot in the second column to rotate the puzzle piece.
Step 6
Tap four times on the third slot in the third column to rotate the puzzle piece.

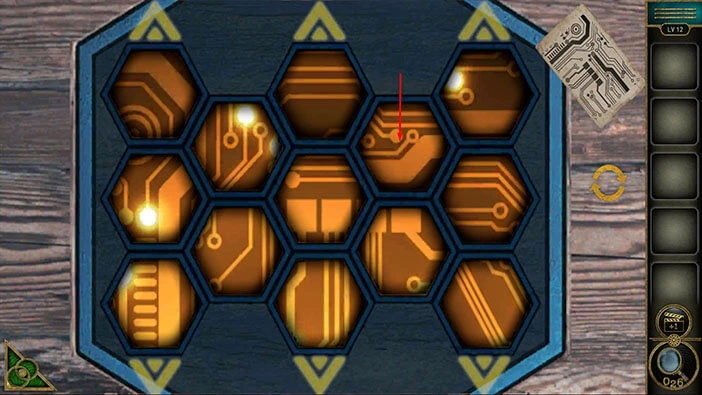
Step 7
Tap once on the “Up” arrow in the third column to move up the slots.
Step 8
Tap twice on the third slot in the third column to rotate the puzzle piece.
Step 9
Tap twice on the first slot in the third column to rotate the puzzle piece.
Step 10
Tap once on the “Down” arrow in the fifth column to move down the slots.

Step 11
Tap twice on the second slot in the fifth column to rotate the puzzle piece.
Step 12
Tap three times on the first slot in the fourth column to rotate the puzzle piece.
Step 13
Tap four times on the third slot in the fifth column to rotate the puzzle piece.
Step 14
Tap three times on the second slot in the fifth column to rotate the puzzle piece.
Step 15
Tap three times on the second slot in the second column to rotate the puzzle piece.
Step 16
Finally, tap three times on the first slot in the third column to rotate the puzzle piece. With that, you will solve this puzzle.
As soon as you solve the puzzle, the box will open and inside you will find a “Knife”. Tap on it to pick it up.
After that, tap on the green button in the bottom left corner of the screen to go back.
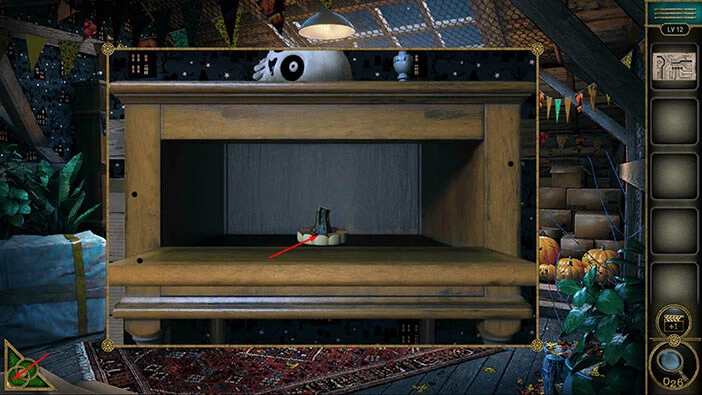
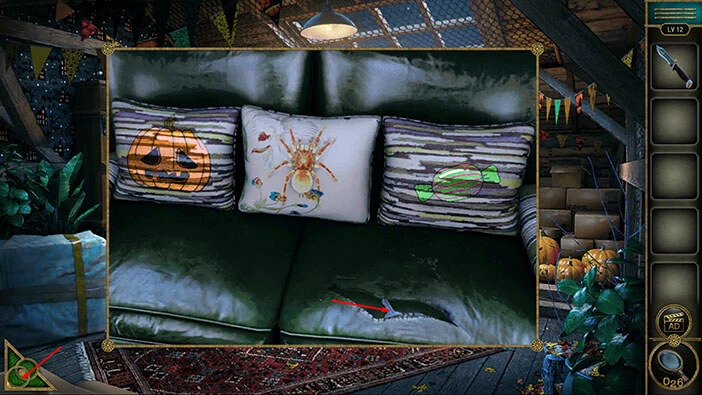
Next, tap on the couch to take a closer look at it.
You will notice that the couch has been patched up on the right side. So, select the “Knife” from the inventory and use it to cut open the couch at this spot.
Inside the couch, you will find a “Key”. Tap on it to pick it up.
After that, tap on the green button in the bottom left corner of the screen to go back.
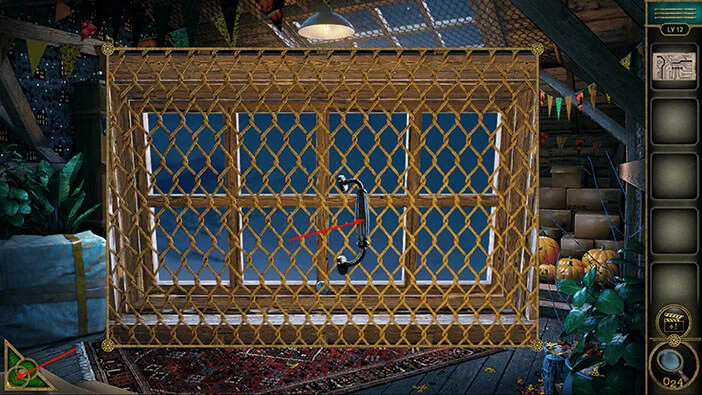
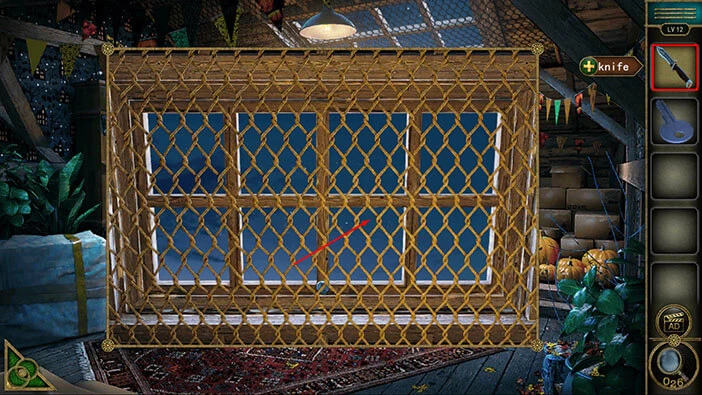
Next, tap on the roof window to take a closer look at it.
You will notice that the window is protected by wire. So, select the “Knife” from the inventory and use it to cut the wire. After that, tap on the window to take a closer look at it.
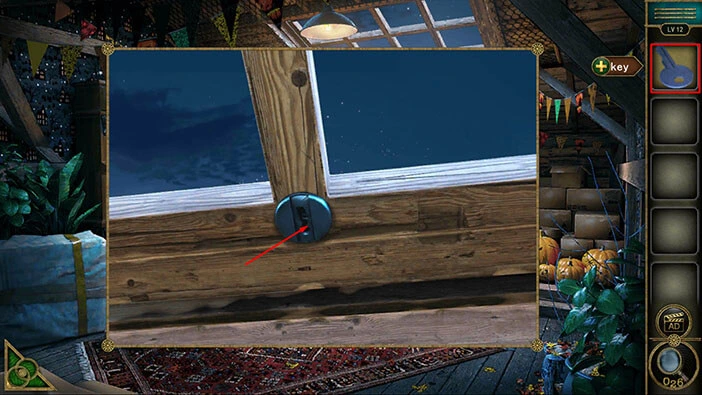
You will notice a keyhole in the window. So, select the “Key” from the inventory and use it to unlock the window.
After that, tap on the window to proceed to the next level.
With that, we have reached the end of the third part of the walkthrough. If you want to see the fourth part, tap on the next part button. In the fourth part of the walkthrough, we will cover levels 13-16.
Thank you for reading.