Can you escape the 100 room 17 | Levels 49-51
Hello everyone and welcome to the thirteenth part of the walkthrough for “Can you escape the 100 room 17”. In the thirteenth part of the walkthrough, we will cover levels 49 to 51.
Level 49
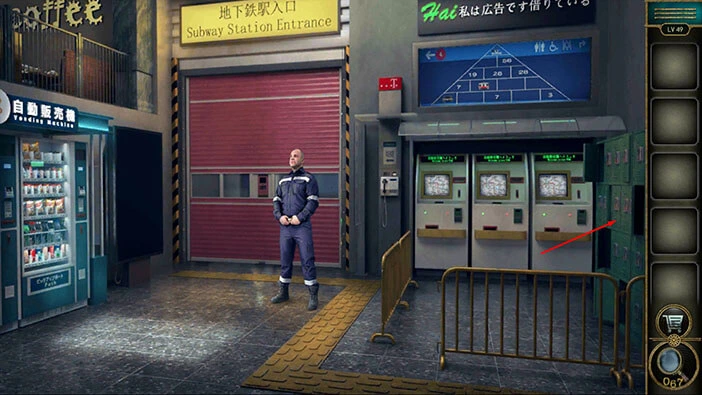
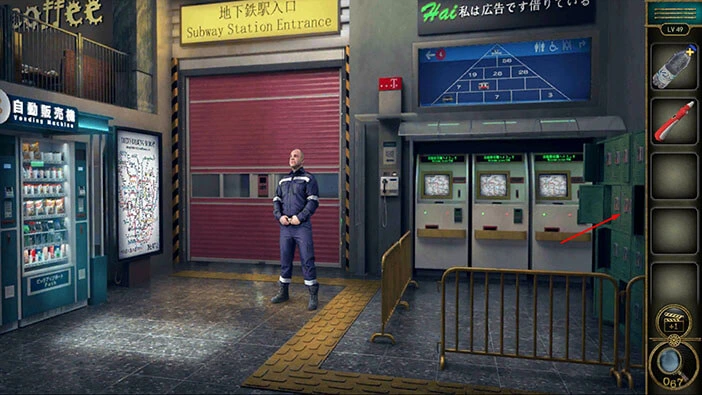
Let’s explore the forty-ninth level. Tap on the lockers on the right to take a closer look at them.
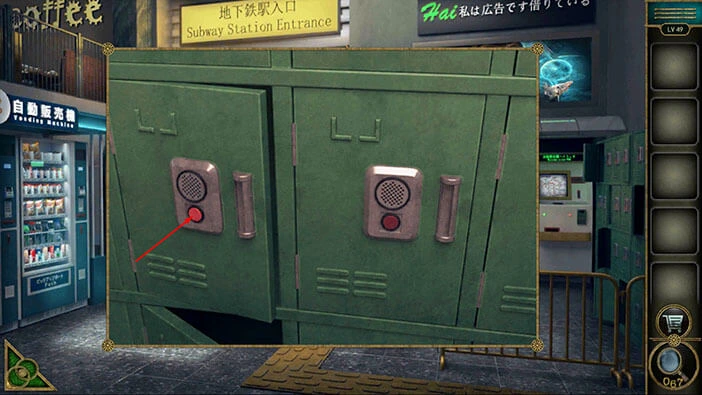
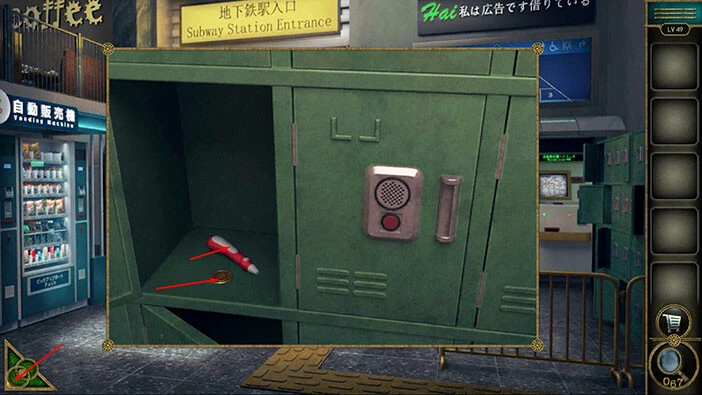
Let’s tap on the locker on the left to open it.
Inside you will find a “Recording pen” and a “Coin”. Tap on these two items to pick them up. 3
After that, tap on the green button in the bottom left corner of the screen to go back.
Next, let’s tap on the machines on the right to take a closer look at them, and tap again to start the interaction.

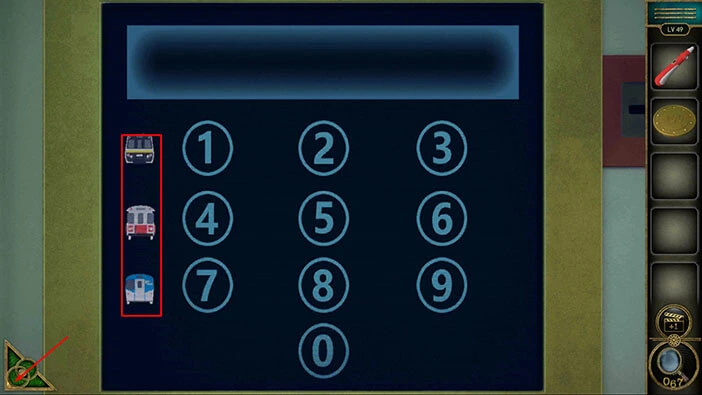
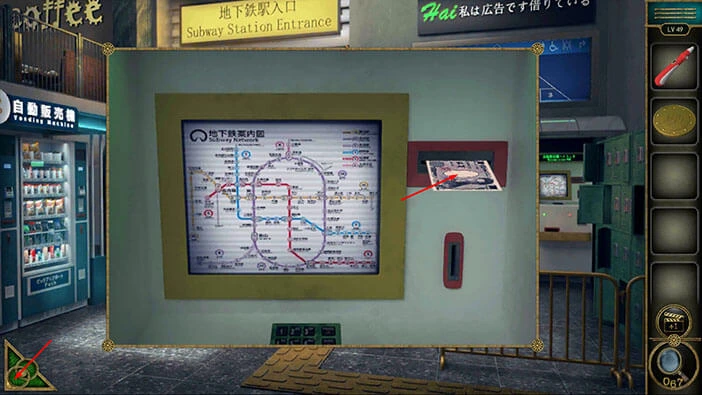
Tap on the map to start the interaction with the keypad below it.
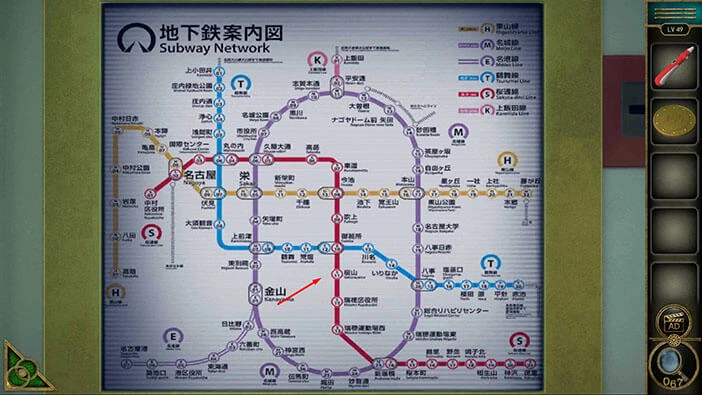
Here, we can see three buses, yellow, red, and blue. Our next task is to discover the value of each bus. Let’s do that. Tap on the green button in the bottom left corner of the screen to go back.
Tap on the screen, located above the machines, to take a closer look at it.

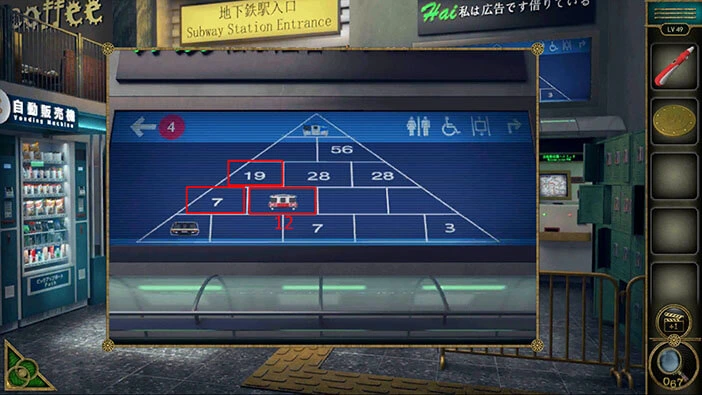
Here, we have another puzzle, and if we solve it, we will discover the numerical value of each bus. This puzzle seems complicated at first, but once you figure out the logic behind it, it is actually quite simple.
If you take a look at the cells in the pyramid, you will notice that the value of the top cell is equal to the sum of the two cells below it. We can see that in the top left corner (28+28=56). So, with that information, let’s take a look at the red bus.
The cell to the left of the red bus = 7. The cell above the red bus = 19. So,
7 + Red bus = 19; Red bus = 19 – 7.
Red bus = 12. Let’s memorize/write down this information.
Next, let’s take a look at the Yellow bus. In order to discover the value of the Yellow bus, we first have to discover the value of the second cell in the first row (looking from bottom to top).
So, let’s calculate the value of this cell.
The second cell in the first row + 7 = 12 (Red bus). So,
The second cell in the first row = 12 – 7 = 5.
Next, let’s calculate the value of the yellow bus.
Yellow bus + 5 = 7. Yellow bus = 7 – 5.
Yellow bus = 2. Let’s memorize/write down this information.
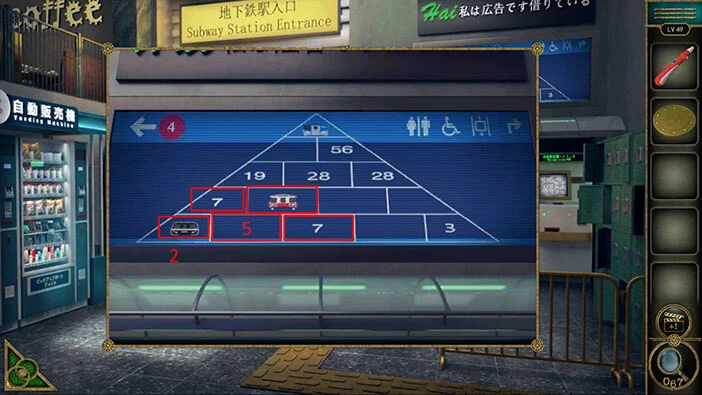
Lastly, let’s take a look at the blue bus. In order to calculate the value of the blue bus, we first have to determine the value of the first cell in the fourth row.
The first cell in the fourth row = 19 + 28 = 47. With that done, let’s calculate the value of the blue bus.
Blue bus = 47 + 56 = 103. Let’s memorize/write down this information.
Once you’re done, tap on the green button in the bottom left corner of the screen to go back.

Tap on the machines, and the map again to start the interaction.

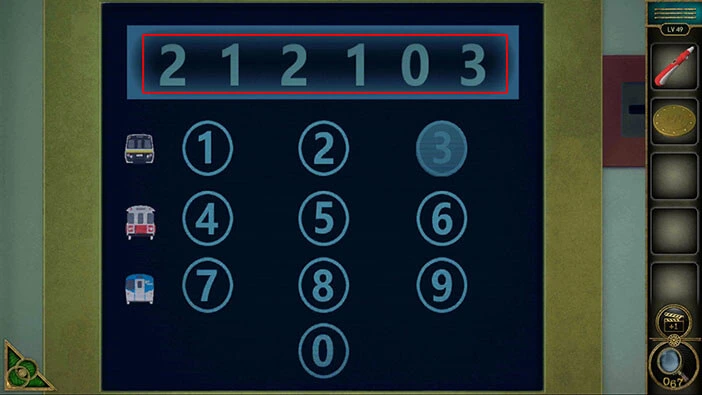
Let’s enter the values that we discovered previously.
First, we have the Yellow bus = 2.
Second, we have the Red bus = 12.
Third, we have the Blue bus = 103.
When we put it all together, we will get the number “212103”. Enter this number, and you will solve this puzzle.
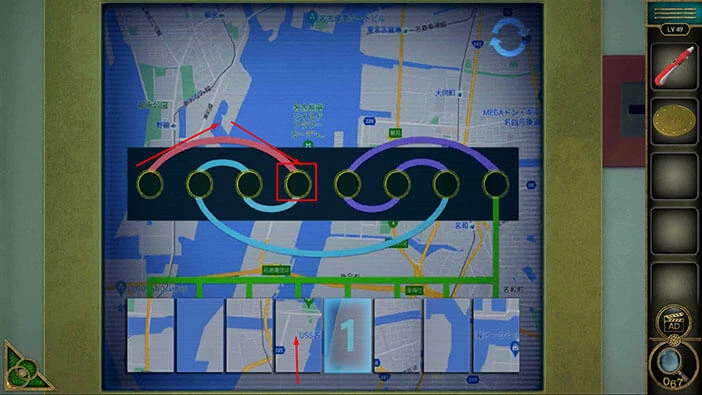
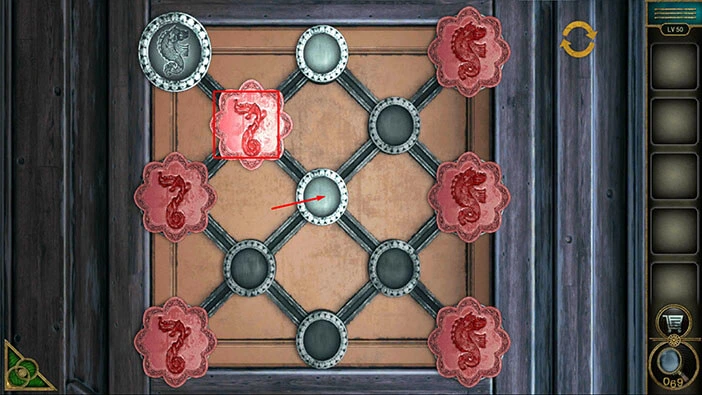
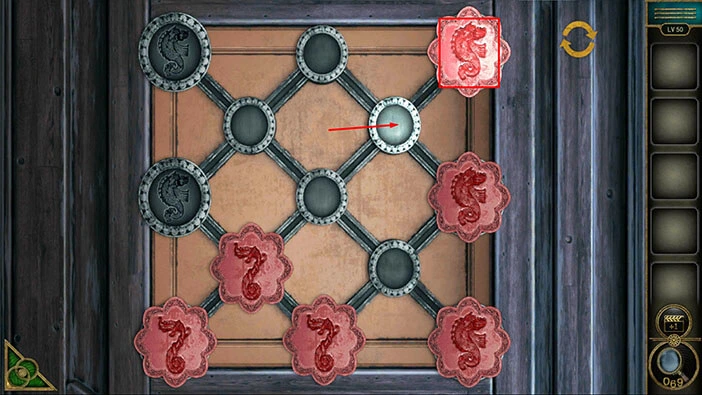
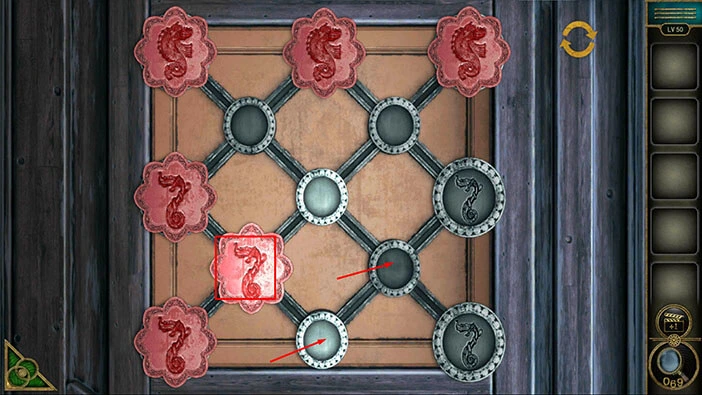
Here, we have another puzzle. Our task is to assemble the map from the pieces that we can see at the bottom. If you tap on one of the pieces of the map at the bottom, the number 1 will appear. So, this piece will be marked as the first piece, and it will go (once you mark all the pieces) into the first slot (looking from left to right) of the map. From there, the slots are connected with the lines, so the number 2 piece will go into the fourth slot, etc. We will do this puzzle in several steps. Let’s begin.
Step 1
Tap on the fifth puzzle piece, and the number 1 will appear. This piece will go into the first slot.

Step 2
If we look at the red line from the first slot, you will notice that it connects the first slot with the fourth slot.
So, let’s tap on the fourth piece of the map at the bottom and the number 2 will appear. This piece of map will be assigned to the fourth slot.
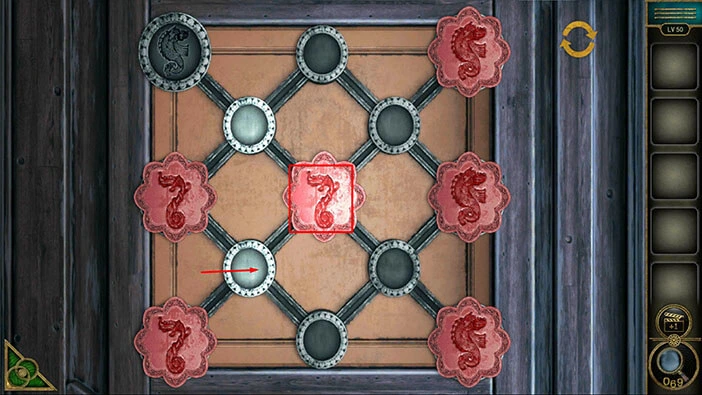
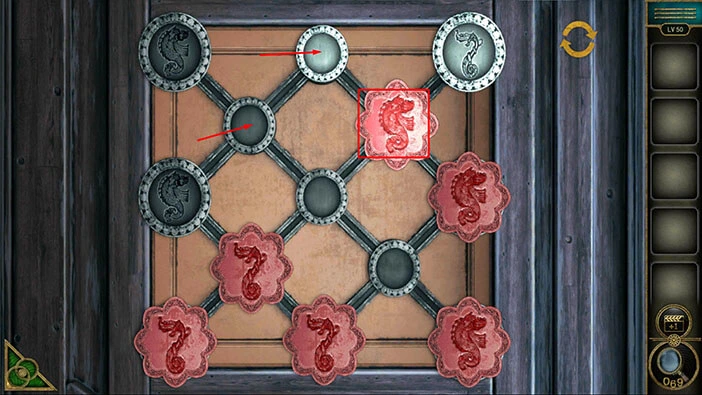
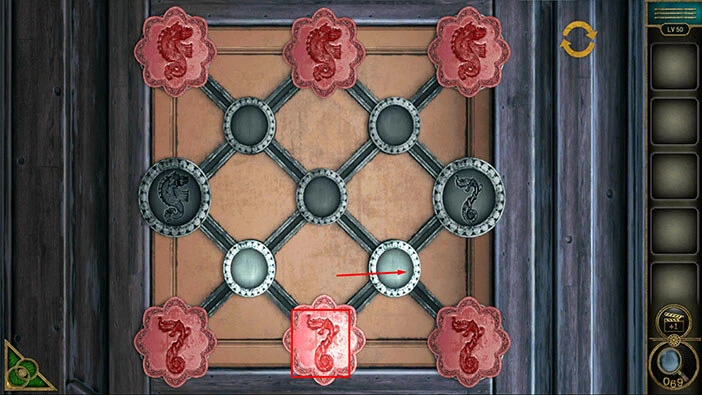
Step 3
If we look at the blue line from the fourth slot, you will notice that it connects the fourth slot with the third slot.
So, let’s tap on the second piece of the map at the bottom and the number 3 will appear. This piece of map will be assigned to the third slot.
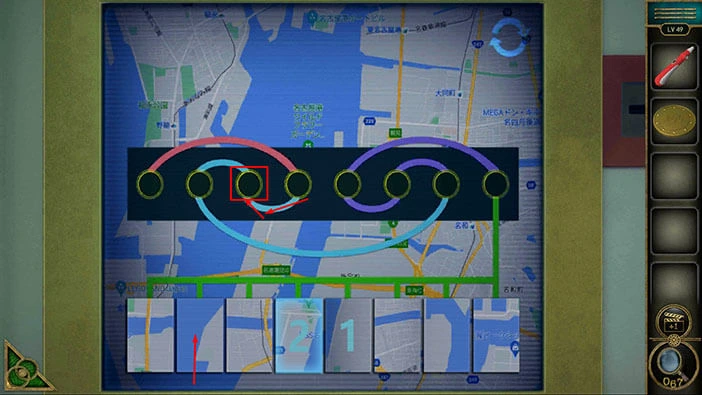
Step 4
If we look at the blue line from the third slot, you will notice that it connects the third slot with the second slot.
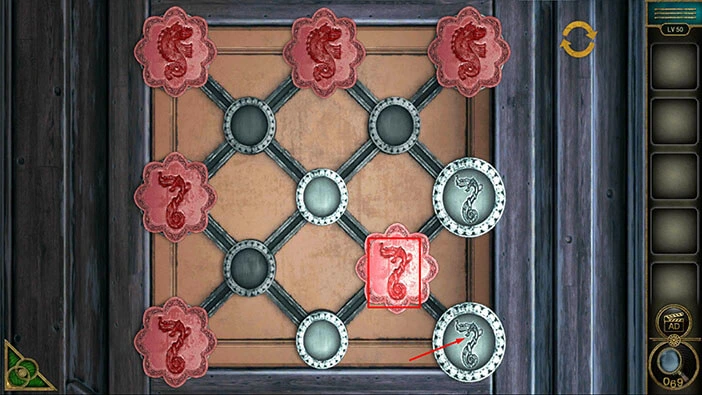
So, let’s tap on the seventh piece of the map at the bottom and the number 4 will appear. This piece of map will be assigned to the second slot.
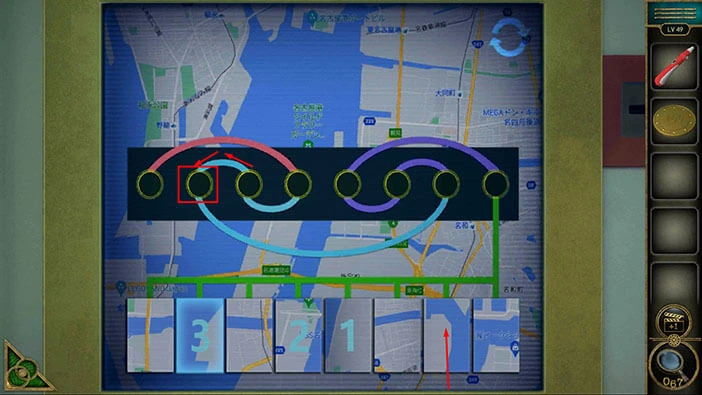
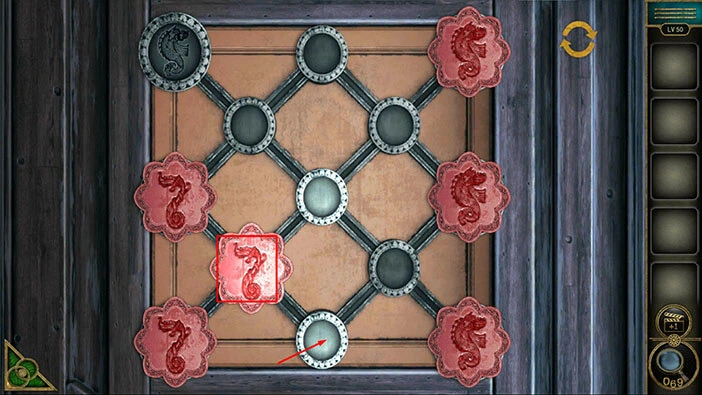
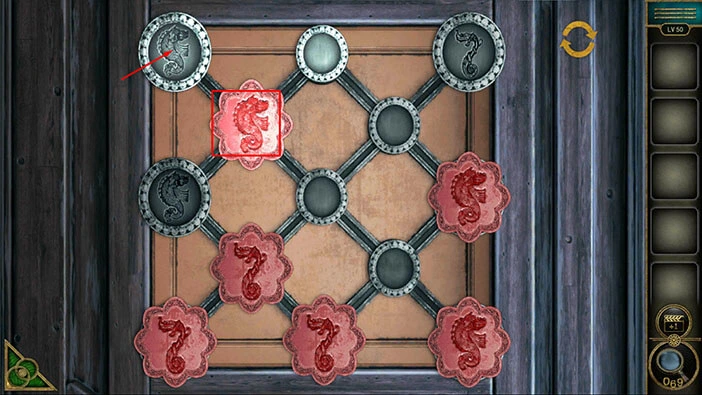
Step 5
If we look at the blue line from the second slot, you will notice that it connects the second slot with the seventh slot.
So, let’s tap on the third piece of the map at the bottom and the number 5 will appear. This piece of map will be assigned to the seventh slot.
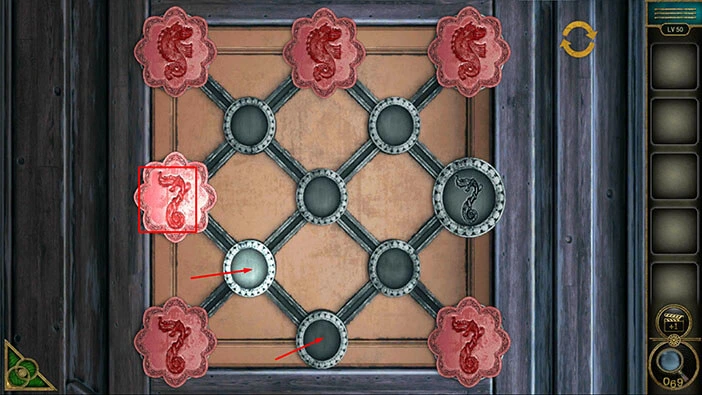
Step 6
If we look at the purple line from the seventh slot, you will notice that it connects the seventh slot with the sixth slot.
So, let’s tap on the first piece of the map at the bottom and the number 6 will appear. This piece of map will be assigned to the sixth slot.

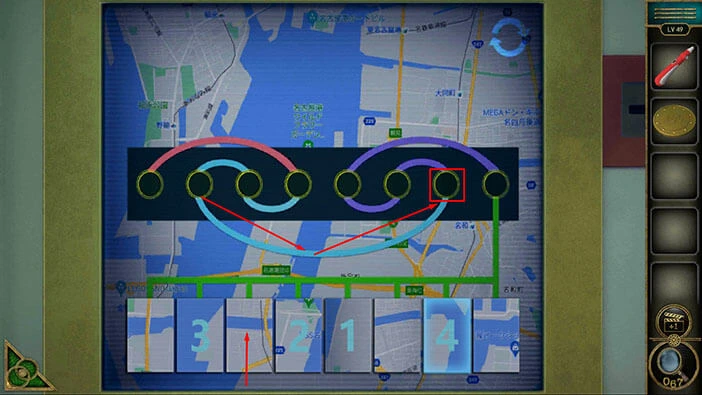
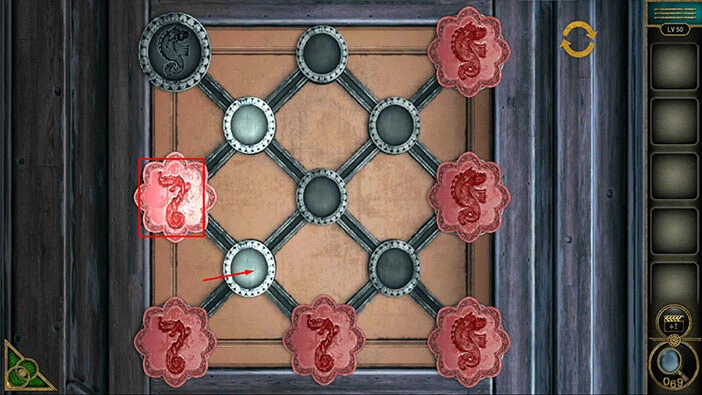
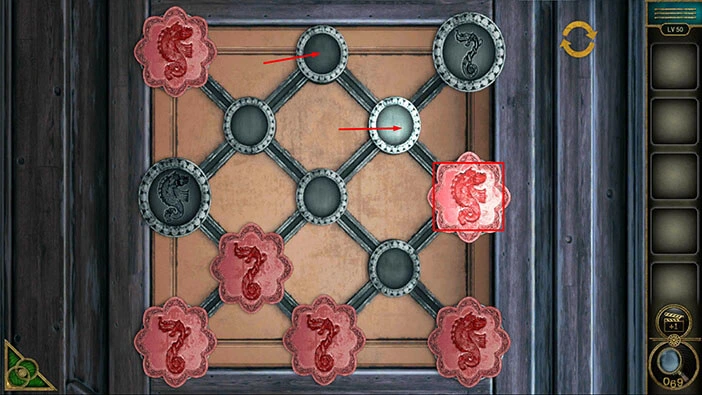
Step 7
If we look at the purple line from the sixth slot, you will notice that it connects the sixth slot with the fifth slot.
So, let’s tap on the eighth piece of the map at the bottom and the number 7 will appear. This piece of map will be assigned to the fifth slot.

Step 8
If we look at the purple line from the fifth slot, you will notice that it connects the fifth slot with the eighth slot.
So, let’s tap on the sixth piece of the map at the bottom and the number 8 will appear. This piece of map will be assigned to the eighth slot.

With that, you will assemble the map, and you will solve this puzzle, and the machine will give you a “Banknote”. Tap on it to pick it up.
After that, tap on the green button in the bottom left corner of the screen to go back.
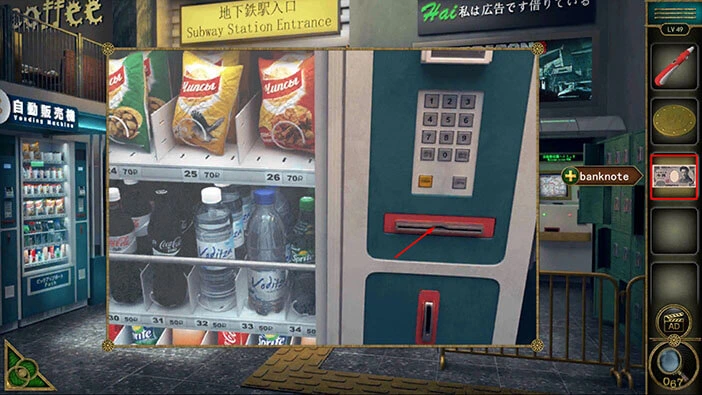
Next, let’s tap on the vending machine on the left to take a closer look at it.
Select the “Banknote” from the inventory and insert it into the slot. After that, tap on the green button in the bottom left corner of the screen to go back.
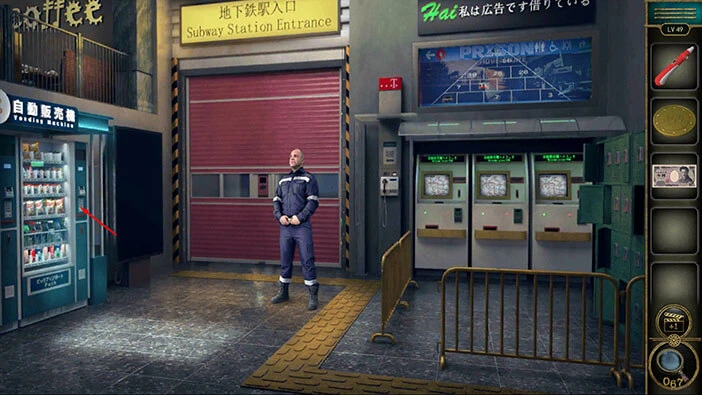
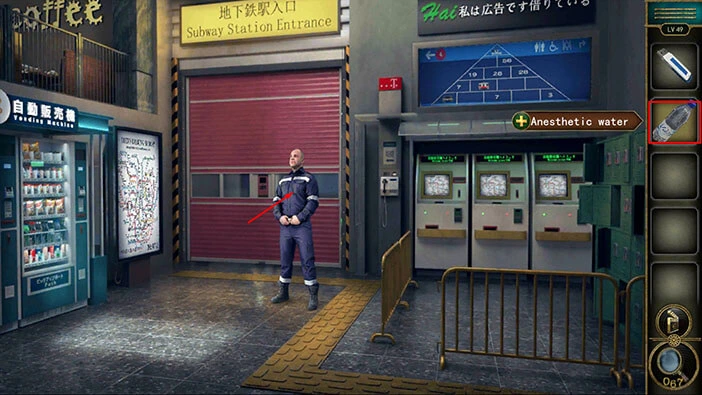
Let’s tap on the security guard to start the interaction. You will notice that the security guard wants a bottle of water. We will have to find a way to neutralize a security guard in order to advance to the next level.
For now, let’s go back to the vending machine, and buy a bottle of water for the security guard.

We can see that water costs “33”. Let’s memorize/write down this information.
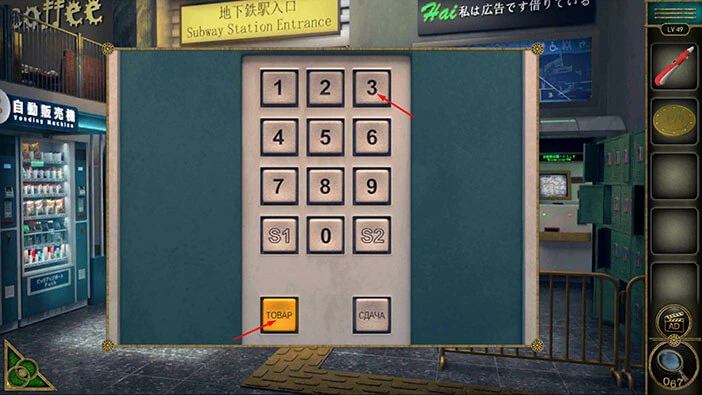
After that, tap on the keypad to start the interaction.
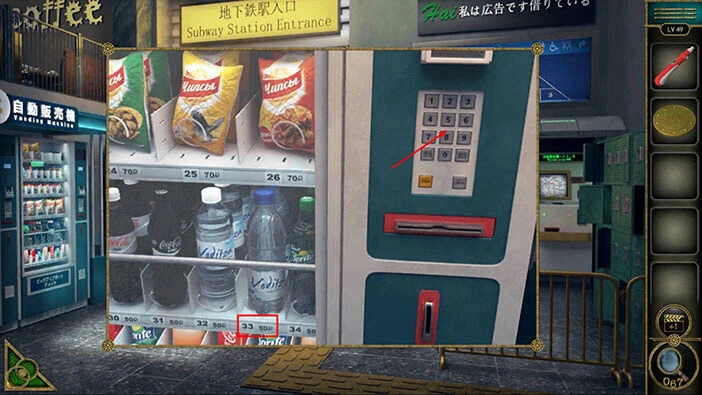
Enter the number “33”. Then tap on the “TOBAP” button to confirm.
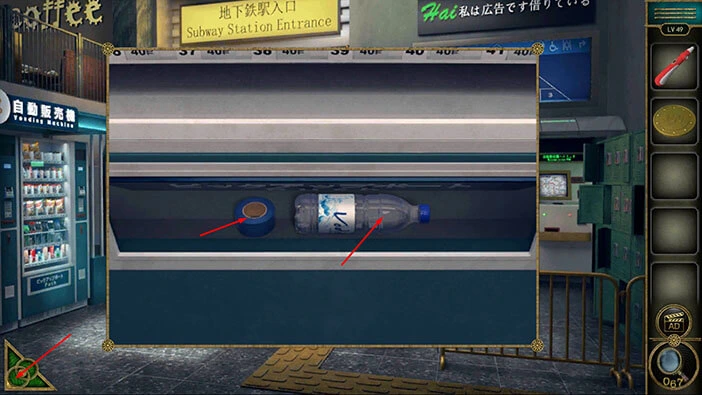
In the next scene, you will see a “Tape” and a “Water”. Tap on these two items to pick them up.
After that, tap on the green button in the bottom left corner of the screen to go back.
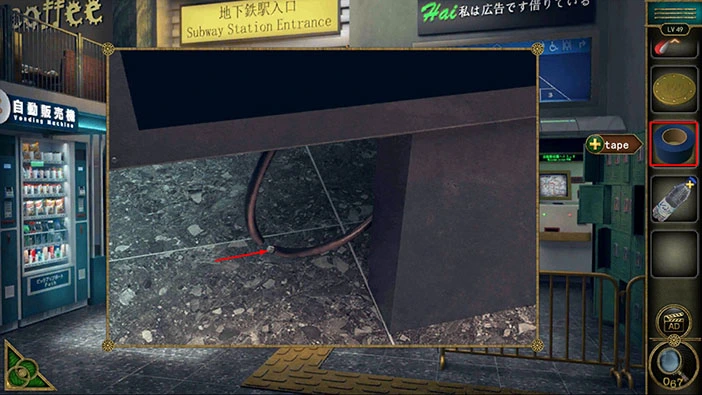
Next, let’s tap on the cable, located below the large screen on the left, to take a closer look at it.

Select the “Tape” from the inventory and use it to reconnect the cable.
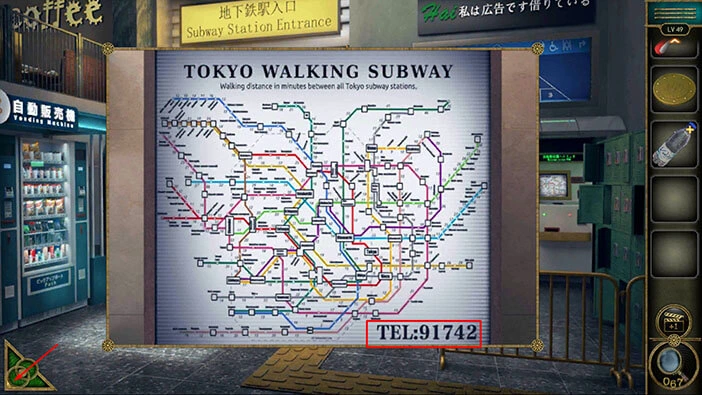
With that, we have restored power to the large screen on the left, so let’s tap on it to take a closer look.

In the bottom right corner of the screen, we can see the phone number “91742”. Let’s memorize/write down this number.
After that, tap on the green button in the bottom left corner of the screen to go back.
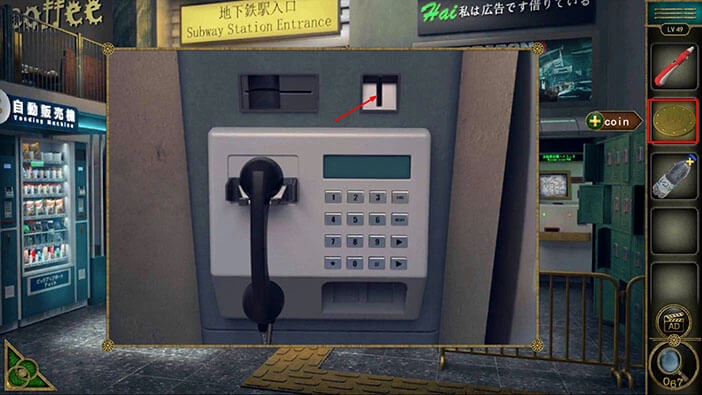
Next, let’s tap on the telephone, located behind the guard, to take a closer look at it.
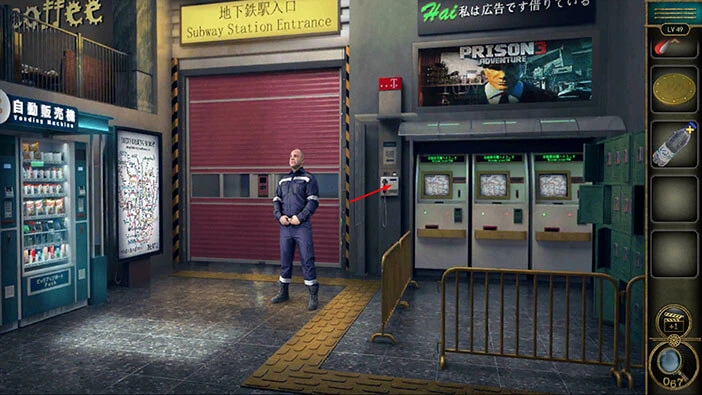
Select the “Coin” from the inventory and insert it into the slot. After that, tap on the keypad to start the interaction.
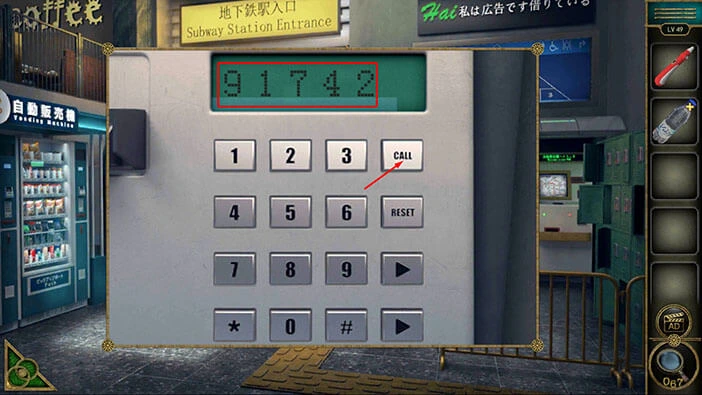
Enter the number “91742” then tap on the “Call” button.
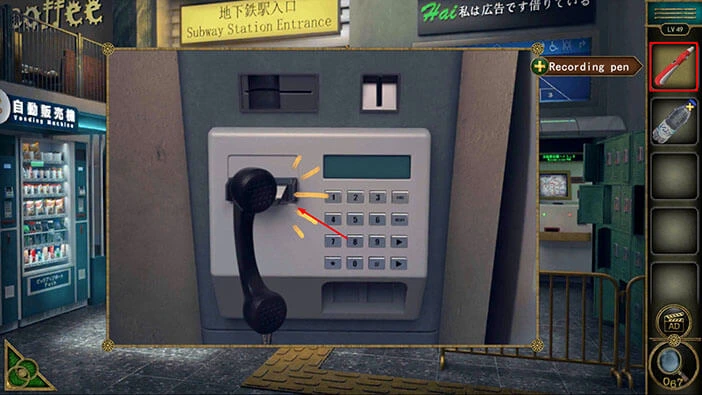
Select the “Recording pen” from the inventory and use it to record the voice.
After that, tap on the green button in the bottom left corner of the screen to go back.
Next, let’s tap on the green lockers on the right to take another look at them.
Select the “Recording pen” from the inventory and use it to unlock the locker on the right.
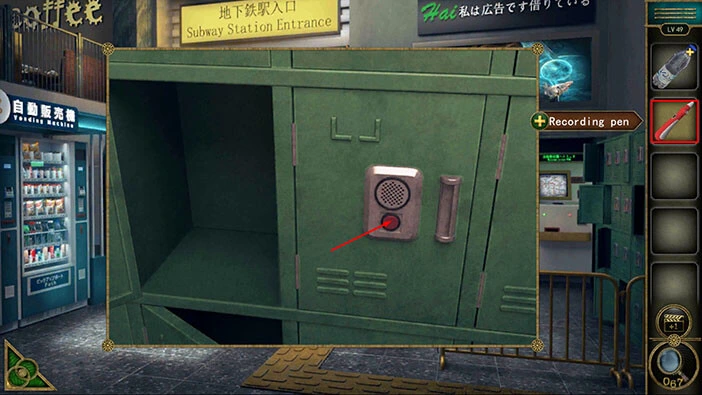
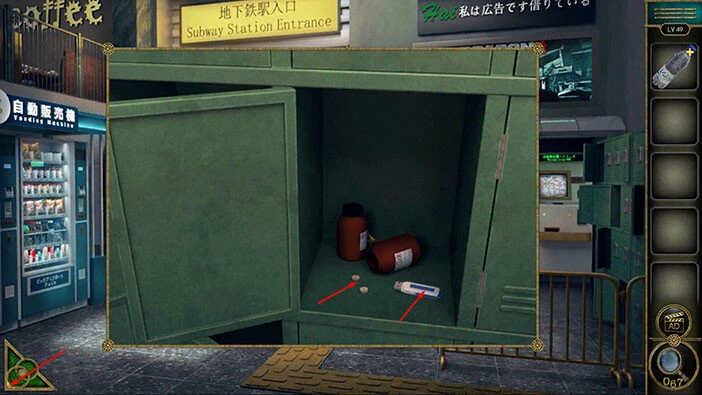
In the locker, you will find an “Anesthetic” and “USB”. Tap on these two items to pick them up. After that, tap on the green button in the bottom left corner of the screen to go back.
Select “Water” from the inventory and it will appear in the middle of the screen. After that, select the “Anesthetic” from the inventory and put it into the water bottle. “Anesthetic water” will be added to your inventory.
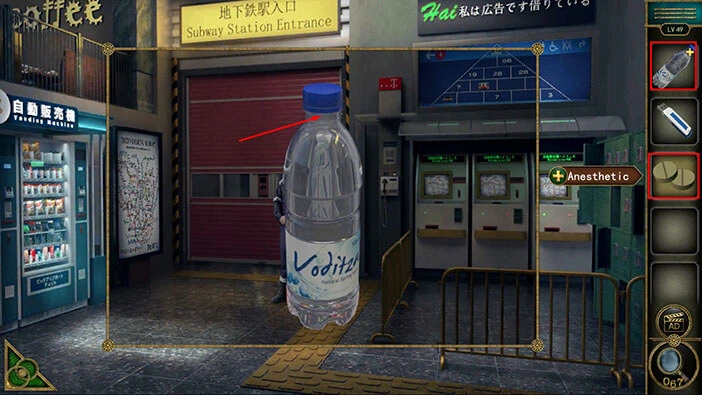
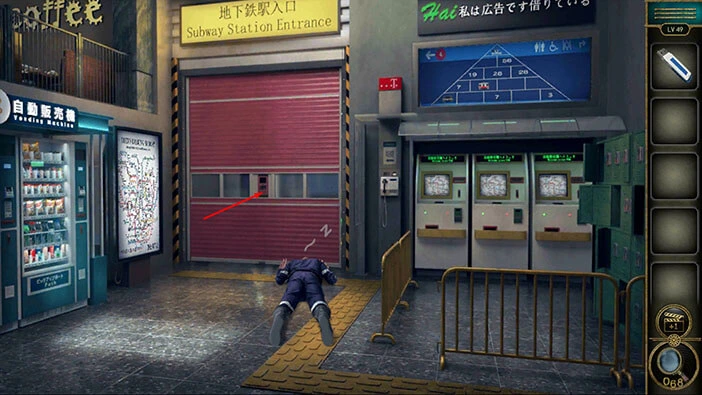
Let’s neutralize the security guard. Select the “Anesthetic water” from the inventory and give it to the security guard.
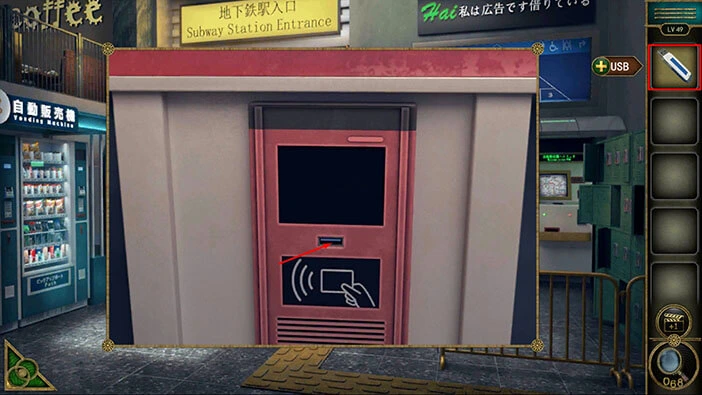
We neutralized the guard, so let’s tap on the red door that he was guarding, to take a closer look at it.
Select the “USB” from the inventory and insert it into the empty slot.
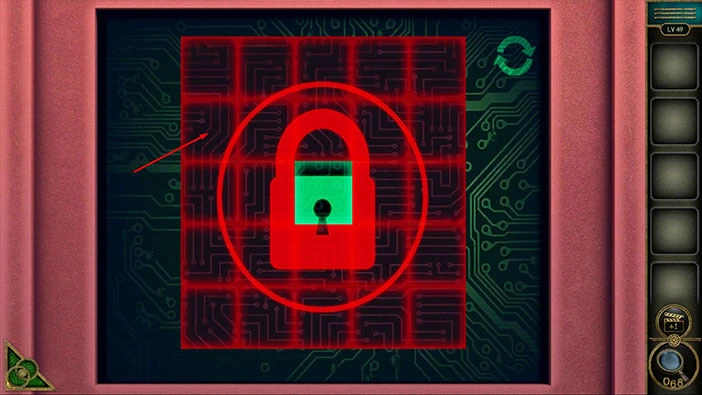
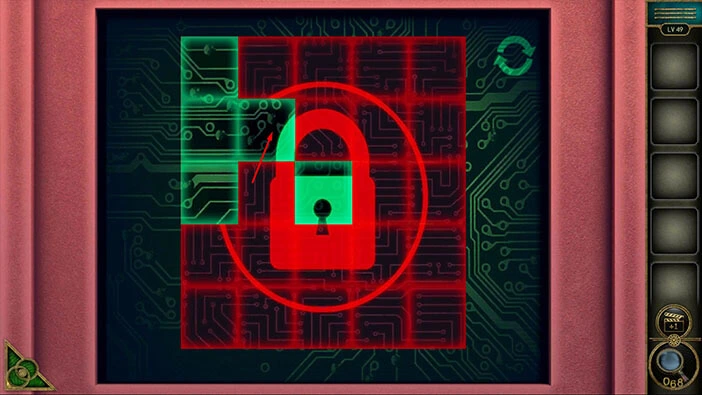
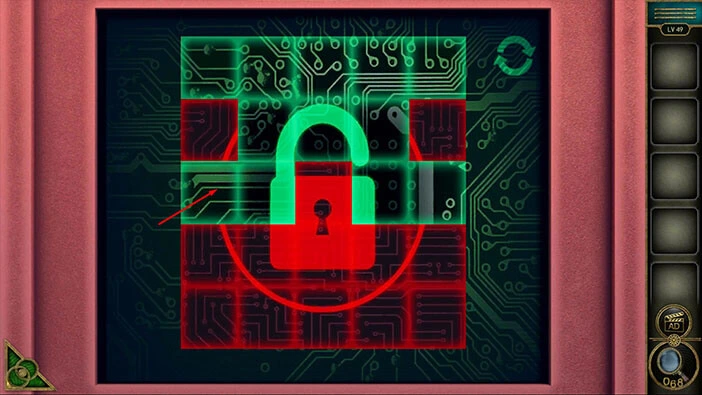
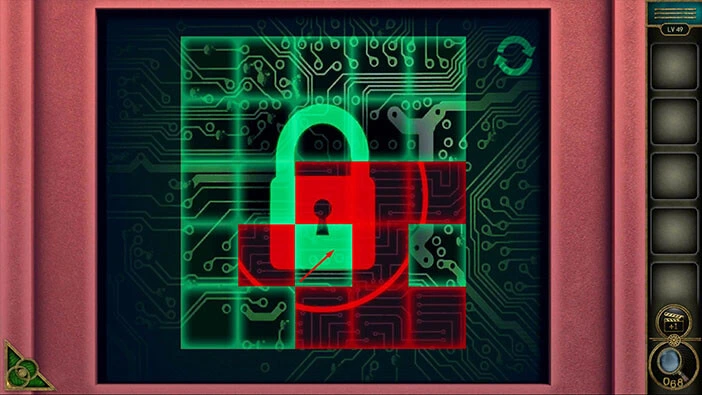
Here, we have another puzzle. We can see a five-by-five grid with the padlock in the middle. Our task is to turn all the fields of the grid from red to green color. We will do this puzzle in several steps. Let’s begin.
Step 1
Tap on the first slot in the second row to activate it.
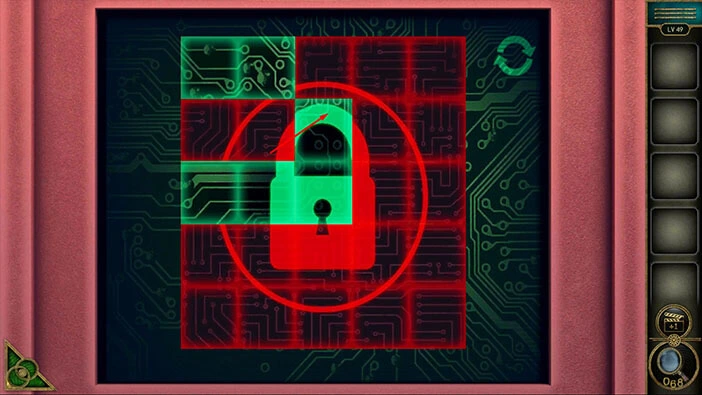
Step 2
Tap on the second slot in the second row to activate it.
Step 3
Tap on the third slot in the second row to activate it.
Step 4
Tap on the fourth slot in the second row to activate it.
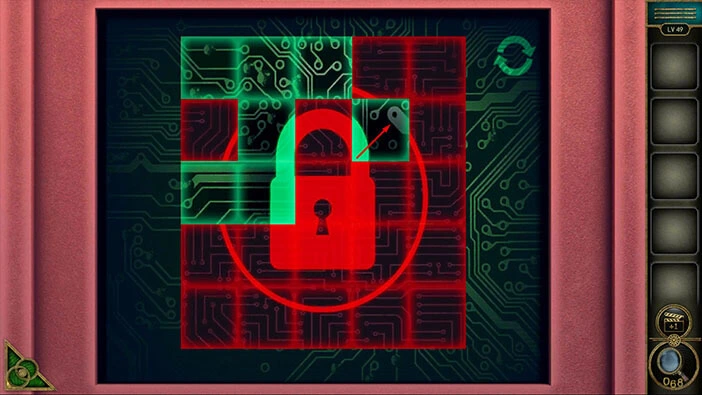
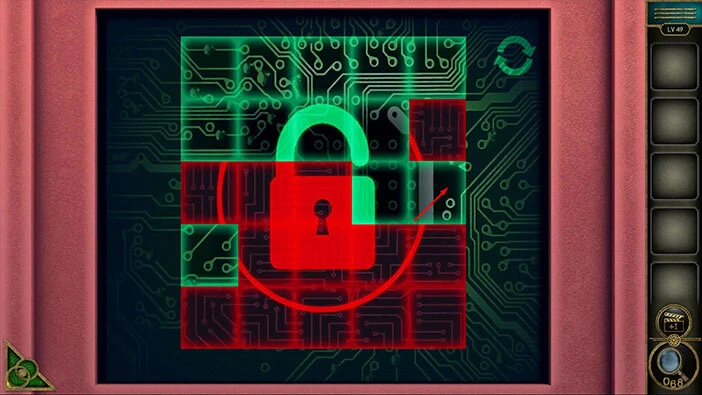
Step 5
Tap on the fifth slot in the second row to activate it.
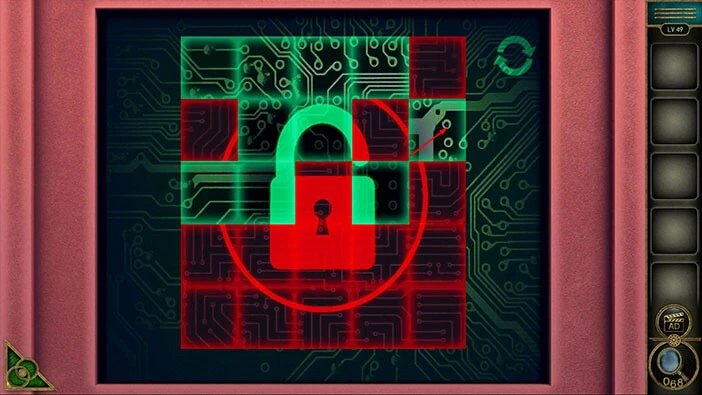
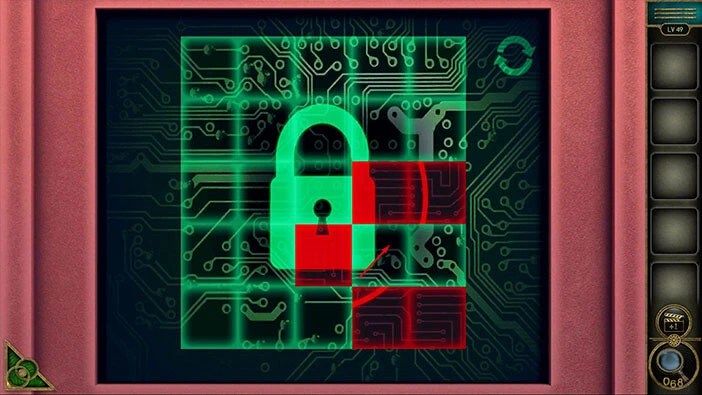
Step 6
Tap on the first slot in the third row to activate it.
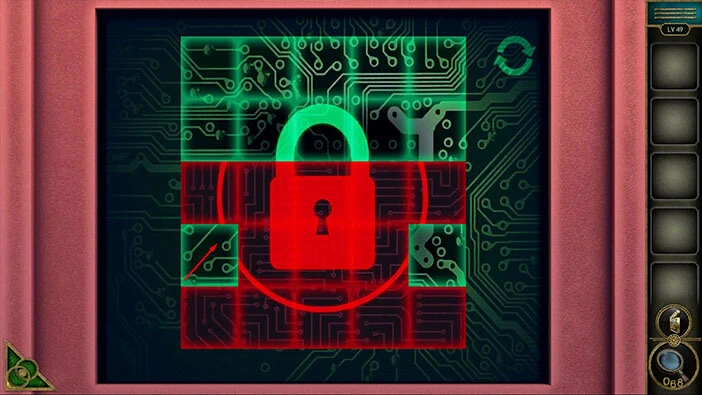
Step 7
Tap on the fifth slot in the third row to activate it.
Step 8
Tap on the first slot in the fourth row to activate it.
Step 9
Tap on the second slot in the fourth row to activate it.
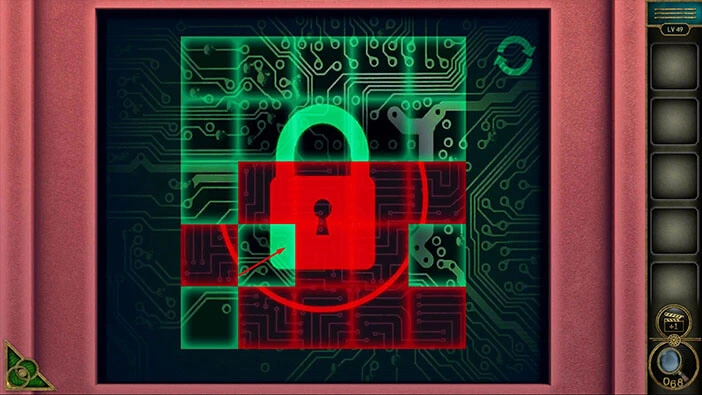
Step 10
Tap on the third slot in the fourth row to activate it.
Step 11
Tap on the fourth slot in the fourth row to activate it.
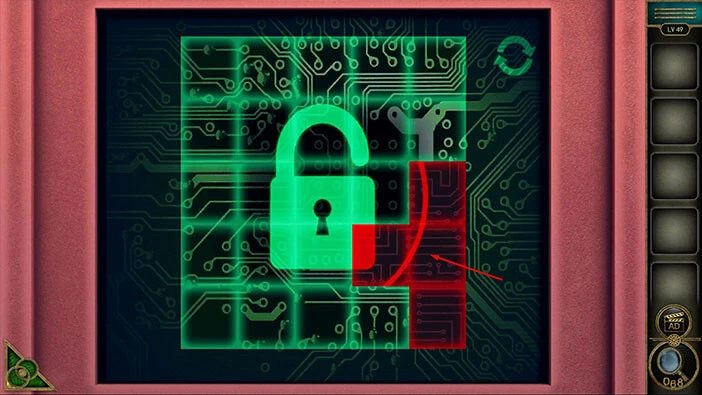
Step 12
Lastly, tap on the fifth slot in the fourth row to activate it, and you will solve this puzzle.
Let’s tap on the door to proceed to the next level.
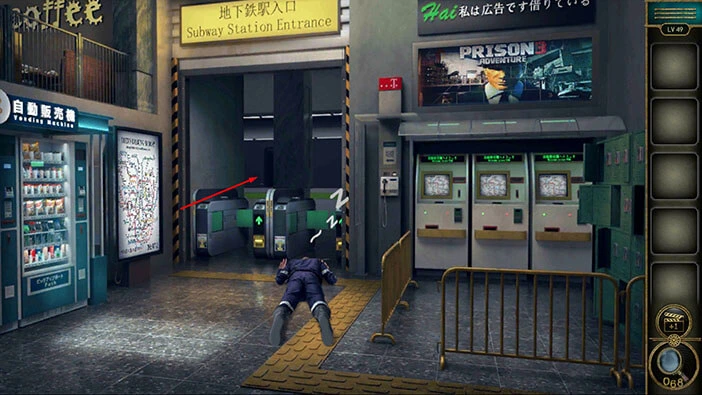
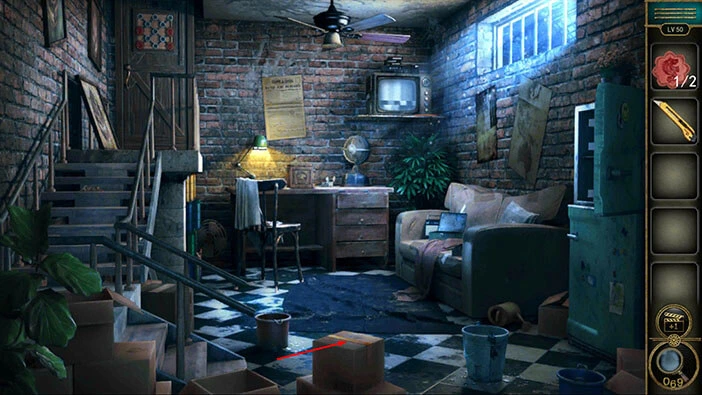
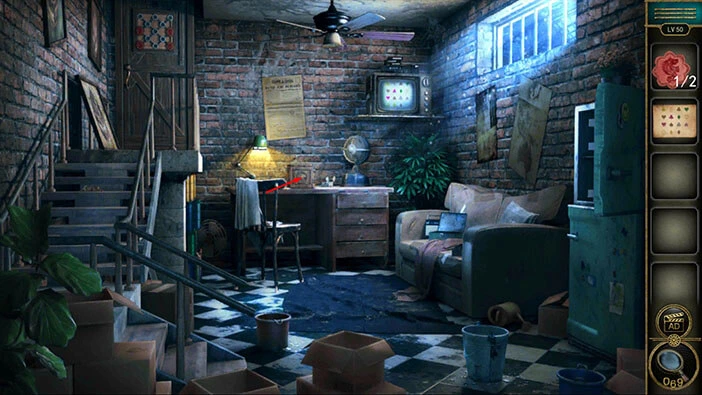
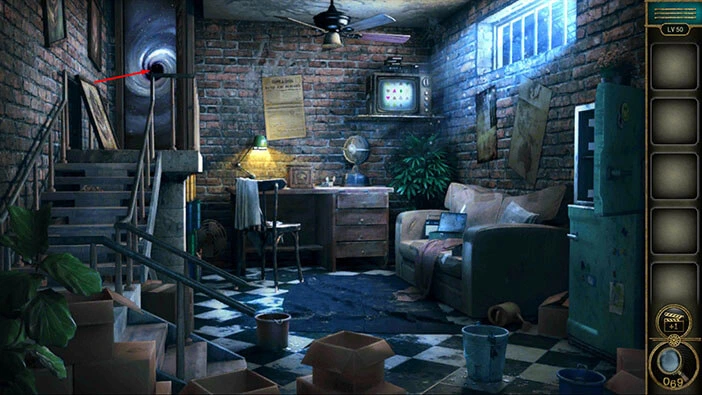
Level 50
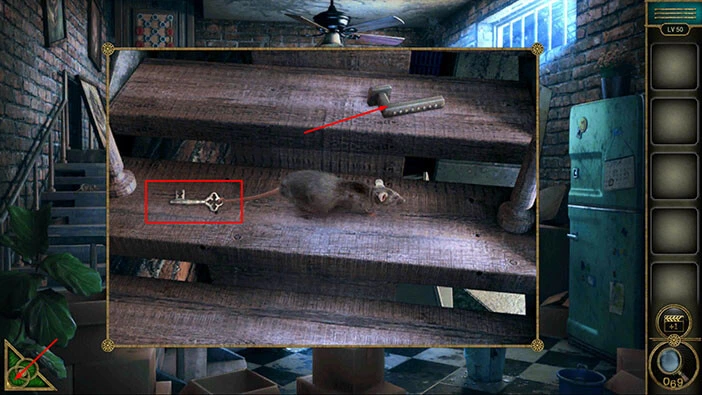
Let’s explore the fiftieth level. Tap on the stairs on the left to take a closer look at it.
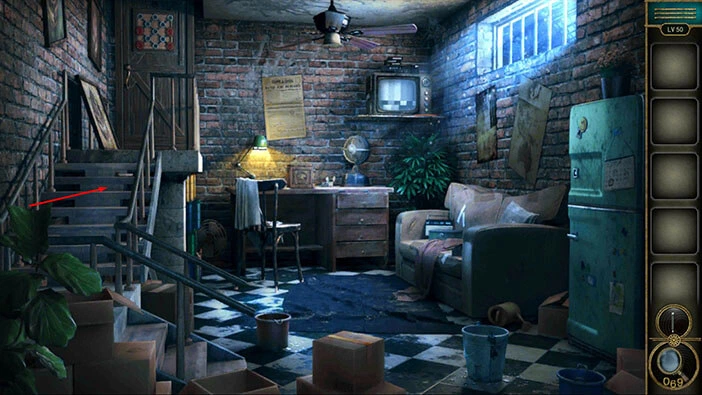
Here, you will find a “Refrigerator handle”. Tap on it to pick it up. You will also notice a rat running around, with a key tied to its tail. We will come back to it a bit later.
For now, tap on the green button in the bottom left corner of the screen to go back.
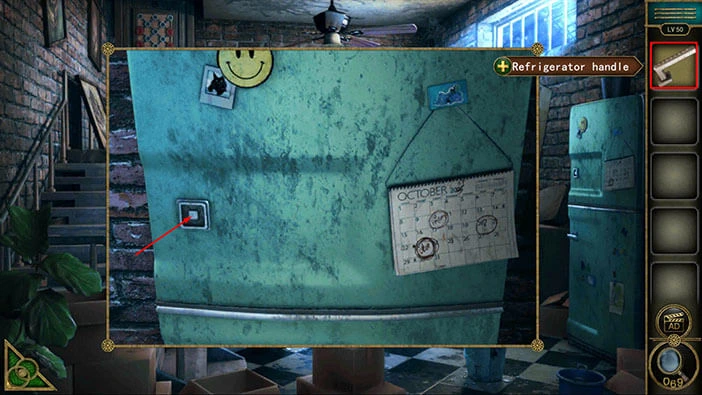
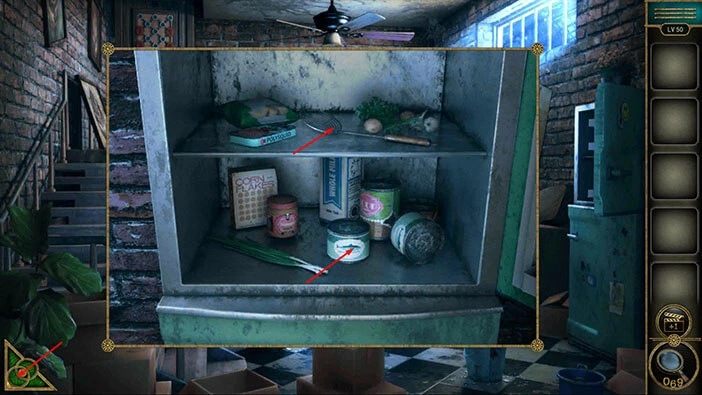
Next, tap on the fridge on the right to take a closer look at it.
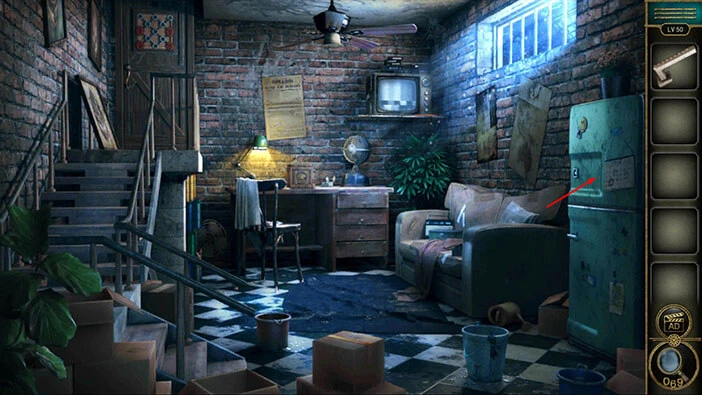
Select the “Refrigerator handle” from the inventory and insert it into the empty slot. With that done, you will automatically open the fridge.
Tap on the “Colander” on the top shelf, and the “Can” on the bottom shelf to pick up these two items.
After that, tap on the green button in the bottom left corner of the screen to go back.
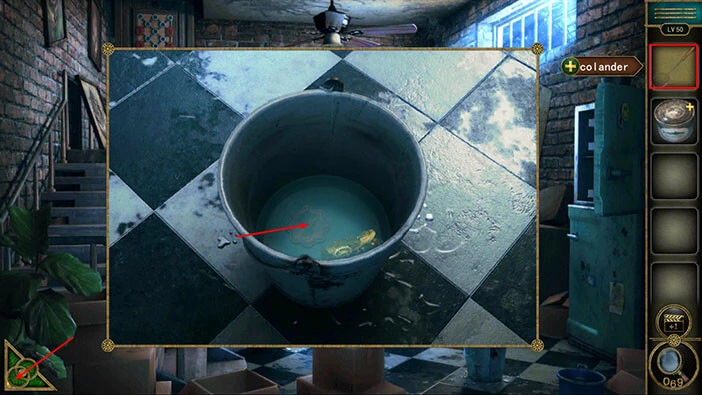
Next, let’s tap on the blue bucket on the right to take a closer look at it.

You will notice an item at the bottom of the bucket, but our character won’t take it with his bare hands. So, select the “Colander” from the inventory and use it to reach this item. A “Badge” will be added to your inventory.
After that, tap on the green button in the bottom left corner of the screen to go back.
Next, let’s tap on the couch on the right to take a closer look at it.
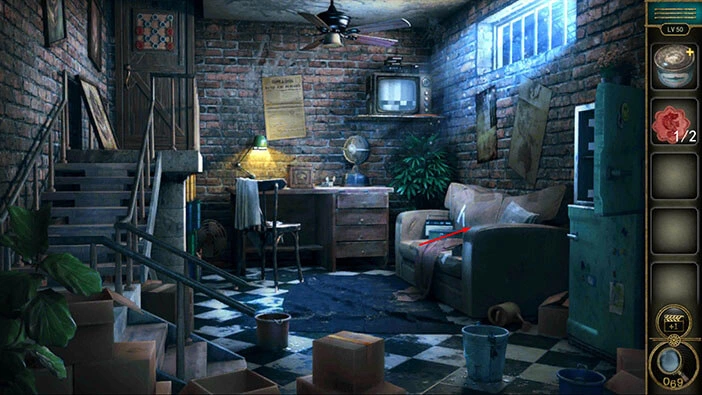
Just to the right of the blue box, you will notice an “Achievement star” sticking out. Tap on it to pick it up.
After that, tap on the green button in the bottom left corner of the screen to go back.
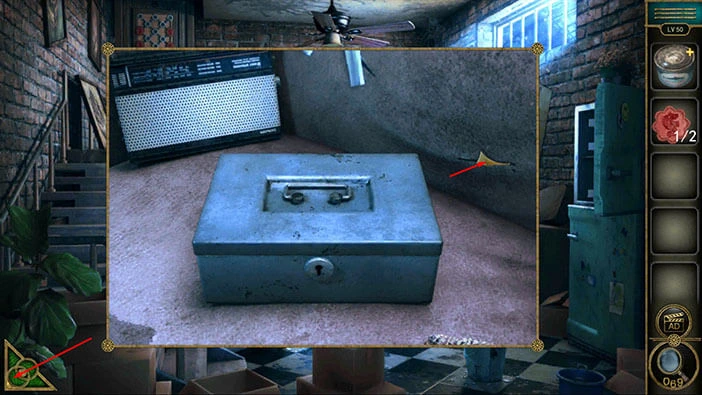
Let’s tap on the table to take a closer look at it.
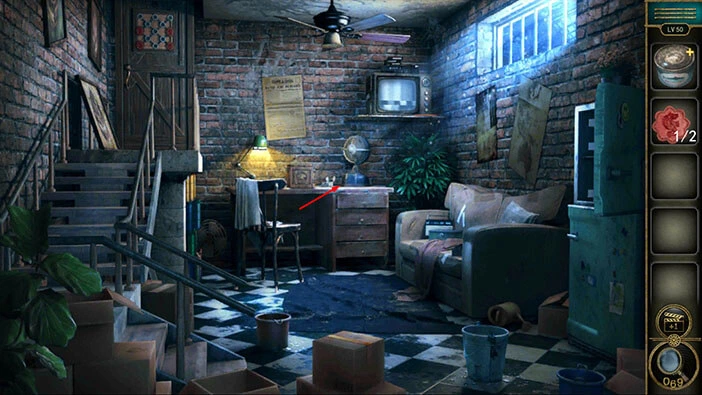
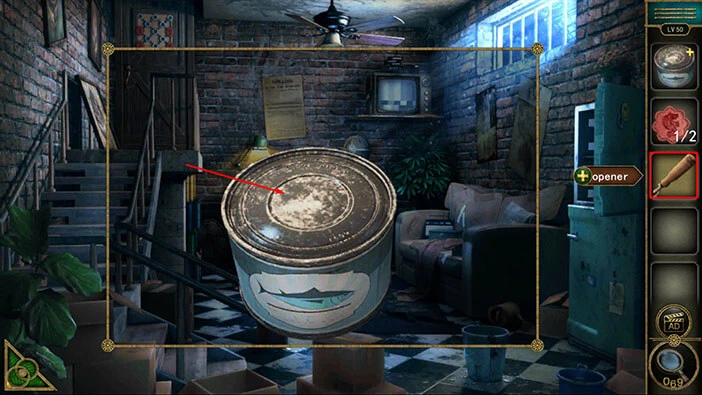
Here, you will notice a box with a puzzle. We will come back to it a bit later. For now, tap on the “Opener” on the left to pick it up.
After that, tap on the green button in the bottom left corner of the screen to go back.
Next, tap on the “Can” in your inventory to select it, and it will appear in the middle of the screen. After that, select the “Opener” from the inventory and use it to open the can.
“Canned fish” will be automatically added to your inventory.
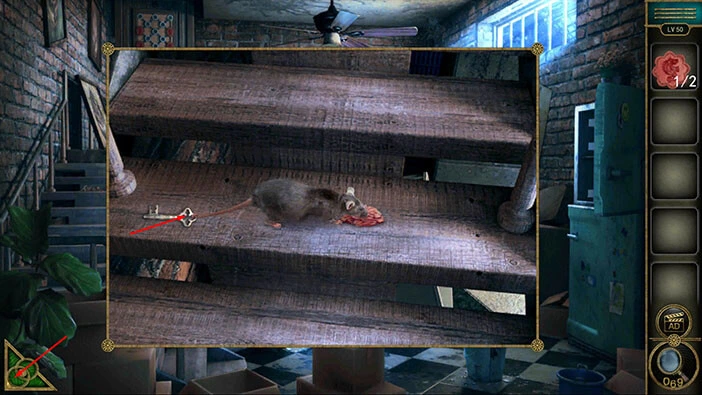
Previously, we saw a rat with a key tied to its tail, and it was running around at the stairs. We can now use the “Canned fish” to lure the rat and take a key from its tail. Let’s do that.
Tap on the stairs on the left to take a closer look at it.

Select the “Canned fish” from the inventory and place it on the stairs.
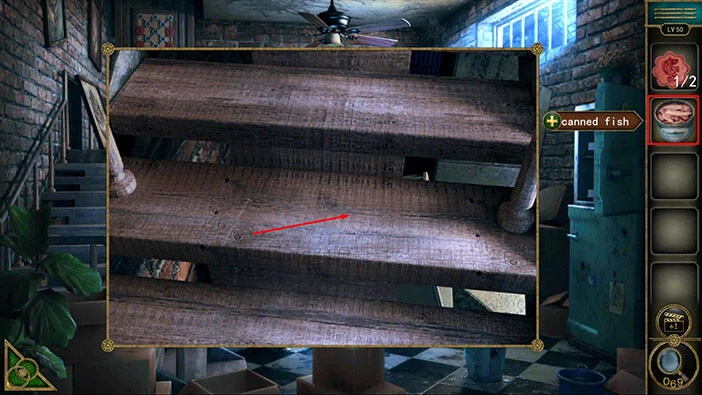
A few moments later, a rat will stop to eat the fish. Tap on the “Key” on its tail to pick it up.
After that, tap on the green button in the bottom left corner of the screen to go back.
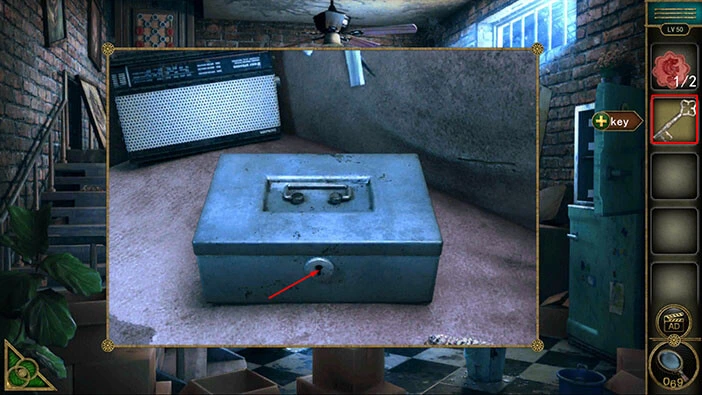
Previously, we saw a blue box on the couch, so let’s take another look at it.

Select the “Key” from the inventory and use it to unlock the box.
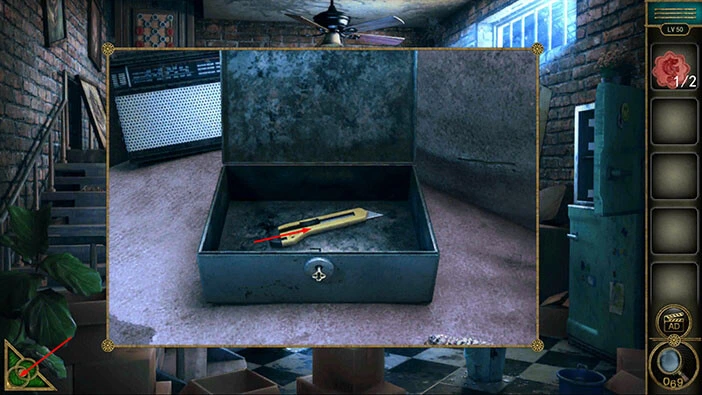
Inside you will find a “Knife”. Tap on it to pick it up.
After that, tap on the green button in the bottom left corner of the screen to go back.
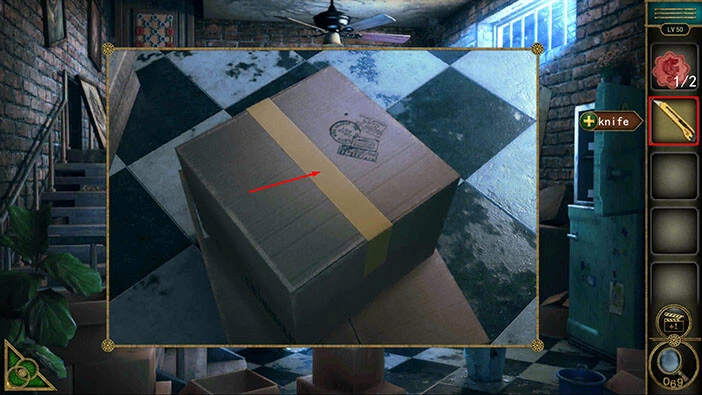
Next, let’s tap on the cardboard box to take a closer look at it.
Select the knife from the inventory and use it to open the box.
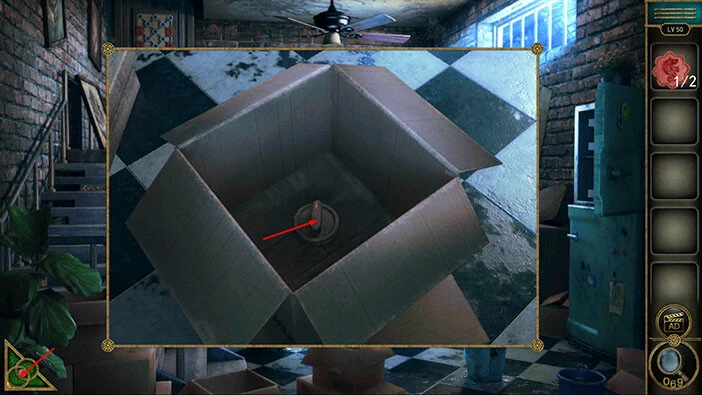
In the cardboard box, you will find a “Control knob”. Tap on it to pick it up.
After that, tap on the green button in the bottom left corner of the screen to go back.
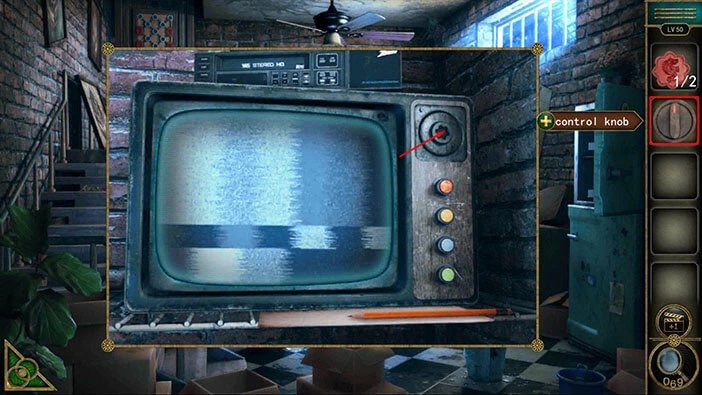
On the wall, in the top right corner of the room, you will notice a TV. Let’s tap on it to take a closer look.

Select the “Control knob” from the inventory and insert it into the empty slot.
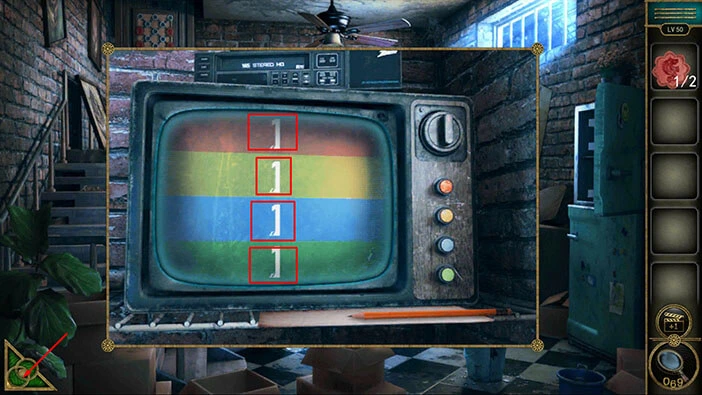
Once you activate the TV, four stripes will appear on the TV, red, yellow, blue, and green stripe. Also, we can see a number 1 in each stripe. So, here we have another puzzle. Our next task is to discover the correct number for each of the four colors. Let’s do that.
Tap on the green button in the bottom left corner of the screen to go back.
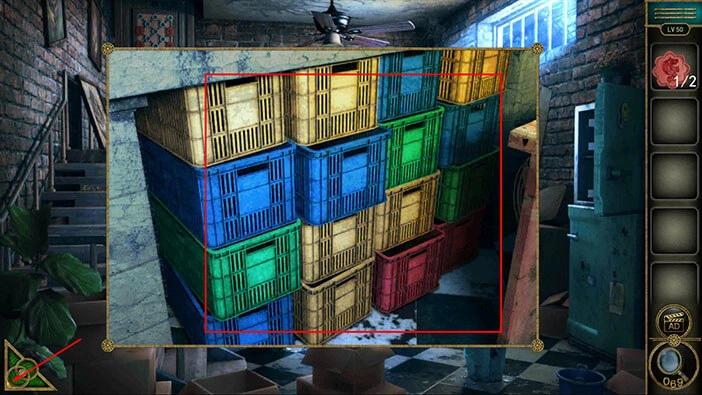
Next, let’s tap on the boxes on the left (under the stairs) to take a closer look at them.

Here, we can see 16 boxes, and their colors match the colors of the stripes that we saw on the TV. So, let’s memorize/write down the number of boxes in each color.
Red = Two boxes
Yellow = Six boxes
Blue = Five boxes
Green = Three boxes
Once you’re done, tap on the green button in the bottom left corner of the screen to go back.
Tap on the TV to take a closer look at it, and tap again to start the interaction.

On the right, we can see four buttons, and we can tap on them to set the numbers on the stripes. So, let’s set the correct number on each stripe (this number should be equal to the number of boxes of that color). So, we had
Red = Two
Yellow = Six
Blue = Five
Green = Three
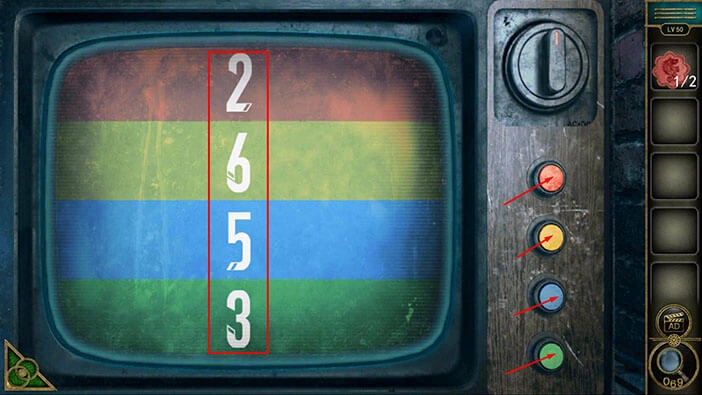
Once you set the correct numbers, some symbols will appear on the screen, and our character will write them down on the note. Tap on the “Paper with hints” to pick it up.
After that, tap on the green button in the bottom left corner of the screen to go back.
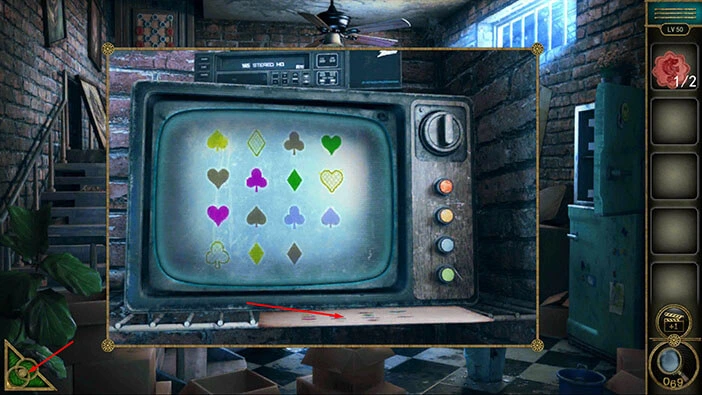
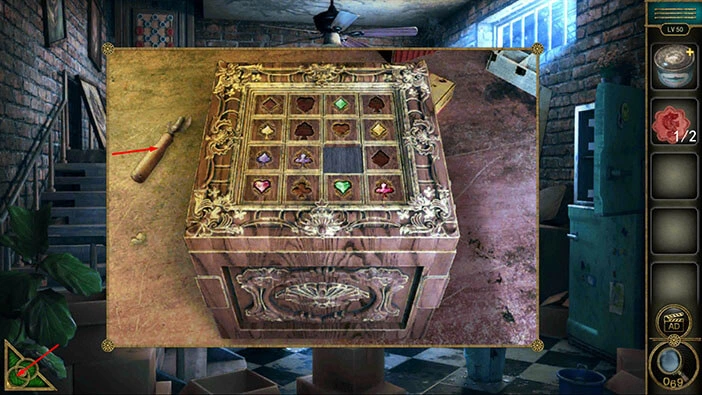
Previously, we saw the box with the same symbols on the desk. So, let’s tap on this box to take a closer look at it, and tap again to start the interaction.
Select the “Paper with hints” from the inventory and place it down, to the right of the box.
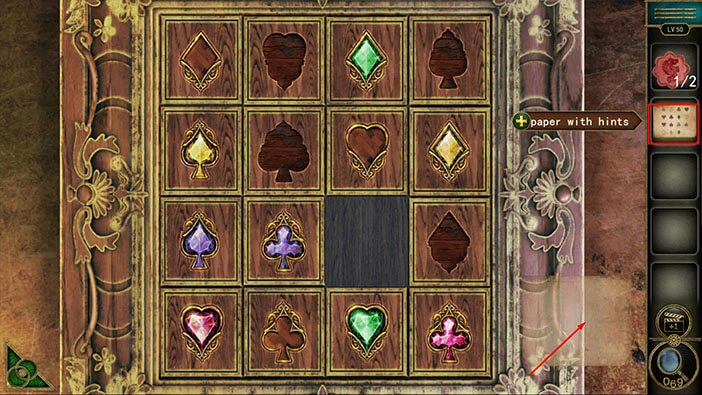
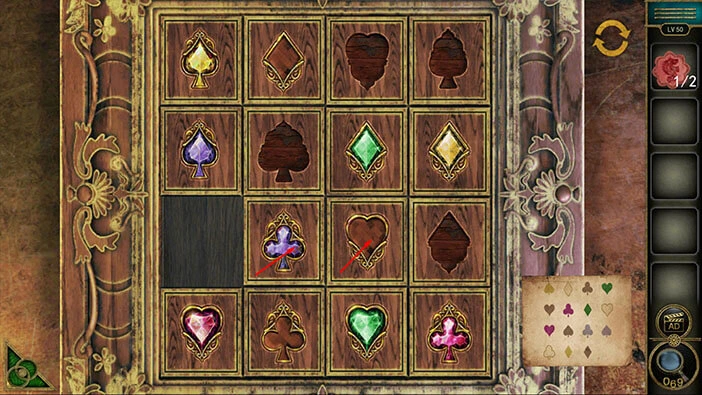
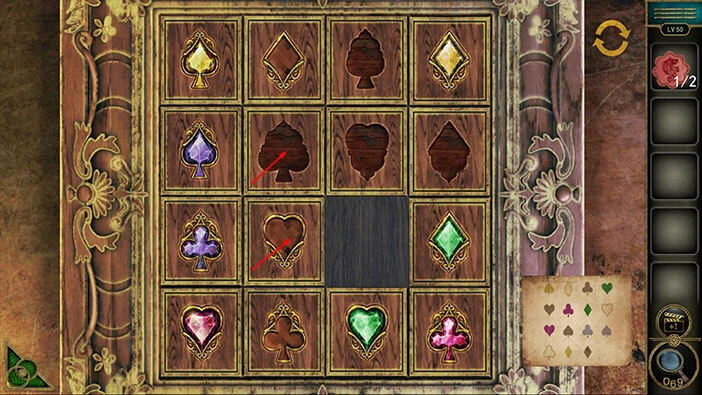
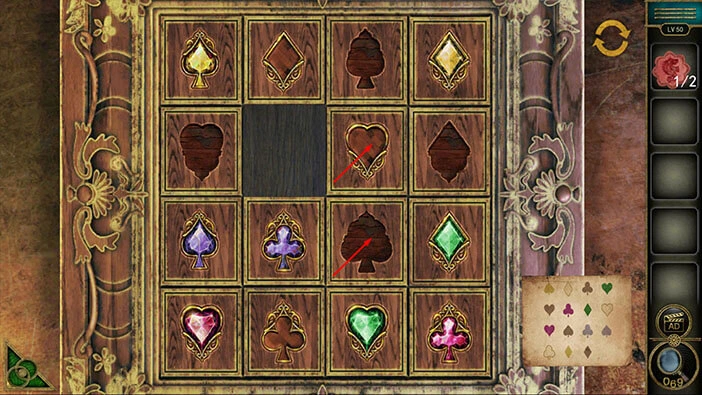
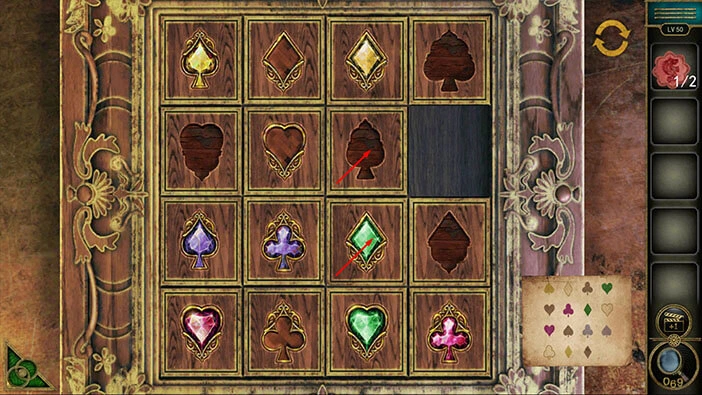
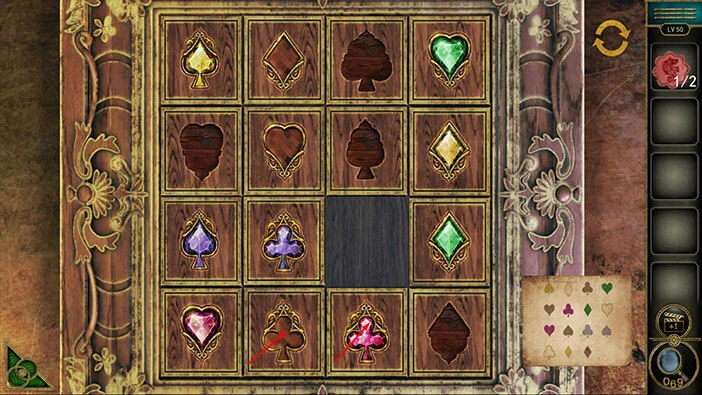
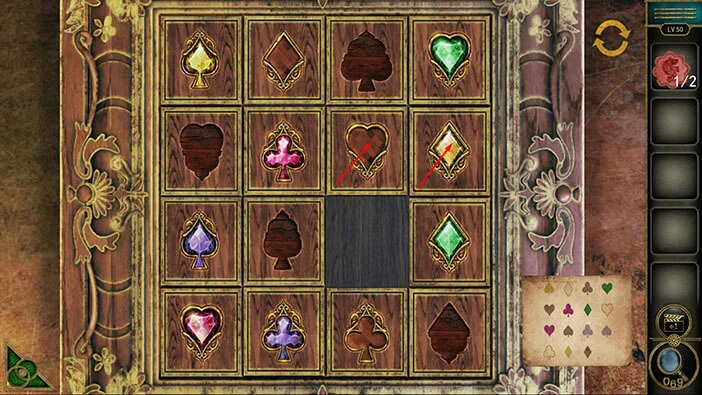
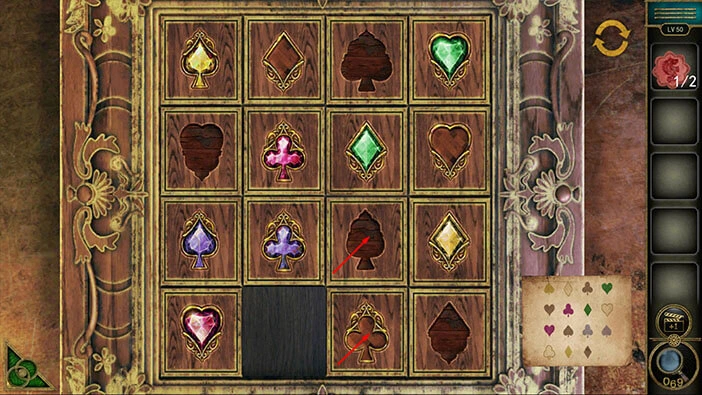
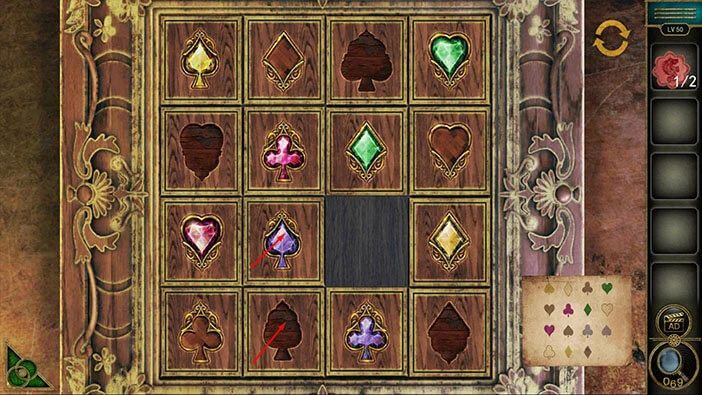
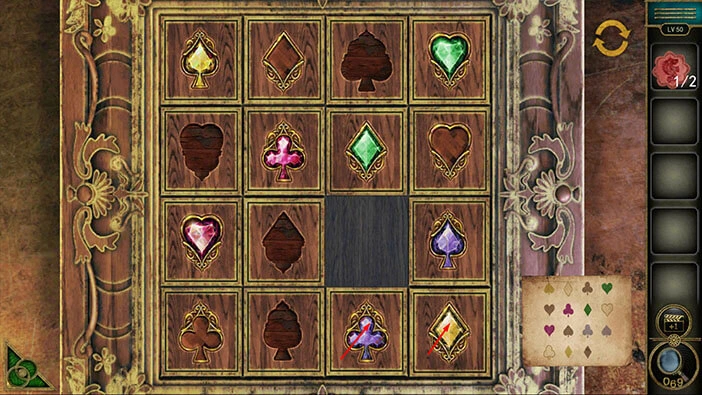
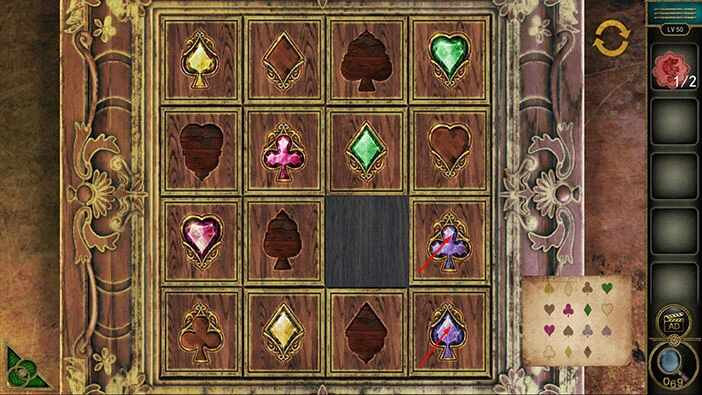
Here, we have another puzzle. The order of the symbols on the box should match the order of the symbols on the hint. We will do this puzzle in several steps. Let’s begin.
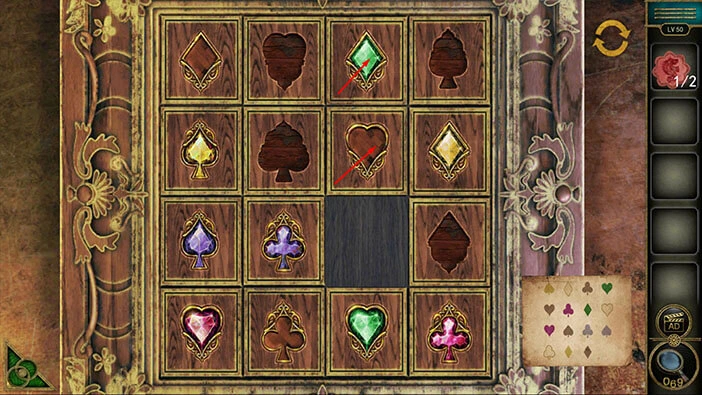
Step 1
Tap on the third symbol in the second row to move it down. After that, tap on the third symbol in the first row to move it down.
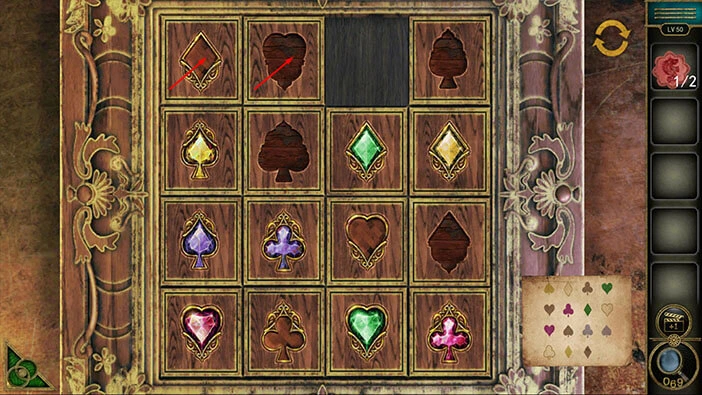
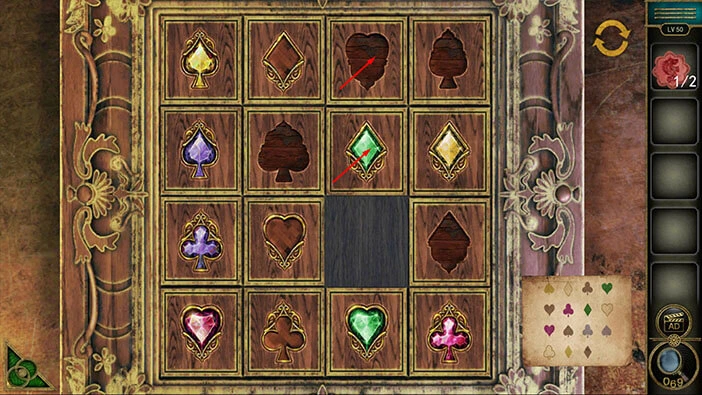
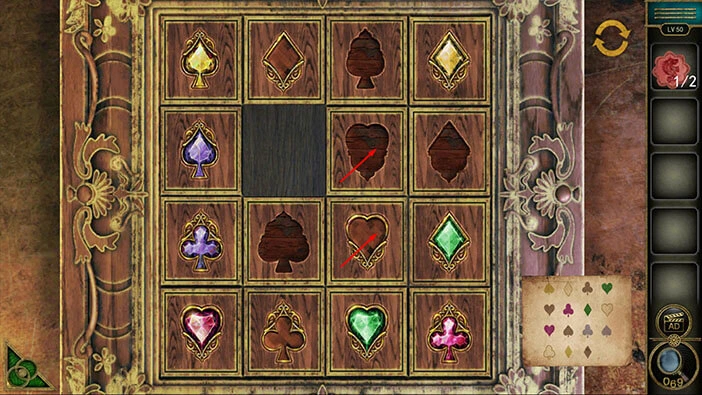
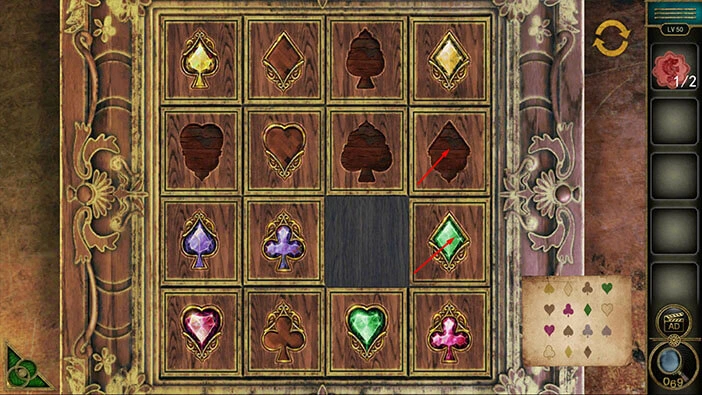
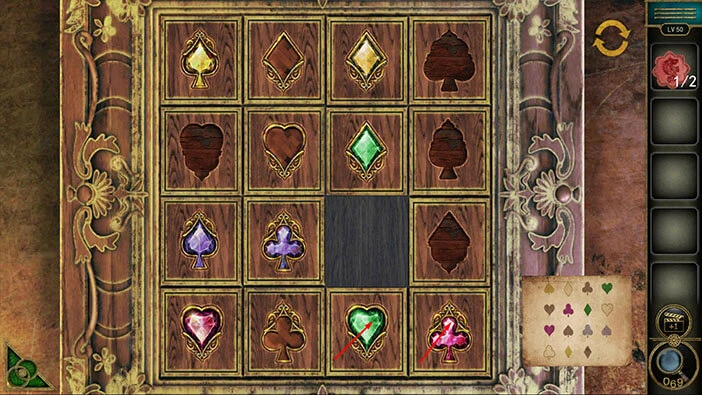
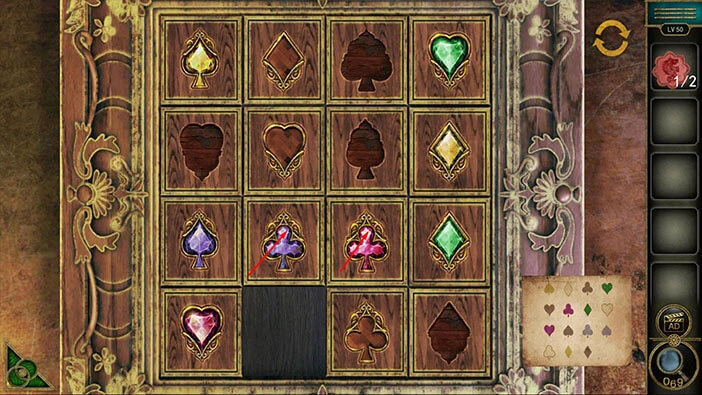
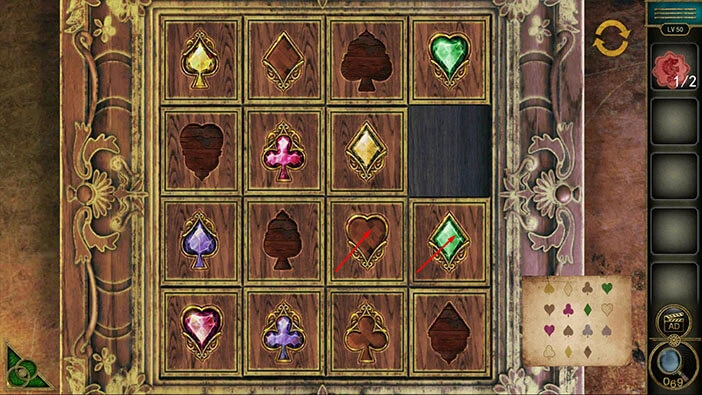
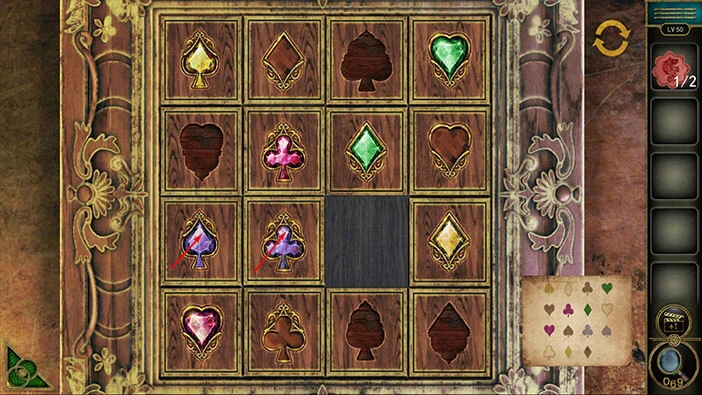
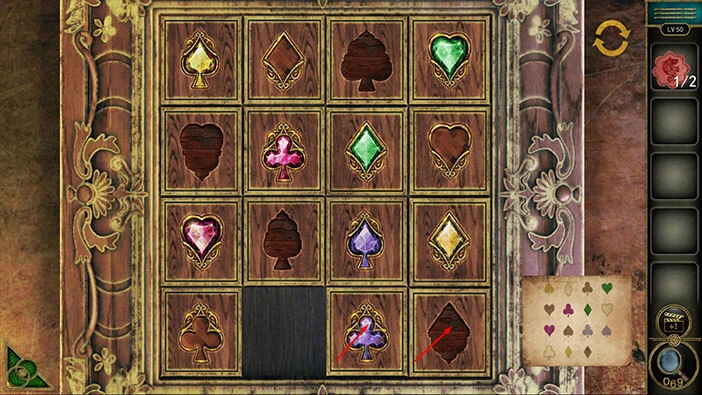
Step 2
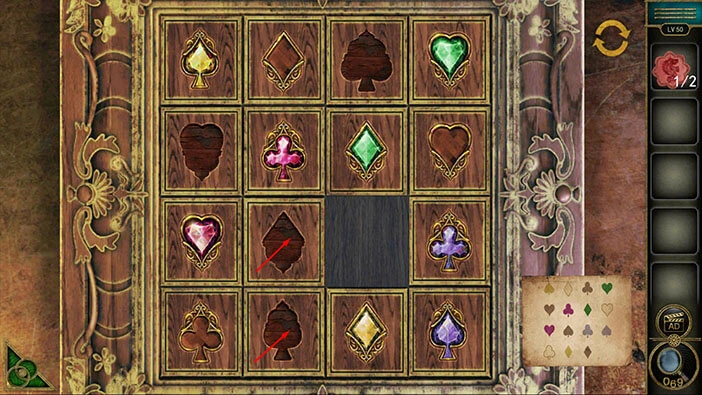
Tap on the second symbol in the first row to move it to the right. After that, tap on the first symbol in the first row to move it to the right.
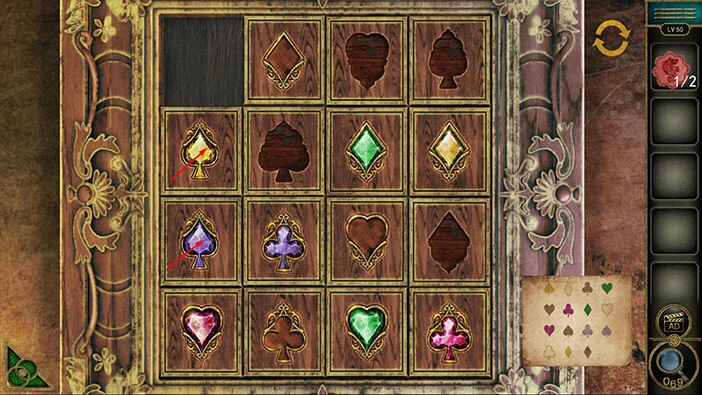
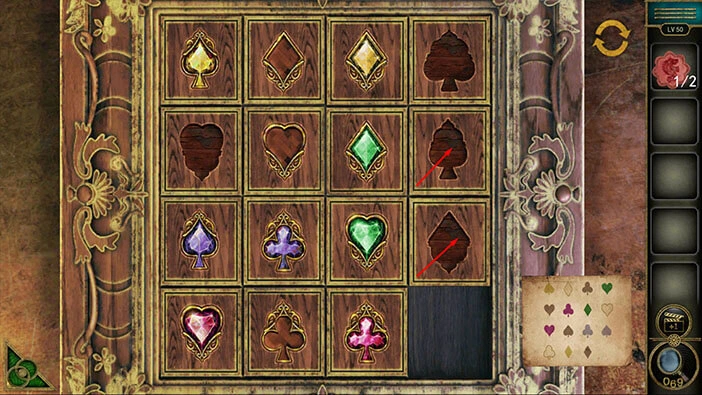
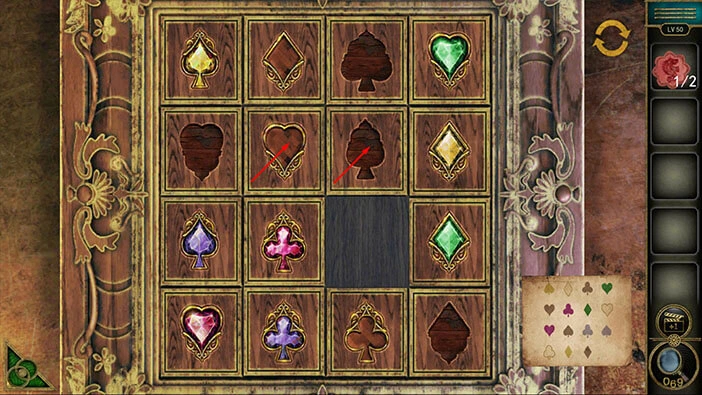
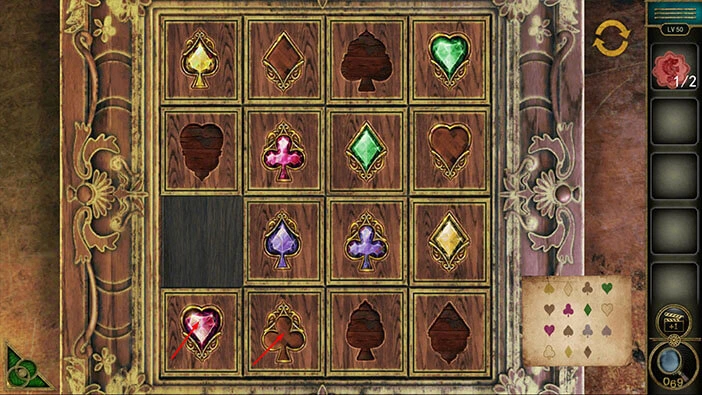
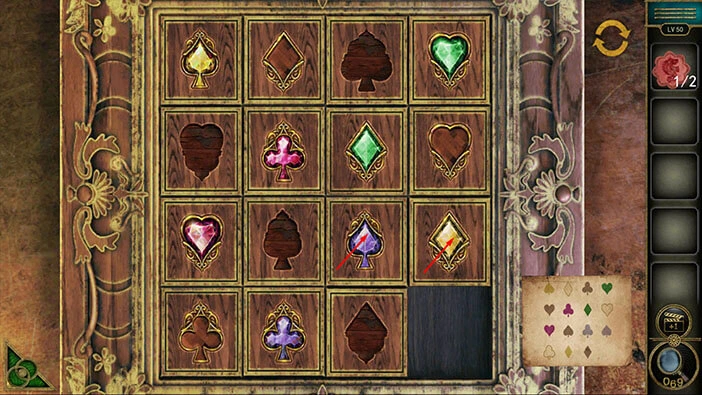
Step 3
Tap on the first symbol in the second row to move it up. After that, tap on the first symbol in the third row to move it up.
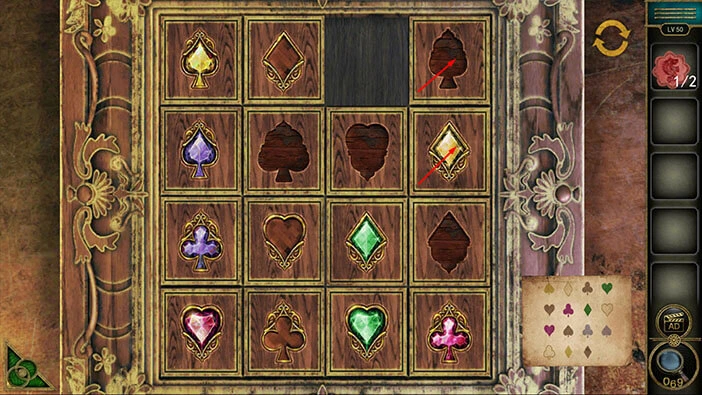
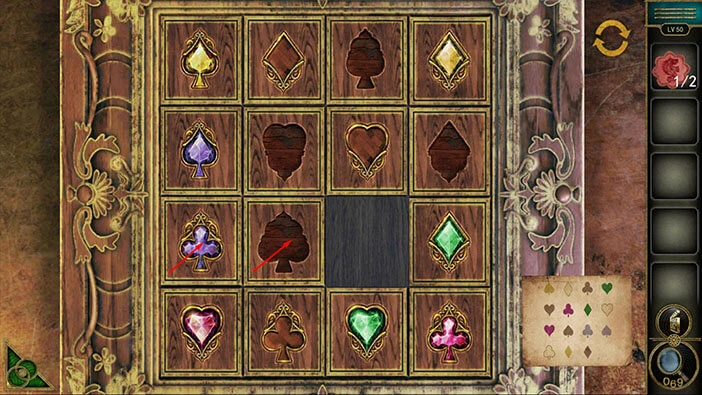
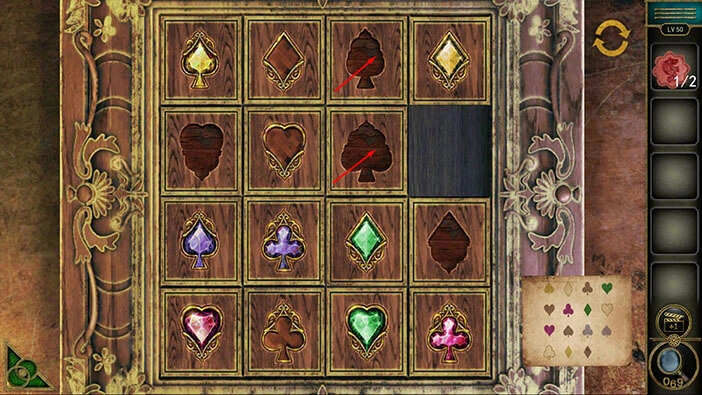
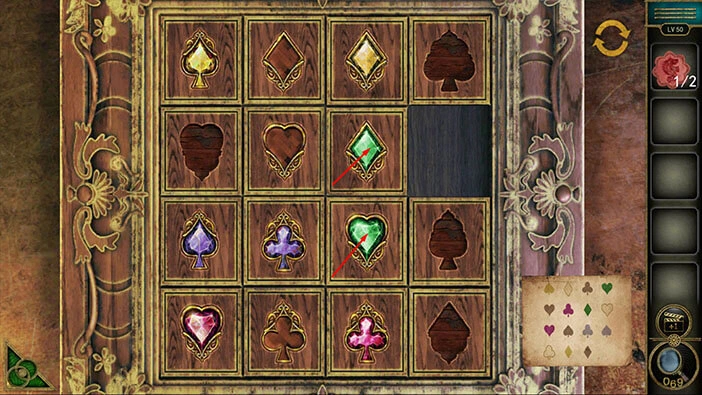
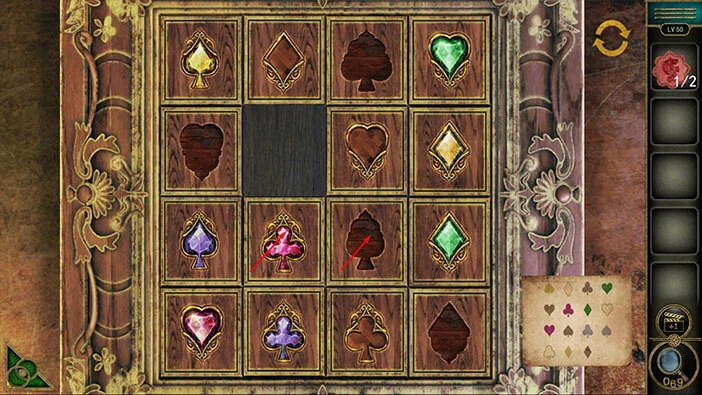
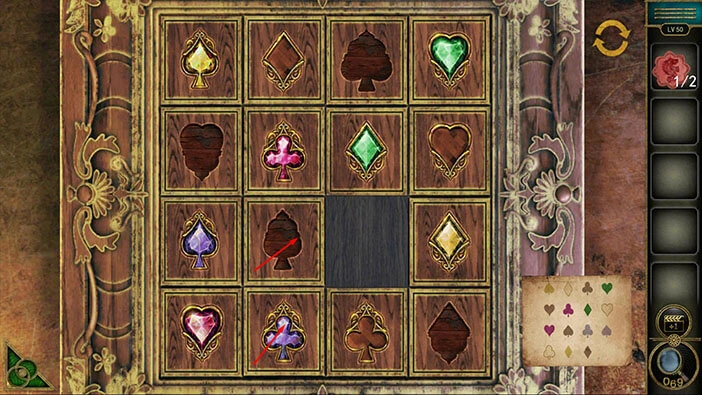
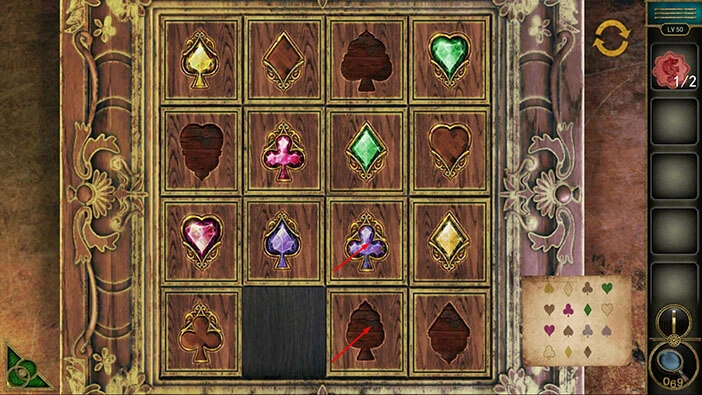
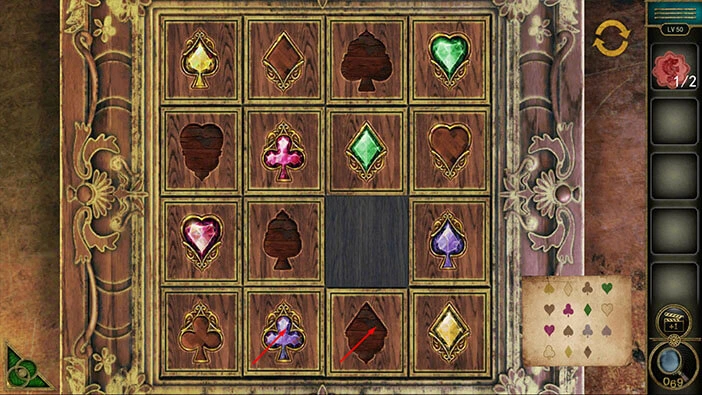
Step 4
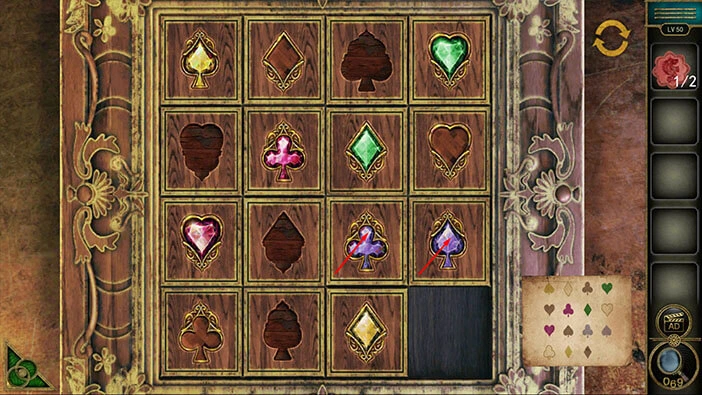
Tap on the second symbol in the third row to move it to the left. After that, tap on the third symbol in the third row to move it to the left.
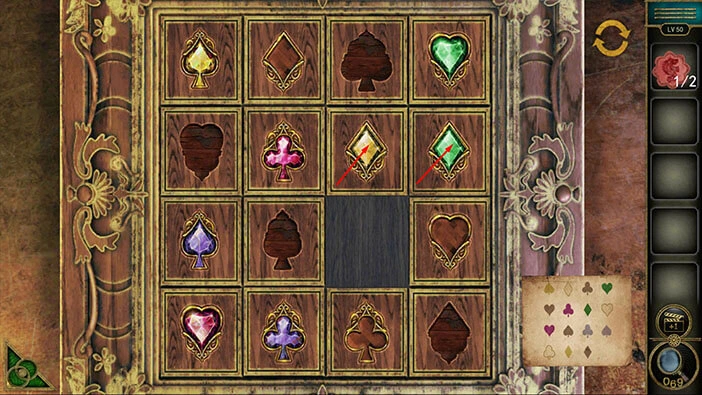
Step 5
Tap on the third symbol in the second row to move it down. After that, tap on the third symbol in the first row to move it down.
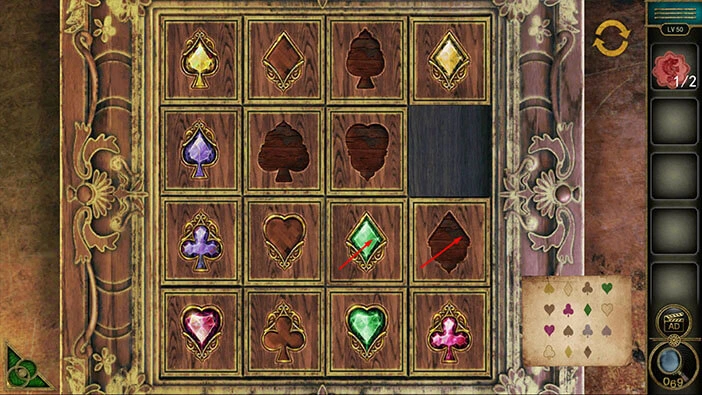
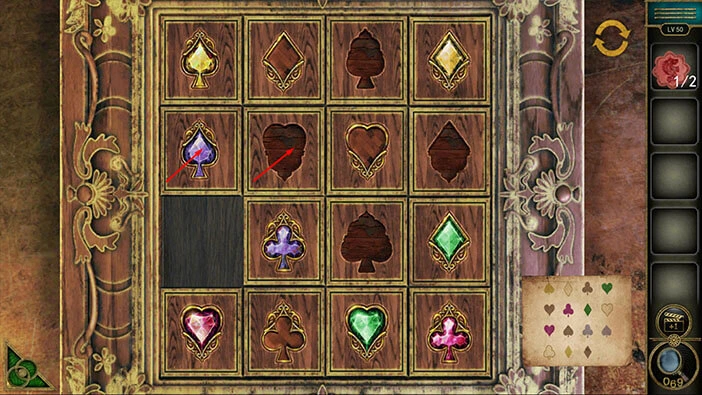
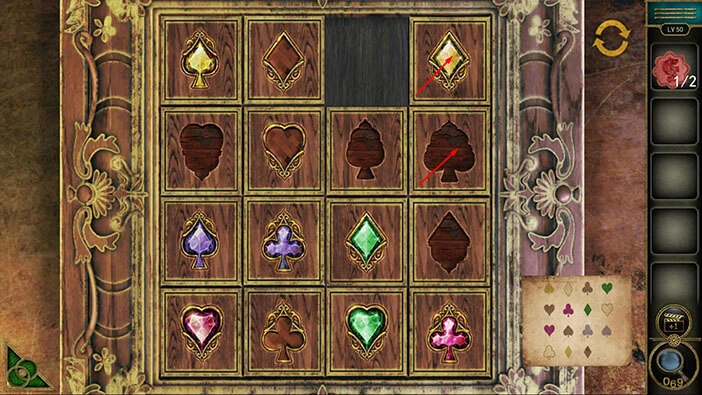
Step 6
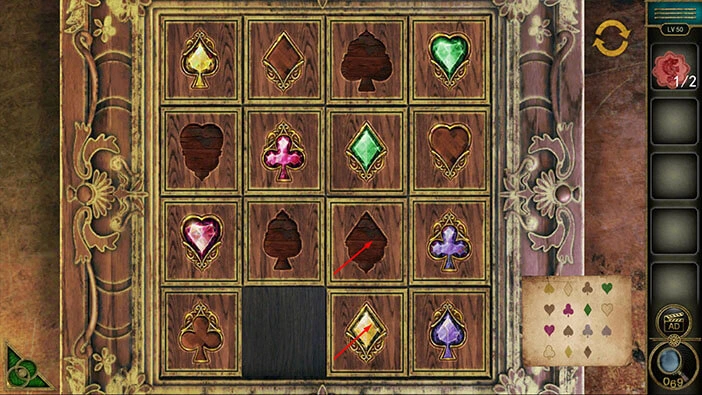
Tap on the fourth symbol in the first row to move it to the left. After that, tap on the fourth symbol in the second row to move it up.
Step 7
Tap on the fourth symbol in the third row to move it up. After that, tap on the third symbol in the third row to move it to the right.
Step 8
Tap on the second symbol in the third row to move it to the right. After that, tap on the second symbol in the second row to move it down.
Step 9
Tap on the third symbol in the second row to move it to the left. After that, tap on the third symbol in the third row to move it up.
Step 10
Tap on the second symbol in the third row to move it to the right. After that, tap on the first symbol in the third row to move it to the right.
Step 11
Tap on the first symbol in the second row to move it down. After that, tap on the second symbol in the second row to move it to the left.
Step 12
Tap on the third symbol in the second row to move it to the left. After that, tap on the third symbol in the third row to move it up.
Step 13
Tap on the fourth symbol in the third row to move it to the left. After that, tap on the fourth symbol in the second row to move it down.
Step 14
Tap on the third symbol in the second row to move it to the right. After that, tap on the third symbol in the first row to move it down.
Step 15
Tap on the fourth symbol in the first row to move it to the left. After that, tap on the fourth symbol in the second row to move it up.
Step 16
Tap on the third symbol in the second row to move it to the right. After that, tap on the third symbol in the third row to move it up.
Step 17
Tap on the third symbol in the fourth row to move it up. After that, tap on the fourth symbol in the fourth row to move it to the left.
Step 18
Tap on the fourth symbol in the third row to move it down. After that, tap on the fourth symbol in the second row to move it down.
Step 19
Tap on the third symbol in the second row to move it to the right. After that, tap on the third symbol in the third row to move it up.
Step 20
Tap on the fourth symbol in the third row to move it to the left. After that, tap on the fourth symbol in the second row to move it down.
Step 21
Tap on the third symbol in the second row to move it to the right. After that, tap on the third symbol in the first row to move it down.
Step 22
Tap on the fourth symbol in the first row to move it to the left. After that, tap on the fourth symbol in the second row to move it up.
Step 23
Tap on the third symbol in the second row to move it to the right. After that, tap on the third symbol in the third row to move it up.
Step 24
Tap on the third symbol in the fourth row to move it up. After that, tap on the second symbol in the fourth row to move it to the right.
Step 25
Tap on the second symbol in the third row to move it down. After that, tap on the third symbol in the third row to move it to the left.
Step 26
Tap on the third symbol in the second row to move it down. After that, tap on the second symbol in the second row to move it to the right.
Step 27
Tap on the second symbol in the third row to move it up. After that, tap on the third symbol in the third row to move it to the left.
Step 28
Tap on the third symbol in the second row to move it down. After that, tap on the fourth symbol in the second row to move it to the left.
Step 29
Tap on the fourth symbol in the third row to move it up. After that, tap on the third symbol in the third row to move it to the right.
Step 30
Tap on the third symbol in the second row to move it down. After that, tap on the fourth symbol in the second row to move it to the left.
Step 31
Tap on the fourth symbol in the third row to move it up. After that, tap on the third symbol in the third row to move it to the right.

Step 32
Tap on the second symbol in the third row to move it to the right. After that, tap on the second symbol in the fourth row to move it up.
Step 33
Tap on the third symbol in the fourth row to move it to the left. After that, tap on the third symbol in the third row to move it down.
Step 34
Tap on the second symbol in the third row to move it to the right. After that, tap on the first symbol in the third row to move it to the right.
Step 35
Tap on the first symbol in the fourth row to move it up. After that, tap on the second symbol in the fourth row to move it to the left.
Step 36
Tap on the third symbol in the fourth row to move it to the left. After that, tap on the third symbol in the third row to move it down.
Step 37
Tap on the second symbol in the third row to move it to the right. After that, tap on the second symbol in the fourth row to move it up.
Step 38
Tap on the third symbol in the fourth row to move it to the left. After that, tap on the fourth symbol in the fourth row to move it to the left.
Step 39
Tap on the fourth symbol in the third row to move it down. After that, tap on the third symbol in the third row to move it to the right.
Step 40
Tap on the third symbol in the fourth row to move it up. After that, tap on the second symbol in the fourth row to move it to the right.
Step 41
Tap on the second symbol in the third row to move it down. After that, tap on the third symbol in the second row to move it to the left.

Step 42
Tap on the third symbol in the fourth row to move it up. After that, tap on the fourth symbol in the fourth row to move it to the left.
Step 43
Tap on the fourth symbol in the third row to move it down. After that, tap on the third symbol in the third row to move it to the right.
Step 44
Tap on the second symbol in the third row to move it to the right. After that, tap on the second symbol in the fourth row to move it up.
Step 45
Tap on the third symbol in the fourth row to move it to the left. After that, tap on the third symbol in the third row to move it down.
Step 46
Finally, tap on the fourth symbol in the third row to move it to the left. After that, tap on the fourth symbol in the fourth row to move it up. With that, you will open the box.
In the box, you will find another “Badge”. Tap on it to pick it up. After that, tap on the green button in the bottom left corner of the screen to go back.
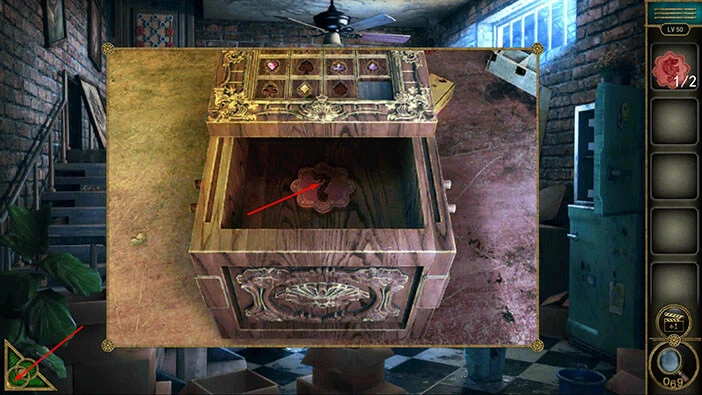
Next, let’s tap on the puzzle, located on the door, to take a closer look at it.

You will notice that two slots are empty. So, select the “Badges” from the inventory and insert them into the empty slots.
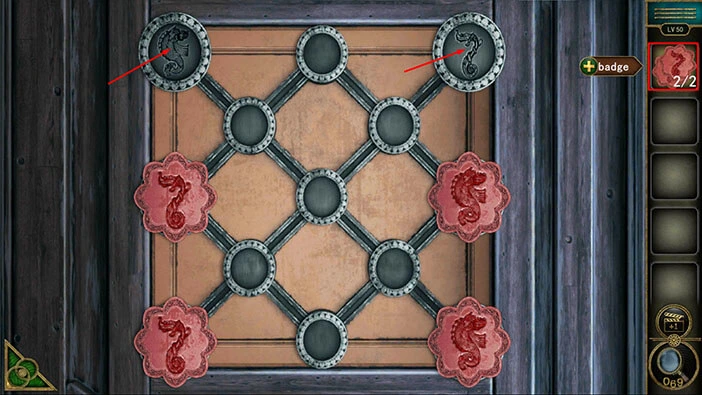
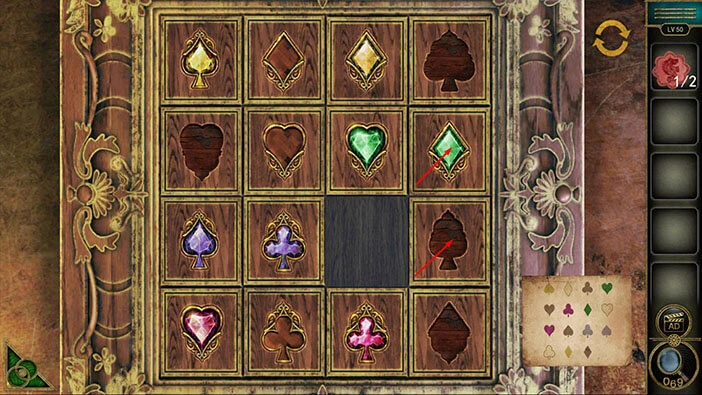
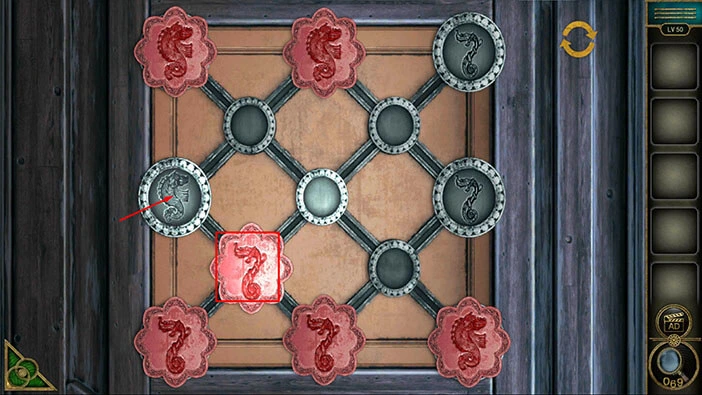
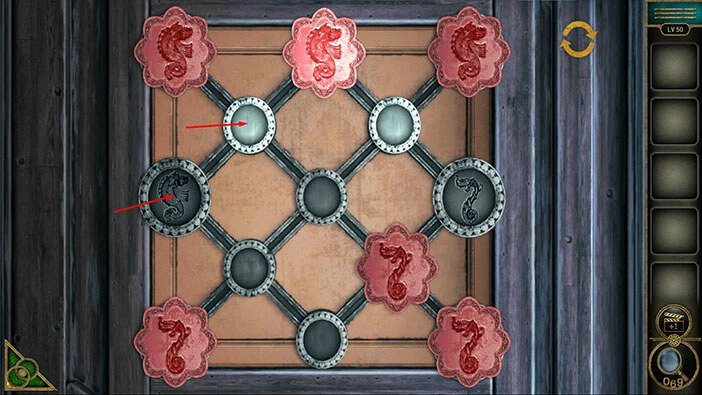
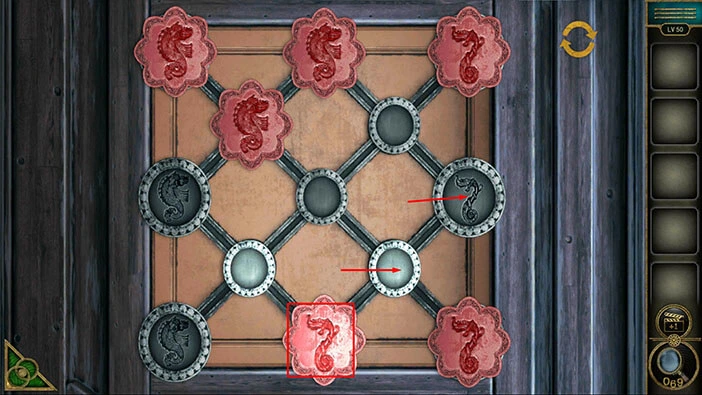
Here, we have another puzzle. Our task is to rearrange the Badges. The badges on the left should be placed into the slots on the right, and the badges on the right should be placed into the slots on the left. We will do this puzzle in several steps. Let’s begin.
Step 1
Tap on the badge in the top left slot to select it, then tap on the first slot in the second row to move it down and to the right.
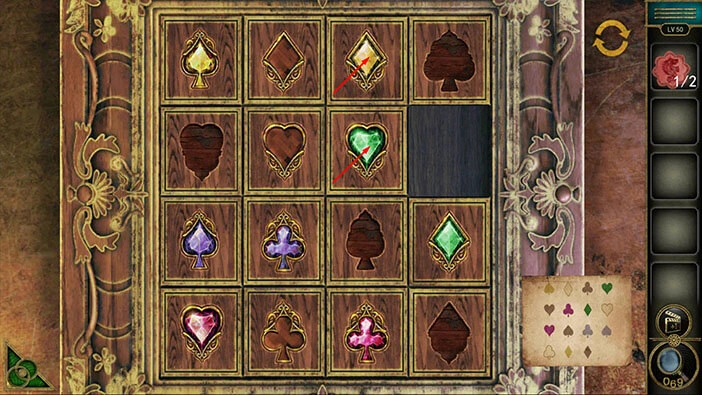
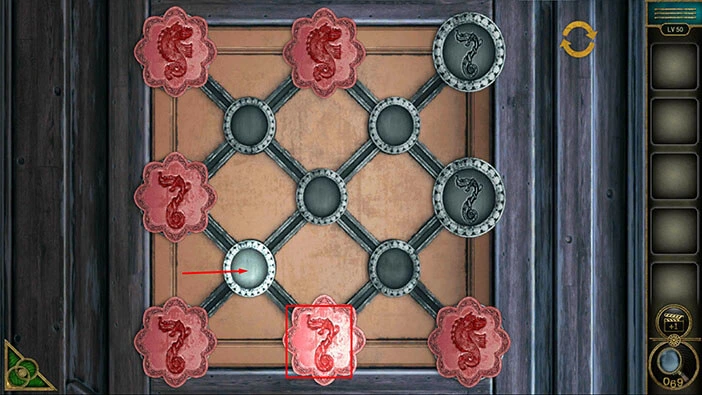
Step 2
Tap on the second slot in the third row to move the badge down and to the right.
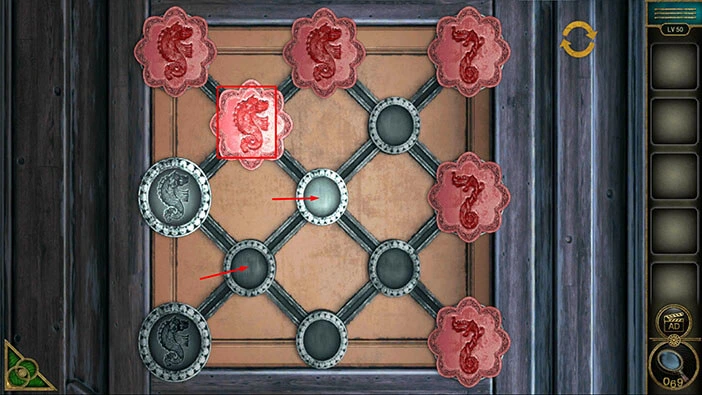
Step 3
Tap on the first slot in the fourth row to move the badge down and to the left.
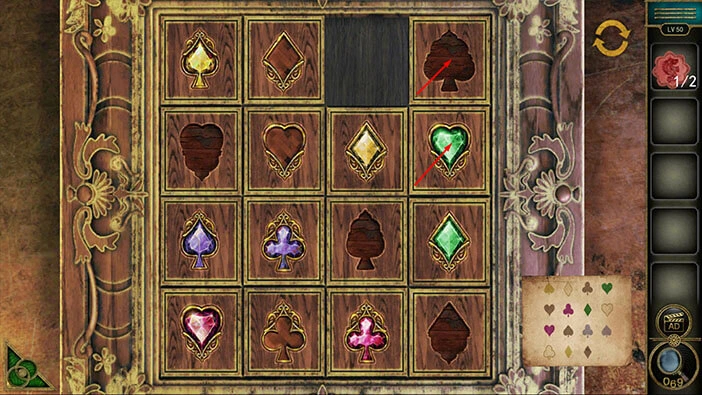
Step 4
Tap on the second slot in the fifth row to move the badge down and to the right.
Step 5
Tap on the badge in the first slot in the third row to select it. After that, tap on the first slot in the fourth row to move the badge down and to the right.
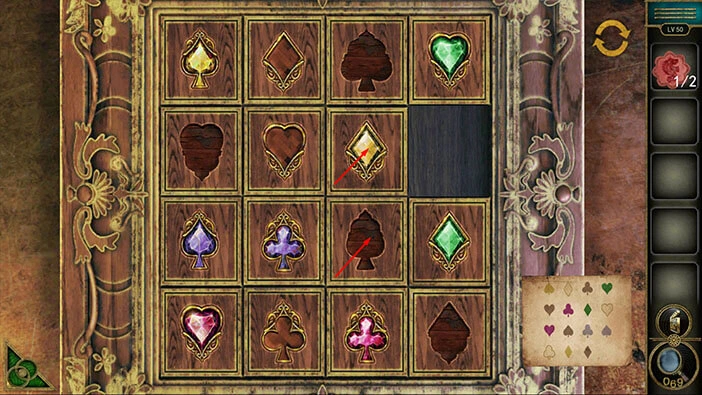
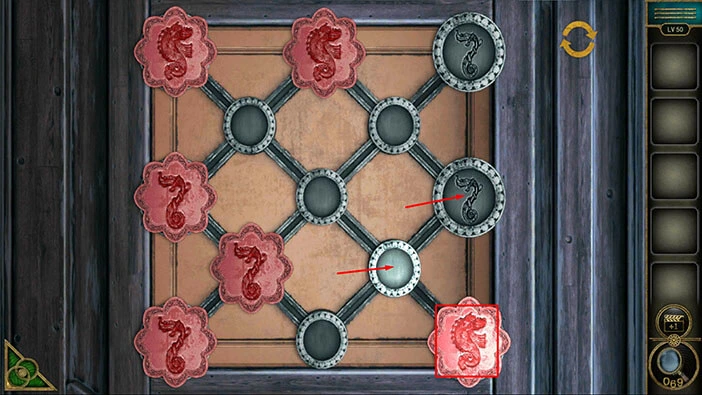
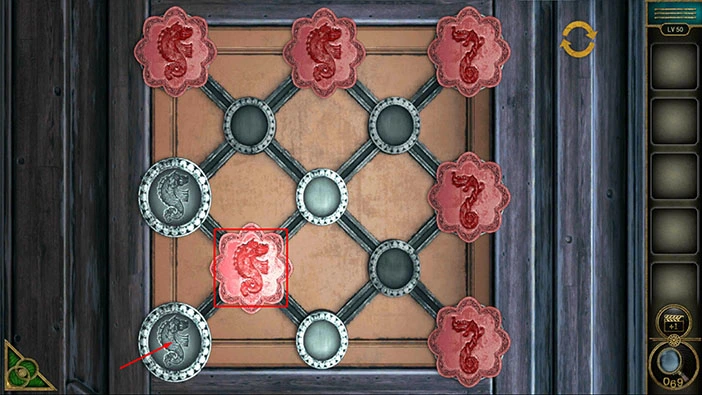
Step 6
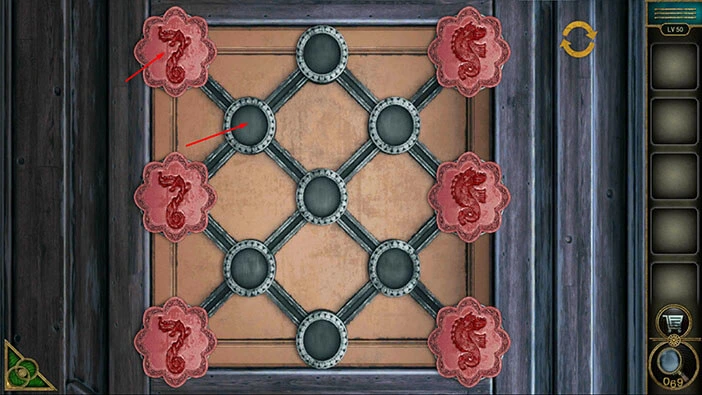
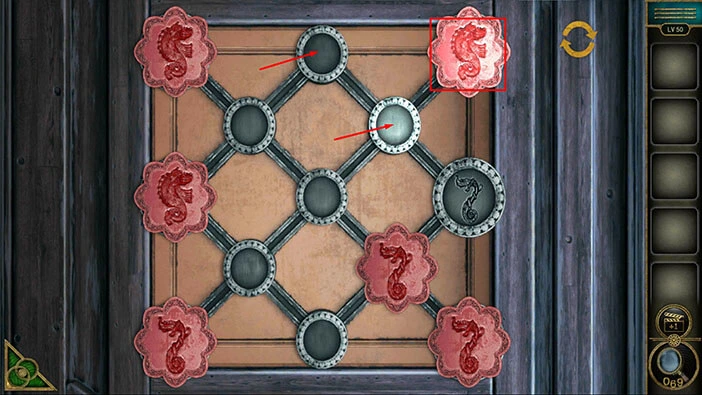
Tap on the badge in the third slot in the first row to select it. After that, tap on the second slot in the second row to move the badge down and to the left.
Step 7
Tap on the second slot in the first row to move the badge up and to the left. After that, tap on the first slot in the second row to move the badge down and to the left.
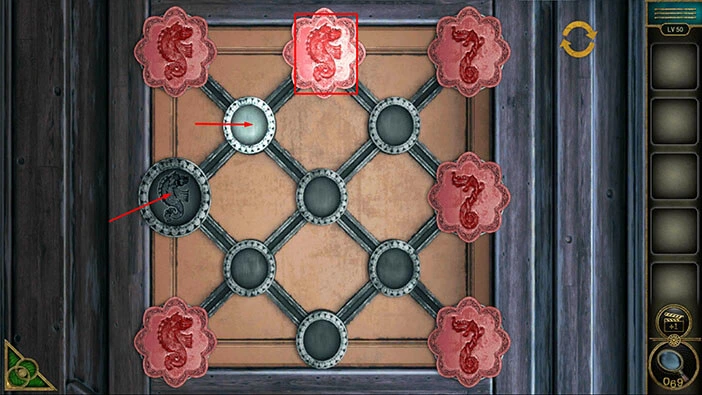
Step 8
Tap on the first slot in the first row to move the badge up and to the left.
Step 9
Tap on the third slot in the third row to select the badge, then tap on the second slot in the second row to move the badge up and to the left. After that, tap on the second slot in the first row to move the badge up and to the left.
Step 10
Tap on the first slot in the fourth row to select the badge, then tap on the first slot in the third row to move the badge up and to the left.
Step 11
Tap on the second slot in the fifth row to select the badge, then tap on the first slot in the fourth row to move the badge up and to the left.
Step 12
Tap on the third slot in the fifth row to select the badge, then tap on the second slot in the fourth row to move the badge up and to the left. After that, tap on the third slot in the third row to move the badge up and to the right.
Step 13
Tap on the second slot in the second row to move the badge up and to the left. After that, tap on the third slot in the first row to move the badge up and to the right.
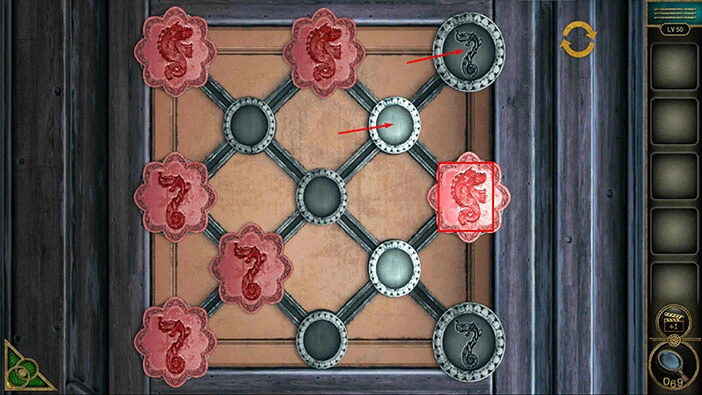
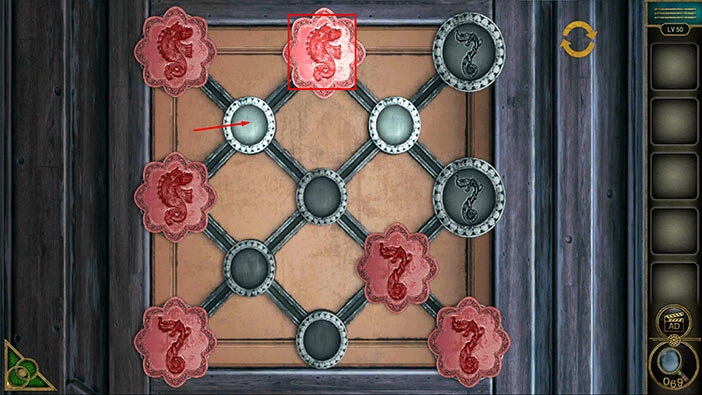
Step 14
Tap on the first slot in the fourth row to select the badge, then tap on the second slot in the fifth row to move the badge down and to the right. After that, tap on the second slot in the fourth row to move the badge up and to the right.
Step 15
Tap on the third slot in the fifth row to move the badge down and to the right.
Step 16
Tap on the first slot in the third row to select the badge, then tap on the first slot in the fourth row to move the badge down and to the right. After that, tap on the second slot in the fifth row to move the badge down and to the right.
Step 17
Tap on the second slot in the fourth row to move the badge down and to the right.
Step 18
Tap on the second slot in the first row to select the badge, then tap on the first slot in the second row to move the badge down and to the left. After that, tap on the first slot in the third row to move the badge down and to the left.
Step 19
Tap on the third slot in the first row to select the badge, then tap on the second slot in the second row to move the badge down and to the left. After that, tap on the second slot in the first row to move the badge up and to the left.
Step 20
Tap on the first slot in the second row to move the badge down and to the left.
Step 21
Tap on the second slot in the fourth row to select the badge, then tap on the third slot in the third row to move the badge up and to the right. After that, tap on the second slot in the second row to move the badge up and to the left.
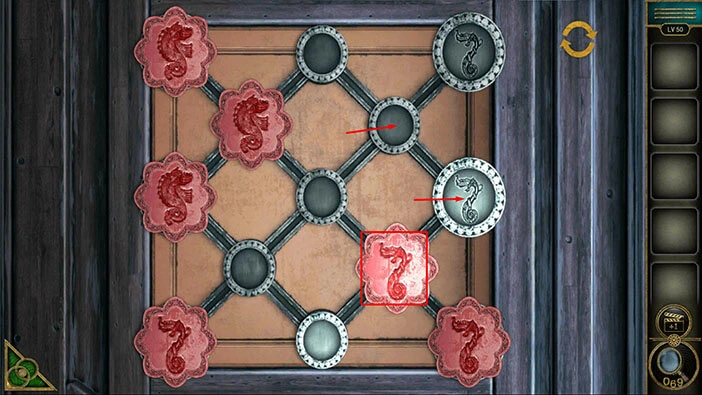
Step 22
Tap on the third slot in the first row to move the badge up and to the right.
Step 23
Tap on the first slot in the second row to select the badge, then tap on the second slot in the first row to move the badge up and to the right.
Step 24
Tap on the first slot in the third row to select the badge, then tap on the first slot in the second row to move the badge up and to the right.
Step 25
Tap on the first slot in the fifth row to select the badge, then tap on the first slot in the fourth row to move the badge up and to the right. After that, tap on the second slot in the fifth row to move the badge down and to the right.
Step 26
Tap on the second slot in the fourth row to move the badge up and to the right. After that, tap on the third slot in the third row to move the badge up and to the right.
Step 27
Tap on the first slot in the second row to select the badge, then tap on the second slot in the third row to move the badge down and to the right. After that, tap on the first slot in the fourth row to move the badge down and to the left.
Step 28
Tap on the first slot in the fifth row to move the badge down and to the left.
Step 29
Tap on the second slot in the first row to select the badge, then tap on the first slot in the second row to move the badge down and to the left. After that, tap on the first slot in the third row to move the badge down and to the left. With that, you will solve this puzzle.
The door will open as soon as you solve the puzzle. Let’s tap on the door to proceed to the next level.
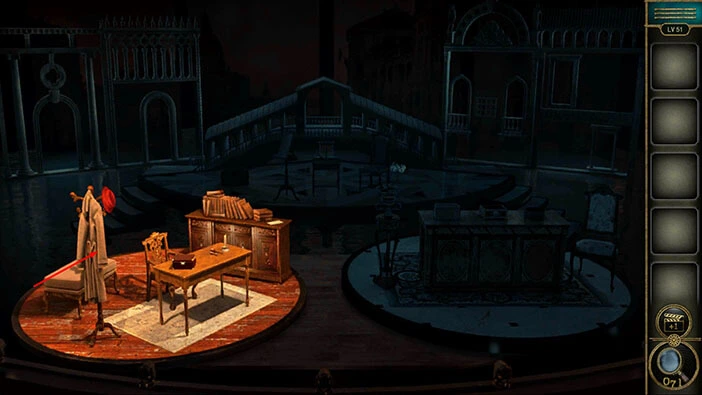
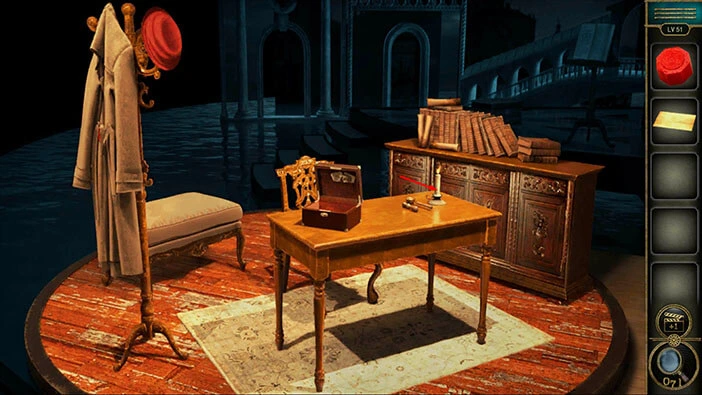
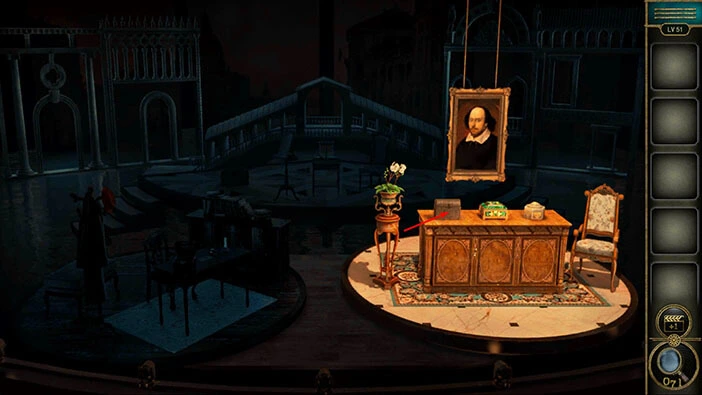
Level 51
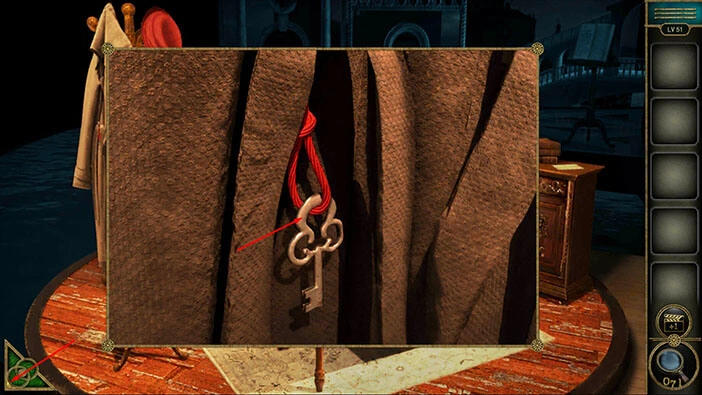
Let’s explore the fifty-first level. Tap on the coat on the left to take a closer look at it, and tap again to start the interaction.
Here, you will find a “Key”. Tap on it to pick it up. After that, tap on the green button in the bottom left corner of the screen to go back.
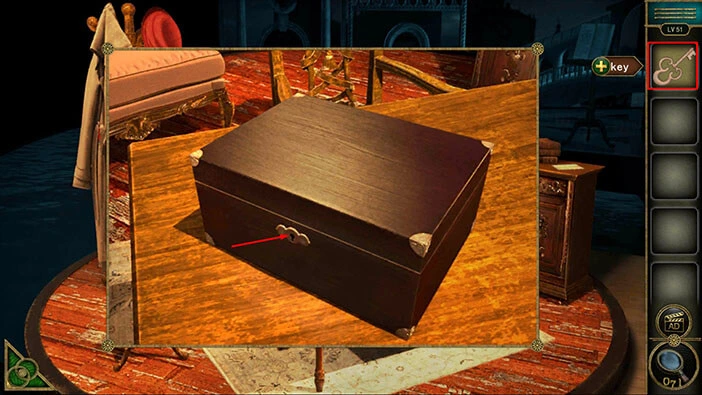
Next, let’s tap on the box on the table to take a closer look at it.
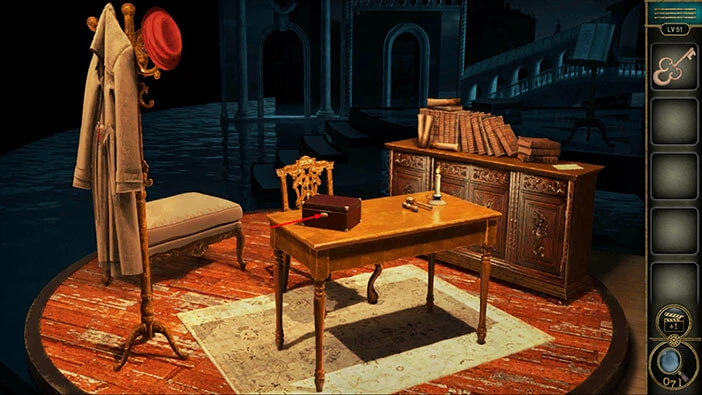
Select the “Key” from the inventory and use it to unlock the box.
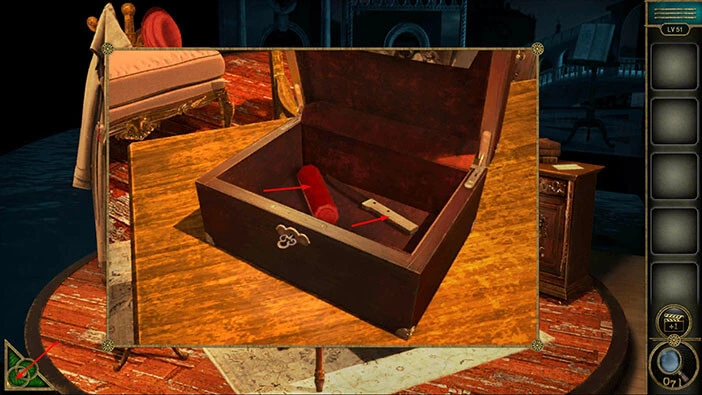
In the chest, you will find a “Knife” and a “Wax stick”. Tap on these two items to pick them up.
After that, tap on the green button in the bottom left corner of the screen to go back.
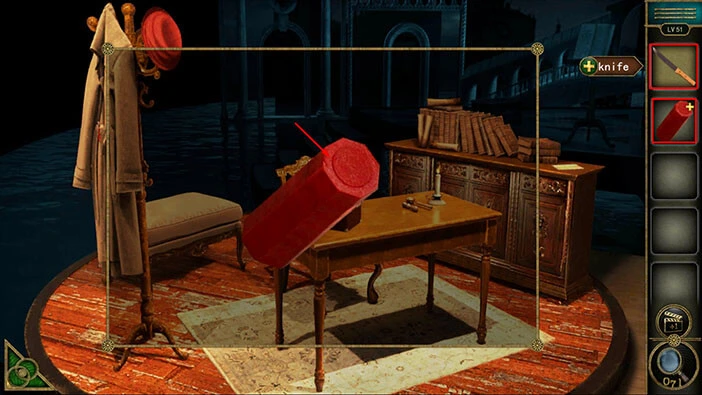
Tap on the “Wax stick” in your inventory to select it, and it will appear in the middle of the screen. After that, select the knife from the inventory and use it to cut off a piece of wax stick. “Wax” will be added to your inventory.
Next, let’s tap on the books on the right to take a closer look at them.

Here, you will find a “Contract”. Tap on it to pick it up.
After that, tap on the green button in the bottom left corner of the screen to go back.
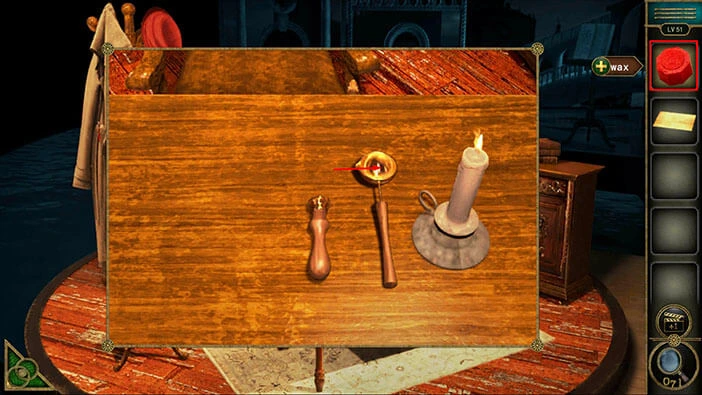
Next, let’s tap on the candle, located on the right side of the table, to take a closer look at it.
Our next task is to seal the letter. Let’s do that. Select the “Wax” from the inventory and put it into the spoon.
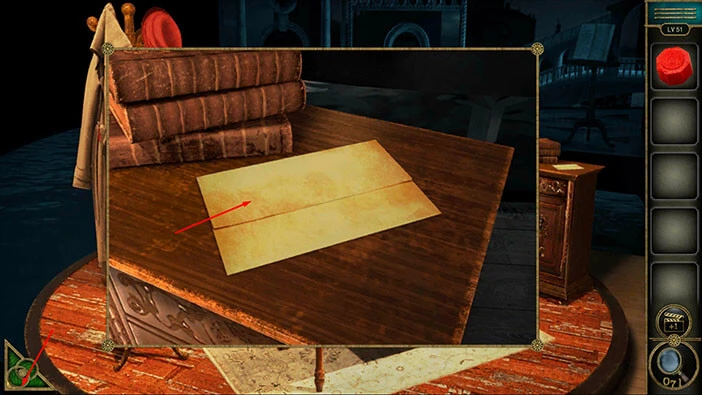
Select the “Contract” from the inventory and put it on the left side of the table.
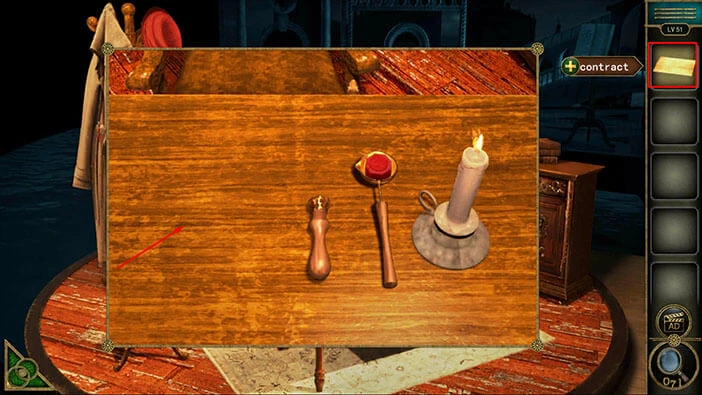
Next, tap on the spoon and our character will use the candle flame to melt the wax. After that, he will spill the melted wax on the letter.

Next, tap on the “Stamp” to seal the letter.
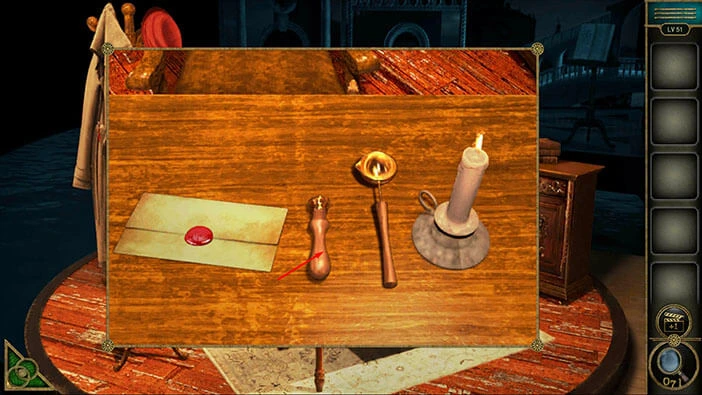
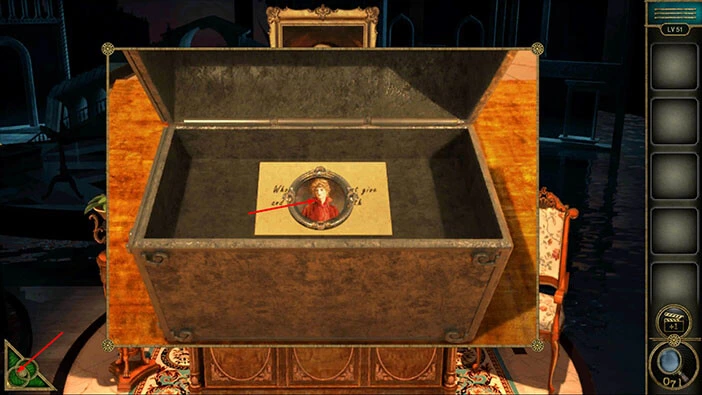
With that, you will complete the first stage. Let’s explore the second stage. Tap on the second stage to start the interaction. After that, tap on the small chest on the left side of the table to take a closer look at it, and tap again to open it.
Inside, you will find, a “Portia’s badge”. Tap on it to pick it up.
After that, tap on the green button in the bottom left corner of the screen to go back.
Next, let’s tap on the portrait to open it, and tap again to start the interaction.
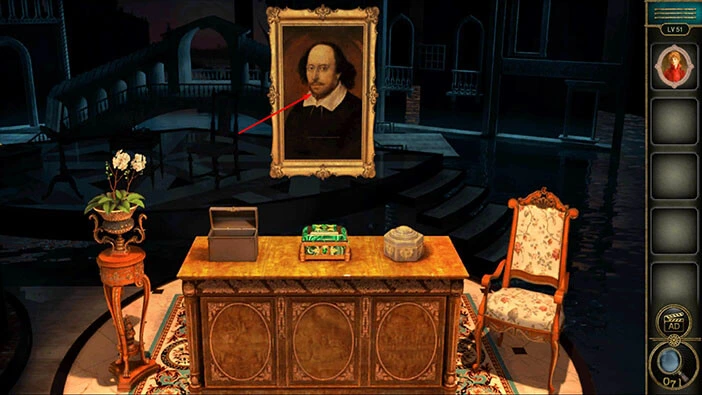
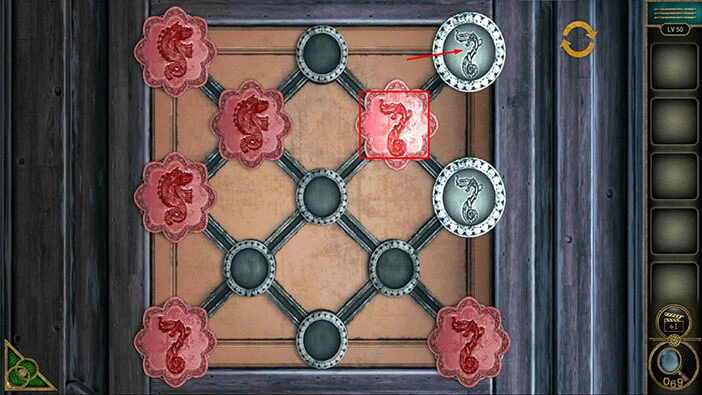
Here, we have another minigame. You will notice that the slot on the right is empty, so select the “Portia’s badge” from the inventory and insert it into the empty slot.
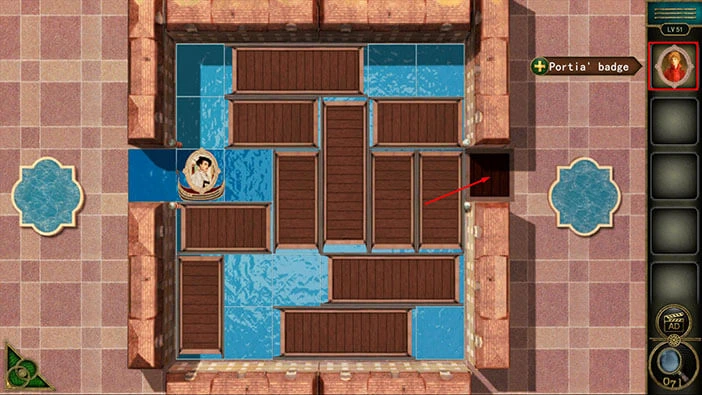
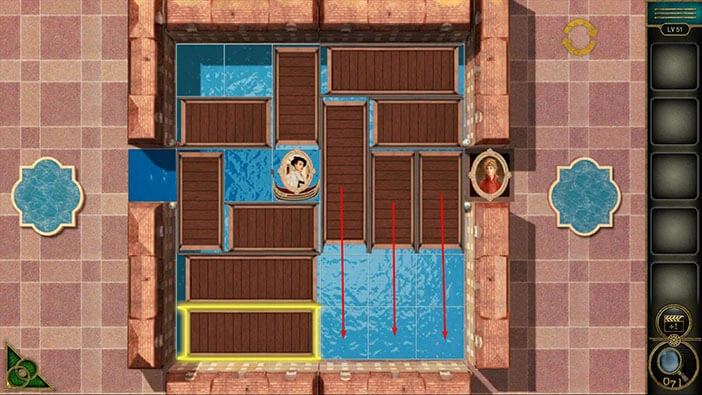
Our next task is to bring the boat with the badge on the left to the “Portia’s badge” on the right. The boat can only float on the water, so we will have to rearrange the pieces of the puzzle in order to get the boat to its destination. We will do this puzzle in several steps. Let’s begin.
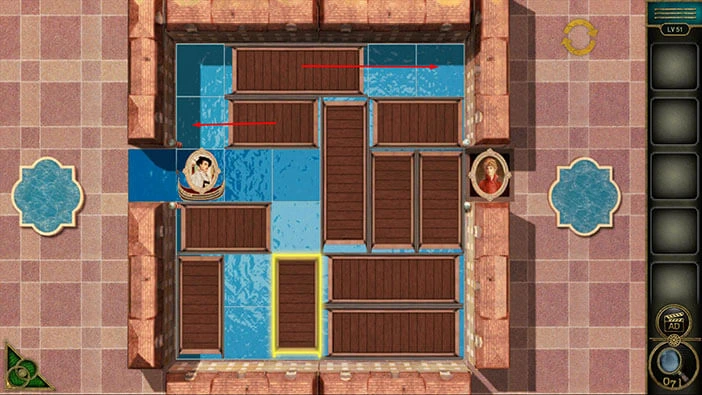
Step 1
Select the horizontal wooden piece in the bottom right corner of the puzzle and drag it all the way to the right. After that, select the vertical wooden piece in the middle of the puzzle, and drag it all the way down.

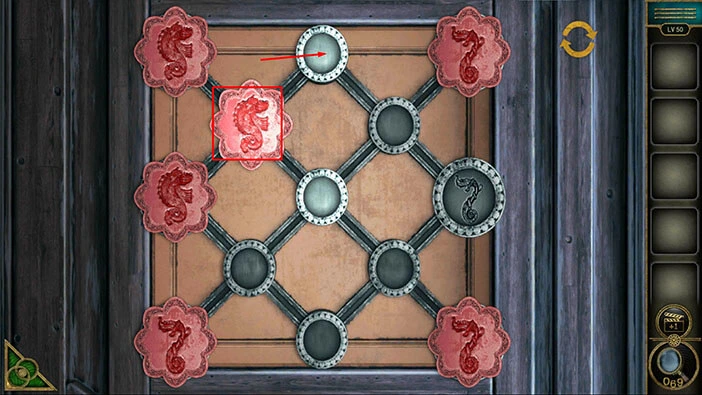
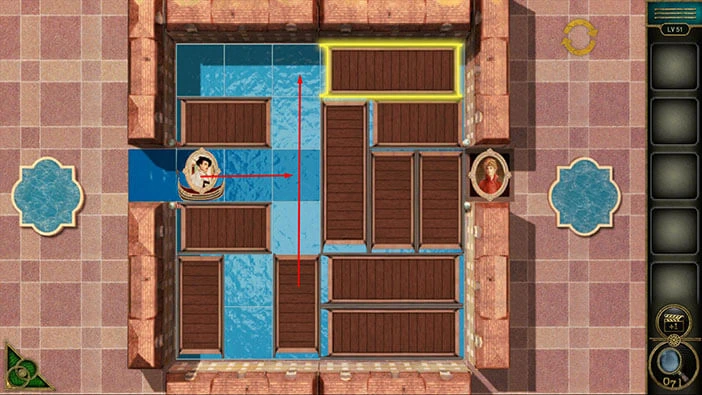
Step 2
Select the smaller horizontal piece in the top left corner of the puzzle and drag it all the way to the left. After that, select the larger horizontal piece in the top left corner of the puzzle, and drag it all the way to the right.
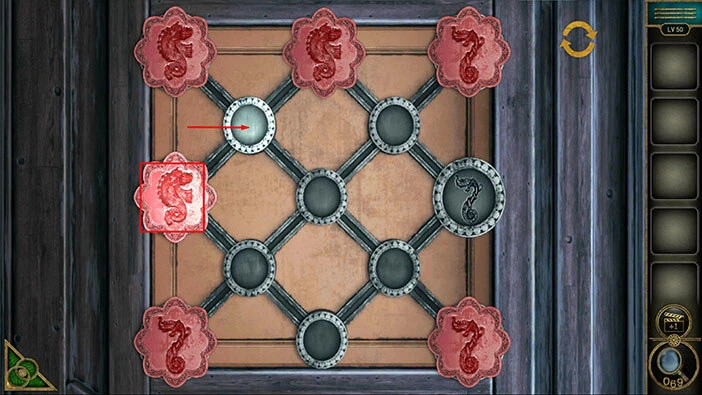
Step 3
Select the vertical piece in the middle/bottom of the puzzle and drag it all the way to the top of the puzzle. After that, select the boat and drag it to the vertical piece in the middle of the puzzle.
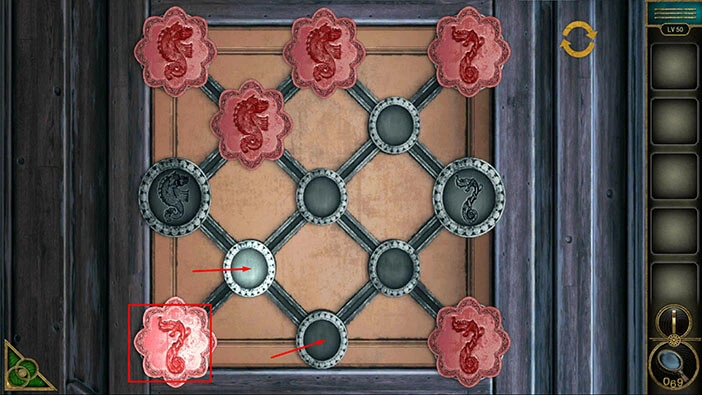
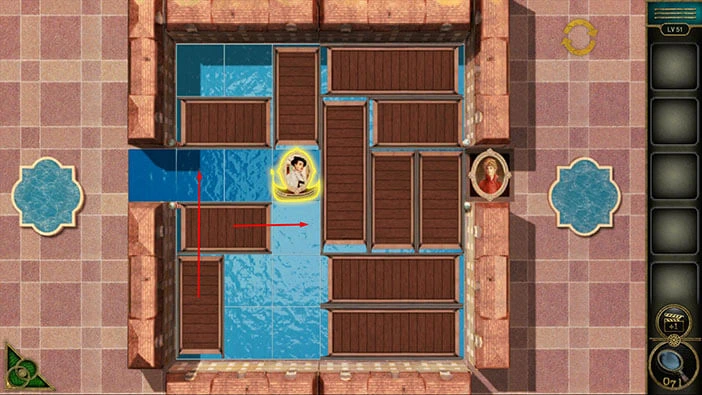
Step 4
Select the smaller horizontal piece on the left (below the boat) and drag it to the right. After that, select the vertical piece in the bottom left corner of the puzzle, and drag it all the way up.
Step 5
Select the two horizontal pieces in the bottom right corner of the puzzle and drag them all the way to the left.
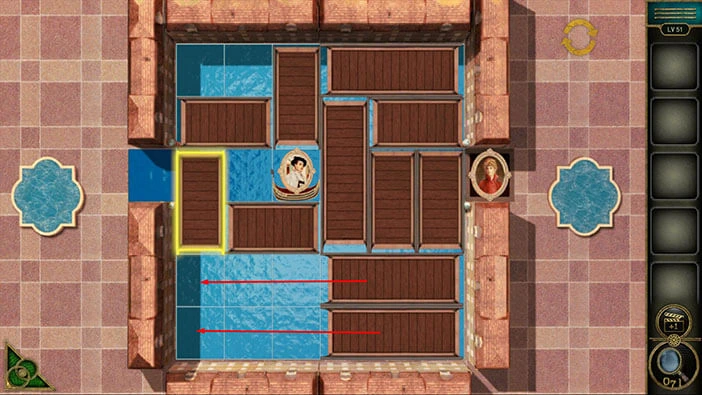
Step 6
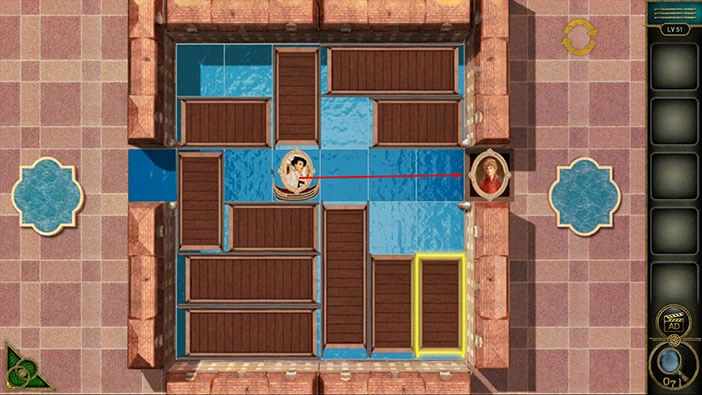
Select the three vertical pieces on the right side of the puzzle, and drag them all the way down.
With that, you will clear the path to the badge on the right, so let’s drag the boat to the badge on the right.
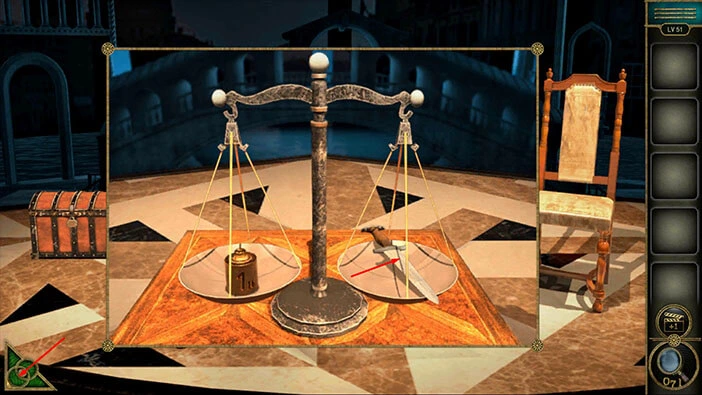
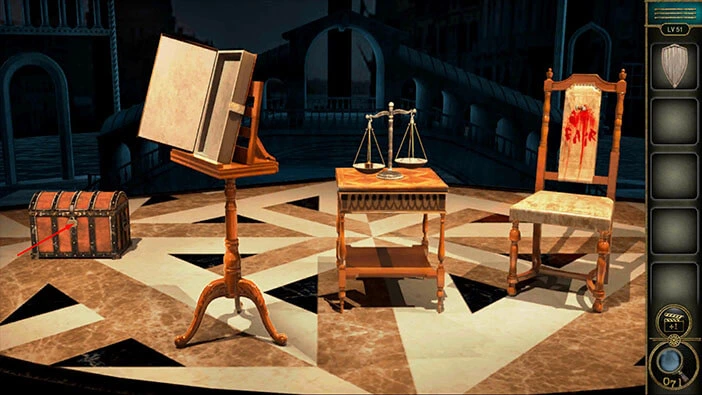
Once you get the badge to the portrait on the right, you will complete this stage and unlock the next stage. Let’s explore the third stage. Tap on the third stage to start the interaction, then tap on the scales to take a closer look at them.
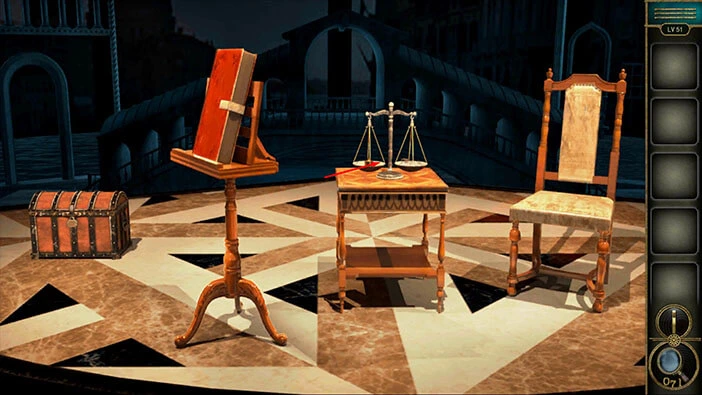
On the right side, you will notice a “Knife”. Tap on it to pick it up. After that, tap on the green button in the bottom left corner of the screen to go back.
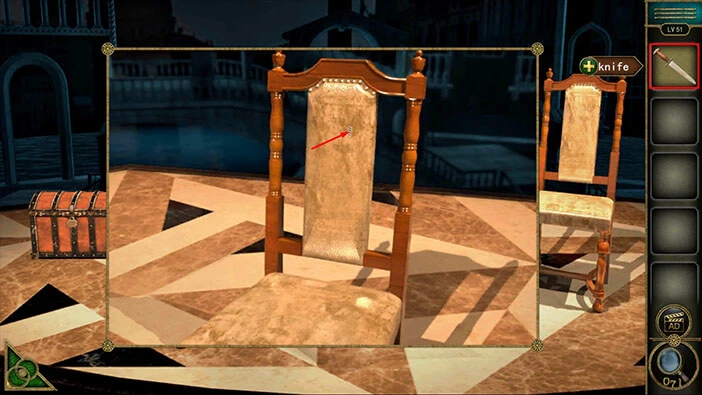
Next, let’s tap on the chair on the right to take a closer look at it.
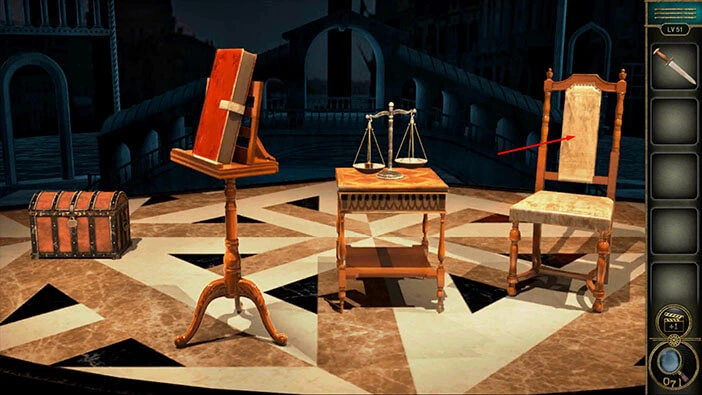
Near the top of the chair, you will notice a small cut. Let’s select the “Knife” from the inventory and insert it into the cut.
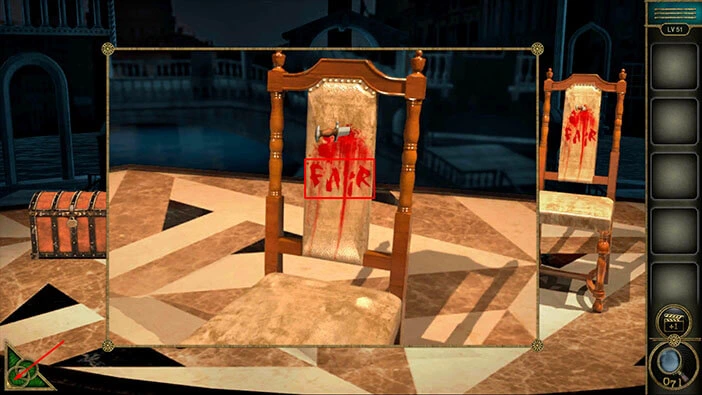
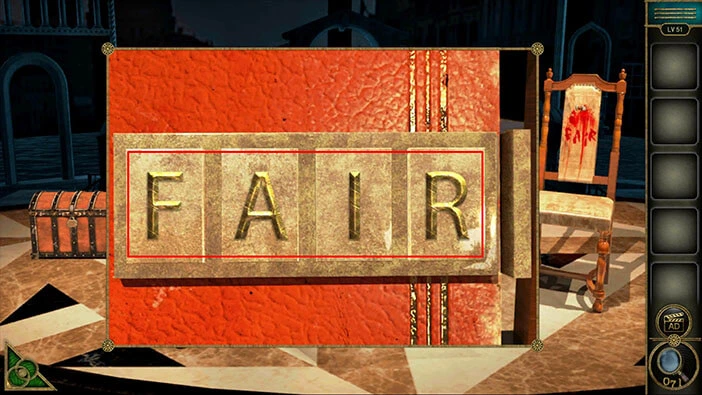
The blood will pour from the cut, and the word “FAIR” will appear. Let’s memorize/write down this word because it represents the hint for the next puzzle.
Once you’re done, tap on the green button in the bottom left corner of the screen to go back.
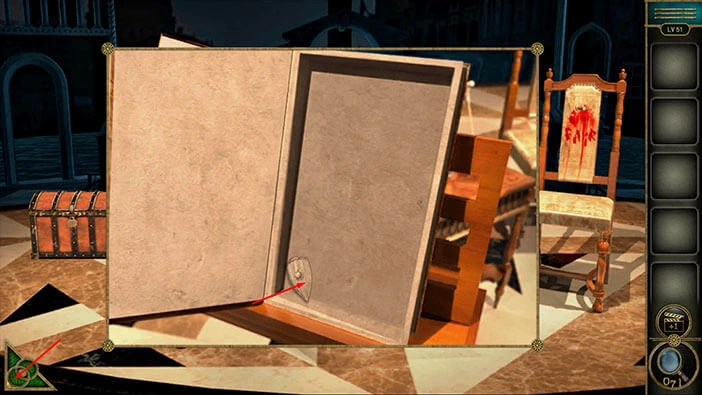
Next, let’s tap on the large book to take a closer look at it, and tap again to start the interaction.
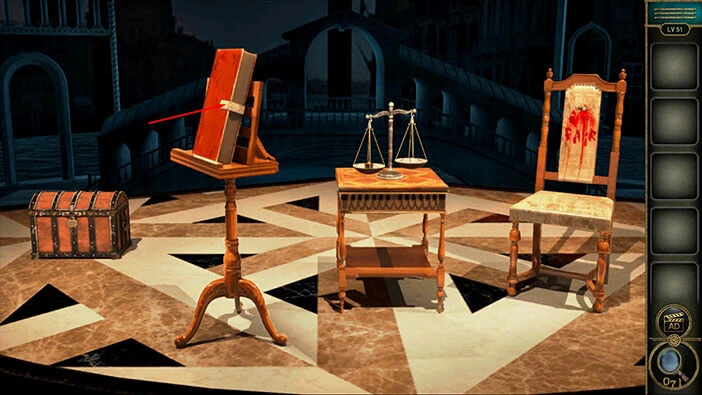
Enter the word “FAIR” and you will unlock the book.
In the book, you will find a “Shield badge”. Tap on it to pick it up. After that, tap on the green button in the bottom left corner of the screen to go back.
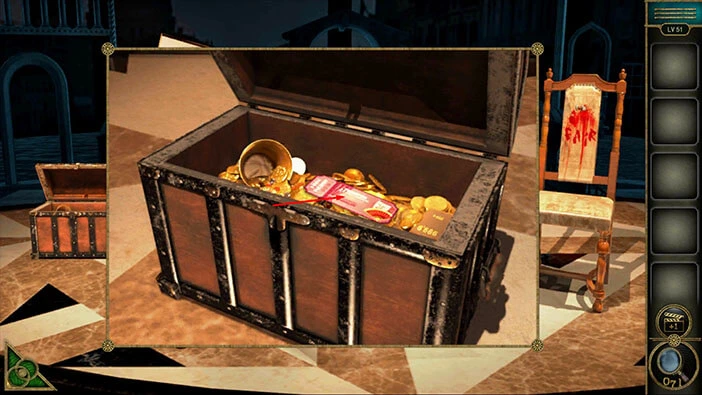
Next, let’s tap on the large chest on the left to take a closer look at it, and tap again to start the interaction.
You will notice that the slot on the left is empty, so let’s select the “Shield badge” from the inventory and insert it into the empty slot.
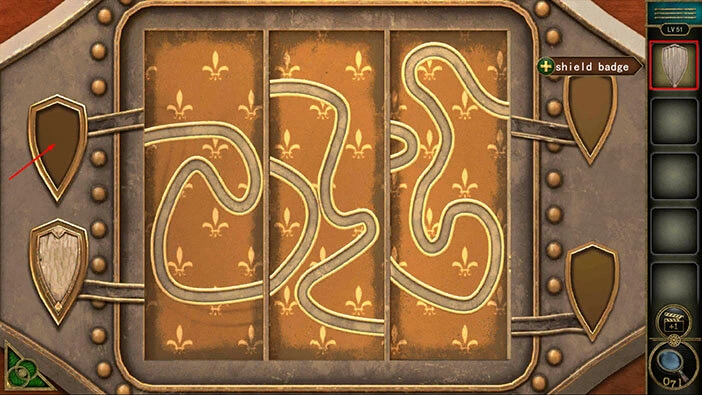
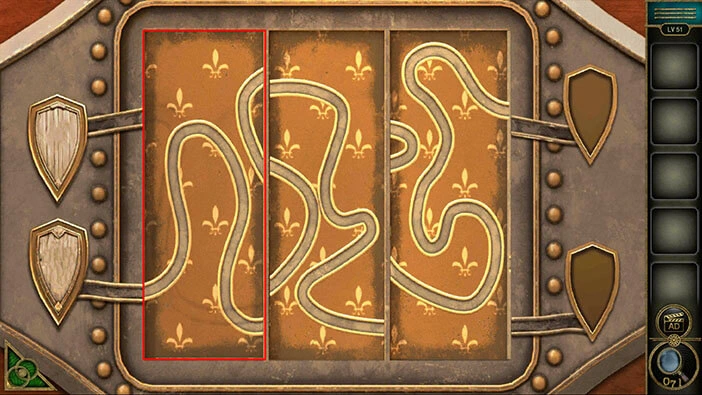
Our next task is to create the path from the shield badges on the left to the empty slots on the right. We can do that by modifying the three pieces in the middle that represent the path. We will do this puzzle in several steps. Let’s begin.
Step 1
Drag the first piece of the puzzle, and align it with the lower shield badge (take a look at the image below).
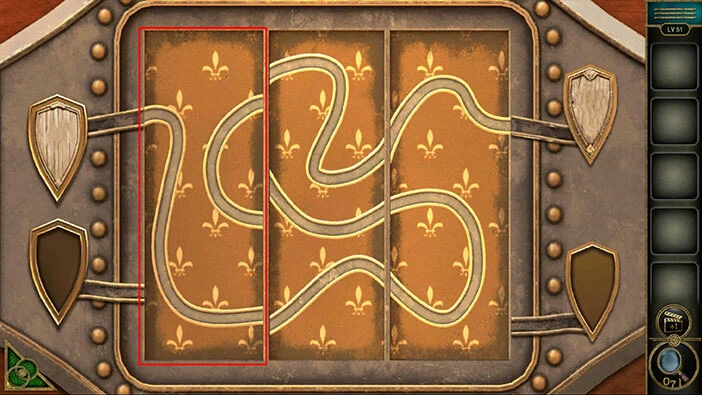
Step 2
Drag the second piece of the puzzle, and align it with the first piece (take a look at the image below).

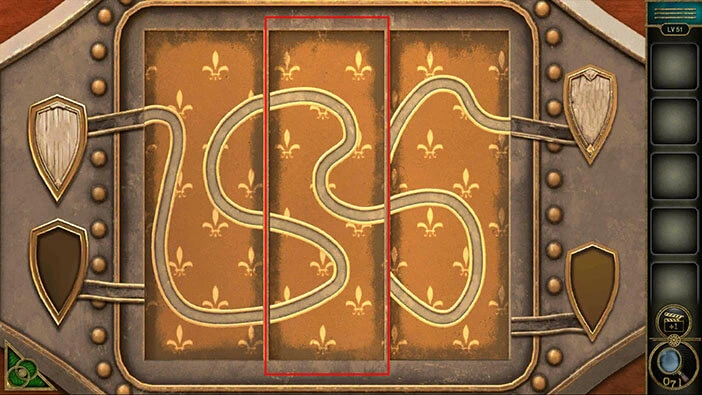
Step 3
Drag the third piece of the puzzle, and align it with the second piece and the shield slot at the top (take a look at the image below).

Step 4
We have created the path from the bottom shield badge on the left side to the top slot on the right side. So, let’s tap on the shield badge to lead it down the path, to the empty slot.

Step 5
Drag the first piece of the puzzle, and align it with the badge at the top (take a look at the image below).
Step 6
Drag the second piece of the puzzle, and align it with the first piece (take a look at the image below).
Step 7
Drag the third piece of the puzzle, and align it with the second piece and the shield slot at the bottom (take a look at the image below).
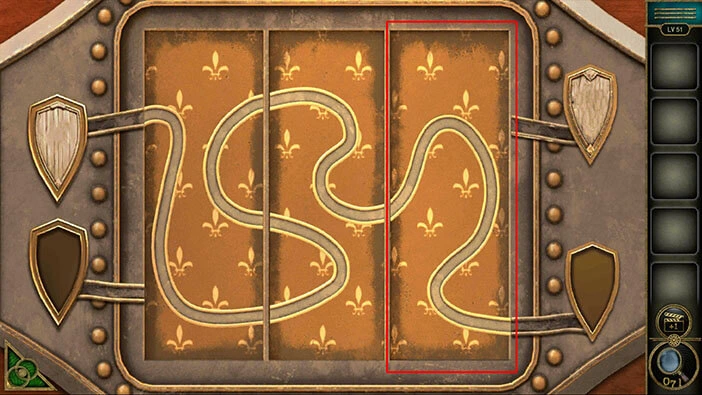
Step 8
We have created the path from the top shield badge on the left side to the bottom slot on the right side. So, let’s tap on the shield badge to lead it down the path, to the empty slot.

You will open the chest as soon as you solve the puzzle. In the chest, you will find a “Ticket”. Tap on it to pick it up. After that, tap on the “Ticket” in your inventory, and you will complete this level.
The curtains will close, and you will automatically advance to the next level.
With that, we have reached the end of the thirteenth part of the walkthrough. If you want to see the fourteenth part, tap on the next part button. In the fourteenth part of the walkthrough, we will cover levels 52-54.
Thank you for reading.