Can you escape the 100 room 17 | Levels 52-54
Hello everyone and welcome to the fourteenth part of the walkthrough for “Can you escape the 100 room 17”. In the fourteenth part of the walkthrough, we will cover levels 52 to 54.
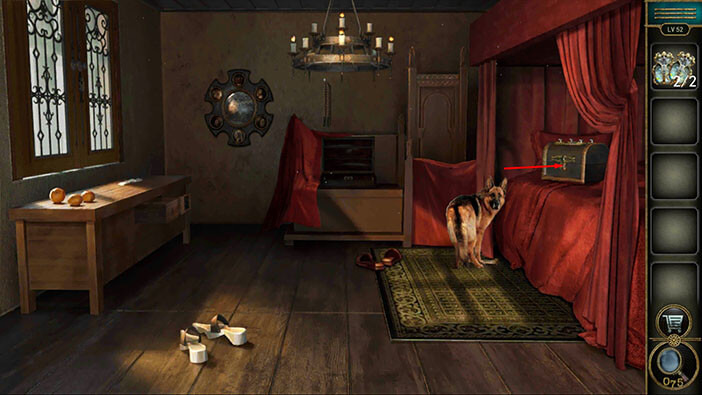
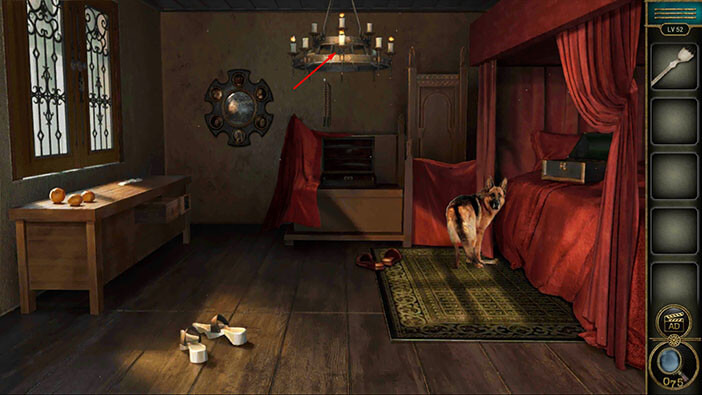
Level 52
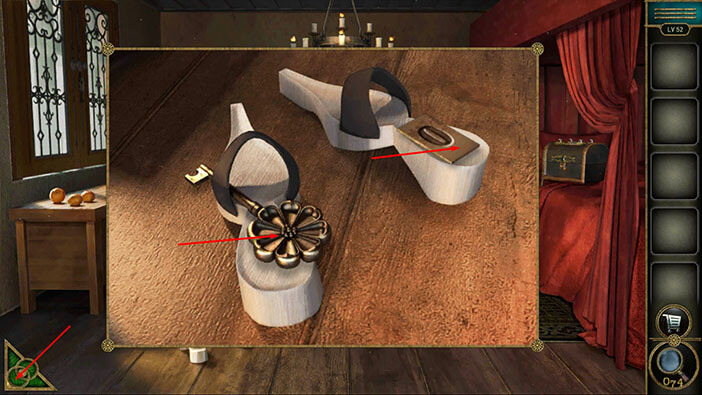
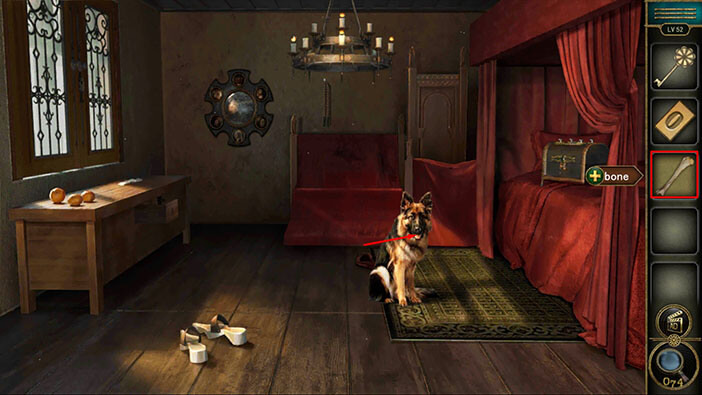
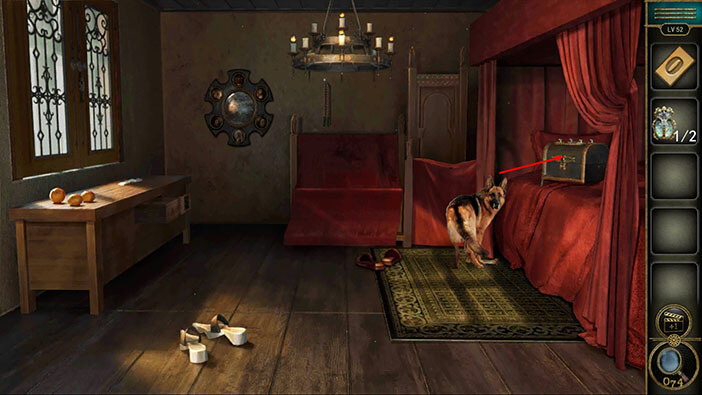
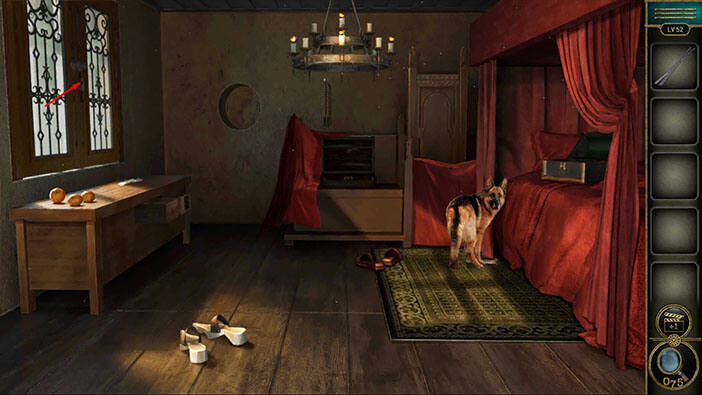
Let’s explore the fifty-second level. Tap on the sandals to take a closer look at them.
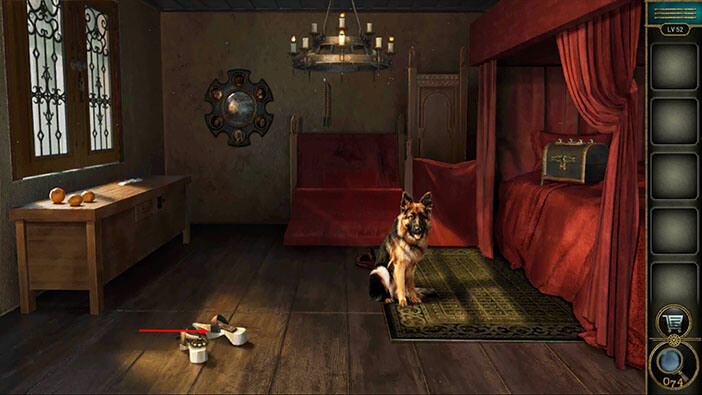
You will notice a “Key” and a “Button”. Tap on these two items to pick them up. After that, tap on the green button in the bottom left corner of the screen to go back.
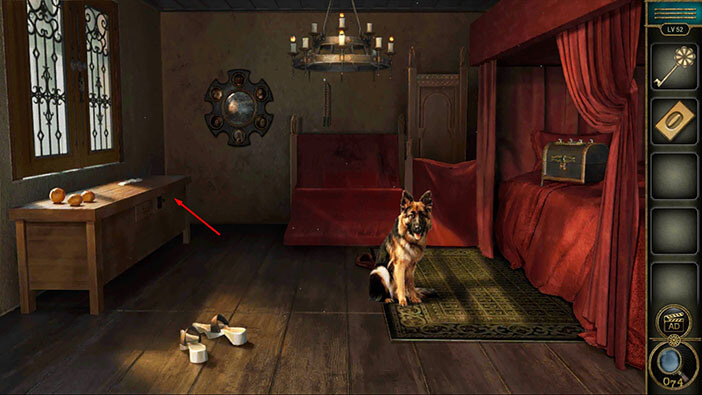
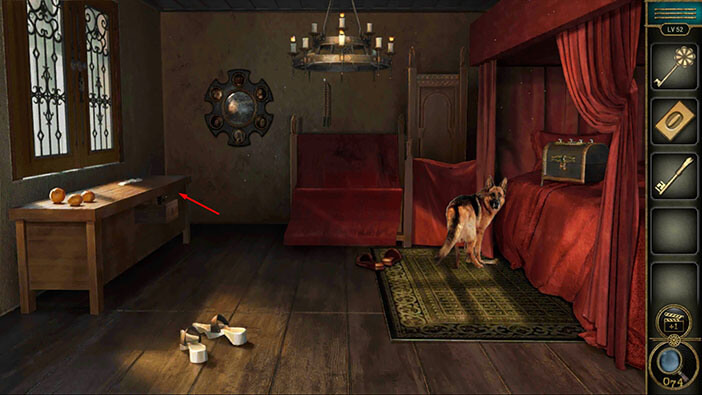
Next, let’s tap on the large cabinet on the left to take a closer look at it.
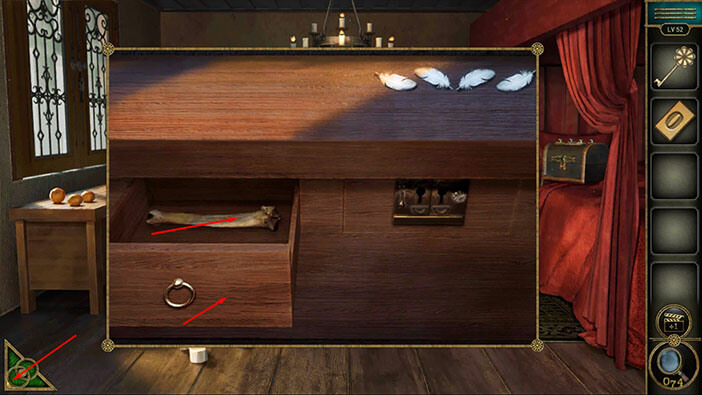
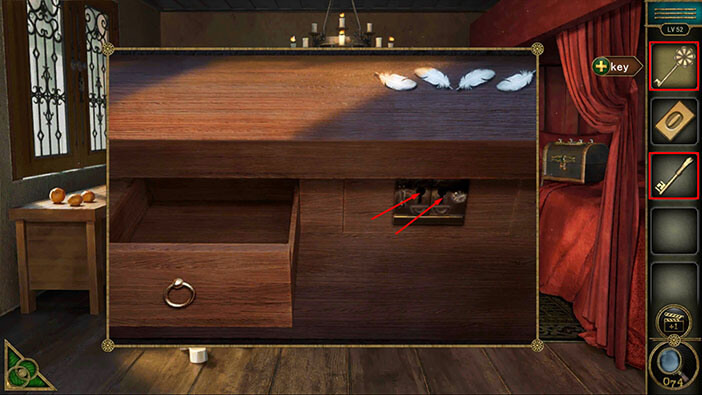
Tap on the drawer on the left to open it, and inside you will find a “Bone”. Tap on it to pick it up. Here, you will also notice four feathers on the right and two keyholes. We will come back to these items a bit later.
Once you’re done, tap on the green button in the bottom left corner of the screen to go back.
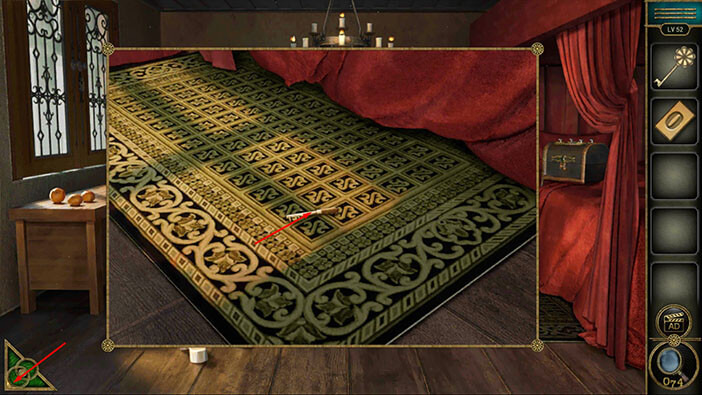
Next, select the “Bone” from the inventory and throw it to the dog.
The dog will chase after the dog, and you will notice a “Key” at its previous position. Tap on the “Key” to take a closer look at it, and tap again to pick it up.
After that, tap on the green button in the bottom left corner of the screen to go back.
Next, let’s tap on the large cabinet on the left to take another look at it.
Select the two “Keys” from the inventory and insert them into the keyholes on the right.
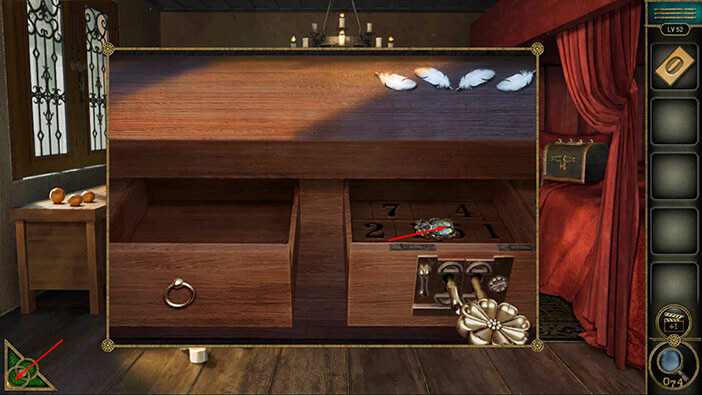
You will unlock the drawer and inside you will find a “Gem”. Tap on it to pick it up. In the drawer, you will also find a hint for the next puzzle. We will come back to it a bit later.
For now, tap on the green button in the bottom left corner of the screen to go back.
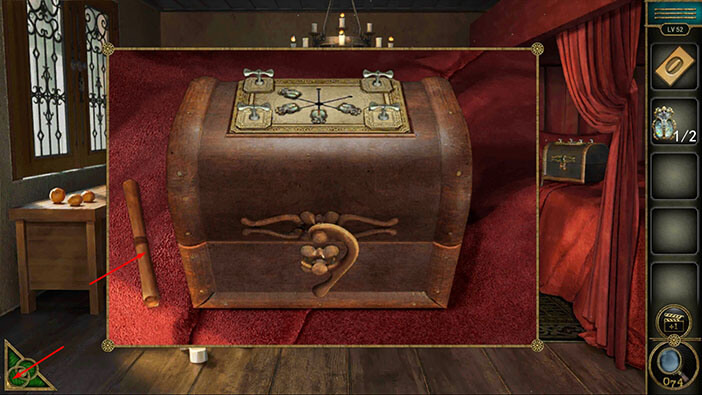
Next, let’s tap on the chest, located on the bed on the right, to take a closer look at it.
On the left, you will notice a “Paper with hints”. Tap on it to pick it up. After that, tap on the green button in the bottom left corner of the screen to go back.
Let’s go back to the large cabinet on the left.

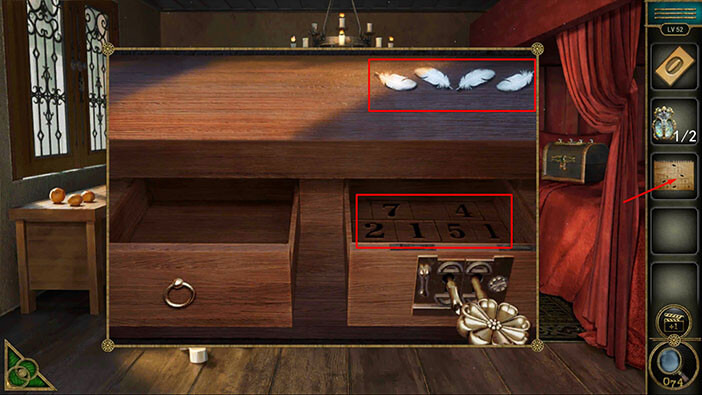
On the right, we can see four feathers, and you will notice that the feathers have different rotations. Let’s memorize/write down the rotation of the feathers, and their order, because we will need this information for the next puzzle. So, starting from left to right, we have,
The first feather = bottom is pointing up and to the left
The second feather = bottom is pointing down and to the right
The third feather = bottom is pointing down and to the left
The fourth feather = bottom is pointing up and to the right
Once you’re done, we should take a look at the hint in a drawer. Here, we can see the numbers arranged in a triangle.
In the first triangle, we can see the numbers 7, 2, and 1. The sum of these three numbers is 10.
In the second triangle, we can see the numbers 4, 5, and 1. The sum of these three numbers is also 10.
So, we can conclude that the numbers are arranged in a triangle and that their sum should be 10. Memorize/write down this information because it represents a hint for the next puzzle.
Once you’re done, tap on the “Paper with hints” in your inventory to take a closer look at it.
Ok, here we can also see four feathers, and their rotation matches the rotation of the four feathers that we saw previously. We can also see some numbers, and we will use the other hint (numbers arranged in a triangle, their sum = 10) to determine the value of each letter.
We will do this in several steps. Let’s begin.
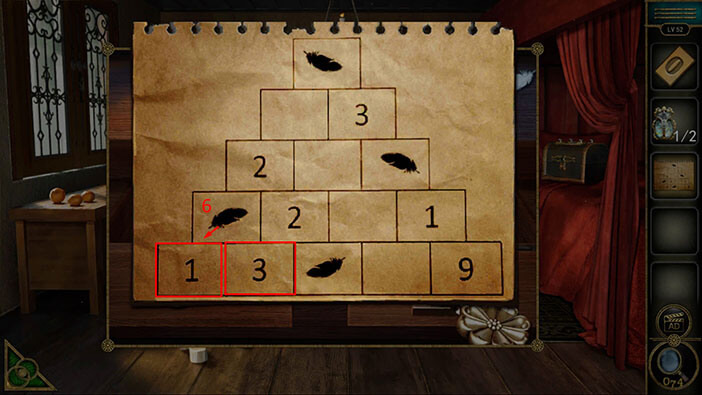
Step 1
So, let’s first take a look at the feather, located in the first of the second (looking from bottom to top) row.
Here, we can see the numbers 1 and 3, and a feather in the top slot. So, the sum of these numbers should be 10.
1 + 3 + feather = 10. So,
Feather = 6.
The bottom of the feather is pointing down and to the left so this is the third number (go back and take a look at the four feathers). So,
The third number = 6. Memorize/write down this information.
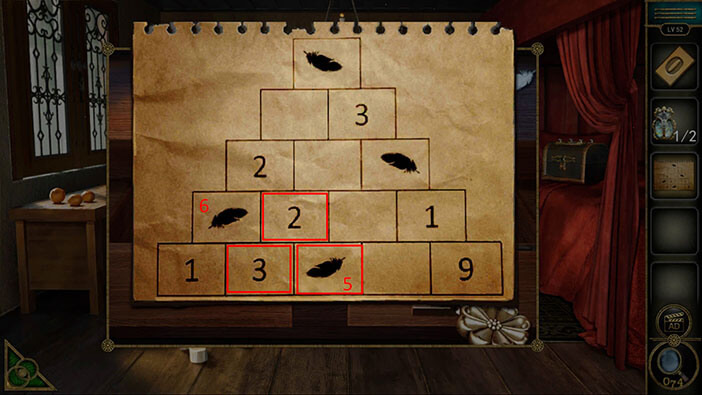
Step 2
Let’s take a look at the feather, located in the third slot in the first row. To the left of the letter, we can see the number 3, and the number 2 in the top slot. So, the sum of these numbers should be 10.
3 + 2 + feather = 10. So,
Feather = 5.
The bottom of the feather is pointing up and to the right so this is the fourth number (go back and take a look at the four feathers). So,
The fourth number = 5. Memorize/write down this information.
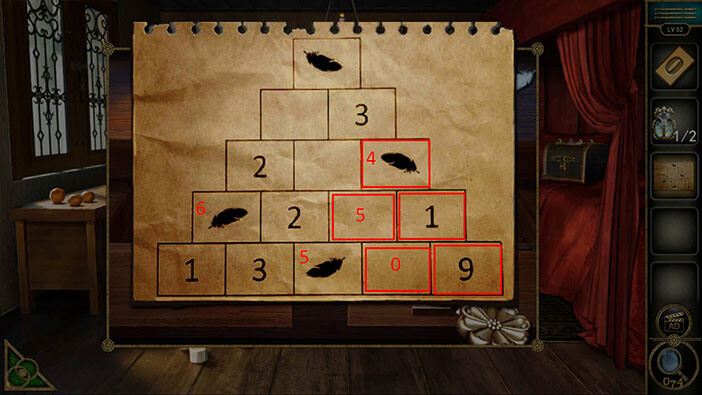
Step 3
Let’s take a look at the feather, located in the third slot in the third row. Before we can discover the value of this feather, we will first have to calculate the value of the fourth slot in the first row, and the third slot in the second row.
So, let’s start with the fourth slot in the first row. To the right of this slot, we can see the number 9, and above it, we can see the number 1. So,
The fourth slot in the first row + 9 + 1 = 10. So,
The fourth slot in the first row = 0.
Next, let’s calculate the value of the third slot in the second row. Below this slot, we have a feather with a value of 5 and a slot with a value of 0. So,
The third slot in the second row + 5 + 0 = 10. So,
The third slot in the second row = 5.
We can now calculate the value of the feather located in the third slot in the third row. The two slots below the feather have values 5 and 1. So,
Feather + 5 + 1 = 10. So,
Feather = 4.
The bottom of the feather is pointing down and to the right so this is the second number (go back and take a look at the four feathers). So,
The second number = 4. Memorize/write down this information.
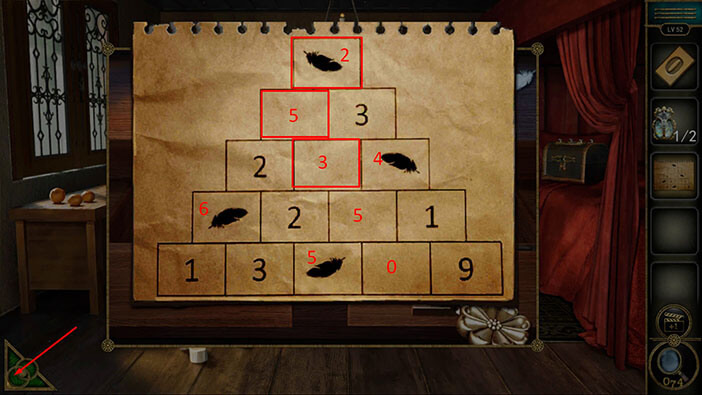
Step 3
Let’s take a look at the feather, located at the top slot. Before we can discover the value of this feather, we will first have to calculate the value of the second slot in the third row, and the first slot in the fourth row.
So, let’s start with the second slot in the third row. To the right of this slot, we have a feather with the value 4, and in the slot above it, we can see the number 3. So,
The second slot in the third row + 4 + 3 = 10. So,
The second slot in the third row = 3.
Next, let’s calculate the value of the first slot in the fourth row. Below this slot, we have a slot with a value of 3 (we just calculated it) and a slot with a value of 2. So,
The first slot in the fourth row + 2 + 3 = 10. So,
The first slot in the fourth row = 5.
We can now calculate the value of the feather located at the top. The two slots below the feather have values 5 and 3. So,
Feather + 5 + 3 = 2. So,
Feather = 2.
The bottom of the feather is pointing up and to the left so this is the first number (go back and take a look at the four feathers). So,
The first number = 2.
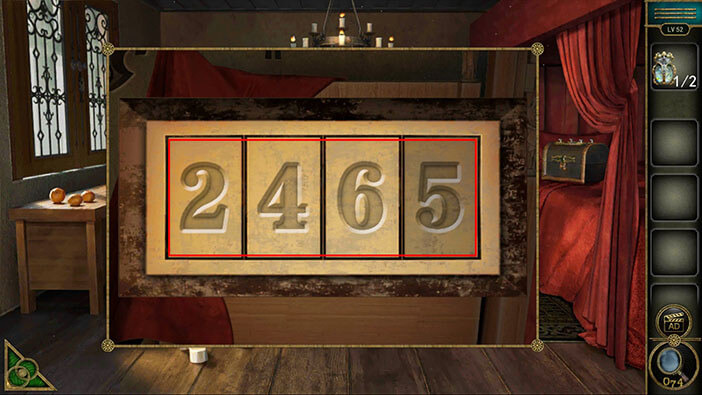
When we put all of this together, we will get the number “2465”. Memorize/write down this information.
Once you’re done, tap on the green button in the bottom left corner of the screen to go back.
Next, tap on the large chair in front of you to take a closer look at it, and tap again to remove the red sheet.
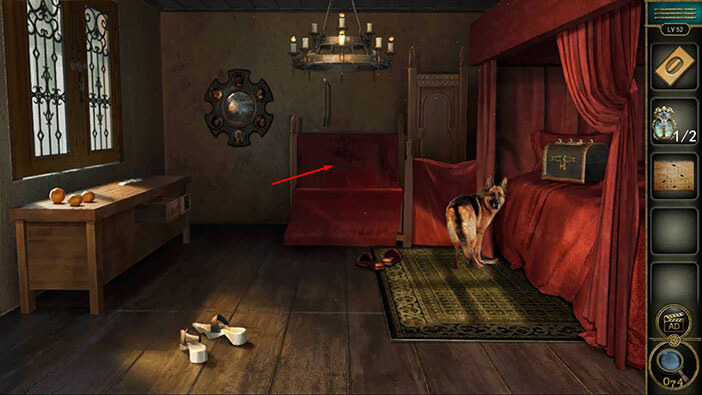
Below the red sheet, you will discover the wooden box and you will notice that one of the buttons is missing. So, select the “Button” from the inventory and insert it into the empty slot. After that, tap on the button to start the interaction.
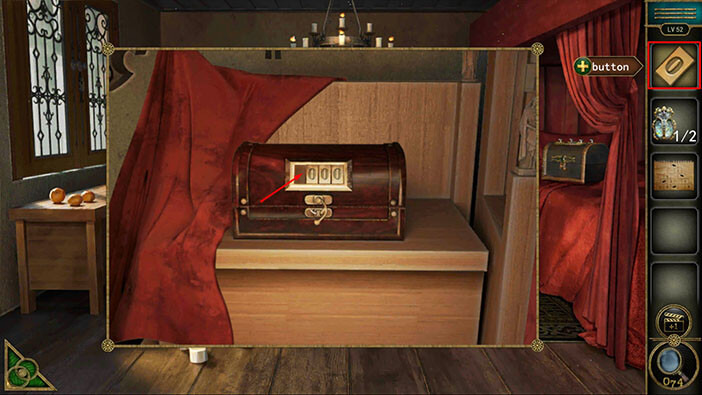
Enter the code “2465” that we discovered by solving the previous puzzle.
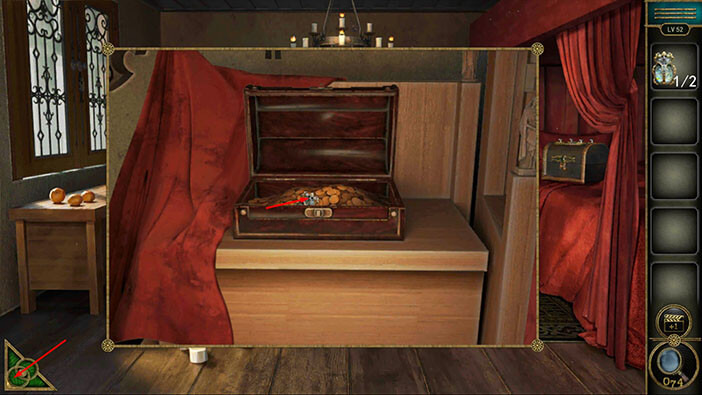
You unlock and open the chest as soon as you enter the correct number. In the chest, you will find another “Gem”. Tap on it to pick it up.
After that, tap on the green button in the bottom left corner of the screen to go back.
Tap on the chest, located on the bed on the right, to take a closer look at it, and tap again to start the interaction.
You will notice that two gems are missing, so select the “Gems” from the inventory and insert them into the empty slots.
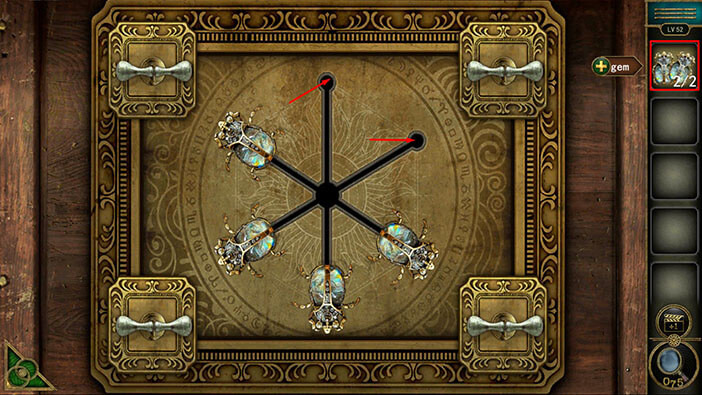
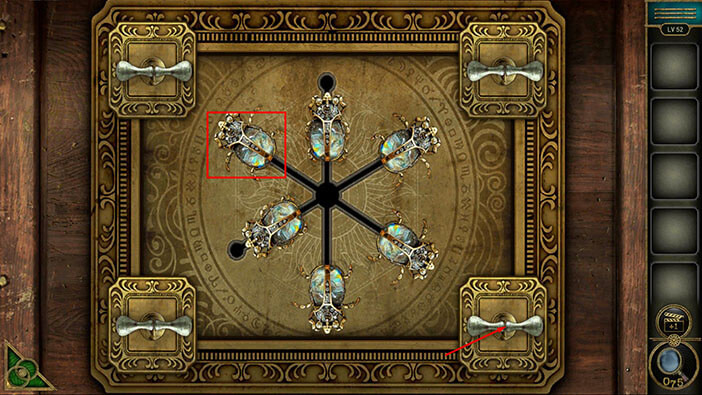
Here, we have another puzzle. Our next task is to activate the four bug shaped gems. We can do that by tapping on the four levers, in the correct sequence. We will do this puzzle in several steps. Let’s begin.
Step 1
Tap on the lever in the bottom left corner and you will activate the gem at the top slot.
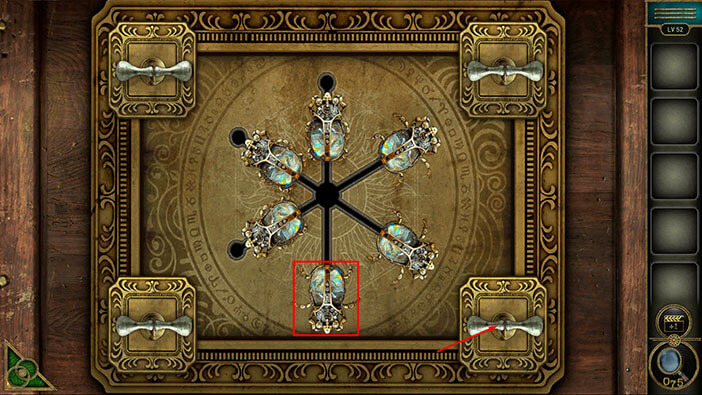
Step 2
Tap on the lever in the top right corner and you will activate the gem in the bottom left slot.
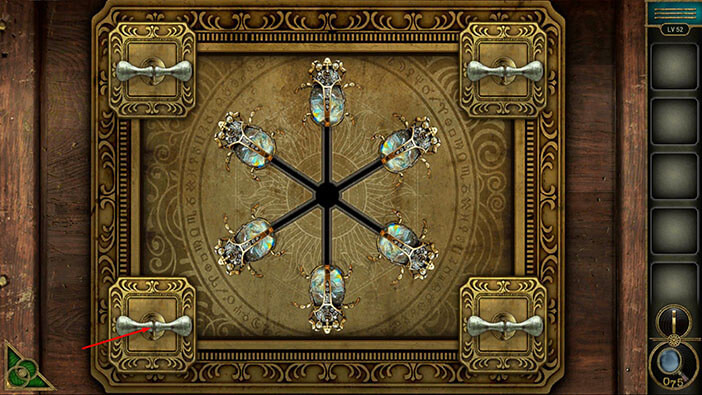
Step 3
Tap on the lever in the bottom right corner and you will activate the gem in the top left slot.
Step 4
Tap on the lever in the bottom right corner and you will activate the gem in the bottom slot.
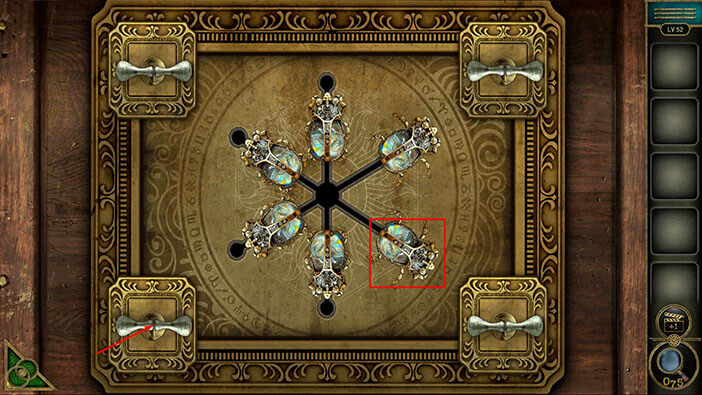
Step 5
Tap on the lever in the bottom left corner and you will activate the gem in the bottom right slot.
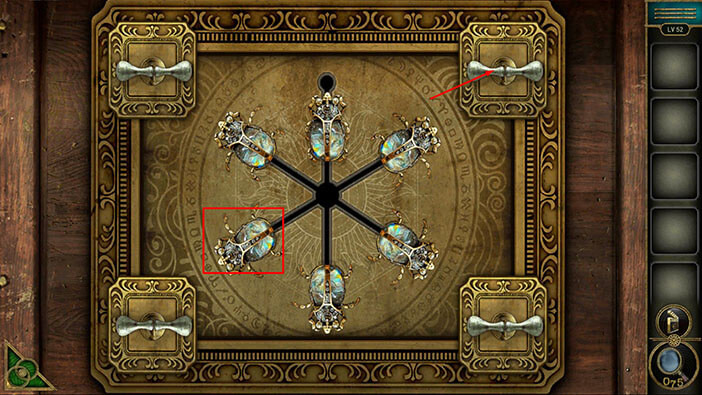
Step 6
Lastly, tap on the lever in the top left corner and you will activate the gem in the top right slot.
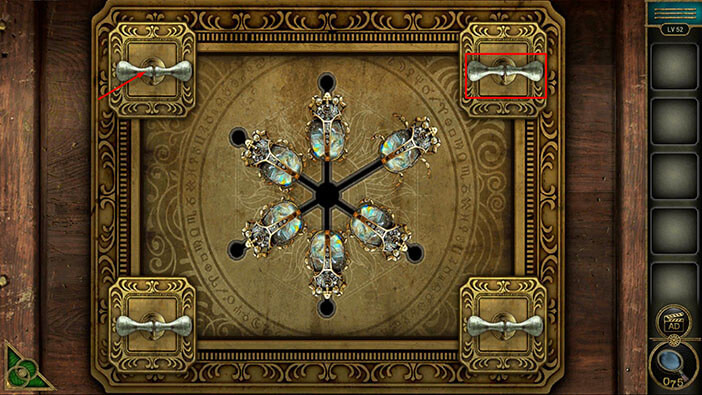
You will unlock the chest, as soon as you solve the puzzle, and inside you will find a “Rod”. Tap on it to pick it up.
After that, tap on the green button in the bottom left corner of the screen to go back.

Next, let’s tap on the chandelier to take a closer look at it.
You will notice a “Paper with hints” on the chandelier, but our character can’t reach it. So, select the “Rod” from the inventory and use it to reach the “Paper with hints”.
After that, tap on the green button in the bottom left corner of the screen to go back.

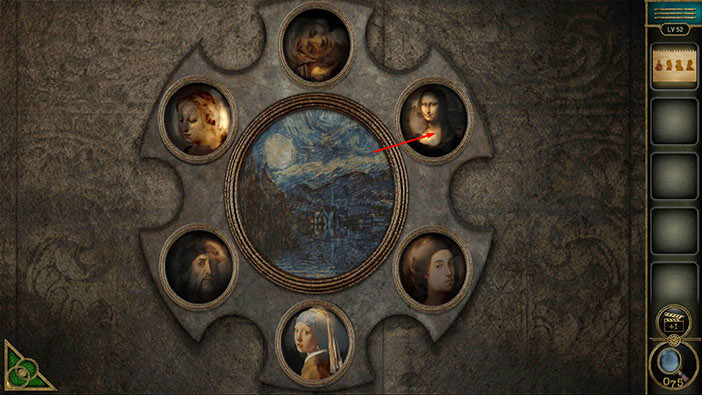
Next, let’s tap on the large mirror on the left to take a closer look at it.
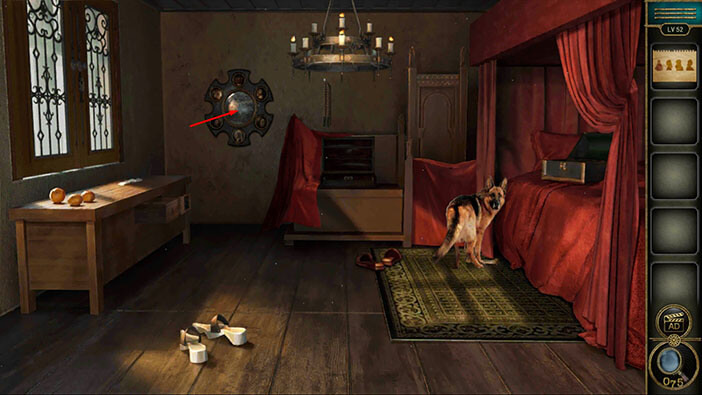
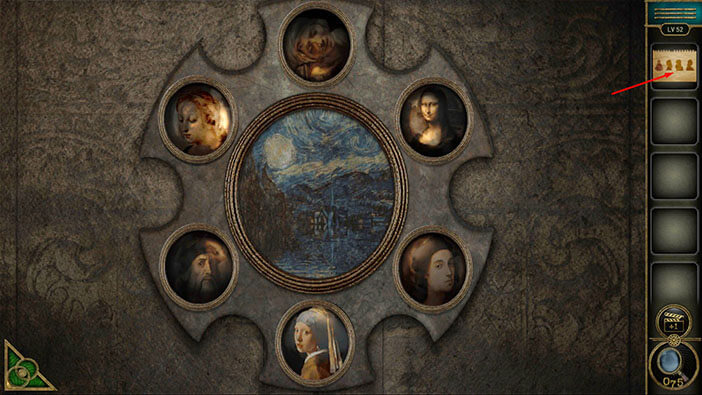
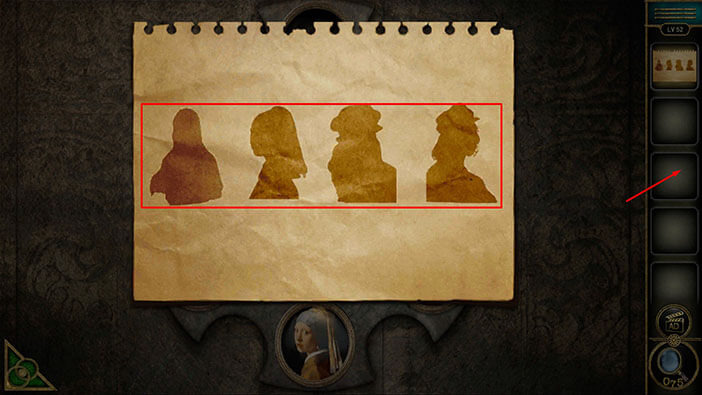
Here, we have another puzzle, and we can see six portraits. Our task is to tap on the portraits in the correct order. To do that we first need to discover the correct order, so let’s tap on the “Paper with hints” in our inventory.
In the “Paper with hints”, you will notice four shapes, and each shape represents one portrait. Let’s memorize/write down the order of the shapes.
After that, tap on the empty inventory slot to go back.
We will do this puzzle in several steps. Let’s begin.
Step 1
The first shape matches the portrait in the top right slot so let’s tap on it to activate it. (You can always take another look at the hint to compare the shape with the portrait).
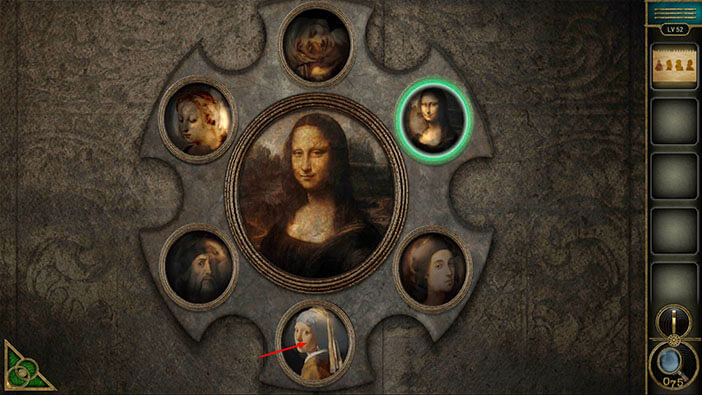
Step 2
The second shape matches the portrait in the bottom slot so let’s tap on it to activate it.
Step 3
The third shape matches the portrait in the bottom left slot so let’s tap on it to activate it.
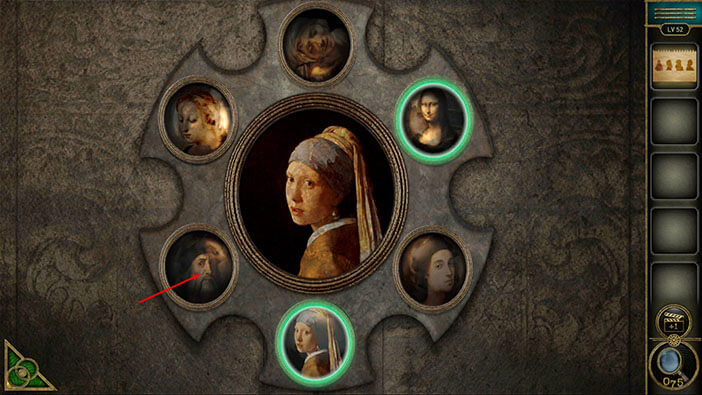
Step 4
Lastly, the fourth shape matches the portrait in the bottom right slot so let’s tap on it to activate it.

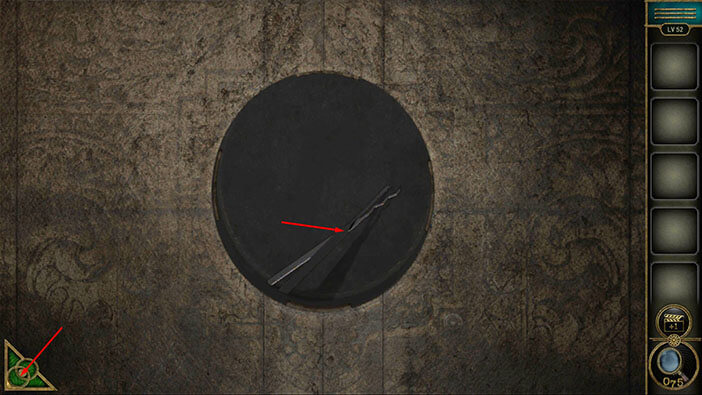
You will remove the mirror as soon as you solve the puzzle, and you will discover a secret compartment in the wall, that was previously hidden by the mirror. In this compartment, you will find a “Picklock”. Tap on it to pick it up.
After that, tap on the empty inventory slot to go back.
Next, let’s tap on the window on the left to take a closer look at it, and tap again to start the interaction.
Next, select the “Picklock” from the inventory then tap on the padlock to start the interaction.
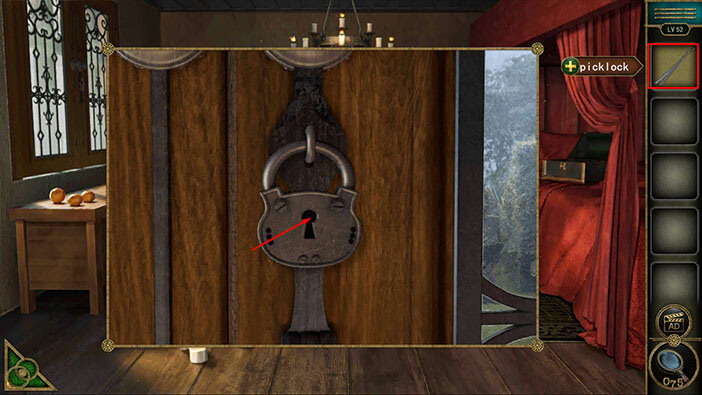
Our next task is to quickly tap on the metal clips, in the correct order. With that, we will unlock the padlock. So, let’s do that,
First = Tap on the second clip (looking from left to right)
Second = Tap on the fourth clip
Third = Tap on the third clip
Fourth = Tap on the first clip
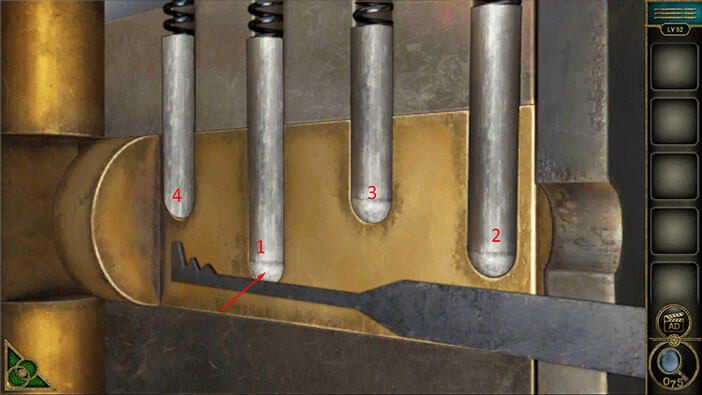
With that, you will unlock and open the window, so let’s tap on it to proceed to the next level.
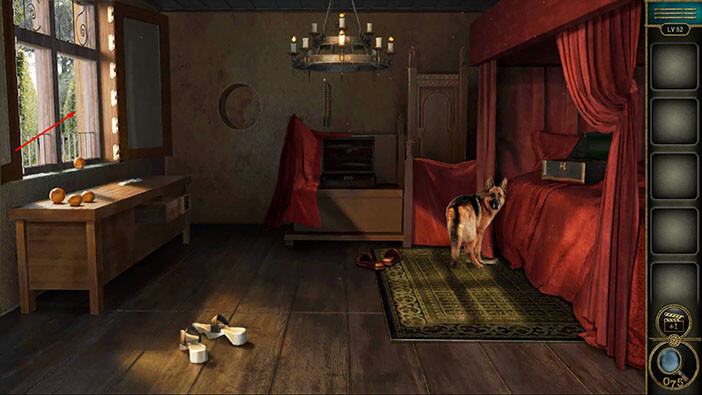
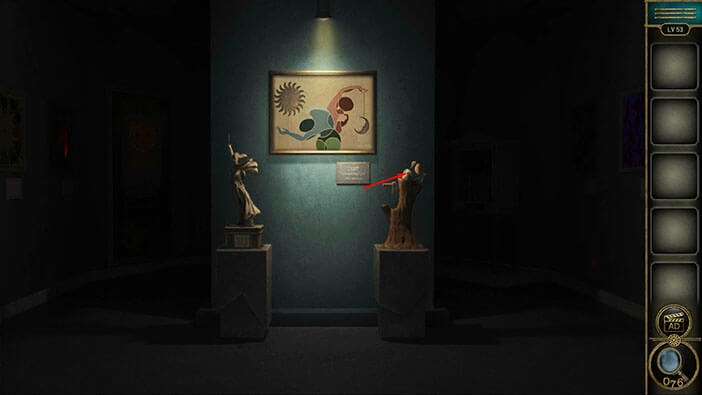
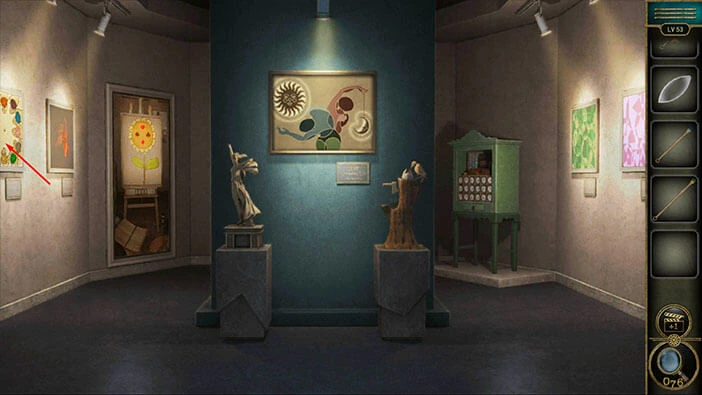
Level 53
Let’s explore the fifty-third level. You will notice that the left and right portions of this room are dark, and we will have to illuminate them in order to solve this puzzle. Let’s begin.
On the pillar on the right, you can see a small tree and a bird. Let’s tap on the bird to take a closer look at it.
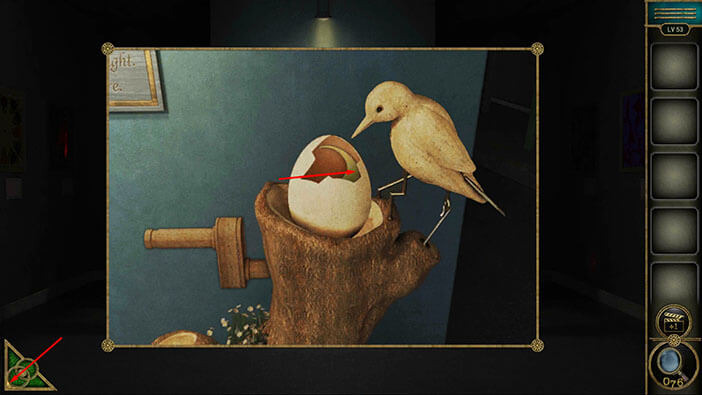
Tap on the handle on the left to start the interaction, and the bird will break the egg.
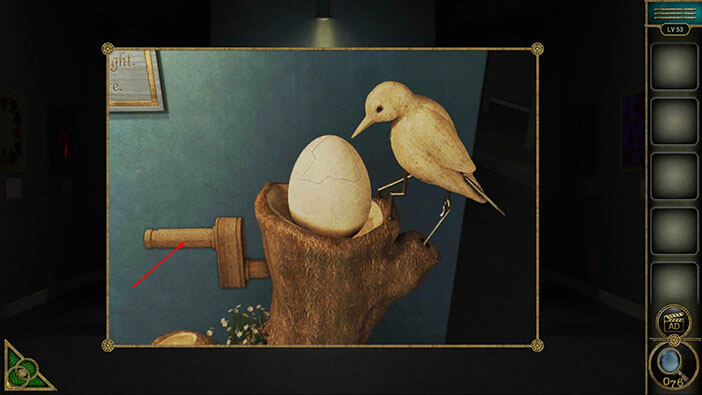
In the egg, you will find a “Moon”. Let’s tap on it to pick it up.
After that, tap on the green button in the bottom left corner of the screen to go back.
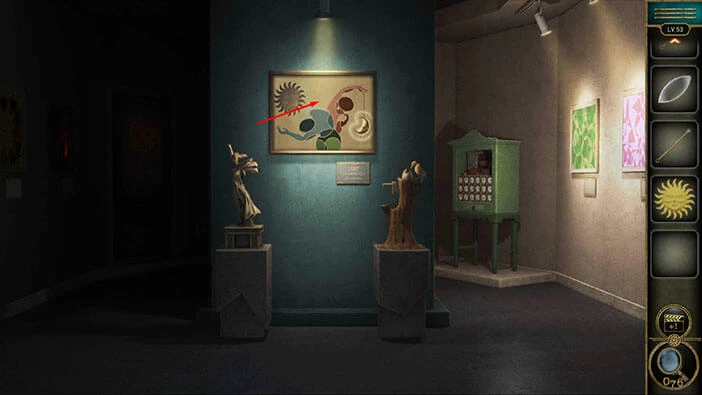
Next, tap on the picture in front of you to take a closer look at it.
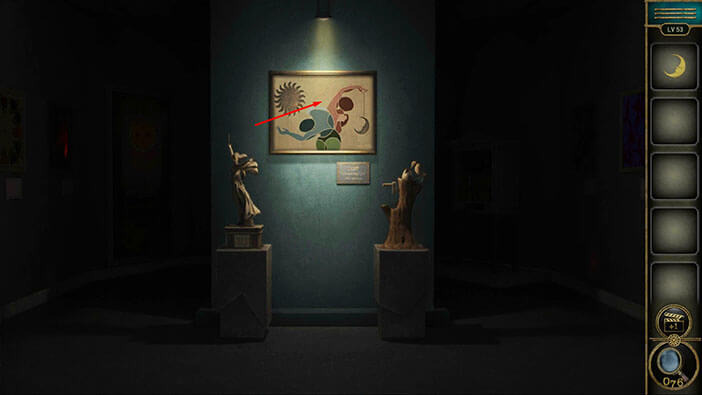
On the right, you will notice an empty “Moon” slot at the end of the string. So, let’s select the “Moon” from the inventory and insert it into the empty slot.
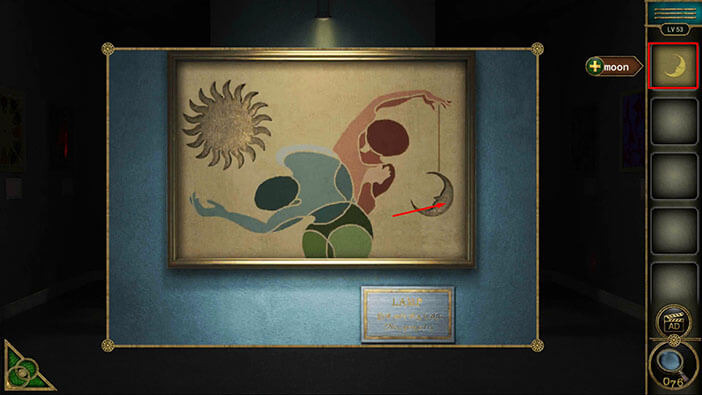
You will illuminate the right portion of the room, as soon as you insert the moon into the empty slot. Let’s explore the new area.
You will notice a wooden box on the green cabinet, located in the top right corner of the room. Let’s tap on the cabinet to take a closer look at it, then tap on the wooden box to open it.

In the wooden box, you will find a “Red pen”. Tap on it to pick it up. After that, tap on the top part of the box to open the hidden compartment.
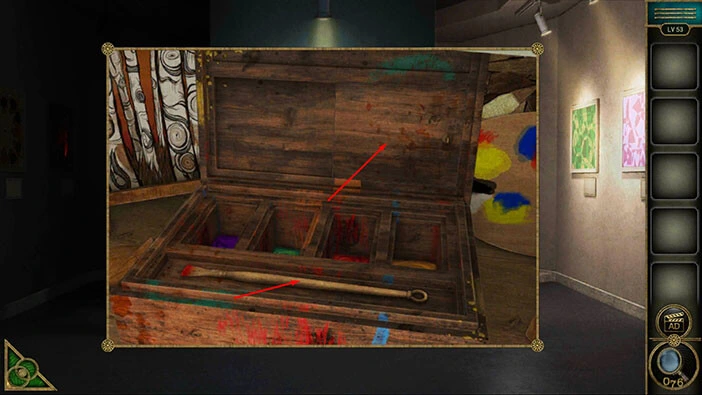
In the hidden compartment, you will find a “Lens”. Tap on it to pick it up.
After that, tap on the green button in the bottom left corner of the screen to go back.

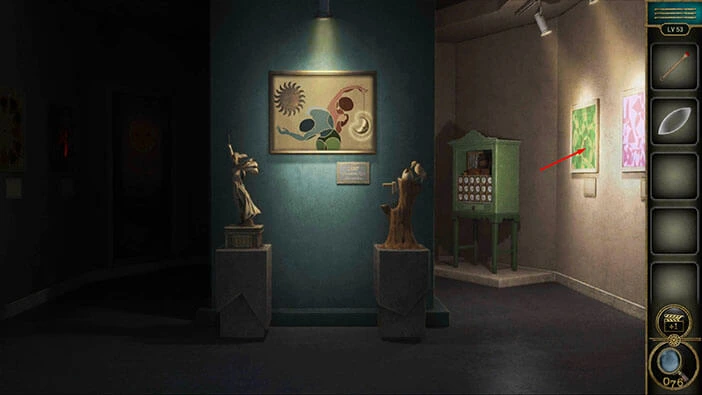
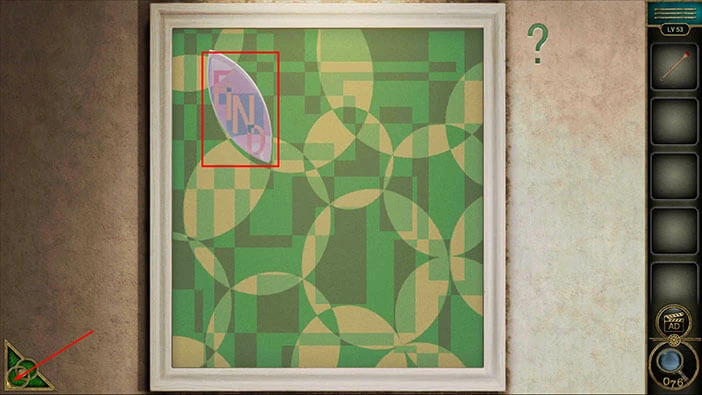
Next, let’s tap on the green picture on the right to take a closer look at it, and tap again to start the interaction.
Select the “Lens” from the inventory and tap on the picture to start the interaction.
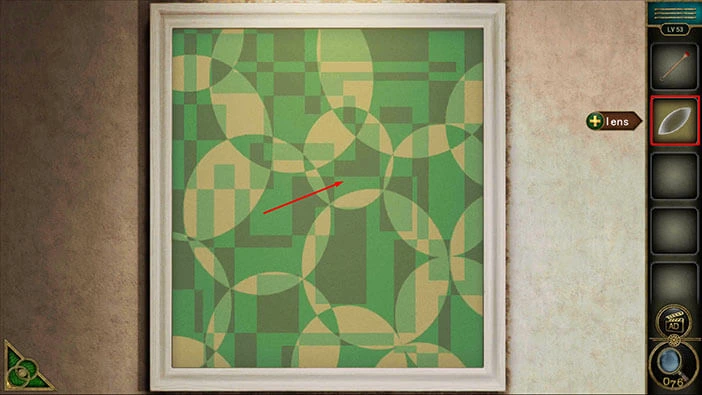
In the top left corner of the picture, you will notice a slot shaped like a lens. So, let’s drag the lens to this slot, and let’s tap on the lens to rotate it (to match the rotation of the slot).
Here, you will discover the word “FIND”. Let’s memorize/write down this word because we will need it for the next puzzle.
Once you’re done, tap on the green button in the bottom left corner of the screen to go back (your character will automatically pick up the lens).
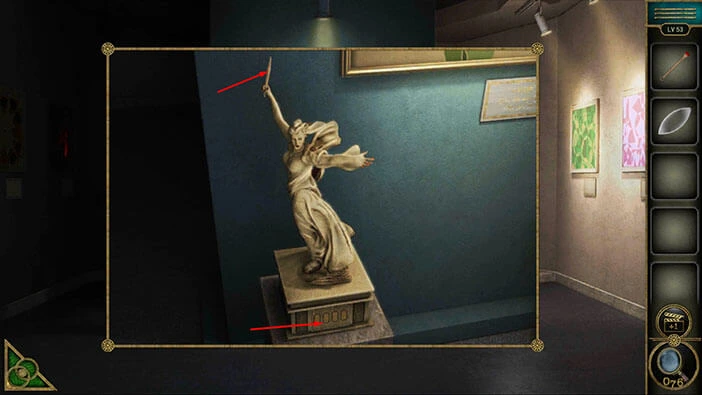
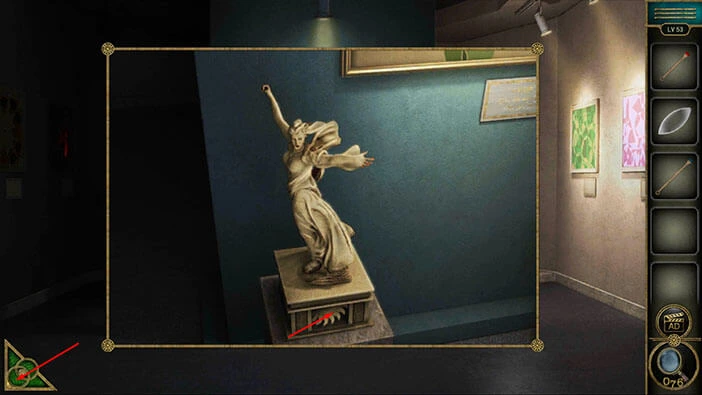
Next, let’s take a look at the statue on the pillar on the left.
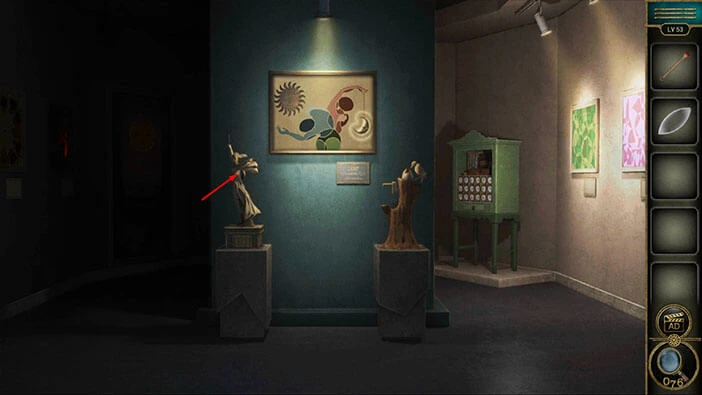
You will notice that the statue is holding a “Blue pen”. Let’s tap on it to pick it up. Also, you will notice four slots at the bottom of the statue. Let’s tap on these slots to take a closer look at them.
Enter the password “FIND” (that we discovered by using the lens) and you will open the compartment at the bottom of the statue.
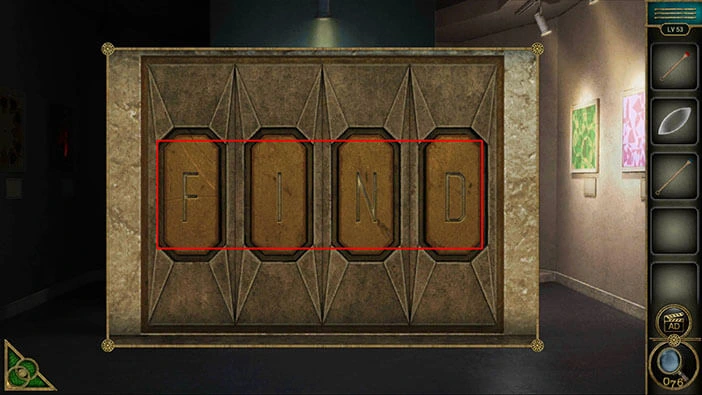
In the compartment, you will find a “Sun”. Tap on it to pick it up. After that, tap on the green button in the bottom left corner of the screen to go back.
Next, let’s tap on the picture again to take another look at it.
On the left side of the picture, you will notice an empty slot. So, let’s select the “Sun” from the inventory and insert it into the empty slot.

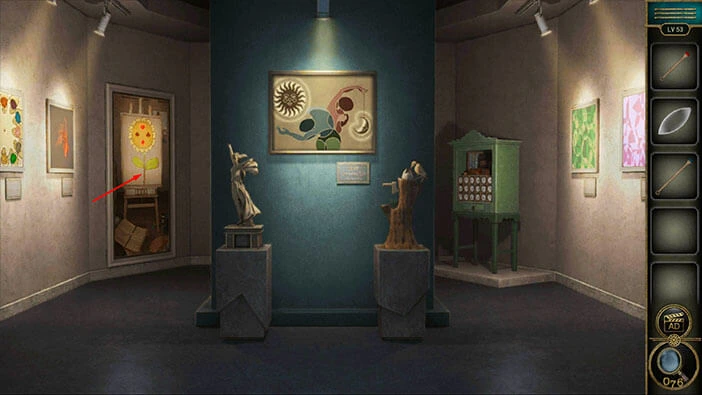
With that, you will illuminate the left side of the room. Let’s explore it.
Let’s tap on the large picture in the top left corner of the room to take a closer look at it.
Here, you will find a “Green pen”. Tap on it to pick it up. After that, tap on the green button in the bottom left corner of the screen to go back.
Next, let’s tap on the picture on the left to take a closer look at it.
Next, select the three “Pens” from the inventory (Red, Green, and Blue) and attach them to the empty slot in the middle.
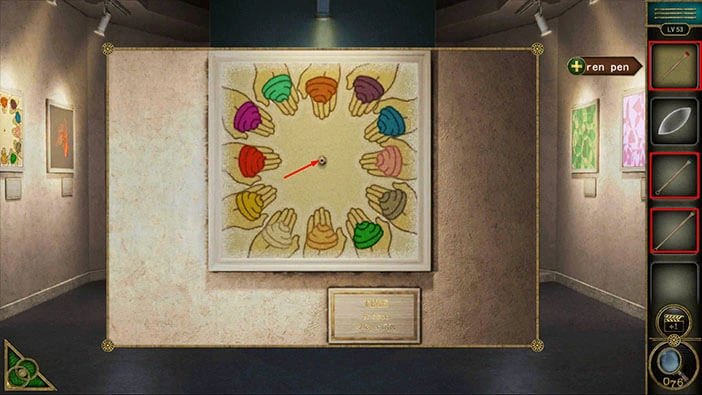
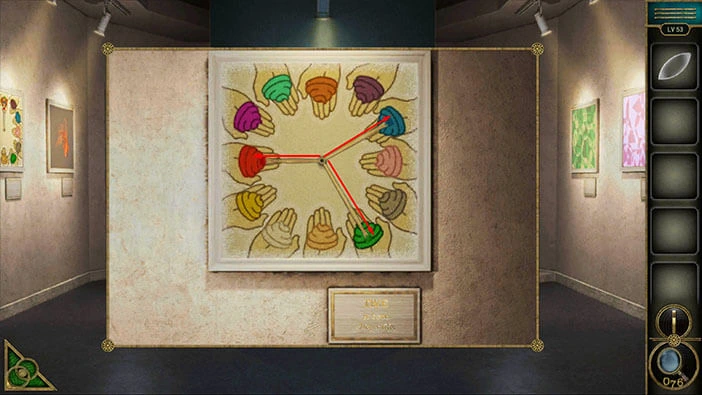
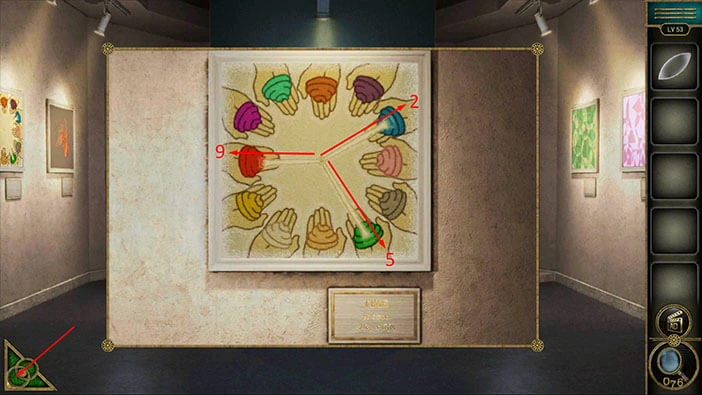
Let’s set the pens in the correct positions. The red pen should point at the red ice cream, the blue pen should point at the blue ice cream, and the green pen should point at the green ice cream.
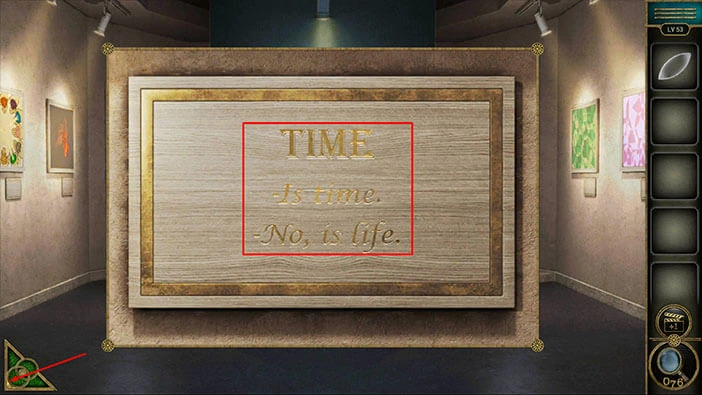
Next, let’s tap on the inscription located in the bottom right corner of the puzzle to take a closer look at it.
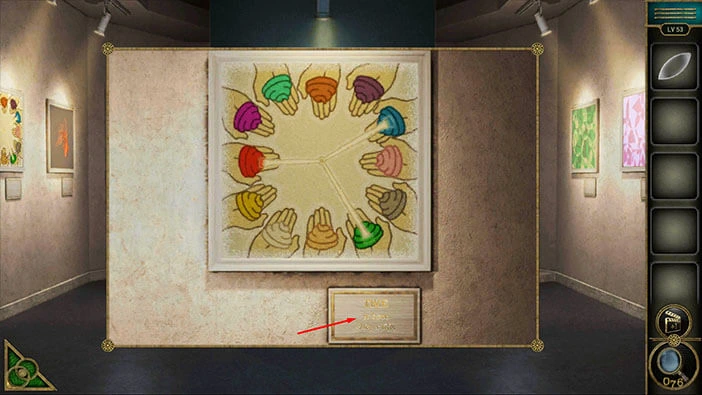
You will see the text,
“Time is time”
“No is life”.
Tap on the green button in the bottom left corner of the screen to go back.
If you take a look at the picture you will notice that it looks like a clock, and the pens look like a clock’s hands. Let’s memorize/write down the numbers that these hands are pointing at,
The red pen = hour hand = points at the number 9.
The blue pen = minute hand = points at the number 2.
The green pen = second hand = points at the number 5.
When we put it all together, we will get the number “925”. Let’s memorize/write down this number because it represents the hint for the next puzzle.
Once you’re done, tap on the green button in the bottom left corner of the screen to go back.
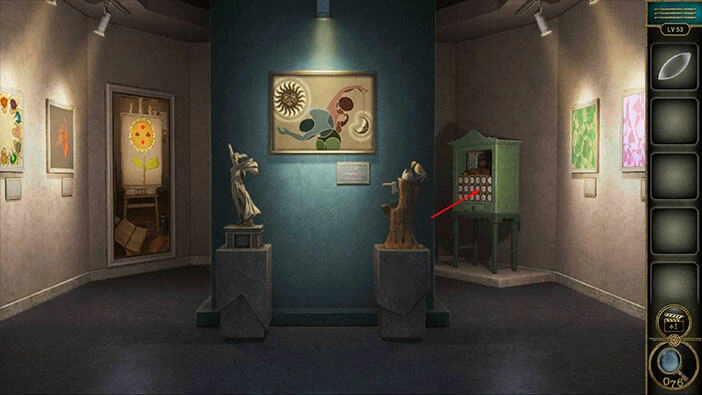
Next, let’s tap on the green cabinet on the right to take another look at it. After that, tap on the clocks on the cabinet to start the interaction.
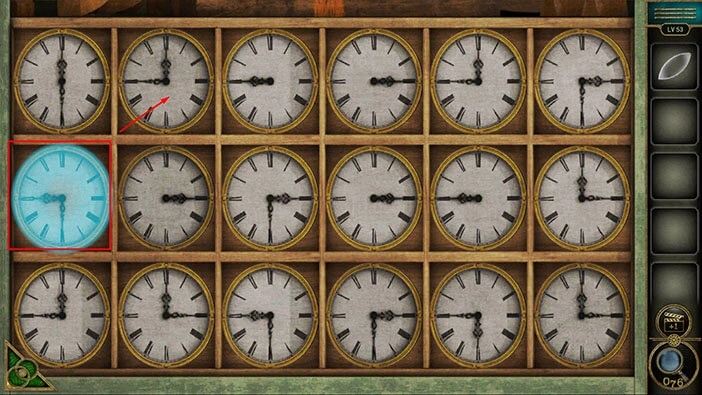
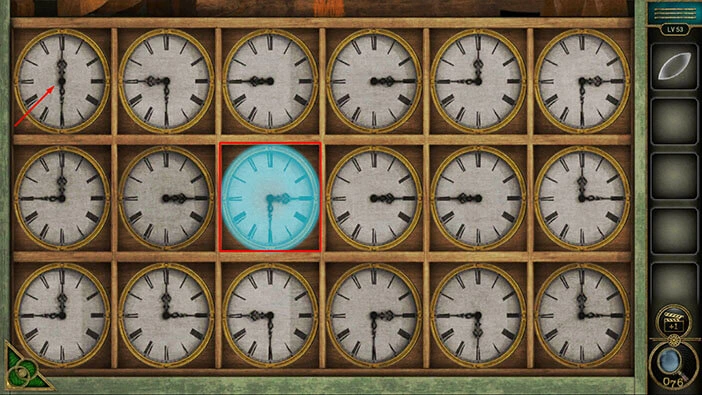
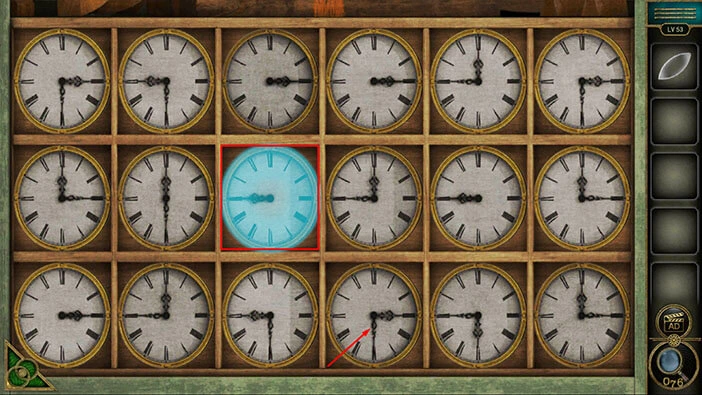
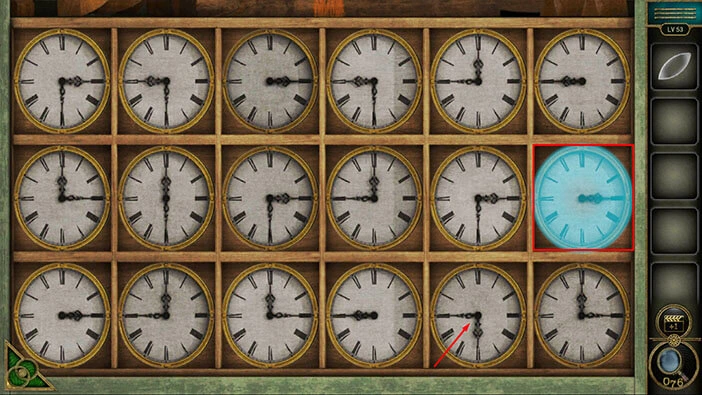
Here, we can see eighteen clocks arranged in three rows, with six clocks in each row. Our task is to rearrange the clocks. The clock hands should form the number(s) that we saw previously (“925”). The first two rows should form the first number, the third and fourth rows should form the second number, and the last two rows should form the third number.
We will do this puzzle in several steps. Let’s begin.
Step 1
Select the first clock in the second row, then tap on the second clock in the first row to swap their positions.
Step 2
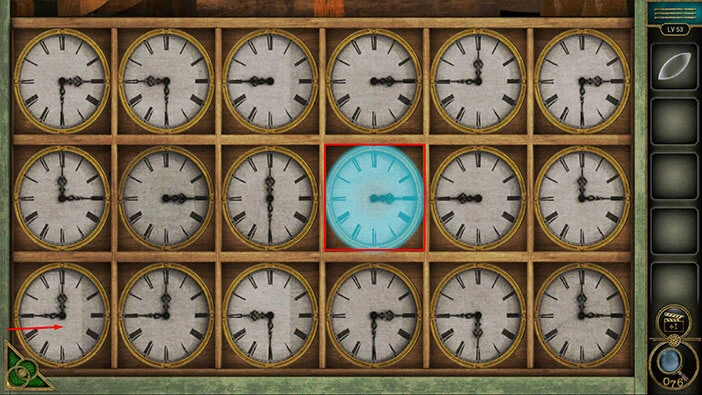
Select the third clock in the second row, then tap on the first clock in the first row to swap their positions.
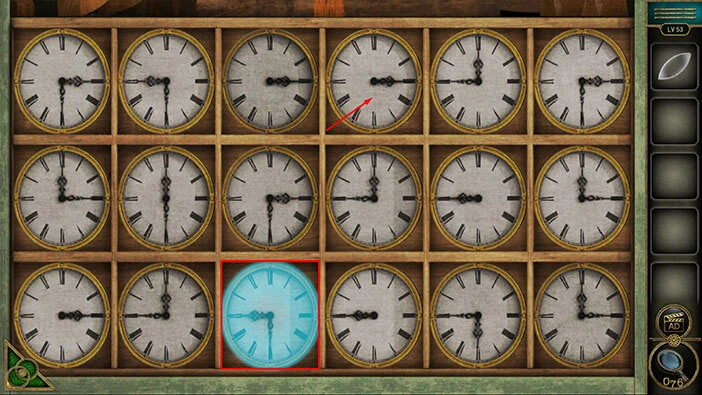
Step 3
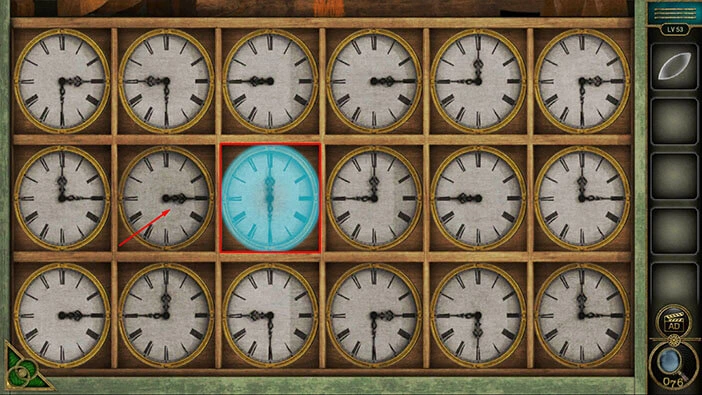
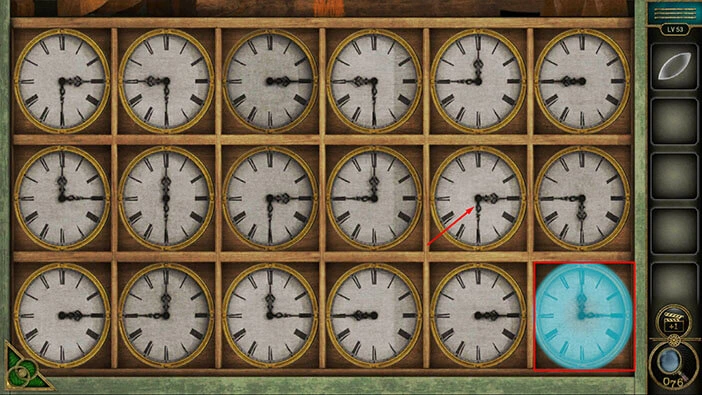
Select the second clock in the third row, then tap on the first clock in the second row to swap their positions.

Step 4
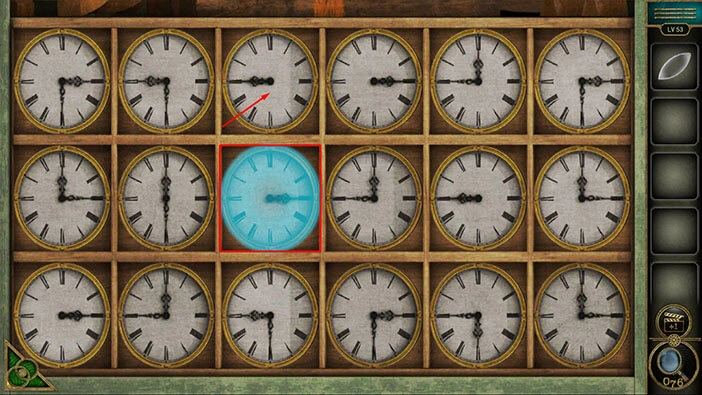
Select the fourth clock in the second row, then tap on the first clock in the third row to swap their positions.
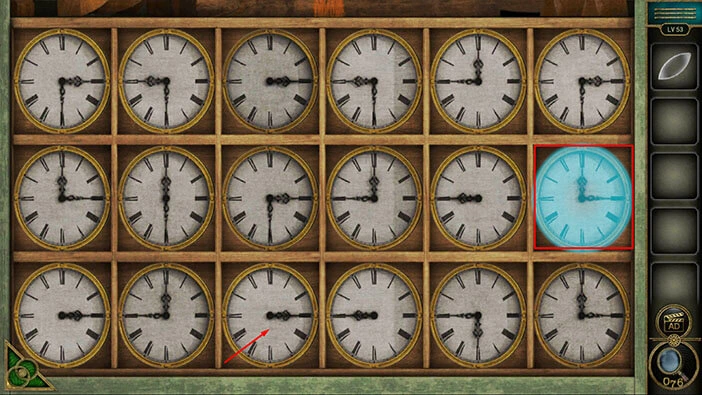
Step 5
Select the third clock in the second row, then tap on the second clock in the second row to swap their positions.
Step 6
The clock hands in the first two rows form the number 9. Let’s continue.
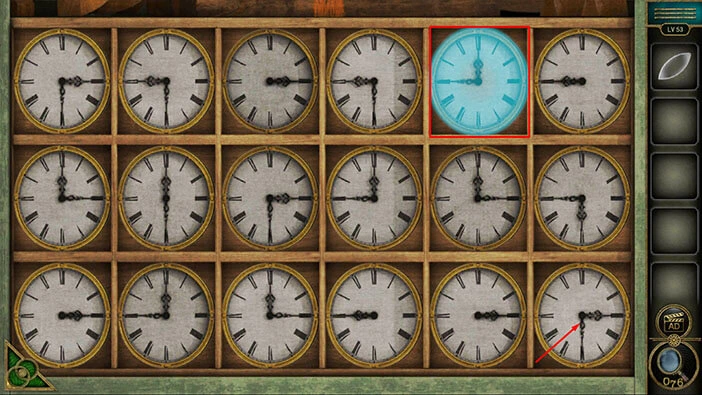
Select the third clock in the second row, then tap on the third clock in the first row to swap their positions.
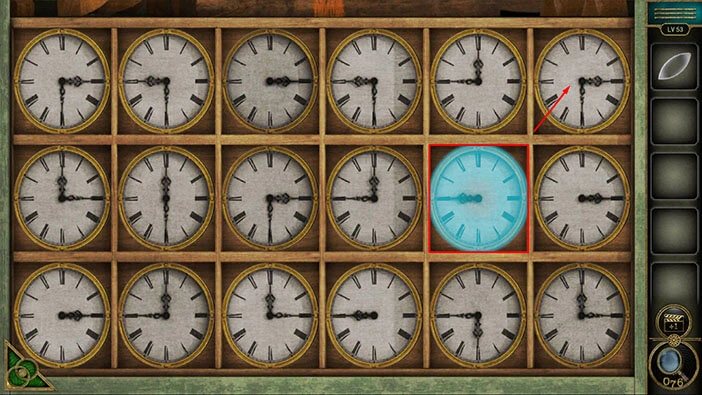
Step 7
Select the third clock in the second row, then tap on the fourth clock in the third row to swap their positions.
Step 8
Select the third clock in the third row, then tap on the fourth clock in the first row to swap their positions.
Step 9
Select the sixth clock in the second row, then tap on the third clock in the third row to swap their positions.
Step 10
The clock hands in the third and fourth rows form the number 2. Let’s continue.
Select the fifth clock in the second row, then tap on the sixth clock in the first row to swap their positions.
Step 11
Select the sixth clock in the second row, then tap on the fifth clock in the third row to swap their positions.
Step 12
Select the sixth clock in the third row, then tap on the fifth clock in the second row to swap their positions.
Step 13
Lastly, select the fifth clock in the first row, then tap on the sixth clock in the third row to swap their positions. With that, you will solve this puzzle.
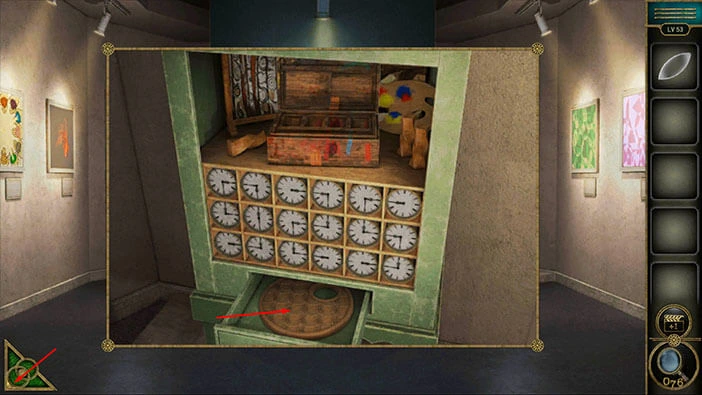
You will open the drawer as soon as you solve the puzzle, and inside you will find a “Disk”. Tap on it to pick it up.
After that, tap on the green button in the bottom left corner of the screen to go back.
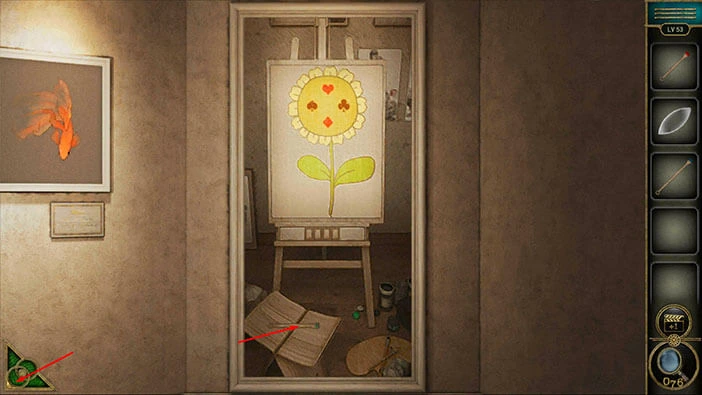
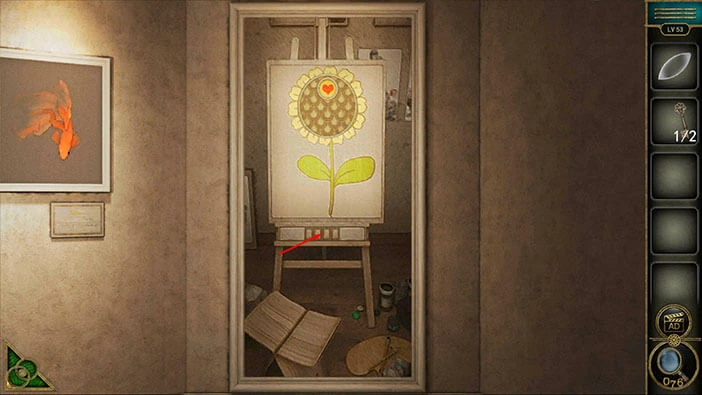
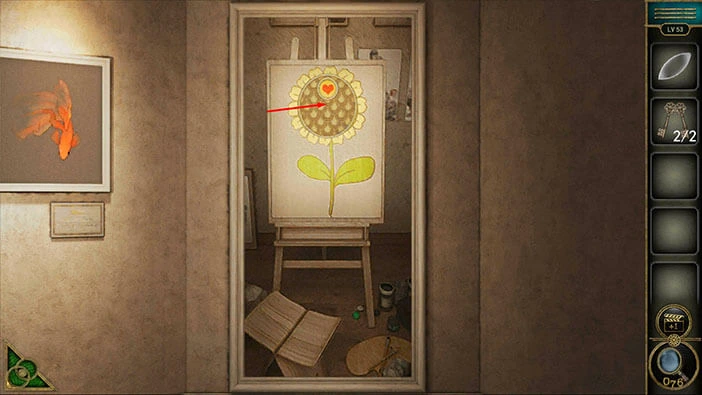
Next, let’s tap on the picture, located in the top left corner of the room, to take another look at it.

Select the “Disk” from the inventory and place it on the sunflower.
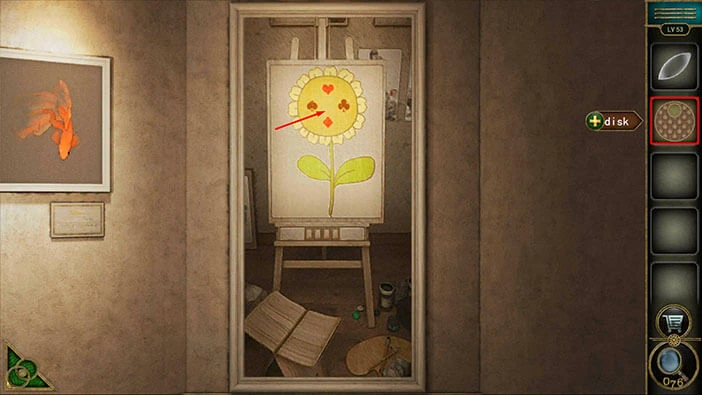
Tap on the disk to rotate it to the right.

In the disk, you will now see the club symbol instead of the heart. The picture will also change. Above the window, you will notice a “Zipper”. Tap on it to pick it up.
After that, tap on the disk to rotate it again.
In the disk, you will now see the diamond symbol instead of the club. The picture will also change.
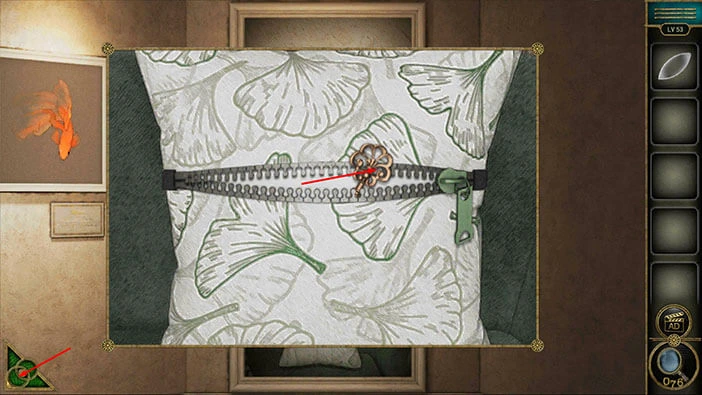
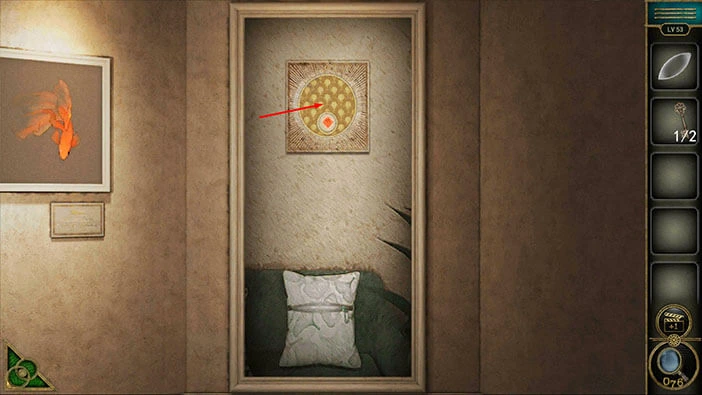
Let’s tap on the pillow to take a closer look at it.
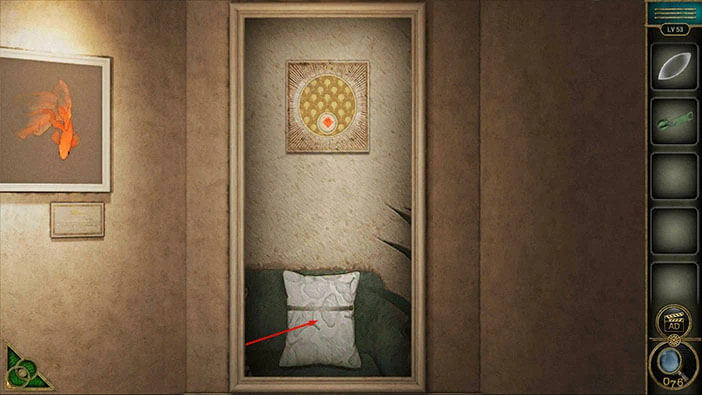
You will notice that the zipper is missing, so let’s select the “Zipper” from the inventory and insert it into the empty slot.

You will open the pillow and inside you will find a “Key”. Tap on it to pick it up.
After that, tap on the green button in the bottom left corner of the screen to go back.
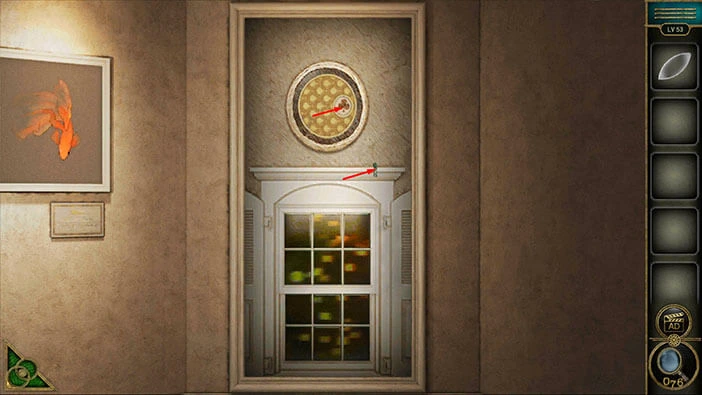
Next, tap on the “Disk” again to rotate it.
In the disk, you will now see the spade symbol instead of the diamond. The picture will also change.
You will notice a green door. We will have to find a way to open this door in order to complete the level. In short, we will need two keys, and now we have one. So, let’s look for the other key.
Above the door, you will see the word “SUSA”. Let’s memorize/write down this word because we will need it for the next puzzle.
Once you’re done, tap on the “Disk” to rotate it.

Below the sunflower, you will notice four slots. Let’s tap on them to take a closer look.
Let’s enter the word “SUSA”.
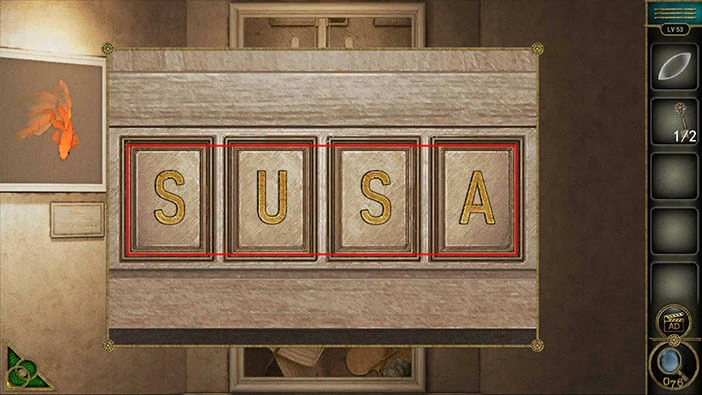
You will discover the second key, so let’s tap on it to pick it up. After that, tap on the green button in the bottom left corner of the screen to go back.
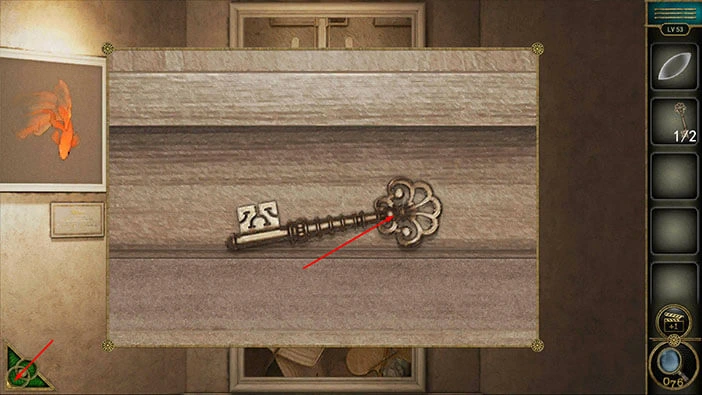
Let’s go back to the green door that we saw previously. Tap three times on the disk to rotate it.
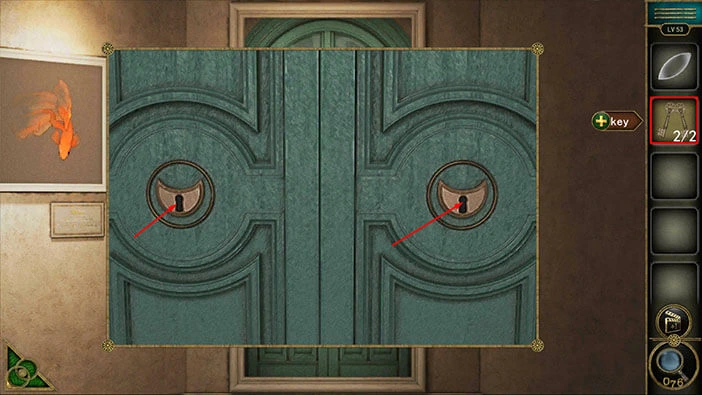
Next, let’s tap on the two keyholes to take a closer look at them.
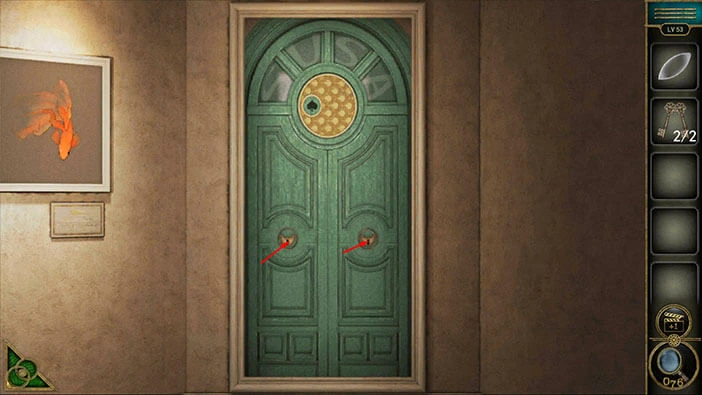
Select the “Keys” from the inventory and use them to unlock the door. After that, tap on the door to proceed to the next level.
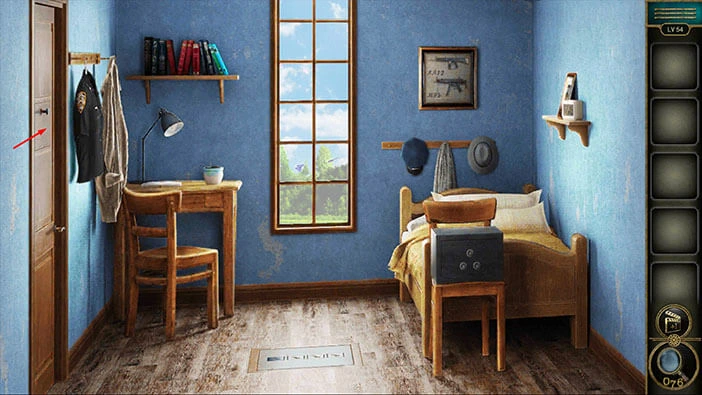
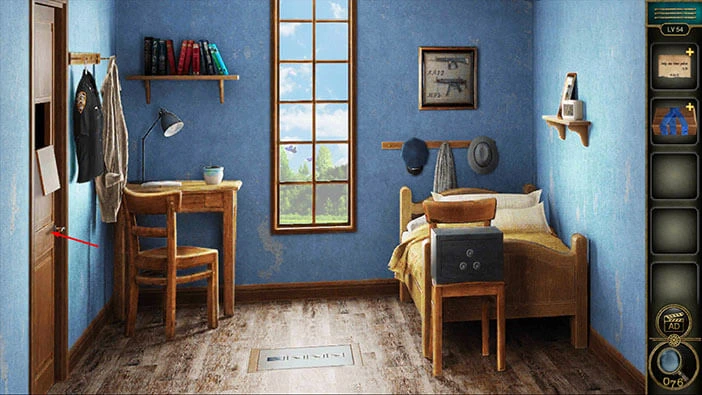
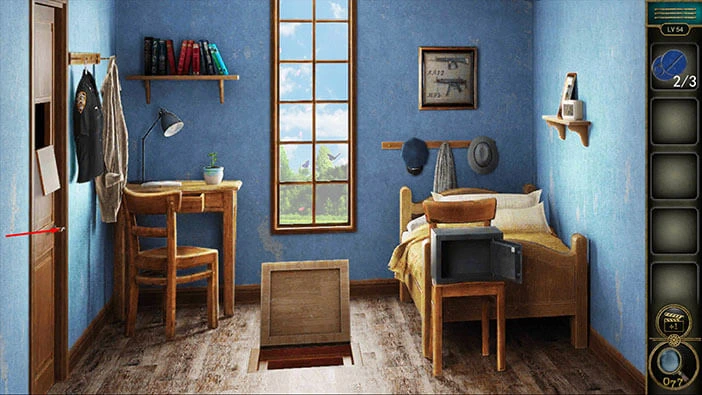
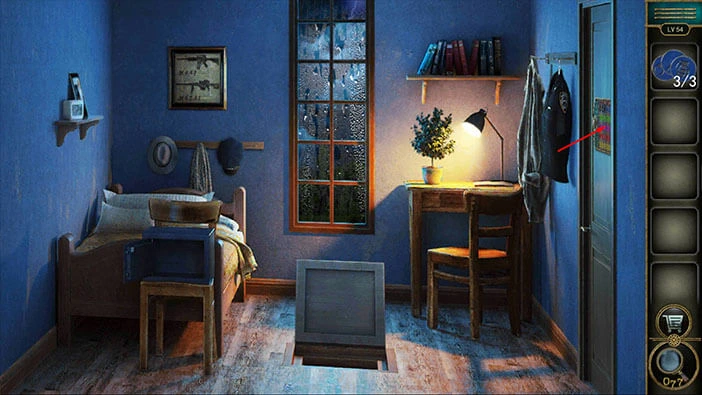
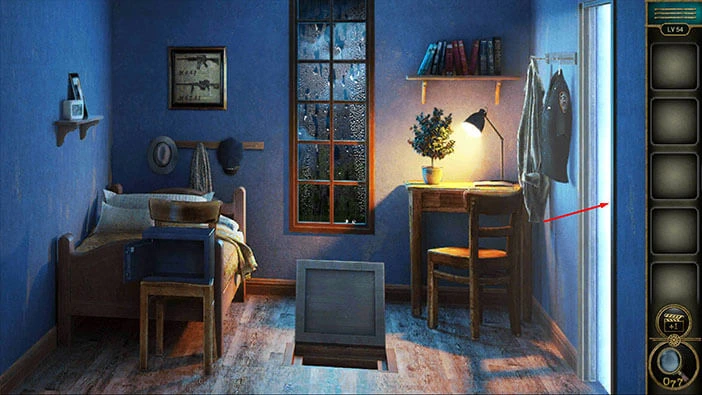
Level 54
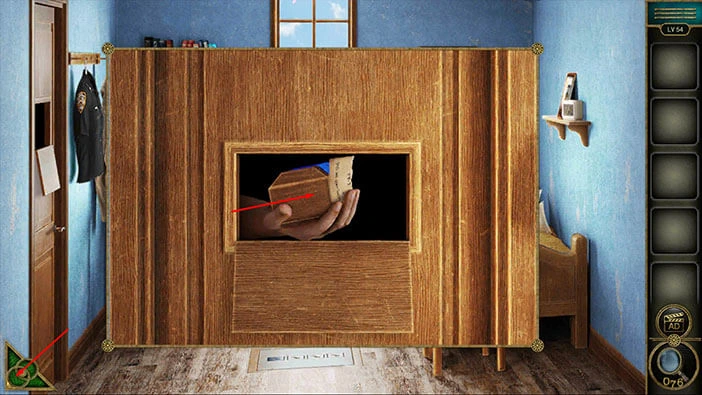
Let’s explore the fifty-fourth level. On the door on the left, you will see a small compartment. Let’s tap on it to take a closer look at it, and tap again to start the interaction.
A hand will appear and it will offer you a gift. Tap on it to pick it up, and you will get a “Paper piece” and a “Box”.
After that, tap on the green button in the bottom left corner of the screen to go back.
Next, let’s tap on the door knob on the left to take a closer look at it, and tap again to proceed to the next room (You will proceed to the next room, not the next level).
Next, let’s tap on the shelf on the wall on the left to take a closer look at it.

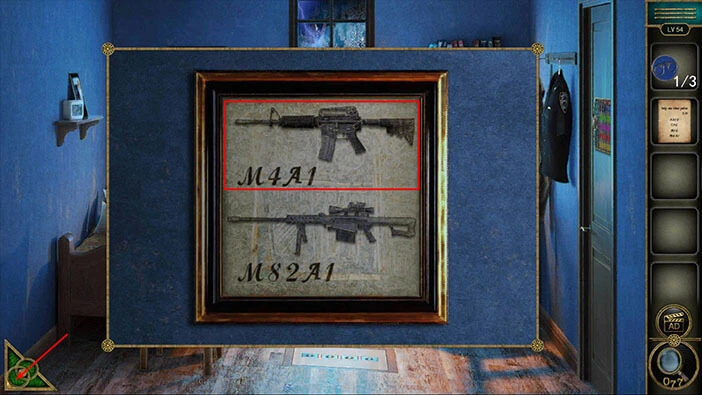
Here, you will find a “Knife”. Tap on it to pick it up. Also, you will notice a photo of the two weapons. There are several photos of this type scattered throughout the level, and we will examine them a bit later in the walkthrough. For now, just take note of them.
Once you’re done, tap on the green button in the bottom left corner of the screen to go back.
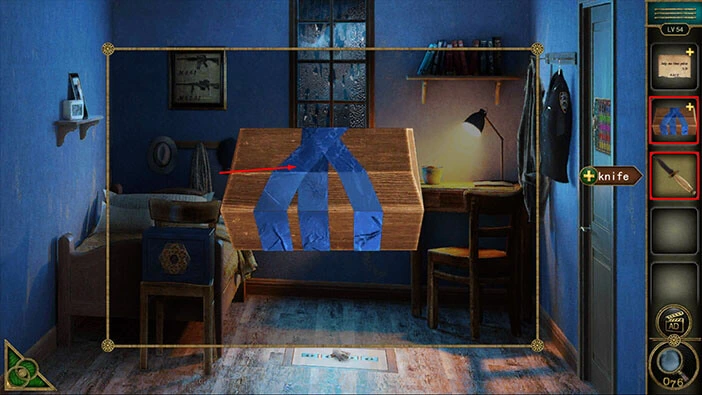
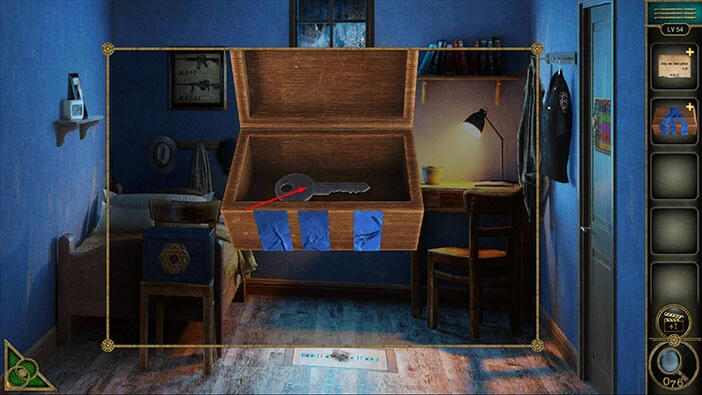
Next, tap on the “Box” in your inventory to select it, and it will appear in the middle of the screen. After that, select the “Knife” from the inventory and use it to open the box.
In the box, you will find a “Key”. Tap on it to pick it up.
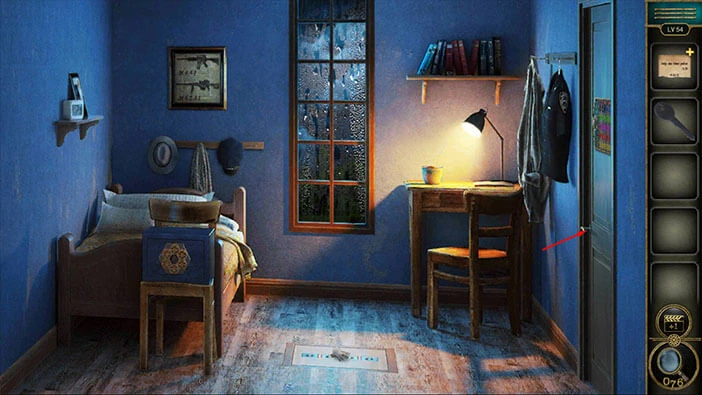
Let’s go back to the first room. Tap on the doorknob on the right to take a closer look at it, and tap again to proceed.
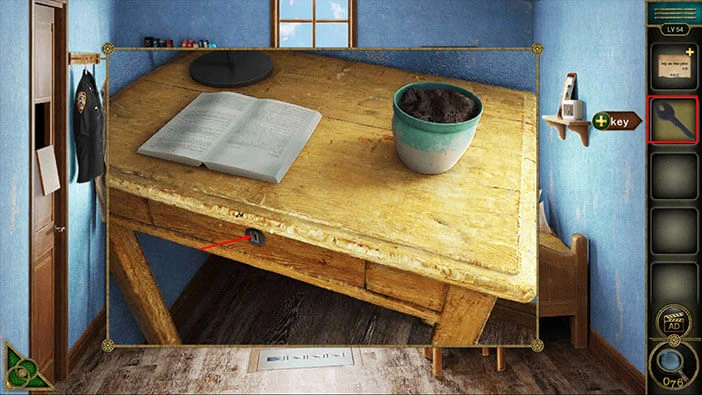
Let’s tap on the table on the left to take a closer look at it.

Select the “Key” from the inventory and use it to unlock the drawer.
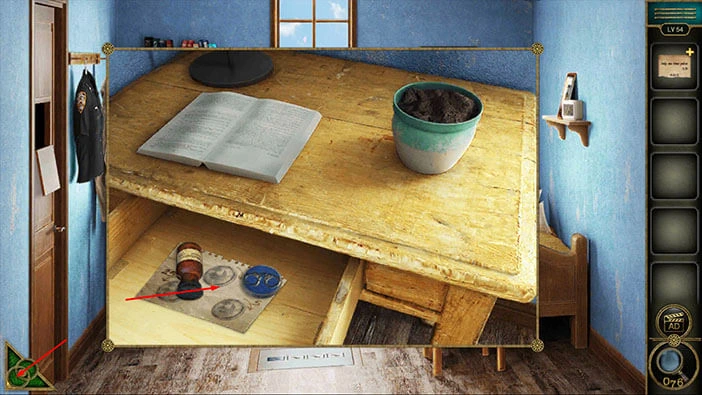
In the drawer, you will find a “Potion”, a “Game prop”, and “Paper with hints”. Tap on these items to pick them up.
After that, tap on the green button in the bottom left corner of the screen to go back.
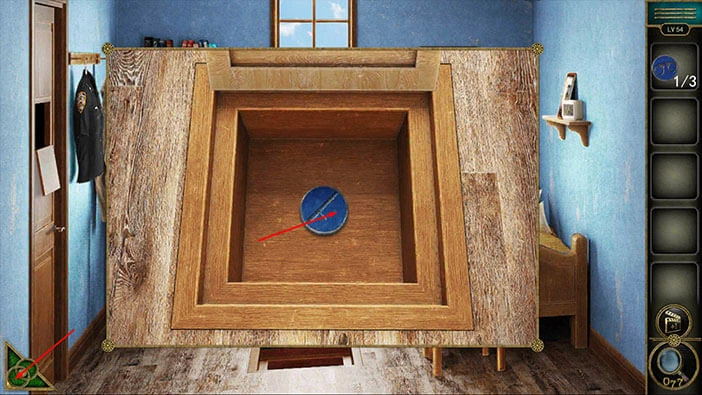
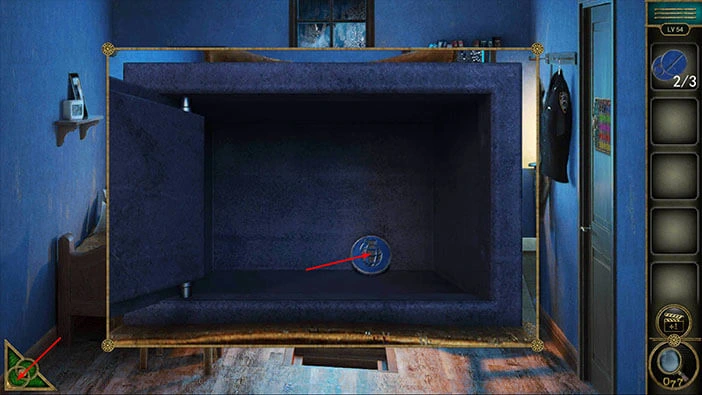
Next, let’s tap on the safe, located on the chair on the right, to take a closer look at it, and tap again to start the interaction.
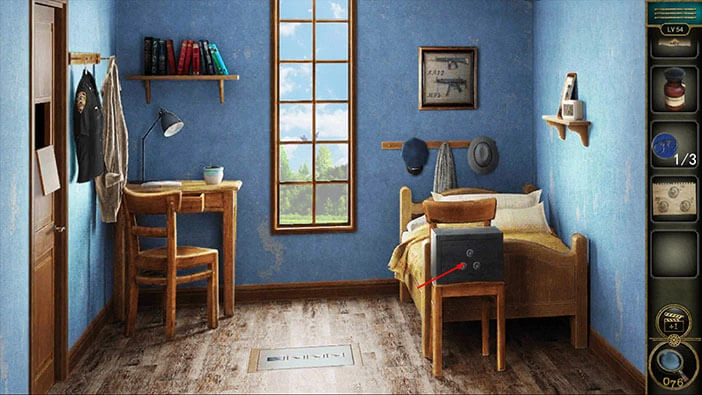
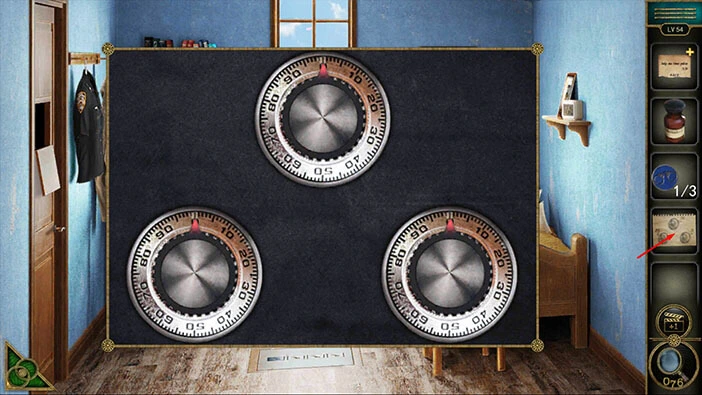
We will need to set the three dials to the correct positions, in order to open the safe. So, let’s tap on the “Paper with hints” in our inventory to examine it.
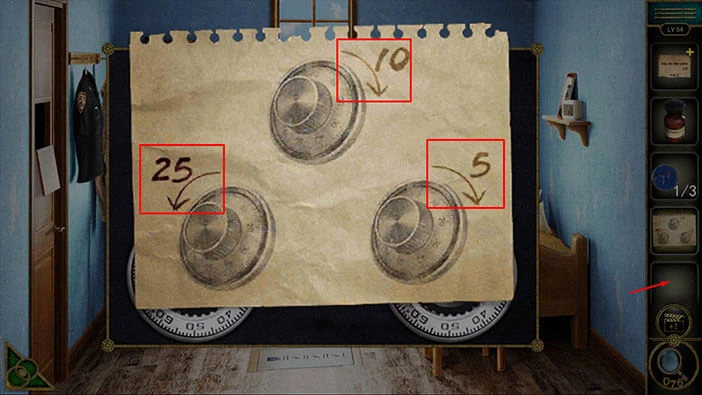
Here, we can see the correct position for each of the three dials, so let’s memorize/write down this information.
Top Dial = 10
Right Dial = 5
Bottom Dial = -25
Once you’re done, tap on the empty inventory slot to put down the paper with hints.
So, let’s select the dials to the correct position.
Top Dial = 10
Right Dial = 5
Bottom Dial = -25 = 75.
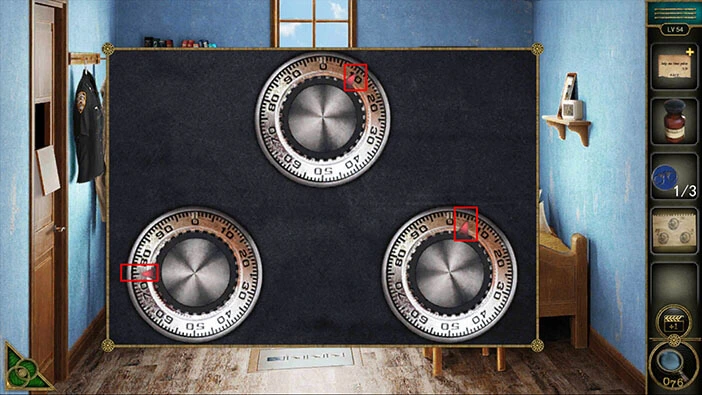
You will open the safe, as soon as you set the dials to the correct positions, and inside you will find “Seed”. Tap on it to pick it up.
After that, tap on the green button in the bottom left corner of the screen to go back.

Next, let’s tap on the table on the left to take another look at it.
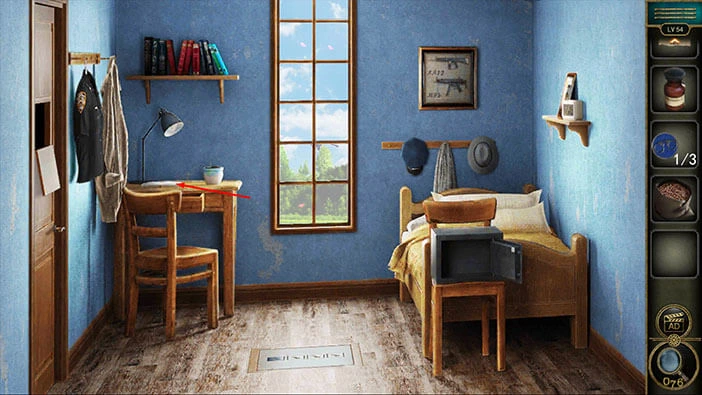
Our next task is to grow a plant. Select the “Seed” from the inventory and put it into the vase.
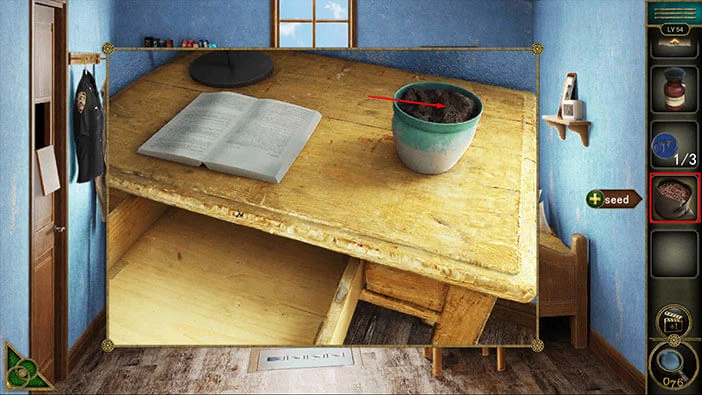
Next, select the “Potion” from the inventory and spill it into the vase.
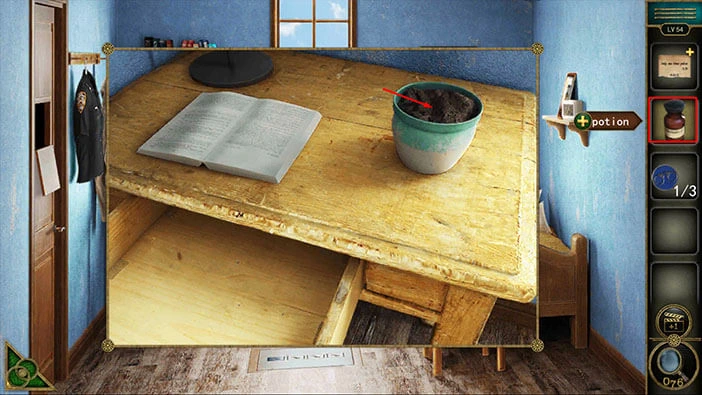
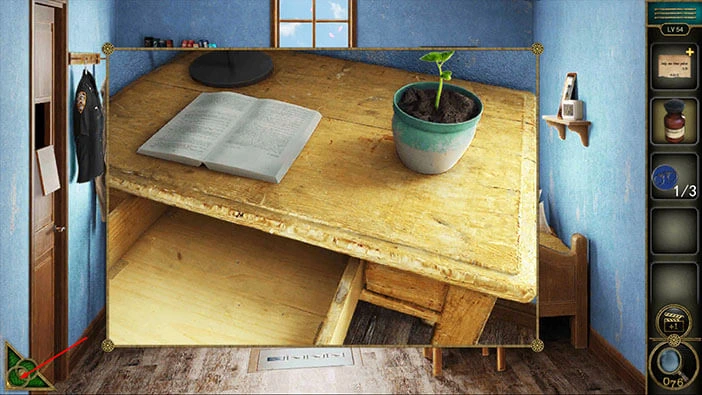
A small plant will grow. Let’s go back. Tap on the green button in the bottom left corner of the screen to go back.
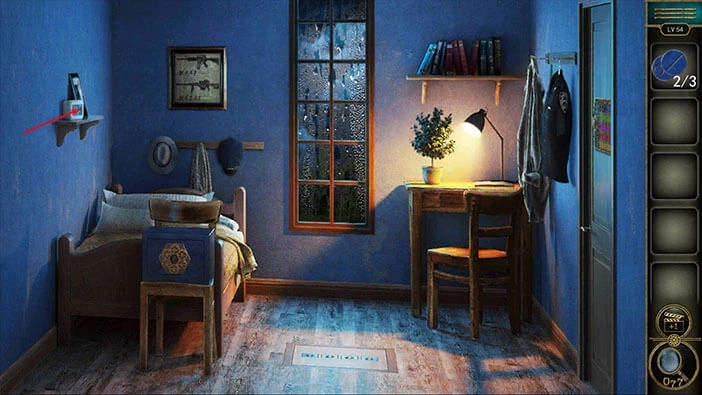
Let’s go back to the second room. Tap on the doorknob to take a closer look at it, and tap again to proceed.

Next, if you take a look at the small table on the right, you will notice a small tree. Let’s tap on it to take a closer look.
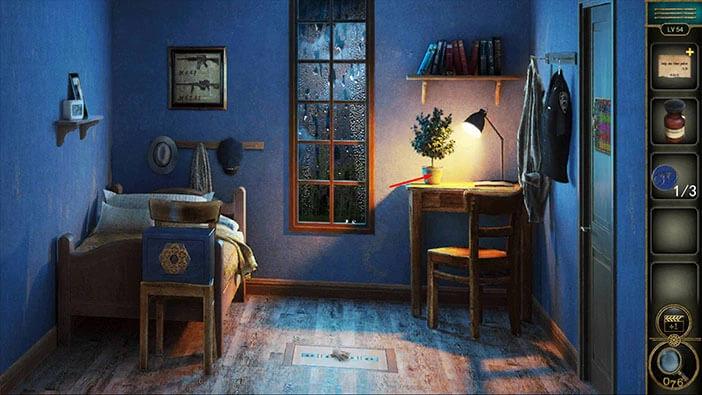
Select the “Potion” from the inventory and pour it into the vase.
Tap on the “Orange” to pick it up. After that, tap on the green button in the bottom left corner of the screen to go back.

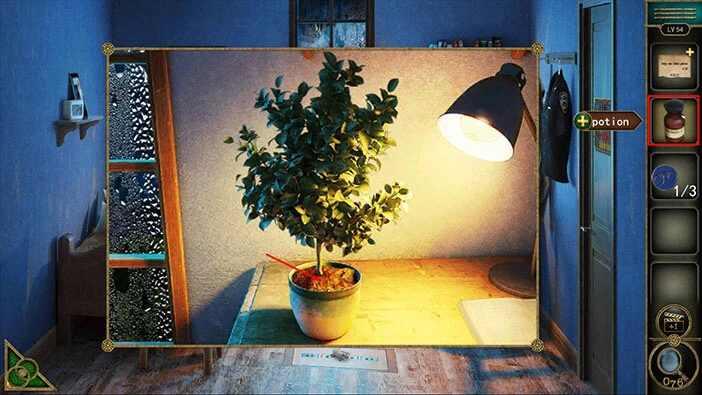
Next, you will notice a small panel on the floor. Let’s tap on it to take a closer look at it.
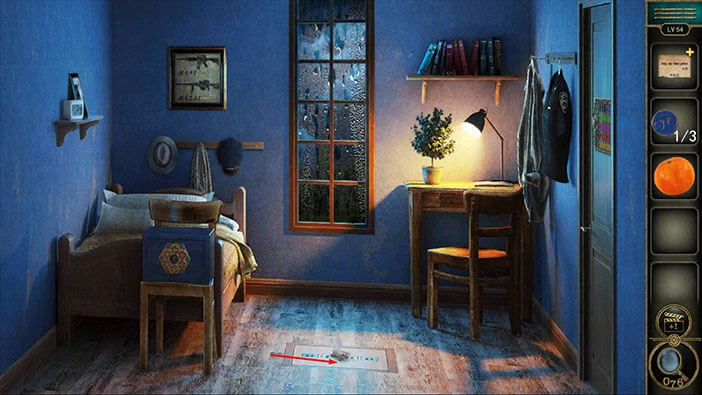
Select the “Orange” from the inventory and put it in front of the mouse.
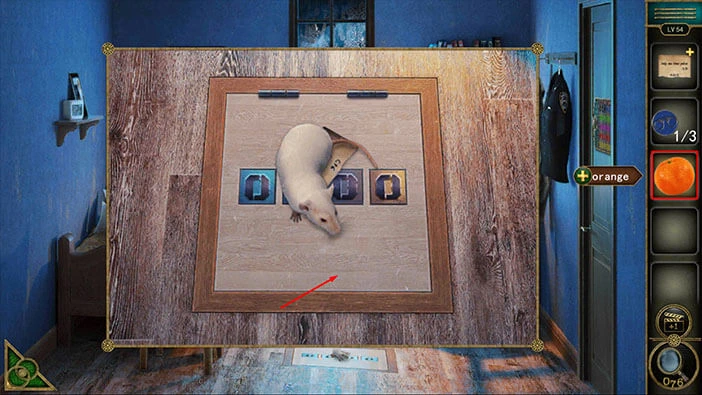
We will get rid of the mouse because it will run away with the orange. Tap on the other “Paper piece” to pick it up.
After that, tap on the green button in the bottom left corner of the screen to go back.
Next, tap on the “Paper piece” in the inventory to select it, and it will appear in the middle of the screen. After that, select the other “Paper piece” and merge it with the first piece. With that done, you will create a “Paper with hints”.
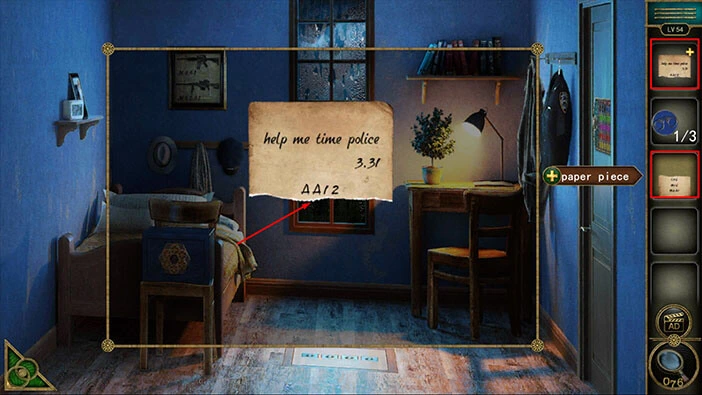
Tap on the “Paper with hints” in your inventory to examine it.
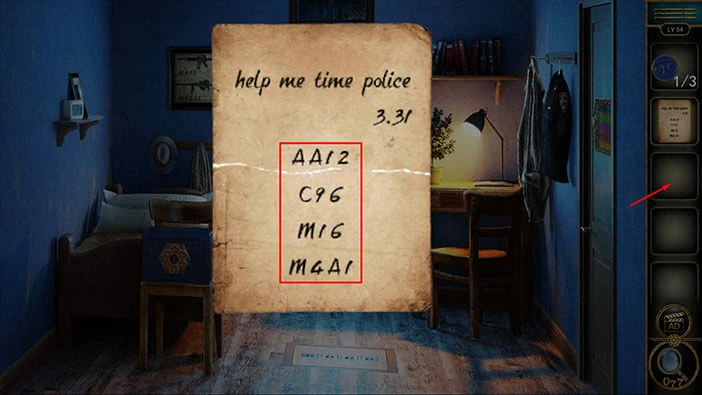
Here, we can see the list of four firearms. Let’s memorize/write down these firearms (and their order).
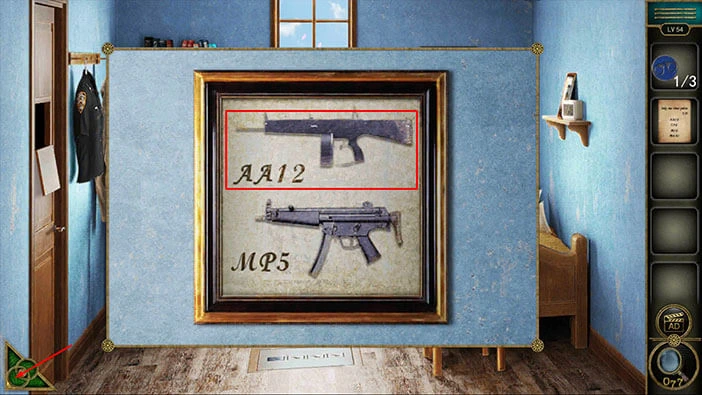
First = AA12 (Automatic shotgun)
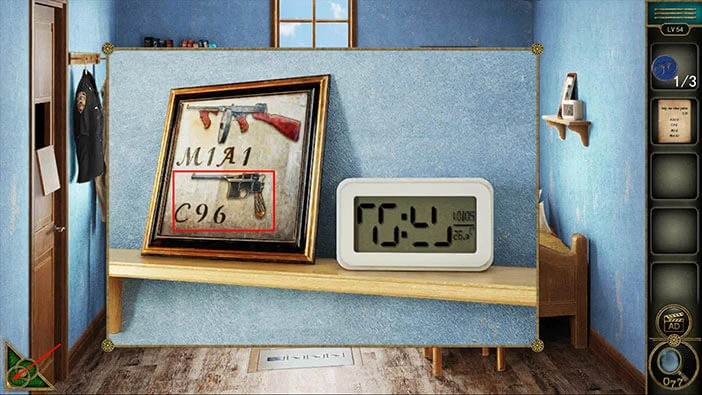
Second = C96 (One of the first semi-automatic handguns)
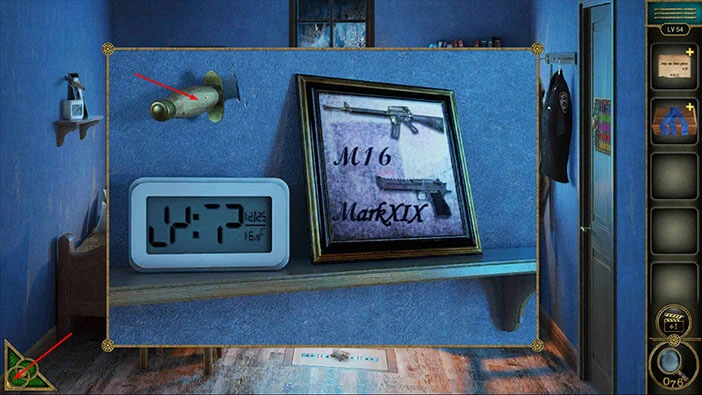
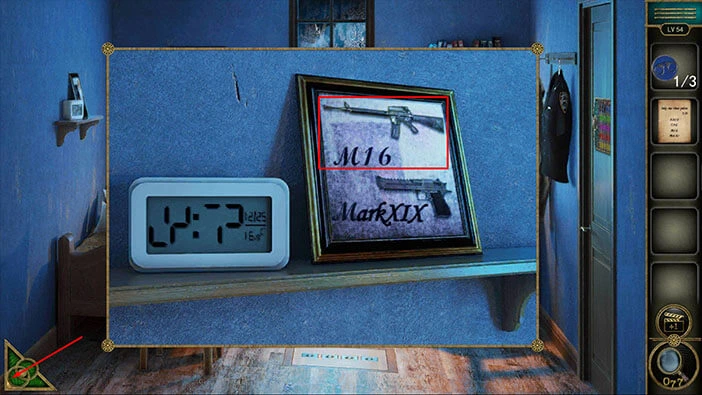
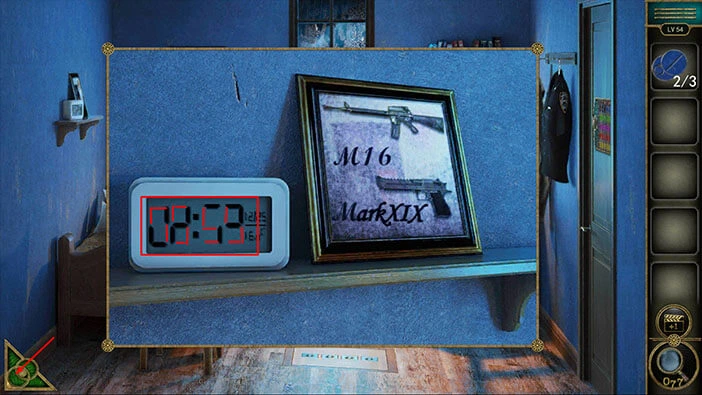
Third = M16 (Assault Rifle)
Fourth = M4A1 (Carbine/Assault Rifle)
Once you’re done, tap on the empty inventory slot to put down the hint.
Our next task is to find the pictures of these weapons and memorize them because these pictures represent the solution for the next puzzle. Let’s begin.
Tap on the picture on the left to take a closer look at it.

Here, we can see M4A1, so let’s memorize this weapon. Once you’re done, tap on the green button in the bottom left corner of the screen to go back.
Next, let’s tap on the next picture, located on the small shelf on the wall on the left, to take a closer look at it.

Here, we can see the M16, so let’s memorize this weapon. Once you’re done, tap on the green button in the bottom left corner of the screen to go back.
Let’s go back to the first room.

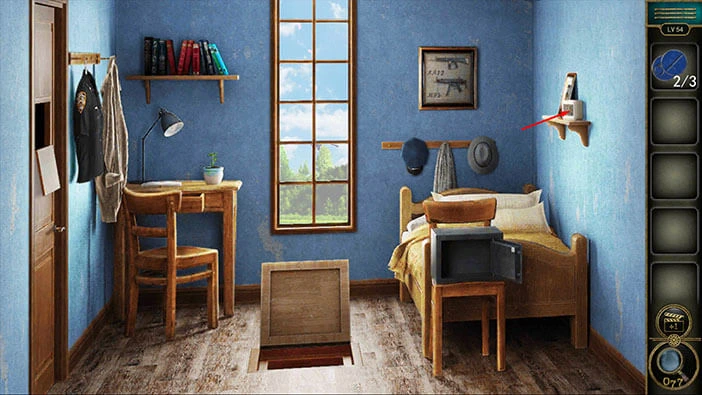
Tap on the picture on the wall in front of you to take a closer look at it.

Here, we can see the AA12, so let’s memorize this weapon. Once you’re done, tap on the green button in the bottom left corner of the screen to go back.
Next, let’s tap on the next picture, located on the small shelf on the wall on the right, to take a closer look at it.

Here, we can see the C96, so let’s memorize this weapon. Once you’re done, tap on the green button in the bottom left corner of the screen to go back.
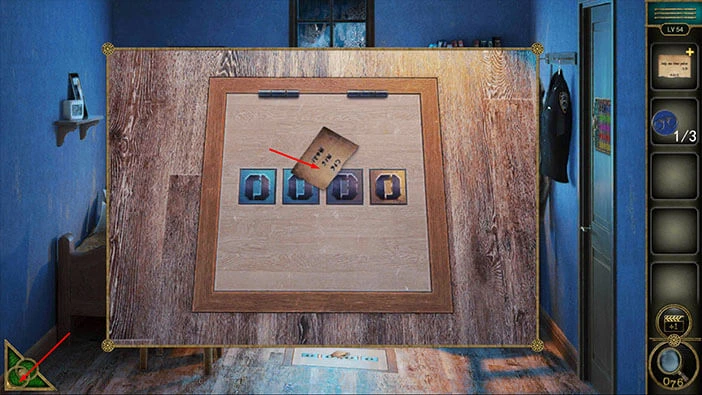
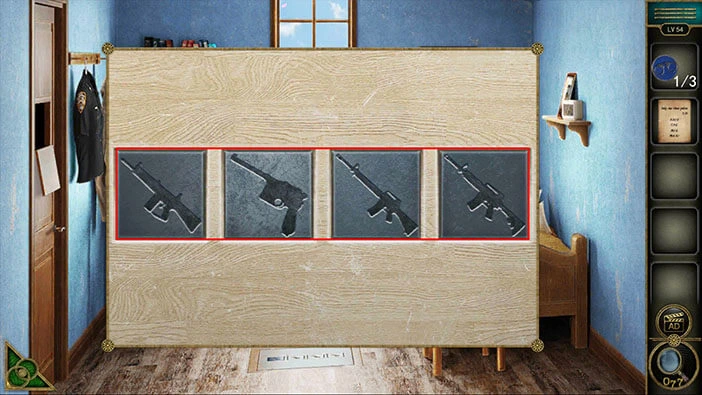
Next, let’s tap on the small compartment on the floor to take a closer look at it, and tap again to start the interaction.

We found the picture of each weapon, so let’s enter these weapons. We had,
First = AA12
Second = C96
Third = M16
Fourth = M4A1
You will open the secret compartment as soon as you enter the correct weapons. Inside you will find another “Game prop”. Tap on it to pick it up.
After that, tap on the green button in the bottom left corner of the screen to go back.
Next, let’s take a look at the small clock, located on the shelf on the right.
Here, we can see only the first half of the numbers on the clock. Try to memorize/write down the dashes on the clock, because we will merge these dashes with the dashes on the other clock, and that will give us the entire numbers.
Once you’re done, tap on the green button in the bottom left corner of the screen to go back.
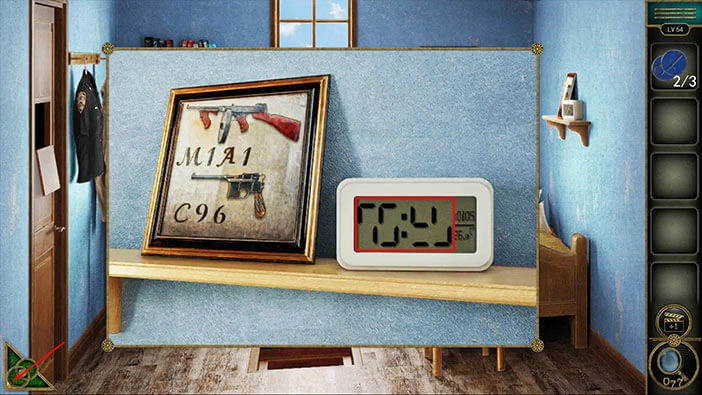
Let’s go back to the second room and look for the other clock.
Next, let’s tap on the other clock, located on the small shelf on the left, to take a closer look at it.
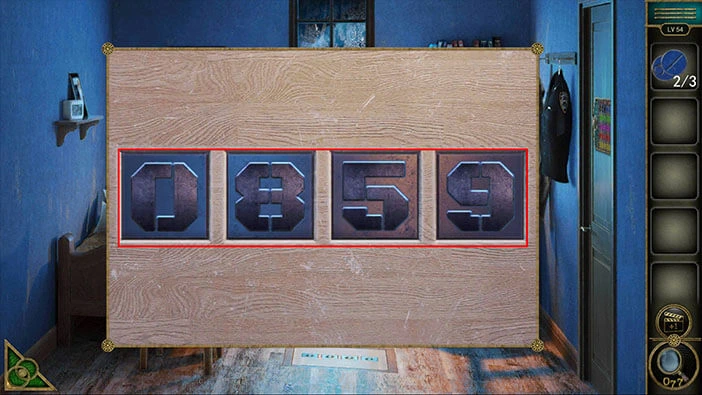
Here, we can see the second part of the numbers. If we merge them with the dashes that we saw previously, we will get the number “0859”. Let’s memorize/write down this number because it represents the solution for the next puzzle.
Once you’re done, tap on the green button in the bottom left corner of the screen to go back.
Next, let’s tap on the compartment on the floor to take a closer look at it, and tap again to start the interaction.

Enter the number “0859” and you will open this compartment.
In the compartment, you will find “Game prop”. Tap on it to pick it up.
After that, tap on the green button in the bottom left corner of the screen to go back.
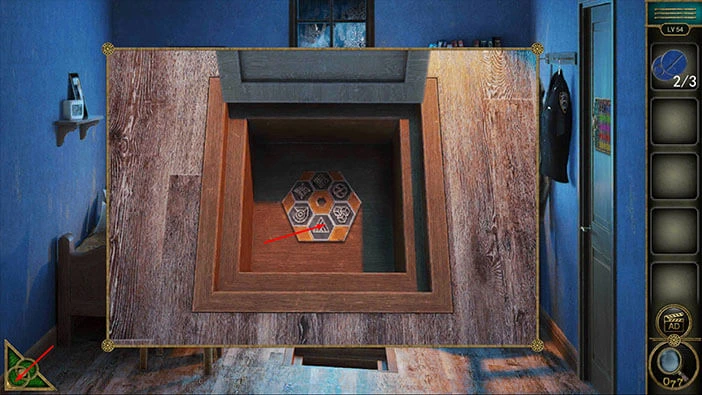
Next, let’s tap on the blue box on the chair on the left, to take a closer look at it, and tap again to start the interaction.

Select the “Game prop” from the inventory and insert it into the empty slot.
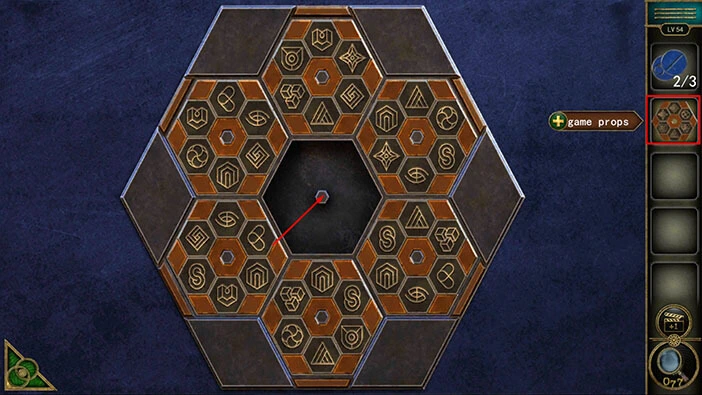
Here, we have another puzzle. Our task is to activate all symbols on the game prop in the middle (the symbols on the game prop should match the symbols on the prop next to them). So let’s rearrange the game props.
We will do this puzzle in several steps. Let’s begin.
Step 1
Select the game prop in the bottom slot, then tap on the game prop in the middle slot to swap them.
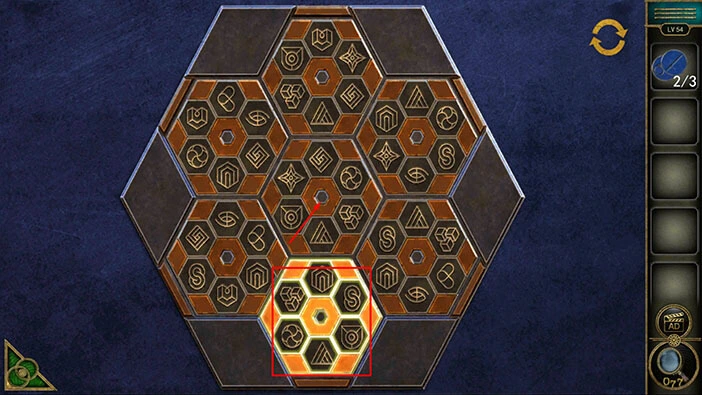
Step 2
Select the game prop in the top slot, then tap on the game prop in the bottom right slot to swap them.
Step 3
Select the game prop in the top slot, then tap on the game prop in the bottom slot to swap them.
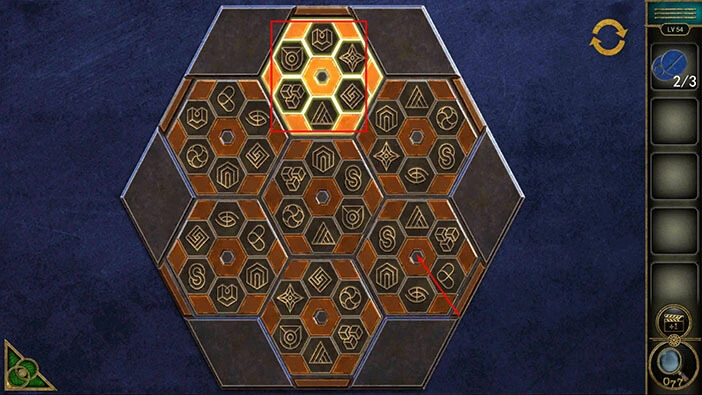
Step 4
Select the game prop in the top right slot, then tap on the game prop in the bottom left slot to swap them.
Step 5
Lastly, select the game prop in the top left slot, then tap on the game prop in the top slot to swap them.
You will open the safe, as soon as you solve the puzzle, and inside you will find another “Game prop”. Tap on it to pick it up.
After that, tap on the green button in the bottom left corner of the screen to go back.
Next, let’s tap on the grid on the door to take a closer look at it, and tap again to start the interaction.
You will notice that three slots are empty, so let’s select the “Game props” from the inventory and insert them into the empty slots.
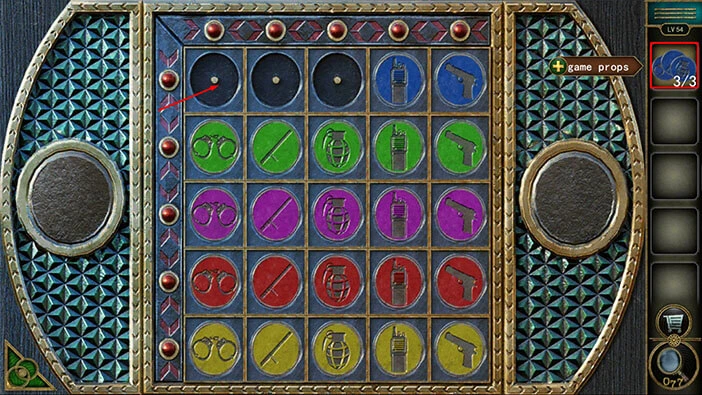
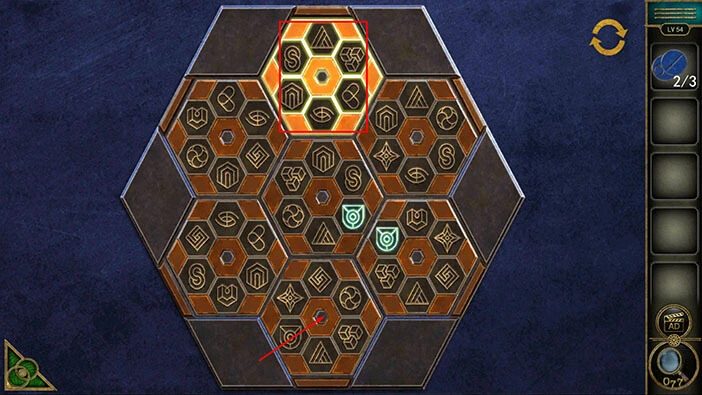
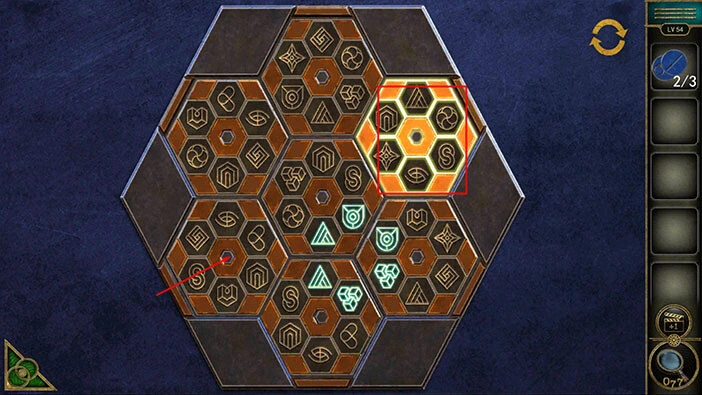
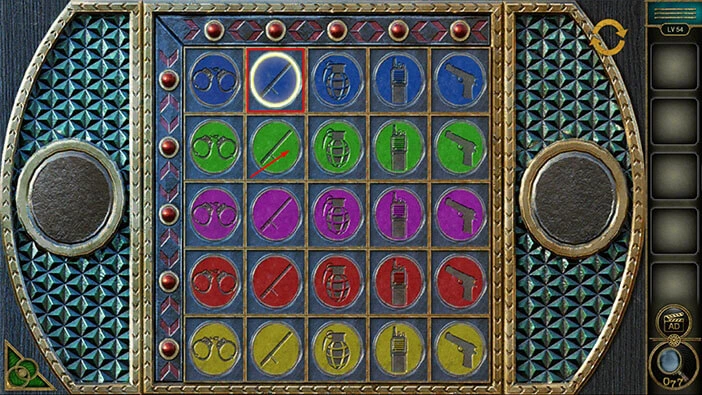
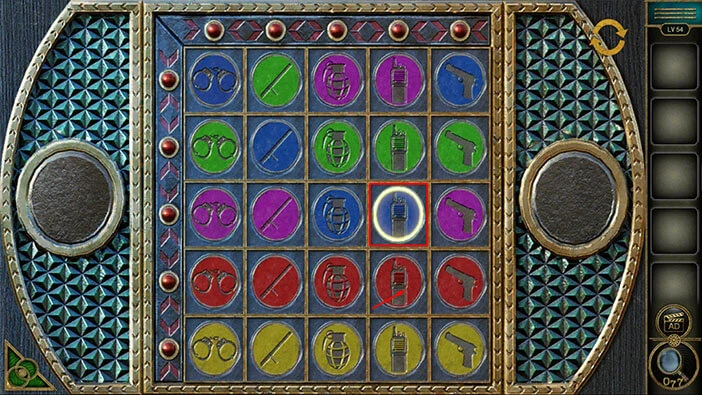
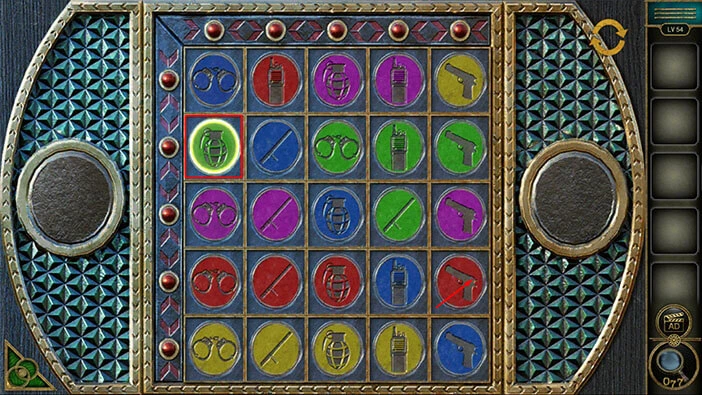
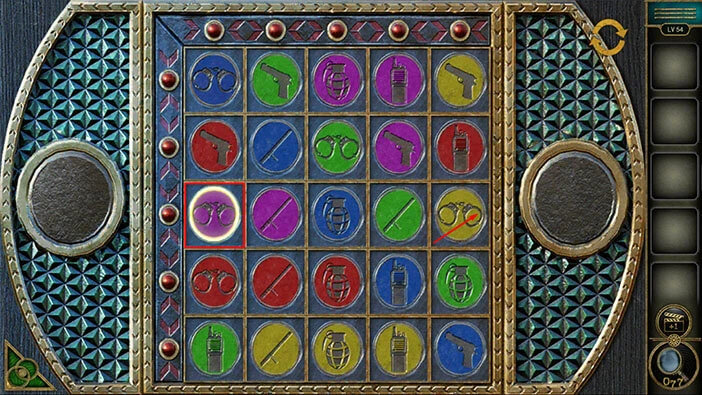
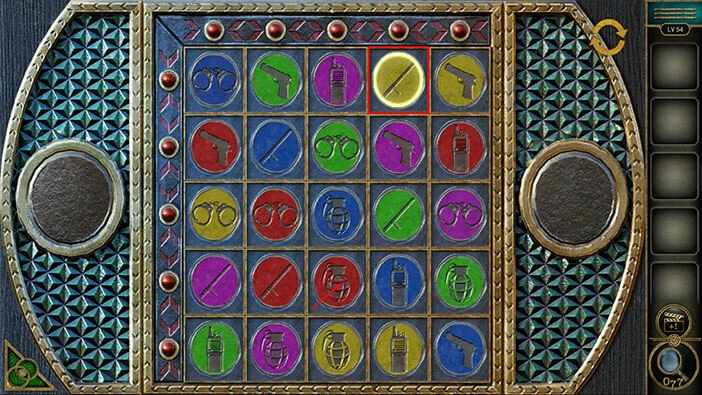
Here, we have another puzzle. In this puzzle, our task is to rearrange the icons on the grid. Icons in each row and column should have different symbols and different colors. We will do this puzzle in multiple steps. Let’s begin.
Step 1
Select the second icon in the first row, then tap on the second icon in the second row to swap their positions.
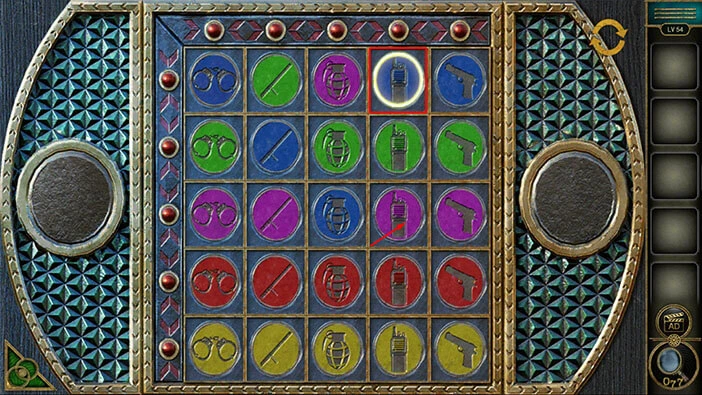
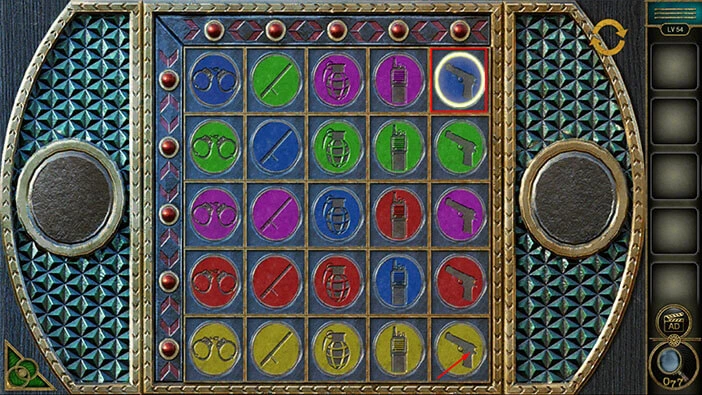
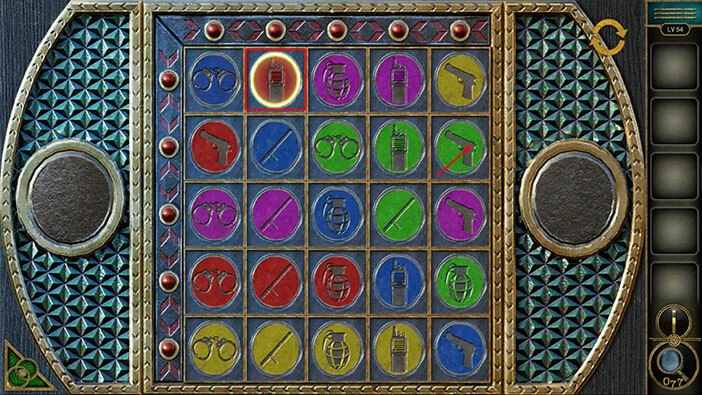
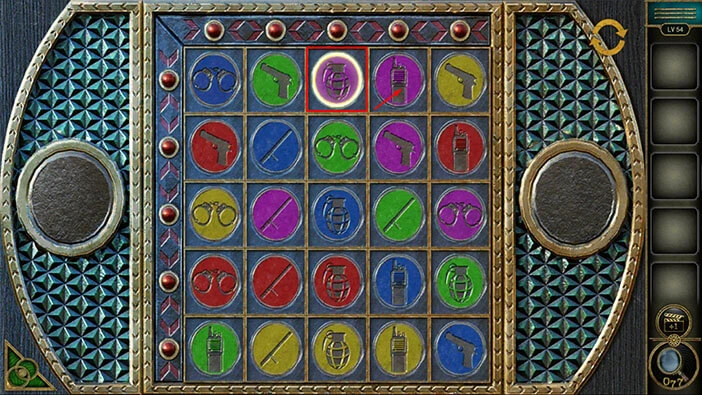
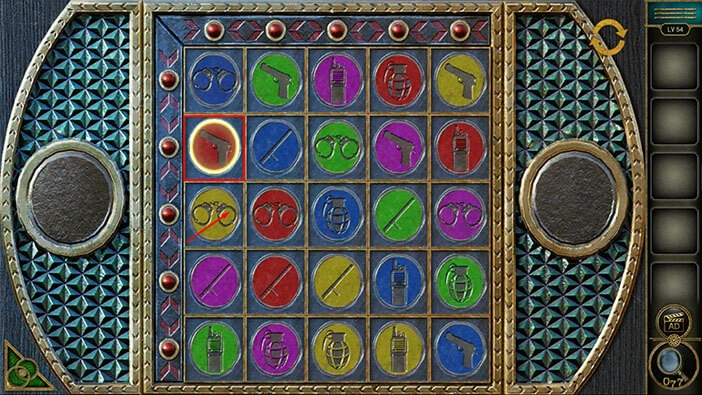
Step 2
Select the third icon in the first row, then tap on the third icon in the third row to swap their positions.

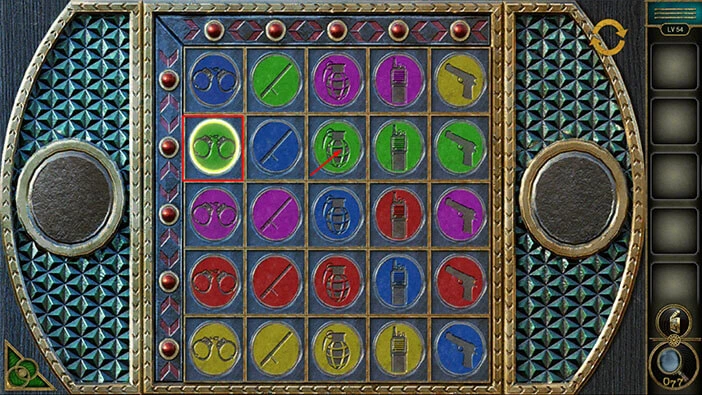
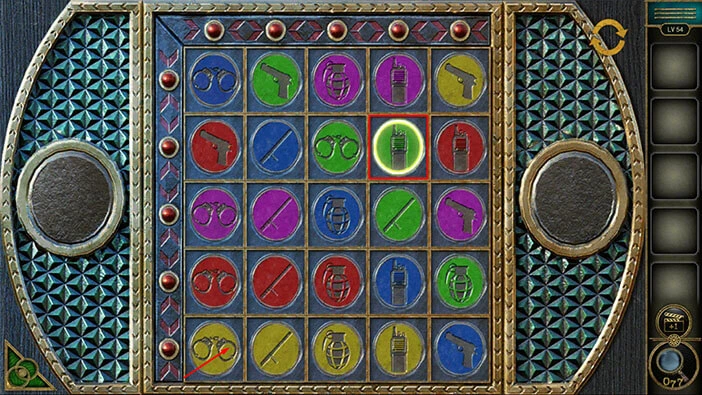
Step 3
Select the fourth icon in the first row, then tap on the fourth icon in the third row to swap their positions.
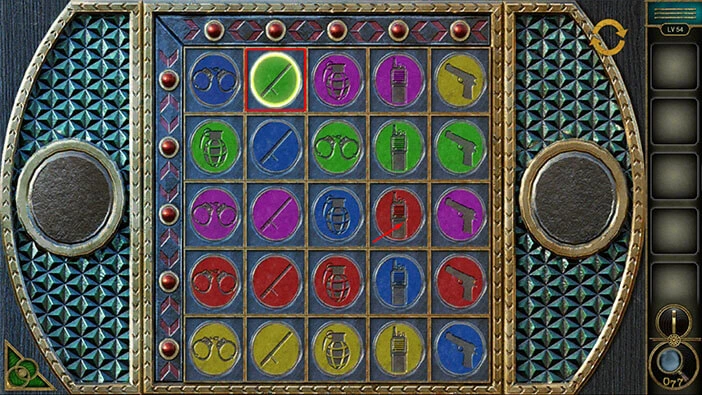
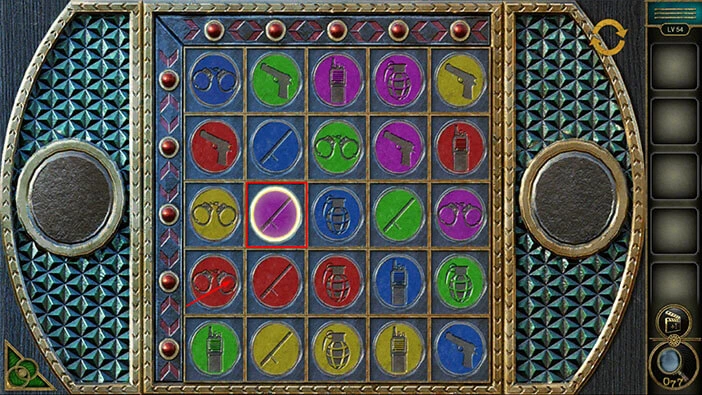
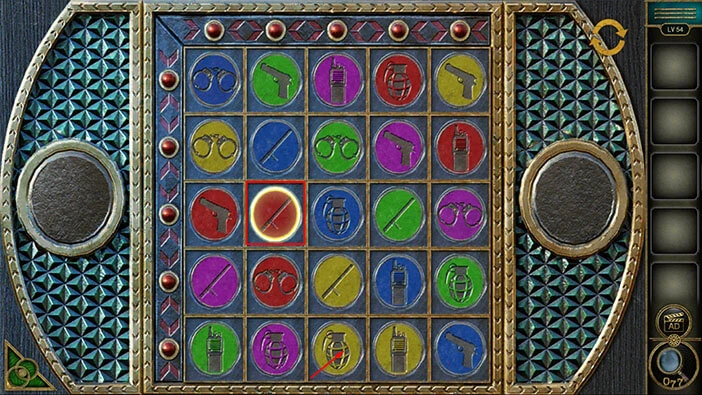
Step 4
Select the fourth icon in the third row, then tap on the fourth icon in the fourth row to swap their positions.
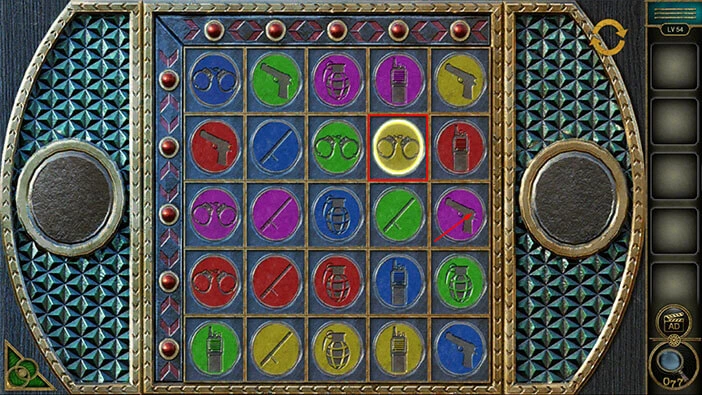
Step 5
Select the fifth icon in the first row, then tap on the fifth icon in the fifth row to swap their positions.
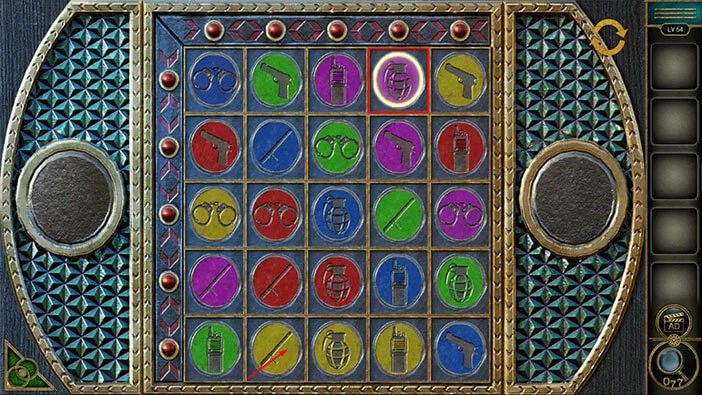
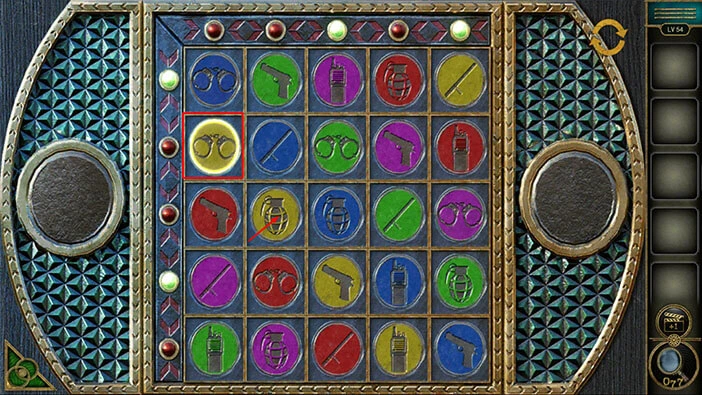
Step 6
Select the first icon in the second row, then tap on the third icon in the second row to swap their positions.
Step 7
Select the second icon in the first row, then tap on the fourth icon in the third row to swap their positions.
Step 8
Select the first icon in the second row, then tap on the fifth icon in the fourth row to swap their positions.
Step 9
Select the second icon in the first row, then tap on the fifth icon in the second row to swap their positions.
Step 10
Select the fourth icon in the second row, then tap on the first icon in the fifth row to swap their positions.
Step 11
Select the fourth icon in the second row, then tap on the fifth icon in the third row to swap their positions.
Step 12
Select the first icon in the third row, then tap on the fifth icon in the third row to swap their positions.
Step 13
Select the third icon in the first row, then tap on the fourth icon in the first row to swap their positions.
Step 14
Select the second icon in the third row, then tap on the first icon in the fourth row to swap their positions.
Step 15
Select the fourth icon in the first row, then tap on the second icon in the fifth row to swap their positions.
Step 16
Select the fourth icon in the first row, then tap on the third icon in the fourth row to swap their positions.
Step 17
Select the first icon in the second row, then tap on the first icon in the third row to swap their positions.
Step 18
Select the second icon in the third row, then tap on the second icon in the fourth row to swap their positions.

Step 19
Select the second icon in the third row, then tap on the third icon in the fifth row to swap their positions.
Step 20
Select the fifth icon in the first row, then tap on the third icon in the fourth row to swap their positions.

Step 21
Select the first icon in the second row, then tap on the second icon in the third row to swap their positions.
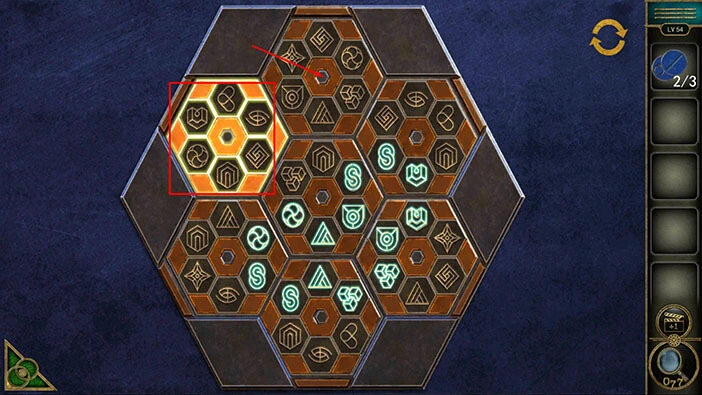
Step 22
Select the second icon in the third row, then tap on the fourth icon in the fifth row to swap their positions. With that, you will solve this puzzle.

The door on the right will be transformed into the portal. Tap on it, and you will complete the last level of the game.
Well, we have reached the end of the game. If you’re interested in Escape Room games, check out our guides for the other games of this genre.
Thank you for reading.