Artifact Seekers Walkthrough | “Wild West”
Welcome to the walkthrough of Artifact Seekers, an adventure game in the hidden object genre created by Five-BN. This walkthrough will show you how to solve all the puzzles and finish the game in the second chapter, “Wild West”.
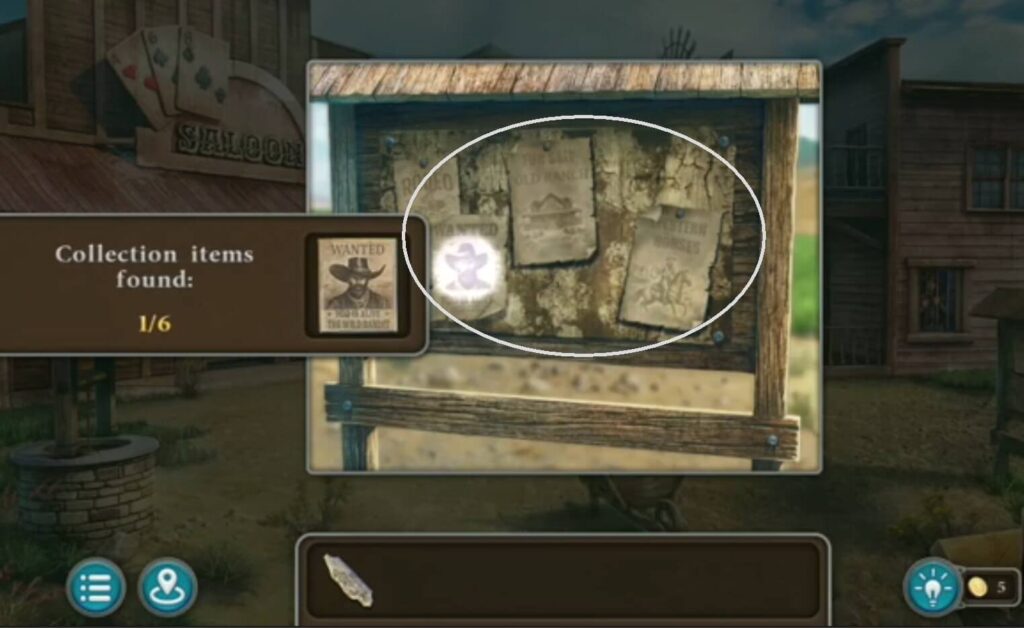
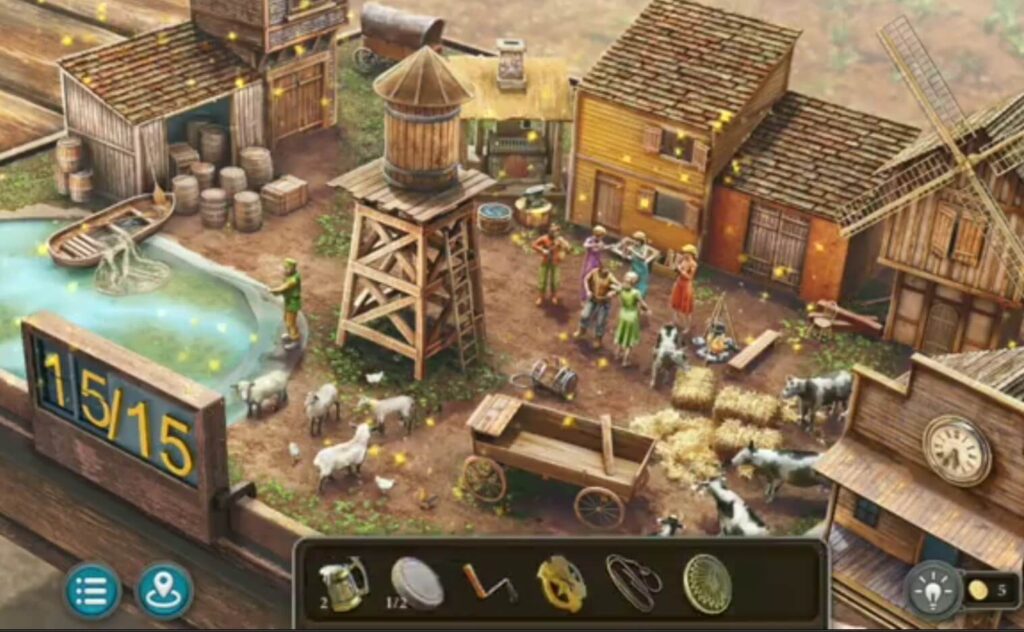
Take a drawing and a collection item.
A morphing object.
- Take a mug and a peanuts.
- A morphing object.
- A collection item.
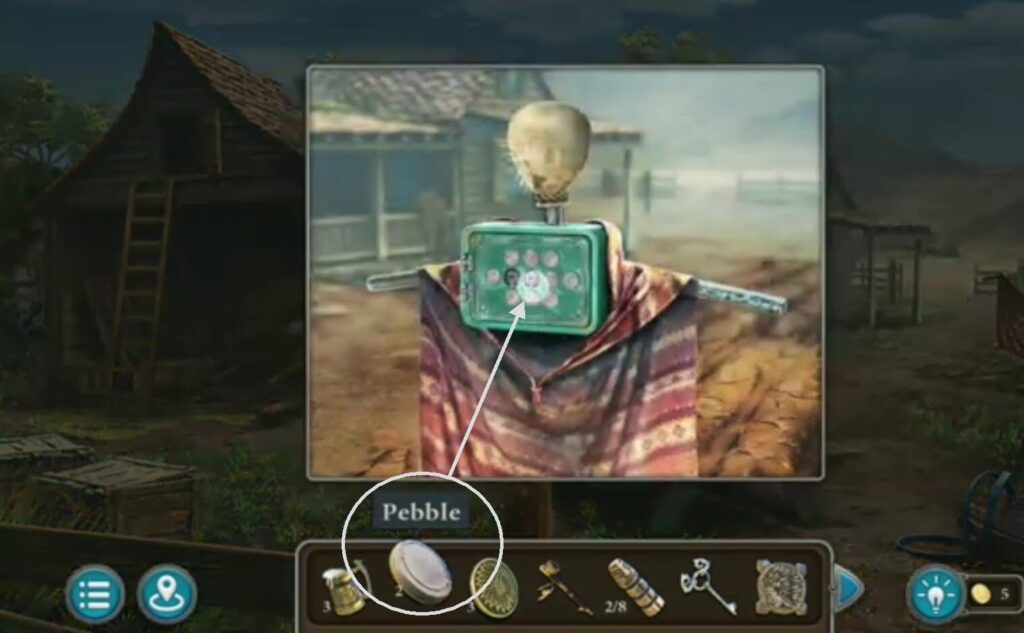
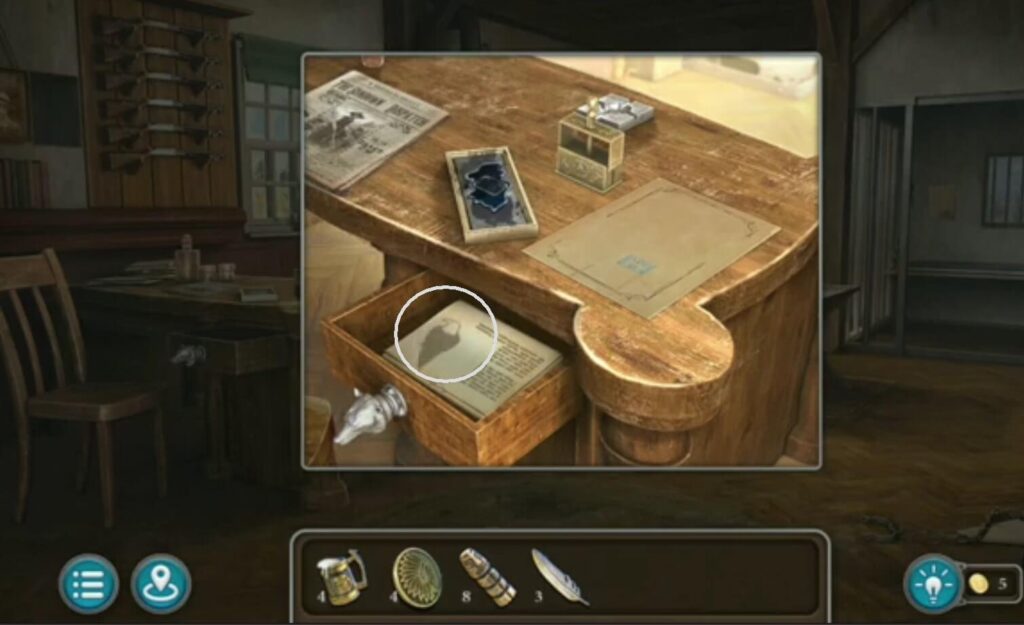
- Put the drawing into the picture. You got a pebble.
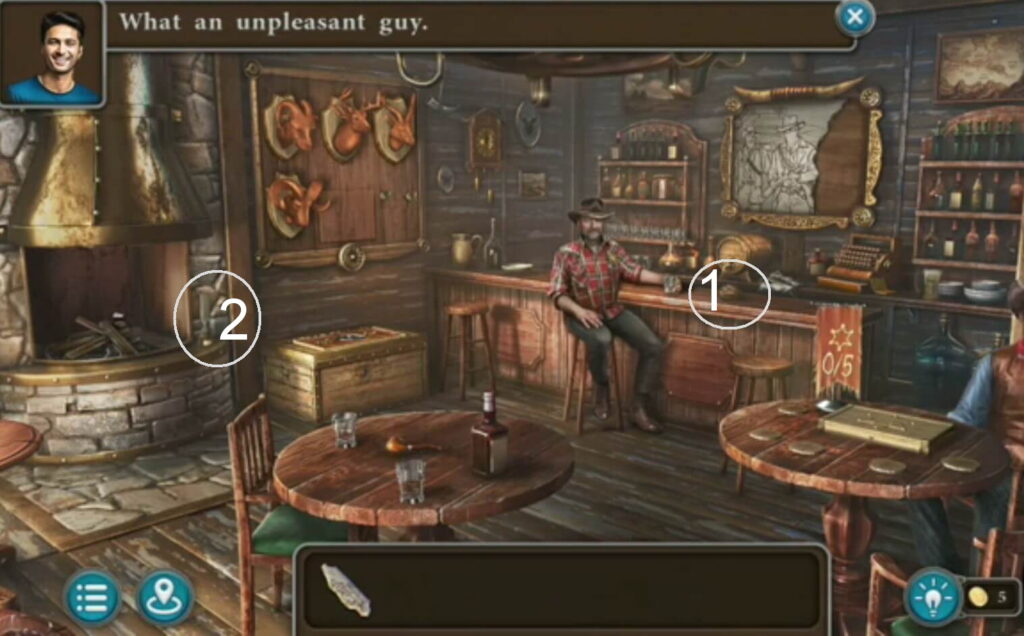
Take the cigarettes.
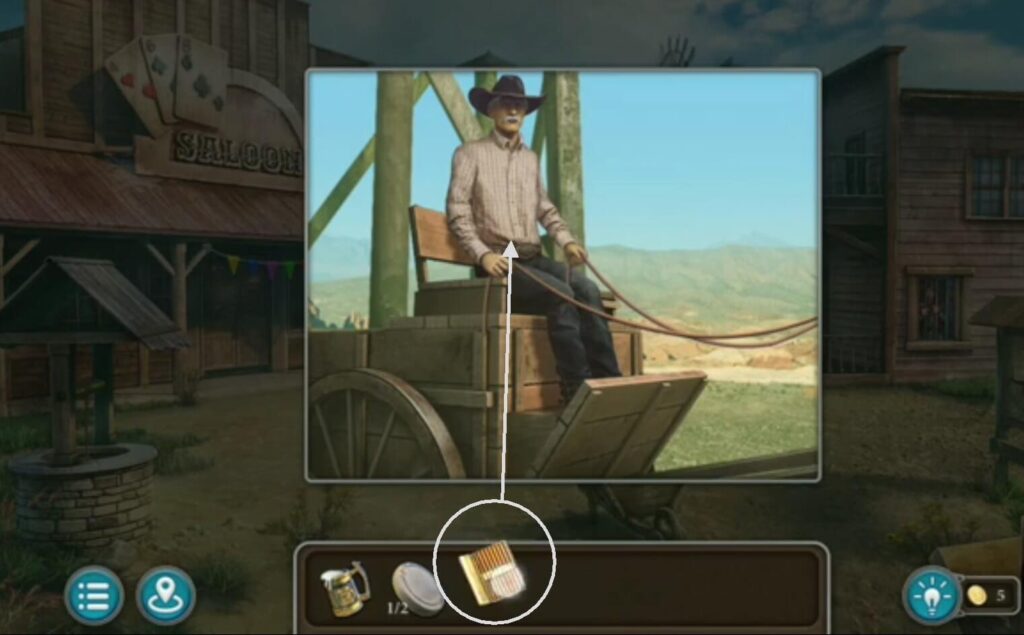
Give him cigarettes (you found them next to the cash register).
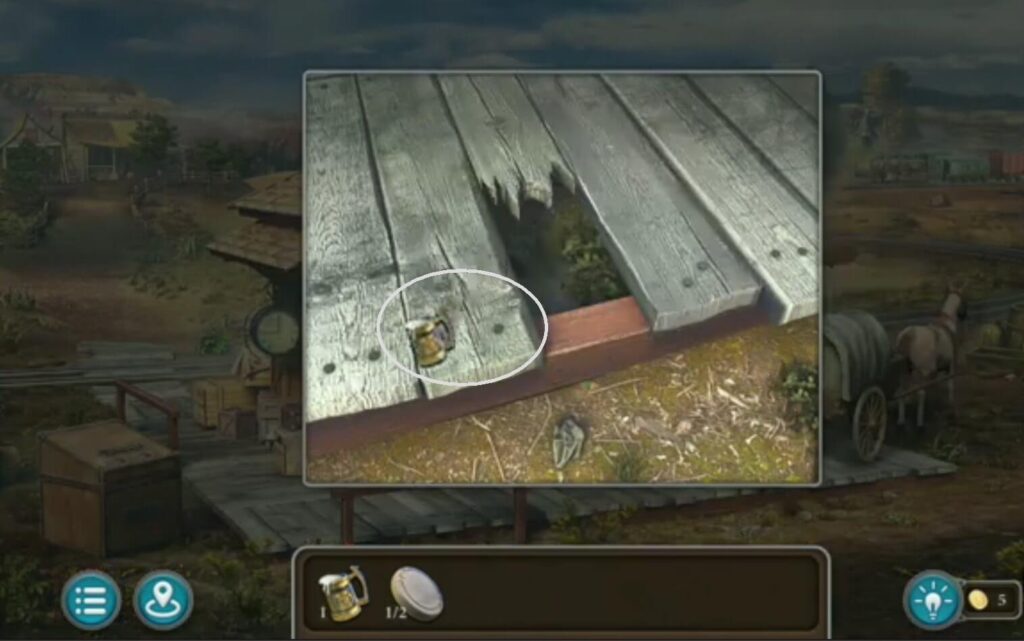
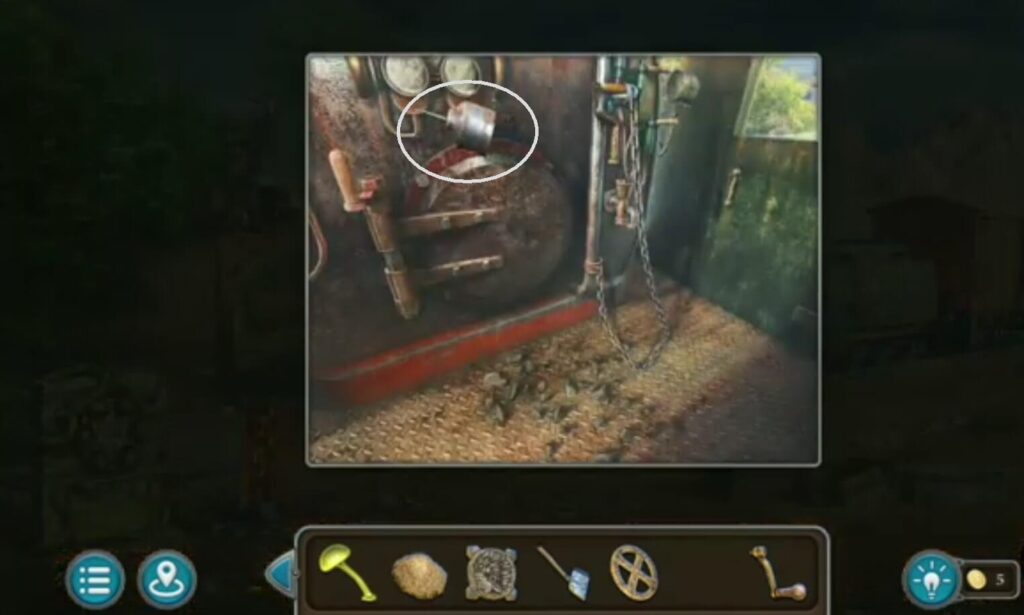
Take the mug that is under the boards.

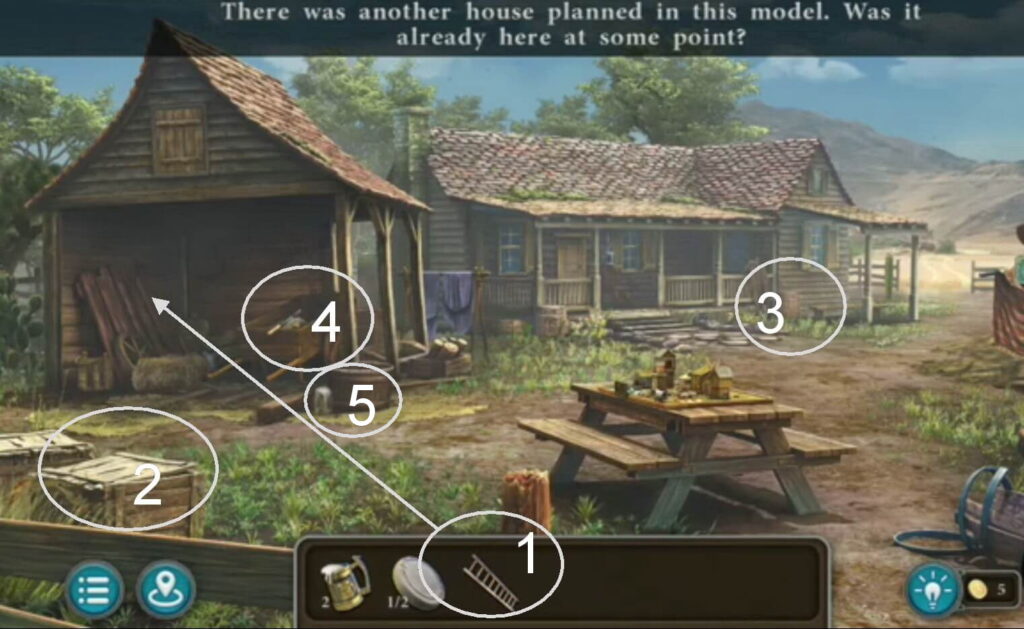
Take the ladder.
- Put the ladder
- A collection item
- A morphing object
- Take a handle
- A mug.
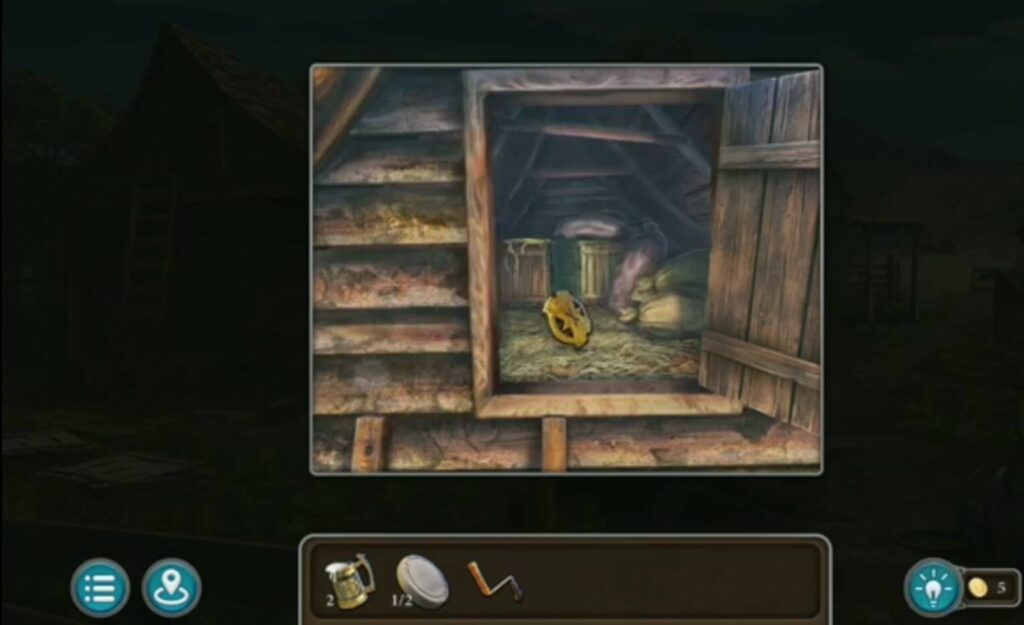
When you put the ladder, open the window. A detail and a lasso are inside.
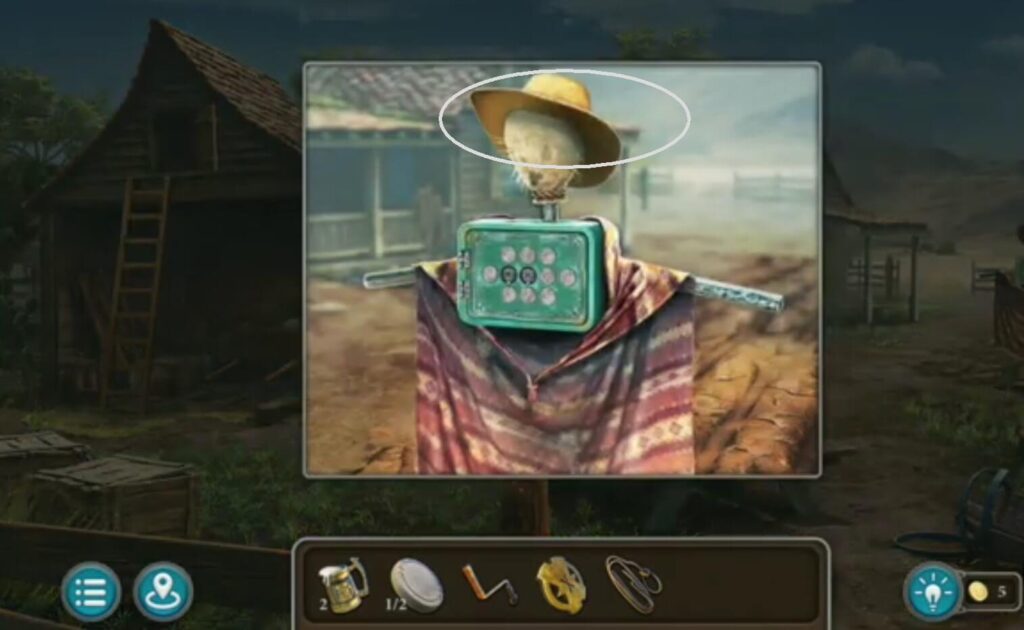
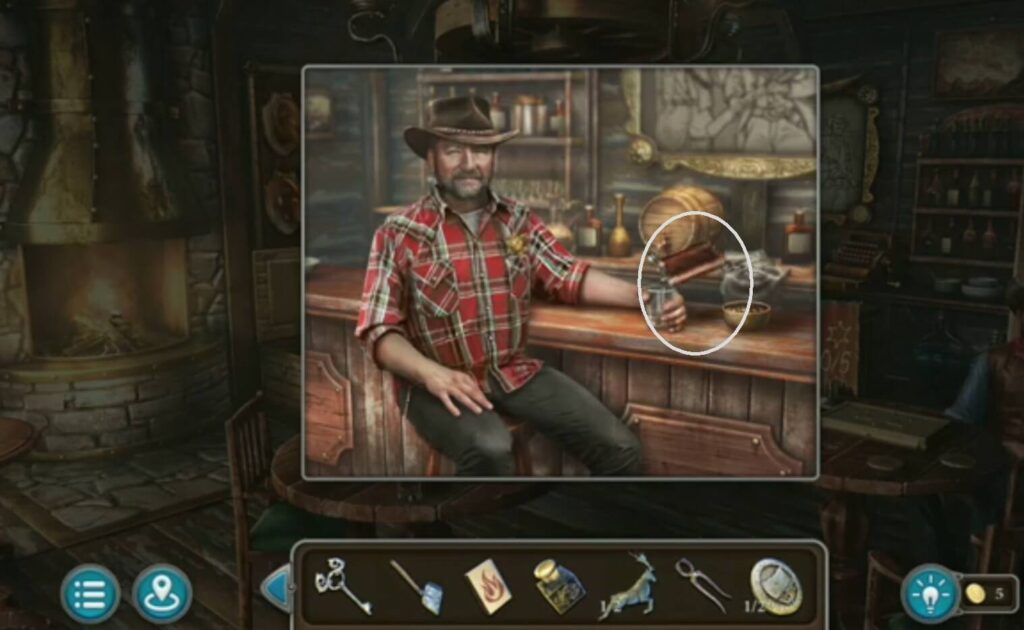
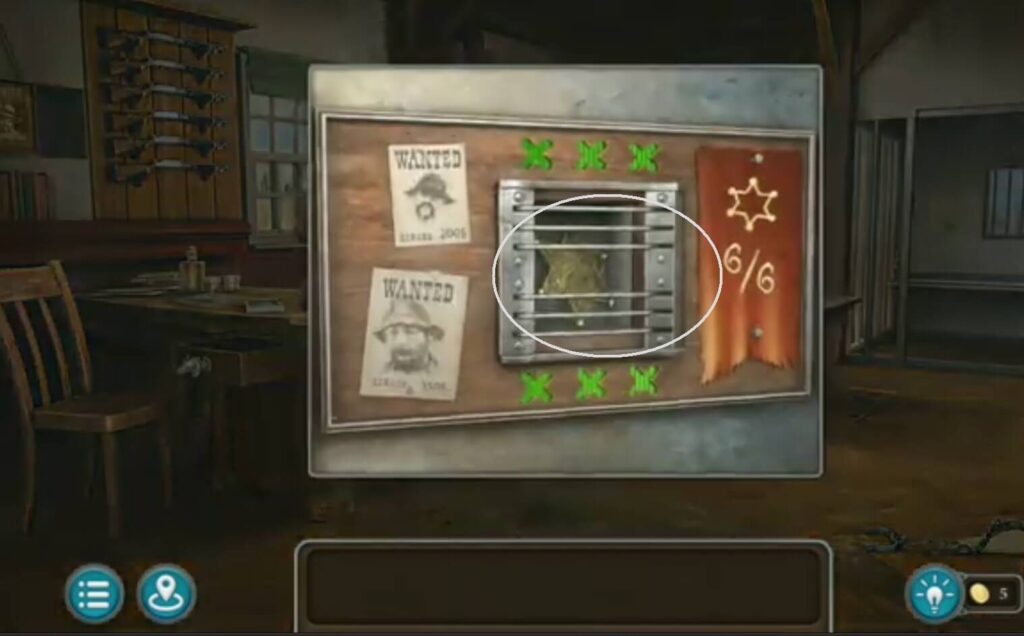
Under the hat is a coin.

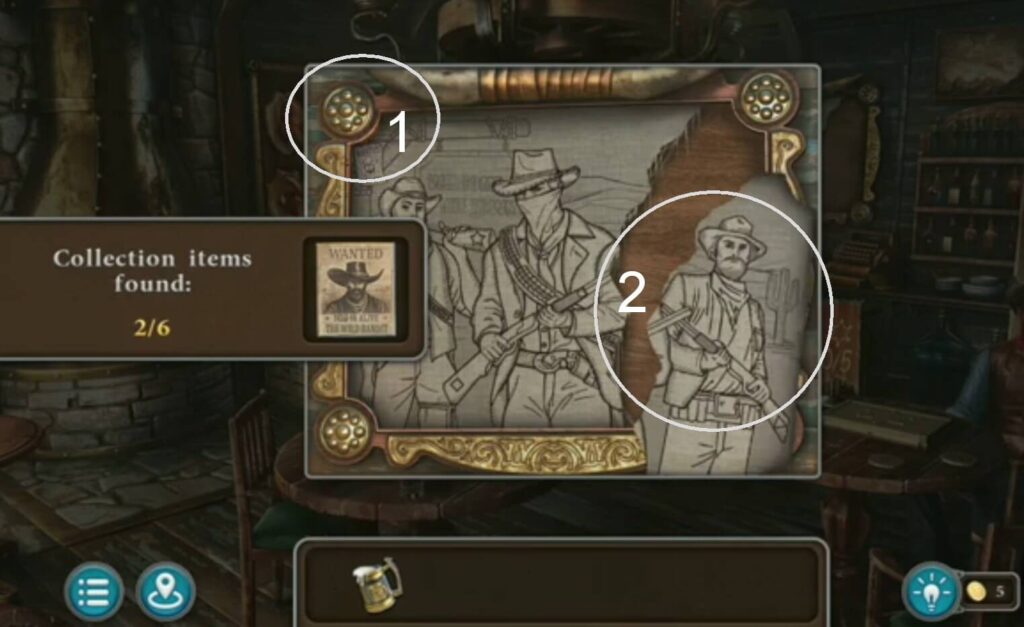
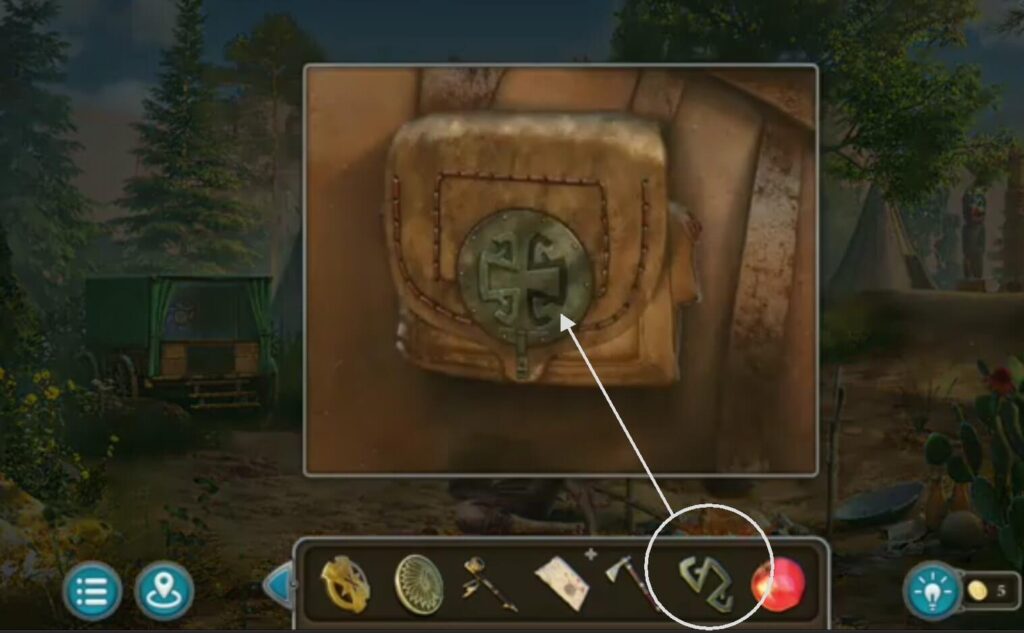
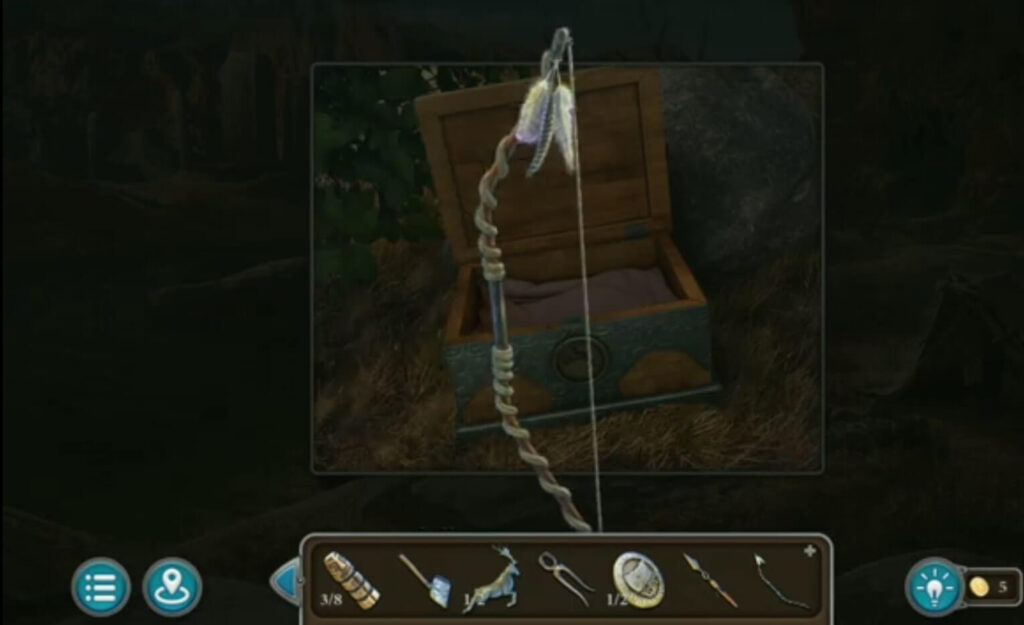
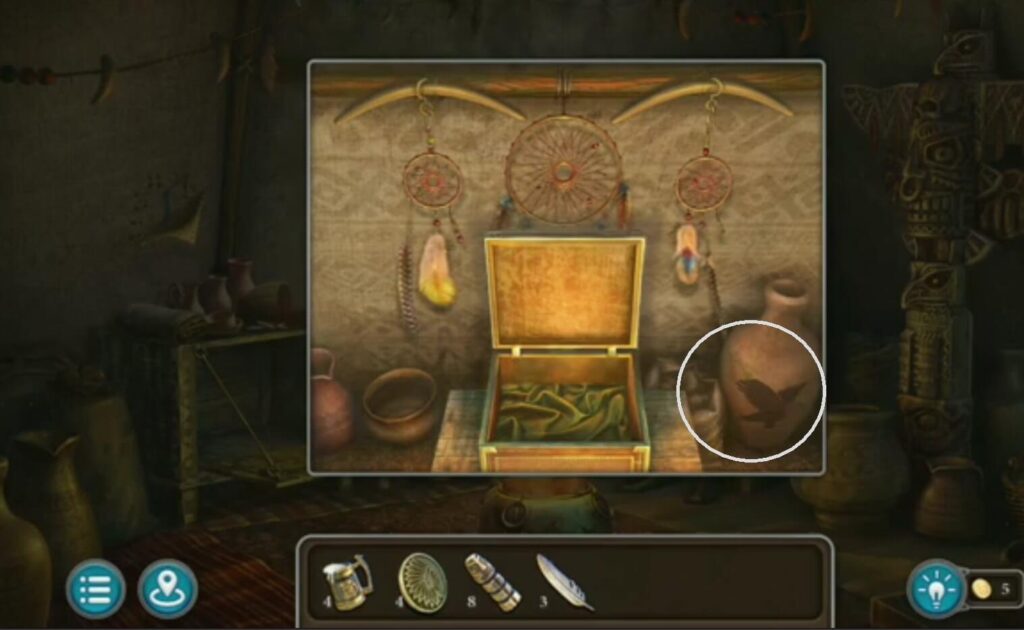
There is a collection item and a morphing object. Throw a lasso (from the barn) on the box and grab it. Inside, a model of the house is.
A star.
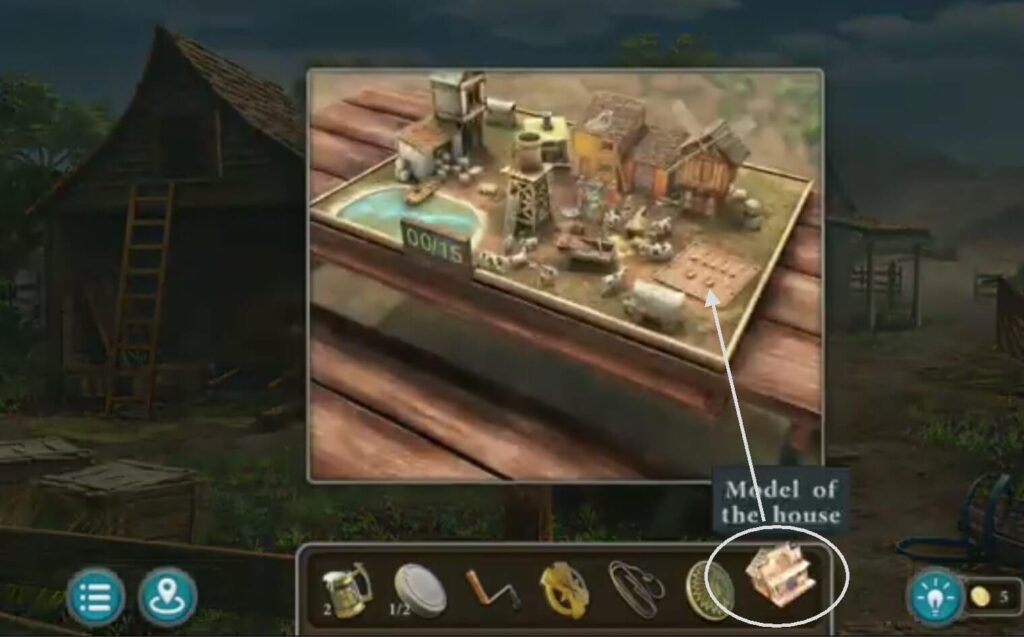
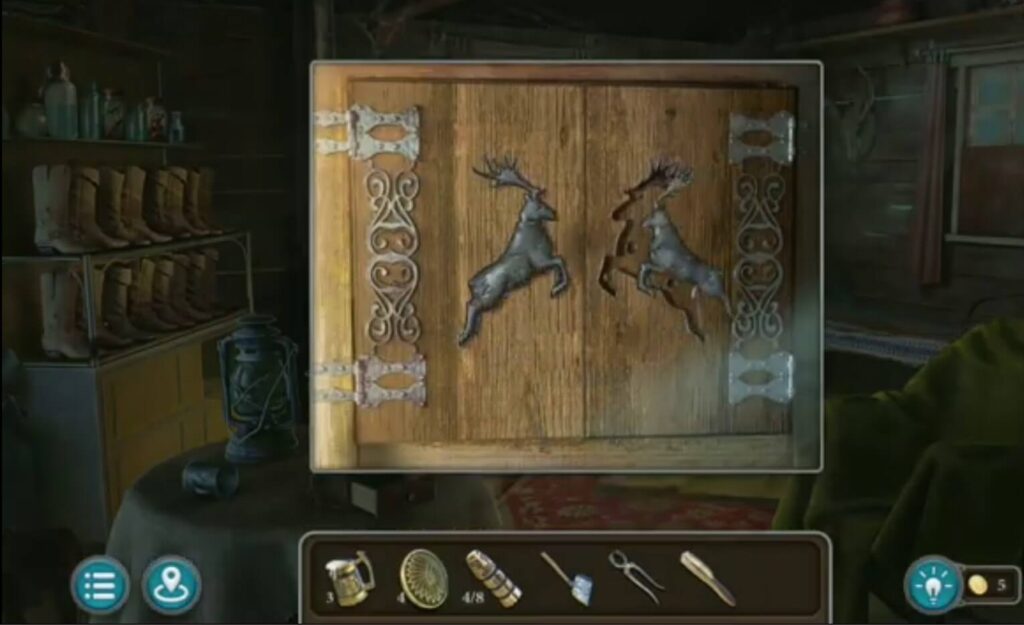
Put the house model (found in the wooden box) in the city model. Also, put the other object in the right place, just like in the picture. You get a pipe.
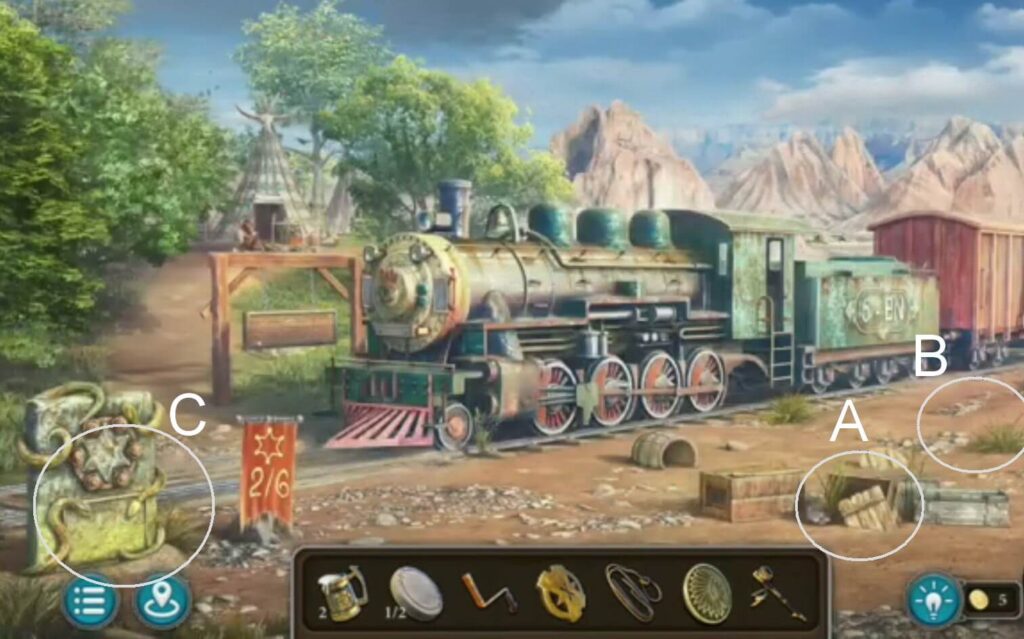
A) A collection item
B) Morphing object
C) A star
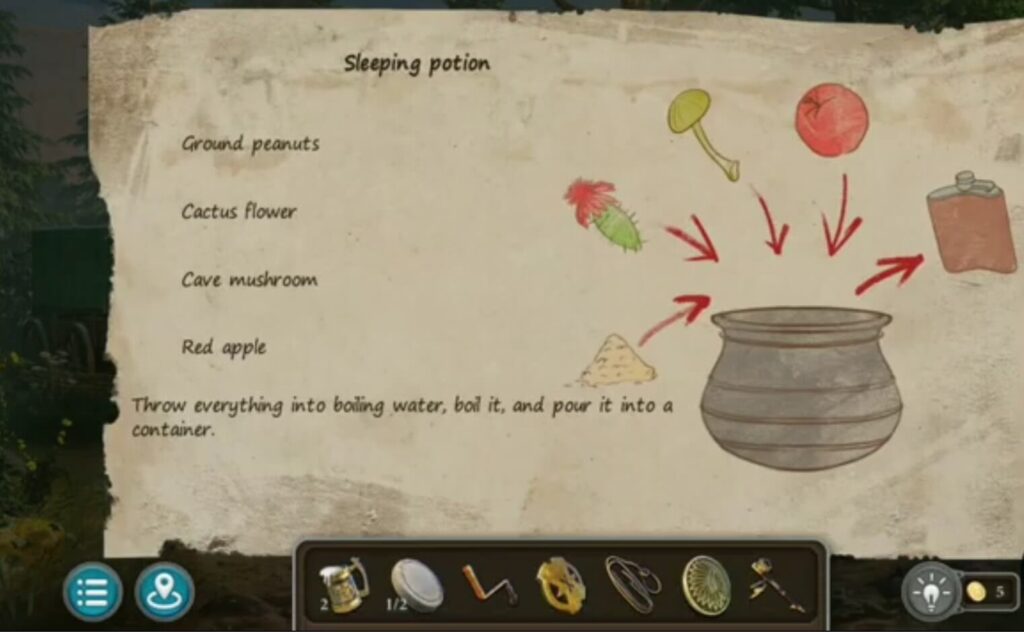
A sleeping potion.
- A collection item
- A recipe
A morphing object
A morphing object.
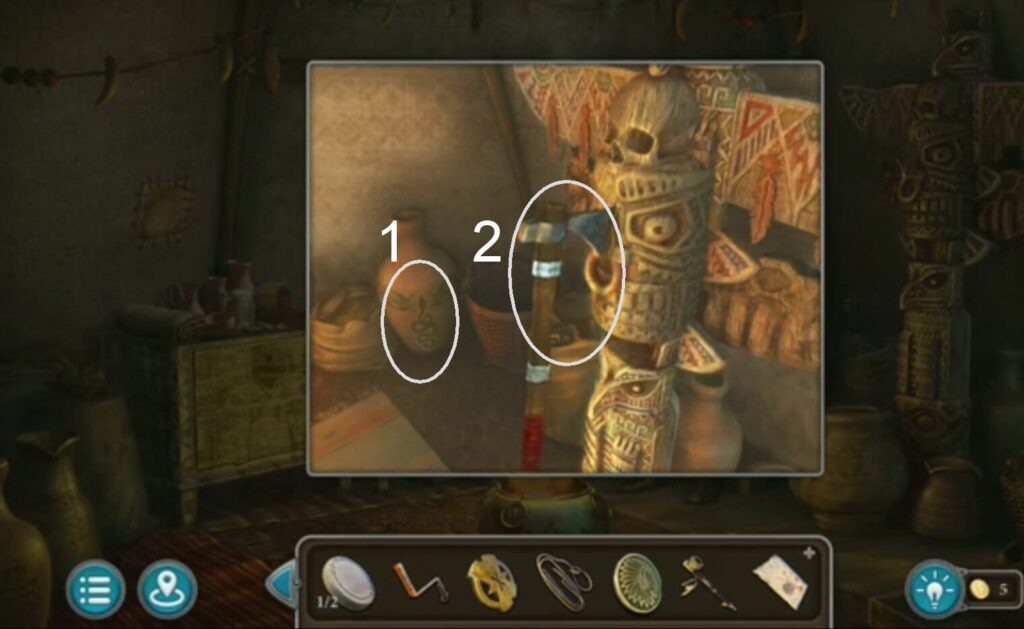
- Take a collection item.
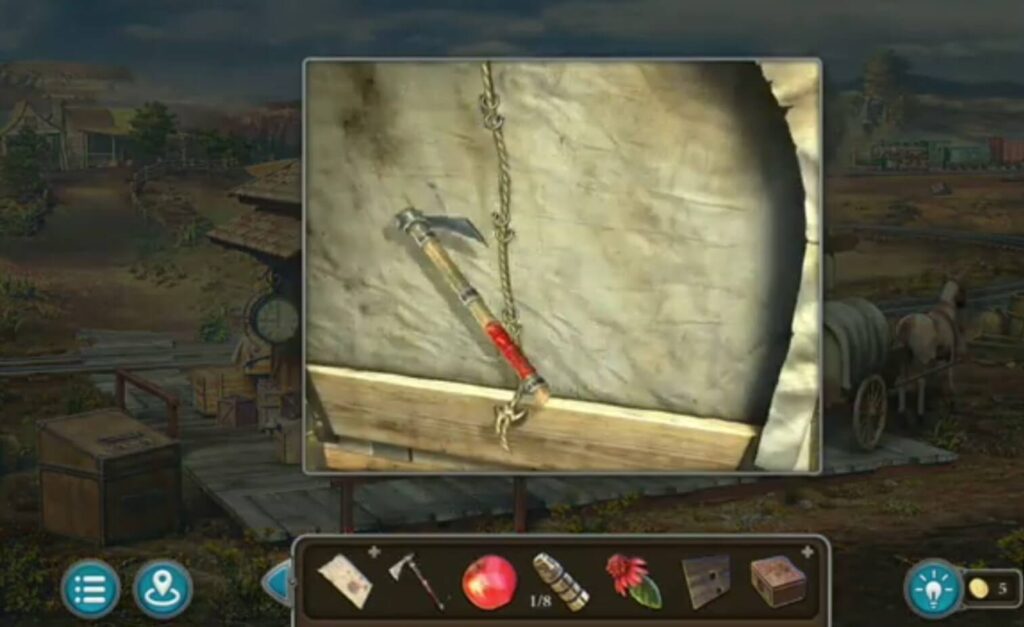
- Take a tomahawk.
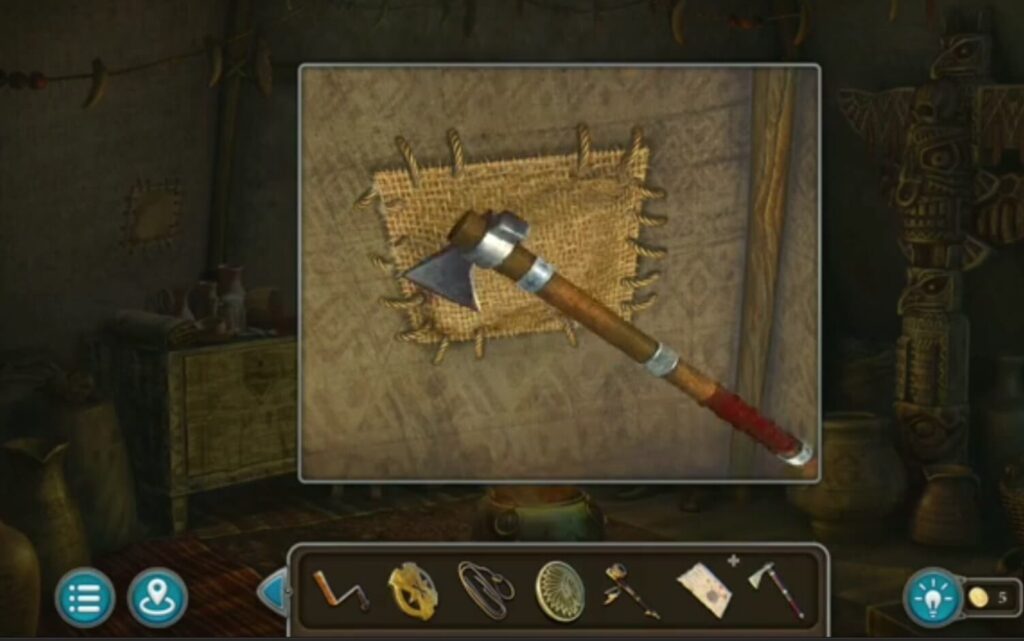
Use the tomahawk (which was taken from the sanctuary) to cut the rope. You got a figurine.
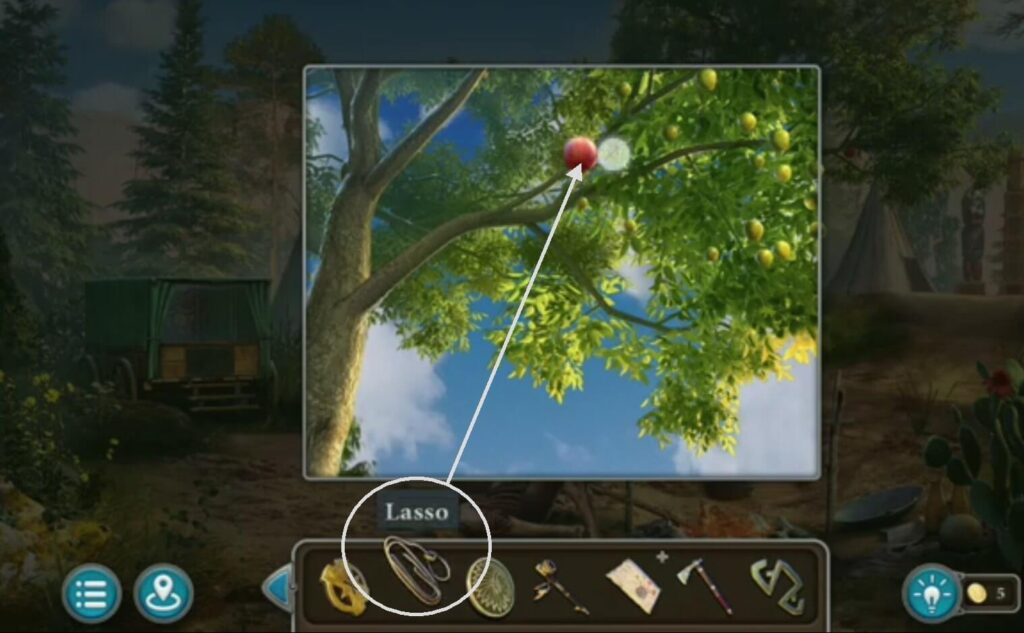
Grab a lasso (from the barn) to get an apple.
Put the figurine (got it when you cut the rope with the tomahawk) in the right place. You got a totem.
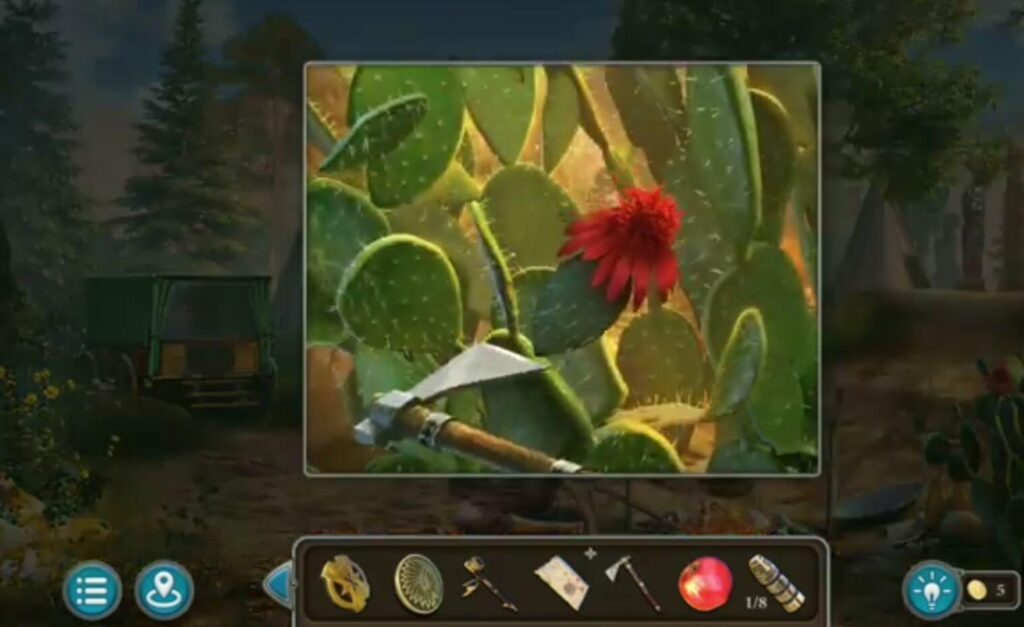
Use a tomahawk (took it from the sanctuary) to cut a cactus flower.
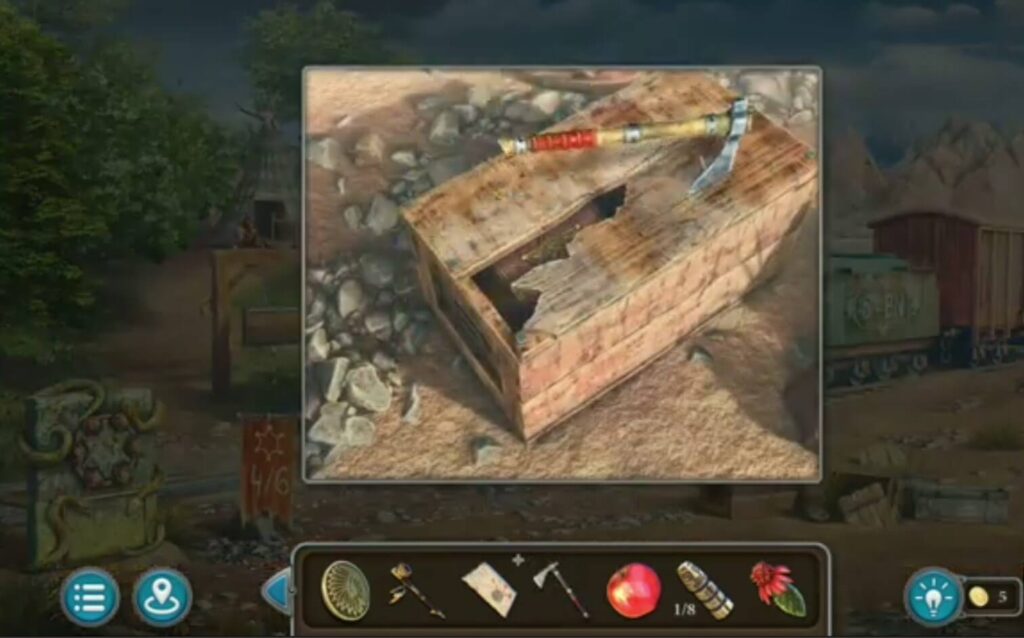
Take the tomahawk (you took it from the sanctuary) to break the box. You’ll get a stencil, a casket, and a coin.
Use a tomahawk to cut a rope. You got a pendulum, a decoration.
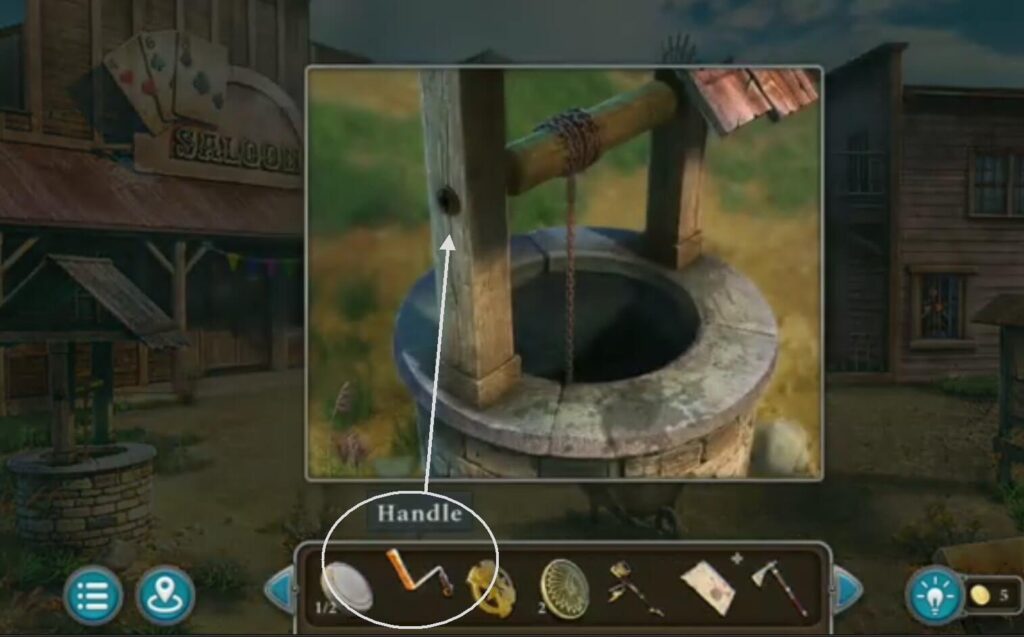
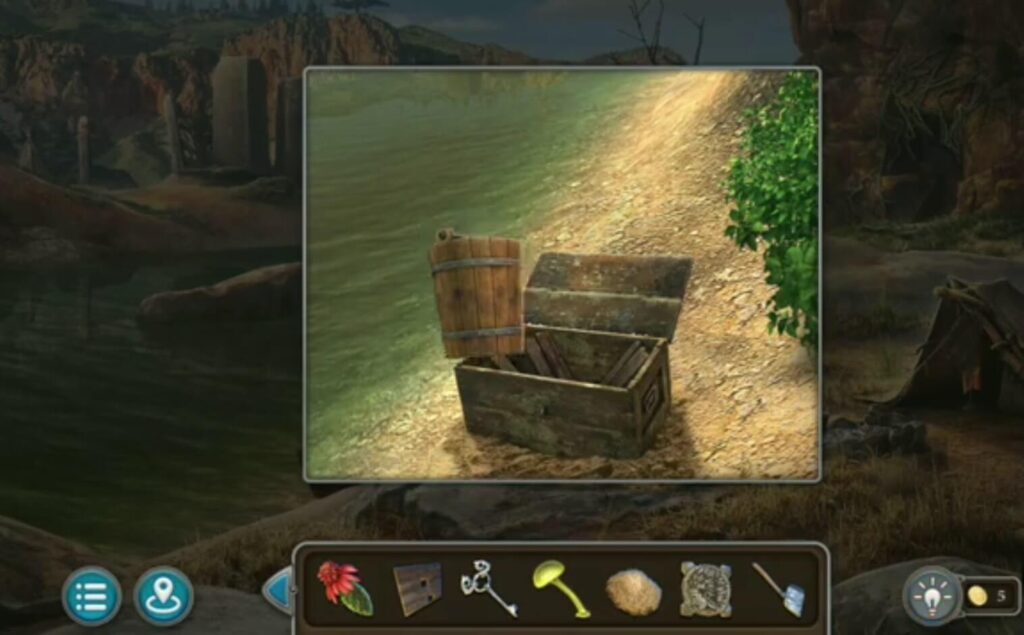
Put a handle (took it from the carriage) on the well. You got a bucket.
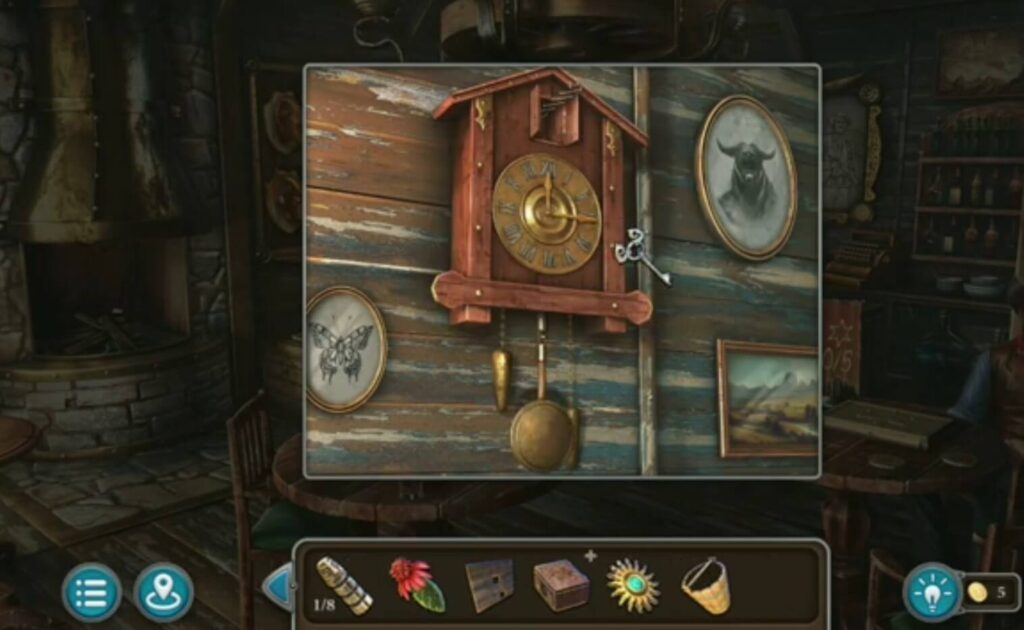
Put a pendulum (got it when you cut the rope with the tomahawk) in the clock. You got a figured key.
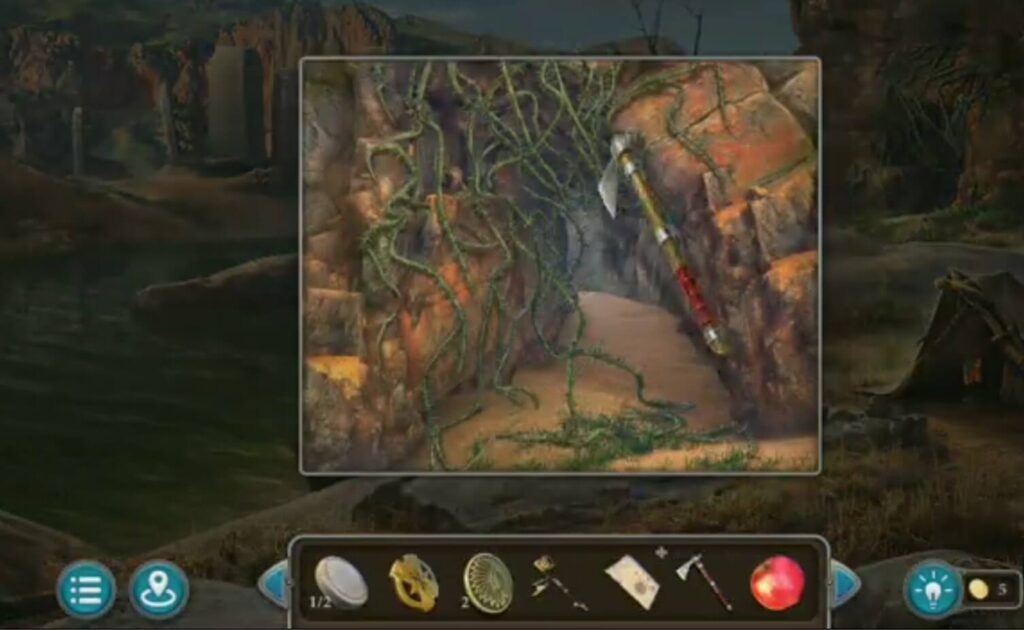
Use a tomahawk to cut lianas.
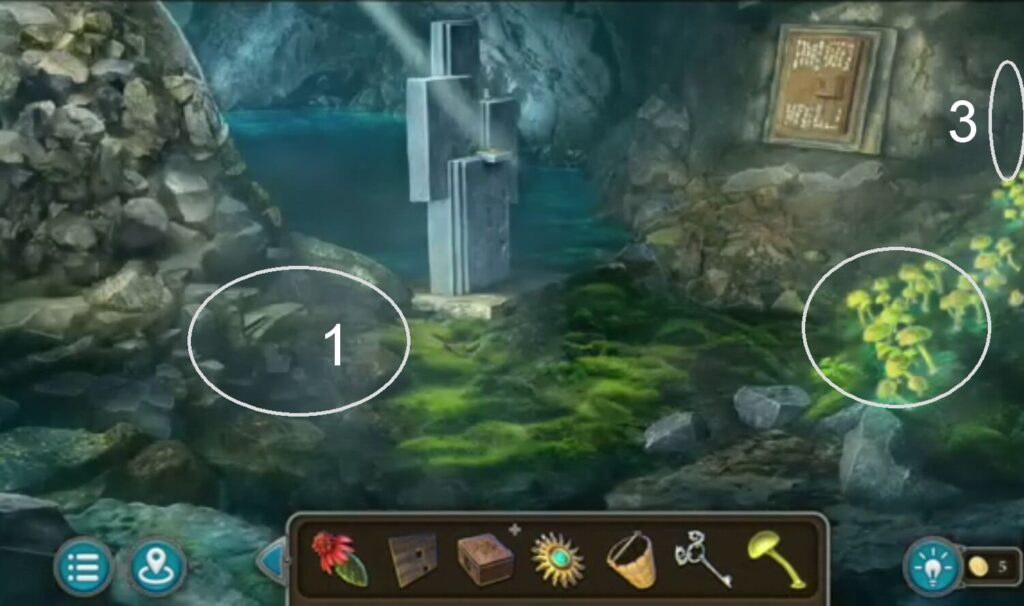
- A morphing object
- Take a tomahawk to cut a cave mushroom.
- A collection item
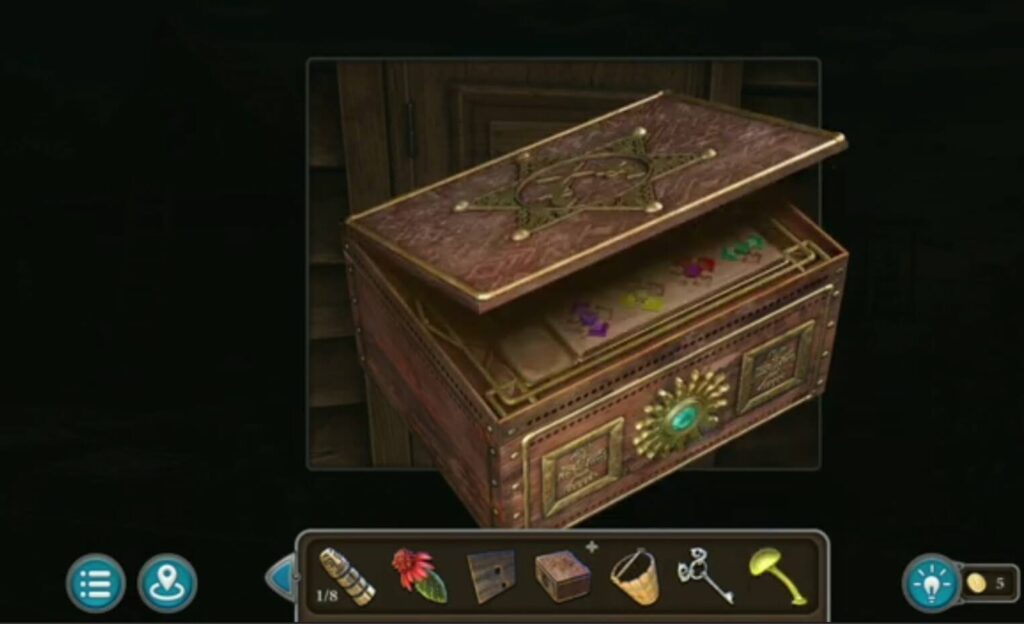
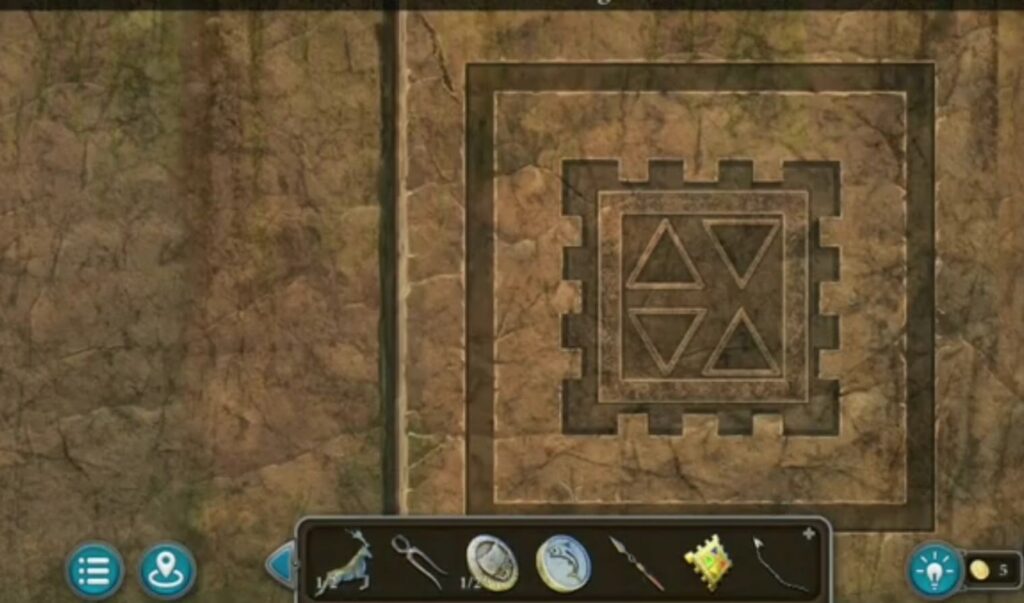
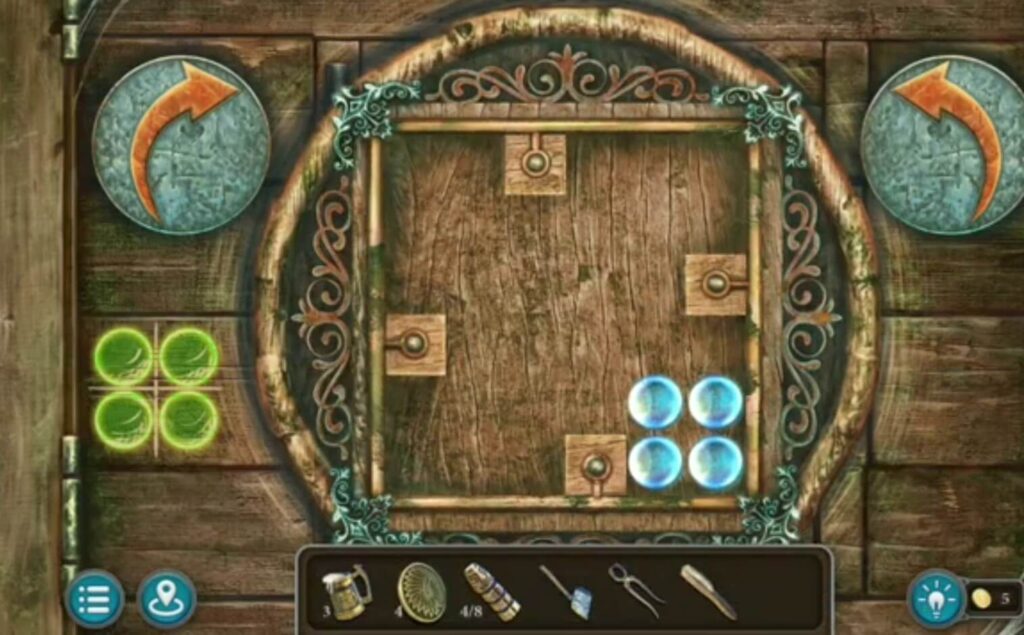
Put the decoration( found it in the car) on the box. A puzzle appears.
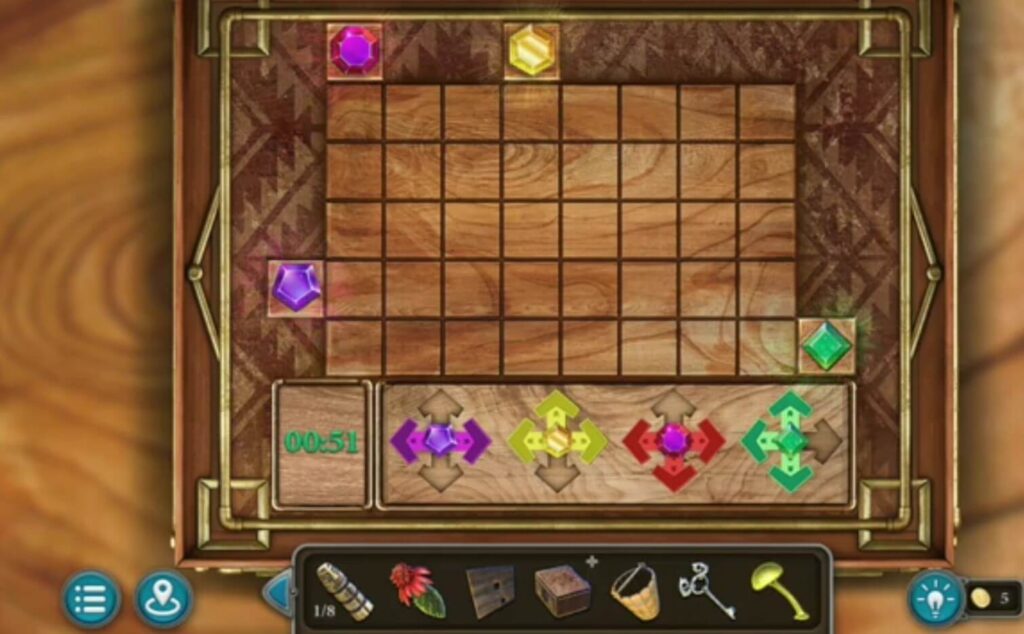
To solve a puzzle you must move the gems so that each one is in the provided place that matches its shape.
You got a key and a star.
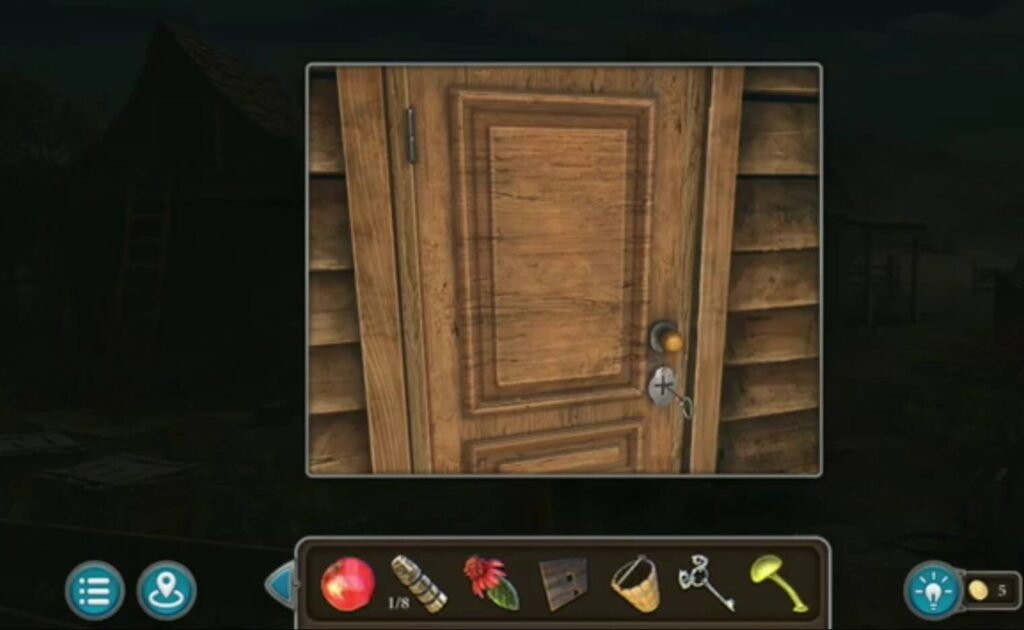
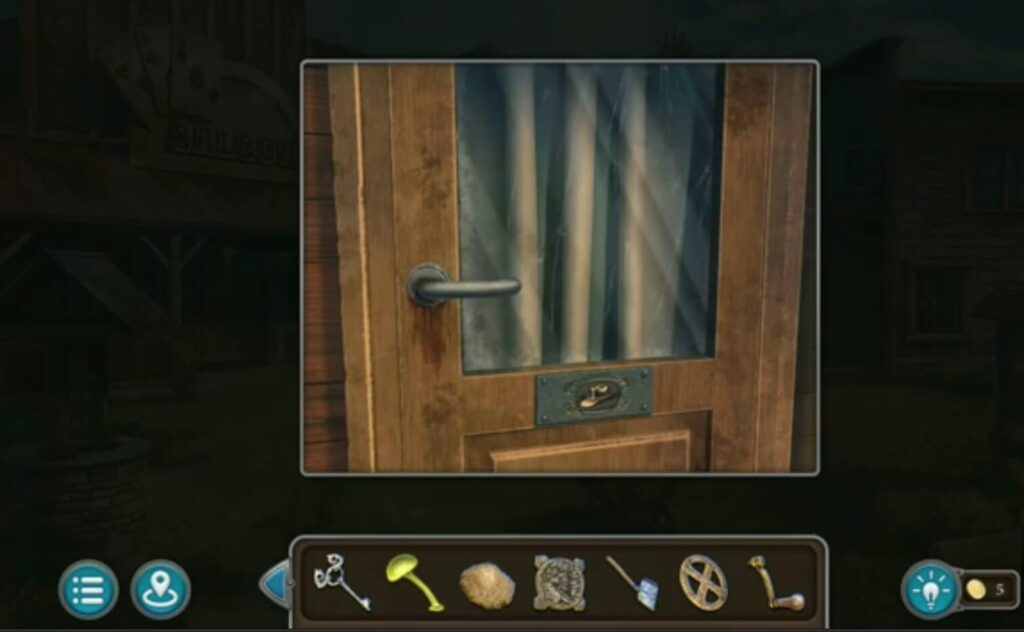
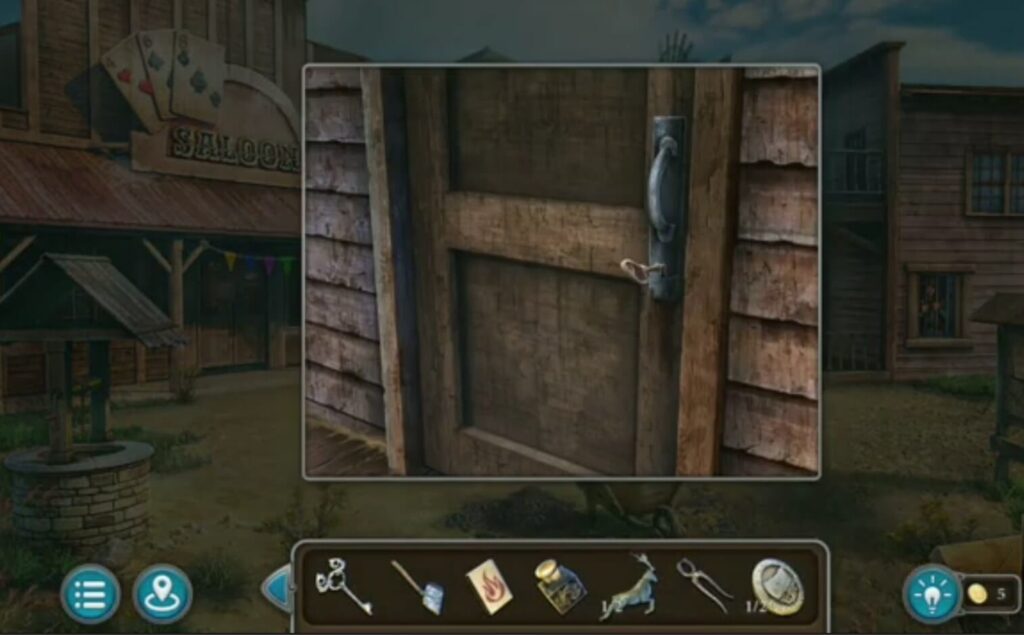
Put a key (found when you solved a jewel puzzle) to open the door.
- A collection item
- A morphing object
- A coin
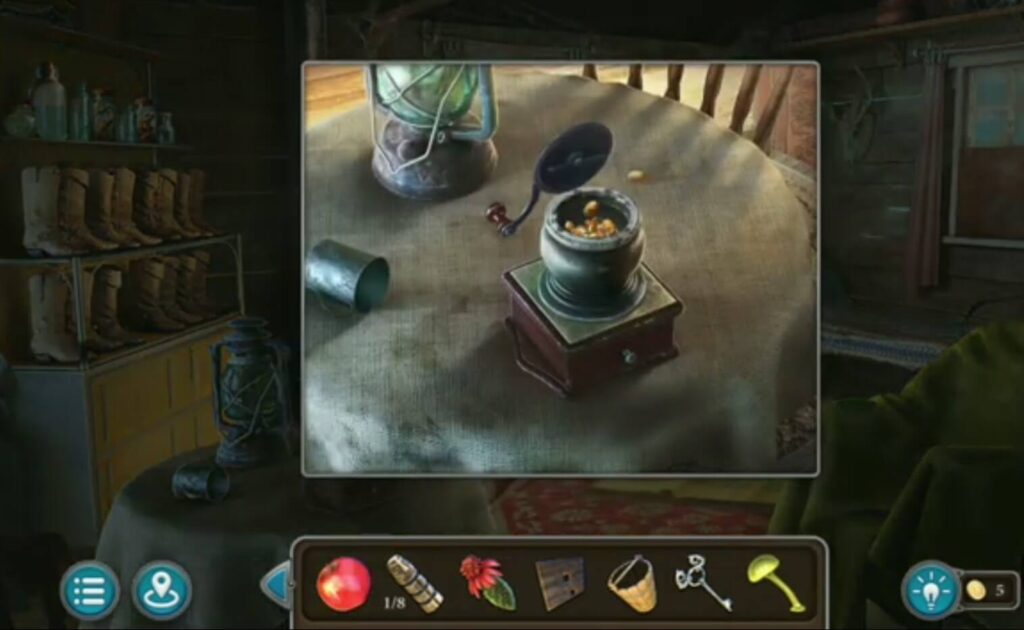
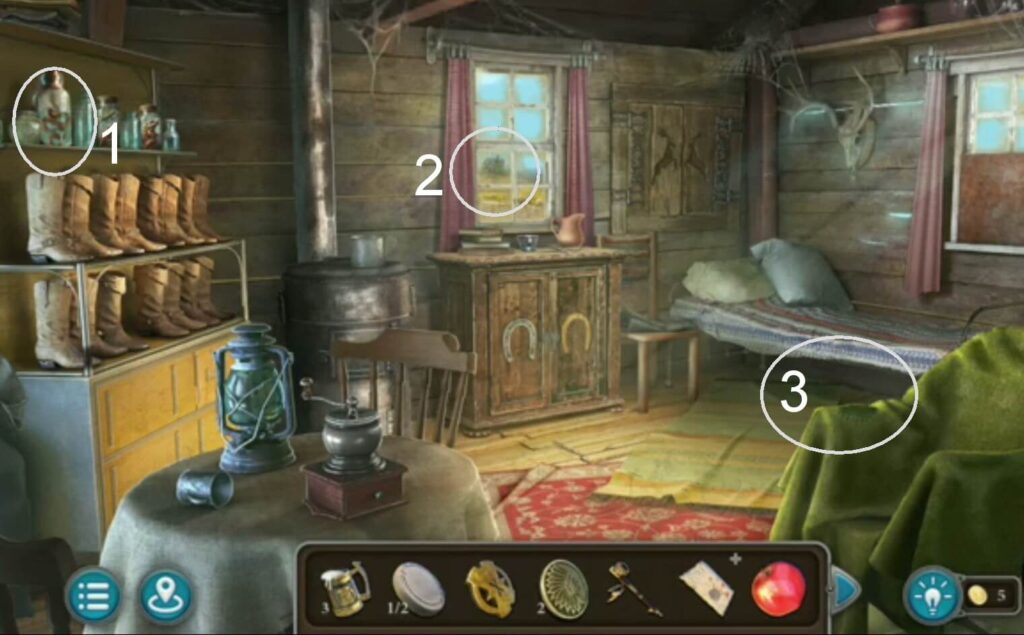
Put peanuts (from the bar) in the mill. You got a ground peanut.
Put the detail (from the roof) on the padlock. You got a handsaw, a detail, a coin.
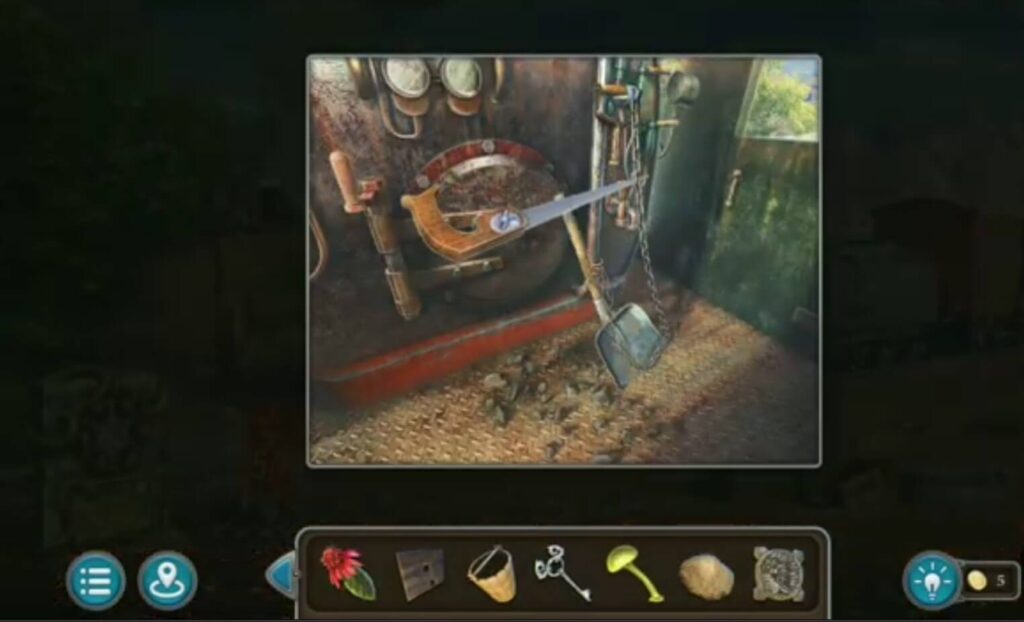
Use a handsaw (found when you open a padlock) to cut a shovel. Take it.
Take the bucket you found in the well and fill it with water. You will get a bucket of water.
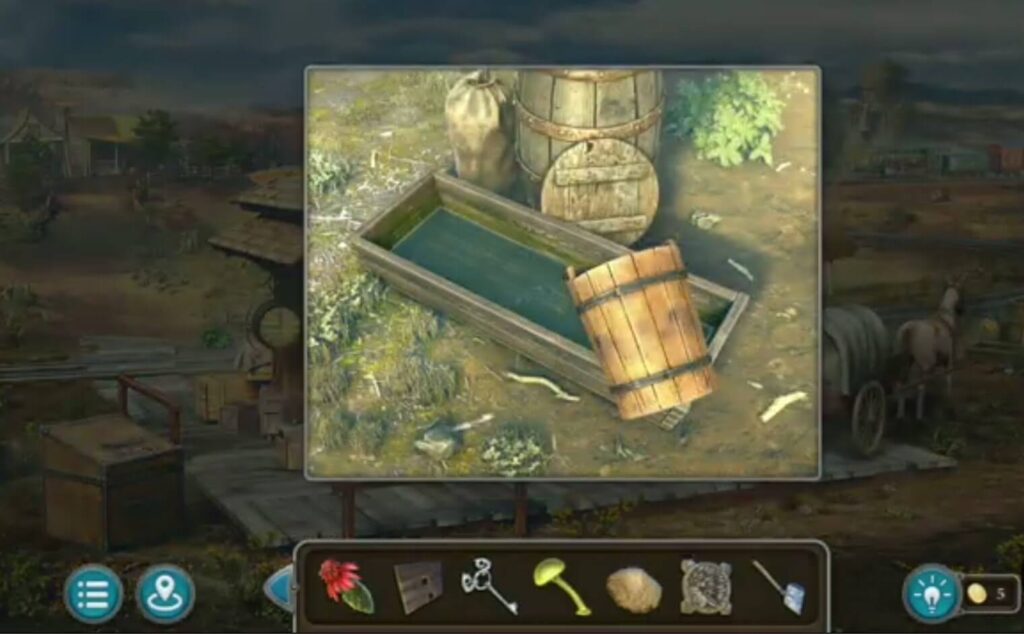
Pour the water from the bucket into the wooden trough. A horse will drink it. You got one boot that was under the car.
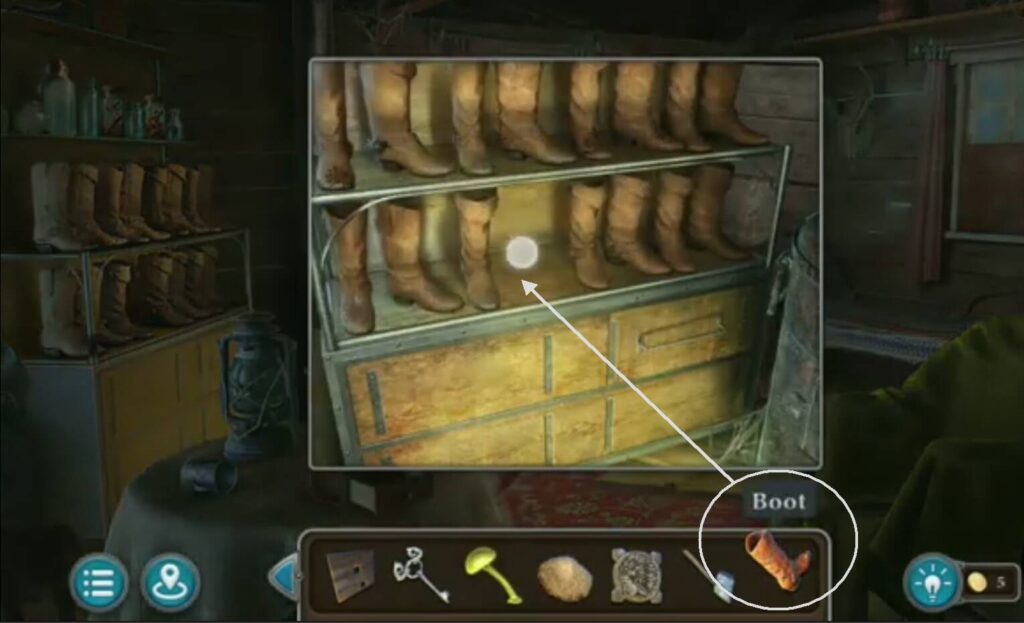
Put the boot (that you got when you poured water into the trough) on the shelf with the other boots.
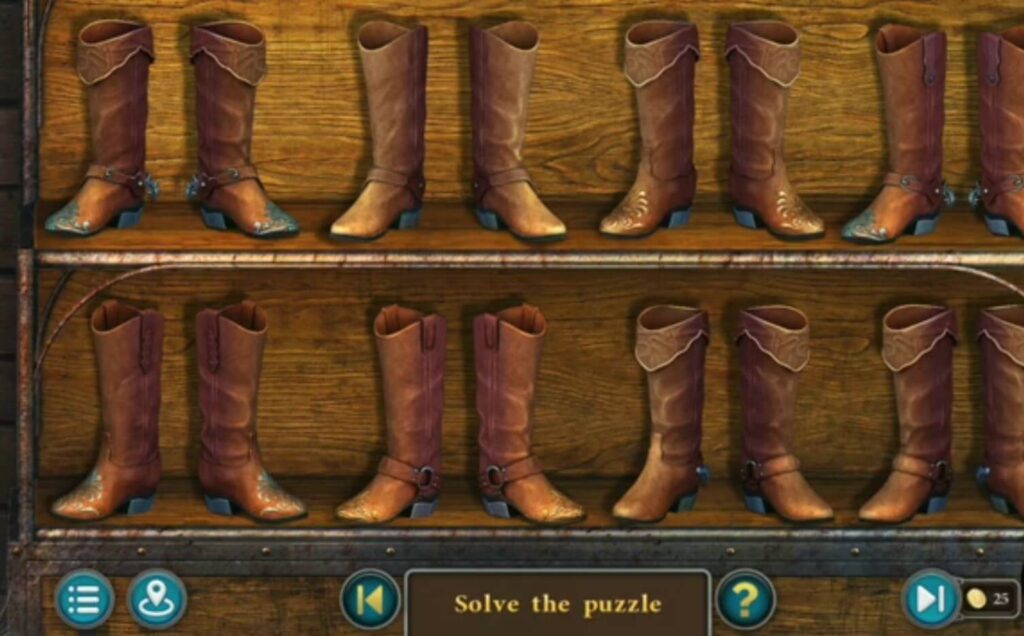
Solve the boots puzzle by matching every pair of them.
You got a detail and an oiler.
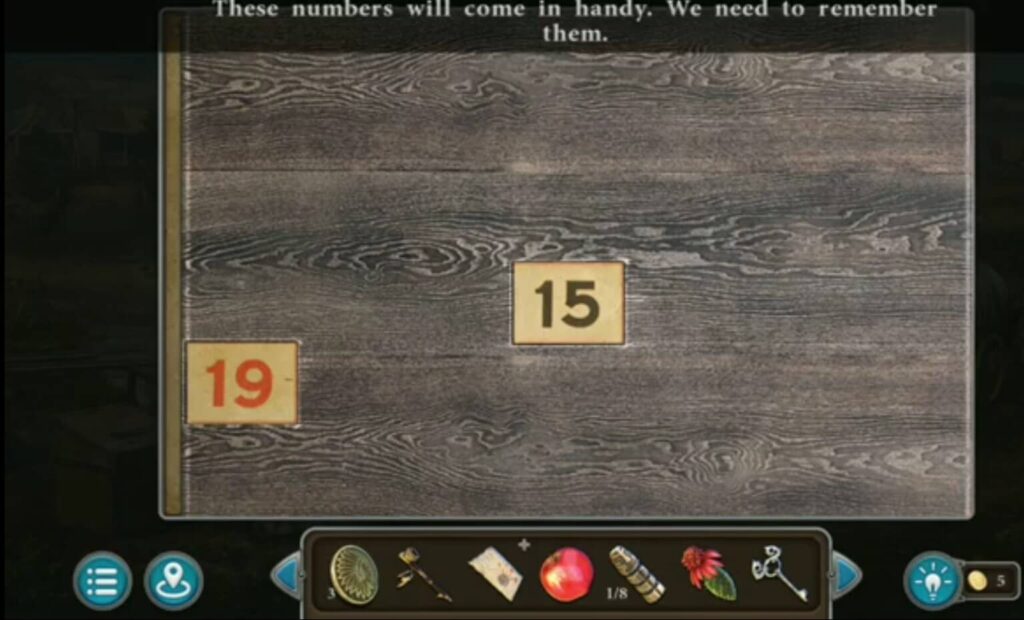
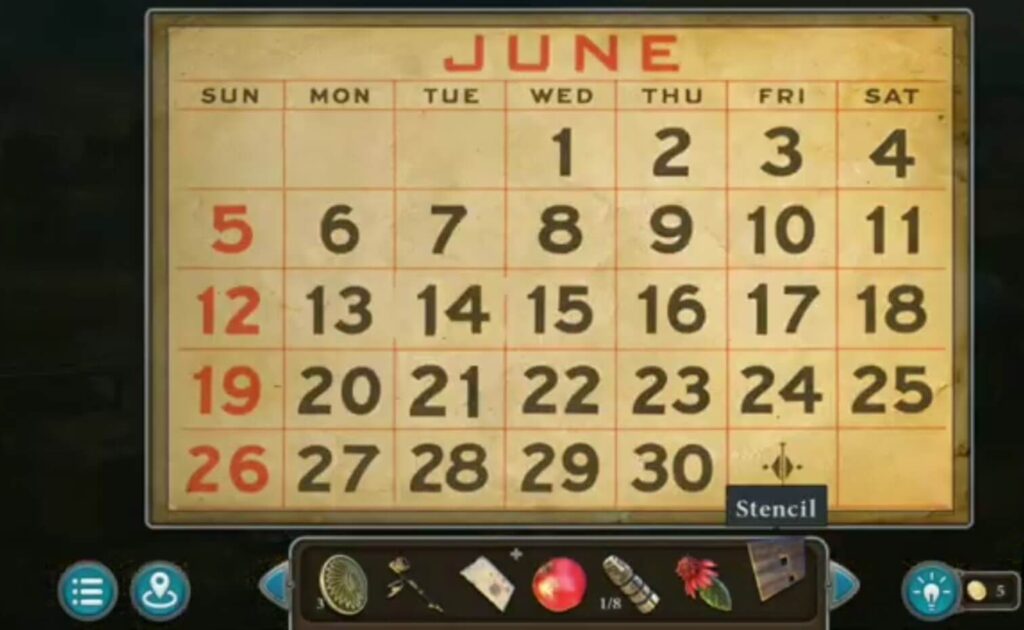
Take a stencil (found it in the box) and put it on the calendar.
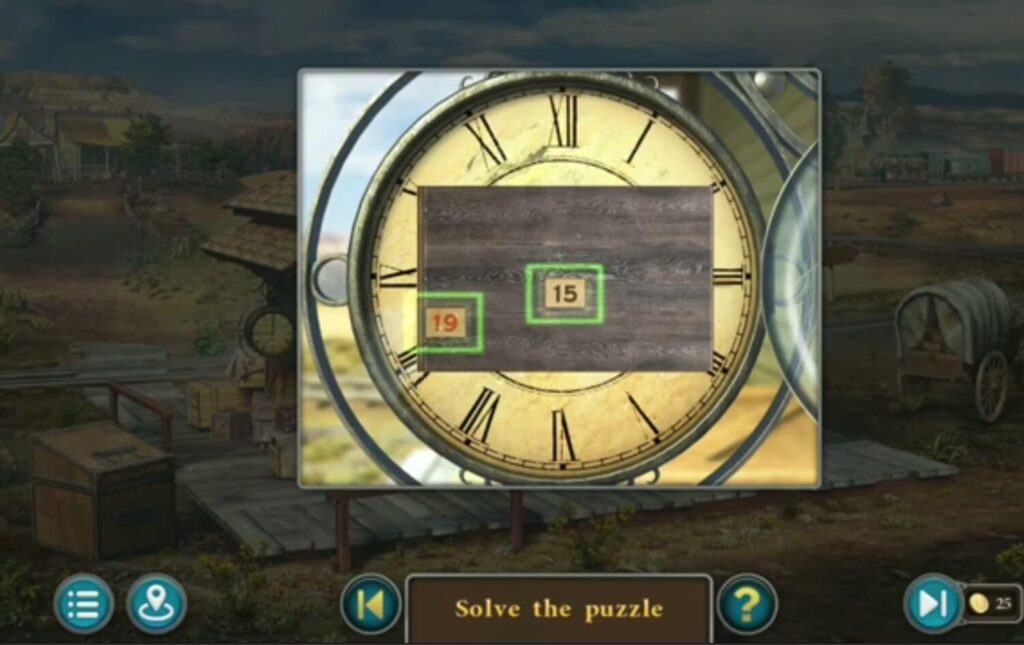
Put the hands on the clock based on the calendar numbers 19 and 15. You got a handle.
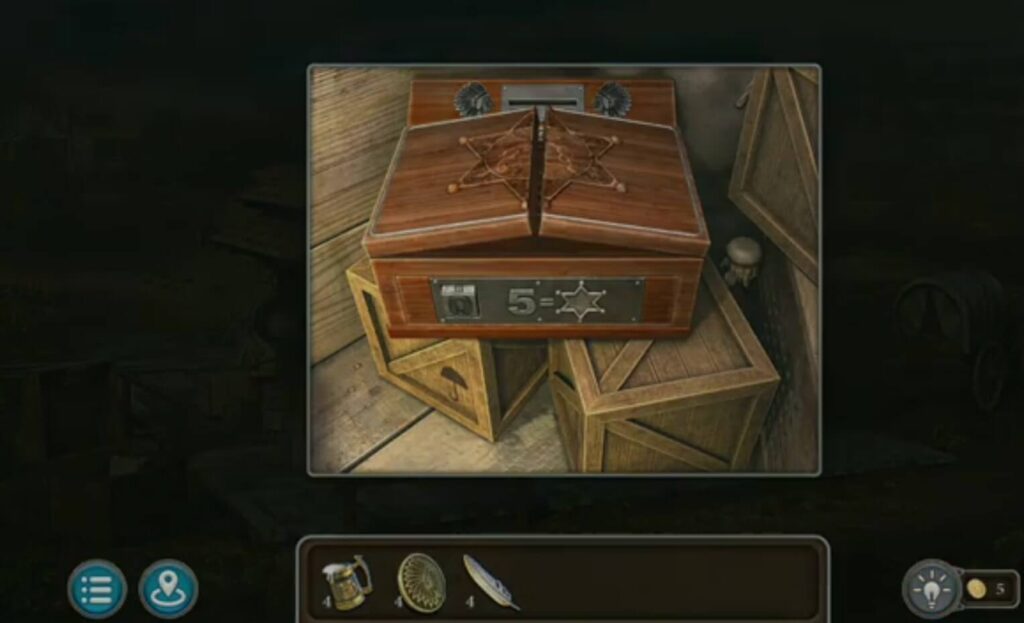

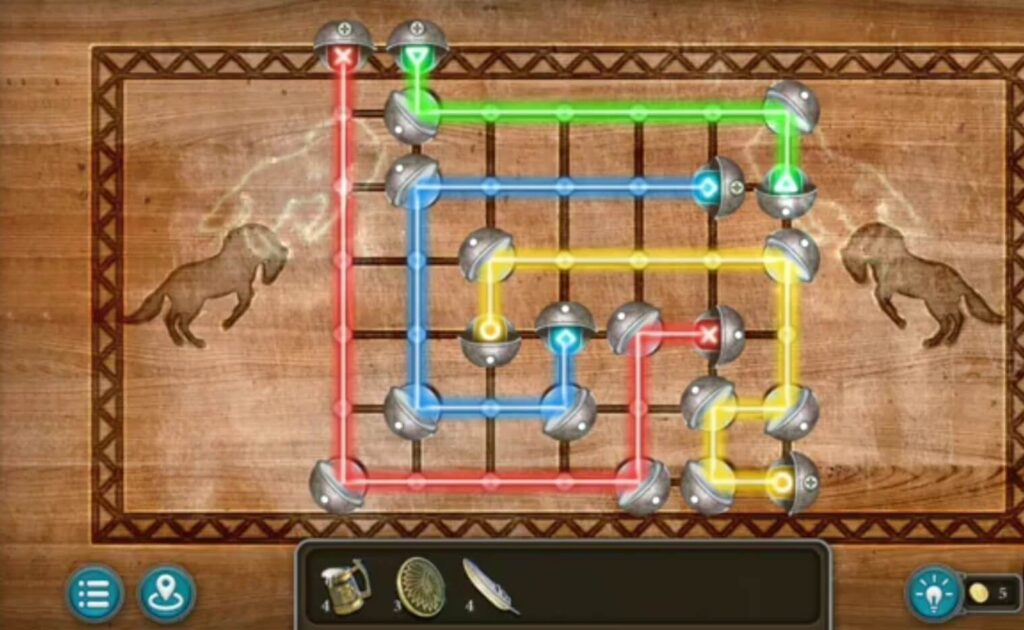
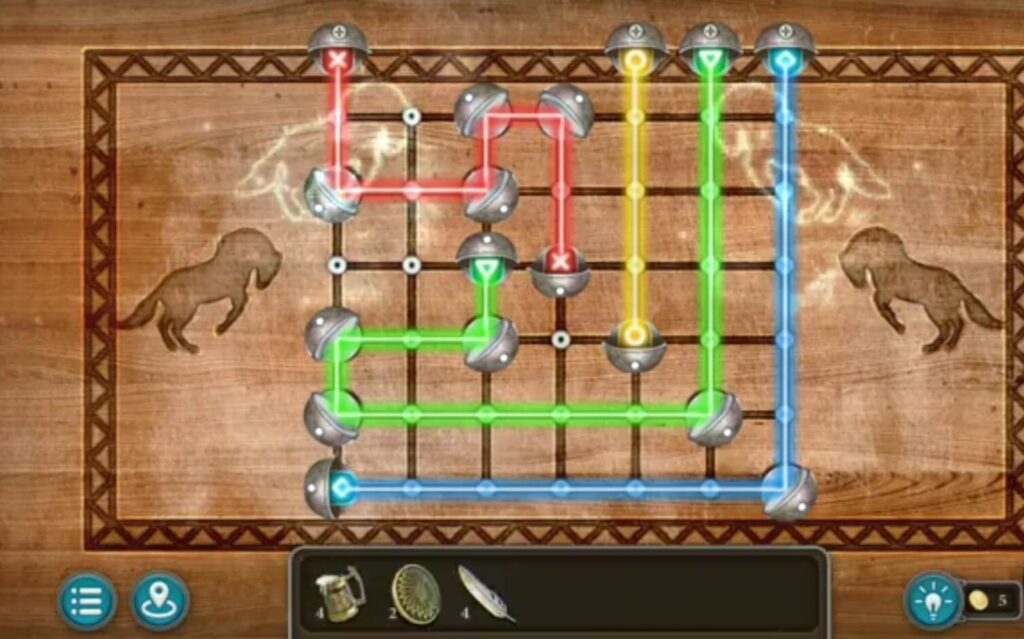
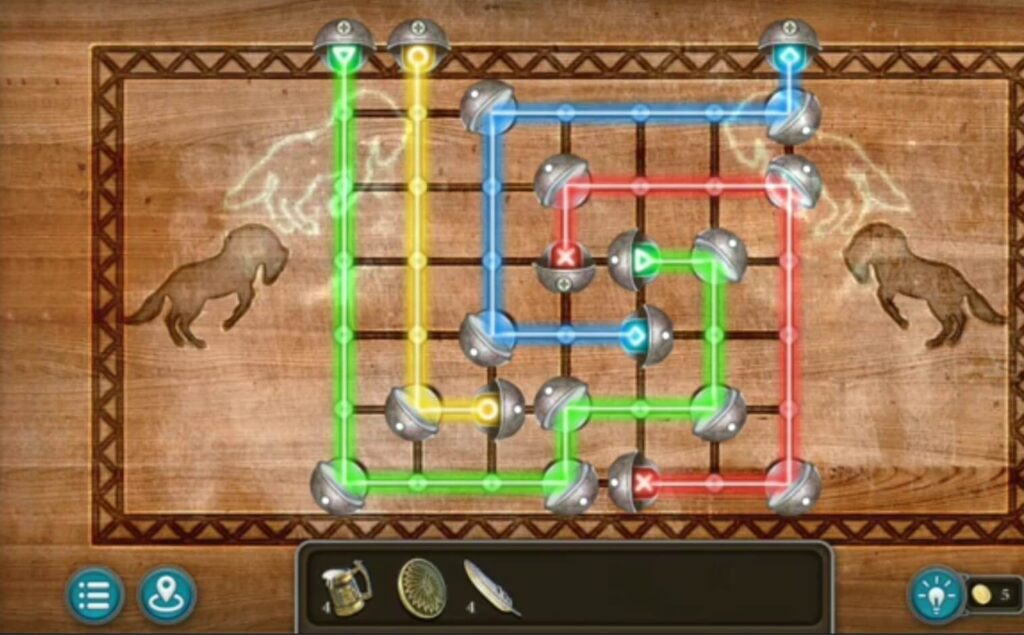
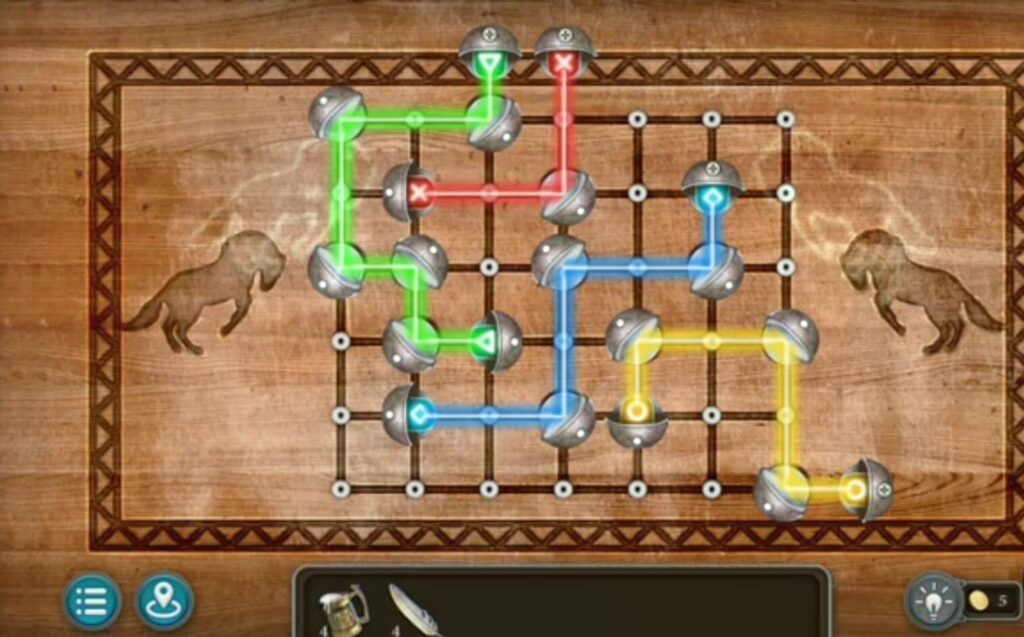
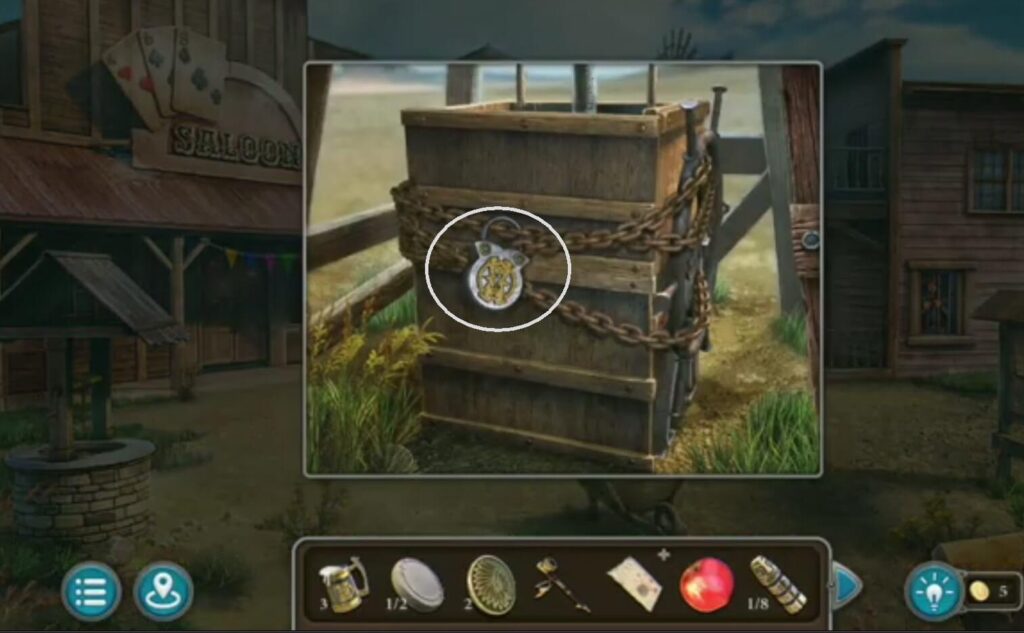
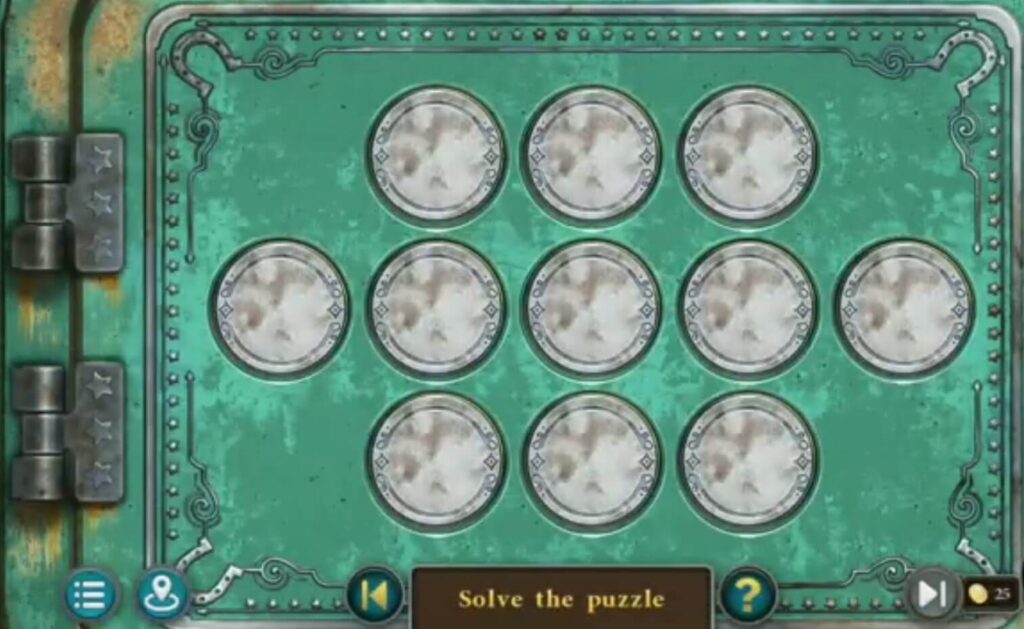
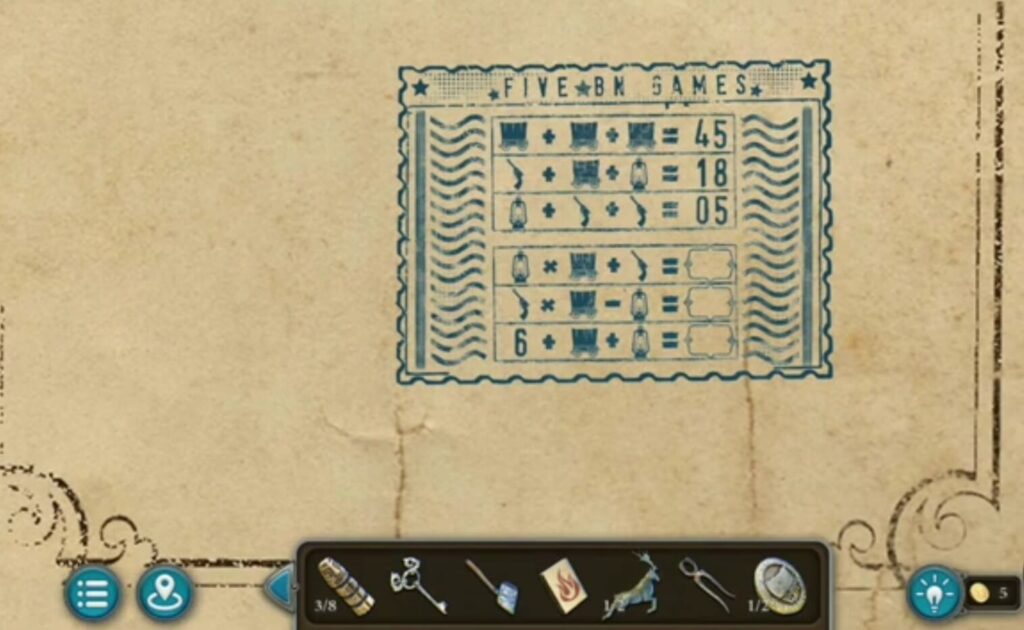
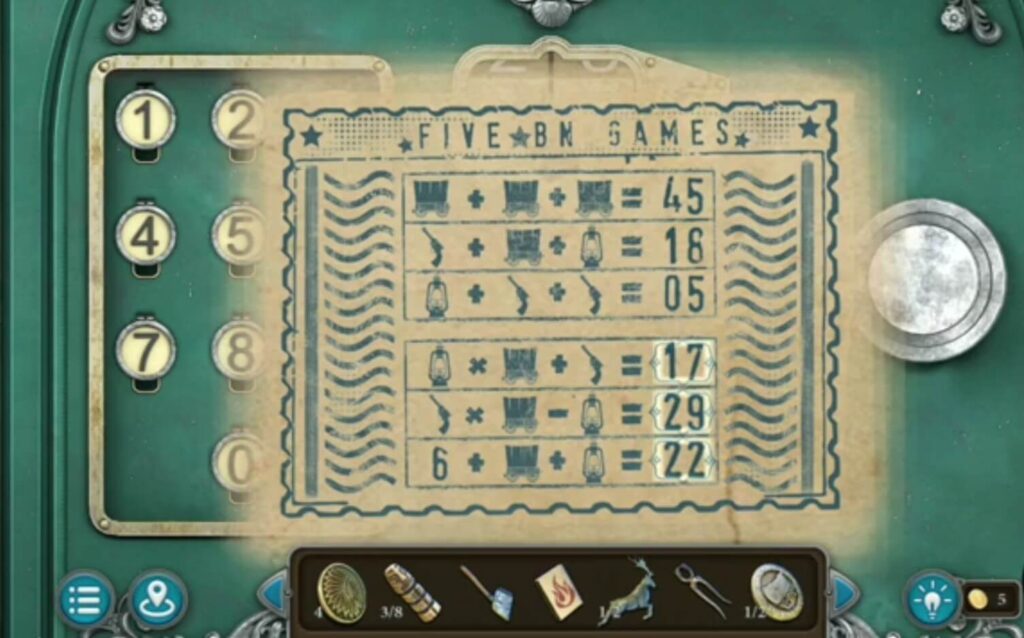
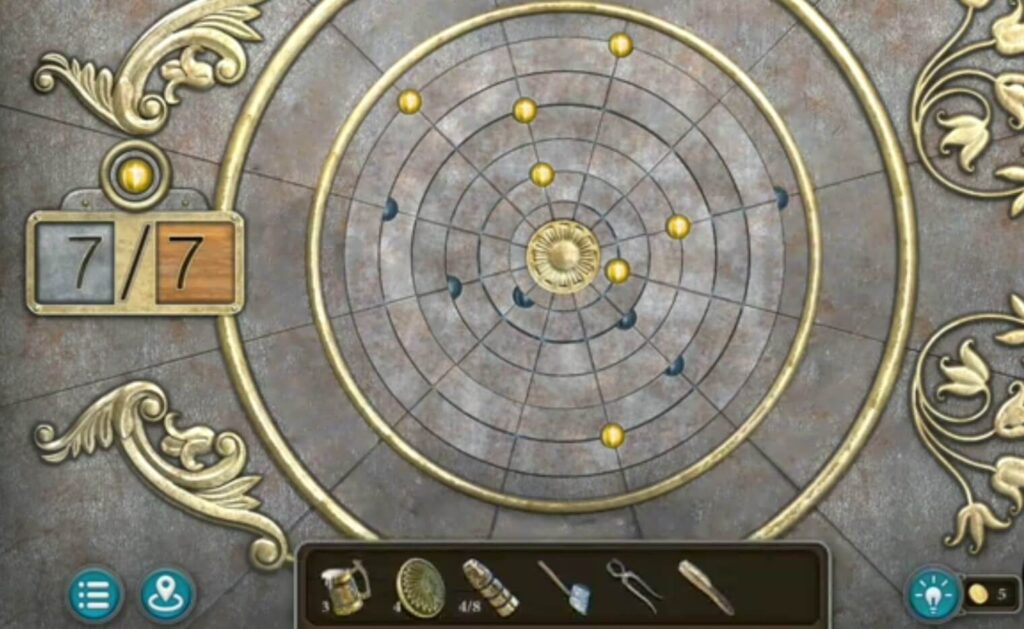
Put coins you collected during the game into the box. A five-level bonus puzzle will appear. Solve puzzles by connecting the chips of the same color with rays. All mirrors must be used. When you solve all 5 puzzles in this way, you get a star.
Put an oiler (found it when you solved the boots puzzle) on the train mechanism. You have an oval detail.
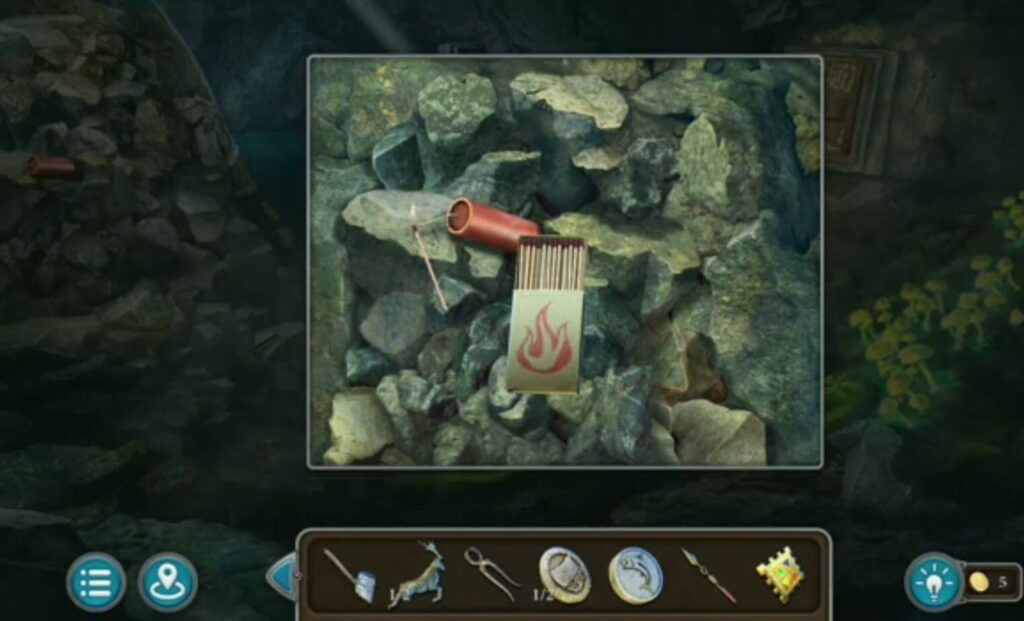
Put the oval detail (found it on the train) into the store door. Press the handle to open the store door. You got a pebble and matches.
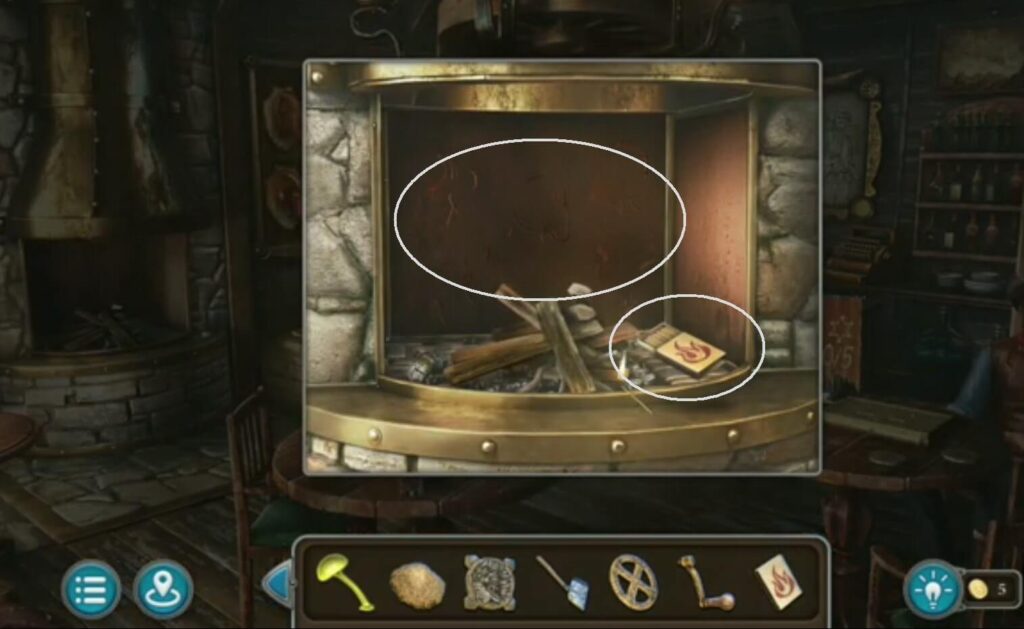
Use matches (from the store) to light a fire. A pattern with animals will appear behind.
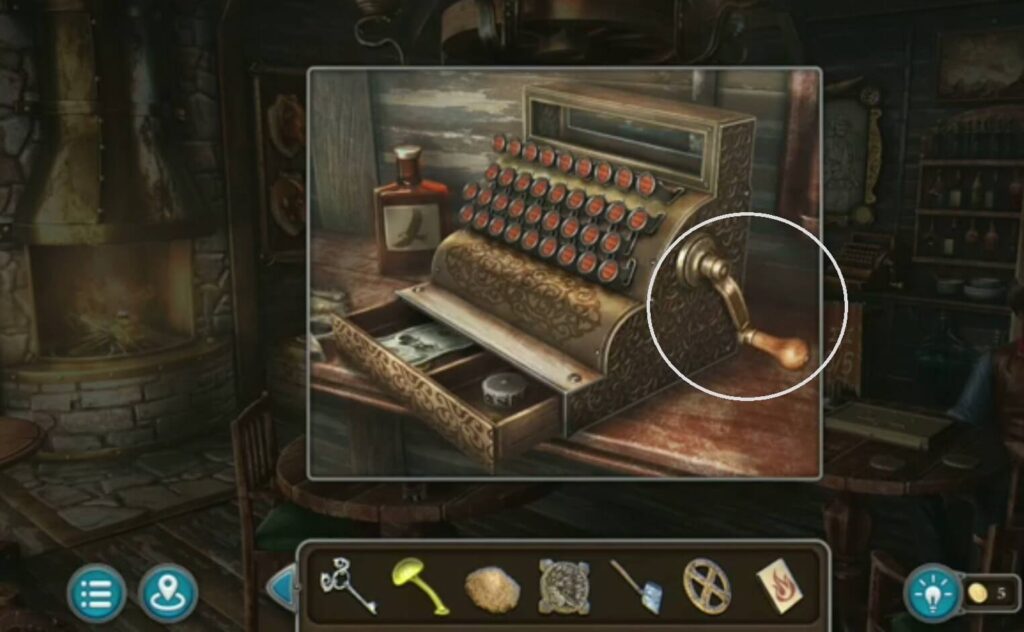
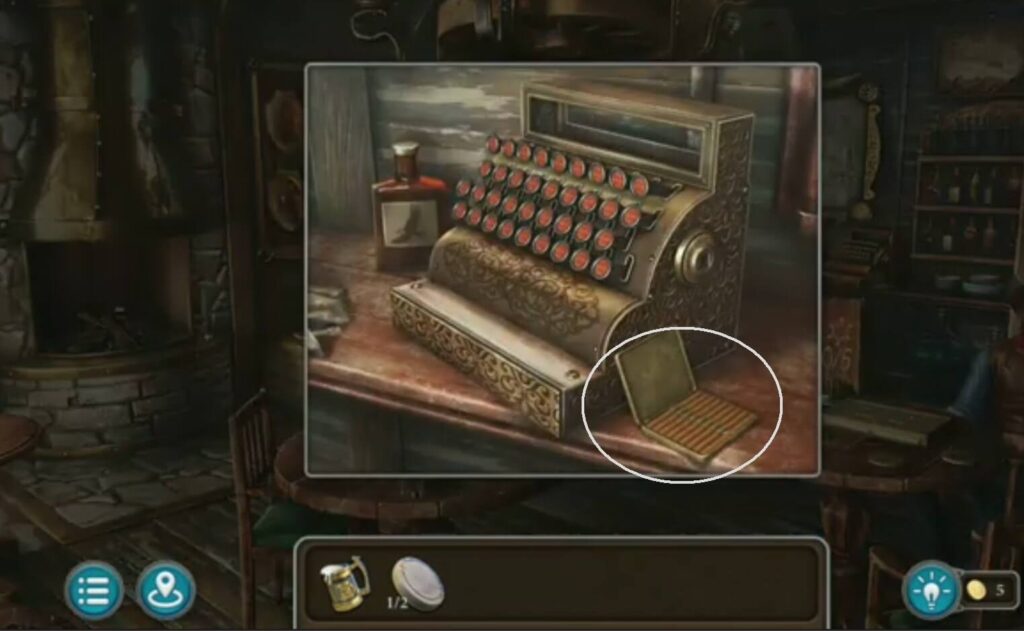
Put a handle ( from a clock) on the cash register.
You got a drum, a banknote.
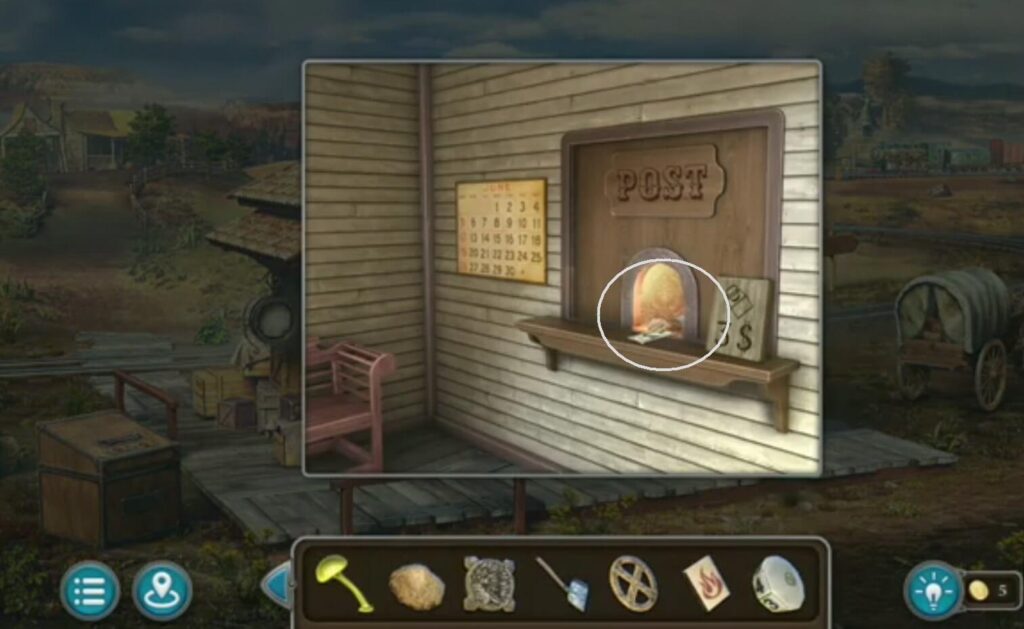
Give a banknote (found it when the cash register opened) to the post office counter. You got an ink.
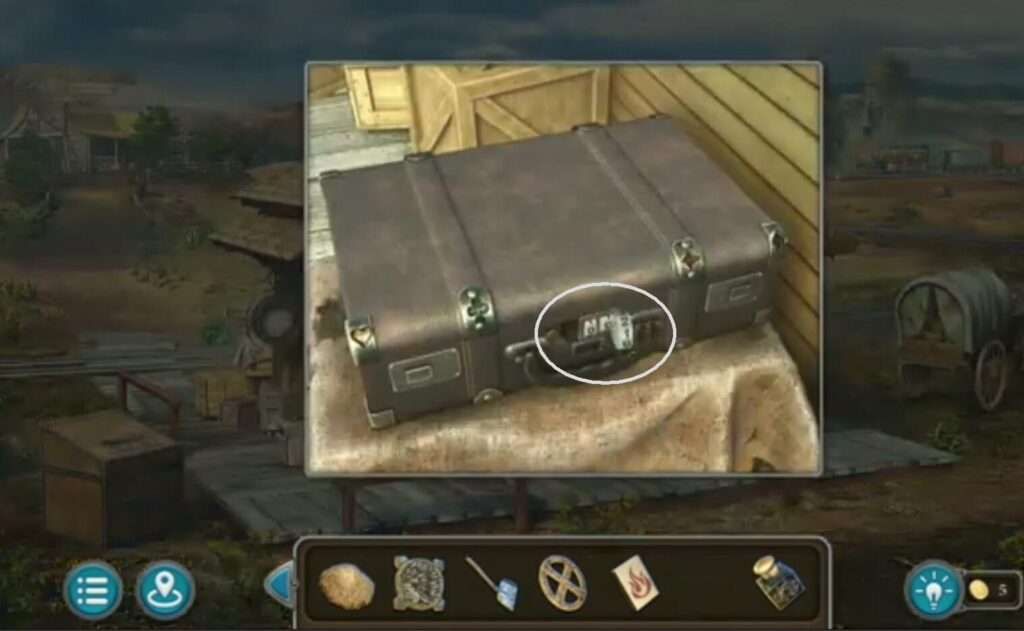
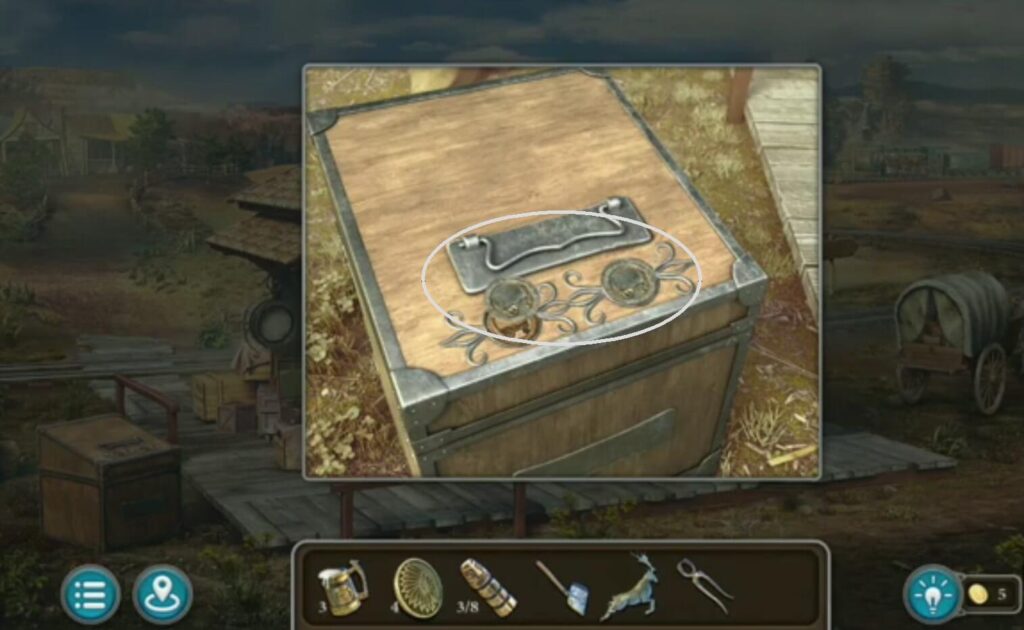
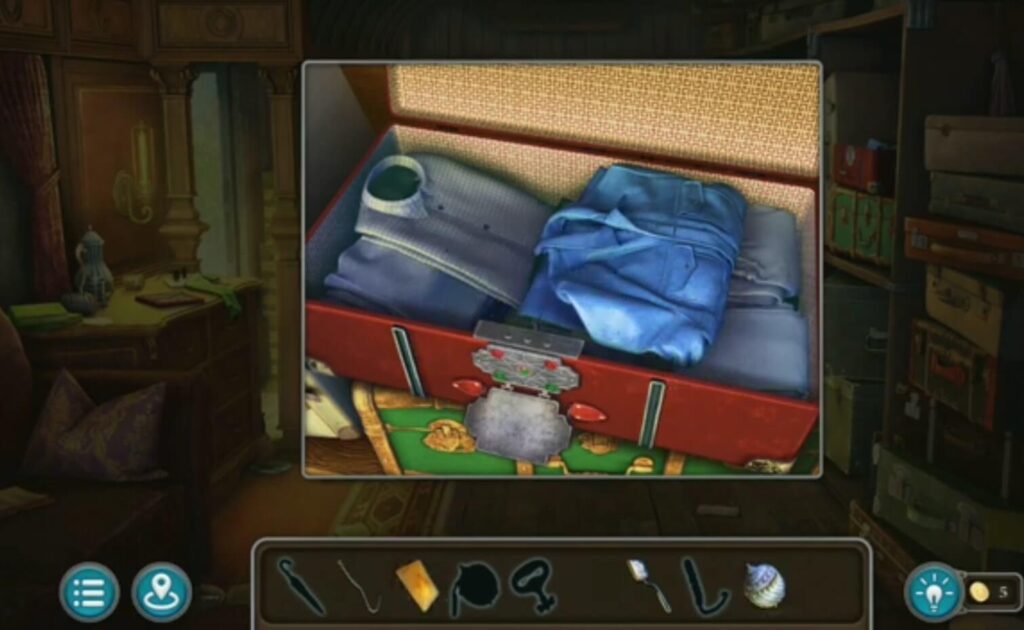
Use the drum (from the cash register) to put it on the suitcase. It’s part of the code on the suitcase.
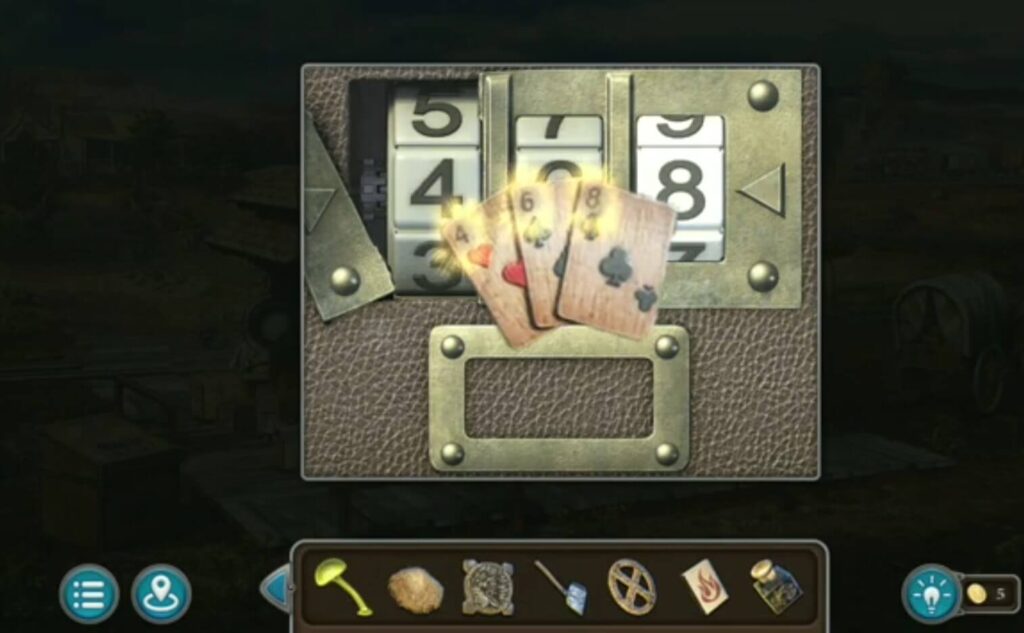
The solution for the suitcase code is card numbers 4-6-8. You got a totem.
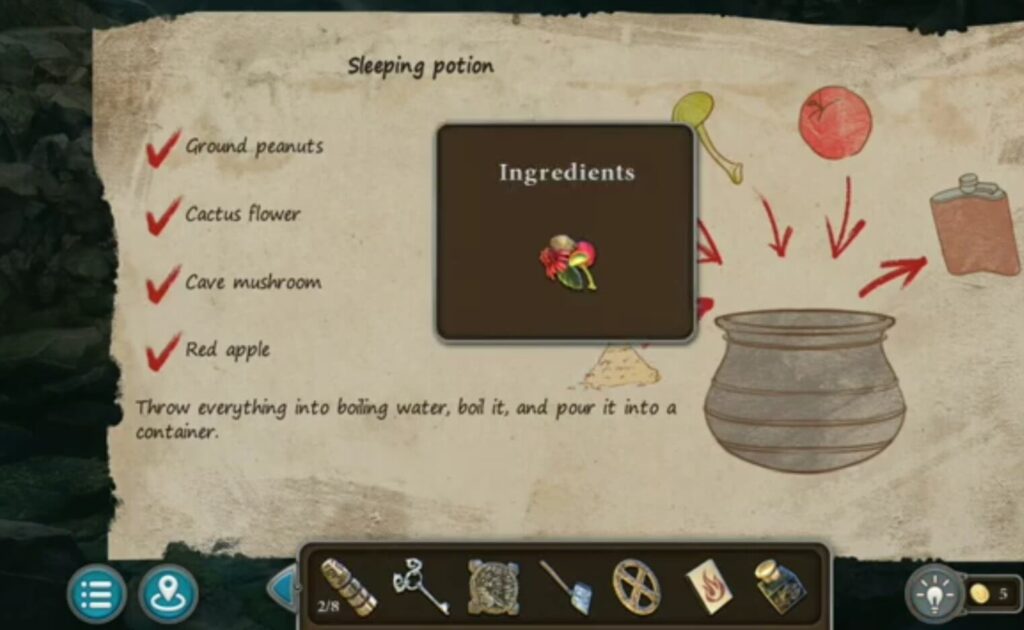
Open the recipe and select all the ingredients. You have ingredients in one place.
Put two pebbles (one you found in the picture drawing, and the other in the store) in the missing place.
Make all discs active by clicking on them. You got a deer toy.
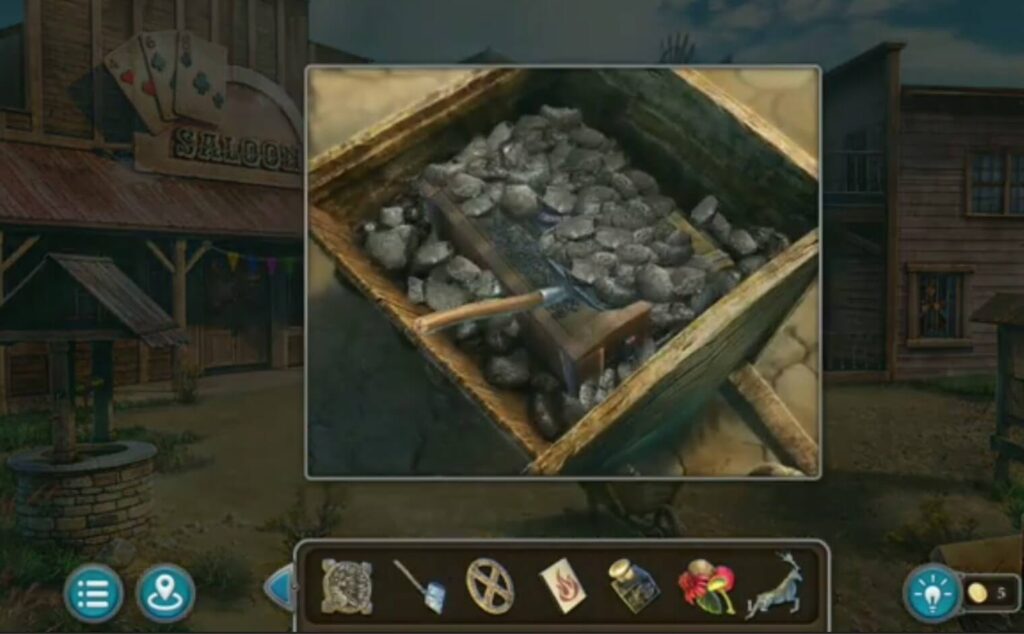
Take a shovel (from the train) and move the rocks. You got pincers.
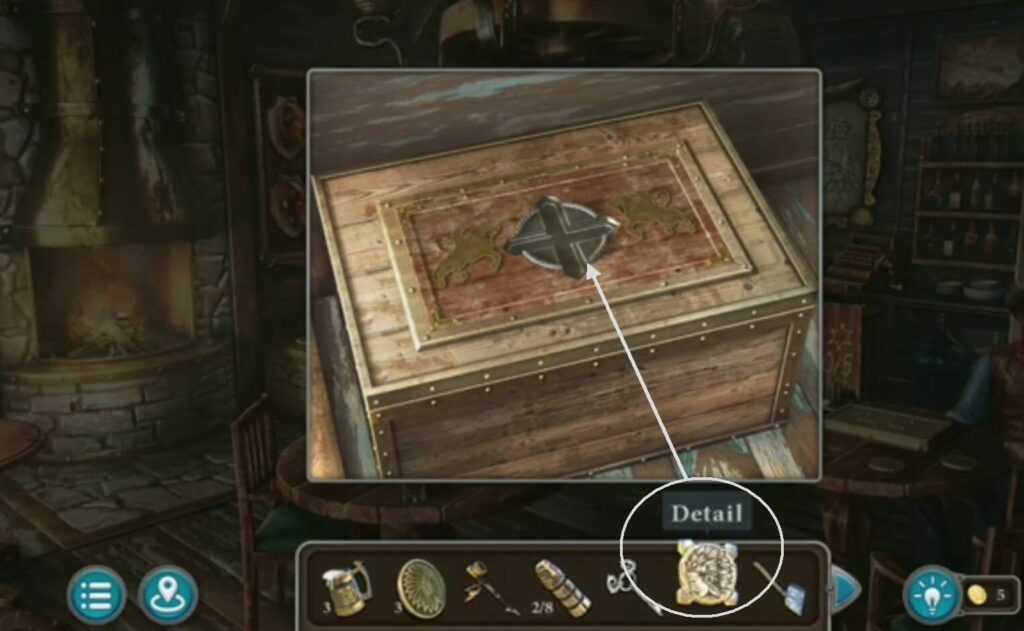
Put the detail (found it when you opened a padlock) on the box. A puzzle will appear.
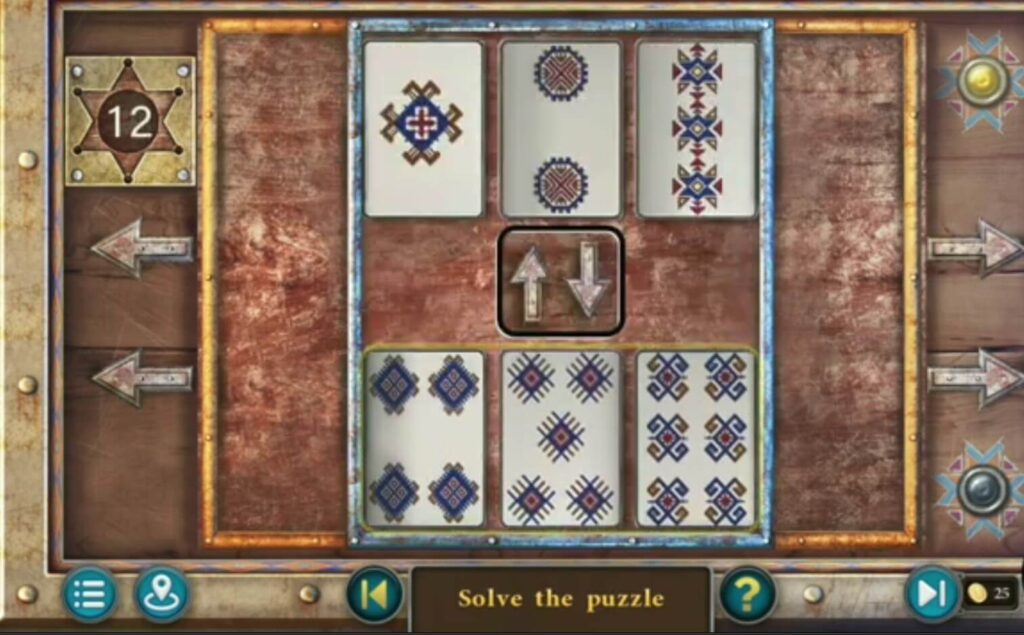
To solve the puzzle you must move the cards so that the patterns on them are arranged in ascending order.
When you solve, you get a roach, a hook, and a star.
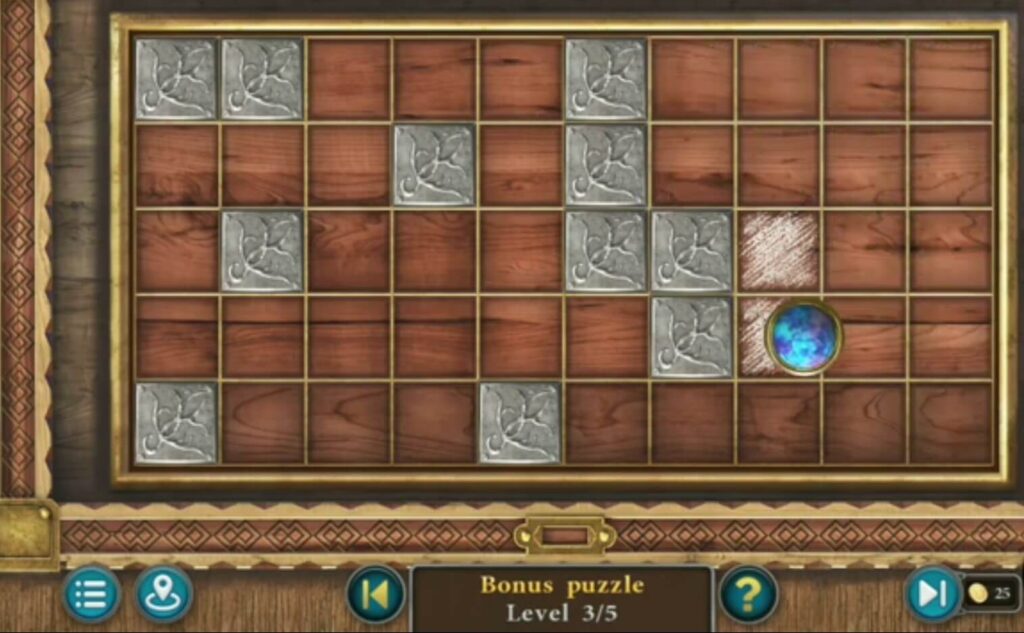
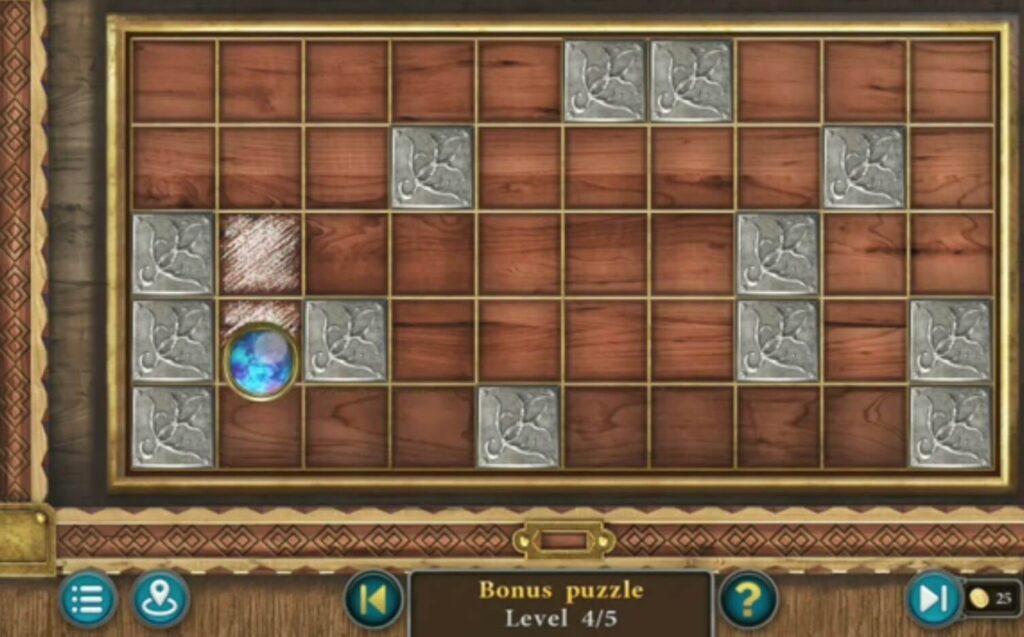
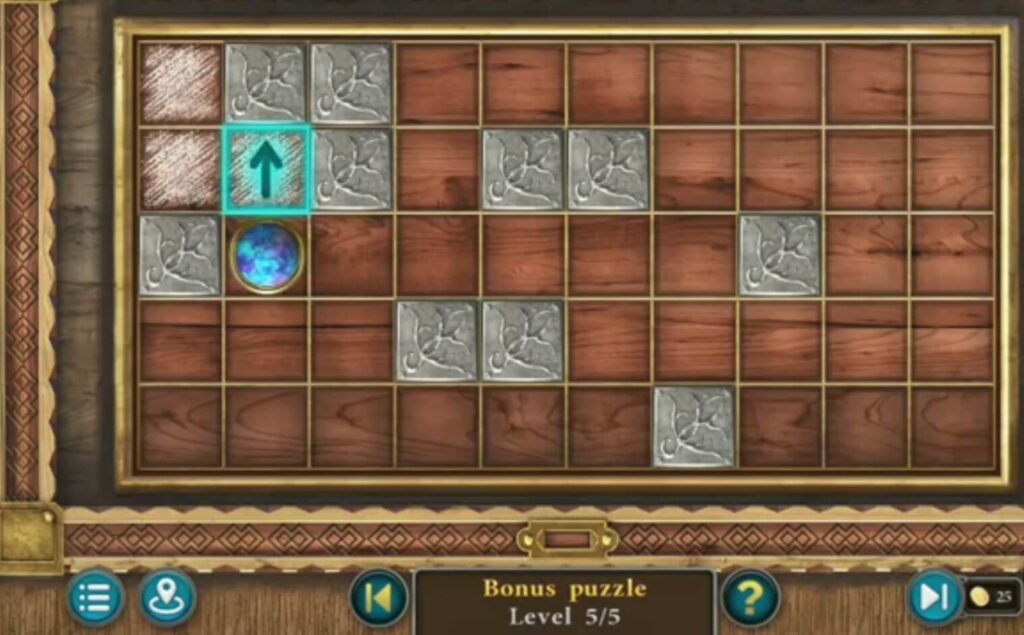
Put mugs you collected during the game. A five-level bonus puzzle will appear. The puzzle is solved by moving the circle to clear all fields.

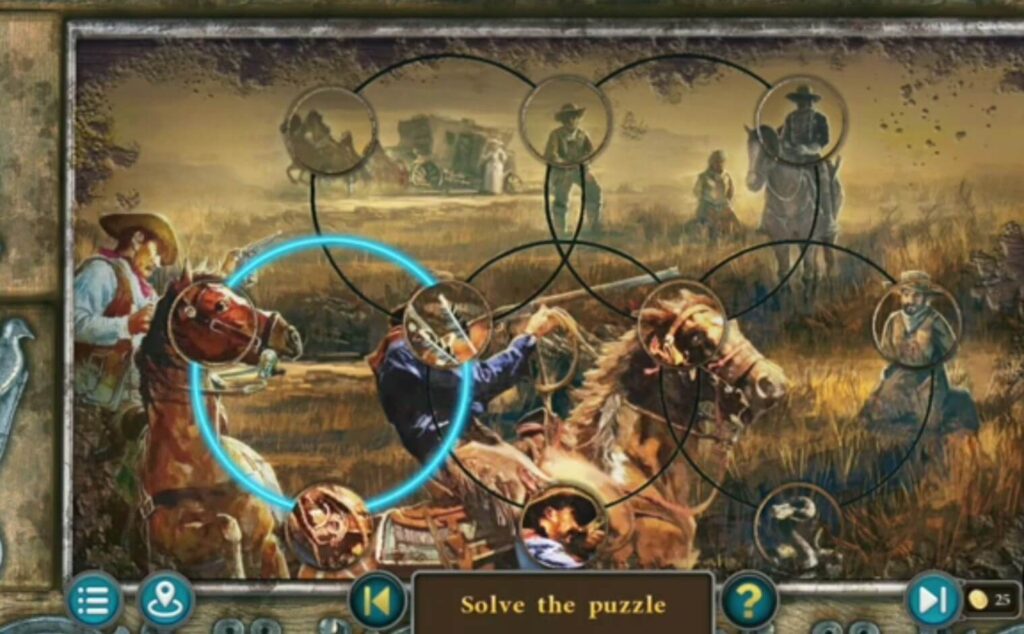
Put the hook that you found when you solved the puzzle, on the coffin that was under the stones. The puzzle appeared. Solve it by matching the pictures in the circles to the appropriate places. You got a token.
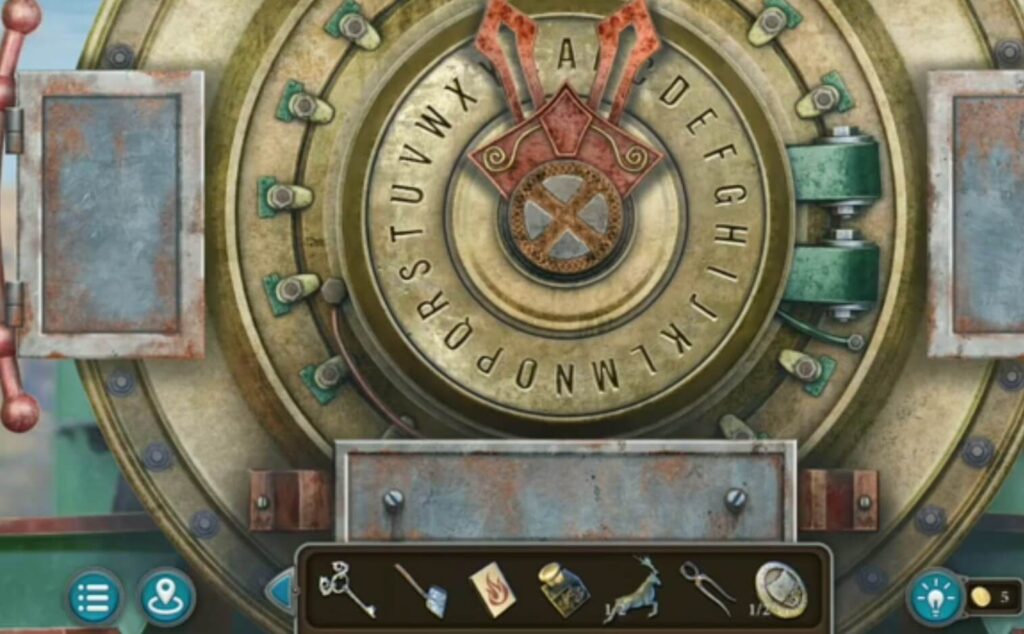
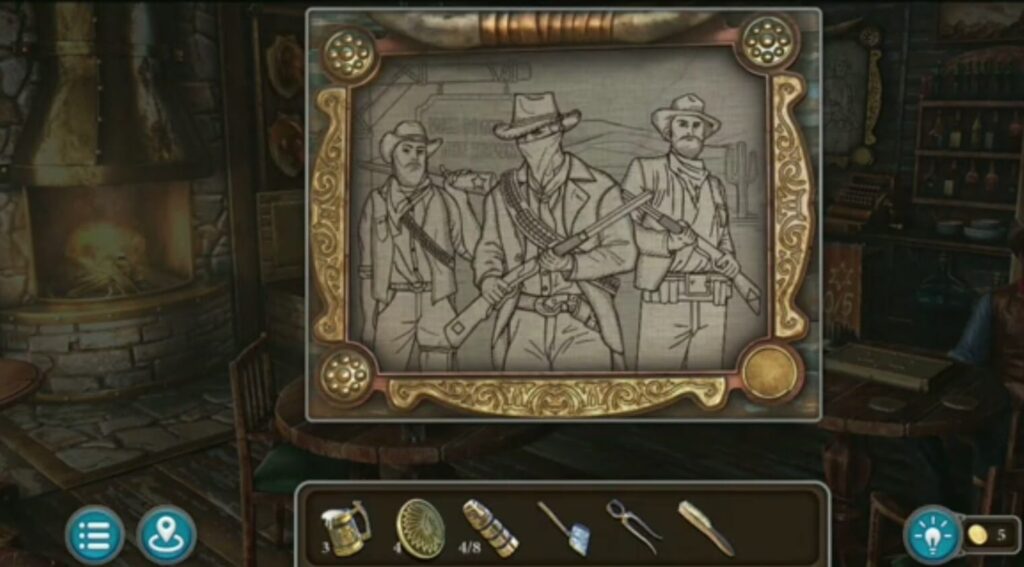
Put a detail on the locomotive. A puzzle with letters will appear.
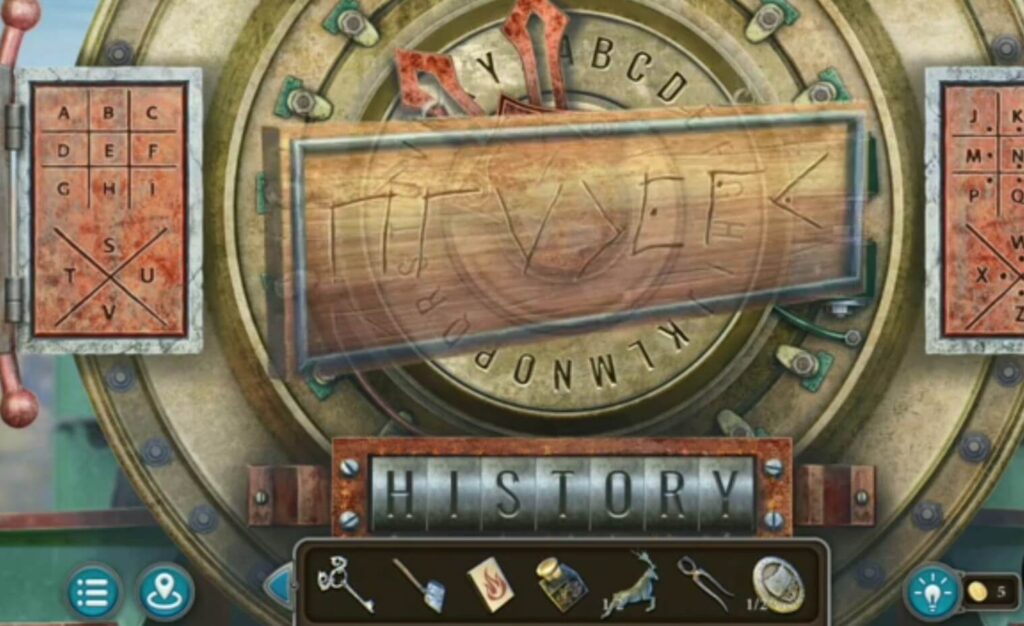
The solution is HISTORY. You got a flask and a totem.
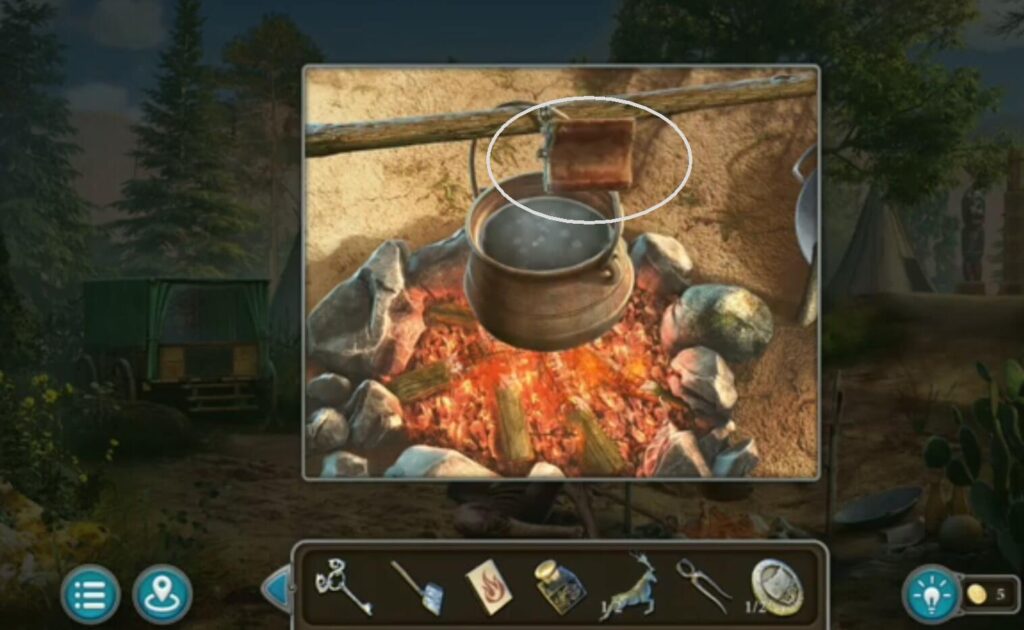
Put the ingredients into the pot. Take a flask (got it when you solved a puzzle on the locomotive). You got a sleeping potion.
Put the sleeping potion (got it from the pot) into the glass. When a man sleeps, take a key from him.
Unlock the prison door with the key you took from the sleeping man at the bar.
A collection item.
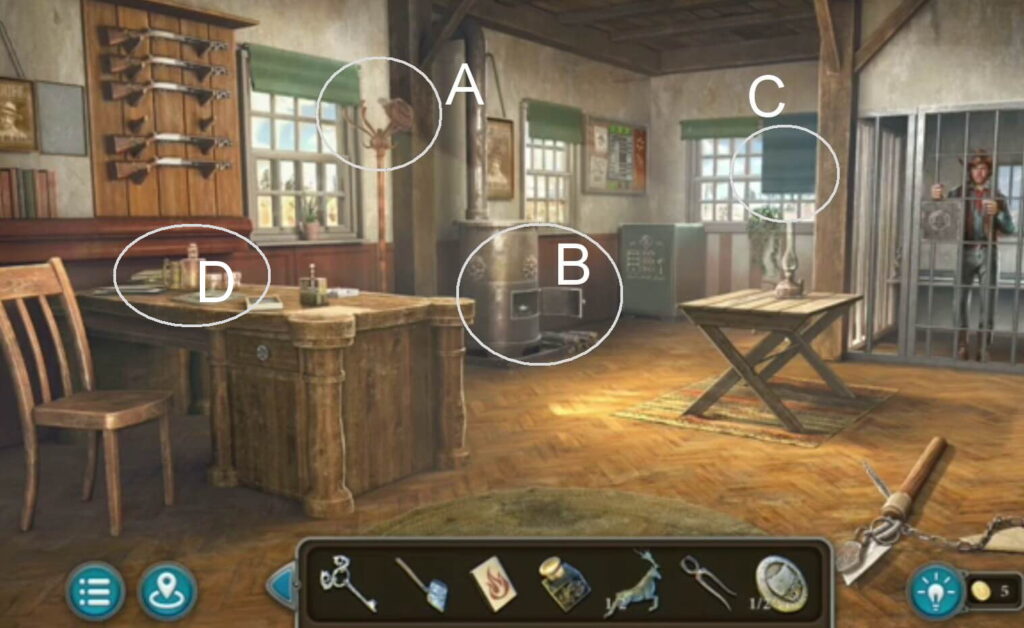
A) A morphing object.
B) A token.
C) A coin.
D) A mug.
A star.
Take ink (got it when you gave a banknote). Hit the stamp on the paper. A seal impression will appear.
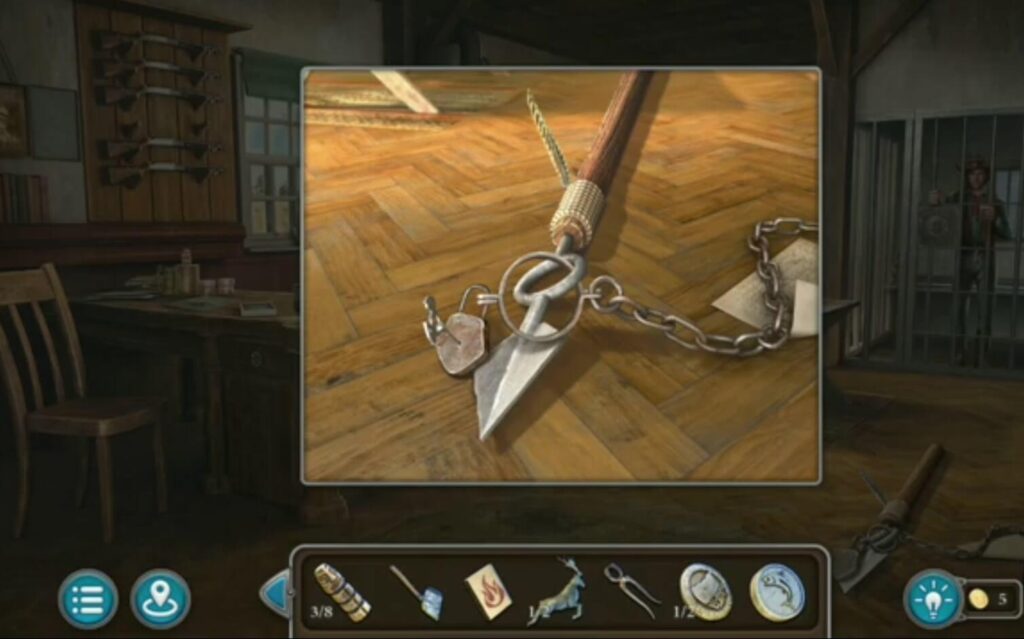
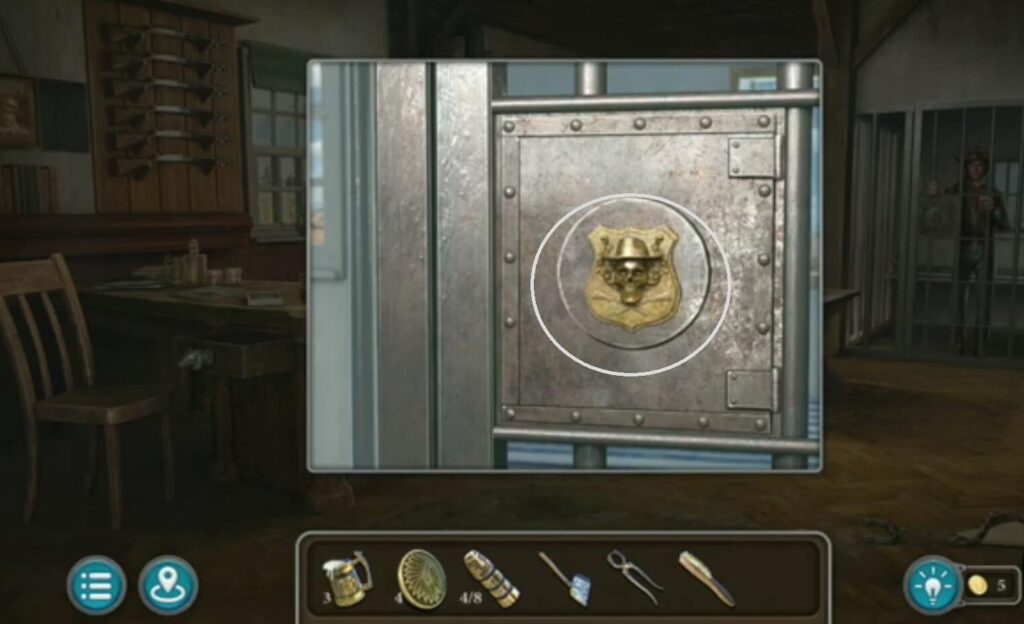
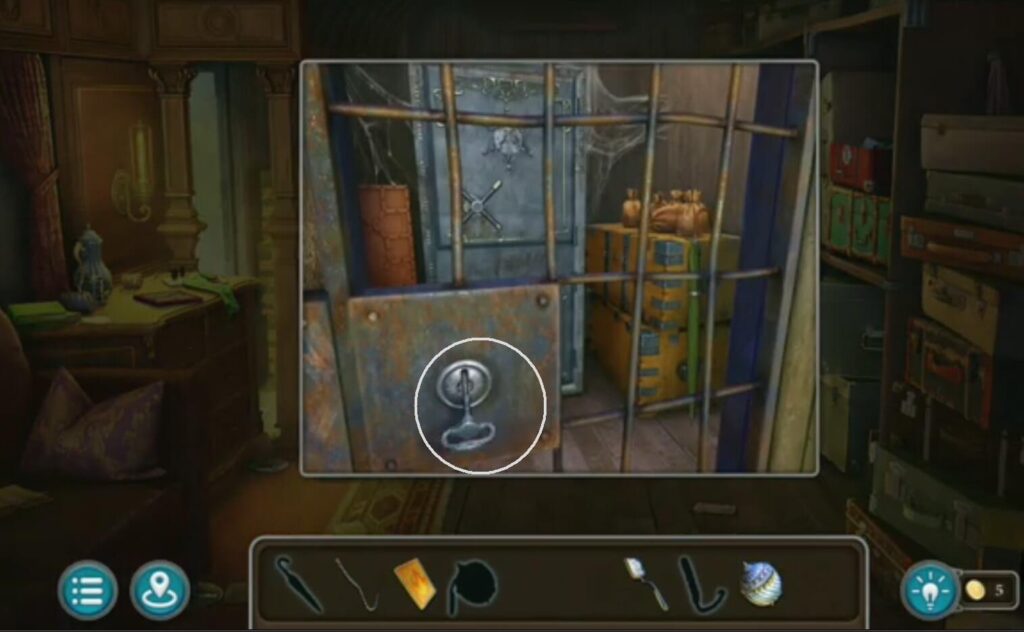
Take the figured key (got it when you put the pendulum) to unlock the padlock. You got a spear.
Solve the puzzle on the safe using the print from the seal. You will get decorations and dynamite.
Put dynamite in the rock (from the safe in the prison) and set it on fire matches (found in the store). You got an arc.
Put the decoration (from the safe) and a puzzle appears.

Put the token (from the stove) on the box. A fishing line appears.
Attach the fishing line (from the box) to the arc (found when the rock exploded).
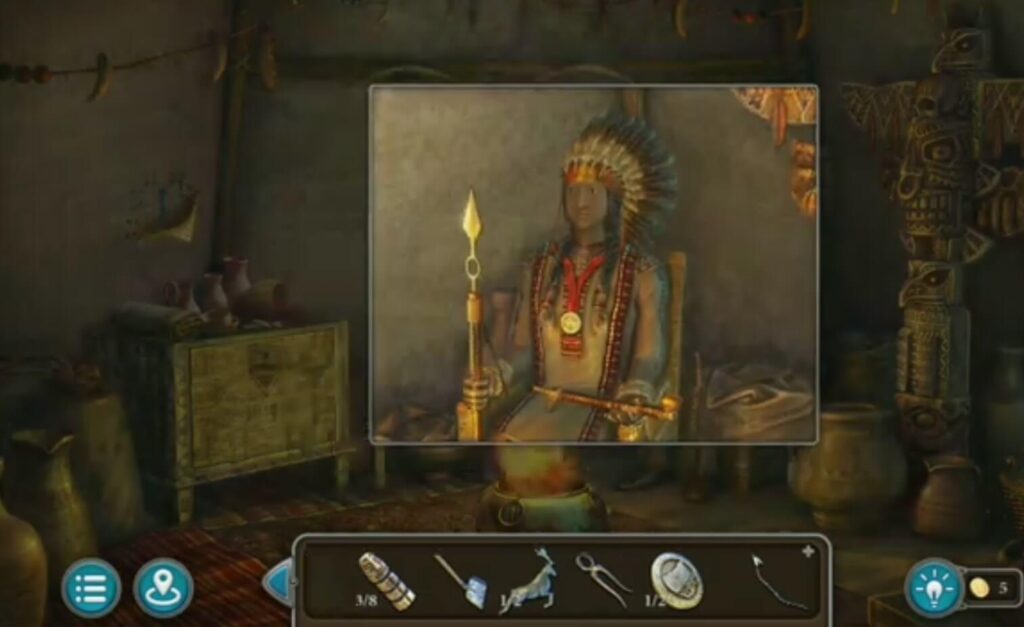
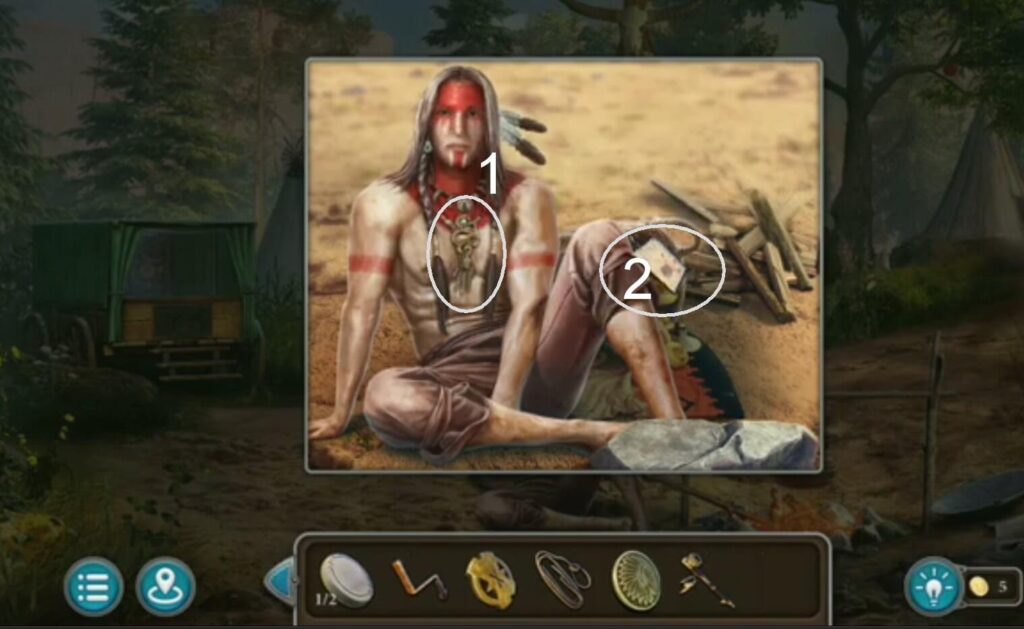
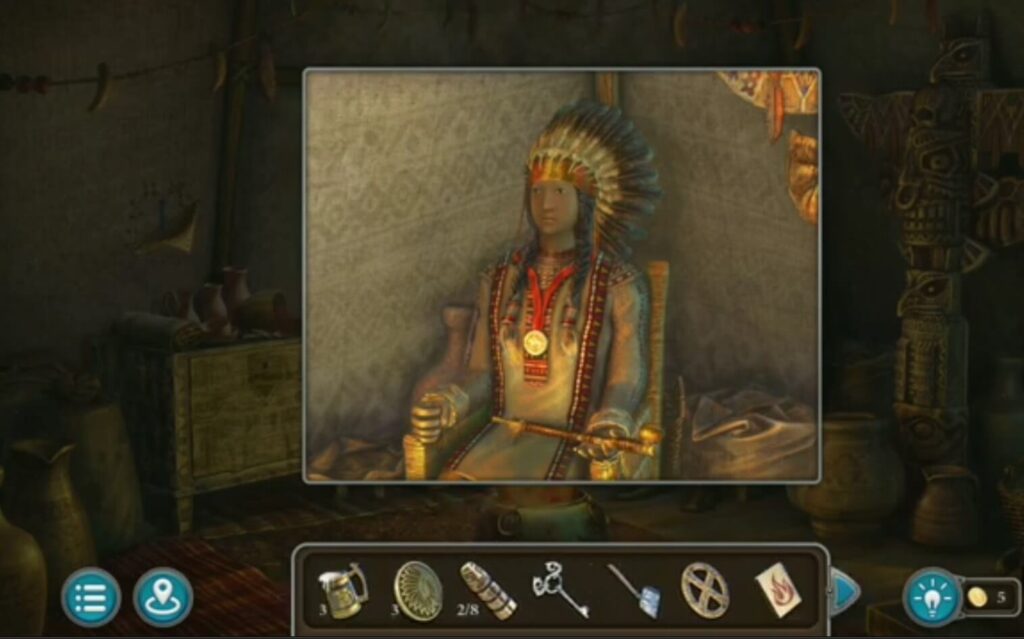
Put the roach (got it when you solved a card puzzle) a pipe (got it when you solved a model house puzzle) and a spear to the Indian. You got a sun.
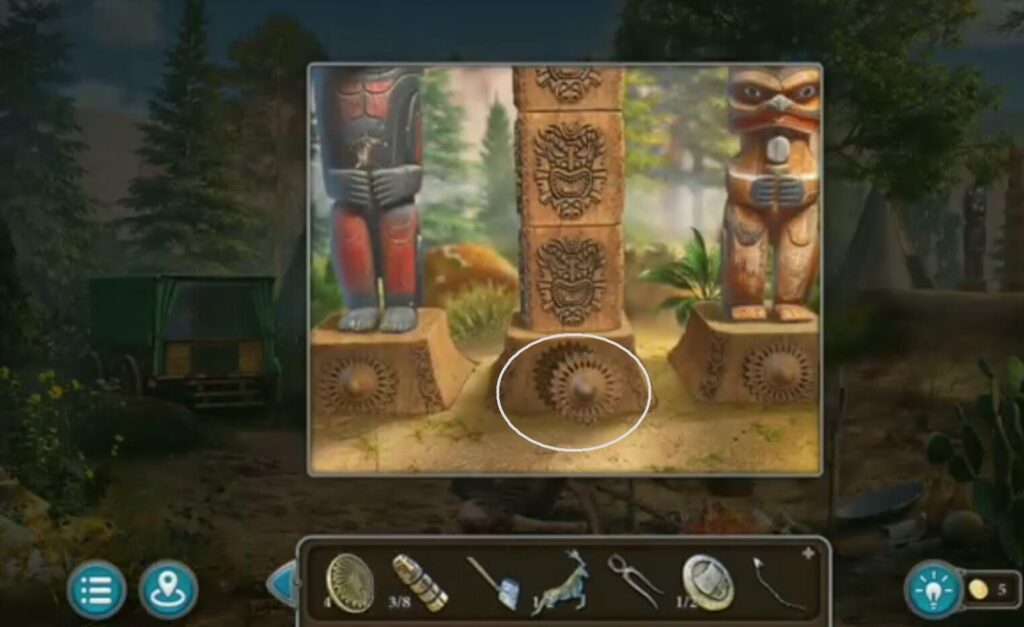
Put the sun (from a locker among the Indians) into the monument.
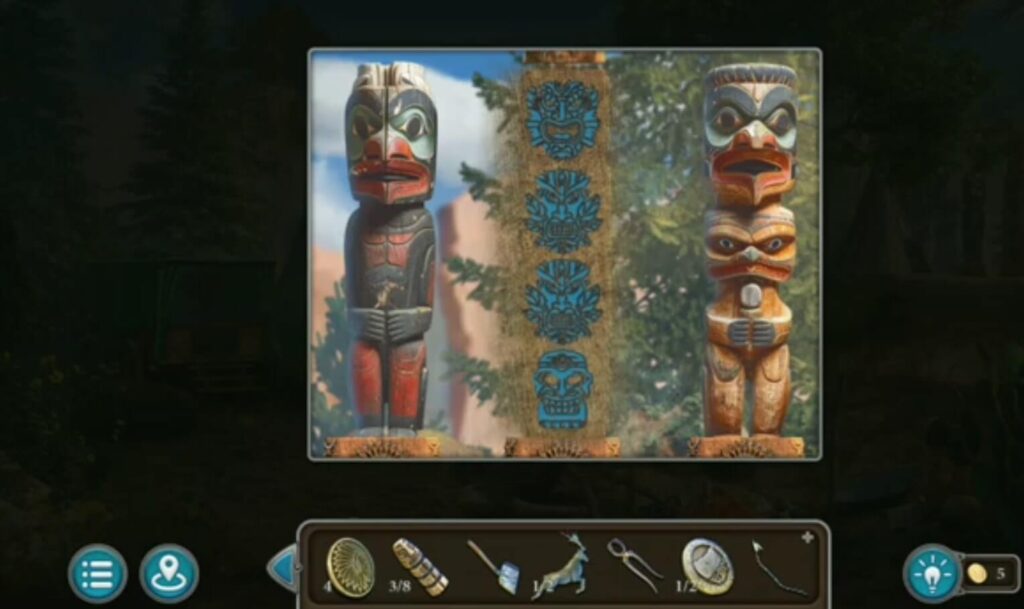
Order the figures on the monument in the order that has the blue drawing on the wall. You will get a quiver.
Combine the quiver with the bow (which you made with a fishing line and arc) and you will get a bow.
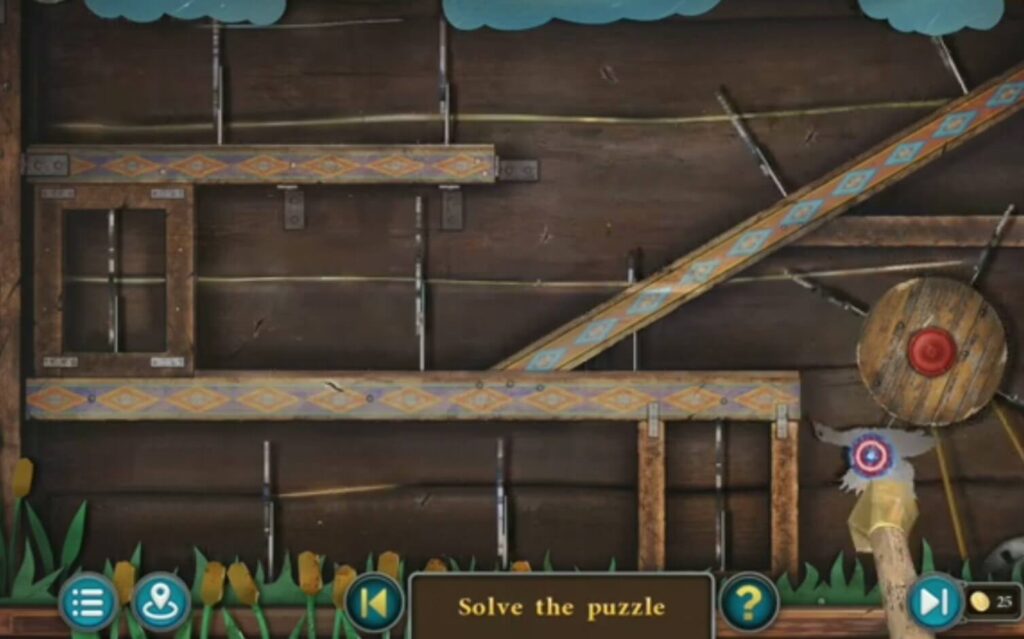
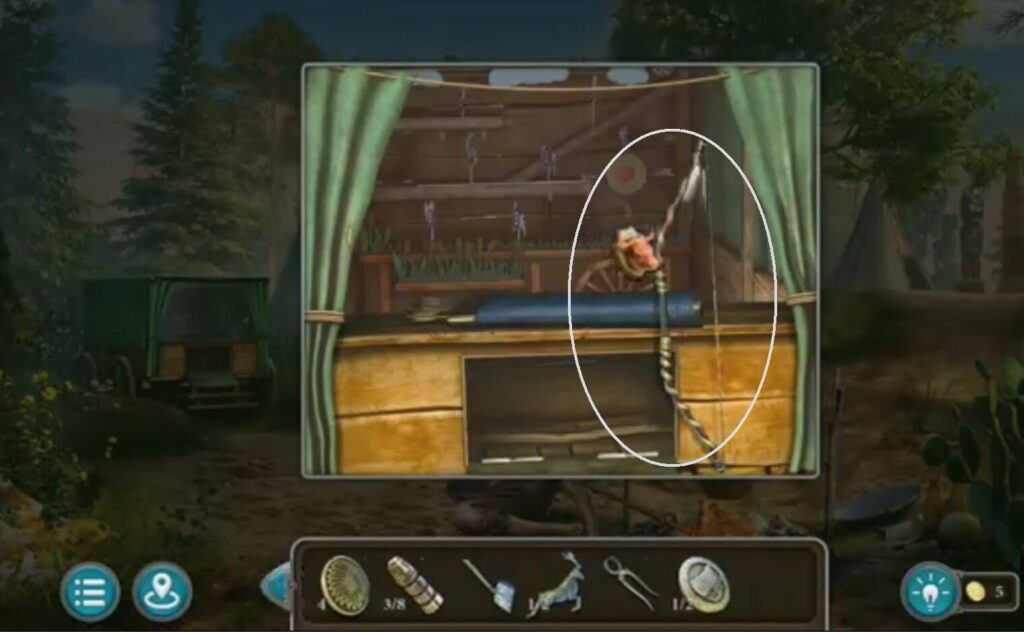
Hit all the targets with your arrow. The head will appear.
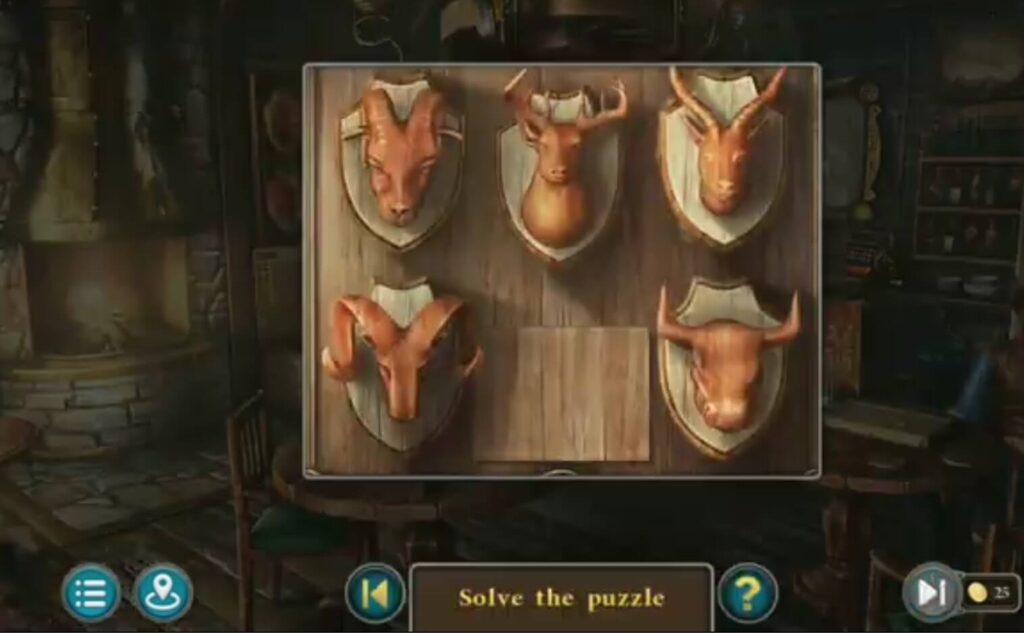
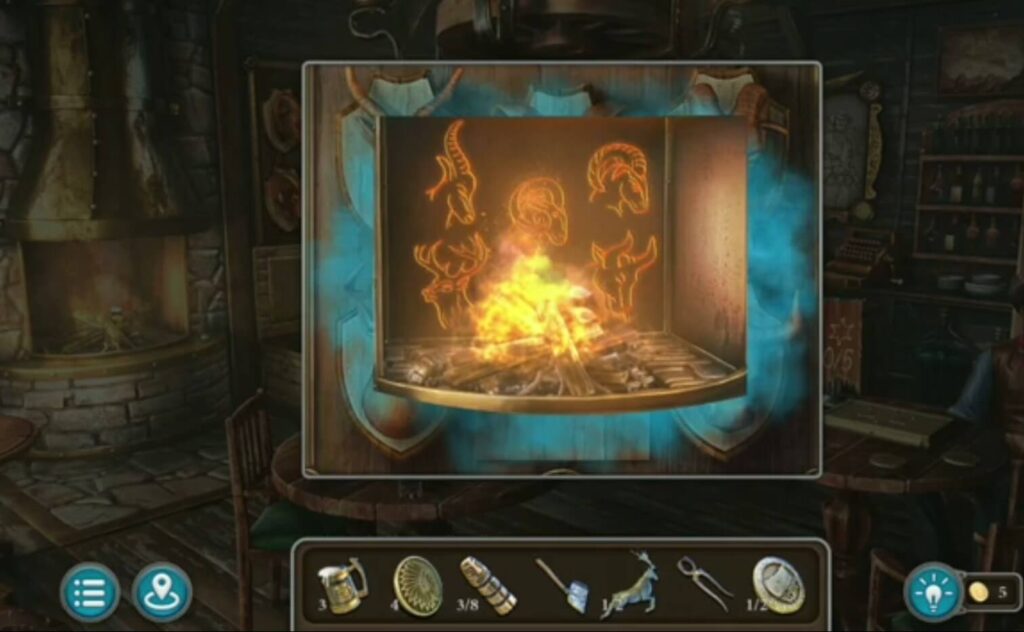
Put head (which you won when you hit all the targets with your arrows). Solve the puzzle by arranging the heads in the same way as in the drawing behind the fireplace. The token I handle will appear.

Take the handle (found when you solved the animal head puzzle) I put it in the drawer in the prison. There is a deer inside.
Place two tokens in the box. Inside, you will find a collection item, a brush, and a totem.
Put two deers (one is from the drawer in prison, and the other is when you solved a disc puzzle). Solve the puzzle roll the balls and group them in the right position. You got a gun.
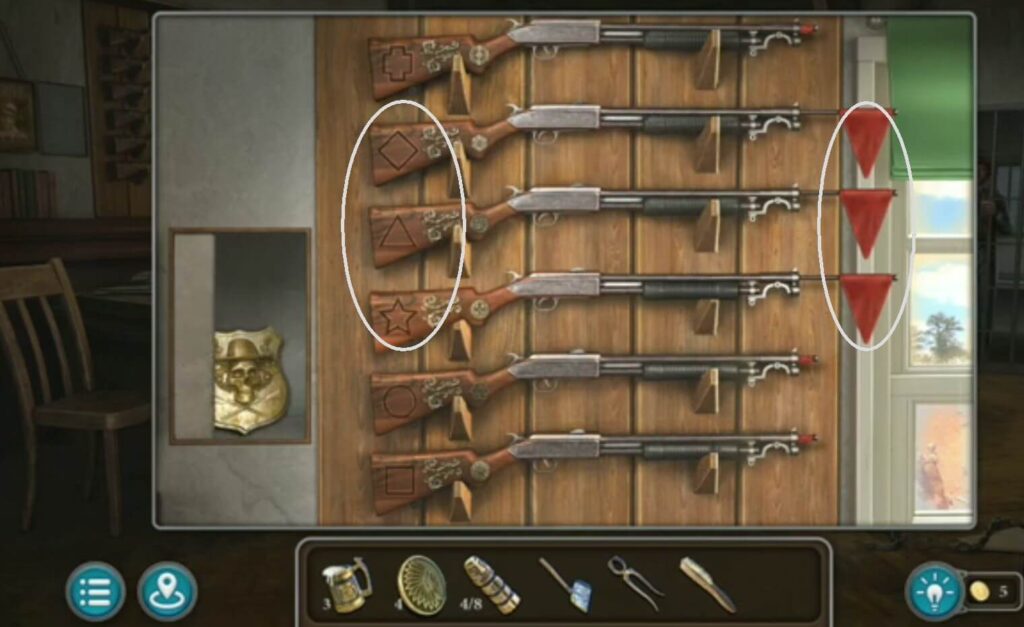
Put the gun (got it when you solved the puzzle with two deers ). Solve the puzzle using this picture. Click on the guns with these three shapes in the picture. Triangle, square, and star. You got bas-relief.
Put the bas-relief (from the gun puzzle) in the door. A puzzle appeared. Solve it by spinning the circles to make golden circles appear. When you solve the puzzle, you will free the prisoner.
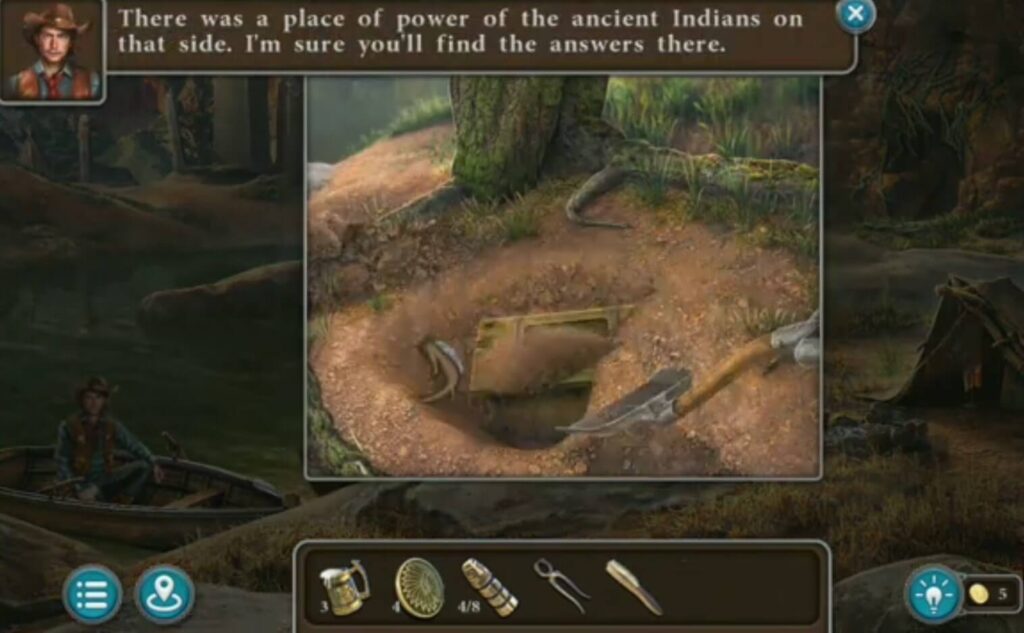
Dig with a shovel (it was locked with a padlock). You get a feather.
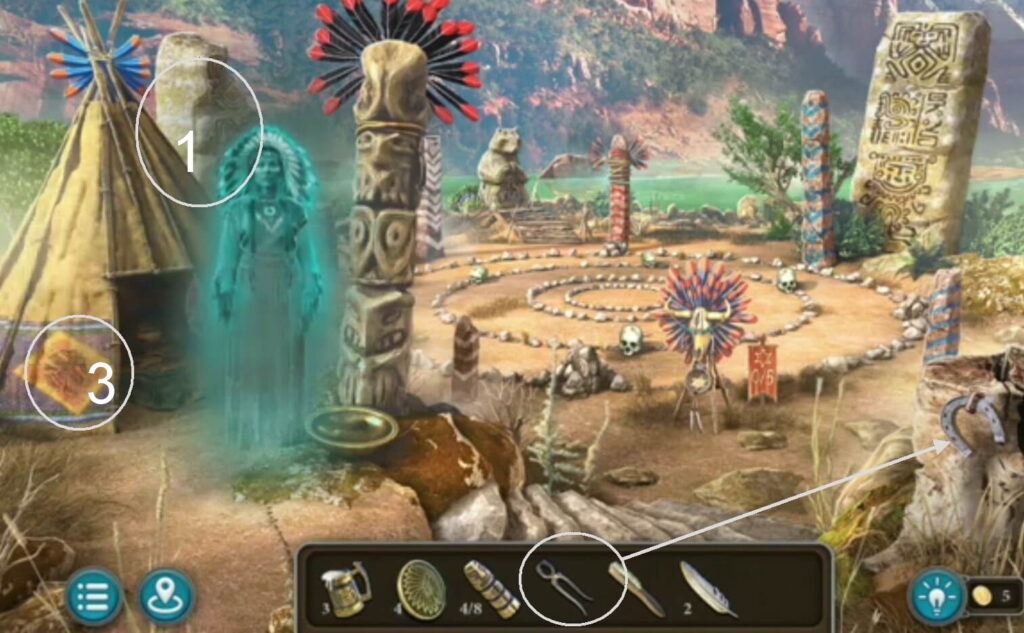
- A collection item
- A pincers (found in rocks) to get the horseshoe.
- A morphing object.
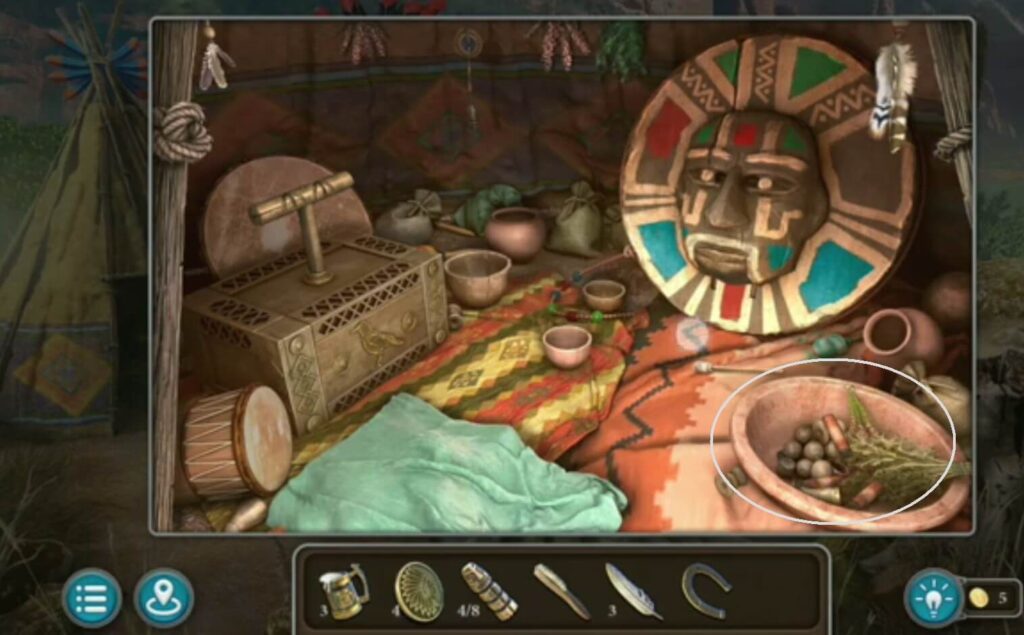
Take the feather from the bowl.
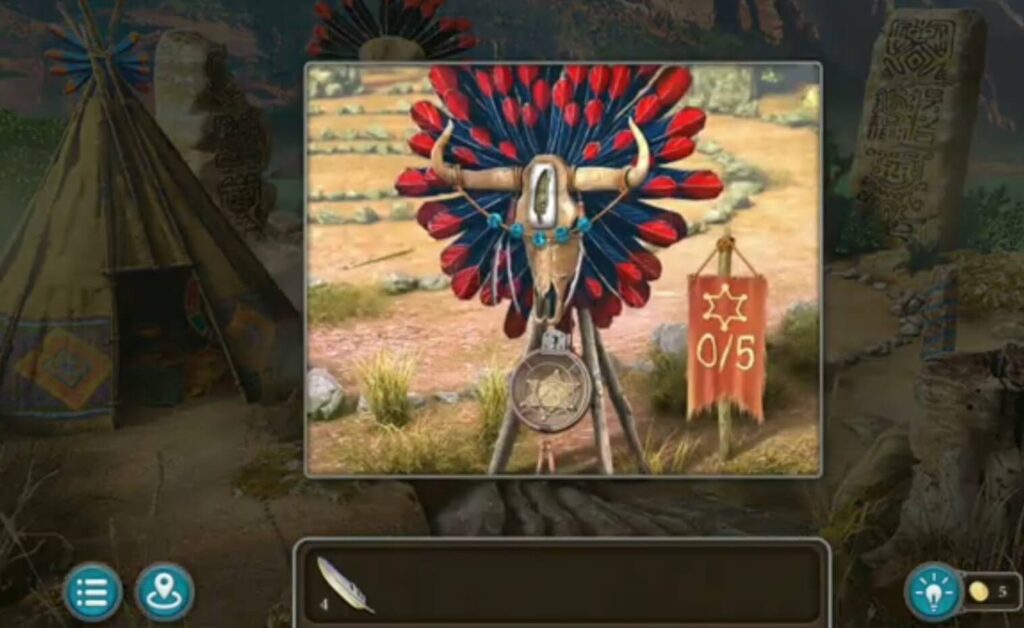
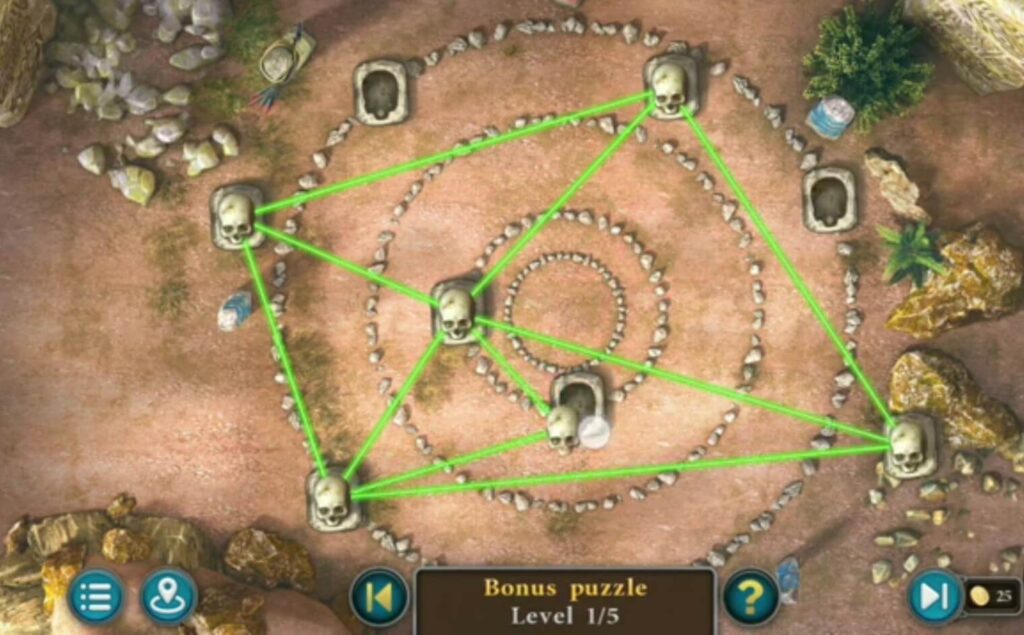
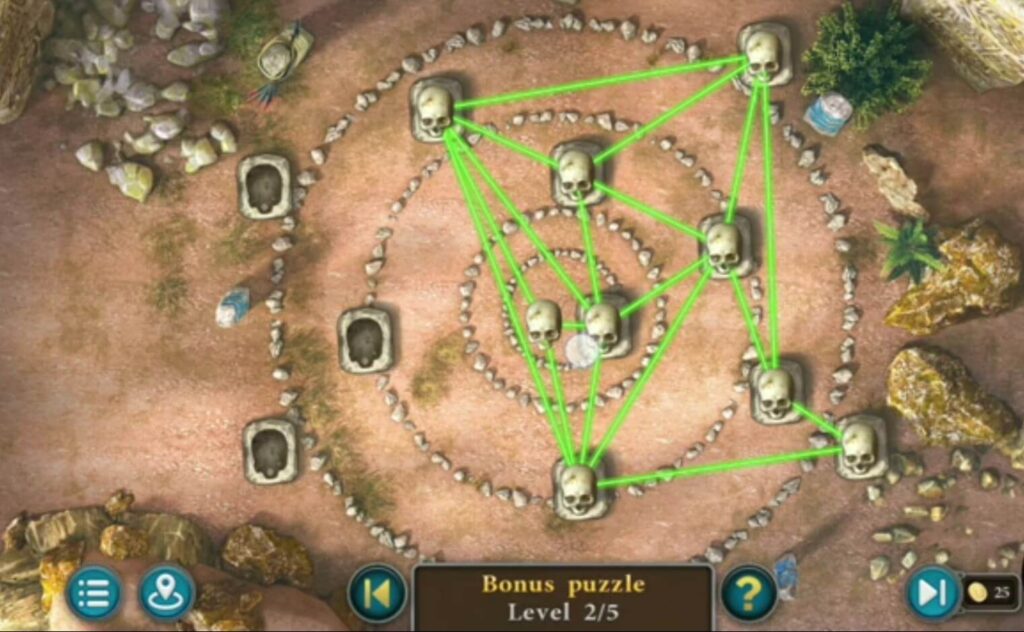
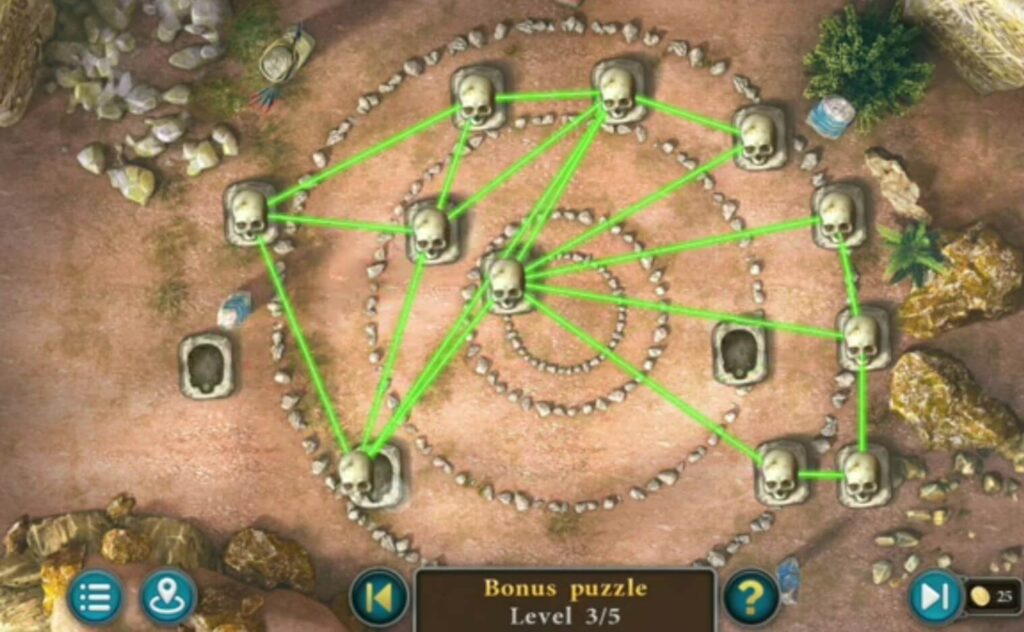

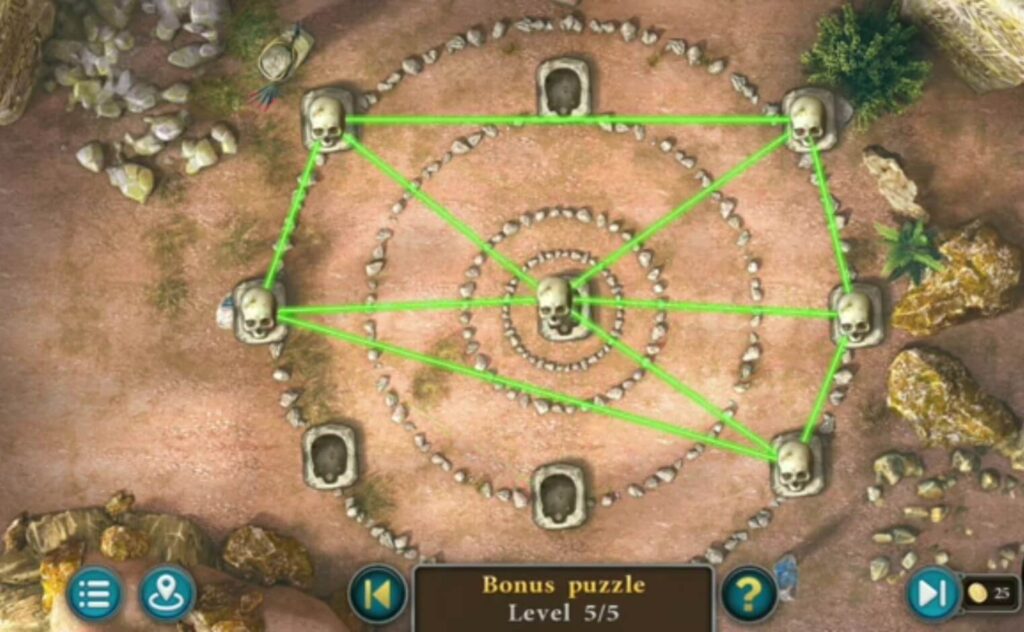
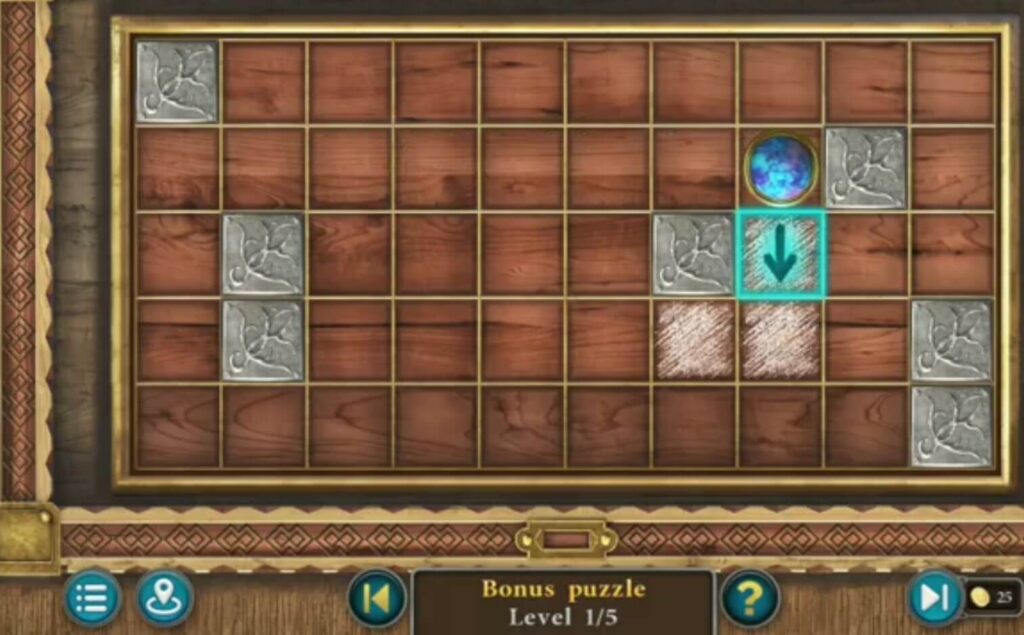
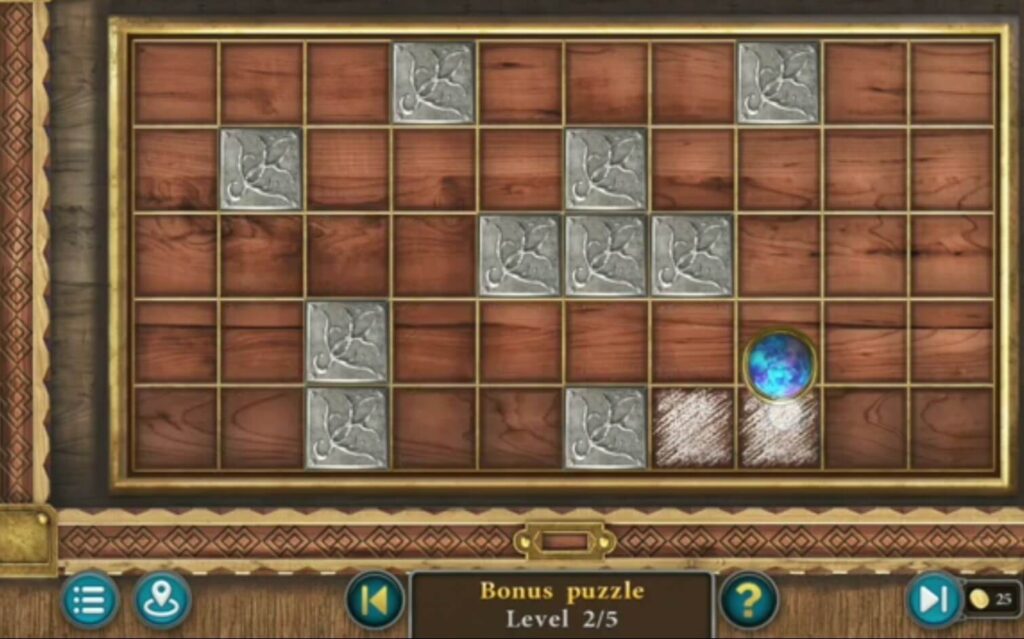
This is a five-level bonus puzzle. Use feathers you collected during the game, and put them to start the puzzle. Arrange the skulls so that they are all connected by green lasers. You get a star when you finish all five levels.
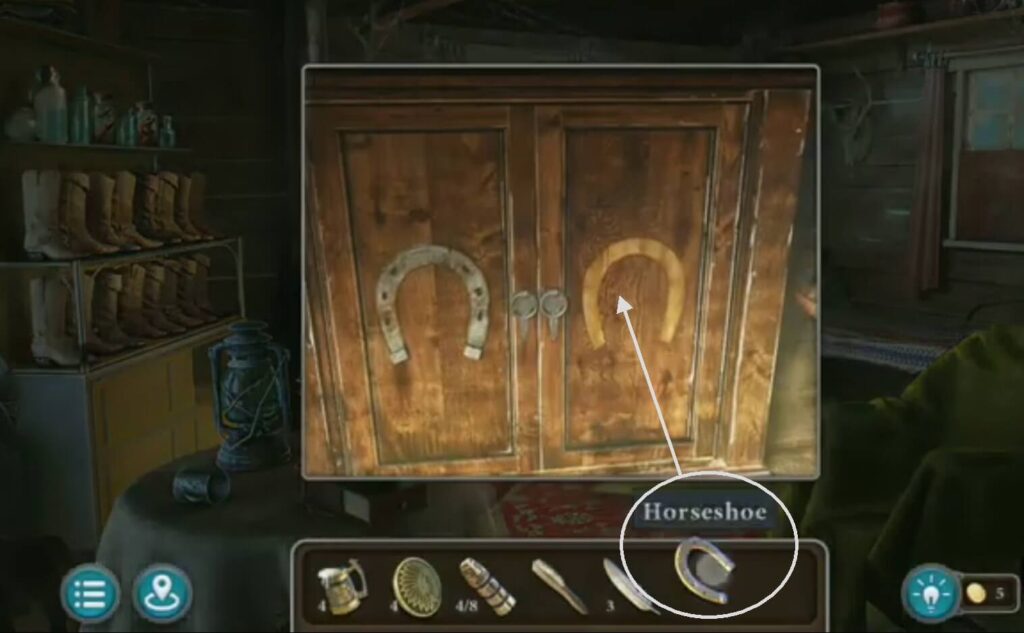
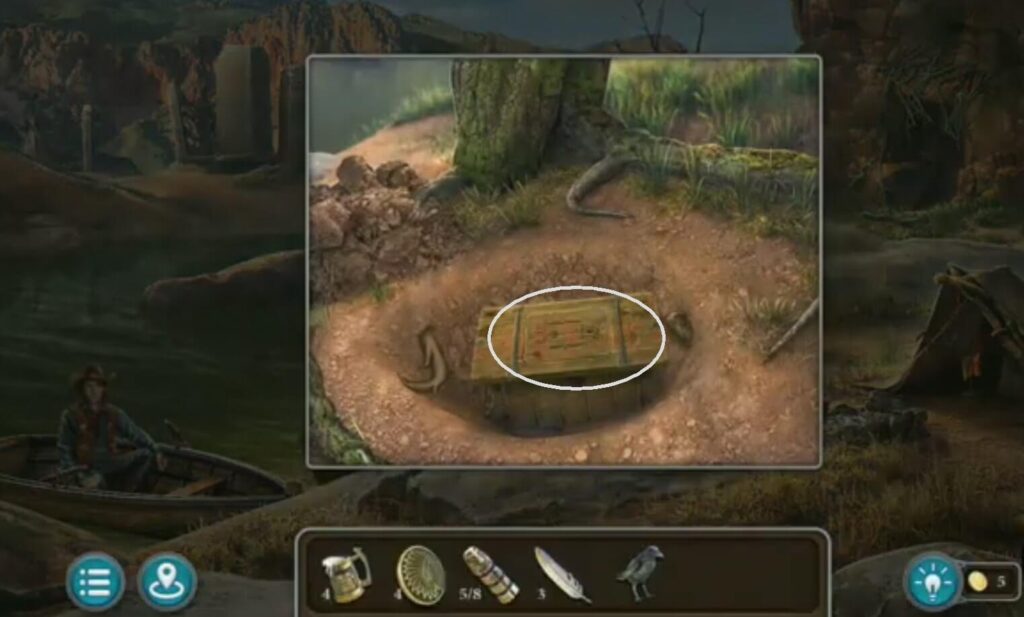
Put the horseshoe (found in rock) in the wooden cabinet. Inside is a puzzle.
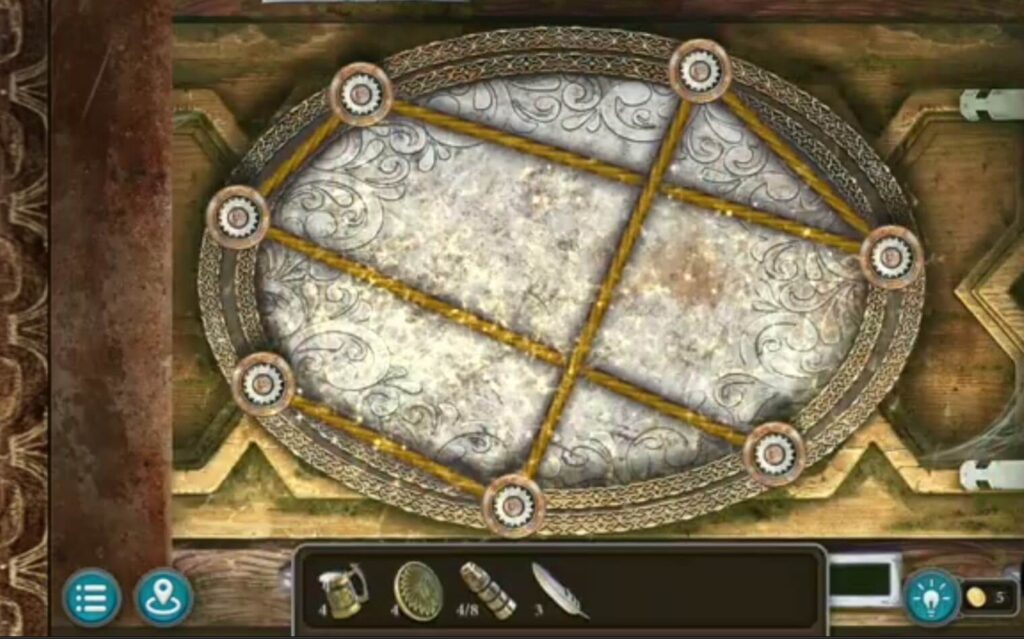
Solve the puzzle by arranging the pieces as shown on the lid. You have a ruby and a totem.
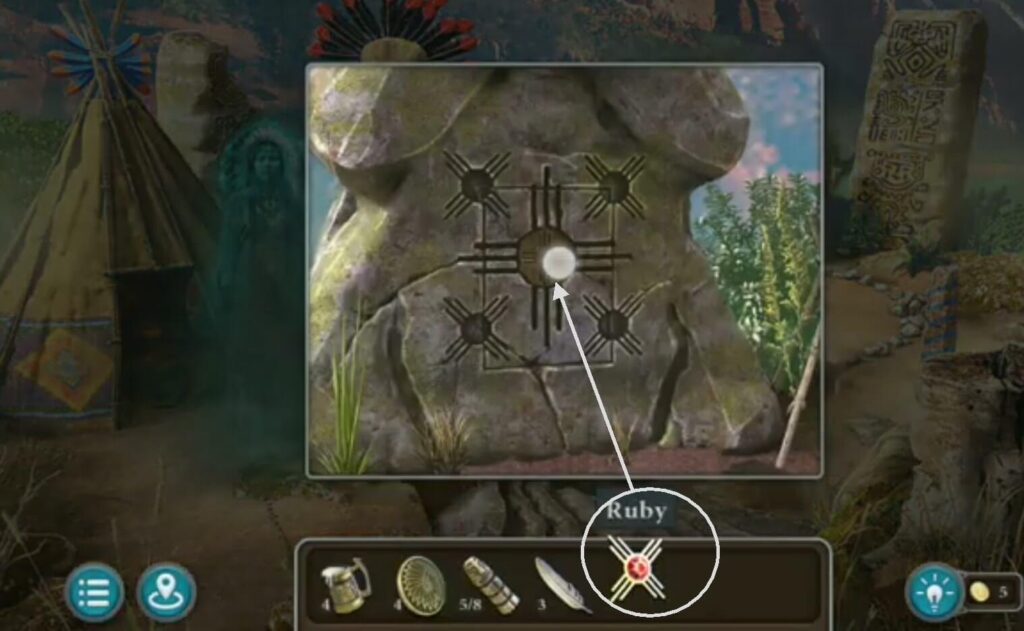
Put a ruby (found in the wooden cabinet puzzle) in the statue. You got a dream catcher.
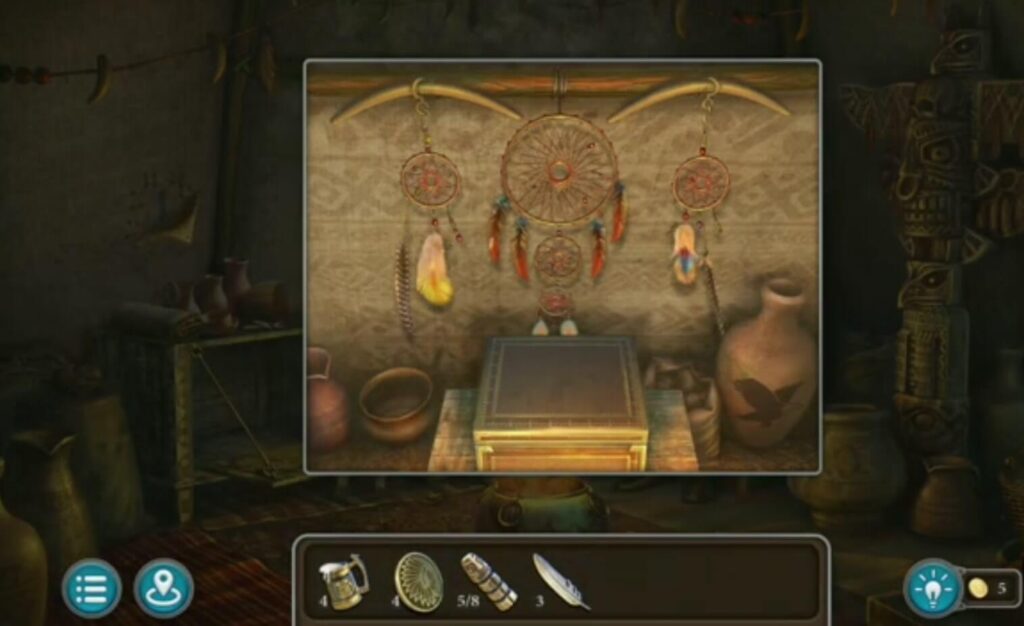
Put the dream catcher (found inside of ruby statue) next to the other dream catchers. You got a plate, a stuffed raven.
Put a plate (found in the dream catchers) on the box. You got a paint and a totem.
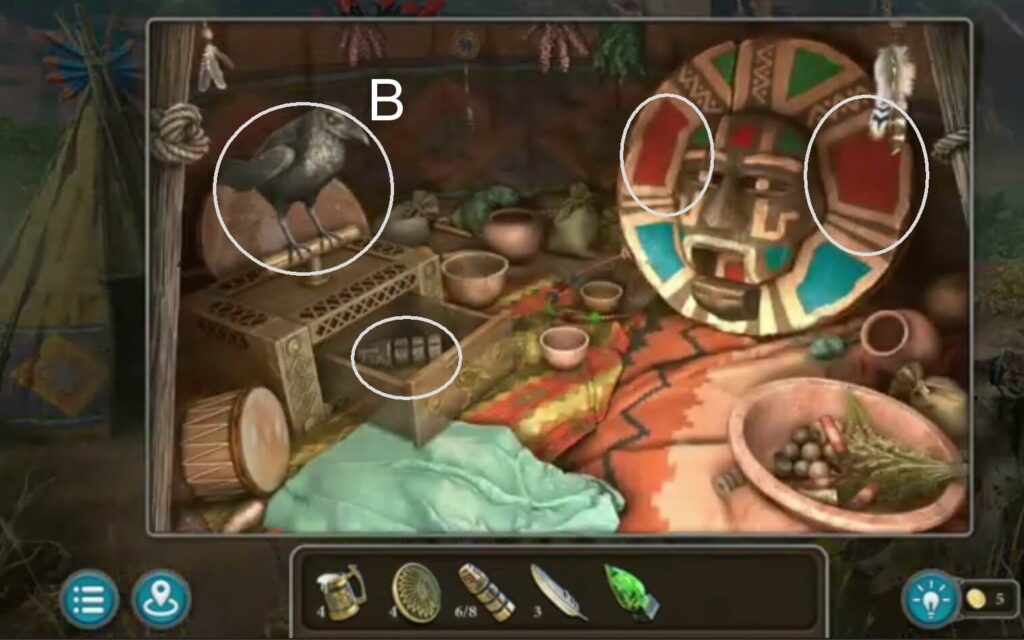
A) Put the paint (found in the box) on the mask. You got a green crystal.
B) Put a stuffed raven (found in the dream catcher puzzle) on the lever box. You got a totem.
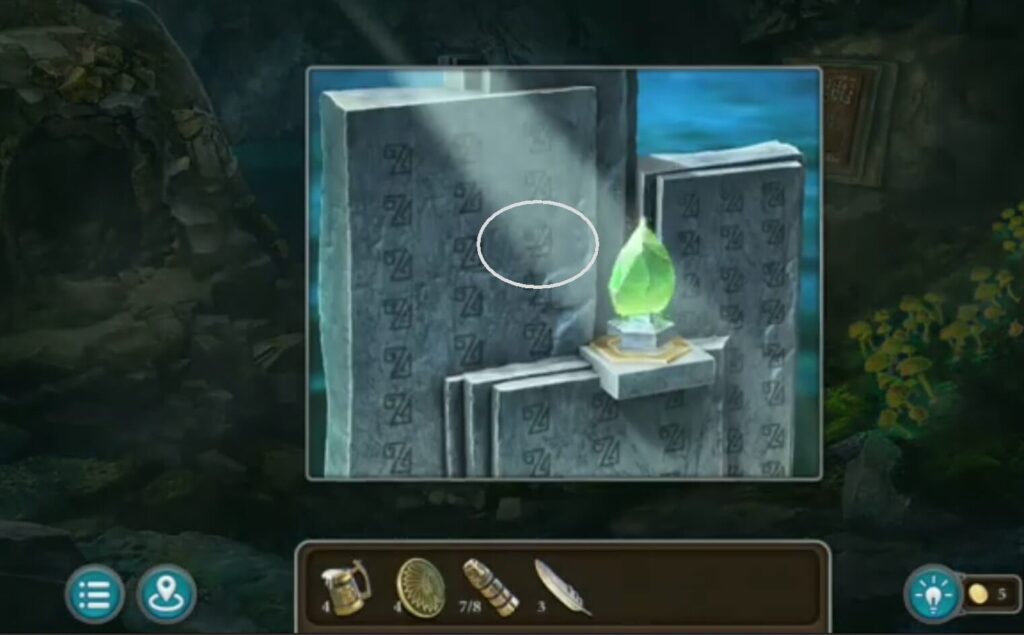
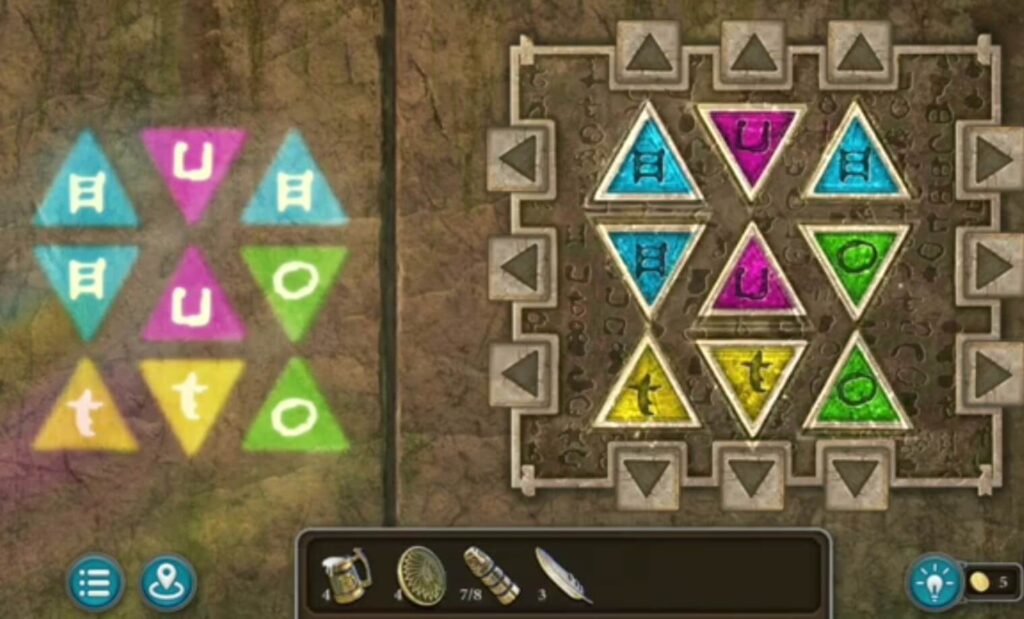
Put a green crystal (found in the Indian mask) on the gray stone statue. The crystal will illuminate the statue across the way and a new puzzle will appear.
There is also a feather on the monument.
Arrange the shapes in the same way as on the shadows on the left that the green crystal reflected.
You got a totem.
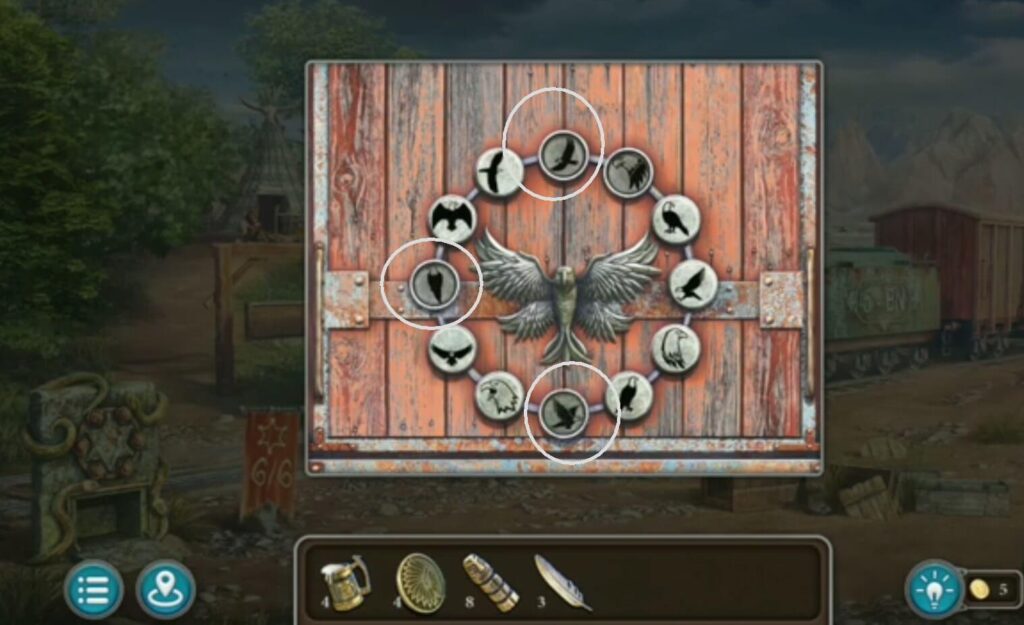
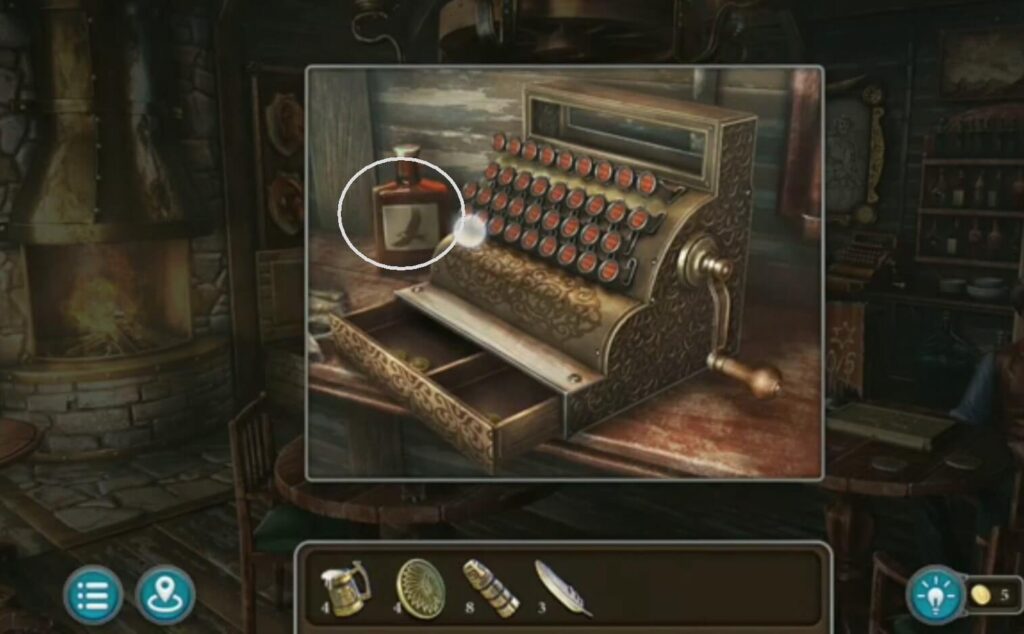
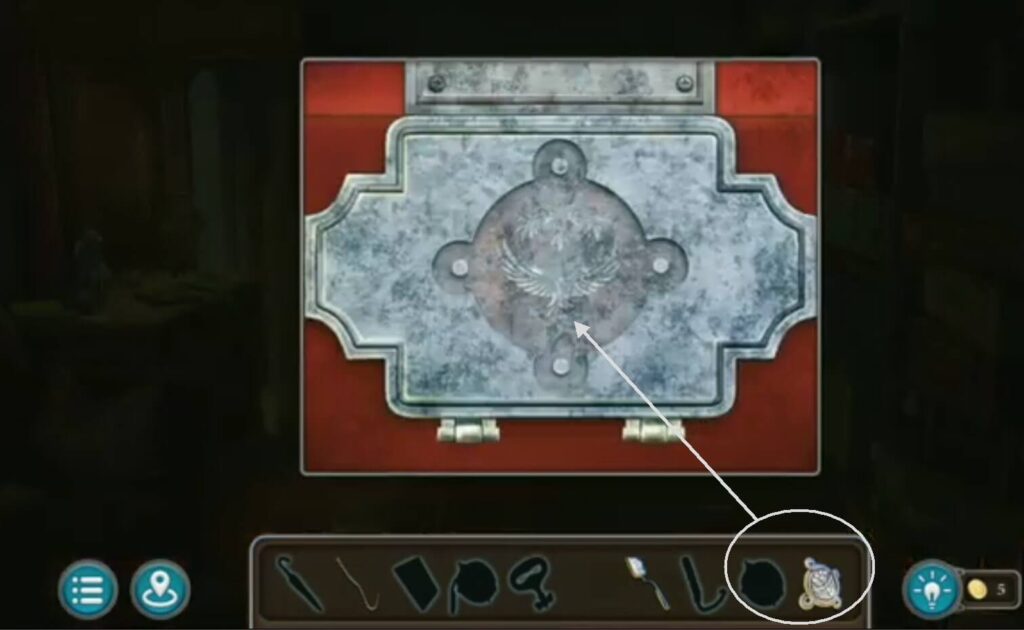
Solve the puzzle to enter a secret room. Press the eagle picture that can be seen in the drawer of the police desk on the flask next to the cash register and on the bowl next to the dream catcher.
This item was behind the frame.
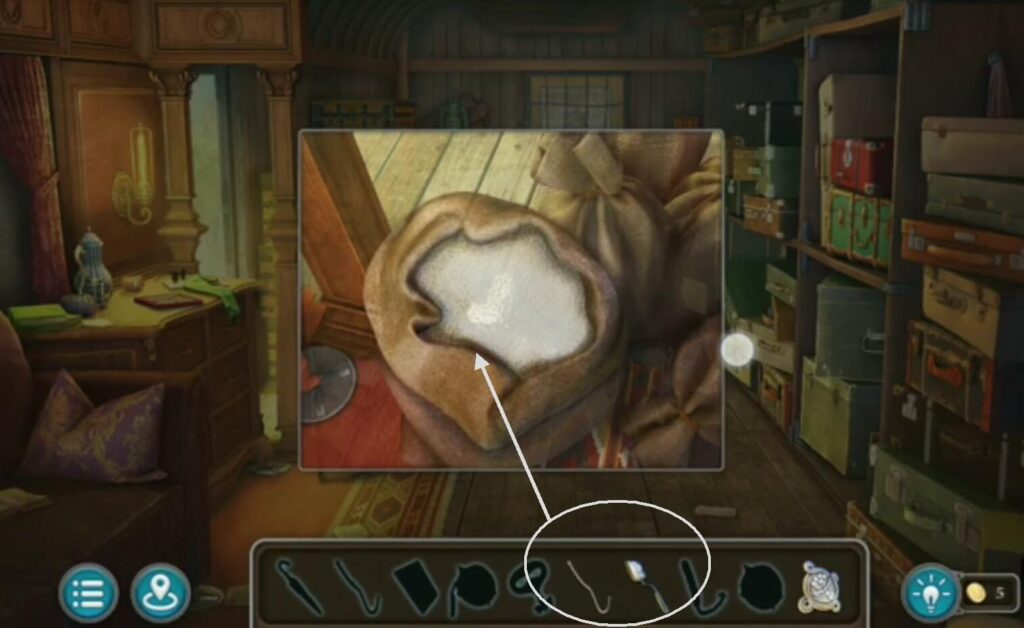
In the sack, there are two more items, a saltpeter, and one more item.
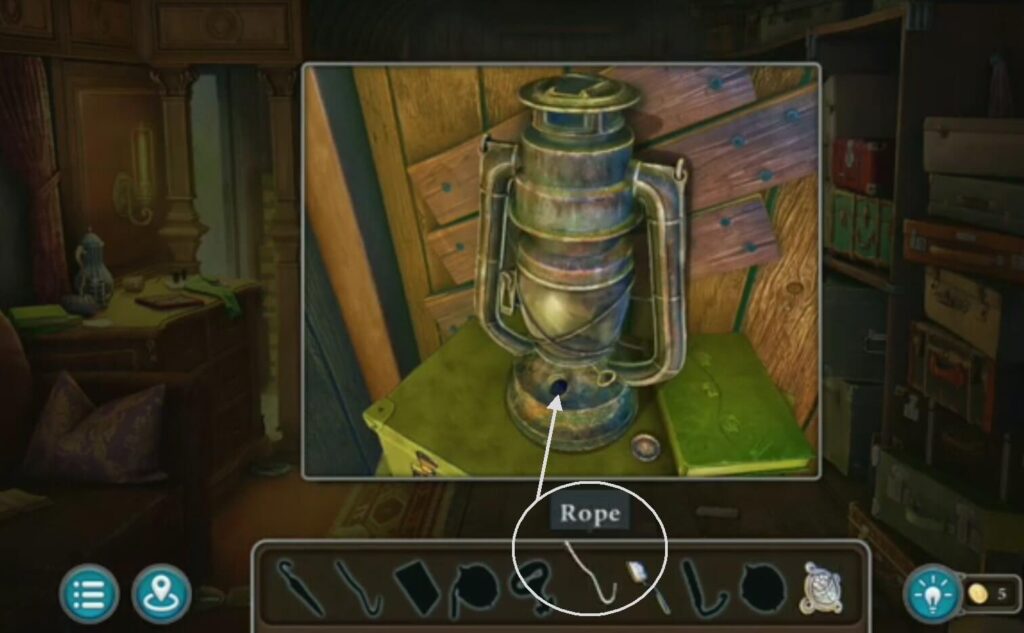
Take the rope from the sack to hang on the lamp and get a new rope in kerosene.
Put the locket, a puzzle will appear.
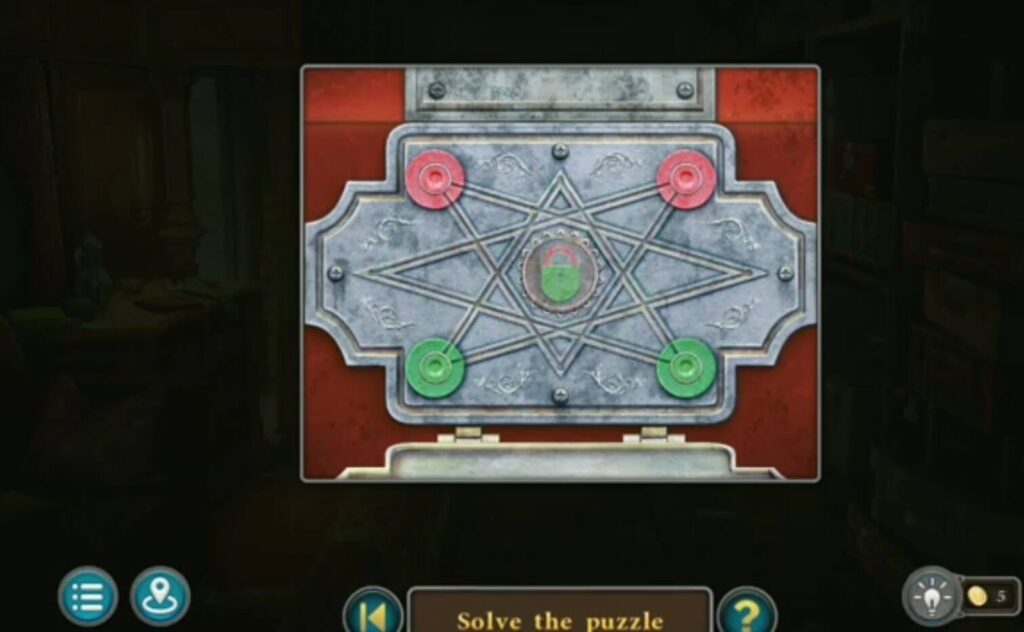
Solve the puzzle by placing the green circles on the green squares and the red circles on the red squares. You have 3 more items: a key, a jar, and another item.
Put a key to unlock the cage. You got an umbrella.

Using the umbrella you took when you opened the cage, remove the boards. Take the rope in kerosene and put it in it. You have a fuse.
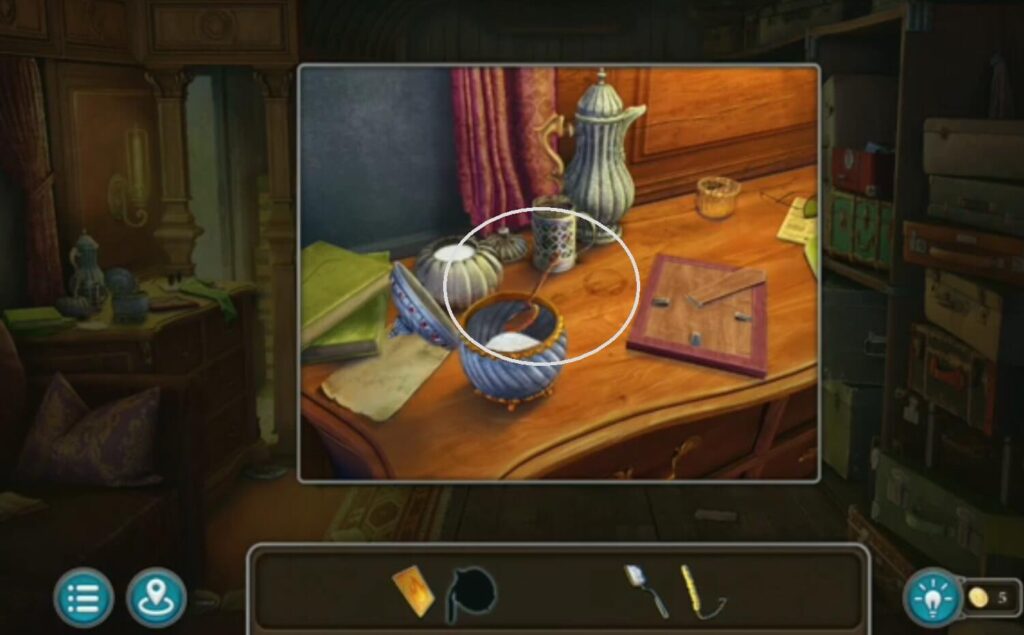
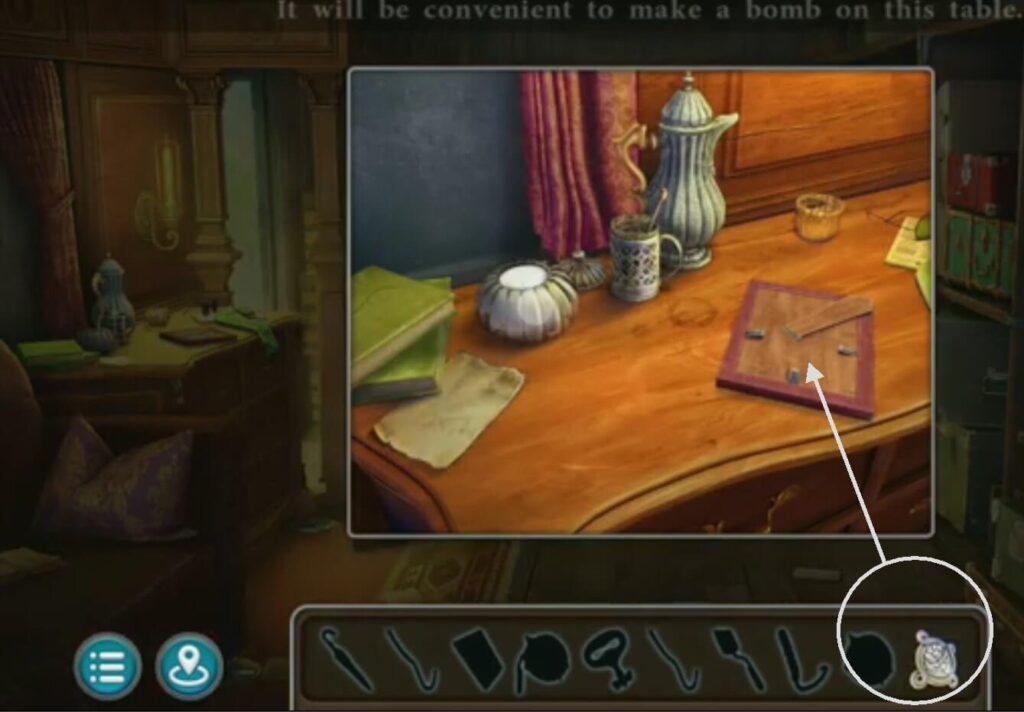
Take a jar (from a solved puzzle) and put it on the table. Take a spoon fill a jar and take a saltpeter. Put a fuse too. You made a bomb. Take matches (found them in the store).
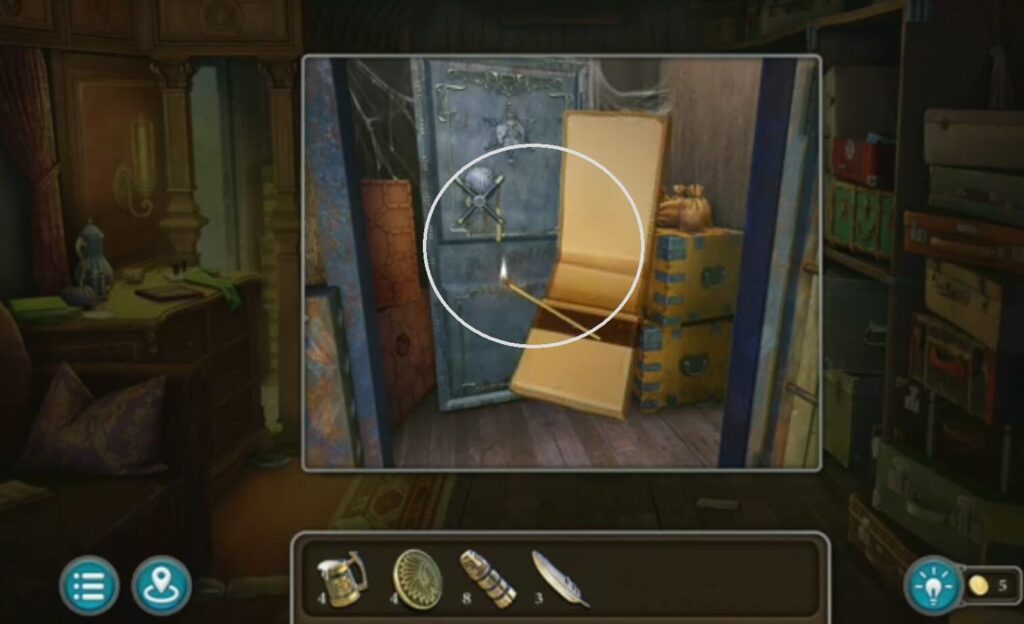
Put a bomb by the door and light it with a match. There is a star inside.

Give totems to the Indian. You got a map.
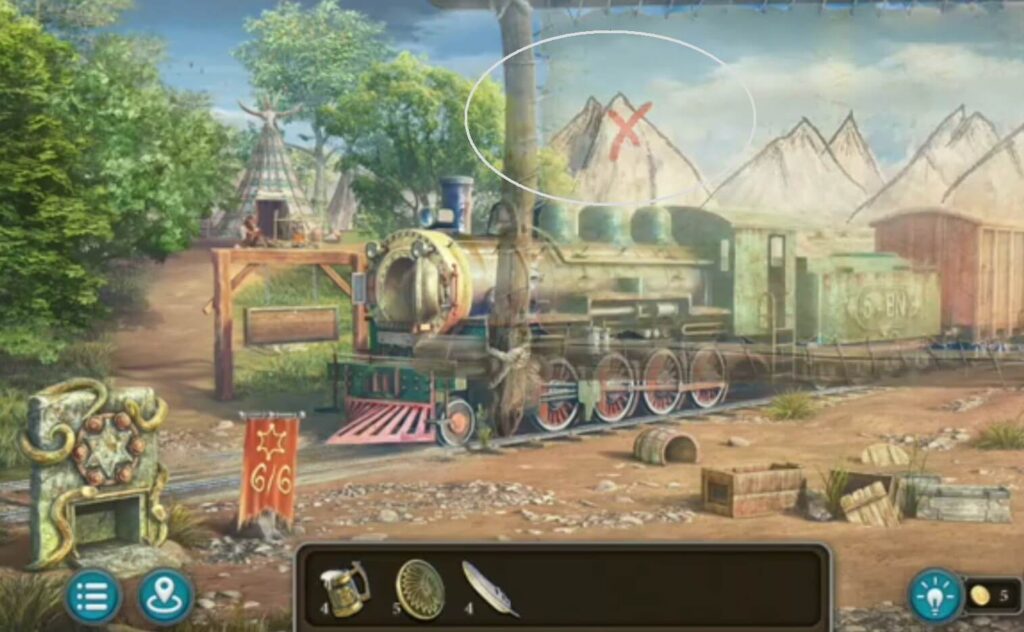
Put the map (which you got when you gave the totems to the blue Indian) in the part where the train is. The marked part matches the mountain in the picture. You got a star, and a cave will open. Inside is a treasure and gold.
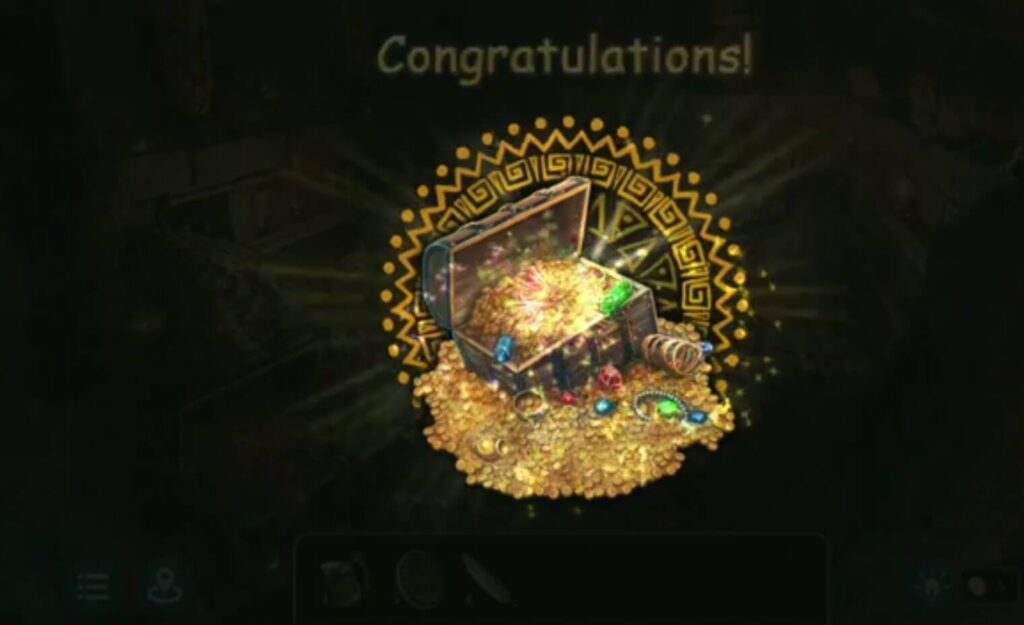
You found the treasure and it’s the end of this chapter.