Artifact Seekers Walkthrough | “Tropical island”
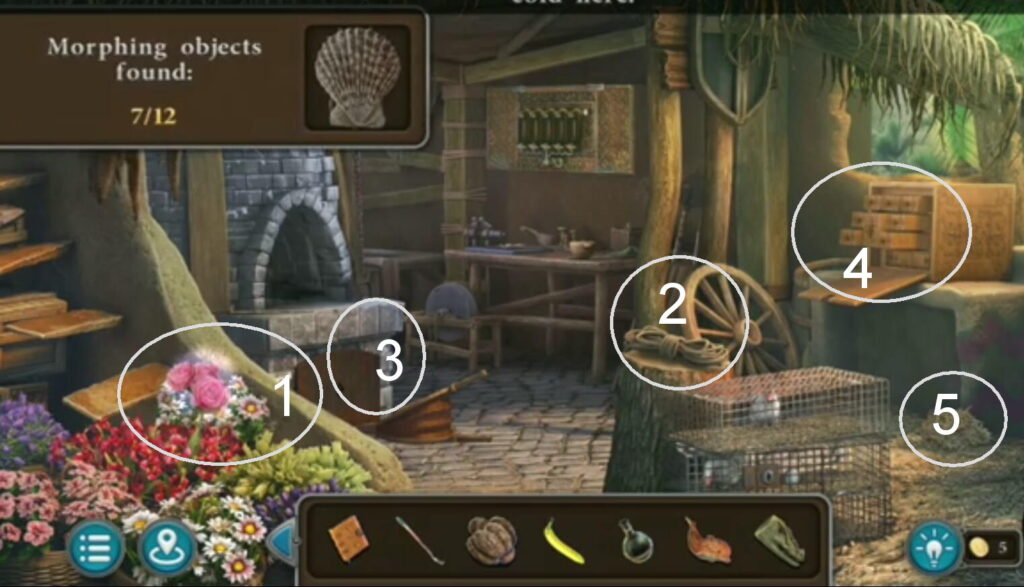
Welcome to the walkthrough of Artifact Seekers, an adventure game in the hidden object genre created by Five-BN. This walkthrough will show you how to solve all the puzzles and finish the game in the first chapter called “Tropical Island”.
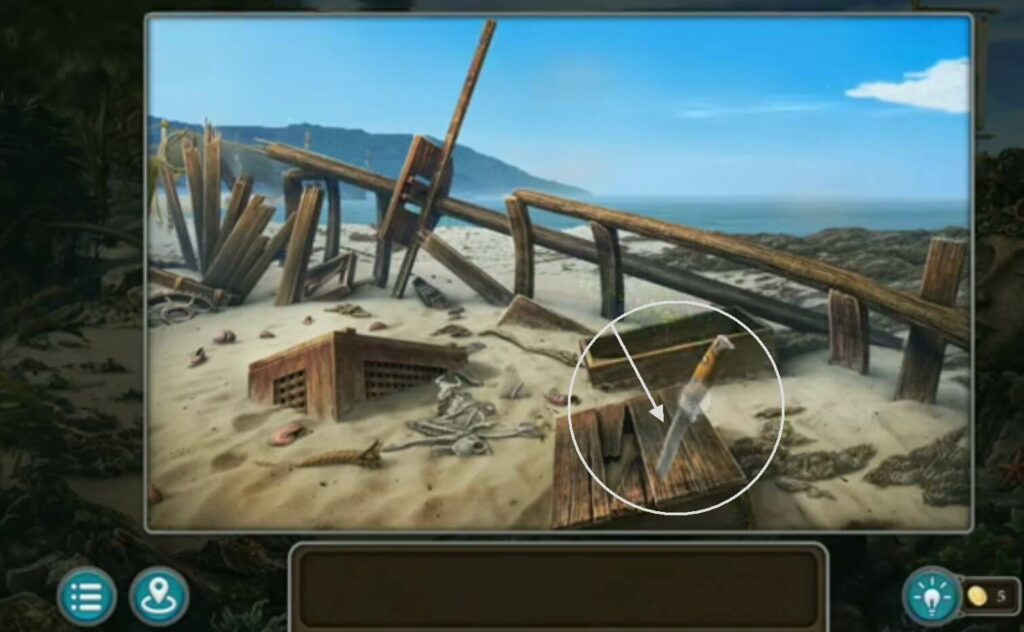
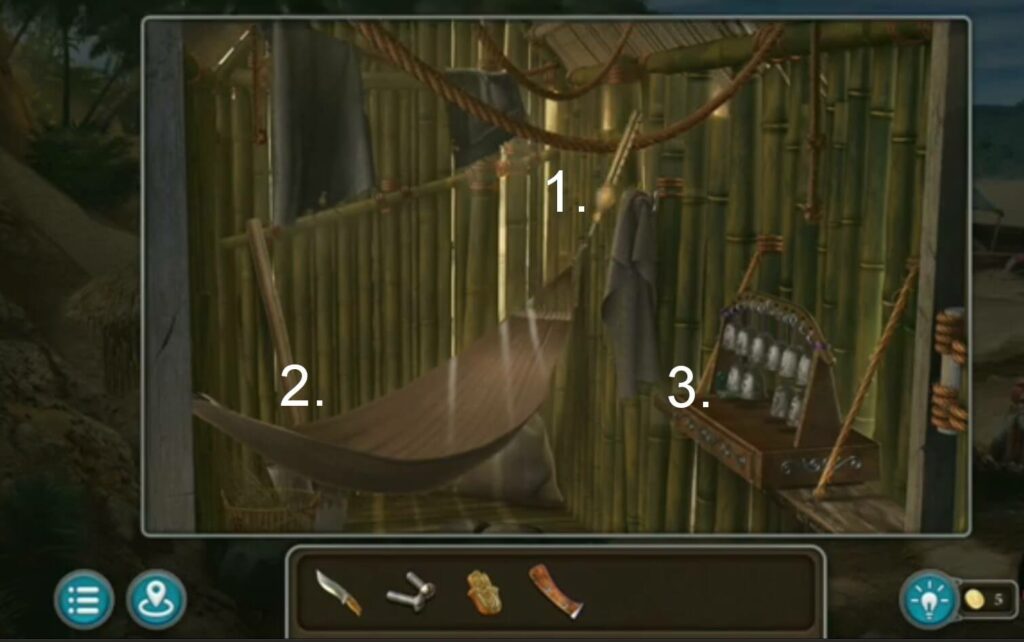
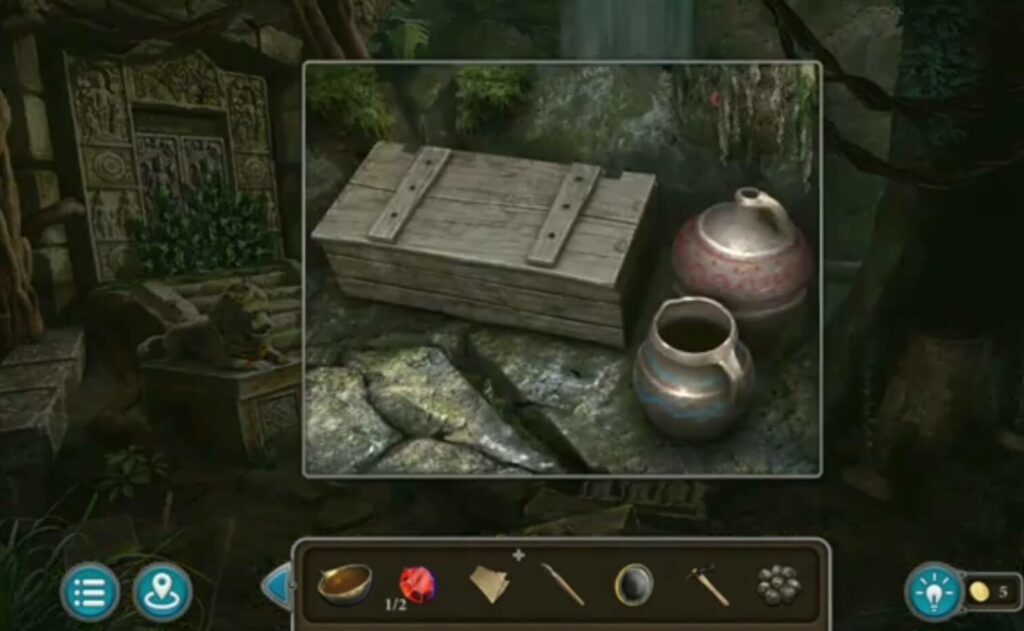
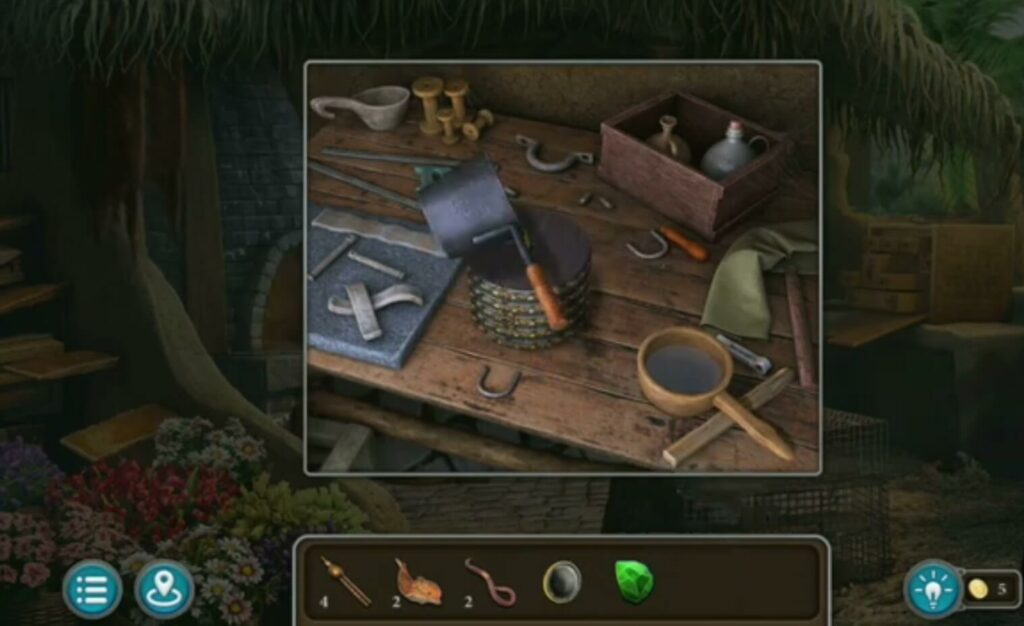
Take the knife from the box.

Open the shells with the knife (in the box). Inside, you will find bolts and an amulet.
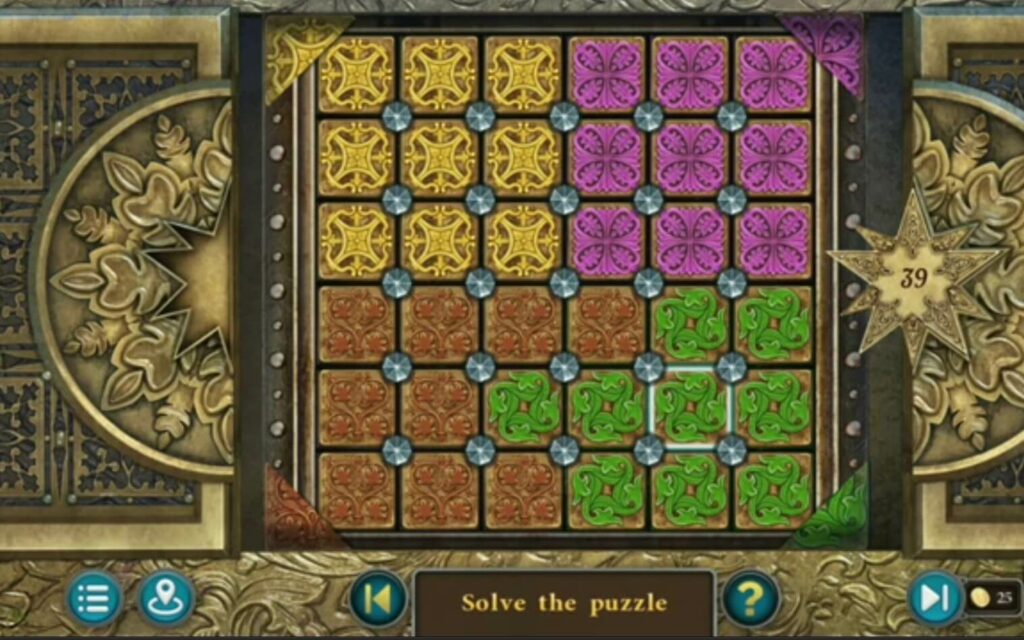
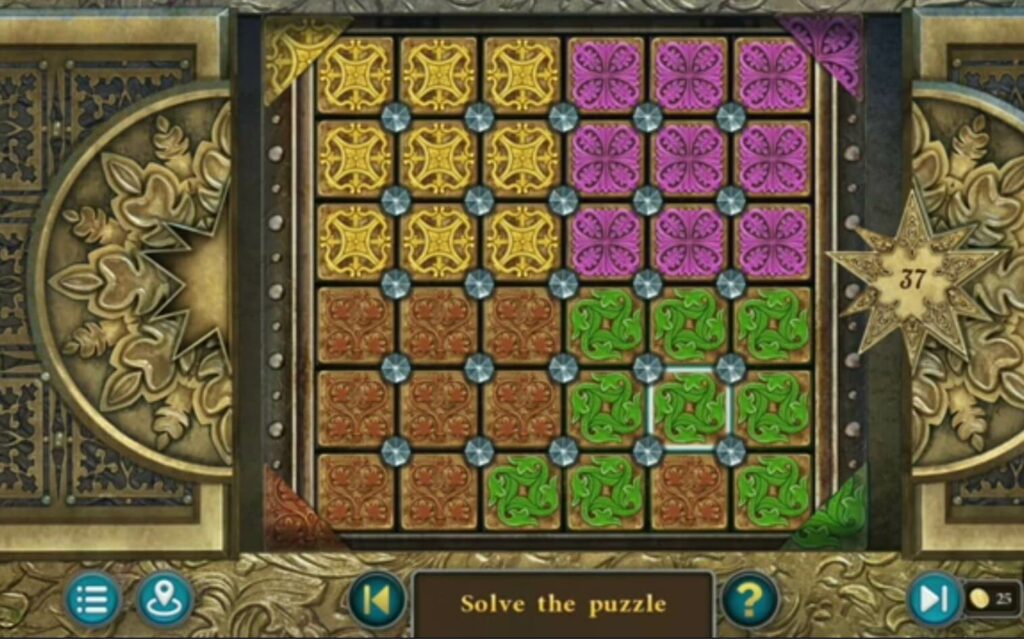
Solve the puzzle by clicking in the order of 1-7 on the prints on the wall. You will get a worm.

- A morphing object
- A collection item

Take a knife and cut the nets.

The fisherman gives the key at the end of the conversation.
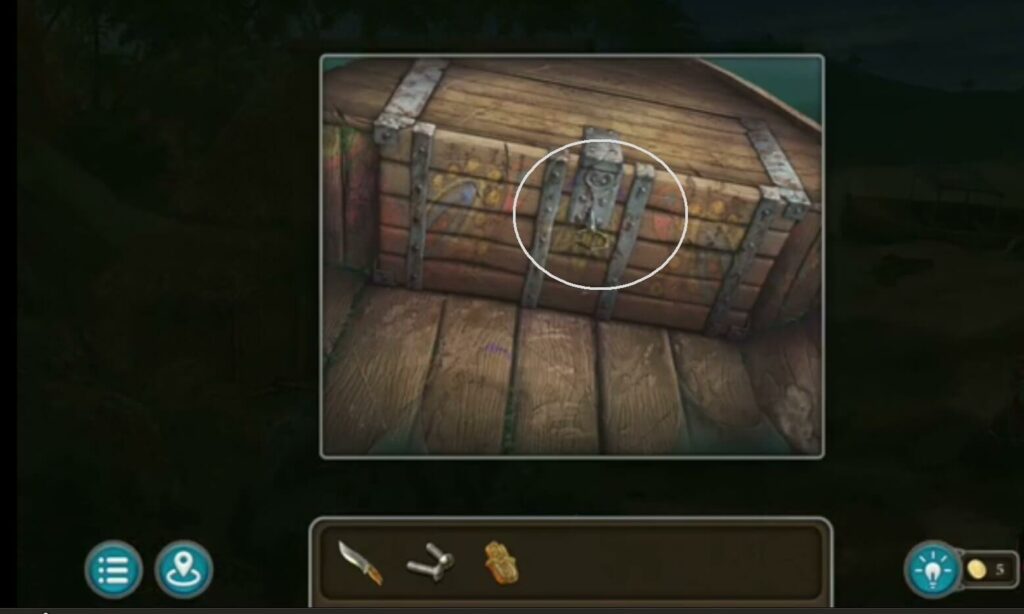
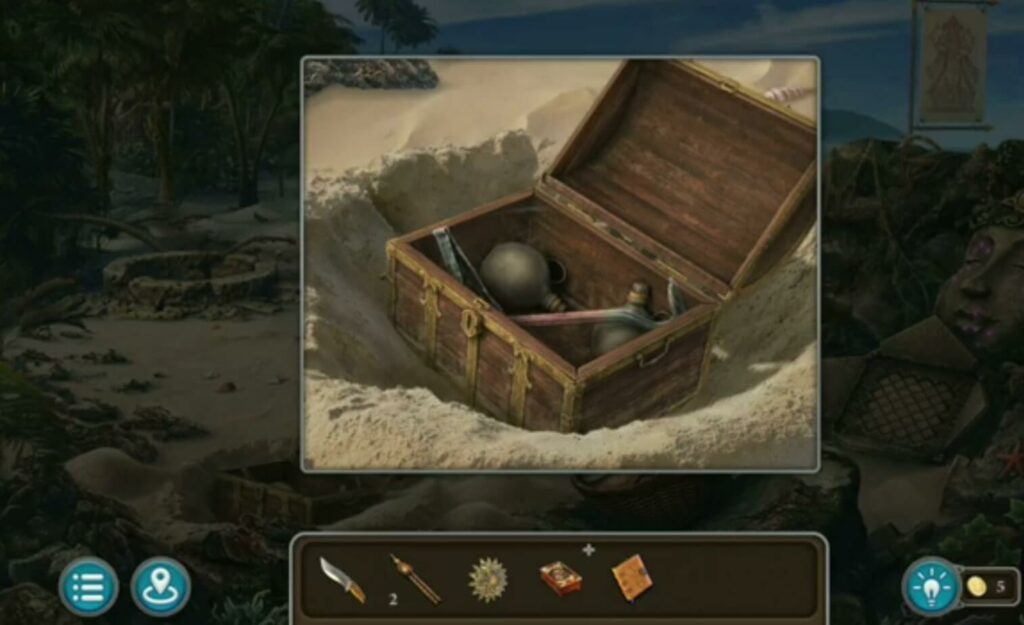
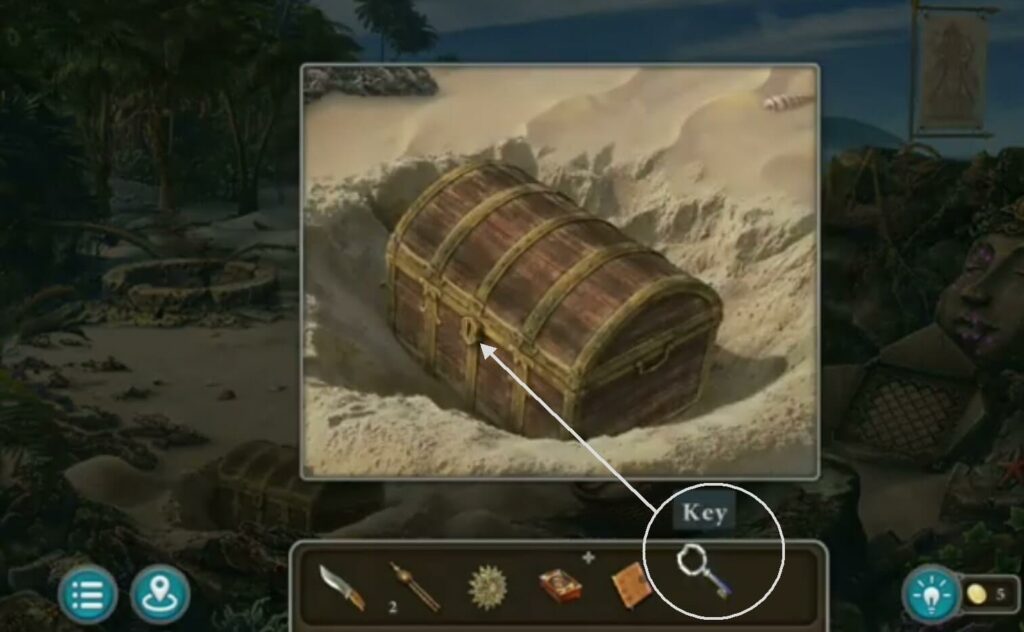
Take the key that the fisherman gave you to open the chest in the boat. When you open the chest, you will see a puzzle you must solve.
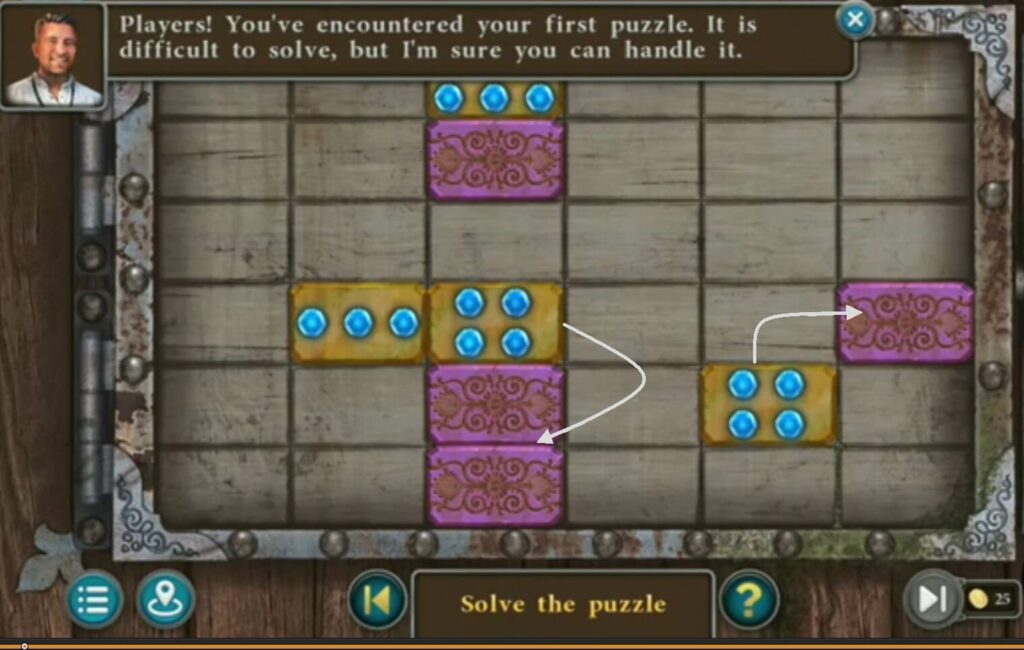
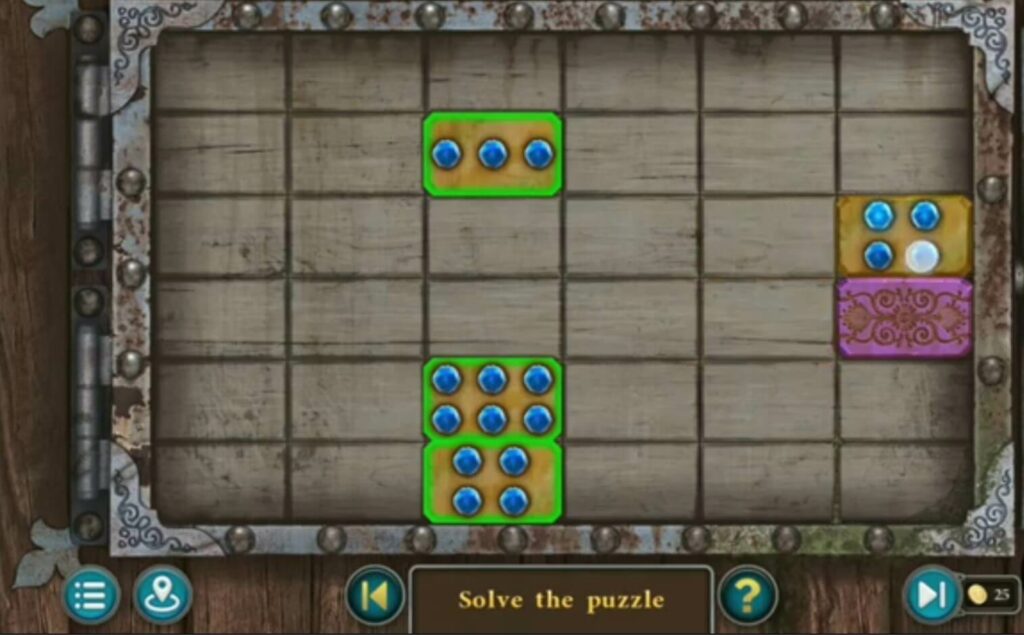
Solve the coffin puzzle by placing the dot tiles over the pink tiles. When you do, another part of the chest will open. It has a map, a handle, and nippers.

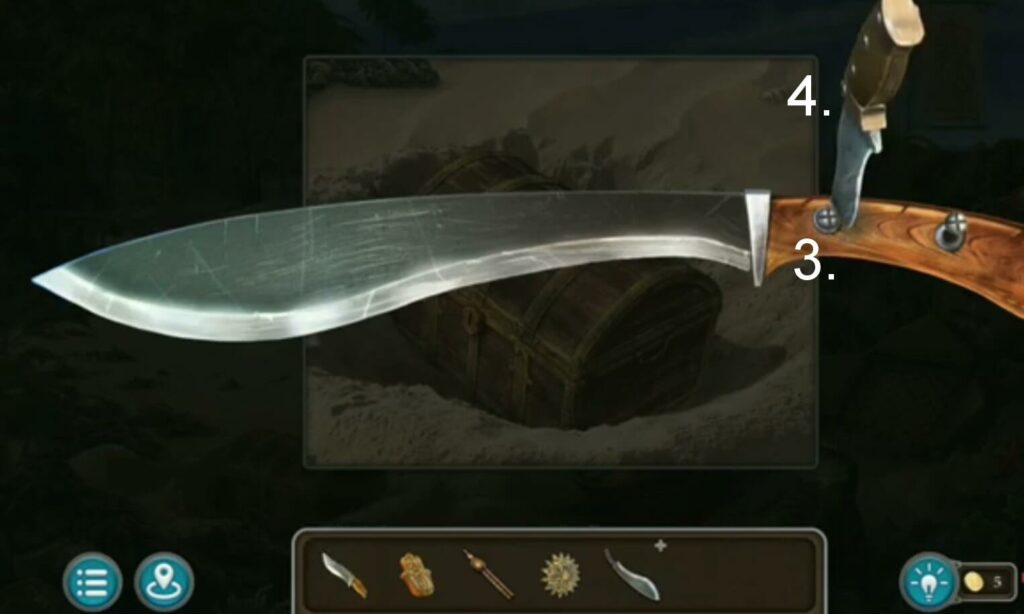
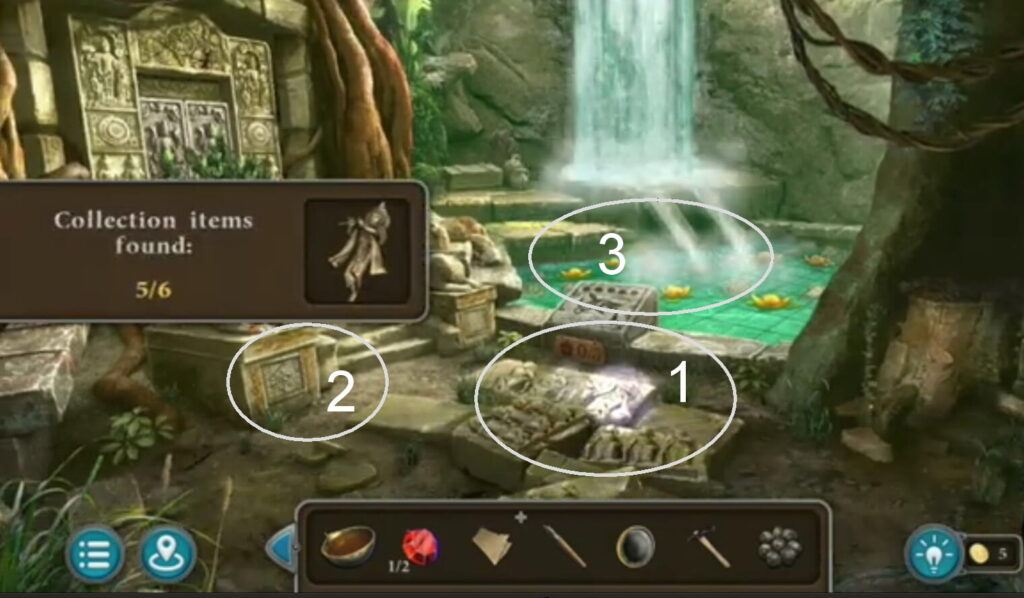
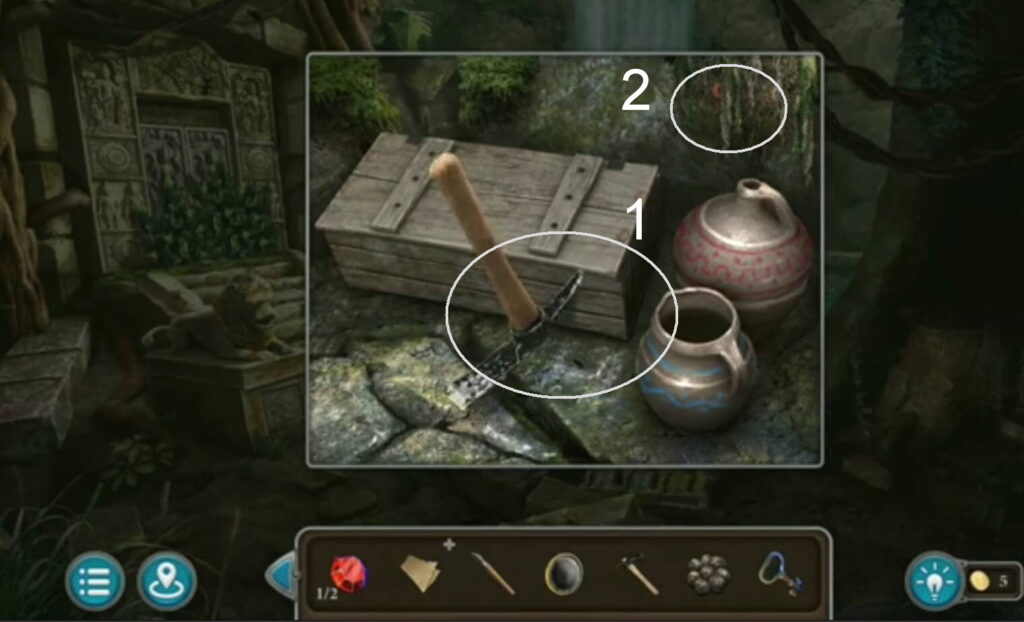
Dig with a shovel coffin out of the sand. Next to it is a blade.
1-2 Put the handle (got it when you solved the coffin puzzle) on the blade and bolts (from shells).
3-4 Screw it all up with a knife and you’ll get a machete.
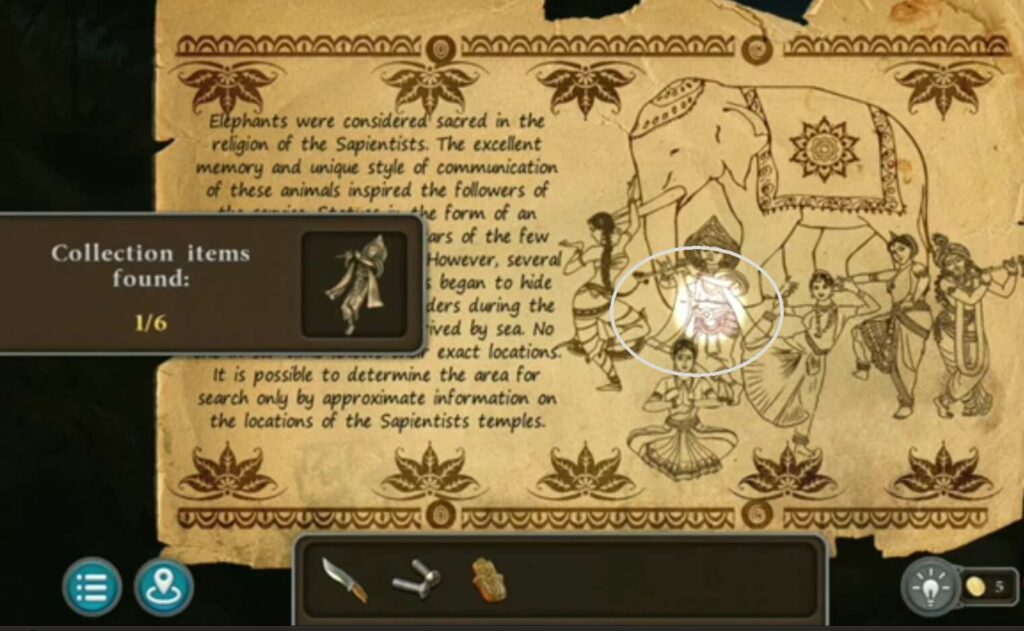
A collection item.
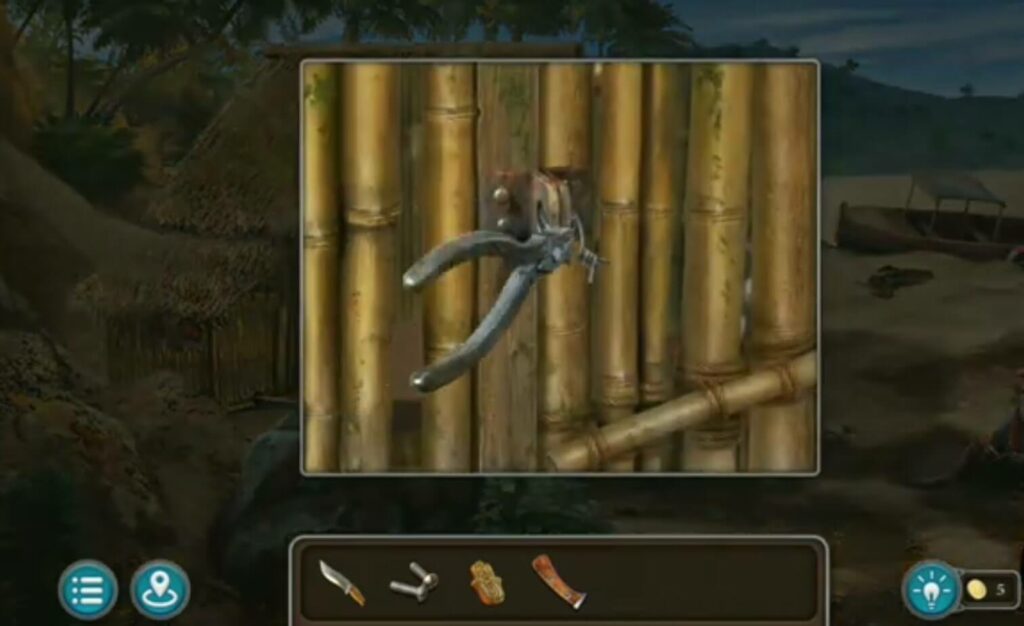
Take the nippers (that you found in the chest) to open the cabin door.
When you open the door of the hut (using the nippers you found in the coffin) you will see:
- A pungi
- A shovel
- A puzzle
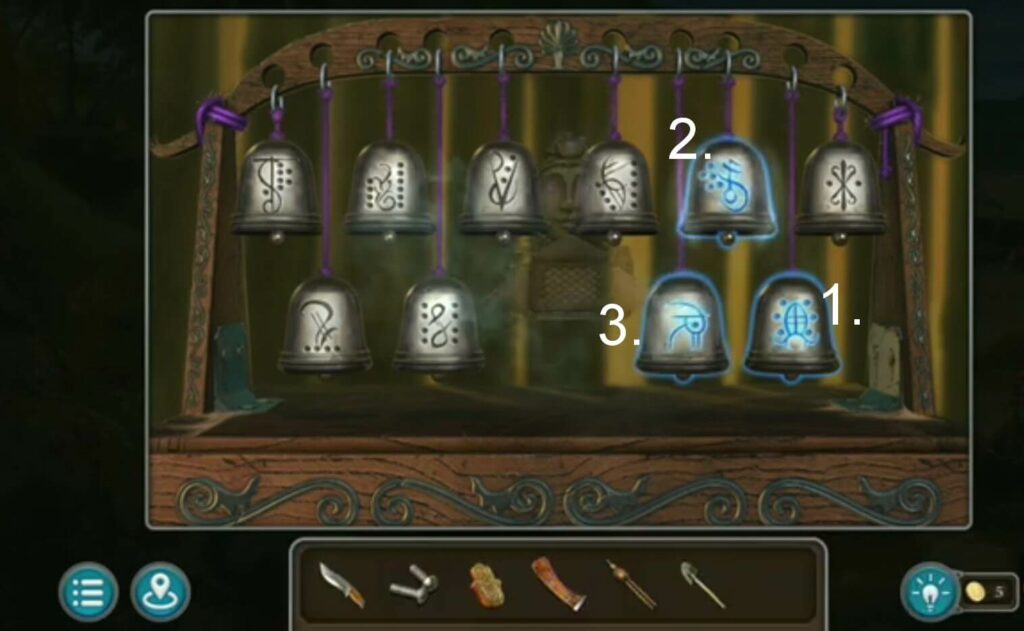
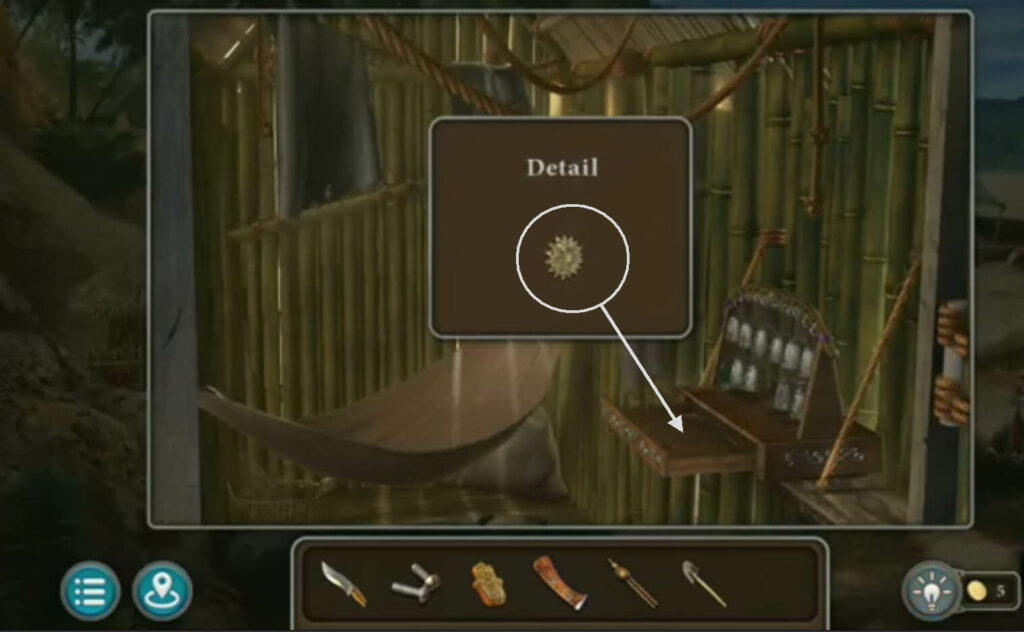
Click on the bells to solve the puzzle on the order 1-2-3. The drawer containing the details will open.
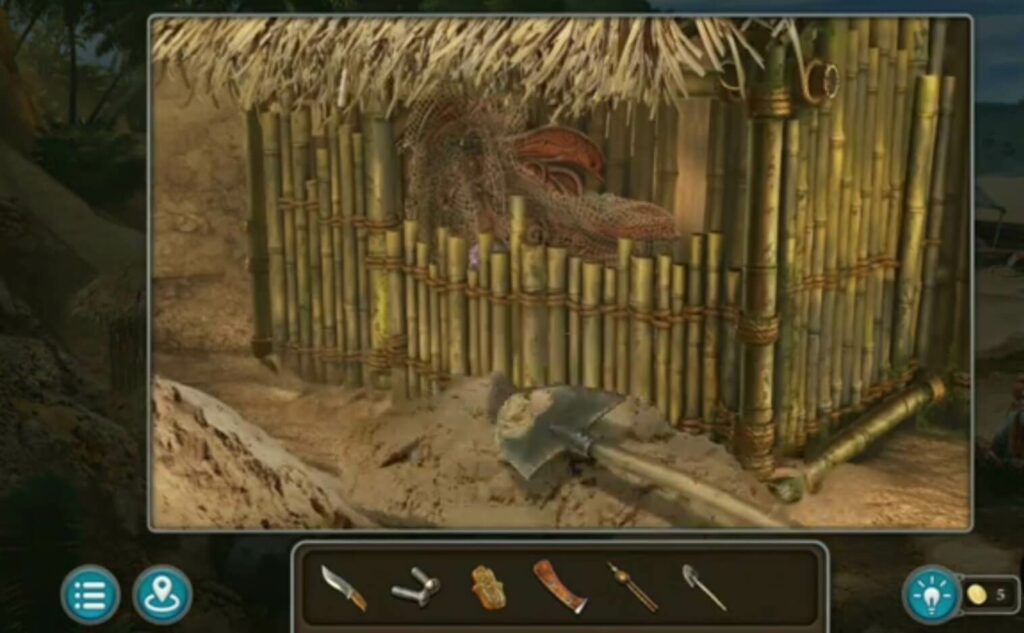
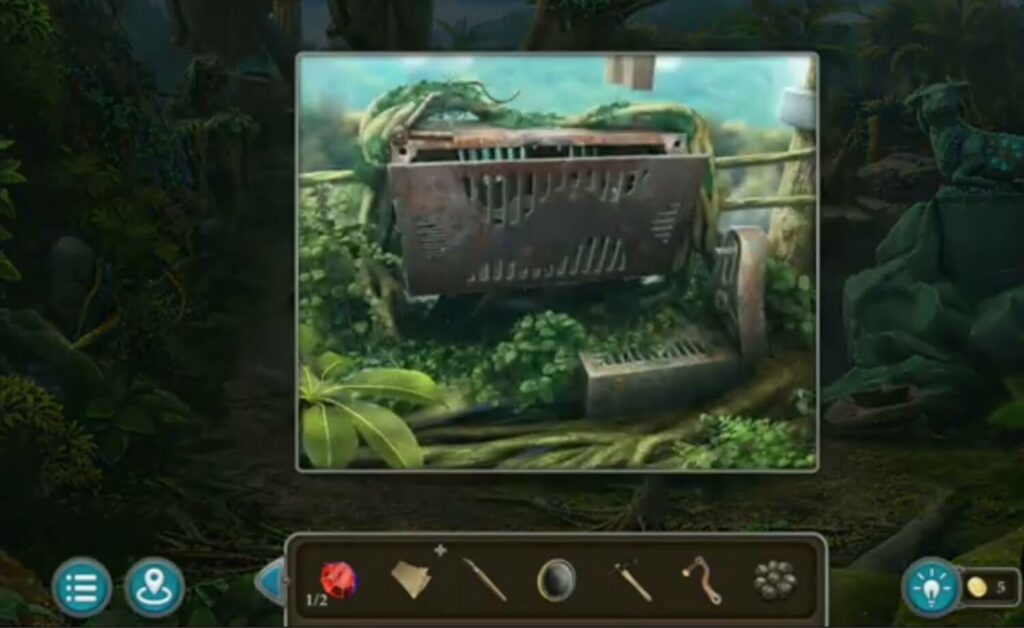
Take the shovel (that you found in the hut) to dig up the sand. When you dig, a box covered with networks will appear. You need to untie these networks.

Take the knife (that you picked up from the box) to cut the net. After that, you will get a glass eye.
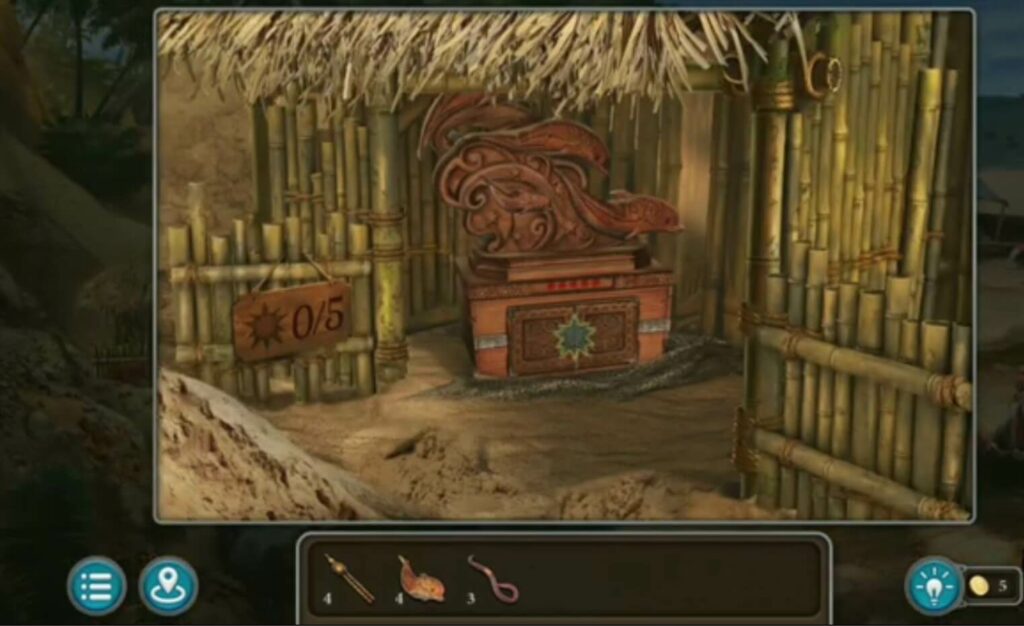
Bonus puzzle: Put the dolphin figurine in the box. A puzzle appears. This puzzle has 5 levels, and for each level, you need to add one collected dolphin figurine.

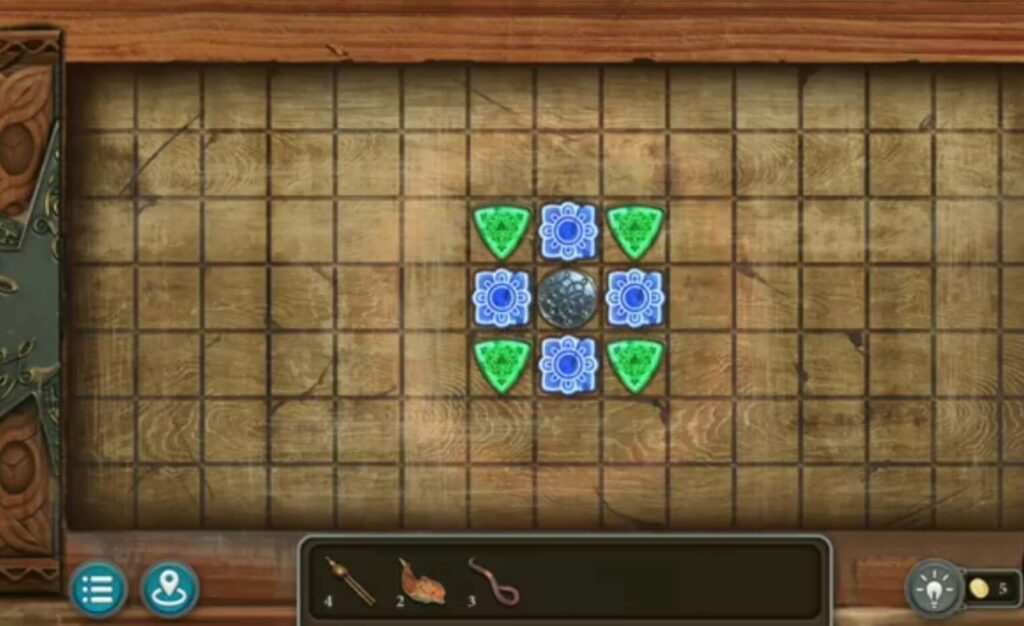
Level 1- Solve the puzzle by arranging the shapes as they are on the board.
green triangle – blue square – green triangle
blue square – silver circle – blue square
green triangle-blue square-green triangle

Level 2- green triangle – blue square – green triangle
blue square – silver circle – blue square
green triangle-blue square-green triangle
Level 3- green triangle – blue square – green triangle
blue square – silver circle – blue square
green triangle-blue square-green triangle
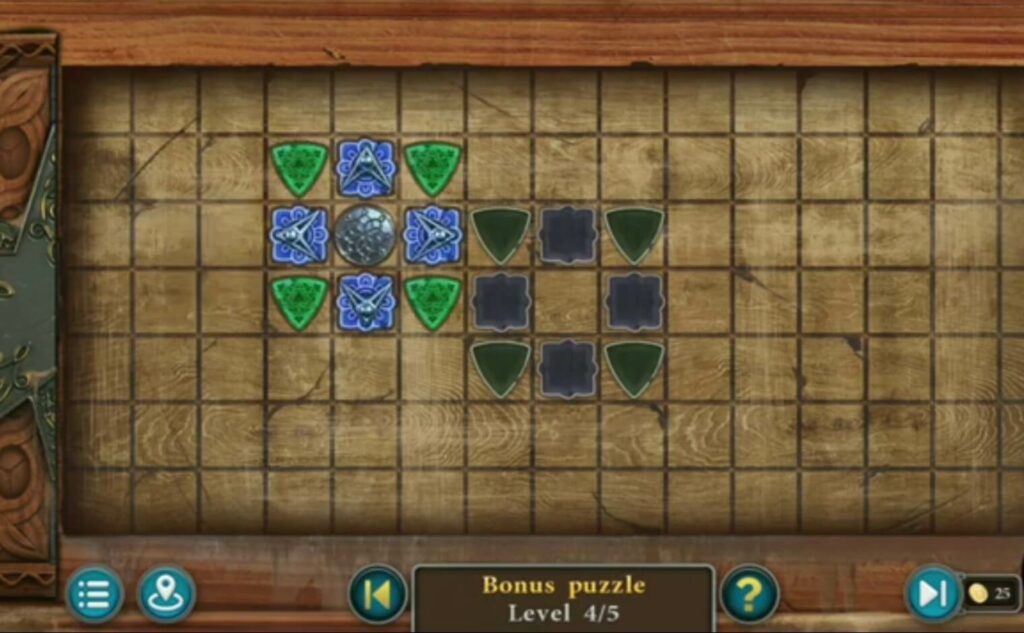
Level 4-green triangle – blue square – green triangle
blue square – silver circle – blue square
green triangle-blue square-green triangle
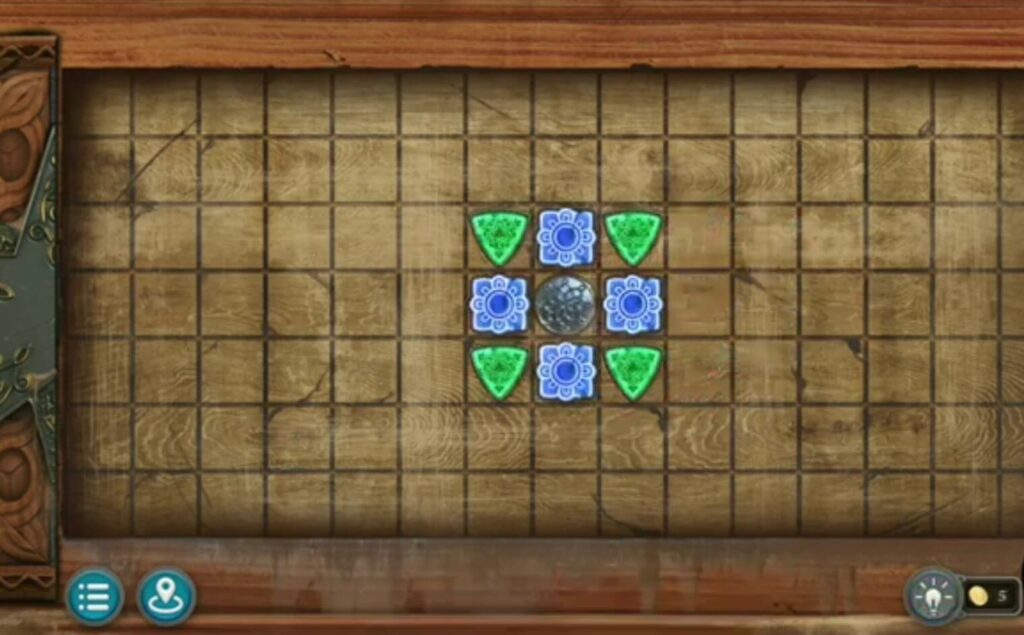
Level 5- green triangle – blue square – green triangle
blue square – silver circle – blue square
green triangle-blue square-green triangle. You get a red star when you solve all 5 puzzles.
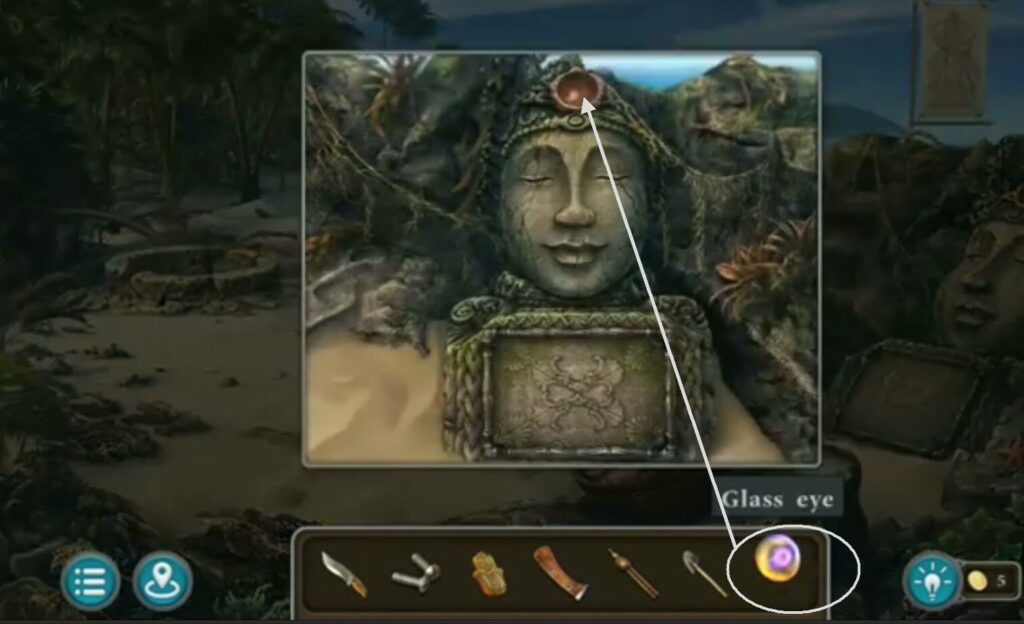
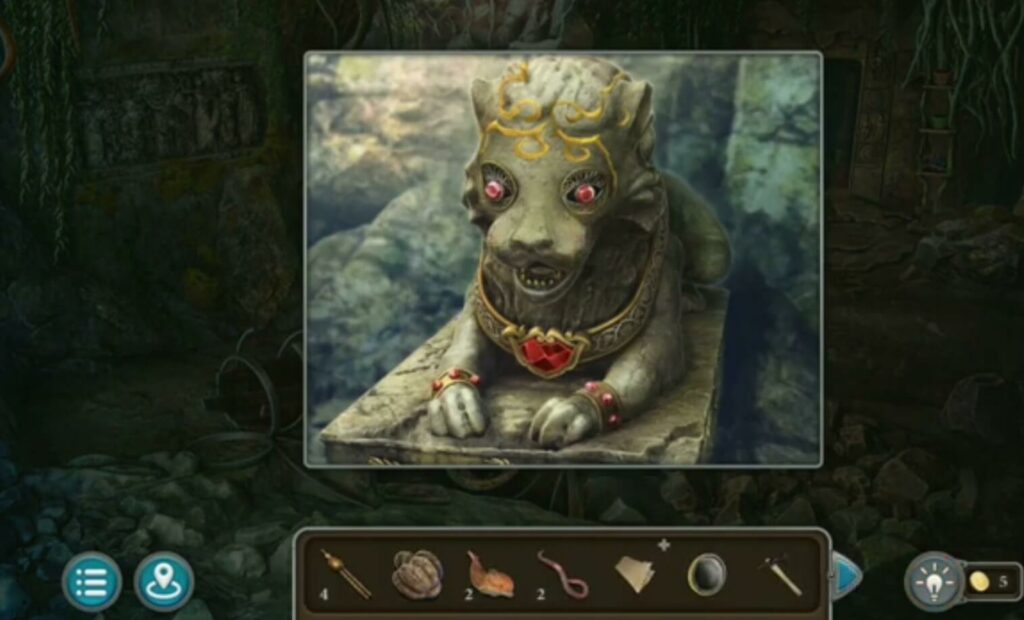
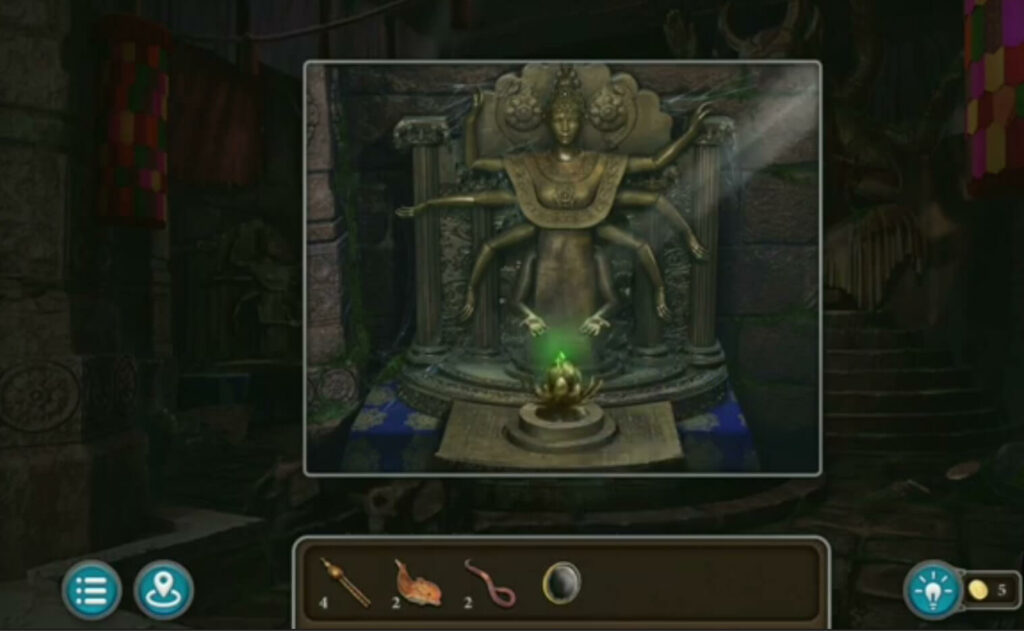
Take the glass eye (that you took when you cut the net) and place it on the figure’s forehead. A puzzle board will appear.
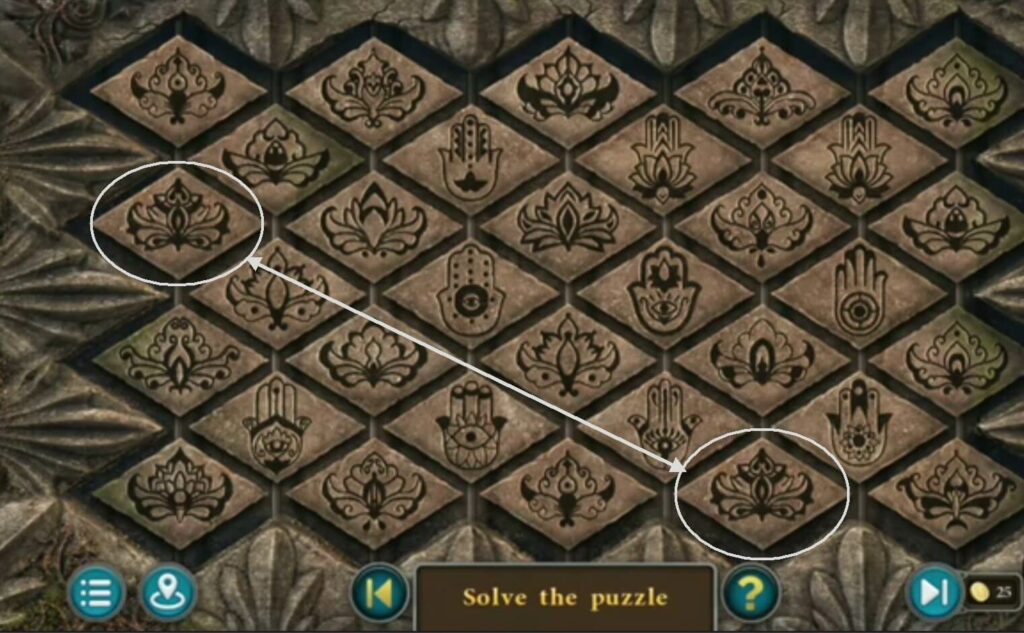
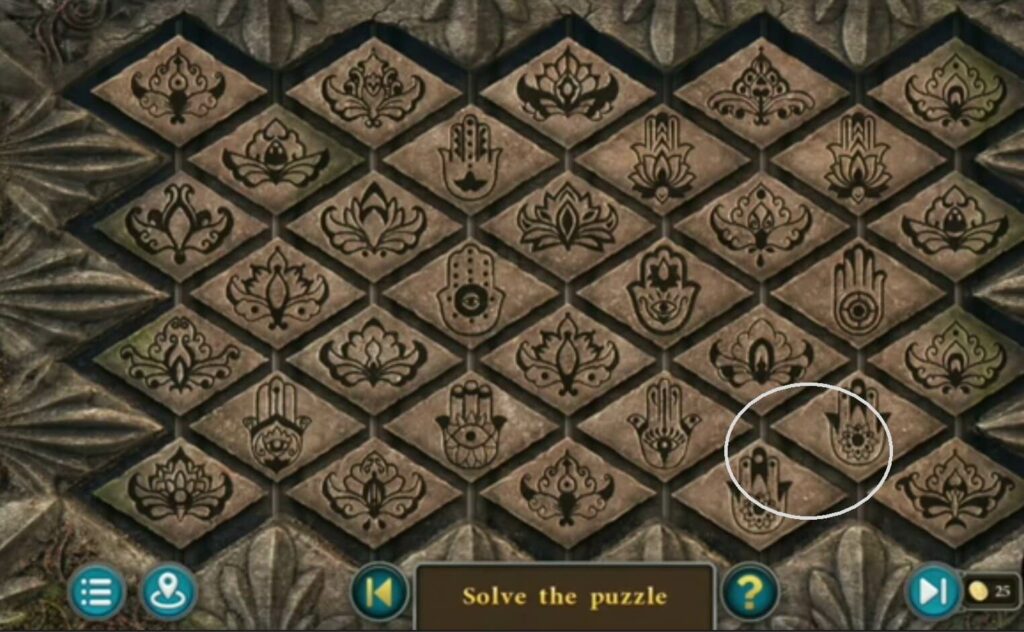
When you put the glass eye in the figure, a board with a puzzle will appear. Solve the puzzle by matching two of the same squares on the board.
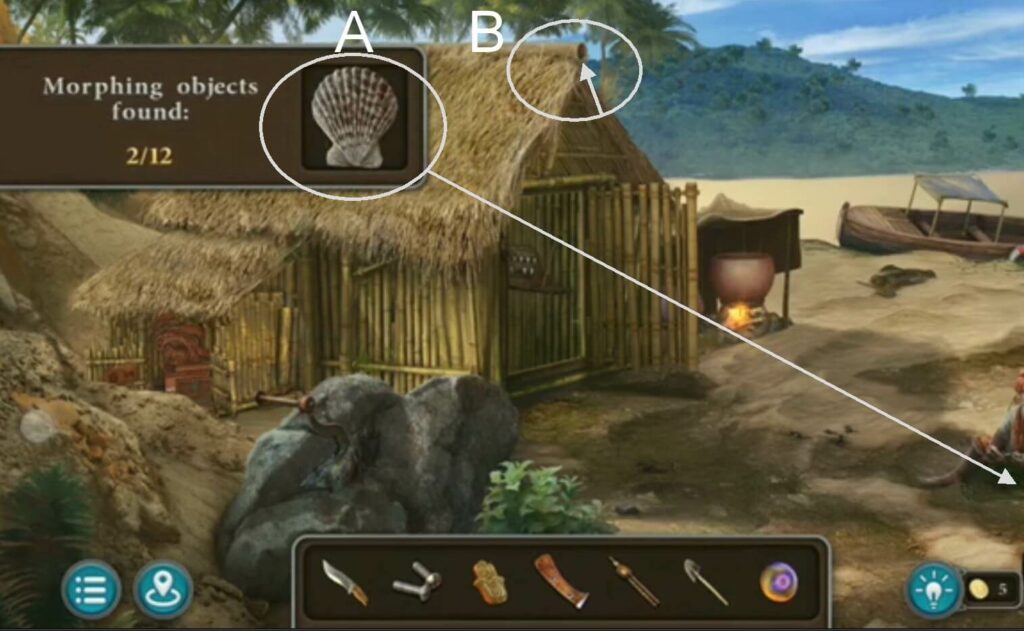
A) Take a morphing object.
B) Take a dolphin figurine.
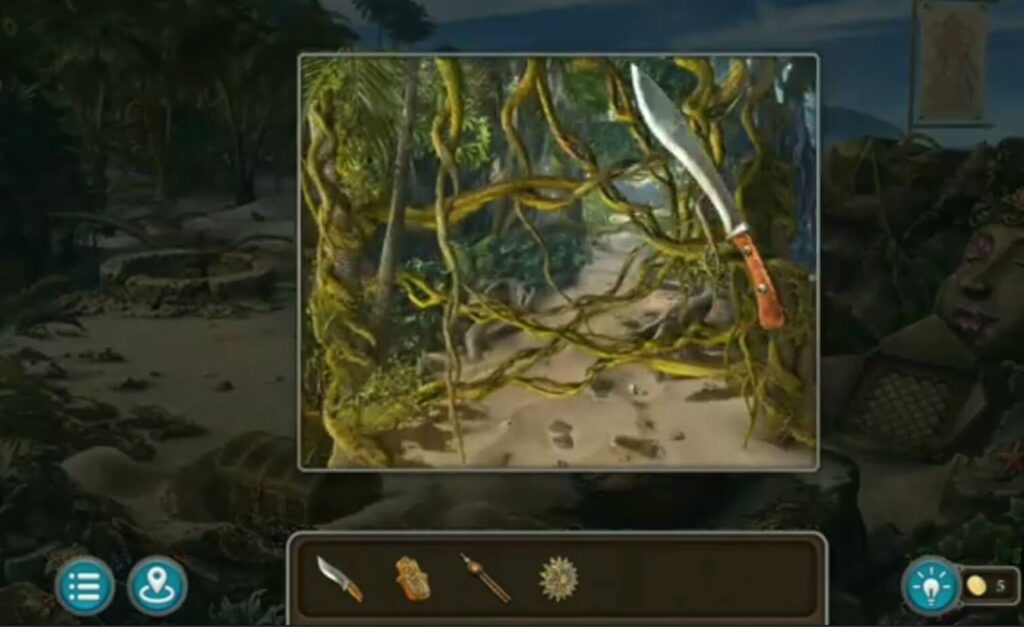
Cut the vines with the machete (that you made).
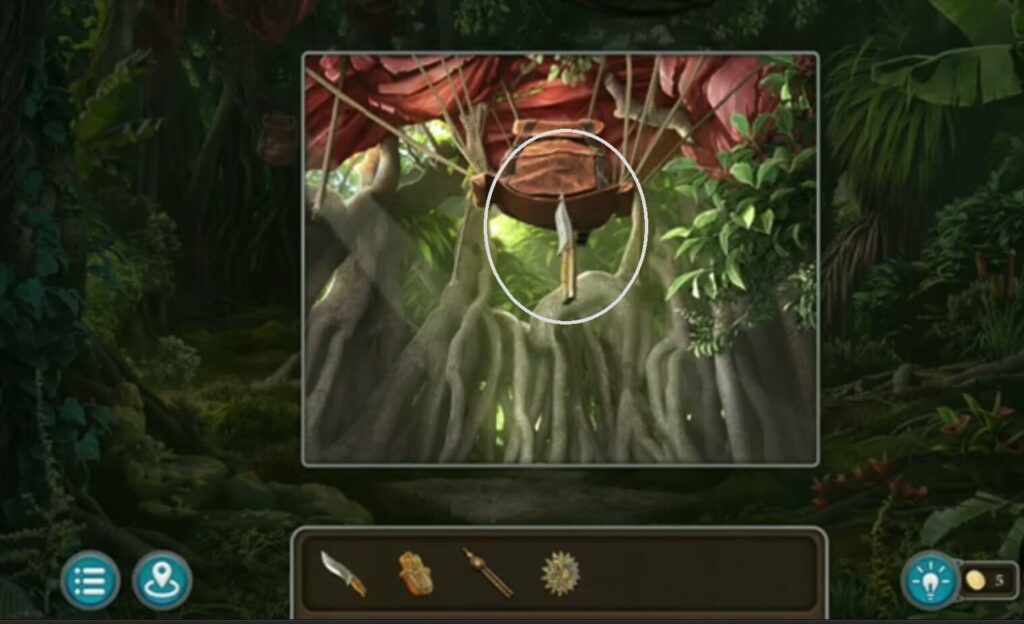
Take a knife to cut the backpack. In the backpack is a casket, and recipe book.
- Take a pungi
- A morphing object
- A collection found
- Take the pry bar to lift the lid. Inside is a crocodile head and decoration.
- A red star under the statue.
It’s a collection item and a morphing object.
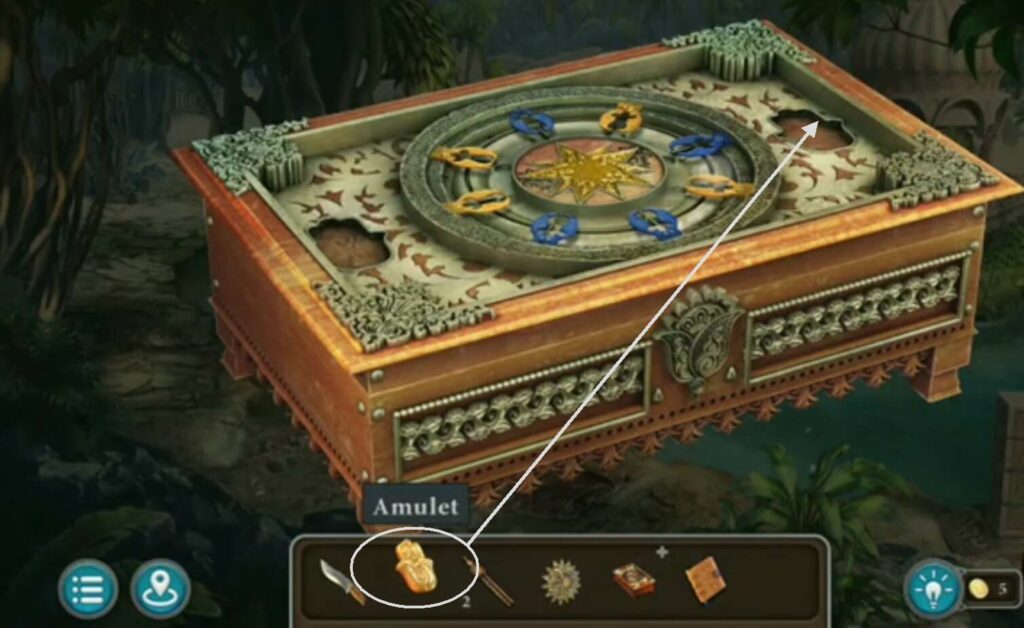
Put the amulet (from shells) into the casket (from a backpack).
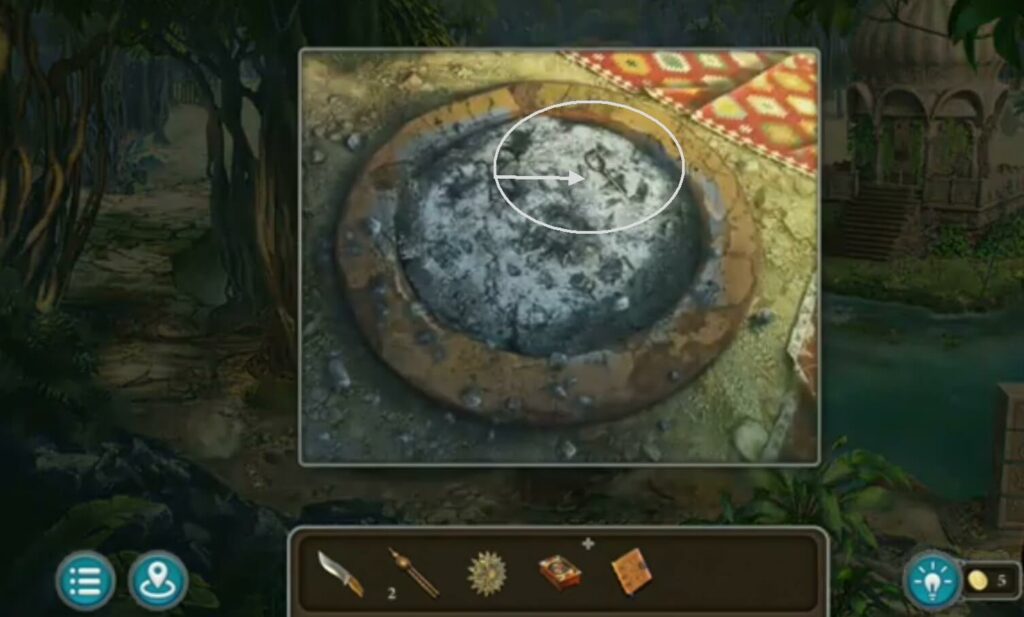
Take the key from the ashes.
Use the key in the ashes to unlock the coffin buried in the sand. There are forceps and a pry bar.
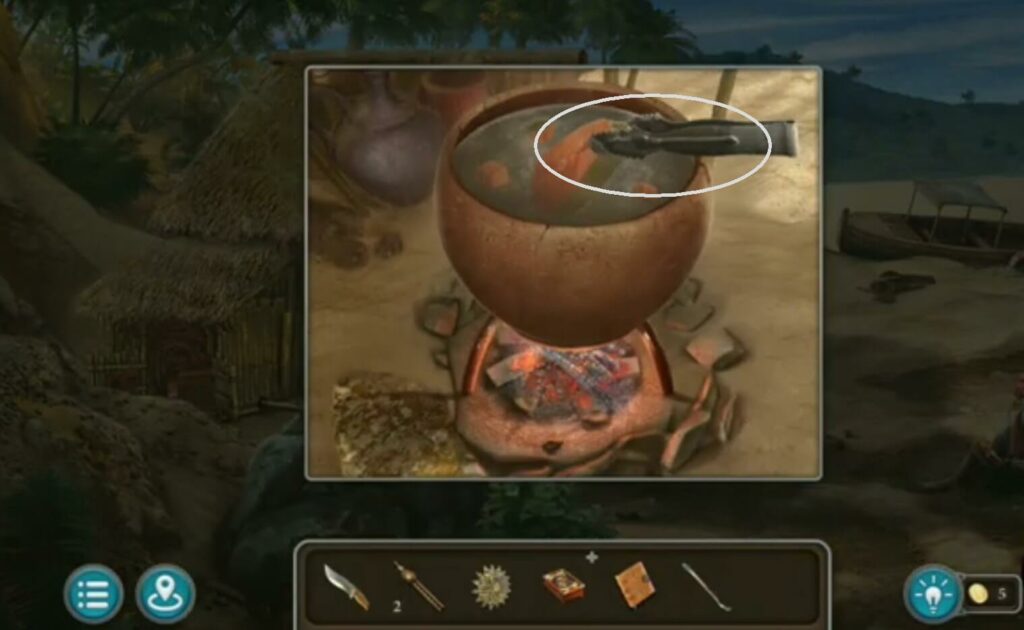
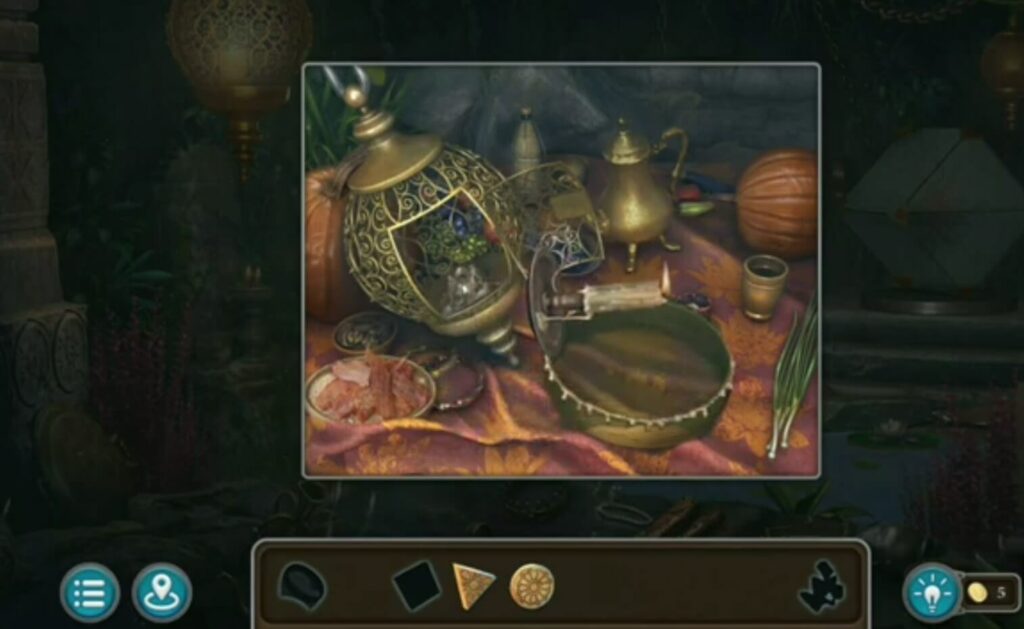
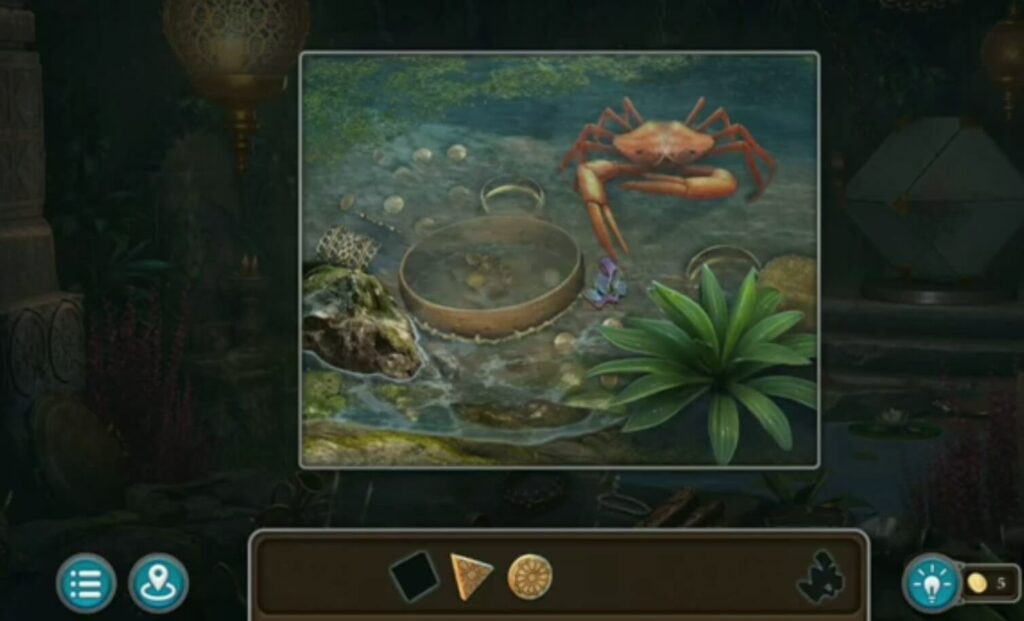
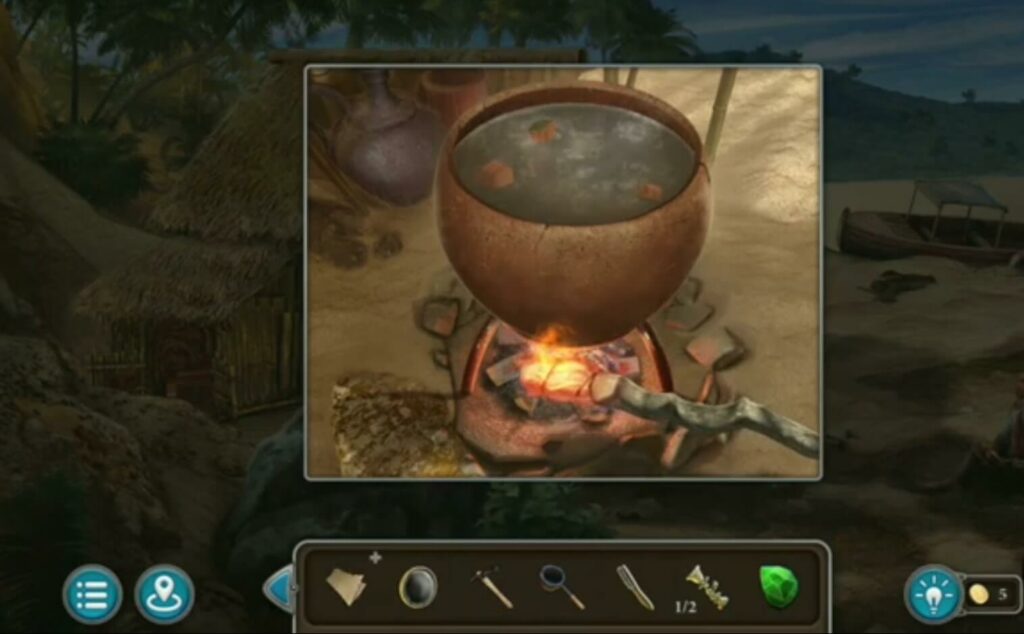
Use the forceps (that you found in the coffin) to remove the fish from the bowl.
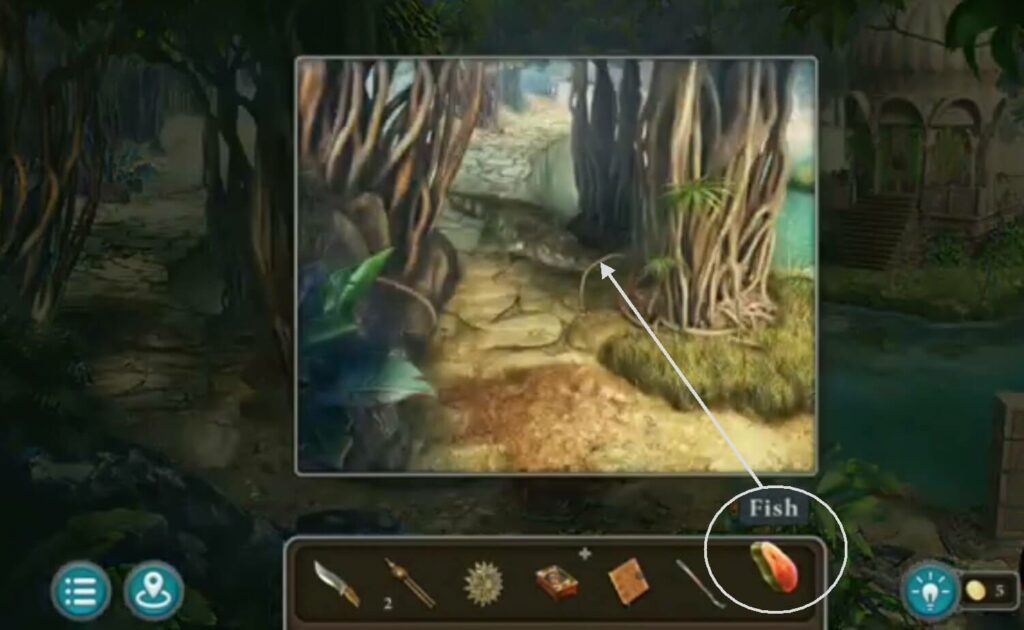
Throw a piece of fish (which you removed from the bowl with forceps) to the crocodile to eat.
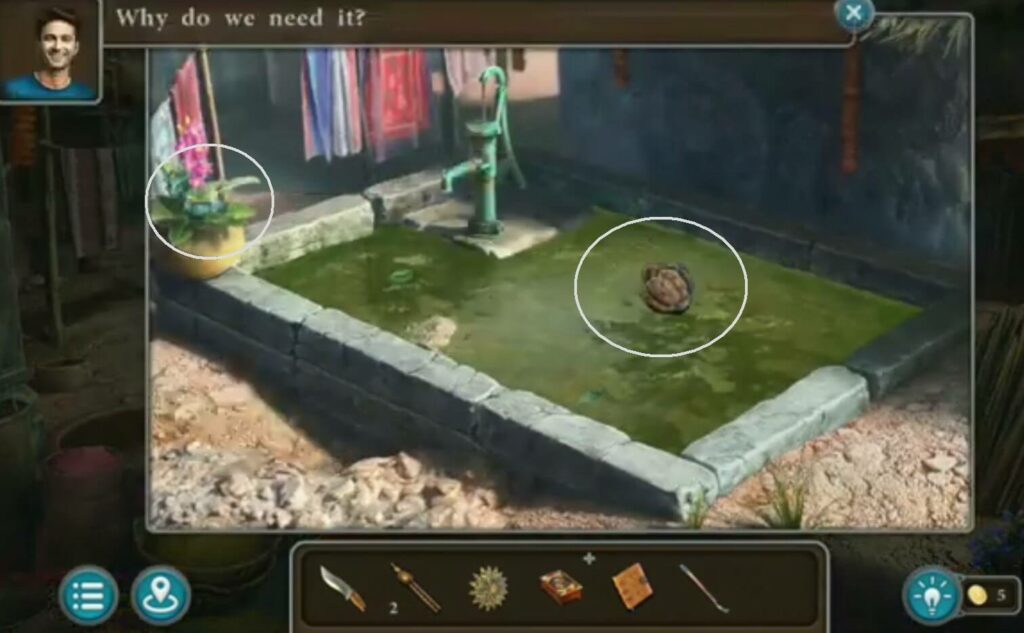
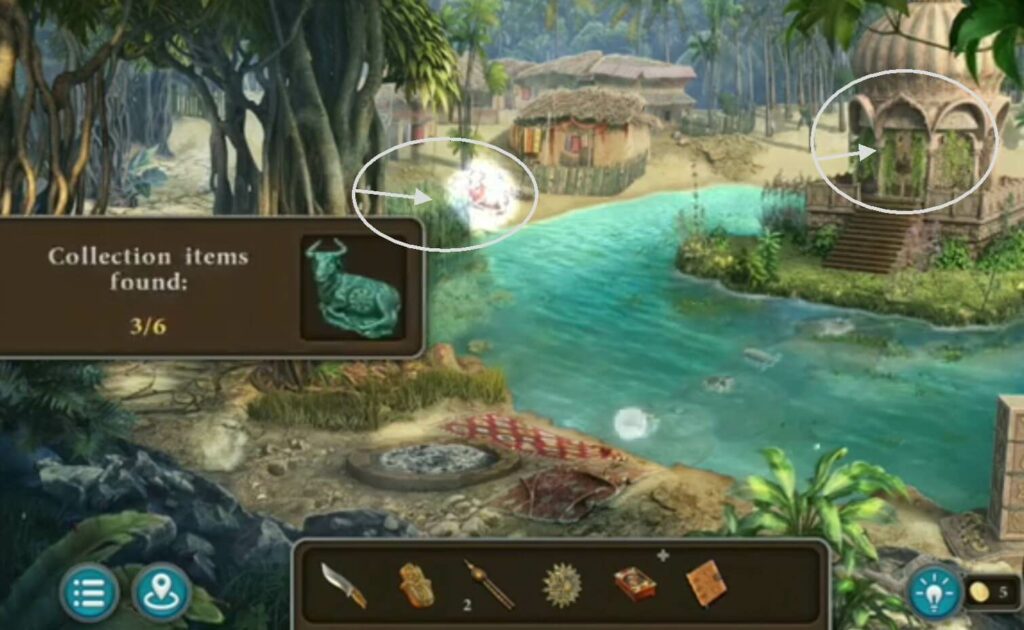
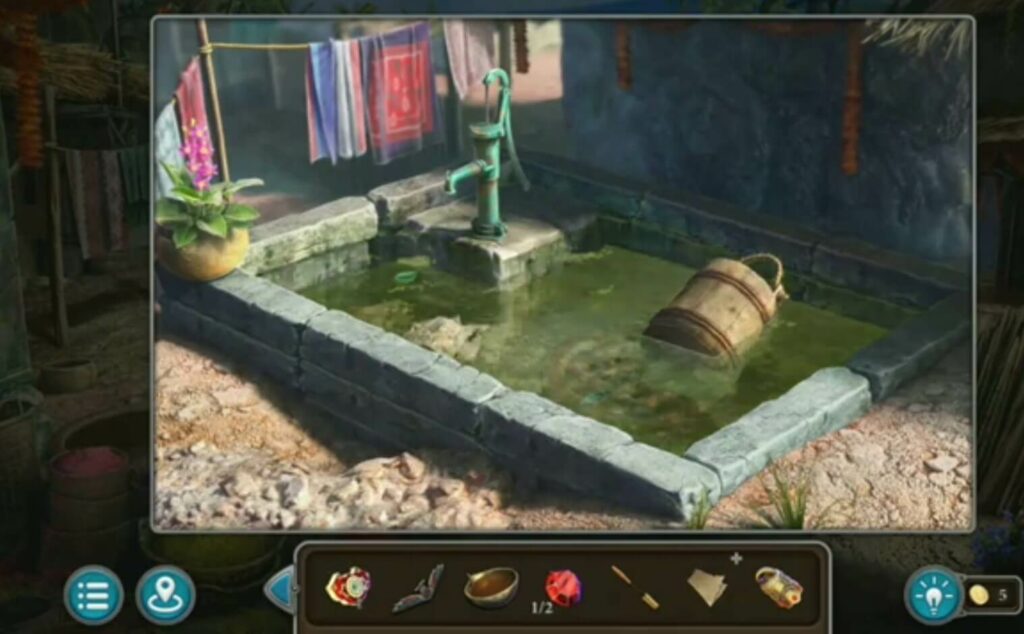
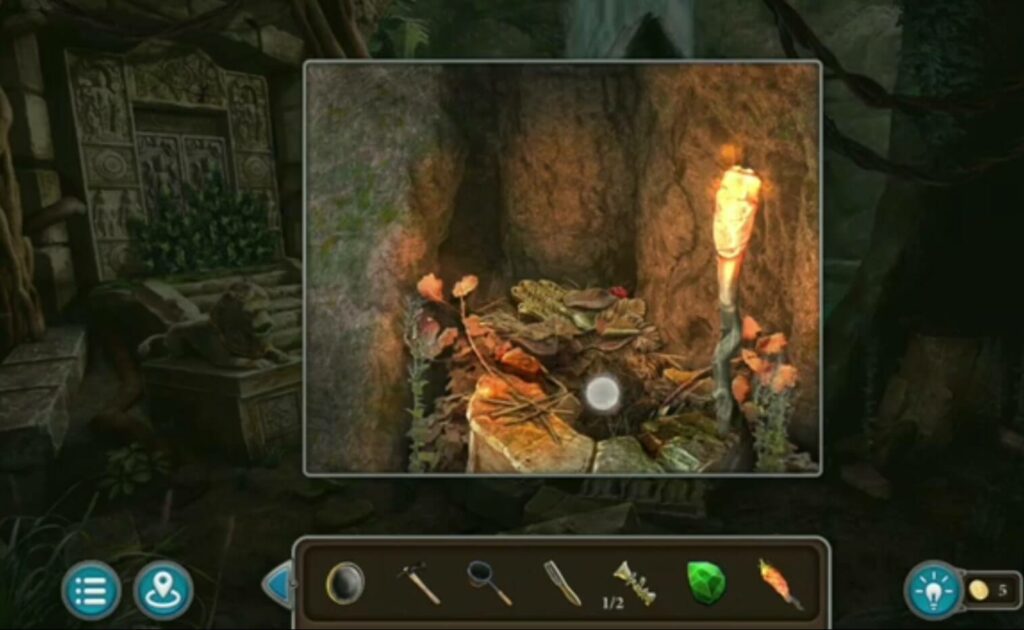
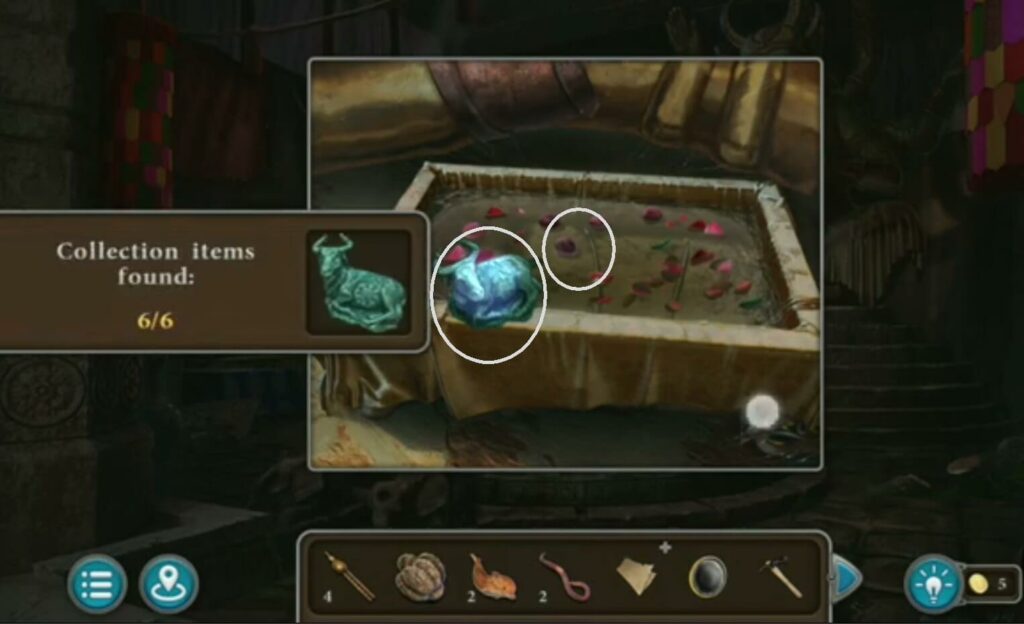
Take dry manure from the water at the fountain. And there is a collection item also.
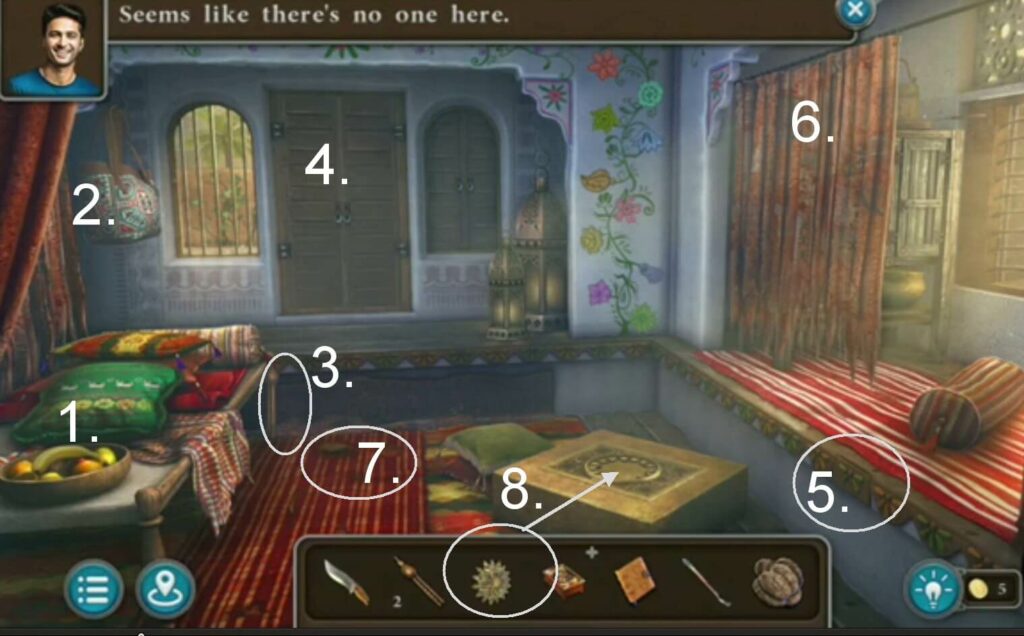
- Take the banana from the fruit bowl
- Take a flask from a bag
- A pungi
- Behind the door is a puzzle
- A dolphin figurine
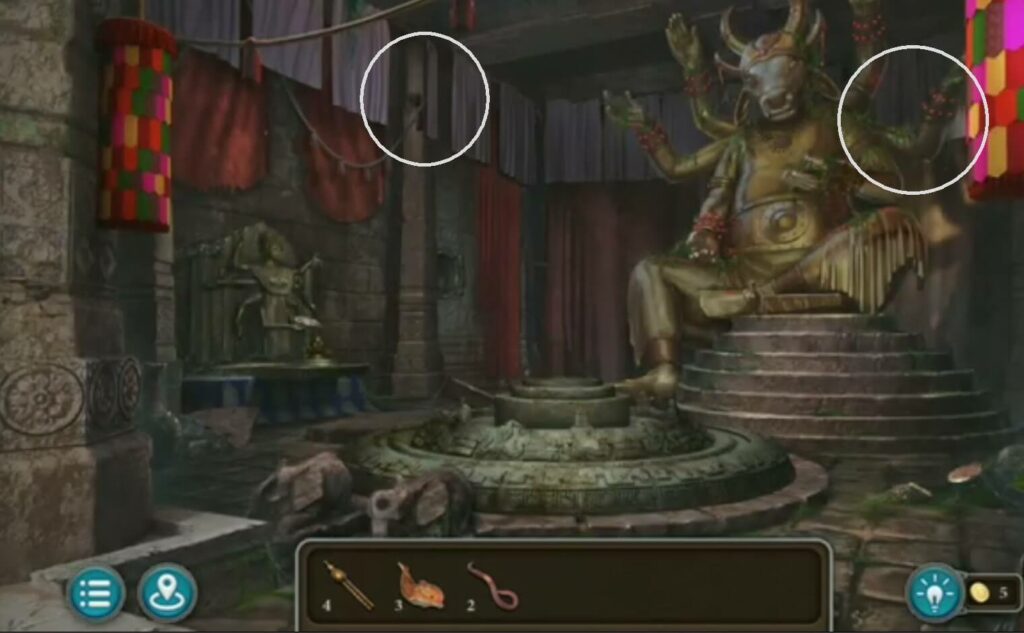
- A collection item(behind the curtain)
- A morphing object
- Put this detail from the menu, and a puzzle will appear.
When you place a detail in an object, a puzzle will appear. You will solve it by grouping the same squares in a 3×3 formation.
For extra points, you need to solve before the move counter or timer. When you solve it, you get a crocodile head and a star.
- A morphing object
- A rope
- Move the cover
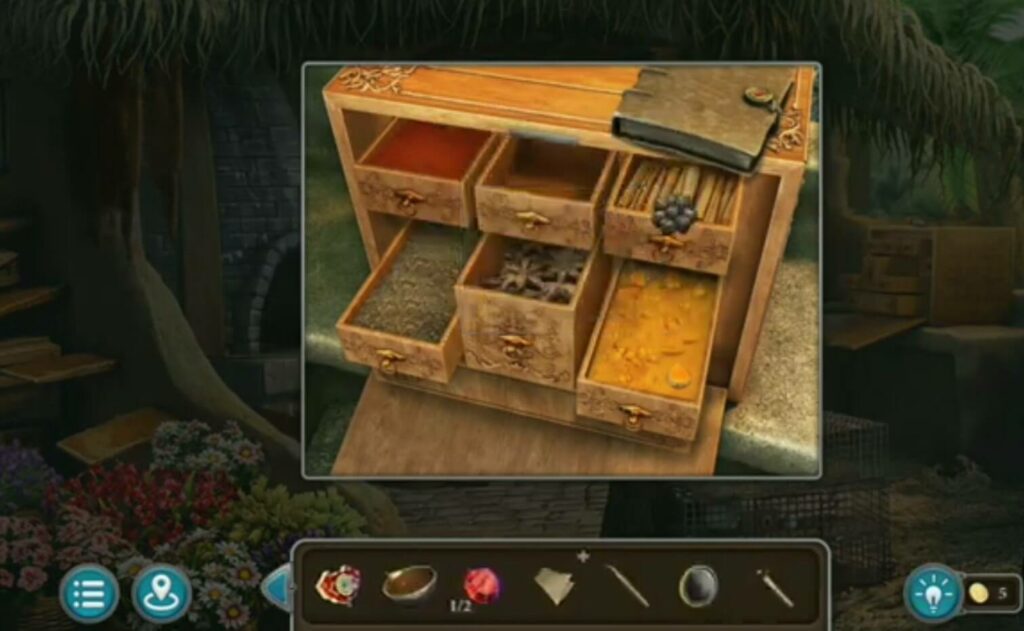
- Spices, it’s a puzzle. You solve the puzzle by looking at the order of the spices in the recipe. In that order, click on the drawers with the spices.
- A worm behind the hay

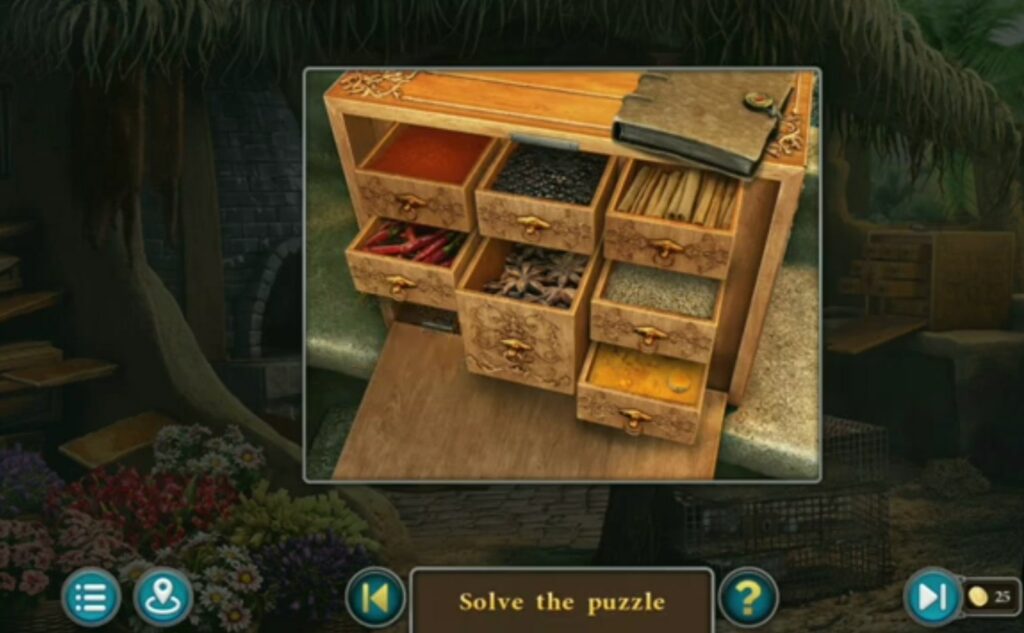
You solve the puzzle by looking at the order of the spices in the recipe. In that order, click on the drawers with the spices. When you solve the spice puzzle you get a part of the mosaic.
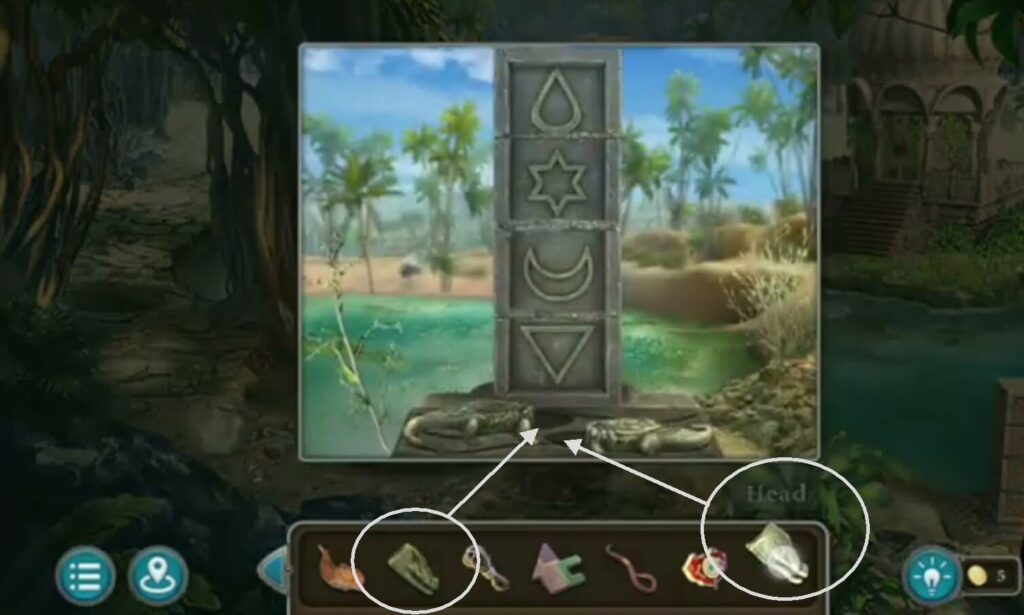
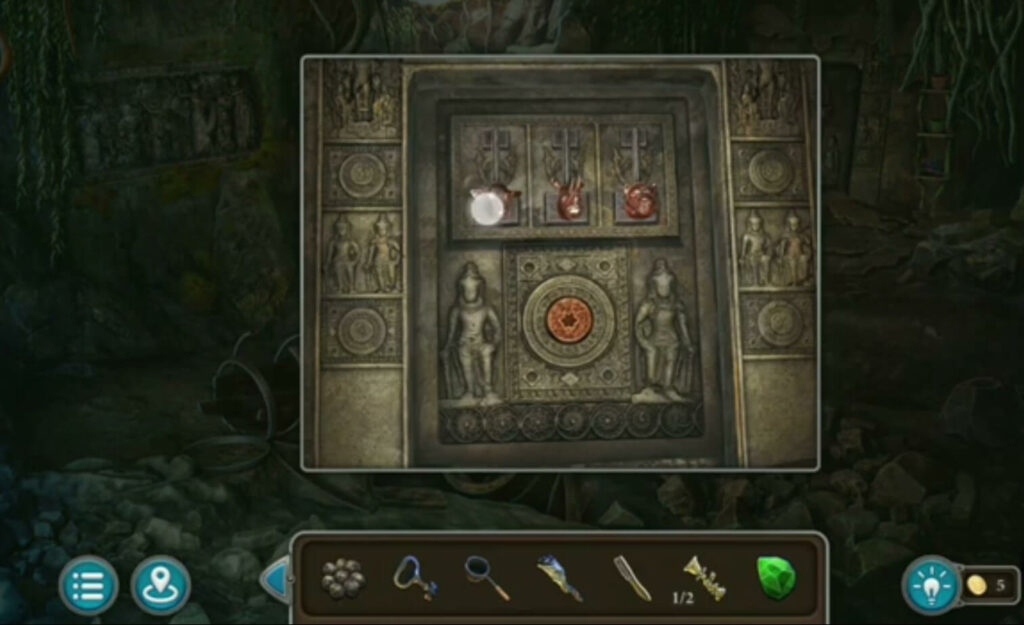
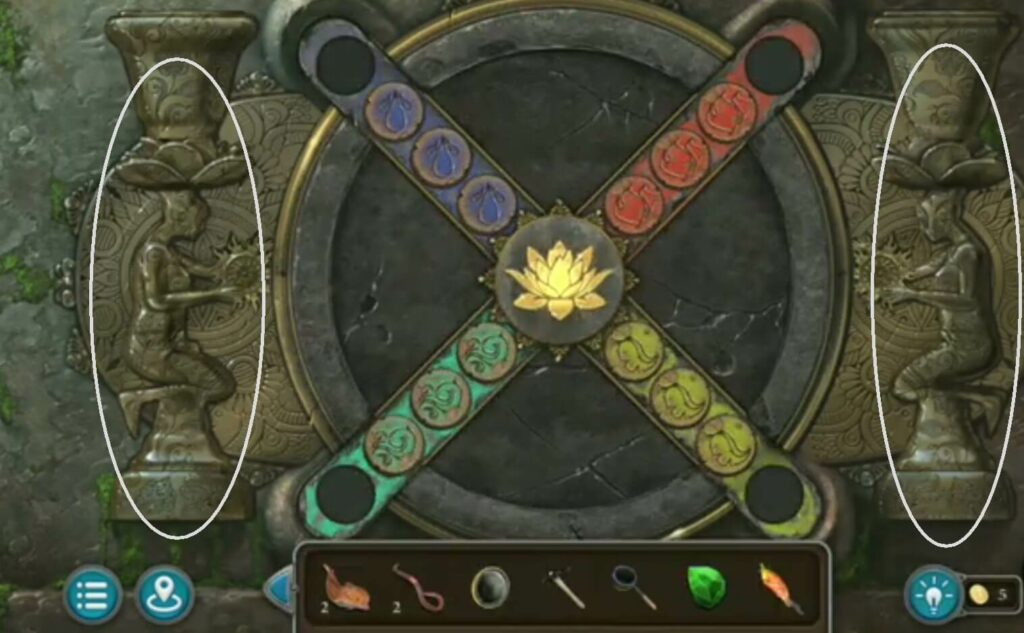
Put the crocodile heads (you found one under the lid and the other when you solved the 3×3 box grouping puzzle). After that, you need to rotate the pillar parts to match the correct combination of symbols.
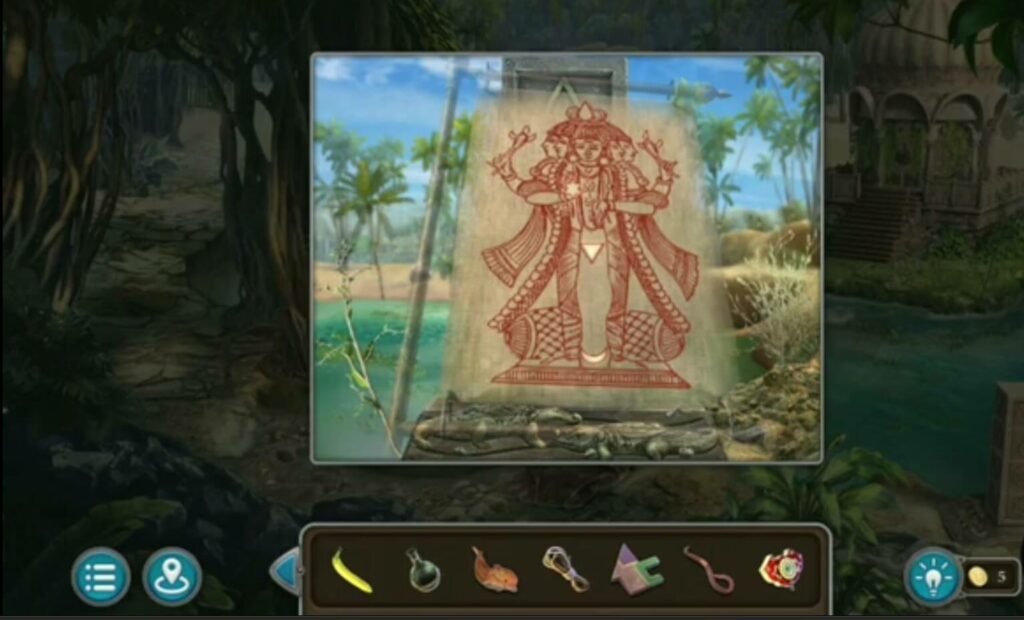
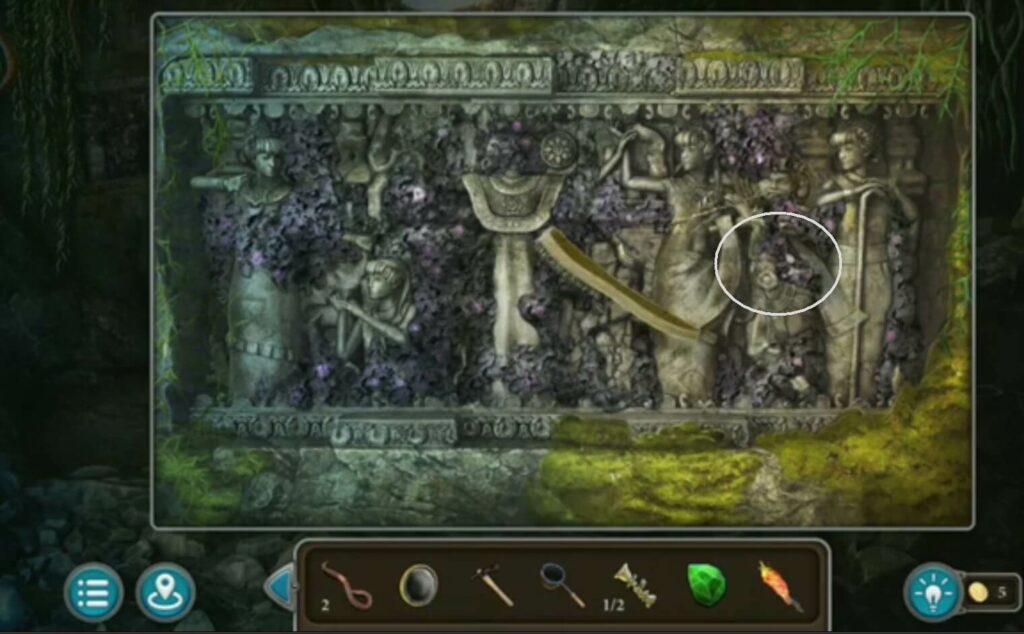
The solution to the puzzle is the layout of the symbols from the red figure on the flag: teardrop, star, triangle, moon. After solving the puzzle, stones will appear in the water, i.e. a road.
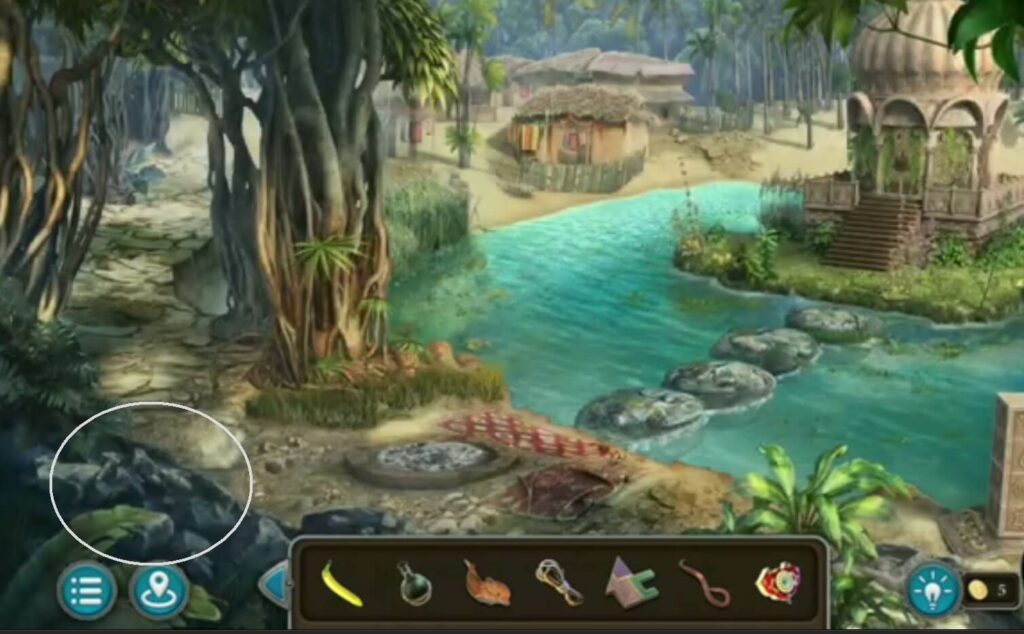
A stone river crossing appeared, and a dolphin figurine.
Rotate the elements left-right so that they match or stay next to an identical element that is static. When you solve the puzzle, the door of that object will open.
- Collection item
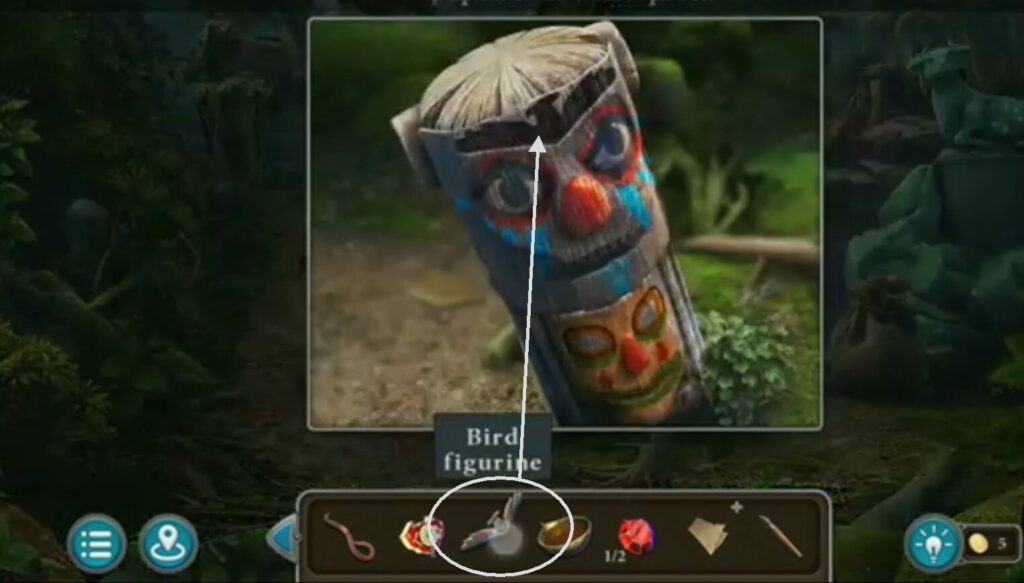
- Cut the pillow with a knife, a bird figurine will appear
- A dolphin figurine
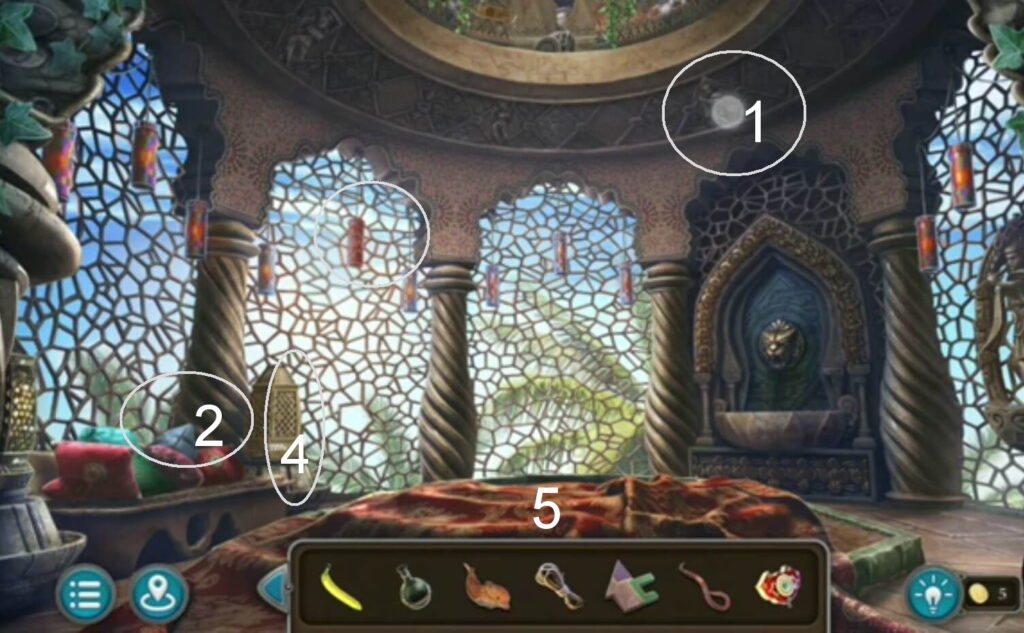
- Open the lantern with a knife and take the oil.
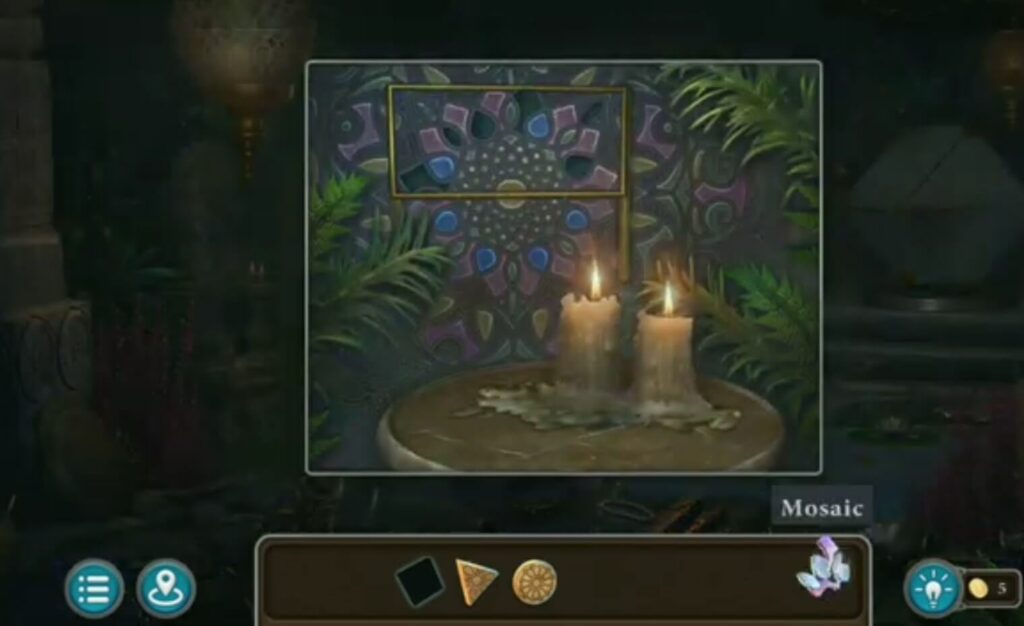
- Move the carpet on the floor to uncover a mosaic underneath. Place the mosaic piece (which you obtained after solving the spice puzzle) into the correct spot. You will then need to solve this additional puzzle as well.
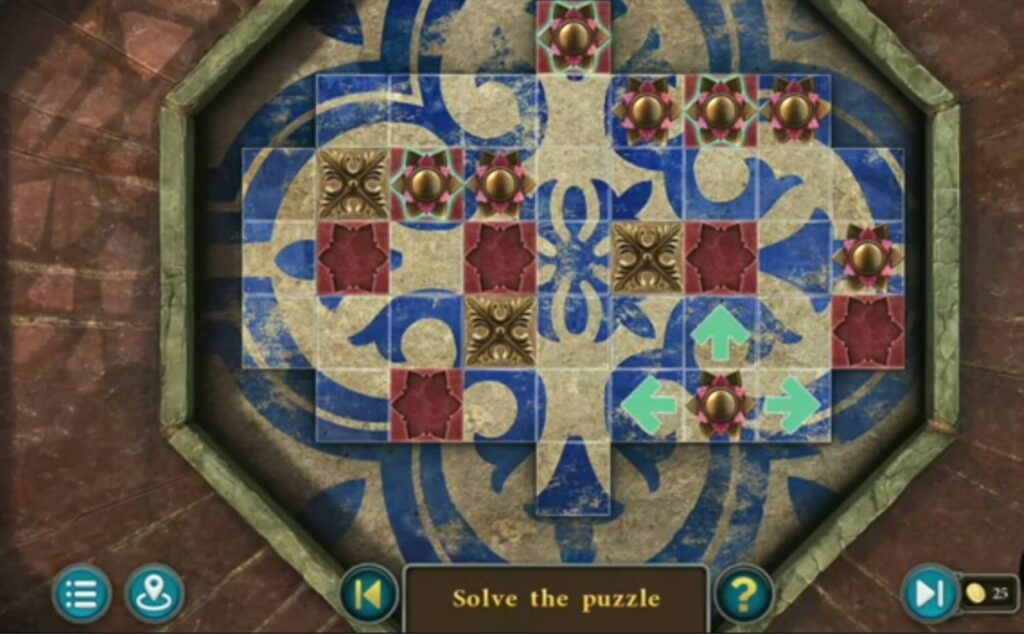
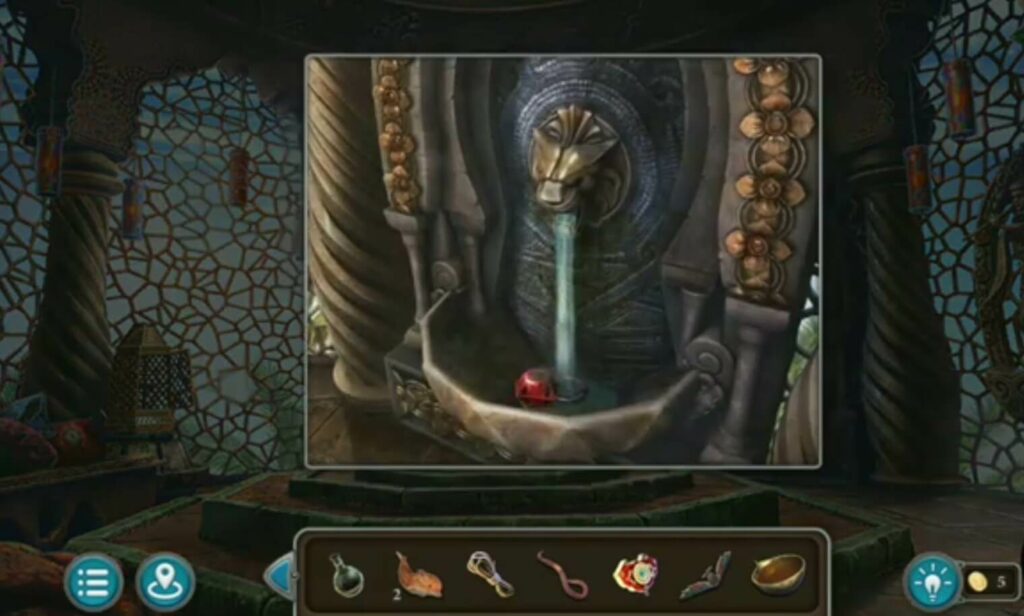
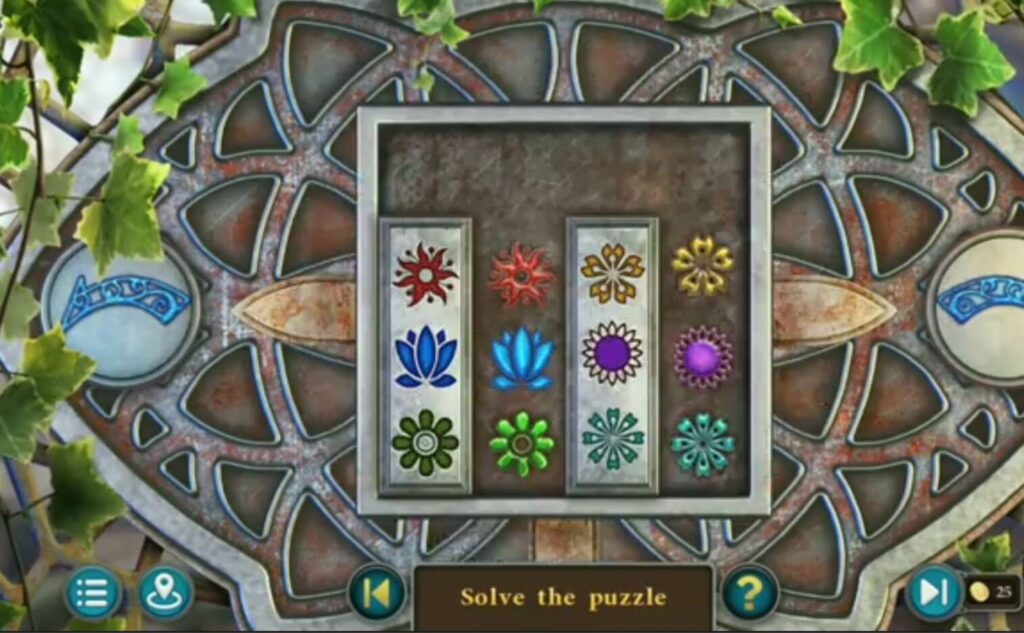
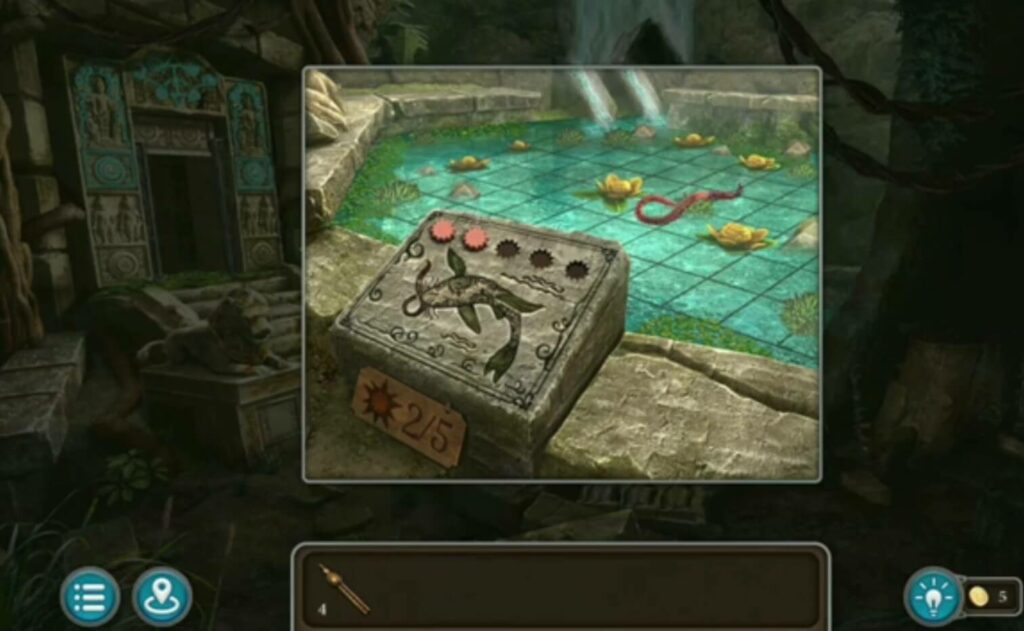
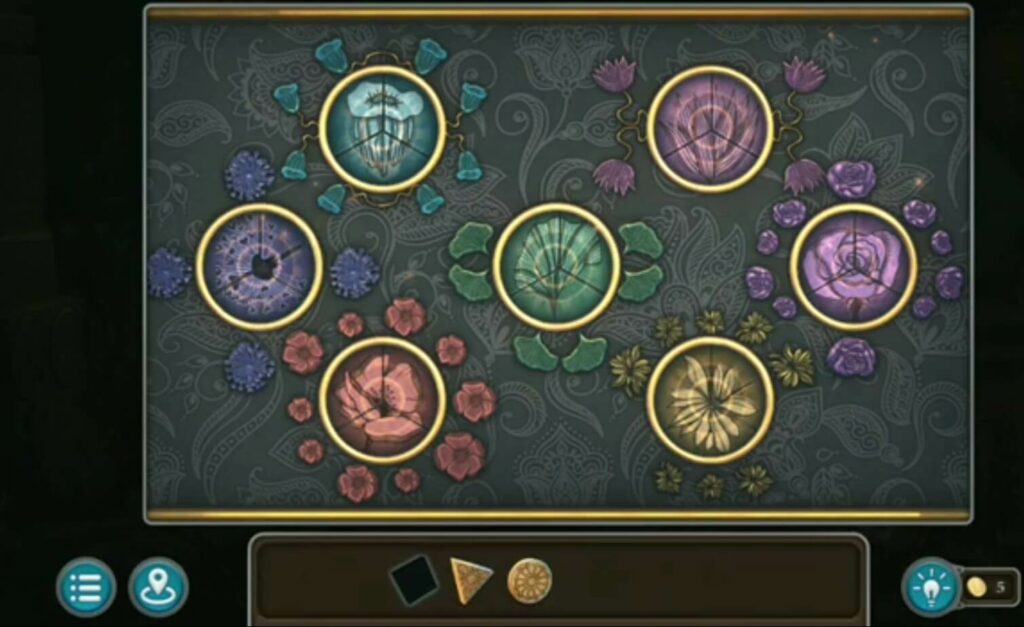
Solve the puzzle that appeared after the solved puzzle with the mosaic piece. It is necessary to return the lotuses to the hollows. Flowers move along the entire board in one move. When you solve it, a ruby will drop from the fountain on the right.
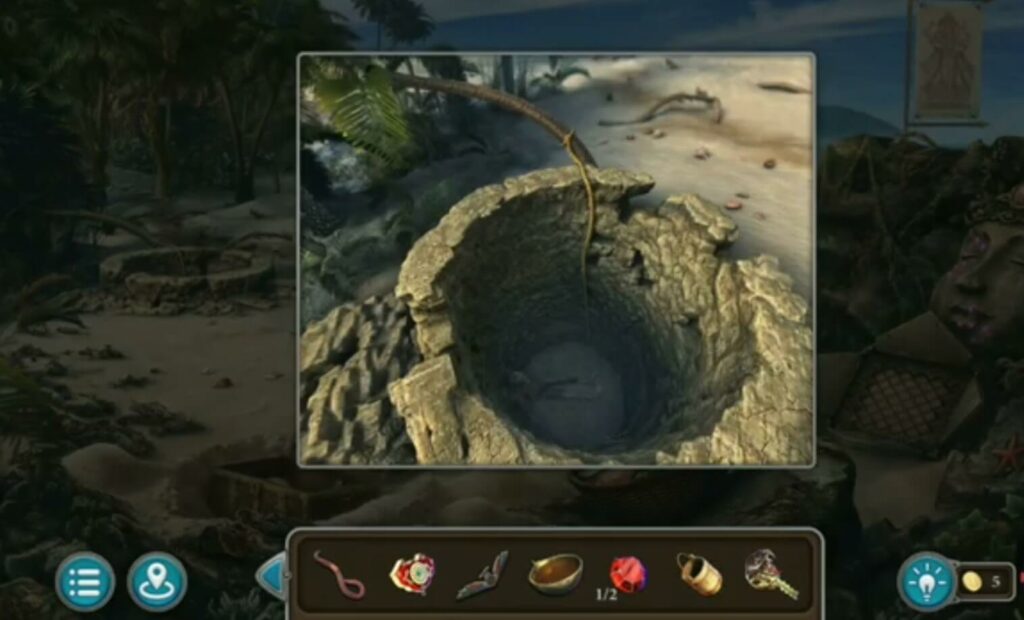
There is a bucket and a key. And a puzzle that you need to solve.
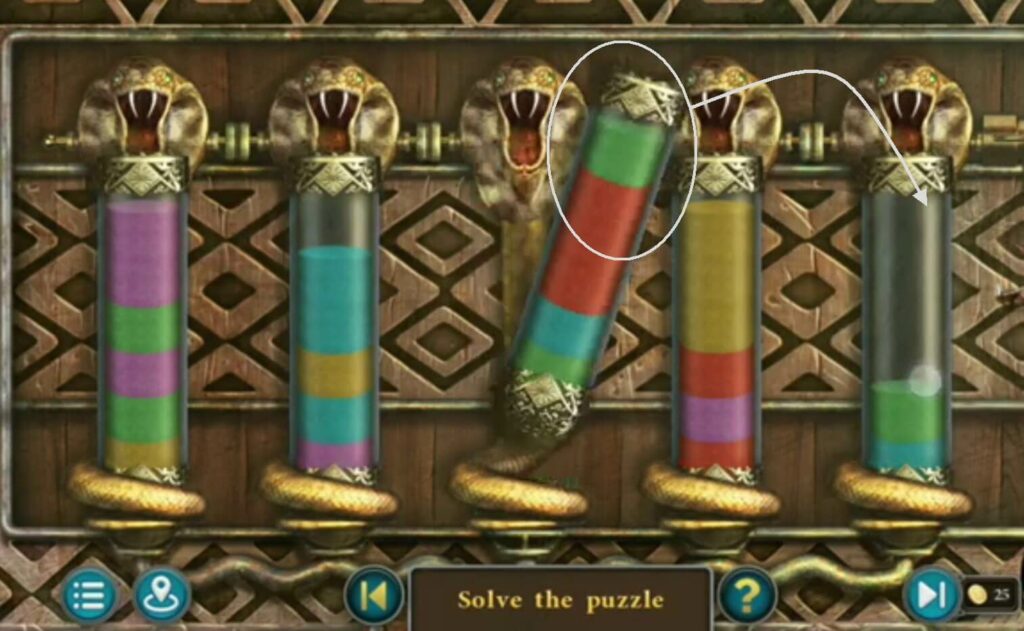
The key (from the well) opens the snake test tube puzzle. You need to combine the ingredients of the same color so that each color occupies one test tube.
After solving the puzzle you will get a brush and a recipe.
A recipe you got when you solved a snake tube puzzle.
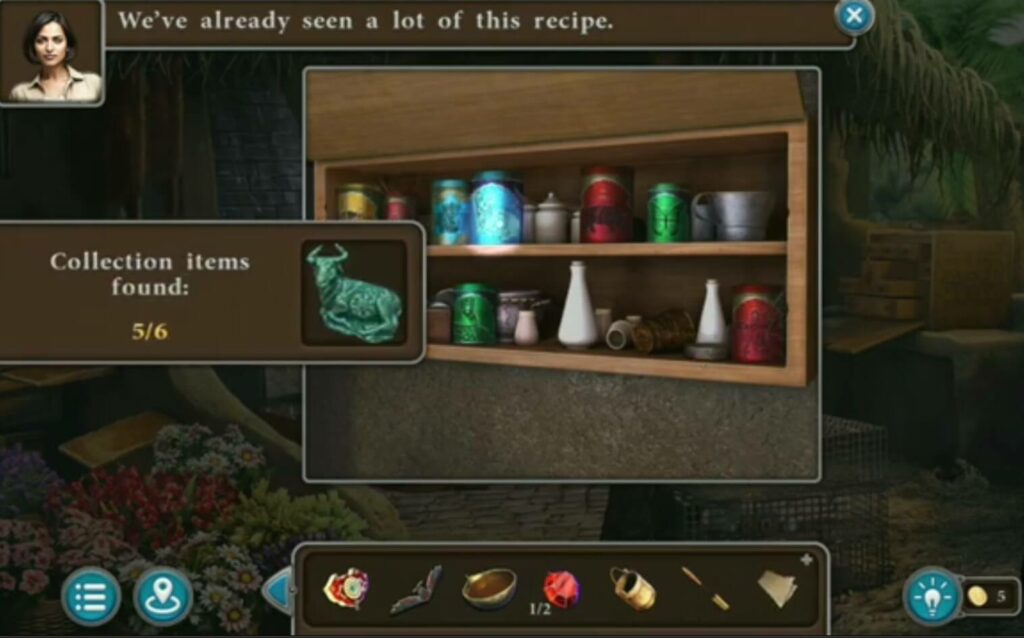
A collection item
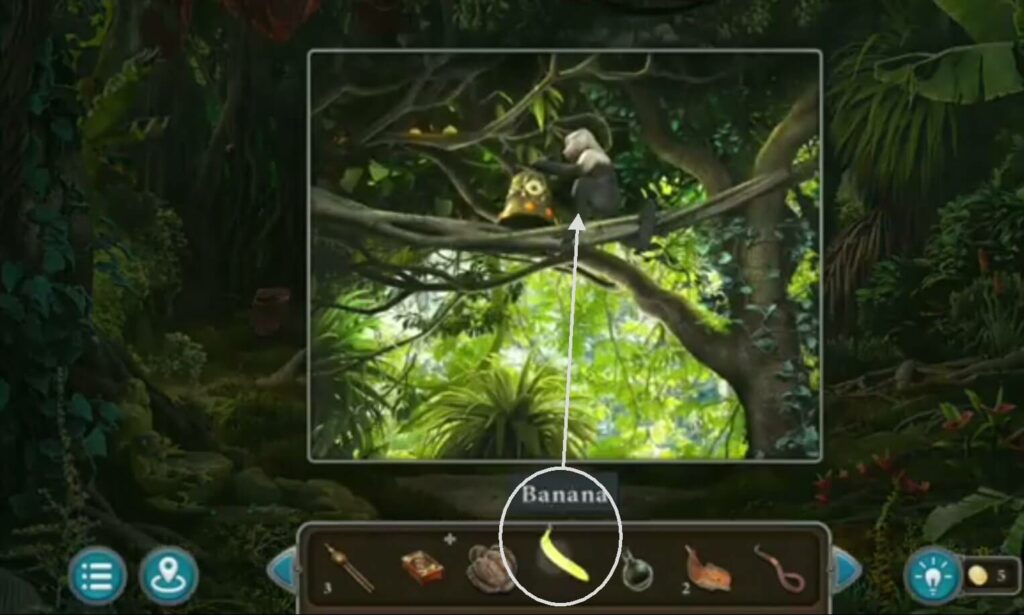
Give the banana (you took it from the fruit bowl) and give it to the monkey. You got a weight.
Put the bucket (found in the well) into the water. You got a valve.
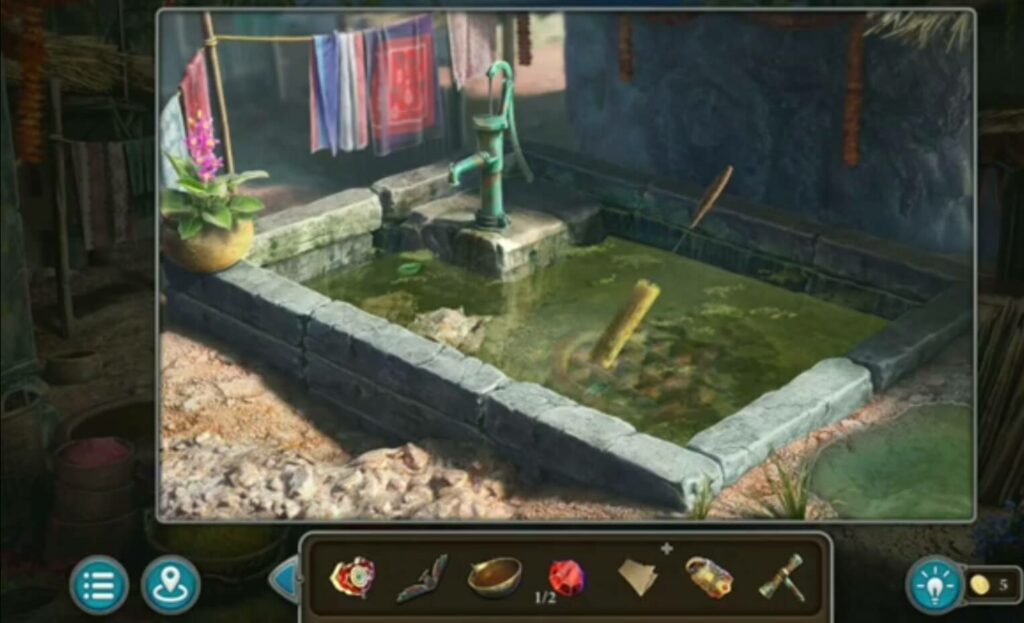
After you have removed the water with a bucket and got a valve, use a brush to drain the water. You will get another weight.
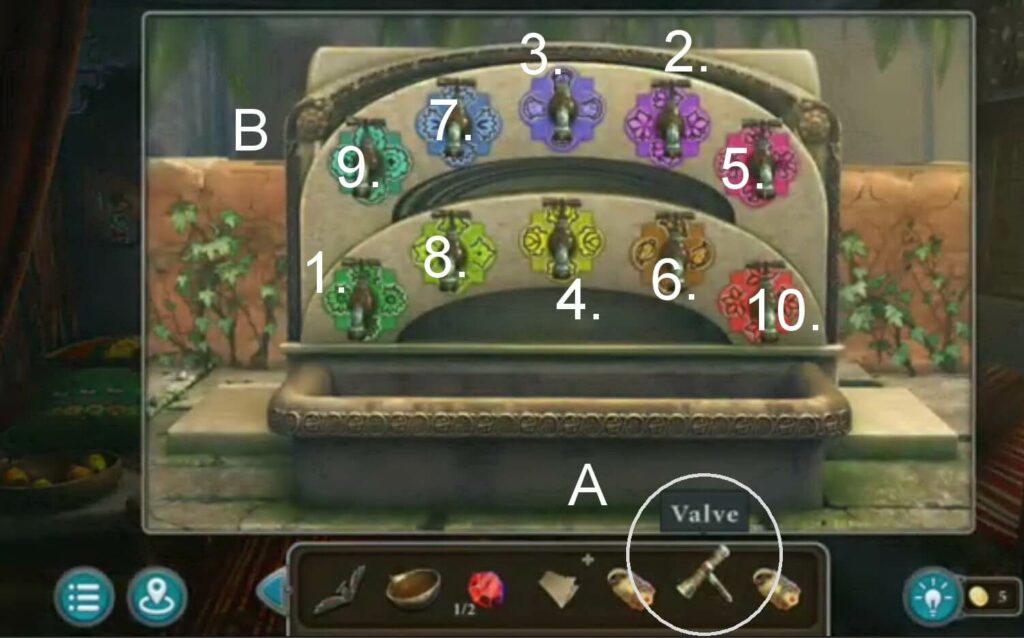
A) Put the valve on the tap.
B) Open the taps in a certain order to make the water run.
Pay attention not only to the colors but also to the shape of the flowers (on the wall and the taps). When you solve this you get a brush.
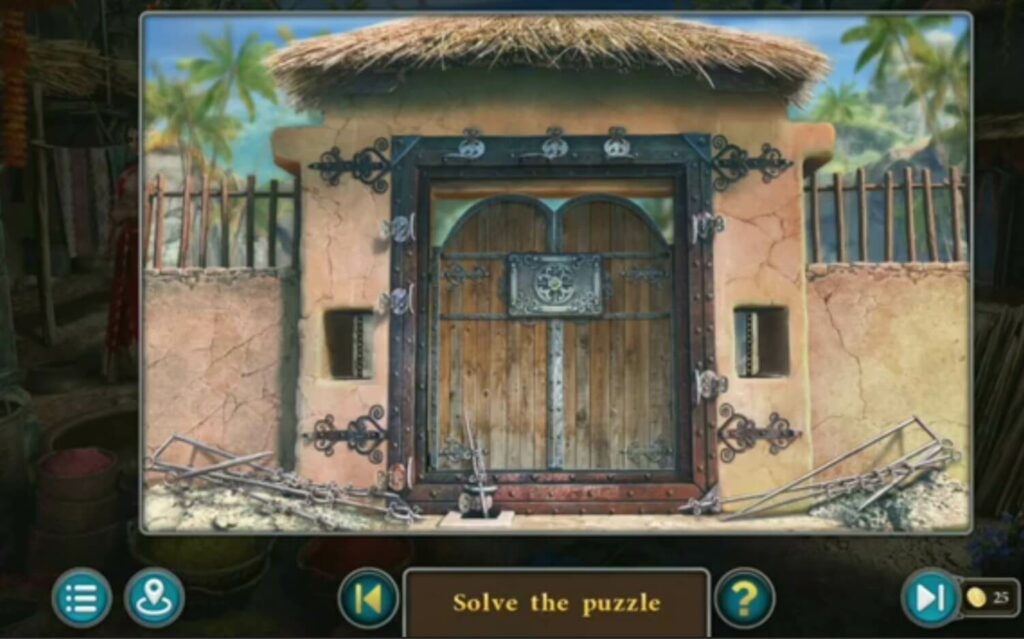
Put the weights (got them from the monkey and water) and then solve the closed-door puzzle. You need to remove the blades in a certain order. When you solve this puzzle, another one will appear.
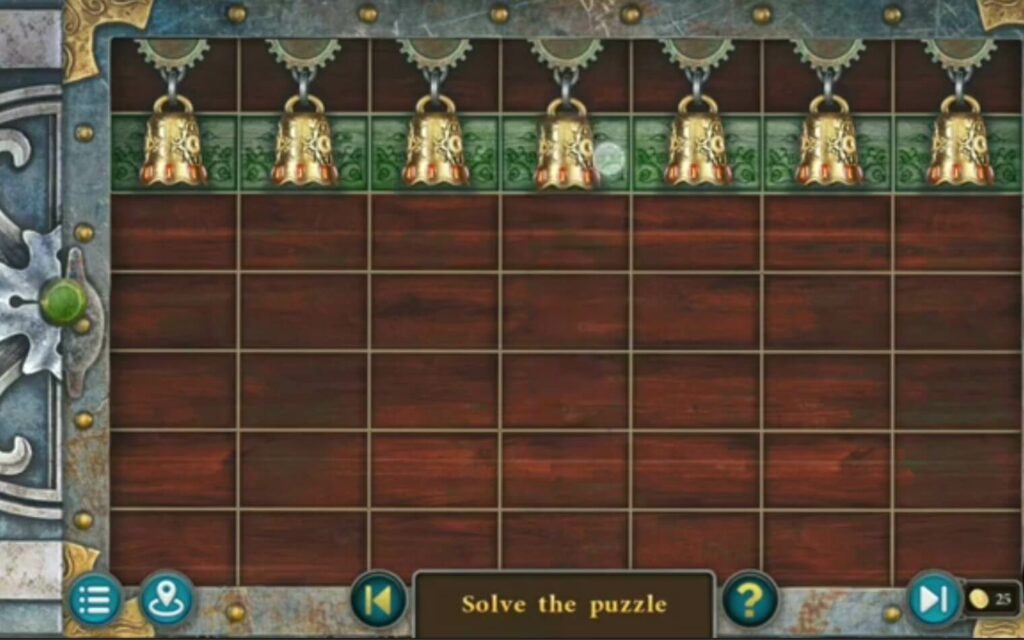
You need to set all bells to be on the same plane. When you do, a door will open.
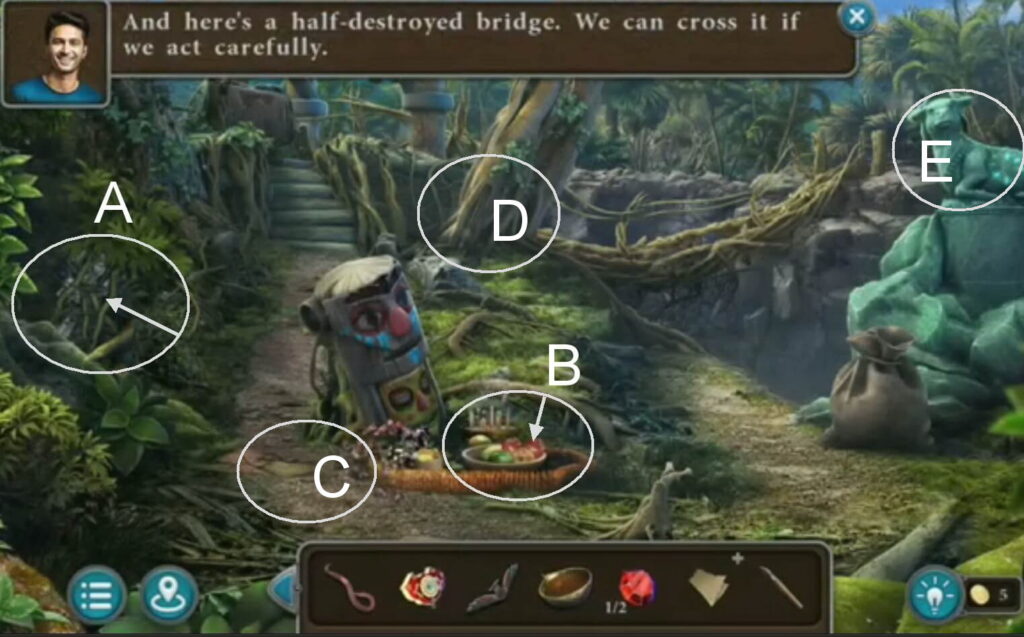
A) A collection item
B) A morphing object
C) A worm
D) A pungi
E) A star
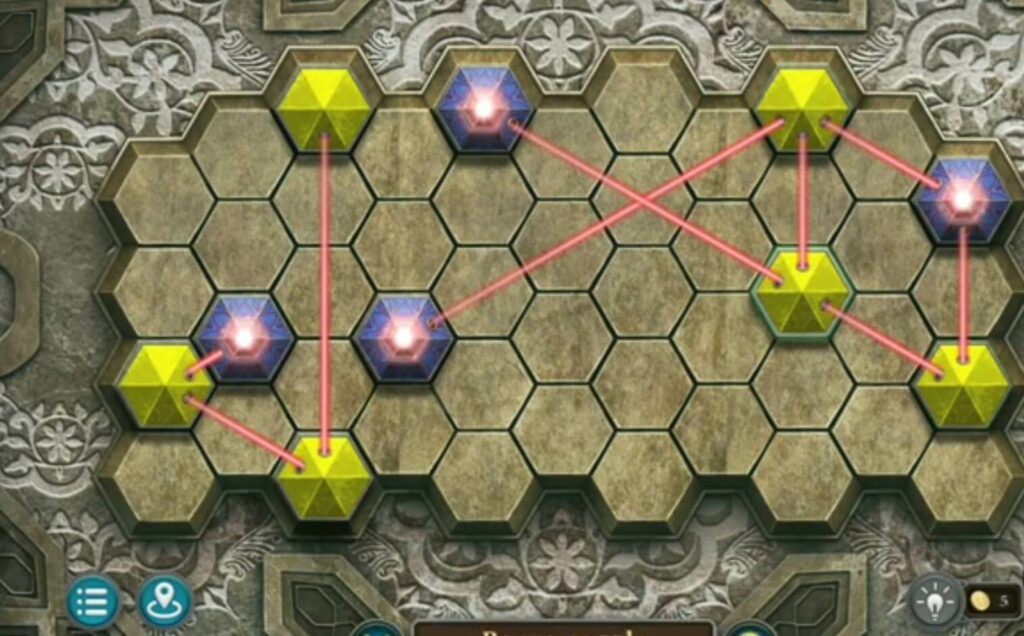
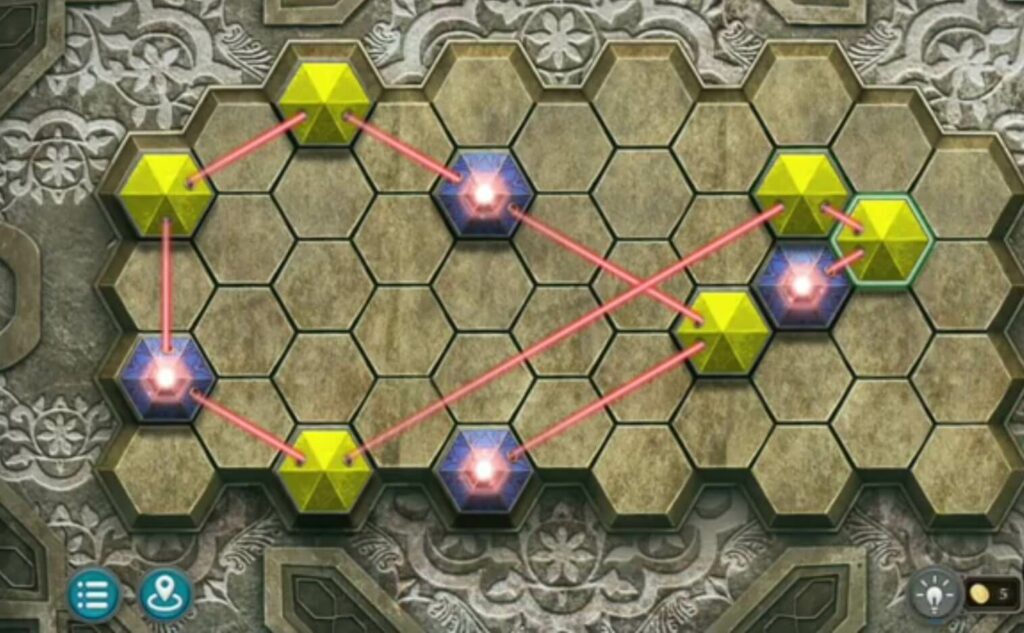
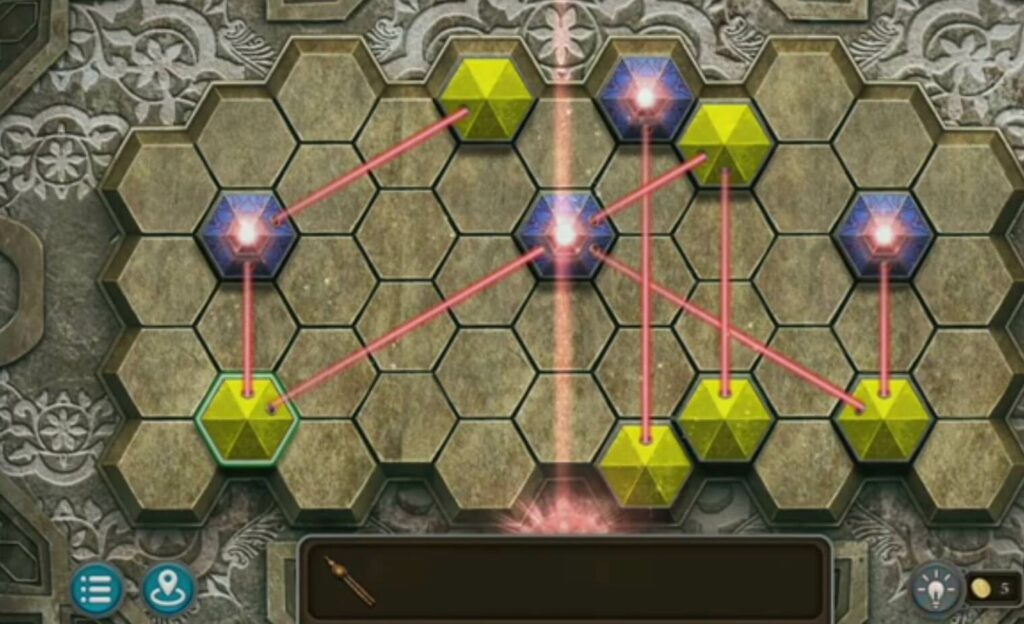
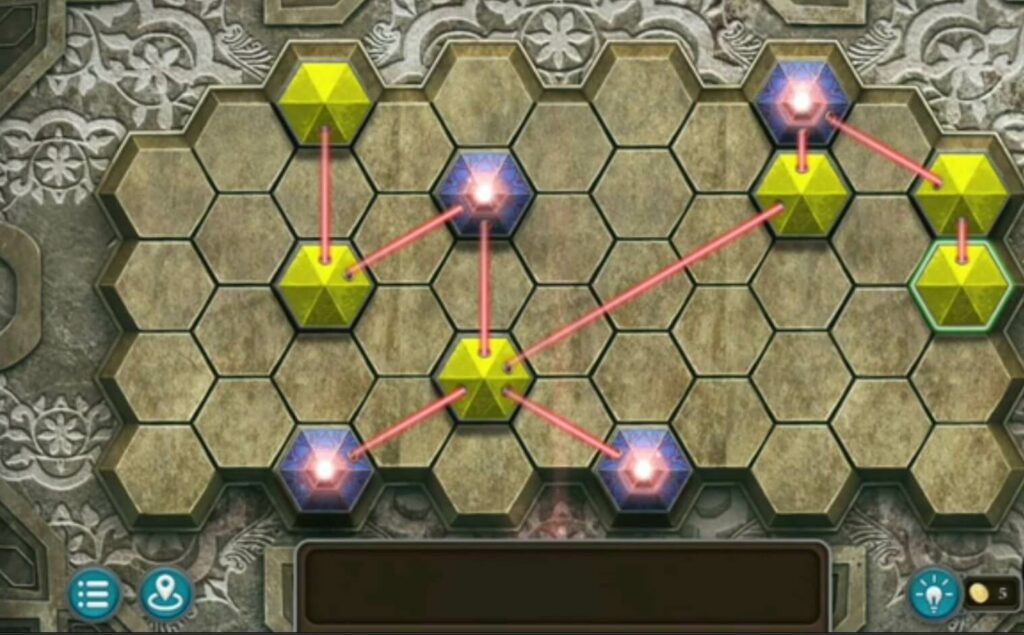
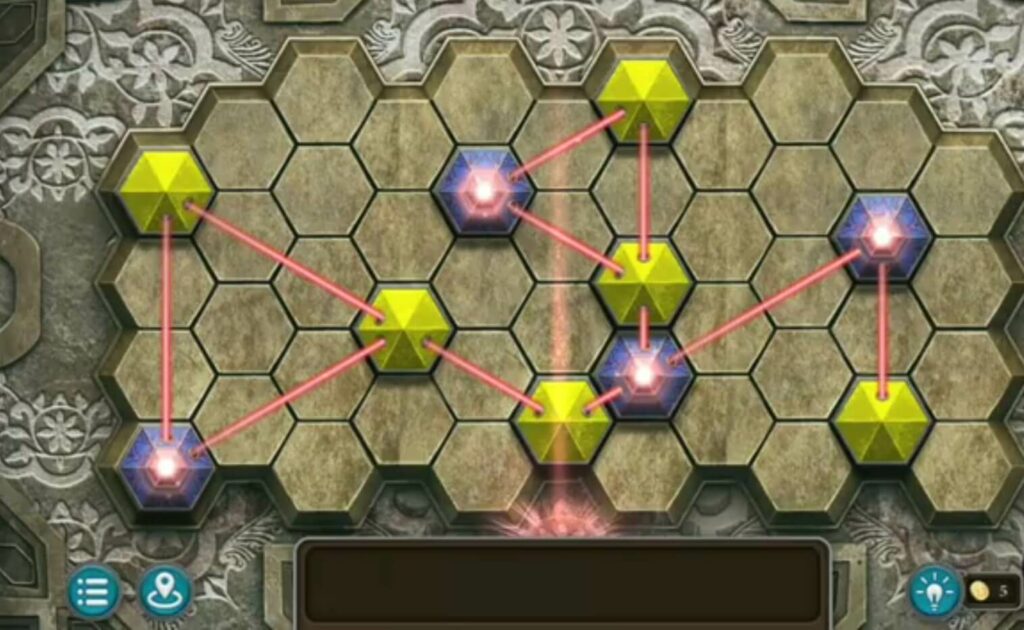
Put the bird figurine (from the pillow) into this figure. A puzzle will appear. You need to move the blue lasers to follow the pattern behind them. When they are well positioned they will turn red.
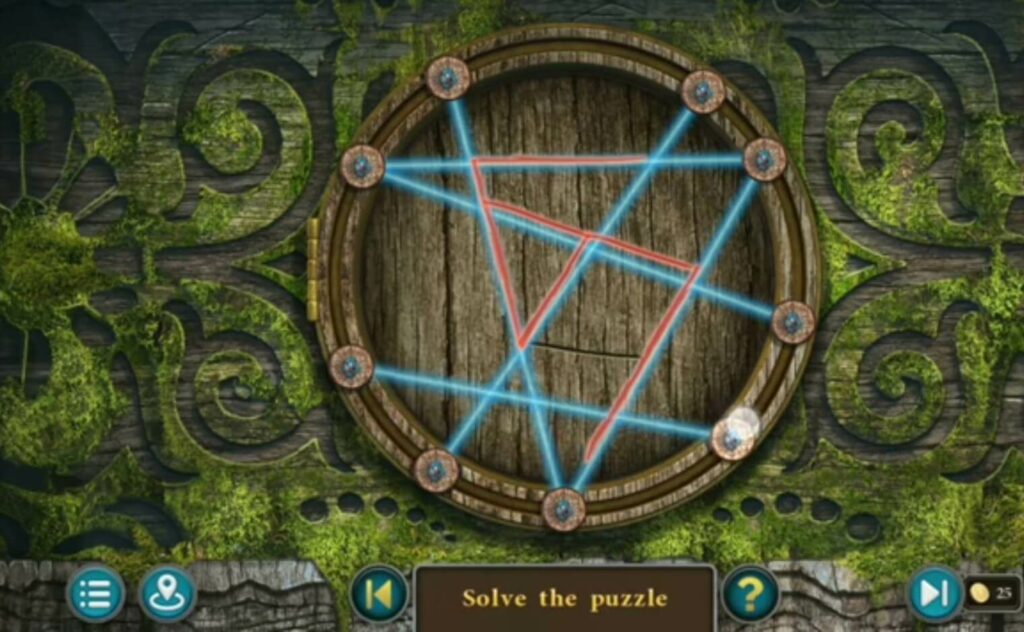
You need to move the blue lasers to follow the pattern behind them. When they are well positioned they will turn red. After solving this puzzle you get a lens.
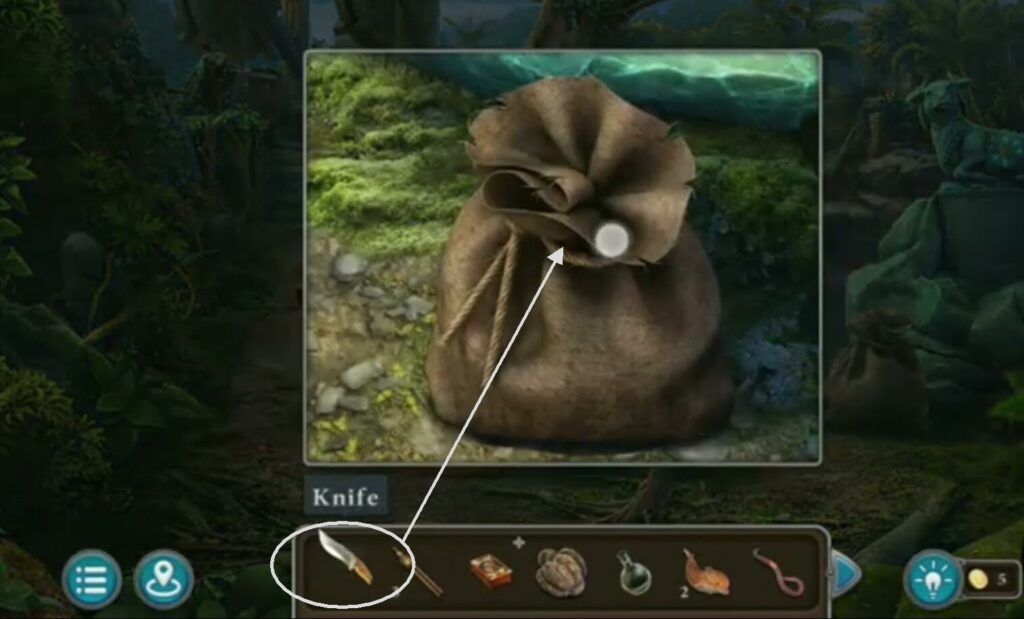
Open the bag with the knife. You will get the pick.
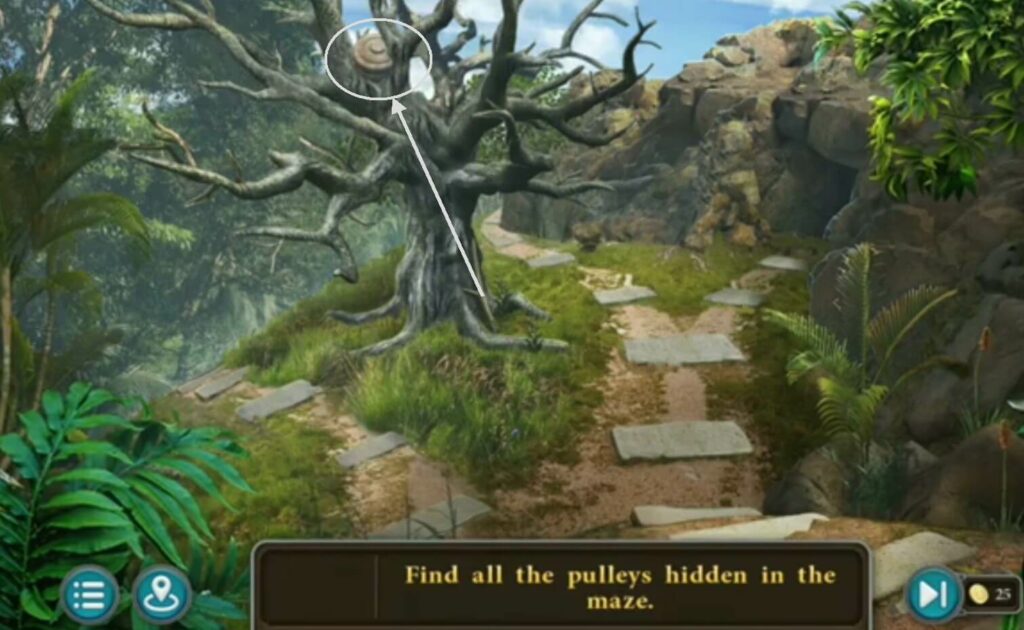
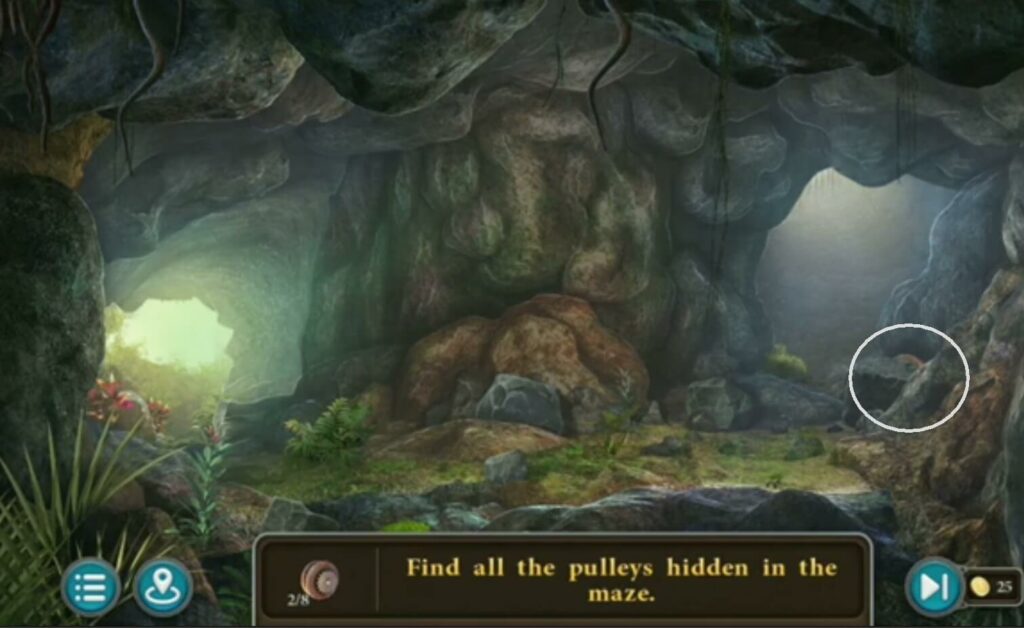
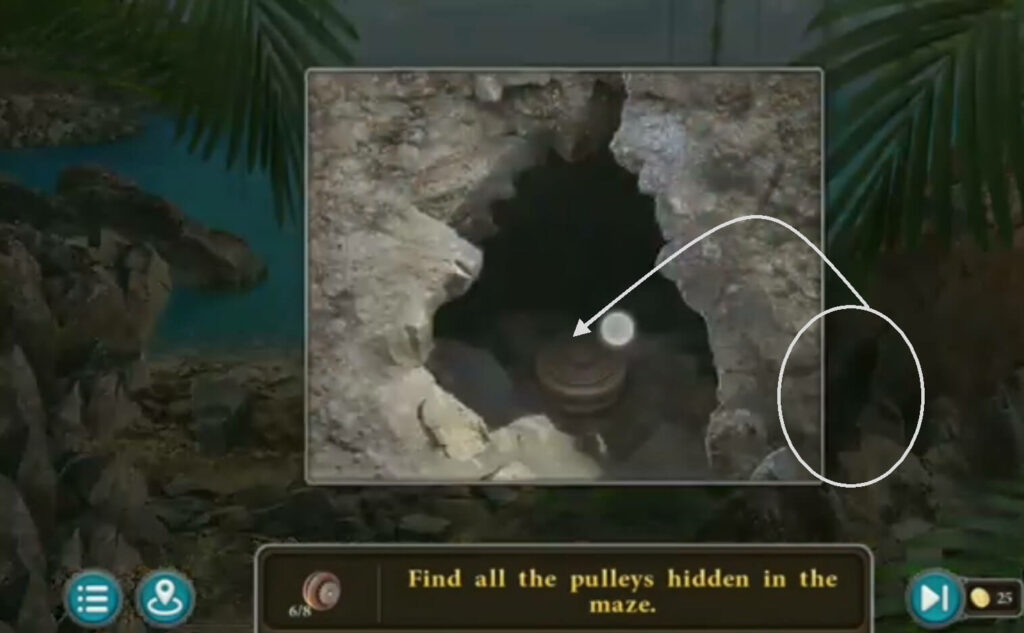
Take a pulleys. Find all the pulleys hidden in the maze.
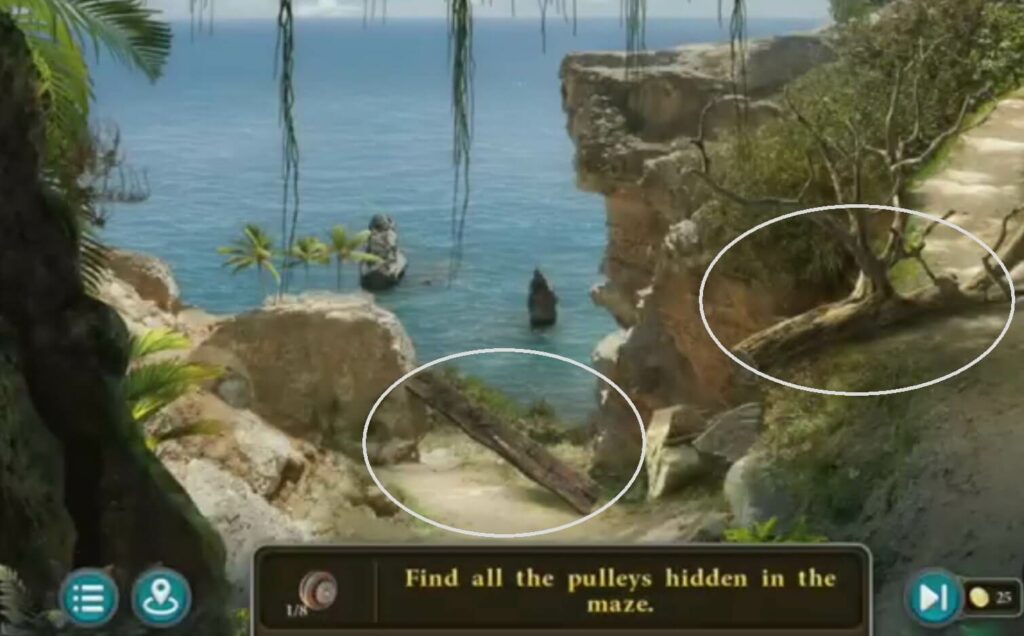
Move these objects so you can cross.
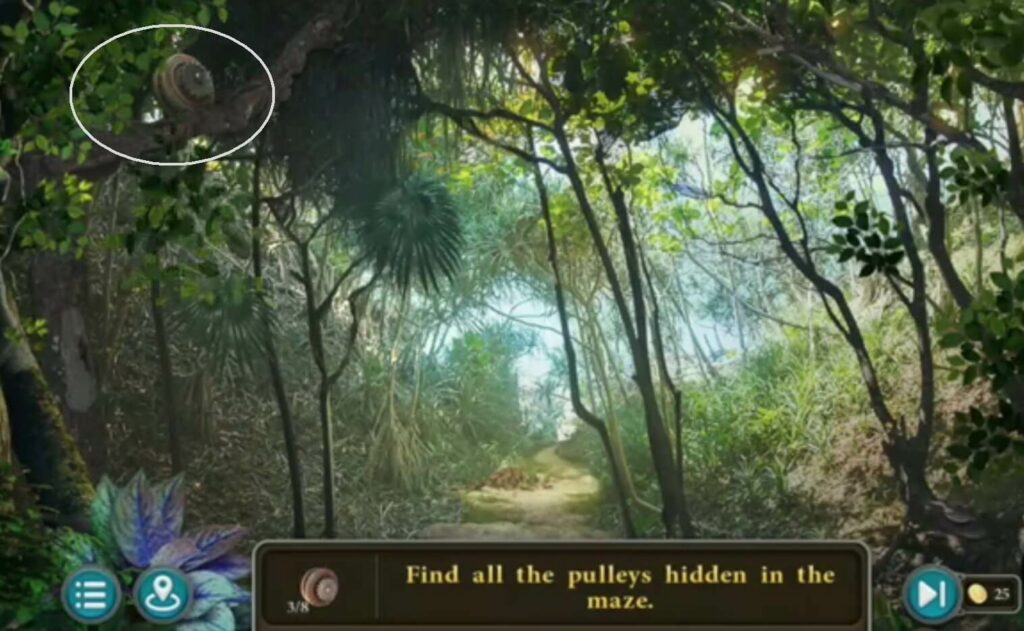
Take a pulleys.
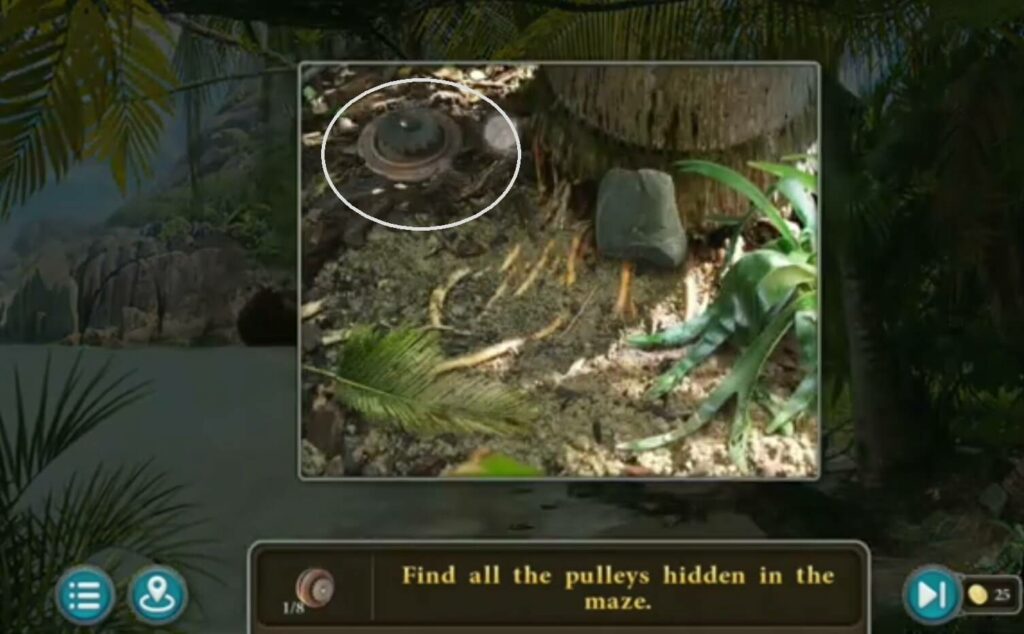
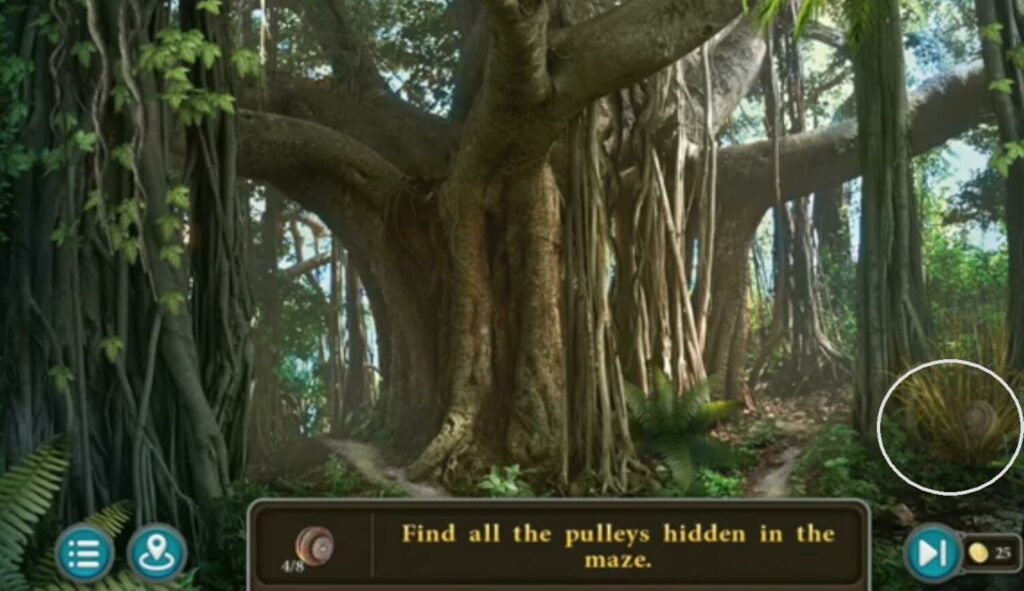
Take a pulleys.
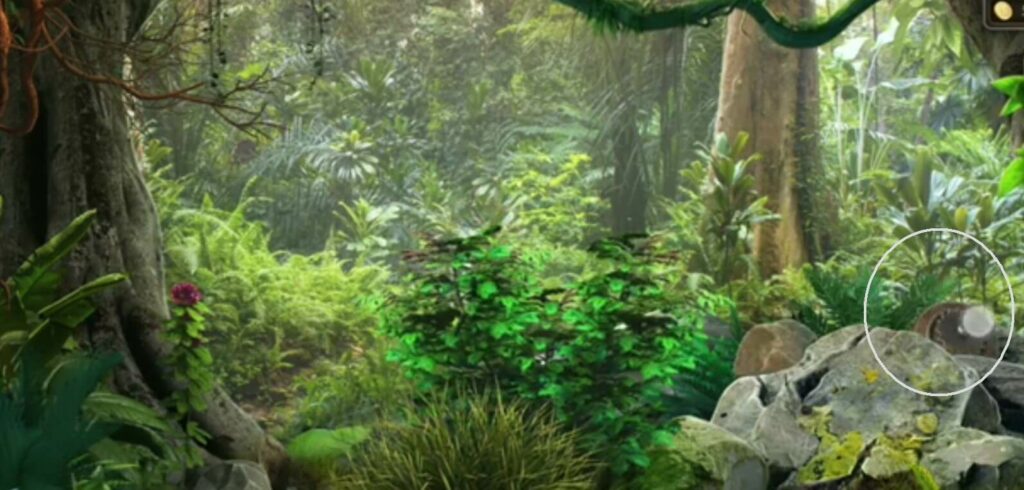
Take a pulleys.
Take a pulleys.
Take a pulleys.
Take a pulleys.
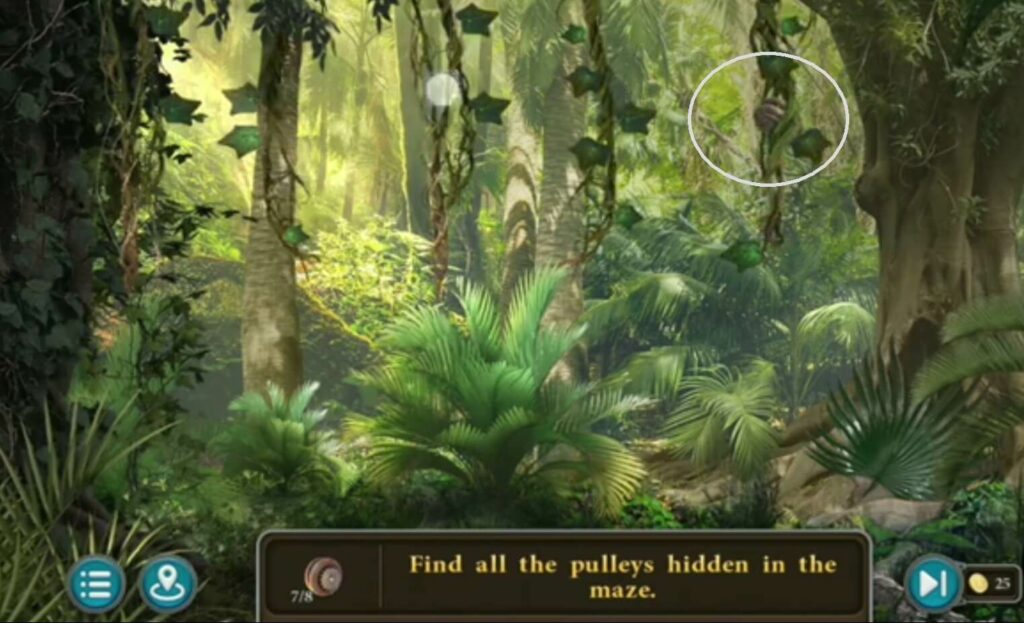
Take a pulleys.
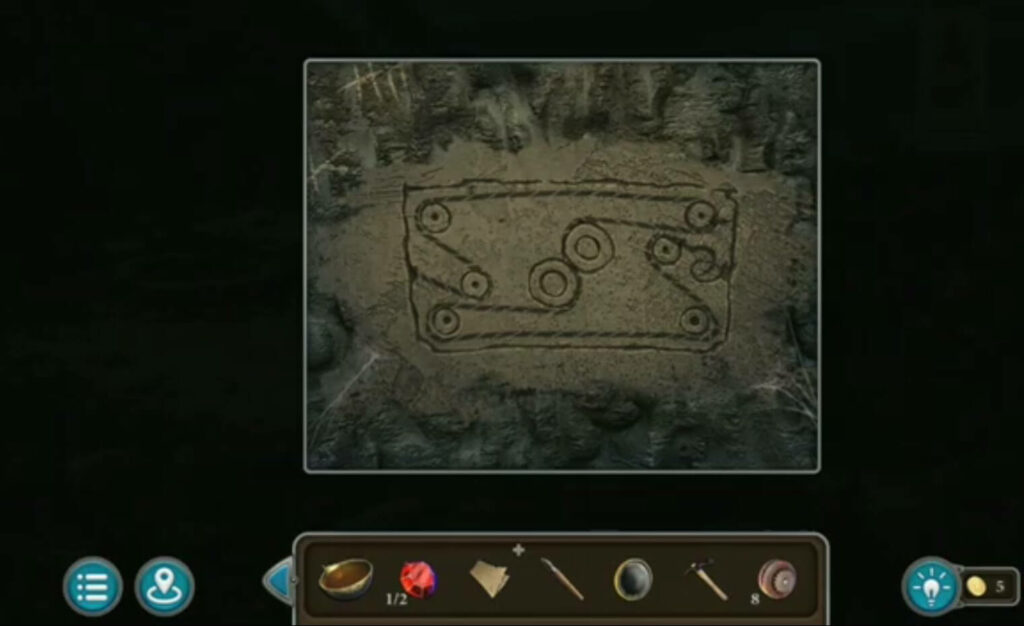
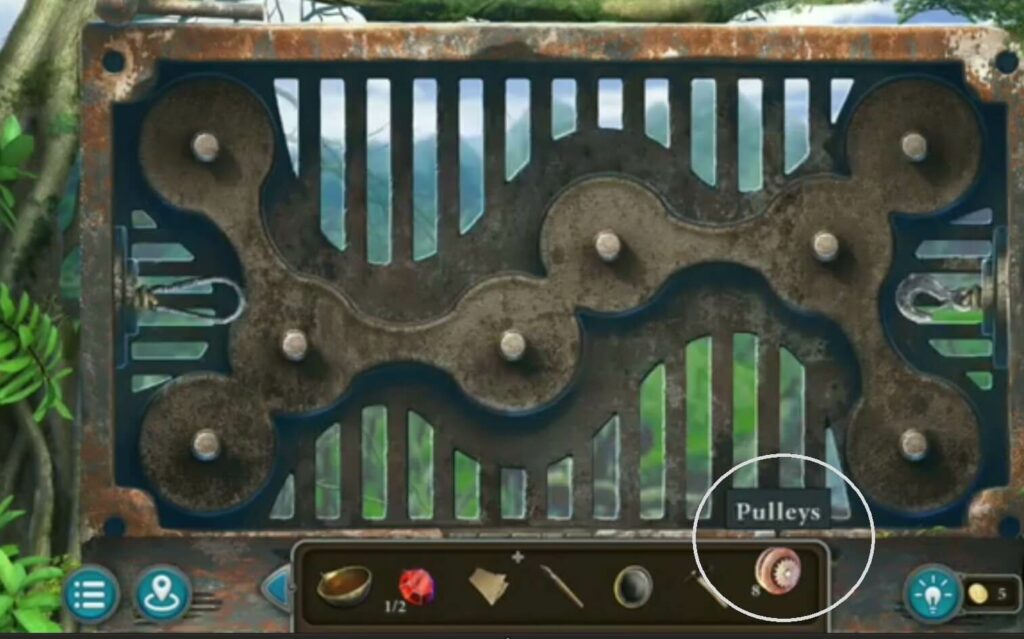
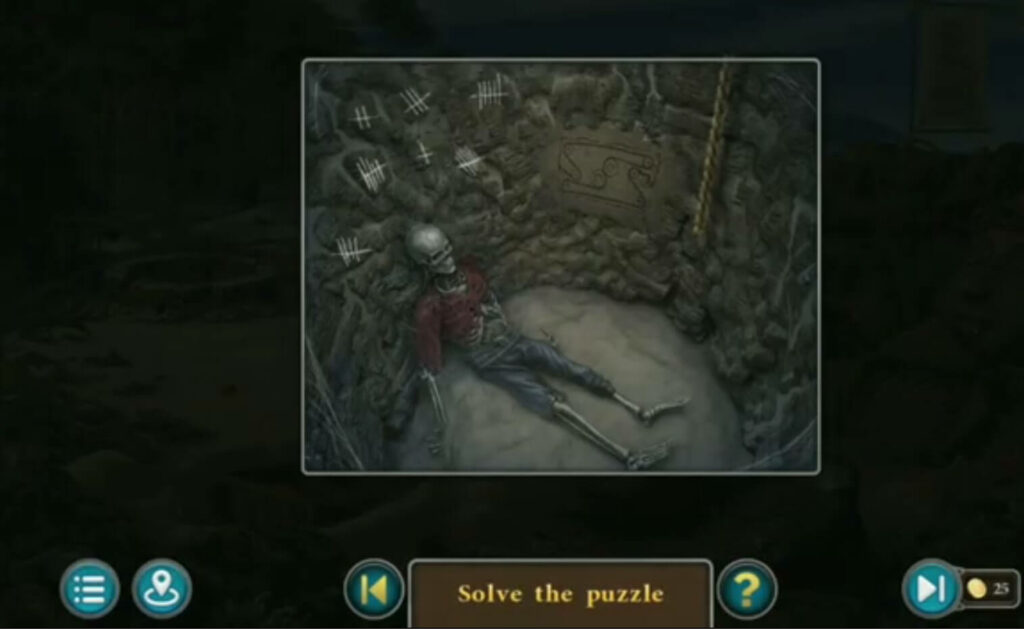
The drawing from the well with the skeleton is the solution to the puzzle. It is necessary to collect all 8 pulleys beforehand.
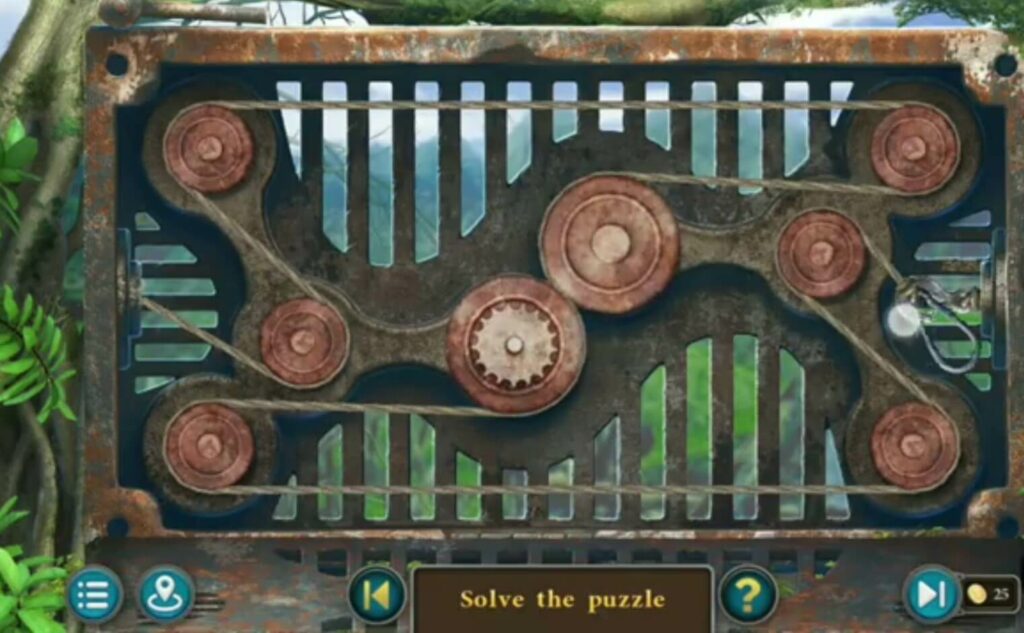
Line up the pulleys in the designated places, then thread the belt around them.

Take the pick you found in the sack to break the rock. You will get a handle.
Place the handle on the mechanism that moves the bridge. After that, the bridge will rise.
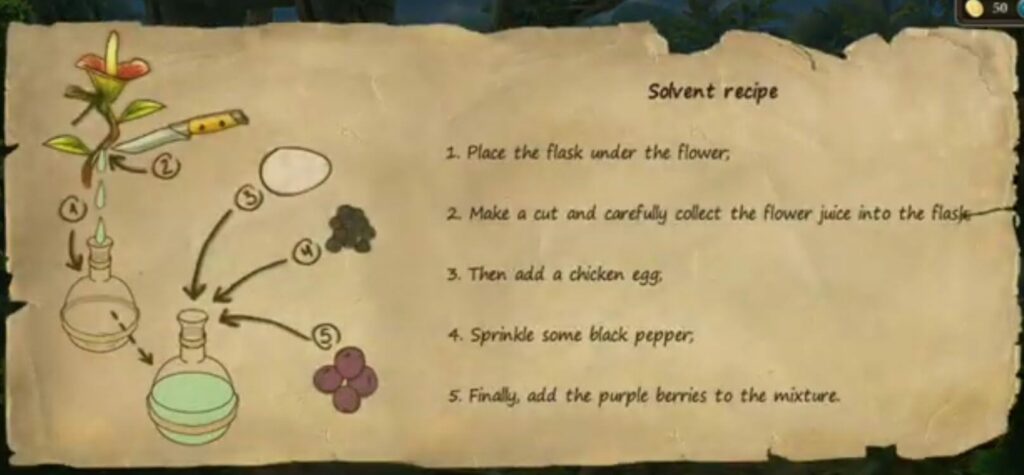
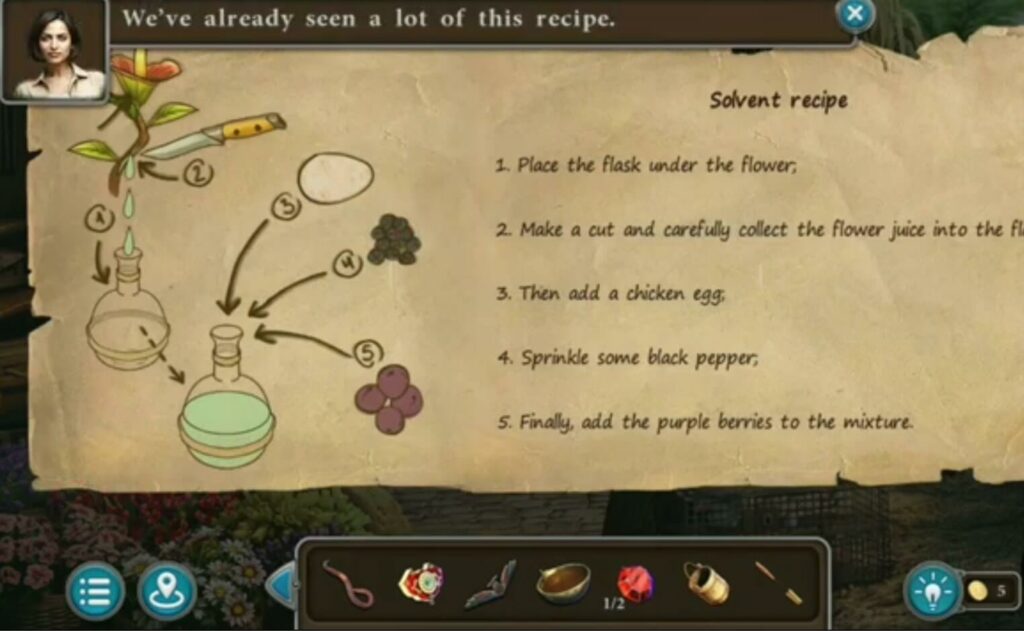
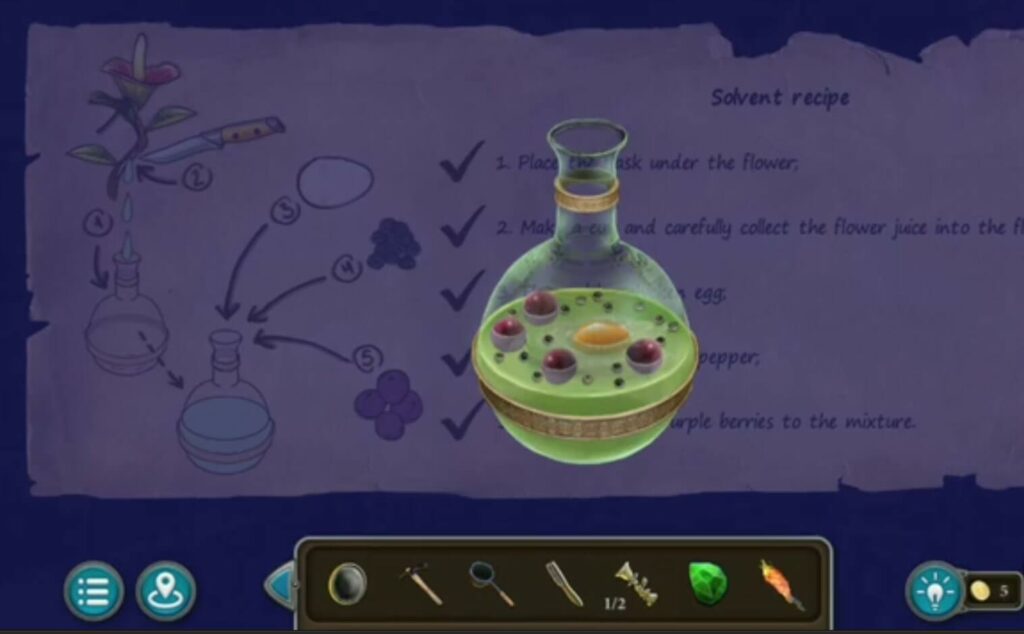
A recipe.
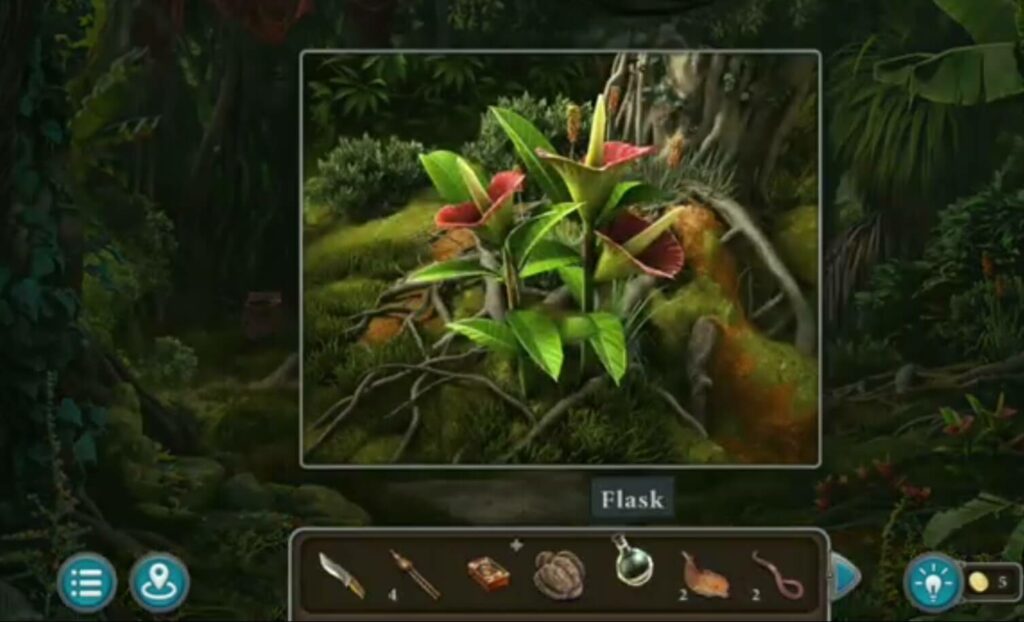
Place the flask (found it in the bag) under the flower just like it says in the recipe (got it when you solved the snake test tube puzzle).
Cut with a knife and collect the flower juice into the flask.
You got a flask with juice.
Take the black pepper from the spice box.
- A collection item.
- A morphing object.
- A pungi.
Put the knife into the crack. You got a key.
- Take a pick (found in the sack) to open a wooden coffin. You will get a crucible and a torch.
- A worm

Put the decoration on the statue.
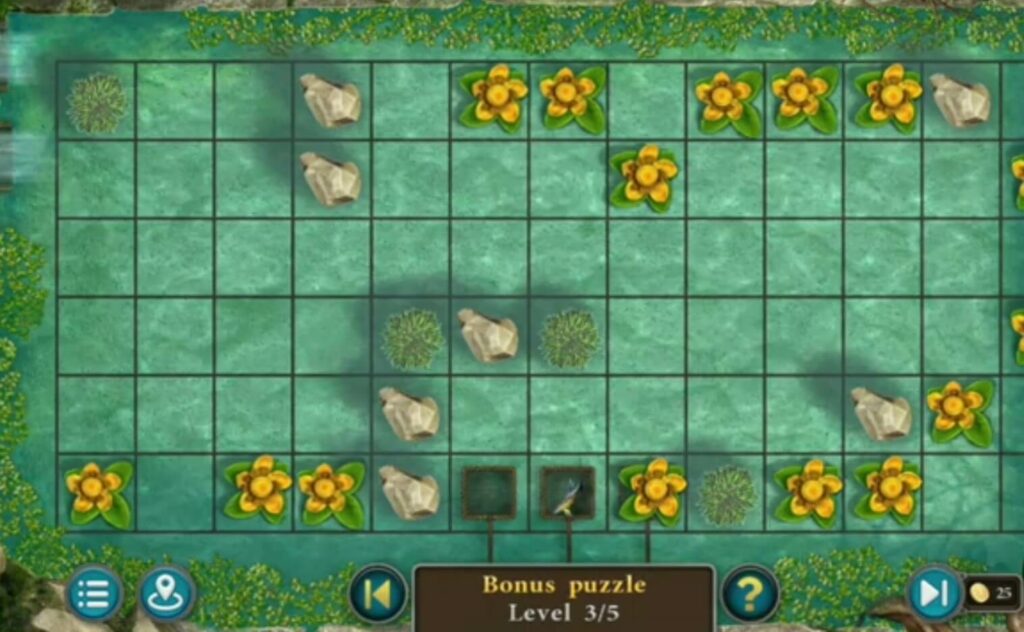
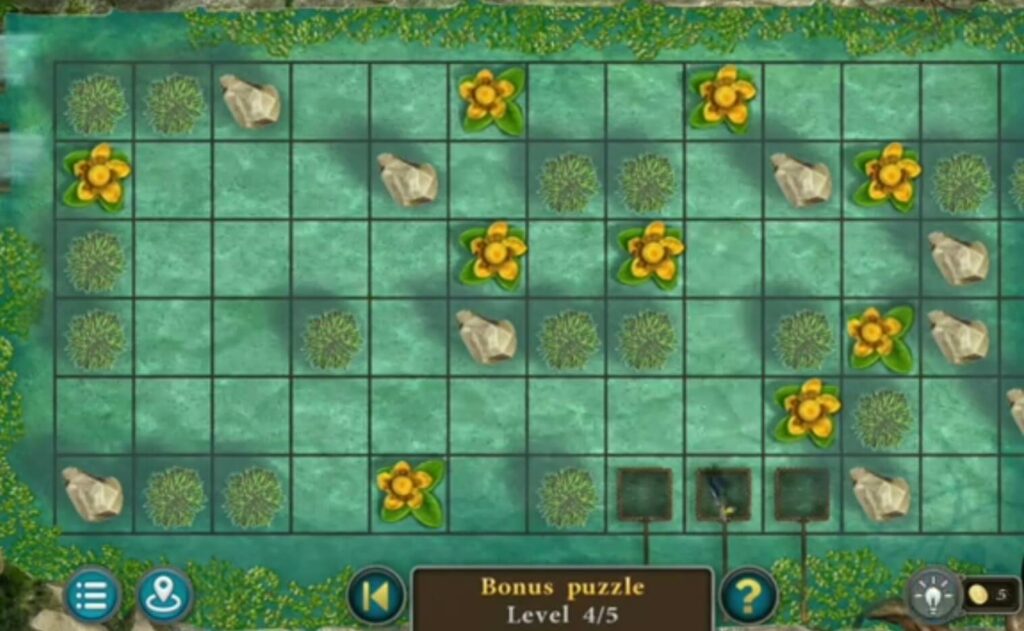
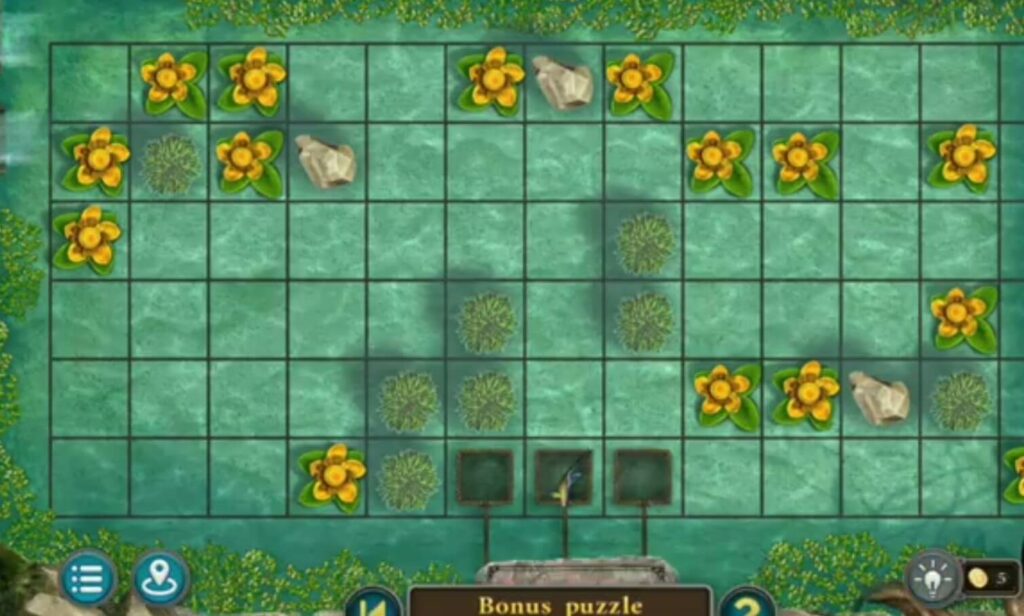
Bonus puzzle: Put the worm in the water. The puzzle has 5 levels. You need to push the fish into the net by throwing stones to move water lilies and obstacles. When you solve all 5 levels, you get a red star.
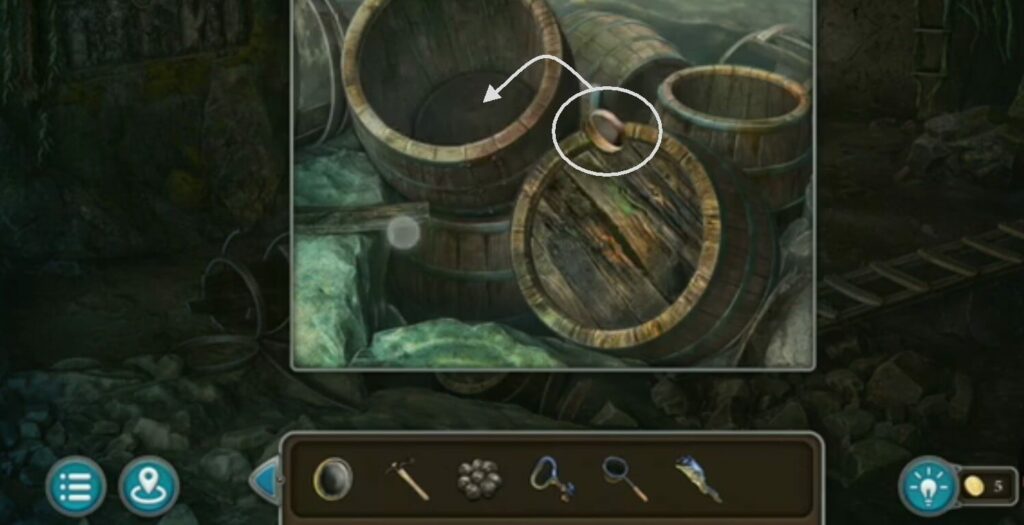
Take the sieve from the barrel.
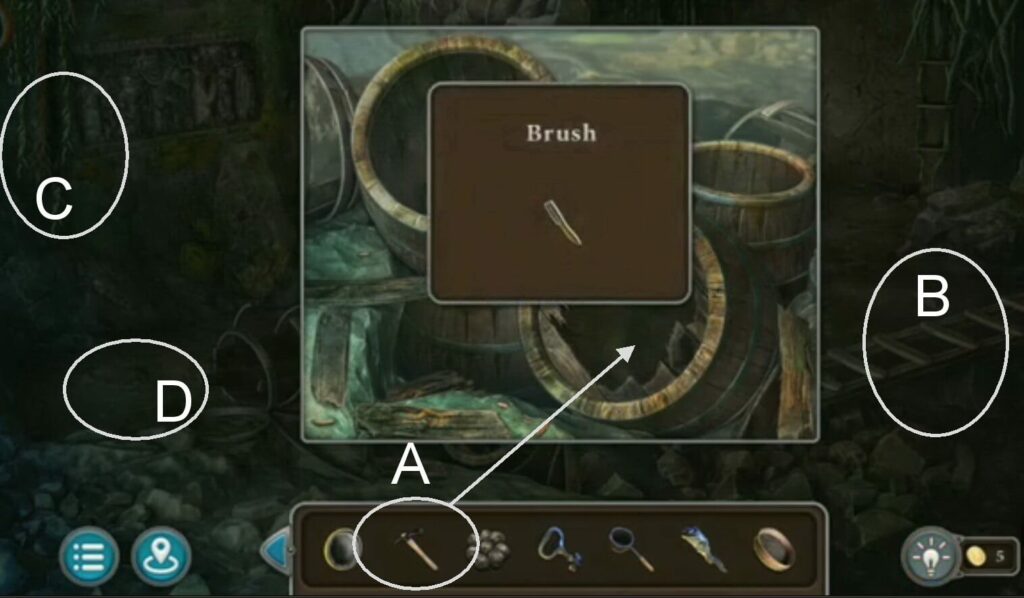
A Break barrel with a pick. You will get a brush.
B Take the ladder.
C Take a morphing object
D Take a worm
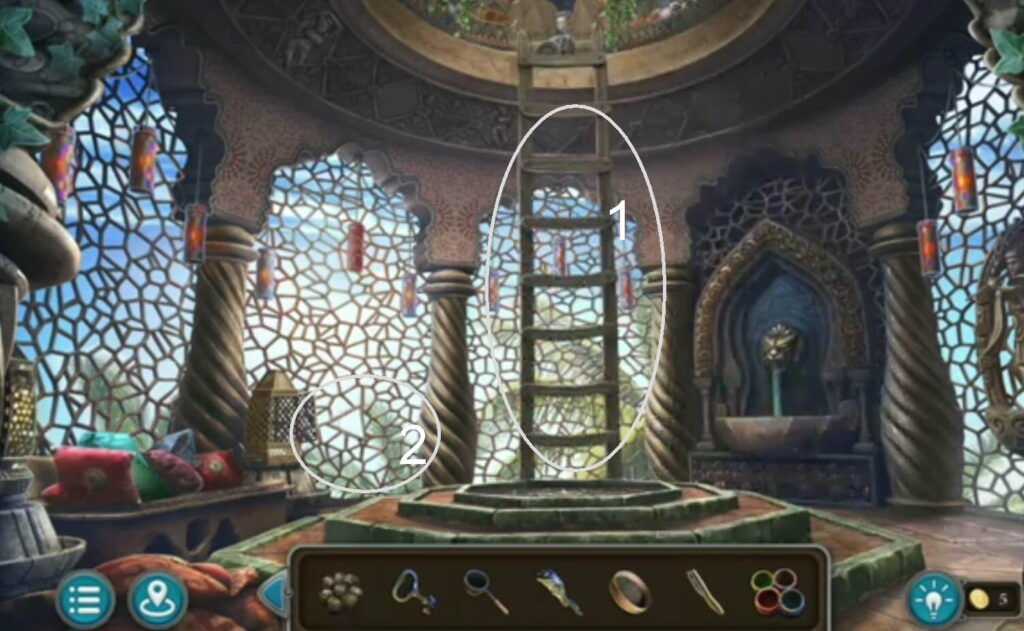
- Put the ladder (which you found on the floor near the barrel) and you will get a bas-relief.
- A morphing object.
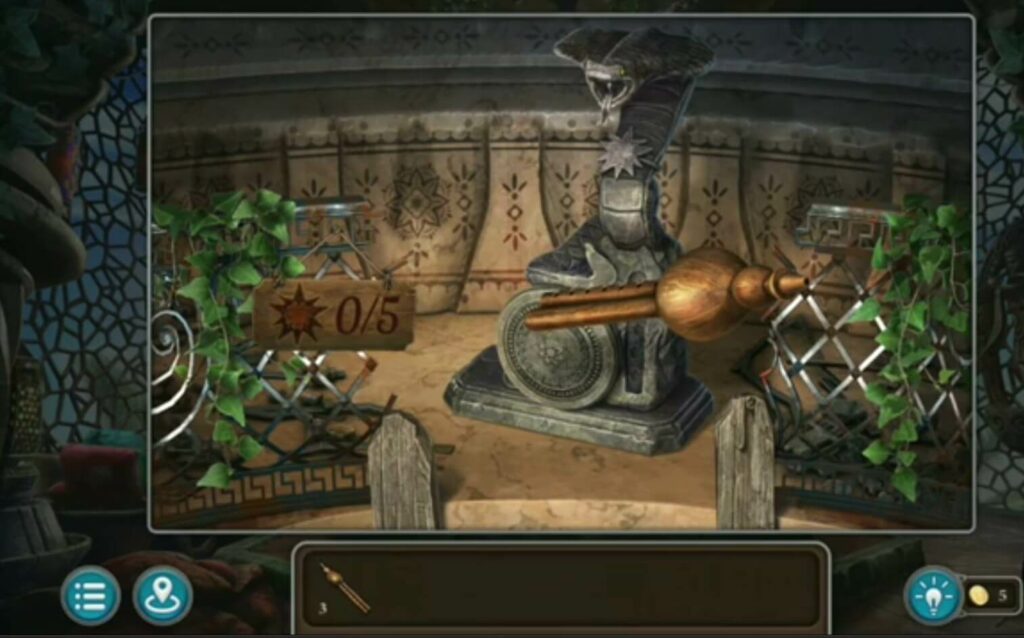
Bonus puzzle: Put pungi, and a bonus puzzle will appear which has 5 levels.
Solve them by arranging the elements so that a red laser passes through each hole.
You got a red star.
Take the bowls.
Put the sieve (that you found in the barrel) and sift the ashes. Two figurines will appear.
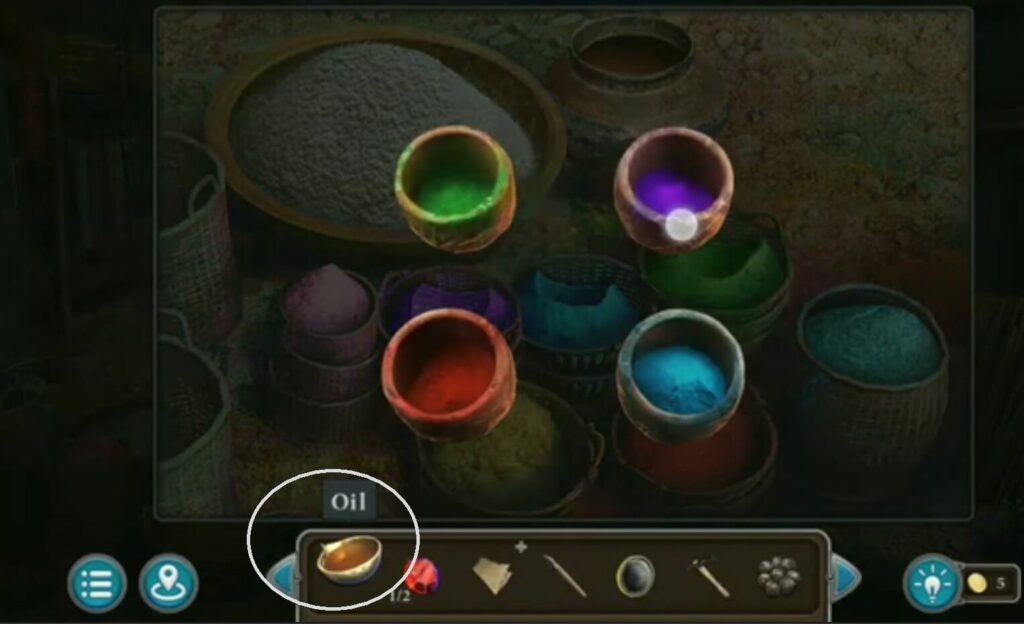
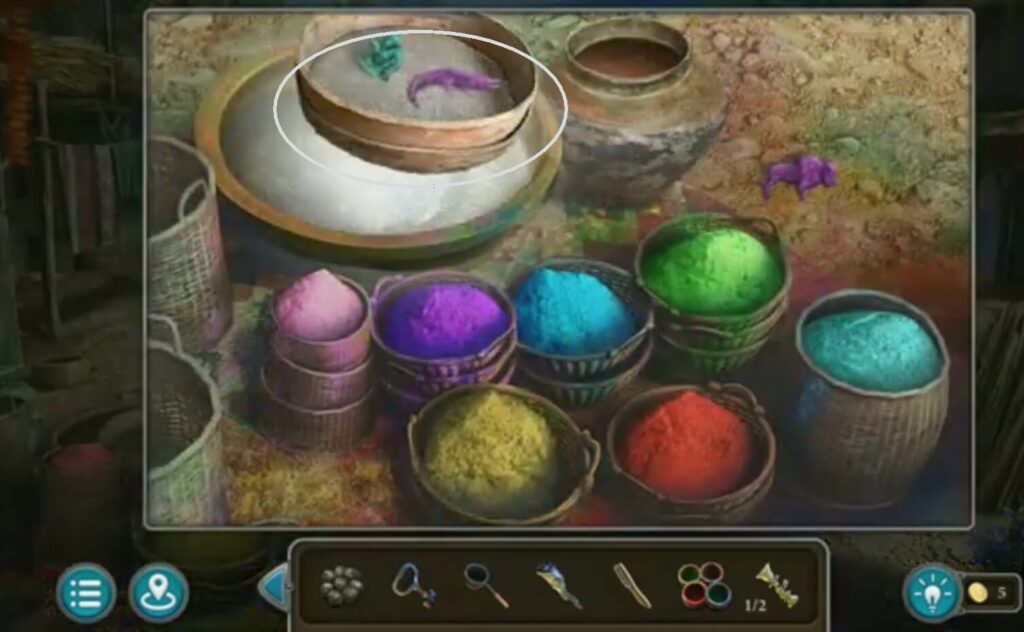
Take the bowls (that you picked up near the animal picture on the wall) and fill them with colors. You got pigments. Add oil to them (found oil in the lantern). Use a brush (got it when you broke a barrel) to mix it.

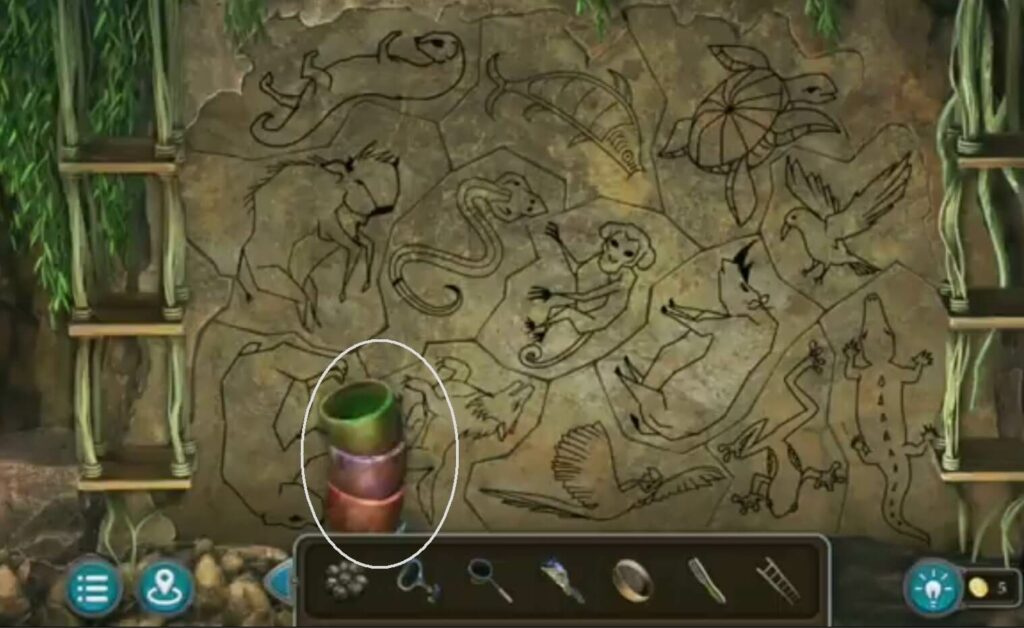
Remember to bring the pigments and figurines in front of the cave painting. Arrange the pigments and use the figurine as a reminder of which color to use for painting the wall: blue for the monkey, and purple for the bison and the crocodile.
After you paint the cave painting, the wall will collapse. An emerald and a puzzle will appear.
To solve the puzzle you need to pull:
A 4X
B 4X
C 3X
A secret location will appear where you win another star. But before that, you need to find certain objects.
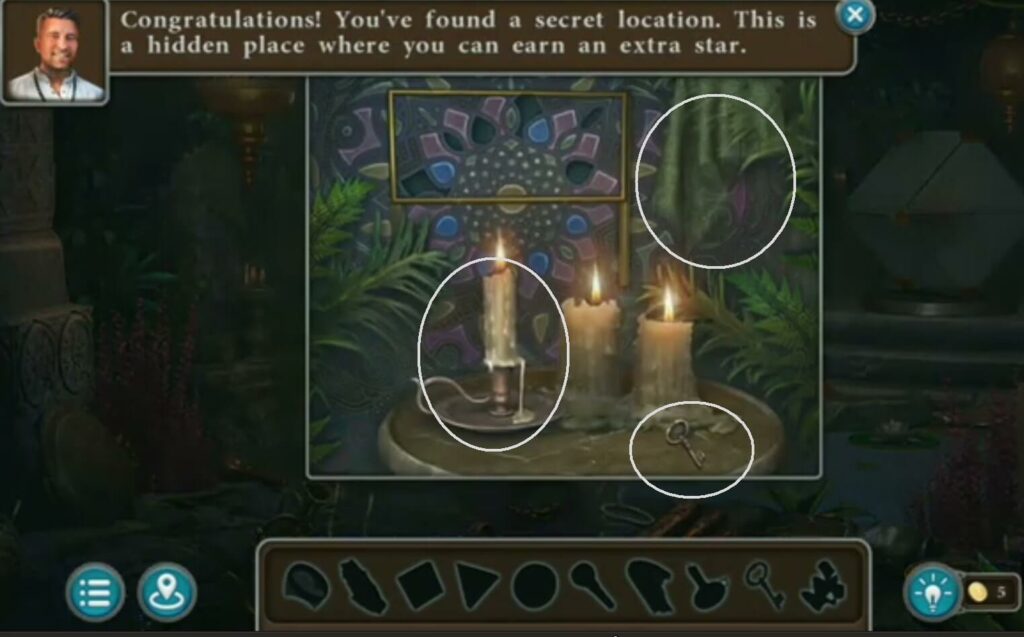
Take a key, a candle and a piece of cloth.
Take the lever.
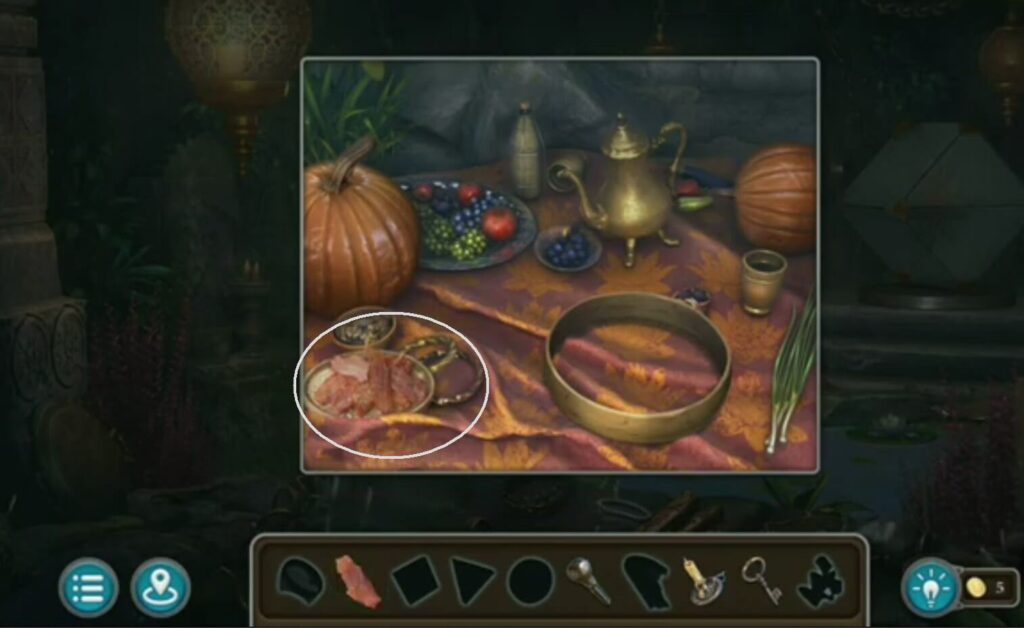
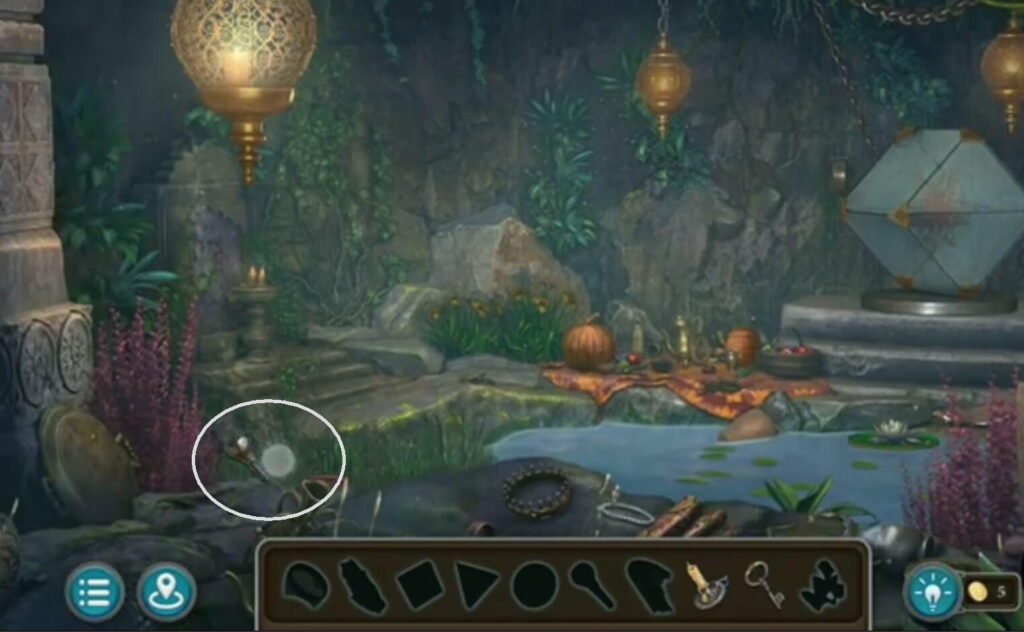
Take dried meat.
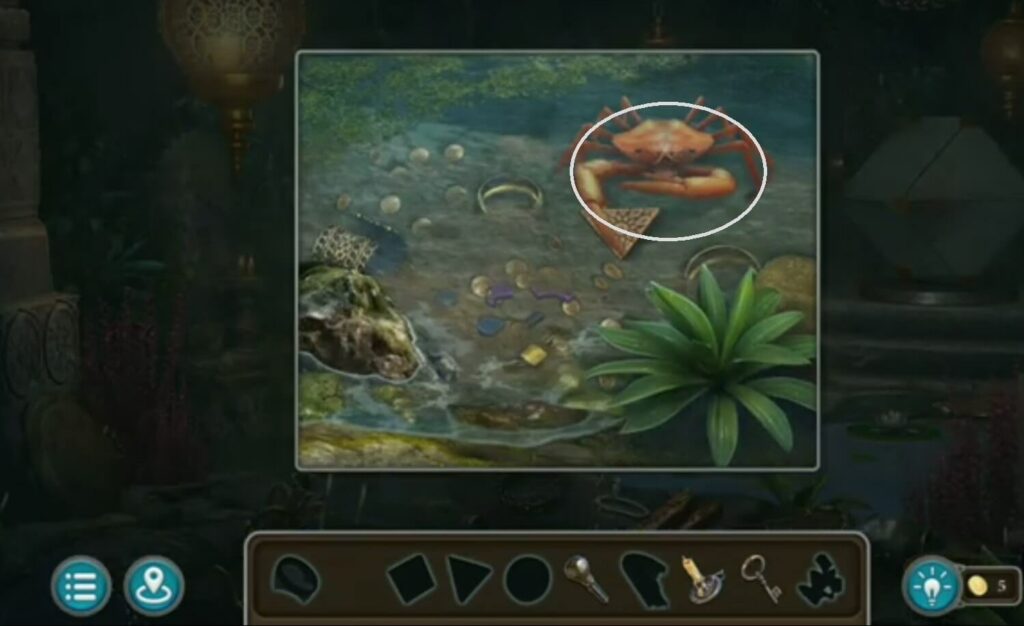
Give dried meat (take it from the table) to the cancer. Then take a triangle.
Put the lever (found it on the floor) and pull it down. A chandelier will fall. It needs to be unlocked with a key.
Unlock the chandelier (which fell after you put the lever and pull it down) with the key you picked up from the candlestick.
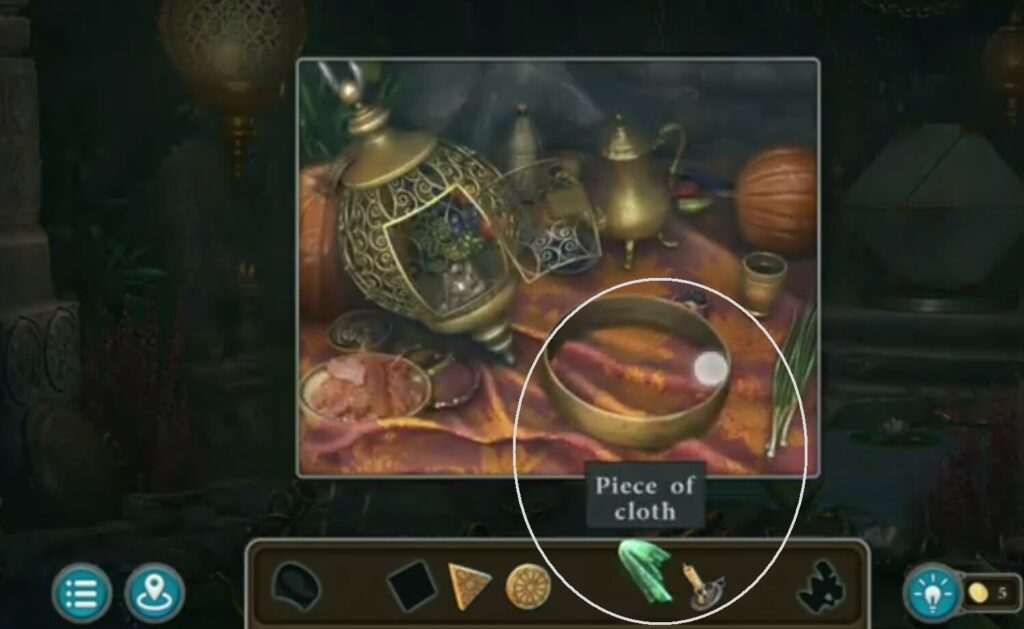
Put a cloth ( take it when you take a key and a candle) on the frame, and pour wax from the candle. It will become a sieve.
Put the sieve into the water. You got a mosaic.
Put the mosaic (got it from the sieve) into the picture, and then solve the puzzle.
The solution is to match pieces with the same color and pattern. When you solve it you get another item to collect.
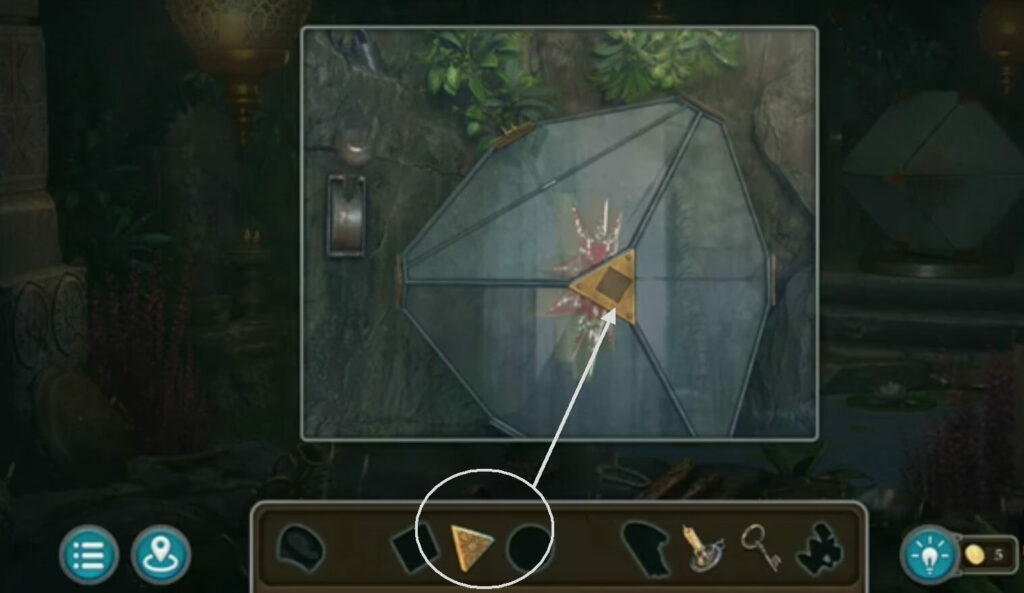
After you solve a puzzle you get a square.

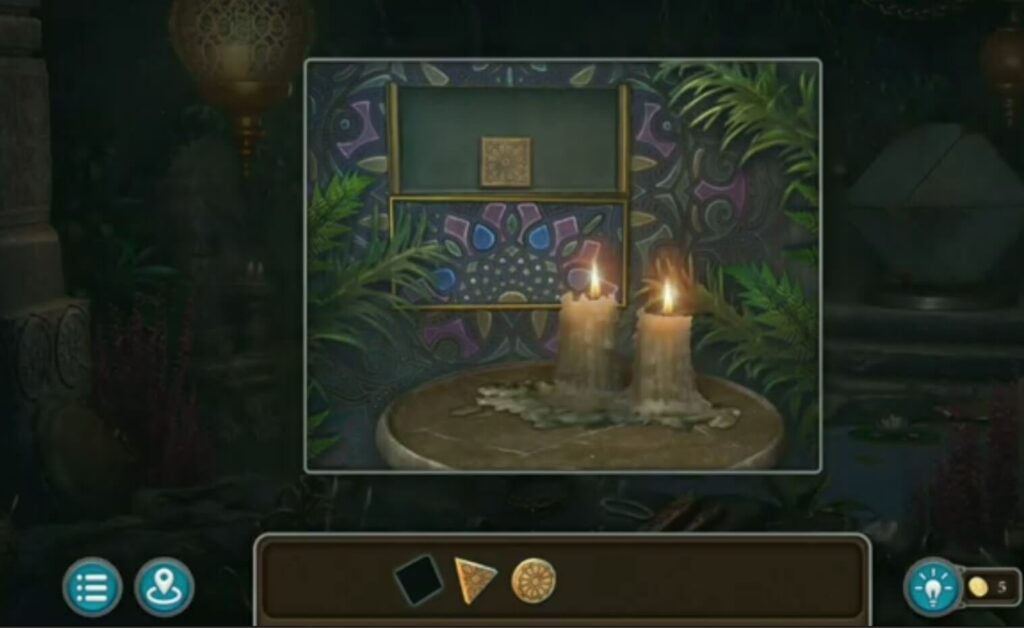
Put a square, circle, and triangle. When it opens you get a star.
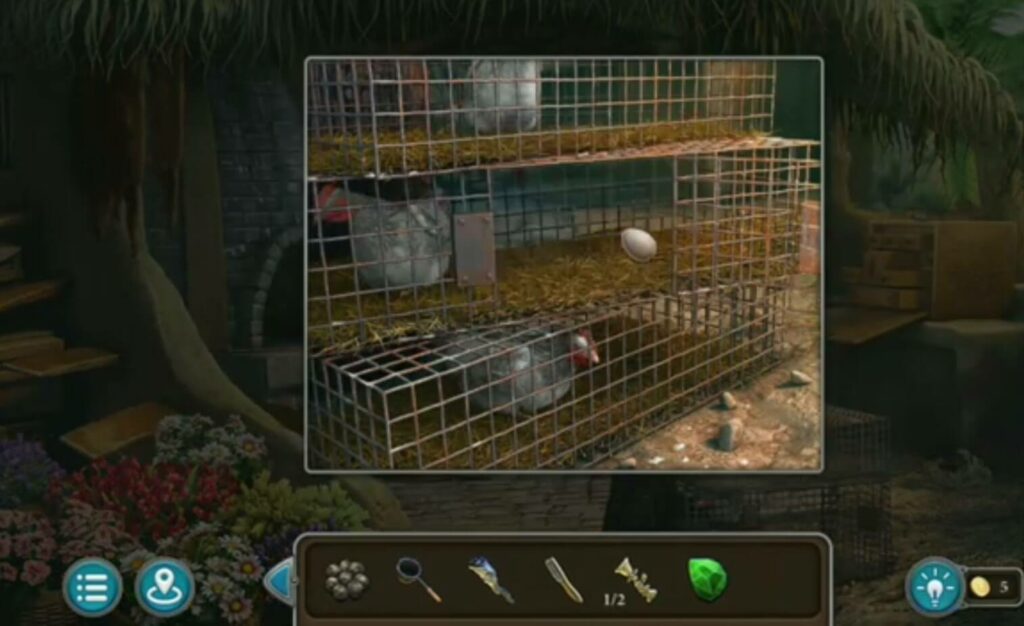
Put a key (found in the crack) to open the cage with chickens. You got an egg.
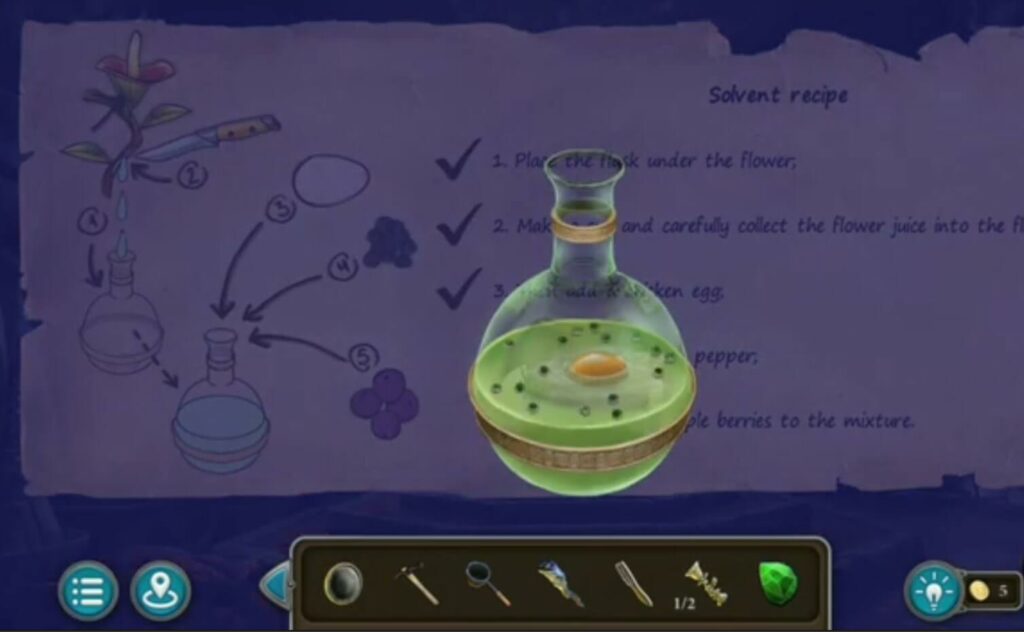
Put the egg (from the cage with chickens) into the bottle, just like is in the recipe.
Then add a black pepper.
Take a torch (found in the wooden coffin) and light it with fire. You got a burning torch.
Take a burning torch (you got it when you lit the torch with fire) and light up the hollow in the rock. Take an amulet and a ruby.
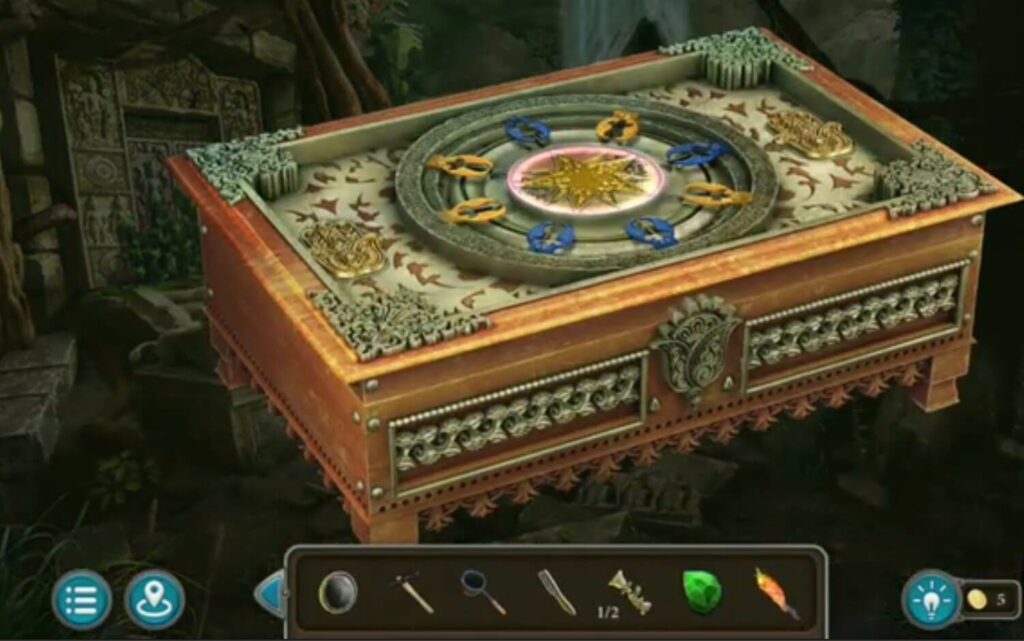
Put the amulet (found in the hollow in the rock) into the casket.
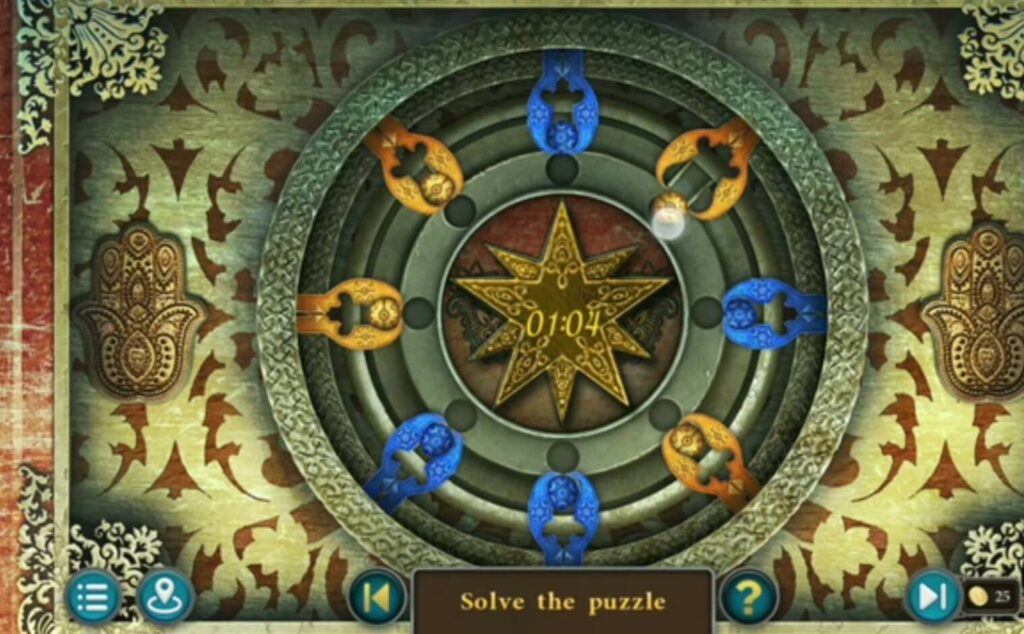
Solve the puzzle by putting the blue and yellow circles in fields of the same color.
The puzzle has a timer, so it should be solved in less than 2 minutes.
You got a bracer and another red star.
Put two rubies into the statue.
Press left ruby 2x
Right ruby 2x
Left 1x
Right 1x
Another door will open. And there is another puzzle to solve.
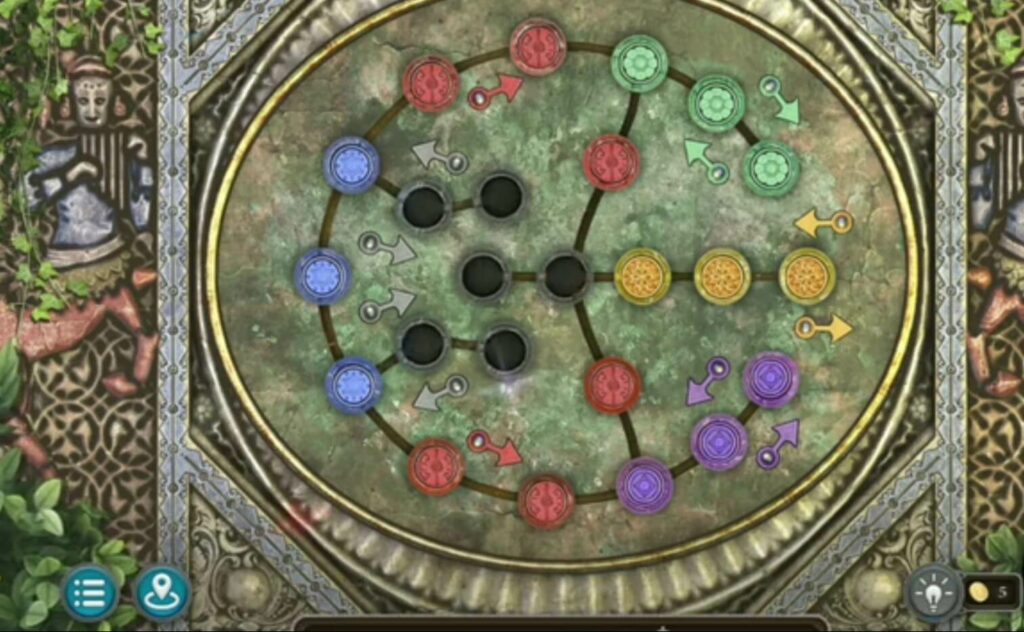
Each circle has a direction in which it can move. Place all the circles in the fields of the same color.
Collection item, and purple berries (ingredient for the recipe).
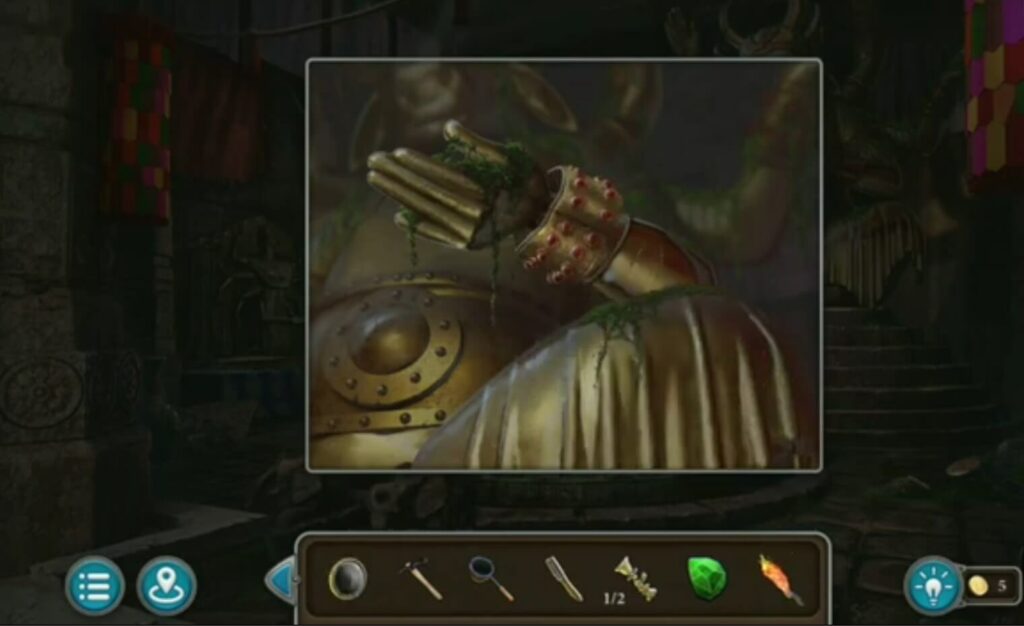
Put the bracer (you got it when you solved the timer puzzle) into the cow statue’s hand.
Put the purple berries (found in the water) into the bottle to finish the recipe. You got solvent.
Put the solvent (got it when you made a mix from the recipe) on the wall and use a brush (found it in the barrel).
Collection item found.
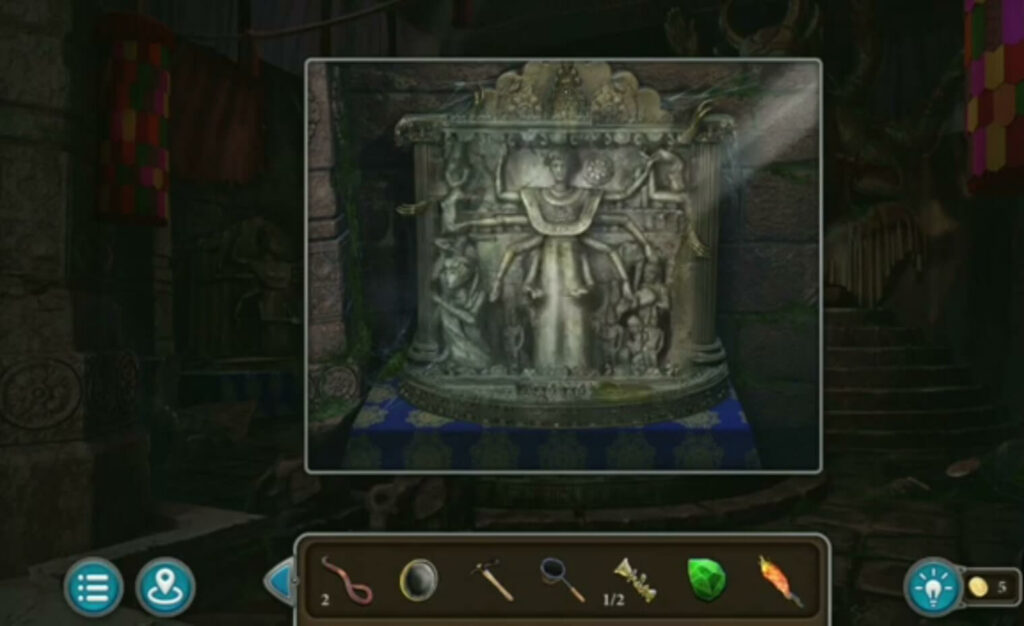
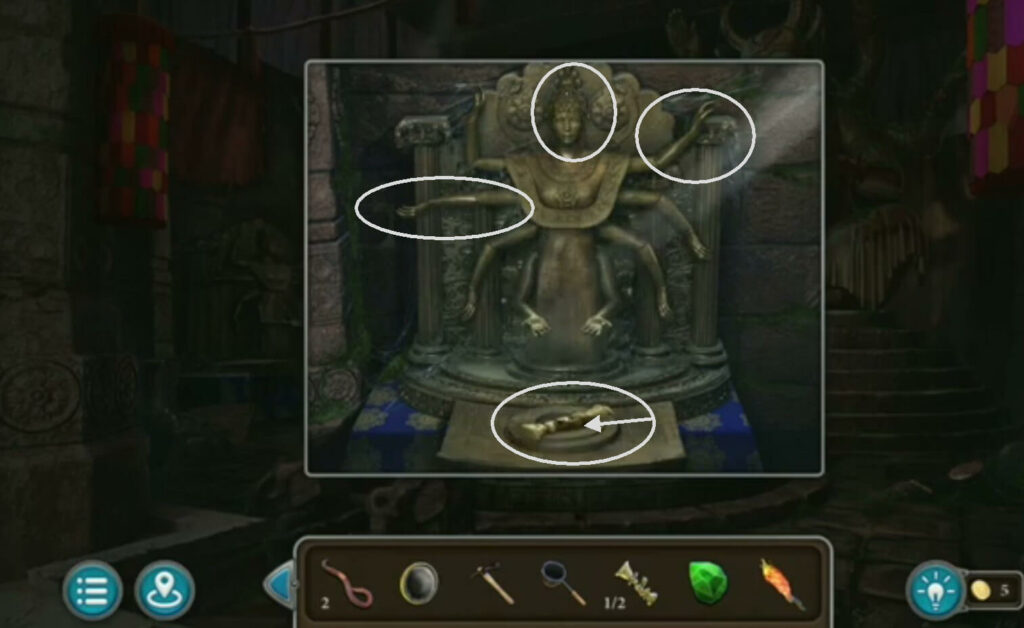
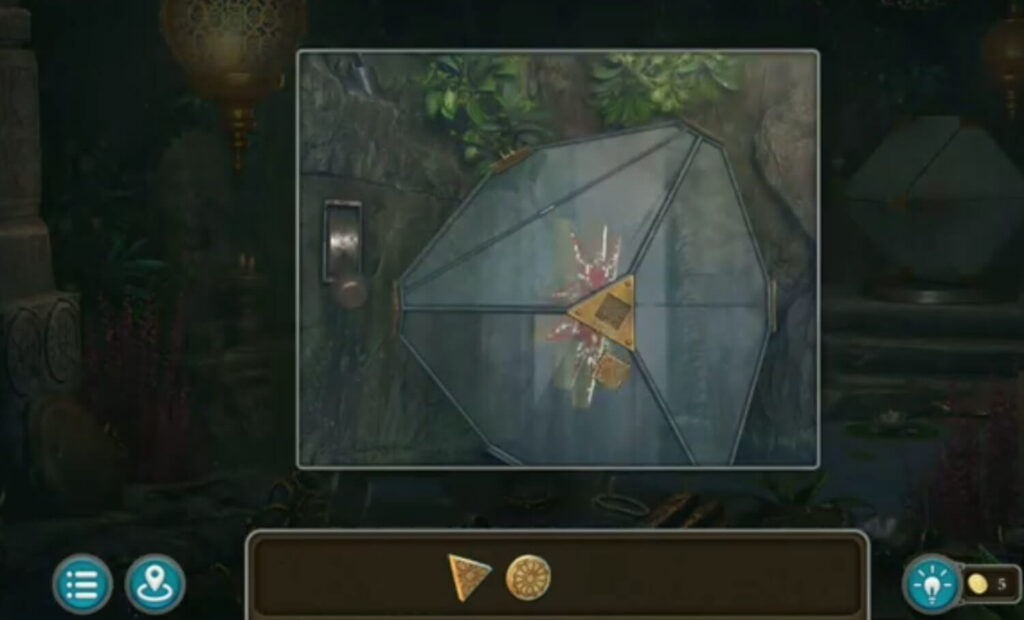
Turn the arms and head of the statue. A bas- relief will appear.
Put a bas-relief (got it when you turned the arms and head of the statue, and you got the second one when you set up the ladder).
Solve the puzzle by arranging circles of the same color into fields of the same color. Rotate them until they match. When you solve the puzzle, you get a map, a mold, and a drawing of a lotus in a stone.
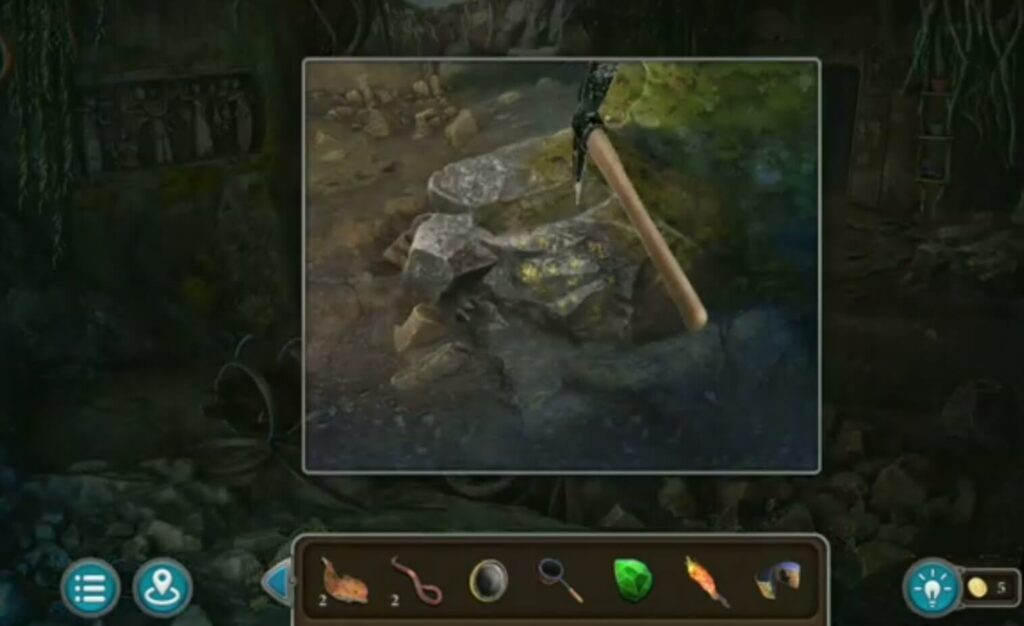
Dig a stone with a pick. You got gold.
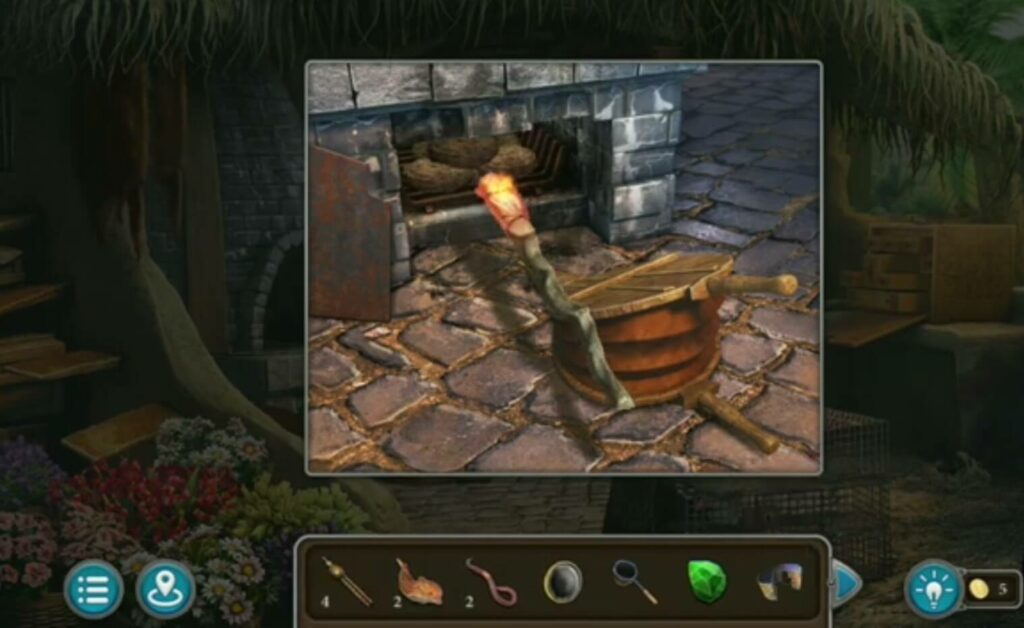
Put the dry manure and a burning torch into the oven. Kindle a fire with a fireplace below.
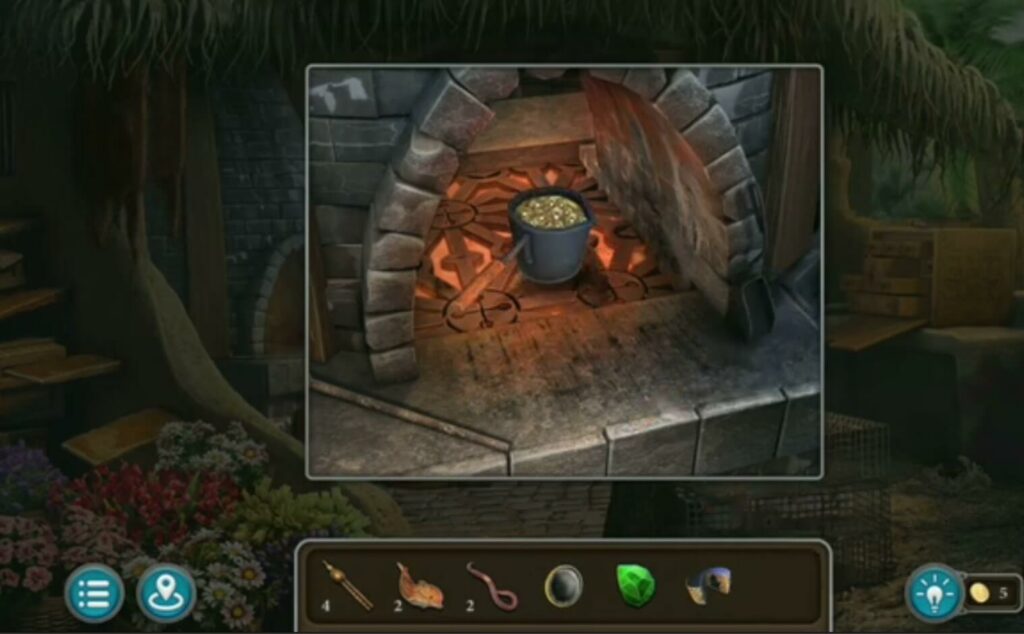
Put the crucible into the oven, then put the gold (got it from the stone). You got a molten gold.
Put the molten gold (got it from the oven) into the mold. You got a golden lotus.
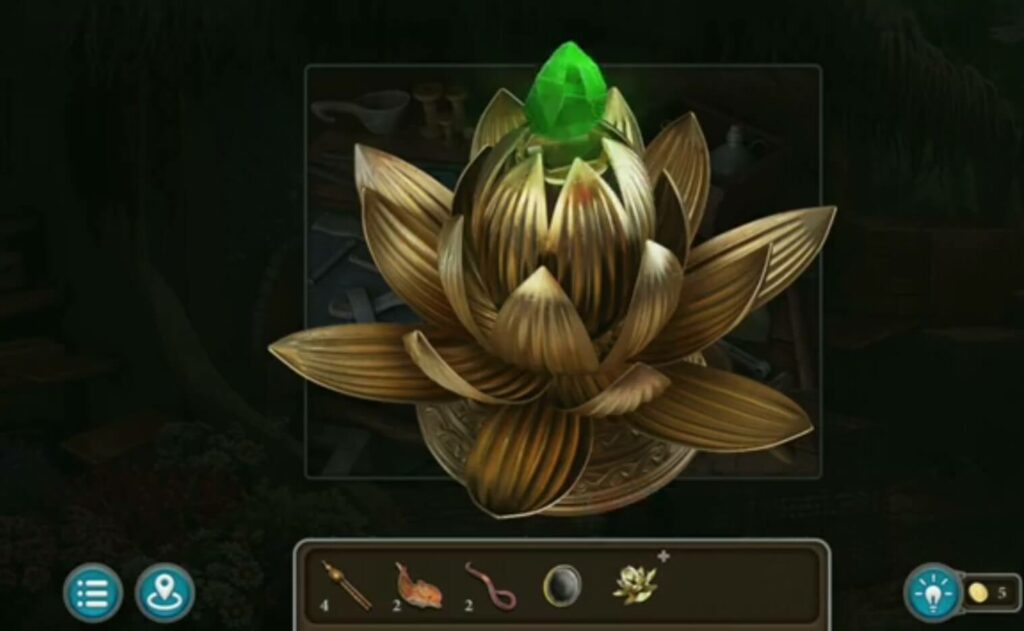
Put the emerald (from cave painting) into the golden lotus (from molten gold in the mold).
It’s a morphing object and a dolphin figurine.
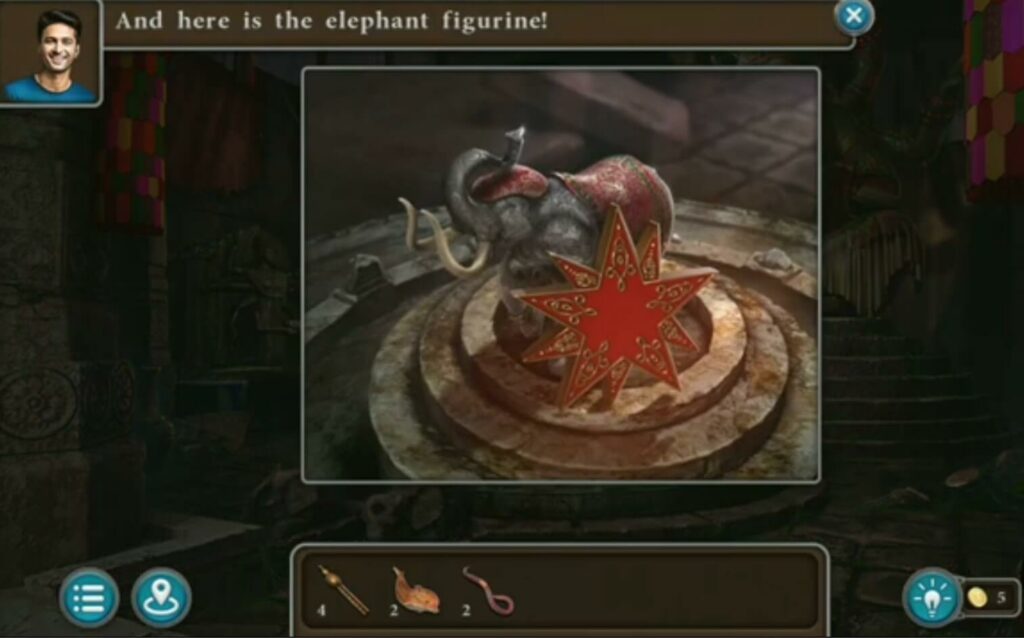
Put the lotus with emerald into the statue. Add lens (from the laser puzzle). An elephant figurine and a red star will appear.