Artifact Seekers Walkthrough | “Doll Factory”
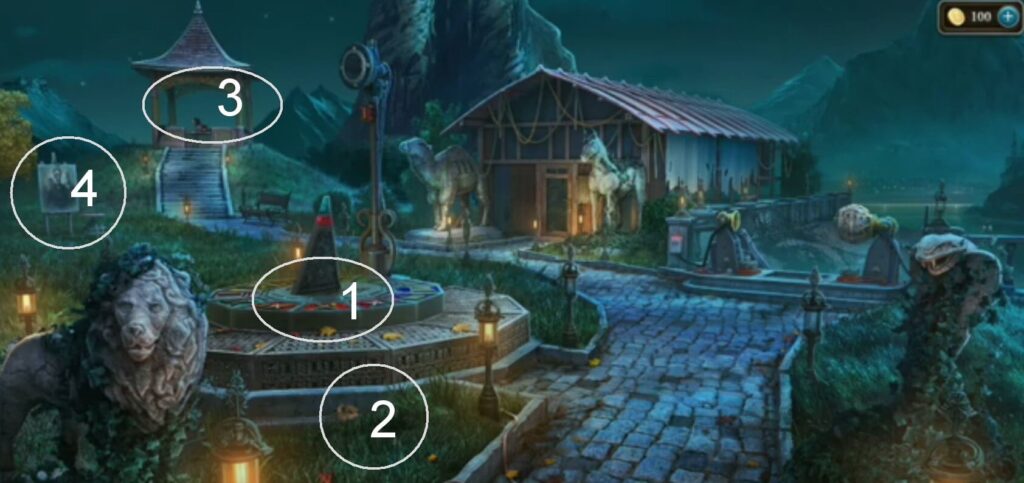
Welcome to the walkthrough of Artifact Seekers, an adventure game in the hidden object genre created by Five-BN. This walkthrough will show you how to solve all the puzzles and finish the game in the fourth chapter, “Dolls Factory”.
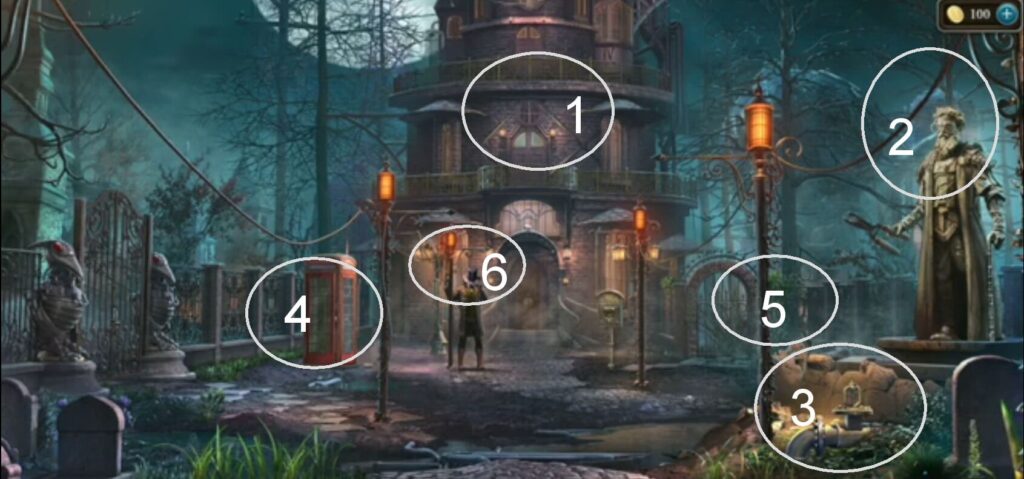
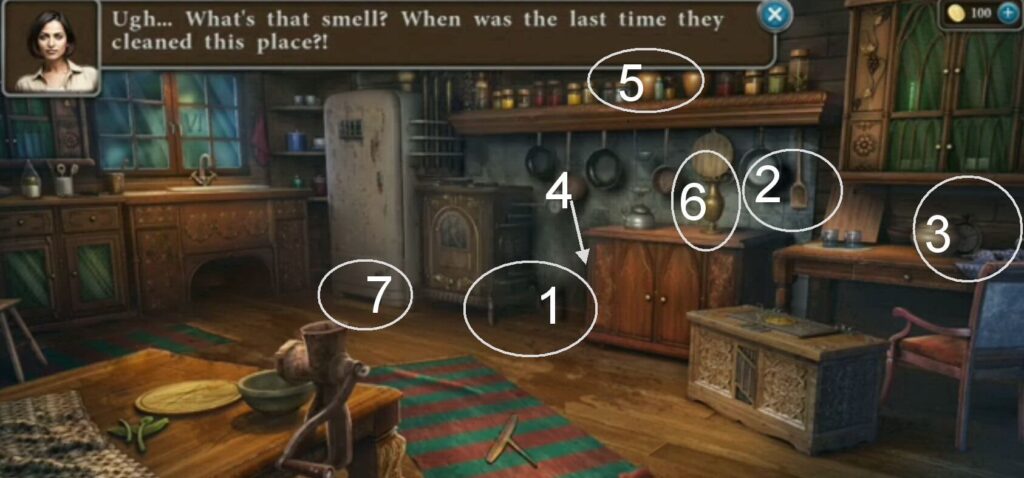
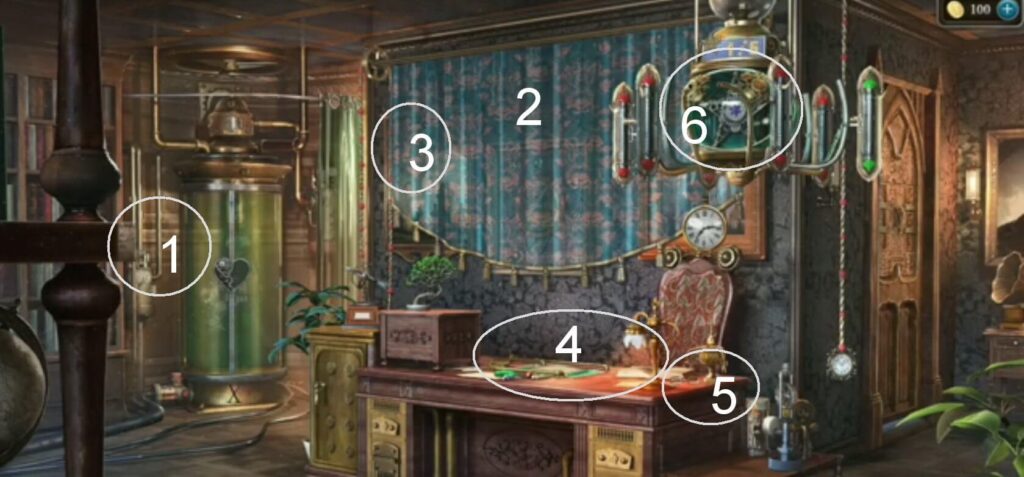
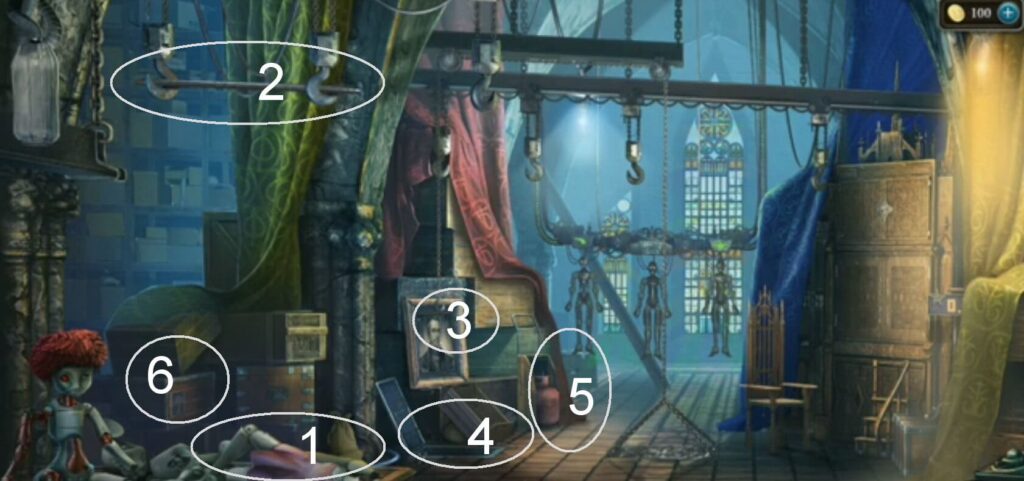
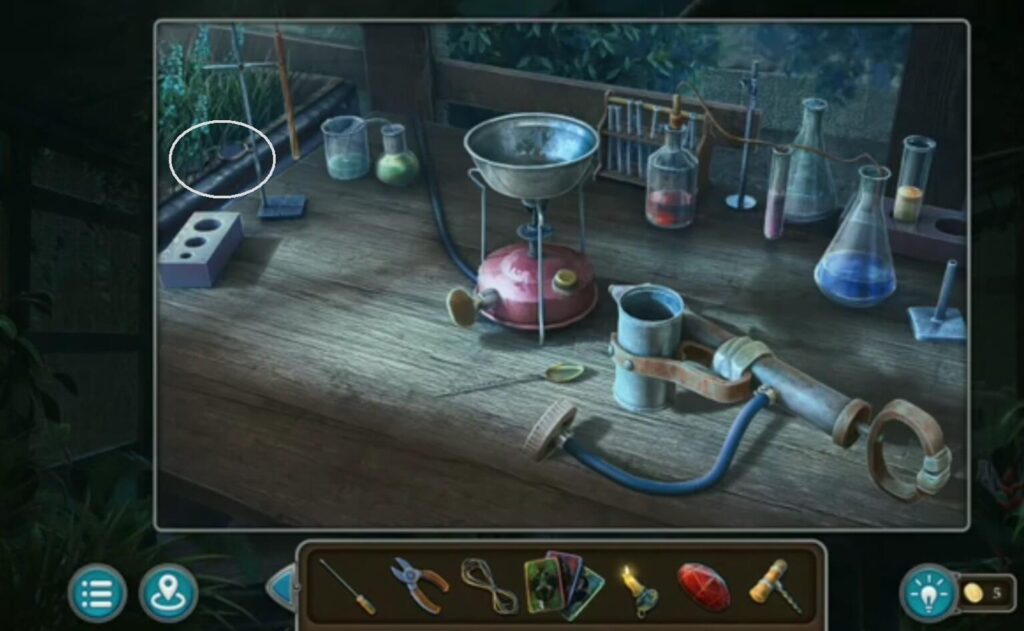
- A morphing object.
- A collection item.
- The keys.
- A record.
- Tweezers.
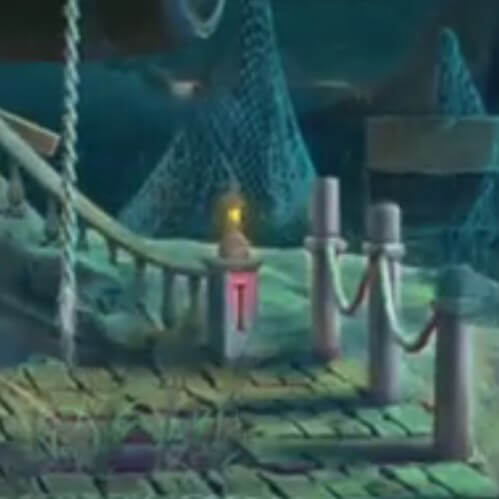
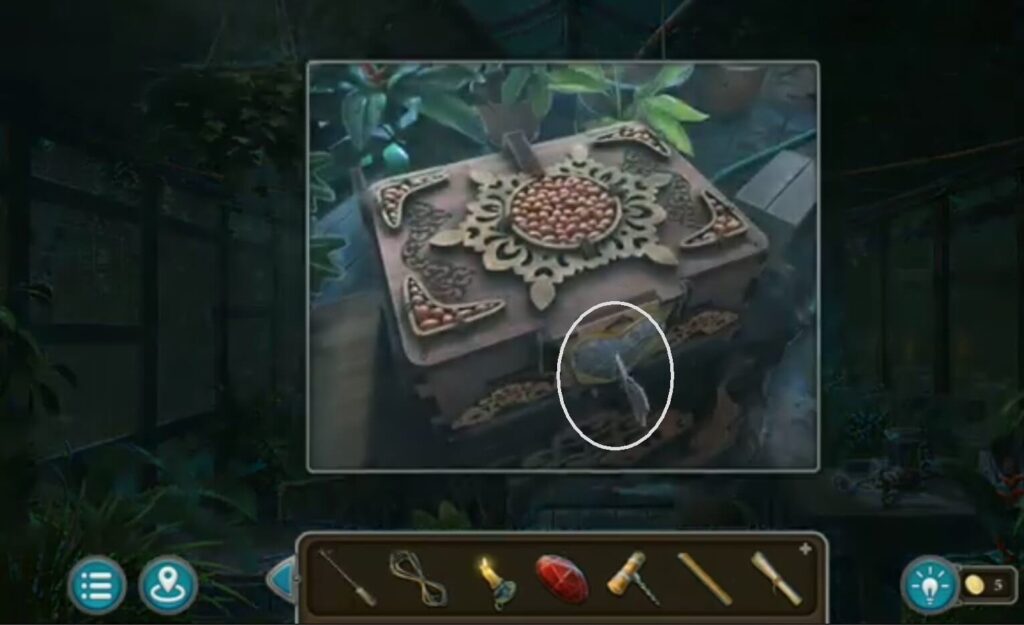
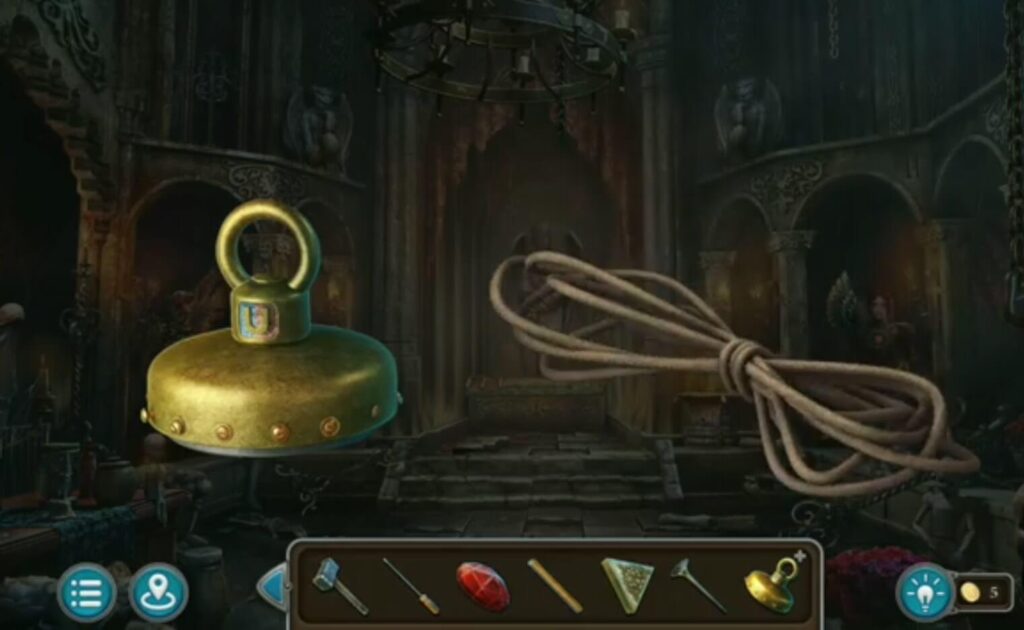
- Rotate the key under the hat. The first clue is there. Use tweezers to get the key.

Use tweezers (got it from the gate) to get the key.
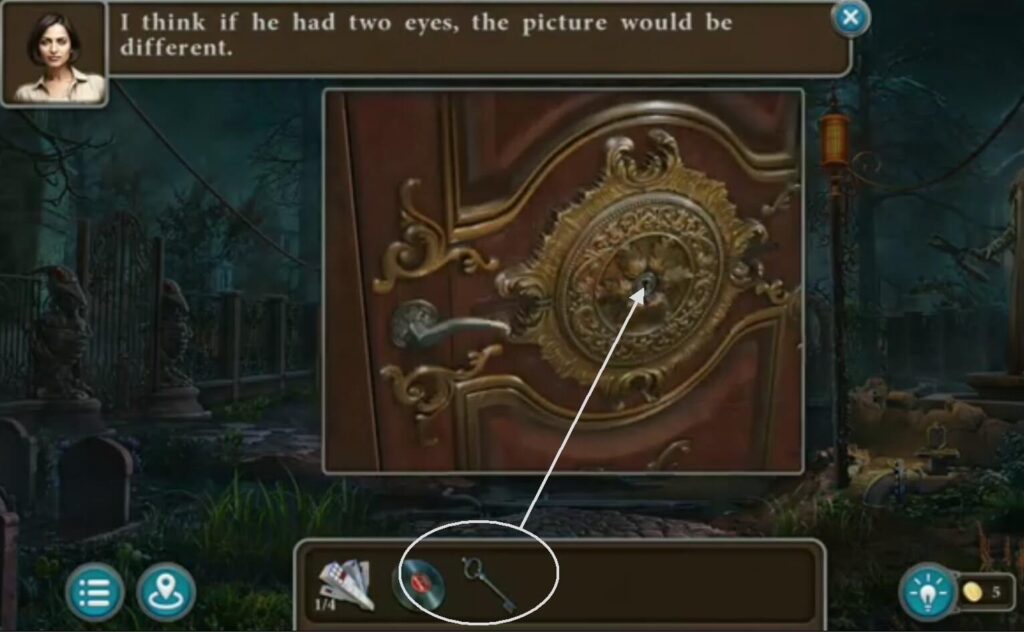
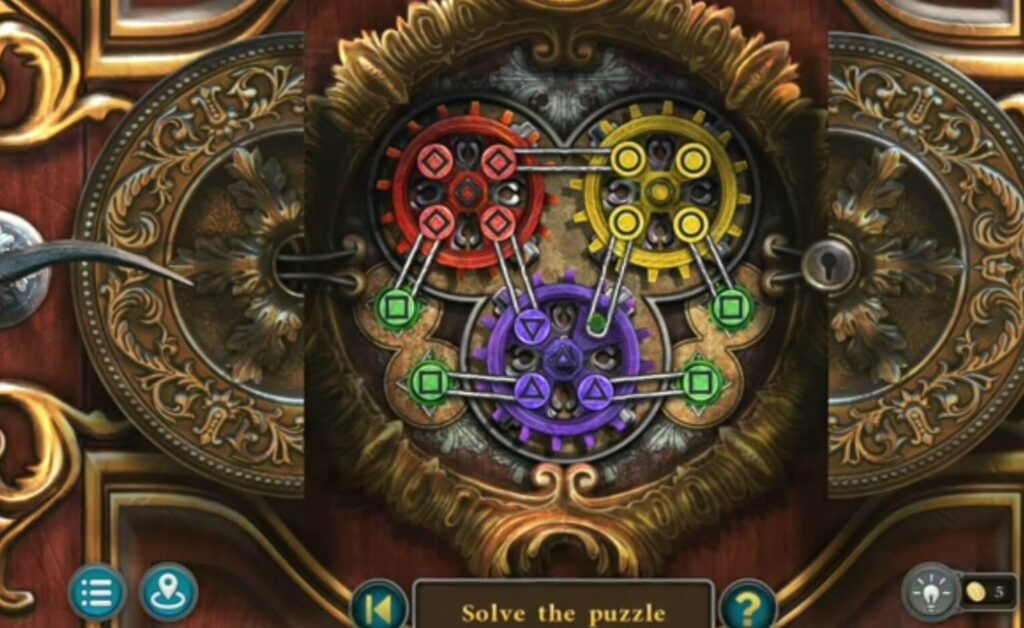
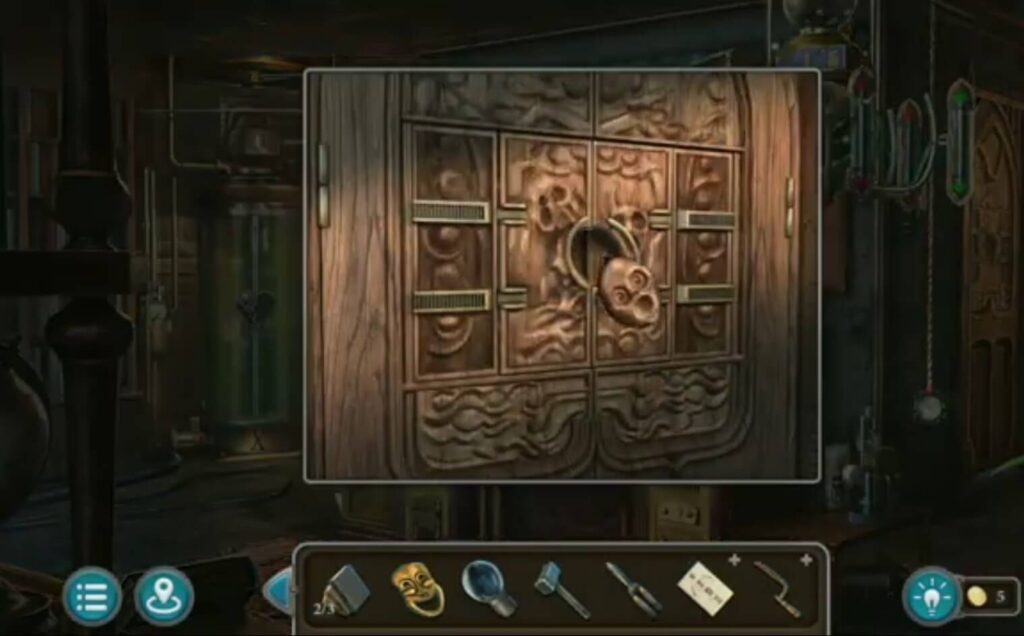
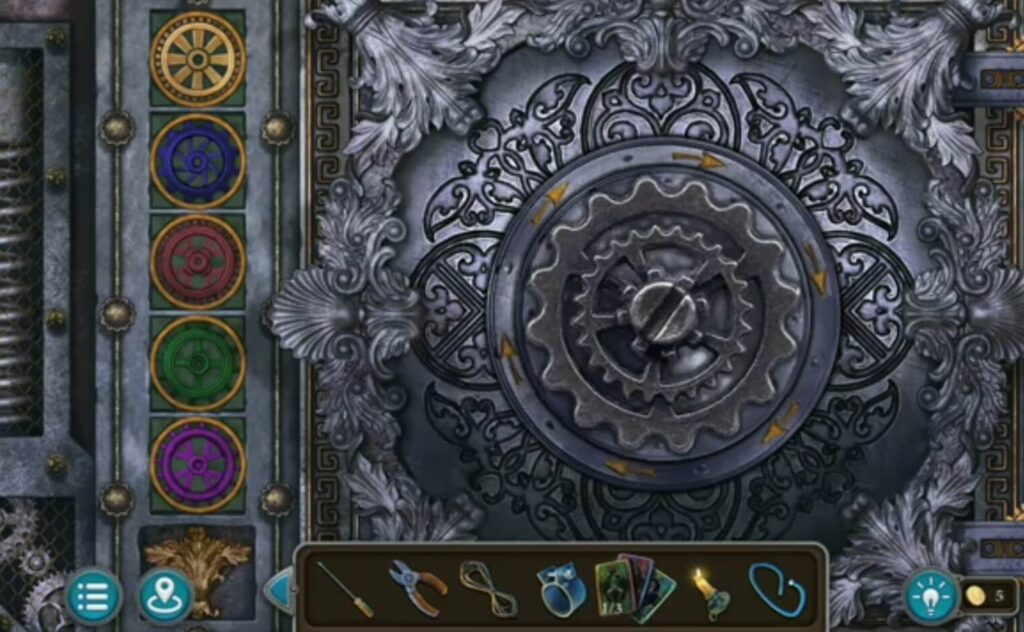
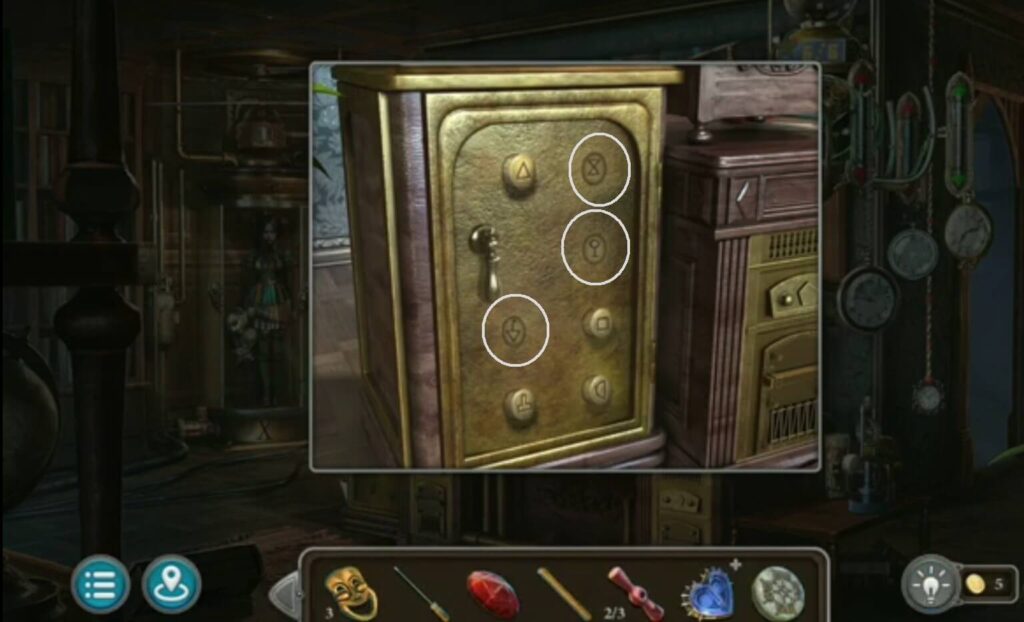
Put a key (you got it using tweezers) to unlock the door. A puzzle will appear. Solve the puzzle by arranging the elements with the shapes of triangles, circles, and quadrilaterals on the mechanisms of those colors: yellow circle, red square, purple triangle. A door will open.
- A morphing object.
- The books.
- A mask.
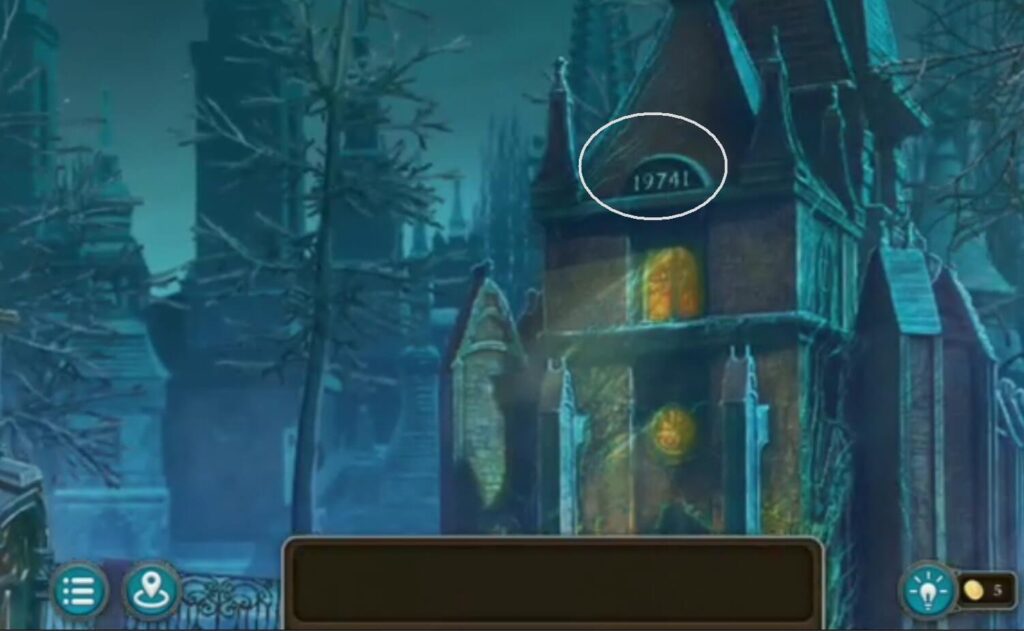
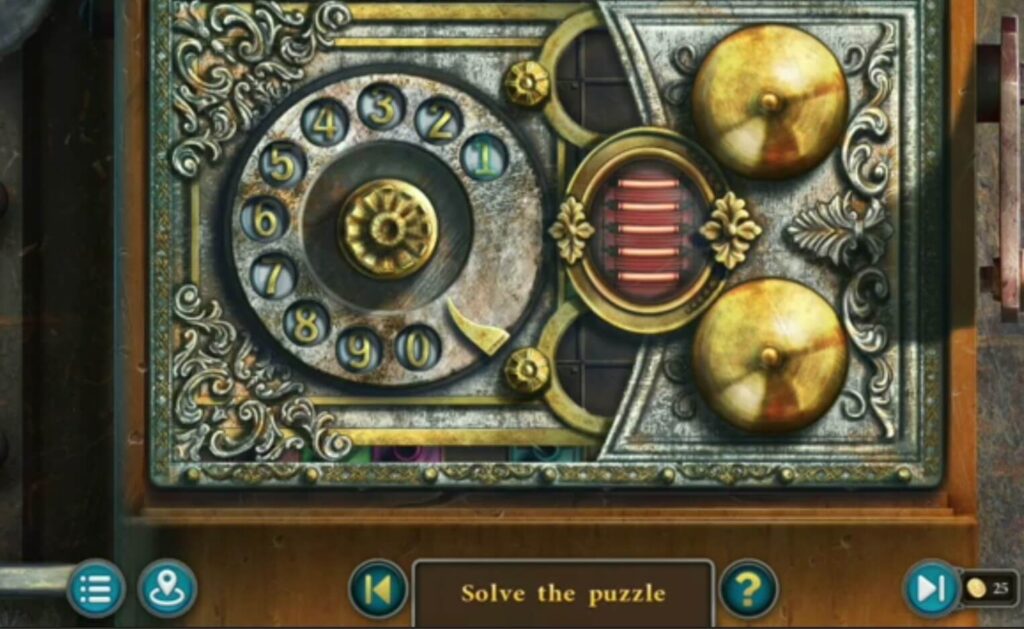
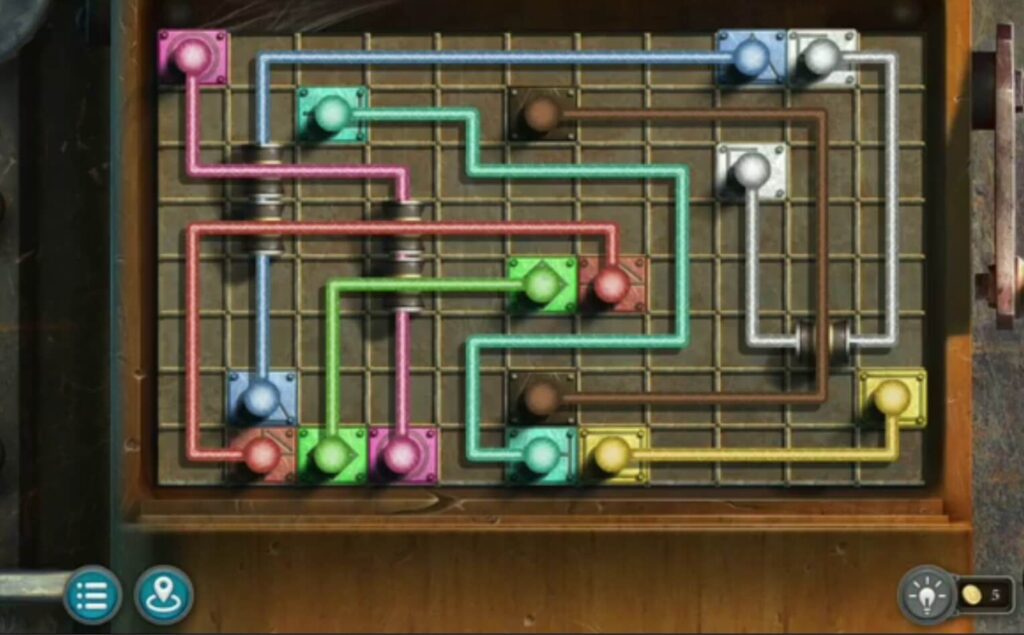
Bonus puzzle: This is the first of the five bonus puzzle levels. A house number is the solution to the telephone puzzle. Try 1-9-7-4-1. To solve a puzzle you have to match two same-colour elements.

This is the second level of the bonus puzzle. The solution is the date in the corner of the painting, which is 1-1-0-5-7.
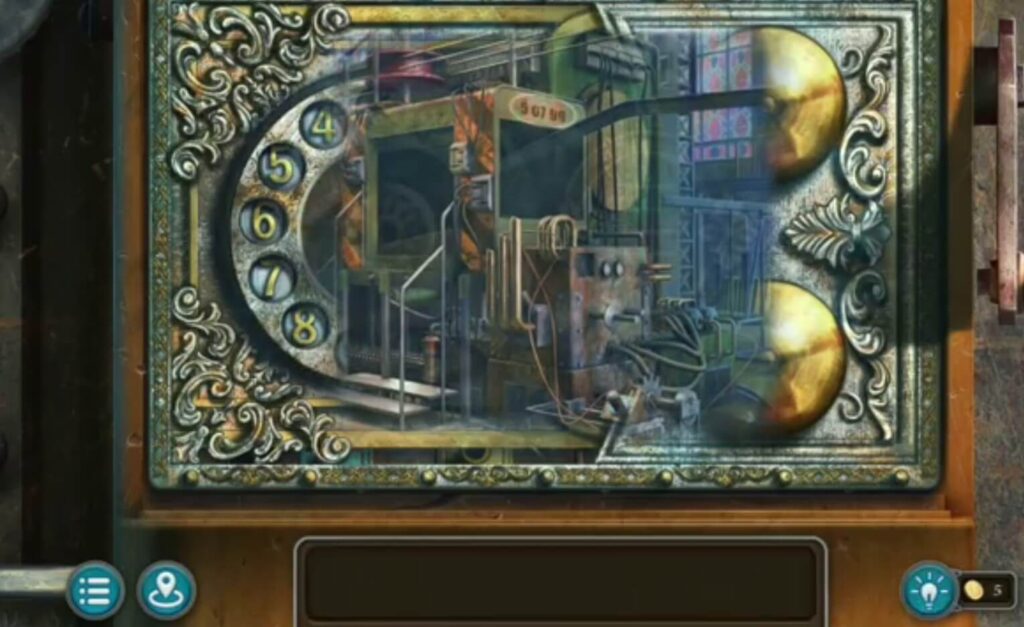
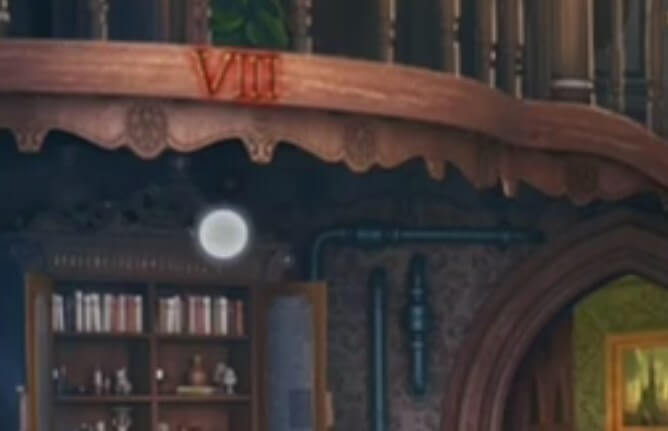
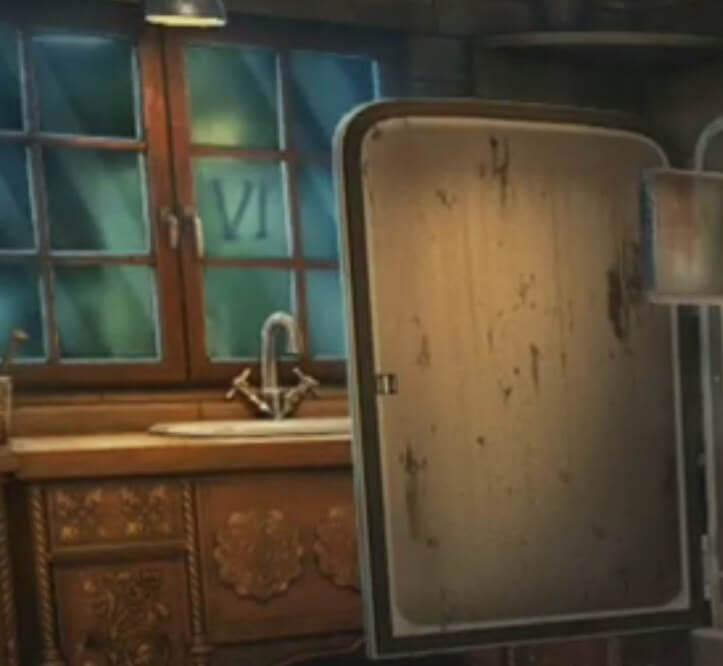
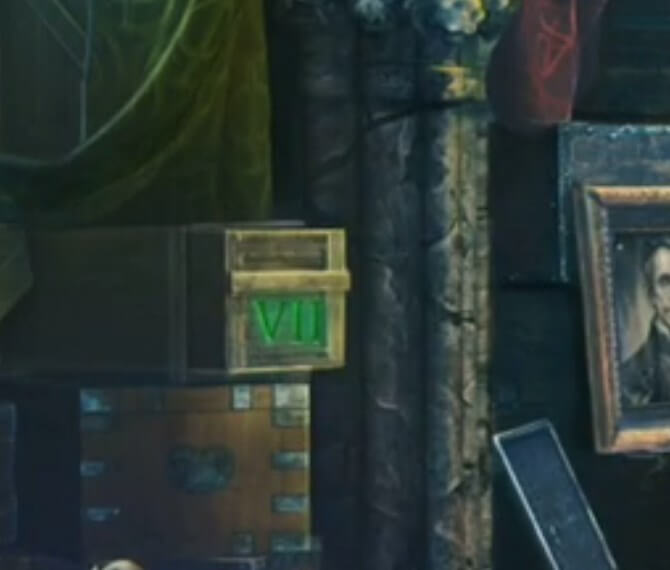
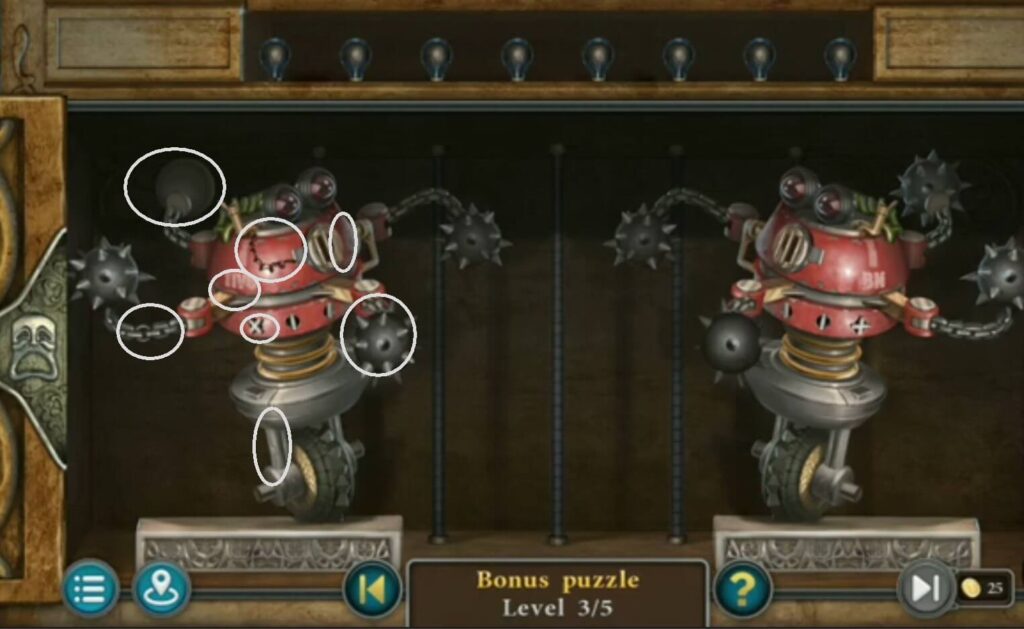
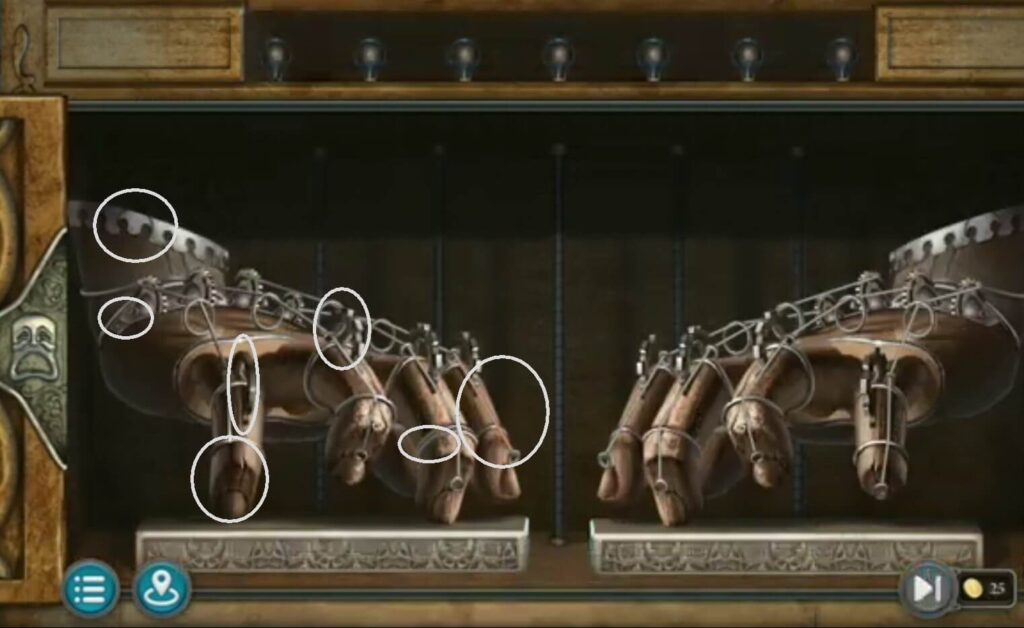
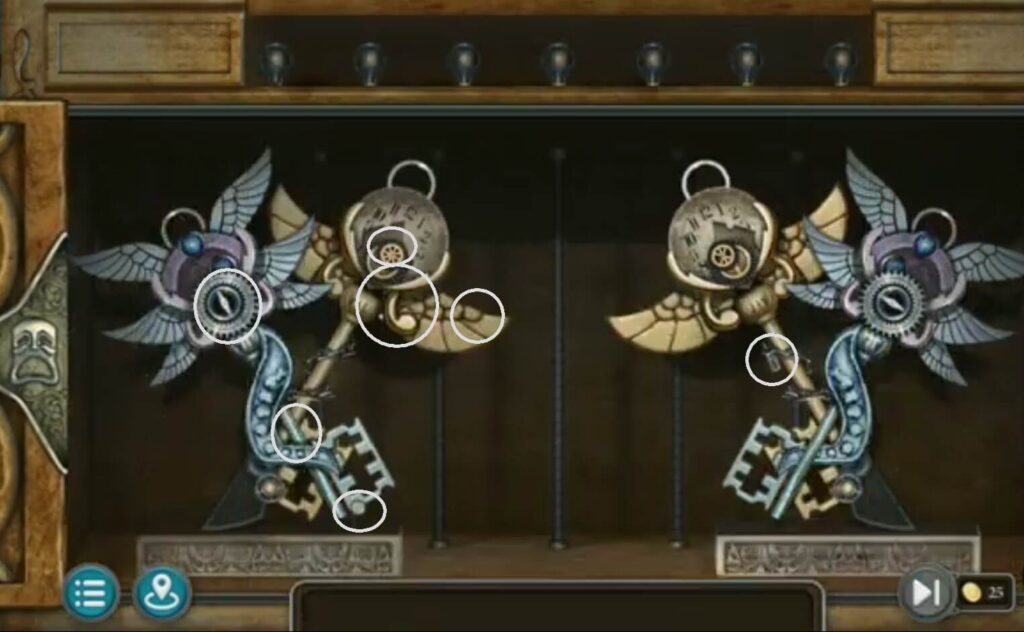
This is the third level of the bonus puzzle. The solution is numbers in the doll factory, and it’s 5-0-7-9-9.
This is the fourth level of the bonus puzzle. The solution is on the book cover: 1-2-8-5-0.
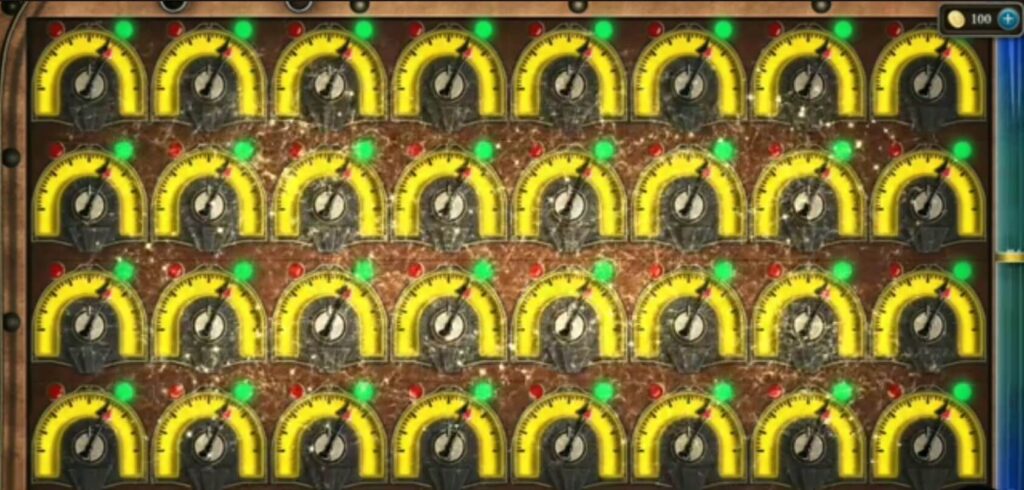
The solution for the last level of the bonus puzzle is the regular pressure gauge. It’s 1-5-1-0-5. When you solve all 5 levels, you will get a star.
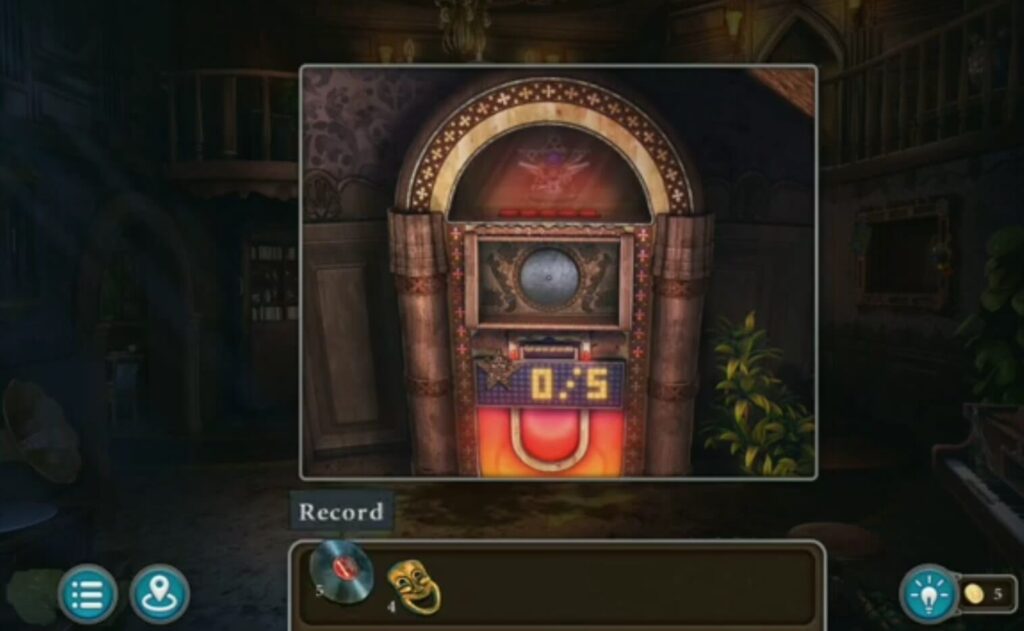
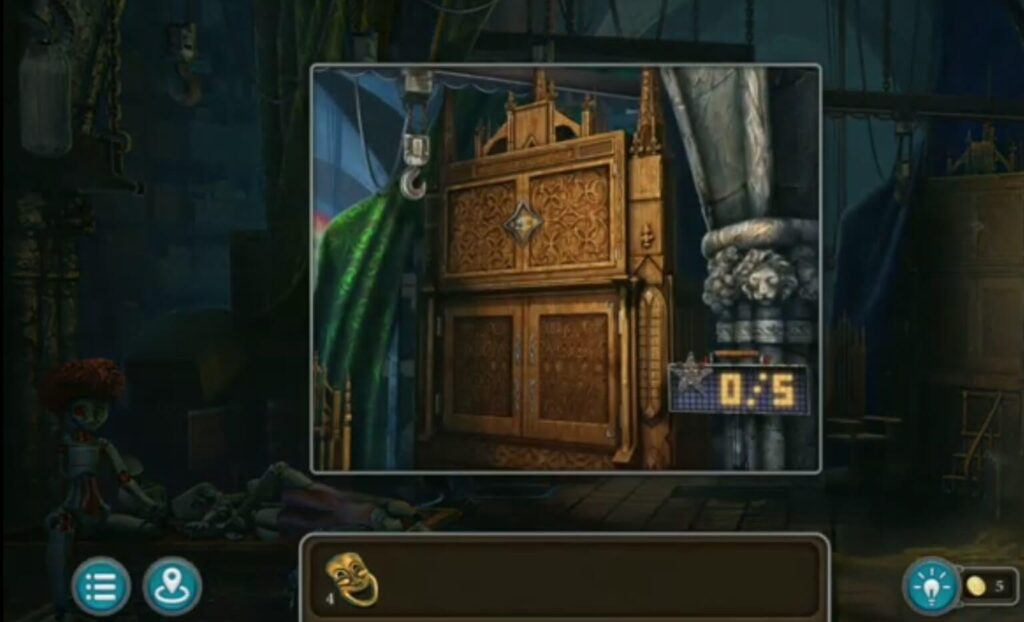
This is a five-level bonus puzzle.
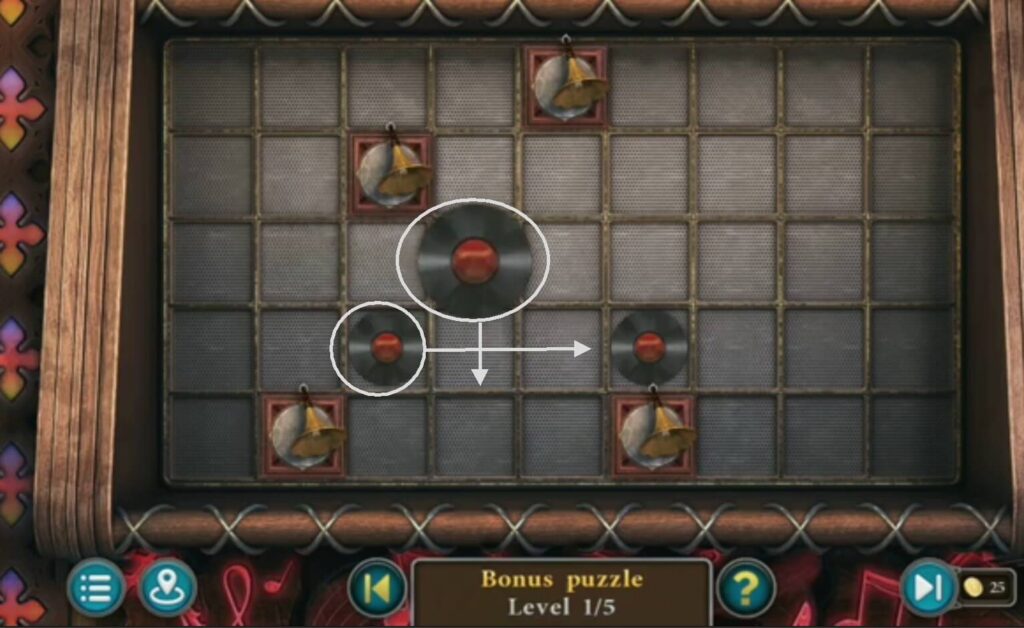
Put all 5 records you collected during the game to start a bonus puzzle. The procedure for each of the five levels is the same. You need to move the record by jumping over another record until all of them are eliminated. You will get a star when you finish.
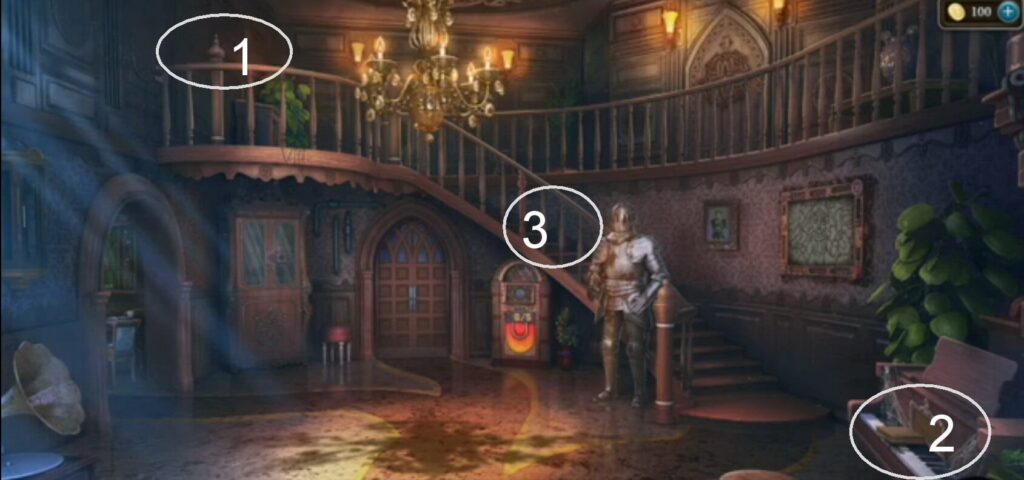
- A mop.
- A morphing object.
- A collection item.
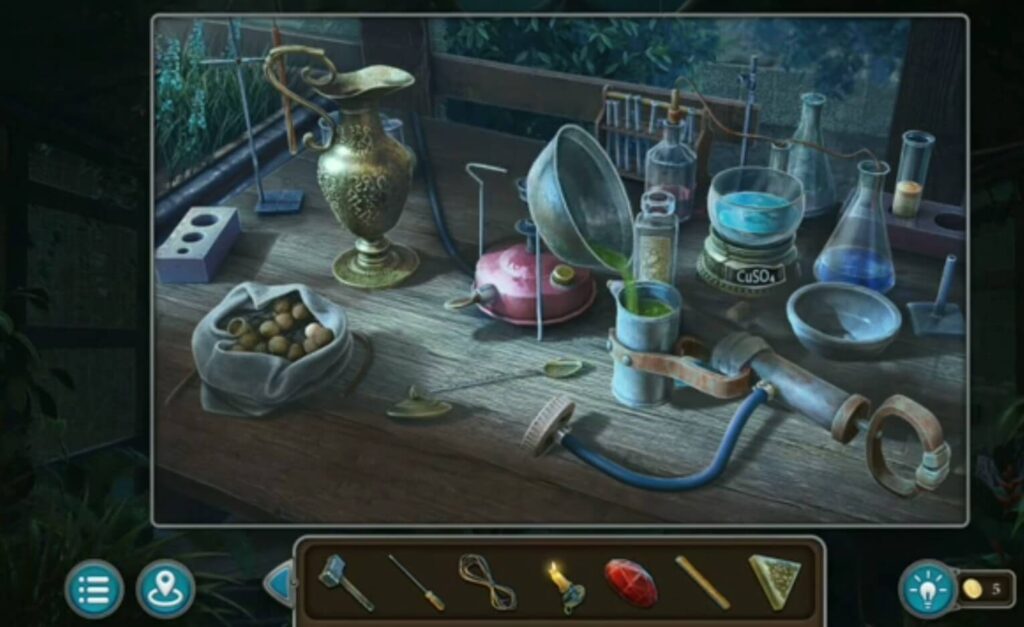
- An oil.
- Lentils.
- A jug.
- A record under the fridge.
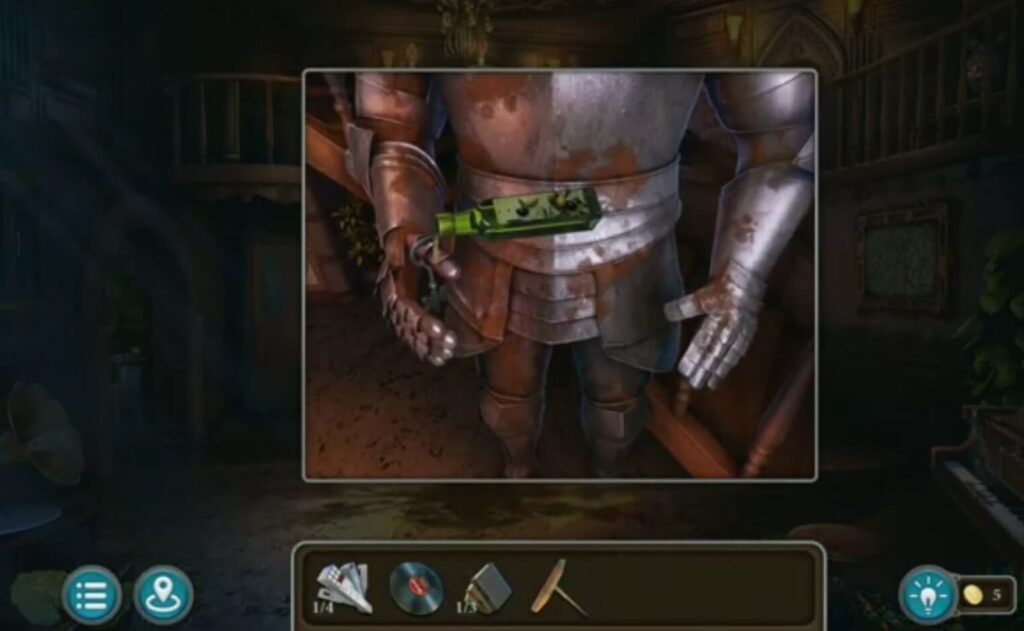
Put oil (found in the kitchen) on the knight’s armor. You got a key.
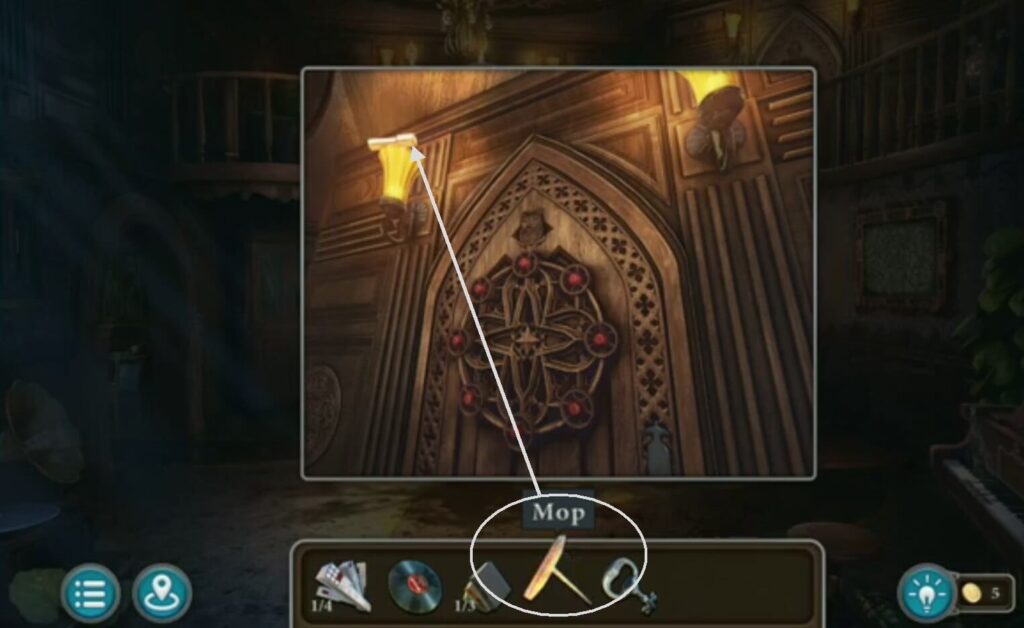
Take the mop (from the kitchen) to get the keys.
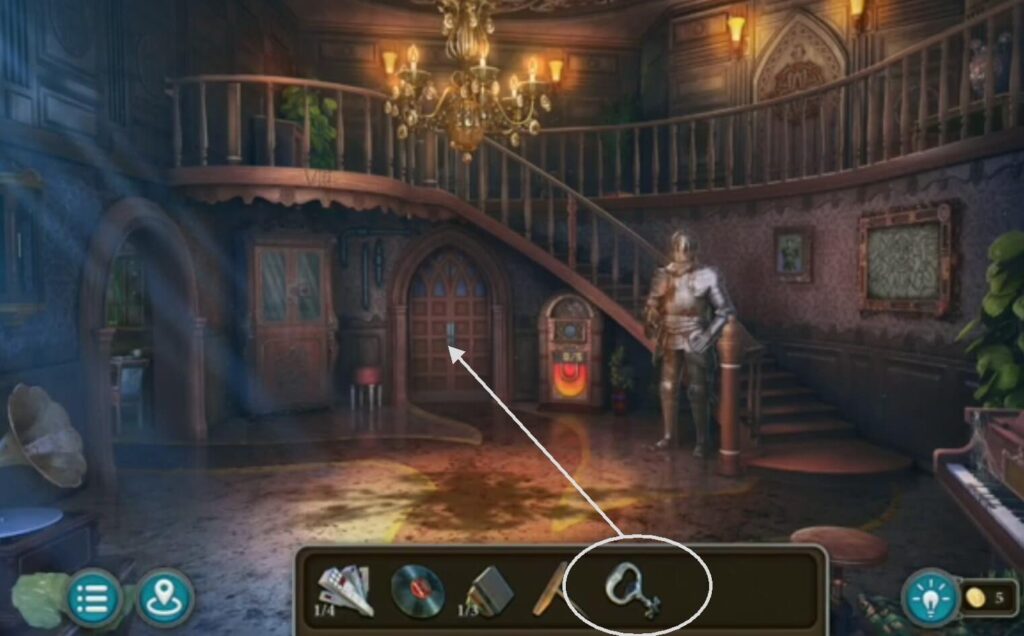
Take a key (from the knight’s armor) to open the door.
- The keys.
- Lift the curtain and a mask will appear.
- A morphing object.
- The keys and the paint.
- A collection item.
- A star.
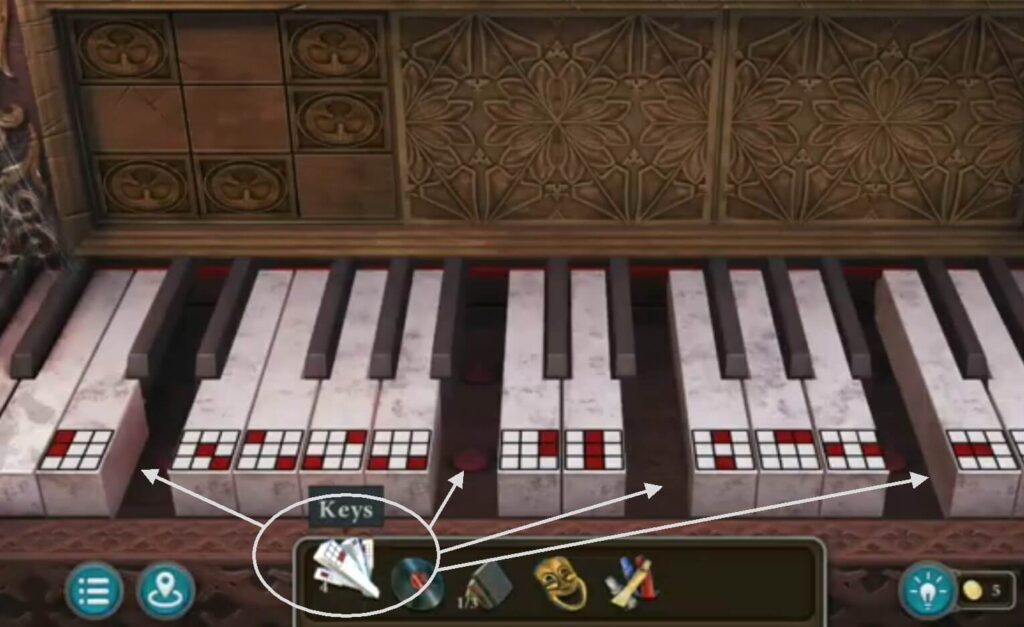
Put all the keys you collected on the piano. Solve the puzzle. Press the holes on the piano that have marked squares so that they match the elements above the holes.
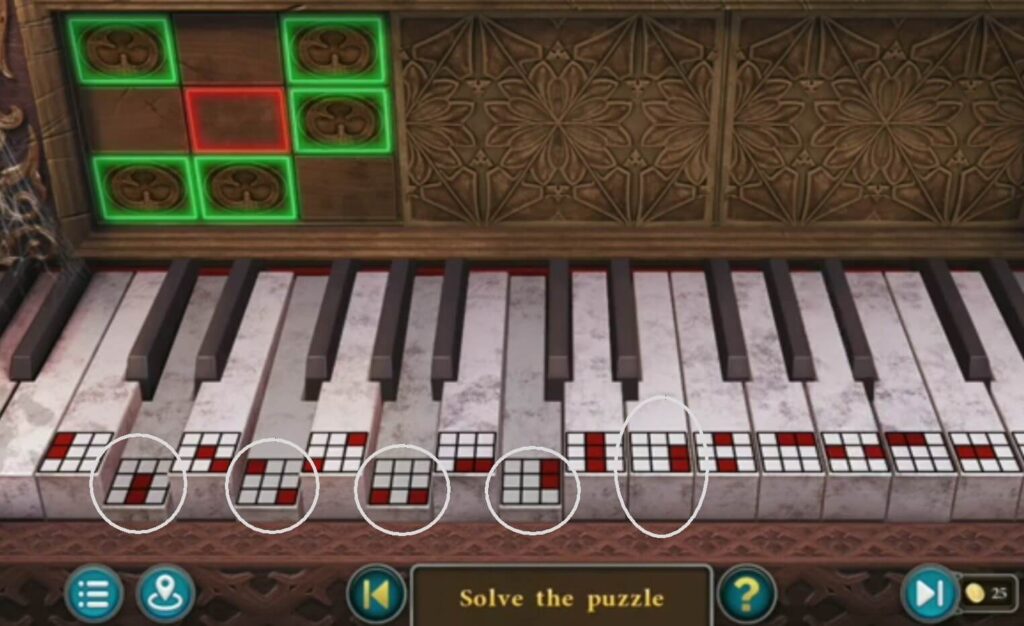
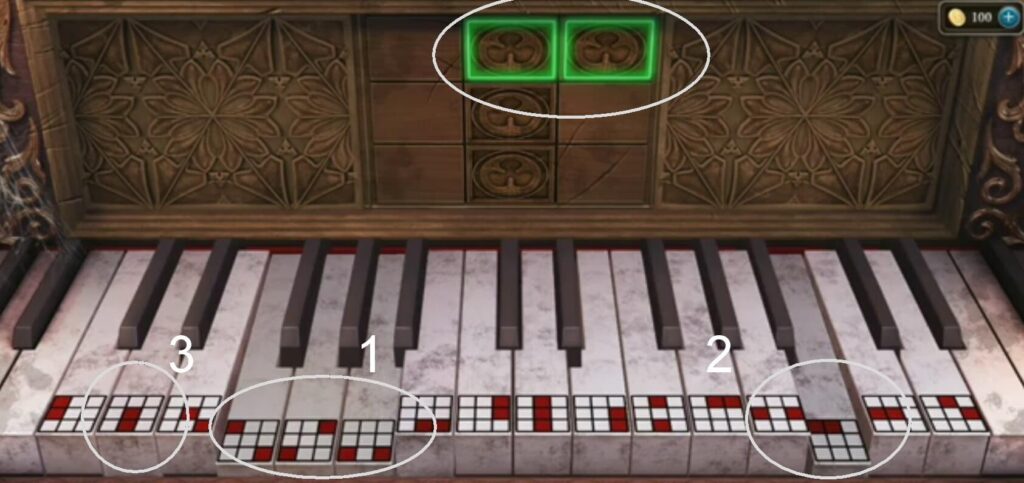
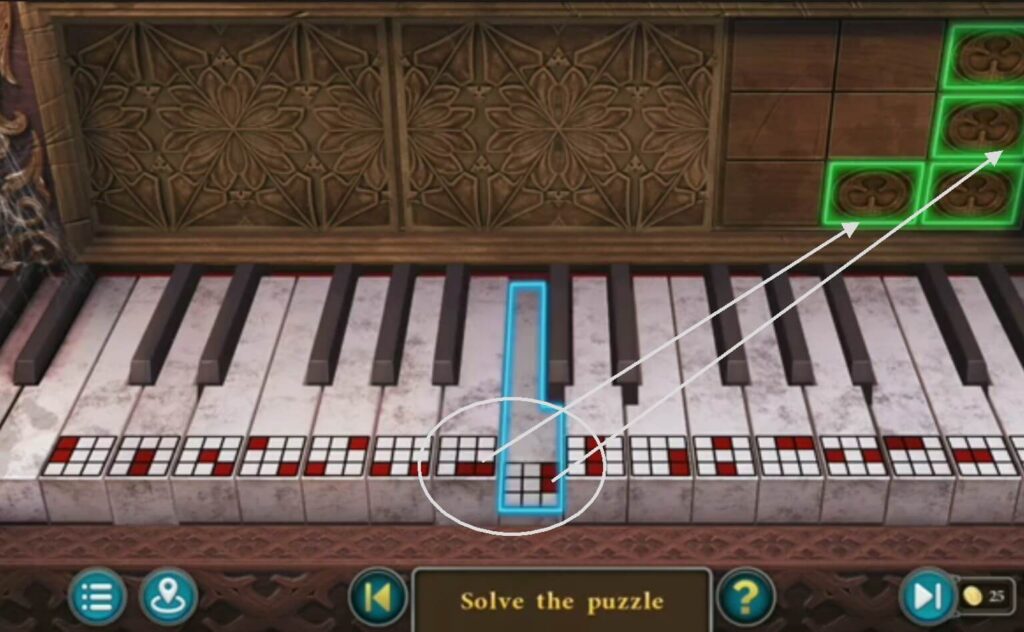
Press the keys on the piano with marked squares in a certain order to match the elements above the holes. You got a bulb and a hammer.
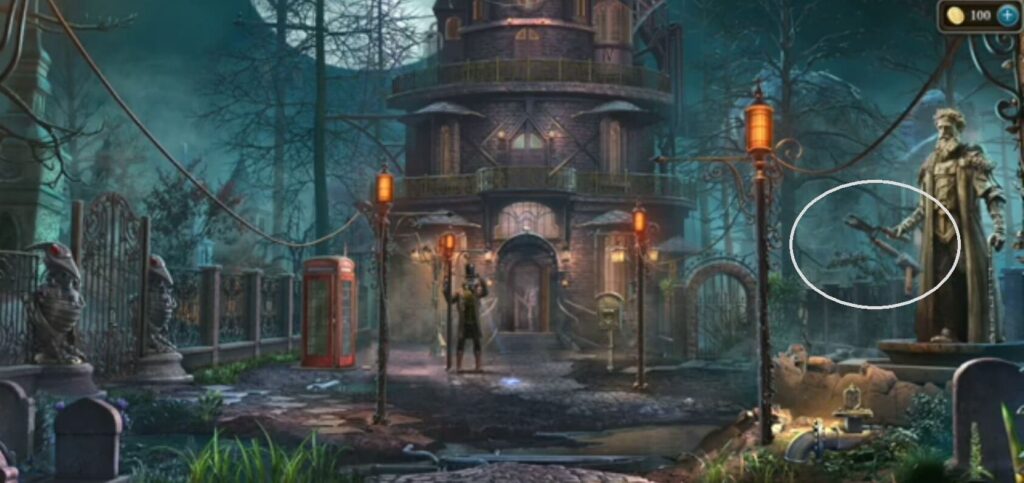
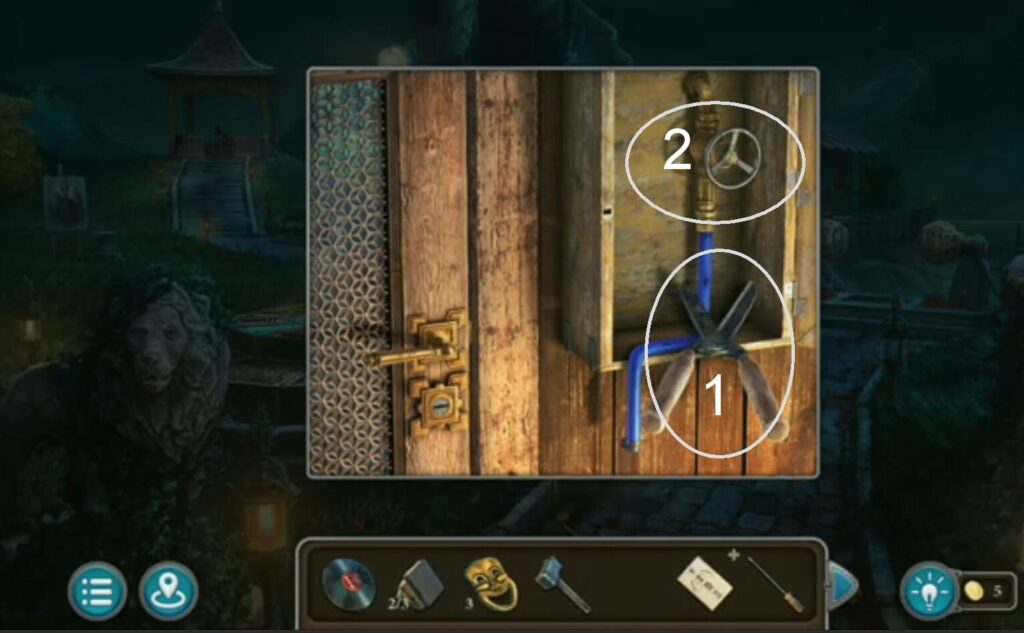
Use a hammer (got it when you solved a piano puzzle) to get garden shears.
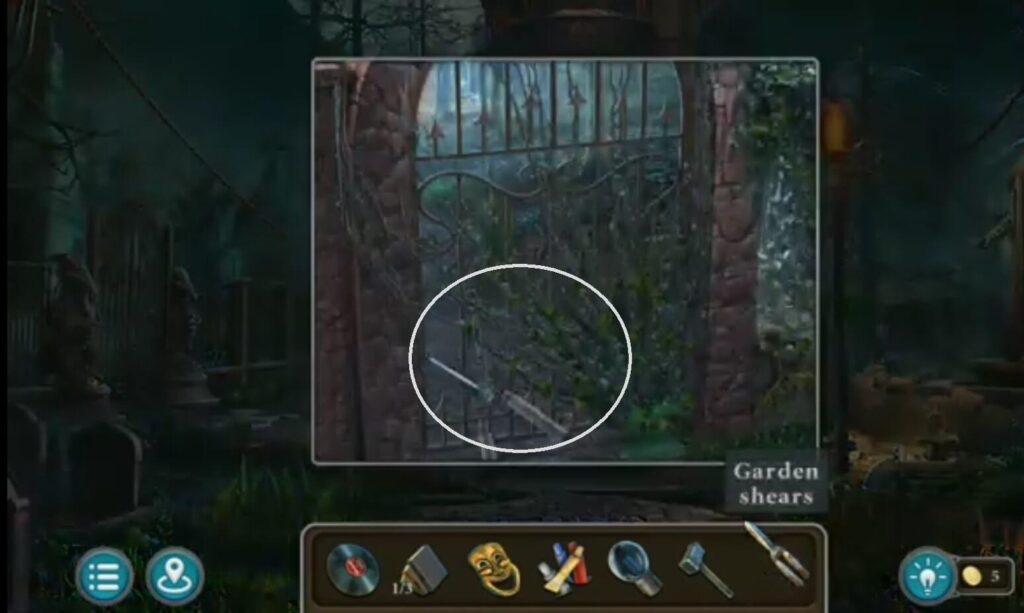
Use garden shears (got it from the monument) to cut the fence.
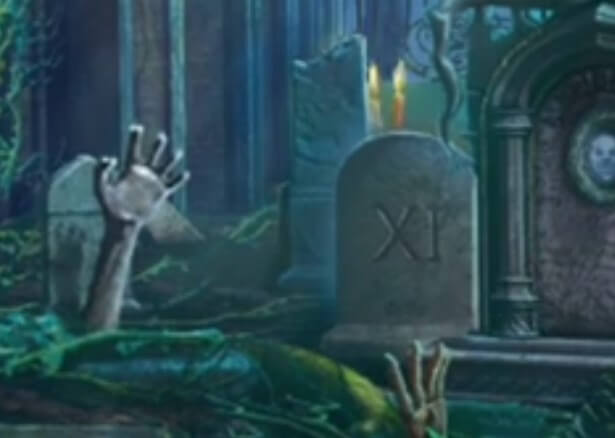
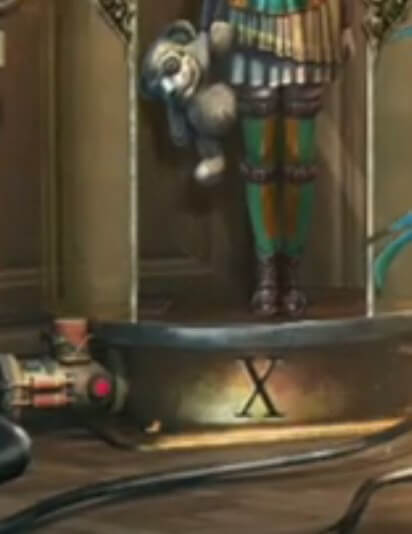
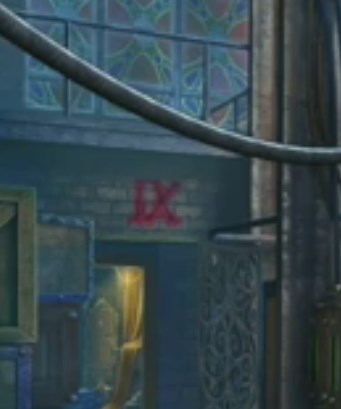

Bonus level: Find numbers from 1-12 on the monuments during the game. Push then the object with 12 numbers, and a bonus level will appear.
It’s a bridge with obstacles in front. When you cross it successfully, you will get a star.
- A picture.
- A morphing object.
- Books.
- A palette, and a collection item (on the paint).
A star.

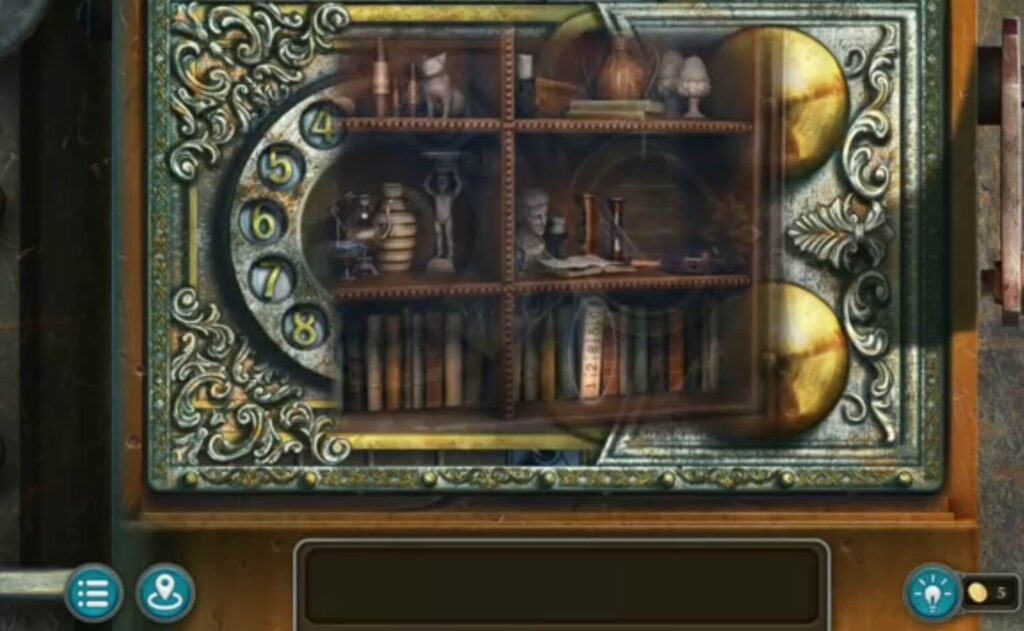
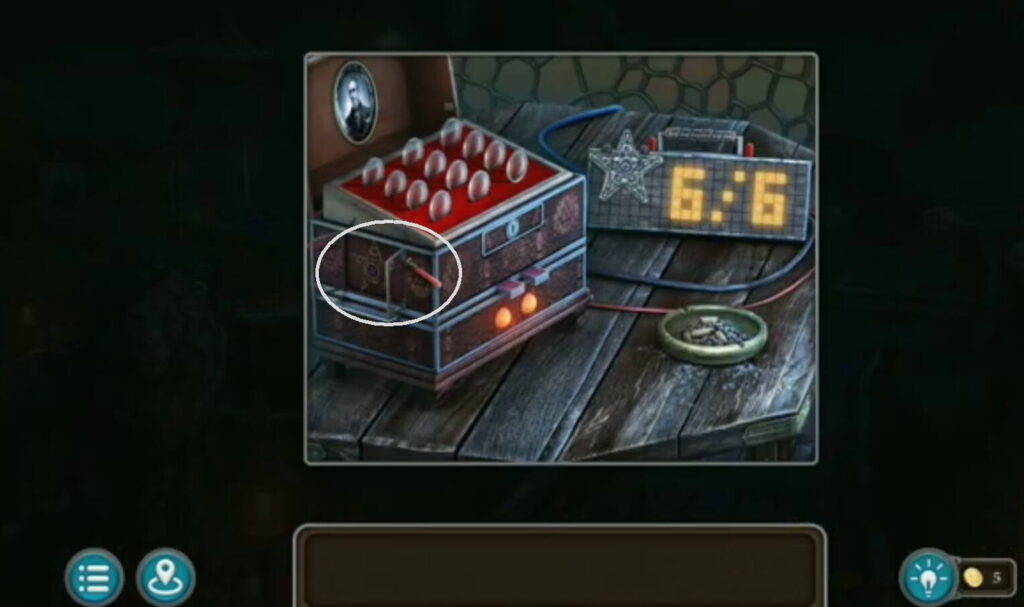
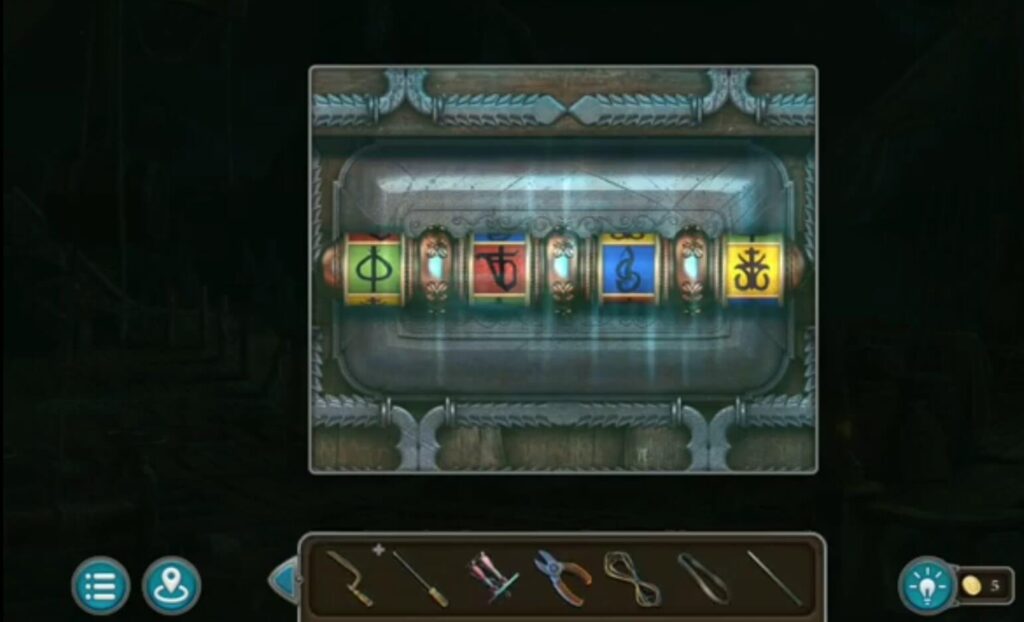
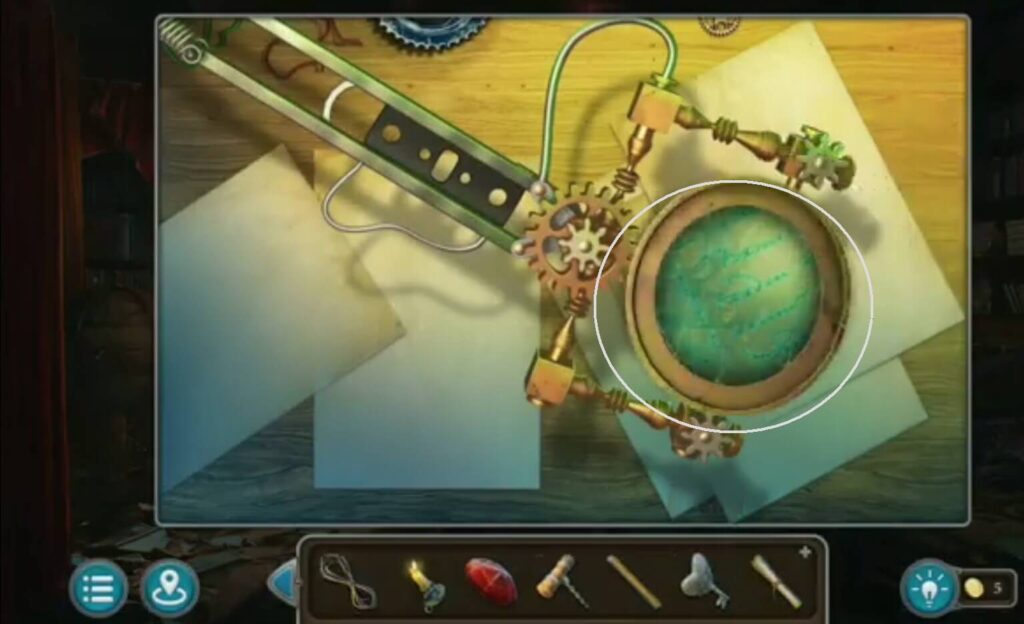
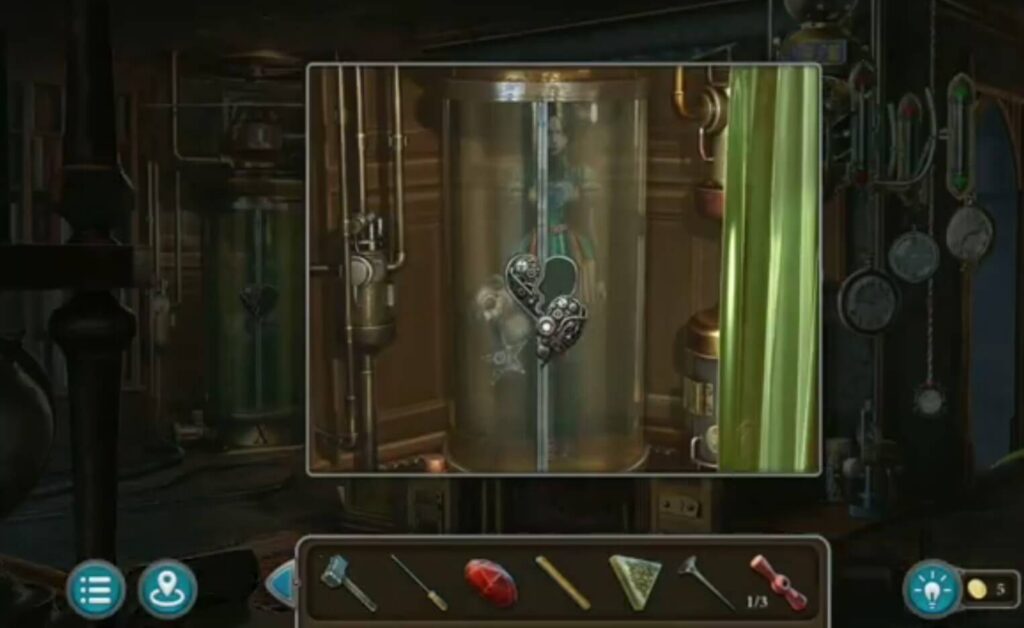
Rotate the cylinder section to set the right combination. You have already seen the required number before.
It’s 6-6-9. You got a letter, a brush.
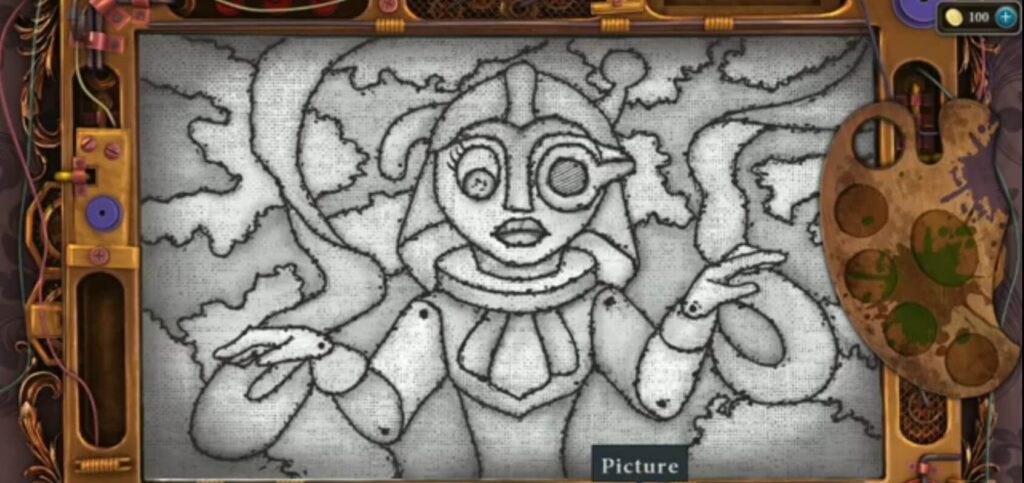
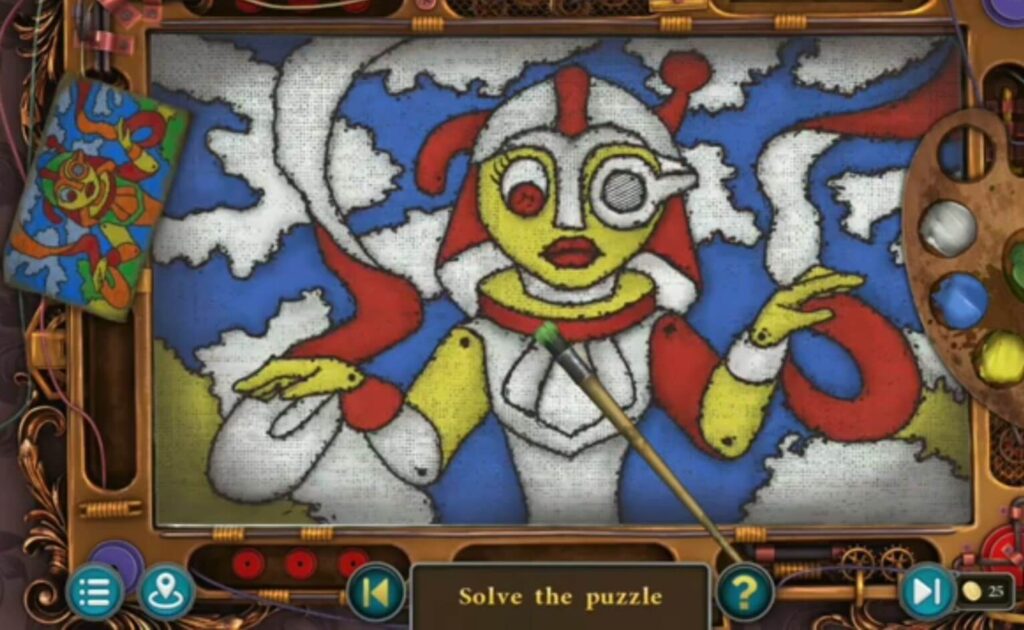
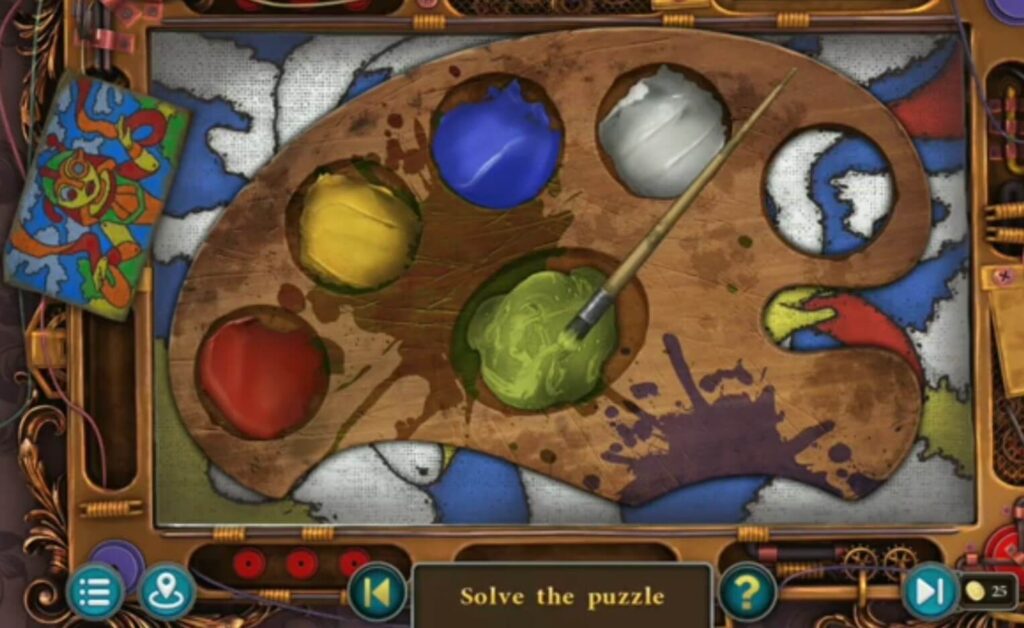
Use a palette (from a picture), colors, a picture (from the floor in the garden), a brush (you got it when you solved a puzzle), and a picture to paint. Mix blue and yellow to get the green color, and red and yellow to get the orange. Blue and white to get a light blue. You have a ball.
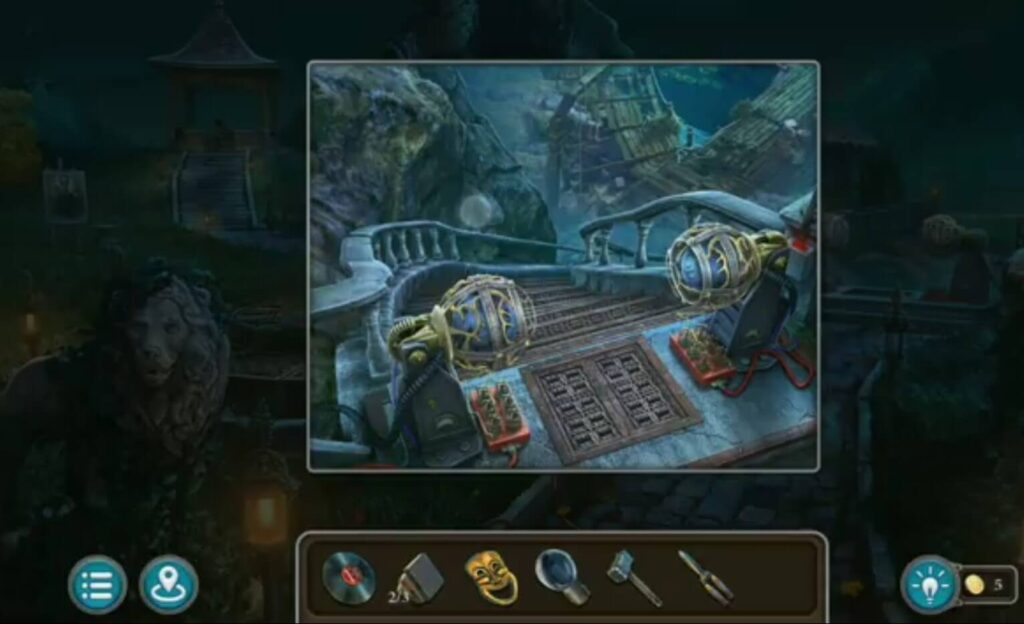
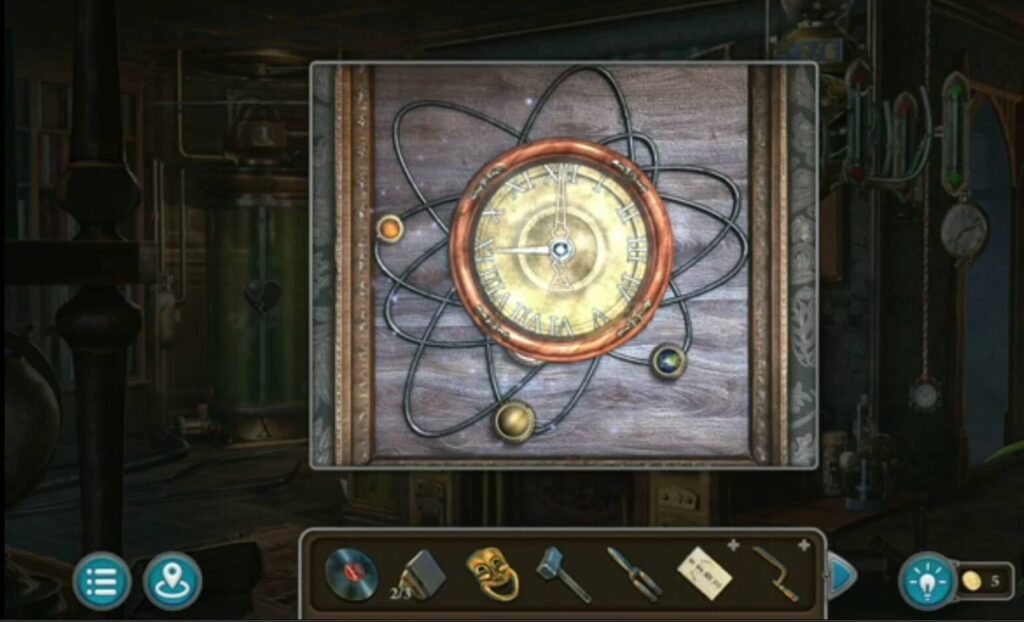
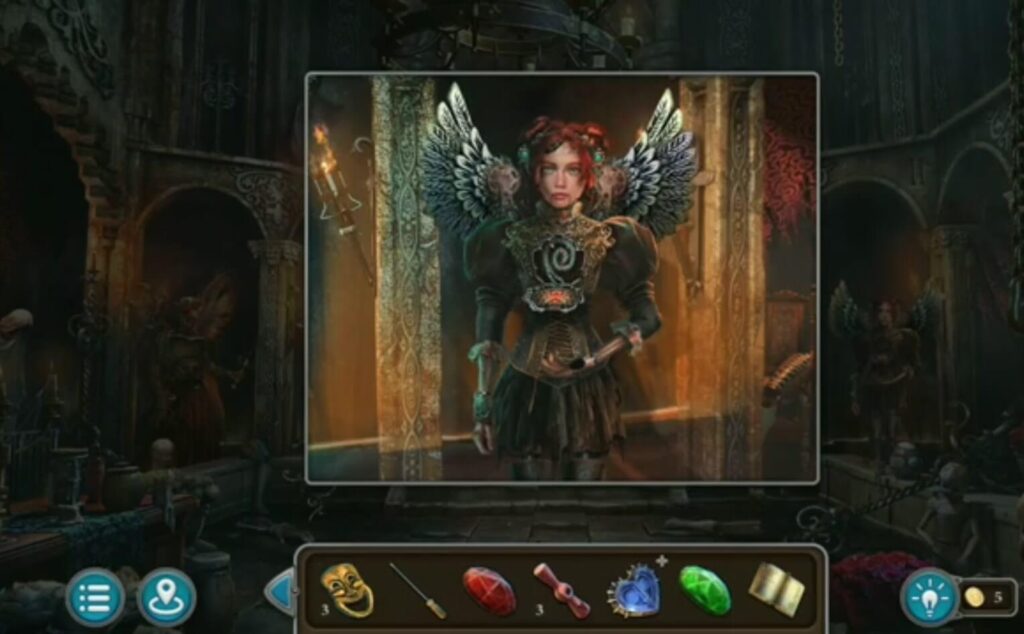
Put the ball you got when you solved the paint puzzle. Solve it by rotating balls to find a match with an illustration. The parts of the face shown on the rotating balls should match the illustration. Stairs will appear.

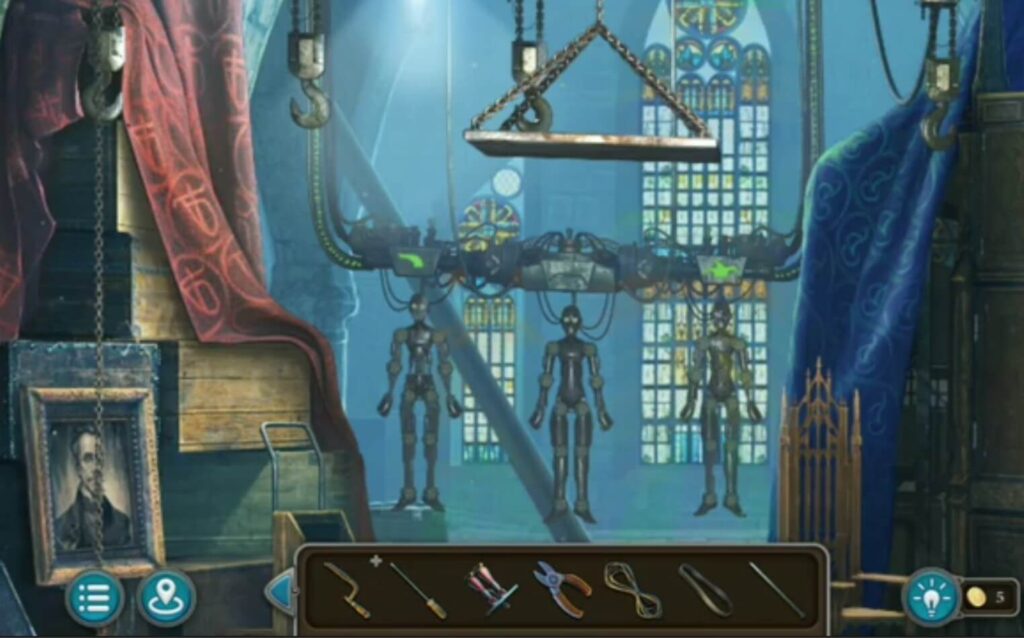
Instruction with doll parts.
- A hacksaw frame.
- Use garden shears to cut the sack. It’s a mask inside.
- A seaweed.
- A morphing object.
- A mask.
Put the mask (found it in the sack). A puzzle will appear. Solve the puzzle by moving the elements up and down so that the gray squares make a line in line with the screws coming out from the left side. A door will open.

- A morphing object.
- A collection item.
- A fuse.
- Use a hammer to break the cabinet. Inside is a paper with a process of assembling dolls, a screwdriver, legs, nippers, a copper sulfate.
- A hacksaw blade, a rope.
- A ladder.
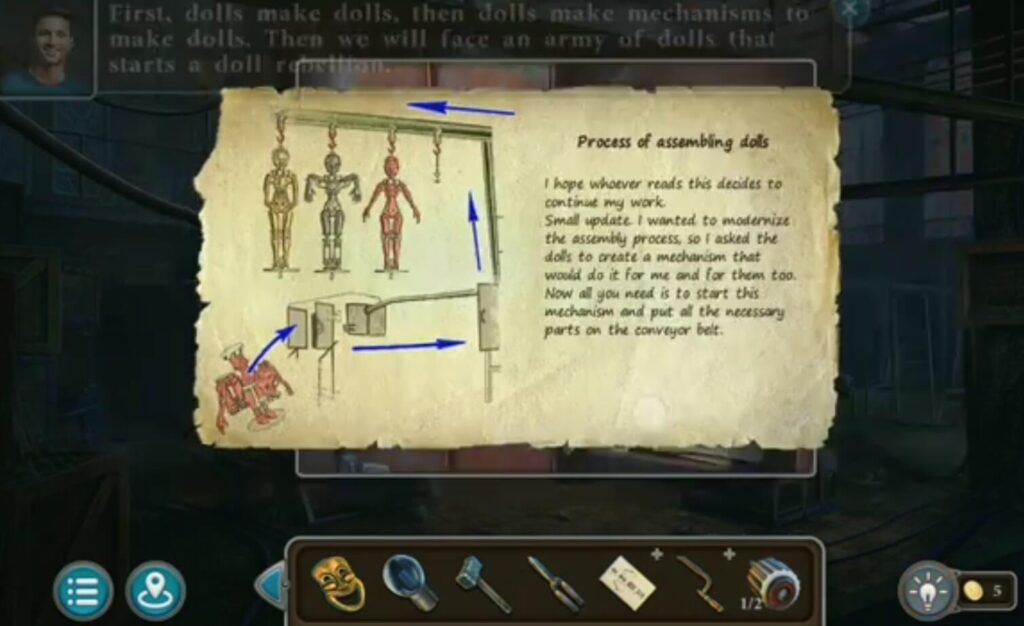
A paper with a process of assembling dolls.
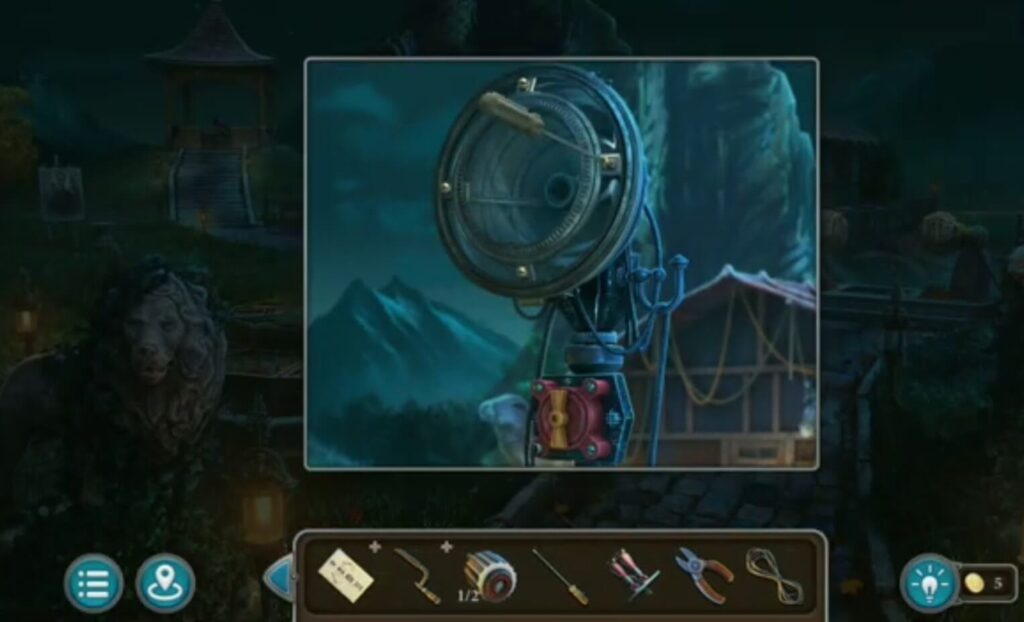
Put a ladder (got it from the factory hall) near the lighting. Use a screwdriver (found in the cabinet) to remove the screws. Put bulb (got it from the piano puzzle). A light will start.
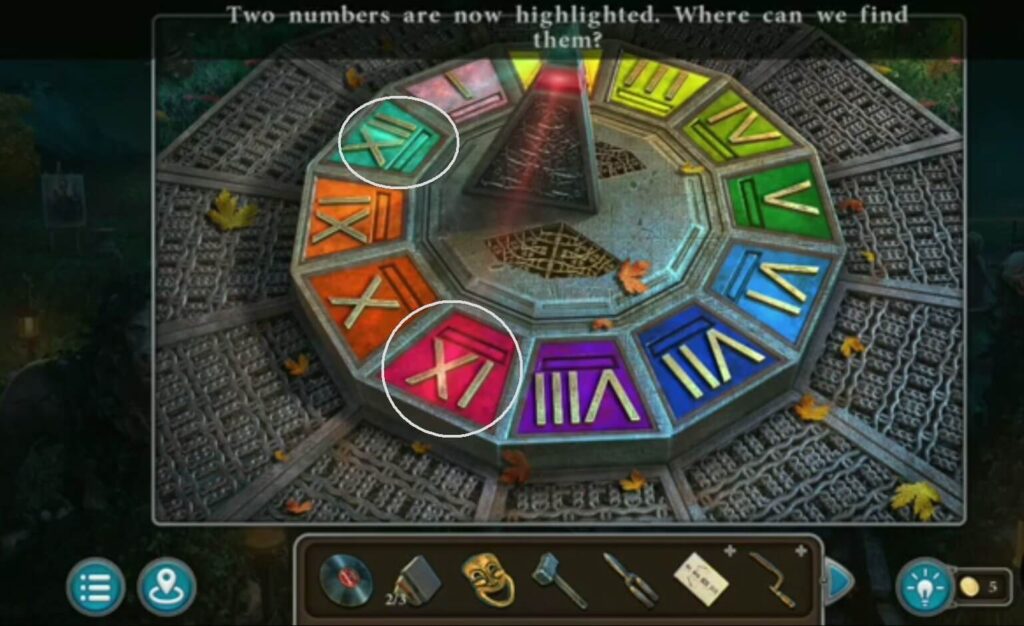
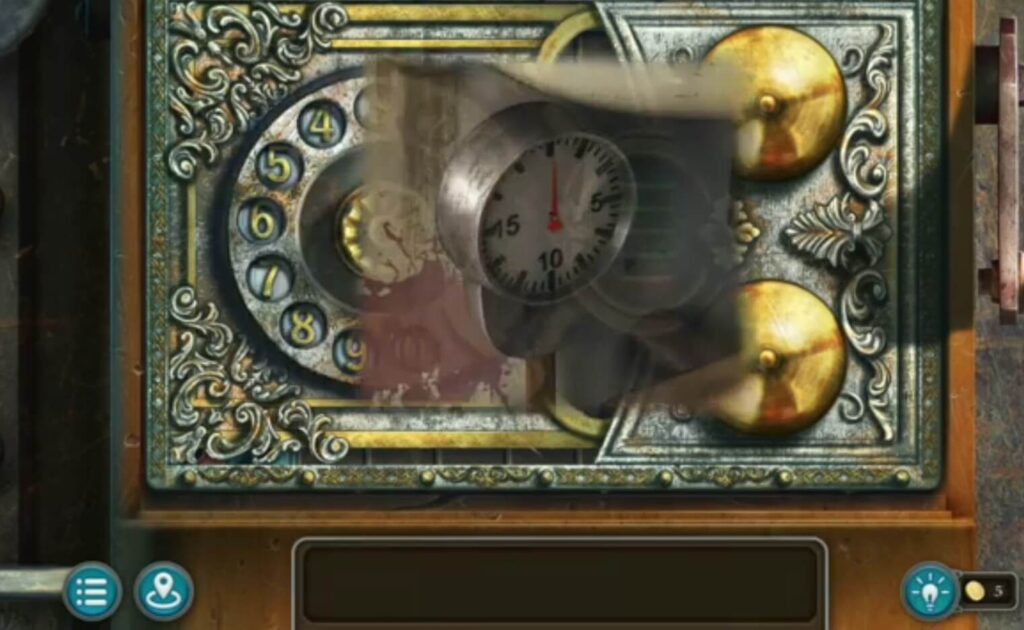
The light from the lighting will illuminate the numbers on the floor. The illuminated numbers are 9 and 12. The puzzle is solved by placing the hands on the numbers 9 and 12. You got a belt, a fuse.
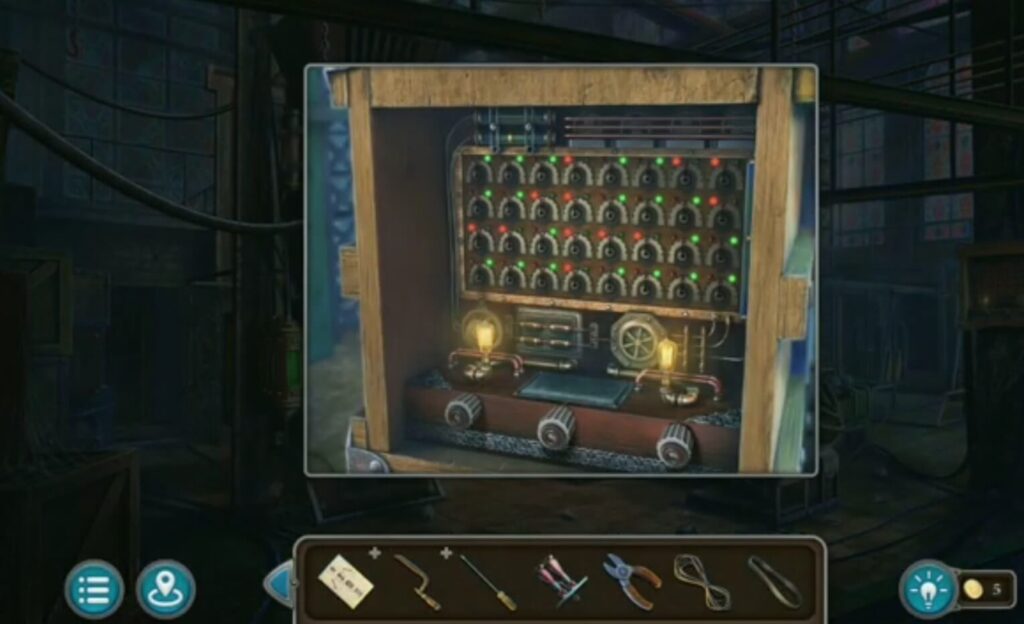
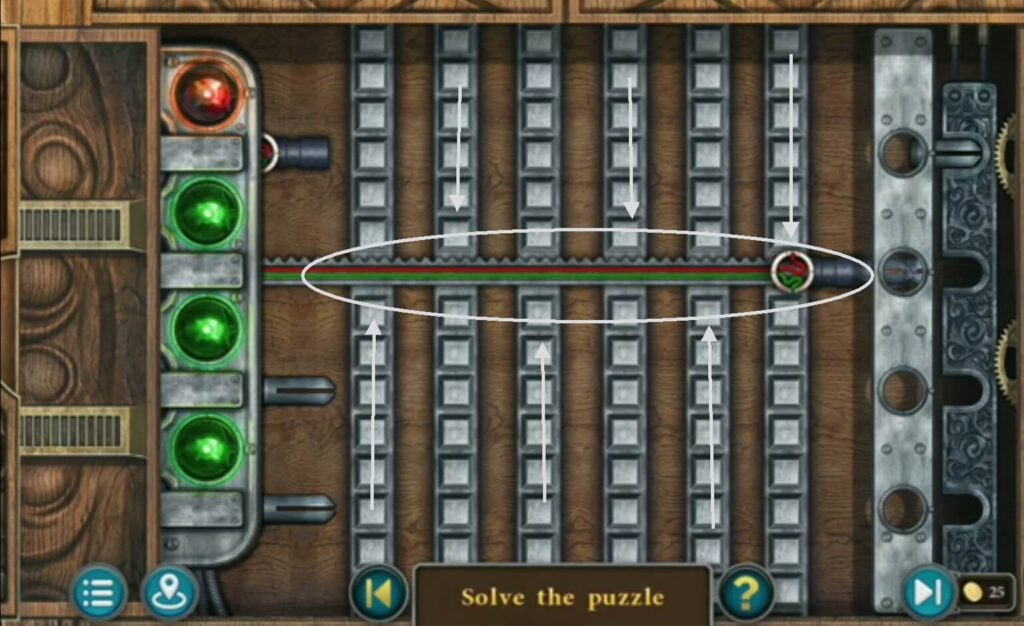
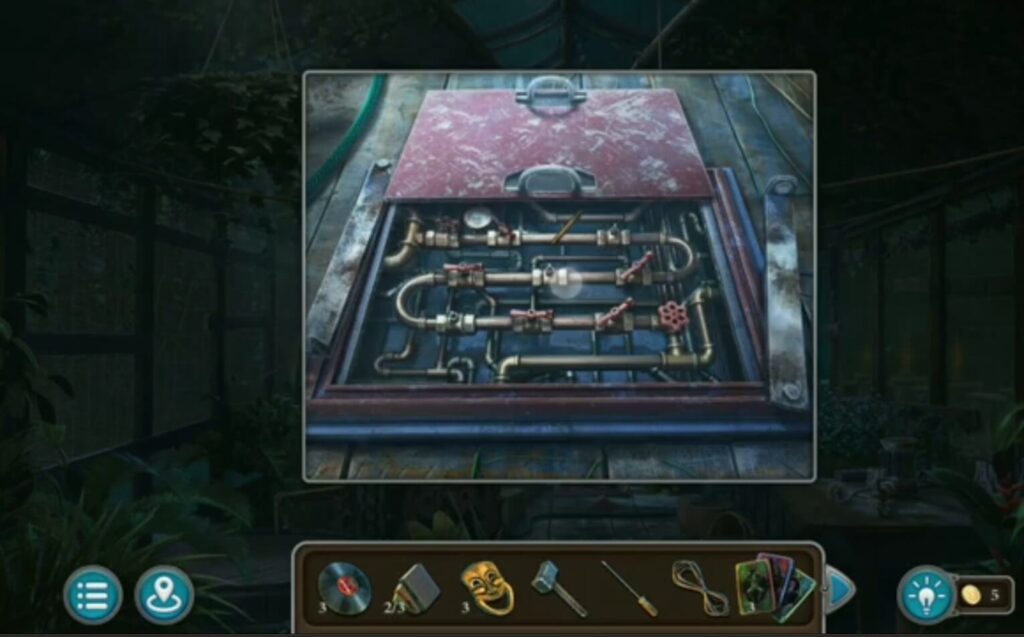
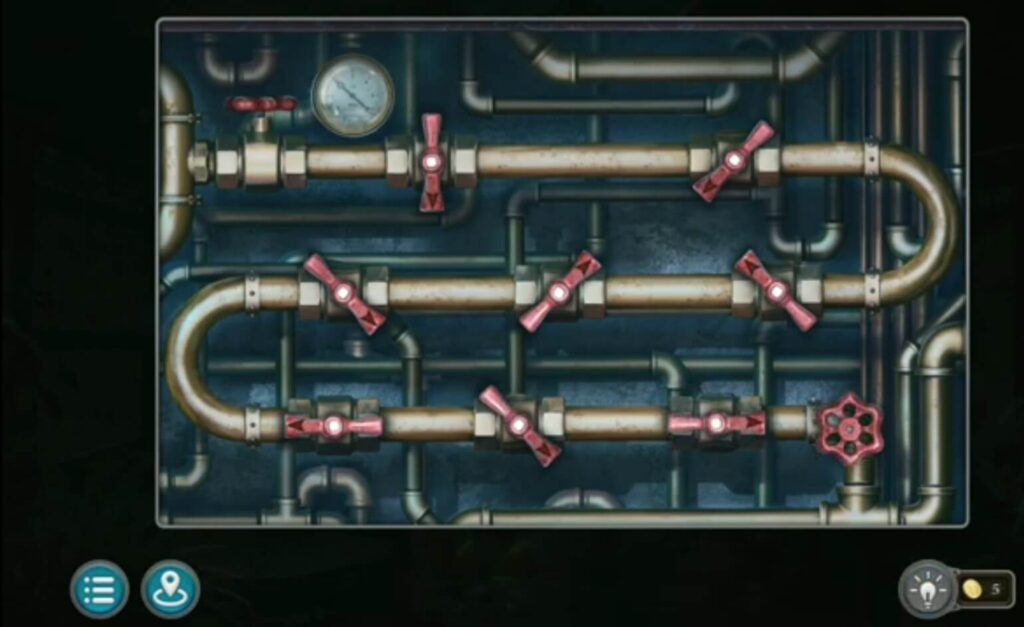
Put a fuse (got it when you solved a clock puzzle, and the other is from the factory hall. A puzzle will appear.
Solve the puzzle by moving the arrows to the side where the green light is.
- A mask.
- A crowbar.
- A collection of items.
- Put 3 sacks in the hole.
- A gas cylinder.
- A morphing object.
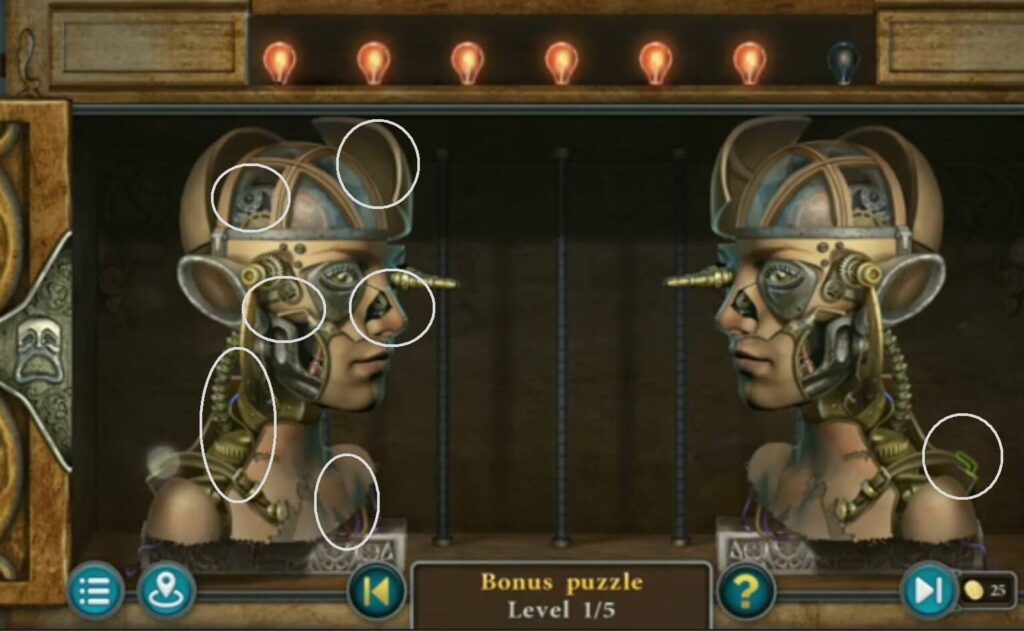
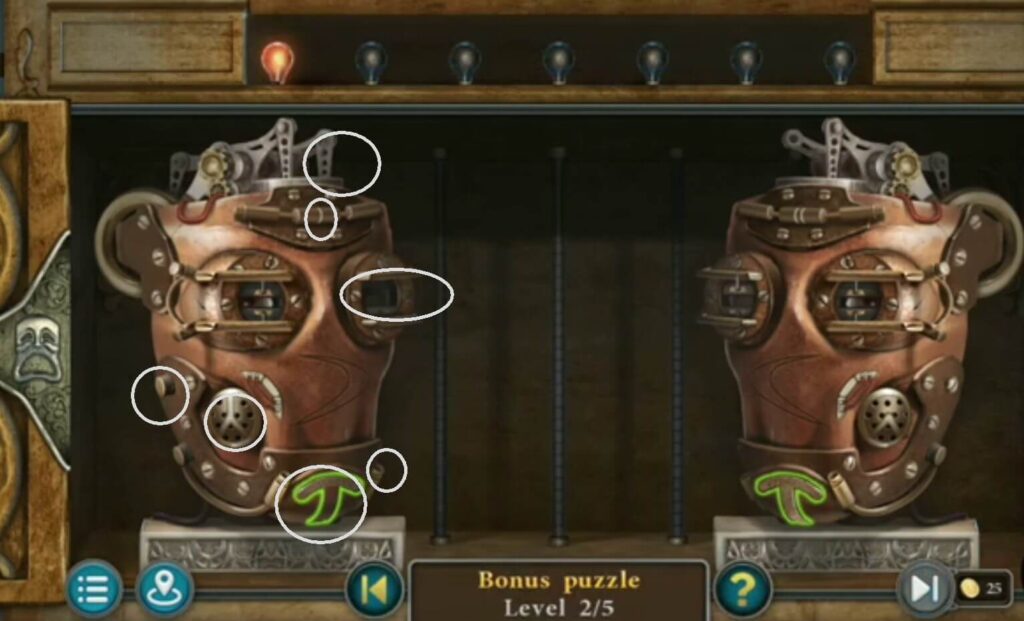
Bonus puzzle: Put masks you collected during the game to start a five-level bonus puzzle.
Solve the bonus level by finding 7 common elements. You got a star.
Solve the puzzle by choosing the symbols that are on the curtains. You got a part of the frame, a clamp.
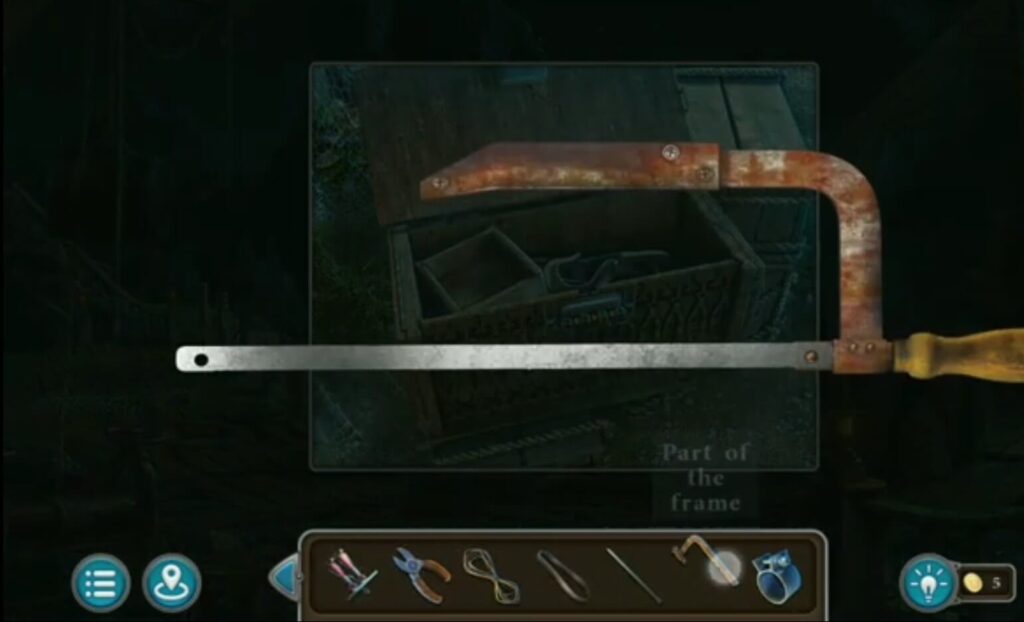

Combine two frames and a blade to get a hacksaw. Cut the fence with it.
- A morphing object.
- A collection item.
- A joker, a mask
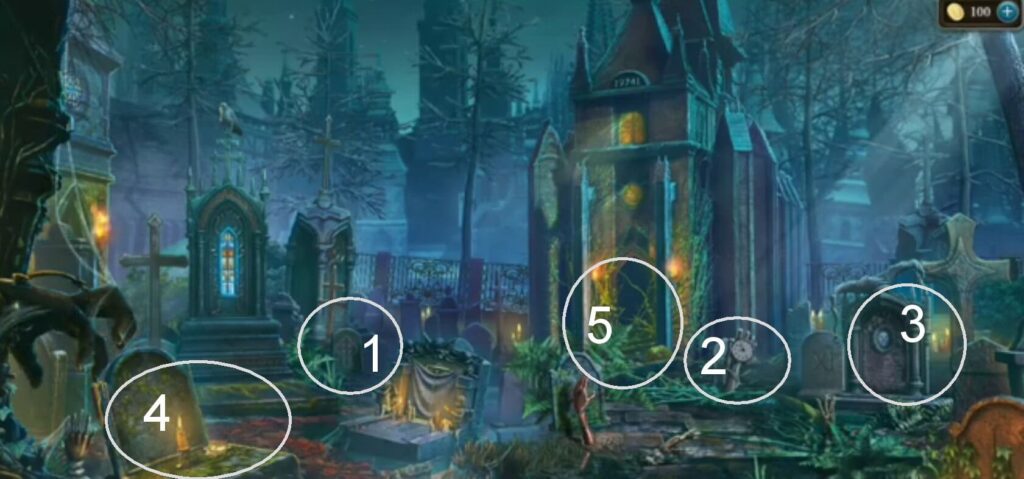
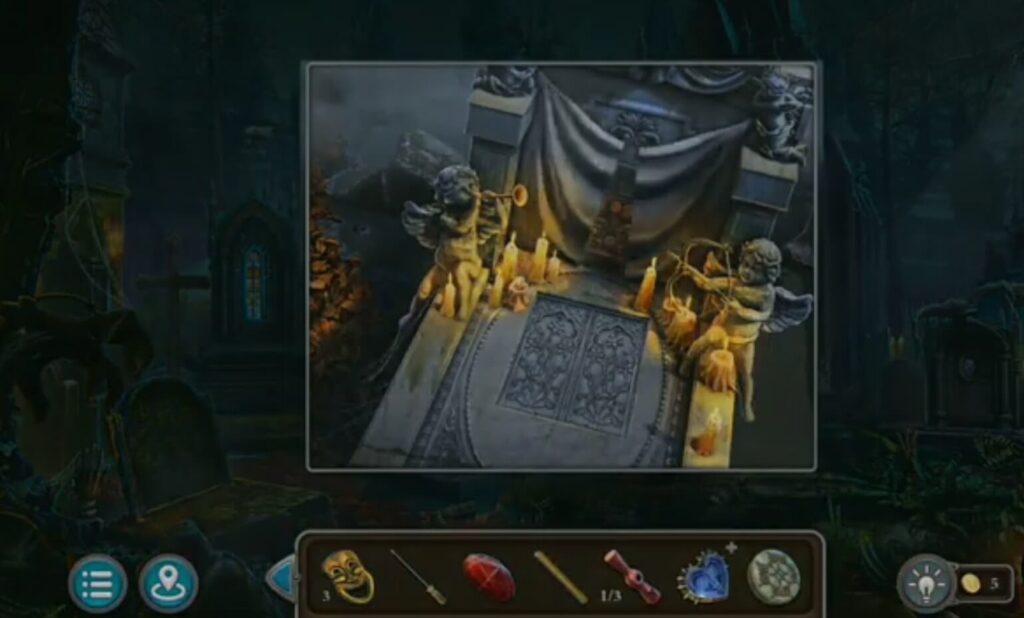
- Use a crowbar (got it from the warehouse) to lift the tombstone. You got a torso, a candle, a detail.
- A decorative gear
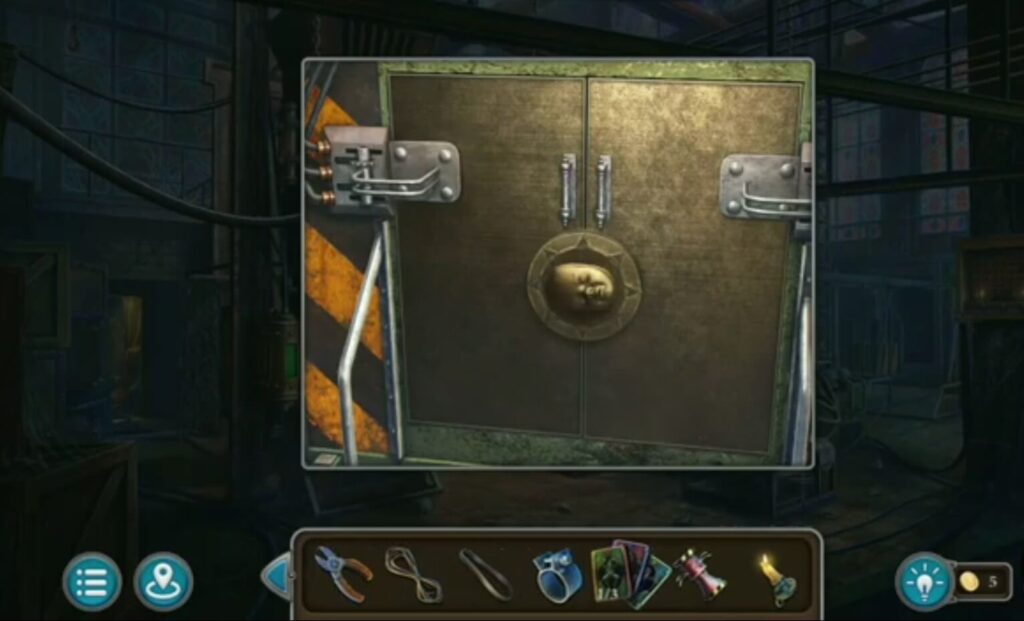
Put the detail ( from the doll cemetery). The locker will open.
Put a belt (from the clock puzzle ) and push a handle down to start the mechanism.

Put a gas cylinder (from a warehouse) into the kitchen. Light it with a candle.
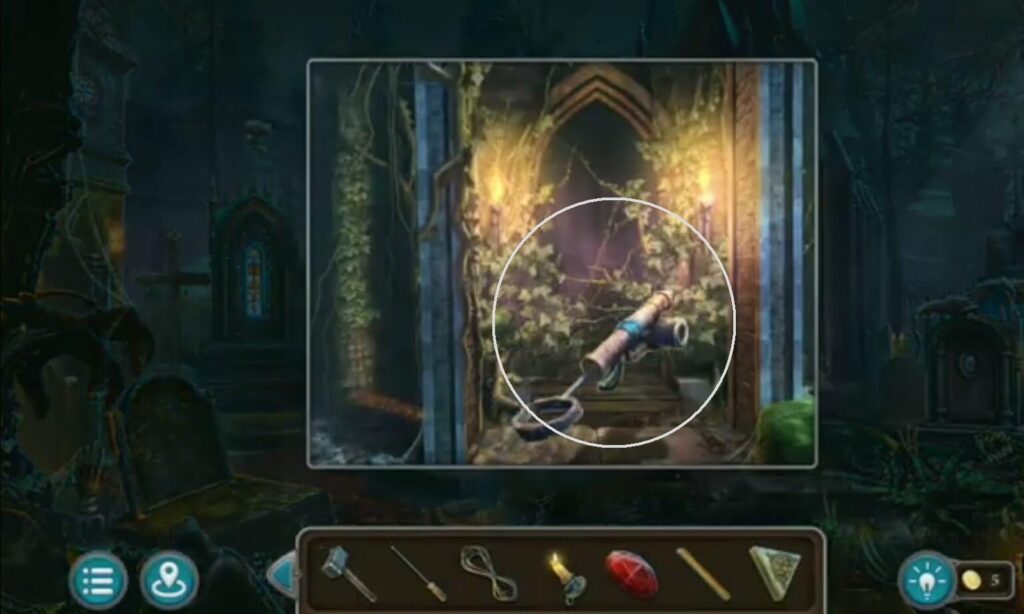
- Use garden shears (got it from the monument) to cut out the hose.
- Use a screwdriver (found in the cabinet ) to get the valve.

- Put a valve (got it from the garden) on the fountain. Water will flow.
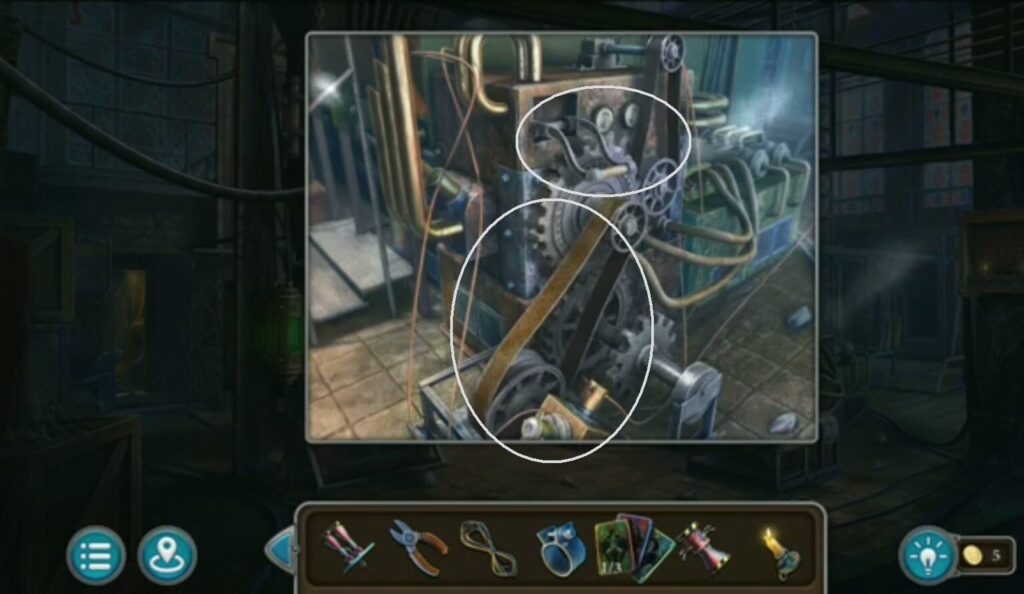
- A wrench is there.
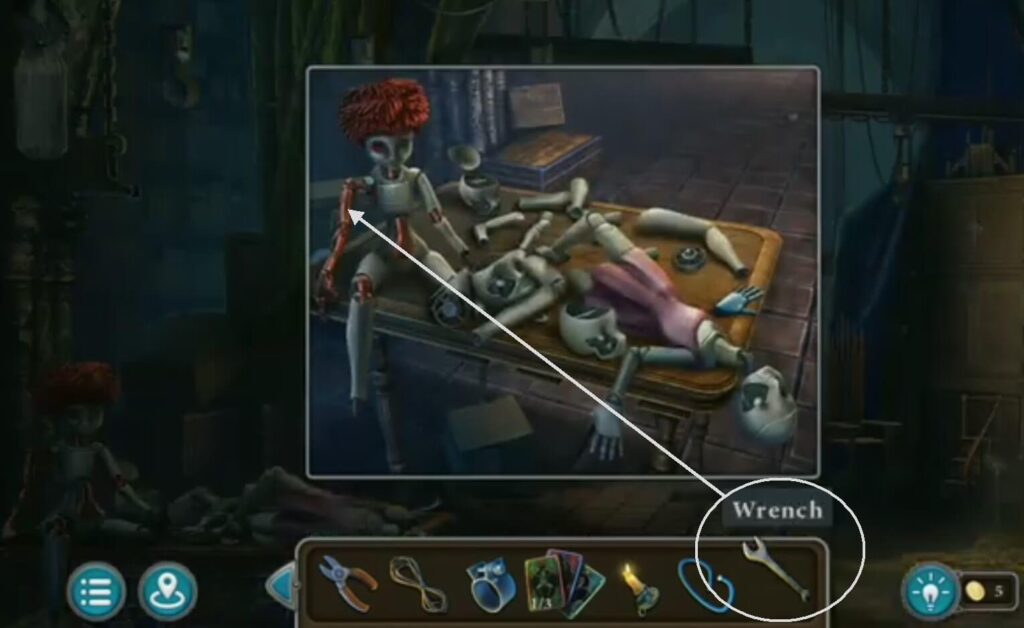
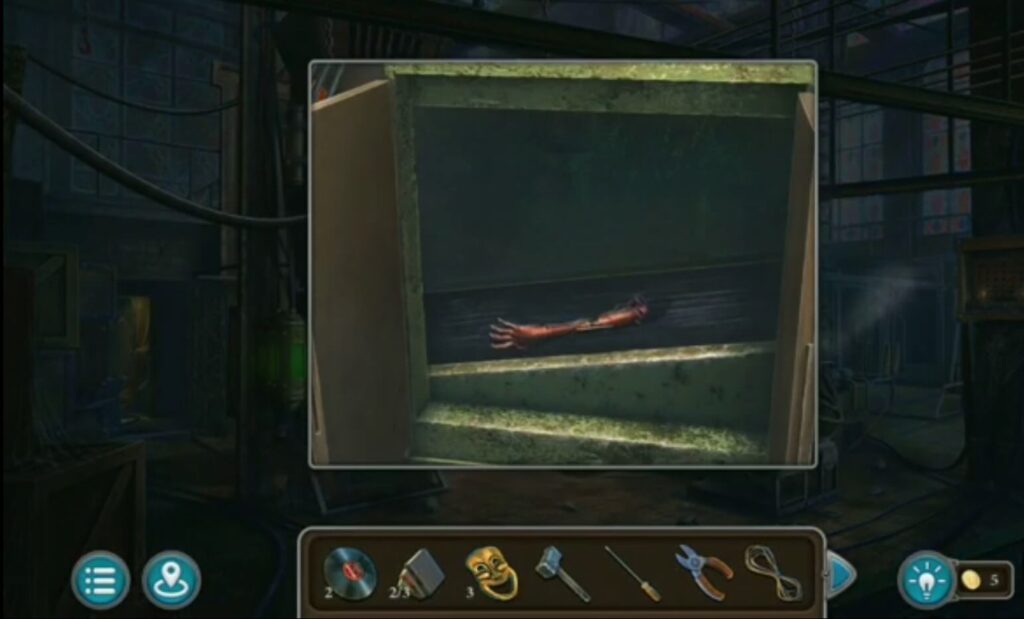
Use a wrench (near the fountain) to get the right doll hand.
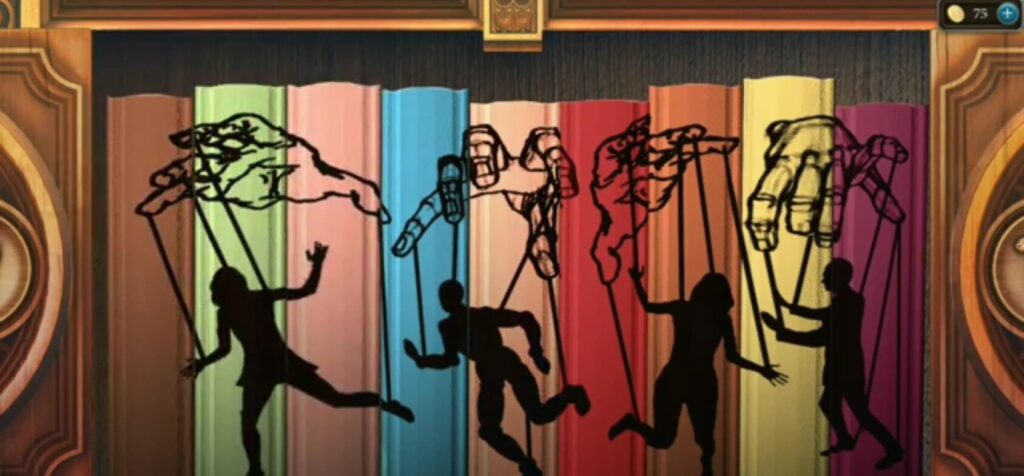
Put a decorative gear (a doll cemetery) to start a puzzle.
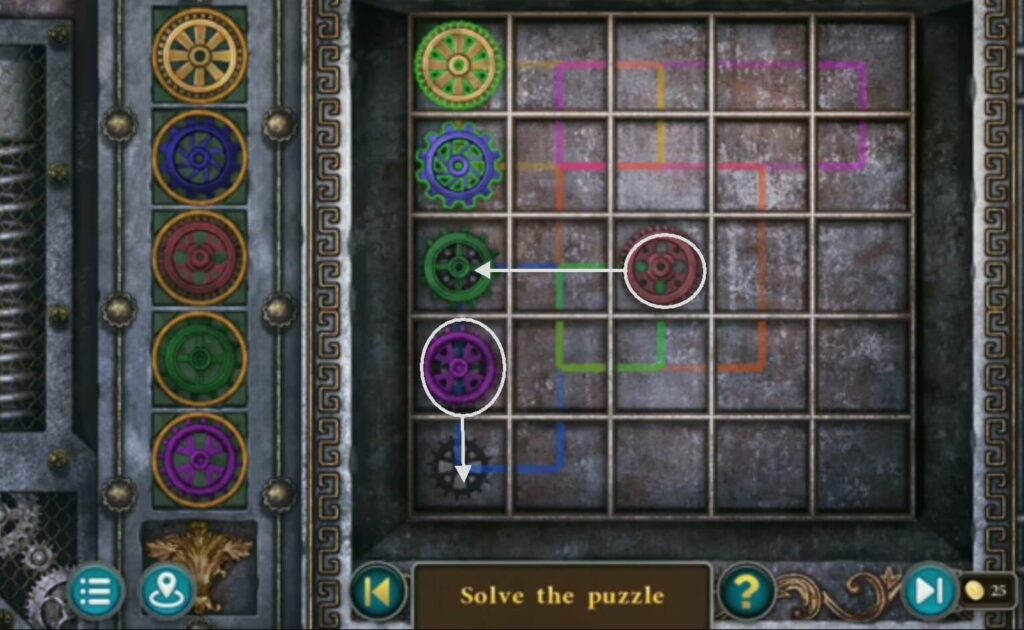
Solve the puzzle by moving the mechanisms to position them in the shadow of the same shape. You got the doll’s hips, a collection item, and a fridge handle.
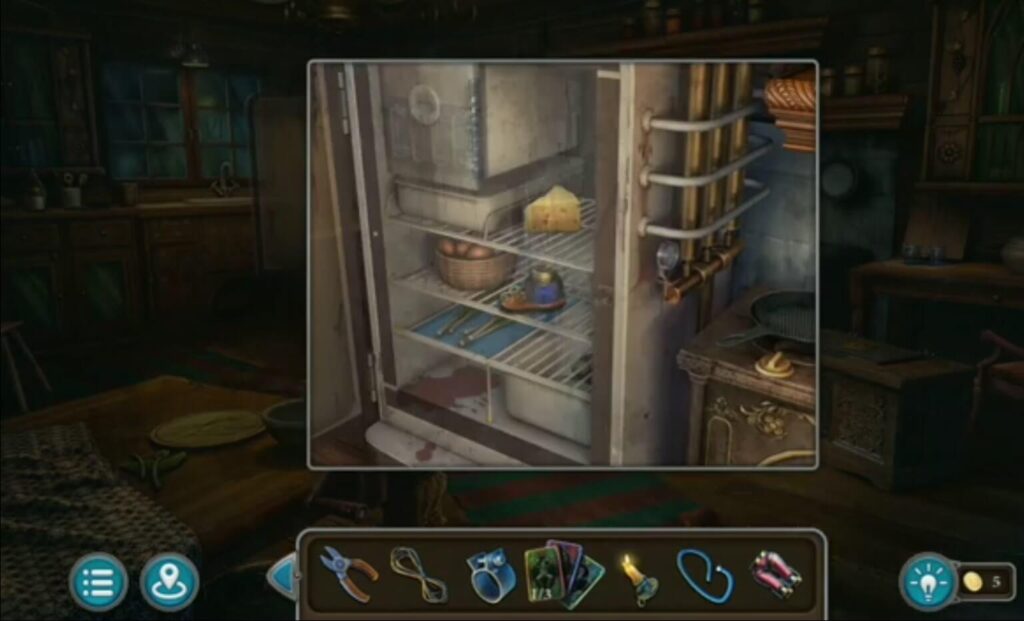
Put a handle (got it when you solve the puzzle with a decorative gear) on the fridge. Inside is an inkwell, a cheese, a doll’s head in ice.
Give the cheese (from the fridge) to the raven and you’ll get a key.
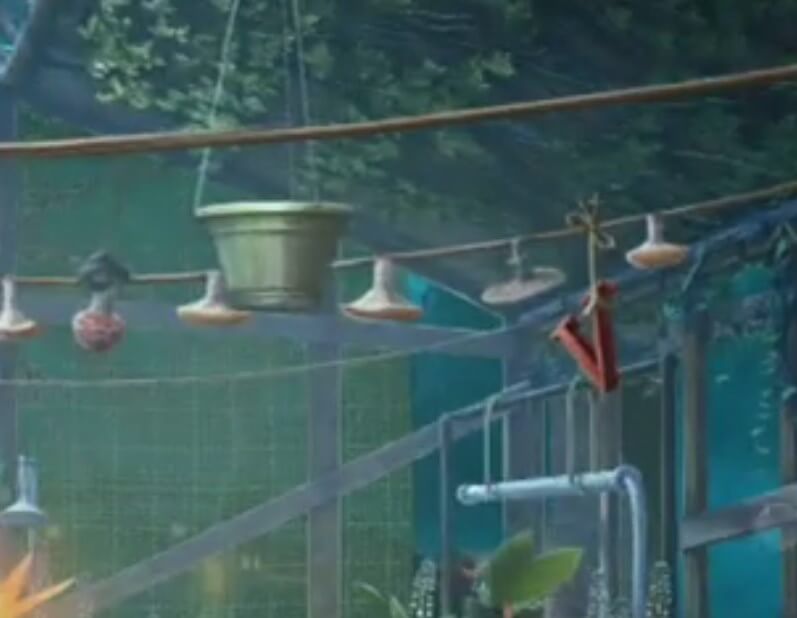
Unlock it with the key you got from the raven. Inside is a greenhouse.
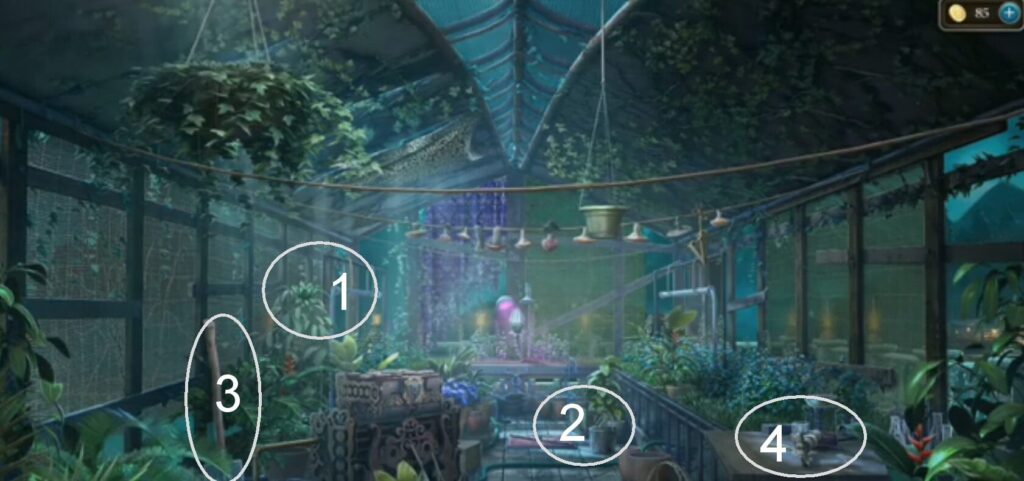
- A morphing object.
- A cauldron, a record (under the pot behind).
- A shovel.
- A sprayer.
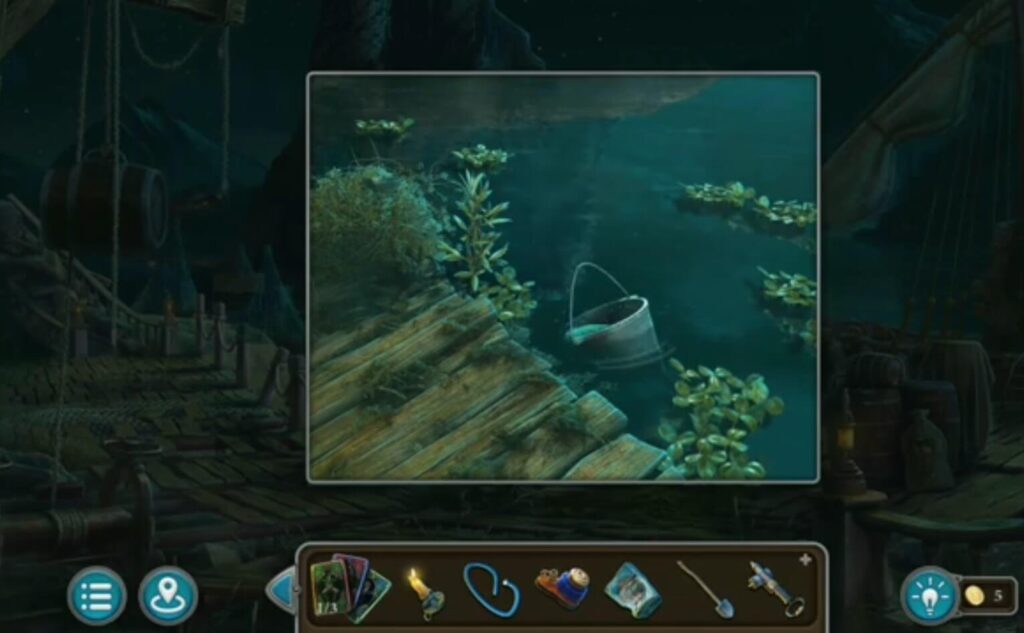
Take a water with a cauldron. You got a cauldron with water.
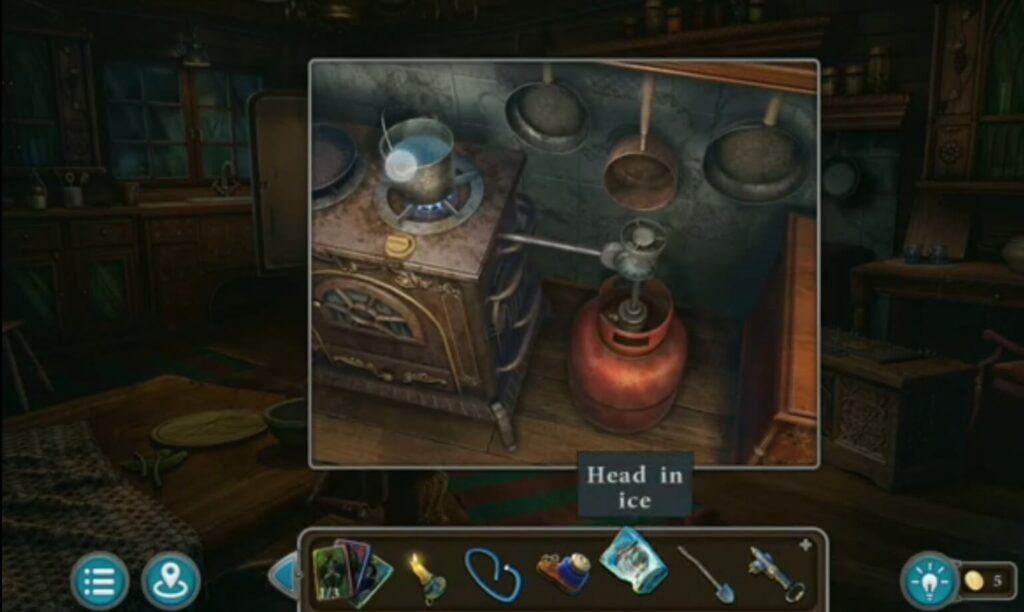
Put a cauldron with water (got it when you took water with a cauldron) on the stove, and then put a doll’s head in ice. You got a doll head.
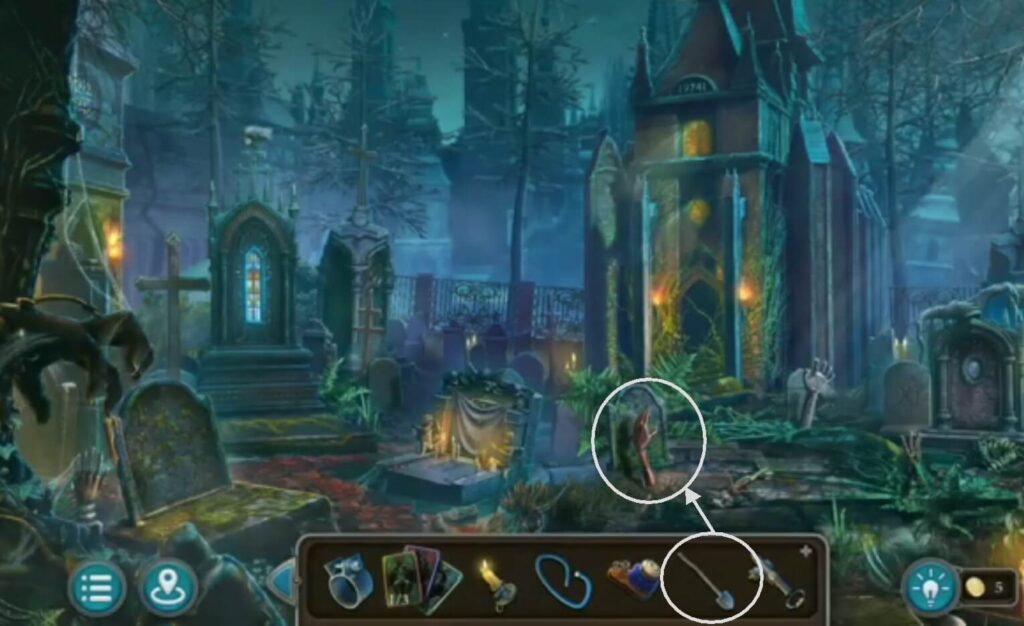
Take a shovel (from a greenhouse) to get a doll’s hand.
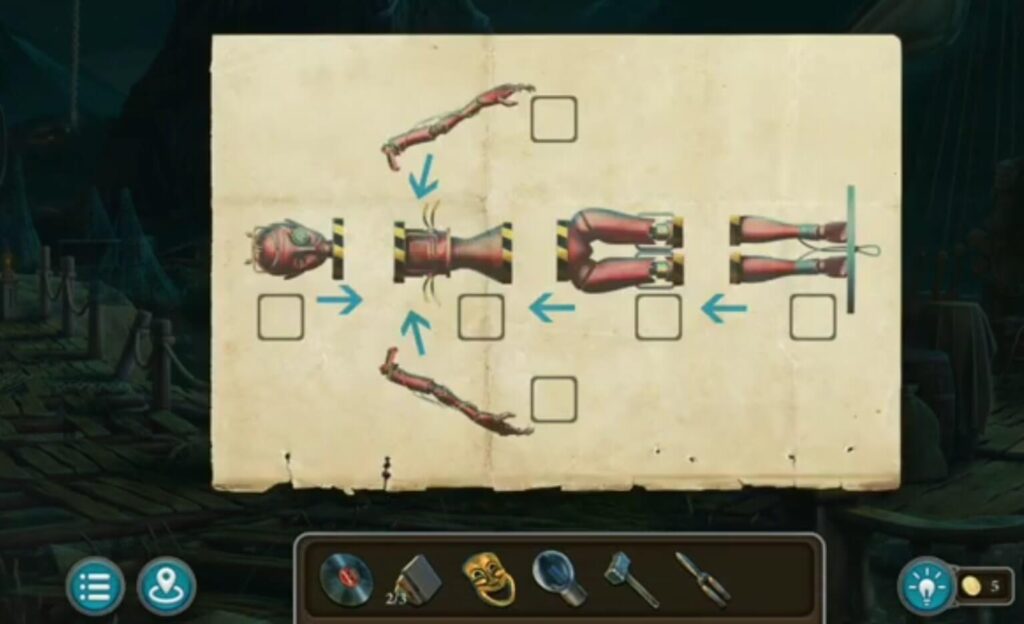
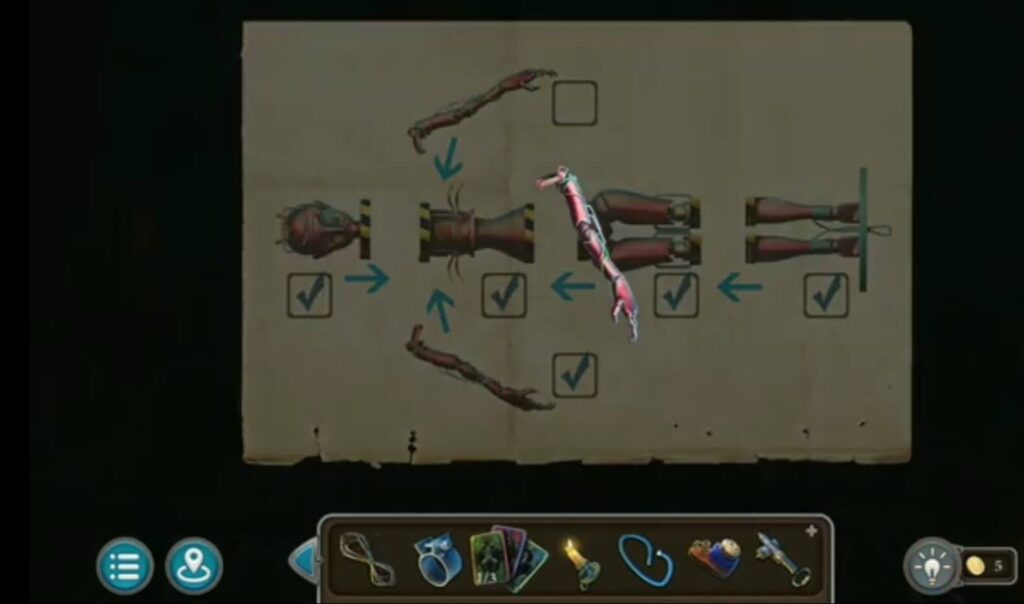
Put all doll parts that you collected during the game. You got a part of a doll.
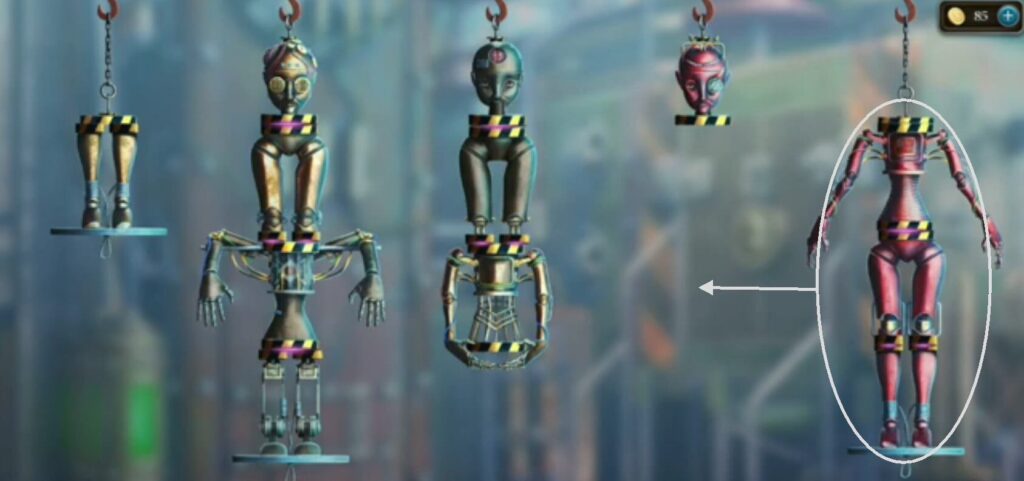
Put all parts of the doll. A puzzle will appear. Solve it by putting parts in the right place. When you solve it, you get an assistant doll.
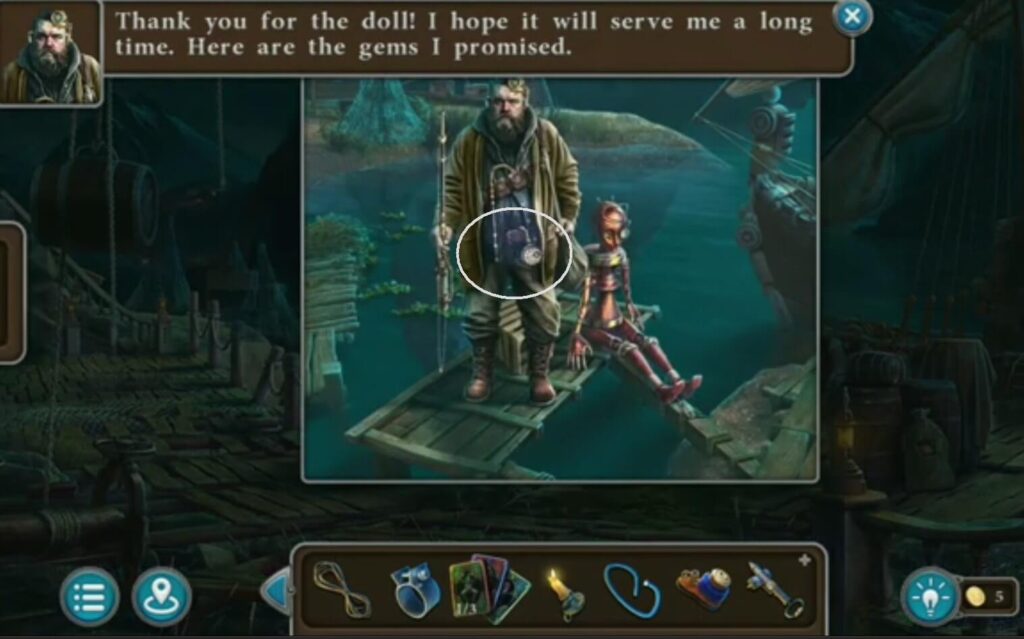
Give the fisherman an assistant doll (got it when you solved a puzzle).
You got a collection item, a glass ball, a red crystal.

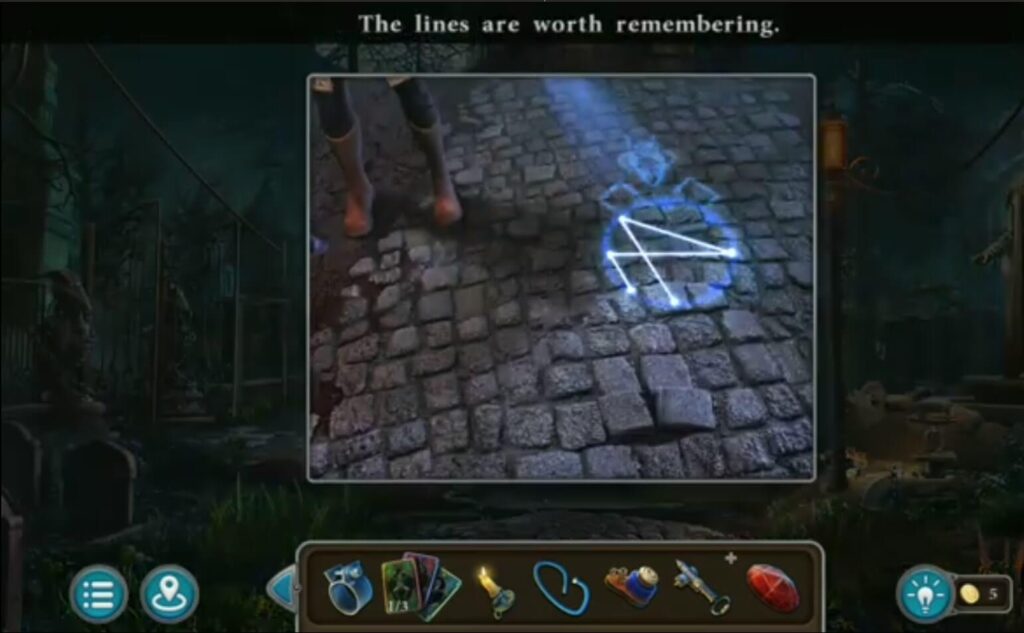
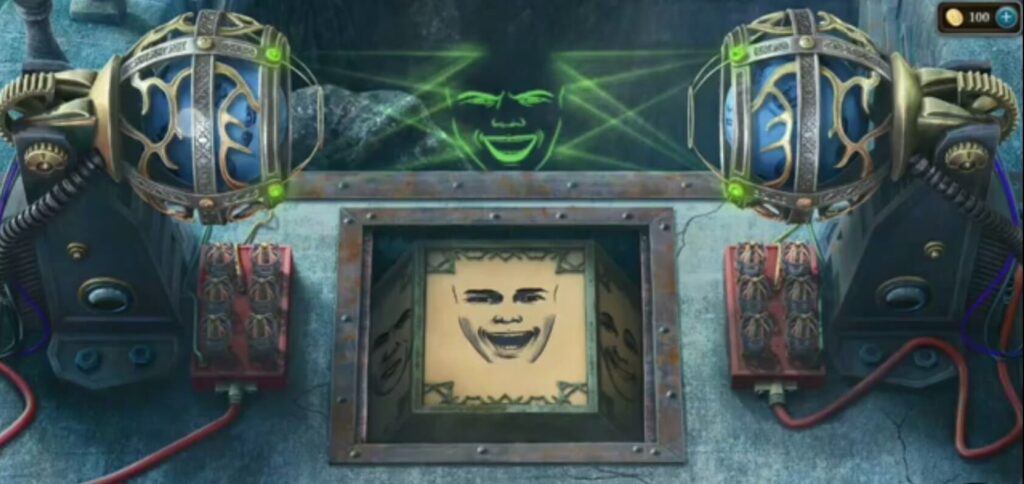
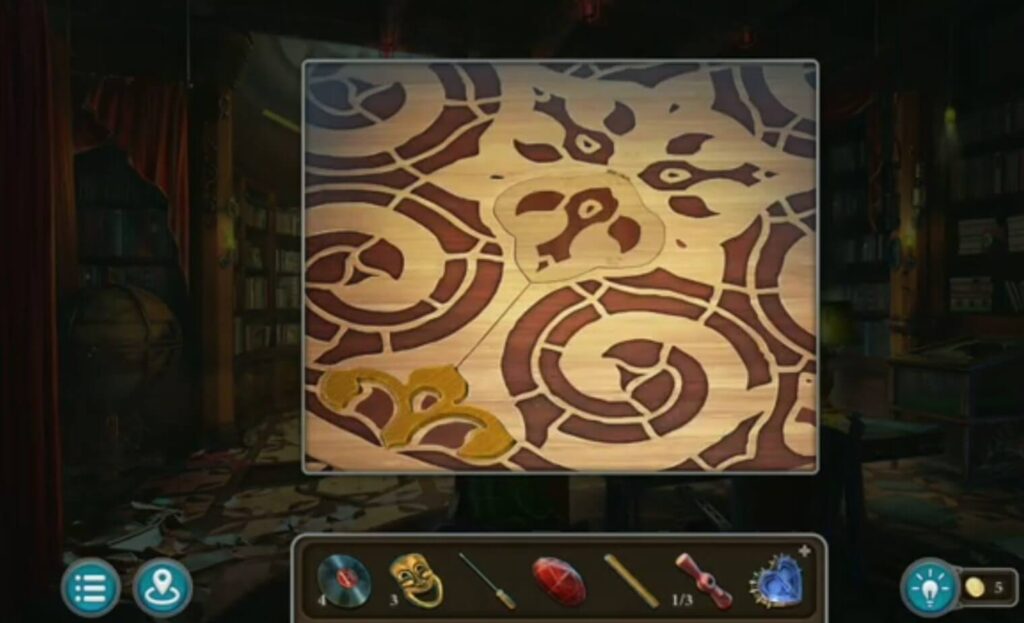
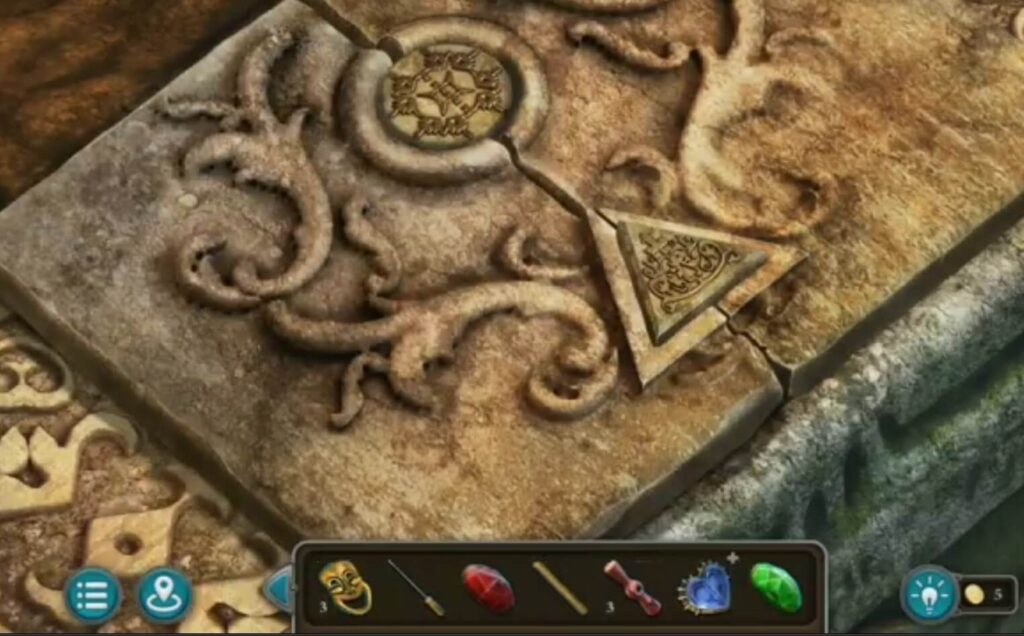
Put the glass ball (got it from the fisherman). The laser from the eyes will indicate the lines on the cobblestones.
Solve the puzzle by making an identical shape to the one from the cobblestones (when you put a glass ball). A door will open. Inside is a library.
- A collection item.
- A joker.
- A morphing object.
- A record.
- Use a hammer (from a piano) to break the glass. You got a quill.
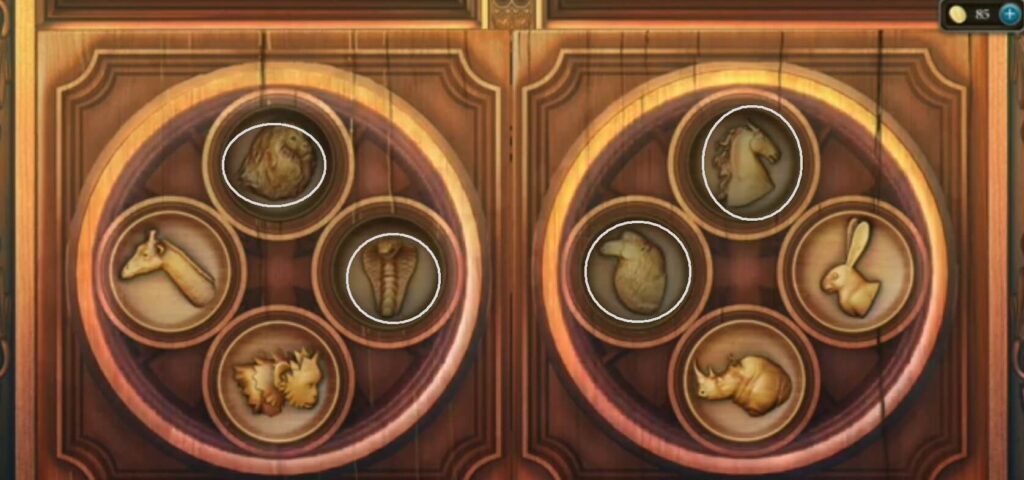
Click on the figures of animals that are in the form of monuments in the yard: a horse, a snake, a sheep, and a lion. Another puzzle (with books) will appear.
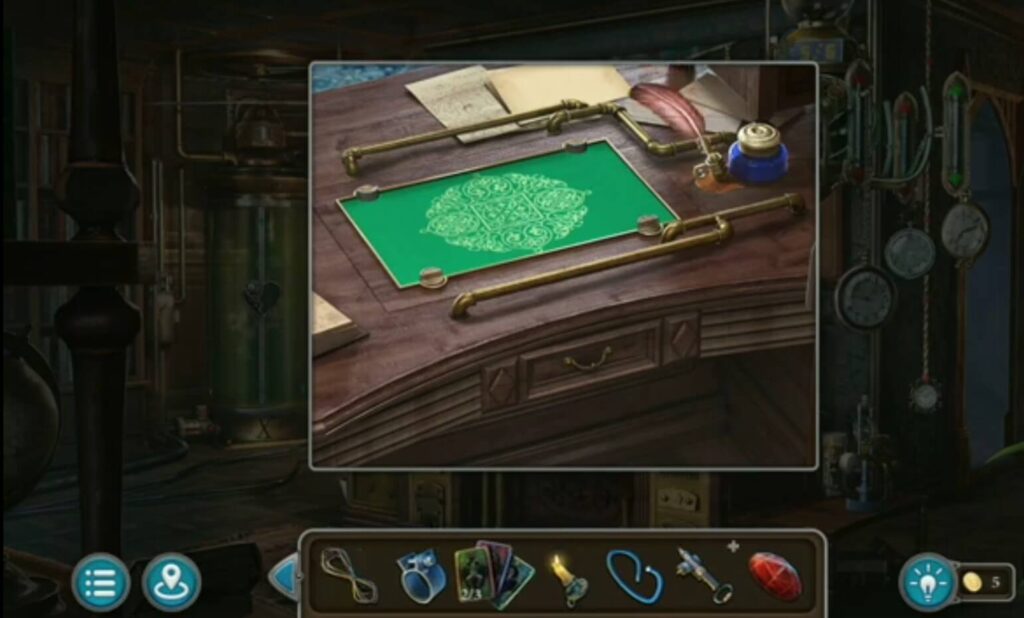
Put an inkwell (from the fridge) and a quill (when you broke the glass) on the desk. A puzzle will appear.
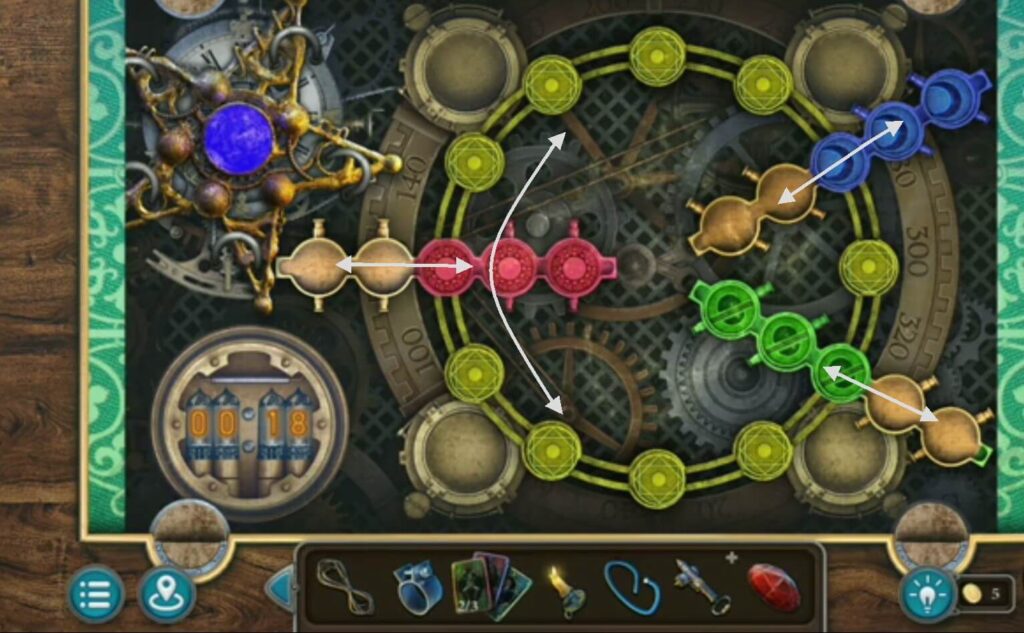
Solve the puzzle by rotating the mechanisms to the left and to the right to line up elements of the same color. When you finish, you get a star. Also, a drawer will open. Inside is a joker, and a corkscrew.
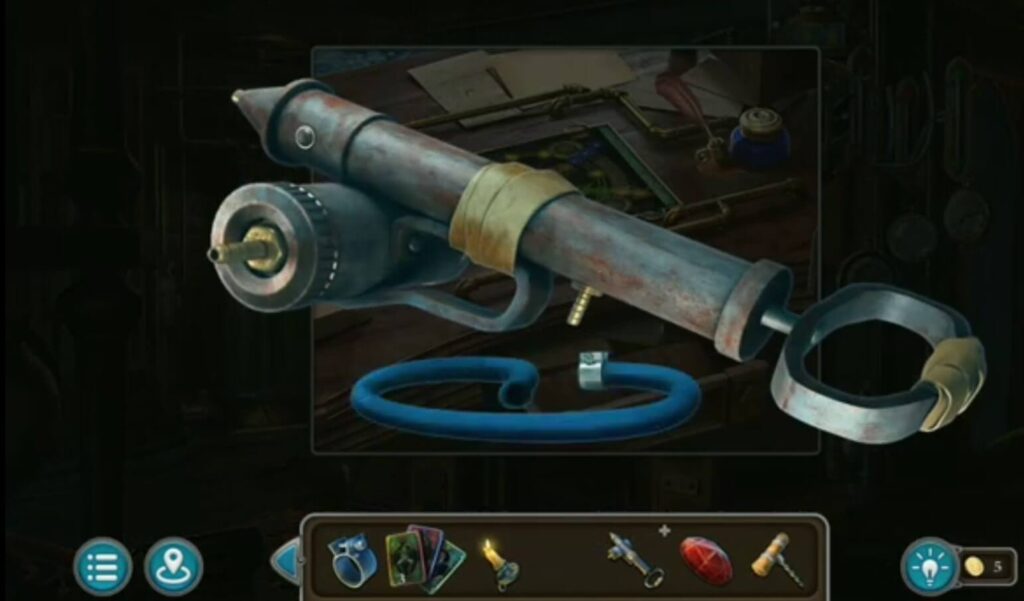
Put together a sprayer, a hose (cut it with garden shears), and a clamp. Take a screwdriver (found in the cabinet ) to connect it. You got a sprayer.
A collection item.
Use nippers (from the broken cabinet) to open. A puzzle is inside. You got a wand.
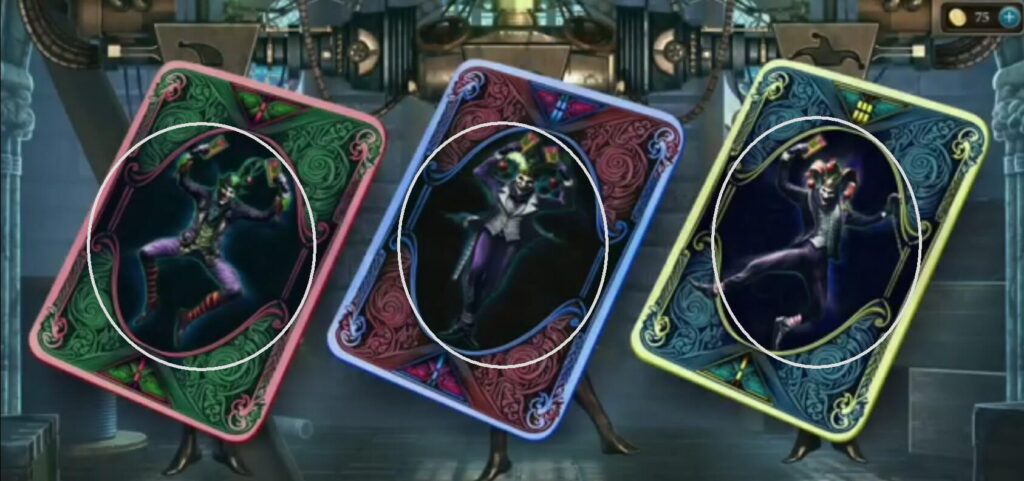
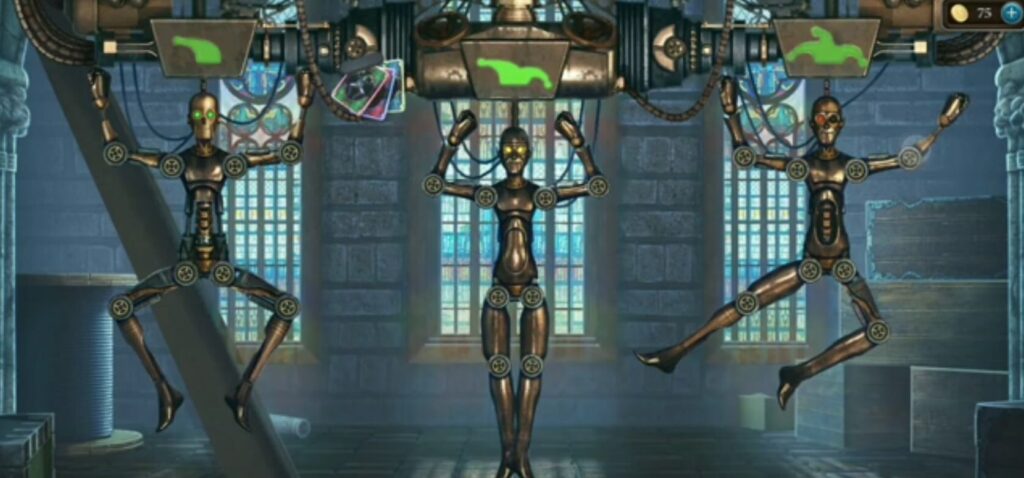
Move the robots’ limbs to bring them to the correct position. Use the Joker cards you collect. You’ll also get books and a key.
Put books you got when you solved the robot puzzle. Solve puzzles by placing books in the right order. You have a lens and an insecticide recipe.
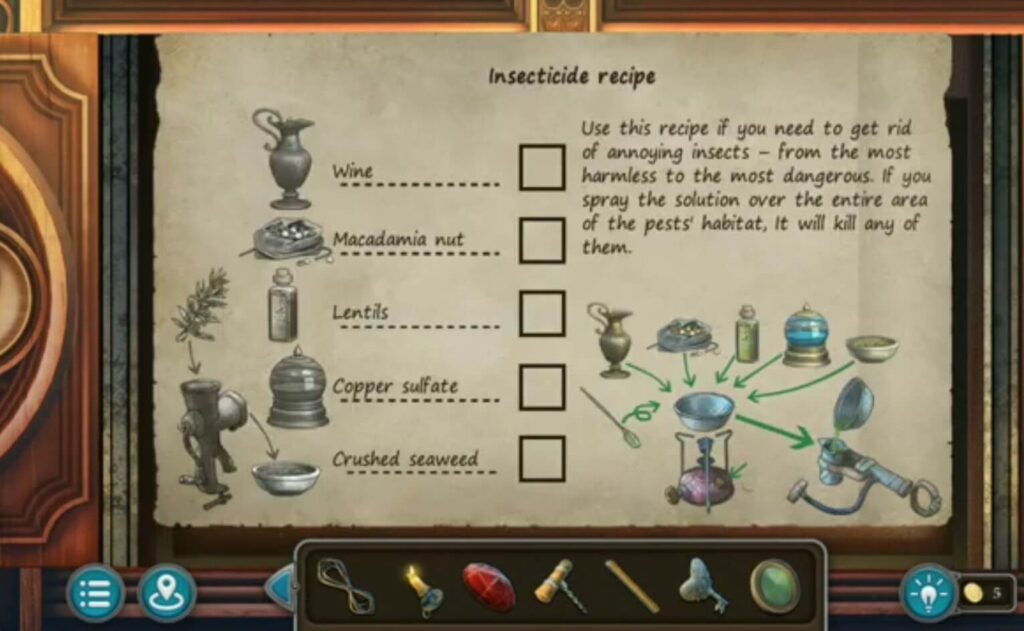
An insecticide recipe.
Put lens (got it when you solved a book puzzle).
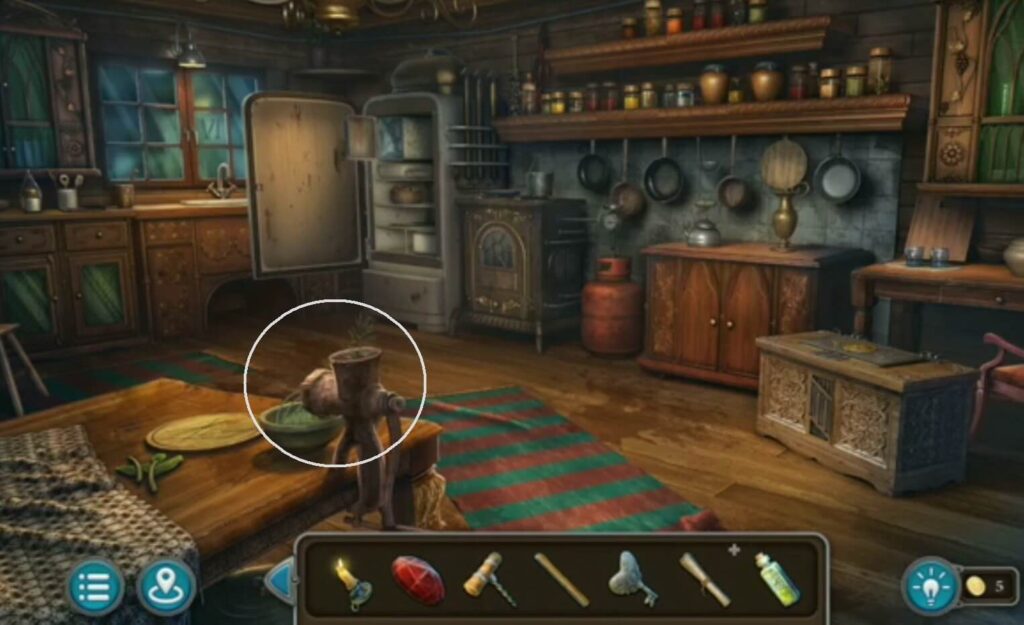
Put a seaweed (got it from the lake) into the mill. You got crushed seaweed.
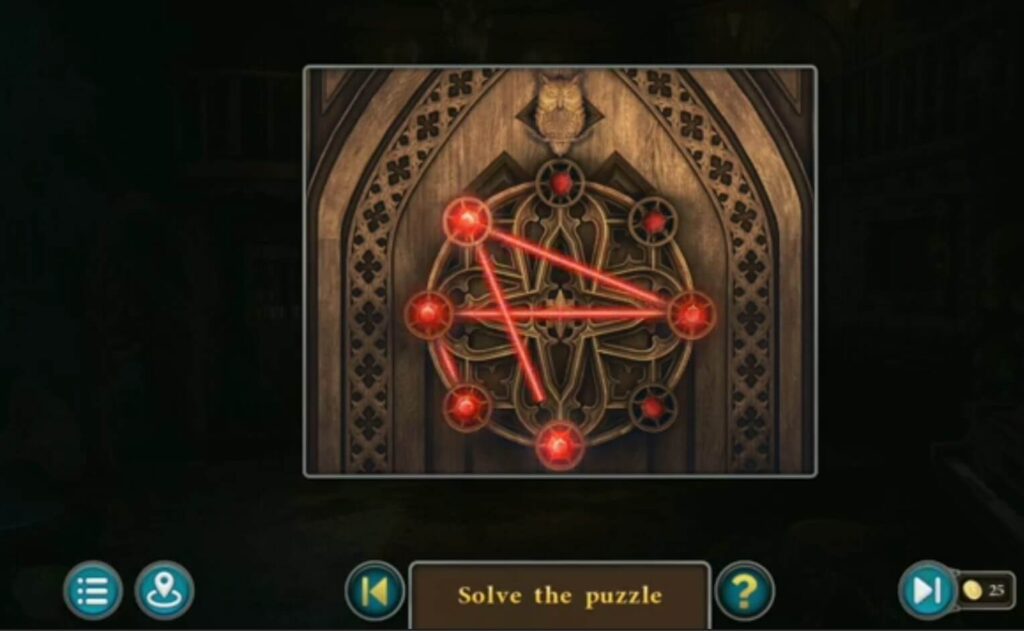
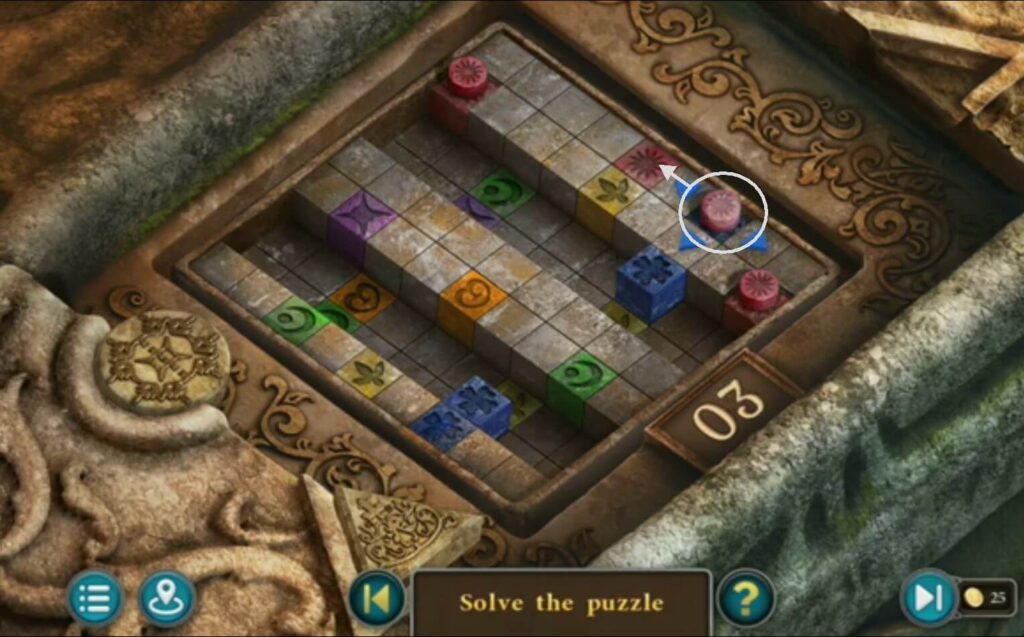
Put a key (got it when you solved the robot puzzle) to open the coffin. It’s a puzzle. Solve it by placing the gems in the marked places. You move them with a pusher.
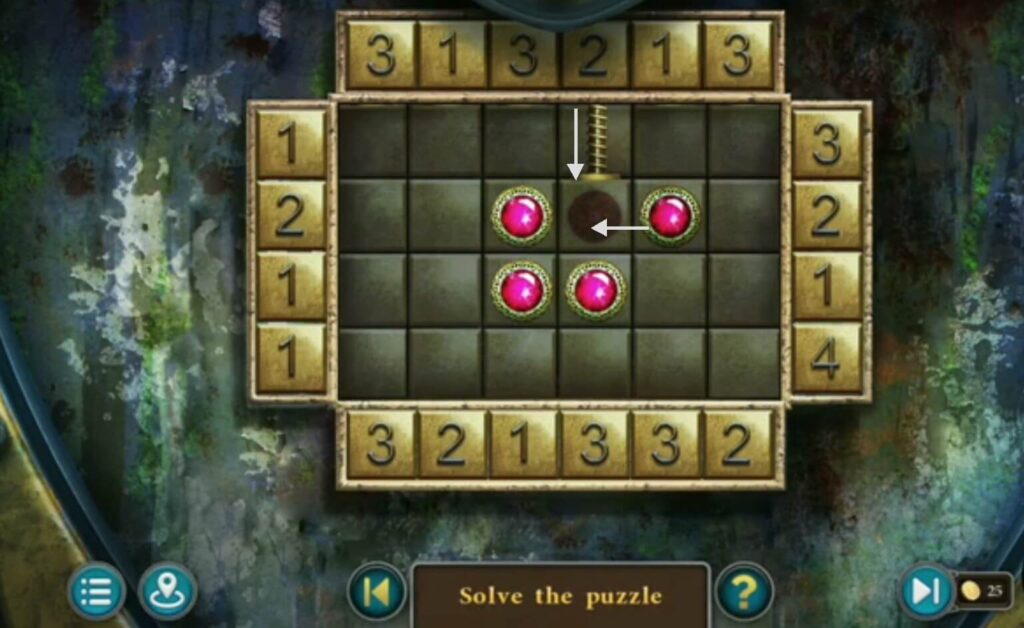
Solve the puzzle by placing the gems in the marked places. You move them with a pusher.
You got a macadamia nut, a triangular piece.
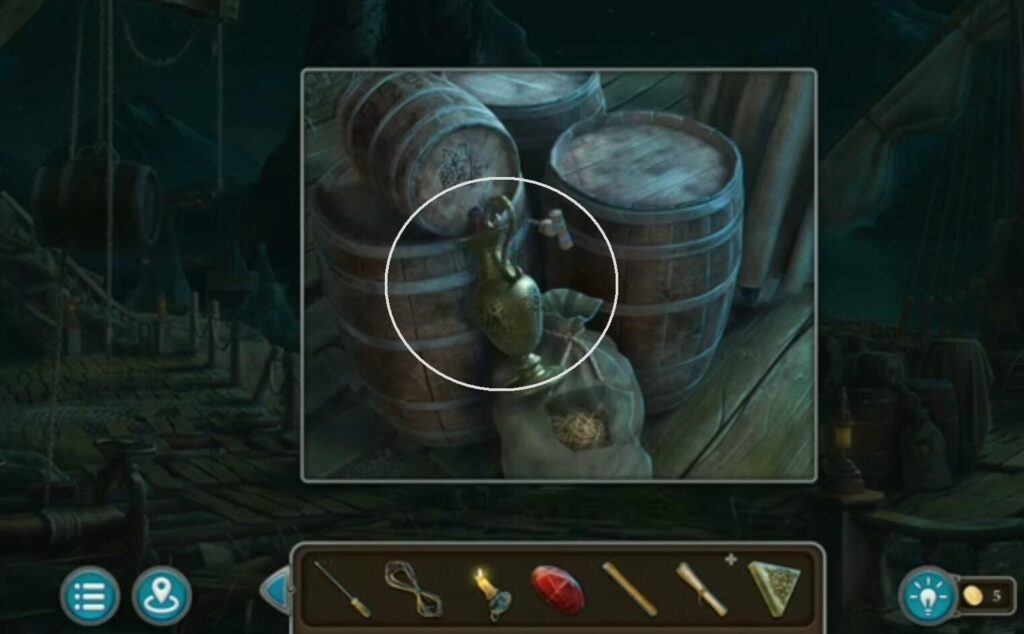
Use a jug (from the kitchen) and a corkscrew (got it when you solved a library desk puzzle) to get wine.
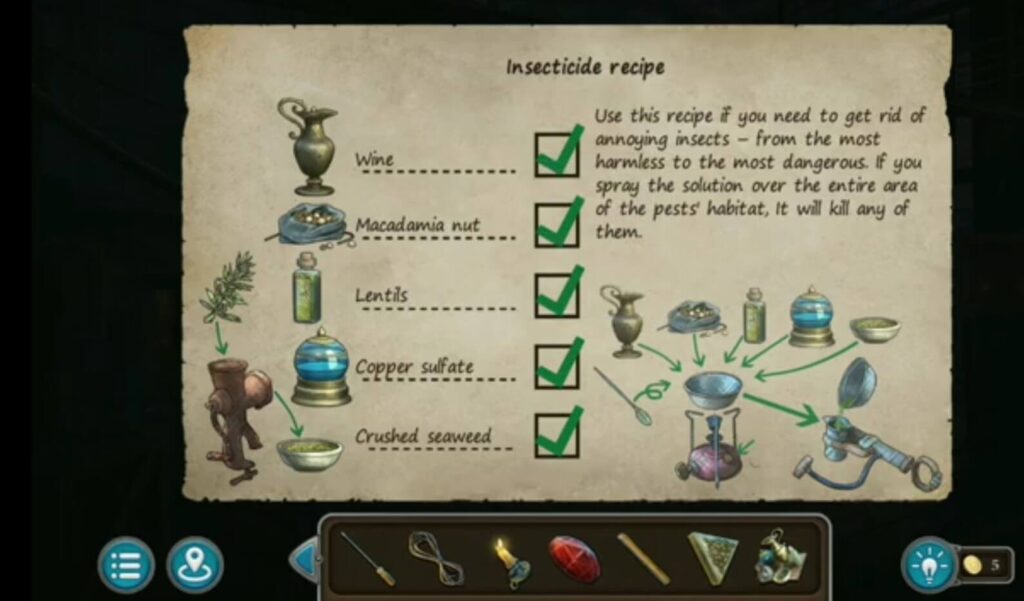
Put all the ingredients you collected during the game, to make an insecticide recipe. You got an insecticide.
Put an insecticide(made with collected ingredients during the game) on the plants. A new room is behind.
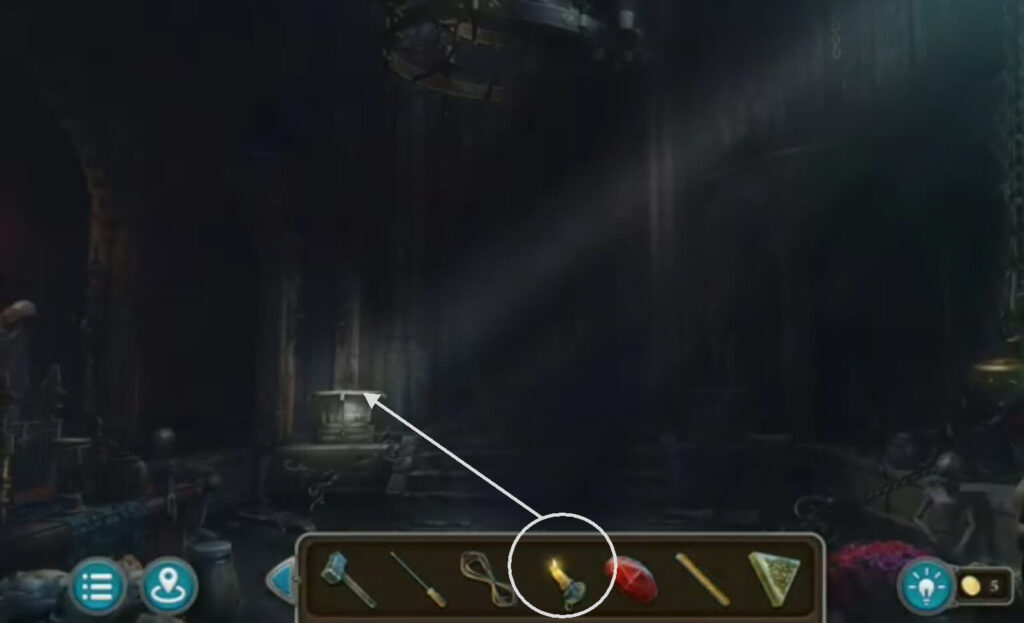
Put a candle (got it in the doll’s cemetery) to light up the room.
- A record.
- A collection item.
- A pipe.
- A magnet.
- Use a hammer to get a part of the pattern.
- A morphing object.
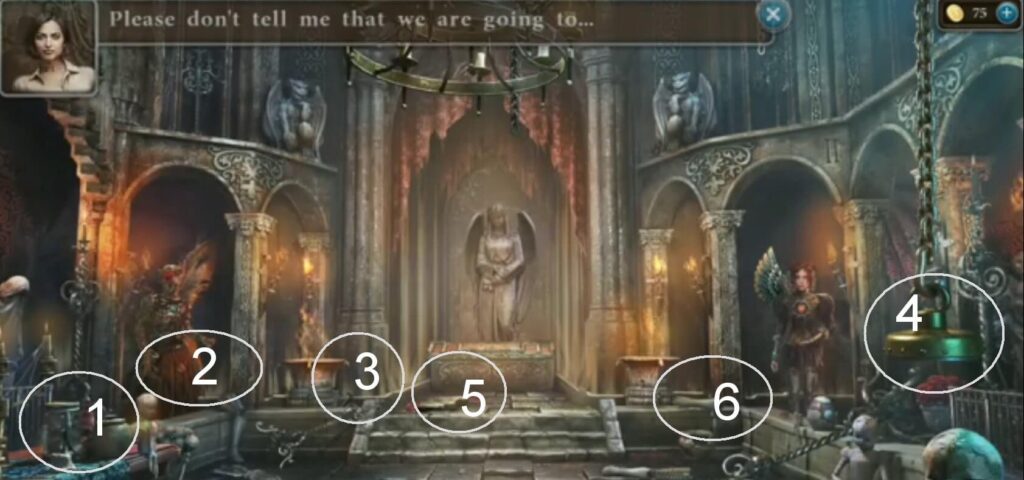
Connect rope and magnet, you have a magnet on a rope. Put a magnet on a rope in the hole to get a box with a knife and a valve.

Put the knife (got it from the box in the hole) into the statue’s arm. You have half of a heart. Put a half of heart. You have a basis of the heart.
Put a part of the pattern (took it with the hammer) on the floor. You got a bow and a round piece.
Give the left angel statue a pipe and the right one a bow. A puzzle will appear.

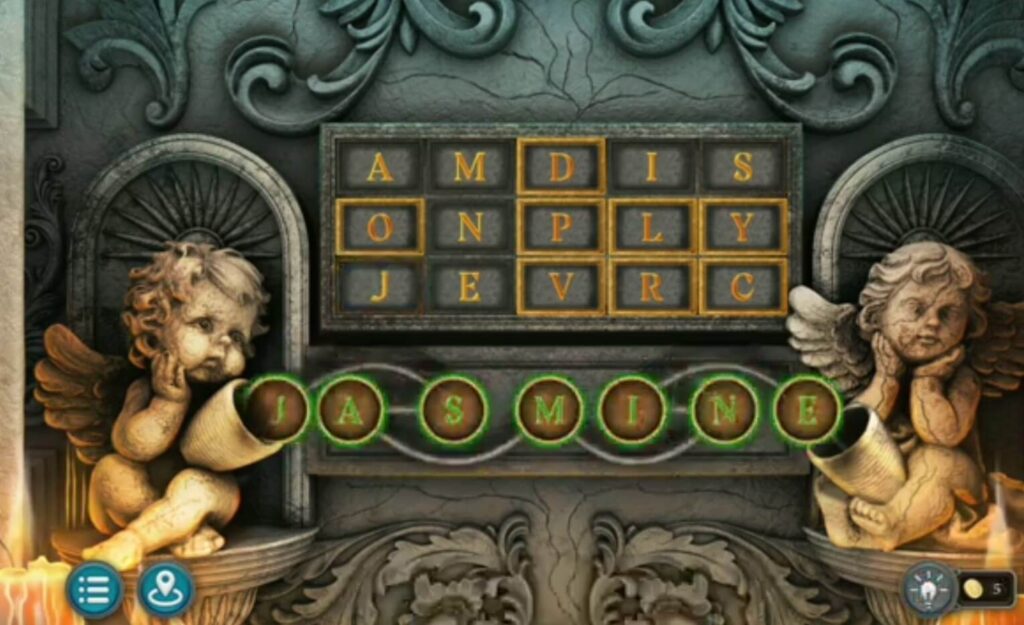
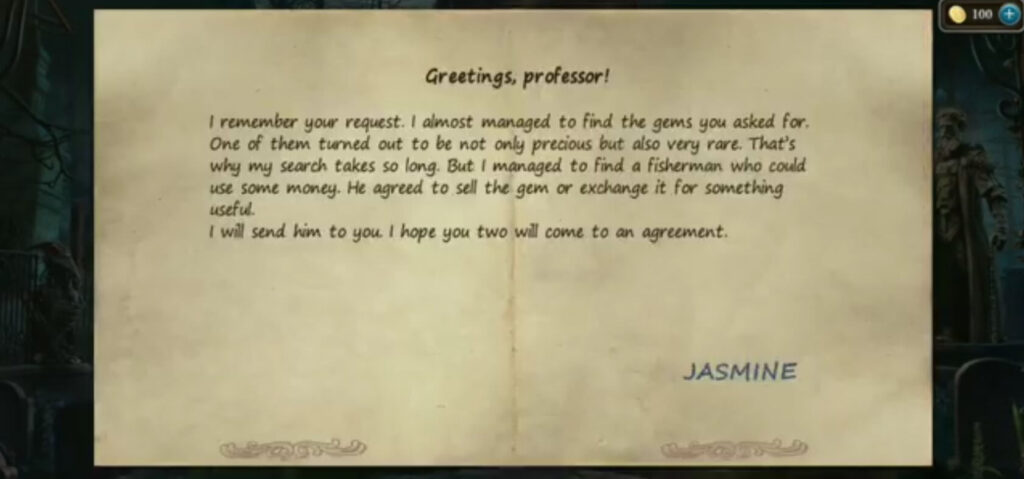
Solve it by choosing the letters J-A-S-M-I-N-E because this name was in the letter at the beginning of the game. You got a valve.
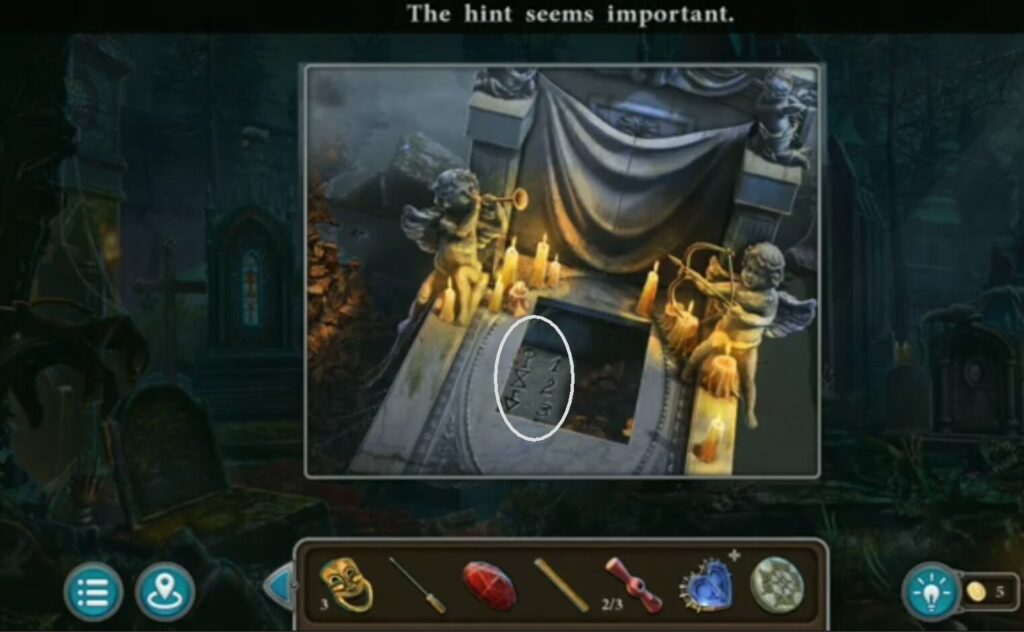
When you solved the angel statue puzzle and got a valve, under the leaves were some symbols. It’s the solution of this puzzle. Press that tree symbol. Inside is a green crystal and a valve.
Put round (got it when you put a part of the pattern on the floor) and triangular piece (got it when you solved a puzzle with macadamia nut), and a puzzle will appear.
Solve this puzzle by moving the red pieces to match their shadow. You got a star, a drawing, a key base.
A drawing from the coffin puzzle.
Use a screwdriver to move items just like is in the drawing.

Put a key base (from a coffin) and a wand (from the robot puzzle). A puzzle will appear.
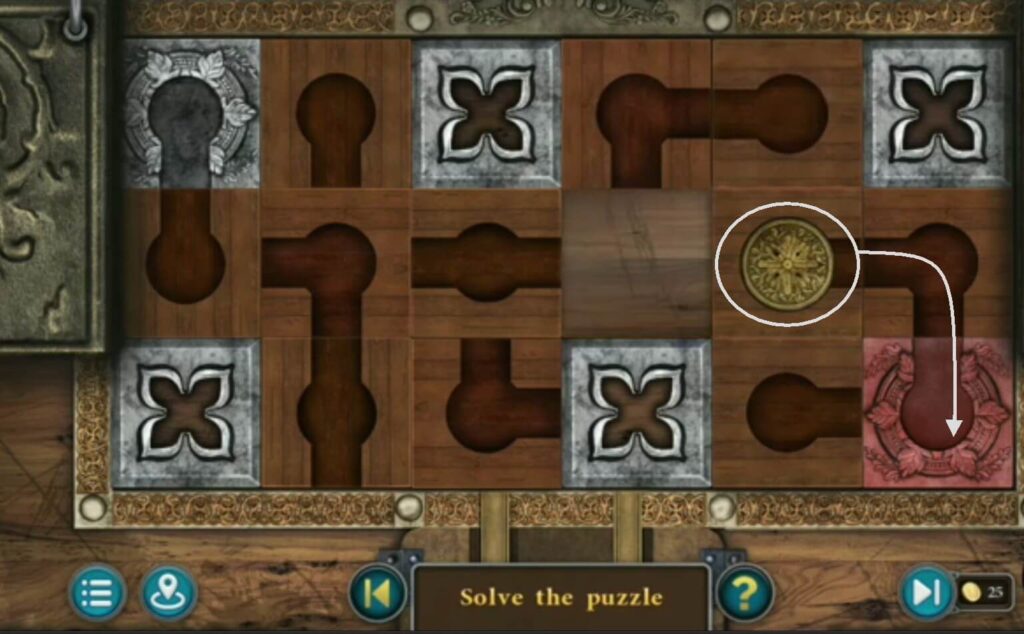
Solve the puzzle by moving the round golden element towards the red goal. You can move the squares one space in any direction, but ensure you create a path to the goal. You got a wing, a diary.
Put a wing you got when you solved a coffin puzzle in the kitchen. You got a chain.

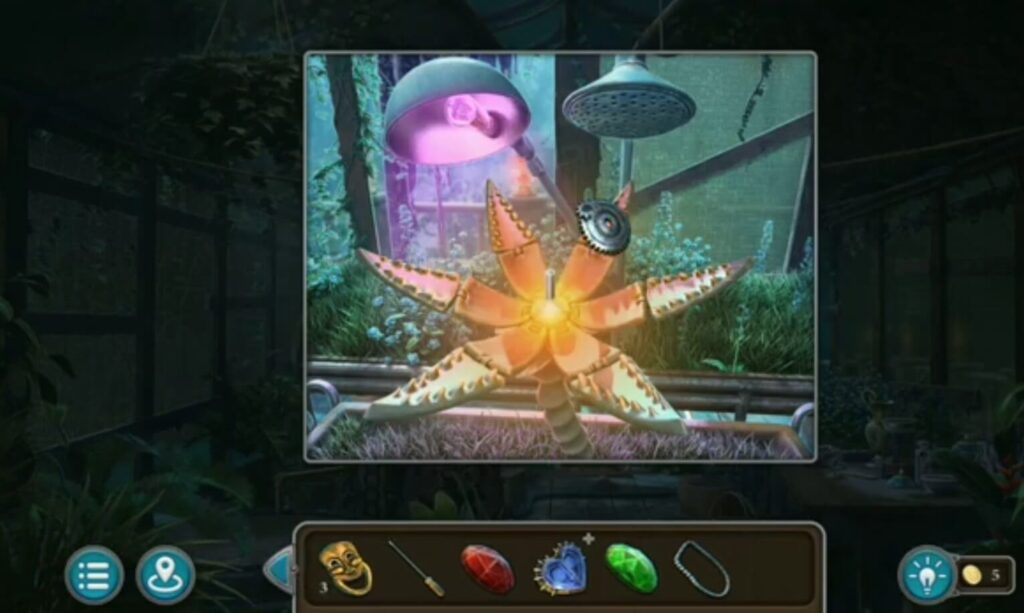
Put the diary (got it when you got a wing) under the lens. Below the lens is the solution to the puzzle and a display of where you should put the valves you collected during the game. Arrange the valve as it was in the picture below the lens when you put the diary. A mechanical flower will open, and you will get a mechanism.
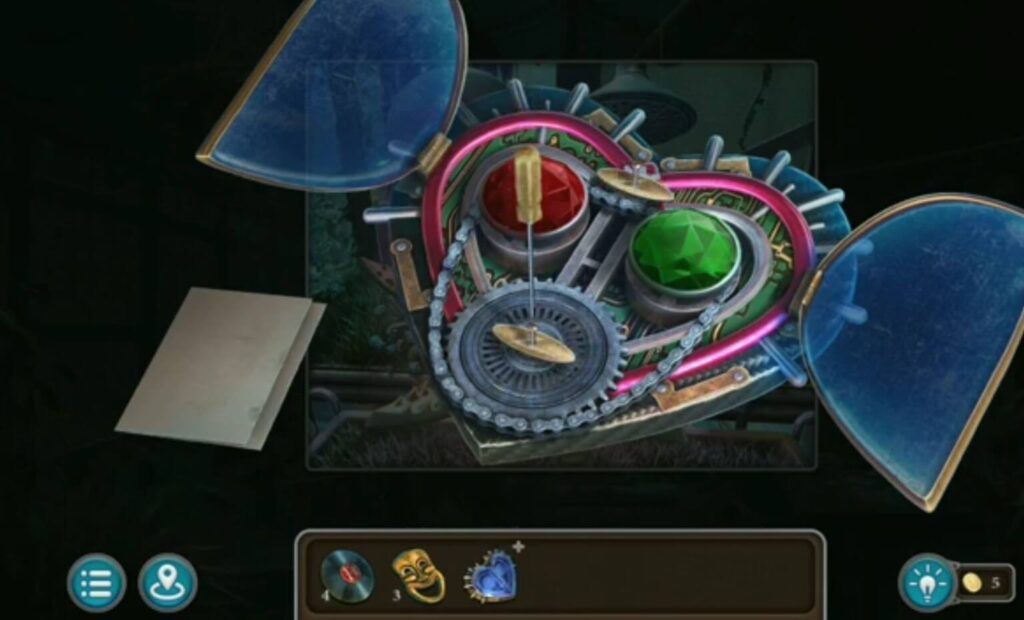
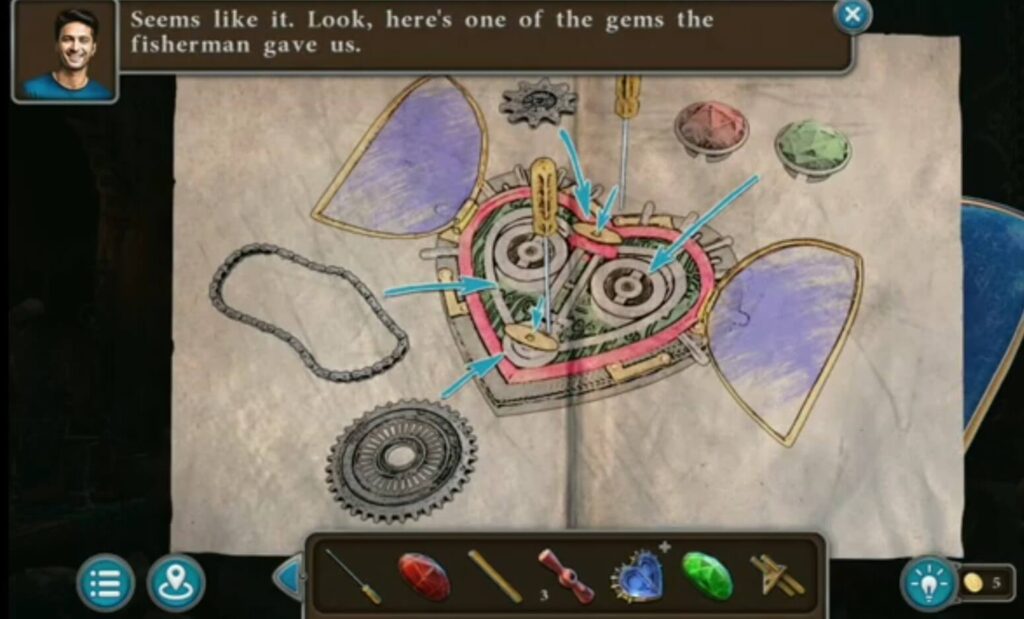
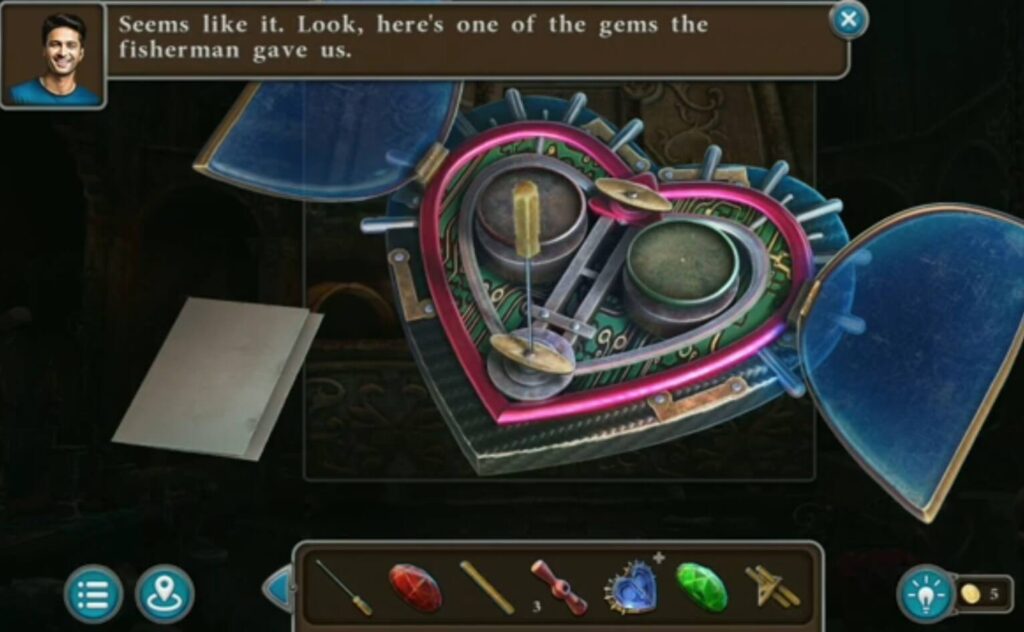
Put a mechanism (from mechanical flower), a green crystal (from angels) a red crystal (from a fisherman), and a chain, and put it all together with a screwdriver. You have got a heart.
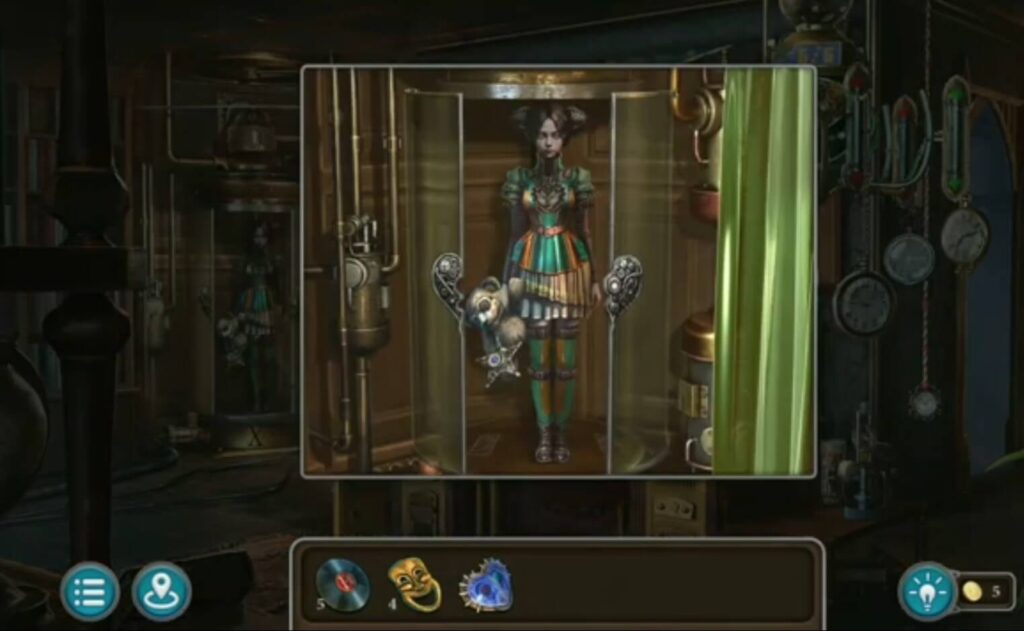
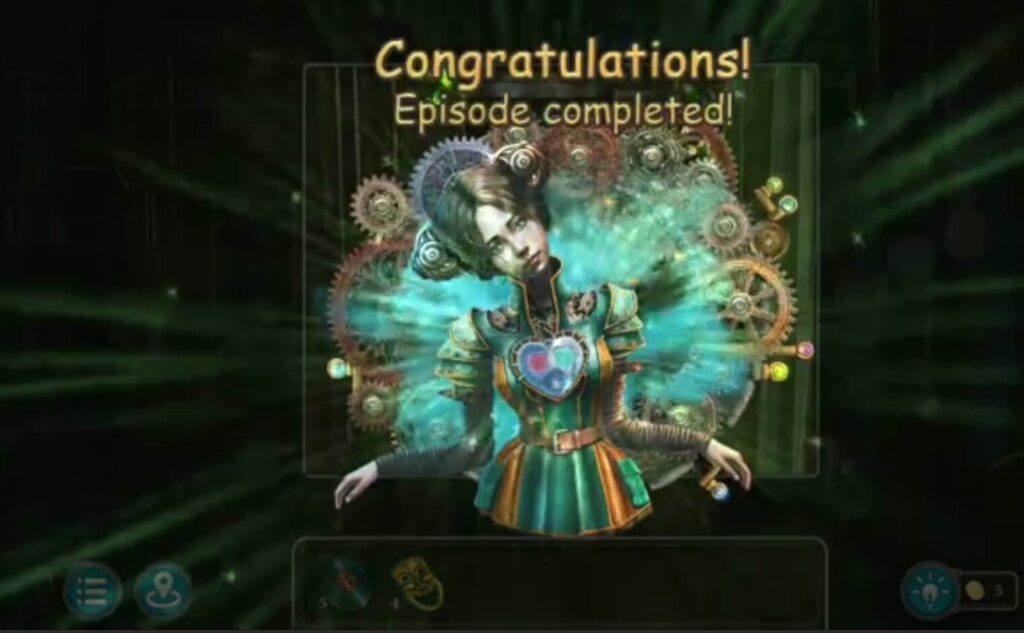
Put a heart (you made it) into the doll. You get a star, and this is the end.