Artifact Seekers Walkthrough | “Ancient Coast”
Welcome to the walkthrough of Artifact Seekers, an adventure game in the hidden object genre created by Five-BN. This walkthrough will show you how to solve all the puzzles and finish the game in the fifth chapter, “Ancient Coast”.

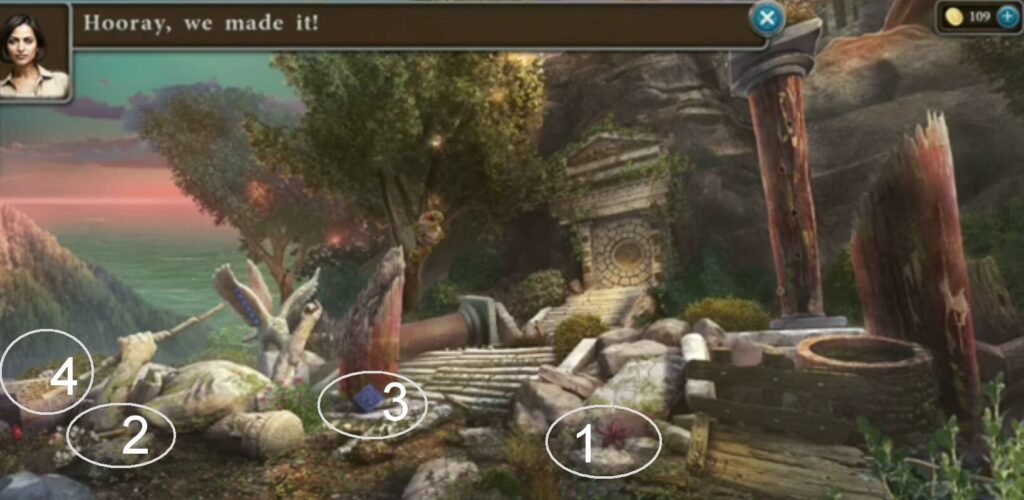
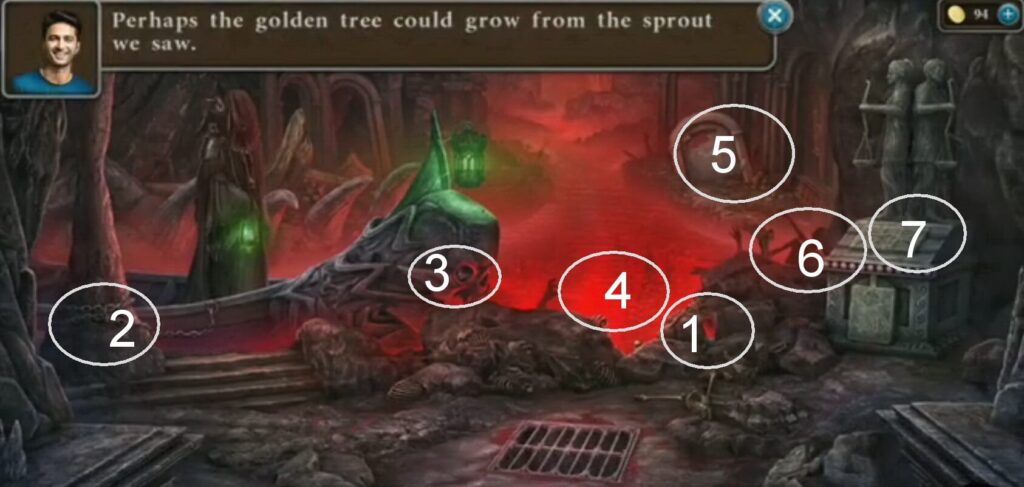
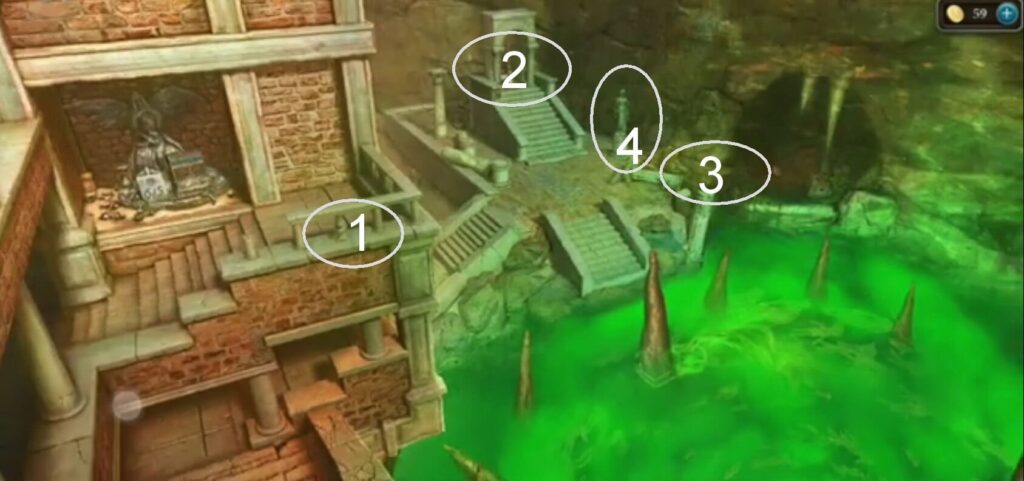
- A collection item.
- An olive.
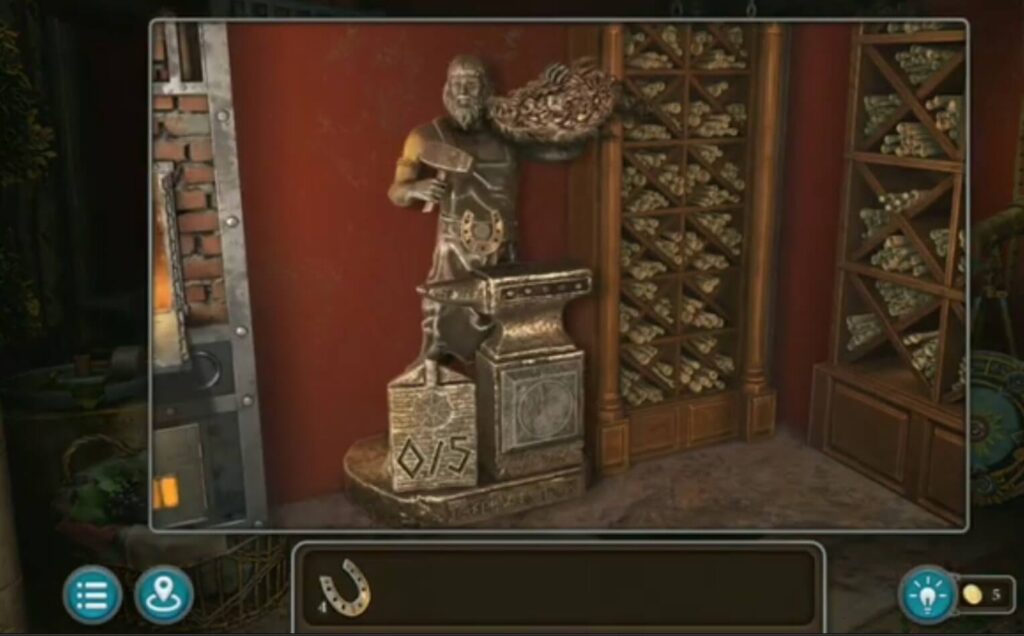
- A horseshoe.
- A morphing object.
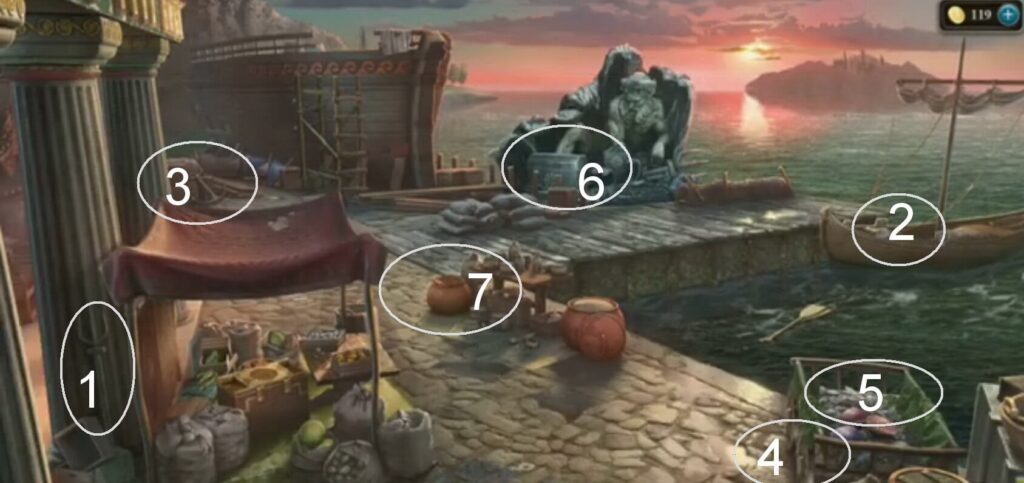
- A collection item.
- A fragment of the labyrinth, a disc fragment.
- A morphing object.
- A coin.
- A fish.
- A star.
- A horseshoe.
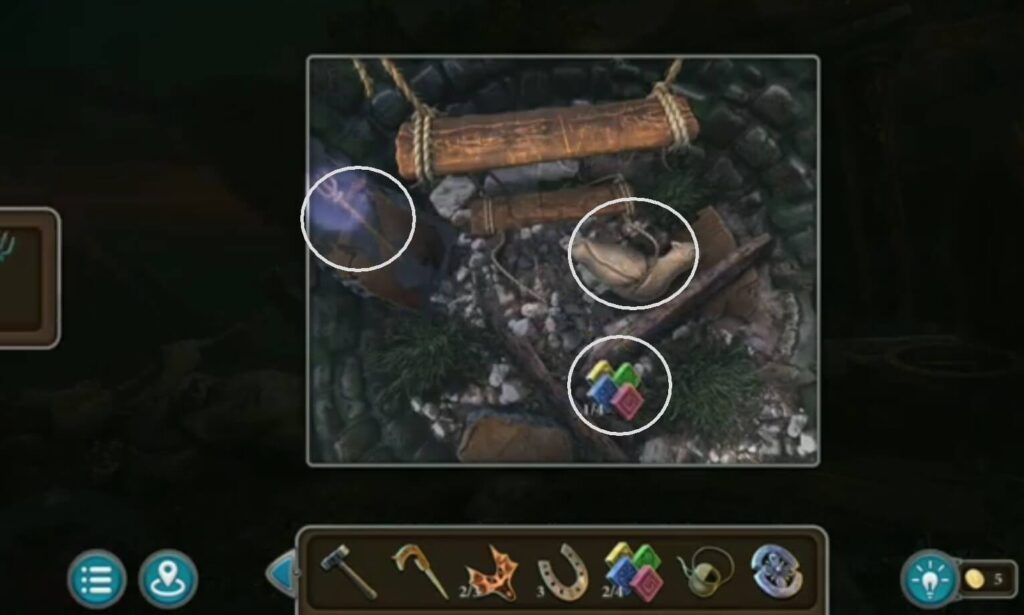
- Boards.
- A collection item.
- A morphing object.
- Convoluted clue.
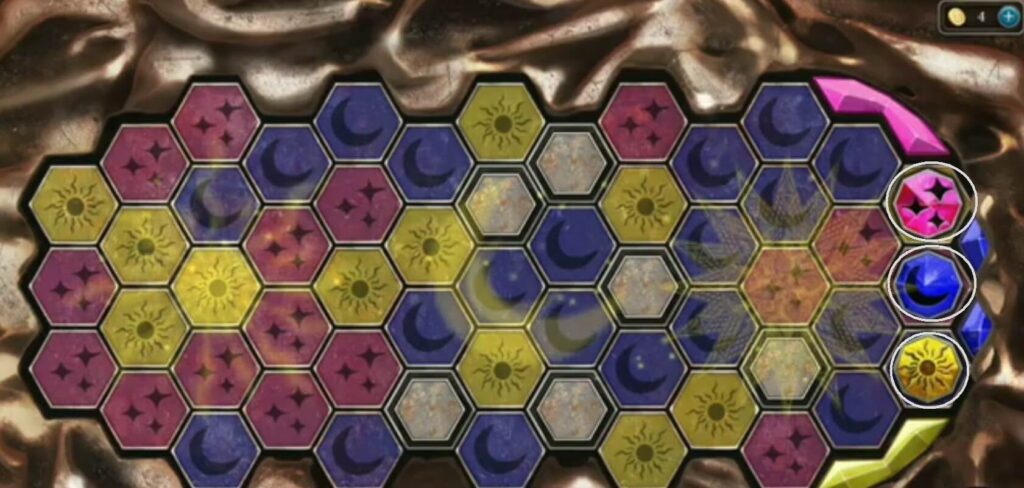
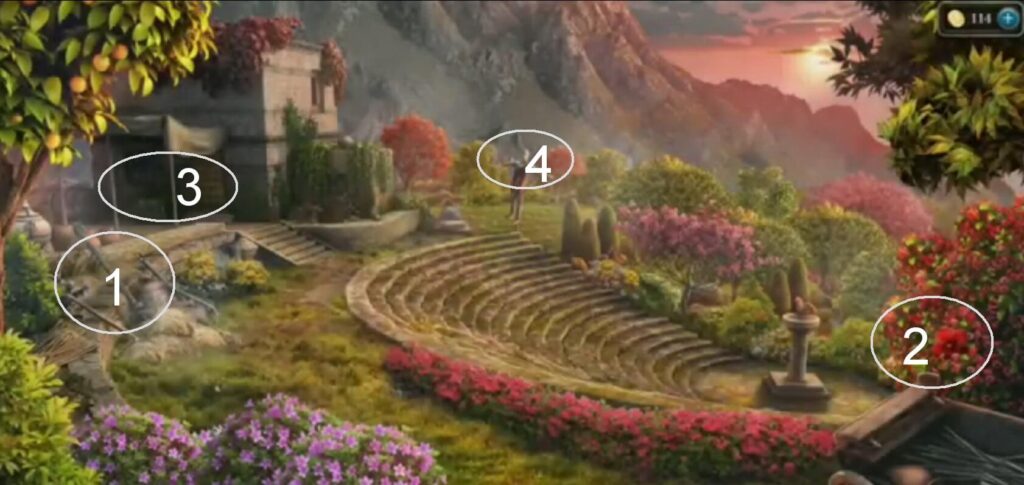
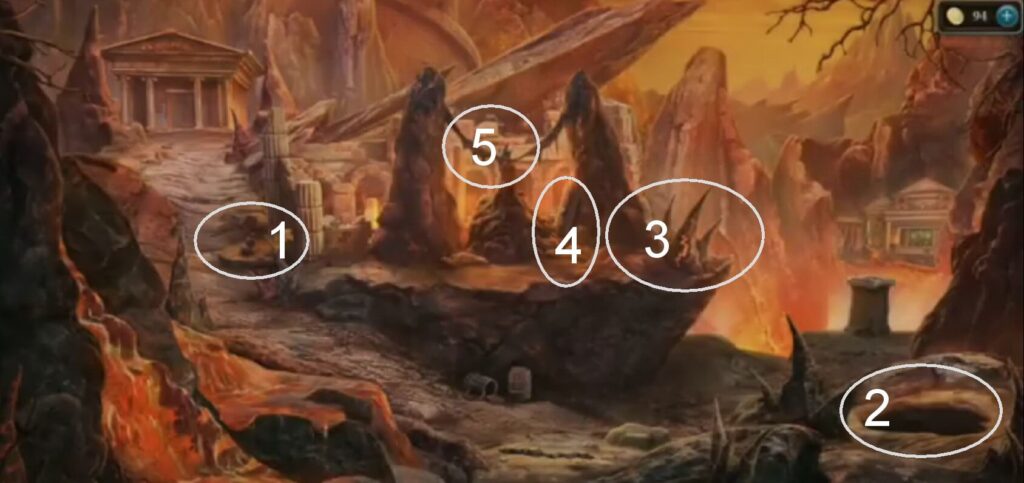
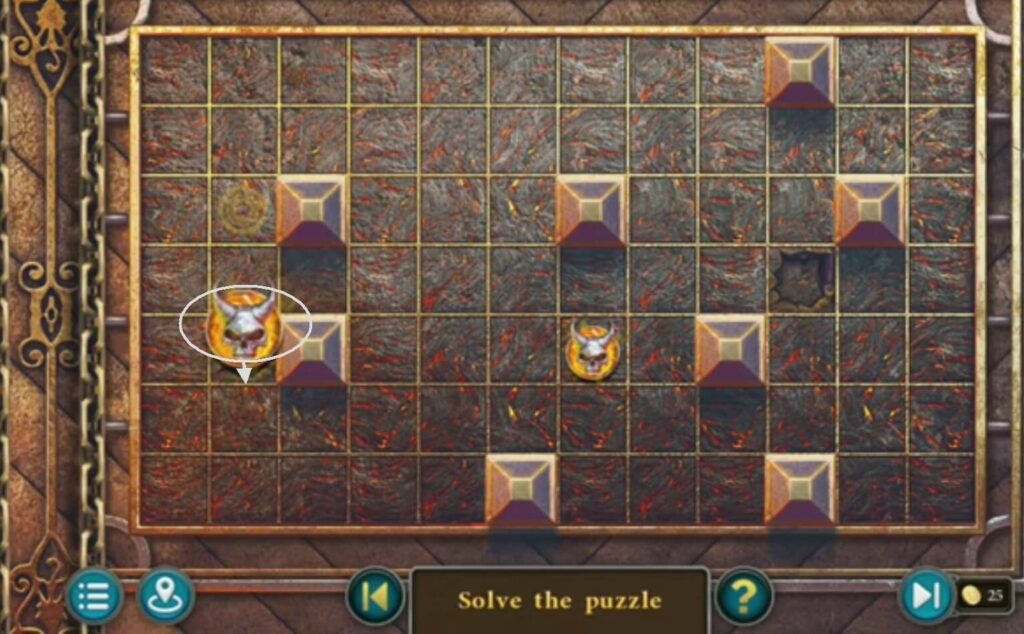
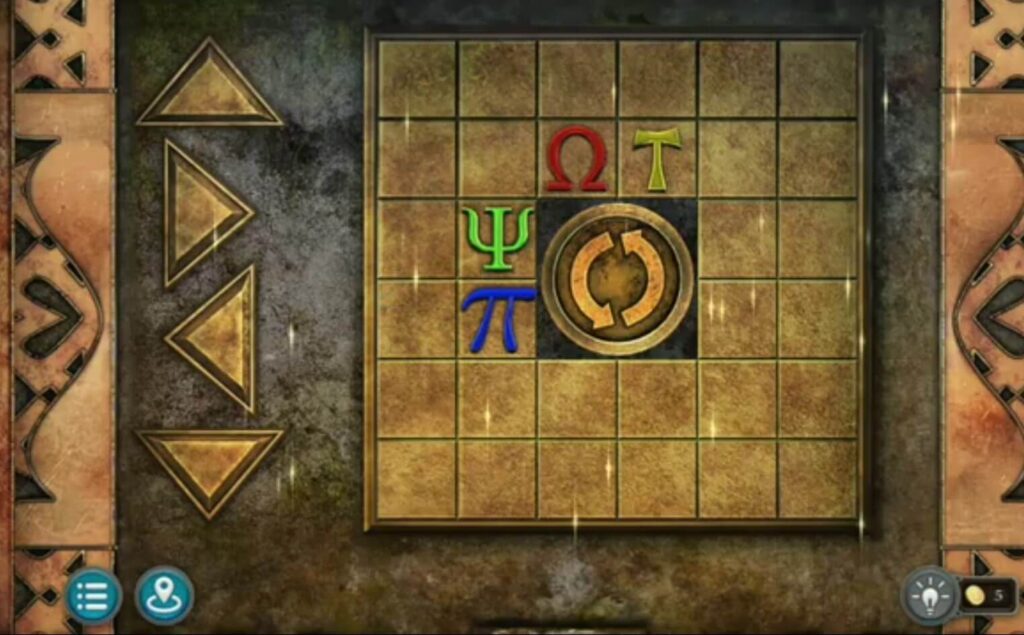
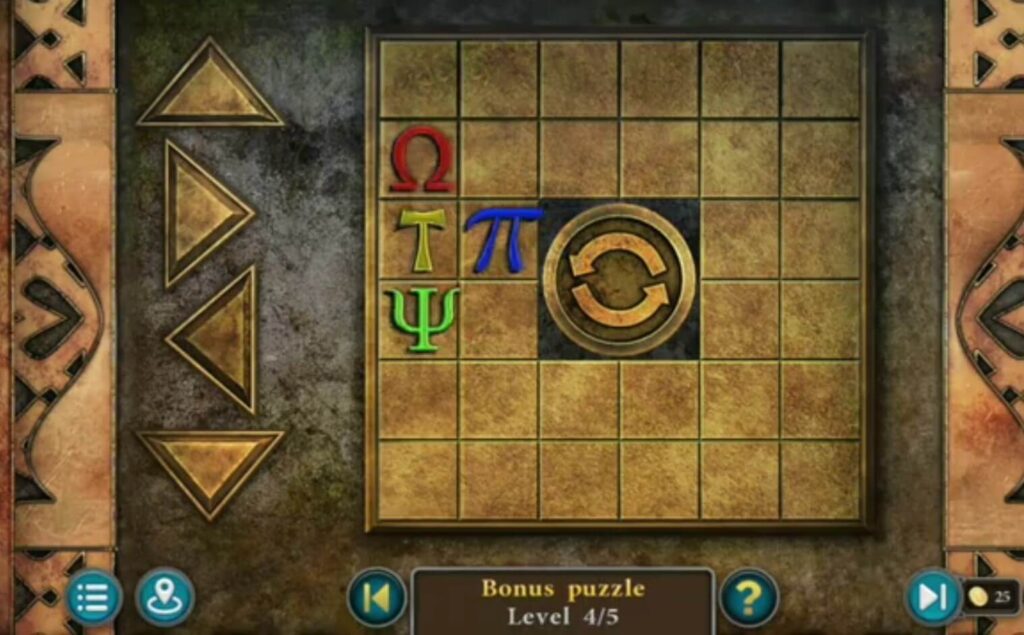
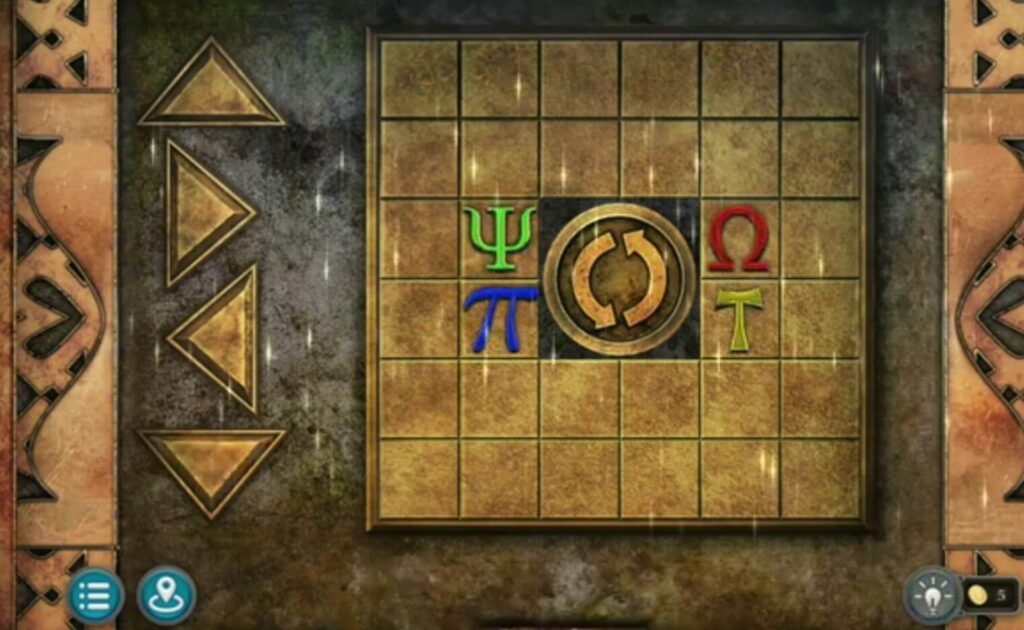
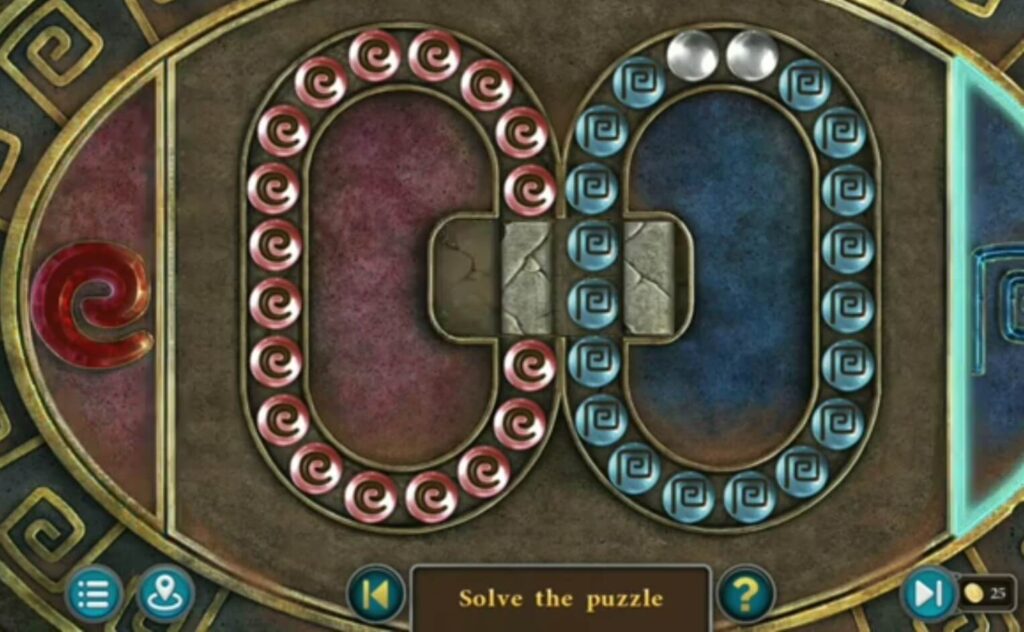
Bonus puzzle: Put all the horseshoes you found during the game. A five-level puzzle will appear. Move the elements sun, moon, and stars with the fields corresponding to those features, to bring them to the goal. When you solve it, you will get a star.
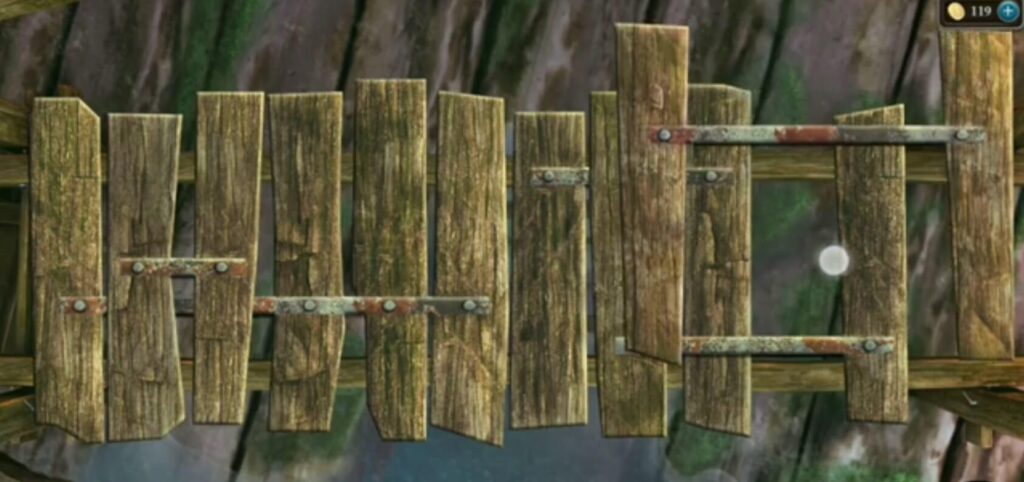
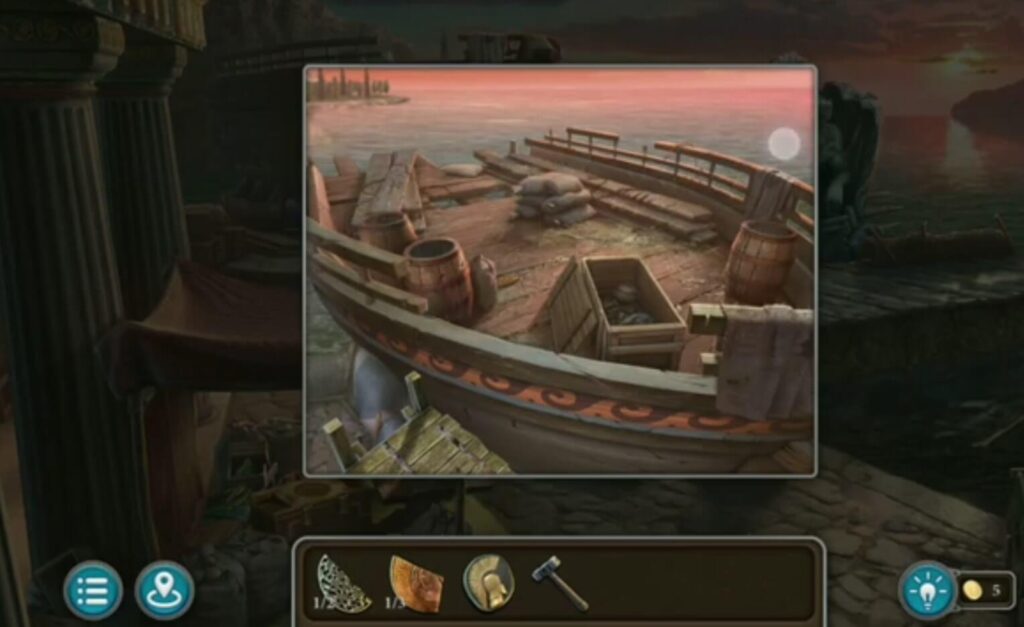
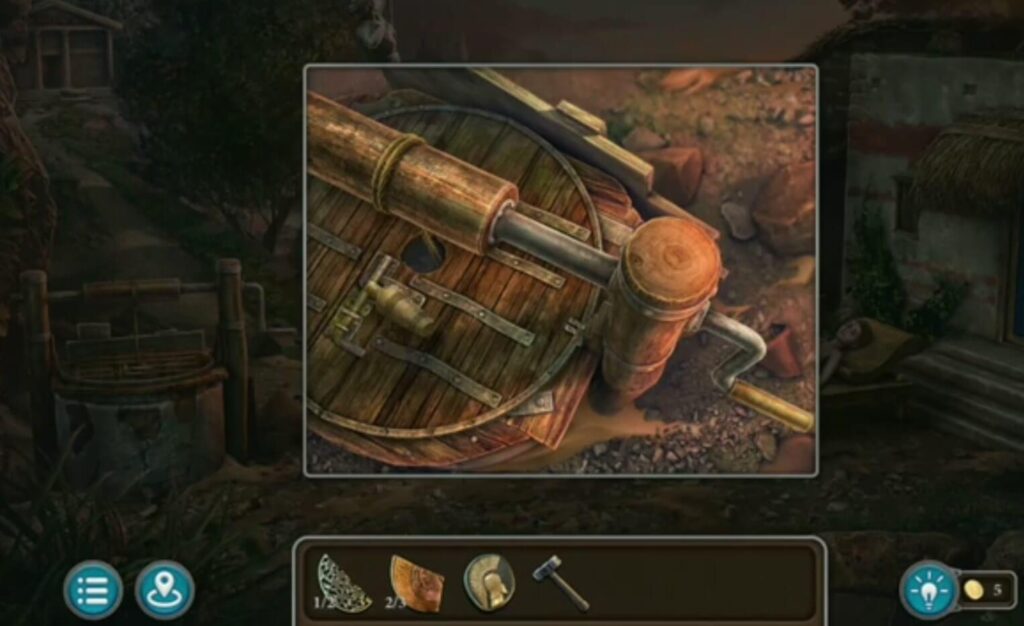
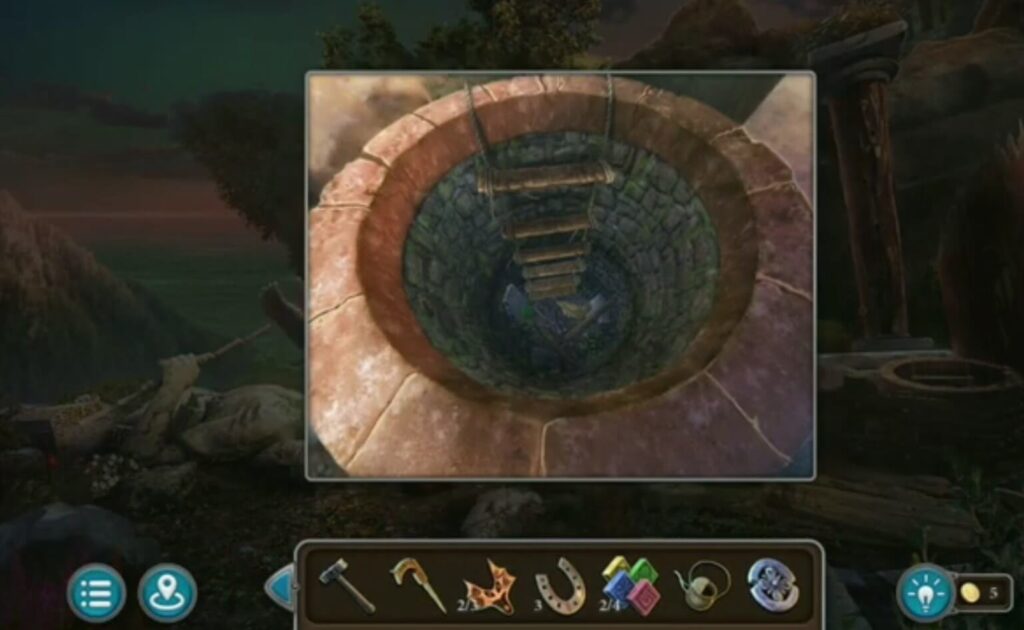
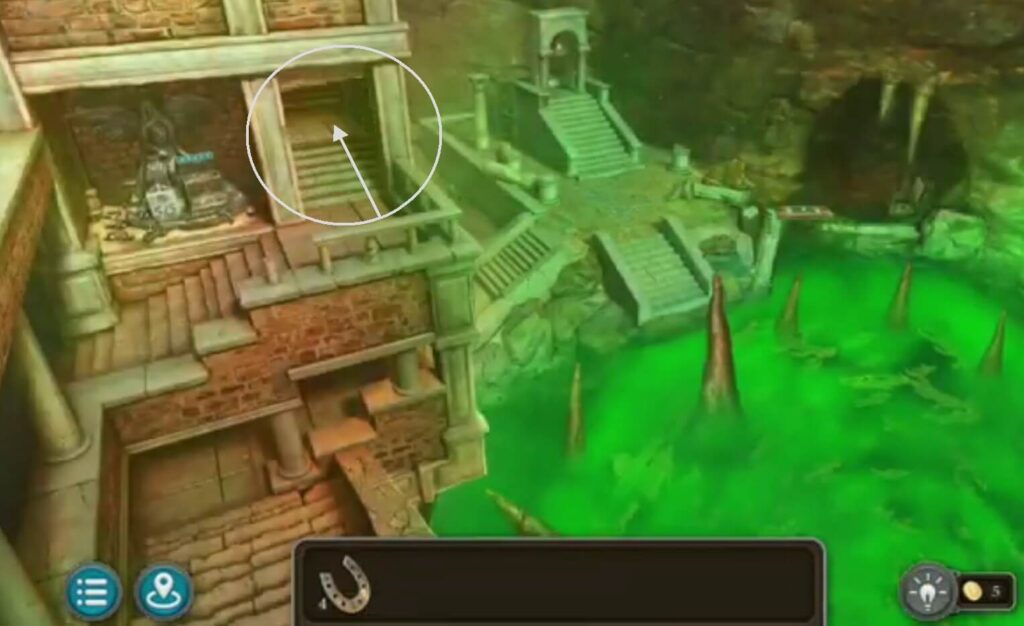
Arrange the boards (found in the room) to get to the ship’s top. You got a hammer and a disc fragment.
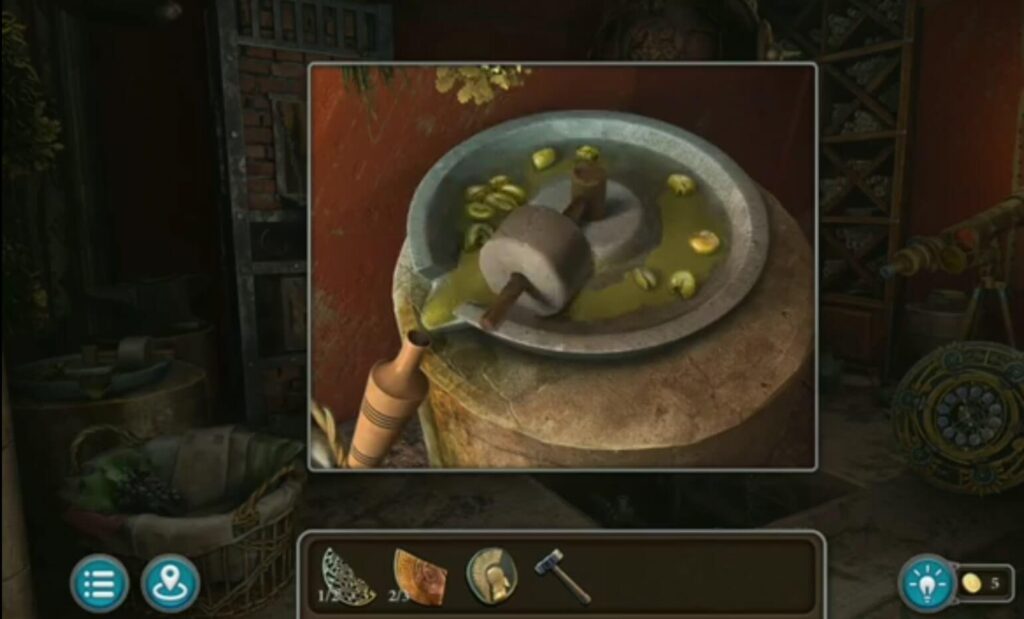
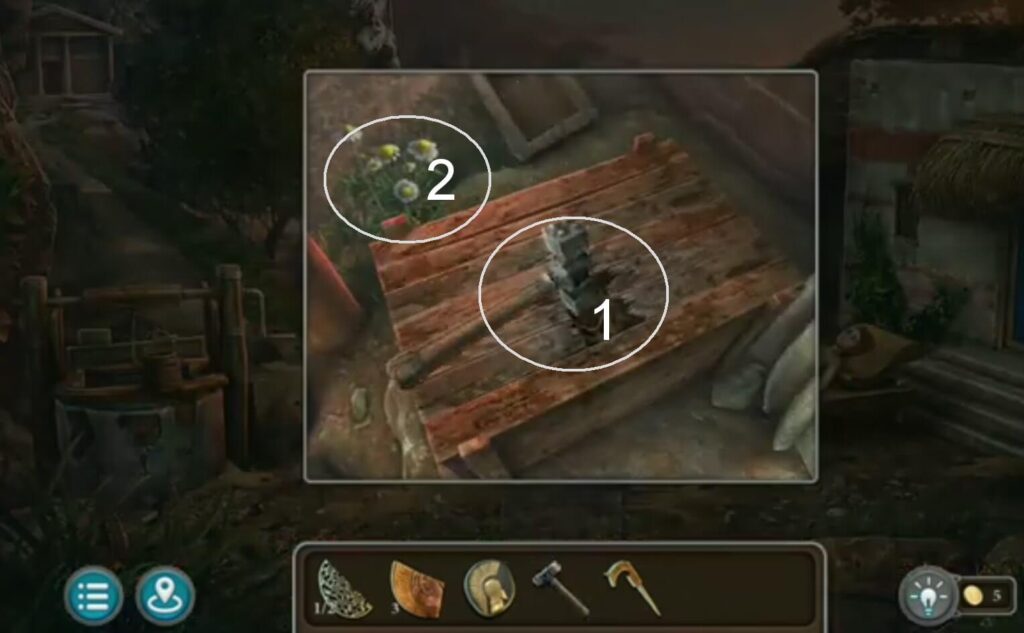
Put an olive and push it with a pestle and you will get an olive oil.
Pour the oil you made from the olives. You got a jigsaw, a disc fragment.
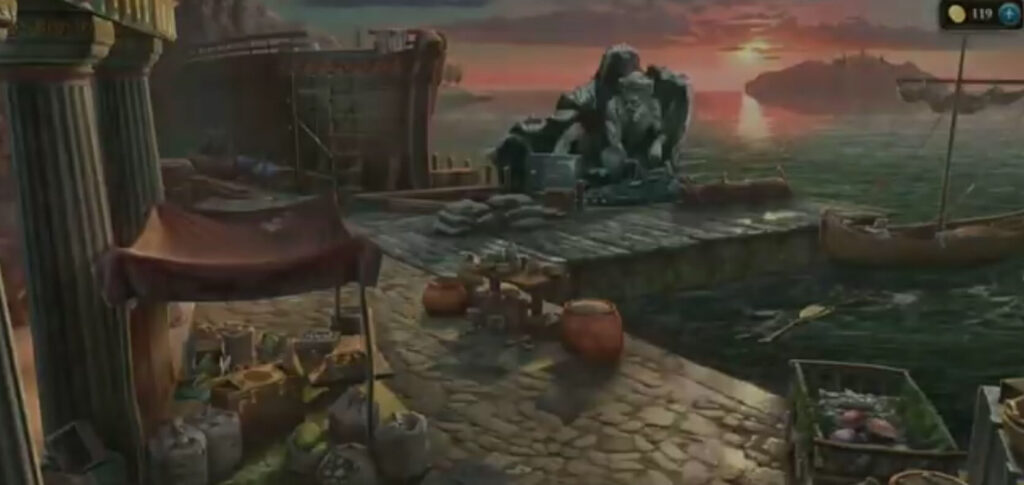
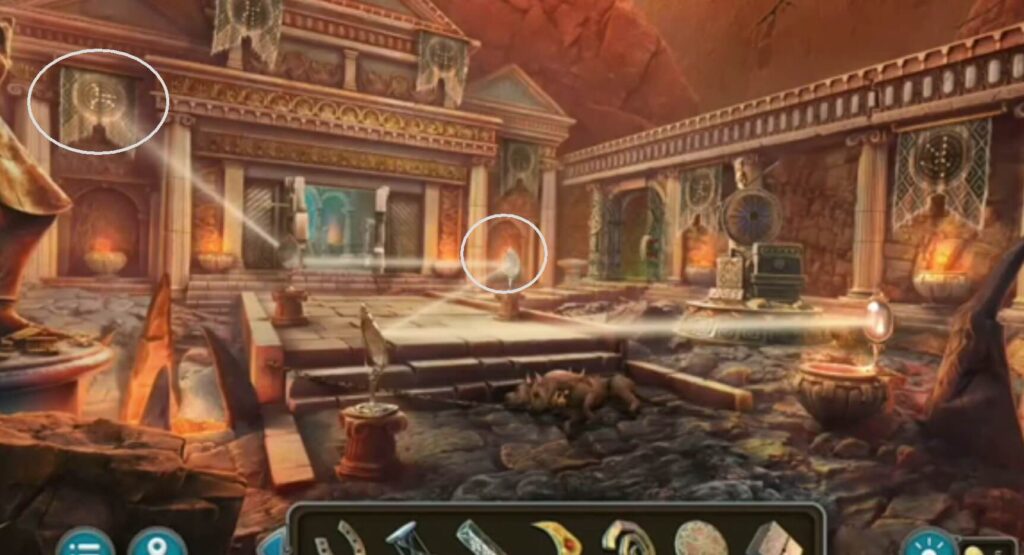
- Use a hammer (took it from the ship) to get a head of the Hydra and a fishing net.
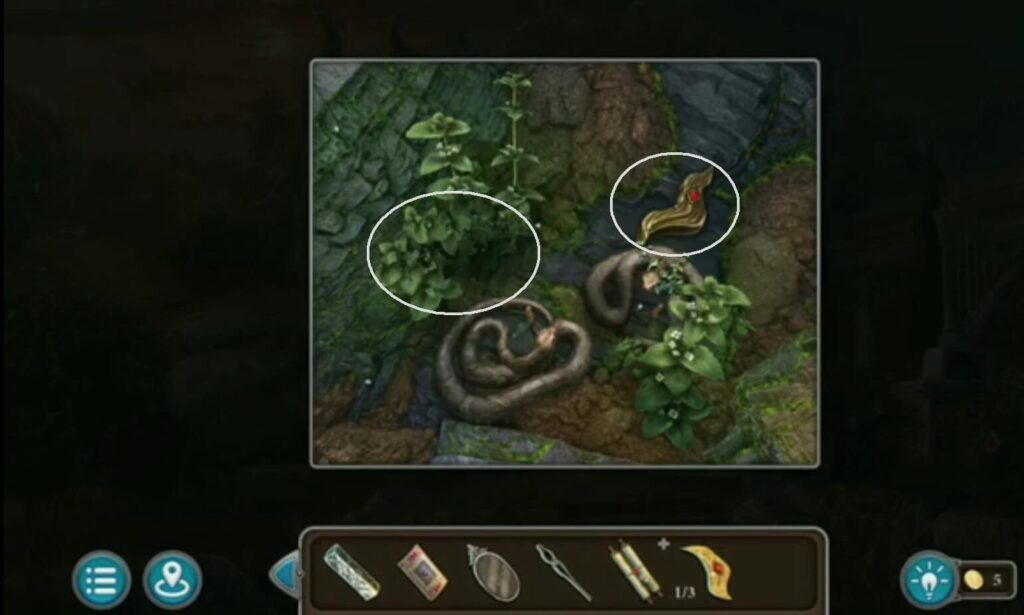
- Take a chamomile.
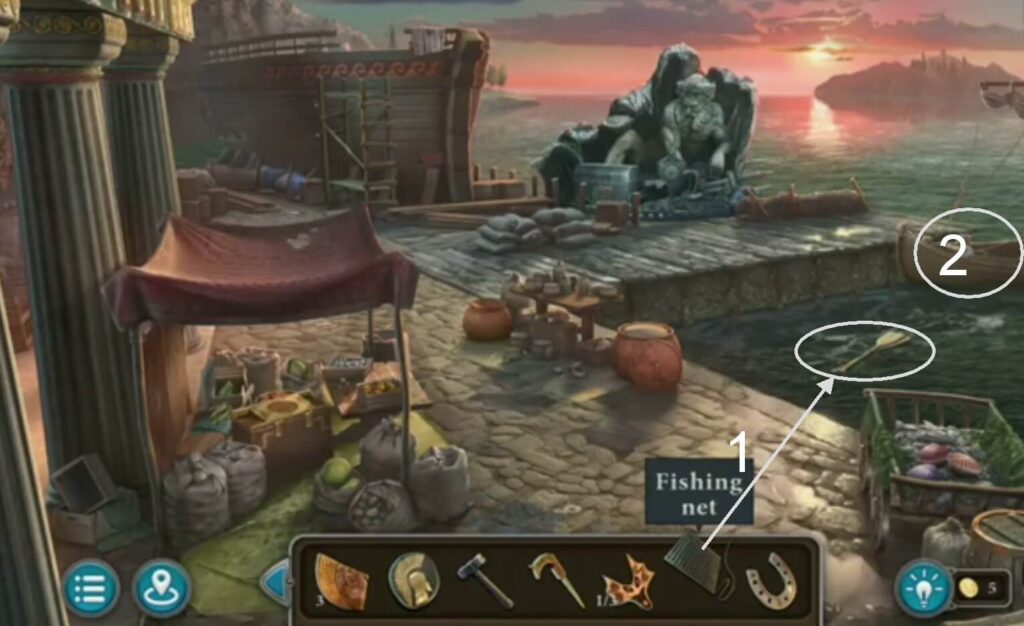
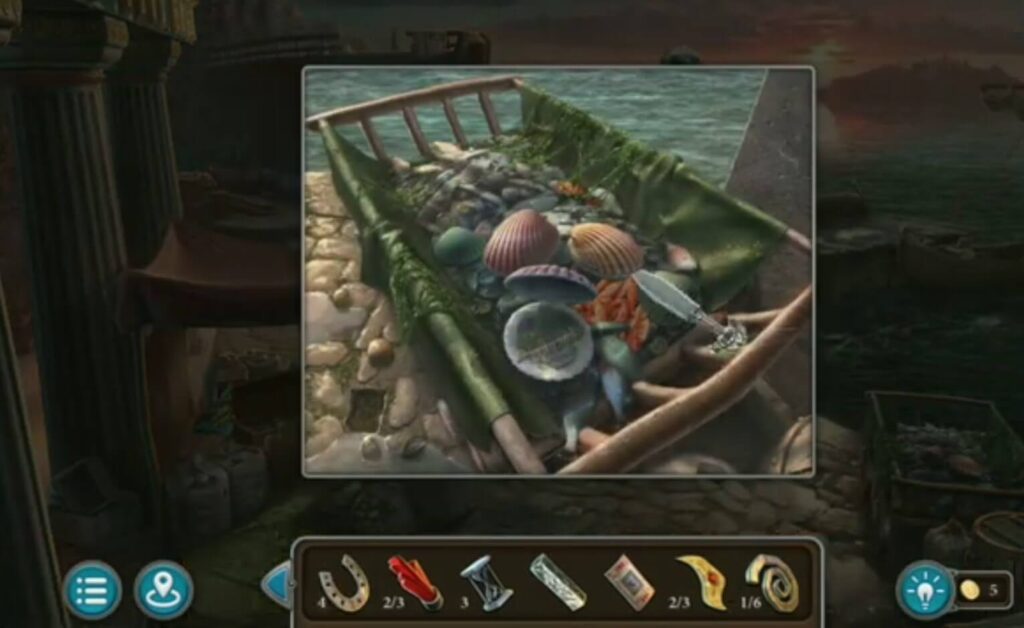
- Put a fishing net into the sea to get the oars.
- Put oars on the boat.
- A morphing object.
- A collection item.
- A horseshoe.
- A collection item.
- A morphing object.
- A coin.
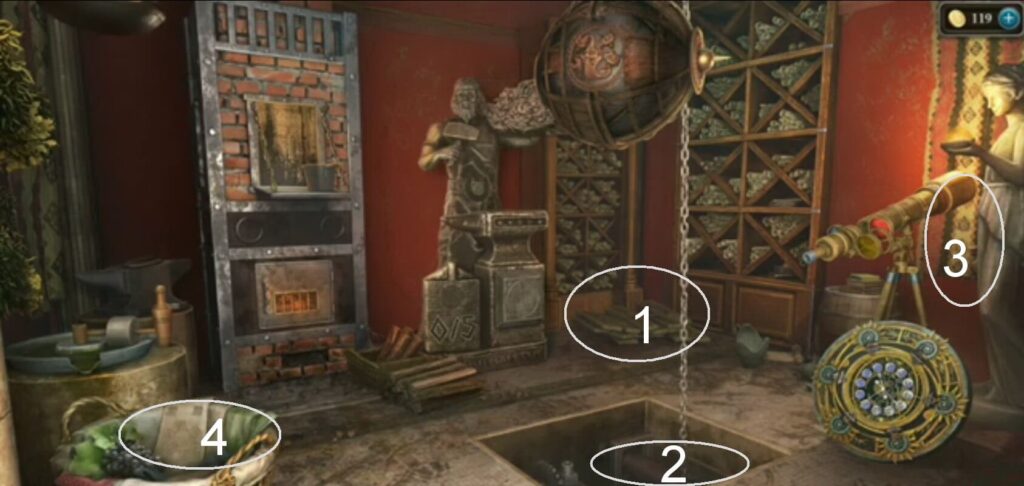
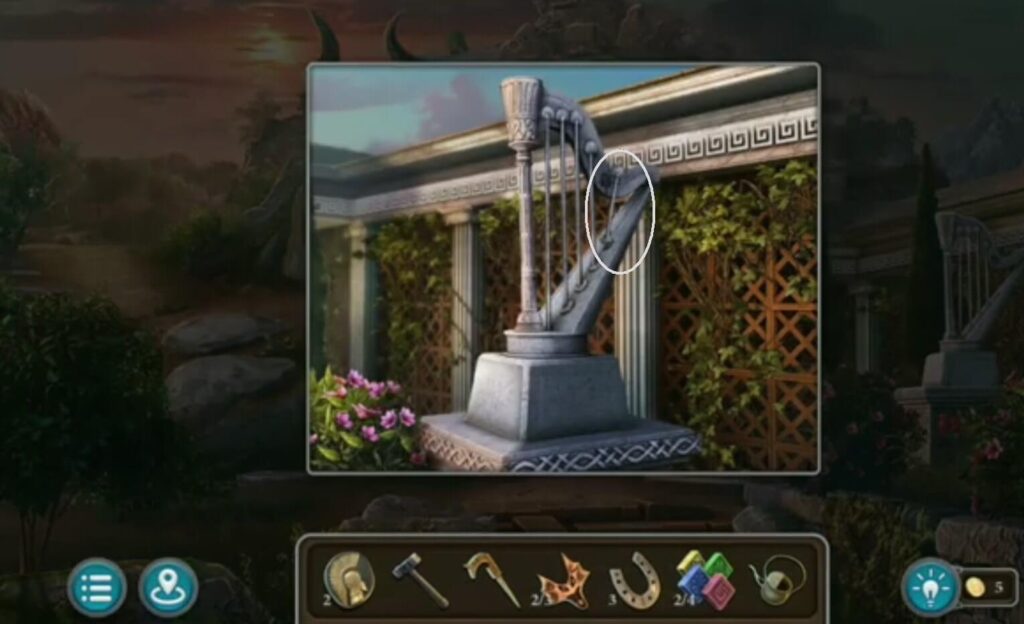
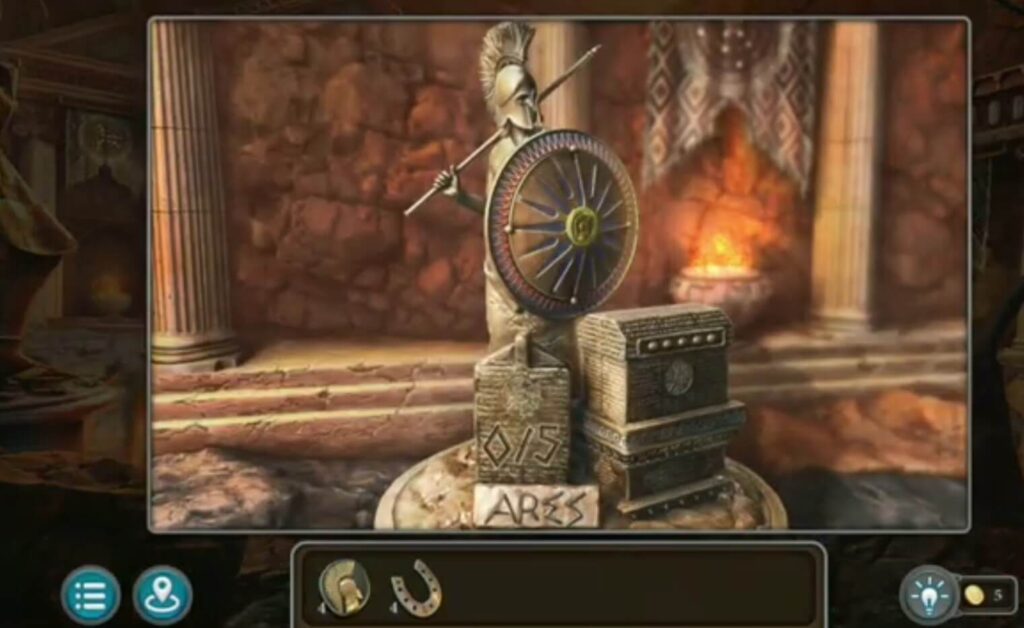
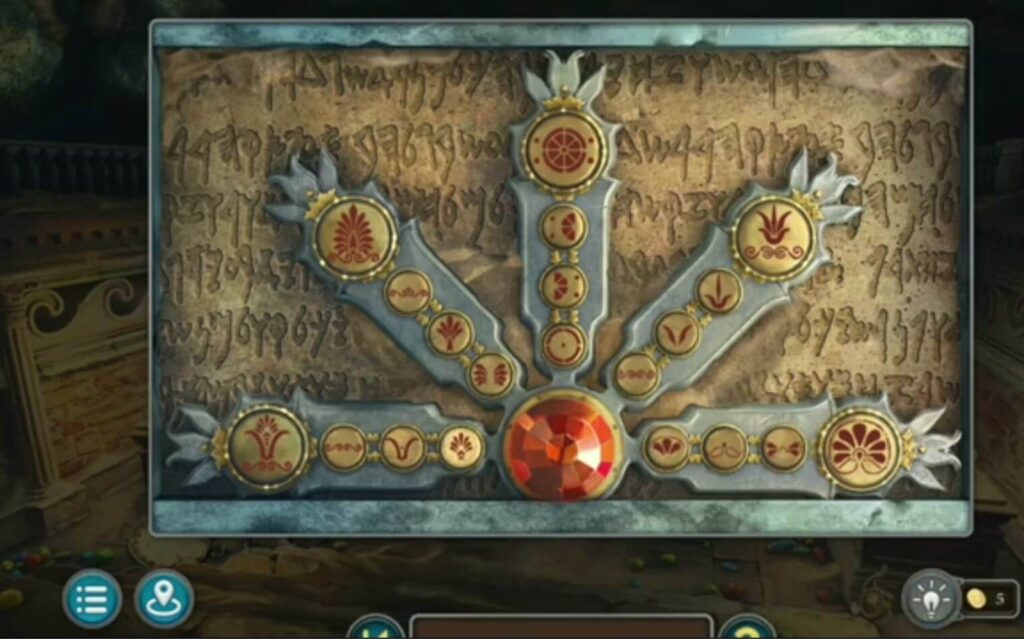
- Parts of the pedestal.
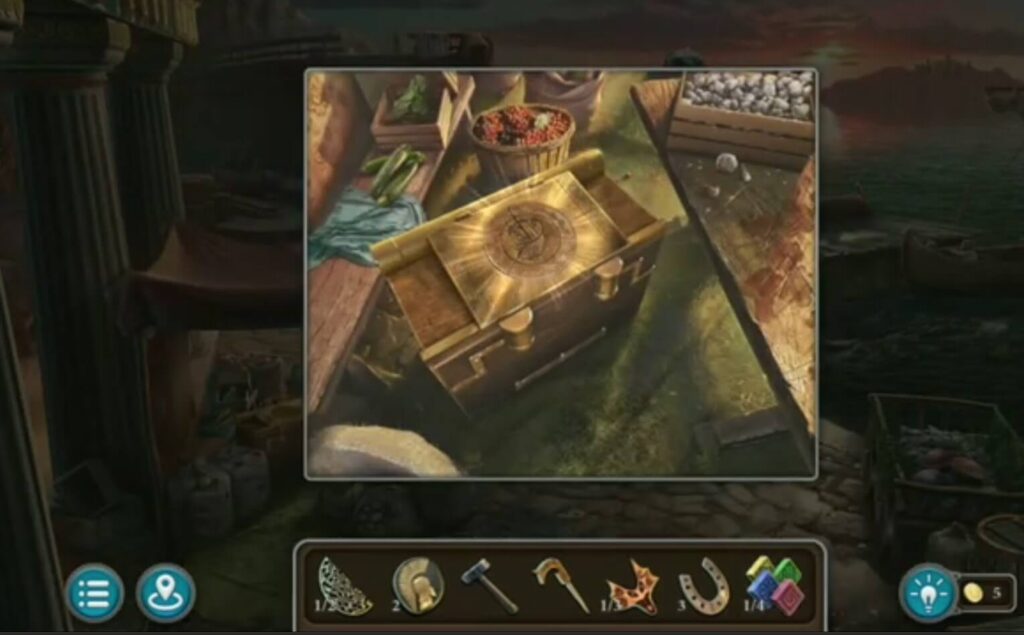
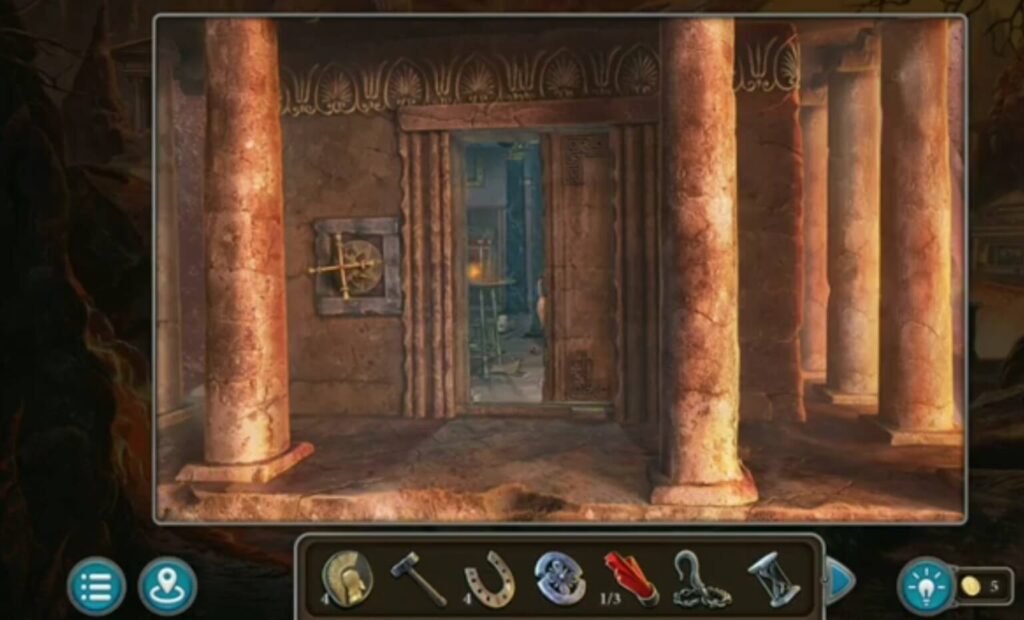
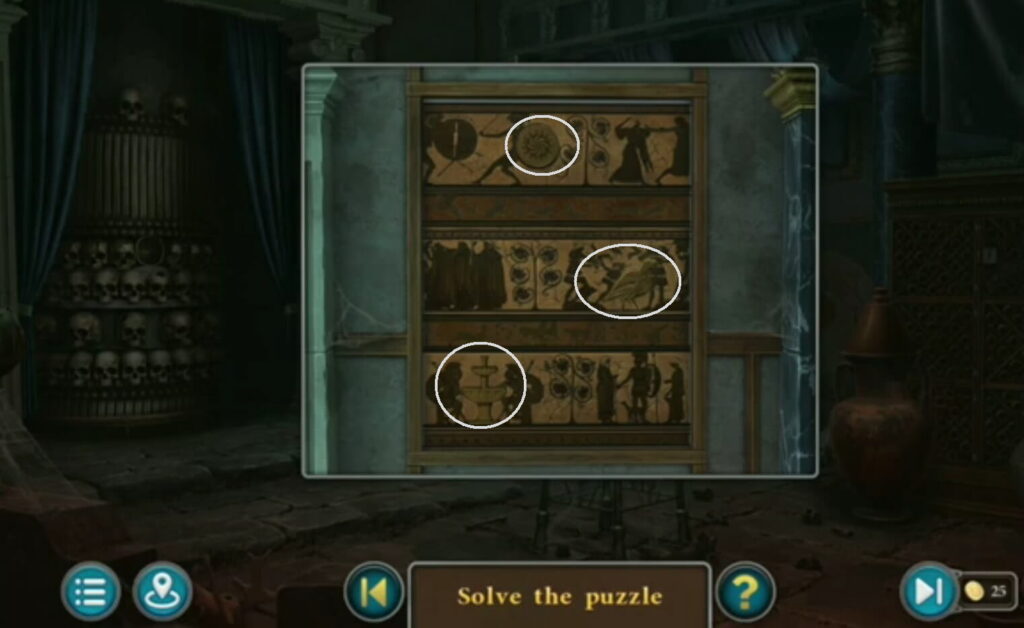
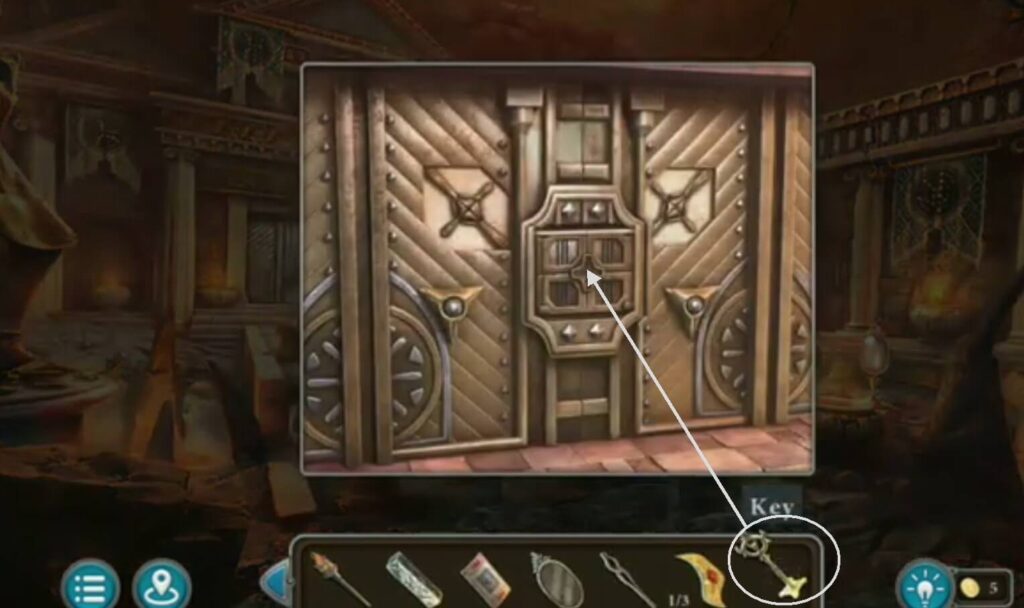
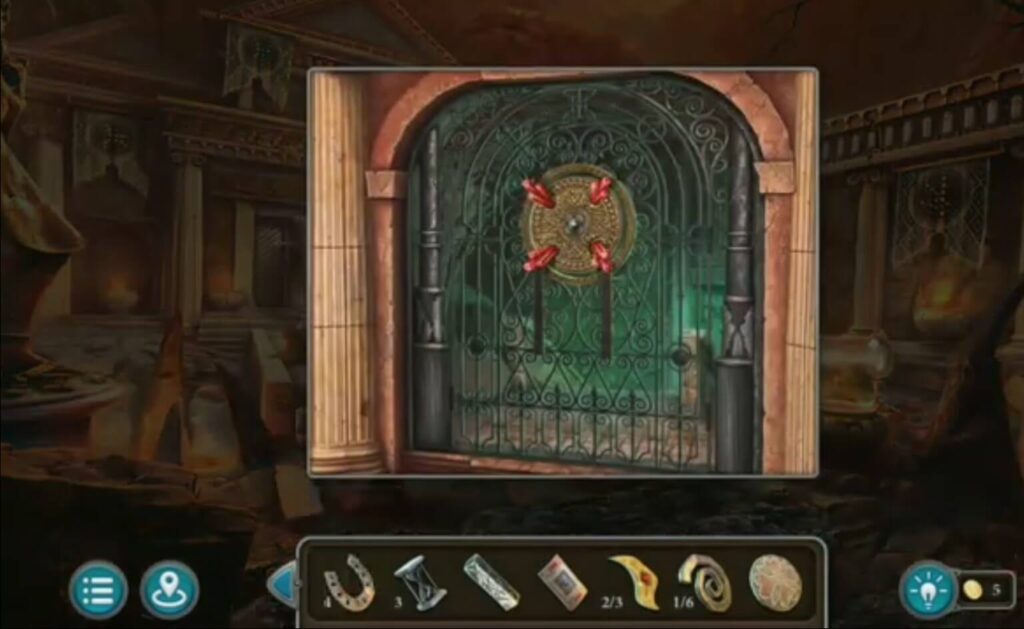
Put parts of the disc. A puzzle will appear. Solve the puzzle by arranging the elements to match the recesses above. You got a handle and a sign.
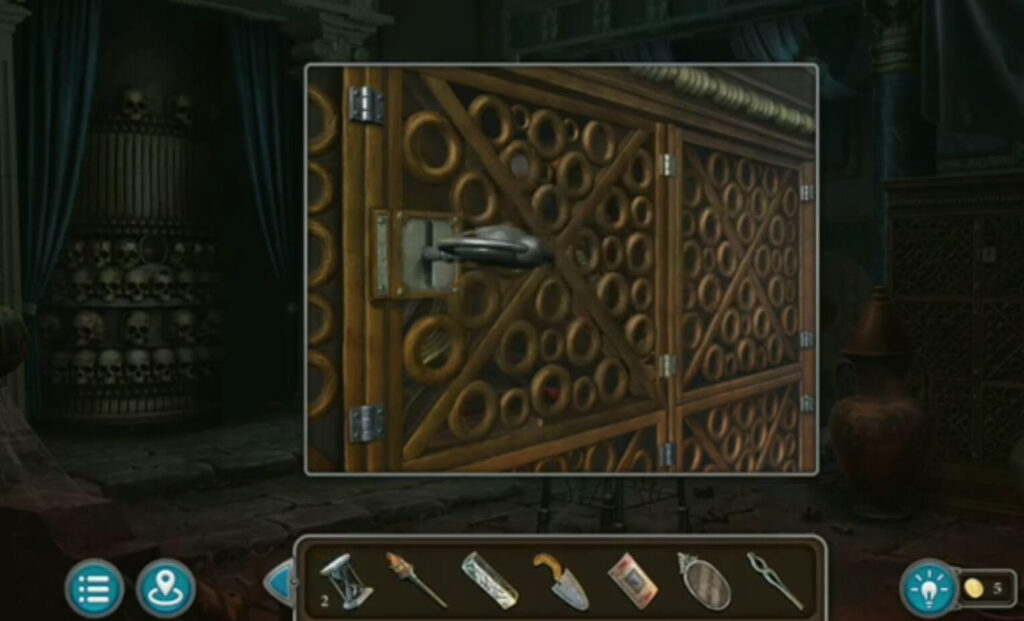
Solve by putting the sign to start the puzzle. The solution should be like the sign. A door will open when you solve it. Inside is a watering can, and garden shears.
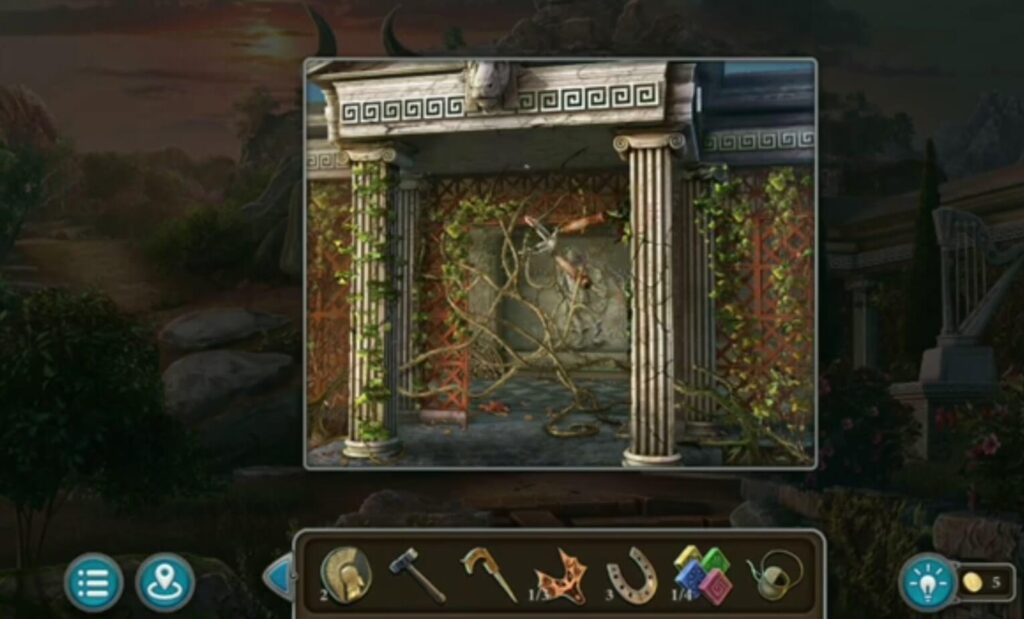
Use garden shears(got it when you solved a puzzle) to cut weeds. You got another Hydra head and a fragment of a labyrinth.
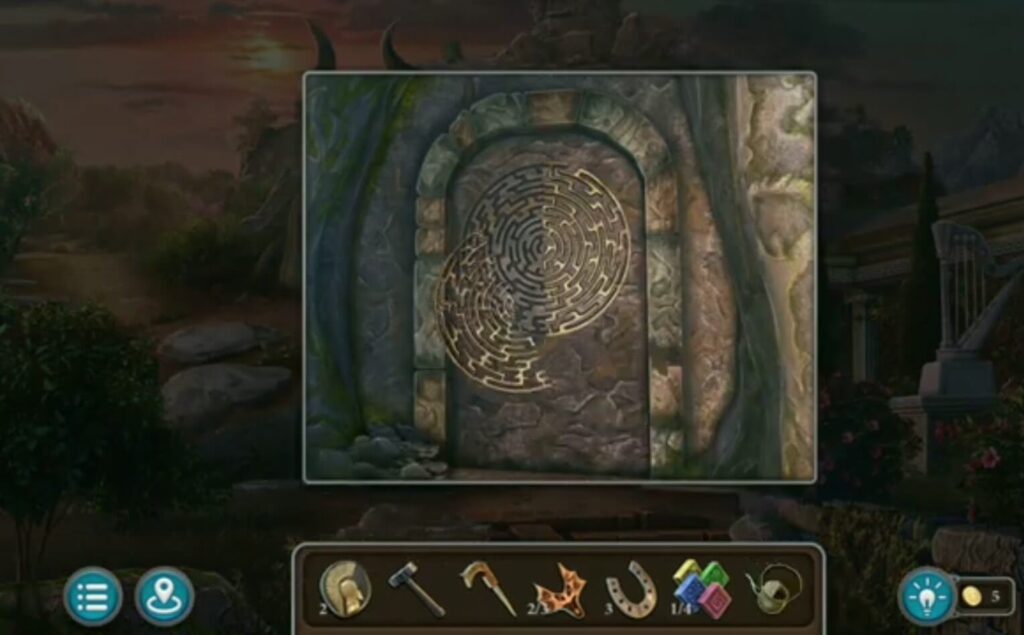
Put two fragments of a labyrinth (found behind weeds, and in the boat), and a labyrinth door will open.
Pull the lever to open the door.
Take a board. Put it so you can get in. Take a lever.

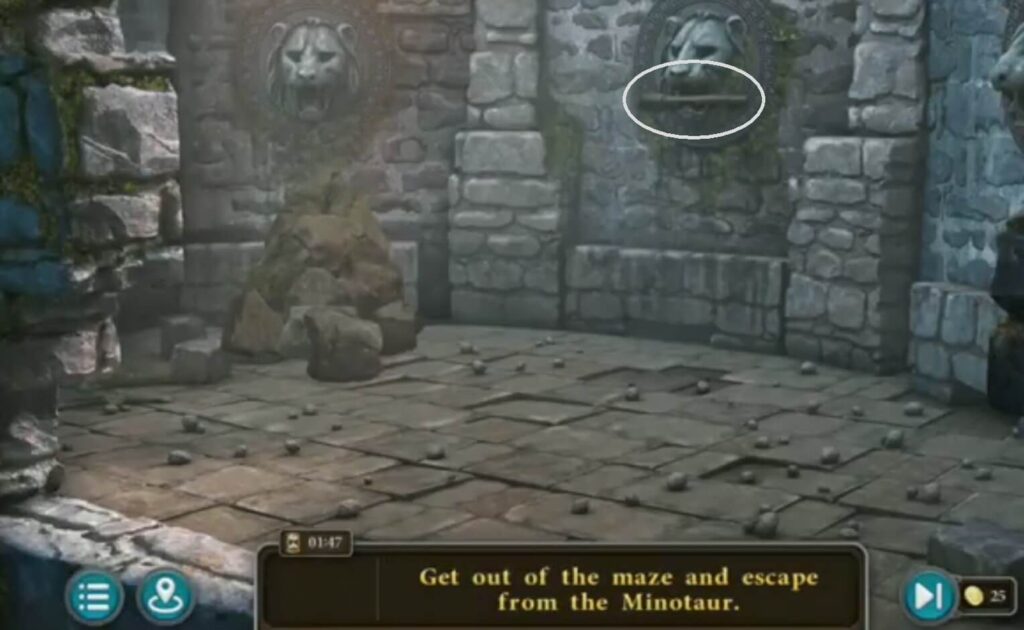
Put a lever (got it from the lion statue) and pull it down. A door will open.
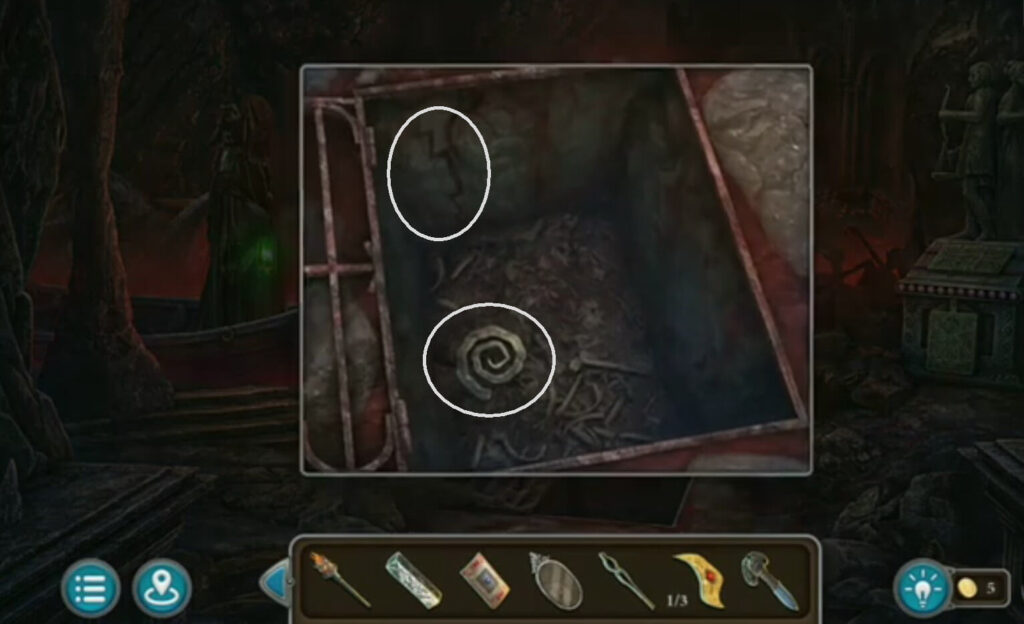
Press the wall decoration there, and the wall will move.
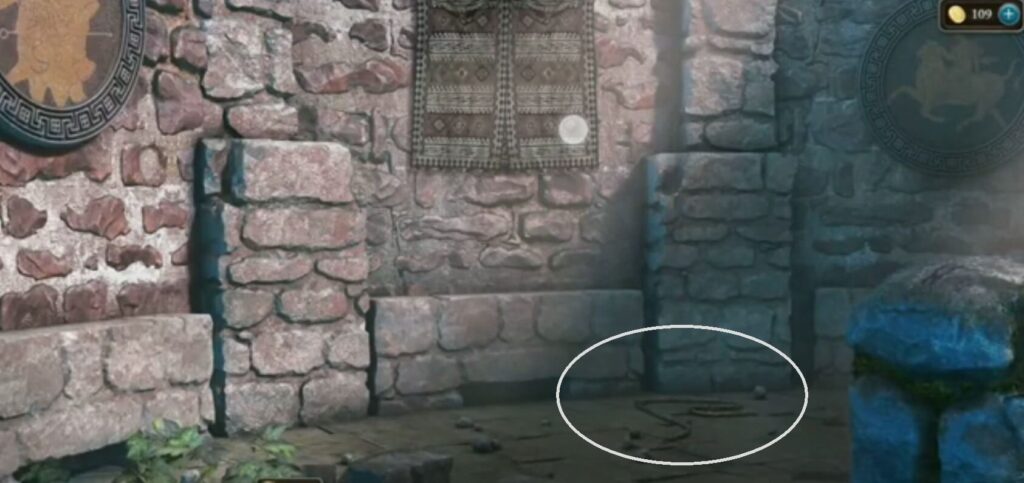
A rope.
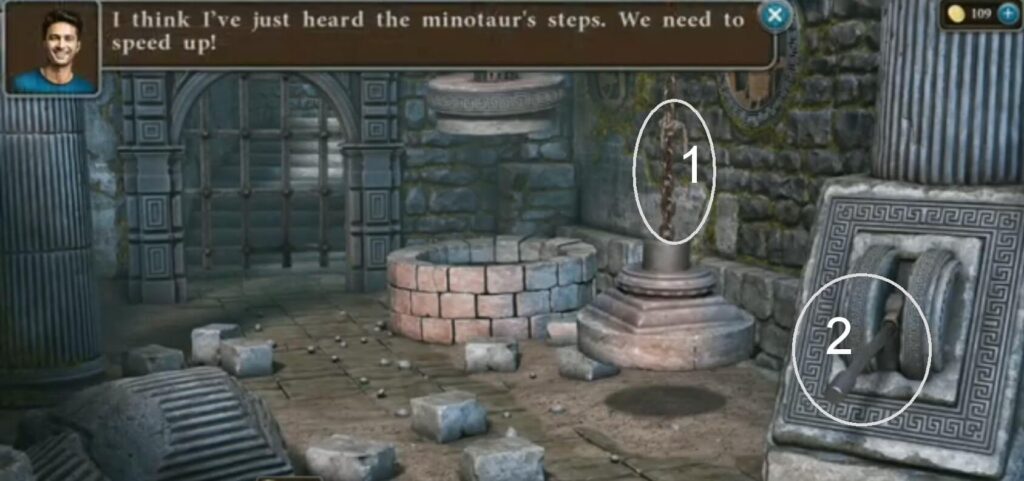
- Put a rope to get together the chains.
- Pull down the lever. The bars will rise.
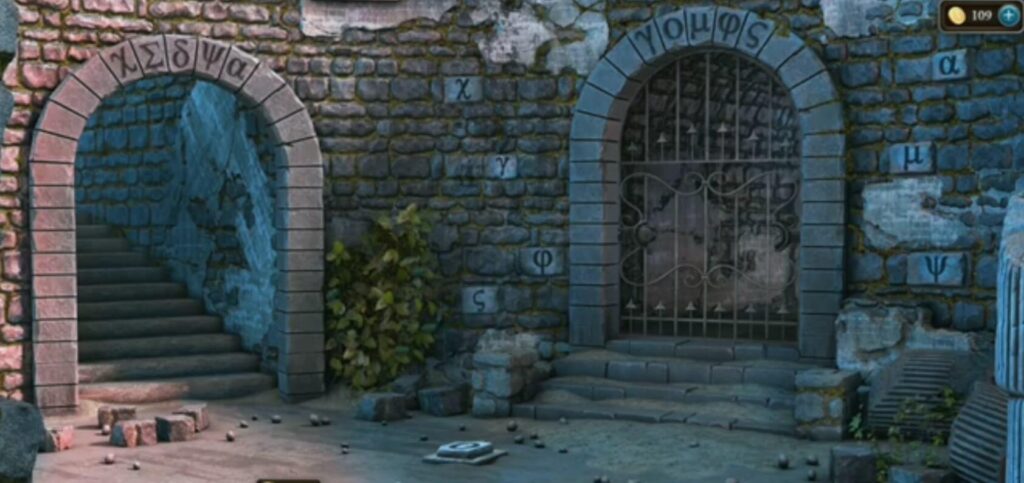
Press letters that are above the entrance to open the entrance.

A sword fragment.
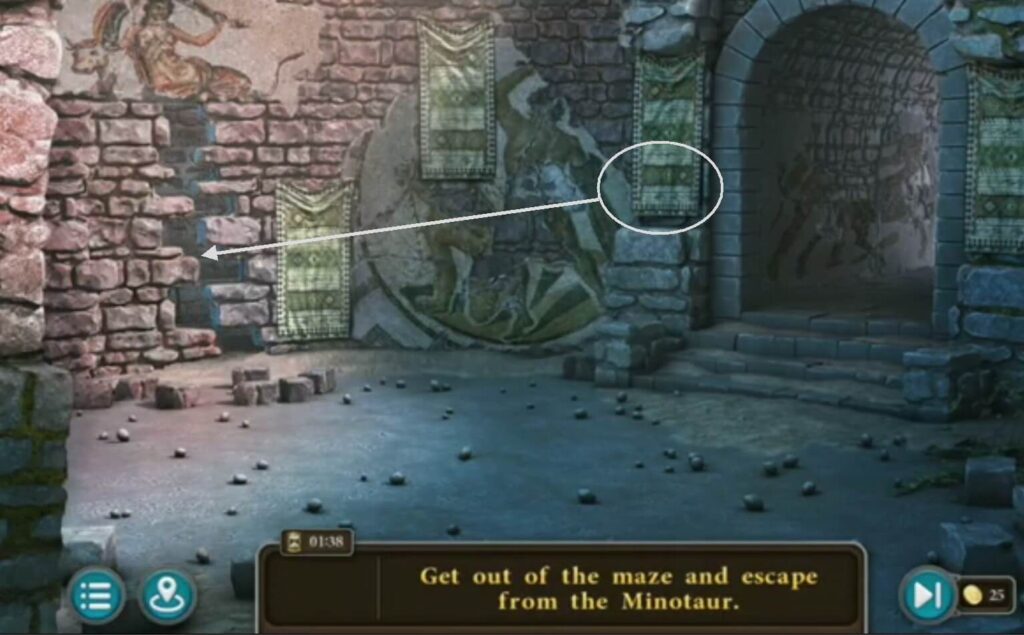
Take a sword fragment and cut plants to get out.
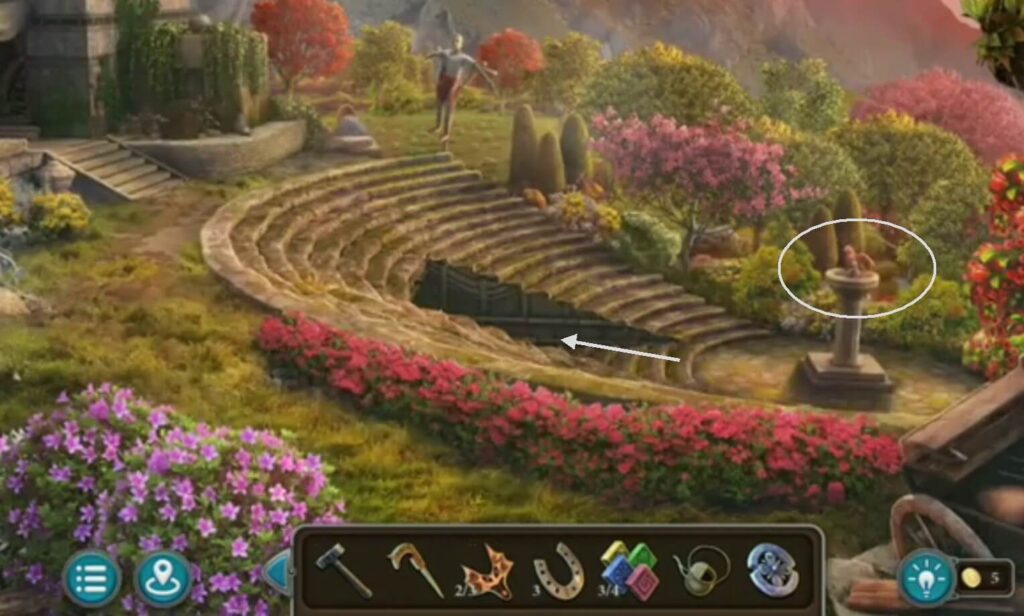
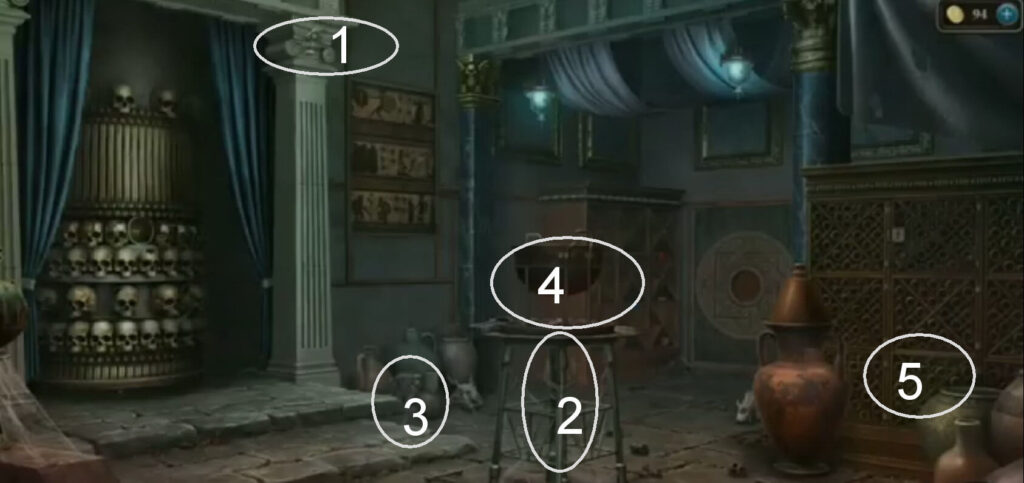
Put the string (you found next to the monument) into the harp. You got a medallion and a ladder.
Put a ladder (got it from a harp) and you got a parts of pedestal, a collection item, and a bird figurine.
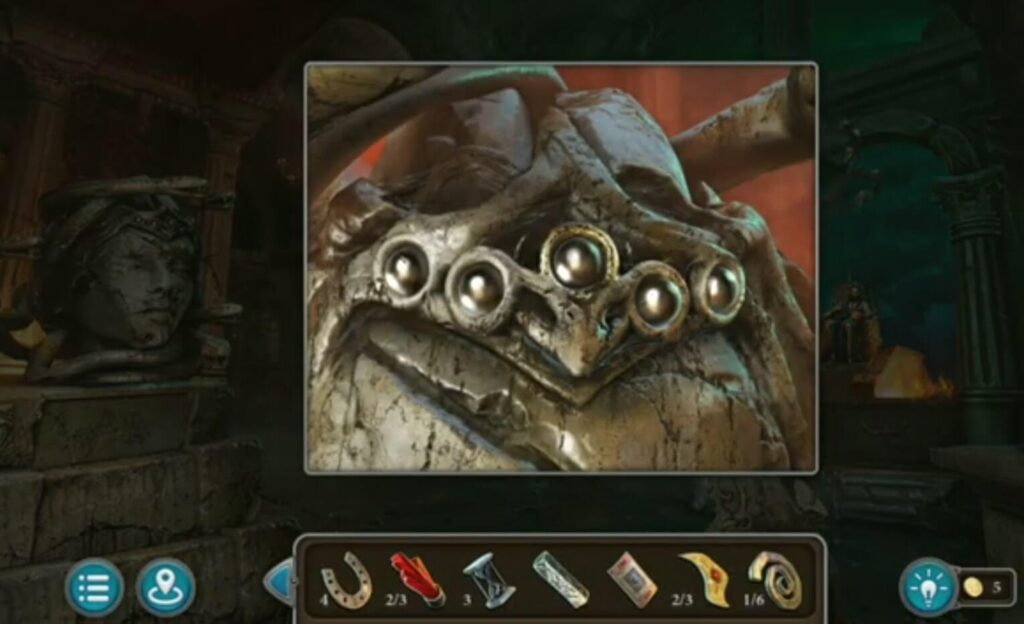
Put a bird figurine( found it when you put a ladder into the hole), and a hidden way will show. Inside is a Hydra head, a horseshoe, and pegs.
Put pegs (got it from the hidden room) and hit it with a hammer. You got a key cross, a part of the pedestal, and a coin.

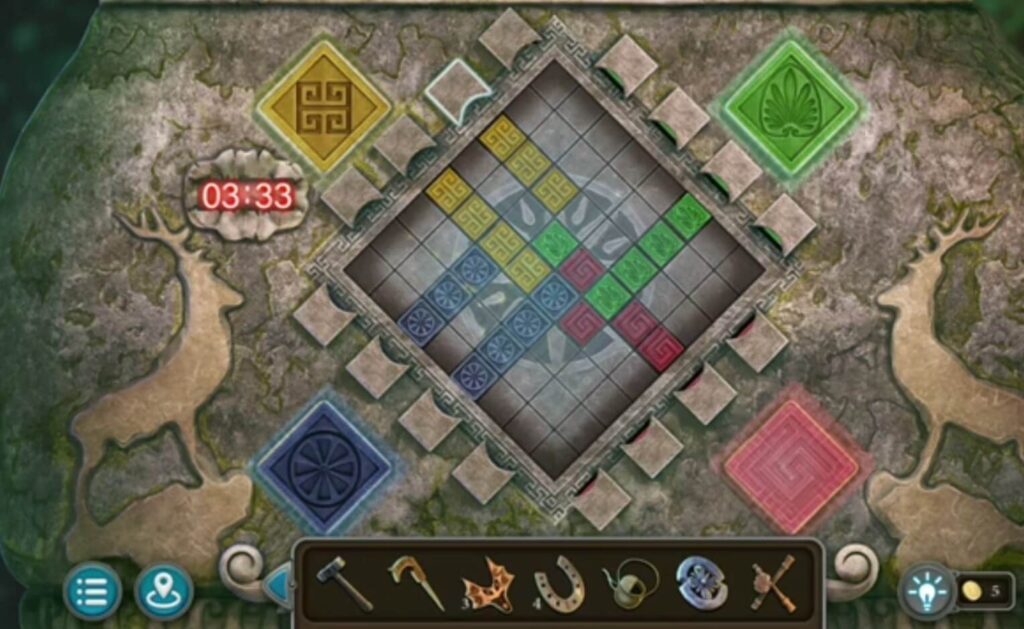
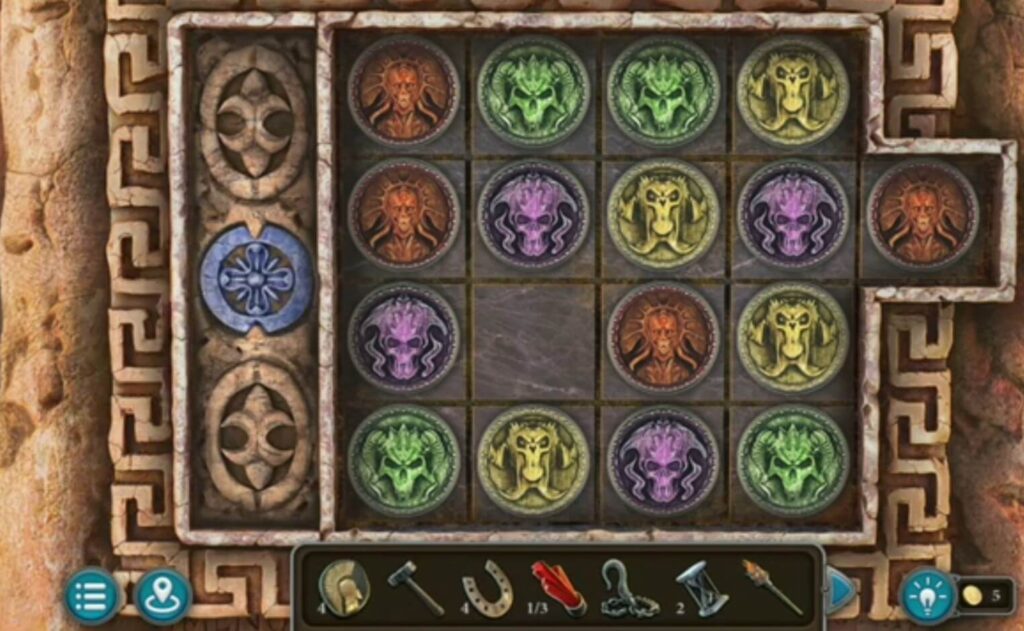
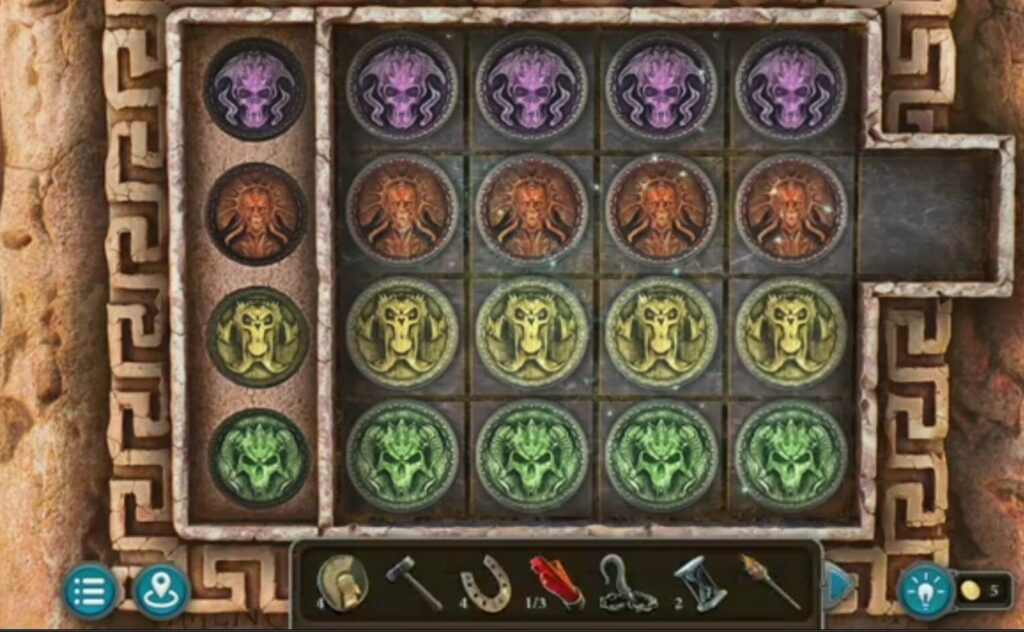
Put parts of the pedestal you collected during the game. A puzzle will appear, with a time countdown. You have 4 minutes to solve it. Move the elements so that the same element passes over an element of the same color and pattern already on the board. When you solve it, a scroll will appear, and a star.

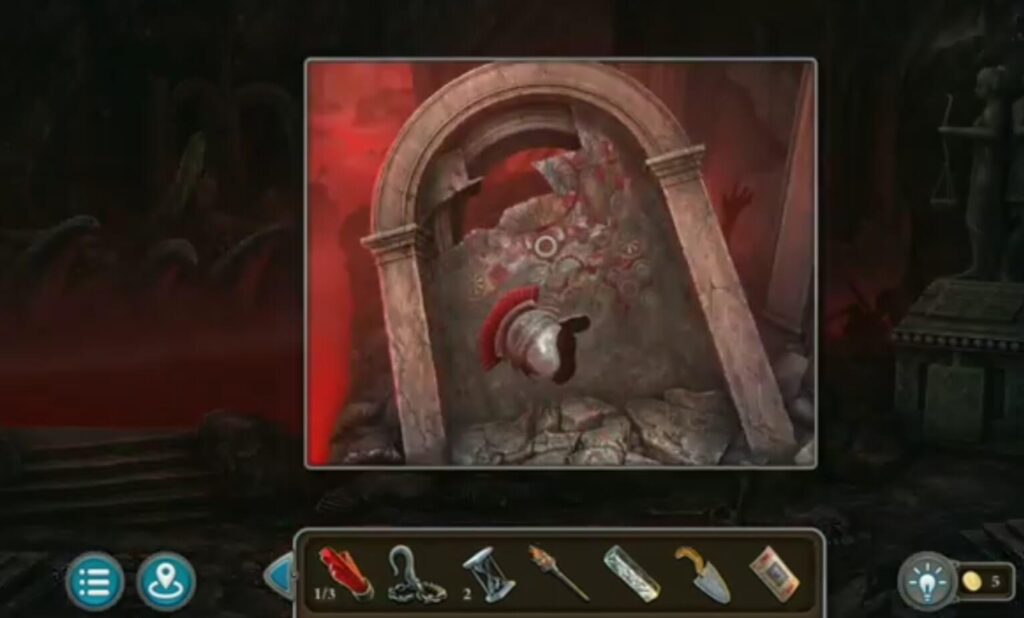
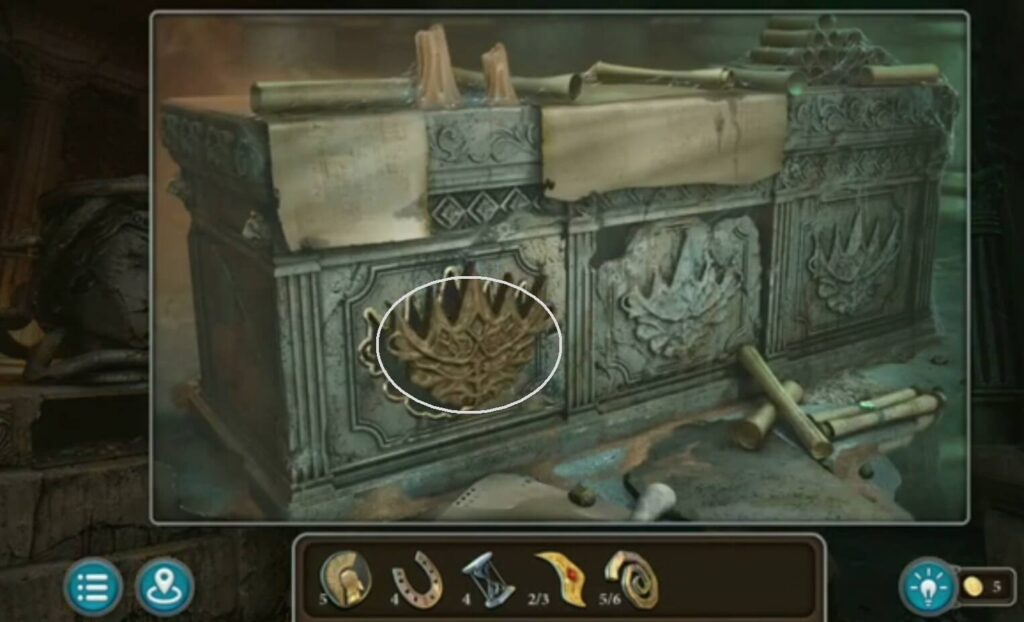
Put a handle you got when you solved a puzzle. Put Hydra heads ( found it during the game). You got a bas-relief.
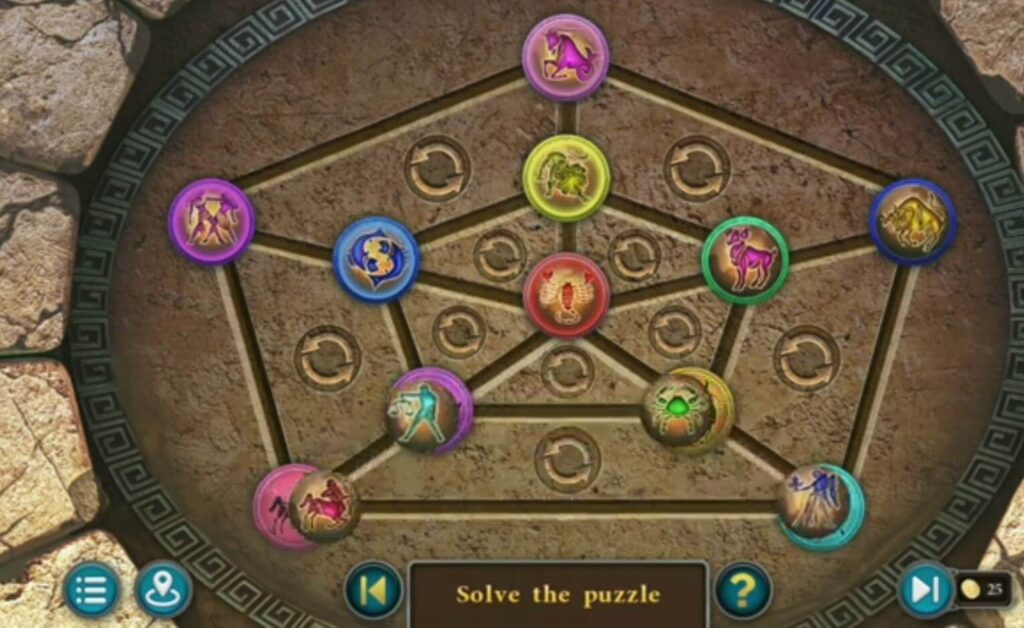
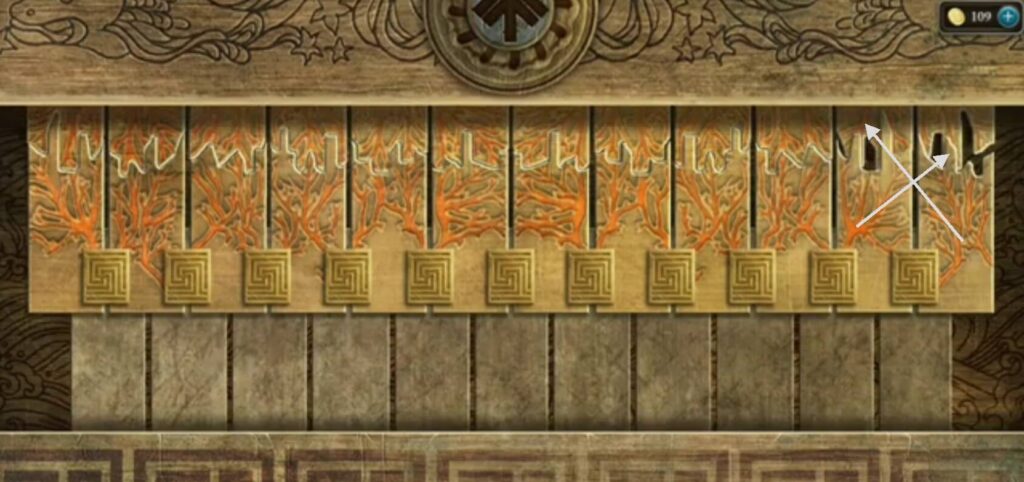
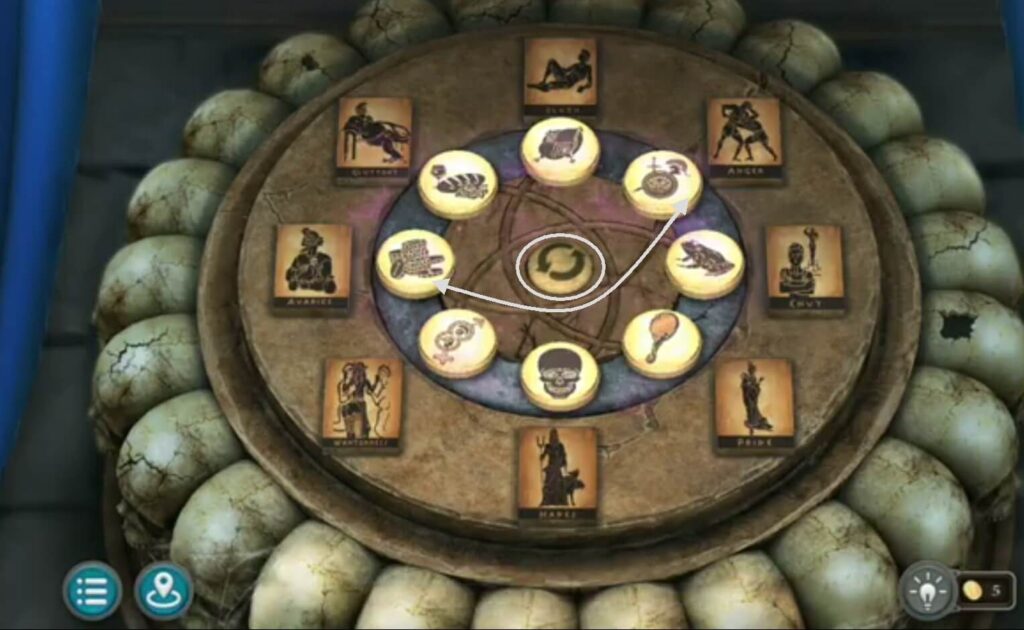
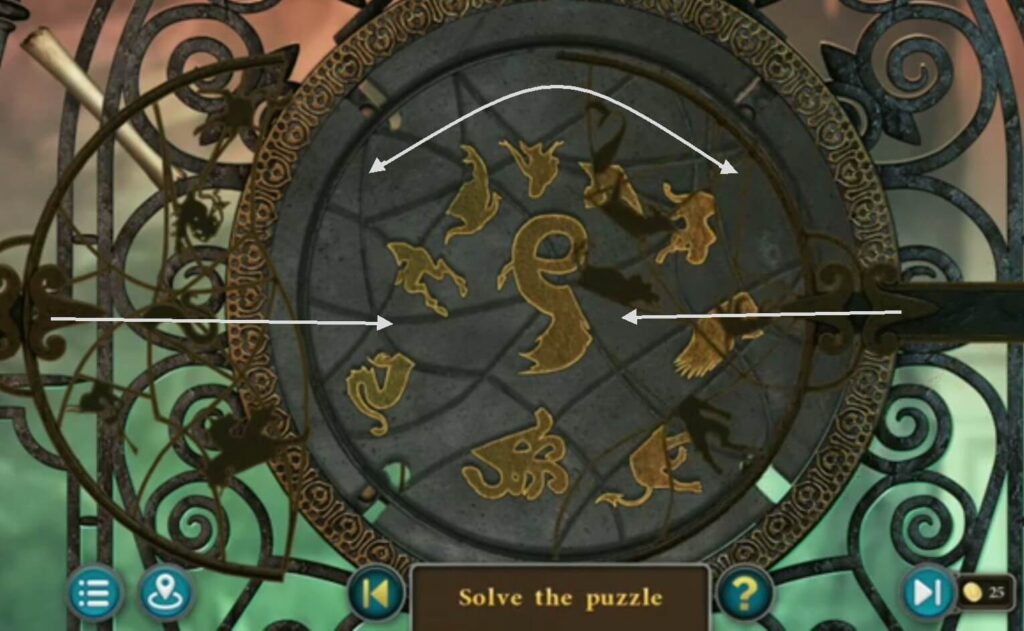
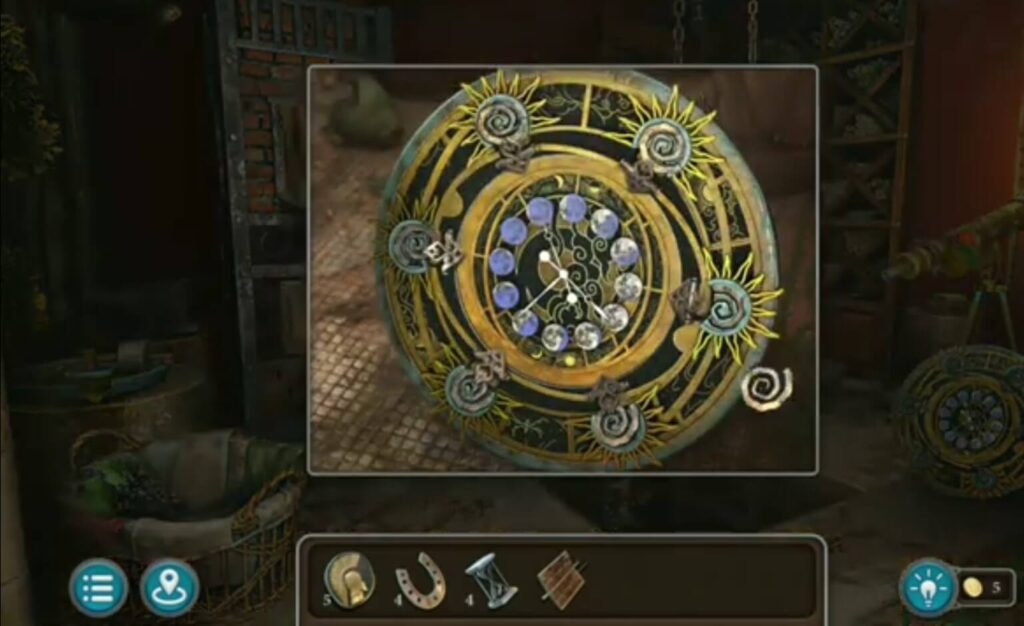
Put a bas-relief (got it when you put Hydra heads). A puzzle will appear. Solve the puzzle by rotating the elements with the zodiac signs so that each one is in the place where that sign is drawn. The stone wall will rise when you solve the puzzle.
- A crystal.
- Use a hammer (took it from the ship) to break the chains. You got a hook.
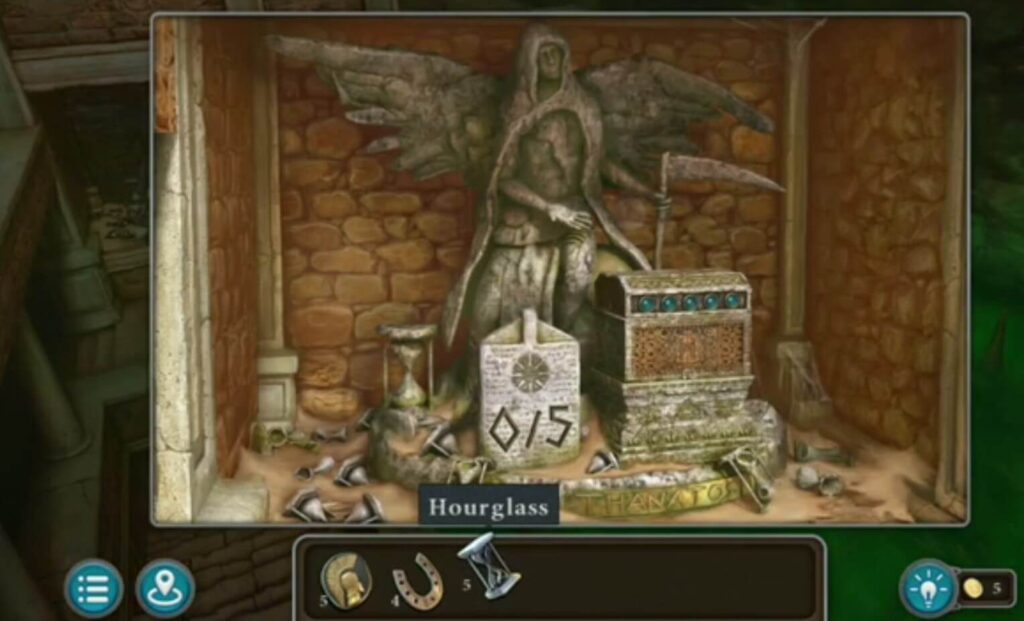
- An hourglass.
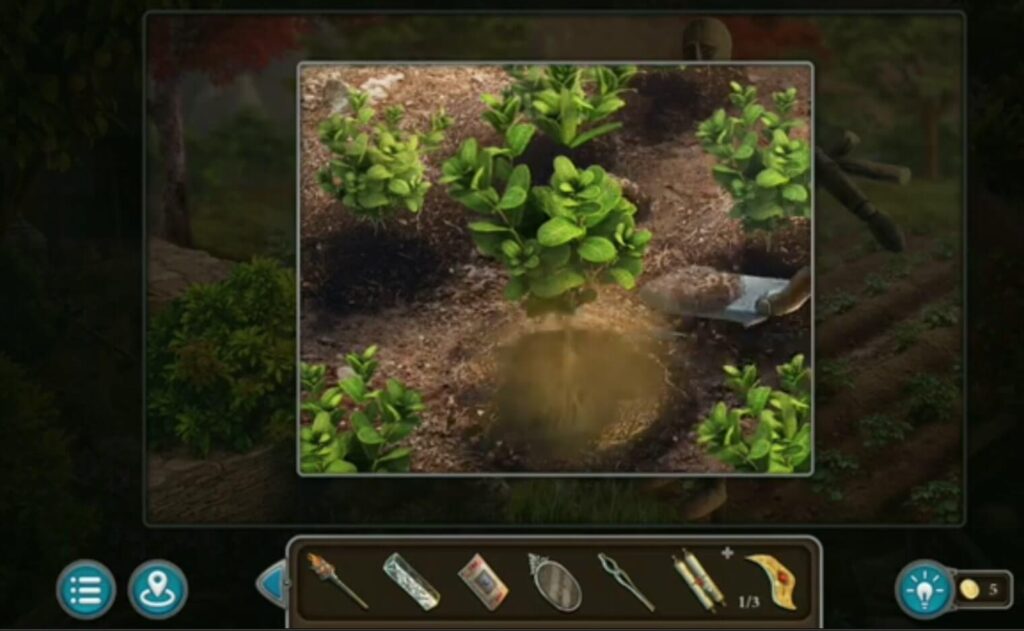
- Put a watering can (got it when you solved a puzzle) to take water. You have a watering can with water.
- A torch.
- A morphing object.
- A star.
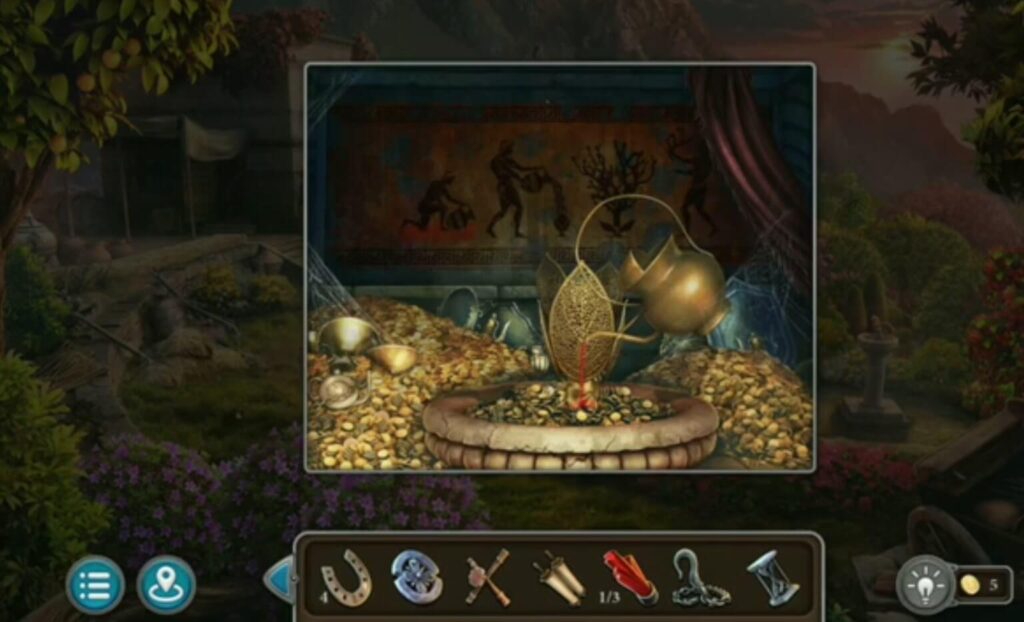

Pour water from a watering can and a golden tree will grow. Take a jigsaw ( got it when you made olive oil) to cut the branches. You got golden branches.
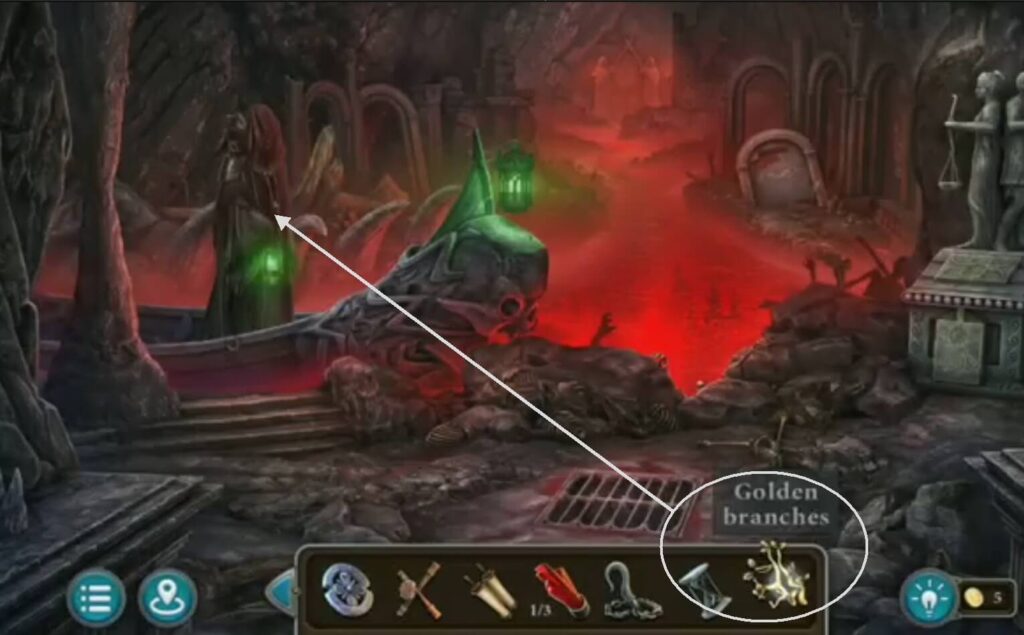
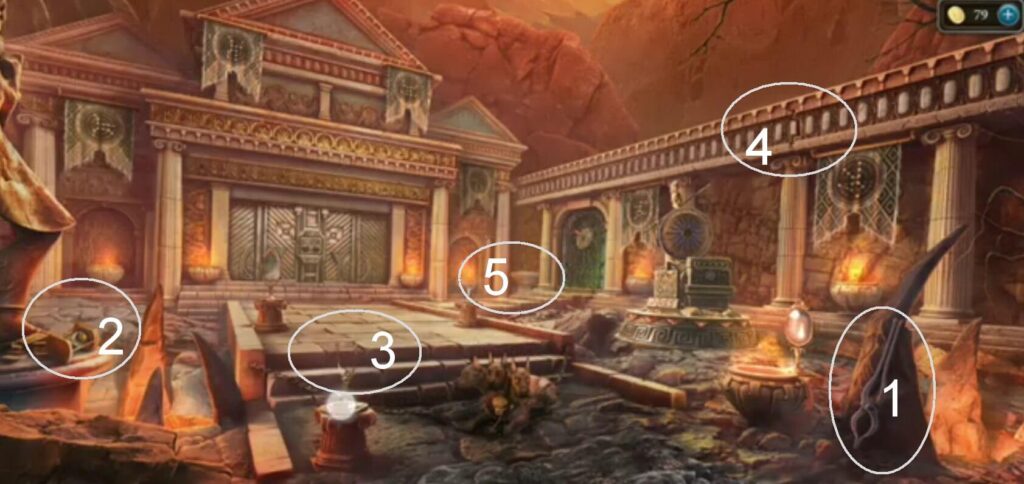
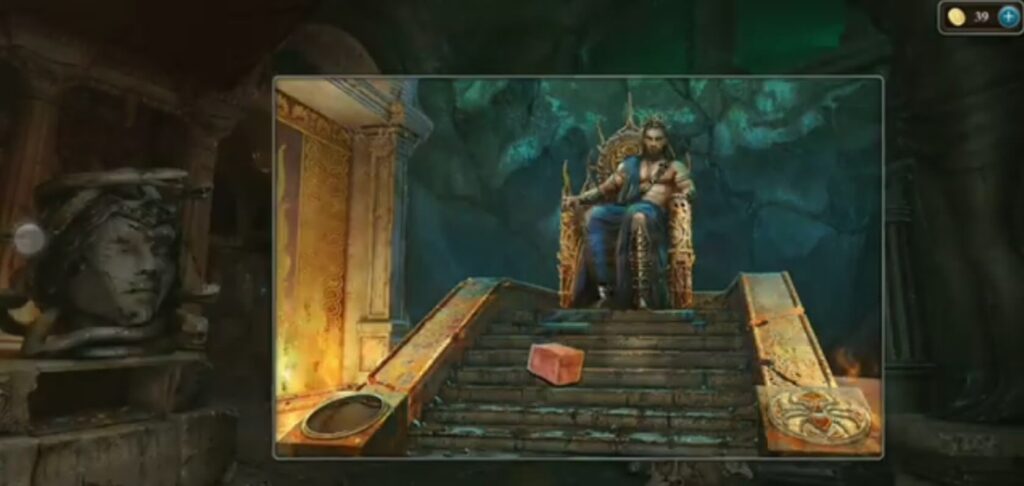
Give him golden branches, and he will drive you.
Use the scroll( got it when you solved a puzzle with a pedestal) to solve the puzzle. Move the arrays of elements up, down, left, and right so that they match as illustrated on a scroll. When you solve it, you will get to the Hades kingdom.
- A morphing object.
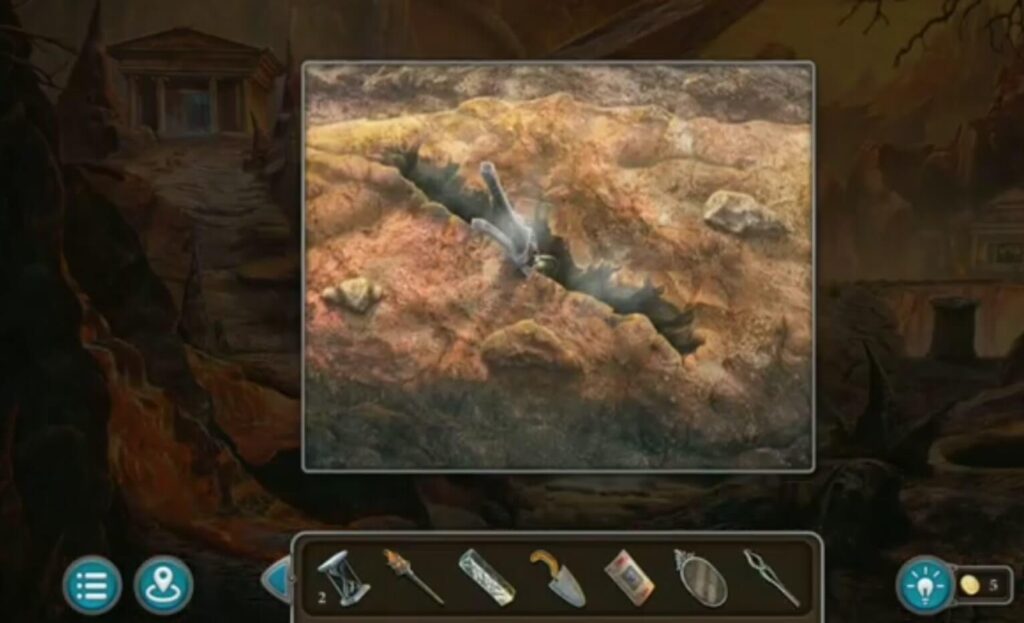
- Use a torch to light up the hole. Take silver and a trowel.
- A collection item.
- A shield.
- Use a hammer to get a helmet. Inside of the skull is a coin.
Put a key-cross (got it from the nest) and a door will open.
- A morphing object.
- A collection item.
- An hourglass.
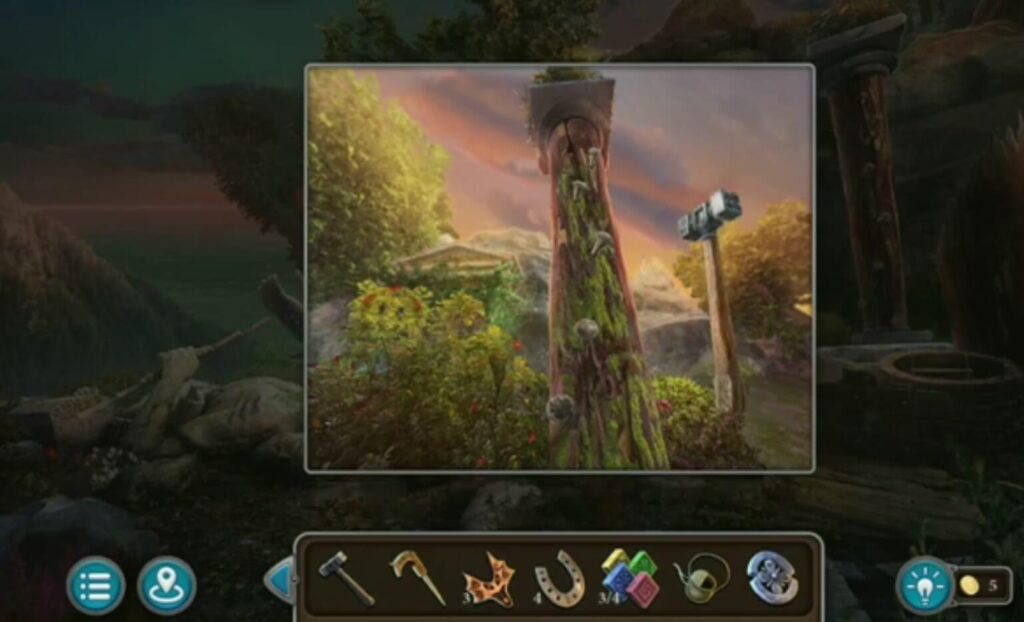
- Use a torch to light a fire.
- An hourglass.

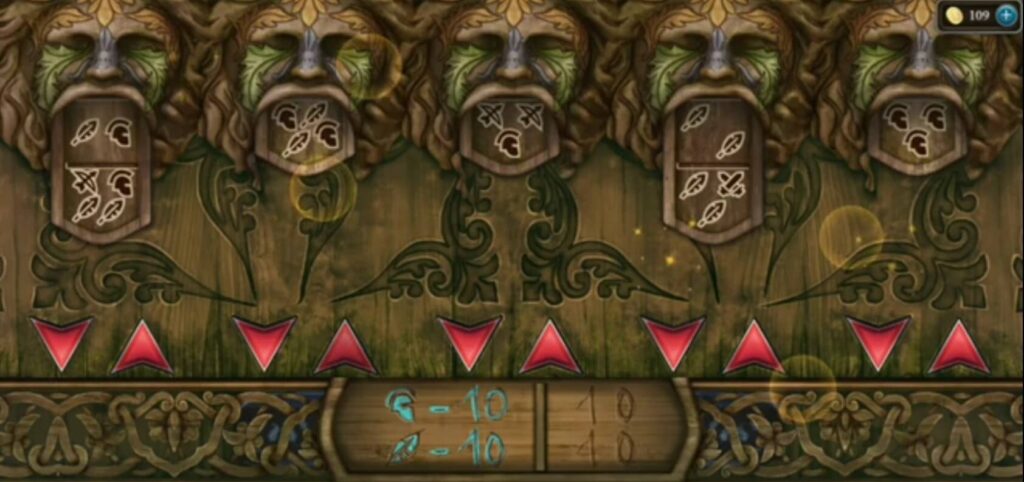
Use a helmet (from the skull) to reveal the drawing. Use this drawing to solve a puzzle. Press the object from the puzzle as many times as they are drawn on the picture. 6 times-2 times-3 times. You got a mirror.
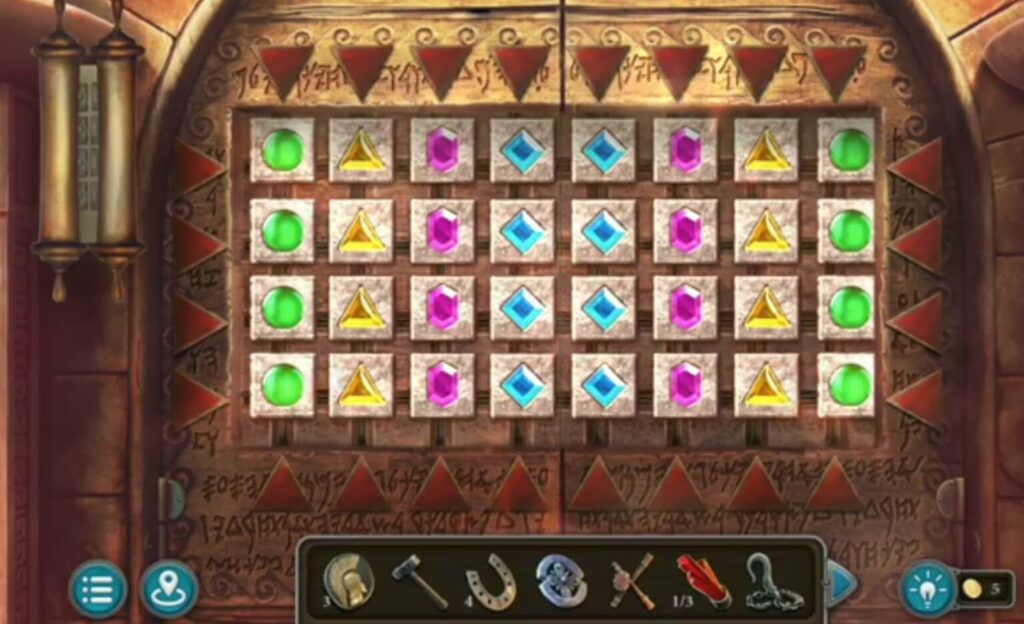
Put a medallion to start the puzzle. Move the elements to be the same in each row. A path to a new room will appear.
- Take pincers.
- An hourglass.
- Put a mirror (got it when you solved a puzzle).
- A collection item.
- A morphing object.
Bonus puzzle: Put coins you got during the game. A five-level puzzle will appear. One of the three blue elements should be brought to the goal, with the help of the other two elements that “turn off” the light fields and thus provide a passable path for the element going to the goal. You will get a star when you solve it.
Use pincers to get a key.

Use the key (got it with pincers) to unlock the cabinet. You got a recipe (Sedative for Cerberus), a detail.
Use a trowel (got it from the hole) to get the ingredient for the recipe- the valerian root.
Use pincers ( from a place with Cerberus) to get the mellisa and a detail.
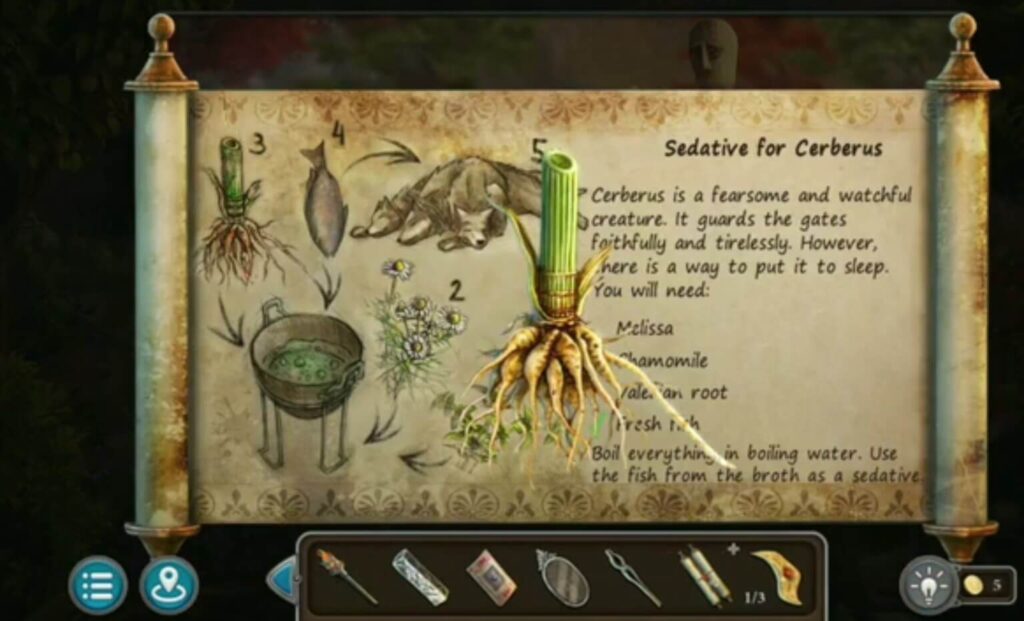
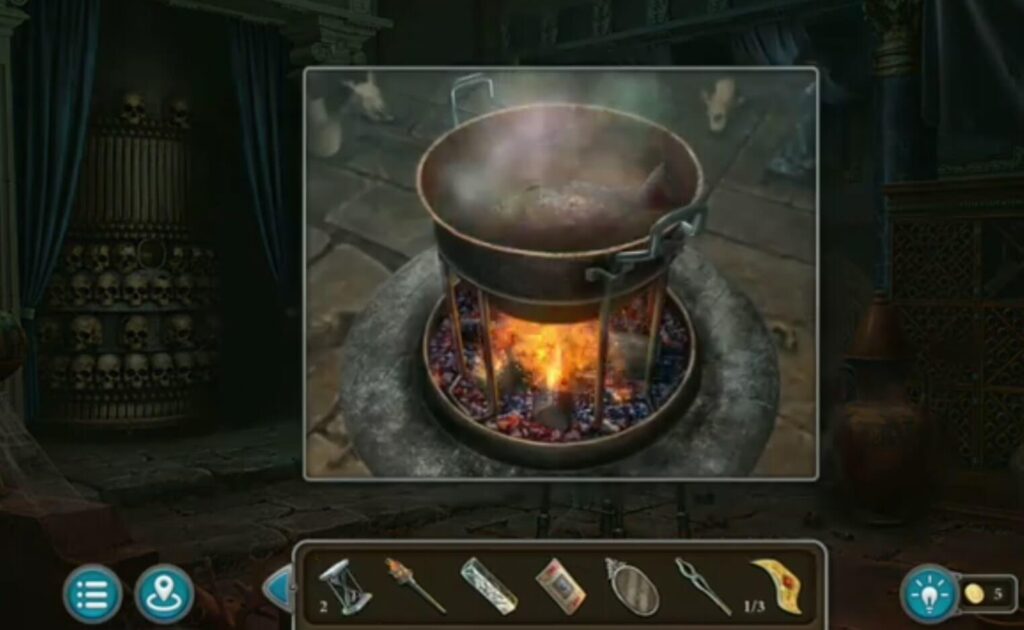
Put all the ingredients into the recipe. You got the ingredients.
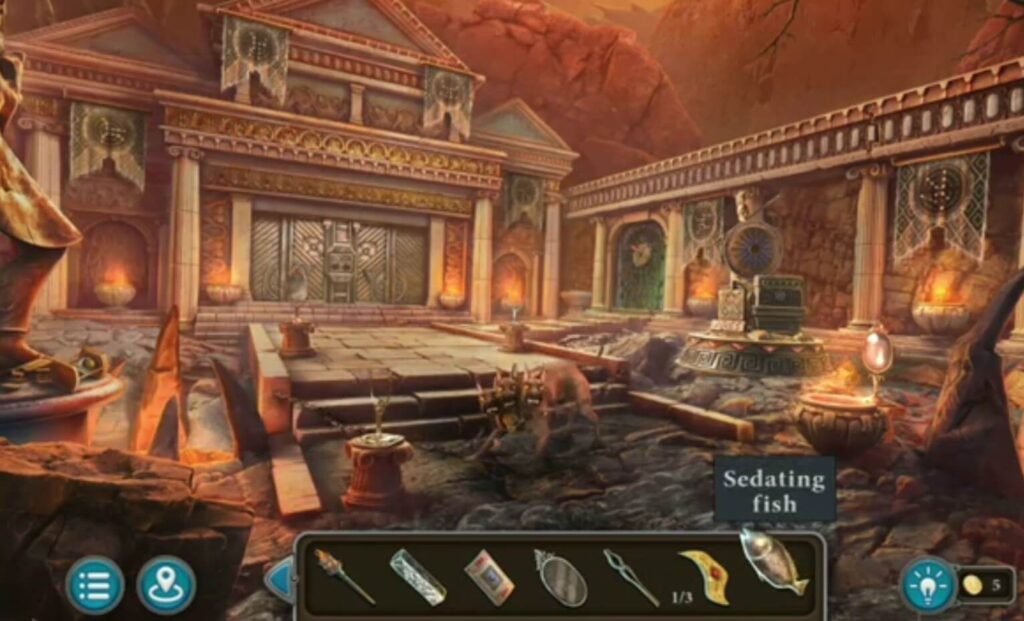
Put it in the pot. You got a sedating fish. Give the fish to the Cerberus. Take a key from Cerberus.
Put a key (from Cerberus) to unlock the door. A puzzle will appear.
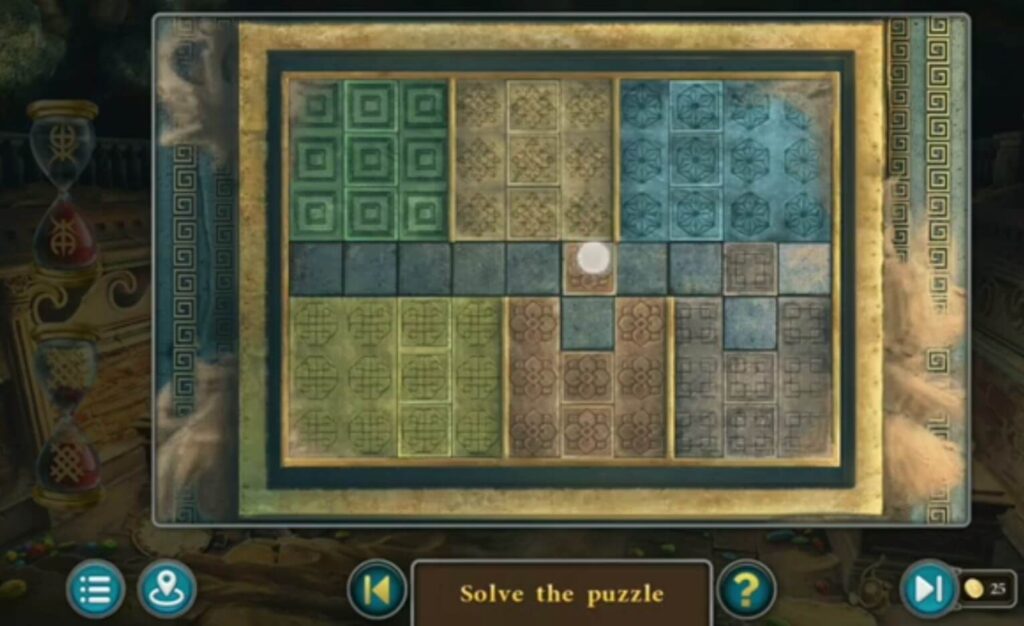
Remove all seals from the field by pushing them into the holes. A new room will appear.
- A coin.
- A skull.
- A collection item.
- A morphing object.
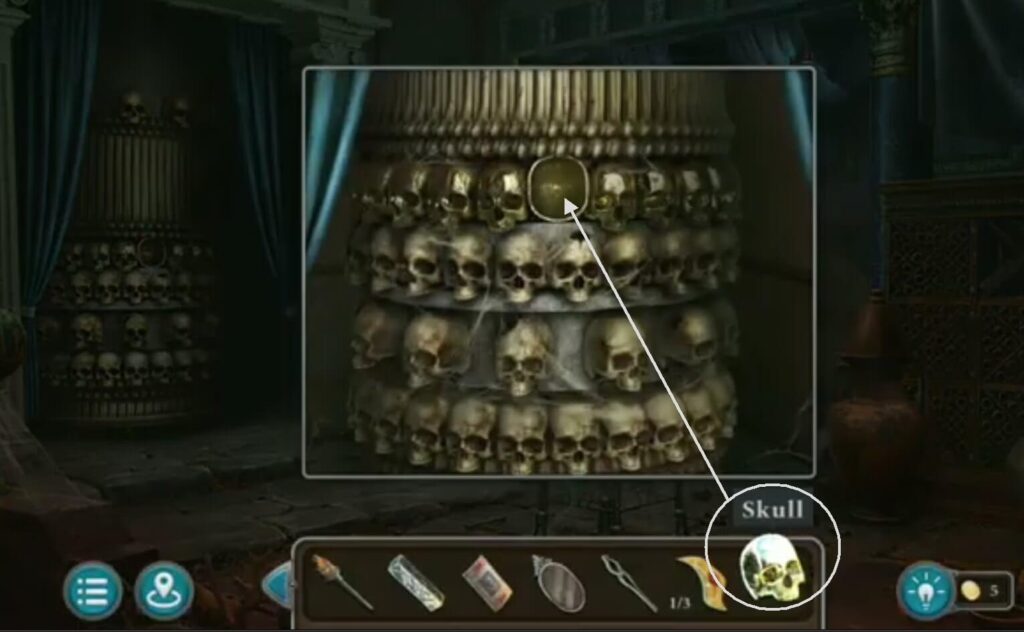
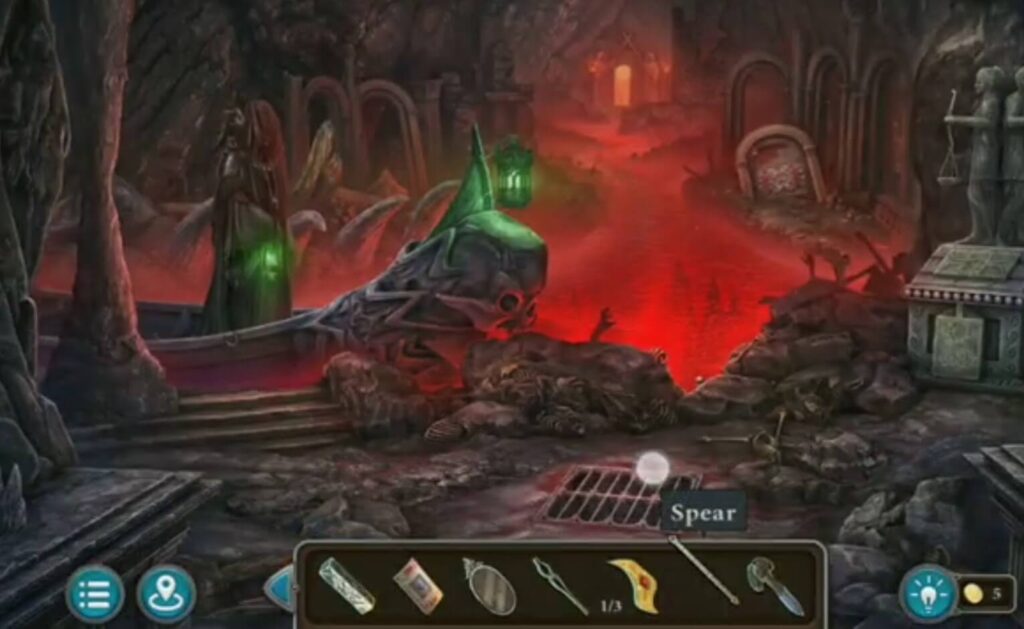
Put a skull from the chandelier. A puzzle will appear. Rotate the elements and swap their places with the pair it is connected to in a semicircle until each circle lights up. You got a spear, a dagger.
Use a spear (got it when you solve a puzzle) to open it. Inside is a watch detail, a collection item.
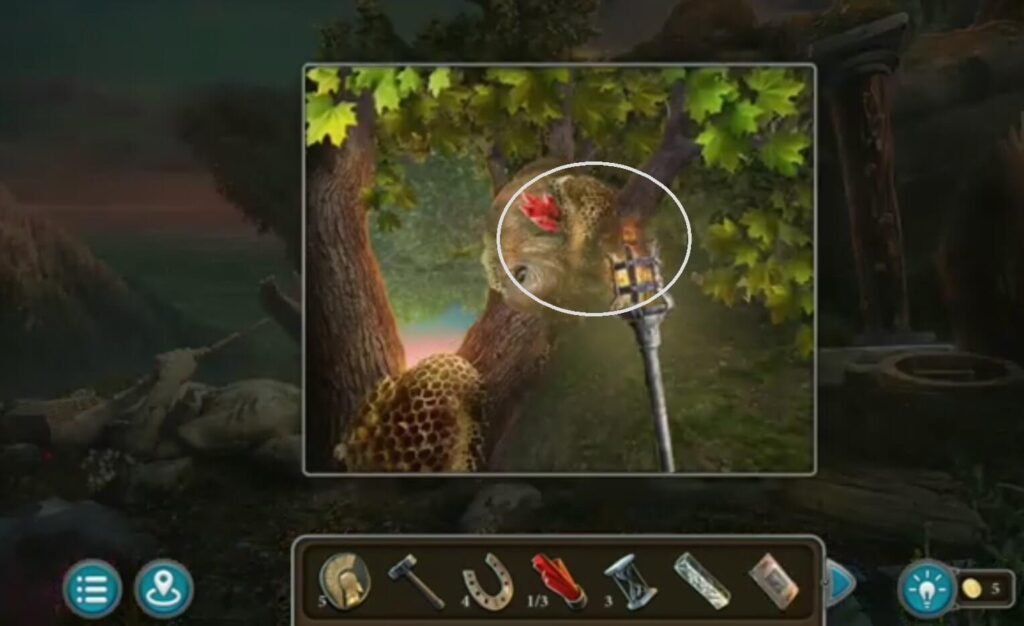
Use a torch (from the monument ) to light up the beehive. Then use a dagger (got it when you solve the skull puzzle) to remove the crystal.
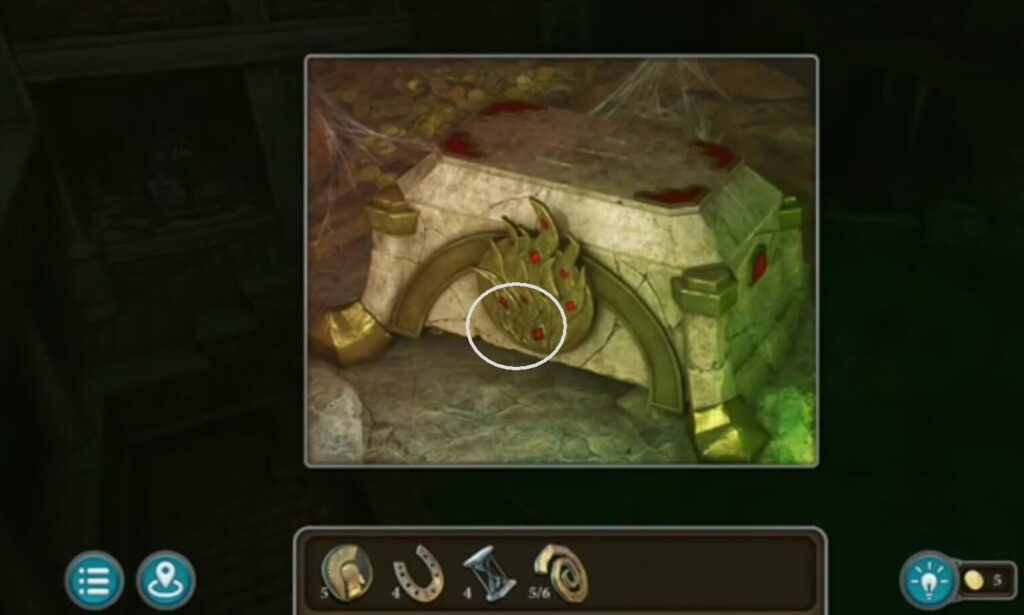
Use a dagger to open the shells. You got a pearl. Put a pearl you found into the monument. You have a crystal and a part of the mosaic.

Put all the crystals you found during the game. A puzzle will appear. Rotate the wheel with the animal parts so that the arrangement matches the shapes on the parts moving left and right. Together they should form a whole. When you solve it, a new room will appear.
- An hourglass.
- A mold.
- Use a shield (got it near the helmet) as a bridge. You got a collection item and a mirror.
- A morphing object.
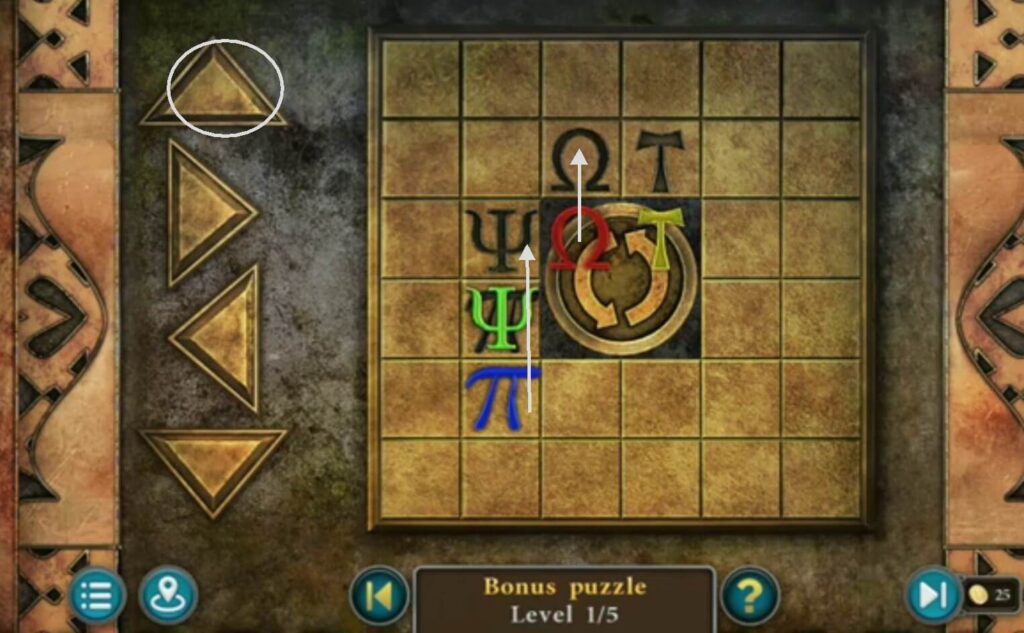
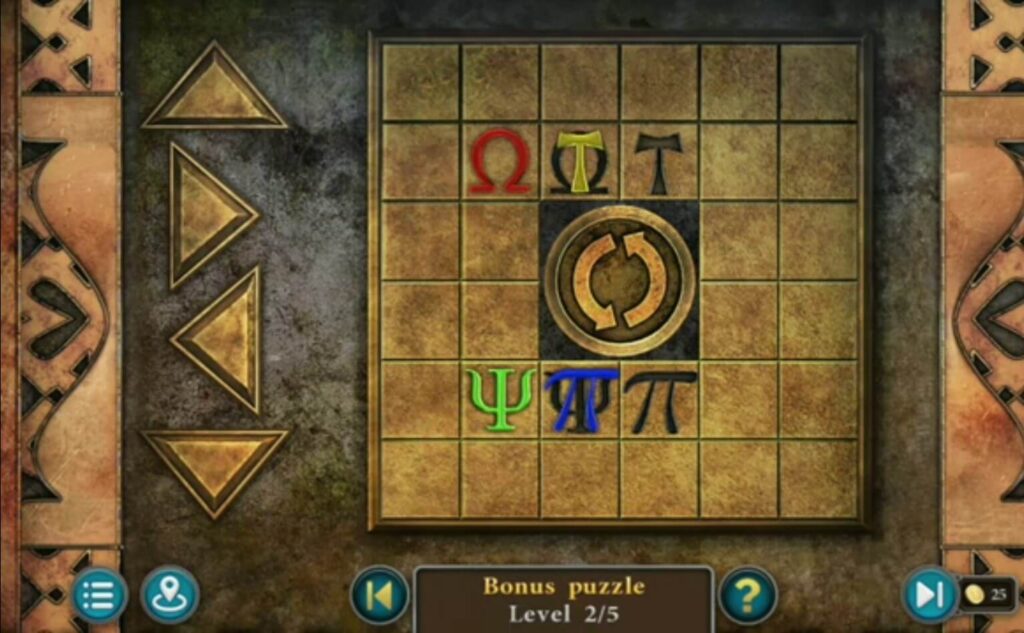
Bonus puzzle: Put an hourglass to start a five-level bonus puzzle. The solution to the puzzle is to move the elements using the triangles (left) for direction. Also, the elements can be rotated, so each element fits on a field with a shape identical to the element. When you solve it you will get a star.
Put a mirror (found when you used a shield as a bridge).
Put a part of a mosaic (from a pearl monument) You got a bellows and a watch detail.
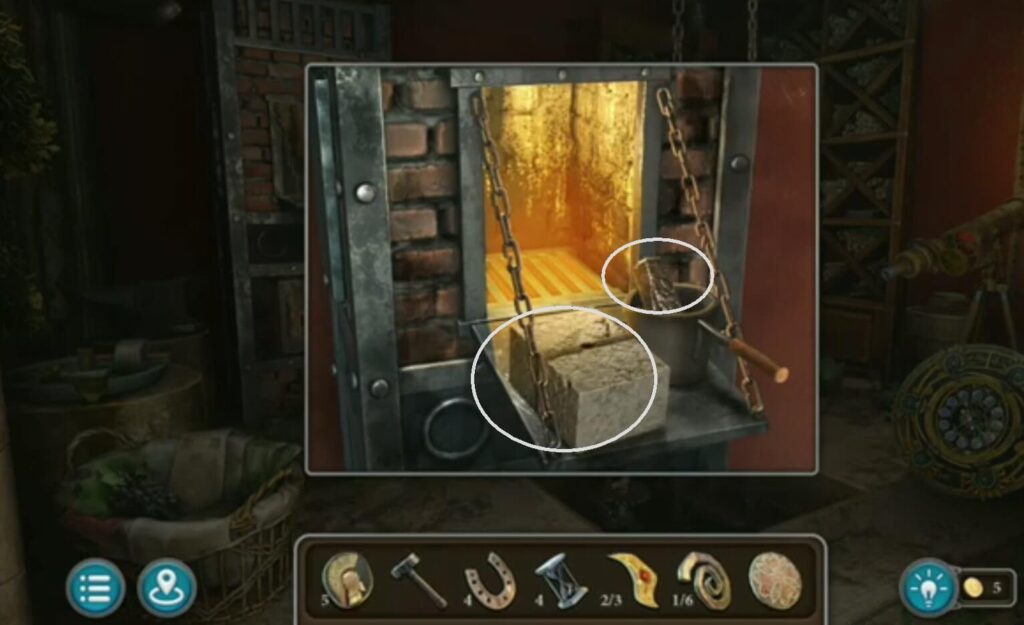
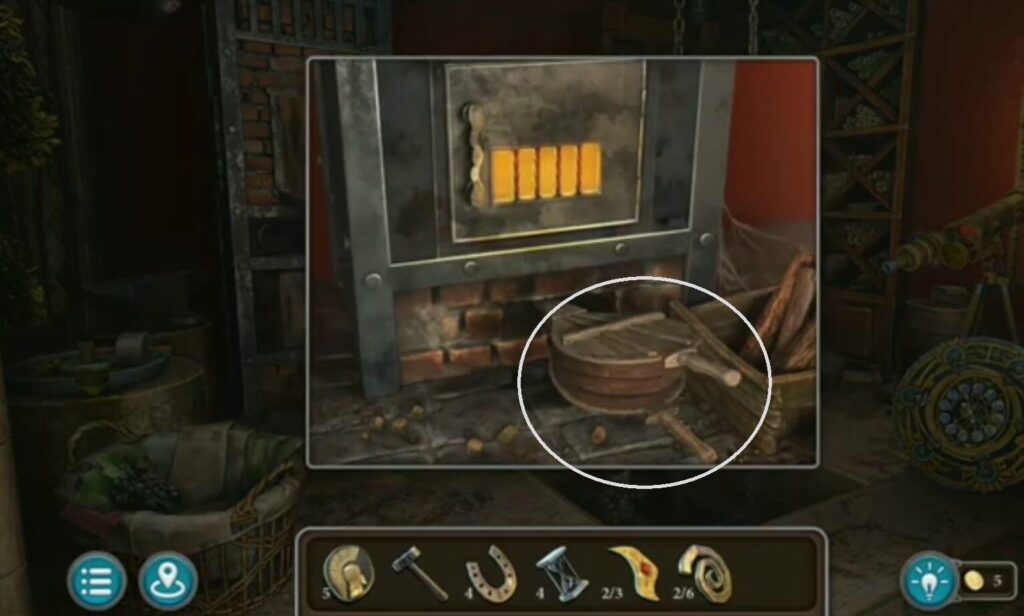
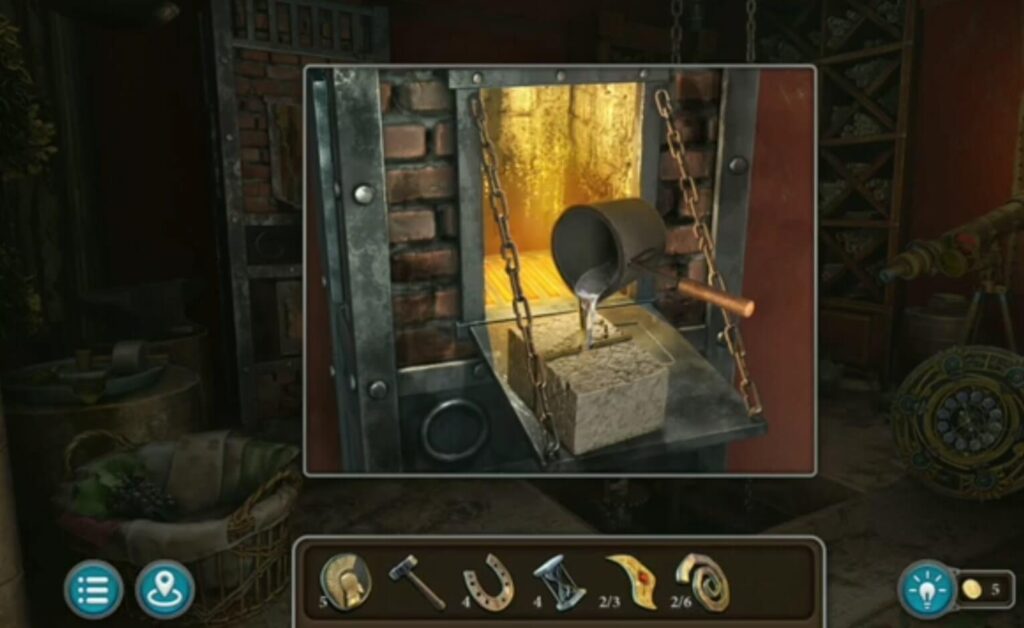
Put a silver into the pot, and a mold near it. Put bellows (behind a part of a mosaic object). Put melted silver into the mold. Brake a mold with a hammer. You got a sandal.
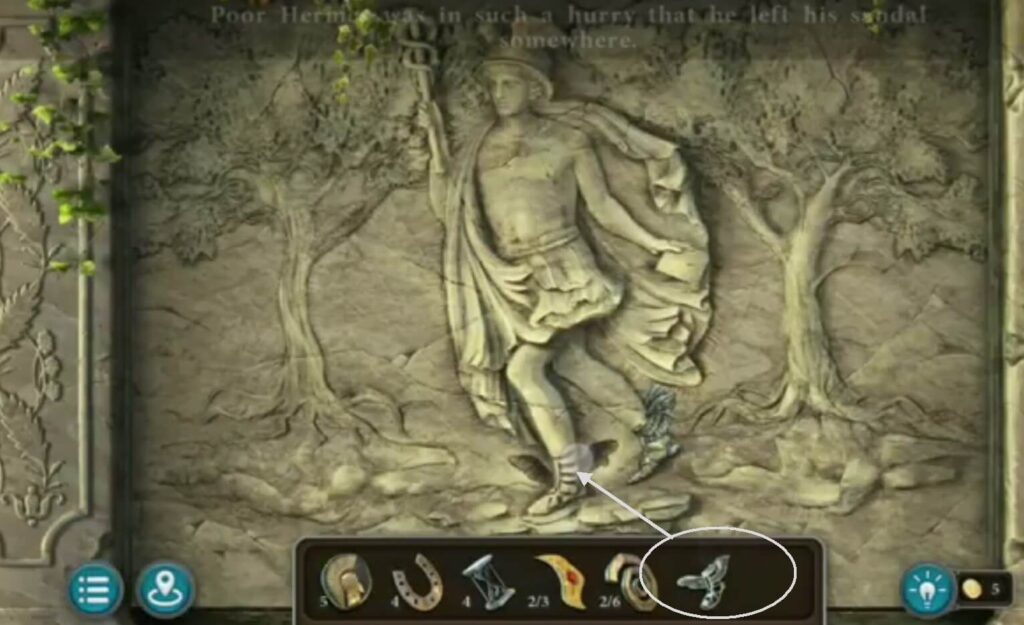
Put a sandal you made from silver. A puzzle will appear. Rotate the parts so that the picture is correct and meaningful. You got a spider and a watch detail. Also, there is a star in the upper left corner.
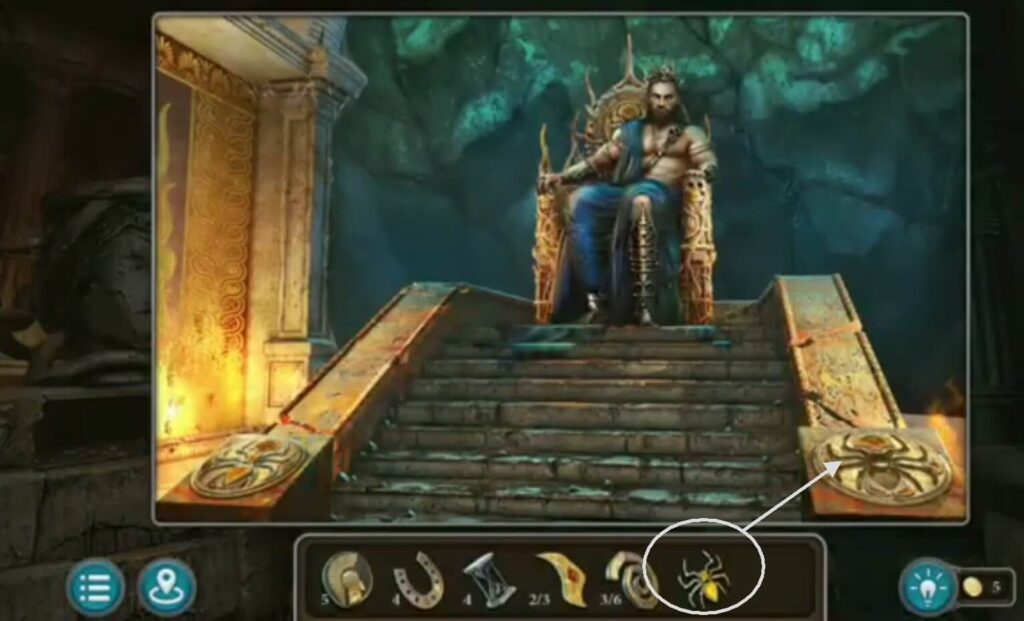
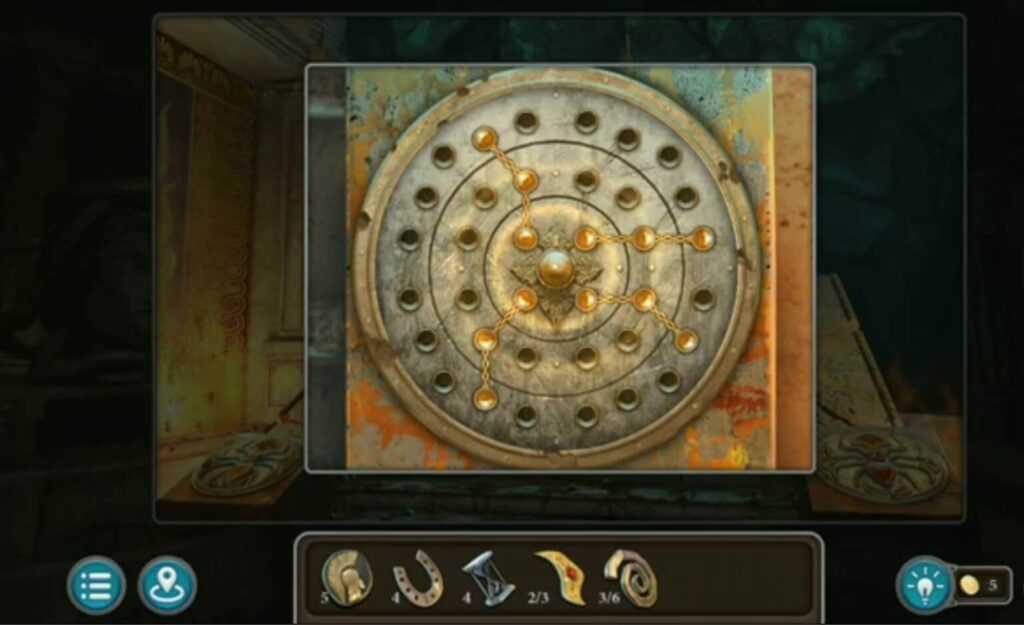
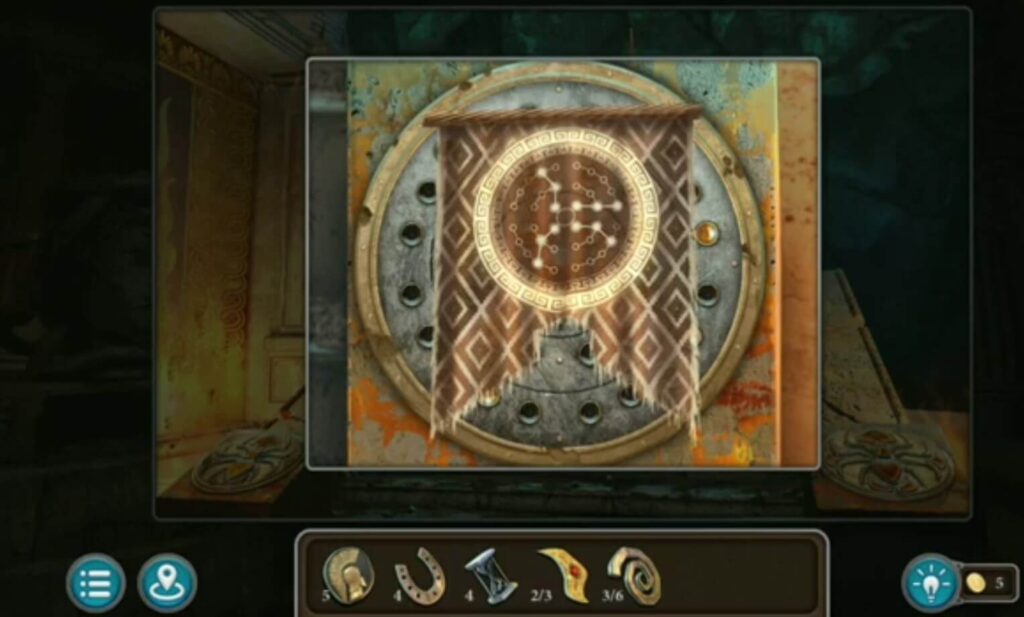
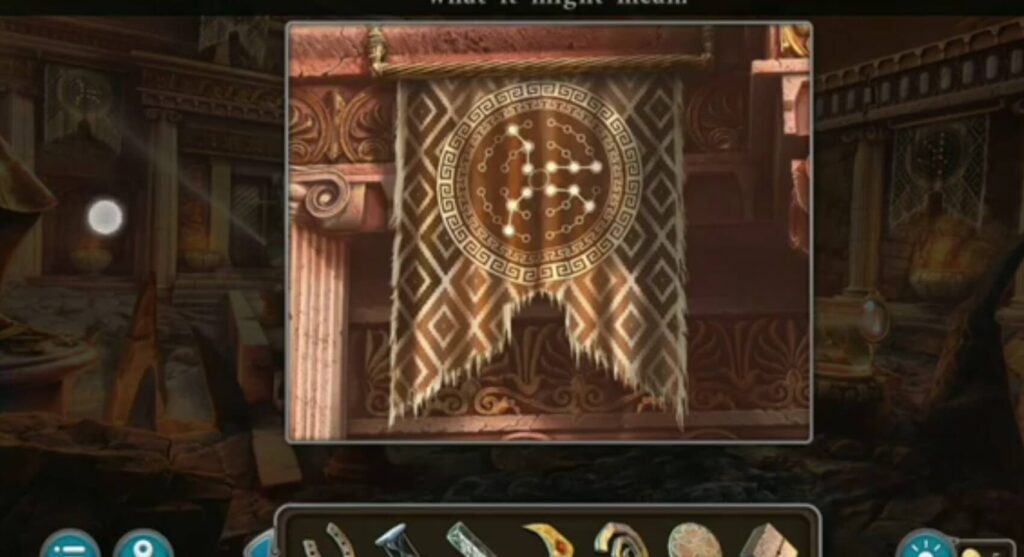
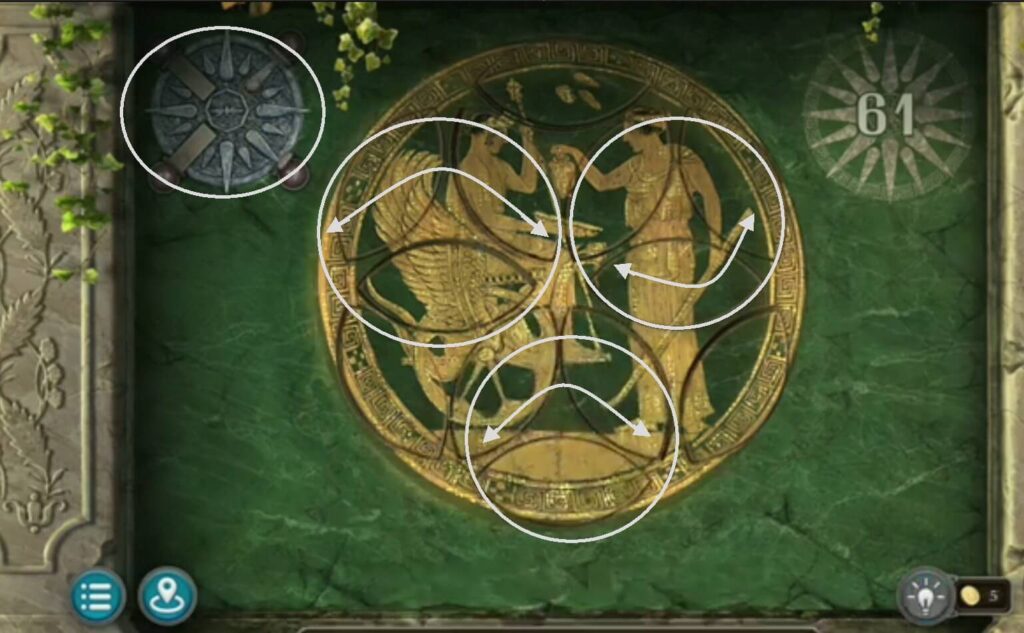
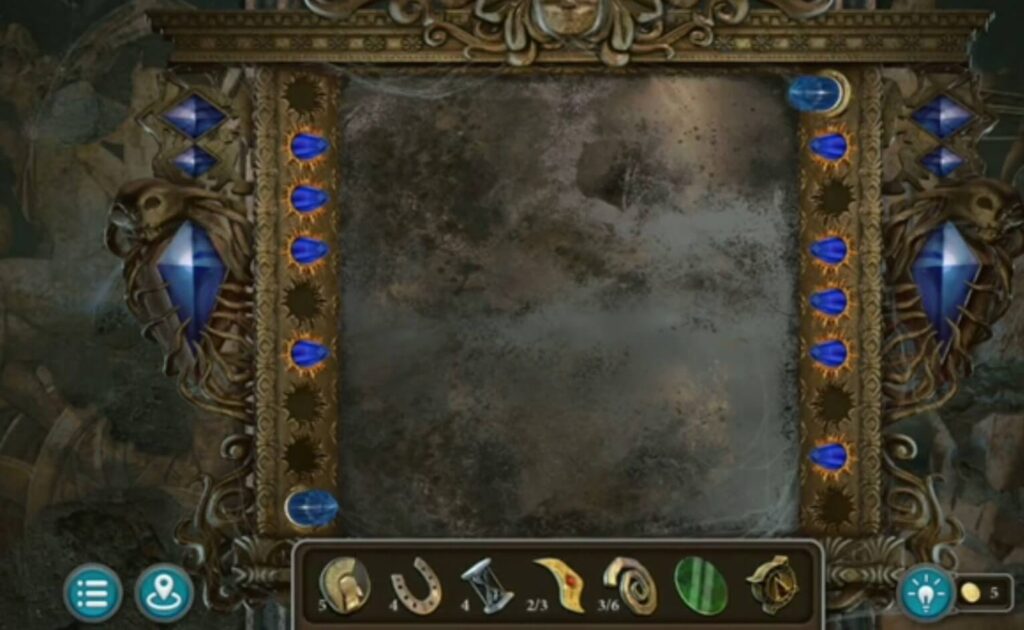
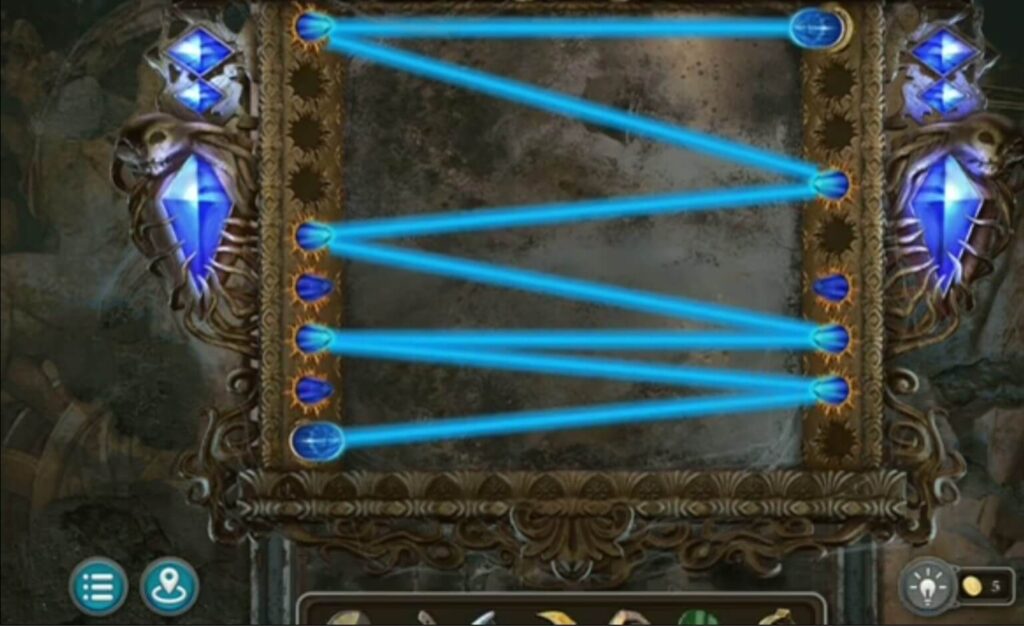
Put a spider (got it when you solved a sandal puzzle). A puzzle will appear. The solution is the arrangement of elements found on the flag illuminated by the reflection of the mirror. You got a lens, a lever.
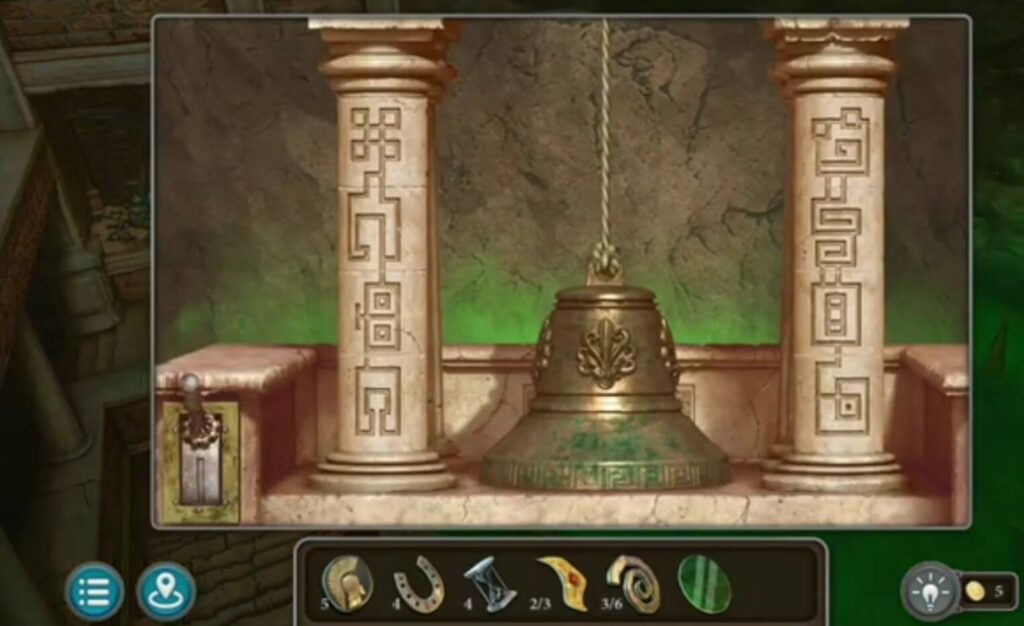
Use a lever (got it when you solve a spider puzzle) and pull the bell. You got a sapphire and a button.
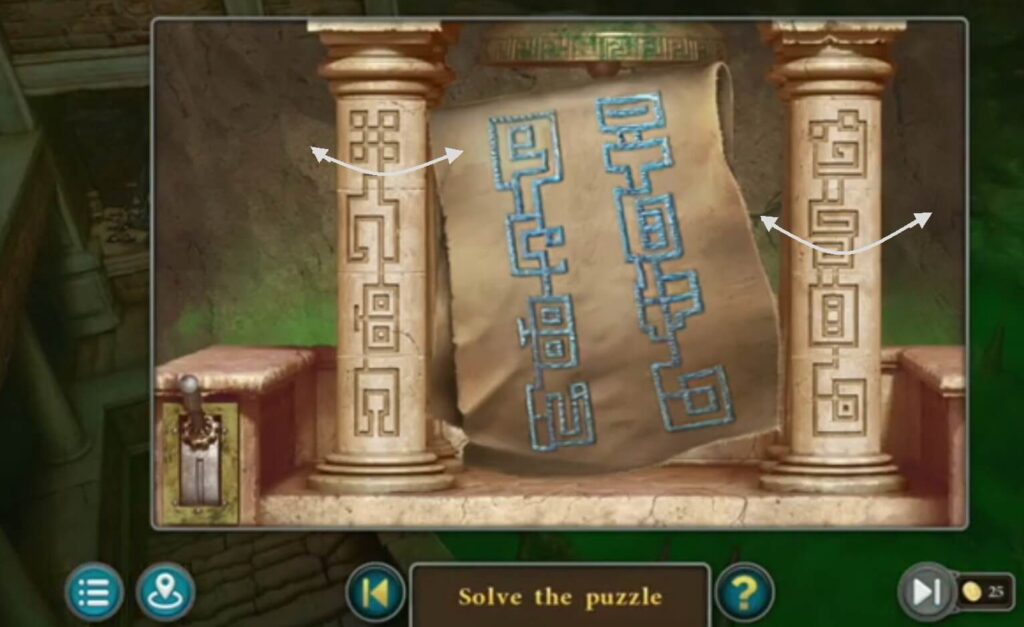
Put a convoluted clue (got it from a basket with grapes). Rotate the parts of the pillars to make the appearance match the image. When you solve it a secret room will appear. When you solve puzzles there, you will get a star.
Put a sapphire (got it under the bell) Solve the puzzle by arranging the sapphire to look like in the picture. You got a watch detail.
Put lens (from a spider puzzle).
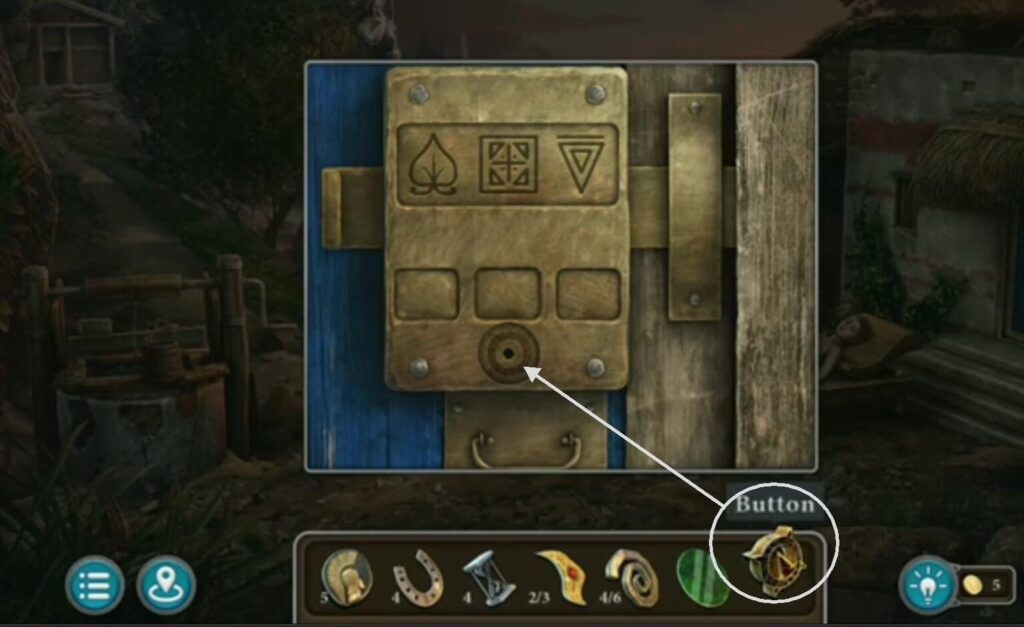
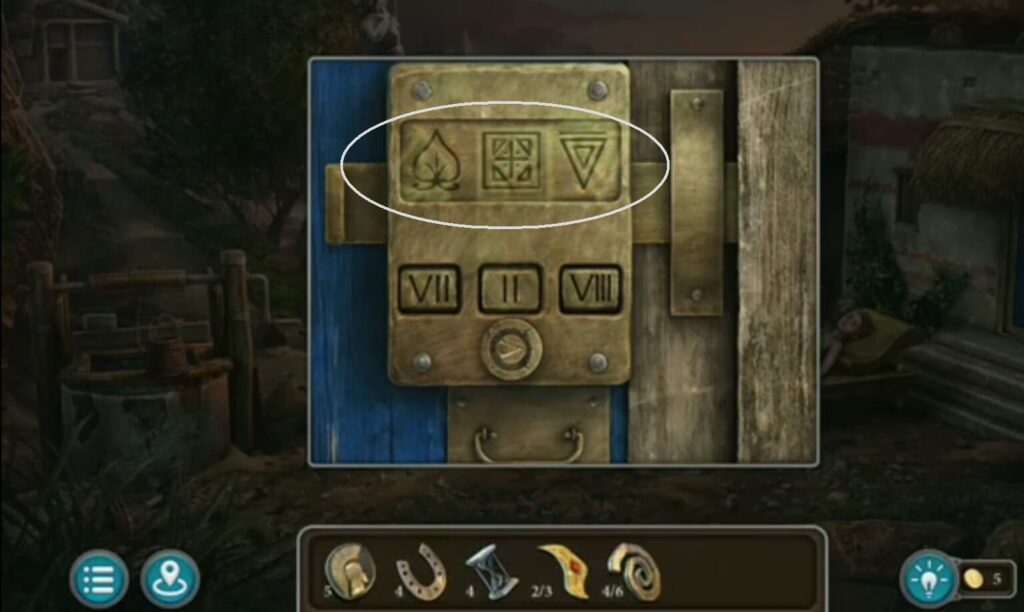
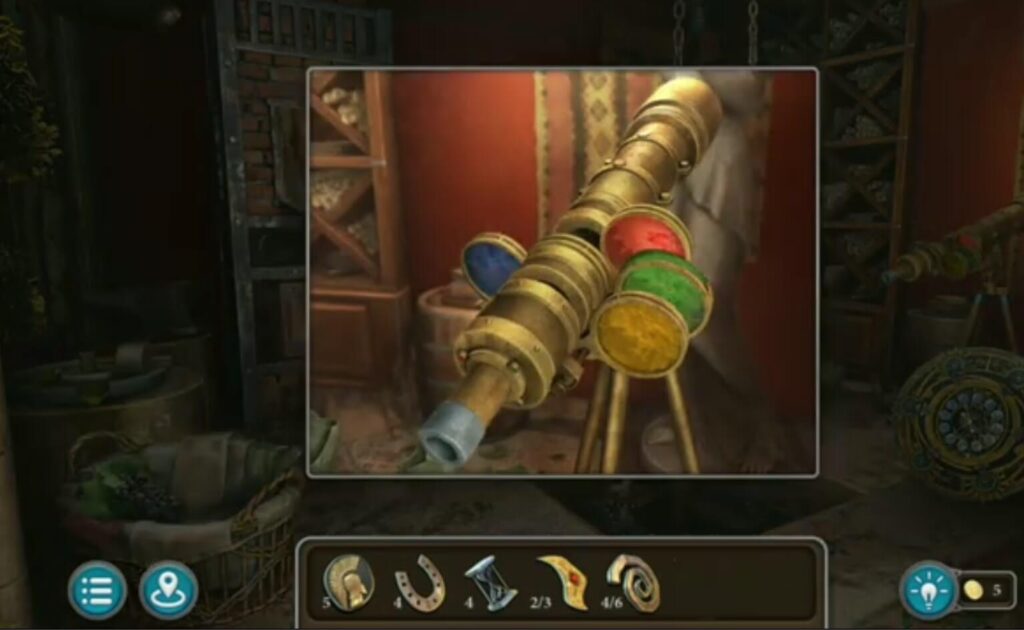
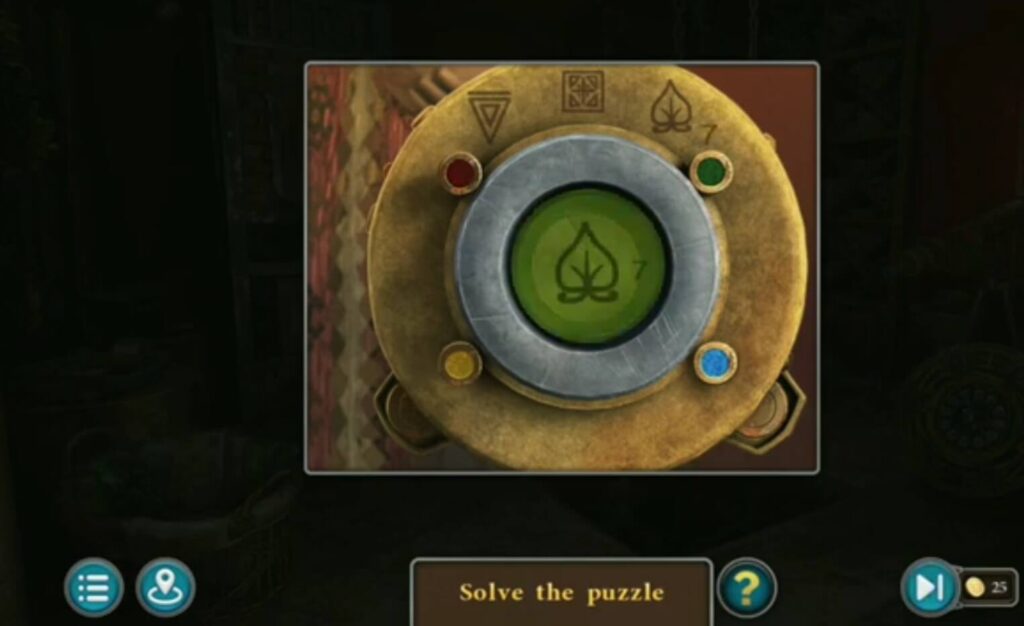
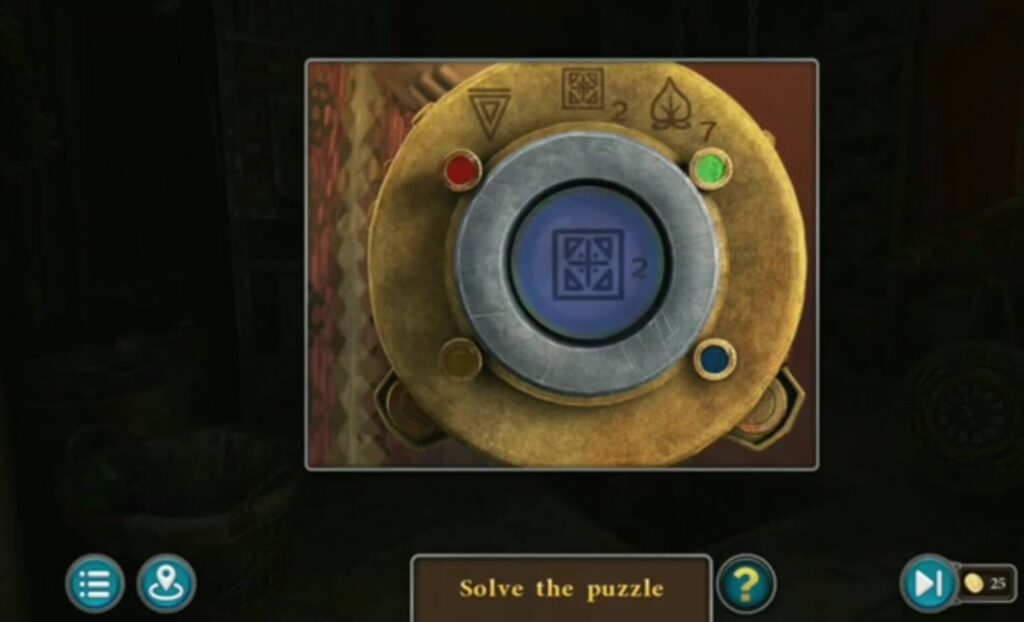
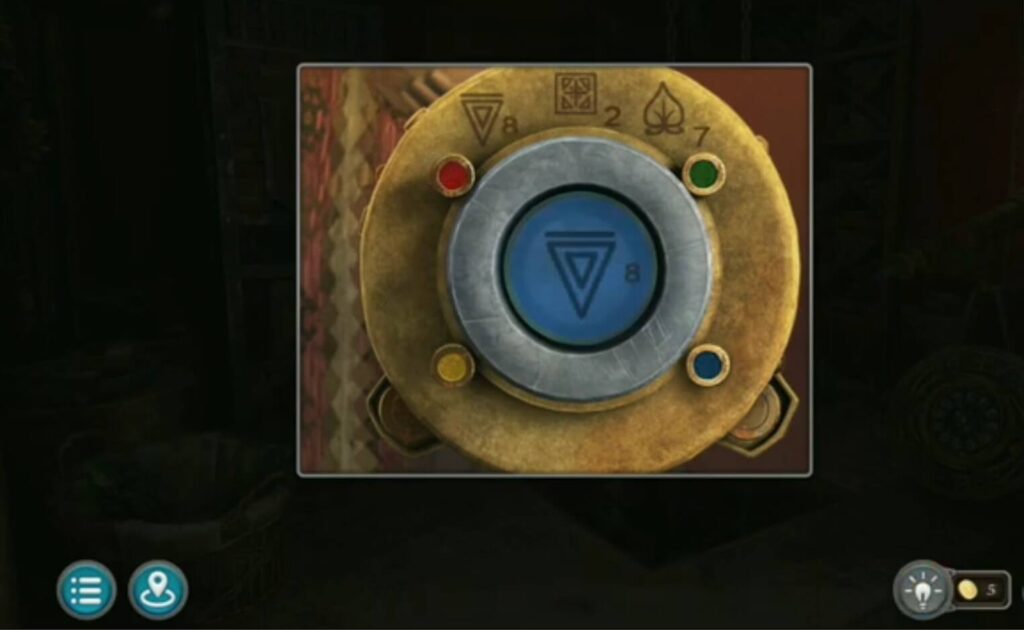
Put a button ( got it under the bell) Use the clue you got from the lens to solve this puzzle. Choose numbers 7-2-8. You got a bas-relief, a watch detail.
Put a bas-relief (from a room you entered when you solved a lens puzzle). You got a detail.
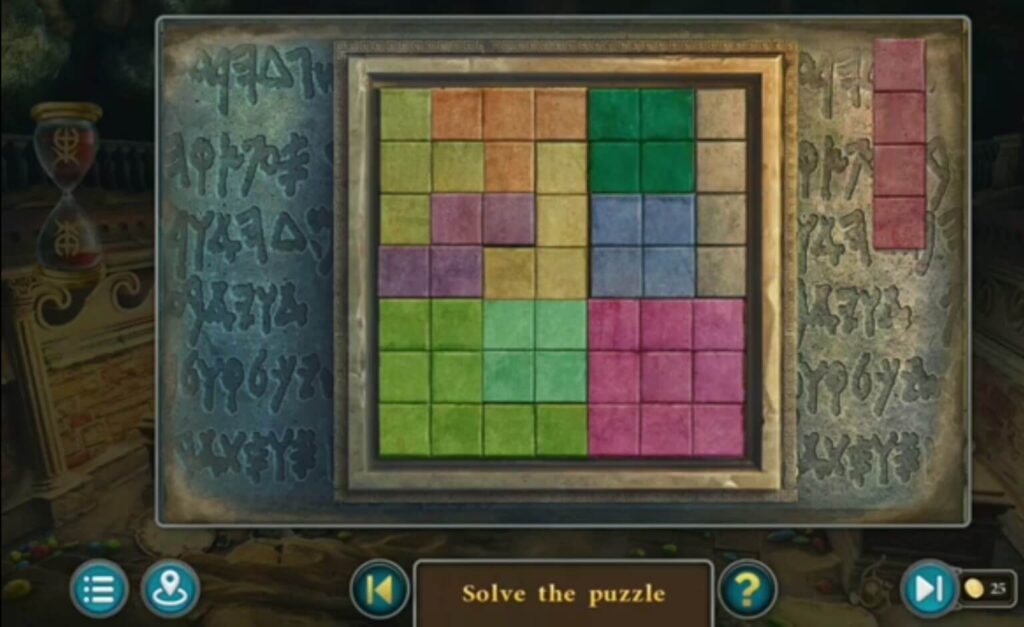
Put all 3 details you found during the game. A puzzle will appear. Solve the puzzle by moving and swapping the elements so that all the same colors are in one place. Red elements on the left, blue on the right. You got a pedal, a watch detail.
Put watch details you found during the game. You got a Hade’s watch.
Give him a Hade’s watch (got it when you put a watch details). You got a clay.
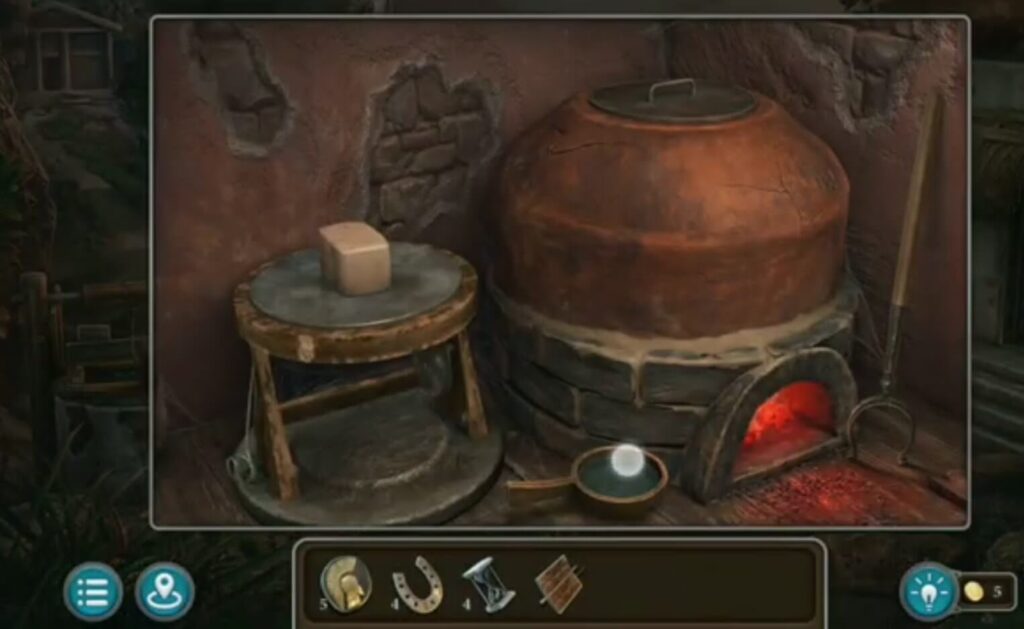
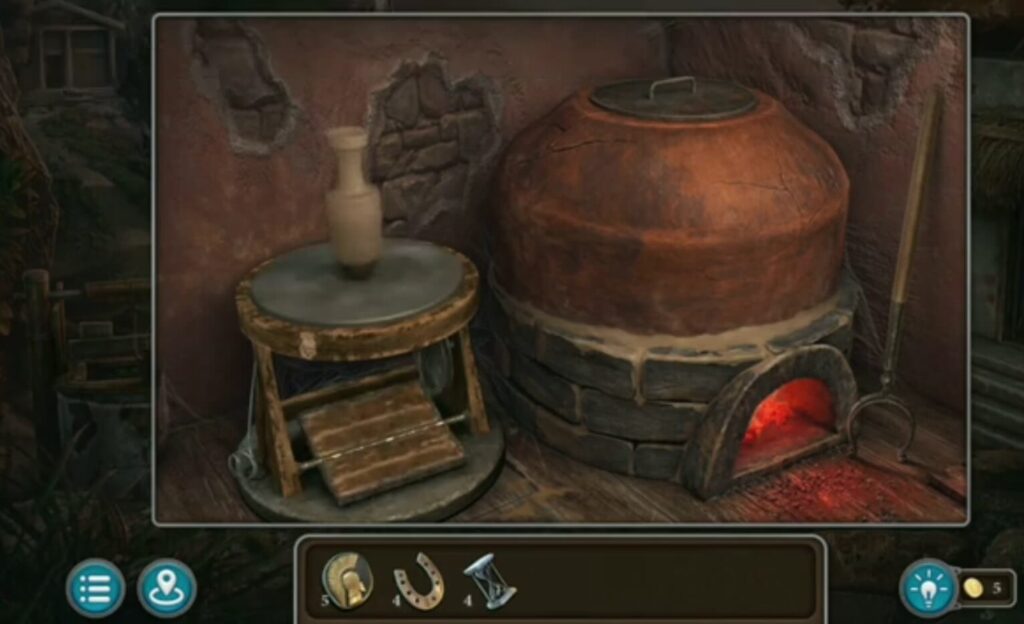
Put a clay and a pedal. Start making an amphora.
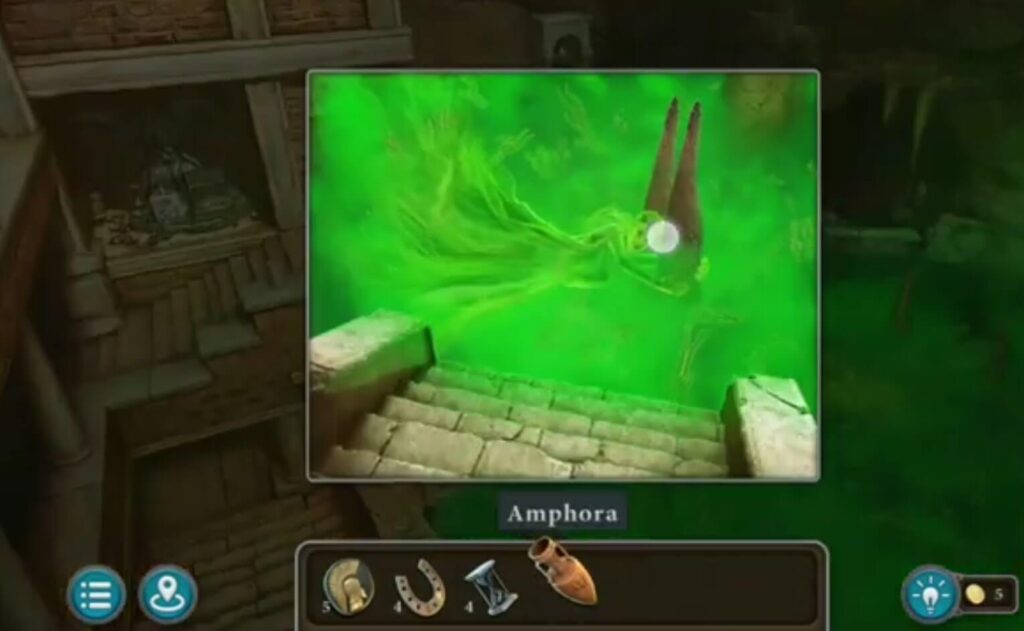
Use an amphora (made from clay) to take a soul from water. You got a soul amphora.
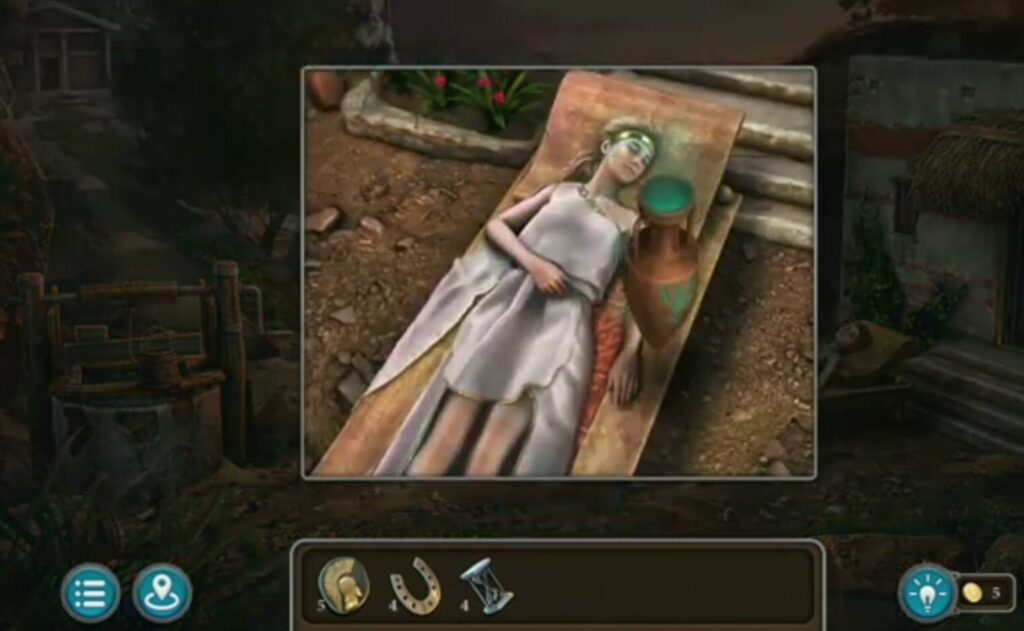
Give a girl a soul from amphora. You got a star.
This is the end of the last chapter.