Underground Blossom – Chapter 6 | Soul Street
Intro
Welcome to our walkthrough for Chapter 6 of the Underground Blossom from Rusty Lake. In this chapter, you will visit Soul Street, where Laura is a corrupted soul.
Walkthrough
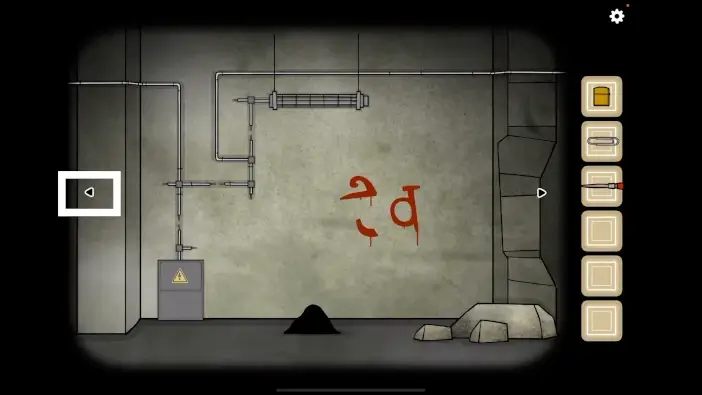
When you exit the train and enter the Soul Street, go left from the starting area.
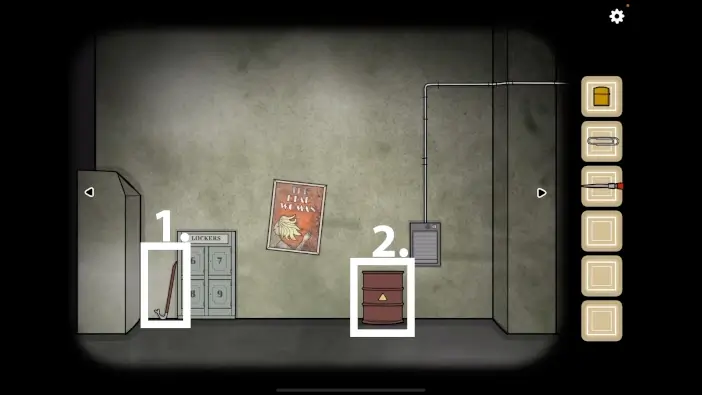
- Pick up the crowbar.
- Approach the barrel.
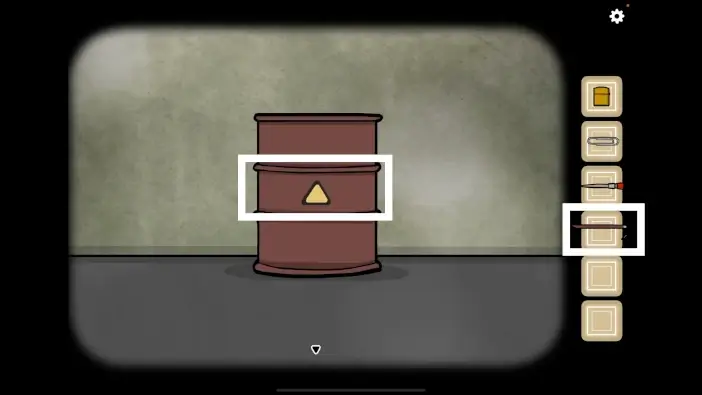
Use a crowbar to make a hole in the barrel.
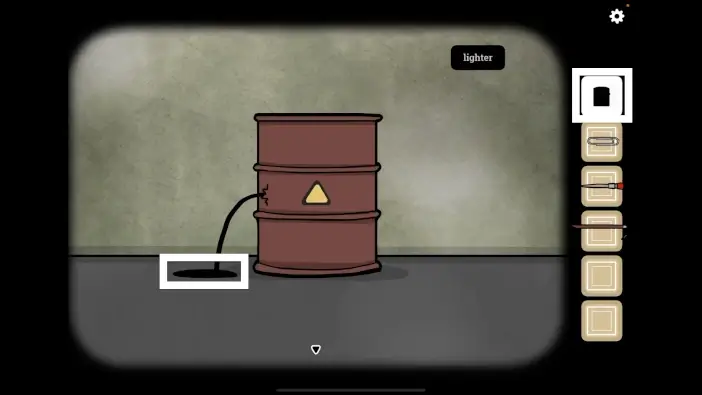
Use a lighter to burn the oil. The barrel will be destroyed in the explosion.
From the starting area, go right.

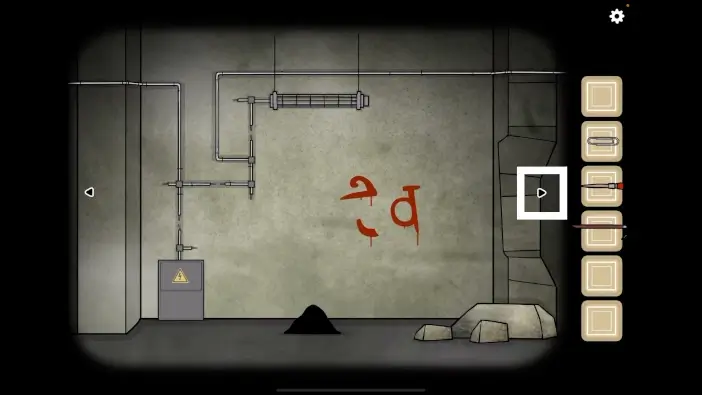
In the door area, approach the box.
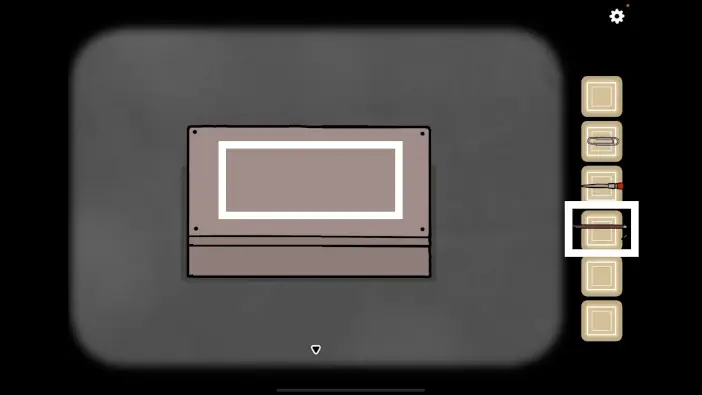
Use the crowbar to open the box.
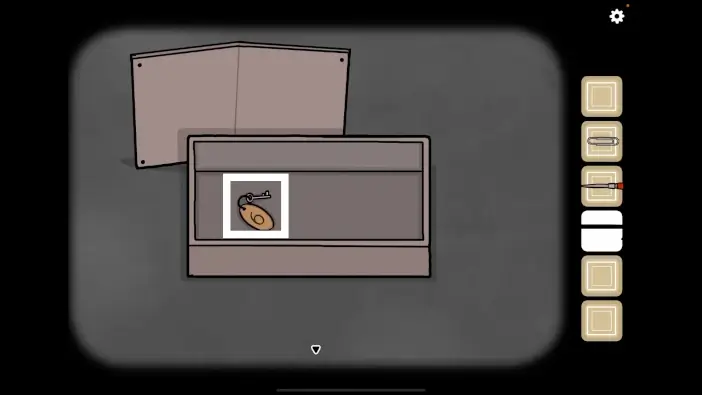
Take the locker key. It can unlock locker number 6.
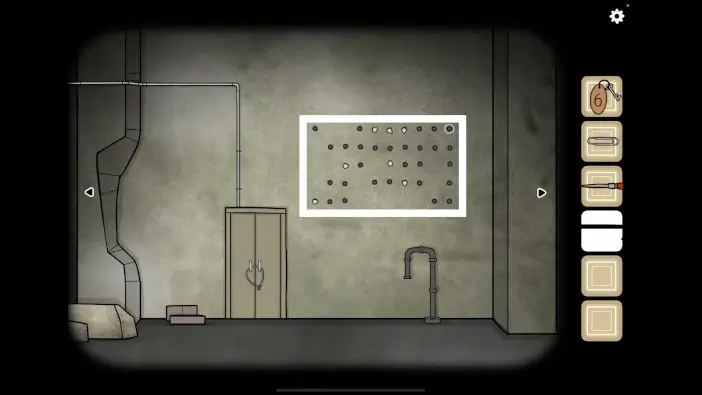
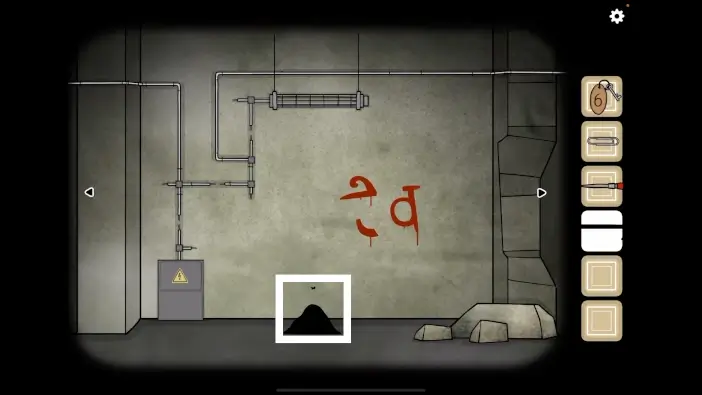
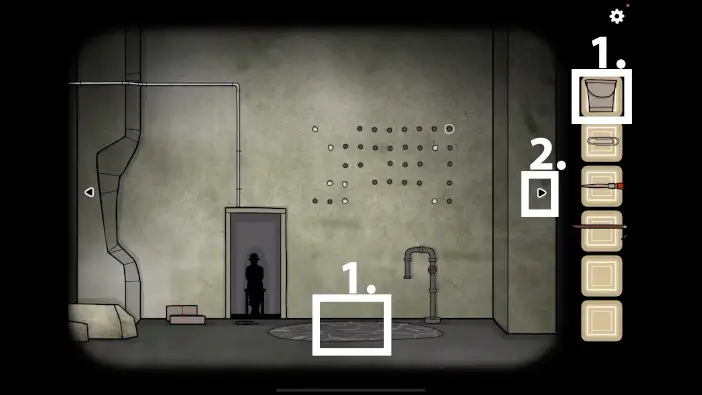
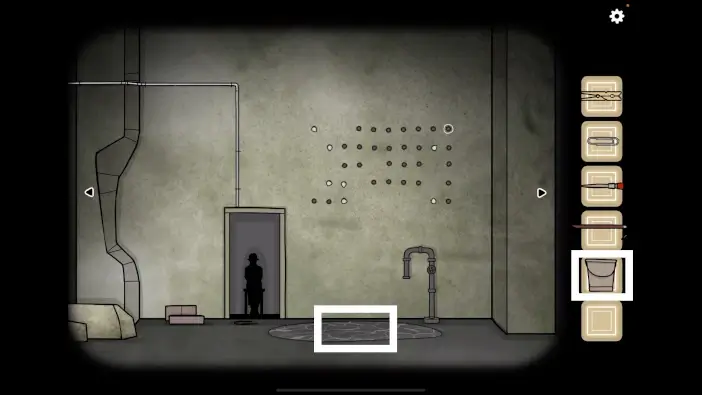
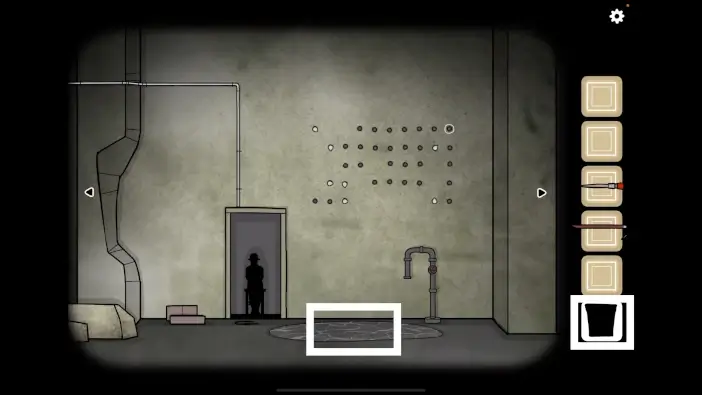
Approach the stones on the wall.

White stones are oriented to a certain fixed position. Their position shows where the butterfly will travel. You’ll need to rearrange the white stones so that the butterfly travels from the top left corner to the top right corner. Once you complete this puzzle challenge, the butterfly will go to Laura’s remains.
Go to the starting area and approach Laura’s remains.
Click on the butterfly, and Laura will catch it.
Click on Laura, and she will return her corrupted soul form.
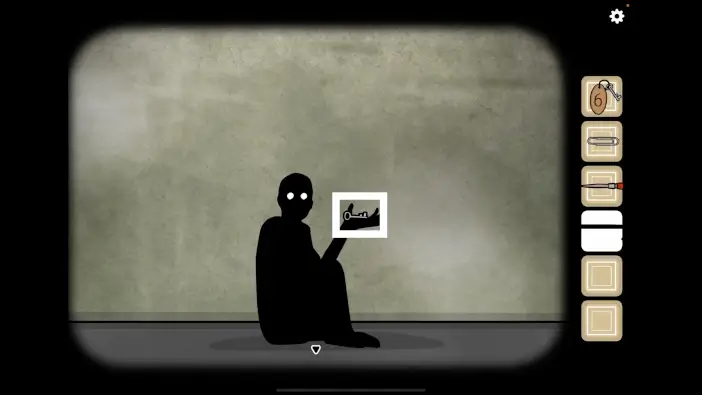
Click on Laura several times to see all the dialogue and then take the key from her hand. It is the key to the locker number 7.
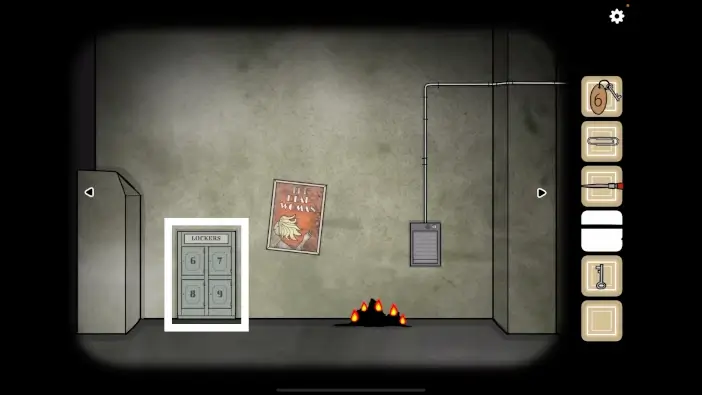
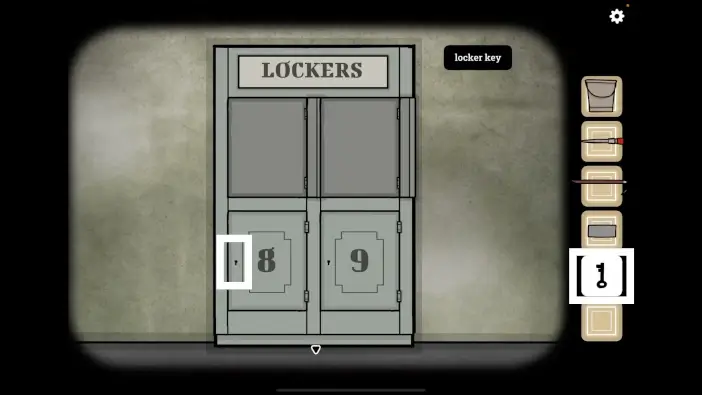
Go to the locker area and approach the lockers.
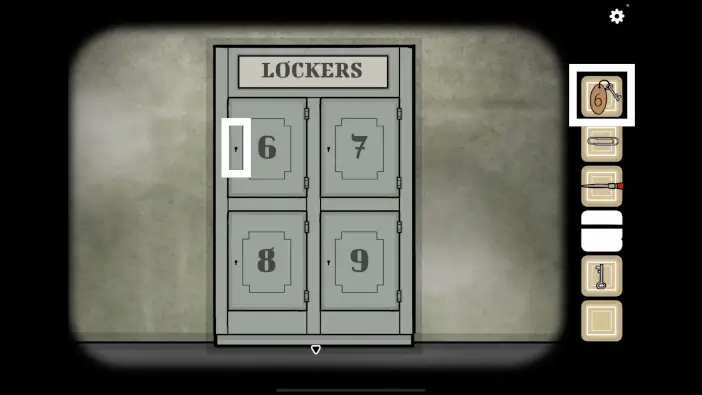
Unlock locker number 6 with the key you’ve found in the box.
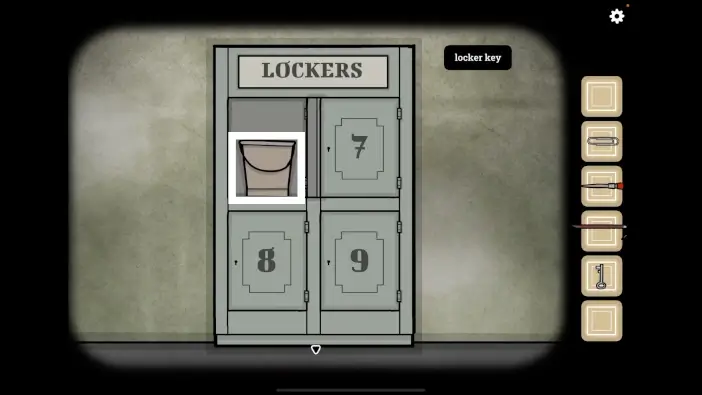
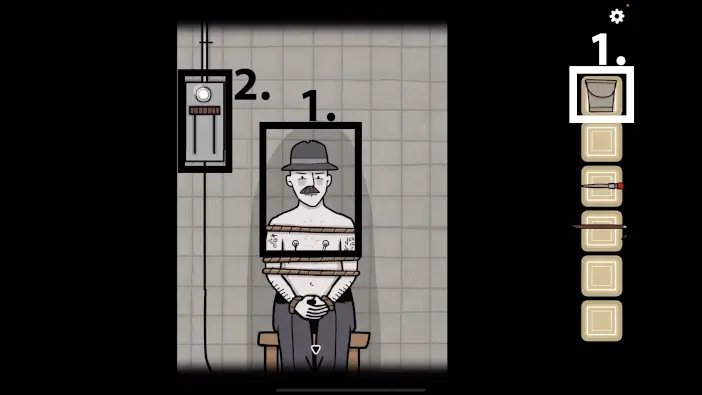
Take the bucket from locker number 6. You’ll fill it with water multiple times.
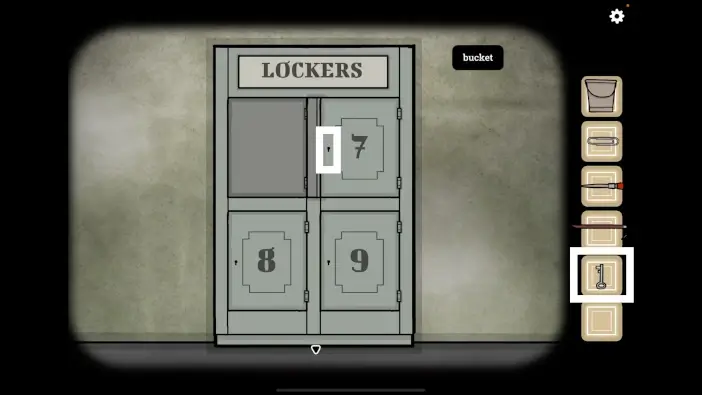
Unlock locker number 7 with the key Laura gave you.
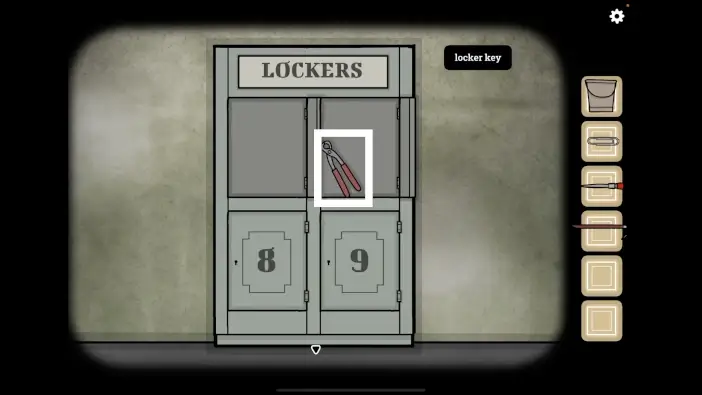
Take the pincers from locker number 7.
Return to the door area and approach the door.
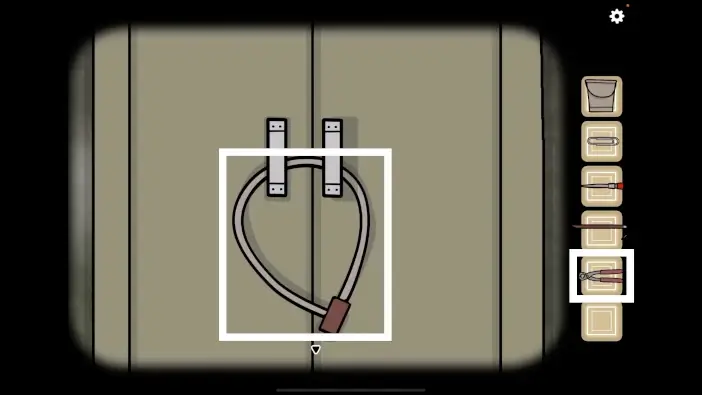
Use the pincers you just found to remove the padlock and open the door.
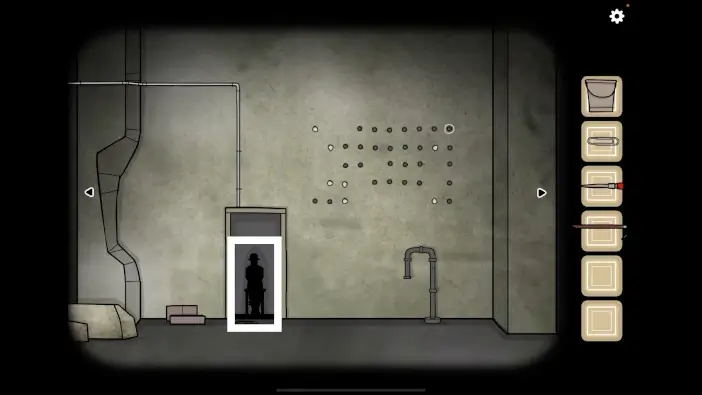
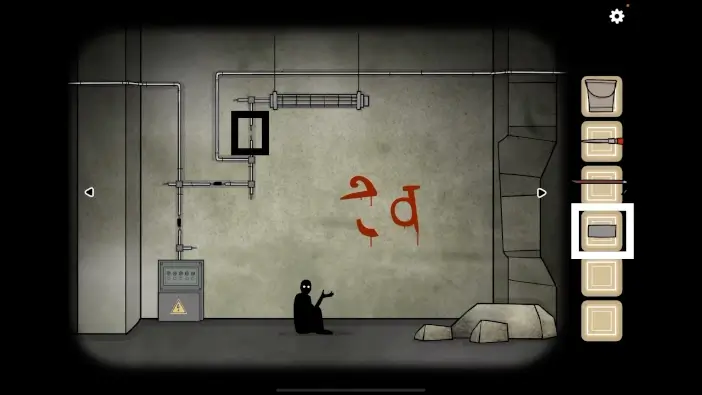
Approach the thief.
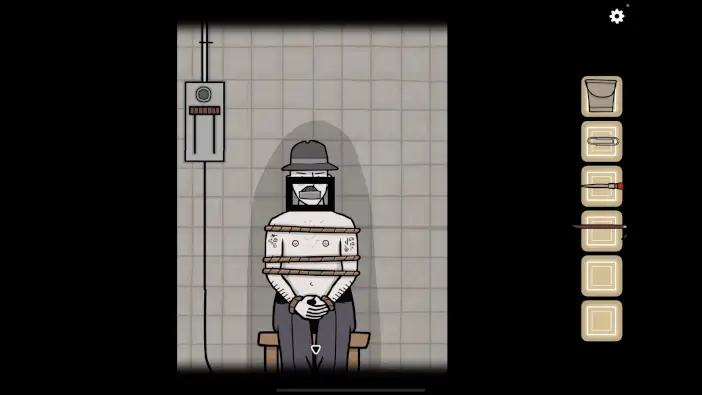
Remove the piece of tape from the thief’s mouth. If you click on the thief, he will refuse to talk to you.
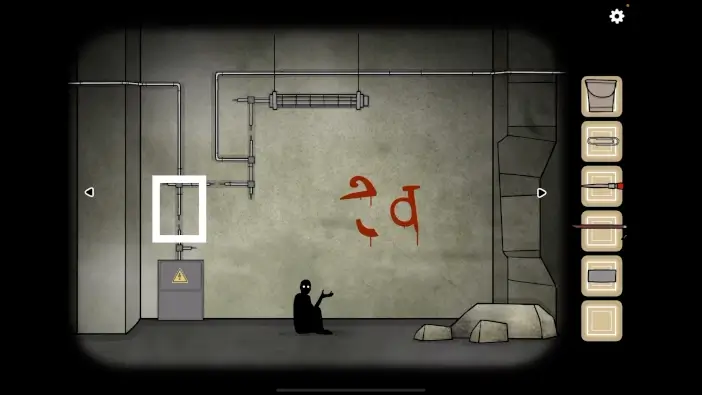
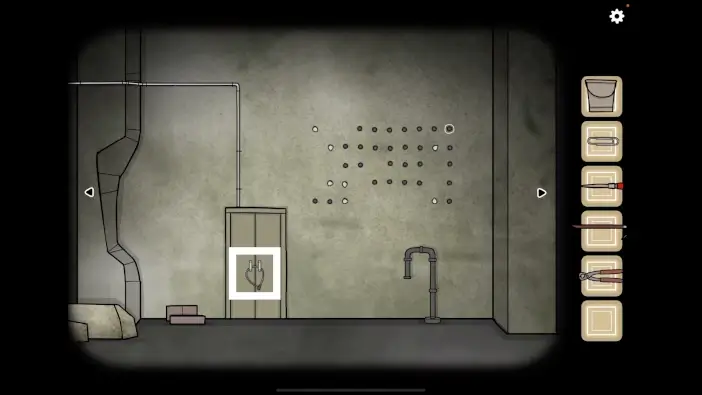
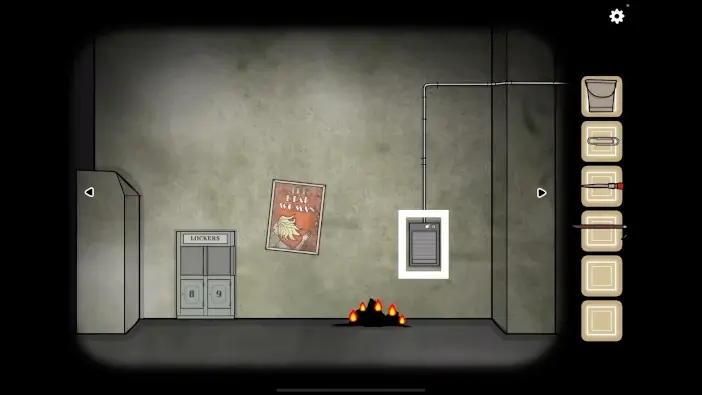
Go to the area where Laura is and approach the cable above the electrical panel.
Fix the cable using the piece of tape that was on the thief’s mouth before.
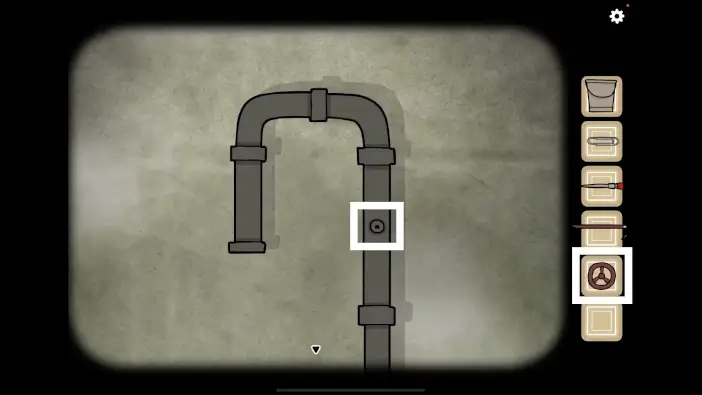
Approach the electrical panel and remove the lid.
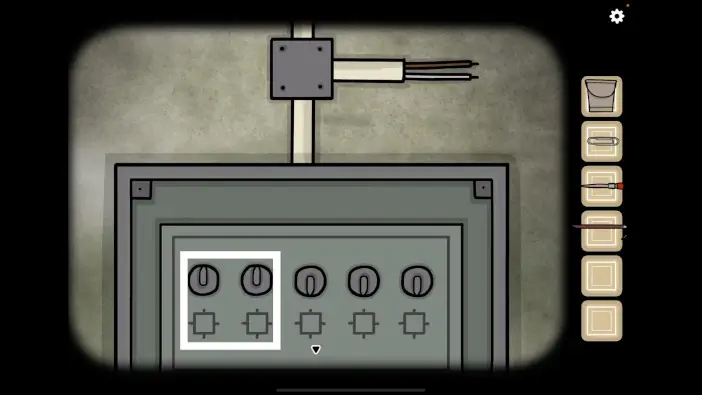
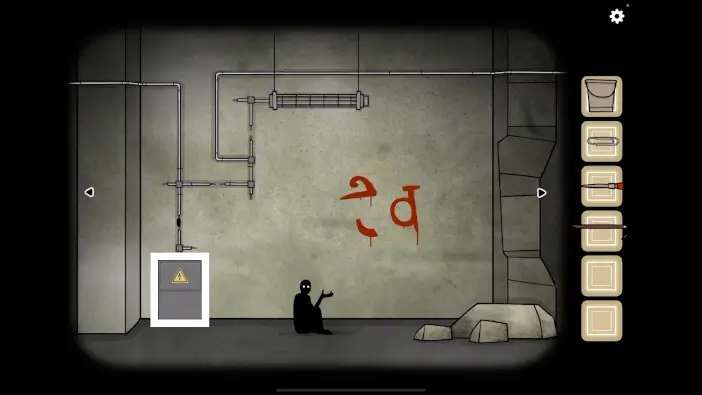
In this panel, you can adjust the electrical current multiple times. This time, you’ll need to unlock a compartment in the locker area. As a clue on which switch to turn and how, you can look at the cables and where they go. For the compartment in the locker area, you’ll need to rotate the first two switches upwards.
Go to the locker area and approach the compartment on the wall.
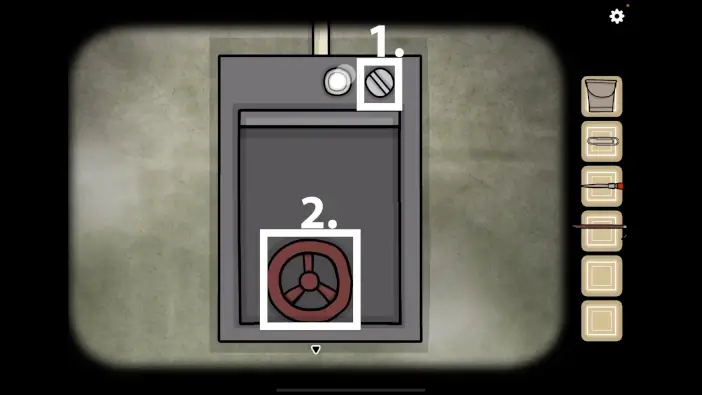
- Rotate the switch on the top to raise the lid.
- Pick up the valve.
Go to the area where the thief is and approach the faucet.
Attach the valve to the faucet, then turn the valve to release some water to create a puddle of water on the floor.
- Approach the puddle of water and fill the bucket.
- From this area, go to the right.

At the railway platform, remove the lid on the floor using the crowbar.
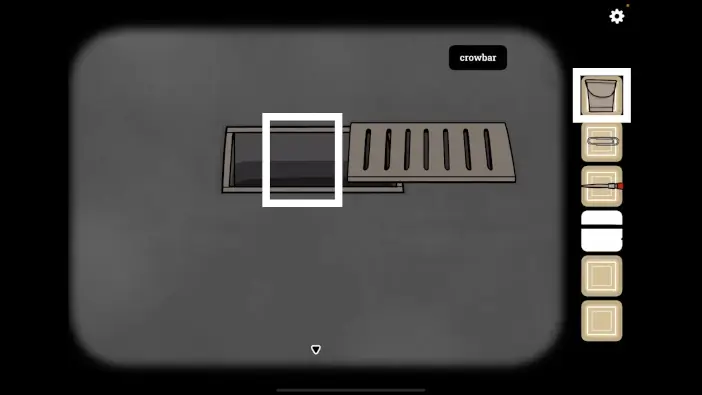
Pour the water from the bucket into the hole.
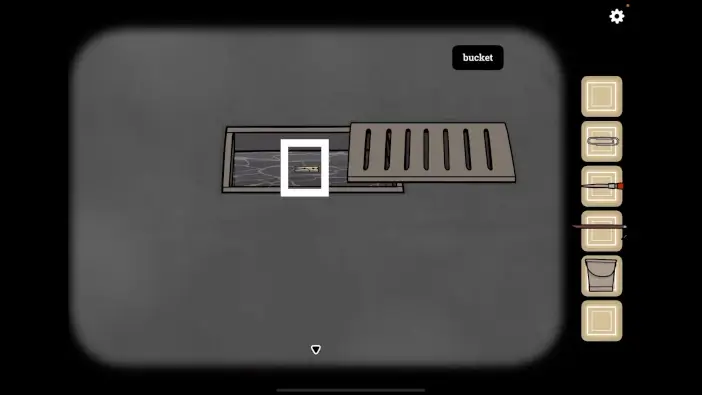
Once the hole is filled with water, pick up the clothespin. You’ll use it to torture the thief.
Return to the puddle and fill the bucket again.
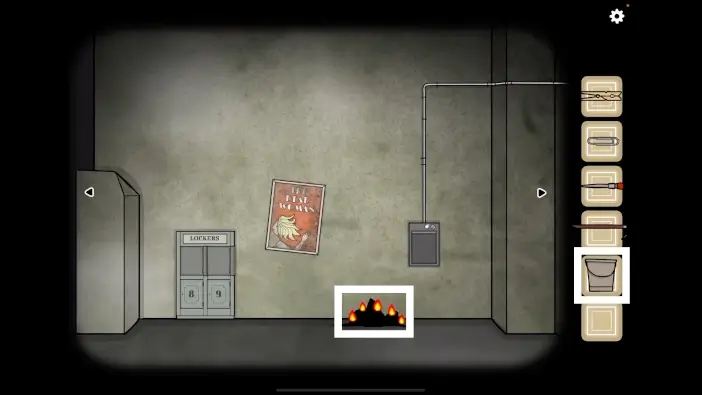
Go to the locker area and extinguish the fire where the barrel was using the bucket of water.
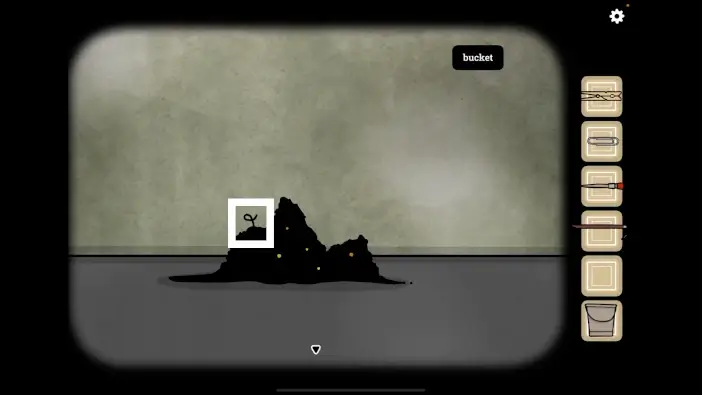
Take the iron wire from the remains of the barrel.
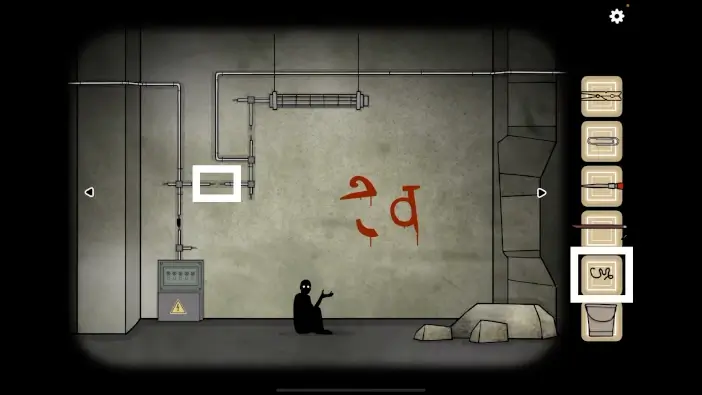
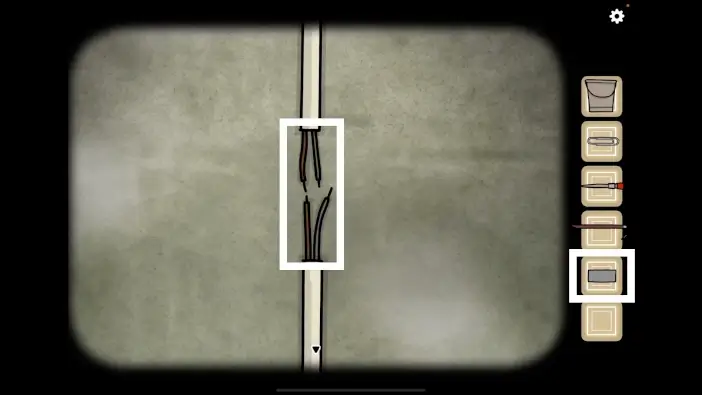
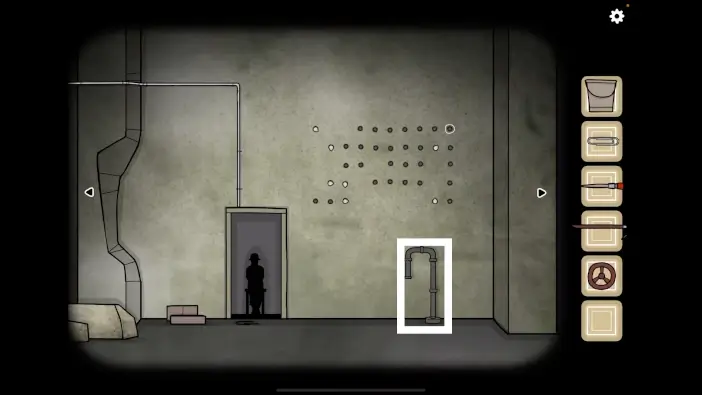
Go to the electrical panel area and approach the next broken section of the cable, marked in the picture above. Use the iron wire to fix this segment of the cable.
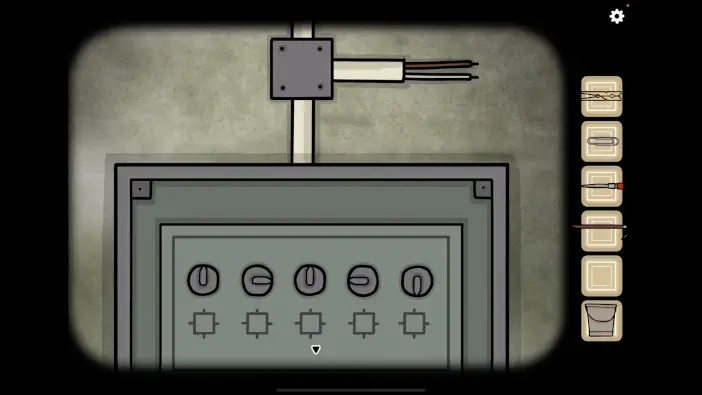
Return to the electrical panel. This time, you’ll need to lead the electrical current towards the torture chamber where the thief is. Now that the next segment of the cable is fixed, you can see where electricity needs to go. Rotate the switches like in the picture above, in the order from left to right: upwards, to the right, upwards, to the left, downwards.

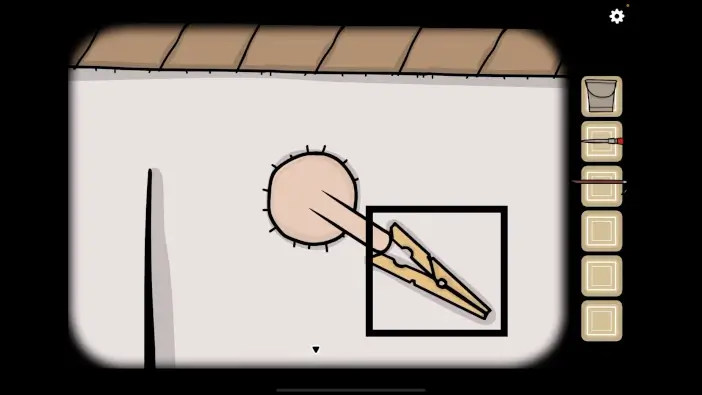
Go to the thief in the torture chamber. Place the clothespin on his right nipple.
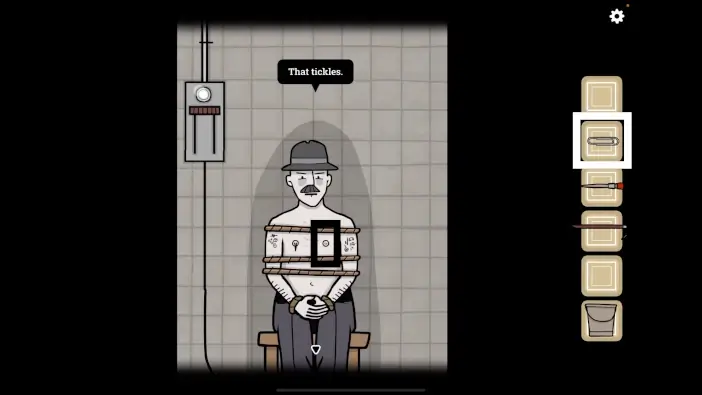
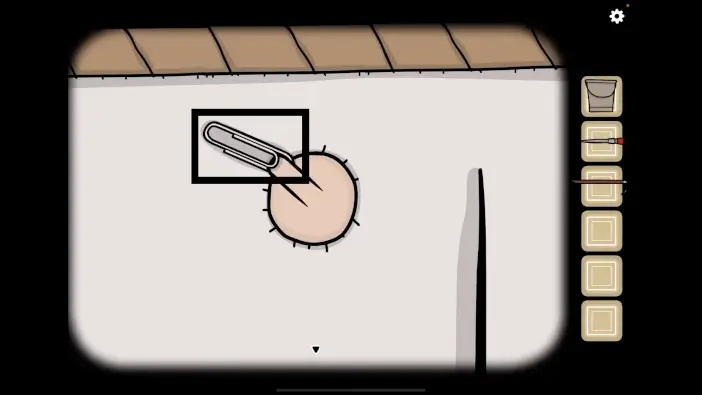
Place the paperclip on his left nipple.
Pick some more water from the puddle using the bucket.
- Return to the torture chamber and pour the water from the bucket on the thief.
- Activate the switch on the left to send the electrical shock to the thief.
Talk with the thief, and he will share with you that the key is behind the hand of the dead woman (which is a poster in the locker area). You will get the “Time to tell” achievement.
For the next achievement, torture the thief using the clothespin and the paperclip. Click and drag these items around for some time.
After some time, you’ll get the “Nice technique” achievement.
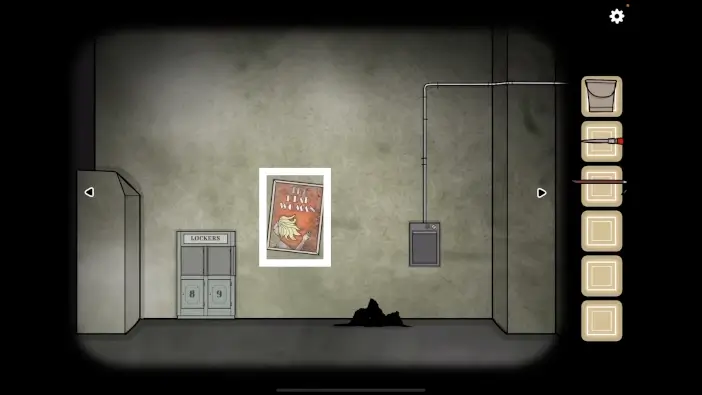
Go to the locker area and approach the poster of the dead woman.

Click on the hand of the woman a few times, and a part of the poster will fall off. Take the key for locker number 8 and a piece of tape.
Go to the lockers and open locker number 8 using the key you just found.
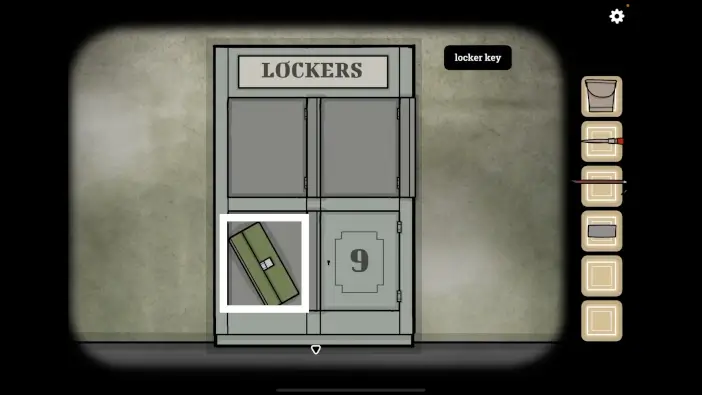
Take a closer look at the box. It is locked.
Go to the electrical panel area and fix the last segment of the cable using the piece of tape you just found from the poster.
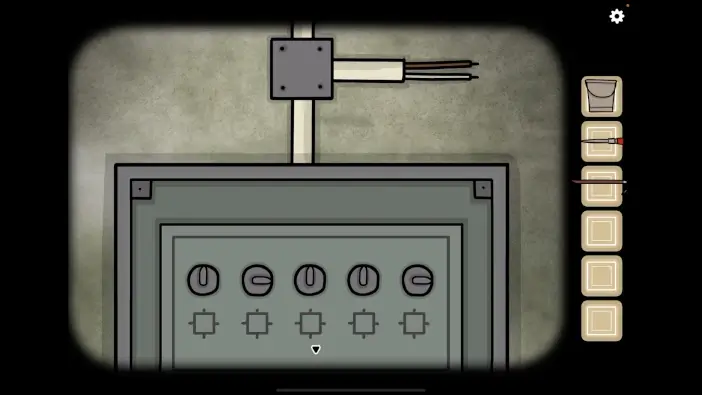
Return to the electrical panel and rotate the switches like in the picture above. From left to right: upwards, to the right, upwards, upwards, to the right. This will cause electrical current to go to the luminaire.

The light from the luminaire will reveal the hidden symbols on the wall. Remember them.

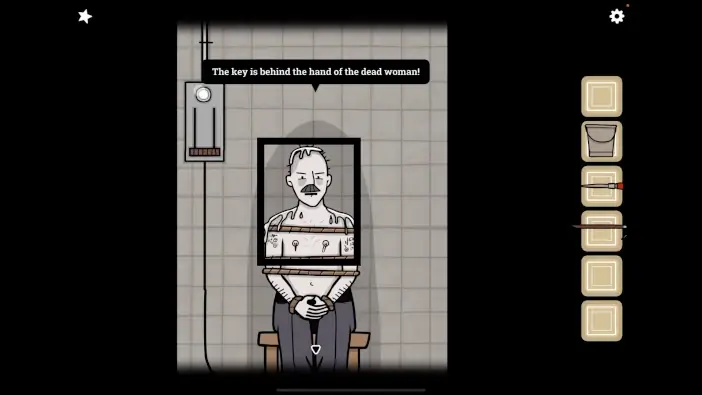
Visit the thief again and look at the tattoos on his arms.
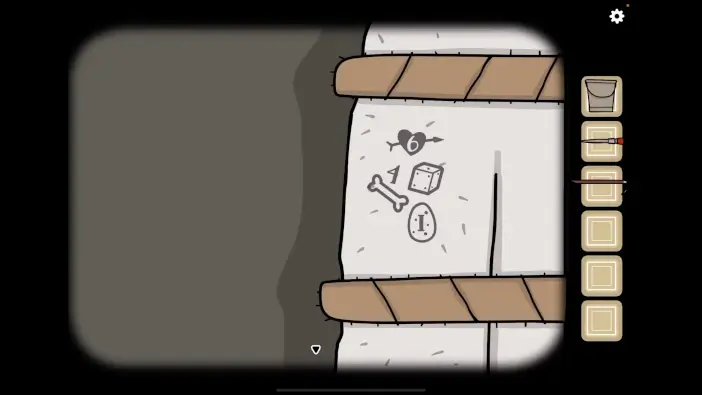
Remember the images on the wall. Find the related tattoos that are associated with those images and then remember the number. On the wall, there is a picture of a dog, on the arm is a tattoo of a bone, and the number 4 above it. Following similar logic, on the wall, there is a picture of a bird, on the arm is a tattoo of an egg, and the number 1 on the egg.

Check the other arm. On the wall, there is a picture of a boat, on the arm is a tattoo of an anchor, and the number 9 beside it. On the wall, there is a picture of a tree, on the arm is a tattoo of a flower, and the number 5 above it.
The final password for the box is 4195.

Return to the box near the lockers.
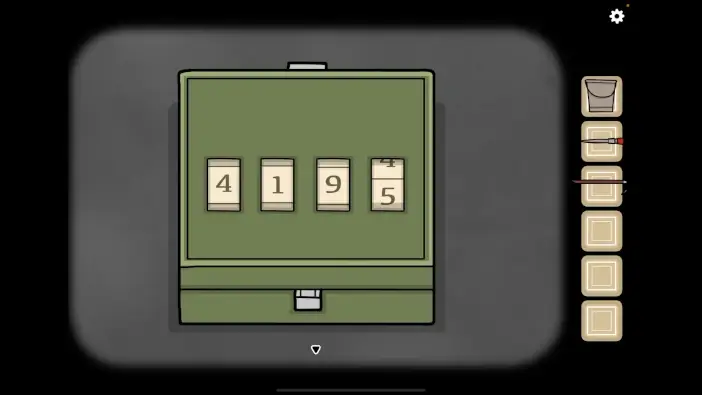
Enter the password 4195 to open the box.
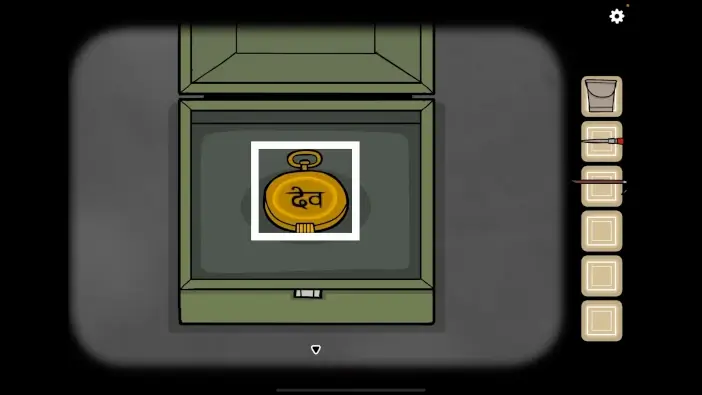
Take the Rose’s golden timepiece.
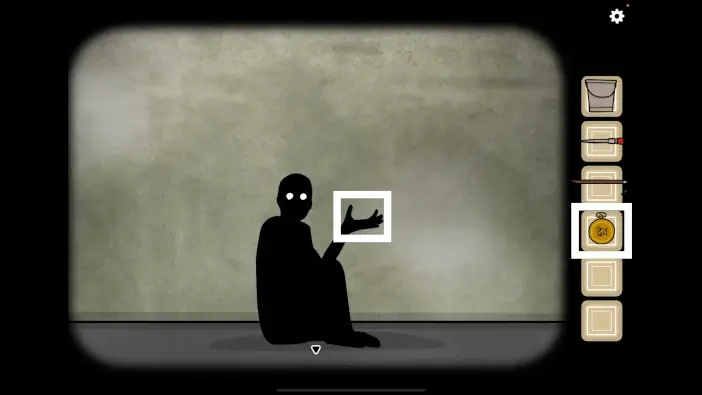
Give the golden timepiece to Laura.

Look at the fragments of the timepiece sigil on the wall and remember them.
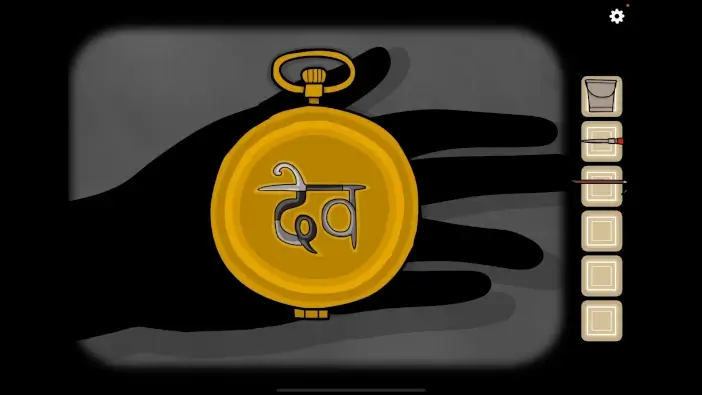
Look at the golden timepiece and click only on the fragments of the sigil shown on the wall.
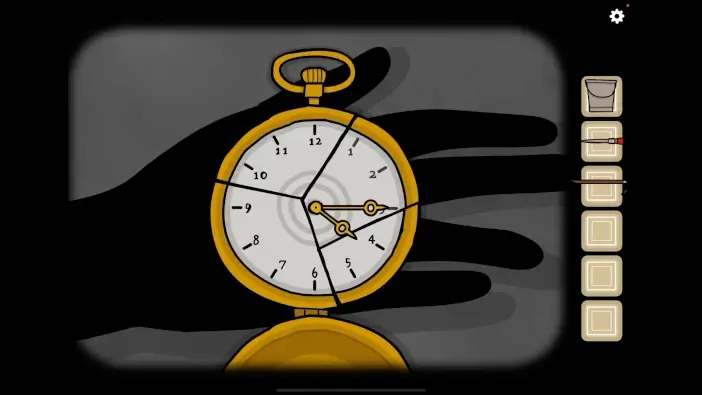
The timepiece will open, showing 16:15.
Go to the railway platform and speak with Laura. Afterwards, enter the train with her and leave the station. You will get the “Departing Soul Street” achievement.
This will mark the end of our guide for Chapter 6 of the Underground Blossom.
Thank you for reading!