100 Doors Escape from Prison Level 11-20
Hello everyone and welcome to the walkthrough for 100 Doors: Escape from Prison. On this page, you can find the solution for levels 11-20.
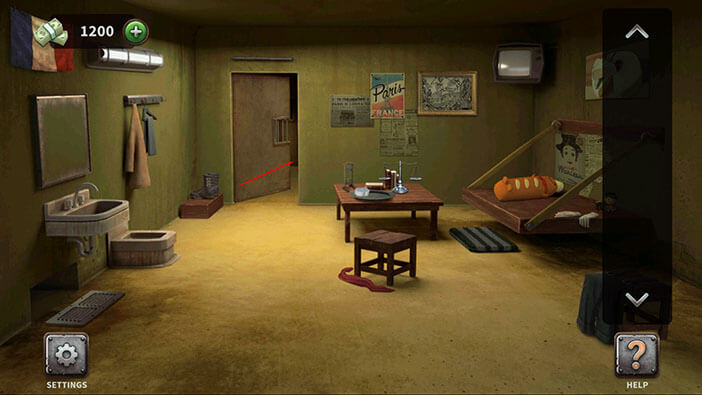
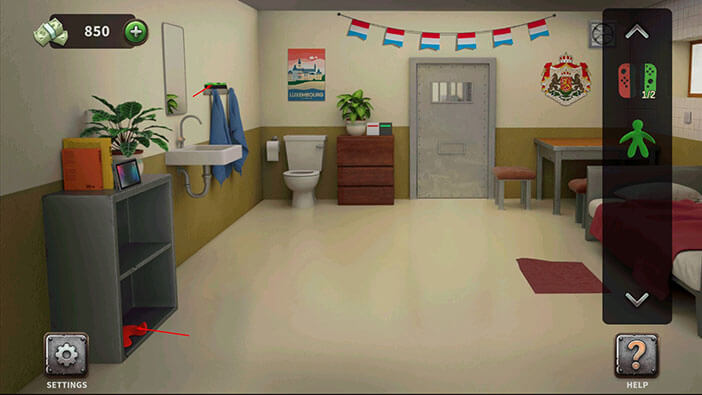
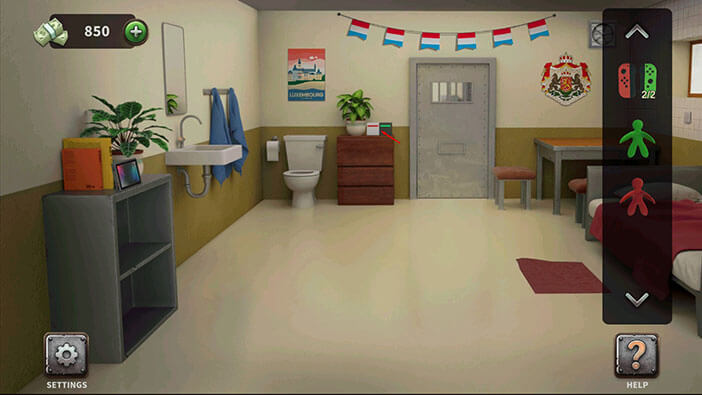
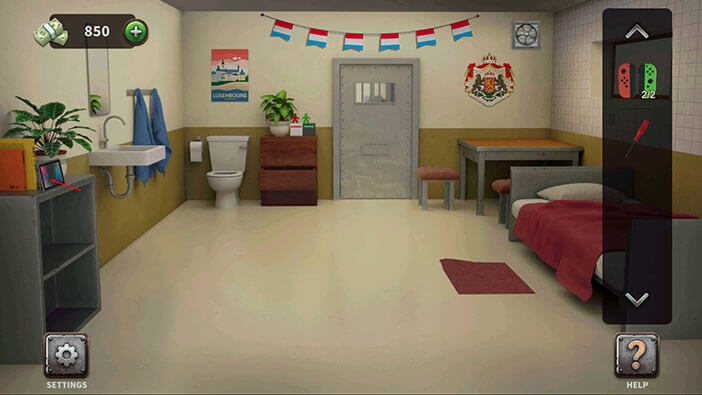
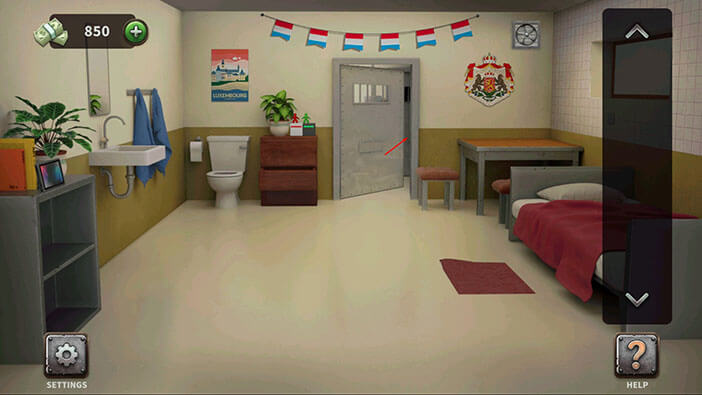
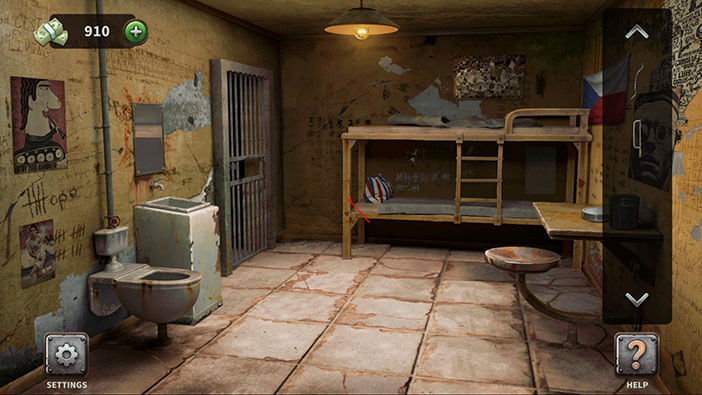
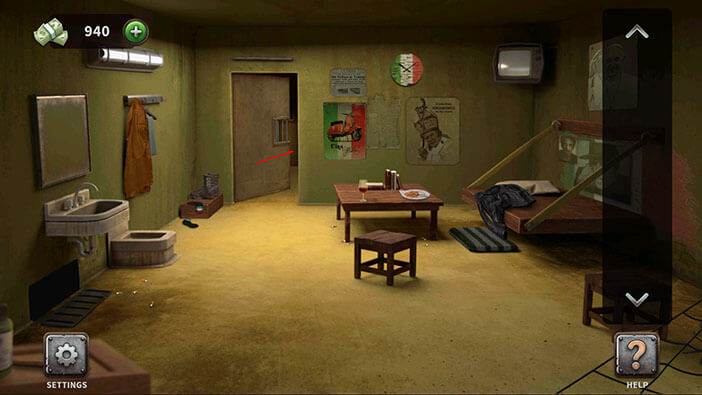
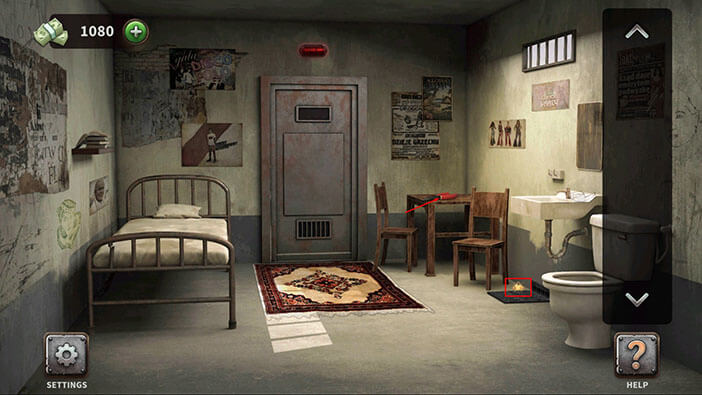
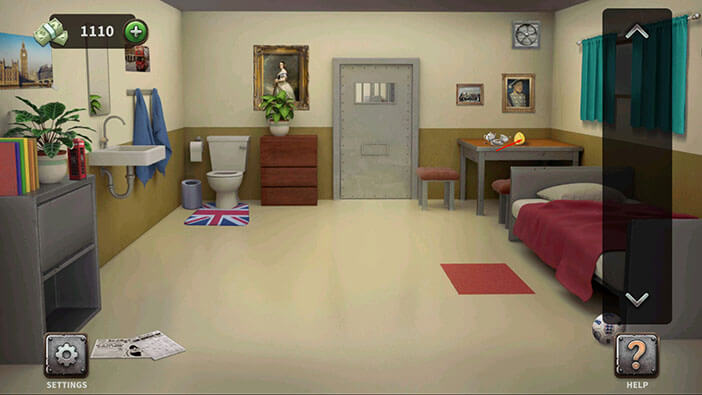
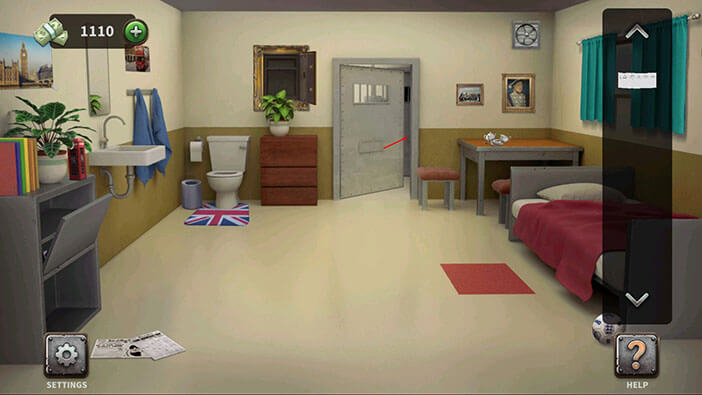
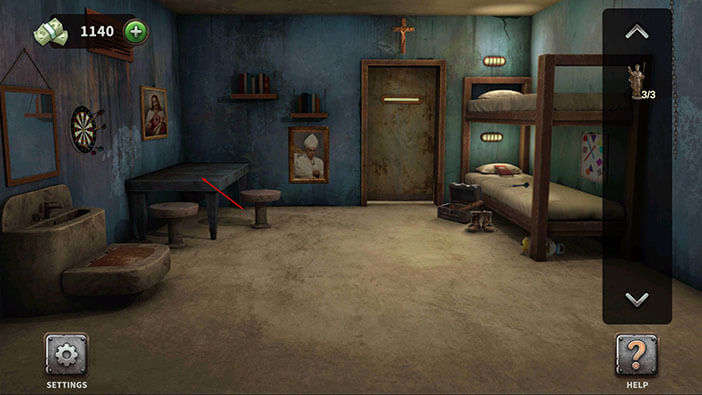
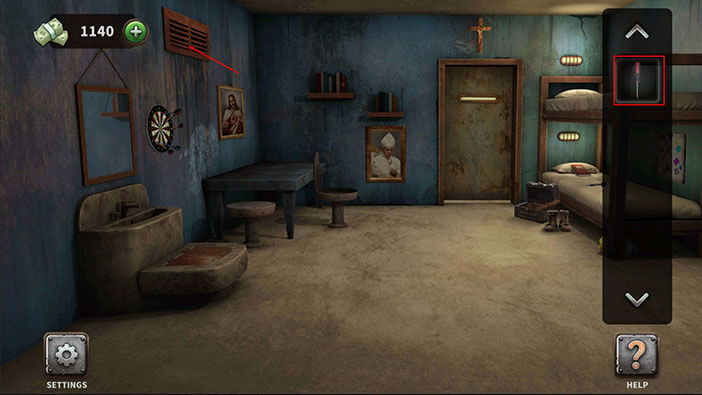
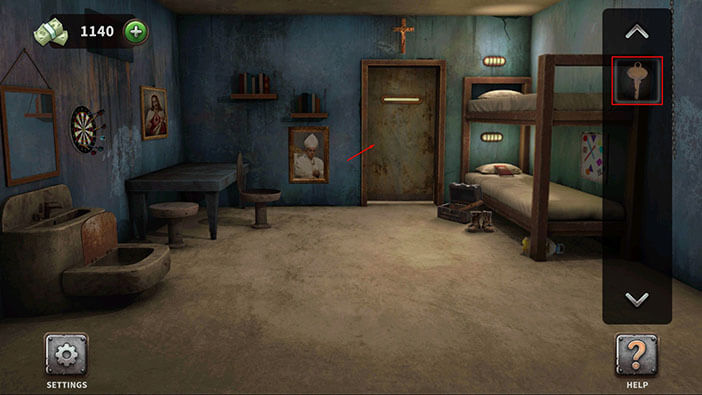
Level 11: Luxembourg cell
Let’s start by picking up two items.
On the right, close to the bed, you will see one-half of a gamepad.
Also, below the table in the right corner of the room, you will notice a green toy.
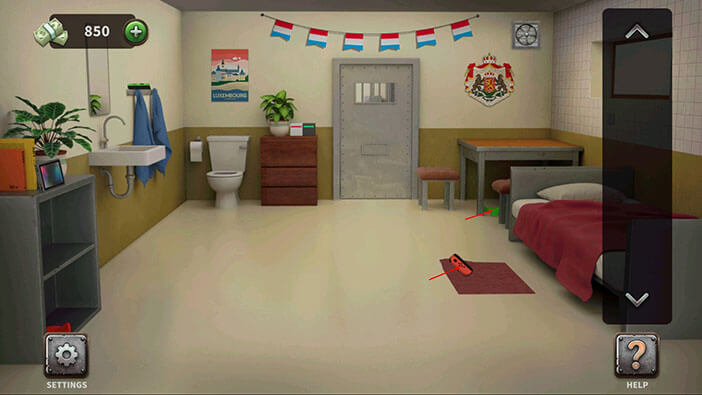
Next, if we take a look at the left side of the room, we will notice two more items.
On the bottom shelf on the left, you will find a red toy.
And on the towel stand, you will find the other half of the gamepad.
Tap on both items to pick them up.
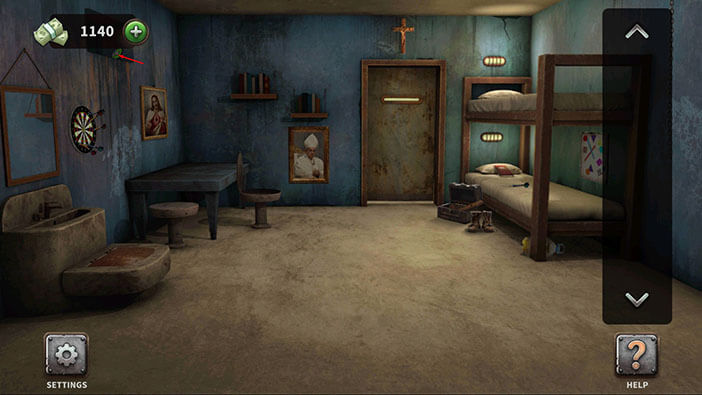
Tap on the box, located on the cabinet, next to the vase, to take a closer look at it.
We can see that the left half of the box is marked with the red line, while the right half of the box is marked with the green line. So, select the red toy from the inventory and place it on the left side of the box.
After that, select the green toy and place it on the right side of the box.
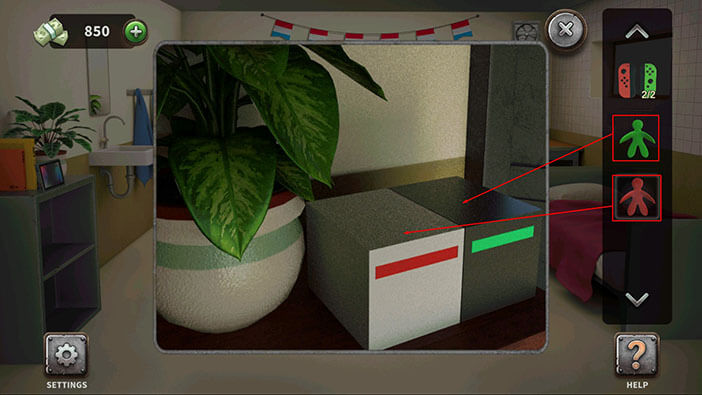
As soon as you place the figurines, one of the drawers will open and you will find a screwdriver. Tap on it to pick it up.

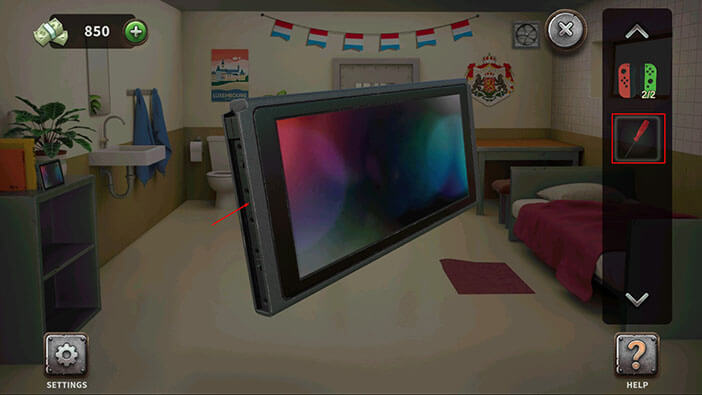
Tap on the tablet, located on the shelf on the left, to take a closer look at it.
Select the screwdriver from the inventory and use it to remove the sides of the tablet.
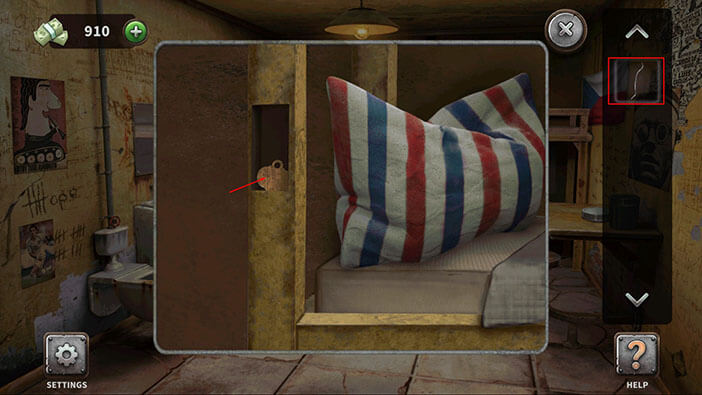
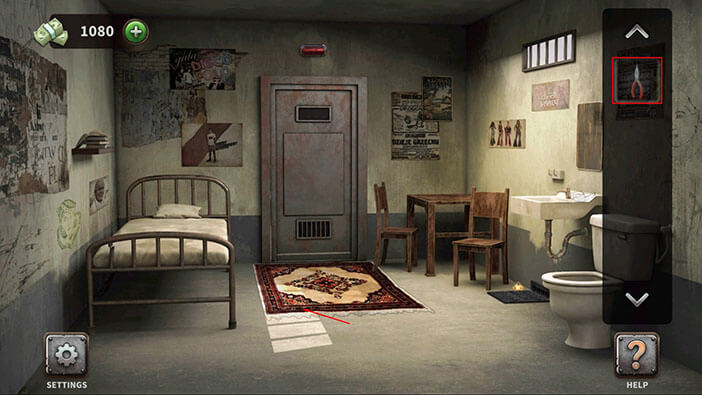
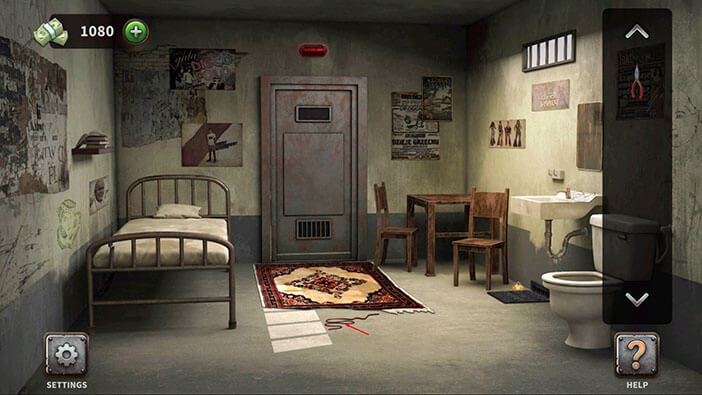
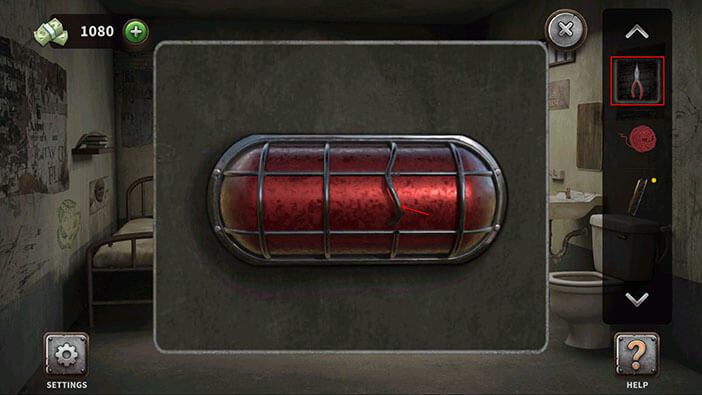
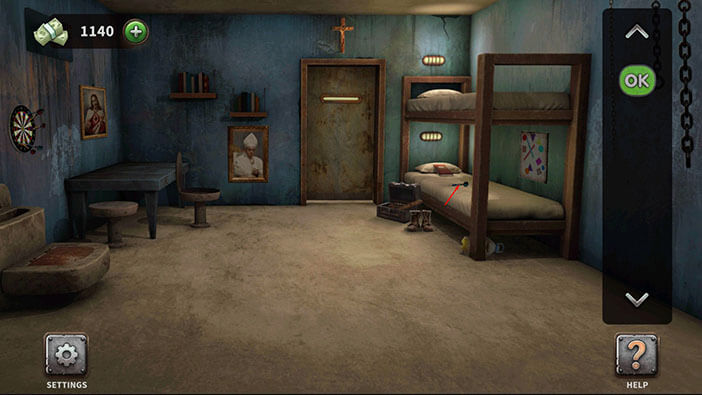
Next, if we take a look to the right, we will notice that one of the tiles (below the window) is sticking out. Tap on the tile to take a closer look at it.
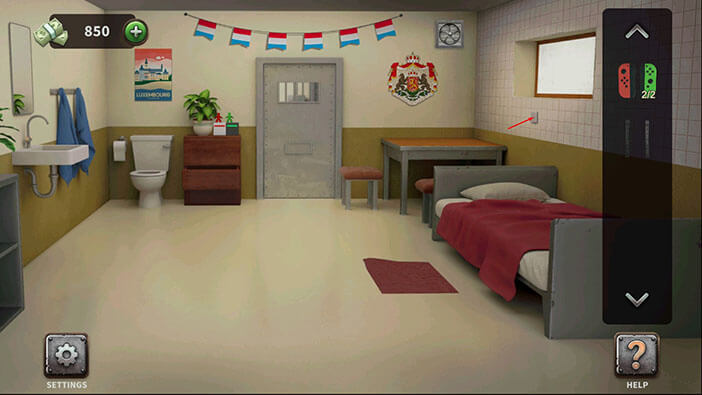
Select the sides from the inventory and attach them to the tile.
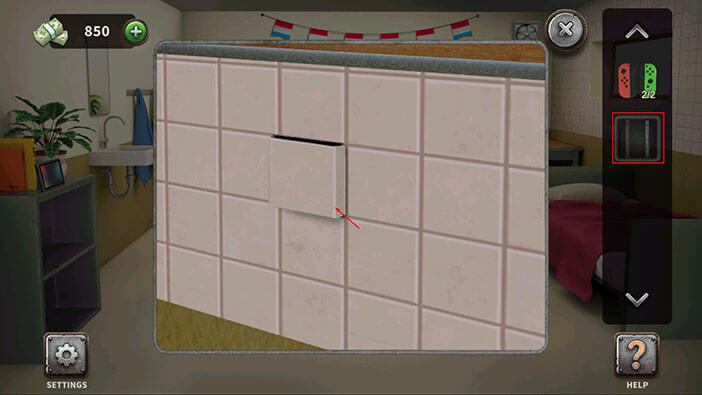
After that, select both halves of the gamepad from the inventory and attach them to the tile.
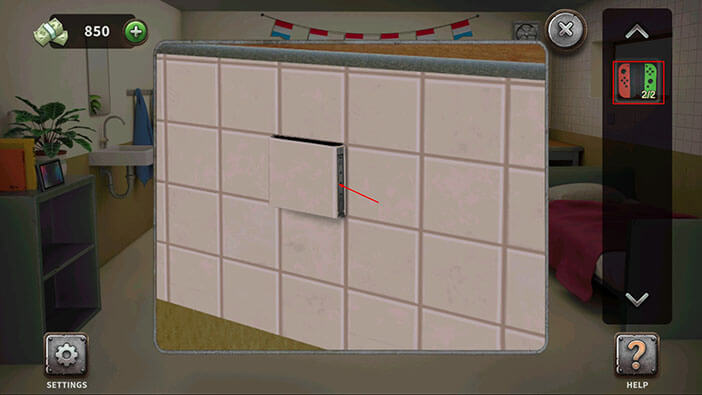
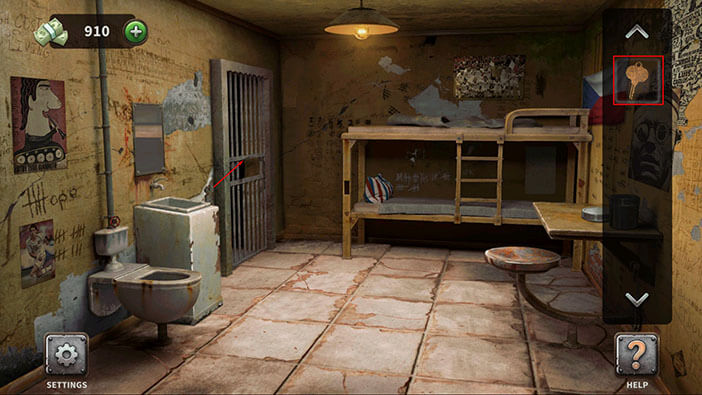
Finally, tap on the gamepad and you will open a secret compartment.

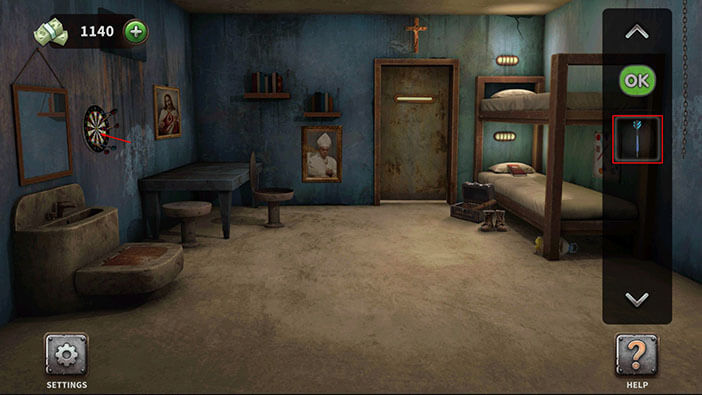
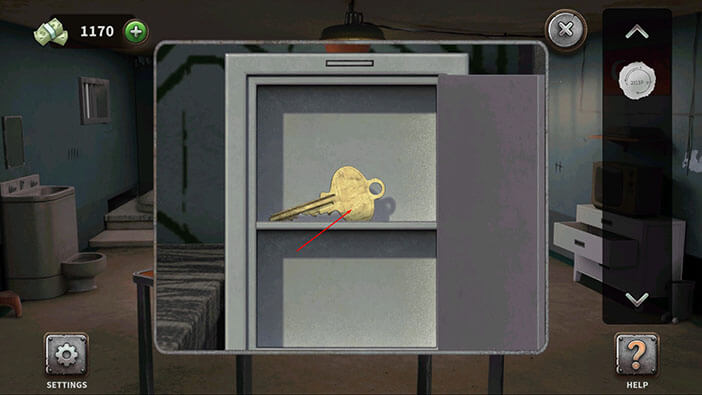
Inside the secret compartment, you will find a key. Tap on it to pick it up.
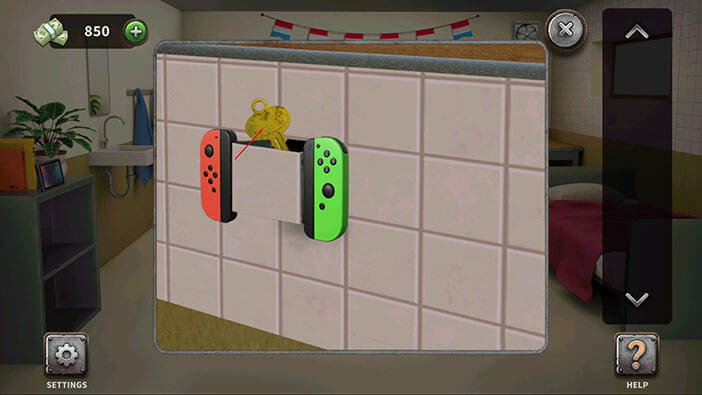
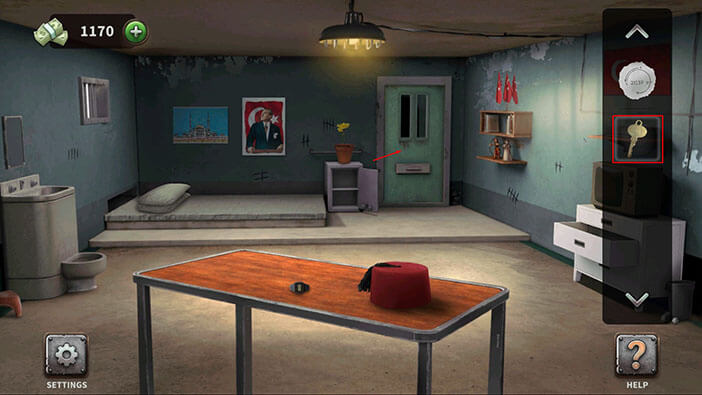
Select the key from the inventory and tap on the cell door to unlock it.
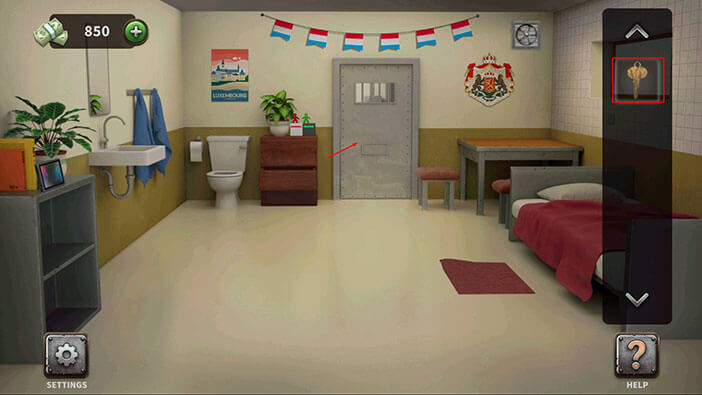
Finally, tap on the cell door to escape and you will complete the first level.
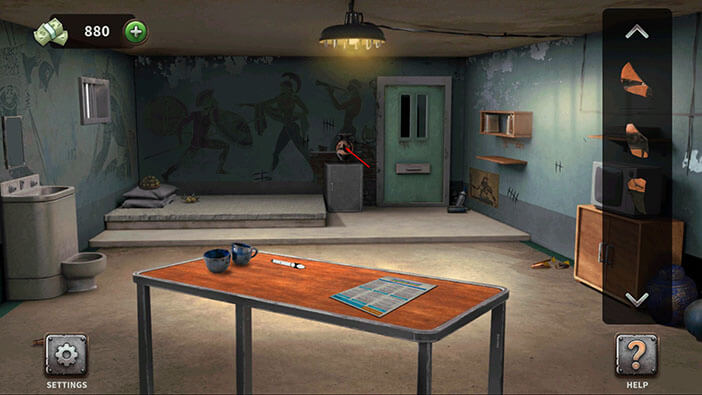
Level 12: Greece Cell
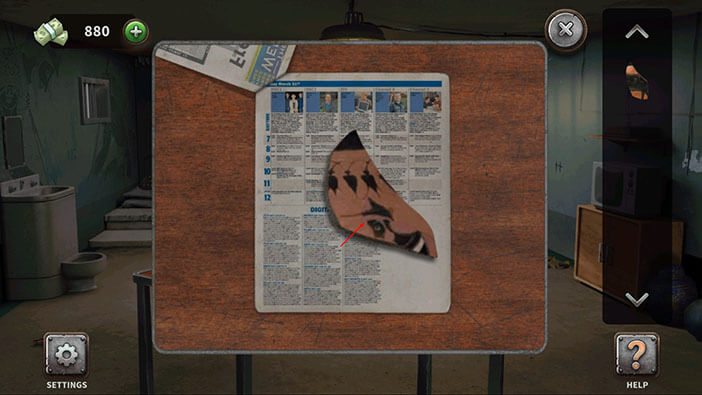
On the mattress, we can see a part of a broken vase. Tap on it to pick it up.
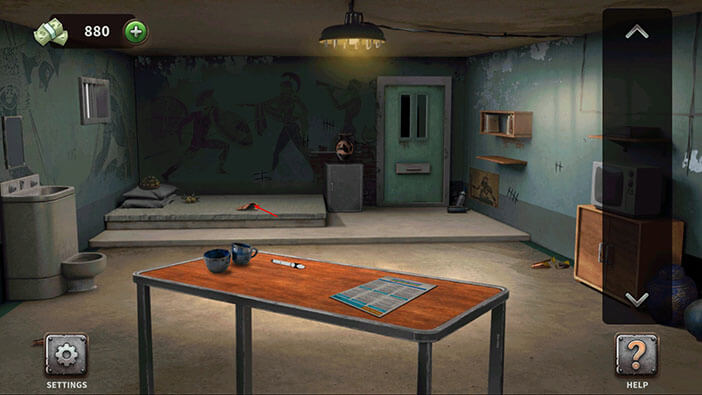
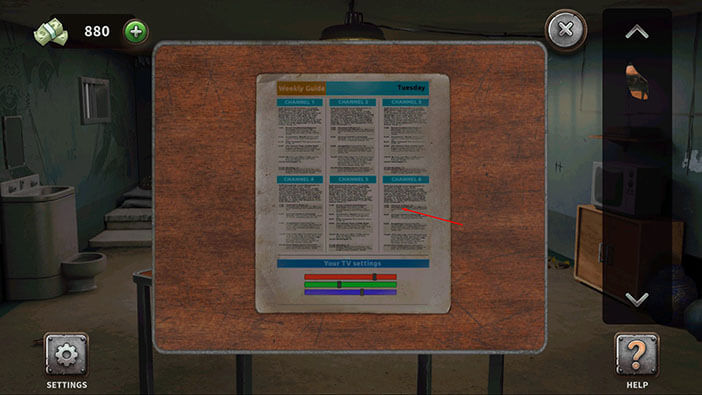
Next, tap on the pamphlet (TV instructions manual) on the table to take a closer look at it.

Tap on the first page, to open the manual, and inside you will discover another piece of the vase. Tap on it to pick it up.
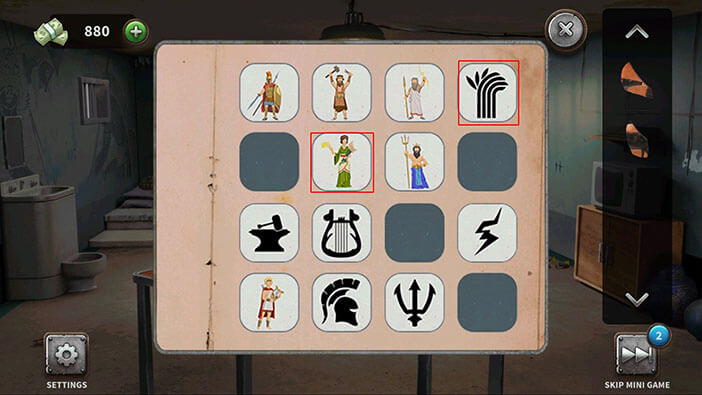
Next, tap on the bookshelf on the right to start the interaction.

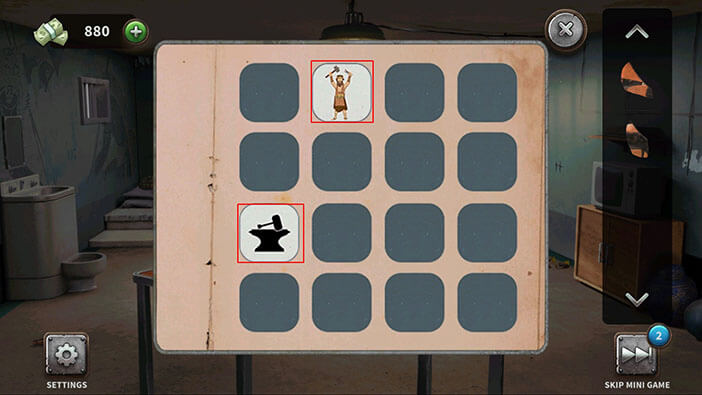
Here, we have another puzzle, and it is very similar to a memory game. There are 16 cards in total, positioned on a four-by-four grid. However, unlike in regular memory games, one-half of the cards (8) contains a picture in color, and the other half has black and white symbols. Our task is to match the black and white symbol with the correct picture. For example, hammer and anvil should be matched with the blacksmith.
We will do this puzzle in several steps. Let’s begin.
Step 1
The blacksmith should be paired up with a hammer and anvil symbol.
So, we have found the first pair. Let’s continue.
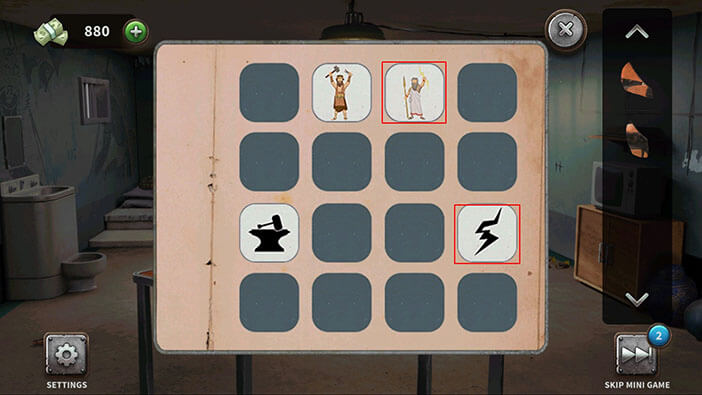
NOTE: The position of the pictures is randomized every time you restart this level, so the pictures in your game won’t be at the same positions as the pictures in my playthrough. Because of that, I will only show you matching pairs.
Step 2
Zeus should be paired up with the lightning symbol.
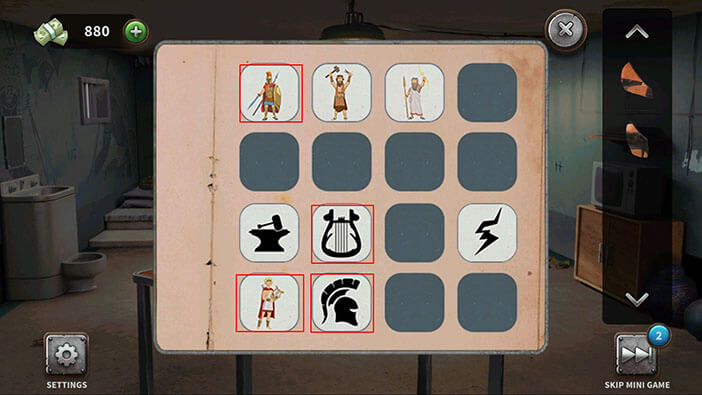
Step 3
The man with the harp should be paired up with the harp symbol.
The ancient Greek warrior should be paired up with a matching helmet symbol (there are two helmet symbols)
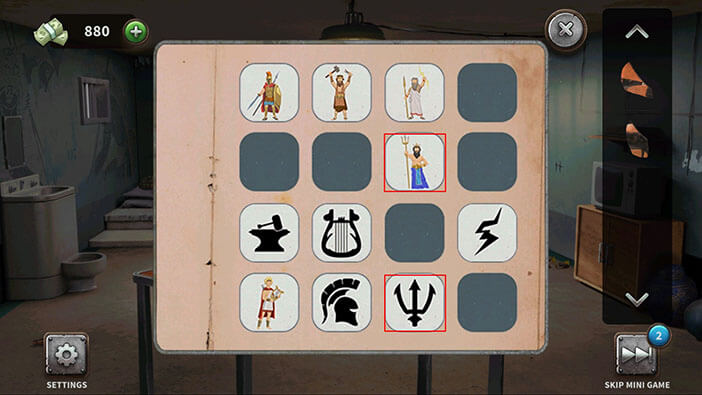
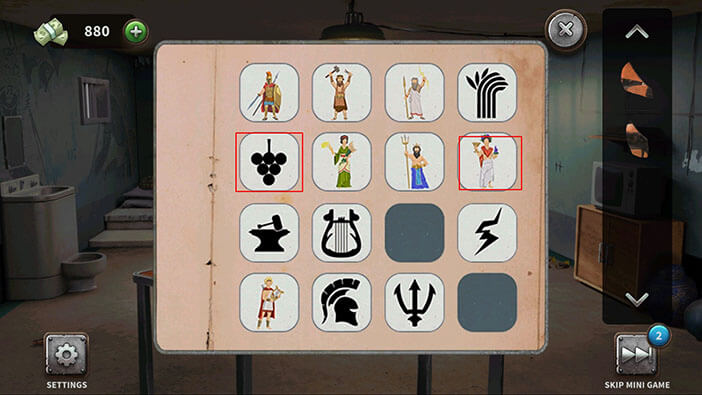
Step 4
Poseidon should be paired up with the trident symbol.
Step 5
The woman with wheat and sickle should be paired up with the wheat symbol.
Step 6
The woman with grapes should be paired up with the symbol of the grapes.
And the final pair is the warrior woman and the other helmet symbol.
After solving the puzzle, you will find another piece of the broken vase. Tap on it to pick it up.
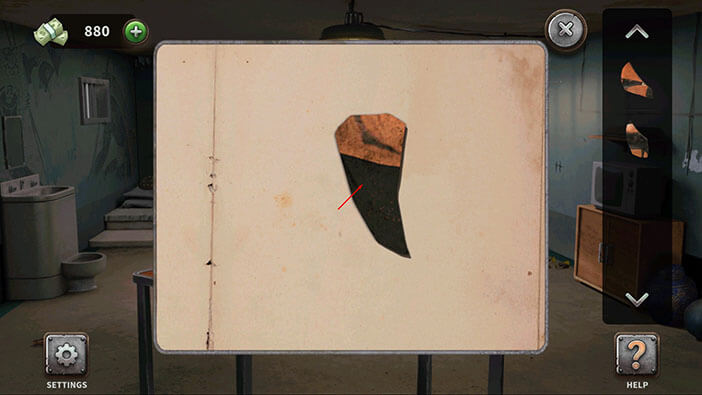
Tap on the broken vase, located to the left of the cell door, to take a closer look at it.
Our next task is to use the repair the vase by using the three pieces that we found.
The top piece should be placed into the middle hole.
The middle piece should be placed into the top hole.
And the last piece should be placed into the bottom hole.
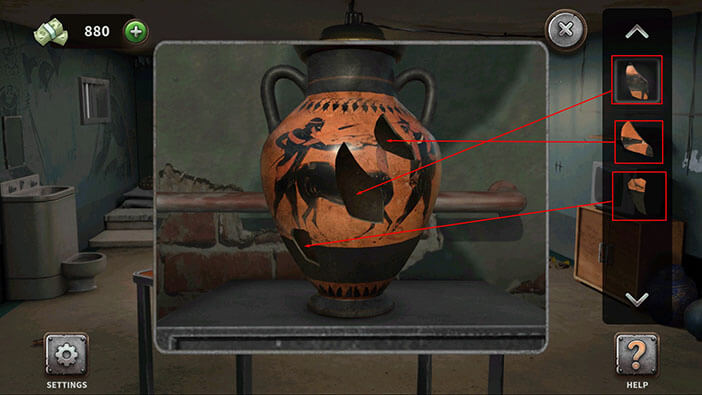
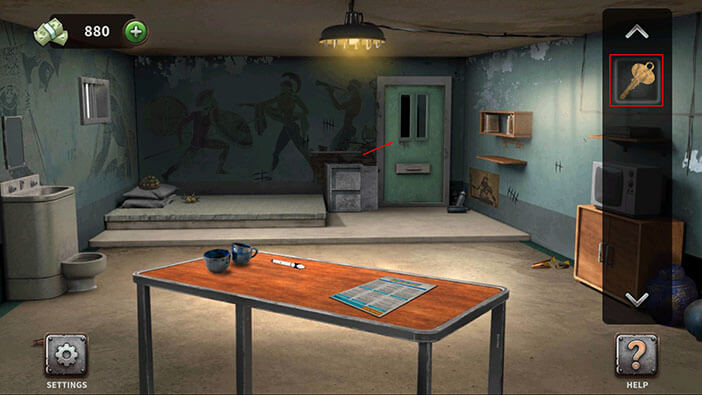
By assembling the vase, you will open a small cabinet. Tap on the key inside the cabinet to pick it up.

Select the key from the inventory and tap on the cell door to unlock it.
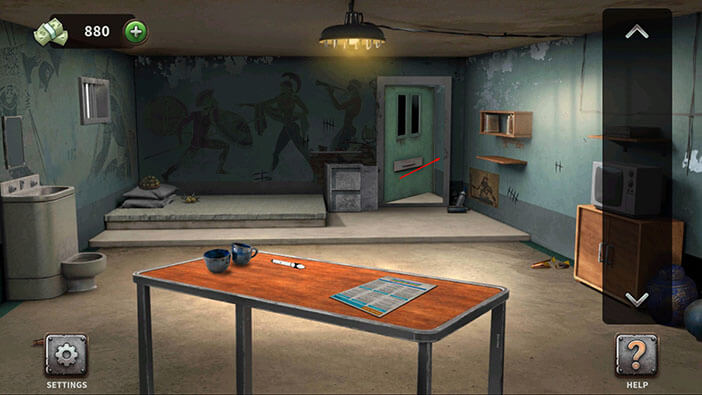
Finally, tap on the cell door to escape and you will complete the twelfth level.
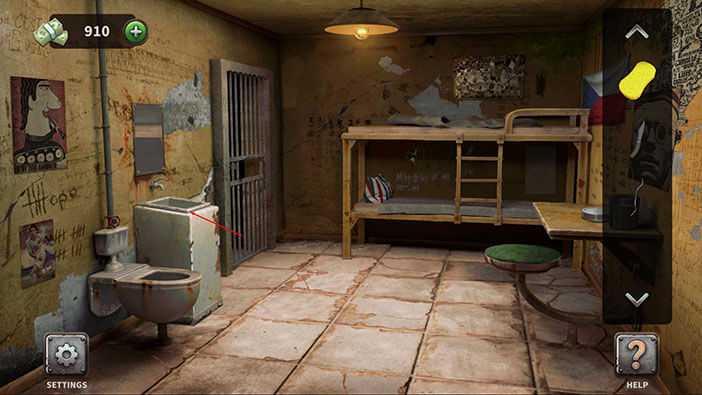
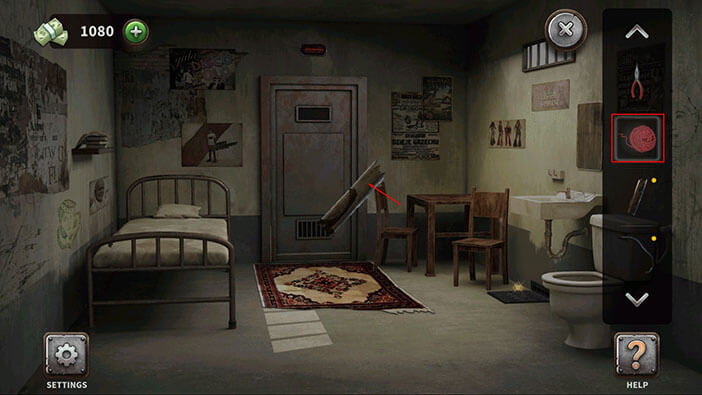
Level 13: Czech Cell
On the table on the right, you will see a sponge. Tap on it to pick it up.
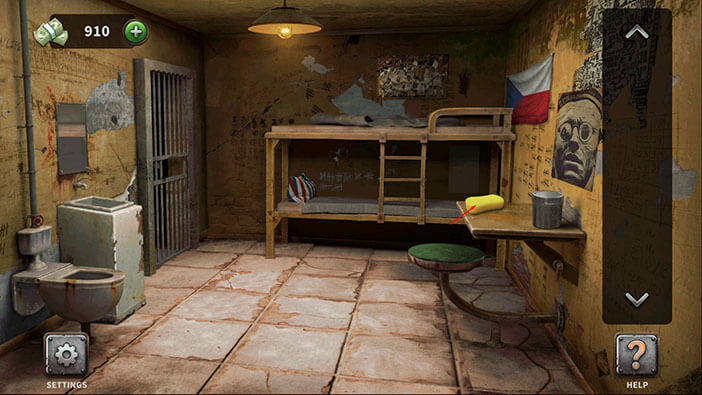
On the same table, you will also see a metal bucket. Tap on the bucket to open it.

Inside the bucket, you will find a knife. Tap on it to pick it up.
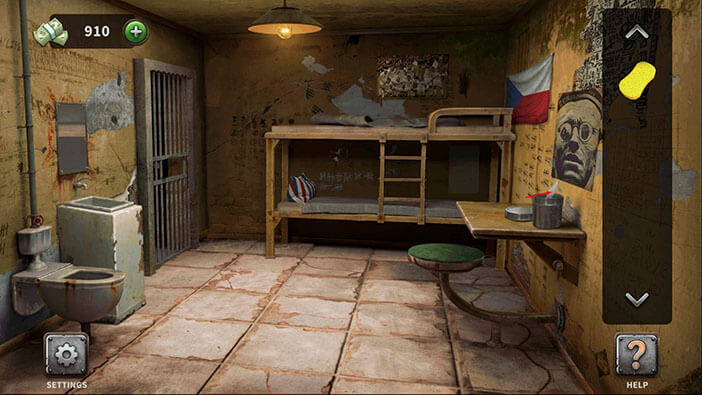
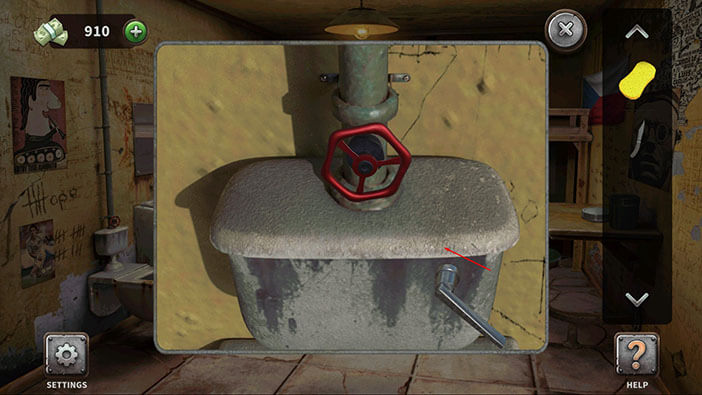
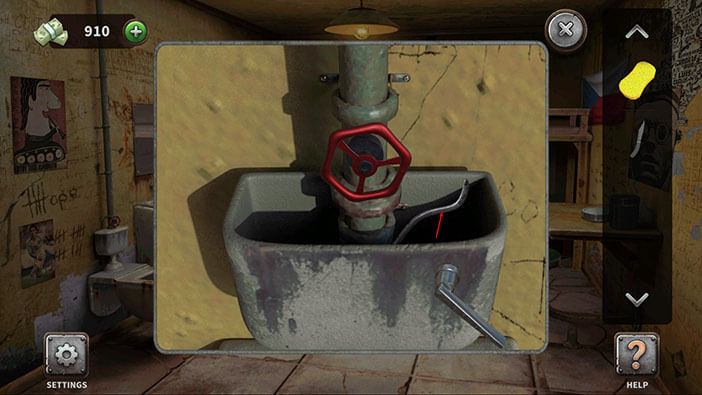
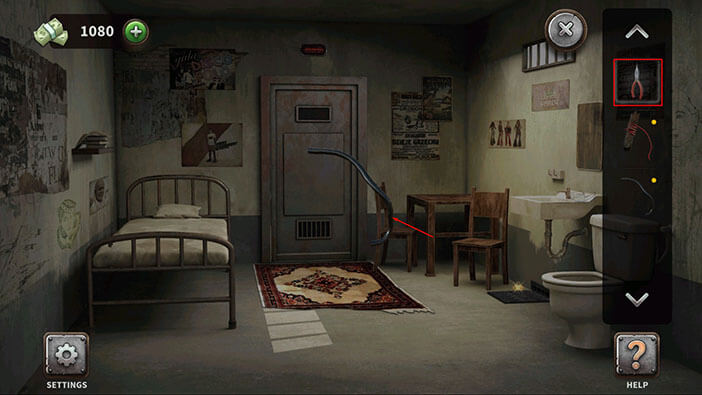
Next, take a look to the left and you will see a toilet. Tap on the water container above the toilet to take a closer look at it.
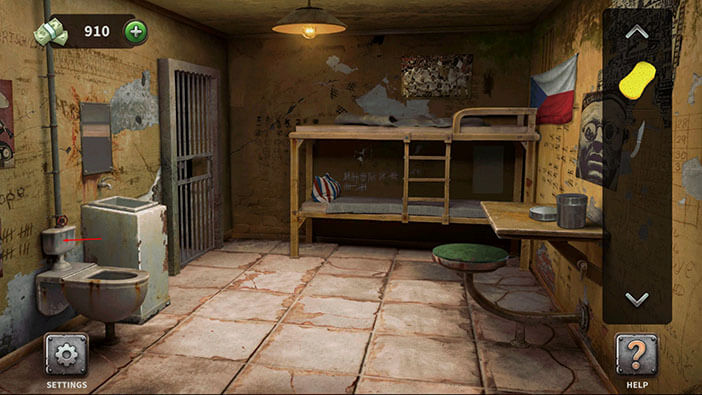
Tap on the red valve to turn on the water.
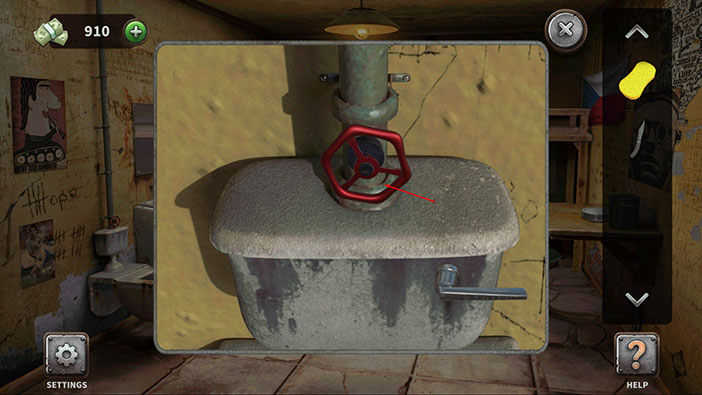
Next, flush the water by tapping on the lever.

Next, tap on the lid to open the container and you will find a metal bar. Tap on it to pick it up.
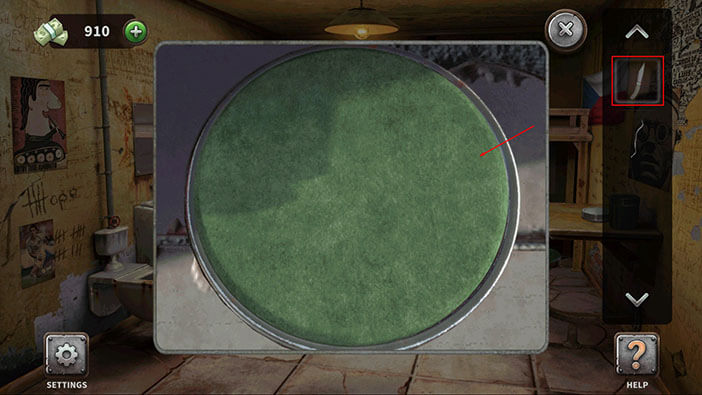
Next, tap on the sink to take a closer look at it.
You will notice that the sink is very dirty, so select the sponge from the inventory and use it to clean the sink.
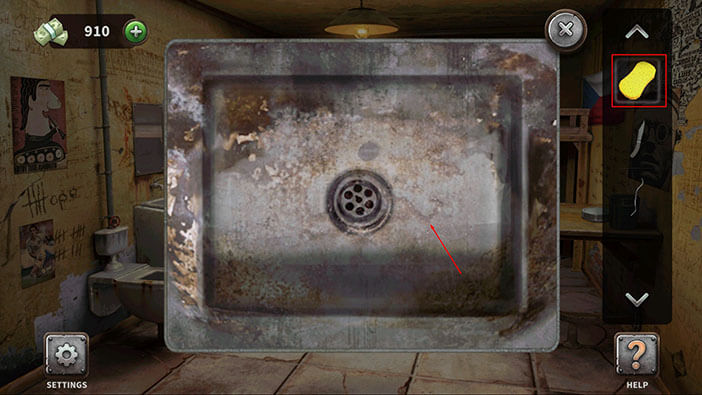
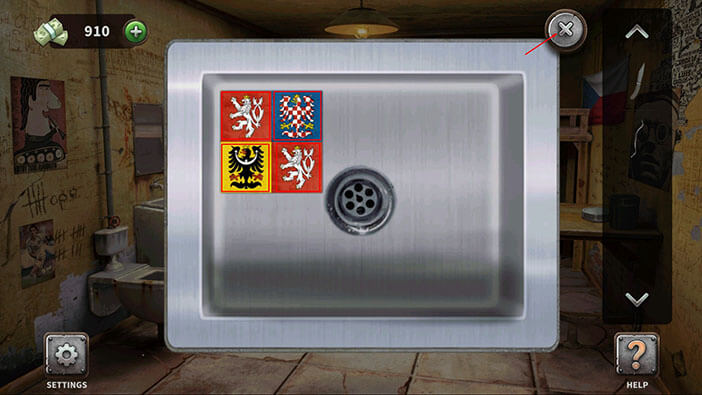
After we cleaned the sink, we can see four heraldic symbols on two by two greed. We should write down/memorize the position of these symbols because we will need that information for the next puzzle. So, we have
Top left square = white lion on the red background
Top right square = red and white eagle on the blue background
Bottom left square = black eagle on the yellow background
Bottom right square = white lion on the red background (again)
Once you’re done, tap on the “X” button in the upper right corner to go back.
Next, tap on the chair with the green seat to take a closer look at it.
Select the knife from the inventory and use it to remove the fabric.
After removing the fabric, we can see four smaller two by two grids, and together they form one large grid. There are 16 tiles in total,
8x white lion on the red background
4x red and white eagle on the blue background
4x black eagle on the yellow background
We can tap on the tiles to change their position. Our task is to arrange the heraldic symbols in the same pattern as we saw in the sink. So,
In the top-right grid, we should have a 4x white lion on the red background
In the top-left grid, we should have a 4x red and white eagle on the blue background
In the top-right grid, we should have a 4x black eagle on the yellow background
And in the bottom-left grid, we should have a 4x white lion on the red background
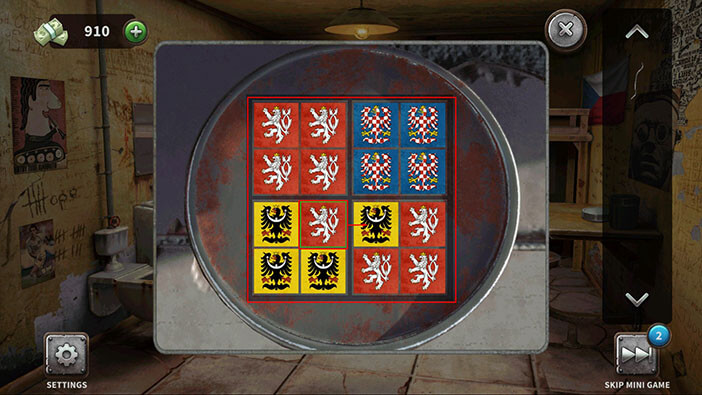
After you correctly arrange the heraldic symbols, the seat will fall off revealing a handsaw. Tap on the handsaw to pick it up.
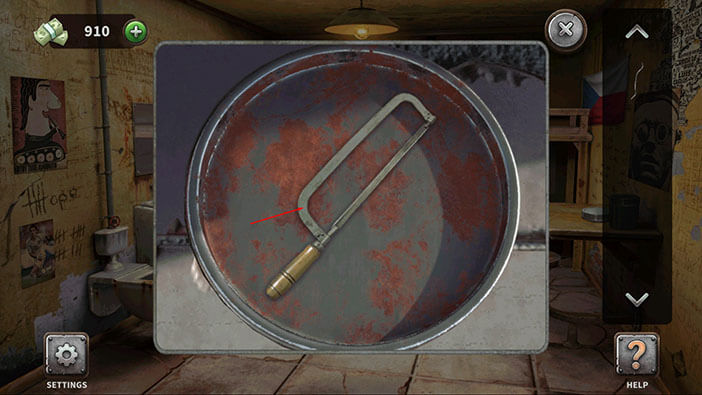
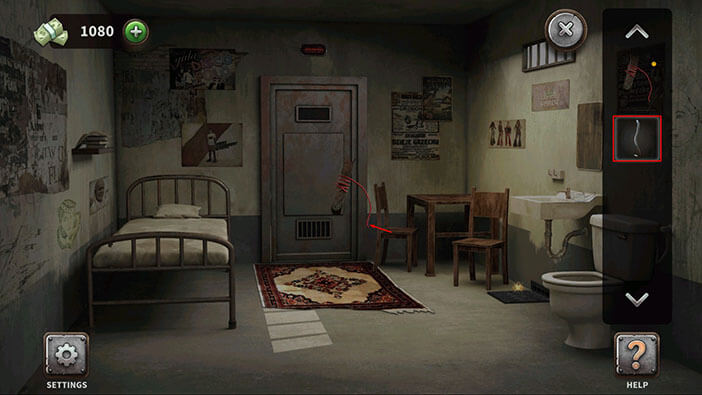
Next, tap on the left side of the bed to take a closer look.
You will notice that there are some cracks in the wood. So, select the handsaw from the inventory and use it to remove the suspicious part.

You will find a key inside the secret compartment. However, our character can reach it. So, select that wire from the inventory and use it to reach the key.
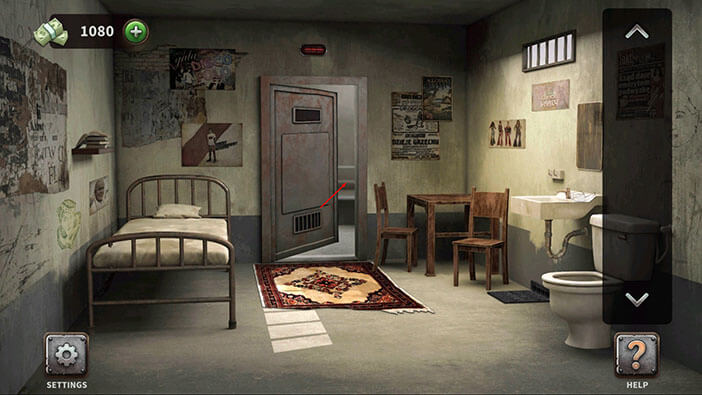
Select the key from the inventory and tap on the cell door to unlock it.
Finally, tap on the cell door to escape and you will complete the thirteenth level.

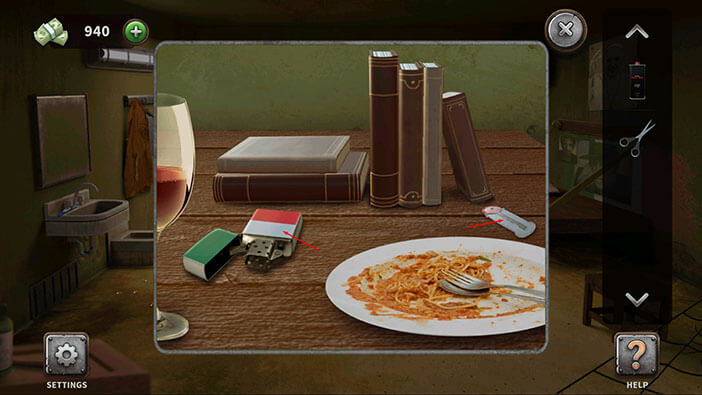
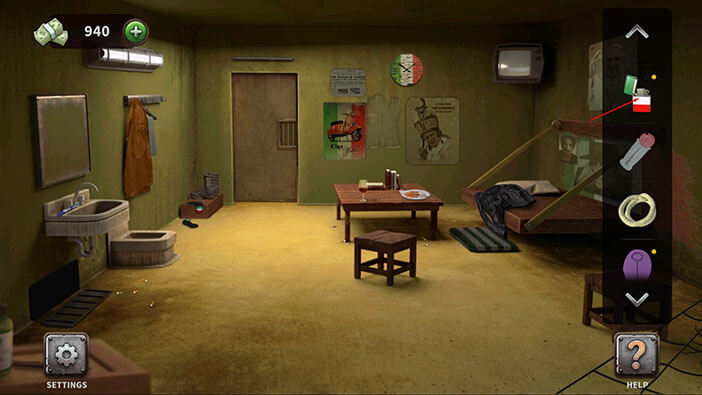
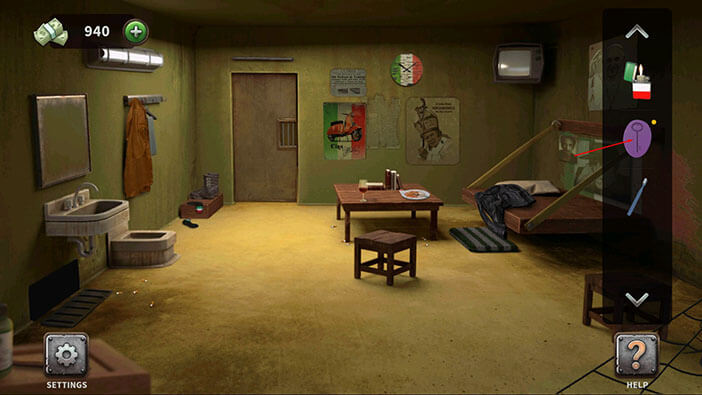
Level 14: Italian Cell
Let’s start by checking out the right side of the room. Here, you will find two items.
First, tap on the bottle of lighter gas (on the bed) to pick it up.
After that, tap on the scissors, located on the small chair, to pick them up.

Next, tap on the table to take a closer look at it.
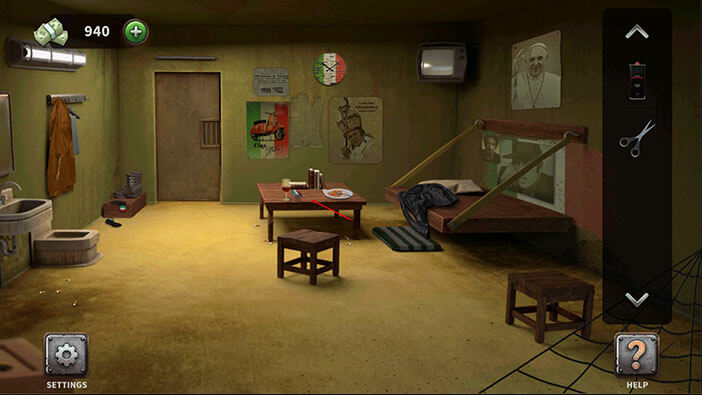
Tap on the zippo lighter and the other item on the right side of the table to pick them up.
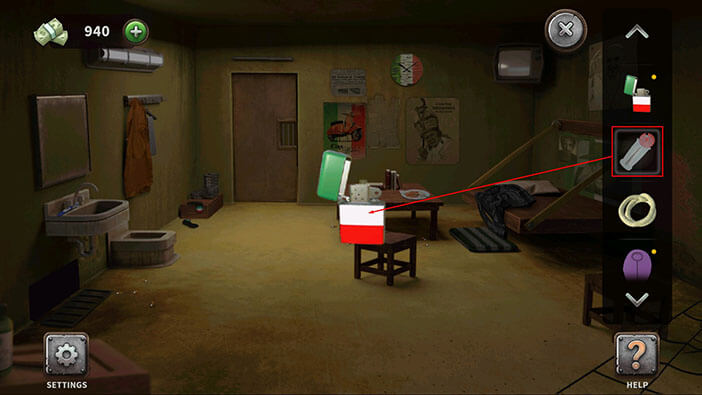
If we look to the left, we will see a thread hanging from the coat. Select the scissors from the inventory and use them to cut the thread (we will use the thread later as a wick for the zippo lighter)

Next, let’s take a closer look at the bars below the sink.
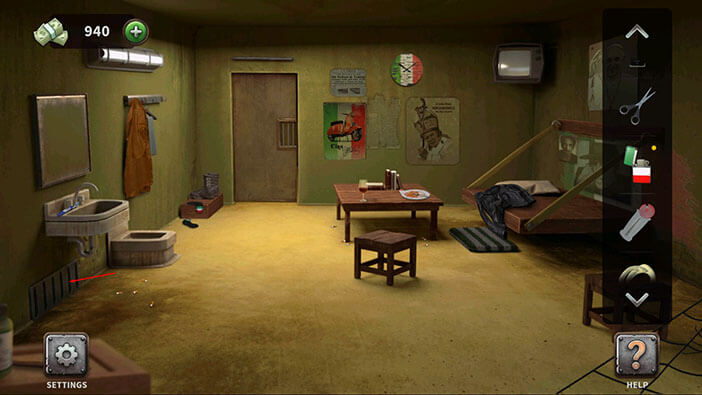
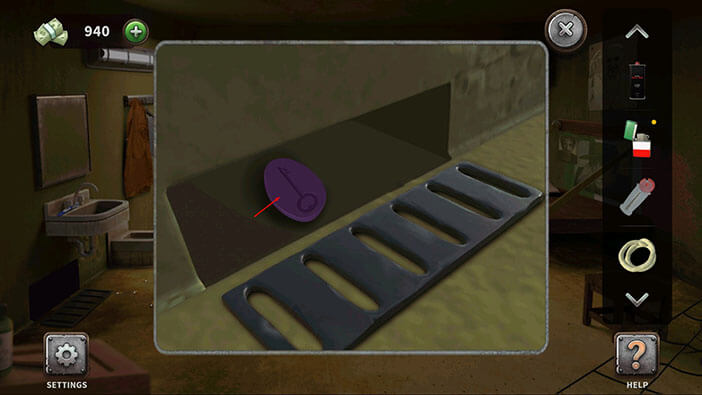
Select the scissors from the inventory and use them to remove the bars.
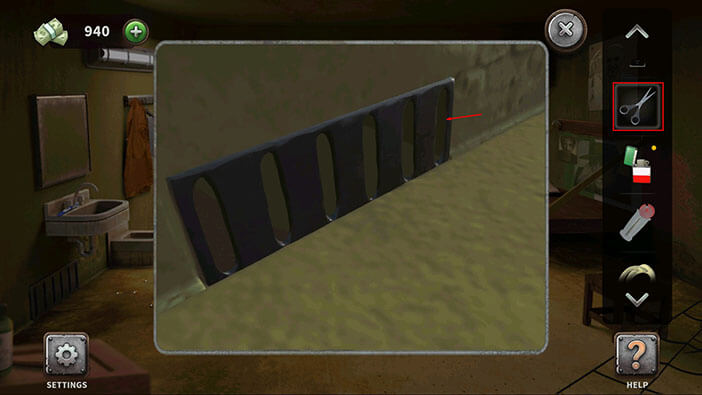
Inside the hole, you will see a key mold. Tap on it to pick it up.
Ok, now we have all the components to make a functioning lighter. First, select the Zippo lighter from the inventory.
Next, drag the item that we found on the table and combine it with the lighter.
Next, select the wick from the inventory and combine it with the lighter.
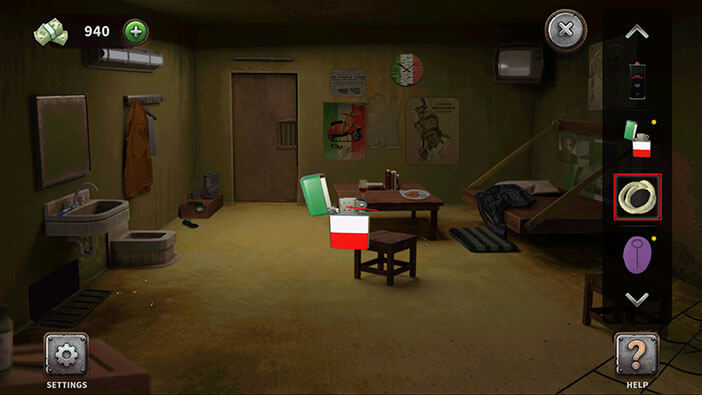
Finally, select the bottle of lighter gas from the inventory and use it to fill up the lighter.
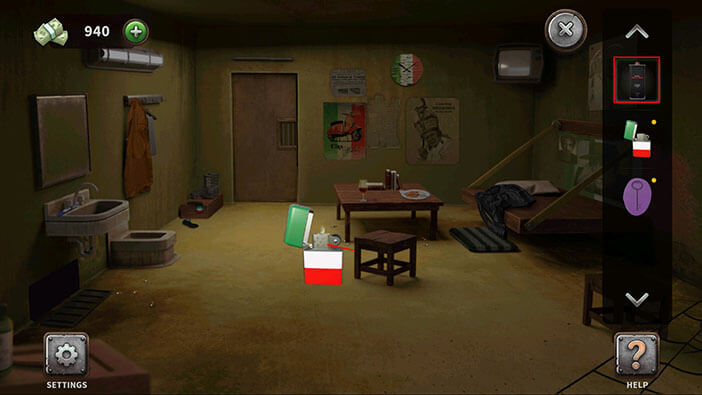
Ok, now we have a functioning lighter. However, we are still missing one item that is necessary to complete this level. Tap on the toothbrush, located on the sink on the left, to pick it up.

Next, tap on the key mold in your inventory to select it.
After that, select the toothbrush from the inventory and drop it on the key mold.
Finally, select the Zippo lighter from the inventory and use it to melt the toothbrush. Our character will make an improvised key. This key will be automatically added to your inventory.
Select the key from the inventory and tap on the cell door to unlock it.
Finally, tap on the cell door to escape and you will complete the fourteenth level.
Level 15: Austrian Cell
On the ground, just below the bed, you will see a wooden hammer. Tap on it to pick it up.

Next, we should take a closer look at the table in the right corner of the room.
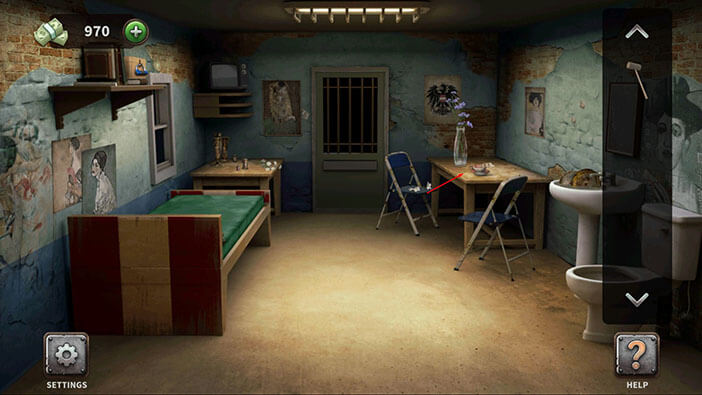
Inside the glass vase, we can see a lighter, but our character can’t reach it. So, select the hammer from the inventory and use it to break the vase.
After that, tap on the lighter to pick it up.
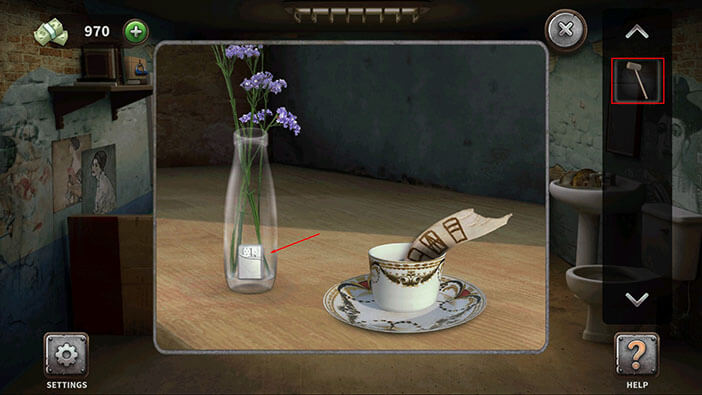
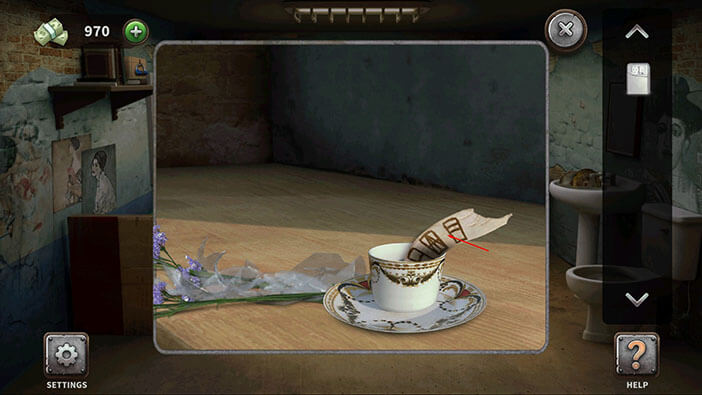
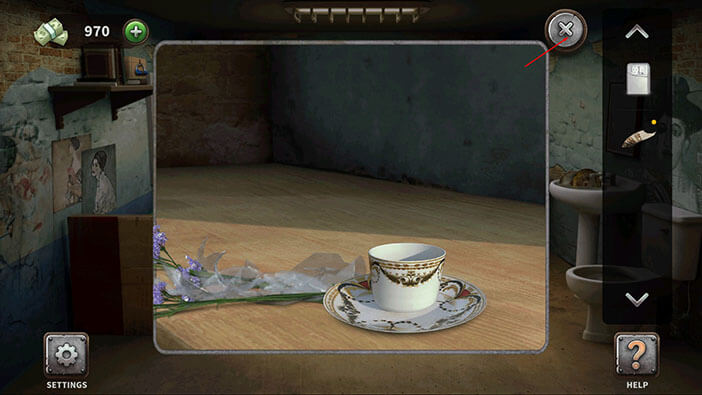
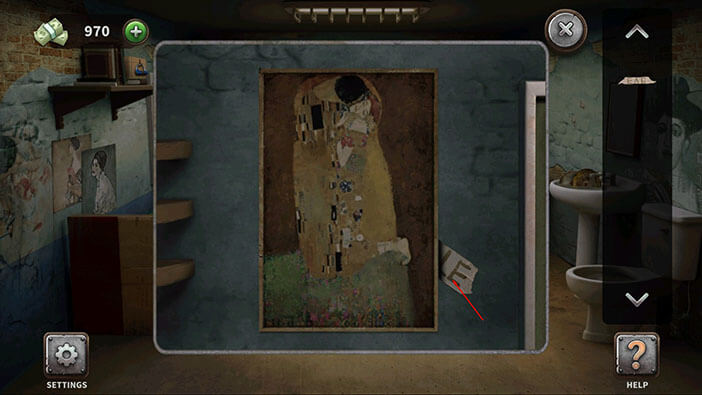
Before you leave, tap on the note inside the teacup to pick it up.
After that, tap on the “X” button in the upper right corner to go back.
Tap on the note in your inventory to select it.
Select the lighter from the inventory and use it on the note (the letter “EAG” will appear).
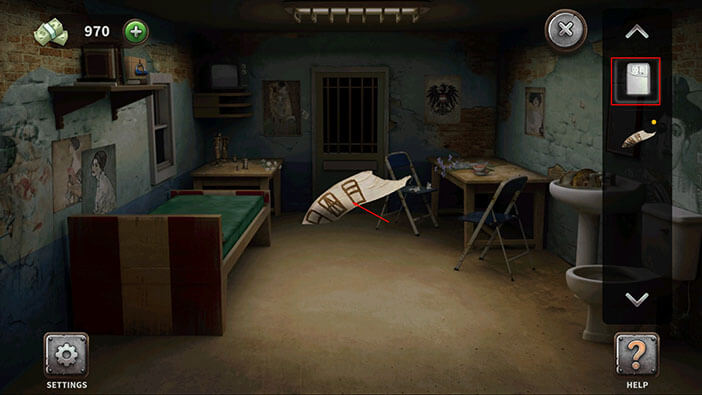
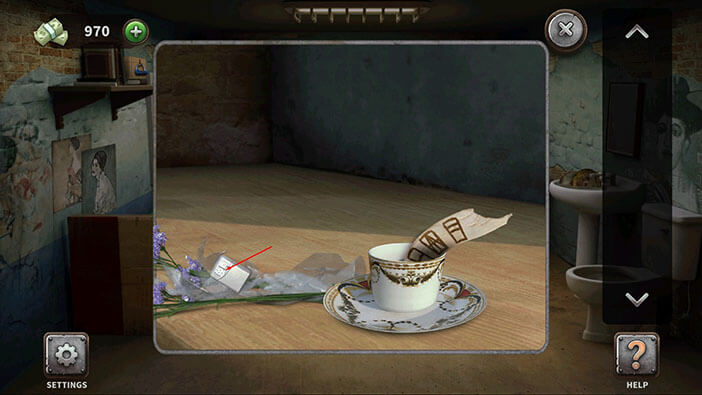
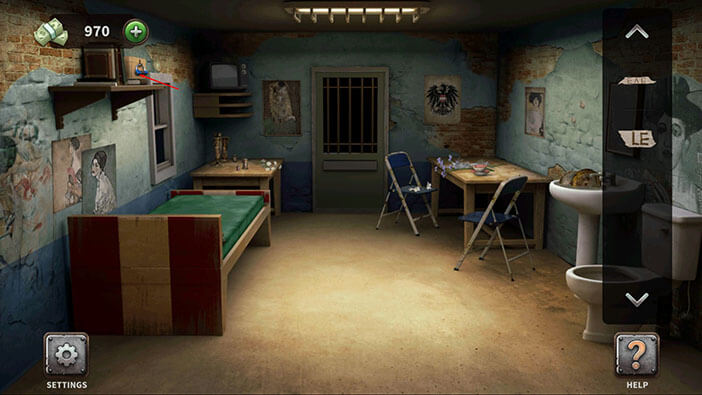
Next, tap on the picture on the left side of the door to take a closer look at it.

We can see a note sticking out behind the bottom-left corner of the picture. Tap on the note to pick it up.
There are only two letters on the second note, “LE”. However, if we combine the first and the second note we will get the word “EAGLE”. Memorize this word because we will need it for the next puzzle.
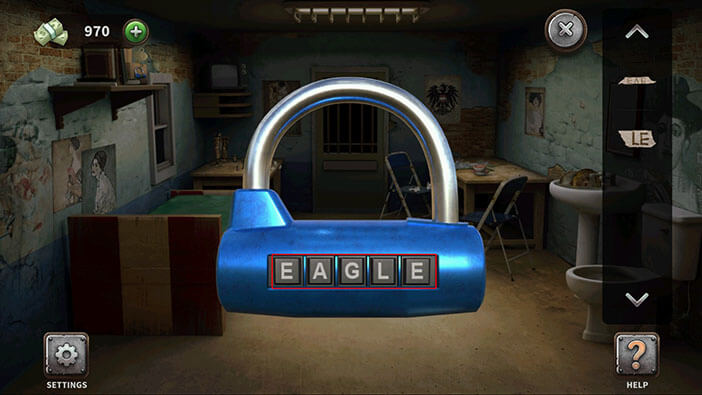
Tap on the locked box, located on the wall shelf on the left to take a closer look at it.
We can see that the box is locked by a five-letter code. Enter the code “EAGLE” and you will unlock the box. Inside the box, you will find a key, and your character will automatically take it.
Select the key from the inventory and tap on the cell door to unlock it.
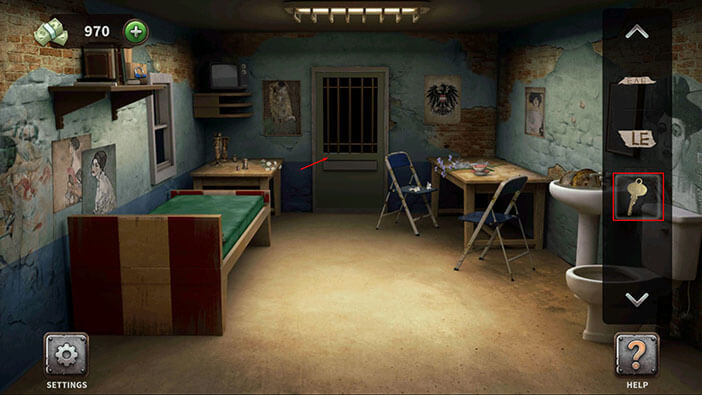
Finally, tap on the cell door to escape and you will complete the fifteenth level.

Level 16: Polish Cell
Tap on the pliers, located on the table in the right corner of the room to pick them up.
Also, if you look at the grate below the sink, you will see that a key is sticking out. Unfortunately, our character can’t reach it with his hand, so we will have to find another way to get to the key.
Next, select the pliers and tap on the rug. Our character will use the pliers to pull out a long thread.
Tap on the thread to pick it up and yarn of thread will be added to your inventory.
If you look to the left, you will notice that one of the bars (on the bed) is broken. Tap on it to take a closer look.

Tap on the broken bar again and our character will rip it off.

Next, let’s take a closer look at the red light above the cell door.

Select the pliers from the inventory and use them to cut off the loose wire.
Ok, we now have all components to make a tool that will enable us to reach the key.
First, tap on the bar to select it.

Next, select the yarn of thread from the inventory and combine it with the bar.
Next, select the small piece of wire from the inventory.

Select the pliers from the inventory and use them to bend the wire. Our character will craft a small hook.
Ok, final part. Select the bar with thread from the inventory.

Select the small hook from the inventory and attach it to the end of the thread. Our character will make an improvised fishing rod, and with it, we will be able to reach the key.
Select the improvised fishing rod from the inventor and use it to reach the key.

Select the key from the inventory and tap on the cell door to unlock it.

Finally, tap on the cell door to escape and you will complete the sixteenth level.
Level 17: English Cell
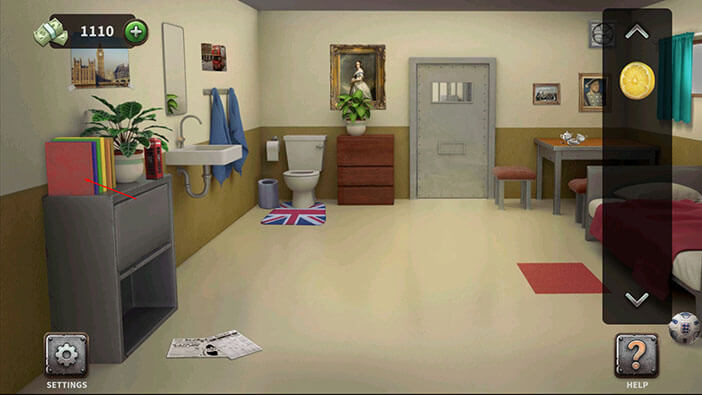
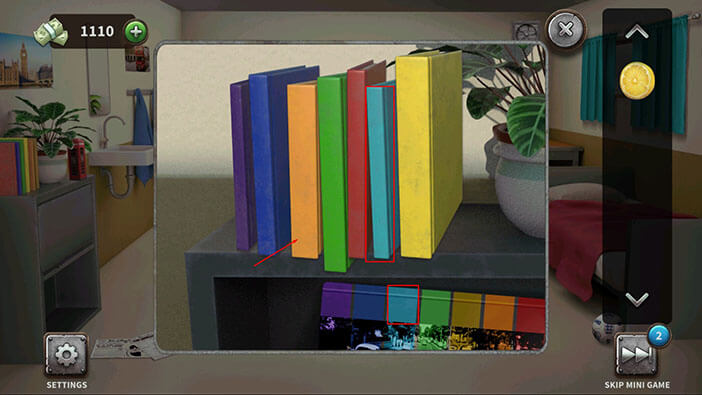
On the table, located in the right corner of the room, you will see half of a lemon. Tap on it to pick it up.
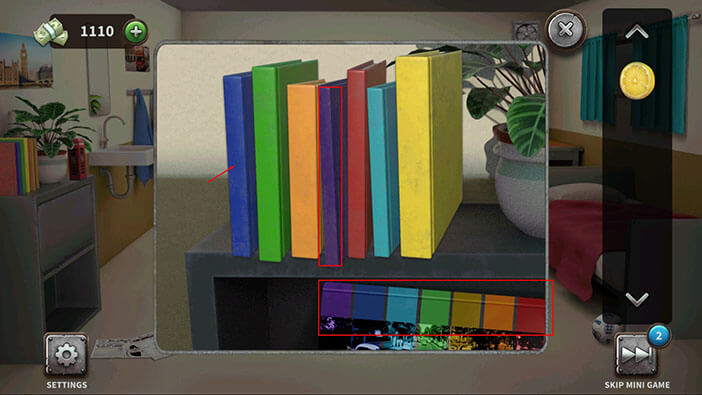
Next, tap on the books on the left to take a closer look.
Here, we can see seven books (blue, green, orange, purple, red, teal, and yellow). Below the books, you will see seven squares of different colors. These squares represent the correct order of the books. So, our task is to rearrange the books, to match the order of colors of the squares below. We will do this in several steps. Let’s begin.
Step 1
Tap on the purple book to select it, then tap on the blue book to switch their positions (the purple book should be in the first position, looking from left to right).
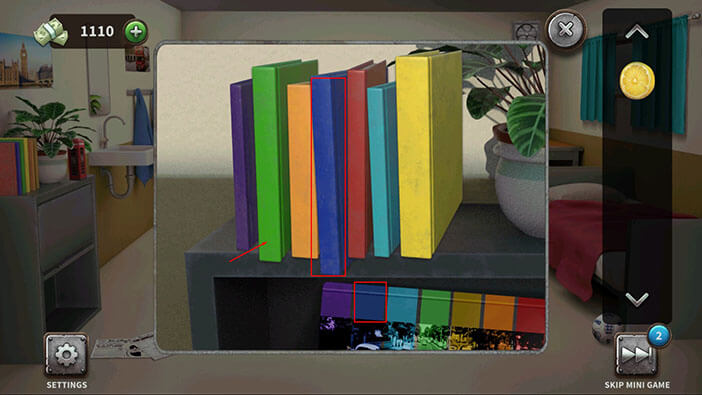
Step 2
Tap on the blue book to select it, then tap on the green book to switch their positions (the blue book should be in the second position).
Step 3
Tap on the teal book to select it, then tap on the orange book to switch their positions (the teal book should be in the third position).
Step 4
Tap on the yellow book to select it, then tap on the red book to switch their positions, and you will solve this puzzle (the green book is already fourth, the yellow book will go to position number five, the orange book is already sixth, and the red book will go to the position number seven).
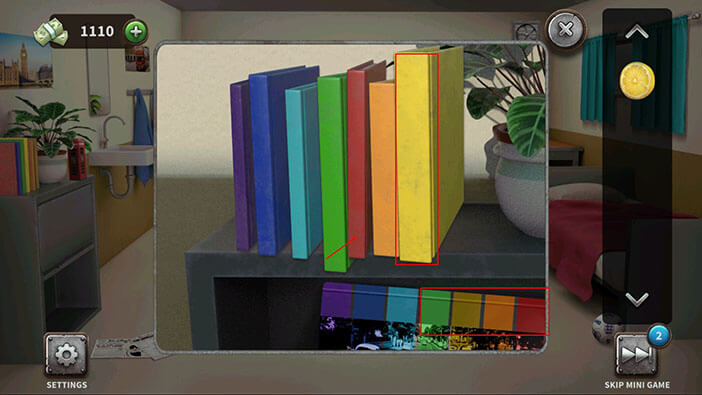
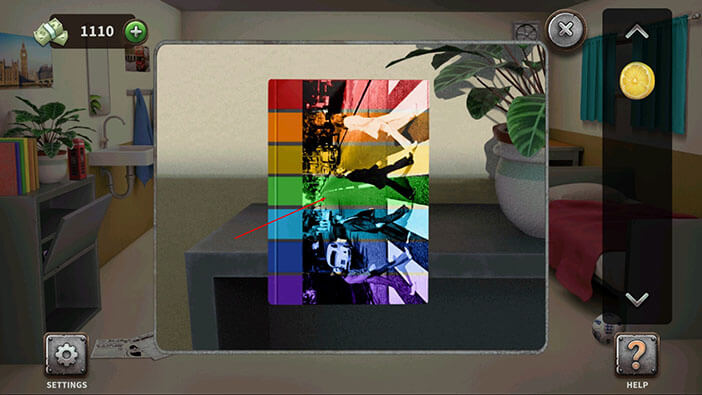
After correctly arranging the books, you will find a CD box. Tap on it to open it.
After that, tap on the note inside the box to pick it up.
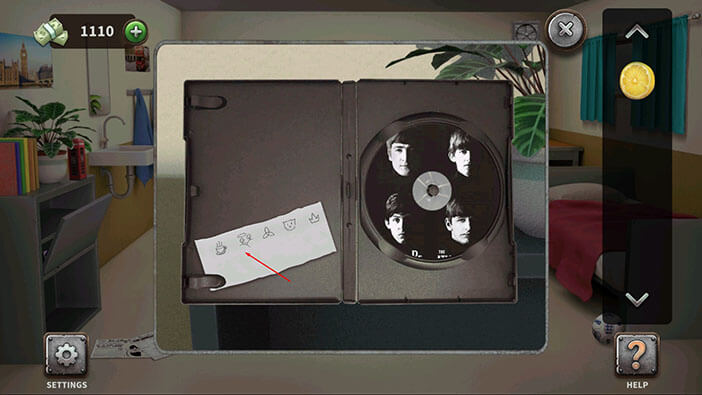
Select the note from the inventory.
Select the lemon from the inventory and tap on the note to squeeze some lemon juice on it.
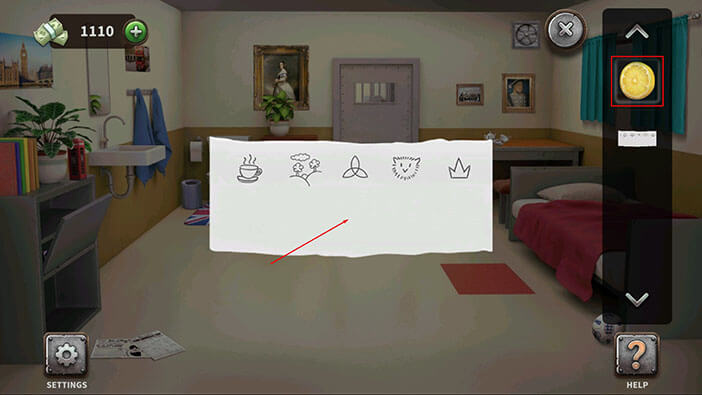
After applying the lemon juice to the note, another row of symbols has appeared. Memorize/write down the order of these symbols, because we will need this information in order to solve the next puzzle. So, looking from left to right, we have
- A sword in stone symbol
- A rocket (kind of) symbol
- Clouds and rain symbol
- Sun symbol
- Cat symbol
Once you’re done, tap on the “X” button in the upper right corner to go back.
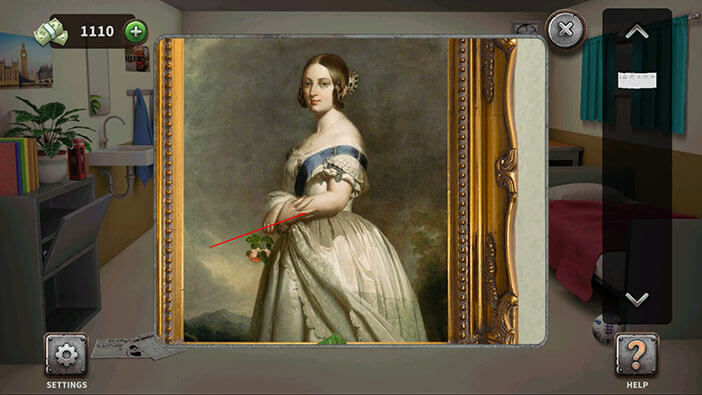
Tap on the picture on the wall, just to the left of the cell door, to take a closer look at it.
Tap on the picture again to move it aside.
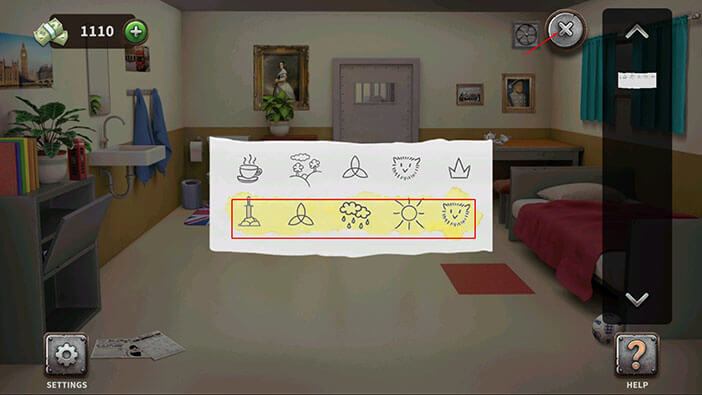
Behind the picture, you will find a safe locked with a password that requires a combination of five symbols. Enter the symbols that we discovered by applying the lemon juice to the note.
- A sword in stone symbol
- A rocket (kind of) symbol
- Clouds and rain symbol
- Sun symbol
- Cat symbol
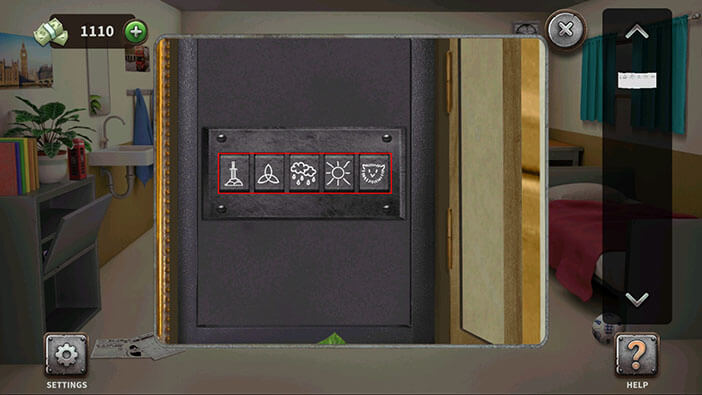
As soon as you enter the correct symbols, the safe will open and you will see a key inside. Tap on the key to pick it up.
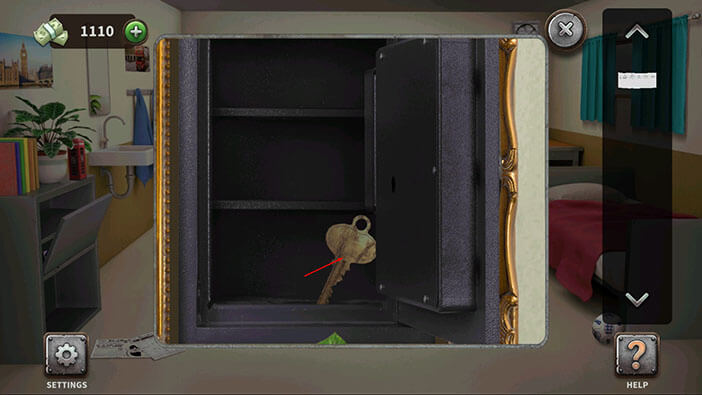
Select the key from the inventory and tap on the cell door to unlock it.
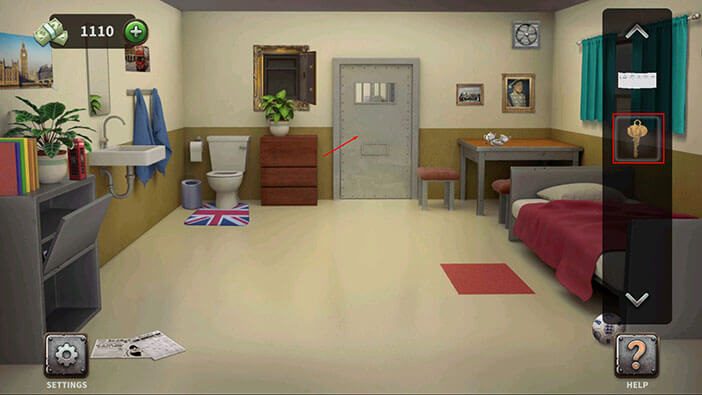
Finally, tap on the cell door to escape and you will complete the seventeenth level.
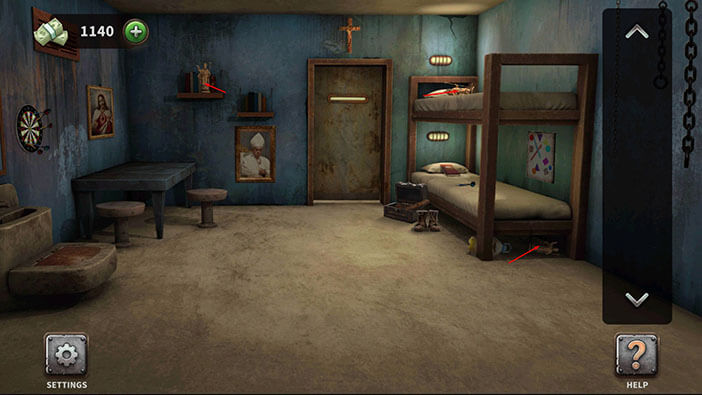
Level 18: Vatican Cell
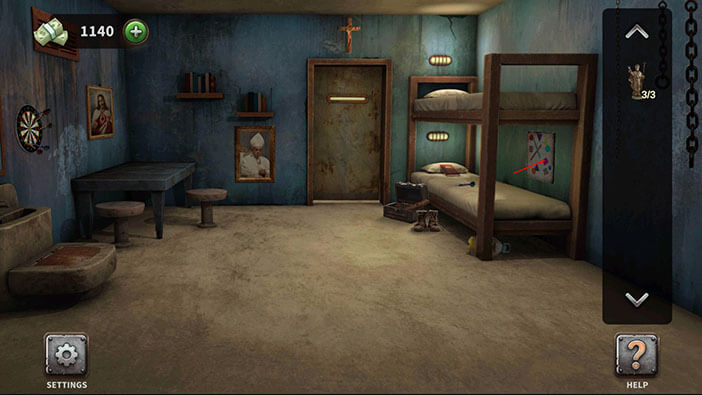
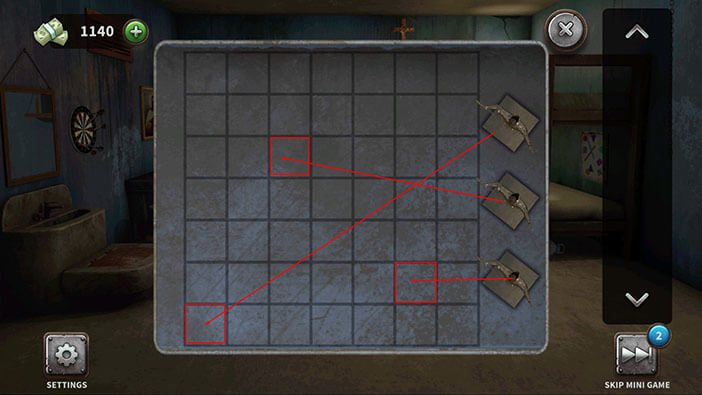
At the start of this level, we should collect the three statues.
The first one is under the bed.
The second one is on the top bed, next to the pillow.
The third one is on the wall shelf on the left.
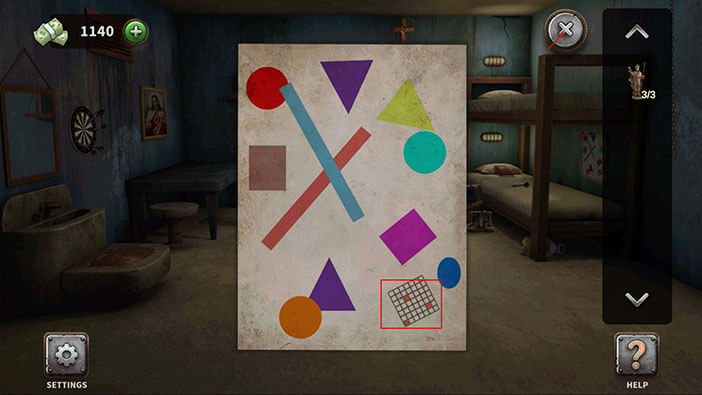
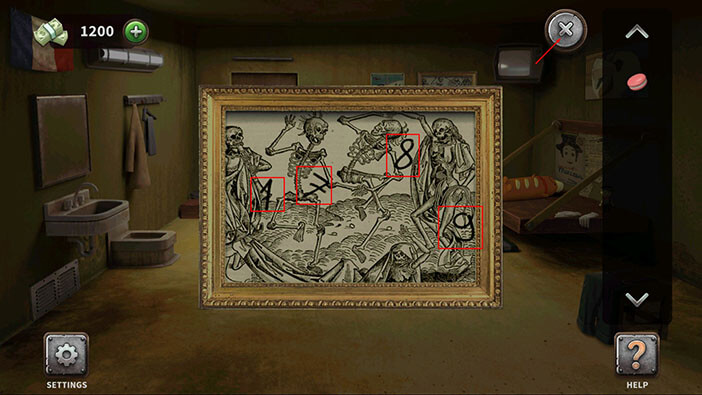
Next, tap on the picture on the wall on the right (between the two beds), to take a closer look at it.
In the bottom right corner of the picture, we can see a seven by seven grid. Three squares on the grid are painted red, and we should memorize/ write down the position of these squares because we will need them for the next puzzle. So, we have,
First position = first square (left to right) in the seventh row (top to bottom). Or simply bottom, right corner of the grid.
Second position = third square in the third row
Third position = sixth square in the sixth row
When you’re done, tap on the “X” button in the upper-right corner to go back.
Next, tap on the stone table on the left to take a closer look at it.
Here, we can see a seven by seven grid, just like the one that we saw in the picture. Right now, we should just select the statues from the inventory and place them on the right side of the table.
Ok, now let’s place the statues on the correct squares.
First position = first square in the seventh row
Second position = third square in the third row
Third position = sixth square in the sixth row
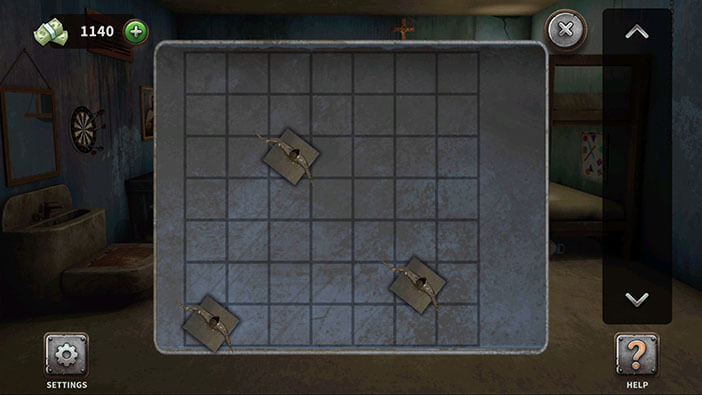
As soon as you place the statue on the correct squares, the seat on the chair will open, and inside you will find a screwdriver. Tap on the screwdriver to pick it up.

Next, select the screwdriver from the inventory and use it to remove the grate in the wall, above the stone table.
Behind the grate, you will find a green “OK” button. Tap on it to pick it up.
If you take a look at the bottom bed on the right, you will see a dart. Tap on it to pick it up.
Select the dart from the inventory, then tap on the target on the left to throw the dart.
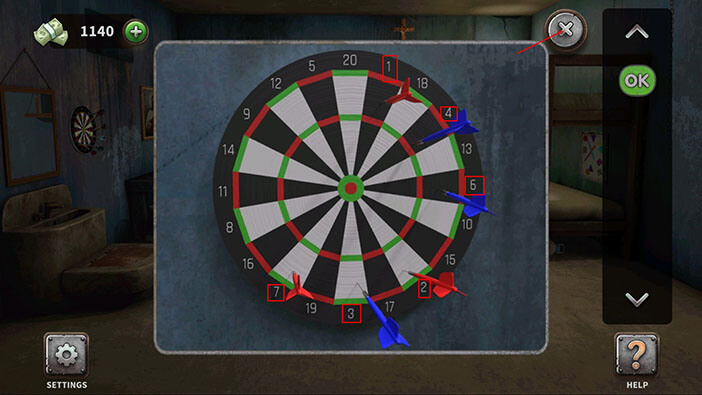
Tap on the target to take a closer look at it.
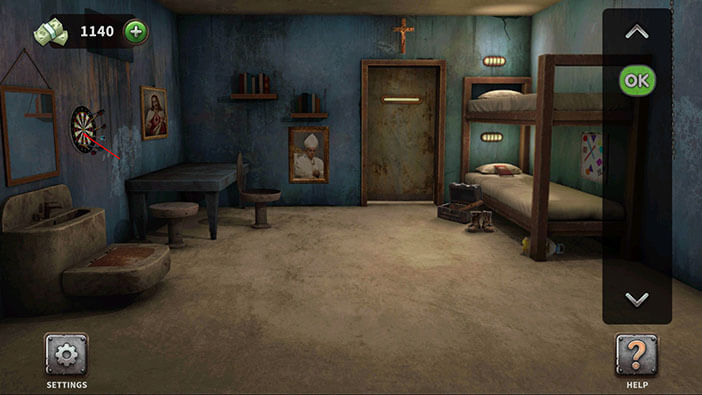
We can see that the darts are stuck in some of the fields. Let’s take a look at the numbers with darts, starting from the field on the top and proceeding clockwise (left to right).
So, we have,
First field = 1
Second field = 4
Third field = 6
Fourth field = 2
Fifth field = 3
Sixth field = 7
When we combine these numbers, we will get “146237”. Memorize/ write down this number because we will need it for the next puzzle.
After that, tap on the “X” button in the upper right corner to go back.
Next, tap on the metal plate, below the sink, to start the interaction.

Select the “OK” button from the inventory and insert it into the empty slot.

Enter the code “146237” that we discovered by examining the dart target.
Once you’re done, tap on the “OK” button.
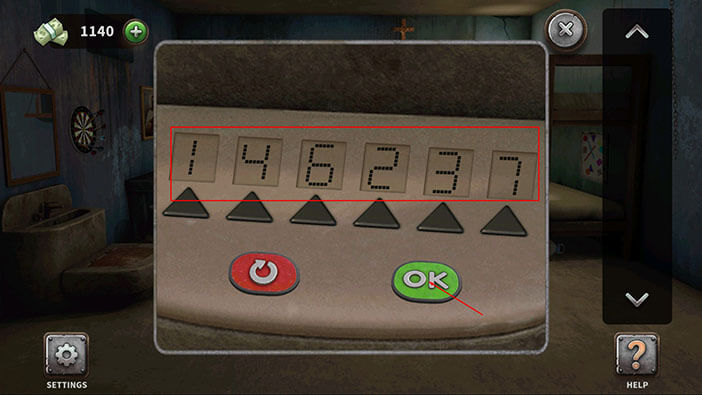
As soon as we entered the correct code, the door to the secret compartment opened automatically, and we found a key. Tap on the key to pick it up.
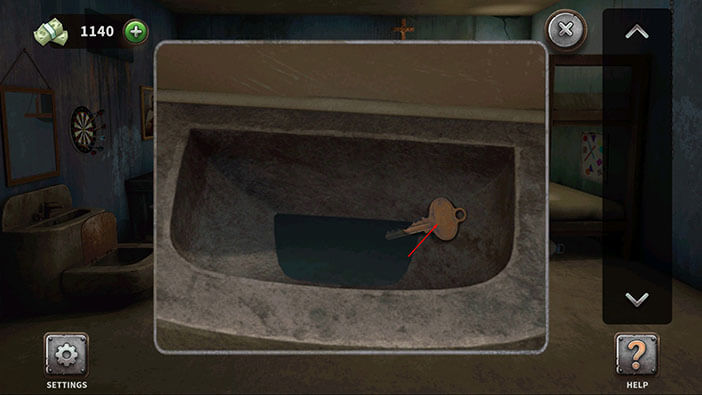
Select the key from the inventory and tap on the cell door to unlock it.
Finally, tap on the cell door to escape and you will complete the eighteenth level.
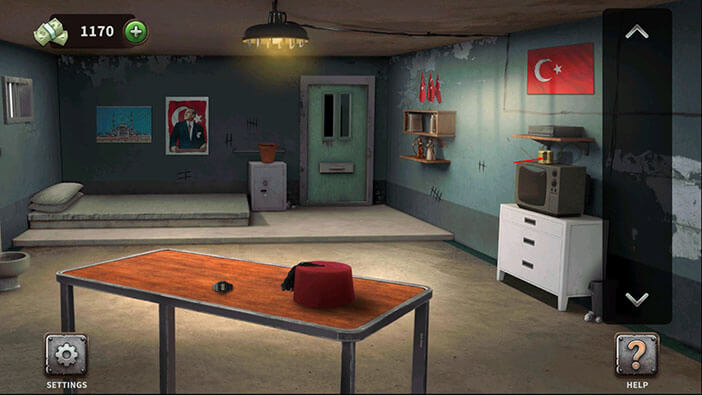
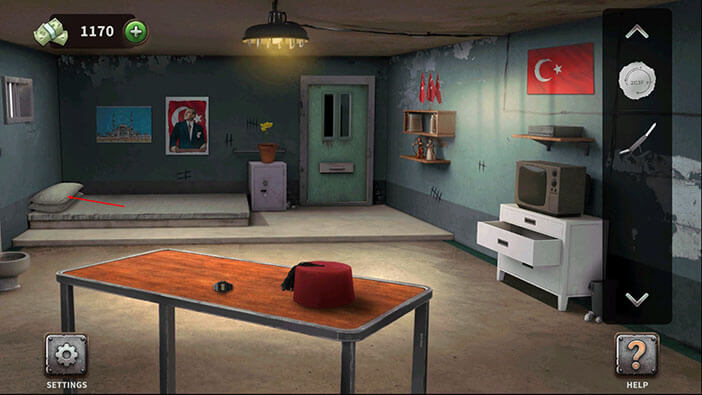
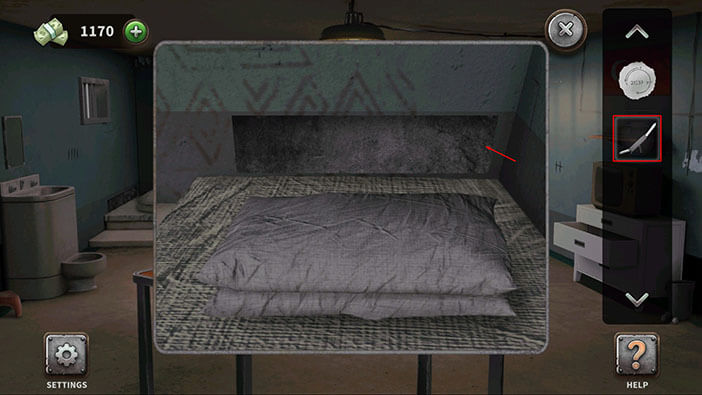
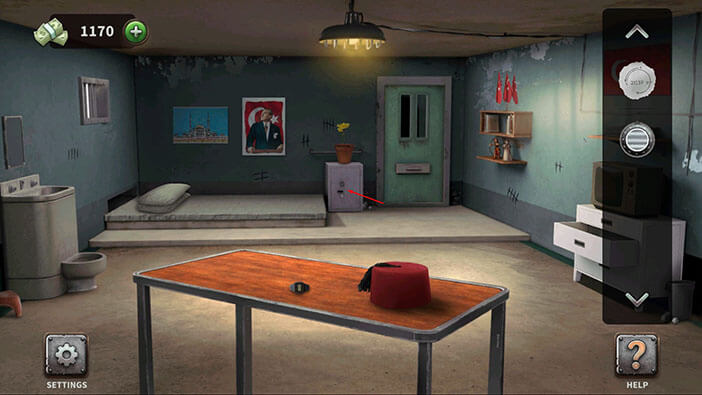
Level 19: Turkish Cell
On the TV, on the right, you will see a tea kettle. Tap on it to pick it up.
On the safe, just to the left of the door, you will see a vase. Select the tea kettle from the inventory and use it to water the ground in the vase. The plant will instantly grow.

Tap on the top of the plant, and our character will pick up a small note.

Tap on the note to examine it.
In the middle of the note, we can see “21:37”. Memorize/write down this number, and then tap on the “X” button in the upper right corner to go back.
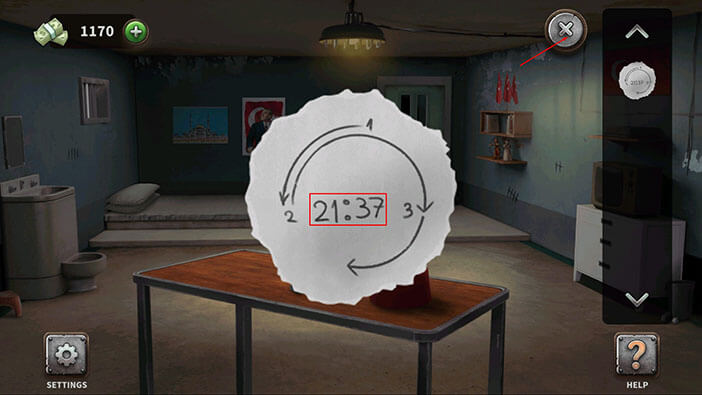
Tap on the wristwatch, located on the table in front of you, to take a closer look at it.

The number that we saw on the note represents the times. So, let’s set the alarm to 21:37 by tapping on the buttons on the side of the watch.
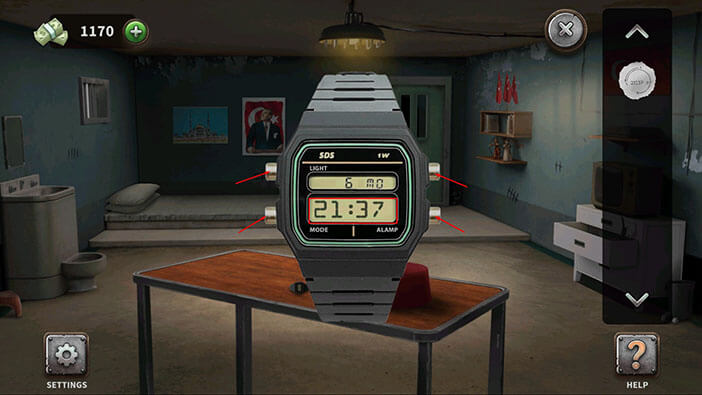
As soon as you set the alarm to 21:37, the drawer on the right will open, and inside you’ll find large nail clippers. Tap on the nail clippers to pick them up.

Next, tap on the pillows in the left corner of the room to take a closer look.
Tap on the pillows again to move them aside.
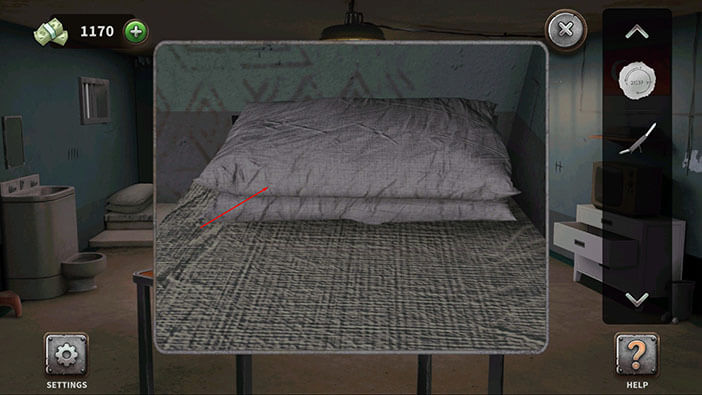
Behind the pillows, you will find a large metal panel. Select the large nail clippers from the inventory and use them to remove the panel.
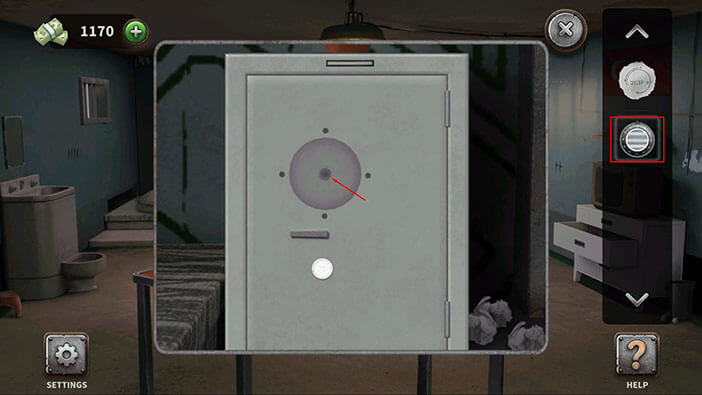
After your character removes the panel, you will find a secret compartment in the wall. Tap on the safe dial inside the compartment to pick it up.

Ok, let’s tap on the safe, and take a closer look at it.
We can see that the dial is missing. So, select the safe dial from the inventory and tap on the empty slot to insert it.
Well, we still don’t know how to open the safe. Let’s take another look at the note in our inventory.
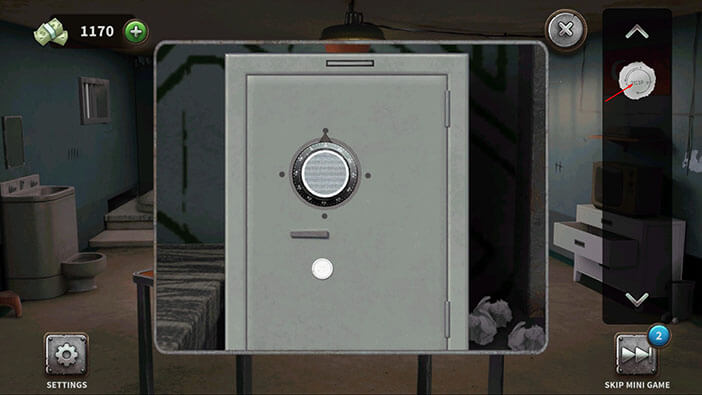
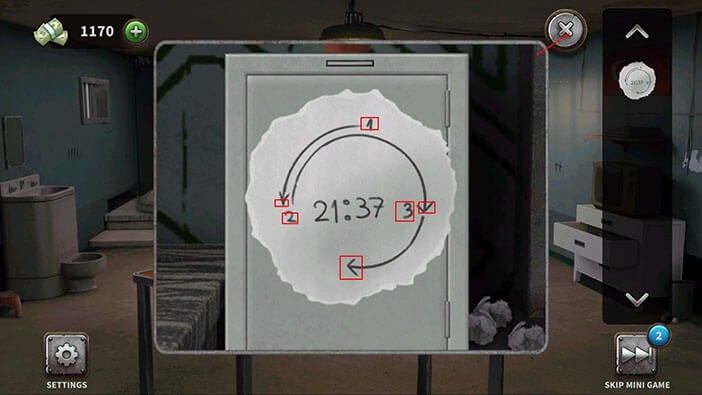
The numbers and the arrows on the note represent the instructions to open the safe. So,
Step 1 = Turn the dial counter clockwise (right to left) to 9 o’clock position
Step 2 = Turn the dial clockwise (left to right) to 3 o’clock position
Step 3 = Turn the dial clockwise (left to right) to 6 o’clock position
Memorize/ write down these steps. After that, tap on the “X” button in the upper right corner to go back.
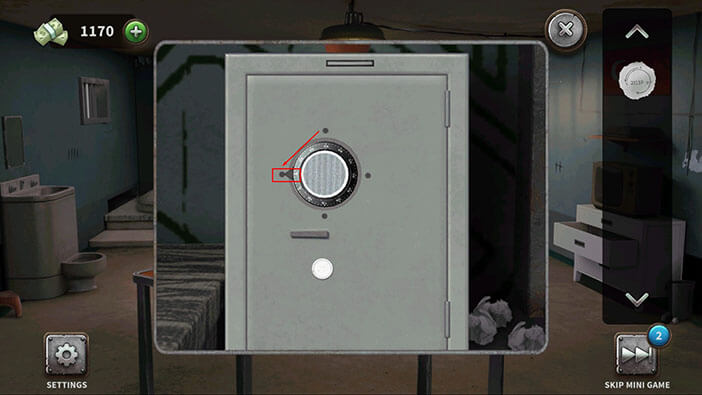
Ok, let’s open the safe. First, turn the dial counterclockwise (right to left) to the 9 o’clock position.
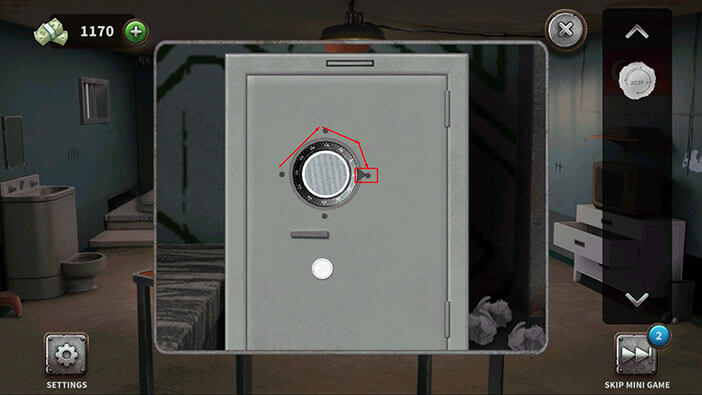
Second, turn the dial clockwise (left to right) to 3 o’clock position
Finally, turn the dial clockwise (left to right) to the 6 o’clock position, and you will open the safe
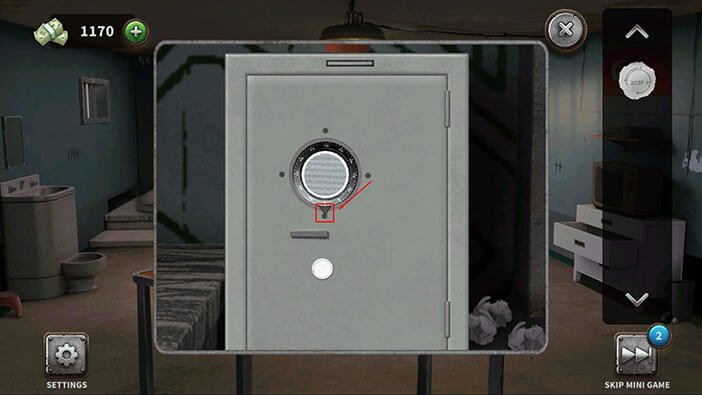
Inside the safe, you will find a key. Tap on it to pick it up.
Select the key from the inventory and tap on the cell door to unlock it.
Finally, tap on the cell door to escape and you will complete the nineteenth level.

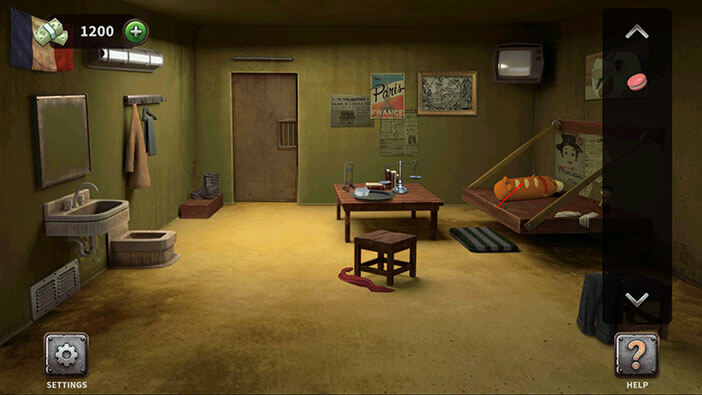
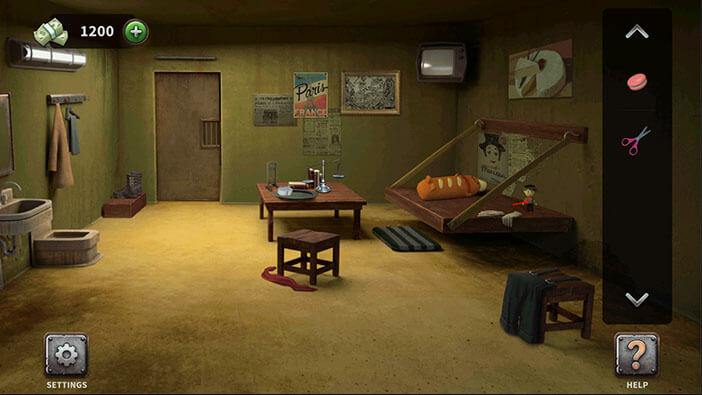
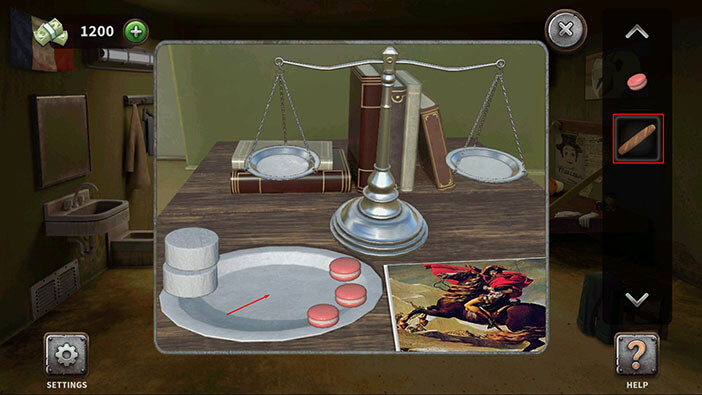
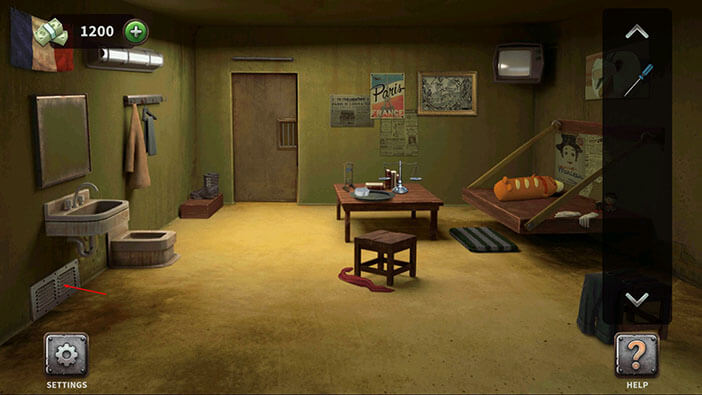
Level 20: French Cell
Inside the box in the left corner of the room, you will find a cupcake. Tap on it to pick it up.
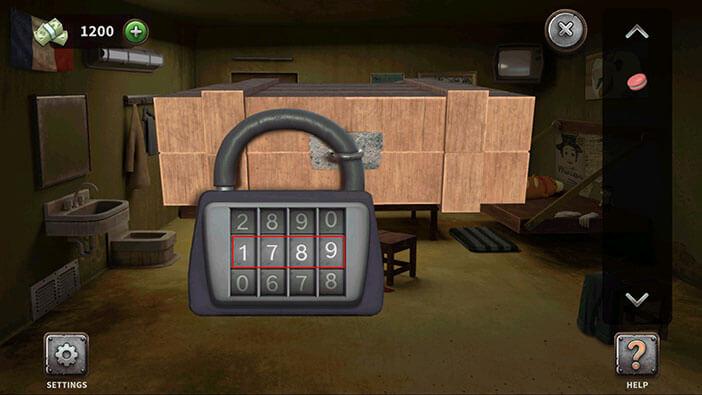
Next, tap on the picture next to the TV, to take a closer look at it.

Here, we can see the number “1789”. Memorize this number because we will need it for the next puzzle.
After that, tap on the “X” button in the upper right corner to go back.
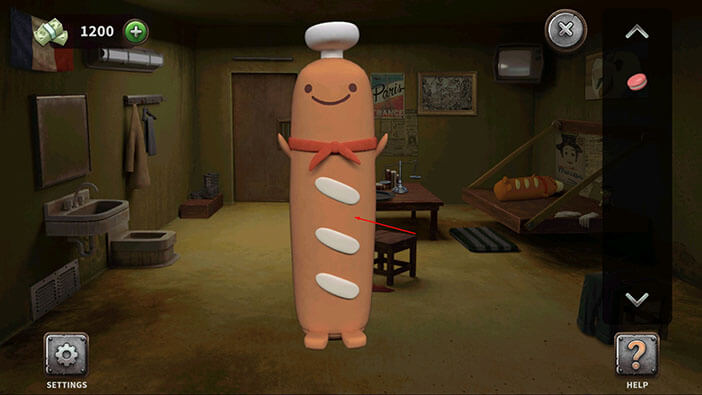
Tap on the bread toy on the bed to take a closer look at it.
Tap on the toy again to turn it around and you will find a padlock. Tap on it to start the interaction.
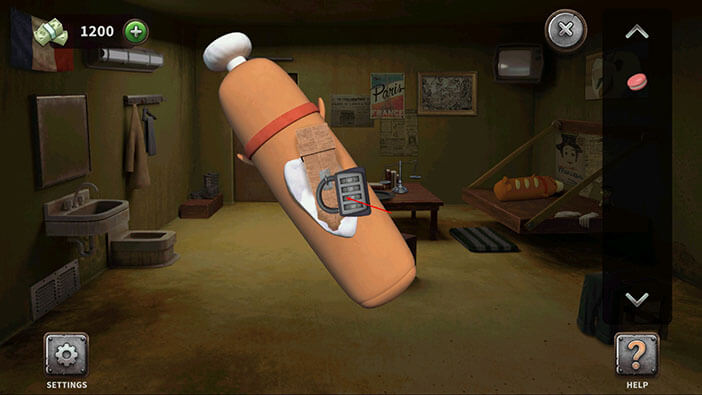
Enter the code “1789” that we saw in the picture, and you will open the box.
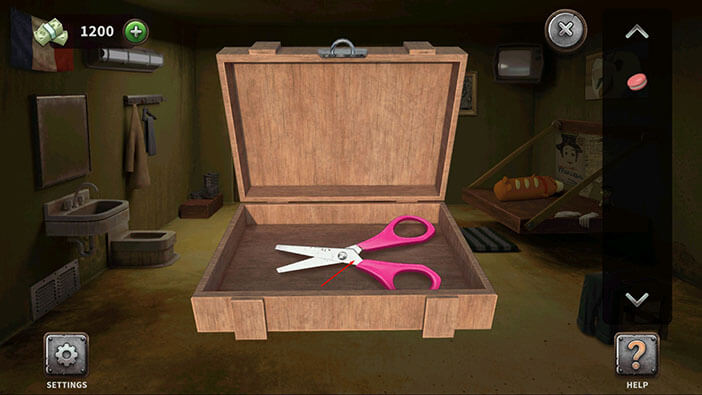
Inside the box, you will find scissors. Tap on the scissors to pick them up.
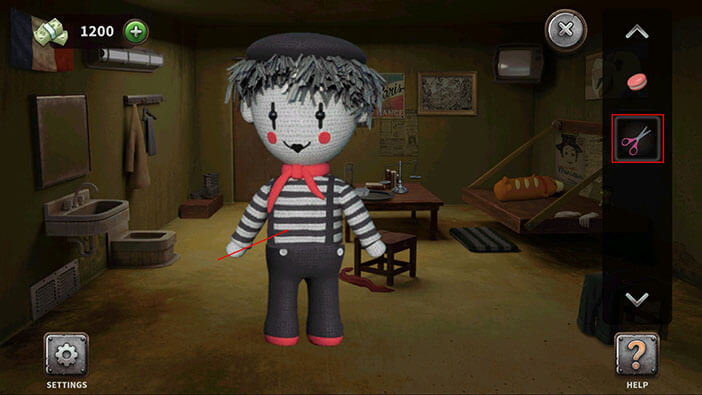
Ok, now, tap on the doll in the lower right corner of the bed to take a closer look at it.
Select the scissors from the inventory and use them to cut the doll.
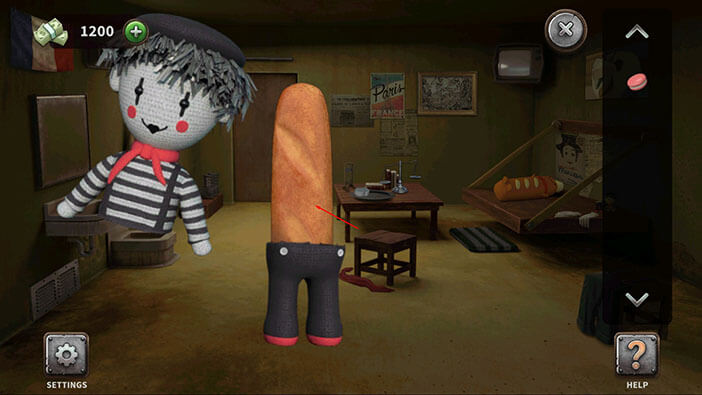
Inside the toy, you will find the baguette. Tap on it to pick it up.
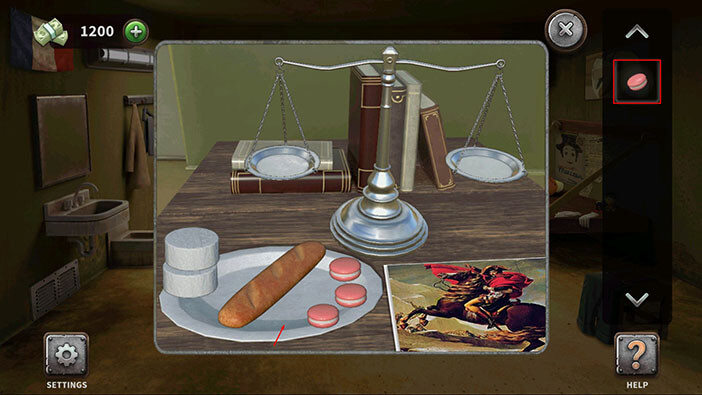
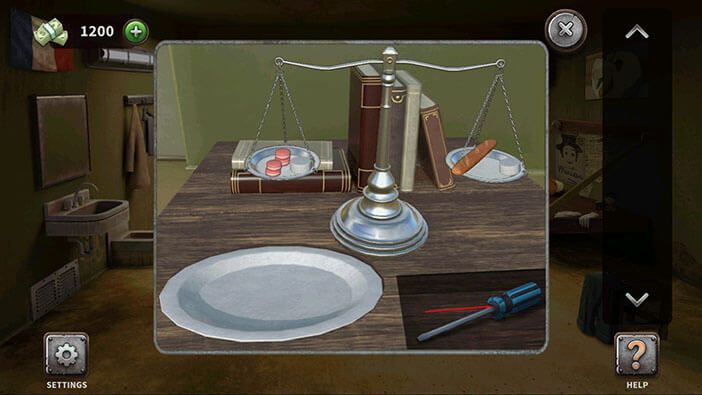
Next, tap on the scales, on the table, to take a closer look.

Select the baguette from the inventory and put it in the middle of the plate. After that, select the cupcake and place it next to the other cupcakes.
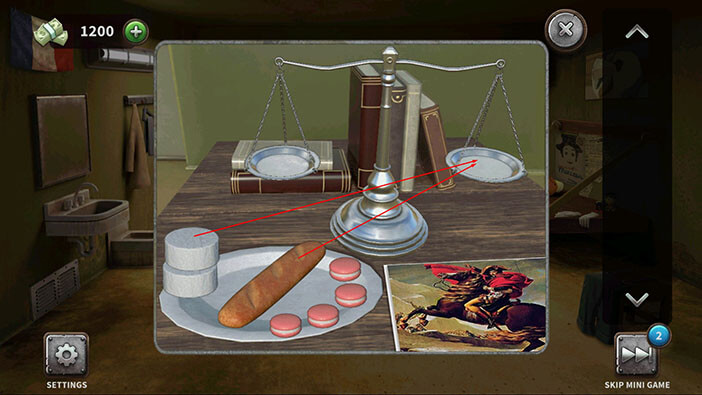
Drag the baguette and a single marshmallow and put them on the right weighing platform.
Now we have to balance the weight. So, drag all four cupcakes and the other marshmallow and put them on the left weighing platform.
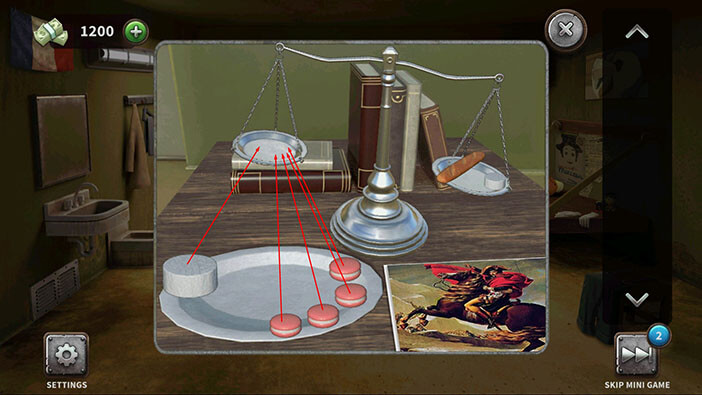
As soon as you balance the weight on the weighing platforms, the secret compartment inside the table will open and you will find a screwdriver. Tap on the screwdriver to pick it up.
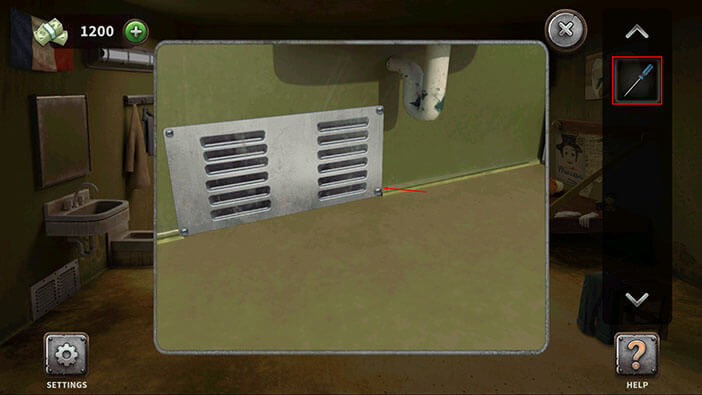
Tap on the grate, located below the sink, to take a closer look.
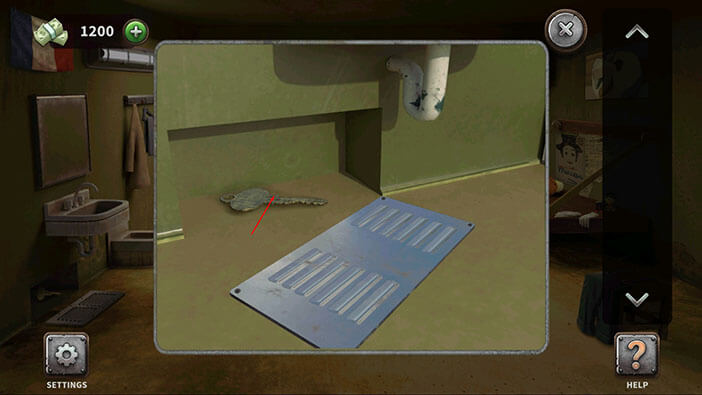
Select the screwdriver from the inventory and use it to open the grate.
Behind the grate, you will discover a key. Tap on the key to pick it up.
Select the key from the inventory and tap on the cell door to unlock it.

Finally, tap on the cell door to escape and you will complete the nineteenth level.