The White Door Day 6-7
Hello everyone and welcome to the third part of our walkthrough for the “White Door” a puzzle-solving game developed by Rusty Lake – one of the most famous game developers in puzzle solving genre. In this game, our character has amnesia and wakes up in a psychiatric institution. Our task is to slowly restore his memory by solving a series of puzzles and performing prescribed daily rituals. Let’s begin.
NOTE: The third part of the walkthrough covers days 6 and 7.
DAY 6
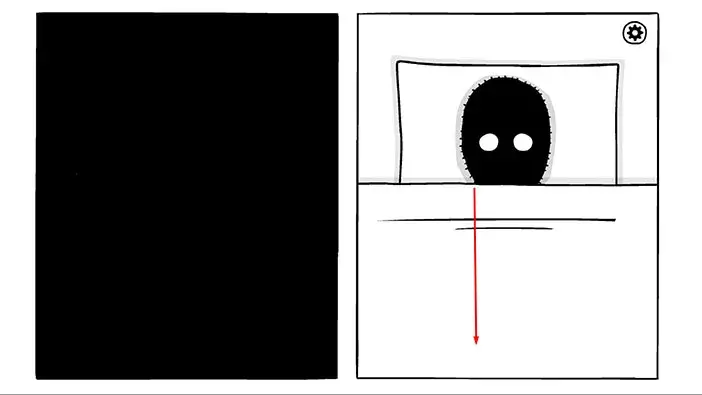
We are still playing as Robert’s dark soul. Let’s pull down the blanket to wake it up.
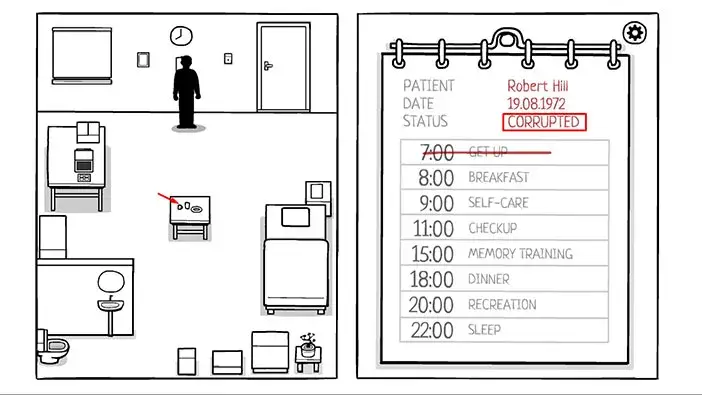
Next, tap on the notice board to view your daily tasks. You will notice that your status has changed to corrupted. But, besides that, the daily routine remains unchanged. So, let’s start with the breakfast. Tap on the table in the middle of the room to approach it.
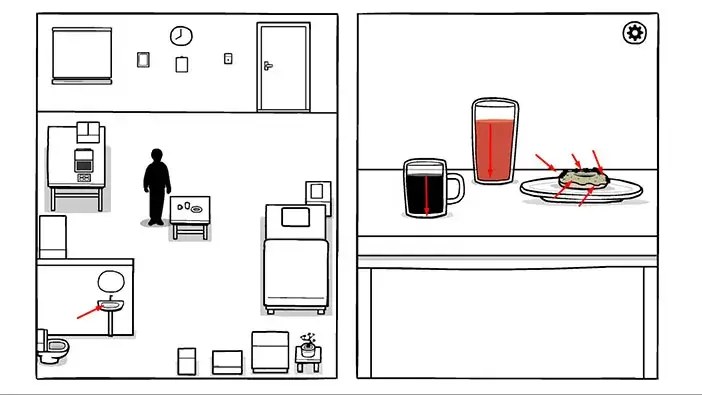
Drag down on the glasses to drink the coffee and the juice. After that, chase off the flies from the stale donut by tapping on them. Lastly, tap on the donut several times to consume it. Well, we are playing as a twisted version of Robert, and it has a very depressing and twisted view of the world – at least that’s my understanding of his situation.
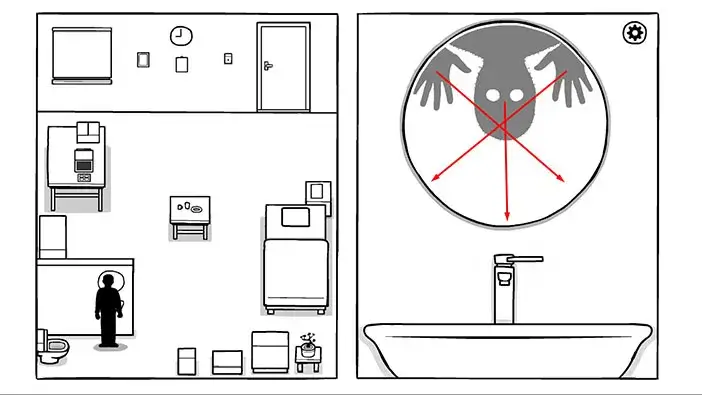
Once you’re done with breakfast, tap on the sink and the mirror in the bottom left corner of the room to proceed to the next task, self-care.
The reflection of the dark soul is upside down. Drag it to the bottom of the mirror. The easiest way to do this is to first drag down the body, then the right hand (the right side of the screen), then the left hand.
Let’s proceed to the next task, the check-up. Tap on the button next to the door to approach it and tap again to push the button and unlock the door. Once you do that, the nurse will come in, but this time she is wearing some kind of a hazmat suit. Tap on her to start the interaction.
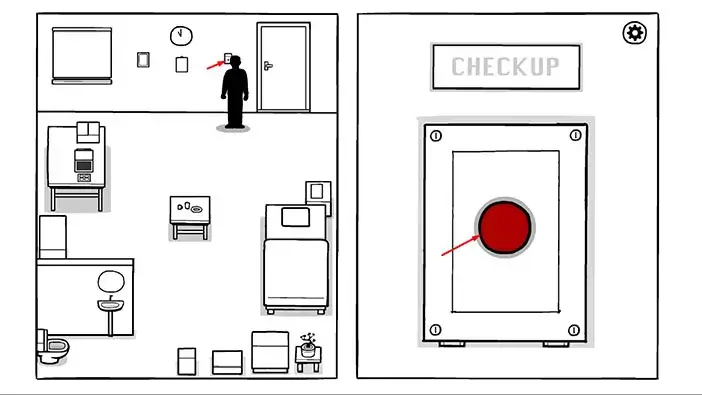
The nurse will warn you to keep your distance. After that, you will proceed with the task. The task is relatively simple. We just need to complete the sequence by looking for the pattern in the first two symbols.
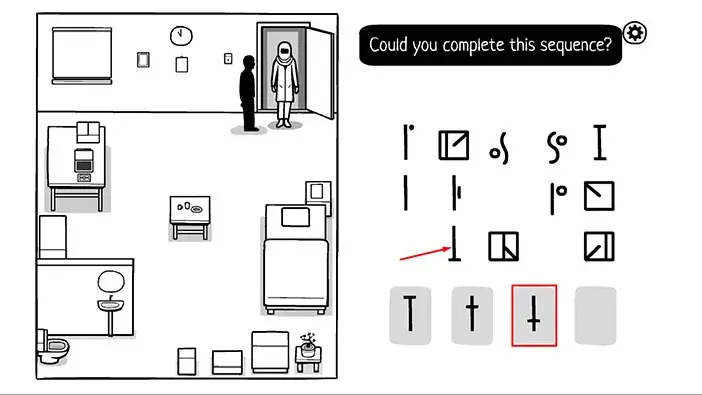
First task. If we look at the first symbol, we can see a vertical line and a horizontal line on top of it. On the second symbol, the horizontal line is slightly lower. So, we just need to find the symbol with the vertical line, and a horizontal line that is even lower. So, tap on the third symbol in the second row. After that, tap on the second symbol in the third row.
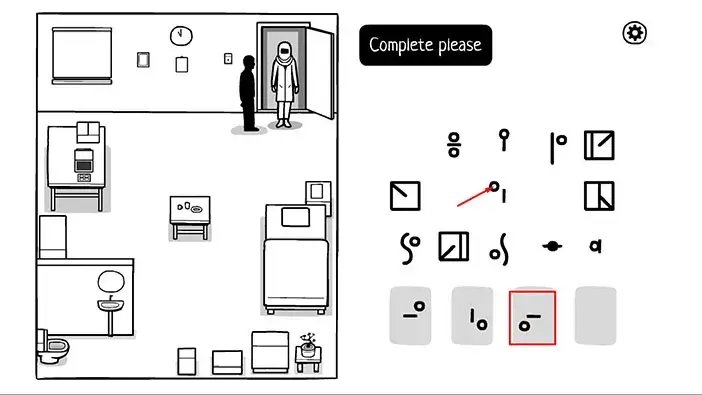
Second task. If we look at the first symbol, we can see a small circle and a horizontal line. The second symbol is the same as the first symbol except that it is rotated by 90 degrees to the right. So, the third symbol should be the same as the second symbol but also rotated 90 degrees to the right. So, tap on the third symbol in the second row. After that, tap on the third symbol in the second row.
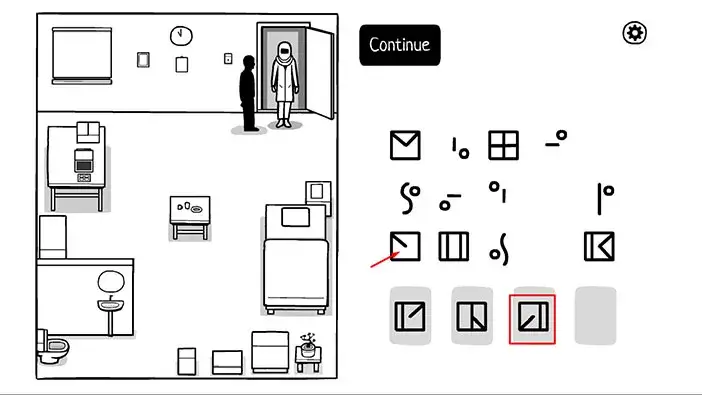
Third task. The first symbol is a cube with a diagonal line pointed up and to the right. On the second symbol, the diagonal line is pointed down and to the right. This is a very obvious pattern. So, on the third symbol, the diagonal line should be pointed down and to the left, and on the fourth symbol the diagonal line should be pointed up and to the left. So, tap on the fourth symbol in the second row. After that, tap on the first symbol in the third row.
Fourth task. The first symbol is a line with a dot in the top right. On the second symbol, the dot is at the bottom left. So, on the third symbol, the dot should be in the top right, and on the fourth symbol, the dot should be in the bottom left (repetition of the dot position of on first two symbols). So, tap on the fifth symbol in the third row. After that, tap on the first symbol in the first row.
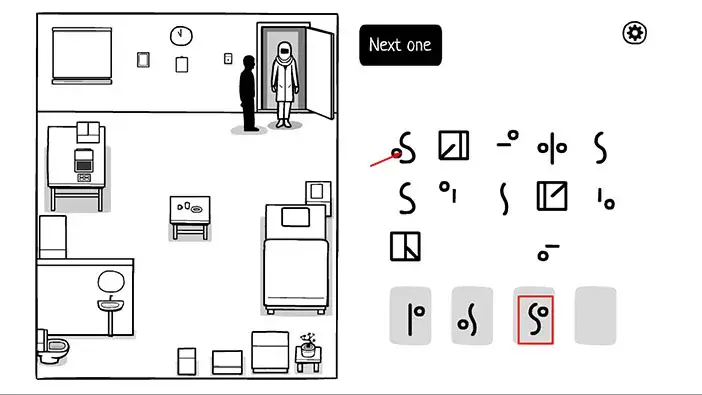
Fifth task. The first symbol is a plane circle. The second symbol is a circle with on horizontal line. So the number of lines in the circle should increase for the third and fourth symbols. Let’s tap on the second symbol in the second row (a circle with two lines). After that, tap on the fourth symbol in the first row (a circle with four lines).
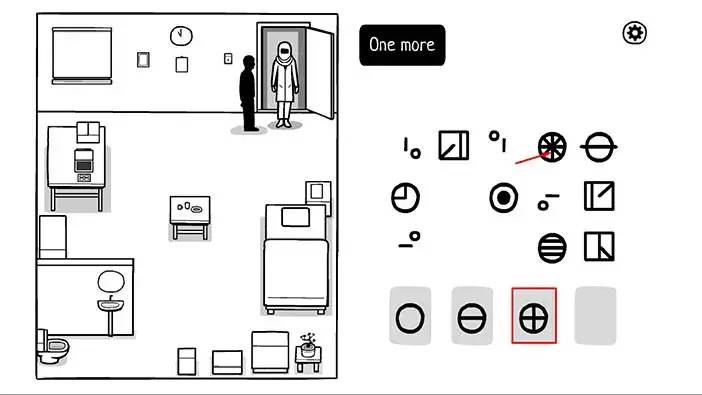
Sixth task. Here, we have two cubes with smaller cubes inside them. Tap on the first symbol in the first row. After that, tap on the fifth symbol in the third row.
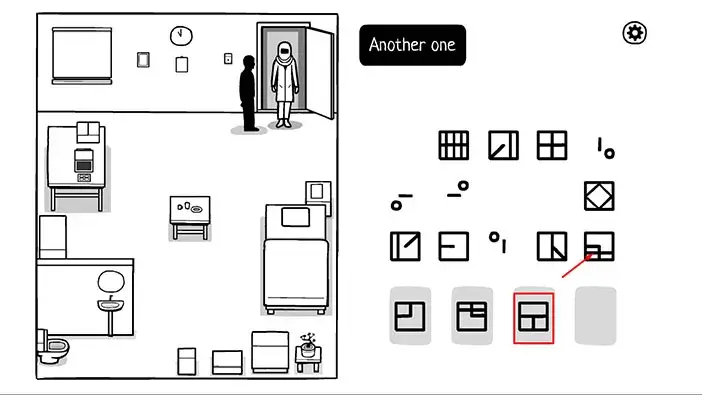
Next, we should order our dinner. Let’s go with the first option, meat.
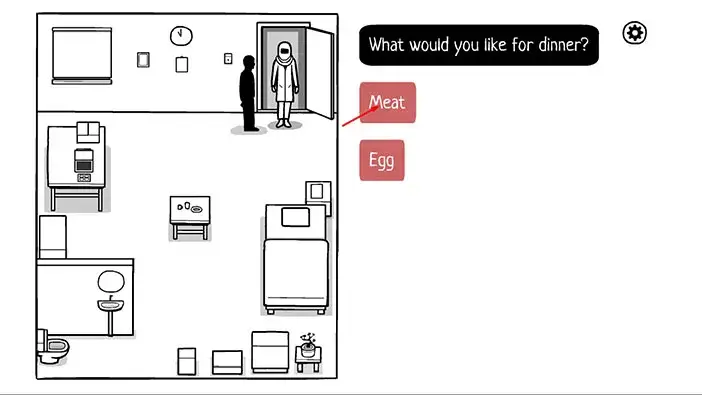
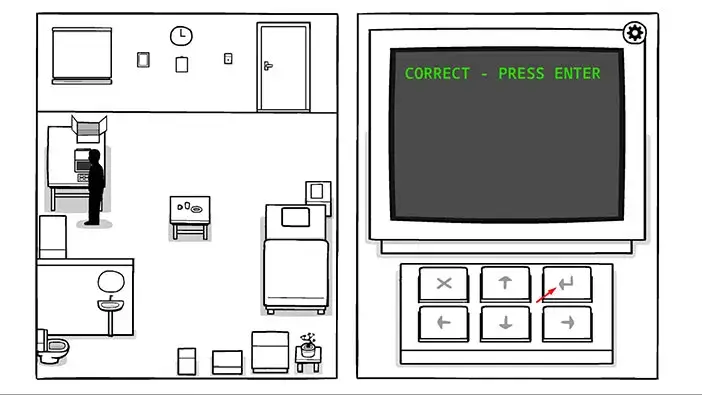
Ok, we finished the check-up. Let’s proceed to the next task, memory training. Tap on the computer to approach it then tap on “Enter” to start the application. On the next screen, select “Yes” and tap on “Enter” to confirm.
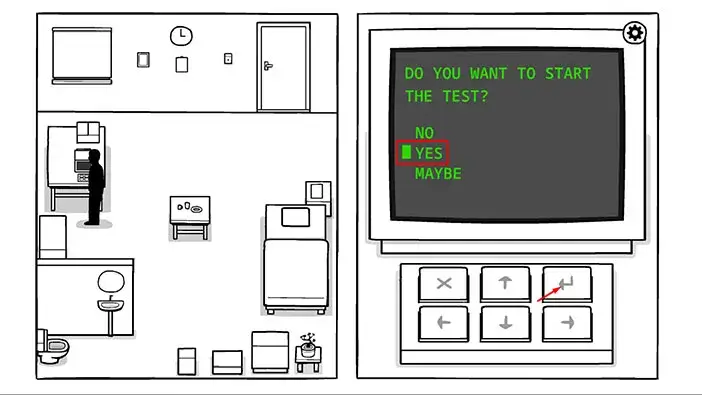
If you look at the map on the screen, you will notice that is pointing to the table in the middle of the room. So, let’s go there and take a closer look.

At the bottom of the glass on the left, you will notice something dark. Tap on it several times and a small, dark figure will rise up. Tap a few more times and the glass will break, freeing the small figure, which will run away.
Once you’re done, tap on the computer to take another look at the map.
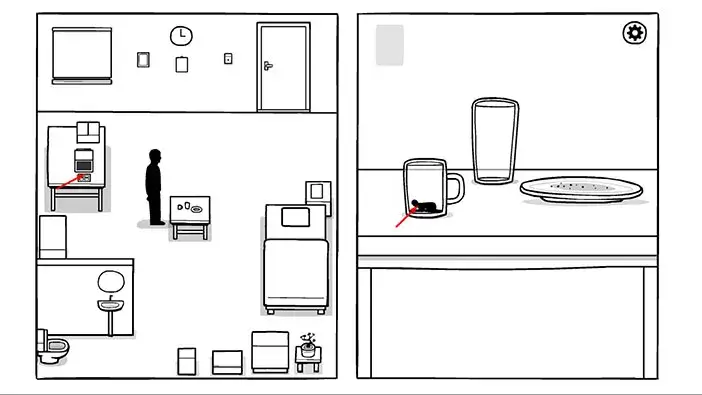
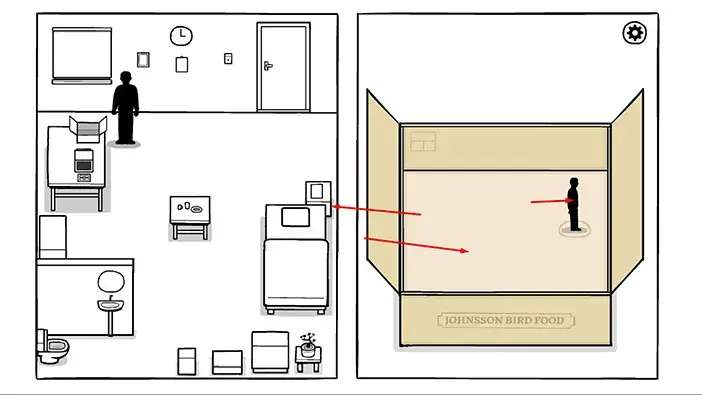
The map is now pointing at the position of the box with Robert’s personal items. So, let’s take a closer look.
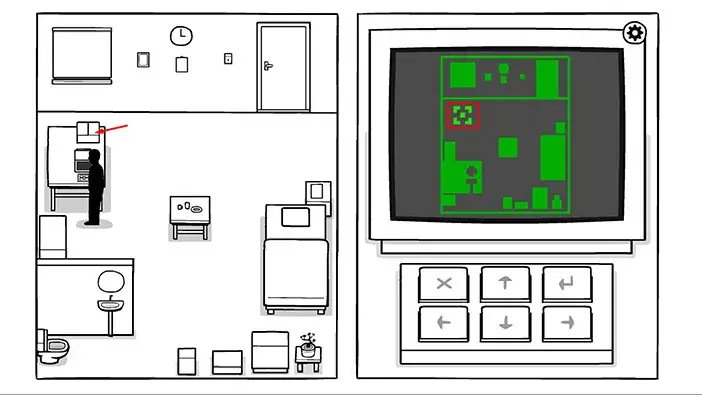
Drag both sides of the box to open it.
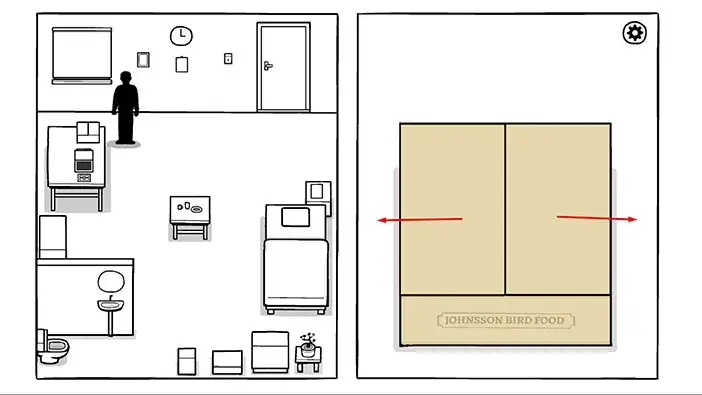
Ok, we found the small figure again. So, in this game, we will use the computer to track the small figure around the room.
If you look to the right of the figure, you will notice a grey circle at the bottom of the box. Drag the left side of the box forward and backward and the figure will move to the right. Once the figure is inside the circle, tap on it and it will disappear (fall down through the hole).
Once you’re done, tap on the computer to check the next position of the small figure.
The map is now pointing to the vase, in the bottom right corner of the room. Let’s go there and take a closer look.

Tap on the vase, and the head of the small figure will appear. In Robert’s dream, the leaves on the small tree were moving. So, let’s tap on the branches with leaves. First tap on the branch with one leaf, then on the branch with two leaves, then on the branch with three leaves, then on the branch with four leaves, and lastly, tap on the branch with five leaves. Each time you tap on the correct branch, the small figure will rise a bit more. Once you tap on all leaves, the figure will fall out.
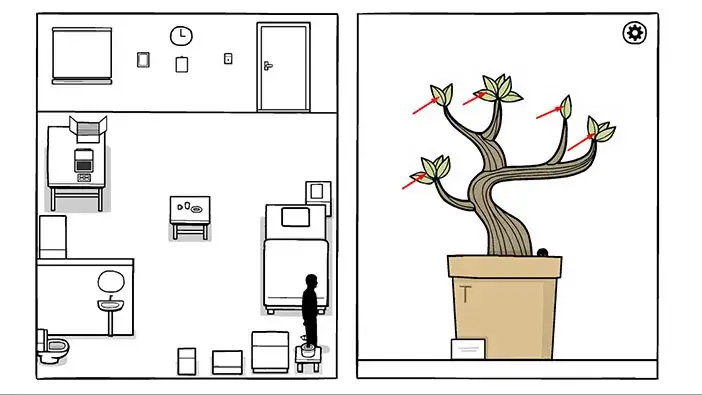
Tap on the figure again, and it will run away. After that, tap on the computer to discover the next location.
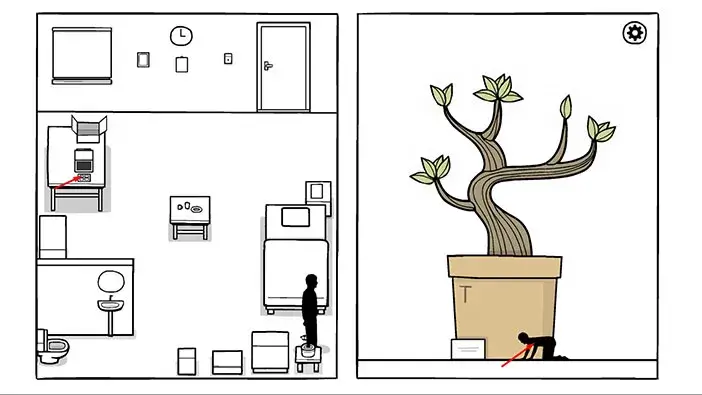
The next location is the panel between the clock and the window. Let’s take a closer look.

In the lower-left corner of the picture, we can see the top of the head of the dark figure. Drag it up and reveal it.
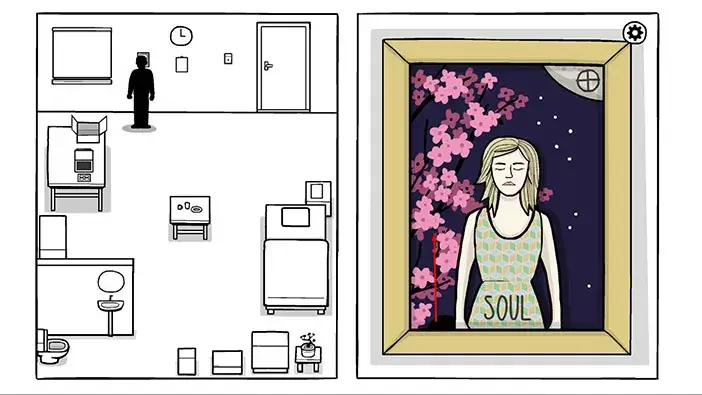
Laura’s eyes will turn black and the figure will disappear. Let’s check out the next location.
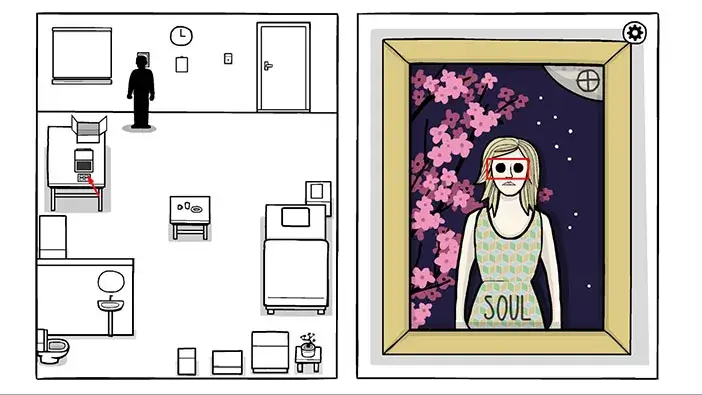
The map is now pointing to the recreation box. Let’s go there and take a closer look.

Tap on the large speaker and you will summon a musical note. After that, tap four times on the middle speaker to push the note to the right, above the figure.
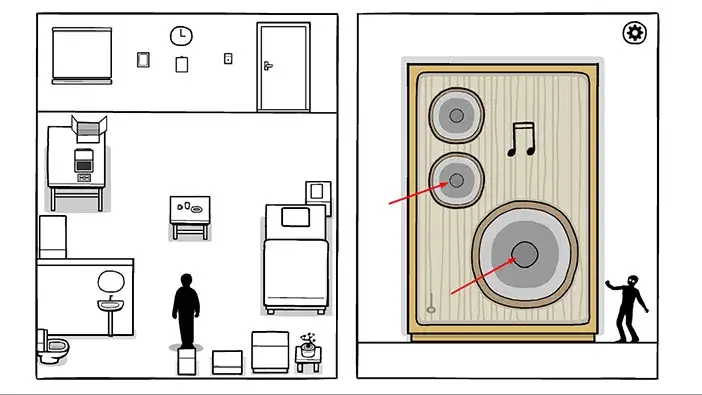
Tap on the large speaker again and the musical note will fall down on the figure. The dark figure will run away, so let’s go back to the computer.
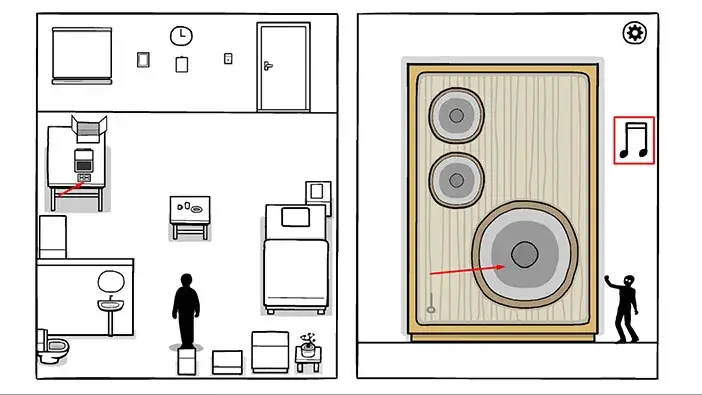
The map is now pointing to the cabinet, located next to the vase. Let’s go there and take a closer look.

Drag the bottom drawer to open it and inside you will find a small box. Tap on the box to take a closer look at it, and then again to open it.
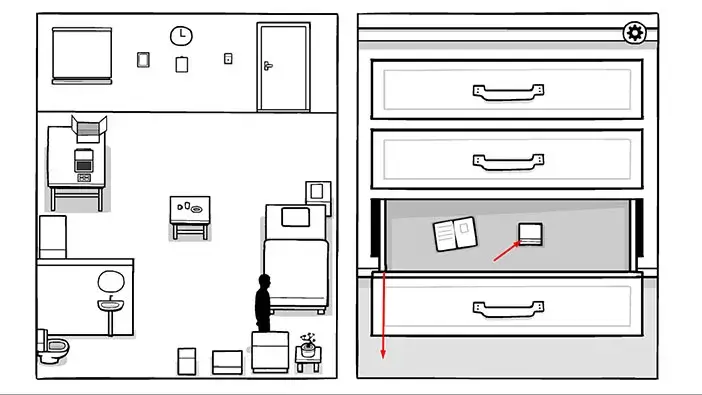
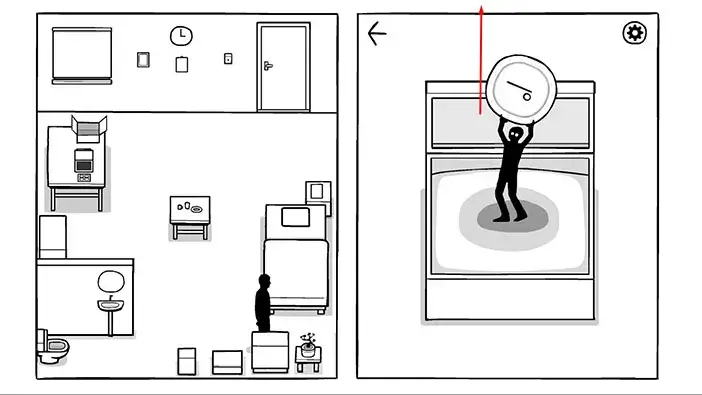
Well, we found the dark figure again, and this time it was holding a coin above its head. Drag the dark figure to the top of the screen, and then release it (it will fall down). Repeat this three times. Once the figure drops for the third time, it will disappear, and only the coin will remain.
Once you’re done, go back to the computer.
Well, that’s it for the memory training. Tap on “Enter” to confirm and the service cart will be delivered to your room.
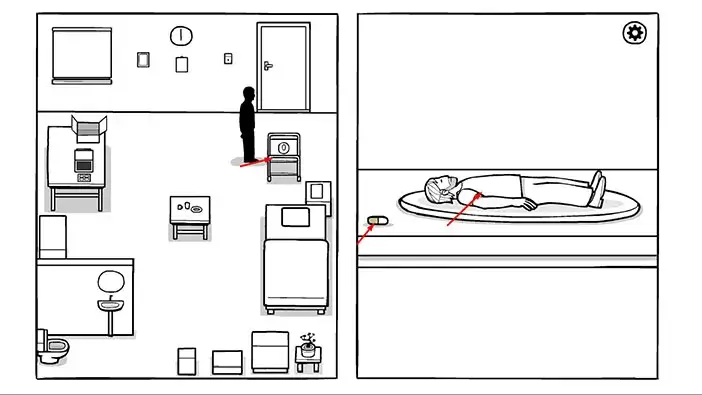
Let’s proceed to our next task, dinner. Tap on the service cart to approach it. You will see a pill and a small Robert will be served on the plate (we ordered meat). Take the pill. After that, tap on the small Robert several times to consume it.
Let’s proceed to the next task, recreation. Tap on the recreation box to approach it, and tap again to open it.
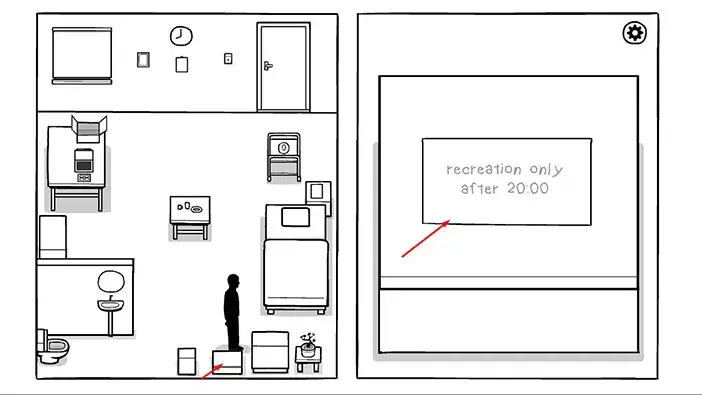
Tap on the open box on the left, and the dark figure will appear under the table in the middle of the room.
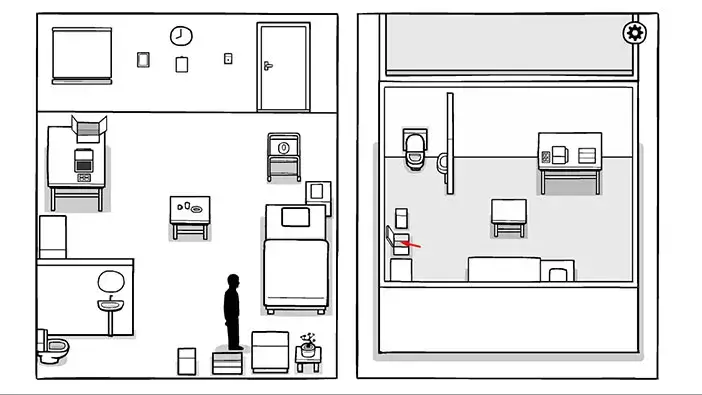
Tap on the dark figure several times and it will get up and wave at you.
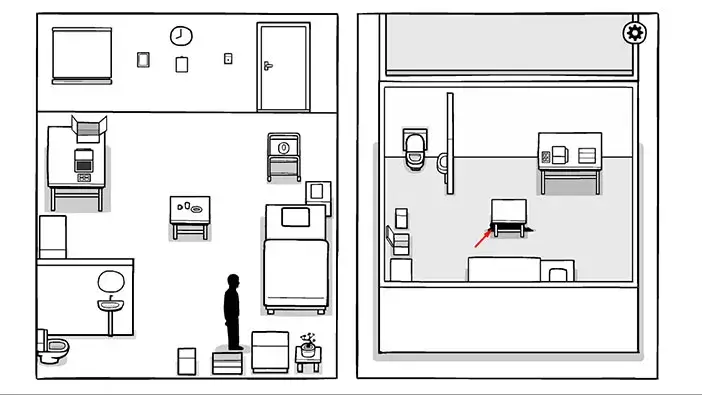
Tap on the dark figure again and it will walk over to the open box on the left.
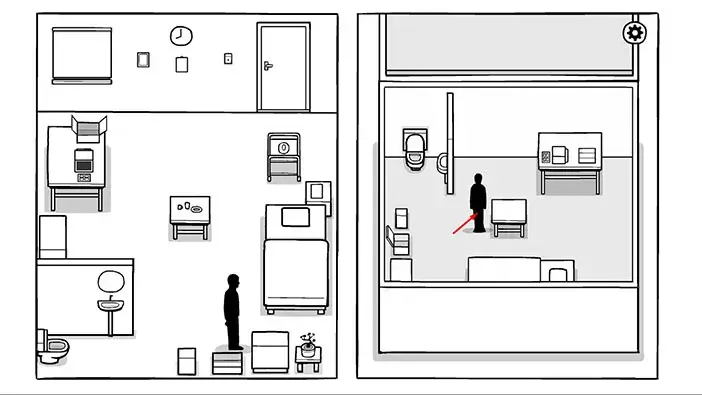
A large shadow will appear in the room on the left, and you will also notice a symbol above the recreation box. In this puzzle, our task is to see the location of the symbol in the room on the left and tap on the same location in the room on the right.
In the room on the right, the recreation box is located above the open box, so let’s tap on it.
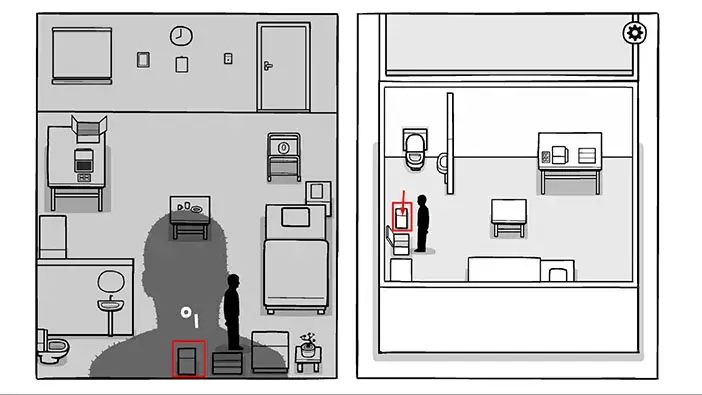
Next, the symbol will appear above the bed in the room on the left. In the room on the right, the bed is located above at the bottom of the room, so let’s tap on it.
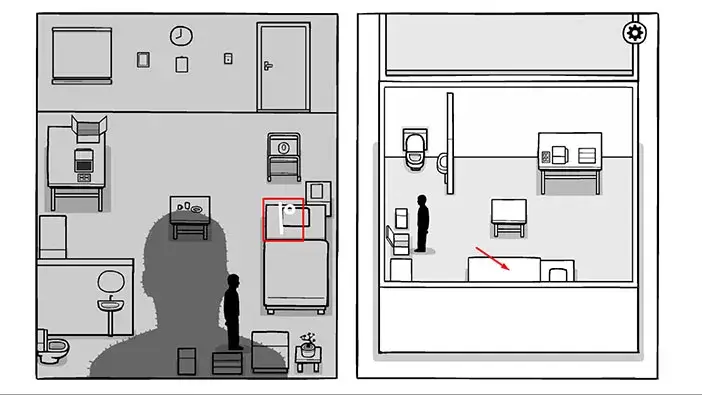
Next, the symbol will again appear above the recreation box. So, let’s tap on the recreation box in the room on the right.
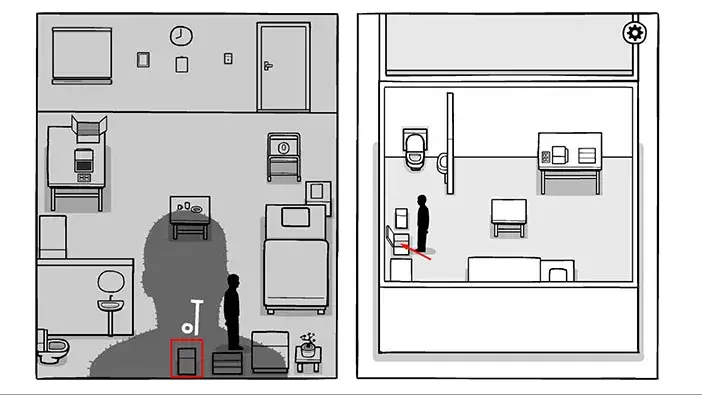
Next, the symbol will again appear above the bed in the room on the left. So, let’s tap on the bed in the room on the right.
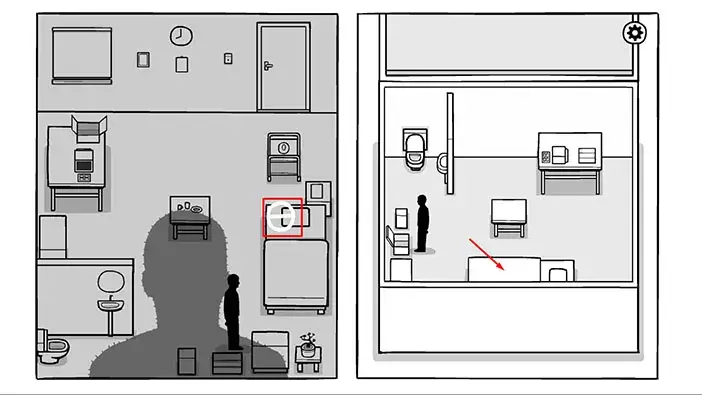
Next, the symbol will appear above the table in the room on the left. In the room on the right, the table is located above in the middle of the room, so let’s tap on it.
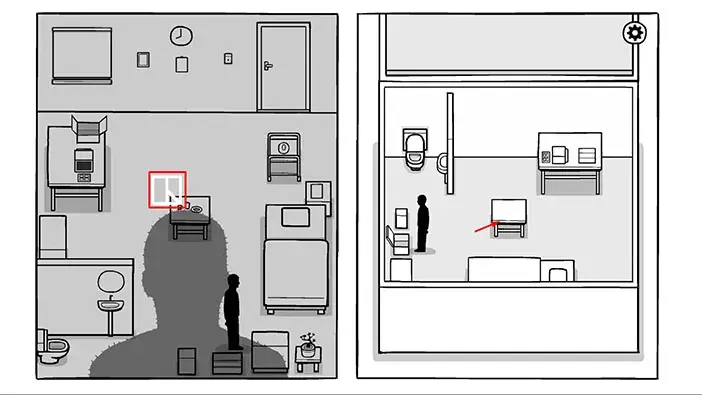
Next, the symbol will appear above the toilet in the room on the left. In the room on the right, the toilet is located in the upper left corner of the room, so let’s tap on it.
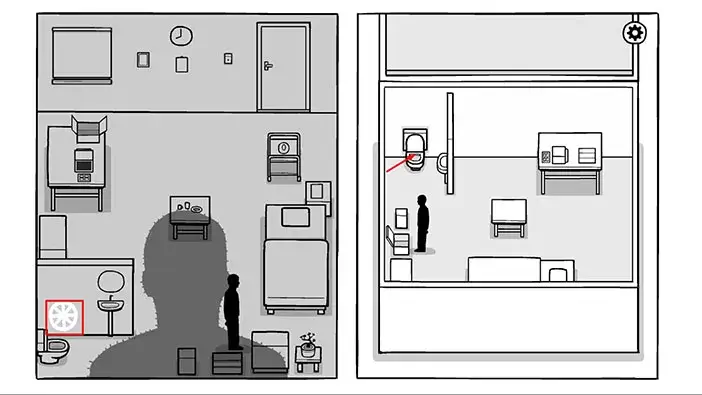
No additional symbols appeared, so looks like we successfully completed this puzzle. Tap on the dark figure in the room on the right and it will walk to the bed.
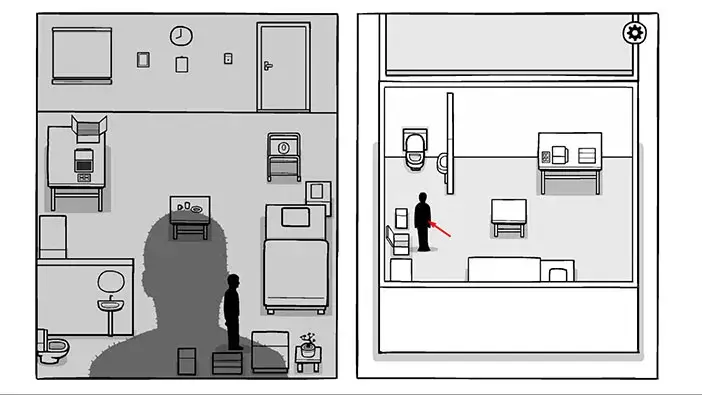
Tap on the figure again, and it will go to sleep.
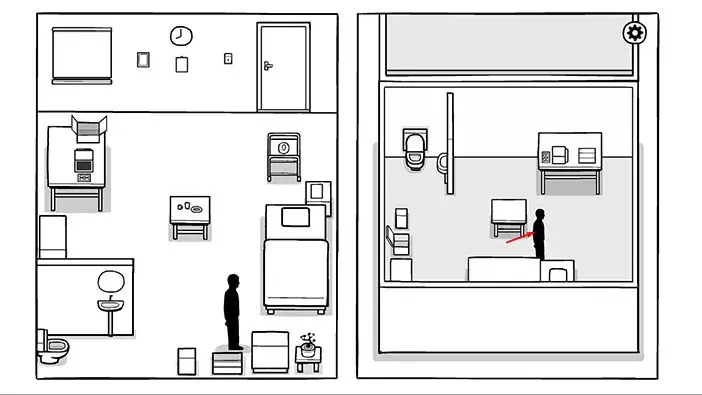
Let’s do the same with the dark soul in the room on the right. Tap on the bed, then drag the blanket to cover the dark soul.
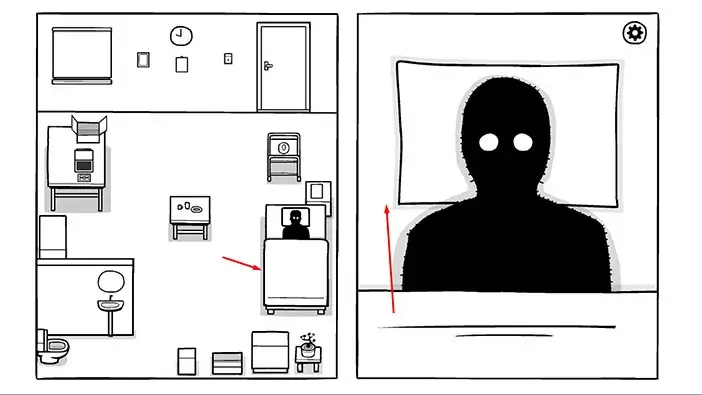
Now, we will explore the dream of the dark figure. The name of this dream is “The White Door”.
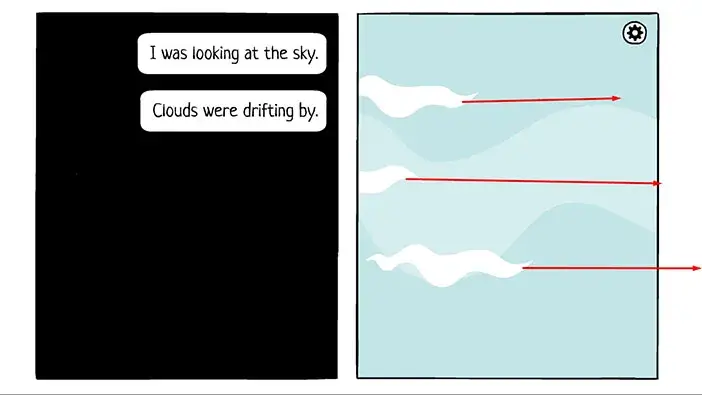
Robert remembered that he woke up on the street and the clouds were drifting by. So, drag the clouds to the right.
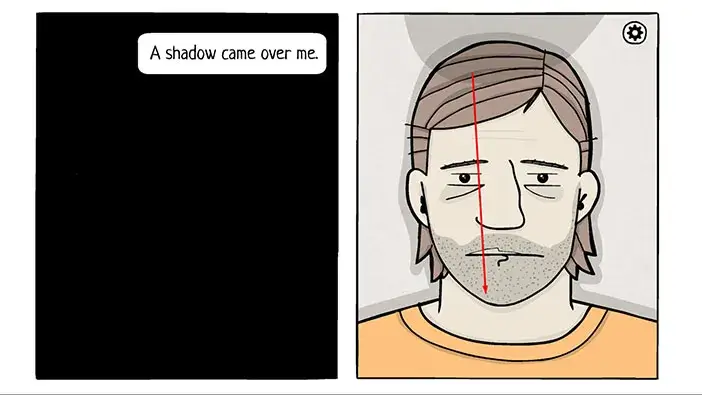
A shadow came over me. Drag the shadow over Robert’s face.
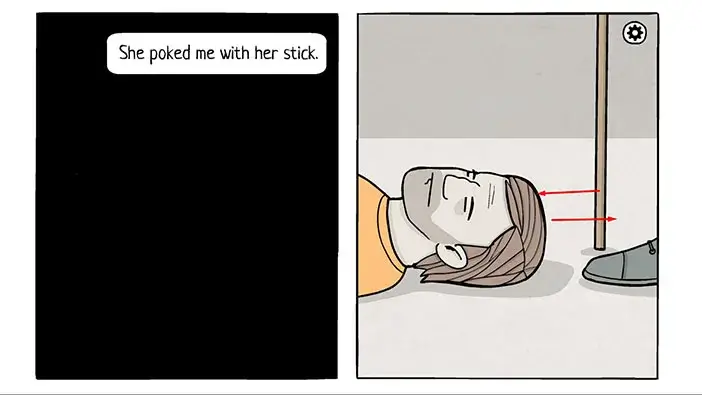
An old woman approached Robert and poked him with the stick. Drag the stick back and forth several times.
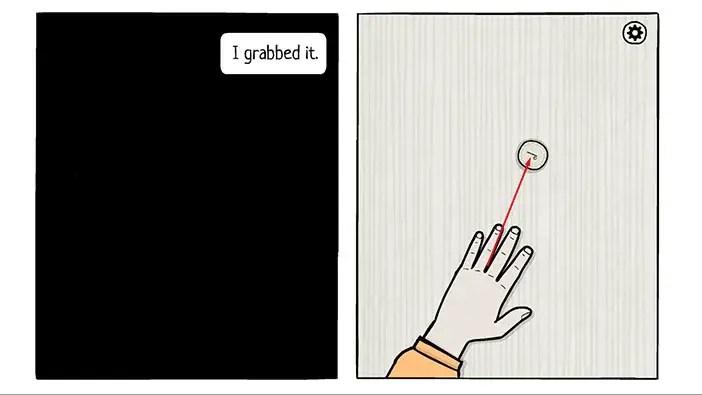
After that, she told Robert that he should call someone, and she dropped him a coin. So, let’s tap on the coin.
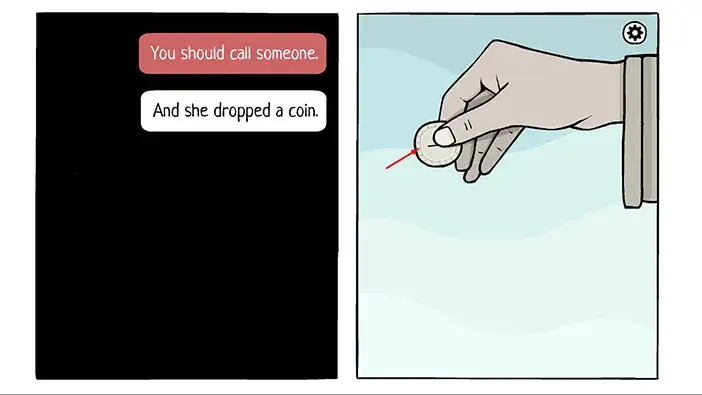
Next, drag Robert’s hand to grab a coin.
Robert knew that there is only one place he could call and look for some help. So, he got up and walked into the phone booth (tap on the phone booth door).
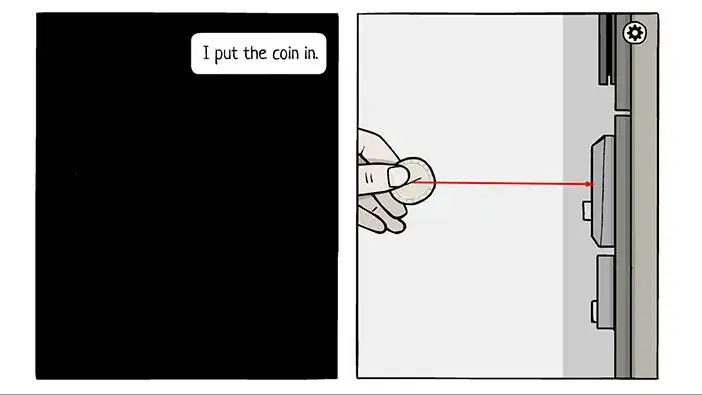
Next, drag the coin and put it into the slot.
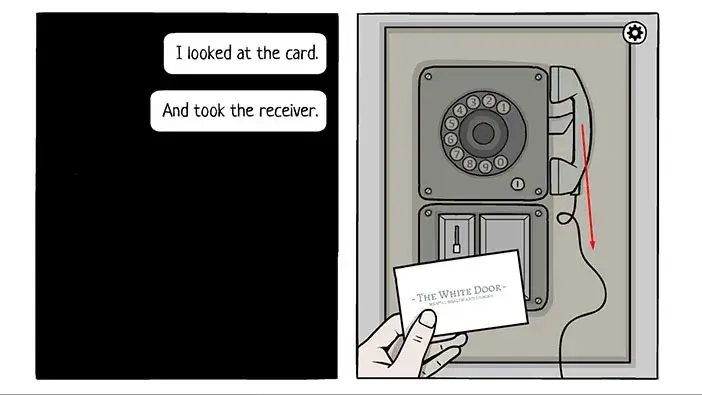
Next, Robert looked at the card and took the receiver. Drag the receiver.
Dial the number “132”.
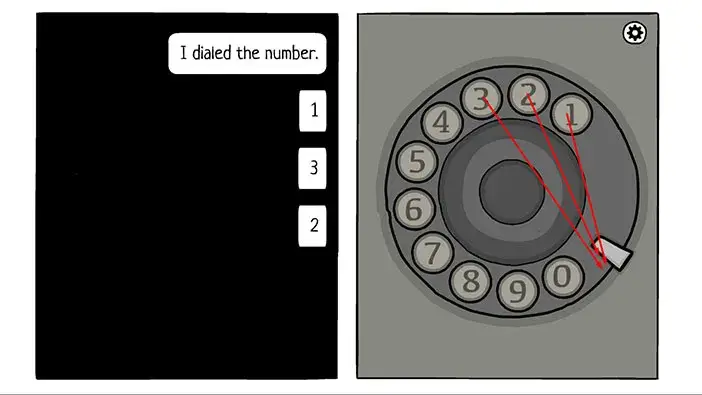
Drag the phone next to Robert’s ear. The voice on the other side told him that they expected his call. They also informed him that the car will come to pick him up.
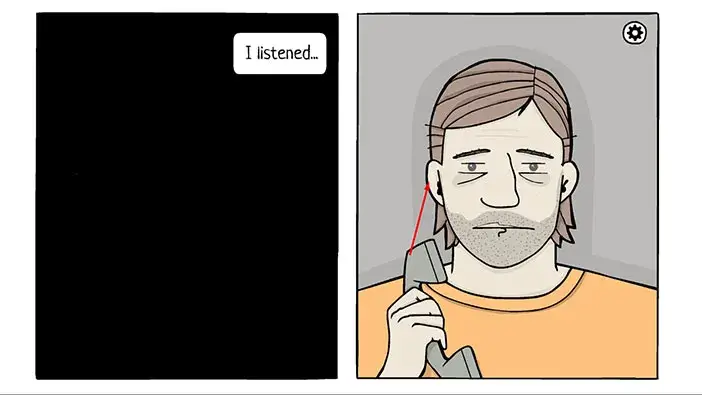
So, Robert put down the phone and waited for the car to arrive. Drag the phone to put it down.
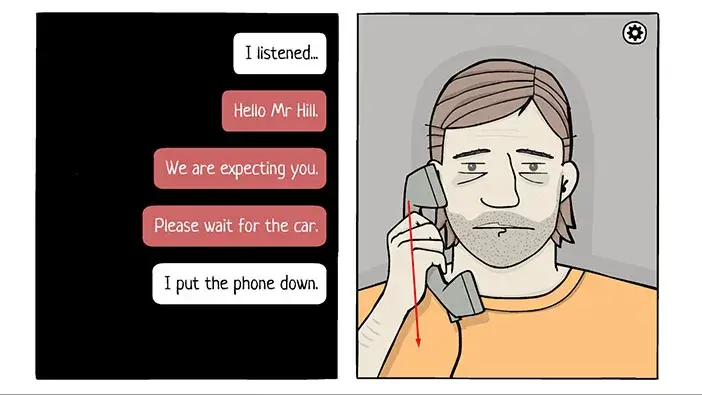
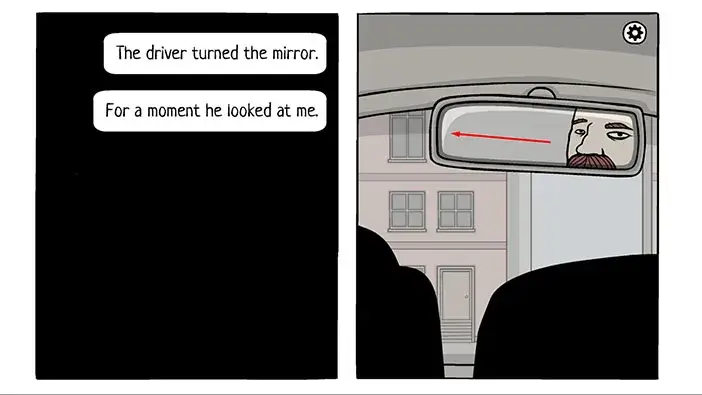
When the car arrives tap on the door to open it and tap again to get into the car. Next, the driver turned the rearview mirror and looked at our character. So, drag to the left to turn the mirror.
We drove to a large building with a white sign. Tap and hold on the car to stop it once you reach the building with the sign “White Door”.
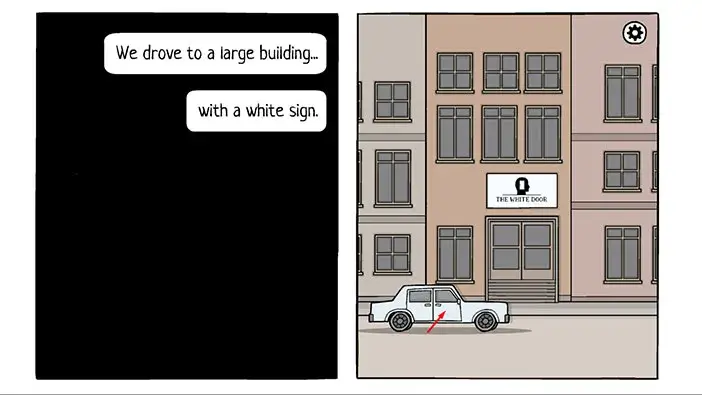
Drag to look up at the sign.
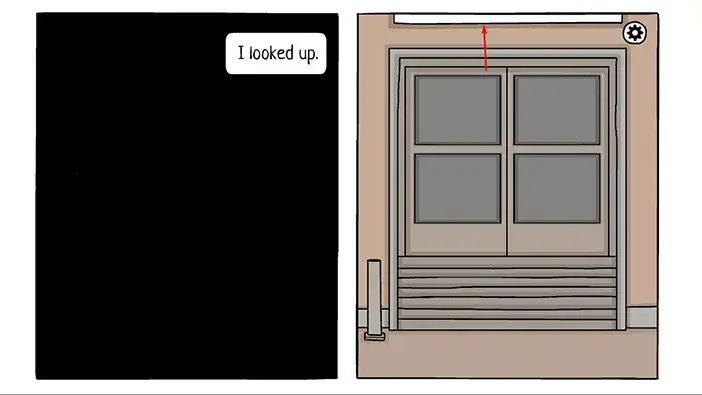
Next, drag until you reach the top of the stairs.
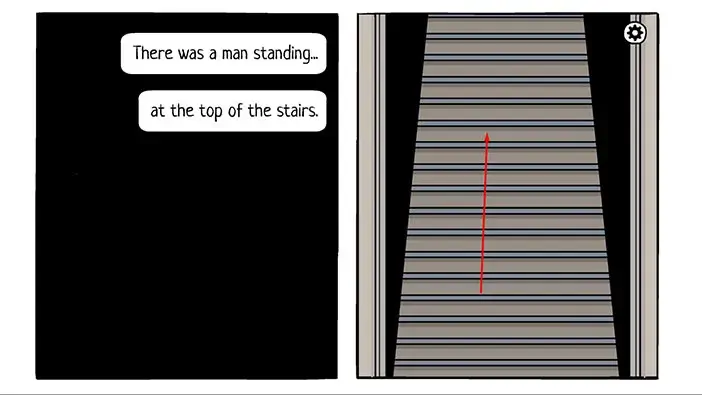
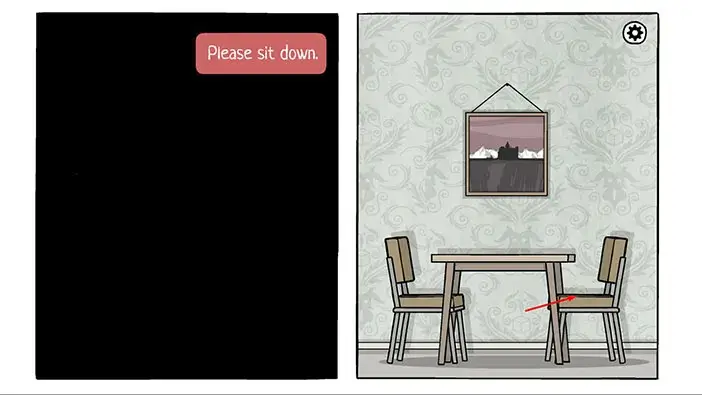
Robert followed the man and sat down on the chair – tap on the chair on the right.
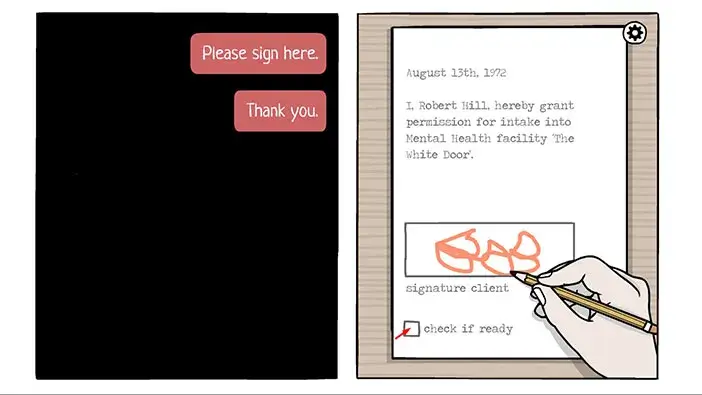
The man welcomed Robert to their institute. He also told him that they could help him retrieve his lost memories and bring back color to his life. He just has to sign the paper. Drag the paper to Robert’s hand.
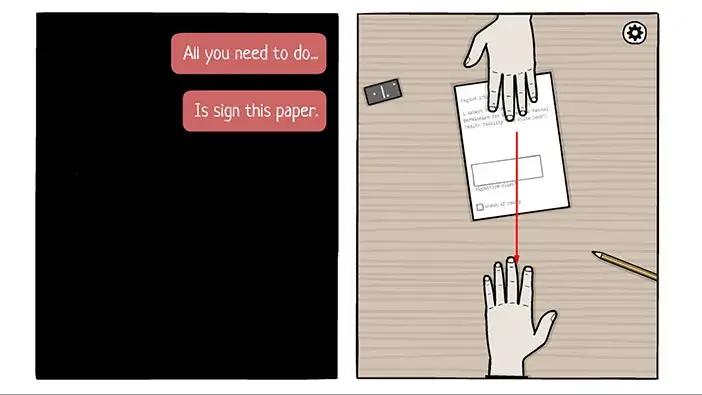
Drag the pencil and try to write “Bob”. After that, check the box below by tapping on it.
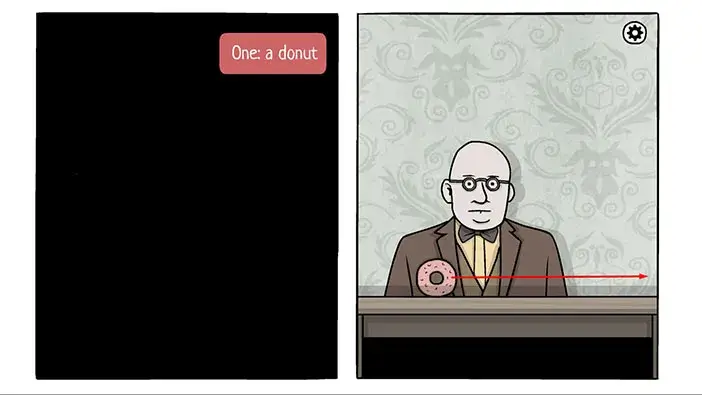
Next, the man will show you some familiar items and your task is to drag them to the right. So, let’s drag the first item, the donut, to the right. We know that Robert loves donuts, that’s why he always got donuts for breakfast.
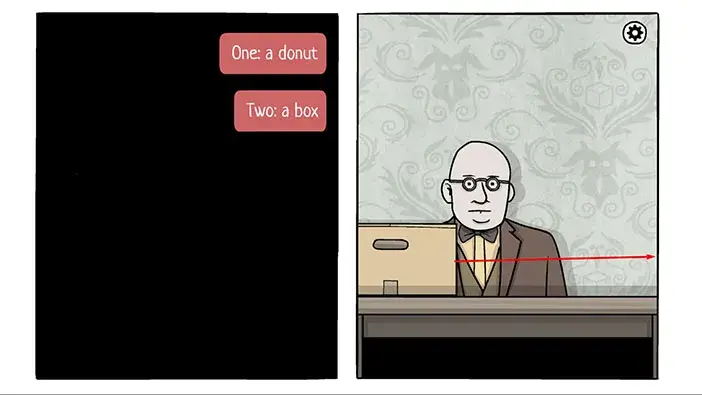
Next, drag the box to the right. This is the box with Robert’s personal items from the factory.
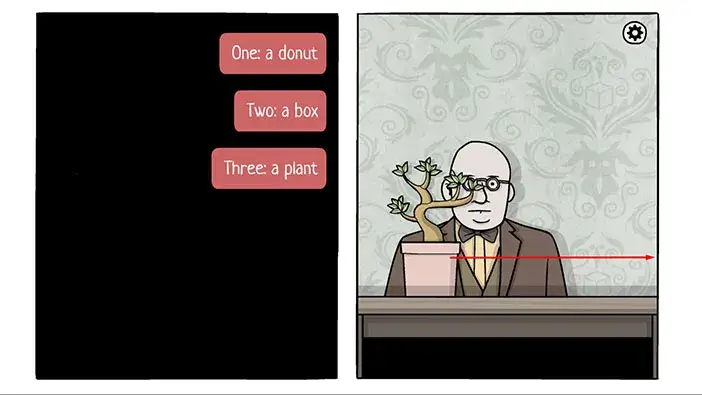
Next, drag the plant to the right. The woman from the “White Door” mental facility gave him this plant when she came to visit him.
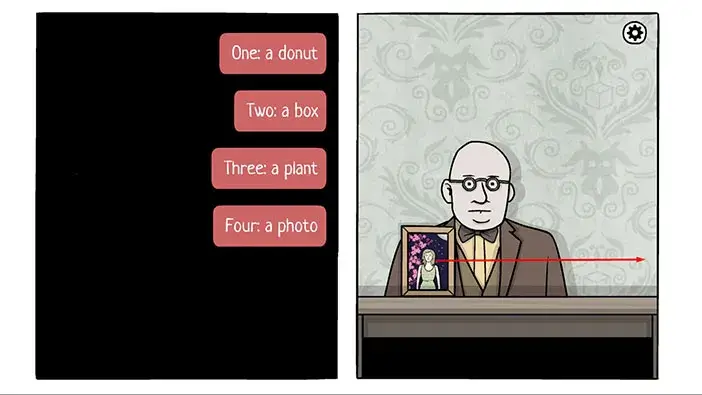
Next, drag the photo of Laura to the right.
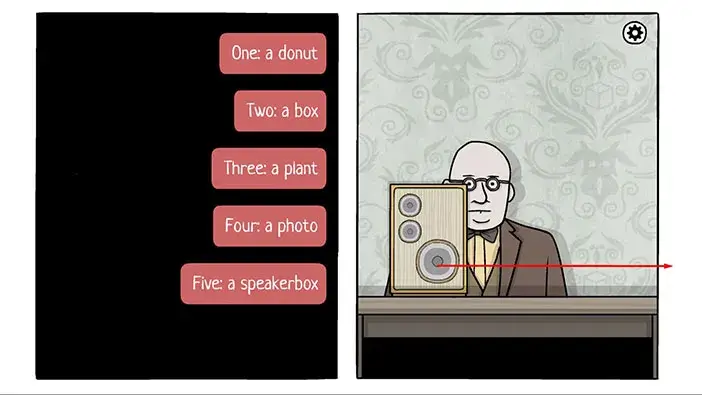
Next, drag the speaker box to the right.
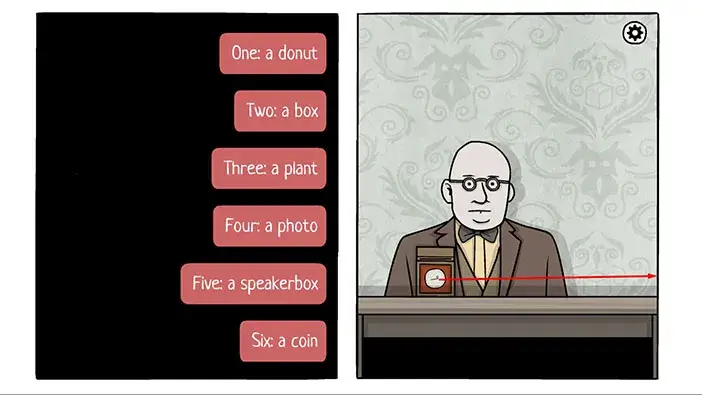
Next, drag a coin to the right. This is probably the coin that Robert gave to the old lady who was begging in the street. Later, the old lady gave him back the coin and Robert use it to call “The White Door” mental institution. So, looks like they pulled the coin out of the phone booth?
Next, drag the birdcage to the right.

Next, the man told Robert to follow him. Now, Robert should meet Sarah at the end of the hall. So, drag to the right, and tap on the lights to turn them on as you approach them until you reach the end of the hallway.
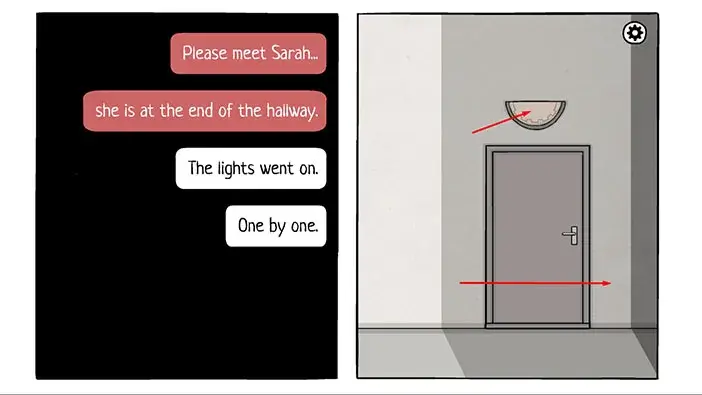
At the end of the hallway, you will see Sarah – the woman that visited Robert in his apartment. Tap on the light above her head to turn it on, then tap on Sarah to start the interaction.
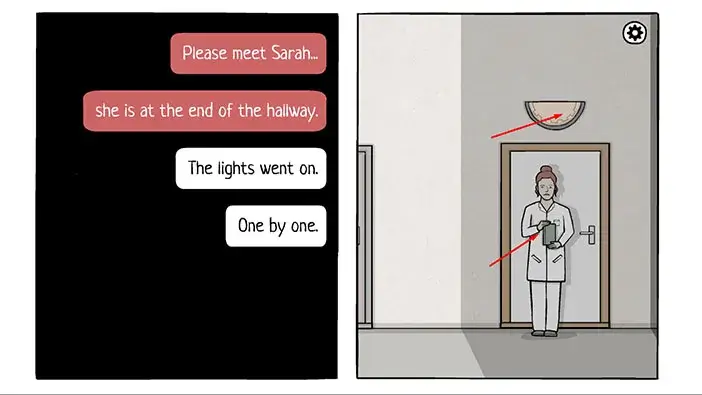
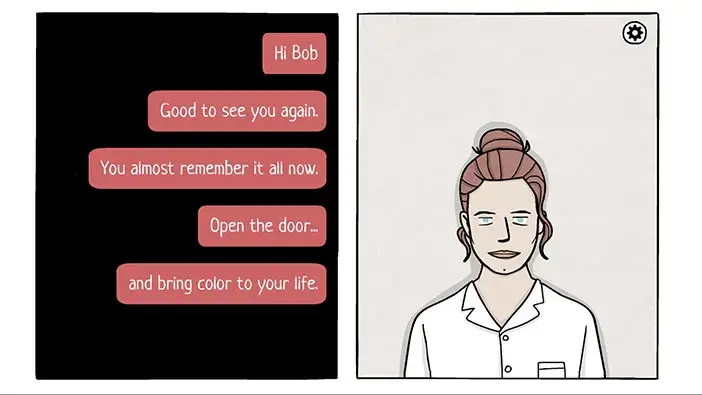
Sarah will tell Robert that his memory is almost completely restored. Now, he just has to open the door to bring back the color in his life.
DAY 7
Unlike the previous six days, we will start the seventh day by opening the white door. Drag the door to open it.
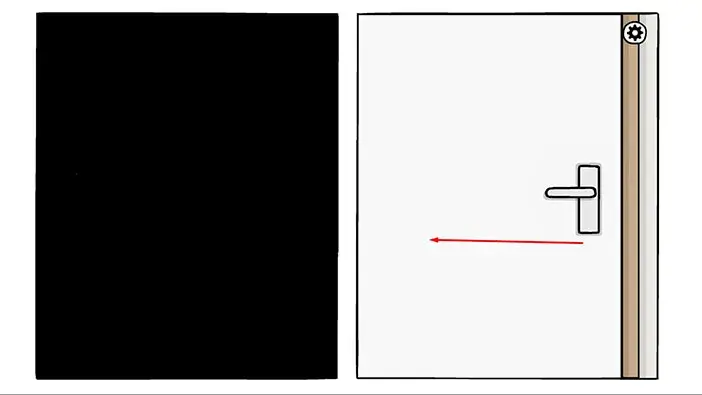
You will immediately notice that Robert has a yellow shirt, blue pants, and brown shoes (and hair). He is no longer black and white, which probably means that his condition has improved significantly.
If you tap on the notice board, you will notice that all daily tasks have been completed. Also, Robert’s status was changed to “Dreaming” and we can see that the dark figure (dark part of Robert’s mind) is sleeping in the bed. So, the doctors probably want to bring up Robert’s positive side by interacting with his dreams.
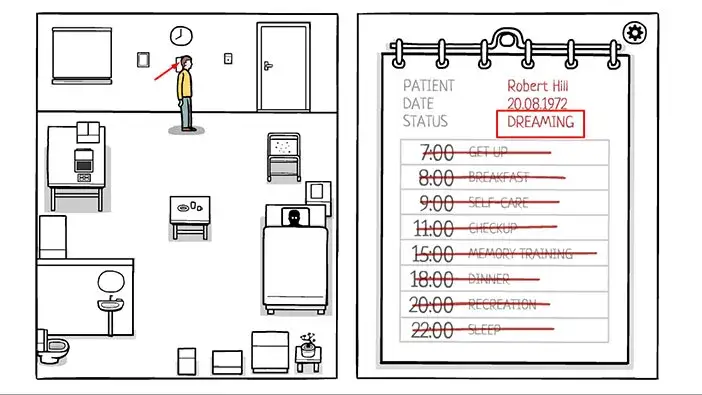
Let’s open the window. Tap on it to approach, then drag it up to roll up the blinds.
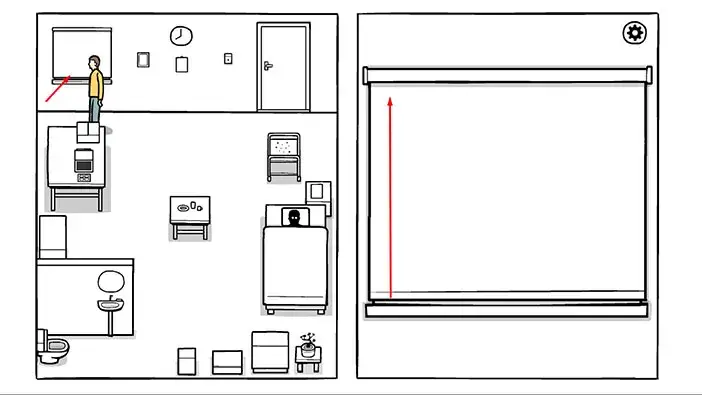
The bird is still on the window, and it appears that outside is a nice, sunny day (unlike the previous time when we saw heavy rain).
Let’s take a look at the service cart.
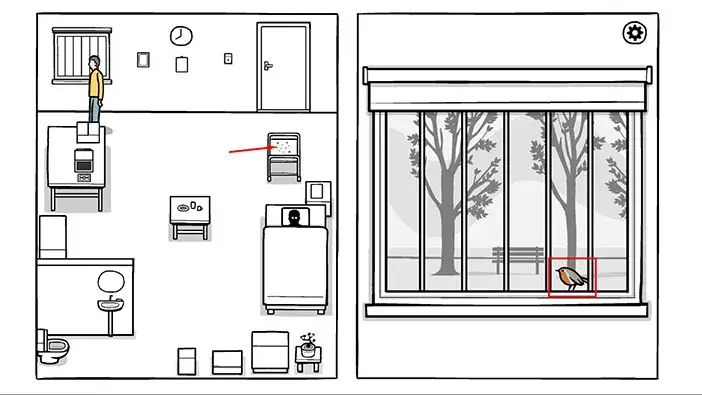
Here we can see seven vegetables and fruit, and below them, we can see two labels “red” on the left, and “green” on the right. Our task is to drag all the red items on the left side of the table, and all the green items to the right side of the table. So, let’s do that.
We will start with the left side. Strawberries and tomatoes are red, so we will leave them on the left side. Drag the pear and celery to the right side since these two items are green.
Next, drag the cherries and the meat to the left side, because these two items are red.
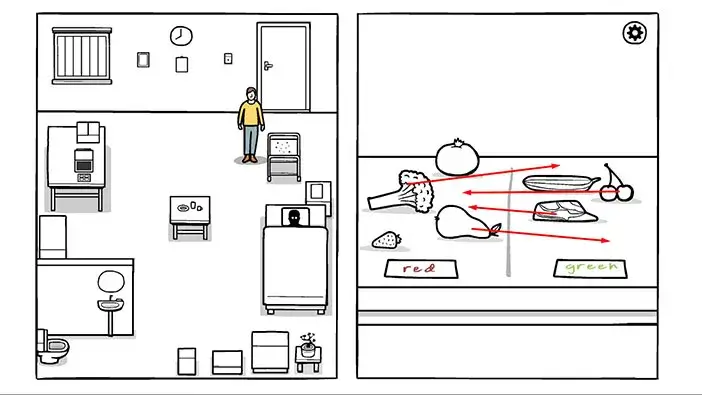
As soon as you arrange all items that should be red on the left, and all items that should be green on the right, they will gain the appropriate color. Tap on all items to consume them.
I guess that Robert’s food tastes much better now since his mood has improved, and that’s why the food suddenly gained color. That’s all fine and dandy, but consuming all of these different types of food could lead to some serious stomach issues. Well, I guess he doesn’t care right now, and thinks that it is better to have diarrhea than a serious mental health issue.
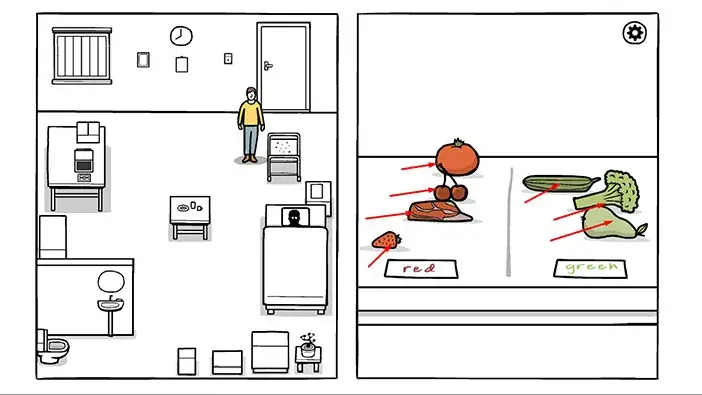
As soon as you consume the food, the cart will restore its color, and the same will happen with a portion of the window.
Next, let’s go to the check-up button. Once you get there, tap on the red button.
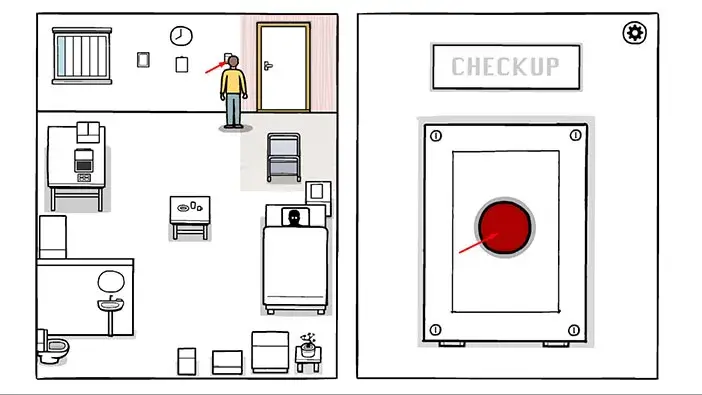
Pressing the red button will restore color to the top right portion of the room, and another part of the window.
Next, let’s go to the computer, and start the test.
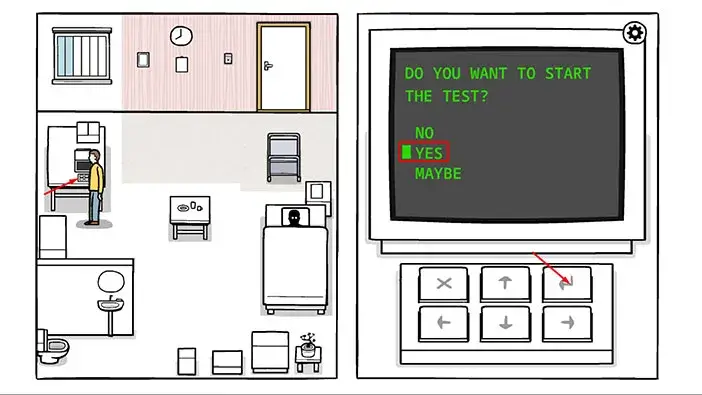
Ok, here we have a new type of puzzle, similar to the “snake” game. The goal is to cover all the squares (empty spaces) in the maze and filled them with color. So, let’s do that. We will do the following puzzles step by step.
FIRST PUZZLE. We can only see green squares.
Step 1
Tap three times on the down arrow key, then tap twice on the right arrow key.
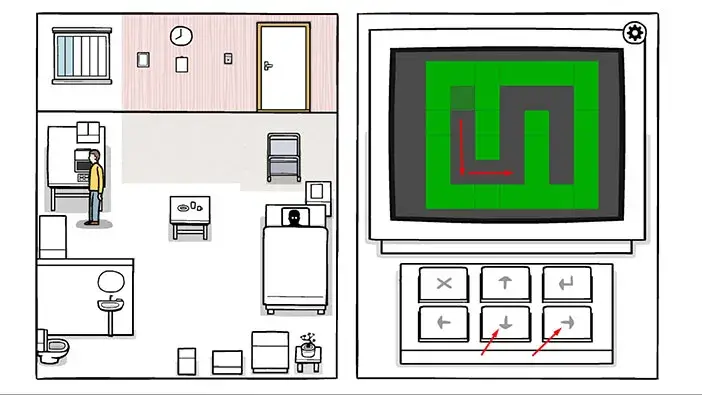
Step 2
Tap three times on the up arrow key, then tap twice on the right arrow key.
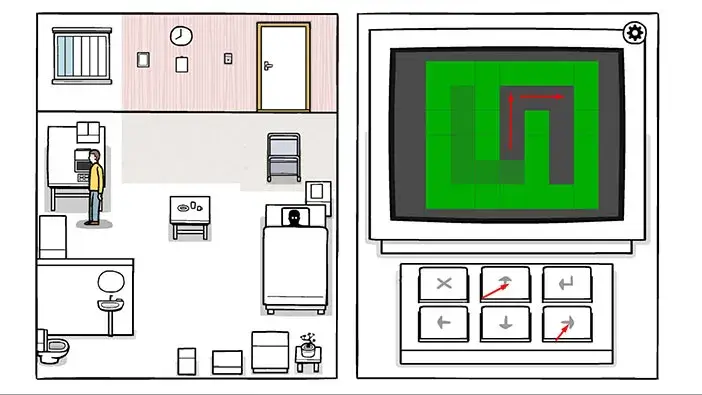
Step 3
Tap three times on the down arrow key.
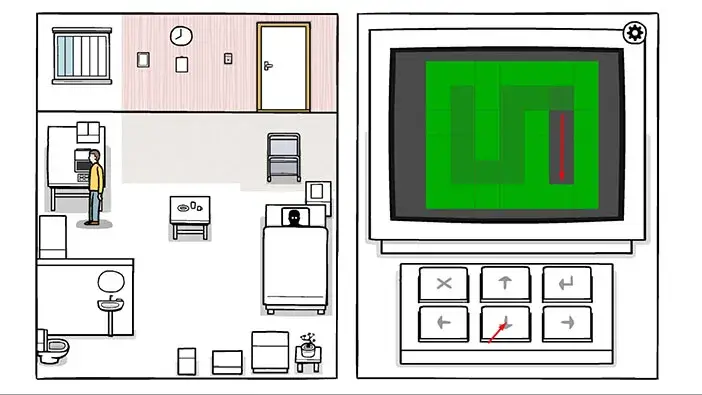
SECOND PUZZLE. Now we have green and yellow squares.
Step 1
Tap once on the left arrow key, then tap once on the up arrow key.
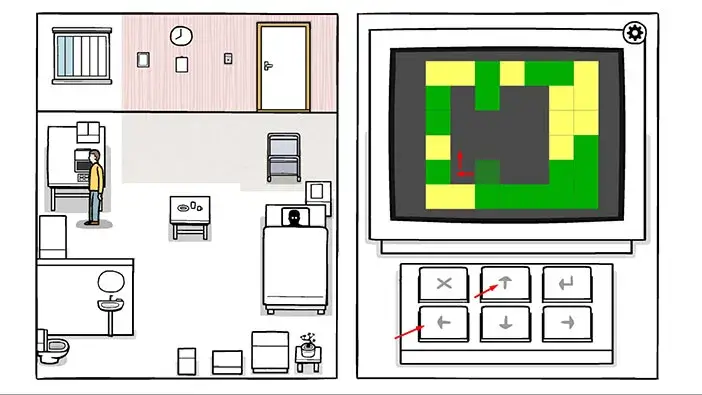
Step 2
Tap twice on the right arrow key, then tap once on the down arrow key.

Step 3
Tap once on the right arrow key, then tap three times on the up arrow key.
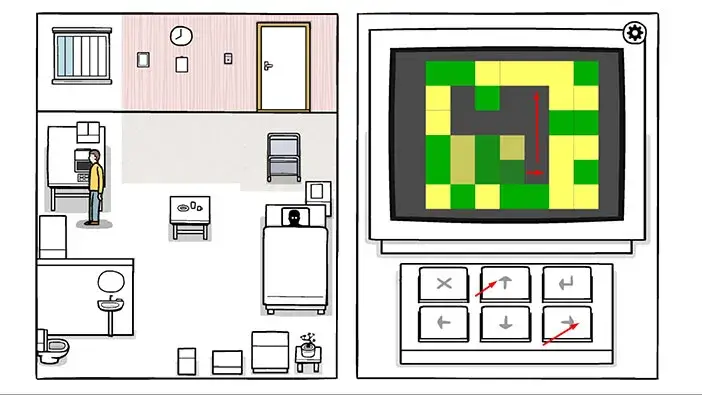
Step 4
Tap once on the left arrow key, then tap once on the down arrow key.
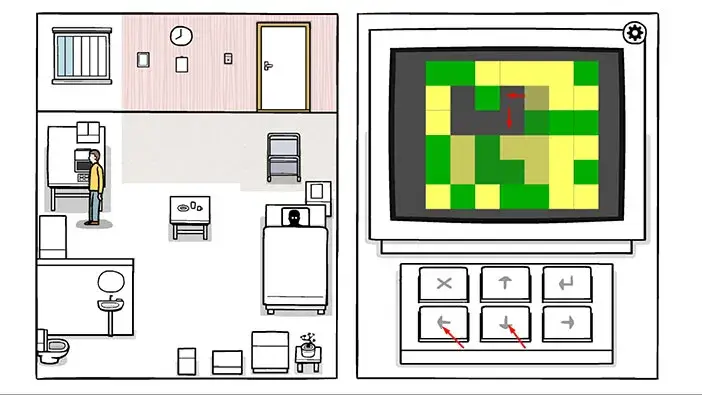
Step 5
Tap twice on the left arrow key, then tap once on the up arrow key.
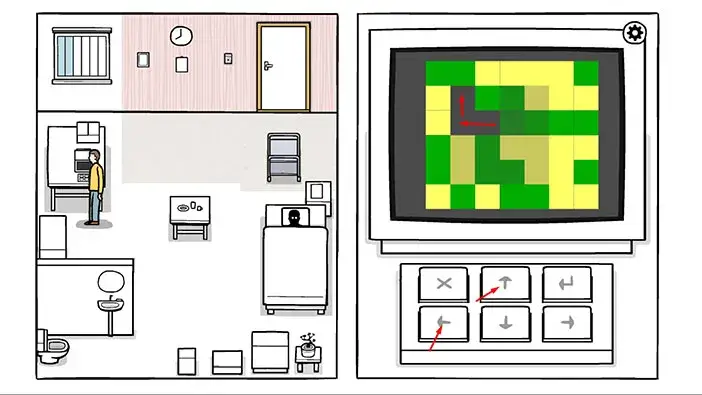
THIRD PUZZLE. Now we have green, yellow, and purple squares.
Step 1
Tap once on the up arrow key, then tap twice on the right arrow key.
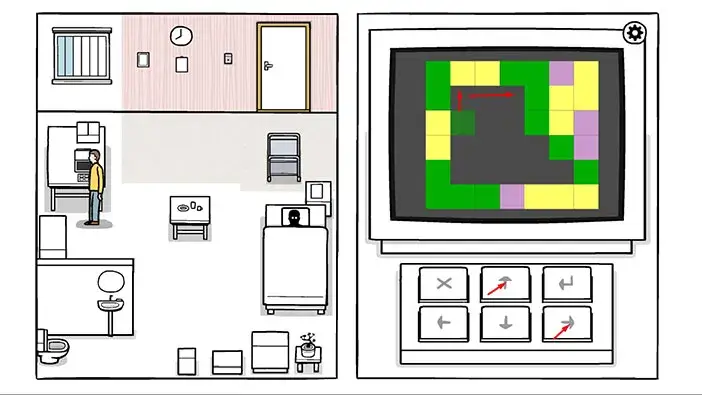
Step 2
Tap once on the down arrow key, then tap once on the left arrow key.
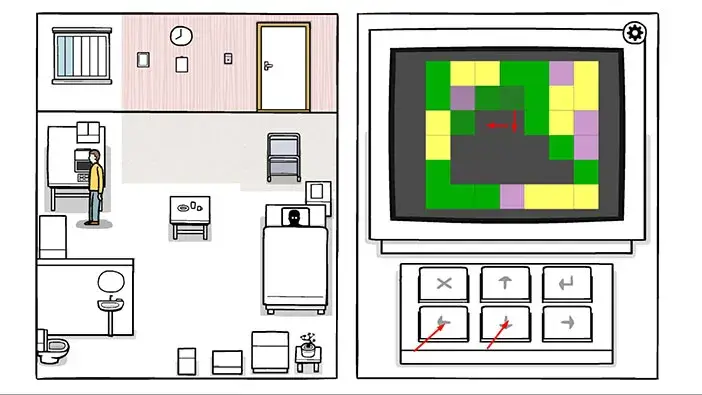
Step 3
Tap once on the down arrow key, then tap once on the left arrow key.
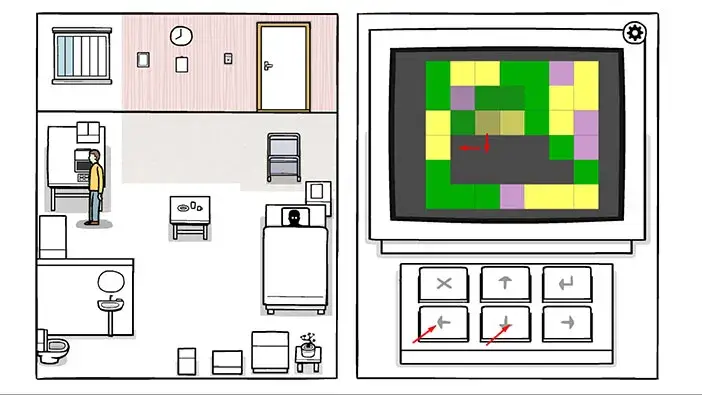
Step 4
Tap once on the down arrow key, then tap twice on the right arrow key.
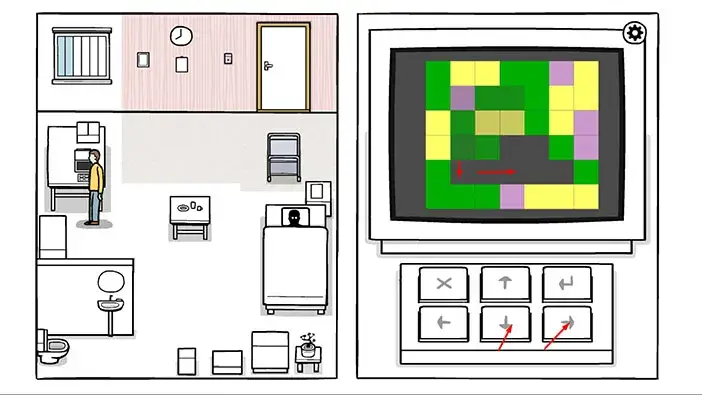
Step 5
Tap once on the up arrow key, then tap once on the right arrow key.

Step 6
Tap once on the down arrow key, then tap once on the right arrow key.
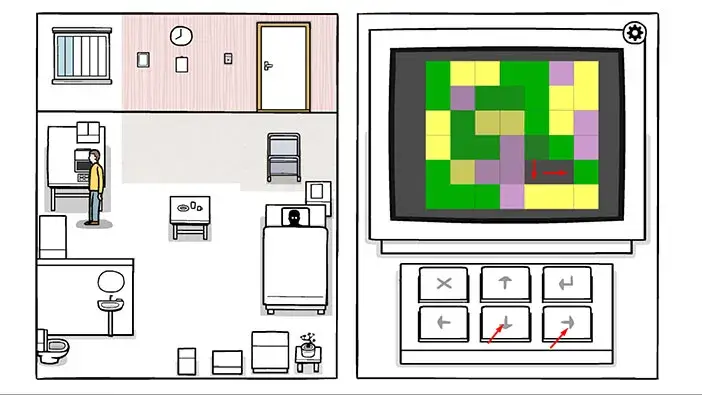
FOURTH PUZZLE. Now we have green, yellow, purple, and orange squares.
Step 1
Tap once on the up arrow key, then tap twice on the right arrow key.
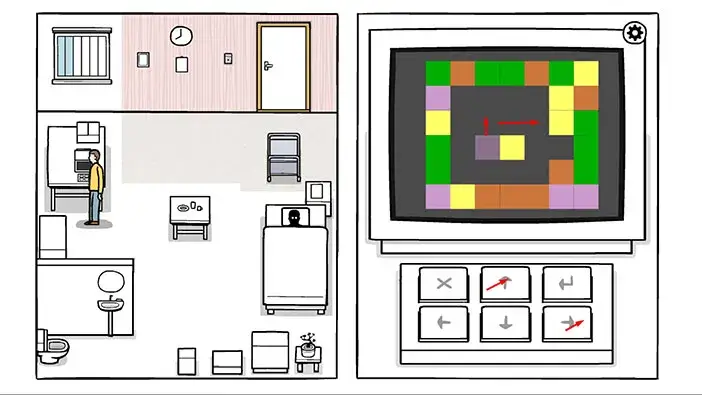
Step 2
Tap once on the up arrow key, then tap three times on the left arrow key.
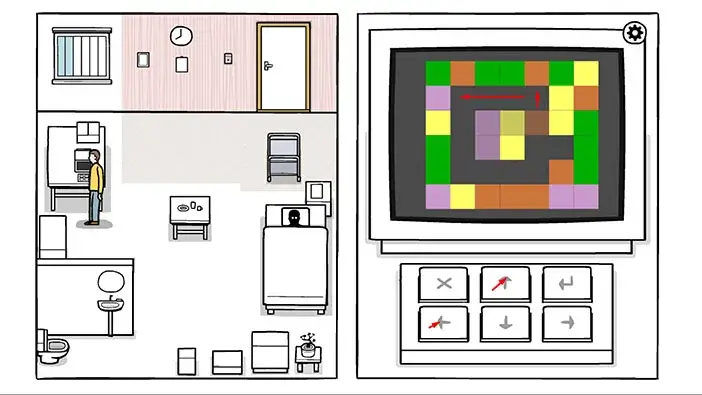
Step 3
Tap three times on the down arrow key, then tap three times on the right arrow key.
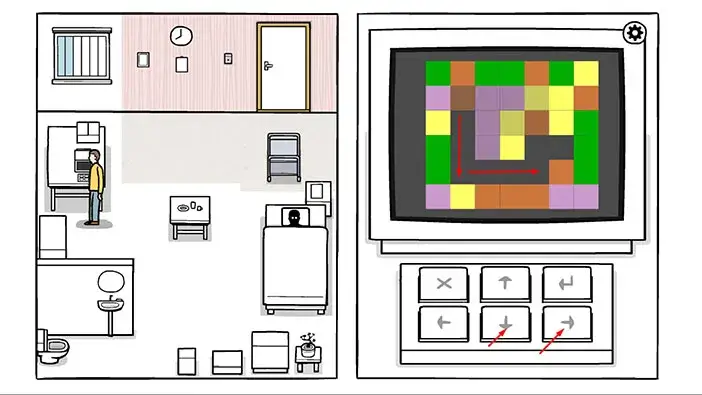
Step 4
Tap once on the up arrow key, then tap once on the right arrow key.
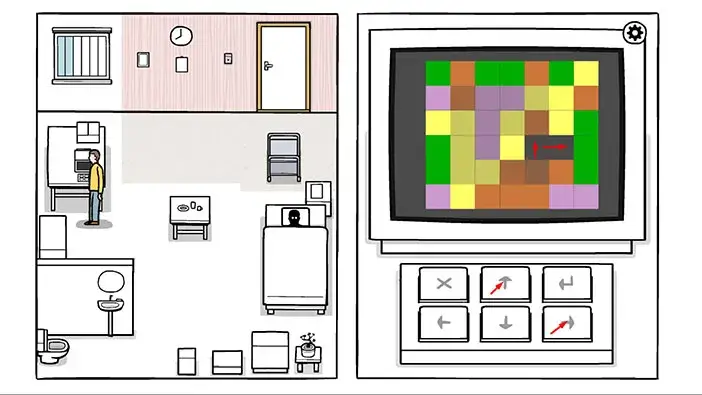
FIFTH PUZZLE. Now we have green, yellow, purple, orange, and blue squares.
Step 1
Tap twice on the up arrow key, then tap once on the left arrow key.
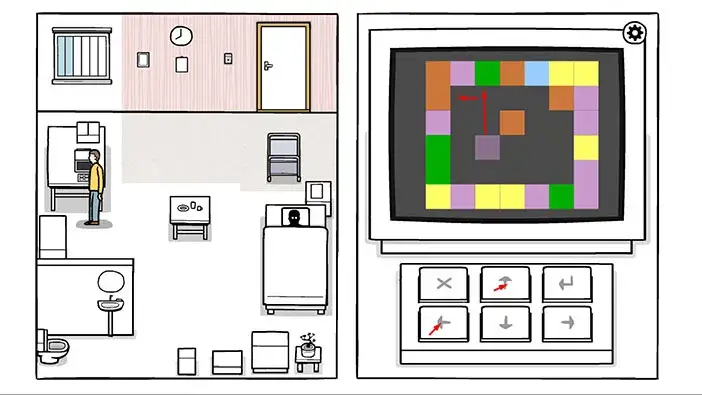
Step 2
Tap three times on the down arrow key, then tap twice on the right arrow key.
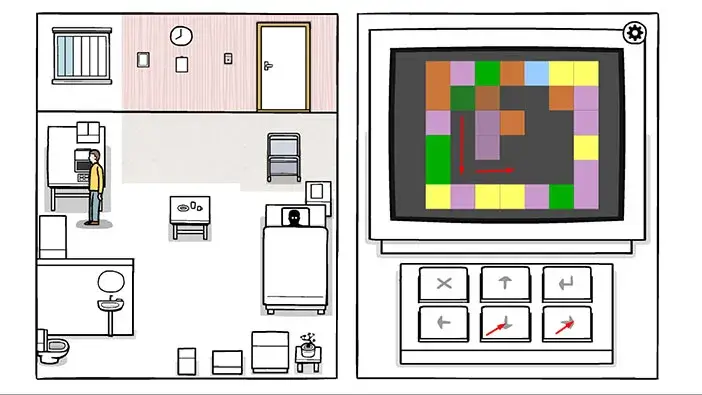
Step 3
Tap once on the up arrow key, then tap once on the right arrow key.
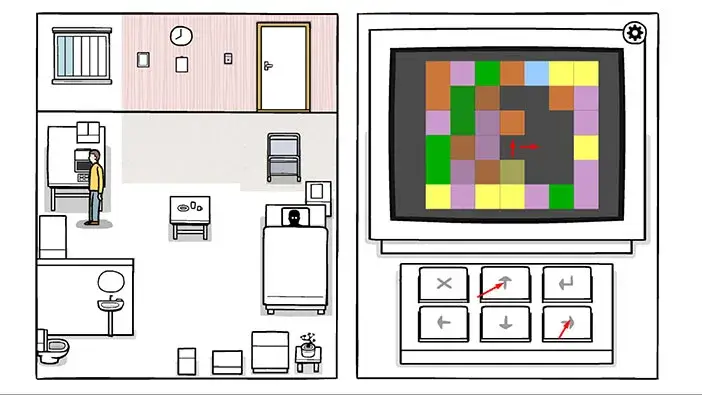
Step 4
Tap once on the down arrow key, then tap once on the up arrow key.
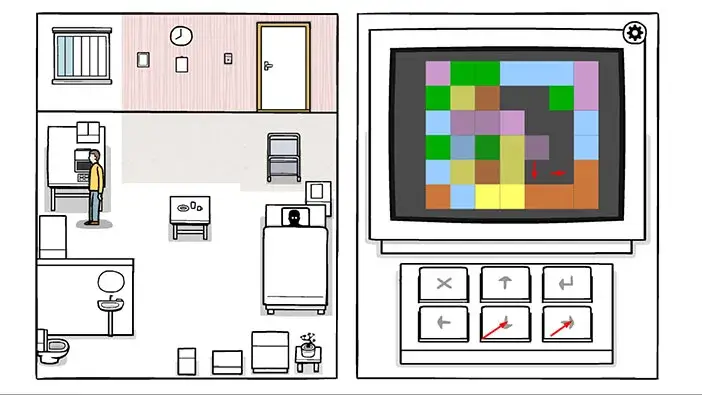
Step 5
Tap twice on the up arrow key, then tap once on the left arrow key.
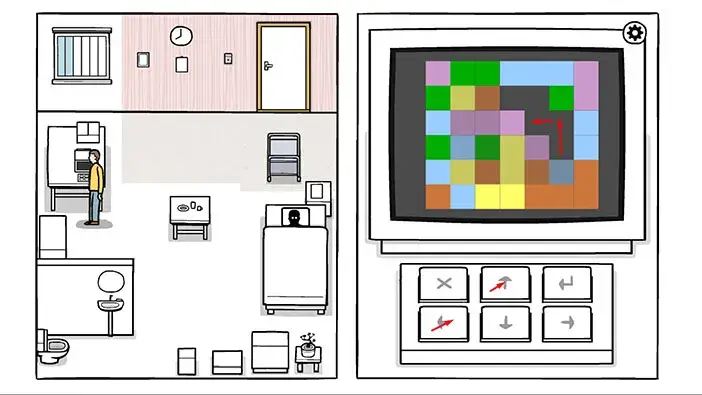
Step 6
Tap once on the up arrow key, then tap once on the left arrow key.
With this last step, you will complete all puzzles of this type. You will also restore color to the computer desk, cabinet, and another part of the window.
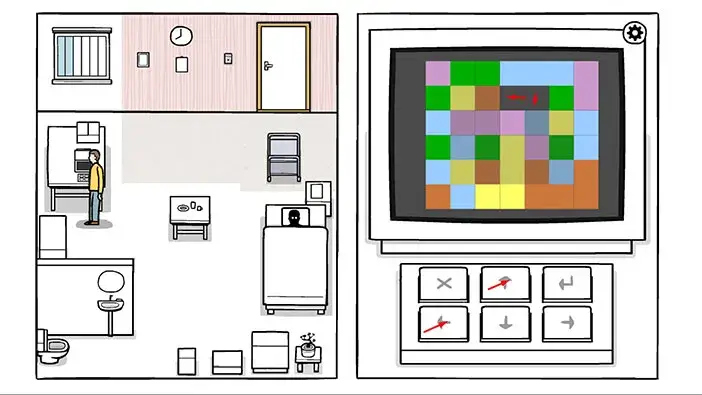
Next, tap on the table in the middle of the room to approach it. Drag down on the juice and coffee to drink them, and tap, several times, on the donut to eat it.
You will restore the color to the table, and another part of the window.
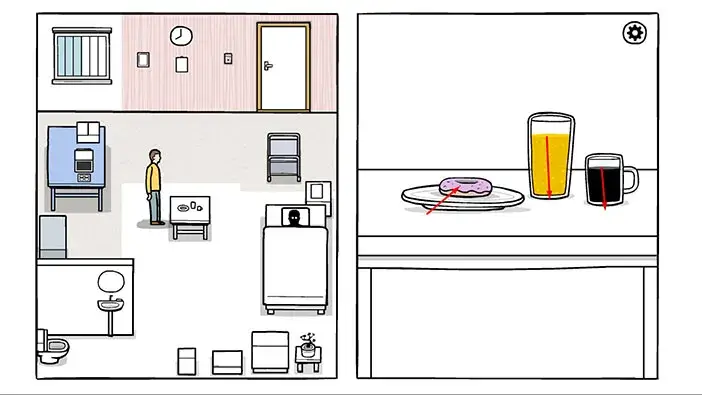
Next, let’s stand in front of the mirror in the lower left corner of the room.
Tap on the sponge to pick it up.
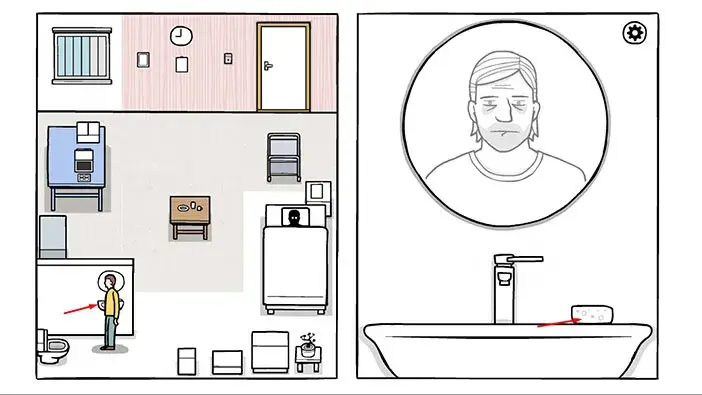
Drag the sponge over the mirror to clean it. You will restore the color to the bathroom wall, and another part of the window. There is only one dark part of the window left, so we almost completely restore the colors in Robert’s world.
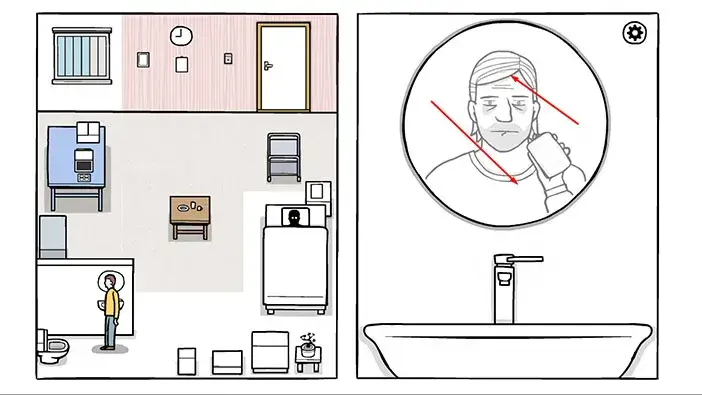
Tap on the recreation box to approach it, and tap again to open it.
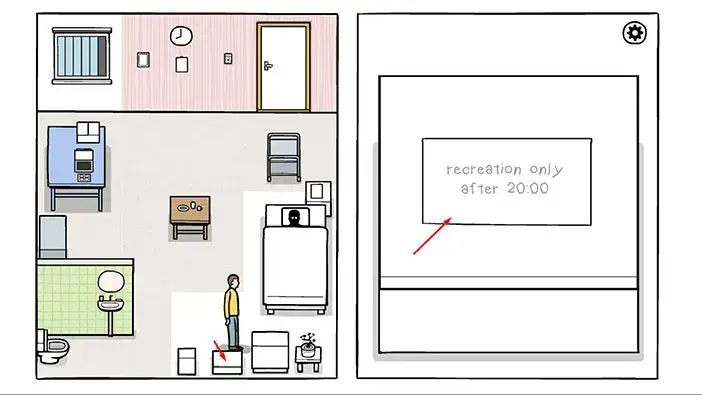
Here, we can see a bird and three crayons. Our task is to color the bird, but before we do that, let’s go back to the window and take another look at the bird.
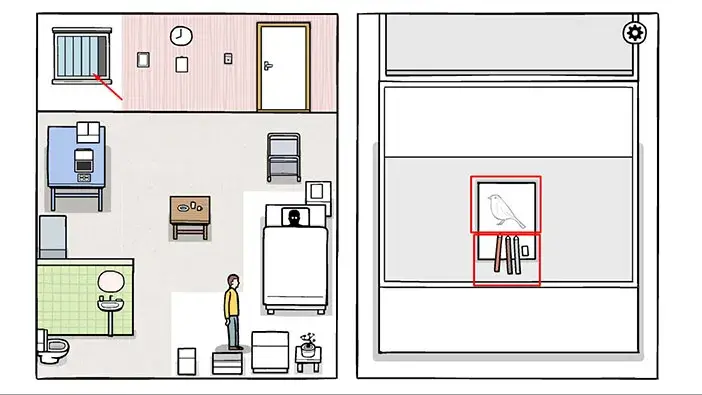
The bird has an orange chest (front), a thin grey line in the middle, and a brown back. Memorize this information, and let’s go back to the recreation box and color the bird.
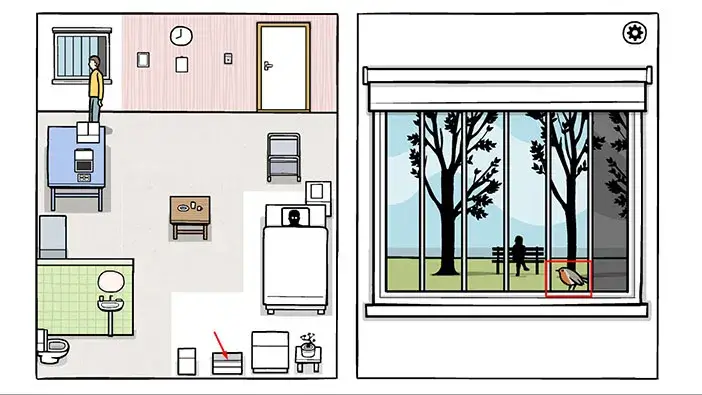
Tap on the drawing of the bird to start the interaction.
Select the orange crayon and use it to color the front (chest) of the bird.
Next, select the grey crayon and use it to color the middle (side) of the bird.
Lastly, Select the brown crayon and use it to color the back and tail of the bird.
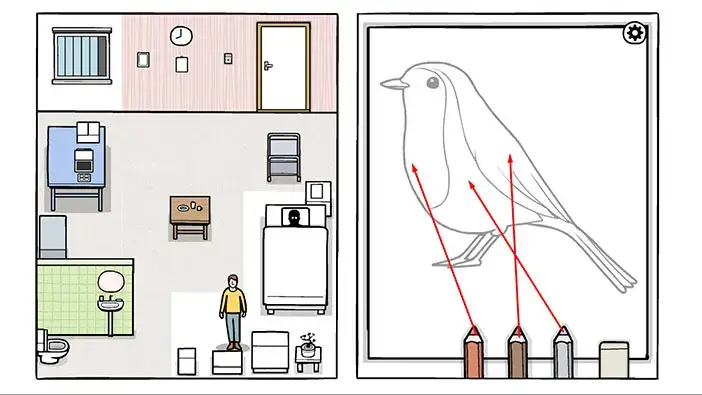
When you color the bird, you will restore the color to the last part of the window, and almost the entire room will now have color. The main exception is the bed and the area around the bed. The dark soul is still sleeping.
Let’s go back to the window. Once you get there, tap on the bird and it will fly away.
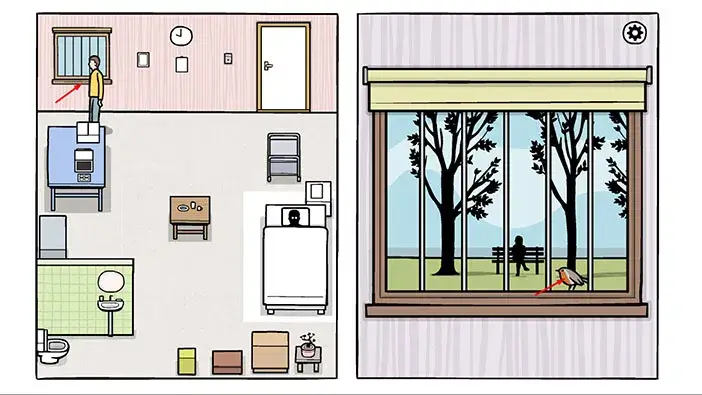
A few seconds after the bird flew away, a dark figure of a man, which looks like Robert’s dark soul will walk up to the woman on the bench. Tap on the dark figure and it will disappear. At the same time, Robert’s dark soul will get out of the bed.
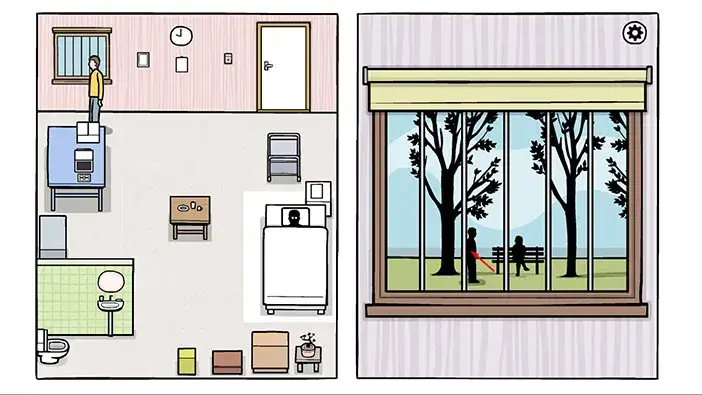
Tap three times on the dark soul and it will walk to the middle of the room. Robert will walk over to it.
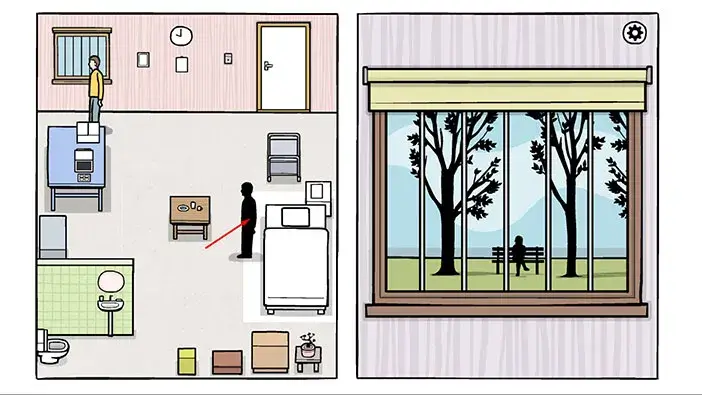
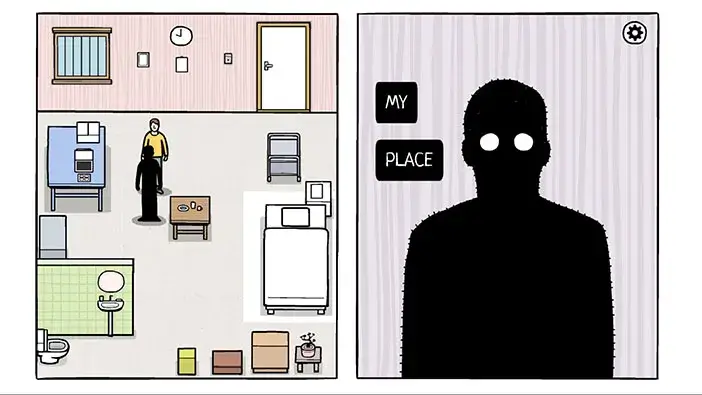
Tap on the dark soul and it will tell you “Take my place” and it will raise its left hand. Tap on the hand to start the interaction.
Here, we have to first align the hands, then align the fingers, just like what we did previously.
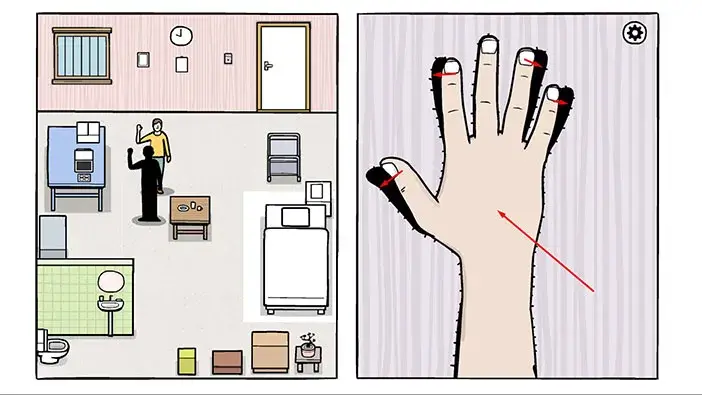
As soon as you align the hands and the fingers, the dark soul will fall down (the same happened to Robert the previous time). So, it looks like Robert managed to face the darkest part of his mind and emerge victorious. With this last step, we restored the color in Robert’s world. Tap on the bed to approach it.
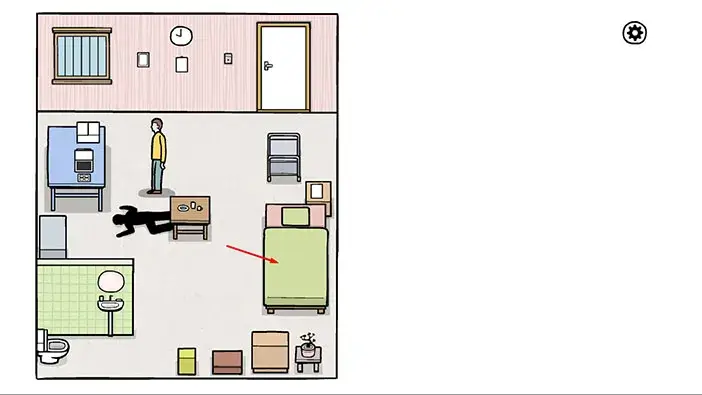
Drag the blanket to cover Robert, and he will fall asleep. The name of the next dream is “The Bird”.
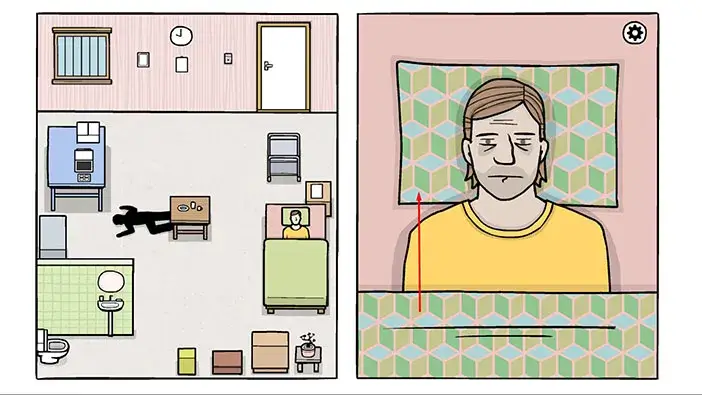
Robert was walking through a park, and, at some point, he noticed a woman sitting on a bench. Drag to the right until you see a woman sitting on a bench.
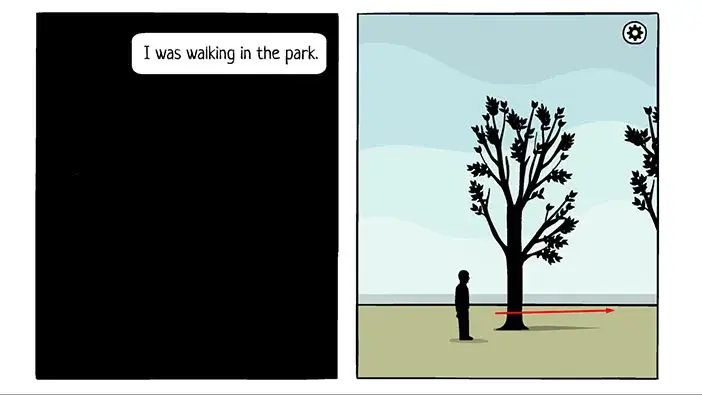
Robert stopped to look at the woman and then noticed that the bird flew away from the nearby branch. Tap on the woman, then tap on the bird.
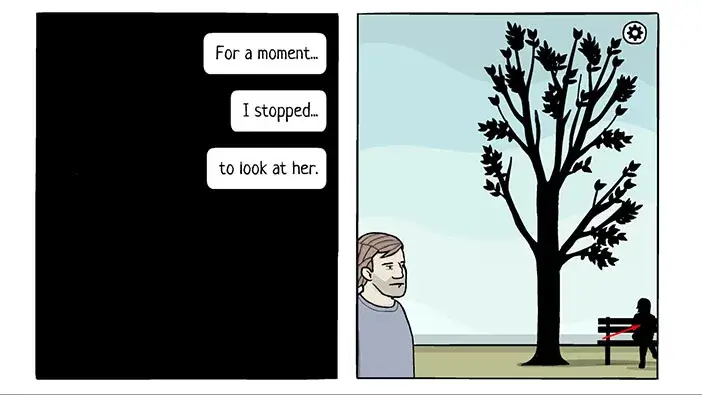
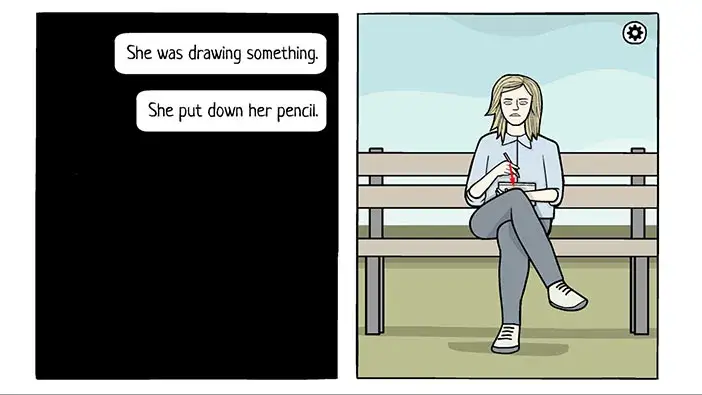
The woman was drawing something, but she put down her pencil when Robert approached her. (drag to put down the pencil). He was curious and asked, “What are you drawing?”.
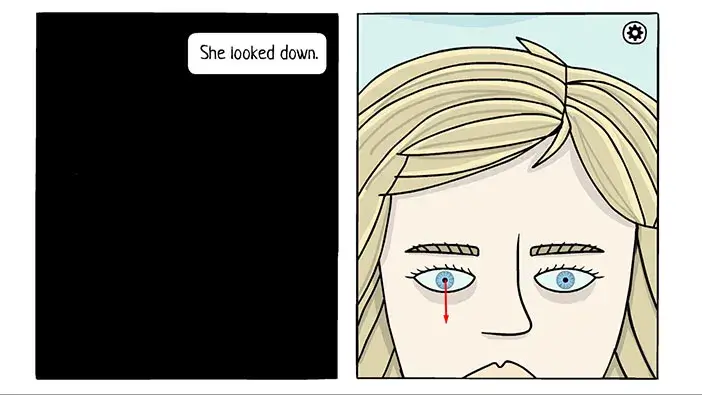
“She looked down” – drag down to move her eyes.
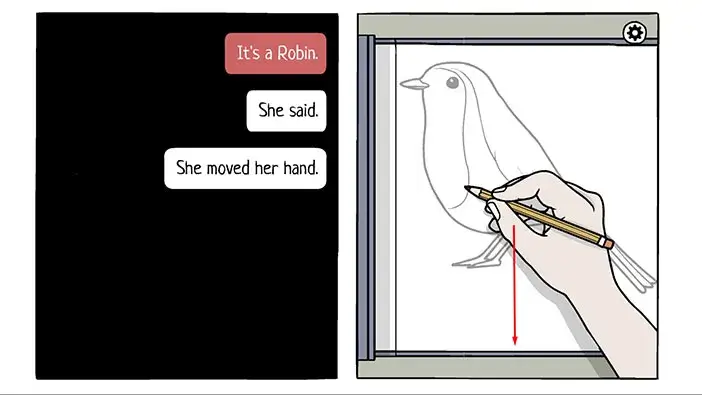
“It’s a Robin” she replied and then moved her hand down. Drag down to lower the hand.
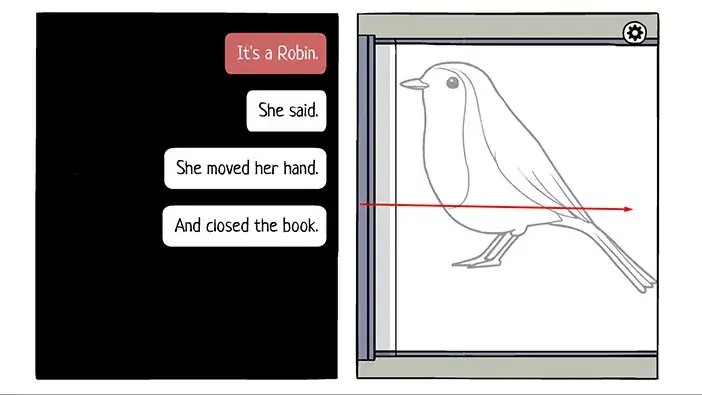
Then she closed the book. Drag to the right to close the book.
“I am sorry. It’s gone now.” Robert said to her. But the woman stared at him with a confused expression. Tap on her eyes.
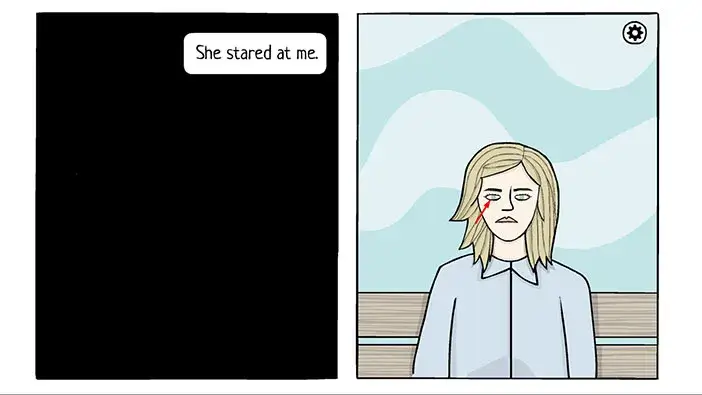
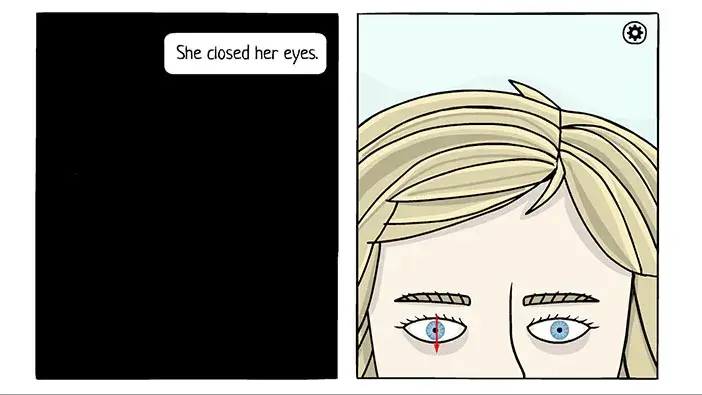
“No, it’s not. It’s all in your head.” – she replied. Then she closed her eyes. So, drag down to close her eyes.
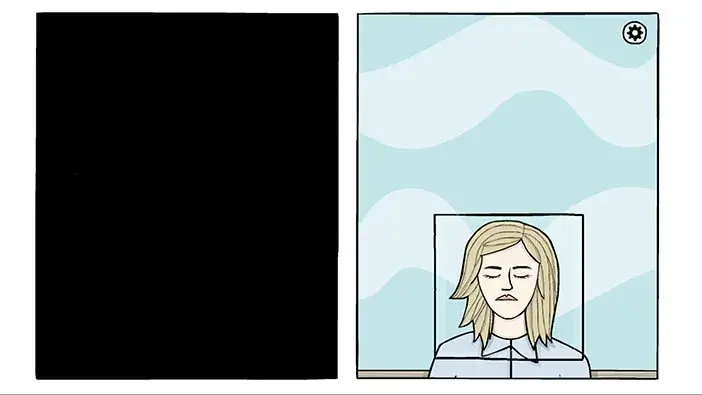
Well, this is the end of the story. Robert managed to overcome a serious case of depression, by facing the darkest part of his mind. It wasn’t an easy road, because his life was completely devastated when he saw on the news that Laura, his true love, has been killed. His entire life went downhill from this point, and soon enough he also lost his job, and his mood spiraled further downward. Luckily, he was able to bounce back with the help of “The White Door” mental health institution. The improvement of his mood was cleverly portrayed by slowly adding color to his otherwise black and white world.
With that, we came to the end of this walkthrough. If you’re interested in Escape Room games, check out our guides for the other games of this genre.
Thank you for reading.