Strange Case: The Alchemist Chapter 3, Part 2
Hello everyone and welcome to Part II of our walkthrough for Chapter 3 of ” Strange Case: The Alchemist”. At the end of the first part, we solved the wall clock puzzle and found a “Crystal”. Let’s continue.
Tap on the right drawer of the work table to take a closer look at it.
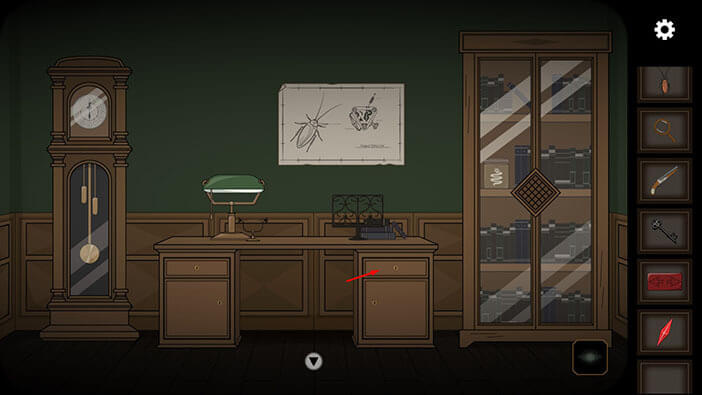
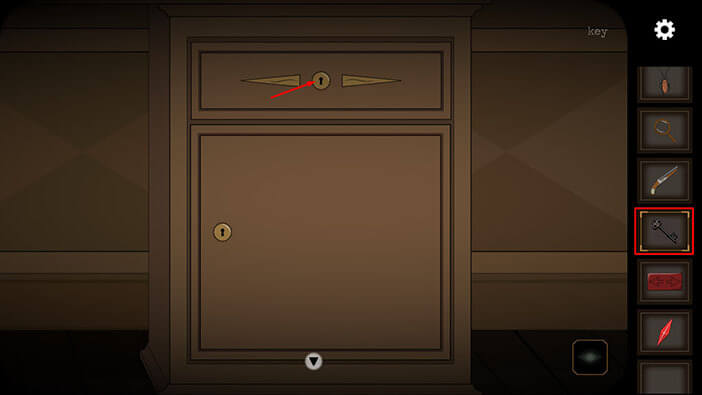
Select the “Key” from the inventory and use it to unlock the drawer. After that, tap on the drawer again to look inside.
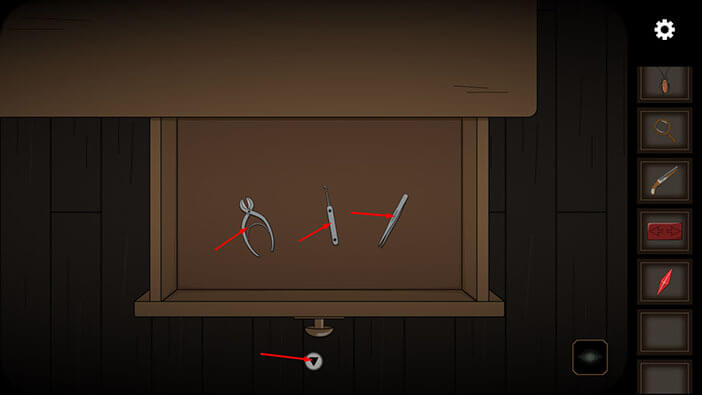
In the drawer you will find three items, so tap on them to pick them up. “Wirecutters”, “Lockpick”, and “Tweezers” will be added to your inventory.
After that, tap on the arrow at the bottom to go back.
Next, select the “Lockpick” from the inventory, and tap on the cabinet door.
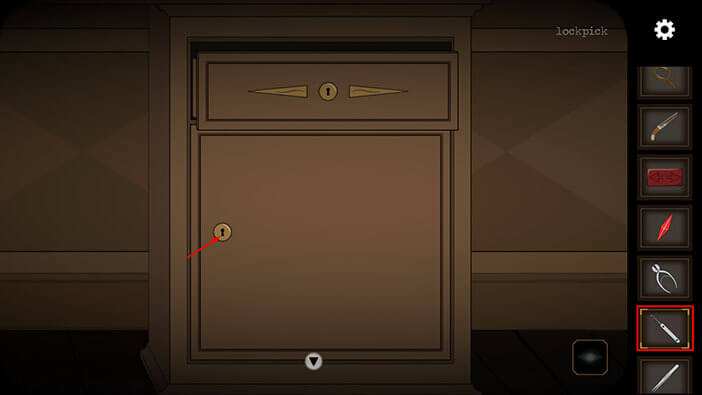
Ok, in order to unlock the drawer, we will have to go back to the other dimension. So, tap on the eye icon in the lower right corner.
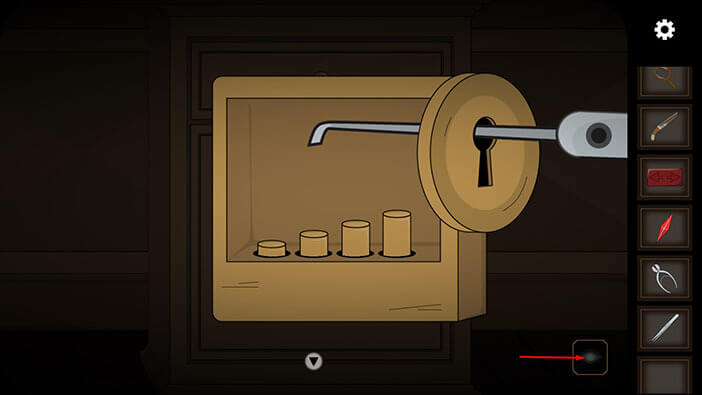
Tap on the right cabinet door of the worktable to take a closer look at it.
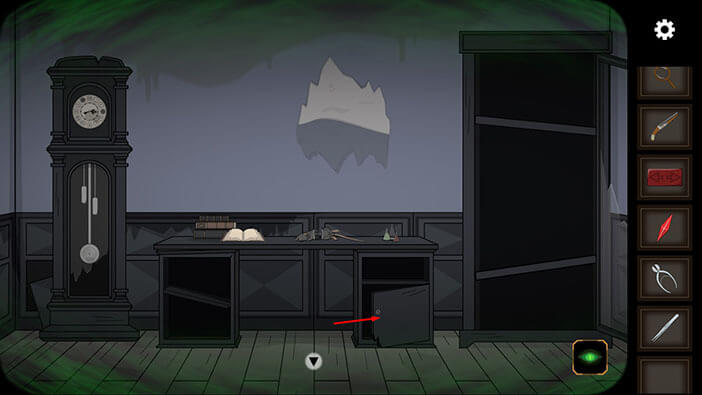
Select the “Tweezers” from the inventory and use them to pull out the small item from the keyhole. “Broken key” will be added to your inventory.
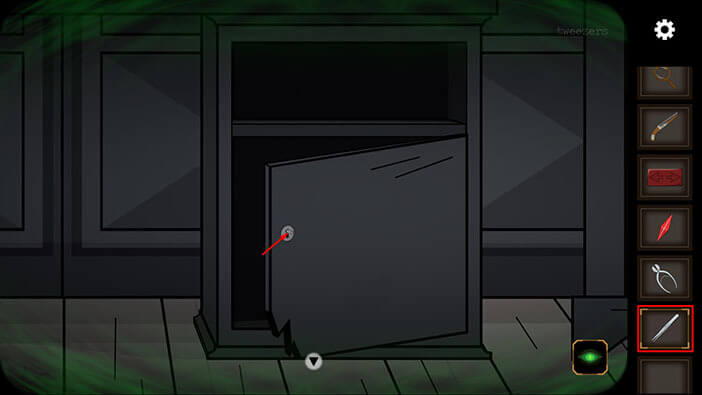
Ok, time to switch off the “Ghost Vision” and go back to the normal world. Tap on the eye icon in the lower right corner of the screen.
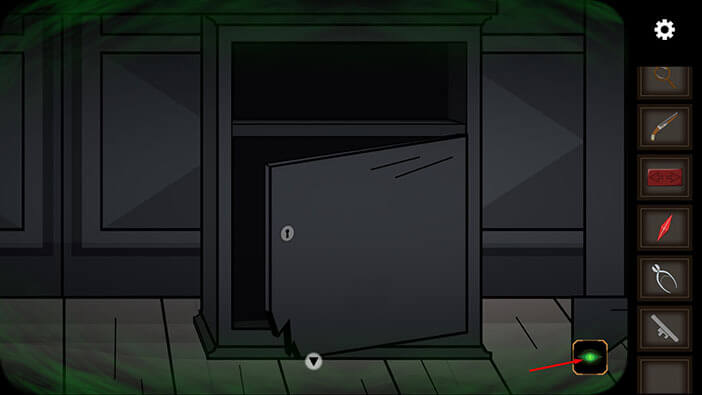
Ok, tap on the right cabinet door, once again.
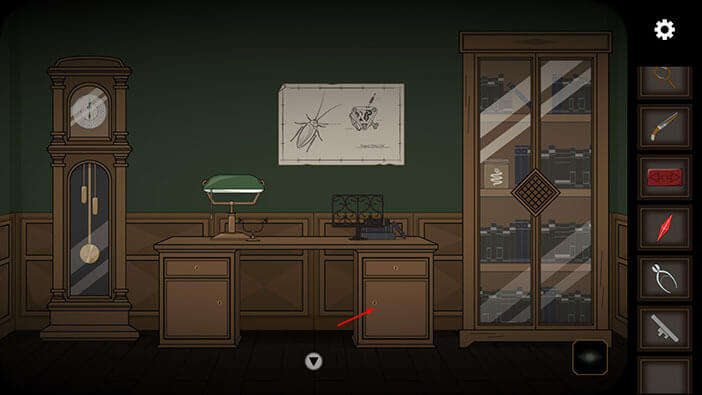
Select the “Broken key” from the inventory and tap on the keyhole to start the interaction.
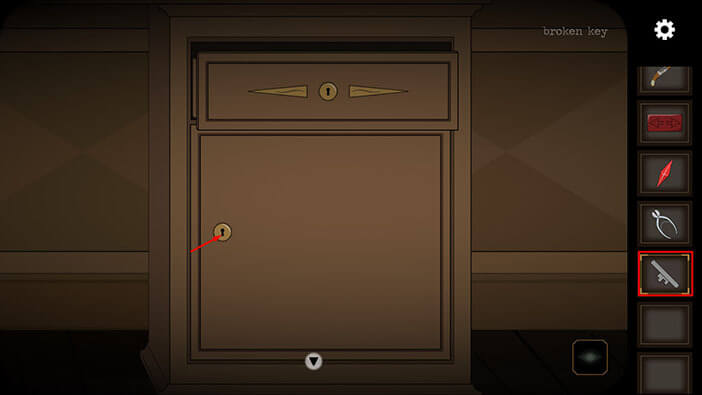
Tap on the device again to bring up the broken key.
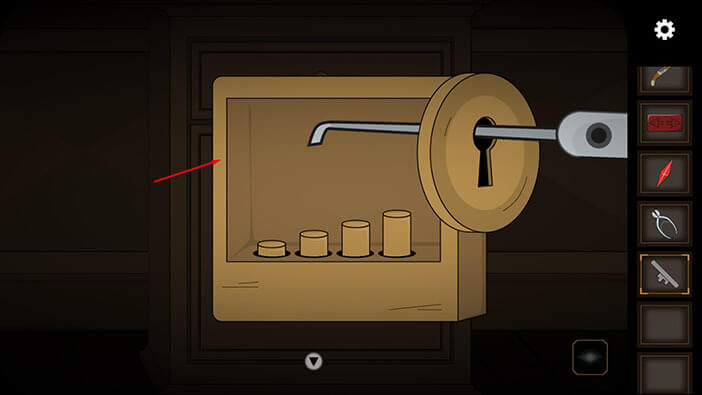
Ok, by looking at the broken key, we can see how the pins on the lock should be set. So, if we closely examine the broken key, we will conclude that, looking from left to right
The first pin should be at the midpoint.
The second pin should be completely extruded.
The third pin should be pushed down.
The fourth pin should be at the midpoint.
We will set the pins in several steps. Let’s begin.
Step 1
Tap twice on the first pin.

Step 2
Tap twice on the second pin.

Step 3
Tap twice on the third pin to push it down.
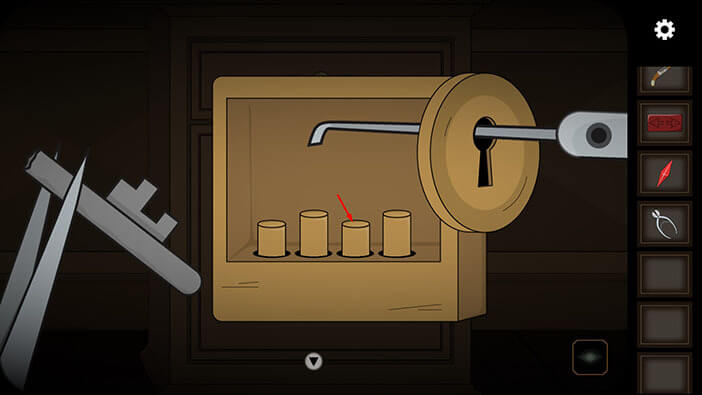
Step 4
Tap three times on the fourth pin, and you will solve this puzzle.
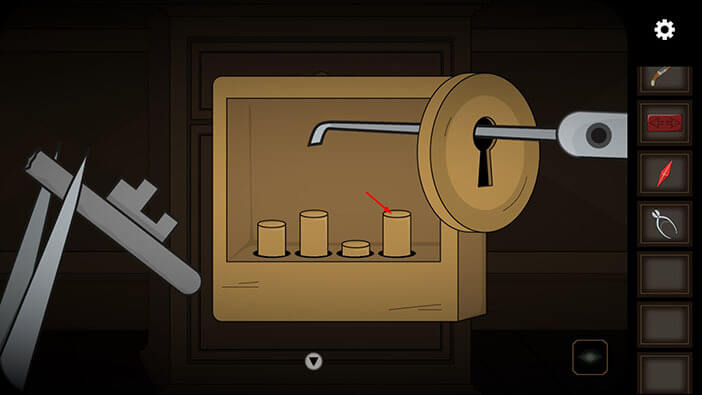
As soon as you solve the puzzle, you will unlock and open the cabinet door and inside you will see a black box with the checker pattern on the top side. Tap on this box to examine it.
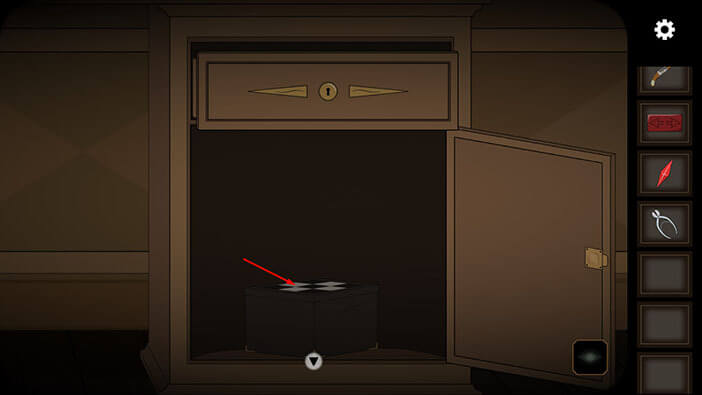
You will probably notice that the white field in the top left corner doesn’t fit into the pattern. Tap on this field, and it will move above the rest of the board.
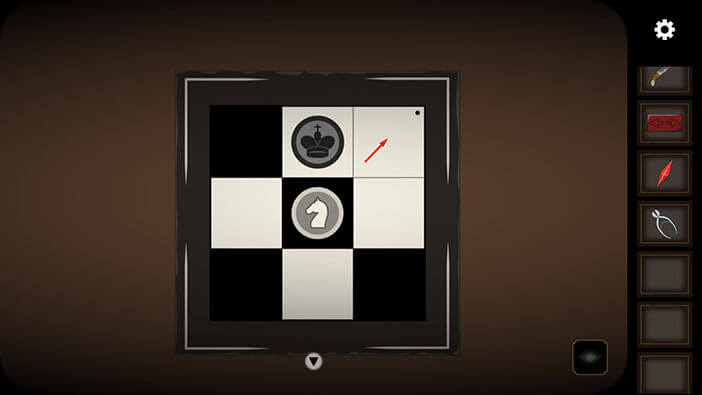
Next, tap on the white field outside the chess board, and the knight figure will move to this position.
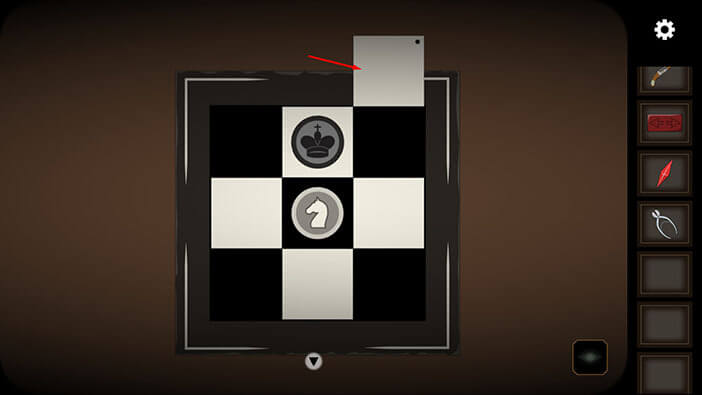
Ok, now our next task is to neutralize the black king figure with our white knight figure. We will do this in several steps.
Step 1
Tap on the first field (left to right) in the top row.
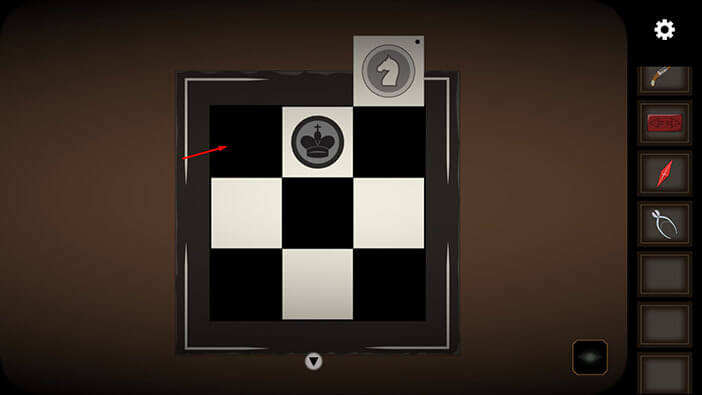
Step 2
Tap on the third field in the middle row.
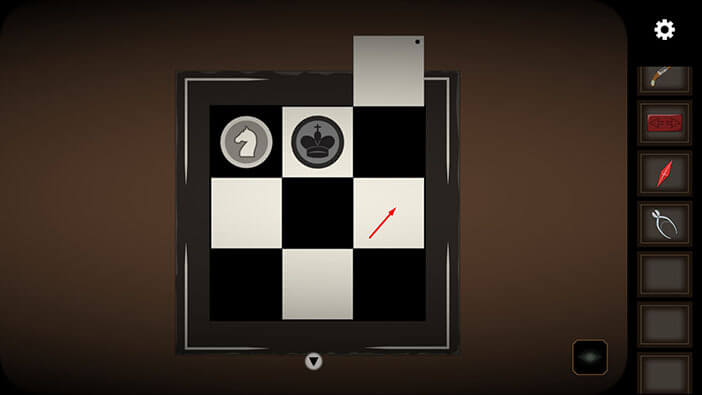
Step 3
Tap on the first field in the bottom row.
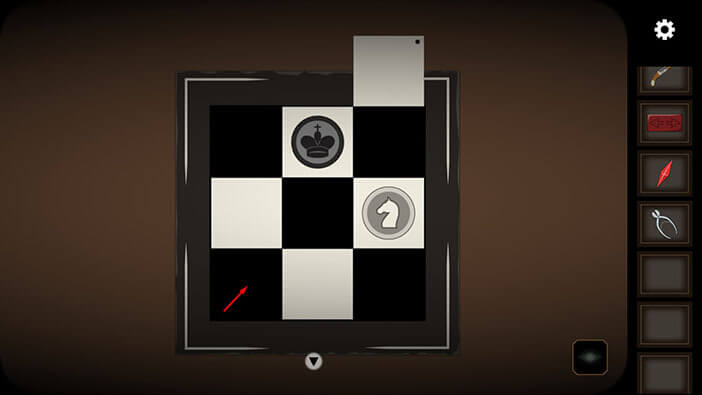
Ok, we can now go for the king. So, tap on the king figure.
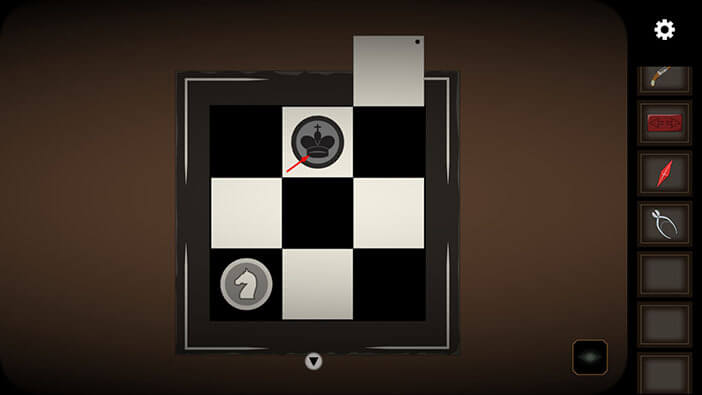
As soon as you solve the puzzle, the box will open and inside you will find a yellow item. Tap on it to pick it up and a “Remote Control” to pick it up.
After that, tap on the arrow at the bottom of the screen to go back.
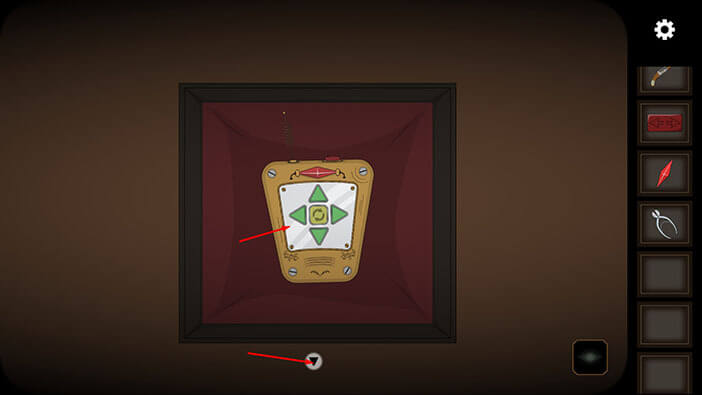
Next, tap on the eye icon in the lower right corner to turn on the “Ghost Vision” again.
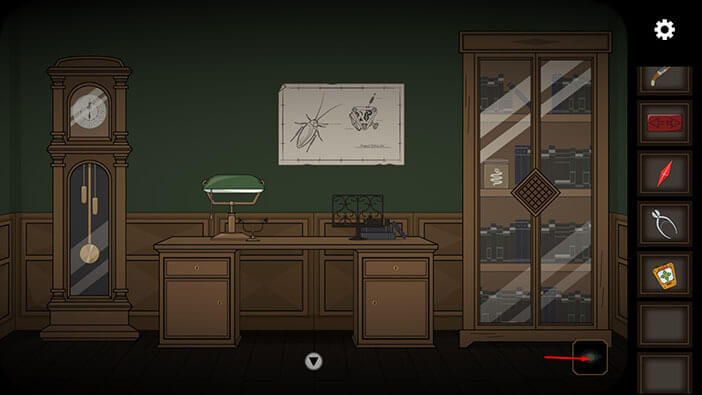
Tap on the dead rat on the work table to take a closer look at it.
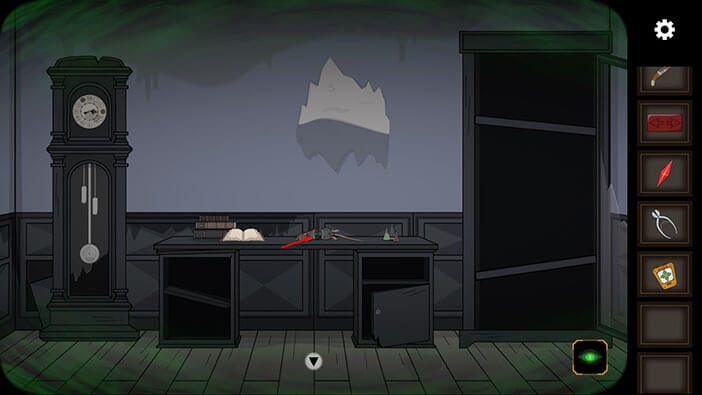
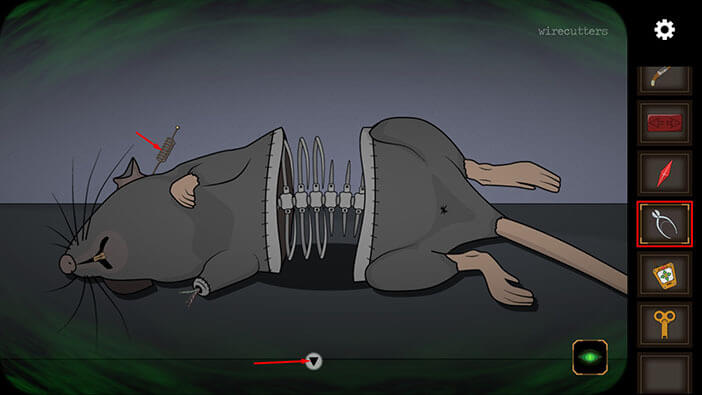
Looks like this is some kind of partially mechanical rat. Interesting. Tap on the item below the rat to pick it up and the “Clockwork key” will be added to your inventory.
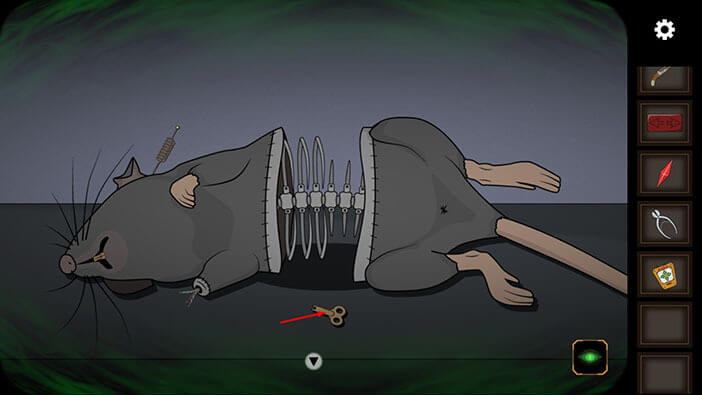
Next, select “Wirecutters” from the inventory and tap on the metal item that is sticking out of the rat’s neck. “Antenna” will be added to your inventory.
After that, tap on the arrow at the bottom of the screen.
Let’s turn off the “Ghost Vision”. Tap on the eye icon in the lower right corner.
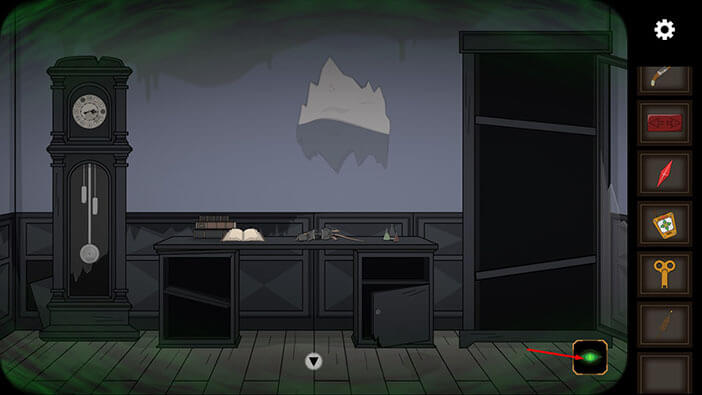
Next, tap on the small item located below the desk lamp to take a closer look.
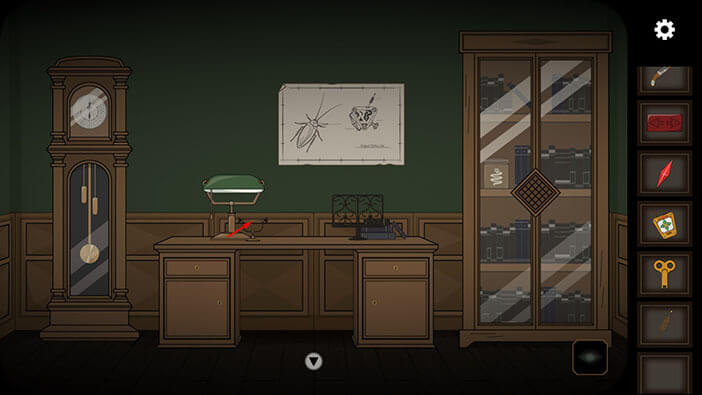
Select the “Cockroach” from the inventory and place it between two needles.
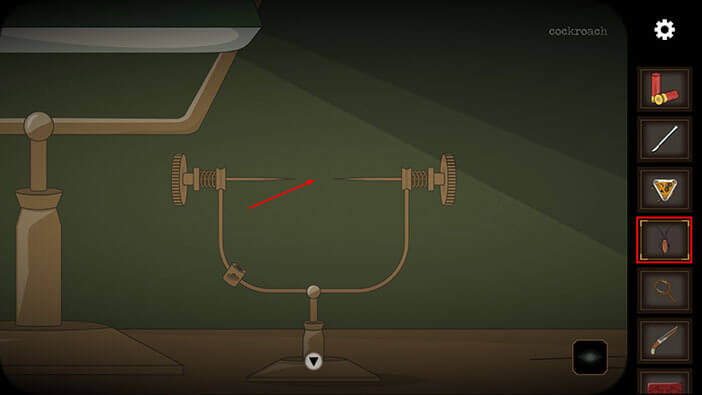
Next, select the “Magnifier” from the inventory and use it on the bug.
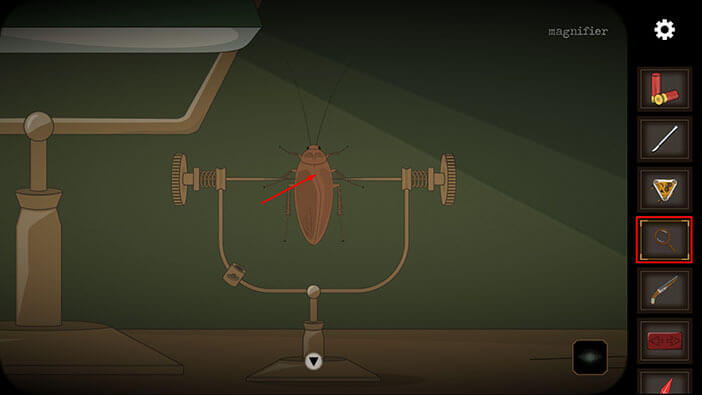
Next, select the “Scalpel” from the inventory and tap twice on the cockroach to start the interaction.
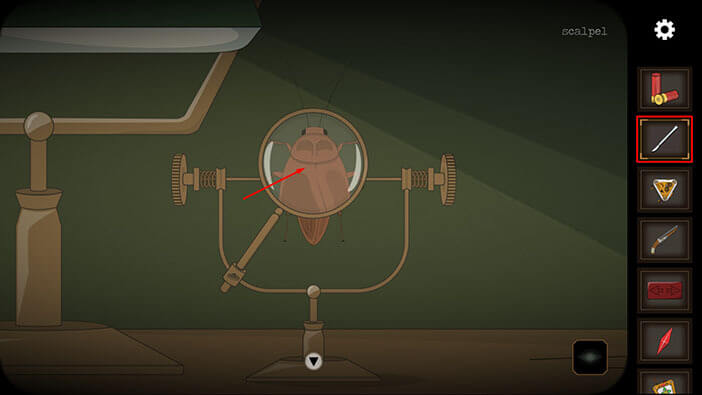
Our next task is to stop the black line inside the green area by tapping at the correct moment. If we do this correctly, our character will make a small cut on the cockroach.
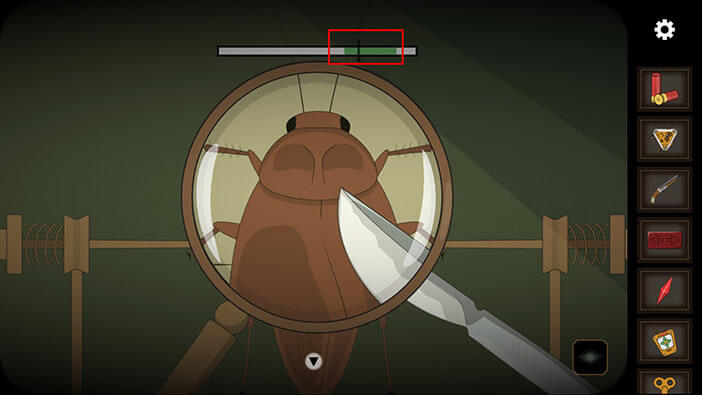
Let’s repeat the process. Tap at the correct moment to stop the black line inside the green area. If we do this correctly, our character will make another small cut on the cockroach.
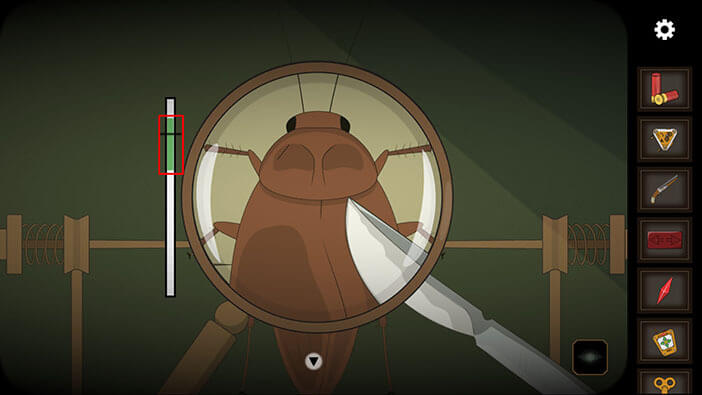
Ok, let’s do this one last time. Tap at the correct moment to stop the black line inside the green area. If we do this correctly, our character will make the third and final cut on the cockroach.
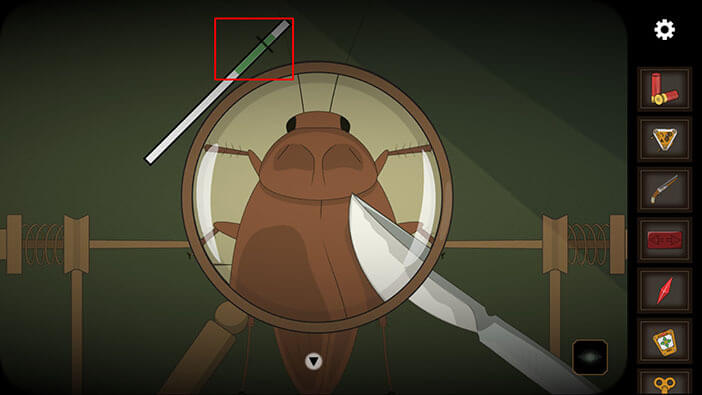
Next, select the “Mechanism” from the inventory and mount it into the cuts that we made previously.
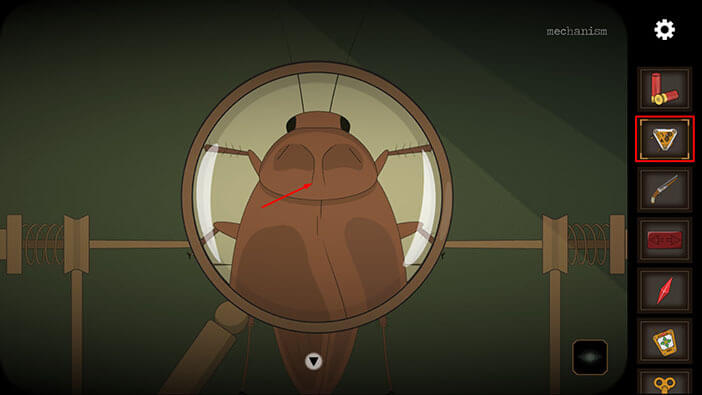
Ok, let’s make a mechanical cockroach. Select the “Crystal” from the inventory and install it on the left side of the mechanism.
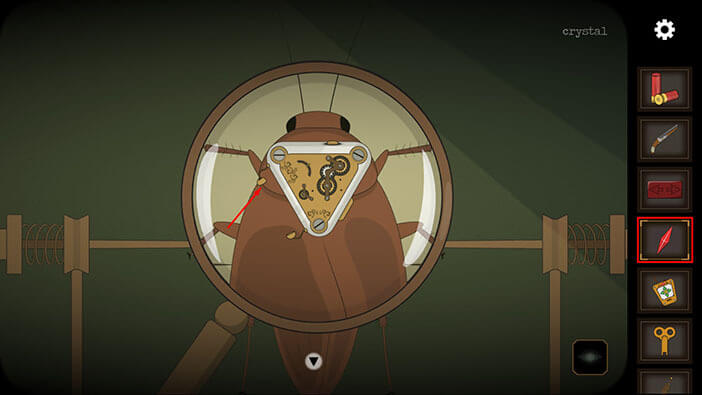
Next step, select the “Antenna” from the inventory and install it in the top right slot of the mechanism.
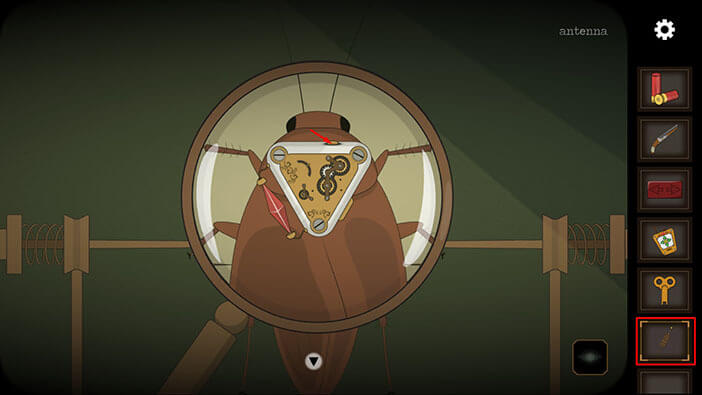
Next, select the “Clockwork key” from the inventory and install it into the lower right slot of the mechanism.
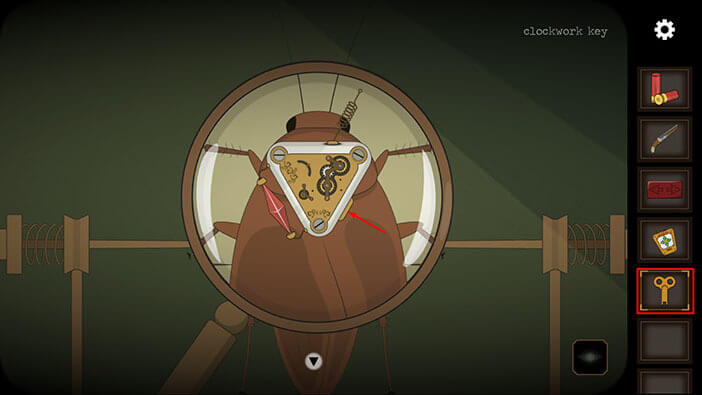
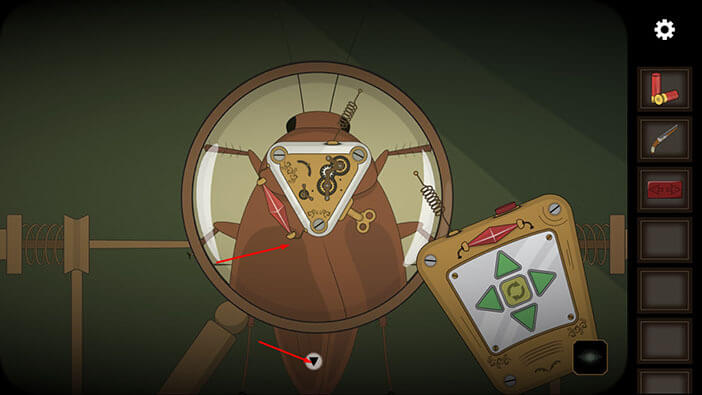
Lastly, select the “Remote control” from the inventory and tap on the bug to activate the mechanism.
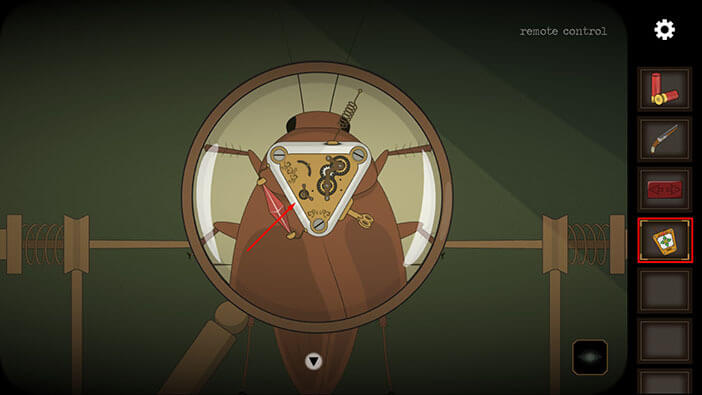
You will notice that the crystal is now blinking. So, our next task is to see how many times the crystal will blink before pausing. After that pause, the crystal will start blinking again.
The crystal will blink twice before pausing. So, let’s match this pattern by tapping twice on the red button on the remote control.

Now, the crystal will blink only once before pausing. So, tap once on the red button on the remote control.

Now, the crystal will blink four times before pausing. So, tap four times on the red button on the remote control.

Ok, now, whenever the crystal flashes, the red light on our remote control will also flash. So, it looks like we synchronized the remote control with the device on the cockroach. Tap on the cockroach to pick it up and “Remote control cockroach” will be added to your inventory.
After that, tap twice on the arrow at the bottom of the screen to go back.
Next, tap on the glass cabinet on the right to take a closer look at it.
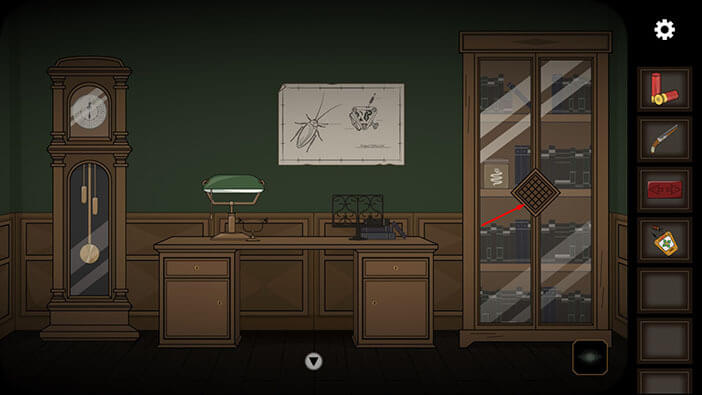
Select the “Wooden key” from the inventory and place it on the empty space (on the black line) on the left.
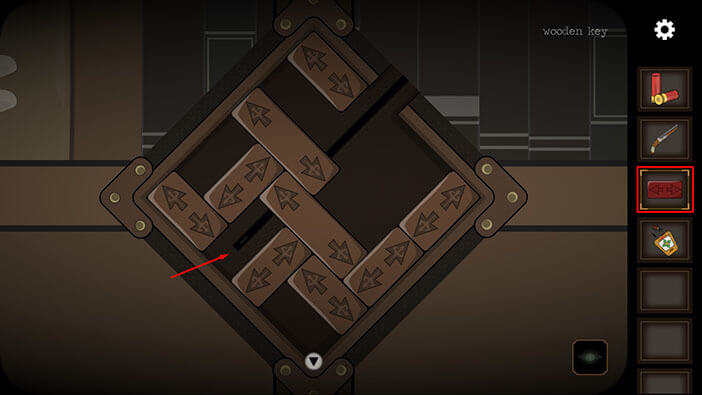
Here, we have another puzzle to solve. Our task is to shuffle around the pieces and get the red piece to the exit on the upper right side. We will do this in several steps.
Step 1
Move down the second (looking from left to right) large vertical piece. After that, move the horizontal piece above the red piece all the way to the right.
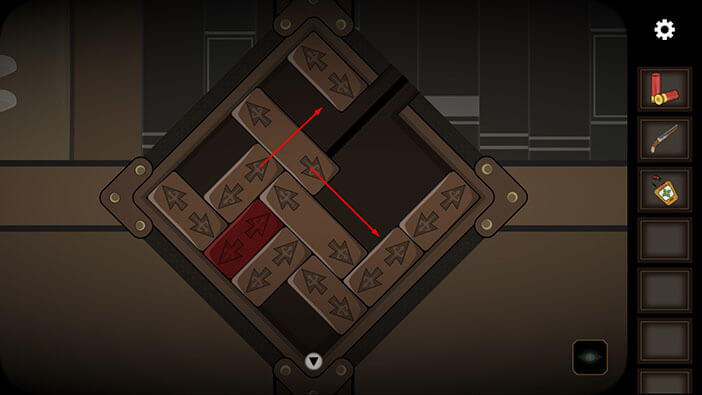
Step 2
Move the first vertical piece all the way up. After that, move down to the small vertical piece located in the top right.
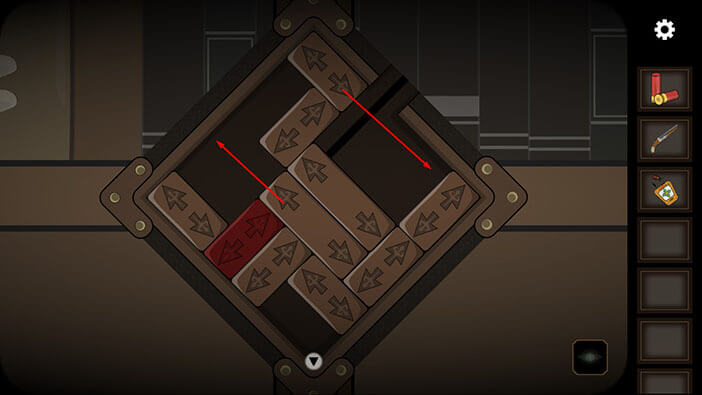
Step 3
Move to the right the small horizontal piece located between two large vertical pieces. After that, move up the second large vertical piece.
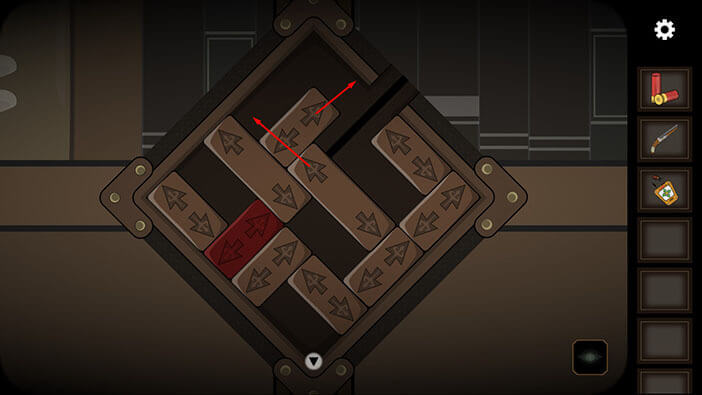
Step 4
Move to the right the small horizontal piece located below the red piece. After that, move up the small vertical piece located in the lower left corner.
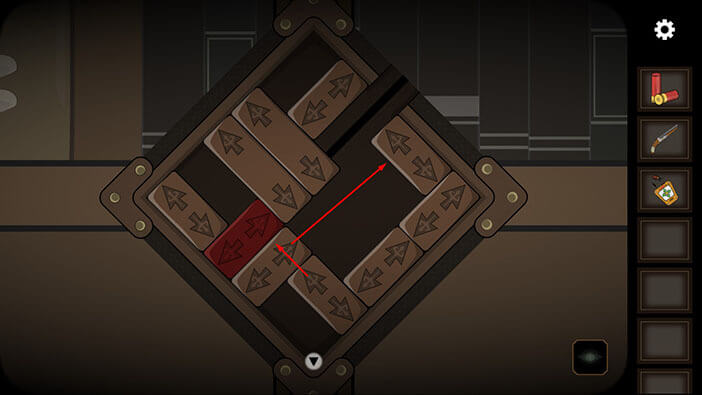
Step 5
Move down the two small horizontal pieces located on the down-right side of the box. After that, move down the small vertical piece located below the exit.
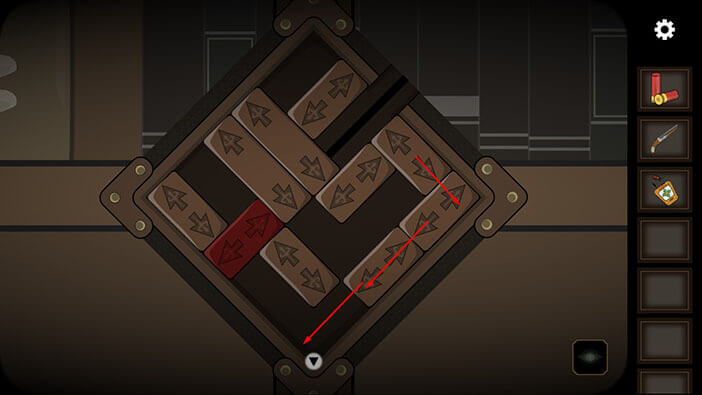
Step 6
Move to the right the small horizontal piece located below the second large vertical piece. After that, move down both large vertical pieces.
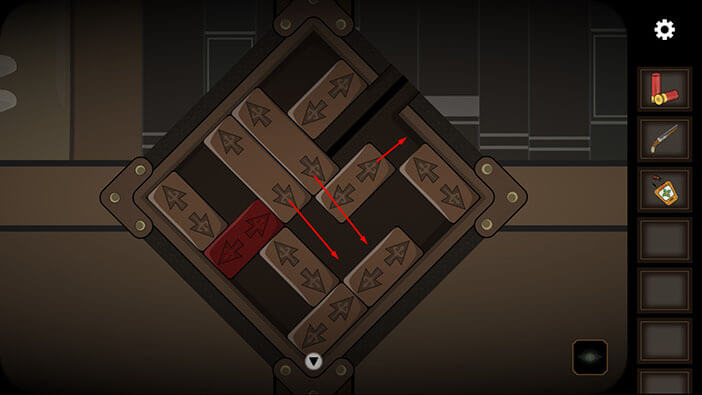
Step 7
Move to the right the second small horizontal piece located on the right side of the box. After that, move down the first large vertical piece.
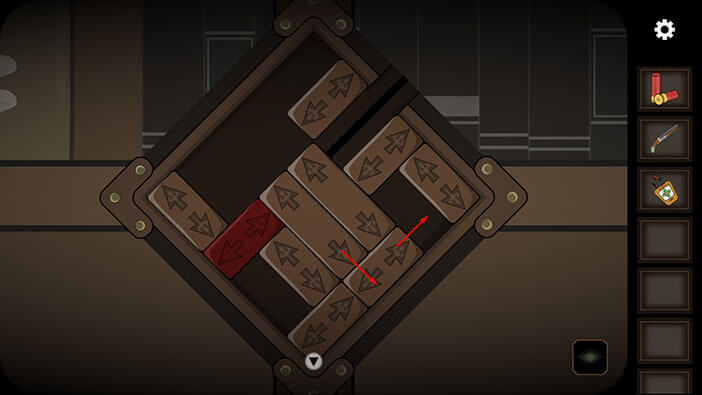
Step 8
Move the red piece to the right. After that, move down the small vertical piece located in the upper left corner.
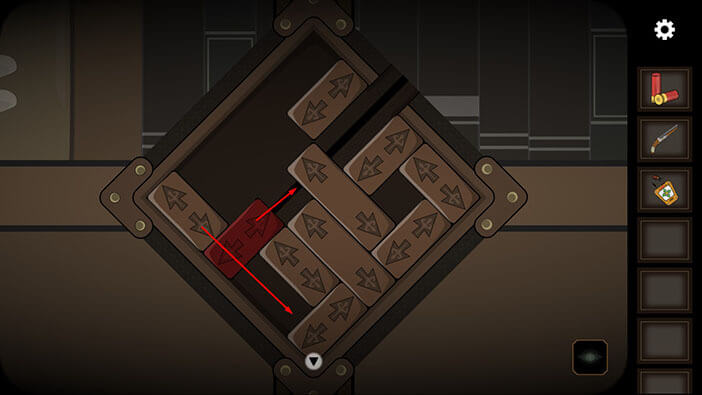
Step 9
Move the red piece to the left. After that, move to the left the small horizontal piece from the top half of the box.
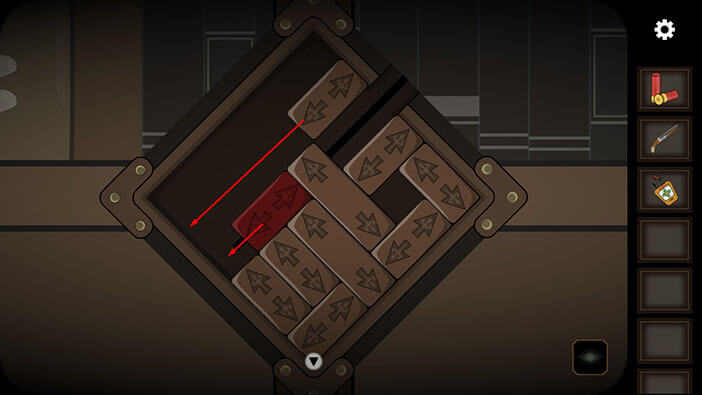
Step 10
Move up both large vertical pieces. After that, move to the right both small horizontal pieces.
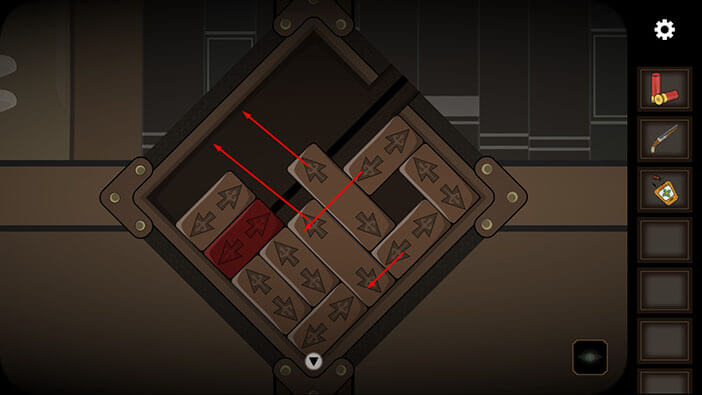
Step 11
Move up the small vertical piece located in the top right corner. After that, move to the right both small horizontal pieces that we moved in the previous step.
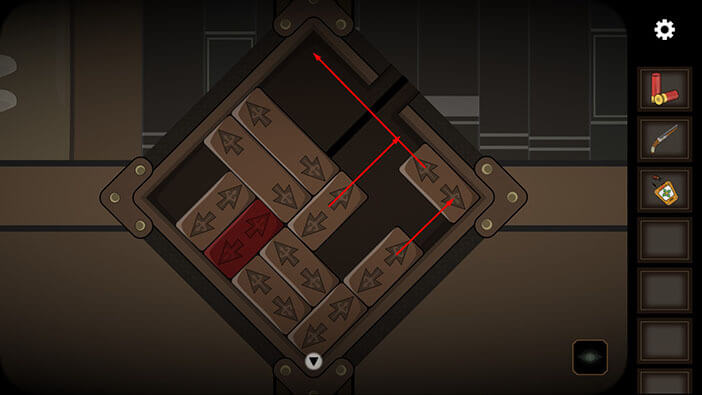
Step 12
Finally, move down both large vertical pieces. After that, move the red piece to the exit on the right. When you complete this step, you will unlock the glass cabinet.
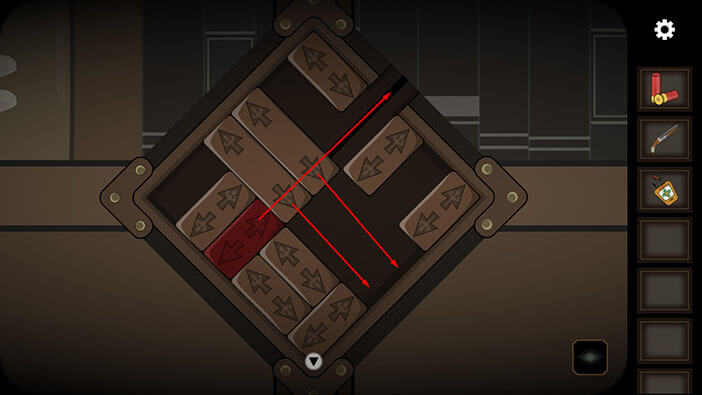
Tap on the glass cabinet to look inside.
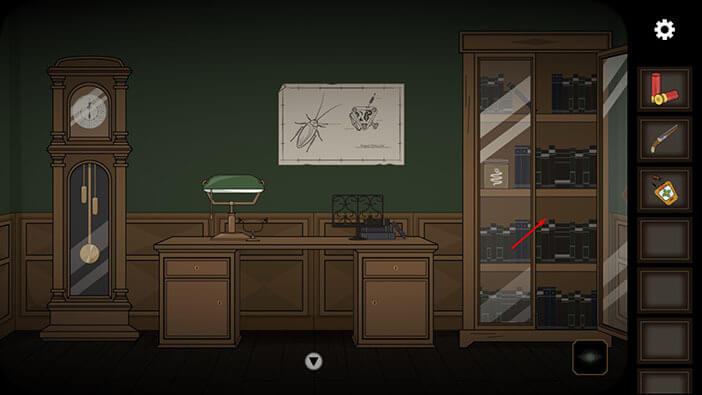
Tap on the book in the middle to pick it up and a “Book of freedom” will be added to your inventory. After that, tap on the arrow at the bottom of the screen to go back.
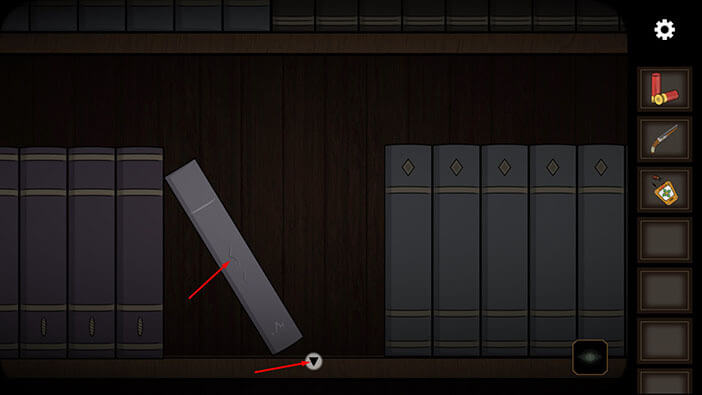
Let’s turn on the “Ghost Vision”. Tap on the eye icon in the lower right corner.
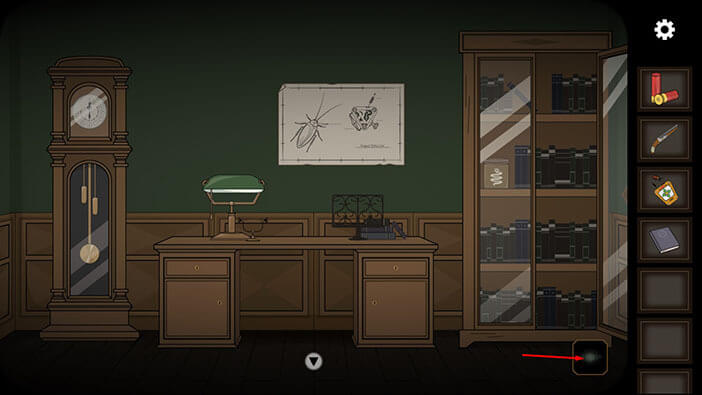
Next, tap on the cabinet on the right in the “other” world to take a closer look.
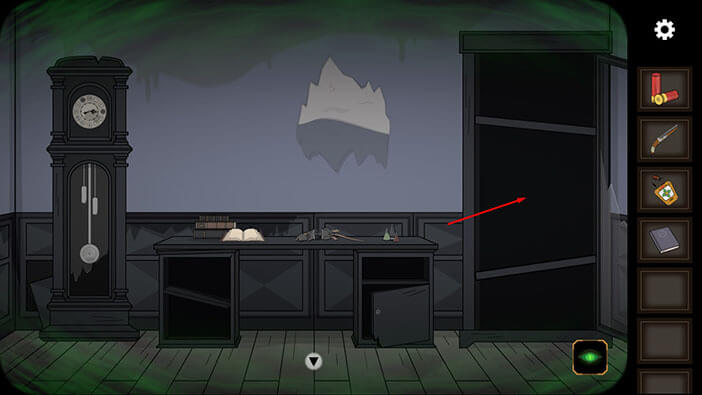
You will notice a round hole in the wooden board. Tap on it to look through it.
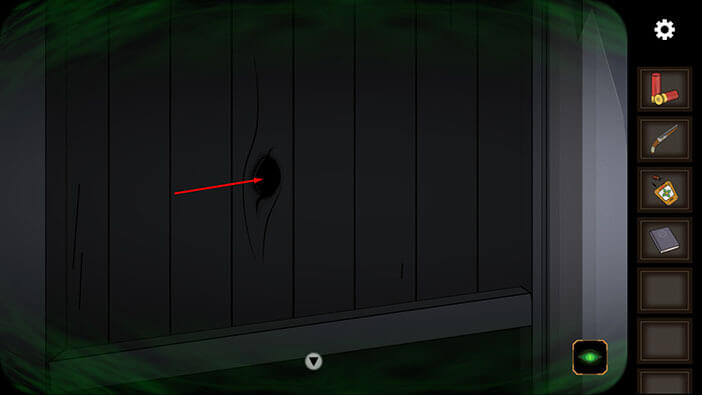
Through the hole, we can see some kind of grid inside the cabinet. Select the ”Remote control” from the inventory and tap on the grid. Our character will drop the cockroach on the grid.
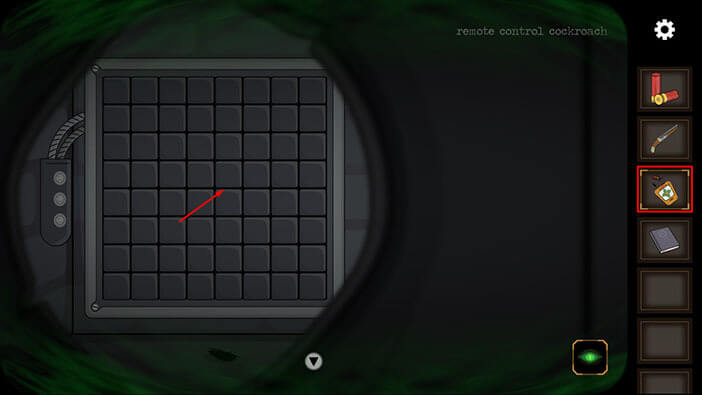
Our next task is to lead the cockroach by using the remote control. The goal is to step on all fields on the grid. We will do this in several steps. Let’s begin.
Step 1
Tap on the right arrow and the cockroach will move one field to the right. After that, tap on the left arrow and the cockroach will move one field up.
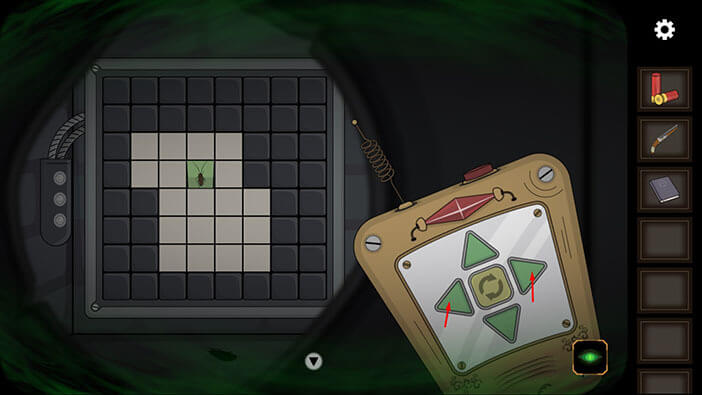
Step 2
Tap two times on the left arrow. The cockroach will move 3 fields to the left, and one field down.
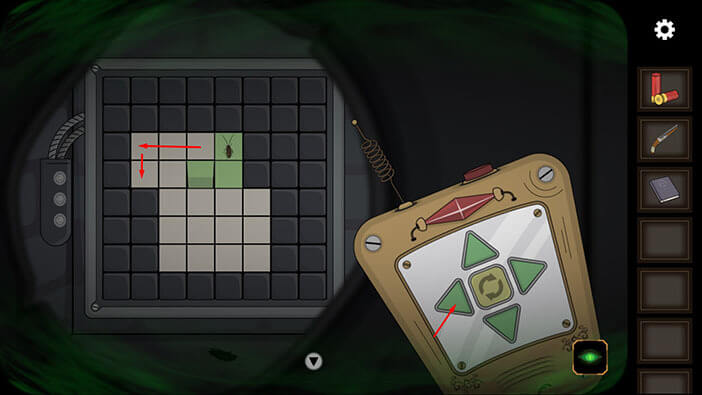
Step 3
Tap once on the left arrow, and the cockroach will move one field to the right. After that, tap on the right arrow, and the cockroach will move three fields down.

Step 4
Tap twice on the arrow on the left. The cockroach will move three fields to the left, and two fields up.
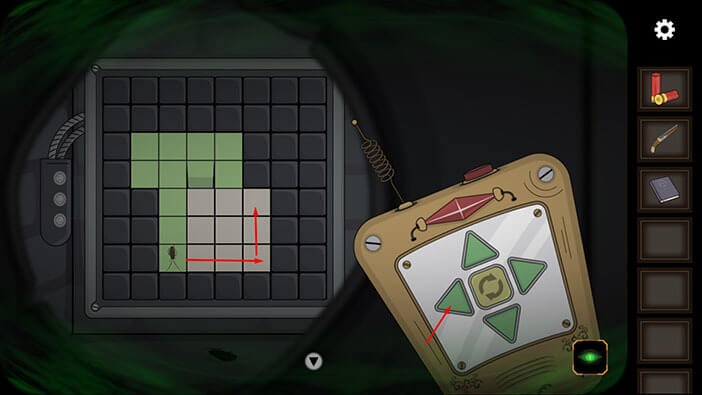
Step 5
Tap three times on the arrow on the left. The cockroach will move two fields to the left, one field down, and lastly one field to the right. With that, you will solve the first puzzle.
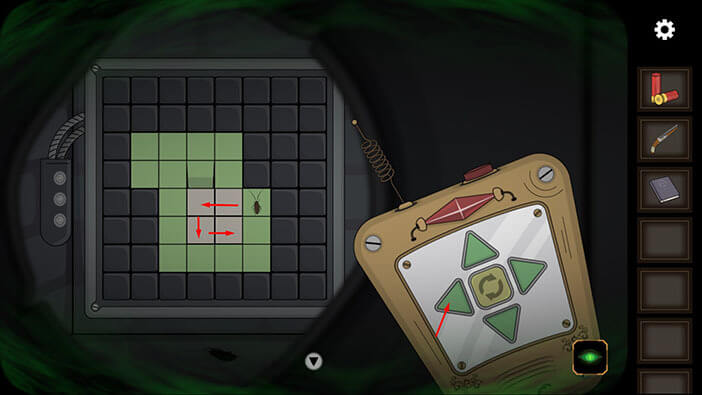
Now, we have another puzzle, and we should do the same thing as in the previous puzzle.
Step 1
Tap on the arrow on the left and the cockroach will move two fields to the left. After that, tap on the arrow on the right and the cockroach will move two fields up.
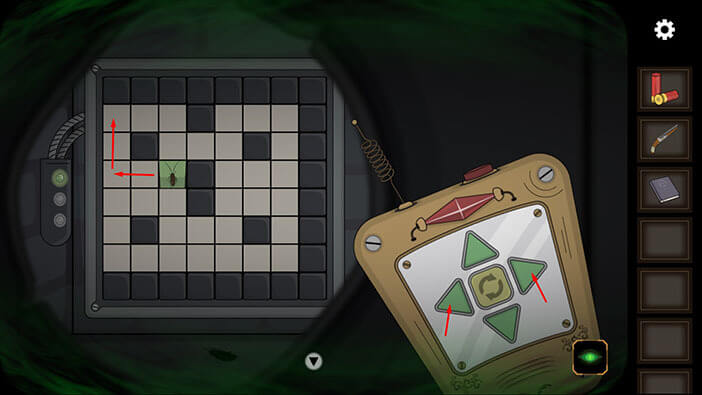
Step 2
Tap twice on the right arrow. The cockroach will move two fields to the right and one field down.
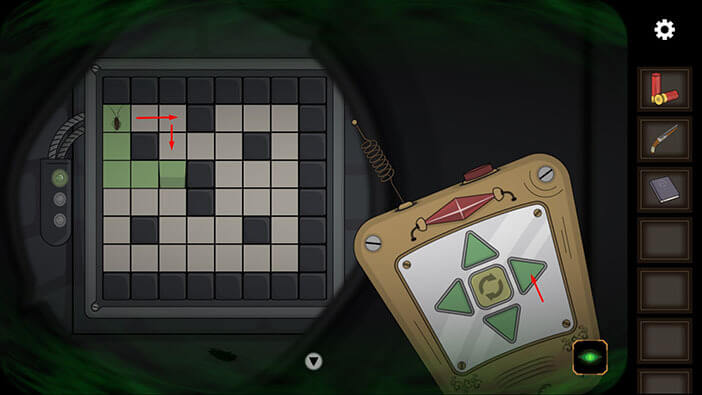
Step 3
Tap twice on the left arrow. The cockroach will move two fields to the left, and one field up.
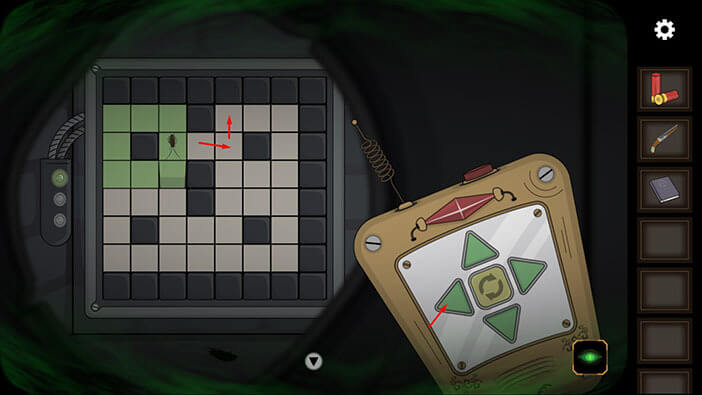
Step 4
Tap twice on the right arrow. The cockroach will move two fields to the right, and five fields down.
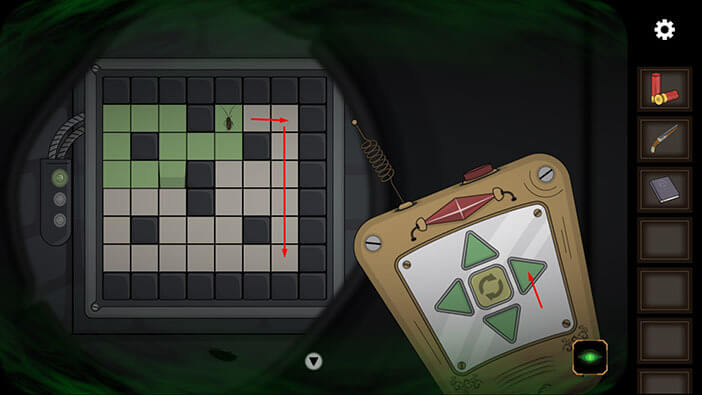
Step 5
Tap twice on the right arrow. The cockroach will move six fields to the left, and two fields up.
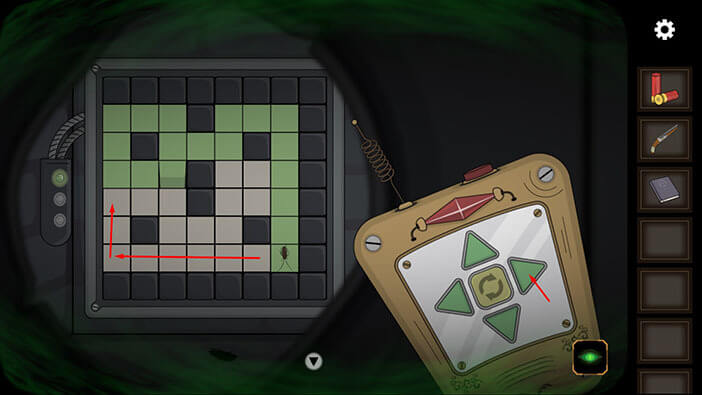
Step 6
Tap twice on the right arrow. The cockroach will move two fields to the right, and one field up.
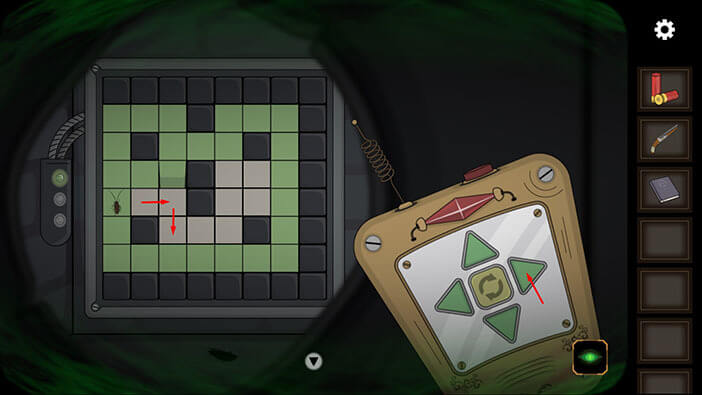
Step 7
Tap twice on the left arrow. The cockroach will move two fields to the right, and two fields up.
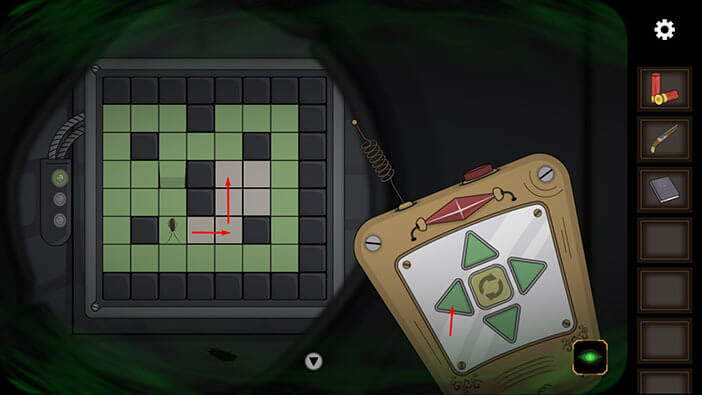
Step 8
Tap twice on the right arrow. The cockroach will move one field to the right, and one field down. With that, you will solve the second puzzle of this type.
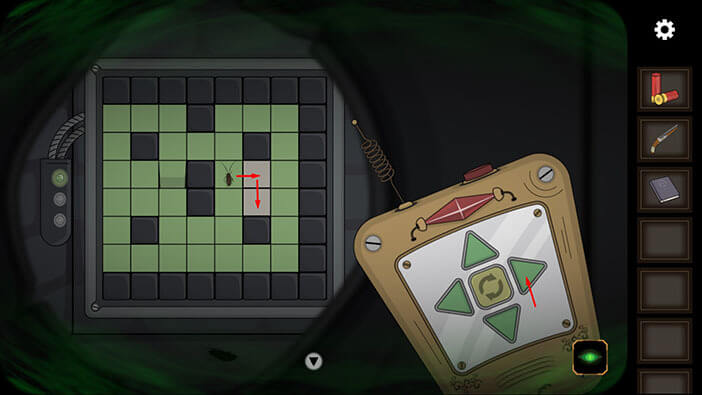
Another puzzle of the same type. Let’s solve it.
Step 1
Tap twice on the left arrow. The cockroach will move one field to the left, and two fields down.
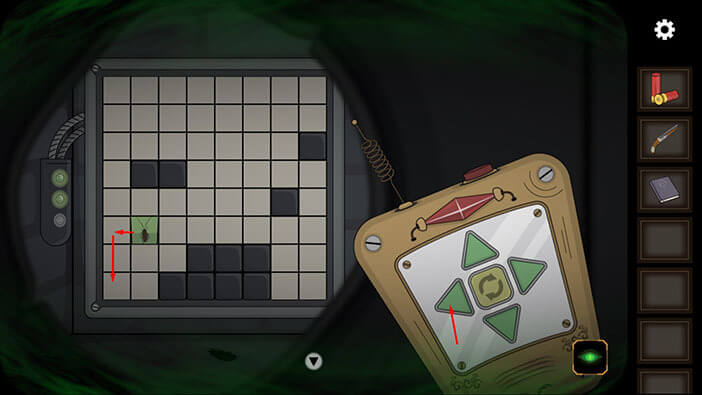
Step 2
Tap twice on the left arrow. The cockroach will move one field to the right one field up.
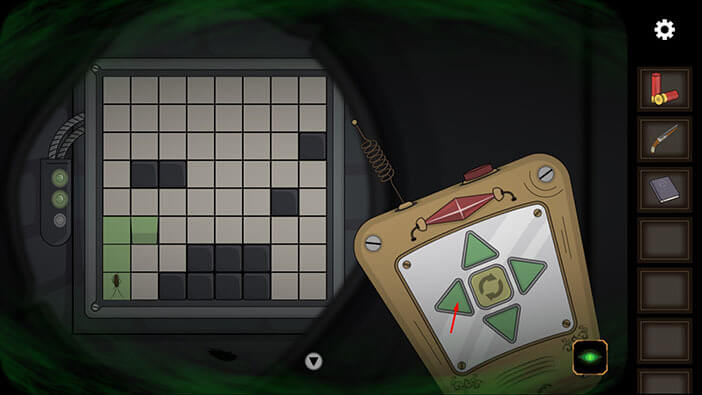
Step 3
Tap on the right arrow. The cockroach will move one field to the right. After that, tap on the left arrow, and the cockroach will move two fields up.
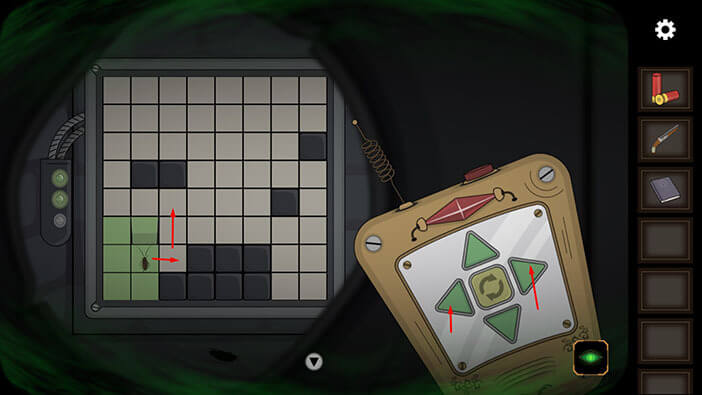
Step 4
Tap on the left arrow, and the cockroach will move two fields to the left. After that, tap on the right arrow and the cockroach will move four fields up.
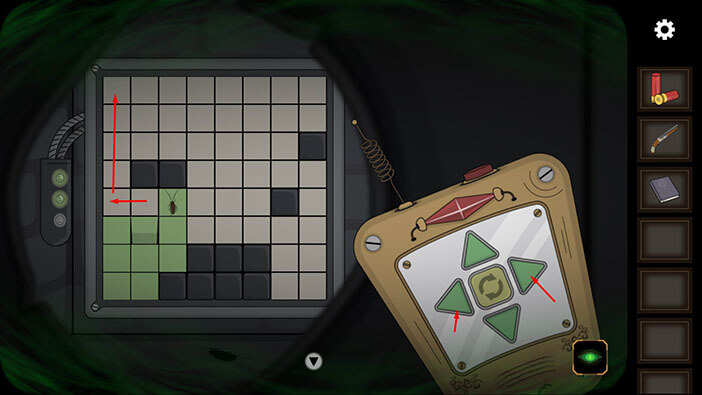
Step 5
Tap twice on the right arrow. The cockroach will move seven fields to the right, and one field down.
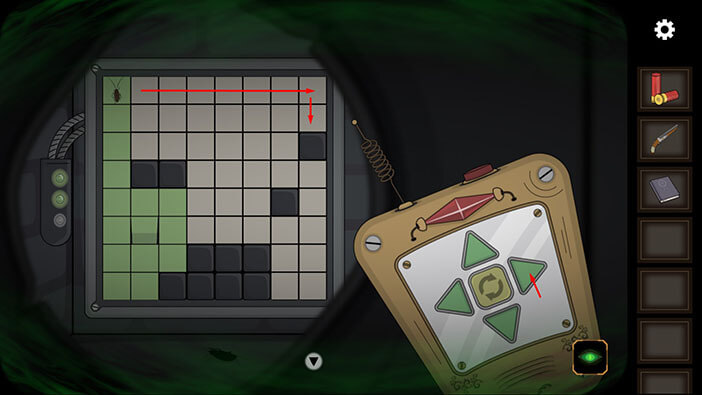
Step 6
Tap on the right arrow, and the cockroach will move six fields to the left. After that, tap on the left arrow, and the cockroach will move one field down.
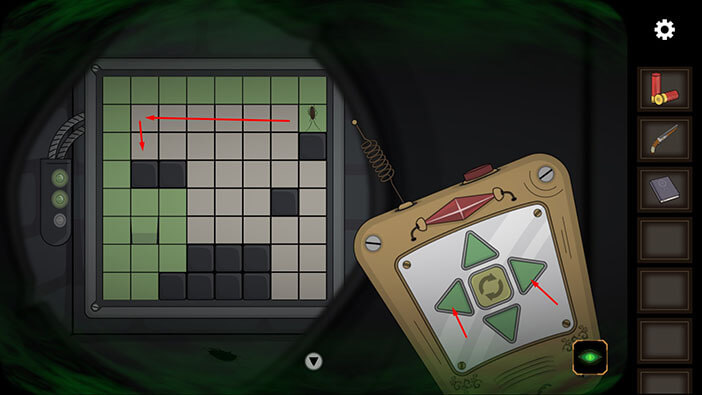
Step 7
Tap on the left arrow, and the cockroach will move five fields to the right. After that, tap on the right arrow, and the cockroach will move one field down.
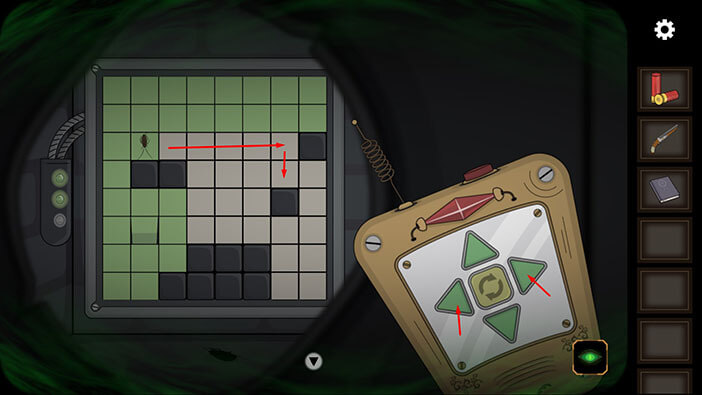
Step 8
Tap on the left arrow, and the cockroach will move one field to the right. After that, tap o the right arrow and the cockroach will move four fields down.
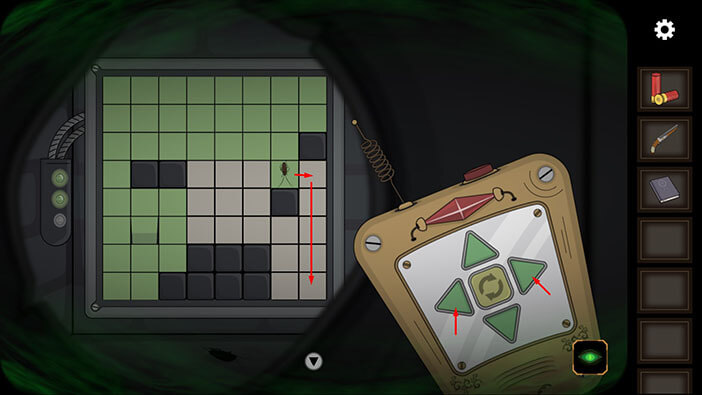
Step 9
Tap twice on the right arrow. The cockroach will move one field to the left, and two fields up.
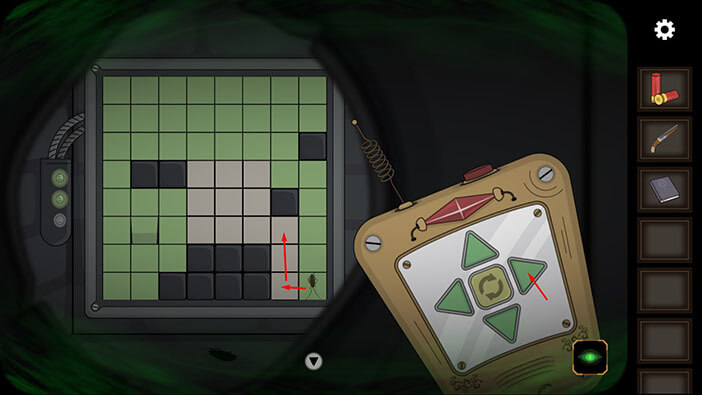
Step 10
Tap on the left arrow, and the cockroach will move three fields to the left. After that, tap on the right arrow and the cockroach will move two fields up.
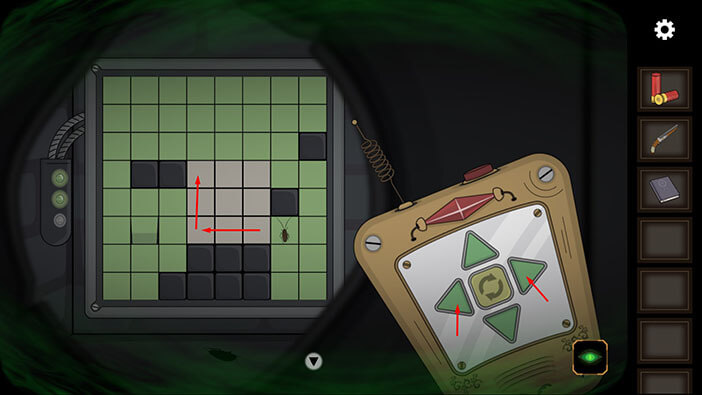
Step 11
Tap three times on the right arrow. The cockroach will move two fields to the right, one field down, and finally, one field left. With that, you will solve the third puzzle of this type.
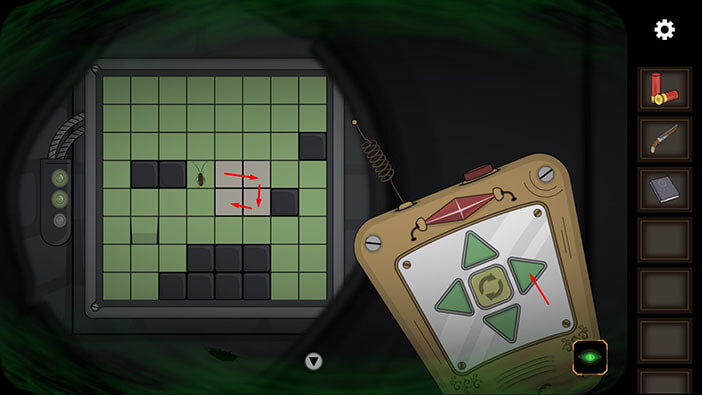
As soon as you solve the third puzzle, the secret compartment will open, revealing a book that was hidden inside it. Tap on it to pick it up and “Book of true form” will be added to your inventory.
After that, tap on the arrow at the bottom of the screen to go back.
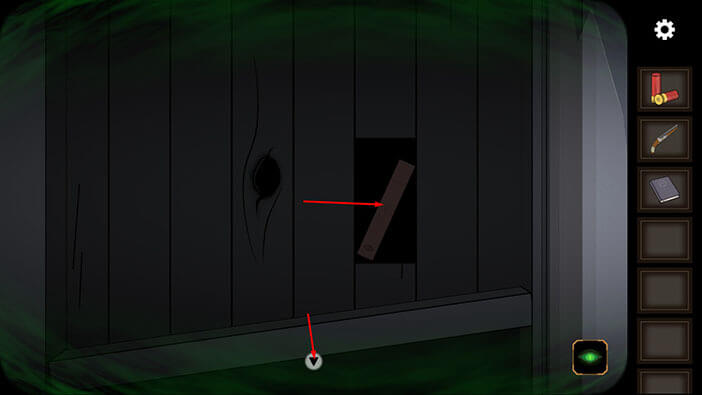
Let’s turn off the “Ghost Vision”. Tap on the eye icon in the lower right corner.
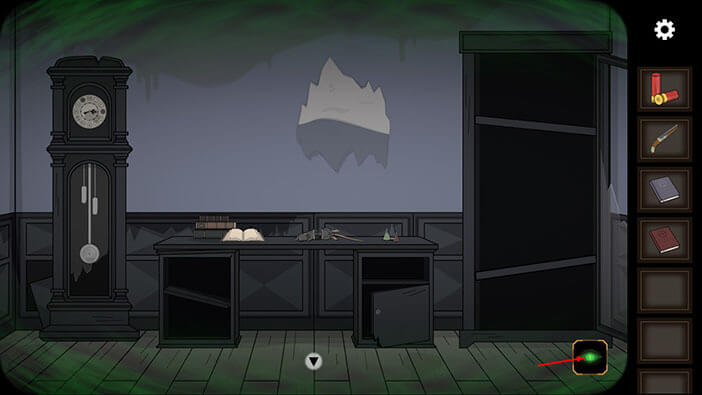
If you pay attention to the work desk, you will notice a bookstand. Tap on it to take a closer look.

Select the “Book of true form” from the inventory and place it on the bookstand.
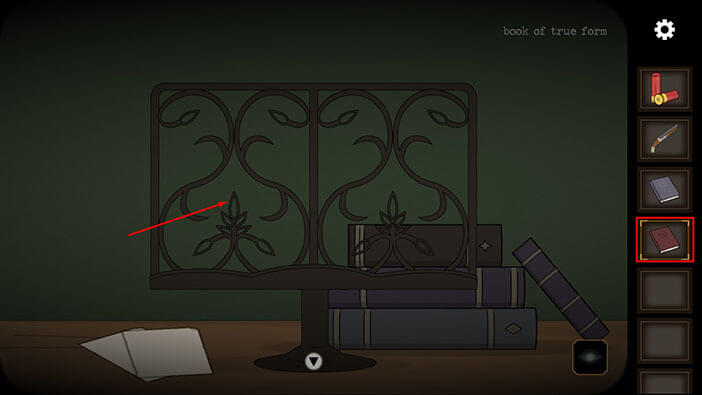
Tap on the page on the right, and our character will rip it out. “Page” will be added to your inventory.
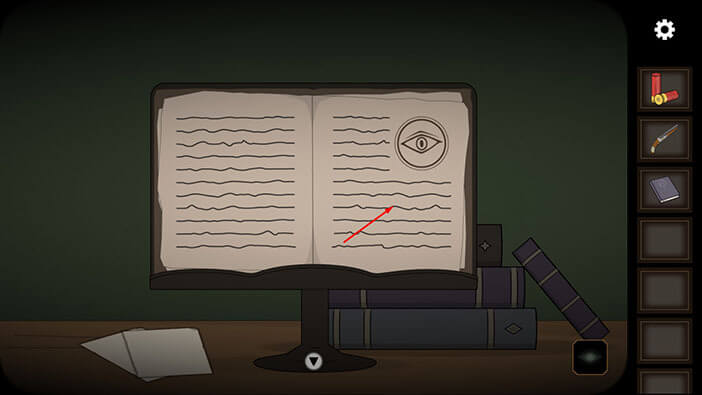
Next, select the “Book of freedom” from the inventory and tap on the right side of the book.
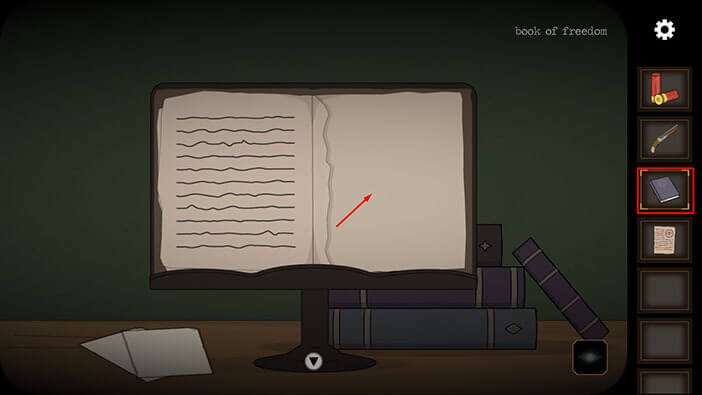
Next, select “Page” from the inventory and tap on the right side of the book.
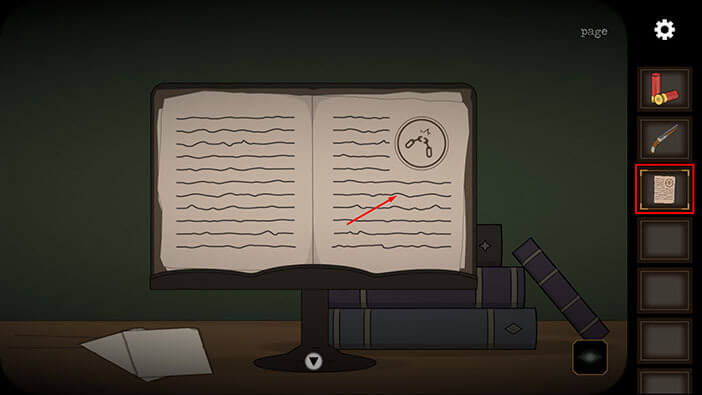
Lastly, tap on the book to pick it up, and “Fake book of freedom” will be added to your inventory. With this fake book, we will try to trick the demon that is disguised as Alchemist’s wife, and force it to reveal its true form.
Once you’re done tap on the arrow at the bottom of the screen to go back.
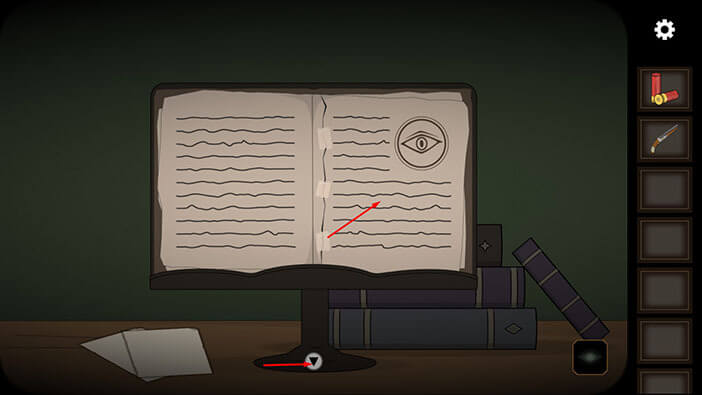
Ok, let’s go back to the Alchemist’s wife. Tap on the arrow at the bottom of the screen.

Tap once on the arrow on the right to go to the starting room.
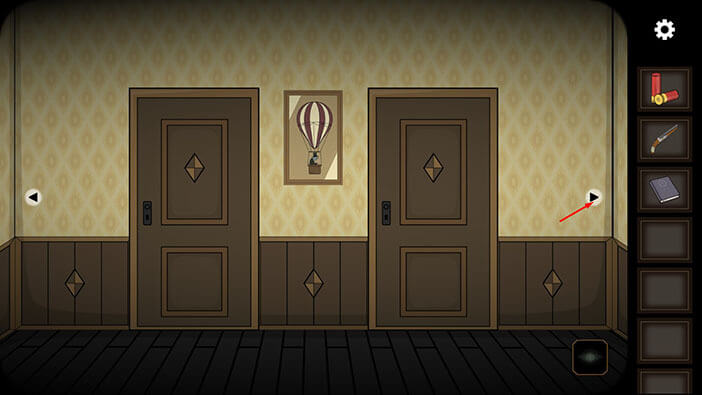
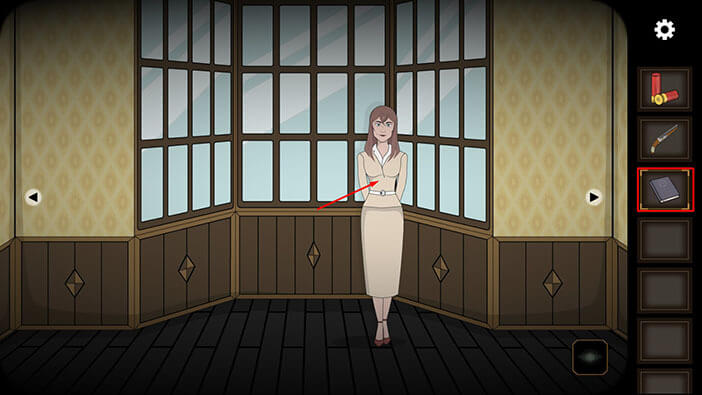
Select the “Fake book of freedom” from the inventory and tap on the Alchemist’s wife to start the interaction.
The Alchemist’s wife will thank you for bringing her the book. She will then open it, and read the text which is written in some very strange language.
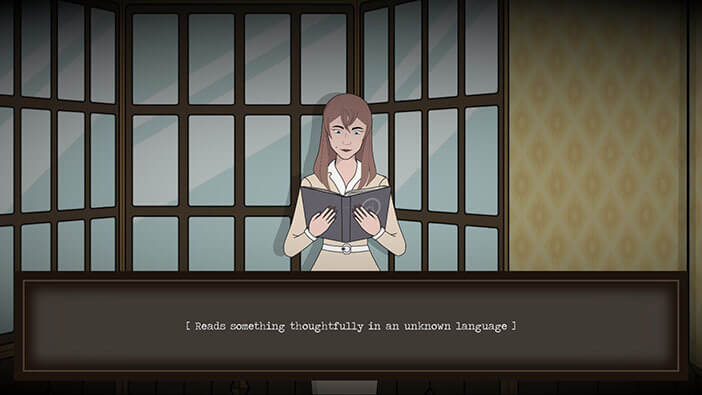
The demon, disguised as Alchemist’s wife, quickly realized that it was tricked. The spell in the book should free it, but it is still bound to this room. With that, the woman’s expression will suddenly change from gratitude to open hostility (yeah, these mood swings are quite dangerous).
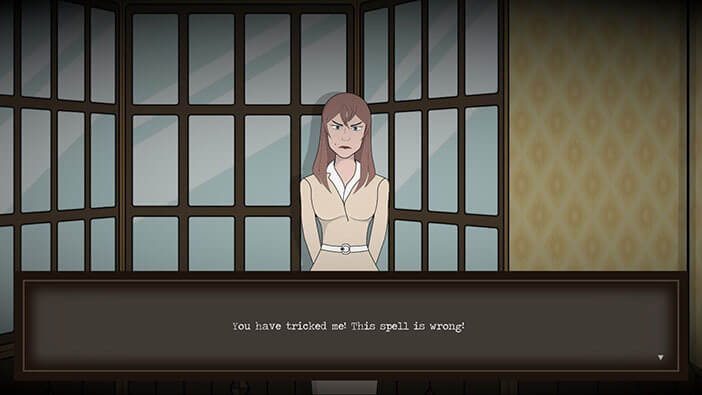
The demon will then reveal its true form, ready to pounce on our character and cut him to pieces with a butchering knife.

Tap on the demon to take a closer look at it.
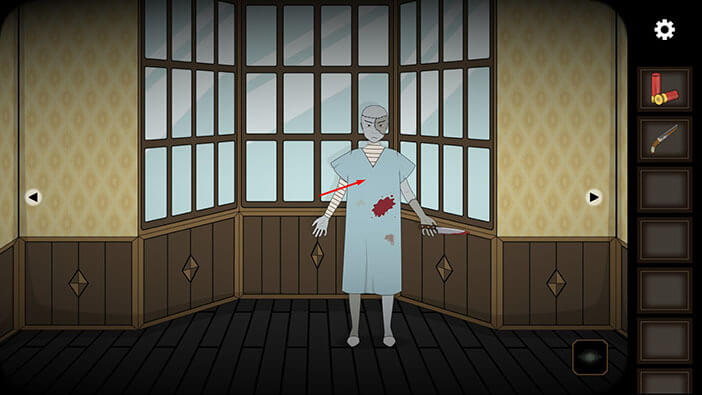
You will notice that the demon is bound by some kind of magical chain.
Tap on the shotgun in your inventory to select it, then tap on the demon. Our character will pull the shotgun out of his backpack, and aim it at the demon.
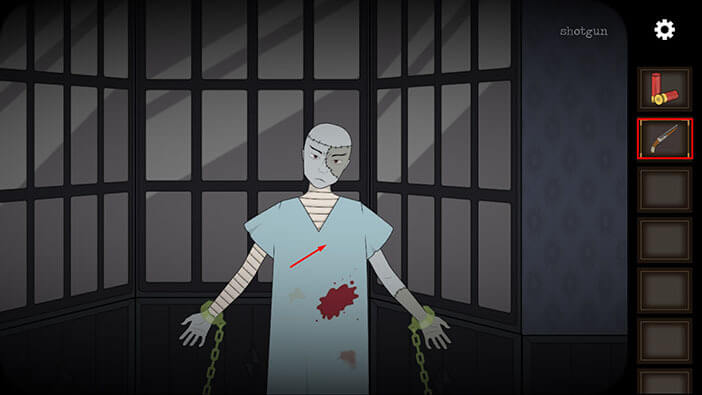
Quickly tap on the double-barrel shotgun to start the reload. After that, select “Ammo” from the inventory and tap on the shotgun to load it.
The demon will tear off one of its arms in order to break free, and the other arm will turn into a deadly claw.
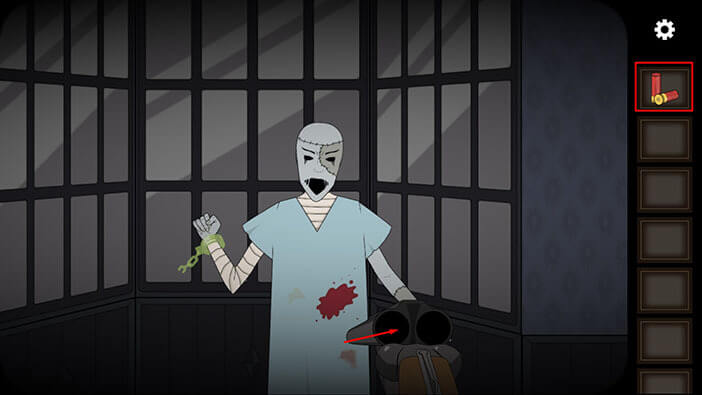
Tap on the shotgun again to complete the reload process.
After that, you will have to stop the line inside the green area to fire a shot. However, even if you stop the line within the green area, your character will miss the first shot. On the bright side, he will hit with the second shot.
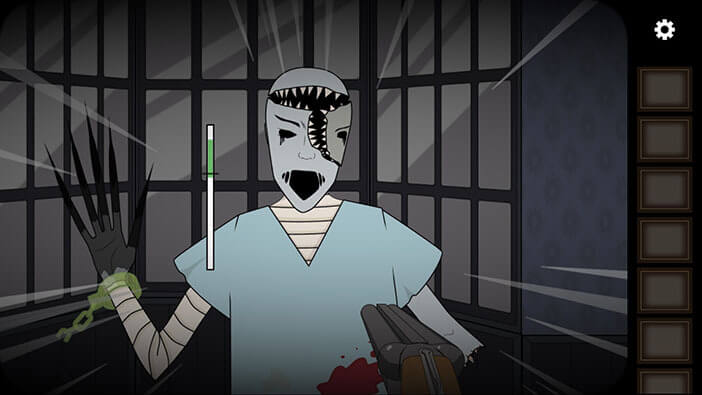
Again, on the negative side, even though the demon took full might of the shotgun blast from point-blank range, it will still manage to take a swing with our character with its deadly claw.
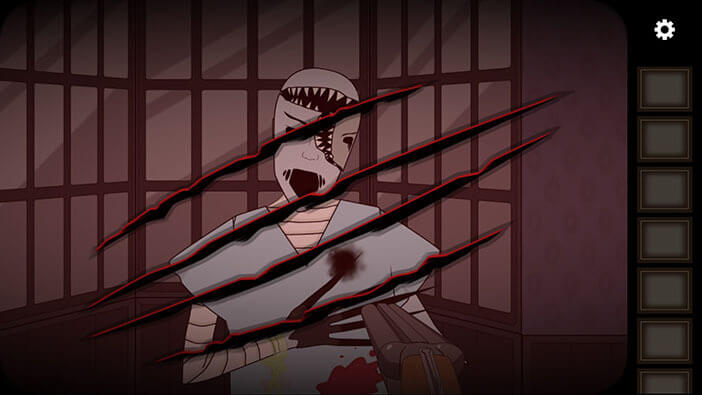
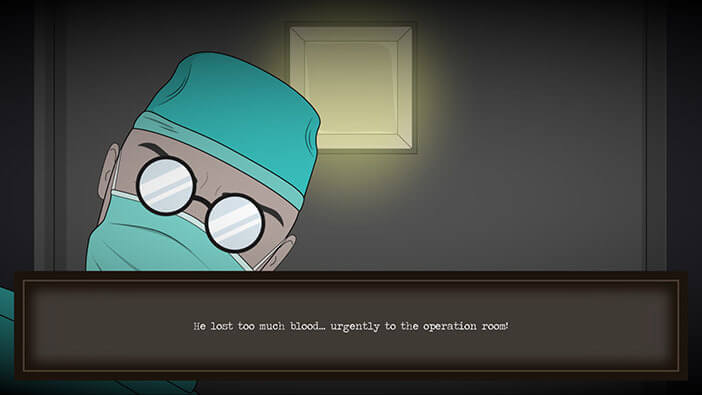
The game ends with our character waking up on his way to surgery. So, we can probably assume that the demon is dead (or banished) since otherwise, it would probably finish off our character while he was incapacitated…
With that, we came to the end of this walkthrough. If you’re interested in Escape Room games, check out our guides for the other games of this genre.
Thank you for reading.