Scary Horror 3: Escape Mystery – Chapter 1 | Part 1
Intro
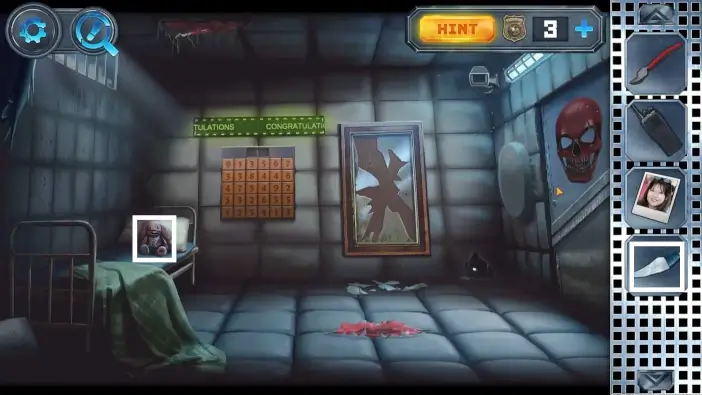
Welcome to our walkthrough for Chapter 1 of the “Scary Horror 3: Escape Mystery” from Escape Adventure Games. In this game, you are playing 2 characters: Alex and Anna, who are trying to escape the strange and spooky rooms after being kidnapped. While rooms resemble situations from their past, they must remain brave and help each other.
Walkthrough
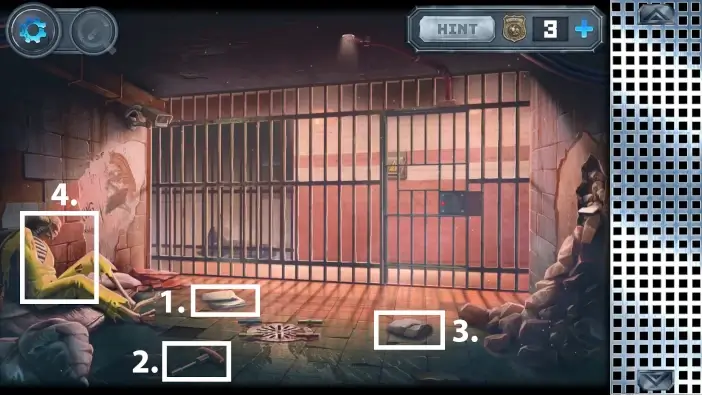
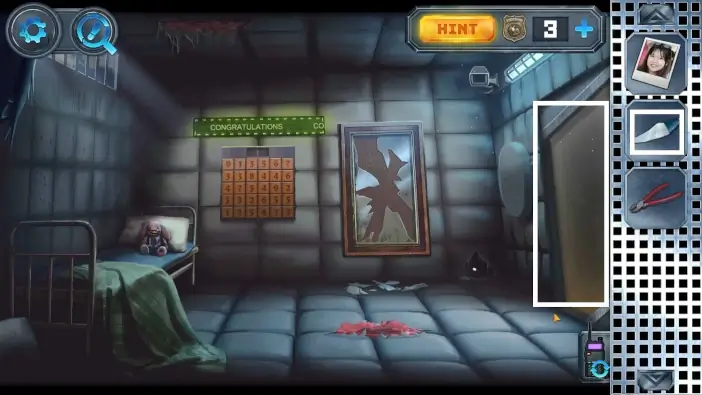
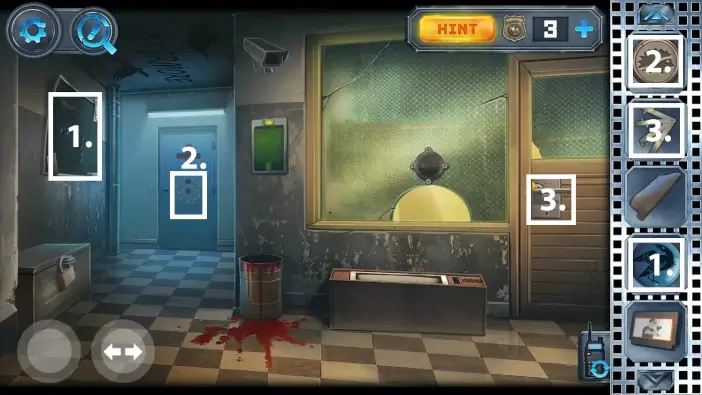
- Pick the rag, You will need it to uncover the clue on the wall in your cell.
- Pick the screwdriver to unlock your cell later.
- Pick the rock.
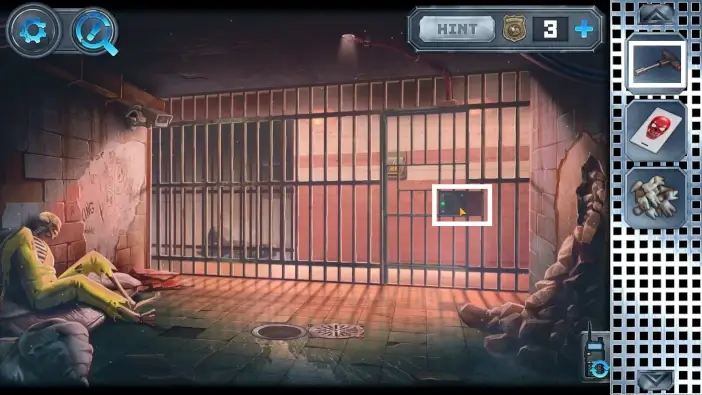
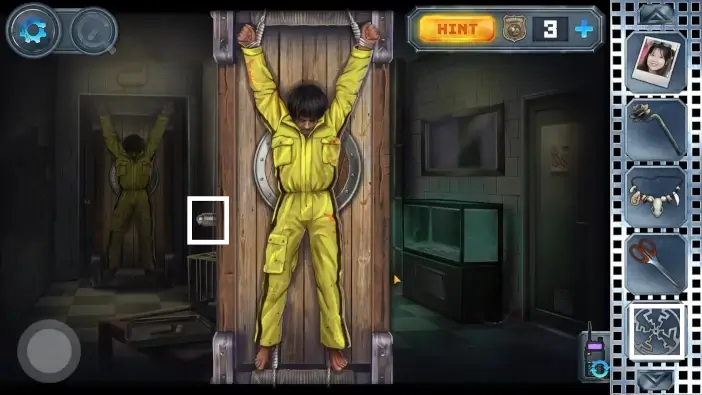
- Approach the skeleton.
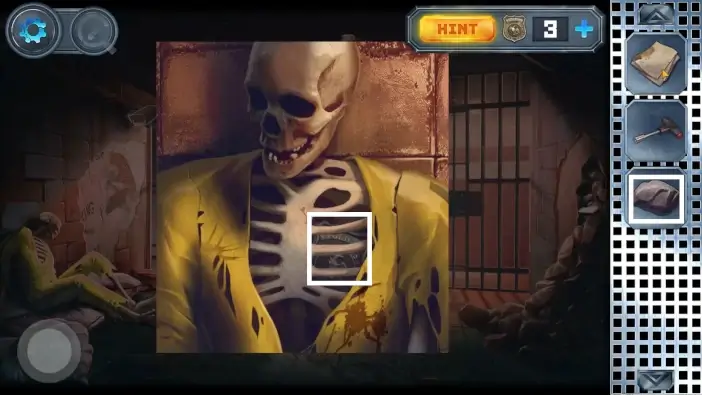
Break the ribs with a rock to get a sharp bone. Optionally, you can get a police badge inside the ribcage. This is not an item to use but a premium token for getting hints in the game.
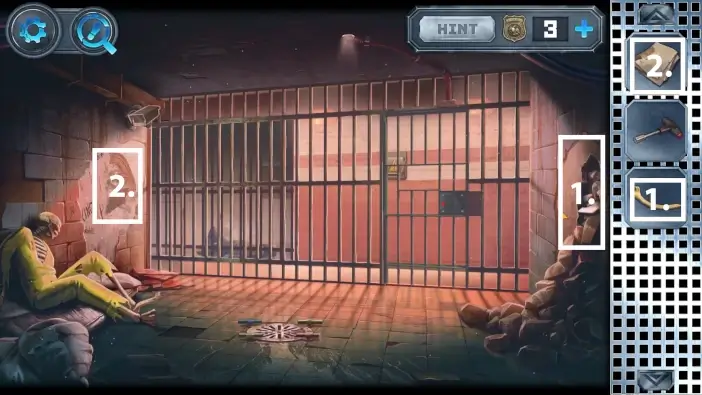
- Approach the crack on the wall on the right. Use the sharp bone to get an access card. You will need it later to unlock Anna’s cell.
- Approach the wall on the left. Use the rag to clean the wall. Remember or screenshot the clues on the wall because you will need them instantly.
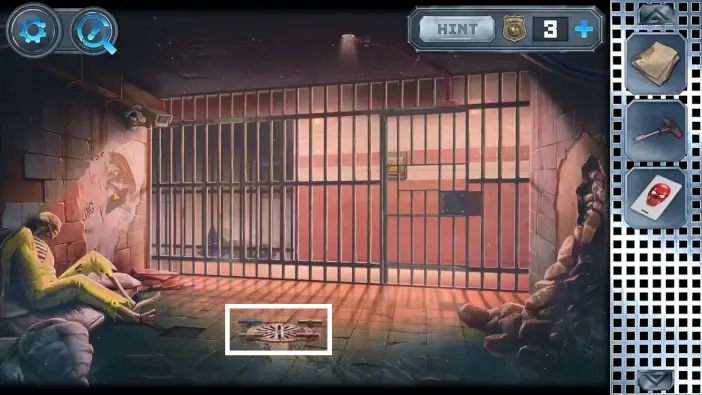
Approach the water drain.
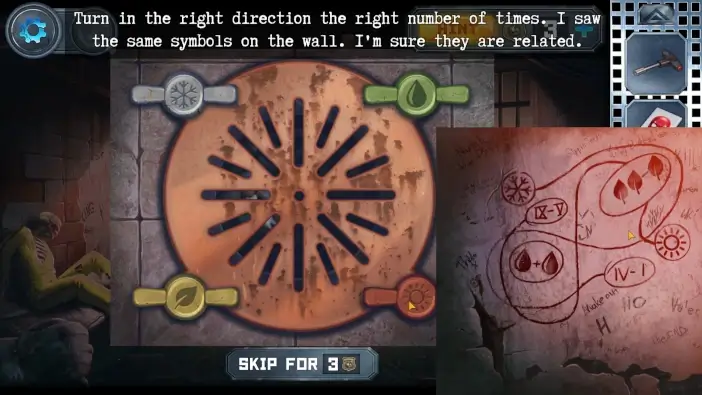
You need to spin different valves for a different number of times. Spin the leaf valve 1 time (hint on the wall: 2 leaves – 1 leaf = 1 leaf), spin the water droplet valve 2 times (1 water droplet + 1 water droplet = 2 droplets), the snowflake valve 3 times (IV – I = 3 – 1 = 2), and spin the sun valve 4 times (IX – V = 9 – 5 = 4).
After you solve the puzzle, the lid will be open. Take the Walkie-talkie and the pile of teeth.
Use the Walkie-talkie to play another character, Anna.
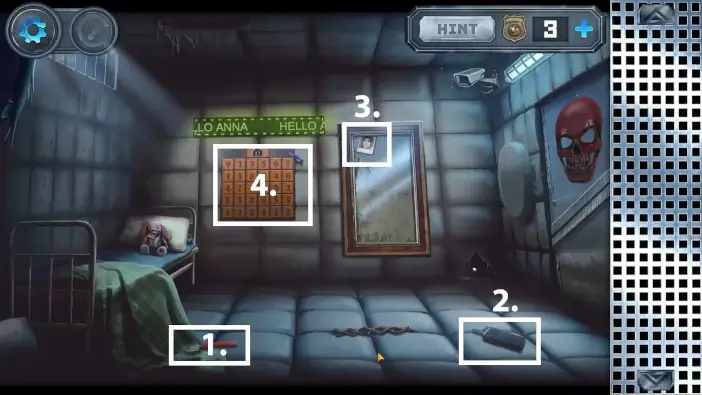
- Pick half of the wire cutters. You will merge it with the other half to create wire cutters.
- Pick the Walkie-talkie. In Anna’s case, the battery is empty.
- Take the “Smiling Lady” photo.
- Approach the numbers in the center of the room.
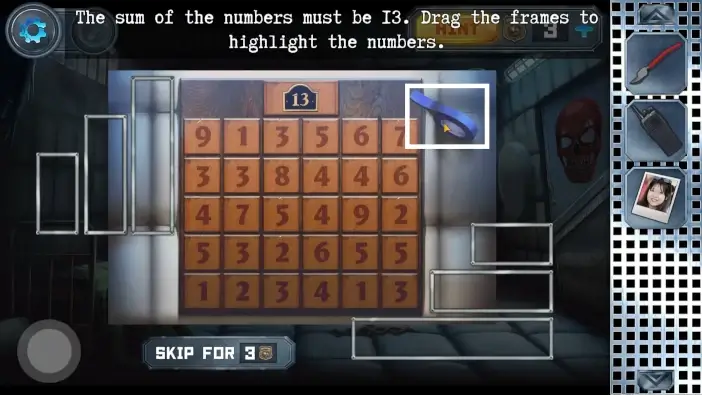
Pick the tape first.
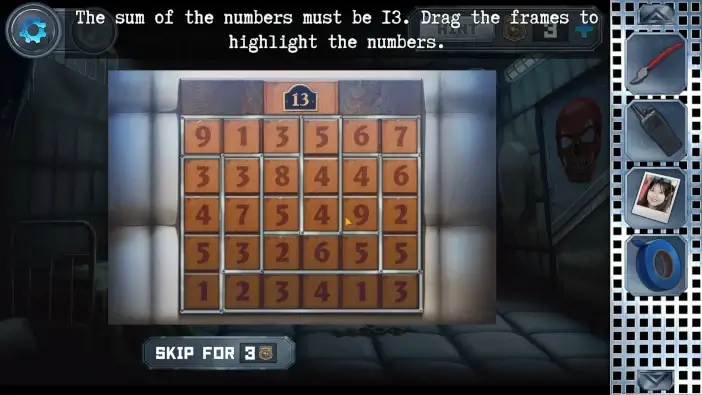
Place the frames around numbered tiles so that the sum of numbers inside the frame is 13. Once you solve the puzzle, the part of the ceiling will break. You will pick another half of the wire cutters from the ceiling hole soon.
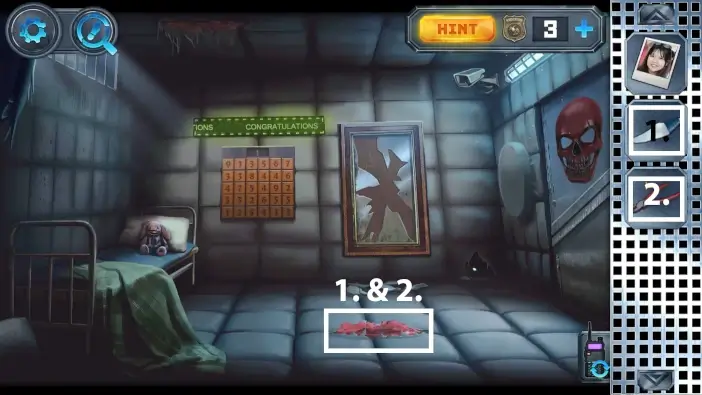
- Approach the bed on the left. Pick the mini kettlebell.
- Pick another police badge.
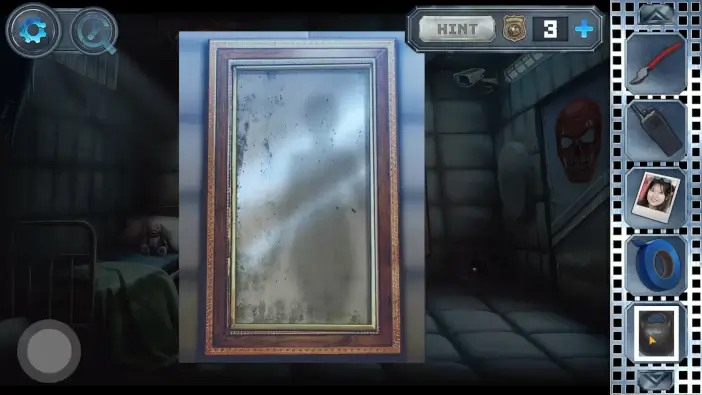
Approach the mirror. Use the mini kettlebell to break it. The shard of glass will be added to your inventory.
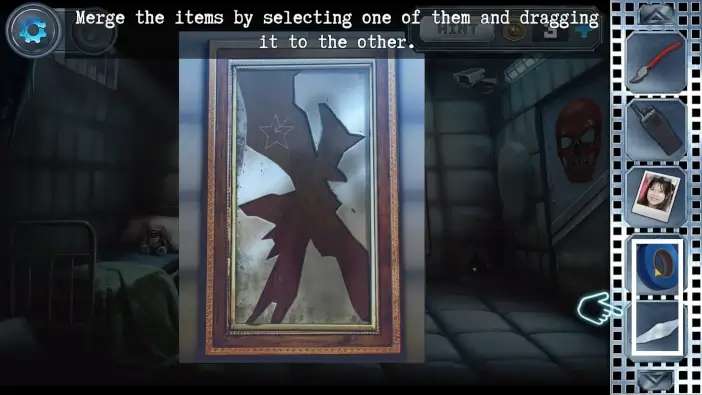
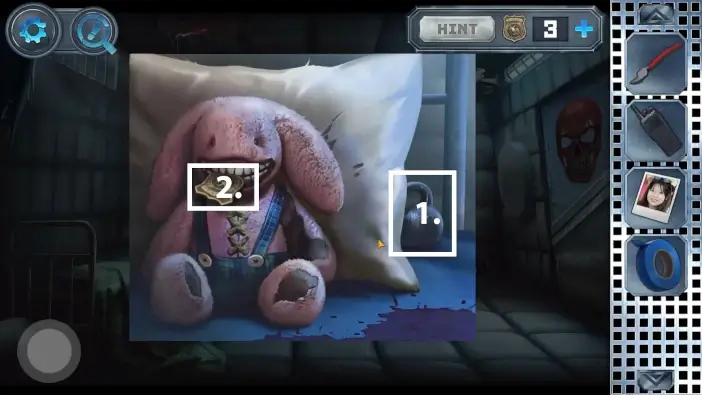
Merge the shard of glass with the tape to create an improvised glass knife.
Use the glass knife on the rabbit doll to cut it and pick up the batteries.
In your inventory, put the batteries in your Walkie-talkie. Now Anna and Alex can communicate and you can switch between these two characters.
Pick the second half of the wire cutters from the ceiling hole.

In your inventory, merge the two halves of the wire cutters.
Cut the cushion on the floor with your glass knife.
Use the wire cutters to cut the wires. This will prevent electricity from reaching the prison bars in Alex’s cell room.
Use the Walkie-talkie to play as Alex. Now you can approach the prison bars. Use the screwdriver to open the lock’s lid.
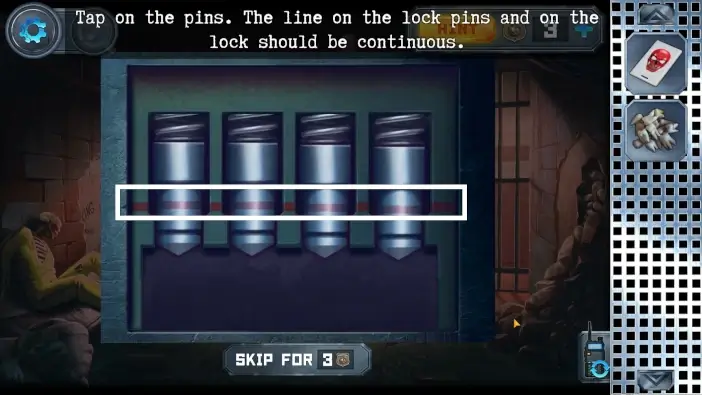
When you click on the pin, it will move upwards and slowly fall. You need to get the timing of the clicks right so all lock pins are in the same position while falling. The correct position is when the bars from the pins are aligned into one horizontal line.
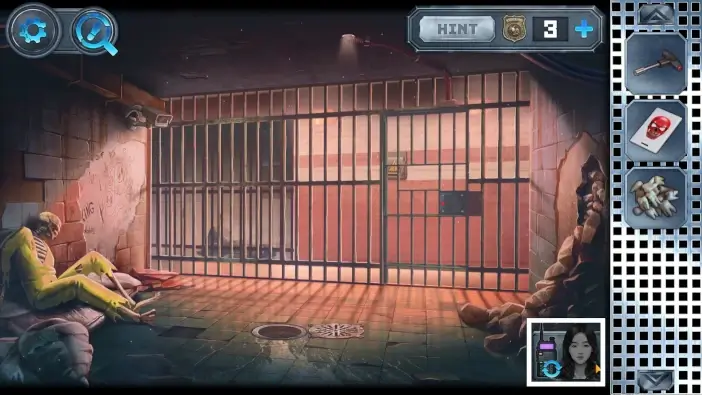
Once you solve this puzzle, you can exit your prison cell.
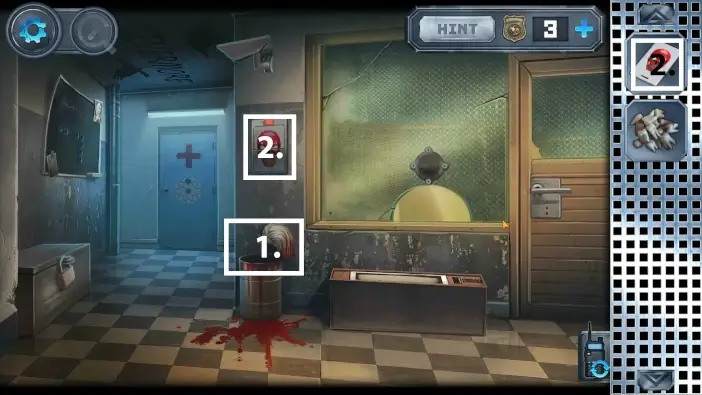
- In the prison hallway, pick the mop head from the bucket.
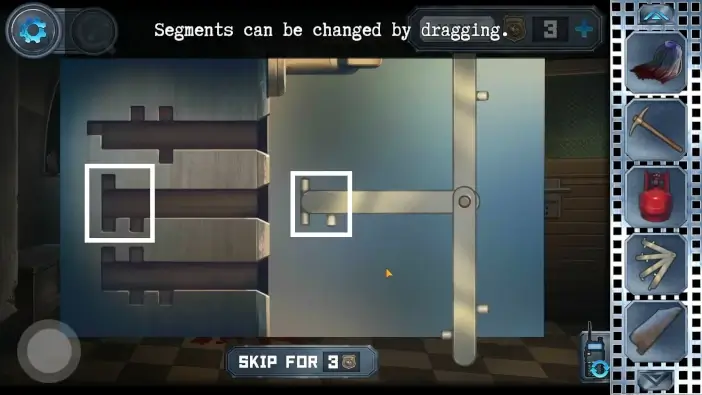
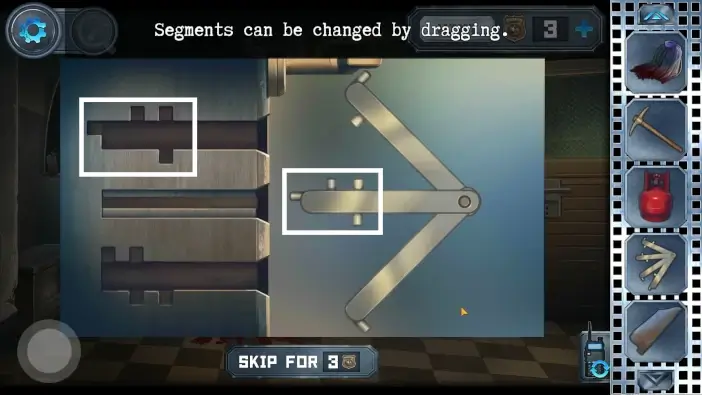
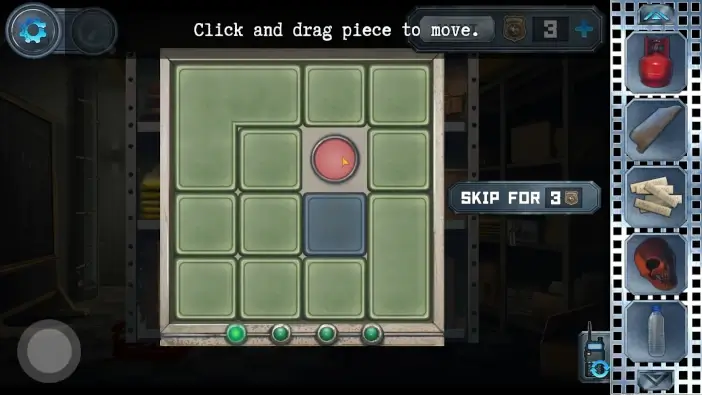
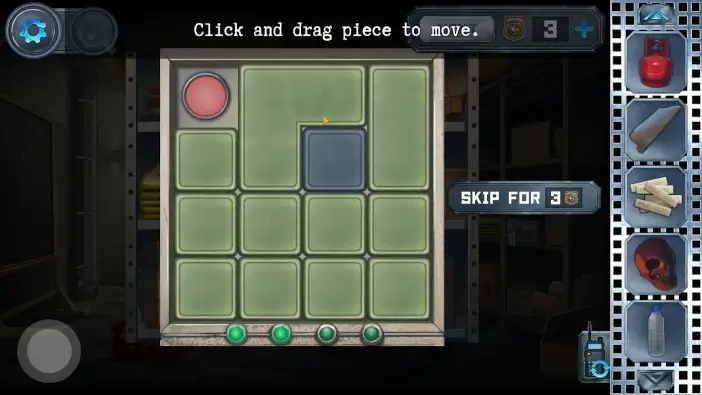
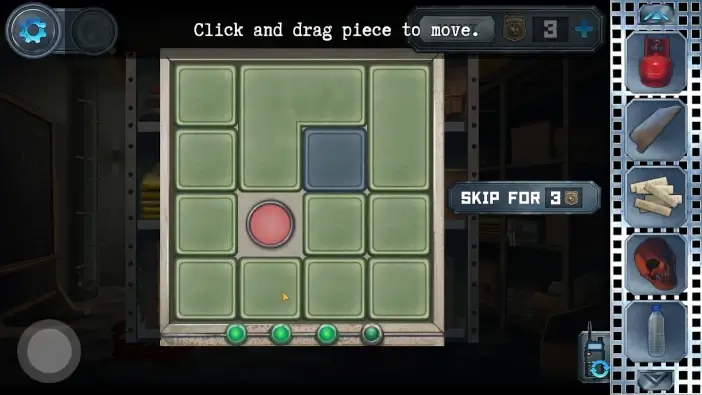
- Use the access card to unlock the next puzzle.
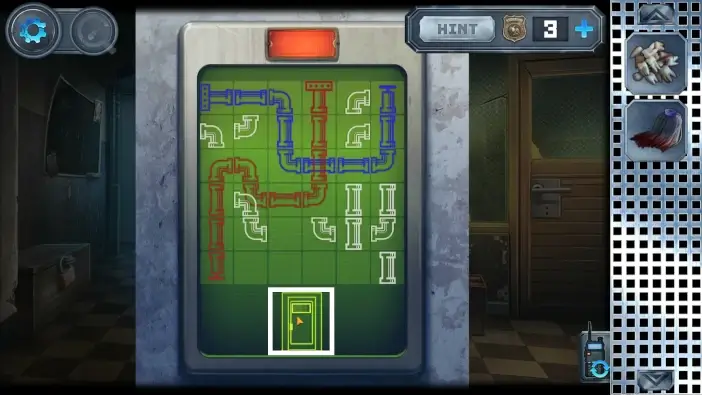
Solving this puzzle will unlock the exit door of the padded cell where Anna is imprisoned. Swap the pipe parts positions until you form 2 pipes that go from their sources to their outlets, as in the picture above. Once you do that, click on the door icon below the pipes, and the padded cell, where Anna is, will be unlocked.
Switch to Anna. The metal door will be gone. Use the glass knife to cut through the fabric and exit the padded cell.
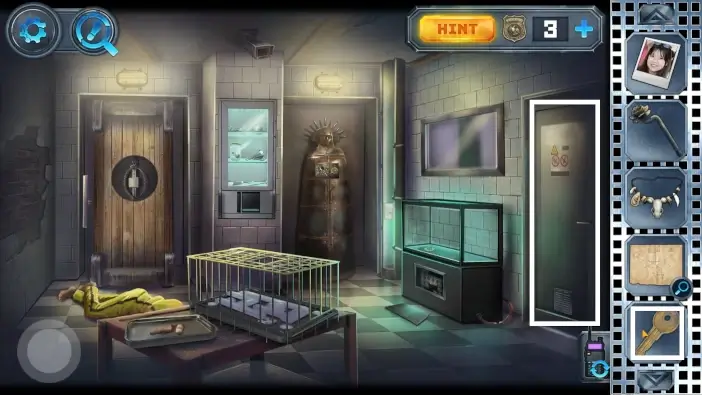
- In the torture chamber pick the flower-lever. It will be crucial for unlocking multiple parts of the forest area.
- Use the wire cutters on the wire near the door to disable the electricity in the aquarium.
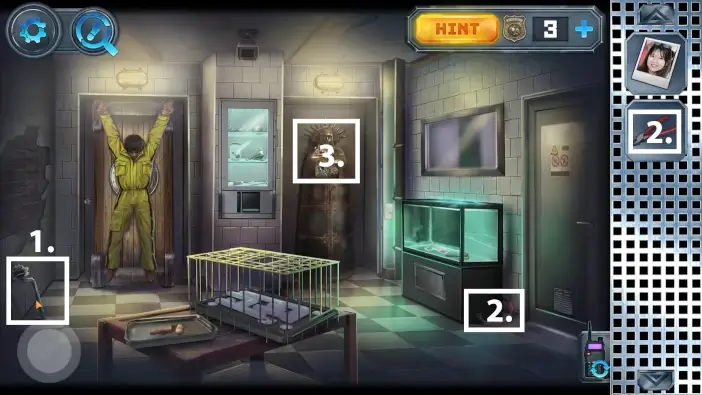
- Approach the iron maiden torture device.
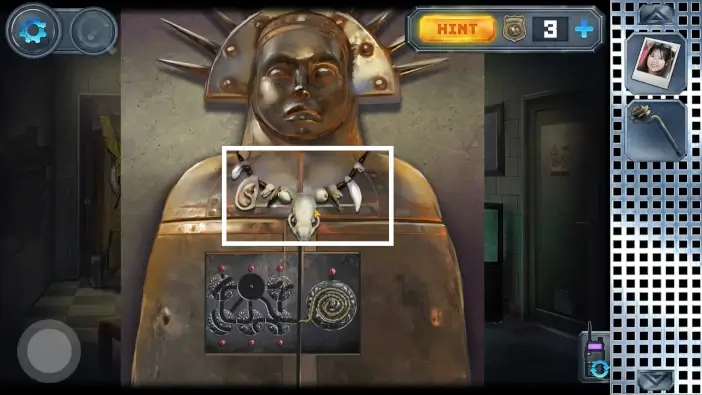
Pick the necklace from the iron maiden. You will need this necklace later to place it on one mannequin.
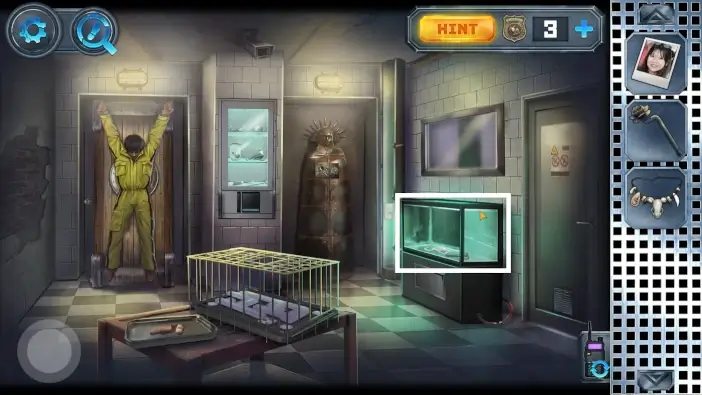
Approach the aquarium
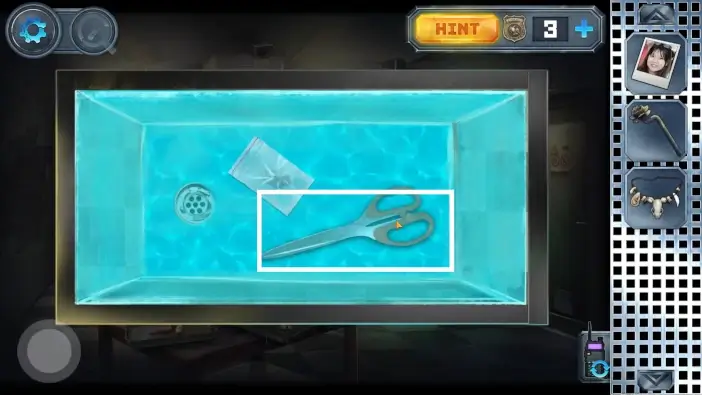
Pick the scissors.
Return to the padded cell. Use the scissors on the fabric that is lined with the circular shape on the wall. You will start a new puzzle challenge.
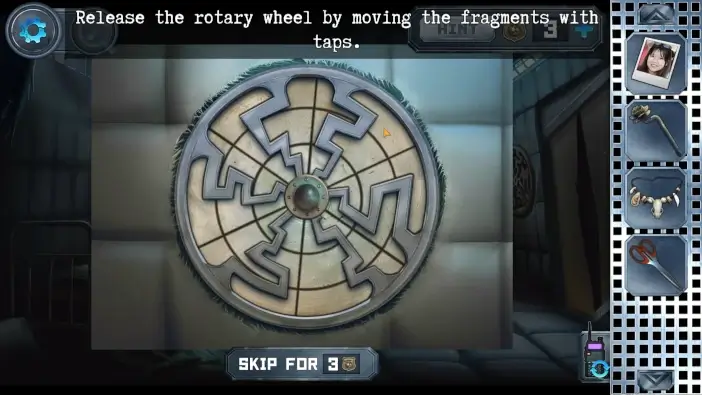
You need to swap fragments of the wheels so that the shadow is behind the metal areas. The final result should not have any shadow visible, like in the picture above. You can swap fragments only within the same circle (e.g. outer circle, middle circle, most inner circle). When you solve the puzzle, you will get the caster wheel.
In the torture chamber, approach the prisoner.
You can place the caster wheel now. As for the unfortunate prisoner, you can’t release him now. You will need some clues first.
Switch to Alex. Go to the left (by clicking/tapping on the left arrow).
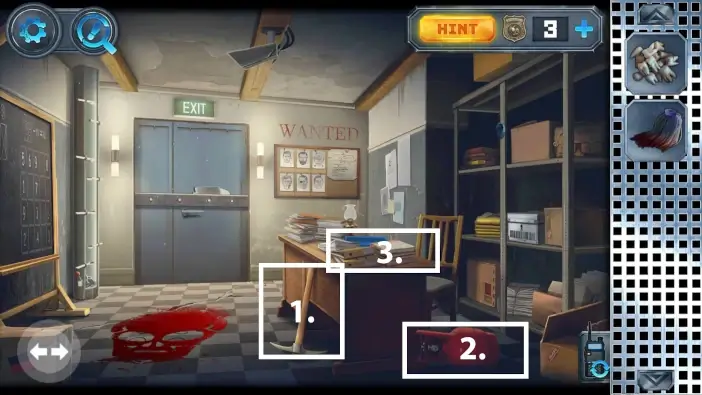
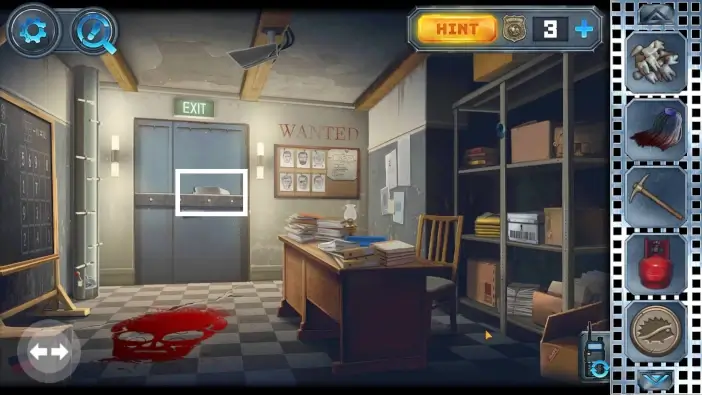
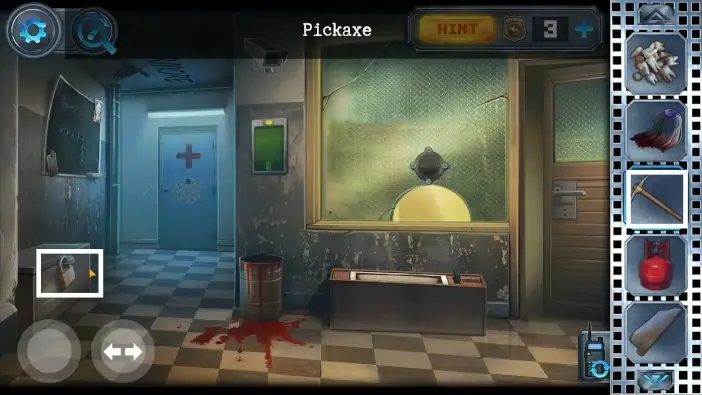
- In the office, pick up the pickaxe.
- Take the propane tank. You will need it in the mortuary.
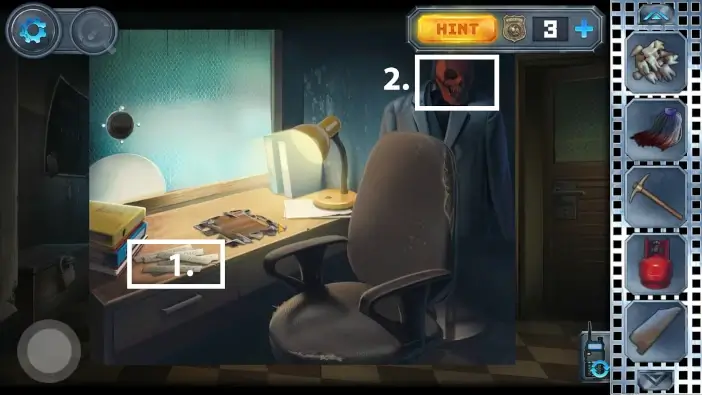
- Approach the table.
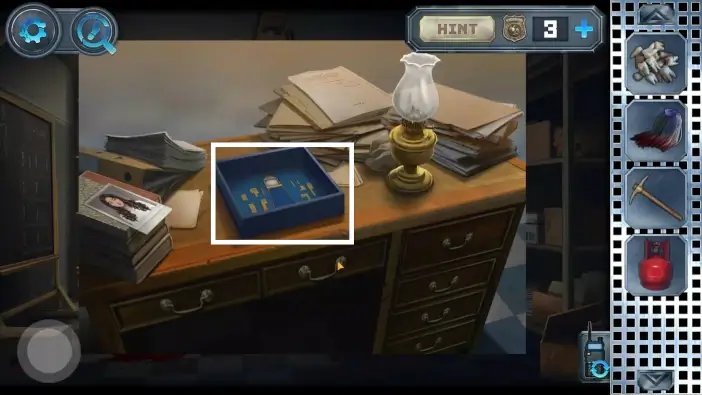
Take a closer look at the blue box.
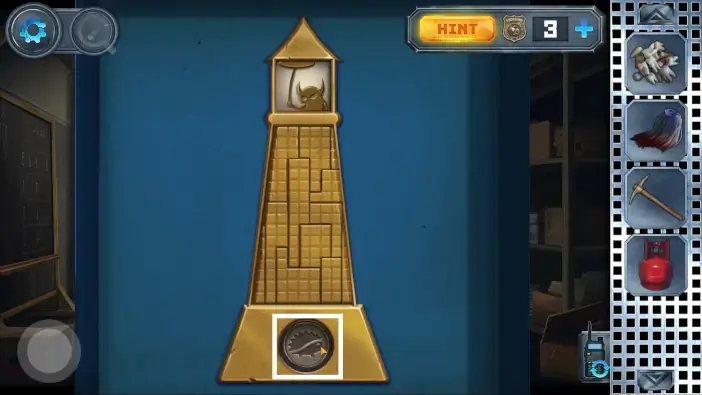
You need to drag all the pieces inside the bell tower. You can see the shape of the pieces by looking at their borders in the solution picture above. Once you solve the puzzle, pick the artsy button. You will need it to unlock the hospital room door.
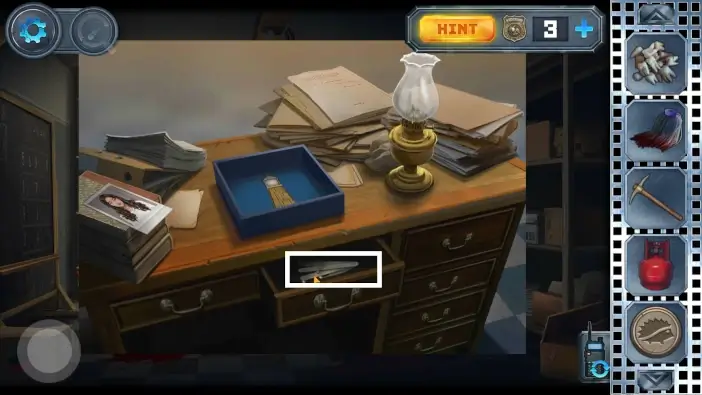
On the same desk, open the drawer, and pick the special key. You will need it to unlock the door to the reception office in the prison hallway.
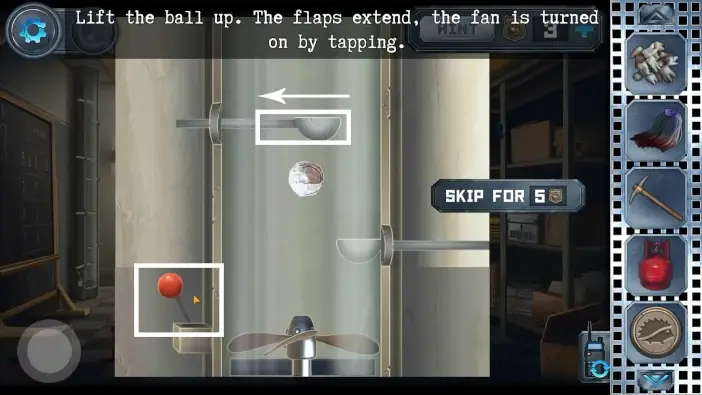
Approach the pillar on the left corner of the office. Click on the lever on the left to activate the fan. The fan will push the paper ball upwards. When you reach the obstacle, you need to remove the obstacle very fast by pushing it to the side, before the ball drops down and the screen changes. Move all obstacles.
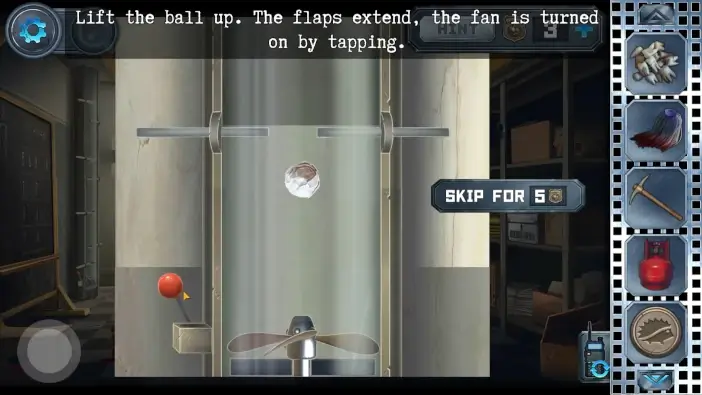
In the end, you need to move the obstacle in a way that the ball has enough space to pass. When you complete this puzzle, Anna will receive the paper. It is a clue for solving a puzzle in the forest related to the lamb sacrifice.
Pick the sawblade from the door. You will later combine it with a handle to form a surgical saw.
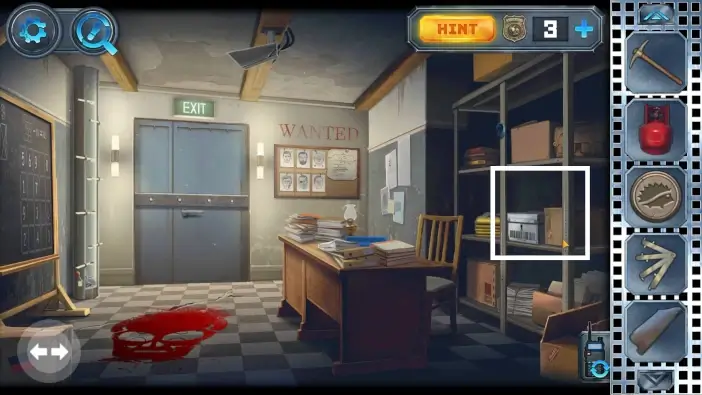
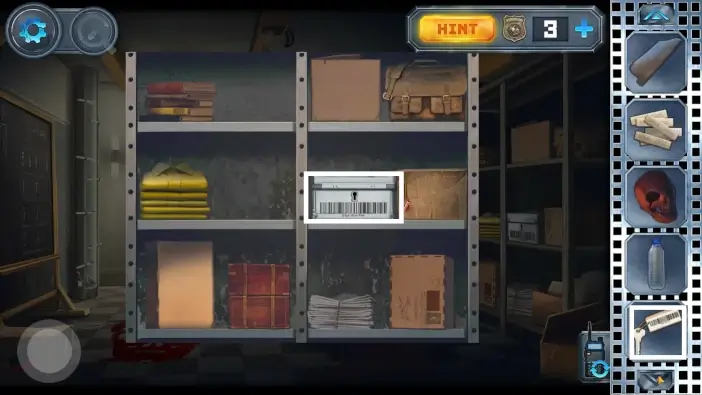
While still in the office, approach the boxes on the shelves.
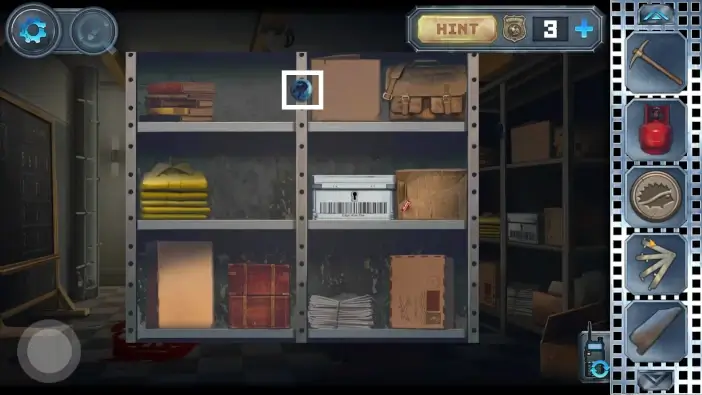
Pick the magnet with a raven on it. You will need it in the prison hallway.
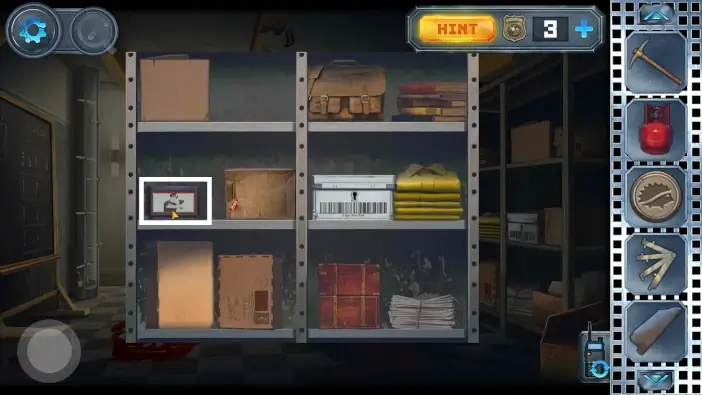
Move the boxes until you can fully see the cartridge. Pick the cartridge named “Cops and Thieves”.
- Return to the prison hallway. Place the magnet with a raven on it on the blackboard. You will later solve this puzzle.
- Go to the door to the hospital room. Place the artsy button. You need a clue to unlock the door.
- Use the special key on the reception office door.
To unlock the reception office, move the keys until you get the correct shape. You need 3 different shapes to get and place inside the locks to unlock the door.

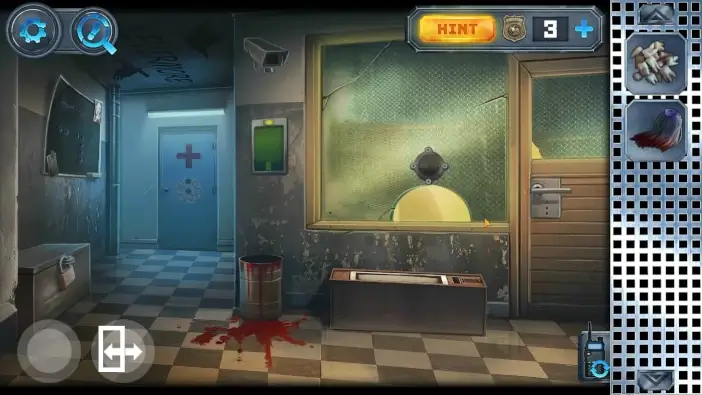
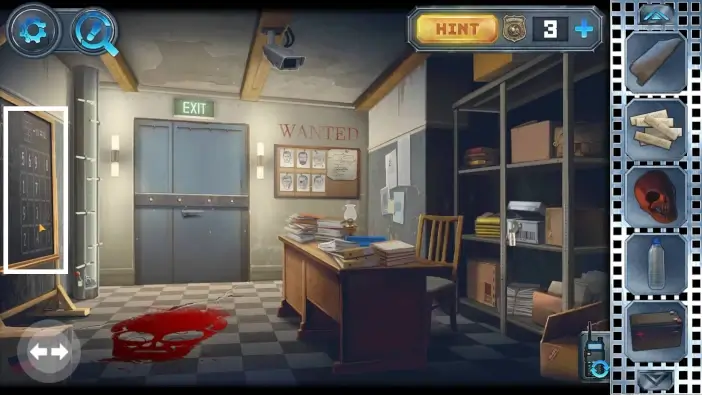
Once you unlock the door, enter the reception office.
- In the reception office, pick the set of numbers from the table. You will need it as a clue in the office.
- Pick the mask. You will need it at the very end of the Chapter 1.
Exit the reception and in the hallway use the pickaxe to break the lock on the chest.
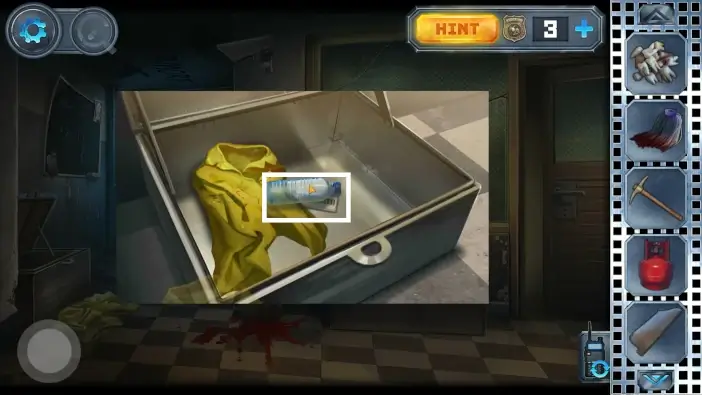
Remove the yellow uniforms and pick up the water bottle and the keys.
Return to the office and approach the boxes. Use the key you just picked up from the chest and unlock the white box.
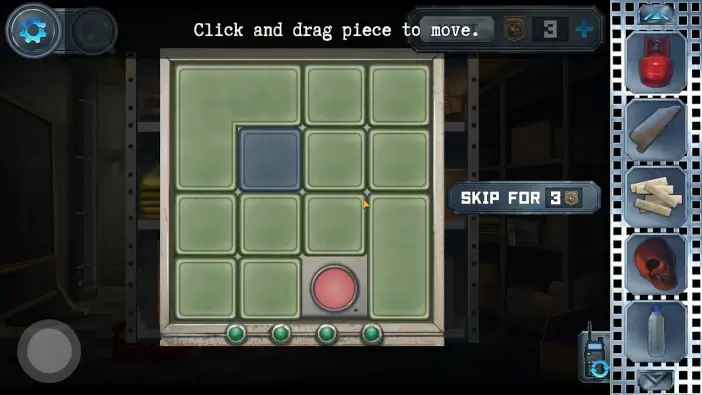
To get the items from the box, you need to find and press 4 different red buttons. There are 3 layers in the puzzle. The green tiles are on the first layer. The grey tiles are below the green tiles, and below the grey tiles are empty spaces. The red buttons are in the 3rd layer. Move the green and grey tiles, find the buttons, and press them.
When you finish the puzzle, pick the battery from the box. You will need it in the prison hallway.
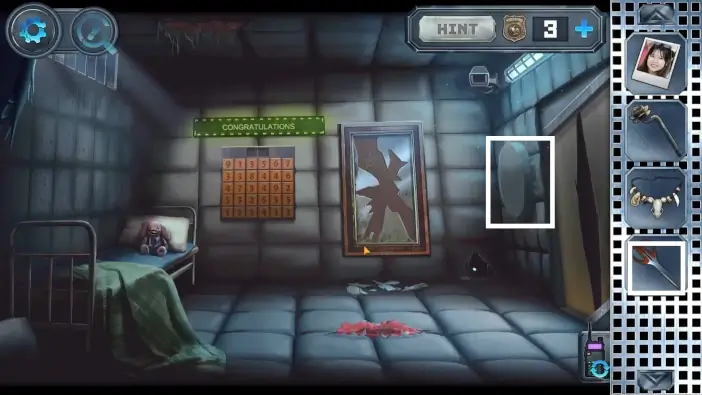
In the office approach the blackboard.

Use the water bottle you got from the chest on the sponge.
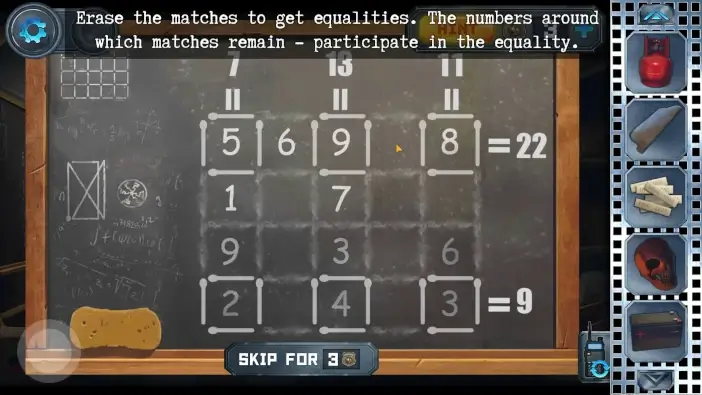
Use the sponge to erase the lines around numbers. Look at the solution above. In a single row, numbers that are surrounded by lines on all four sides are calculated in the sum. Erase all the lines except the lines that are around those crucial numbers, to get the desired sums on the right side. 5 + 9 + 8 = 22 and 2 + 4 + 3 = 9. These numbers will be a clue later.
Also, pay attention to the drawing on the left.
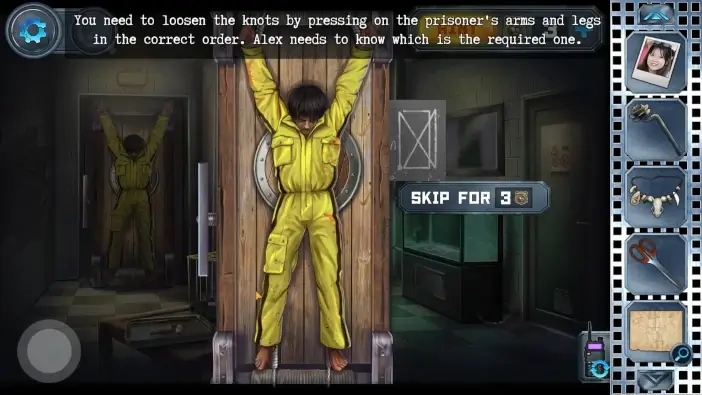
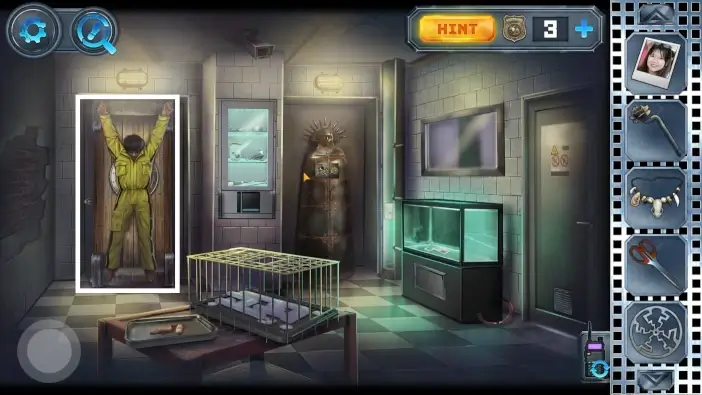
Switch to Anna and approach the prisoner. Remember the drawing on the blackboard. This is an instruction on where to touch the prisoner to free him and in which order. The order is: his right leg, his right arm, his left leg, his left arm, his right leg, his left leg, his left arm, and his right arm.
You will release the prisoner. He will hide one item, but you can’t do much now.
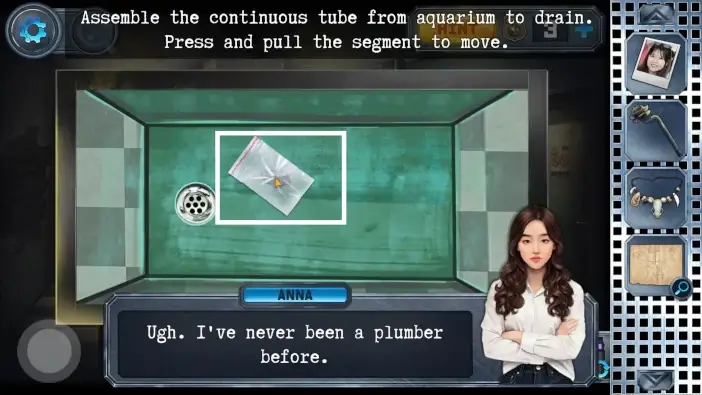
Approach the lid on the aquarium and use the scissors to remove it.
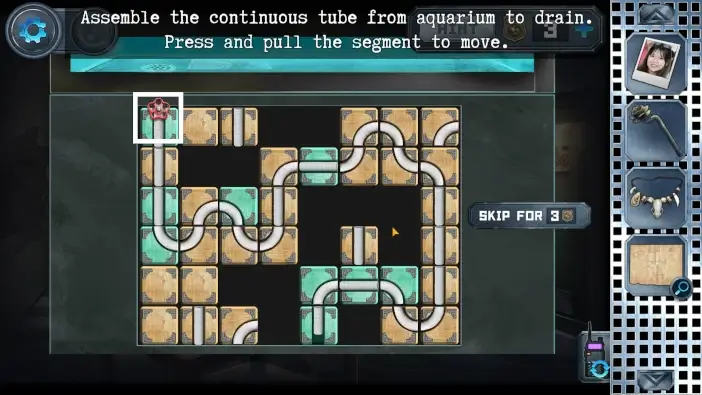
Behind the lid is the puzzle challenge. Move the tiles until you have the continuous tube from the aquarium to the drain. Once you do, rotate the valve in the upper left corner. Once you solve this puzzle, you will remove the water from the aquarium.
Pick the bread from the empty aquarium.
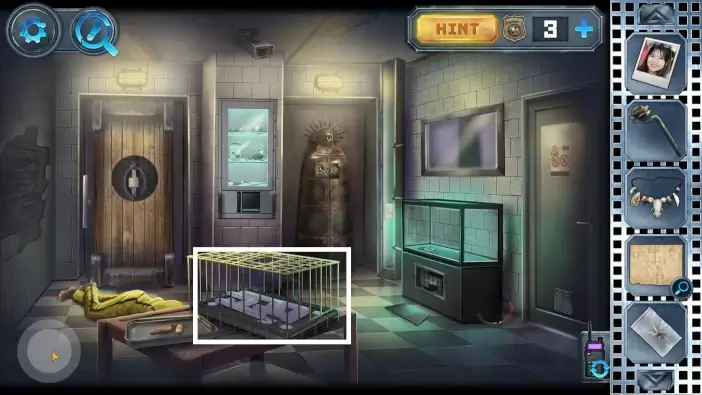
Approach the small cage on the table.
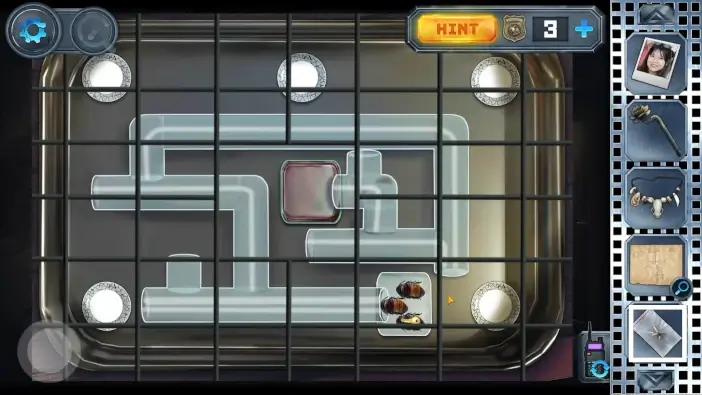
Use the bread on one of the plates to start the puzzle challenge.
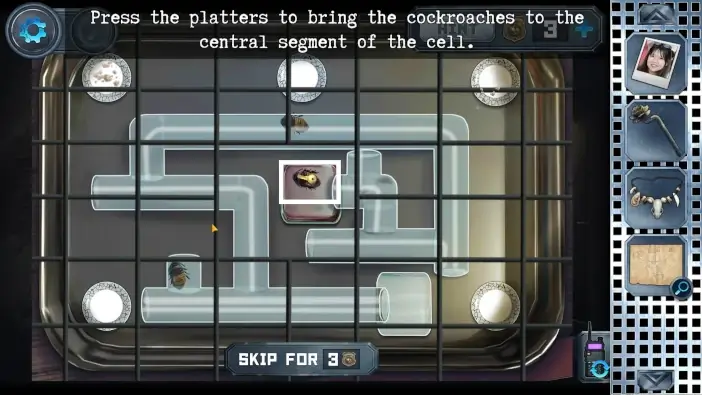
One of the bugs has a key to the torture chamber exit door. Lure that bug into the middle rectangular area by placing bread on various plates. Once you place the bread inside one plate, all bugs will rush in that direction. Once you place bread on the other plate, bugs will immediately change their direction. Once you lured the desired bug into the rectangular area, pick the key from its back.
Use the key to unlock and exit the torture chamber.
This will mark the end of part 1 of our guide for Chapter 1. Feel free to check the next part!
Thank you for reading!