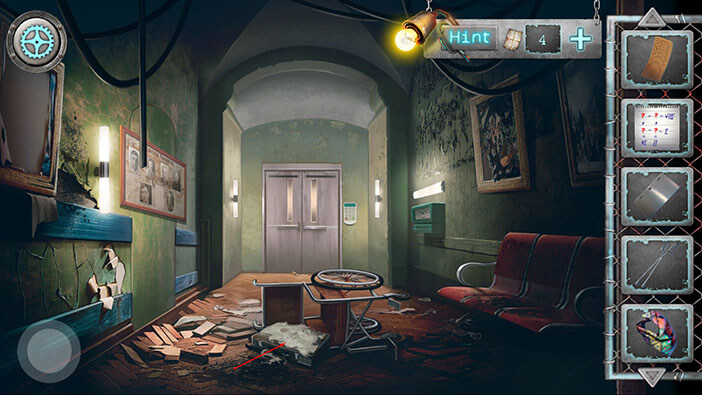
Scary Horror 2 – Chapter 1, Part 1
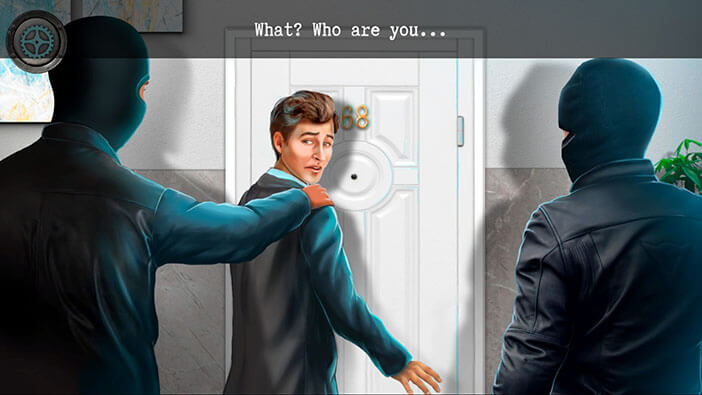
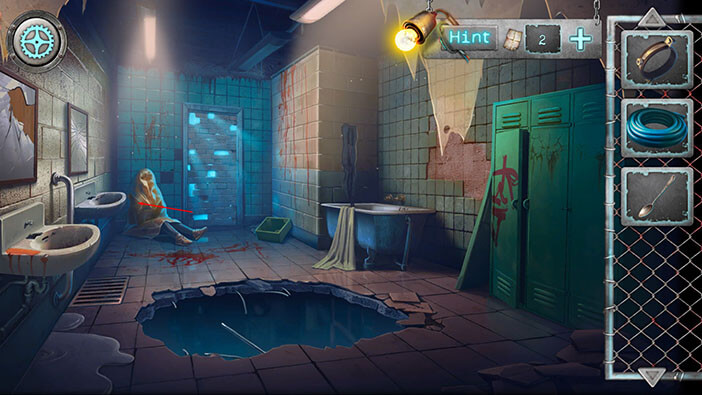
Hello everyone and welcome to Part I of our walkthrough for Chapter 1 of the “Scary Horror 2: Escape Games”. At the start of the game, our character was kidnapped by two masked men. They grabbed him from behind, pulled the black hood over his head, and threw him into the back of the van.
NOTE: The first part of the walkthrough follows the story up to the point when you arrange the photos and open the secret door (inside the room that was on fire).

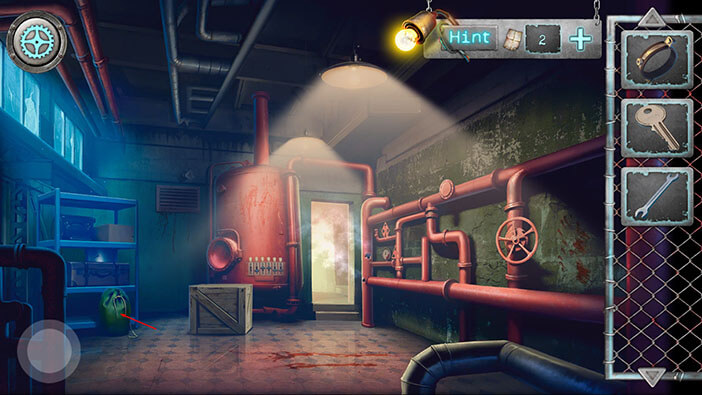
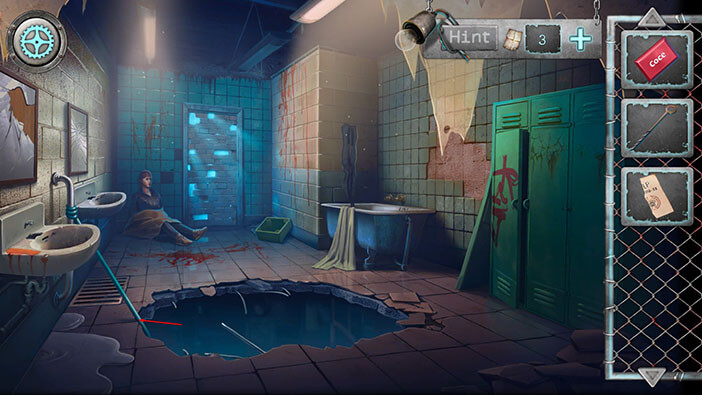
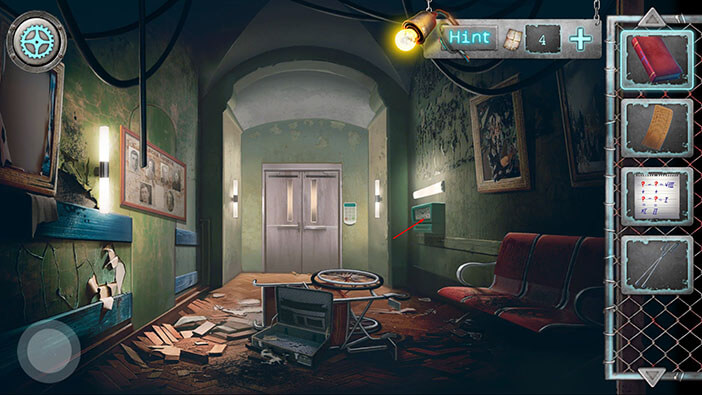
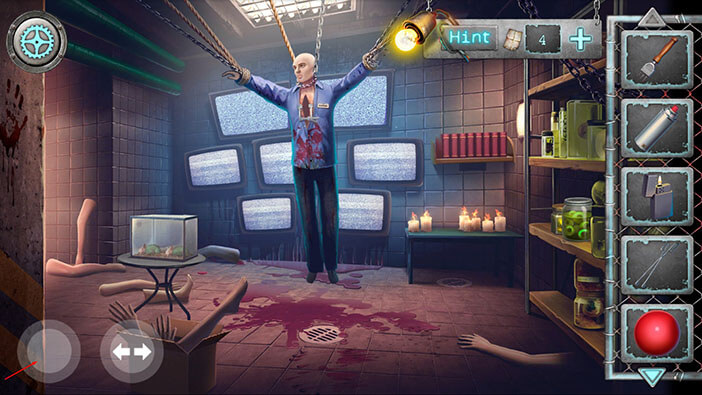
After some time, the kidnappers drugged our character and put him to sleep. When he woke up, he was in a scary room, which is very similar to the rooms in the “Saw” movie series. Well, all in all, the beginning is very similar to the first game, and we will probably encounter familiar puzzle design, during this adventure.
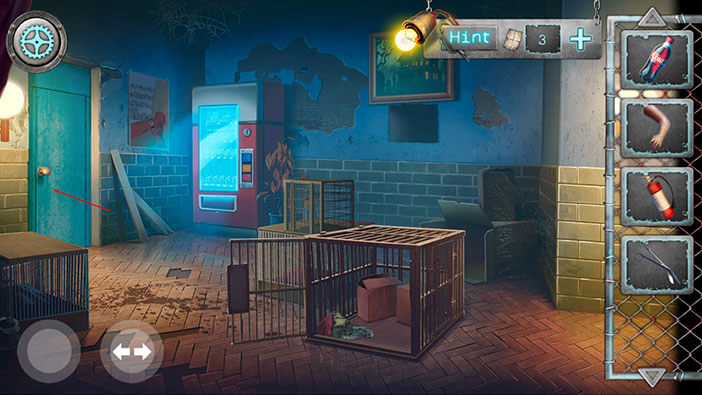
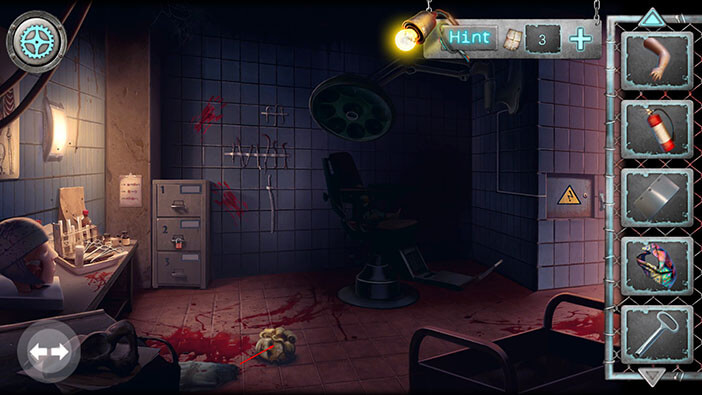
Ok, first, tap on the “Metal nippers” to pick them up, because this item will probably come in handy further down the road.
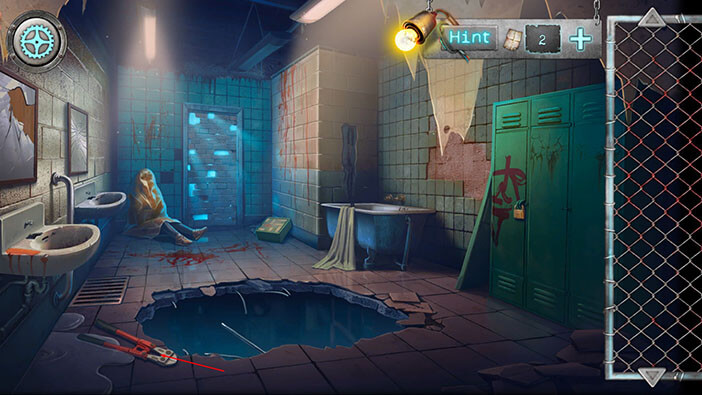
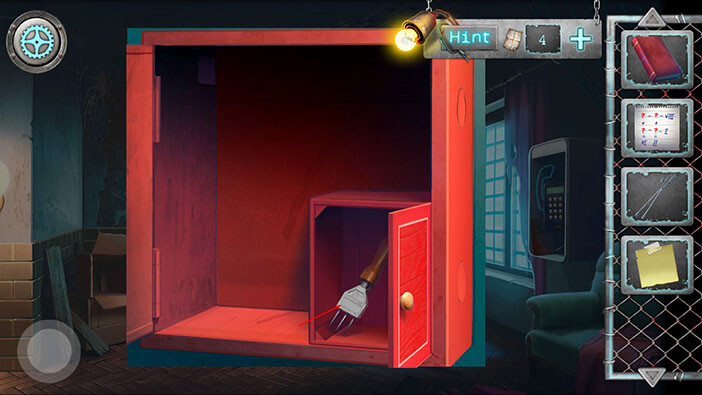
Next, let’s tap on the box on the right to take a closer look at it.
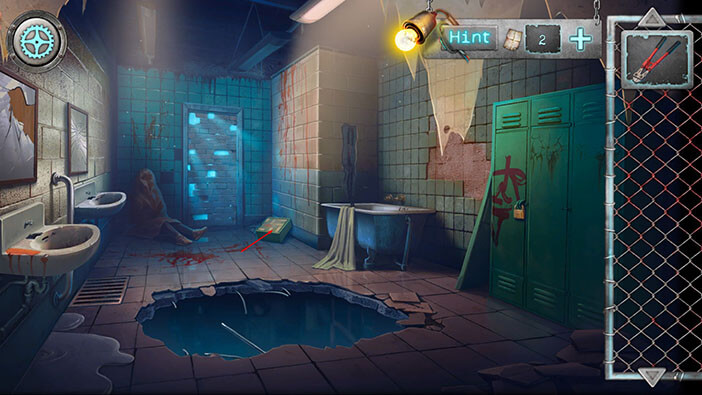
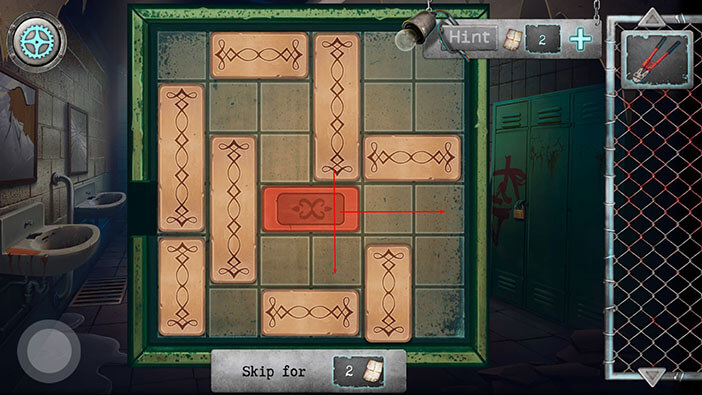
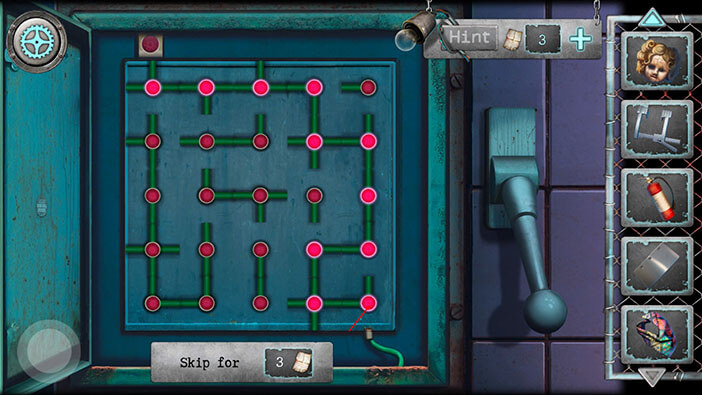
Here, we found the first puzzle. The goal is to get the red piece out of the box, through the hall on the left. To do that, we will first have to shuffle the other pieces and clear the way for the red piece. We will do this puzzle in several steps. Let’s begin.
Step 1
Move the horizontal piece, located in the lower right corner of the grid, two fields to the left. After that, move the vertical piece, also located in the lower-left corner of the grid, one field down.
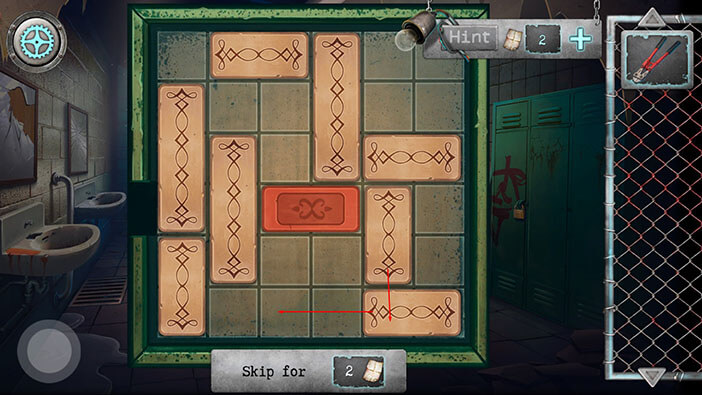
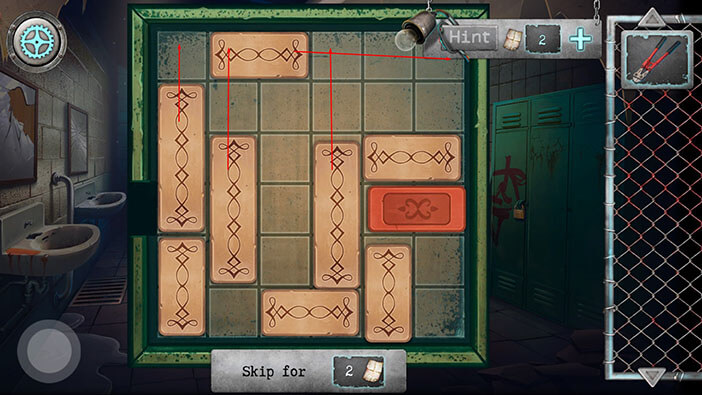
Step 2
Move the red piece all the way to the right. After that, move the large vertical piece, located in the middle of the grid, two fields down.
Step 3
Move the horizontal piece (top left corner of the grid) all the way to the right. After that, move all vertical pieces all the way to the top of the grid.
Step 4
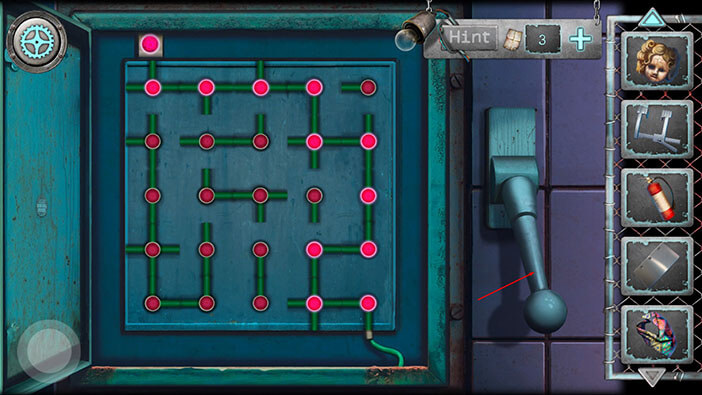
Well, with that, we have cleared the way for the red piece, so move it all the way to the exit on the left, and you will solve this puzzle.
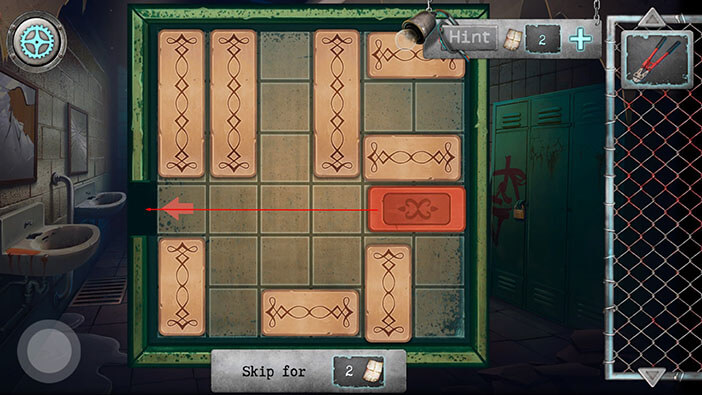
After completing the puzzle, we managed to unlock the box. Tap on the item inside the box to pick it up and “Pipe clamp” will be added to your inventory.
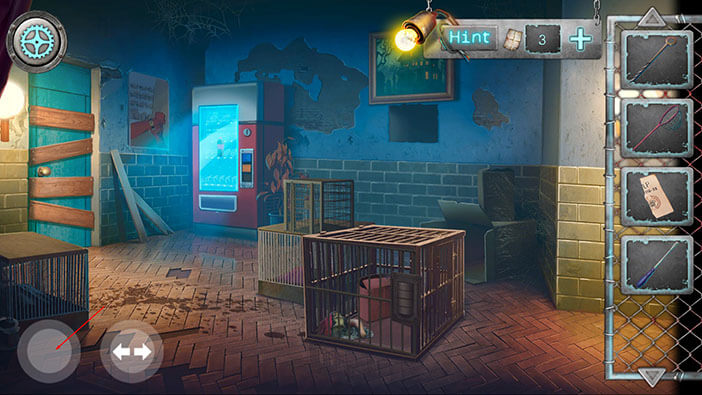
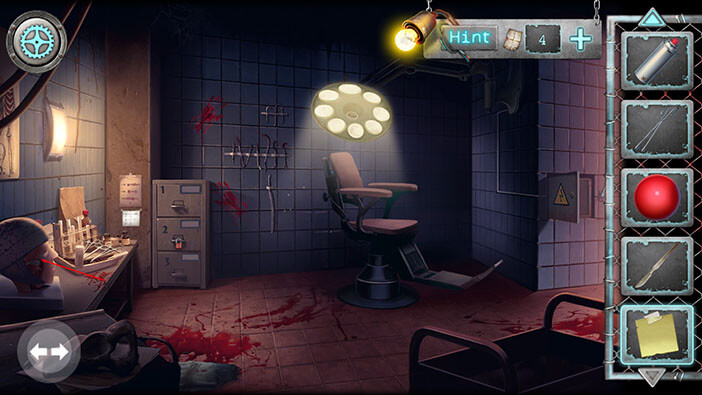
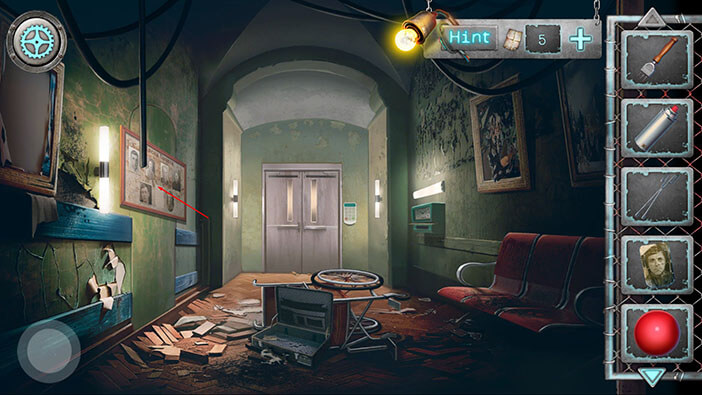
Let’s take a closer look at the locker on our right.
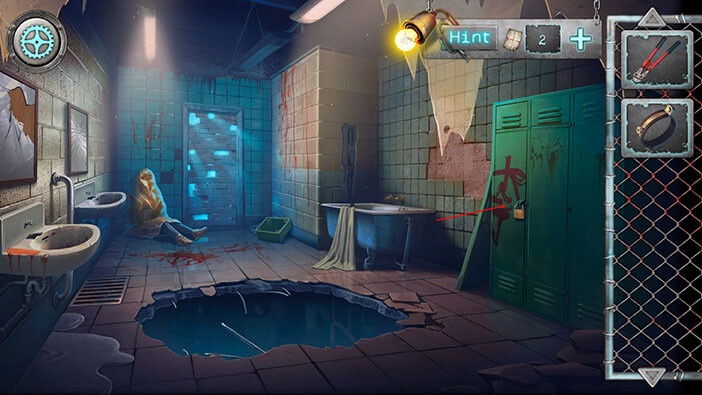
Select the “Metal nippers” from the inventory, then tap on the padlock to cut it, and open the locker.

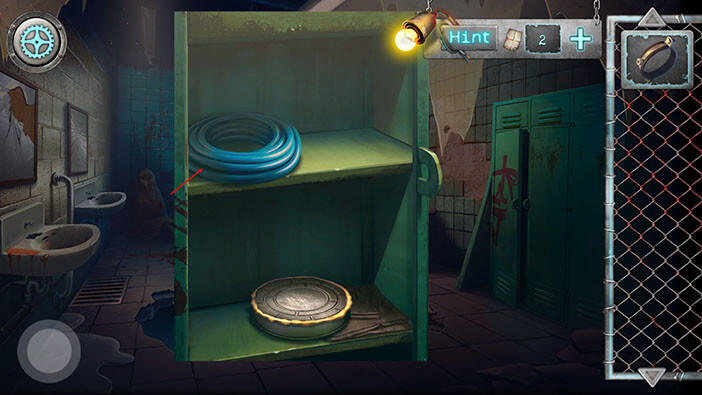
Tap on the “Hose” inside the locker to pick it up. Our character wants to use the hose to climb down to the room below. But, before we do that, let’s see what else we can find in this room.
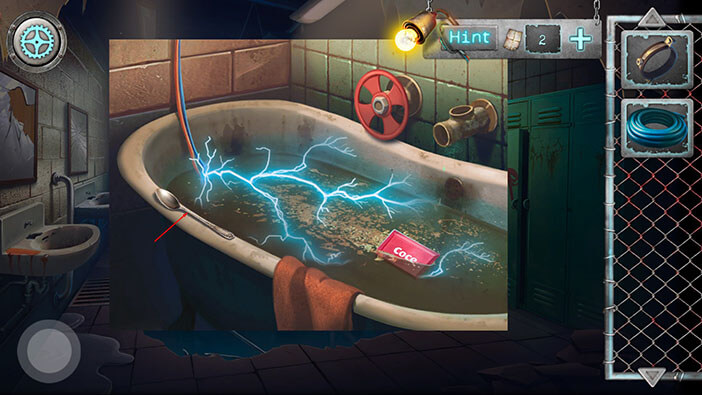
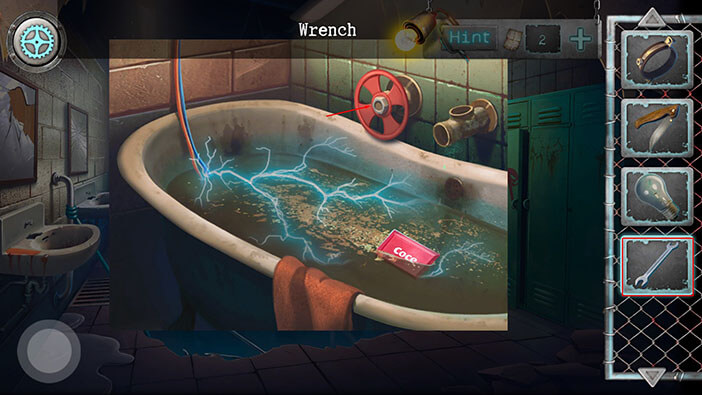
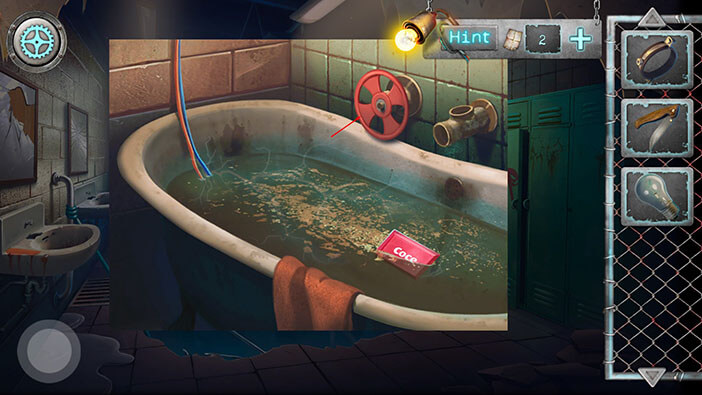
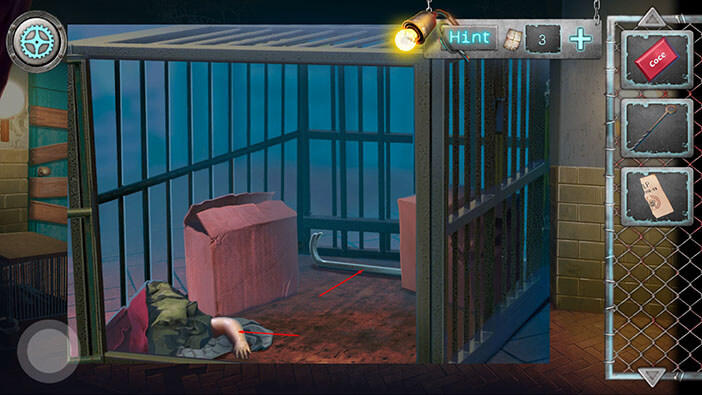
Tap on the bathtub on your right to take a closer look at it.
Well, we should stay away from the water, or else our character will get electrocuted. But, we can tap on the “Spoon” to pick it up.
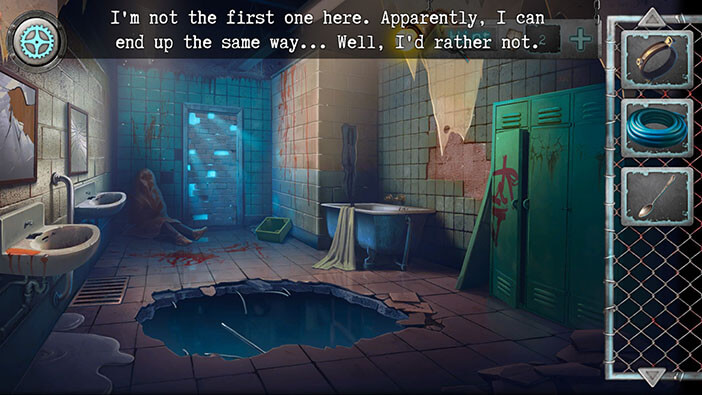
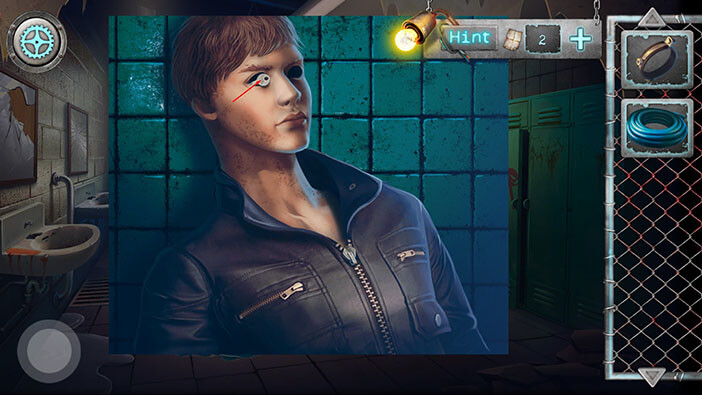
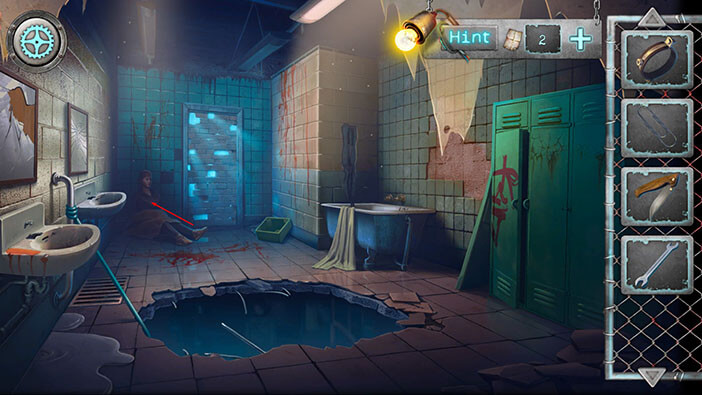
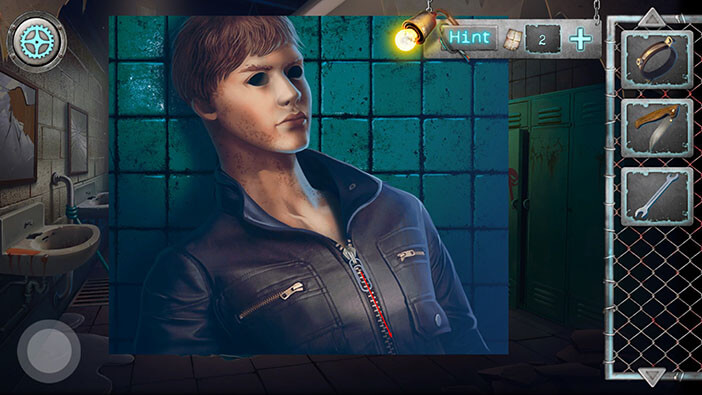
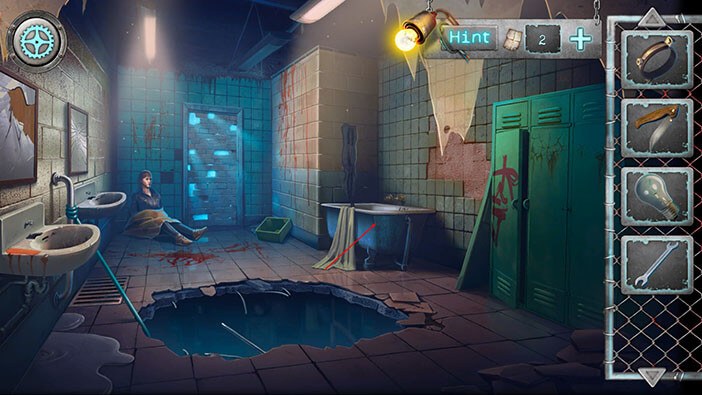
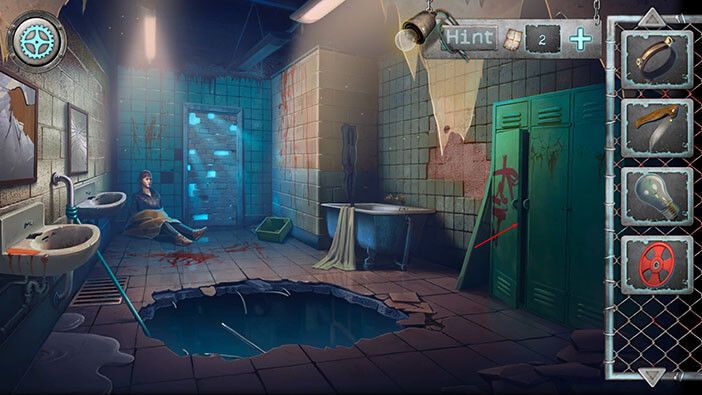
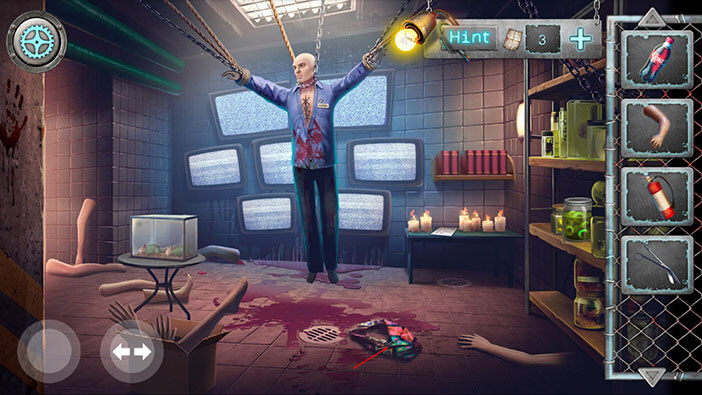
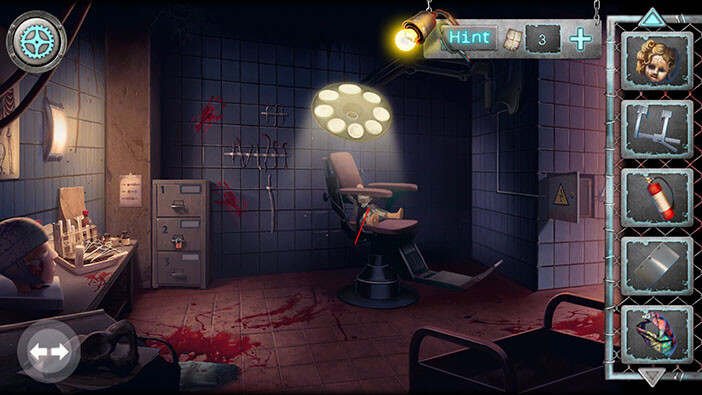
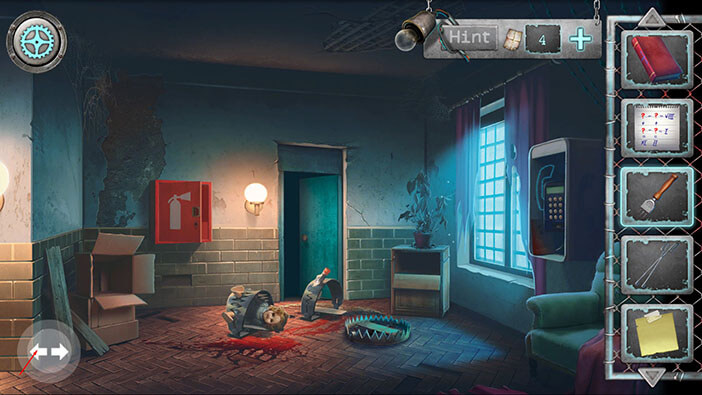
Let’s examine the body in the corner of the room. Our character will comment that the person inside the body bag probably ended up in this place the same way as he did. However, our character is determined to find a way to escape.
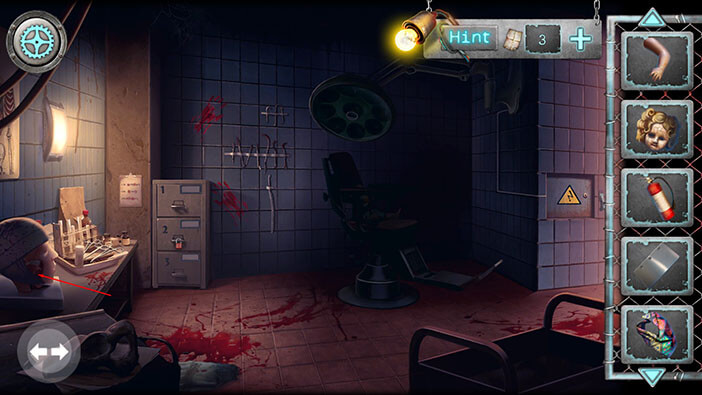
Tap on the body bag to move it away.
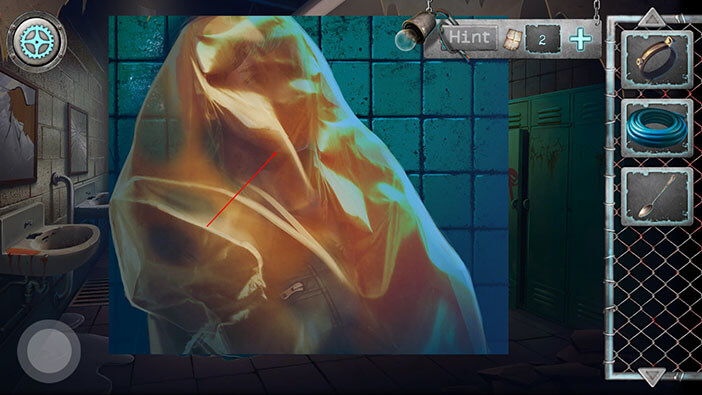
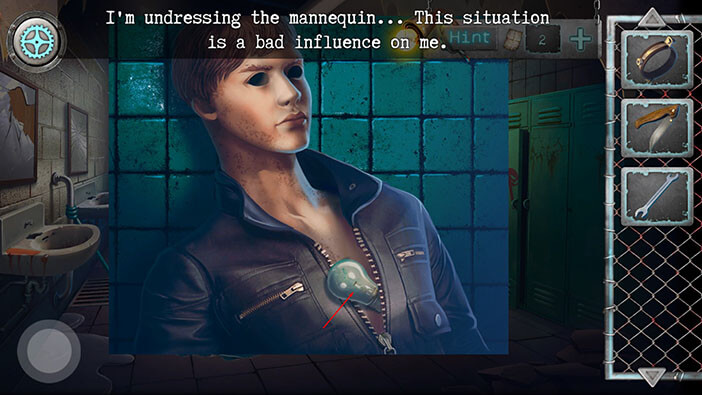
Uh, luckily, our character was wrong, and the body bag was covering a mannequin, not a real person. We can see that mannequin is missing the left eye. So, select the “Spoon” from the inventory and tap on the right eye. Our character will use the spoon to remove the eye from the eye socket.
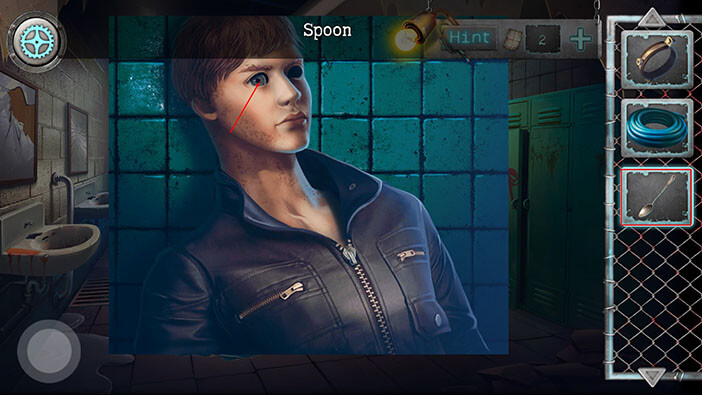
After we removed the eye from the eye socket, we discovered a key. Tap on it to pick it up and a “Lunchbox Key” will be added to your inventory.
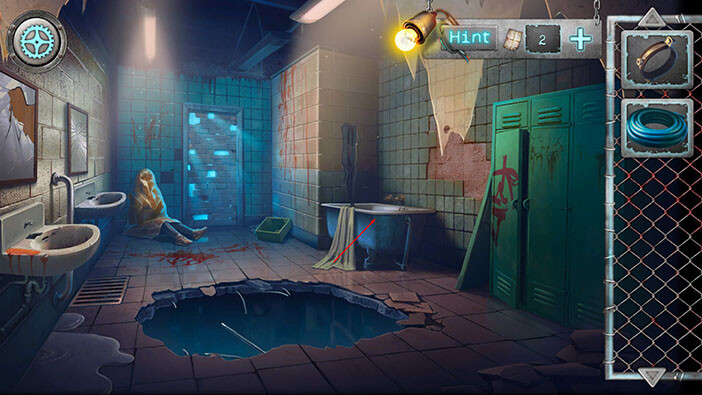
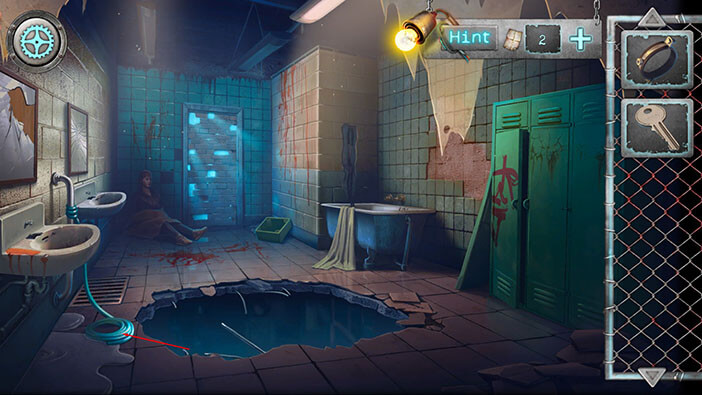
Well, I think that’s it for this room, at least for now. Let’s go down to the room below. Select the “Hose” from the inventory and tap on the metal pipe, located on the left, between the two sinks.
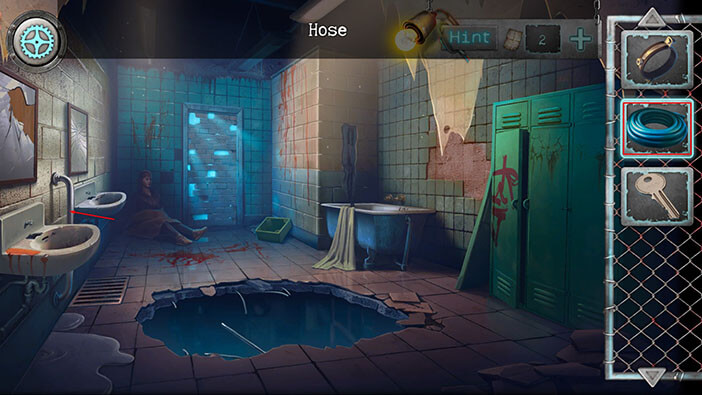
Our character will tie a hose to the pipe. Tap twice on the hose to drop it through the hole, and to climb down into the next room.
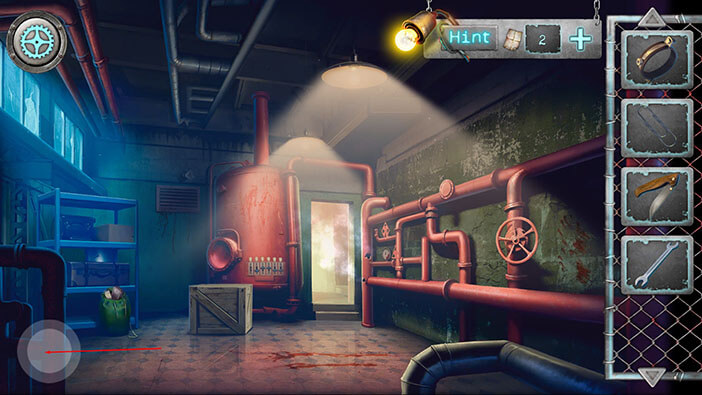
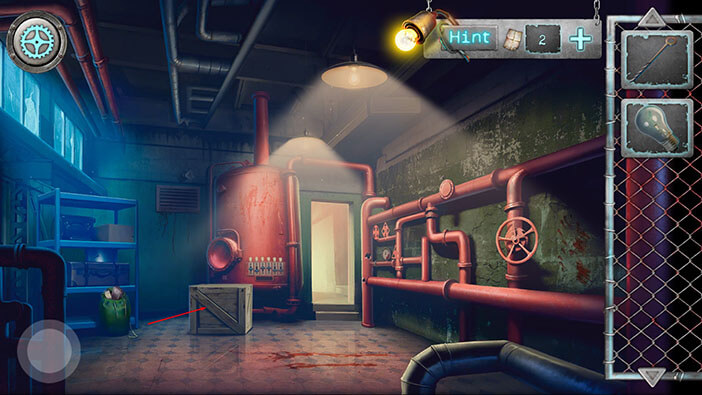
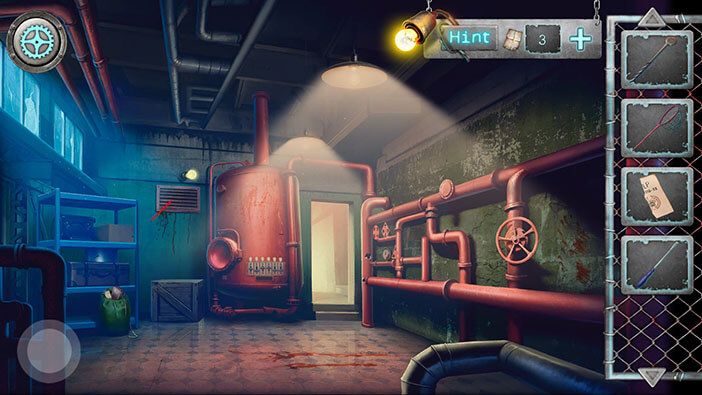
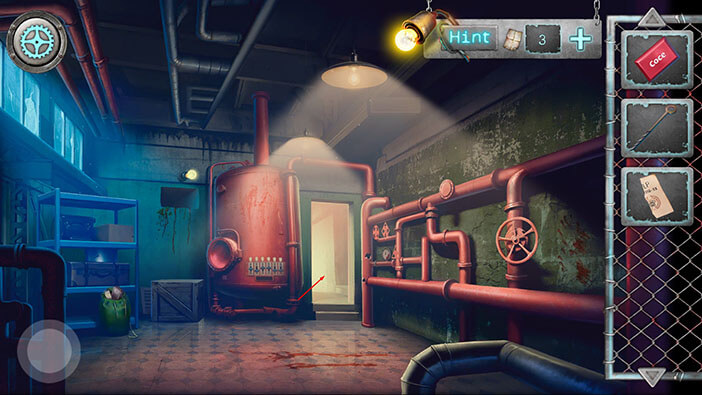
We are now inside the boiler room. Tap on the “Wrench” on your left to pick it up. As soon as you do that, the pipes on your right will explode. So, tap on the “Wrench” again.
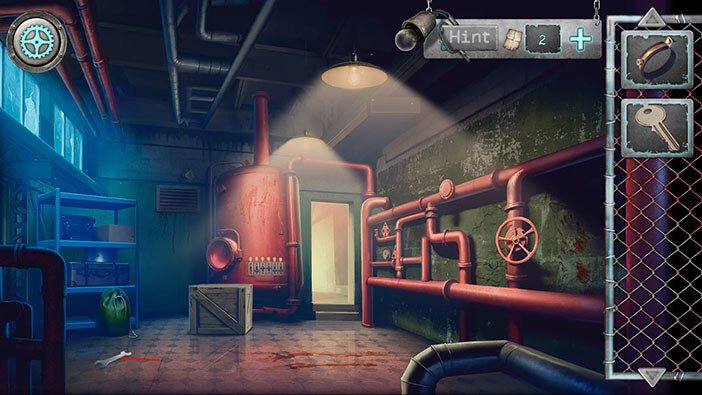
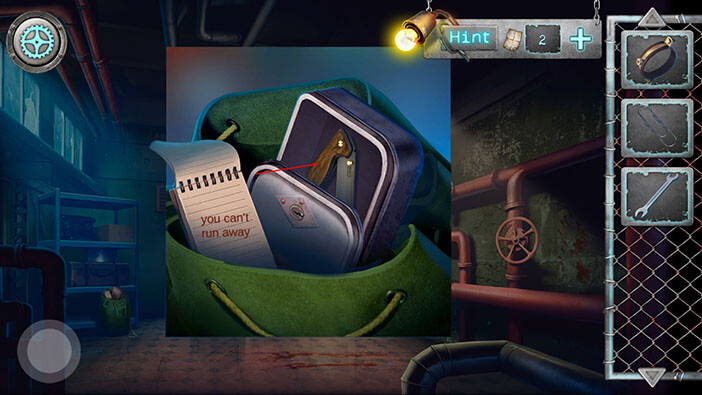
Let’s examine the green bag on our left. Tap on the bag to open it.
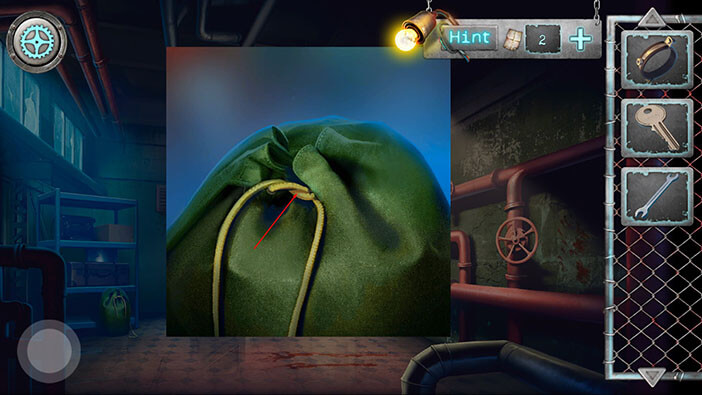
If you turn the pages you will discover a note “you can’t run away” and a paper clip. Tap on the “Paper Clip” t pick it up.
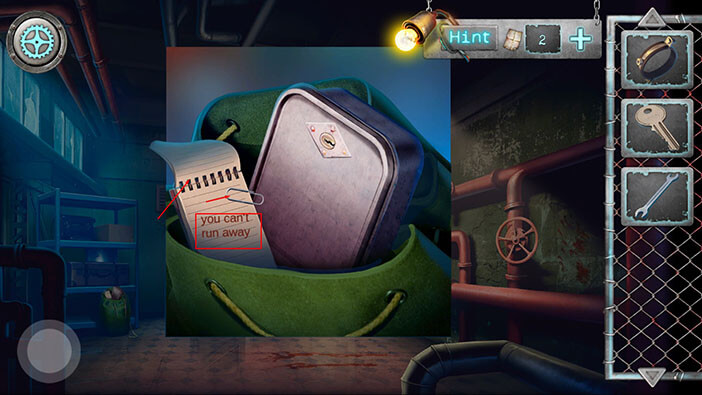
We can also see a locked lunchbox in the bag. So, select the “Lunchbox Key” from the inventory and tap on the lunchbox to unlock and open it.
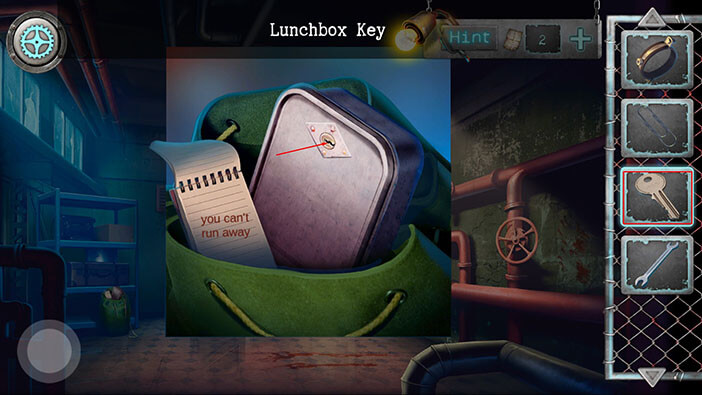
Tap on the knife inside the box to pick it up and “Jackknife” will be added to your inventory.
We should now use the hose to climb back to the previous room. To do that, tap on the button in the lower-left corner of the screen.
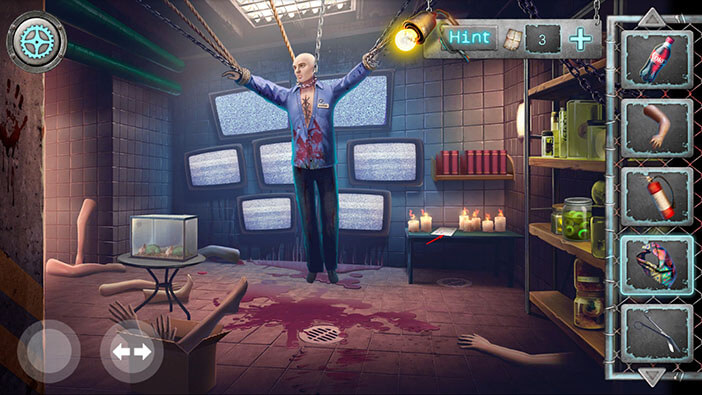
Let’s take another look at the mannequin.
Select the “Paper Clip” from the inventory and then tap on the zipper (our character will attach the paper clip to the zipper). After that, drag down the paper clip to unzip the jacket.
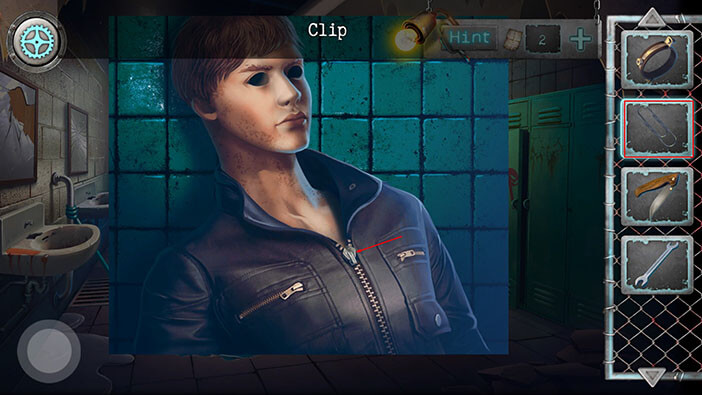
Inside the jacket, you will find a “Light bulb”. Tap on it to pick it up.
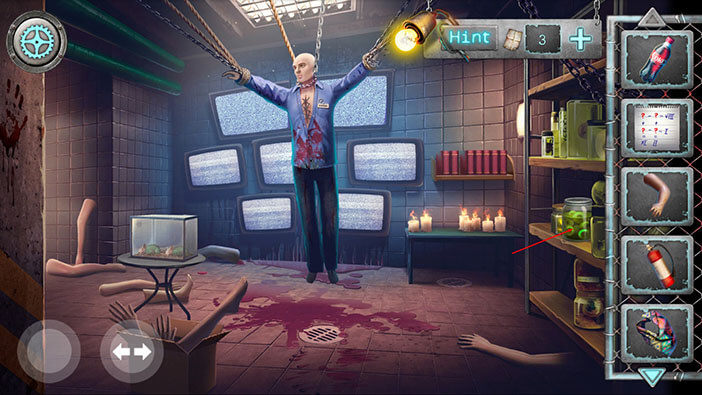
Tap on the bathtub to take a closer look at it.
Select the “Wrench” from the inventory and tap on the valve. Our character will use the wrench to remove the screw that is holding the valve in place. After that, tap on the “Valve” to pick it up.
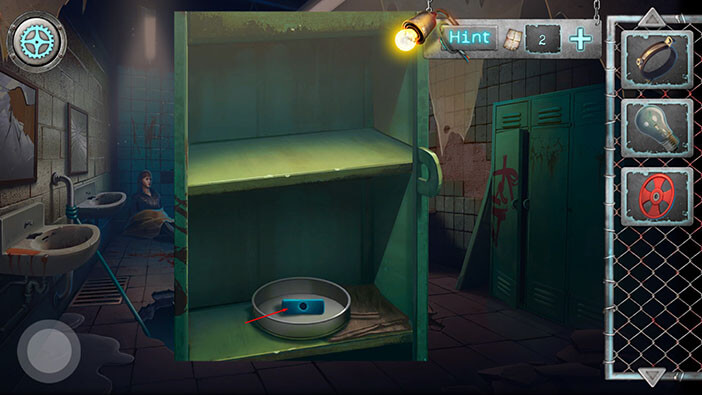
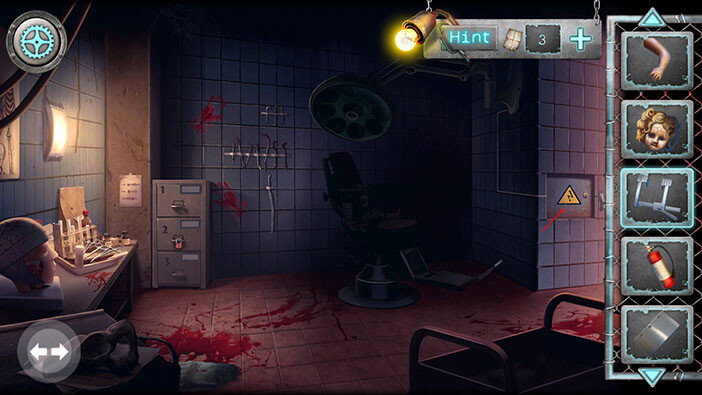
Let’s take another look at the locker on our right (which we unlocked by cutting the padlock).
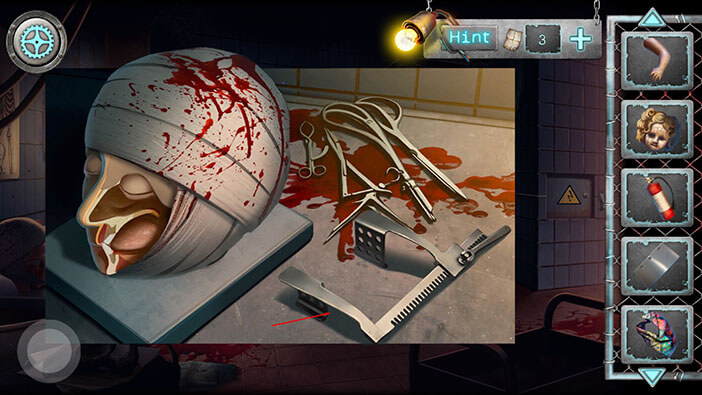
Select the “Jackknife” from the inventory and tap on the object on the bottom shelf.

Our character will use the knife to remove the lid. Tap on the object inside to pick it up and a “Boiler lever” will be added to your inventory.
Let’s go back to the boiler room. Tap on the hose to climb down.
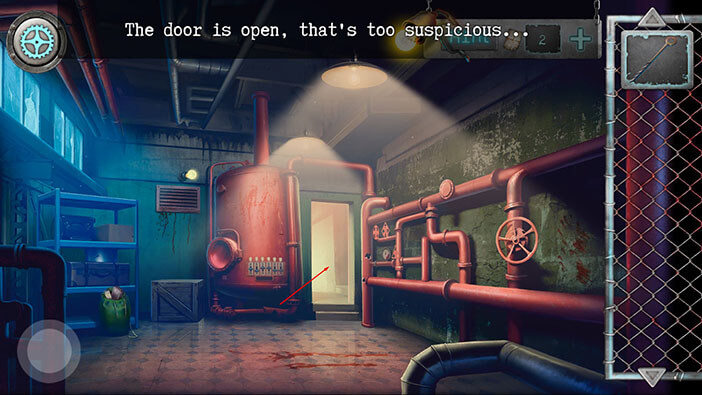
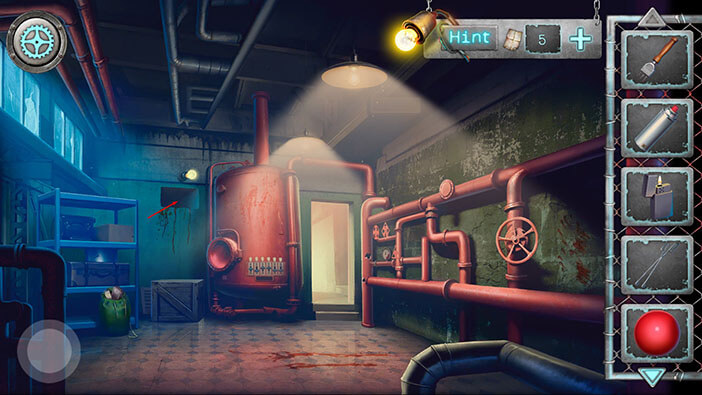
Tap on the large boiler to take a closer look at it.

We can see that the lever on the left is missing. So, select the “Boiler lever” from the inventory and tap on the empty slot to attach it.
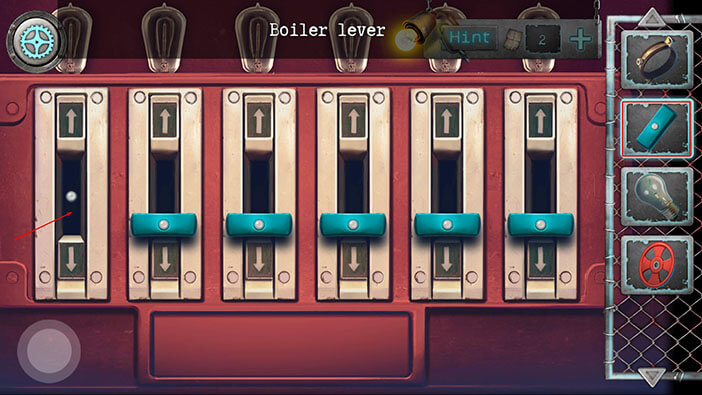
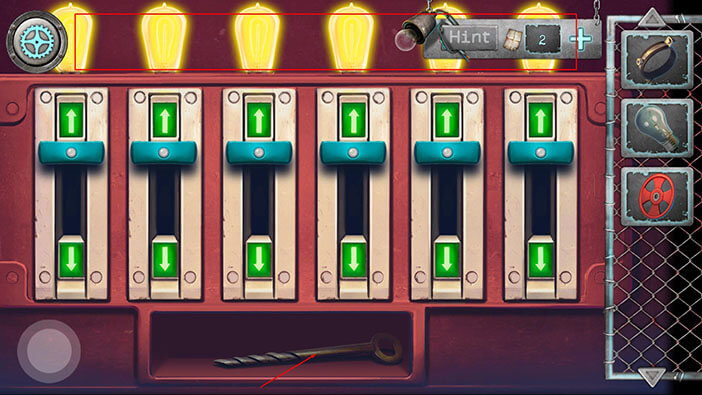
Well, we can now see green lights, which indicates that the mechanism is active. Now, we have to solve another puzzle. Here, we need to push the levers in the correct order. When we push the correct lever, the light bulb will start to glow. If we push up the wrong lever, all light bulbs will go dark, and we will reset the mechanism. So, looking from left to right here is the order in which you should push the levers,
Tap on the first lever (left to right)
Tap on the third lever
Tap on the sixth lever
Tap on the second lever
Tap on the fifth lever
Finally, tap on the fourth lever
So, 1st, 3rd, 6th, 2nd, 5th, 4th.
As soon as you push all the levers, the secret compartment will open. Tap on the item inside the compartment to pick it up and a “Fire box key” will be added to your inventory.
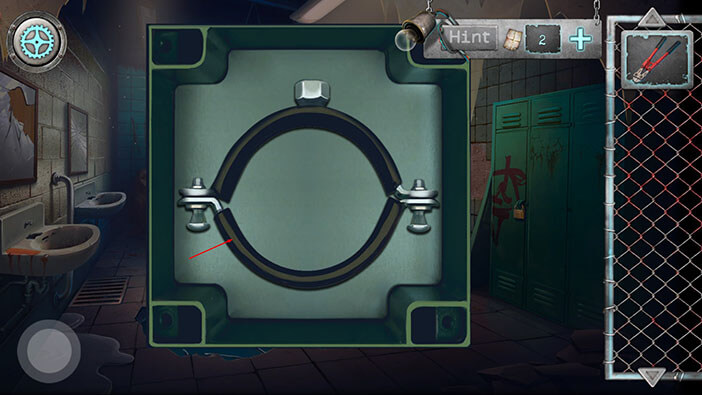
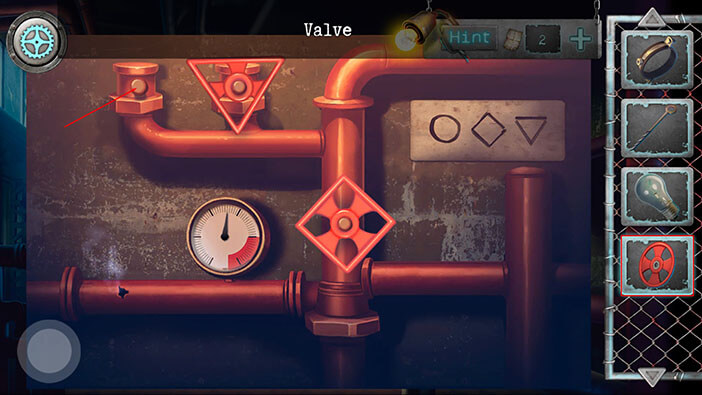
Let’s take a look at the pipes on the wall on our right.
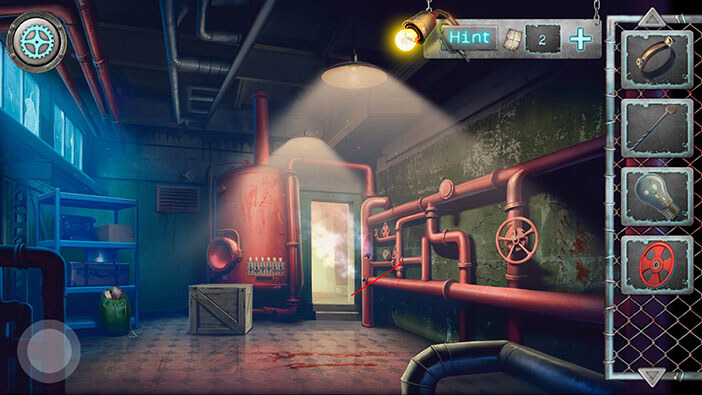
We can see that one of the pipes is leaking, and we can also see that the pressure in the pipes is at a very dangerous level. We can relieve the pressure by turning the three valves shaped like triangle, square, and circle (which is in our inventory). The correct position of the valves is shown in the picture on the right. Let’s begin.
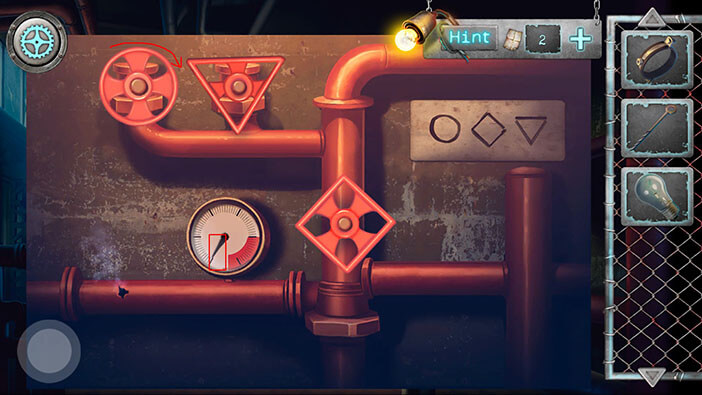
First, we will rotate the valve shaped like a triangle. If we take a look at the picture on our right, we can see that two larger sides of the triangle should be pointed down. So, let’s rotate the valve.
After turning the triangular valve, you will notice that we managed to decrease the pressure, so this valve is in the correct position.
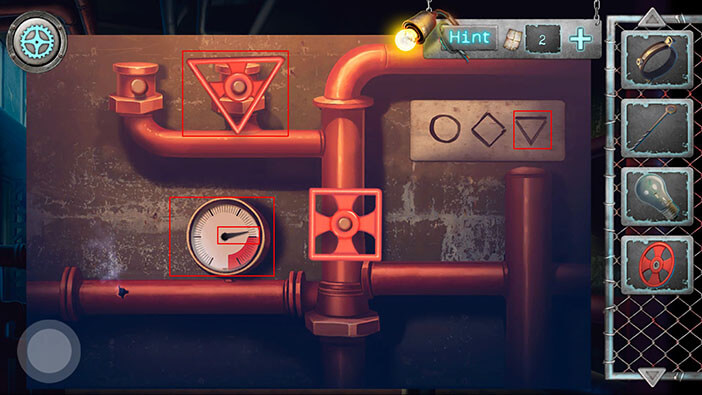
Next, we will turn the square valve, to the same position as the one on the instructions on the right. Just rotate the square valve ~45 degrees, and the pressure will drop.
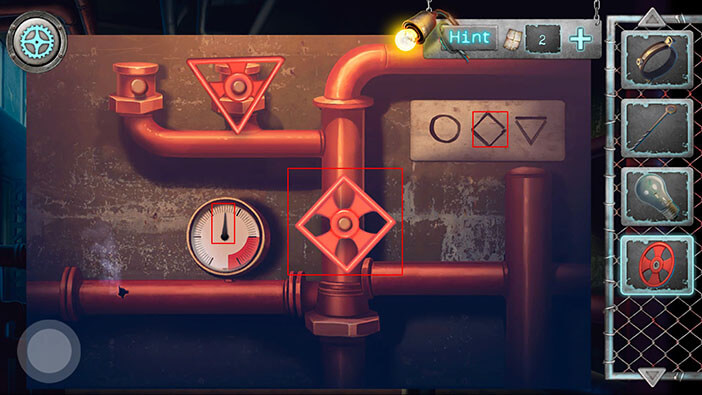
Next, select the “Valve” from the inventory and tap on the empty slot on the left to attach it.
After we attached the last valve, we should slowly rotate it clockwise, until the pressure drops to the minimum value.
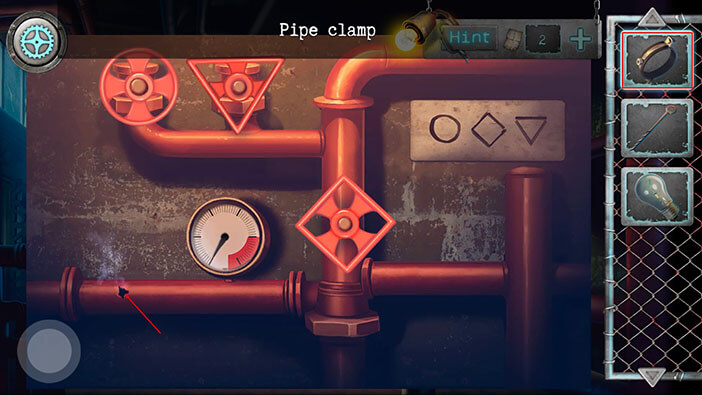
Well, since we reduced the pressure, we can now repair the pipe. To do that, select the “Pipe clamp” from the inventory, and tap on the hole in the pipe to stop the leaking.
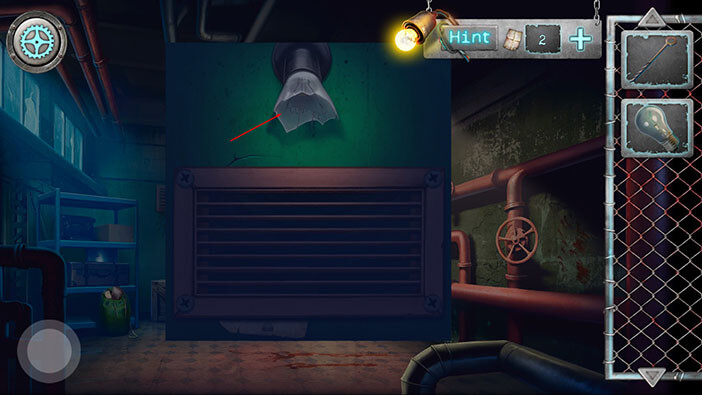
After we stopped the gas leak, we can now go through the door into the next room. But, before we do that, let’s take a look at the vent, located to the left of the large boiler. The first time you tap on the vent, your character will say that he can’t use it to escape from the building because the vent is too small for him.
Besides being too small, the vent is also too high, and he can’t reach it. So, tap on the to push it below the vent.
Our character can now reach the vent, so let’s take a closer look at it.
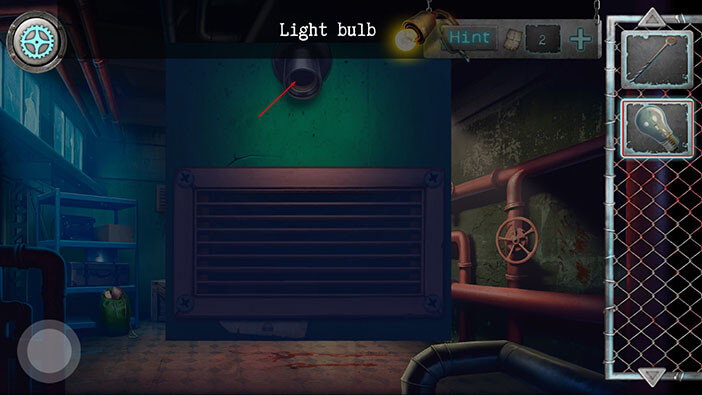
The light bulb above the vent is broken. Tap on it to remove it. After that, select the “Light bulb” from the inventory and tap on the empty socket to replace the broken light bulb.
Well, we will have to remove the screws to access the vent. Since we don’t have the screwdriver, let’s go to the next room.
Our character will be a bit suspicious, but after you tap the second time, he will decide to go through the door.
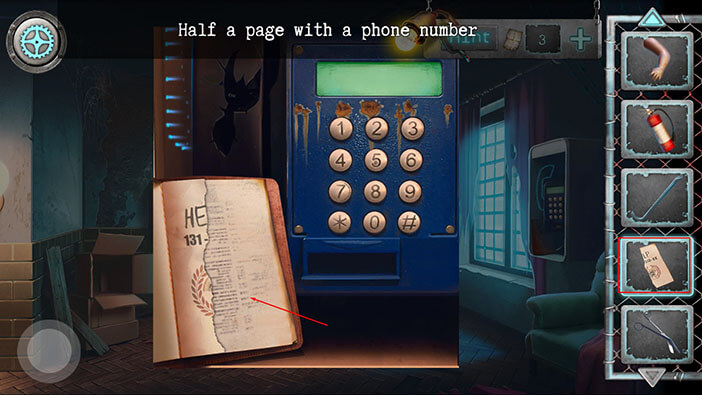
Tap on the note on the left to pick it up, and “Half a page with the phone number” will be added to your inventory.
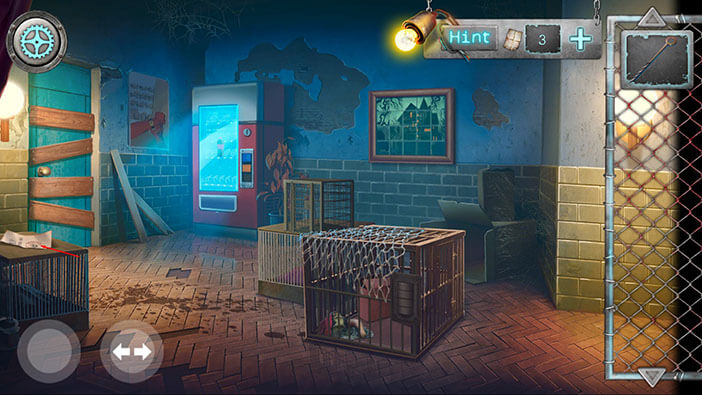
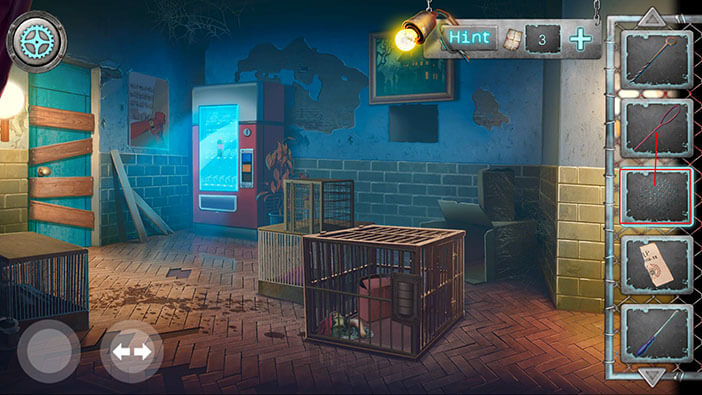
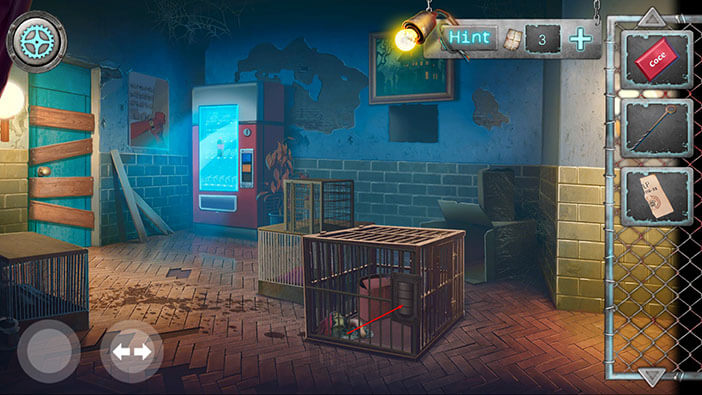
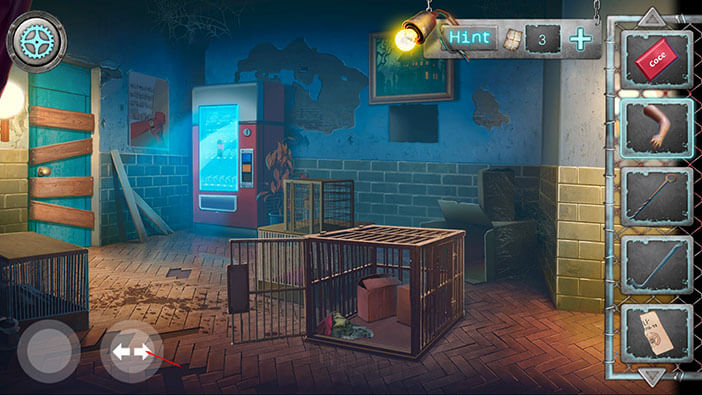
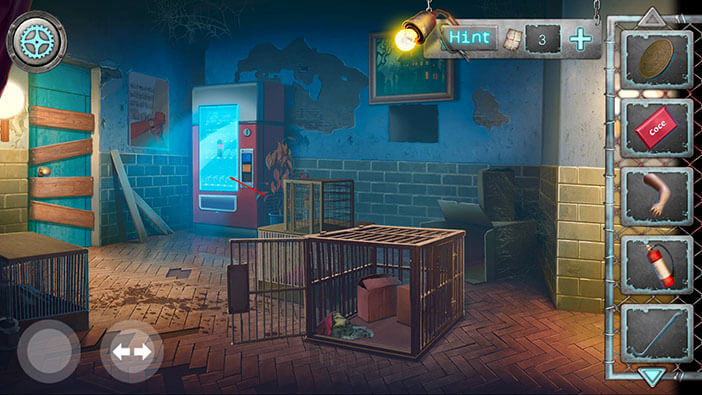
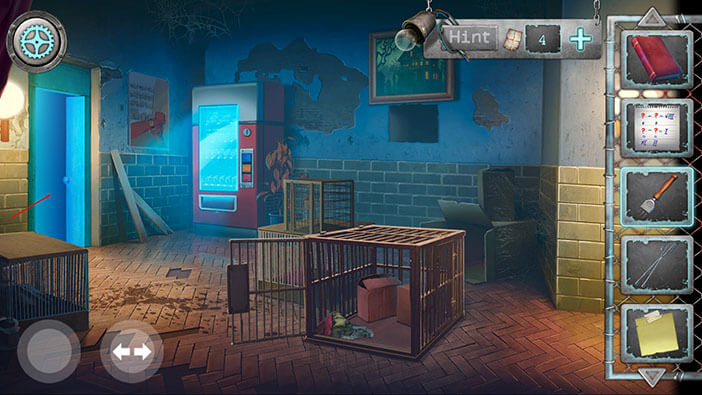
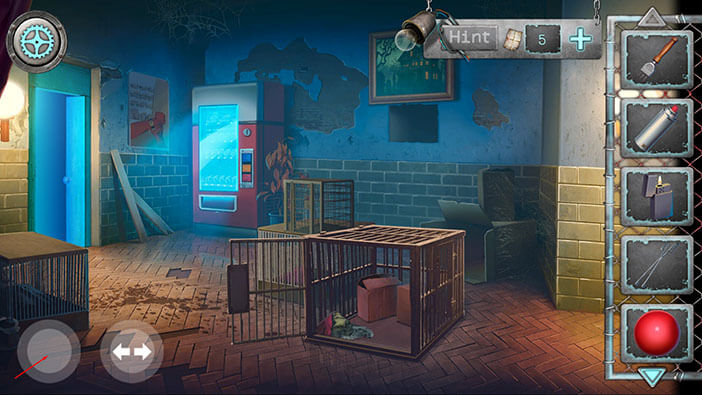
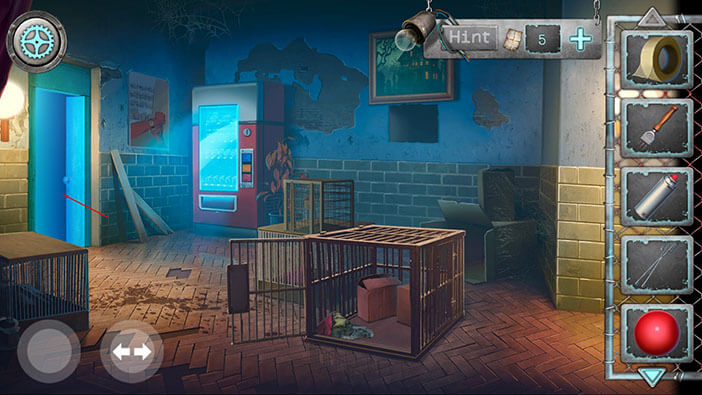
Let’s take a closer look at the cage.
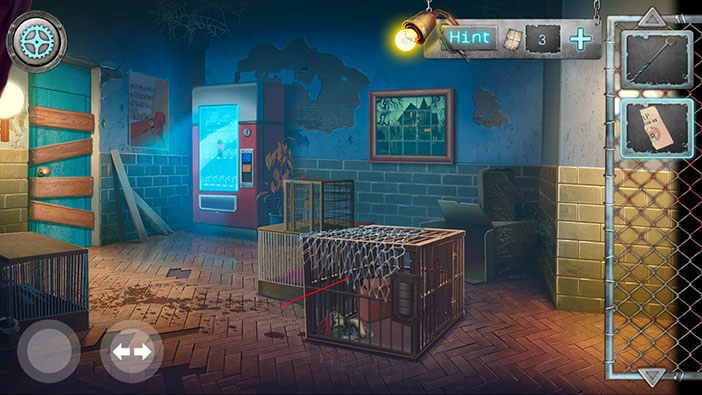
The cage is locked, and we don’t know the combination for the lock (we will get back to it later). So, let’s just tap on the net to pick it up. “Net for butterfly net” will be added to your inventory. Hmm, very weird name for a net…
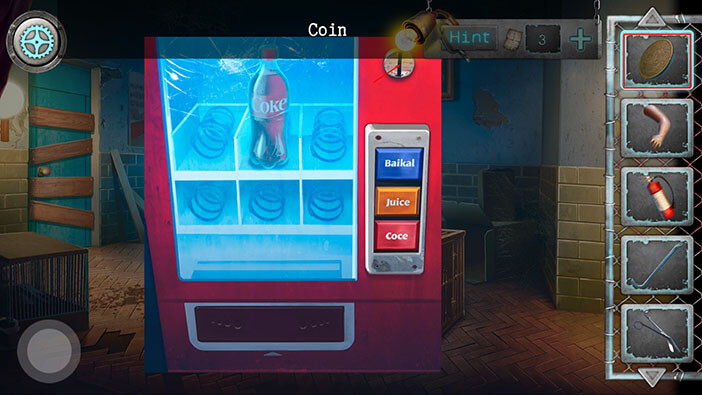
Tap on the vending machine on the left to take a closer look at it.
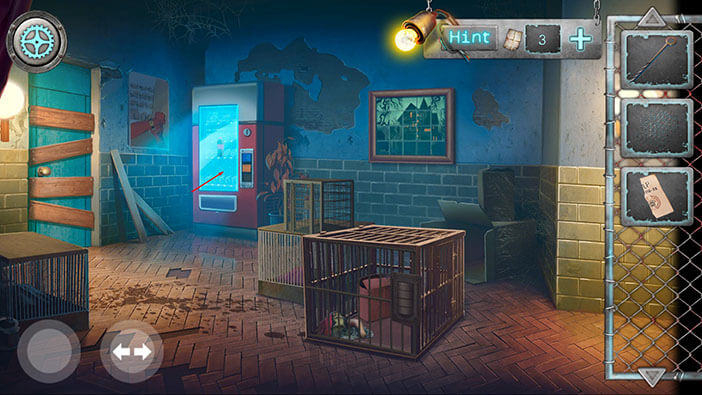
Tap on the “Screwdriver” to pick it up. Later, we will use it to access the vent. Also, we can see that one of the buttons on the vending machine is missing. We will get back to it later.
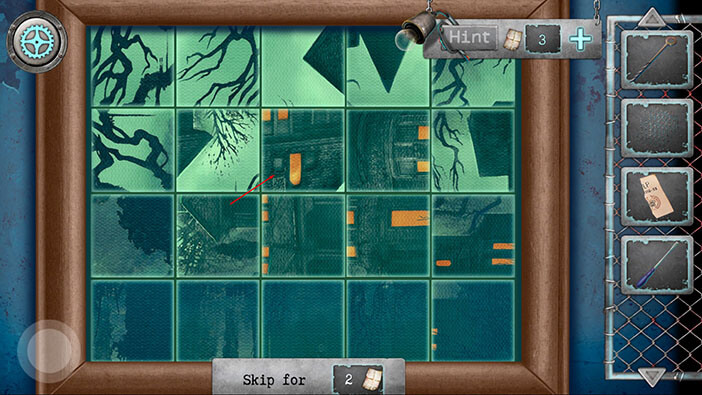
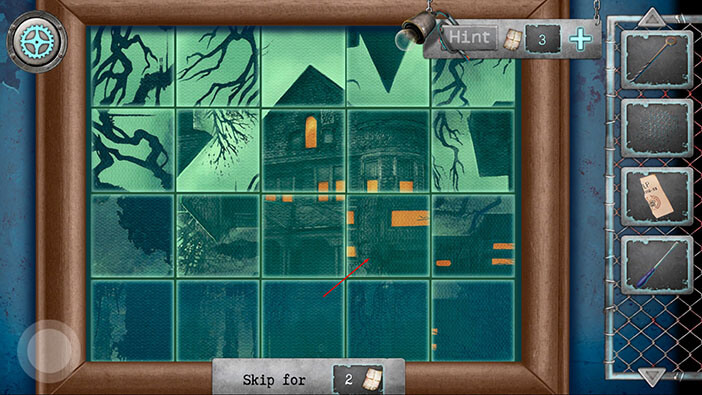
Ok, let’s check out the picture on the wall, to the right of the vending machine.

Here, we have another puzzle. We should tap on the pieces to rotate them into the proper position, and assemble the image. We will do this puzzle in several steps. Let’s begin.
Step 1
Tap twice on the third piece (left to right) in the second row (top to bottom) to rotate it.
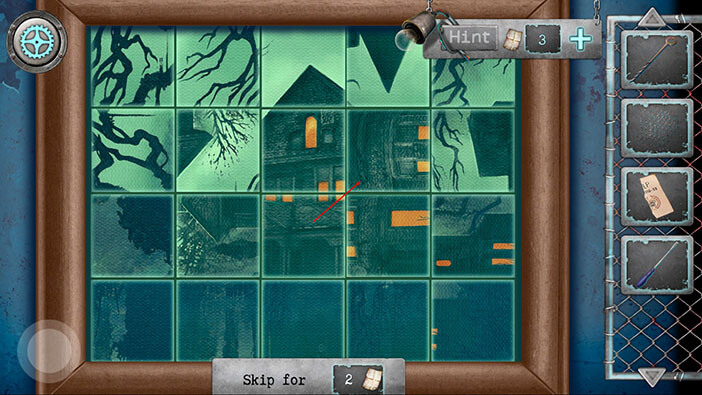
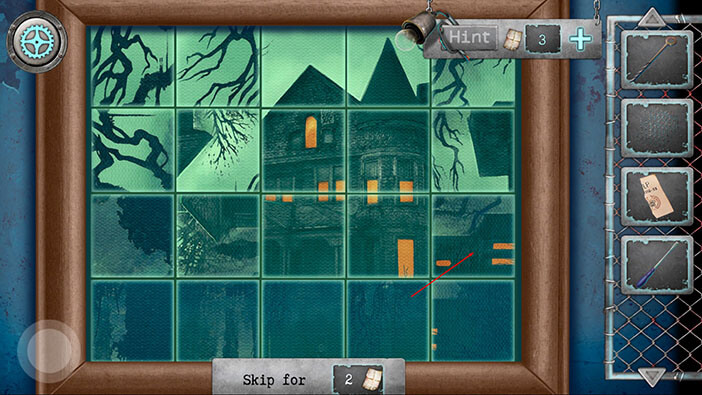
Step 2
Tap once on the third piece in the first row – we will align the roof.

Step 3
Tap once on the third piece in the third row – we will align the windows.

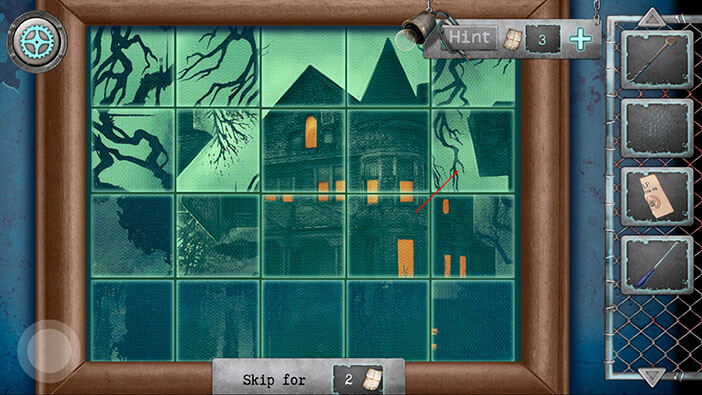
Step 4
Tap once on the fourth piece in the second row.
Step 5
Tap once on the fourth piece in the third row – we will align the windows.
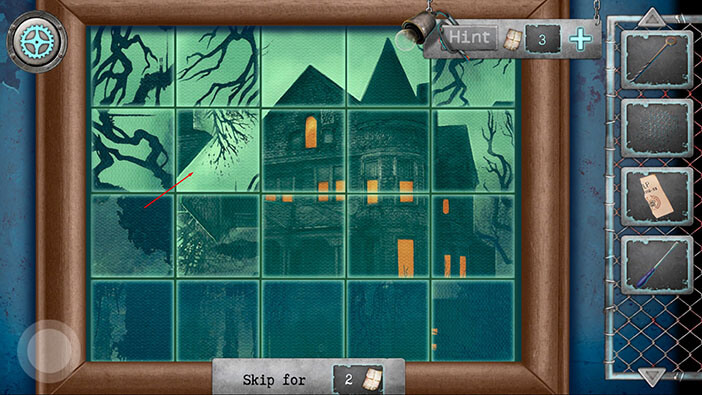
Step 6
Tap twice on the fourth piece in the first row – we will align the roof.

Step 7
Tap once on the fifth piece in the third row.
Step 8
Tap twice on the fifth piece in the second row. We assembled the right side of the house.
Step 9
Tap twice on the second piece in the second row.
Step 10
Tap once on the second piece in the third row. We mostly assembled the house. Let’s continue.

Step 11
Tap once on the fifth piece in the first row.
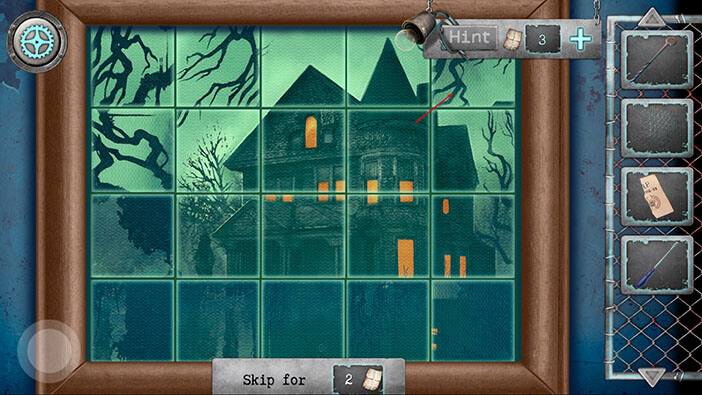
Step 12
Tap once on the fifth piece in the fourth row.

Step 13
Tap twice on the fourth piece in the fourth row.

Step 14
Tap twice on the third piece in the fourth row.
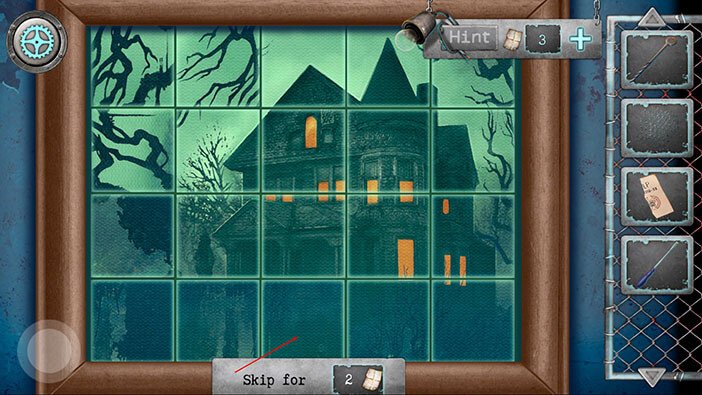
Step 15
Tap twice on the second piece in the fourth row.

Step 16
Tap twice on the first piece in the fourth row.

Step 17
Tap twice on the first piece in the third row.
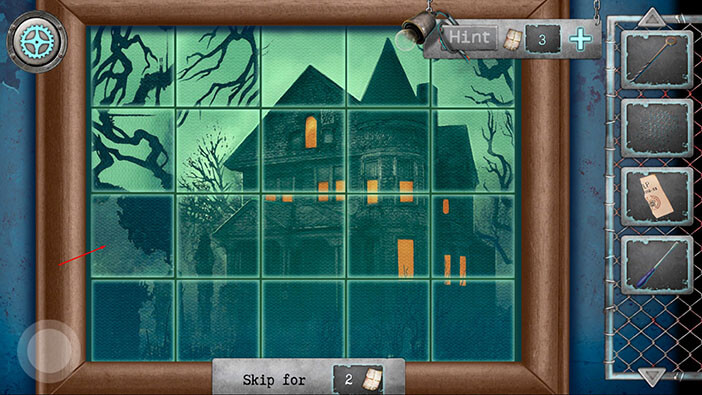
Step 18
Tap once on the first piece in the second row.
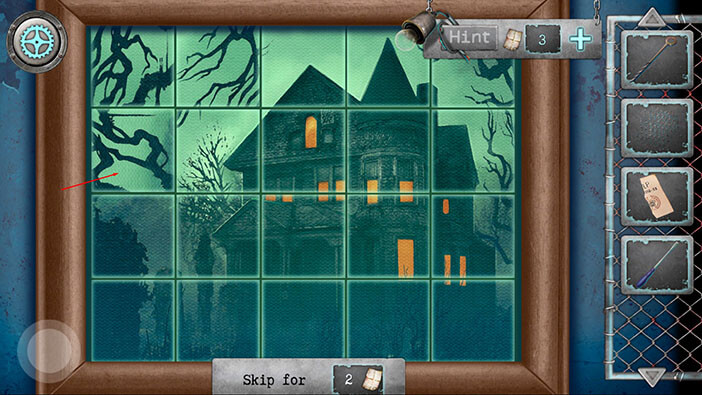
Step 19
Tap twice on the first piece in the first row.
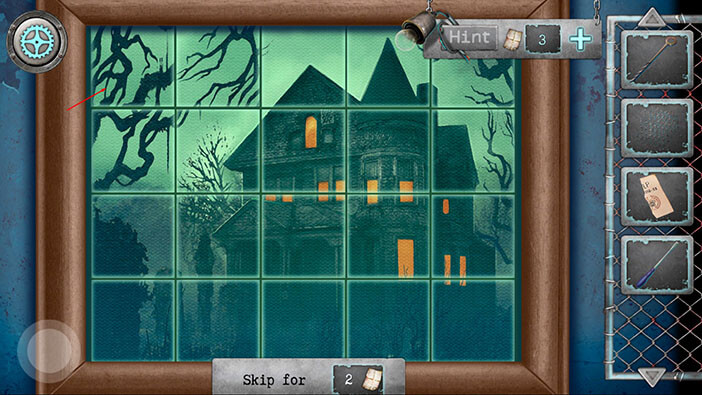
Step 20
Finally, tap twice on the second piece in the first row, and you will assemble the picture.
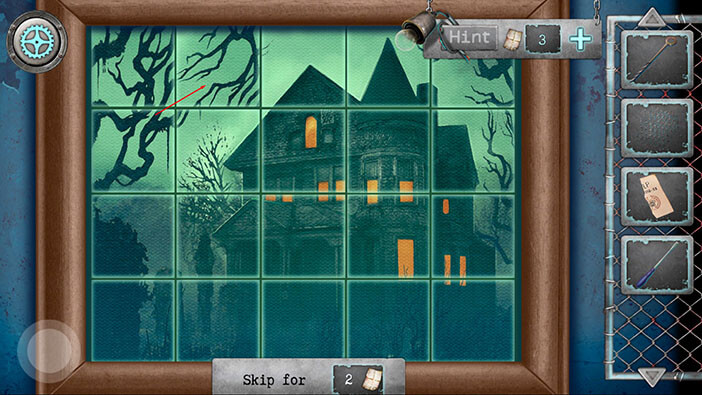
As soon you assemble the picture, the head of some scary creature will appear and it will scream at our character. However, it will quickly disappear, revealing a compartment that was hidden behind the picture. Tap on the item inside to pick it up and a “Butterfly net without a net” will be added to your inventory.
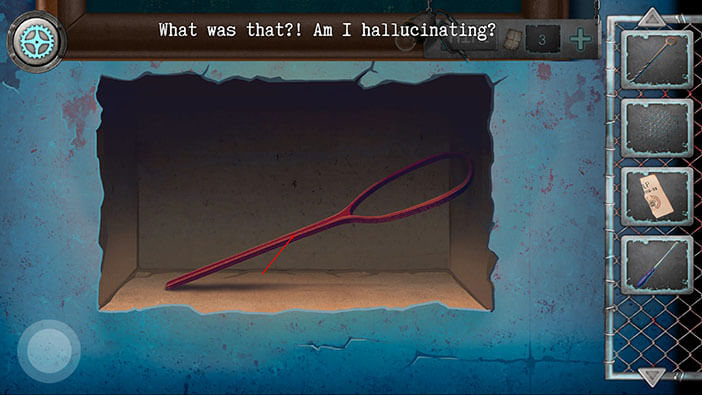
Drag the “Net for butterfly net” and combine it with the “Butterfly net without a net” (the naming of these objects is really weird). You will assemble the “Butterfly net”.
Let’s go back to the previous room. To do that, tap on the button in the lower-left corner of the screen.
We have found the screwdriver, so let’s go back to the vent.
Select the screwdriver from the inventory and tap on the screws to remove the ventilation lid.
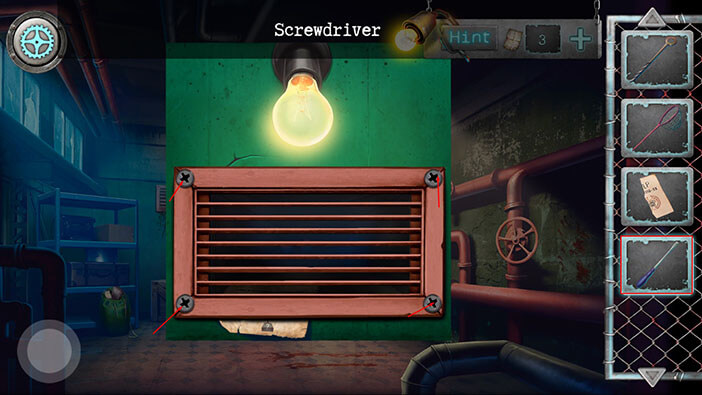
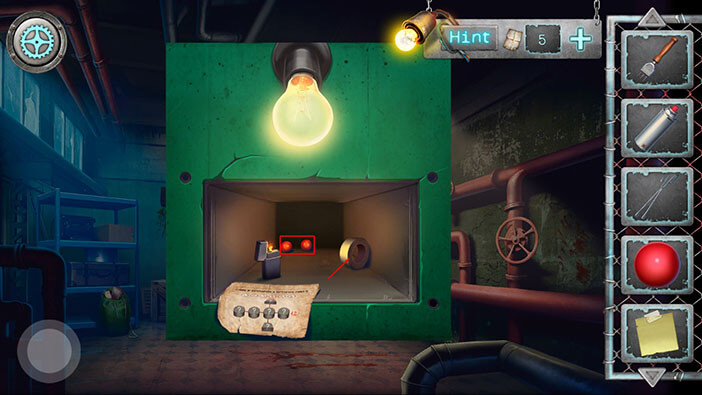
Tap on the note inside the ventilation to take a closer look at it. We can also see that there’s something else, deeper inside the ventilation system, but we can’t reach it, right now.
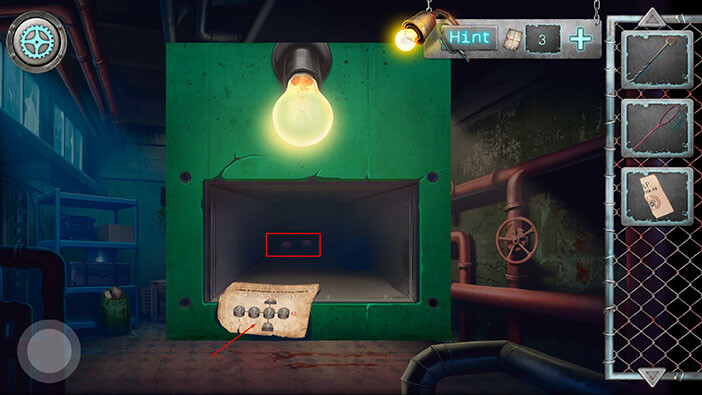
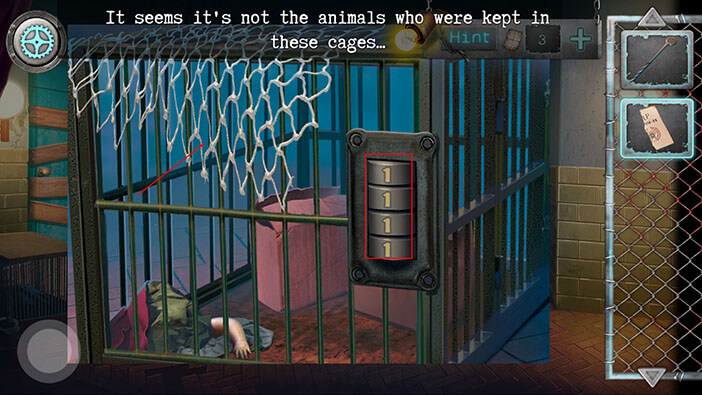
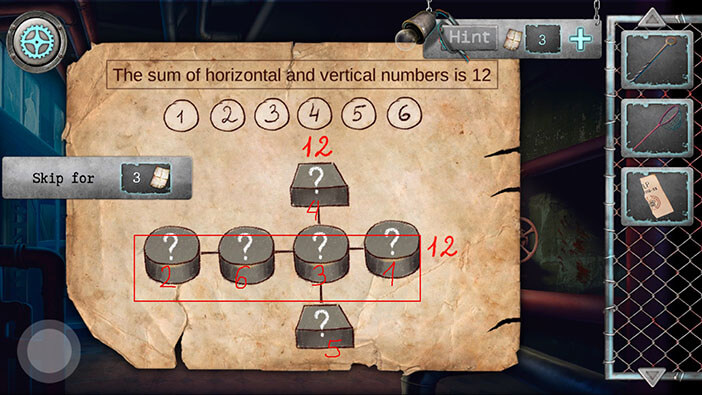
The note is another puzzle. Here, we should arrange six numbers in 4 horizontal and 3 vertical slots. The sum of the numbers both horizontally and vertically should be 12.
Horizontally = 2 + 6 + 3 + 1 = 12
Vertically (top to bottom) = 4+ 3 + 5 = 12
Memorize/write down the horizontal array (2, 6, 3, 1) because it represents the password for the cage lock.
Let’s quickly go back to the first room, and we will unlock the cage after that.
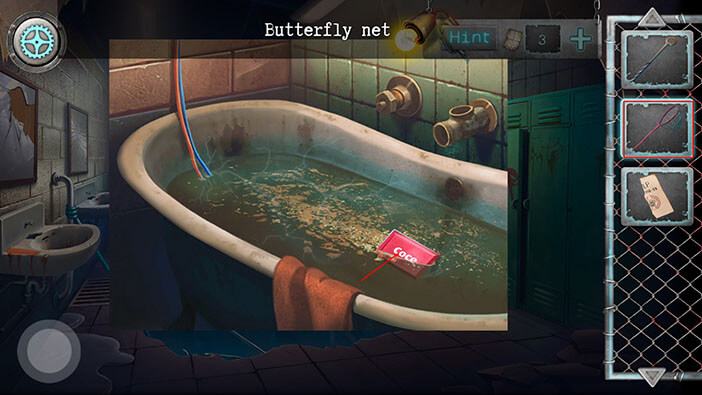
Tap on the bathtub to take a closer look at it.
Select the “Butterfly net” from the inventory and use it to fish out the item with the label “coce”. “Coke button” will be added to your inventory.
Ok, let’s climb down the hose to the boiler room.
Tap on the door to proceed into the next room.
Tap on the cage to take a closer look at it.
Enter the code “2631” that we discovered by solving the puzzle on the note that we found in the vent.
The cage door will automatically open. Tap on the two boxes to move them aside.
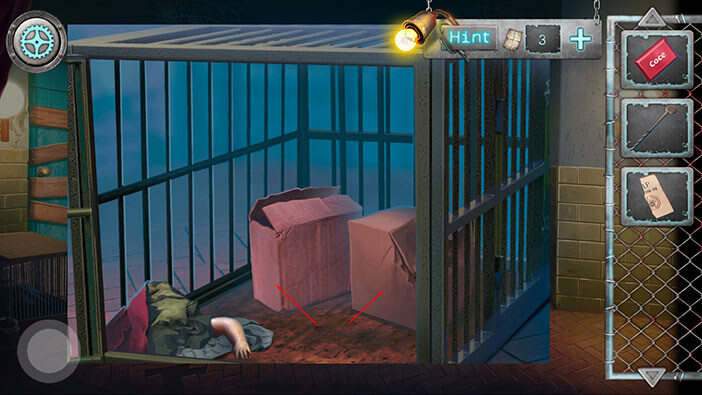
Tap on the crowbar to pick it up. Tap on the crowbar and plastic arm to pick them up. “Small nail puller” and “Hand from the doll” will be added to your inventory.
In the lower-left corner of the screen, you will see two buttons. Tap on the arrow pointing to the right to go to the next room.
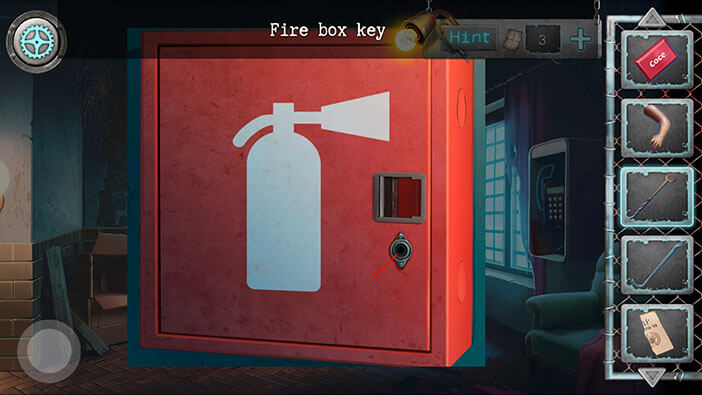
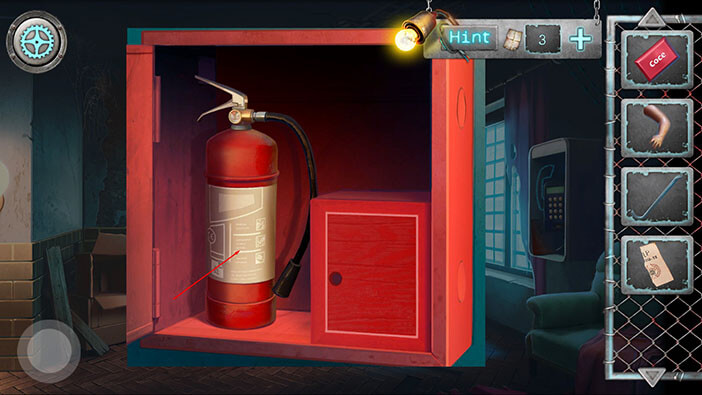
Tap on the fire extinguisher box to take a closer look at it.
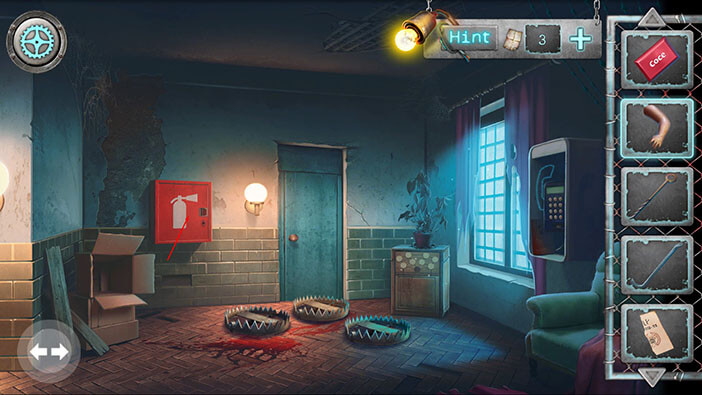
Select the “Fire box key” from the inventory and tap on the keyhole to unlock the box.
Tap on the “Fire extinguisher” to pick it up.
Ok, let’s take a closer look at the cabinet on our right.
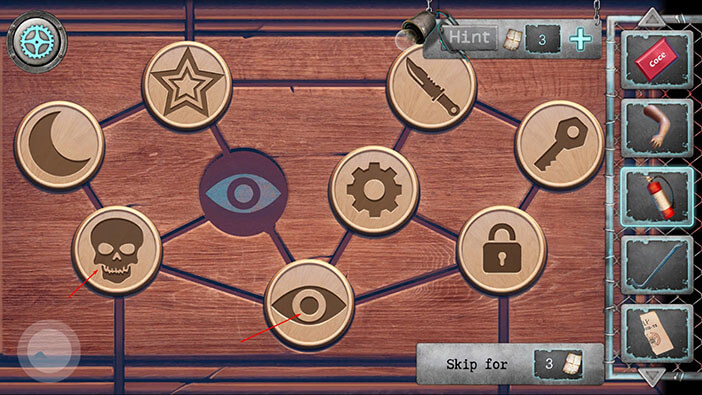
Here we have another puzzle. We should shuffle the tiles, and place them on the fields with the matching symbols. We will do this puzzle in several steps. Let’s begin.
Step 1
Tap on the “Skull” tile. After that, tap on the “Eye” tile.
Step 2
Tap on the “Cogwheel” tile. After that, tap on the “Knife” tile.
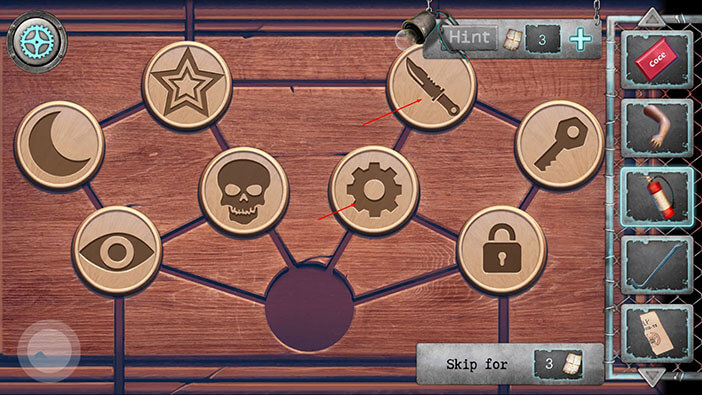
Step 3
Tap on the “Key” tile. After that, tap on the “Padlock” tile.
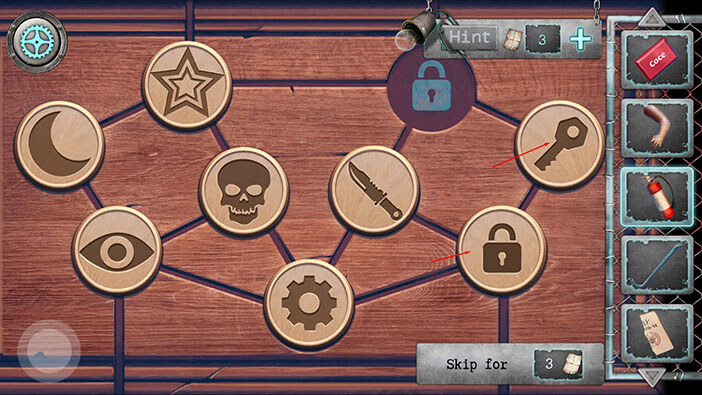
Step 4
Tap on the “Knife” tile. After that, tap on the “Key” tile.
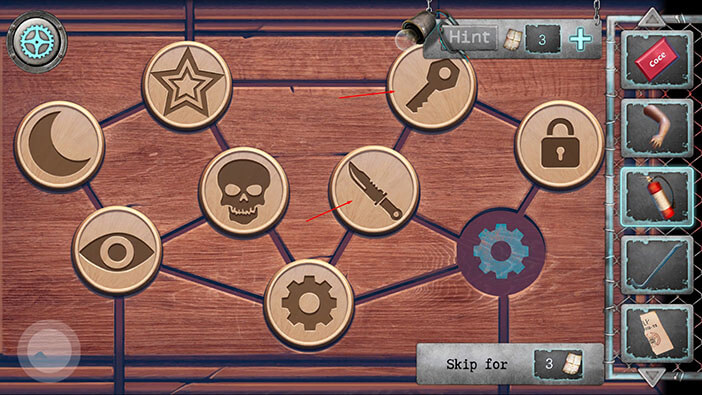
Step 5
Tap on the “Padlock” tile. After that, tap on the “Knife” tile.
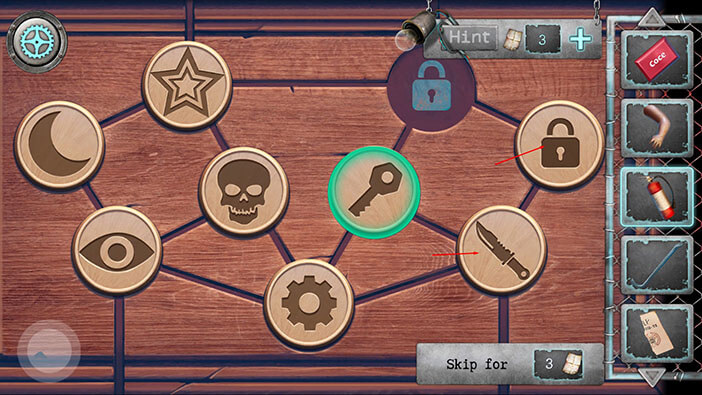
Step 6
Tap on the “Cogwheel” tile. After that, tap on the “Eye” tile.
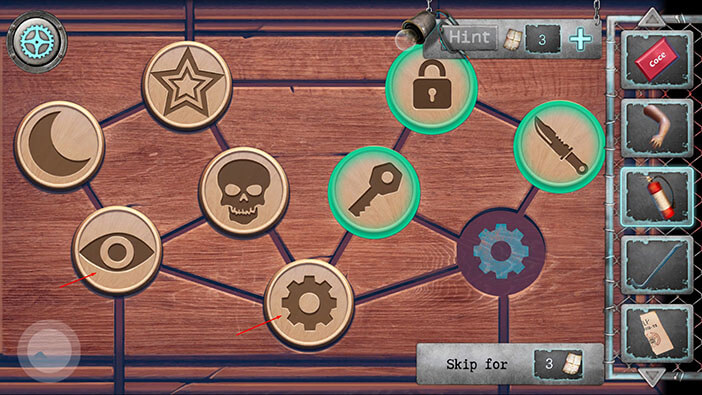
Step 7
Tap on the “Moon” tile. After that, tap on the “Star” tile.
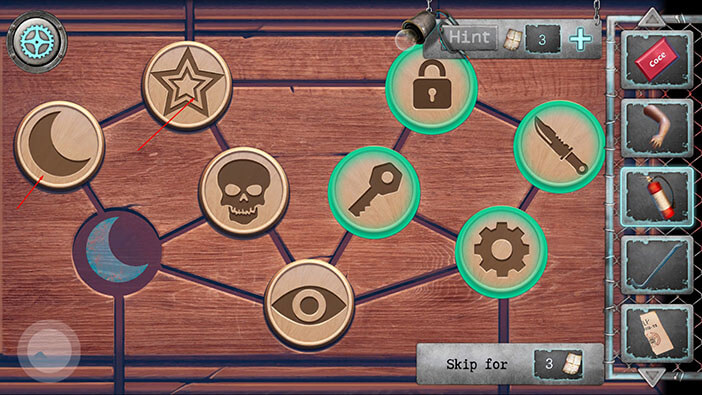
Step 8
Finally, tap on the “Skull” tile. After that, tap on the “Eye” tile. With that, you will solve the puzzle.
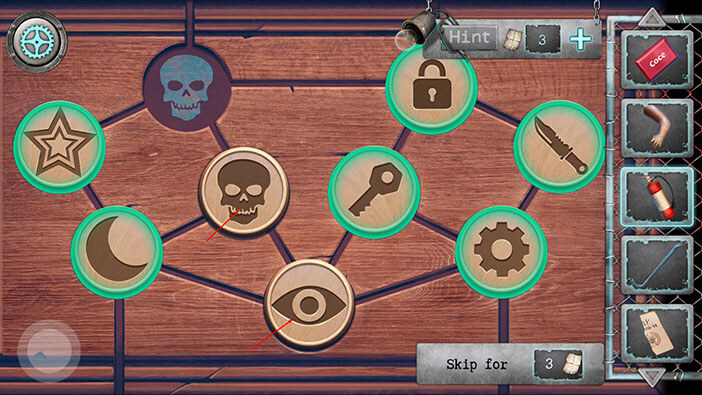
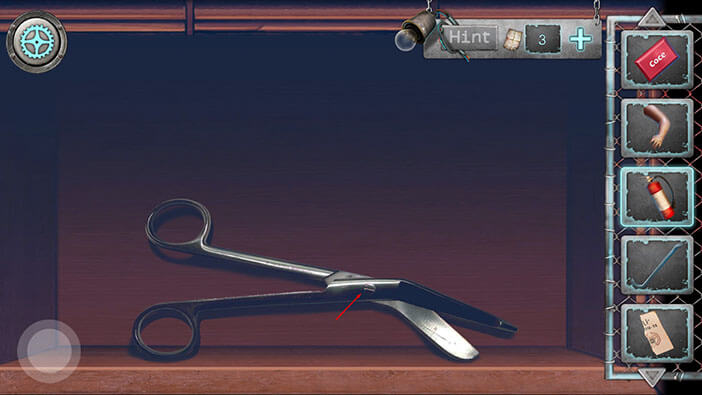
The cabinet door will open. Tap on the “Medical scissors” to pick it up.
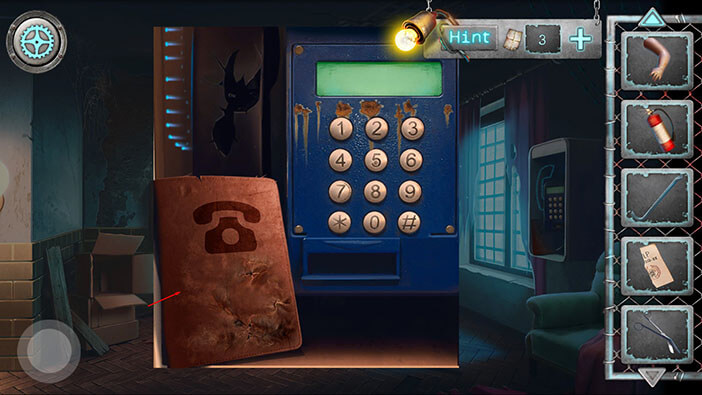
Tap on the phone booth on your right to take a closer look at it.
Tap on the phone book to open it.
Select the “Half a page with a phone number” from the inventory and use it to assemble the page in the phonebook.
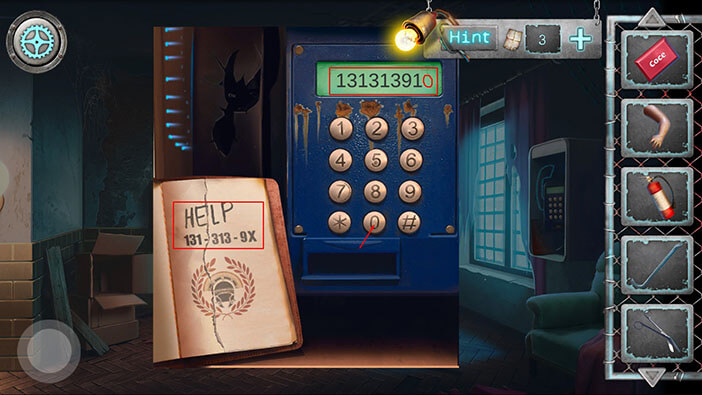
Now we can see numbers 131-313-9X. Here, X actually represents the Roman numeral. So, the last number is “910”.
Well, the note says that we should dial this number for help, so let’s do that. Dial 131-313-910
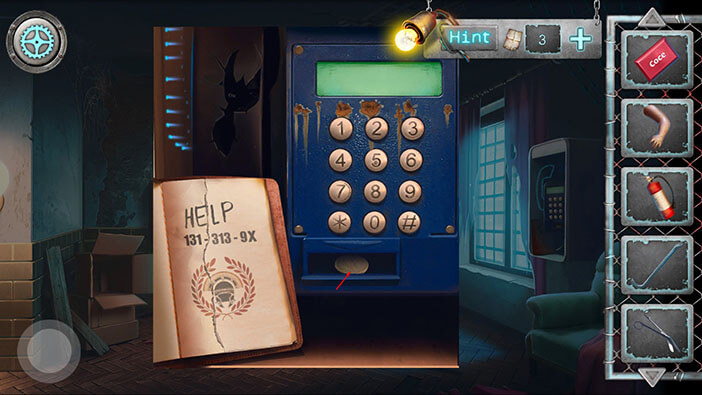
As soon as we dialed this number, the coin dropped from the phone booth. Tap on the “Coin” to pick it up.
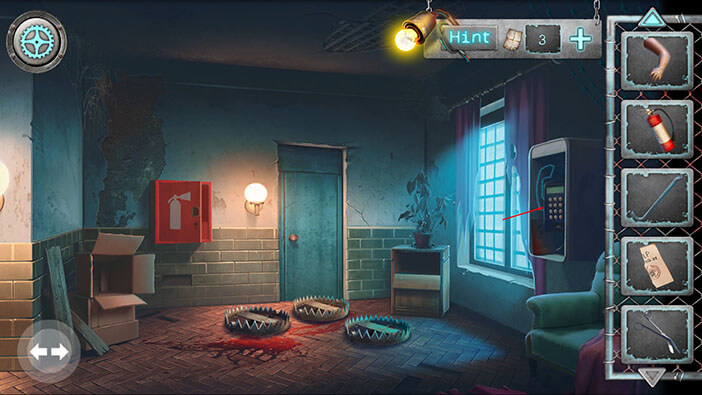
The way to the other door is blocked by bear traps, so let’s tap on the left arrow to go back to the previous room.
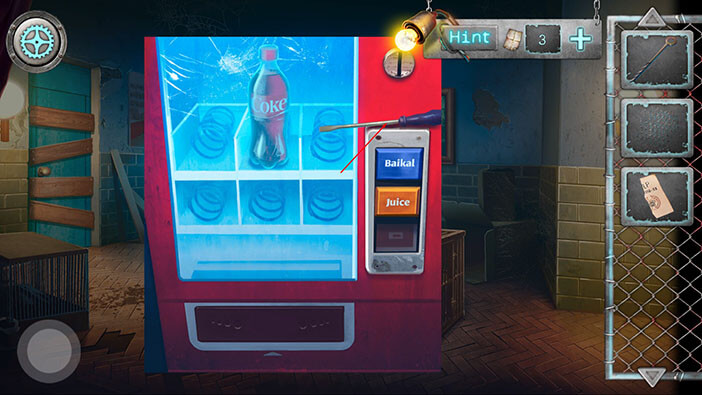
Tap on the vending machine to take a closer look at it.
Select the “Coke button” from the inventory and tap on the empty slot to insert it.
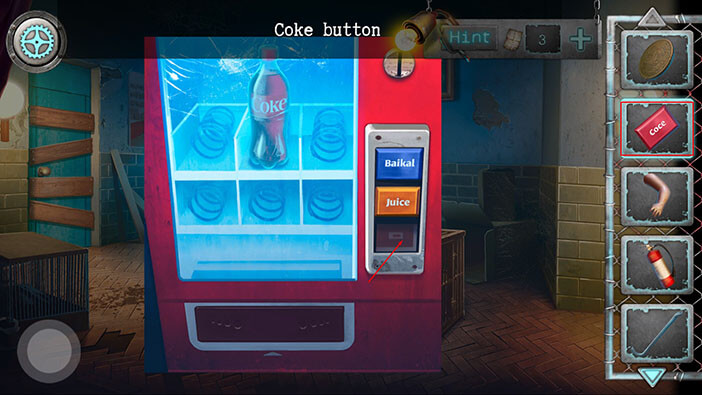
Select the “Coin” from the inventory and put it into the vending machine.
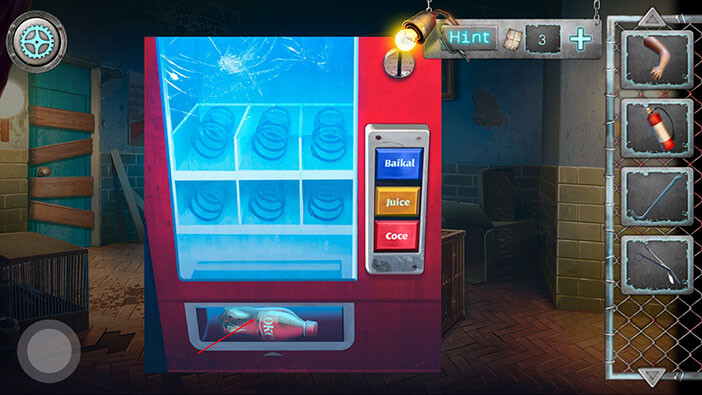
Finally tap on the “Coce” button.
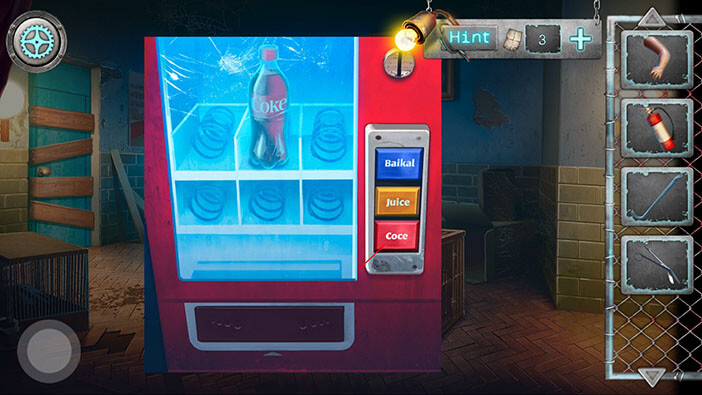
The bottle of coke will fall out, so tap on it to pick it up and a “Plastic bottle” will be added to your inventory. Also, your character will notice that the bottle is very heavy.
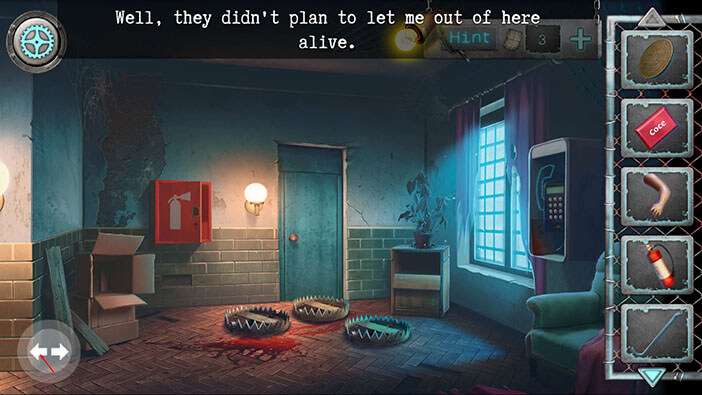
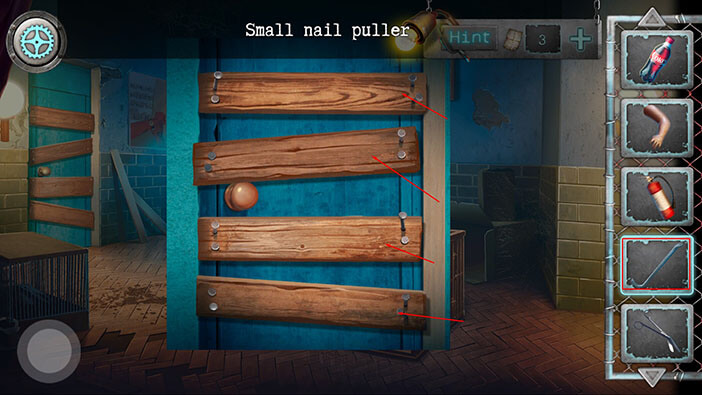
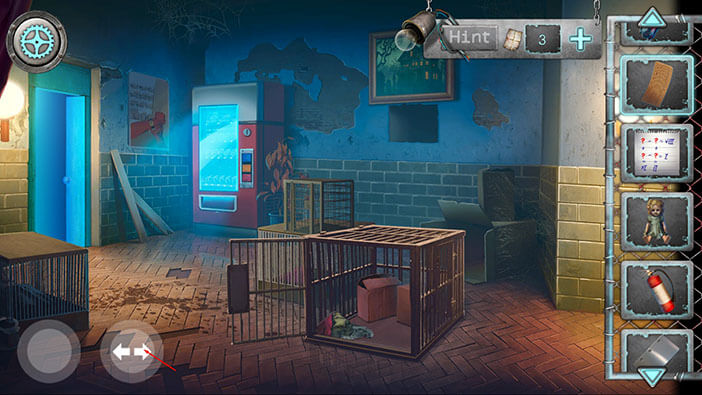
Tap on the barred door on your left to take a closer look at it.
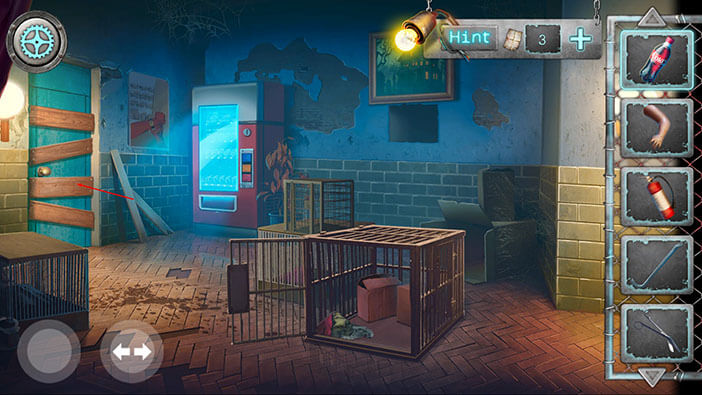
Select the “Small nail puller” from the inventory and tap on all four planks to remove them.
Tap on the door to proceed into the next room. The swarm of rats will rush out from the room…
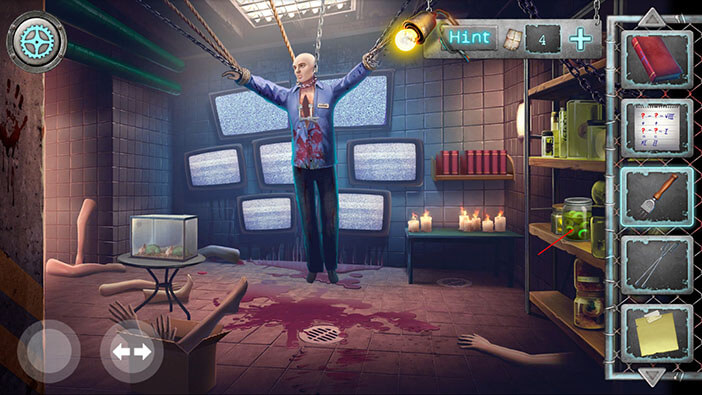
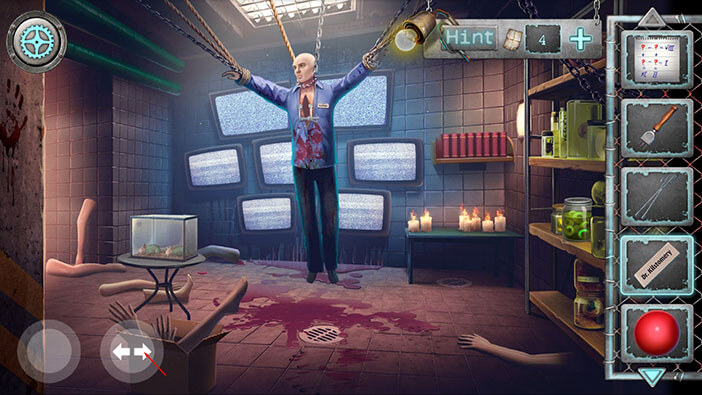
Here, somebody placed another mannequin, in a very scary position. Tap on the rag on the floor to pick it up and “Neckerchief” will be added to your inventory.
Tap on the note, located on the table between the candles, to pick it up and a “Note” will be added to your inventory. This note represents some kind of a riddle, that includes Roman numerals. We will take a look at it again, a bit later.

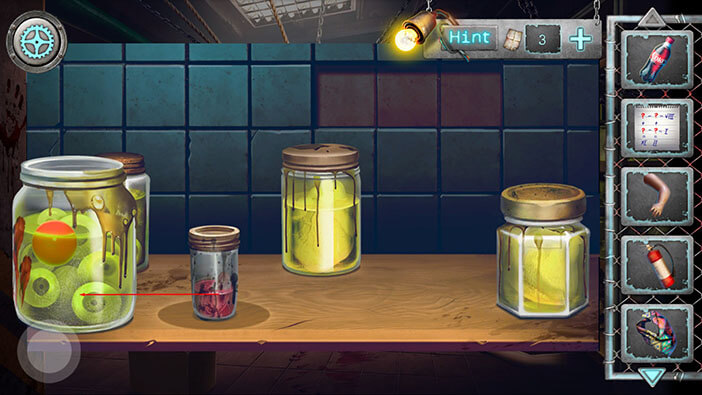
Tap on the jars, which are on the middle shelf on your right, to take a closer look at them.
We can notice that somebody shuffled the jars because the shape below them do not match the shape of the jars. So, our next task is to properly arrange the jars.
We can see a hexagonal shape on the far right. So, select the hexagonal jar (second row, far left) and switch it with the jar which is currently in the hexagonal position.
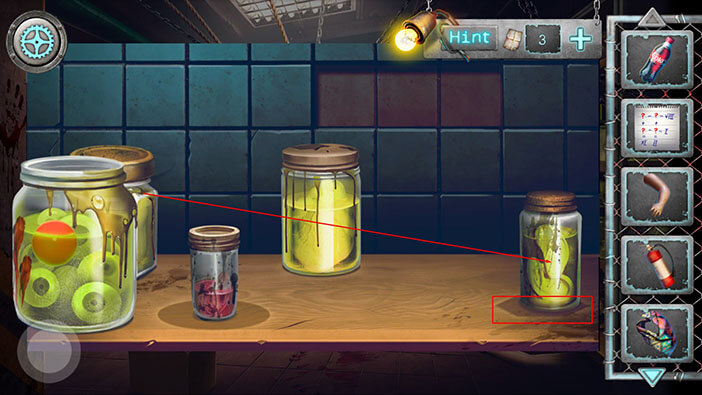
After that, take the smallest “red” jar, and switch it with the largest jar (first row, far left).
With that, we properly arranged the jars and opened the secret compartment. Tap on the item inside it to pick it up and a “Key card” will be added to your inventory.
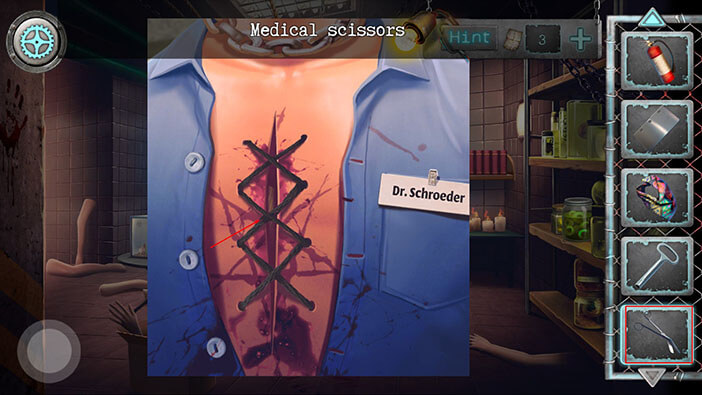
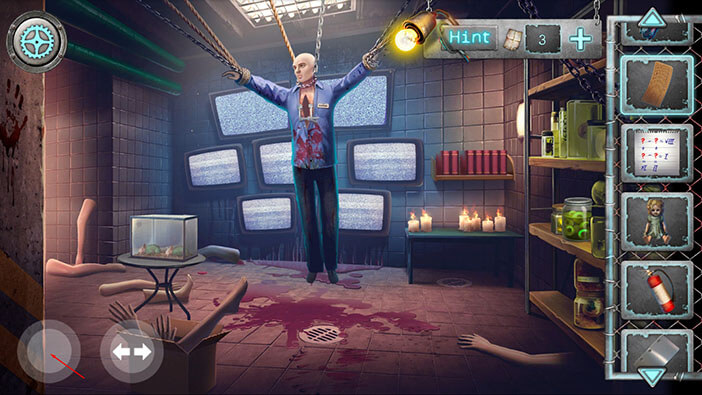
Let’s take a closer look at the mannequin.
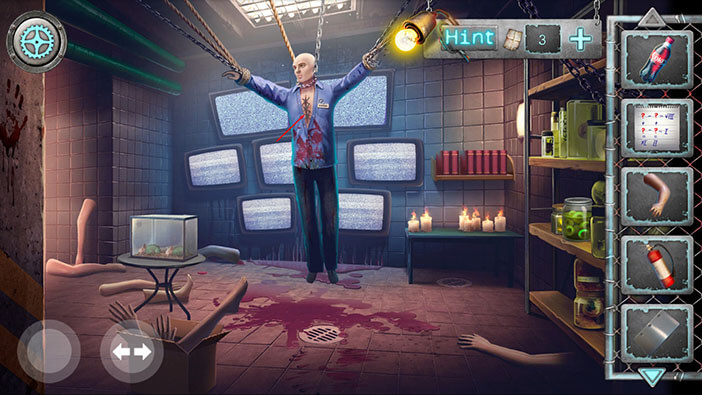
Tap on the key above the “Dr. Schroeder” name tag to pick it up and “Triangular key” will be added to your inventory.
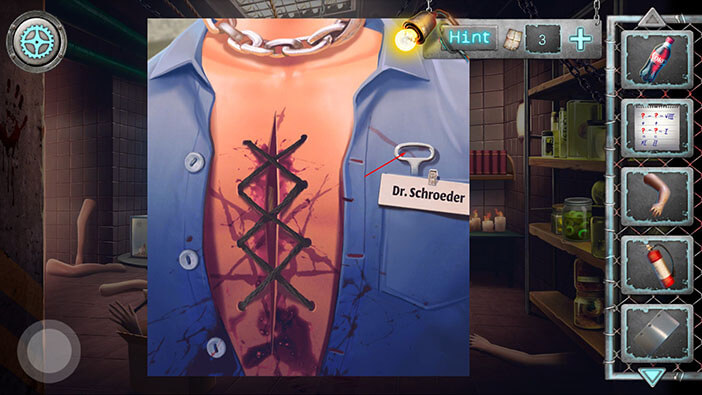
Next, select the “Medical scissors” from the inventory and tap on the chest of the mannequin to cut the stitches.
For now, that’s it for this room. Let’s go to the next room on the right.
Tap on the rag on the floor to move it aside and you will discover a doll head. Tap on it to pick it up and “Doll head” will be added to your inventory.
Tap on the mannequin head on your left to take a closer look at it. Strangely enough, it will blink a few times.
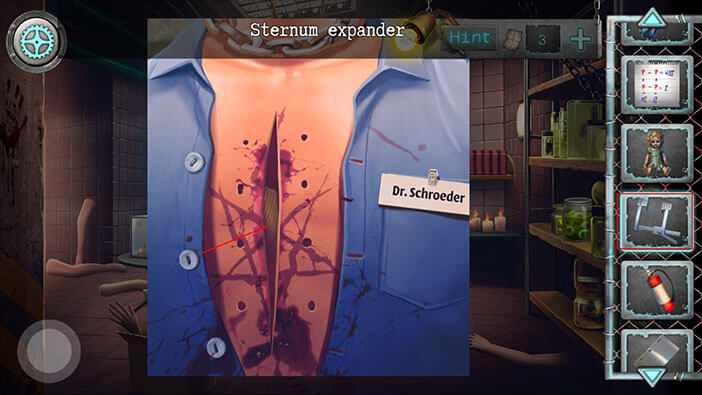
Tap on the instrument next to the head, and a “Sternum expander” will be added to your inventory.
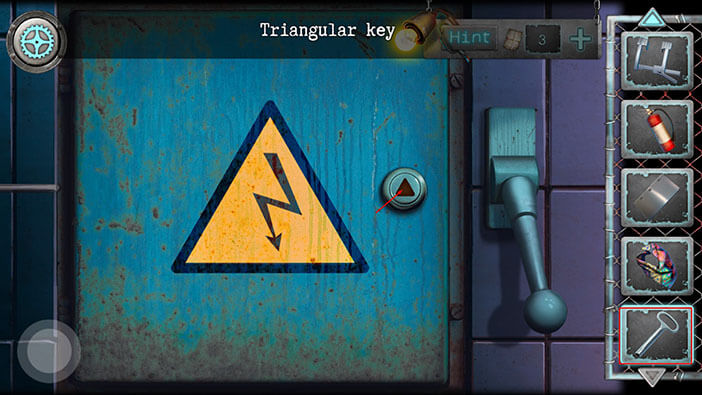
Tap on the fuse box on your right.
Here we can see a triangular keyhole. So, select the “Triangular key” from the inventory and tap on the keyhole to unlock and open the box.
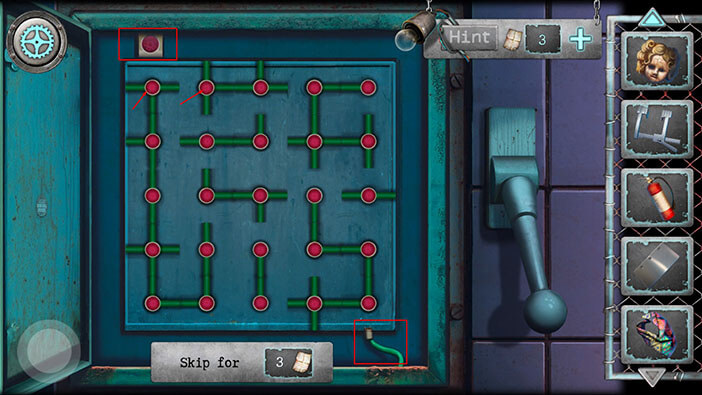
Here, we have another puzzle. Our task is to rotate parts of the wire and make a connection between the red button in the upper left corner and the green wire in the lower right corner.
We will do this in several steps. Let’s begin.
Step 1
Tap twice on the first (left to right) wire in the first (top to bottom) row to rotate it. After that, tap once on the second wire in the first row.
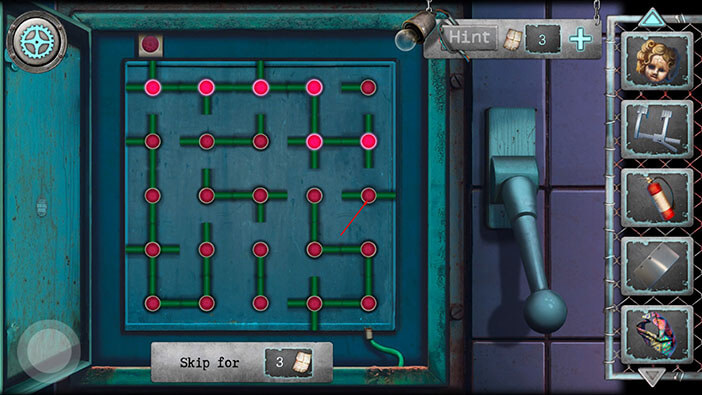
Step 2
Tap once on the fourth wire in the first row.

Step 3
Tap once on the fifth wire in the third row.
Step 4
Tap once on the fifth wire in the fourth row. After that, tap once on the fourth wire in the fourth row.
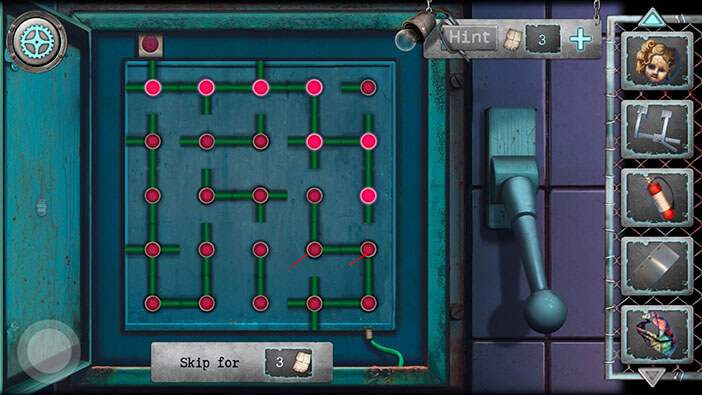
Step 5
Tap three times on the fifth wire in the fifth row, and you will connect the red button with the green wire.
Finally, tap on the lever, on your right, to restore the power.
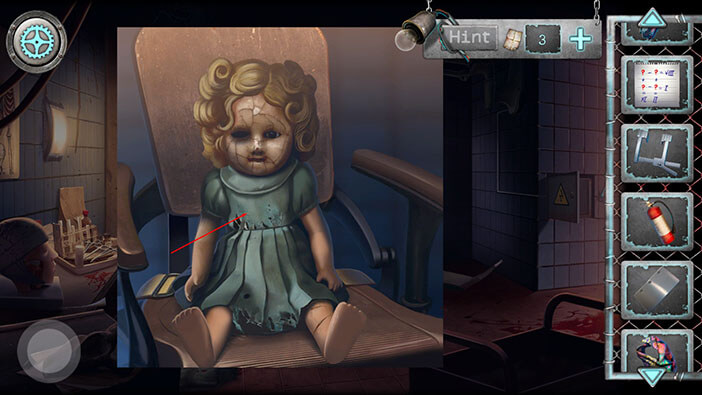
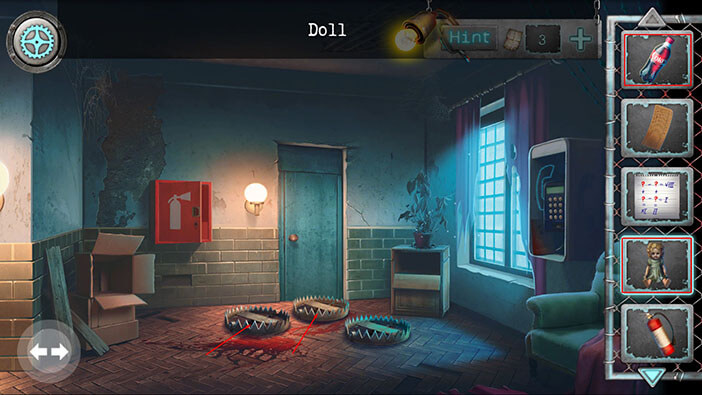
Tap on the doll to take a closer look at it.
We can see that the doll is missing the head and the right arm. So, select the “Doll head” and the “Hand from doll” from the inventory and use them to assemble the doll.
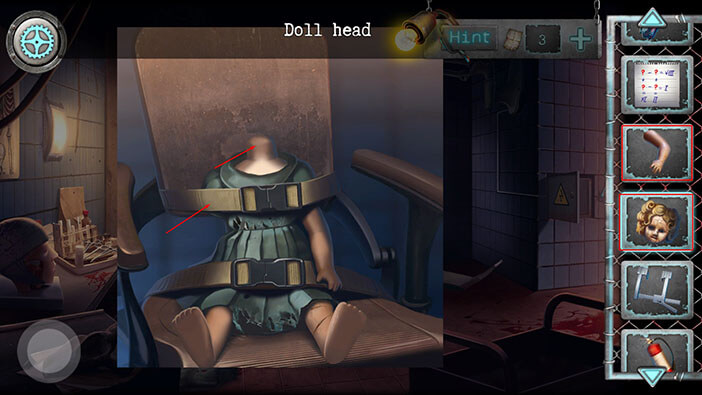
After that, tap on the belts to untie the doll.
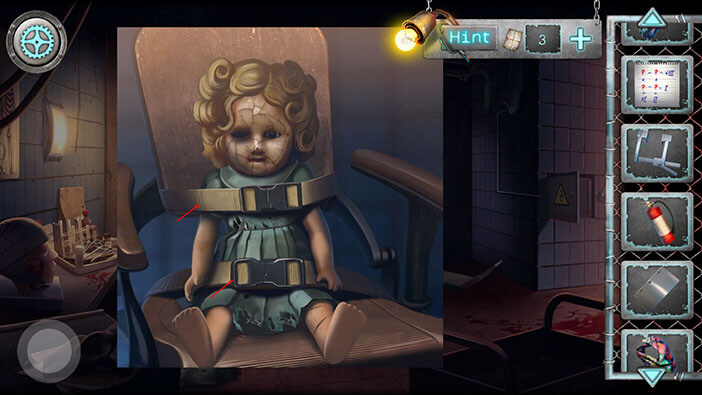
Finally, tap on the “Doll” to pick it up.
Ok, let’s go back to the previous room.
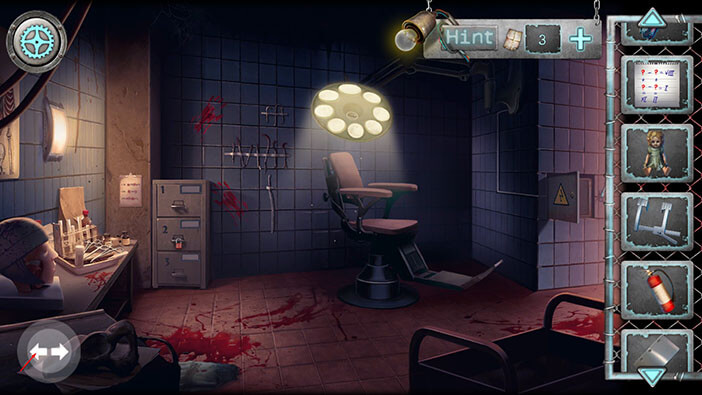
Let’s take another look at the mannequin.
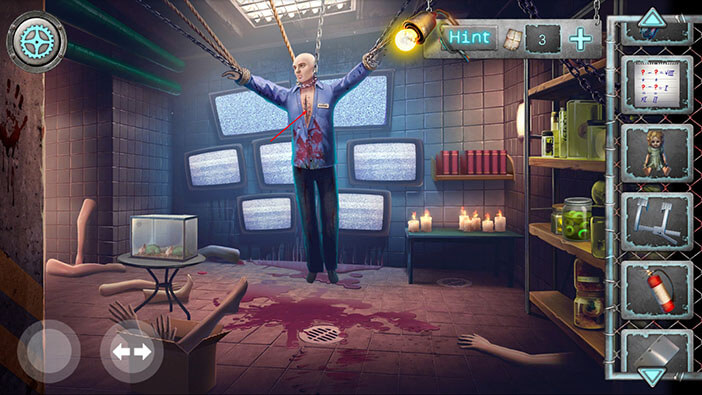
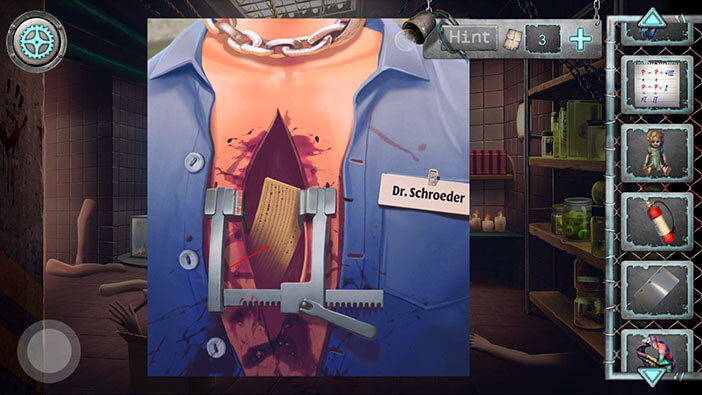
Select the “Sternum expander” from the inventory and use it to open the chest of the mannequin.
Tap on the note inside the mannequin to pick it up and a “Punched card” will be added to your inventory.
Tap on the button in the lower-left corner to go back to the previous room.
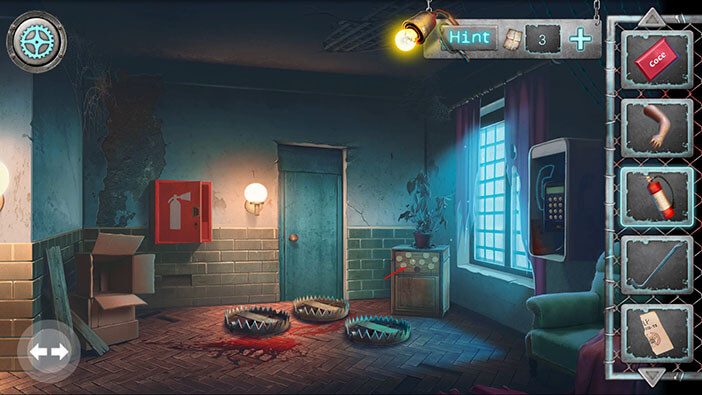
Let’s go to the first room on the right.
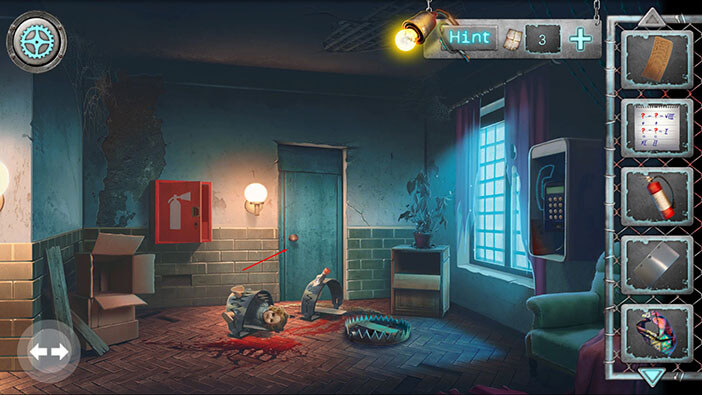
We will use the doll and the coke to disable the bear traps. Select the “Doll” from the inventory and tap on the trap on your left. After that, select the “Plastic bottle” from the inventory and tap on the trap in the middle.
The traps are now disabled, so we can proceed into the next room.
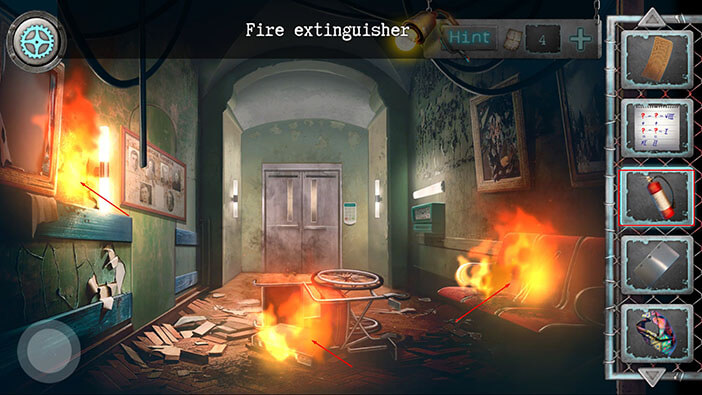
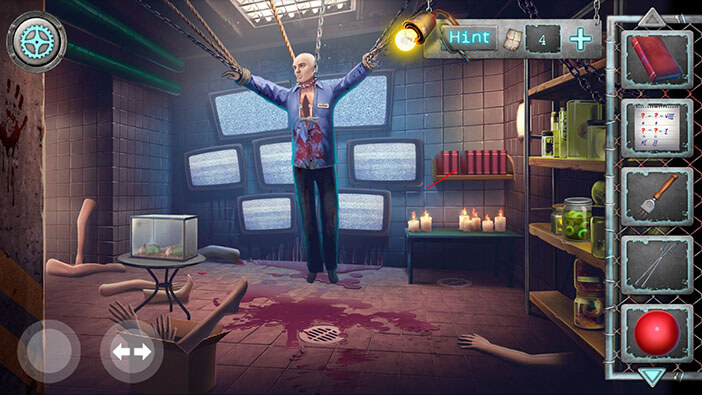
This room is burning. So, select the “Fire extinguisher” from the inventory and tap on the fire to put it out.
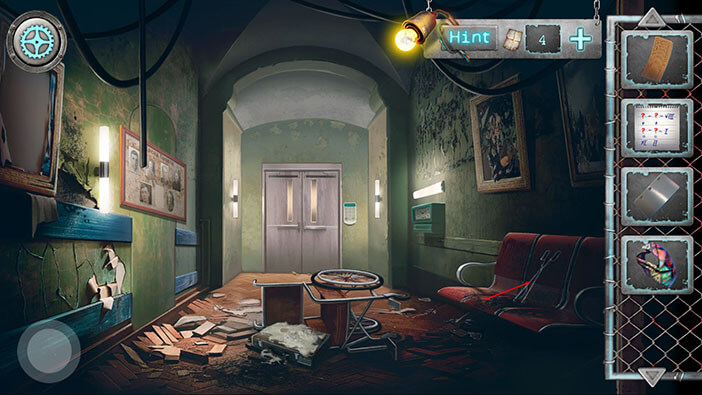
Tap on the item on your right to pick it up, and “Forceps” will be added to your inventory.
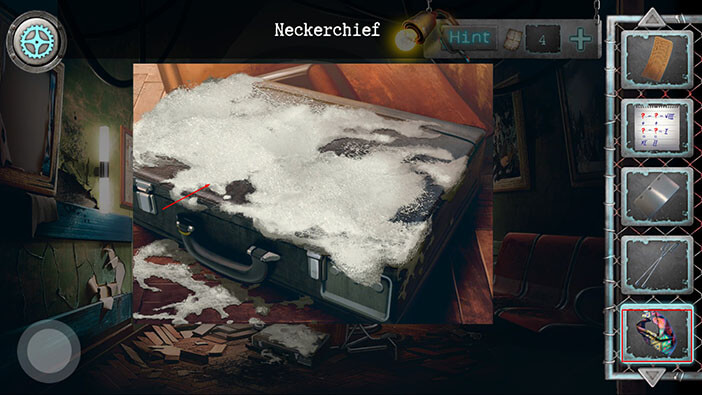
Tap on the suitcase to take a closer look at it.
After that, select the “Neckerchief” from the inventory and use it to clean the suitcase.
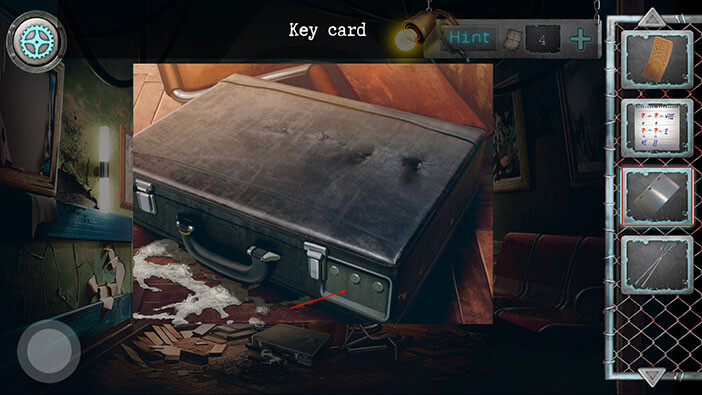
Next, select the “Key card” from the inventory and tap on the suitcase to open it.
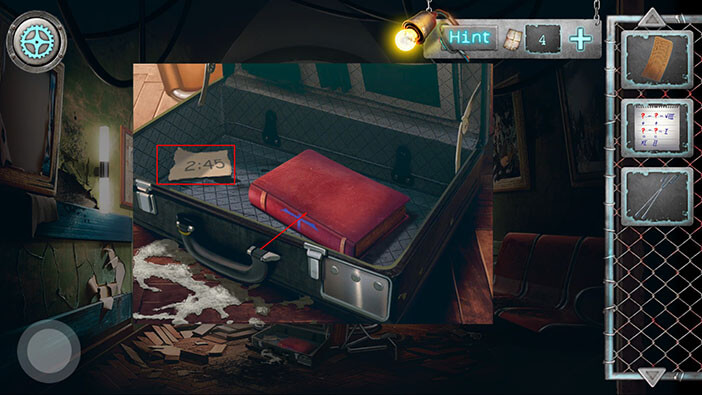
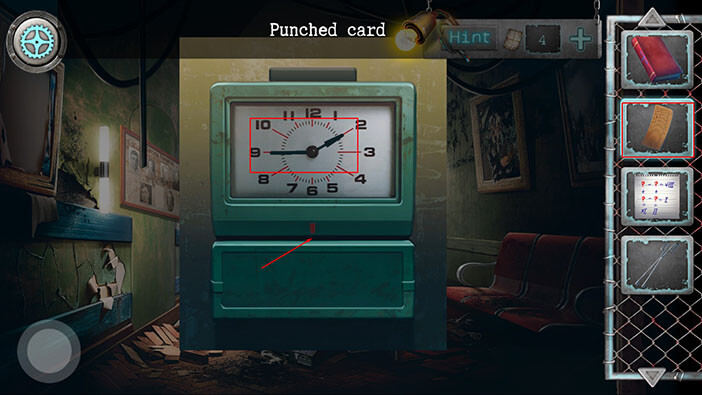
Tap on the “Book” in the suitcase to pick it up. Also, memorize the time on the note on the right. It’s 2:45. We will need this information for the next puzzle.
Tap on the clock on your right to take a closer look at it.
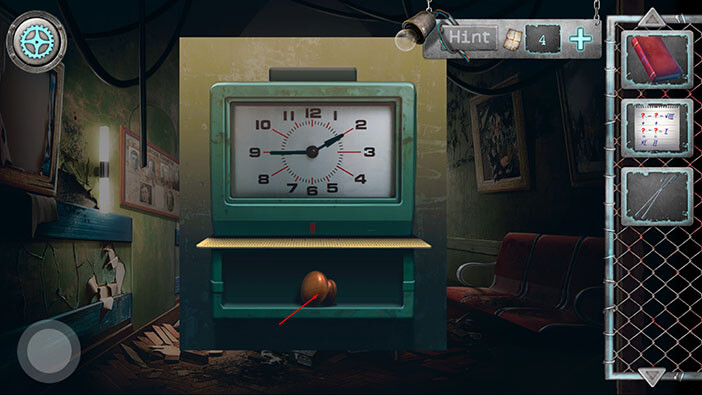
Set the time to 2:45. After that, select the “Punched card” from the inventory and insert it into the slot on the clock.
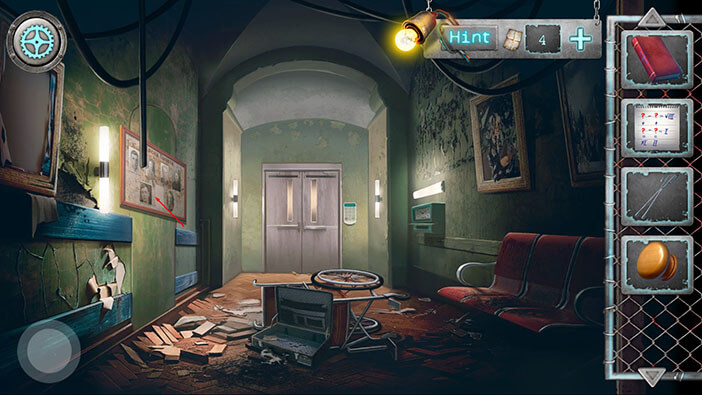
The compartment under the clock will open. Tap on the item inside to pick it up and “Round handle” will be added to your inventory.
Next, tap on the notice on your left to take a closer look at it.
Tap on the “Sticker” to pick it up.
That’s it for this room, at least for now. Tap on the button in the lower-left corner of the screen to go back to the previous room.
Let’s take another look at the firebox.
Select the “Round handle” from the inventory and tap on the empty slot (on the small door in the lower right corner of the box.). After inserting the handle, tap on the box to open it.
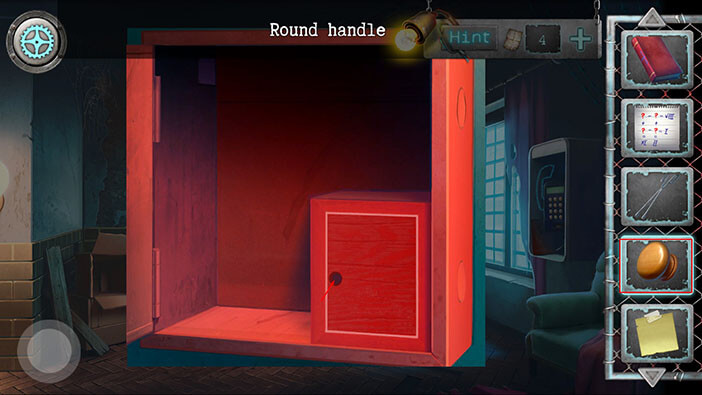
Tap on the item inside to pick it up and “Icebreaker” will be added to your inventory.
Let’s go to the room on the left.
After that, tap on the blue door to proceed into the next room.
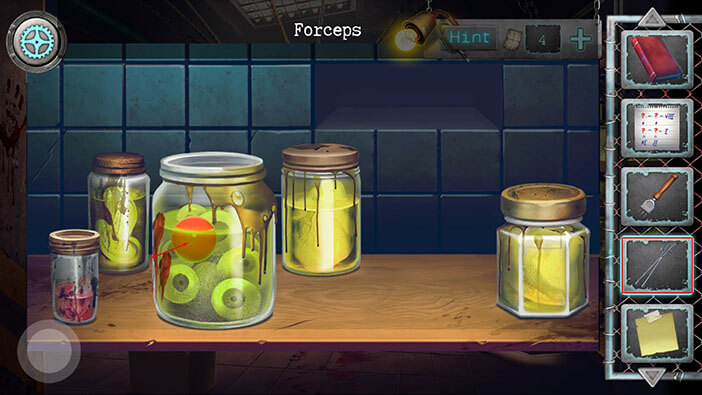
Let’s take another look at the jars on our right.
We can see that there’s some kind of a red ball inside the largest jar. So, select the “Forceps” from the inventory and tap on this item to pick it up. “Plastic ball” will be added to your inventory.
Tap on the bookshelf on your right to take a closer look at it.
The book that we found is very similar to these books. Also, you will notice that one of the books is missing. So, select the “Book” from the inventory and put it on the empty space on the shelf.
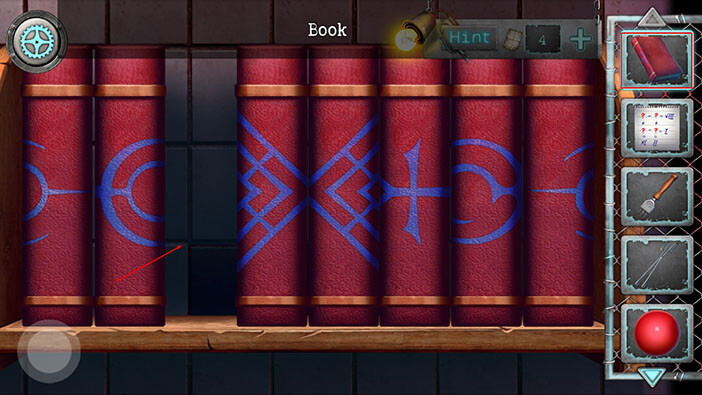
Ok, we should now assemble the pattern by rearranging the books. We will do this in several steps. Let’s begin.
Step 1
Select the fourth book (looking from left to right) and switch it with the fifth book.
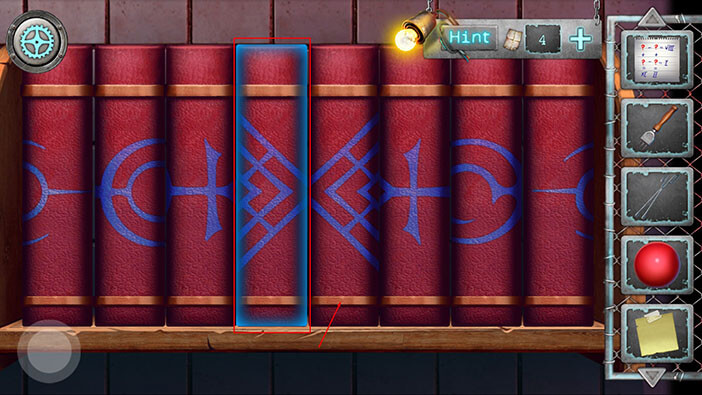
Step 2
Select the first book and switch it with the eighth book.
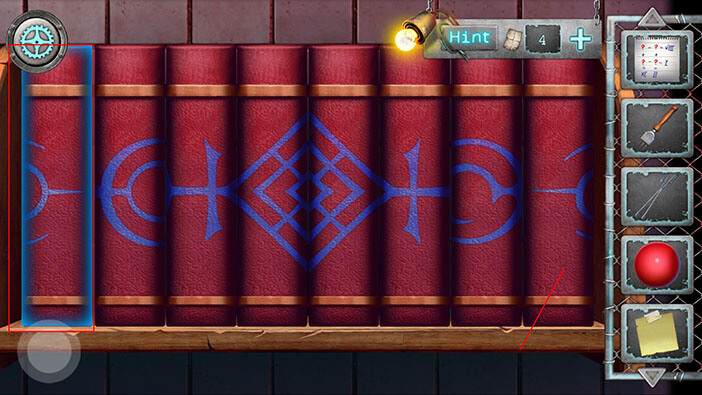
Step 3
Select the second book and switch it with the seventh book. With that, we will solve this puzzle.

After you properly rearrange the books, the secret compartment will open. Tap on the name tag inside it and “Piece of paper with the name Dr. Kilstomery” will be added to your inventory.
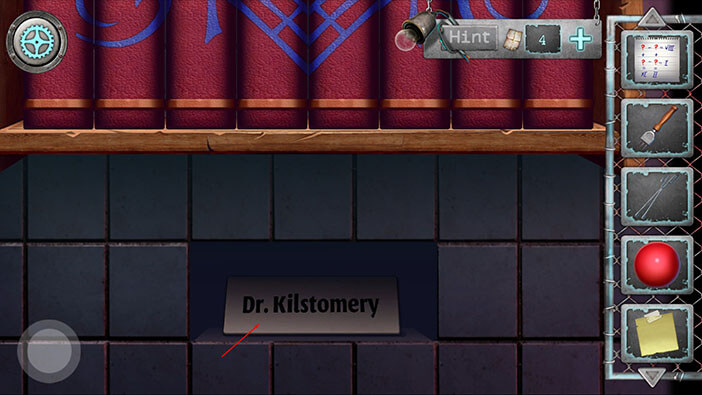
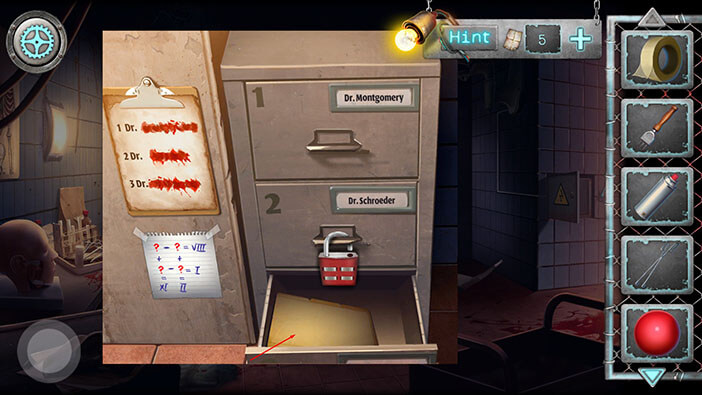
Ok, let’s go to the room on the right because that’s where we previously saw a cabinet with the name tags.
Tap on the cabinet to take a closer look at it.
Select the “Piece of paper with the name Dr. Kilstomery” from the inventory and tap on the empty space in the middle drawer.
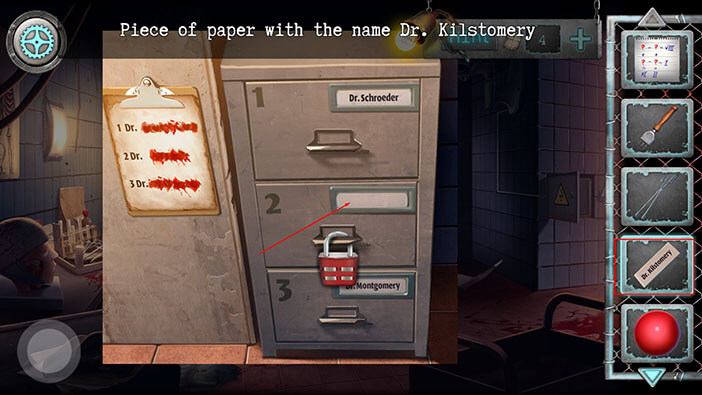
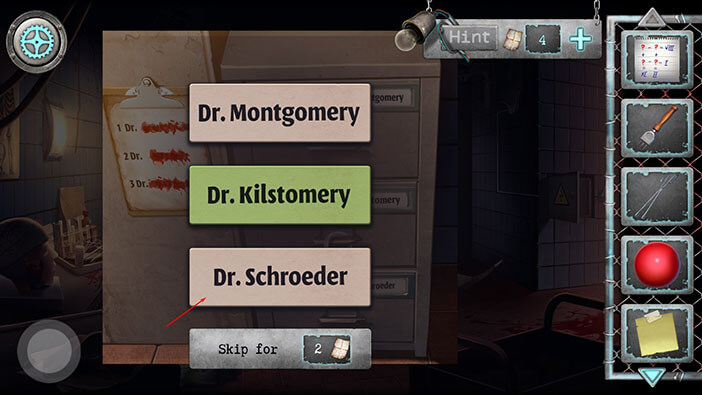
If we take a look at the names on the notice board, we can somewhat determine the correct order of the names. So, let’s rearrange the name tags.
Select Dr. Montgomery’s name tag and switch it with Dr. Schroeder’s tag.
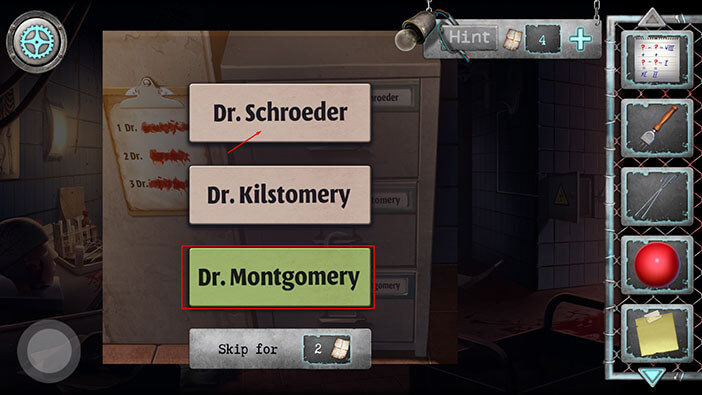
After that, select the Dr. Kilstomery tag and switch it with the Dr. Schroeder tag.
So, the correct order is,
Dr. Montgomery
Dr. Schroeder
Dr. Kilstomery
As soon as you properly arrange the name tags, our character will automatically place the note that we found earlier next to the padlock. So, we will have to solve the puzzle on the note in order to find the combination for the padlock. Tap on the note to take a closer look at it.
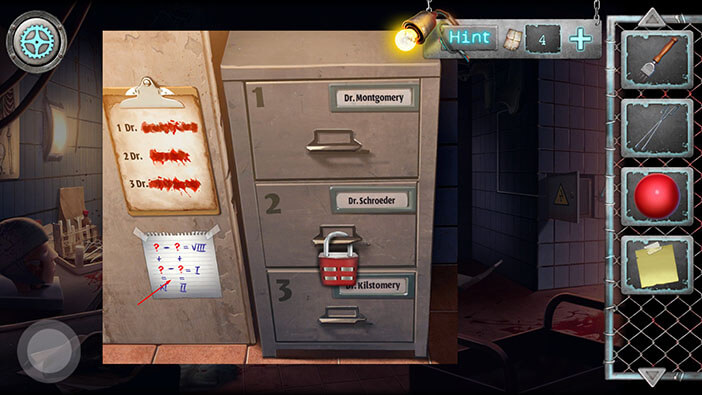
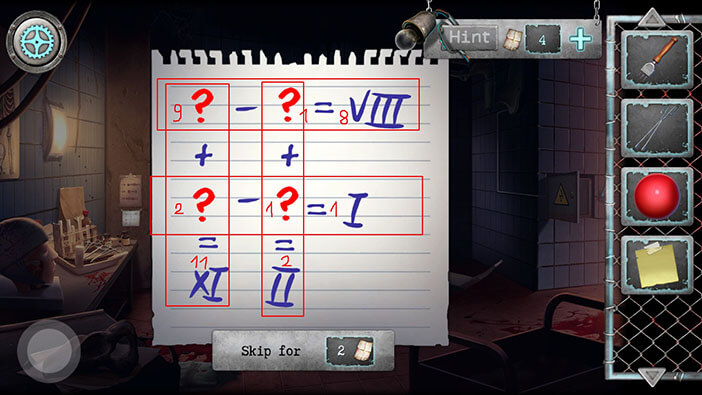
This mathematical puzzle is much than it seems at the first look.
When we subtract the second number from the first number in the first row the result will be 8.
When we subtract the second number from the first number in the second row the result will be 1.
However, if we add the first numbers from the first and second row, the result will be 11.
Also, if we add second numbers from the first and second row, the result will be 1.
With this information, we can easily solve the puzzle.
9 – 1 = 8
+ +
2 – 1 = 1
= =
11 2
So, the numbers that we were looking for are 9, 1, 2, and 1. Memorize/write down this information.
Tap on the padlock to initiate the interaction.

Enter the code,
9, 1
2, 1
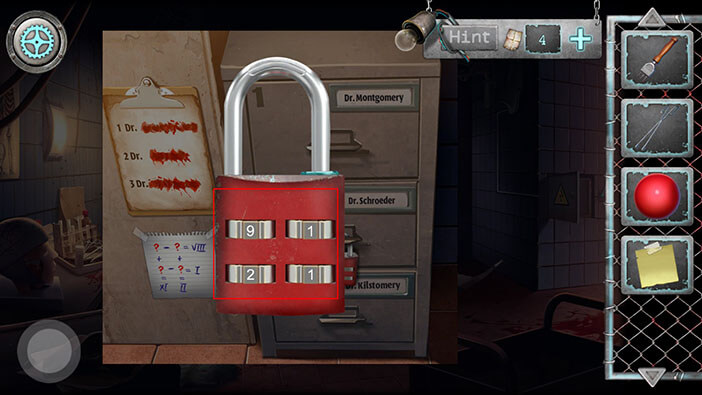
Well, we unlocked the padlock, so let’s see what’s inside Dr. Schroeder’s drawer.

Tap on the “Scalpel” to pick it up.
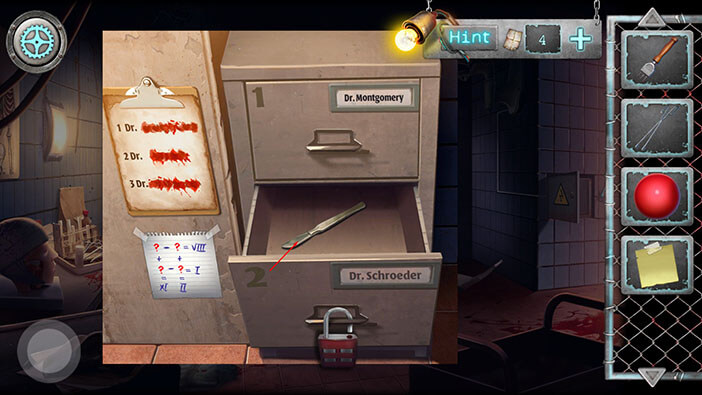
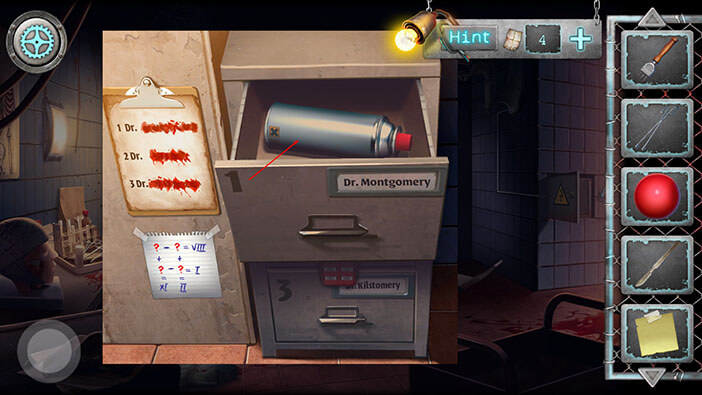
After that, let’s close Dr. Schroeder’s drawer, and open Dr. Montgomery’s drawer.
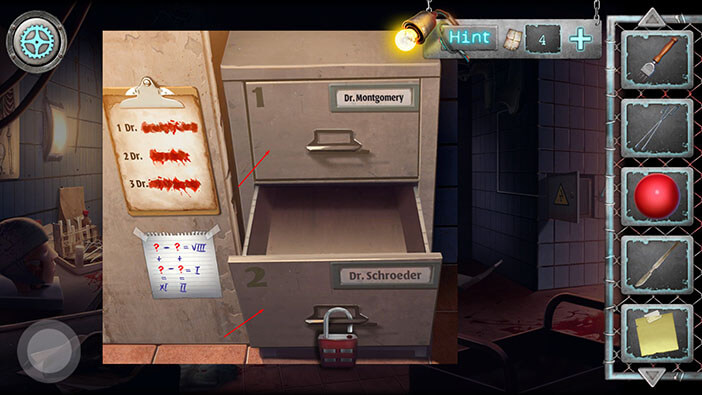
Tap on the item inside Dr. Montgomery’s drawer to pick it up and “Sleep Gas Cylinder” will be added to your inventory.
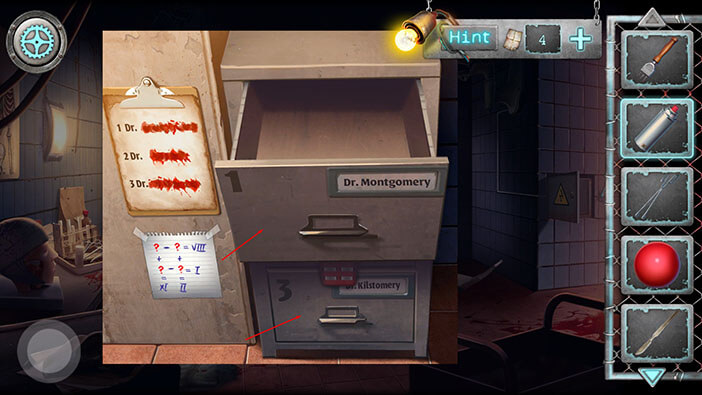
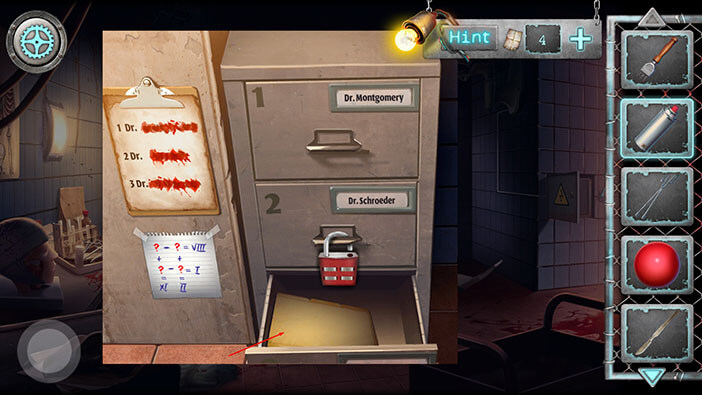
Ok, now, let’s close Dr. Montgomery’s drawer and open Dr. Kilstomery’s drawer.
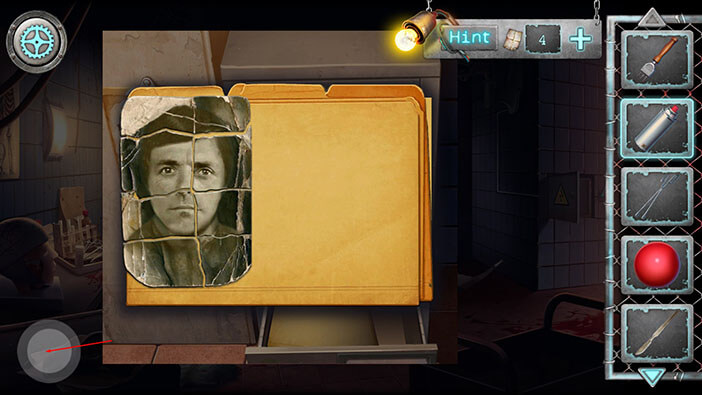
Tap on the item inside the drawer.
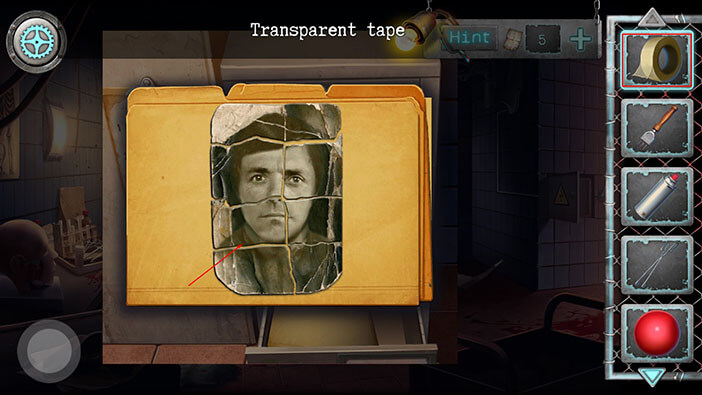
Here, we have another puzzle. We have to put the pieces of the photo together, and then tape them. However, we haven’t found the duct tape, yet. Assembling the photo is quite easy. You can see the solution in the image below.
When we find the duct tape, we will return here to tape the image. For now, tap on the button in the lower-left corner to go back.
Tap on the mannequin head on your left, to take a closer look at it.
Select the “Scalpel” from the inventory and tap on the head to make a cut.
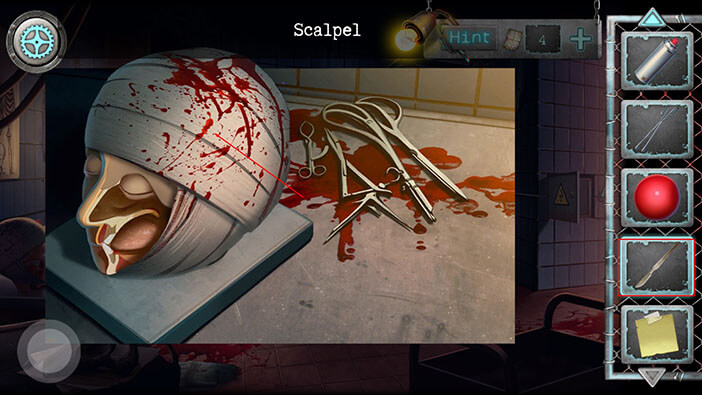
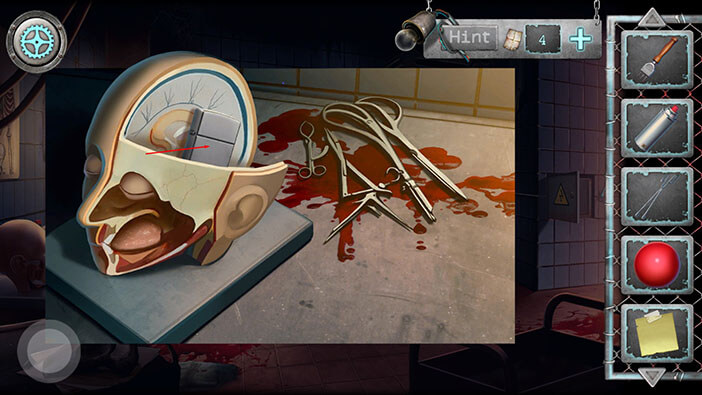
Tap on the head, several times, to remove the bandages and a few layers of the skull and brain.
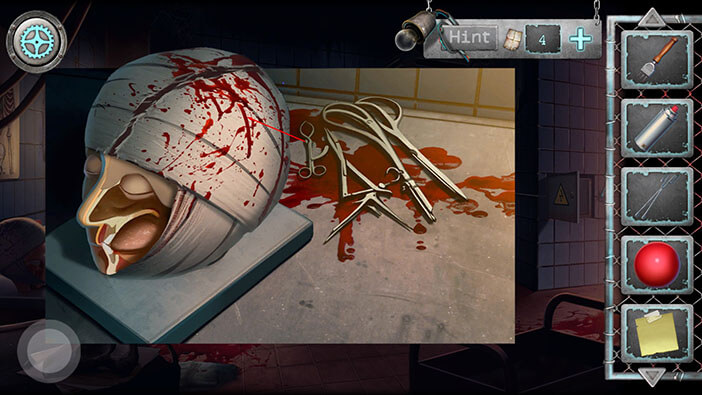
Inside the head, you will find a lighter. Tap on it to pick it up and a “Cigarette lighter” will be added to your inventory.
Ok, we should now go back to the boiler room. To get there, go to the first room on the left. After that, tap on the button in the lower-left corner of the screen.

We will reach the room with the vending machine. Tap on the button in the lower-left corner, once again, and you will reach the boiler room.
Let’s take another look at the vent.
Select the “Cigarette lighter” from the inventory and tap on the vent. Our character will use the lighter to illuminate the inside of the vent.

Ok, we can now see inside the vent. Tap on the “Transparent tape” to pick it up. Also, we can see two more “Plastic balls” deeper inside the vent, but our character can’t reach them.
Ok, since we found the duct tape, we should now go back to the drawer, and tape the photo. First, tap on the door to go back to the vending machine room.
After that, tap on the blue door to go to the next room.

From here, we should go to the first room on the right.
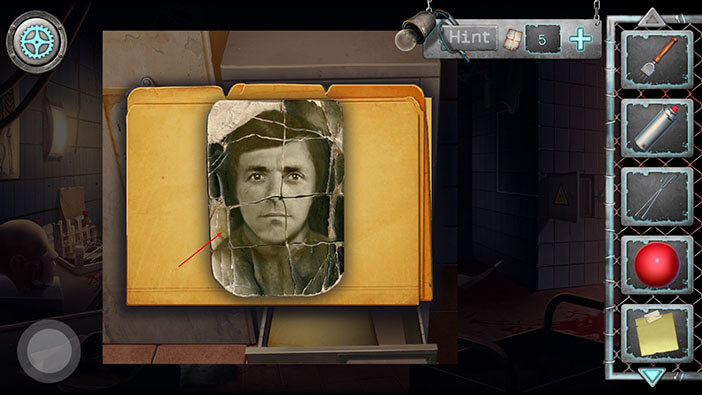
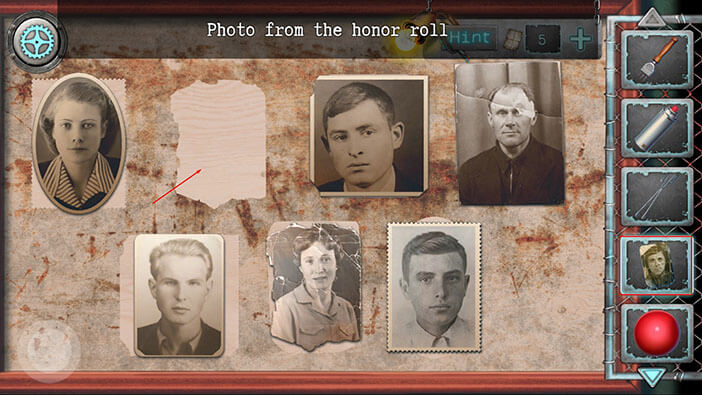
Tap on the drawer to take a closer look at it. After that, tap on the photo to start the interaction.
We already assembled the photo, so select the “Transparent tape” from the inventory and tap on the photo to tape it. After that, tap on the photo to pick it up, and “Photo from the honor hall” will be added to your inventory.
Ok, we should now go to the honor hall. To get there, we should go back to the room with the vending machines (to get there, go to the first room on the left. After that tap on the button in the lower-left corner to go back).
Once you reach the room with the vending machine, go to the first room on the right.
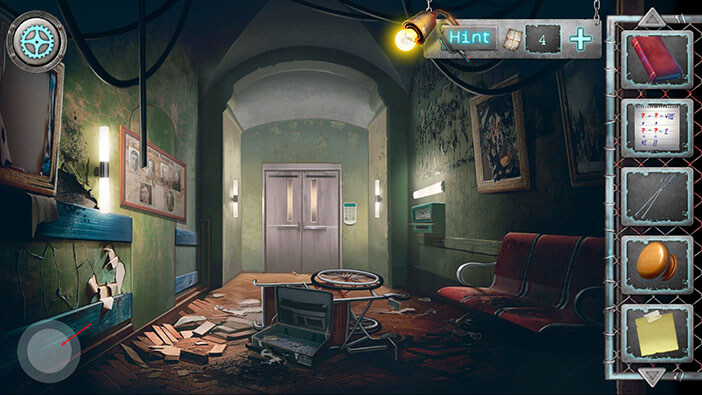
After that, tap on the green door, and you will reach the honor hall.
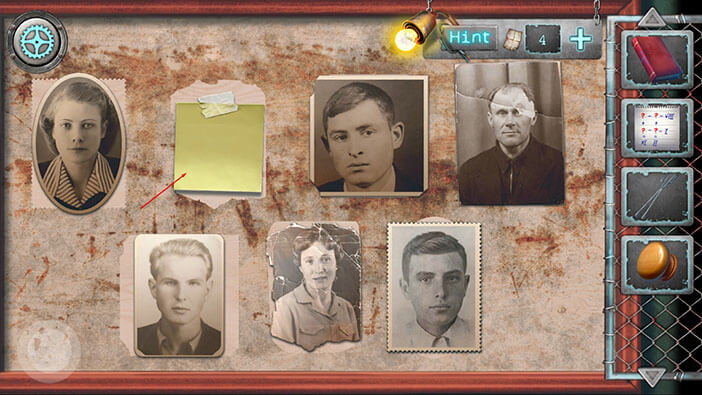
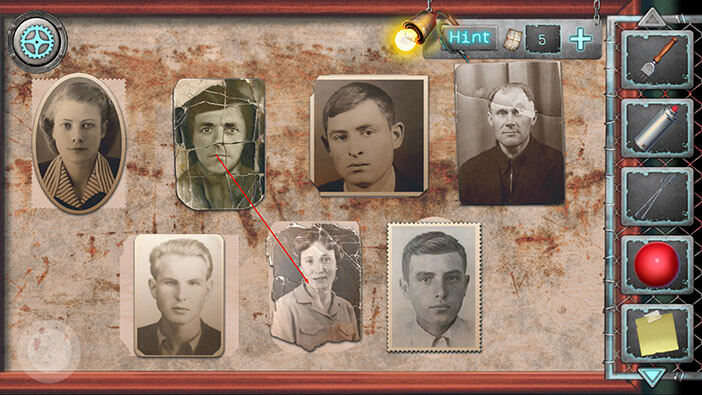
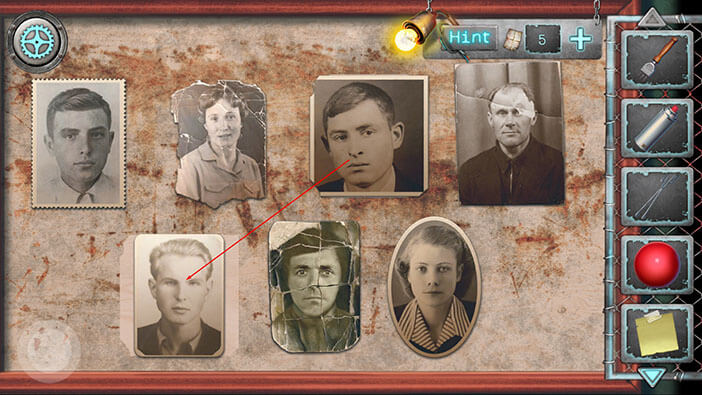
Tap on the panel on your left to take a closer look at it.
Select the “Photo from the honor hall” from the inventory, and tap on the empty space.
Ok, we added the photo. However, if you take a closer look at some of the photos, you will notice that their shape doesn’t match the shape in the background. So, we should now rearrange the photos by matching their shape with the background. We will do this in several steps.
Step 1
Drag the photo that we added (the second one (left to right) in the top row), and switch it with the second photo in the bottom row.
Step 2
Drag the first photo in the top row, and switch it with the third photo in the bottom row.
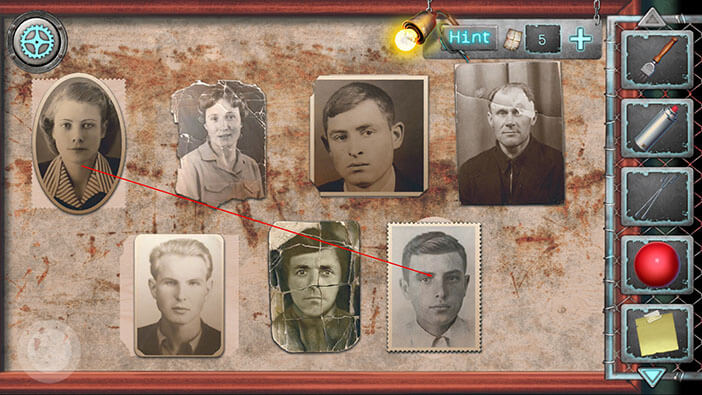
Step 3
Drag the third photo in the top row, and switch it with the first photo in the bottom row. With that, we will properly arrange the photos.
After we arranged the photos, the secret door opened.