Room Escape: Detective Phantom | Level 1
Hello everyone and welcome to the walkthrough for the first level of “Room Escape: Detective Phantom”. In the first level, we will begin our hunt for the serial killer known by the nickname “Black Spider”.
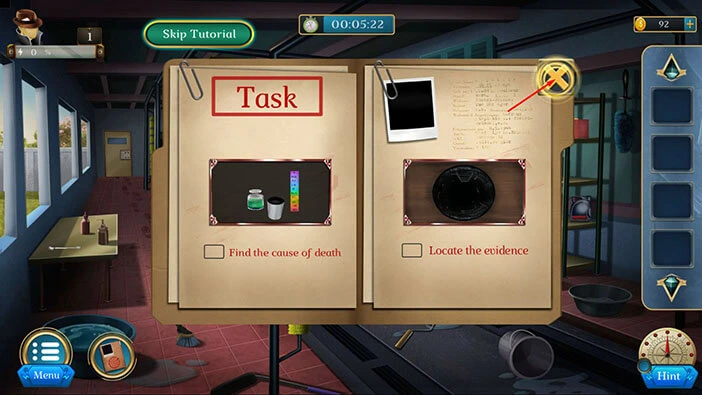
Let’s begin. If you tap on the second icon in the bottom left corner, you will see the objectives for this level.

So, in the first level, we have two objectives. We need to “Find the cause of death” and “Locate the evidence”.
Tap on the “X” button in the top left corner of the screen to close this window.
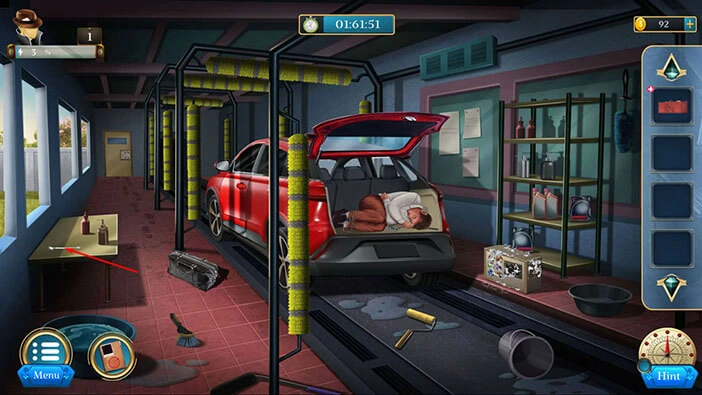
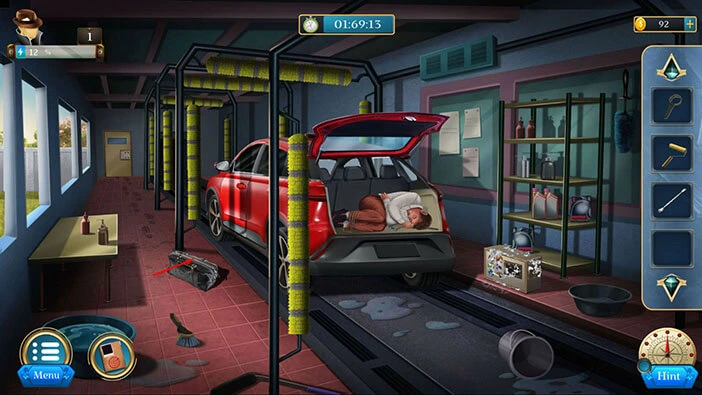
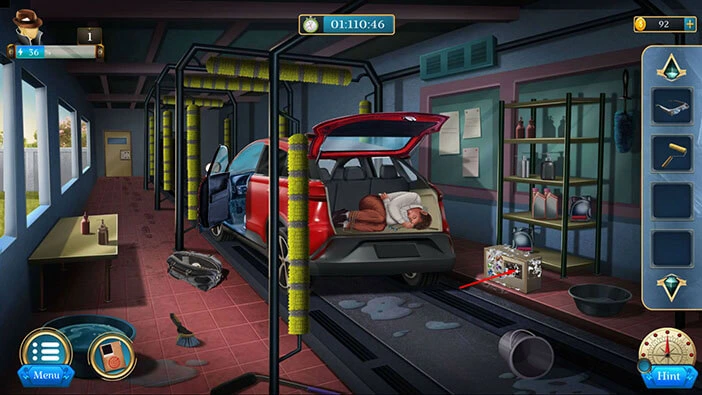
Let’s begin our investigation. Tap on the red box on the top shelf on the right to take a closer look at it.
Tap on the box again to pick it up. After that, tap on the arrow to go back.
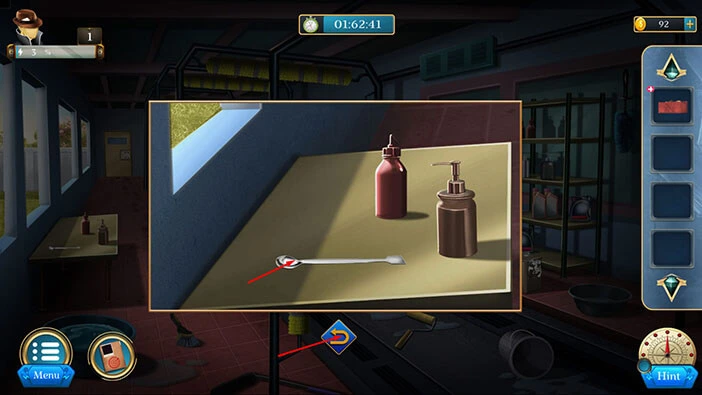
Next, let’s tap on the table on the left to take a closer look at it.
Here, you will see a “Spoon”. Tap on it to pick it up. After that, tap on the arrow at the bottom to go back.
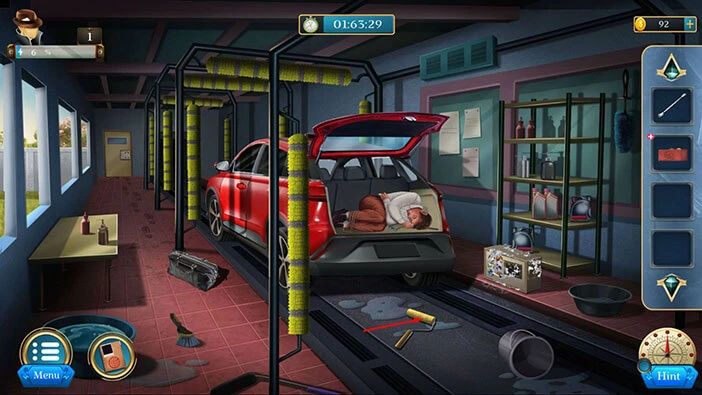
Next, on the floor, just below the car, you will notice a “Roller brush”. Tap on it to take a closer look at it, and tap again to pick it up.
After that, tap on the arrow at the bottom to go back.
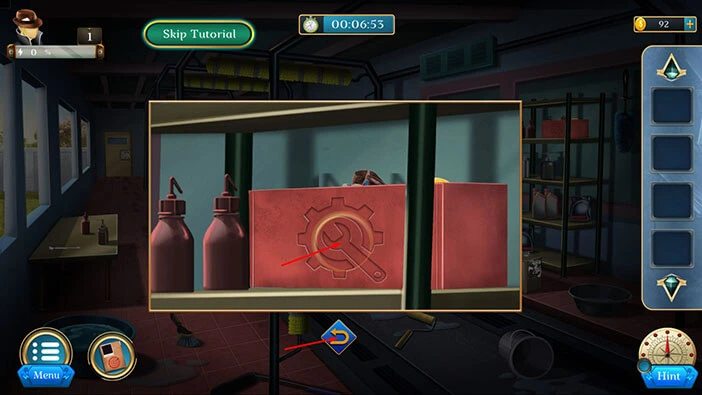
Next, let’s tap on the red box in our inventory to examine it, and it will appear in the middle of the screen. Tap on the box again to open it.
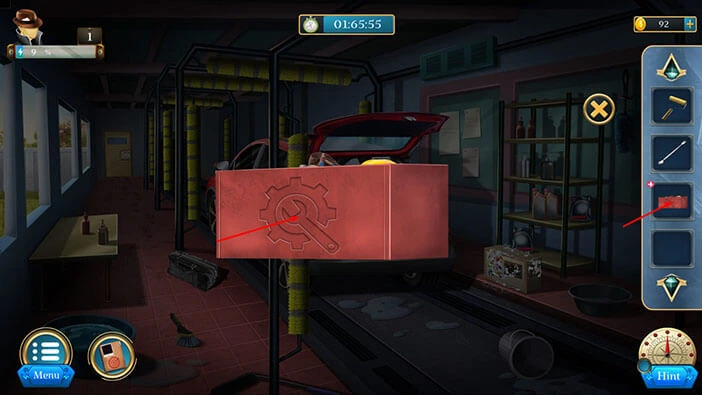
In the box, you will find a “Spanner”. Tap on it to pick it up. After that, tap on the “X” button in the top right corner of the screen to go back.
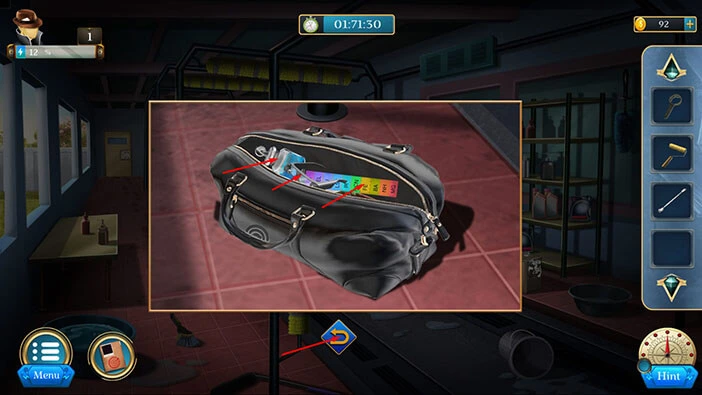
On the floor, just to the left of the car, you will notice a black bag. Let’s tap on it to take a closer look. After that, tap on the zipper to open the bag.
In the bag, you will find a “Color scale”, “X-ray glass”, and a “Solution”. Tap on these three items to pick them up.
After that, tap on the arrow at the bottom to go back.
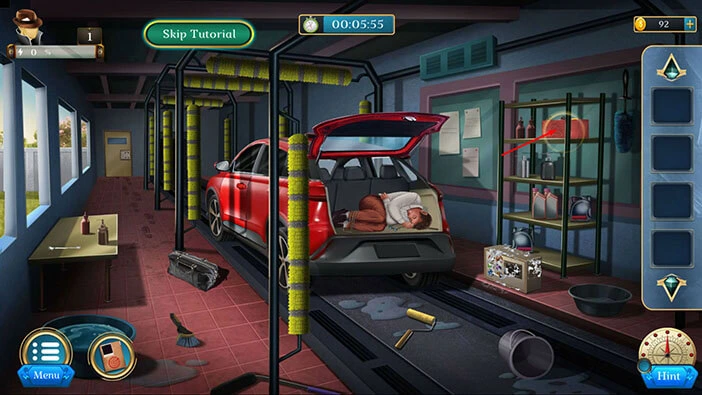
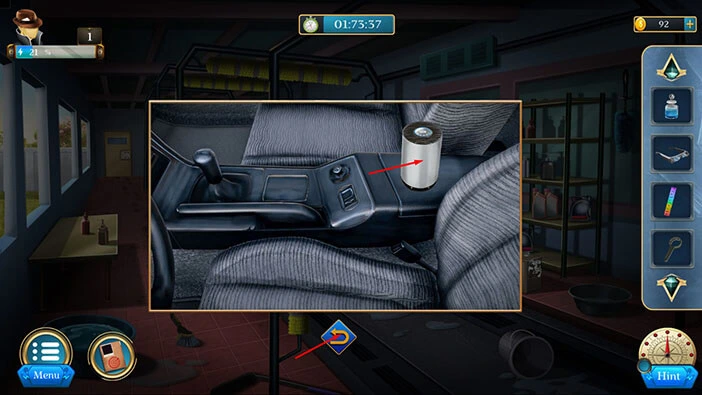
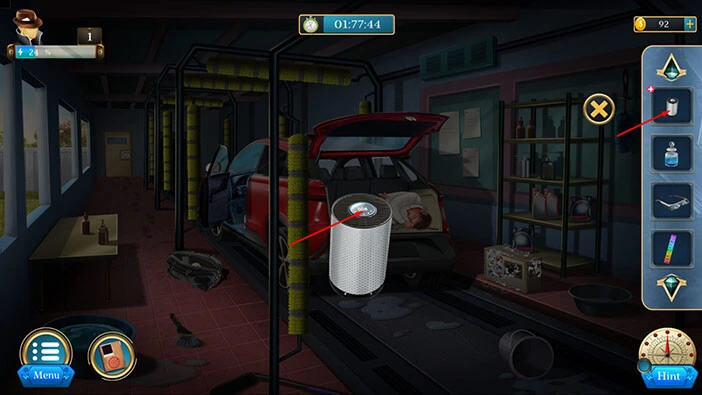
Next, tap on the car door to take a closer look at it, and tap again to open it. After that, tap on the open car door to go inside.
Here, you will find an “Air purifier”. Tap on it to pick it up.
After that, tap on the arrow at the bottom to go back.
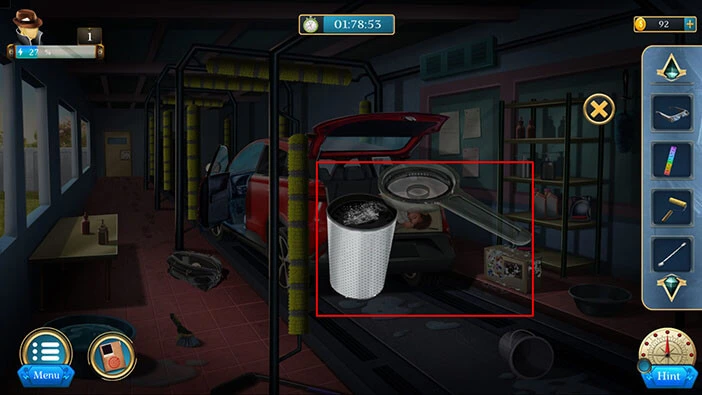
Next, let’s tap on the “Air purifier” in our inventory to examine it. It will appear in the middle of the screen.
Tap on the “Air purifier” to turn it around.
Next, select the “Spanner” from the inventory and use it to open the “Air purifier”.
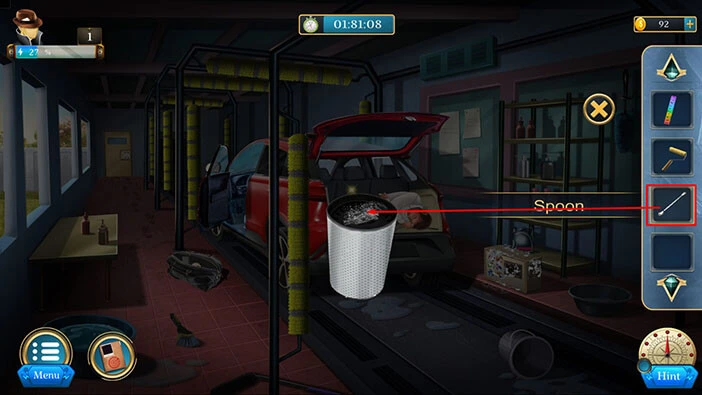
Next, select the “Spoon” from the inventory and drag it to the air purifier. Our character will use it to take some powder from the air purifier.
Next, select the “Solution” from the inventory and drag it to the middle of the screen. Our character will pour the powder from the spoon into the solution.

Our character will create a green(ish) solution. So, let’s select the “Color scale” from the inventory and drag it to the middle of the screen to compare it with our solution.
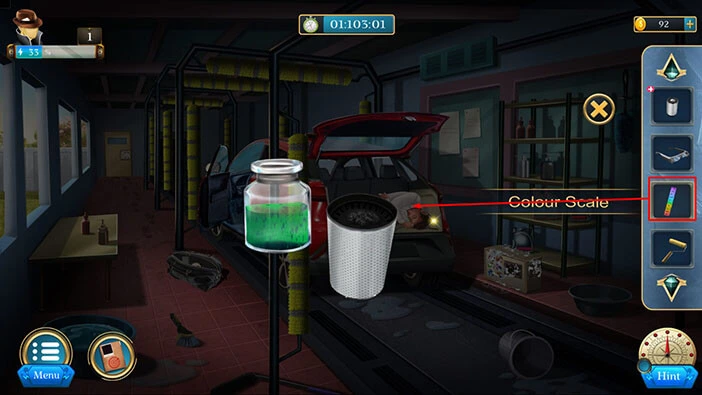
Our character, Detective Kyle Phantom will discover that the victim was eliminated with cyanide. The “Black Spider” also used cyanide to eliminate his victims, so our character suspects that he might also be responsible for this crime.
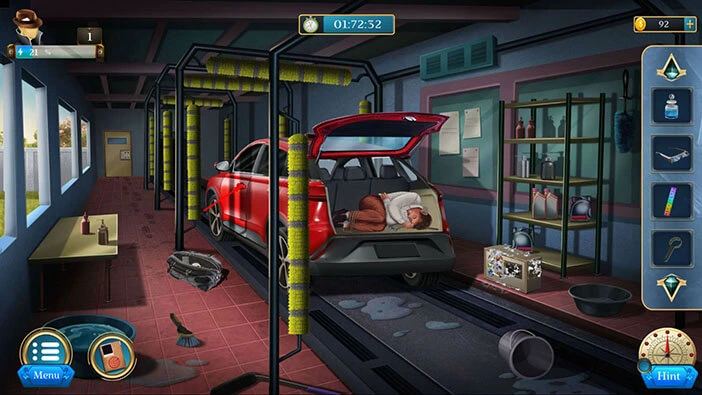
Our next task is to Locate the Evidence. Tap on the “X” button in the top right corner.
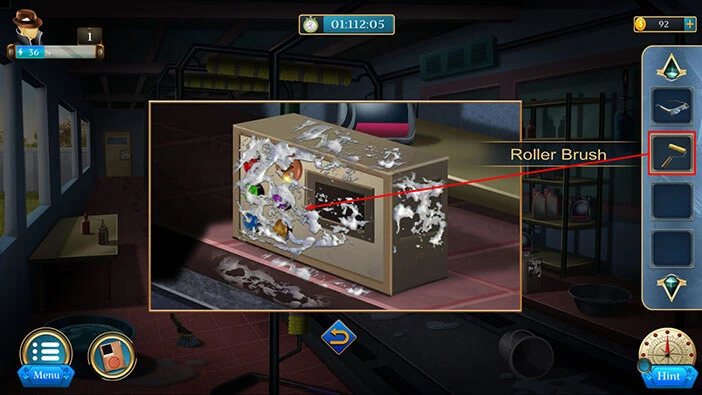
Let’s proceed. On the right side of the room, you will notice a dirty box. Let’s tap on it to take a closer look.
Next, select the “Roller brush” from the inventory and drag it to the box. Our character will use it to clean the box.
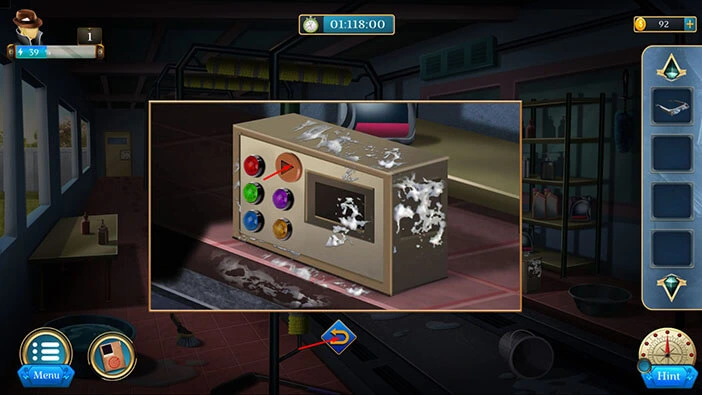
Next, let’s tap on the play button. The light will be turned on in a certain sequence. So, let’s memorize/write down the sequence because we will need this information for the next puzzle.
First button = Red light
Second button = Blue light
Third button = Green light
Fourth button = Yellow light
Fifth button = Red light
Once you’re done, tap on the arrow at the bottom of the screen to go back.
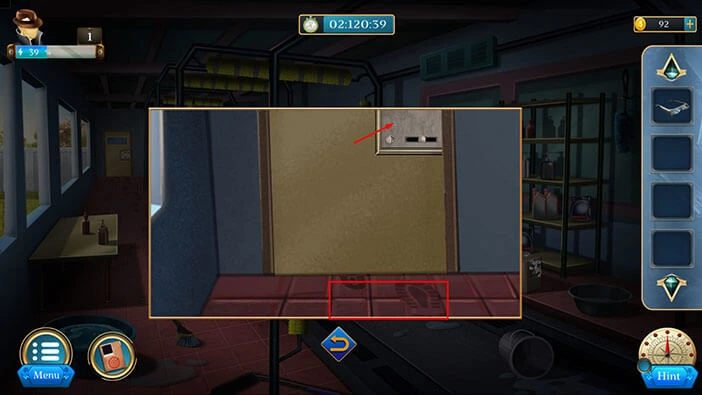
Next, let’s tap on the door, located in the top left corner of the room, to take a closer look at it.

You will find footprints leading out of the room, and they probably belong to the person who committed this crime. Let’s look for evidence.
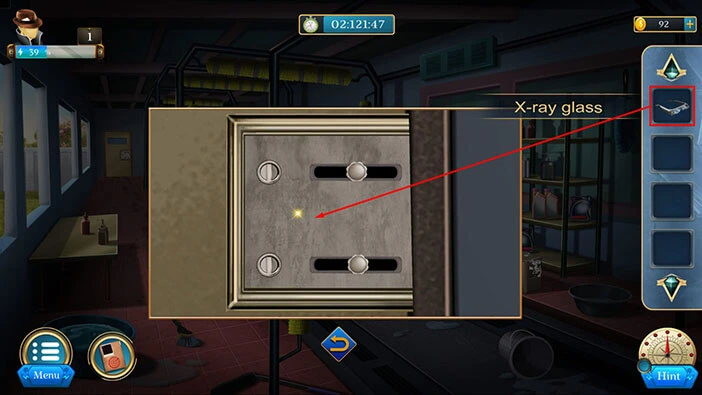
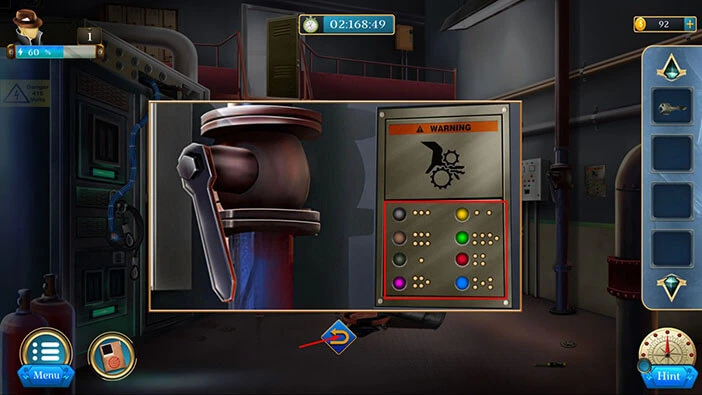
Let’s tap on the lock on the door to take a closer look at it.
Select the “X-ray glasses” from the inventory and drag them to the lock.
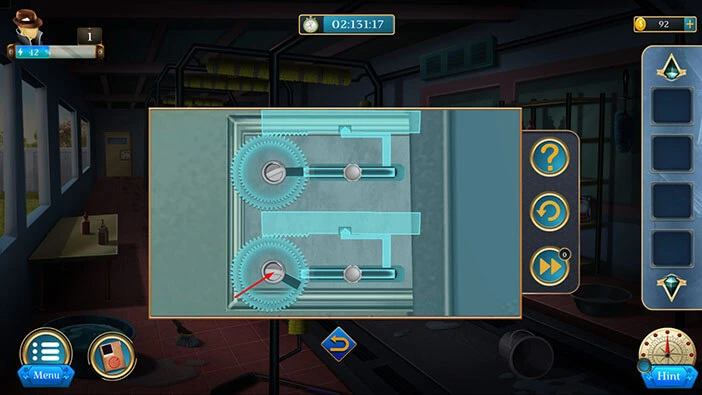
To solve this puzzle, we have to place the two plugs on the gears on the left, into the holes on the right. We can do this by rotating the plugs on the gears. We will do this puzzle in several steps. Let’s begin.
Step 1
Tap three times on the top gear, and you will rotate both gears.

Step 2
Tap seven times on the bottom gear, and you will rotate it into the same position as the top gear.
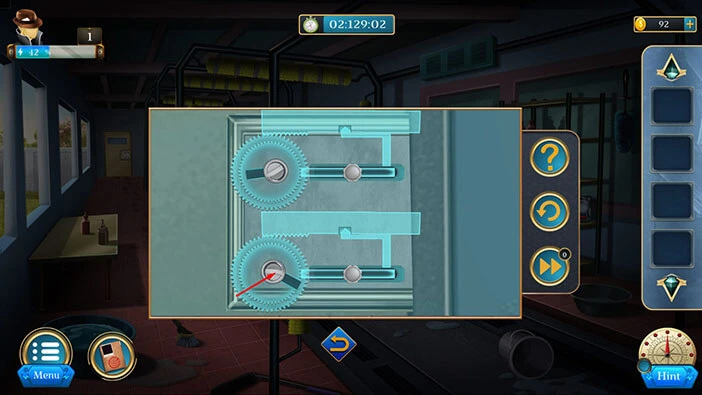
Step 3
Tap five times on the top gear, and you will place the plug on the top gear into the hole.

Step 4
Tap once on the bottom gear, and you will place the plug on this gear into the hole.
With that, you will unlock the door.
Let’s tap on the door to proceed to the next room.

On the stairs on the left, you will notice “Wiping cloth”. Tap on it to take a closer look, and tap again to pick it up.
After that, tap on the arrow at the bottom to go back.
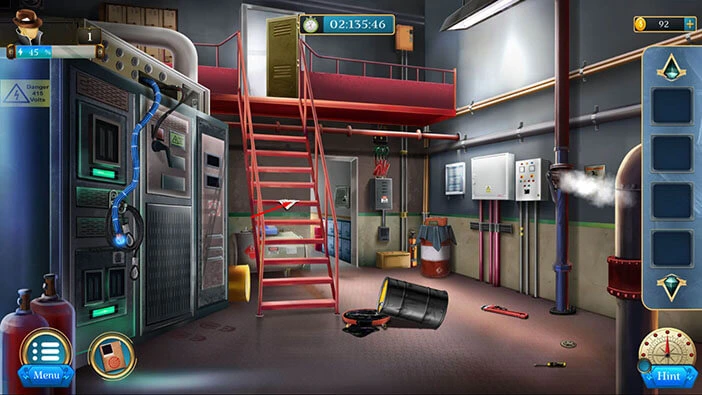
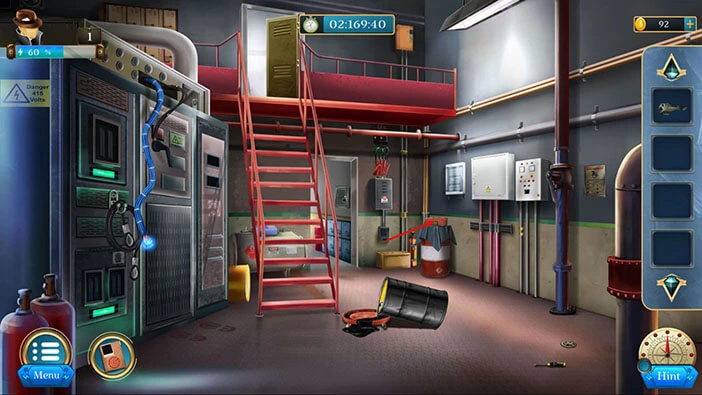
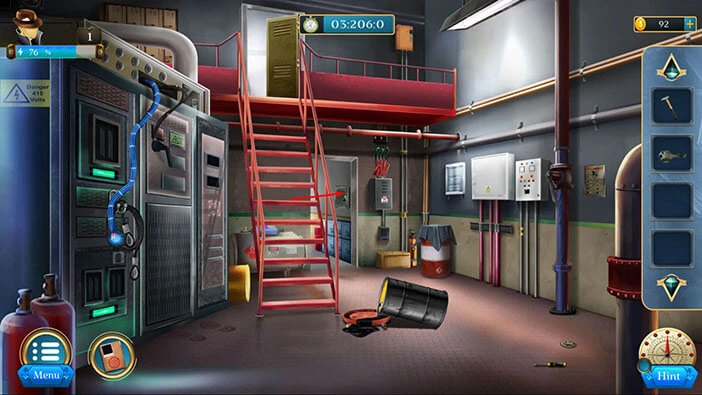
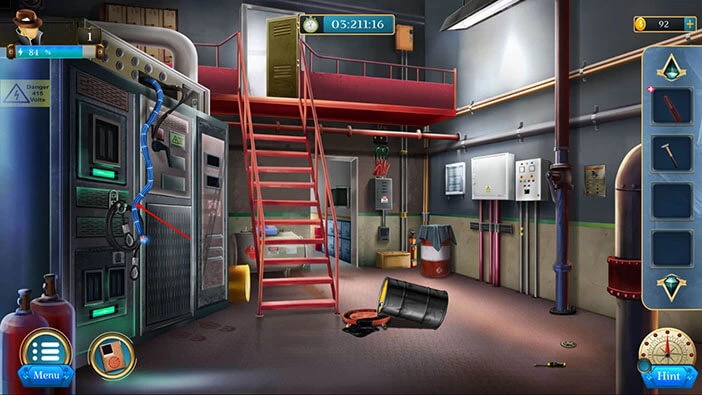
Next, let’s tap on the oil barrel to take a closer look at it.

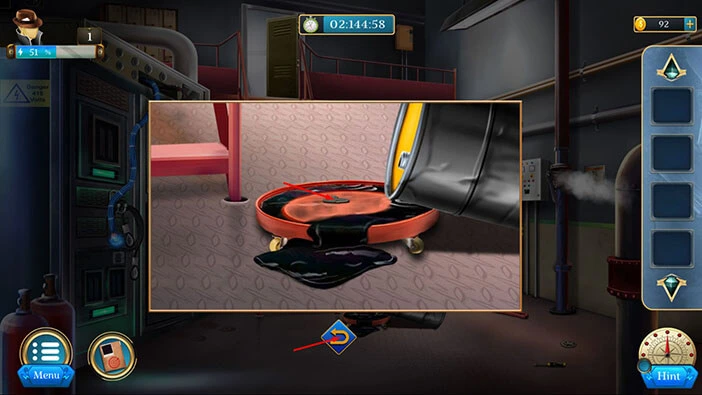
Select the “Wiping cloth” from the inventory and use it to clean the oil.
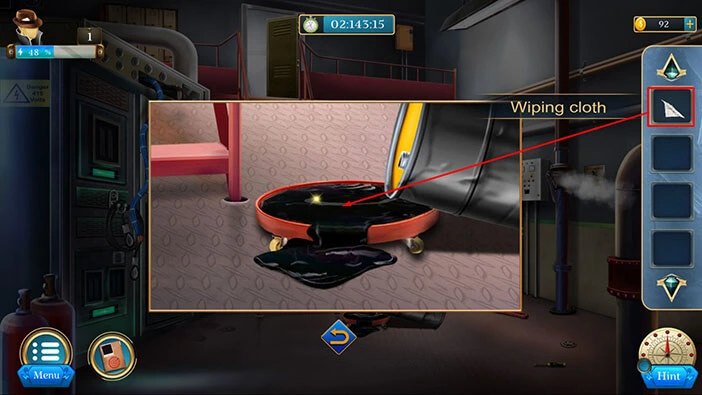
You will discover a “Key” that was previously hidden under the oil. Let’s tap on the “Key” to pick it up.
After that, tap on the arrow at the bottom to go back.
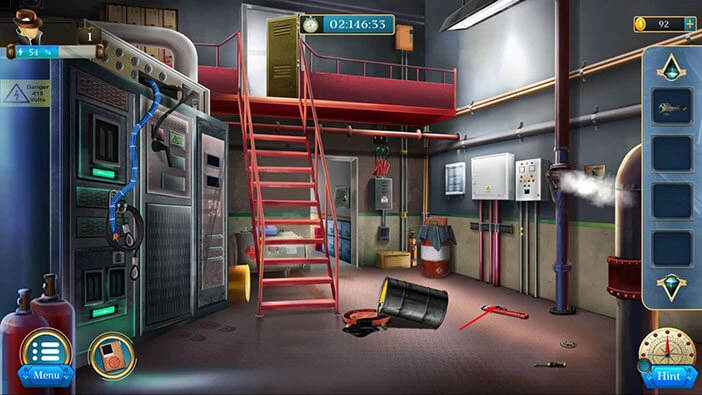
Next, on the floor, on the right side of the room, you will notice a “Wrench”. Tap on it to take a closer look at it, and tap again to pick it up.
After that, tap on the arrow at the bottom to go back.
Next, let’s tap on the pipe and steam on the wall on the right to take a closer look at it.

Select the “Wrench” from the inventory and drag it to the large screw on the right. With that, you will stop the steam.
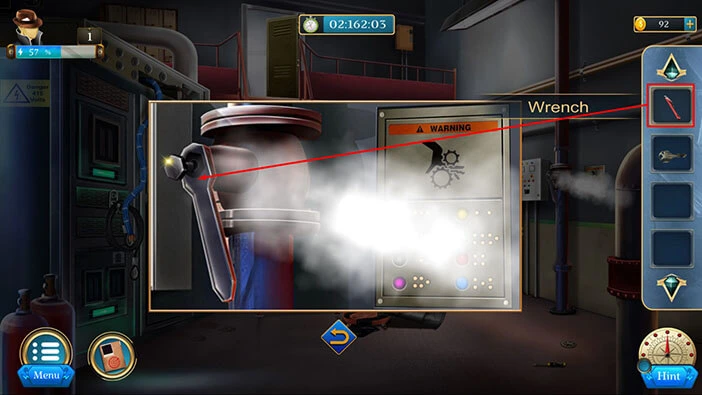
We will come back to this panel a bit later. For now, tap on the arrow at the bottom to go back.
Next, on the barrel, in the top right corner of the room, you will notice a toolbox. Let’s tap on it to take a closer look at it, and tap again to pick it up.
After that, tap on the arrow at the bottom to go back.
Let’s go back to the panel that we saw on the wall behind the steam. Tap on it to take another look.

Previously, we saw that the lights turned on in a certain sequence, and we memorized/wrote down this sequence. So, let’s swap the lights with the dots next to them. We had,
First button = Red light = Four dots
Second button = Blue light = Five dots
Third button = Green light = Seven dots
Fourth button = Yellow light = Two dots
Fifth button = Red light = Four dots
Memorize/write down this information because we will need it to unlock the toolbox. Once you’re done, tap on the arrow at the bottom to go back.

Next, let’s tap on the “Toolbox” in our inventory to start the interaction.
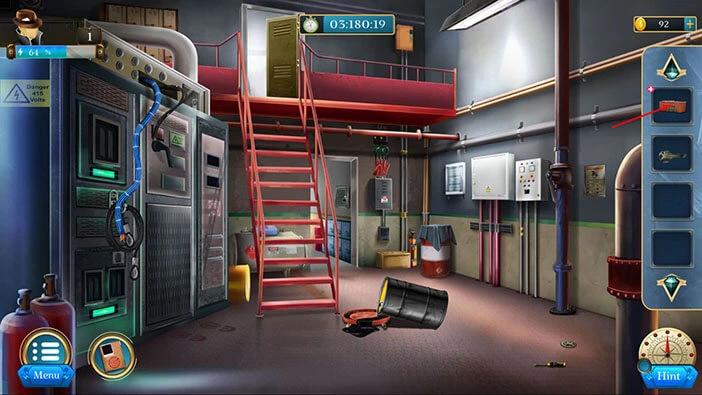
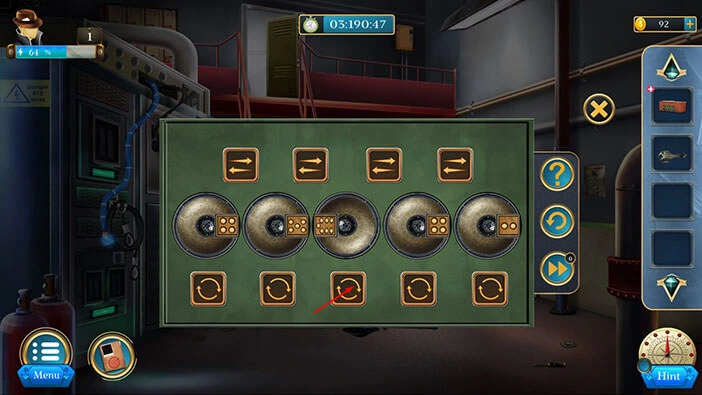
Our next task is to arrange the buttons on the toolbox to match the order that we previously discovered (by examining the lights, and the panel behind the steam).
So, looking from left to right, the buttons should be arranged in the following order
First button = Four dots
Second button = Five dots
Third button = Seven dots
Fourth button = Two dots
Fifth button = Four dots
We can use the arrow below the buttons to rotate them, and we can use the arrows above the buttons to swap them.
We will do this puzzle in several steps. Let’s begin.
Step 1
Tap on the arrow below the third button to rotate it. After that, tap on the second button with arrows to swap the dots of the second and third buttons.

Step 2
Tap on the arrow below the second button to rotate it. After that, tap on the first button with arrows to swap the dots of the first and second buttons.
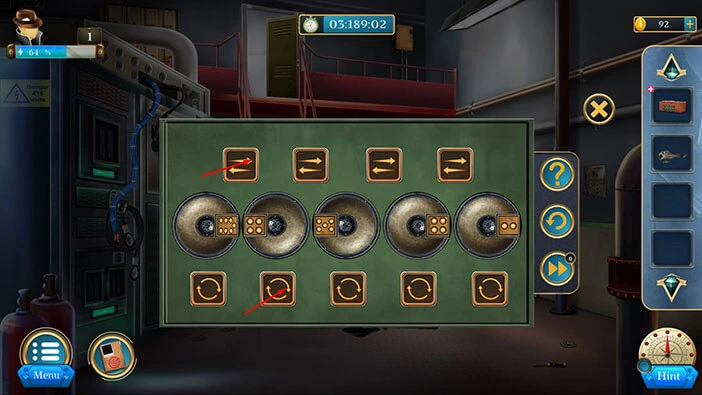
Step 3
Tap on the arrow below the second button to rotate it. After that, tap on the second button with arrows to swap the dots of the second and third buttons.

Step 4
Tap on the arrow below the third button to rotate it.
Step 5
Tap on the arrow below the fifth button to rotate it. After that, tap on the fourth button with arrows to swap the dots of the fourth and fifth buttons.
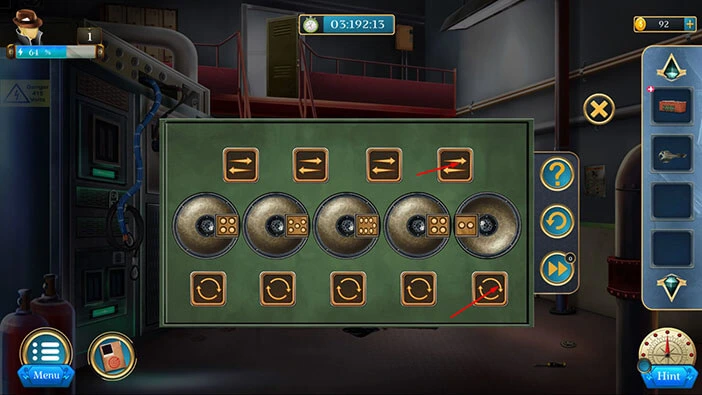
With that, you will unlock the toolbox. Let’s tap on it to look inside.
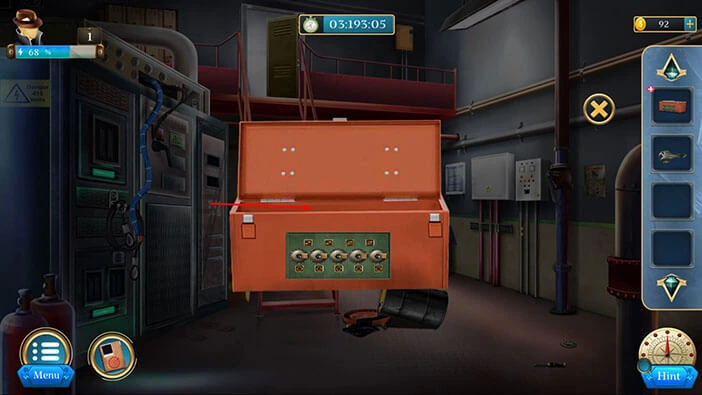
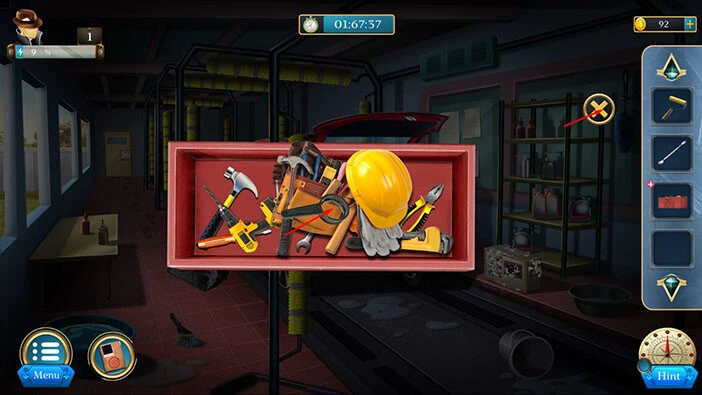
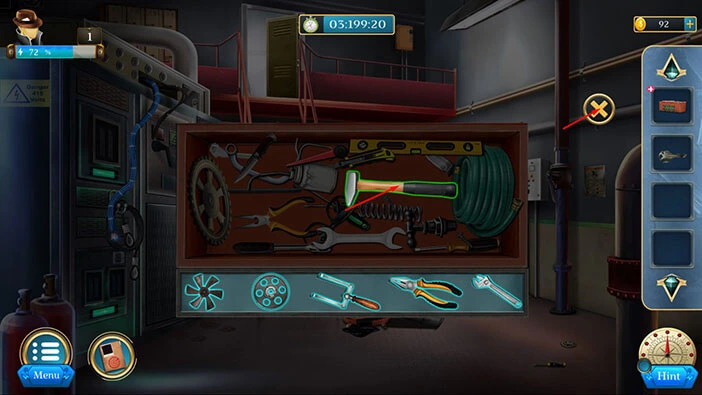
Below the toolbox, you will see five slots. Our task is to find the tools that would fit into these slots. Let’s do that.
In the middle of the toolbox, you will see a “Windmill”. Tap on it to place it into the first slot.
Above the “Windmill” you will notice a “Dial”. Tap on it to place it into the second slot.
In the top right corner, you will notice a tool that would fit into the third slot. Let’s tap on it.
On the right side of the toolbox, you will notice “Pliers” and the “Wrench”. So, let’s tap on these two items to place them into the fourth and fifth slots.
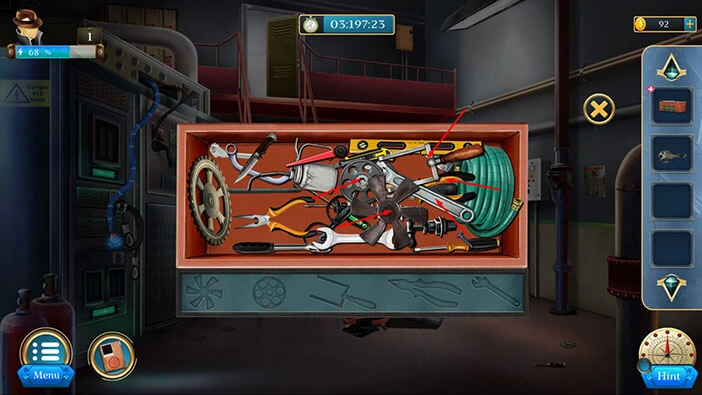
Once you place all five tools into the slots below, you will discover a “Hammer”. Let’s tap on it to pick it up.
After that, tap on the “X” button to go back.
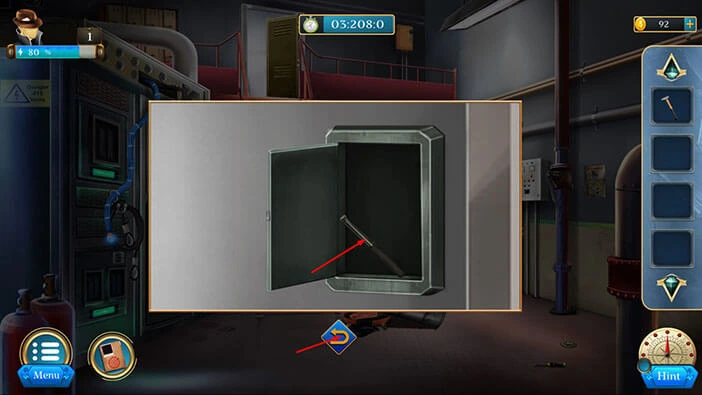
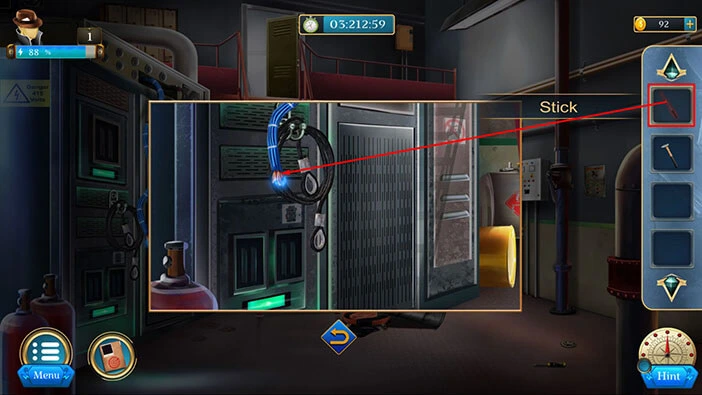
Next, in the small room in the back, you will notice a locker on the wall. Tap on the locker to take a closer look at it.
Select the “Key” from the inventory and drag it to the locker to unlock it.

In the locker, you will find a “Stick”. Tap on it to pick it up.
After that, tap on the arrow at the bottom to go back.
Next, tap on the “Stick” in your inventory to select it and it will appear in the middle of the screen. After that, tap on the “Stick” again and you will increase its length.
After that, tap on the “X” button to go back.
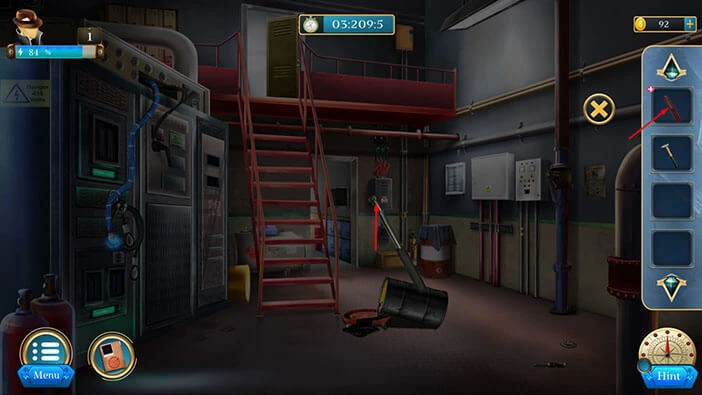
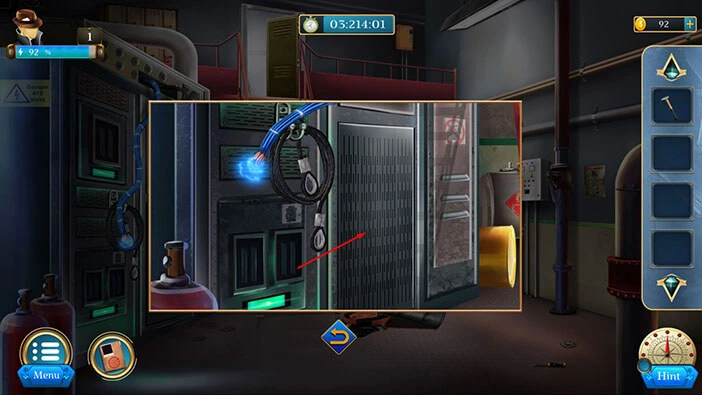
Next, let’s tap on the wire on the left to take a closer look at it.
Select the “Stick” from the inventory and drag it to the wire. Our character will use the stick to push the wire out of the way.
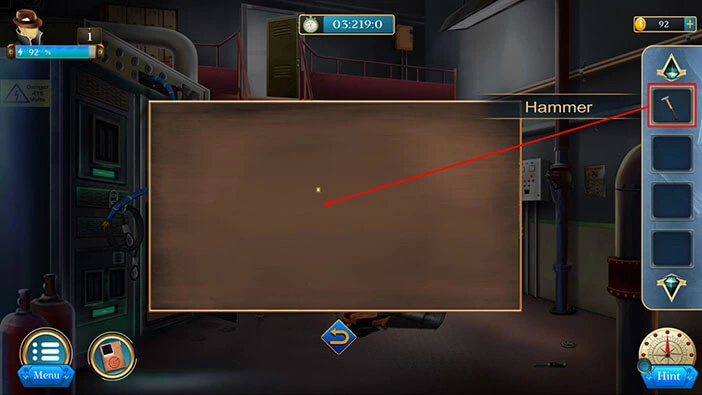
Next, tap on the panel on the right to open it, and tap again to look inside.
You will see a wooden board. So, let’s select the “Hammer” from the inventory and use it to smash the wooden board.
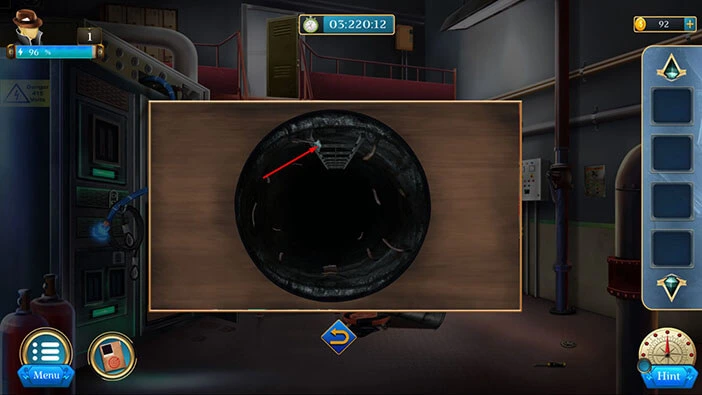
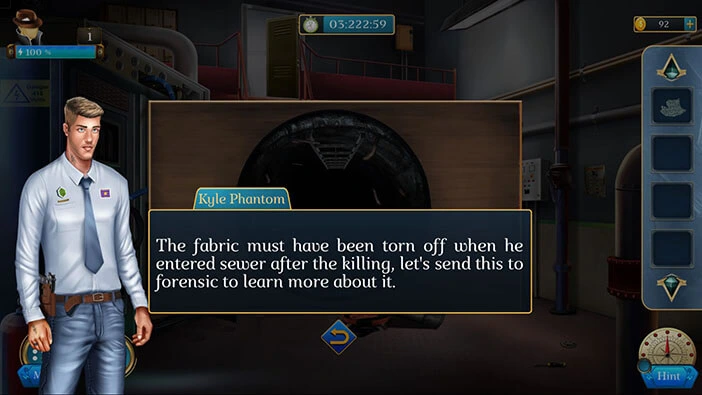
You will discover a hole with the ladder. On the ladder, you will notice a piece of cloth. Tap on it to pick it up, and “Evidence” will be added to your inventory.
Our character, Detective Kyle Phantom will conclude that the “Black Spider” used this sewer to access the room and commit the crime. While he was escaping, a piece of his cloth was caught on the ladder, and this is the evidence that we found.
With that, you will complete the first level.
With that, we have reached the end of the first level. If you want to see the walkthrough for the second level, tap on the next part button.
Thank you for reading.