Nobodies: Silent Blood – Part 1
Introduction
Welcome to the walkthrough for “Nobodies: Silent Blood” from Blyts. In this game, you are an Agent 1080. When your agency assassinates targets that are funding the terrorist groups, your job is to get rid of the dead bodies. To earn the medal at the end of each mission, you need to hide or destroy the body, return all the items you found during the mission to their original places, and return the starting state of things (if you turned the valve, turn it back, if you unlocked the door, lock it back, etc…).
The gameplay consists of 14 missions, while the 14th mission has 2 different variations, depending on your choice. You can check out Part 2 here.
During each mission, you can:
- Pick up items
- Merge items in your inventory to get a more complex item
- Use items from your inventory on the objects
- Disassemble complex objects in your inventory to get back the original items
- Have conversations with NPCs where you choose dialogue options
- Solve safe codes
During the missions, you can find 6 collectible items. You can find their locations in this guide.
Part 1 of this guide will cover content from mission 1 to mission 10.
Mission 1: Operation Groundwater is a tutorial of the game. Don’t press the “Skip tutorial” button and the game will lead you, click by click, to what you need to do to solve this mission and earn your first medal. Here, you will learn all the basic mechanics of the game.
Mission 2: Operation Last Rites
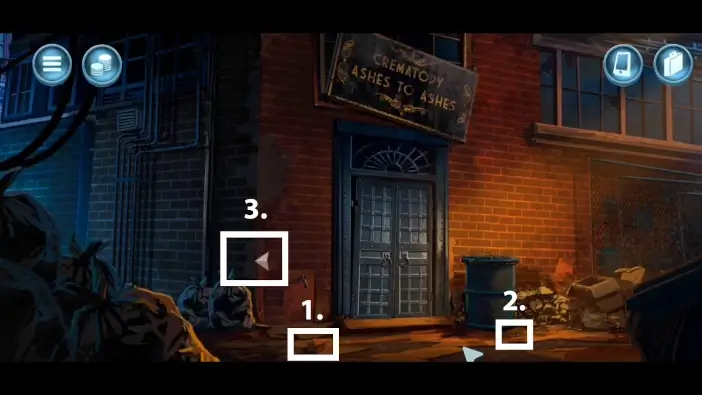
- Pick the wooden block. You will cut this block with a hacksaw later.
- Pick the pin.
- Go left.
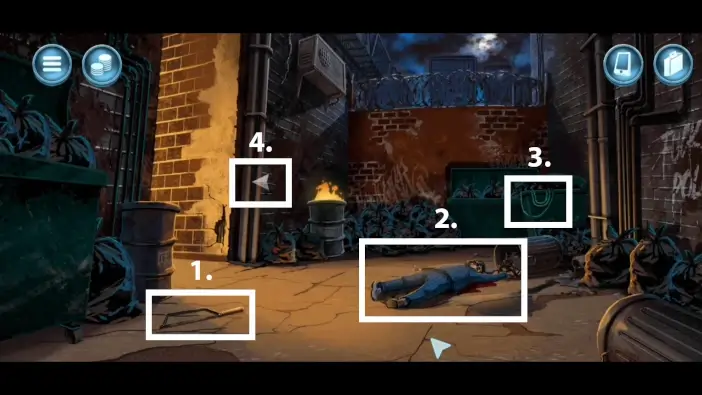
- Pick the hacksaw. You will need it to cut the hose.
- Pick up the body.
- Take the hose.
- Return to the crematory’s main entrance.
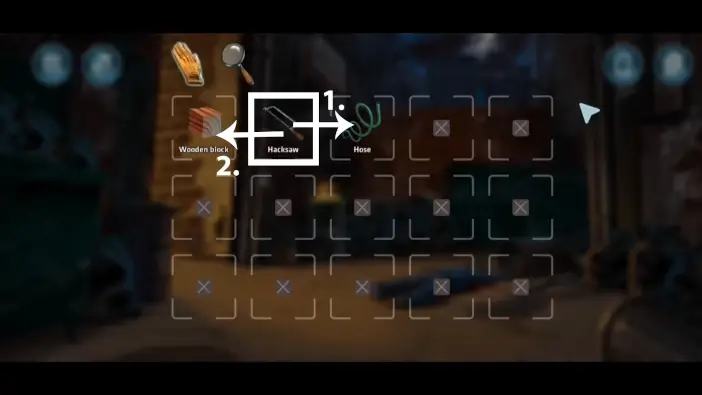
- Go to the inventory and cut the hose with your hacksaw. The hose segment will be added to your inventory.
- Cut the wooden block you found near the crematory entrance with your hacksaw to get the wooden wedge in your inventory.
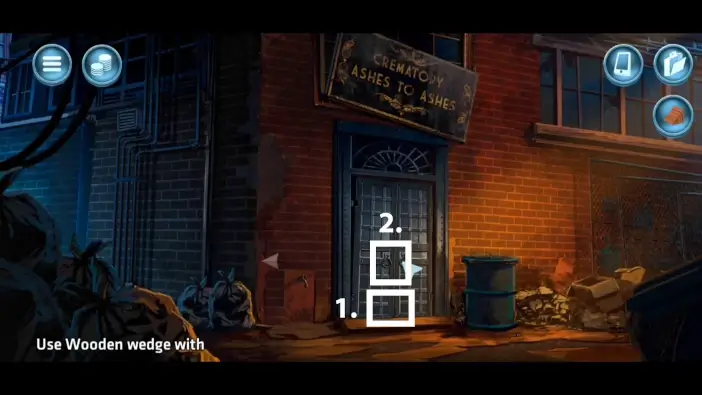
- Place the wooden wedge to fix the door.
- Use the pin to unlock the door and enter the crematory.
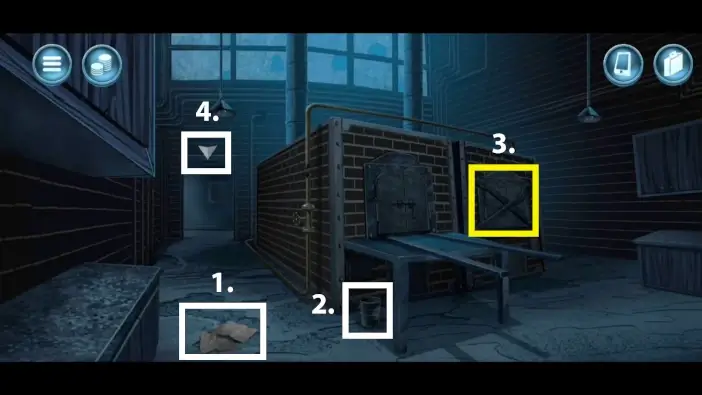
- Once inside the crematory, pick up the document.
- Pick up the bucket.
- The belt, one of the collectibles is in the right furnace. Use the hacksaw to open the furnace and take the belt.
- Exit the crematory.
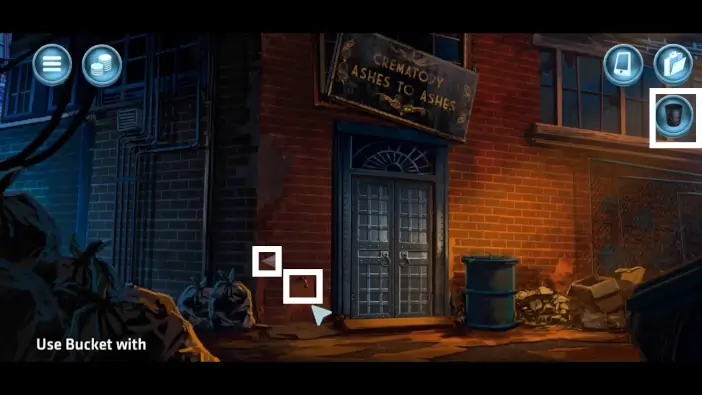
Use a faucet to fill the bucket with water. Go left.
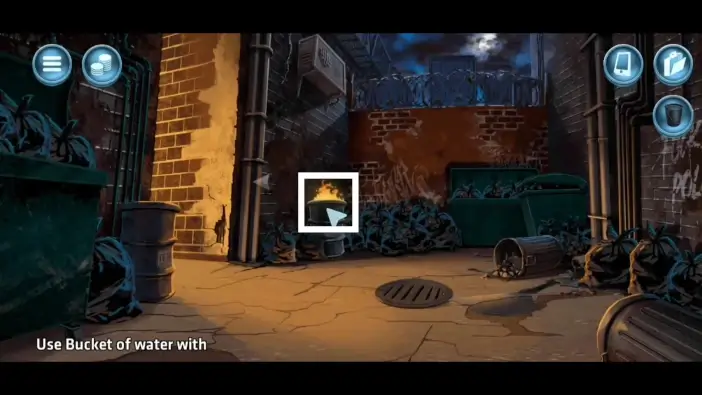
Burn the newspaper you got from the crematory to get the “burning paper” item.
Use the flames to heat the water in your bucket. Go back inside the crematory.
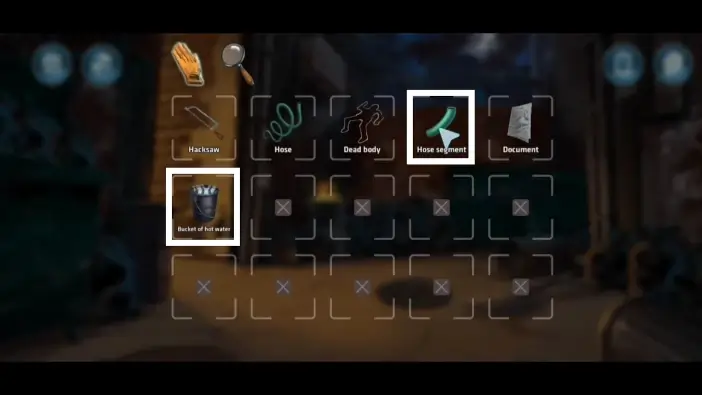
In your inventory, put the hose fragment inside the bucket of hot water. Your hose segment will turn into an expanded hose segment.
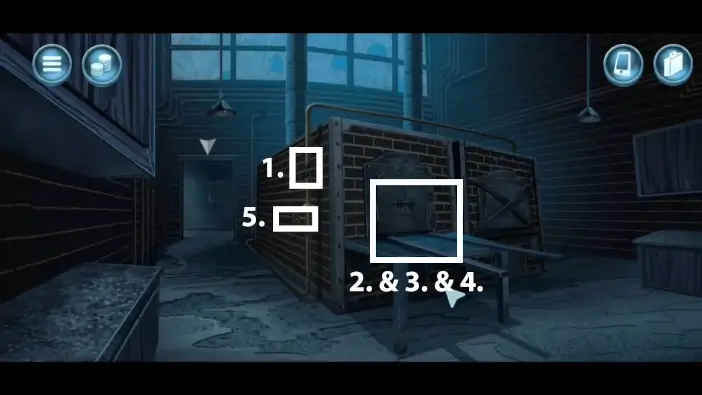
- Use the expanded hose segment to fix the pipe.
- Place the body inside the left furnace.
- Light the furnace with the burning paper.
- Push the body inside the furnace.
- Turn the valve to release the gas.
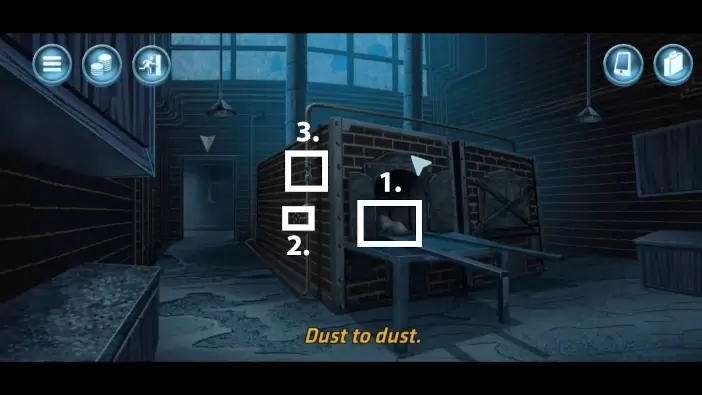
- Use the hose on the dust to eat it.
- Turn off the gas.
- Take off the expended hose segment.
Before you finish the mission, return all the items from your inventory to the locations where you found them. This way, you will earn the medal.
Mission 3: Operation Spillway
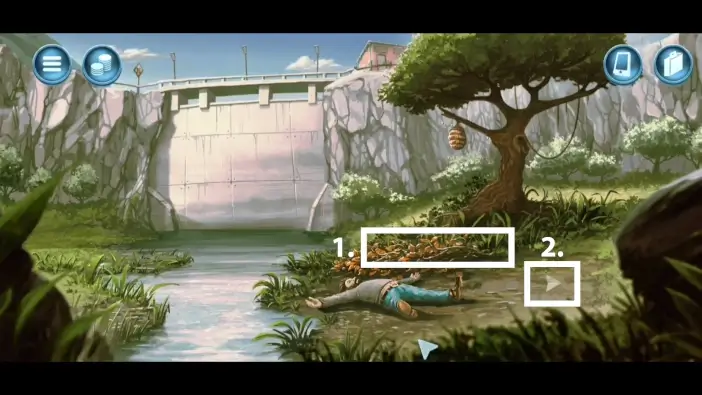
- Pick the dead branch.
- Go to the right.
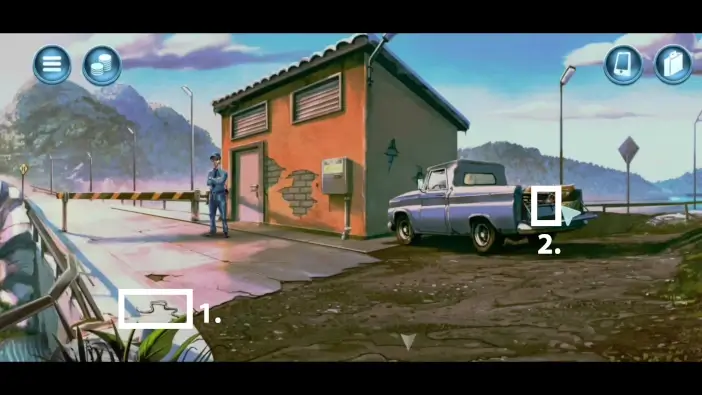
- Pick up the wire.
- Pick the hacksaw.
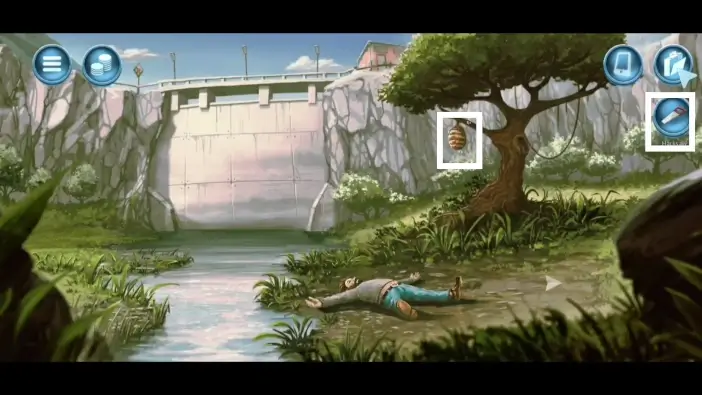
Go back to the crime scene. Using a hacksaw, cut down the beehive and take it.
Go right.
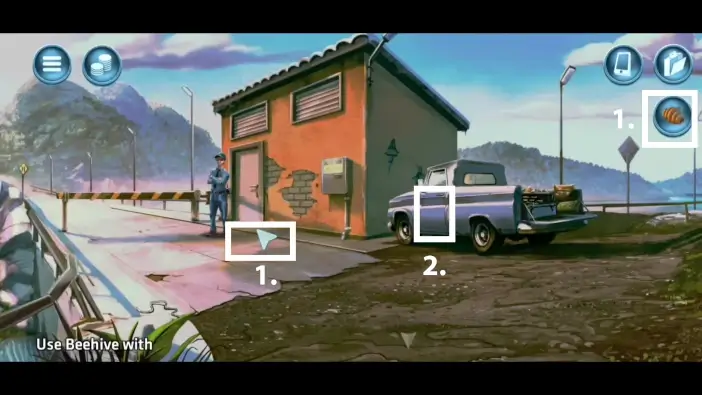
- Place the beehive near the police officer. This will cause him to run away.
- Go to the car. Use the wire to unlock the door.
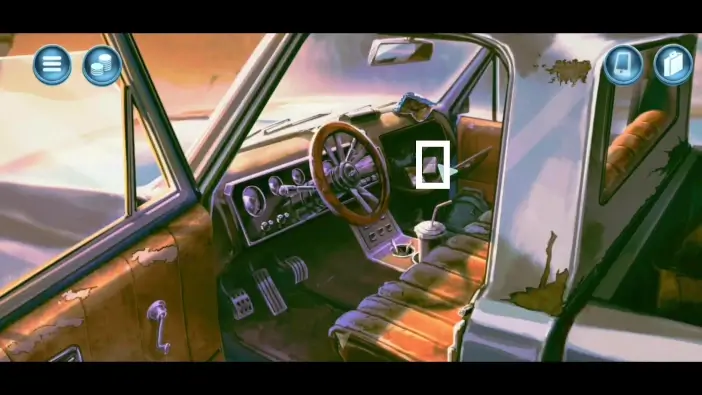
Open the compartment near the co-driver’s seat. Pick the lighter and exit the car.
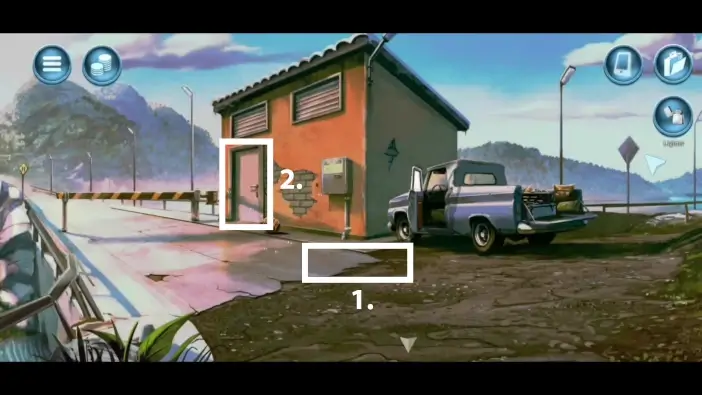
- Place the dead branch near the car and burn it with a lighter. This will scare the bees away from the beehive.
- Now you can enter the building.
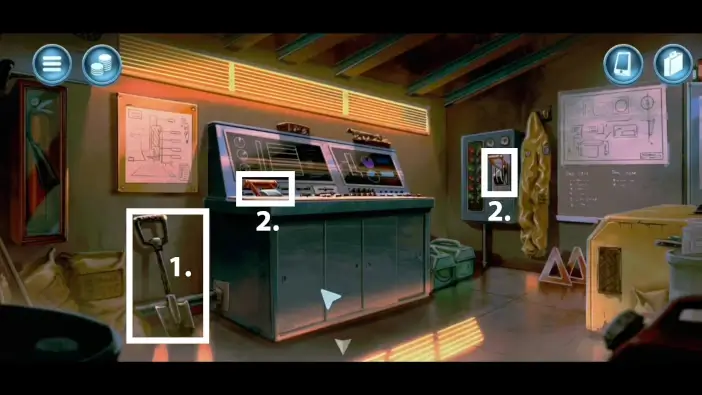
- Pick the shovel from the left corner.
- Pull the 2 levers to stop the water from flowing from the dam.
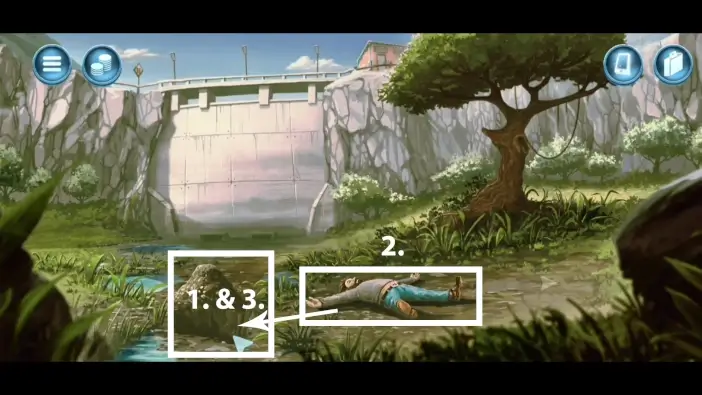
- Go back to the crime scene. With a shovel, dig a hole.
- Pick the body, and then place it into the hole.
- Use a shovel to cover the hole.
Before you finish the mission, return all the items from your inventory to the locations where you found them.
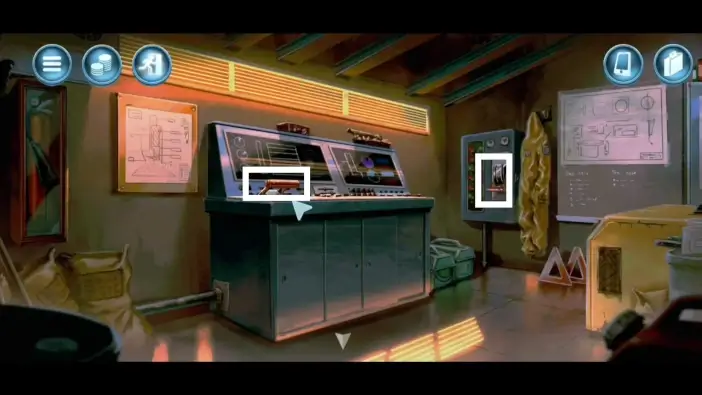
Don’t forget to pull back the 2 levers to let the river flow again and don’t forget in the car to close the cabinet where the lighter is. Don’t leave the car unlocked, use the wire once again to lock it.
Mission 4: Operation Airlift
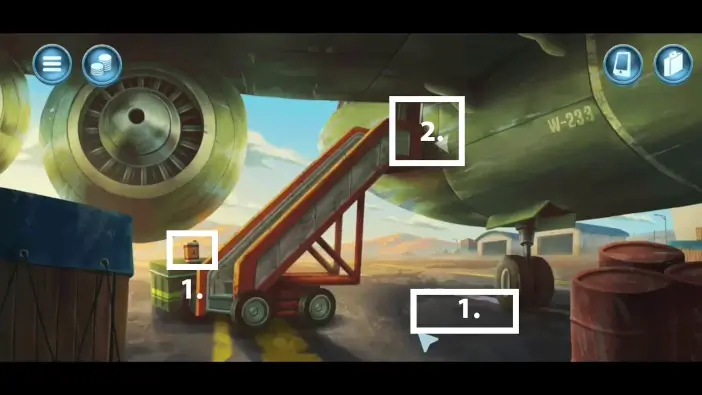
- Pick the oil can and spill it on the ground.
- Enter the plane.
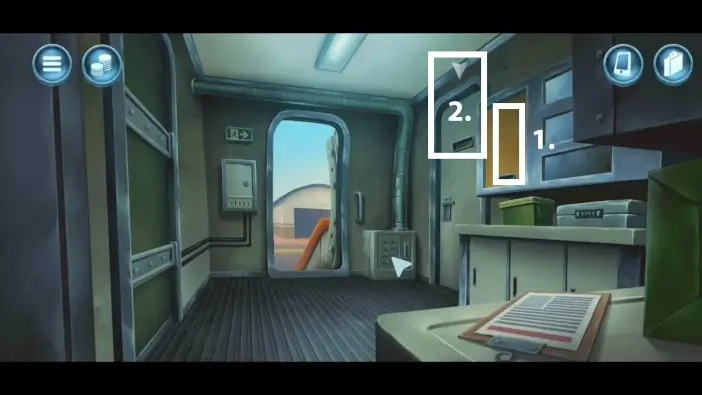
- Take the strap.
- Go to the cockpit.
When speaking with the pilot, pick the first dialogue option.
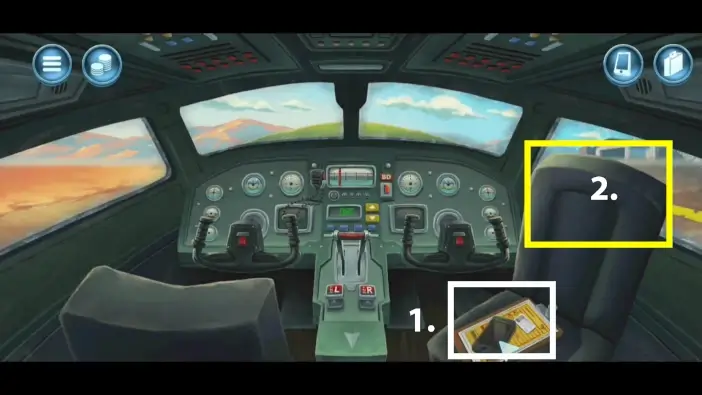
- When the pilot is gone, pick up the phone and the ID. Examine the ID and pay attention to his date of birth.
- Pick up the jacked from the chair. This is the second collectible in the game.
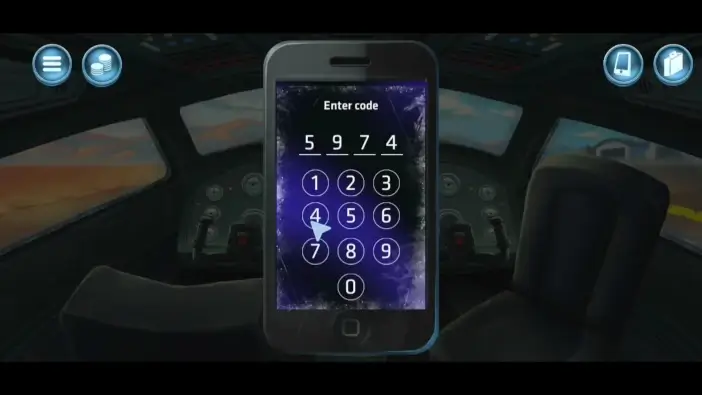
You should pick up the phone from your inventory and type in the password 5974, which is his date of birth.
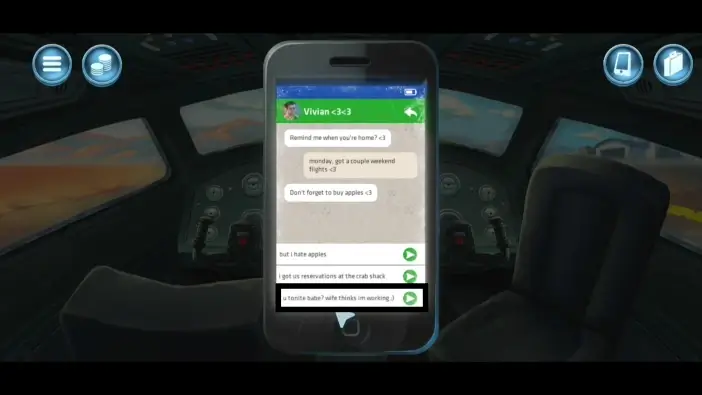
Choose Vivian’s inbox and pick the third option. Once Vivian replies, delete your and her messages.
Place the phone back where it was before.
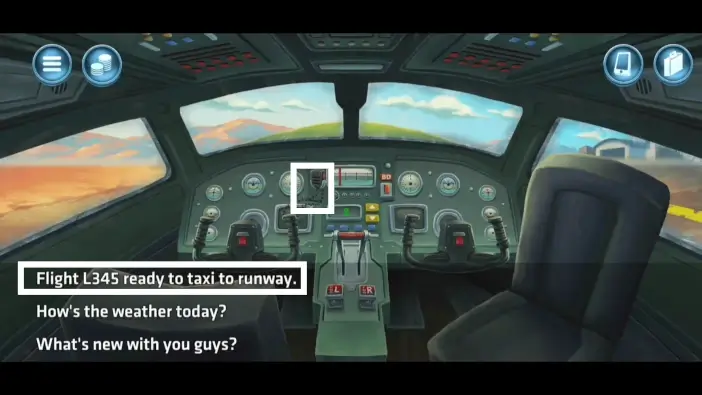
The pilot will return but he will answer the phone call. When the pilot leaves again, speak with the flight control. Pick the first dialogue option.
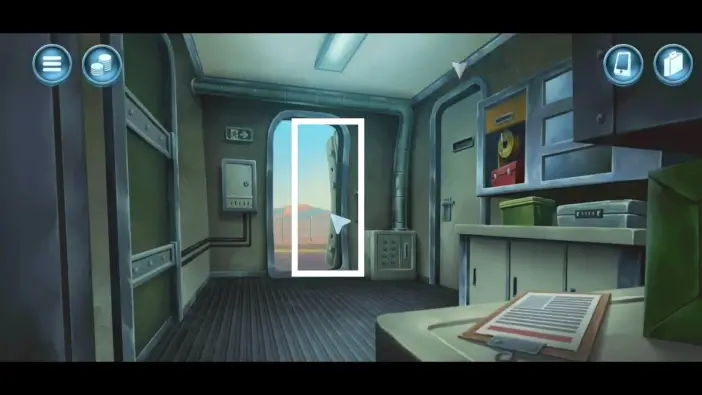
Exit the cockpit to close the door of the plane. Return to the cockpit.
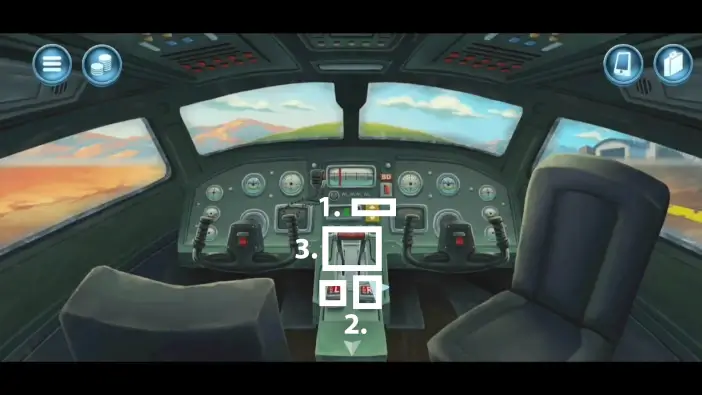
- Reset the altitude selector.
- Engage engines.
- Accelerate.
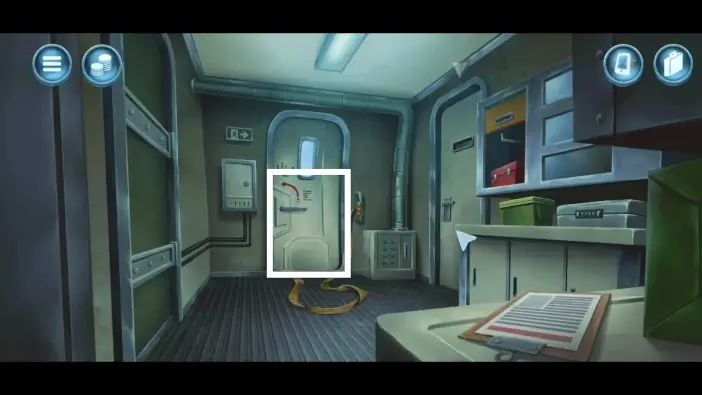
Go to the corridor, attach the strip, and open the door.
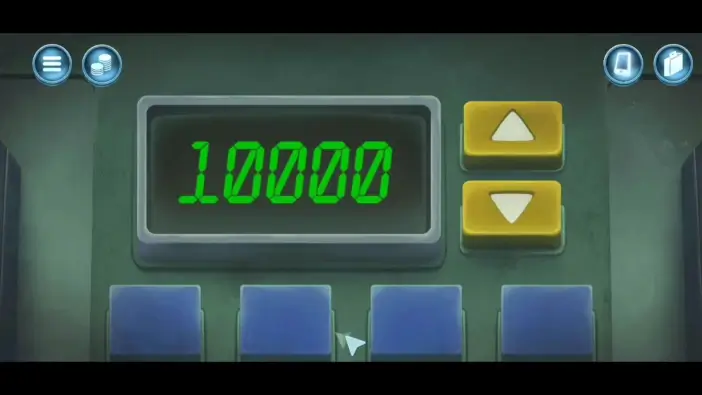
Return to the cockpit and lower the altitude to 10000.
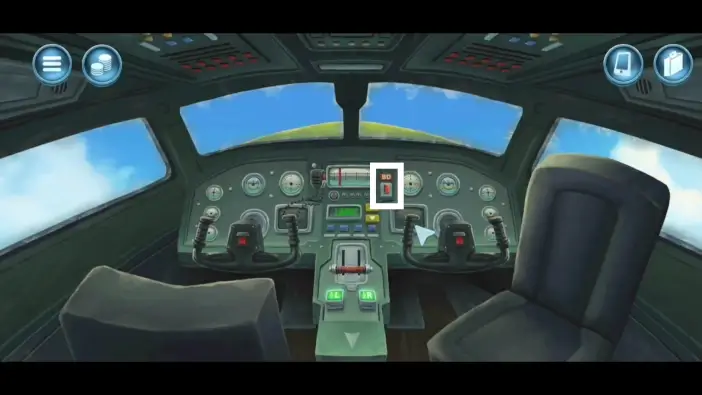
Press the red button.
Exit the plane. You will eventually reach the back area of the ship.
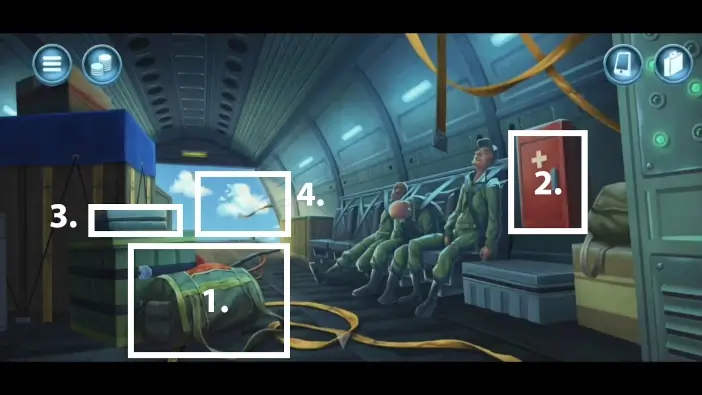
- Pick the parachute.
- Pick the flare from the cabinet. Don’t forget to close the cabinet.
- Burn the box with the flare.
- Use your parachute to jump.
Mission 5: Operation Manifest
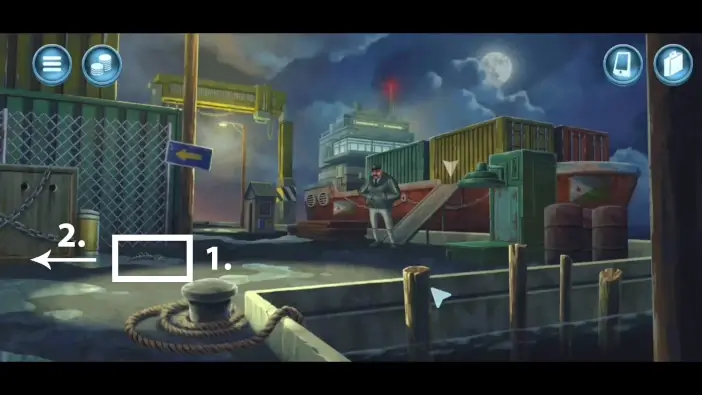
- Pick the rotten fish.
- Go left.
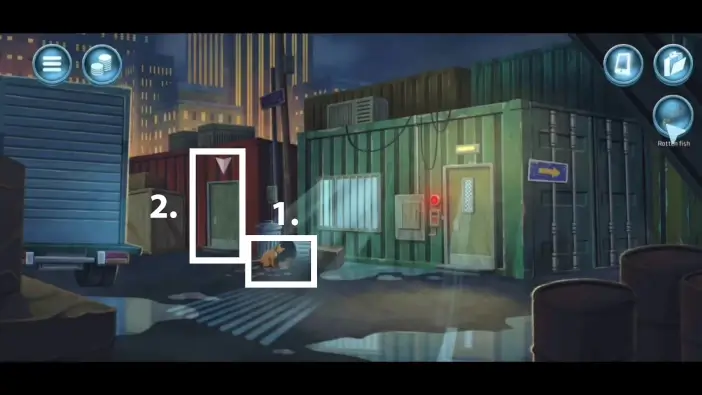
- Give the rotten fish to distract the cat, then pick the cat.
- Enter the warehouse on the left.
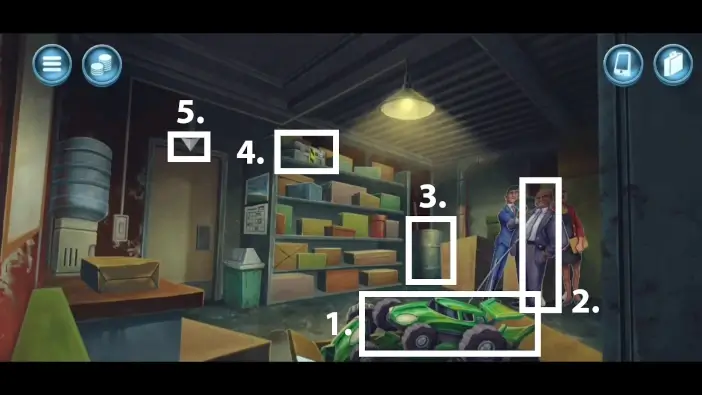
- Pick the RC car.
- Pick the cardboard cutout.
- Pick the barrel.
- Pick the laser pointer from the suitcase.
- Exit the building.
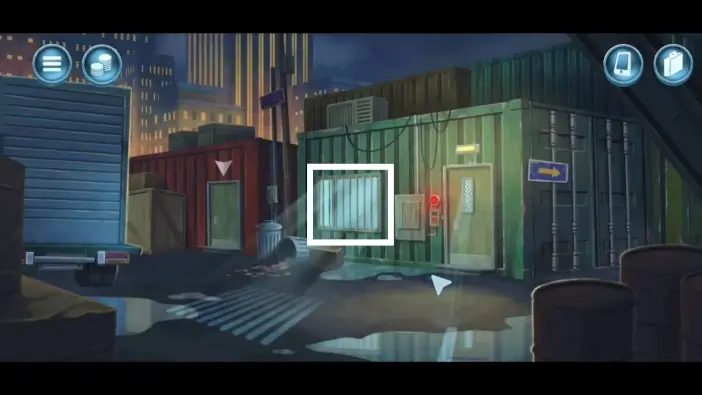
Approach the bars.
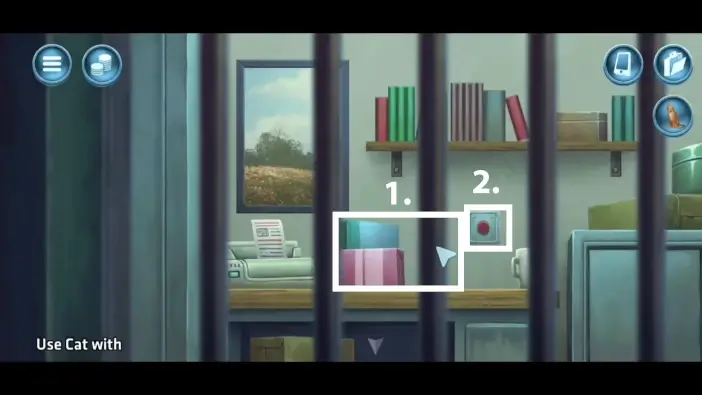
- Send the cat past the bars.
- Use the laser pointer to lure the cat into pressing the red button to unlock the door.
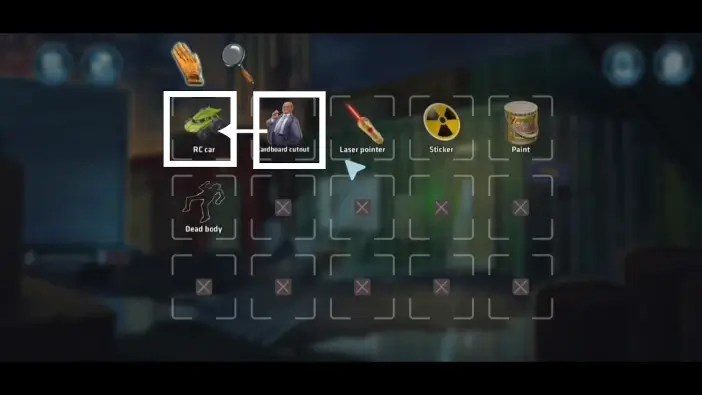
Go to the starting area. Combine the RC car and the cardboard cutout in your inventory, and you will have the “perfect decoy.”
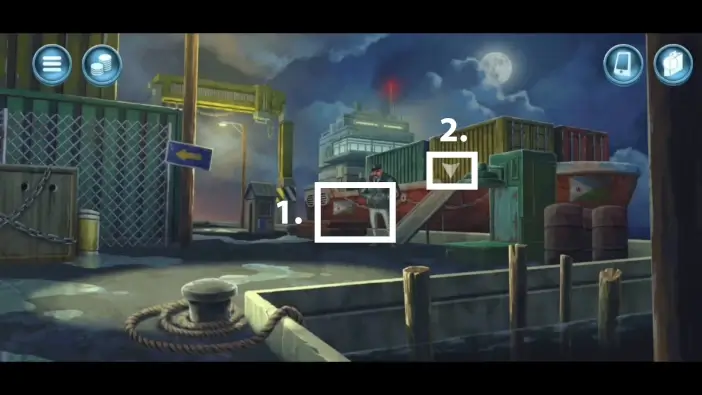
- Use the decoy to distract the guardsman.
- You can now access the cargo ship, but first, you need to obtain the password for the container.
Remember the container’s ID, “9417”.
Go to the office you recently unlocked with the help of a cat.
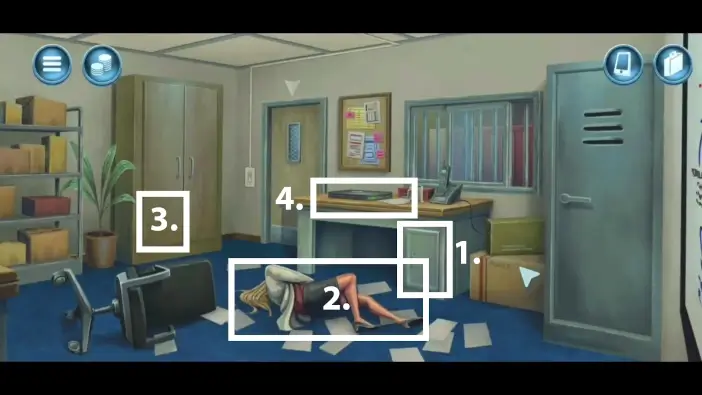
- Open the cabinet and pick the sticker.
- Pick the dead body.
- Pick the paint.
- Approach the laptop.
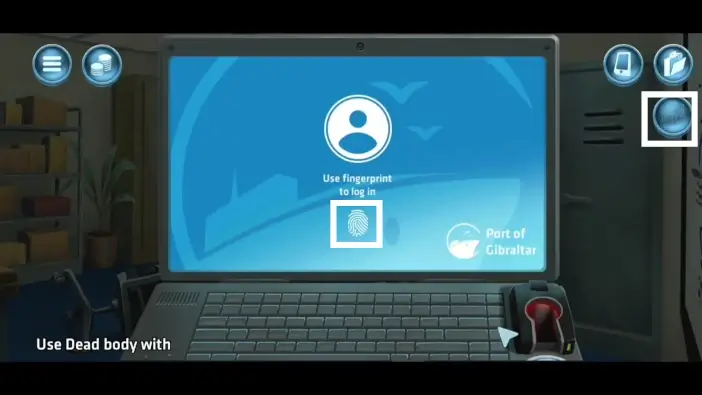
Use the dead body’s finger to log in.
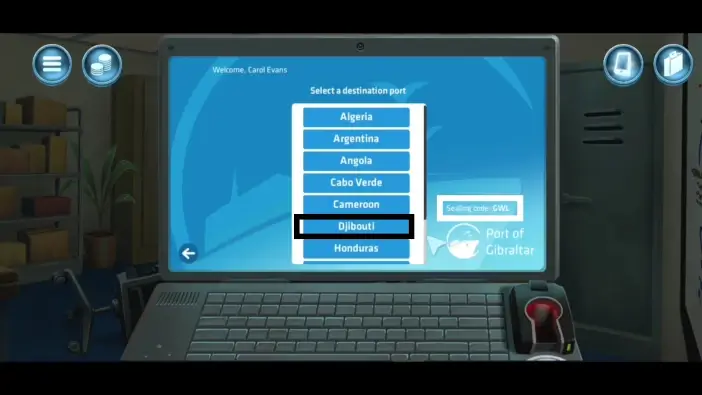
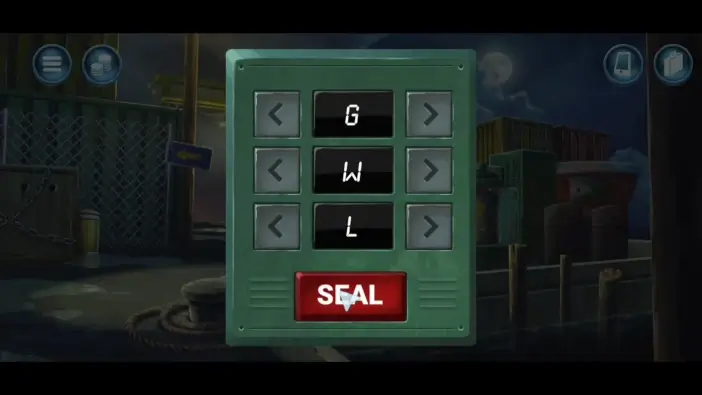
Pay attention to the sealing code on the right: “GWL”. You will use this code to seal your barrel. Select the Djibouti location.
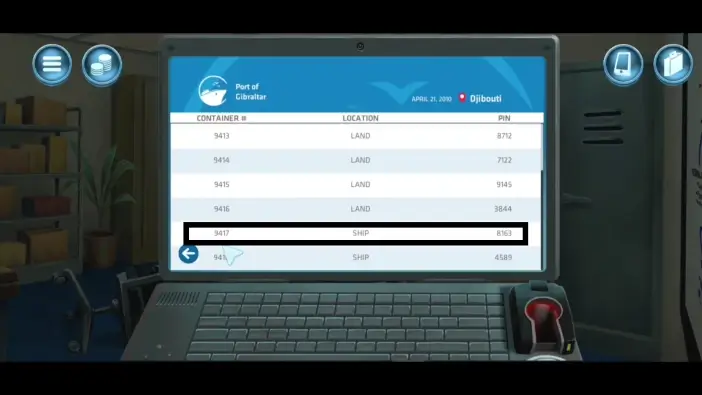
Check the PIN code for the container 9417. Its PIN code is “8163”.
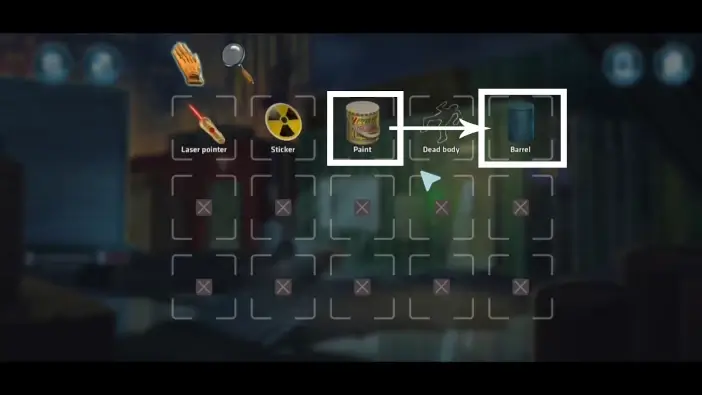
In your inventory merge the paint and the barrel to get a painted barrel. Go to the starting location where the security guard was, near the cargo ship.
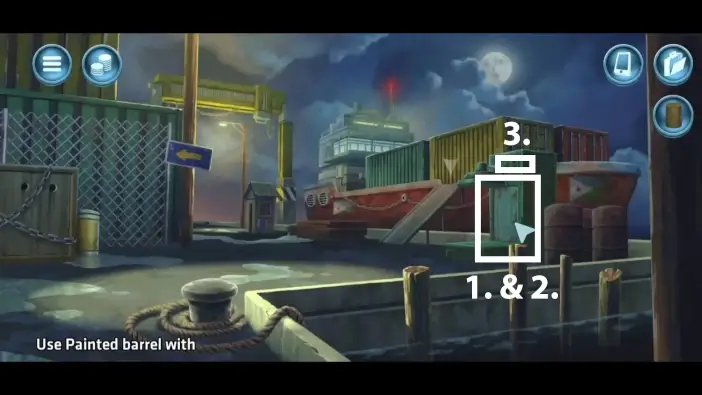
- Place the dead body in the barrel.
- Place the barrel on the machine.
- Use the code “GWL” you read from the laptop.
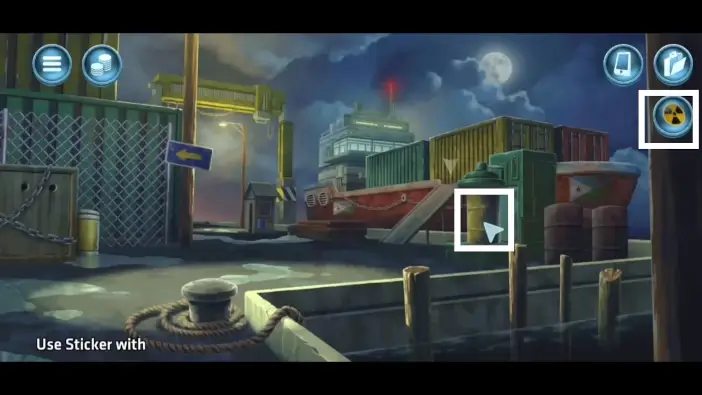
Place the sticker on the barrel and pick it up.
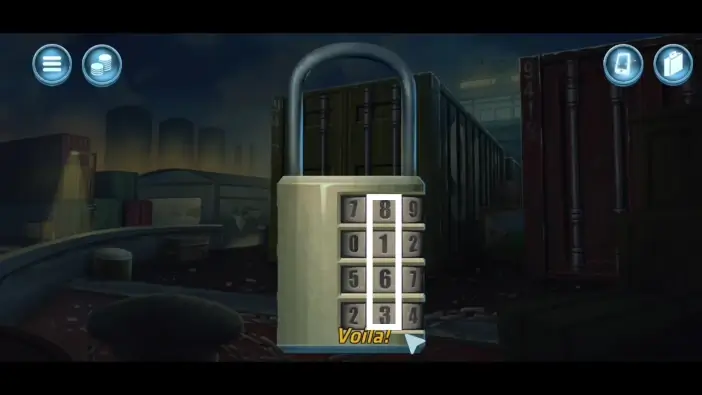
Go to container number 9417 and insert the code “8163”.
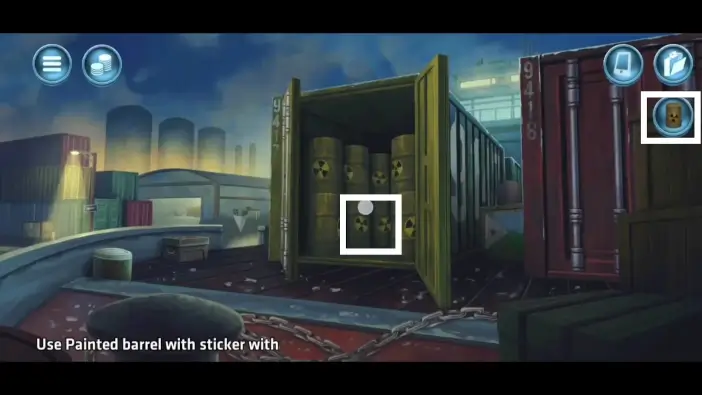
Once you open the container, place your barrel inside. Close the container.
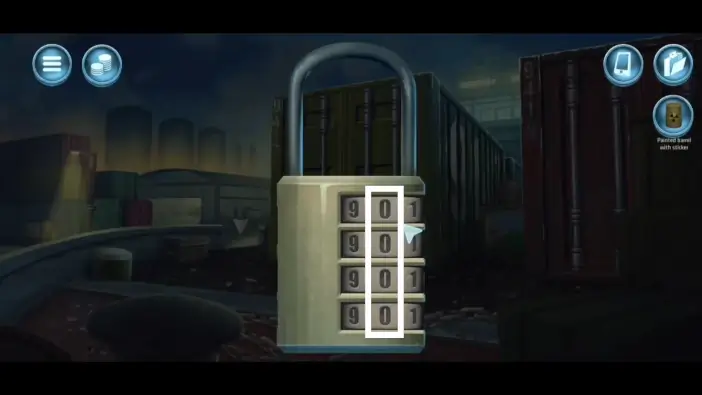
Lock the container by setting the lock to its original state.
Return to the office, return the paint, and close the cabinet. Then, log out of the account and close the laptop.
Go outside the office and approach the window. Once again, use the laser pointer on the button so that the cat will lock the building. Lastly, go to the warehouse and return the laser pointer.
Mission 6: Operation Zinfandel
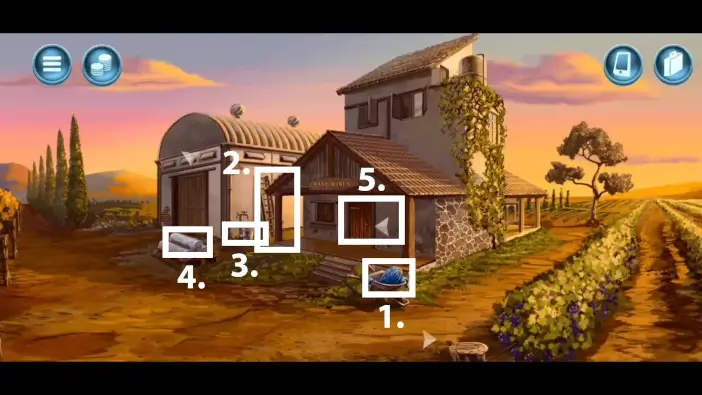
Pick up the hose, the ladder, the bucket, and the silage bag.
Enter the house.
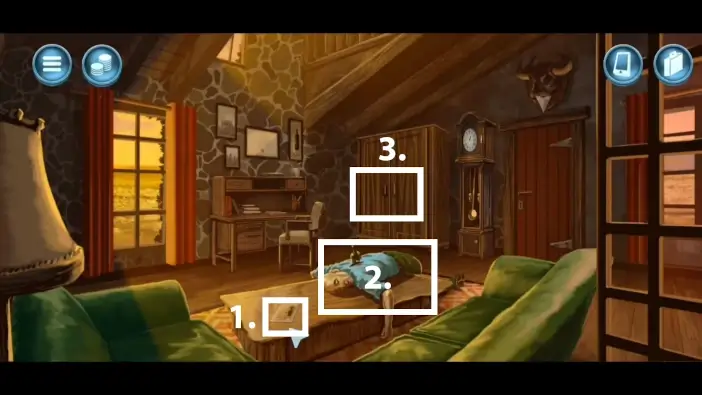
- Pick the brochure.
- Pick up the dead body from the table.
- Open the wardrobe.
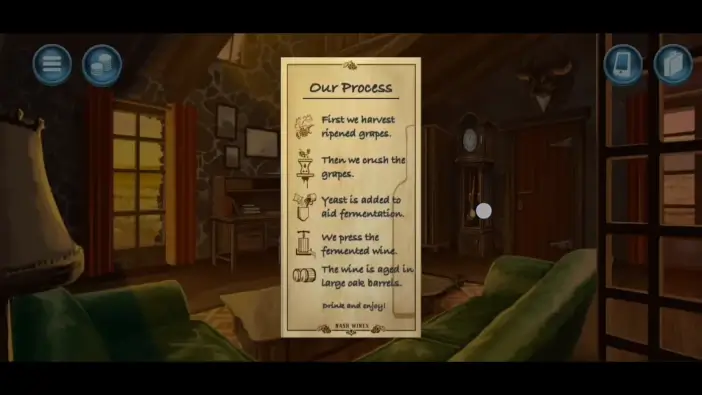
From the brochure, you can learn about the process of wine-making. You will need it later.
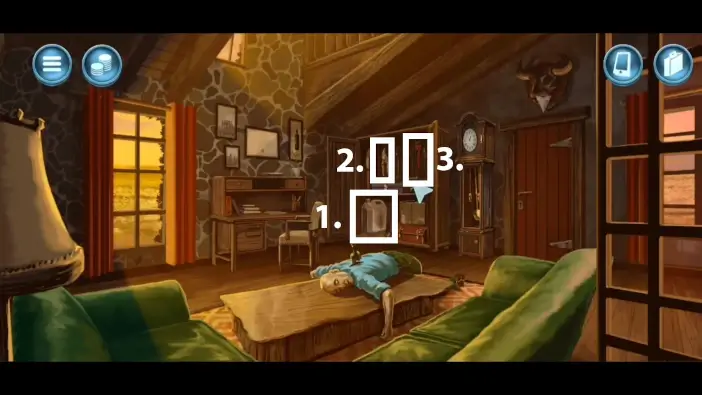
Pick the large jug, the pruning shears, and the pipe wrench.
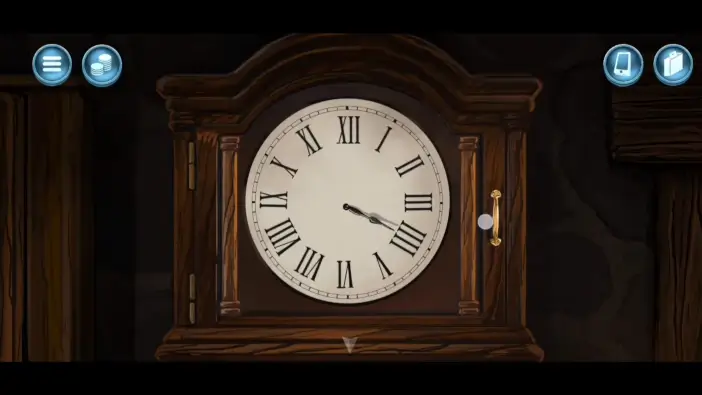
Approach the clock. Place the clock hand to 4 o’clock to unlock the gear inside the clock. Open the clock and take the gear. Exit the house.
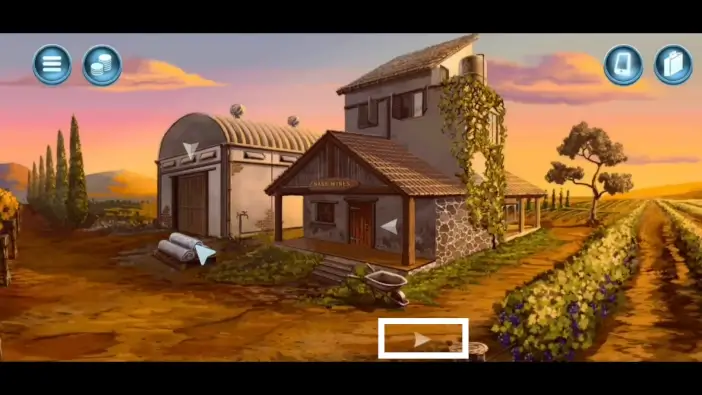
Go to the vineyard.
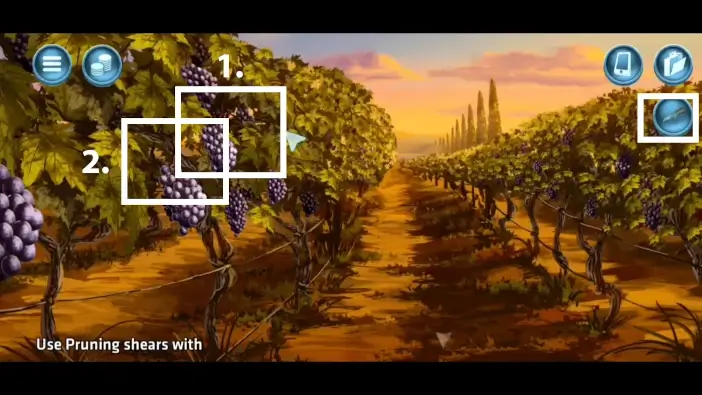
Use pruning shears to get the grapes and the branch. Leave the vineyard.
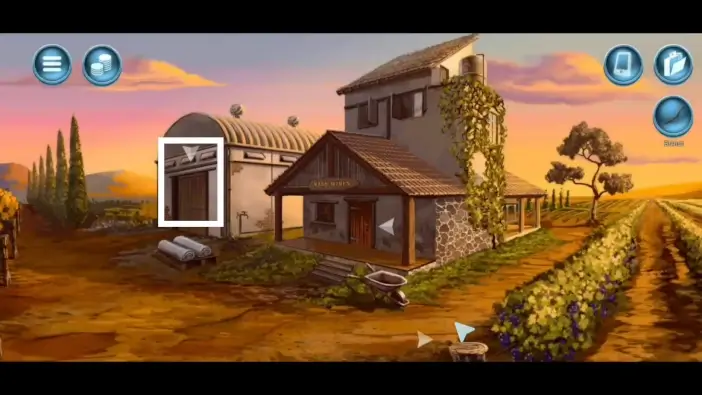
Enter the winery building.
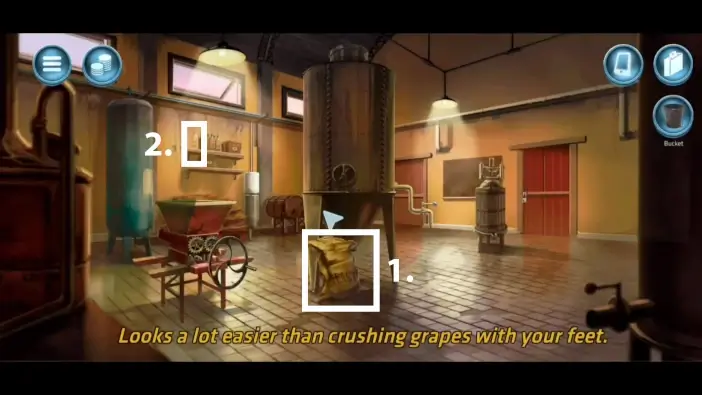
Pick the bag of yeast and the grapeseed oil. Exit the building.
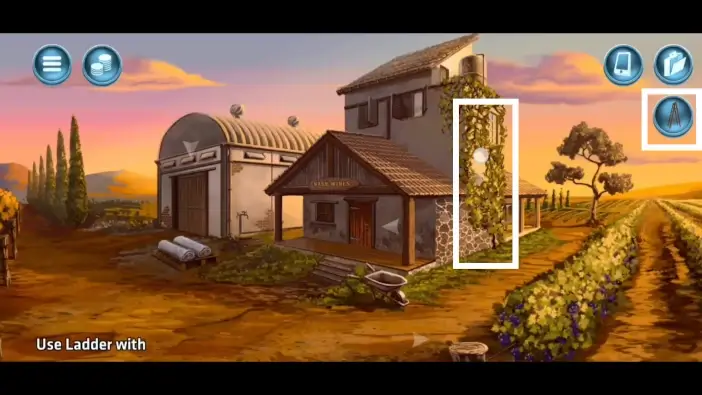
Use Nash’s house ladder to climb to the attic.
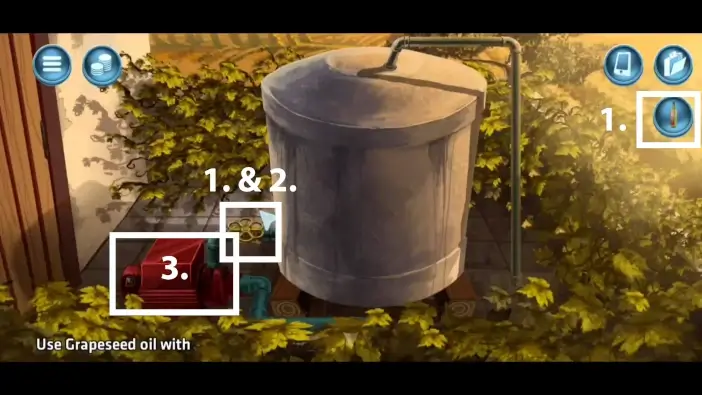
- Pour the grapeseed oil on the valve to make it easier to turn.
- Turn the valve to stop the water flow.
- Use the pipe wrench to detach the pump and take it.
Go back to the winery building.
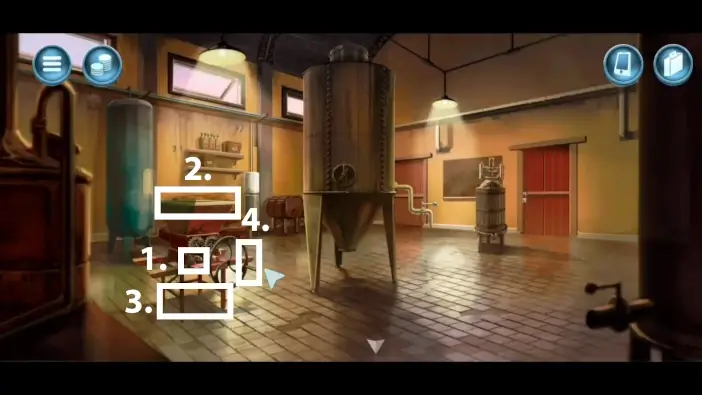
Now you need to follow the instructions from the brochure to create a wine.
- Place the gear.
- Place the grapes in the wine press.
- Place the bucket below the wine press.
- Activate the wine press.
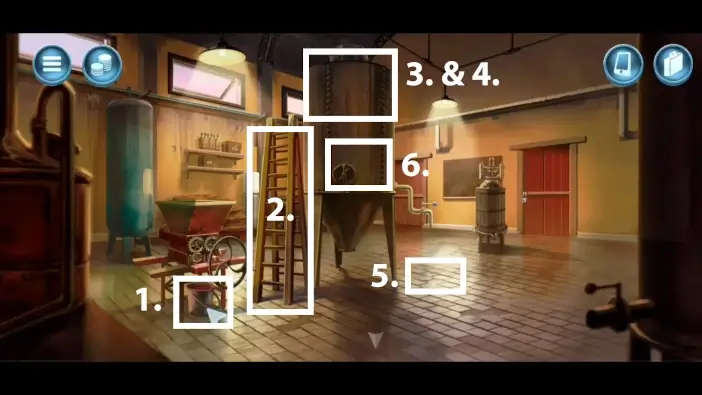
- Pick the bucket full of grapes.
- Place the ladder near the fermentation tank.
- Pour the crushed grapes from your bucket into the fermentation tank.
- Use the bag of yeast from your inventory to pour the yeast into the tank.
- Place the large jug below the faucet.
- Activate the fermentation by turning the valve.
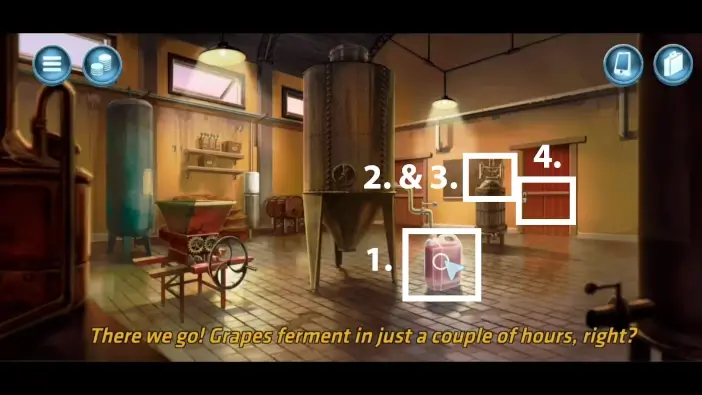
- Pick the jug with wine.
- Place the branch atop the barrel and use the branch to seal it.
- Pour the jug of wine into the barrel.
- Approach the locked door.
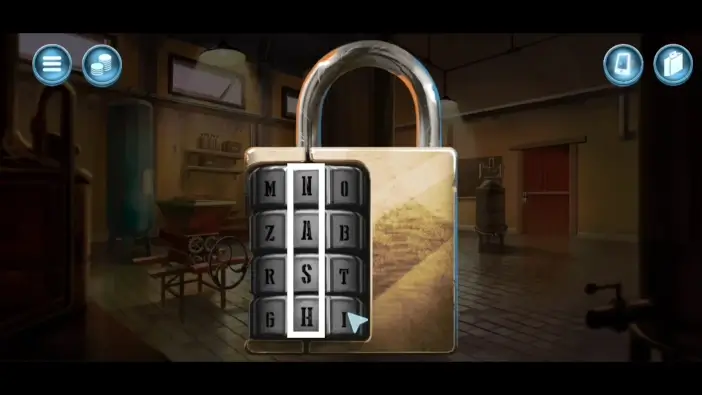
To unlock it, ensure you have the “NASH” name vertically on the middle column. Proceed to the cellar.
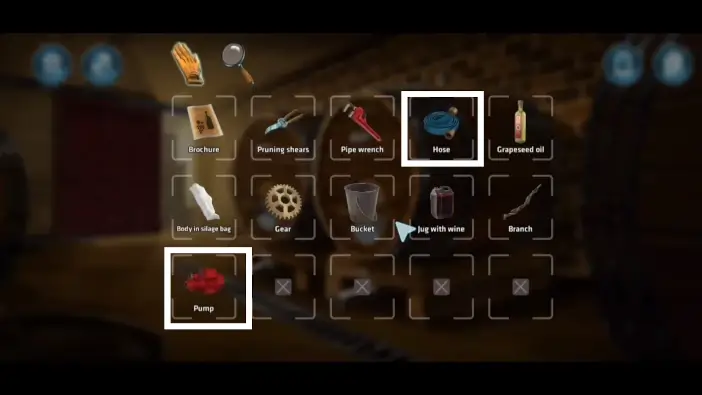
Open your inventory and attach the hose to the pump. The “pump with hose” will be added to your inventory.
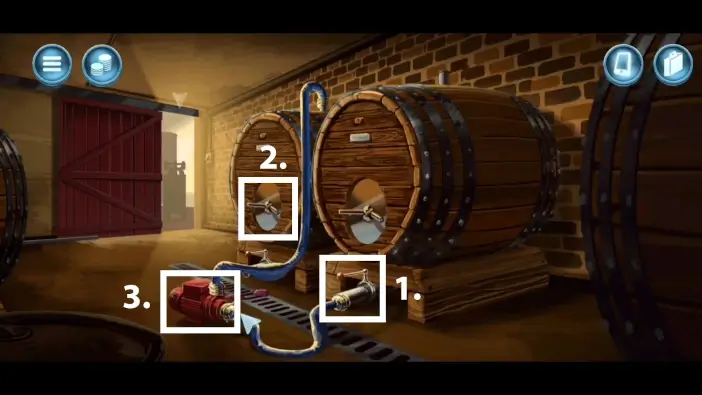
- Place the pump with a hose on the faucet of the right barrel.
- Open the left barrel to dump out the wine from it.
- Activate the pump to transfer the wine from the right barrel to the left barrel.
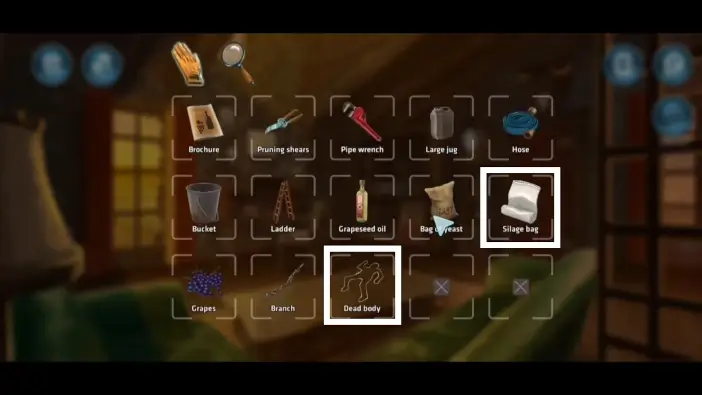
In your inventory, merge the silage bag item with the dead body item, to place the dead body in the bag. The “Body in silage bag” item will be added to your inventory.
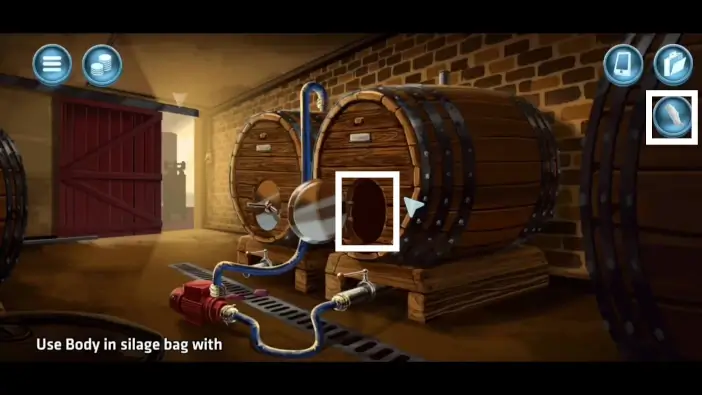
Place the body in a silage bag inside the right barrel and close the barrel.
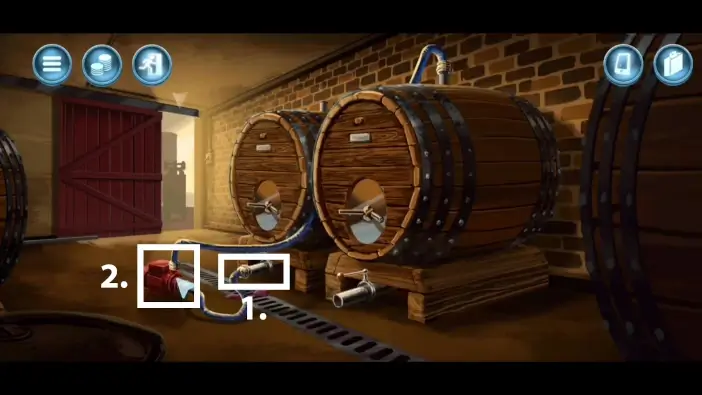
Take the pump with a hose and place it on the faucet of the left barrel. This way, you will fill the right barrel, where the body is, with wine. Take the pump.
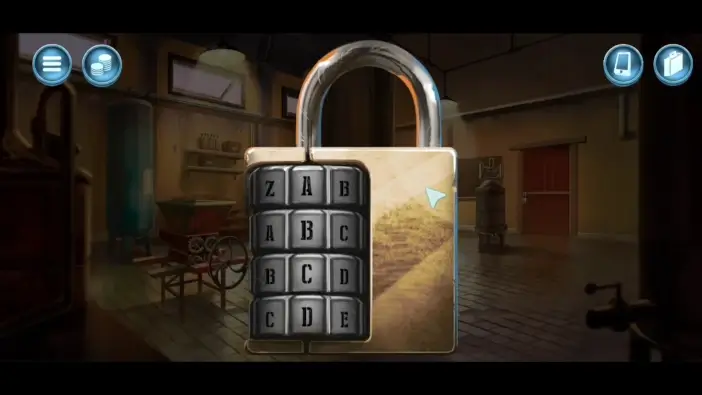
Lock the cellar.
Return all the items to their previous locations. Don’t forget to disassemble complex items, close all the doors and cabinets, return the hour hand to show 1 o’clock, and return the water flow in the attic (turn the valve again).
Mission 7: Operation Tee Time
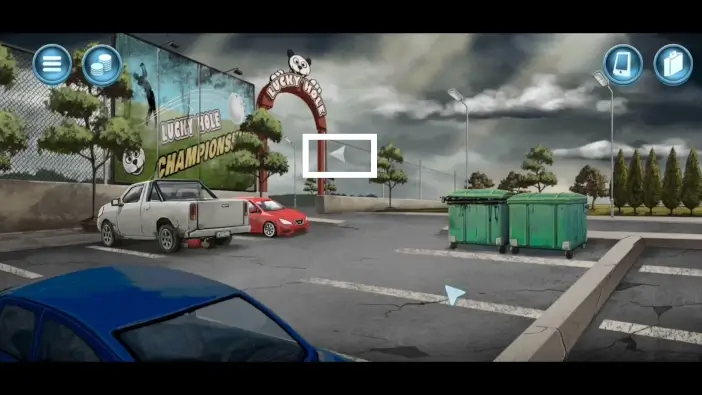
Enter the Lucky Hole park.
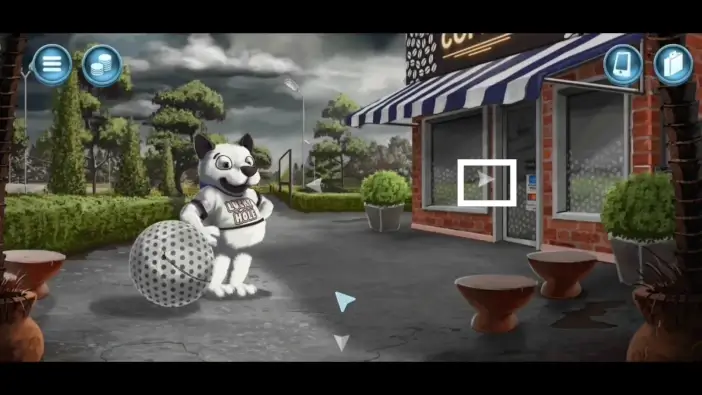
Enter the cafe.
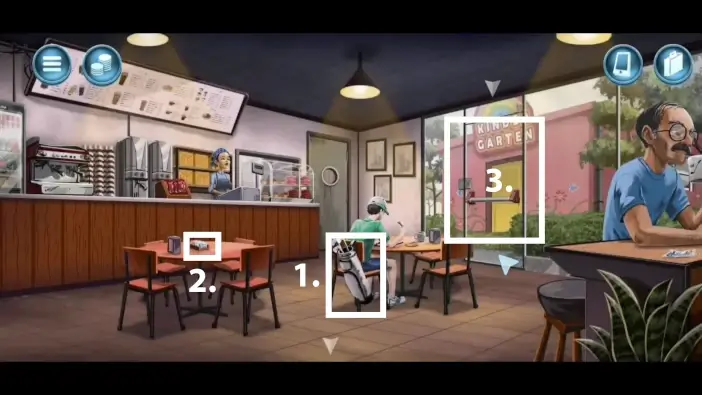
- Pick the golf club.
- Pick the sugar packets.
- Go to the kinder garten area.
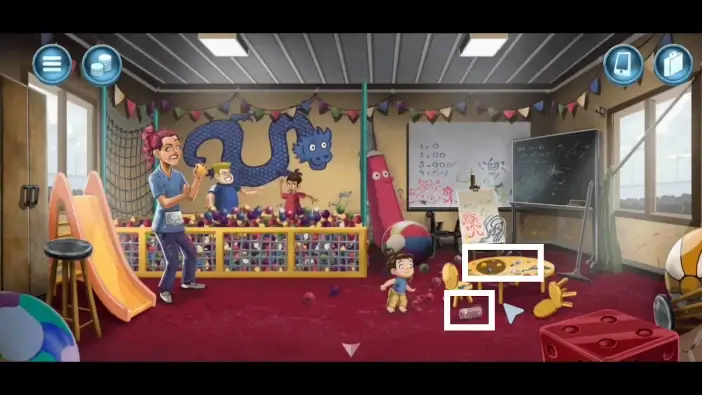
Pick the jar and the paints.
Exit the room and the building.
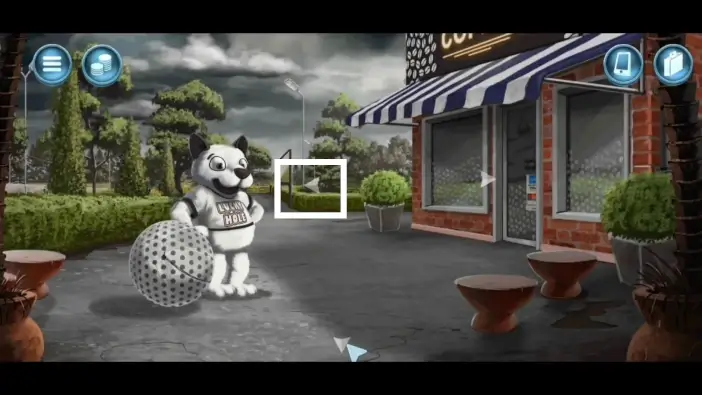
From the building’s entrance, go left to arrive at the crossroads.
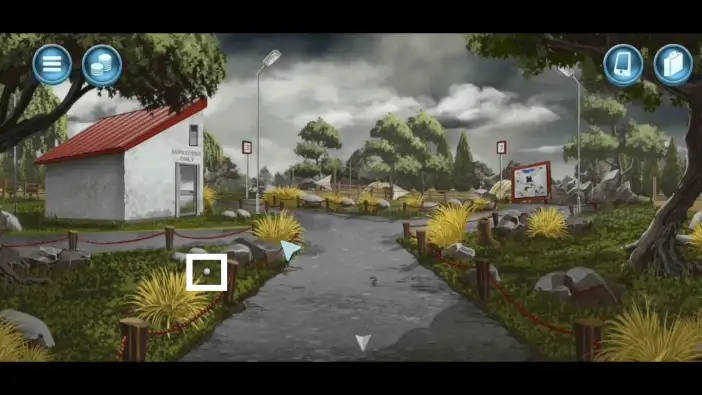
Pick the golf ball.
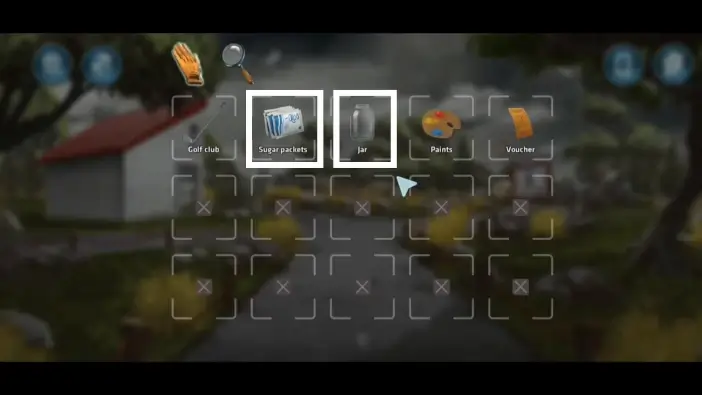
In your inventory, merge the “sugar packets” item with the “jar” item to create the “jar with sugar.”
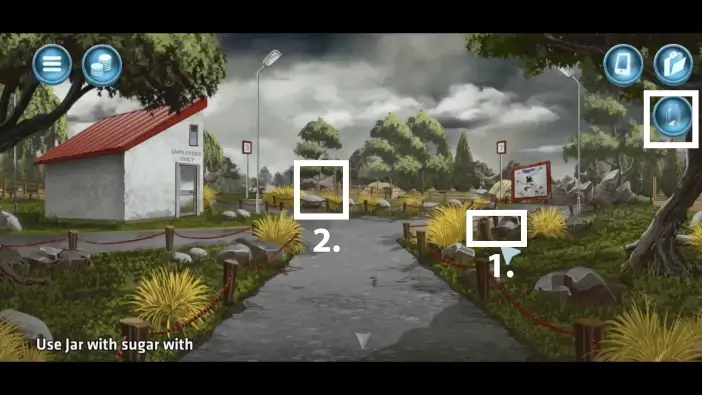
- Place the jar with sugar near the ants to lure them into it. Pick the jar of ants.
- Choose the path on the left from the crossroads to reach the windmill.
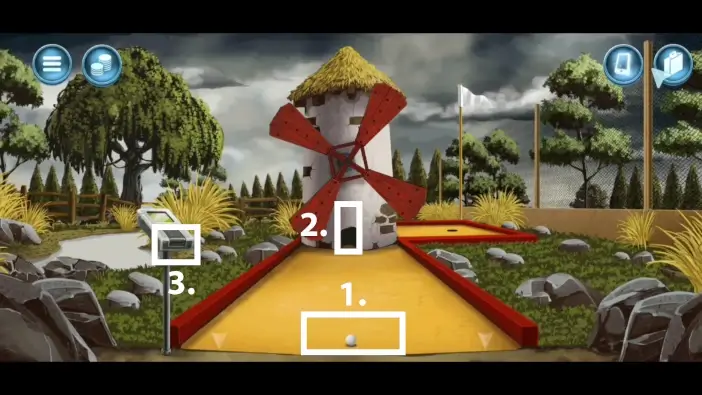
- Place the golf ball on the ground.
- Use the golf club to hit it. The ball will go to the golf hole.
- When you succeed in golf, you will get a voucher from the device on the left. Take it. You will later give it to the cashier in the cafe.
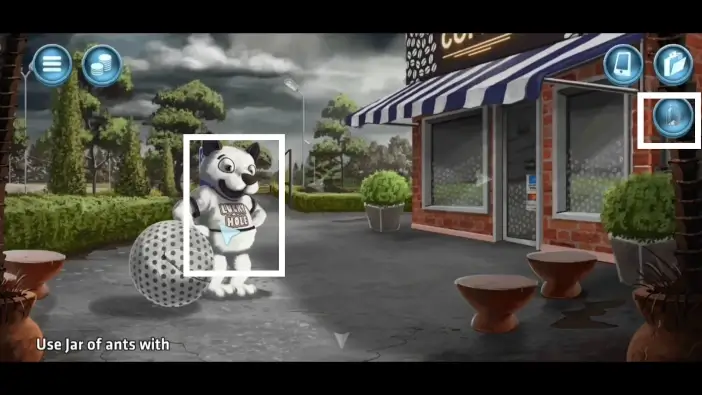
Go back to the crossroads and take the bottom road to go back in front of the cafe. Place the jar of ants near the mascot to make them leave.
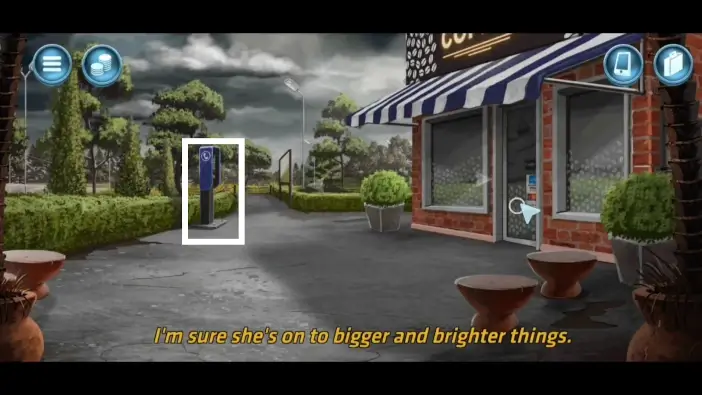
Go to the payphone.
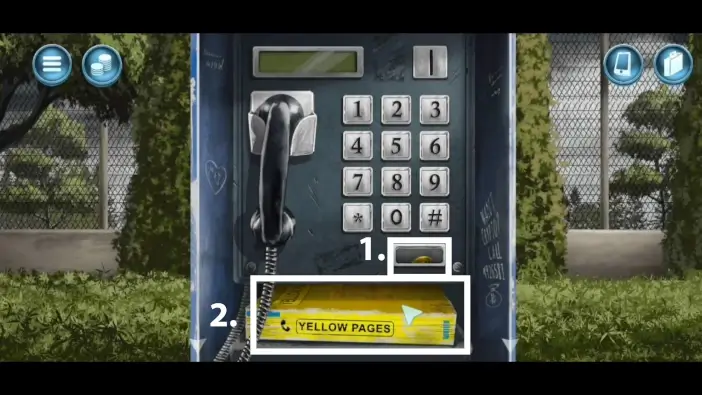
- Pick the coin.
- Open the Yellow Pages.
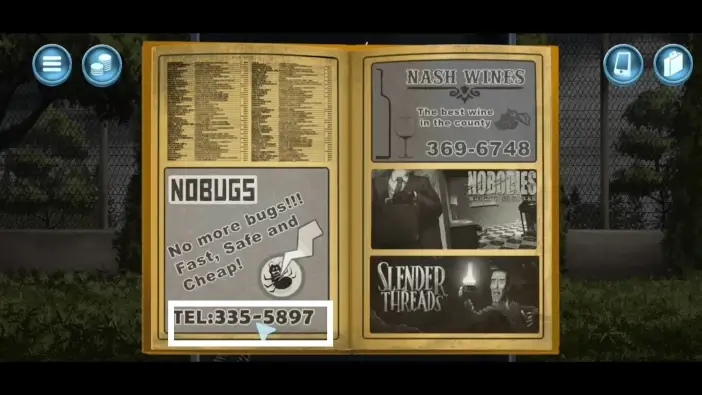
Turn the pages until you see the “NOBUGS” ad and pay attention to the phone number.
Close the Yellow Pages. Insert the coin into the payphone and pick up the phone. Type the phone number of “NOBUGS”, which is “3355897”. Once you finish the conversation, leave the payphone.
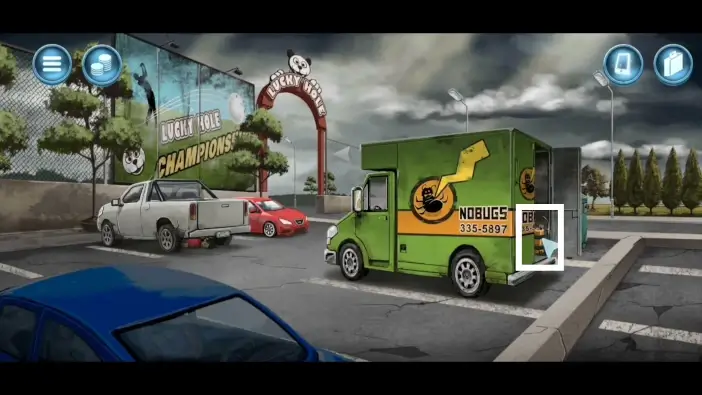
Go back to the entrance of the Lucky Hole. You will see the “Nobugs” van. Open it and take the pesticide sprayer.
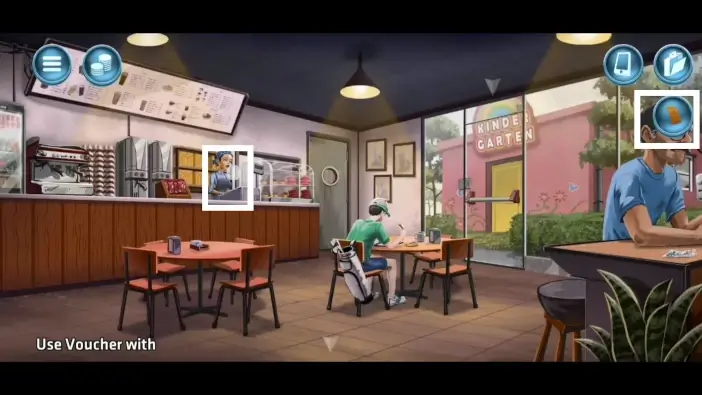
Go back to the cafe and give the voucher to the cashier. She will give you a chocolate bar.
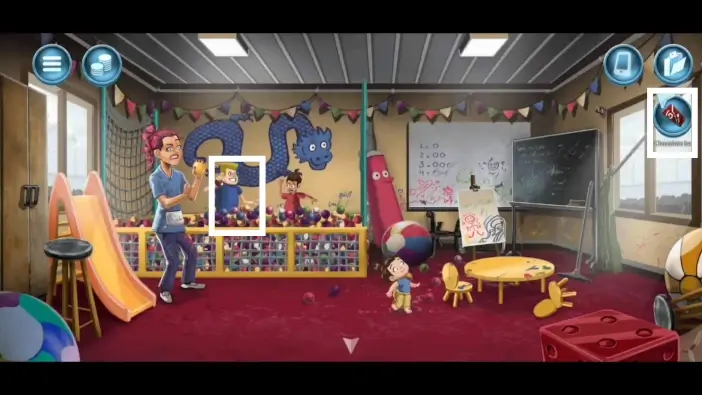
Go to the kindergarten. Give the chocolate bar to the kid on the left.
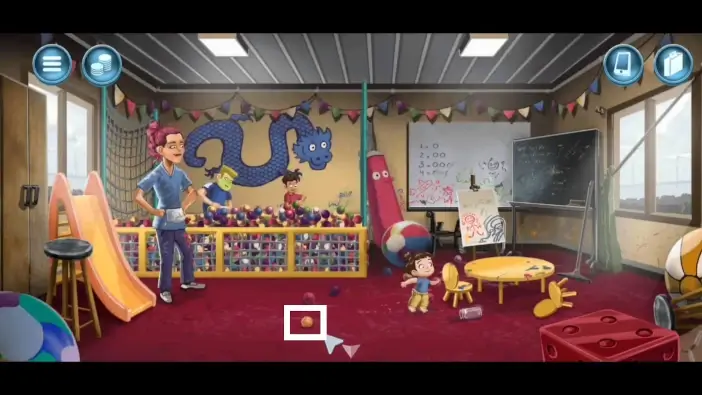
Exit the kindergarten and then enter back. The worker will drop the stress ball on the ground. Pick it.
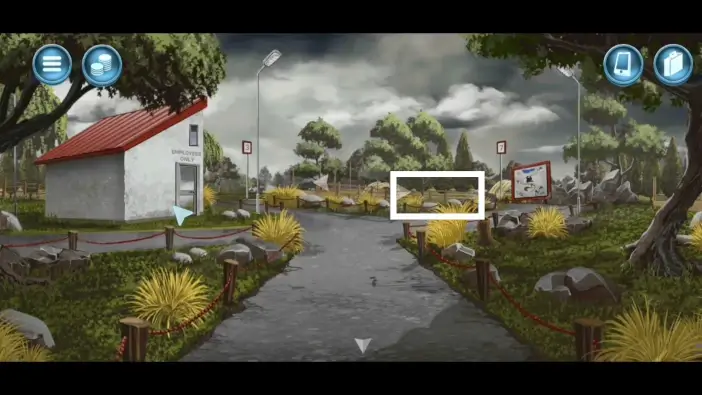
Exit the building and go to the crossroads. From there, pick the path on the right.
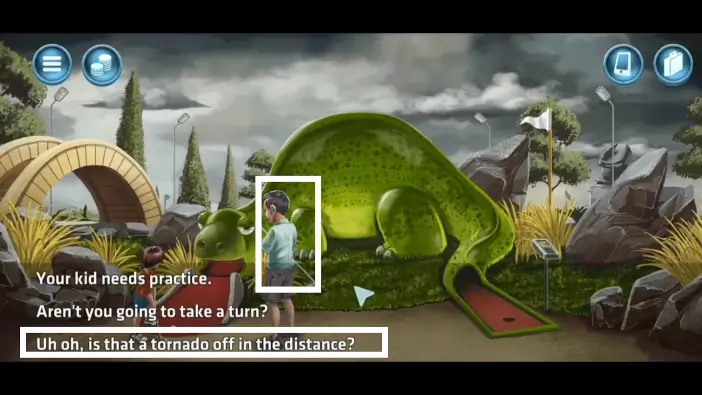
Talk with the man and pick the third option.
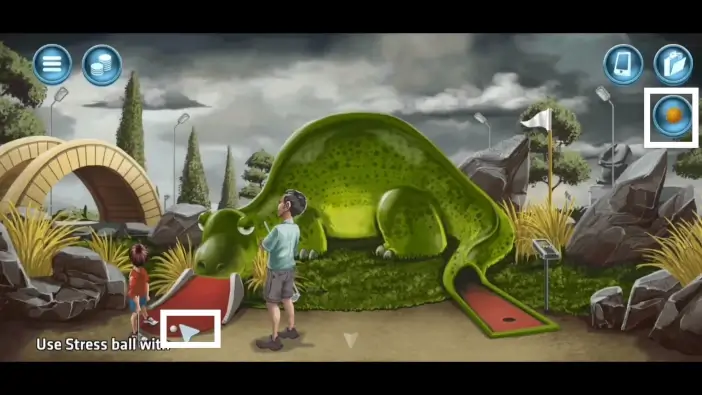
While the man is distracted, place the stress ball on the ground. The kid will hit the stress ball, and the dinosaur will malfunction. This will cause the kid and his parent to leave.
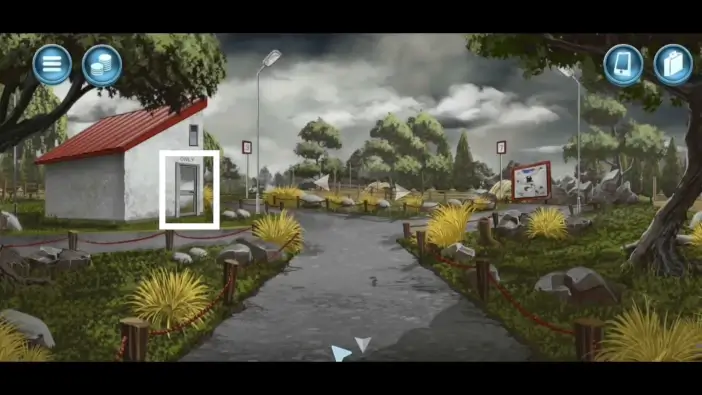
Go to the crossroads and enter the locker room.
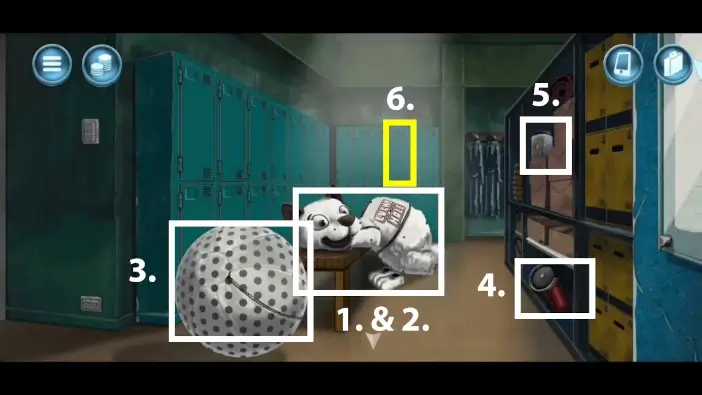
- Use the pesticide sprayer on the mascot costume to eliminate the ants.
- Take the mascot costume.
- Take the novelty golf ball.
- Pick up the grinder.
- Pick up the epoxy.
- Use the grinder you just found to open the locker. There, you will find the pants, the 3rd collectible of the game.
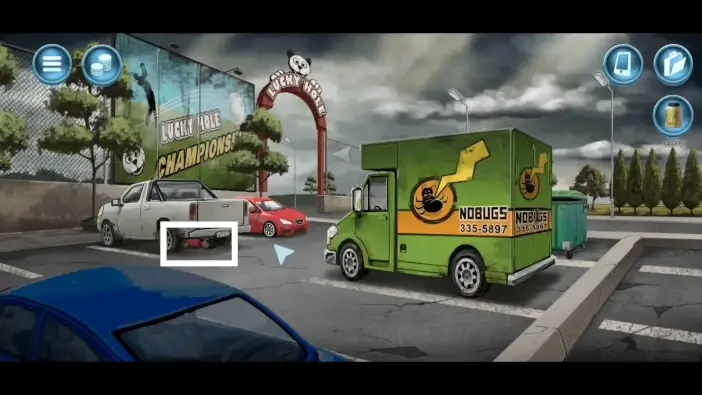
Go to the entrance of the Lucky Hole where the parking lot is and pick up the dead body.
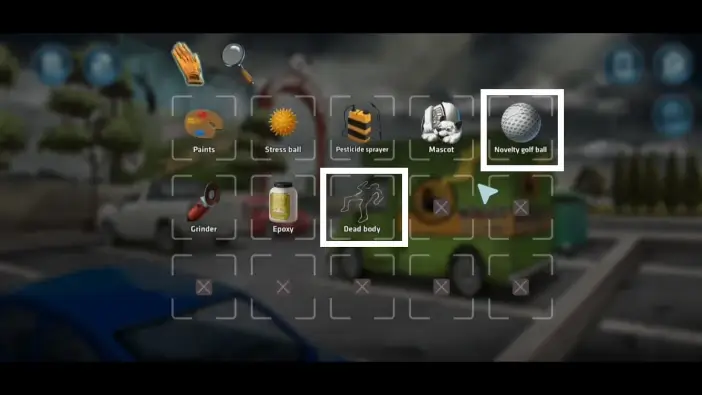
Open your inventory and place the dead body inside the novelty golf ball.
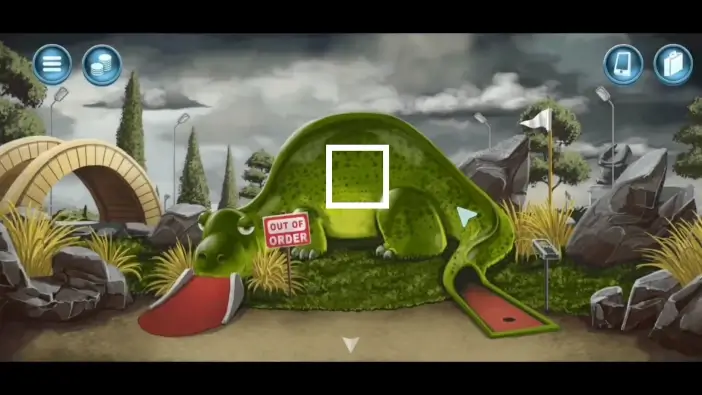
- Go to the dinosaur area. Use the grinder to carve out the hole inside the dinosaur.
- Open your inventory and remove the dead body from the novelty golf ball.
- Place the dead body inside the dinosaur. Don’t forget to close the hole.
- Use epoxy to glue the cover.
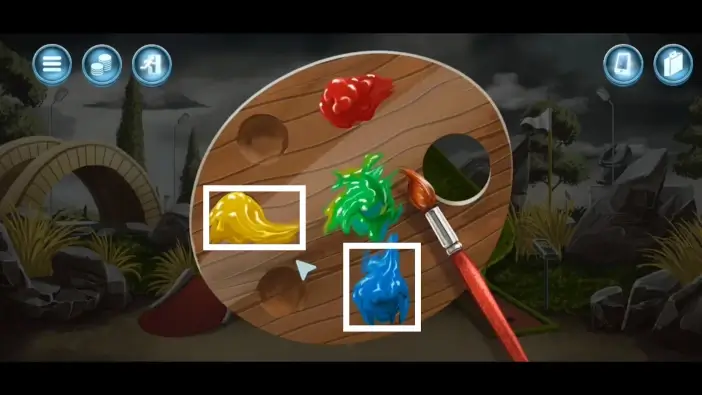
Select the paint from your inventory. Mix the blue and the yellow paint to get the green paint. Select the paint from your inventory again and paint the edges of the hole.
Return all the items to their original places. Don’t forget to close all the doors you open.
Mission 8: Operation Slalom
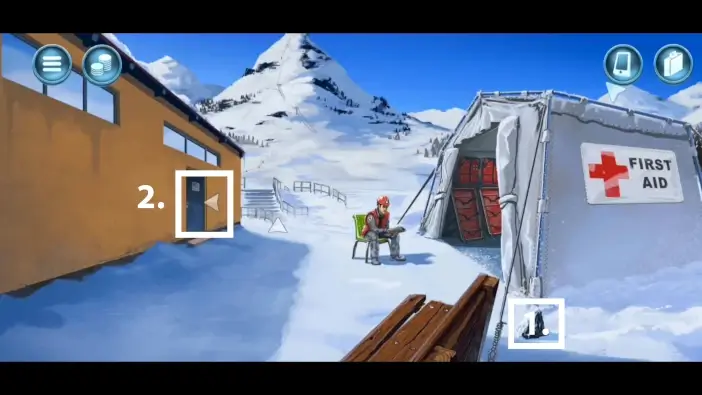
- Pick up the rock.
- Enter the building to the left.
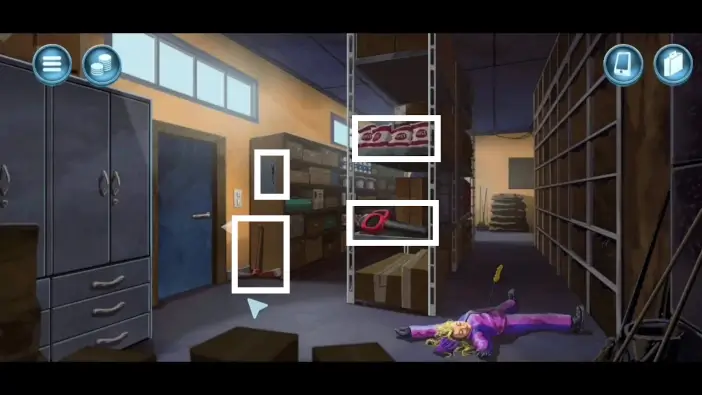
Pick up the screwdriver, the pickaxe, the bags of salt, and the blower.
Exit the building.
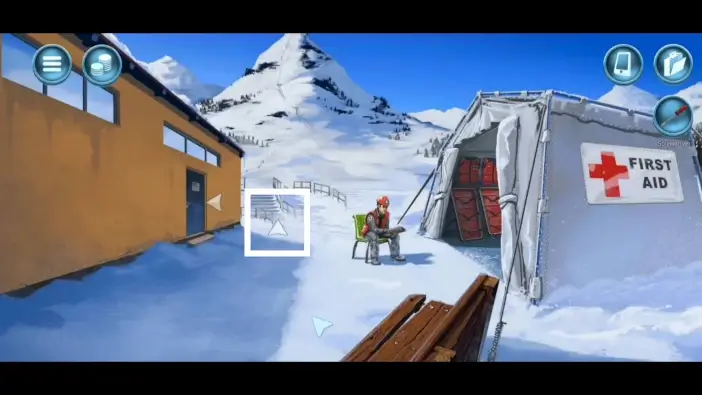
Follow the forward path.
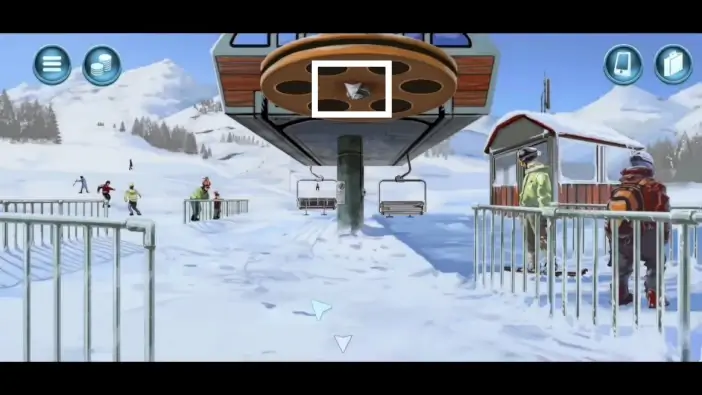
Go to the north once more.
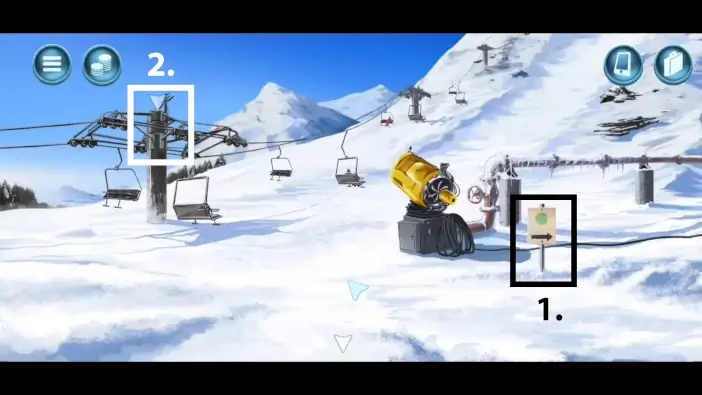
- Pick up the green slope sign.
- Go to the left.
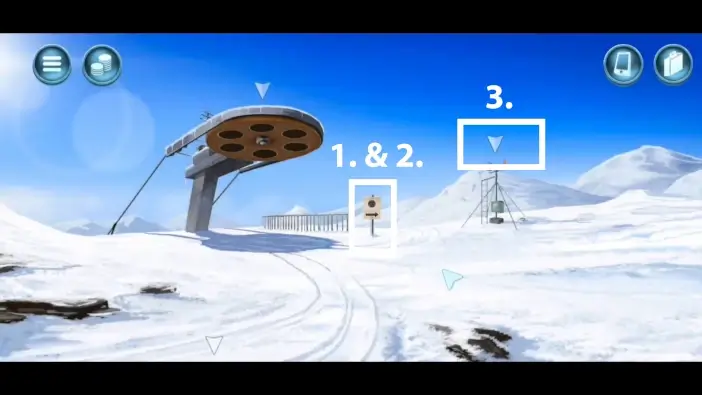
- Pick up the black slope sign.
- From your inventory, place the green slope sign where the black slope sign was. This will cause a novice skier to fall and the medic will be distracted.
- Approach the radar.
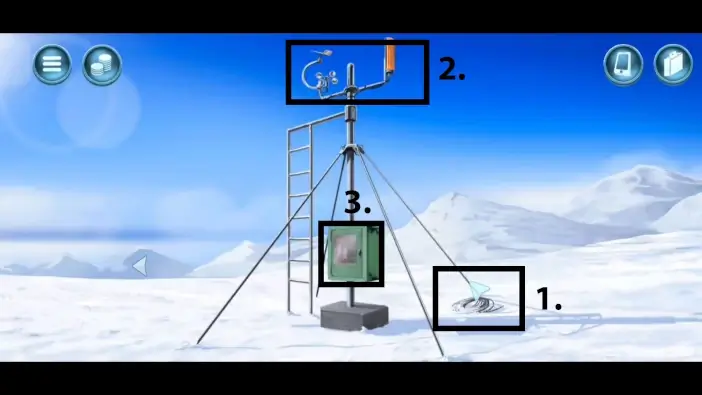
- Pick up the wire coil.
- Use the blower on the radar.
- After some time, the technician will arrive to fix the radar. Meanwhile, you should approach the box.
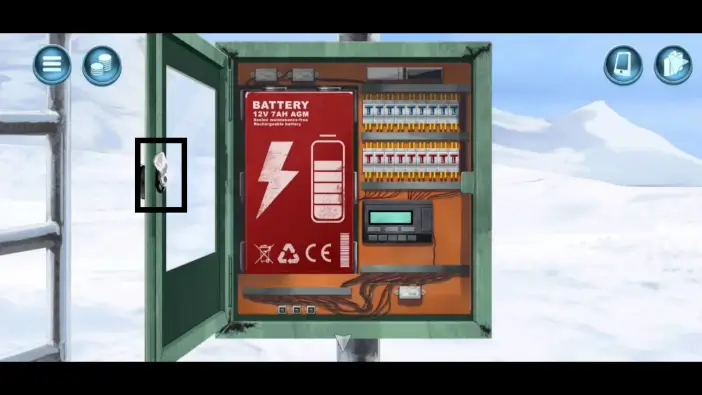
Use the screwdriver from your inventory to take the latch.
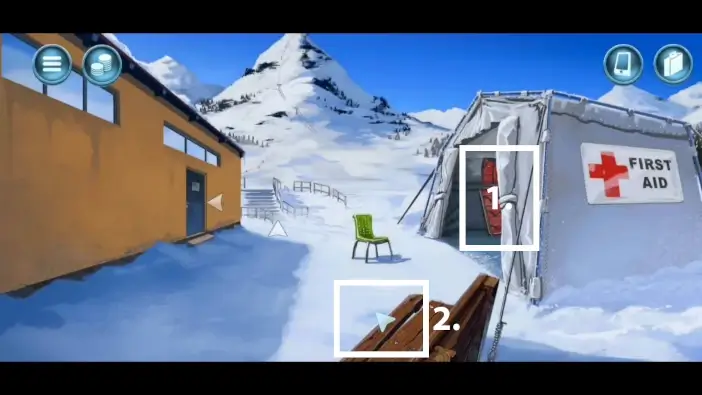
- Go back to the starting location and pick up the stretcher.
- Use the pickaxe from your inventory to get a wooden plank.
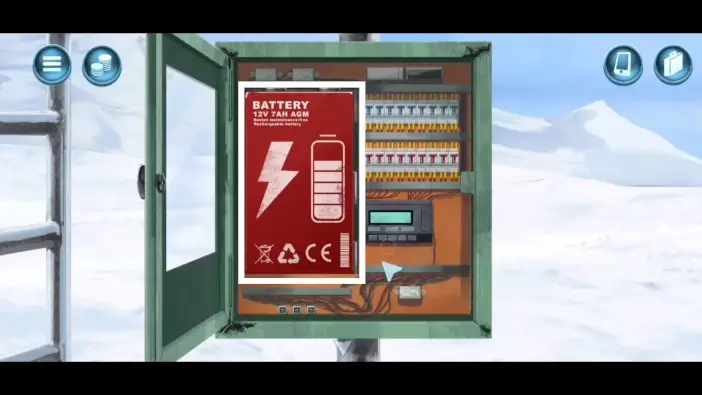
Go back to the radar. Open the box and pick up the battery. Close the box.
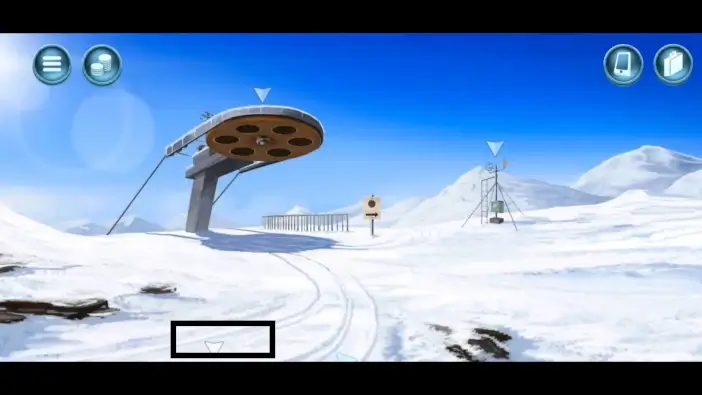
Leave the radar and go to the south. You will arrive at the cave entrance.
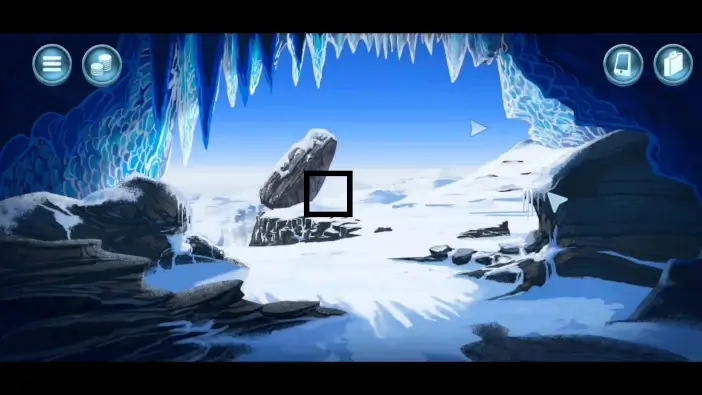
- Place the rock from your inventory under the giant boulder.
- Place the wooden plank between the rock and the boulder to create leverage.
- Press the plank to move the boulder over the edge. The boulder will create an avalanche. This will cause the evacuation of all the skiers.
- Pick up the wooden plank.
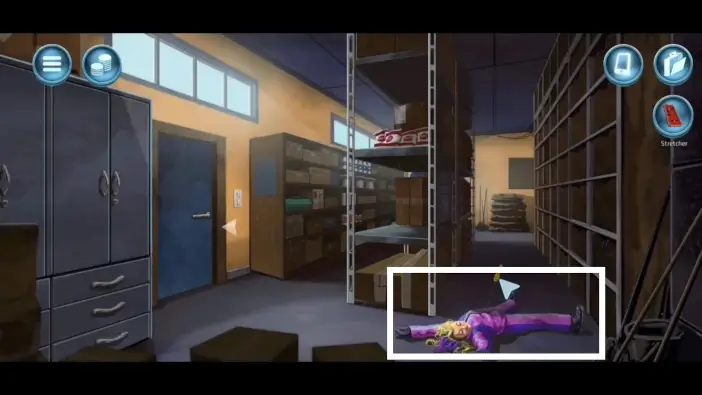
Go back to the warehouse building in the starting location. Pick up the dead body.
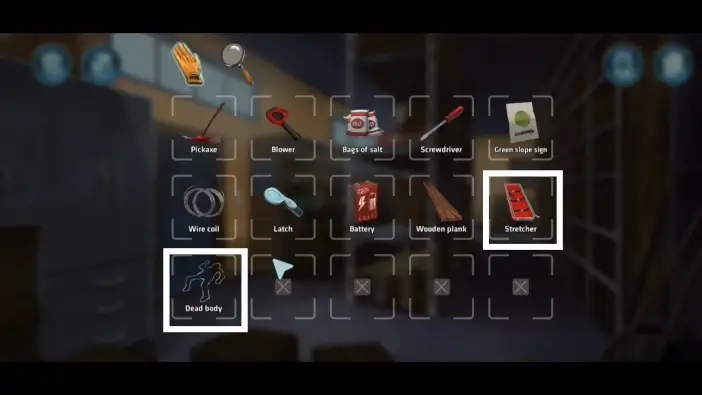
Open your inventory. Place the dead body into the stretcher. Exit the warehouse.
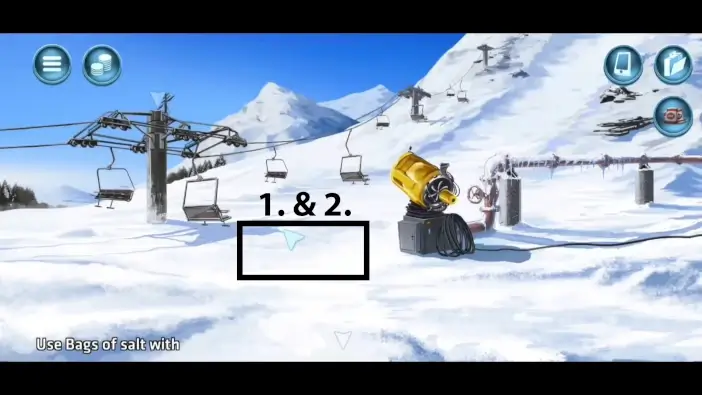
- Go to the snowmaking machine area. Use the bags of salt on the snow.
- Use the pickaxe to dig a grave.
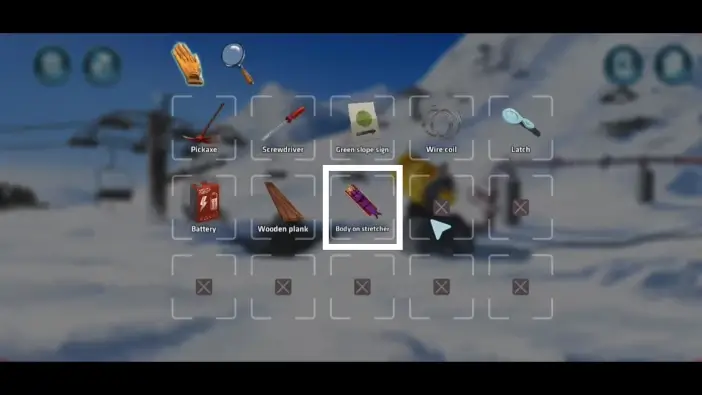
In your inventory tap on the “body on stretcher” item to dismantle that item into two items: “dead body” and the “stretcher”.
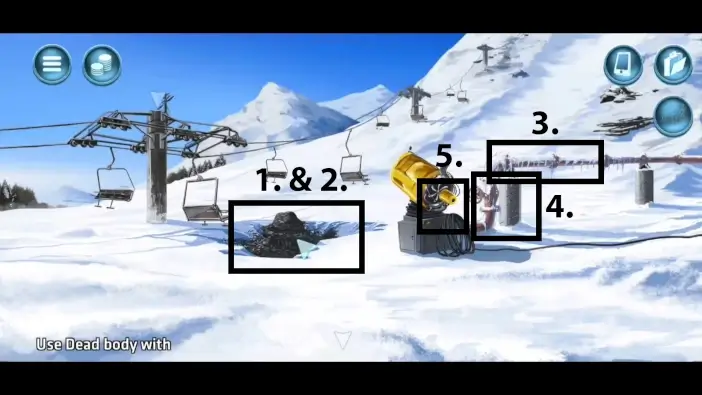
(1 & 2.) Use the pickaxe to bury the dead body.
3. Place the wire coil on the pipe.
4. Connect the battery with a wire coil.
5. Activate the snowmaking machine. The grave location will be covered with snow.
Return all the items to their original places.
Mission 9: Operation Food Chain
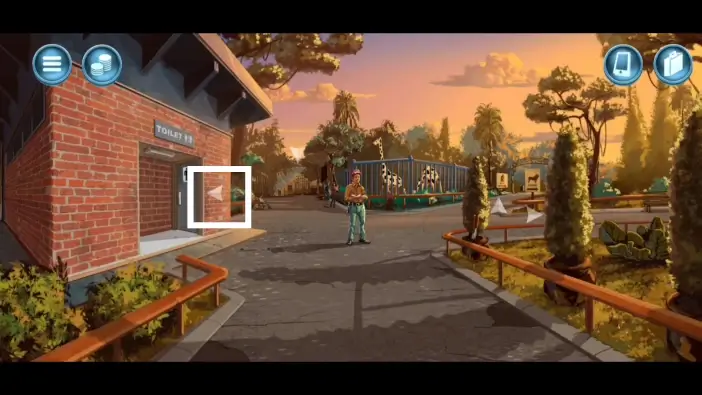
Go to the toilet.
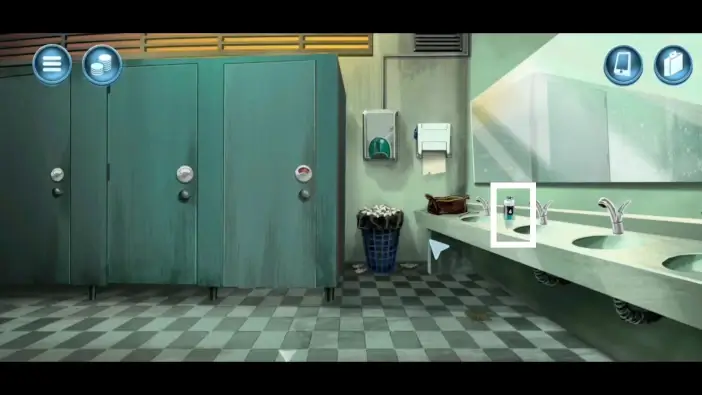
Pick the shaving cream and exit the toilet.
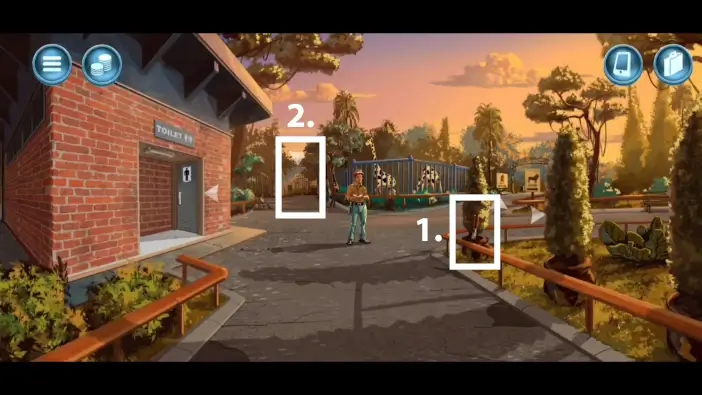
- Pick up the shears.
- Choose the path forward. You will arrive at the square with a giant fountain.
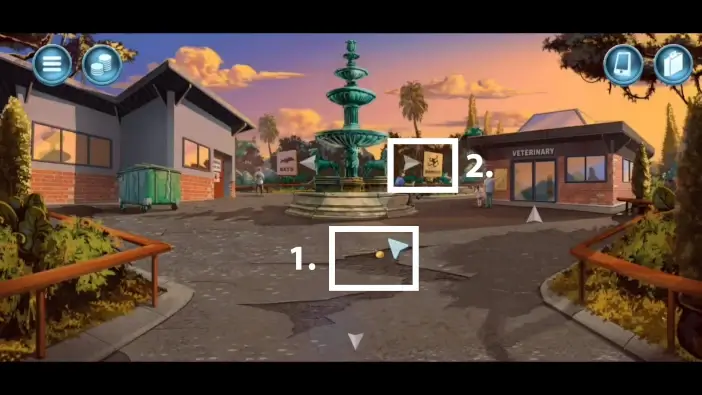
- Pick the pendant.
- Go to the monkeys’ cages.
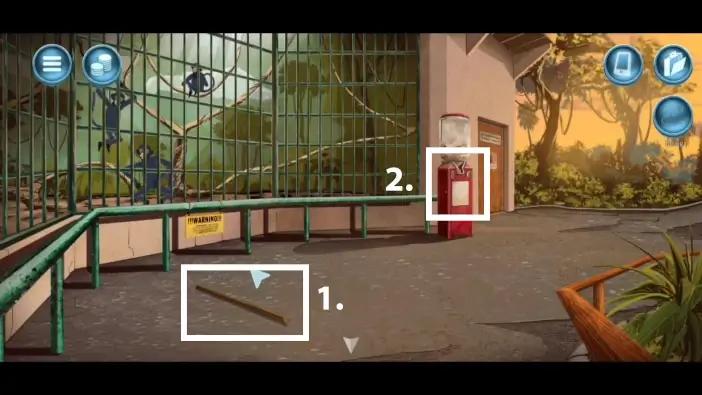
- Pick up the stick.
- Place the pendant from your inventory into the machine. The machine will malfunction, so the zoo worker will come to check it out. While he is looking at the machine, one of the monkeys will steal the flashlight from him.
- Leave the area.
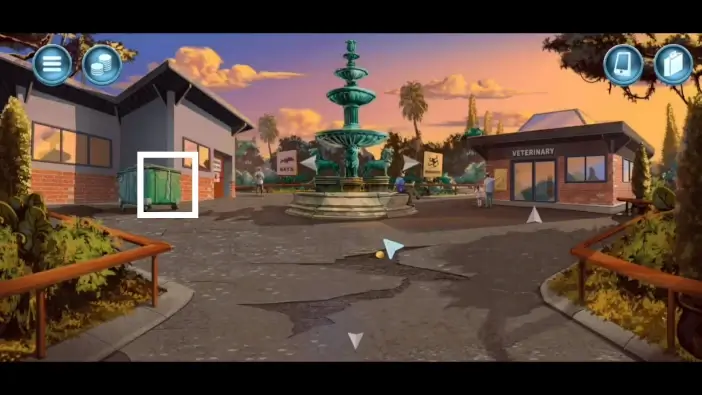
Pick the string in the square.
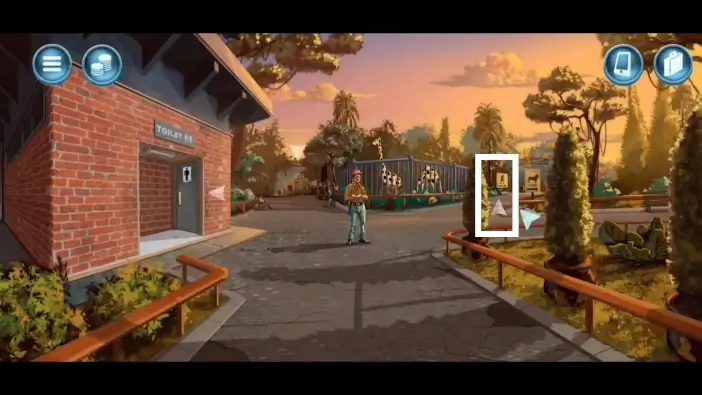
Return to the starting area and then pick the path toward the bear cage.
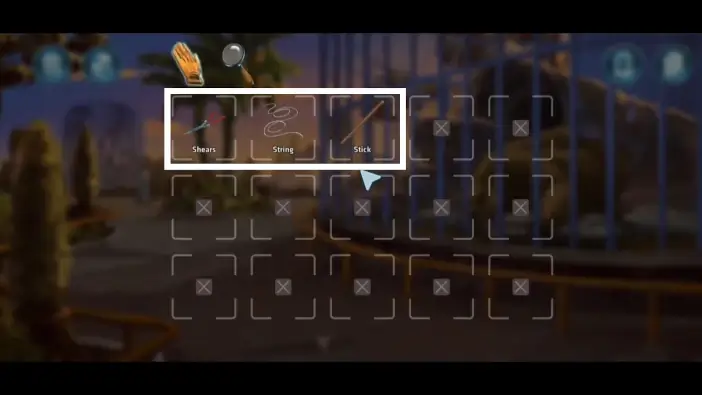
In your inventory, merge the string and the stick to create the “stick with string” item. Attach the shears on the “stick with the string” to create a “long-range shears” item.
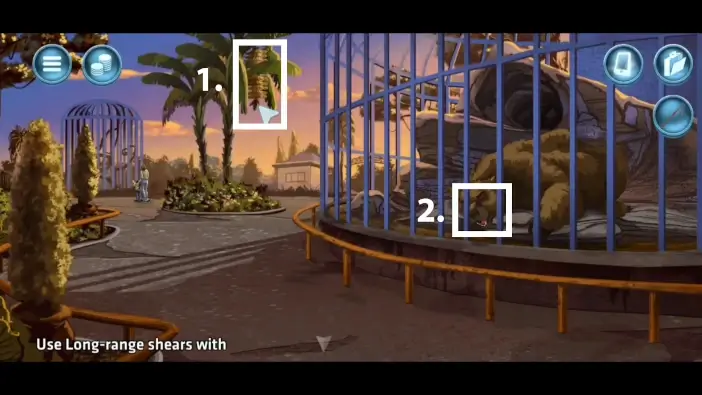
- Use this new item to take the banana from the tree.
- Spray the shaving cream on the bear’s mouth.
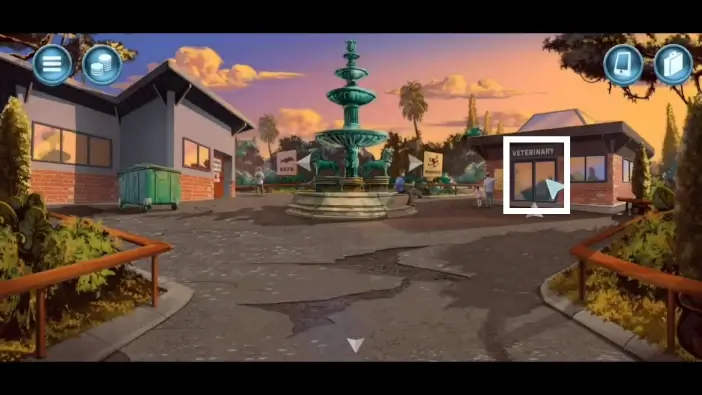
Go to the square and enter the veterinary building.
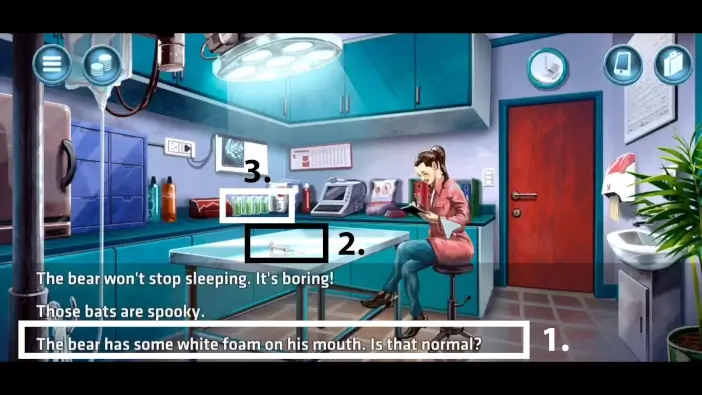
- When you speak with the veterinarian, choose the third option.
- Shortly after, the veterinarian will leave. Pick the syringe from the table.
- Fill the syringe from your inventory with antibiotics.
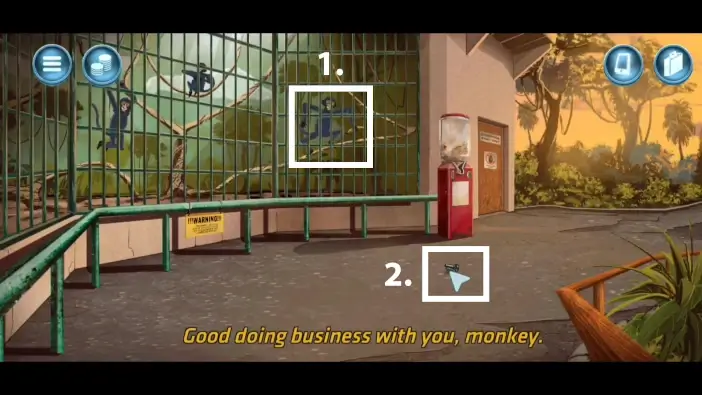
- Go to the monkeys’ cage.
- Throw a banana to the monkey. Monkey will drop the flashlight. Pick it up from the ground.
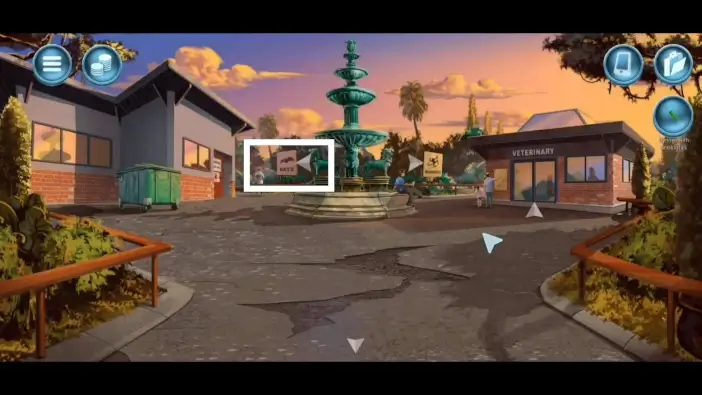
Go to the square and go to the left path to reach the bats’ cage.
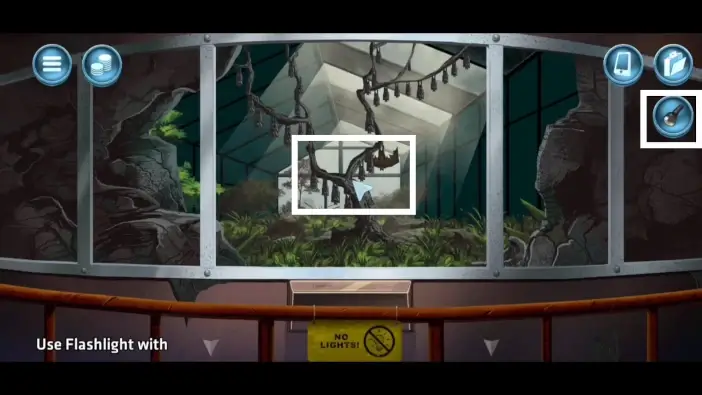
Use the flashlight to scare the bats. They will start flying in chaos.
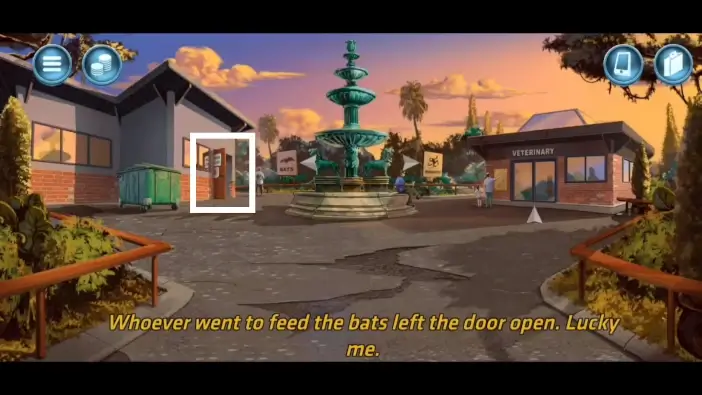
Return to the square. The warehouse on the left will be open because someone heard the bats and went to feed them. Enter the warehouse.
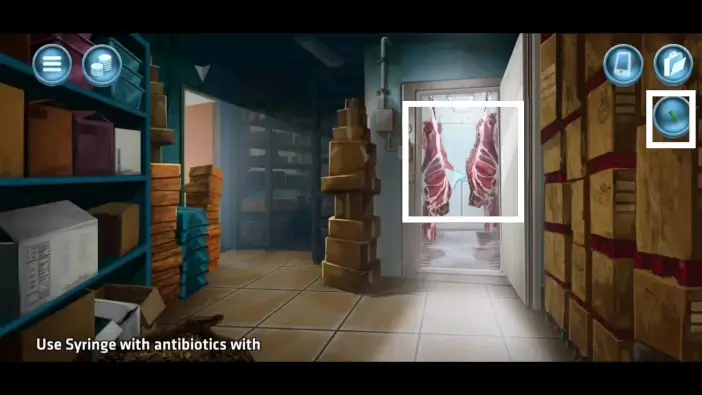
Inject the meat with antibiotics. These will cause lions to dislike the meat but don’t worry, you will feed them with the dead body. Exit the warehouse.
Your character will then wait for the zoo to close.
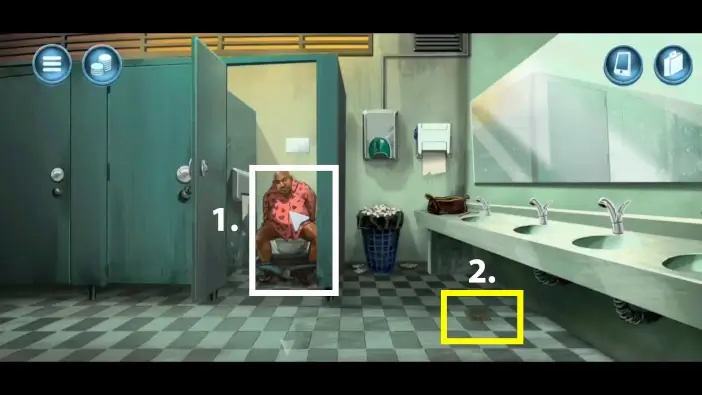
- After the wait, go to the toilet building. Open the toilet door and pick up the dead body.
- Use the flashlight that the monkey dropped on the ground to check the water drain. Open it and pick the pin. The pin is the 4th collectible in the game.
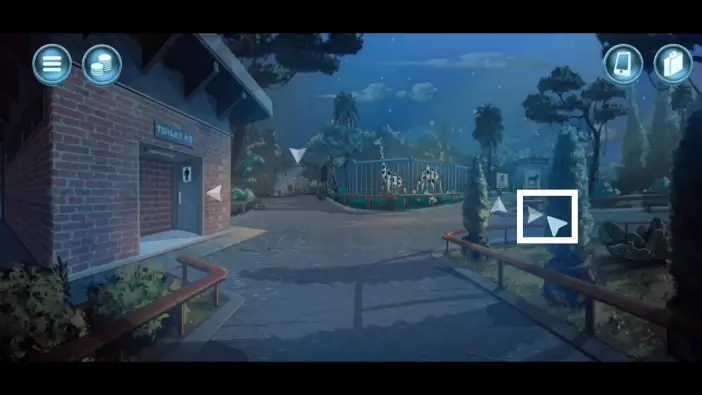
Go to the right, where the lions are.
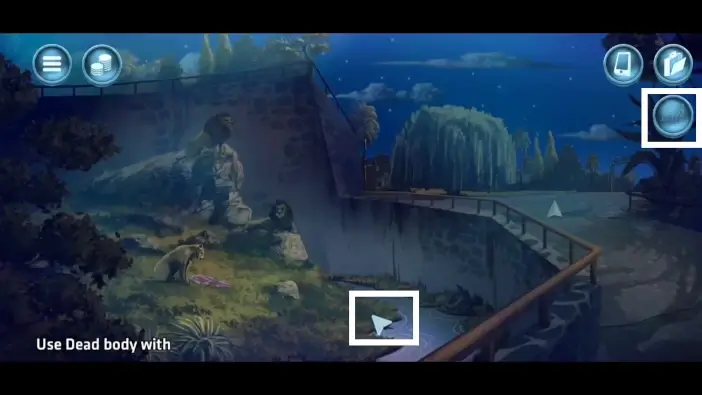
Throw the dead body to the hungry lions.
Disassemble the complex items and return all the items to their original locations.
Mission 10: Operation Mulligan
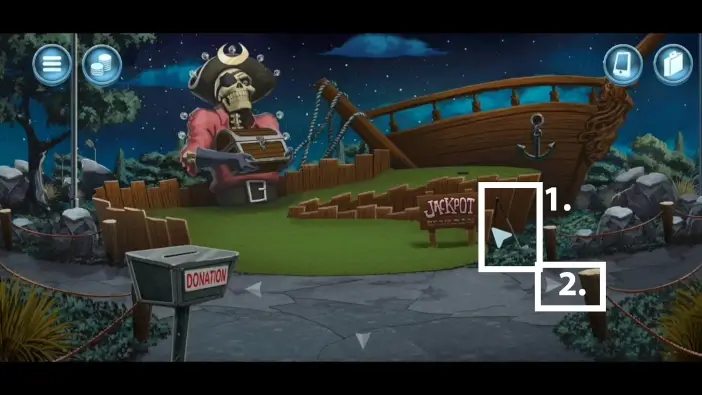
- From the starting location, where the dead body and the dinosaur are, go left to the pirate area. Pick the golf club.
- Return to the dinosaur.
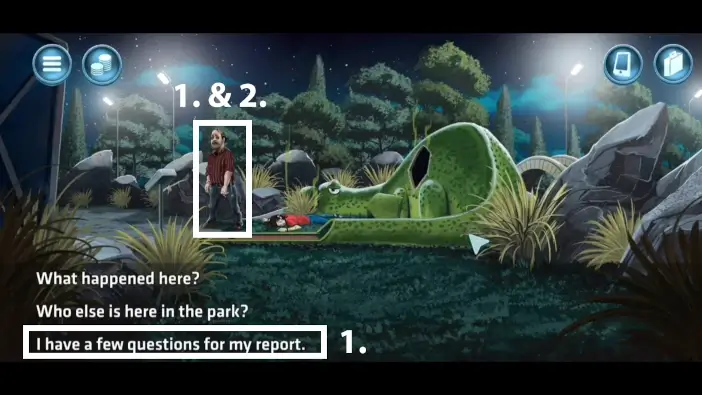
- Speak with the owner of the park and pretend you are a sergeant. During the dialogue, choose the third option. He will give you his ID that you can use later, to disarm the alarm in the office. His ID is “46-279-5390”.
- After the conversation is over, use the golf club to kill the owner. Grab the keys from his pockets.
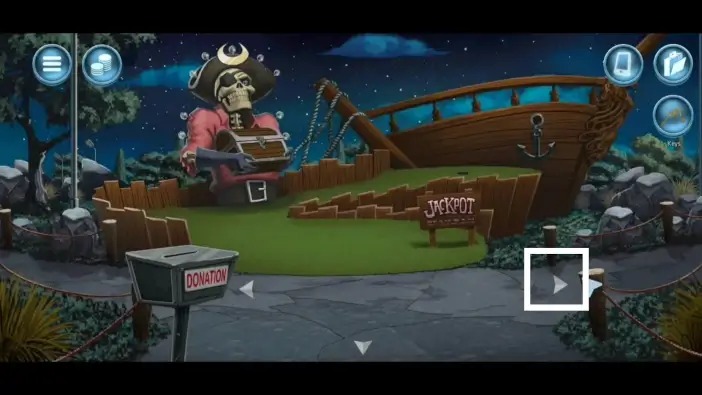
Go to the pirate area. Go right toward the office.
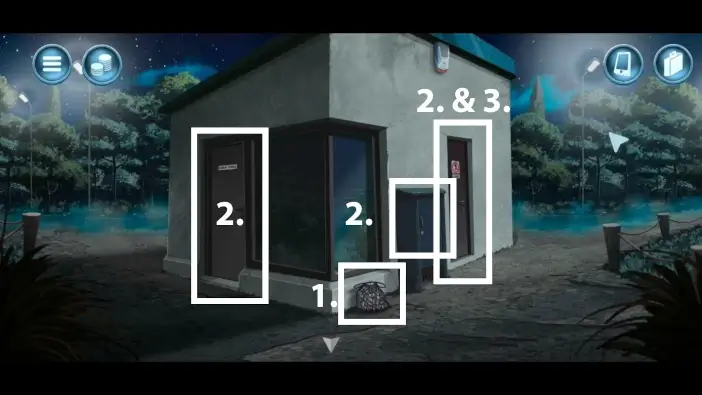
- Pick the golf balls.
- Use the keys from the owner to unlock both doors and the breaker box.
- Go to the door on the right to enter the storage room.
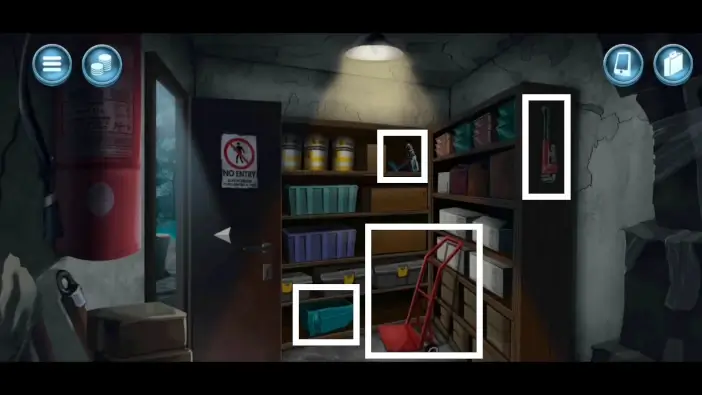
Inside the storage room pick the pipe wrench, the drill, the hand truck, and the ball dispenser. Exit the storage room.
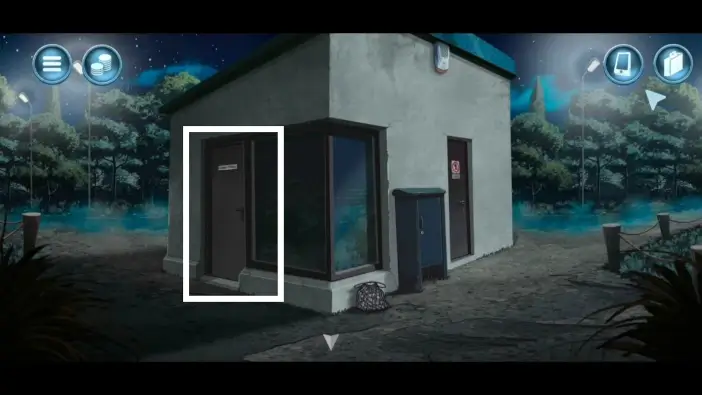
Enter the office.
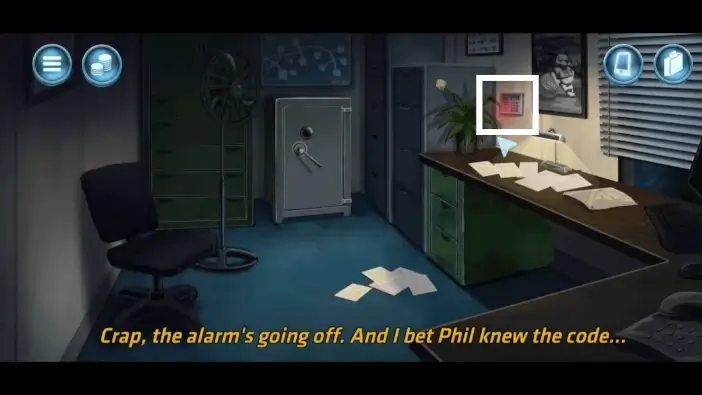
Once you enter, you will activate the alarm.
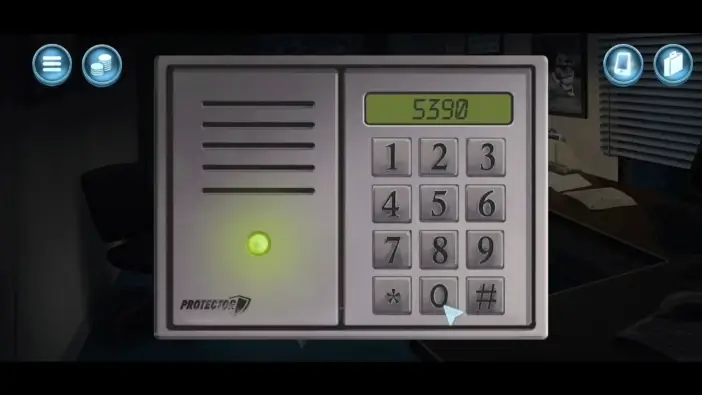
To disarm it, you need to type the last number of the owner’s ID, which is “5390.”
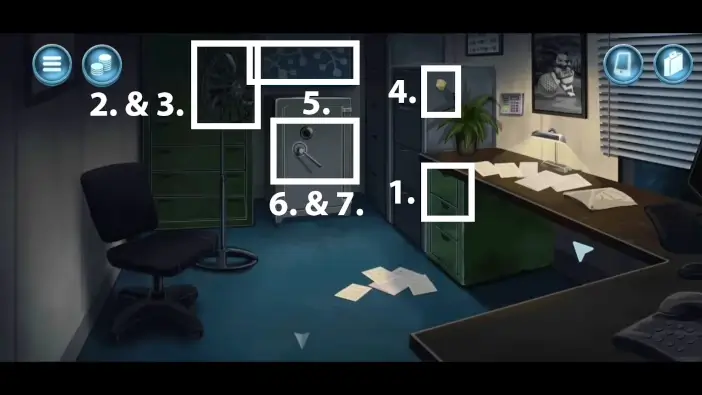
- Open the drawer and pick the padlock, then close the drawer.
- Use the pipe wrench to remove the fan guard from the fan.
- Pick up the fan blades.
- Check the sticky note to read the clue for opening the safe. In the note, tiger, windmill, and the waterfall are mentioned.
- Check the map. You will see that near the tiger there is a number 5, near the windmill is number 1, and near the waterfall is number 6.
- Following the clues from the map, unlock the safe with these numbers: 50, 10, and 60.
- Take the money from the safe.
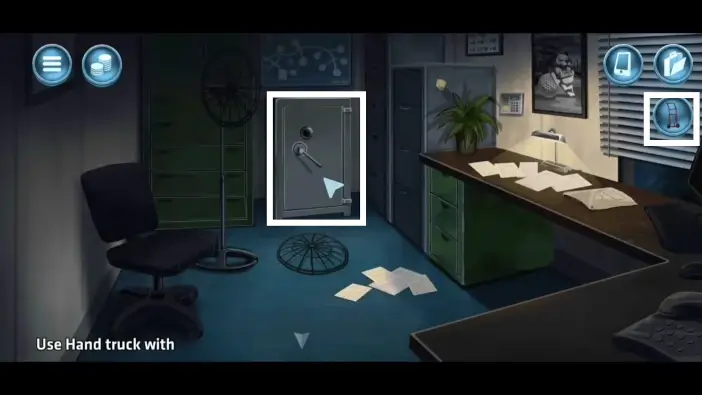
Use the hand truck from your inventory to pick up the entire safe.
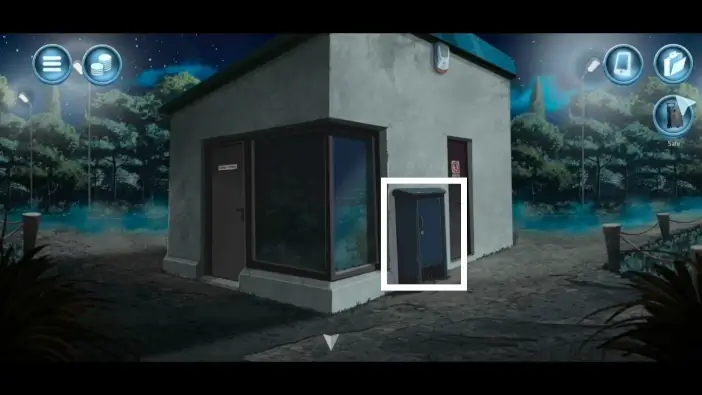
Exit the building open the breaker box and approach it.
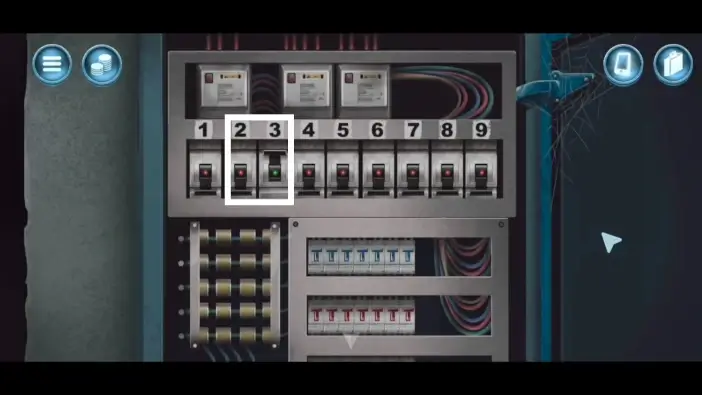
Turn off the position 2 and turn on the position 3.
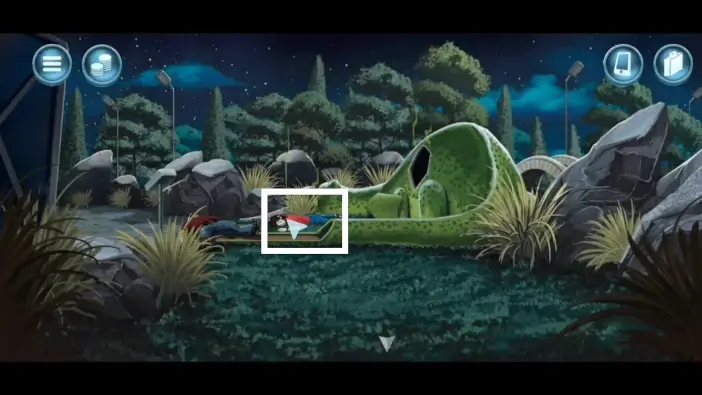
Go to the dinosaur area. Pick up the victim’s body and put it in a safe in your inventory.
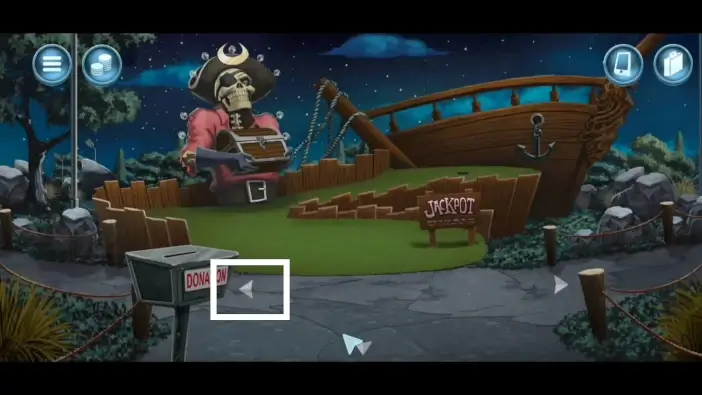
Go to the beach, which is on the left of the pirate area.
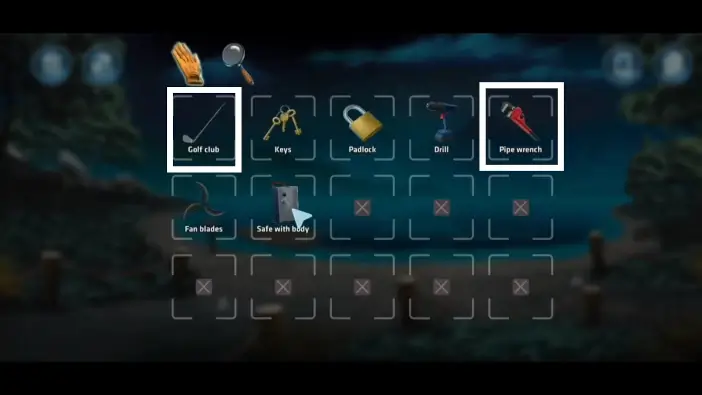
Cut the golf club with the pipe wrench to create a club shaft and the club head.
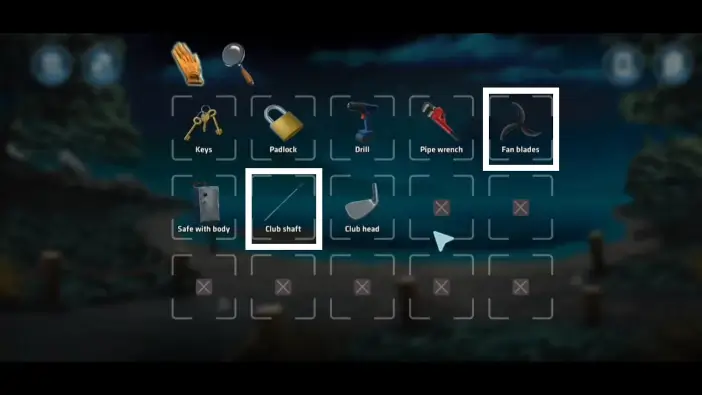
Place the fan blades on the club shaft.
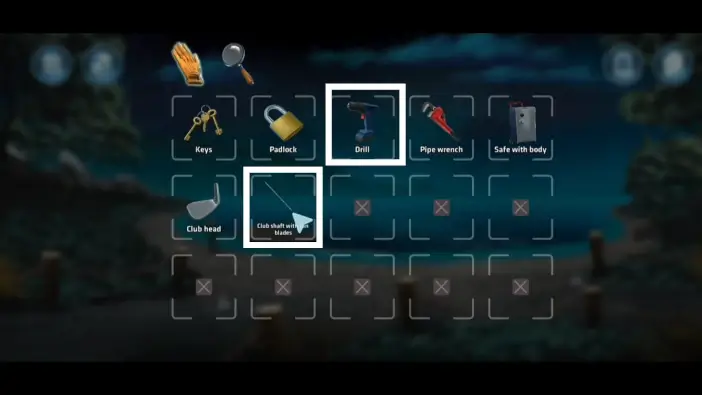
Place the drill into the club shaft with blades to create a boat motor.
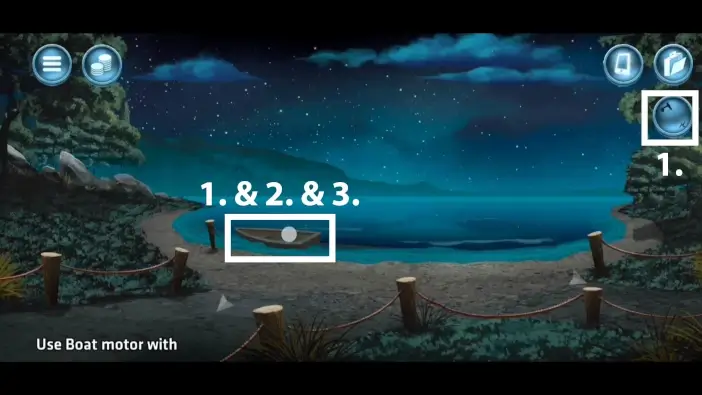
- Place the boat motor on the boat.
- Place the safe with an owner’s body on the boat.
- Go on the boat and push the safe into the water.
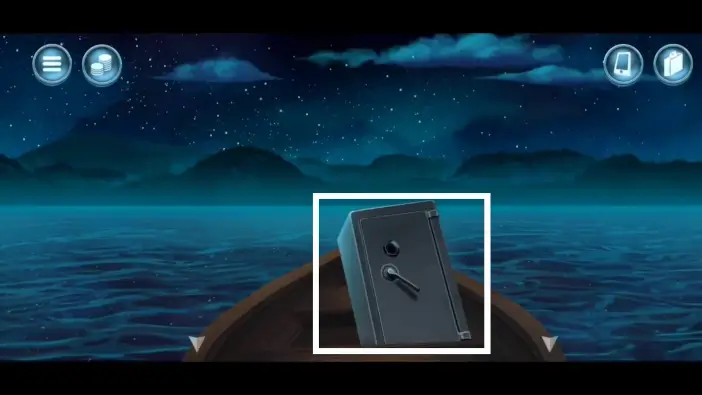
Go on the boat and push the safe into the water.
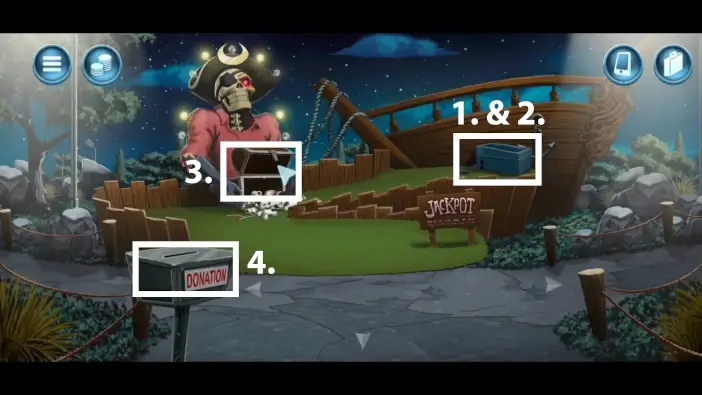
- Go to the pirate area. Place the ball dispenser near the golf hole.
- Place the golf balls into the ball dispenser. The skeleton pirate will malfunction and it will drop the chest.
- Pick the empty chest with your hand cart from your inventory.
- Place the money into the donation box.
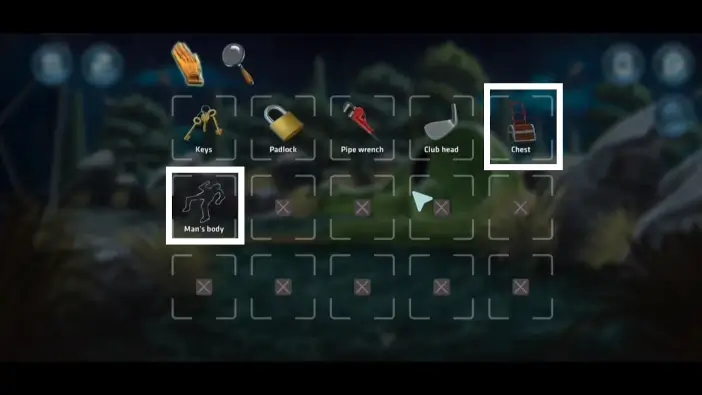
Go to the dinosaur area. Pick up the dead body of the owner. Place the dead body inside the chest.
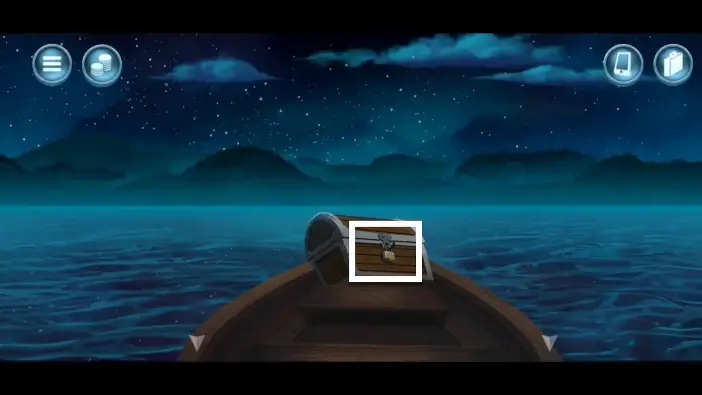
Return to the beach and place the chest on the boat, then board the boat. Place the padlock on the chest, and throw the chest into the lake then run away.
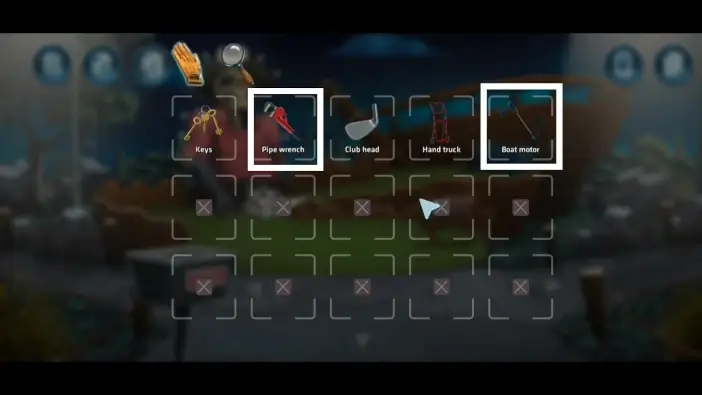
You need to return all the items to their original places before finishing the missions. Don’t forget to disassemble the complex items such as the “boat motor” you created. Use the pipe wrench from your inventory to disassemble it.
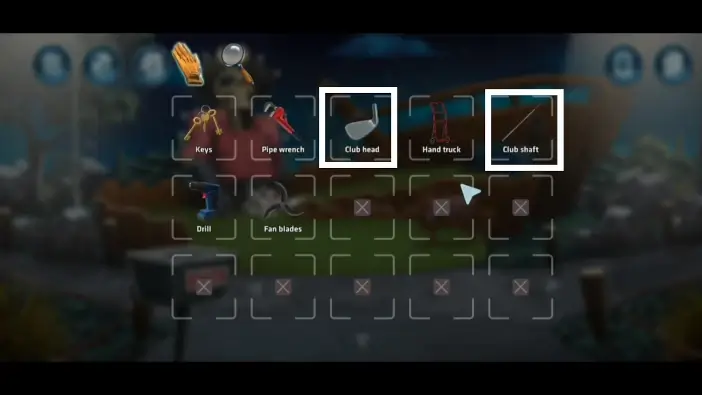
After you disassemble the boat motor, return the club head to the club shaft to get the original golf club. Of course, return the golf club to its original place at the skeleton pirate area.
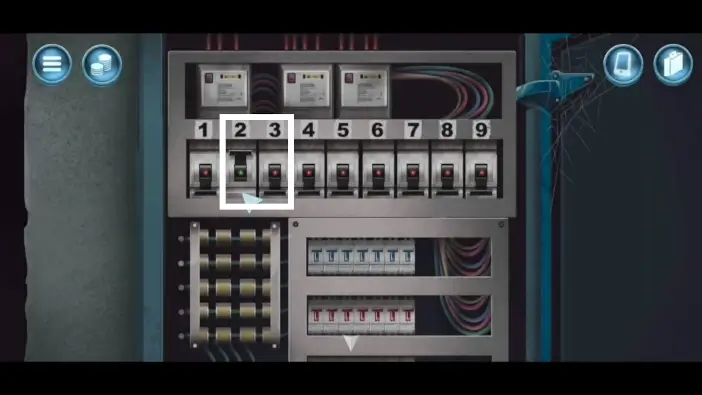
Don’t forget to return the switches back to their original state in the breaker box.
Close every door and don’t forget to lock the breaker box and the doors of the storage room and the office.