Nobodies After Death 11-13
Hello everyone and welcome to our walkthrough for “Nobodies After Death”. In this game, you will be a “cleaner”, whose main task is to cover up the murder(s), by removing all evidence of any mischief. The main part of this task is to dispose of the body, and this can be achieved in various ways, as you will quickly discover.
In this walkthrough, we will cover missions 11 through 13.
MISSION 11
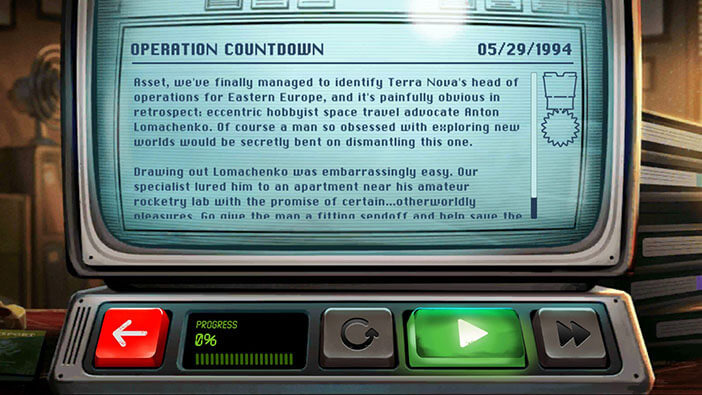
OPERATION COUNTDOWN
Our agency was able to lure out and eliminate Anton Lomachenko, Terra Nova’s head of operation for Eastern Europe. Lomachenko has a rocketry lab nearby, so we could get rid of the body in a very creative way.
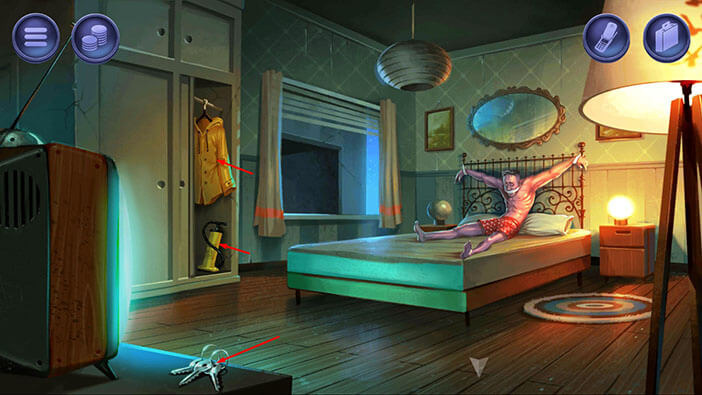
In this room, we can see Lomachenko’s body tied to the bed. There are also three items that we can pick up here.
First, tap on the “Keys” located next to the TV, to pick them up. We can also see two items in the closet. Tap on them to pick them up and a “Raincoat” and a “Hand pump” will be added to your inventory.
Once you have all three items, tap on the arrow at the bottom of the screen to go to the next area.
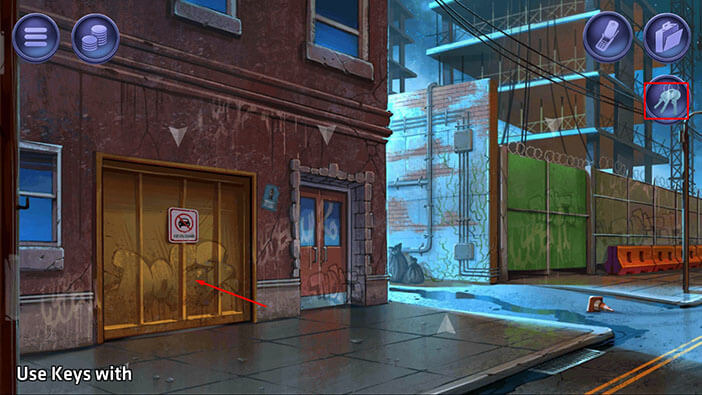
Ok, we are now on the street. Select the “Keys” from the inventory and use them to unlock the garage door on the left. After that, tap on the door to proceed inside.
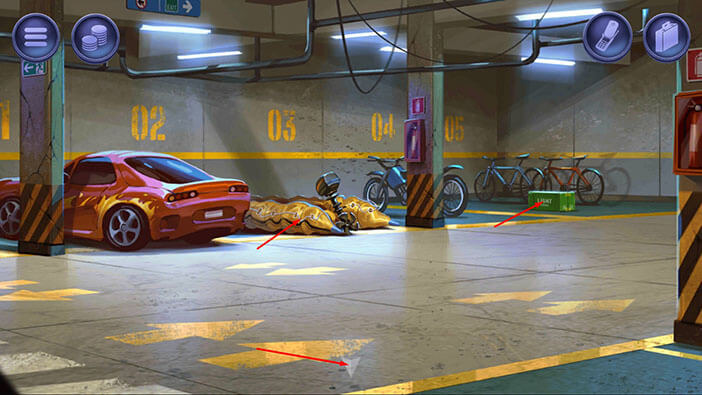
Here, we can pick up two items. First, tap on the “Inflatable boat” located next to the car to pick it up. Next, tap on the green box located below the red bike. “Chemical lights” will be added to your inventory.
After that, tap on the arrow at the bottom of the screen to go back to the street.
Next, tap on the “Traffic cone” to pick it up. Our character believes that the traffic cone will be crucial for this mission. Spoiler alert, it won’t.
Tap on the alley on the left to proceed to the next area.
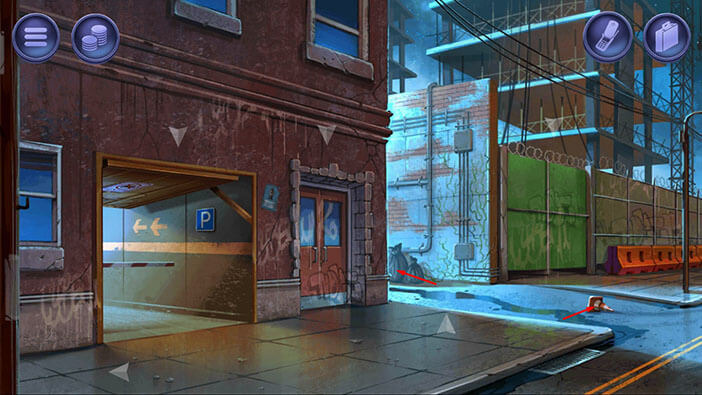
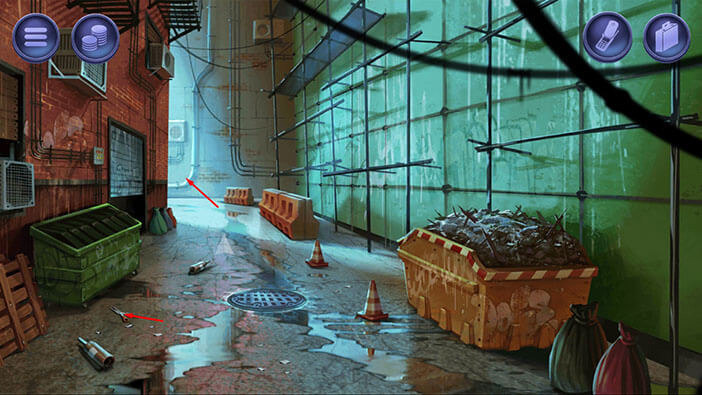
On the ground, below the green dumpster, you will see “Scissors”. Tap on them to pick them up. We are done with the alley, at least for now, so tap on the other side of the alley to go back to the main street.
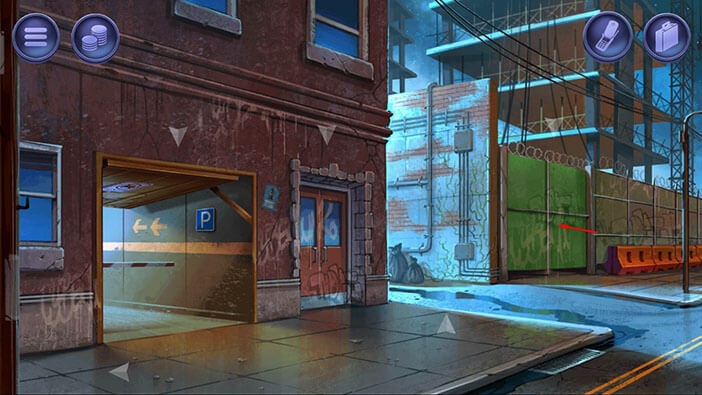
On the left side, you will notice a construction site. Tap on the large green gate to go into the building that is under construction.
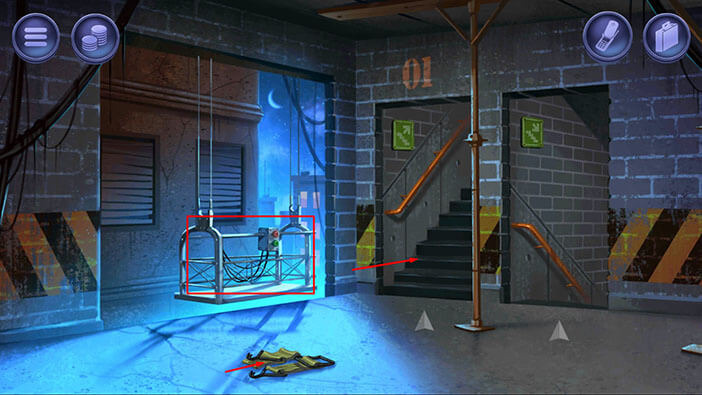
Here, we can see two items. On the ground in front of you, there’s a “Ratchet strap”. Tap on it to pick it up. You will also notice a Suspended scaffolding platform – we will use it a bit later, once we explore the building on foot. Tap on the stairs on the right to go to the next floor.
Tap on the ladder on the left to pick it up. After that, tap on the stairs on the right to proceed to the next floor.
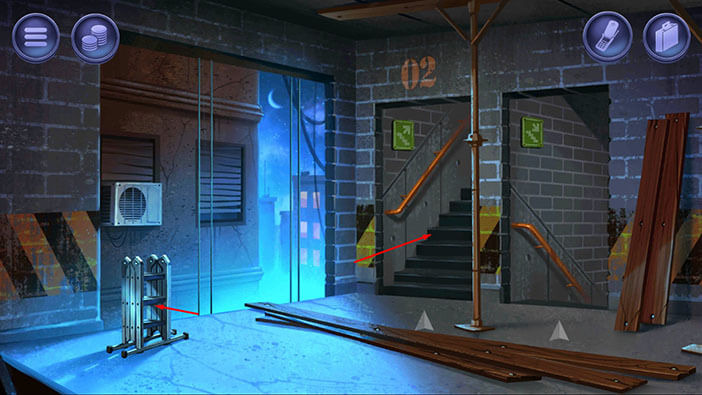
There is nothing of interest on the third floor, so let’s go to the next floor.
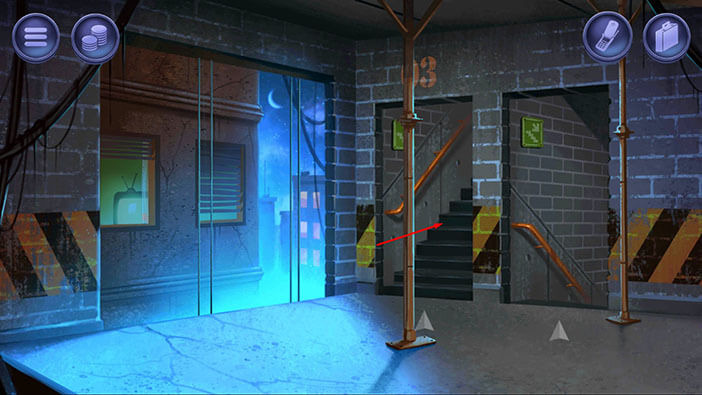
In the left corner of the room, you will notice three metal bars. Tap on them and our character will pick up the “Steel rod”. After that, tap on the stairs on the right to proceed to the next floor.
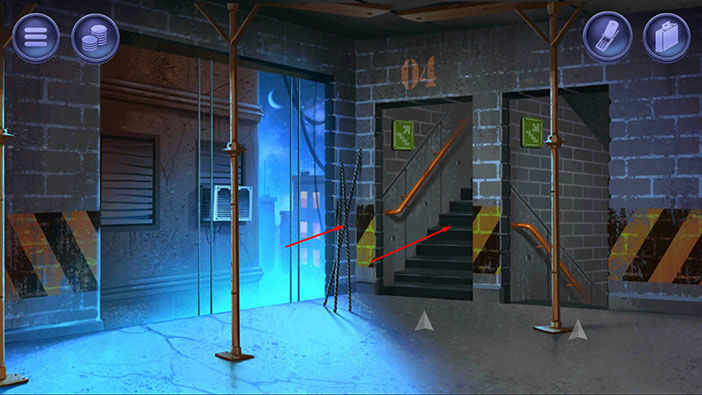
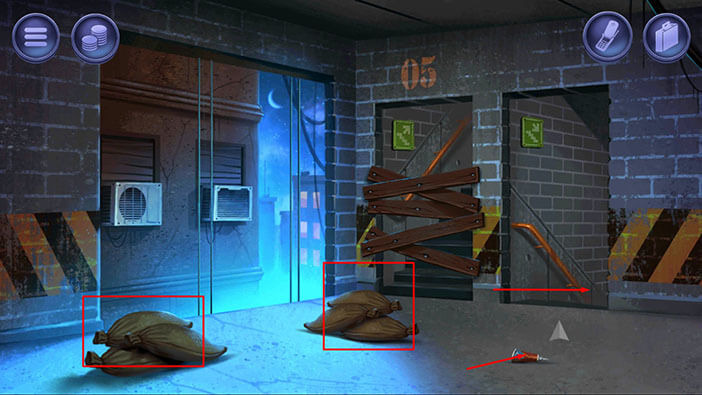
If you look at the right side of the floor, you will notice a small tube. Tap on it to pick it up and “Glue” will be added to your inventory. We can also see two piles of sandbags on the left side of the room. If you pick up the sandbags, your character will complain and he will say that the sandbags are too heavy for him, and he can’t carry them. Later, we will come back with the Suspended scaffolding platform and use it to transport the sandbags downstairs. Now, we should go back to the first floor, so tap on the stairs until you reach it.
Tap on the Suspended scaffolding platform to start the interaction. After that, tap twice on the “Red button” to go to the third floor.
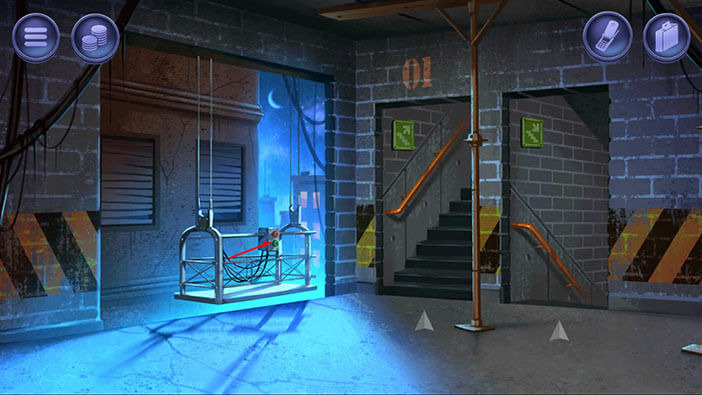
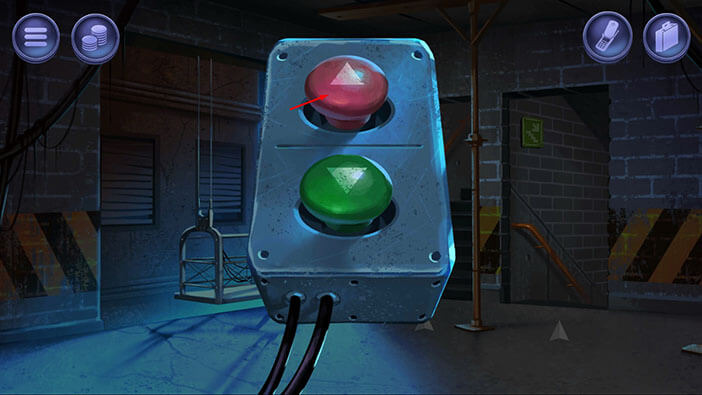
There is an open window in the neighboring building, and we can see that the TV is on in this room. This window leads to the apartment in which Lomachenko’s body is tied to the bed. So, let’s use the “Ladder” from our inventory to create a makeshift bridge and go into the room from outside – place the ladder between the window and the platform and use it to cross to the other side.
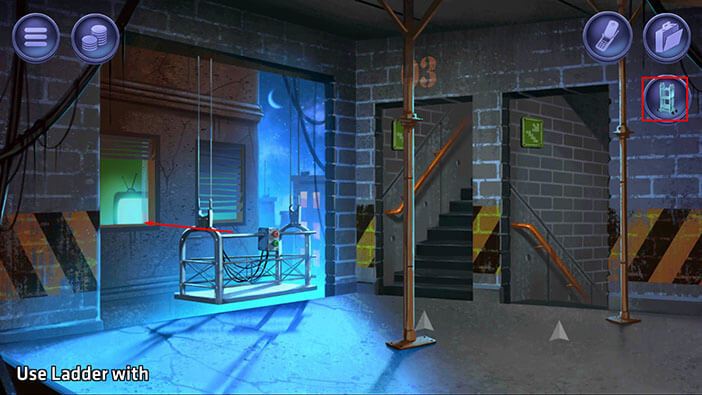
Tap on the “Dead body” to pick it up. After that, tap on the window, and our character will carry the dead body over the makeshift bridge. So, we managed to get the body out of the apartment without anyone noticing. So far, so good.
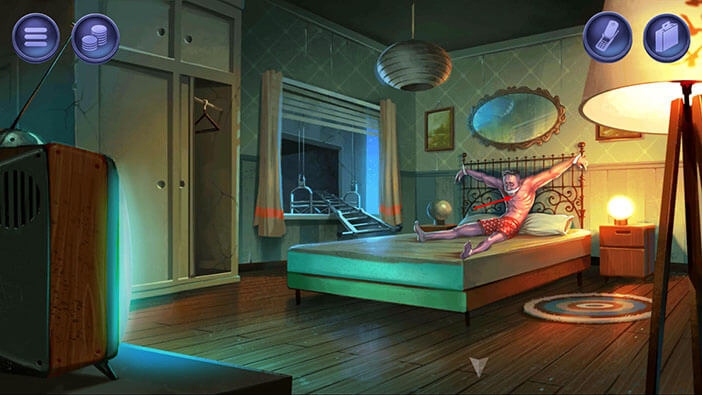
Tap on the “Ladder” to pick it up. After that, use the platform controls to go to the fifth floor (tap twice on the red button).
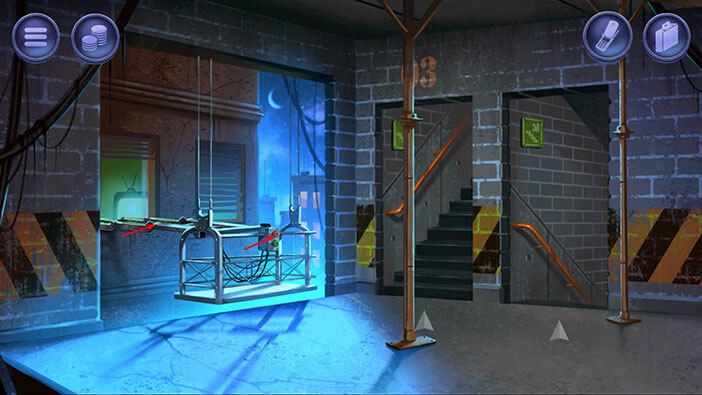
Tap on the “Sandbags” to pick them up. We will use the suspended scaffolding platform to transport the sandbags downstairs.
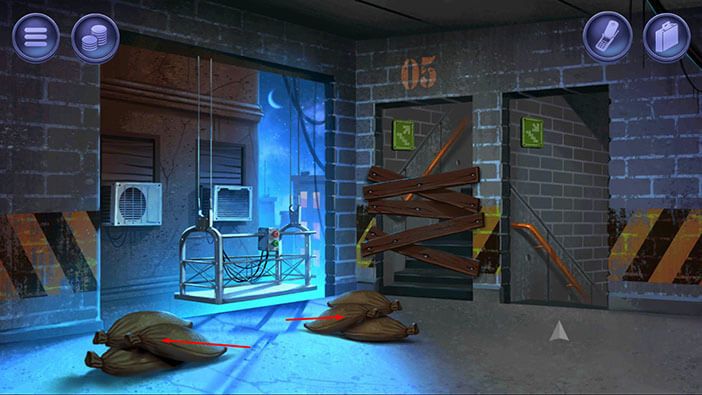
Select the “Sandbags” from the inventory and load them onto the suspended scaffolding platform.
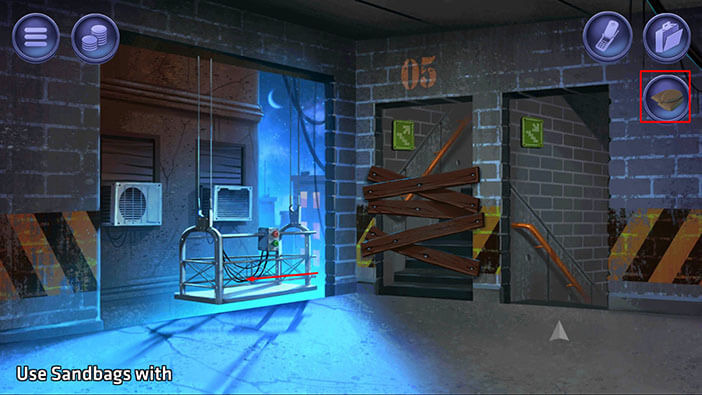
Tap on the platform controls to start the interaction, and tap on the green arrow five times. This will get you (and the sandbags) to the ground floor.
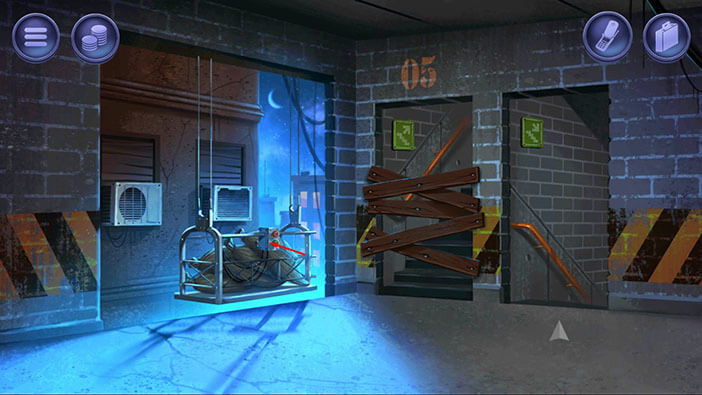
Tap on the “Sandbags” to pick them up.
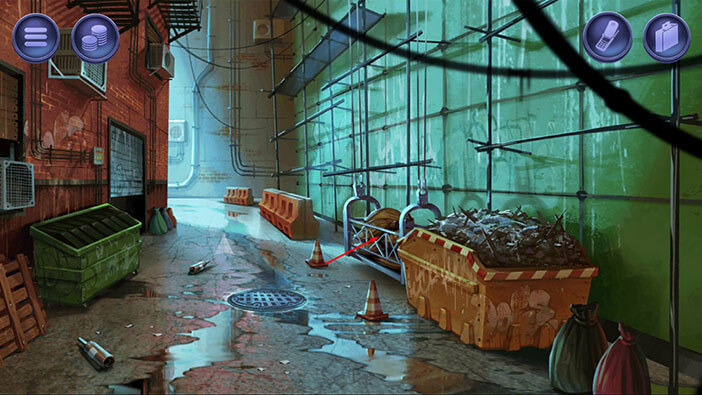
Select the “Steel rod” from the inventory and use it to open the sewer hatch. Tap again to go into the sewer – well, this is a dirty job, but somebody has to do it.
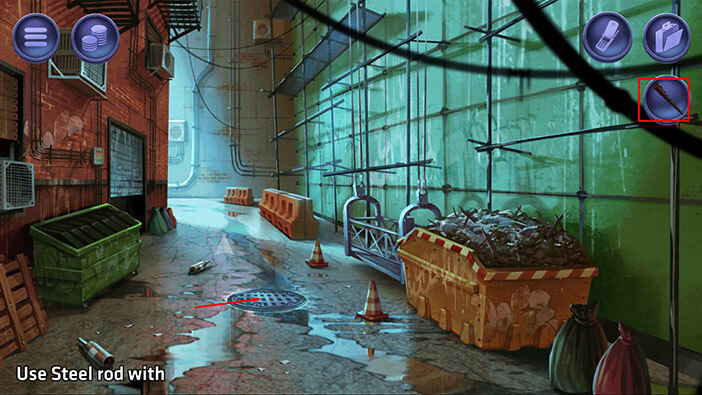
Select the “Inflatable boat” from the inventory and put it on the ground.
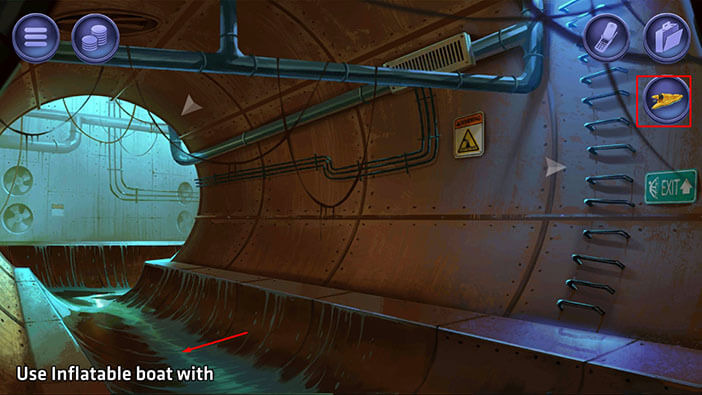
If you tap on the inflatable boat, you will discover that it has a small hole, and we have to patch it up before we can inflate it. So, let’s do that. Tap on the suitcase icon to open the inventory and use the “Scissors” on the “Raincoat”. Our character will cut out a piece of “Waterproof fabric”.
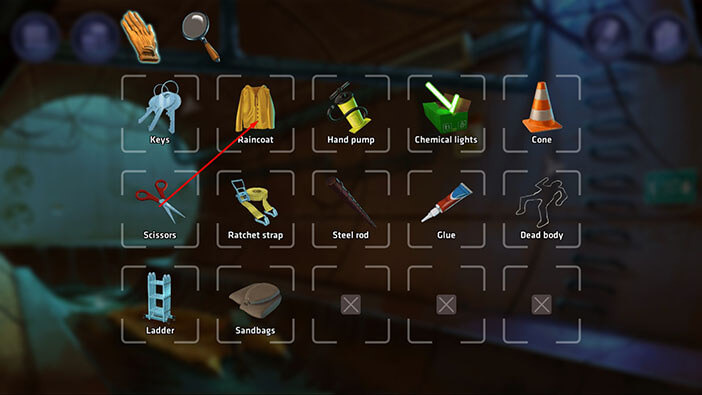
Next, select the “Glue” from the inventory and combine it with the “Waterproof fabric”. You will create “Glued fabric”.
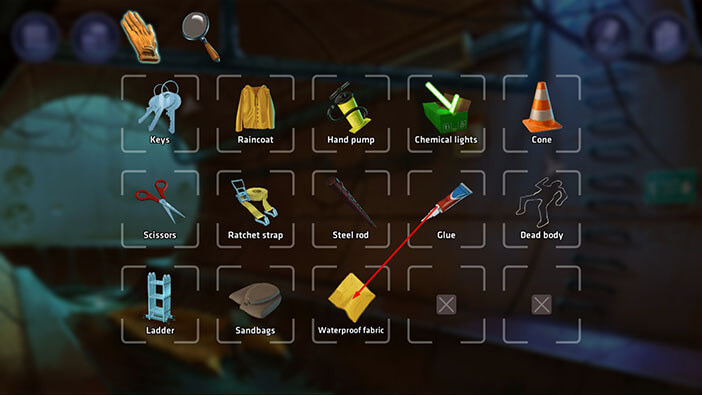
Select the “Glued fabric” from the inventory and use it to patch up the boat.
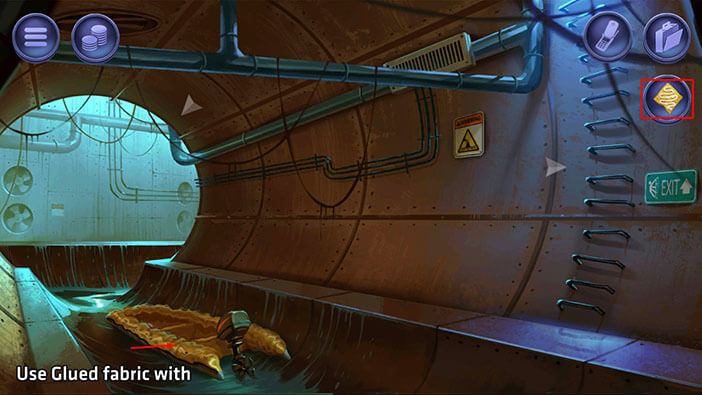
We can now inflate the boat, so let’s do that. Select the “Hand pump” from the inventory and use it to inflate the boat.
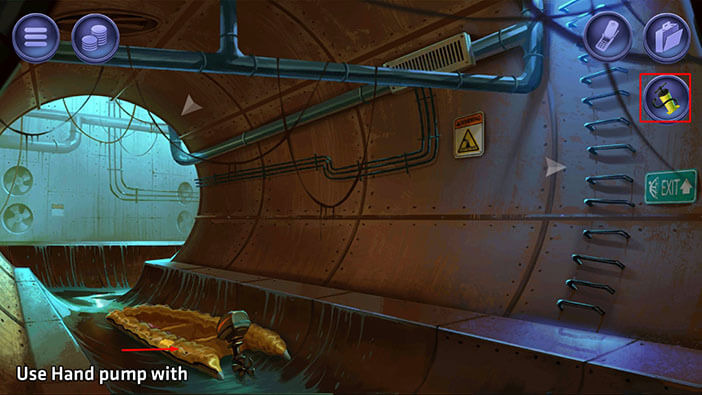
Next, select “Sandbags” from the inventory and tap behind the boat. Our character will use the sandbags to create a small damn. The damn will increase the water level on the other side, so now the boat can float.
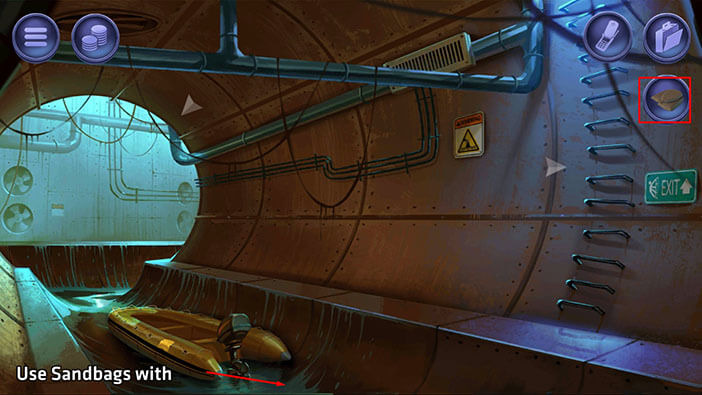
Select the “Dead body” from the inventory and put it into the boat. After that, tap on the wall ladders to go back to the surface.
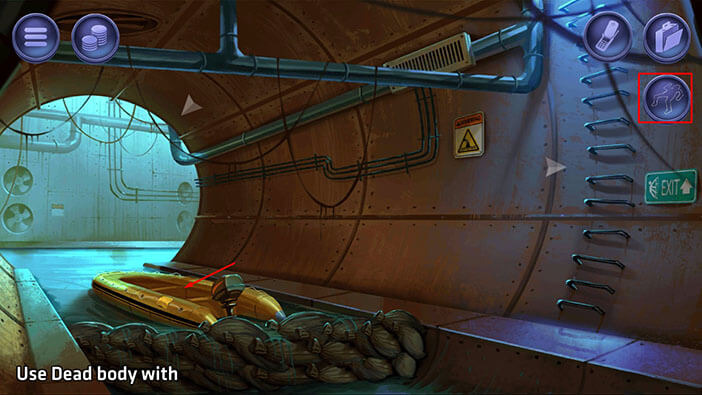
Tap on the end of the alley to go back to the main street.
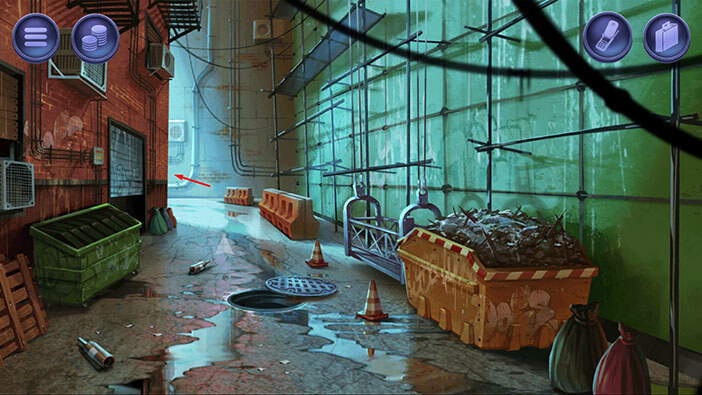
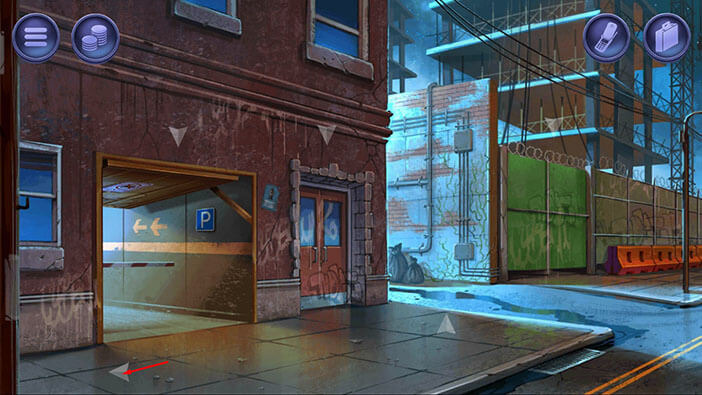
Tap on the arrow on the left and you will see the entire town from a top-down perspective.
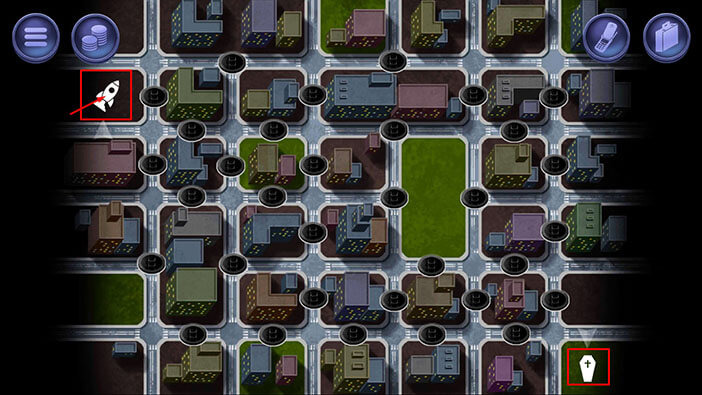
Ok, in the bottom right corner, you will see a small coffin, and it represents our current location (the apartment in which we found the dead body).
In the top left corner, you will see a small rocket. This rocket represents a rocketry lab. Our task is to transport the dead body through the sewers from the coffin to the rocketry lab. However, before we do that, tap on the rocketry lab icon, and let’s explore this location.
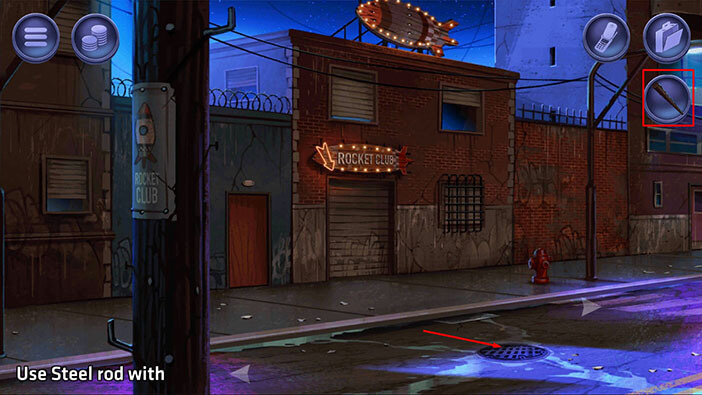
Select the “Steel rod” from the inventory and use it to open the sewer hatch. After that, tap on the hole to go down into the sewers.
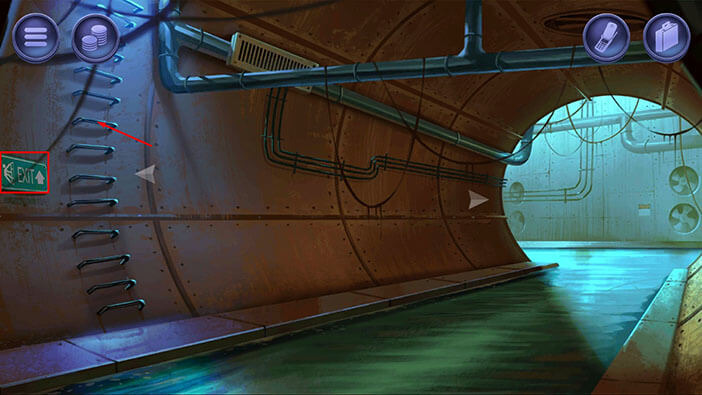
On the wall on the left, we can see an “Exit” sign. Later, we will use the sewer system to transport the dead body to this spot. For now, we just opened the hatch so we can later have access to the surface once we reach this spot.
Tap on the ladder to go back to the surface.
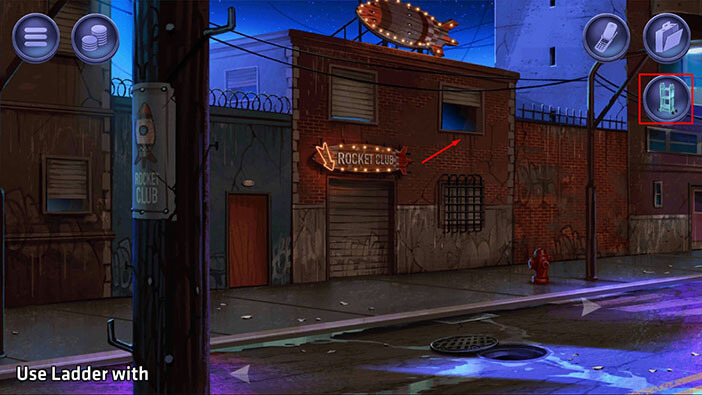
Let’s go into the “Rocket Club”. The door is locked, so we will have to climb through the window. Select the “Ladder” from the inventory and put it below the window. After that, tap on the window to go into the building.
On the ground in front of you, you will see two items. Tap on the “Wrench” and the “Dolly” to pick them up.
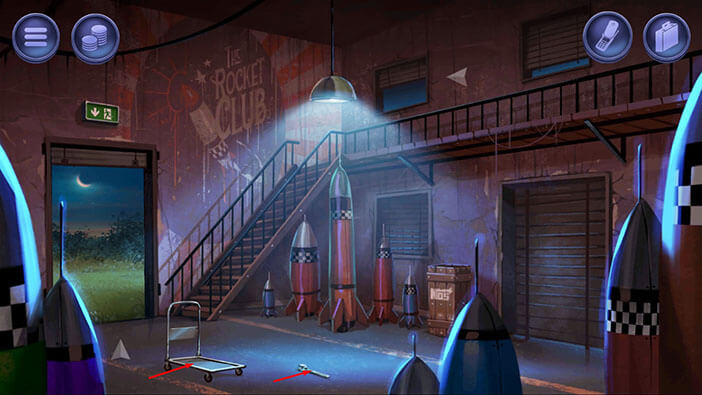
Next, tap on the suitcase icon to open the inventory and select “Dolly”. Tap on the large rocket to load it onto the dolly – “Dolly with rocket” will be added to your inventory. After that, tap on the doorway to go to the backyard.
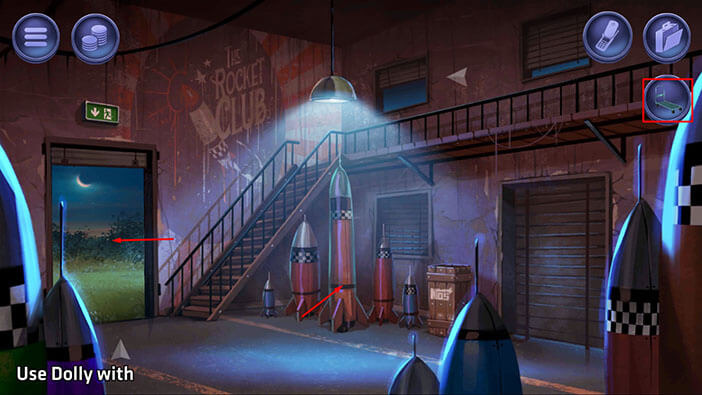
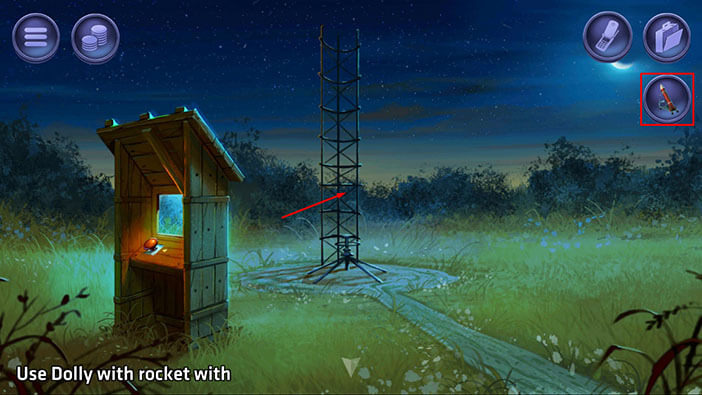
We are now looking at the rocket launch site. Select the “Dolly with rocket” and use it to install the rocket on the launch ramp. Later, we tie the dead body to the rocket and launch it into space. This is probably the most creative way to get rid of the dead body, so far.
Once you’re done tap on the arrow at the bottom of the screen to go back.
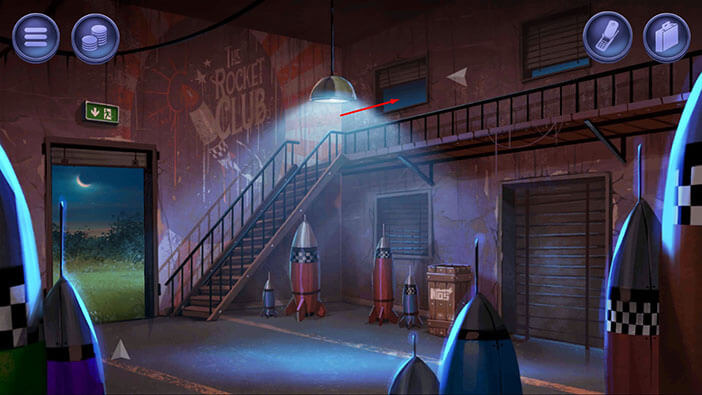
Tap on the window to go back to the street.
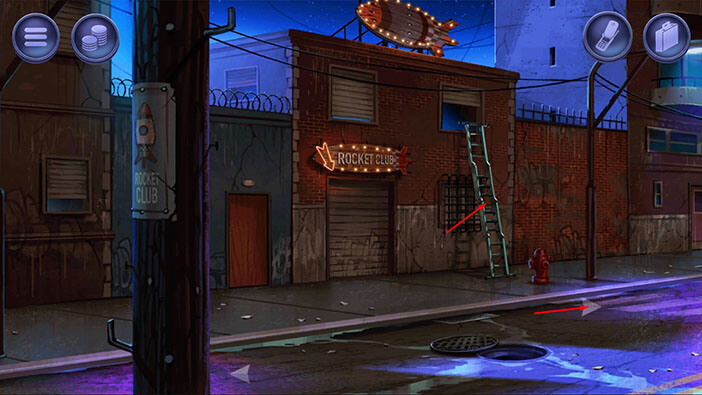
Tap on the “Ladder” to pick it up. After that, tap on the arrow on the right to take a look at the town from the top-down perspective.
Our next task is to mark the path from the coffin in the bottom right corner of the screen to the rocket in the top left corner of the screen. We will use the “Chemical Lights” to do that. However, our character has only 7 chemical lights, so we will have to find a short route. Let’s begin.
Select the “Chemical lights” from the inventory and use them to light the path on the nodes shown in the image below.
Once you’re done, tap on the coffin icon in the bottom right corner, and you will find yourself on the main street, in front of the apartment.
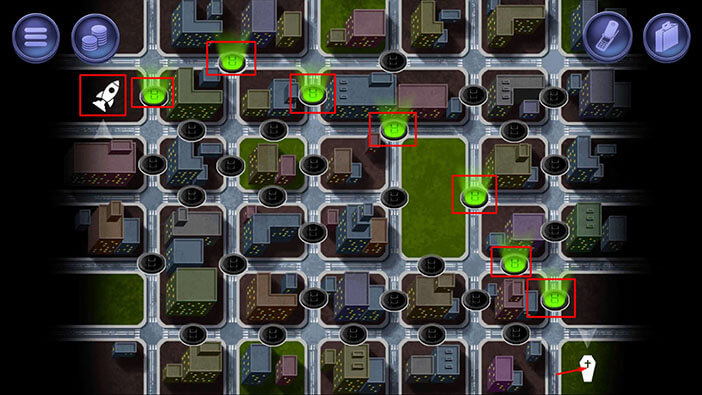
Ok, let’s go into the sewers and transport the dead body to the Rocket Club. Tap on the alley on the left.
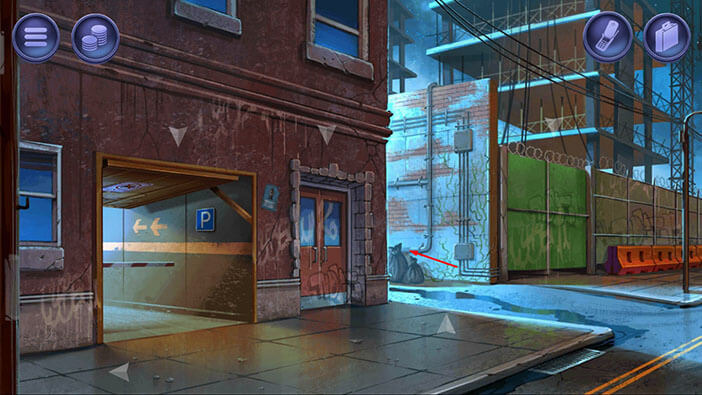
Tap on the hole to go into the sewers.
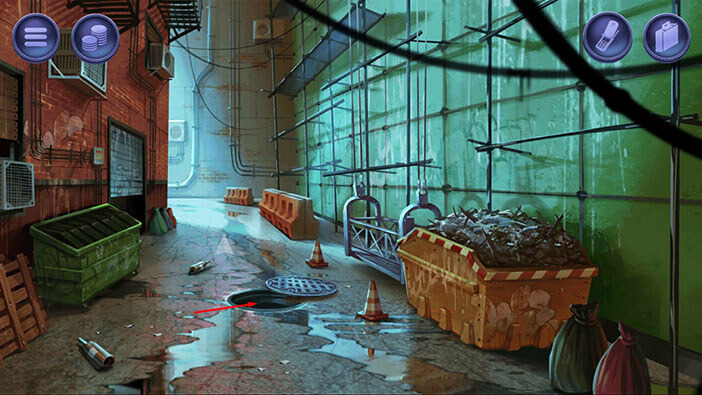
Tap in front of the boat to go down the sewer.
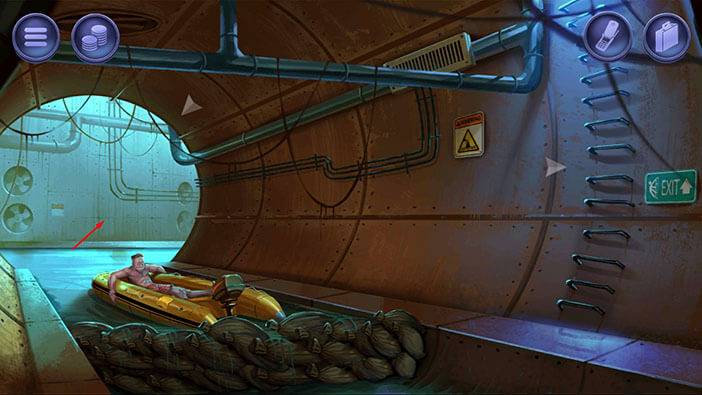
We are now at the first crossroads, and here we have three options. We can go into the tunnel on the left, or right, or continue forward. If you take a closer look at the tunnel on the right you will notice that water is glowing in the light green color. This is the effect of the chemical lights which we set up earlier to mark the path. Now we just have to follow the path marked with these lights. So, tap on the right tunnel to proceed to the next area.
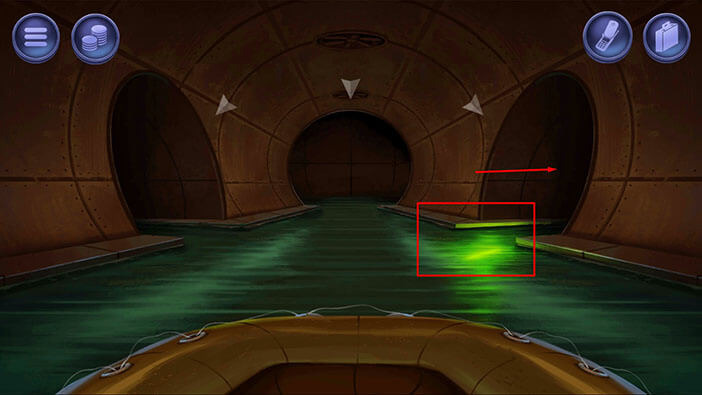
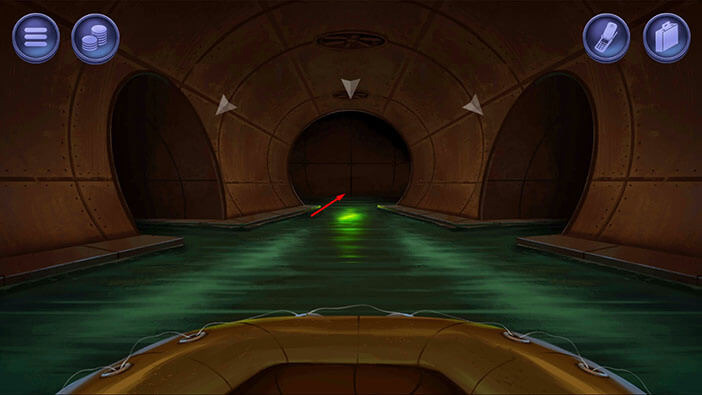
At the second crossroad, we will continue forward, because there we can see a chemical light.
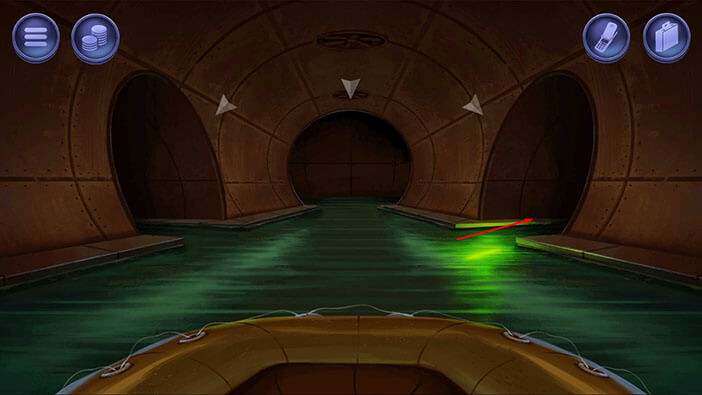
At the third crossroad, we will go into the right tunnel, because there we can see a chemical light.
At the fourth crossroad, we will go into the left tunnel, because there we can see a chemical light.
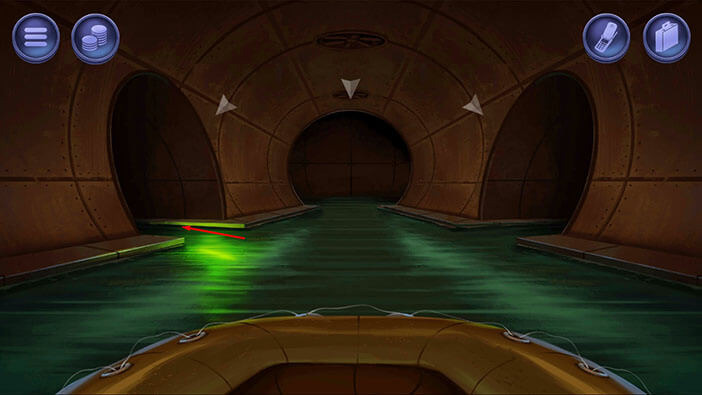
At the fifth crossroad, we will go into the right tunnel, because there we can see a chemical light.
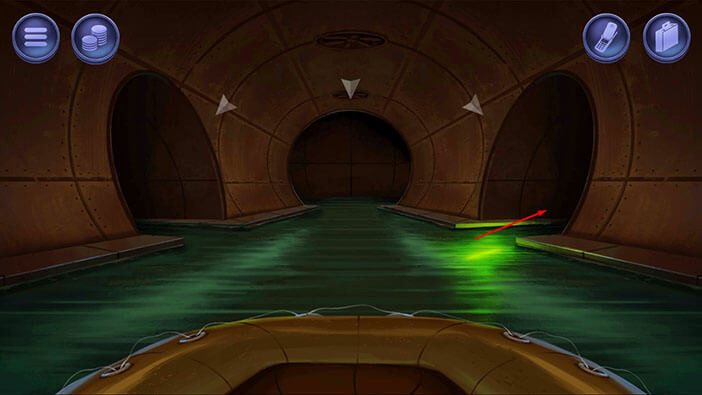
At the sixth crossroad, we will go into the left tunnel, because there we can see a chemical light.
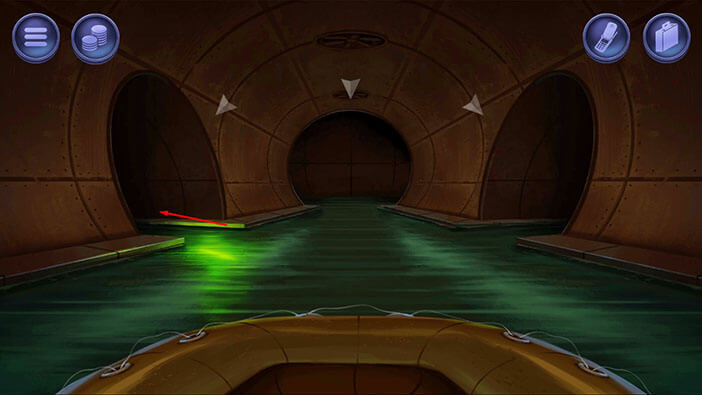
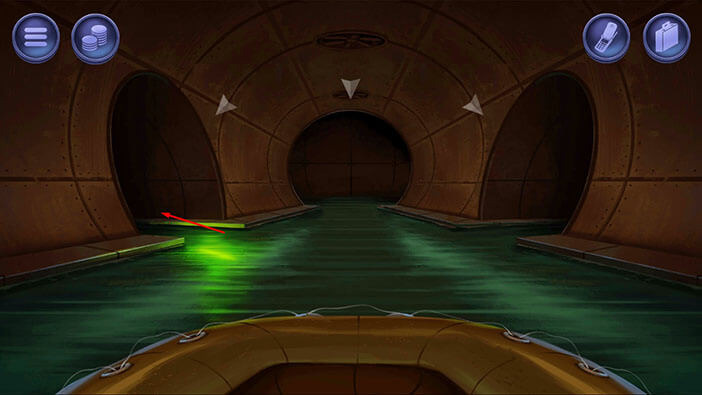
At the seventh crossroad, we will again go into the left tunnel, because there we can see a chemical light.
We reached our destination. Tap on the “Dead body” to pick it up. After that, tap on the ladder to go to the surface.
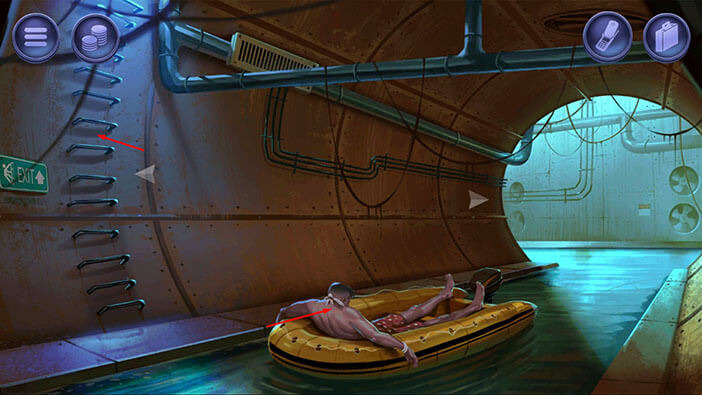
Select the “Ladder” from the inventory and put it under the window and enter the “Rocket Club”.
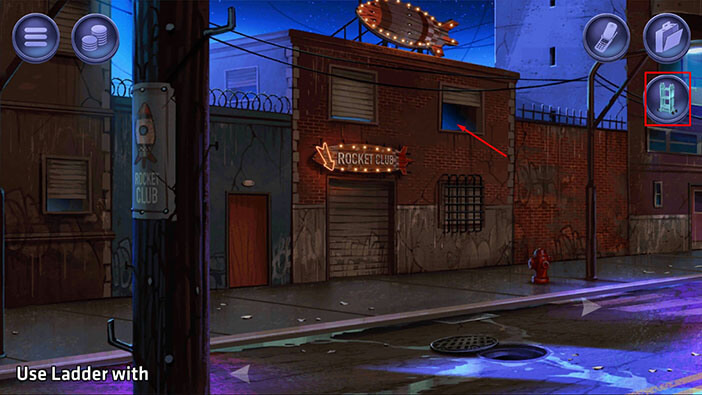
Next, tap on the doorway to go to the launch site.
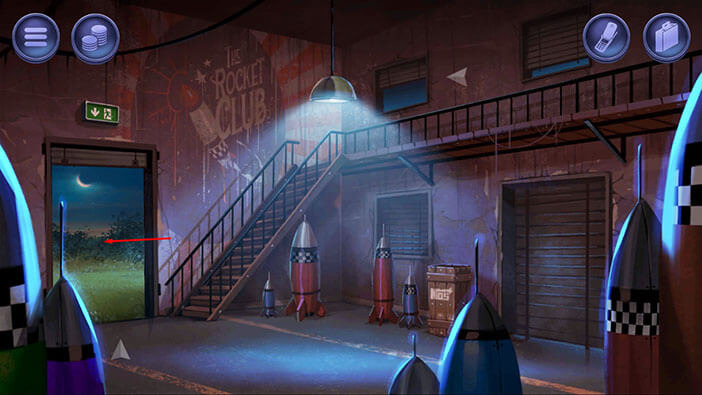
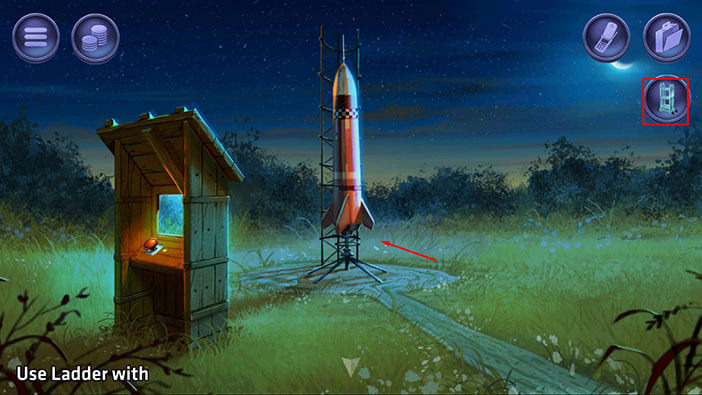
Select the “Ladder” from the inventory and place it next to the rocket.
Next, select the “Ratchet strap” from the inventory and attach it to the rocket.
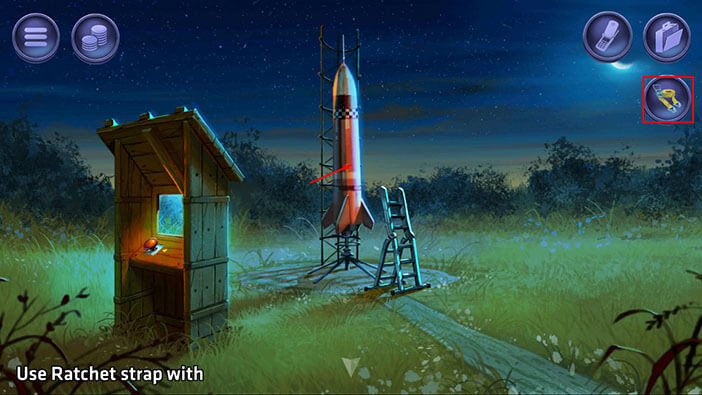
Lastly, select the “Dead body” from the inventory and tie it to the rocket.
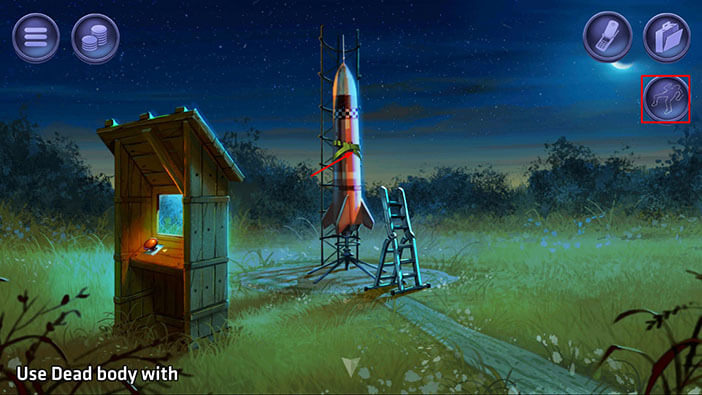
Tap on the ladder, to pick it up.
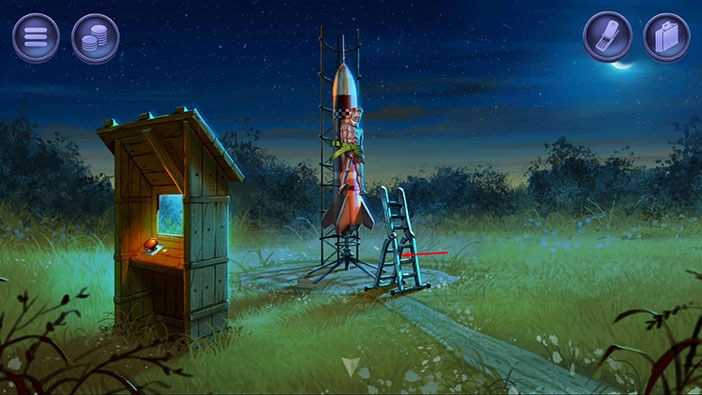
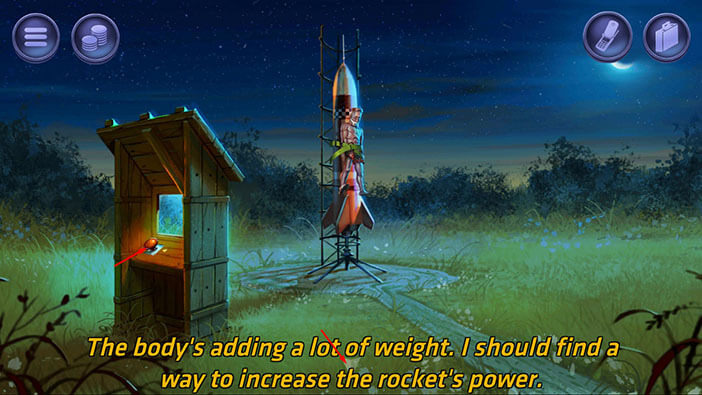
If you tap on the “Red button” to launch the rocket, you will find out that the rocket has insufficient power – probably because the body added some weight. So, we will have to find a way to increase the power of the rocket before we can launch it.
Tap on the arrow at the bottom of the screen to go back to the previous area.
Tap on the window to go back to the street.
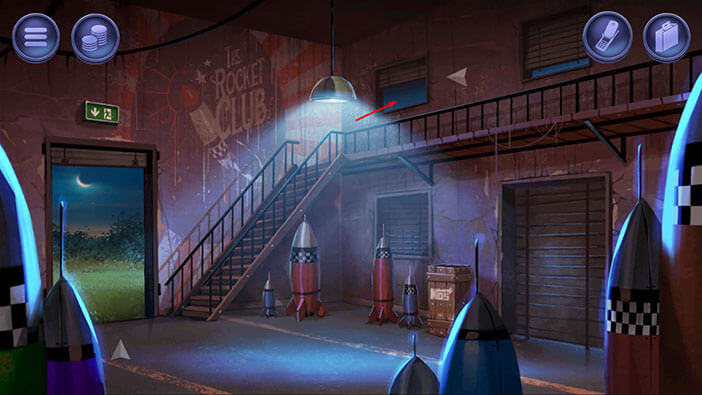
Tap on the “Ladder” to pick it up. After that, tap on the arrow on the right to go back to the main street in front of the apartment.
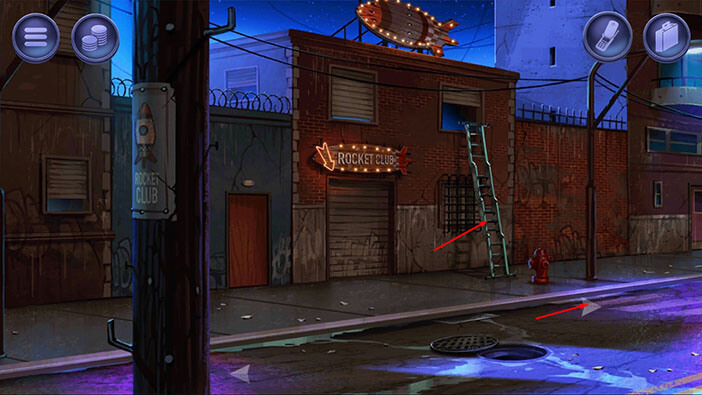
Tap on the garage door to proceed inside.
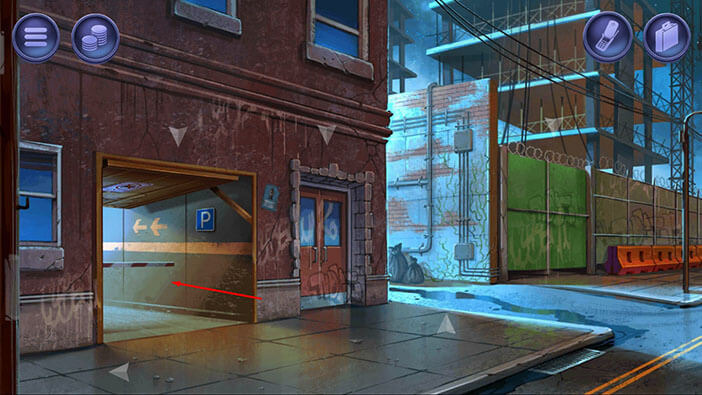
Tap on the trunk to open it and you will find something that could be used to boost our rocket. However, our character will need a tool in order to detach it.
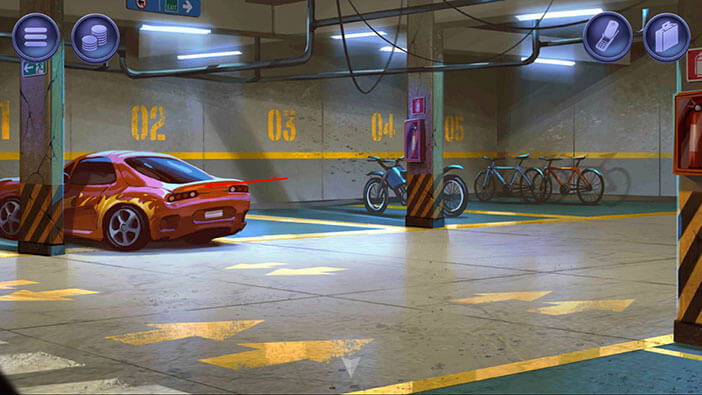
Select the “Wrench” from the inventory and use it to detach the “Nitrous bottle” from the car. Ok, we have our booster, so let’s go back to the launch site. Tap on the arrow at the bottom of the screen to go back to the street.
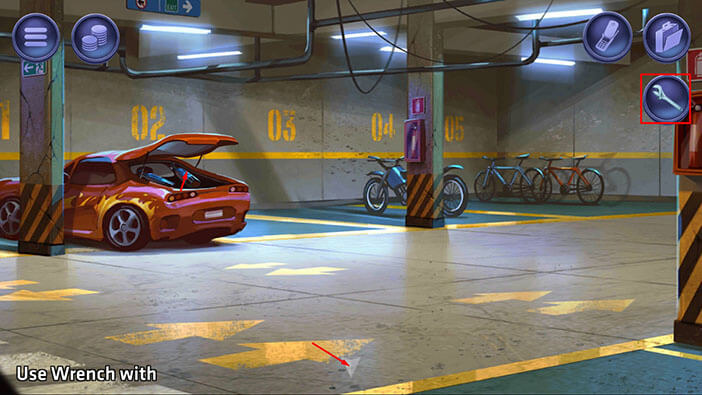
Tap on the arrow on the left and you will get to the street in front of the rocket club.
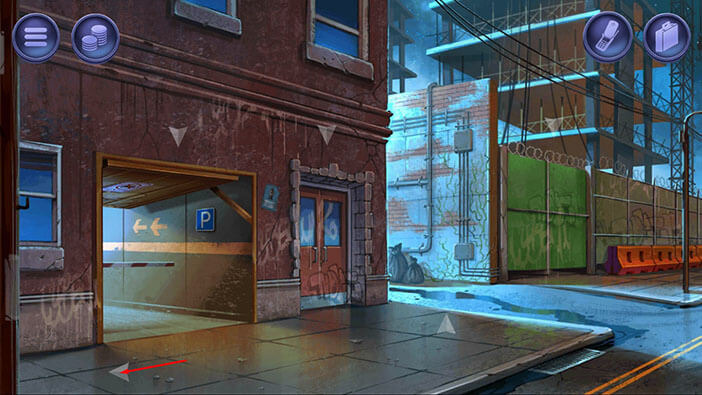
Ok, let’s go back into the Rocket Club. Select the “Ladder” from the inventory and place it below the window. After that, tap on the window to get inside.
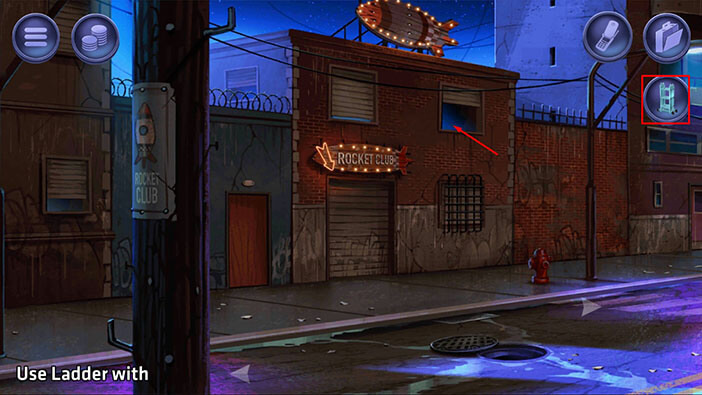
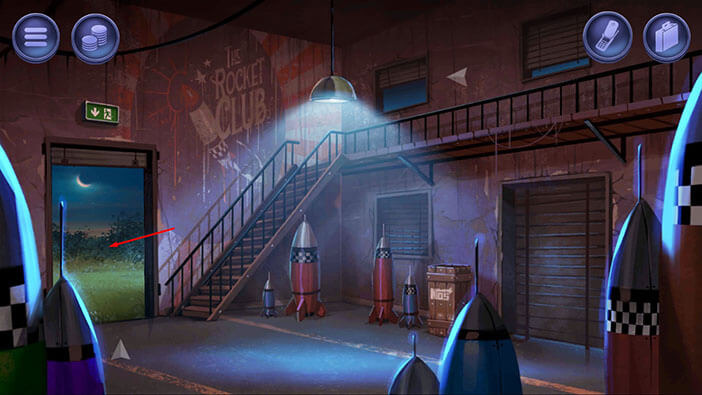
Tap on the doorway to go to the launch site.
Next, select the “Ladder” from the inventory and place it next to the rocket.
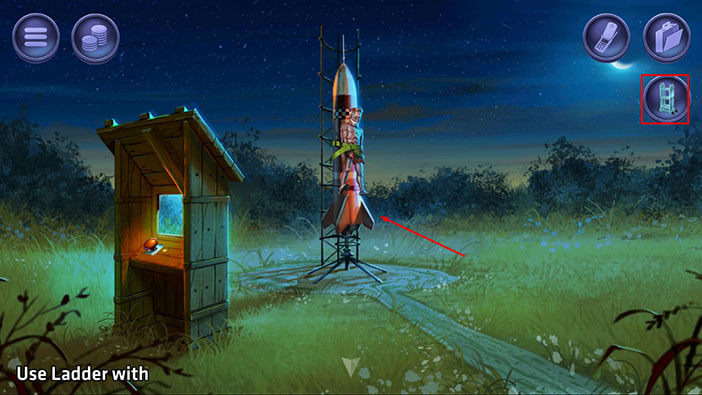
Next, select the “Nitrous bottle” from the inventory and attach it to the rocket.
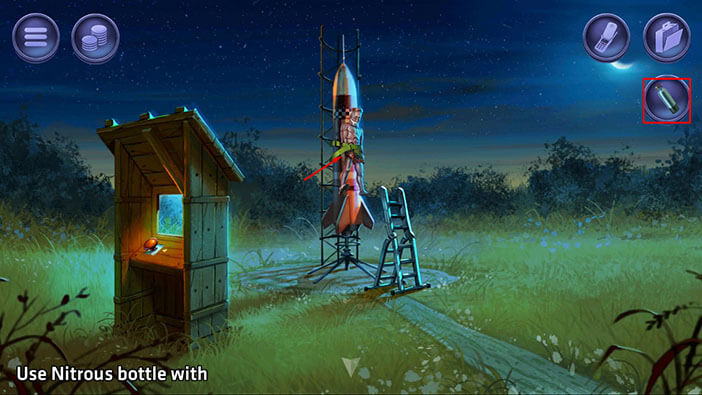
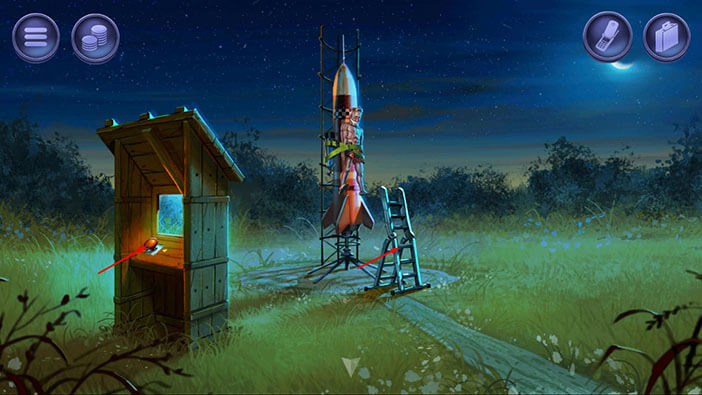
Ok, now we’re ready. Tap on the “Ladder” to pick it up. After that, tap on the “Red button” to launch the rocket.
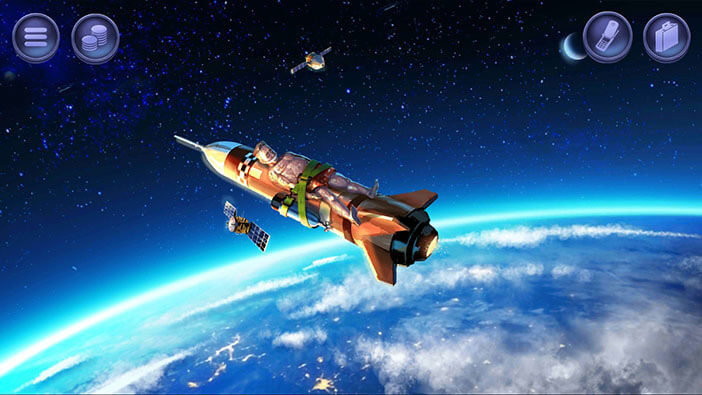
In the next scene, we can see the rocket and the dead body floating in space, so we successfully got rid of the body.
Just like before, we should now return all the items back where we found them. Let’s begin. Tap on the arrow at the bottom of the screen to go back.
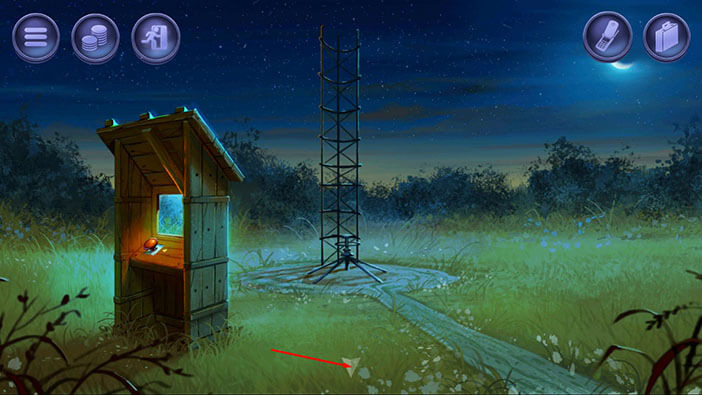
Select “Dolly” from the inventory and put it down on the ground.
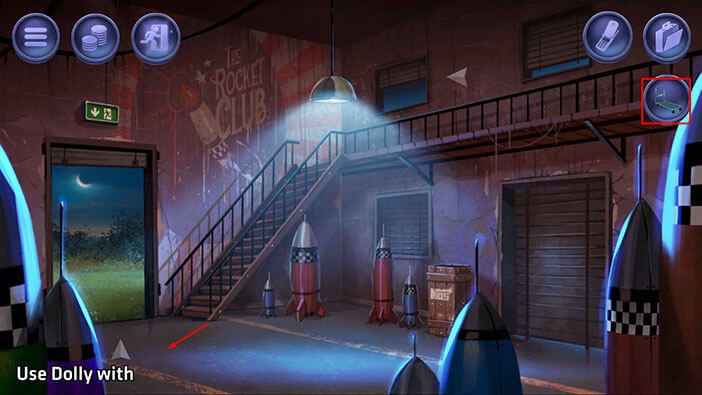
Next, select the “Wrench” from the inventory and place it next to the dolly. After that, tap on the window to go outside.
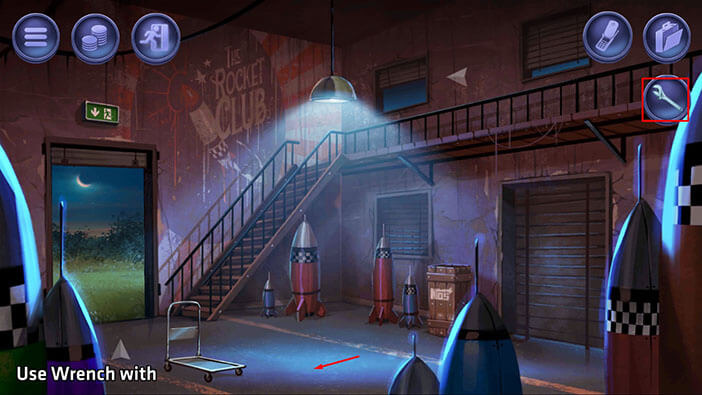
Next, tap on the “Ladder” to pick it up. After that, tap on the hole to go into the sewers.
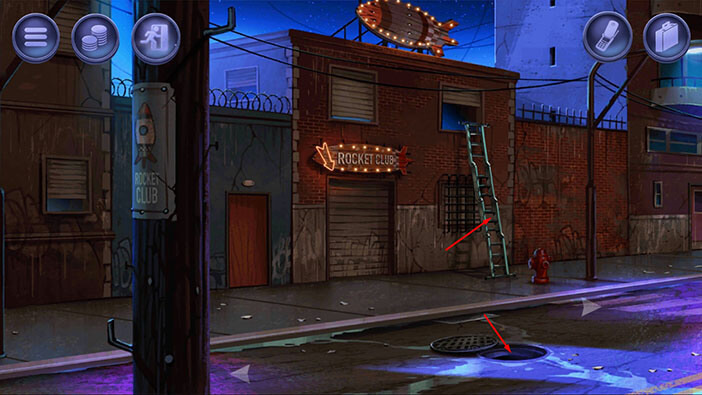
Next, tap on the arrow on the right to travel to the other end of the sewers.
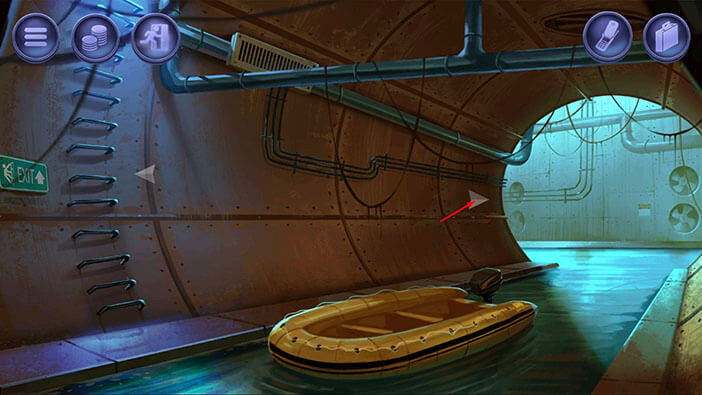
Next, tap on the “Sandbags” to pick them up.
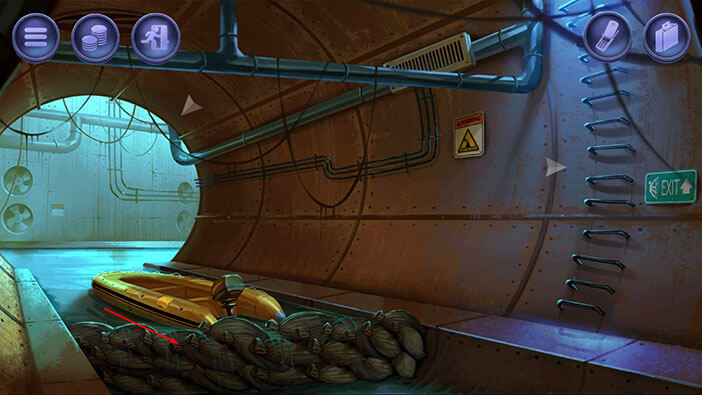
Before we can pick up the boat, we have to deflate it. So, select the “Scissors” from the inventory and use them to remove the “Glued fabric”. This will deflate the boat (you might have to tap several times in order to get this to work).
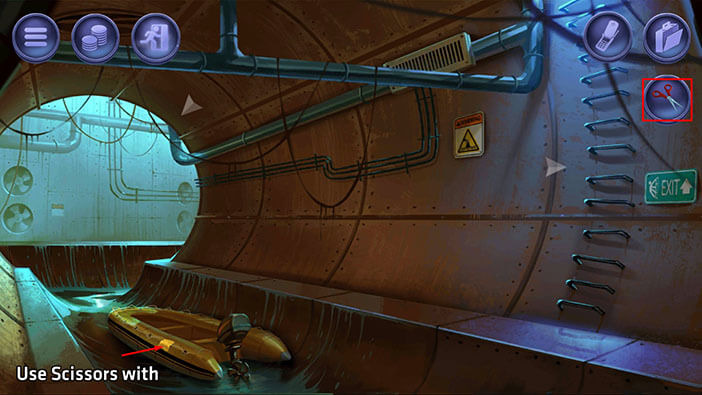
Next, tap on the “Inflatable boat” to pick it up. After that, tap on the ladder to go back to the surface.
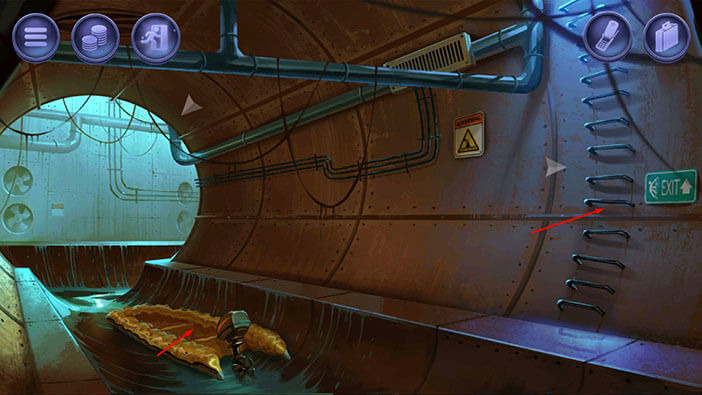
Next, select “Sandbags” from the inventory and put it onto the platform.
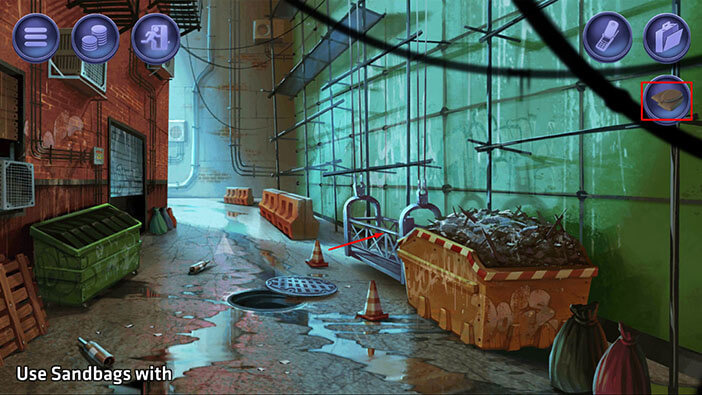
Next, select the “Steel rod” from the inventory and use it to close the sewer hatch.
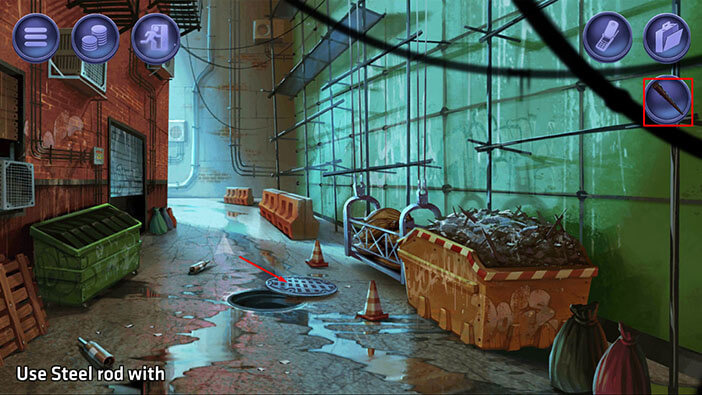
Next, tap on the suitcase icon to open the inventory. Select the “Glued patch” and attach it back onto the “Raincoat”.
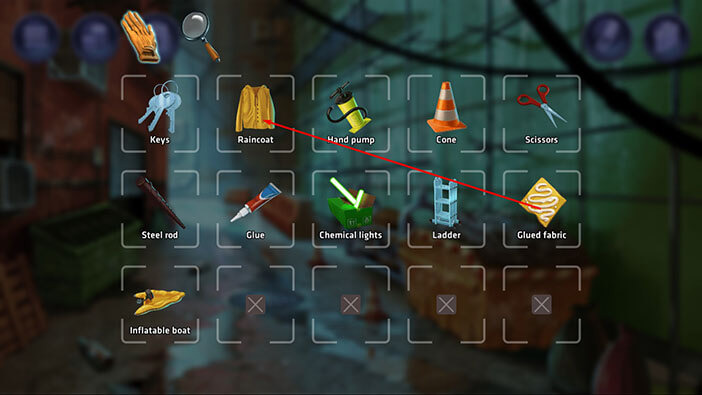
Ok, let’s go into the garage and finish up there. Tap on the end of the alley to go to the main street.
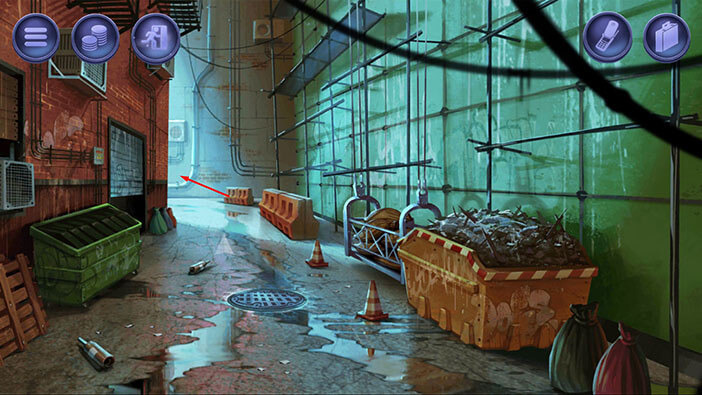
Tap on the garage door to go inside.
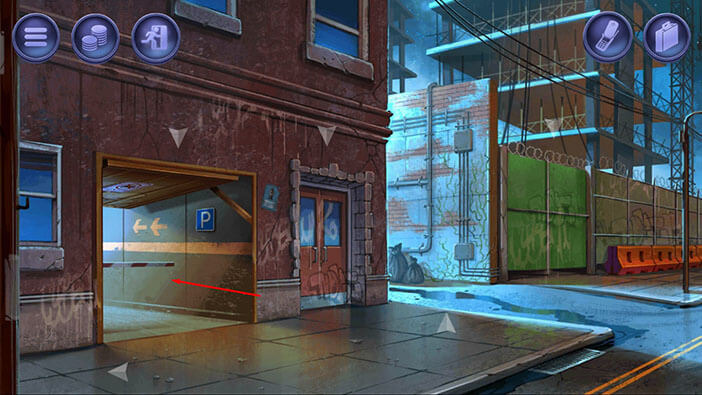
Tap on the trunk to close it.
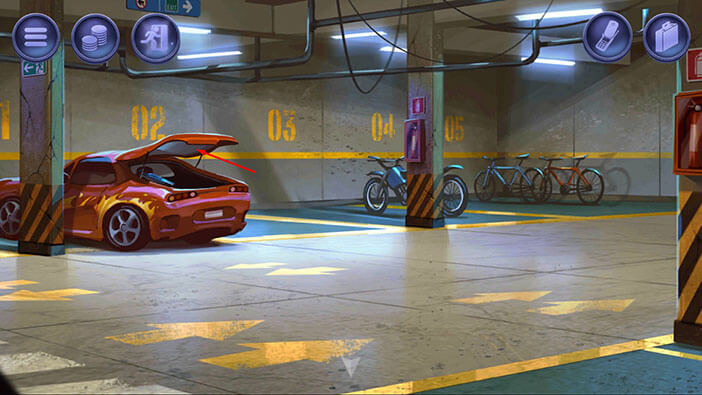
Next, select the “Inflatable boat” from the inventory and put it down next to the car.
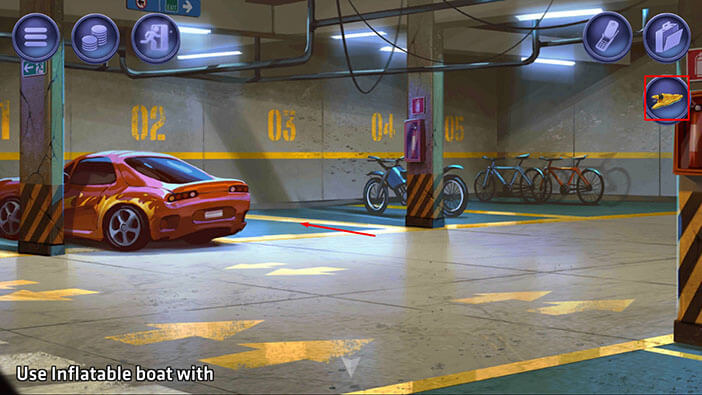
Next, select the “Chemical lights” from the inventory and put them down below the red bike. After that, tap on the arrow at the bottom of the screen to go outside.
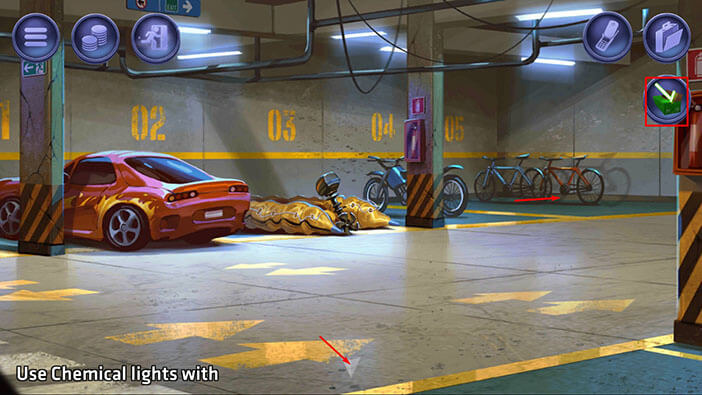
Next, select the “Keys” from the inventory and use them to close and lock down the garage door. After that, tap on the arrow on the left to go back to the street in front of the Rocket Club.
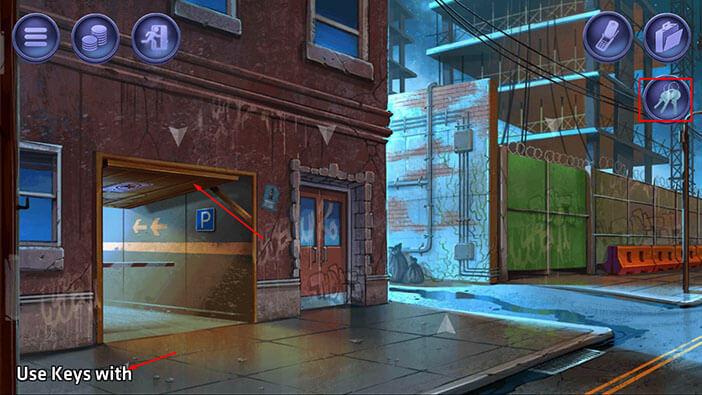
Select the “Steel rod” from the inventory and use it to close the sewer hatch. After that, tap on the arrow on the right and go back to the main street in front of the apartment.
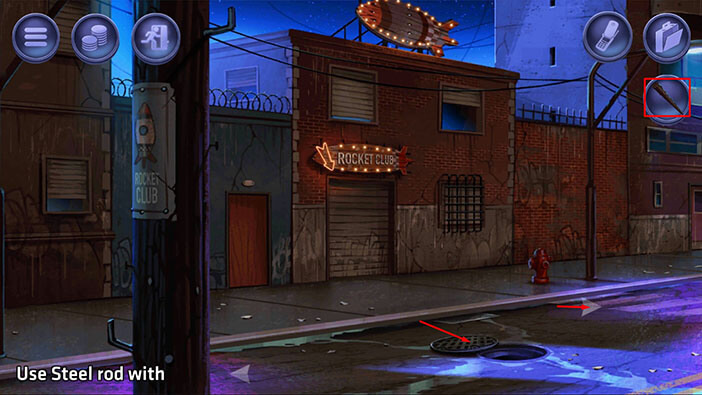
Let’s go into the alley.
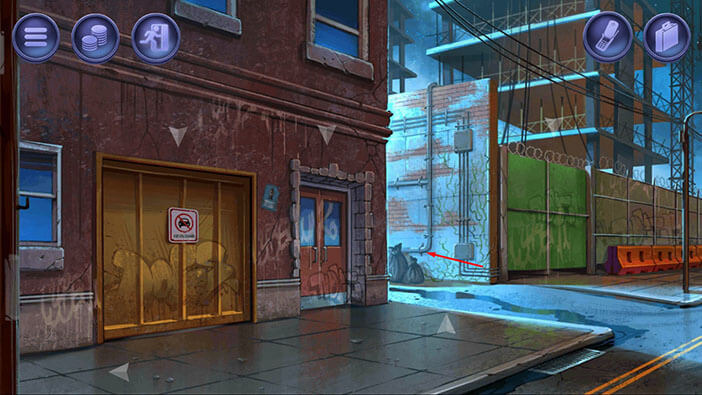
Tap on the platform to start the interaction, and tap twice on the “Red button” to get to the second floor.
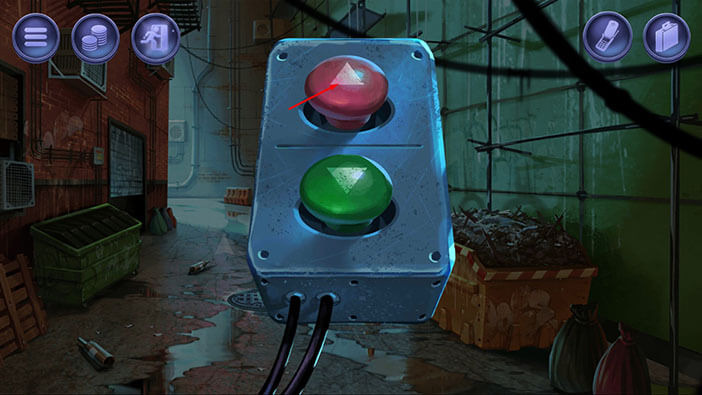
Next, select the “Ladder” from the inventory and put it into the left corner of the room. After that, tap on the platform again to start the interaction.
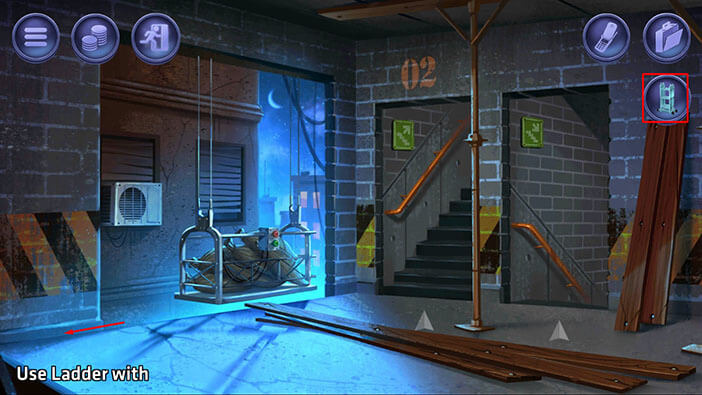
Tap twice on the “Red button” to get to the fourth floor.
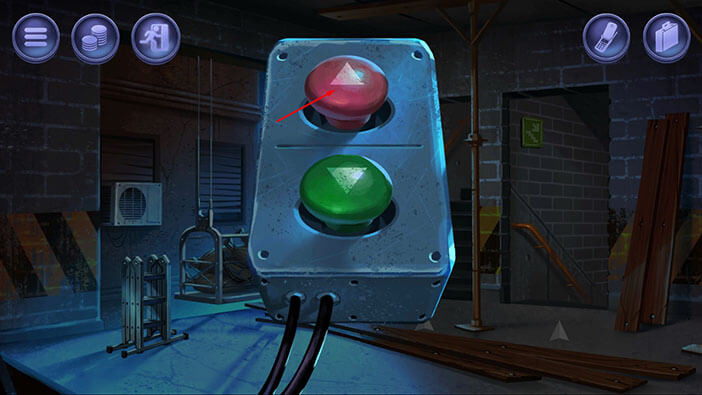
Select the “Steel rod” from the inventory and add it to the pile in the right corner. After that, go back to the platform.
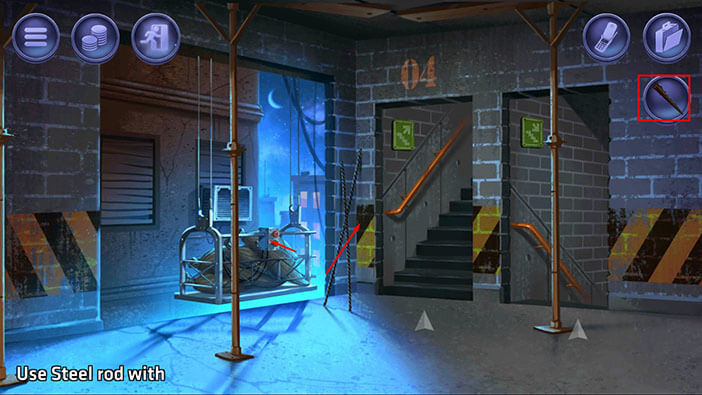
Tap on the red button to go to the last floor.
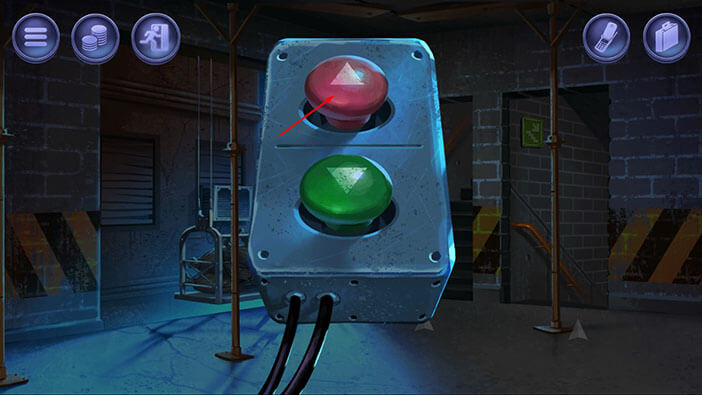
Tap on the “Sandbags” to pick them up.
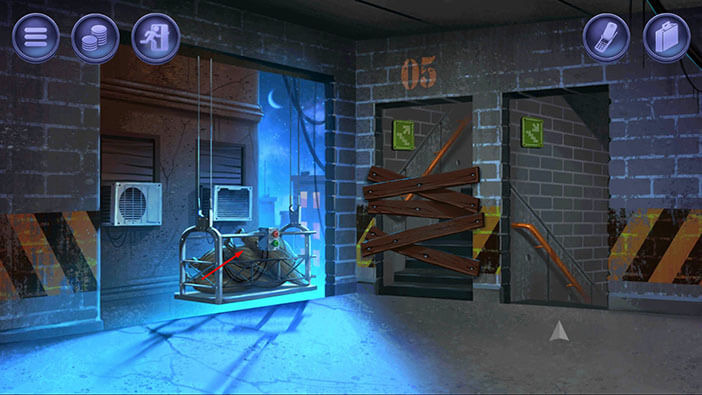
Select the “Sandbags” from the inventory and put them down on the left side of the room.
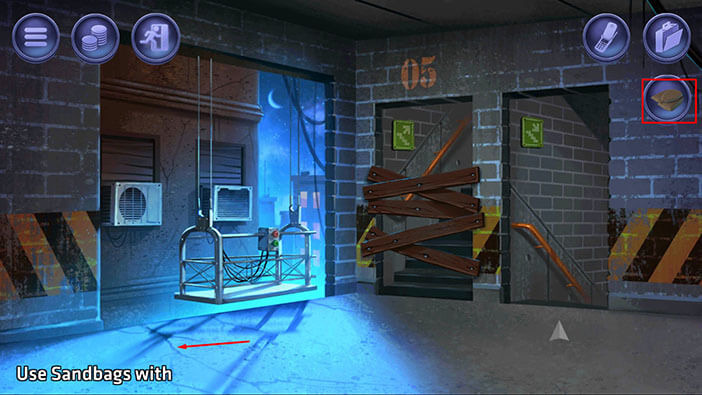
Next, select the “Glue” from the inventory and put it down on the right side of the floor.
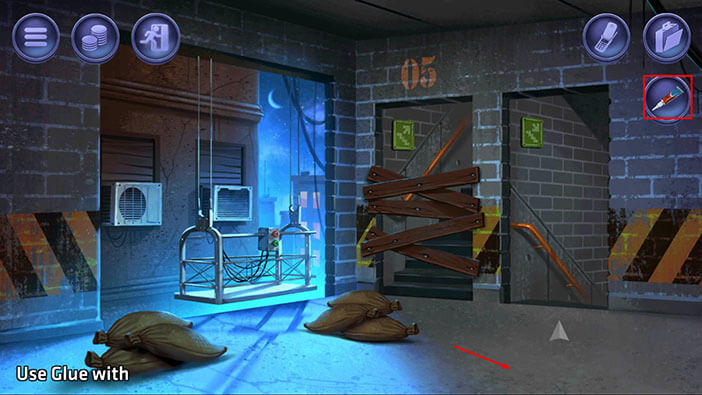
Ok, we’re done with this building. The only thing left to do is to get the platform back to the first floor because that’s where we found it.
So, tap on the platform to start the interaction, then tap four times on the green button to go to the first floor.
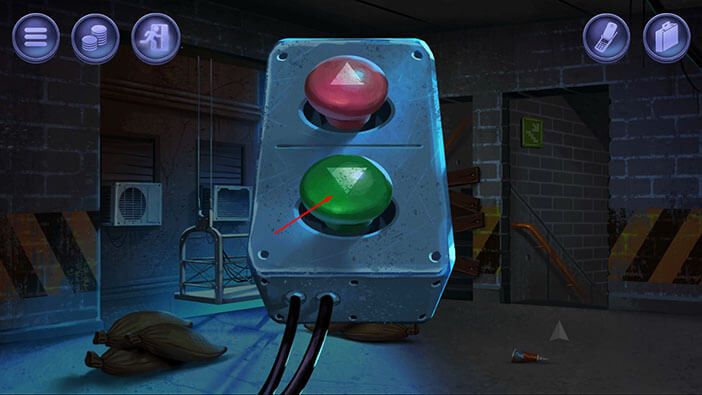
We will leave the platform here, on the first floor. Tap on the stairs to go back outside.
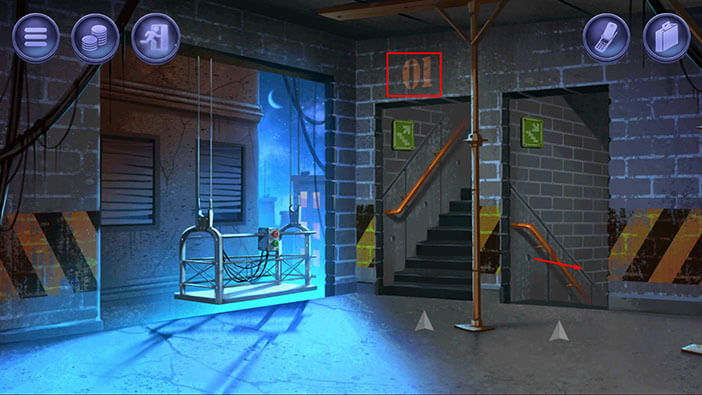
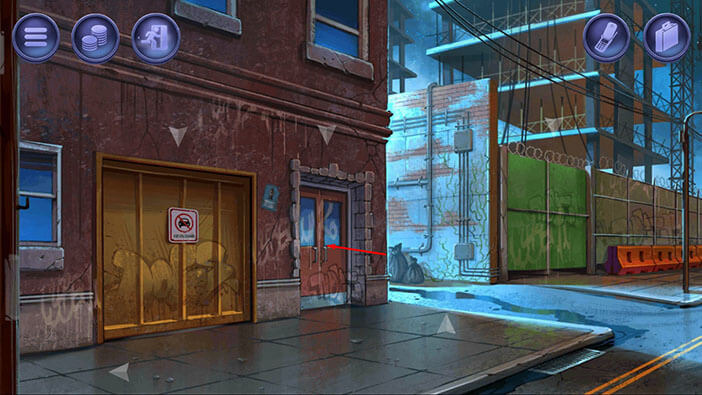
Tap on the front door to go into the apartment.
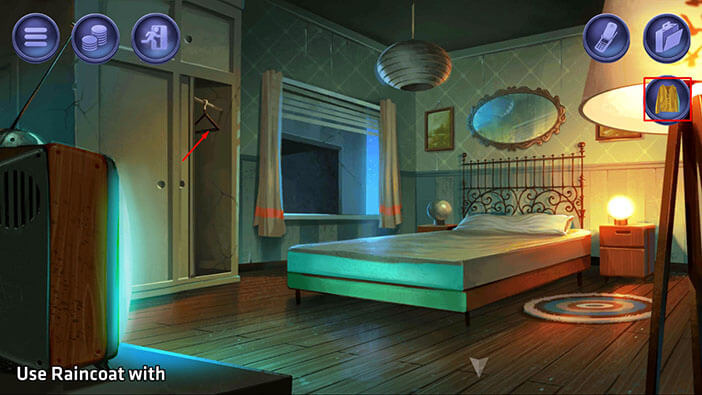
Select the “Raincoat” from the inventory and put it into the closet.
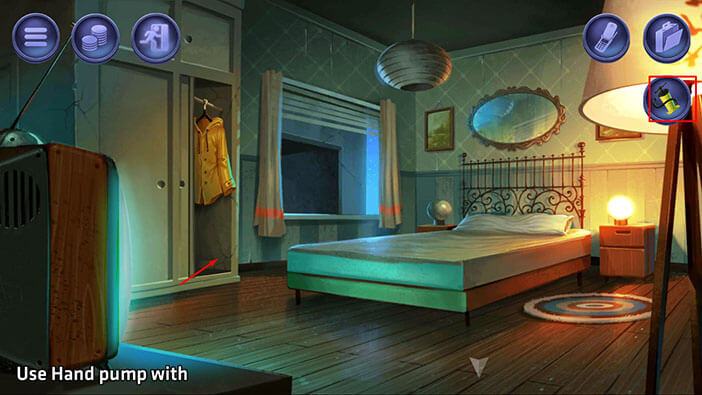
Next, select the “Hand pump” from the inventory and put it into the closet.
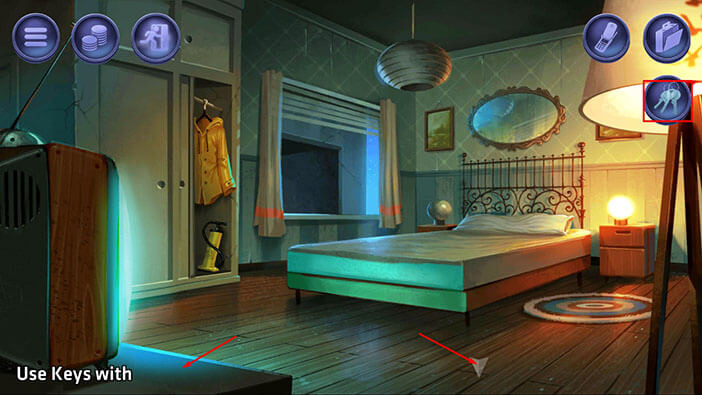
Lastly, select the “Keys” from the inventory and put them next to the TV. After that, tap on the arrow at the bottom of the screen to go back to the main street.
Select the “Cone” from the inventory and put it down on the ground. In the end, the cone was of no use to us. Next, tap on the alley to proceed.
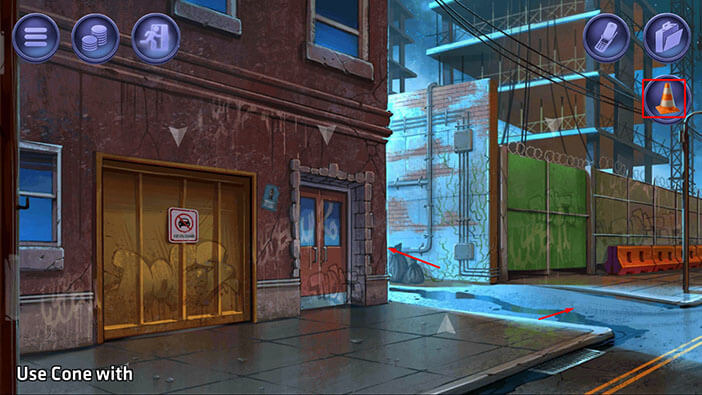
Ok, now we just have to return the scissors and we’re done. So, select “Scissors” from the inventory and put them on the ground next to the dumpster.
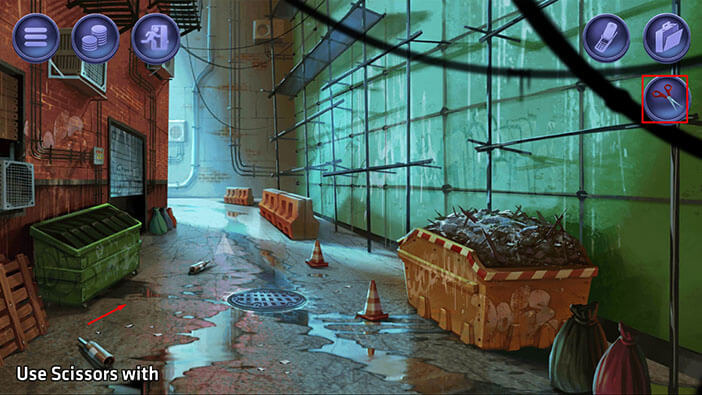
Ok, now we’re done. Tap on the last icon in the upper left corner to finish the mission.
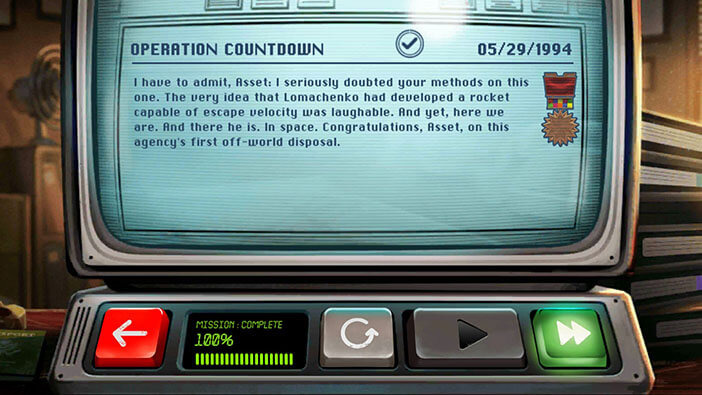
Our employer had some doubts concerning our plans because he didn’t believe that the rocket would actually function and that it would reach orbit. However, the plan worked, and our employer is very satisfied with the outcome.
MISSION 12
OPERATION OVERDRAFT
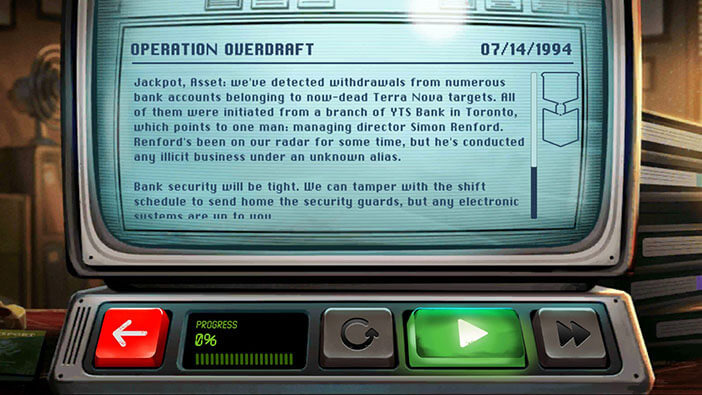
Our agency has managed to identify Terra Nova’s financial director and his name is Simon Renford. Simon is the director of YTS Bank in Toronto, but he made all shady financial operations under an alias that is currently unknown to us. Our task is twofold. First, Simon Renford has been eliminated by one of our assassins and we should get rid of the body which is currently in the office. Secondly, we should try to discover the secret identity that Simon has been using to make the withdrawals. In the meantime, our agency will try to track the flow of the money.
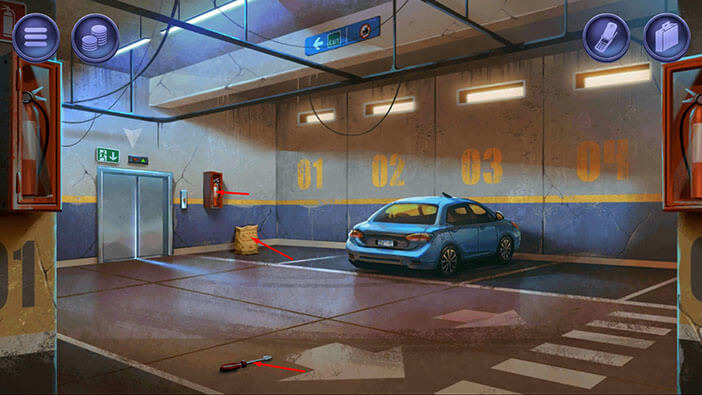
We are now in the garage, and there are three items that we can pick up right away.
First, you will notice a “Screwdriver” on the ground in front of you. Tap on it to pick it up.
Second, there is some kind of bag next to the fire extinguisher. Tap on the bag to pick it up and “Bag of lime” will be added to your inventory.
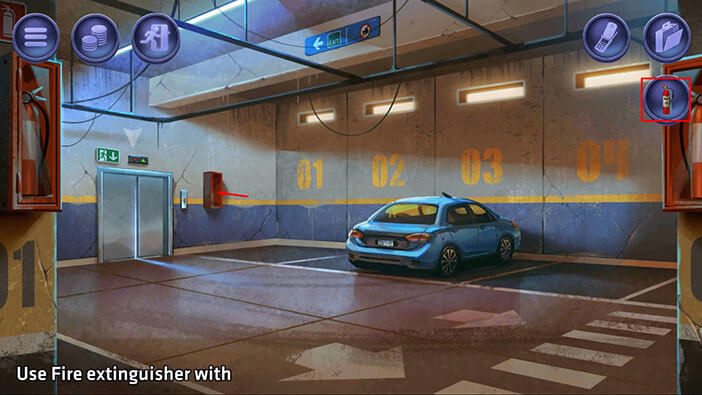
Third, there is a “Fire Extinguisher” on the wall, next to the elevator, so tap on it to pick it up.
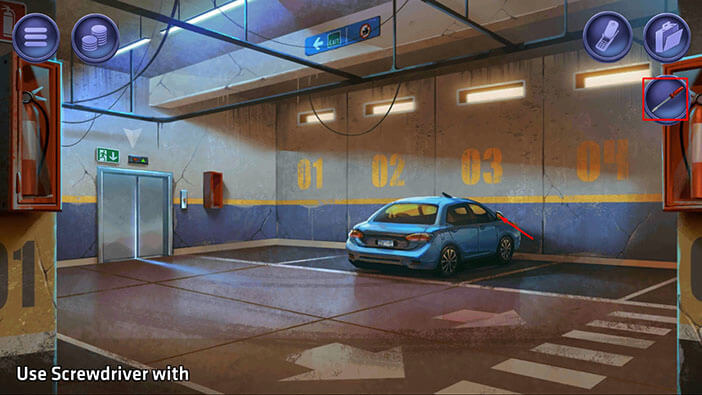
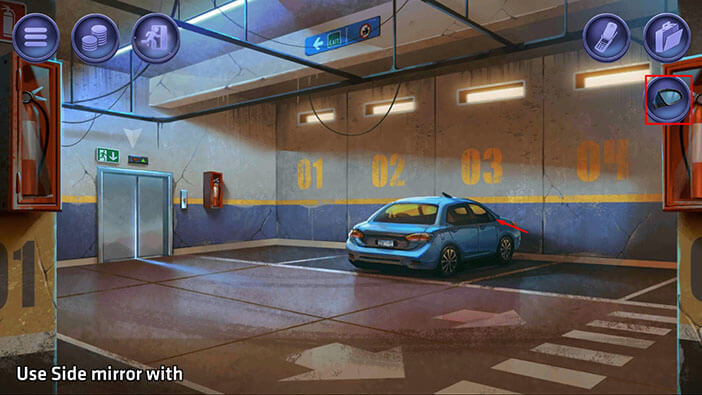
Next, select the “Screwdriver” from the inventory and use it to remove the “Side mirror”. After that, tap on the elevator door to proceed to the next area.
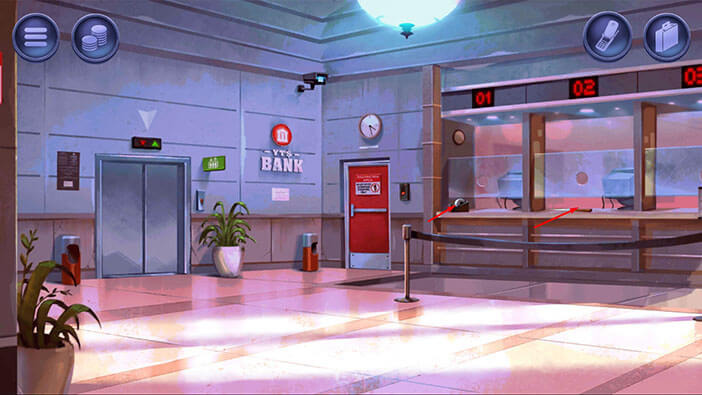
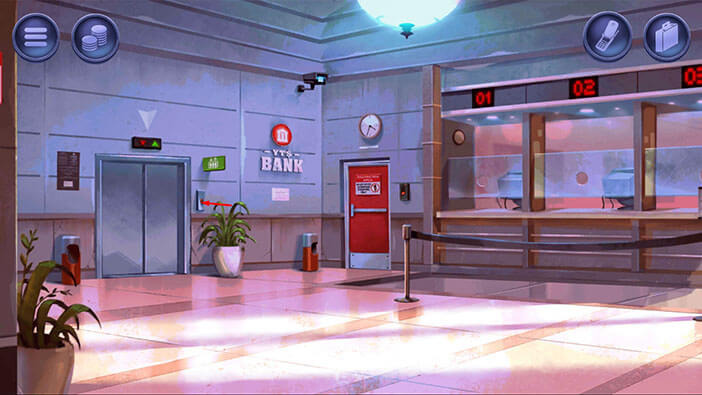
We are now in the lobby, and here we can pick up two items.
First, tap on the item on the left counter (number 1), and “Tape dispenser” will be added to your inventory.
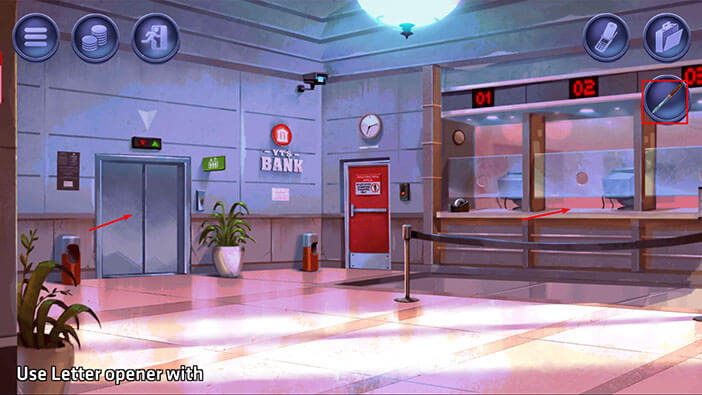
After that, tap on the item on the middle counter (number 2), and you will pick up a “Letter opener”.
We will need a valid fingerprint in order to go through the red door. We will solve this problem by taking the fingerprint from the car window – the car that we saw earlier in the garage. So, tap on the elevator to go back to the garage.
Tap on the rear window to take a closer look at it.
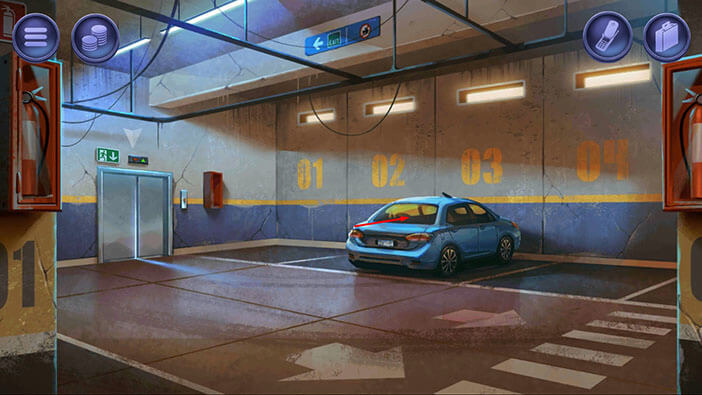
If you tap on the glass, our character will comment that it hasn’t been washed in a while and our character can see several fingerprints.
Tap on the suitcase icon to open the inventory, and use the “Letter opener” on the “Bag of lime”. “Lime powder” will be added to your inventory.
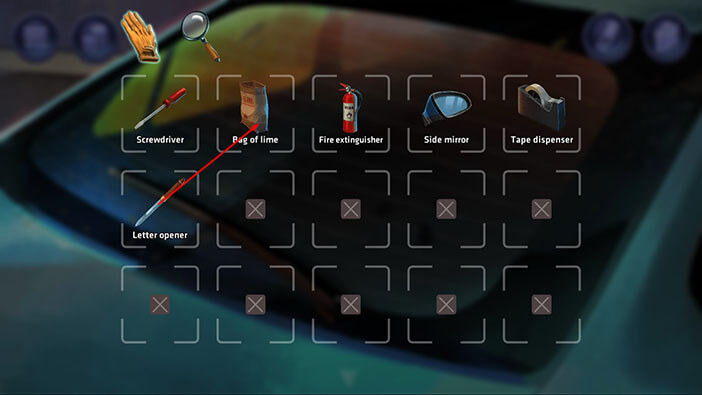
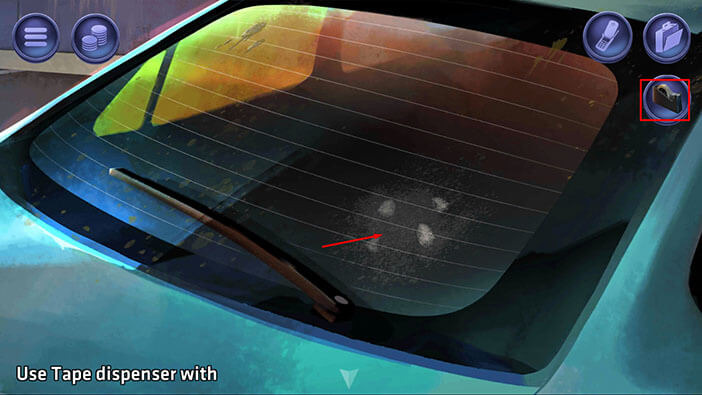
Select the “Lime powder” from the inventory and sprinkle it on the window – this will make the fingerprints more visible.
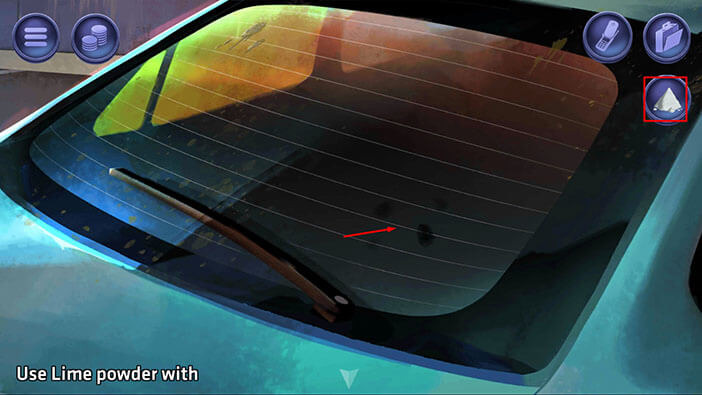
Next, select the “Tape dispenser” from the inventory and use it on the glass. Our character will be able to extract the fingerprint and the “Copied fingerprint” will be added to your inventory.
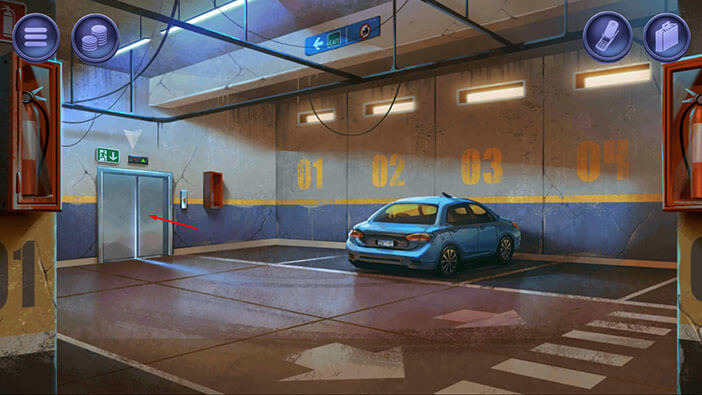
Let’s go back into the lobby. Tap on the elevator door.
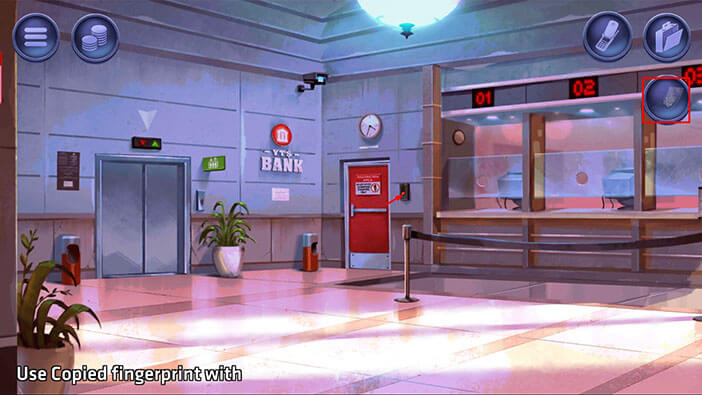
Select the “Copied fingerprint” from the inventory and use it to unlock the red door on the right – tap on the fingerprint reader next to the door.
If you tap on the hallway in front of you, your character will comment that there are definitely some lasers in front of him, but they are barely visible, and he can’t slip past them. Well, we can increase the visibility of the lasers.
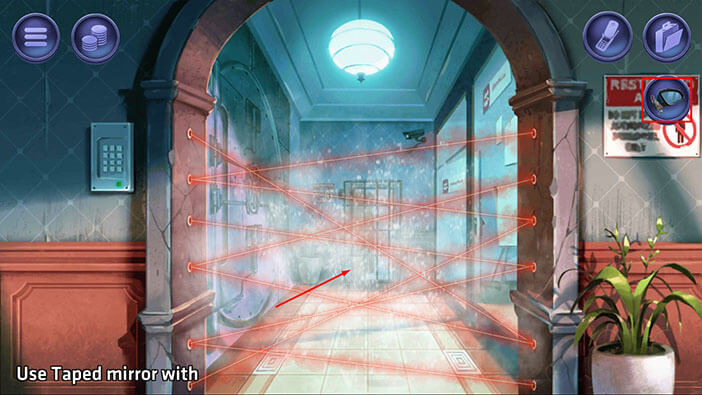
Select the “Fire extinguisher” from the inventory and tap on the lasers in front of you to activate it.
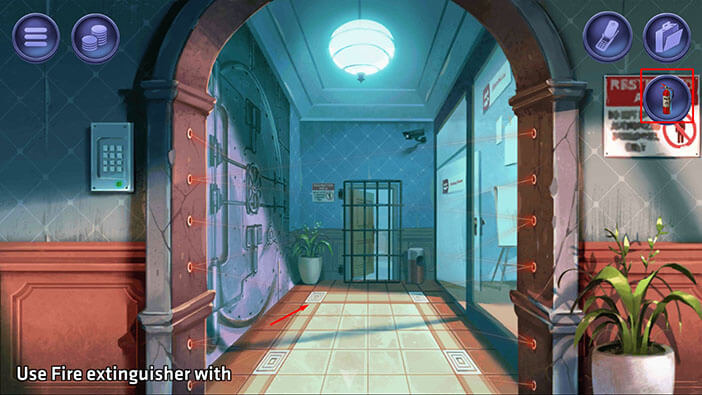
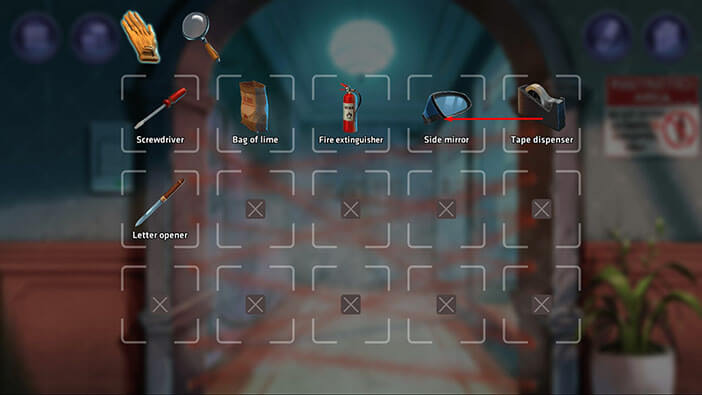
Ok, we can now clearly see the lasers. Let’s disable them. Tap on the suitcase icon to open the inventory, and use the “Taped dispenser” on the “Side mirror”. You will create a “Taped mirror”.
Next, select the “Taped mirror” from the inventory and use it to disable the lasers, by redirecting them.
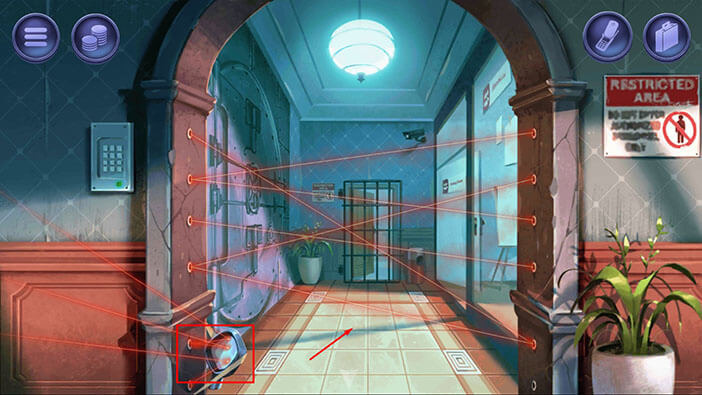
Ok, with some laser redirected, we can now slip past the rest of them. Tap on the ground below the lasers to proceed to the next area.
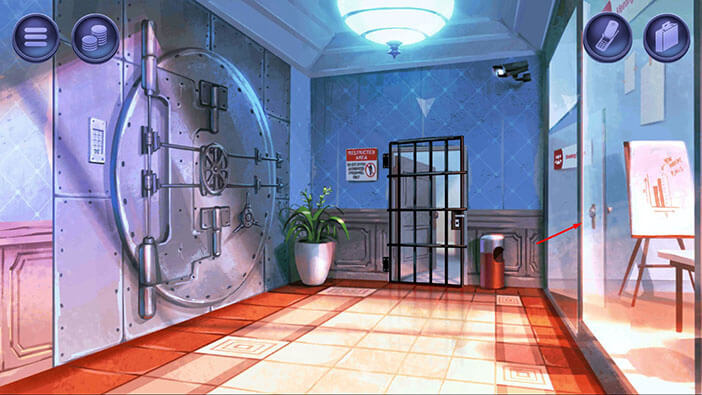
Tap on the door on the right to proceed into the next room.
There are two items that we can immediately pick up in this room, and we will find two more in the containers.
First, tap on the “Box cutter” located on the table to pick it up. After that, tap on the “Electrical cord” located below the table, to pick it up.
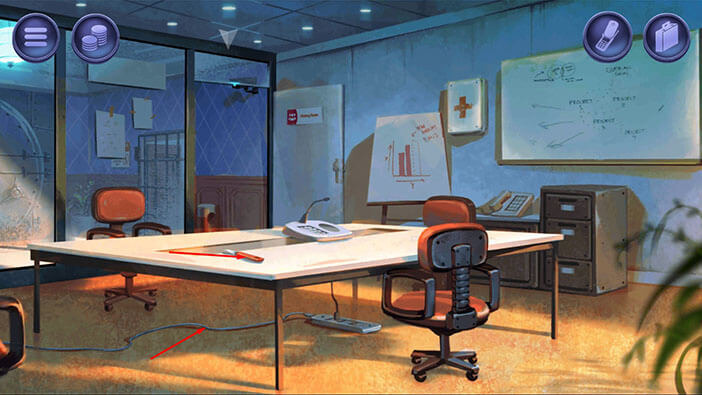
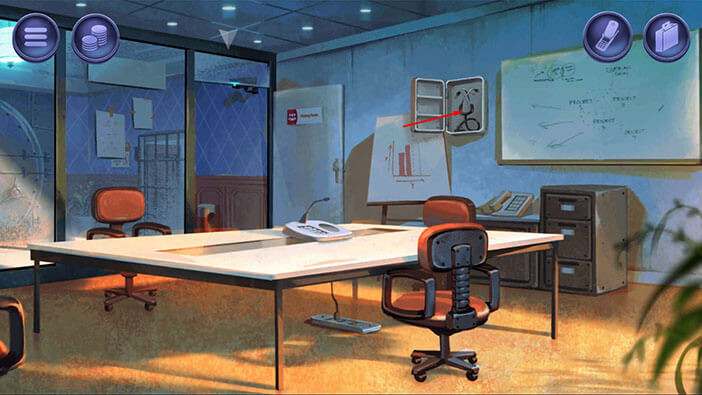
Next, on the wall, you will see a medical box. Tap on it to open it, and inside you will find a “Stethoscope”.
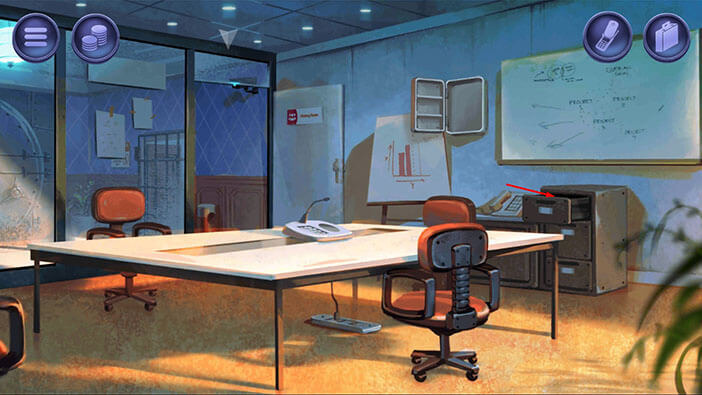
Next, open the top drawer of the small cabinet on the right. After that, tap again to pick up the “Hard drive” from the drawer.
Ok, we will now combine some items. Tap on the suitcase icon to open the inventory. Select the “Box cutter” and use it on the “Electrical cord”. You will create a “Stripped electrical cord”.
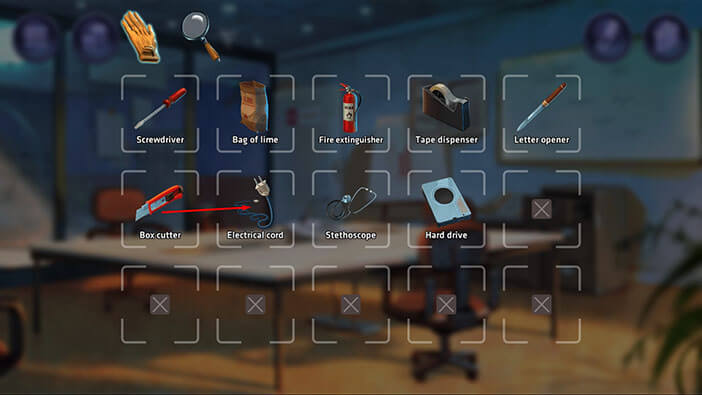
Next, select the “Screwdriver” from the inventory and use it to disassemble the “Hard drive”. “Magnet” will be added to your inventory.
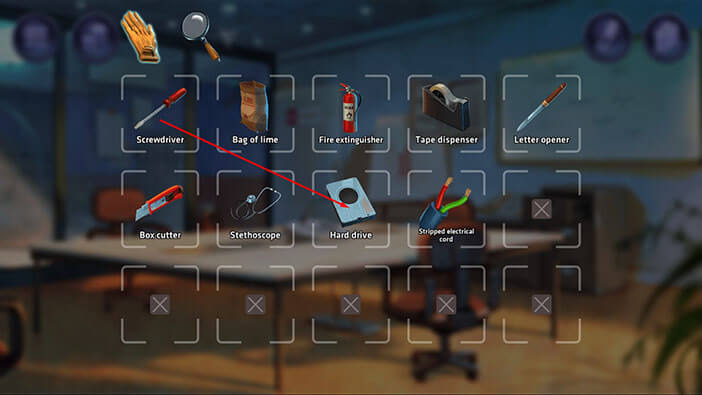
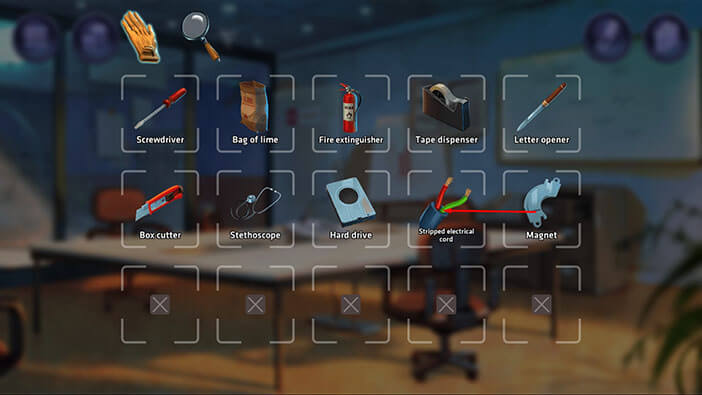
Next, select the “Magnet” from the inventory and combine it with the “Electrical cord”. You will create a “Cord with magnet”.
Ok, let’s go back to the hallway.
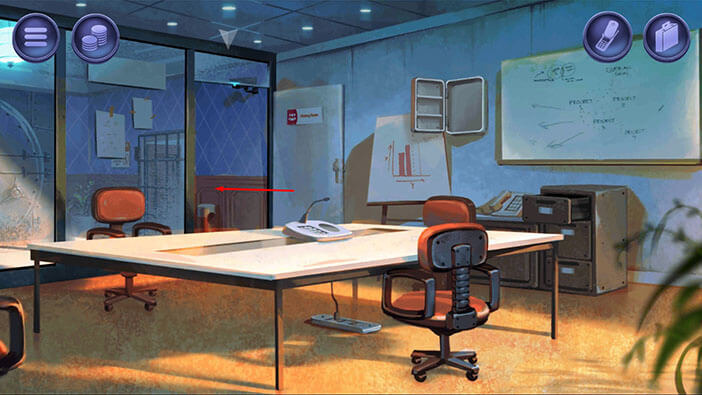
Tap on the door in front of you to take a closer look at it.
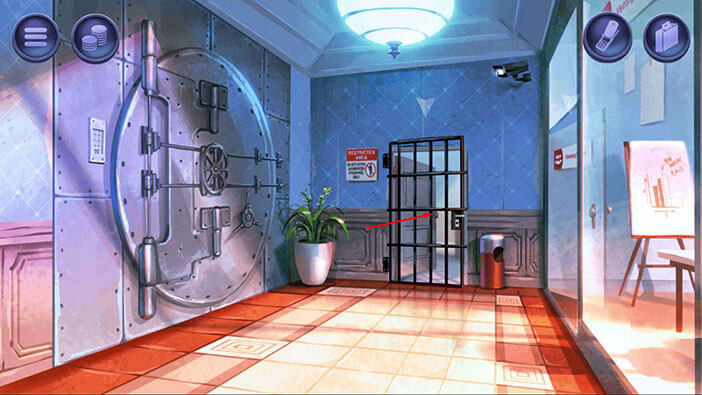
The door is locked, but we can see the keys hanging from the desk in front of us. Select the “Cord with magnet” from the inventory and use it to get the “Keys”.
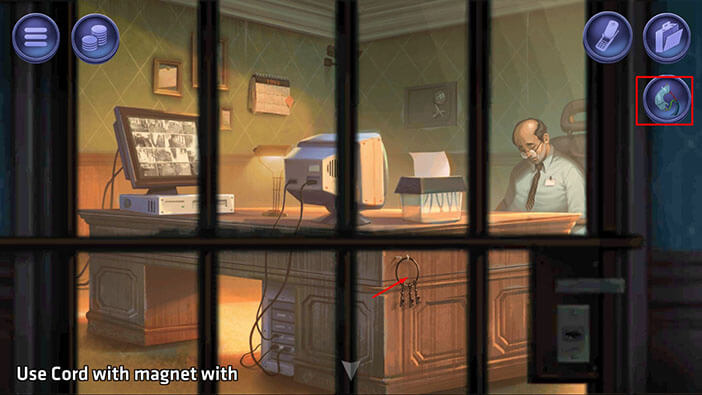
Next, select the “Keys” from the inventory and use them to unlock the door.
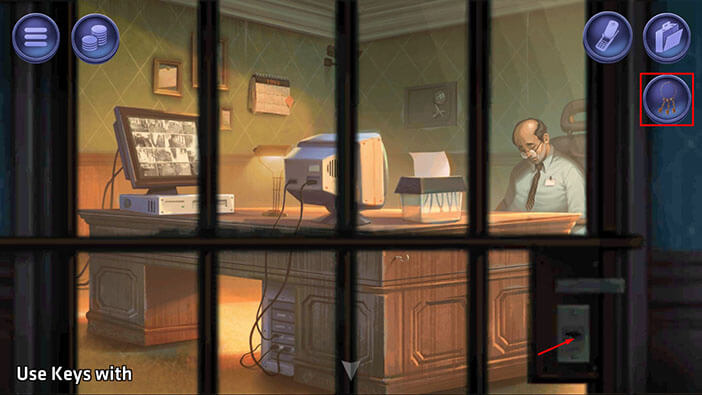
Ok, we now have access to the office and the dead body that is sitting in the chair. Tap on the wall safe to take a closer look at it.
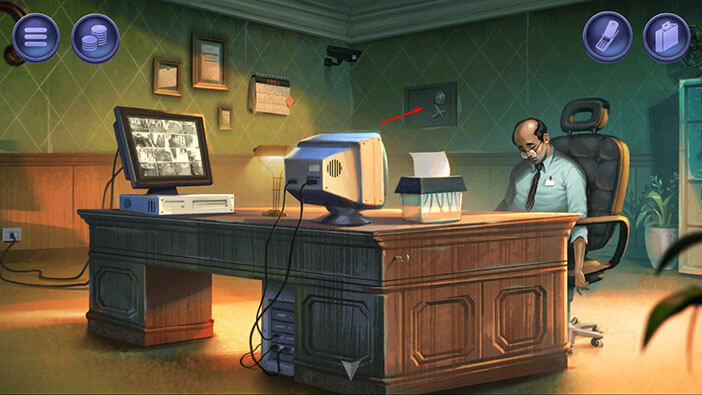
Select the “Stethoscope” from the inventory and tap on the wall safe to start the interaction.
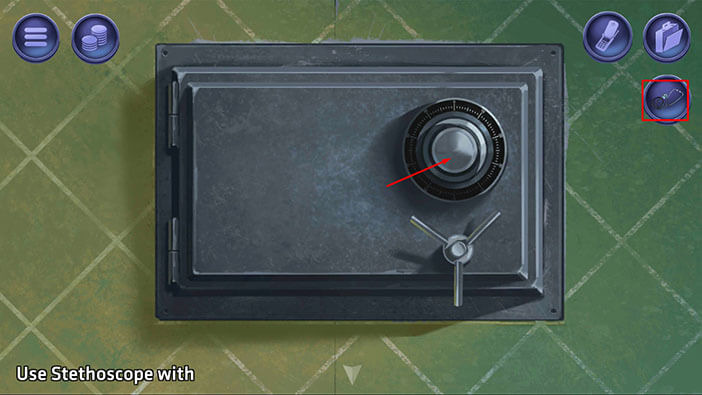
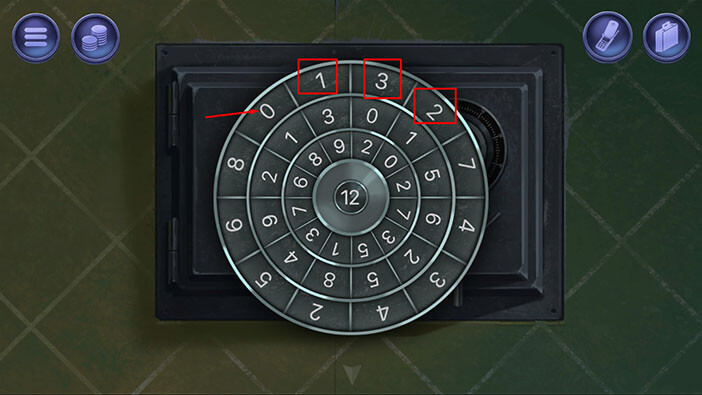
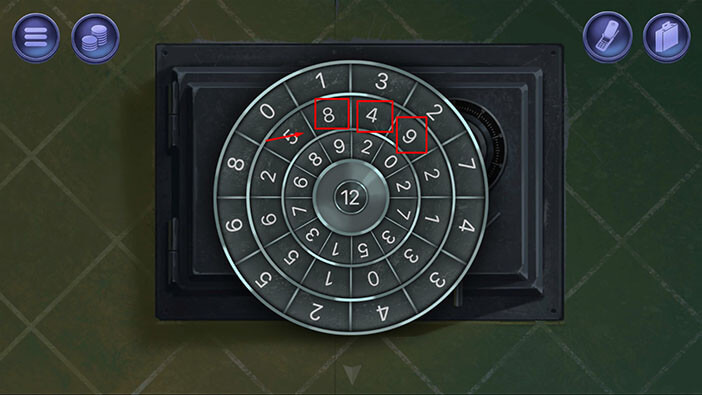
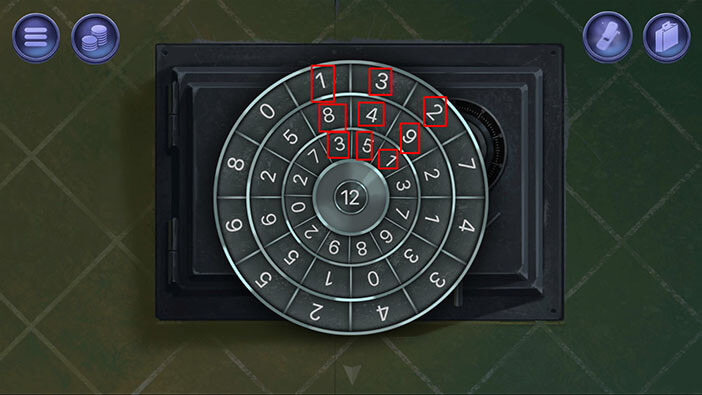
Here, we have a small minigame. We can tap on the three rings to rotate them, and this will change the position of the numbers on the rings. The sum of three fields should equal 12 (the number in the middle slot).
Let’s begin.
Tap on the outer ring six times. The numbers at the top should be 1, 2, and 3 (looking from left to right).
Next, tap on the middle ring seven times. The numbers at the top should be 8, 4, and 9.
Last step. Tap on the inner ring five times. The numbers at the top should be 3, 5, and 1. With this last step completed, the sum of the numbers in all fields will be 12, and you will unlock the wall safe.
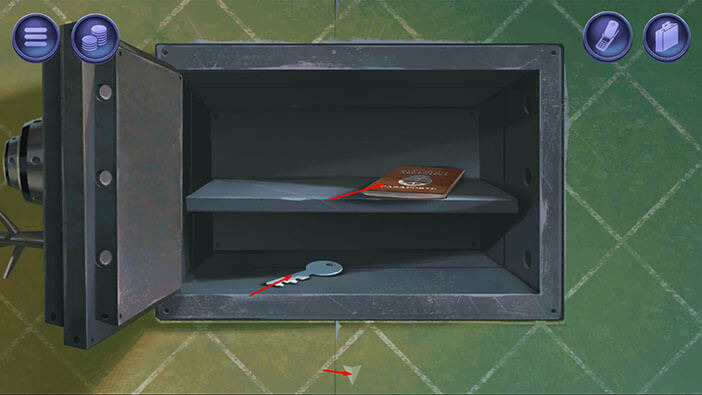
There are two items in the safe, a “Key” and a “Passport”. Tap on them to pick them up.
The passport is in the name “Juan Friz”. Memorize/write down this name, because this is Renford’s alias, and we will need it in order to complete this mission.
After that, tap on the arrow at the bottom of the screen to go back.
Next, tap on the computer to start the interaction.
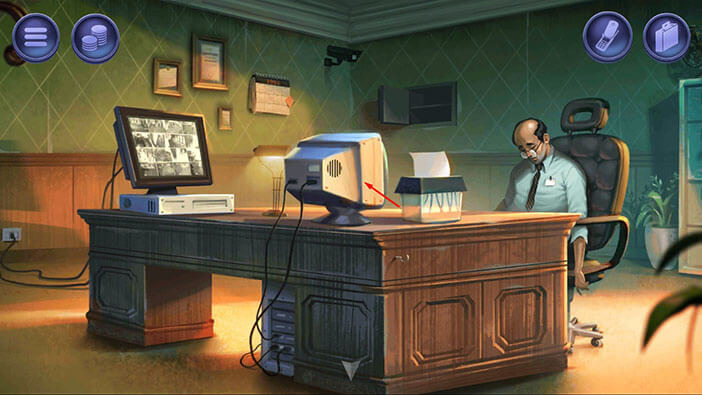
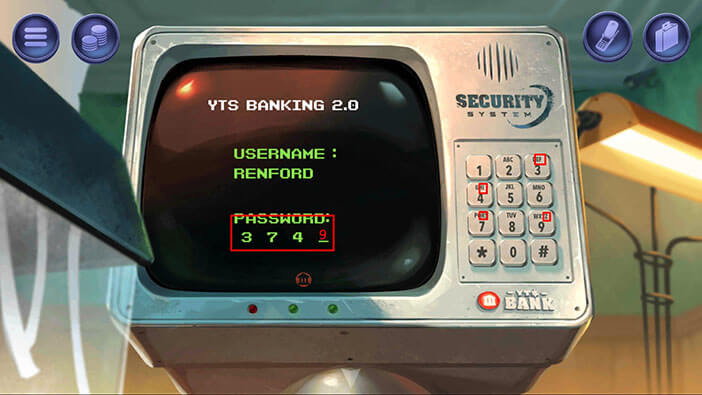
In order to unlock the computer, we need a four-digit password. If we presume that the password is “Friz” (Renford’s alias), we will have to tap on the numbers that contain these letters.
So,
The letter “F” is located on the number 3. That’s our first number.
The letter “R” is located on the number 7. That’s our second number.
The letter “I” is located on the number 4. That’s our third number.
The letter “Z” is located on the number 9. That’s our fourth number.
When we put it all together, we will get the code “3749”. Enter this code and you will gain access to the information on the computer.
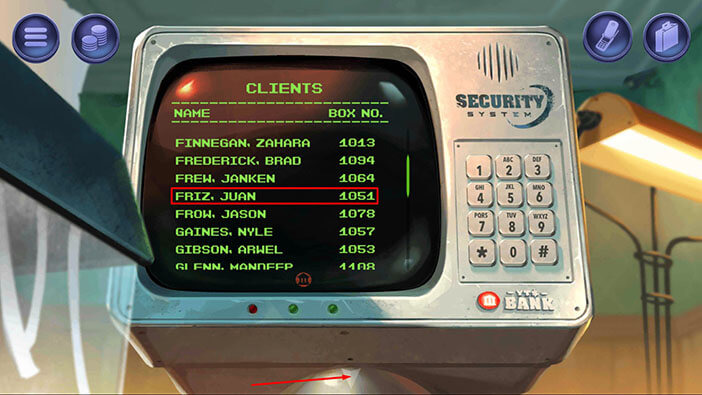
Scroll down the list of names until you reach Friz, Juan. You will notice the number “1051” next to it. This is the number of the safe so memorize/write it down.
Once you’re done, tap on the arrow at the bottom of the screen to go back.
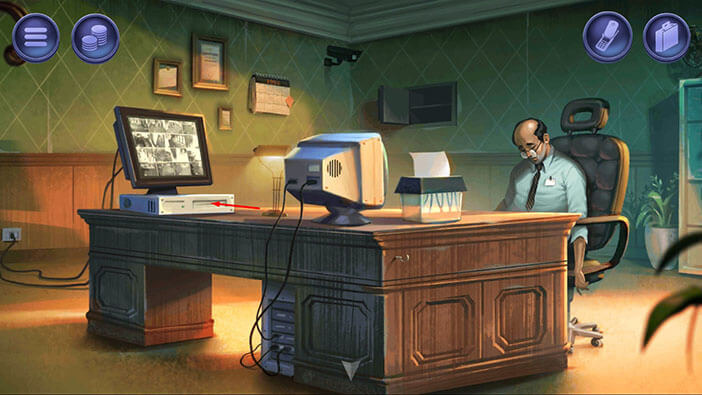
Next, tap on the recorder below the monitor on the left, and you will take the “Videotape”.
Next, you will notice a transparent box on the desk, next to the computer. Tap on this box to start the interaction.
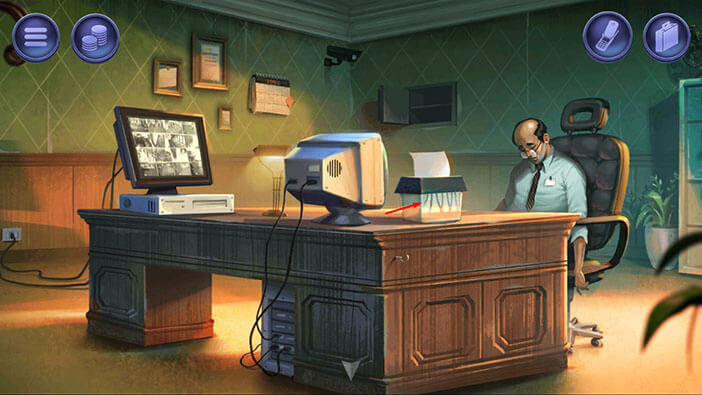
Ok, here we can seven pieces of paper. Our task is to assemble the pieces and discover the code that was written on them. We will do this puzzle in several steps. Let’s begin.
Step 1
Tap on the third piece of paper (looking from left to right) and exchange it with the first piece of paper.
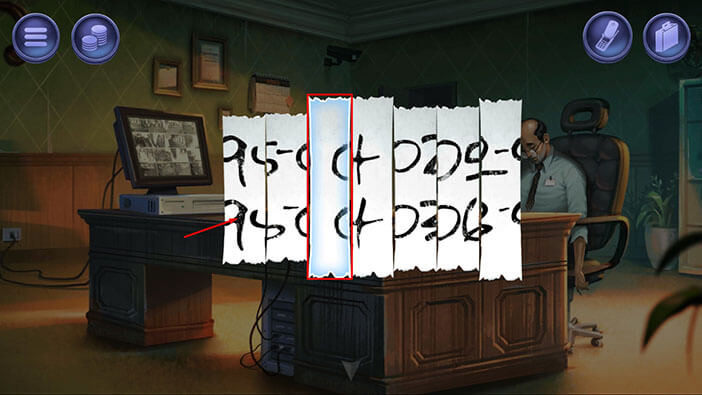
Step 2
Tap on the sixth piece of paper and exchange it with the second piece of paper.
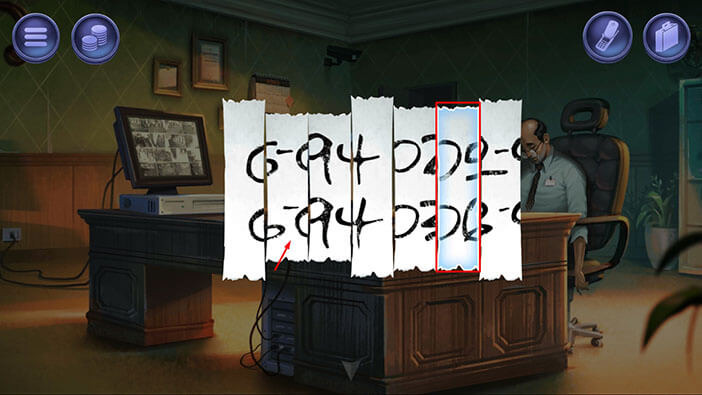
Step 3
Tap on the sixth piece of paper and exchange it with the third piece of paper.
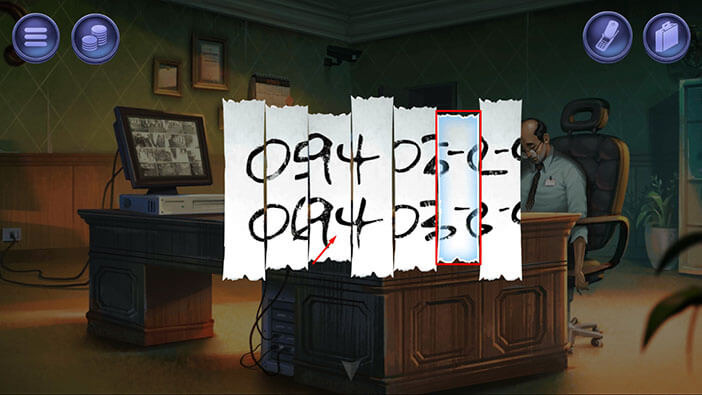
Step 4
Tap on the fifth piece of paper and exchange it with the fourth piece of paper.
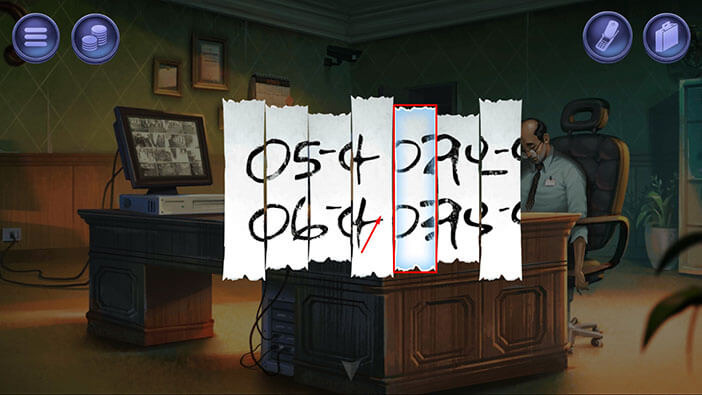
Step 5
Tap on the seventh piece of paper and exchange it with the fifth piece of paper.
With this last step completed, you will solve the puzzle.
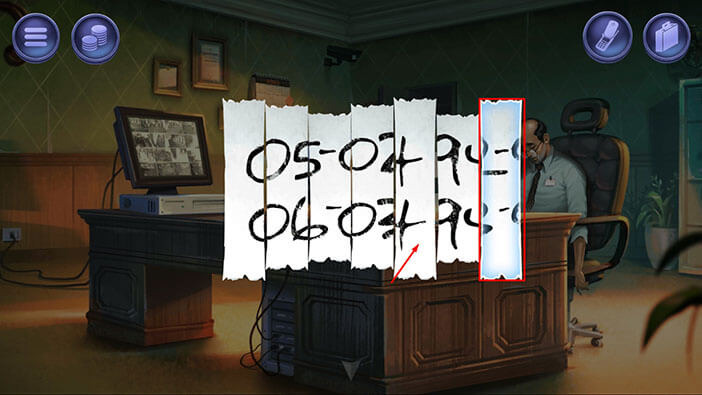
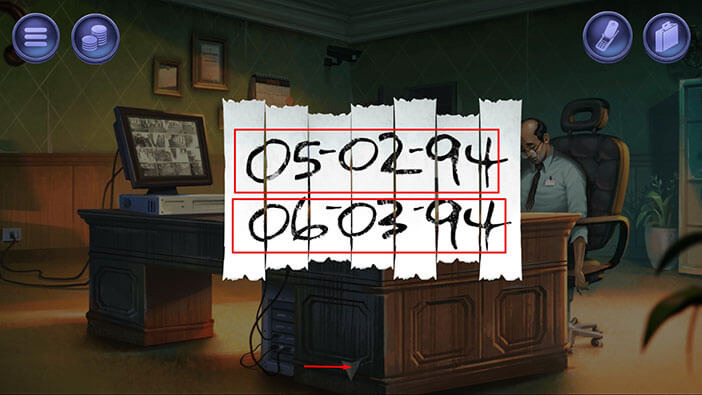
Ok, we can now see two dates.
05-02-94
06-03-94
You will notice that the second date is equal to +1 day, and +1 month in relation to the first date (This is MM/DD/YY format). If we follow this logic the third date should be
07-04-94. Memorize/write down this date because we will need it later.
Once you’re done, tap on the arrow at the bottom of the screen to go back.
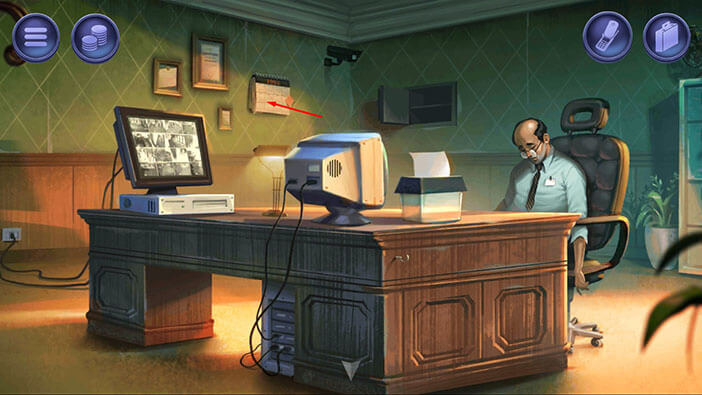
Next, if you pay attention to the wall on the left, you will notice a calendar. Tap on it to take a closer look.
Here, we can see that the password should be changed every month, and now is July ’94. So, the password should be 07-04-94, just as we presumed (this is the password for the vault door). Tap on the arrow at the bottom of the screen to go back.
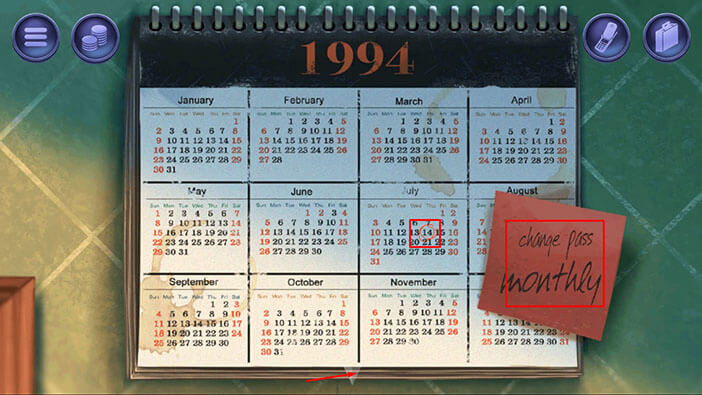
Tap on the arrow at the bottom of the screen to go back to the hallway.
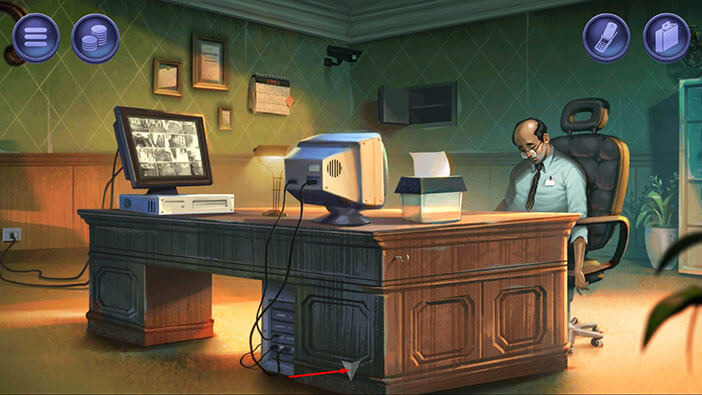
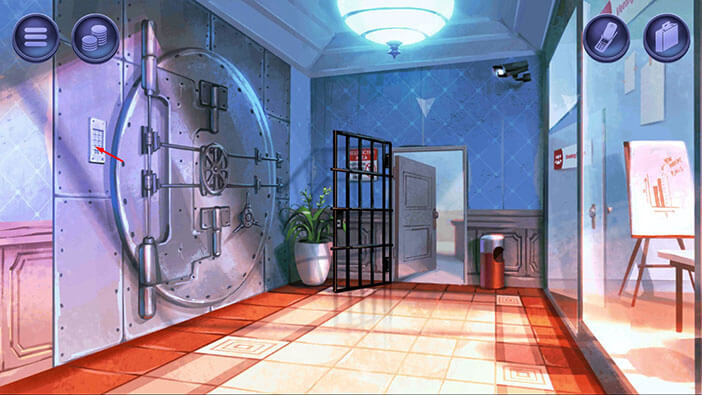
Tap on the control panel on the left side of the vault door to start the interaction.
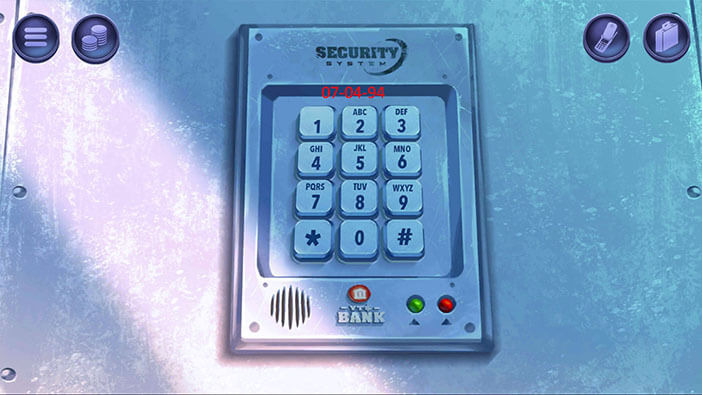
Enter the code “07-04-94” and you will unlock the vault door.
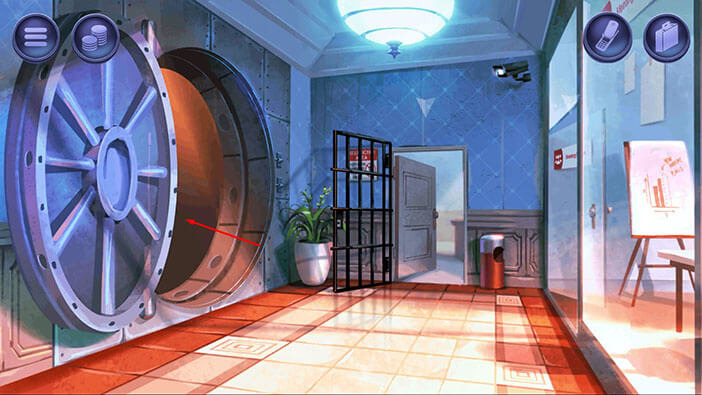
Tap on the vault door to proceed inside.
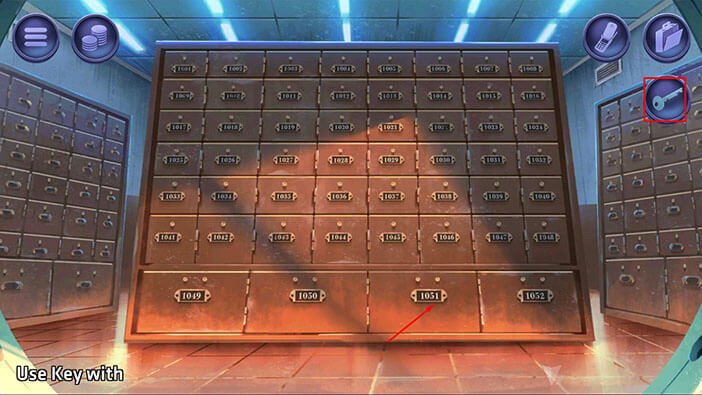
Select the “Key” from the inventory and use it to unlock the safe number “1051”.
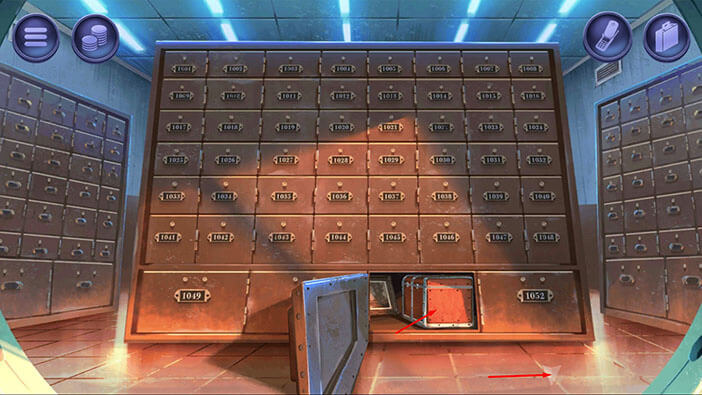
Tap on the “Trunk” to pick it up. After that, tap on the arrow at the bottom of the screen to go back.
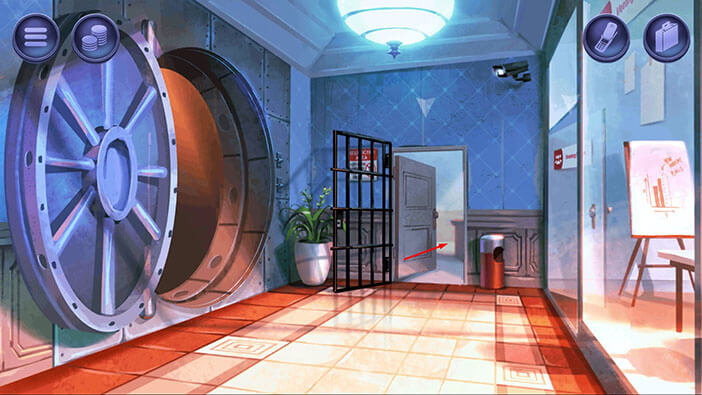
Tap on the door to proceed into the office.
We should now pick up the dead body and put it in the trunk. However, our inventory is full at the moment, and we will have to free up some space. So, select the “Paper shreds” from the inventory and put them in the transparent box.
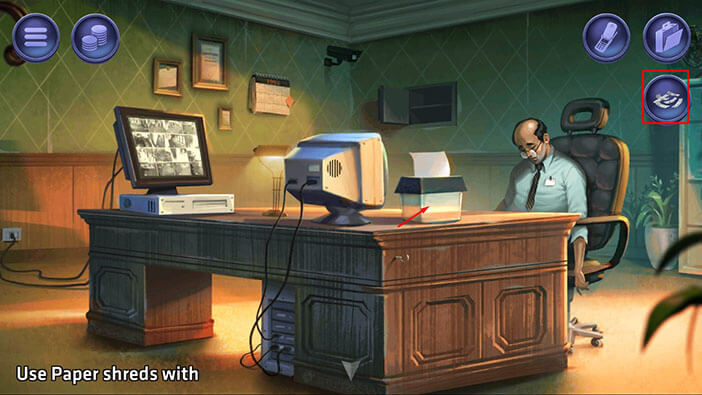
Well, we now have some space in our inventory, so tap on the “Dead body” to pick it up. After that, tap on the arrow at the bottom of the screen to go back to the hallway.
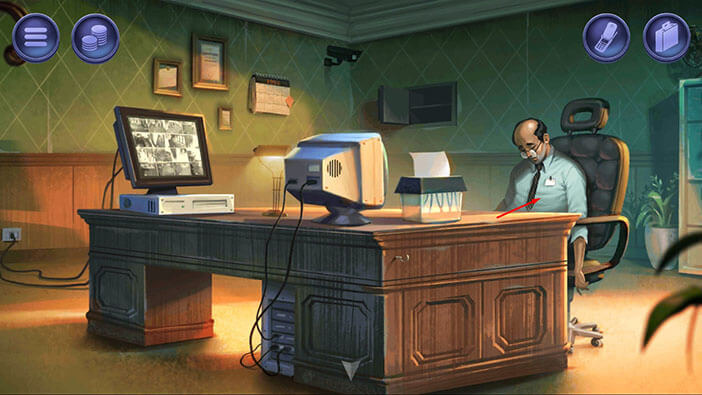
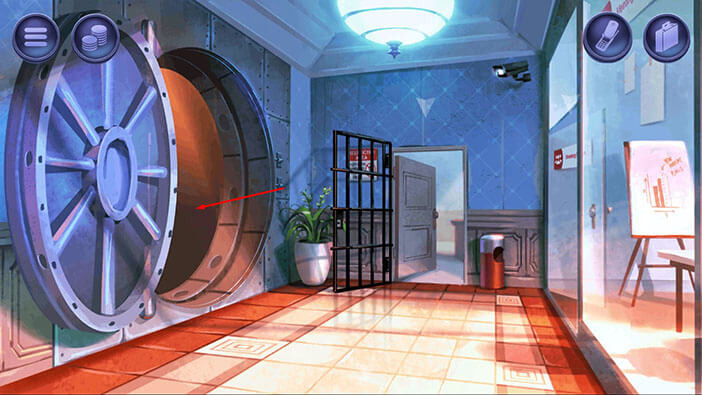
Let’s go into the vault and lock the body in the safe that belonged to “Friz” (Simon’s alias).
Tap on the suitcase icon to open the inventory. Select the “Dead body” and put it in the trunk. You will get “Trunk with the body”.
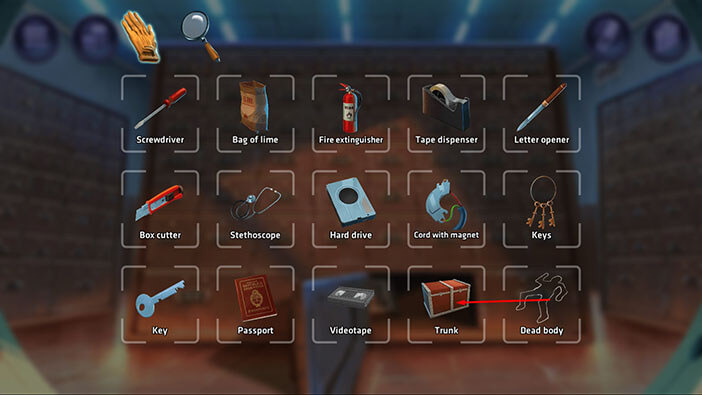
Next, select the “Passport” from the inventory and put it into the trunk. Now, no one will ever find out Simon’s alias.
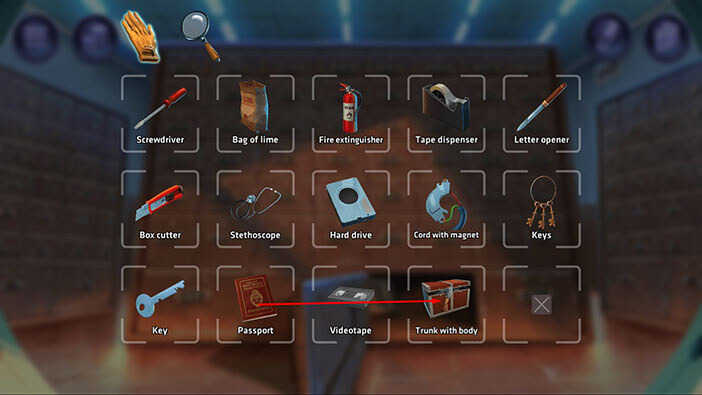
Next, select the “Bag of lime” and put it into the “Trunk with the body”. You will get “Trunk with the body and lime”.
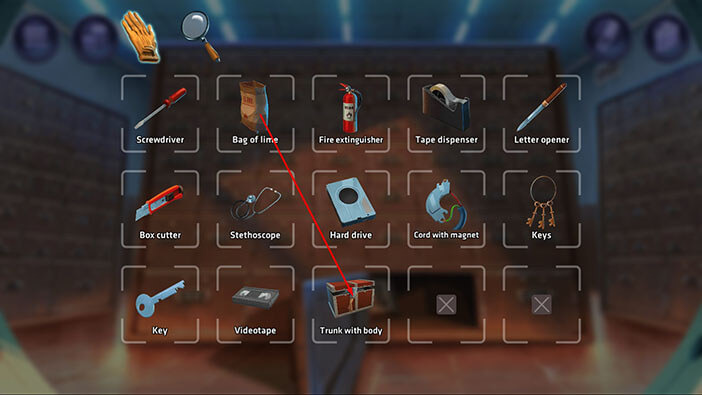
Ok, it’s time to wrap up. Select the “Trunk with the body and lime” from the inventory and put it in the safe.
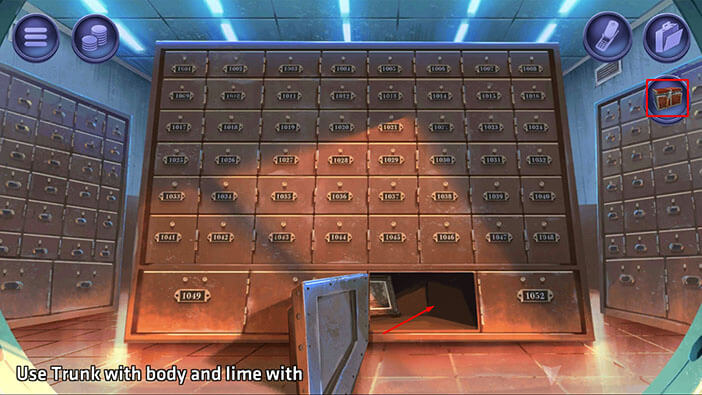
Next, select the “Key” from the inventory and use it to close and lock the safe. With that, we got rid of the dead body. Once you’re done, tap on the arrow at the bottom of the screen to go back.
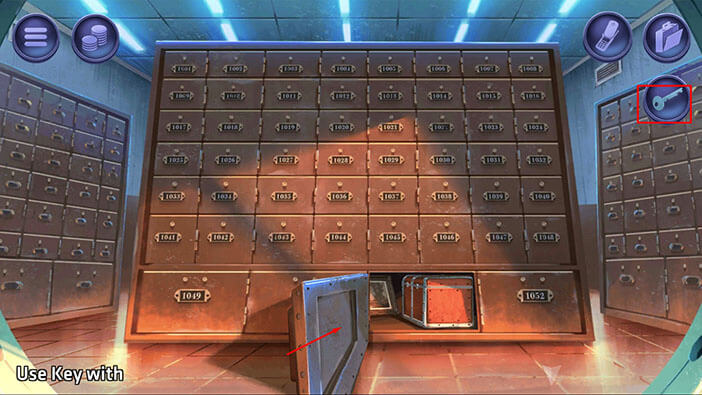
Next, tap on the vault door to close them. After that, tap on the office door to proceed to the office.
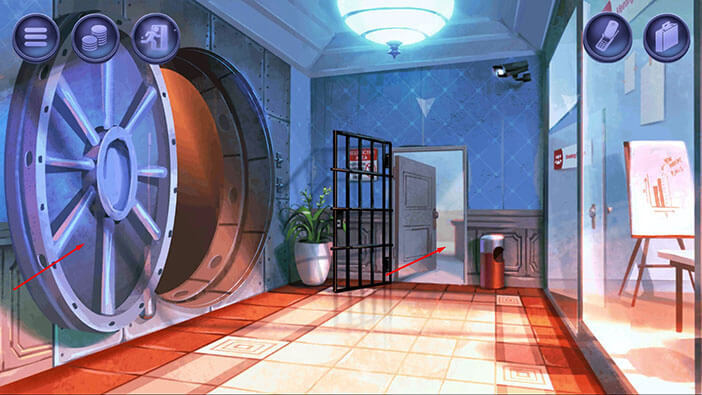
Next, tap on the wall safe to take a closer look at it, and tap again to close it.
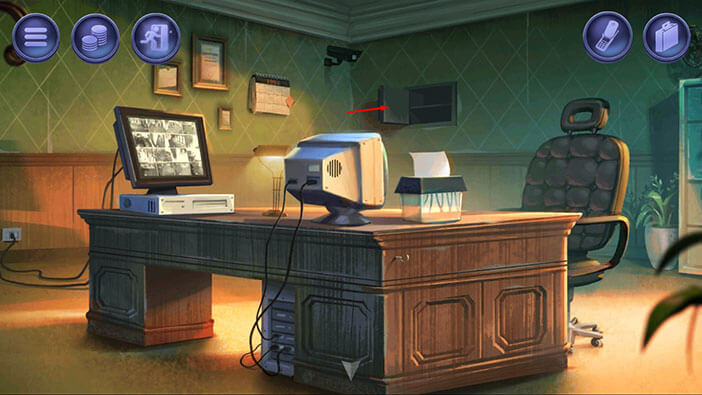
Well, now it’s time to return all the items back where we found them. Tap on the suitcase icon to open the inventory. Select the “Screwdriver” and use it to disassemble the “Cord with magnet”. “Magnet” and “Electrical cord” will be added to your inventory.
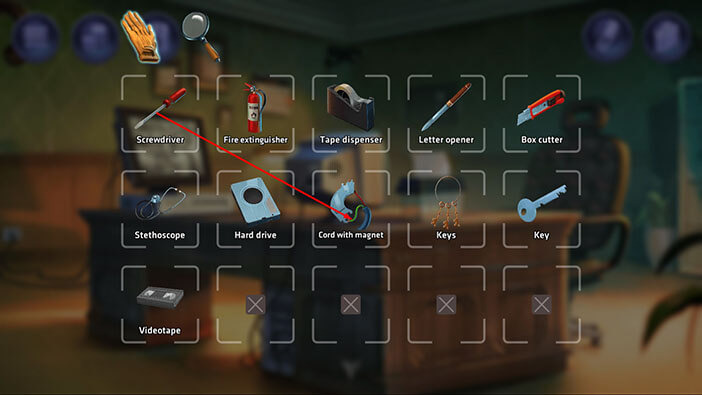
Next, select the “Magnet” from the inventory and use it to wipe the “Videotape”.
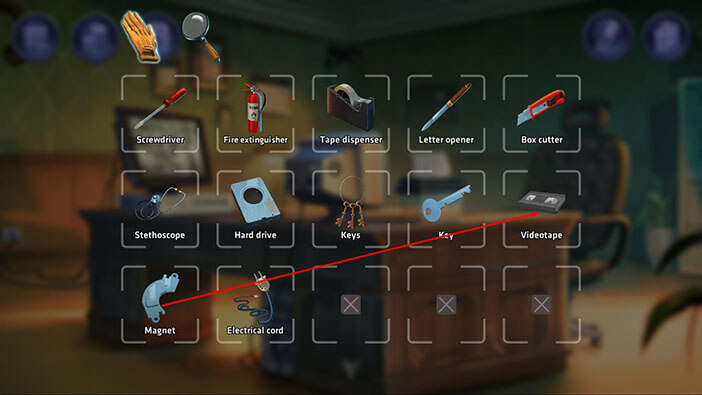
Let’s proceed. Select the “Videotape” from the inventory and put it back into the recorder. After that, tap on the arrow at the bottom of the screen to go back.
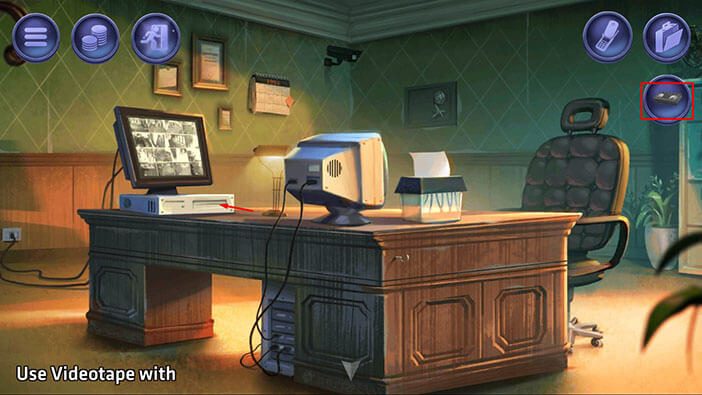
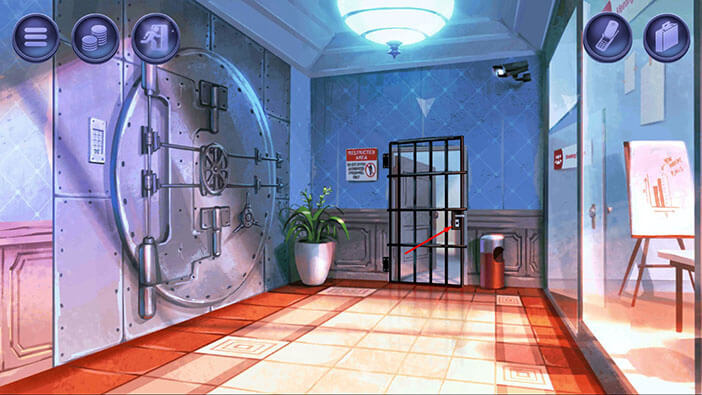
Tap on the office door to close it.
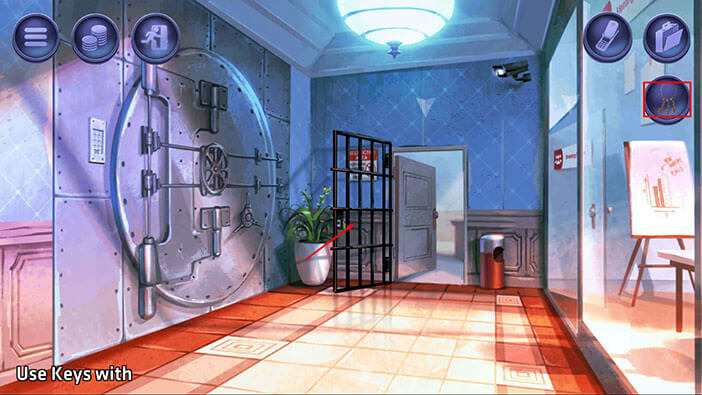
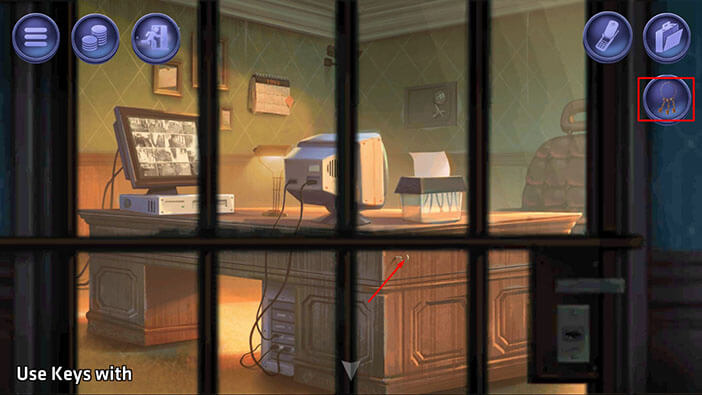
We should now return the keys, so tap on the office door to take a closer look at it.
Select the “Keys” from the inventory and throw them on the hinge on the table. Our character will make a perfect throw. After that, tap on the arrow at the bottom of the screen to go back.
Next, tap on the door on the right to go to the next room.
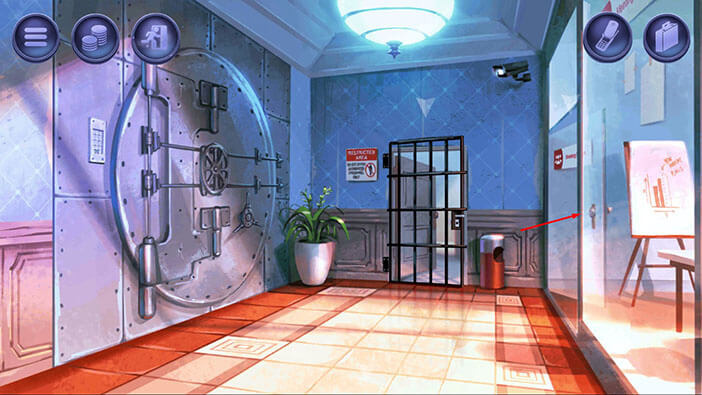
Next, select the “Stethoscope” from the inventory and put it into the medical box.
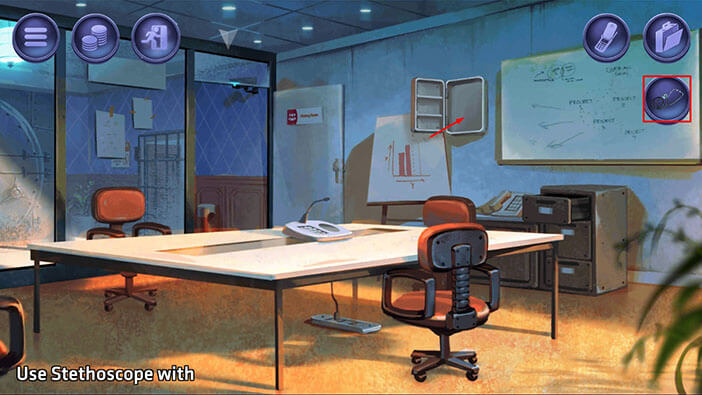
Next, tap on the suitcase icon to open the inventory. After that, drag the “Magnet” from the inventory slot and reattach it to the “Hard drive”.
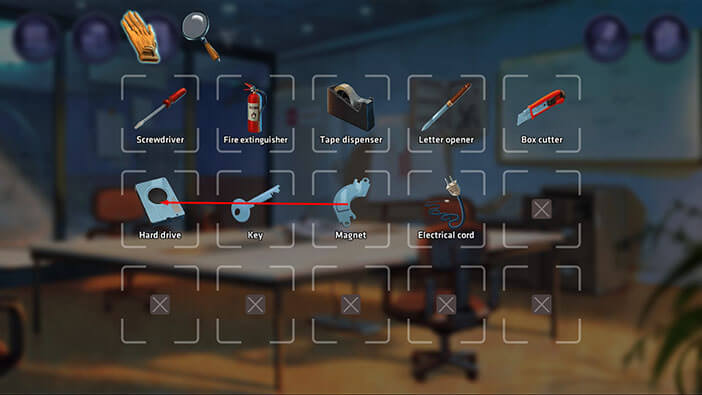
Next, select the “Hard drive” from the inventory and put it into the top drawer of the small cabinet.
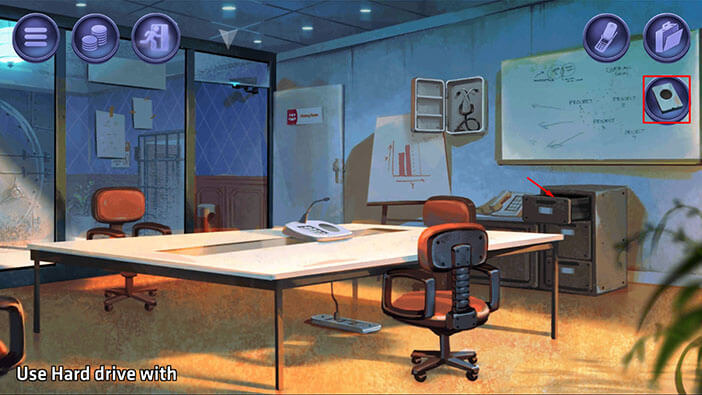
Select the “Electrical cord” from the inventory and place it under the table.
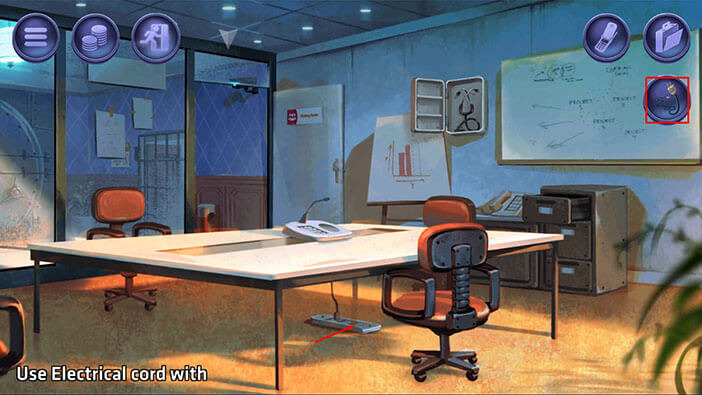
Next, select the “Box cutter” from the inventory and put it down on the left side of the table. After that, tap on the door to go back to the hallway.
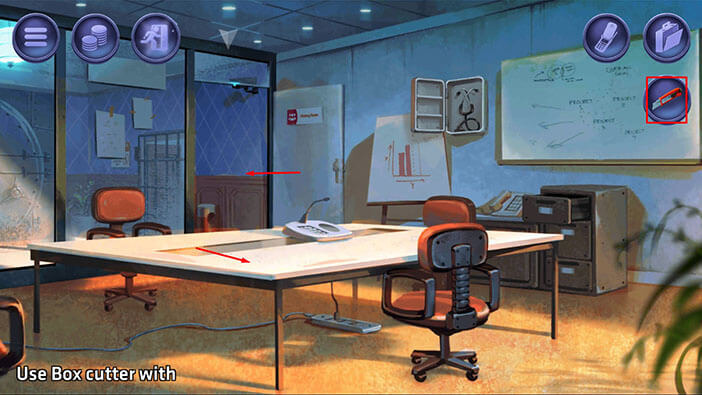
Let’s go back. Tap on the arrow at the bottom of the screen.
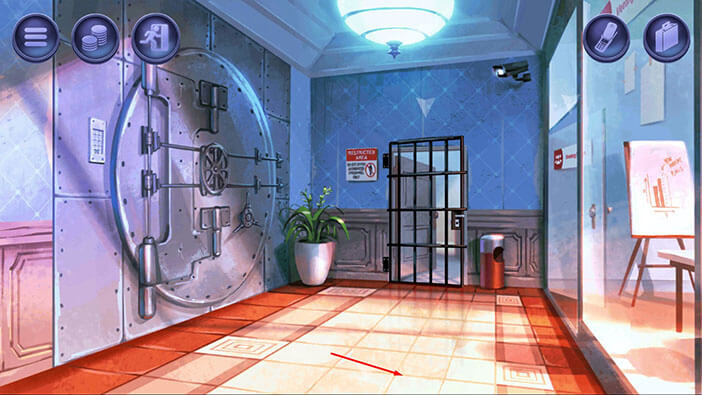
Next, tap on the “Side mirror” to pick it up. This will reactivate the lasers, but we no longer have to go to the other part of the bank. After that, tap on the arrow at the bottom of the screen to go back to the lobby.
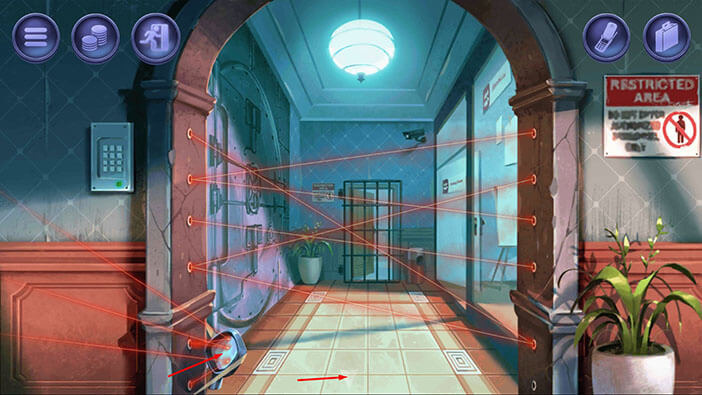
Select the “Tape dispenser” from the inventory and put it down on the counter on the left.
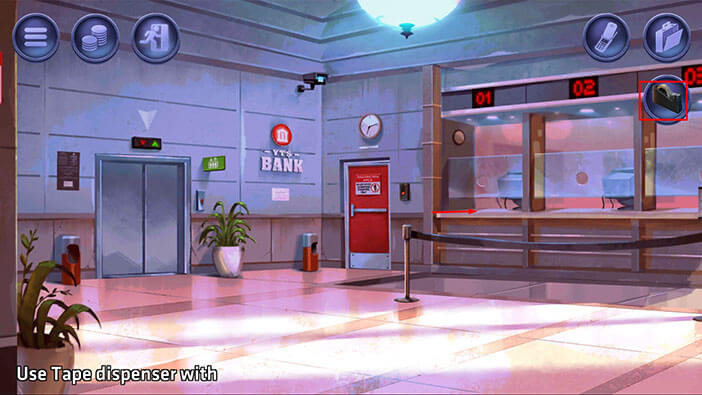
Next, select the “Letter opener” from the inventory and put it down on the middle counter. After that, tap on the elevator to go back to the garage.
Select the “Fire extinguisher” and place it into the red box on the left.
Next, select the “Side mirror” from the inventory and reattach it to the car.
Next, select the “Screwdriver” from the inventory and put it down on the ground in front of you. I forgot to throw away the key, so let’s go back into the elevator.
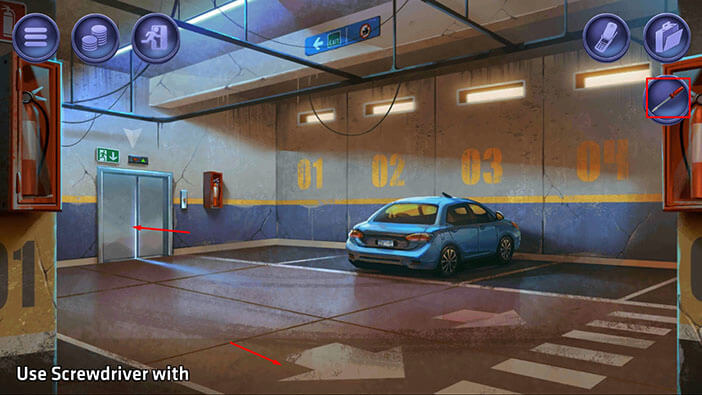
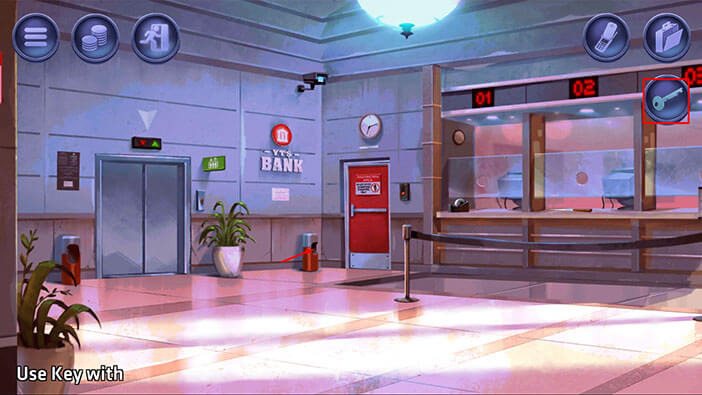
Select the “Key” from the inventory and throw it into the garbage can on the right.
Ok, we’re done now. Tap on the last icon in the upper left corner to finish the mission.
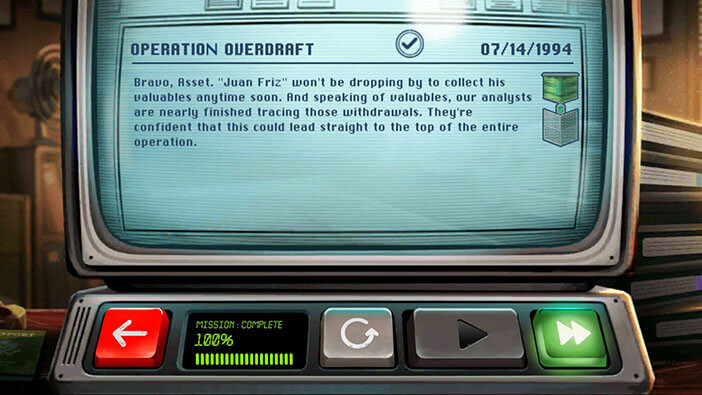
Our employer is satisfied with our performance, and we are now certain that “Juan Friz” won’t be making any more withdrawals. So, Terra Nova’s assets are now frozen. Also, our agency was able to track the money flow, and we should soon be able to identify, and hopefully eliminate, the head of Terra Nova.
MISSION 13
OPERATION DEAD SEA
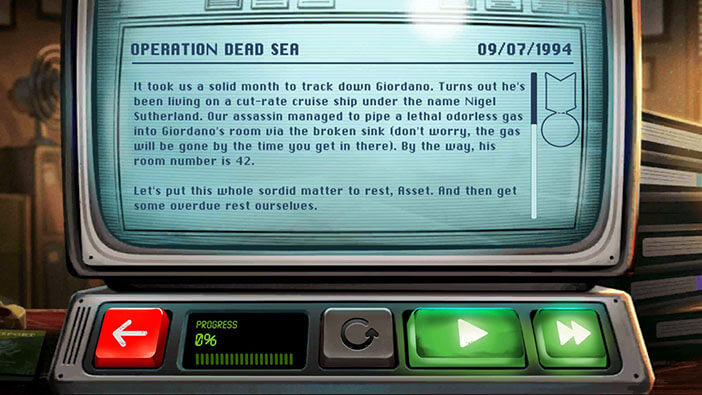
By following the money flow, our agency was able to identify the head of Terra Nova, and his name is Carlo Giordano, an infamous arms dealer. Carlo Giordano went into hiding by living on the cruiser under the alias Nigel Sutherland. Our assassin managed to eliminate him by pumping a deadly gas into his room. Carlo is in room number 42, and the gas will dissipate by the time we arrive to clean up the murder scene, so there’s no need to worry. Memorize/write down the number of the room. This is a final mission.
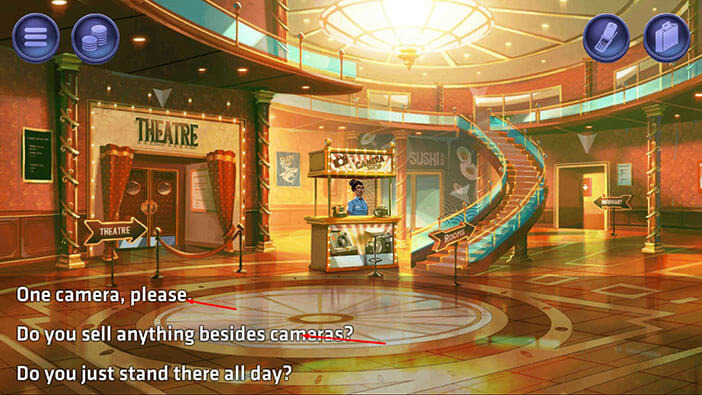
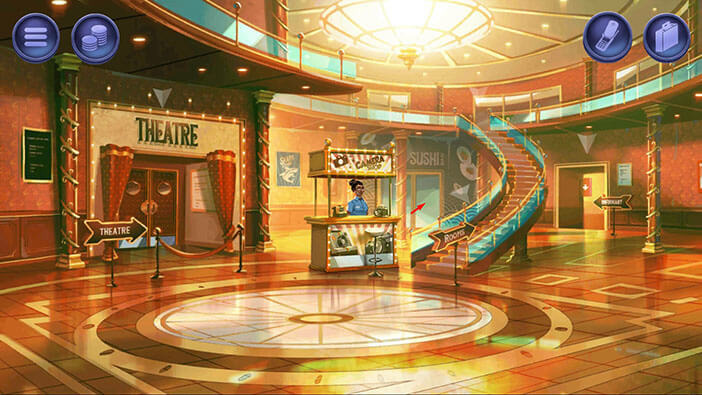
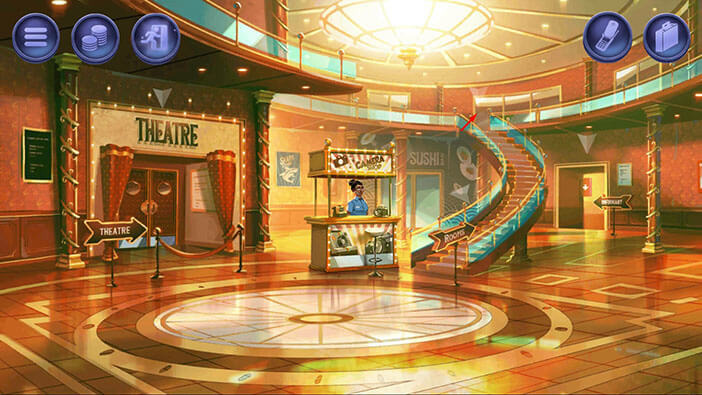
Tap on the employee to initiate the conversation, and let’s go through the first two dialog options.
“One camera, please”.
There are two cameras on the stand, but she won’t sell them to us because these are display models.
“Do you sell anything besides cameras?”
You will find out that she also sells tape recorders, but one costs 50 bucks. As usual, our character is completely broke and he can’t afford to buy the tape recorder. I think our character should definitely think about changing professions, once this mission is over. By the way, we will have to find a way to get that tape recorder, because we won’t be able to finish the mission without it, as you’ll discover later in this walkthrough.
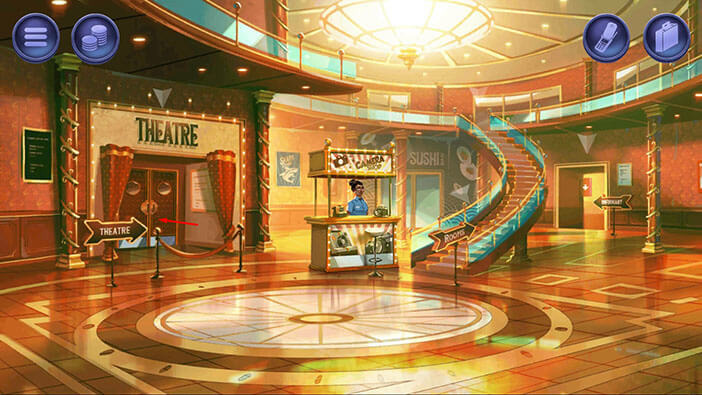
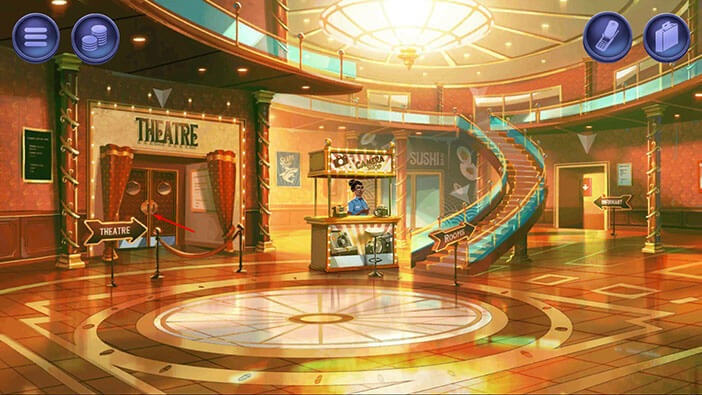
Ok, let’s go to the theatre. Tap on the door on the left.
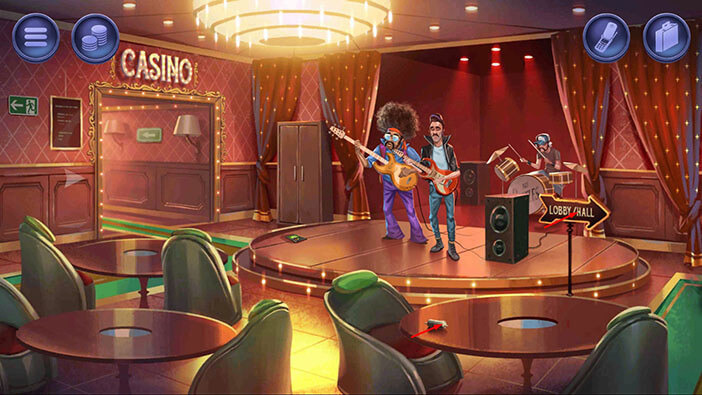
On the table on the right, you will notice the “Roll of string”. Tap on it to pick it up. After that, tap on the “Lobby/Hall sign” to go back. We can pick up several more items here, but first, we will have to get rid of the band.
Next, tap on the door behind the counter to go to the sushi restaurant.
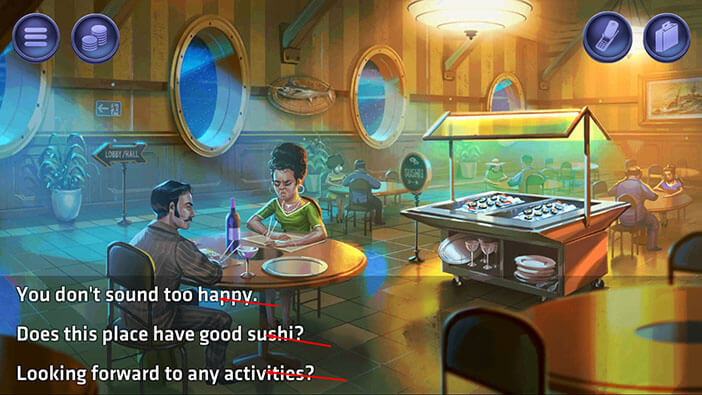
Tap on the woman to initiate the conversation, and let’s go through all the dialog options.
“You don’t sound too happy.”
The woman is furious because her husband wants to spend some time in the casino, and tonight is the first night of their honeymoon. This shouldn’t be too much of a problem in a normal situation, but her husband has a gambling addiction, and he promised that he will never gamble again.
“Does this place have good sushi?”
The sushi on this cruiser should be great, but they still didn’t have any because she is not done criticizing her husband.
“Looking forward to any activities?”
Well, she was. Until her husband said that he wants to go to the casino. Now, he is in huge trouble, and he ruined the first night of their honeymoon.
The important part of this conversation is that they still haven’t ordered any sushi, as you’ll see later in this walkthrough.
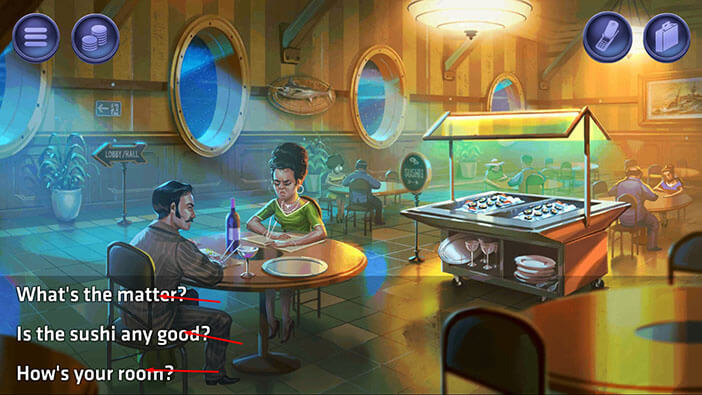
Let’s talk to the man. Tap on him to initiate the conversation, and let’s go through all the dialog options.
“What’s the matter?”
Well, the wife is angry because she thinks that the man will spend the entire night at the casino and lose all their money, but he claims that he would never do that. Naturally, our character doesn’t believe him.
“Is the sushi any good?”
He still didn’t have any because the woman is arguing with him, and he doesn’t dare to get up and take some sushi.
“How’s your room?”
They are disappointed because they paid for the luxury room, but their balcony is looking directly at the shark cage. They expected a better view.
So, we found out two important pieces of information. Both of them still didn’t have any sushi. Secondly, they rented a luxury room, and their balcony is located above the shark cage.
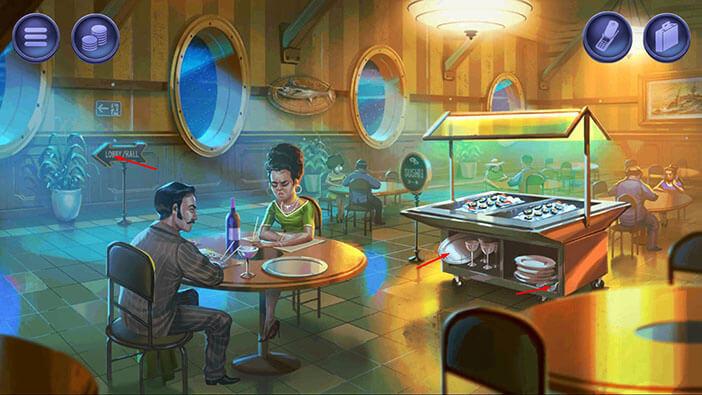
We can pick up two items from the serving cart on the right. First, tap on the “Serving Tray” to pick it up. Second, tap on the “Spoon” to pick it up.
After that, tap on the “Lobby sign” to go back to the lobby.
Let’s go back to the theatre. Tap on the door on the left.
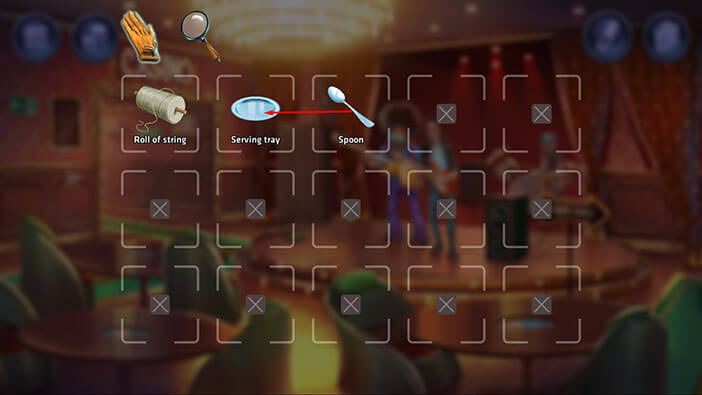
The band is having a rehearsal. We will try to sabotage it, and that should force them to leave. Tap on the suitcase icon to open the inventory, and combine the “Spoon” and the “Serving tray”. You will create “Tray and Spoon”.
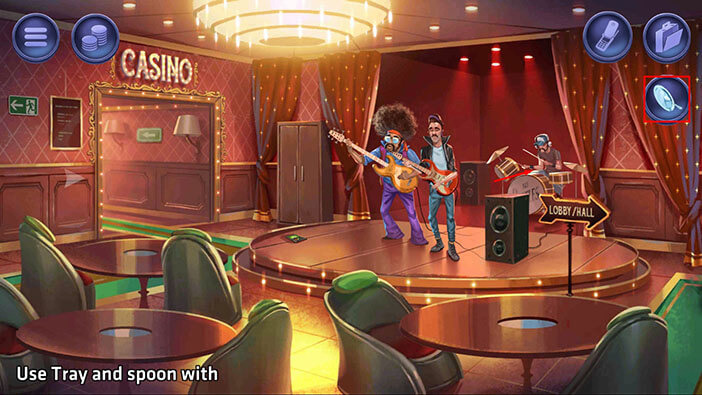
Select the “Tray and spoon” from the inventory and tap on the drummer in the back. The band frontman will conclude that the drummer has lost his concentration and that he made an awful sound. So, the frontman will decide to stop the rehearsal, and the band members will leave.
Ok, with the band gone, we can pick up several items in this room. First, tap on the green item located on the left side of the stage, and “Tuner” will be added to your inventory.
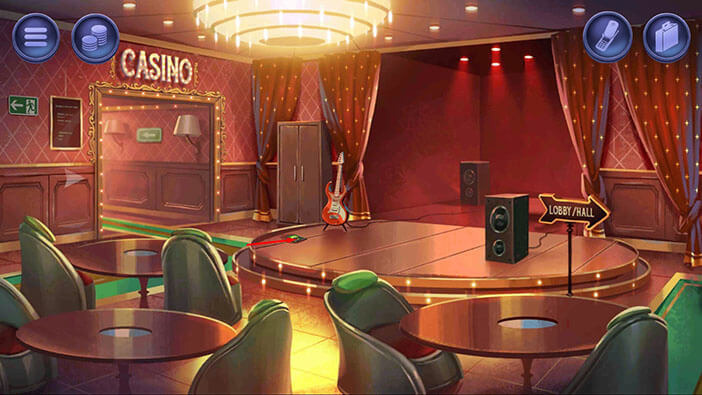
Next, tap on the cabinet in the left corner to open it. Inside you will find two items. Tap on them to pick them up and “Helium tank” and “Uninflated balloon” will be added to your inventory.
After that, tap on the door on the left to go to the casino.
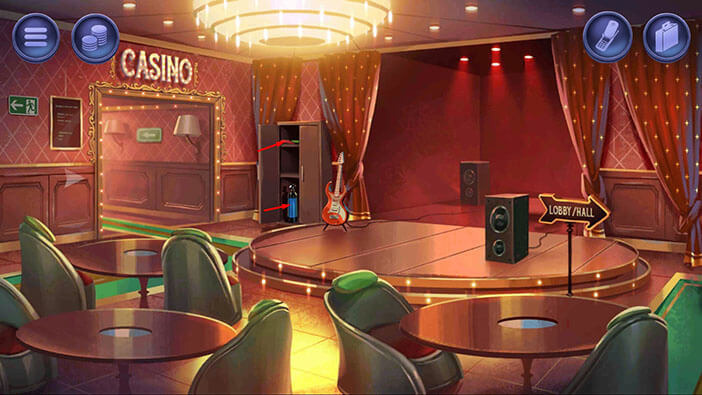
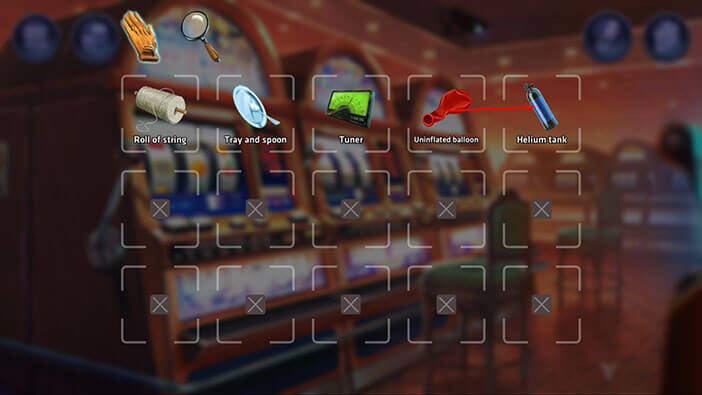
Ok, we will use the balloon to block the view of the camera. Tap on the suitcase icon to open the inventory, then use the “Helium tank” to inflate the “Uninflated balloon”. “Helium balloon” will be added to your inventory.
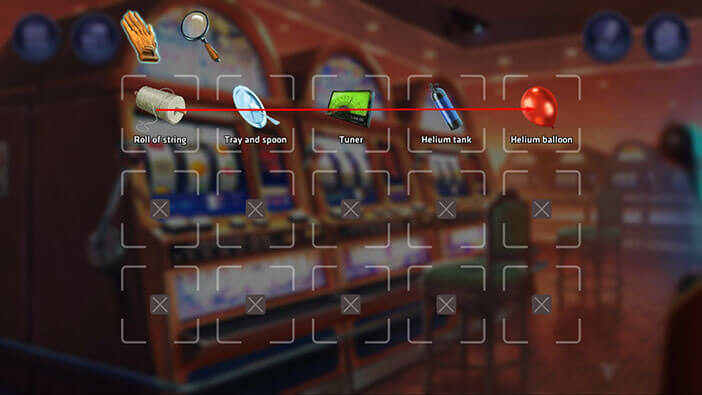
Next, select the “Roll of string” from the inventory and tie it to the “Helium balloon”. “Balloon with the string” will be added to your inventory.
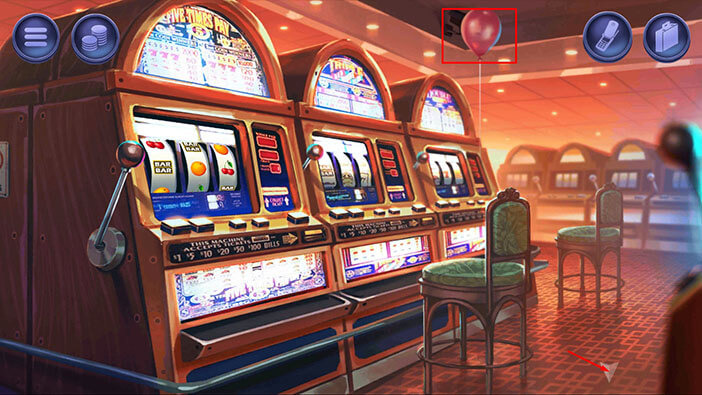
Next, select the “Balloon with the string” from the inventory and use it to block off the camera in the top left corner.
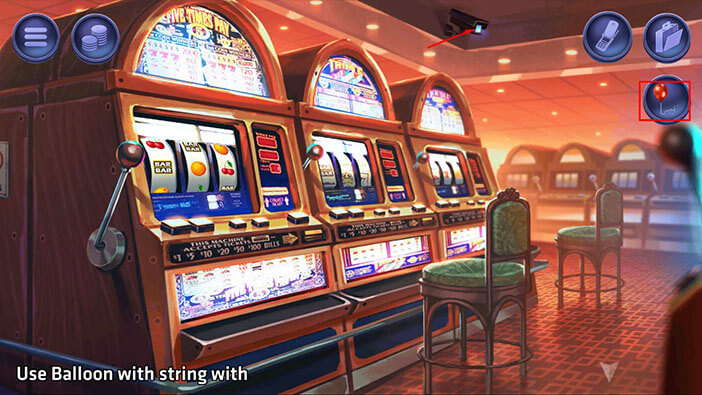
Ok, we blocked the camera and this will be quite helpful later because we will cheat in order to win the prize on one of the slot machines. I mean, our character has to do that. He is so broke that he has to figure out a way to earn some money on every mission.
Tap on the arrow at the bottom of the screen to go back to the theatre.
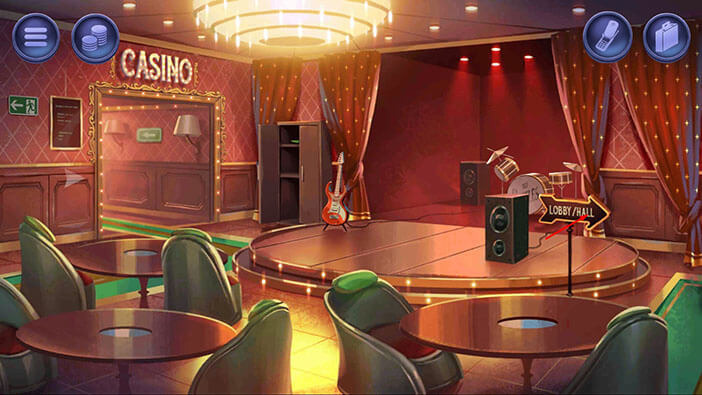
Let’s go back to the lobby. Tap on the sign on the right.
Let’s explore the next area. Tap on the door on the right.
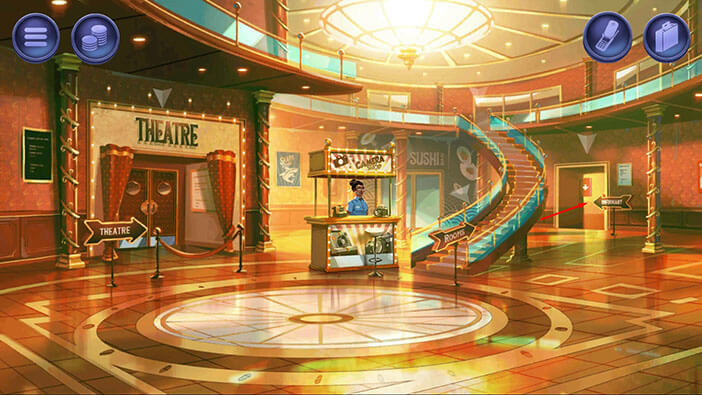
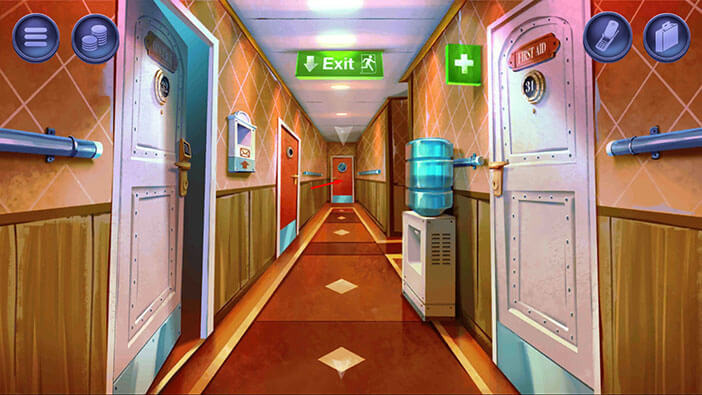
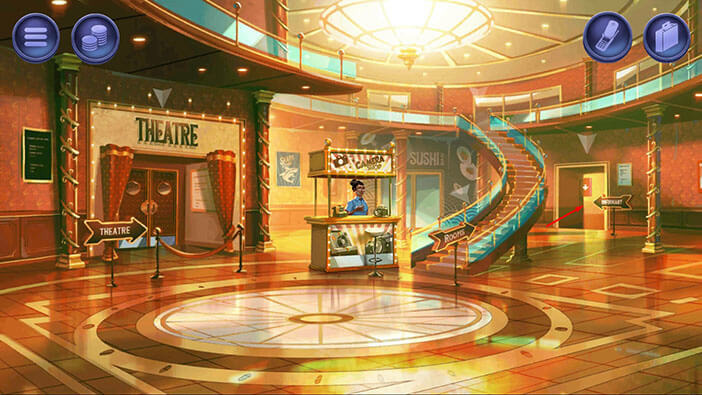
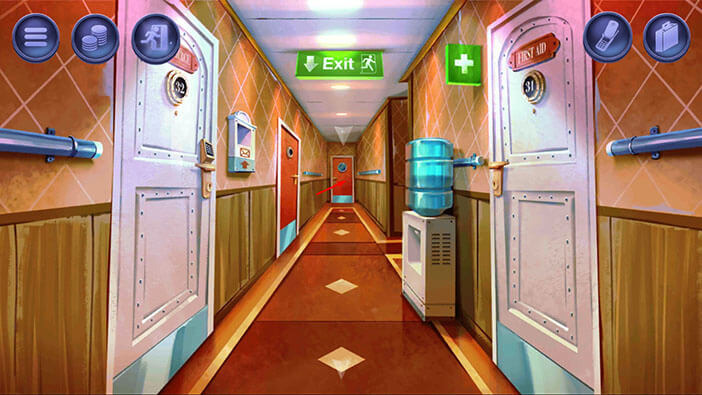
In the room on the right is a doctor, and in the room on the left is the concierge. We will come back to these two rooms later. For now, tap on the red door at the end of the hallway to proceed to the next area.
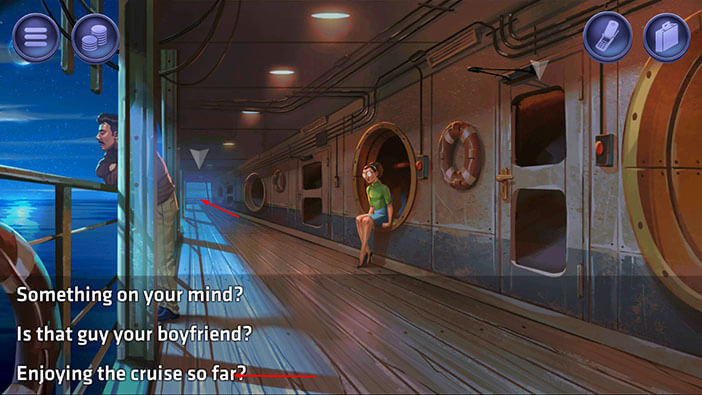
Tap on the woman on the right to initiate the conversation. After that, tap on the last dialog option “Enjoying the cruise so far?”
She is not happy with the overall service on this cruiser. Besides that, she went down in the shark cage but was very disappointed because she didn’t see any sharks. Apparently, there was no bait to lure the sharks. Our character immediately got an idea. If he could find a way to lure in the sharks, they could take care of the body, and that would solve our problem.
Once you’re done, tap on the other end to go to the next area.
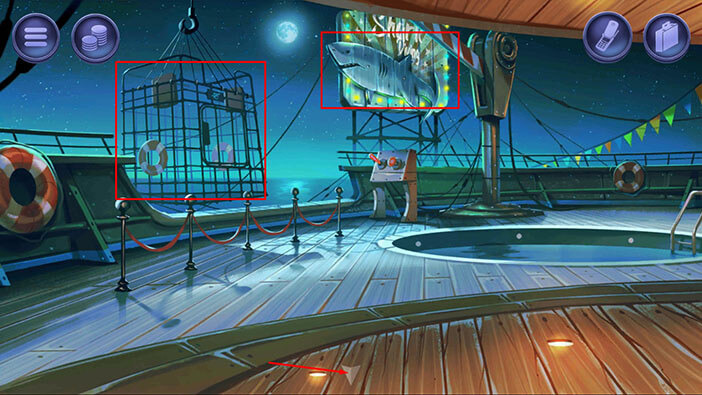
Ok, here we can see a shark cage. We will come back to it later in this walkthrough. Now, we should go back to the lobby.
To get there, tap on the arrow at the bottom of the screen. After that, go through the door on the right. After that, tap on the arrow at the bottom of the screen and you will reach the lobby.
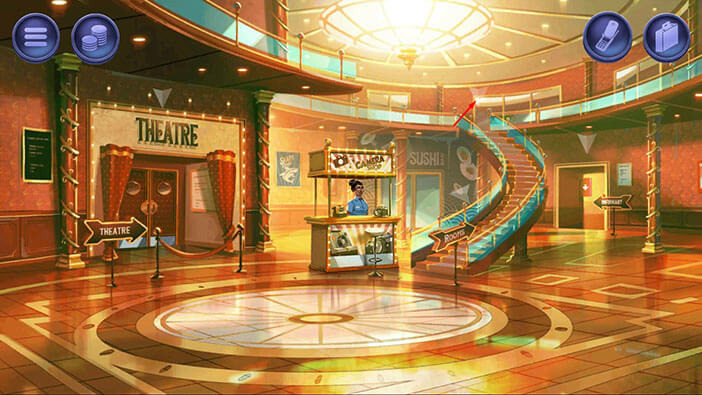
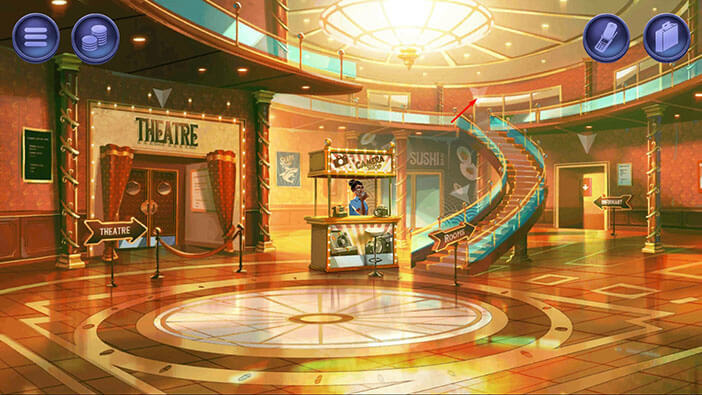
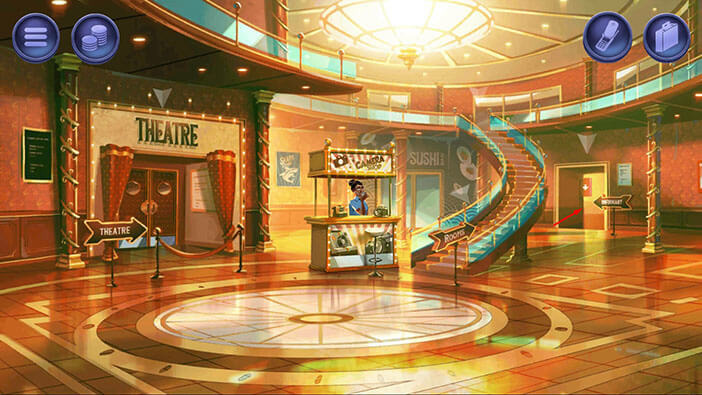
Once you reach the lobby, tap on the arrow in the upper right corner to go upstairs.
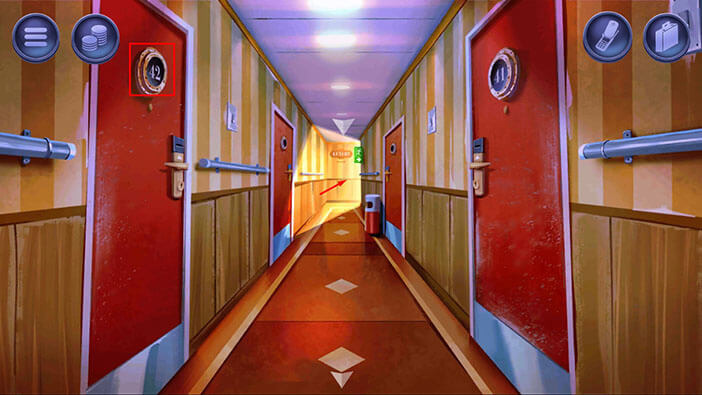
We can see room number 42 on the left. During the briefing, our employer said that the body was located in this room. We will come back to it later. For now, tap on the end of the hallway to proceed to the next area.
On the ground, you will find a “Coin”. Tap on it to pick it up. On the right side, we can see a luxury apartment and it was rented by the couple that we saw in the restaurant earlier. We will come back to it later.
Now, we should go back to the lobby. To get there, tap on the arrow at the bottom of the screen to go back. In the next hallway, again tap on the arrow at the bottom of the screen and you will reach the lobby.
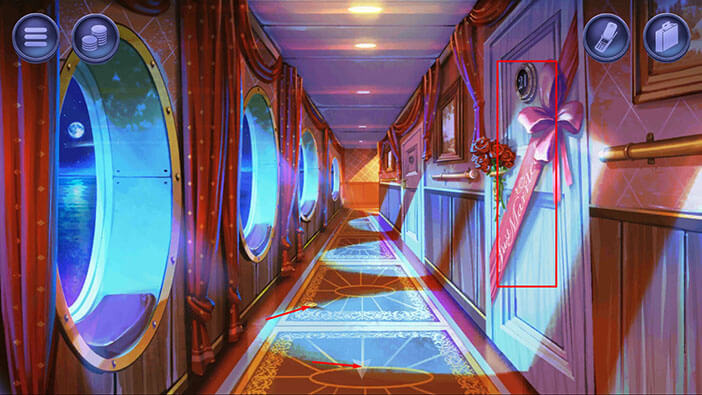
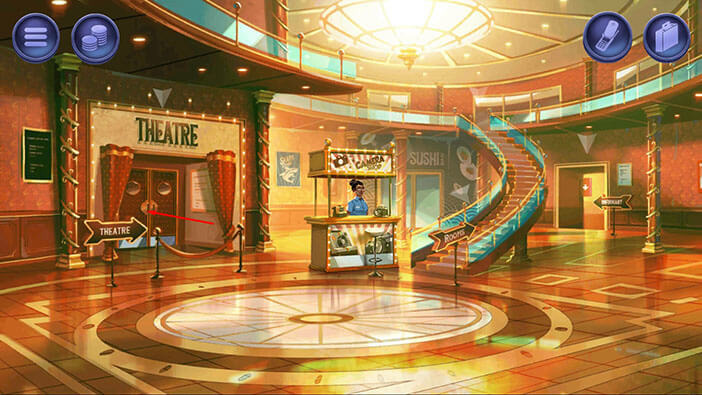
Ok, we should now go to the casino. To get there, tap on the door on the left to go to the theatre. Once you get to the theatre, tap on the door on the left to go to the casino.
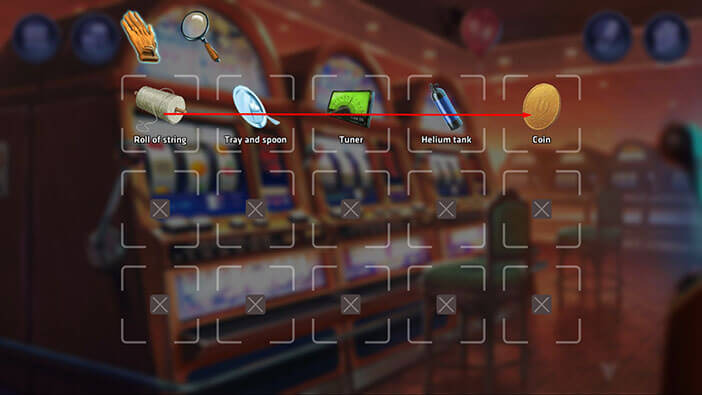
Well, now we will cheat to score a jackpot on the slot machine – because our character is the poorest “cleaner” in the entire world. Tap on the suitcase icon to open the inventory, and combine “Roll of string” with the “Coin”. You will create a “Coin with the string”.
Ok, we already blocked the surveillance camera, so we can put our plan into motion. Select the “Coin with the string” from the inventory and tap on the slot machine to insert it.
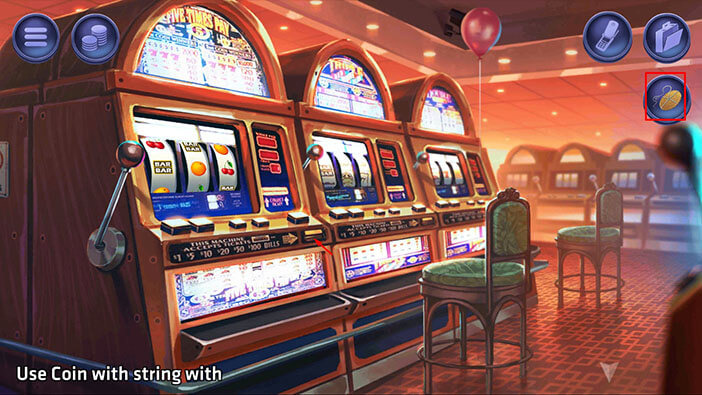
So, even if we lose, our character will pull out the string, and he will use the same coin over and over again. Pull the lever on the left, and let’s begin.
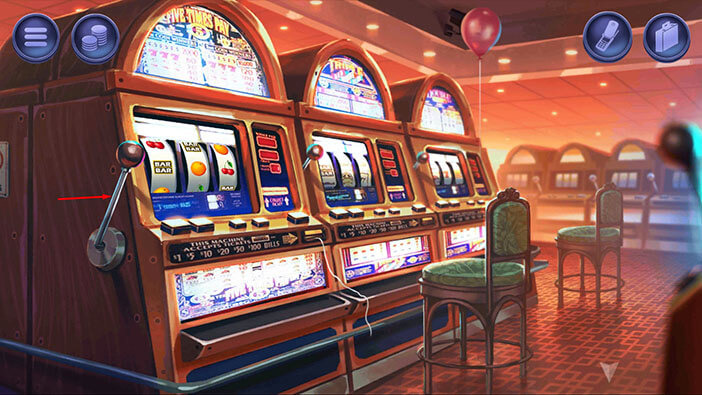
30 minutes later, you will score a jackpot. Tap on the coins to pick them up and “Winnings” will be added to your inventory. We will use this money to buy a tape recorder.
So, let’s go to the lobby. Tap on the arrow at the bottom of the screen to go back to the theatre. Once you get there, tap on the sign on the right to go to the lobby.
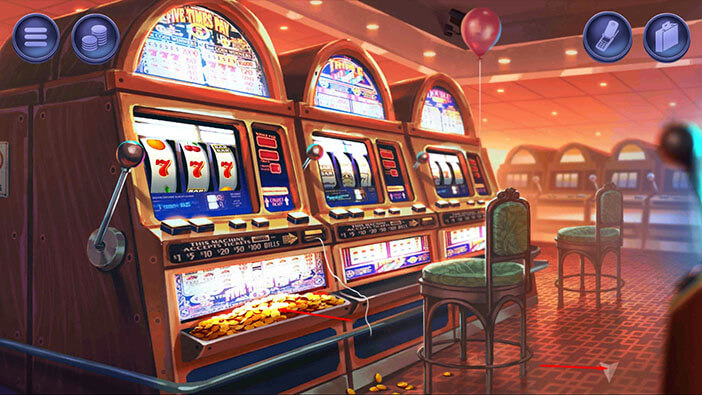
Next, select the “Winnings” from the inventory and use it to buy the “Tape recorder”. After the conversation with the employee, an “Audio recorder” will be added to your inventory.
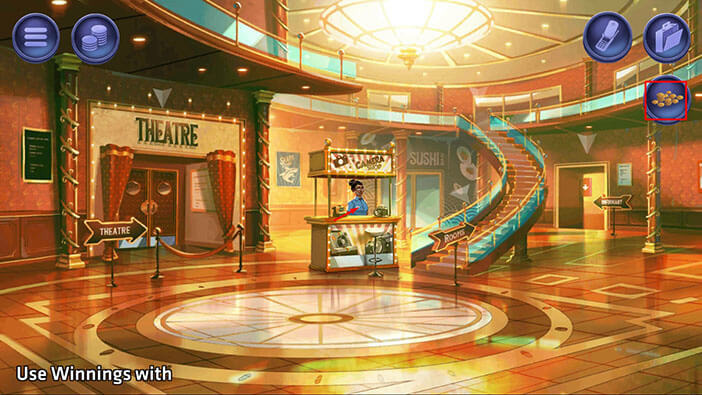
Tap on the door on the right.
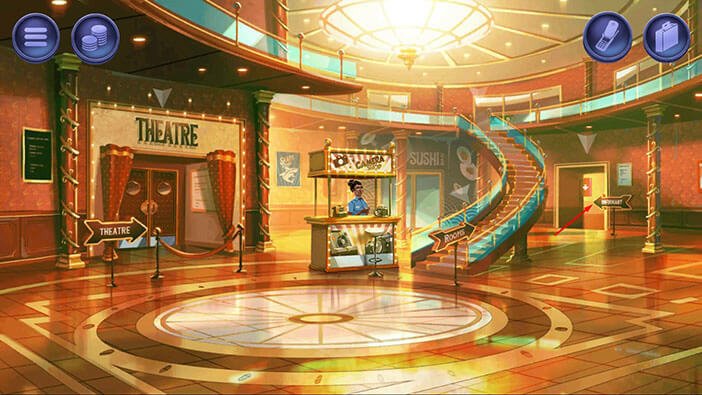
Select the “Audio recorder” from the inventory and put it into the mailbox located next to the door on the right.
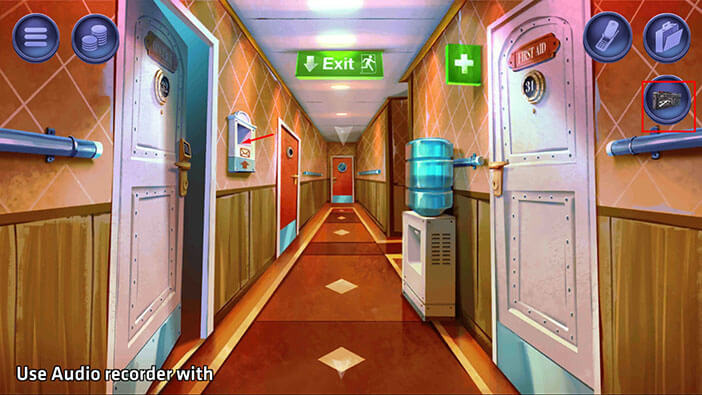
Ok, I should explain the plan before we go in. We set up the audio recorder next to the door. Next, we will find some excuses to lure out the night manager. Once he returns to the office, the tape recorder will record the sound of buttons when he enters the code. Next, we will again think of some excuse to draw him out. While he is out, we will take the tape recorder and use the tuner to decipher the sound and determine which buttons he pressed to unlock the office door. While he is out, we will enter the code and go into the office. This plan is a bit complicated, but we should be able to pull it out. Let’s begin.
Tap on the door on the left to go to the office.
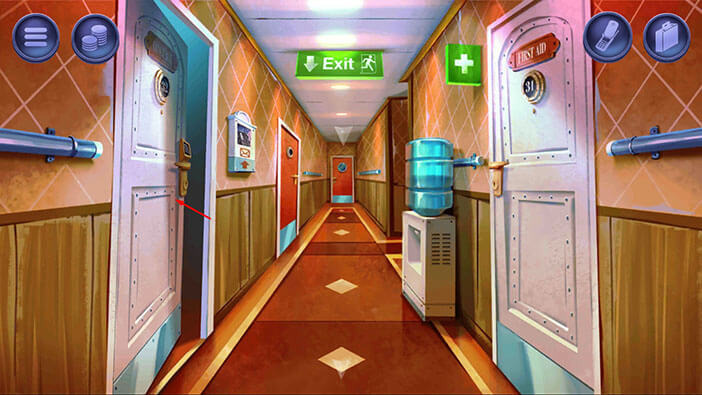
Tap on the concierge to initiate the conversation, and let’s go through all the dialog options.
“I lost my room key.”
He won’t give us the key until security confirms our identity. On the positive side, he has the key printing machine in the office, so we should be able to easily get the key once we complete our plan.
“What’s the difference between a regular concierge and a night shift concierge?”
Basically, a night shift concierge doesn’t have to be nice to guests. Interesting.
“One of the escalators is malfunctioning.”
After the brief conversation, the concierge will say that he has to go and look at this problem, and he will order you to get out of his office.
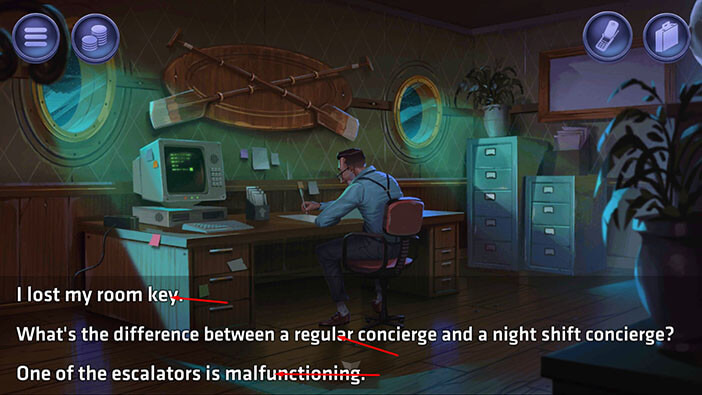
We will now go back to the lobby, and wait for the concierge to come back and enter the code. So, tap on the arrow at the bottom of the screen to go back to the lobby.
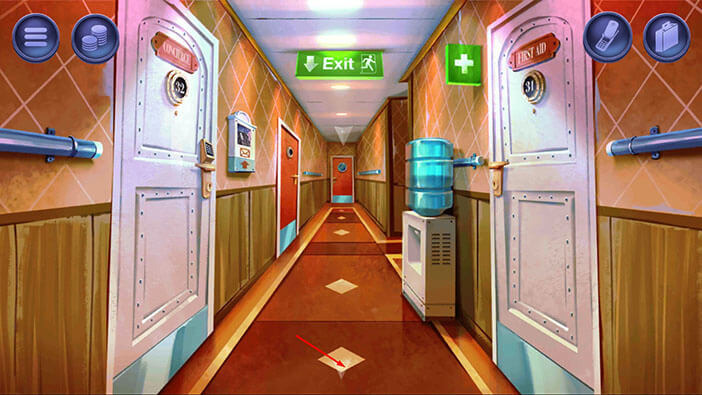
Ok, let’s go back to the office. Tap on the door on the right.
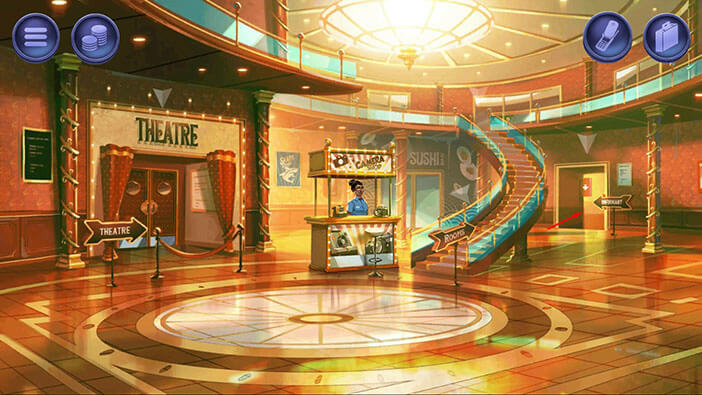
We have recorded the sound, so tap on the “Audio recorder” to pick it up. After that, tap on the door on the left to go to the office. Now, we will find another excuse to draw the concierge from the office, and then we will crack the code and go in.
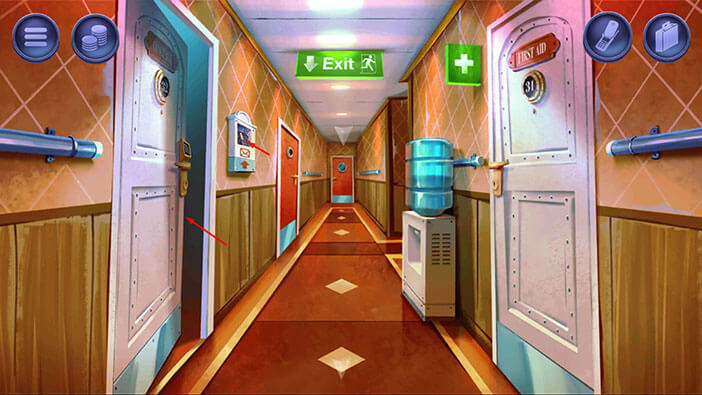
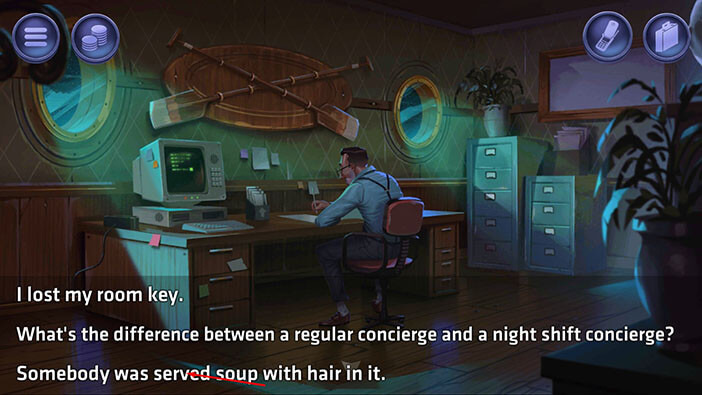
Tap on the concierge to initiate the conversation, then tap on the third option.
“Somebody was served the soup with hair in it.”
The concierge will leave again, and you will find yourself in front of the office door.
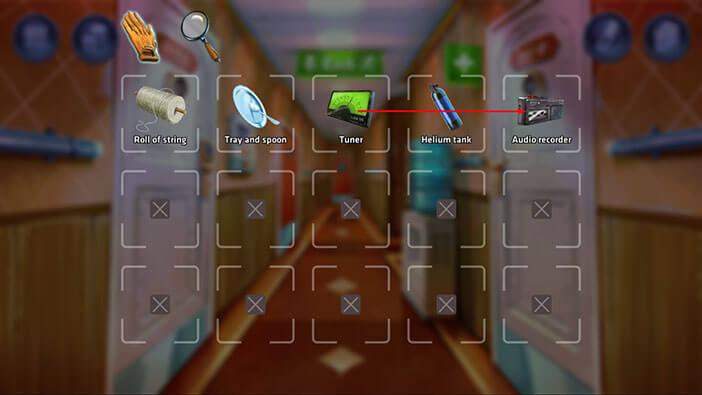
Ok, let’s crack that code. Tap on the suitcase icon to open the inventory. After that, drag the “Tuner” and combine it with the “Audio recorder”.
Tap on the “Play” button. The arrow on the tuner will point to a certain letter/symbol each time the button was pressed (every button makes a unique sound). Memorize/write down these letters/symbols.
The arrow will point to, D# -> A# -> F# -> B -> D -> F.
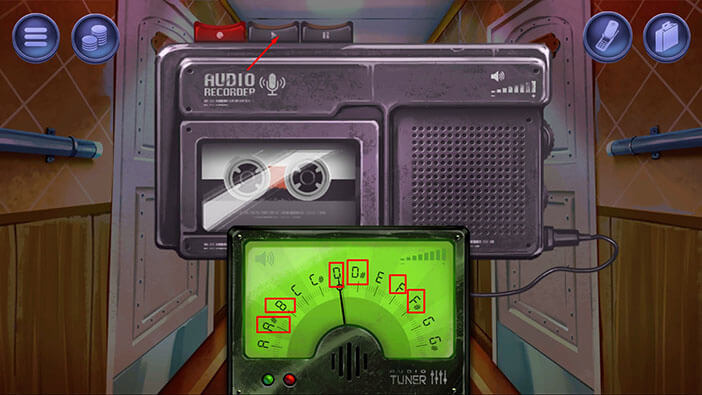
Ok, now, let’s presume that each symbol represents a number. The numbers are arranged from 0 to 9 starting from left to right. So,
A = 0, A# = 1, B = 2, C = 3, C# = 4, D = 5, D# = 6, E = 7, F = 8, F# = 9.
Next, let’s replace the symbols which we wrote down previously with the numbers. We had,
D# -> A# -> F# -> B -> D -> F.
If we replace them with numbers we will get the code “619258”. Memorize/write down this code. After that, tap on the empty space on the left to put down the device.
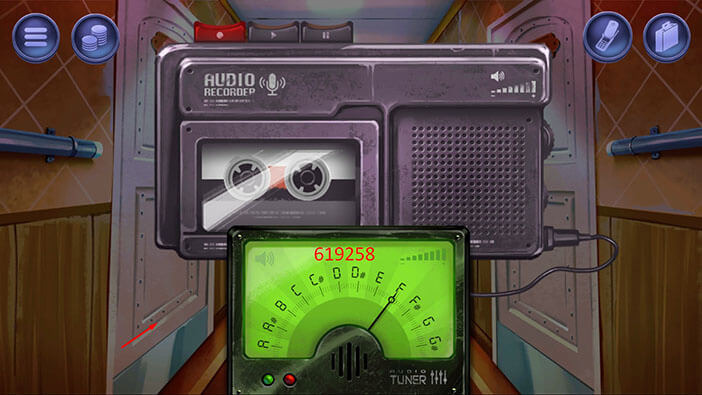
Tap on the lock to initiate the interaction and enter the code “619258”.
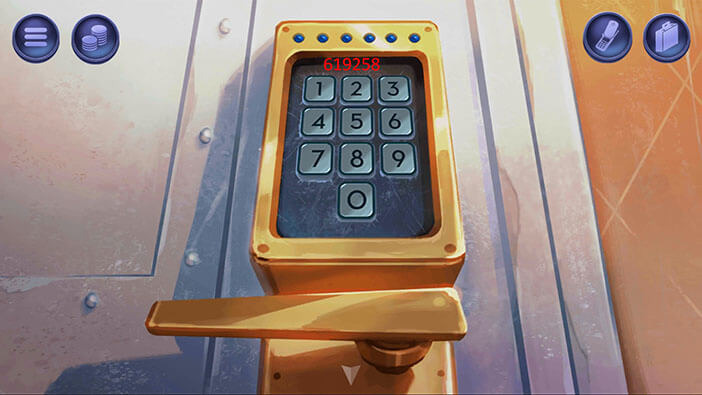
Ok, we’re in. Tap on the pile of cards located to the right of the computer. You will pick up a “Basic room keycard”.
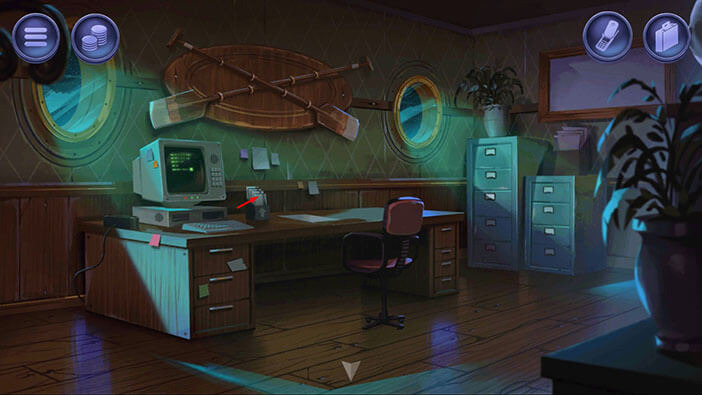
Next, select the “Basic room keycard” from the inventory and insert it into the slot on the left side of the computer.
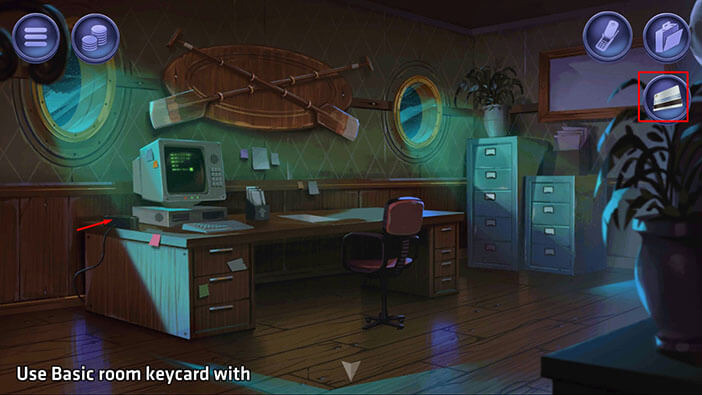
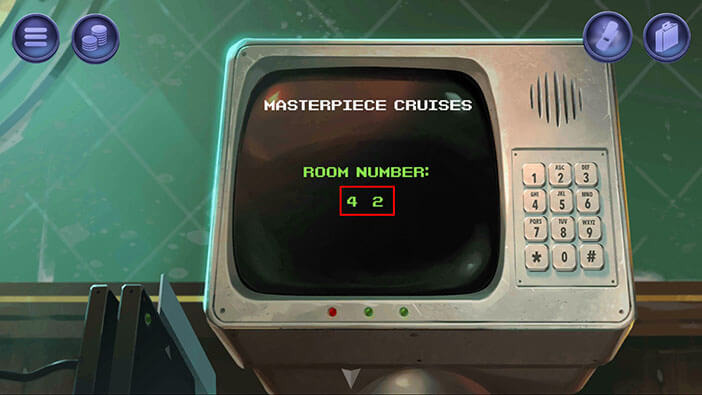
Next, tap on the computer to start the interaction, and enter the number 42 because that’s the room with the dead body.
After that, tap on the arrow at the bottom of the screen to go back.
Tap on the keycard to pick it up, and the “Basic room keycard” will be added to your inventory.
After that, tap on the arrow at the bottom of the screen to go back to the hallway.
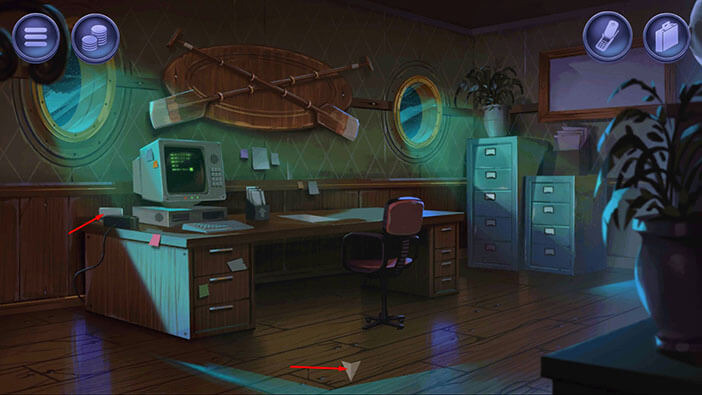
Let’s go to room number 42. Tap on the arrow at the bottom of the screen to go back to the lobby.
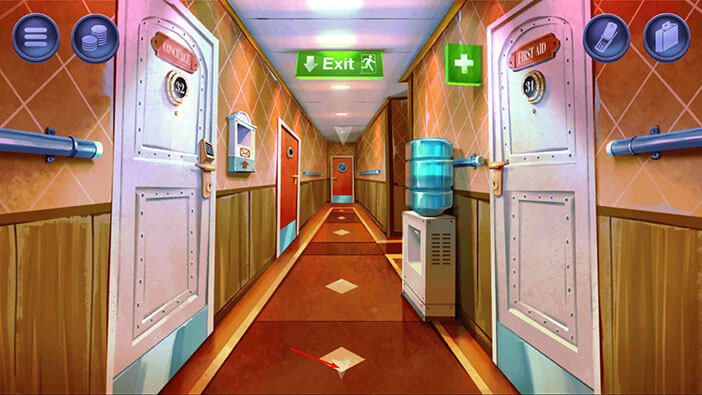
Tap on the arrow in the upper right corner to go upstairs.
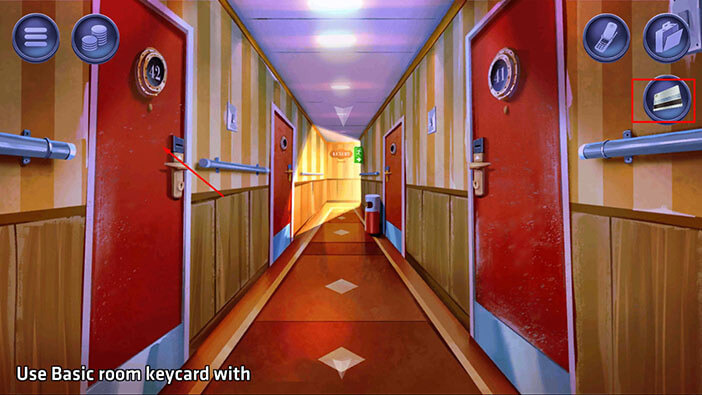
Select the “Basic room keycard” from the inventory and use it to unlock room number 42.
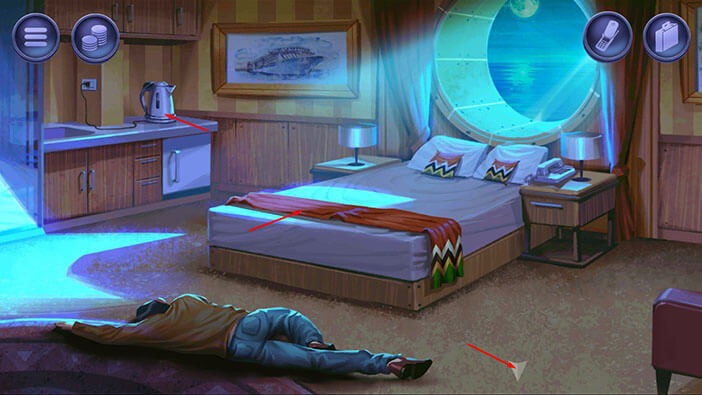
Ok, we can see the dead body lying on the floor. We will leave it here, for now, because we need a few more items in order to put our plan into motion and get rid of the body.
Here, we can pick up two items. On the left, you will notice an “Electric kettle”. Tap on it to pick it up. You will also see a “Blanket” on the bed, so let’s pick it up.
After that, tap on the arrow at the bottom of the screen to go back.
Next, we should fill the kettle with water. To do that, we should first go back to the lobby, so tap on the arrow at the bottom of the screen.
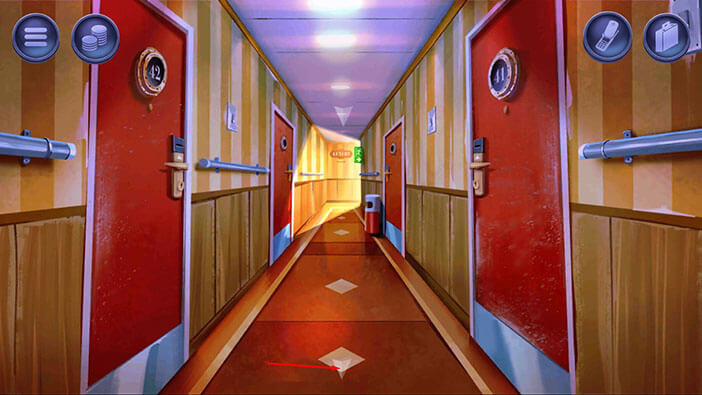
Tap on the door on the right.
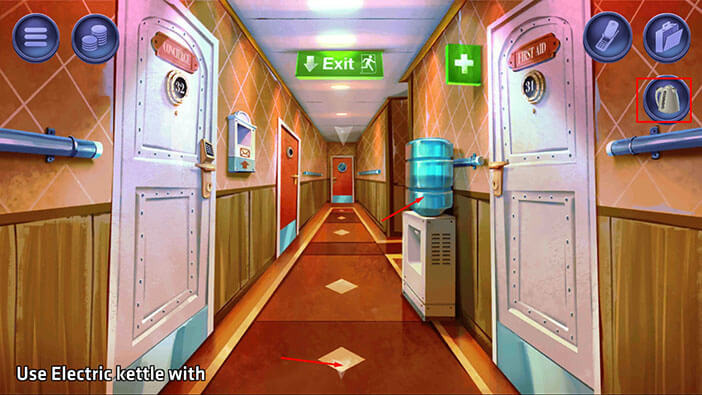
Select the “Electric kettle” from the inventory and tap on the water bottle to fill it up. “Filled kettle” will be added to your inventory.
After that, tap on the arrow at the bottom of the screen to go back to the lobby.
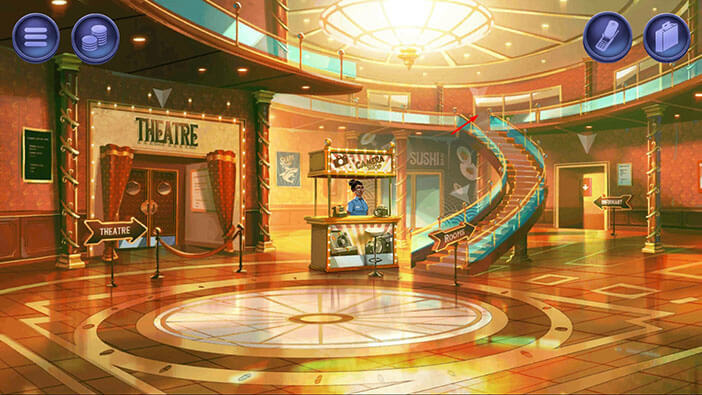
We should now go back to room 42 and heat up the water in the kettle. So, tap on the stairs to go to the second floor. After that, tap on room 42.
Select the “Filled kettle” from the inventory and plug it in.
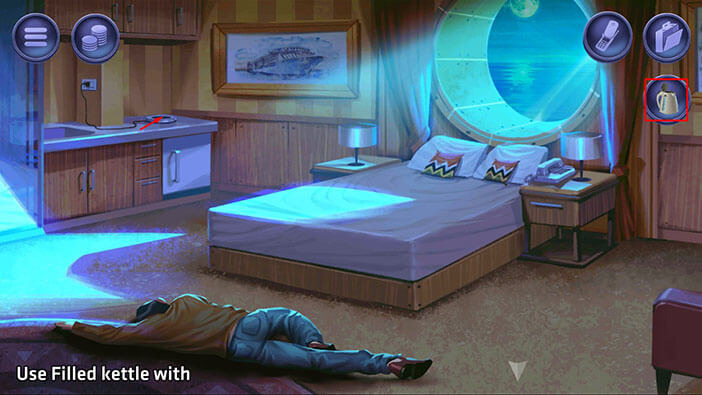
Wait a moment or two for the water to heat up, then tap on the kettle to pick it up. “Heated kettle” will be added to your inventory. After that tap on the arrow at the bottom of the screen to go back.
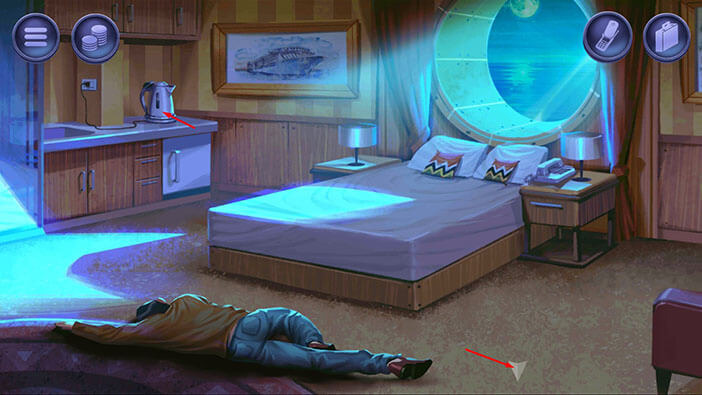
Ok, we should now head to the sushi restaurant, and use the heated water to spoil the sushi. We will basically use the spoiled sushi to poison the arguing couple. The doctor will leave his office to examine them, and during the commotion, we can also snatch a keycard for their room. That’s the plan.
So, to get to the sushi restaurant, first, tap on the arrow at the bottom of the screen to go back to the lobby. After that, tap on the door in the back to go to the sushi restaurant.
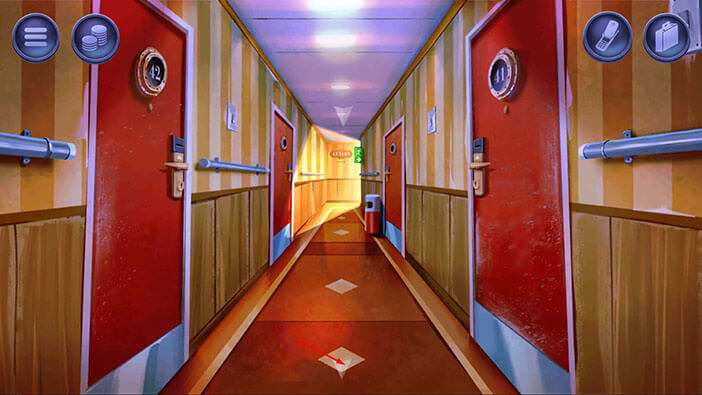
Select the “Heated kettle” from the inventory and use the hot water to melt the ice below the sushi.
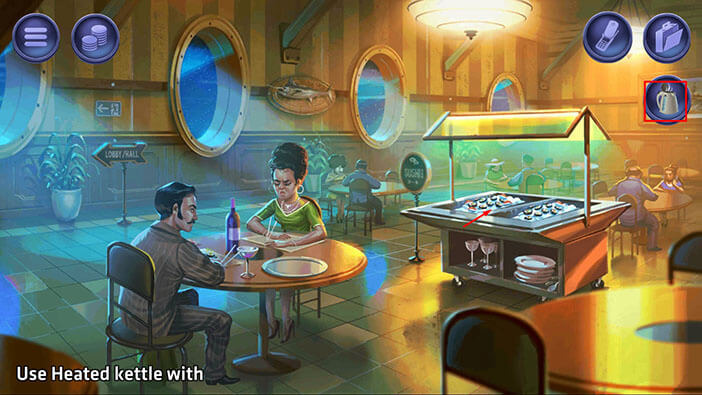
Thirty minutes later, the doctor will come to examine the couple who had food poisoning, so his office is now empty. Also, if you take a look at the ground, you will notice a coat, and slightly above it a keycard. Tap on the keycard to pick it up and “Luxury suite keycard” will be added to your inventory.
After that, tap on the sign to go back to the lobby.
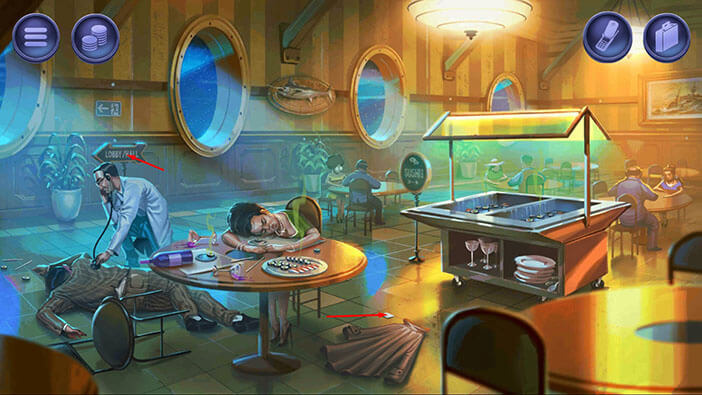
Next, we should go to the doctor’s office and sniff around while he is busy examining the patients in the lobby. To get to the doctor’s office, tap on the hallway on the right. After that, go through the door on your right.
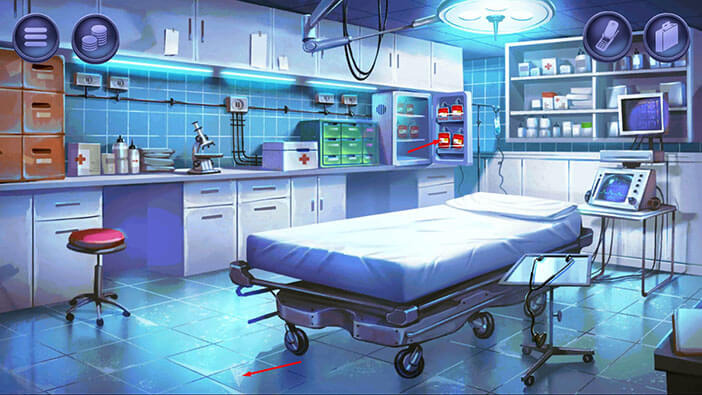
Tap on the fridge on the right to open it, and inside you will see several blood bags. Tap on them and “Blood” will be added to your inventory. Later, we will use this blood to lure the sharks.
Once you’re done tap on the arrow at the bottom of the screen to go back.
Ok, we have the luxury room keycard (the balcony is located above the shark cage), and we have the blood. Now, we just need to figure out a way to transport the body from room 42 to the luxury room. Let’s do that.
Head to room number 42. To get there, tap on the arrow at the bottom of the screen to go back to the lobby. Next, tap on the stairs to go to the second floor. Lastly, go through the door on the left.
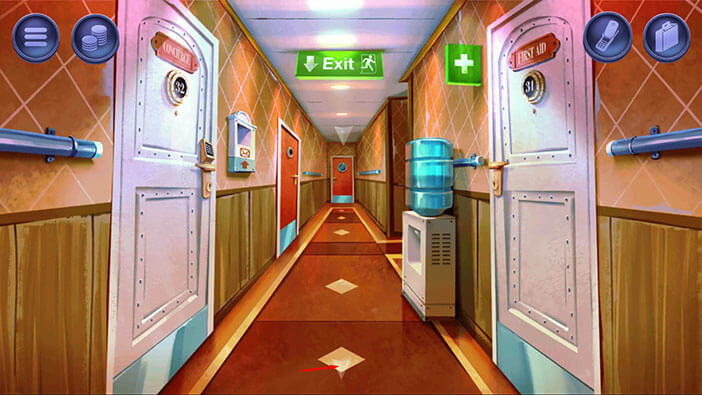
Ok, here’s the plan. We will call the room service and order something. The room service will bring our order in the cart, and we will use that cart to transport the body to the luxury apartment.
So, tap on the phone to start the interaction.
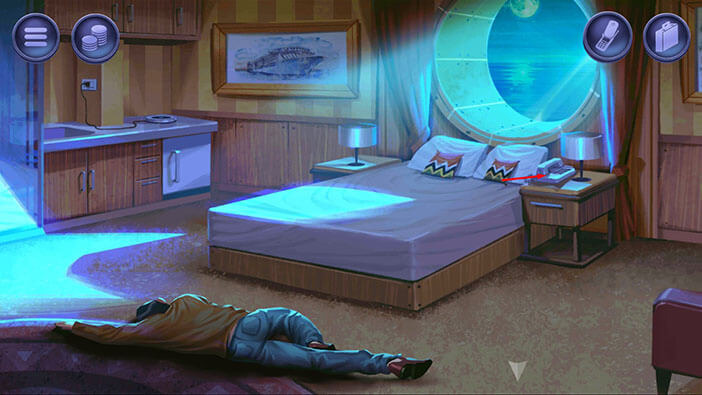
Tap on the headset, then dial the lobby by pressing the number 0.
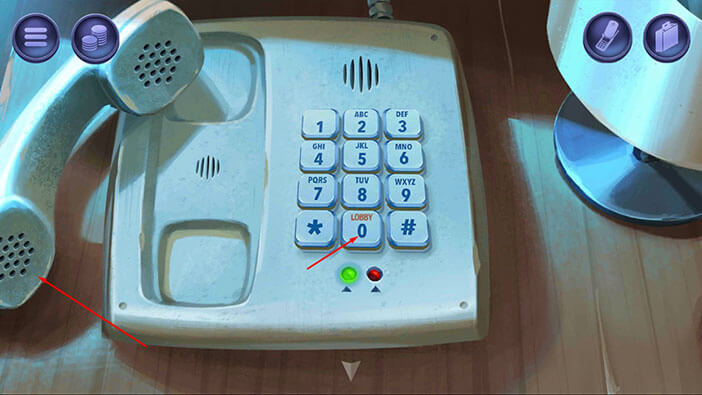
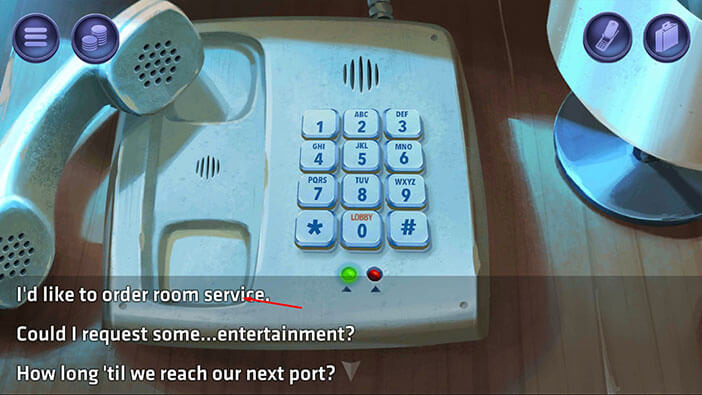
Select the first option “I’d like to order room service.”
Our character wanted to order some food, but he was informed by the staff that the kitchen is overwhelmed with orders, at the moment. However, they will send us a bottle of wine, which is fine, since we only need a cart.
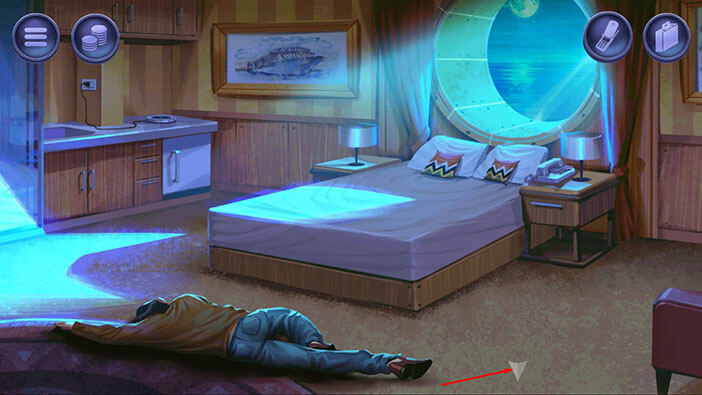
15 minutes later, the wine will arrive in front of our room. Let’s go outside and pick up the cart. Tap on the arrow at the bottom of the screen.
Tap on the “Service cart” to pick it up. After that, tap on the door to go back into the room.
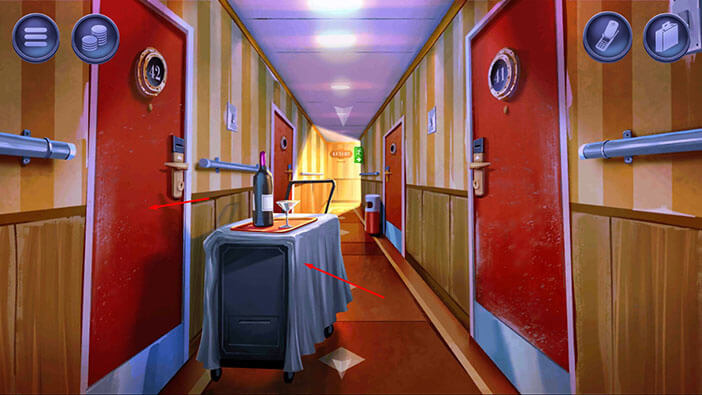
Next, tap on the “Dead body” to pick it up.
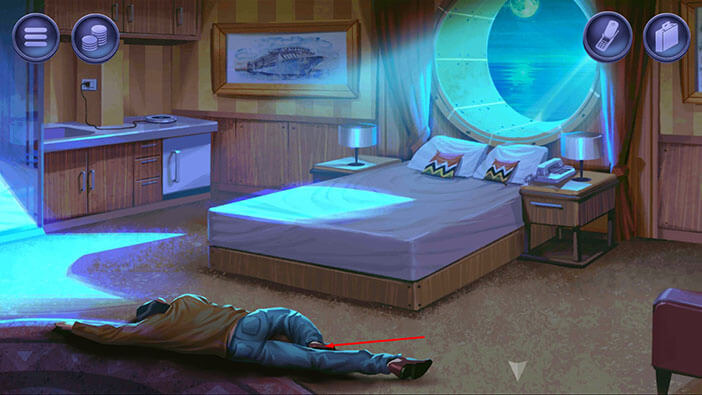
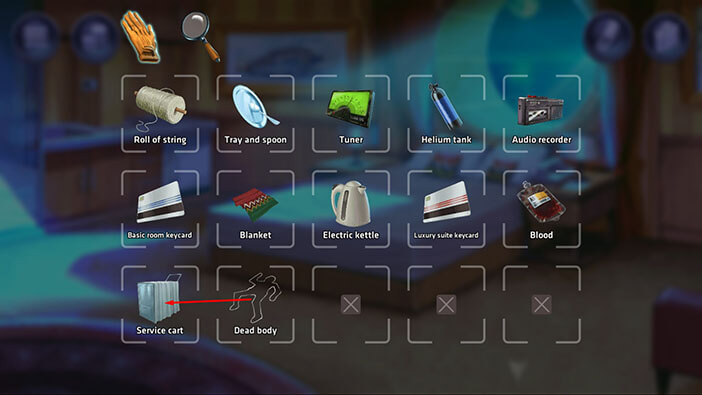
Next, open the inventory and put the “Dead body” into the service cart. “Cart with the body” will be added to your inventory. We can use it to transport the body a short distance, without raising suspicion. However, we can’t go downstairs.
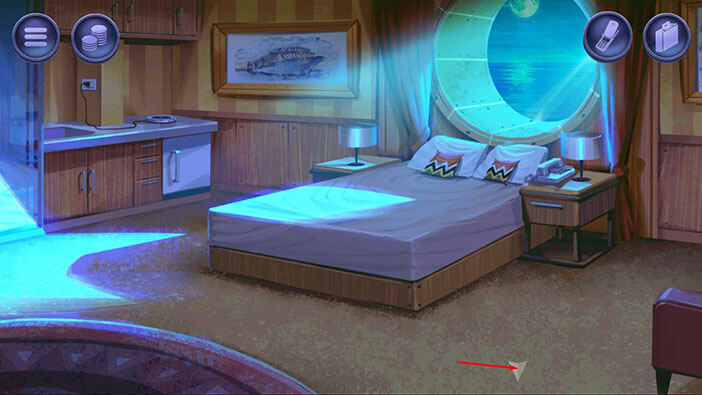
Ok, next stop, luxury apartment. To get there, tap on the arrow at the bottom of the screen to go back to the hallway. After that, tap on the other end of the hallway to continue going forward.
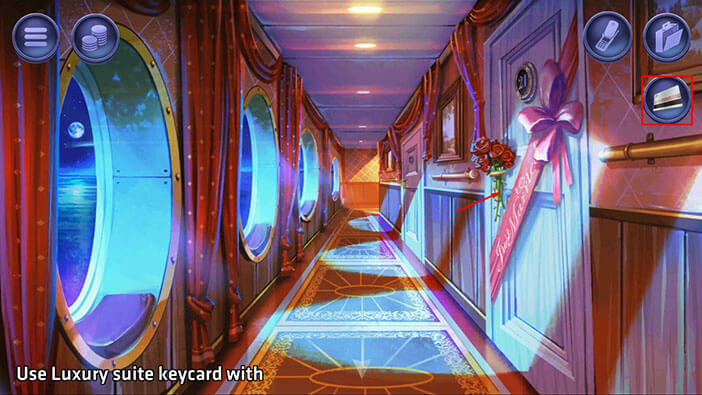
We are now in front of the luxury apartment. Select the “Luxury suite keycard” from your inventory and use it to unlock the door.
Select the “Blanket” from the inventory and tie it to the balcony. We will use it as an improvised rope to climb down to the shark cage.
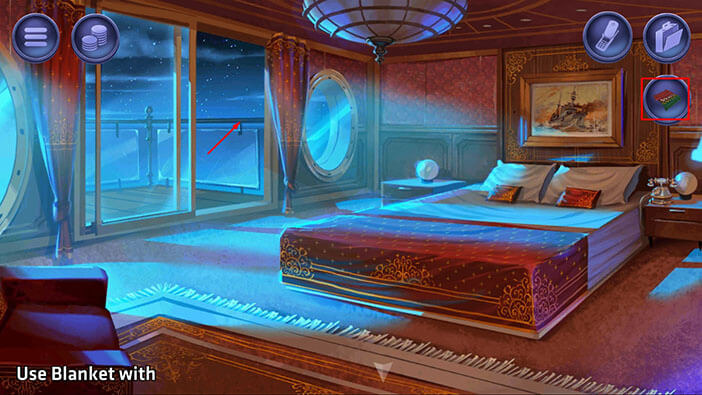
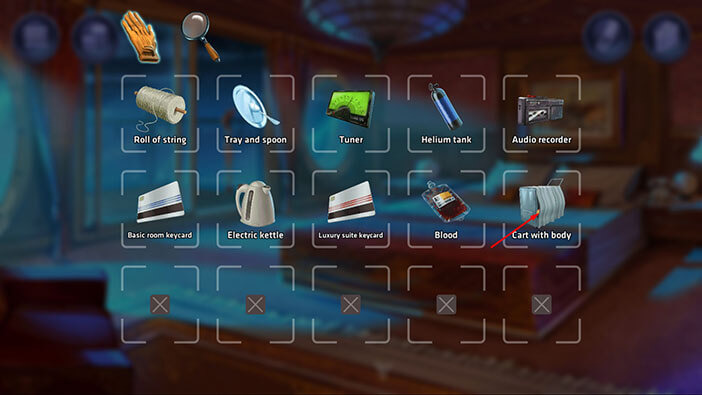
Next, tap on the suitcase icon to open the inventory, then tap on the “Cart with the body” to extract the body.
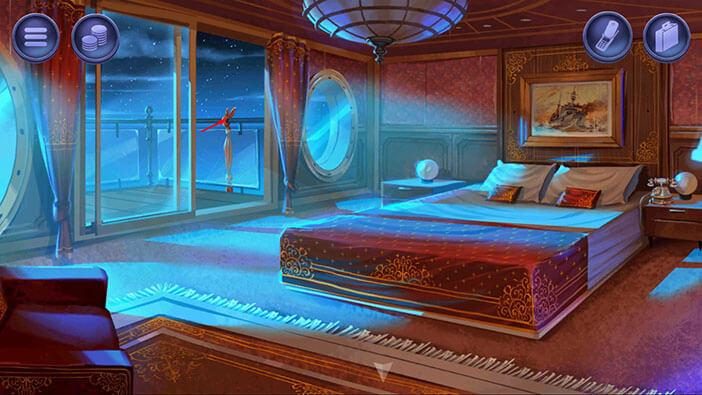
Next, tap on the blanket to climb down to the shark cage.
Ok, it’s time for the final stage of our plan. Tap on the cage door to open it. After that, select the “Dead body” from the inventory and put it into the cage.
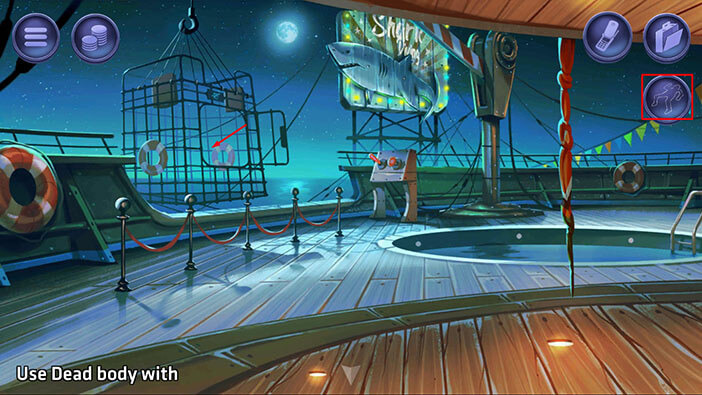
Next, select “Blood” from the inventory and spill it over the dead body. This will attract the sharks.
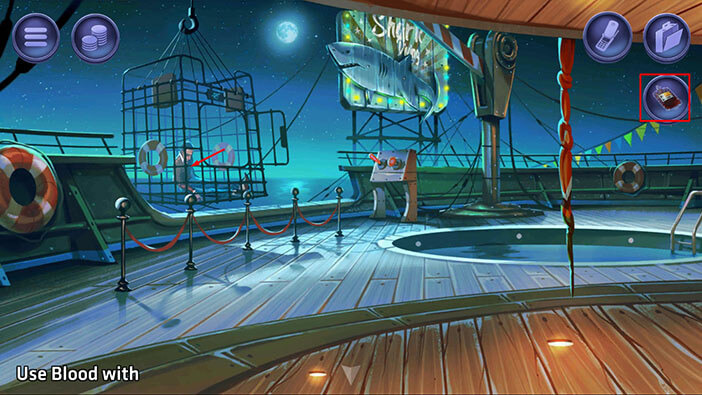
We should leave the cage door open because we want the sharks to get in and it the body. Last step. Tap on the red lever to lower the cage.
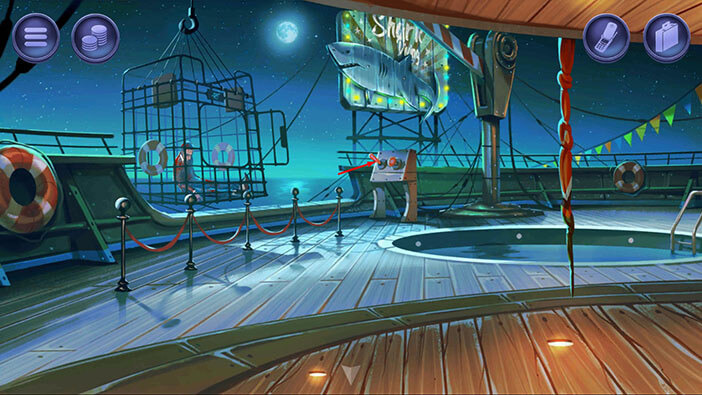
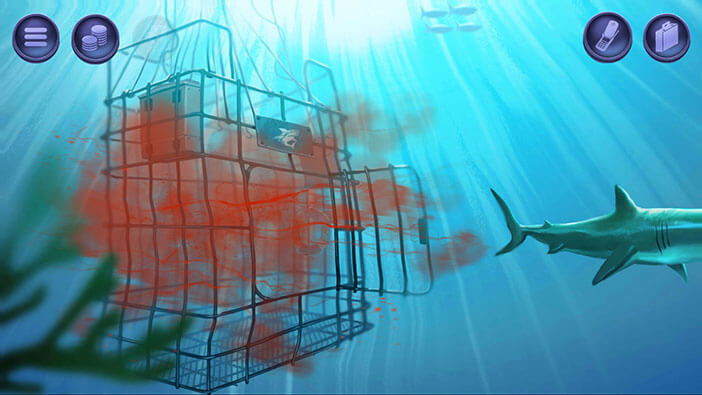
The scent of blood will attract a shark, and it will eat the dead body. Well, that solves our problem. Tap on the top of the cage to switch the scene to the surface.
Tap on the red lever to raise the cage.
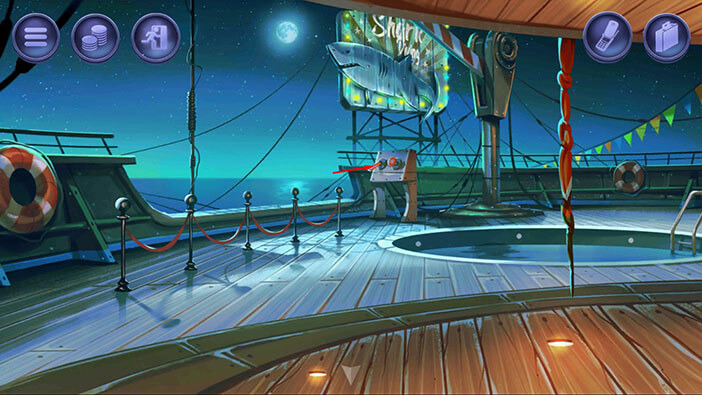
It’s time to wrap up. Just like in previous missions, now we should return all the items back where we found them. First, tap on the cage door to close it. After that, tap on the blanket to climb up to the luxury apartment.
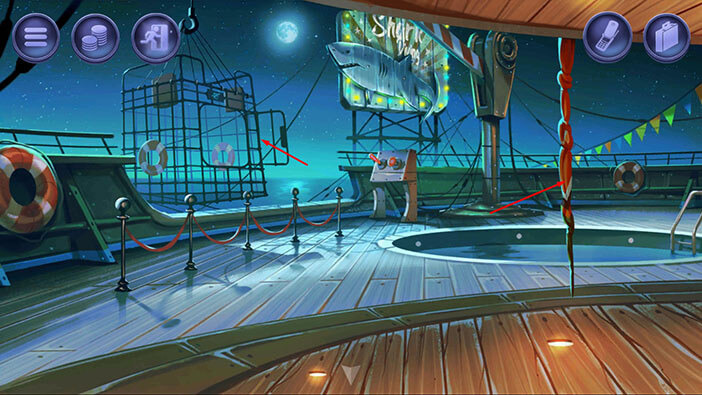
Tap on the “Blanket” to pick it up.
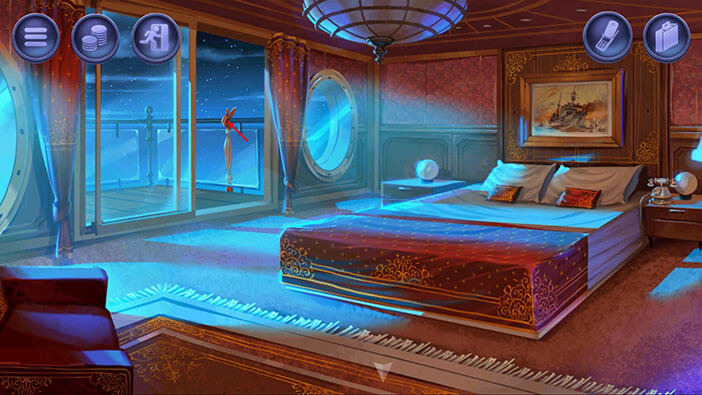
Select the “Luxury suite keycard” from the inventory and leave it on the bed. After that, tap on the arrow at the bottom of the screen to go back.
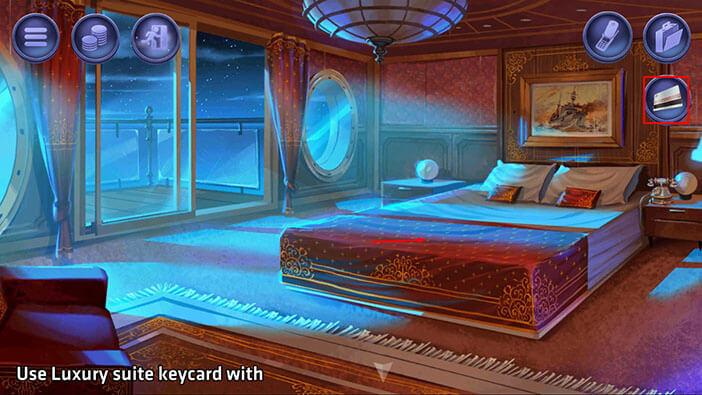
Let’s go back to room number 42. Tap on the arrow at the bottom of the screen to go back.
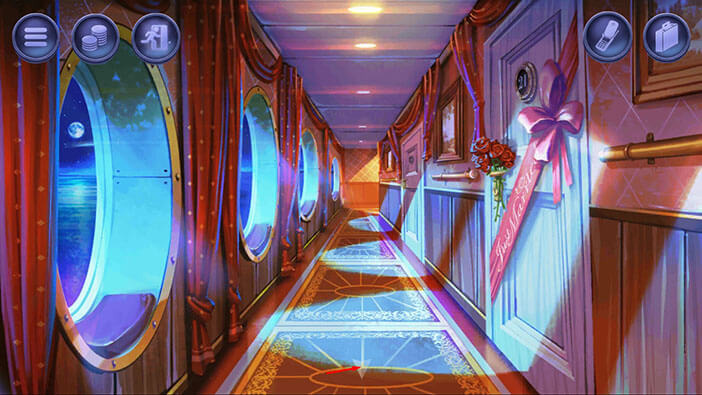
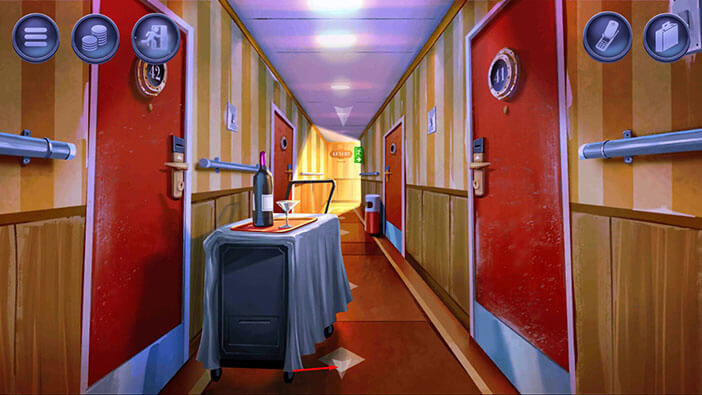
Select the “Service cart” from the inventory and leave it next to the door on the left. After that, tap on the door to go to room number 42.
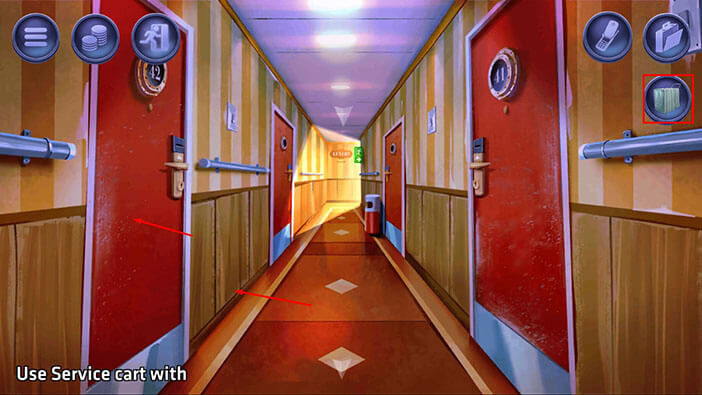
Select the “Electric kettle” from the inventory and put it in its slot on the left.
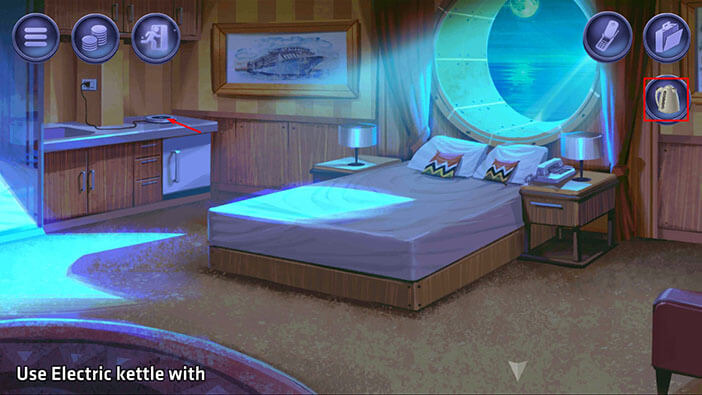
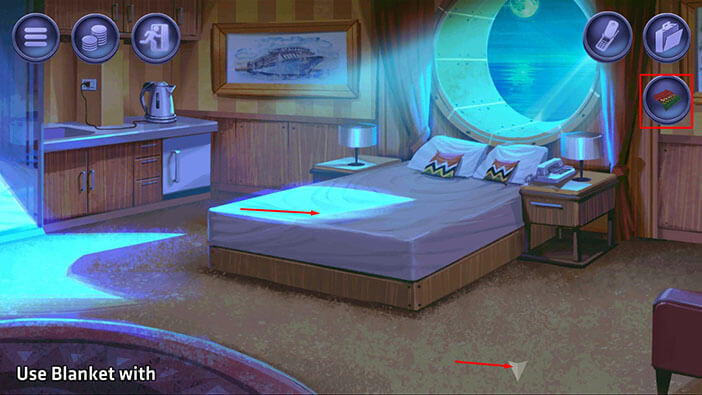
Next, select the “Blanket” from the inventory and place it on the bed. After that, tap on the arrow at the bottom of the screen to go back to the hallway.
Ok, we should now go back to the casino, and pick up the items that we left there. To get to the casino, tap on the arrow at the bottom of the screen to go to the lobby. Once you get to the lobby, tap on the door on the left to go to the theatre. Once there, tap on the doorway on the left to go to the casino.
Tap on the “Coin with the string” (which we left in the slot machine) to pick it up.
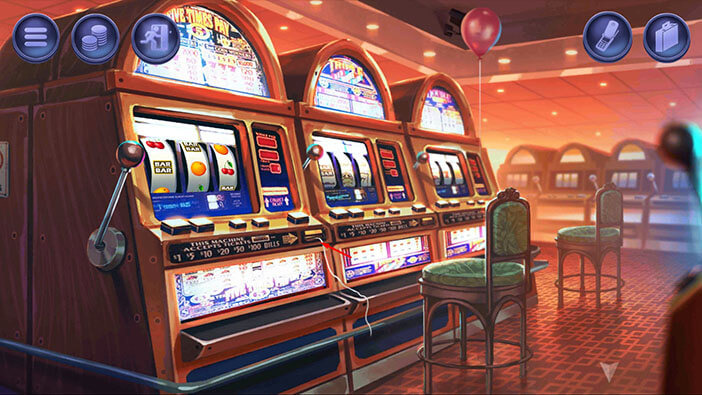
Next, tap on the “Balloon with the string” to pick it up. After that, tap on the arrow at the bottom of the screen to go back to the theatre.
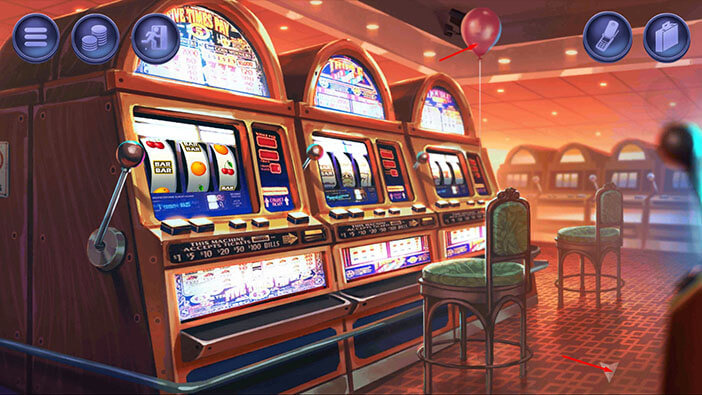
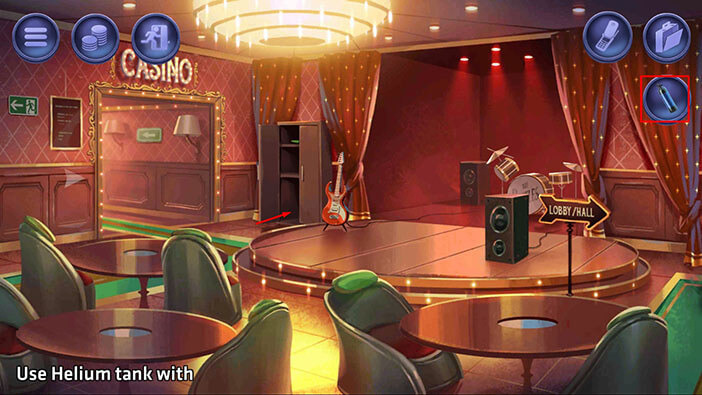
Select the “Helium tank” from the inventory and put it on the bottom shelf.
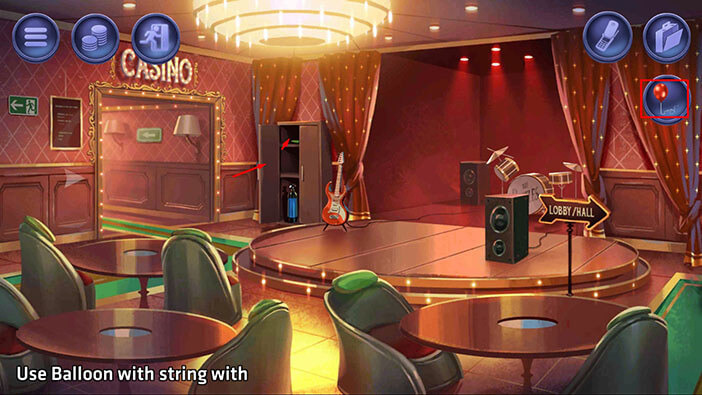
Next, select the “Balloon with the string” and put it on the top shelf. After that, tap on the cabinet door to close it.
Next, select the “Tuner” from the inventory and put it down on the left side of the stage.
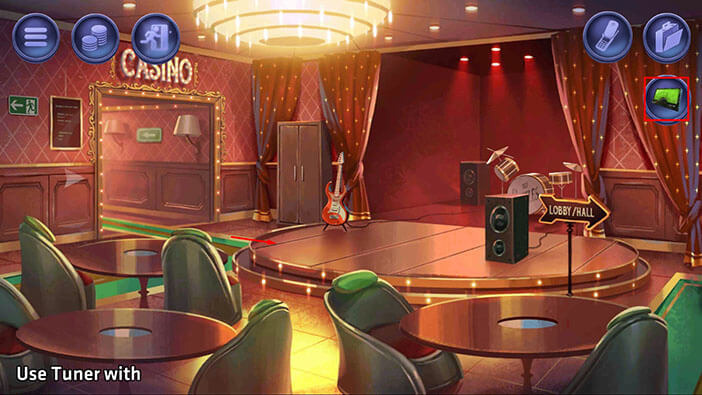
Lastly, select the “Roll of string” from the inventory and put it on the small table on the right. After that, tap on the sign to go back to the lobby.
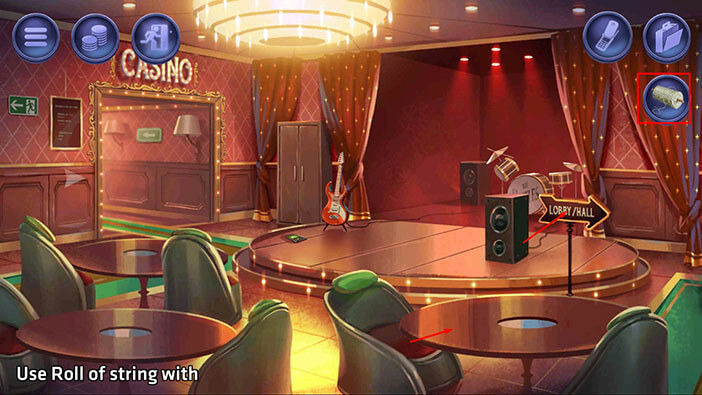
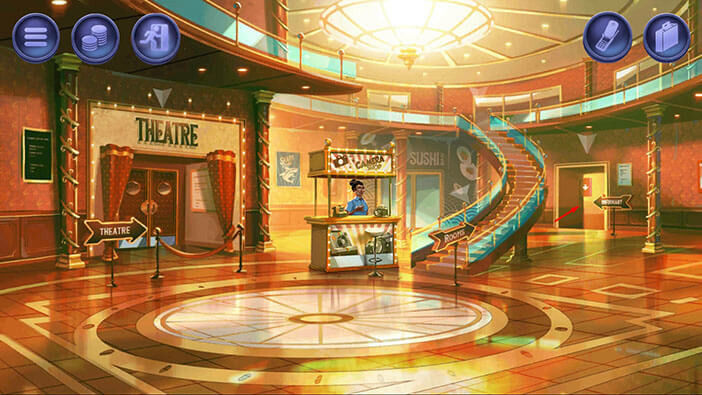
Next, we should go to the manager’s office. To get there, tap on the doorway on the right. After that, tap on the door on the left.
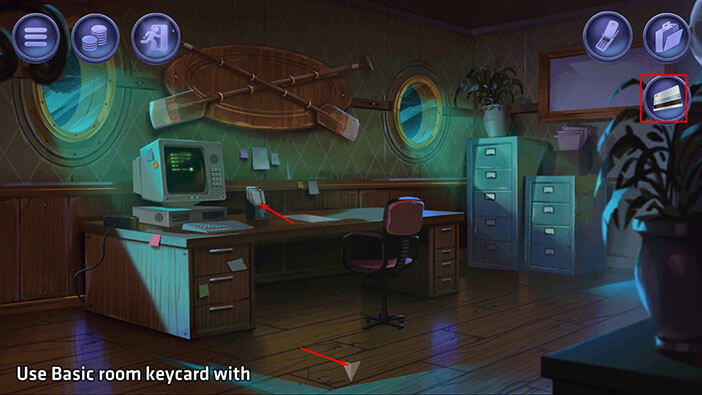
Select the “Basic room keycard” from the inventory and put it on the pile next to the computer. After that, tap on the arrow at the bottom of the screen to go back to the hallway.
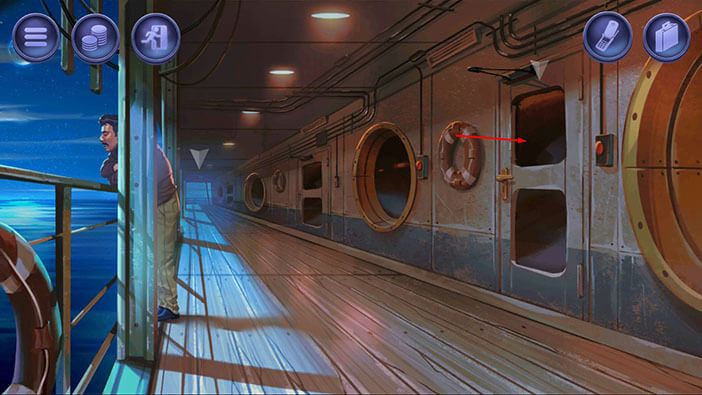
Next, tap on the red door at the end of the hallway to go outside.
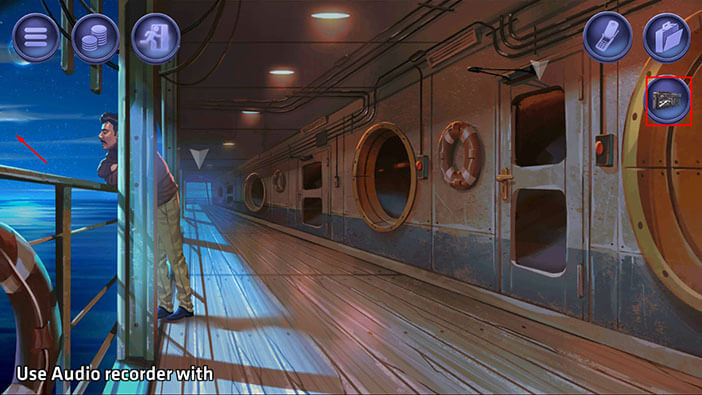
Select the “Audio recorder” from the inventory and throw it overboard.
Next, we should go to the sushi restaurant. To get there, tap on the door on the right to go back to the hallway. After that, tap on the arrow at the bottom of the screen to go to the lobby. Once you get there, tap on the door in the back to go to the sushi restaurant.
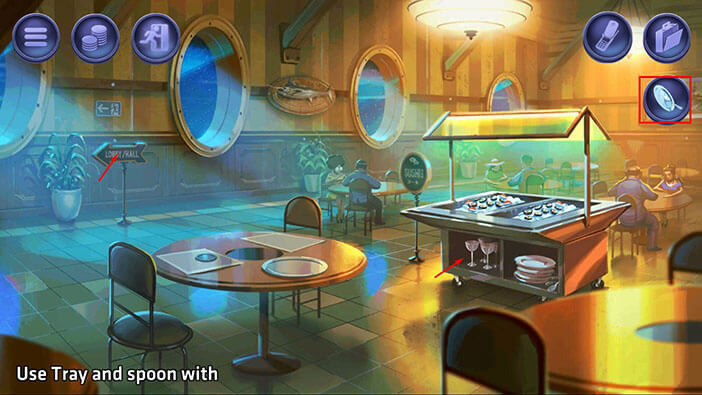
Select the “Tray and spoon” from the inventory and put them on the shelf below the sushi. After that, tap on the sign to go back to the lobby.
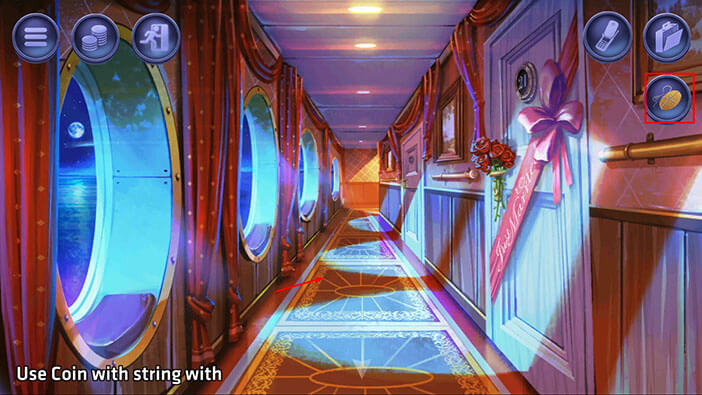
Now, we just have to return the “Coin with the string” which we found in front of the luxury suit. To get there, tap on the stairs to go to the second floor. After that, tap on the other end of the hallway.
Select the “Coin with the string” from the inventory and put it on the ground. After that, tap on the last icon in the upper left corner to finish the mission.
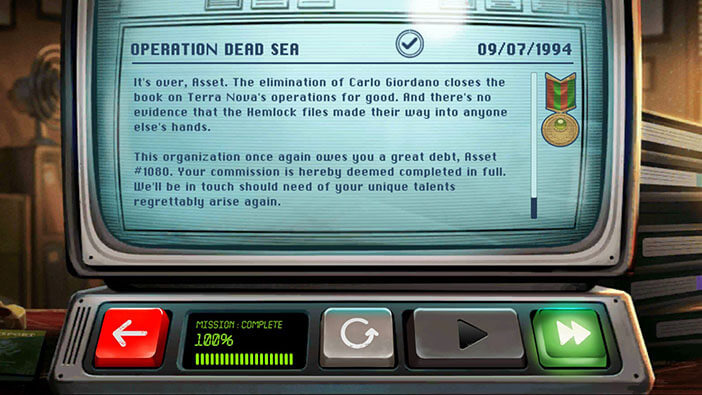
With the elimination of Carlo Giordano, we shut down the Terra Nova. Our employer congratulates us on a job well done and mentions that they will look for us again if they need our service.
Our agency was able to shut down Terra Nova’s bioweapon operations for good. Only several members of the organization managed to escape, so it effectively ceased to exist.
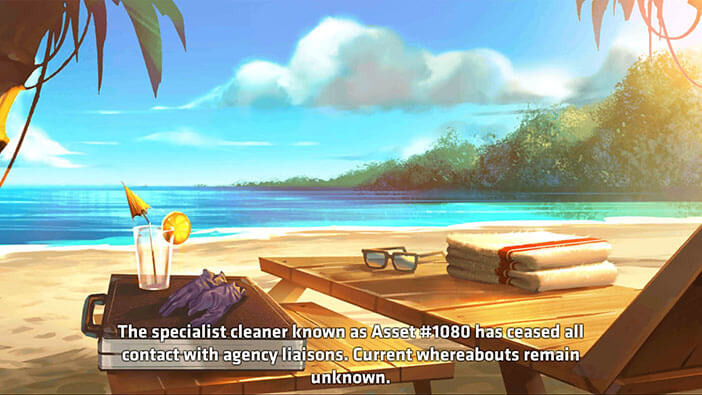
Our character has ceased contact with the agency, and he is now enjoying life in his new home – located on an unknown tropical island. Well, I guess he saved a lot of money because he was completely broke on every mission.
With that, we came to the end of this walkthrough. If you’re interested in Escape Room games, check out our walkthroughs for the other games of this genre.
Thank you for reading.