Machinika: Atlas – Part 2
Intro
This is part 2 of the walkthrough for “Machinika: Atlas” from Dear Villagers (publishers) and Littlefield Studio (developers). This part of the walkthrough will cover the last 4 chapters of the game.
Chapter 5 – Takeoff
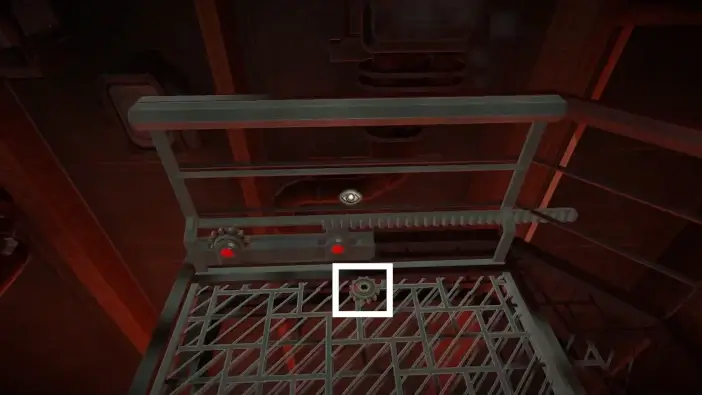
After chapter 4 enter the elevator in front of you.
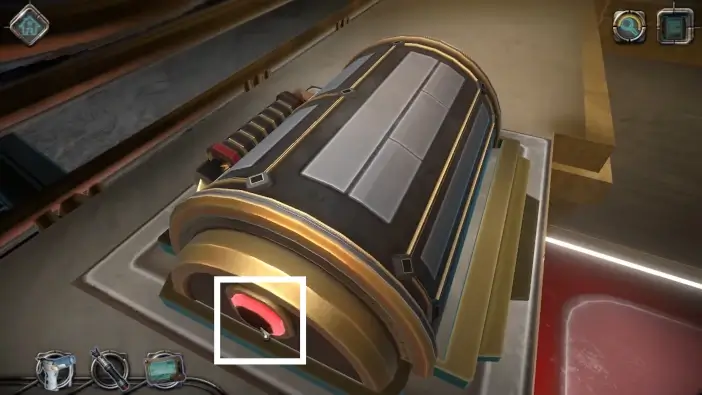
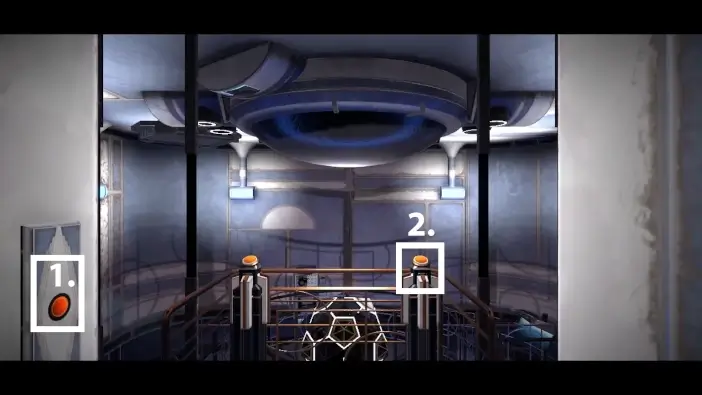
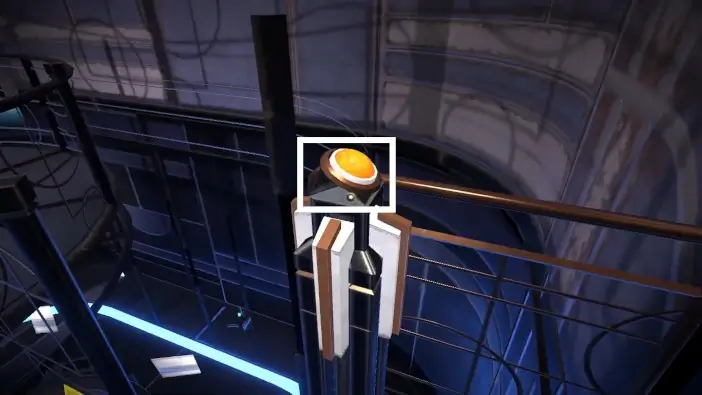
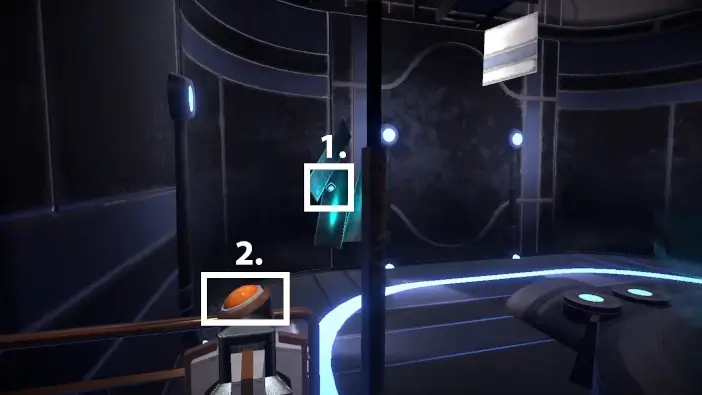
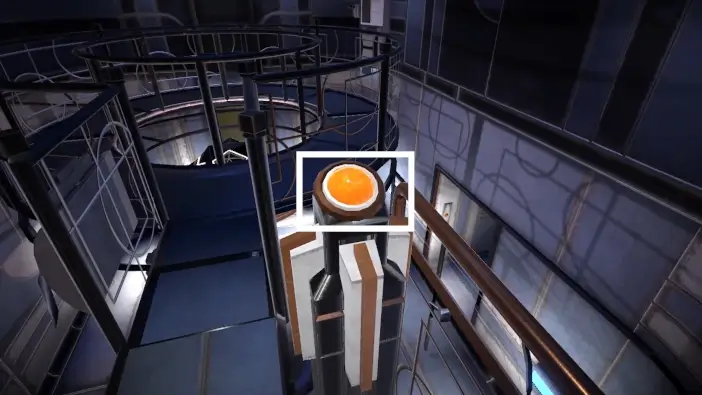
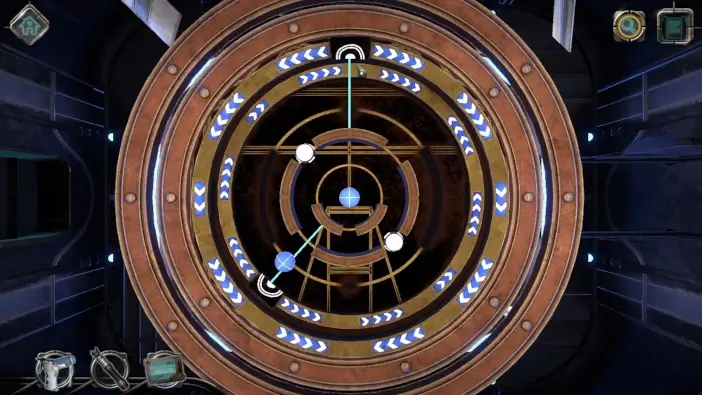
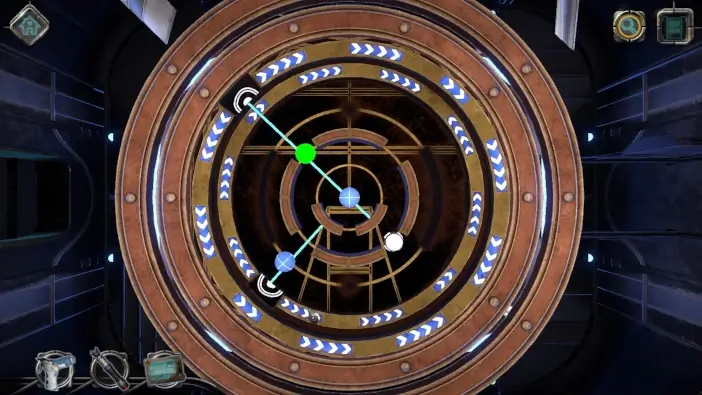
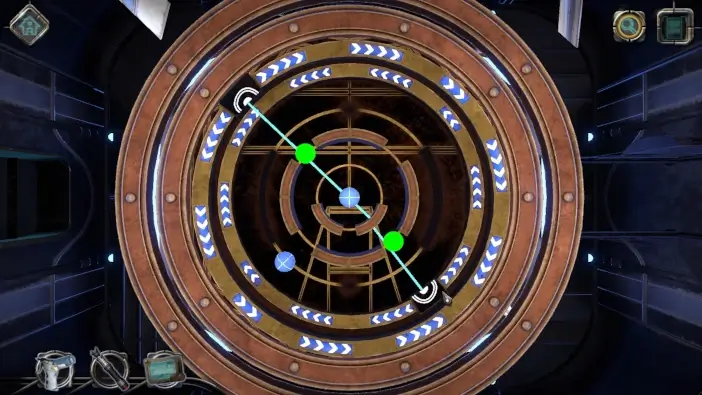
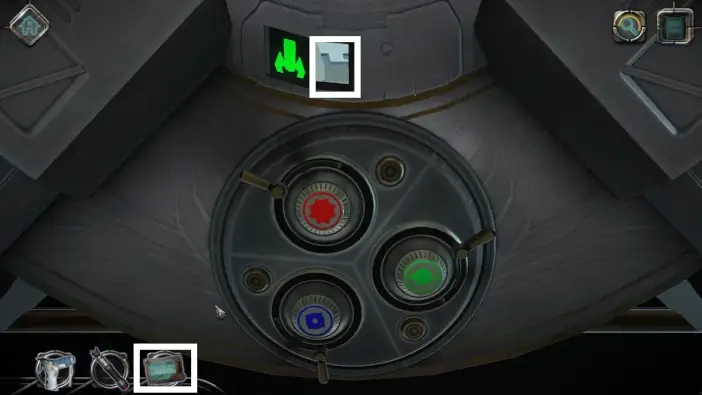
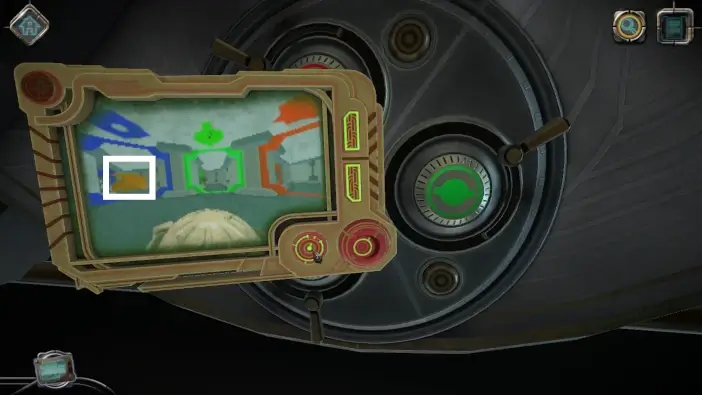
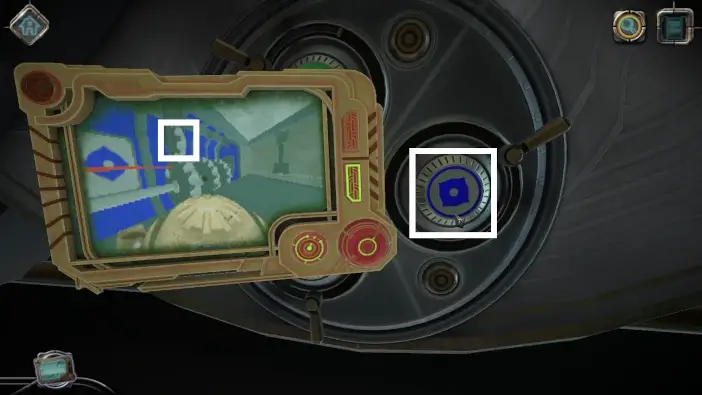
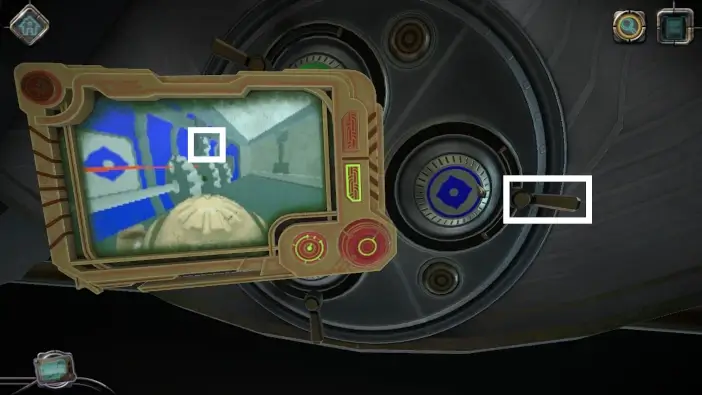
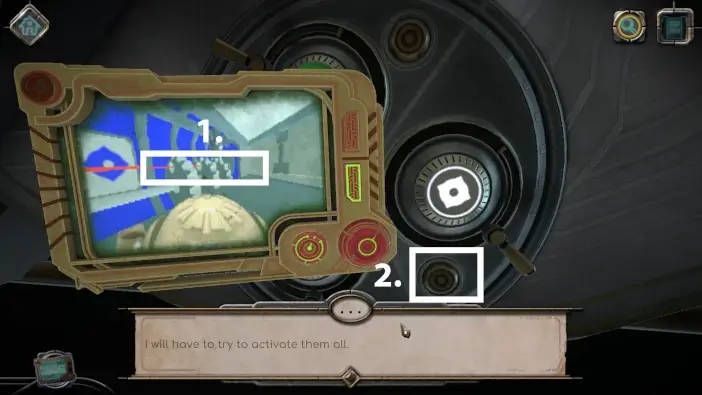
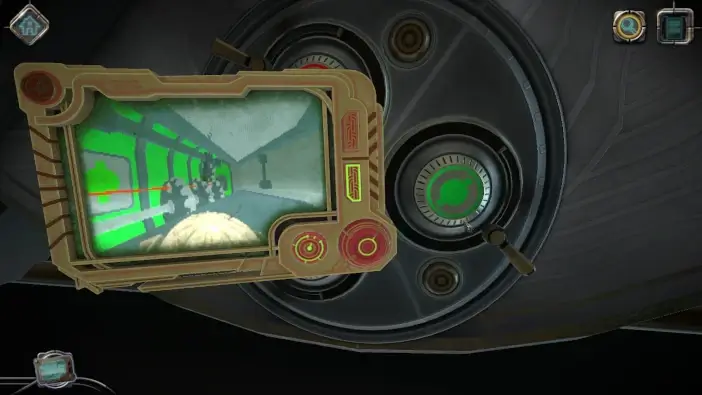
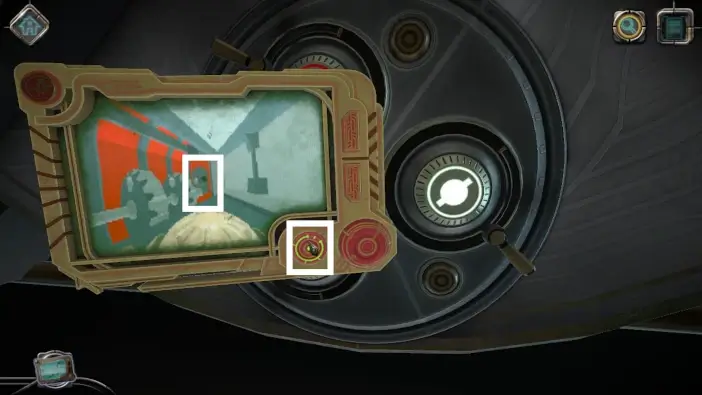
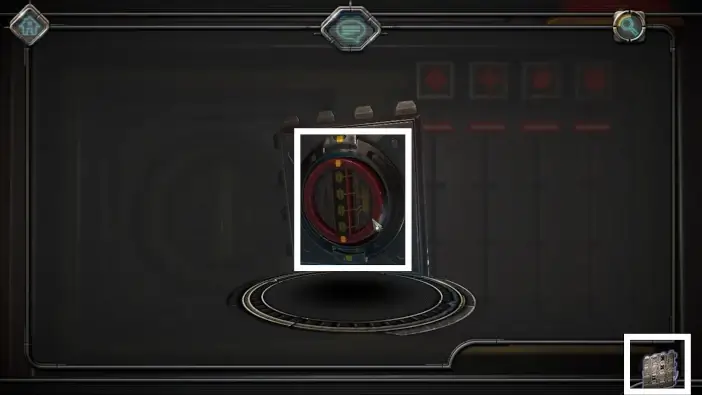
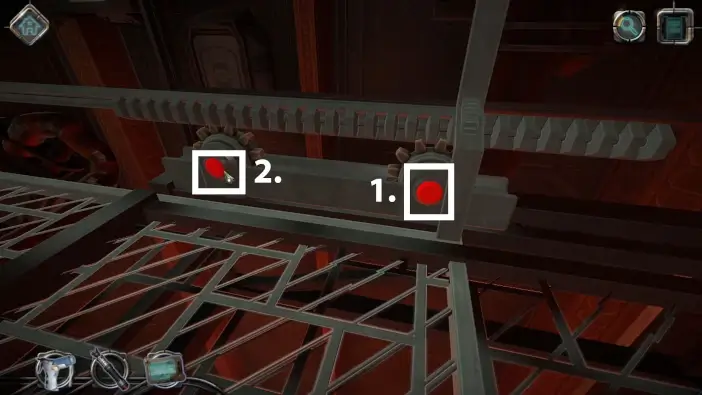
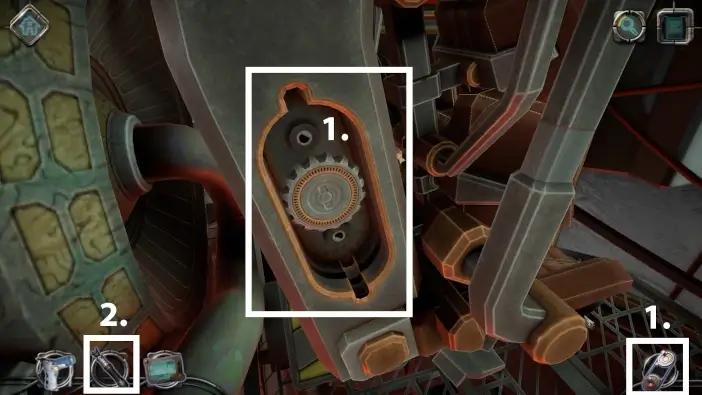
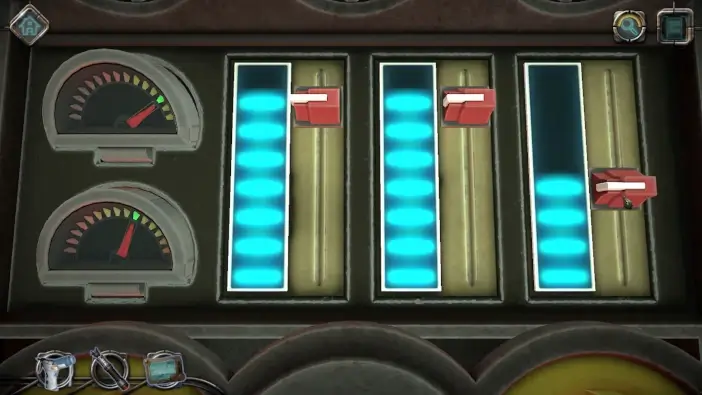
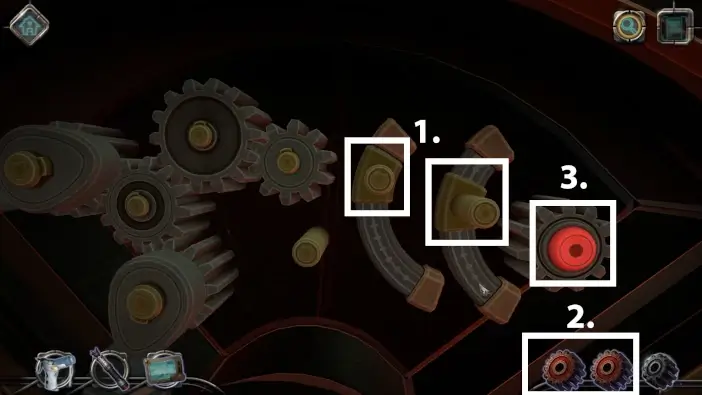
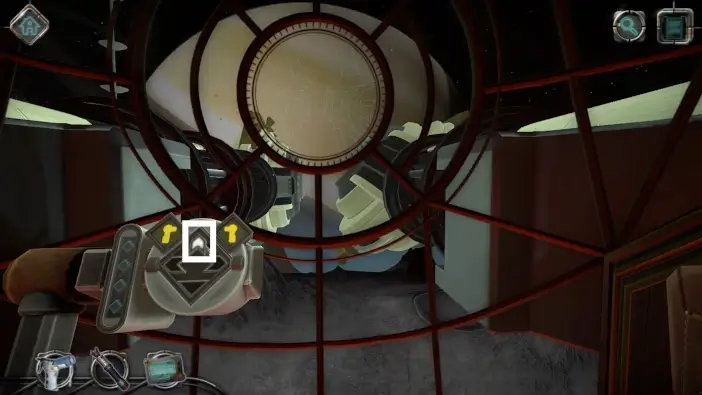
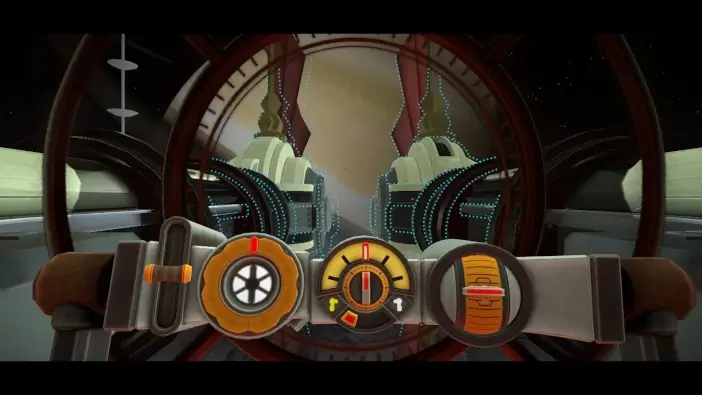
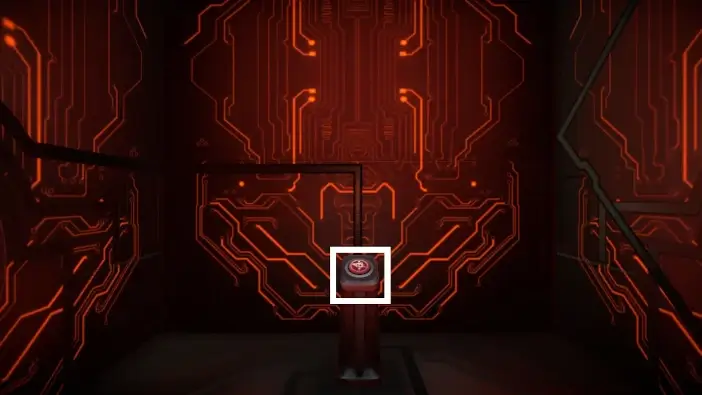
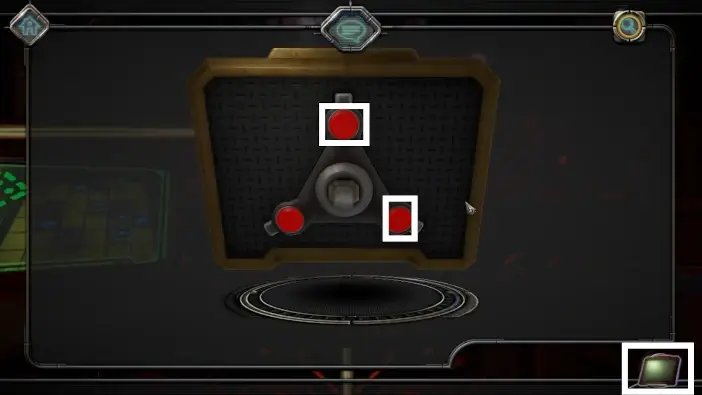
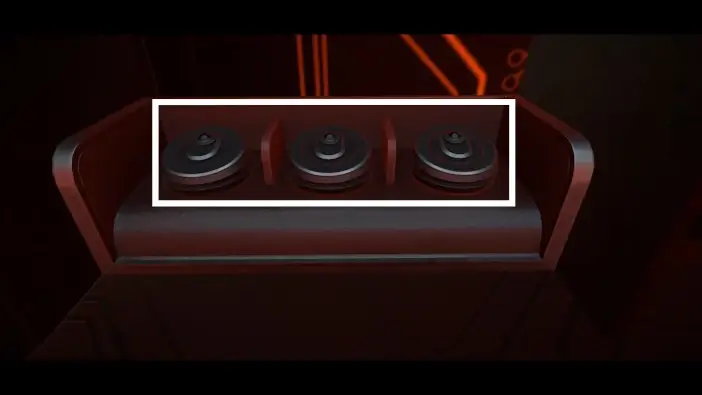
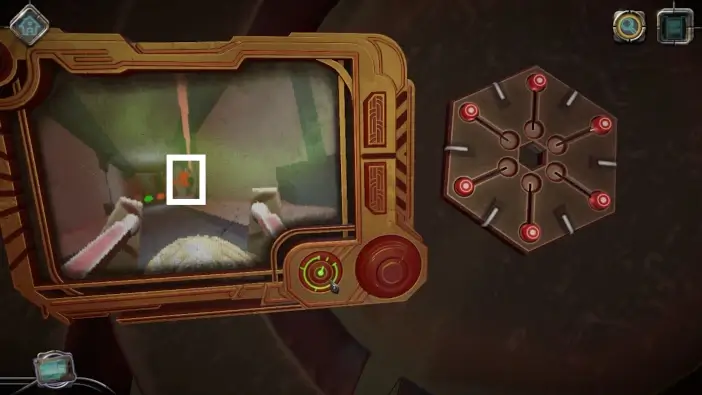
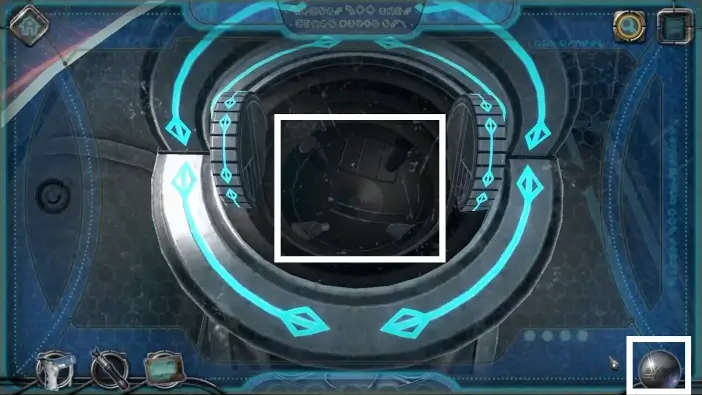
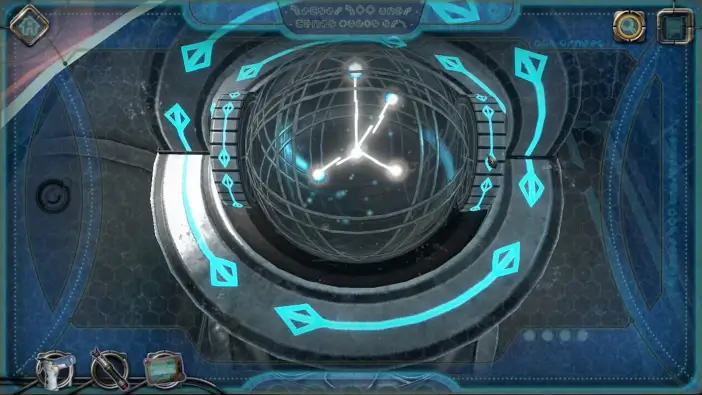
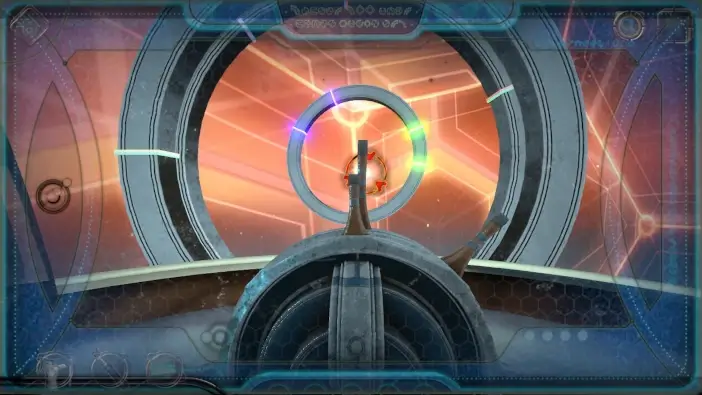
Press 2 buttons that are on the sides of the cylinder-looking machine.
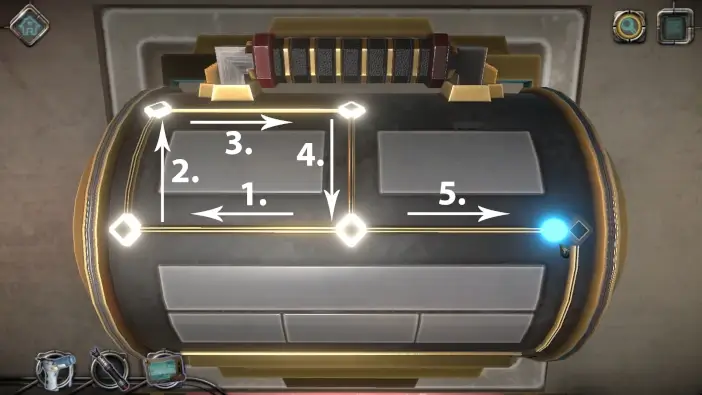
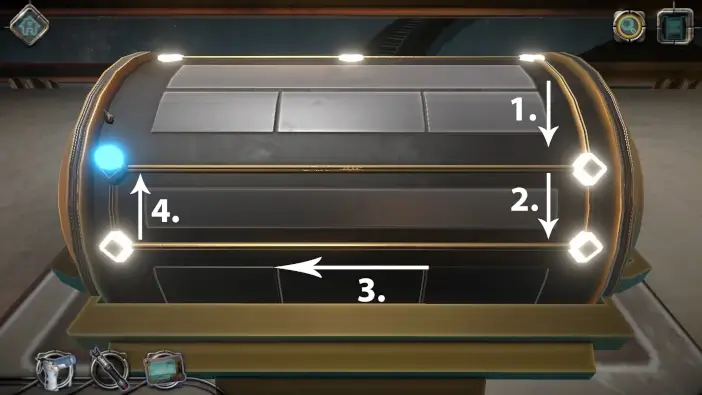
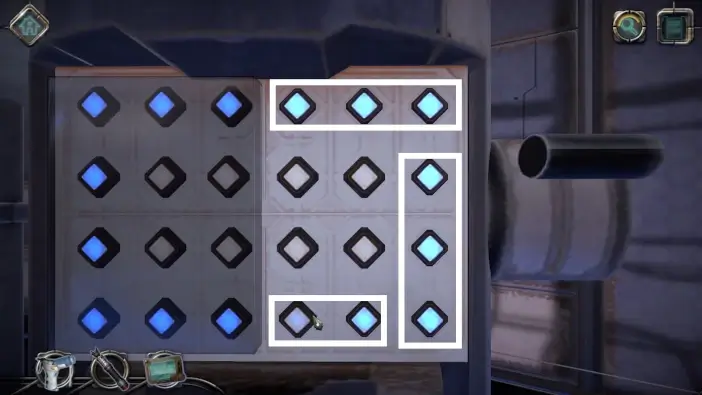
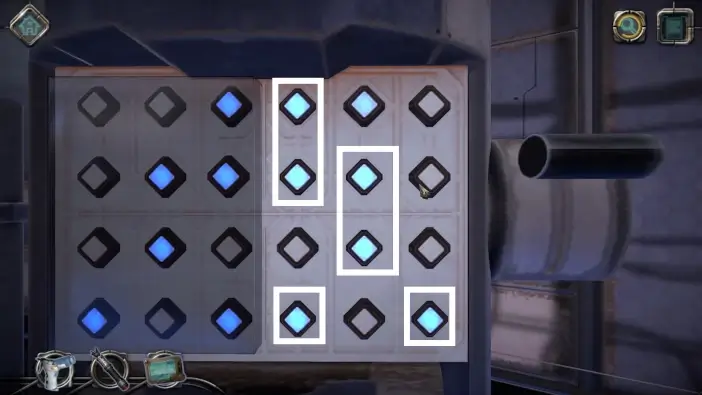
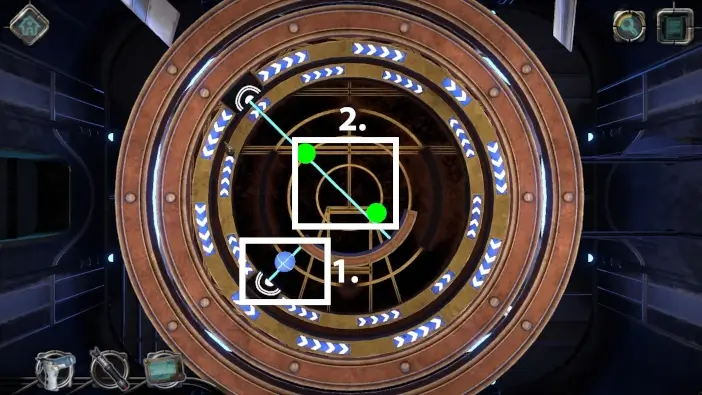
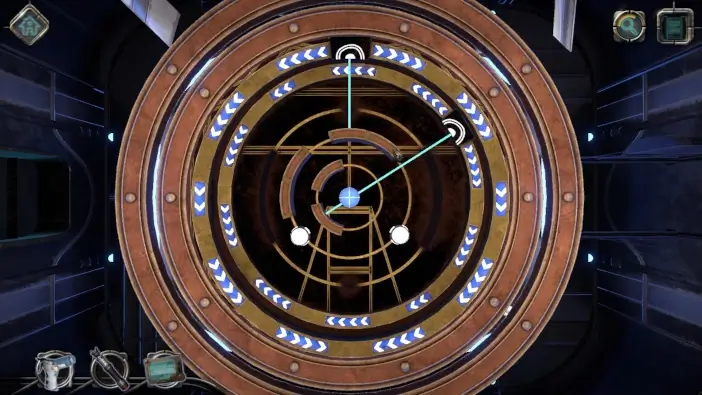
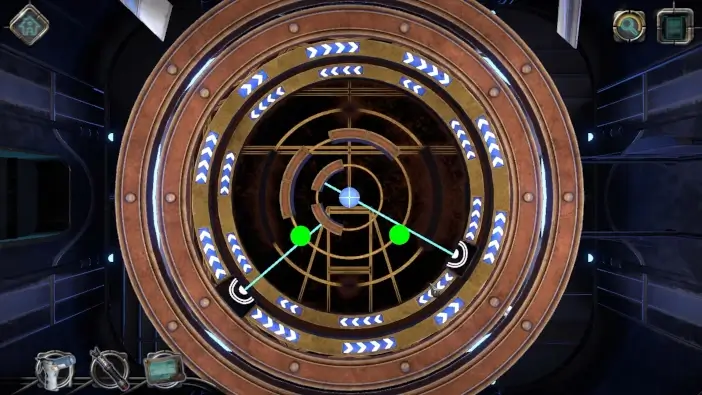
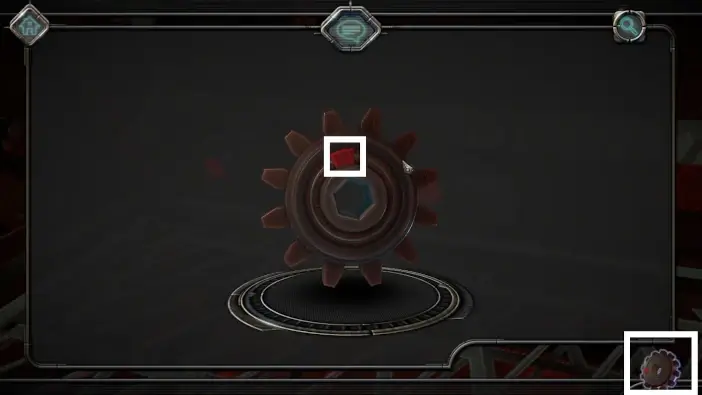
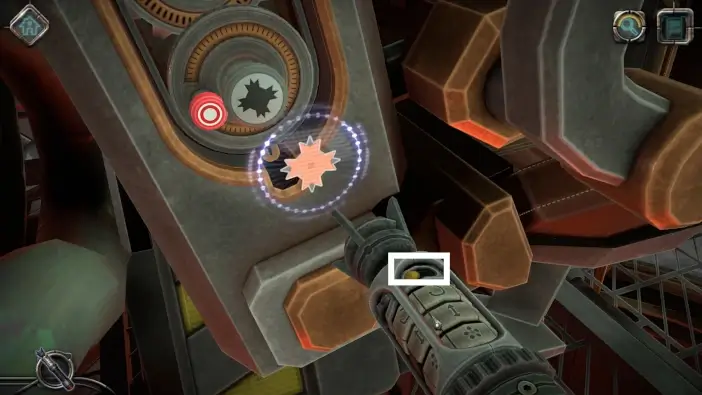
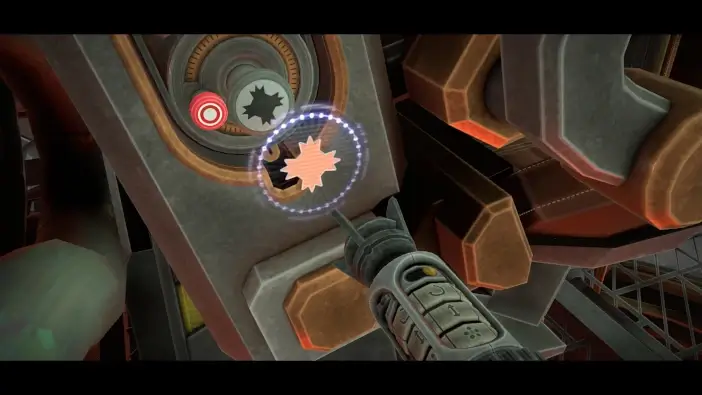
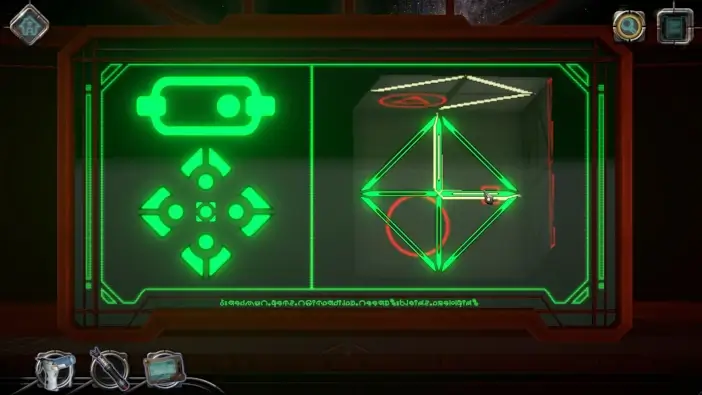
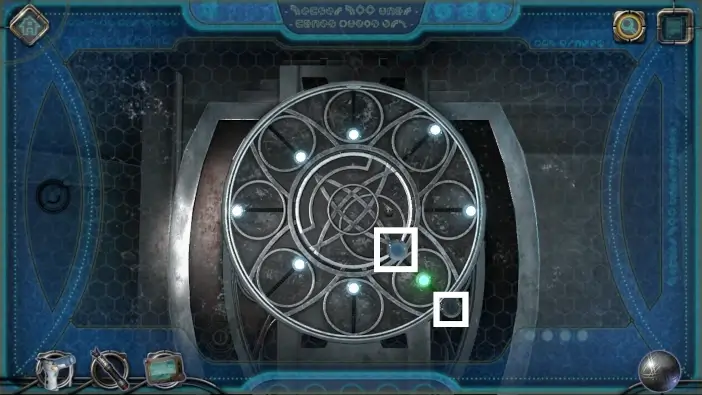
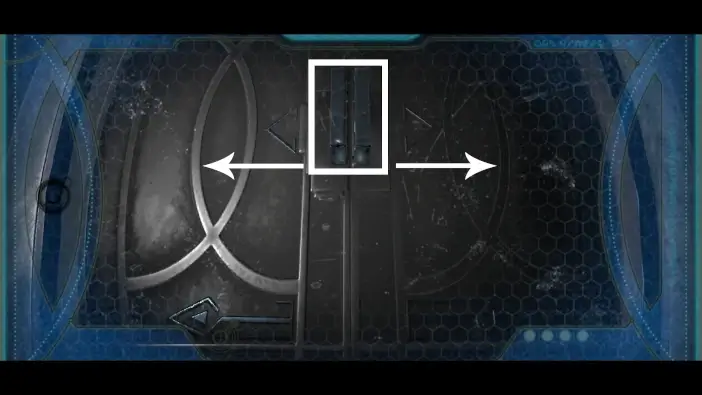
Move the blue light in the order described in the pictures above. After this, you will be transported to another part of the ship and chapter 5 will begin.
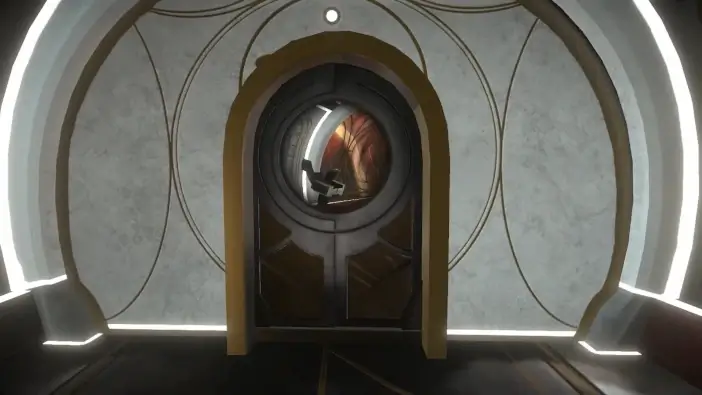
Open the door of the elevator to exit.
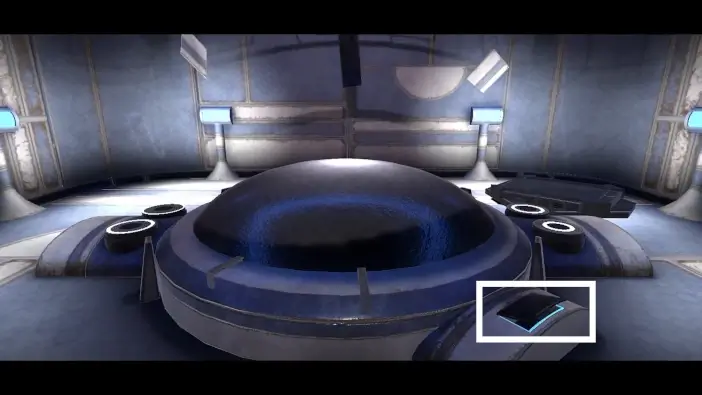
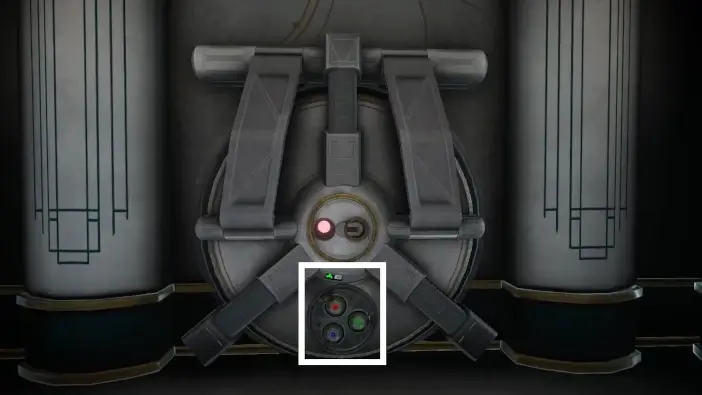
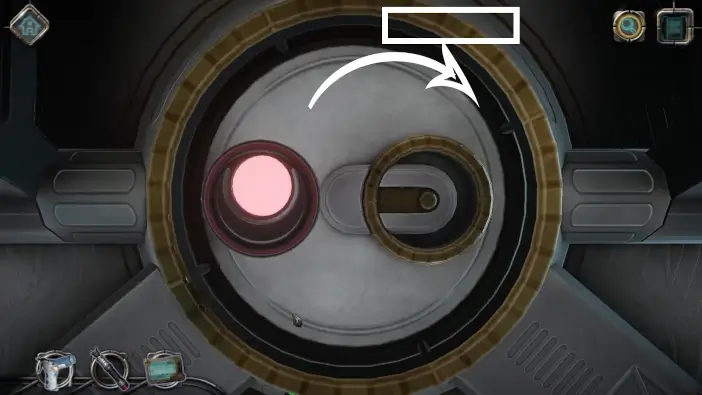
- Press the button on the left to call another elevator platform.
- On the platform, press the right button.
When the platform stops, press the right button again.
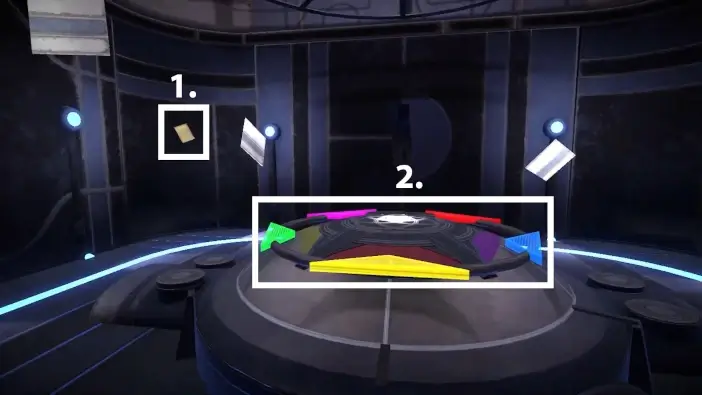
- Pick the 7th letter.
- Approach the star.
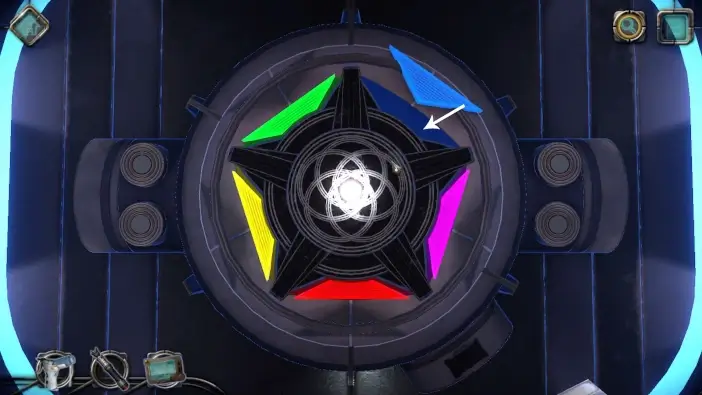
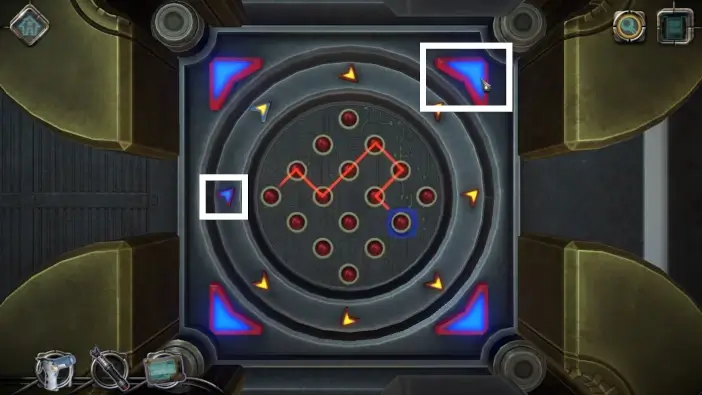
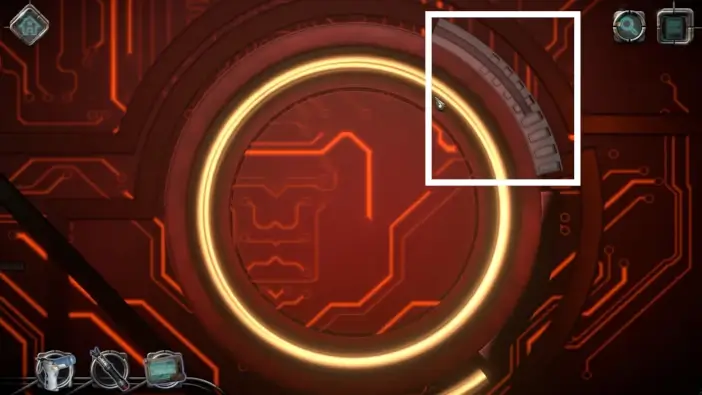
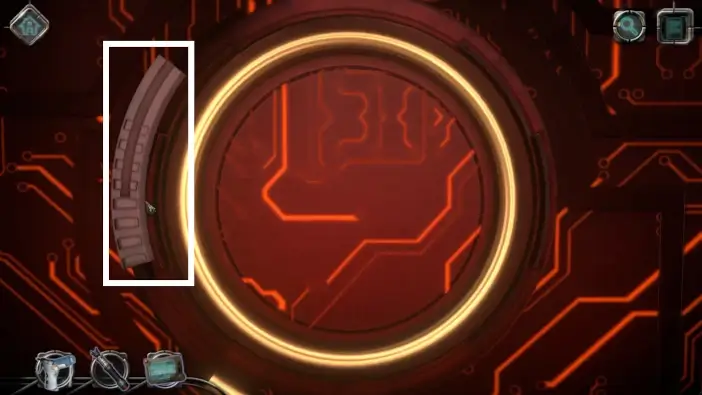
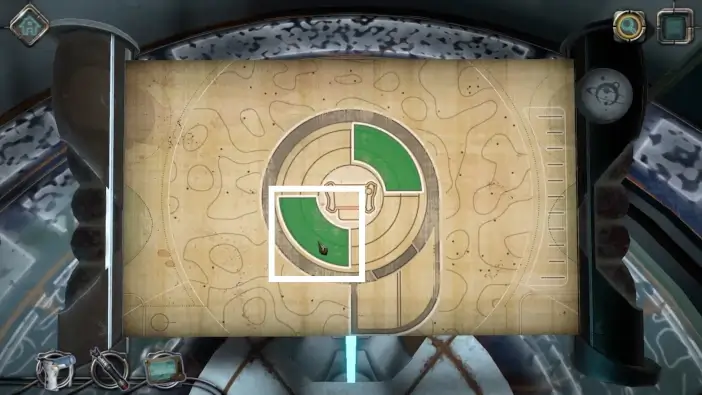
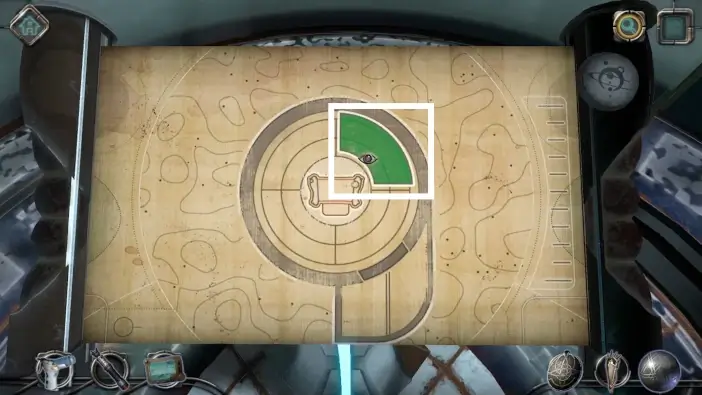
Rotate the outer circle and place the triangles in their correct placeholders. The colors of the triangles and placeholders should match.
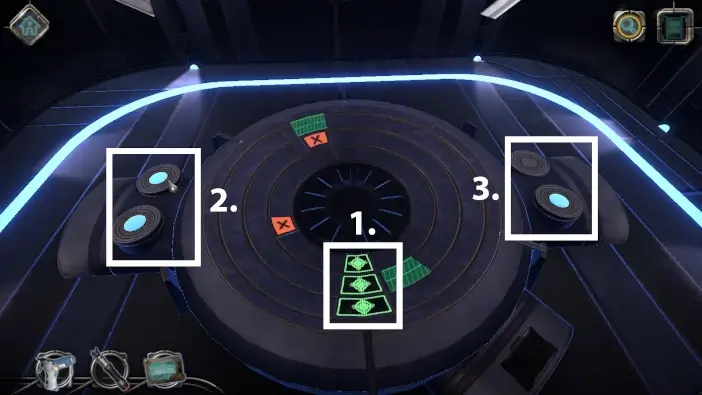
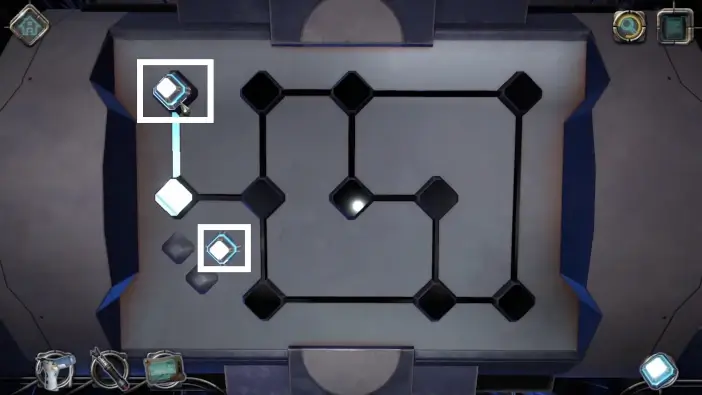
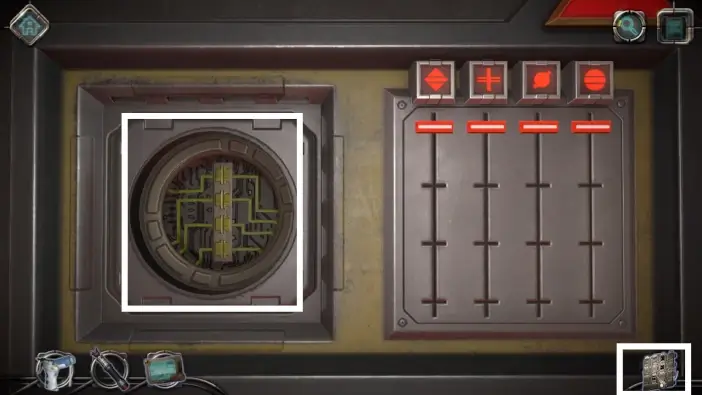
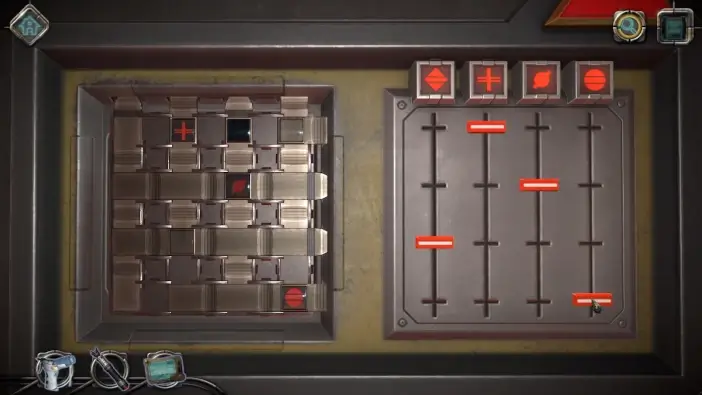
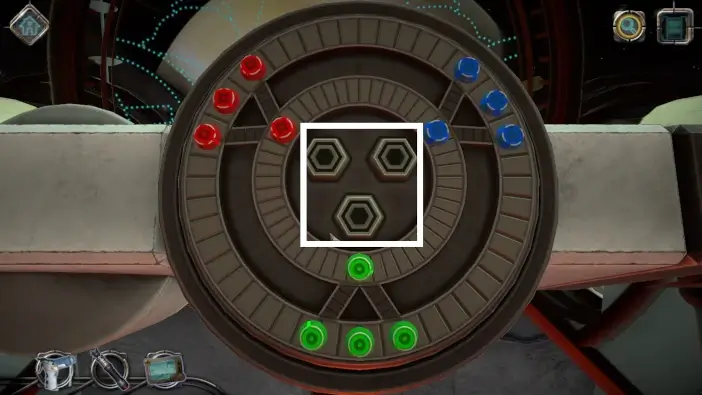
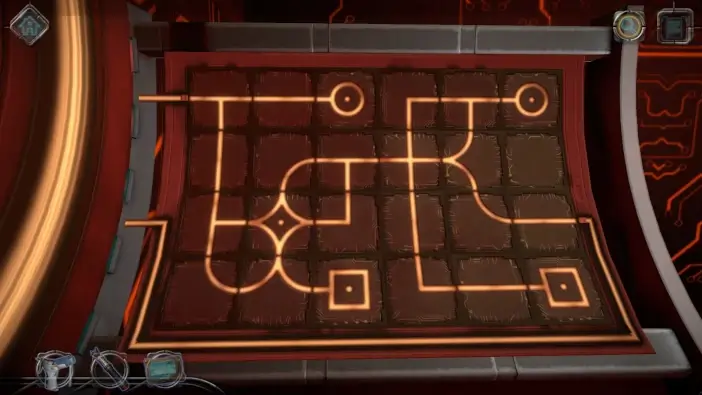
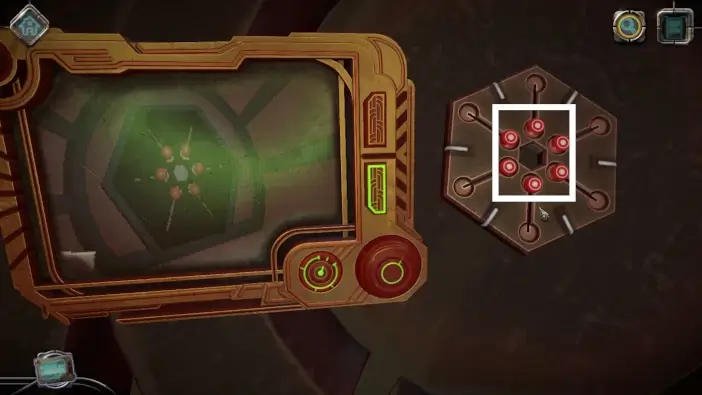
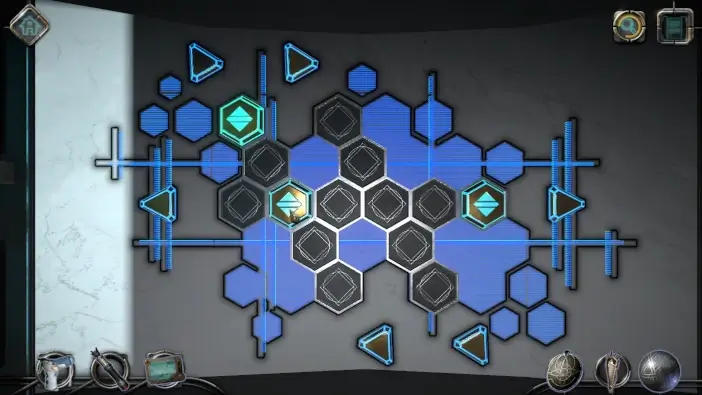
- You need to move all the black fields with bright sigils to their slots, as in the picture above. Each field is on a separate ring.
- The buttons on the left will move each field one step clockwise (upper button) or counter-clockwise (lower button).
- On the rings, certain areas will be red. This will block the black field from passing. When you click one of the buttons on the right side, the red obstacle fields will turn green, which can be passed through, while previously green fields will become red obstacles.
- There is a lightbulb on the left side of the moving platform. Remember to pick it up.
- Go to the platform and press the left button to move up.
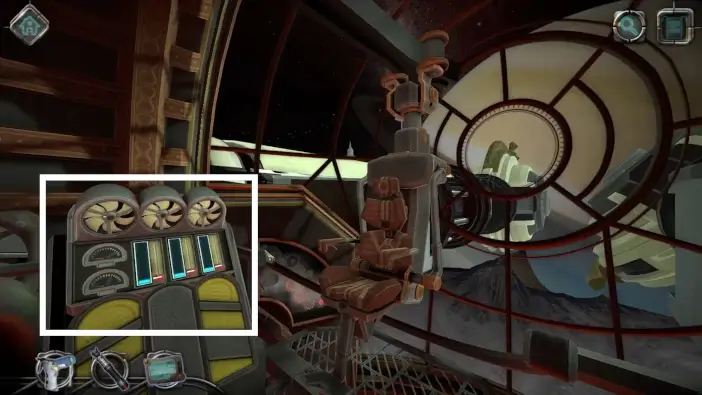
Approach the dashboard. Pick the two remaining lightbulbs.

Place the lightbulbs in a way that the sum of all of their adjacent fields is the total number of fields.
Go to the next dashboard.
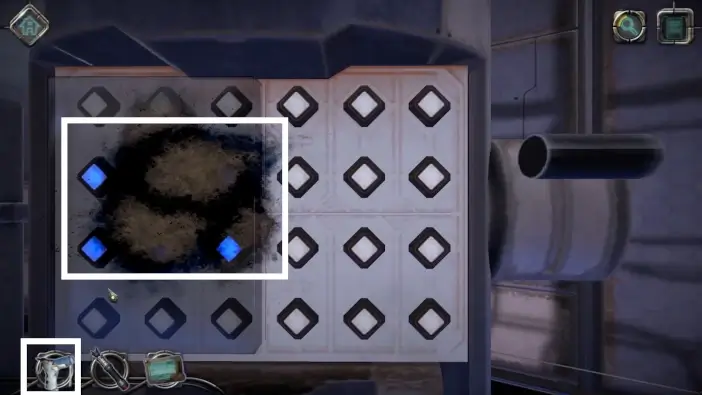
Clean it with your air duster.
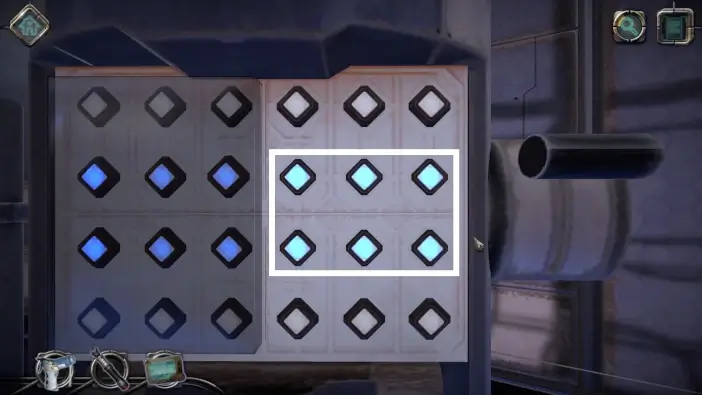
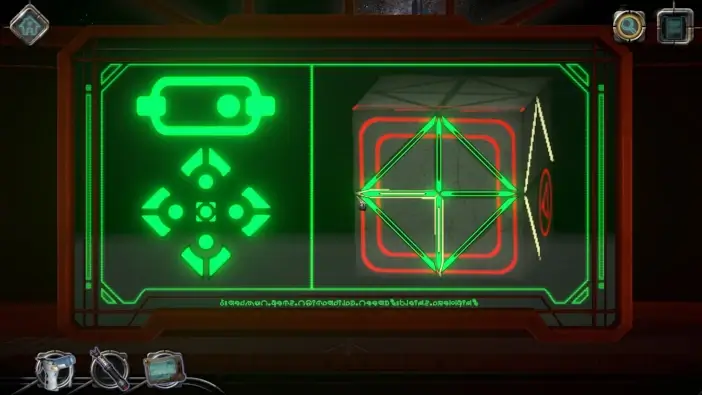
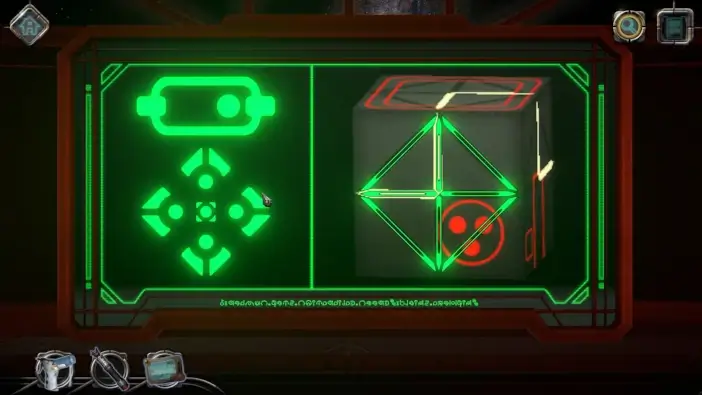
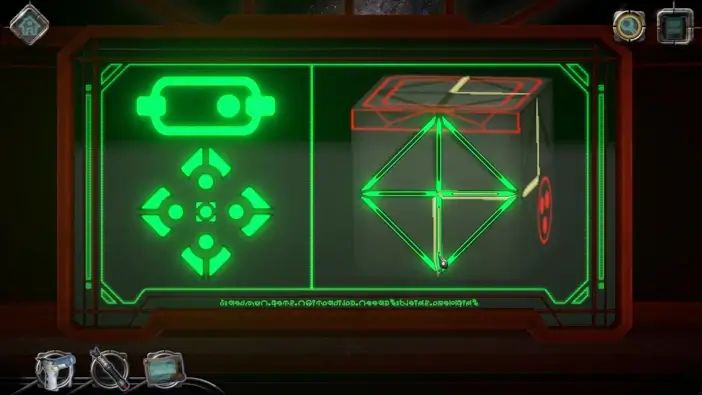
The next puzzle will have 3 stages. At each stage, you need to leave active diamonds that are in the mirror/opposite side of the blue diamonds. You activate or deactivate a diamond on the right half of the dashboard by clicking on it.
After solving the puzzle, pull the lever next to the previous dashboard (your camera will be centered toward the lever).
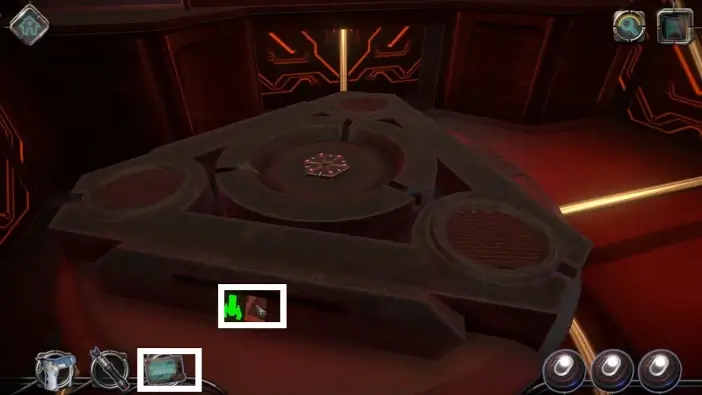
After the next cutscene, your character will look at the mechanical device, where the previous puzzle was. Pick it up.
Go to the platform and press the right button to go to the lower floor.
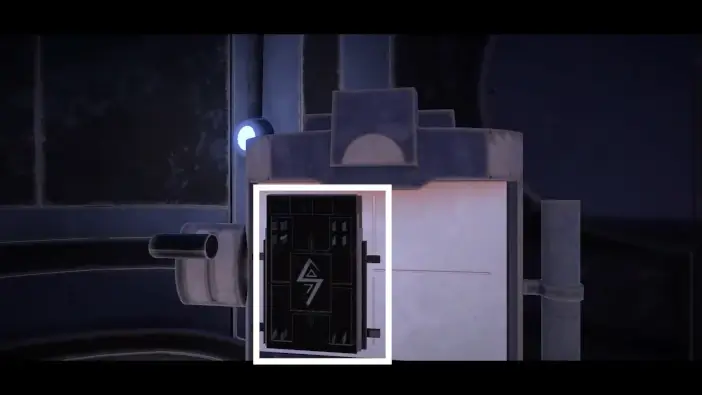
Open the small lid. This is a place for the mechanical device.
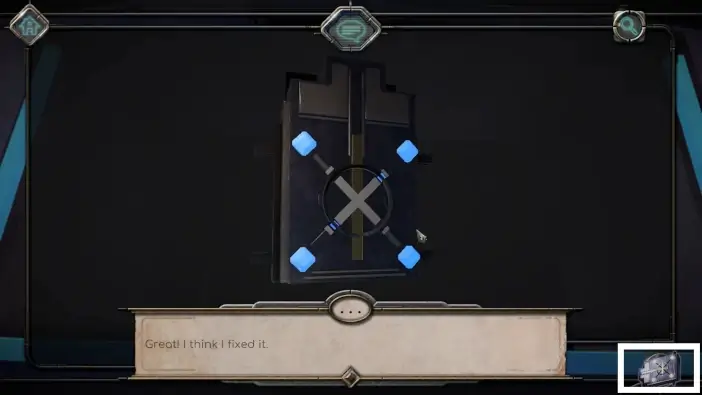
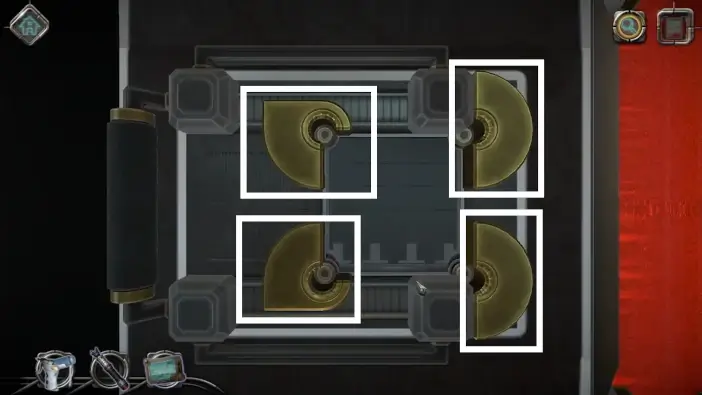
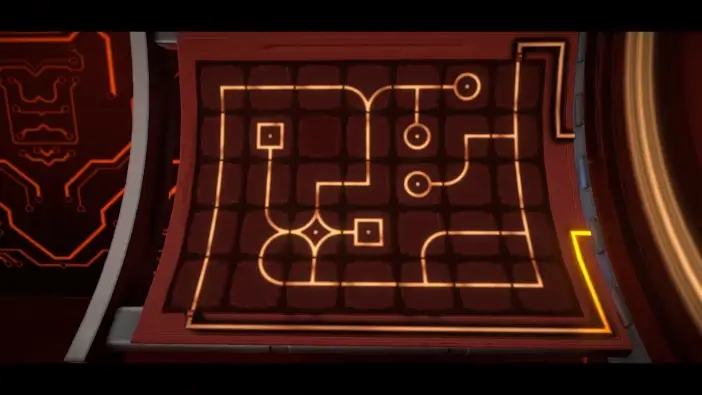
Before you put a mechanical device into its place, you need to place grey paths in an “x” shape like in the picture above.
Place the mechanical device inside the compartment you were looking at before.
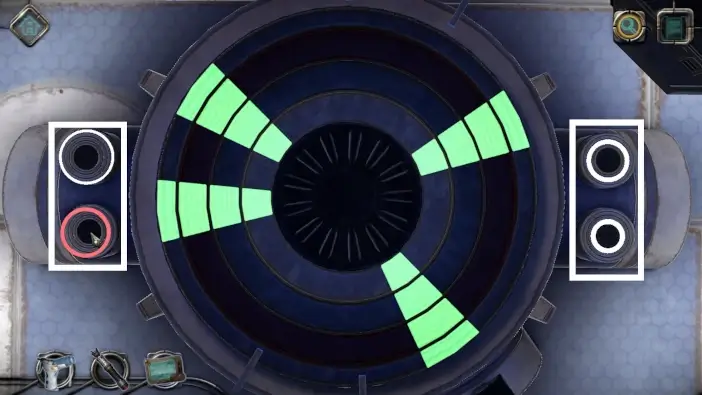
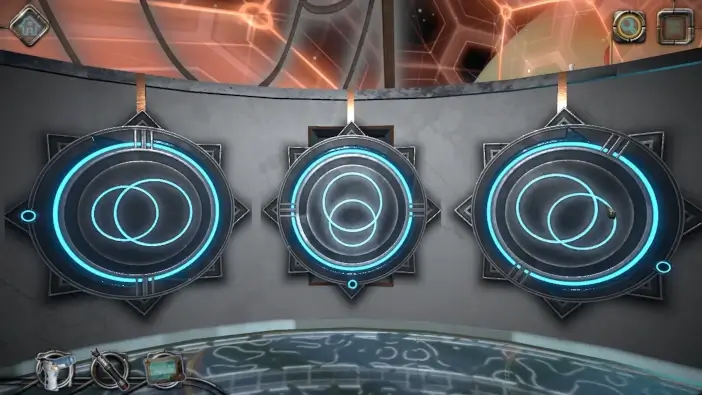
Multiple circles will move counter-clockwise automatically after 3 seconds. When you click on one of the buttons on the side, one of the circles will turn black and will circle clockwise. You need to merge all the green lines from each circle like in the picture above.
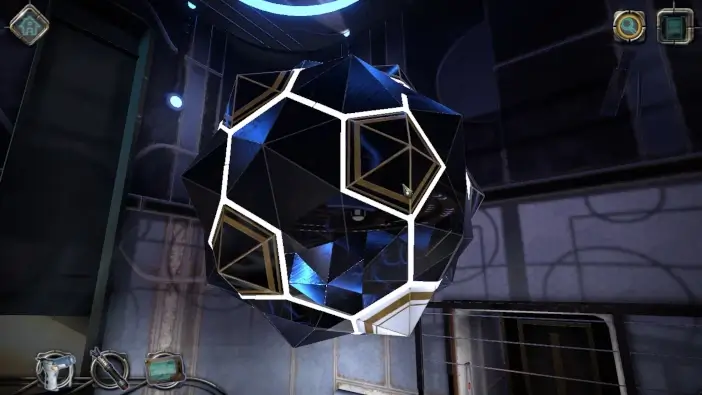
For the next puzzle, you need to connect all the pentagon shapes. You can move freely because of the zero gravity.
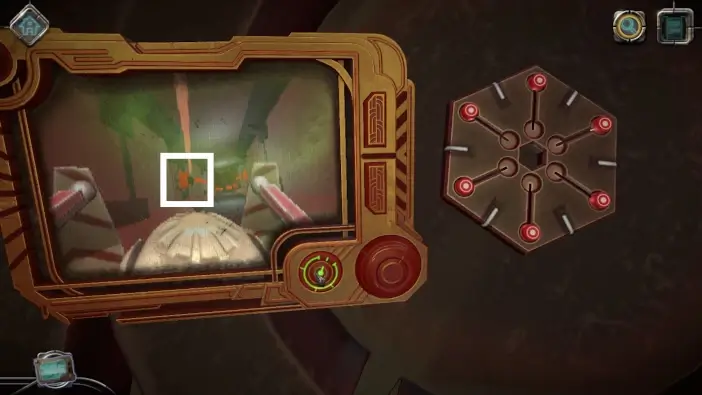
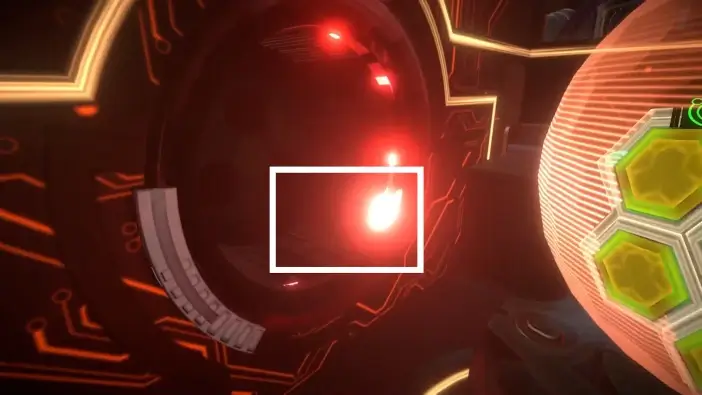
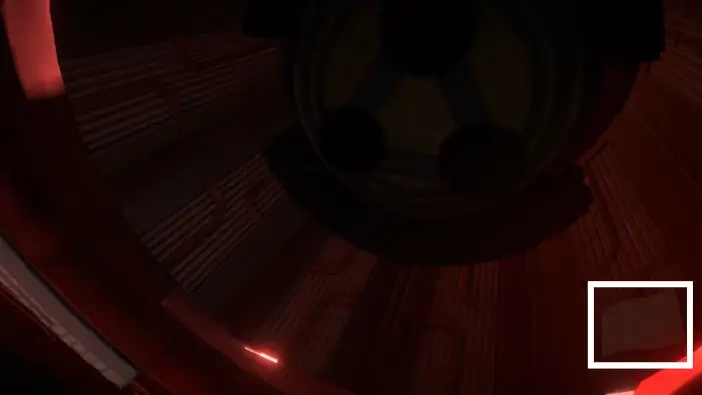
- In the next puzzle, If you hit the blue sphere with a light beam, it will remove some of the obstacles.
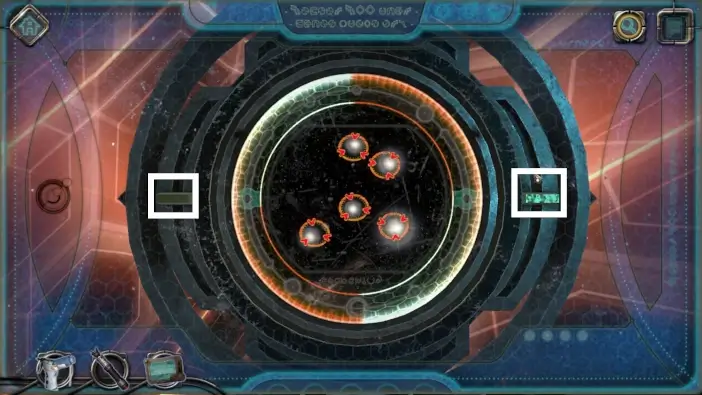
- You need to hit all the white spheres with a light beam, by moving one of the circles. When you hit white spheres, they will turn green.
This puzzle will have 3 phases. After you complete it, the Chapter 5 will end.
Chapter 6 – Engine Room
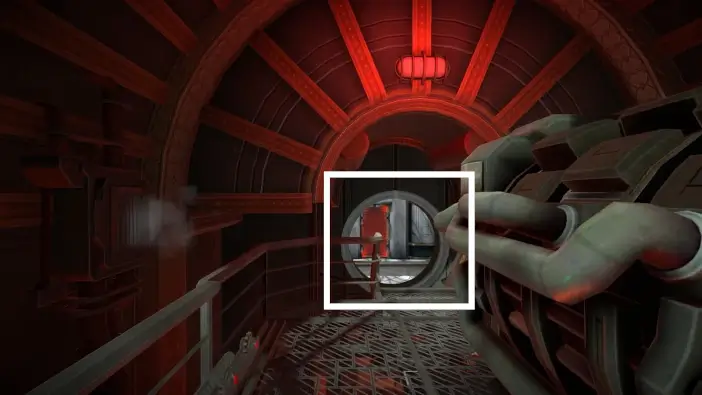
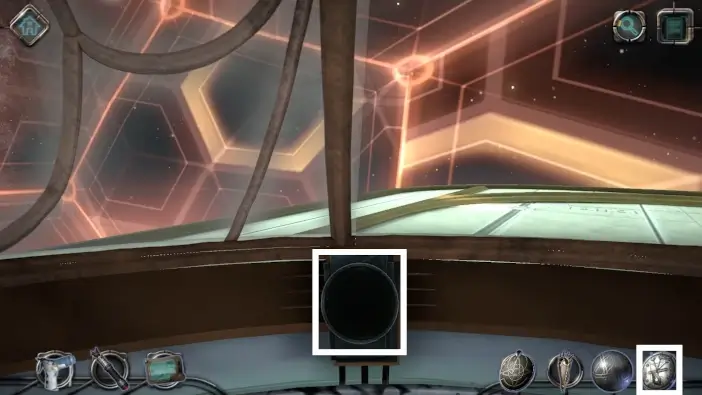
When you finish Chapter 5, after the cutscene, you will be in a ventilation pipe. Open the lid in front of you and you will have another cutscene.
You will end up in a corridor, in front of the sealed door of the engine room. Approach it.
Place your drone.
Go to the blue area.
At the end of the hallway, you will see large gears. Press the smaller button on the right to change the active gear control. You will need control for gears in the blue corridor.
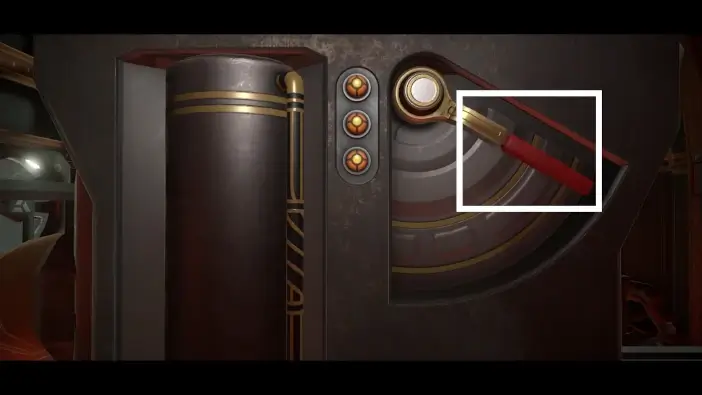
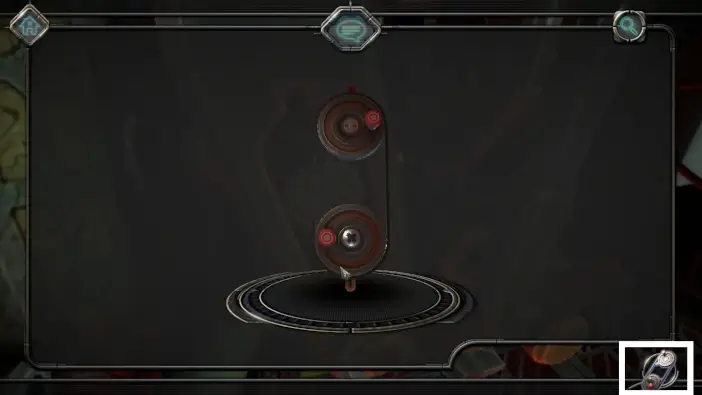
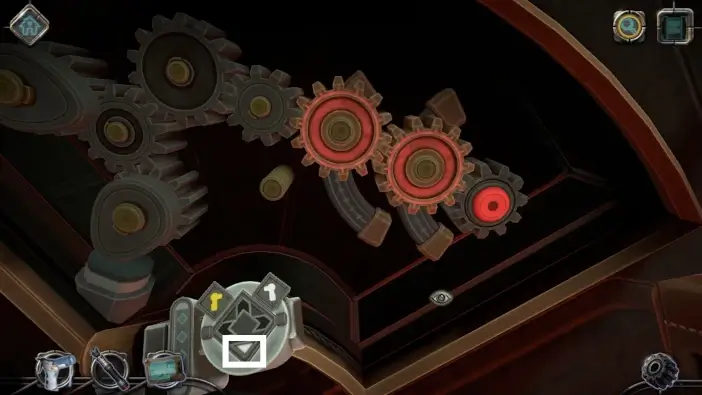
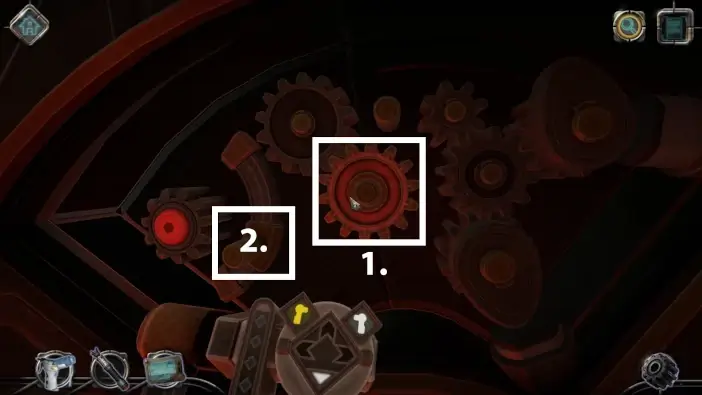
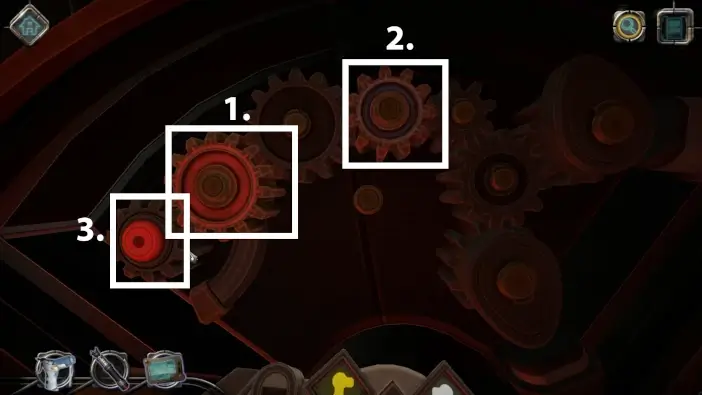
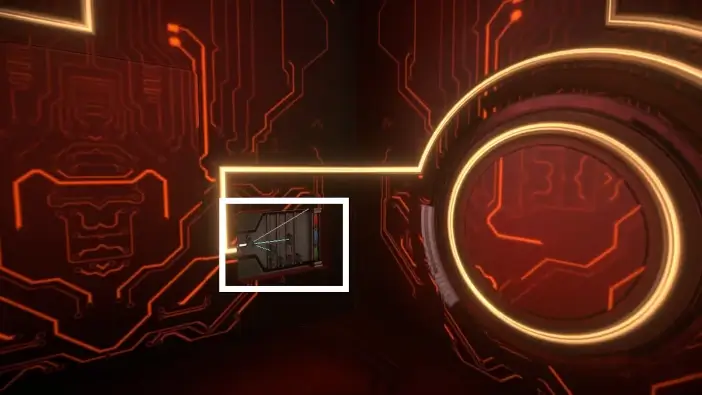
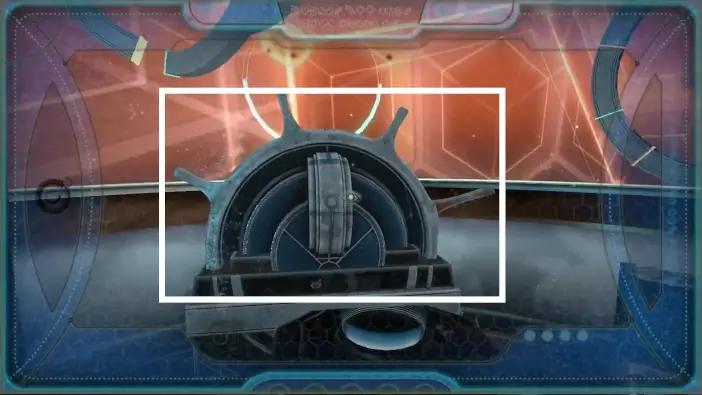
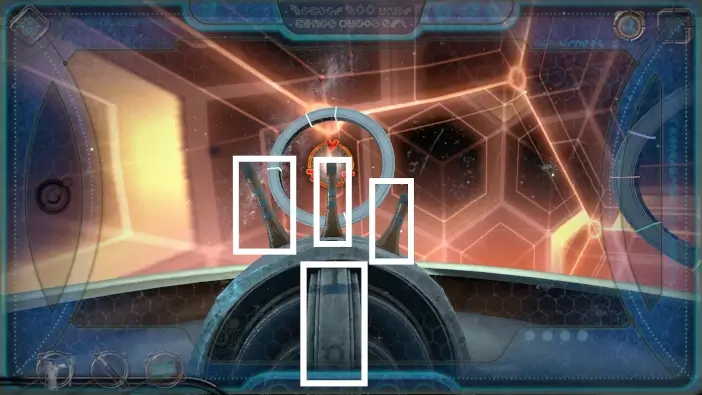
Spin the circle to move the upper gear. This upper gear will move the gear below it. You need to move the lower gear so that the laser can pass through the gear hole.
Pull the lever to change the position of the upper gear so you can move other gears as well.
- Repeat for the final gear.
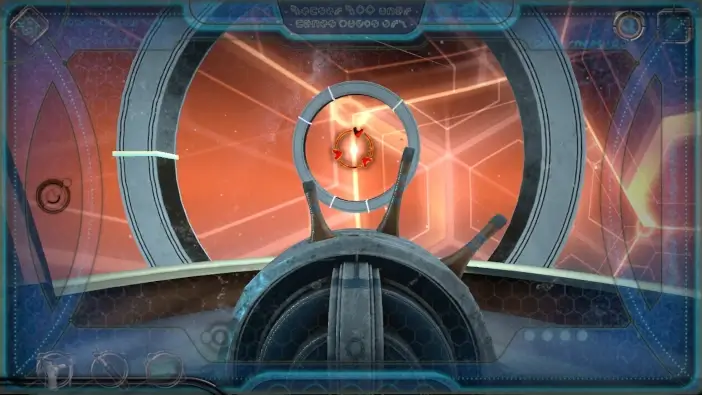
- Once you complete this puzzle and the laser can pass through all 3 gears, you can press one of the smaller buttons to change control. Now you will need a control for gears in the green area.
Go to the previous crossroad and go to the green area. Similarly to the blue area, rotate the gears so that the laser can pass through all 3 of them.
Return to the hallway and go to the red area. Here, you will need only to shoot the area at the corner. This will end the drone puzzle.

Above the previous puzzle, there is a valve. Turn it clockwise.
Turn the larger valve clockwise as well. This will unlock the door to the engine room and Chapter 6 will start.
Approach the engine’s corner near you.
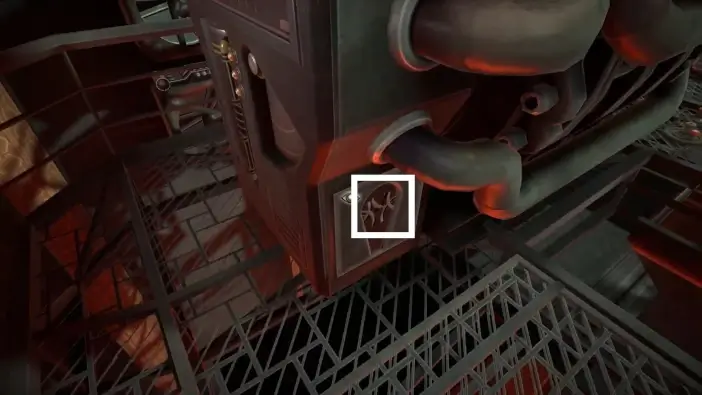
Move all the straps to open a drawer. Pick a strange item from it.
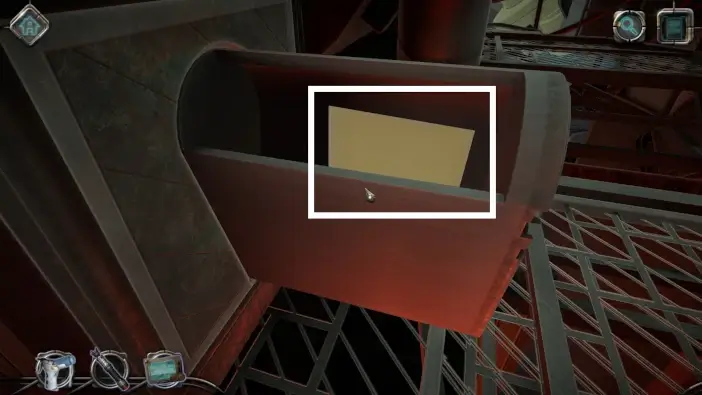
From the same drawer, pick the 8th letter.
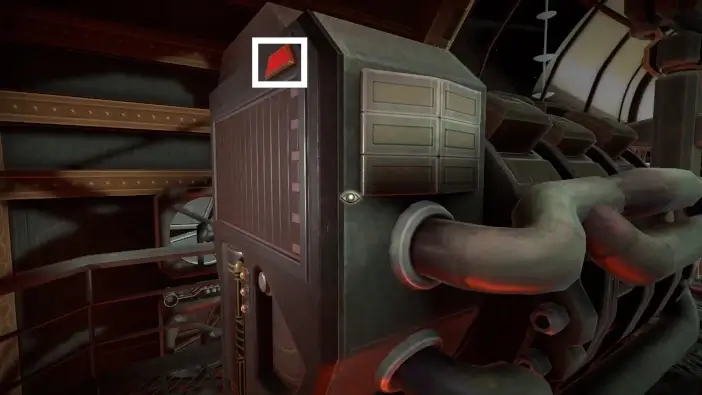
Look up and approach the other side of the engine. Press the red button to open the lid for the control panel.
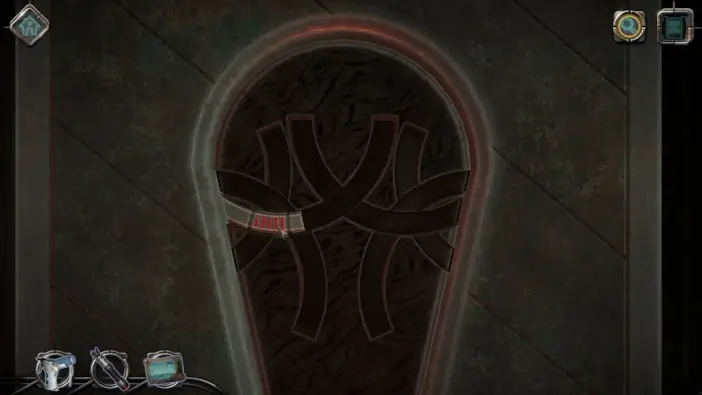
Examine a strange item from your inventory. Turn it around to see the other side and turn the wheel to get all the pins in vertical order.
Place the strange item on the left.
From the strange item, you need to move the stripes to see the positions of the symbols. Once you find the position, you can move the slider on the right side for the corresponding symbol. The solution is in the picture above.
The lever will appear below the previous puzzle and your character will approach it after the cutscene. Pull the lever trice. This will activate the engine.
After the cutscene, beside the engine, pick the gear.
Examine it in your inventory and rotate a small red slider fully clockwise. The teeth of a gear will appear.

Place the gear where it belongs.
Press the red buttons one by one, in order like in the picture above, to move the platform on the left, so you can cross to the other side of the room.
Continue walking the platform and pick a pulley below the seat.
Examine the pulley in your inventory. Move the pulley so that the pins are up and down.
- Place the pulley.
- Use the screwdriver from your inventory.
Solve the screwdriver puzzle like those before. You will unlock the seat.
Approach the dashboard.
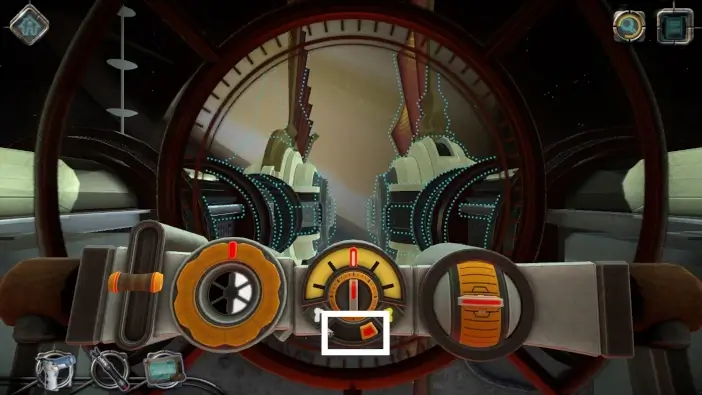
Move the sliders up so that the red arrow is on the highlighted area.
Sit in your seat.

Flip the squares in the center (just click on them).
Press the left button to move your seat closer to the gears on the left side of the room.
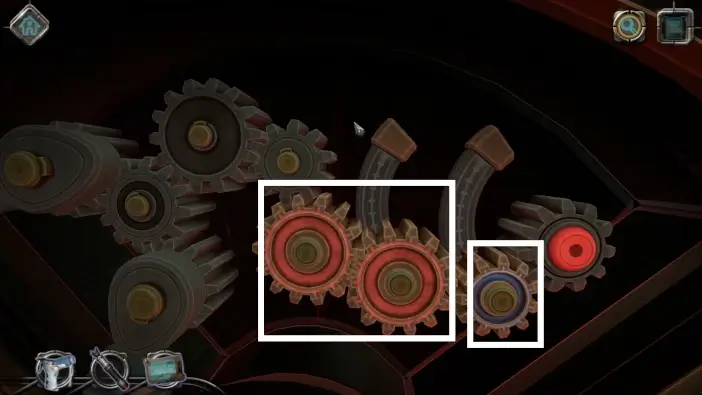
Pick up the gears.
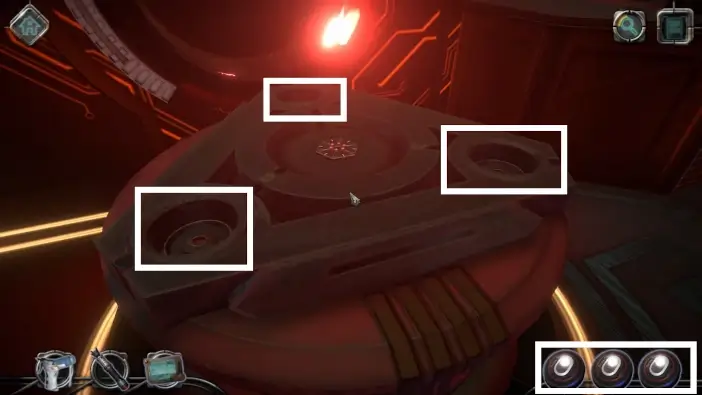
- Move the gear shafts upward.
- Place the red gears on the shafts.
- Push the red button.
Press the “down” button to return the seat to the previous position. After that, press the “right” button to go to the right side of the ship.
- Pick the red gear.
- Move the gear shaft upward.
- Place the red gear from your inventory.
- Place the blue gear from your inventory.
- Push the red button.
Return the seat to the central location via the “left” button and then press the “up” button to access the engine controls.
Take a closer look at the controls on the right.
You need to group tokens of the same color. The buttons in the center can rotate the tokens on the outer ring with the inner ring tokens. You can move the inner ring manually.
You need to adjust the right wing of the spaceship to be the same as the dotted outline. You will have 4 different controls to achieve that. When you are done with the right wing, press the switch in the center to start adjusting the left wing.
Once you adjust both wings perfectly, you will complete Chapter 6.
Chapter 7 – Matter of Security
After you complete Chapter 6, the exit door will open. Go there and enter the hallway.
Your alien friend will open a new puzzle right next to the red door. Rotate the locks so they don’t block the opening of the lid behind it.
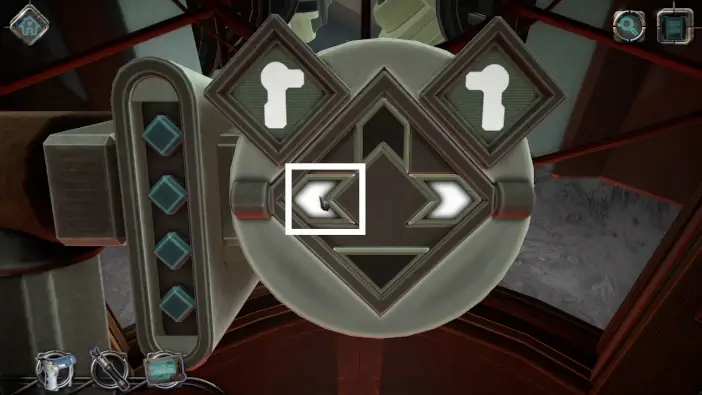
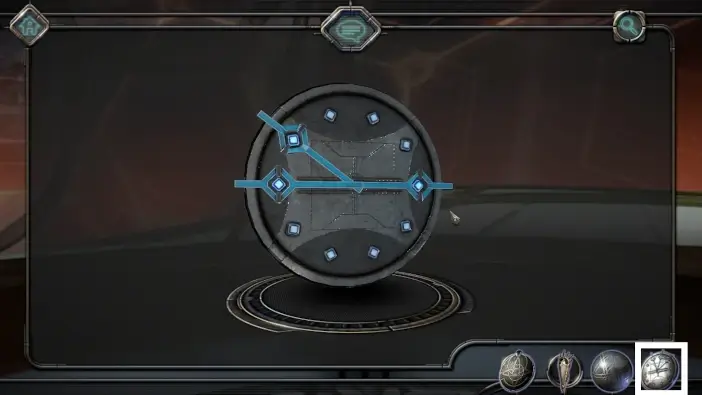
Once the lid is open, a new puzzle awaits you. You need to press one of the arrows on the corners of the table. Which one you need to press is shown by the smaller blue arrow on the circle. There is only one blue arrow on the circle at a time.
This will unlock the red door to the security section of the ship and Chapter 7 will start.
Press the huge button in the middle to let the energy flow through the room.
You need to complete the same puzzle on both sides of the room. Your character will look at one of the walls after the cutscene, so start from there. Move the slider clockwise to unlock the hidden drawer.
In the hidden drawer, rotate the squares, to get a connected map of energy flows.
Do the same on the other wall. This time, move the slider counterclockwise to unlock the drawer.
Once you complete these puzzles, a whole new table with a fancy dashboard screen will appear. Approach the screen.
Toggle the button on the left. This will activate the energy flow across the room.
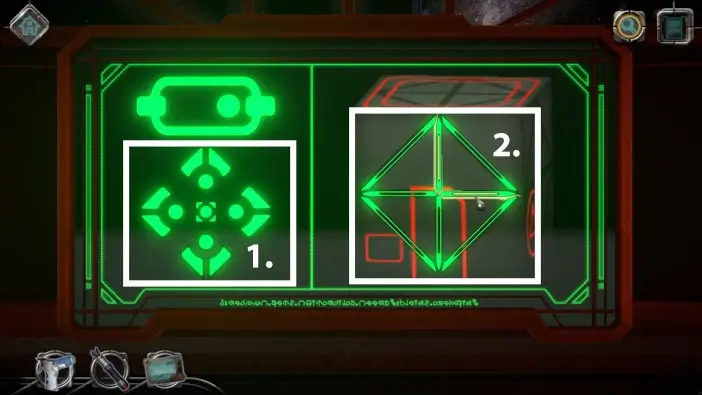
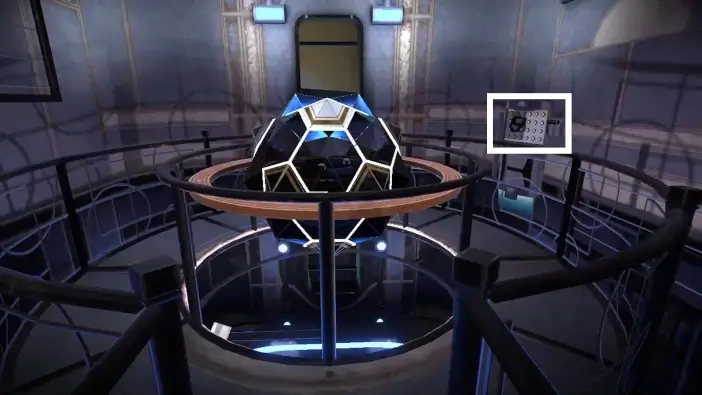
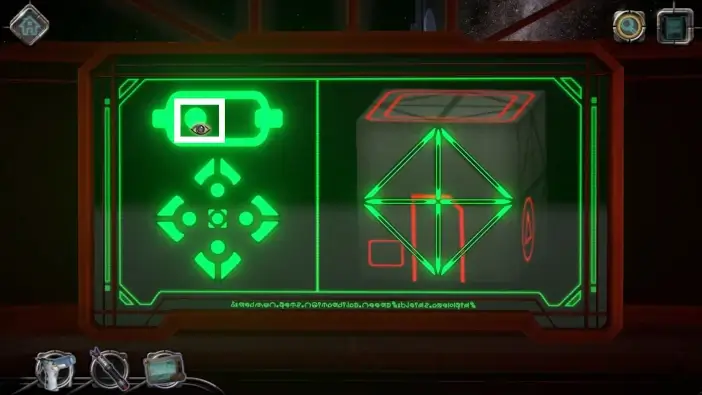
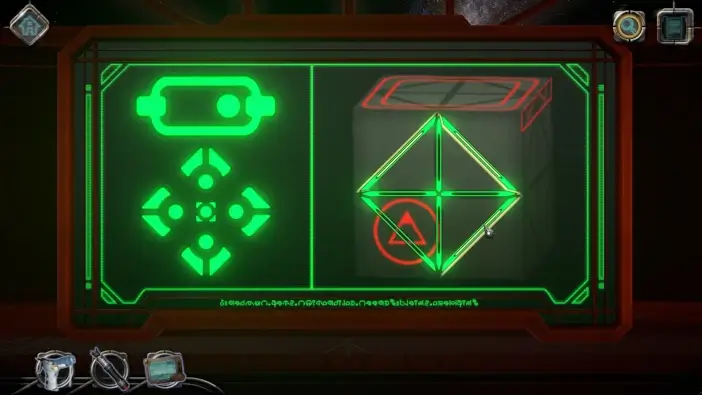
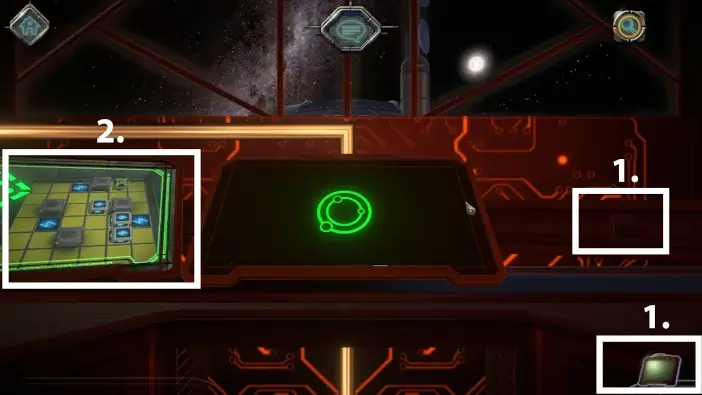
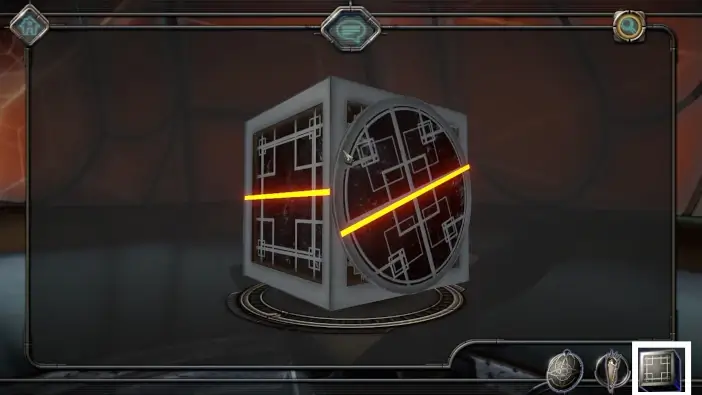
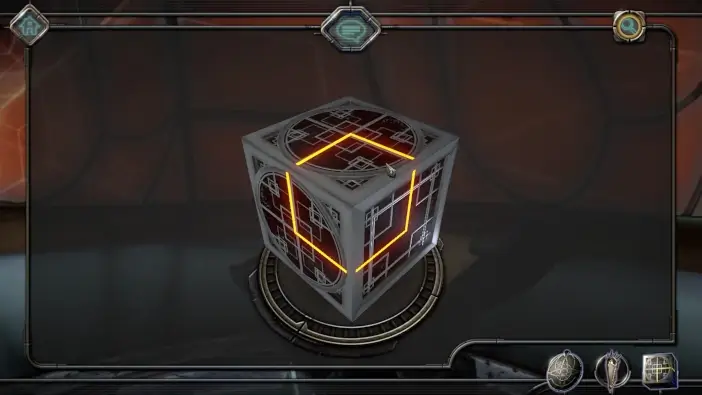
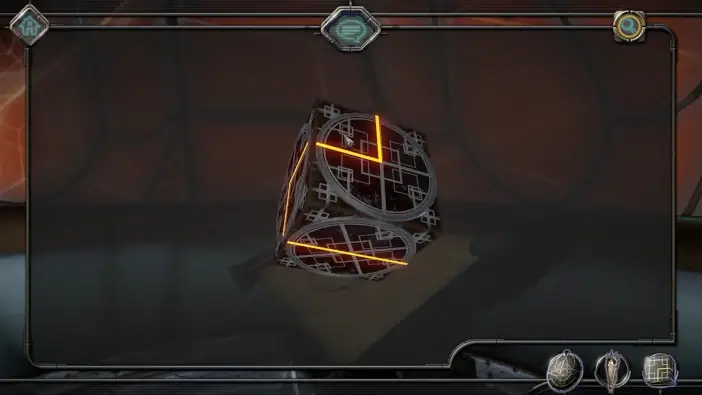
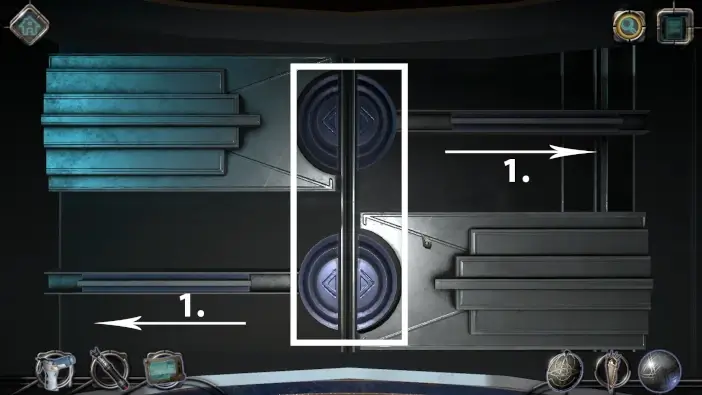
Now you need to draw where the energy is flowing. On the left are arrows where you can rotate the cube (1.). On the right is a cube that is a visual representation of the room (2.). You need to select green lines to leave a white mark where the energy is flowing. You can see the solution in the image above and the pictures below. The white lines are immediately below the green lines.

When you finish the previous puzzle, 2 additional screens will appear and one of them will fall to the ground. Pick it up.
Examine the screen from your inventory and adjust the screen holder. Afterward, press the 2 red buttons.
- Return the screen to its previous position.
- Approach the screen on the left.
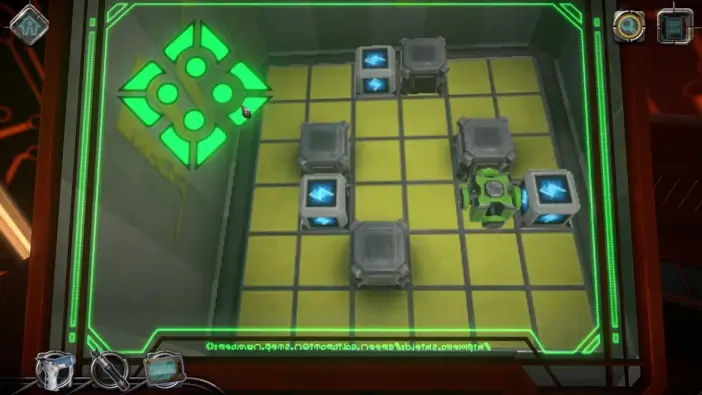
You need to place all the boxes in designated positions. You will control a green machine. When the machine is next to the box, it will attach the box to itself like a magnet. The machine will detach from the box once you place the box on the correct field.
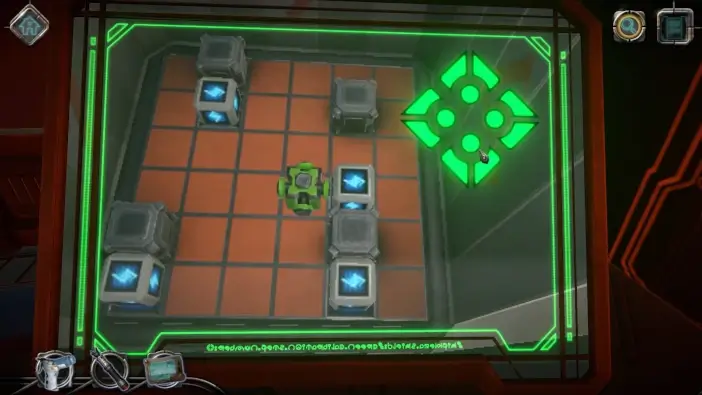
Do the same puzzle on the right monitor.
When you finish the previous puzzle, 3 projectors will appear. Pick them up.
Approach the part of the wall with laser beams.

Move the sliders so that laser beams hit the crystals of the same color.
A giant table will appear in the middle of the room. Place the drone inside.
You will have a few buttons to shoot along your way.
In the end, you will have a wall with the same pattern as on the table. All the tokens are on the outer part. On the left screen, you will see one of the circles in the inner part is glowing green. This is a clue that you need to move exactly that token from the outer part to the inner part. You move tokens on your table, and the change will affect the screen as well.
Place all the projectors.
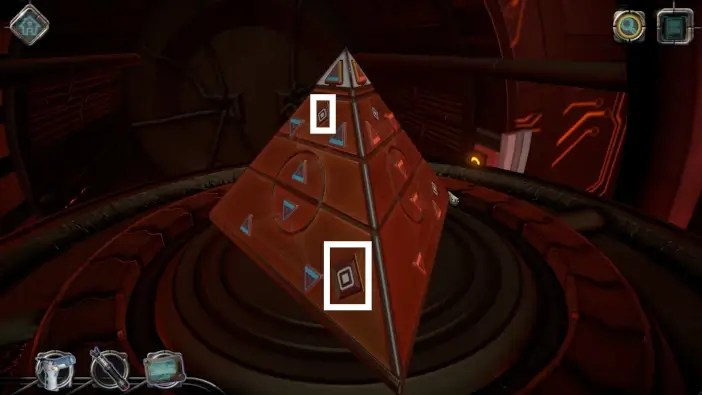
When you reach the pyramid puzzle, you need to place all the small triangles of the same color on their designated sides of the pyramid. You can rotate any level of the pyramid and you can rotate middle circles. You will have buttons that will move triangles in certain places.
Before you approach the final puzzle, go to one of the wall areas.
There is a 9th letter hidden there, behind a red light. This is a very easy-to-miss letter.
The last puzzle will have 3 stages. Click on hexagons like in the pictures below to activate the protective shield of the spaceship.
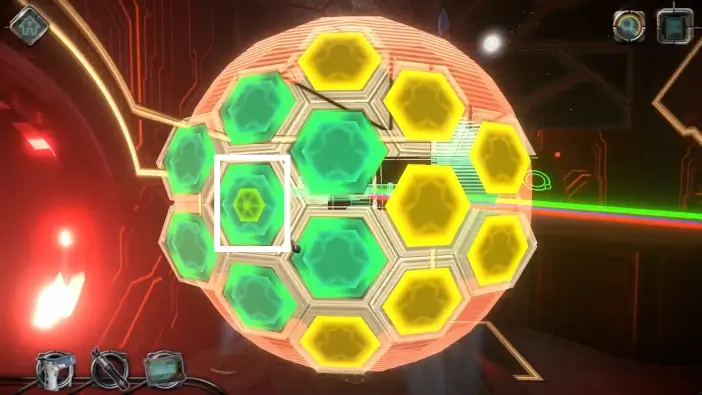
Stage 1.
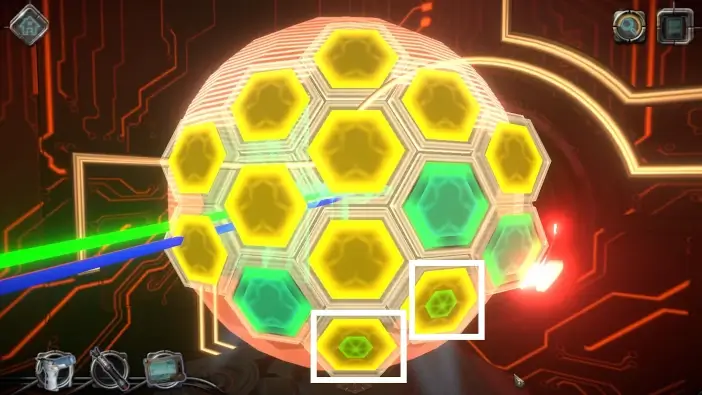
Stage 2.
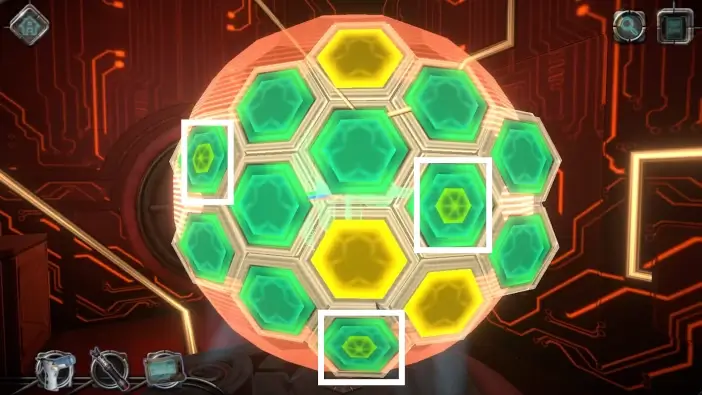
Stage 3.
Chapter 8 – Departure
When you exit the security room, go right to reach one of the corridors from earlier. A sphere capsule from the start of the game will arrive and you will have a cutscene where you travel around the spaceship.
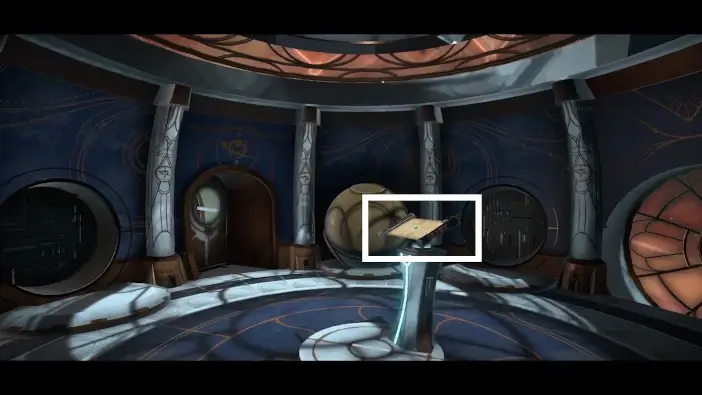
After the cutscene, you will return to the starting location, from Chapter 1. Approach the scroll in the center of the room.
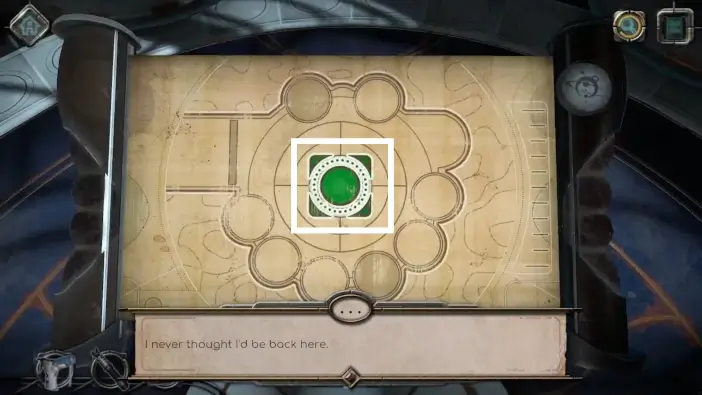
Click on the central circle.
Click on the bottom green fragment.
Three sealed compartments will appear behind you. Unlock them by rotating them until they glow. Pick the magnetic disc, a helmet, and a strange box from them.
Select a strange box from your inventory. You need to rotate the sides of the box so that the red lines are connected. This puzzle will have 3 stages, after each stage, you will pick a new smaller box, that was in a larger box.
After the third stage, you will get a metallic orb that you’ll need later.
Approach the scroll at the center of the room and click on the upper segment. New hidden things will rise from the ground.
- Take the 10th (and final) letter.
- Approach the locked area.
Remove the bars by moving them to the sides. Rotate the half-circles in the middle so that their openings in the center align with the central opening of the lid.
After you open the lid, you will have a new puzzle challenge. You need to place all three tokens in their placeholders. You can move them by pressing one of the triangles around. Completing this puzzle will unlock the helm that you will need later.

Turn around and pick the disk.
Take the disk from your inventory and move its hands like in the picture above. You can find the clue where to move hands by looking at the back side of the disk.
Return the disk where you found it. Your character will automatically put on a helmet you found earlier and the side of the ship will open.
Approach the mechanism outside and place the magnetic disk you found earlier in one of the sealed compartments.
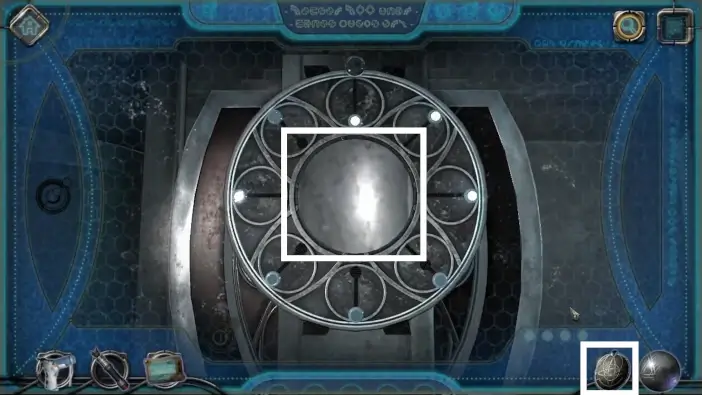
Move the inner and outer circular handles. The inner handle will move the tiny circles outward while the outer handle will move them inward. When the circle is in the right position, it will glow white.
The previous puzzle will reveal yet another lid. Open it.
Place the sphere you got from the many-layered strange box earlier.
Use all the elements you can rotate to align the white spheres with the blue spheres.
Use the radar (just above the previous puzzle) and move the radar to align the stars to be inside the marked areas, just like in the picture above. Use the handles on both sides.
Approach the helm.
Move the separate parts of the helm to find a star and assemble the metal circle around it. This will have 3 stages.
When you finish this puzzle, congratulations! You’ve completed the game!