Machinika: Atlas – Part 1
Intro
Welcome to the walkthrough for “Machinika: Atlas” from Dear Villagers (publishers) and Littlefield Studio (developers). This is the 2nd game in the Machinika franchise.
In this game, you will find yourself in a mysterious alien ship that has landed on one of Saturn’s moons. To understand where you are and what happened to aliens, you need to explore strange alien technology. You can also collect 10 letters scattered around the ship, written by another human passenger.
This part of the walkthrough will cover the first 4 chapters of the game.
Chapter 1 – New Horizons
At the start of Chapter 1, the game will lead you on what to do and how controls work.
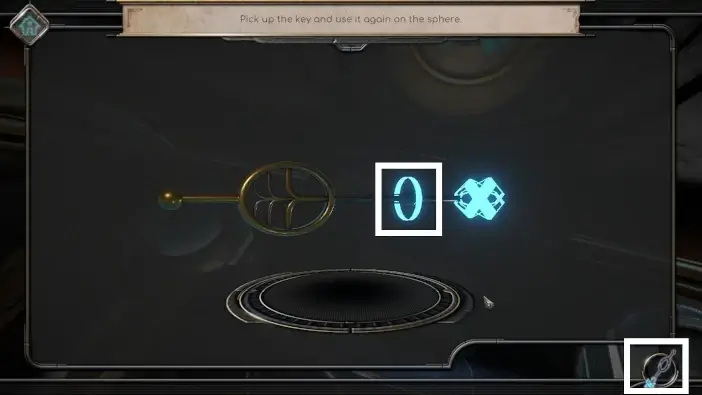
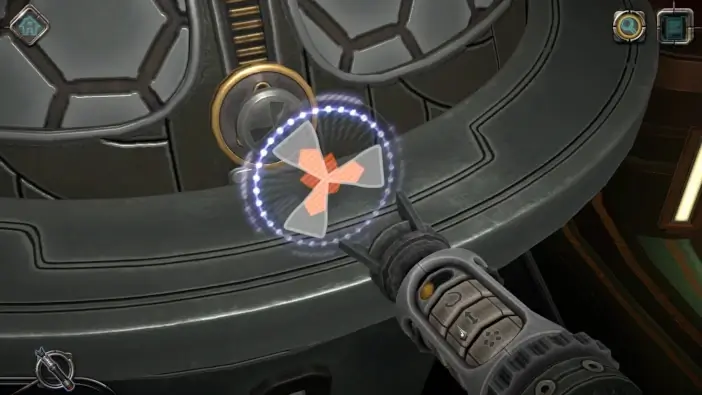
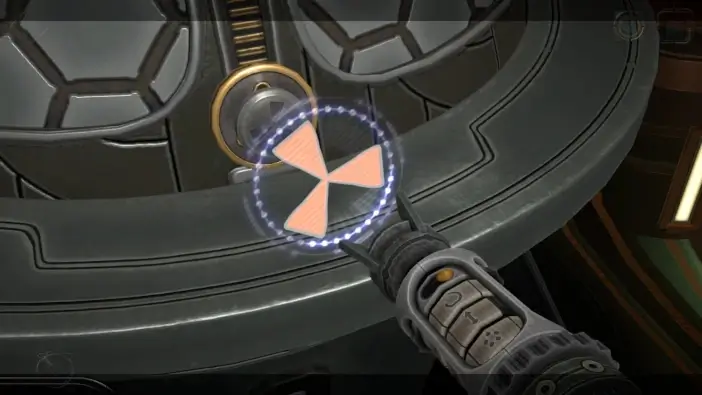
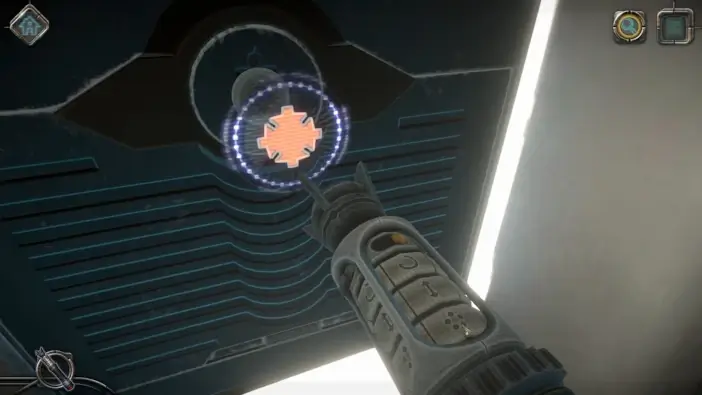
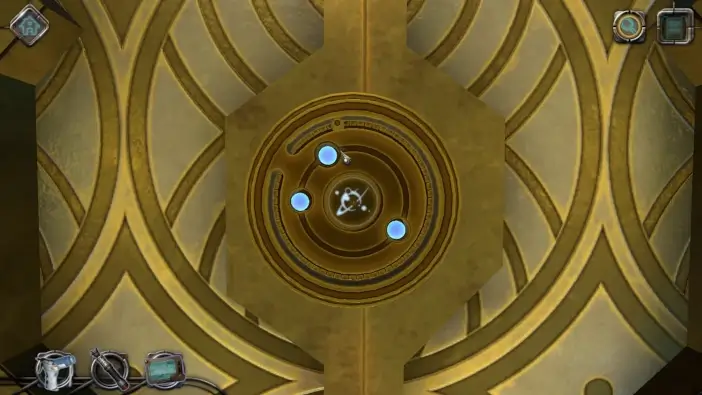
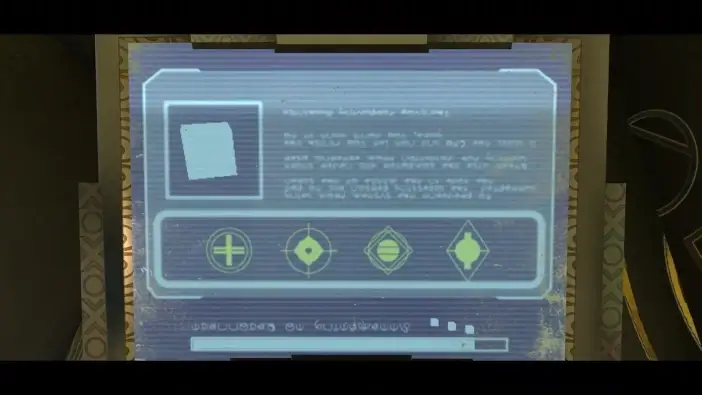
Once you found the key and the orb, select the key from your inventory and adjust the position of the circle. This will alter the key. Choose the “x” shape and then activate the floating orb with the key. This will end the intro and you will exit from your sphere capsule.
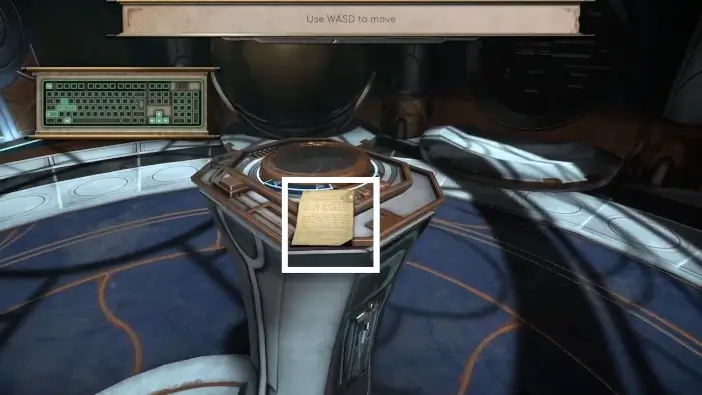
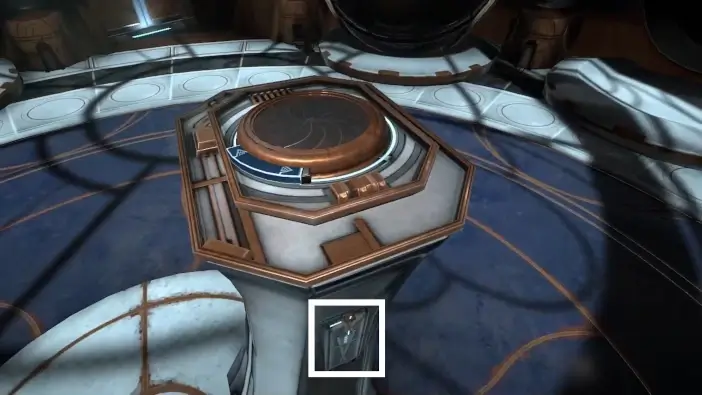
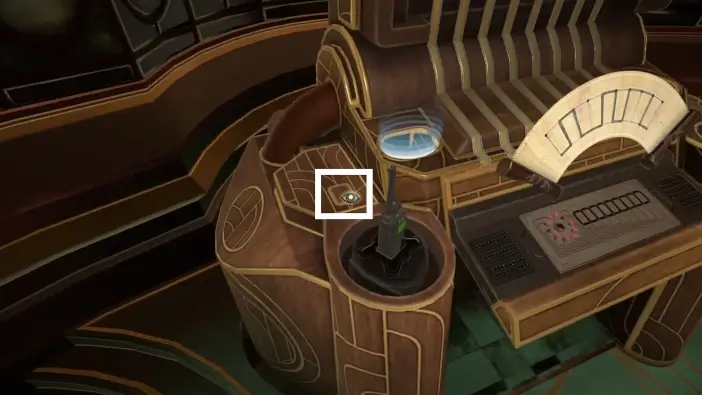
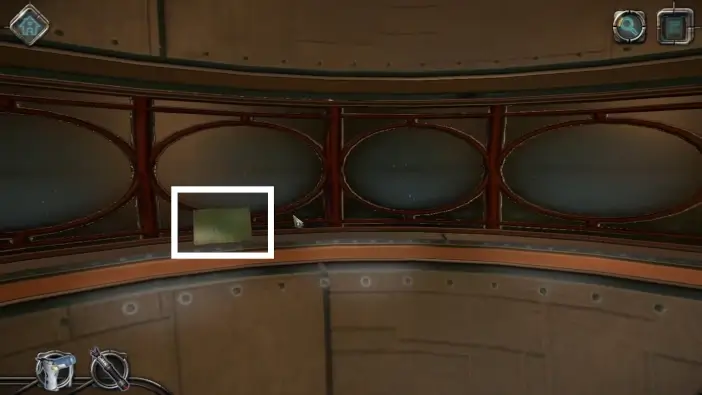
Go to the central pedestal and pick the 1st letter.
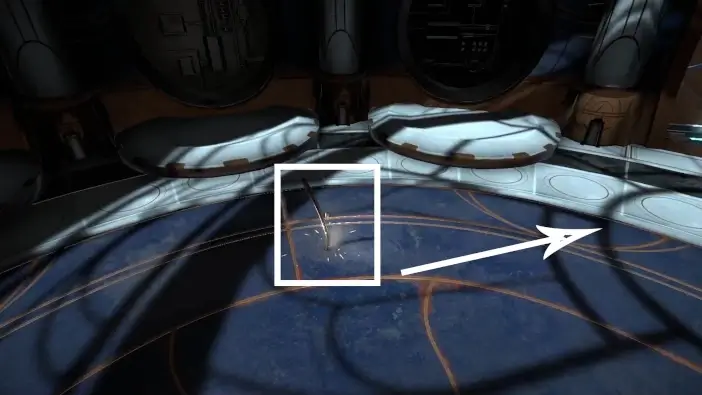
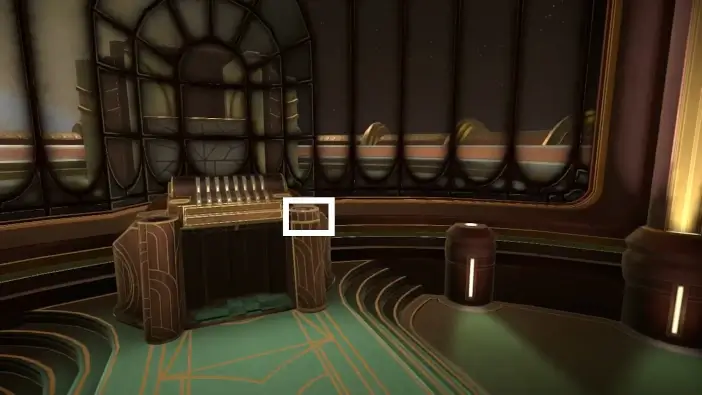
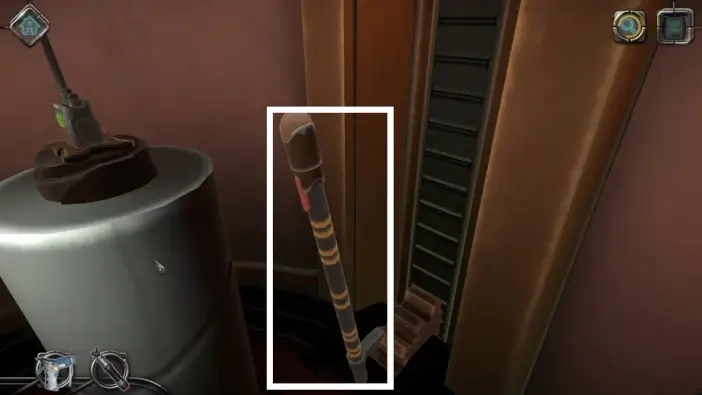
Pick the nearby metal stick from the floor and go right.
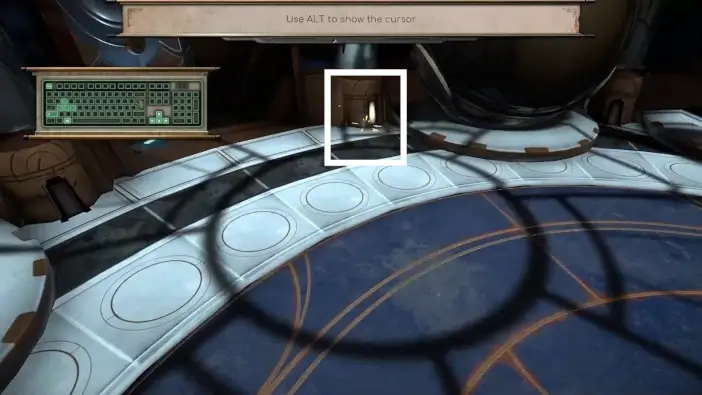
Approach the pillar.
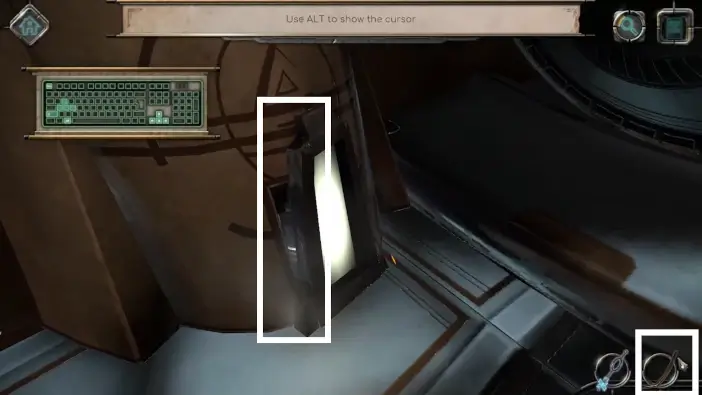
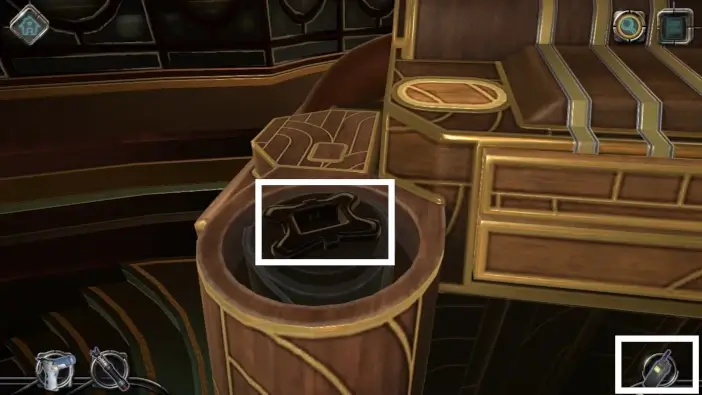
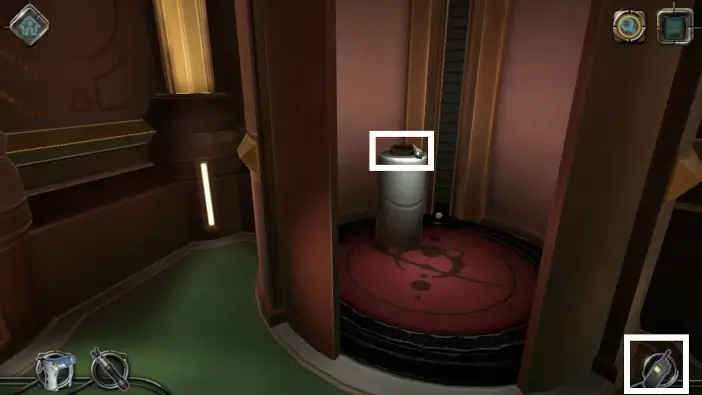
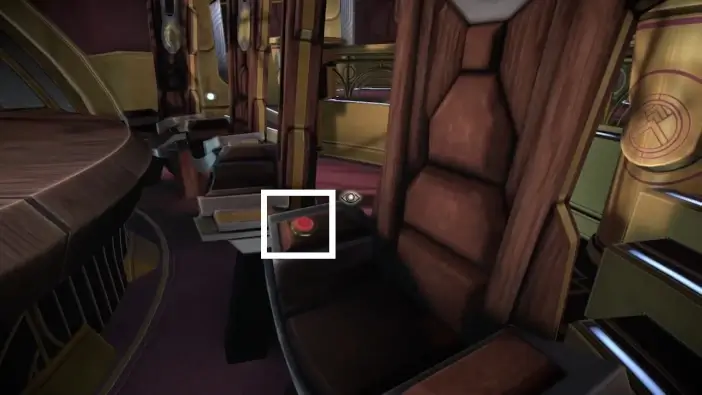
Use the metal stick you just picked to remove the lid and take a round box.
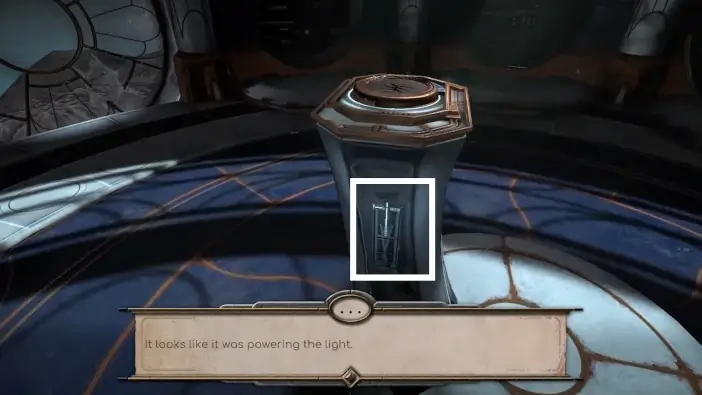
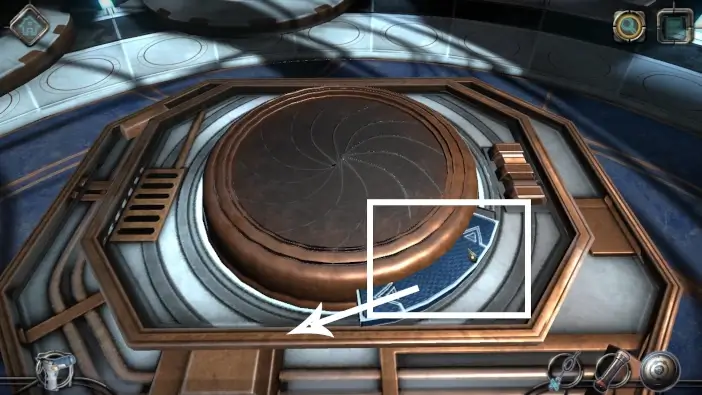
Approach the pedestal.
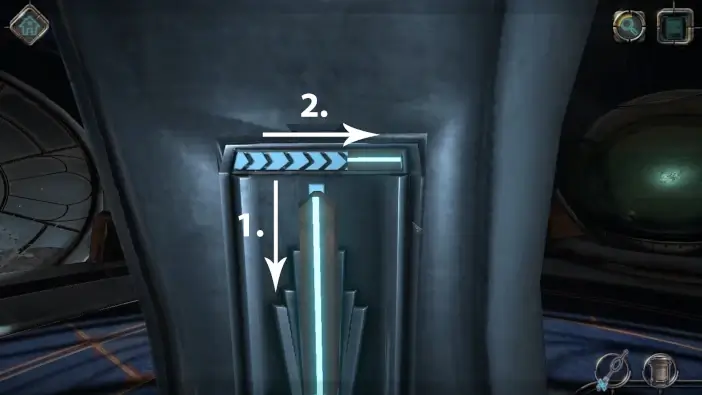
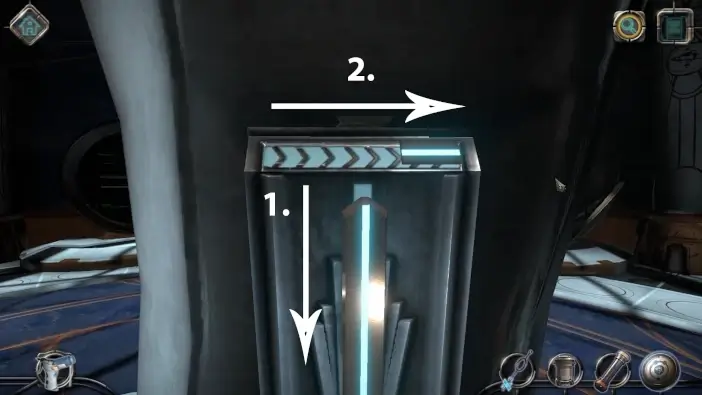
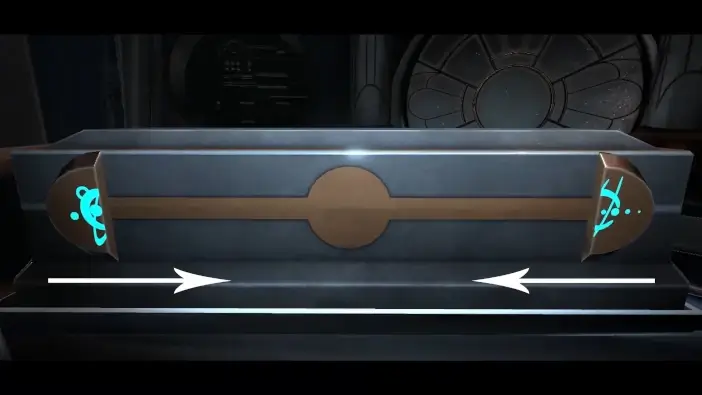
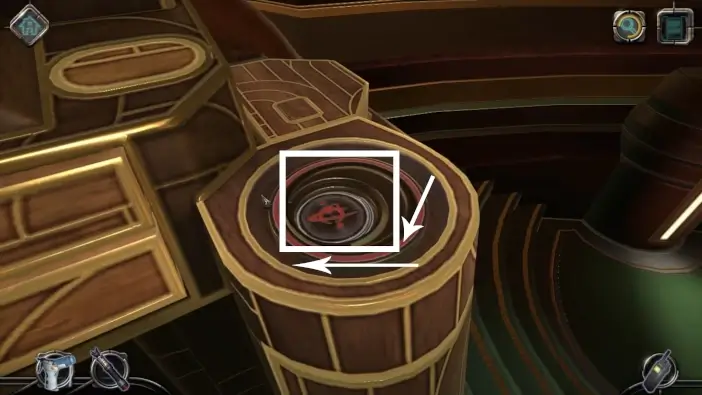
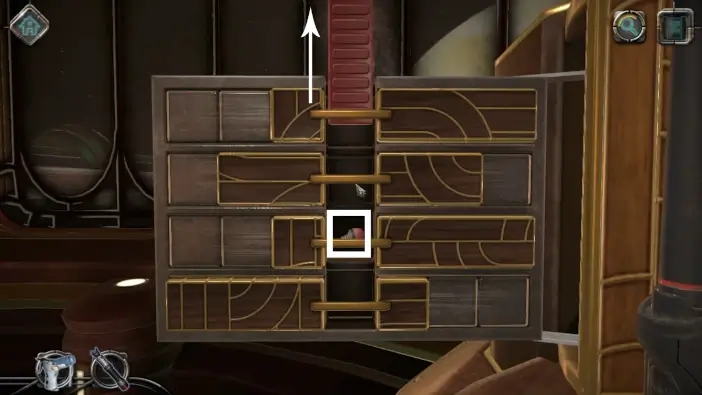
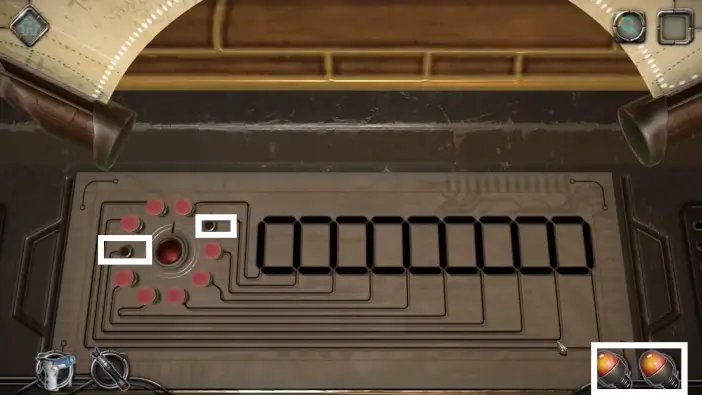
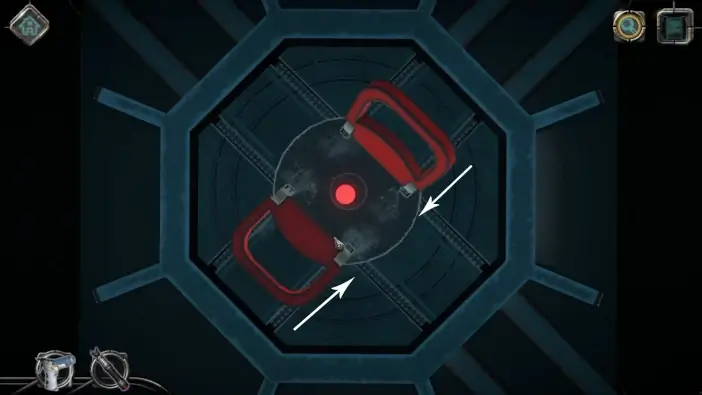
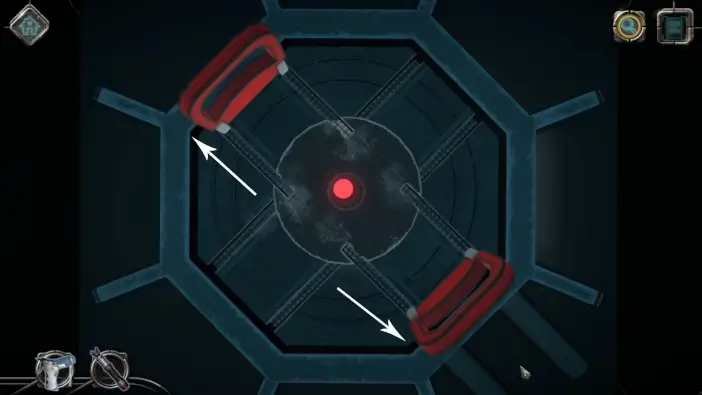
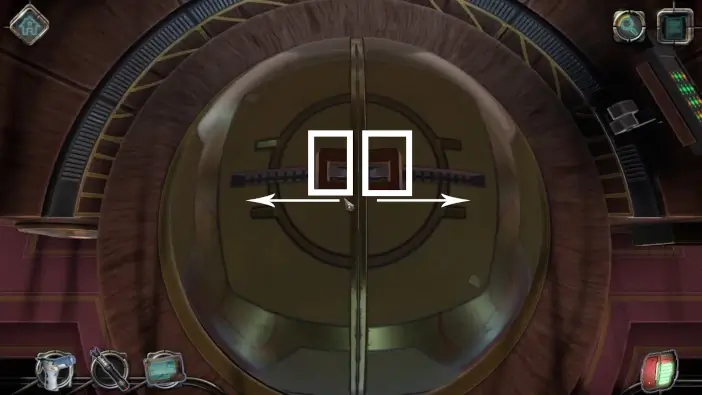
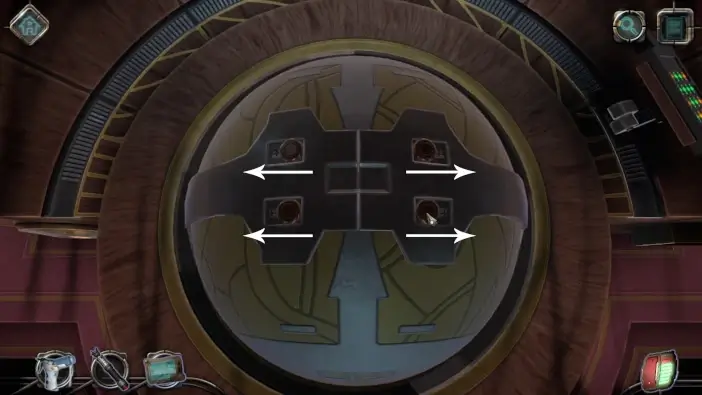
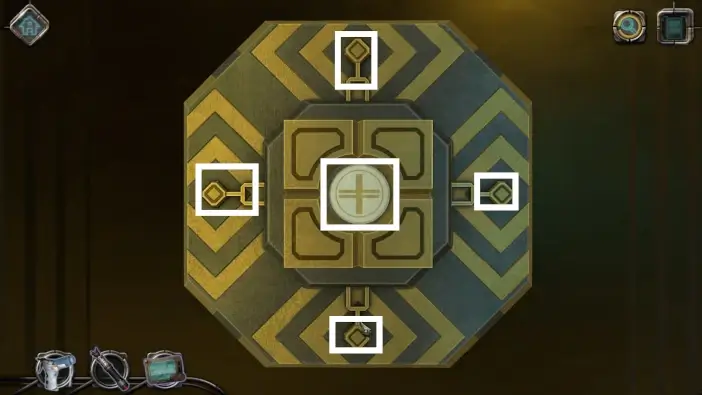
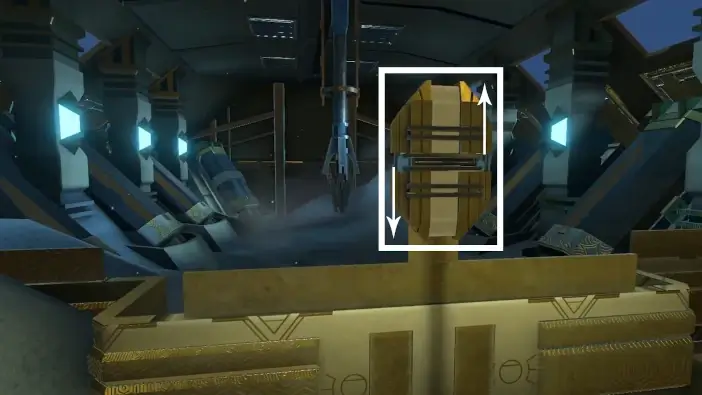
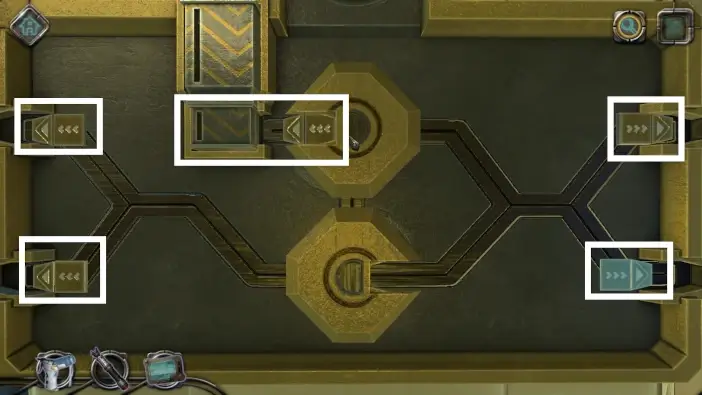
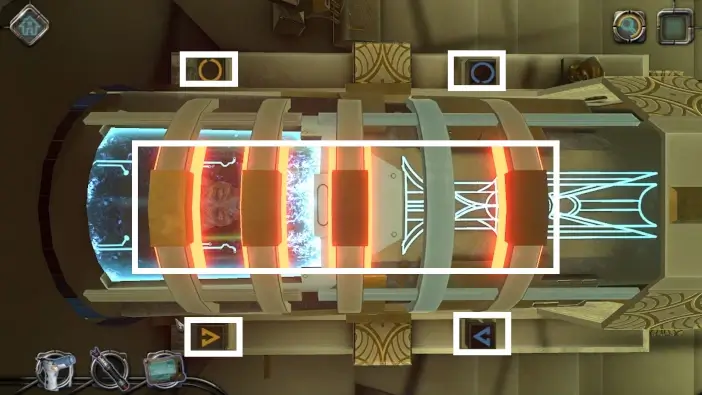
Move the bars in the directions shown in the picture above.
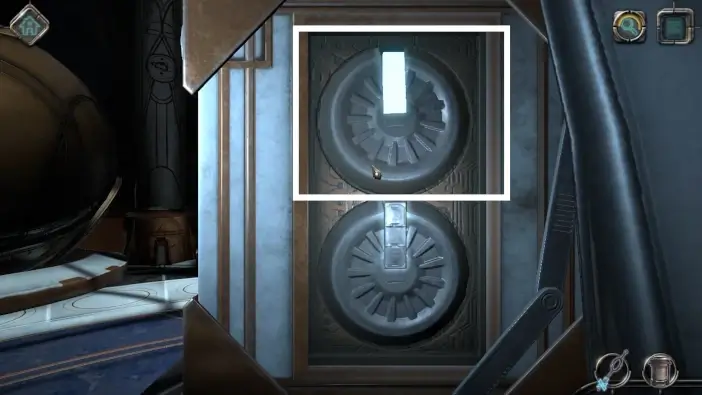
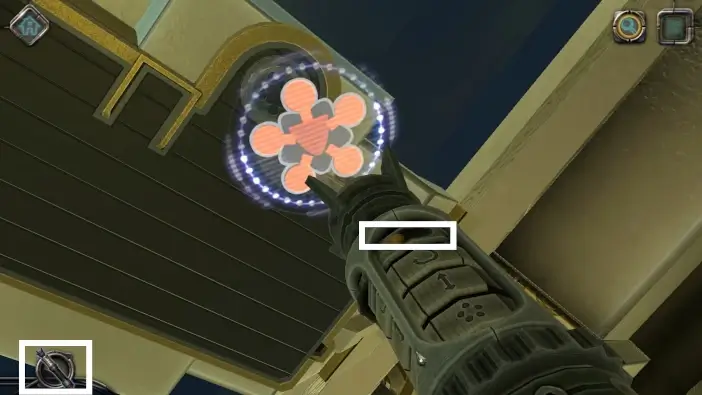
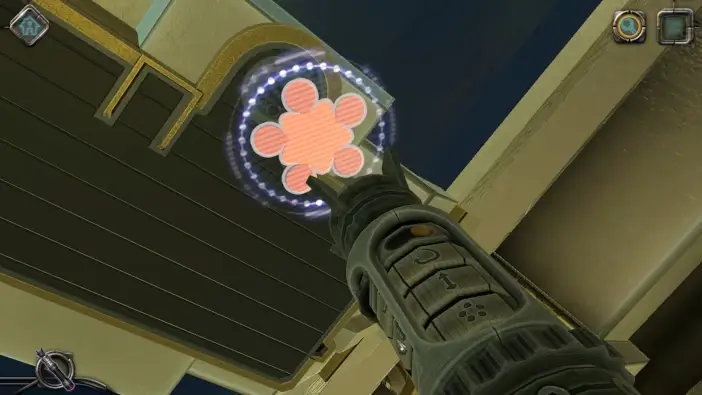
The new board will appear out of the pedestal wall and you will see two circles on it. Rotate the upper circle to look like in the picture above. The energy rod will appear from the hole on the side of the board. Pick it up.
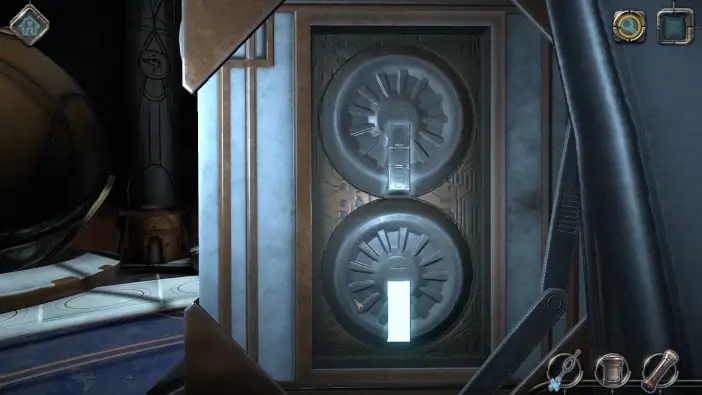
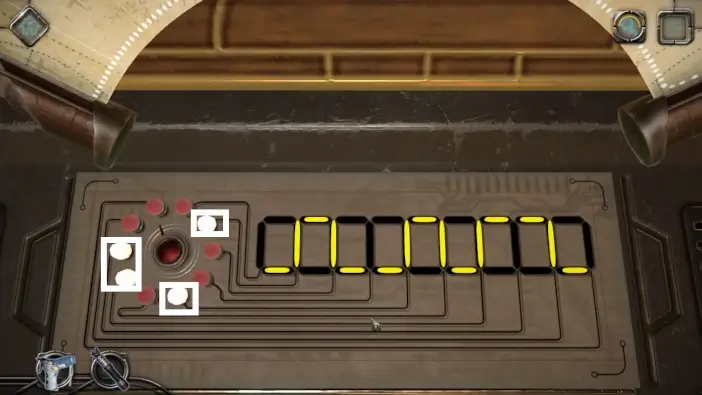
Return to the circles and adjust them like in the picture above. Once you do it, a strange disc will appear from the side of the board. Pick it up.
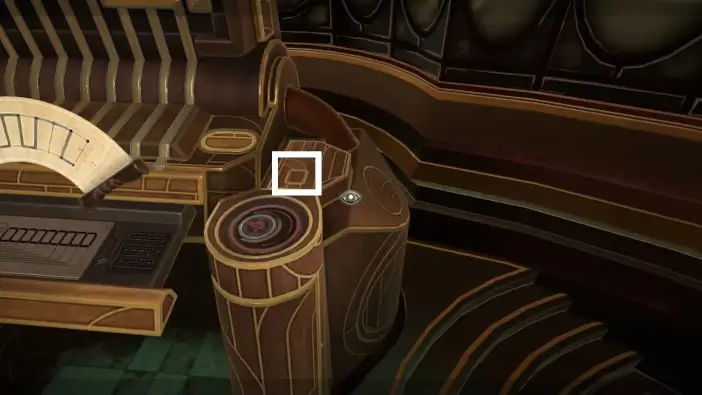
Approach the other side of the pedestal.
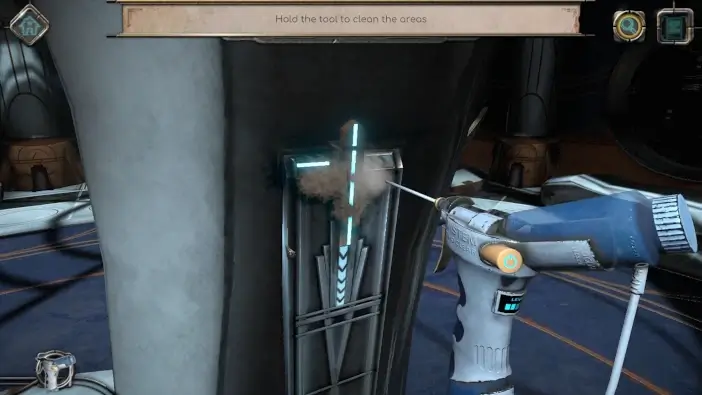
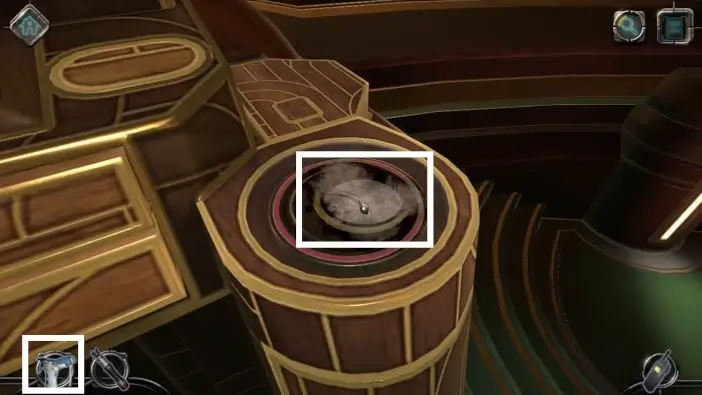
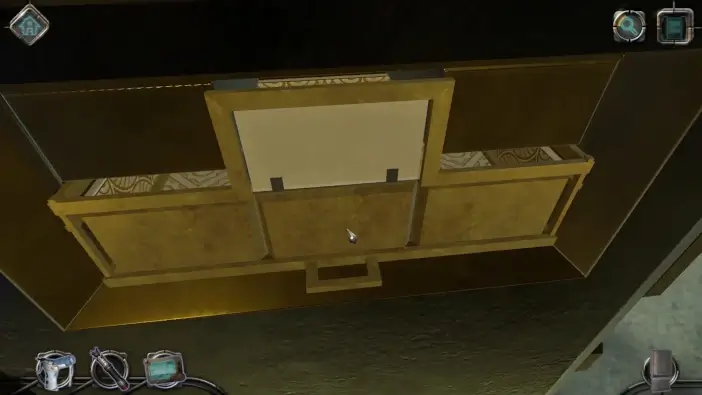
You will automatically get an air duster. Clean the lid with it.
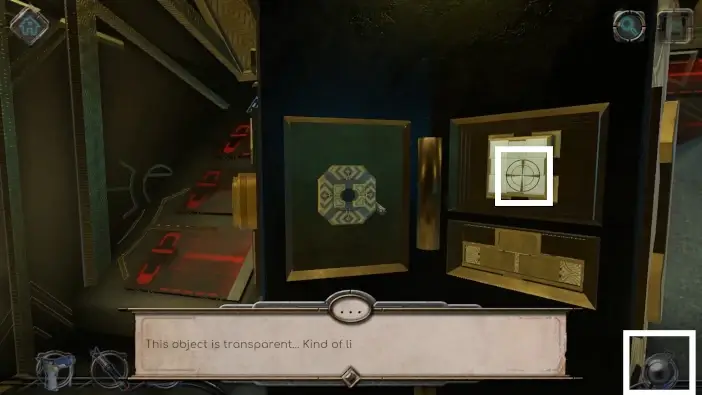
Open the lid like in the picture above.
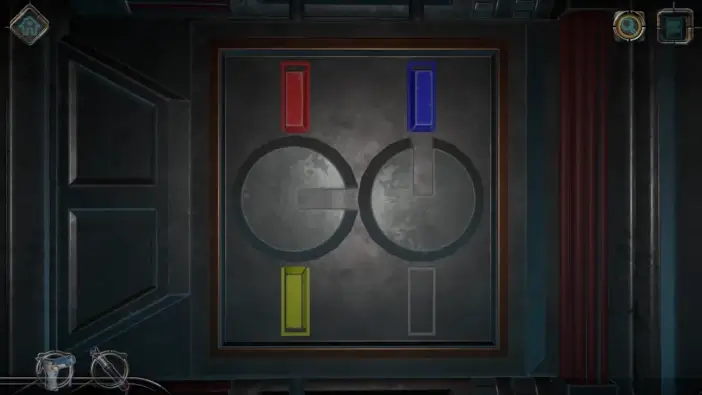
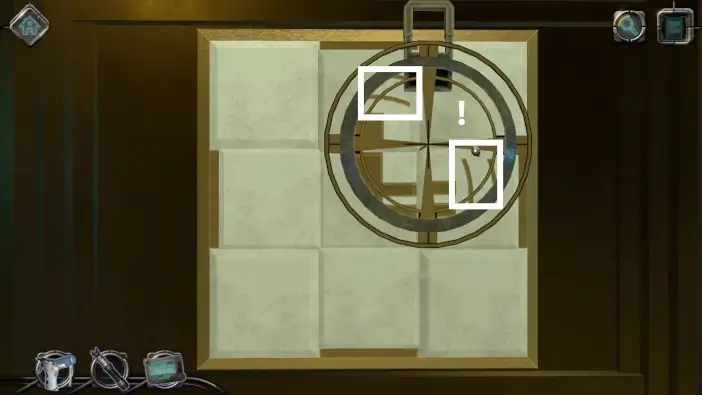
Move the halves of the circle to join them. This will unlock the box.
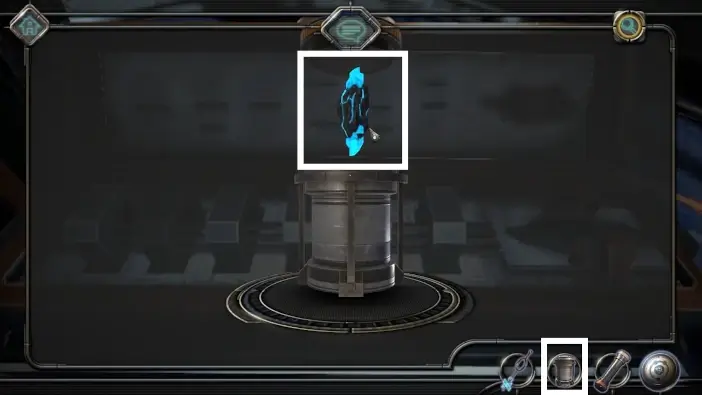
Select the round box from your inventory, open it, and pick the crystal.
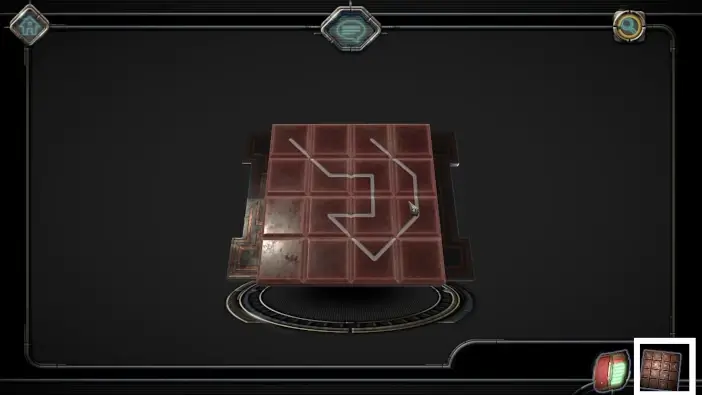
Place the crystal in the empty socket on the right to start the puzzle.
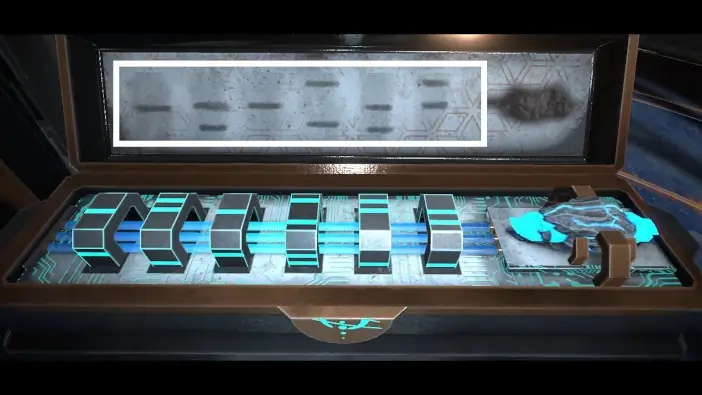
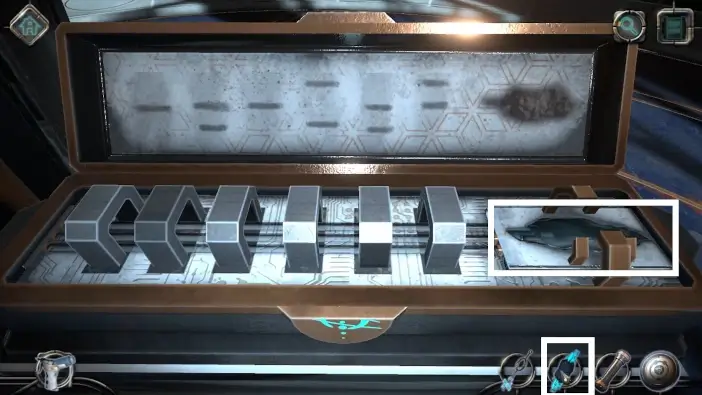
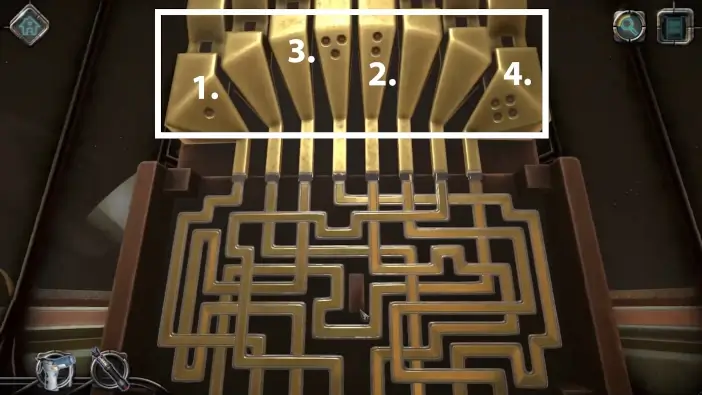
Pay attention to the pattern of traces above. You need to spin metal pieces so that you have identical patterns of lines on the pieces.
On the pedestal, rotate the mechanism clockwise. The protocol for opening the exit door of the chamber will start, but the system will inform you that the energy lost connection in one specific spot below the floor. That part of the floor will open and you will automatically go there.
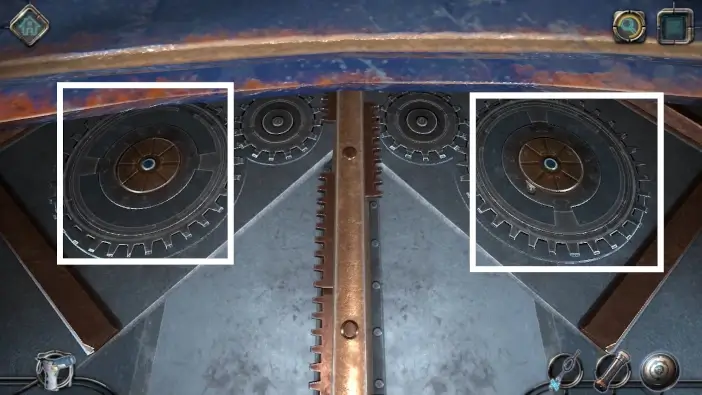
Press the larger gears whenever the smaller gear beside it has connected teeth with the central teeth. This way, you will open the second layer of the floor.
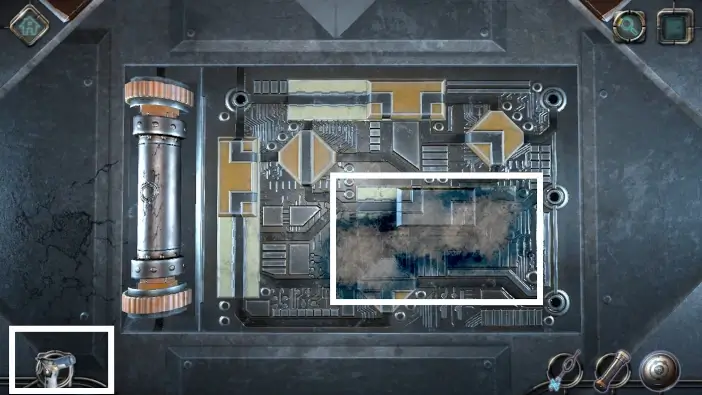
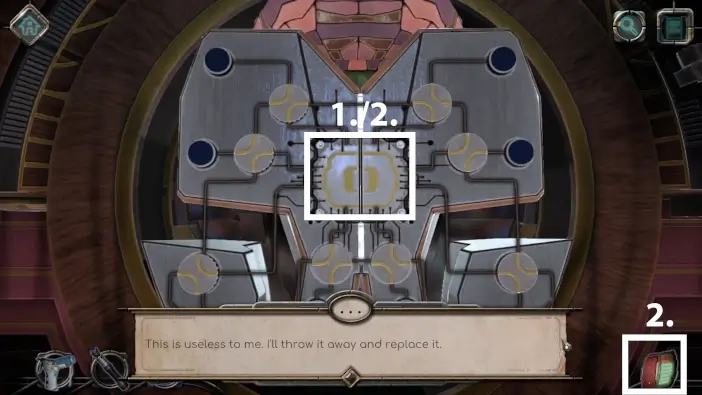
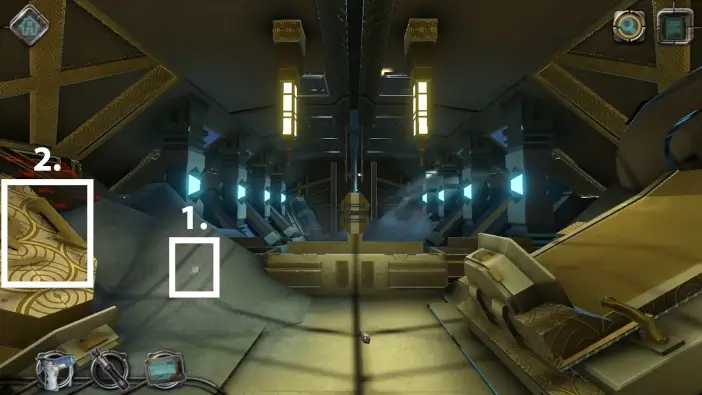
On the 3rd layer of the floor, you will see an electrical board. Use the air duster to clean the dirt first.
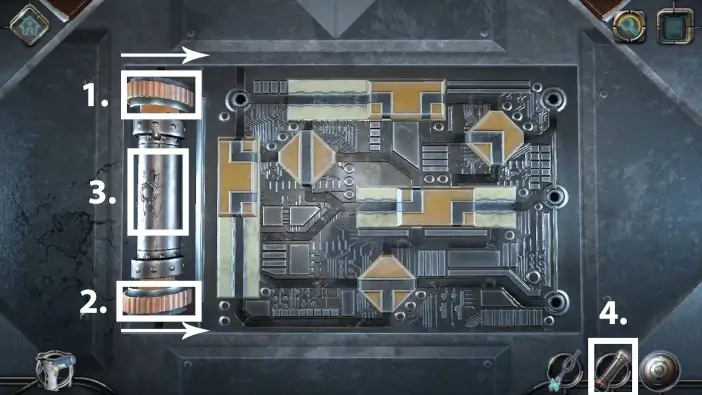
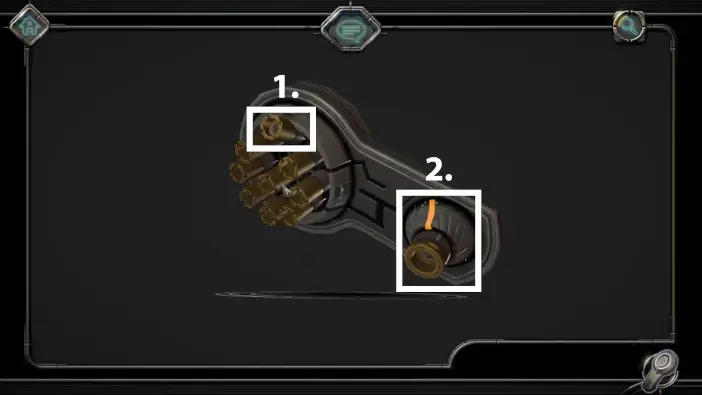
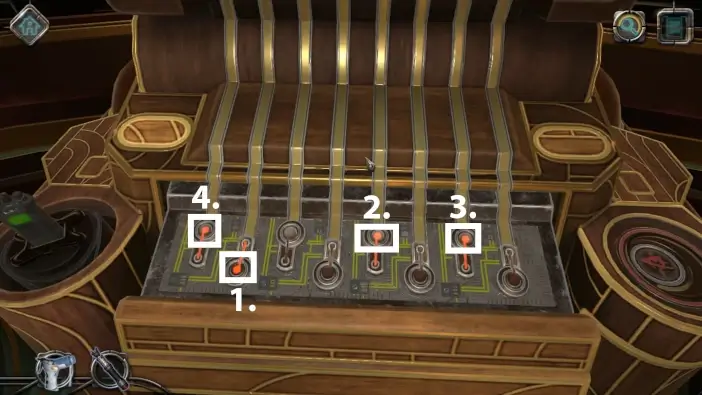
1. & 2. Unscrew the energy rod.
3. Remove the broken energy rod.
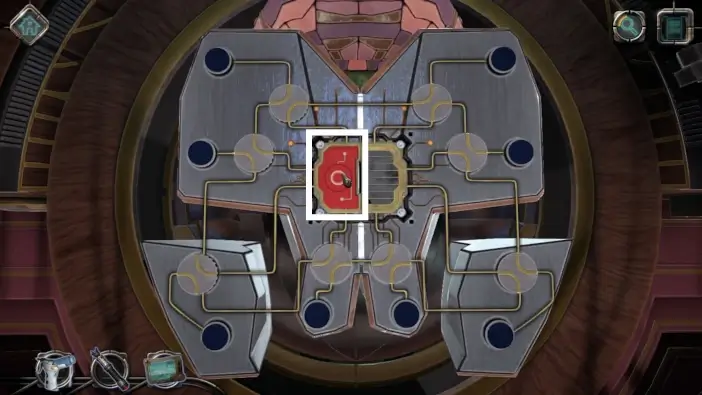
4. Place the energy rod from your inventory.
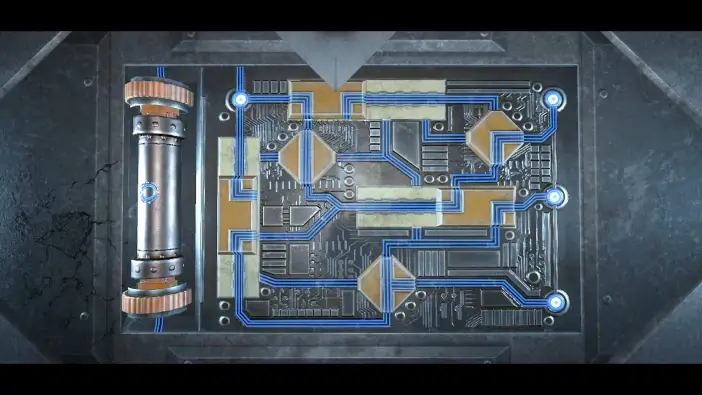
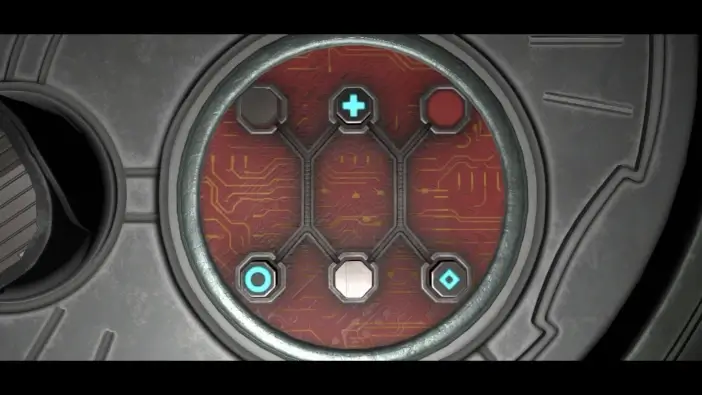
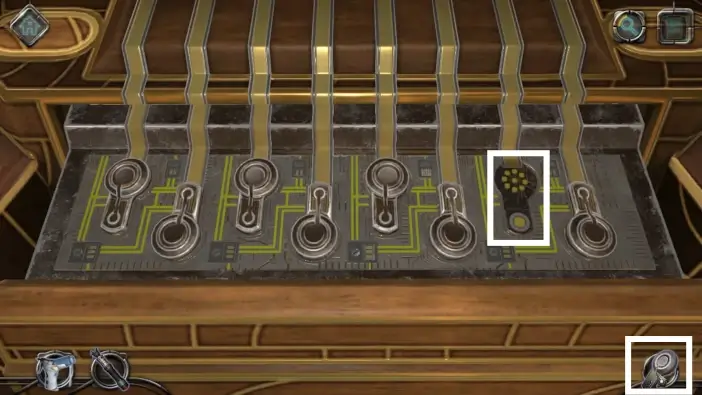
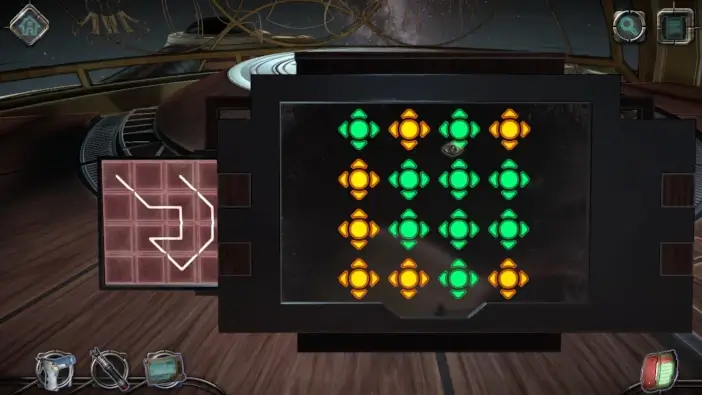
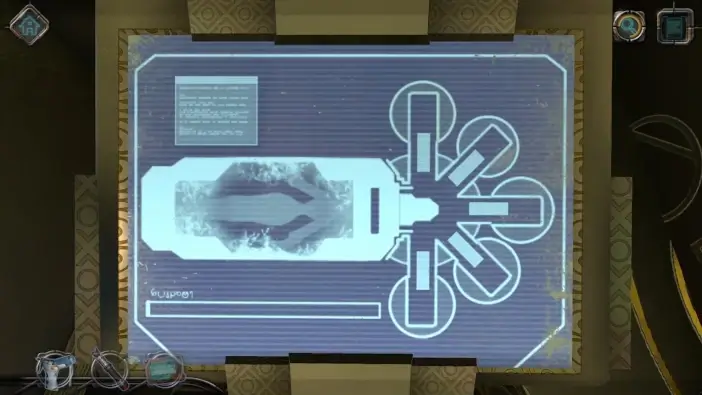
Next, you’ll need to move the orange parts to connect all the electronic pathways to the circles.

Once you complete the previous puzzle, your character will return to the pedestal. On the scroll, move the circles, so that energy can flow from the center to the two outside circles on the left. The door for the room’s exit will become functional.
Your character will approach the door. Place the strange disk from your inventory on the door’s lock.

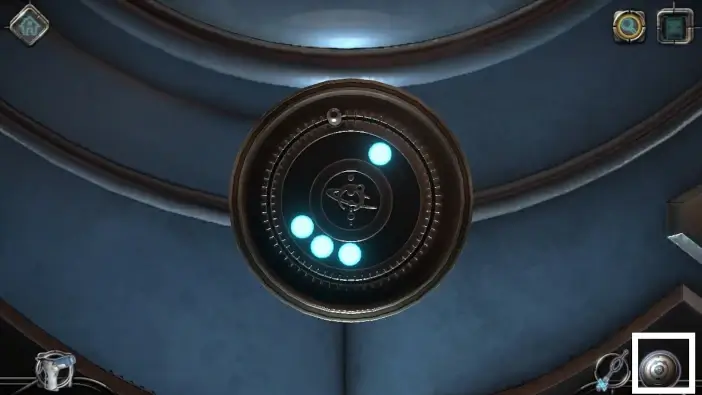
Rotate the disk so that all three holes are parallel to the three shining keyholes.
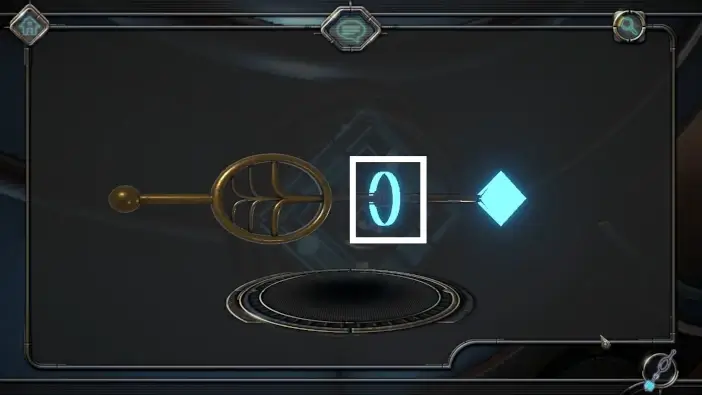
Finally, modify your key to take the shape of a diamond. You modify the key’s shape like before, by changing the position of the circle. Once you do this, place the key inside the lock and turn the key clockwise to unlock the door.
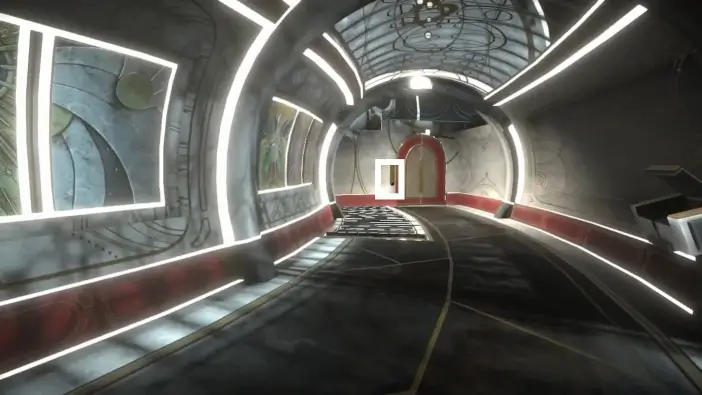
Once you reach the long corridor, you will complete Chapter 1.
Chapter 2 – First Contact
Once you finish Chapter 1, proceed through the next two doors. You will arrive at one long corridor.
Go to the box that is further away.
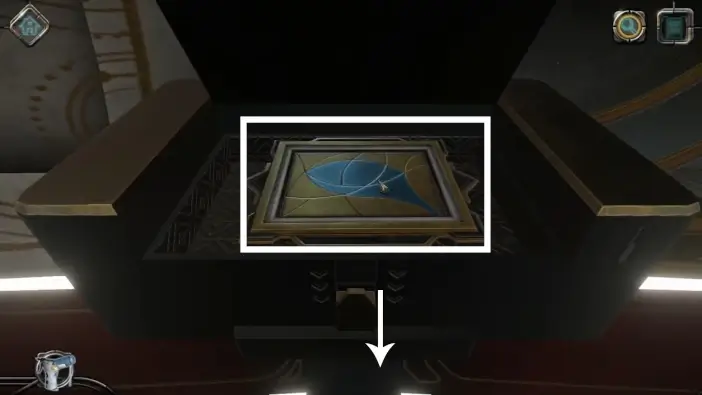
Open the box and pick the engraved plaque. It is a clue to the puzzle for the other box.
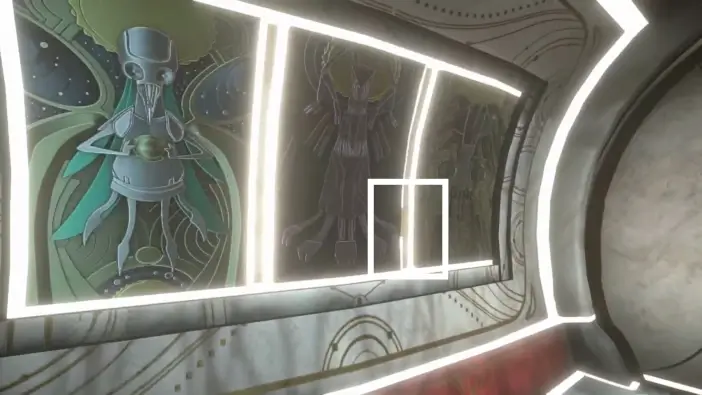
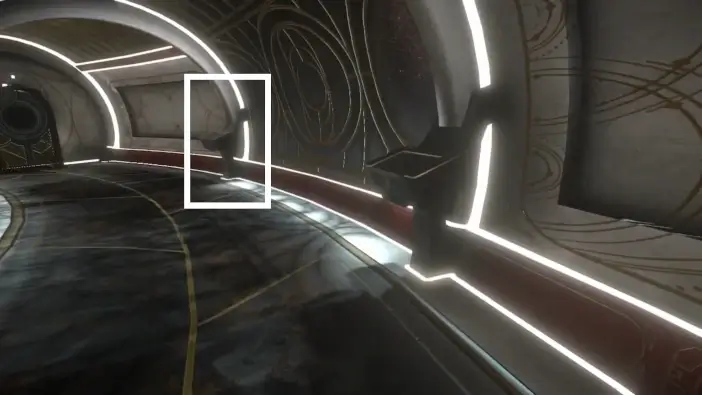
While standing near the box that contained the engraved plaque, turn behind you, and you will see a 2nd letter stuck between the paintings.
Go to the other box and open it.
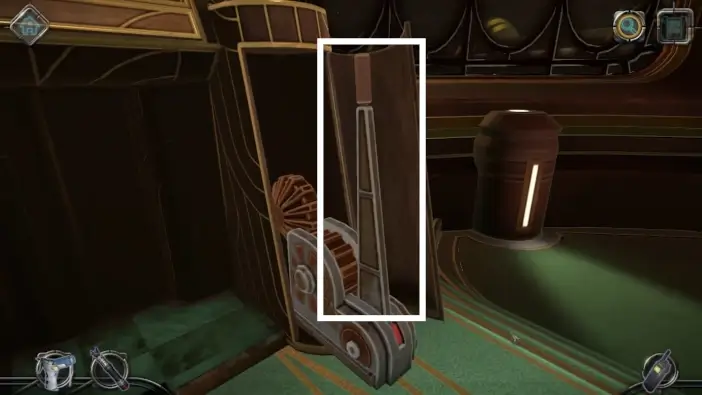
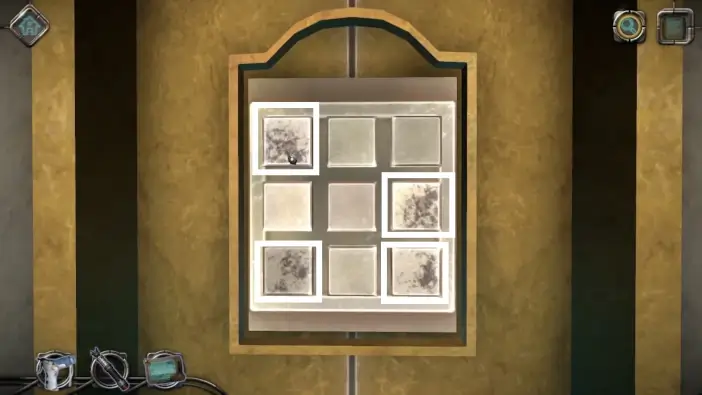
Select the fields like in the picture above. The engraved plaque in your inventory can serve as a clue. Solving this puzzle will raise a staircase that leads to the next area, but the staircase will stuck.
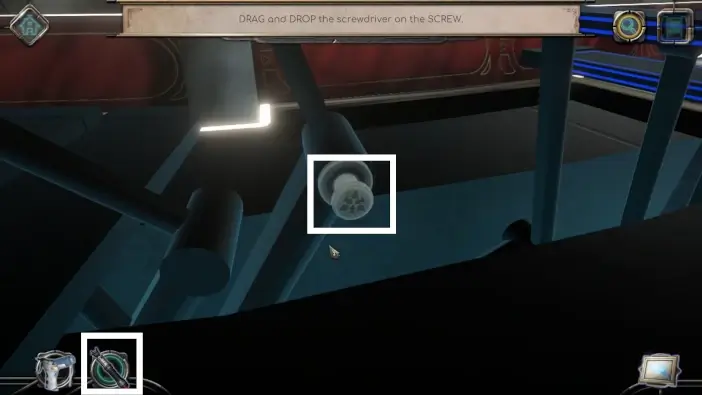
Your character will automatically approach the staircase and you will get a magnetic screwdriver in your inventory. Use it on a screw to fix the staircase.
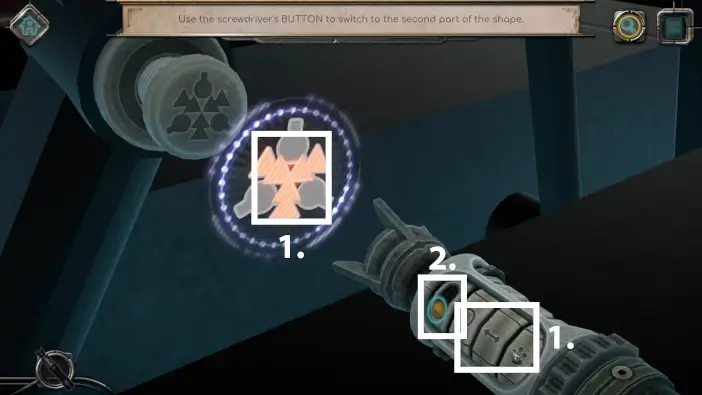
- Move the wheels on your magnetic screwdriver until you get the triangles right. You can see which shape you need to get on the staircase screw.
- Press the toggle button to start adjusting the circles.
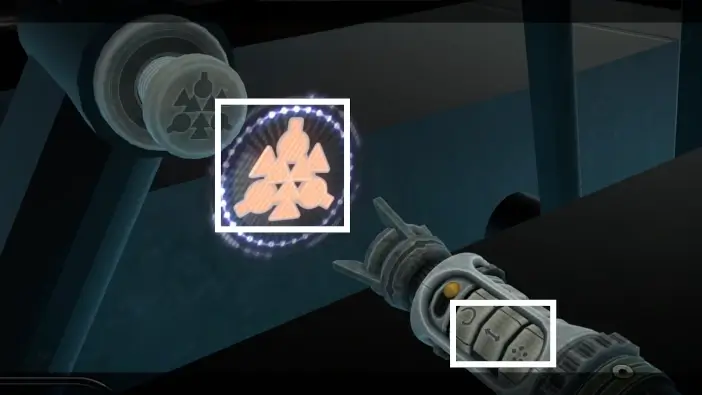
Move the wheels to adjust the position of the circles. Once you get the required shape, the staircases will be fixed. Climb them and open the door to enter a new room. Once you enter the new area, the new chapter will officially begin.
In this chapter, you need to increase the signal of your walkie-talkie.
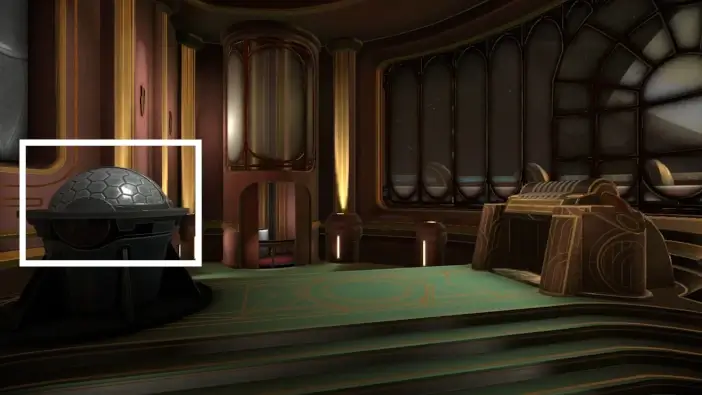
Approach the globe on the left.
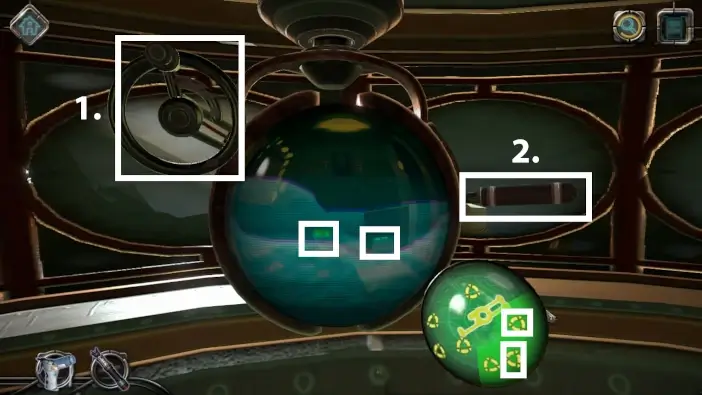
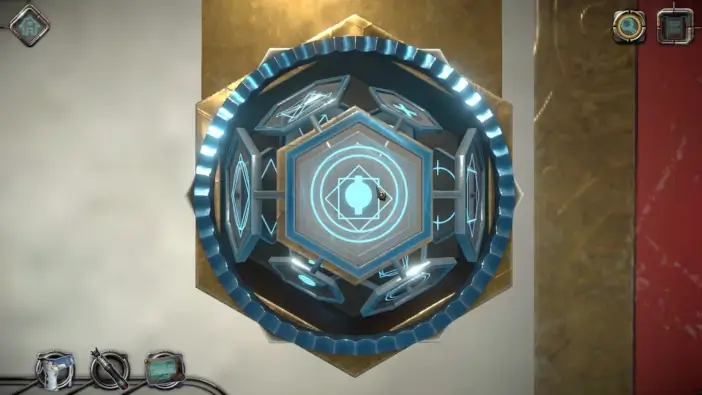
Use the magnetic screwdriver to unlock the globe. Like before, scroll the rings until you get the shape in the picture above.
Toggle the orange button and scroll again to get the full shape of the lock.

Move up the lock to unlock the globe.
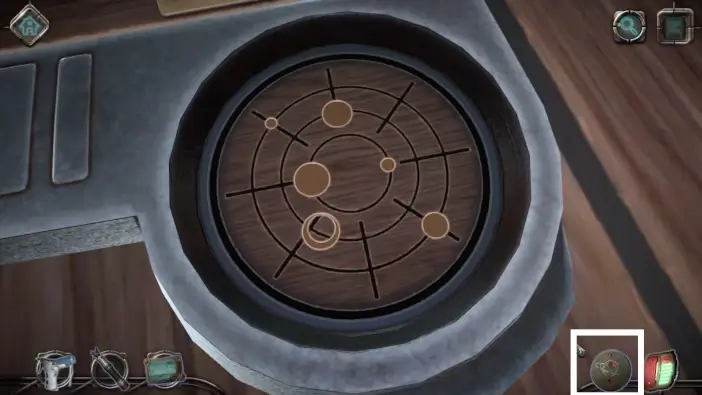
To solve the next puzzle, arrange tokens like in the picture above. A walkie-talkie holder will appear.

Place your walkie-talking on the holder.
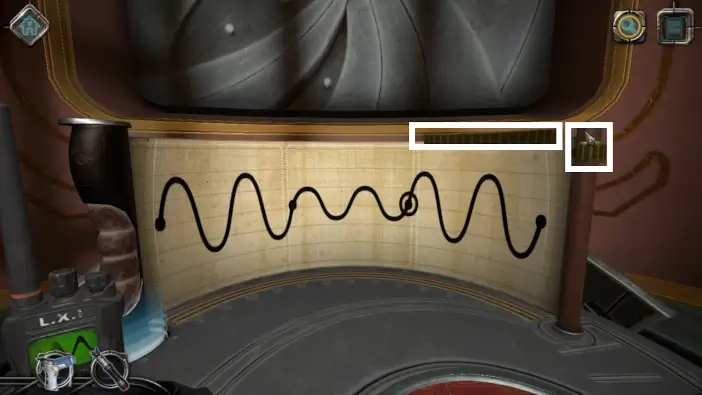
Place the horizontal and vertical sliders in the positions like the picture above to adjust the frequency. This will increase the signal of your walkie-talkie. When you finish the puzzle, pick up the walkie-talkie.
Go in the opposite direction of the globe and approach the right side of the inactive organ instrument.
Use an air duster to clean the surface.
Spin the display case clockwise until it is aligned with the circle. This will unlock the lever below it.
Pull the lever to unlock the organ pipes.
Place the walkie-talkie on the holder. This will unlock the organ keyboard and the scroll with a clue. Before you start the next puzzle on the keyboard, you need to find 2 missing lightbulbs.
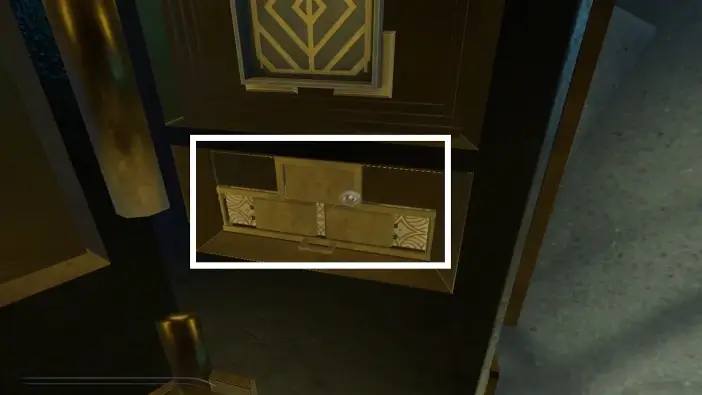
Press the button on the left side to reveal a hidden board.
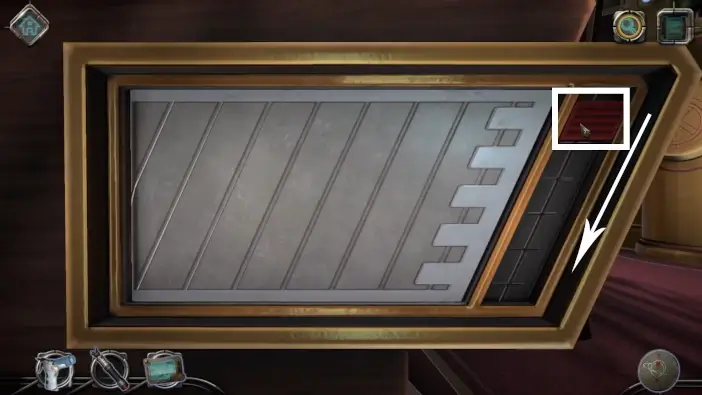
Move the horizontal bars first to unblock the vertical bar, then move the vertical bar upward. Pick the 1st lightbulb.
Following a similar logic, press the button on the right side of the organ to open a hidden board. This time, move all the vertical bars to unblock the horizontal bar. Move the horizontal bar to the far left and pick the 2nd lightbulb.

Approach the keyboard.
Place the 2 missing lightbulbs in their slots.
Following the clue on the scroll, activate the correct lightbulbs, to get the same pattern as on the scroll. Press the central button to activate the organ and the pattern will appear.
An additional control panel will appear but one of the control gadgets will fall off. Pick it up from the ground.
- Straighten one of the pins.
- Move the valve until all the lines on the gadget start glowing orange.
Place the missing gadget on the control panel.
Pay attention to the organ pipes. Each pipe is connected to one of the gadgets on the panel. You need to activate the pipes in the correct order. Order is represented by holes in the pipes. For example, you need to activate the pipe that has one hole, the second pipe should be the one with the two holes, etc…
Press the gadgets in such an order like in the picture above. The signal of your walkie-talkie will be improved. Pick it up from the holder.
Turn around and go to the elevator. Place your walkie-talkie to another holder. Shortly after, a lever will appear.
Pull the lever to activate the elevator.
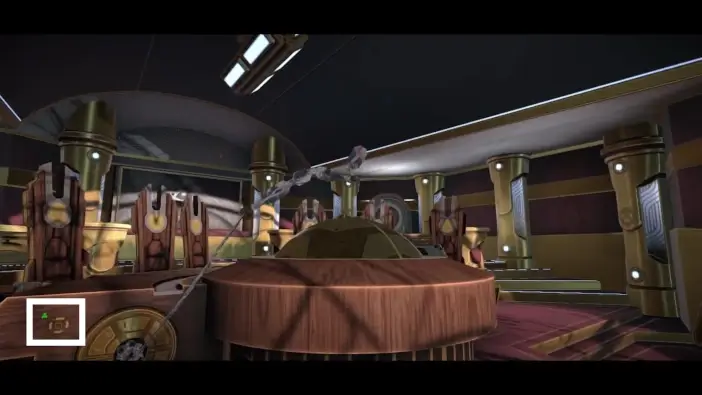
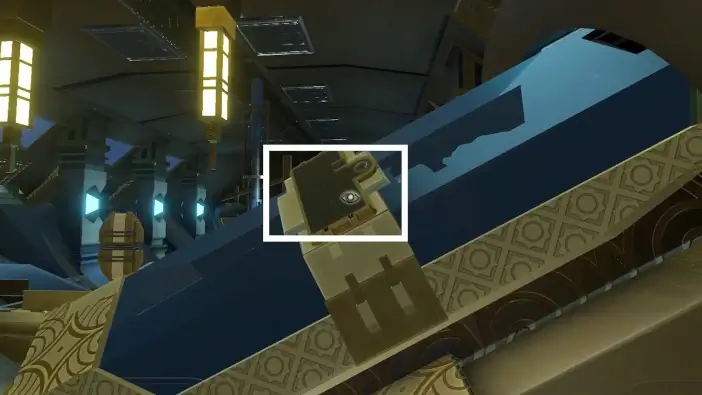
Once the elevator stops at a certain height and you see a telescope, turn around to find the 3rd letter.
Turn back again and approach the telescope.
- On the left side is the valve that will move the telescope left and right.
- On the right side is the switch that can move the telescope up and down.
You need to spot the antennas that are glowing and to identify them on the minimap.

When you are finished, your walkie-talkie will get a full signal and you will have a conversation. This will mark the end of Chapter 2.
Chapter 3 – Artificial Intelligence
After you complete Chapter 2, your character will exit the room and you will be in the hallway where you solved a staircase puzzle.
Go to your right. The door will be locked, so approach the ventilation lid.
Use your screwdriver to open the lid. Your character will crawl through the ventilation system until you reach another lid.
To remove the next lid and continue moving, you need to place all the tabs inside the frames of the same color as the corresponding tab.
Next, you will encounter a lid that leads to the meeting room. The opening of this lid is very easy. Once you go inside the meeting room, Chapter 3 will officially begin.
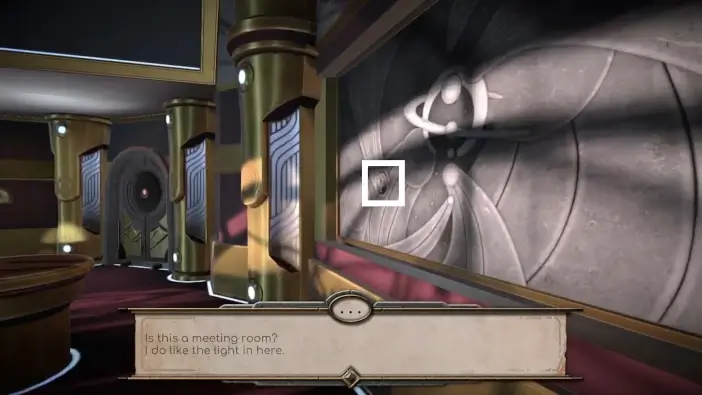
Once inside the room, go to your right and pick a seal from the wall.
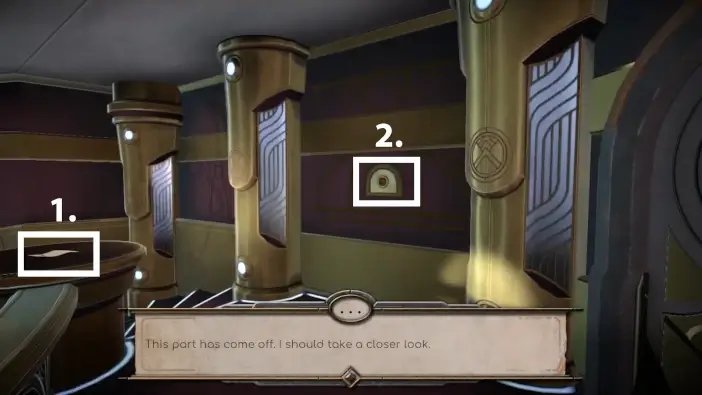
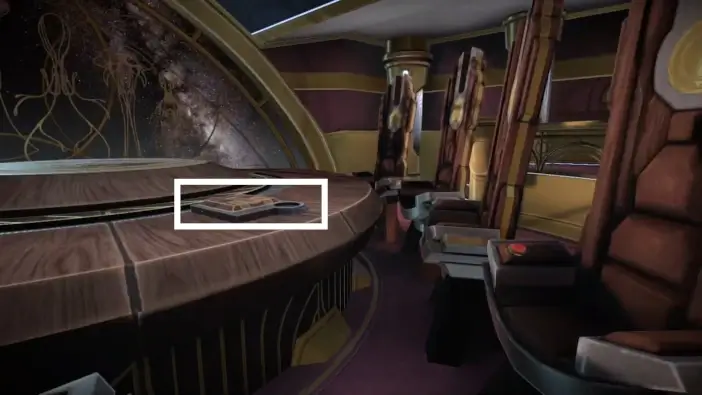
- Continue the same path until you see a letter on the table. Pick the letter, it’s the 4th one so far.
- Across the table, on the wall, there is a socket. Place the seal in that socket to open a hidden compartment in the wall.

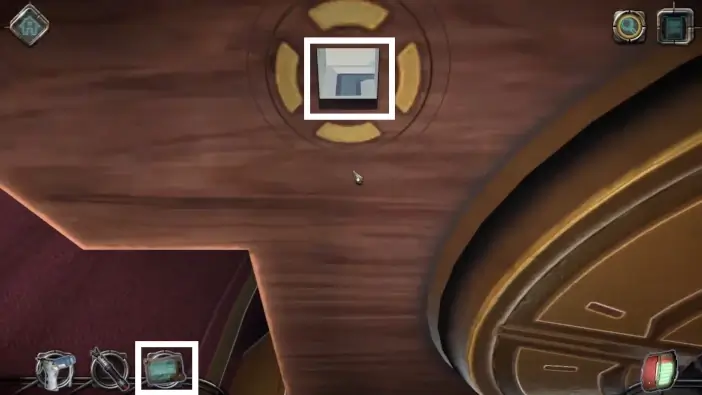
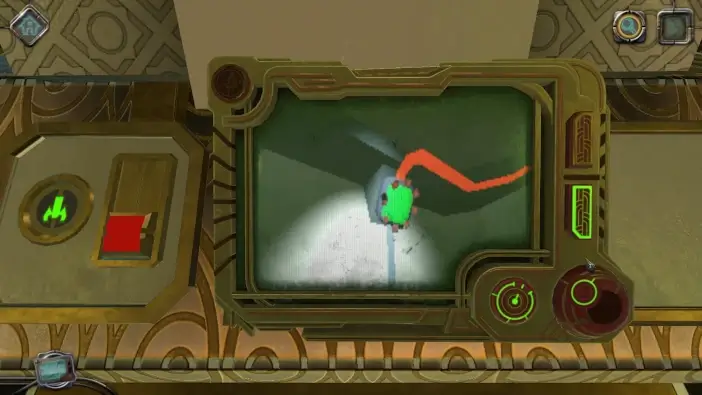
Open the box by moving the slider left. You will get a controller and your camera will move toward the upper left corner of it. There will be a tiny drone. Pick it up.
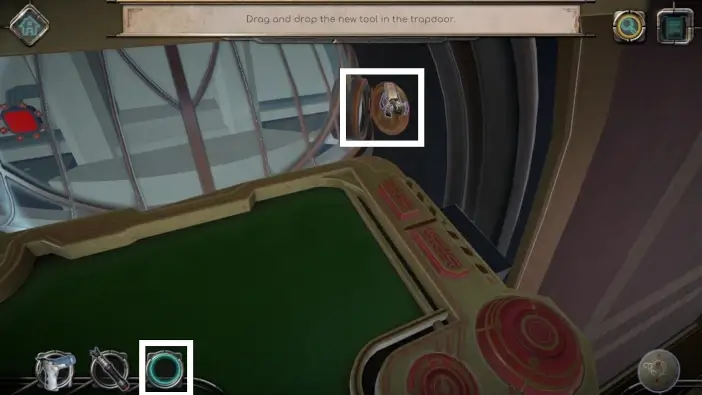
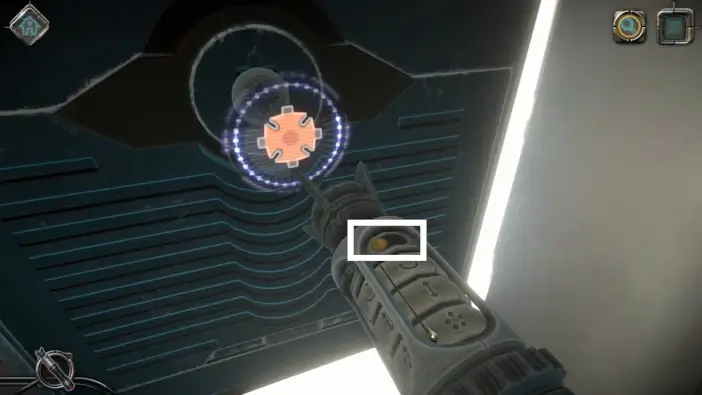
Place the drone inside the small hole to reach the unaccessible hallway.
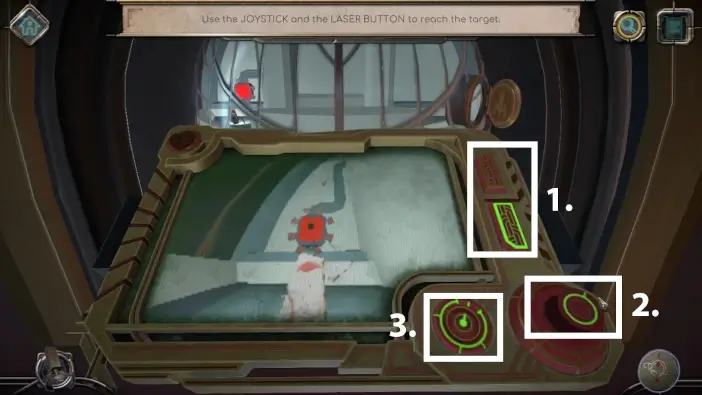
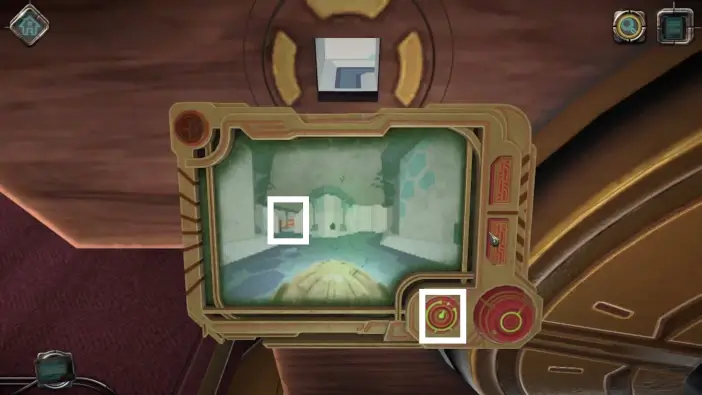
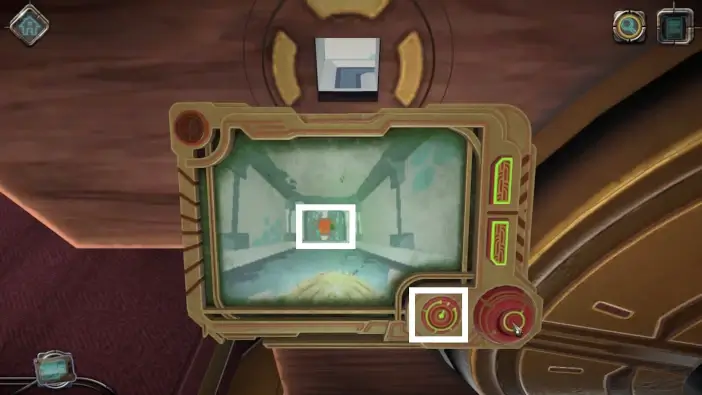
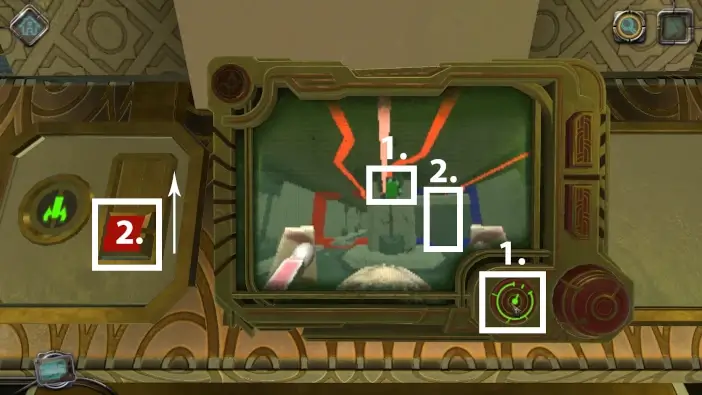
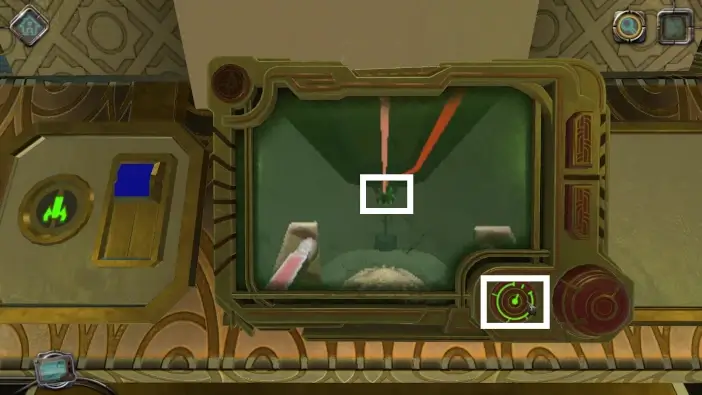
You will have controls for your drone on your controller. You can move it (1.), rotate it (2.), and shoot (3.). Move the drone until you see a large red button. Press the button to shoot and hold it for a few seconds.
After you complete the drone puzzle, you will get the controller in your inventory. This controller can be used multiple times, whenever you need help from your drone.

Continue on your path around the meeting room, until you reach the opposite side of the table. Approach the box on the corner.
Open its cover by moving the slider downward.
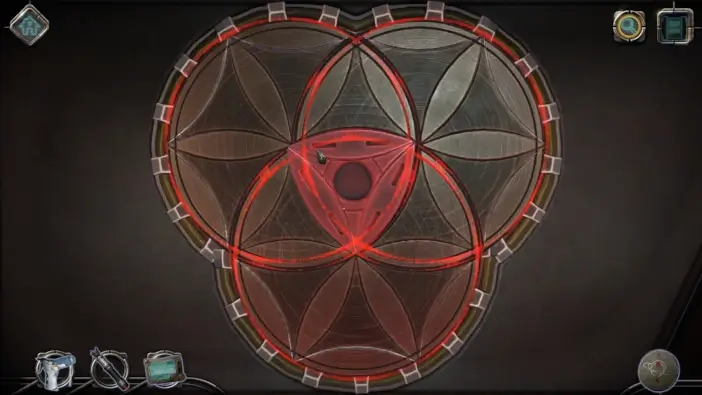
This will unlock a new puzzle. You need to spin the circles so that in the end, the black hole will be in the center, in the intersection of all the circles. This will open the box and you can grab a battery.
Go to your right side and circle around the table, past the monitor, until you see a strange box. Take a look at the slot where the seal should be. Memorize its pattern of planets.

Take a closer look at your seal from your inventory and change its pattern to match the one on the slot.
Place the seal in the slot. You will open the strange box. Pick up the grid from it.
On the chair that is in front of the box, press the red button. The monitor will move to your part of the table.
Look at the grid from your inventory. Rotate all the squares until all the lines are connected.

Place the grid on the slot on the left.
The grid will be your clue for the next puzzle. You can imagine the symbols on the right representing the individual squares from the grid on the left. Select all the symbols that would contain part of the line if they are on the grid. When you select the symbol, it will change color to green.
A globe will appear on the table. Approach the left side of the table.
Place the drone inside the small hole (select and drag the controller icon and the drone will appear automatically).
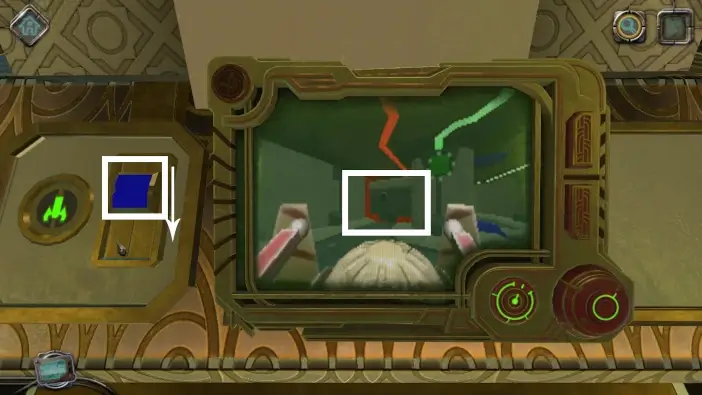
The path for your drone will be linear at first, but when you meet the crossroads, choose the left path. There, you will encounter some obstacles. Shoot it to continue further.
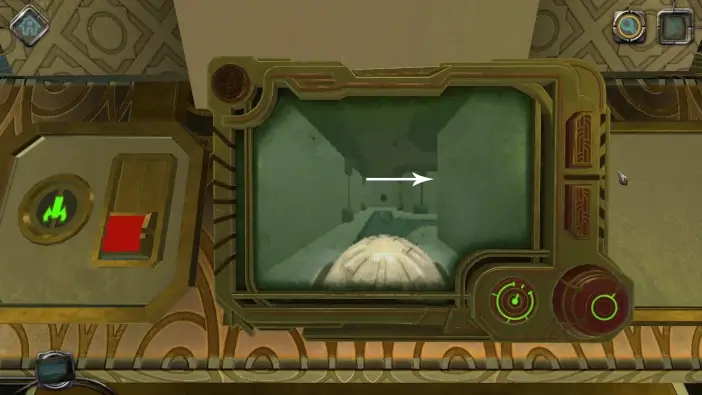
The next part is again linear. Once you arrive at the end, shoot the red area and hold the button for fire, for a few seconds.

Approach the globe and open its three layers.
- Remove the old battery.
- Place the new battery, from your inventory.
Rotate the circles. You need to connect all the capacitors to the battery, with yellow lines (buses).

A hologram of scattered ship pieces will appear near the window. Merge them together to get the hologram of the entire ship. This will end Chapter 3.
Chapter 4 – Onboard Presence
Once you complete Chapter 3, your character will automatically go toward the exit room. Open that door and the next one at the end of the very short hallway.
You will arrive at the long hallway and your character will go downstairs automatically.
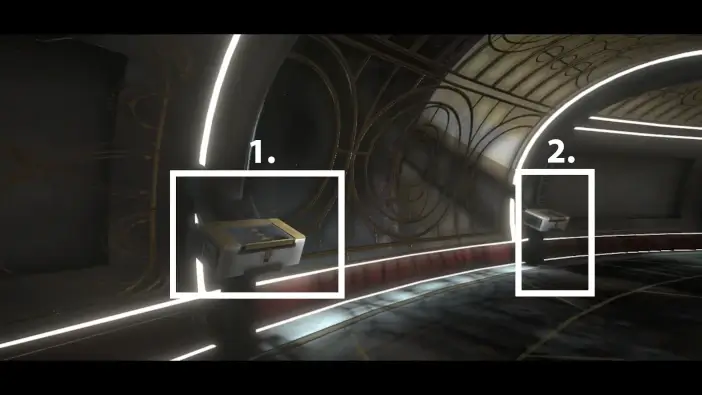
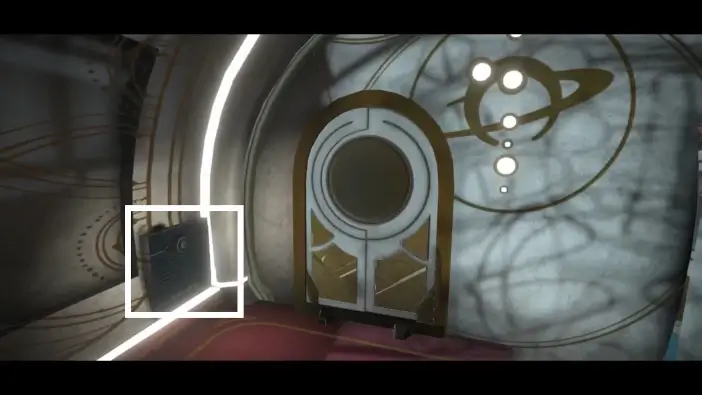
- In the hallway, approach the nearest display case on your left. Open it and pick the 5th letter.
- Approach the second display case and pick the mechanical part from it.
Turn around and approach the door that is beside the lowered staircase. Place the mechanical part you just got inside the slot, next to the door.
When you place it, you will see for a few seconds the correct pattern that you need to place to unlock the door. When the two seconds pass, the solution will be removed. The solution at the end of the puzzle is in the picture above.
Enter inside the elevator and press the buttons that are used a lot. You will recognize them by their faded surfaces.
You will reach a new area and the Chapter 4 will begin.
- Pick up the 6th letter.
- Approach the sarcophagus-looking machine on the left.
Unlock the machine by turning the seal until all three holes overlap the lights. When the machine opens, approach the left side.
Rotate the central fields so that the lens (with the plus sign) in the center is fully visible. You can rotate the parts by pressing the small buttons shown in the picture above. Once you solve the puzzle, pick the lens.
Approach the right side of the machine and place the lens on the board.
Below the surface of the lens, you can see a hidden shape. You need to rotate all the squares to get the full circles. Before you can rotate the square, you need to move the lens away from it and memorize which square to rotate.
When you solve this puzzle, you will get a metallic item.
Approach the section below the whiteboard you just solved.
Move the rectangles like in the picture above to open the drawer. You will get a mysterious cylinder.
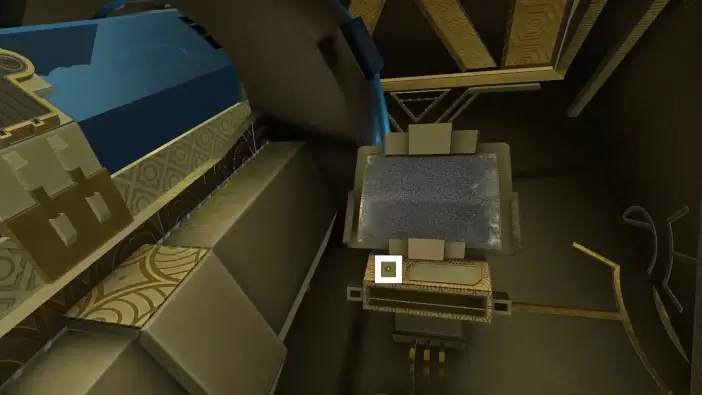
Leave the machine and turn right. Approach the device in the middle and unlock the board.
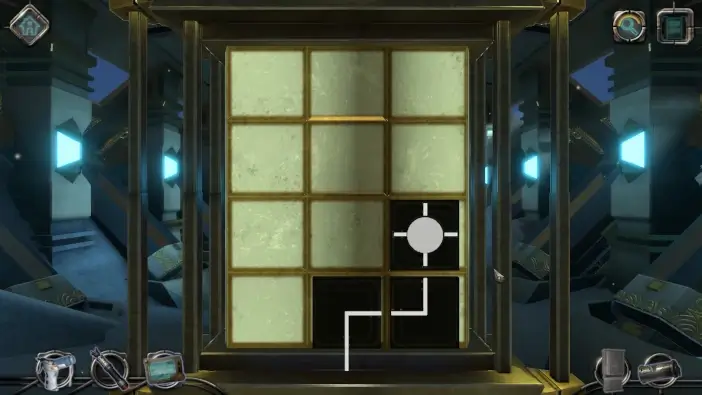
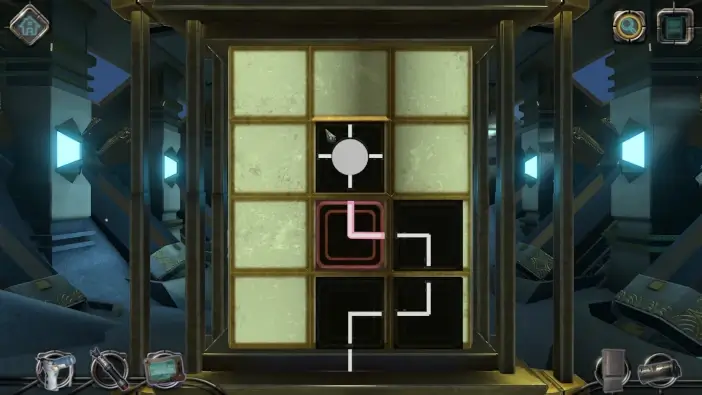
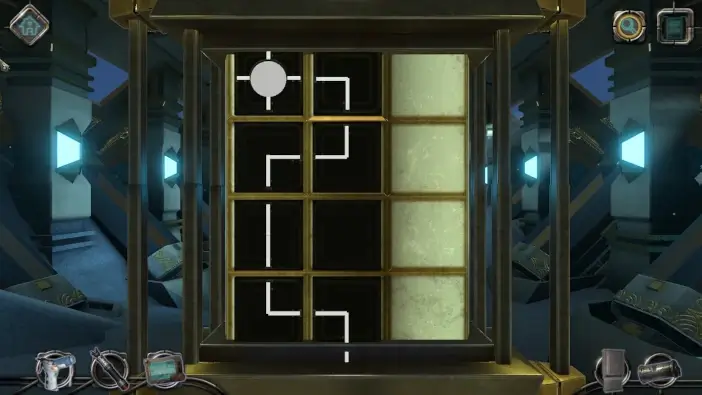
This puzzle has three phases. You need to arrange the black fields in a way that the white line from the bottom reaches the white circle. When you complete this puzzle, the crane will drop the sarcophagus near you.
Approach the monitor near the sarcophagus.
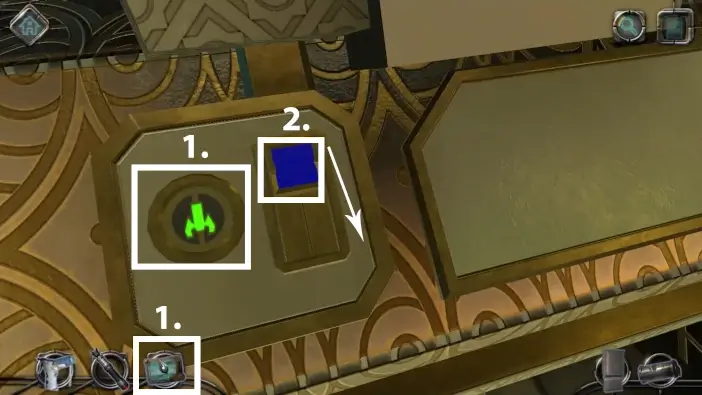
Place your drone inside the slot. At the start, your drone will face a red wall. Switch the blue button to lower the wall (the button will turn red).
When you reach the crossroad, shoot at the green button first, then switch up the red button on the left. This will unlock the path on the right.
Continue the right path and shoot the green button then turn back and return to the crossroad.
Switch the button to get access to the left path and go there.
Go to the end of the path and choose right.

Go right again.
The next corner, turn the drone camera to the left and shoot the green button. This will start a new puzzle.
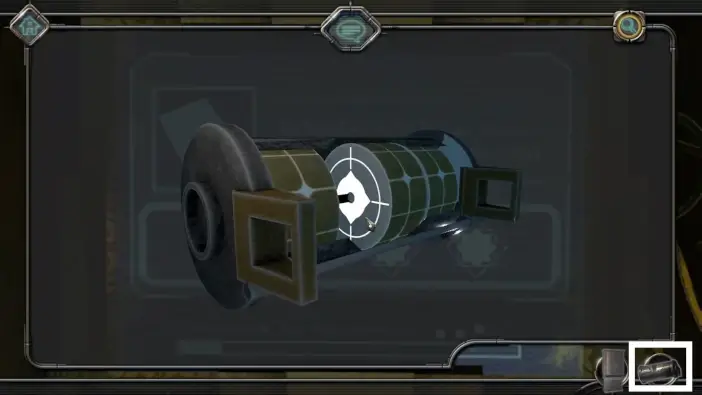
The clues for the new puzzle are in the mysterious cylinder. Inside the cylinders are 3 tokens. Move them to see the symbols.
Set the symbols you saw on the cylinder. The order of the symbols should be the same as in the cylinder, from left to right.
Approach the sarcophagus.
Use your magnetic screwdriver to unlock a new puzzle.

Place the metallic item.
You will get tokens from a metallic item. You need to place all the tokens in their designated places. You can move the tokens and rotate the fields in the middle.
On the monitor next to the sarcophagus, rotate all five circles so that they are connected to the sarcophagus.
You need to move the belts to get all 5 glowing rectangles. Use buttons on the sides.